

It was New Year's Eve and my regular opponent, Neil, and I had got together to fight one last battle in 2011. We had agreed to fight a big, Operation Cobra battle, with Neil bringing his boccage terrain, and me providing the troops. Now late war isn't really my thing, so I just decided to get as many troops on the table as I thought would fit: a decision that would prove 'poor' at the very least!
The terrain consisted of two low hills forming a valley along which passed a fairly good road. The Americans would enter the table along the road from the south just before a small hamlet. Their objective was the bridge at the other end of the road, which led over a wide river to where the Germans had set up a command HQ. The German blocking force would deploy anywhere north of the hamlet. The two pictures below show the whole table, and then a close up of the German HQ; and you can see how good Neil's boccage looks:
I was playing the Americans. First on the table was my reconnaissance force of two Stuart tanks and two Greyhound armoured cars. They moved quickly through the hamlet, then slowed down as they started to try and spot the enemy.
The lead Stuart crept up to the first corner, and almost immediately spotted a StuG hiding on the right of the road. The StuG opened fire, but missed with all three of its shots. Another StuG then deployed to the left of the road, and also opened fire, fortunately also missing with all three of its shots.
The Greyhounds sprinted for cover, and the lead Stuart reversed rapidly out of sight down the road. The second Stuart, however, essayed a shot at the right hand StuG and, with superb targeting, brewed it up!
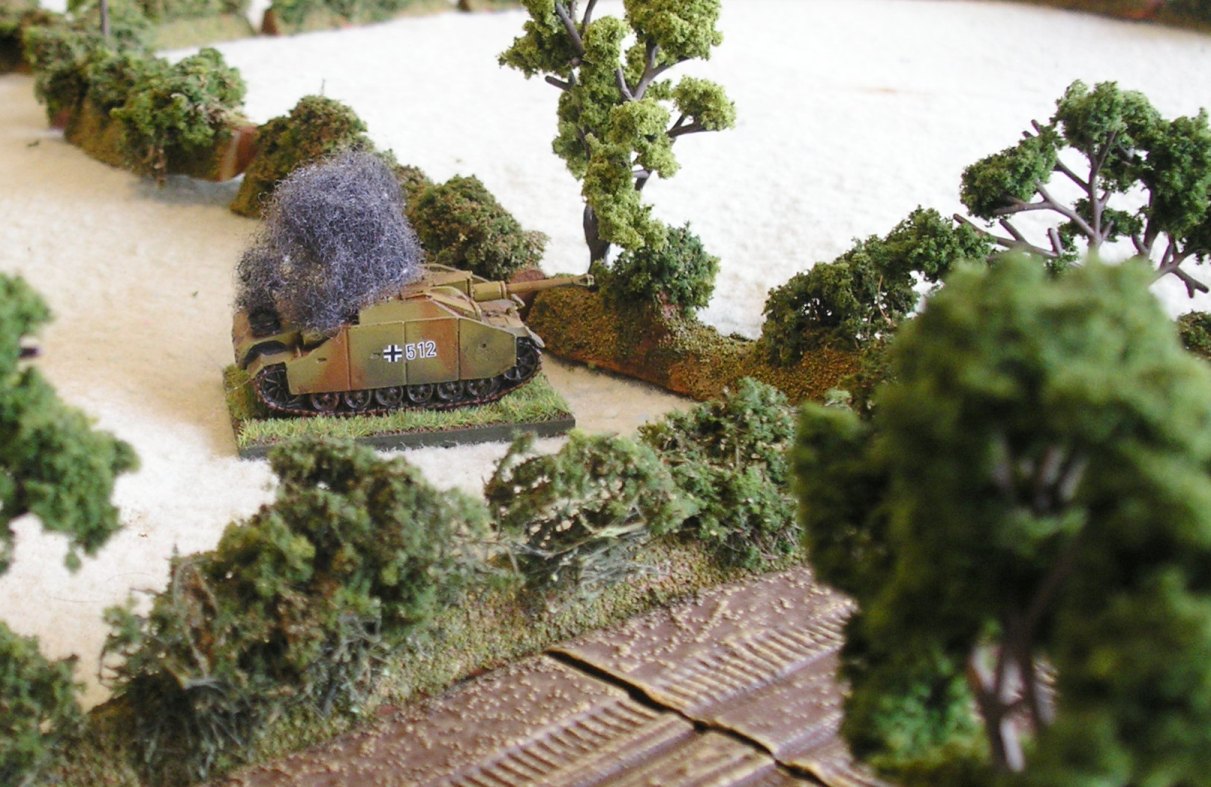
Now deciding that discretion was the better part of valour, the dead-eye Stuart then joined its troop leading in reversing rapidly down the road: the recon troops would play no further significant part in the battle (although both would be knocked out later on as they unwisely tried to bolster up the general US advance).
With the German line of defence now discovered, US Blinds entered the table in numbers. A US infantry platoon was spotted crossing an open field (when will I learn!) and a Tiger opened up with HE from a hull down position right at the top of the eastern hill. The US platoon hit the dirt, with two of its number killed by flying shrapnel.
The Tiger needed to be dealt with, and a platoon of Shermans moved into position to part flank it. Five Shermans against one Tiger might have been sensible, but unfortunately another 'big cat' opened fire as the Shermans moved into firing position. If it hadn't been for the appalling shooting of the German Tigers, and some nice boccage to hide behind, there would have been bits of Sherman spread all over the battlefield!
The pictures below show a birdseye view of the situation, then close-ups of the Tigers and Shermans facing off against each other.
Things were looking a bit grim for the Americans. Something drastic needed to happen in order to change the odds, especially as shell after shell bounced off the Tigers and I realised that Shermans with 75mm guns are already obsolete in Normandy!
Something drastic...hmm.
The American infantry company HQ had a couple of jeeps and a couple of bazooka teams. I looked at the distance between the remaining StuG and where the hamlet ended and thought 'yeah, why not'! Quickly the company commander jumped into a jeep and both jeeps, a bazooka team on board each, then hurtled down the road towards the StuG, hoping to get close enough to do something (at this stage I wasn't sure what!) to it.
The lead jeep, CinC and bazooka team on board, crashed into the field holding the StuG...and crashed straight into the platoon of fallschirmjager infantry in the trenches next to the self-propelled gun!
Now this is where I'm afraid I got a bit game-y. No excuses: may the Lard forgive me, but I played the rules and not the period. What I should have done was agreed with Neil that after the double-takes on both sides, the US company commander would make a witty quip and surrender to the Germans, who would also make a couple of witty quips as well. Neil even said he'd let me have a flank shot at the StuG with the bazooka before the surrender took place.
I am ashamed to say, however, that I insisted on having my flank shot as an Action, then having the fallschirmjager and US bazooka crew and Big Man fighting a close combat as in the rules. Why does this matter, you ask? Well, if your opponent has more than four times your dice, they aren't rolled, but you rout back miles and miles immediately taking only six points of shock rather than any kills i.e. my jeep would zoom into the field, take a quick pot shot at the StuG whilst surrounded by enemy infantry, then rout back the way it had come without taking any damage.
Neil, tolerant of my "enthusiasm" as ever, took this in good part (I think he realised that I had given him way too much stuff for the Americans to have any chance of breaking through) and said that if that was what I wanted to do, then we would play it that way. The Gods of Lard, however, were feeling less tolerant. My point blank range bazooka shot missed the StuG by miles, and although my jeep did then rout back, the next chip out of the bag was the fallschirmjager platoon, who opened fire and, fairly fluke-ily considering they were firing through boccage, killed both the bazooka team and the US company commander!
Which just goes to show that the Gods of Lard are not to be, er, trifled with! The pictures below illustrate the action:
The German main line of defence was now fully revealed. In addition to the Tigers, they had two platoons of infantry, more MMG teams than you could shake a stick at, and a zugof Panzer IV's. As I said, I had the weighting of this scenario all wrong!
The white crosses on each FSJ squad represent its Panzerfaust: once fired it would be removed. The Panzer IVs in the nifty dot pattern are from Plastic Soldier Company. At £16 for five, you can't get better value...although I must say their lack of weight does take some serious getting used to.
As you have probably guessed by now, the Americans were never going to break through! Even two 57mm anti-tank guns had little effect on the Tigers, although I did eventually manage to force the crew of one of them to bail out by concentrating everything I had on it, but I lost two Shermans whilst doing so, and must have hit it with over twenty shells before its crew even realised they were under fire!
The final nail in the US coffin was the appearance and subsequent destruction of a platoon of four M10 self-propelled anti-tank guns. They had been hoping to sneak into firing position on the Panzer IVs before being spotted, but didn't, and were taken out in two Panzer IV volleys. A miserable performance!
The pictures below show the position at the end of the game, and the demise of the unfortunate M10s. Despite my miscalculation of the troops to be fielded, we had a good time playing, and did have an awful lot of figures on the table! And so, on to 2012...
Robert Avery