
It had been a long week, and writing a scenario for the Q13 battle that Neil wanted to play in our usual Saturday night game was not something that I wanted to do. Luckily I had options: in this case whipping out the Blenneville or Bust! scenario pack and setting up one of the scenarios I had only play-tested not played through. It would also give me a chance to test out my new IABSM-specific movement trays (see post here).
The British would attack from the 'bottom' of this picture
The scenario is a simple one: two thirds of a squadron of British tanks supported by a company of infantry would attempt to eject a supported platoon of Germans plus two StuGs and an anti-tank gun from a village in France.
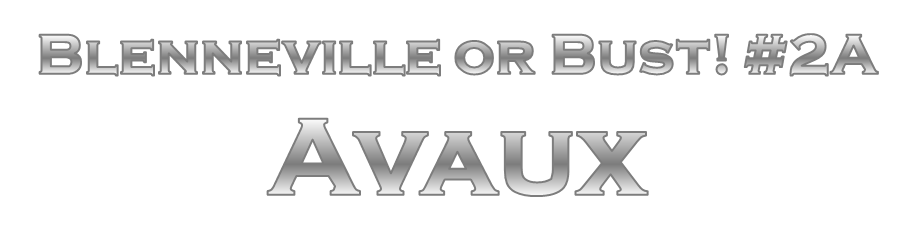
Avaux is a small village in Normandy bisected by a long straight road running north-south. Just near the village is a sizeable manor house surrounded by orchards. All the hedges you can see in the picture are actually supposed to be bocage, but Neil hadn't brought his bocage with him as he'd thought we were playing sci-fi!
After a preliminary stonk, the British would enter the table from the 'bottom' of the picture on the right, with the Germans beginning the game on-table under hidden Blinds. As the Germans had not a lot of troops to cover an awful lot of battlefield, they deployed their two StuGs to the south (i.e. behind) the orchard, ready to move to wherever the British developed their main axis of attack. The anti-tank gun was just in front of the lone grey house to the east; supported by two squads of infantry in the two houses just to its left. There were another two squads of infantry, supported by an HMG, in the manor house; with the final HMG being in the house on the north face of the village square. Dummy Blinds were in the house next to that one and lurking behind the hedge with the StuGs.
The game began with the British stonk. This they landed on the manor house and orchard, causing lots of Shock but only one casualty. The Shock would wear off before any of the troops suffering from it were in combat, so I got away quite lightly with that one.
The British then began advancing cautiously on table. There was huge amounts of spotting from both sides as the lead British Blinds approached the first line of bocage, with most of the German positions being identified (but not what troops were in them), and most British Dummy Blinds being dispersed. In addition, the British tank squadron and infantry company HQs were revealed and placed on table half way along the first line of bocage. The squadron HQ tanks were held a few yards back from the bocage, so were effectively un-shootable.
Now that they could see that the centre-right (from the British point of view) was looking like a possible main thrust, the two StuGs, under Blinds, entered the orchard and drove north towards the line of bocage on its northern edge.
Swamp the second StuG!
They had just arrived there and gone hull-down when the British, conscious that time was ticking away, finally decided to start moving forward. One of the two HQ tanks moved up to the line of the bocage in front of them, its commander peering over the hedge embedded on top to see what was what.
What they saw, of course, was one of the StuGs, that promptly came off its Blind and opened fire, blowing the Sherman to bits!
This was a nice success for the Germans, particularly as the revealed StuG was then able to scoot backwards out of danger to wait to do the same thing again. The other StuG remained under a Blind at the hedgerow, but was soon spotted through the combined efforts of the two British infantry officers dismounted from their scout car and crawling up to the top of the bocage with binoculars.
Taking their time, again, the Brits called in artillery and, luckily for them, it arrived almost immediately and dropped right on top of the StuG after only some minor adjustments from their FOO. With the StuG rocked by the 25-pounder shells falling around it, a platoon of British tanks revealed itself and sprang into action, hammering the StuG with AP shells until its crew abandoned ship.
Two of the British tanks then smashed through a gate and advanced forward as their two colleagues and squadron HQ tank maintained overwatch from behind the bocage. Half-way across the field, however, the two brave tankers halted, unwilling to advance further forward and give the remaining StuG an almost identical pot-shot as before: it now lurking on the edge of the orchard.
Meanwhile, a platoon of British infantry supported by a couple of Vickers MMGs mounted on carriers had advanced under a Blind towards the two shelled houses on the eastern side of the road.
Unfortunately for them, they were spotted by a German Dummy Blind. One of the carriers was hit by the PaK40 anti-tank gun and destroyed; with the infantry, caught out in the open taking horrible casualties (Great shot, Close range, 4D6!) from the German HMG in the house on the north side of the square. The remains of the British platoon and remaining carrier went to ground, and would only start moving forward again towards the end of the game. The German anti-tank gun, on the other hand, retreated to a position just behind the two houses containing the two infantry squads on the southern side of the square, waiting to see where it would be needed next.
Immediately after the close combat
Still nervous about advancing forwards against the one remaining StuG, the British commander decided to change his axis of attack. Two Blinds headed down the eastern edge of the town: one covered another infantry platoon, the other another platoon of four Shermans (well, three Shermans and a Firefly).
Obviously it would be foolish to advance with tanks against a ready-for-action, PaK40, so the British FOO called up the artillery again, and again it came down immediately and landed straight on top of its target. Ooof! The anti-tank gun crew, caught limbered, staggered from the remains of their SdKfz 11 tow, and desperately tried to get their weapon ready for action again.
Not wanting to give them any chance to recover, the British infantry platoon, still under a Blind, charged forward, intending to close assault the German gun crew. As they did so, however, they passed the two houses where two squads of German infantry lay waiting. As the British approached at the run, the first German squad opened fire, doing significant casualties but not enough to prevent a close combat from occurring. Outnumbered three to one but in a far superior position, the German squad lost the combat by only one 'kill', and so were pushed backwards out of the house, leaving the British platoon milling around on the other side.
This was too good an opportunity to miss. The other German squad (you can see them 'on the roof' in the picture above - just under the beer bottle in the background!) ran out of their house and poured fire into the disorganised Brits, effectively wiping out the entire platoon!
"I'm your huckleberry!"
Luck was now not with the Germans. Unfortunately the British artillery, and now air support, was both plentiful and, apparently, readily available. The German infantry and anti-tank gun crew, themselves now caught out in the open, was shelled and strafed...leaving them battered and reeling. In the centre of the photo above, you can just see the 'fall of shot' marker by the anti-tank gun poking out from behind the tree behind the house.
Up came the platoon of British tanks, and it was 'gunfight at the Avaux coral' time with two squads of battered German infantry, each with a single Panzerfaust, and a PaK40 versus four Shermans. Incidentally, in the picture to the right, the remains of the British platoon have been removed from the table: in reality the Shermans are parked on a lot of dead bodies. Not a pleasant thought.
Fire was simultaneous (shooting on the Tea Break card), and we decided to calculate my (German) results first.
Unfortunately (I seem to be using that word a lot lately) my troops were just too battered to do any significant damage. You can see that just one Sherman has taken a point of Shock: not exactly a spectacular result!
The tanks opened fire with their MGs, and knocked one German squad and the PaK40 crew into next week. Well, into retreating nine inches each, Pinned and with more Shock you could shake a stick at.
At that point I called the game and conceded defeat. If I'd taken out two, or maybe even one, of the British tanks on the right then I would have continued, thinking that perhaps the remaining StuG could have got across the table and done something.
It had been an epic game, much enjoyed by both Neil and myself. He had certainly felt very nervous about advancing forward against unknown quantities of Germans sheltering behind bocage, and the fact that he had effectively lost two out of three of his infantry platoons (mostly dead as well) shows how careful you have to be. In the end, the Germans had been a bit unlucky to get hit so quickly and accurately by the British artillery and, as a result, to be at such a huge disadvantage in the final clash, above.
In our usual beer-fueled post-match discussion, we agreed that I came reasonable close to winning and very close to achieving a very respectable draw, which is effectively a win for the Germans. One thing I would say, though, is that this scenario only works with the forces as written if the Brits don't know how few troops they are facing. That's why I played the Germans, and why Neil was seeing Germans behind every hedge!
Robert Avery
still lurking!