

Ancients is the most diverse of any wargaming period, in that it attempts to cover warfare from pre-history to the advent of gunpowder.
Wargaming the period can therefore pose a huge challenge to the beginner. There are a myriad of different armies and troop types, many with strange and exotic names. There are hoplites, peltasts, ashigaru, lanciarii, fyrd and huscarls to name but a few. Weapon technology also changed: including the move from the use of sticks and stones to bronze, to iron, to steel, and the development of the horse as a weapon of war.
The situation is further confused by the large numbers of different sets of wargaming rules available for the period.
There are the two biggies, the De Bellis family of rules (DBA and DBM, together known as DBx) and Warhammer Ancient Battles, each of which takes a radically different approach even to such fundamentals as basing the troops: the former uses element-based figures, the latter recommending individually-based figures. After these, the Society of Ancients lists no fewer than 30 other sets, including my own Vis Bellica rules.
What this article will try to do is to give the beginner a basic guide to the tabletop tactics that can be used when wargaming the Ancients period. In other words, what you should be trying to do with your figures when you’re actually playing a wargame, and what your opponent will be trying to do you!
A Body of Knowledge
Rather than rely wholly on my own research and opinions, a request for other people’s ideas and opinions on the subject was posted on two of the wargaming and Ancients wargaming forums. My thanks to all those people who took the time and trouble to respond.
Gross Over Simplification
As has already been stated, the Ancients period is about as diverse as you can get in wargaming terms so, in order to simplify matters for the beginner, I've divided the armies of the period into five extremely approximate stereotypes.
These are:
- The Charioteers: mass light or heavy chariots supported by infantry (New Kingdom Egyptians; Assyrians; Hittites)
- The Regulars: drilled or regular foot supported in a 'combined arms' way by smaller numbers of light troops and horse (Hoplite Greeks; Macedonians and Successors; Imperial Romans)
- The Warbands: any irregulars armed with light spear and shield (Celts, Norse, Saxons)
- The Cavalry: heavy, extra heavy or noble cavalry supported by light cavalry or horse archers, with maybe the odd infantryman to rally behind (Mongols; Ayyubids; Turks, later Romans)
- The Knights: heavily armoured knights supported by peasants who deserve to be ridden down, except for those lovely English longbowmen (Medieval French; 100 Years War English)
These choices caused some controversy from contributors, despite my requests for tolerance!
Comments such as “I can't even agree with your 'extremely approximate' divisions, so I can't make any specific comments here” and “historical tactics for one army that might fall within one of these ‘types’ may never have been used by other armies within that type” whilst not being particularly helpful do serve to illustrate the potential difficulties involved.
However, what follows is a summary of my own and others’ opinions of the following questions:
- what tactics are historically accurate for each type of army?
- how are those tactics simulated in the various sets of wargaming rules used?
- how well do those simulations reflect history?
- what tactics ACTUALLY work for that type of army under the various rules used?
The Charioteers
Chariot armies have at their disposal light chariots and/or heavy chariots. These are supported by average or poor quality infantry and, for later armies, average quality cavalry as well.

Despite looking fantastic and awe-inspiring on the table, relying on a panzer division of chariots alone is not going to win battles. Part of their attraction for the Ancients period general was as a strategic transport for his men: they would arrive on the battlefield more rested than if they had walked all the way there themselves. This explains their predominance as much as any of the tactical strengths that they possess.
The key to winning on the tabletop with a charioteer army is to use the chariots to disrupt the battle line of the enemy force to such an extent that your infantry can win the day. Note that you may need to clear enemy chariots from the field before you can do this and, under the DBA rules system, this can often lead to the end of the battle as your general is usually in a chariot and if he goes, so does your whole army.
Assuming that your chariots have cleared any enemy chariots from the field with some form of mass attack, light chariots and heavy chariots should be used to soften up the enemy line.
Light chariots are for skirmishing, not for close combat. They should use their mobility to get round the flanks of an enemy force and pour missile fire into them. Once the enemy battle line has been sufficiently disrupted by this, either due to being shot down or being demoralised by flank fire, attack frontally with your infantry.
Many rules systems, including Vis Bellica and Warhammer Ancient Battles (WAB), simulate this tactic by giving chariots a stability bonus for missile fire over other mounted archers: presumably for providing a relatively stable shooting platform. Watch out, however, for foot bowmen, who can probably outshoot chariots on a frontage-to-frontage basis.
In DBA, however, the missile firepower of chariots is subsumed into their general melee factor: so contacting the enemy’s flank is the thing to do. Being pushed back or removed from the table can here represent withdrawing to regroup rather than being physically destroyed.
As for heavy chariots, many rule systems, including Vis Bellica and WRG 6th, make a mass of heavy chariots frightening to enemy morale but not quite as effective in combat as an infantry unit of the same size. They move faster than the infantry however, so one use is to position your heavy chariots behind your main line as a comparatively fast-moving, and reasonably combat effective, reserve. They can also be used as the expendable tip to a rapid thrust at the enemy line: denting the line enough for your main force to punch a way through the weakened spot. They provide a bit of extra “oomph” for your troops: not your main strength.
In conclusion, your first task is to clear away any enemy chariots: probably with a massed chariot charge of your own. Stay away from the enemy infantry until this is done. After that, if the battle is still continuing, divide your chariots into groups of small numbers and use light chariots as skirmishers, with heavy chariots either forming a reserve or being used as expendable shock troops to be committed just before your main infantry battle line attacks.

when the italians didn't go backwards!
The Regulars
Various contributors pointed out that this army type should really be divided into two sub-types: those regular, drilled, close order troops whose prime aim was to melee and those whose prime aim was to blow the enemy away with concentrated missile fire.
This is a fair point, so let’s deal with each in turn.
For those Regular armies whose main strength is melee, one basic principle emerges: get stuck in to the main enemy force as soon as possible. This holds despite the fact that the tactics used by the Macedonians, Romans and Hoplite Greeks were all slightly different. Alexander used his heavy infantry to pin enemy units, then smashed his shock cavalry into the critical point of the enemy line. The Romans used their heavy infantry as a grinding force that wore down an enemy army through its ability to replace units in close combat, and also used their flexible system to allow them to reinforce weak areas or exploit gaps in the enemies line. Hoplite tactics were pure grind: trying to break an enemy’s line by continual pressure.
Whatever the actual army used, the wargaming application is largely the same. If you are fielding an army whose strength is drilled 'heavy' infantry (Regulars/Melee) then your tactical aim must be to engage your opponent’s main strength with yours as fast as possible: either to pin them to allow your combined arms forces to strike elsewhere (Alexander but not necessarily other pike leaders), or to grind them down (Romans, Hoplites).
Don’t forget that you must be careful to protect the flanks of your valuable infantry as you advance them into combat: and that this will usually involve countering enemy skirmishers or cavalry. Players must also remain focussed on the tactical aim of entering close combat with the main enemy body, and not fritter your Regulars/Melee away on other battlefield tasks. That’s what the Auxilia are for. Finally, only commit them when you have identified where the enemy main strength is on the field.
Note that there are similarities between the tactics above and those previously described for Charioteer armies: the main difference being that Regulars/Melee don’t necessarily need to soften up the opposition before seeking contact. This article will conclude with an examination of these emergent general tactical principles.
As for how rules systems simulate this, most make Regulars/Melee type infantry extremely effective in close combat. DBA also rewards a solid line: making it possible to "squeeze" the enemy by seizing the initiative. Both it and Vis Bellica also do a good job of simulating how, once the battle lines are joined, your choices become more limited: emphasising how important it is to get the choice of where to deploy your Regulars/Melee troops right first time.
The opposite tactics apply to Regulars whose primary strength is missile fire (e.g. Classical Indians, Achaemenids). Here, the tactics are to avoid combat for as long as possible and, as one contributor put it, “shoot, shoot, shoot”.
Find a good spot on the battlefield, preferably behind a defensive obstacle that borders an area of poor quality, but open, terrain (think Agincourt) and sit and wait for the enemy to attack. When actually deploying your troops, work out the fields of fire of your Regulars/Missile troops, making sure you have covered all approaches and exploited cross- or concentrated fire opportunities whenever possible i.e. into an advancing enemy’s flanks, and/or having more than one unit able to hit the same enemy. The more aggressive commander might also want to keep an eye out for the moment to launch a battle-winning counter-charge as the enemy reels back from a failed attack.
When looking at how different rules sets advantage or disadvantage Regulars/Missile troops, two areas must be examined in great detail: the ratio between speed of troop movement and range of missile fire, and the degree of flexibility allowed in target acquisition.
For your army to have the greatest possible chance of success, you want long range missile fire in a system with slow movement (WAB is a bit this way); and as much free choice of target as possible. In Vis Bellica, for example, elements fire at the nearest enemy unit at close range but, at longer ranges, the presence of Officers can concentrate the fire of several bases.
In DBM, nearly all missile fire is subsumed into close combat, with only artillery and foot archers in formed bodies shooting at longer ranges, so players wanting to use tactics like the above must choose which army to use carefully.
In conclusion, using Regulars is relatively simple. If their speciality is melee, go forward. If their speciality is missile power, stay back!

not your average celtic warband!
The Warbands
Warband armies are those such as the Ancient British that are made up of large numbers of average quality, irregular foot, armed with light spears and shields, supported by similarly armed light or medium horse, and large numbers of missile-firing light infantry.
I believe that they are the most challenging type of army to use, as they have the command and control problems associated with their tribal nature, combined with the fact that, troop type for troop type, they usually don’t fight as well as the armies that they are likely to face. The ‘average’ unit of Celts stands very little chance of success in a straight melee with an ‘average’ unit of Roman legionaries.
The key to success with Warband armies is to use your whole infantry force like Alexander’s Companions: striking with overwhelming numbers at a single point of your opponent’s line and relying on your support troops to hold off the rest of the enemy army until you have broken him there.
Warbands do best to attack near a flank of a solid line of "Regulars", especially if they can overlap one edge. Rather than lining up your men evenly across the field, heavily weight one end of your line and aggressively attack that end of the enemy’s battleline with everything you’ve got. The one thing to avoid is to get sucked into the “mincing machine” of a frontal melee against Regulars/Melee troops. Likewise, a “Light Brigade” charge into the front of a line of Regulars/Missile troops.
In DBA, one suggestion is to attack a flank with a double-deep line making sure you have one stand of overlap, and the other flank "held" by a skirmisher. You only get one chance to win with an attack like this, because your skirmisher will flee at the earliest opportunity, but you have a 50/50 chance of rolling up your opponent's flank, and then it doesn't matter what your skirmisher does.
In WRG 6th, one tactic is to mass your skirmishers into larger than normal units. This is particularly effective if using sling-armed lights against Cavalry or Knights armies: watch your opponent’s wedges of five or seven figures disintegrate under the hail of slingshot fire that sixteen slingers can produce!

but it must be true...i saw it on tv!
The Cavalry
Cavalry armies are fast-moving armies with a devastating combination of (a) massive missile firepower delivered by light cavalry and (b) powerful charges delivered by shock cavalry.
The formula for success is actually very straight forward.
The light cavalry skirmishers use their mobility to shift about the battlefield and pour fire into the stationary enemy. The enemy is almost always outnumbered in the cavalry arm so must either hold it in reserve or watch it get destroyed. If the enemy is foolish enough to charge the horse archers, they fire and retire, drawing the advancing enemy further and further from their supports. Without a fast striking force to interfere, the horse archers fire and fire, careful to avoid any infantry missile men that can out range them.
After a period of time during which the enemy has been weakened, the heavier cavalry charges. Ideally the targets of the charge have been so decimated by archery fire that they don't even stand. The skirmishing horse is now thrown in pursuit of the fleeing enemy, turning defeat into rout.
One aspect of this army overlooked by most rules systems is their ability to pursue the enemy after the battle. This pursuit is, however, handled nicely in Warrior Kings from Two Hour Wargames. After the battle, both sides count the number of units still functioning. Any numerical superiority on the winning side can, under certain circumstances, be used to inflict more (post-battle) casualties on the losing side. This can have a huge effect in competition and campaign games where it’s not just if you win, but how much you win by, that counts.
In DBA, light horsemen are allowed to take more than one move per turn, as long as they stay away from the enemy whilst so doing. This, combined with the longest move distance of any troop type in the game, lets them get almost half way across the battlefield each turn, making them extraordinarily manoeuvrable. Most combat defeats result in them fleeing rather than being destroyed, so they aren't easy to get rid of, and as they are allowed "quick kills" against a number of troop types, they can relentlessly harass slower opponents.
Finally, one thing to note about most rules systems is that they do not allow a good simulation of the “false flight” tactic practised by some cavalry armies.
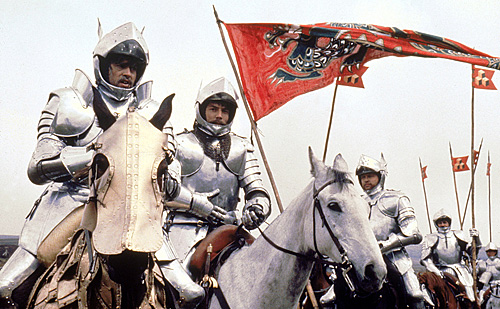
The Knights
Knights armies generally comprise a limited number of lance-armed, super-heavy, armoured cavalry supported by similar number of skirmishing light cavalry, and a body of below average quality infantry armed either with bows/crossbows or long spears. They are sometimes split from the Ancients period into a separate Medieval period, representing the fact that they are just too technologically superior to, say, a charioteer army for a battle between the two to have any more relevance than magazine-rifle armed European infantry against spear and shield armed tribesmen!
the best film ever made!
Under most rules systems, the actual ‘armoured knights’ elements of a Knights army are incredibly effective in an all out charge, but also incredibly expensive to buy as part of your army composition. In Vis Bellica, for example, a base of Knights (300 odd horse) costs the same to buy as two bases of decent quality foot (say 2,000 men). All the principles that we have explored above for similar troop types therefore apply, but to an even greater extent.
The temptation is to use the armoured knights themselves for an all out charge at the very heart of an enemy line. This is often doomed to failure because, after an initial success, the knights are overwhelmed by superior numbers of inferior troops. The small number of knights available also makes them vulnerable to mass missile fire: Agincourt and Crecy being perhaps the most familiar examples, but light horse archers very dangerous as well.
The knights should be saved for a smashing attack similar to that of heavy chariots or shock cavalry, above, but taking into account the fact that they are so effective in a charge that they can often succeed where the chariots/cavalry would fail. The trick is therefore to make your opponent expose a weak point you can charge: the problem is that you often won’t have the support troops to do it.
As above, again, light cavalry and missile-armed infantry should be used to tempt the enemy into over-extension. At Agincourt, it wasn’t until the English archers snuck forward into range and fired an ineffective but annoying volley of arrows that the French knights charged them: attacking piecemeal in their eagerness to get at their socially inferior tormentors.
In DBx, it is also often worth dismounting your knights and using them as infantry. It might not be historically accurate, but compare your chances of success mounted and dismounted against the enemy troops you are facing, and act as appropriate.
Emerging General Principles
Those amongst you taking notes will have noticed several general principles that have emerged during our examination of battlefield tactics. In summary, these are:
1) The key to success is combined arms, not a preponderance of strength in one type.
2) Use your troops for what they were designed for. Use skirmishers to skirmish, shock cavalry as shock cavalry.
3) Weaken the enemy with skirmishers, then smash overwhelming force into a single, critical point of the enemy line.
4) Aim to disrupt the enemy line. Punching a hole in the middle of it; or attack, then roll up, a flank.
Perhaps most importantly, you must know how the rules system that you use simulates and rewards the successful tactics listed above.