FK&P AAR: Transylvanians vs Swedes - The Re-Match

As we still had plenty of time left after our last game (Transylvanians vs Swedish, a narrow victory for me) Si and I decided to play again.

I offered a change of sides, but Si said that now that he’d taken the Swedes for a test run, he’d like to use them again “for real” this time. That was fine by me, so we re-set the table and both re-deployed.

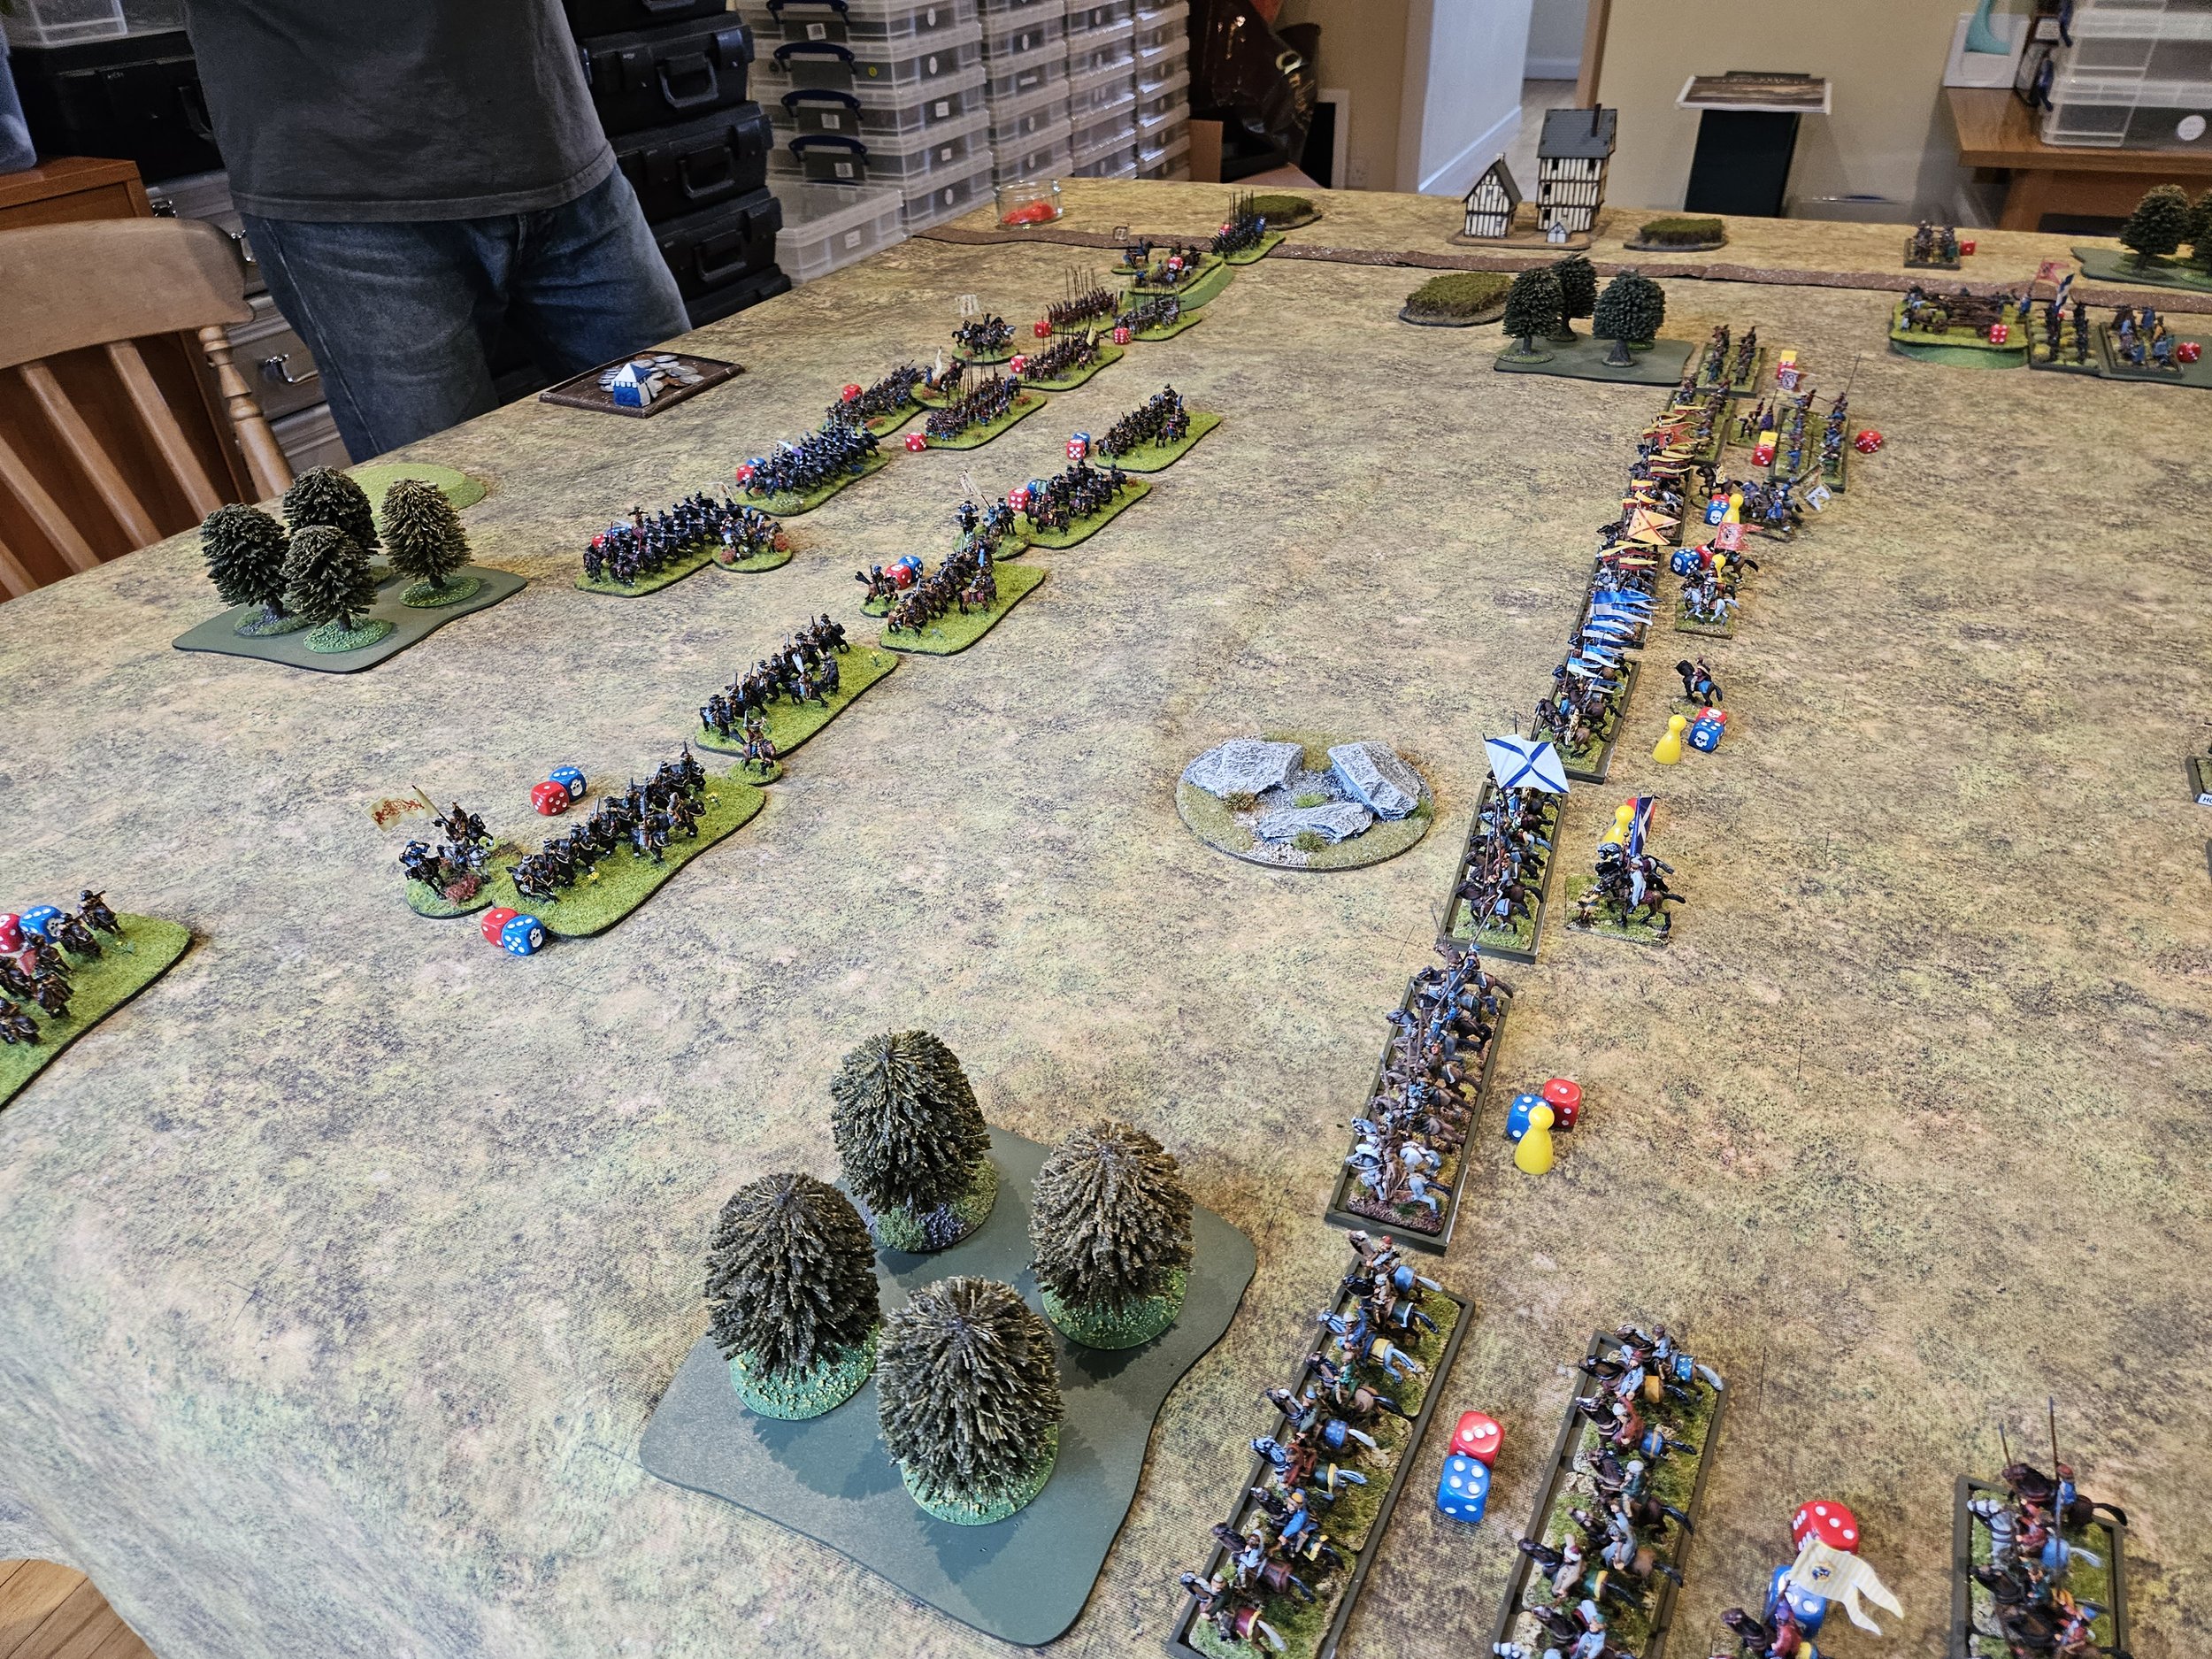
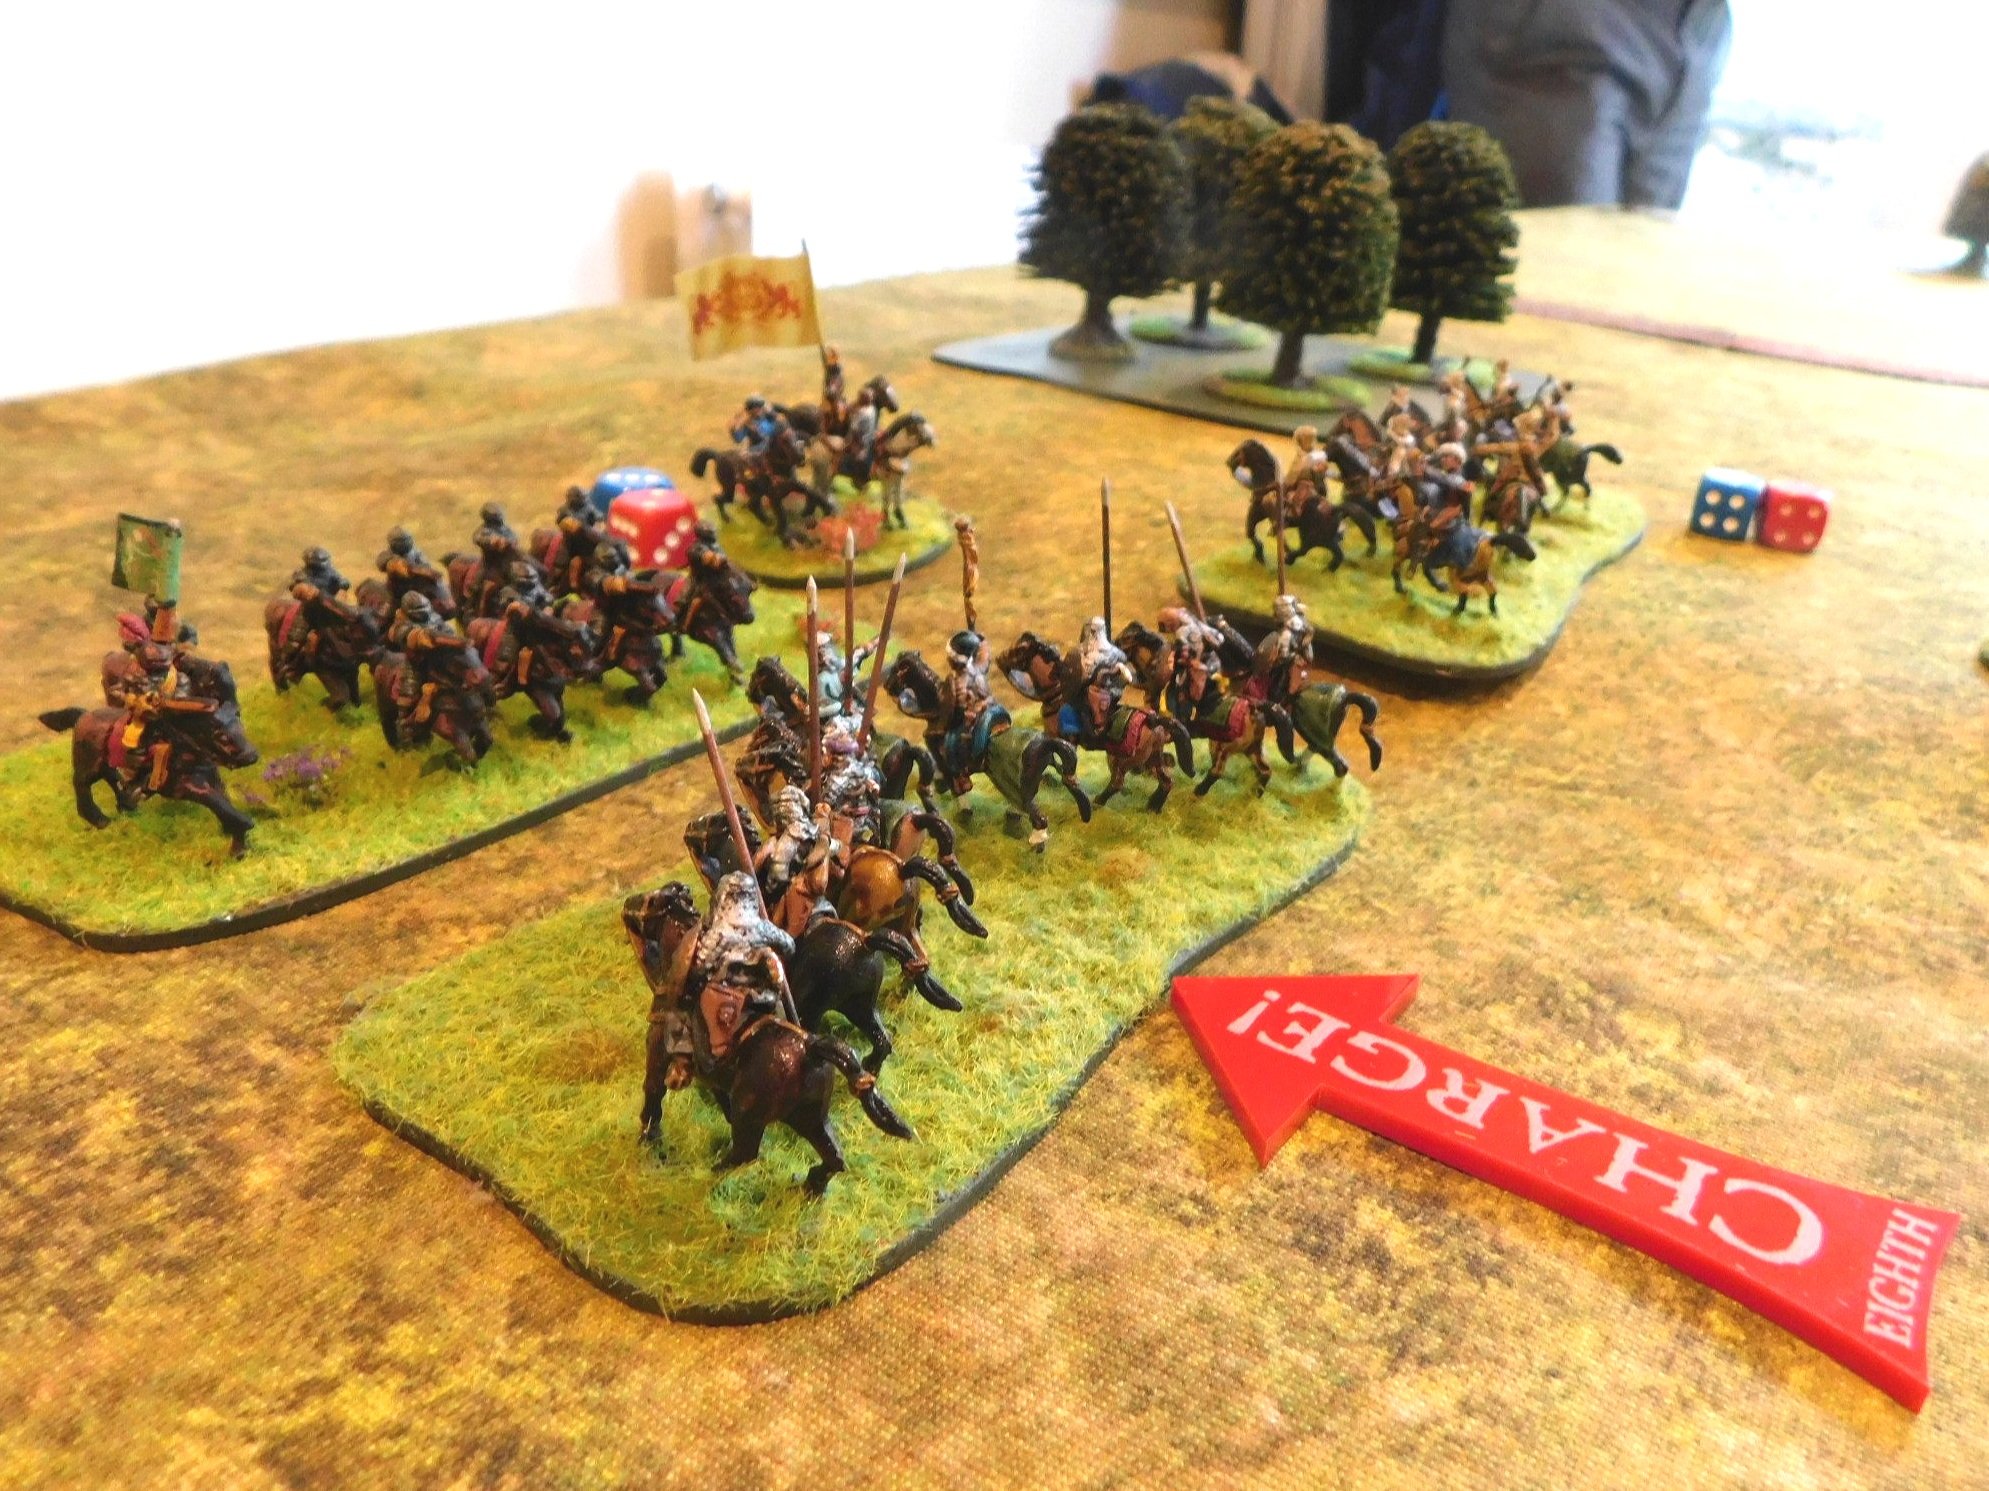
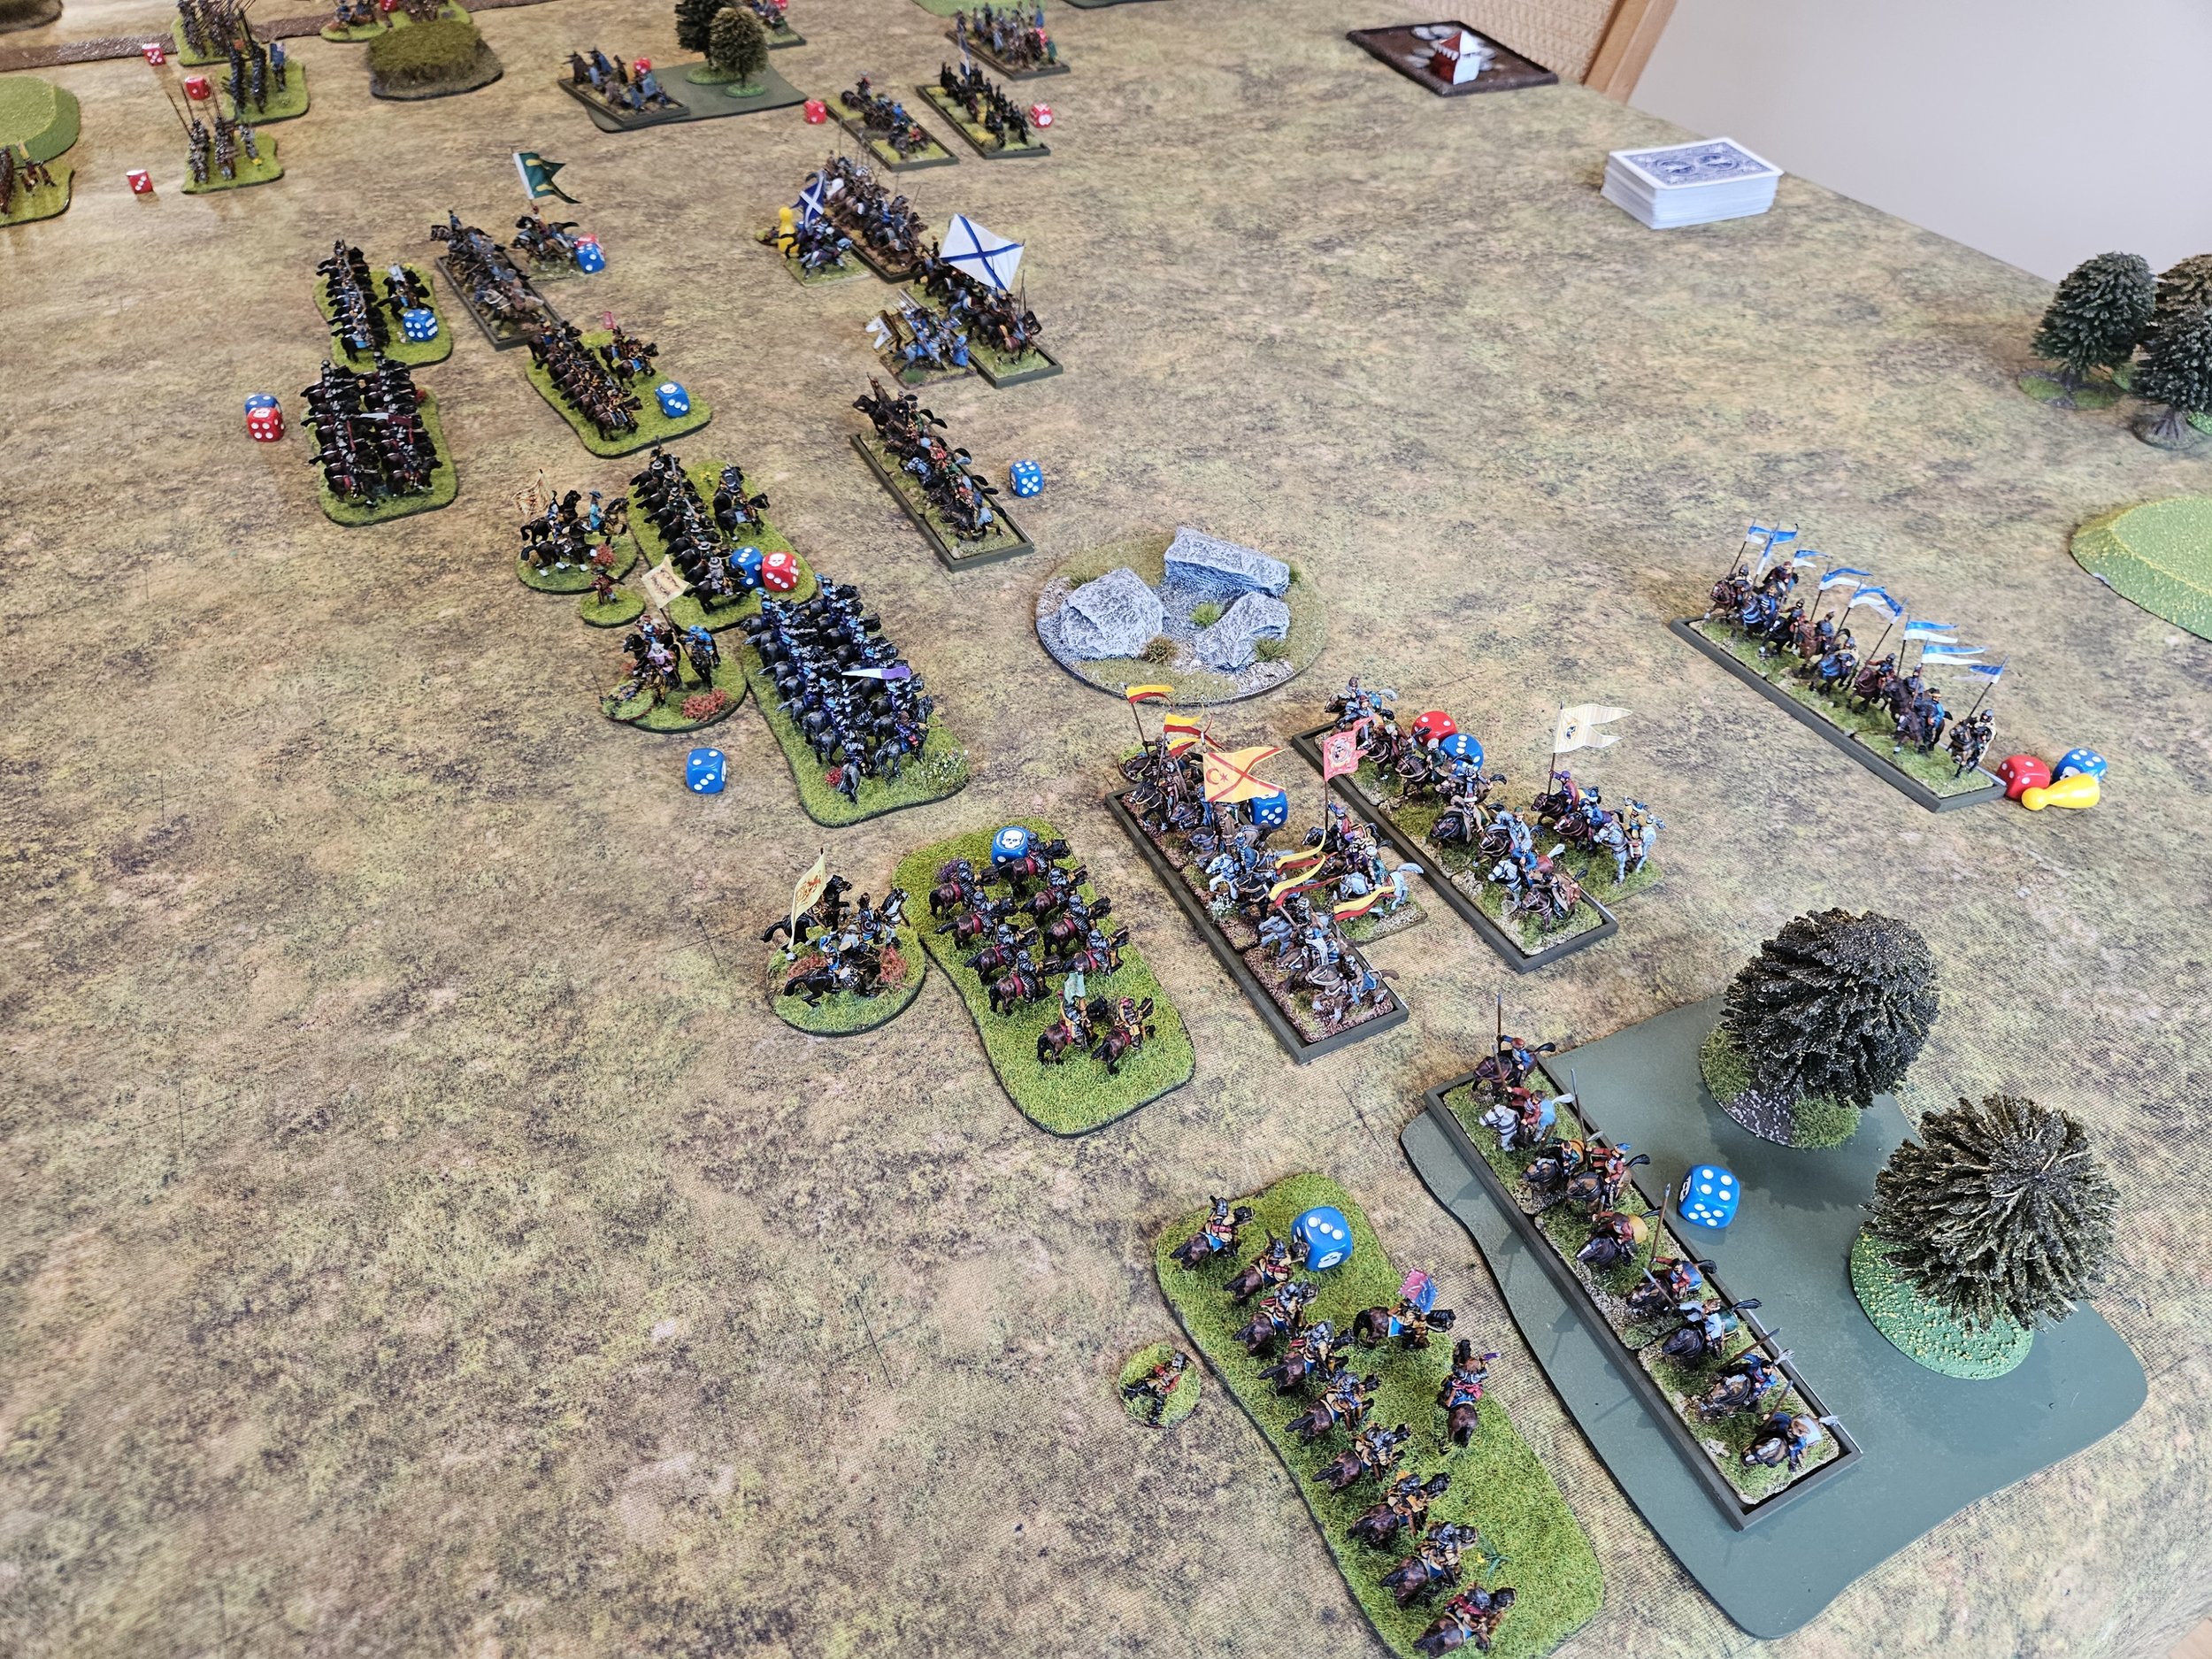
Both sides placed their infantry facing the small village on the far side of the picture, above. I faced my Elite National Cavalry off against the Swedish Cuirassiers and cavalry in the centre, with my light horse on the left wing hopefully enough to slow down or stop more Swedish cavalry facing them.

An advance by both sides rapidly saw the two battle lines come together in the centre and on my left in a series of cavalry melees that swung backwards and forwards in terms of advantage for both sides.

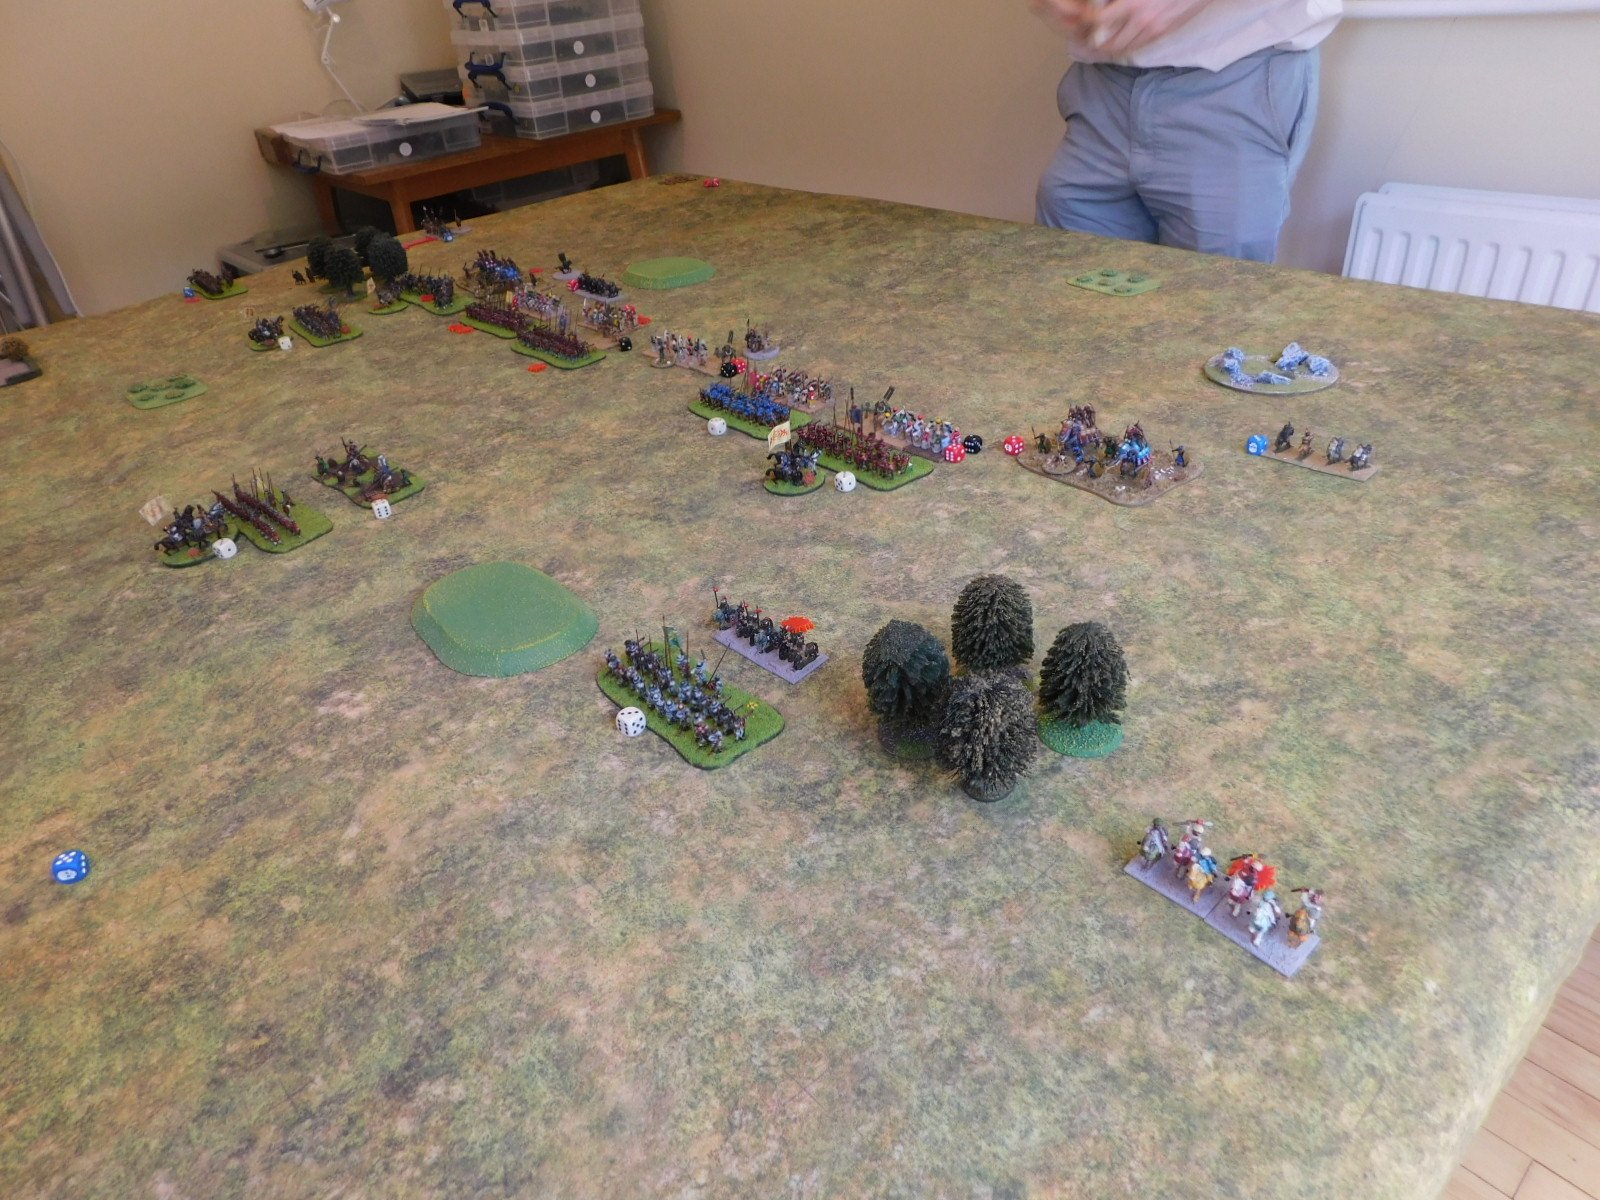
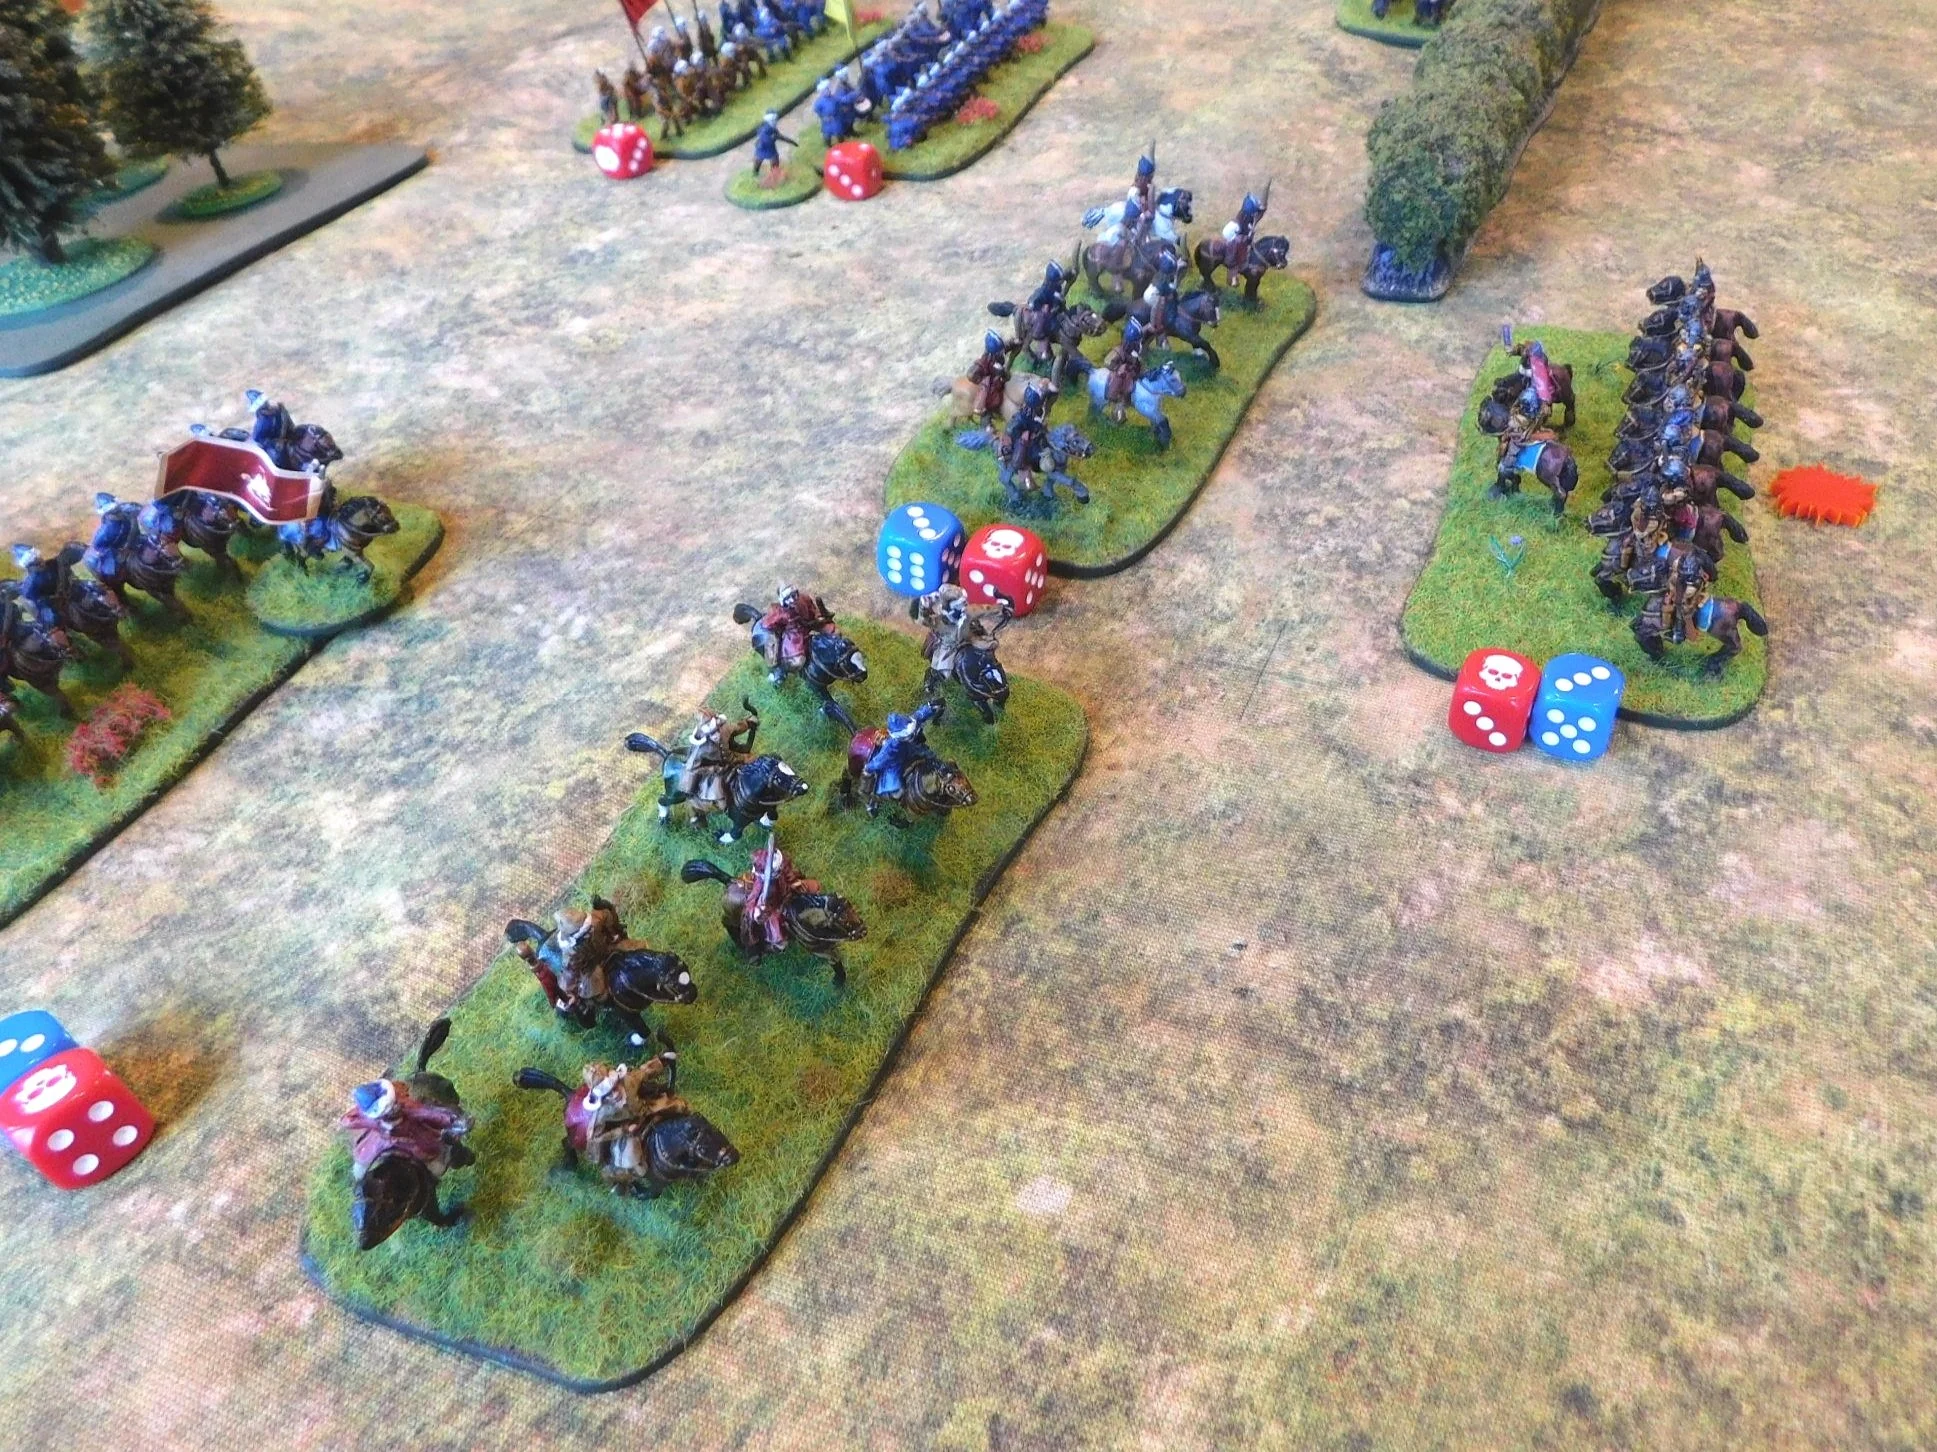
Although I managed to hold the left flank, my center had to give ground and soon all I could see was my own horse thundering back towards me!

Fortunately I had troops available on my left to bring into the centre as reinforcements, and the battle broke up into a series of individual melees as units that had disposed of one enemy looked for another opponent to engage. In the confusion, one of my light horse units also managed to sneak through and take the Swedish camp, a much needed boost to my fortunes at that point!

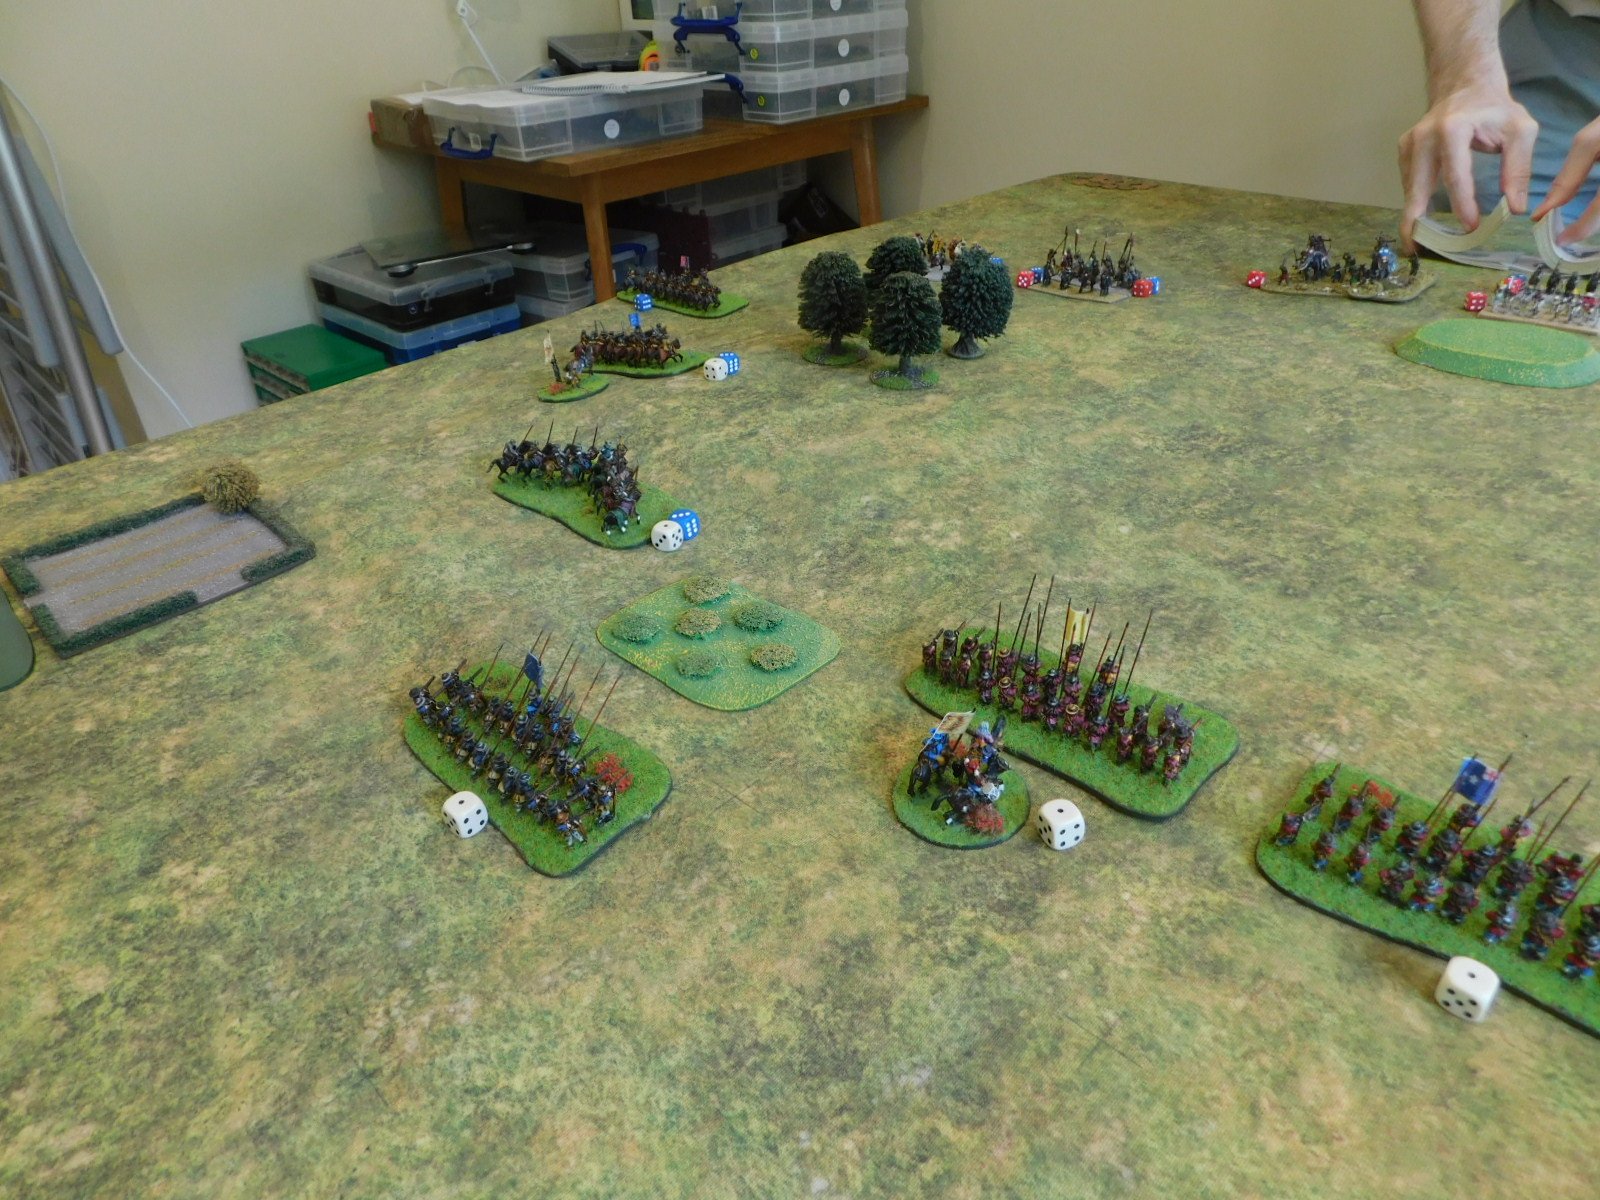
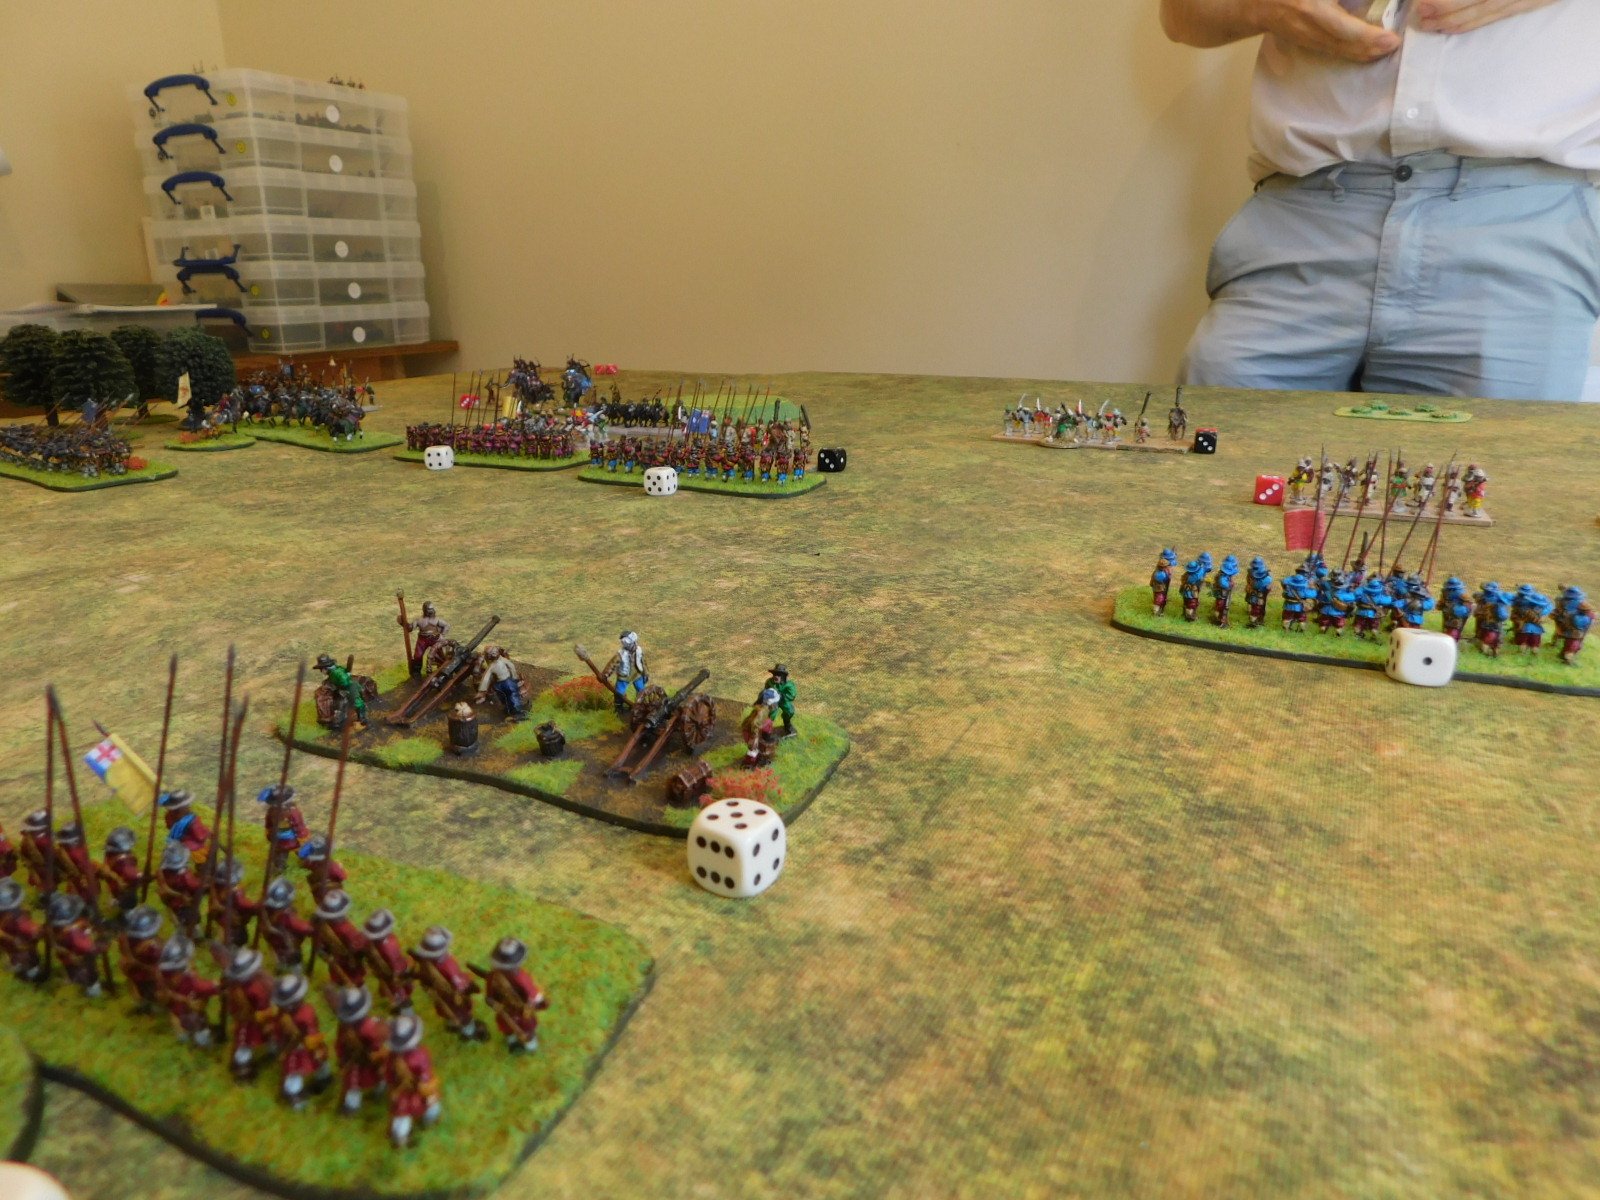
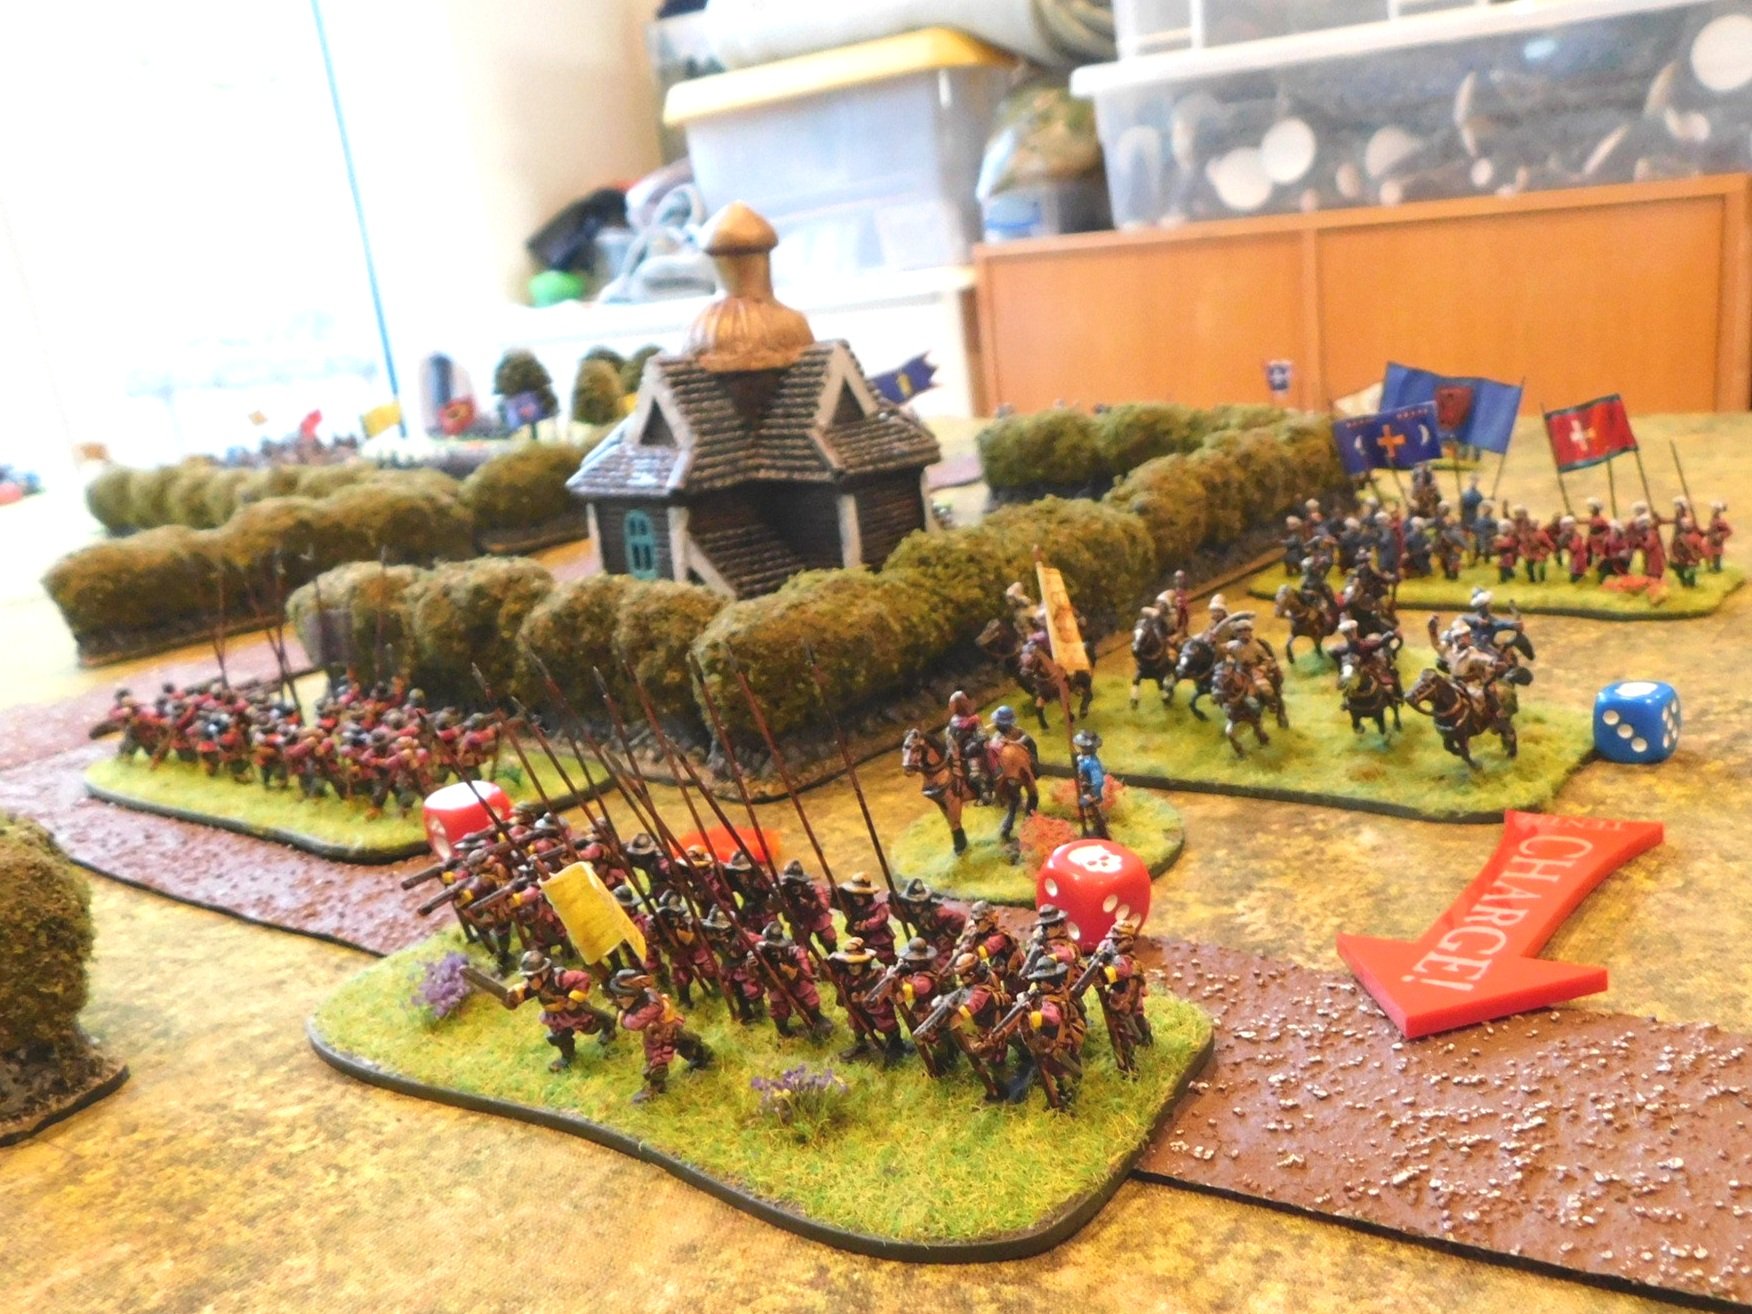
Meanwhile the two infantry lines had slowly advanced towards each other and begun exchanging long range fire, with the Transylvanian militia troops getting the worst of the deal.

At this point I stopped taking photographs as it was neck and neck as to who would run out of victory medals first. In the event, it was me: giving Si and the Swedish a narrow victory.

A cracking couple of games decided by very narrow margins.

FK&P AAR: Transylvanians vs Swedes

Friend Si coming round for a gaming session provided the perfect excuse to get my new 17th century Cuirassiers onto the table.

Si would field the Swedes (with said Cuirassiers) and I would play the Transylvanians:

The Swedes

The Transylvanians

My plan was to hold his superior infantry on my right whilst my better cavalry rolled over his centre and his right.

Originally I had planned to sweep my light cavalry around the left, but realising that he could block that move with his horse, my first action was to try and reposition my lights so that I could use them either as general reinforcements or to bolster up my right. You can see them moving across the rear of the battlefield in the pictures above, and here’s an even better shot:

Grand tactics!

The two main battle lines then came together with a crash, with the Transylvanians definitely getting the advantage as their elite cavalry went in. The Swedes reeled backwards, apart from one unit of Cuirassiers that stubbornly refused to give way, and a period of jostling backwards and forwards ensued.

This continued until the relentless pressure from the Transylvanian horse finally proved too much for the Swedes to bear, and their centre began to crumple (their right had given way much earlier).

Meanwhile, there had not been a lot of activity on my right flank: my infantry had indeed advanced forward and then stopped to hold the ground, but the Swedes had been too busy elsewhere to worry about them.

Just as the Swedes thought they might have to do something on their left, their centre finally gave way and the game was mine.

Cuirassiers Ahoy!

With my foray into the 17th Century European wars continuing, I decided I needed to armour-up and get a couple of full-blown cuirassier units.

You don’t really need them for the English Civil War - a full suit of armour being a bit too expensive for most people so a rarity on the ECW battlefield - but I think I can probably justify having them available to early 17th Century European armies.

As most of my ECW collection is Peter Pig, I decided to stick with them for the cuirassiers. At this stage of the 17th Century, heavy cavalry like this would have fought in the “Dutch” or “trotter” style: trotting up into pistol range and letting loose a volley or two before advancing steadily into contact.

Usually I would use Contrast paints on the horses, but as I wanted to drybrush the armour on the riders I undercoated in Matt Black and then painted their steeds with basecoat-highlight-wash as I used to do before speed paints came along.

On reflection, it was probably the wrong choice. I should have undercoated in Grey Seer as usual, painted the horses with Contrast paints, then painted the riders with a second matt black undercoat before drybrushing.

The way I used was certainly expedient - I completed the two units in two days - but I’m not very happy with the horses. The truth is that Contrast paints have their weaknesses, but they are really good for painting 15mm horses.

Anyway, they are done now: two units of cuirassier cavalry to trample over the fields of 17th Century Europe!

FK&P AAR: Swedish vs Moghuls

With the Moghuls having defeated the Cossacks in short order (see previous post) there was time to have another game. This time I thought that I would wheel out the Swedes: not sure quite how the contemporary but not contemporaneous Swedes and Moghuls would ever encounter each other…but then that’s the great joy of wargaming!

I was a bit more confident of victory this time: the Swedish army has a good mix of pike-armed infantry and decent Reiter horse: surely this would be enough to put the upstart easterners in their place!

The Swedes

The Moghuls

I drew up my Swedes in entirely the traditional manner: two brigades of infantry in the centre, a brigade of cavalry on each wing. My plan was to advance in a line and just get stuck in as soon as possible: my pike should be able to defeat his largely musket- or sword-armed infantry through reach alone!

The Moghul plan was to sweep his wings forward using weight of numbers to win the cavalry battle there, then curl in to take my main line in the flanks just as his main line hit them from the front.

His cavalry duly swept forward, with my cavalry advancing to meet them.

Left flank

Right flank

As the cavalry on both sides began their fight for dominance on the wings, the Swedes marched their infantry forward in the centre.

On the left wing, my cavalry were initially successful, and had a great opportunity to charge his main horse units in the rear by swinging around the small wood top left in the left hand picture above. Unfortunately, I drew a “10” for my first movement card, so got into the perfect position to launch the charge but just couldn’t actually charge before the way into the enemy cavalry’s rear was blocked by Moghul elephants.

Meanwhile, on my right wing, the cavalry clash had proved inconclusive. Both sides had lost multiple units, and things ended up with his cavalry technically ready to do more, but positionally unable to do so before the main battle lines clashed.

With the cavalry actions on the wings proving inconclusive, it was obvious that the battle would be decided in the centre. The two lines moved into contact and a grinding melee began.

As with most grinding melees, it was 50/50 who would win: the advantage I had from my pikes countered by the Moghuls slightly outnumbering me.

To cut a long story short, after a long series of to-and-fro clashes, I lost. At the end of the battle, the Moghuls had only three victory medals left, so if I’d broken one of his foot units before he broke one of mine, then I would have won.

All that was left in the centre of battlefield!

A great game, with the Swedes proving decidedly harder for the Moghuls to beat than the Cossacks!

Here’s a chronological, pictorial history of the battle:

FK&P AAR: Swedish vs Cossacks

Now that I had my Swedes all planned out, it was time to take them into action against my only other vaguely contemporaneous army, the Zaphorogian Cossacks.

This would be an interesting clash, as the two armies were very different: essentially a western pike & shot army (the Swedes) against an eastern pike & shot army (the Cossacks). Indeed, so different were the Cossacks that Bevan, my opponent, asked if he could use the Swedes (despite the dice initially saying otherwise) as he wasn’t sure how to fight with the Cossacks.

The Cossacks, therefore under my command, consisted of a brigade of four tabor war-wagon bases and some artillery; two brigades of Tatar cavalry, each consisting of two horse archer units and one heavier cavalry unit; and two brigades of infantry, each consisting of two Moloitsy units and one Registered Cossack units.

The Left Wing of the Cossacks

The Swedes, commanded by Bevan, were more like a conventional ECW army. They fielded two brigades of Reiters (like harquebusiers) , each with three squadrons; two brigades of pike, one consisting of three “Swedish” or pike-heavy battalia, the other consisting of four “German” standard battalia; and finally a battery of artillery and an orphan brigade of mixed cavalry consisting of a small unit of cuirassiers and another unit of standard Reiters.

The Reiters grouped together on the Swedish left wing

Despite having all the Tatar bowmen to seek out the opposition, the Cossacks were out-scouted and had to deploy first. The ground wasn’t ideal for war-wagons, with the only open space on my left, so that’s where they went along with a brigade of Tatar horse. The two infantry brigades went in the centre and centre right, with the final brigade of horse out on my right. I planned to hold the hedgerows on my right whilst the war wagons dealt with the Swedish left wing, and go from there!

The battlefield from the Cossack side. My CinC is obviously off to visit the church in the middle of the field!

The Swedes massed their cavalry on their left wing, and lined their infantry up next to them but stretching across the rest of the battlefield. That looked like an awful lot of cavalry facing my right, and I could immediately see that Bevan was intending to punch through my right hand cavalry brigade and then bring his horse round onto my flank. Gulp! I’d better win elsewhere rather quickly then!

The Battle Itself

The battle itself divided neatly into two halves: with action taking place on either side of but not along the road that ran up the centre of the field.

On the Cossack left flank, the tabor trundled forward with the Tatar horse easily keeping pace. Opposite them, the pike-heavy Swedish battalia advanced in a slightly ragged line, with the orphan brigade of cavalry behind them.

As the two sides got closer, the tabor turned and deployed ready for action, quickly opening fire with their light guns and muskets. One Swedish battalia was disordered by their fire, so the Tatar horse archers moved forward and double-disordered them with bowfire.

This was too good an opportunity to miss: the veteran Tatar Noble Lancers charged the disordered pike and smashed them from the table! Behind the pike were the Cuirassiers, but they were also dashed from the field by the rampaging Tatars. Unfortunately, the exhausted Nobles were then dispersed by the Reiters accompanying the cuirassiers, but they in turn were then routed by the horse archers following up their Noble comrades.

Meanwhile, one tabor was locked in combat with a battalia of pikemen. The action swayed back and forth, but the Swedish pike were too strong, and the tabor’s crew fled the field.

That was, however, the limit of Swedish success on this flank. Another battalia was hit in the flank and routed by horse archers, and as the battle on the other side of the field reached its climax, more Swedish infantry were about to be charged in the rear by the rampant Tatar horse: the combination of fortress-like tabor shooting any enemy that moved and the nimble Tatar horsemen proving a winnig combination.

It was, however, on the other flank that the battle was decided.

The Swedes wanted to push their horse forward en masse and just overwhelm the outnumbered Tatars in front of them. Unfortunately the cards did not smile on this endeavour, and their attack was first delayed and then delivered piecemeal.

This allowed the Tatars to focus their efforts on the front-runners and break two squadron of horse, but this initial success turned into a gradual retreat in the face of overwhelming numbers of Reiters and, as the battle ended, all three Tatar/Cossack units had been routed and the Swedish horse was preparing to lap around the right flank of the Cossack infantry.

The three Tatar/Cossack units had, however, effectively neutralised the initial Swedish plan of punching huge numbers of Reiters around the Cossack right flank meaning that, along with the successes on the left flank, the Cossacks had a real chance to win the battle with their infantry in the centre…provided they could do so before the Reiters eventually arrived.

The gallery below shows the cavalry action on the right of the Cossack position:

So the battle would be decided in the centre-right axis of the Swedish advance, where the good quality “Swedish” (pike-heavy) infantry moved forward against the Cossack foot: mostly raw infantry armed with long spears rather than pike.

The Cossacks lined the hedgerows near the crossroads and the Swedes advanced to contact. Cossack musket fire was largely ineffective, and they were soon forced to retreat away from the hedgerows in the face of a series of determined charges by the enemy pike.

I brought up reinforcements from the other flank, but so crowded was the nature of the fighting that I couldn’t find a way of extricating my disordered troops from the front line so that I could replace them with fresh. This, as I said, was due to the ferocity of the Swedish attack: continually pressing forward.

And then Lady Luck smiled upon the Cossacks: the Swedish Commanding General was cut down by Cossack musket fire as he led his infantry line forward!

In FK&P, your c-in-c is worth a lot (and I mean a lot) of victory medals, so this really tipped things in my favour. If I could break just two more Swedish units (across the battlefield, not just on this flank, so including all the action on the other flank, happening simultaneously with what I’m now describing) then the day would be mine.

The death of the swedish C-in-C

Unfortunately, Lady Luck is nothing if not even handed, and the very next turn the Cossack commanding general was first lightly wounded and then also killed, losing me an equal number of victory medals!

Death of the Cossack Commanding General

Both sides were now down to just two victory medals remaining: whoever next broke a unit would win the battle.

The initiative was with the Cossacks, so my line of Moloitsy and Registered Cossacks opened fire, bur failed to break the enemy. They returned fire…and this proved too much for one of my raw Moloitsy battalia. They broke and fled the field, taking the rest of my infantry with them.

Seeing their right flank broken and, indeed, with the survivors about to be cut down by rampaging Reiters, the victorious Tatar cavalry and tabor on the left flank remembered an important appointment elsewhere and also skedaddled. The day was with the Swedes!

Aftermath

It had been an epic game that, once again, came down to the final action.

All credit to Bevan for having a great plan and deployment: if his infantry hadn’t carried the day then his Reiters coming in from my right would have finished me off for sure.

17th Century Swedish Command

Over the last couple of year’s I’ve built up a sizeable 15mm collection of English Civil War figures. To them I’ve added some Cossacks and am in the process of building a contemporary Polish army as well.

Looking to get more use out of all the above, I realised that I could quite easily use the bulk of my English Civil War collection as Swedish troops for the Thirty Years War. After all, the Swedish troops dressed in “western” styles rather than the “eastern” styles of the native Polish or Cossack infantry: so my “Swedish-style” ECW cavalry could masquerade as Swedish reiters, and the infantry could be fielded as is.

That was a good start, but I didn’t have any idea as to the composition of a Swedish army…but a couple of hours online and with the FK&P rulebook enabled me to put together the following, which I think does the trick nicely.

The main elements of the army would be reiters and either “Swedish” of “German” foot. “Swedish” foot were rarely actually Swedish of course (a lot of Finns and a surprising amount of Scots): the name comes from the way they were fielded in terms of pike/musket ratio following Carl Gustav’s reforms. Likewise, “German” foot were not all German, and the term applies to any foot with a more conventional pike/musket ratio.

I could have gone into more detail and noted that CG’s army were often short of pikemen, so all the infantry were effectively “German” stylee, but that’s probably an unnecessary complication: it’s enough that I can call pike-heavy battalia “Swedish” and standard battalia “German”.

The next question was how to make the army look a bit more Swedish. The solution was actually quite easy: the Swedish Command pack from By Fire & Sword gives you seven different command stands plus flags.

One problem is that the By Fire & Sword models are really difficult to get hold of in the UK: exports from Poland presumably more difficult now due to a mixture of Brexit, COVID and the dramatic increase in postage/transport costs. I manged to get one of the last I could find from Entoyment in Poole.

The models are generally up to the usual high standard of By Fire & Sword except, unfortunately, for a lot of the faces. I don’t know whether it’s the original sculpts or the casting, or even worn out molds, but many of the faces just didn’t have the relief that you’d normally expect. I’m not the best painter in the world, so I reply on clearly defined detail on figures to bring out the, er, detail, including faces. Base colour, a wash then highlight forehead, nose, cheeks and chin only really works if you have a clearly defined forehead, nose, cheeks and chin…otherwise you’re actually painting faces from scratch, well beyond my talents!

This was disappointing, but I still think the By Fire & Sword packs are great: everything you need plus flags.

So that’s a Swedish army created from existing stock and one pack of command figures. I might see if I can do the same with some of the other TYW nations…