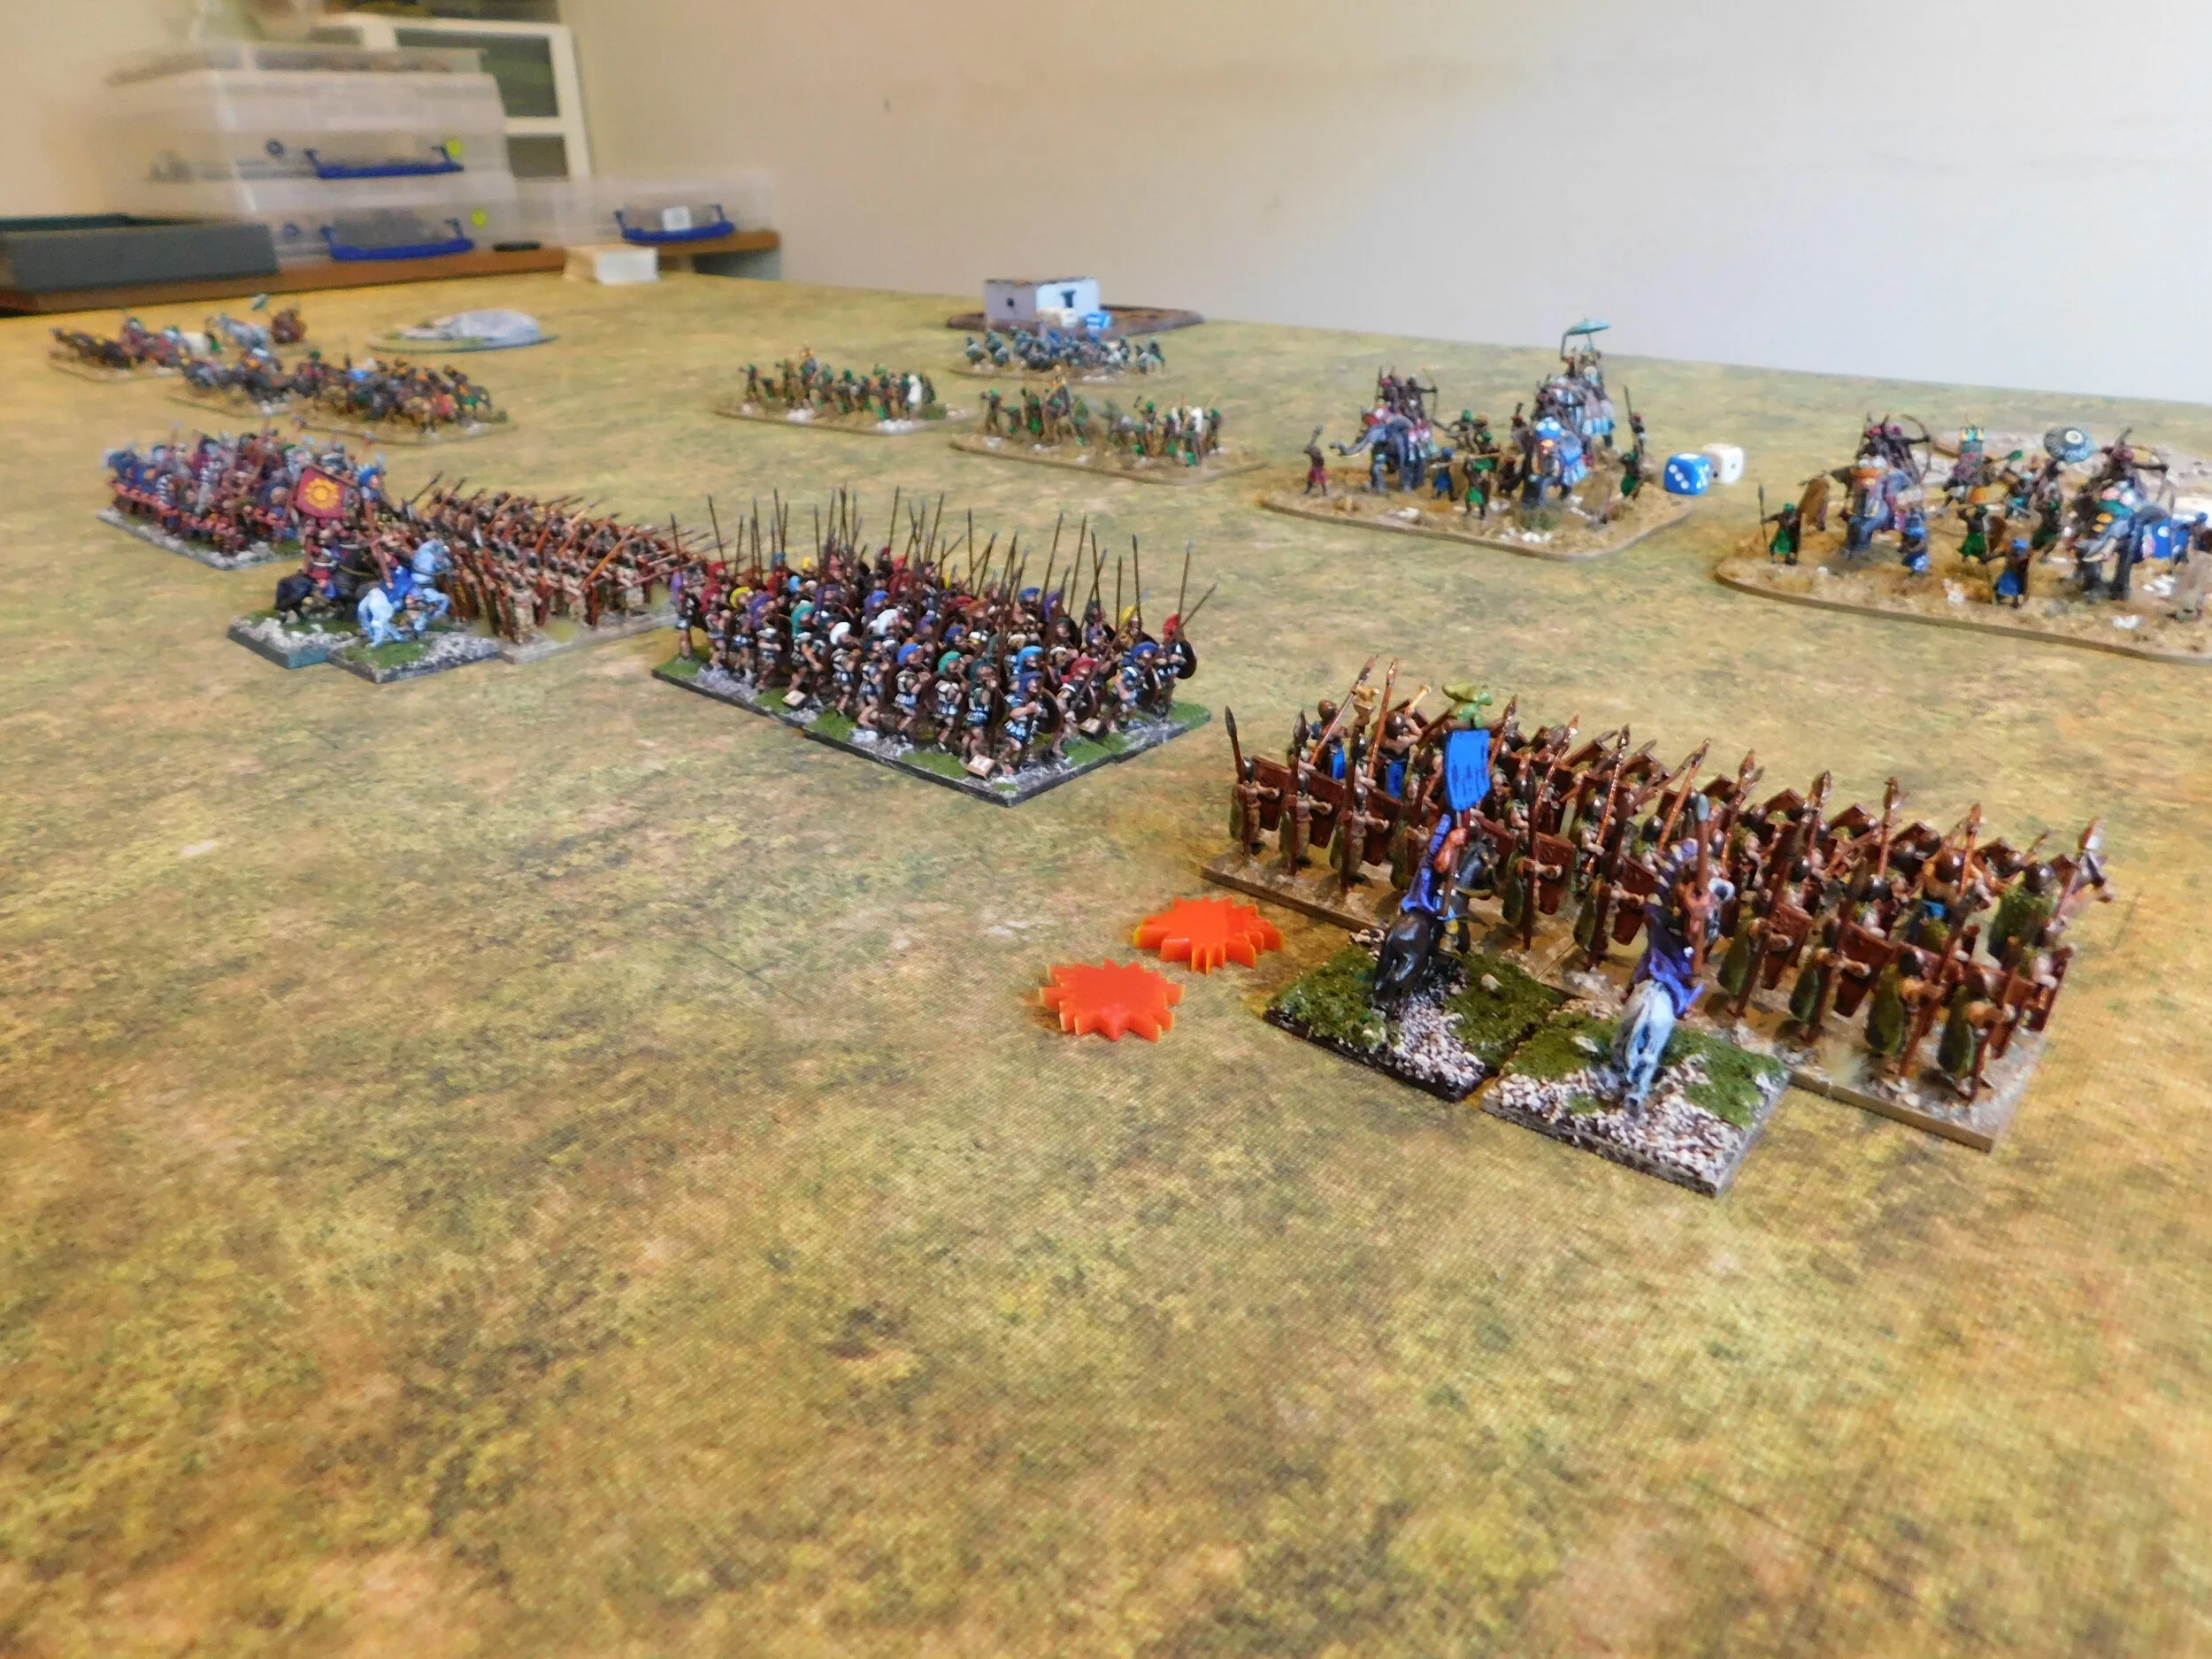
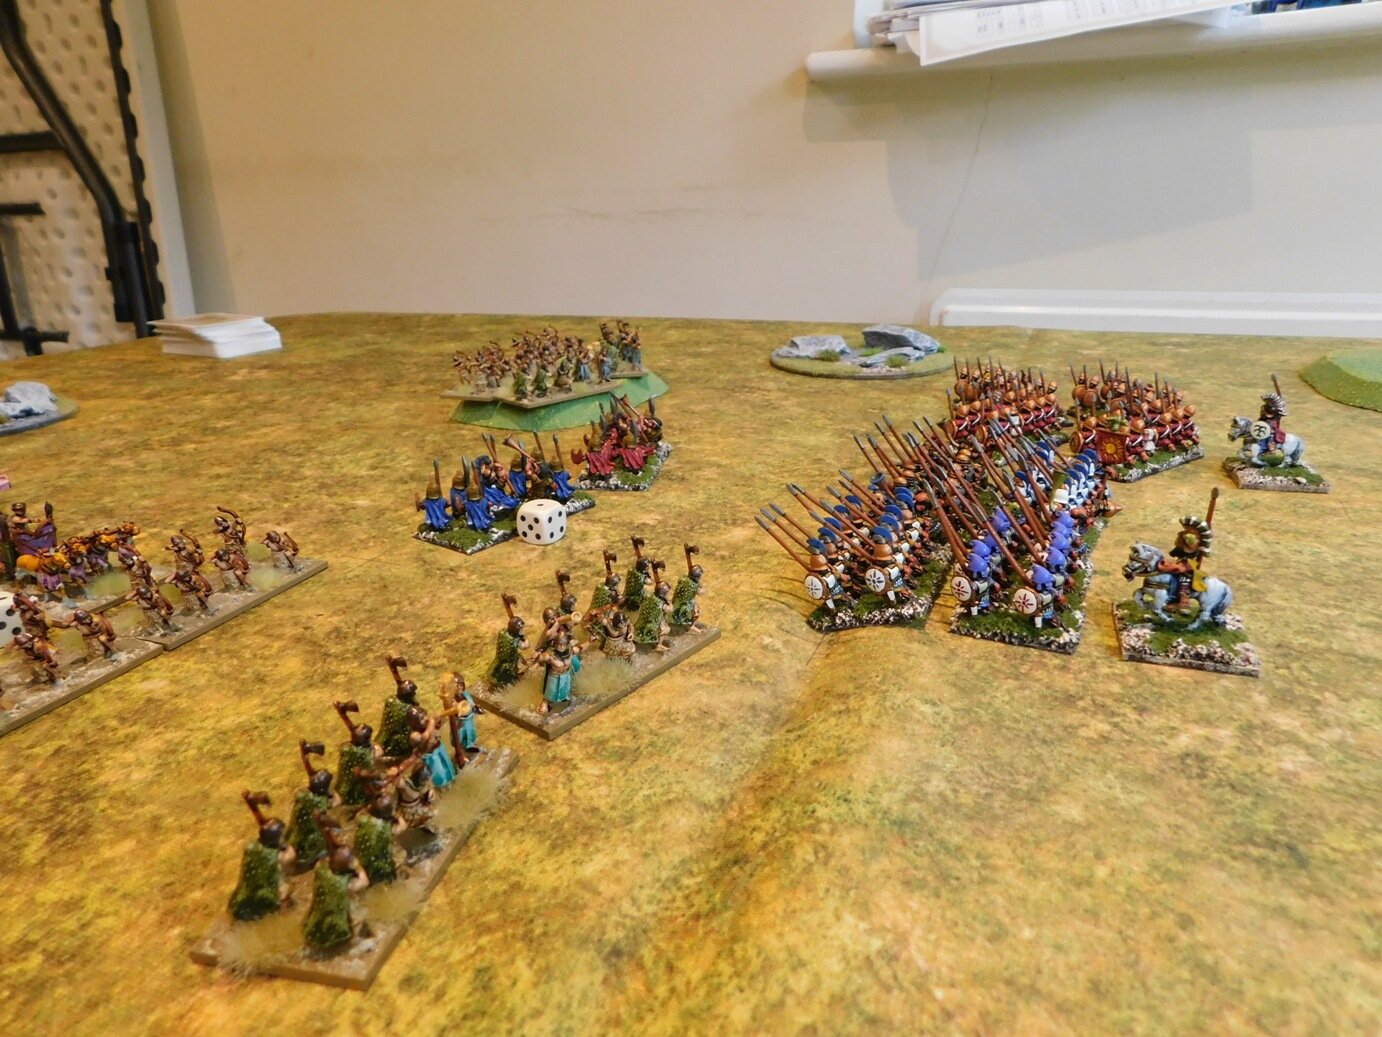
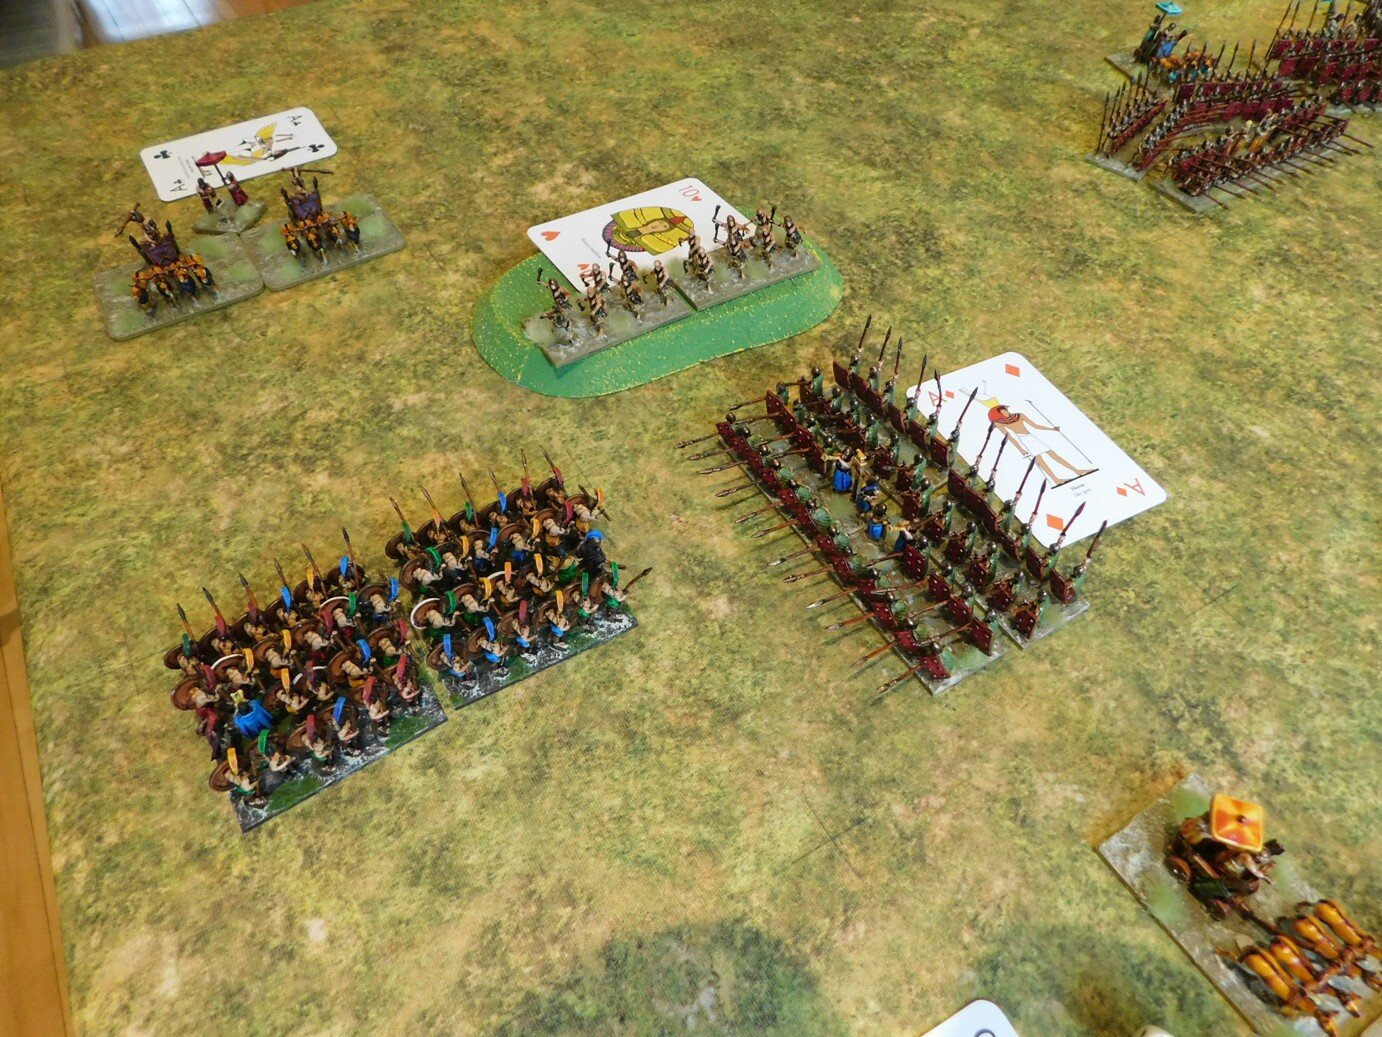
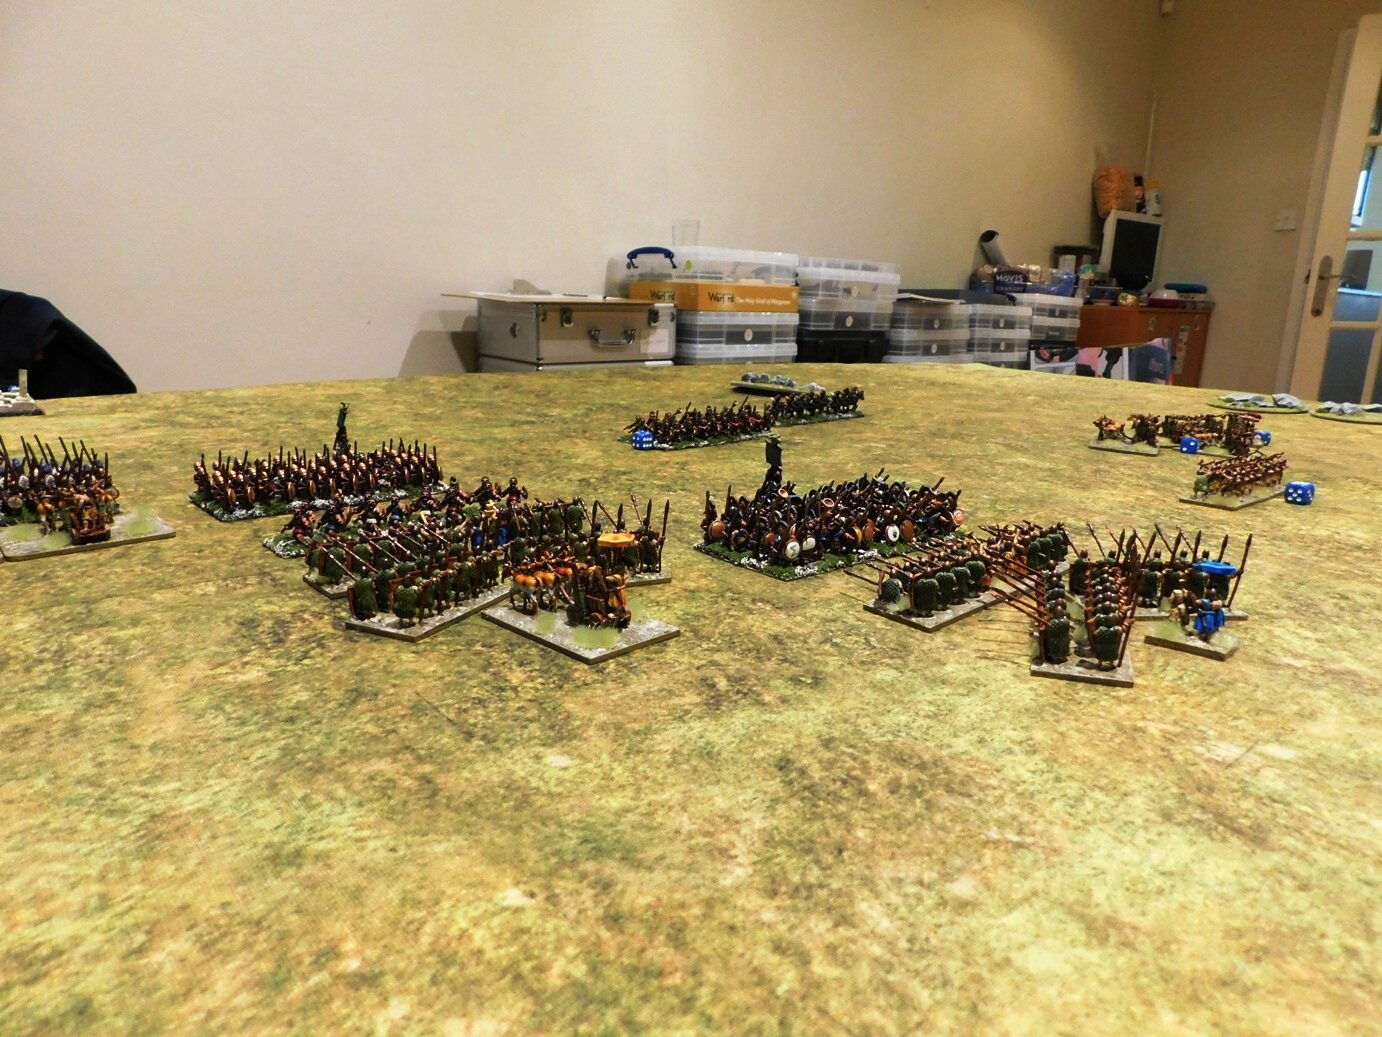
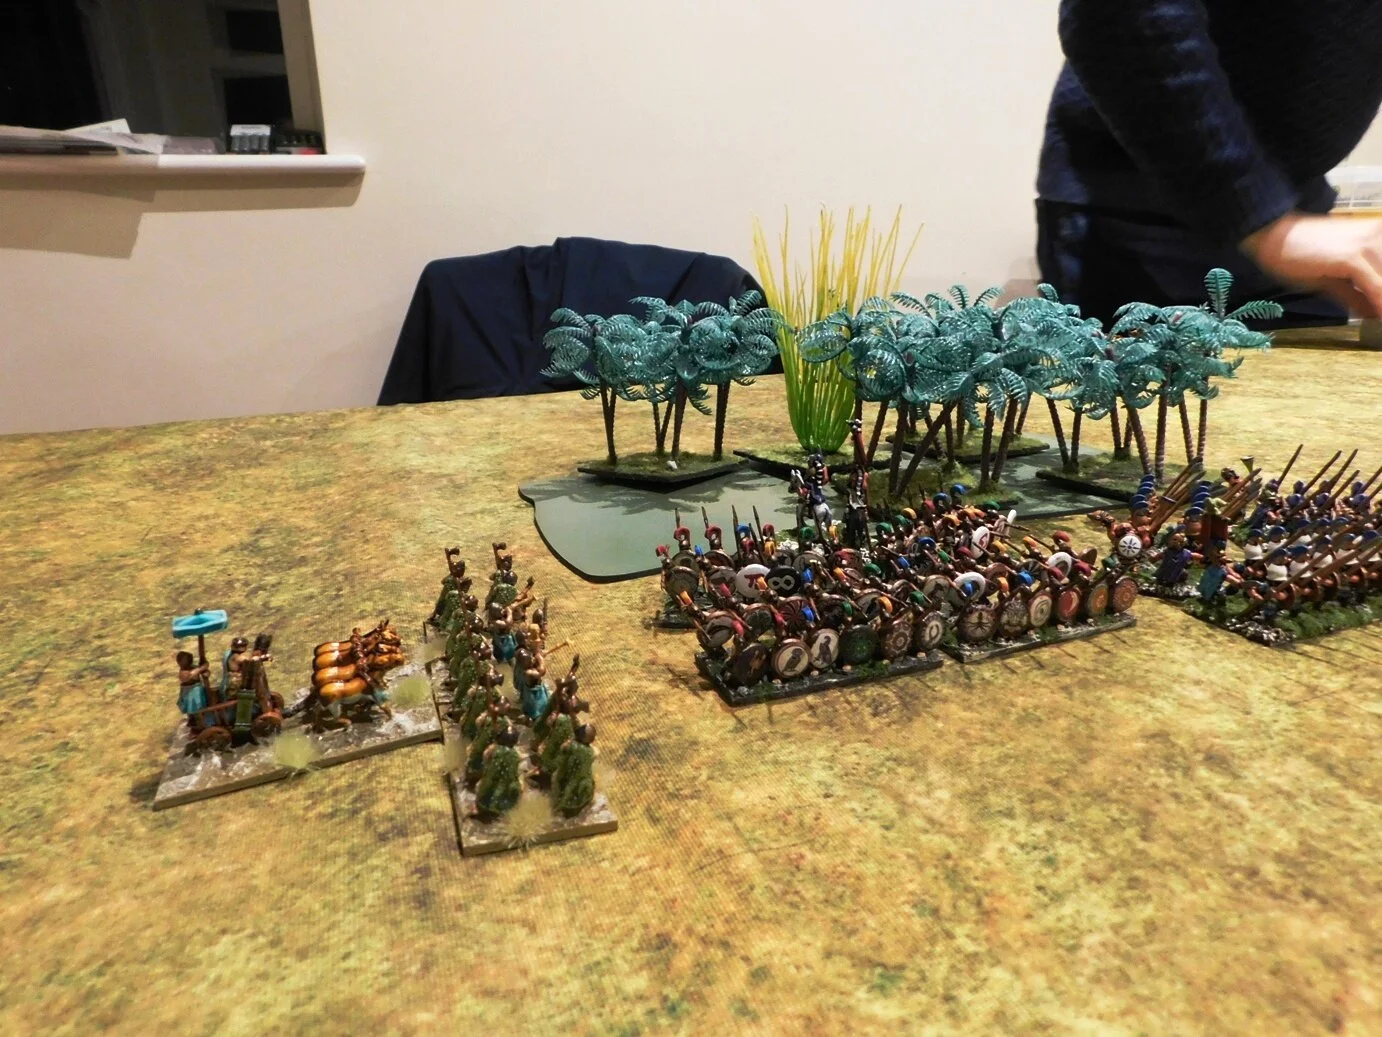
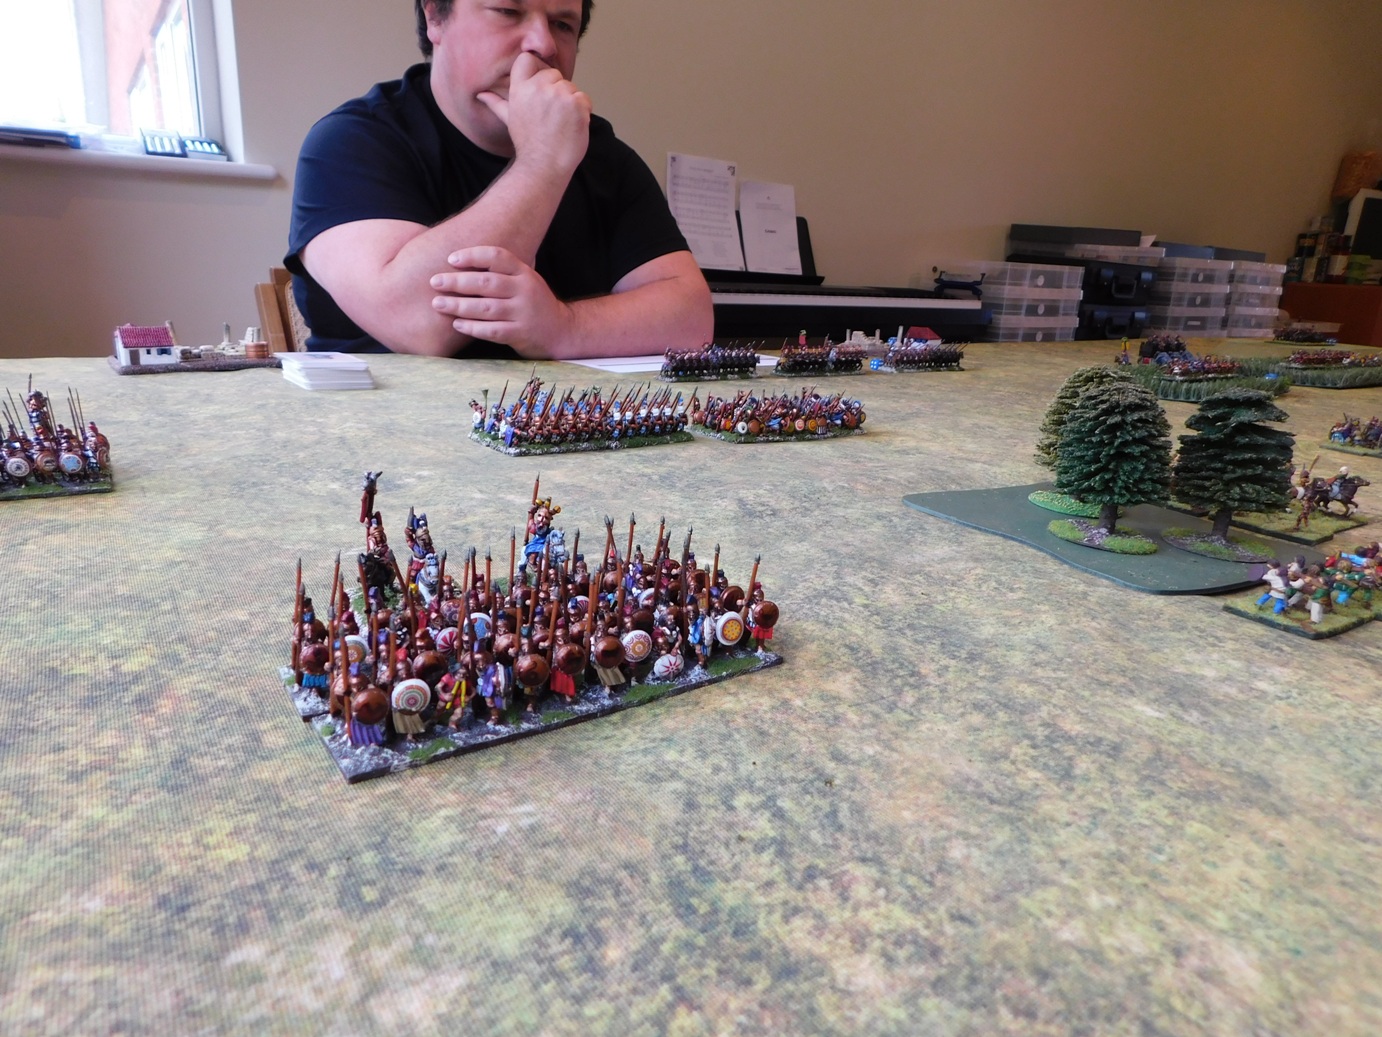
TTS AAR: Early Imperial Romans versus Hoplite Greeks
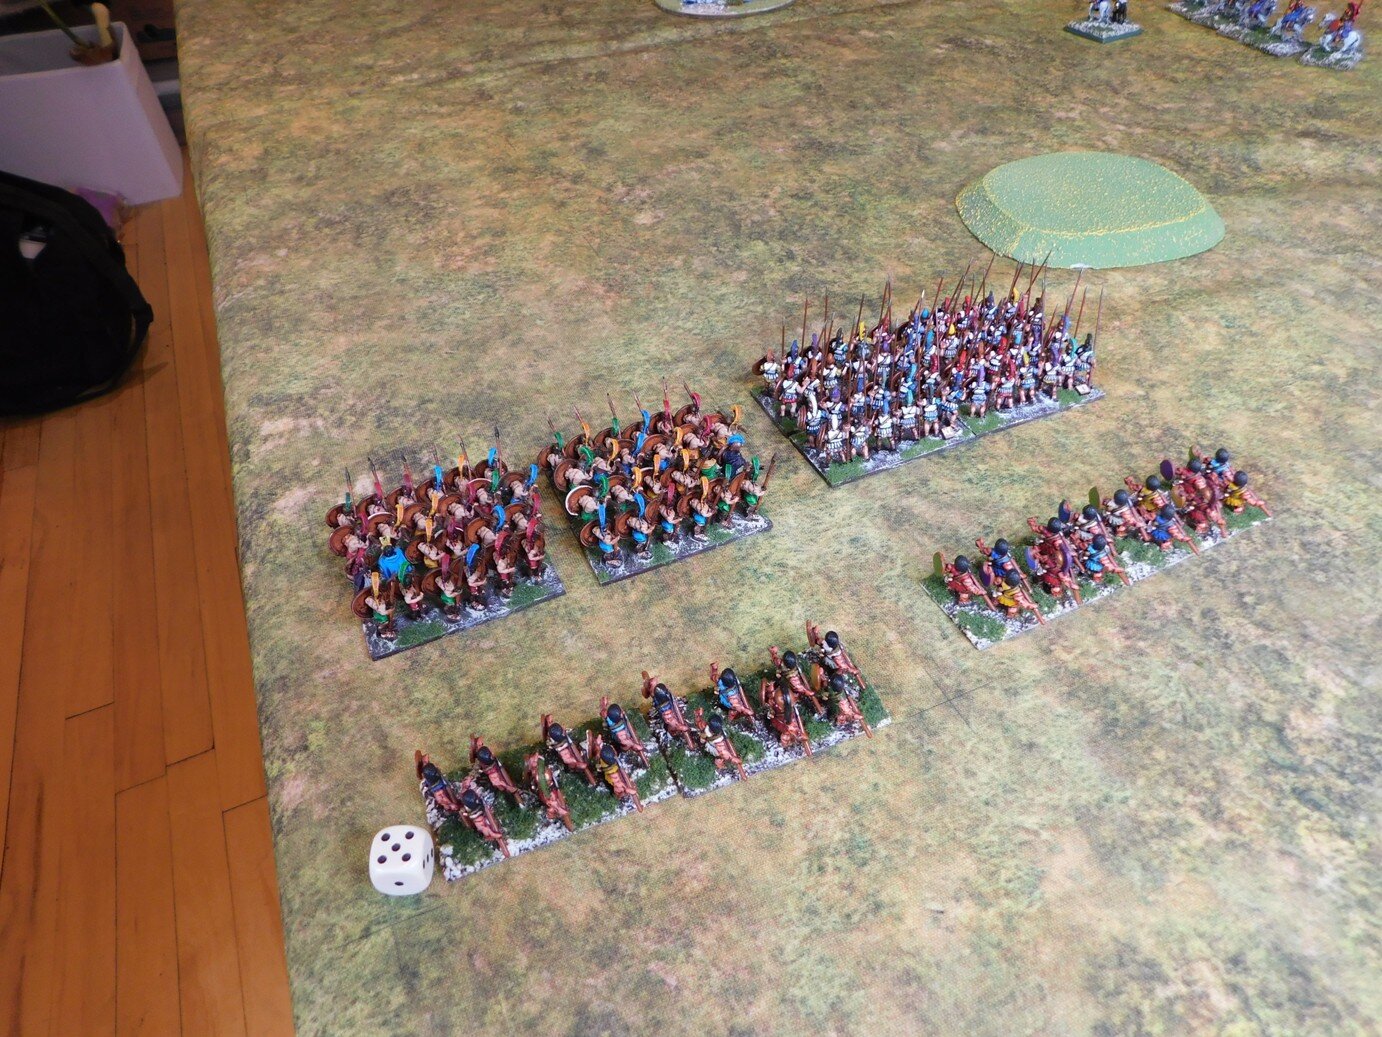
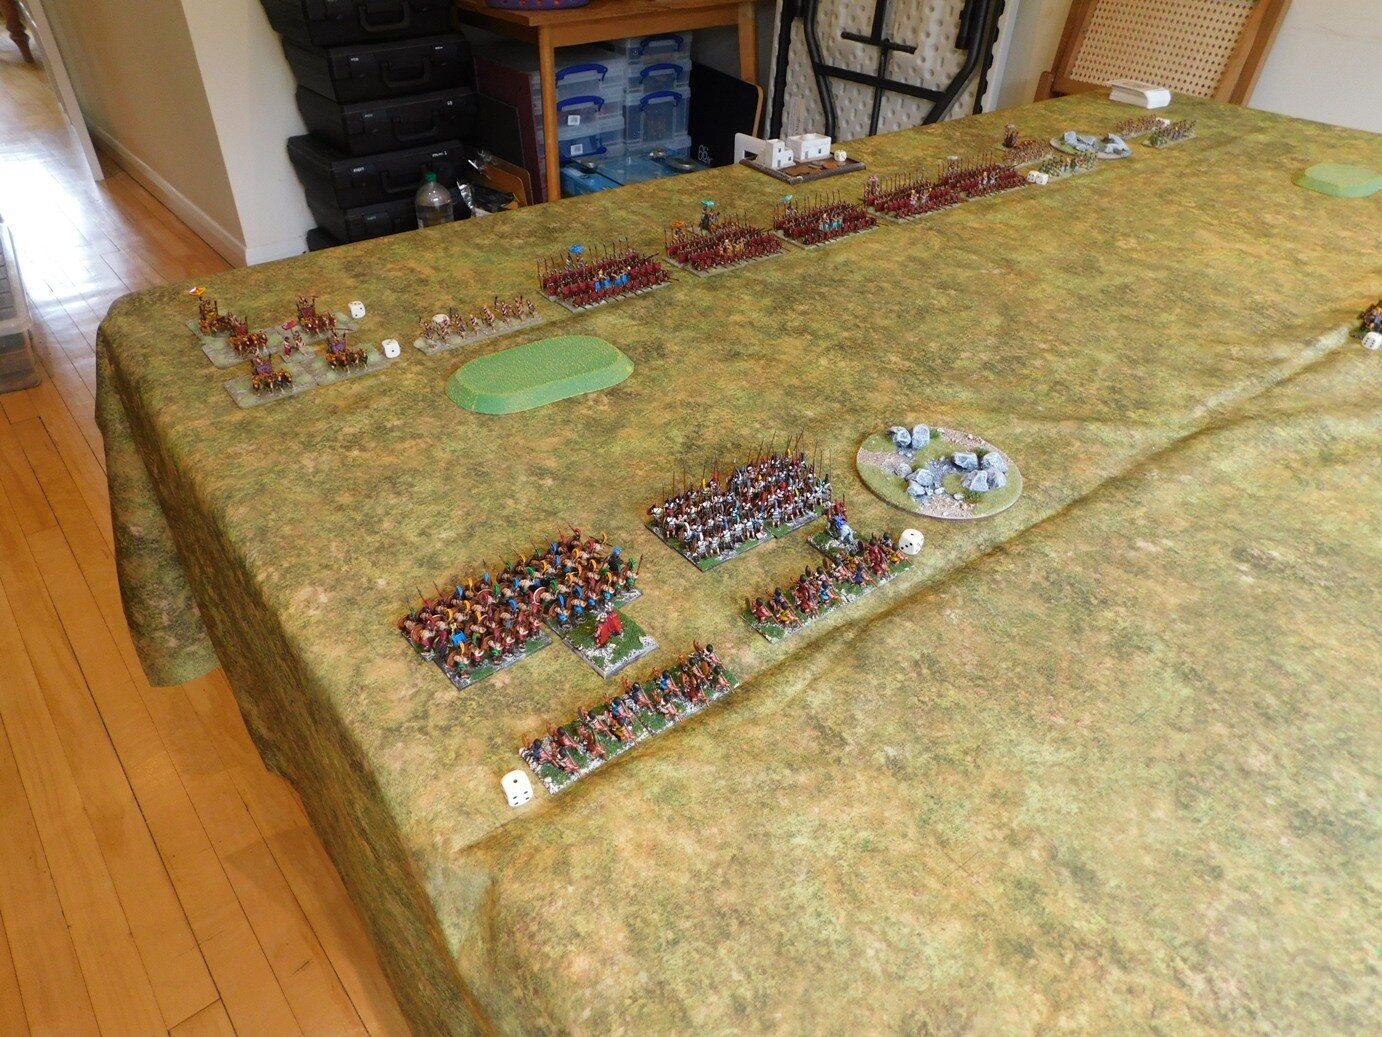
Clearing out my computer’s memory, I came across these pictures from a game played earlier this year: a practice session for the autumn tournament season that pitched my Early Imperial Roman’s against friend Other Rob’s Hoplite Greeks.

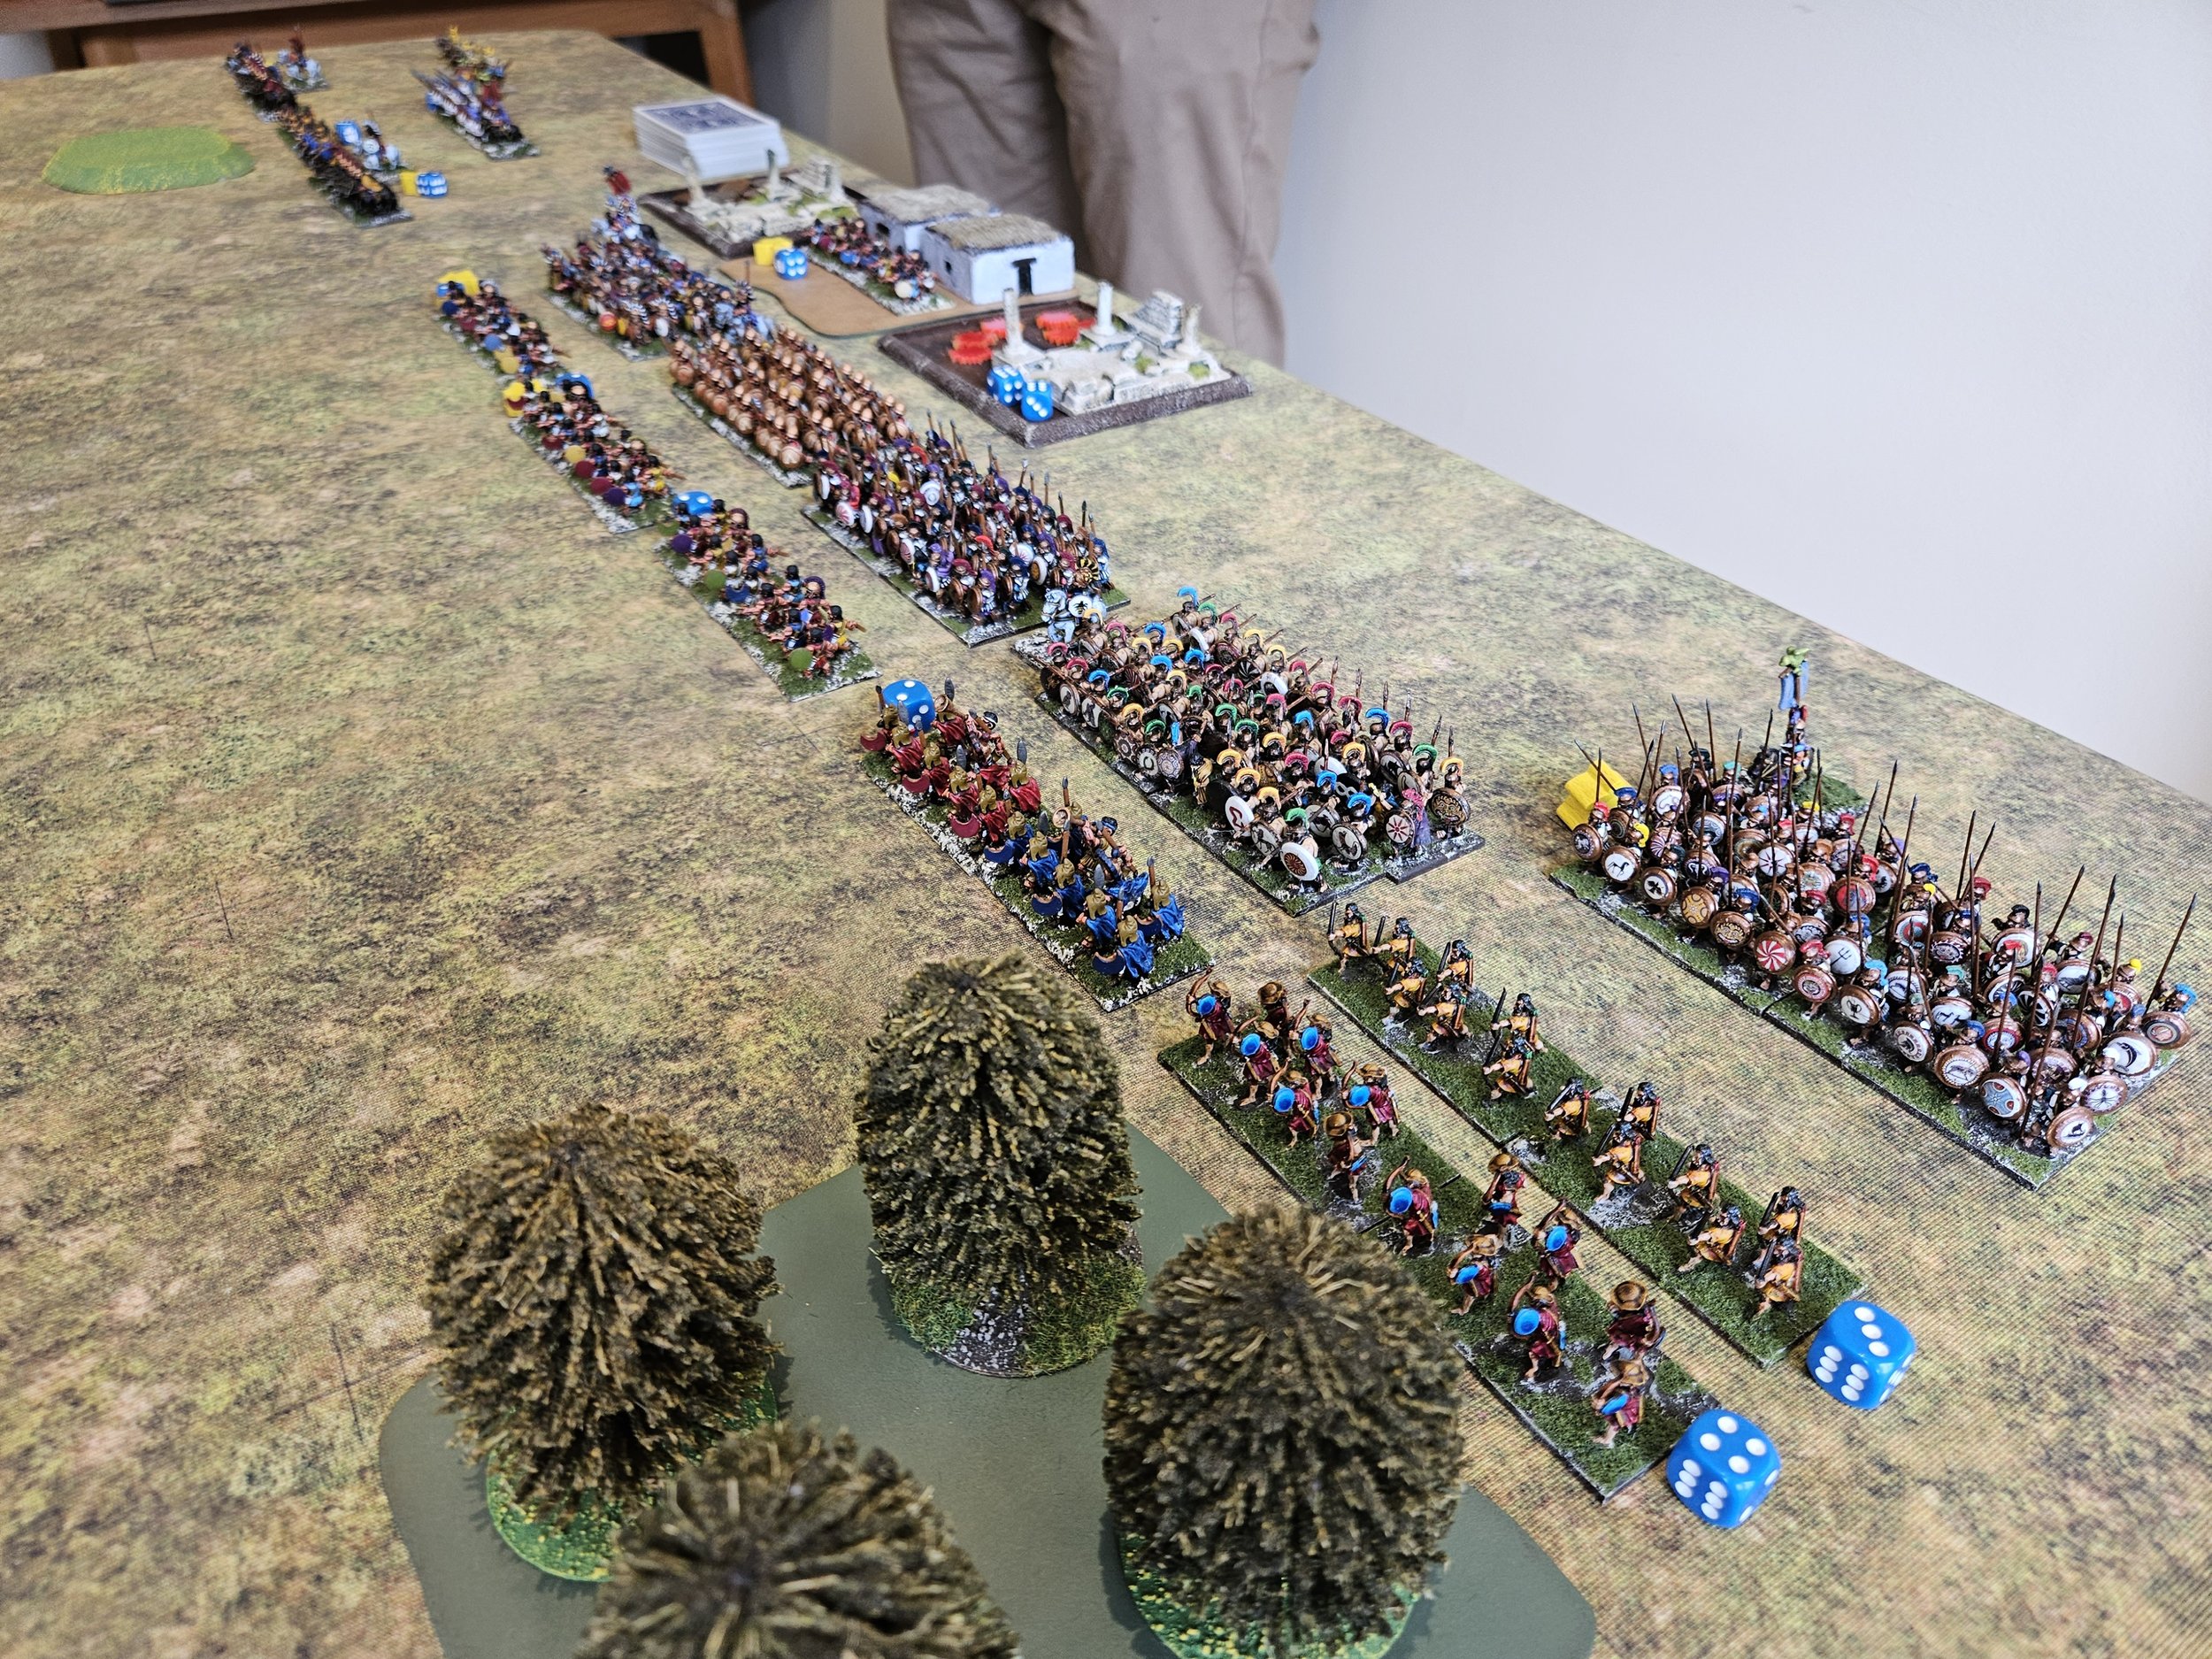
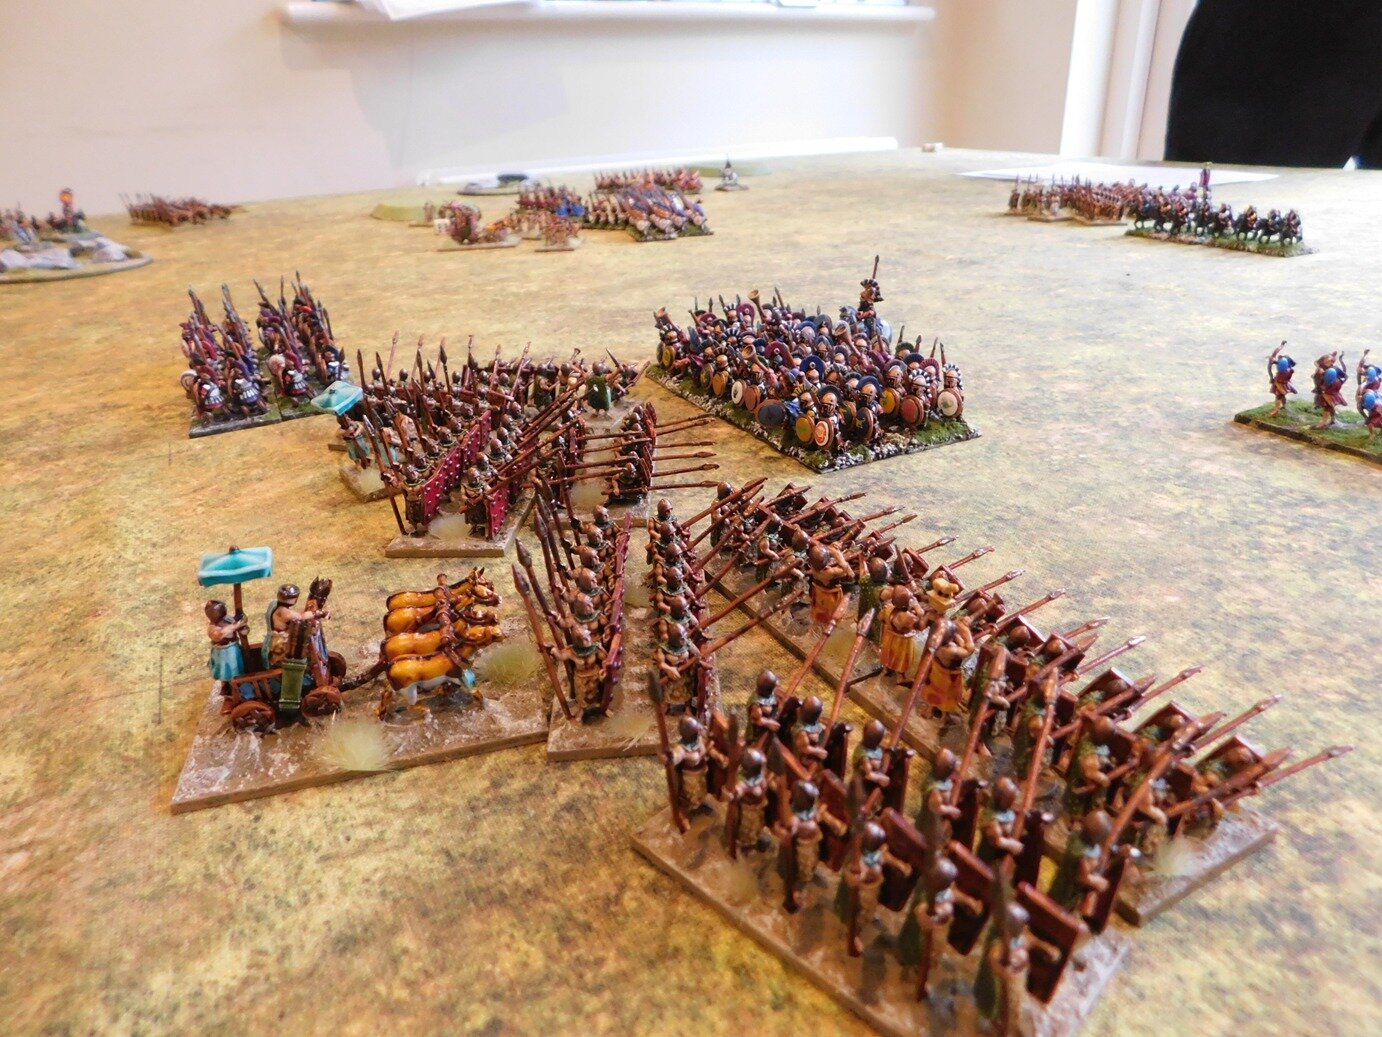
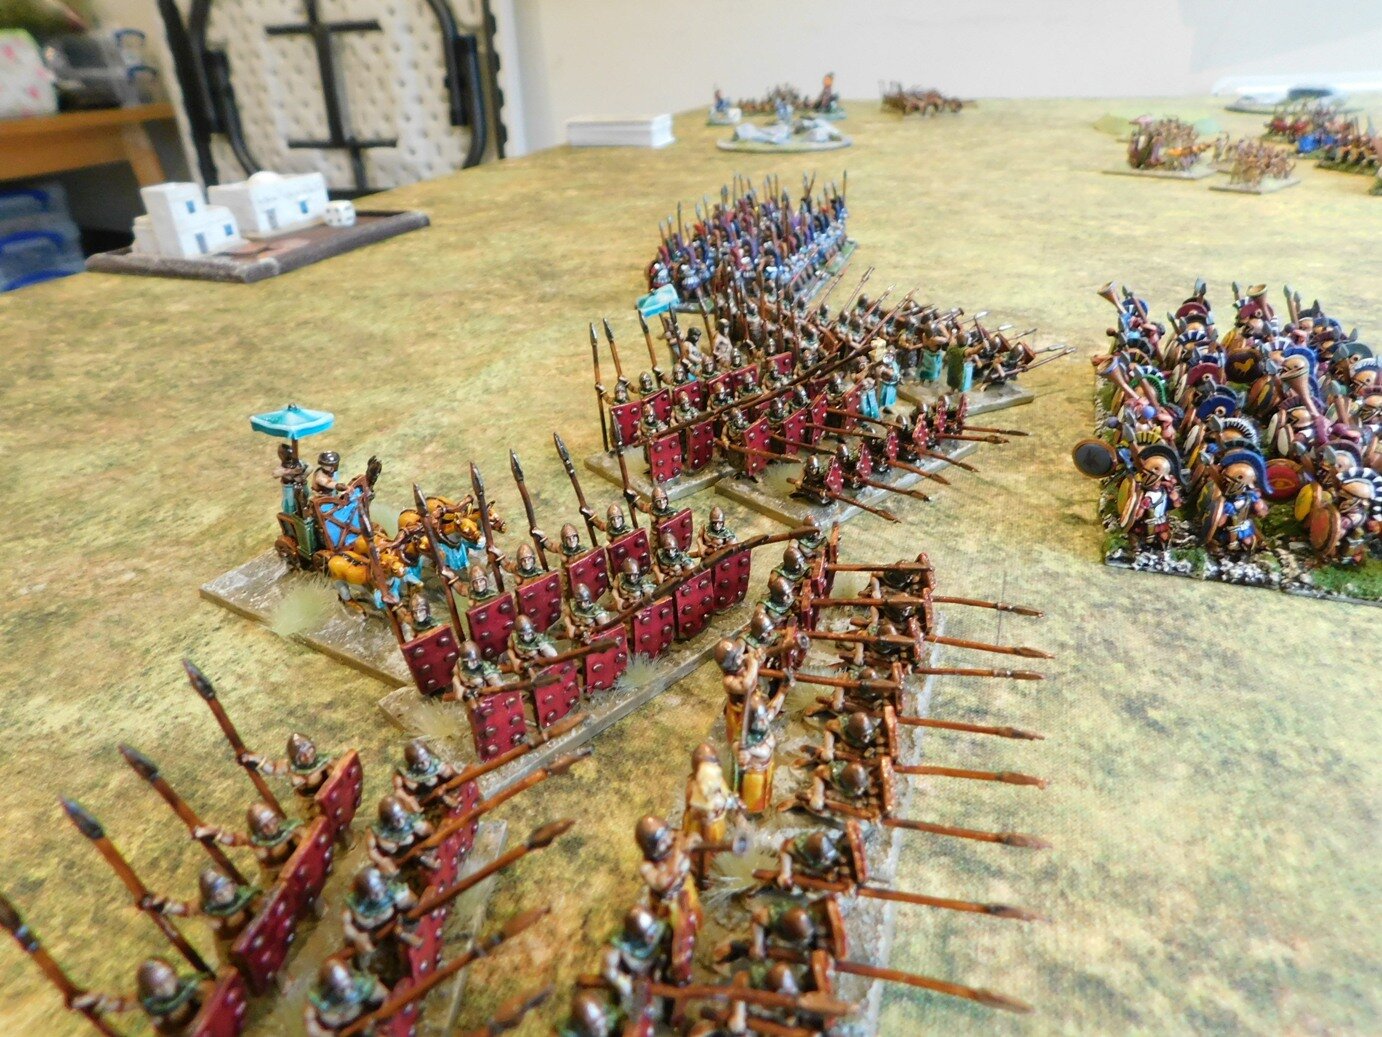
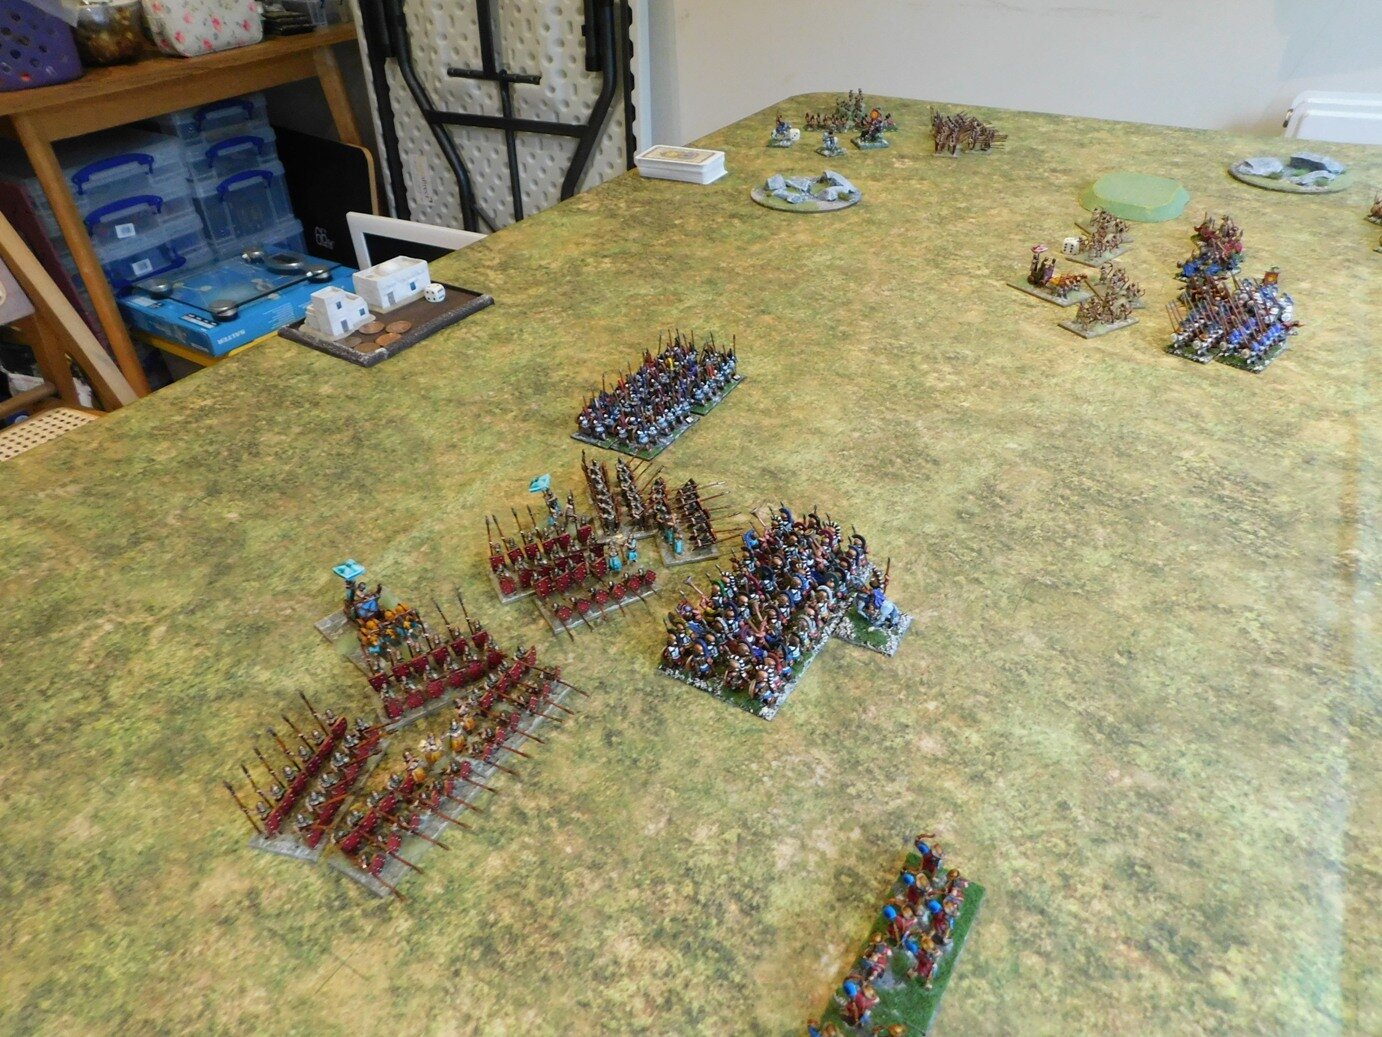
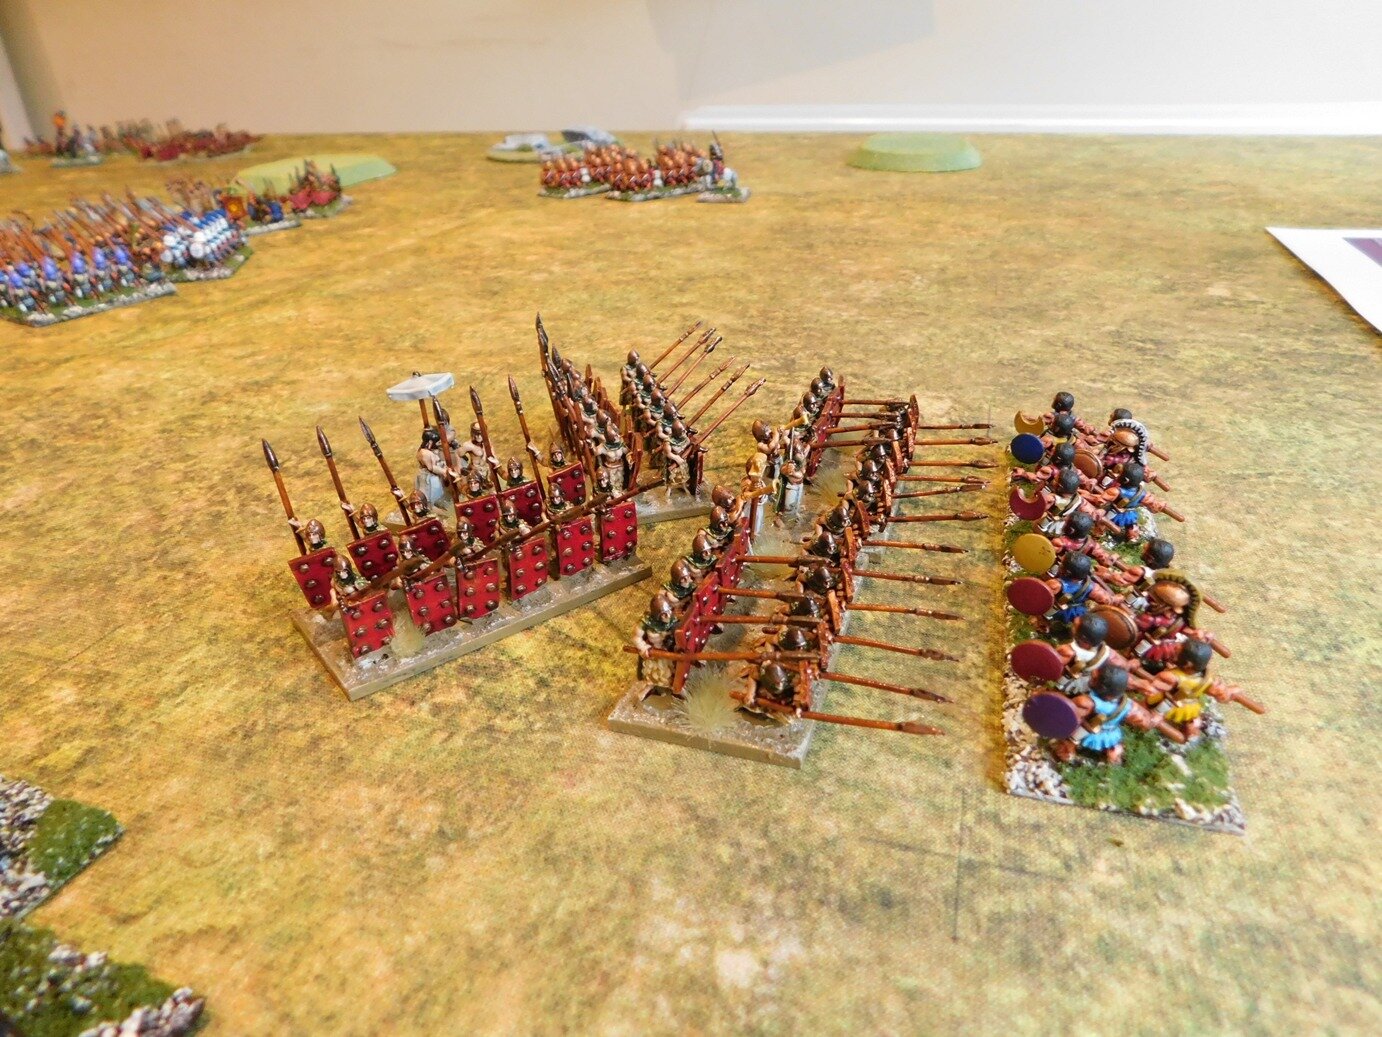
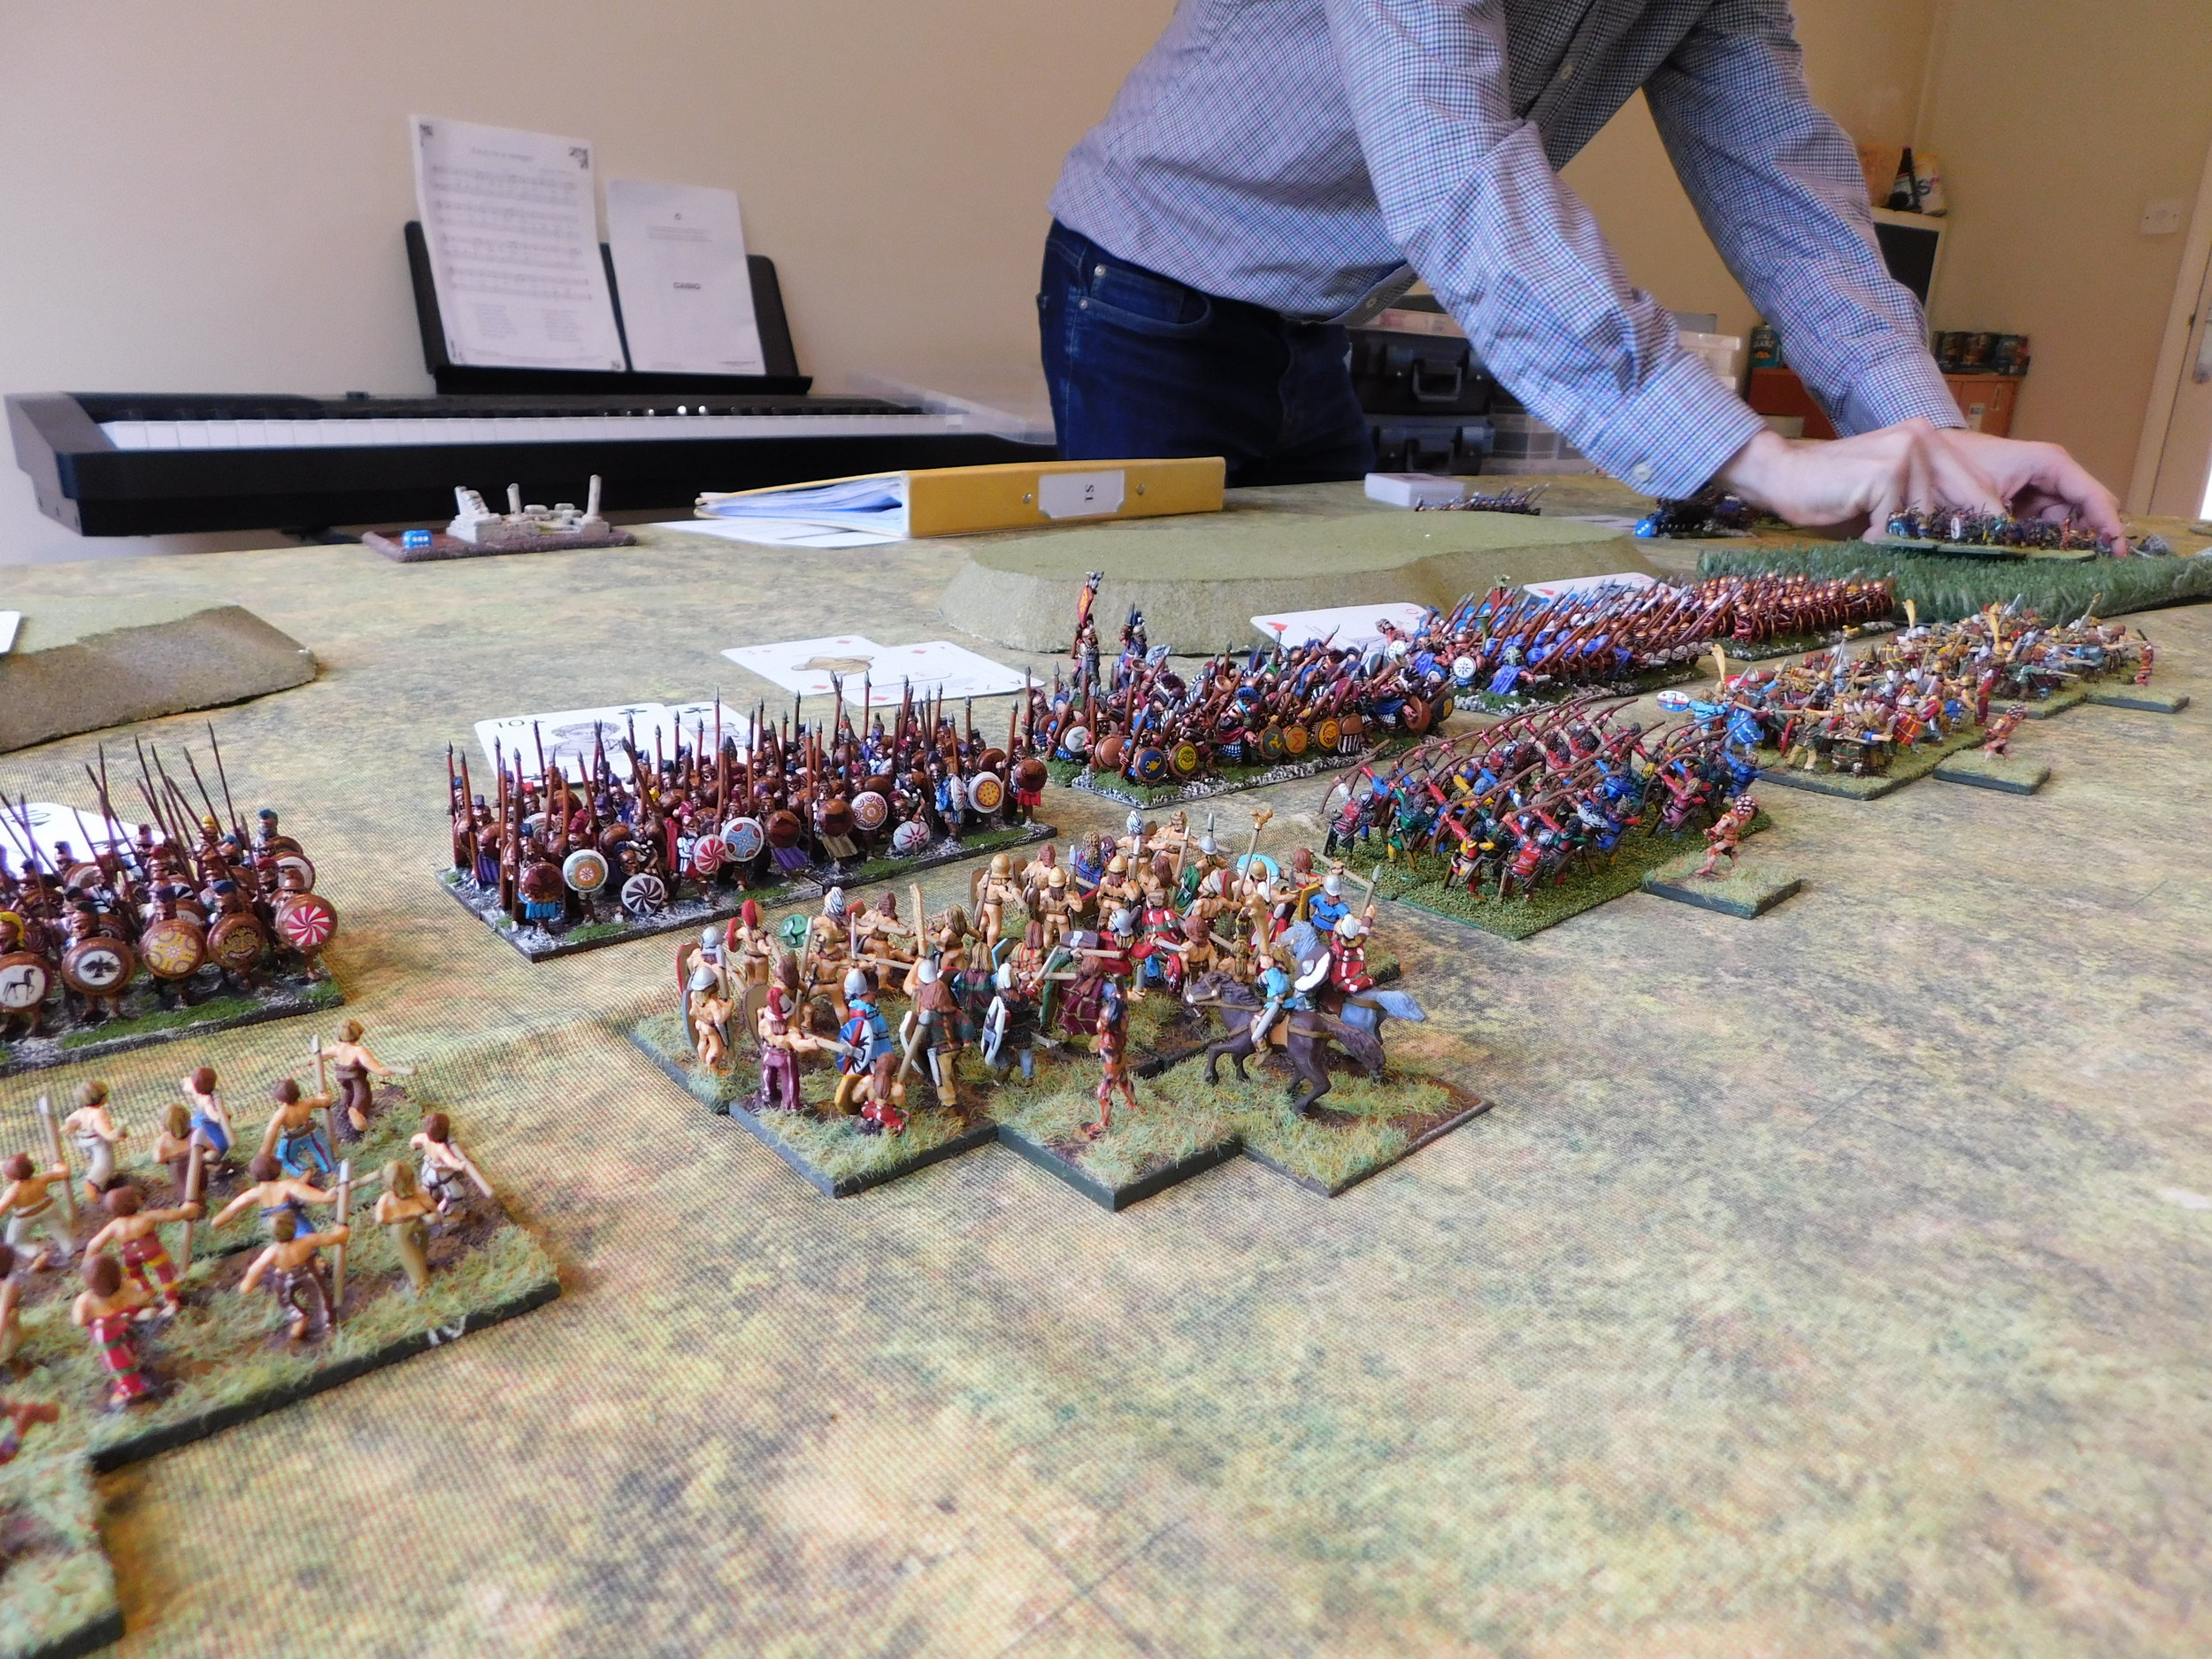
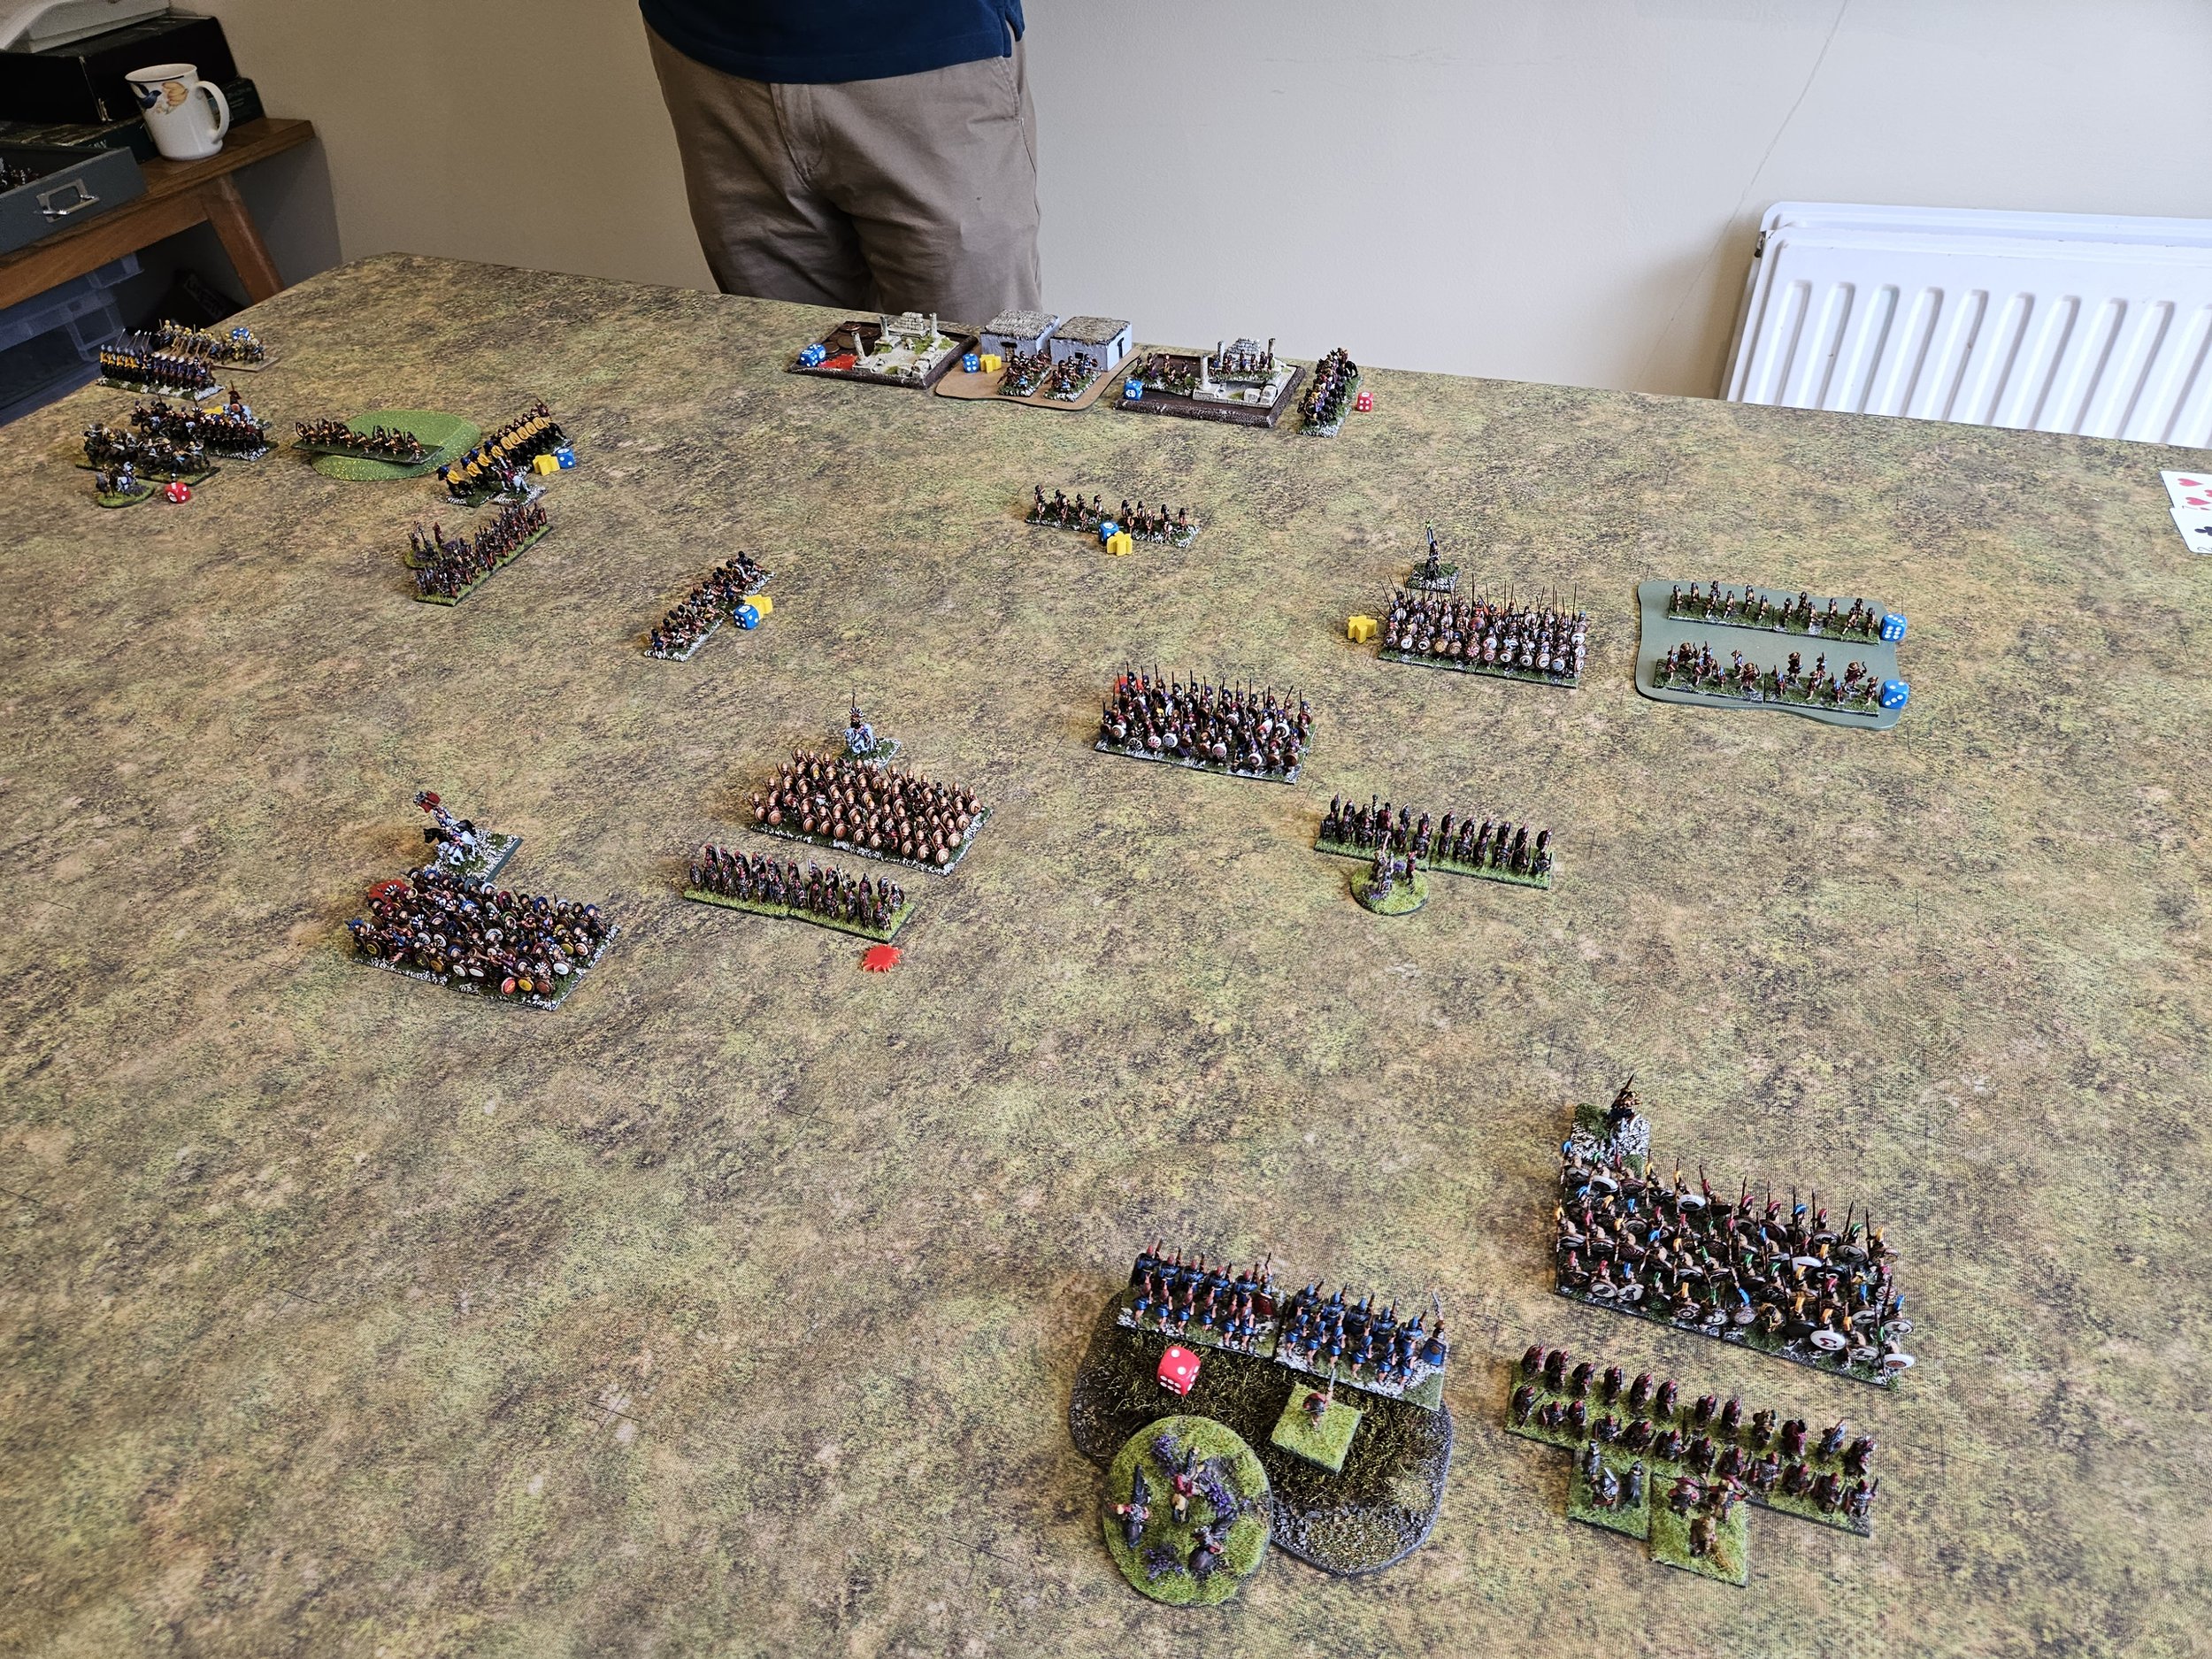
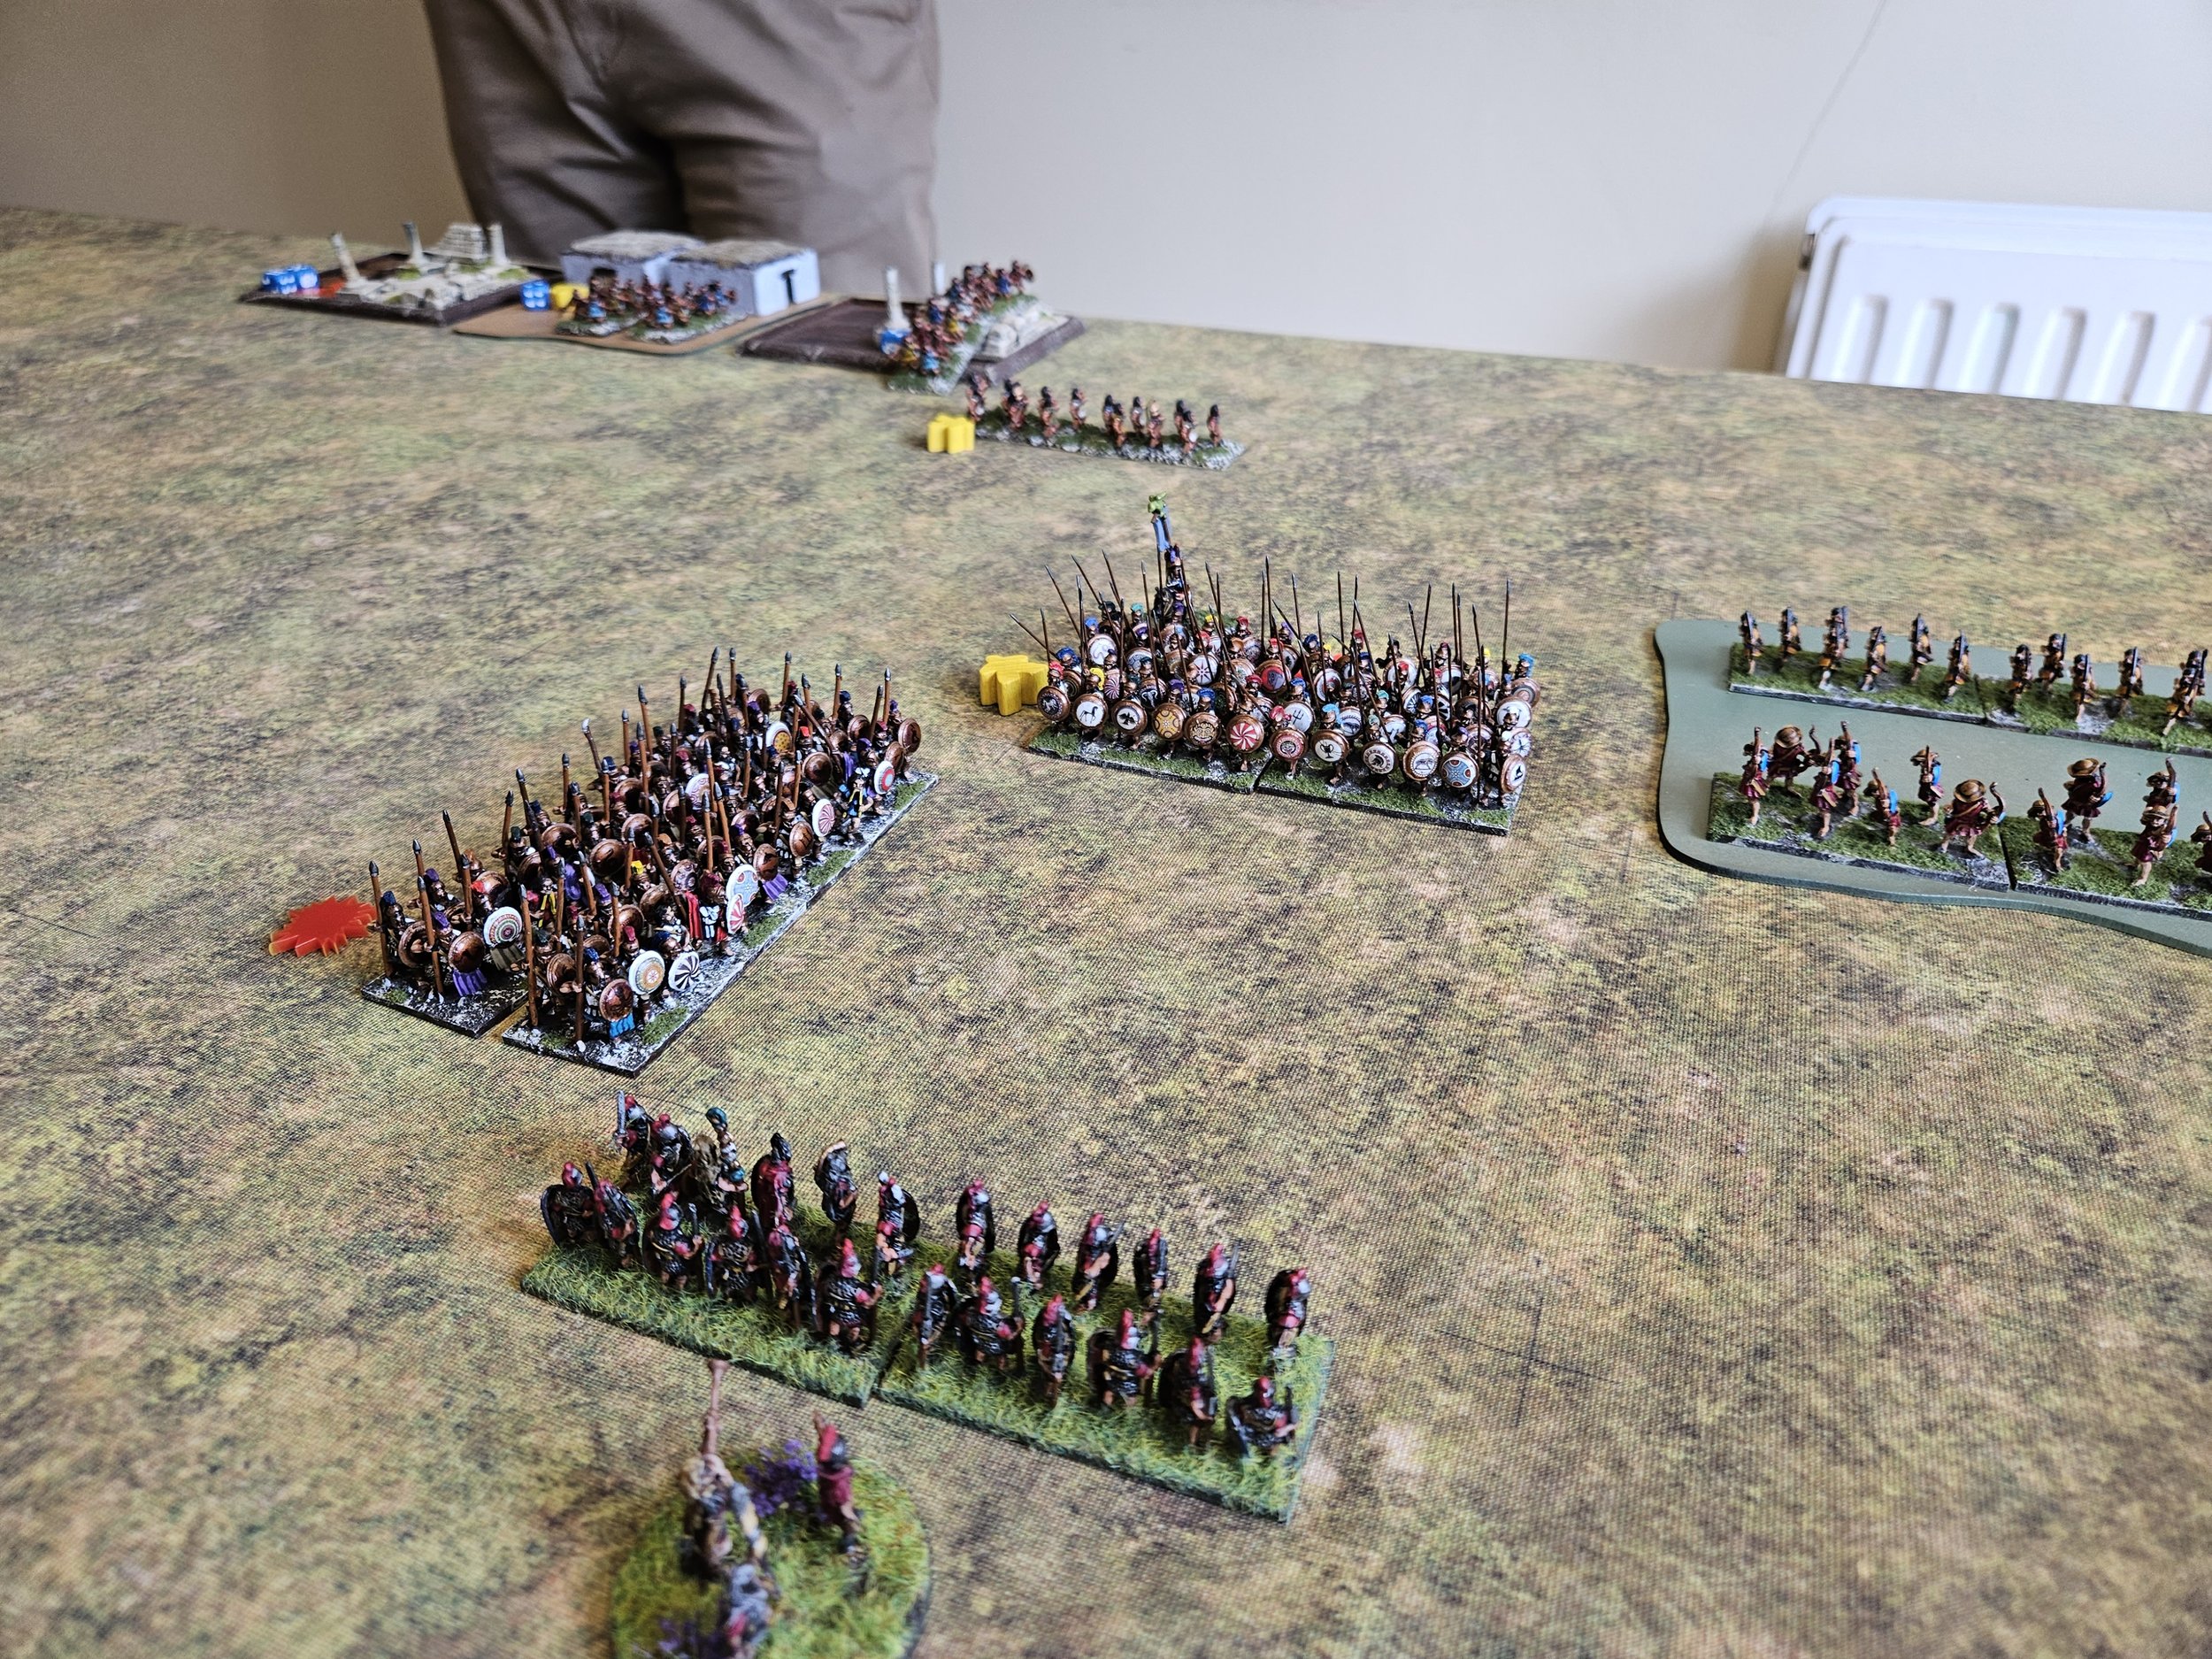
As it was a few weeks ago, I don’t have a blow-by-blow account of the game for you, but I do remember that the large Greek phalanxes caused a few problems for the Romans, and it was only their ability to manoeuvre and to rally that got them the win.

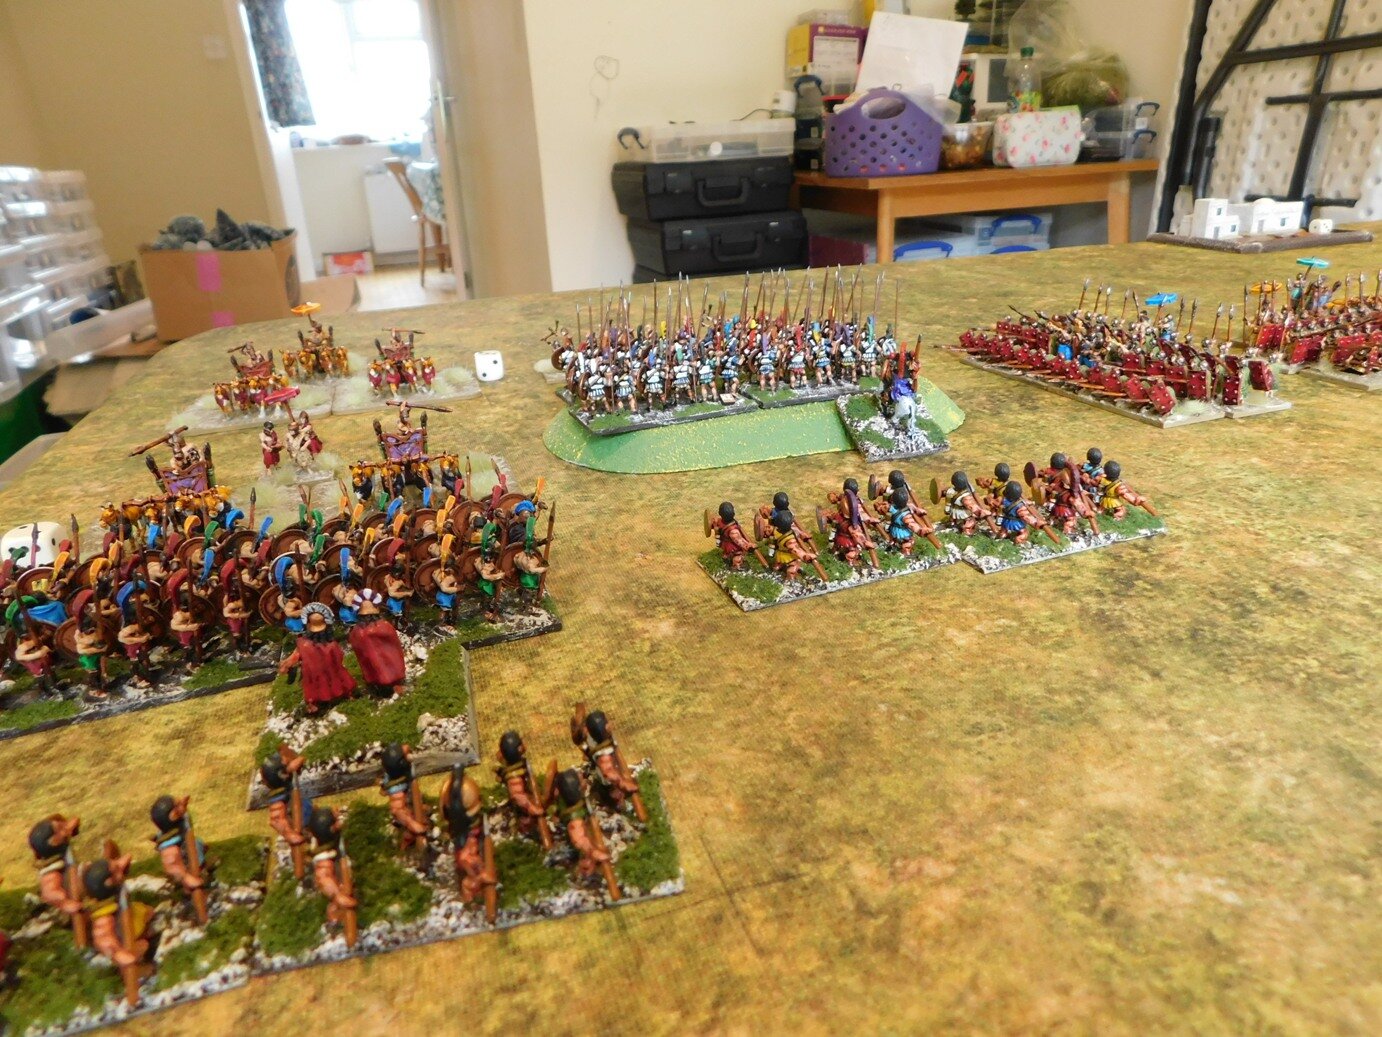
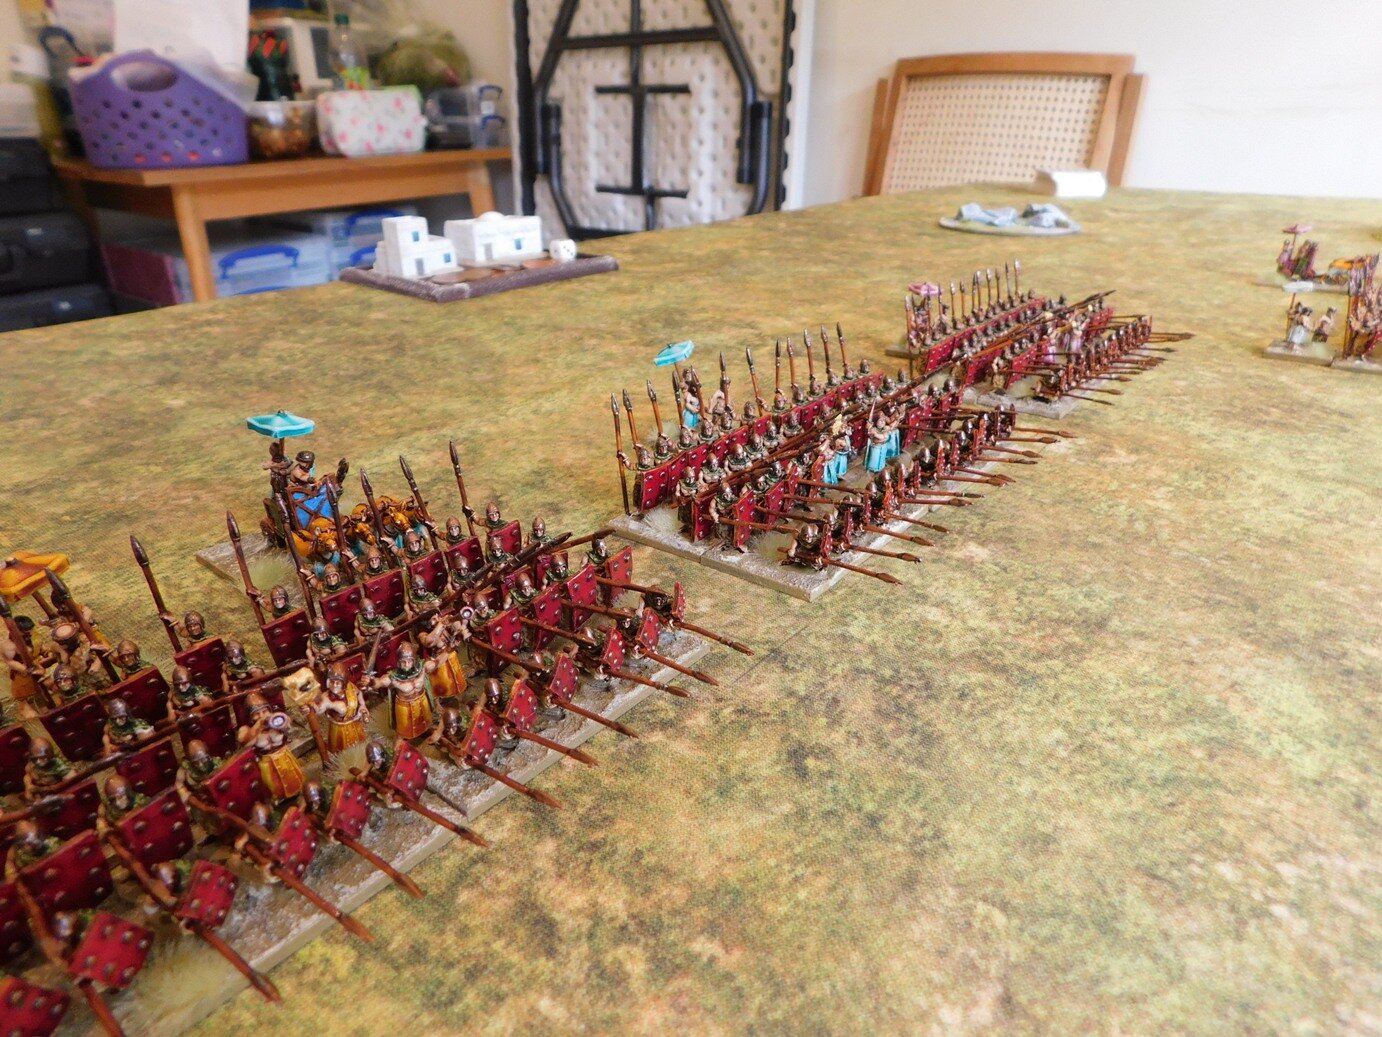
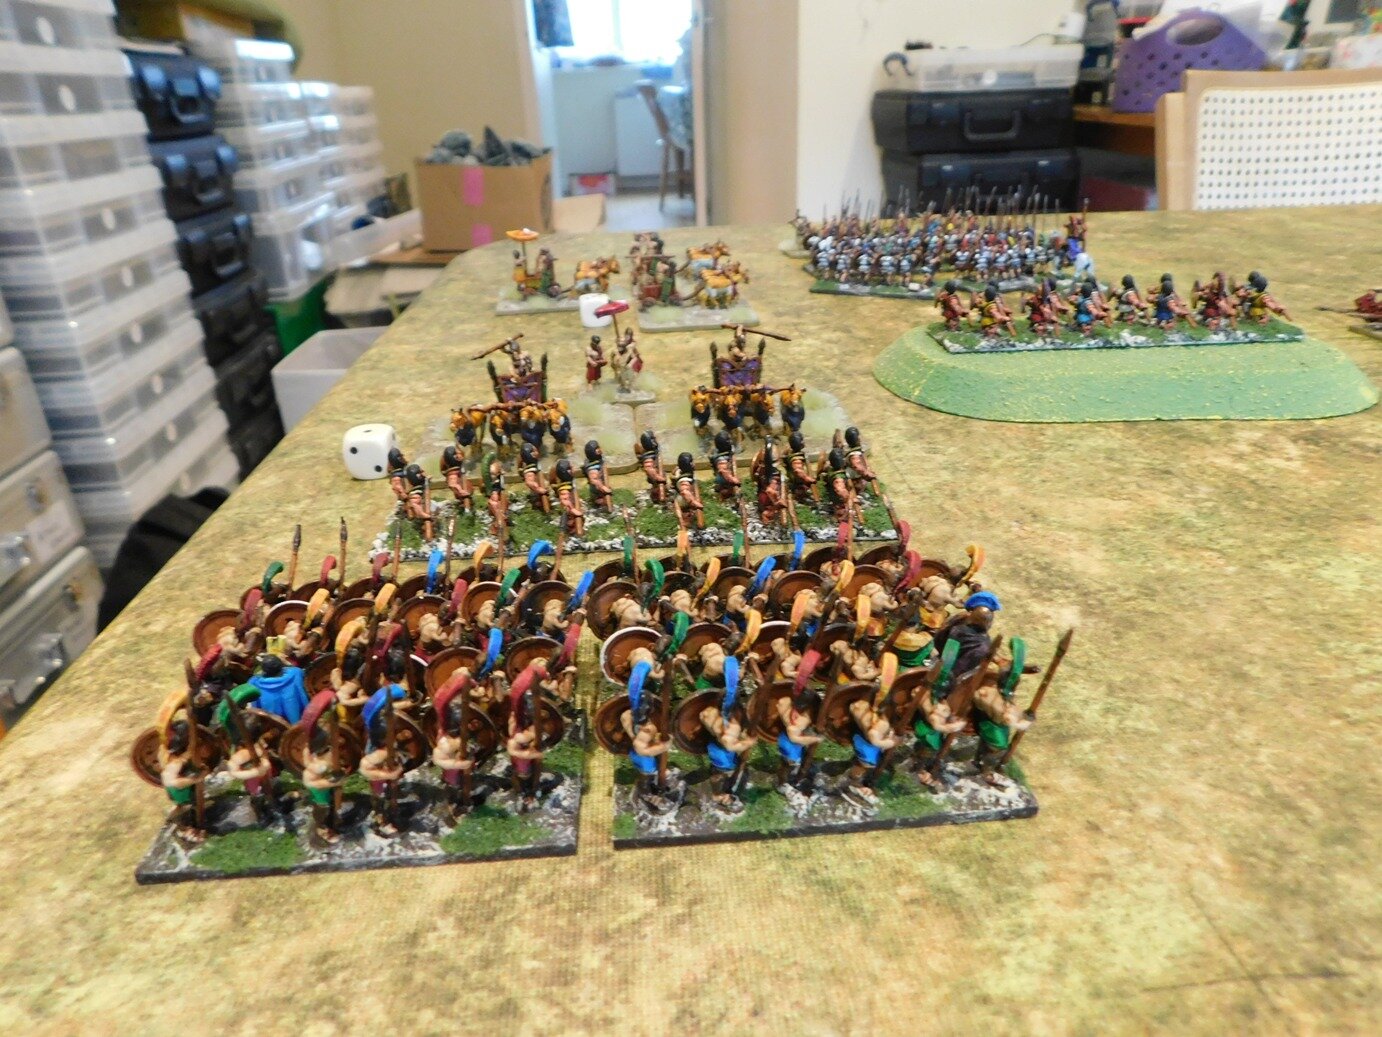
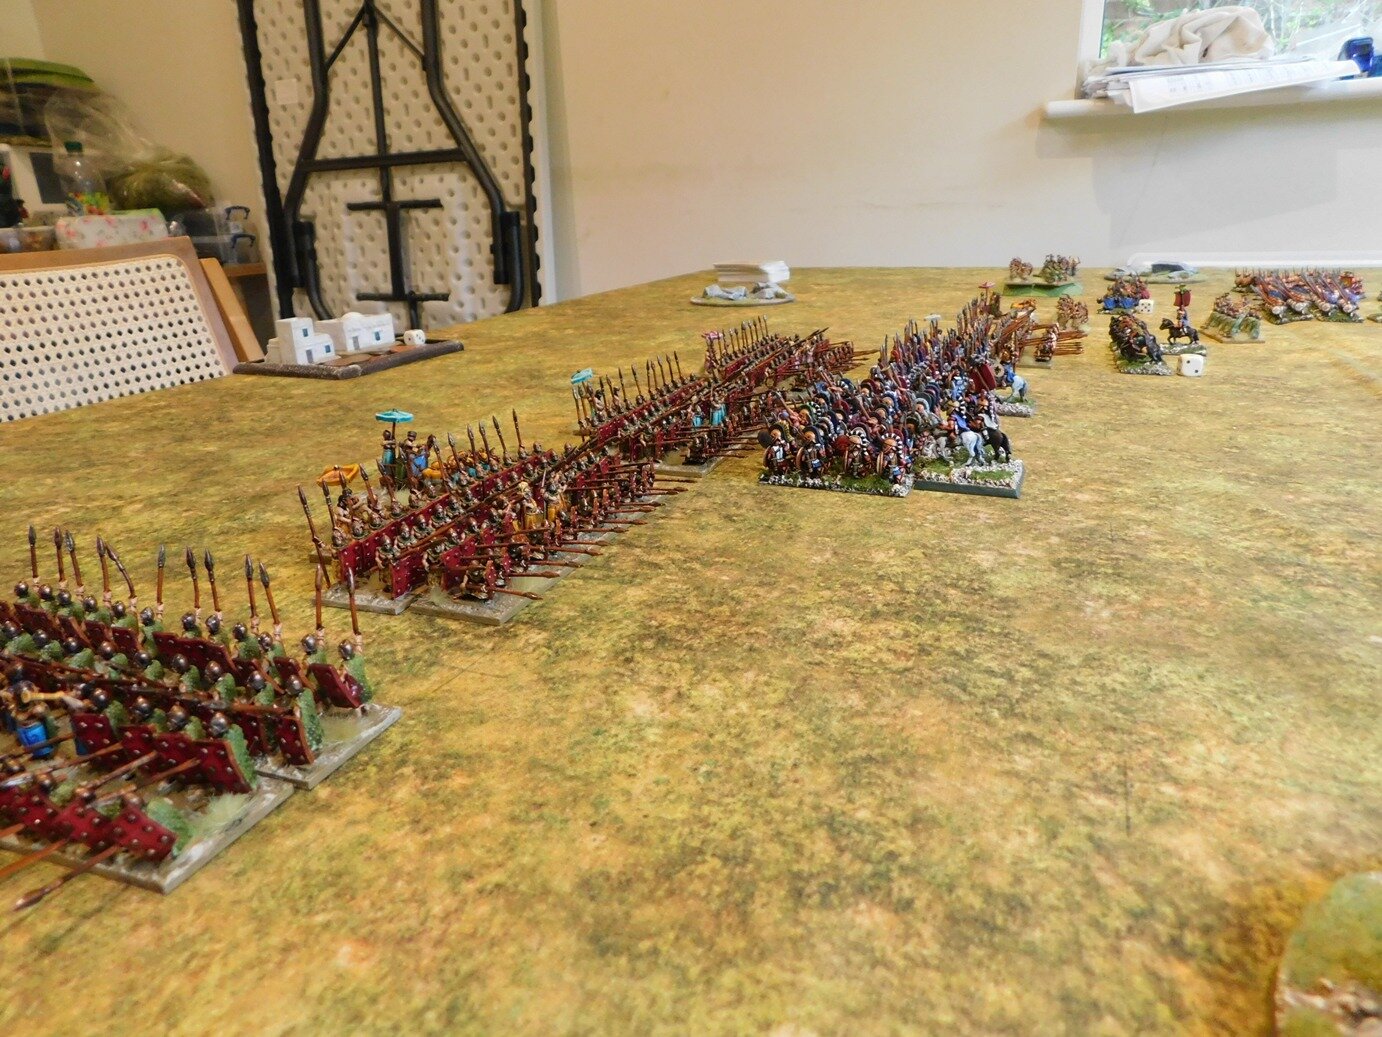
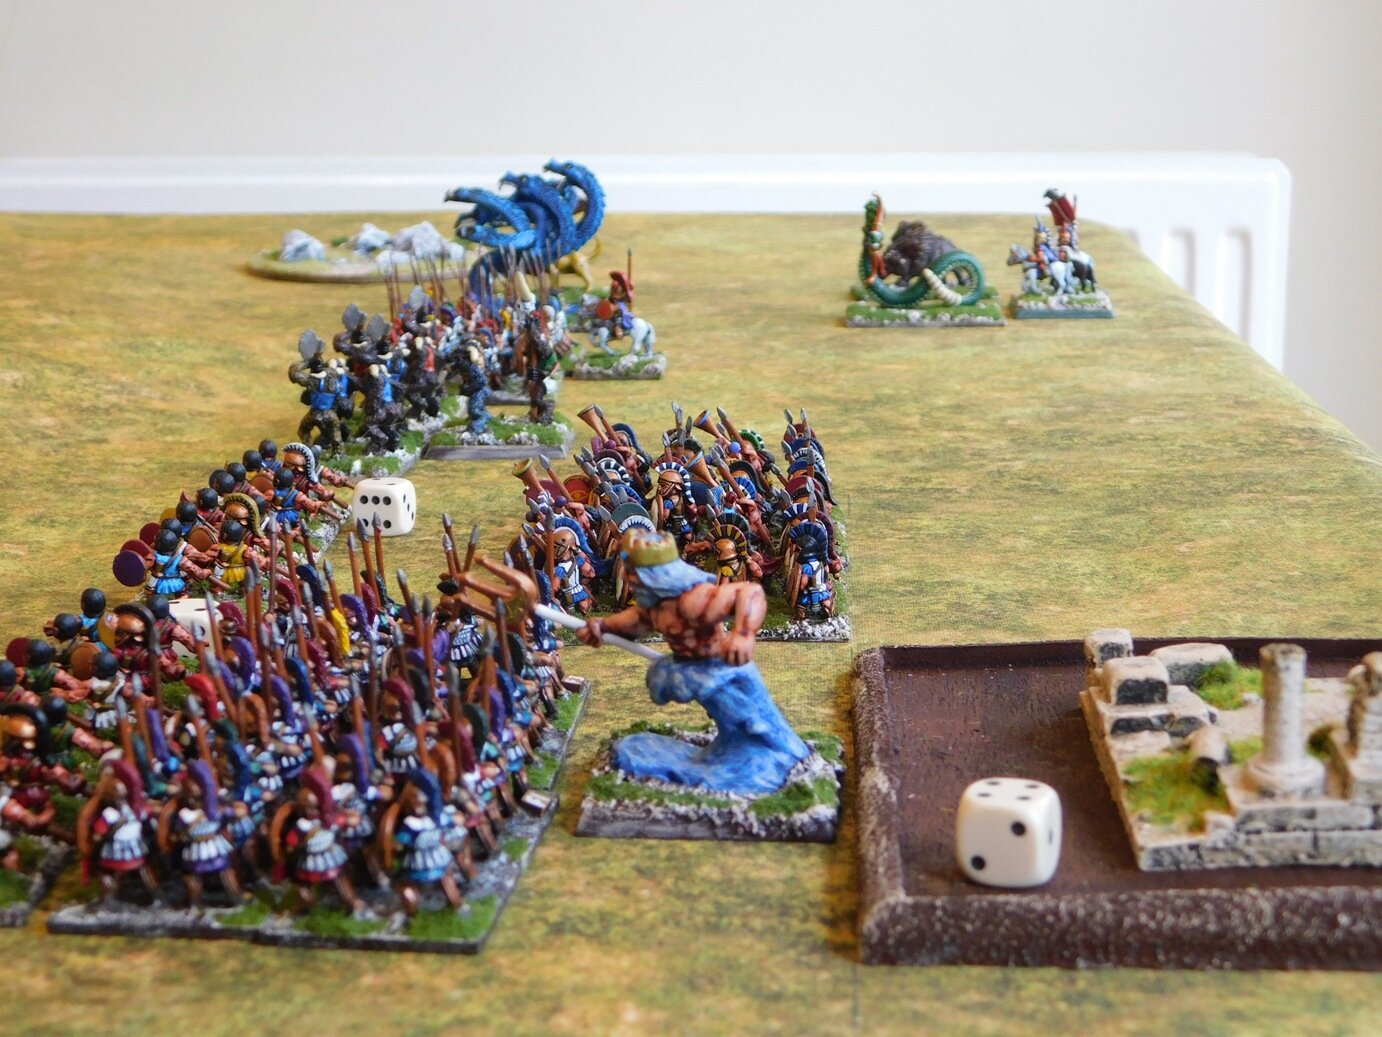
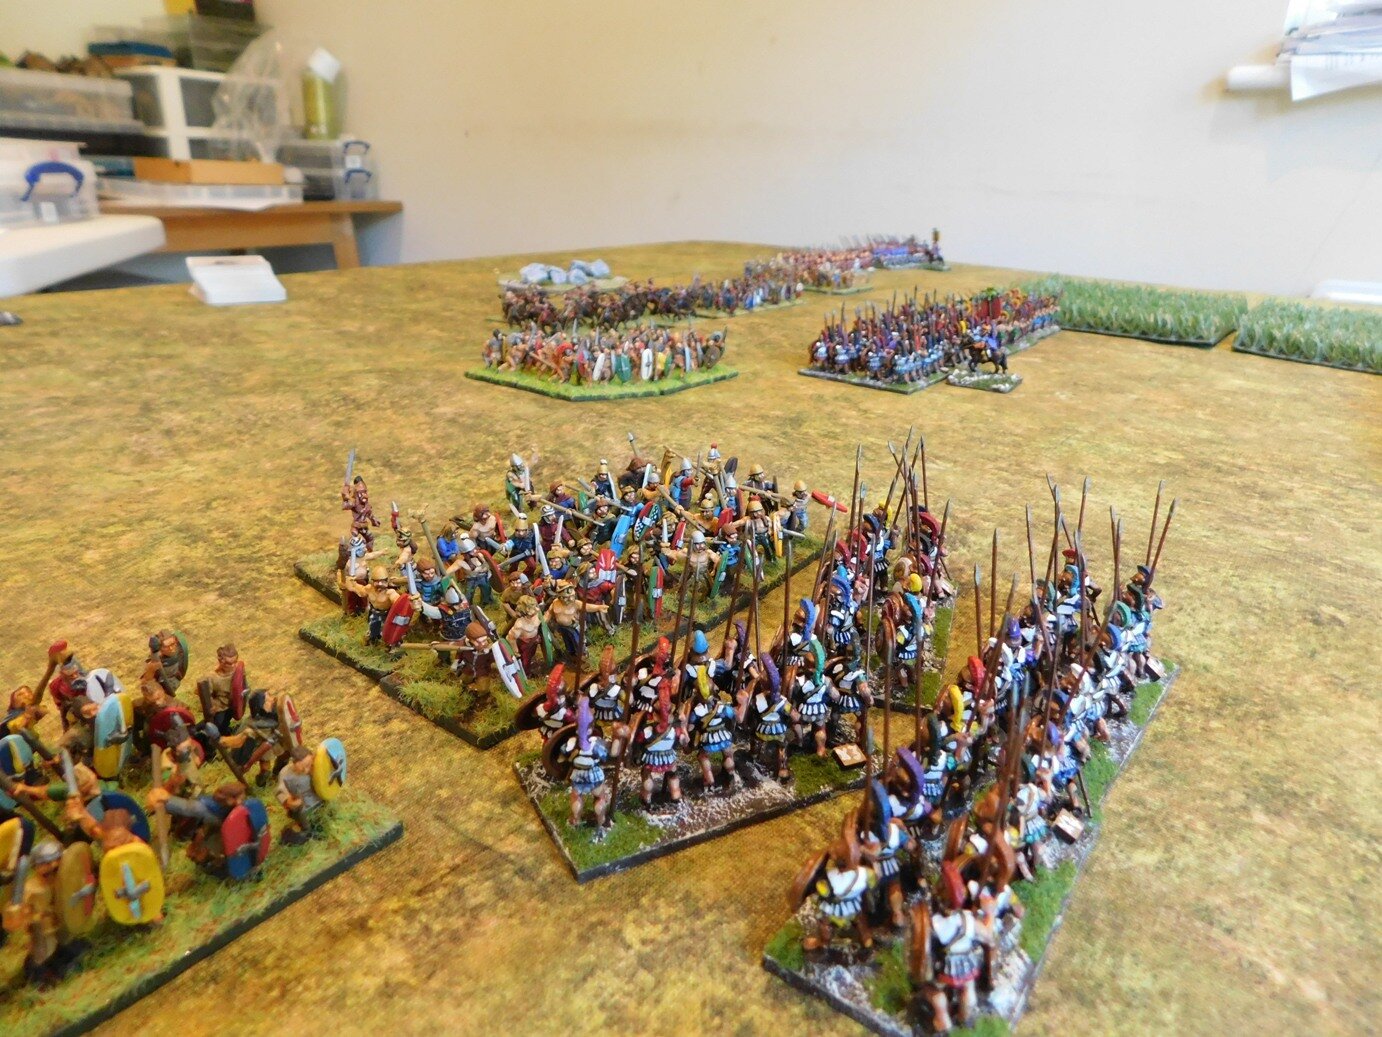
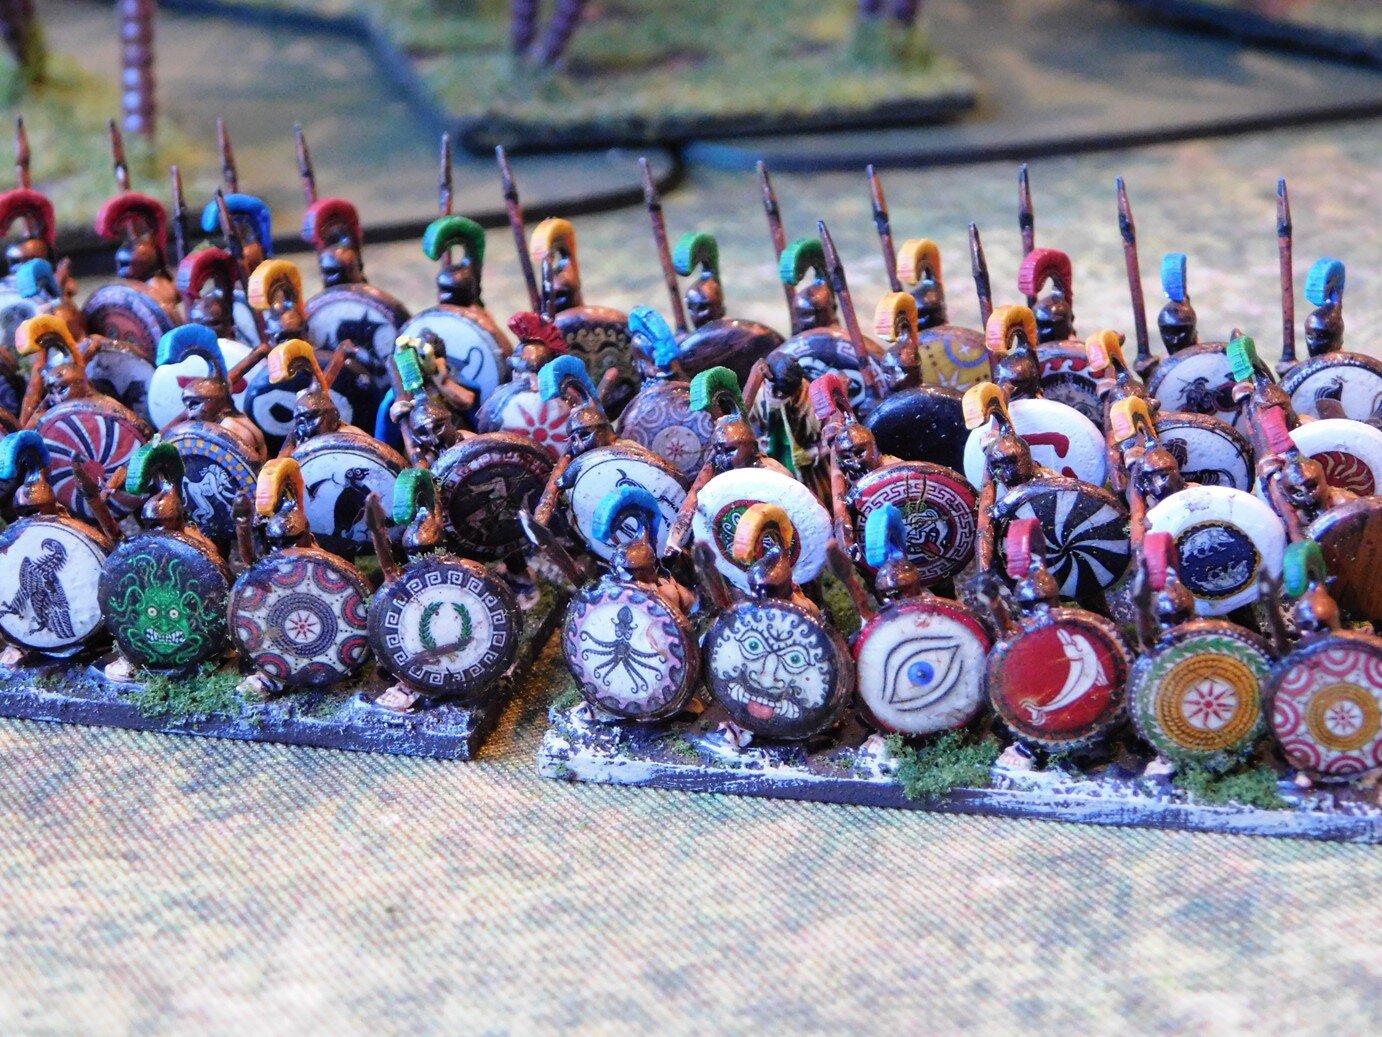
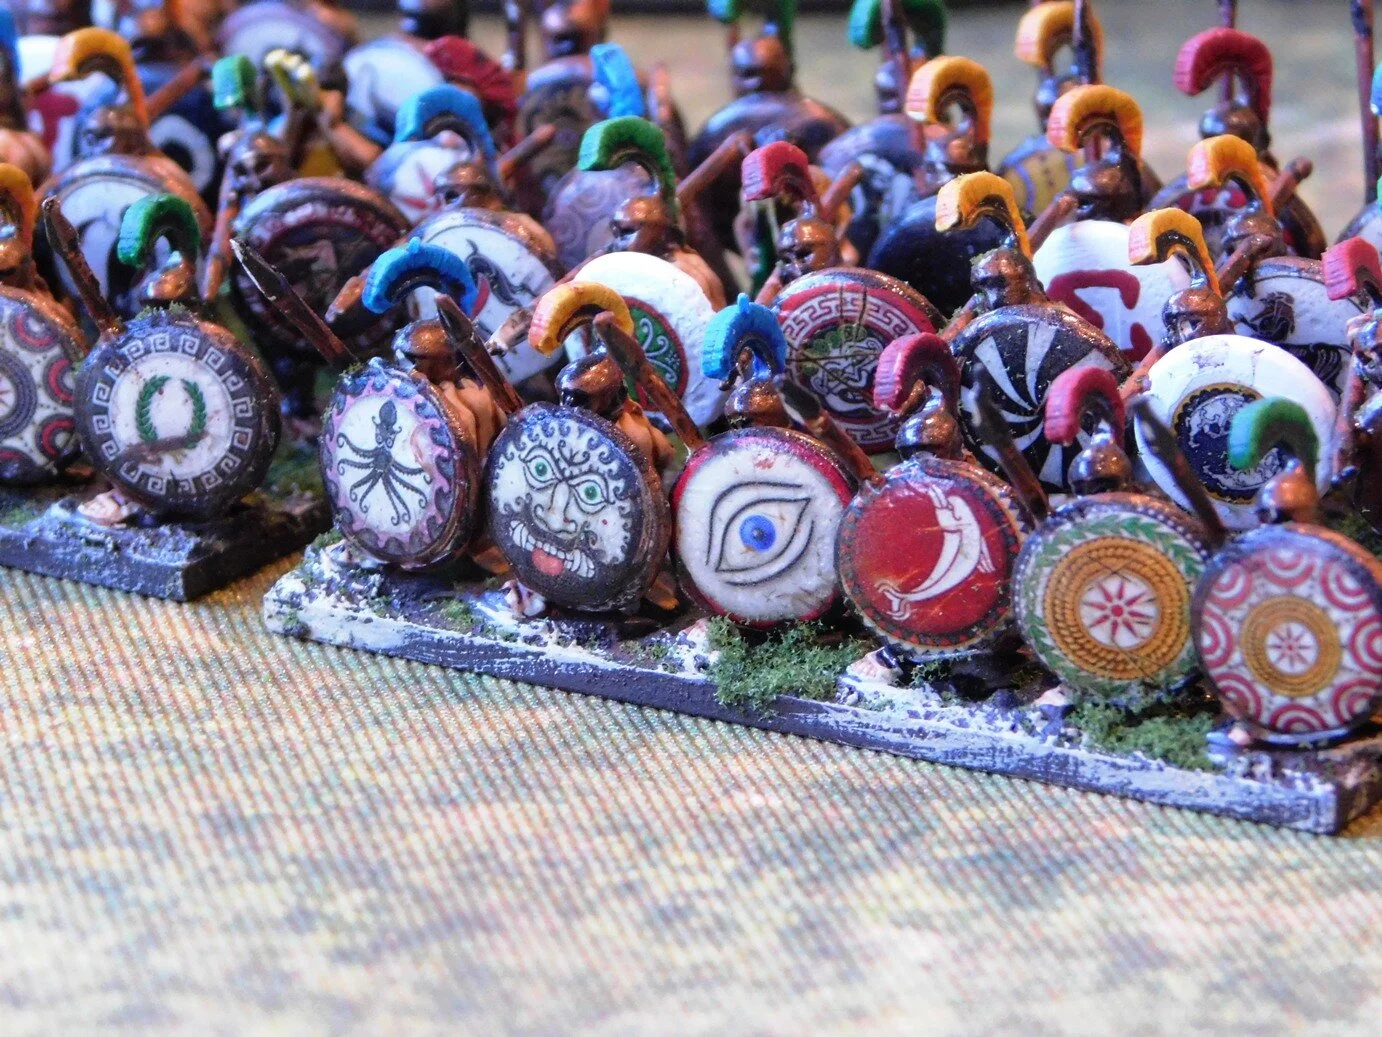
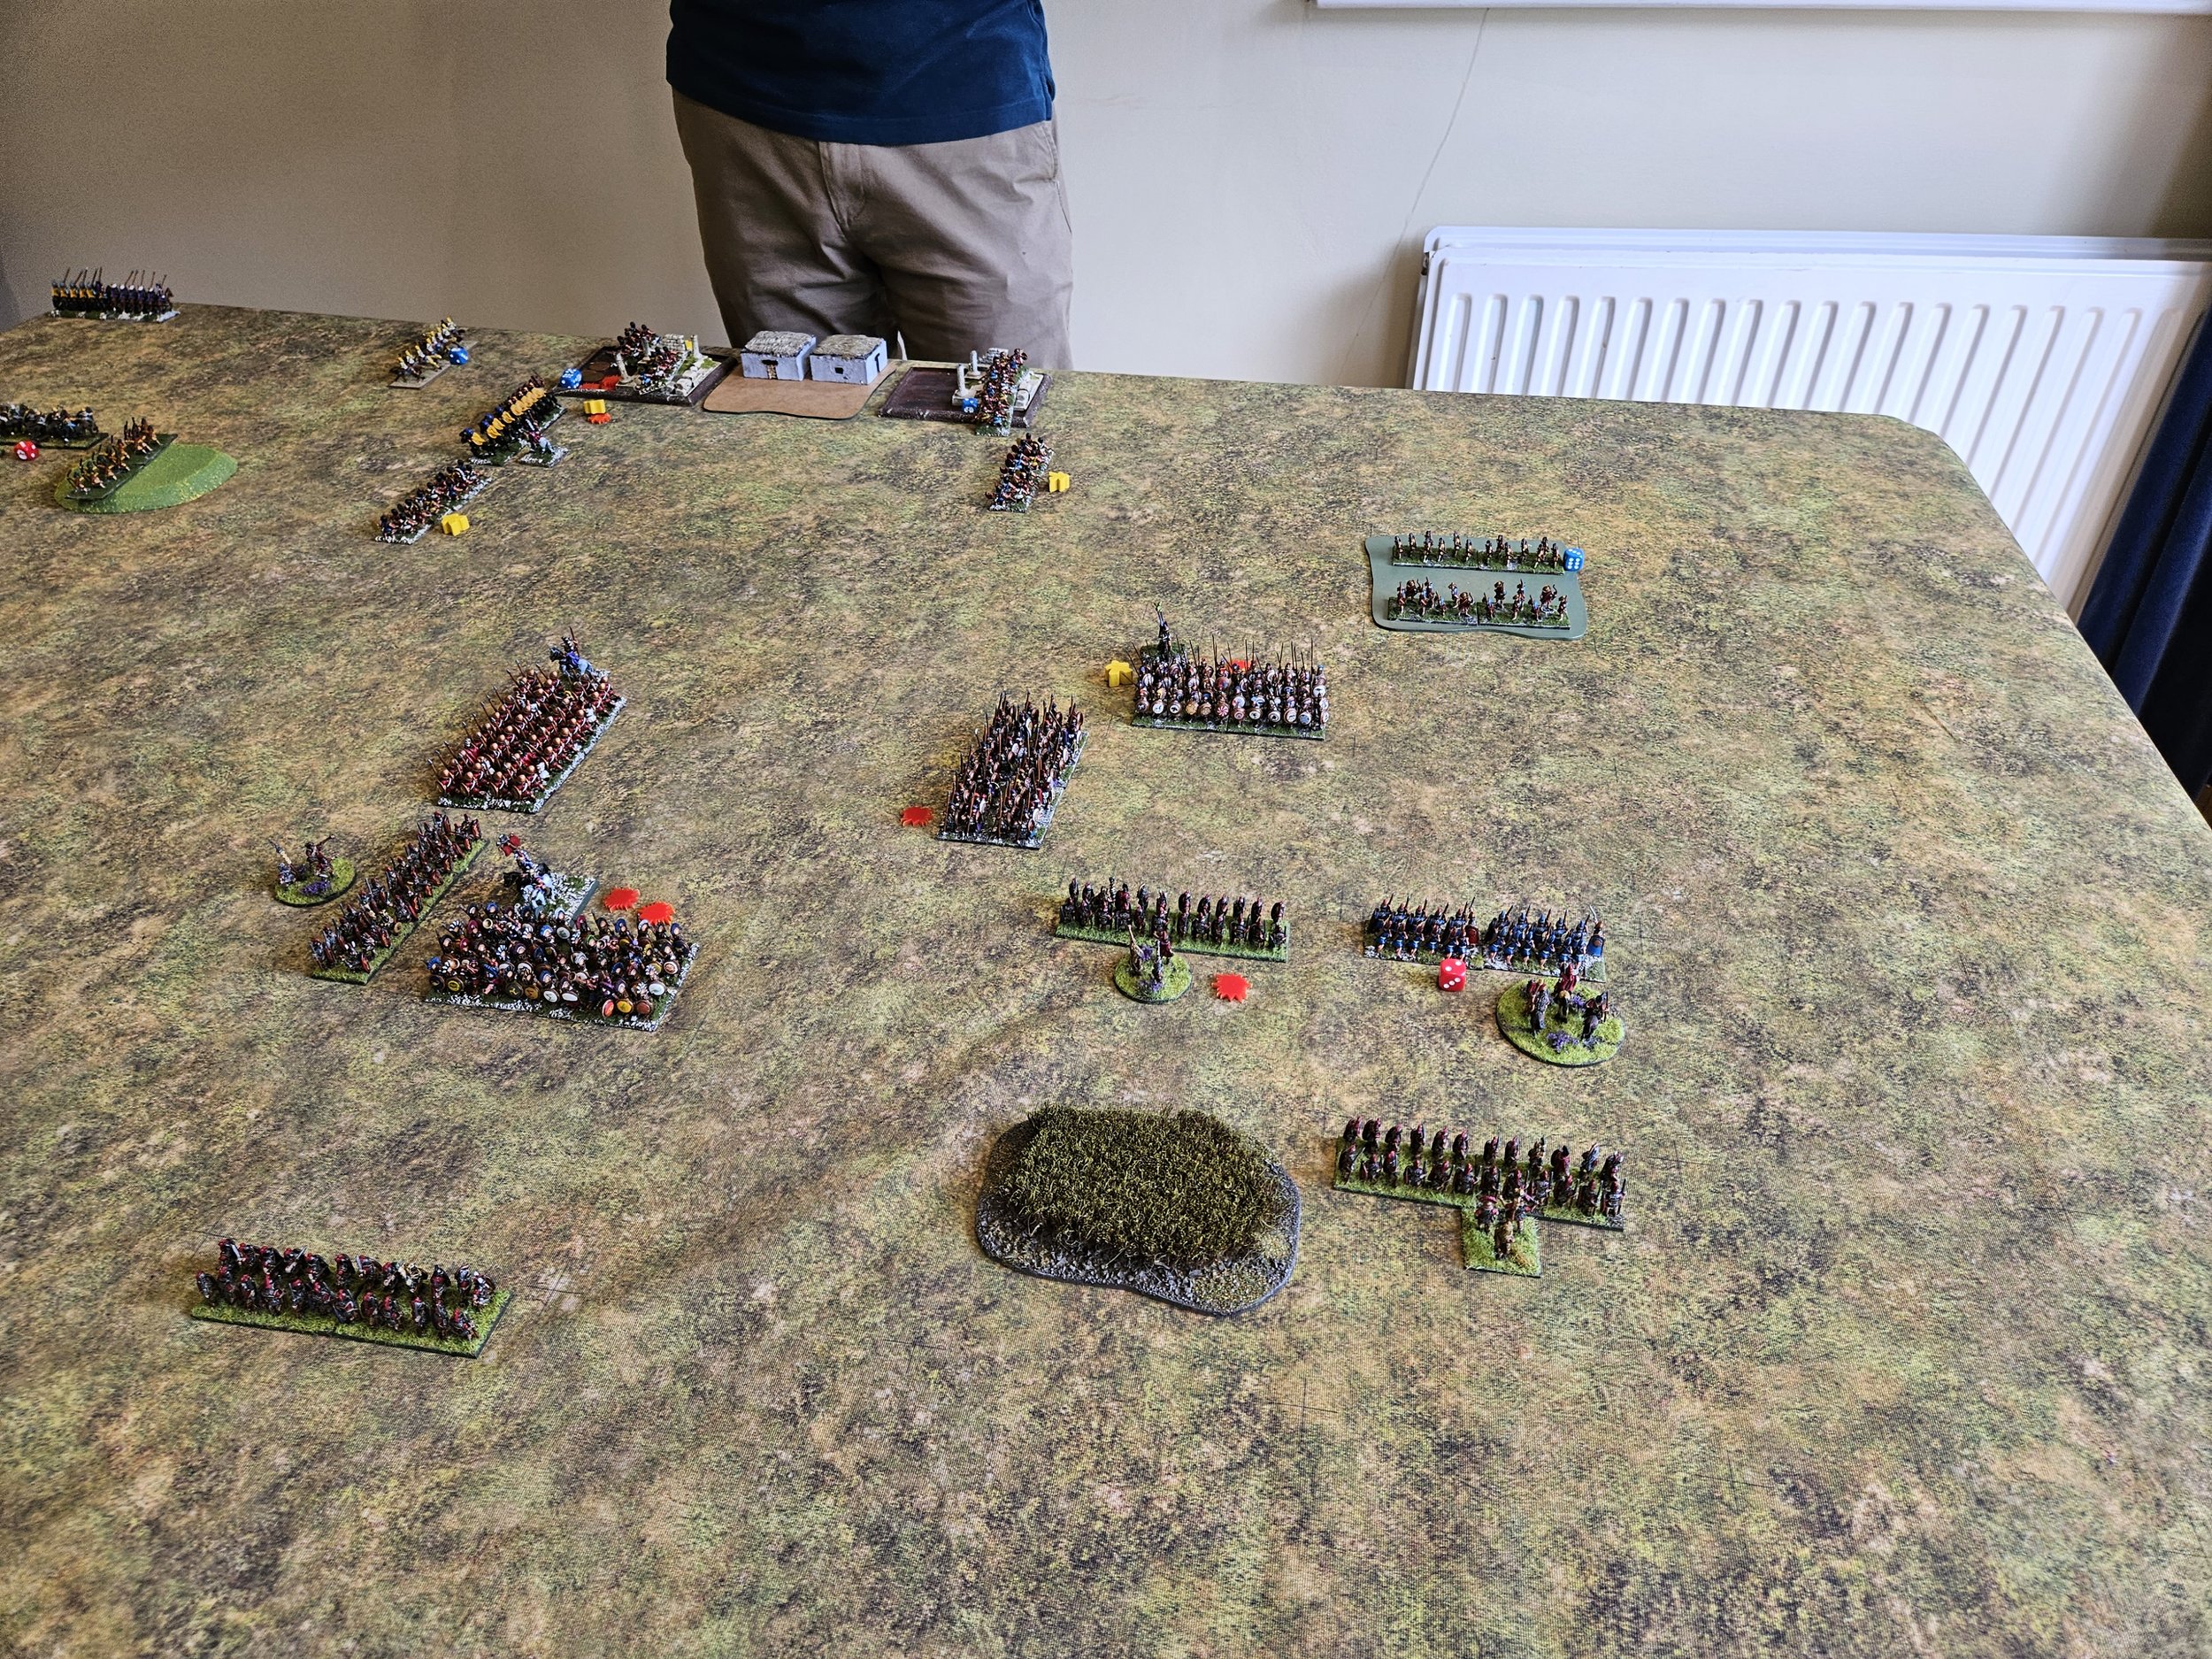
Here’s a gallery of the action: hopefully the pictures will tell the story!

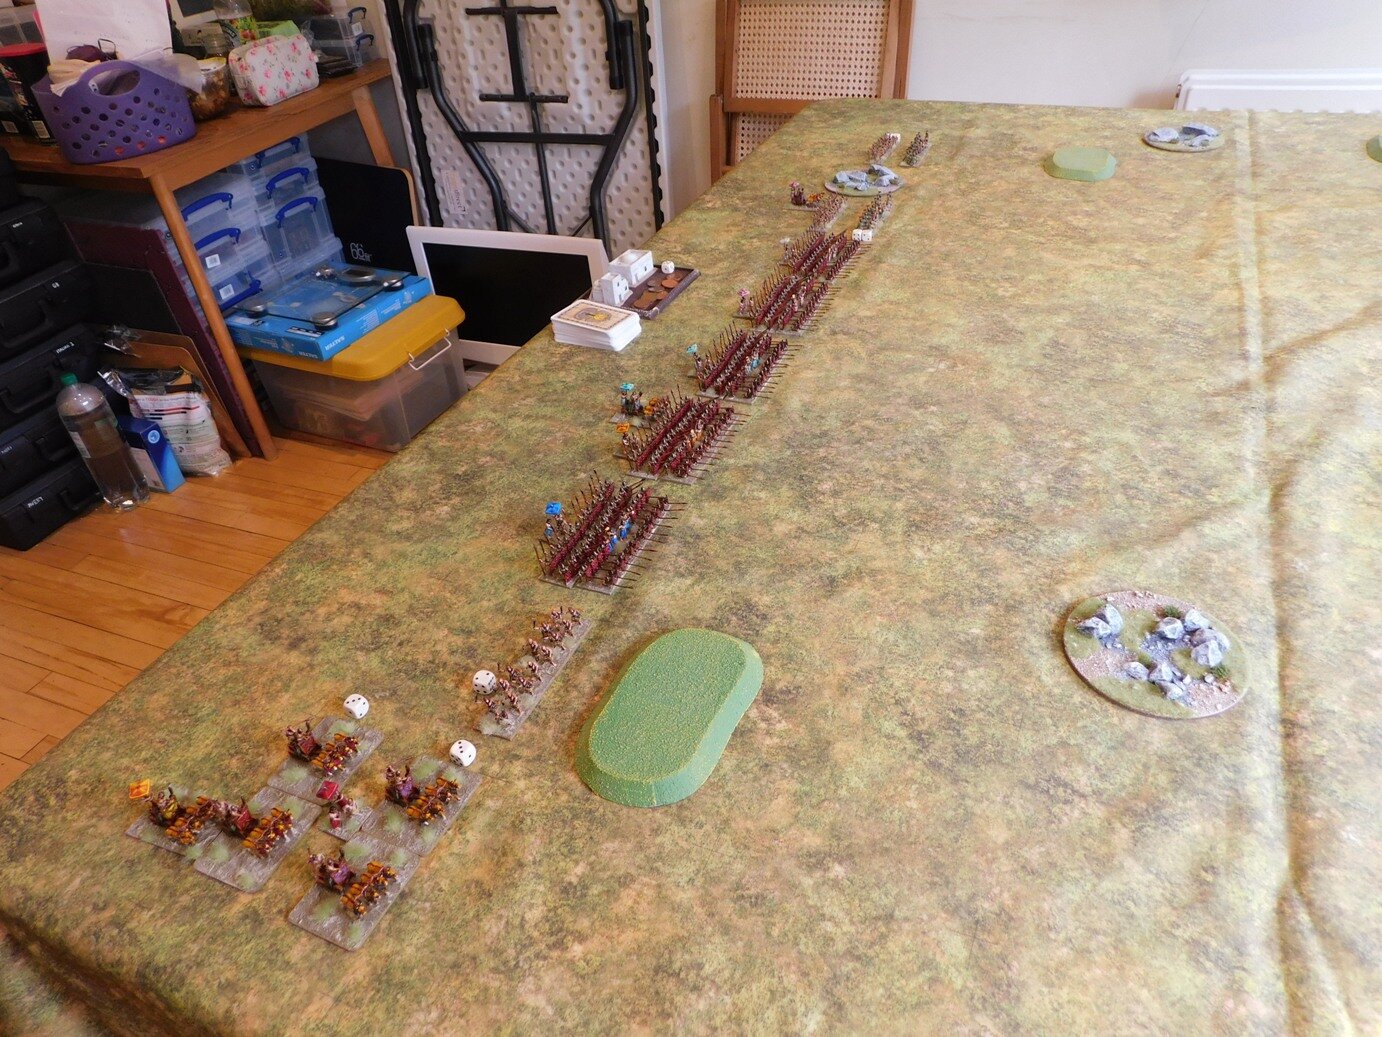
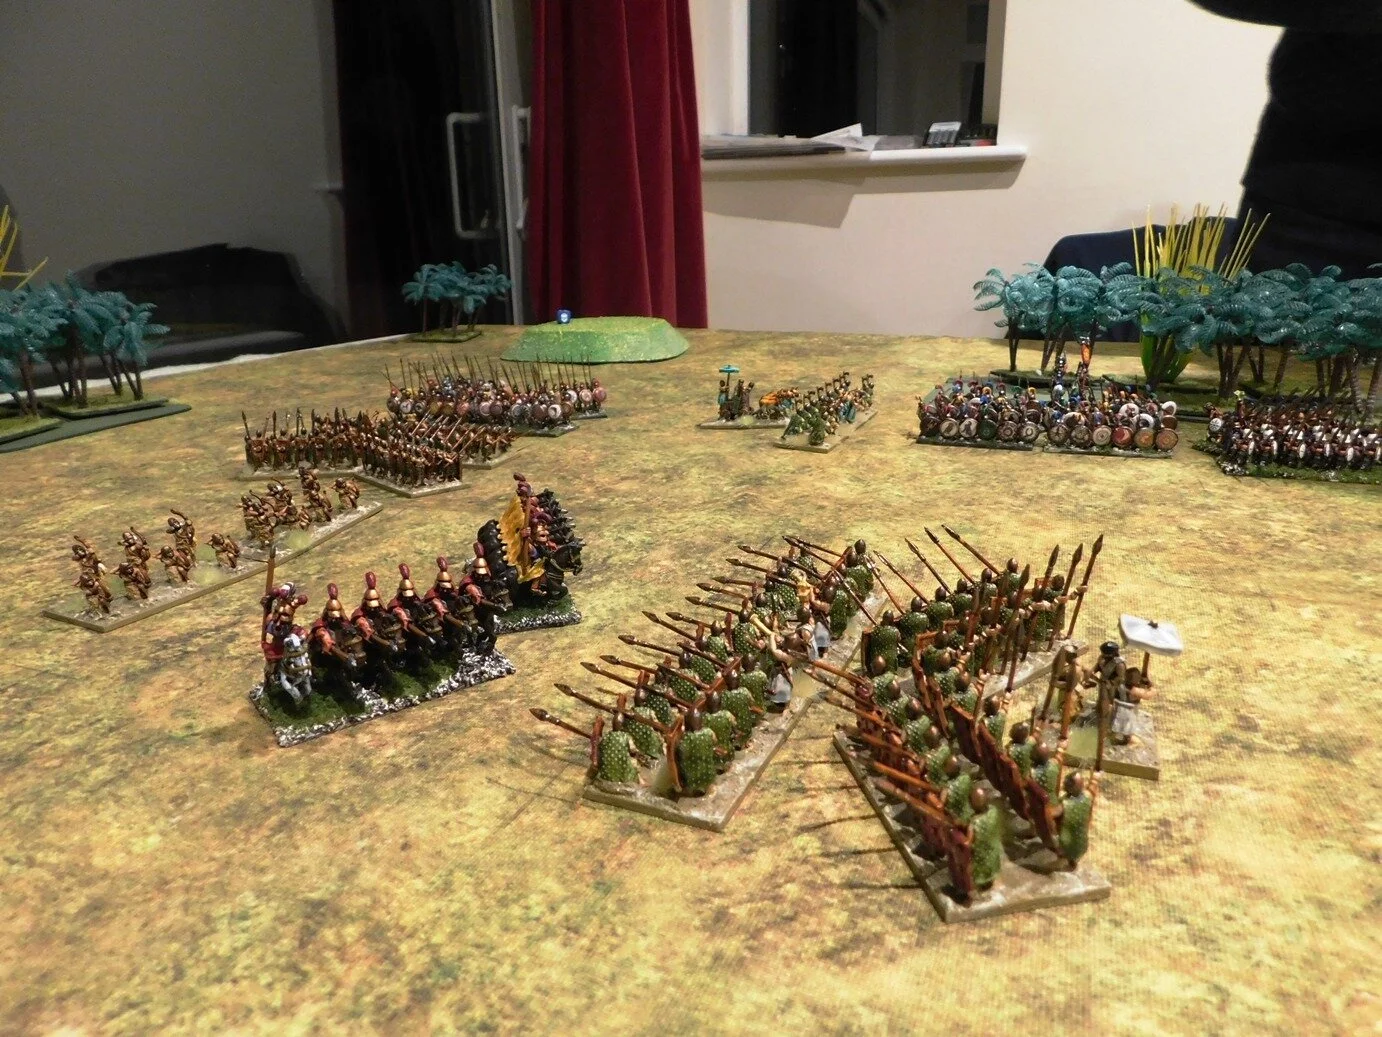
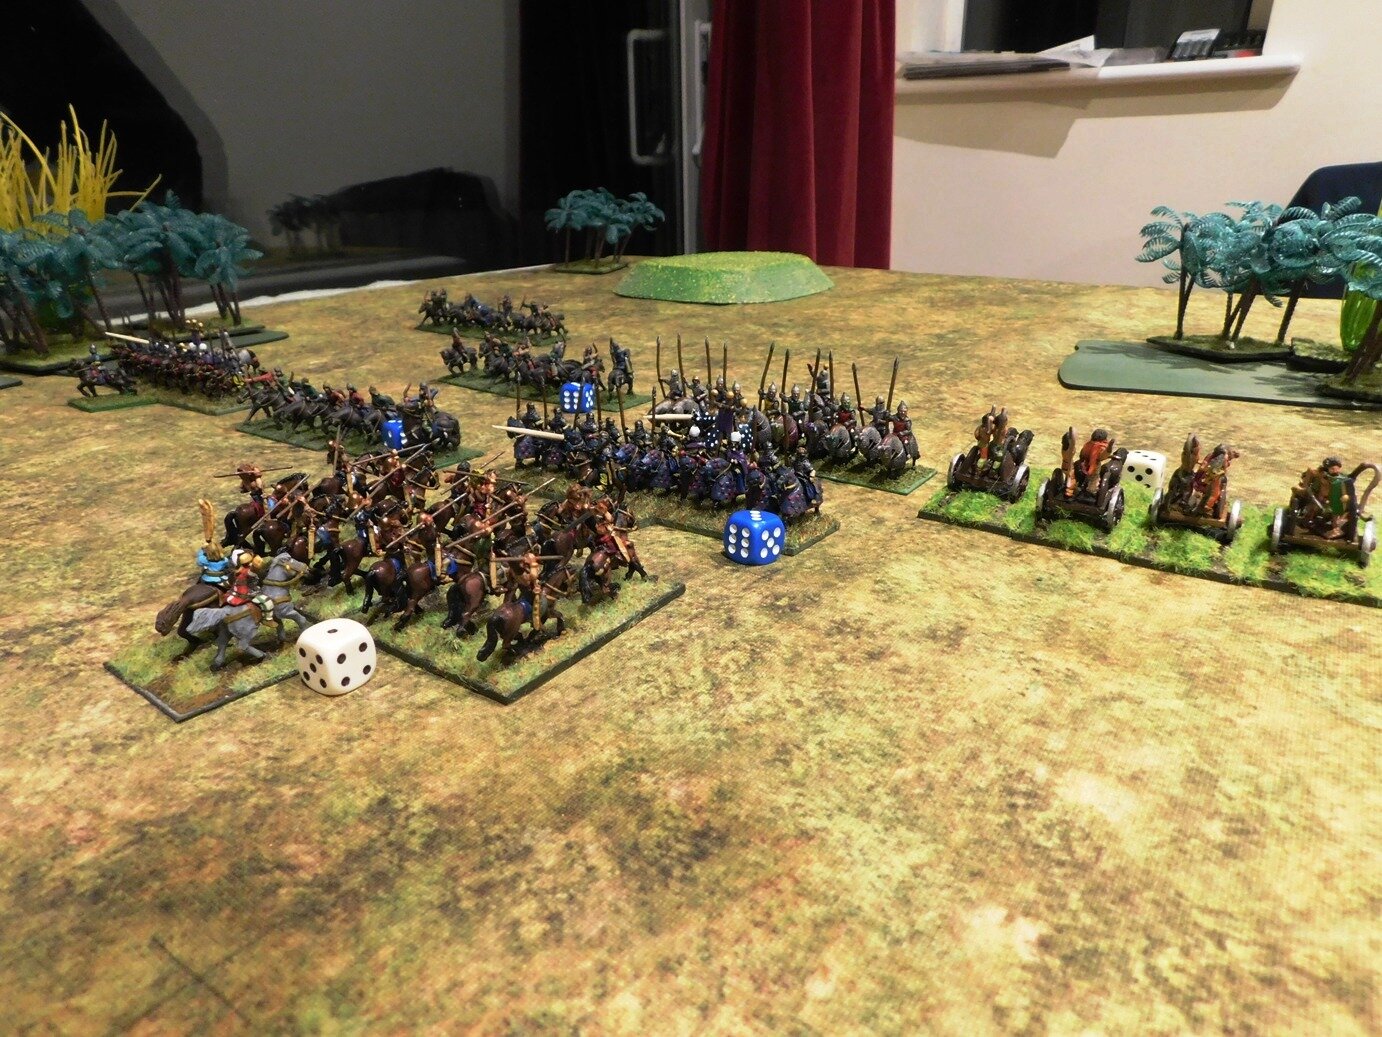
It’s all coming back to me now!

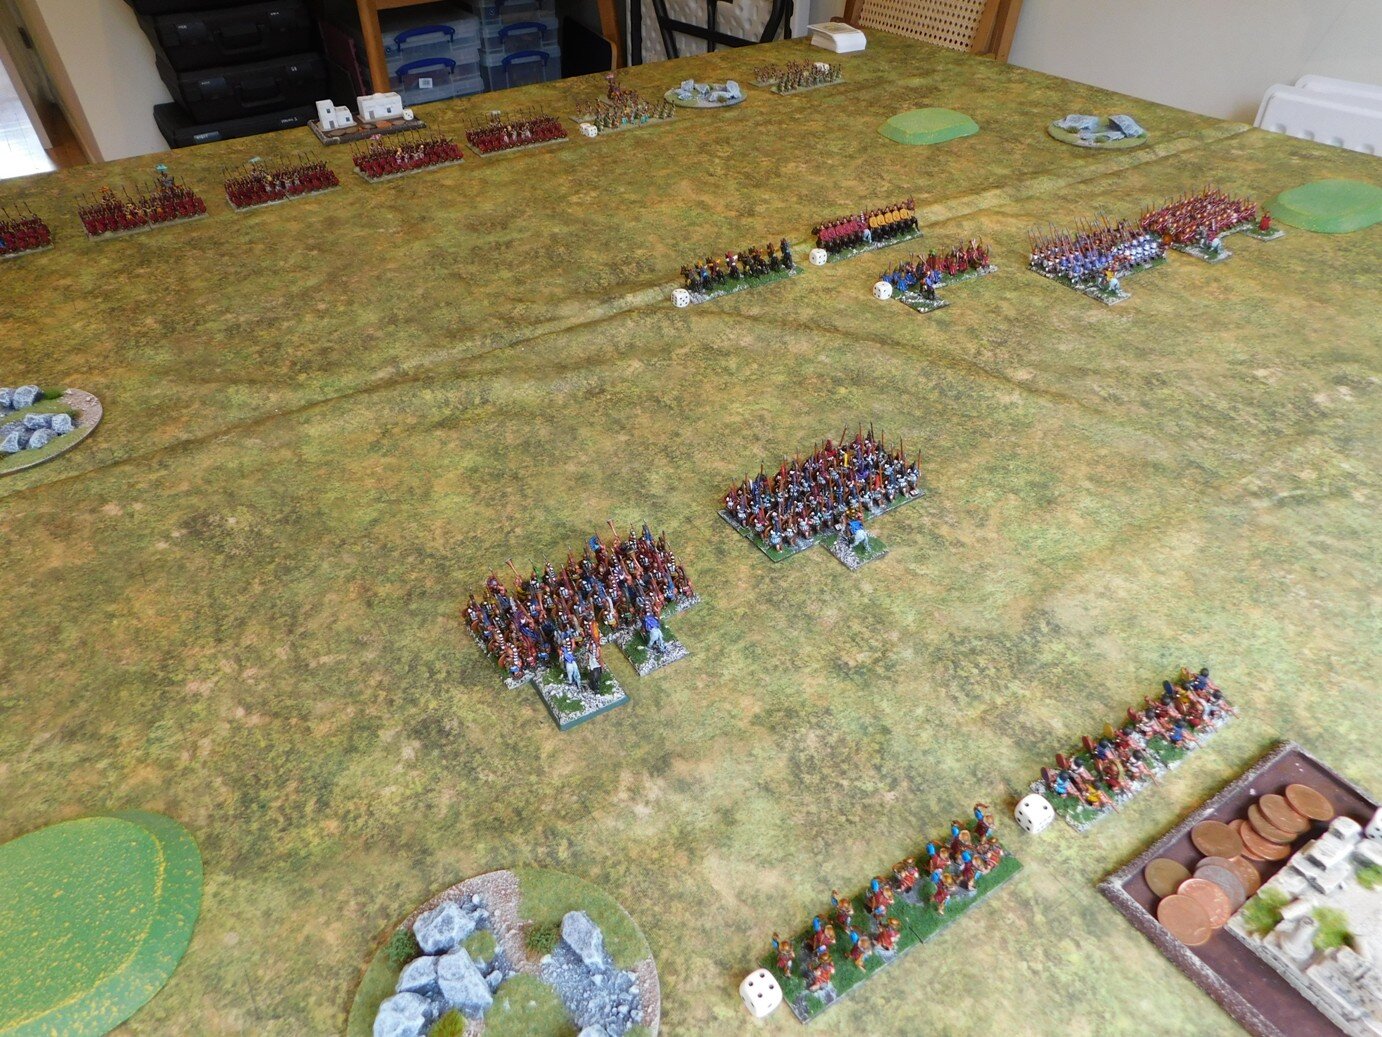
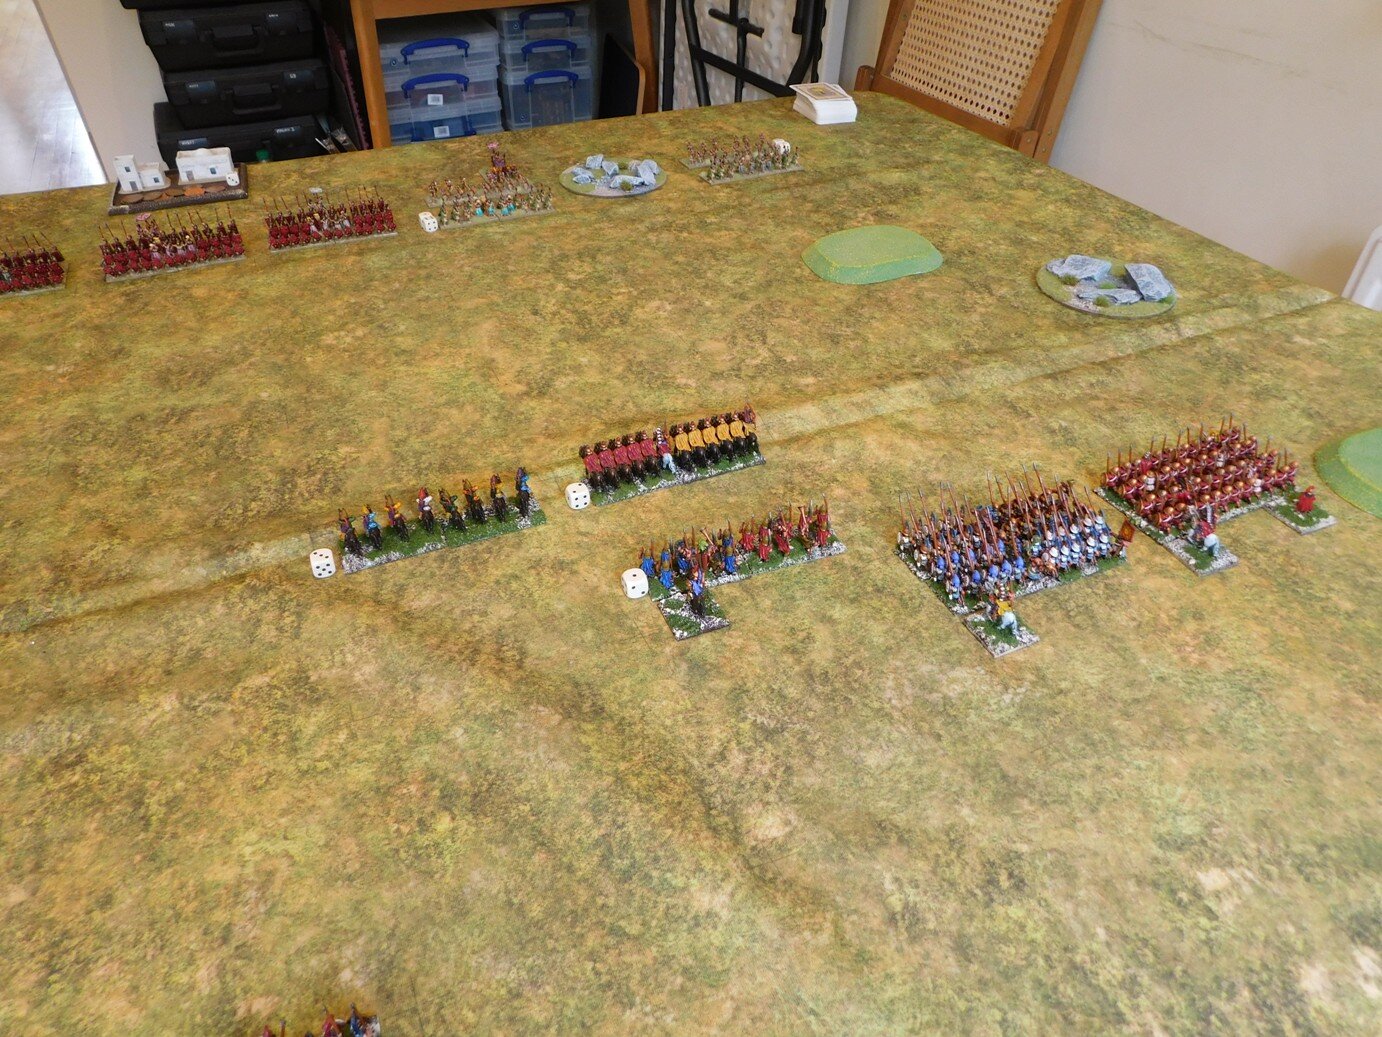
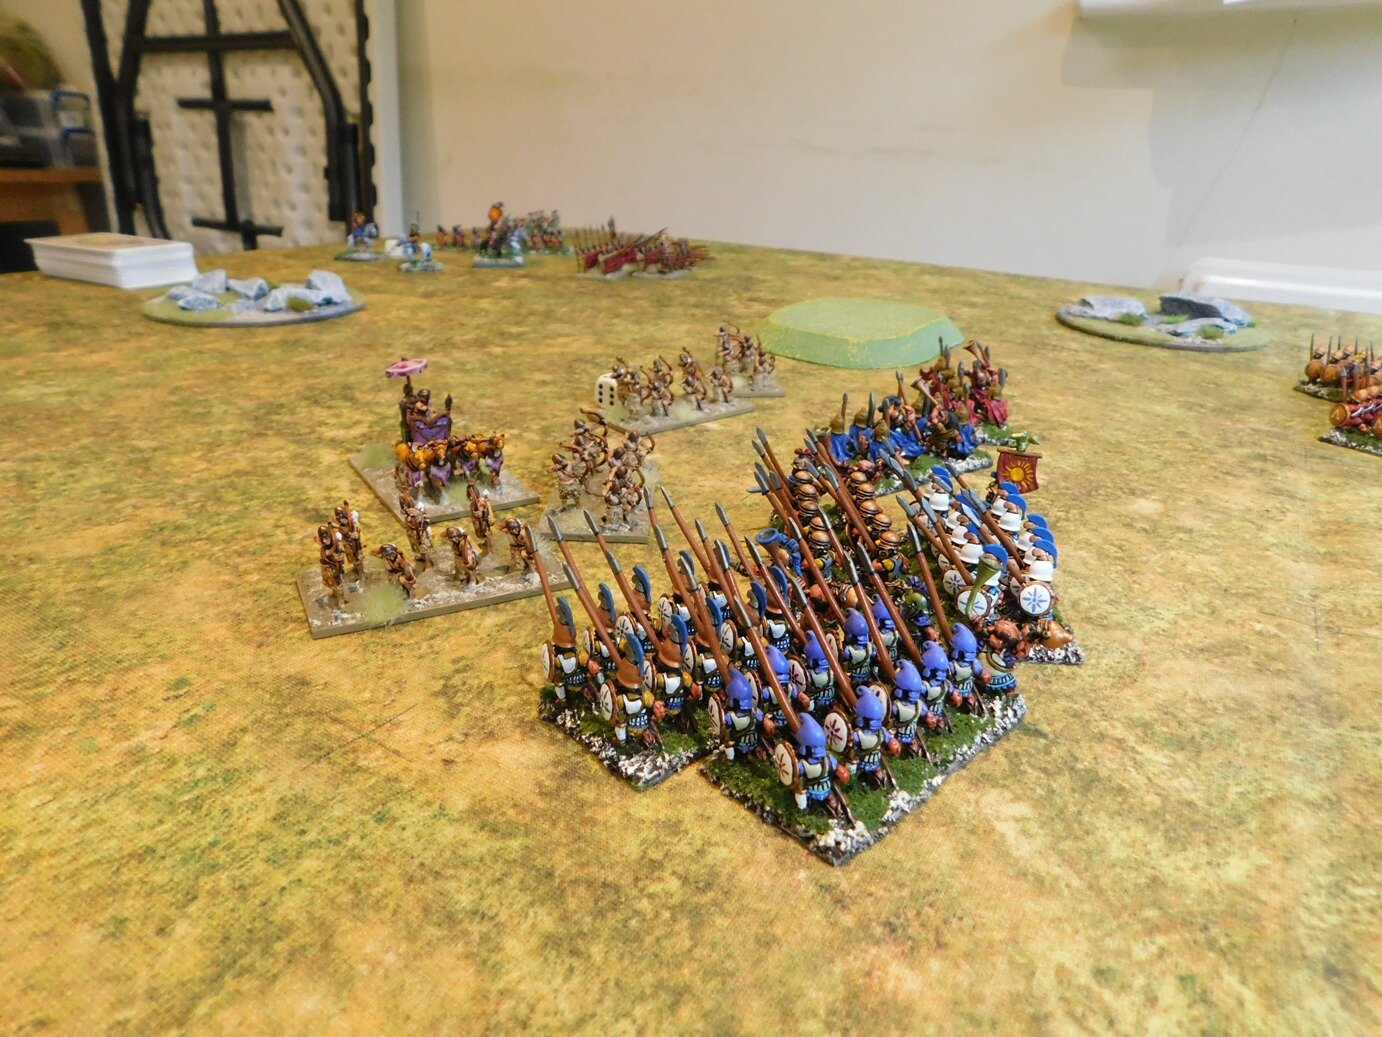
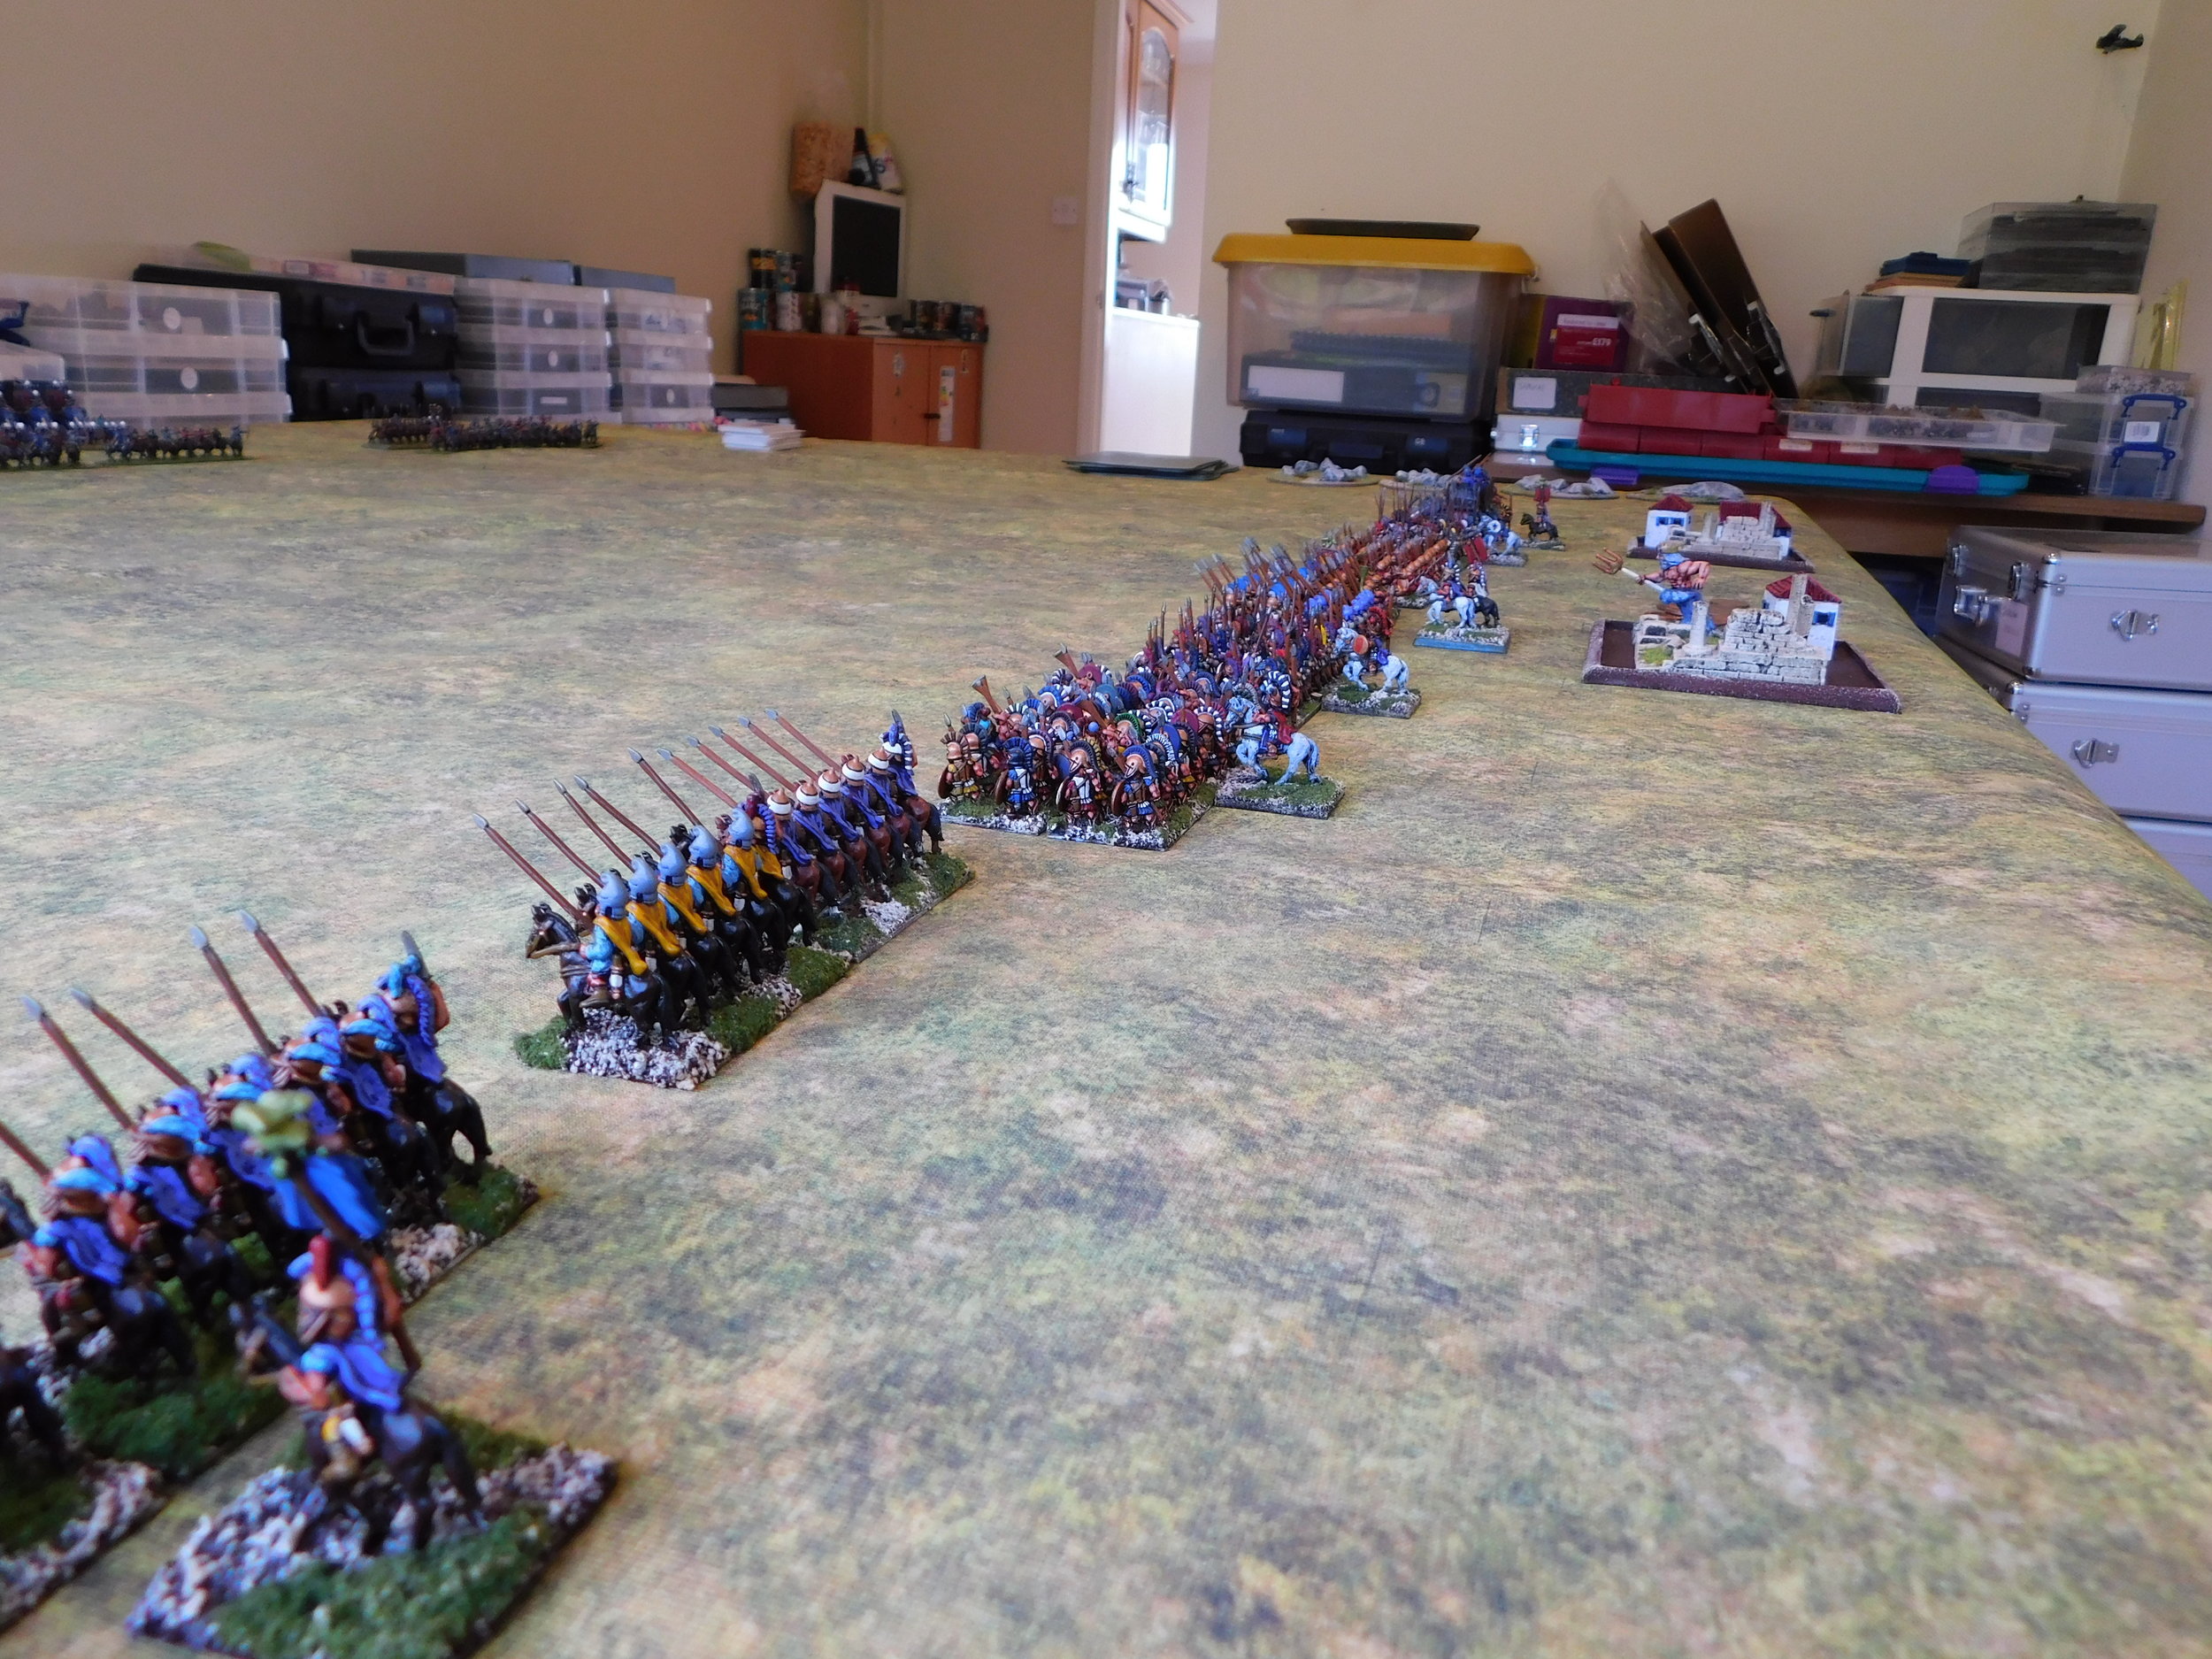
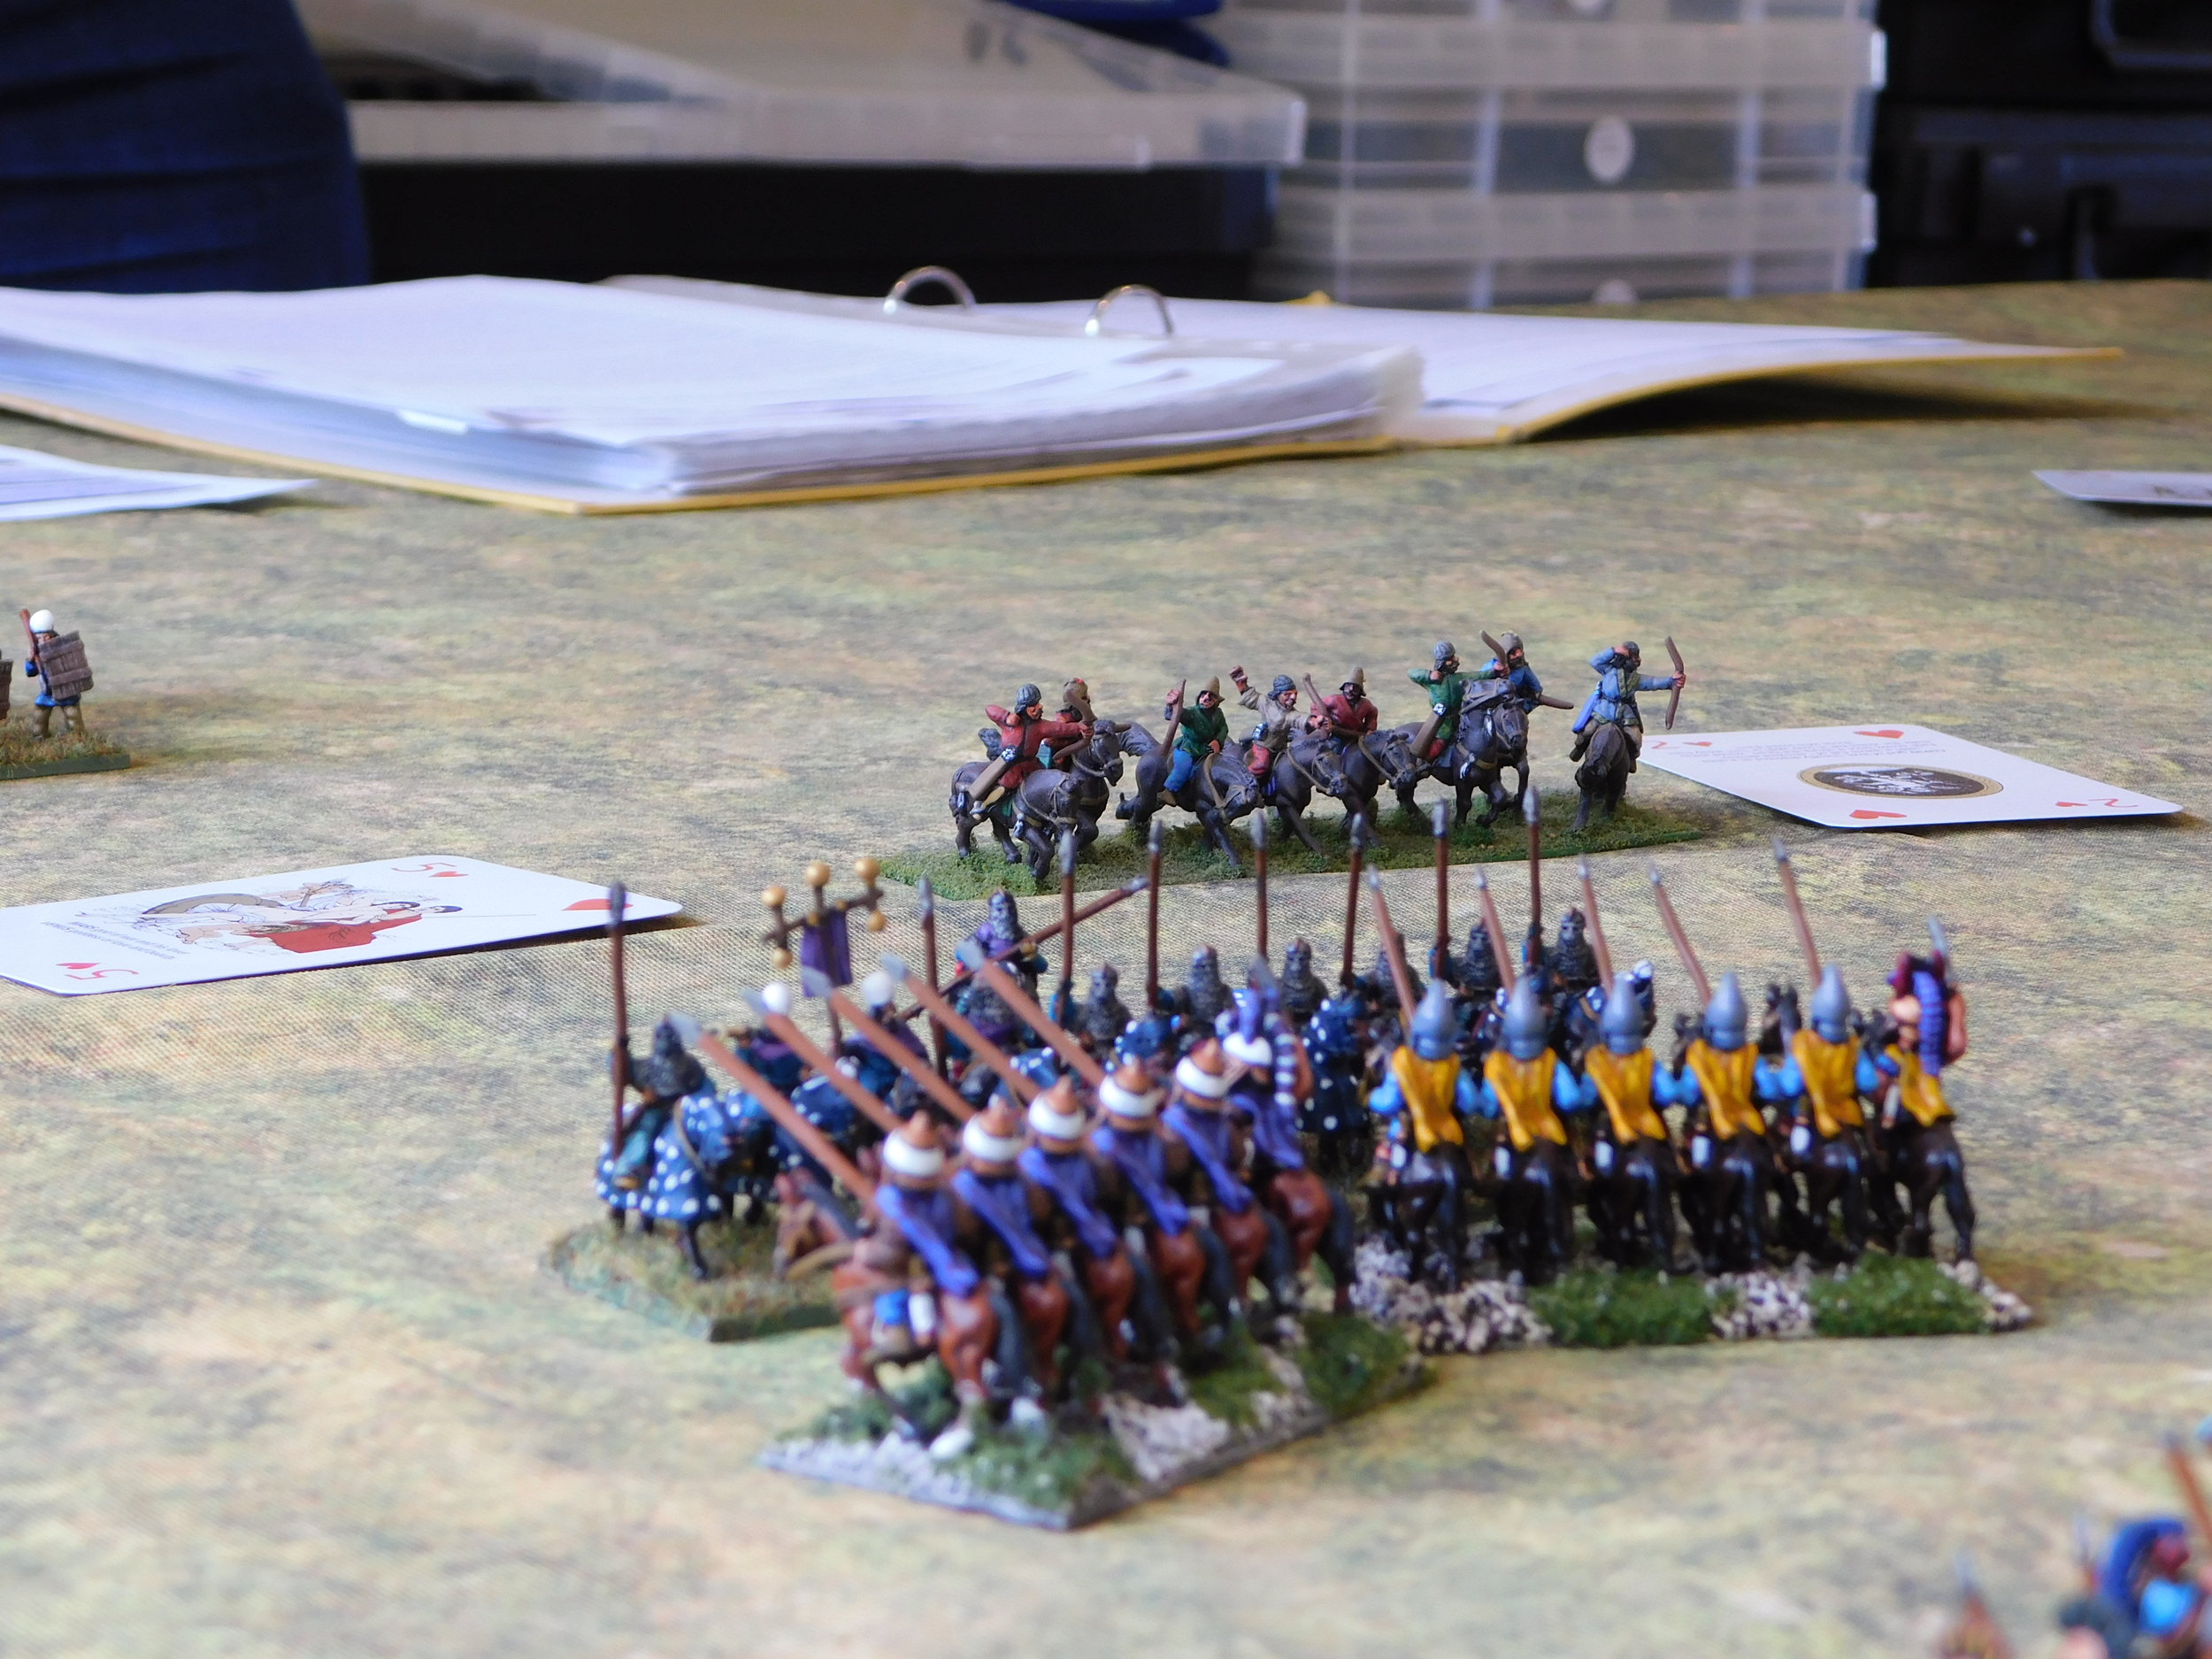
My plan was to have the Roman cavalry overwhelm the lesser quality Greek horse on my left then curl back into the centre to take the Greeks in the flank.

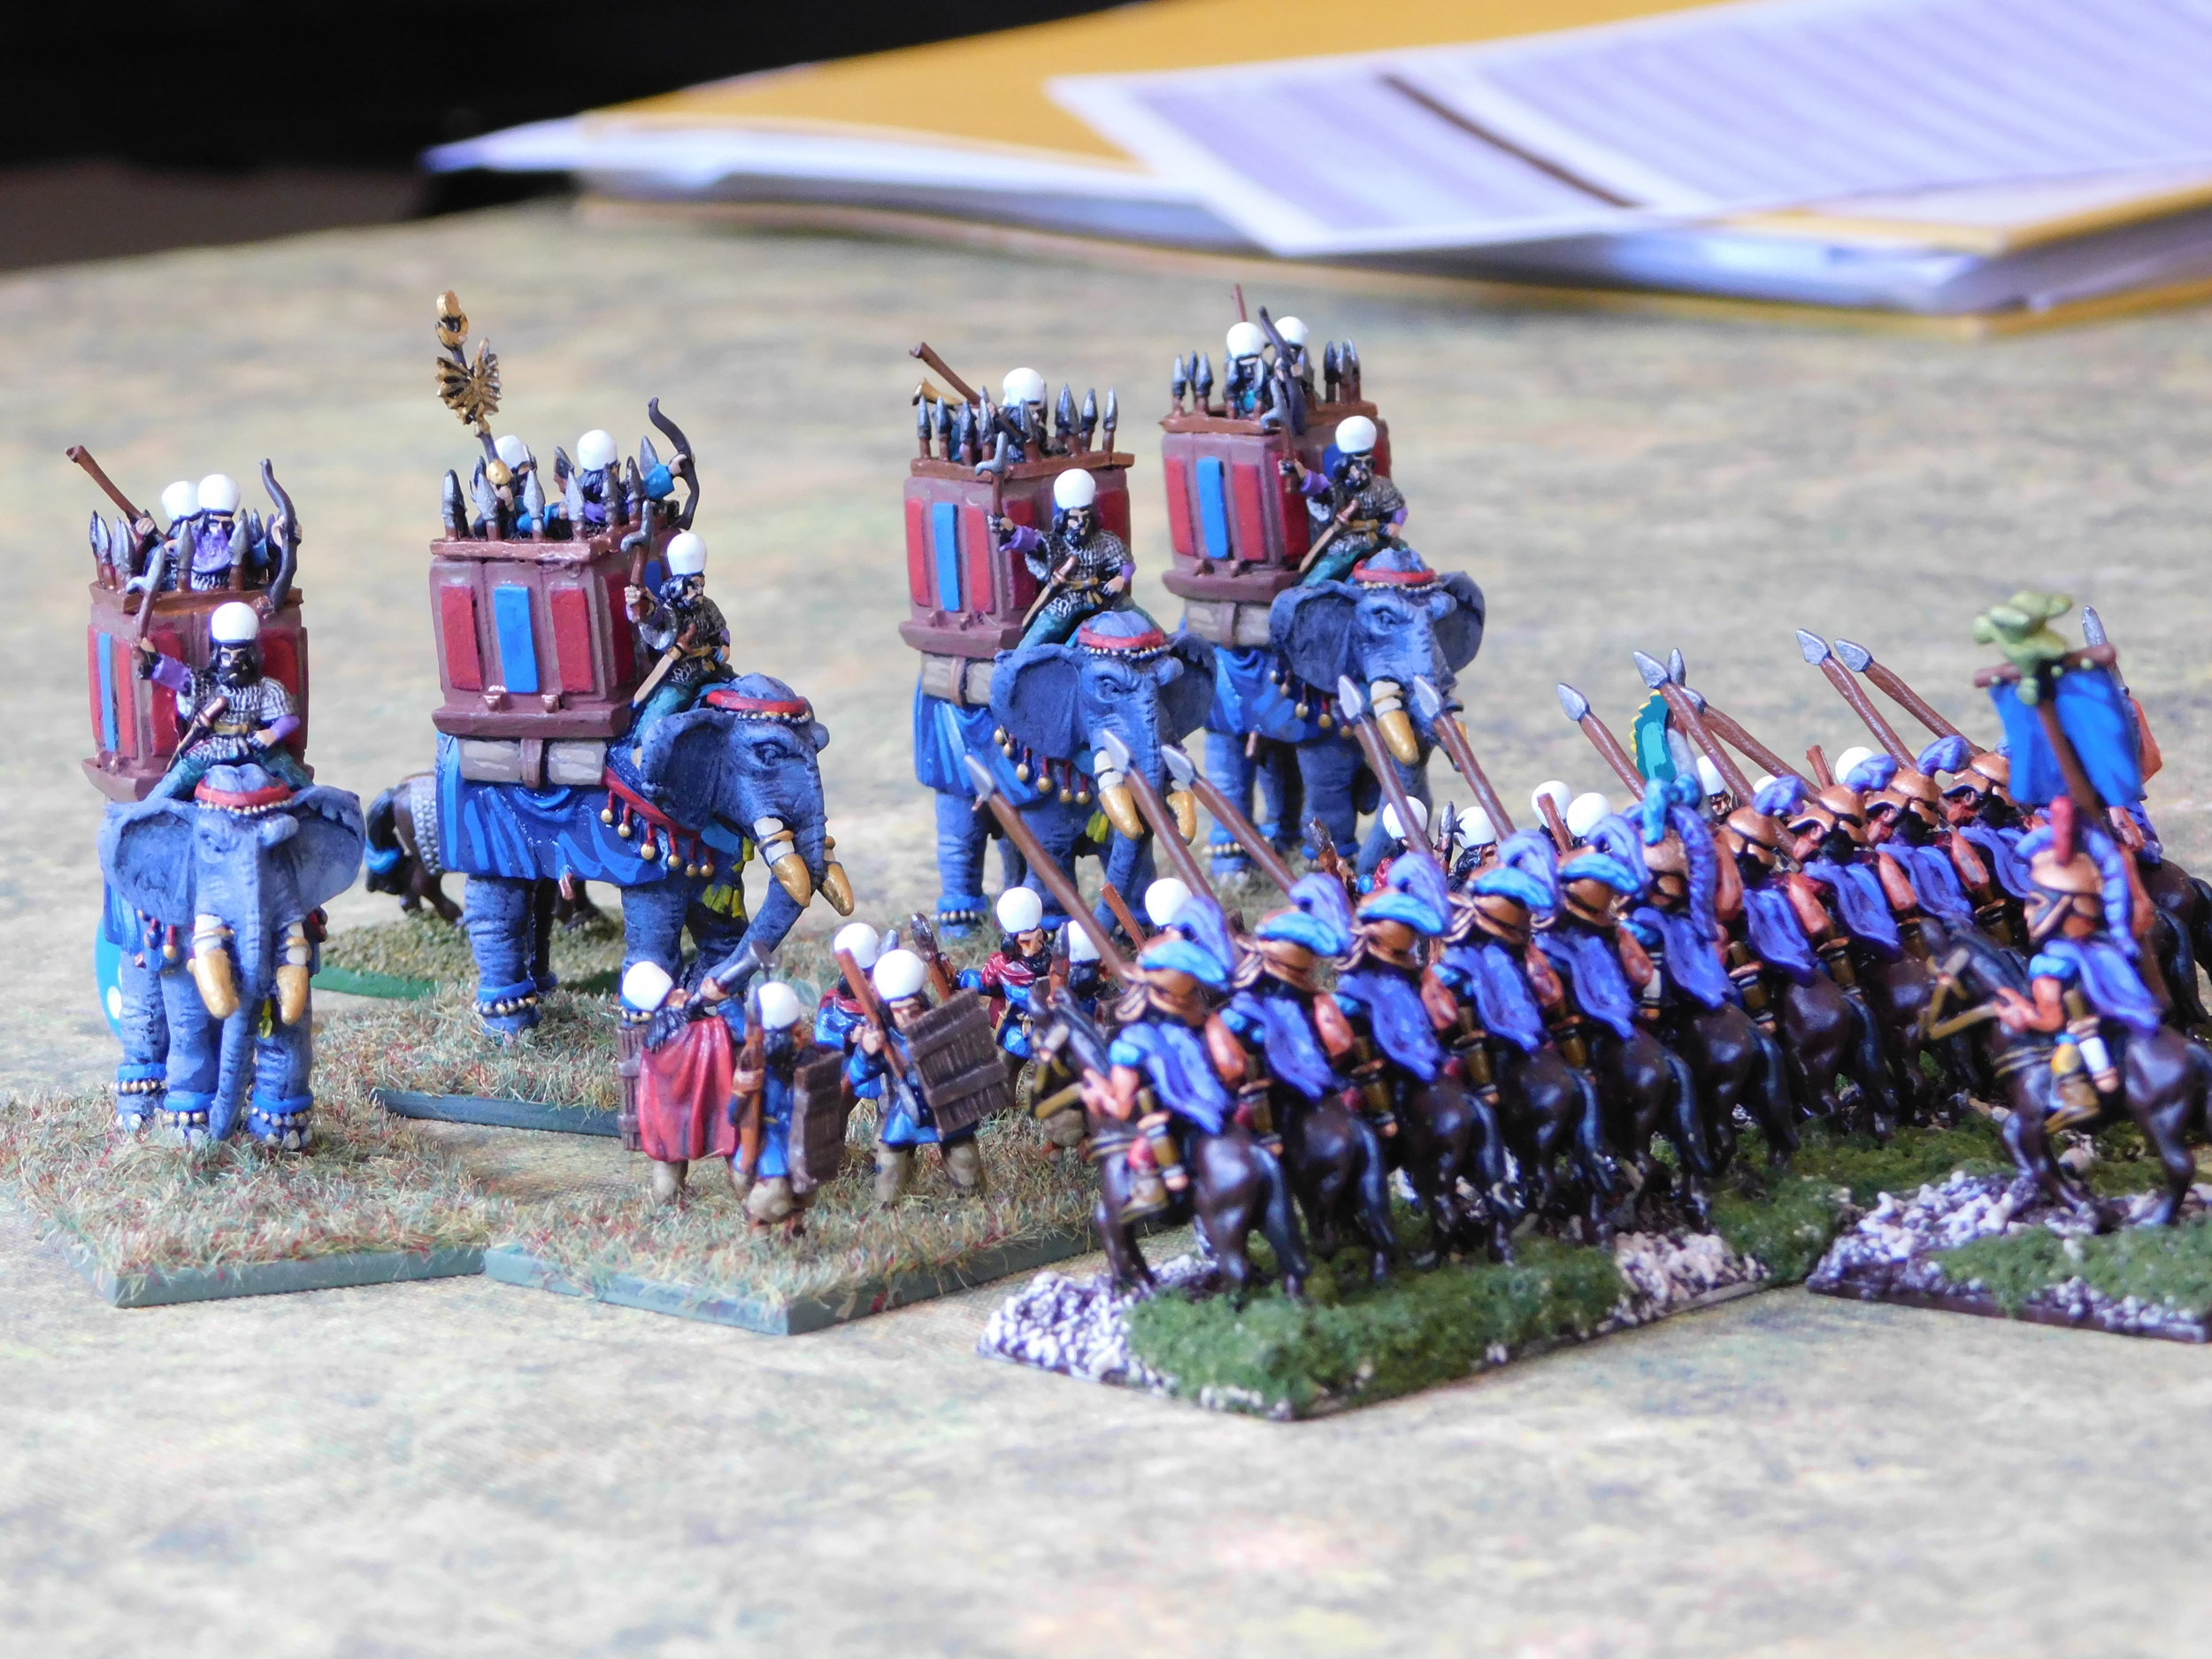
That didn’t happen: as per usual the Roman horse proved incapable of beating the moth-eaten rabble in front of them, so that flank remained effectively neutralised throughout the battle.

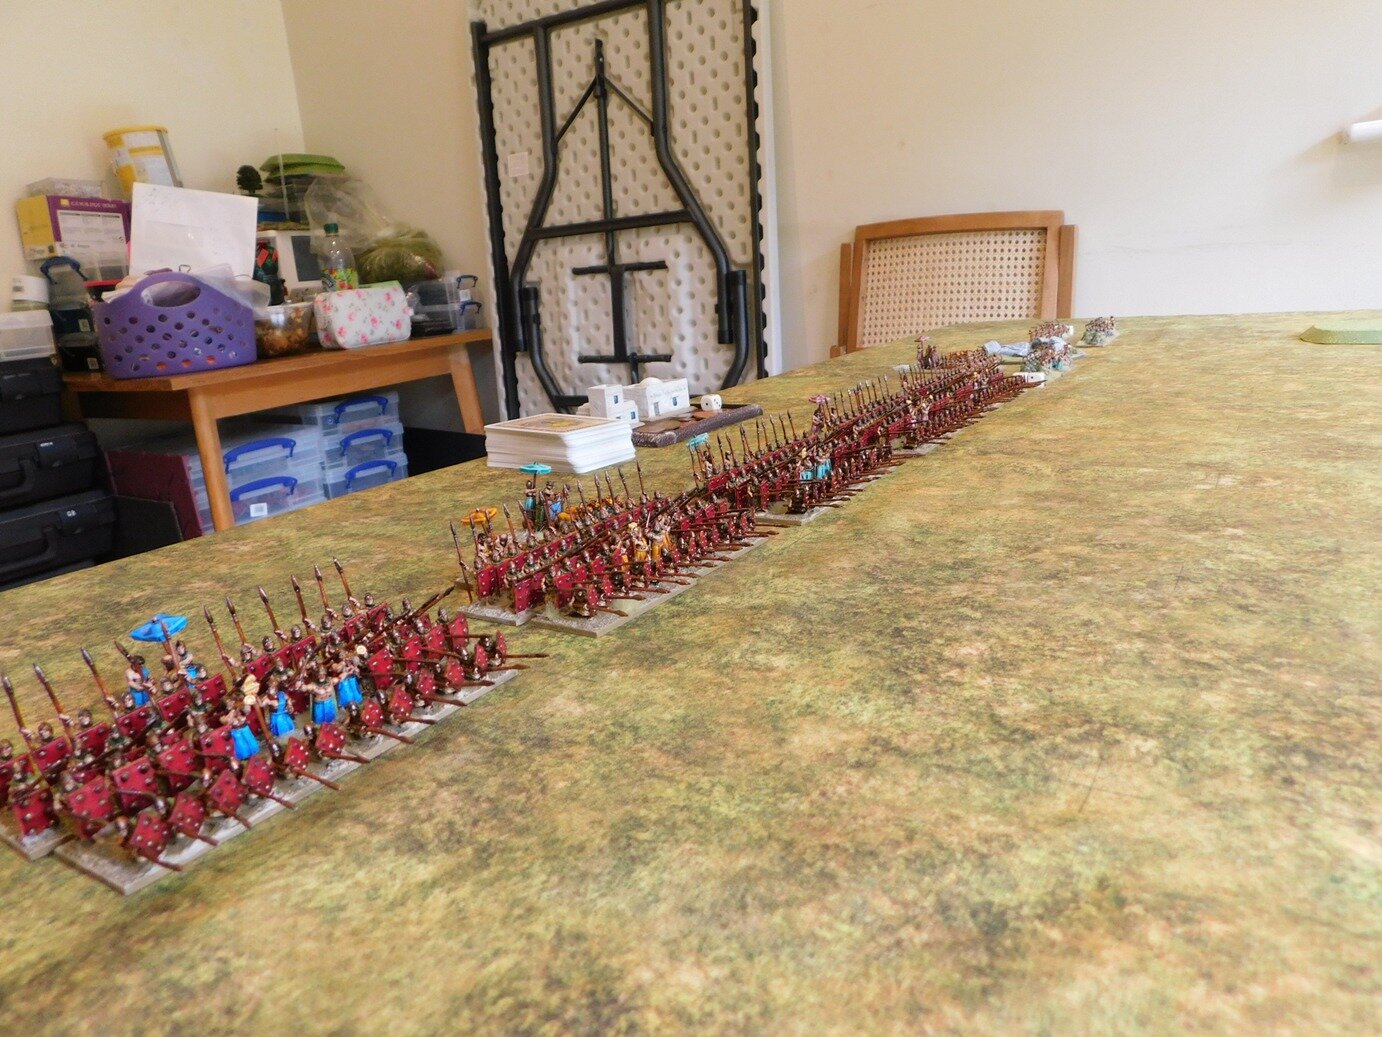
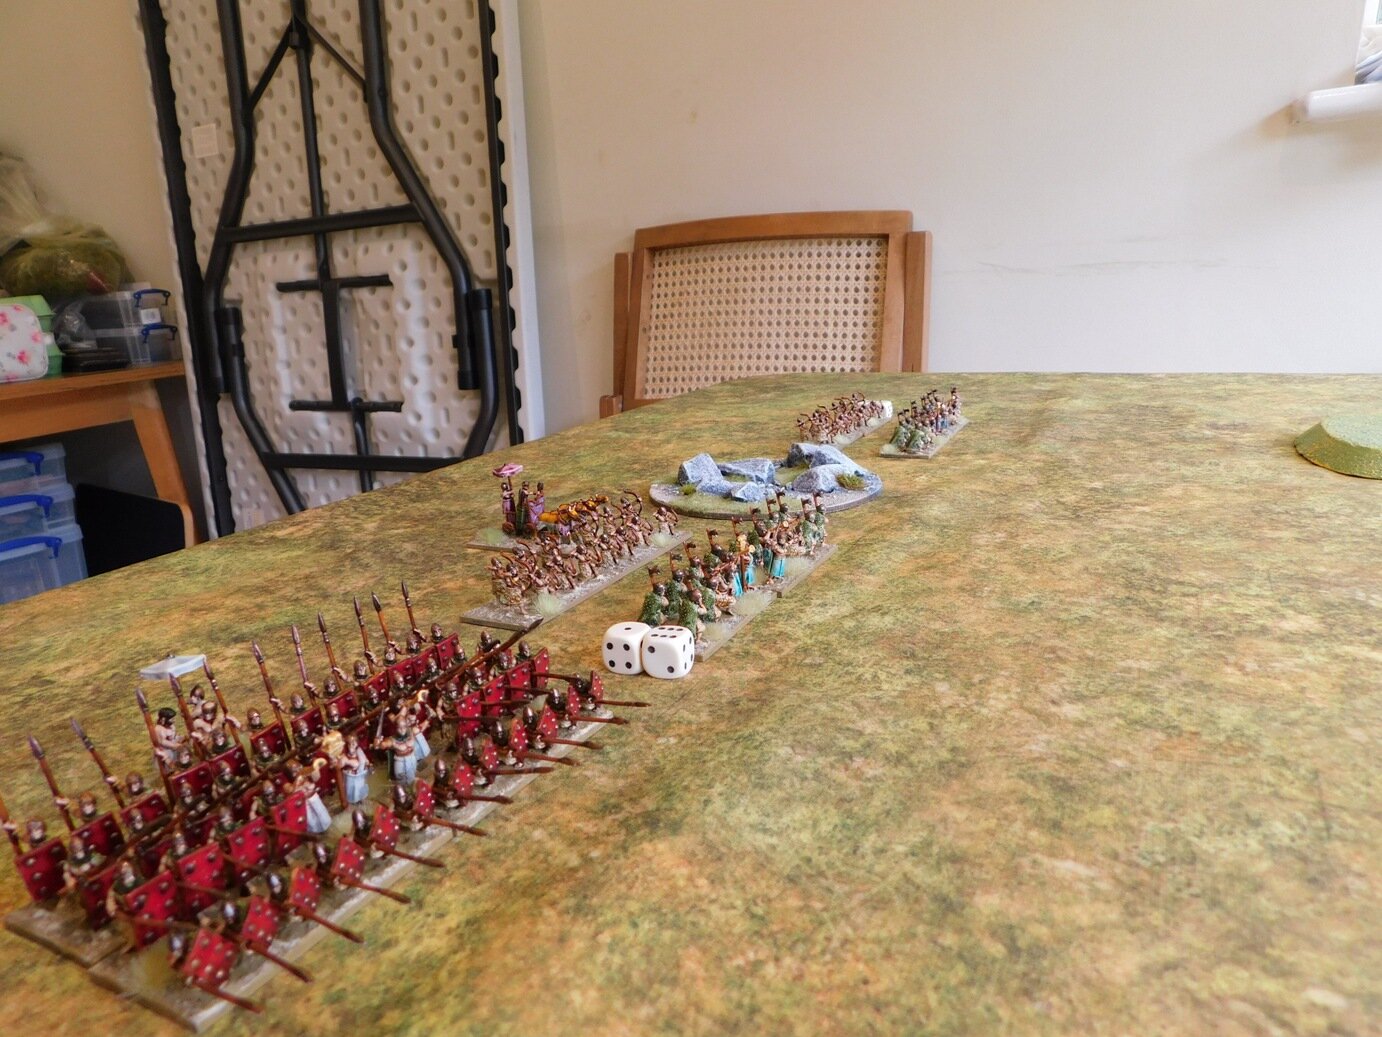
That meant that the Legions had to do the work and won the day by ganging up on the individual phalanxes and taking them from two sides at once. Oh, and the Equites Sagittarrii light horse took the enemy camp as well, which helped!

TTS AAR: No Revenge for the Indians

Regular visitors will know that a couple of week’s ago, my Classical Indians were defeated by an 11-phalanx strong Hoplite Greek army played by friend Bevan. Now it was time to get my revenge with a re-fight of the same battle.

Opening stages: so far everything is going to plan!

Well that was the plan!

Unfortunately things didn’t go at all to plan, and I ended up getting beaten more comprehensively than at our last encounter. Once again my massed longbow fire just failed to break his deep units, often getting to the stage of double-disordering but then not managing the extra hit needed to break them, but this time my impact troops suffered from terrible cards just at the point of impact, when it mattered most.

Just before the two battle lines came together

Although the game, as always with To The Strongest, was great fun, my troops were then gradually ground down by the remorseless space invaders from Greece!

Here’s a few more pictures of the game:

Classical Indians vs the Greeks

Restrictions lifted on Sunday, first face-to-face game on Tuesday!

My Classical Indians would face off against a Hoplite Greek army fielded by Bevan…and what a Hoplite Greek army it was: ten units of Hoplites and one of light infantry. The rules used were To The Strongest, a grid-based game, so with my table being twelve squares wide, Bevan could form a space-invader like line of hoplite units and just advance forward, spearpoints out!

So many hoplites that I had to draft in some Summerians as proxies!

On the other side of the battlefield, my Classical Indians consisted of five units of longbowmen as the softening-up element, with a hard core of two escorted elephant units and two heavy chariot units as the “finishers”. Reserves were provided by the Maiden Guard.

Maiden Guards, Elephants, Longbowmen

The Game

As predicted, the Greeks deployed in a largely straight line and spent the early stages of the battle manoeuvring around the patches of scrub and palm trees in order to keep their frontage solid as they came into longbow range.

opening stages

At one stage it did look as if the cards had opened up a couple of holes in the hoplite line and, given a little more lateral space and luck, I could perhaps have got one of my heavy chariot units through a gap and into his rear, but Bevan just managed to block my path on both occasions.

I really wanted to get through that gap!

Finally the Greeks (and pseudo-Greeks!) arrived into longbow range, and my men opened fire. I was determined not to end the game with a camp-full of spare ammunition, so shot for all I was worth.

The Greeks staggered slightly, but came on. There were so many enemy units in an unbroken line that I couldn’t concentrate my fire, so although I could disorder or even double-disorder half his unit, I couldn’t quite break any.

The View from the Other Side

It was time to commit my melee troops, so forward trundled the elephants and chariots, wherever possible aiming at already-disordered enemy units.

Helicopter Viewpoint

Unfortunately, things followed the same pattern again: I disordered or double-disordered the four units I hit, but couldn’t quite manage the break, apart from one raw hoplite unit that did flee the field…but this was soon, space-invader like, replaced by another.

Damage, of course, was being done to both sides, but my troops only had two hits each as opposed to his three. I lost a unit of elephants (to what looked like the Spartans, no less), evening things up again, and the battle became one enormous melee.

Bye bye Nellies!

My men (and maidens) resisted bravely for a couple of rounds, another unit of hoplites was destroyed by one of my chariot units, but the writing was on the wall: I hadn’t done enough damage in the missile-fire stages of the game to win the grinding melee that followed.

I started steadily losing units, victory coins and eventually, the battle itself.

Aftermath

The game was actually a lot closer than the above implies. At one stage, I did actually manage to break his line with some chariots and had two more of his hoplite units on double-disorder. Unfortunately, the chariots couldn’t turn and get into the enemy rear in time, and I just couldn’t get the extra hit I needed to break the spearmen. I did use up all my spare ammunition though!

So a close run thing despite the apparent disparity in sides. My Classical Indians will lick their wounds and have another go in a few week’s time!

The far chariot unit has broken through, but too late to alter the outcome of the battle

TTS AAR: Marian Romans' First Outing

With the varnish on the first two cohorts of blue-shield legionaries literally still drying, it was time to take the Marian Romans out for their first game of To The Strongest.

Looking at their list, the Romans have three basic options dependent on their commander: Caesar (Spain and Gaul); Pompeii (the East) and Sulla. My choice was to field a Caesarian army, mainly because I already have Gauls so wouldn’t need to paint any of them. My list was therefore as follows:

  • Proconsul

    • Two units of legionaries (one veteran)

  • Legate

    • Two units of legionaries (one veteran)

    • One unit of Cretan Archers

  • Legate

    • Two units of legionaries (one veteran)

    • One unit of legionary artillery

  • Allied Cavalry Leader

    • Two units of veteran Gallic cavalry

    • One unit of horse archers

I’m thinking that perhaps the Gallic cavalry should, if veteran, more properly be Germanic cavalry, as the Gauls fighting for Caesar didn’t seem to be very good whereas the Germans were very effective, but that’s something I can rectify in due course: for this battle they were hyped up on Getafix’s potion!

Kavan, my opponent, chose to field a Syracusan army. Not strictly speaking contemporary, but very much the sort of army the Romans had faced in the years leading up to the Marian period. His force consisted of:

  • Commander-in-Chief

    • One unit of Bodyguard Hoplites

    • One unit of Light Infantry

  • Commander

    • Two units of Gallic mercenaries

    • One unit of mercenary Greek cavalry

  • Commander

    • Two units of Syracusan Hoplites

    • Two units of light infantry

  • Commander

    • One unit of Syracusan Hoplites

    • One unit of Syracusan cavalry

    • One unit of light infantry

Initial Deployment

I deployed the Romans in a long line of Legionary bases, with the Gauls on the left wing.

The Roman Battle Line

A friend had warned me that being very much an infantry army, my flanks were very vulnerable, so although I felt my left was covered by the Gallic cavalry, I was very much aware that my right was somewhat ‘floating’, so just after the picture above was taken, I moved the legionary artillery onto the small hill behind the 9th/10th Cohorts.

Kavan also deployed in a long line but, obviously reading my mind, heavily weighted each flank i.e. his Gallic mercenaries were in the centre along with the bodyguard hoplites, but he had two hoplite units on his far right and one on his far left.

That’s an awful lot of syracusans

Battle is Joined

I opened proceedings by advancing slowly forward, holding my line. The Syracusan centre, on the other hand positively leapt forward. My Gallic cavalry annoyingly hung back, but this was countered by the fact thatb his right-flank hoplites were also slow to get going.

syracusan centre advances forward speedily

syracusan centre advances forward speedily

As the two centres approached each other, the action actually began on my right wing where, as predicted, the Syracusan cavalry attempted an outflanking manouevre, backed up by a unit of hoplites and some light infantry. The 9th/10th Cohorts turned to face them and the artillery opened fire.

The Syracusan cavalry were disposed of by the artillery (superb shooting!) and, for the rest of the game, the 9th/10th Cohorts would hold off the hoplites despite being attacked in their rear by more Syracusan light infantry. At one stage, the legionaries survived four consecutive rear attacks whilst disordering the hoplites in front of them. Plaudits and rewards all round!

cohorts IX and X hold the right flank against all comers

On the left wing, my Gallic cavalry were keeping the two enemy Hoplite units occupied, using their superior mobility to avoid a head-on clash and occasionally managing to threaten their flanks even if contact couldn’t be made. Two veteran cavalry units for two Hoplite units seemed a fair exchange to me, so it looked as if the action was going to be decided in the centre.

the two centres are about to clash

the two centres are about to clash

The legionaries and enemy Gallic mercenaries clashed first. I was expecting my pila to make a difference, but they didn’t really have much effect at all. The clash became a grinding melee where the quality of my legionaries was perfectly balanced by the size (and therefore extra hits) of the Gauls.

Slightly to the left of the above, my 1st/2nd and 3rd/4th Cohort unit were faced by two units of Syracusan light infantry. I just couldn’t get rid of these: every time I charged forward, they evaded, and I soon found my troops well in front of the rest of the centre. Kavan had done to me what I had done to his two Hoplite units on the far left!

cohorts I to IV distracted by light infantry

cohorts I to IV distracted by light infantry

Eventually, however, one of his light units were caught and disposed of, leaving my legionary unit to turn either for the enemy camp or back towards the centre to drive into the back of the enemy who were, bu now, hard pressing my men there.

the centres have now clashed!

I decided that the Roman thing to do was to go to the aid of the legion, so two cohorts of fresh Roman infantry drove into the back of the Celtic mercenaries, smashing them from the table.

This proved too much for the Syracusans, who had by now lost enough troops to force a retreat. It had been a narrow victory for the Marian Romans.

Aftermath

Lots of lessons learnt about the capabilities of the Marians. I was very pleasantly surprised by the effectiveness of the Roman artillery, although I do feel that that was down to the cards they turned rather than any innate ability. On the other hand, I was disappointed with the Roman pila: the extra attack card was useful, but not decisive.

What was without doubt the key to victory, however, was the manouevrability of the Roman cohorts along with their staying power, particularly the three veteran units. I foresee interesting times ahead, particularly as the next fight will be with the Sassanids.

TTS AAR: A Very Narrow Victory

Time for the weekly battle with Daughter #1’s boyfriend K, trapped with us for the duration of lockdown.

We’d left it a bit late in the day to start (family quiz evening!) so elected to play To The Strongest. I would take the Neo-Sumerians, K would play the Athenian Hoplite Greeks. This is one of our favourite combinations: both sides consisting mostly of deep spear-armed blocks of infantry.

In TTS, there are several variants of the basic Sumerian army. In chronological order, they are Dynastic Sumerian, Akkadian and Neo-Sumerian. I had chosen the Neo-Sumerians because although their spear blocks are almost all raw citizen militia , they do have the ability to field a sizeable Royal Guard of archers and axemen.

My plan, therefore, was to keep my spearmen away from the mincing-machine of his Hoplites whilst the Royal Guard knocked out as much of the rest of his army as possible. I could then surround the Hoplites and polish them off.

Here’s what actually happened in the form of a pictorial report…

And that was the battle won, with only one of my coins remaining!

Aftermath

Well that was a very close run thing!

The Royal Guard performed appallingly, and it was really only the fact that K kept getting his generals killed that allowed me to win the day. K lost three officers, take two away and he would have had four coins remaining as his Hoplites made mincemeat out of my militia. As it was, I scraped home with only one coin to spare.

Another great game!

Two Games of To The Strongest

Another two lockdown games of To The Strongest with Daughter#1’s boyfriend, who is staying with us for the duration.

This time we ditched any pretense of involving the distaff side of the family: leaving them to watch The Queen’s Corgis on Netflix or Amazon or one of the other multiple streaming services that we seem to have adopted over the past few months, as we men got down to some serious gaming.

As this was our third session of TTS, I wanted K. to experience something a little different to the largely “deep units on both sides” games that we’d been playing so far. I therefore mocked up a Sarmatian army from my Sassanid Persians: four units of veteran heavy cavalry with lance and bow represented by cataphracts (represented by, not counting as!) and four units of standard heavy cavalry with lance and bow represented by clibinarii. There was also a unit of horse archers in there somewhere too.

K would take a Syracusan army: a core of four Hoplite units, one bodyguard; a mercenary command with a couple of units of Celts; and then a sprinkling of light infantry and raw cavalry to add flavour. It was, I explained, the first time that the Cretan Archers (see post from a couple of days ago) had been on the tabletop, so he was to expect them to perform extremely badly indeed!

“Why are all your men on that side of the battlefield?”

We deployed our troops, and K immediately noticed that I had heavily weighted my left flank, leaving many of his units with an open battlefield in front of them. He queried why I had done so, and I kindly explained that he would find out in a few minutes.

The reason, of course, was that I was going to try and smash his weak right flank to pieces and then wheel round and roll up his line like a yoga mat before his slow, left-flank units could get in on the action.

The first phase of my plan went, well, according to plan: one command of veterans and one command of standard cavalry did indeed clear K’s right flank from the table, leaving things looking like this:

Tough love!

Some of you might suggest that it was perhaps a little harsh of me to take advantage of the lad’s inexperience in this way, but I did explain exactly what I had planned and what I thought was going to happen as I did it: making sure that he would understand what was going on and be able to either counter or employ the same tactic in the future.

Back to the battle.

As a command of clibinarii duly held off his rampaging Celtic mercenaries, my cavalry duly wheeled round and, in text book fashion, slammed into his flank and, in one unit’s case, went for his camp.

Cretan Archers fulfilling their first-game destiny

Syracuse has fallen!

K began shedding victory coins right, left and centre, and the day was soon mine.

Game Two

As that game hadn’t taken very long, we swapped sides and prepared to do battle again.

I was expecting K to try and copy my refused flank tactic of last time, so determined that I would use an advance in echelon tactic to try and disrupt his plans. As it happened, K deployed his men evenly over his side of the table, so after I had made my first move, the battlefield looked like this:

On his right flank, K advanced his cavalry forward to meet the two units of Celts coming towards him over the hill. This left his horse archers to hold off the mercenary Greek cavalry coming through the pass.

This turned out to be a bit of a mistake as, admittedly with a bit of luck, my cavalry rapidly dispersed his light horse and found themselves in a fantastic position on the flank of one of his commands.

By rights, his horse should have been able to turn to face me, and then a normal face-to-face combat would have occurred, but K managed to draw not one, not two, but three Aces in succession for activation: his horse weren’t moving anywhere!

By rights, I should then have been able to crash into his flank and roll up both units rather pleasingly before going on to sack his camp: seven of his nine victory coins should have been mine. Again, however, a weird series of cards meant that his cavalry, although they wouldn’t turn to face me, were able to hold me off for the duration of all his Aces. I did eventually destroy both units, but not before events on the rest of the field decided the day.

Battle was then generally joined across the rest of both lines, with K’s lance armed cavalry attacks compensating for the depth of my foot units.

the first cut is always the deepest!

I kept expecting my horse to roll up his cavalry and win the game but, as I said above, it kept failing to happen, and gradually my foot units began to lose the day. A lost general sealed my fate, and the turn after my horse had finally rolled up those cavalry at the back, I lost one victory coin too many and the day was K’s: a grinding triumph for the Sarmations.

K was naturally chuffed to bits to get his first victory. The only thing that now puzzles me is where he’s going to sleep tonight…

A Bit of Bank Holiday Painting

I managed to get a bit more painting done over the bank holiday weekend: just a few bits and pieces rather than anything major.

First up, a unit of Cretan Archers for my Greek and Macedonian armies:

These are from Museum Miniatures’ excellent Z Range of CAD figures. Really nice and highly recommended.

Then there are a couple of officer stands for For King & Parliament: a General and a Colonel.

These are the always-dependable Essex figures in 15mm. I think I went bit over the top with the costume on the Colonel’s flag-bearer, but have compensated by making the General’s costume quite muted.

AAR: Smash of the Titans!

So #1 Daughter’s boyfriend had been roped into cooking the Easter Roast, which left me no-one to play with except for #2 Daughter.

She felt that she could manage another battle, but only if it had “monsters and aliens and stuff” in it.

Not a problem my dearest fruit of my loins: time to make To The Strongest literally fantastic by breaking out my Legendary Greek figures.

I would play the Sumerians, #2 Daughter would take the part of Poseidon leading a contingent of Hoplite Greeks spiced up with few “monsters…” etc.

In effect, this meant that she fielded (nearest to furthest in the picture above) a unit of Pegasus horse that could ignore terrain penalties; two units of Centaur cavalry (one horse archers, one cavalry); a unit of Minotaurs counting as axemen; and two units of monsters: the Hydra, the Erymanthian Boar, the Chimera, and the Medusa (treated as elephants).

The Sumerians remained unphased by this display of divine horrors:

The Battle Begins

The game began with one of those weird series of multiple Aces appearing on each side, with the result that although the lines crept slightly closer together, the only interesting event was the Hydra and Chimera bounding forward to attach the Sumerian left flank.

Very sensibly, the slingers ran for it…and here #2 Daughter made a mistake. Instead of crashing through the poor terrain, or lurking in its lee, the Hydra and Chimera decided to go round it. Not being very manoeuverable, however, they got stuck with their rear ends sticking out!

This would prove to be a very inviting target for the, er, pink Sumerian spearblock, and they would eventually charge the two monsters in the rear and do enough damage to send them straight off the table, therefore negating the regenerative abilities that I had assigned to both (automatically regenerate from disordered when activated).

The two battlelines then got on with the business of smashing into each other, each advancing forward as fast as they could.

As Sumerian commander, I sent in my battlecars first: determined to soften the Legendary Greeks up a bit before committing my infantry.

This was all going nicely, with the Centaur horse archers eradicated when they failed to evade, but I had forgotten about the terrain-ignoring Pegasus cavalry: which snuck around my flank and threatened to roll up my entire line!

Fortunately, great Zeus was obviously determined to make sure that his somewhat soggy brother was humiliated, and the flank charge only managed to KO one unit of battlecars before a spear block managed to get forward fast enough to force the flying horses to evade beyond the trees.

Unfortunately, the other two units of battlecars believed in a different divine panoply, and were destroyed by the Hoplite unit backed by Poseidon himself and, a bit unexpectedly, the Centaur cavalry. Things were looking a bit dicey on my right flank, but I had the infantry brigade behind ready to stabilise the situation.

The action now swung to the other side of the field, where the Minotaurs had been easily dismissed: obviously their tales of martial prowess were complete bull! I had, however, lost my Axemen, so the situation looked like this:

Zeus intervened again, and somehow I managed to dispose of the Medusa and the Boar, and get my spearmen back across the field and into the rear of what had been the Minotaur-led Hoplites.

Their loss proved too much for the Legendary Greeks to take, and the field of glory was mine.

Aftermath

A most enjoyable game which, I must confess, that I won by sheer luck of the cards. #2 Daughter, who is not yet old enough to drive, made only one tactical error, at the beginning, and otherwise came close to annihilating an entire flank which would, I think have given her victory. As it was, I was only one coin behind her in terms of defeat.

I think I might actually make a serious attempt to define some characteristics for the Legendary Greeks, if only because it’s nice to get some unusual figures on the tabletop.

Right, off to the Temple of Zeus to give thanks…

A Second Lockdown Game of To The Strongest

We’re still in coronavirus lockdown in the UK: banned from leaving the house except for essential trips. For most people, that means no gaming or, at best, some kind of online get together. I, however, am lucky enough to have daughter number one’s boyfriend staying with us for the duration: lucky because (1) he likes to cook and (2) he has discovered that he enjoys wargaming.

Our second game was To The Strongest again: it’s grid-based tabletop and simple-yet-subtle mechanics make it ideal for a new gamer to pick up quickly.

This time, I would take a Gallic army consisting of large amounts of hairy-arsed Celtic warriors and face off against an Athenian Greek Hoplite army consisting of large amounts of, well, hoplites.

Gauls

Greeks

The Greeks set up first: heavily weighting their right flank. At this point I realised that perhaps I should have mentioned to my novice opponent that hoplites can’t move diagonally to the left, but decided to just ignore that rule for the moment.

My Gauls were fairly evenly spaced out, but my noble cavalry were on the left i.e. facing two unit of hoplites with very sharp pointy spears! This was no good, so I decided to try a switcheroo gambit and move my cavalry right over to the other side of the field, leaving behind the warband that accompanied them.

The Switcheroo Begins

This would hopefully isolate his two units of hoplites on the far side of the table.

Meanwhile, both battle lines lurched towards each other, the Greeks behind a protective screen of light infantry.

The game then developed into three different battles.

On my left flank, the single warband faced off against the two hoplite units who had actually managed to advance forward much faster than I had expected. Although my warband did achieve one flank attack, this was largely unsuccessful, and I was soon under a lot of pressure as the Greeks got themselves sorted out and threatened to overwhelm me with the two-on-one advantage that they had.

In the centre, meanwhile, the main bodies of the two armies came together in a series of thumping clashes: deep unit versus deep unit. The Greeks took full advantage of their light infantry: using them either to soften the Celts up before contact, or to retreat behind if they suffered a disorder. The advantage would swing backwards and forwards between the two sides throughout the rest of the battle.

On my right flank, my light infantry had managed to see off his horse archers, but a warband was having real difficulty dispatching the rubbish Greek cavalry. Fortunately, my cavalry arrived after their pell-mell gallop across the back of the battlefield, and prepared to sweep all before them as they rounded the corner of some rocks and lined up on the Greek battle line’s flanks.

All that stood between them and certain victory was the lone unit of Greek peltasts that, so far, had hung back and stayed out of trouble.

Cavalry, bottom right, lined up to roll up the Greek line. Only the peltasts are in the way.

Could I get through the peltasts? Not in a month of Sundays! My grand plan blocked by a unit of men who only thought they weren’t light infantry!

Anyhow, that meant that although I had won the right flank, I was losing the left flank, and honours were just about even in the centre. A Greek hoplite unit finally broke through my line and captured my camp, one of my warbands threatened to do the same to the Athenian camp. Units were breaking on either side until we both had just two coins left: the next unit to break would decide the game.

It was the Greeks who had the initiative. I was in real trouble on my left flank, with a couple of double-disordered warbands who would go with one more hit. My opponent reached for his pack of cards: all he needed to do was to send his men in diagonally to hit me: 2+ to activate becomes 3+ for a difficult move becomes 4+ because your hoplite units are deep.

So that was the end of the Greek offensive and, on my subsequent turn, I managed to finally kill the peltasts and win the game!

Aftermath

Another great game of TTS, with the daughter’s boyfriend coming within Ames Ace of beating me.

Here’s a complete gallery of the game:

Robert Avery

First Painting of 2020

If you’re a regular visitor to this page, then you’ll know that I have recently built a 15mm Sumerian army using Museum Miniatures’ superb “Z Range” of CAD-designed figures.

I was browsing their website wondering whether to go for their Z-range Classical Indians when I noticed that they had also released some Z-range Greek Hoplites. Now I need at least another three Hoplite spear blocks, each 48 figures strong. I actually have 48 figures from another manufacturer waiting to be painted, but doing two of the blocks towards the end of last year (i.e. 96 Hoplites) had quite put me off painting them. Those cuirasses take ages to do properly.

So I had a look and noticed that Museum produced a set of Hoplites with no clothes on and another with only a little kilt to cover their, er, dignity. Ideal: Z-range figures with no cuirass to paint! One odd thing: the Hoplites come in mixed packs of kneeling, thrusting and standing i.e. you can’t buy 48 of the same pose. Maybe I could have rung up and seen whether I could have had some custom homogeneous packs run up for me, but I thought I’d give the mixed unit a go.

Hmmm…not sure.

Good points: easy and quick to paint up, nicely animated, shield transfers from Little Big Man Studios are superb.

Bad points: I prefer my Hoplite blocks to have all the same pose, and somehow the kilts made me paint everything in prime colours instead of varying the crests and kilt colours more. At least my daughter likes my “rainbow Hoplites”!

Feel free to let me know what you think. I still need another couple of Hoplite blocks, and the Museum Miniatures ‘nearly nude’ range does make it easy to do…

An Afternoon of "To The Strongest"

Second weekend of the year and I’ve managed to get in an afternoon of “To The Strongest”.

Bevan and I managed two games. The first was a grinding clash between two quite similar armies: I played the Akkadians, Bevan took an Athenian Hoplite force. Each side had a core of a number of deep blocks of close-formed infantry (Spearmen for the Akkadians, slightly superior Hoplites for the Athenians); but the Akkadians had their veteran four-onager heavy chariots plus Royal Bodyguard axe- and bowmen versus a mix of low quality cavalry and lights for the Greeks.

As mentioned, the game was a truly grinding clash. The Akkadian chariots, out on their right wing, threatened to curl around the Athenian left flank, but began the game seemingly unable to move. This meant that the Greeks could come forward and join a general line-against-line engagement that slowly started to bow the Akkadian battle line backwards.

But somehow the Akkadians held on. The Royal Bodyguard axemen did stirring work, the line began to straighten slightly, and then the heavy chariots finally got going and smashed in from the right. In the end, this was a colossal victory for the Akkadians, who didn’t lose a single unit and managed to capture the Greek camp. Here are some pictures:

For the second game, I took the Ancient Britons, with Bevan playing the Sassanid Persians.

The Brits had a huge chunk of (somewhat unwieldy) warriors in the centre of the field, and large numbers of light chariots/cavalry and infantry on each wing…so many lights, in fact, that (much to Bevan’s surprise) his all-horse Sassanids were matched in terms of scouting points.

Looking at the set up, I was confident of victory: there was no way his incredibly small force was going to beat the Ancient British steamroller!

Unfortunately, Bevan and the Persians begged to differ, and what followed was the dissection of my army with surgical precision. First my lights were stripped away unit by unit as I struggled to get my warriors moving, and then enough of those warriors that did move were beaten for me to lose (given that I’d lost a lot of coins through my lights). It was a superb demonstration of how to use a horse archer and cataphract based army.

Fortunately I did manage to kill at least one of his units, so technically the afternoon as a whole was to my advantage, but the way my Brits were annihilated didn’t make it feel so!

Here are some more pictures:

TTS AAR: The Sasanids Ride Out!

The final game in my recent set with Neil was my Sasanid Persians versus, again, the Pyrrhics.

This promised to be quite interesting: an army composed of extra heavy cavalry and horse archers against a mostly spear and pike-armed force.

In the event, however, it turned out to be quite a mundane battle. My horse archers quickly got around his flanks and started shooing anything that moved. In the centre, I held back until his heavy foot advanced past a line of hills running down the centre of the battlefield, leaving only one unit each side to guard their flanks.

As the two main lines came together, the single unit of heavy clibanari that I had put with each horse-archer command was just coming into play, pinning his flank units in place as the lighter cavalry shot at and charged their flanks.

With his flanks crumbling, his main line getting nowhere, and horse-archer nipping at his Hoplites’ heels, Pyrrhus decided that discretion was the better part of valour and surrendered!

A workmanlike victory for the Sasanids.

Even More To The Strongest

More pictures from a recent day of To The Strongest gaming.

First game was a replay of the last: me and my Ancient Britons vs Neil and the Pyrrhics.

Unfortunately, this time he protected his flanks well, and kept his battle line very closely together. I tried the same tactics as before: warbands in the middle, outflank with the chariots, but this time just couldn’t get through.

On my left flank, he advanced as quickly as possible and used his cavalry to drive my chariots back until they were forced off table. His cavalry were then free to take one of my camps and then turn back towards the rear of my line. meanwhile, the elephants and lights on his left flank were doing exactly the same thing: drive my lights back with charges that might not actually connect, but do force my lights to evade and evade until they are no longer relevant to the main action.

In the centre, my infantry were held by his Hoplites and pikemen until his cavalry appeared in my rear…and that, as they say, was that!

A loss to the Ancient Britons.

Robert Avery

More To The Strongest

Just to leaven the flow of I Ain’t Been Shot, Mum! battle reports that have been flowing through this site, here are some pictures of another day spent playing the Ancients ruleset To The Strongest.

One of the great things about the game is how fast it plays, so an afternoon’s gaming can often involve three games of TTS…and so it was the last time that friend Neil came around to play.

The action began with Neil playing a Pyrrhic army against my Ancient Britons. Not exactly contemporary or contemporaneous, but not spectacularly unbalanced either.

I placed my warbands in the middle of the field, and my massed chariots on either flank. Neil lined up his Hoplite and pikemen on his right flank, his cavalry in the middle, and his elephants and light infantry on his left wing.

Unfortunately for Neil, his Hoplites took too long to advance forward, which allowed me to engage and pin his centre whilst I sent a mass of chariots around behind his left flank. This led to me rapidly capturing his camps, and then threaten the rear of his main line: a victory to me.

Here are some more pictures of the game:

TTS Battle Day Game 3

Onto the third battle of the three that took place as part of a TTS battle day with friend Bevan. Regular visitors will know that by this time I was down two-nil, so rather keen to finish the day with a victory! The sides would be Pyrrhic (played by Bevan) and Ancient British (played by me).

The Ancient Brits are a favourite of mine: in fact, they were the army I used to use when I played WRG 6th competitions in 28mm some thirty years ago…when your chariots were known as the Ancient British Panzer Division.

Under TTS, the Ancient British have an even greater proportion of their army as light chariots than under WRG 6th, so I decided to keep things very simple and employ that well known AncBrit tactic known as “the horns of the Highland Cow”!

This actually worked surprisingly well. My light troops on either flank overwhelmed his light troops through sheer weight of numbers and, most pleasingly, before his Hoplites could start trying to chew through my warbands.

As my chariots curled around onto his rear, the Pyrrhics realised that this was not going to be a Pyrrhic victory so much as a Pyrrhic disaster, and surrendered.

End of the day score: Bevan - 2, Me - 1 .

A great days gaming with what is a delightful little rule set!

A To The Strongest Battle Day

Friend Bevan and I took full advantage of the recent bank holiday to play a few games using the To The Strongest (TTS) rules.

TTS is played on a grid, so no measuring, and activation is by playing card: you need a basic 2+ or 3+ to activate a unit dependent on the difficulty of what you want to do and then, if successful, have to get over the card drawn to activate that unit again. As I said, a fast-play set of rules that give fun battles!

First up were a couple of my 15mm armies: the Sasanid Persians (Bevan) versus the army of Pyrrhus (me).

This game involved an army composed almost all mounted troops (the Sasanids) versus an army of mainly hoplites and phalangites (the Pyrrhics). I was determined to keep my battle line together, use my lighter troops on the flanks, and advance space-invader-like across the table until I squished his troops against their edge.

Unfortunately, although I kept things together for the first two thirds of the game, one of my flanks crumbled, letting some of the enemy horse archers through to loot my camps (rookie mistake: I left them unguarded).

Worse, I then succumbed to temptation and let my heavy infantry loose against Bevan’s heavy horse. Although I achieved a bit of short-term success, kebab-ing some Clibanarii units, this split my line and enabled my opponent to start knocking off my units one by one until I ran out of victory coins.

In short, I came on in the old way and was beaten in the old way!

One-nil to Bevan!

More new Hoplites

I’m continuing to build up my Hoplite Greek force for To The Strongest. My target is six units of Hoplites, with each unit being 48 figures strong. That’s 288 Hoplites in all!

I started with 96 Hoplites, added another 48 two weeks ago, and am now adding another 48 making 192 in all. So 96, or two more units to go.

This time, I chose to use Hoplites from Forged in Battle’s 15mm range. They come with shields and spears attached, and although the spears don’t look quite as good as the wire spears used with the Xyston lot, it did save an awful lot of time to have them ready-fitted.

So how do these compare with Xyston?

  • There’s less variety of pose in the FiB pack, but that’s not necessarily a bad thing as Hoplites are supposed to be in formation , so even-Stevens on that one.

  • As mentioned, the spears and shields are integral, so don’t look as good, but save an awful lot of work, so even-Stevens on that one too.

  • Details is comparable, although the hoplons themselves (the shields, darling, the shields) are a little small.

  • The FiB Hoplites are a shade easier to paint: the relief on the panoply is just slightly deeper

So, all-in-all, Xyston edge FiB in terms of quality of sculpt and final look, but the ease of integral spears and shields, and the fact that FiB are slightly easier to paint, more than makes up for it. I shall use both evenly from now on.

Right: time to start on the next 48 of the little blighters!

First of the New Hoplites

To cut a long story short, I am increasing the size of my 15mm Vis Bellica armies in order to play To The Strongest using two VB elements per TTS element.

My Vis Bellica Hoplite Greek army is very powerful: four bases (elements) of Hoplites, four bases of Spartan Hoplites, and loads of light infantry in support.

Unfortunately, however, To The Strongest classifies Hoplite units as “deep”, meaning that I need to field four VB bases to represent one TTS unit…and as most Hoplite armies have a minimum of five Hoplite units, that means I need a minimum of another twelve VB bases of Hoplite infantry, which at 12 figures per base is another 144 figures to paint and base!

It’s also been some time since I’ve bought any ancients, so I thought I’d try a “new” manufacturer: Xyston Miniatures.

They have a wide selection of Hoplite figures, so I chose to get my first unit as Later Hoplites in Linen Cuirass:

These are lovely figures: crisp and largely flash free. The only pain is that the shields and spears come separately: which means sticking 48 shields onto 48 arms, and then remembering to buy a pack of wire spears, cutting them down to size (from a pike-sized 5cm to a Hoplite-spear sized 3.5cm), and then sticking them in place as well. Just adds another session to the process.

The Xyston figures are easy to paint. First undercoat in black, base coat the flesh and tunics, and then carefully paint the cuirass white using the black undercoat to get the detail. Then paint the shield strap in leather; and. the spear and back of the shield in a wood brown. Tip the spears in dull silver, and leave to dry. Then highlight the tunic, and brass the helmet. Front of the shields in white all over (for the moment), highlight the flesh, paint the crest. Done!

Why paint the shields white? To take the decals of course. I used the Little Big Man Studios transfers designed specifically for Xyston shields. They are easy to use, have a wide variety of designs and, as you will hopefully agree, look really good. Again another fiddly bit: after you put the transfers onto the (white) shields, you’ll need to paint the shield rim to get a nice finish. If you don’t get the transfer dead centre, then you’ll have to paint around the design by hand.

So all in all highly recommended. Only another two units to go!