Japanese Staff Cars and the Japanese Gallery Re-Vamped

With everyone sleeping in until gone 11 o’clock this morning, there was time for me to finish off the two 15mm Japanese Type 95 Kurogane Staff Cars that I bought from Syborg 3D printing the other day:

These are absolutely lovely little models that, in the flesh, aren’t as layered as they might appear in the picture.above: the trouble with good cameras that pick up all the detail is that sometimes they pick up all the detail!

Syborg delivered these to me in just three days, and you get both versions in the same pack for the very palatable sum of just £4.

I can’t recommend these enough: just the thing to keep your Japanese staff officer from getting his boots muddy as he drives down the Grik Road!

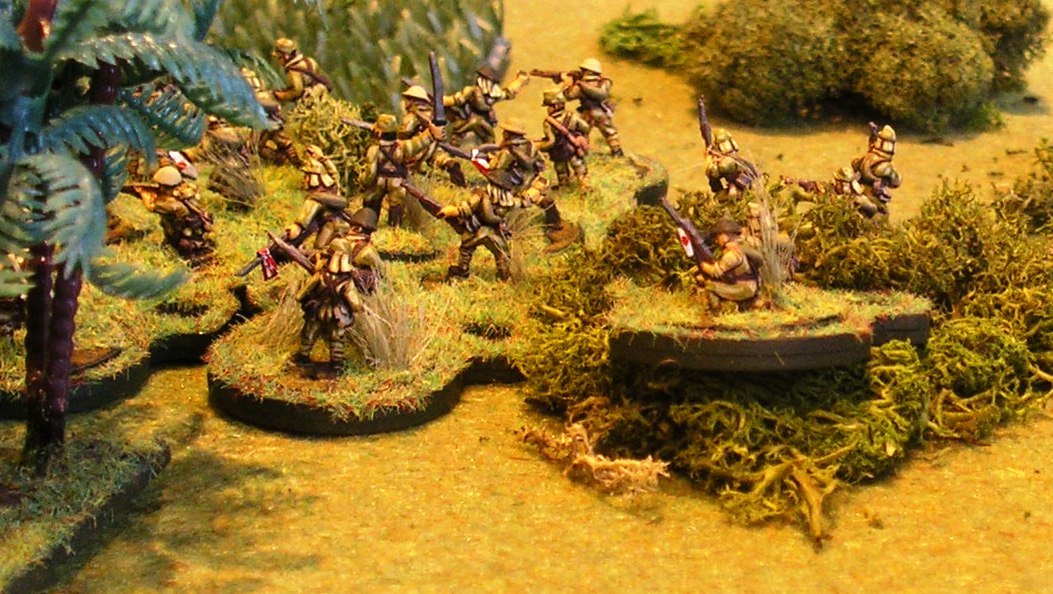
Re-Vamped Japanese Galleries

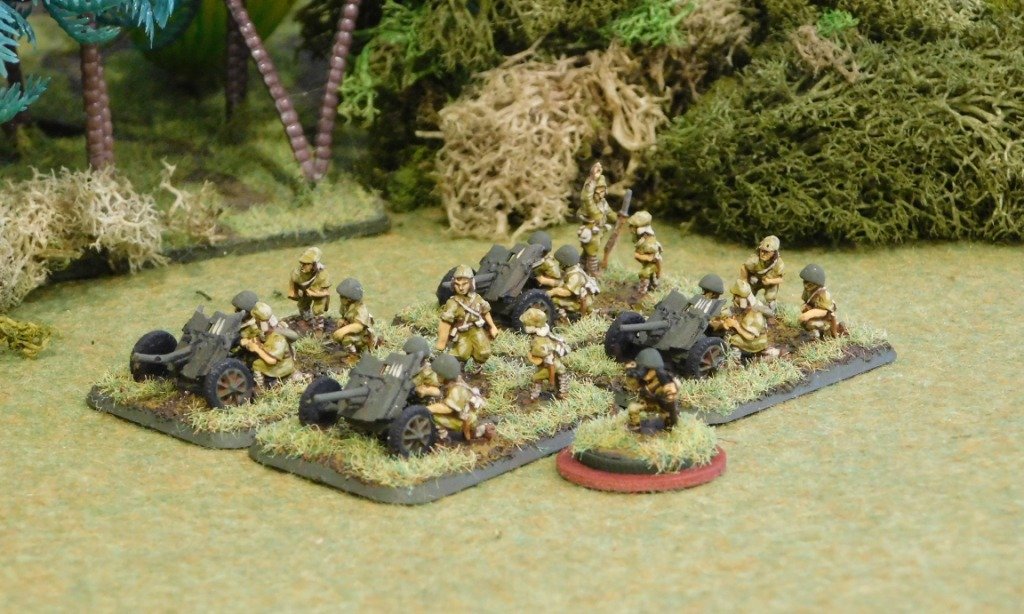
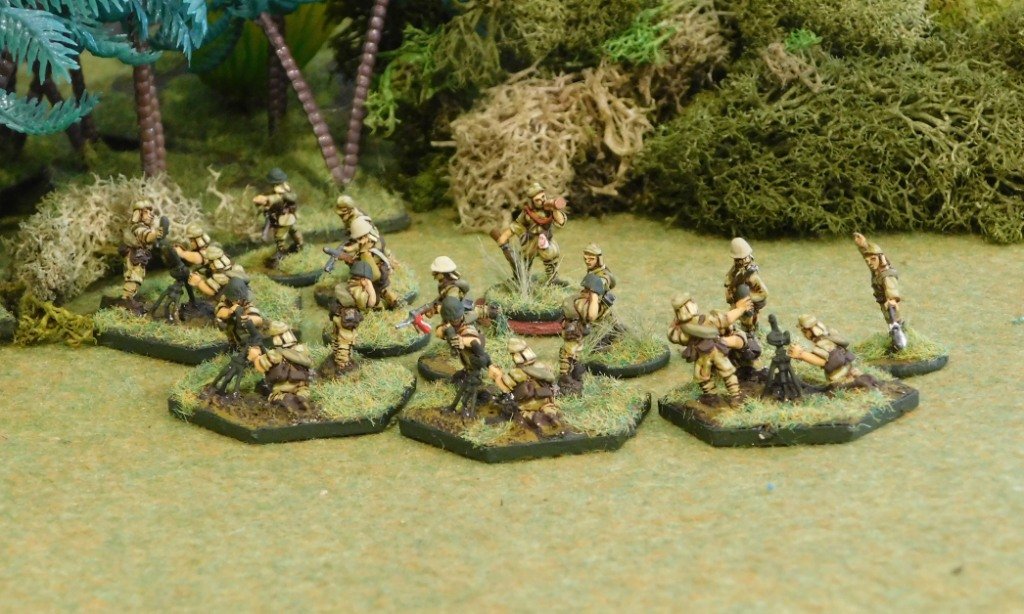
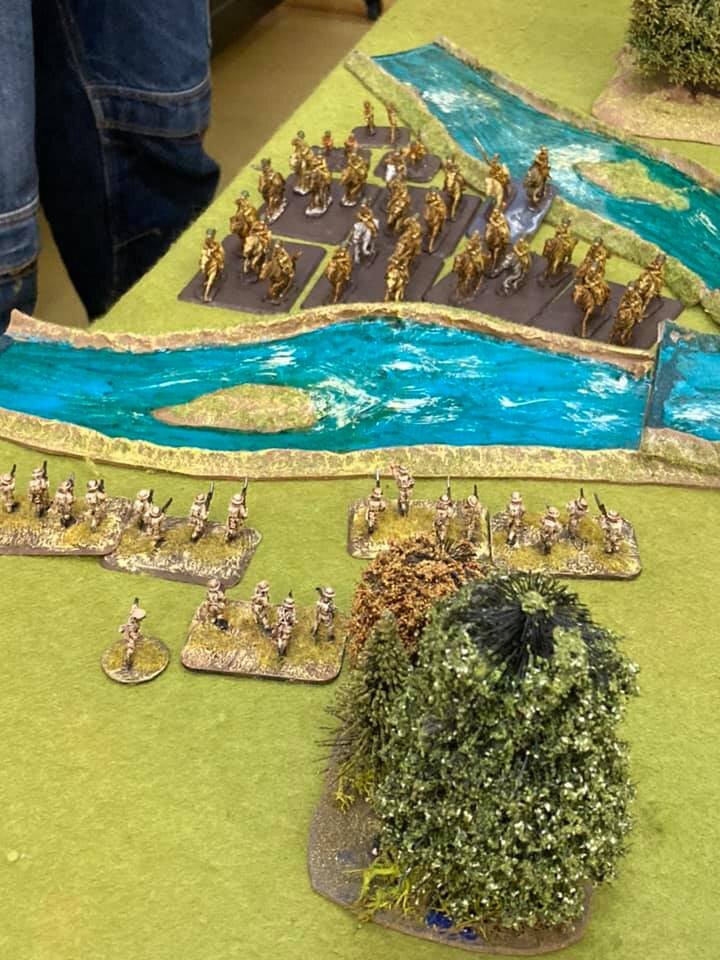
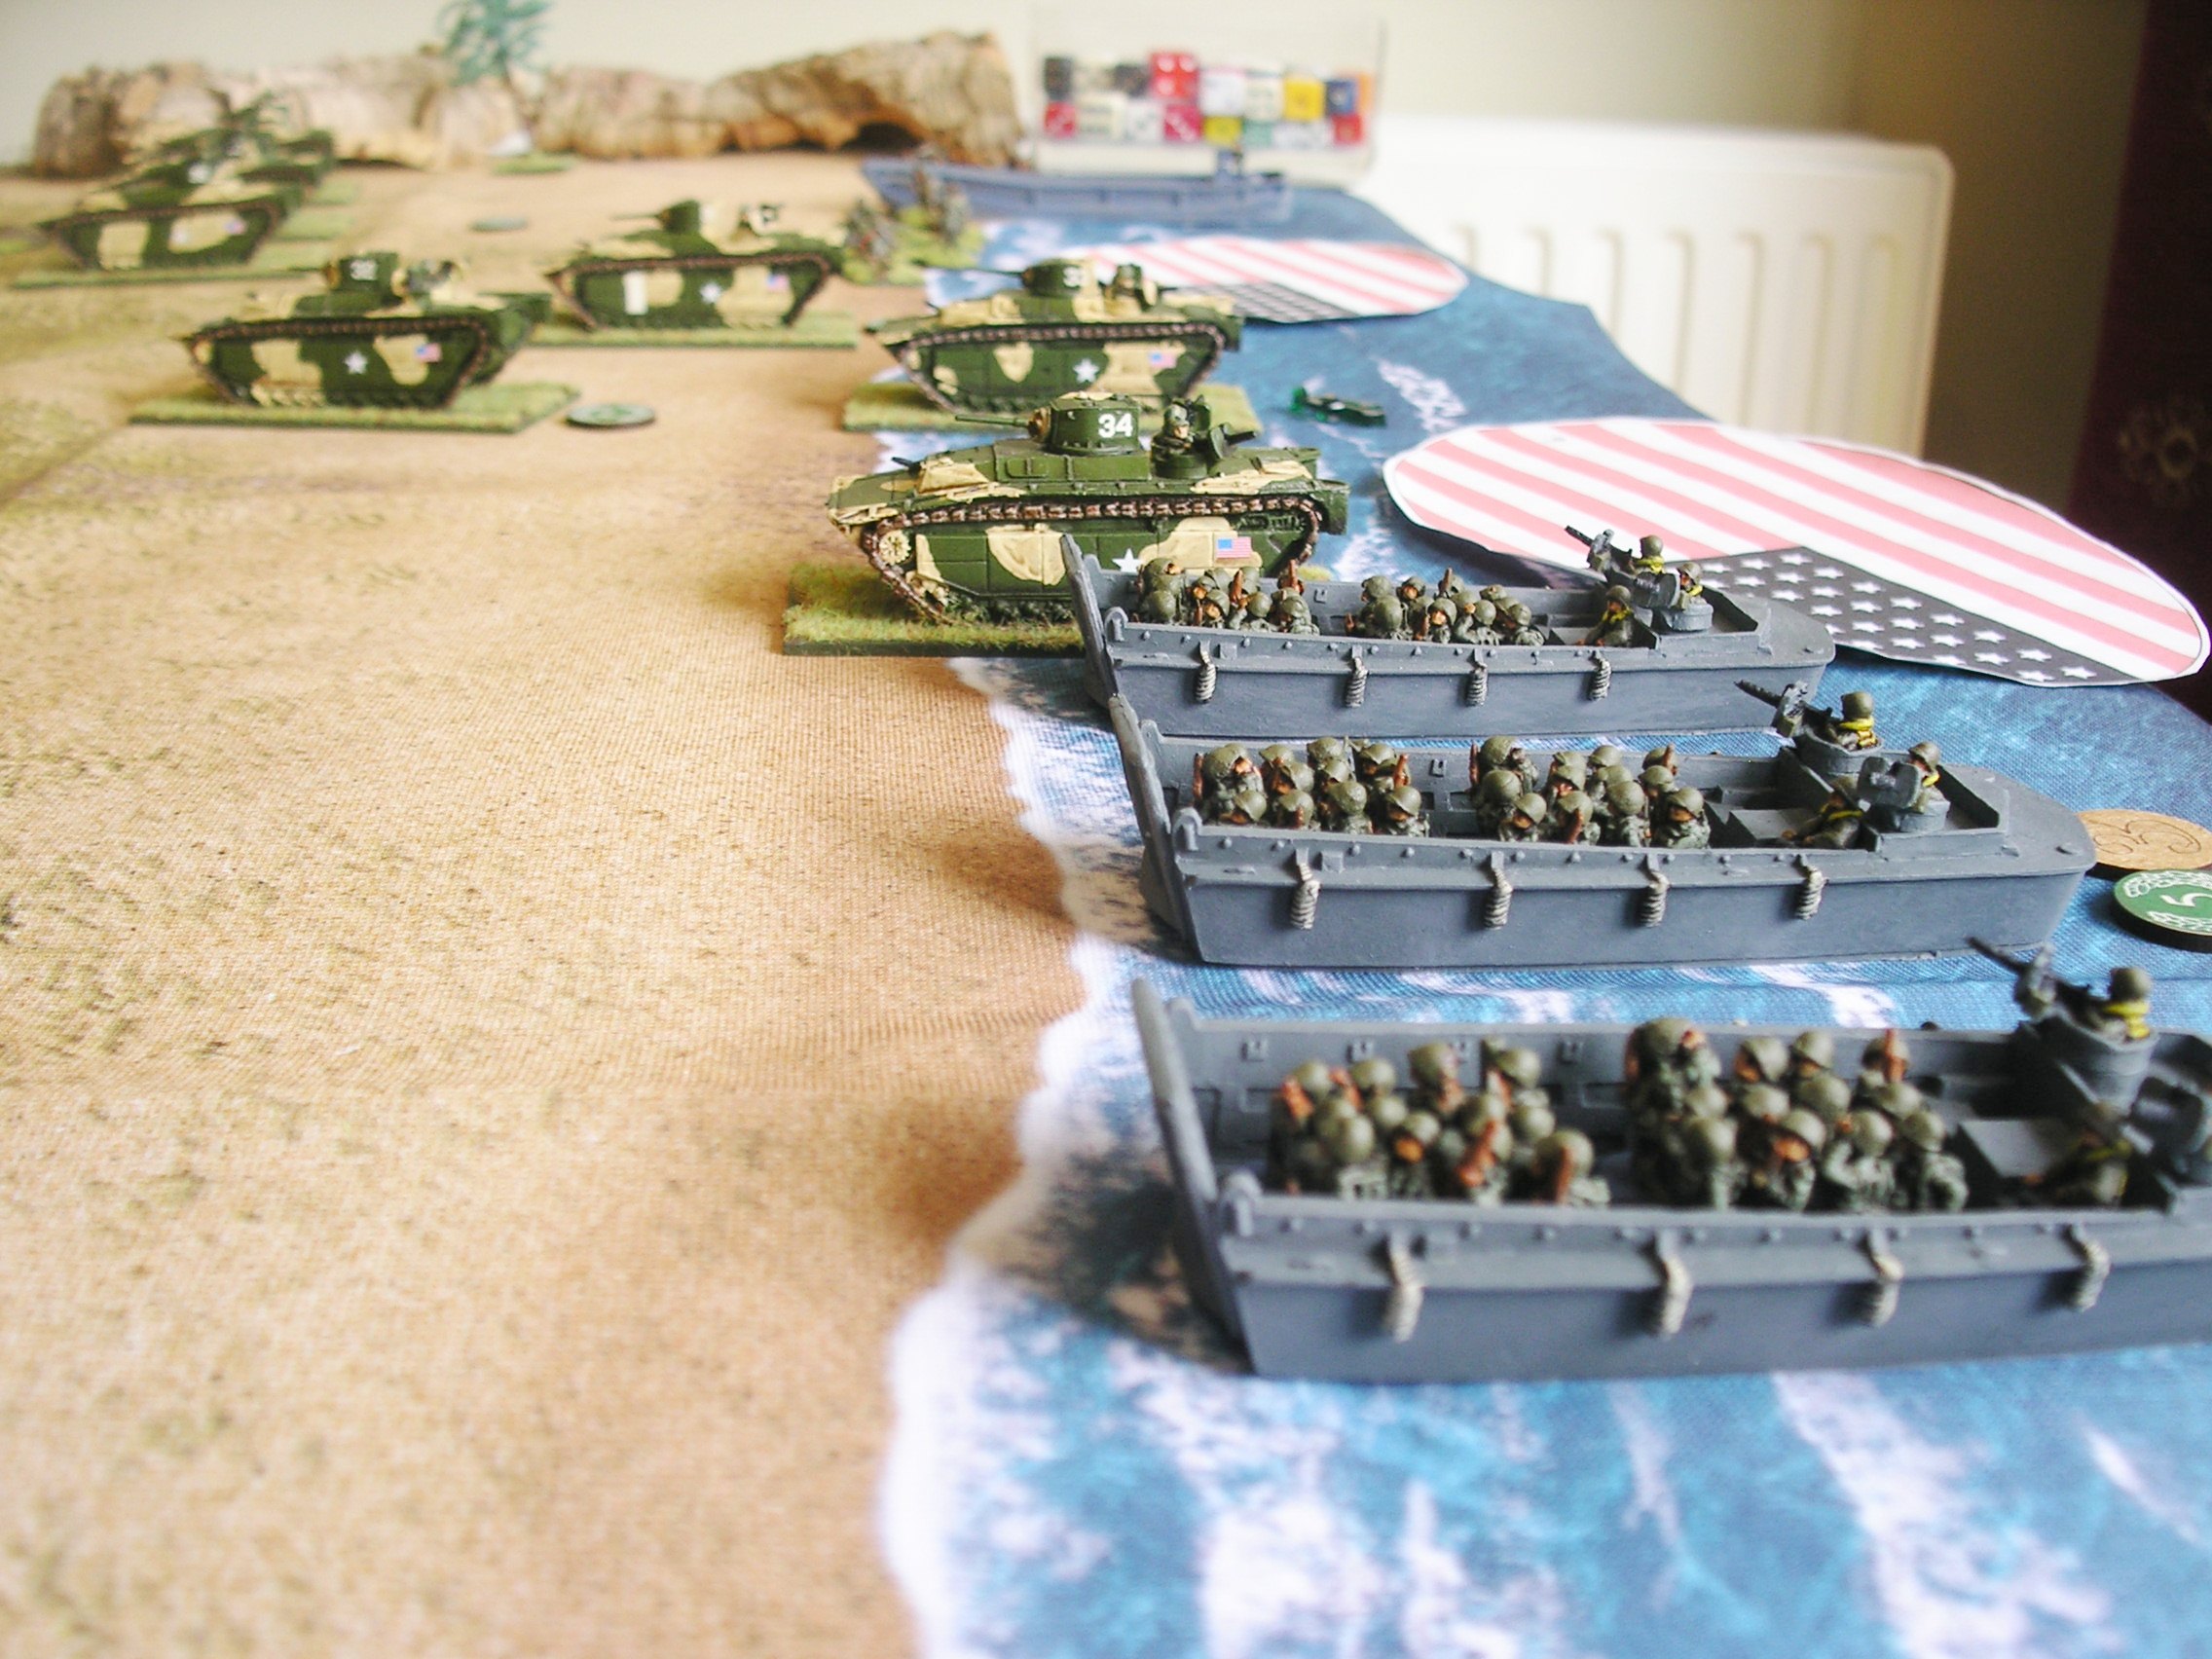
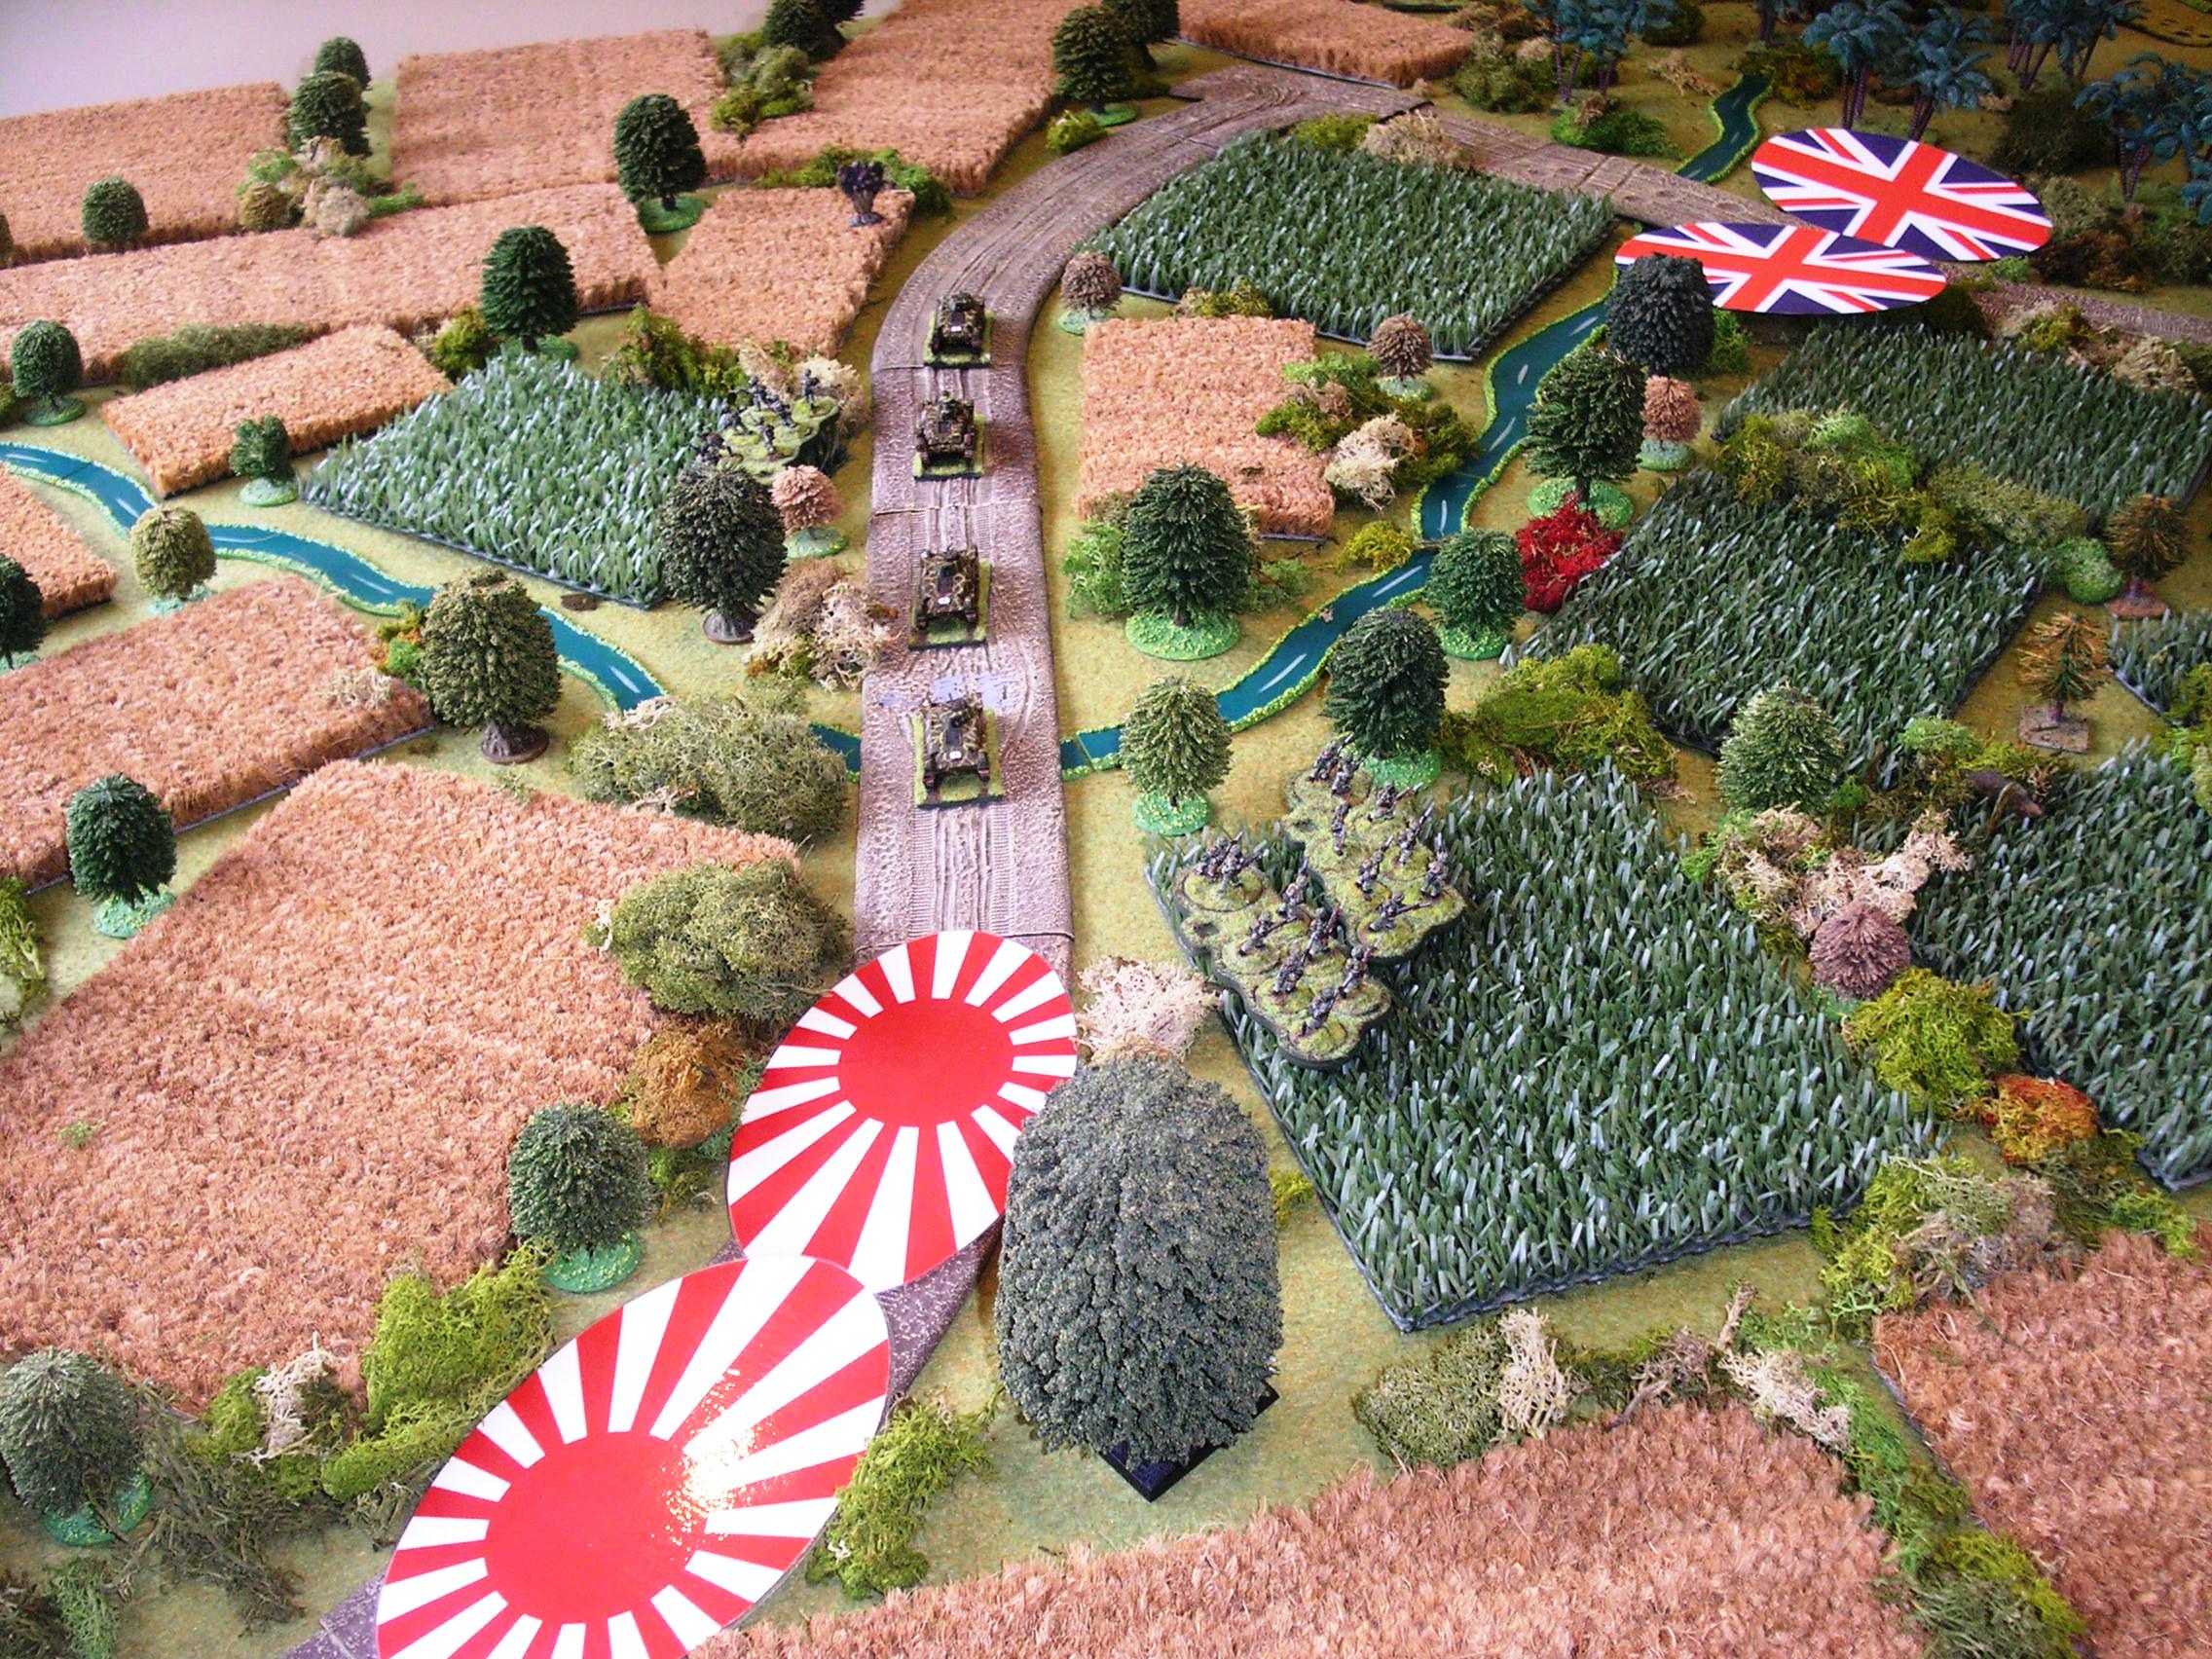
In fact, these were so nice, and the house was so quiet, that I was inspired to re-photograph my Japanese collection against a jungle background as opposed to the rather stark, white background I was using before.

This actually took me an hour or so less than I thought it would (I had predicted 4-6 hours, but it took me three) and I’m very happy with the result. Check out the three galleries here:

Japanese 25th Army in Malaya/Singapore

Japanese 15th Army in Thailand/Burma

Japanese 14th Army in the Philippines

Here’s a selection of other shots:

IABSM AAR: Take the Hills

Another great I Ain’t Been Shot, Mum battle report from the keyboard of Chris Lane, and taken from the IABSM Facebook Group.

Their game this time saw part two of what has now become their fall of Singapore campaign. In this battle, a full strength British company was tasked of taking two strategic hills while the Japanese (briefly) rested. The Japanese commander was tasked with holding the hills but with the option of taking a junction for a major victory.

Click on the picture below to see all…

IABSM AAR: A Late Christmas!

Here’s a rather nice battle report from Alex Sotheran covering a game played just before Christmas last year, and taken from Alex’s excellent blog Storm of Steel.

The action is once again set in Malaya in late 1941, and covers an action very similar to the encounter at Slim River.

Click on the picture below to see all:

IABSM AAR: Rumble in the Jungle

Here a nice little after action report from Alex Sotheran, taken from both the IABSM Facebook group and Alex’s Storm of Steel blog.

The game was Alex’s first using I Ain’t Been Shot, Mum!, and involved a solo game set on the Malay peninsular at the time of the Japanese invasion in December 1941. Although knocked together by Alex himself, the scenario resembles #02: Ban Sadao from the Fall of the Lion Gate scenario pack.

Click on the picture below to see how Alex got on:

Blitzkrieg in the Far East Part One: Japan now available!

Published today, and available to buy from the TooFatLardies shop, Blitzkrieg in the Far East 1: Japan is the sixth in the series of early war handbooks for I Ain’t Been Shot, Mum. The handbook is 116 pages long and covers the Japanese army during the first phase of the War in the Pacific, December 1941 to June 1942, when its battle-hardened armies inflicted defeat after defeat on the Allies. 

Unlike the other titles so far in the series, the nature of Japan’s campaign of expansion means that the booklet is not divided into sections defined by the different types of division that fought, but into sections defined by the different geographical mini-campaigns: Malaya and Singapore, Burma, the Philippines, The Dutch East Indies and the South Seas. In effect, it is several theatre booklets rolled into one.  

There are a total of forty-eight different lists split as follows: 

  • Malaya & Singapore: 7 lists from 25th Army 

  • Thailand & Burma: 5 lists from 15th Army 

  • The Philippines: 16 lists from 14th Army 

  • Hong Kong: 1 list from 38th Division 

  • Borneo:  2 lists from 35th Brigade 

  • The Dutch East Indies: 15 lists from 16th Army 

  • The South Seas: 2 lists from the South Seas Detachment 

Finally, we have the usual ratings and armoury sections, and a note on air support. 

Although designed for IABSM, Blitzkrieg in the Far East: Japan contains a vast amount of information useful to gamers of other systems, and is really a must-buy for anyone interested in the early war period. 

Buy it here, now!

Peleliu at The Other Partisan

The other game of I AIn’t Been Shot, Mum at The Other Partisan was another amphibious assault: Tim Whitworth and the Like a Stone Wall Group’s magnificent Pelelie scenario, set in the Pacific with US Marines assaulting a Japanese-held beach.

This game was, in fact, so good that it won the Best Demonstration Game award for the show. Click on the picture below to see loads of excellent pictures of the game:

IABSM AAR: Peleliu Warm-Up

Tim Whitworth and his colleagues from the Like A Stonewall Wargames Group have been preparing the game they are showcasing at The Other Partisan wargames show in a couple of week’s time.

It’s a scenario for I Ain’t Been Shot, Mum based on the US Marine assault on Peleliu Airfield in 1944. Click on the pic below to see all:

AAR OML7 Game 1: Chain of Command in Malaya

The first game that I played at this year’s Operation Market Larden was a game of Chain of Command set in Malaya 1941 put on in 28mm by Mark Backhouse.

The British, played by Matt Slade and I, were represented by a platoon of Argyll and Sutherland Highlanders. We were defending: our mission was to prevent any Japanese troops exiting the table on our side: Mark, in the picture above, is standing behind the British baseline. A sub-plot also involved us getting a senior officer to the knocked out ambulance to rescue certain vital supplies.

As mentioned, we had a full platoon of Scottish infantry at our disposal: three sections, a light mortar team and a Boys anti-tank rifle team led by lots of officers. In support, we chose a Lanchester armoured car (mainly because this theatre is about the only place you can use one) and a roadblock, which we used to prevent the Japanese bringing any tanks on from the side road on our right flank.

The Japs, played by Jeff Davis and Ian Gilbraith, had the opposite idea. Their aim was to capture two thirds of the table (horizontally) allowing them to exit troops off the British baseline. They also had a secondary mission: explore the two huts in search of rice supplies.

The Japanese also had a full platoon to field, but their sections were enormous: fourteen strong IIRC. In addition to their three regular rifle sections, they also had a grenade launcher squad with three Mk89 teams. In support, they had a Chi Ha tank: something we were not looking forward to facing.

Patrol Phase

The Patrol Phase happened quickly, with the Japanese ending up with their Jump Off Points largely on their left side of the table. We had two of our JOPs on that side of the table too, but as we’d had to protect out entire front instead of being able to schwerepunkt along one road, we had another behind the hut on our left hand side of the table.

The Main Game Begins

The dice really fell for the Japanese in the early stages of the game. I’m not quite sure of the mechanic, but something about them rolling lots of 6’s on their Command Dice twice in a row meant that they shot up the battlefield until there was a section in the jungle to our right, the grenade launchers behind the hut just in front of our positions, and another section right in front of us in front of the hut.

The Japanese opened fire, promising huge amounts of devastation on our lead section. Fortunately (me rolling lots and lots of very low dice) the potential for large numbers of deaths was never realised. In fact, our only casualty was a junior officer knocked down…who promptly got back up again. This did, however, cost us two Force Morale points: the officer was obviously deeply unpopular!

Now the dice swung our way, and we had the chance to pour fire into the Japanese squad out in the open: which we did, knocking their strength down by half. At the same time, our Lanchester appeared, and promptly shot up the Japanese squad to the right.

It was all going so well…then this happened:

The Chi Ha took a shot at the Lanchester, hit it, and almost knocked it right back off the table. One more of them and we’d have no Lanchester left, and a dwindling number of Force Morale points.

Our light mortar popped some smoke down on the road between the Chi Ha and our armoured car, which gave us a little time to breathe…but what to do? There were still lots of Japs on the table, albeit half of them were pretty bashed up, but we needed to do something quickly and decisively if we weren’t going to spend the next four years building railways!

There was nothing for it: we would have to go forward and take the fight to the Japanese!

Bursting from the undergrowth, one of our sections rushed across the road to the right shouting strange Scottish epithets as they closed with the enemy. There were more Japanese there than we expected (the figures were hiding in the scenery!) and we lost the first round of close combat. This boded ill, but then Mark reminded us that as we were Scottish, we could ignore a loss by a mere one man, and carry on fighting until we were properly wiped out!

Back in went the Argylls, and in another two rounds of fighting (the Japs weren’t giving up the ghost easily either) we killed every enemy solider except one senior leader, who fled the field not to be seen again until 1966, when he finally emerged from the jungle not knowing the war had ended in ‘45!

The loss of so many of their men was too much for the already battered Japanese to survive. With a Force Morale of zero, they melted away back the way they’d come. Another successful Argyll ambush: time to fall back and do it all again tomorrow!

Aftermath

A cracking game of CoC, and one after which I am actually starting to remember the rules. I don’t think I’m switching from gaming companies in 15mm (IABSM, CDS, Q13) but I shall definitely play CoC again when I can.

Thanks to mark, Matt, Jeff and Ian for making it such a great game. Here are a few more piccies:

Type 89 Japanese Tanks

Some of you may know that I am currently writing the I Ain’t Been Shot, Mum theatre handbooks for the Far East, starting with the Japanese armies that invaded the Pacific region: Malaya, Burma, the Philippines, Borneo, the Dutch East Indies etc.

All the research, particularly into the 7th (Medium) Tank Regiment that fought in the Philippines, inspired me to finally get around to painting the two boxes of Type 89 Chi Ro tanks that have been sitting in my lead mountain since Salute two years ago. These I bought from Troll Trader for the princely sum of £12 each: a huge discount off ratecard at only £2.40 per tank.

These went together really nicely: even the back sled-things weren’t too hard to build. Not only that, but this makes 23 tanks consecutively from Battlefront without a single piece missing. Given my previous rants about quality control, this is a real (and very welcome) improvement.

Painting was just a matter of following the patterns shown on the box art. I now just need to tone down the gloss lacquer a bit with some mat spray.

My only disappointment was that when I went to enter my new Type 89 tanks into my Japanese roster, I found that I already had five of them, bought and painted some time previously. Ah well: you can never have too much of a good thing!

Recommended.

IABSM AAR: Pacific Island Invasion

A nice little after action report from Desmondo Darkin, orginally posted on the I Ain’t Been Shot, Mum Facebook page.

Not only do we get the first part of an AAR (the rest being lost in the mists of time!) but also some hints and tips on how to run an island invasion of your own.

Click on the picture below to read more…

AAR: First Game of the Year

And so to the first battle of 2019: a game of I Ain’t Been Shot, Mum! against Dave using one of the scenarios from the TooFatLardies Summer Special 2016. For those unaware of the Specials, and now the Lard Magazine, these are a wonderful source of scenarios, information and inspiration for all Lard games.

The scenario, by Richard Morrill, was called George of the Jungle, and was set in Burma, 1945. A Company, 9th Borders, part of 63 Brigade of 17th Indian Division, was tasked with clearing a small village near Meiktila of Japanese. The reason for the scenario’s title is that this action includes the participation of George McDonald Fraser, author of the Flashman novels, and is mentioned in his autobiography Quartered Safe Out Here. I would play the Japanese, and Dave would play the British.

Click on the picture below to see what happened:

IABSM: Japanese Type 89 Chi Ro Tanks

Next part of my catching up with the Japanese Battlefront pre-Pacific releases: the Type 89 Chi Ro (aka I-Go) medium tanks.

These come in boxes of five tanks, which is a bit weird really, as they fought in platoons of three tanks with a two-tank HQ. Must be Battlefront economics to always sell this sized tank in boxes of five.

Anyhoo, as you'd expect from Battlefront, these are lovely models: nicely detailed, and with relief deep enough to really bring out that detail when washed. Quality control was very good as well:  no missing parts, no horribly contorted parts, and everything went together very easily. You see, Battlefront, you can do it right!

The five tanks above were painted using the guide on the FOW website: spray undercoated in a deep yellow; camouflage added; then washed with GW Agrax Earthshade. All I would suggest is that you think about where you want the thin yellow line to go before you paint the main brown and then green camouflage stripes i.e. plan your paint job rather than just starting willy-nilly.

The command figures are also well detailed. I love the pointing-chap, but I'm not sure about the bloke with the sword. Leaving aside his grip (that's the martial arts geek emerging from his lair!) I'm not sure that it's very practical to carry a katana, even a WW2 cut-down one, in a smallish tank such as a Chi Ro. Surely that's what a wakisashi is for!

Nice models, recommended for re-fighting Khalkhin Gol.

Japanese Self-Propelled Guns

With Battlefront bringing out their new range of Pacific Theatre miniatures, I thought it might be about time to catch up on the models I missed from their pre-war Manchurian Theatre range. I do always seem to be one range behind!

First off the production line are the Type 4 Ho Ro self-propelled guns:

So, wanting to put a bit of background in for this post, I've done a bit of research. Apparently only twenty-five Ho Ros were ever produced, which means that I have about a sixth of the entire production run!

They were also not very useful, as the crew had no protection,  and you had to turn the whole vehicle in order to acquire your targets. Excellent!

They also fought only in the Philippines and on Okinawa: so no good for Manchuria either.

All in all, an excellent example of a model that I am going to struggle to field on the tabletop. I wonder how many other wargamers have collections full of the same!

IABSM AAR: Slim River

Scenario #10, Slim River, is one of my favourite battles from the Fall of the Liongate scenario pack for I Ain’t Been Shot, Mum.

Taking place on 7th January 1942 (i.e. a month after Pearl Harbour), the Japanese have been hammering down the centre of Malaya, smashing most British Indian troops aside, and slowed only by the efforts of some Gurkha regiments and the Argyll and Sutherland Highlanders. To continue their advance, they launch a sudden thrust down the single road that leads to the village of Trolak, their objective being the bridge there over the otherwise impassable Slim River.

Click on the pic below to see if the Japanese manage to take the bridge:

IABSM AAR: Fall of the Lion Gate #04: Jitra

I umpired a tremendous game of I Ain't Been Shot, Mum! on Saturday!

Using the fourth scenario from the Fall of the Lion Gate scenario pack for Malaya and Singapore, the game focussed on the British defence against the main Japanese advance down the Malayan pennisular on 11th December 1941.

Previously the Japanese of the Saeki Detachment have chewed through the British Indian troops at Ban Sadao and The Ledge (cf) but now come up against somewhat stiffer opposition in the shape of 2/1 Gurkha Rifles...

Click on the pic below to see all: