An I Ain't Been Shot 6mm game played at my home in June 2015 between Martin, Rick, Matt and myself.
Mark Luther


An I Ain't Been Shot 6mm game played at my home in June 2015 between Martin, Rick, Matt and myself.
Mark Luther

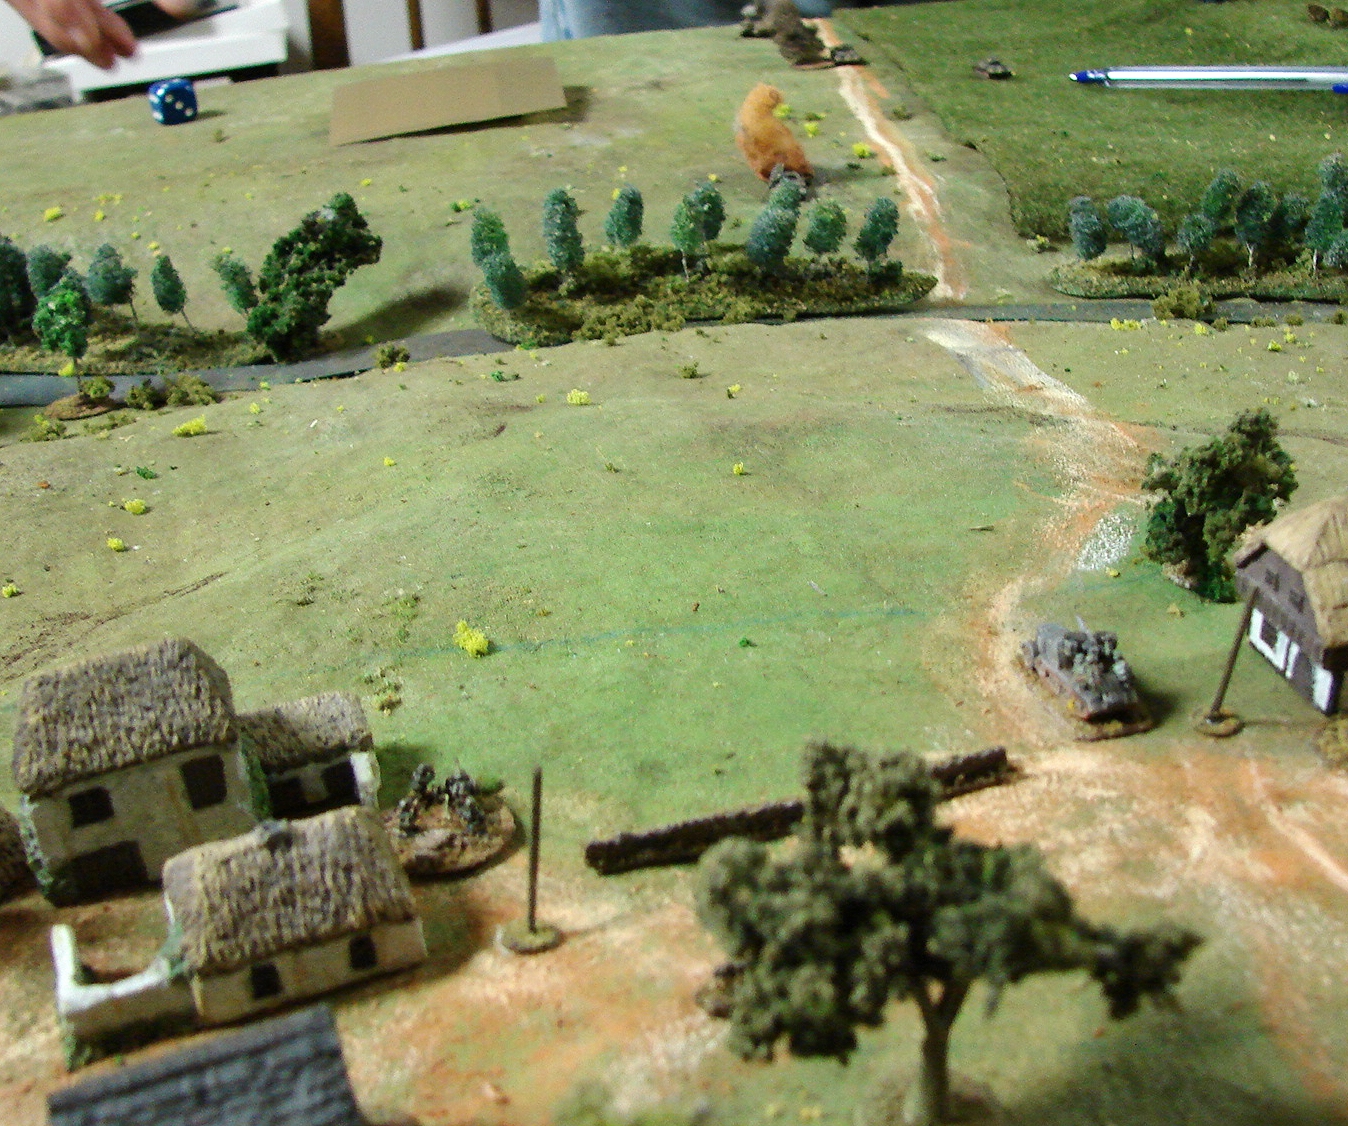
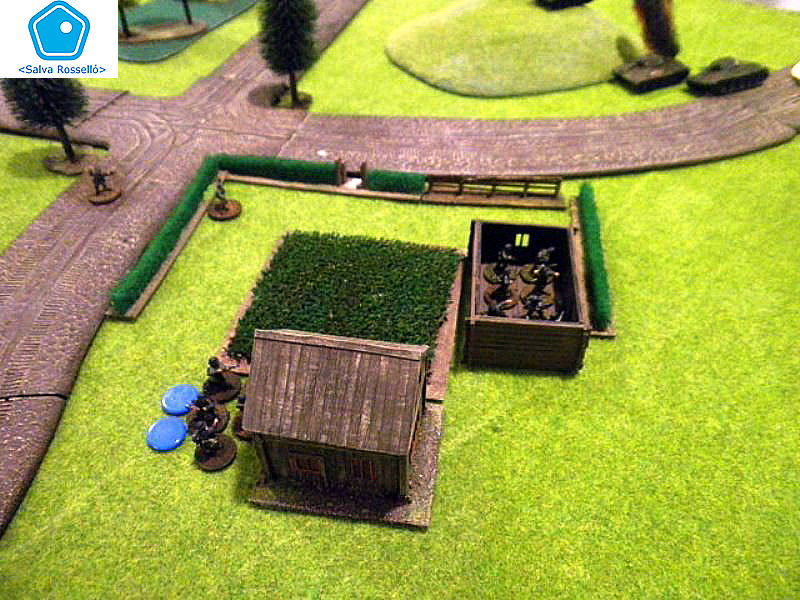
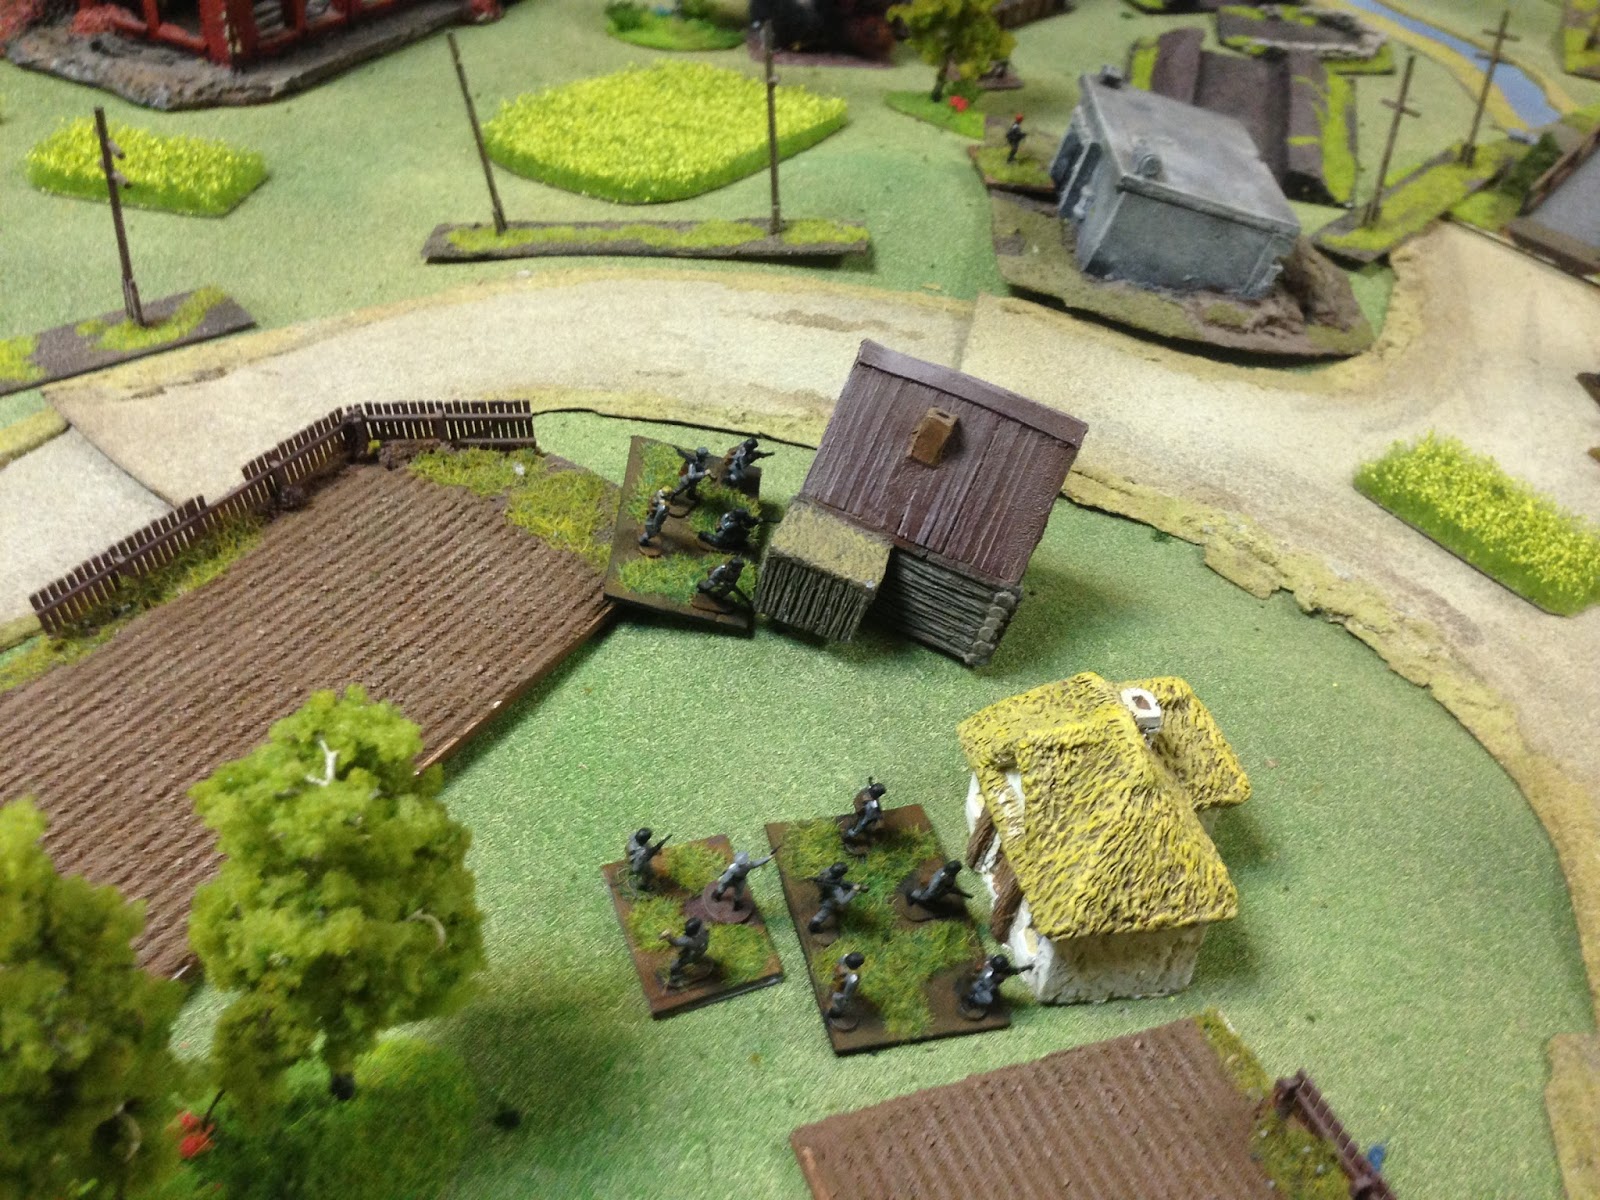
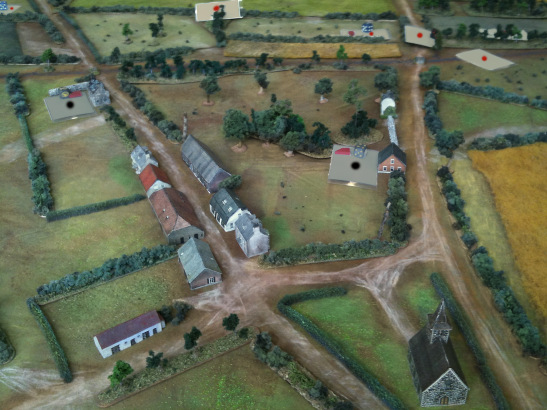
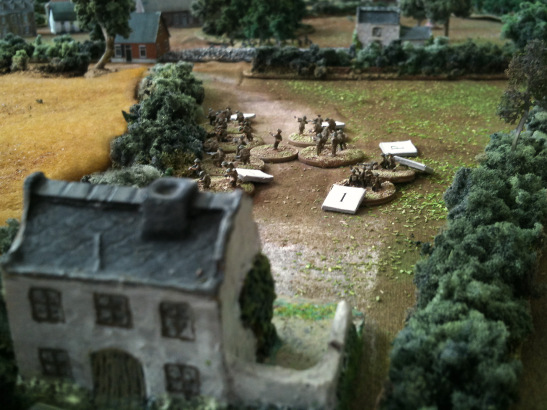
Some pictures of a game featuring a clash between Japanese and Indian troops of the British army near Singapore in February 1942.
We played a scenario from the Fall of the Lion Gate campaign pack from the Too Fat Lardies. The rules were I ain't Been Shot, Mum, and more specifically the scenario played was #20: Nee Soon.
Indians troops near the village of Nee soon need to defend the road against Japanese attacks. George led the Japanese, but failed to break through the British defense led by Andrew.
The Stipsicz Hussars

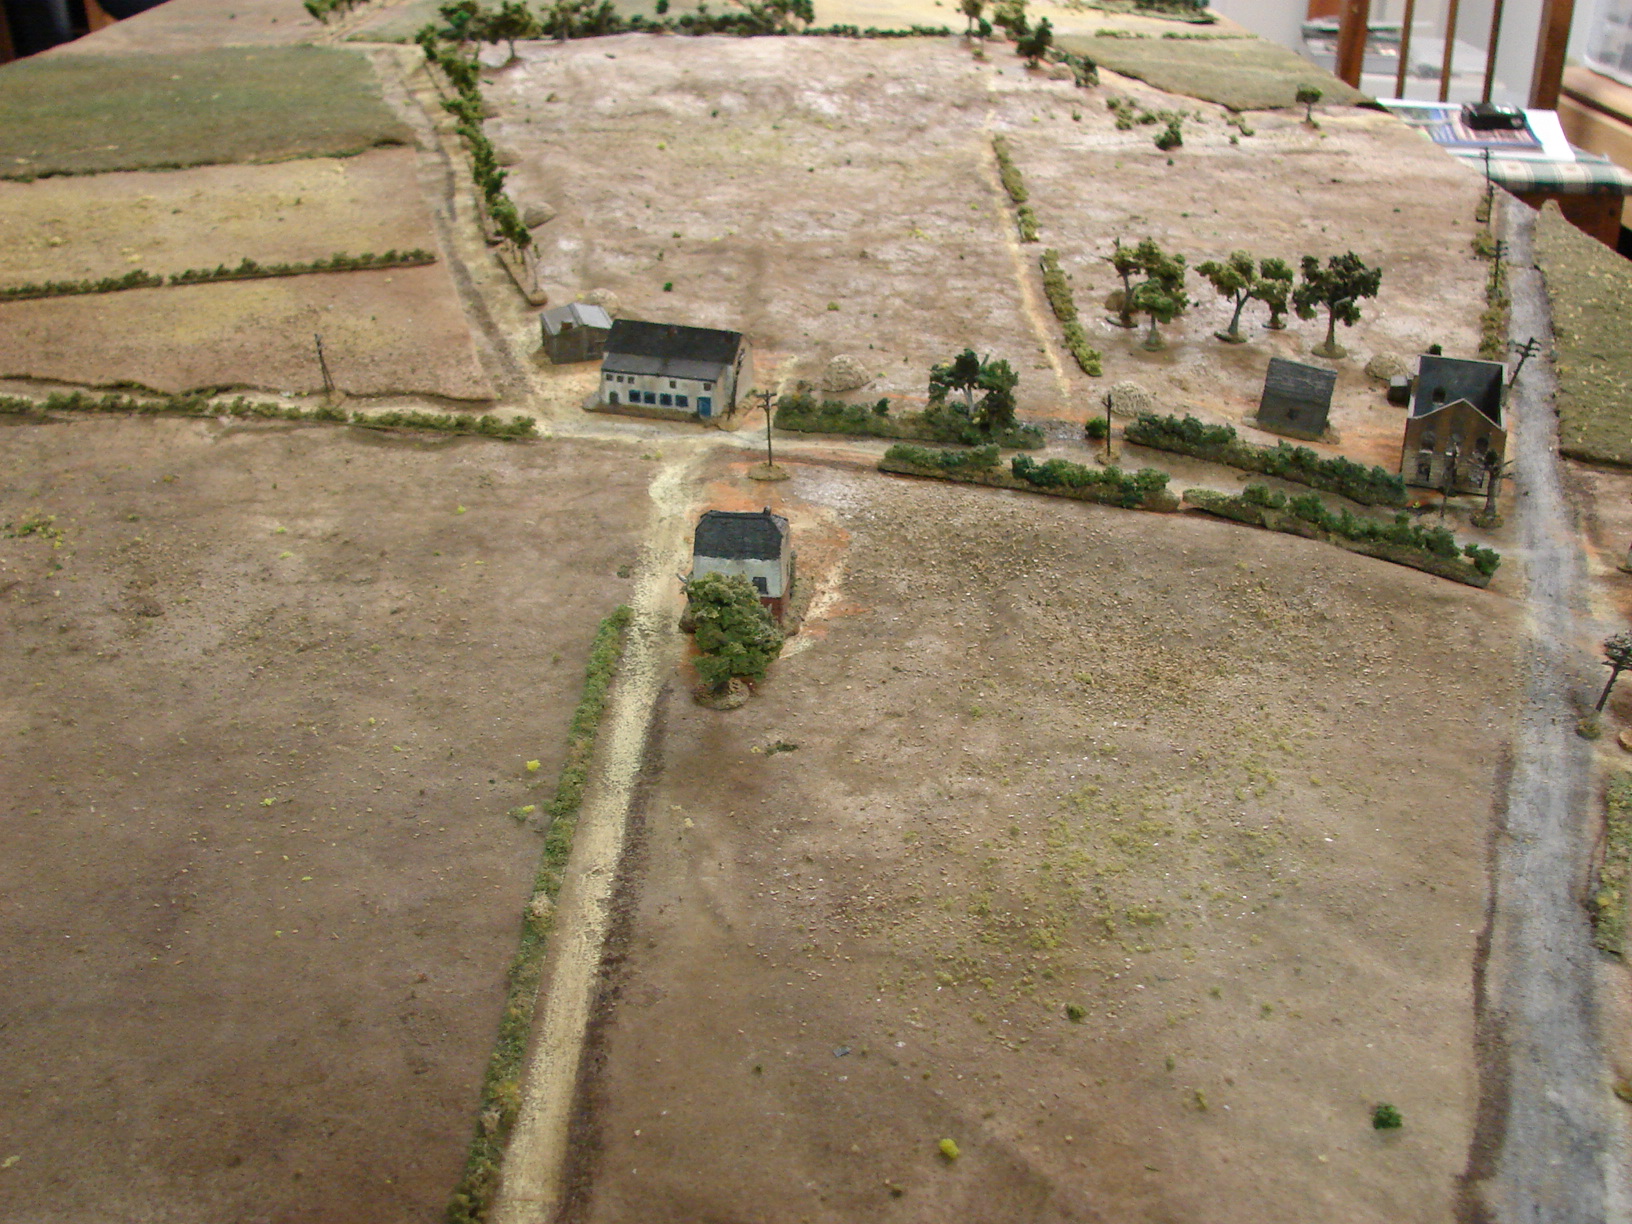
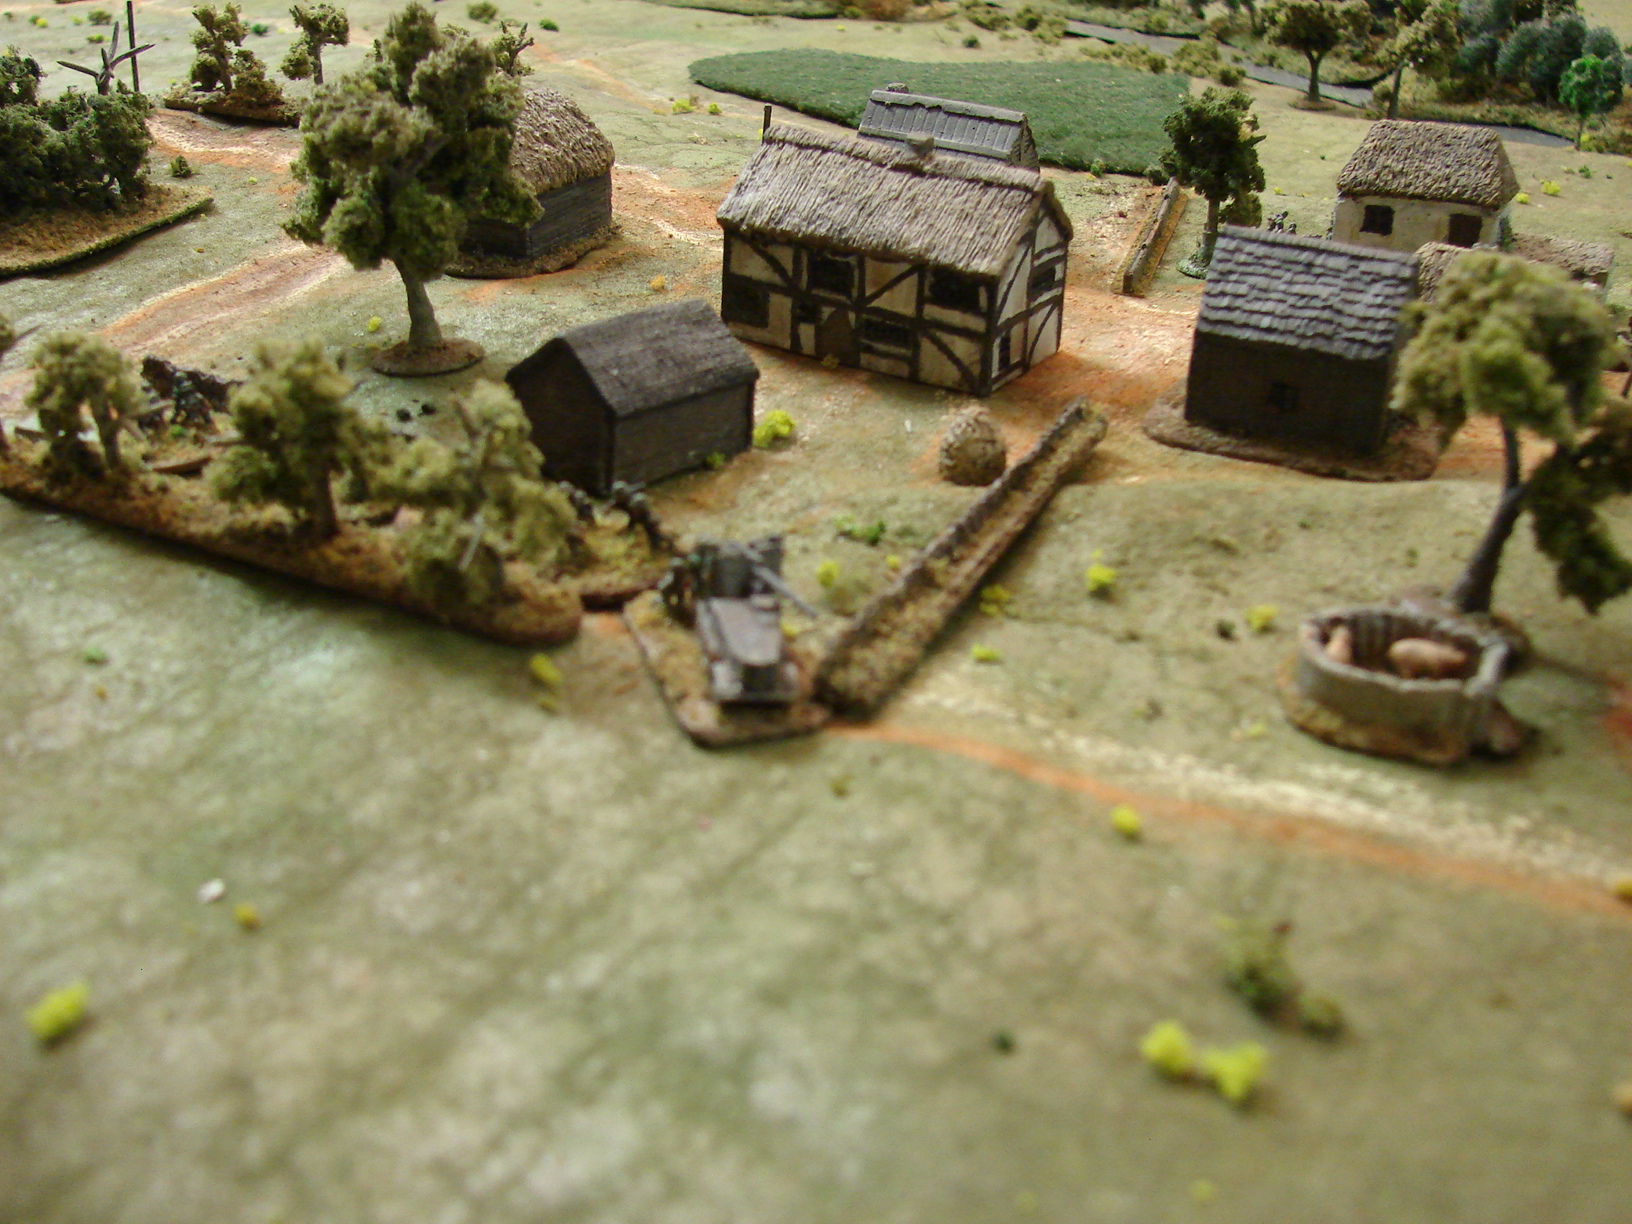
The Benson boys (Dave, John, Bevan) and I got together yesterday to playtest the first scenario in my The September War scenario pack for I Ain’t Been Shot, Mum (due for release Wednesday 15th March 2017). The pack will contain thirty-three scenarios covering the 1939 Invasion of Poland, and is part one of two, with the second (another 36 scenarios) to be released in the autumn. Both packs are very much based on Anatoli’s FoW scenario pack, Poland in Flames, but with the games fully adapted for IABSM, and presented as I usually do my scenarios: full briefings, force lists, stats etc.
The battle for Chojnice involves the Poles defending a railway bridge for long enough for their engineers to place and then explode demolition charges. In game terms, the Poles have to make sure that after the fifth appearance of the Turn Card, there are no Germans within 4” of the bridge on their side of the river, and that they have men close enough to actually push the plunger. If both criteria are satisfied, then each time the Turn Card appears, the bridge is blown on a roll of 5 or 6 on a D6.
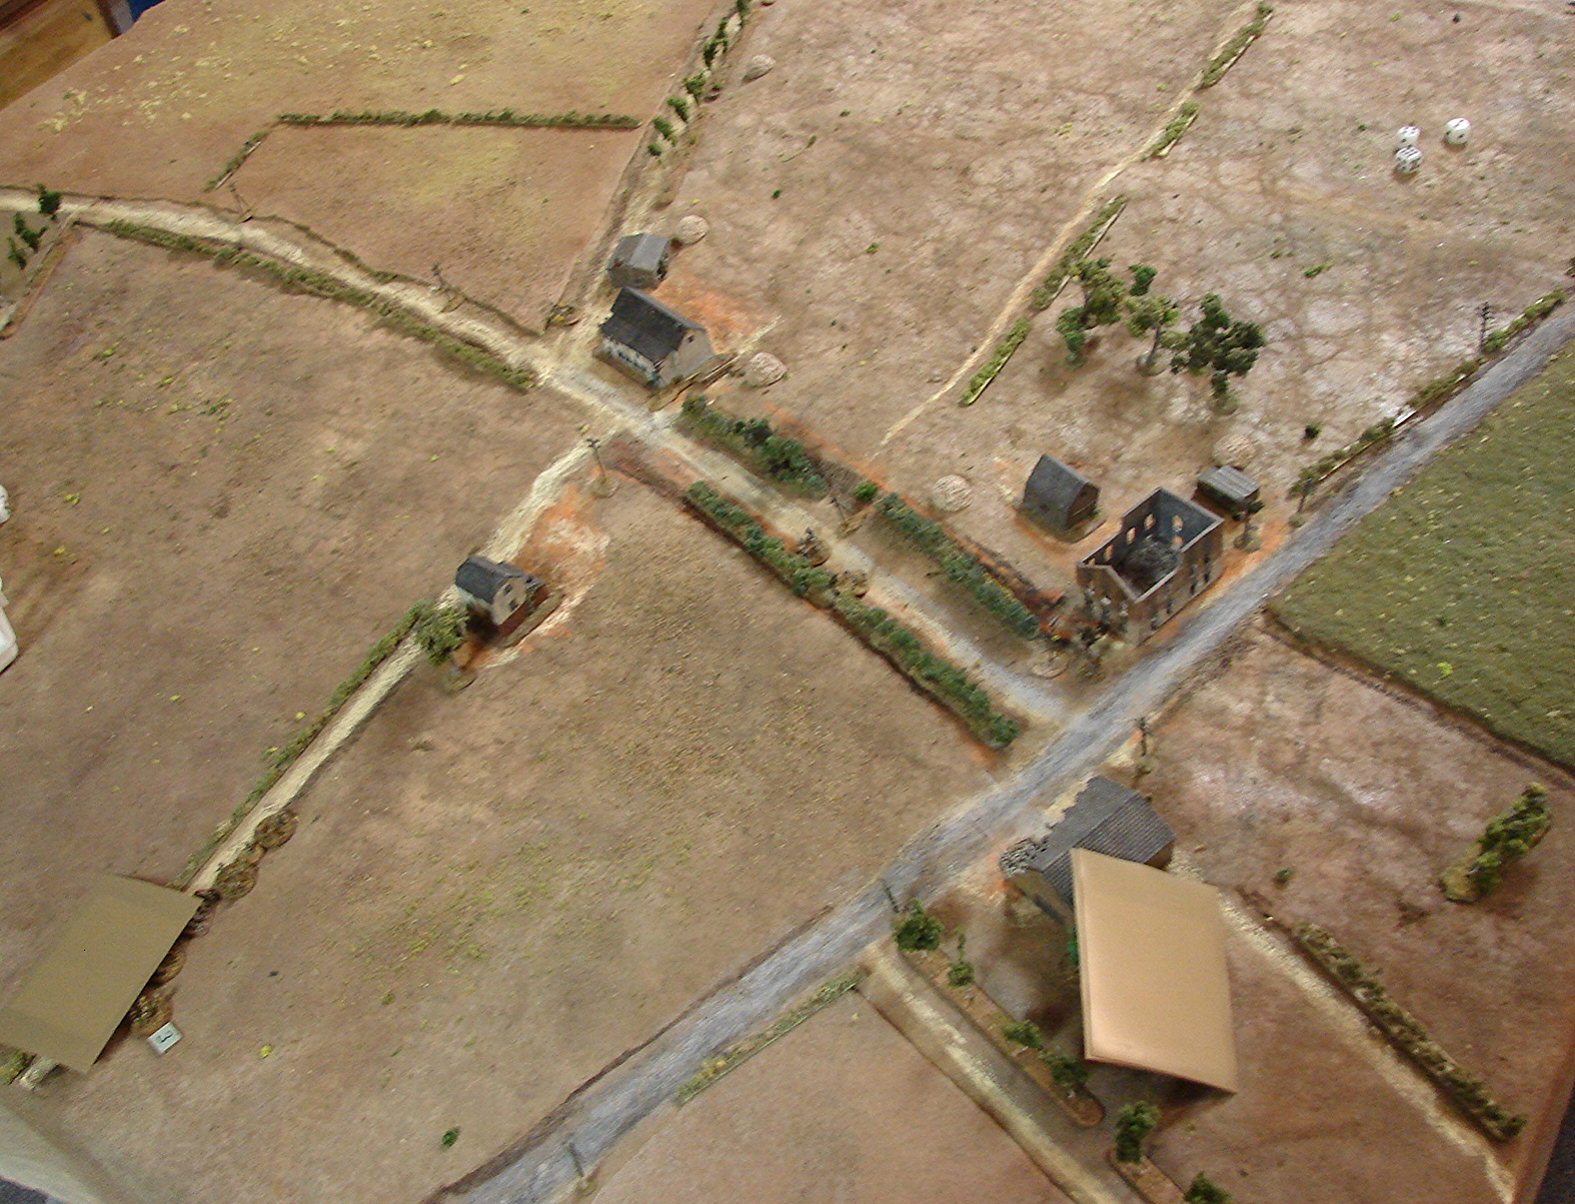
The rest of the terrain is fairly open, except for the right hand side of the battlefield (from the Polish point of view) where a road runs over the river via another bridge. Along the road are a series of buildings including, close to the bridge on the Polish side of the river, a church which, for our game, had obviously been built as an homage to Norman architecture! Opposite the church, on the other side of the river, is a large farm.
To defend their position, the Poles had a couple of two-squad infantry platoons supported by a couple of medium mortars and three taczankas carrying MMGs. They had a bit of a shortage of Big Men, only three, but did have an FOO with supposedly unlimited access to off-table artillery. In the event, the Polish artillery played no part in either of the two games we played: never arriving at all.
The Poles would begin the game in prepared positions under hidden Blinds, so would not be placed on the table at all to start off with. The Germans would therefore effectively have to spot them twice: once to establish the position of the Polish Blinds, and once more to spot what was actually underneath the Blind.
The German assault force consisted of a three-platoon company of dismounted kradschutzen infantry (they had left their motorbikes off-table…I really must get around to buying and painting some!) supported by an MMG platoon of four guns and an armoured car patrol of two SdKfz 221 and two SdKfz 222. They had a plethora of Big Men, and were very fast moving: benefiting from a Recon Bonus Move card as well as the usual German Rapid Deployment etc.
The Poles, played by Bevan, set up with one platoon defending the bridge and the other defending the church. Two of their taczanka supported the troops at the bridge, one lurked next to the church, ready to help defend either bridge as required. Their mortars were at the back of the battlefield, but with a good line of sight to the railway bridge.
The Germans, with John commanding, planned to suppress the troops on the bridge with firepower from their MMGs and armoured cars, then charge across with their infantry. Nothing like the direct approach!
The Germans therefore hit the tabletop running, moving their Blinds towards the bridge with all possible speed. One platoon had managed to start the game in the farm just by the footbridge, and began spotting the Polish positions around the bridge and church so, following their plan, the Germans deployed their MMG platoon at the edge of a small wood just in front of the railway bridge and opposite where they could now see the Polish trenches were positioned. Their armoured cars were also moving up.
At this point it all started to go horribly wrong for the Germans.
Miscalculating where they needed to be to stop the Poles blowing the bridge, the Germans moved an infantry platoon forward right up to the start of the bridge on their side of the river. They didn’t have much cover, so when the Poles shot at them with a whole platoon supported by a couple of MMGs, they were unsurprisingly pinned down and could advance no further. Worse, they were blocking most of the fire from the German MMGs. Worse, the Polish mortars had found their range and were dropping bomb after bomb on the German MMG platoon, who were finding out that being in a wood under mortar fire is not a very pleasant experience: wood splinters flying everywhere.
Desperate to do something to distract the Poles from mullering their troops by the bridge, the Germans then advanced an infantry platoon across the footbridge to the Polish right. Unfortunately they chose to do this through a slow, squad-by-squad advance: easily stopped by the other Polish platoon defending the church.
At this point the German commander gave up in disgust. His MMGs were neutralised, he had a platoon pinned down and taking heavy casualties by the railway bridge, his armoured cars were shooting, but also being shot at by some very nasty anti-tank rifles, and his other platoons were also getting nowhere fast. The Germans retreated to lick their wounds.
In the second game, played immediately afterwards, I took command of the Germans against Dave, playing the Poles.
With Captain von Hindsight telling me that the direct approach would probably have as little success as in the first game, I decided to throw caution to the wind and throw everything I had at the bridge on the left. My aim was to get over the bridge then roll up the Polish line, their right to their left. That way I could hit their trenches from the flank or rear.
Dave had set his infantry up in the same way as had worked for Bevan in the first game: one platoon at the bridge, one platoon defending the church. Suspecting I might try something different to John, however, he kept his taczankas back behind the front line, but made the crucial mistake of not putting a Big Man with them: in IABSM, support weapons only move if in company with a Big Man.
The game therefore opened with a long line of German Blinds throwing themselves forward at the riverline. Unknown to Dave, the entire right side of my line was Dummy Blinds, with the real things on the left.
The cards fell well for me, and my troops quickly got up to the bridge on the left, and here’s where I got a bit overexcited and made a crucial mistake. Well, I think it was actually a combination of the quite large amounts of red wine and strong coffee I’d drunk between games, which just goes to show that you should never wargame fuelled by Malbec!
Getting the opportunity to move forward again, rather than soften up the Polish troops defending the church, I decided just to hurl a whole platoon forward in a surprise assault on the troops in trenches in front of the church.
Well, the Poles were certainly surprised, but not surprised enough not to resist. My entire platoon was wiped out: very credible really when you consider I was assaulting twenty-four men in trenches with twenty-four men running across open ground! Blame the Malbec!
The game now looked like being a disaster for the Germans, so there was nothing for it but to pretend that this was all part of some great masterplan, and carry on throwing stuff forward.
Untruthfully claiming that the initial unsuccessful assault had been just the cover I needed to get into position, I moved my MMG platoon and the armoured cars up into a position from which I could bring the somewhat battered Polish troops defending the trenches in front of the church under fire.
Four MMGs at Close range, plus the armoured cars, inflicted more damage on the Poles, and Pinned them in position, so I then sent a second platoon forward to charge the trenches. This time the assault was successful, with the defending Poles being largely wiped out as my troops took possession of their trenches.
This is where Dave needed to bring up his taczankas and pin my troops down but, as mentioned above, the taczankas weren’t moving without a Big Man...and one Polish Big Man was dead, one was defending the trenches, and the third was nowhere near the taczankas.
Dave desperately tried to sort out his defences: his free Big Man rushed for the taczankas, and the infantry platoon by the bridge redeployed to face the threat from their flank. This, of course, meant that some of them had to leave their trenches, which made them sitting ducks for my third infantry platoon, and the armoured cars/MMGs who, using their Big Men, had now moved into positions from which they could bring the Polish works under fire.
At the same time, the German infantry platoon across the river moved into the church itself, and brought the Poles under fire as well, with the shots coming down from the church tower proving especially effective.
Time, and the timers on the Polish explosives, was ticking on however, and at any moment the Turn Card could appear and give the Poles the opportunity to blow the bridge. Unfortunately, the Turn card seemed to have gone on holiday, and the Polish troops were driven back away from the bridge by the sheer weight of firepower heading their way. With seconds to spare before the bridge was blown, the Germans managed to get men across the bridge, and the explosives were defused.
A cracking game which could so easily have proved a complete and utter disaster for the Germans. Fortunately, Dave’s deployment of the taczankas gave me enough leeway to soak up the loss of the first infantry platoon (just!) and to eventually take the Poles in the flank as planned. A very high butcher’s bill for the Germans, however, with their commander definitely at risk of fragging in the future!
Overall, it was a very successful playtest, with the scenario proving finely balanced and very much dependent on the tactics employed. Scenario #01 now approved for publication!
Robert Avery

The first game of the club's IABSM campaign, which has migrated from being "Blenneville or Bust" to being "29: Let's Go Large" to "oh, sod it, let's make something up based in Italy because Italy is a) fun and b) not Normandy"! So much fun, in fact, that I only took one photo!
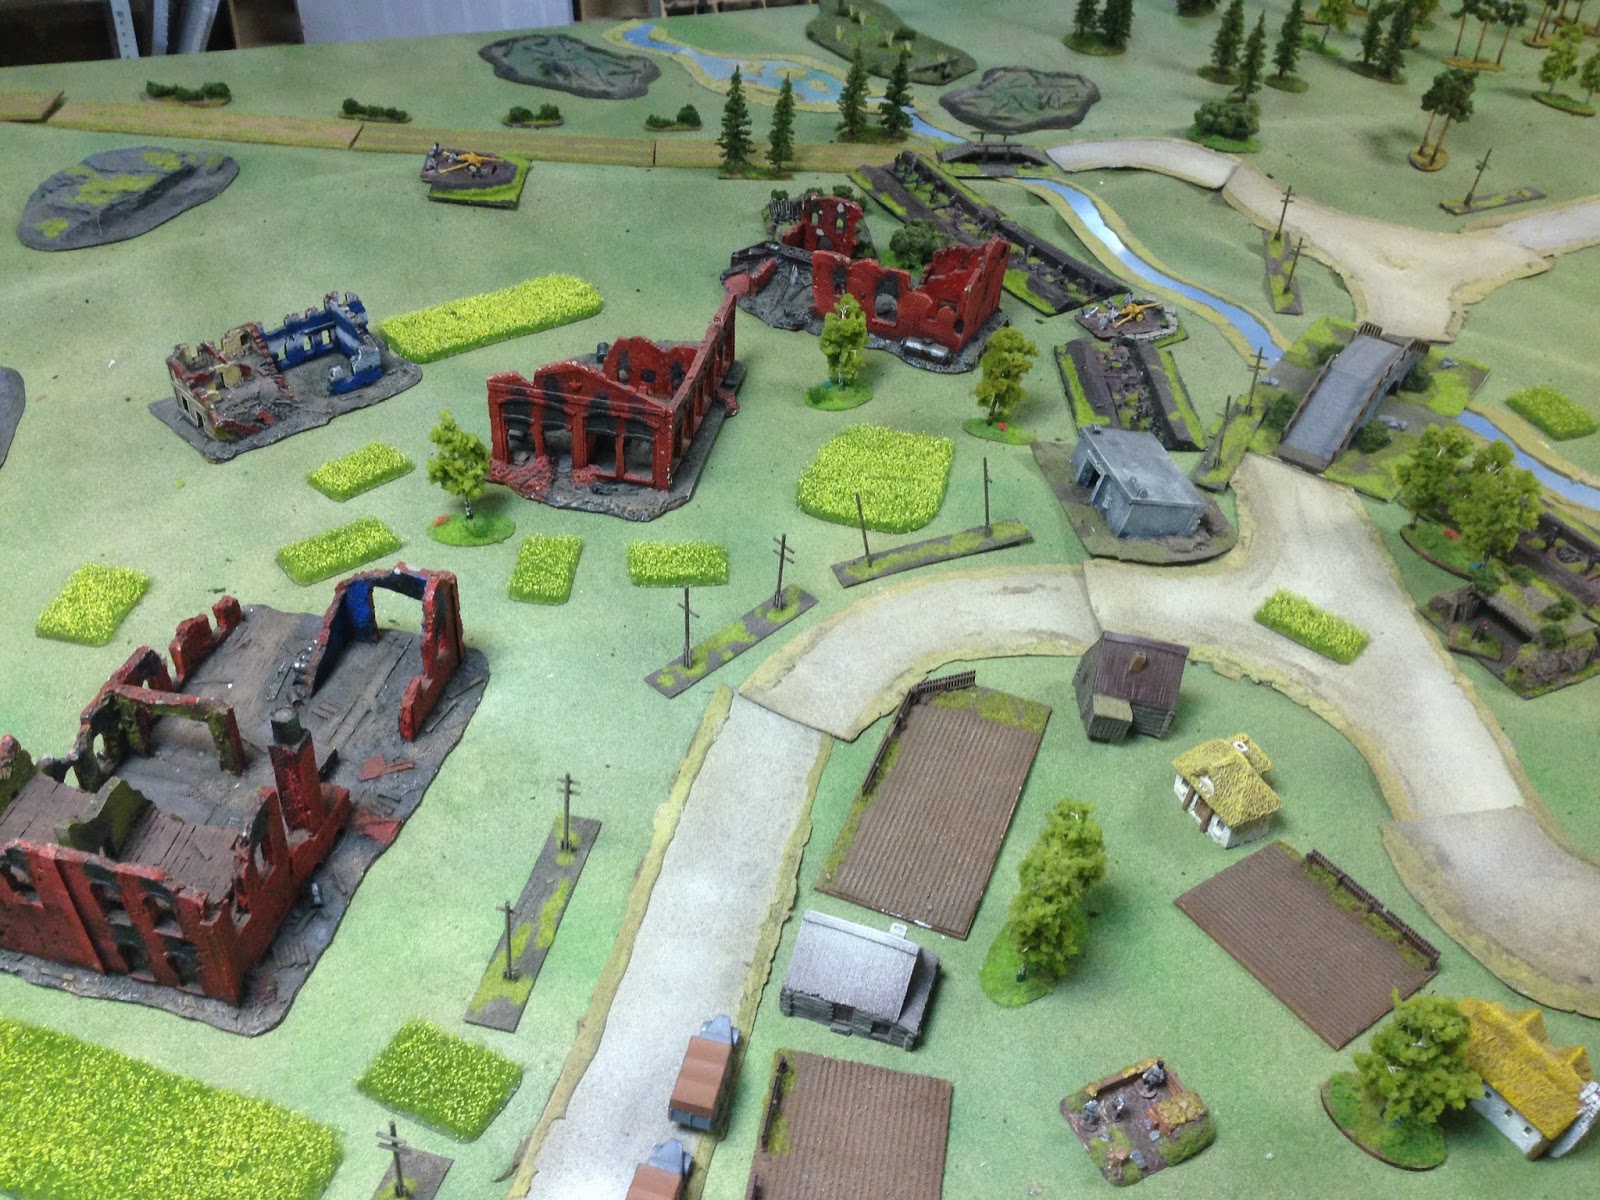
So, check out the table to your right. North to the top, the village of Santa Magdalena nestling under the church, and the remains of the village of Santa Maria to the southeast, having undergone a pretty heavy bombardment from the Allies in an abortive attempt to take it the day before.
It's 26th August 1944, and A Company, the Hereward Fusileers (commanded by Carl, aided by Pippa, Ash and AndyB), have been tasked with taking both villages from the Germans (Gary, with help from AndyM and Tom) before nightfall. The latter had the classic slightly understrength company (which is a roundabout way of saying "I must paint those last two German sections!").
Both sides got support lists to choose from, rather à la Chain of Command. The British chose a Firefly, two Sherman IIIs, two pre-game stonks, a FOO and battery of 25pdrs, a sniper and a Kittyhawk off the 'cab rank': I suspect rather too much of this might have been in the spirit of 'oo, wonder what this does' (still surprised they declined the Churchill MkV CS - 95mm howitzer on tracks!), and I'm sure I overpointed the P40, as only activating on a 6 when its card comes up makes it markedly less useful, and possibly the stonk. The Germans went for the coldly practical: 4 off-table 80mm mortars, a Tiger, two StuG IIIG's and a sniper.
As umpire and campaign adviser, I stood back once I'd devised the scenario, and before listening to the players' plans, and asked myself what I'd do with both forces: the Germans pretty much agreed with me, placing a Zug in Santa Maria, one in Santa Magdalena, the third in the olive grove/vineyard area. They plonked the Tiger in the ruins of the churchyard, with a nice view of the battlefield, and hid the StuGs.
Were I the British, I'd have bypassed Santa Maria entirely barring a small force to keep the Germans interested (a blind and a platoon, perhaps), laid smoke west of the road into Santa Magdalena and gone for it, foot on the floorboards, on the theory that if I can take Santa Magdalena I can mop up at my leisure.
The British had a degree of internal debate before deciding to go the roundabout route, essentially doing the exact reverse: strike at Santa Maria, push round on the eastern road. To be fair, the initial strike was pretty classically beautiful: AndyB's platoon were briefly pinned by mortar fire in the woods before the platoon's 2" coughed up a wall of smoke across the front of the buildings and all three sections came in from the south side. There then followed a textbook house clearance - Nos. 1 and 2 sections fired on the first building containing a German section, did it a couple of shock, a couple of kills and more importantly a pin, and in went No. 3 section to close assault, winning by one kill and driving them out.
By this time the Shermans had turned up, and one tossed a couple of HE rounds in the other building containing a German MG42, set it on fire, drove them out and pretty much wiped them out. That was the cue for the other German section to bail out of the village towards the vineyard, and it got caught in the open on the way out.
Meanwhile, a dummy blind headed along the wheat field to the west towards Santa Magdalena, and proceeded to make a pain of itself by simply failing to be spotted while not spotting anything either - it did keep the Germans in the village interested though!
7 Platoon deployed on the edge of the woods, in support of the tanks, preparatory to advancing on the olive grove under a 25pdr barrage...
At which point... the Tiger (in the church, with a glorious field of fire) and the StuG in the vineyard deployed off blinds, and it all went horribly wrong for the British. Within about four actions from the two tanks the Firefly's gun was out, one Sherman was disabled, with its crew bailing for cover, and the other went up with a bang. Unteroffizer Honisch in the Tiger is well on his way to Junior Ace.
The British are, understandably, hollering for any kind of support that will turn up: first up a fire mission from the 25 pounders that fails to do more than scratch the paint. It's followed by a P40 peeling off the cab rank, dropping a bomb on the Tiger, just missing and doing some damage to the church that they're going to have to explain to High Command.
The British push 7 Platoon into the olive grove, but it's clear they are now in a position where they're not going to manage to take Santa Magdalena, not with a Tiger on the loose. To quote the post-session summary for the players:
It's a 'winning draw' for the Germans, in campaign terms.
The British have a reasonable hold on Santa Maria, though a strong German counter-attack could dislodge them, but they made no appreciable dent (other than a couple of architectural ones) in Santa Magdalena. The German battalion 80mm mortars will be called onto another target, as will the British 25pdr battery, allowing both sides to consolidate as dusk falls where they are, with the British A Company holding Santa Maria and the southern woods, and the Germans Santa Magdalena and the heights above it. The olive grove, the vineyard and the wheat field on the east of the road are contested no-mans land, as I don't think either side has done enough to claim to actually hold them yet (yes, the British had men in both, but hadn't demonstrated that they could stay there).
Mike Whitaker

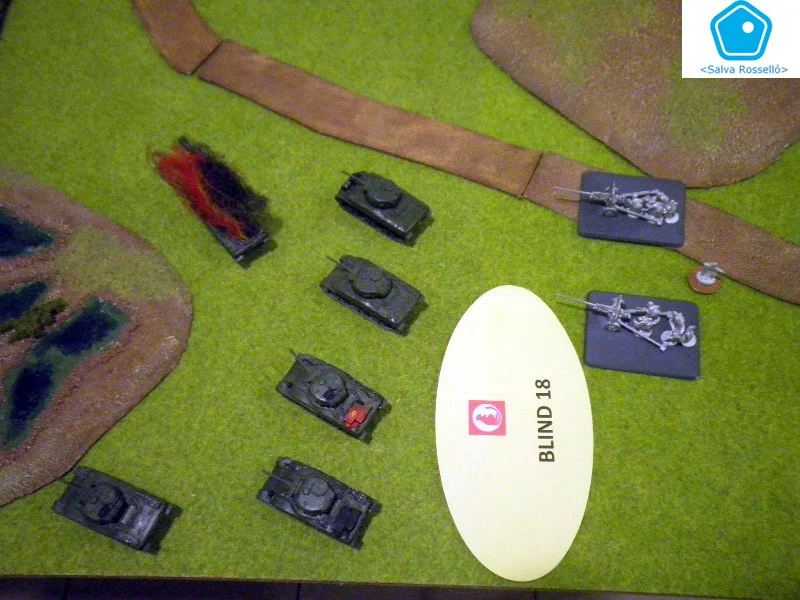
A 6mm I Ain't Been Shot, Mum game played by Mark Luther in May 2015
And at this point we called the game for the Germans.
The Soviets lost every tank: six T26s and fourteen T34s and the two Ba 10 armoured cars. In addition they lost 31 men and three Big Men.
The Germans lost the two Sfl and two PaK 35s outright and one crew was down to one man. Two PaK 38 crew men were KIA. But the grenadiers only had three casualties in their sections . Over a 4 to 1 kill ratio for the ATGs.
Another fun and tense game.
Mark Luther

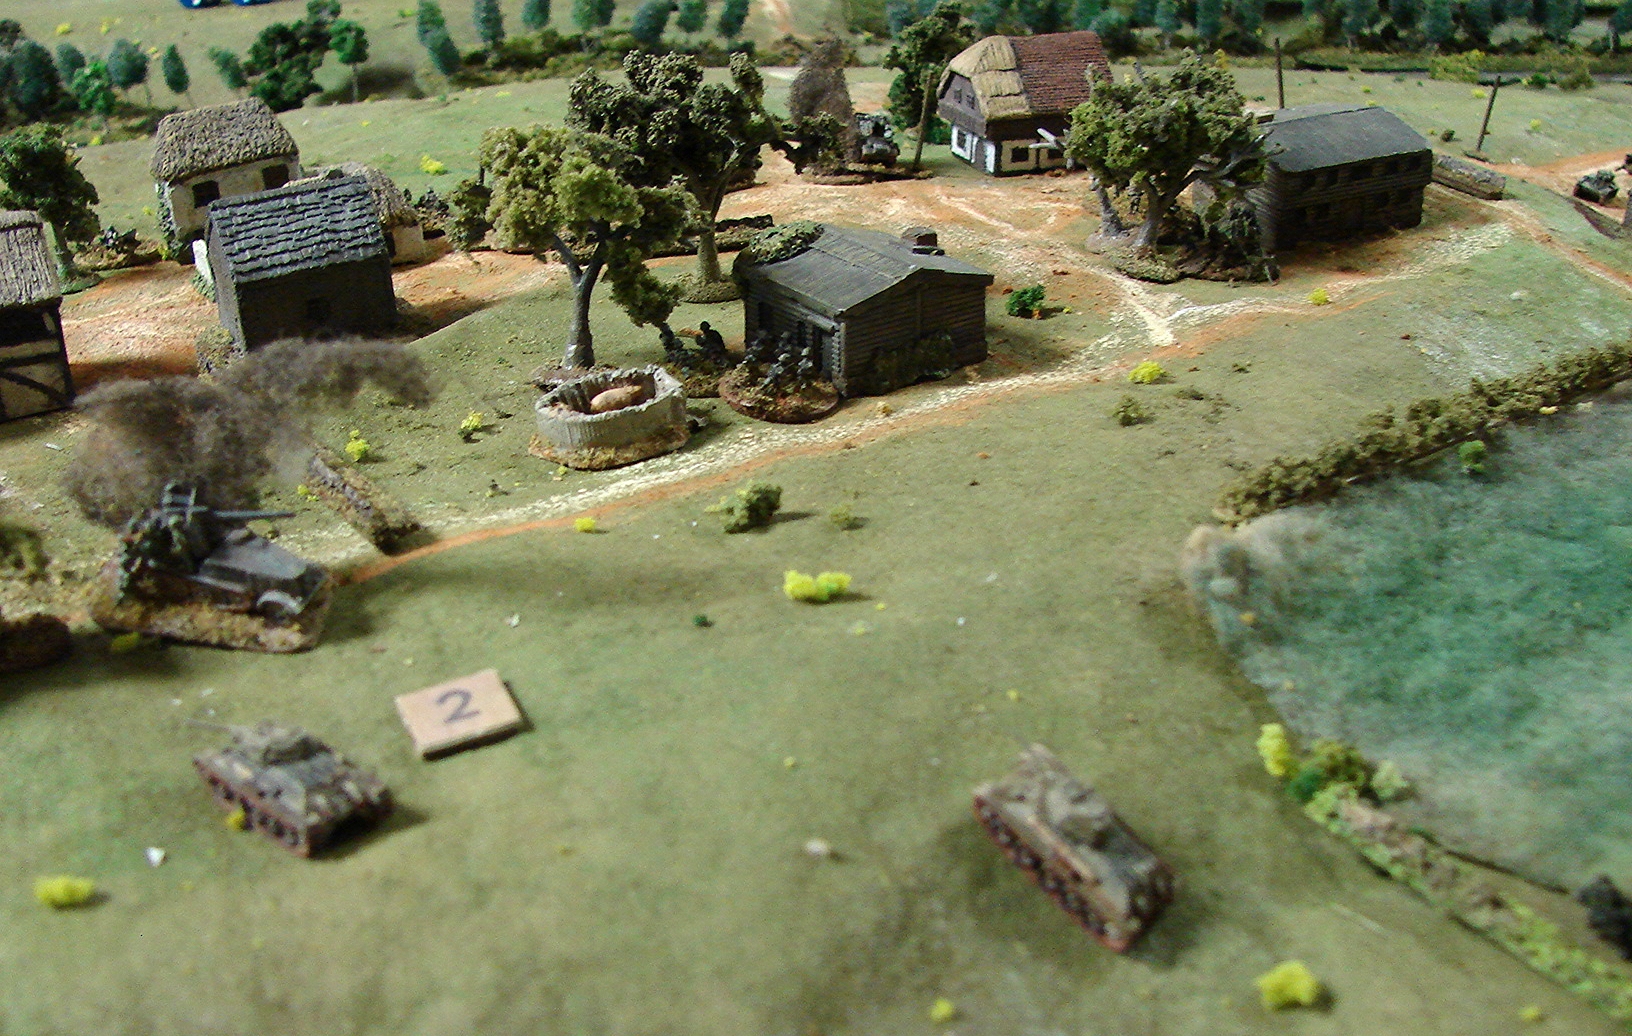
On this occasion I bring you another blast from the past, kept in the dossier marked "Top Secret" and only declassified today. The photos, by the way, don't do the game justice: it was an intense encounter that really absorbed the interest of all the players.
The scenario was a simple one: the Germans must take a small town defended by the Soviets.
The German set up, to the right of the photo to the right, was quite orthodox, but with some troops advancing onto the table not under Blinds: hoping to suggest, I suppose, that there were other troops we couldn't yet see.
The Soviets, with a much smaller force, concentrated their few troops within the town and its immediate surroundings. They didn't bother to conceal their artillery under a Blind, as they wanted it in action right from the start of the game.
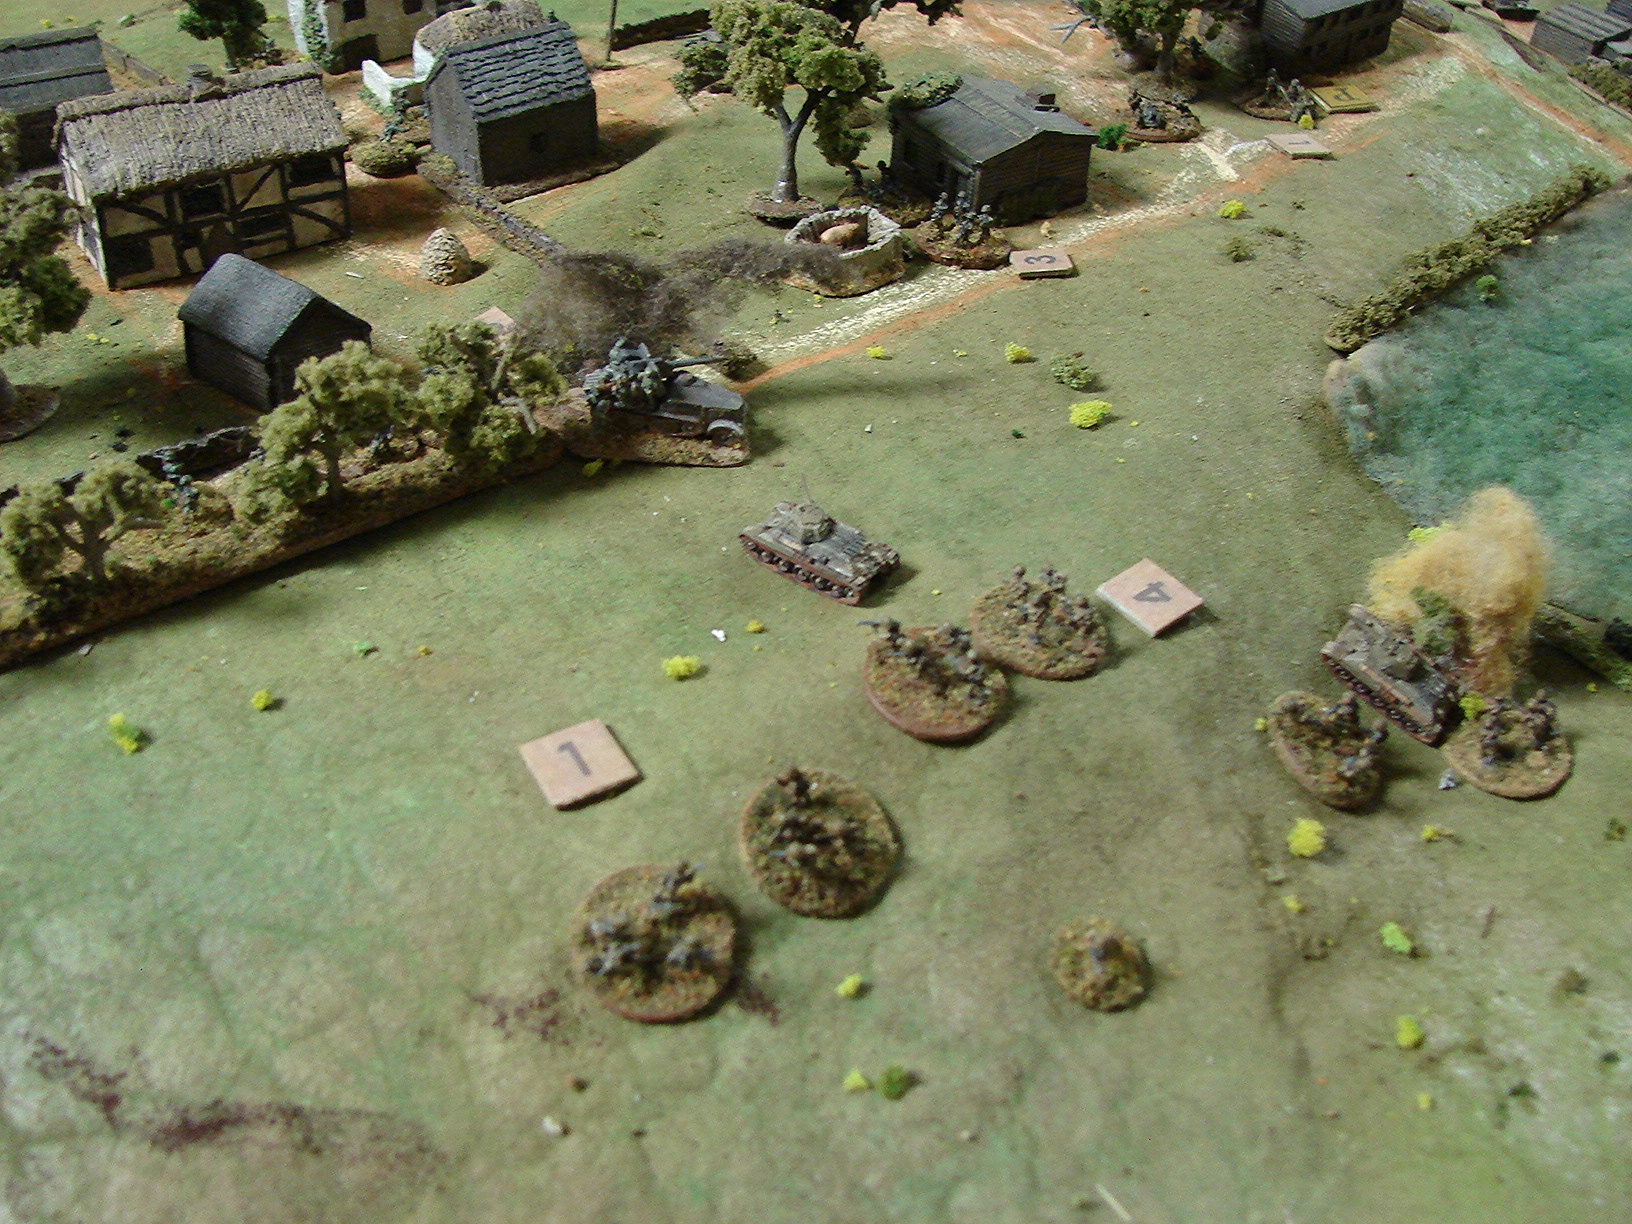
As soon as the game began, the Soviet artillery began to punish the Germans for deploying some of their troops in the open.
The Germans, on the other hand, were totally committed to sending their truck-bound infantry straight into an assault on the town's defenders.
And from that moment, the surprises began!
The Soviets thought that the Germans were going to have off-table artillery to hammer us, but what they actually had was airborne artillery! Fortunately, the Soviet artillery we had on the hill was very well hidden, so the German air attacks failed to take it out.
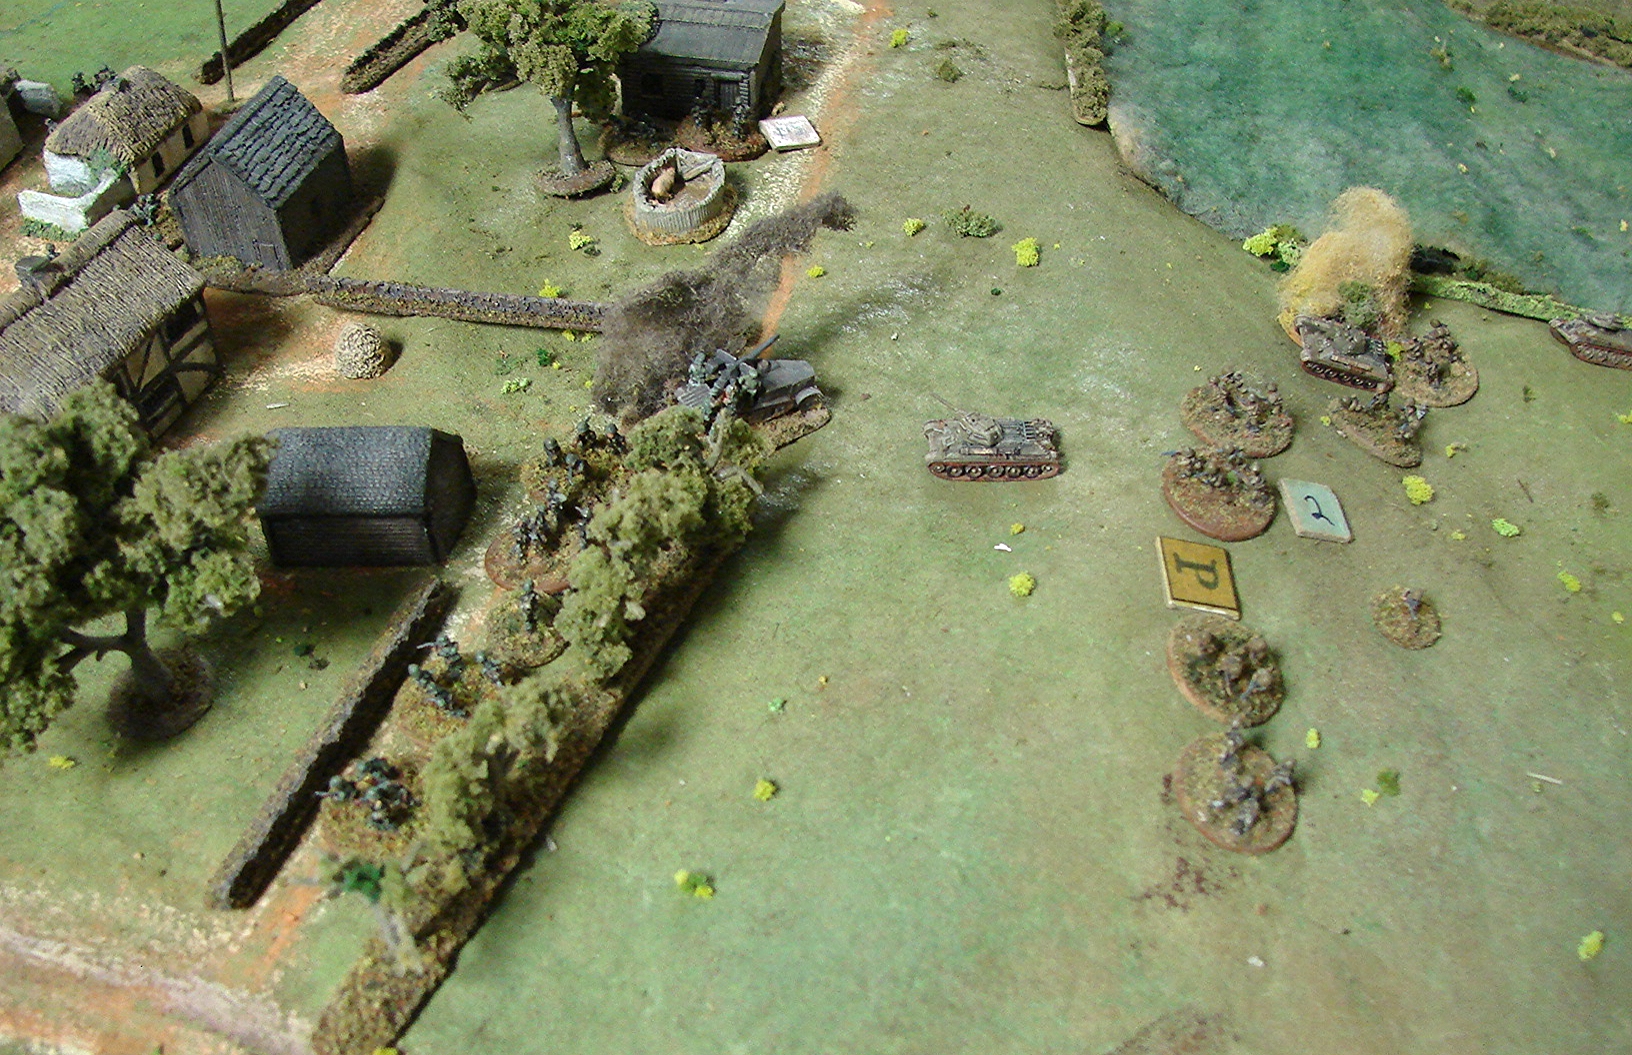
Taking advantage of the fact that his aviation was "distracting" our artillery, the German tanks and other fast-moving units, began their advance.
Even the troop transports were emboldened enough to drive straight through the small village and head straight for the town itself.
More surprises: the Germans had brought artillery with them, 105mm howitzers, which they quickly deployed on a nearby hill in their deployment area.
Since the Soviets appeared to have no off-table artillery, the Germans gradually dared to reveal their troops, with the Soviets quickly following suit:
But the Soviets also had a surprise for the Germans, as they had also brought along some air support! In their first fly-pass, Soviet ground-attack aircraft let loose a stick of bombs right onto a unit of enemy armour that was getting dangerously close to the town.
The results were pleasing: as the smoke from the explosions dissipated, one German tank was on fire.
The German artillery found that it could only fire at our artillery, since the only elevated position where it could deploy was not suited to covering the advance of their troops.
Meanwhile, the Soviet guns, and the tanks hidden in the grove, did their job very well: leaving the Panzer unit severely punished.
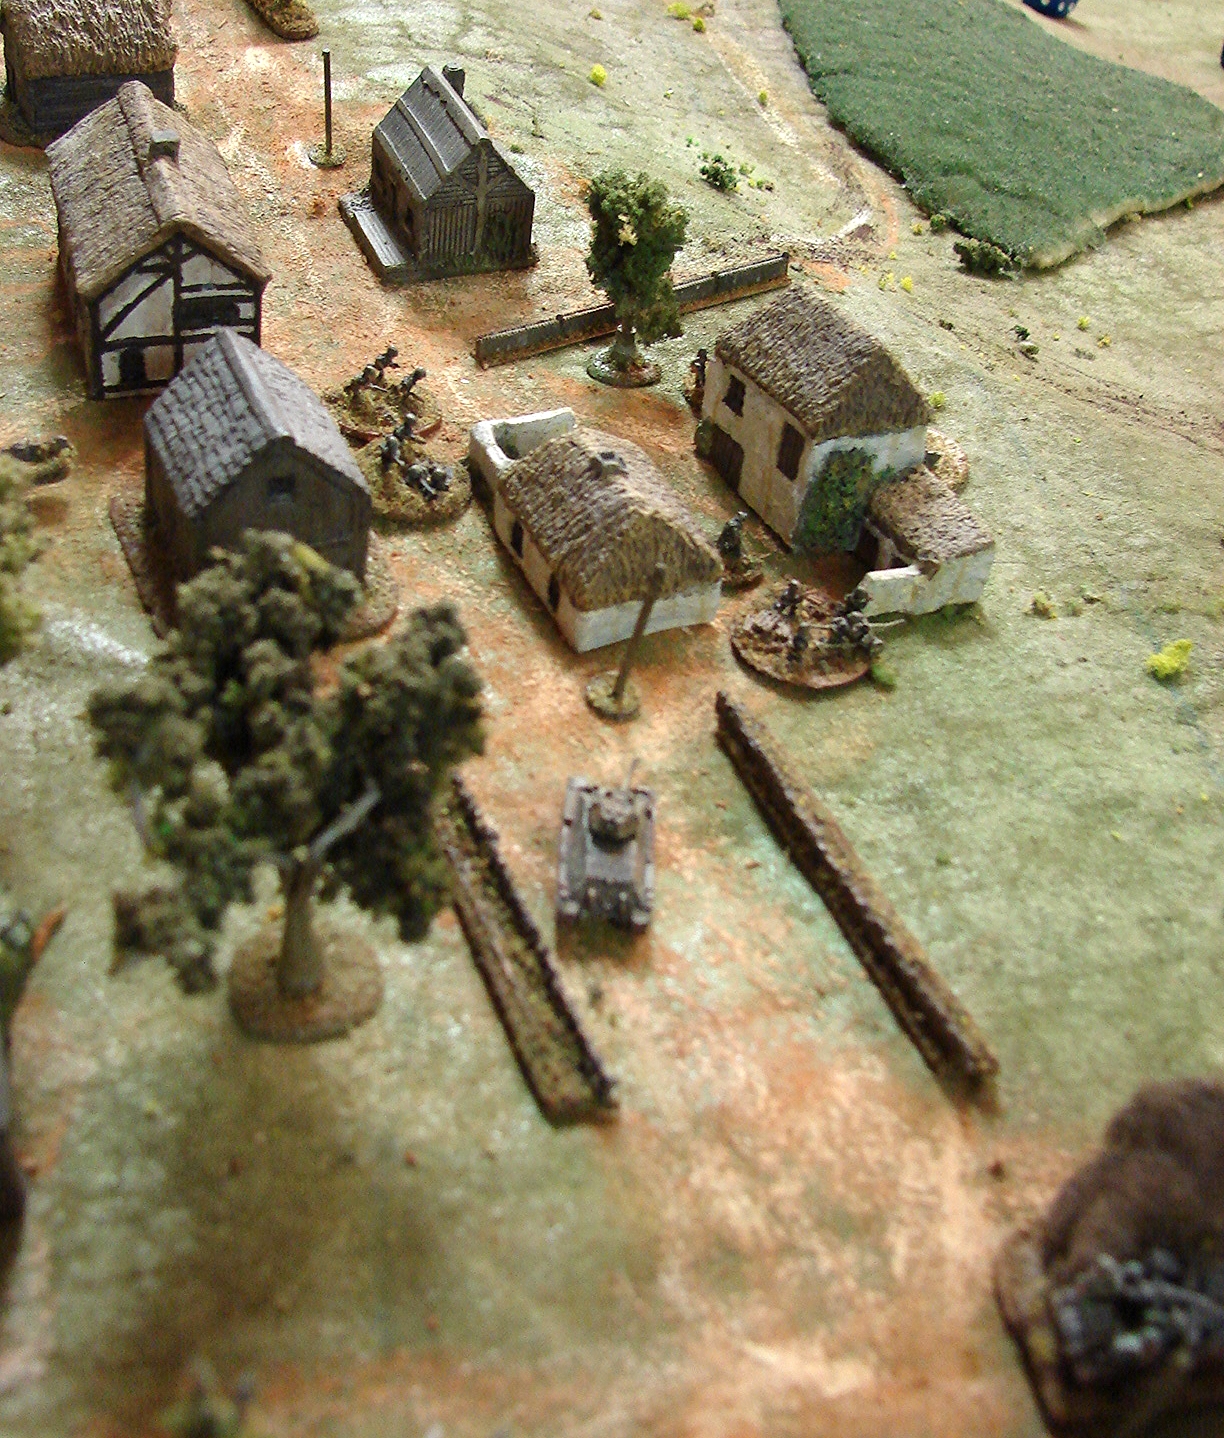
The German infantry, believing there to be no opposition within the town, "cheerfully" entered it...only to find the place full of a Soviet platoon that also received them "cheerfully", but in the Russian style!
At this point in time, on the verge of having to pack up, the Germans had suffered many casualties and were not in a very good condition to make another assault on the town. The Soviets, on the other hand, freshest and most fortunate in chance, were fully operational and ready to give more "love" to the Germans.
It was a good afternoon of laughter.
Burt Minorrot with pictures from Salva Rossello


The second battle of Rob Avery's campaign booklet Vyazma or Bust! takes place in late September 1941 as the Germans continue Operation Teifun (Typhoon), with an attempt to take Sychevka, a town just to the north of Vyazma.
The German player is tasked with capturing the bridge at the hamlet of Urk which his division will use to outflank a strong Soviet position. The Soviet player, currently in disgrace after defeat in the last game, commands a motley bunch of poor quality conscript troops dug in around Urk.


After the loss of his armor, the German player didn't have the will to continue the battle and retreated. An impressive display of Soviet firepower in combination with a lot of German tactical mistakes gave the victory to the Soviet side.
Vaggelis

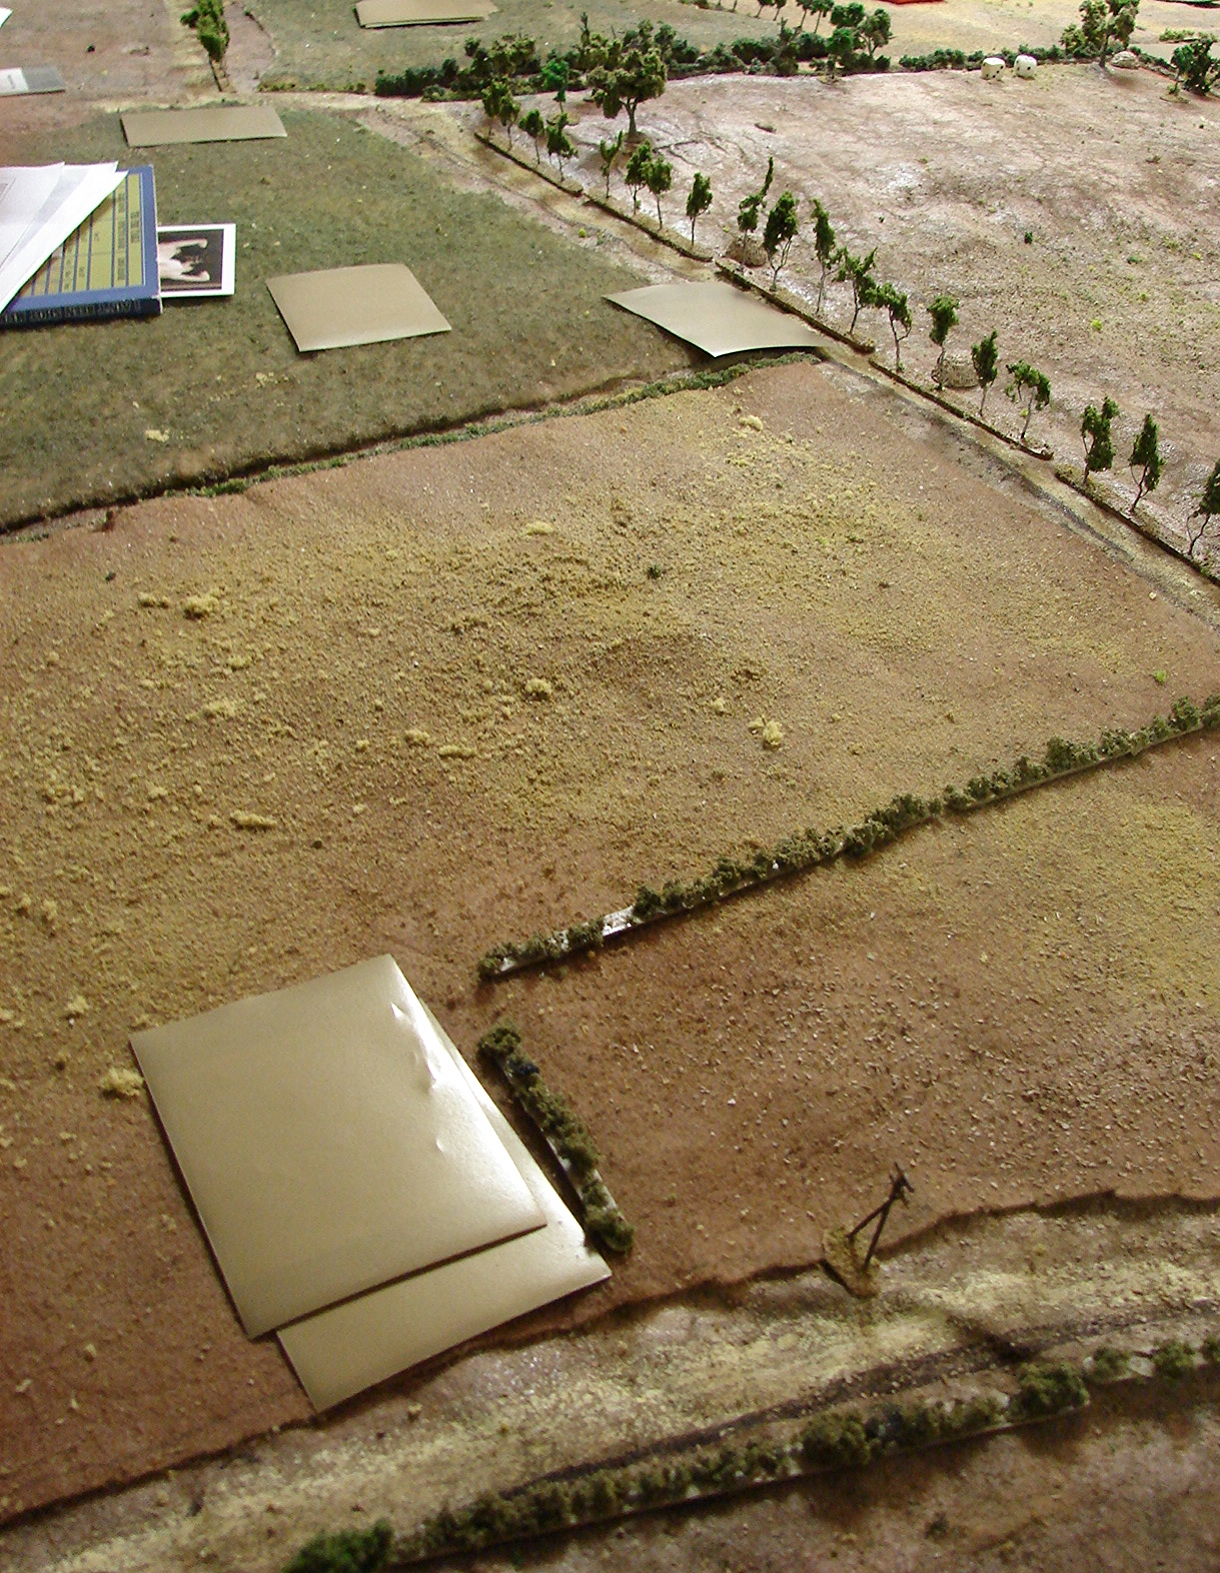
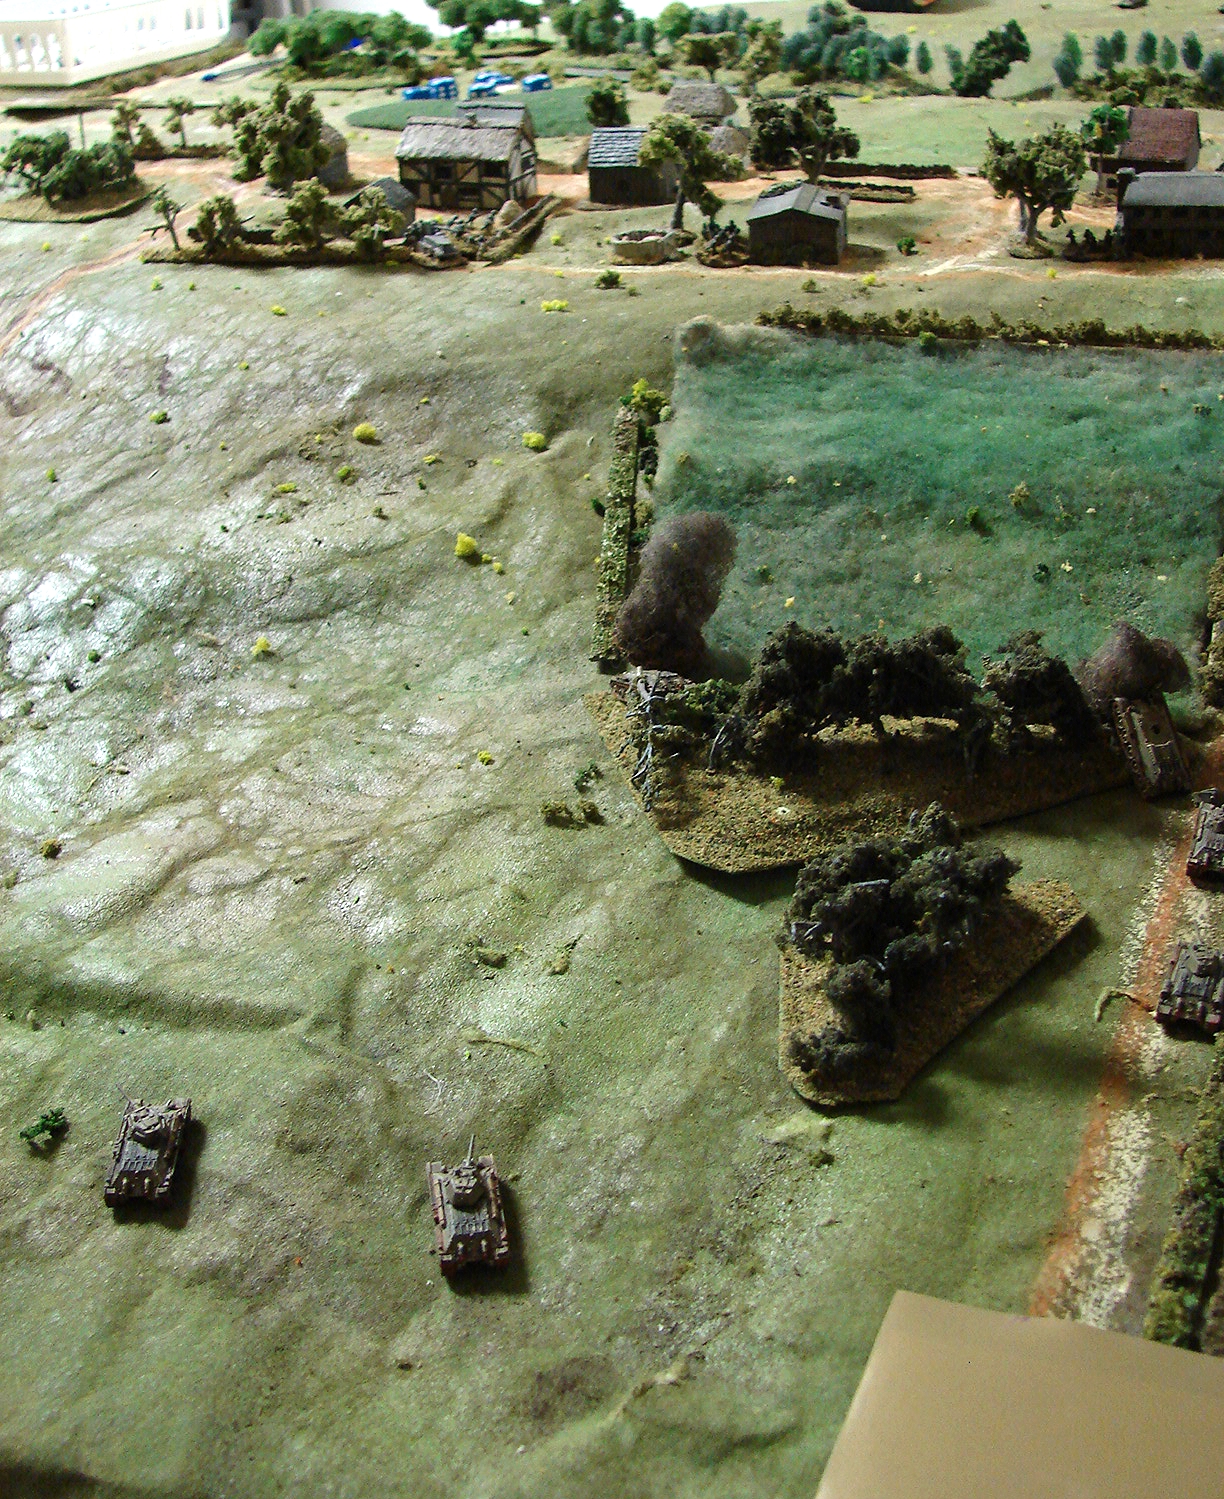
This was scenario 1 from Cymru Am Byth, the Welsh Guards scenario book by the TooFatLardies. The countryside is flat leading towards the railway embankment where the British defenders were. One section of French infantry with a Big Man were in the house on the far left of the map.
The Germans enter from the bottom of the map
The Germans were quickly spotted, and advanced on Arras, with the Panzers quickly leaving their infantry behind. The German CO seemed to become quite enamoured with the farmer's daughter and didn’t move out of the farm all game: we later discovered that his card hadn’t been given to the umpire to add to the deck!
The unstoppable forces of the Fatherland advance
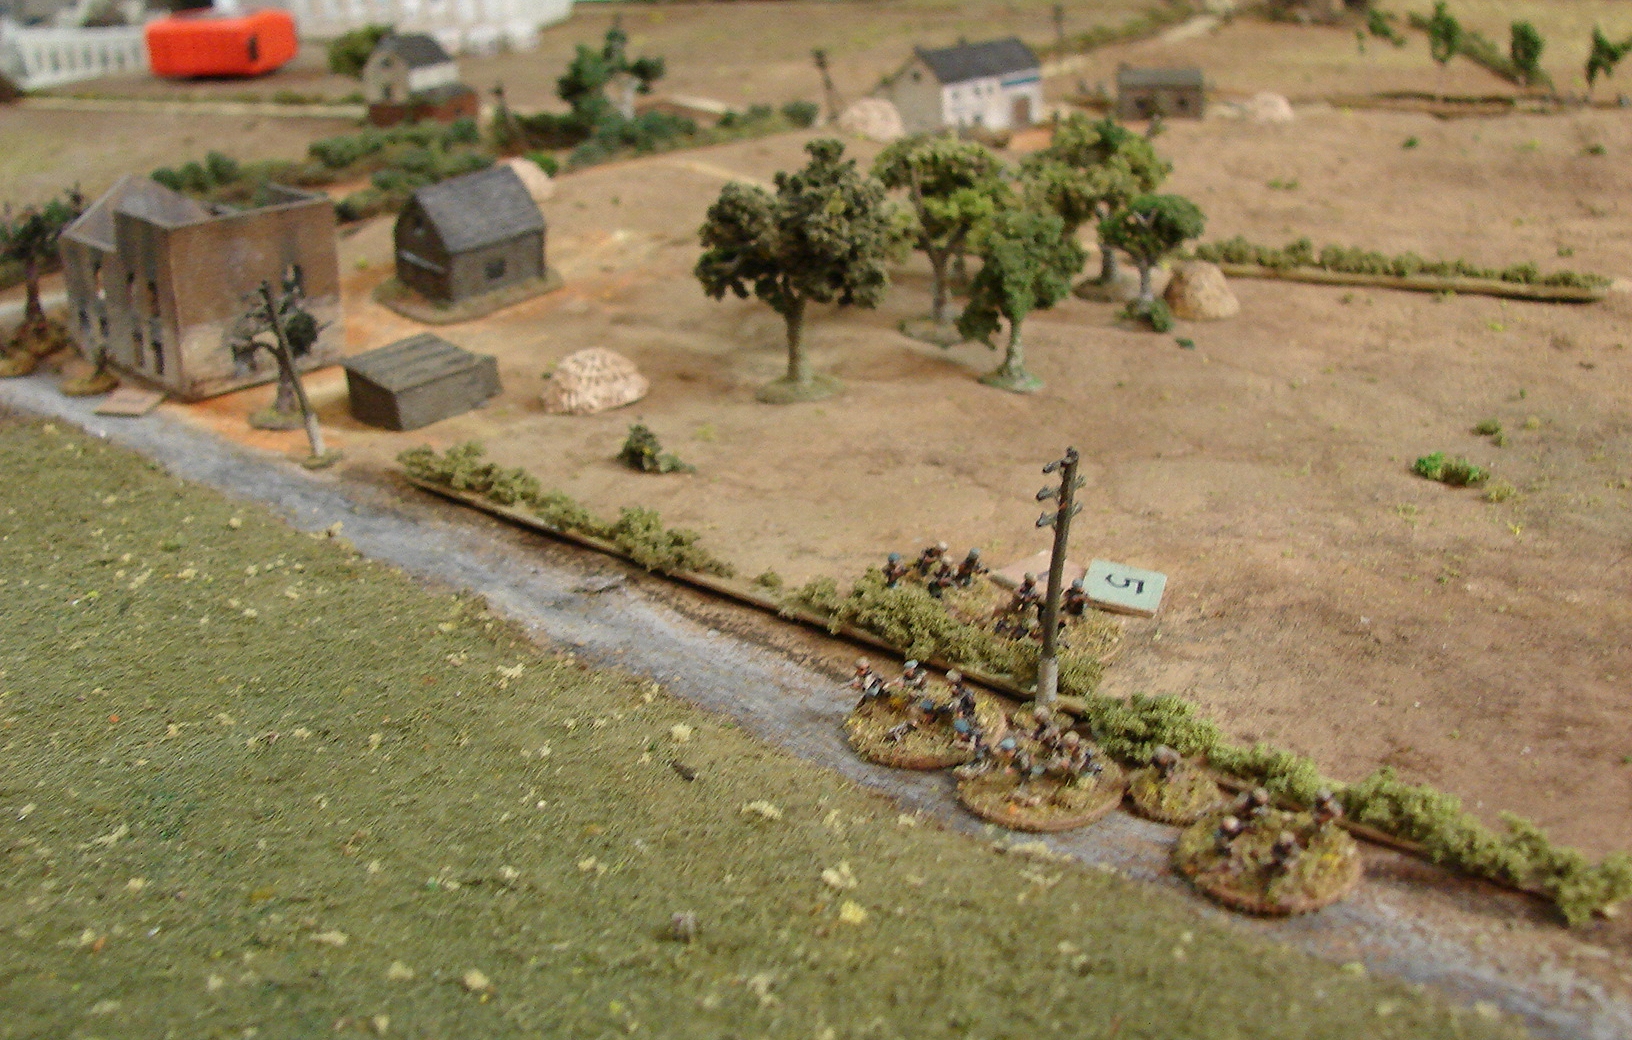
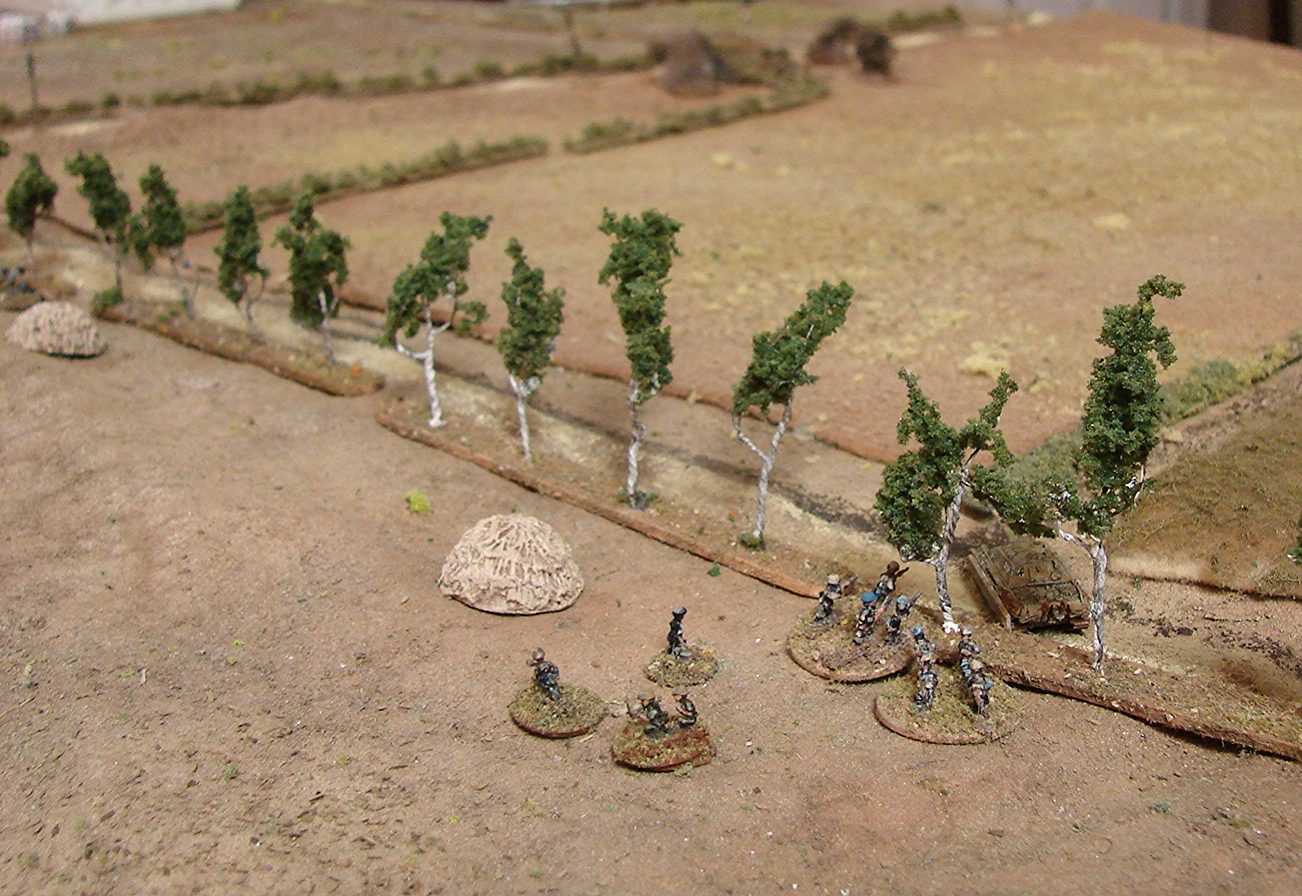
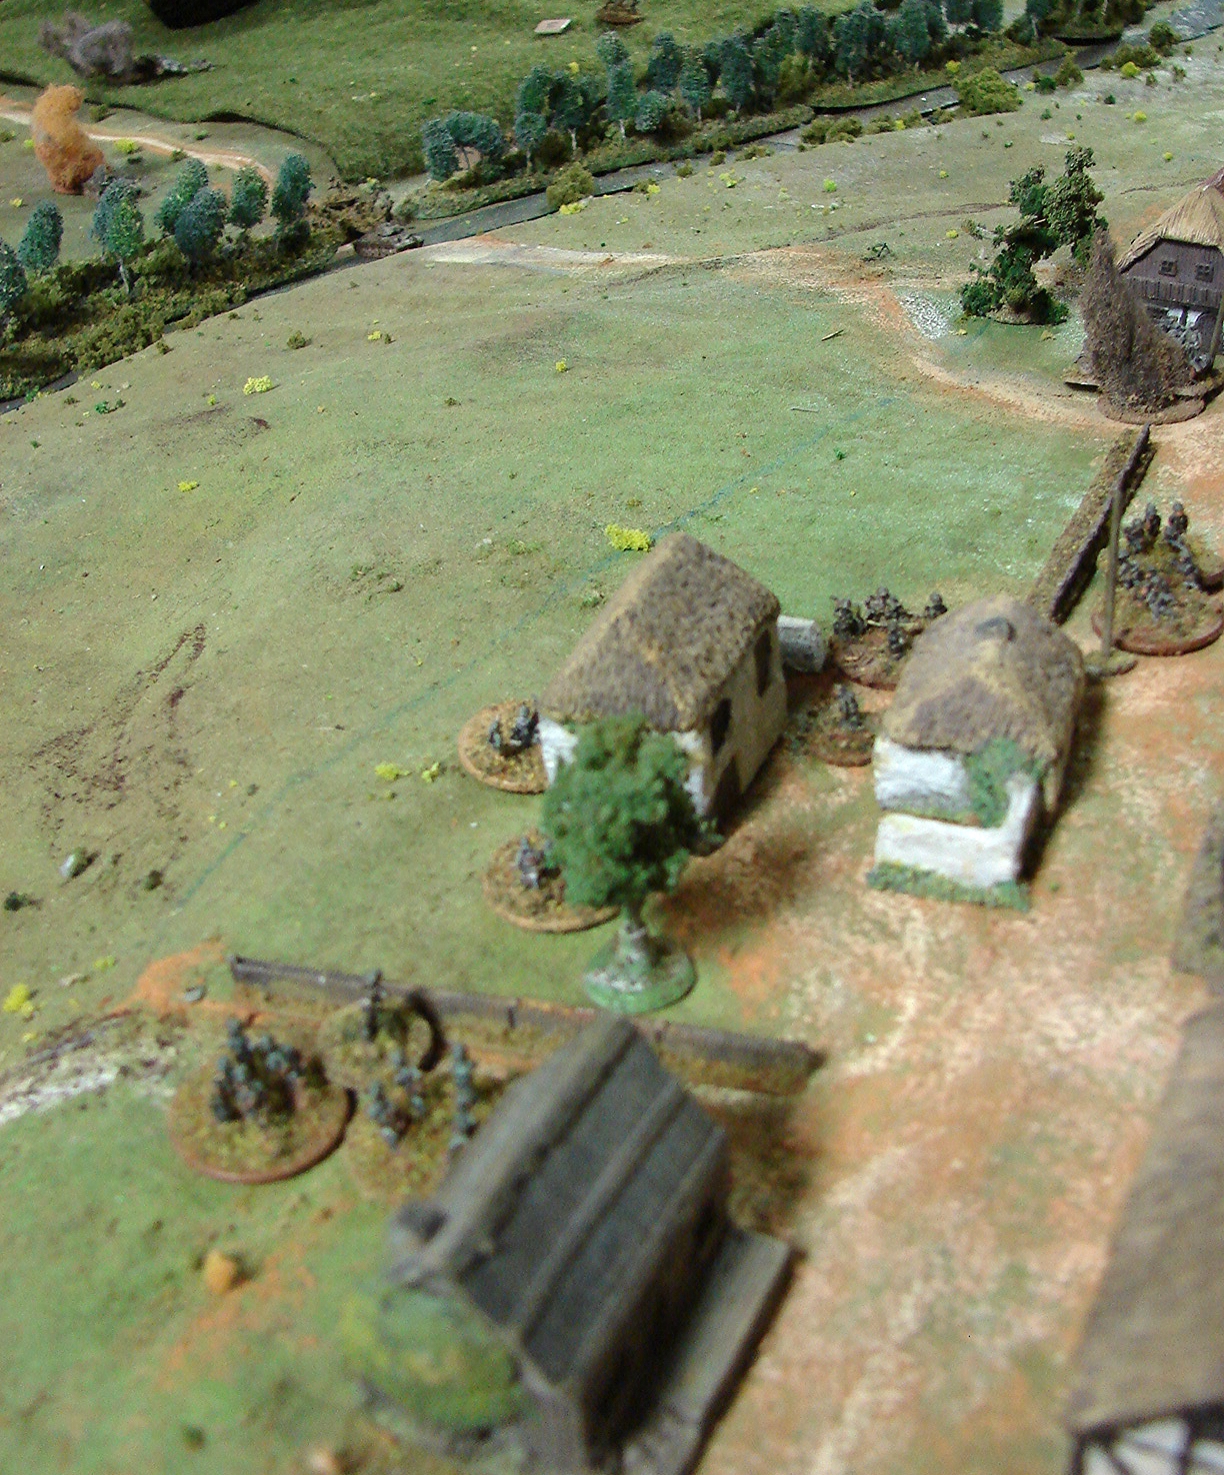
The Germans spotted there was movement in the houses by the railway bridge but weren’t able to see what it was. The French section had retired from their position in the house at the end of the village and very astutely took up a position on the railway embankment (by the green tape) from where they kept the left hand German platoon pinned just out of view for the rest of the game:
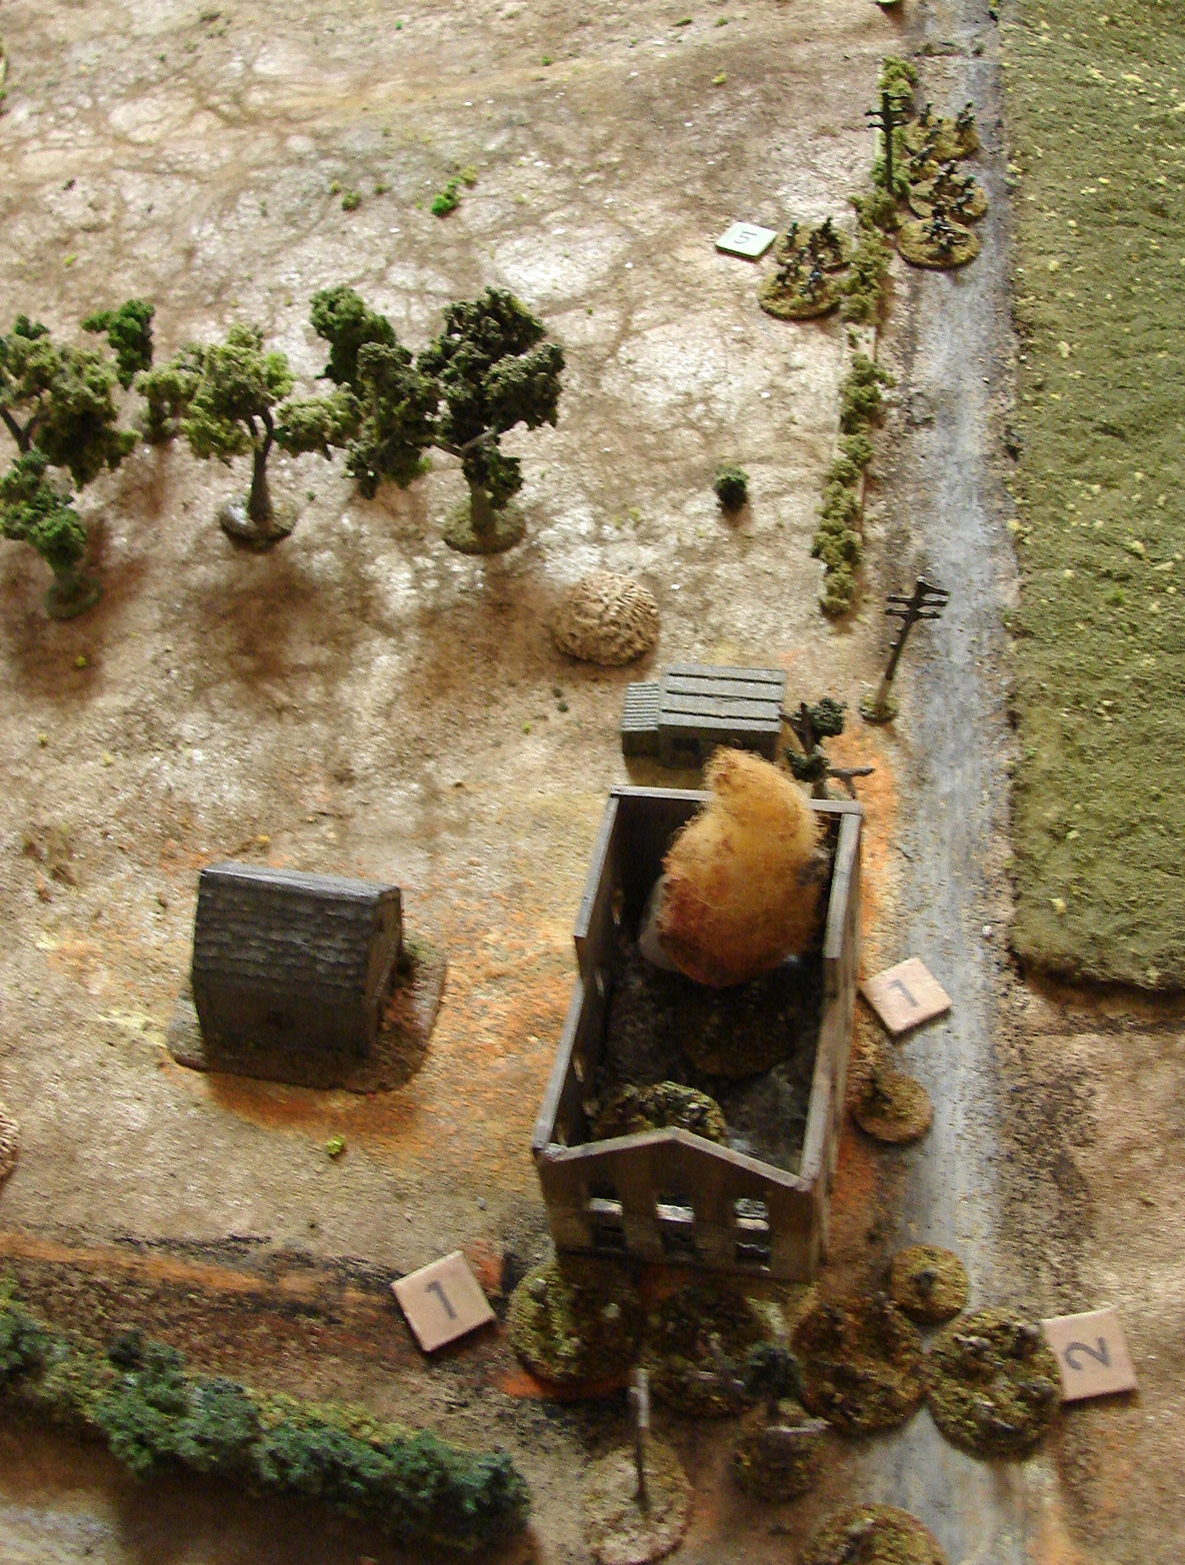
The German Panzers made a rush for the railway underpass, forgetting that they only have tin cans. They were ambushed by British infantry who, while not destroying any, did knock several bits off them, at which point due to how slowly the Panzers had been advancing, the British reinforcements of two troops of Vickers MkVIBs arrivedand gave them the coup de gras, causing two to be abandoned.
The second Panzer zug, in Panzer 1s, and the third infantry zug were still on Blinds in the background. They didn’t get past the railway line, which was now strongly held by the Welsh Guards.

This was a game we played last year involving British forces in Syria in action against the Vicky French. I have included the players briefings.
The Commonwealth troops faced the biggest challenge as they had no anti-tank guns apart from a couple of Boyes rifles, and their 25 pdr battery will not be available either, no matter how many requests their FOO makes.
Historically the anti tank guns (only 37mm Bofors anyway) and the supporting 25pdr battery had been withdrawn by Brigadier Lloyd to support the attack on Damascus, and despite several urgent/desperate calls to have them returned when the fusiliers realised they were in deep trouble with French tanks advancing on them, they would not be returned until the action was over. The battalion were captured or wiped out after a day of fierce fighting in the streets, houses and orange groves of Kuneitra between the outnumbered and out gunned Fusiliers and Vichy French Senegalese supported by Renault R35 tanks.
The game followed history quite well. Roughshaft's Fusilier company put up a spirited defence against the French, and kept their left hand platoon pinned in the orchard in front of the town for most of the game. However when the French attack on the right flank supported by the R35s got into the town, it became a series of small fights with the Brits unable to stop the French.
Unfortunately (as usual) I only took a few pictures of the earlier part, getting too wrapped up in events to remember to take any pics of the finale.
One benefit of doing this AAR is that I have found my missing 8th Army company command stand which has been AWOL since this game. I realised it had been put inside one of the buildings and forgotten.
It is June1941, and we have launched an offensive to take Syria from the Vichy Frenchand their German allies before Germany decides to send more than just a few squadrons of aircraft out here to threaten the oil fields of Iraq and Persia.
Sadly, as this is something of a backwater and most of the troops are needed in Egypt and Libya to fight the Italians and the newly arrivedAfrika Korps (Operation Battleaxe is in full swing there), this campaign is being run on something of a shoestring.
General ‘Jumbo’ Wilson has settled for a three pronged advance to Damascus, the main attack is being delivered by a reinforced Australian brigade driving up the Bekaa valley, whilst an Indian brigade is advancing up the road over the Golan Heights through the town of Kuneitra. The eastern flank is being covered by a horsed cavalry force of yeomanry and arabs advancing up the road from Deraa through some place with the unpronounceable name of Ghabaghab, which the entire army calls Rhubarb!
You are Captain Roger Roughshaftin command of B co. of the Royal Fusiliers.
Your unit, 1st Battalion the Royal Fusiliers captured the town of Kuneitra yesterday from the Vichy forces, after a hard action with some very tall African French troops, and your company has been tasked with securing the northern sector of the perimeter against possible counter attacks, while we wait for the rest of the brigade to catch up.
Company HQ
Platoon 1
Platoon 2
Platoon 3
Royal Artillery
It is June 1941, France has fallen, Les Anglais abandoned her in her hour of need and now they are trying to take her Colonies!
TheBritish have invaded Syria from Palestine, it is now becoming apparent that their main thrusts towards Damascus are coming up the Bekaa valley and across the Golan heights.
General Deverdilac, the Vichy commander in Syria has held back his reserves and armoured troops whilst trying to identify the main axes of attack and waiting for the british to commit their tanks. The british have now advanced up the Bekaa valley as far as Merjayoun and Jezzine, and yesterday after a hard fight with our Senegalese troops they threw us out of the town of Kuneitra, here on the Golan Plateau.
It has become obvious that our spies can’t tell the difference between those little carriers the British use, and a proper tank, and that the stories of hundreds of tanks waiting to attack us are rubbish.
They don’t have any tanks here at all!
It is now clear that the British have attacked French Syria with an insultingly small and under equipped little army. They are taking the piss, treating us as if we were Italians! Well we will show them that Frenchmen are not to be trifled with!
You are CapitainPierre Choux, you are in command of acompany of Colonial infantry and have just been joined by 2 platoons of R35 tanks. You and the rest of your battalion supported by the newly released tanks are to retake the town of Kuneitra and send the Anglais scuttling back to Palestine!
Allons, Vive la France!
Company HQ
Platoon 1
Platoon 2
Platoon 3
Tank Platoon 1
Tank Platoon 2
NB: The R35s operate on individual cards, have no radios and one man turrets
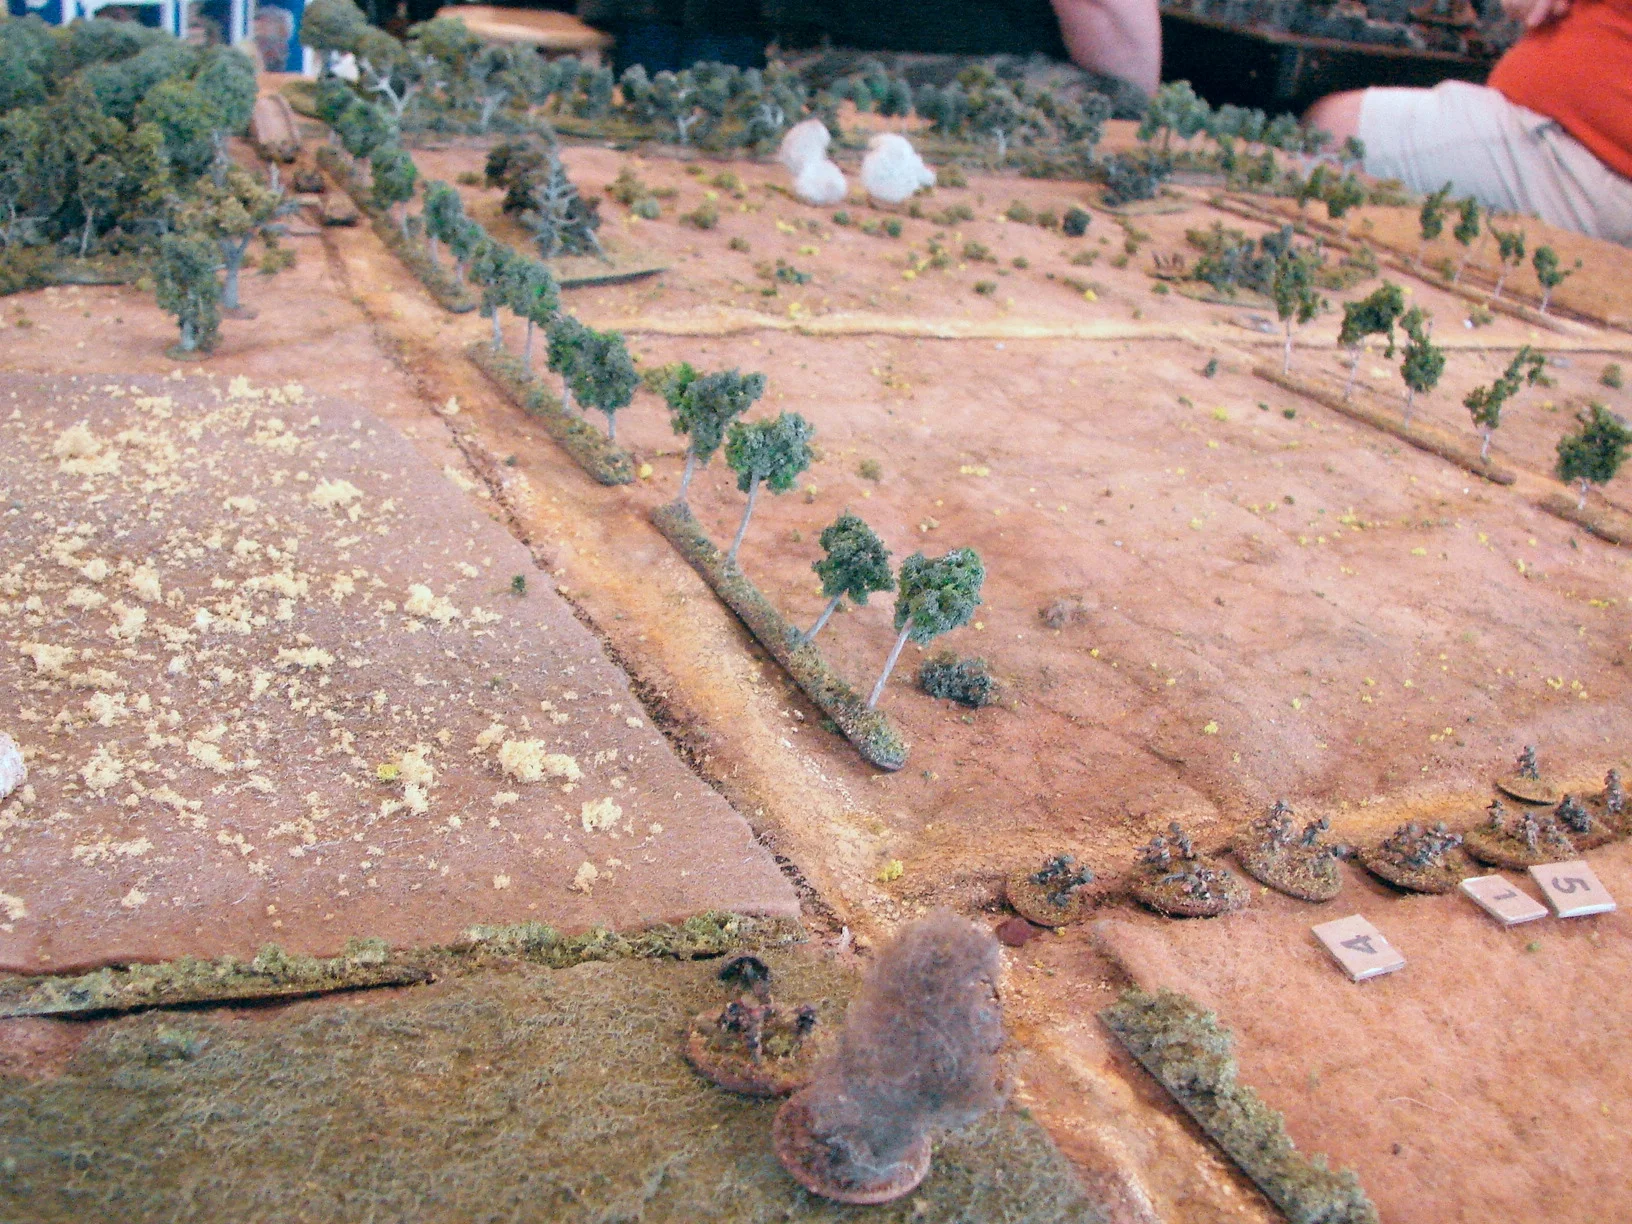
The picture below gives the view of the table towards the French entry point, the British managed to keep the two French Blinds on the far right (one infantry platoon and what turned out to be a dummy) pinned down in the orange grove in front of them, though they had a couple of sections very battered in the process. The Blinds on the left of the road sneaked along the edge of the table screened by the hills and managed to get almost up to the town before they were spotted.
Another view of the british blinds in the town
The hand of god...well, alright, Colin telling his unit to fire.
The damning picture of Colin hiding my command stand in the building!
And finally, the French attack breaks into the town:
Sadly at this point I forgot to take any more pictures!
The hall we meet in had just bought new trestle tables which have a slight ridge around the edge which rather annoyingly makes buildings/ roads etc. sit at an angle when they are over it, I shall have to try putting some underlay under the cloth.
Egg
It is February 14 1943, and the green, but well trained American 1st Armored Division troops are strung out on a wide front as they push into Tunisia to finally boot the Afrika Korps off the continent. On the ridge beyond, 88mm batteries peck at the isolated US Infantry dug in on low forward rises in front of the cross roads town of Sidi Bou Zid.
The AFRIKA KORPS ADVANCES
The Americans know numerous large columns of German troops are closing in because of their towering dust clouds. They know that an entire combat command of 1st Armored is driving hard to meet the threat so they can move back in order. They don't know that they are in the middle of two pincers, the 10th Pz Div. and the 21st Pz Div.
US Forward Positions
The Germans were commanded by Captain Biederman. His powerful force included four long barrel Panzer IVs, five long barreled Panzer IIIs and two almost invulnerable Tiger tanks. In addition to this was a scout car Platoon (two SDKFZ 251s) and, for the coup de gras, a small truck-borne infantry platoon. They could expect air support in the form of Messerschmitt fighters for air cover or Stukas laden with bombs .
ERMAN LEFT STARTS IN
The tactical problem was simple: cut off the forward US infantry and destroy any reinforcements pushing to relieve them. The Germans needed to come onto the board on either side of the small bluff occupied by a single US infantry platoon. They chose to bring their Pz.IVs and Scout platoon in on their left flank and their Pz. IIIs and Tigers on the right. The panzer grenadiers would wait off board for their moment.
The US armored Force was commanded by Captain Ritchie and Lieutenant Sopp and consisted of two platoons of five Shermans, a platoon of four Lee tanks, a scout platoon of two Stuart tanks and two M3 Scout cars. The infantry platoon up forward was unequipped to help in this armor heavy fight except for its one 57mm anti-tank gun tucked in behind the bluff — pointed, it turned out, at the avenue of advance of the Tigers.
US Left Flank Meets the Tigers
The American forces came off Blinds fairly swiftly as they rushed to stem the German panzers. The two platoons of Shermans went left to face the Tigers and the Lees and Scout platoon went right discovering they were face-to-face with the very capable Pz. IVs. In spite of the heavy armament and armor on the Tigers, both of them swiftly succumbed to the fusillade of 75 mm and 57 mm fire.
shermans duel with tigers
Right Flank Tigers
At least two of these shots were Critical Hits. Soon both Tigers were dead and burning with no US tanks killed yet and only a couple tanks damaged.
German Left Starts In
Even though their heavies were dead, the superior morale of the Afrika Korps tankers on the right allowed them more action points/ shots which allowed them to kill or disable most of the ten Shermans they faced before all five Pz IIIs were knocked out.
Meanwhile on the German left front, the Panzer IVs shot up the light platoon, disabling the guns on the Stuarts but making no kills.
When the Lee tanks came up, the Germans flamed all four of them before any of the big boxy American tanks could get off a single shot.
The Stuarts and the Scout cars and a 105 battery did put some damage on the German tankers but they were all still mobile and still deadly. And it was lucky for them that they knocked out everything in front of them because at that very moment the German right flank was completely silenced.
US RIGHT BRAVELY ADVANCES TO ITS DOOM
lees destroyed!
It was at this point that the American infantry on the forward bluff finally made it into their halftracks and tried to run for it across the gauntlet of the German left flank Pz. IV gunners.
At this point, the Stuka finally heeded the call of the Forward Observer and attempted to bomb the Shermans. He missed the target but hit one of the fleeing infantry halftracks, disabliing the vehicle and killing some of the infantry.
Battered US Cavalry Platoon
belated stuka strike
We called the game at that point but most of the American forces had escaped. The superior remaining force on the table was the Germans. Nonetheless, I'd have to call it a Pyrrhic victory for the Germans. When I set up the scenario, I was sure I would have to apologize to the Americans for putting them in the position of ducks in a shooting gallery but the early defeat of the Tigers made this a very close game indeed. Well played by all!
Joe Patchen
Retreating US Troops Run the Gauntlet

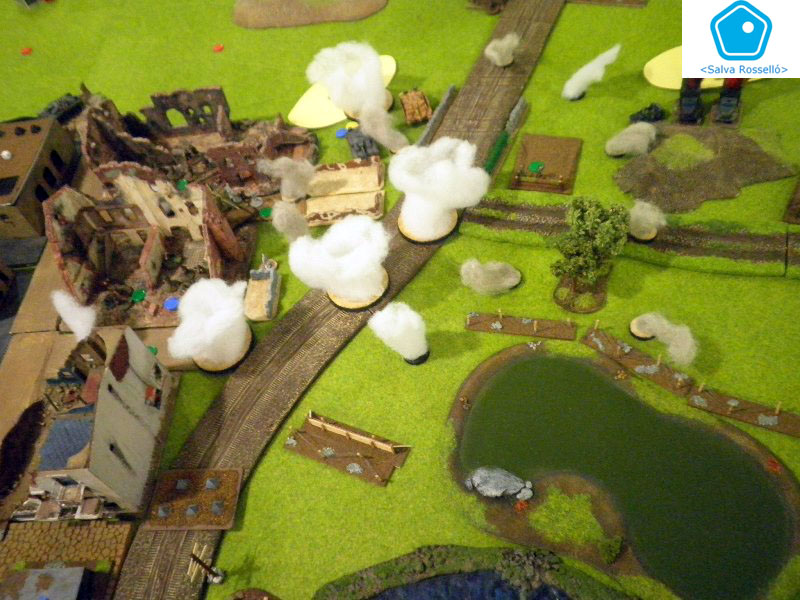
This was a randomly generated game played in October 2012 just for a bit of fun and to get some wargaming in. Jordi and Dae played the Germans, Strategus and Burt played the Soviets.
After we'd generated the terrain by rolling dice, we decided that the Germans had to defend the bombed out town, with the Soviets having to overwhelm and evict them.
The Germans deployed within the town: some of their troops under Blinds, some already on table - especially their armour, which they wanted to be able to move as soon as the game began.
The Soviets, on the other hand, advanced everything under Blinds, as they did not want the Germans to be able to determine their main axis of attack. One thing they did deploy on table as soon as possible was their battery of katyushas: aiming to give the Germans a little "love and affection" right from the start!
The Germans were shooting at any Soviets they could see, but were getting back as good as they were giving.
The Russian artillery had zeroed in on the German positions on the riverbank, and were pounding them for all they were worth.
The Germans were spotting Soviet Blinds: which actually worked in the Russian's favour as they had realised that after the first surge forward, it would have been better to have deployed onto the table.
The Soviets had positioned their mortars on a hill (which was a mistake that they won't make again) and had begun their own bombardment of the Germans positions.
Meanwhile, the rest of their force were getting deployed on table and gradually creeping forward towards the German-occupied town.
The Soviets prepared to cross the river, hiding their infantry in the woods along the banks as they waited for the best moment to advance. Soviet anti-tank gunners, on the other hand, had brazenly moved right up to the riverbank in a hunt for targets. It was the Germans guns, however, that were doing damage.
Now, however, the massed guns of the Soviets prepared to shoot, laying down devastating amounts of fire until plumes of smoke could be seen in the town.
Some German units were lucky, and the German guns were quick to reply: taking out the Soviet mortars in full sight on top of the hill (never again!) nd severely damaging some infantry.
As time ran out (an unfortunate consequence of not being able to leave a game out as we play in our local Civic Centre) the Germans were still in the village, but with many casualties, and the Soviets were as yet unable to cross the river in the face of strong German opposition.
Even though it wasn't very clear whether either side had actually done enough to win the game, it was a good laugh...especially when the Germans discovered the almighty destructive power of the Katyushas (their players' faces were a picture!) even if their fire didn't actually kill many men.
Burt

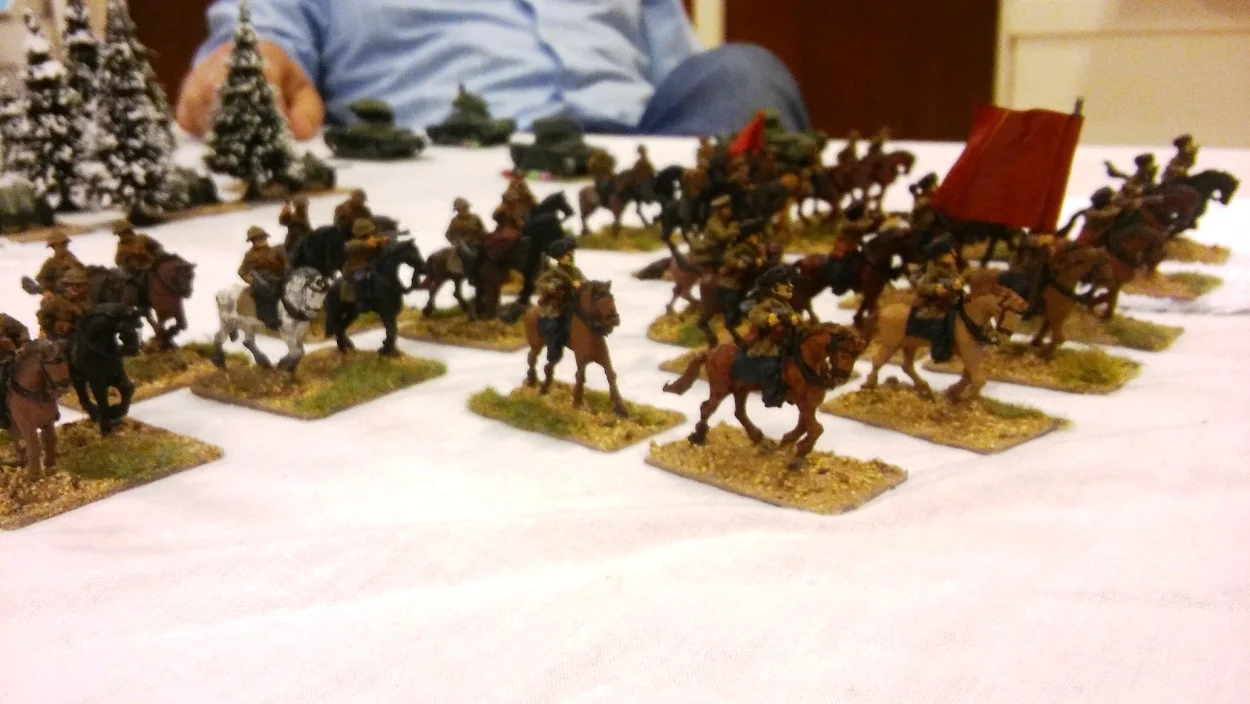
This game was a great laugh to play in and had everything. Monster tanks, heroic last stands, futile human wave attacks and a cavalry charge! And snow, lots of snow.
The scenario was quite simple: Andy, Ian and I had to liberate some of mother Russia from the evil clutches of Des and Daren’s Germans. To do so we had the always fun T-35 and T-28 tanks, a T-26 company, an infantry company and a Cossack company. The filthy fascist, imperialist invaders had a well dug in force liberally equipped with HMG’s, AT guns and a few tanks in reserve.
Our plan was nice and straightforward in a Stavka approved way. Andy’s Cossacks and the T-26’s would advance quickly on the left and engage the Germans to cause them to reveal their positions whilst our heavy tanks rolled forward down the middle to take them out. My infantry company was to work along the right flank, move one platoon through a wood to take out an advanced German position in the flank and use this as a jumping off point to roll up the rest of the position whilst the other two kept them busy – this flanking had to be done by the infantry as the deep snow present there made it impossible for the cavalry or tanks to do it. Obviously if Andy’s T-26’s could do the same over on the other flank so much the better.
Things didn’t go well from the off for either myself or Ian. Ian started to receive fire early on and his tanks suffered from the off without managing to do much harm themselves, I recall turrets being taken out and a terribly glacial rate of advance which wasn’t helping the cause much. I did start to advance well but once I come off my blinds after being fired at I seemed to just sit there for ages without my cards coming up. It took a few rounds before I asked our glorious leader if they had actually added my cards to the deck, no was the answer and thus I could get moving once more. Andy was not having any such trouble and had leaped forwards and was trading shots with the Germans and was beginning to suffer from doing so whilst our remaining tanks got more involved in the fight but not in a really effective manner, indeed some dead eye shooting from the German PAK gunners and intervention from a Panzer 38 soon put paid to Andy’s tank force.
I eventually managed to get my chaps moving but came a cropper when executing my flank attack when an Iron Cross winning display from the battered German defenders put paid to my glorious charge and held on! It was about this time when Andy decided that some drastic action was needed if we were to carry out our mission and went all Dr Zhivago, mounting up his remaining lads and led them in an all or nothing charge on the German line. Surprisingly this didn’t end well either, the few remaining survivors limping back to cover and the battle was over for us as we decided we couldn’t break through.
Bags of fun to take part in and great to see something different played, hopefully we will do some more sometime this year.
Iain Fuller

19th of August 1944. St. Lambert‐sur‐Dive, Normandy, France. The Allies attempt to plug the neck of the Falaise Gap.
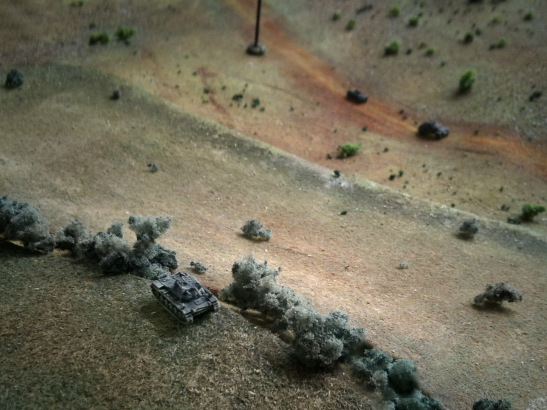
A new addition to my collection! GHQ, 1/ 285 Tiger I
This is a game based on the last of the scenarios that appear within the IABSM v3 rulebook, which we slightly adapted to fit our table. We wanted a scenario with more closed-in terrain than in our previous game, set in Russia. Can you imagine something better than Normandy? Maybe a scenario in Far East...aaarghh?
The scenario is set late in the Normandy Campaign, on August the 19th, and focuses on the Canadian advance into St Lambert‐sur‐Dive where the Allies were attempting to plug the neck of the Falaise Gap.
Vaggelis


This was a game of IABSM fought on the 22nd of September 2012 between the Germans (played by Fasbender and Dae) and the Soviets (played by Strategos and Burt). It was a randomly generated scenario just for a bit of fun.
The Soviet advance through Belarus during the summer of 1944 as part of Operation Bagration has reached a small town. The Germans are trying to slow the Soviets down in order to gain enough time to scrape together what troops they can in an attempt to deal with the oncoming red tide. The town, already devastated, contains a couple of crossroads of strategic importance.
Quickly sending forward their light 45mm guns as an opening gambit, the Soviets prepare to advance their tanks under cover of their 75mm guns, firing down from a nearby hill.
As the battle begins, a quick shot of the town centre shows that this promises to be a very close game.
The Soviet guns engage the German 88's, deployed in the middle of an open field, but fail to achieve anything.
Meanwhile, the town remains in German hands.
The German 88's, firing in reply from the other end of the town, manage to knock out one of the few tanks that the Soviets had available for their attack.
But the Russian infantry take advantage of the confusion and the smoke caused by the burning tank, to advance towards where the German infantry await them in the town.
Meanwhile, another platoon of Soviet infantry assaults a battery of German anti-tank guns.
At the same time, the Soviet infantry poised to enter the town take cover from the hail of bullets sent their way by Herr Infantryman!
The Germans receive reinforcements: a pair of Tigers that must surely shift the balance of victory to their favour.
German infantry advances forward and expels the Soviets that had taken possession of their guns.
German armour begins to emerge from their hiding places.
The German 88 devastate the enemy artillery on the hill.
The German infantry unit in the town has been holding back the Soviet infantry advance.
But the Soviets, do not stand idly by, and throw their BA-10 armoured cars in against the German infantry.
On this occasion the German's patience in waiting for the Soviets to advance, combined with the tactics of hiding their armour and only sending them in to battle at the last moment, meant that they quickly threw back the helter-skelter Soviet advance despite the fact that it seemed at one point that they might lose the game.
In the end, the Soviets were left with much of their infantry bottled up in the approaches to the village without artillery support and with the only armour they had available destroyed at the beginning of the game.
A good German victory.
Burt, with some photographs from VIIII Legion

We had a great 10mm IABSM game at Strategikon of Athens last Sunday.
The story so far; somewhere in Ukraine during summer of 1944, a German infantry company reinforced by a couple of PaK 40s and 2-3 Panzerschreck teams, holds a strong defensive position trying to stop the advance of the Soviets. The troops in the defence were dug in and there was a 18″ barbed wire to be used by the Germans. The Soviets relied on the firepower of their tank company (3xT-34/85s and the 6xT-34/76s) plus a company of mechanized infantry.
Three players for the Germans and equal number of players for the Soviets commanded about a platoon each. I kept the umpire’s role for myself.
The battle began with the Soviets entered in masse of the eastern side of the table.
Soon, the German units placed inside the woods and over the hill NE of the hamlet spotted an infantry platoon and a T-34 section as well. At first, the Soviets tried to run over the hill but soon withdrew with a lot of casualties. Paris (our new member for the IABSM games) found out in a nasty way that the game is really, as the rulebook states, the other WWII game! The remnants of the platoon after the MG42s’ fire tried to take some cover, but the unit had already lost its fighting capability.
The Germans with most of their units entrenched did not suffer great loses.
The Soviets desperate for support were pinned down by heavy machine gun fire. An artillery barrage was an emergency for the Soviets but did not arrive on time! It was that moment when Kapitan Nikolai Tsygardev (Nick) brought up a section of T34/ 85s to “clean up” the hill.
While the 85s did the job assigned to them, some flashes appeared from the hill beside the hamlet. A section of Pak 40s began to fire at the T34s from their well-prepared positions.
he crew of the T34 (#202) shocked because of their tank been targeted tried to manoeuver but an engine failure left their tank vulnerable in place.
It was a great opportunity for Jurgen’s (George) Schreck team to blew it up!
eanwhile the german platoon on the NE hill had serious problems from the HE fire into the woods. But the Germans were lucky. The badly shocked Soviet platoon couldn’t have any chance to move towards the enemy positions. It was now time for the Germans to withdraw to another position.
The Soviet's unwise approach to the hamlet cost them lives. A tank section was knocked out from the AT fire of the German company. Soviets had no courage to continue their advance. They withdrew from the battlefield and waited for reinforcements (maybe in a replay of this particular game on another day).
Our guests had already seen what an excellent game this is. I think a couple of players “recruited” in the Lardies fans from Sunday and beyond!
Vaggelis

Nieuwkerk, 7th October 1944: a 6mm I Ain't Been Shot Mum game played at Gigabites Cafe in April 2015.
Mark Luther

This is a game dating back to 2013, played between Burt & Strategus (the Soviets) and Gimly & Fasbender (the Germans). The Germans were to defend a pair of crossroads of high strategic importance against an all out Soviet attack.
Although the Soviets committed everything they had to the assault, the Grmans were determined not to yield, as the crossroads formed the starting point for their next counter-attack.
In the end, as has unfortunately happened a few times, we weren't able to finish the game, but at the end the Soviets were winning but had suffered heavy casualties.
Burt

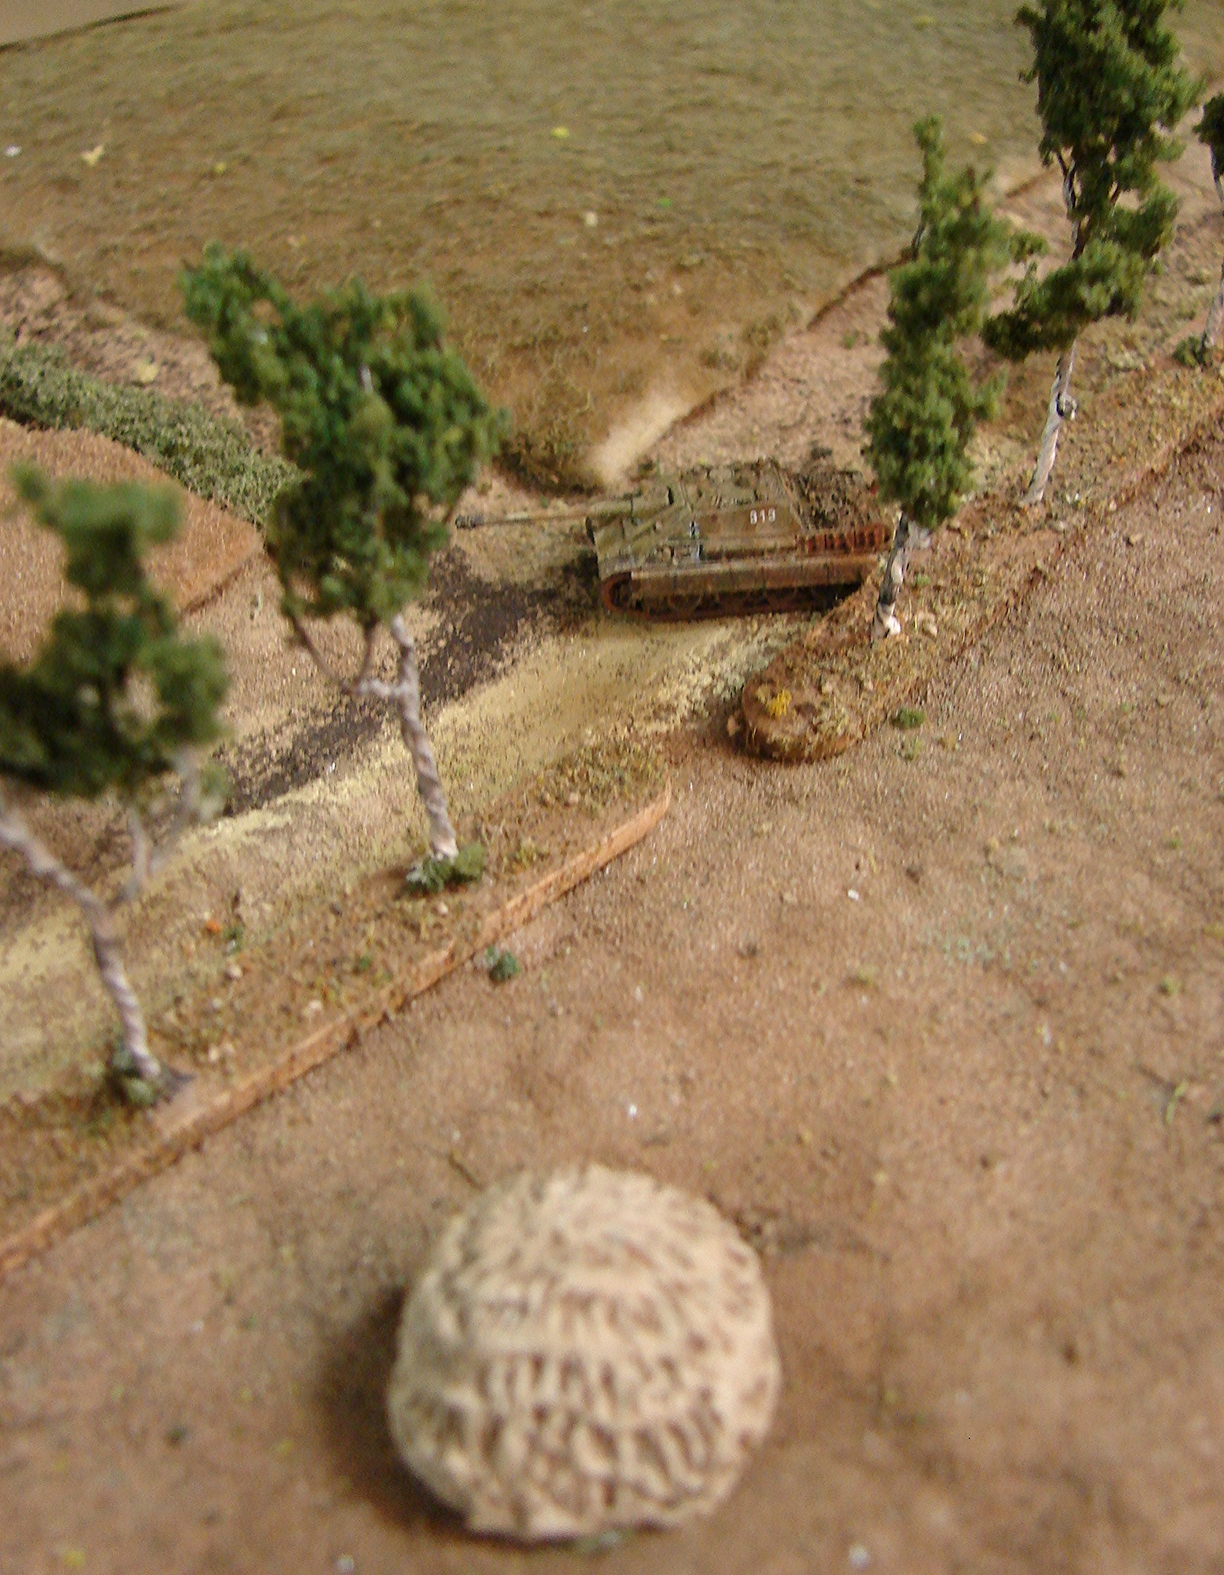
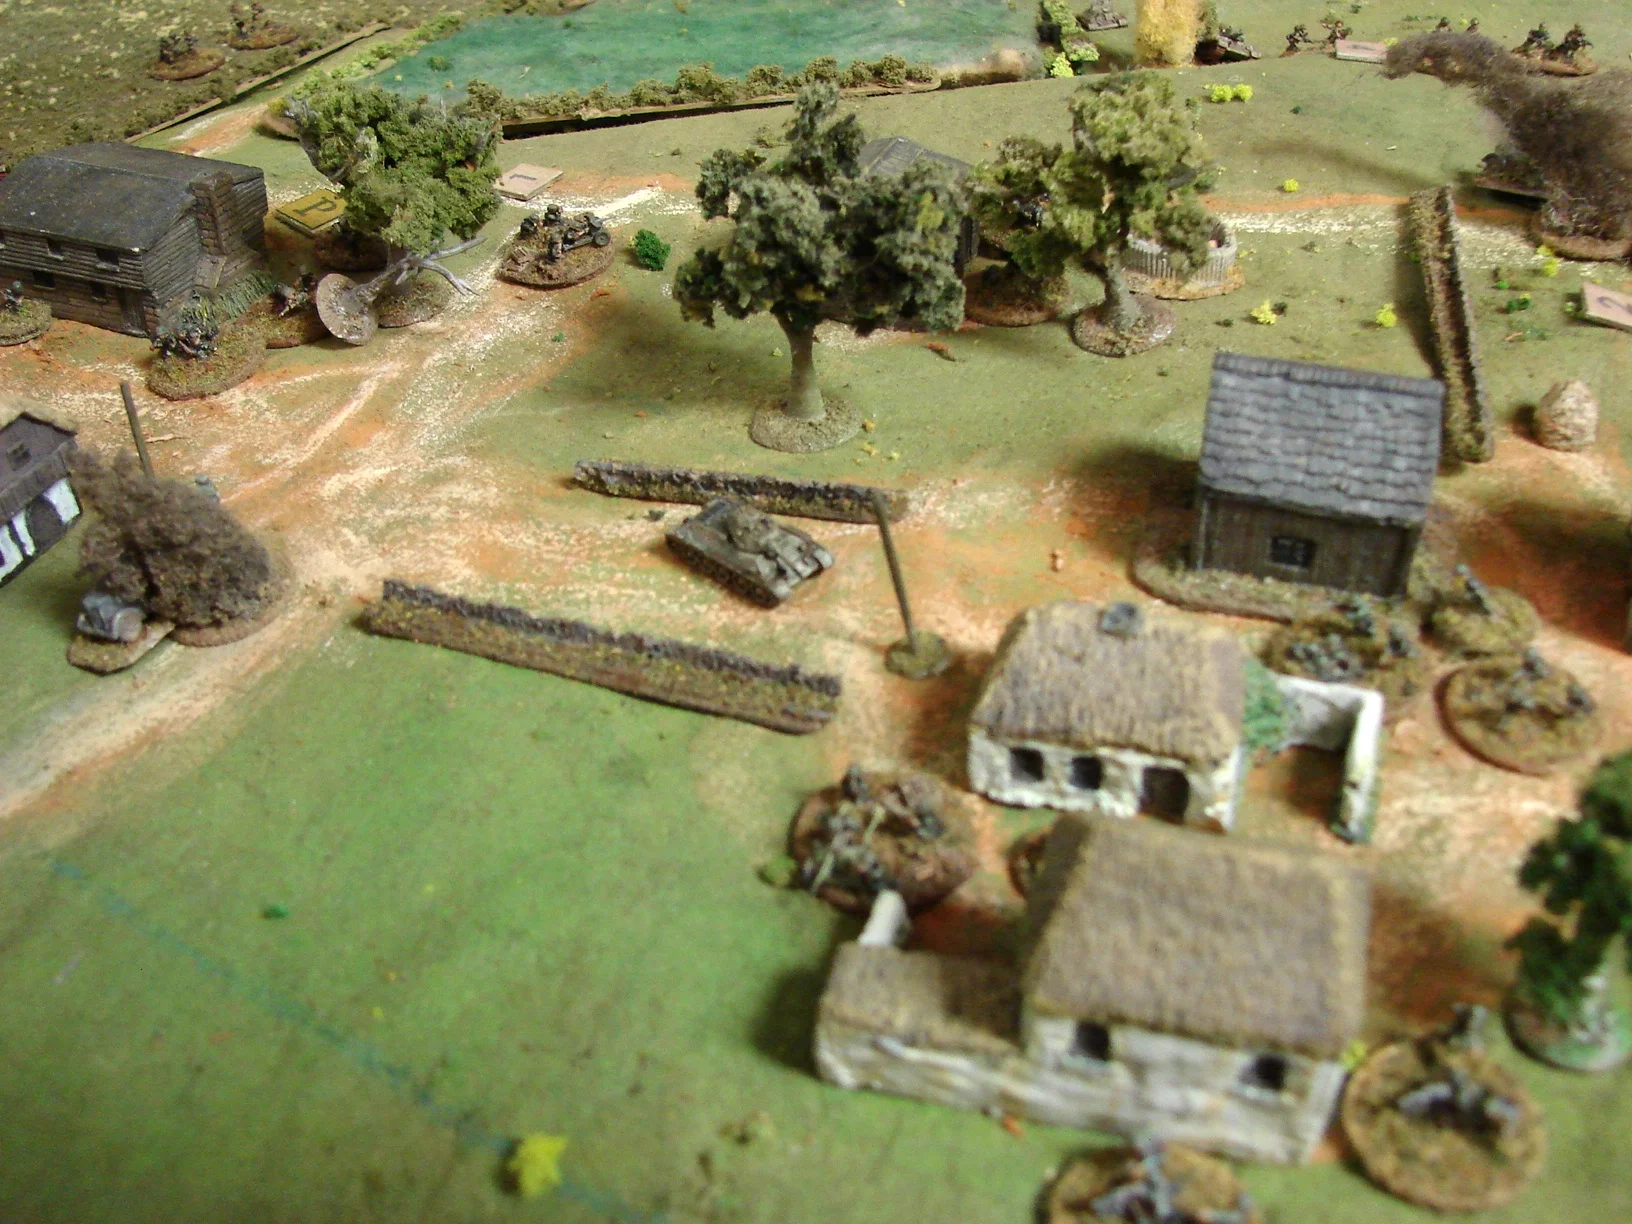
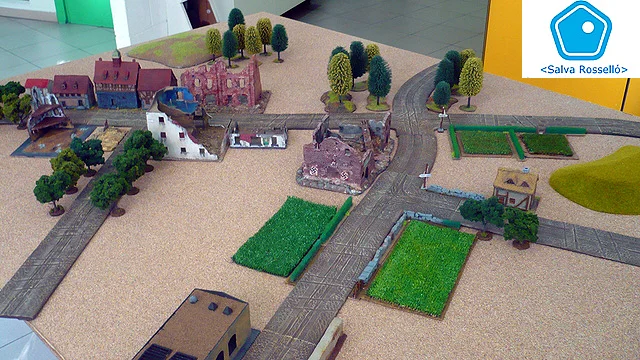
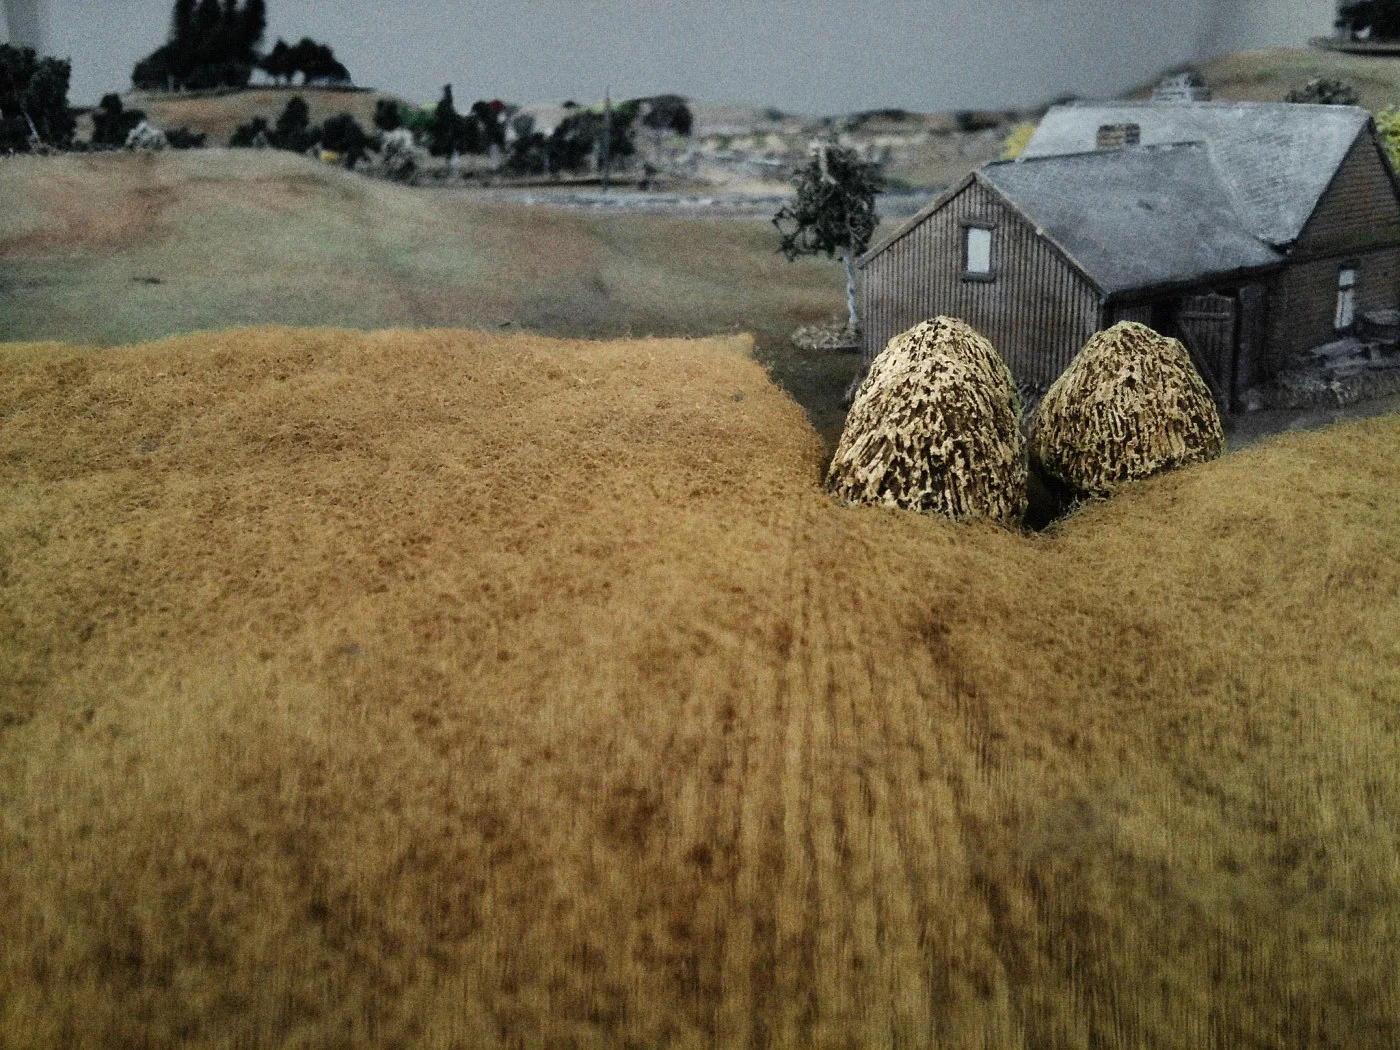
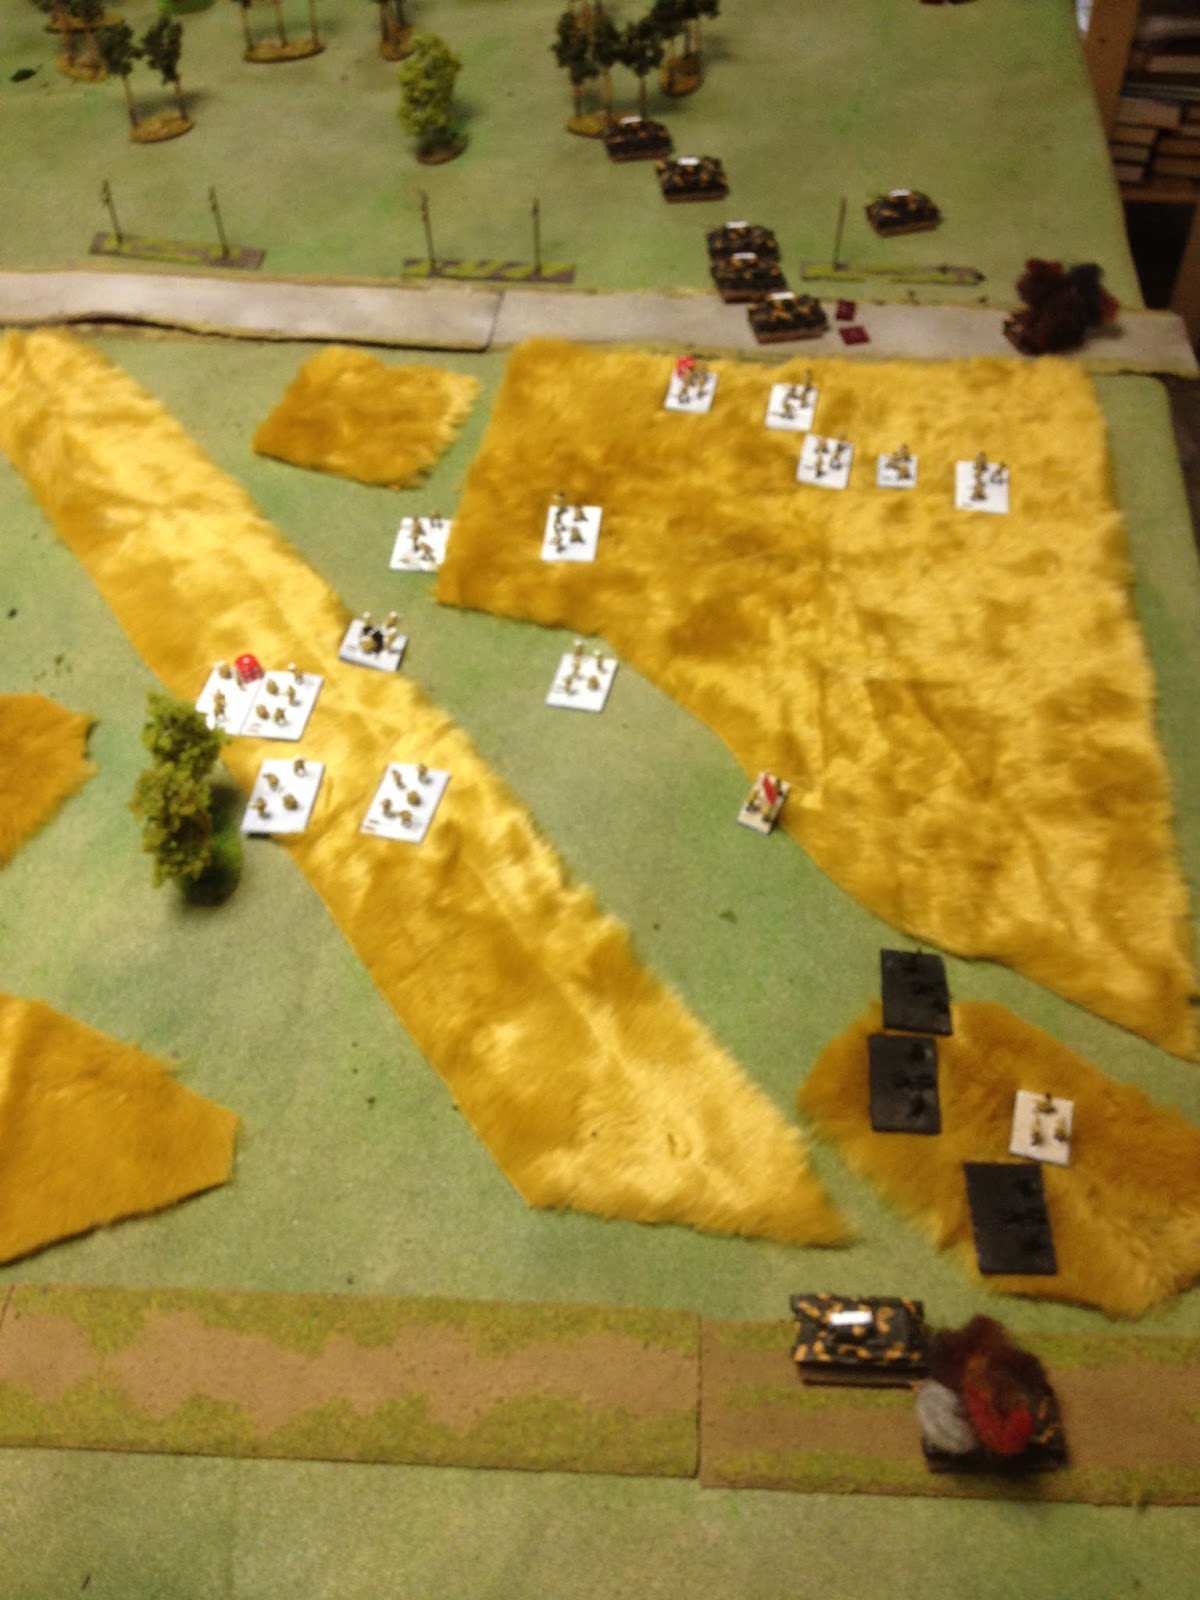
It was on the Eastern Front. The dusty road passed through a small village where factory workers had lived before the war: a gloomy, battered place largely reduced to rubble. The village stood on the shore of a shallow creek, crossed by three small, plank bridges. On the other bank were silent, peaceful woods and fields, offering a balm to the spirits of those who huddled in the trenches that scarred the ground in front of them. It is here that the Red Army unleashed its impact.
Having had the rules for some time and, for some reason, never played them, we finally got around to playing our first game of "Mum". In short, they are a company-level set of wargame rules led by card activation much like Sharpe Practice.
The German defense was represented by a company of grenadiers (however, each of the three platoons consisted of only two squads) strengthened by three PaK 40 guns. Their commander was Johann Schmidt aka the Red Skull.
The infantry were dug in at the edge of the village - on the river bank, with their PaKs distributed evenly across their line of defense.
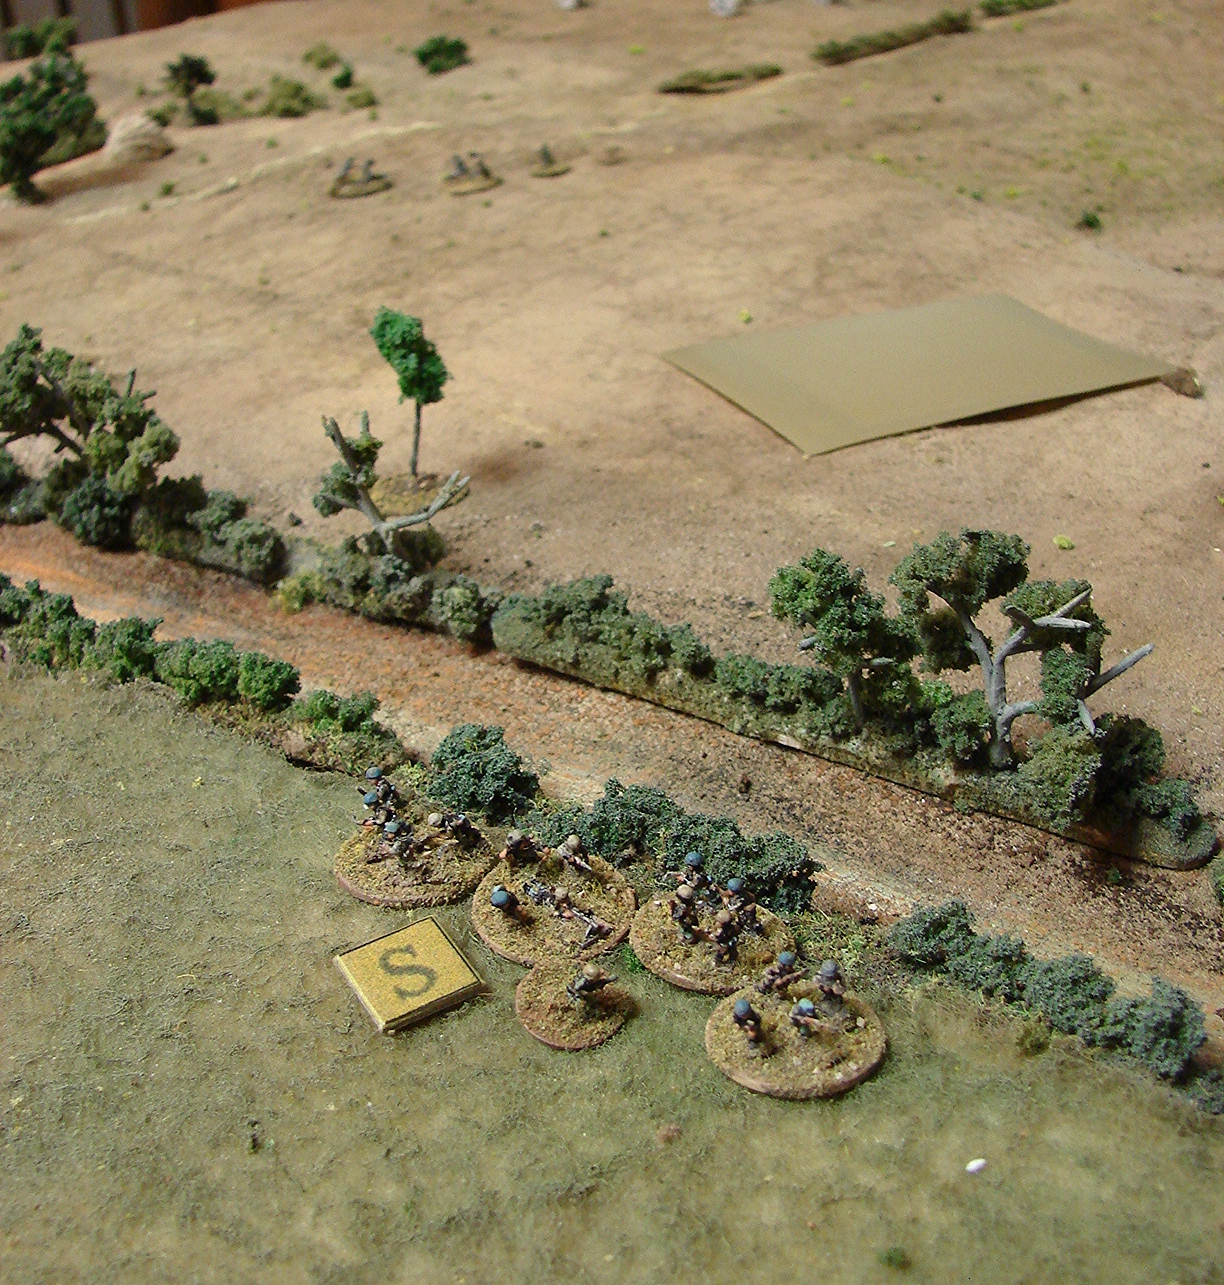
And the Russian were not long in coming. A company of submachine gun armed infantry plus support, and a company of T-34 tanks. A formidable force.
Russian tank company commander immediately opened fire - hitting and destroying one of the PaKs. Great start, I thought.
During the initial phase of the battle Russian tanks killed several Marines, and, finally, the German guns began to respond: accurate fire knocking out one tank and forcing the crew of another to bail out.
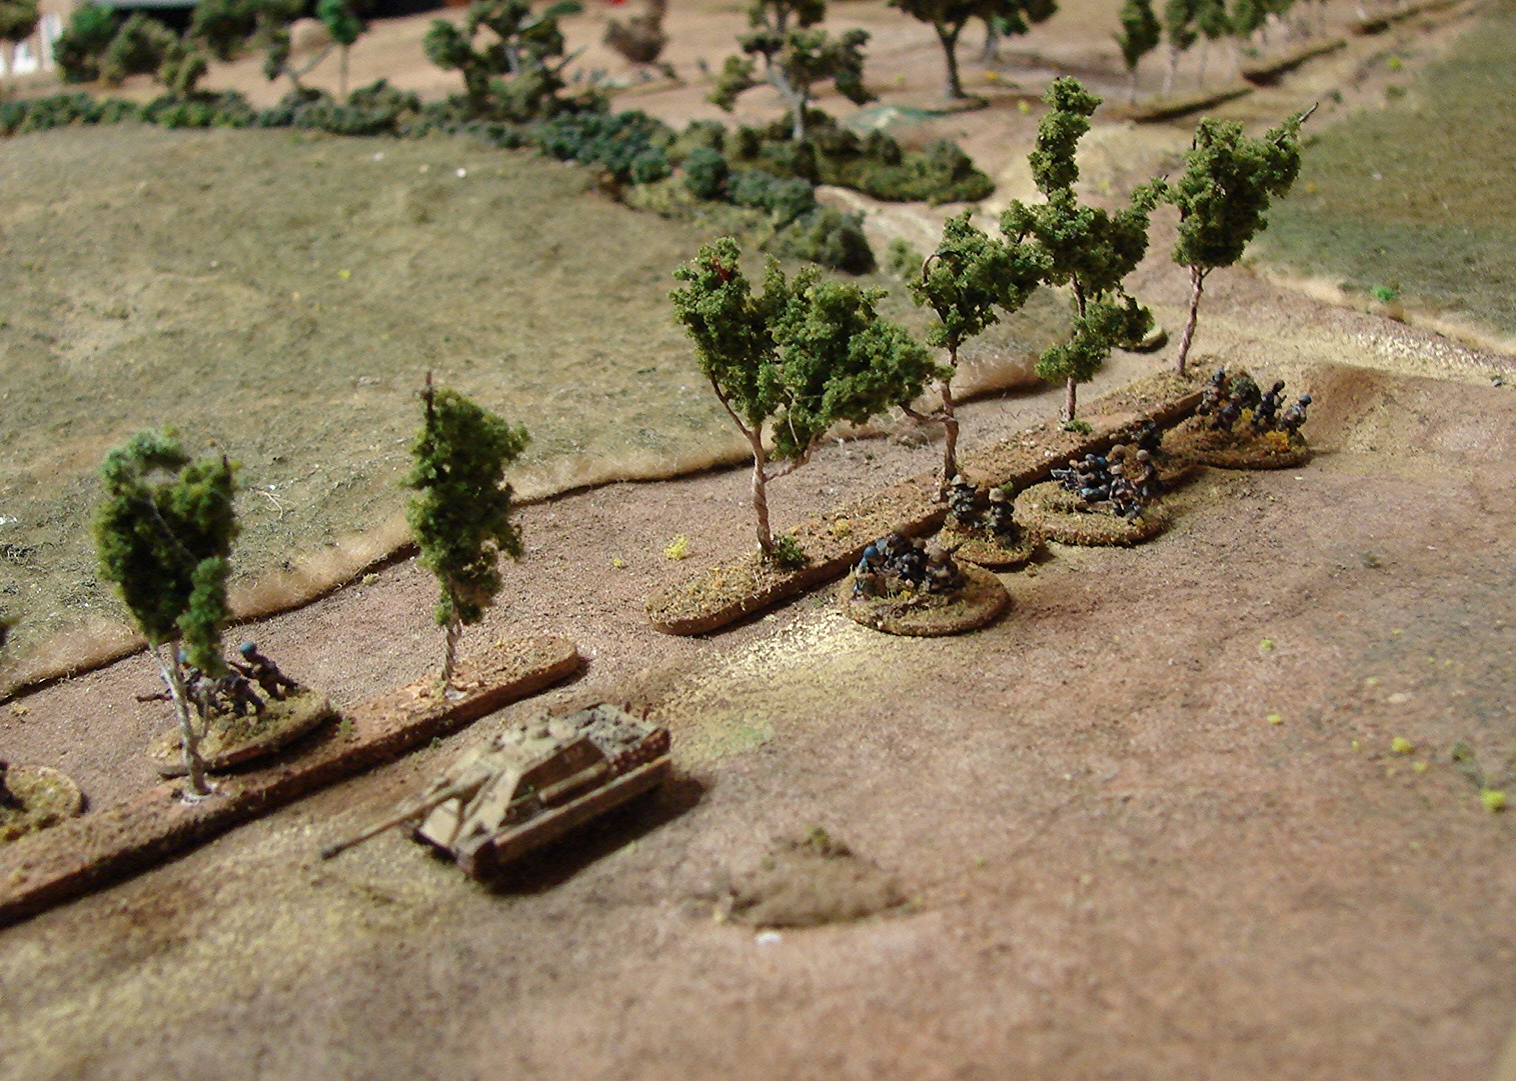
The Soviet infantry began to advance, their pace increasing as the tanks and PaKs continued to exchange fire.
The left hand platoon of T-34s were all KO'd, but the Germans lost their central PaK: it's crew fleeing in panic just before the gun was destroyed.
The Germans, now deprived of their guns (the third PaK was unfortunately positioned: it only covered the right side of the defense so couldn't hit the bulk of the Soviet tanks), began to retreat from their trenches.
Some ran back into the village, some into other buildings, and some into the factory units.
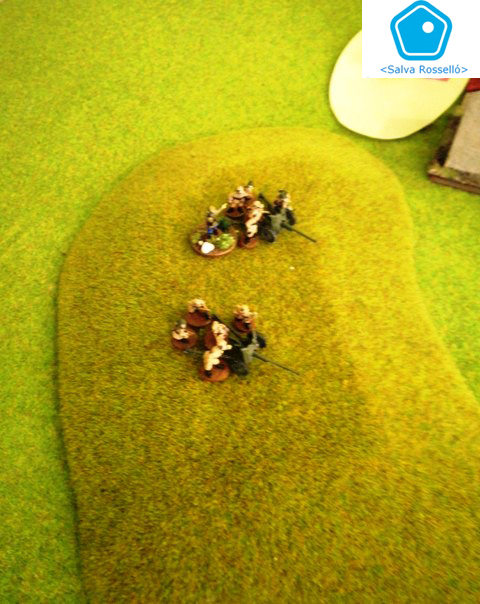
On the left flank, the Soviet infantry ran into a minefield, which stopped their advance after their company commander was killed.
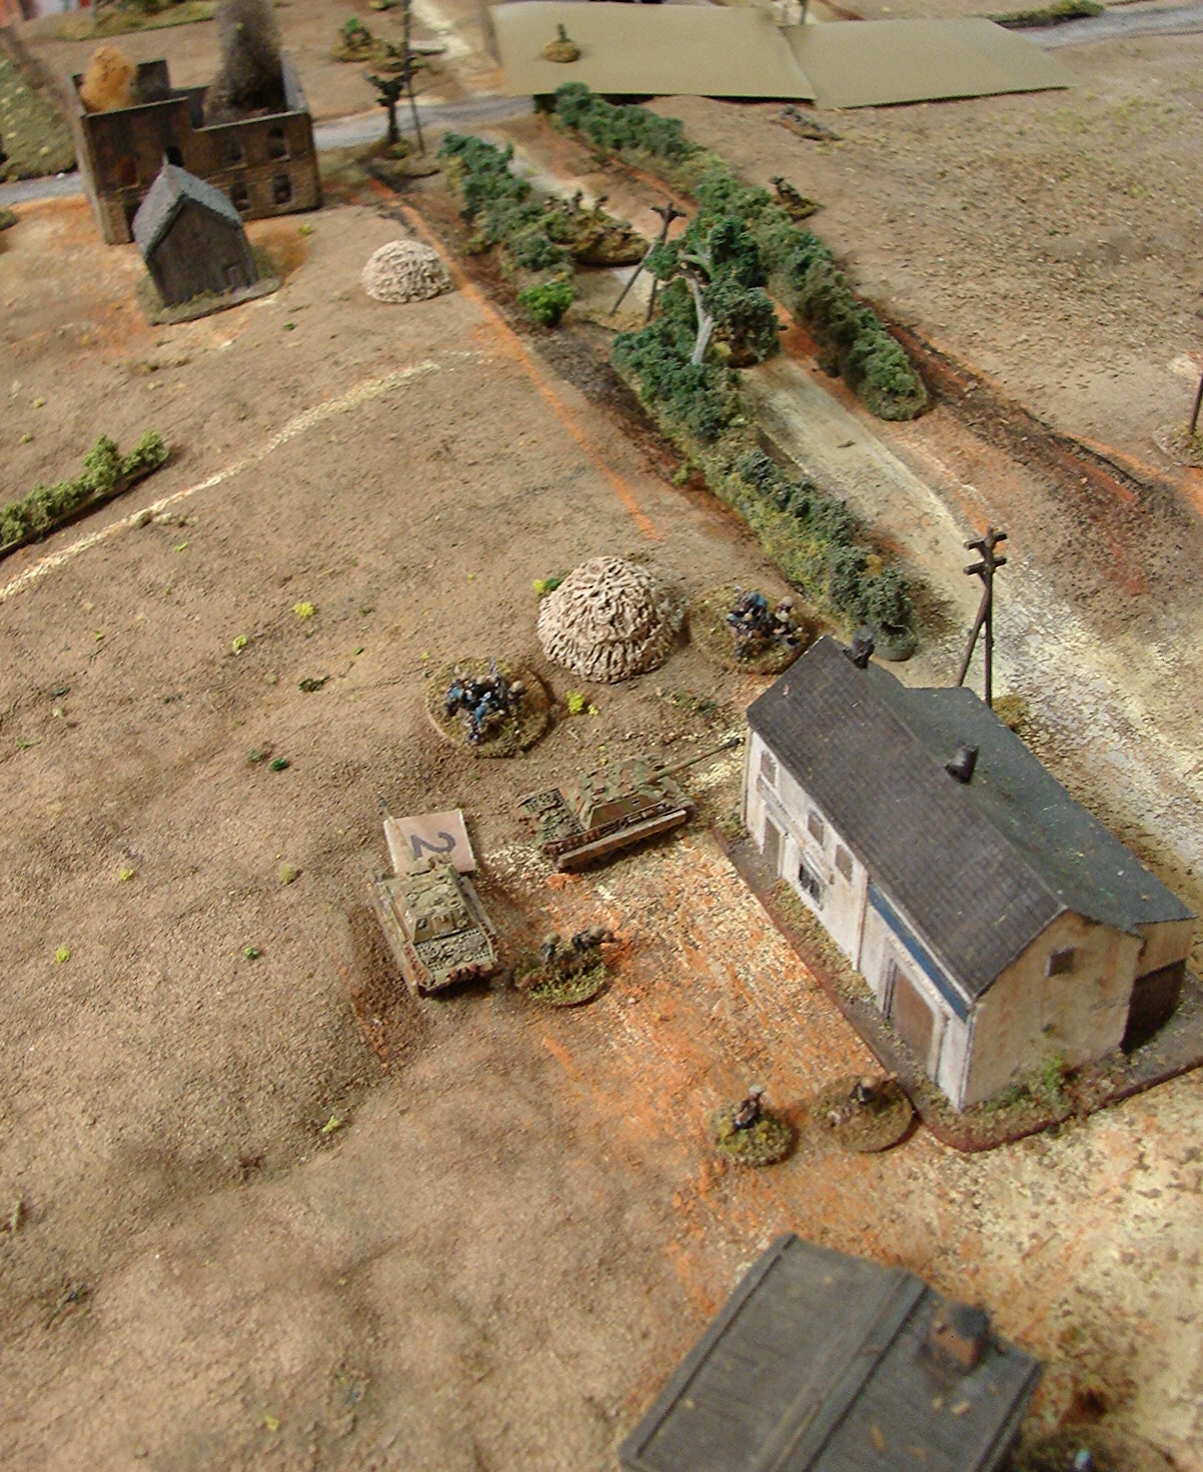
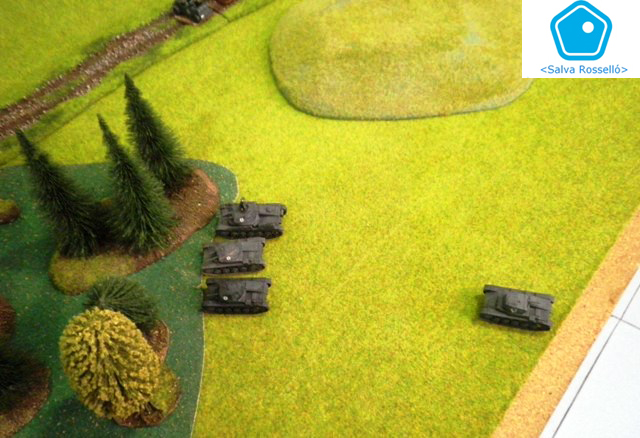
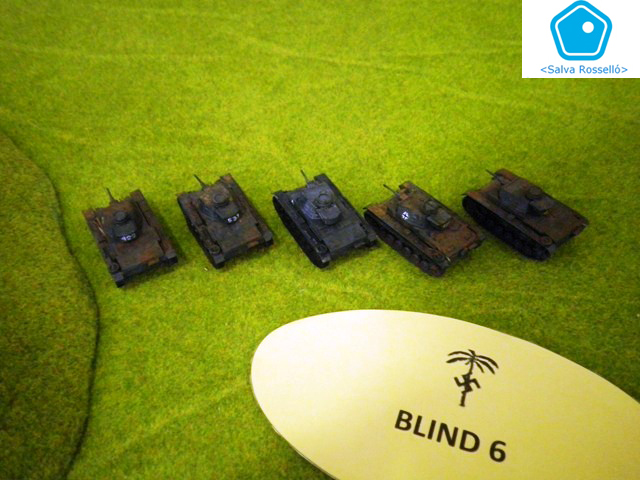
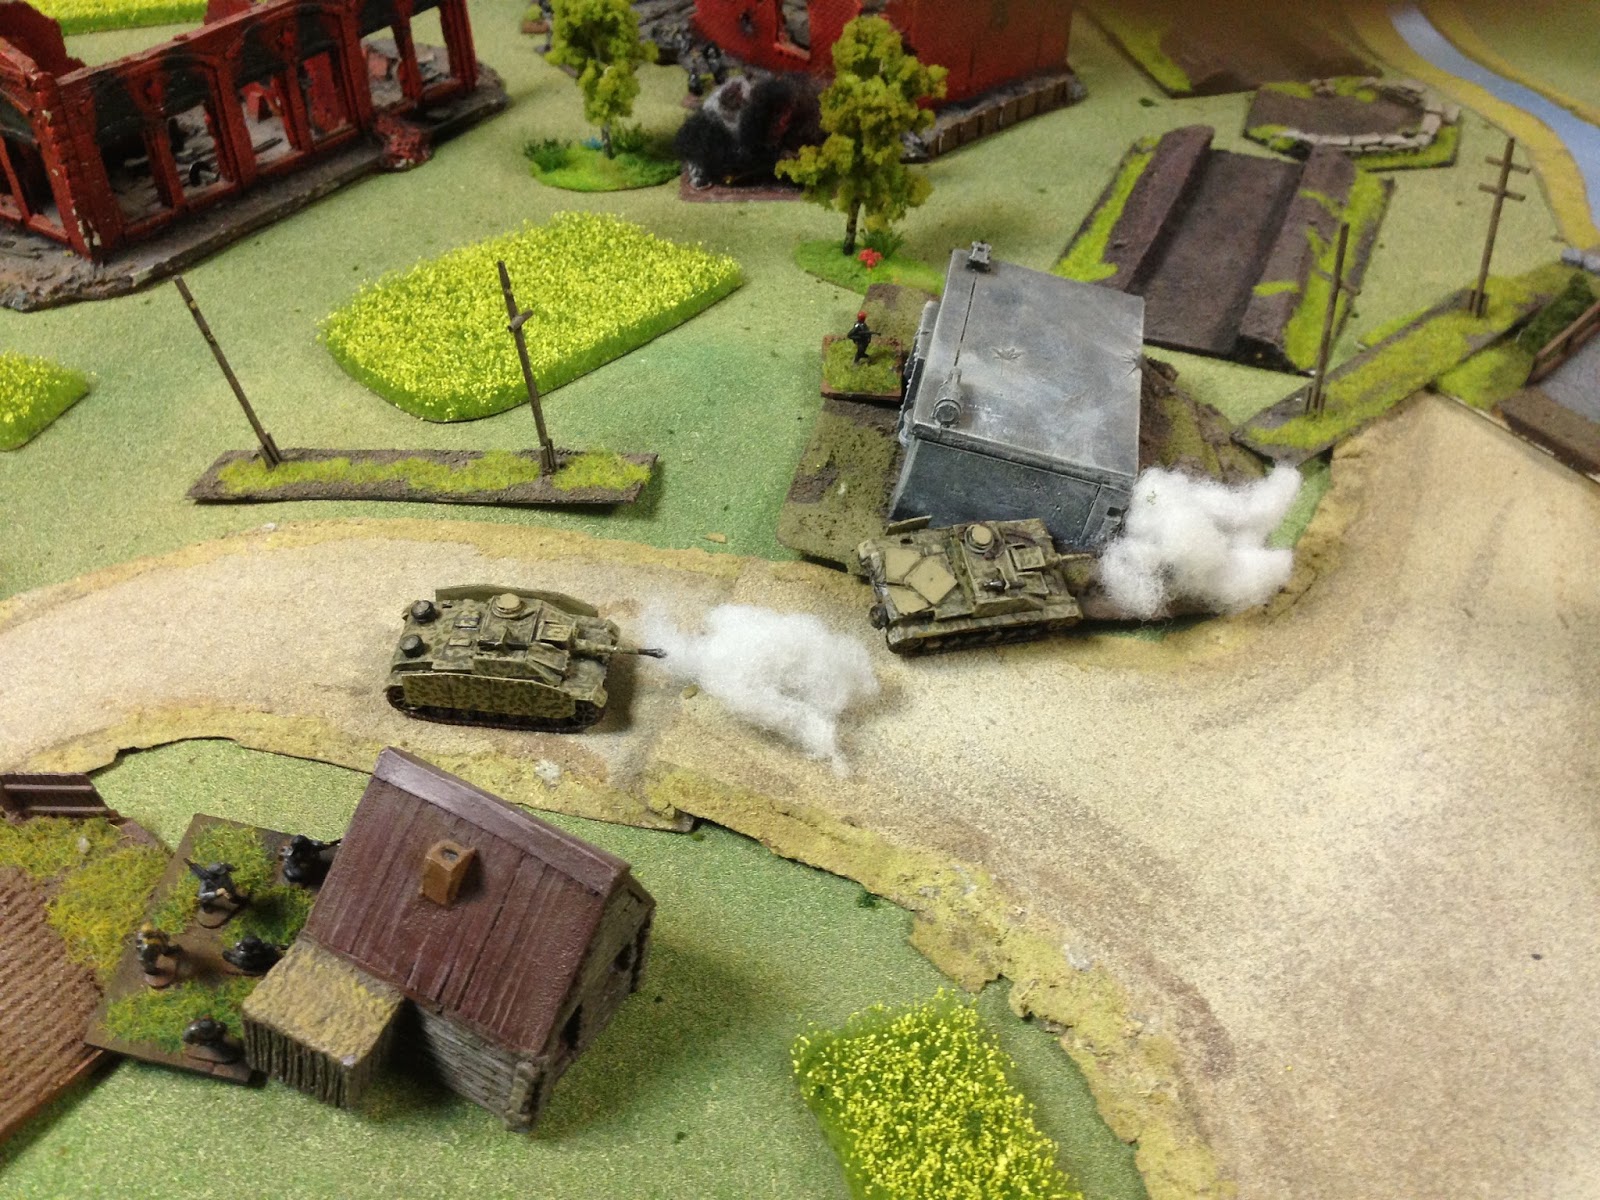
At this point fate (well, the IABSM card deck) intervened, and suddenly the clattering of tracks was heard in the village as a platoon of StuGs came thundering through as fast as possible.
The Soviet tanks were now on the road and hurling themselves towards the village. This meant, however, that about a quarter of them now came within the firing arc of the last remaining PaK 40, with predictably explosive results!
The Command StuG carefully crawled to the edge of the village and opened fire from cover, destroying one tank and knocking bits of a second. Another StuG opened fire on the enemy infantry, but to no effect.
At this point we decided to finish the game. The advancing Red Army was completely exhausted, and the three StuGs were the last straw!
Without the self-propelled guns, of course, we would still have faced a hellish struggle for the village (Panzerfausts in the side of tanks and melee-ing infantry) so probably, at least subconsciously, we decided to avoid it!
Whatever it was, it was a great game: great (as always) rules from the Lardies and a great opponent. Uncle Kostya - thank you so much for the game, and I'm looking forward to your report on the game.
Algiz