Last night‘s game of TFL World War II. The attack on San Marco, Italy, July 1944.

Germans played by Ralph Gibson and Barry Foster. British played by Richard Hudson, Martyn Cartledge and Andrew Sharpe. Meth and Archie were in charge of the tea and Doritos.

As ever we used the rules “I Ain’t Been Shot, Mum!” from the TFL stable.

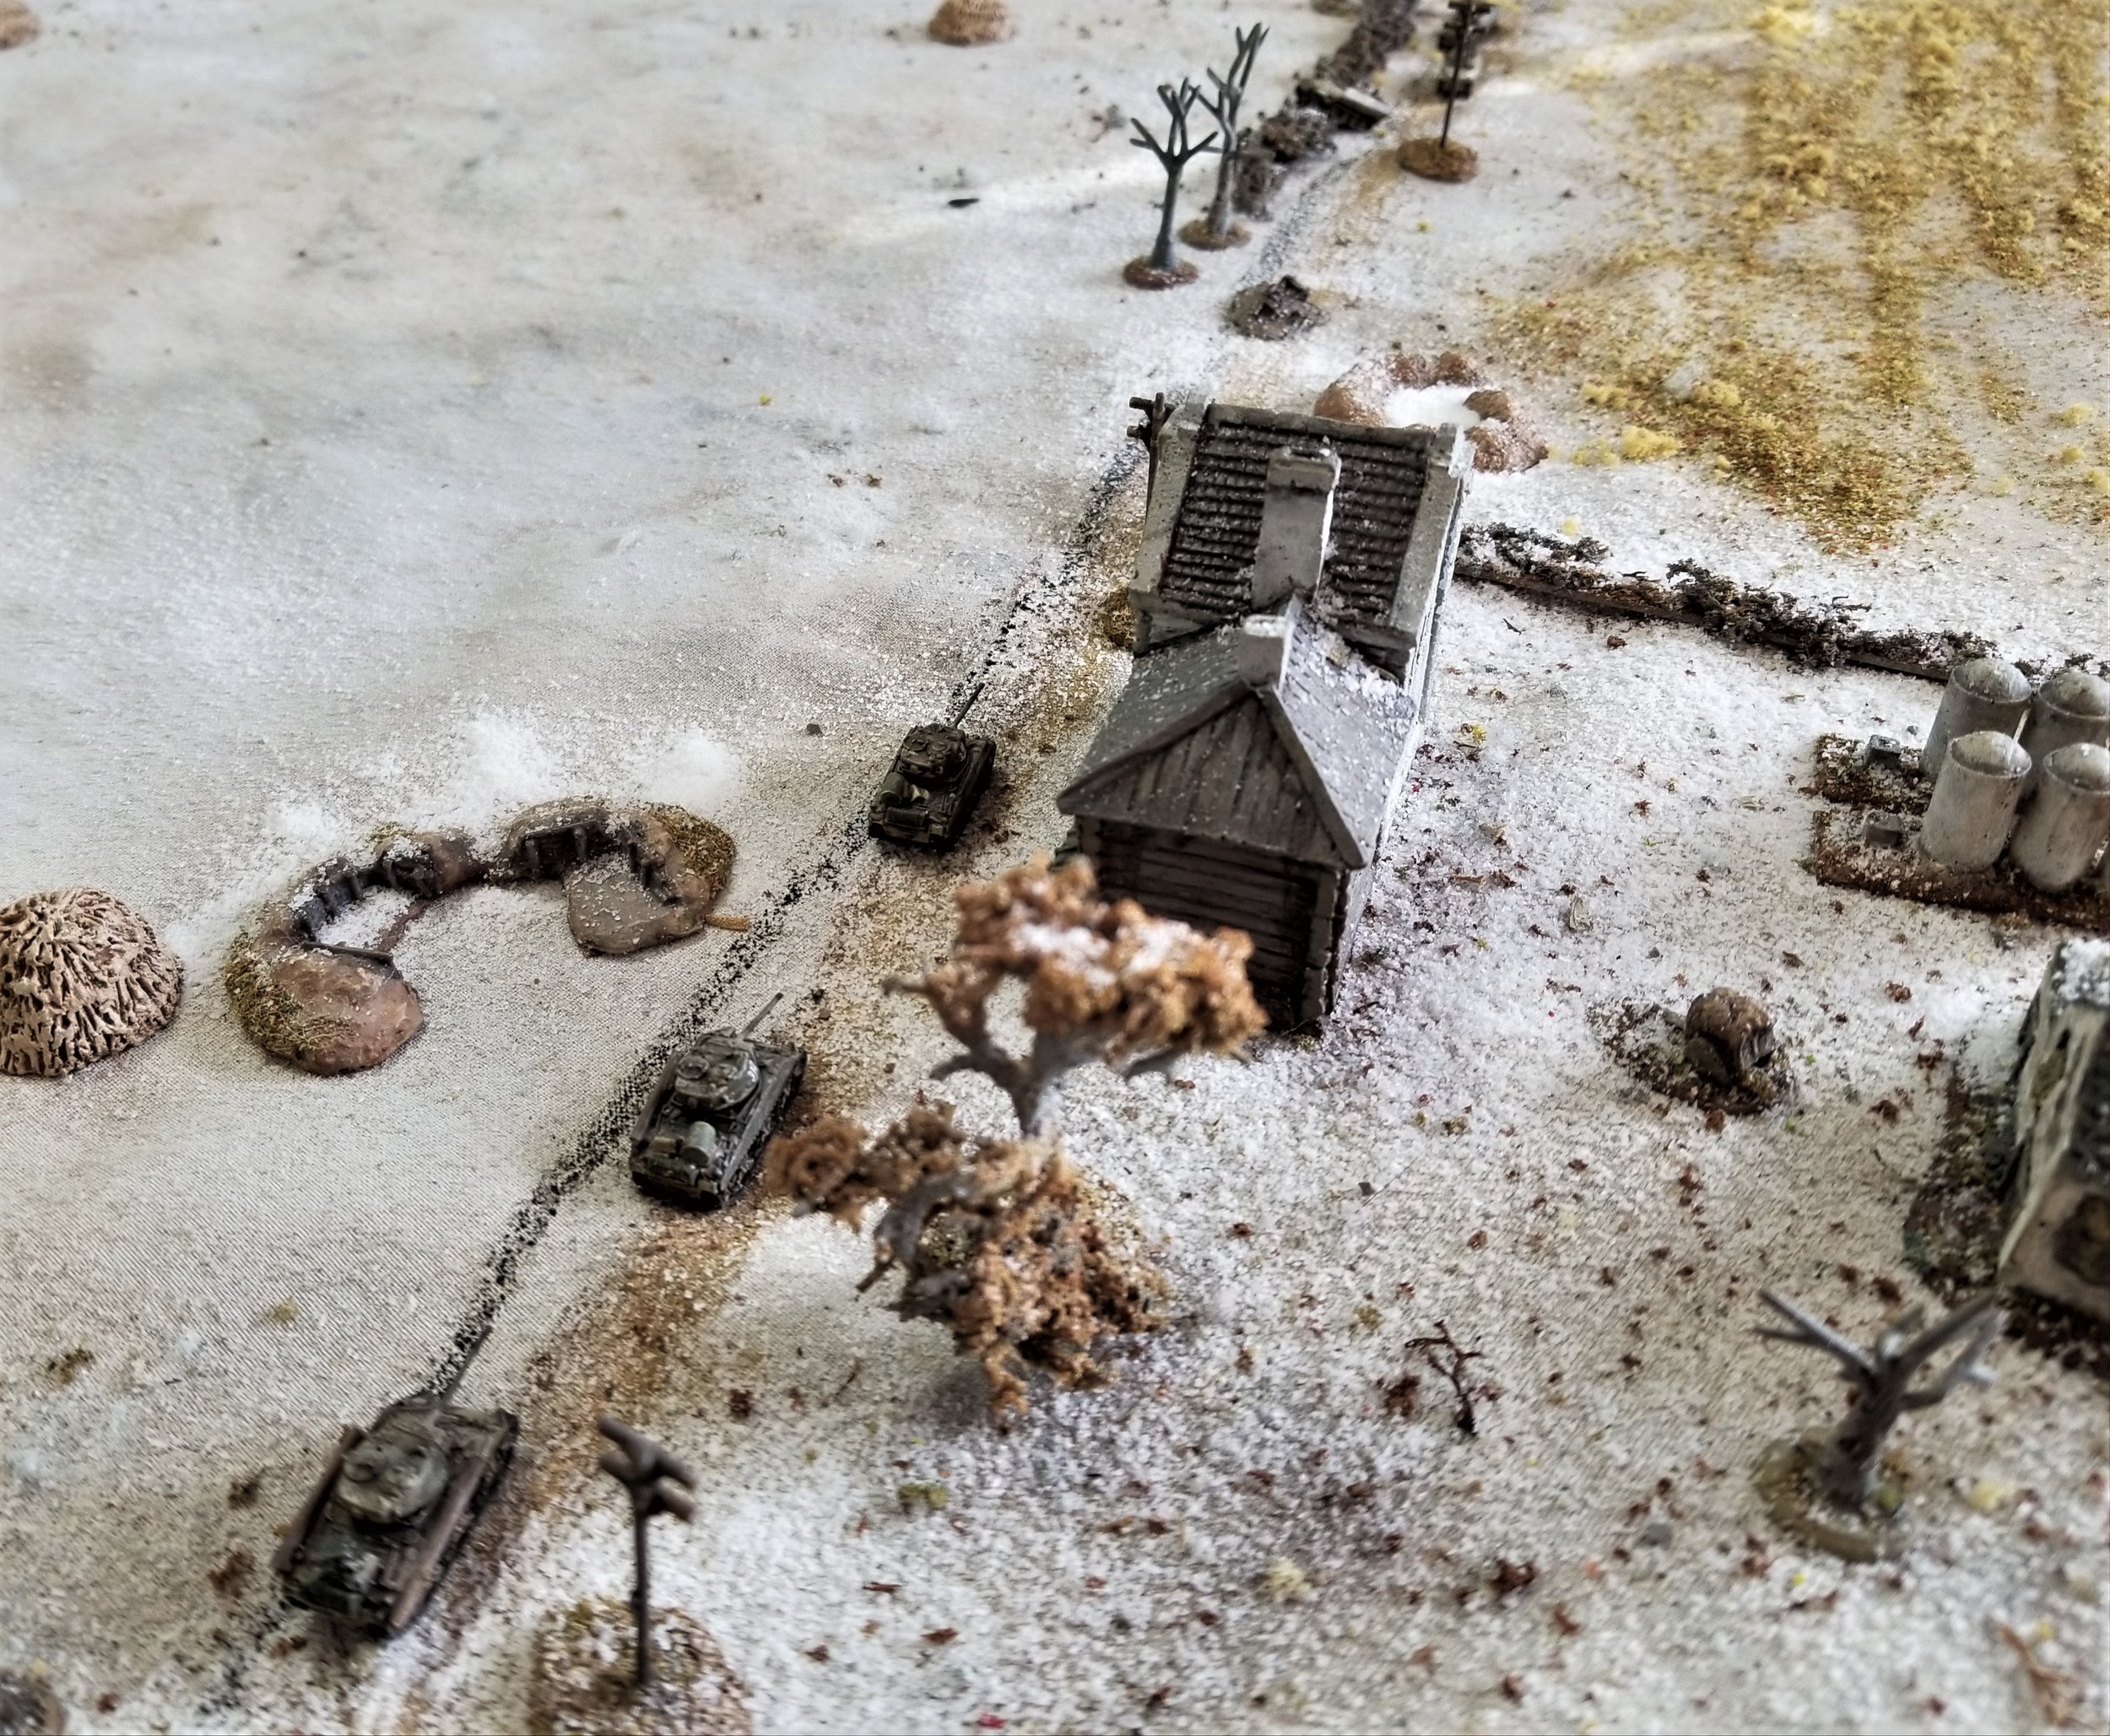
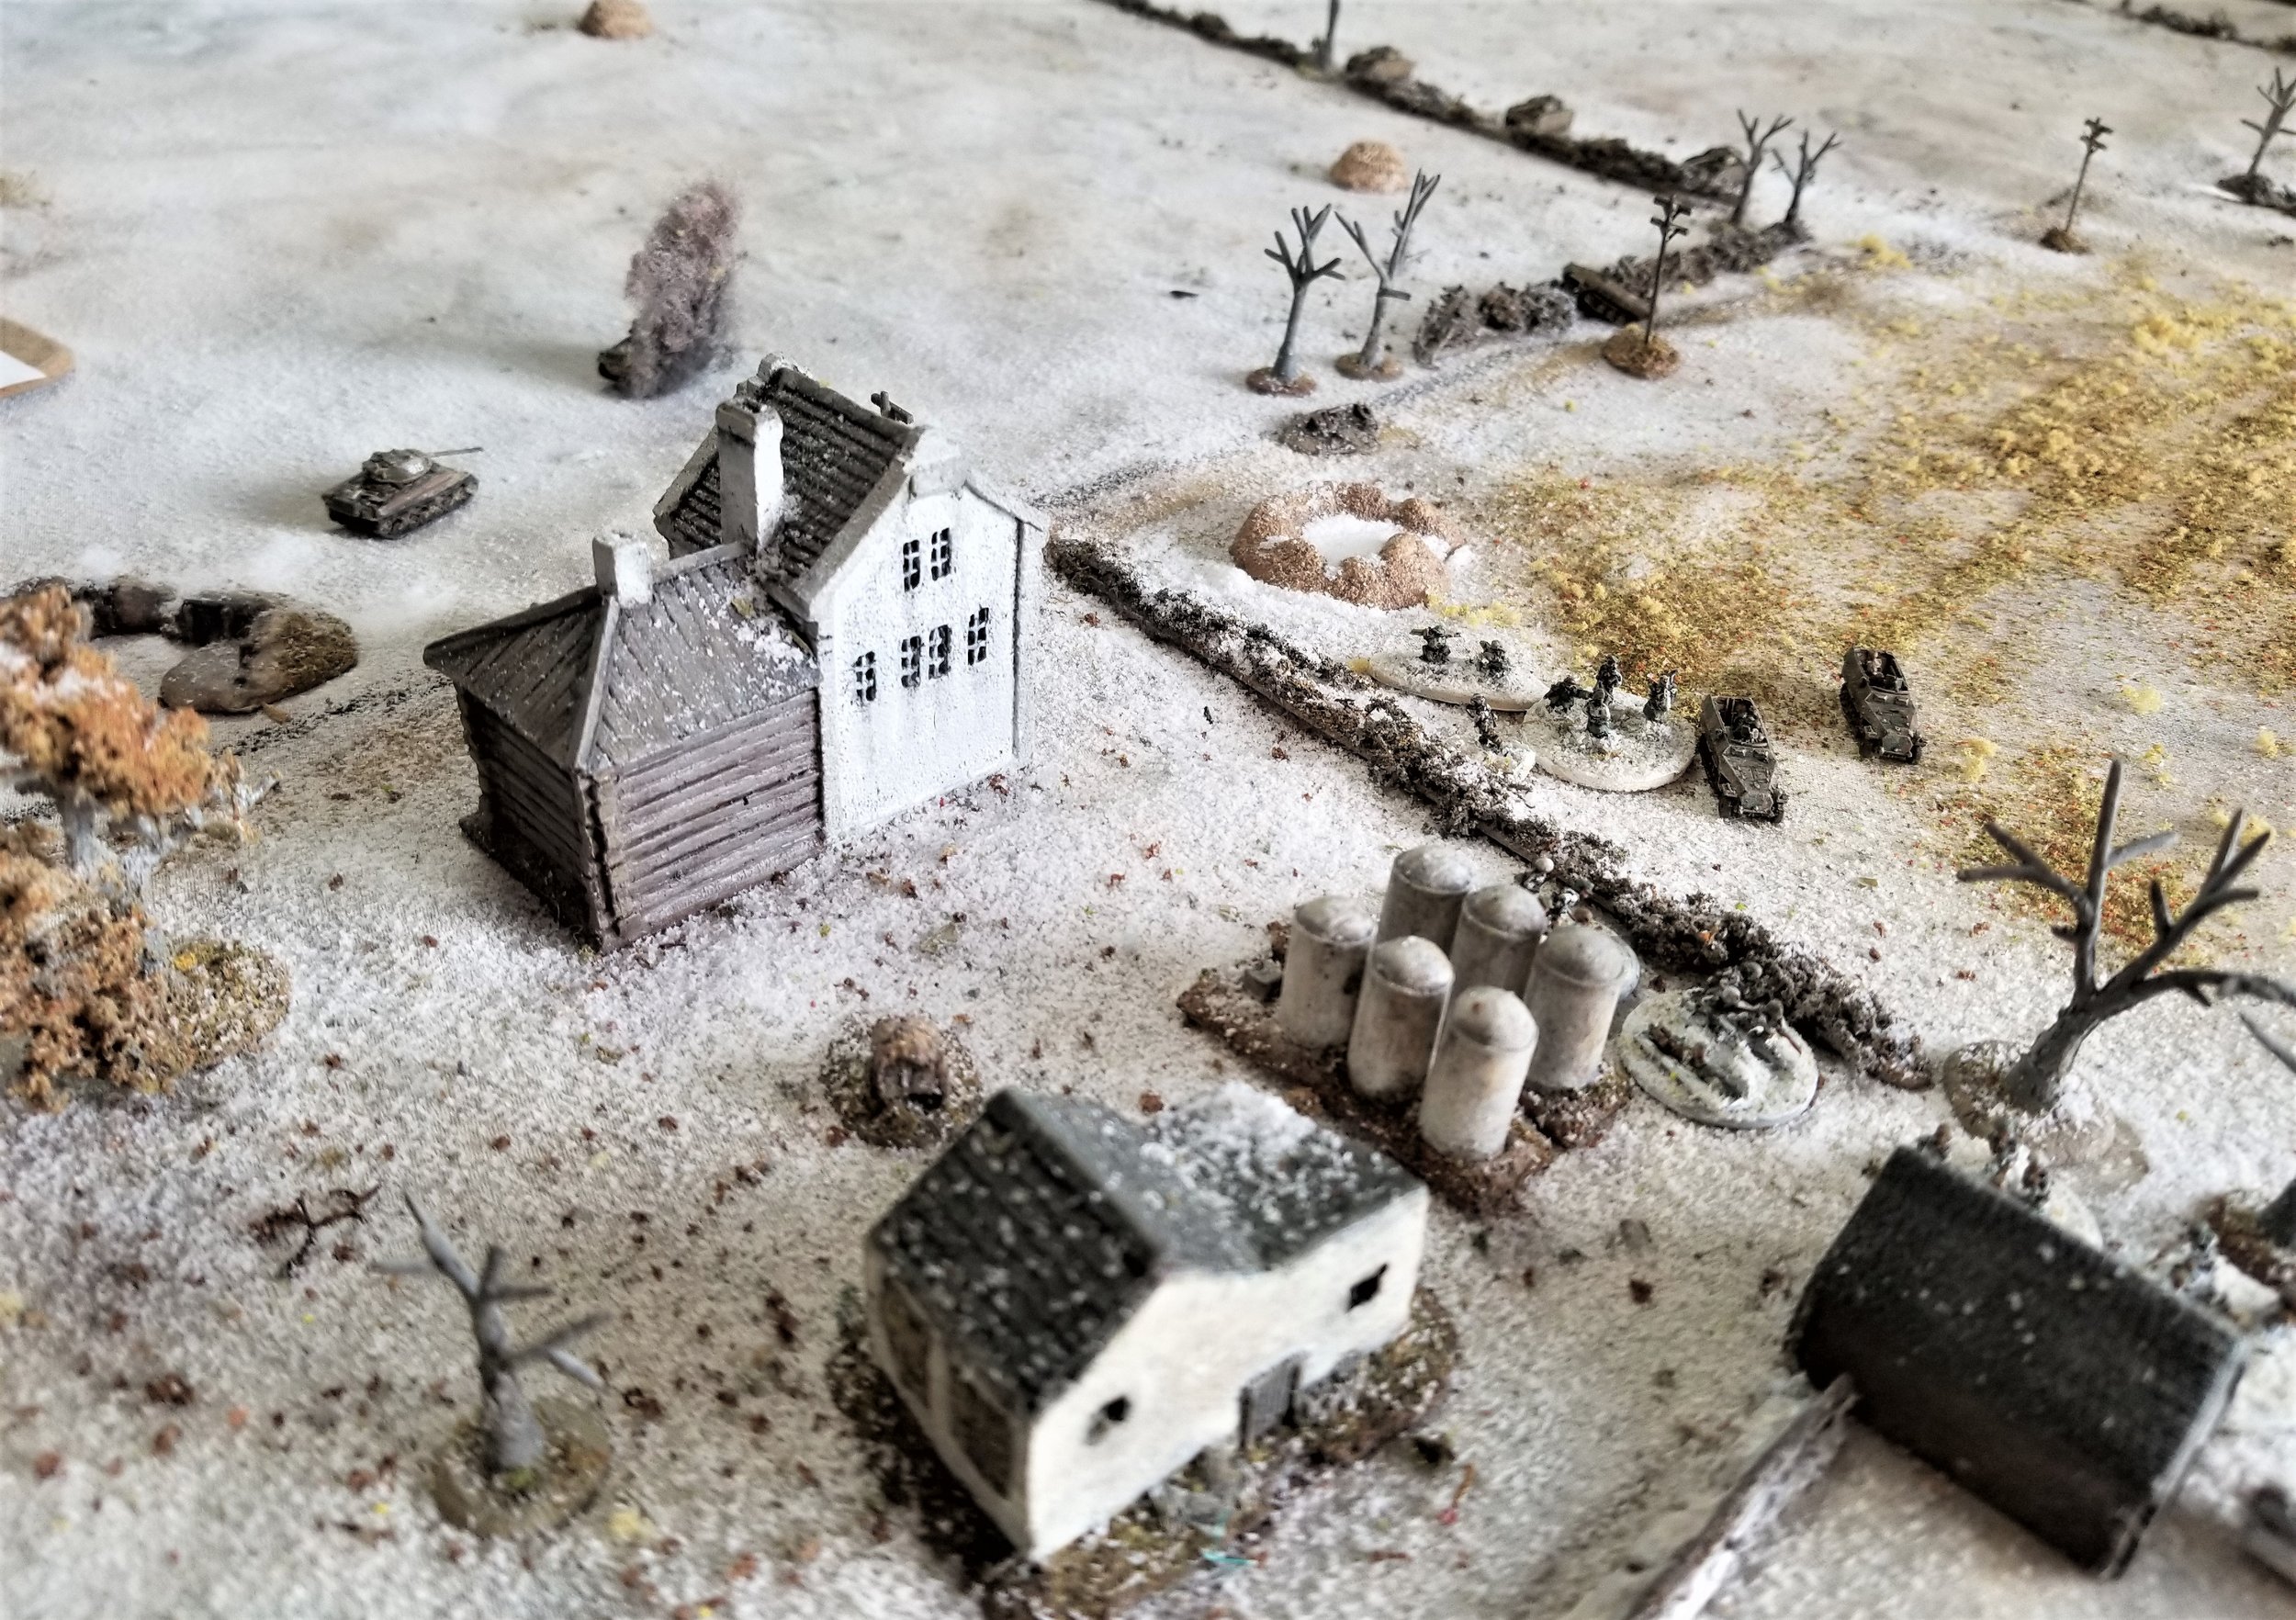
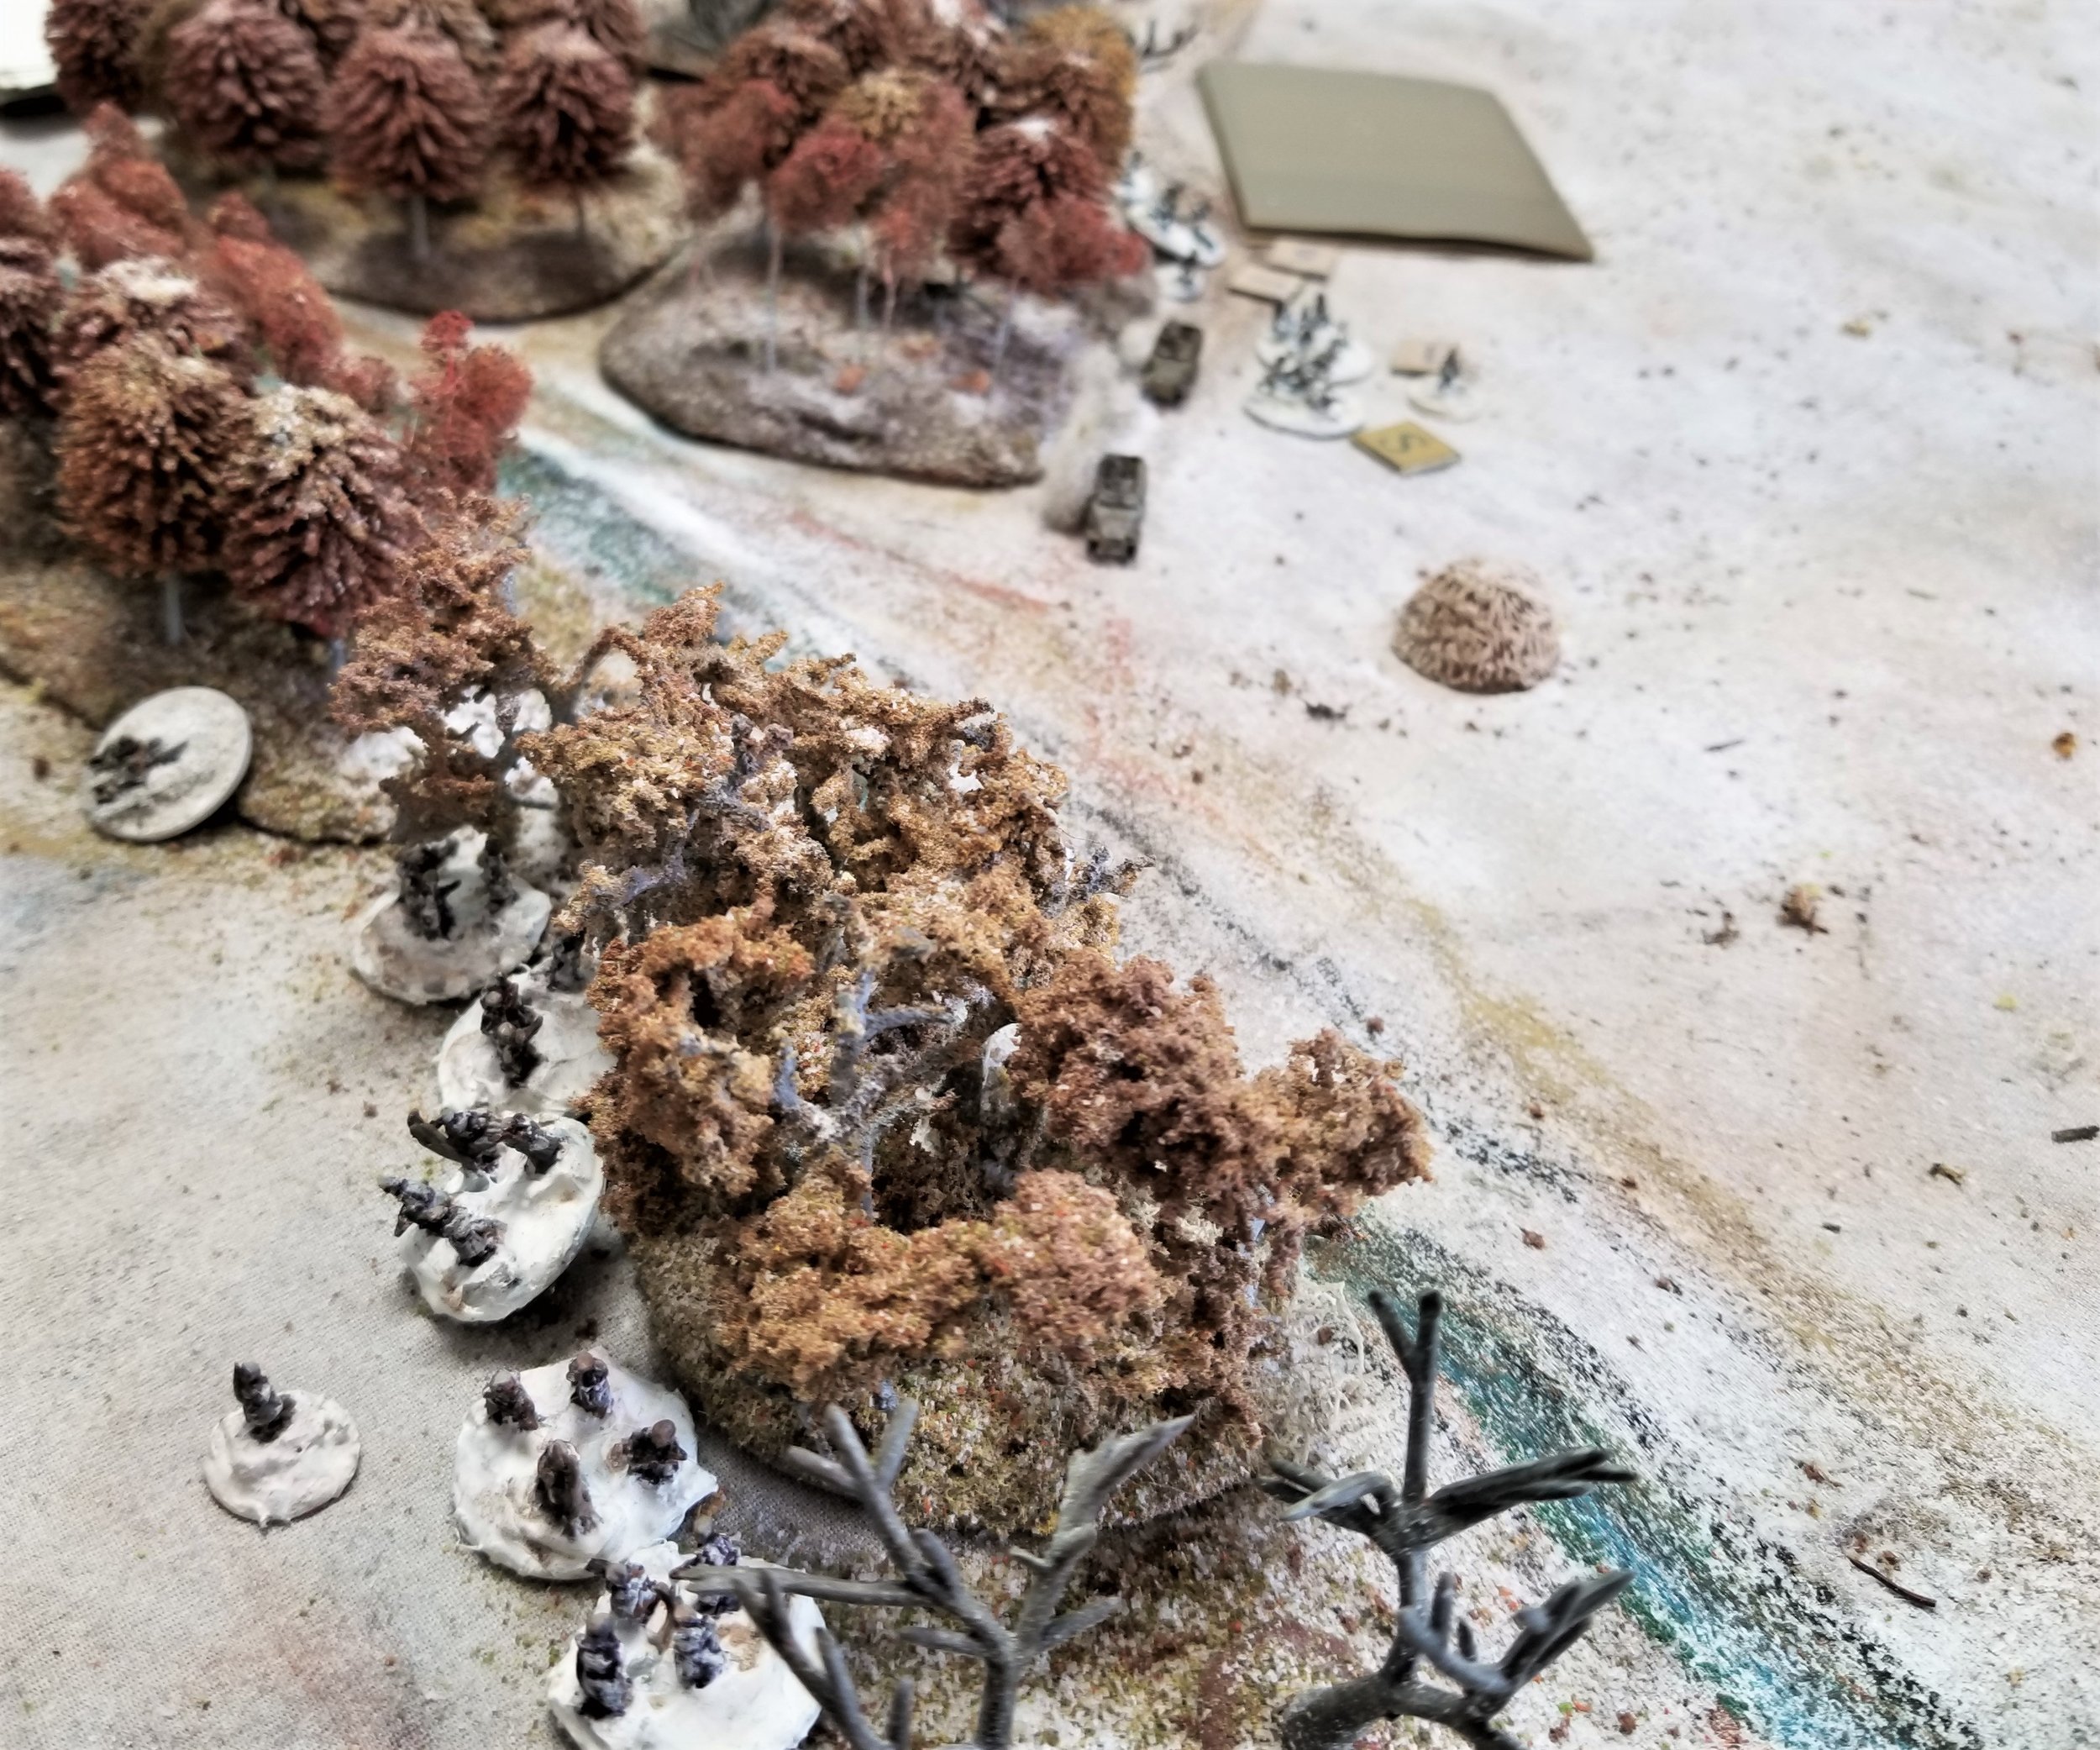
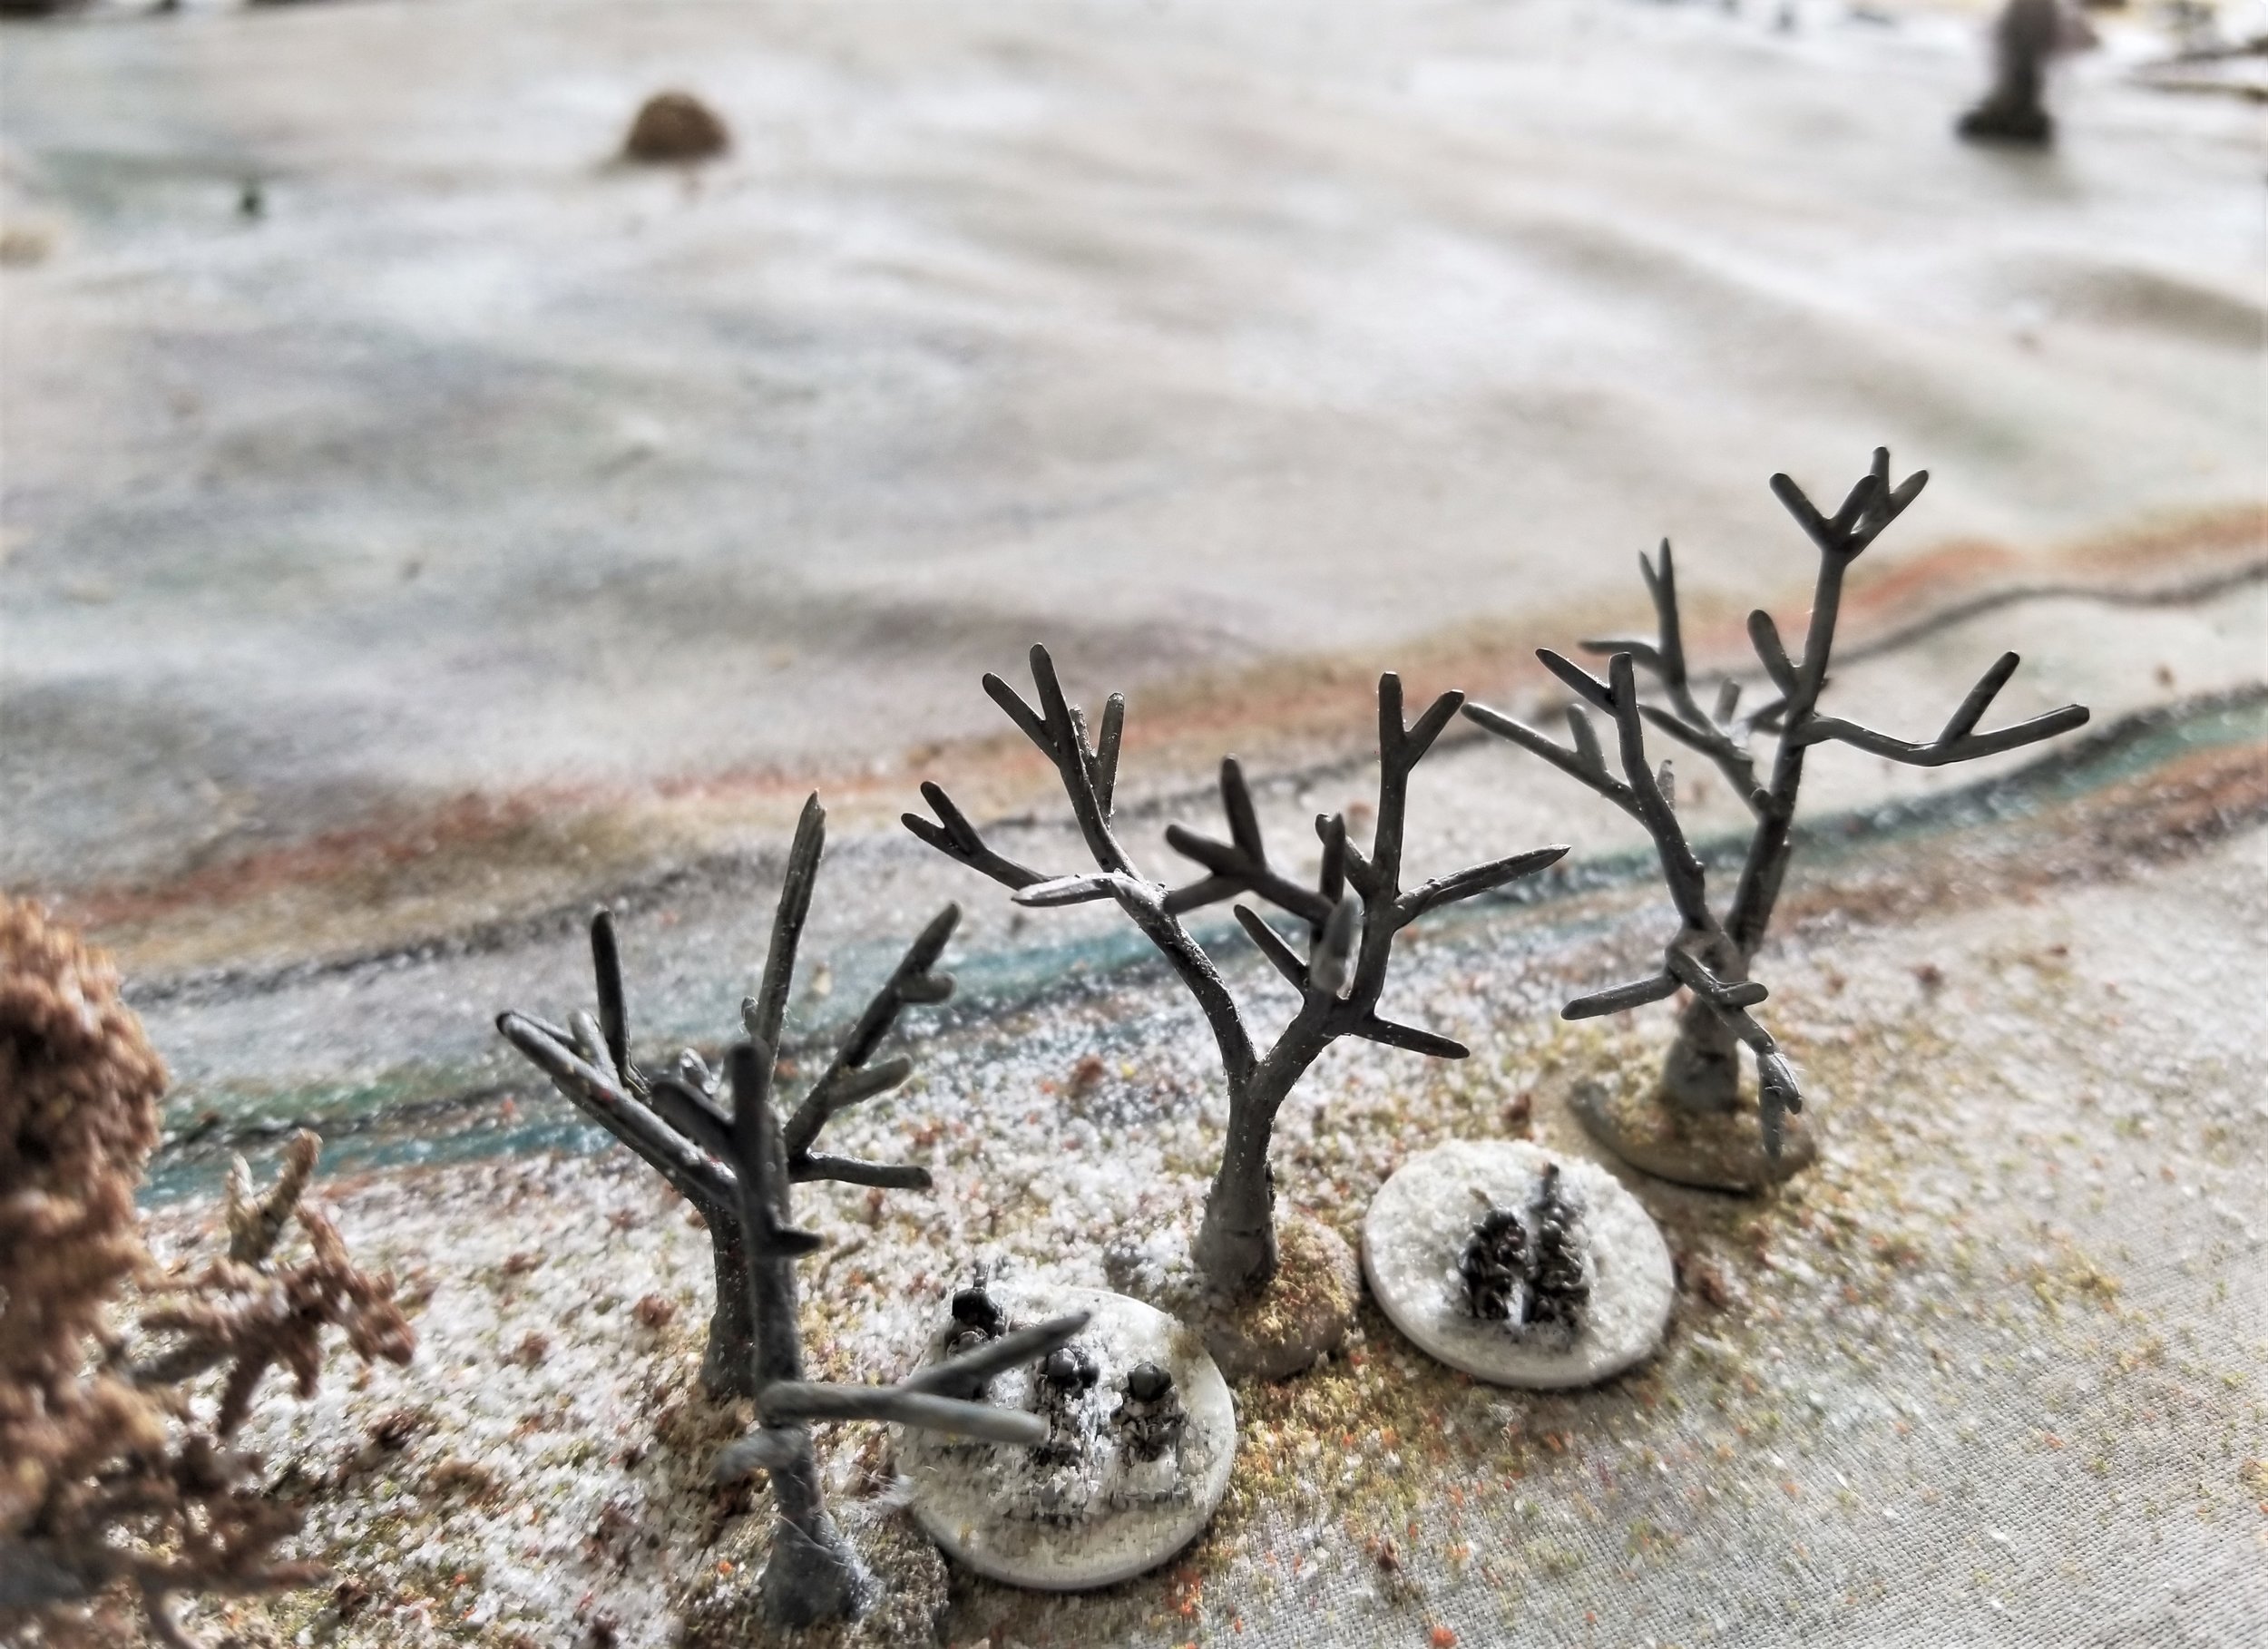
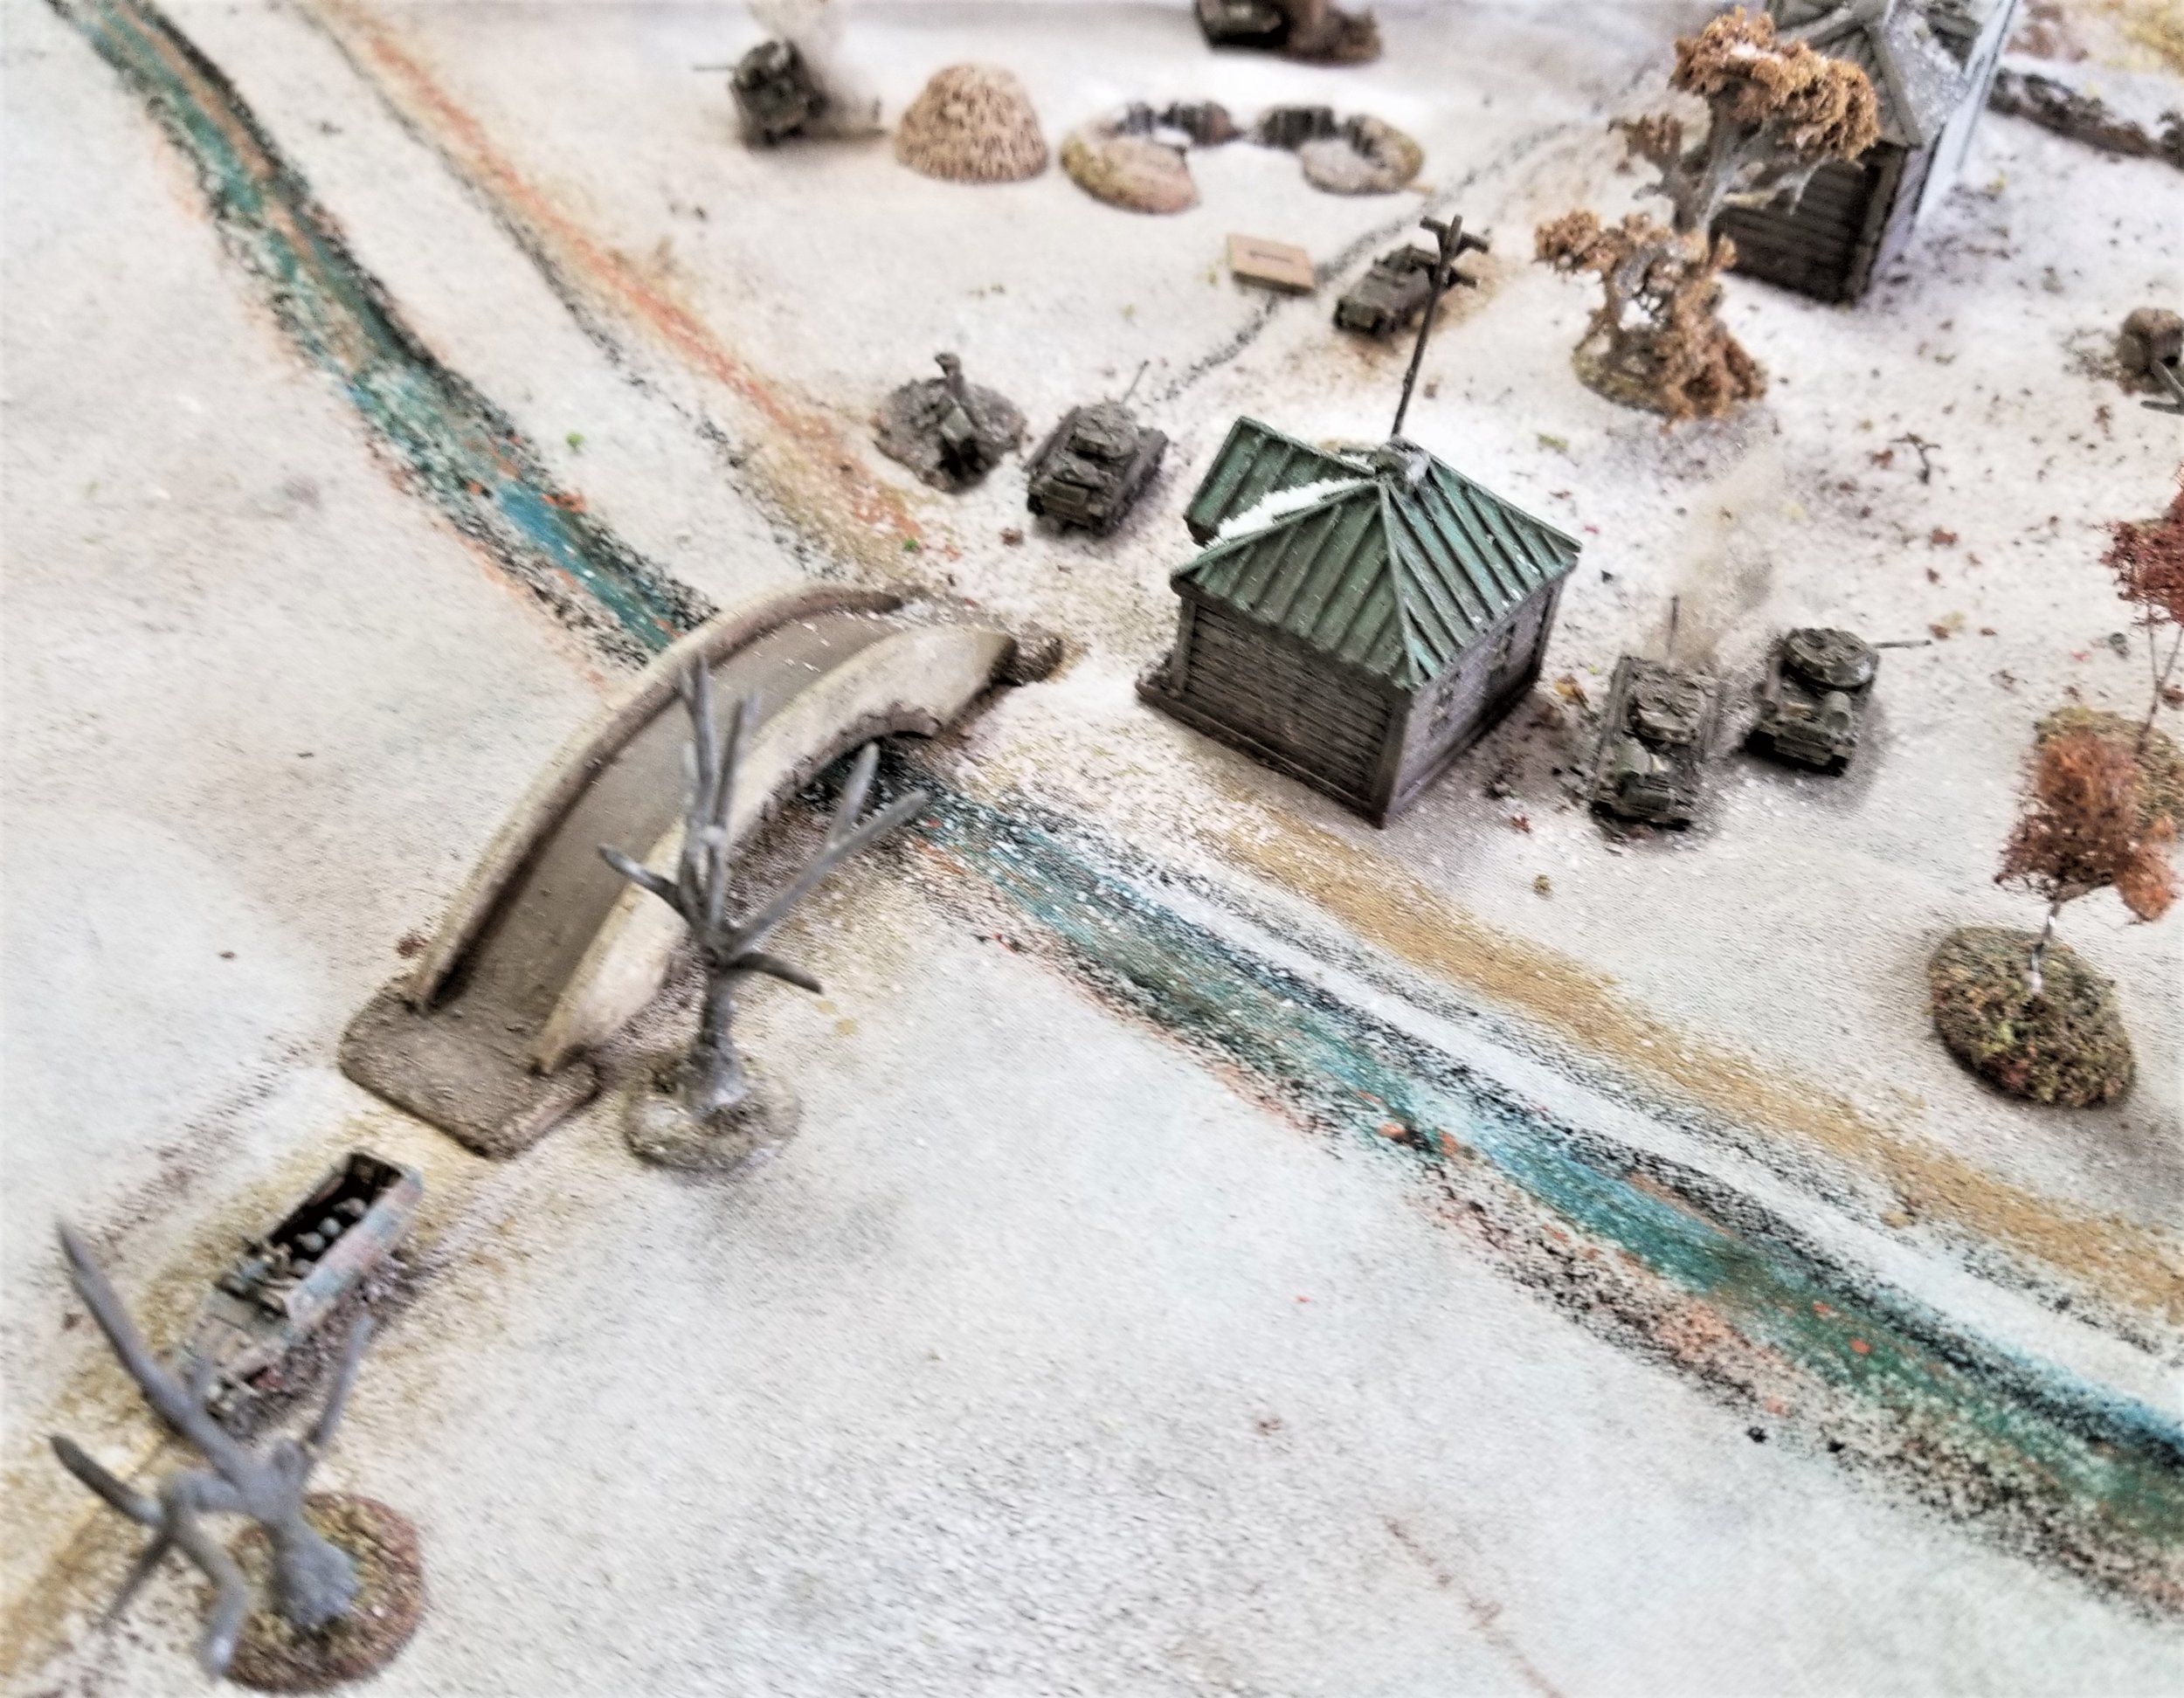
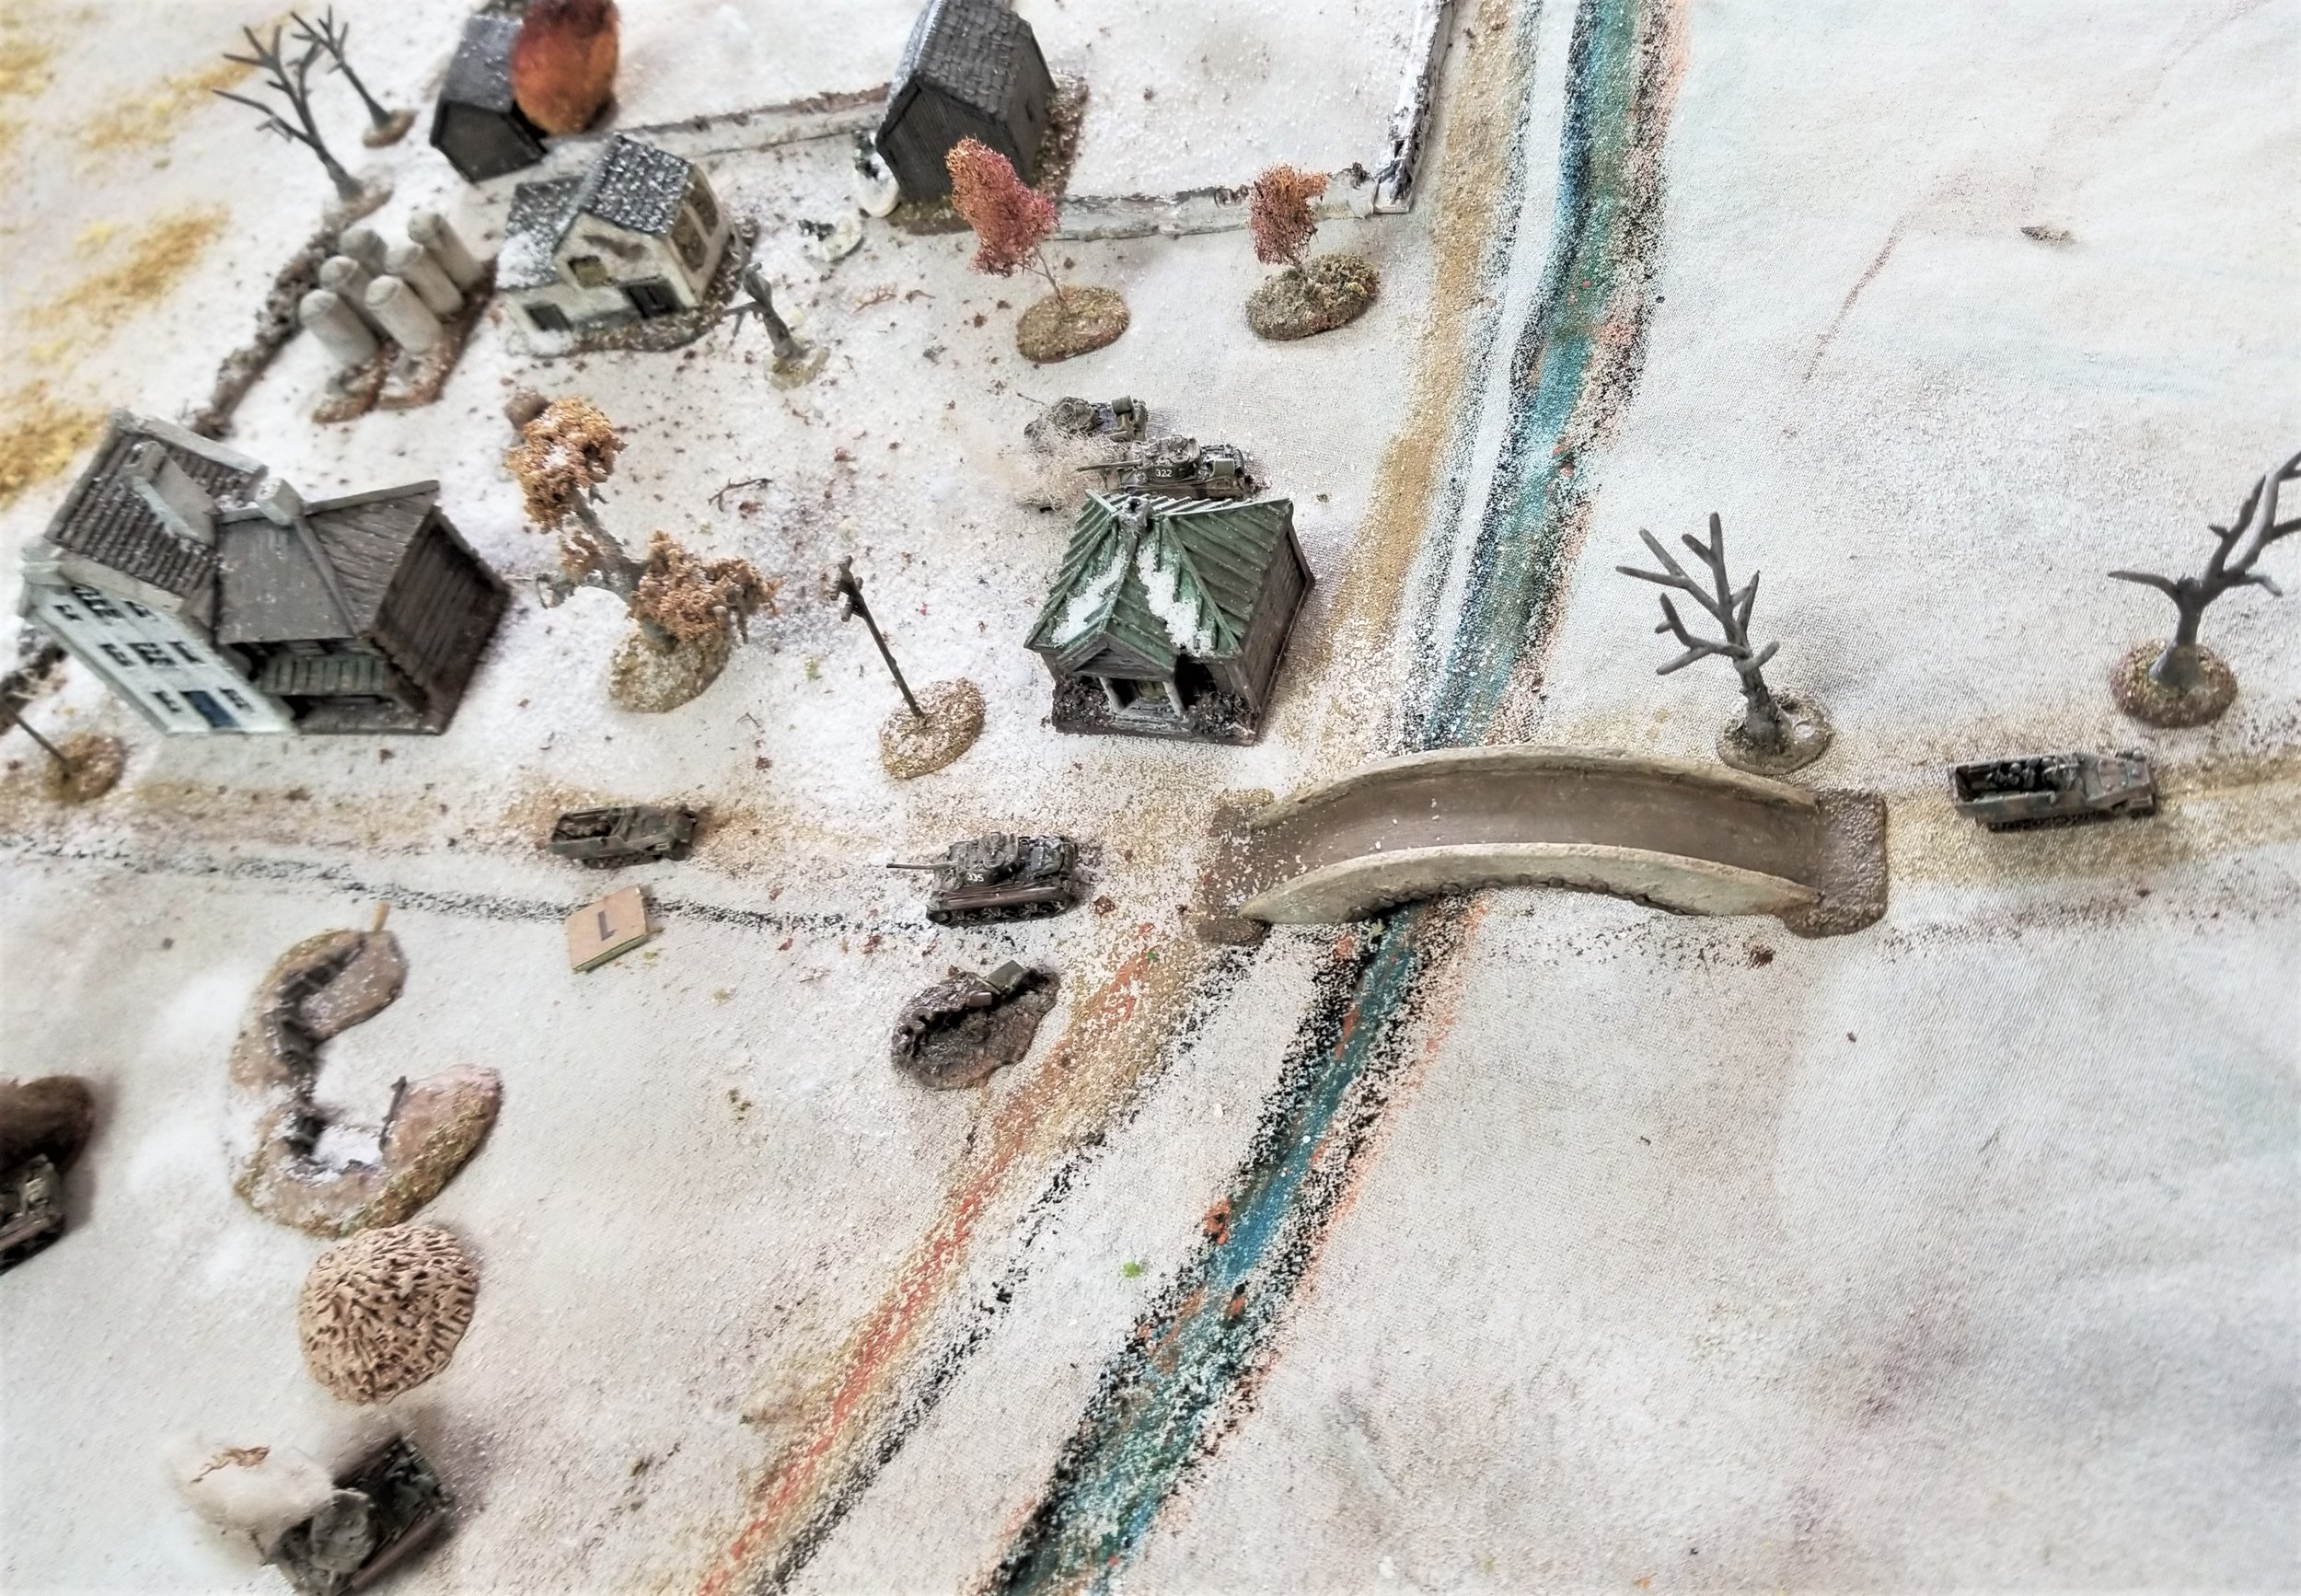
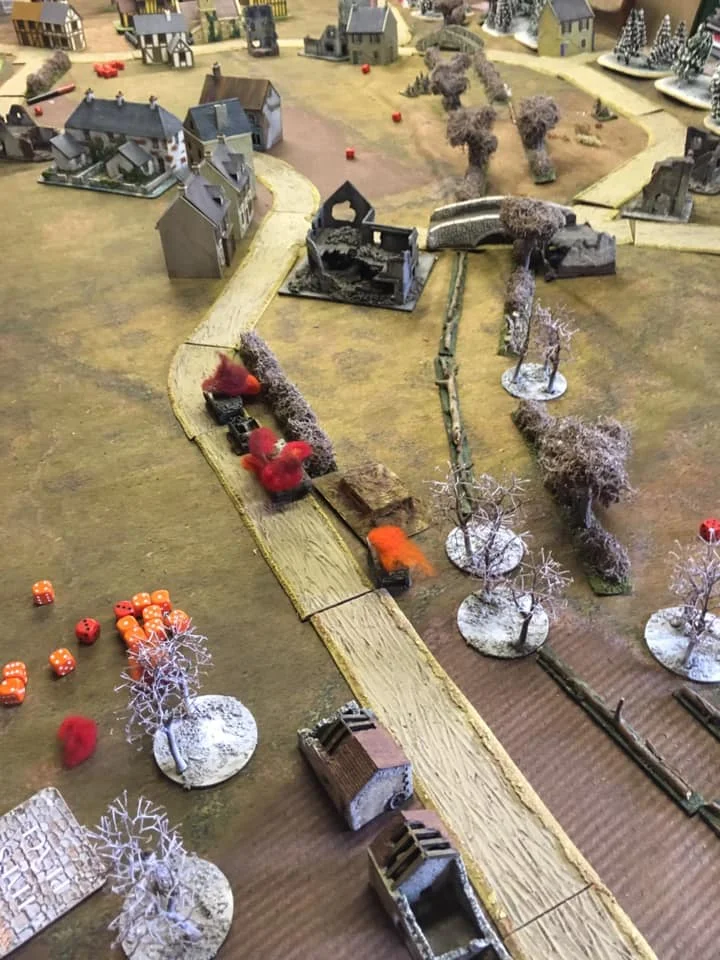
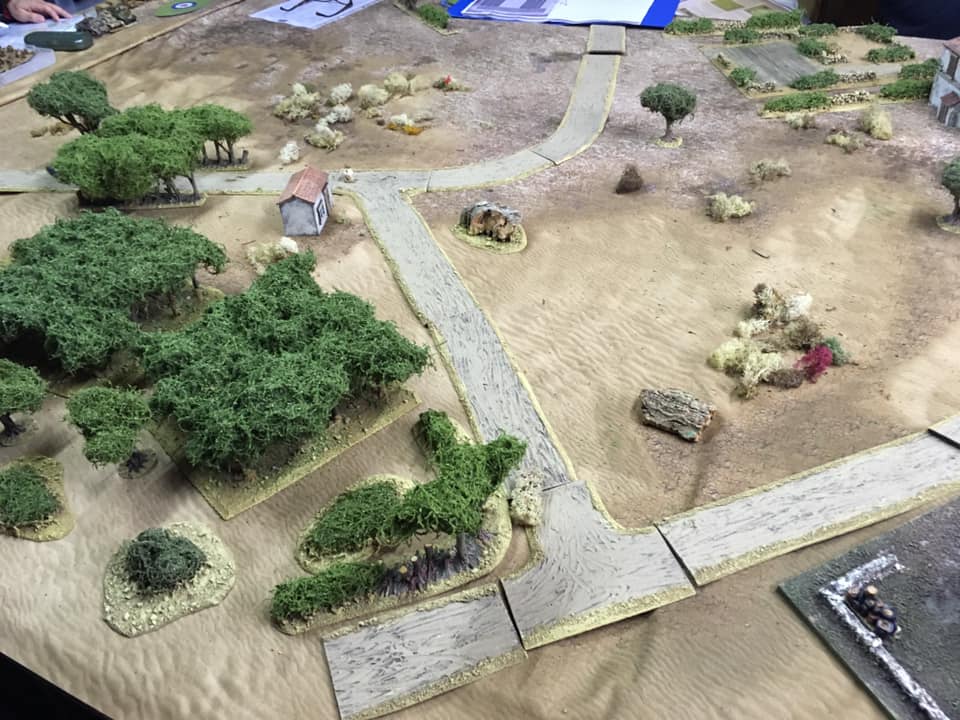
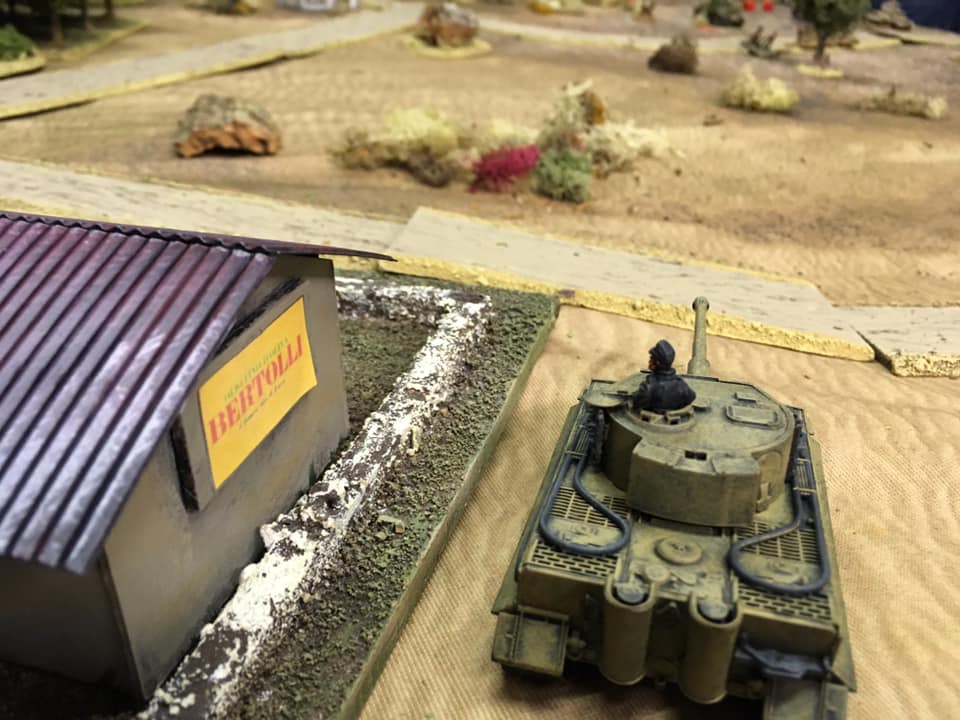
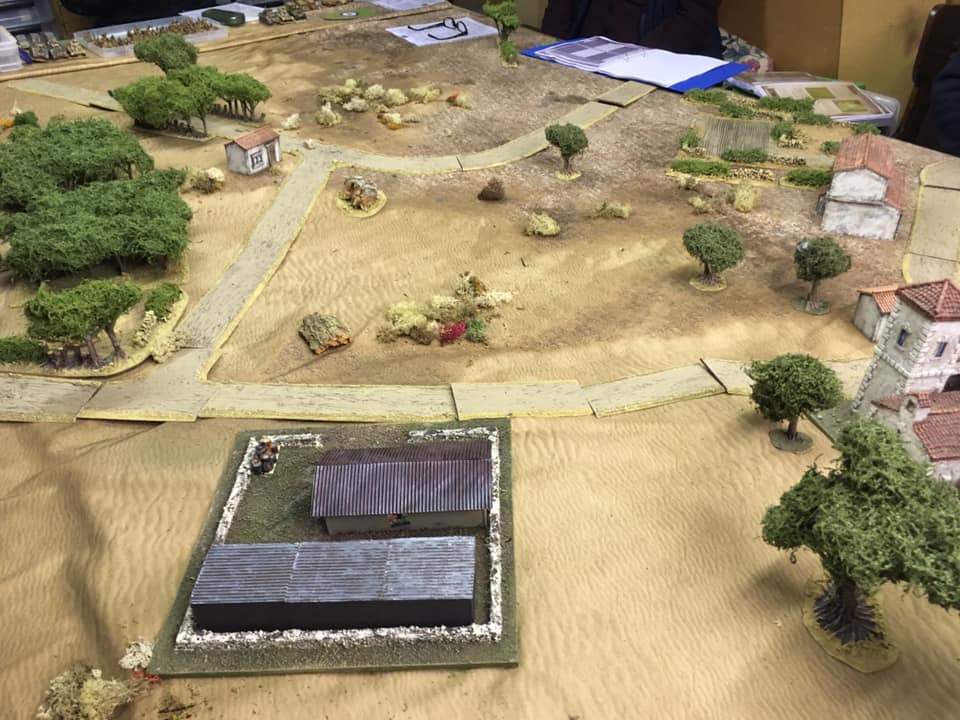
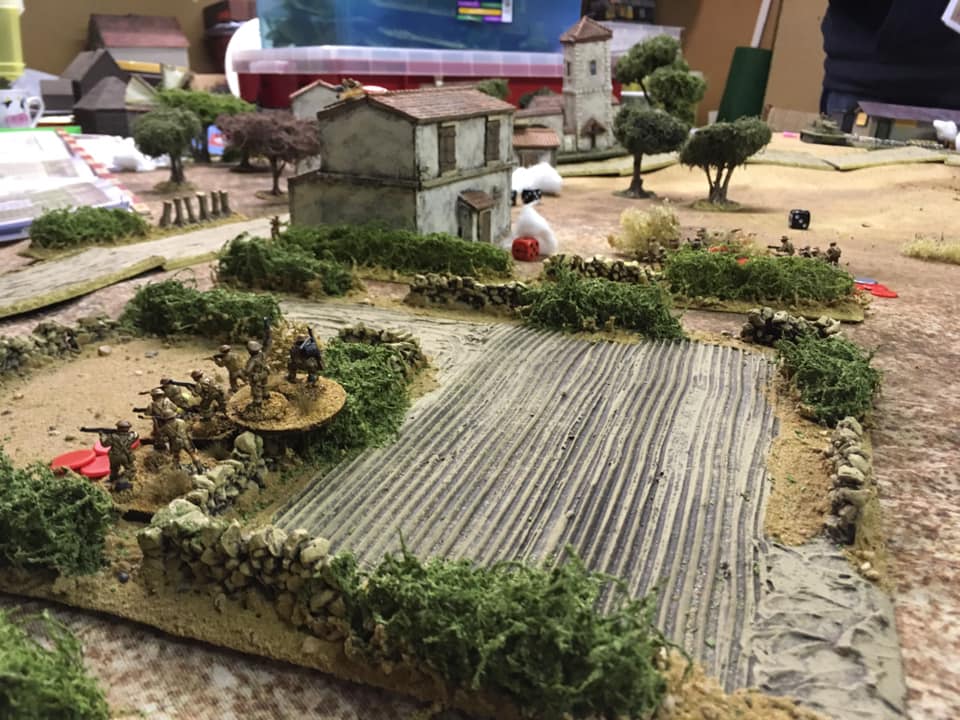
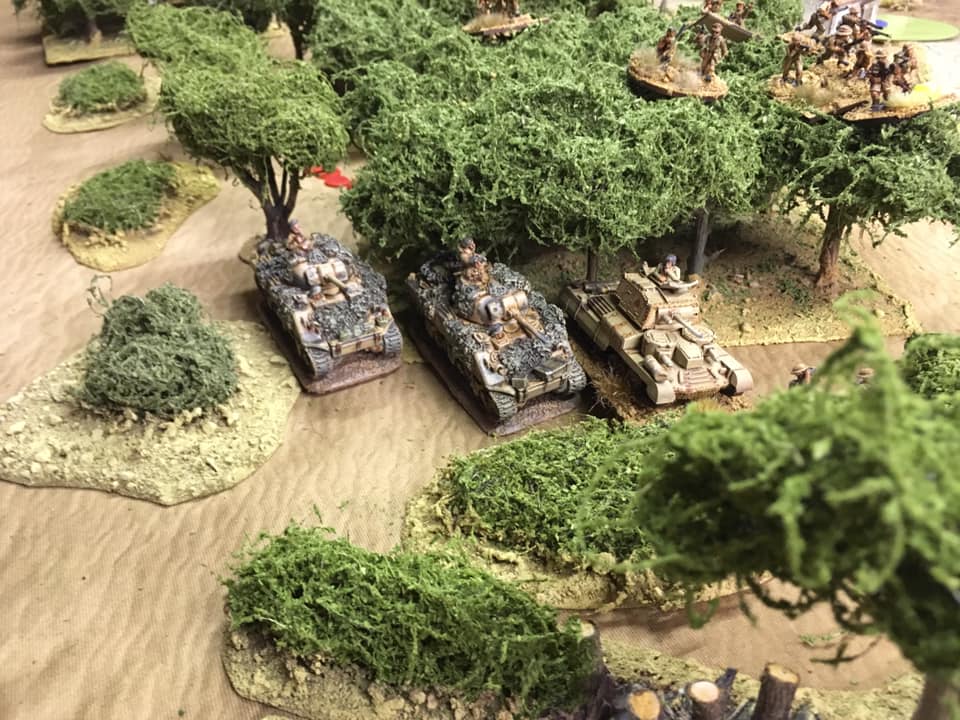
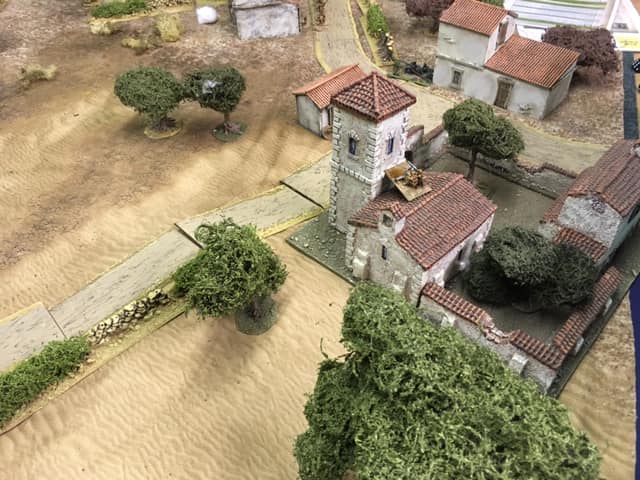
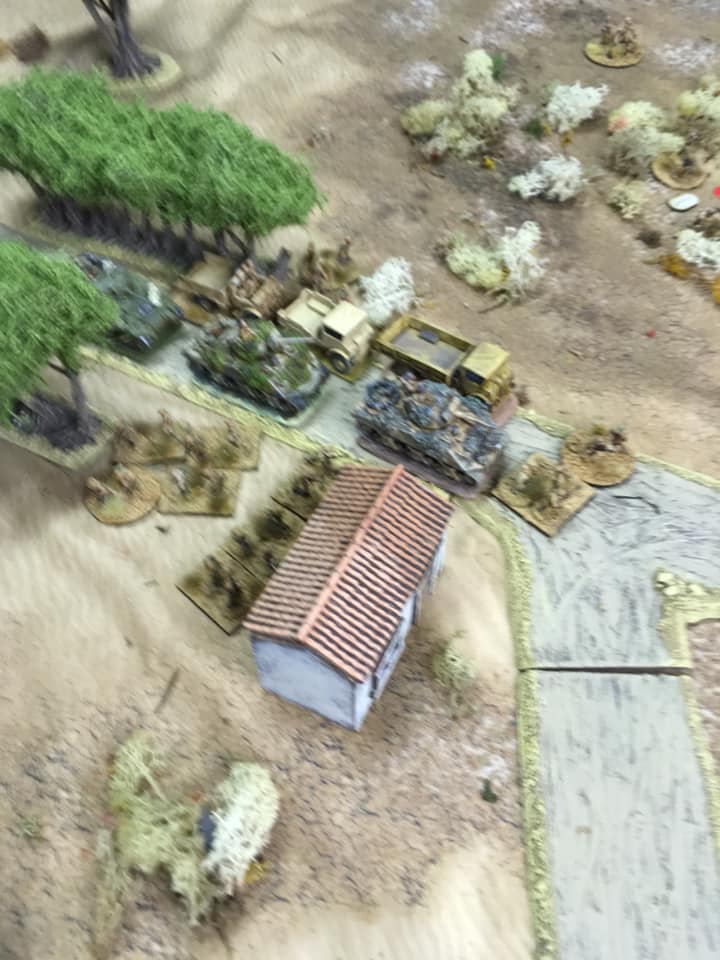
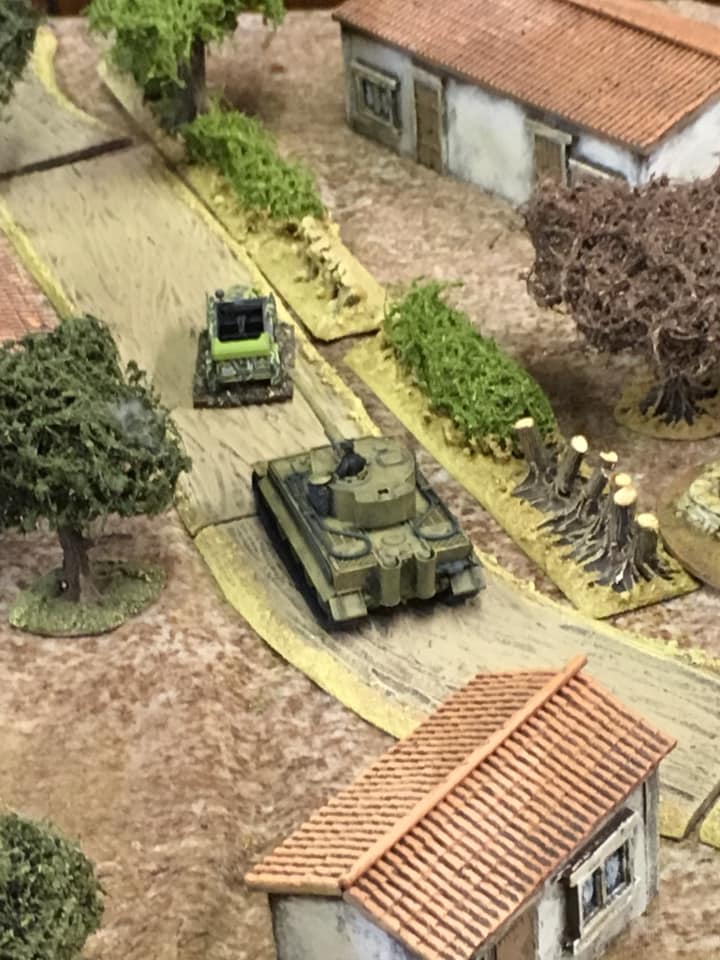
Both sides started on Blinds with the Germans defending the hillside between the factory and the village. They placed their only AFV, an assault gun, next to the factory covering the whole of the valley. Their only anti-tank gun was positioned on the edge of the village covering the main road from the valley, paying particular attention to the area around the gully where they hoped the Allied advance would take place. A lucky shot against any armour advancing through the gully would cause a blockage. They also placed their for machine guns liberally about the hillside and protected them with infantry sections.

The Allies were fortunate in the early rounds with the Blinds card appearing several times where as the Germans card didn’t and frustration set in a little.

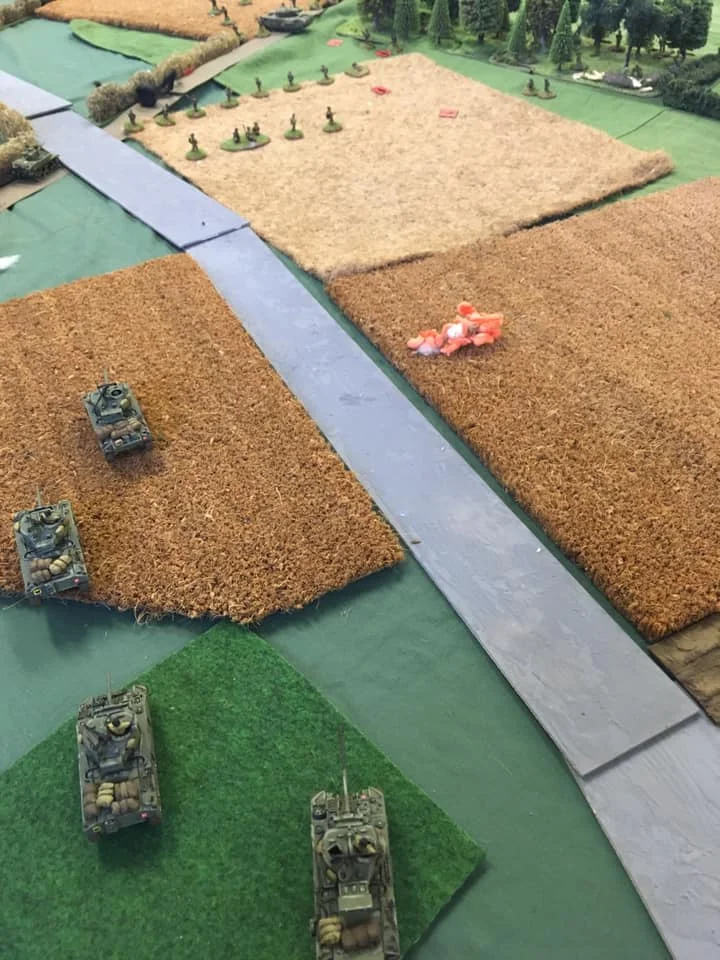
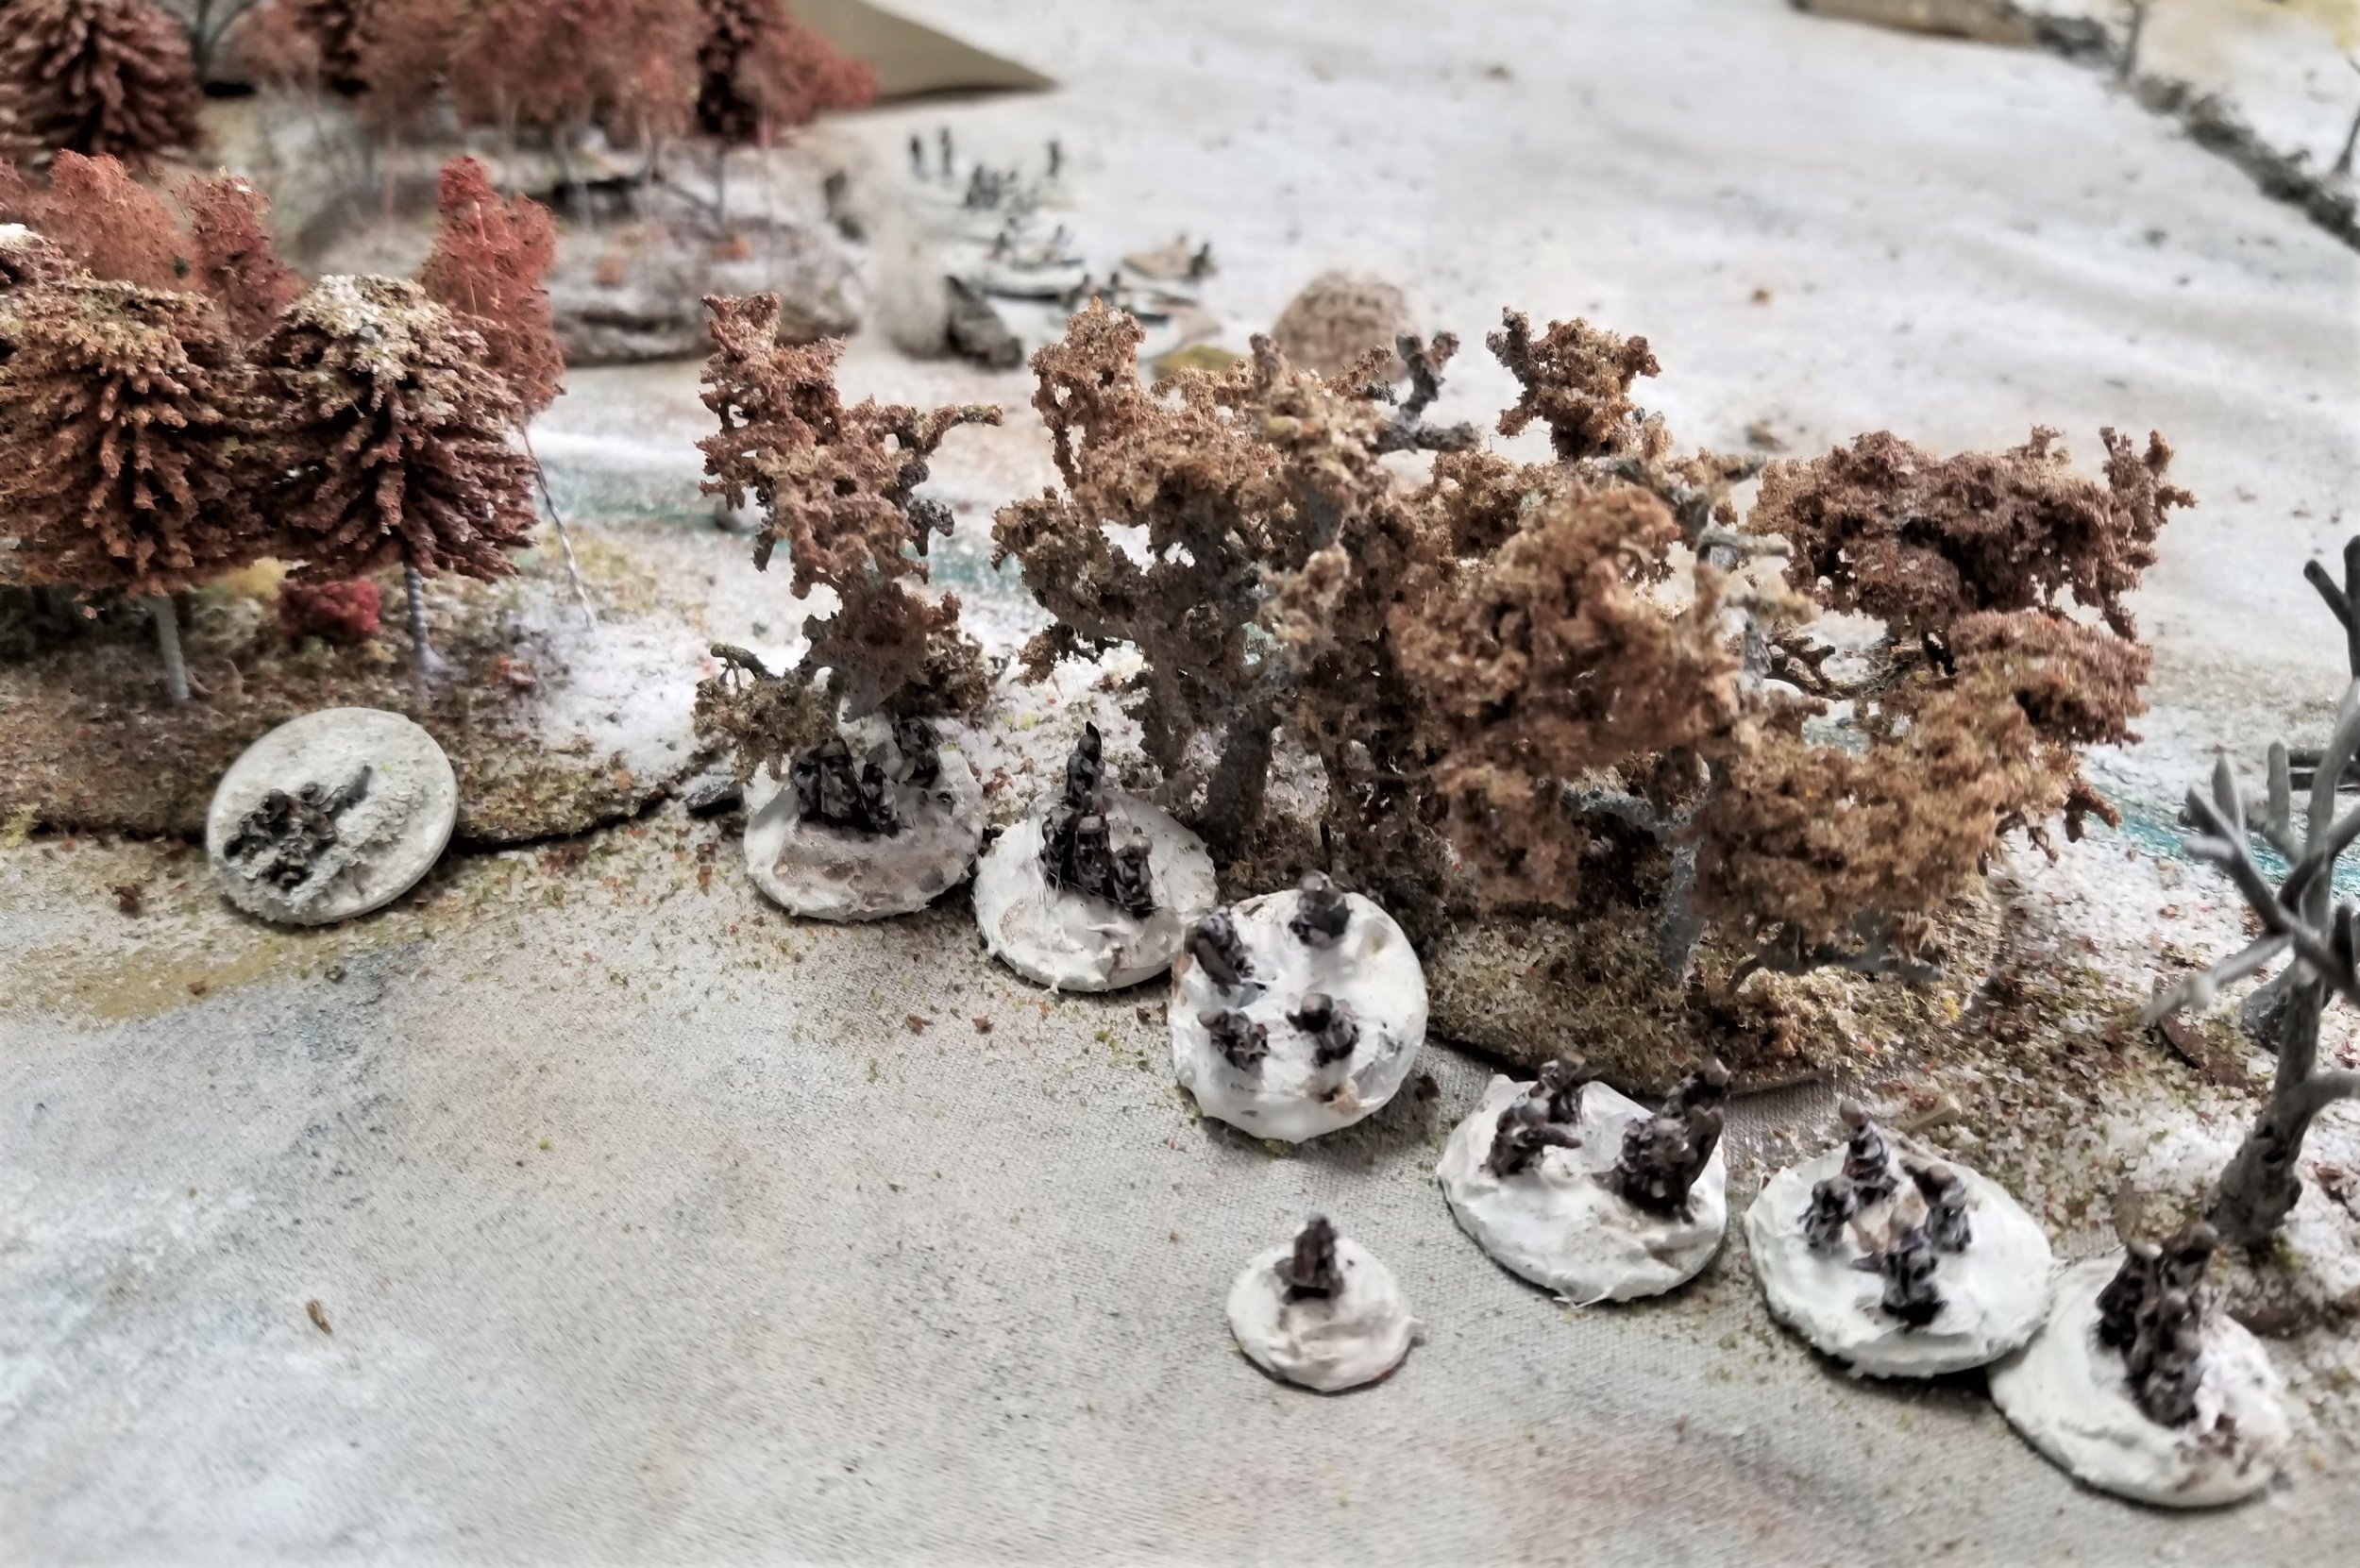
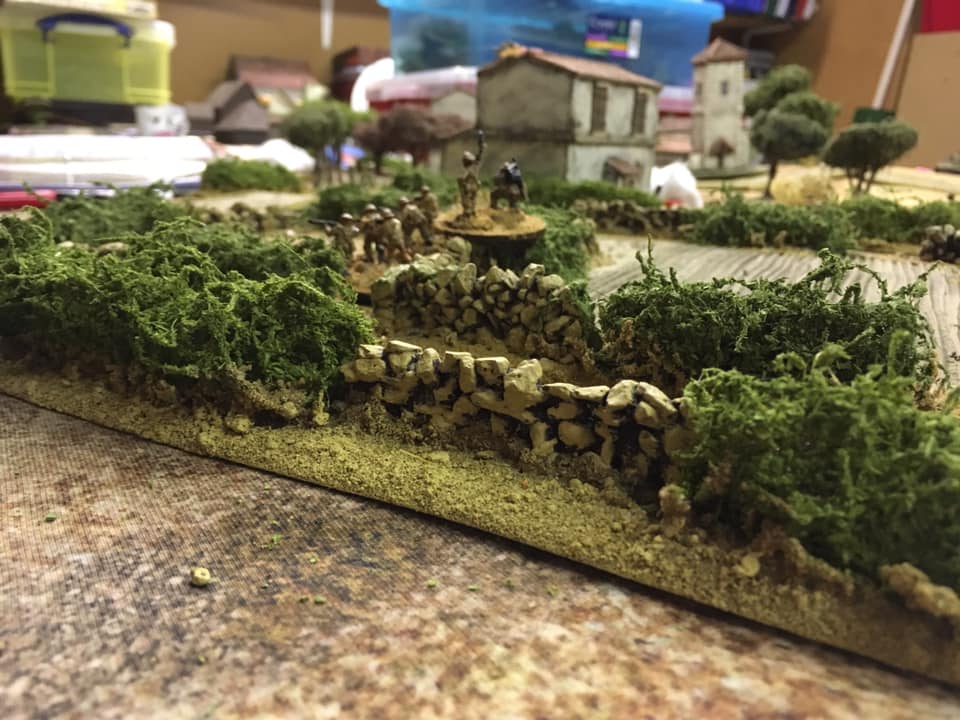
Andy managed to get an infantry platoon under cover of smoke right up to the vineyard at the edge of the village under Blinds before falling victim to auto spotting. He was also supported on that flank by a group of Sherman tanks.

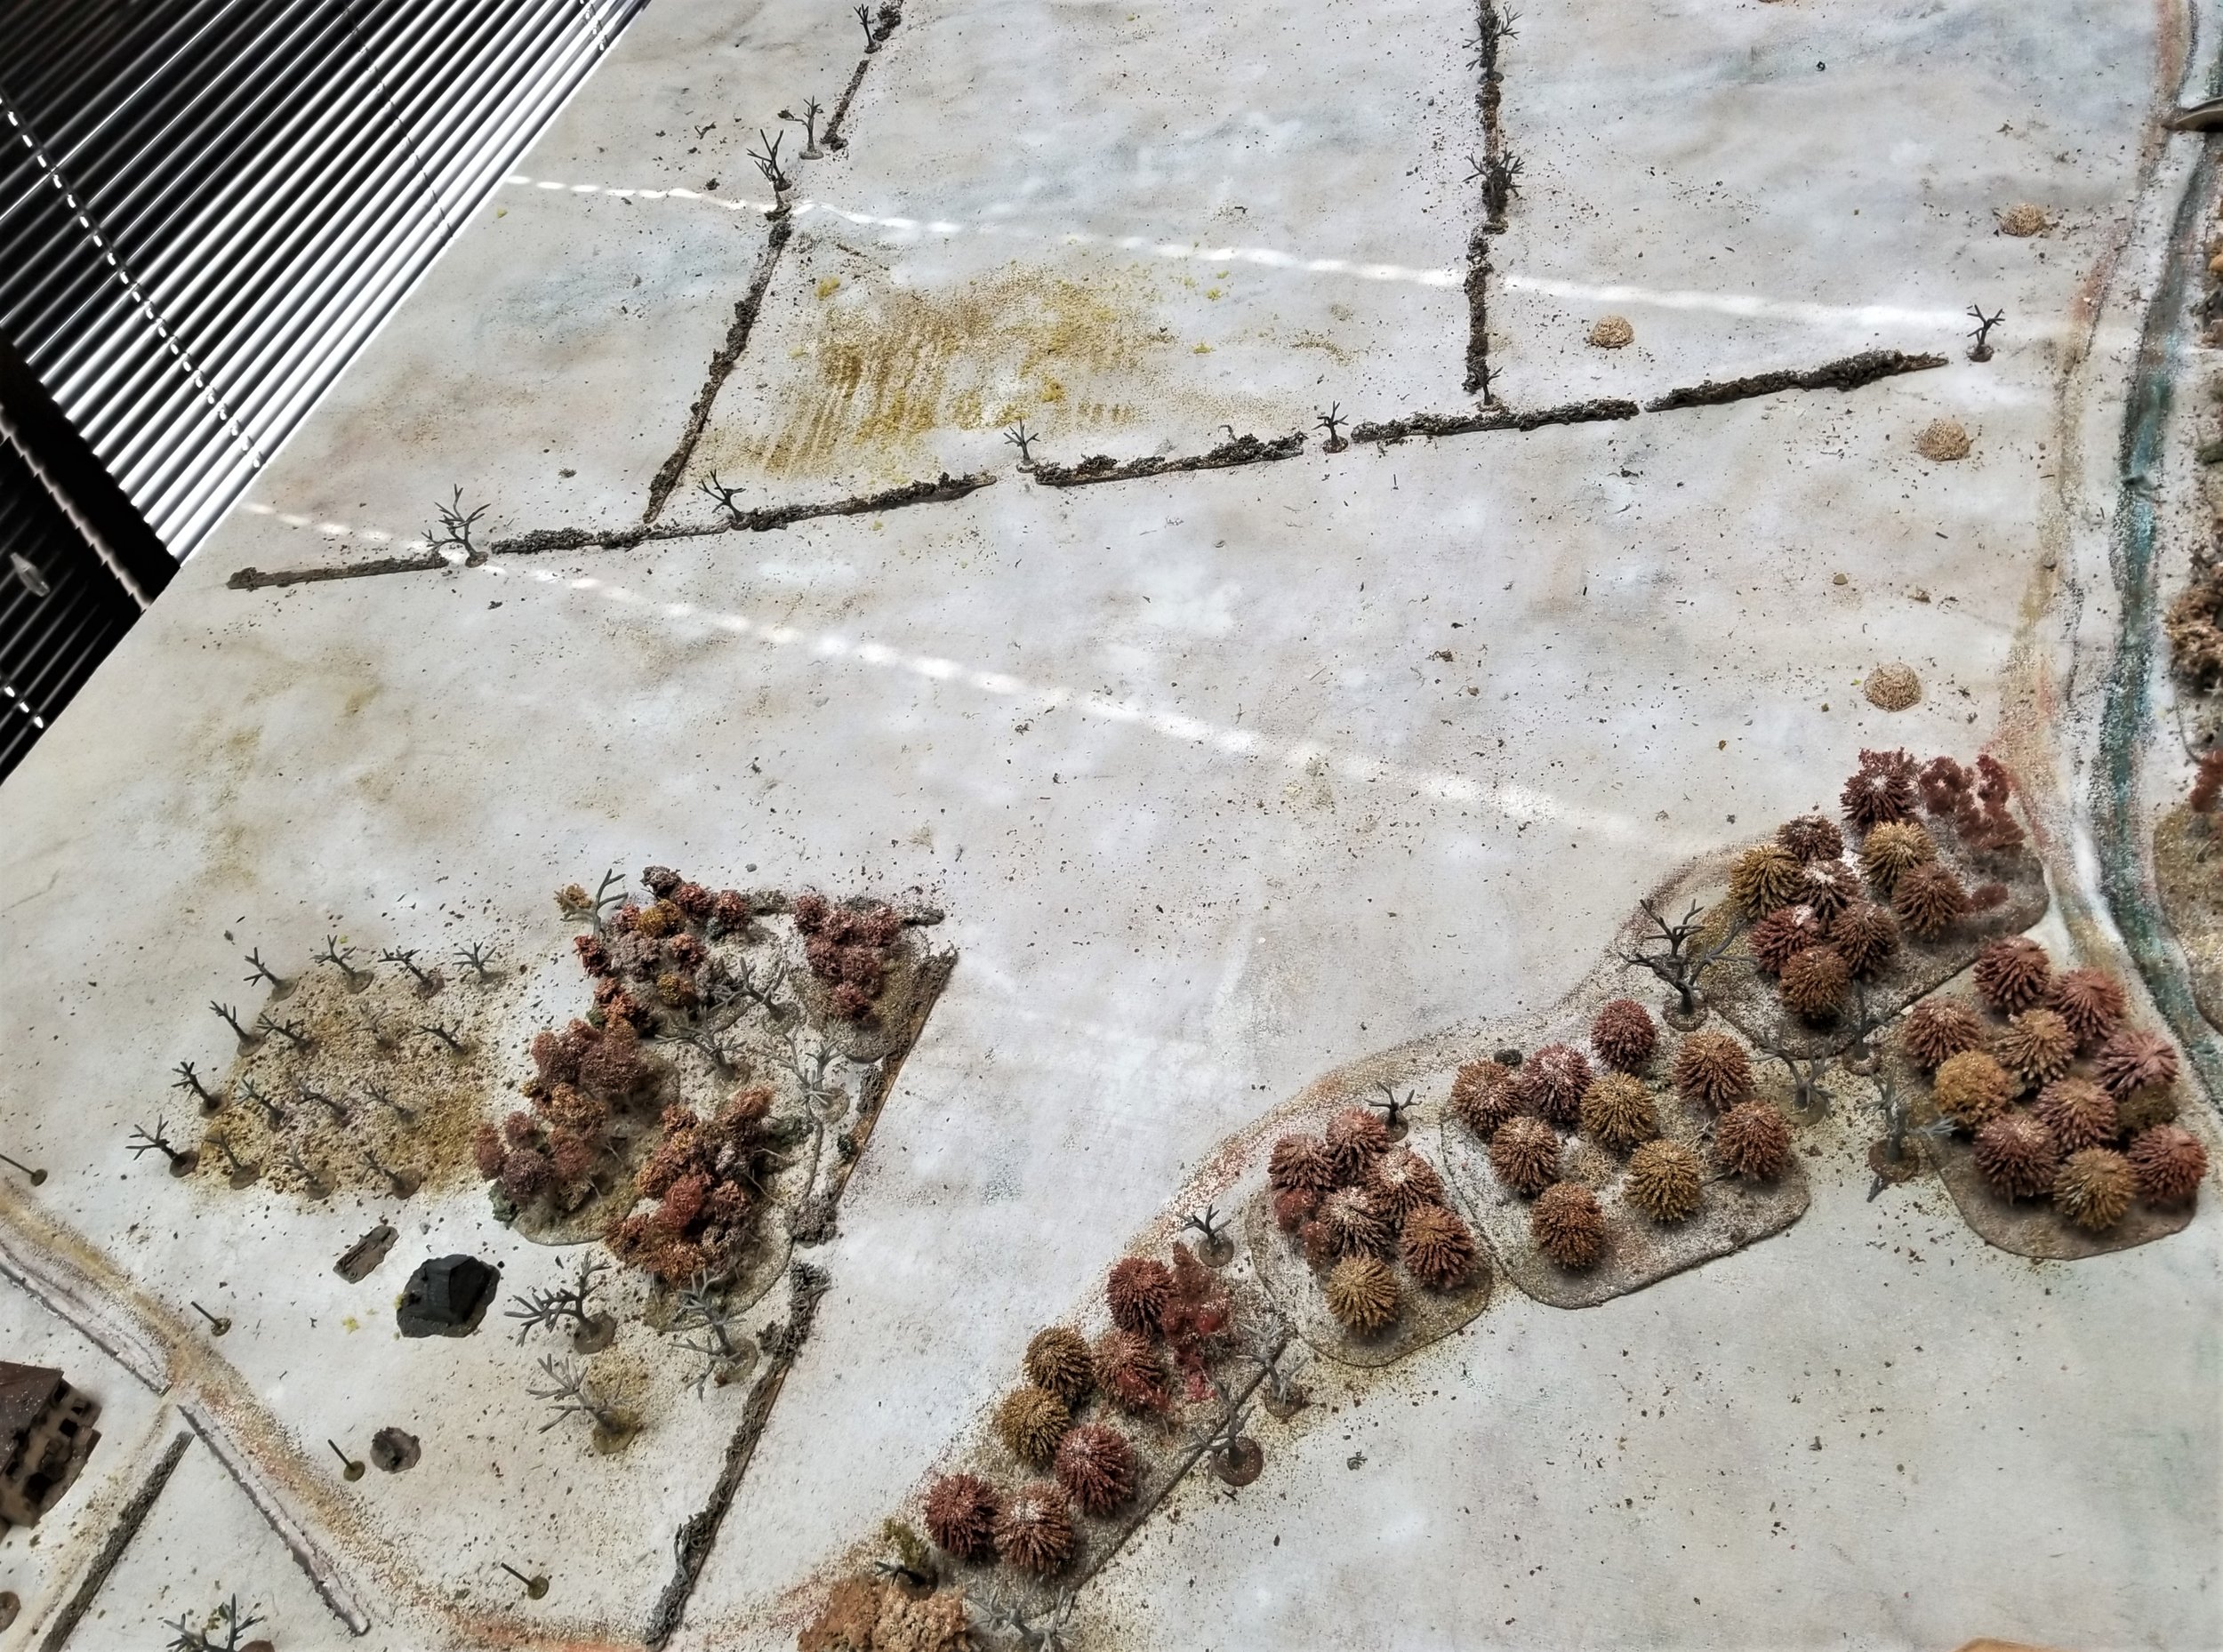
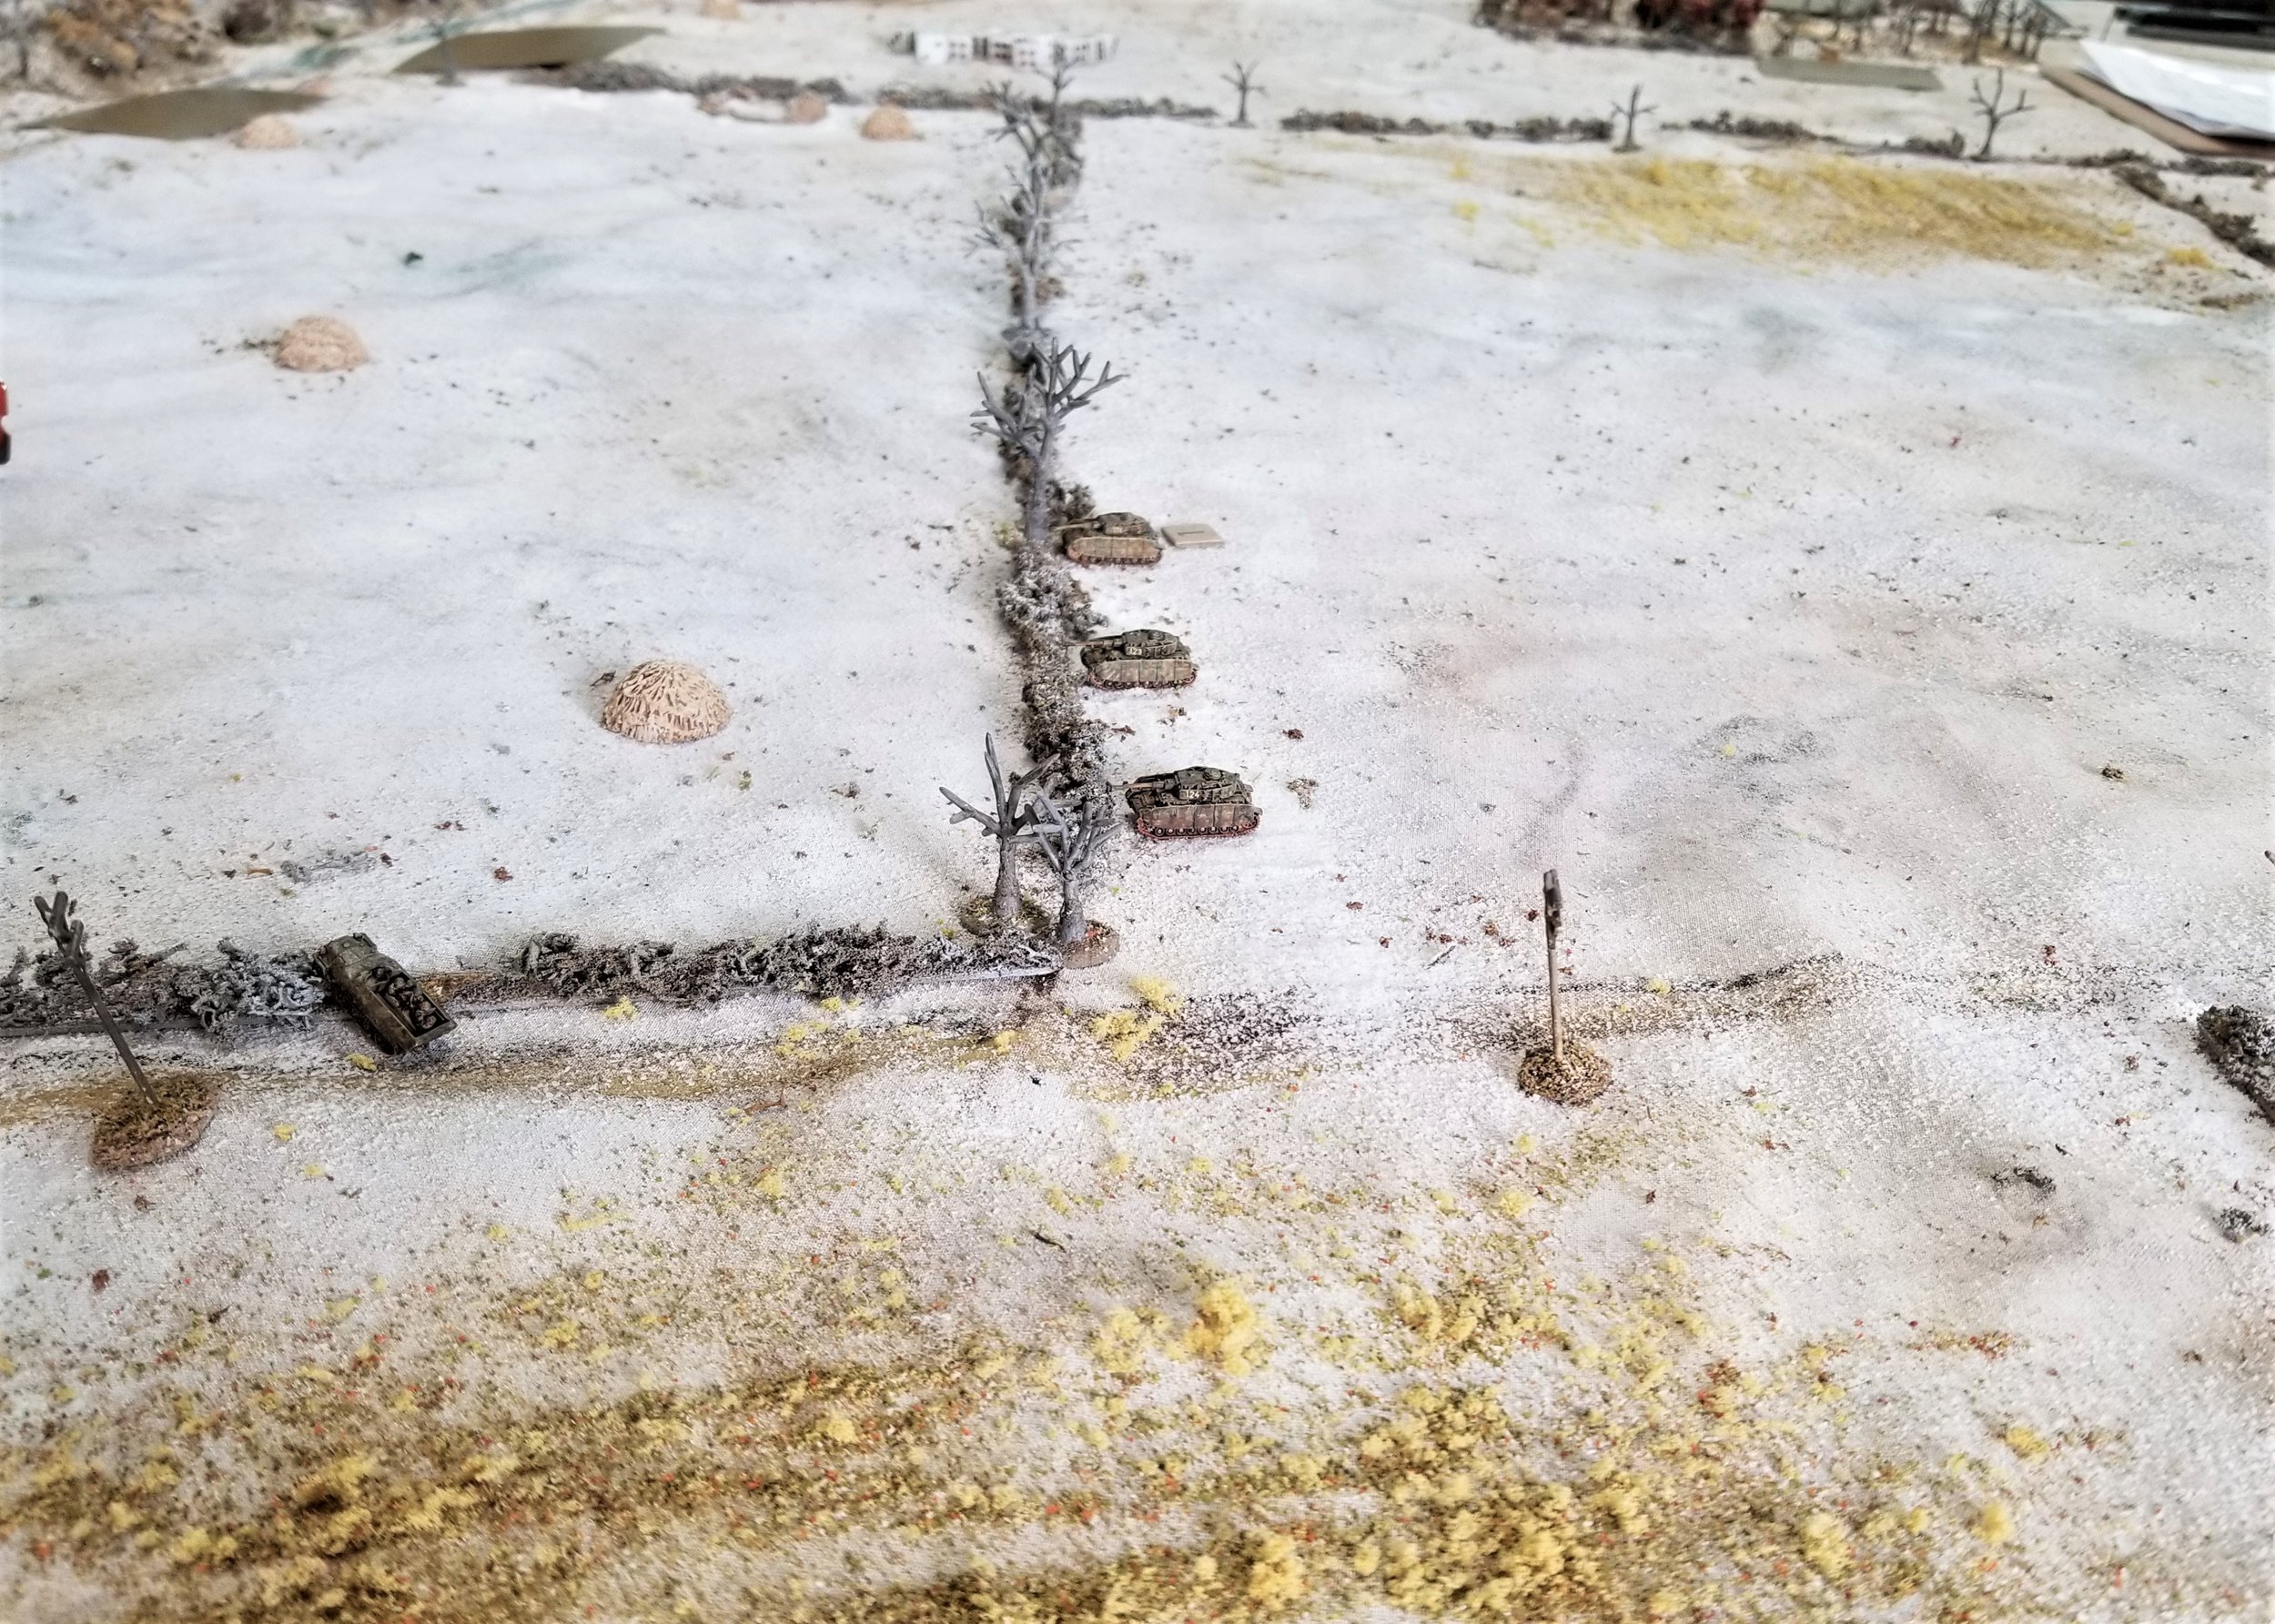
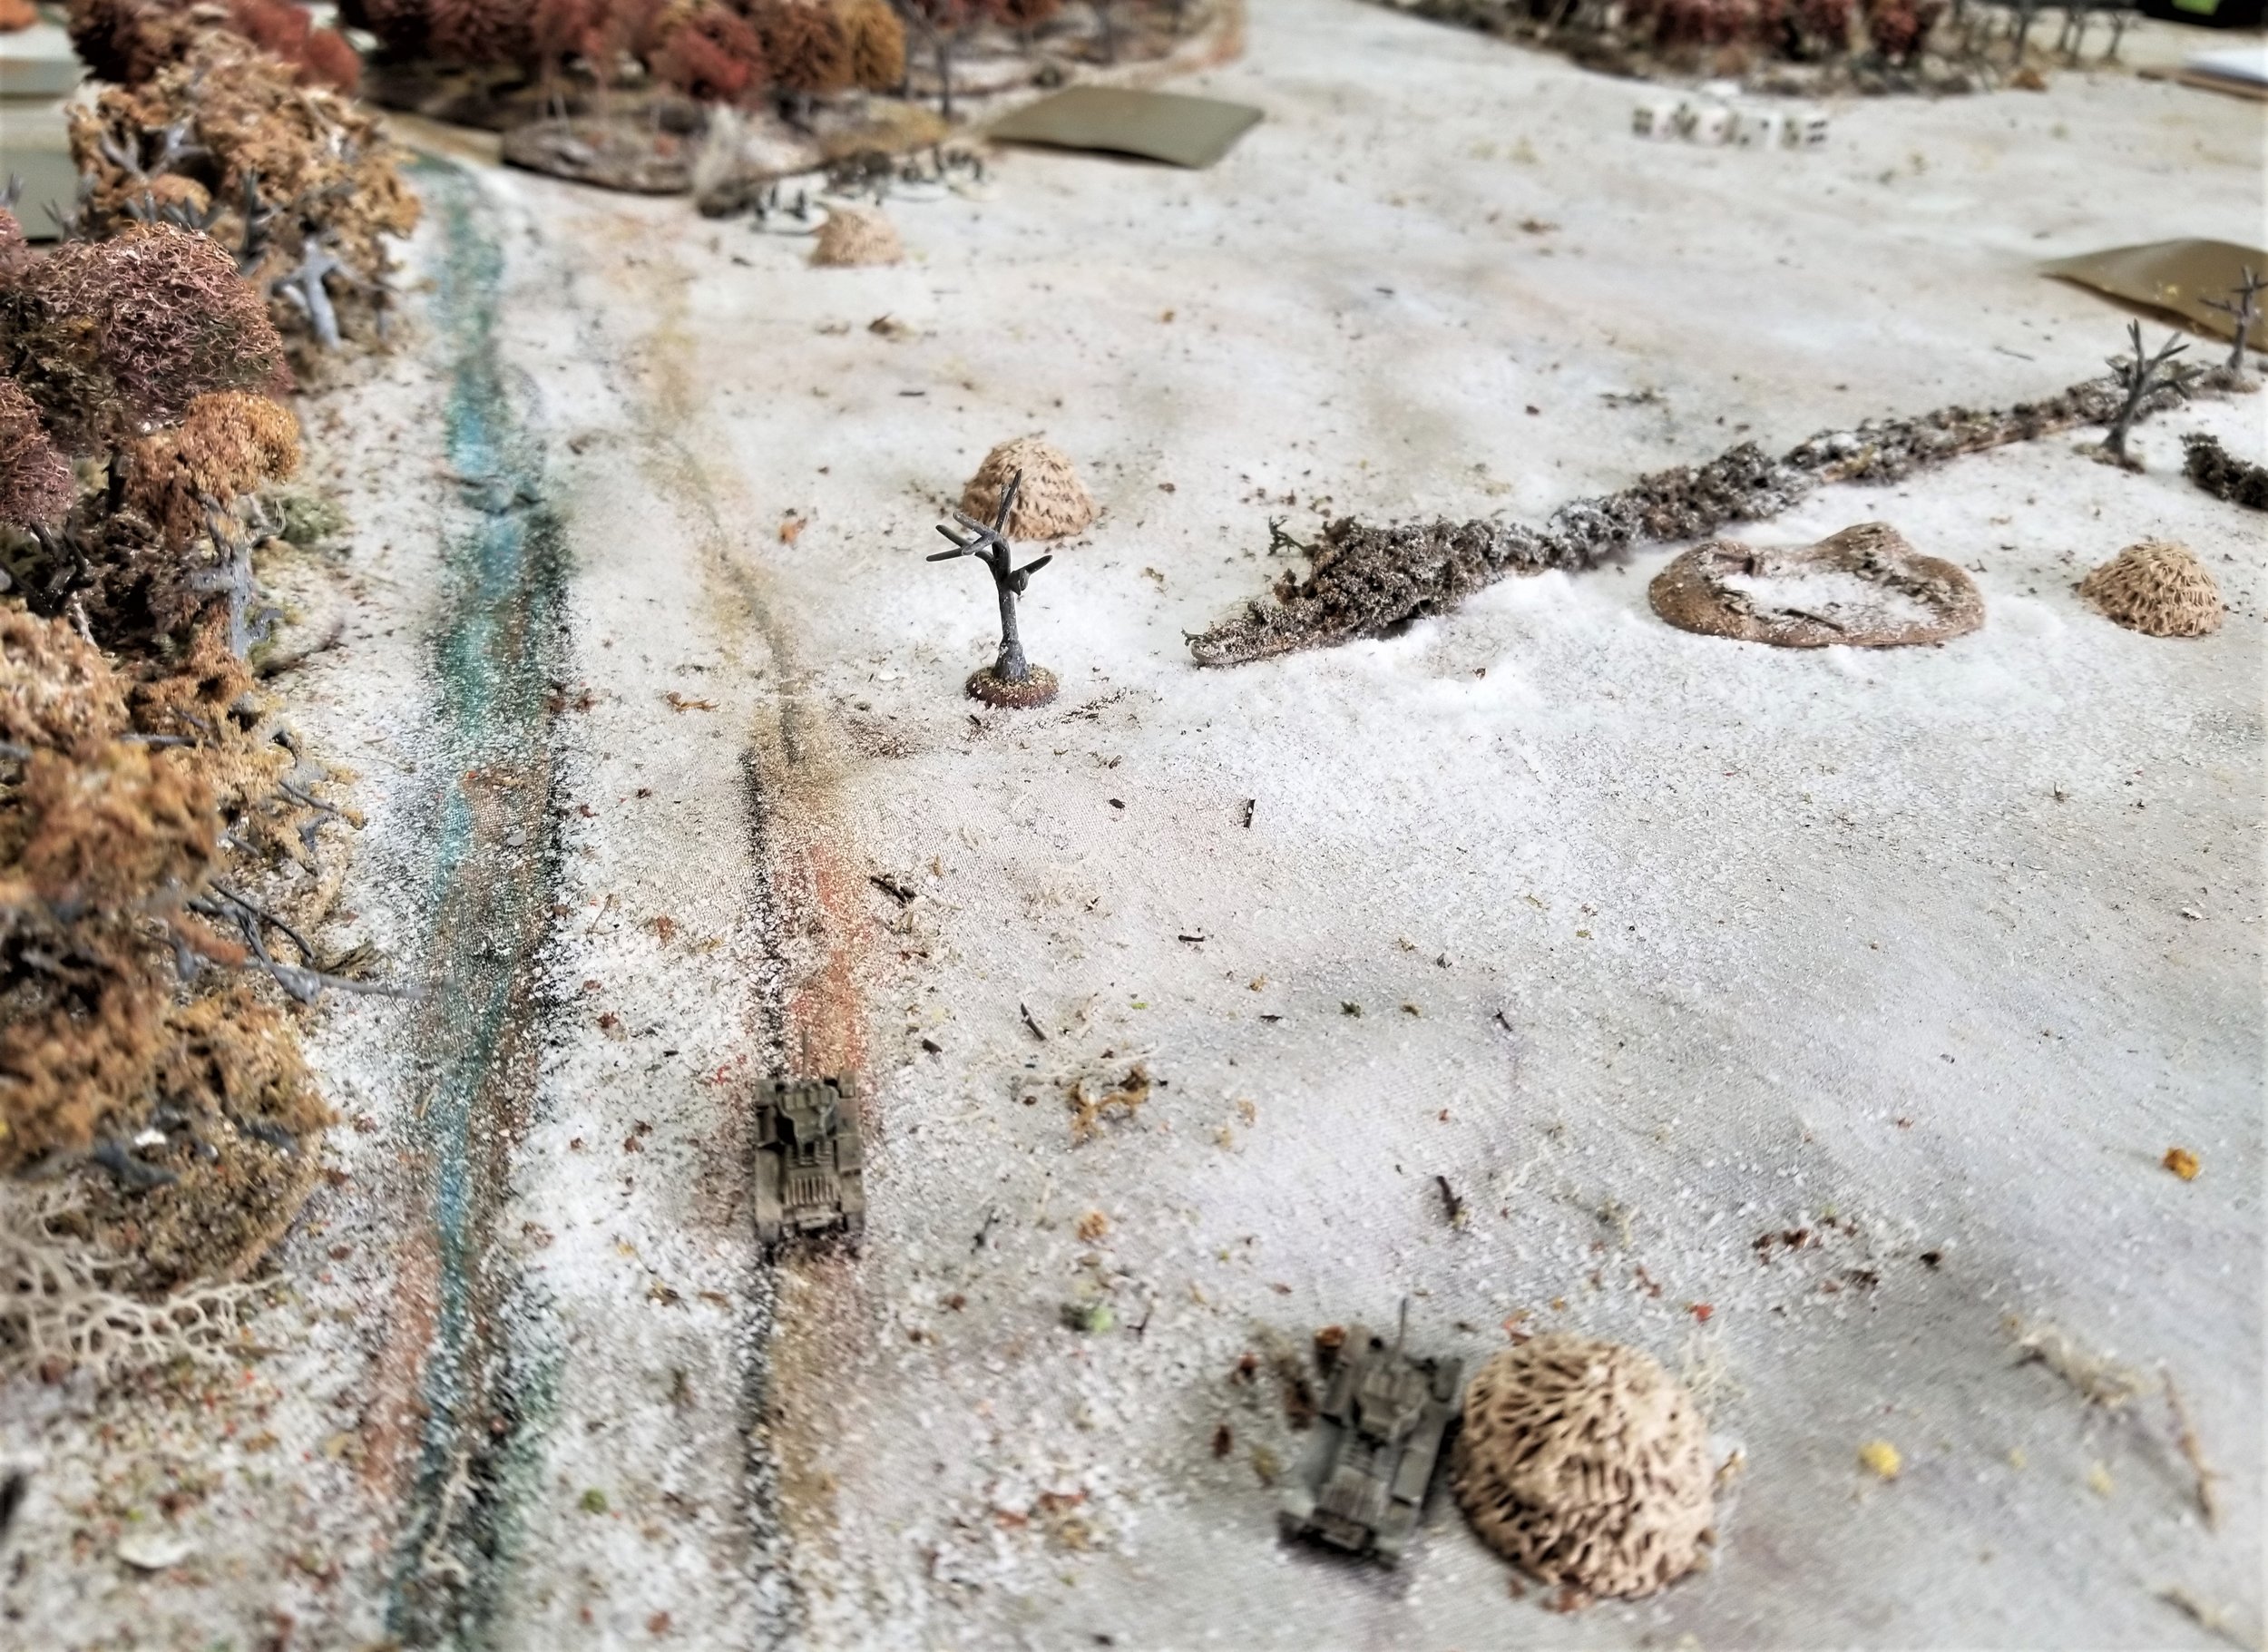
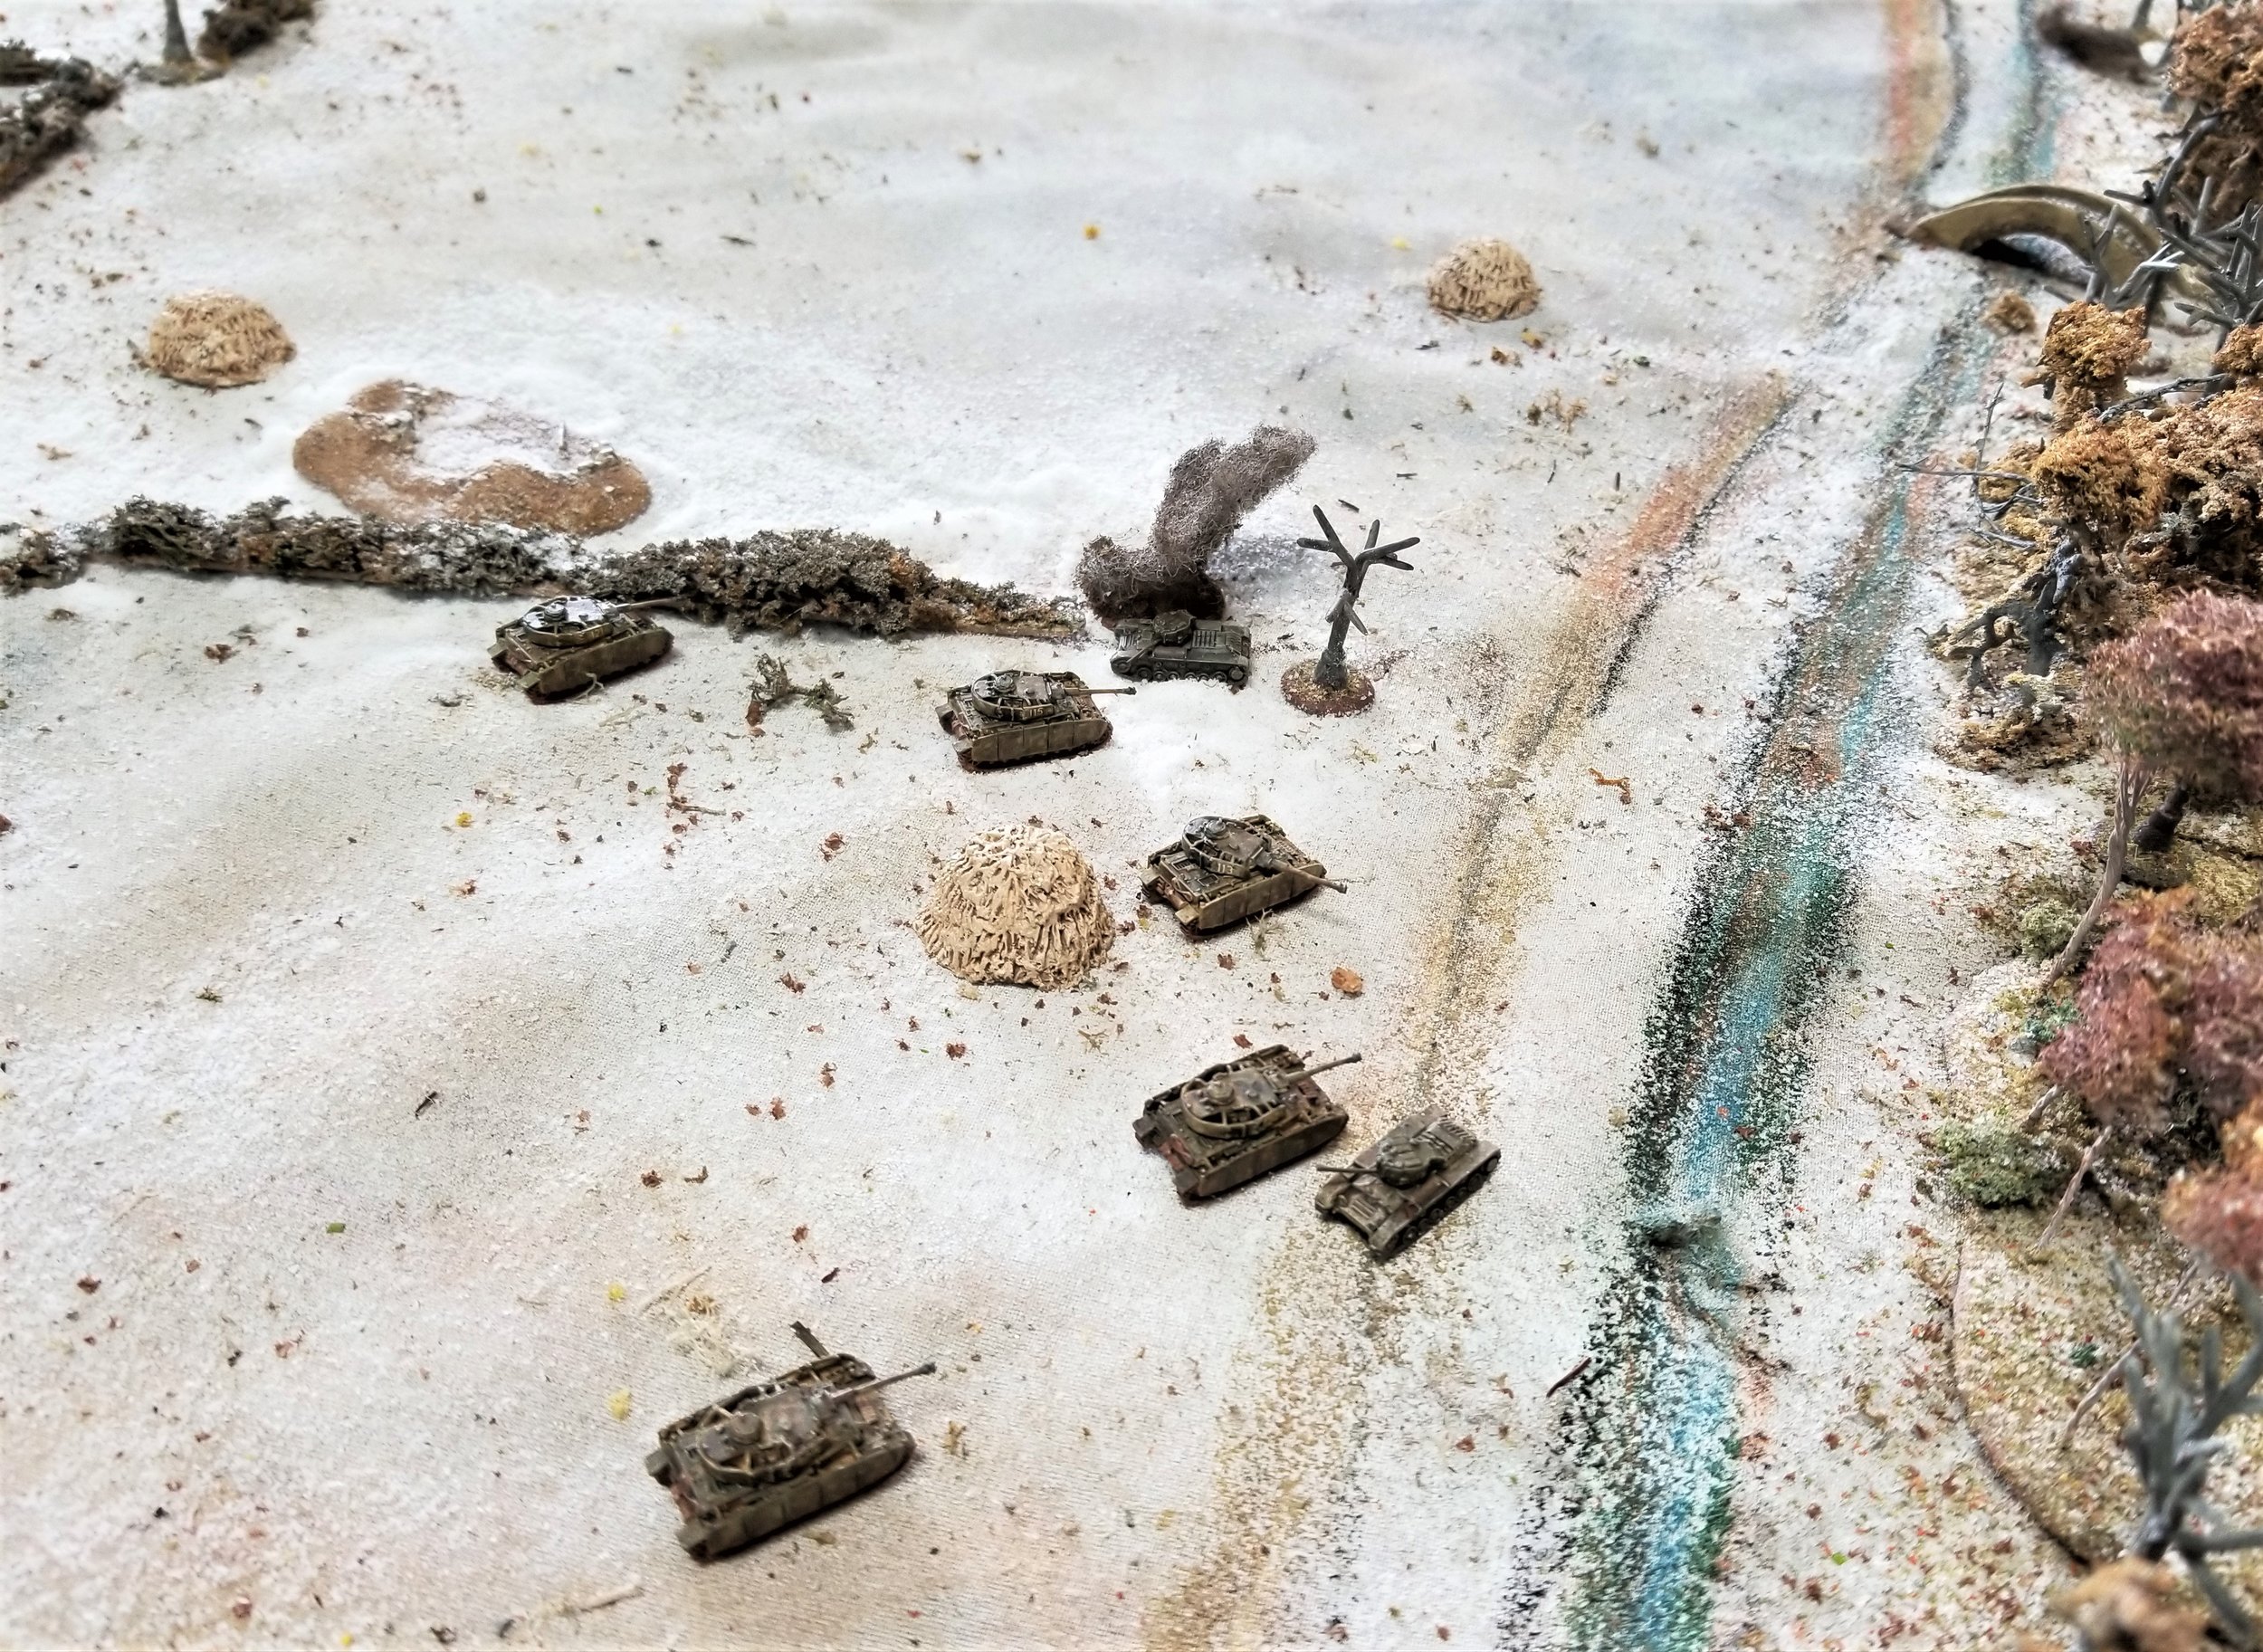
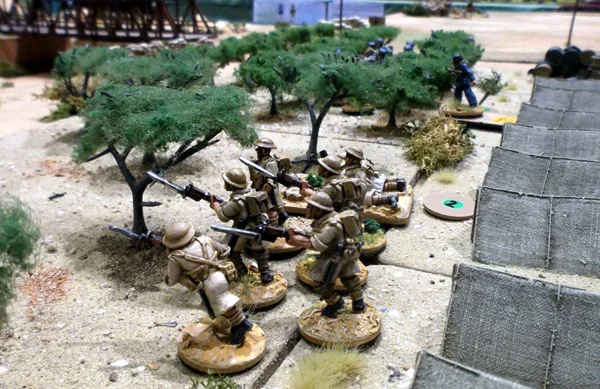
On the right flank Richard successfully negotiated the hillside which was heavily populated with olive groves. A combined infantry and armour assault here caused significant discomfort for the German defenders of the factory, who soon retreated with heavy losses.

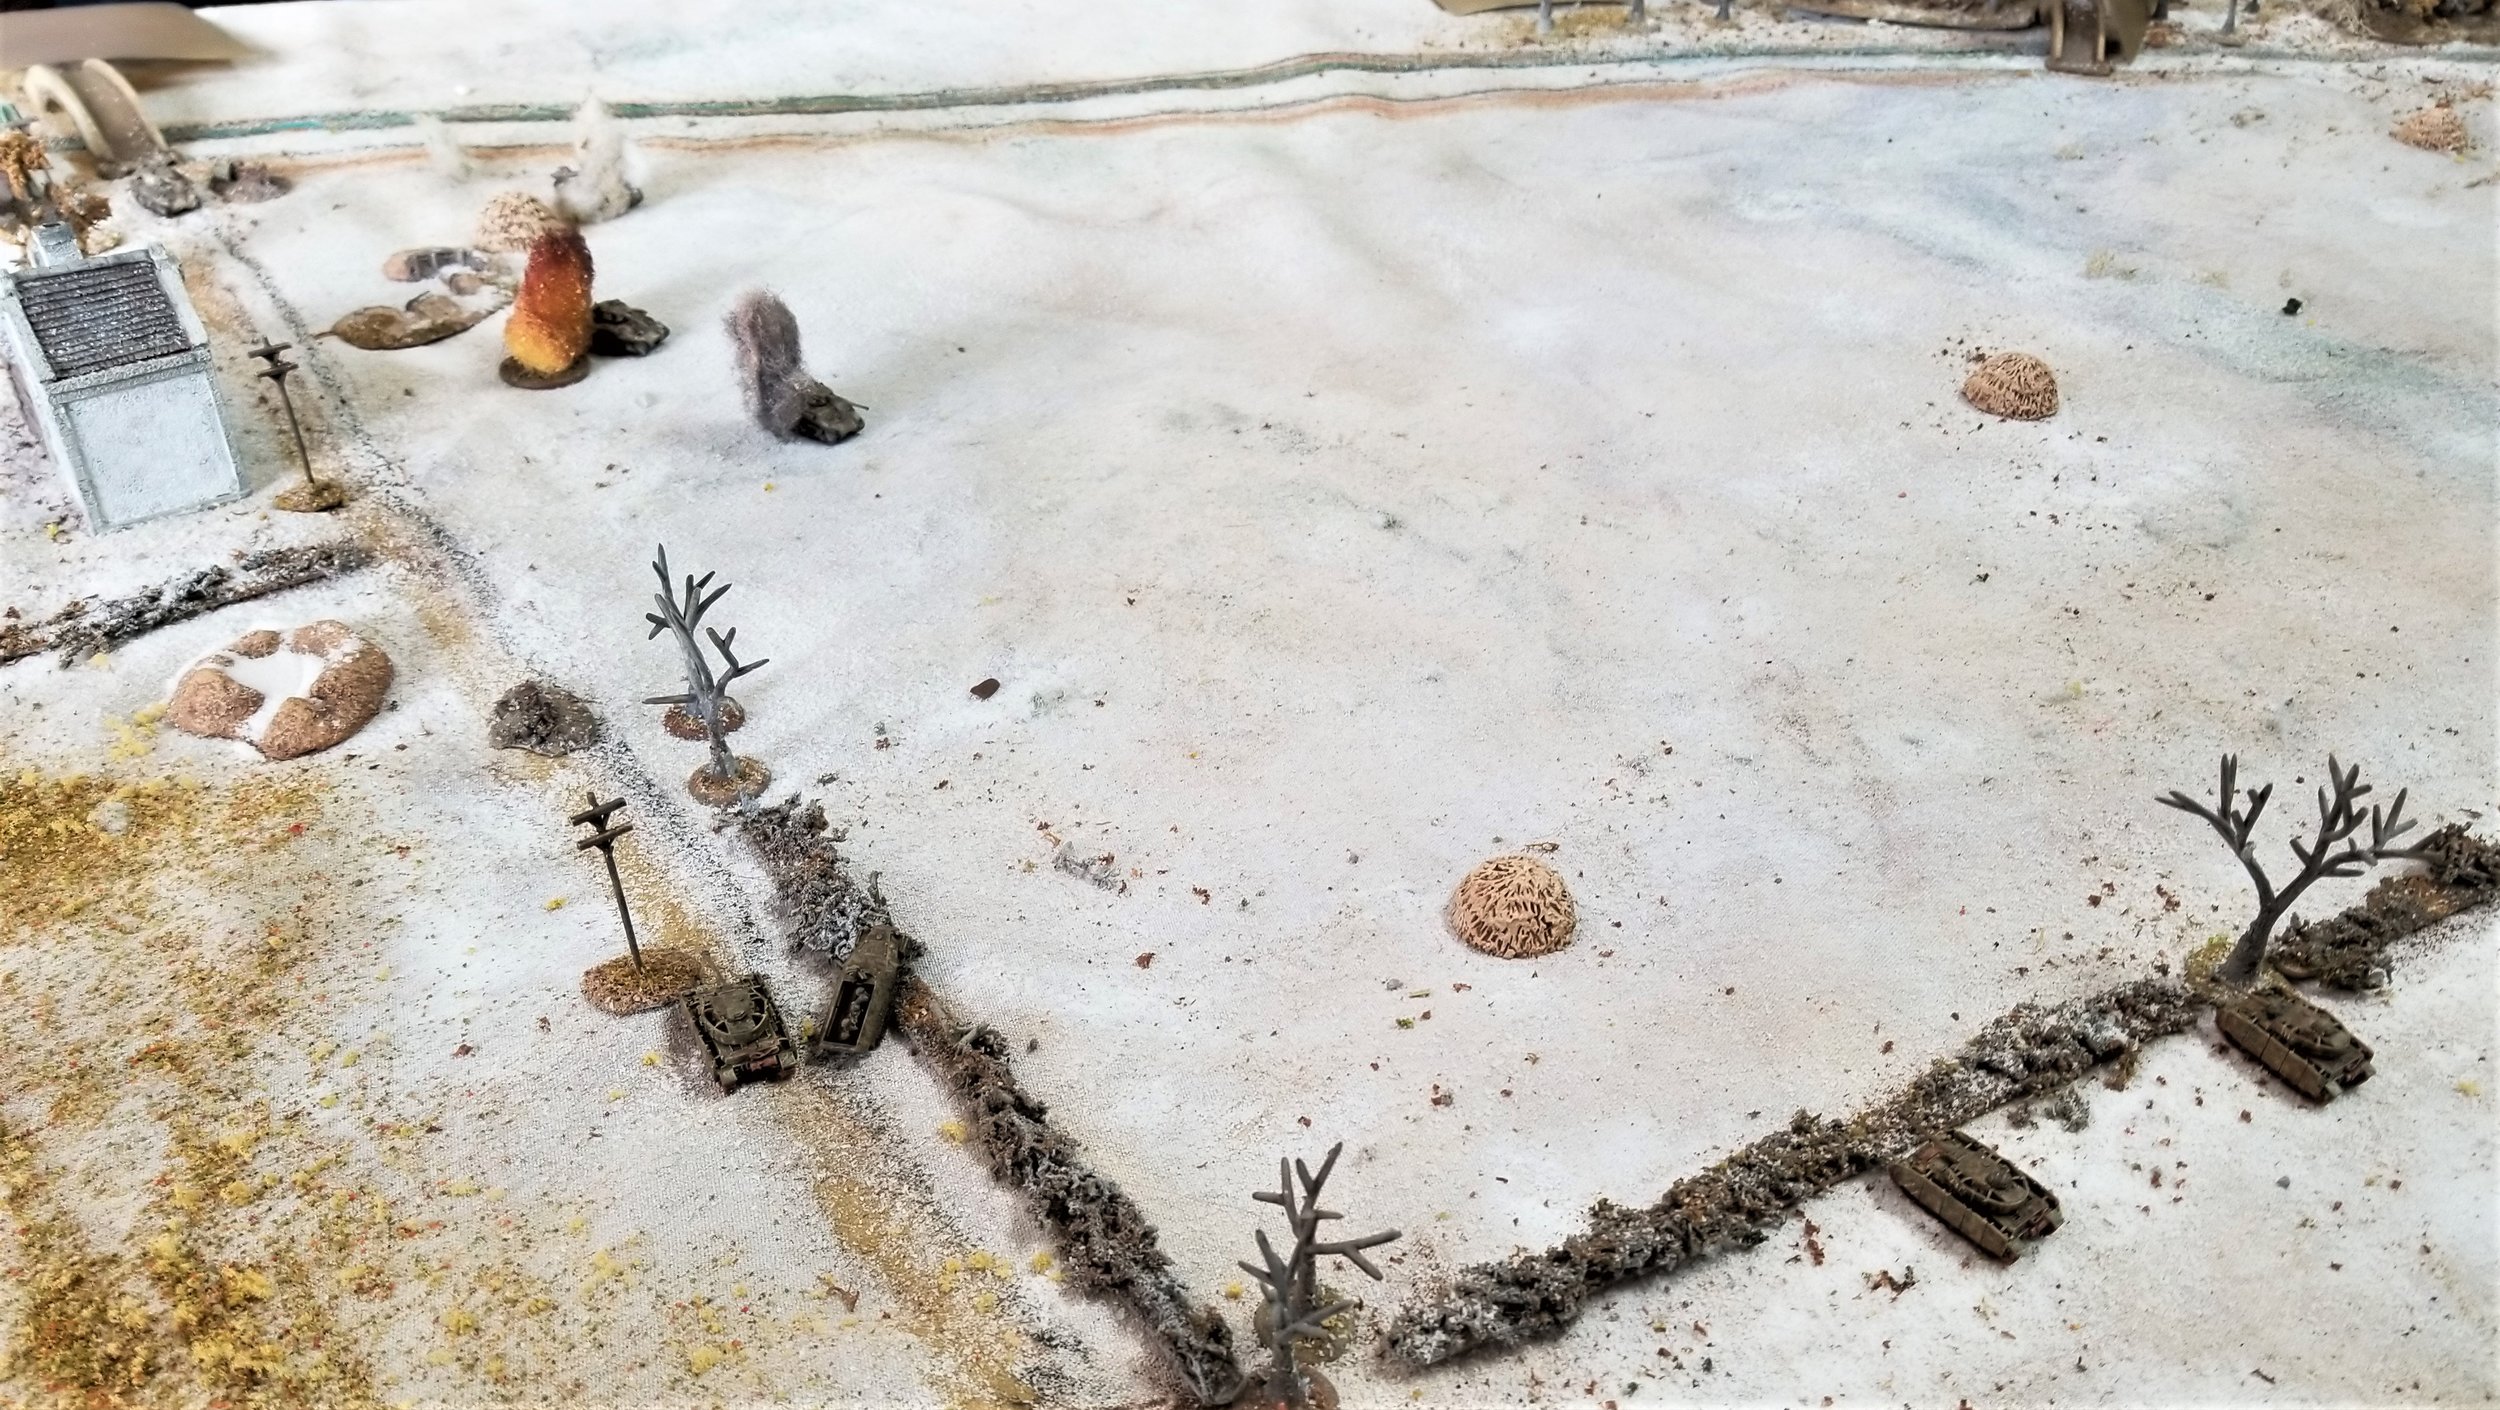
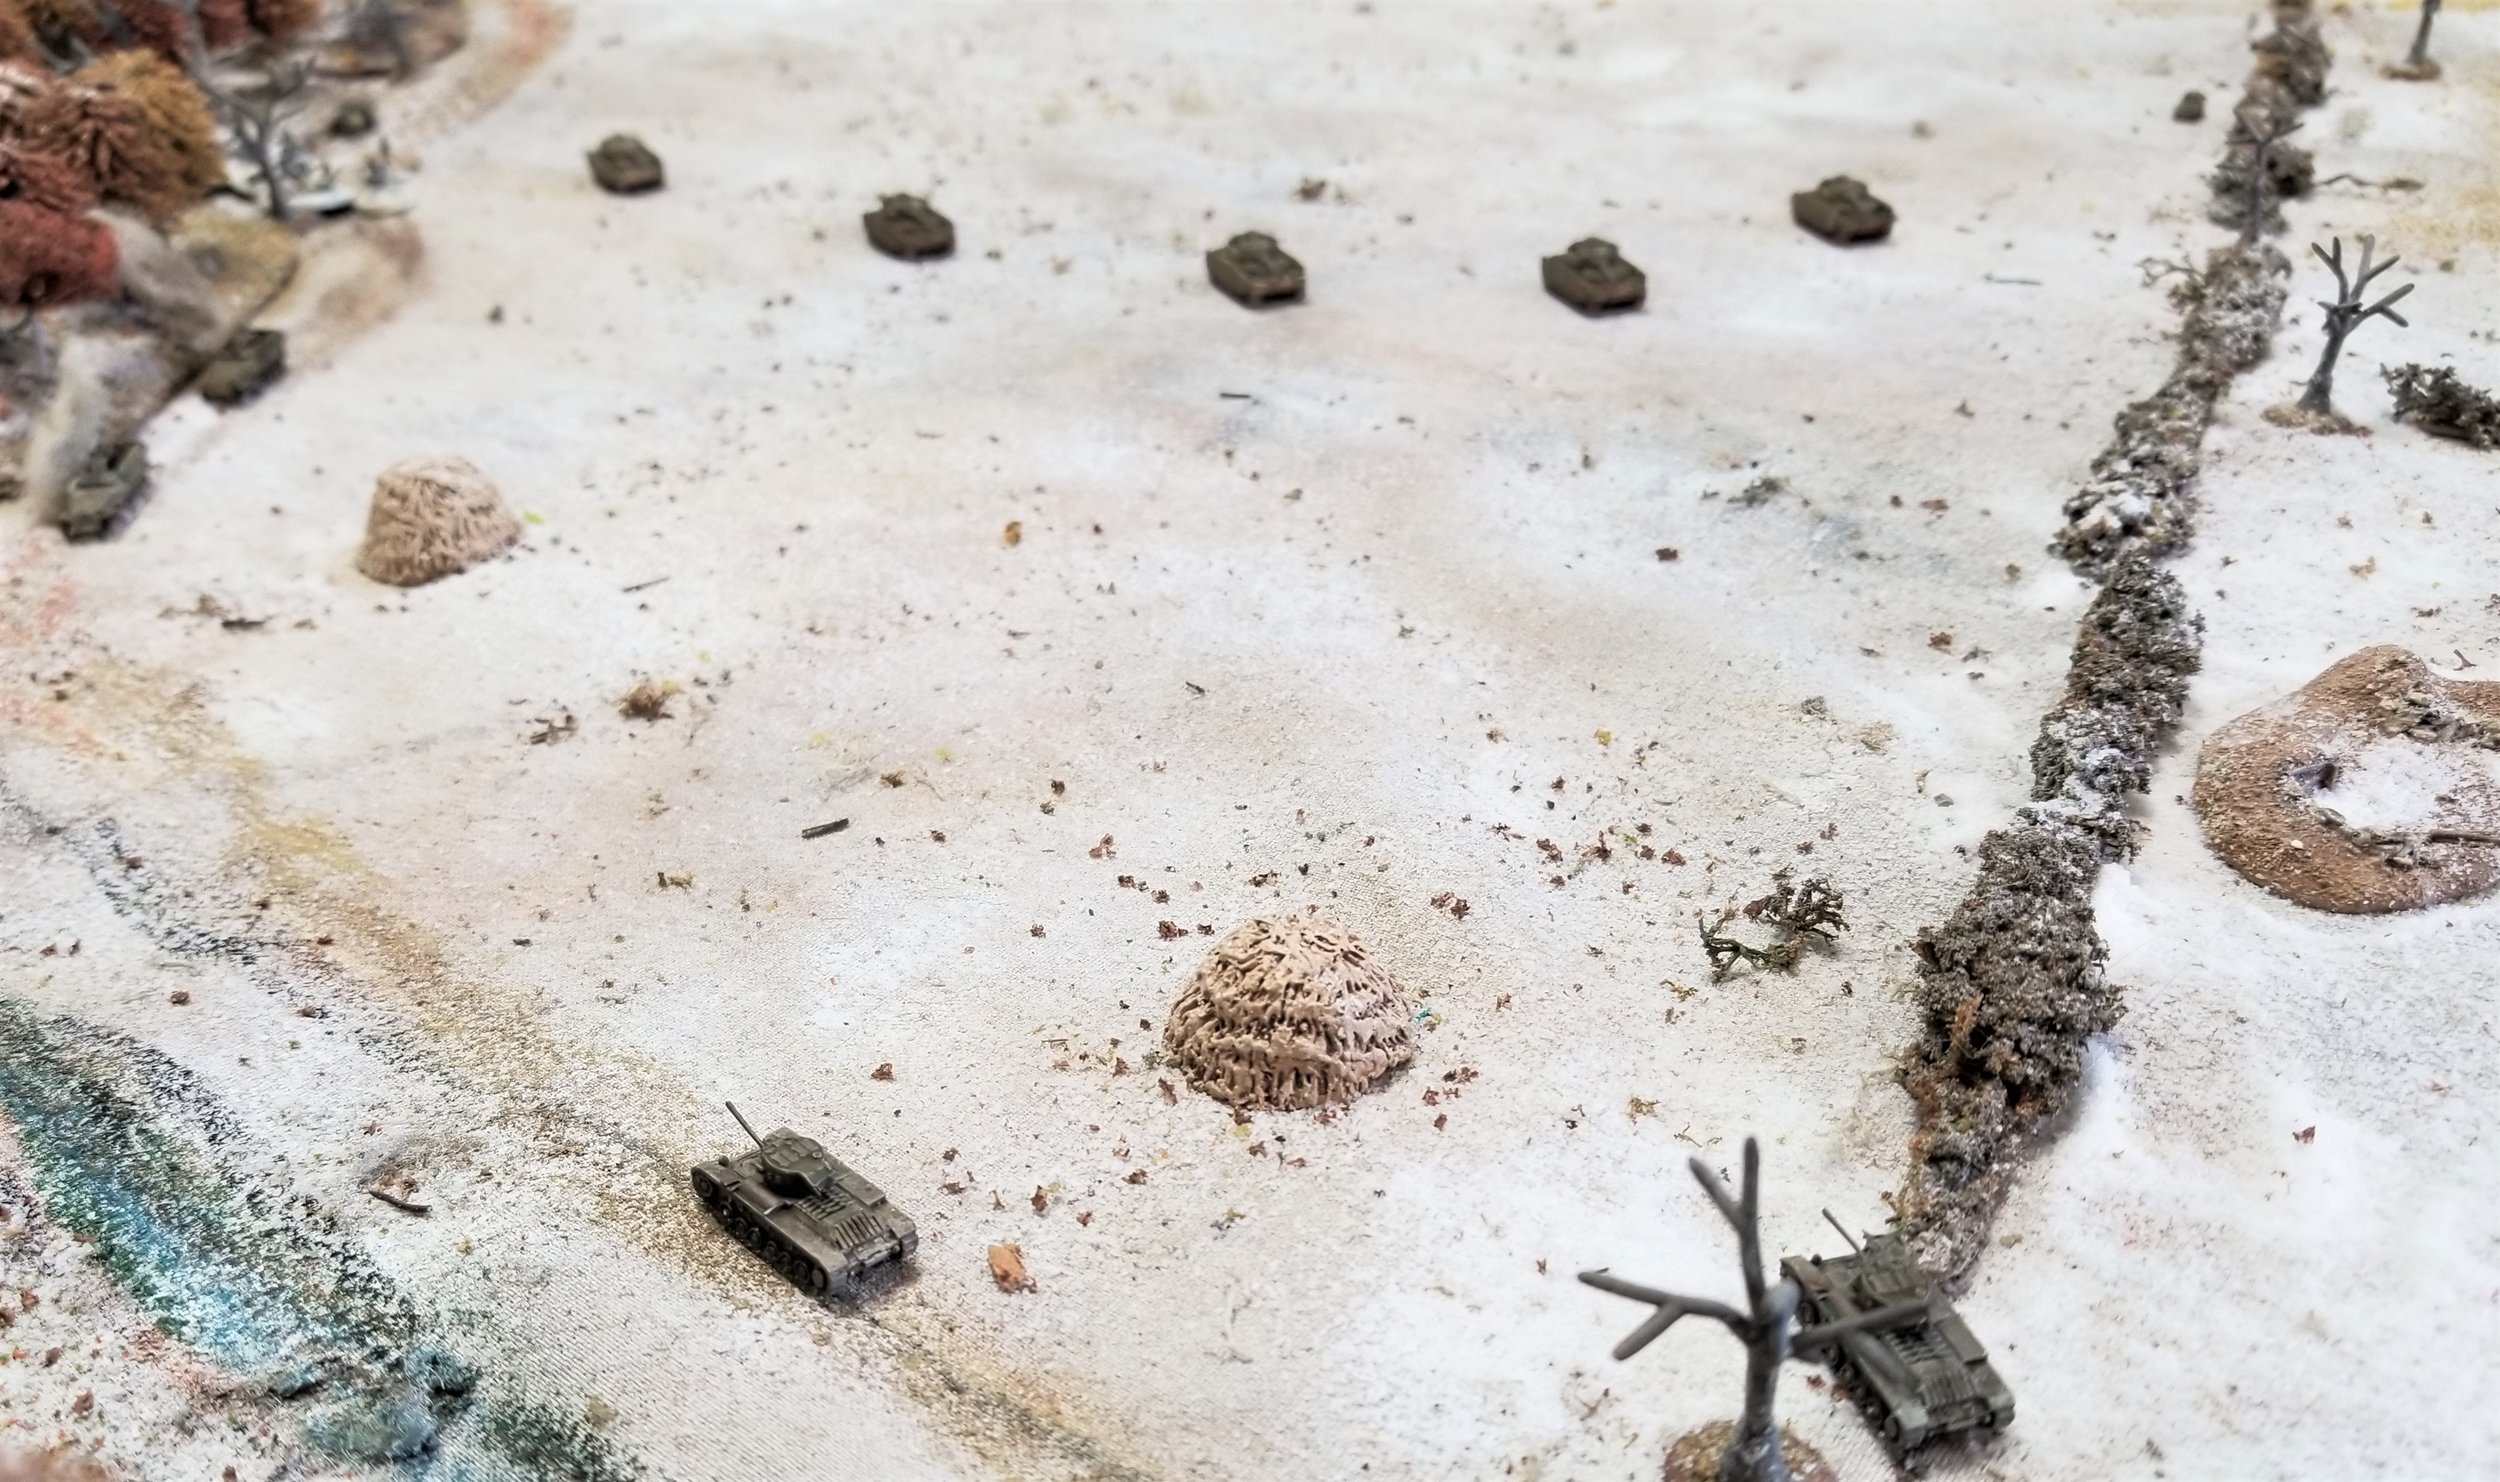
The Germans responded with some very effective fire from the machine guns who raked the valley and caused mayhem. They combined this ferocity of defence with some determined artillery support who homed in on a series of pre-registered target points along the main road, between the gully and the village.

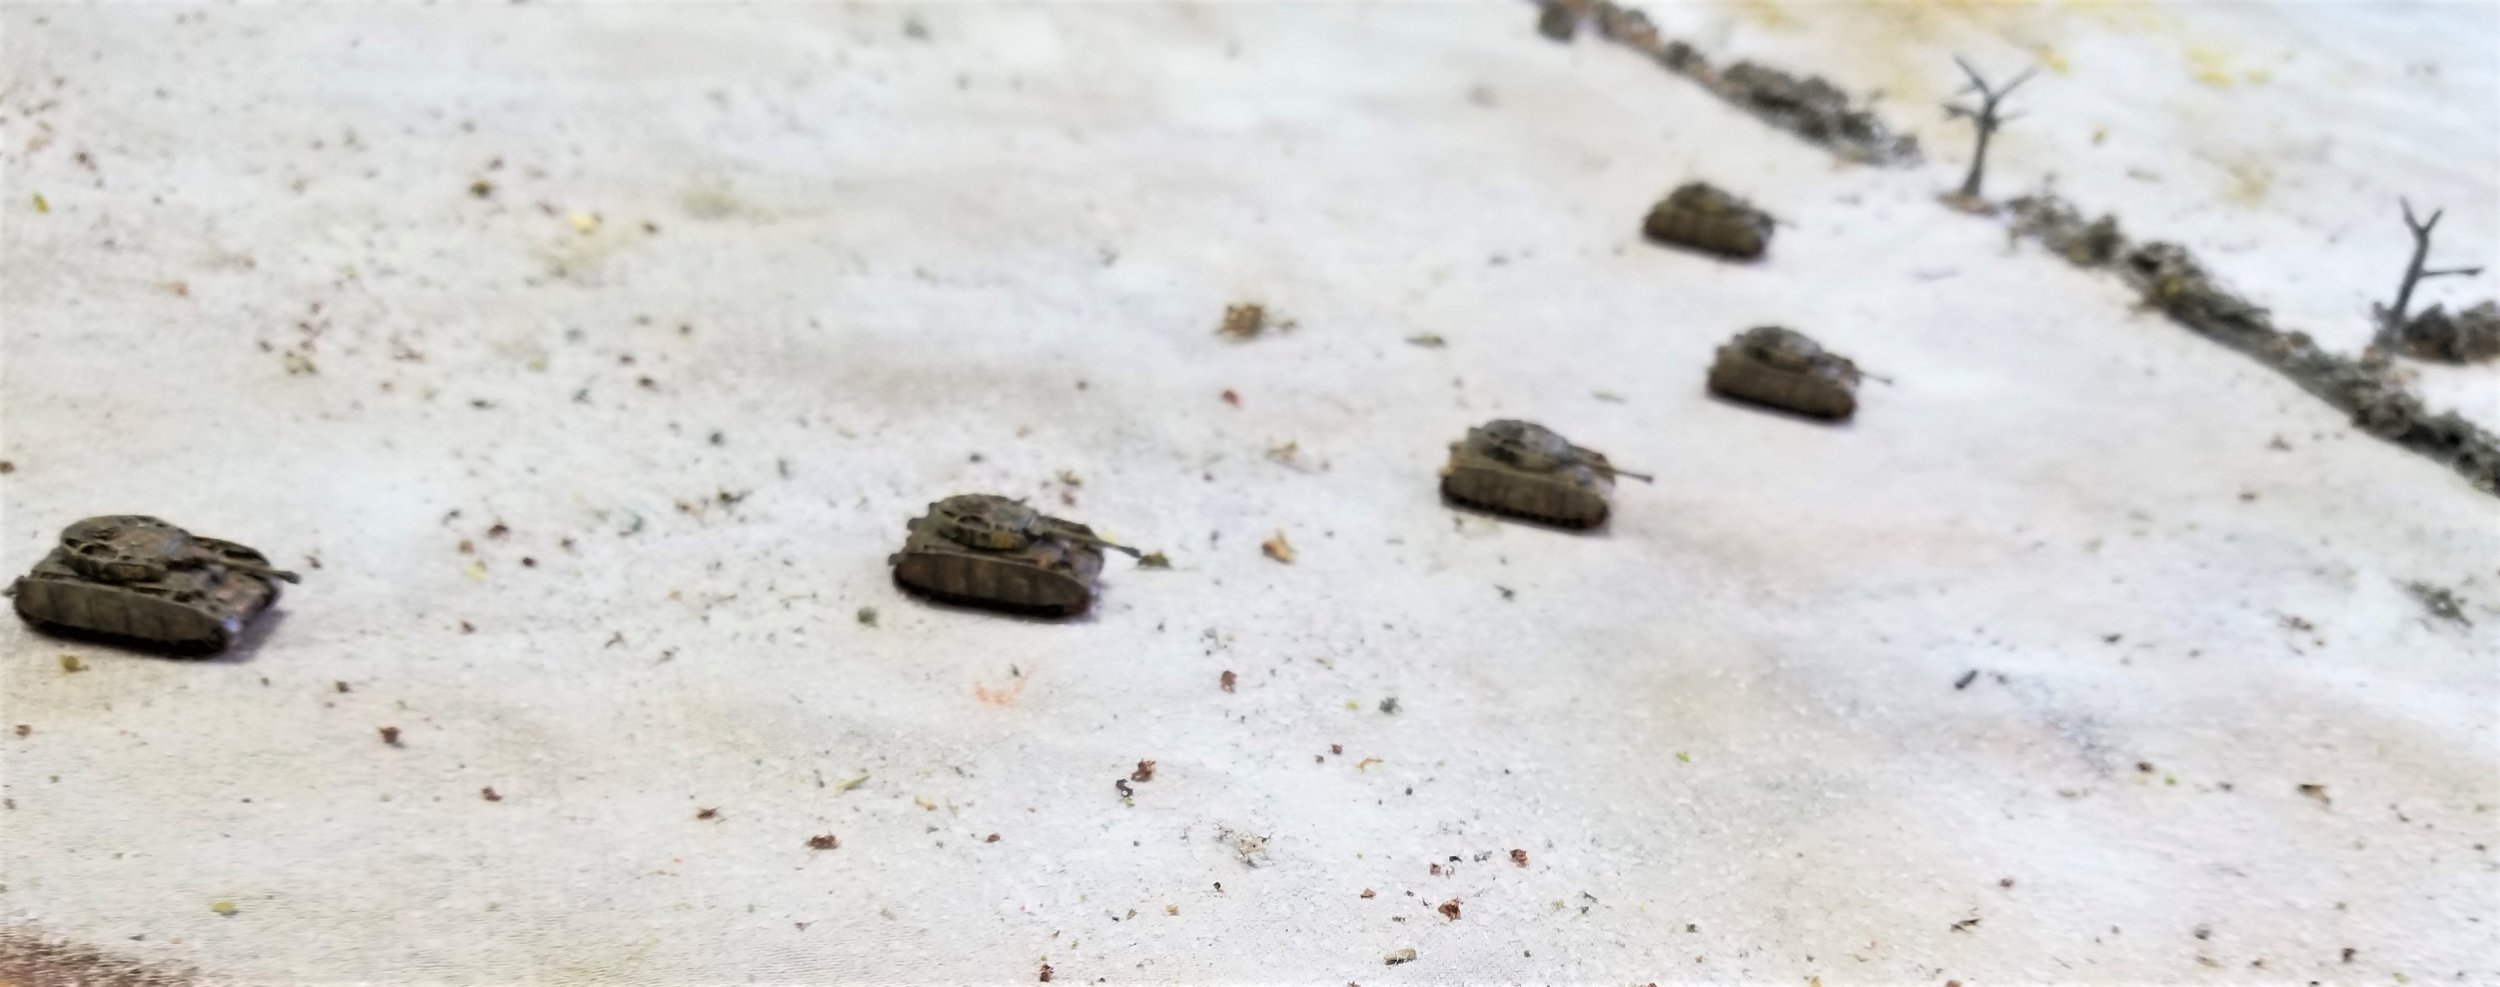
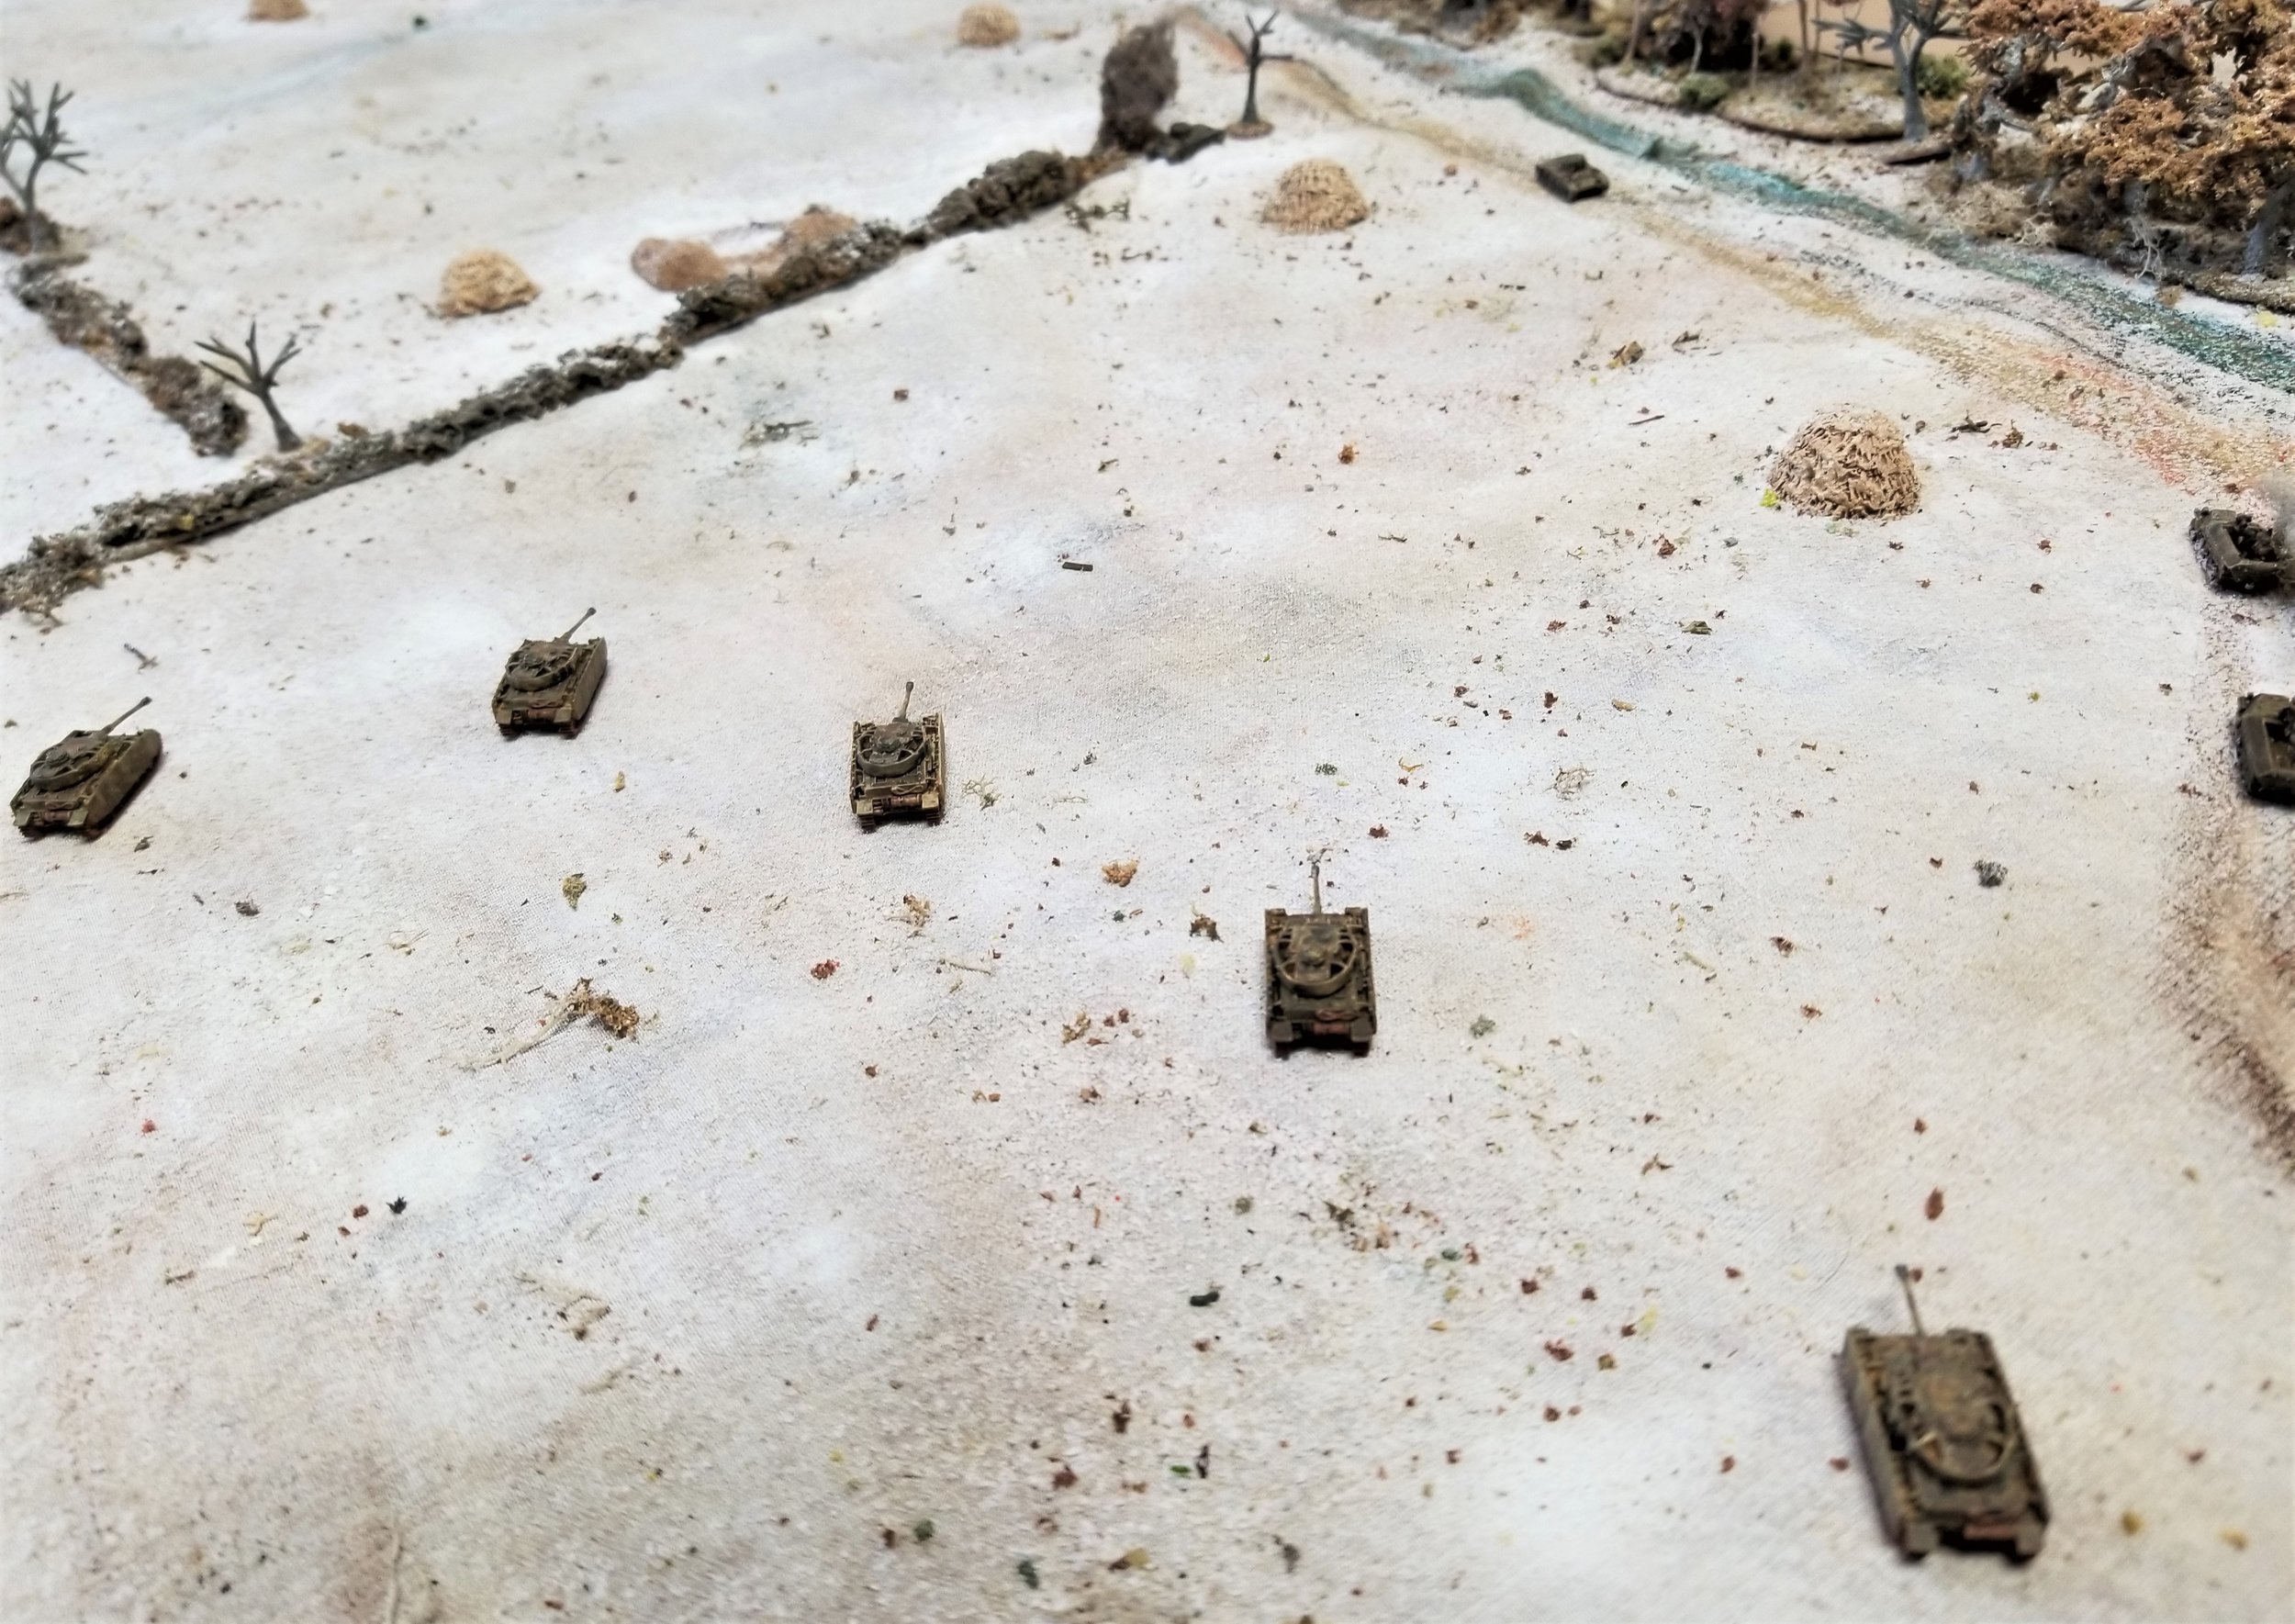
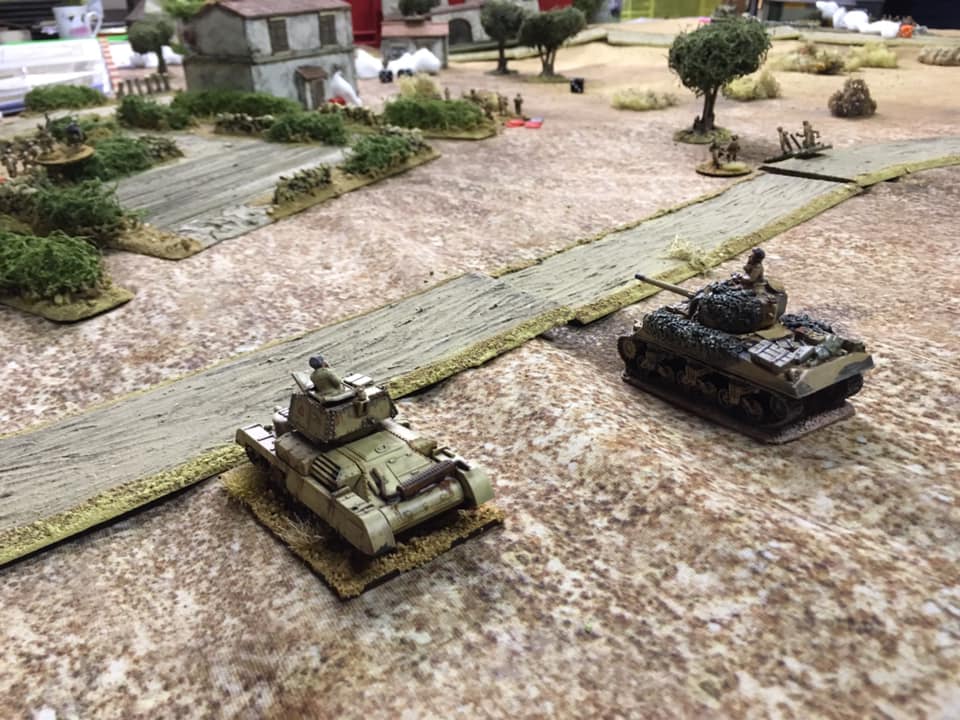
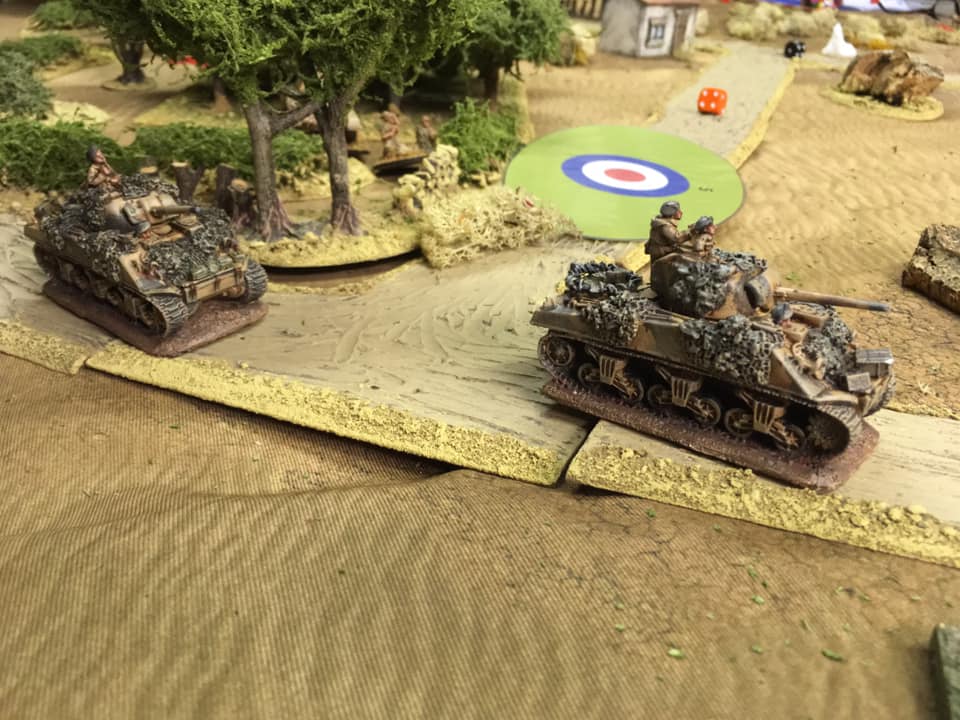
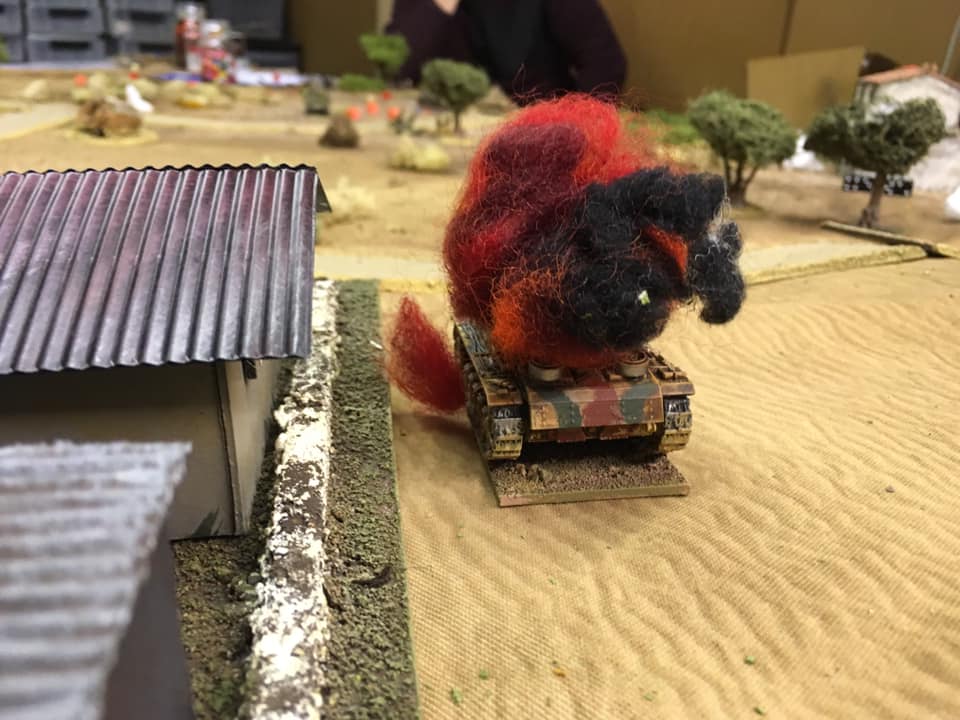
Not everything went the Germans way. Up on the hillside their StuG Assault Gun came under significant anti-tank fire from the Sherman troop in the valley. The clever use of tank support is key to British success in this game and Andy interchanged his AFV direct fire between the assault gun and by using direct high explosive at the closest buildings in the village.

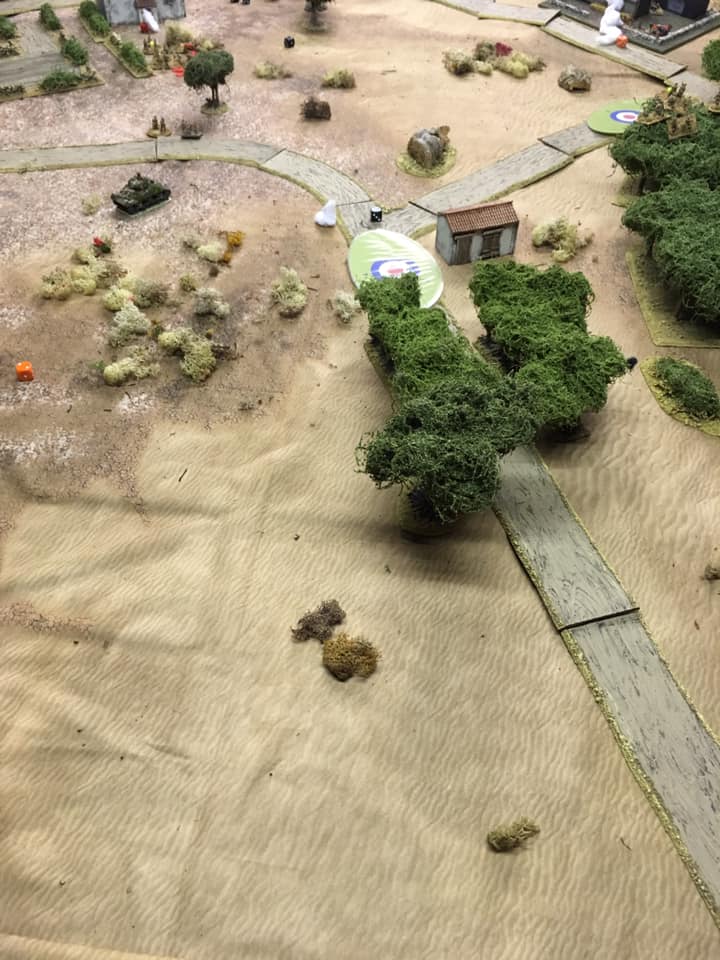
We played the game for about two hours at which point the Germans considered a tactical withdrawal, leaving the British to clear the hillside under continuous artillery bombardment for the next day also. Very similar to the real thing.

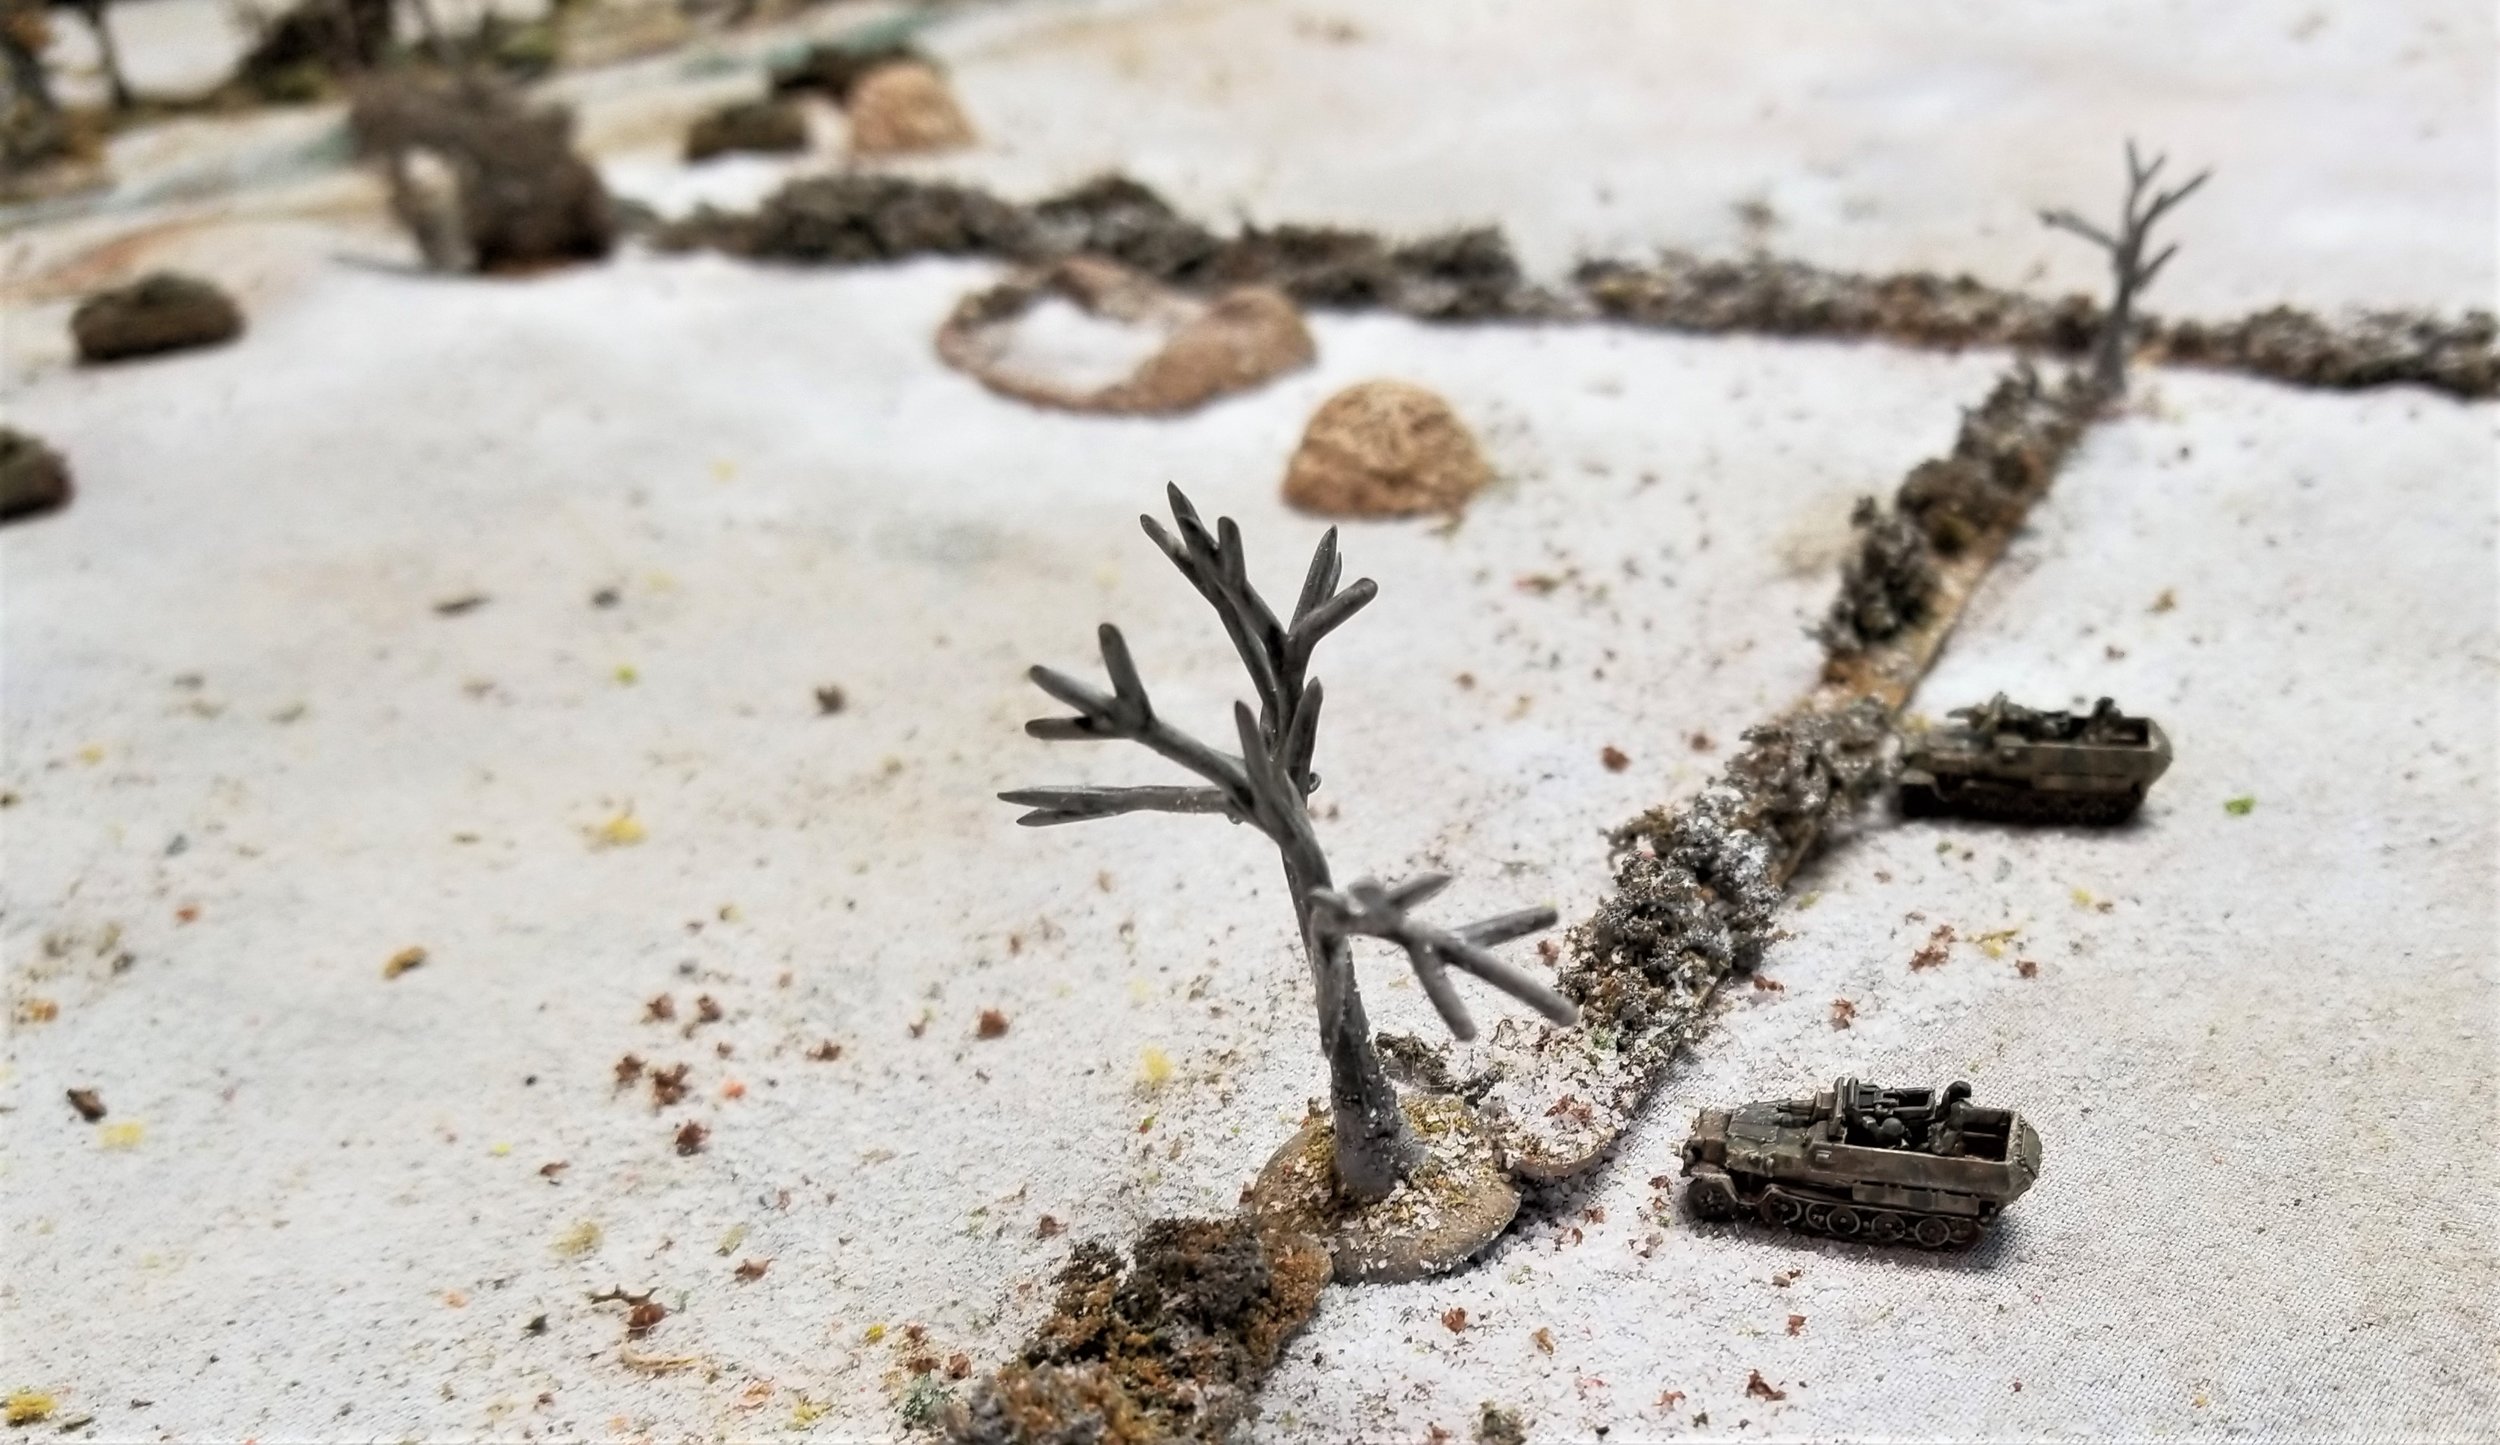
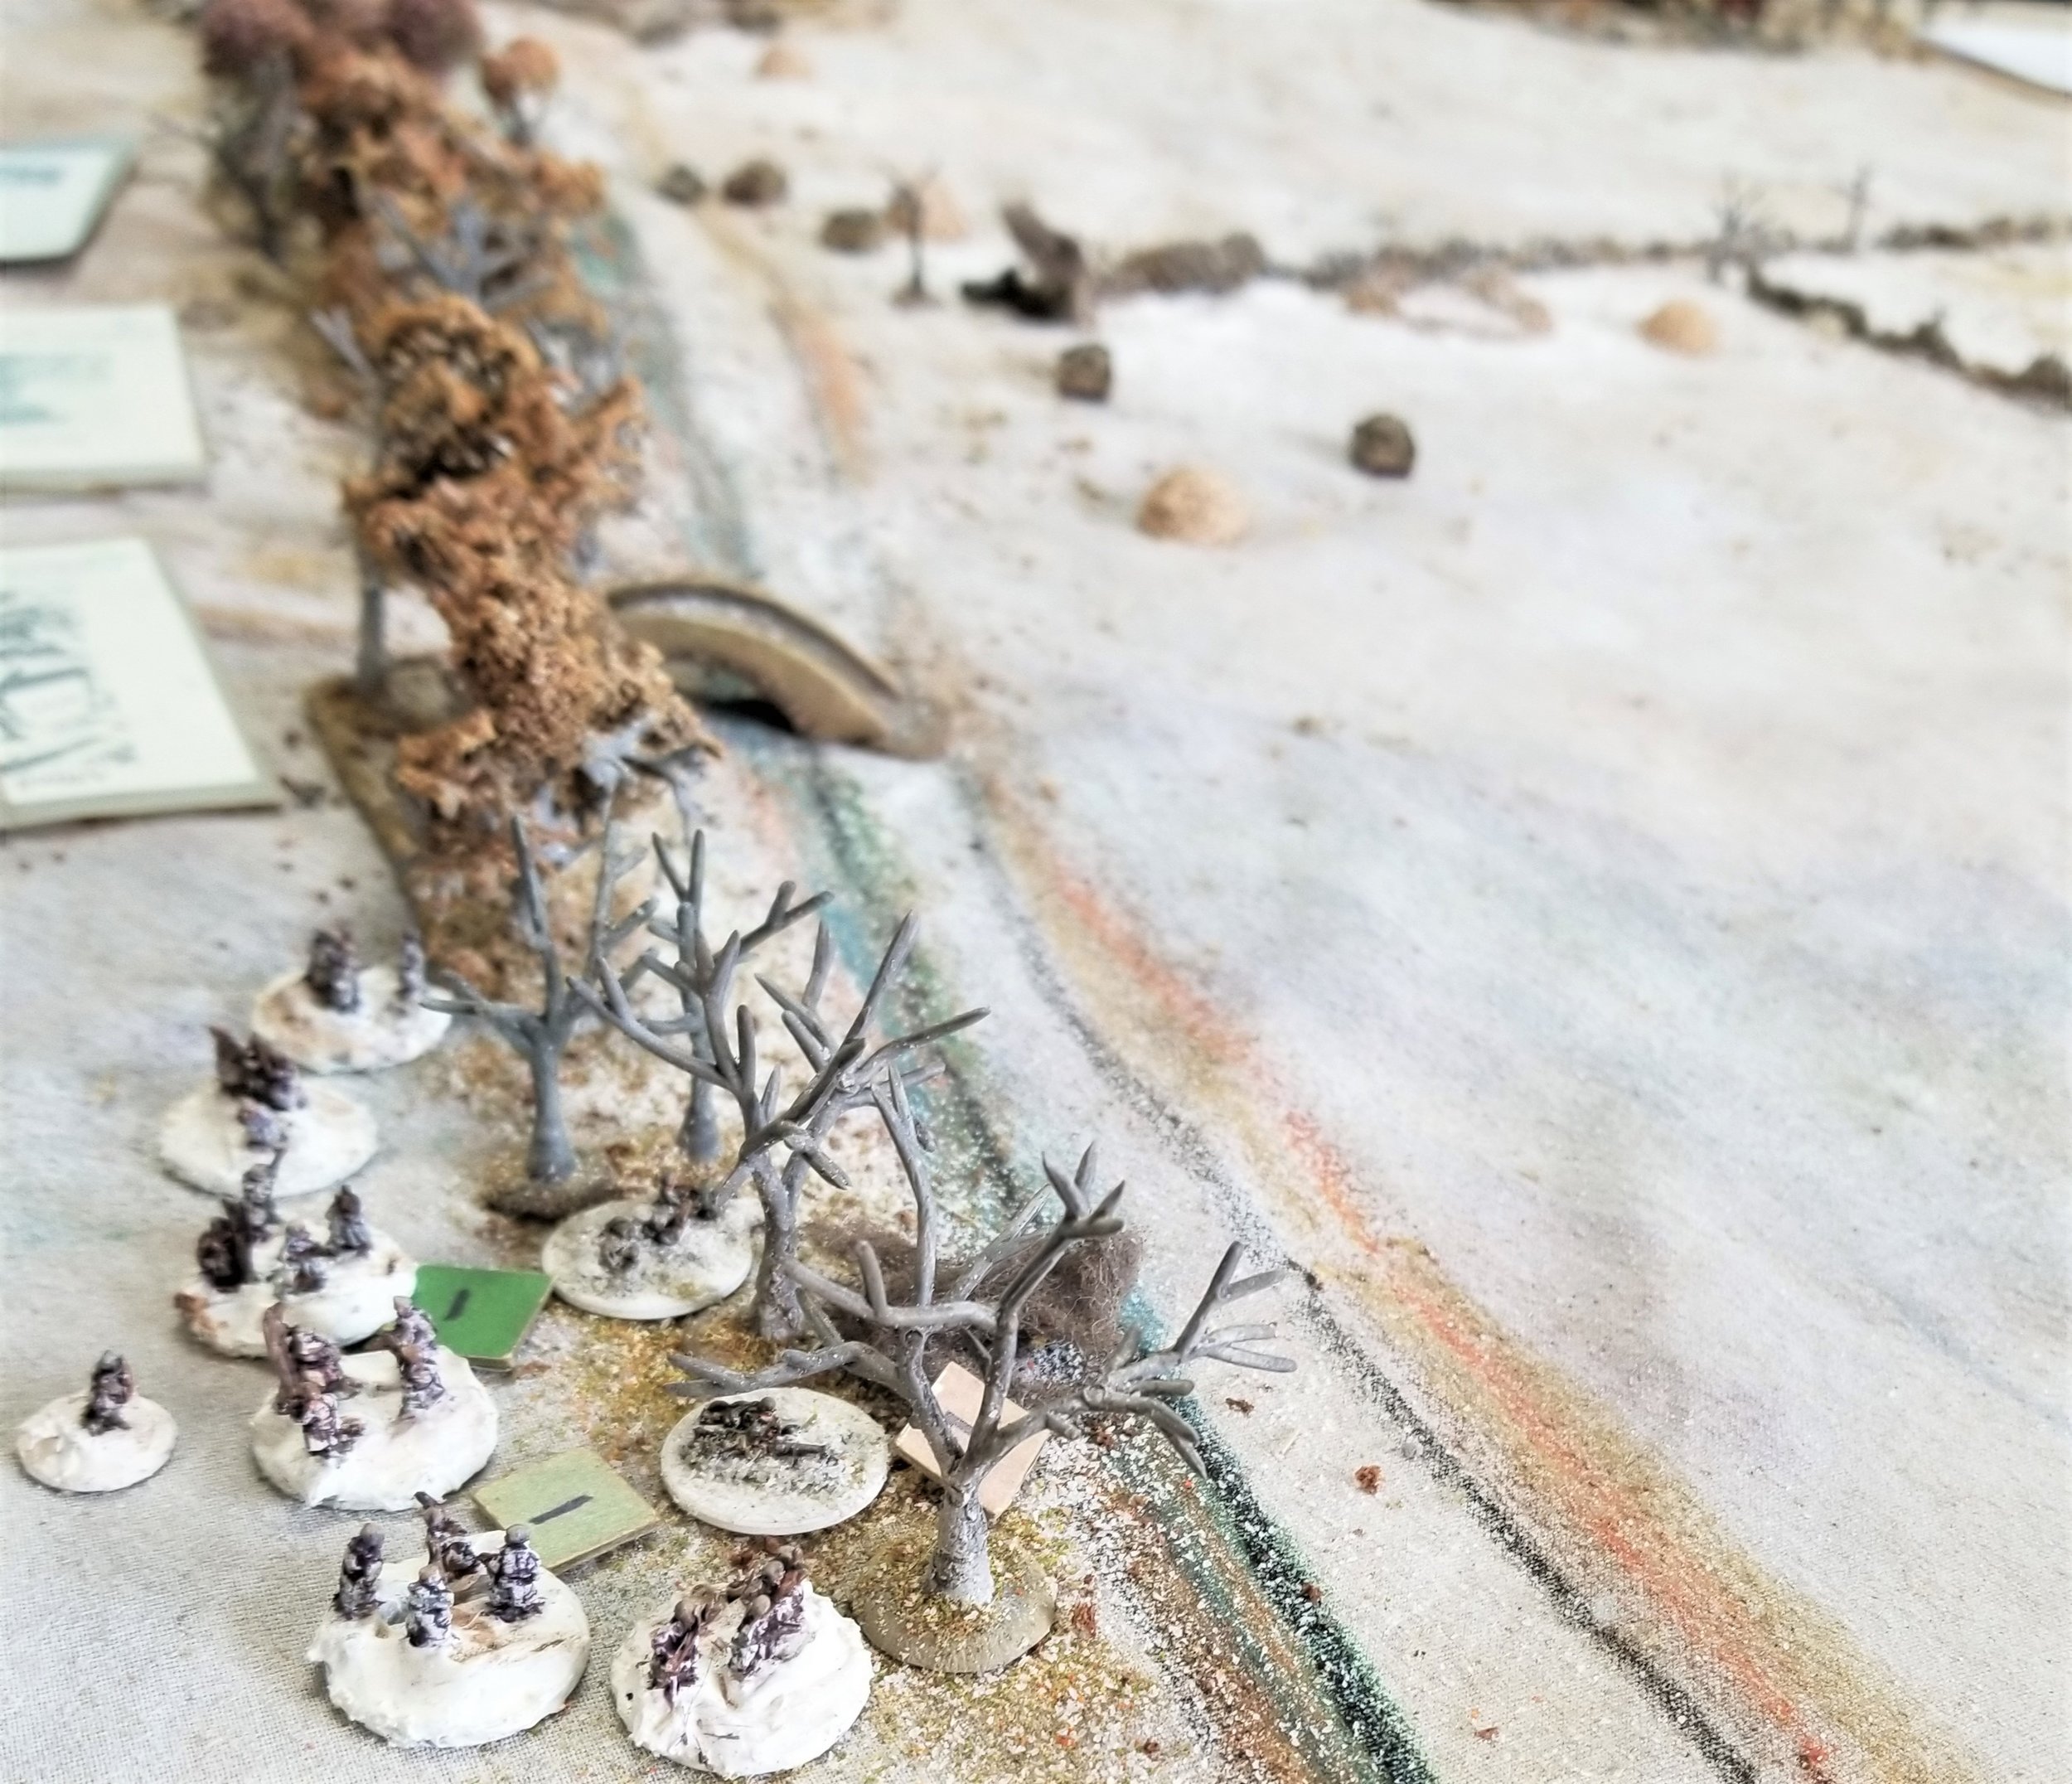
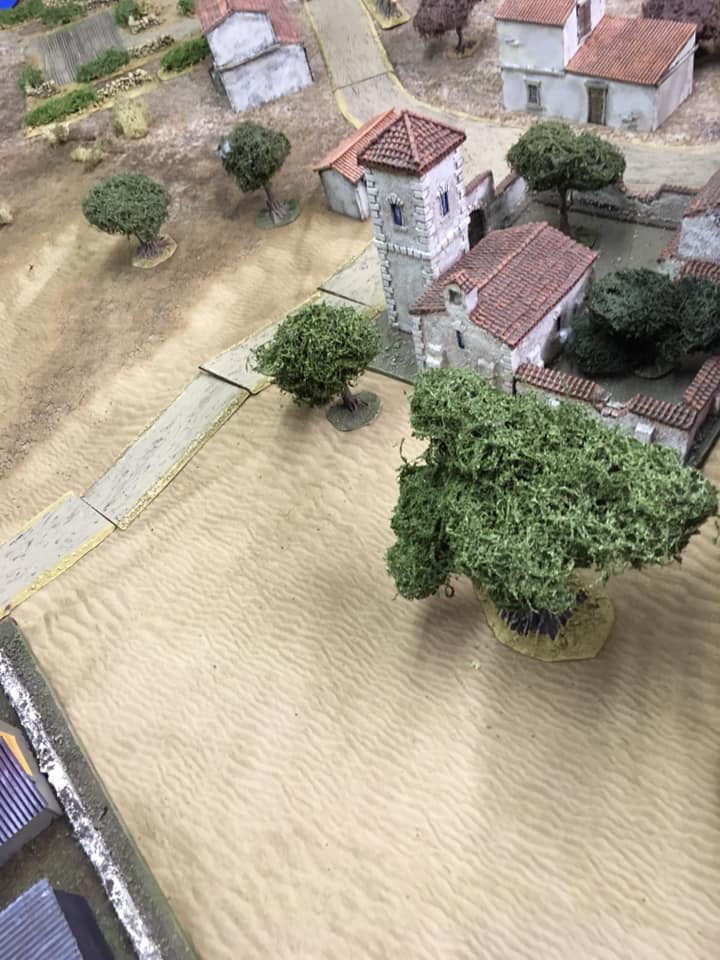
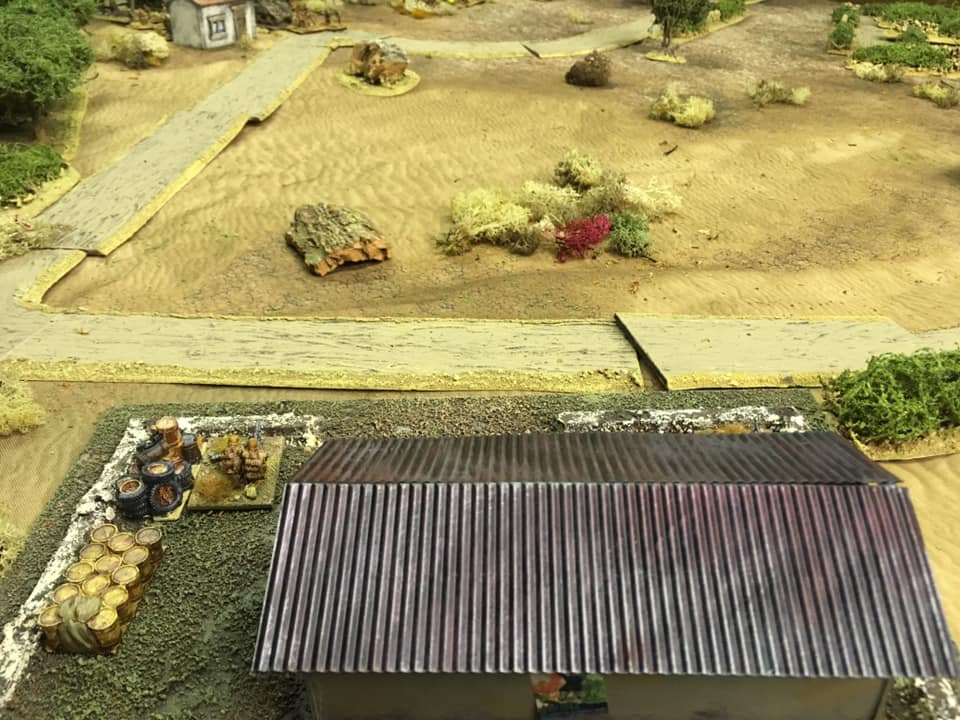
Here are some pictures of the game:

Second Go

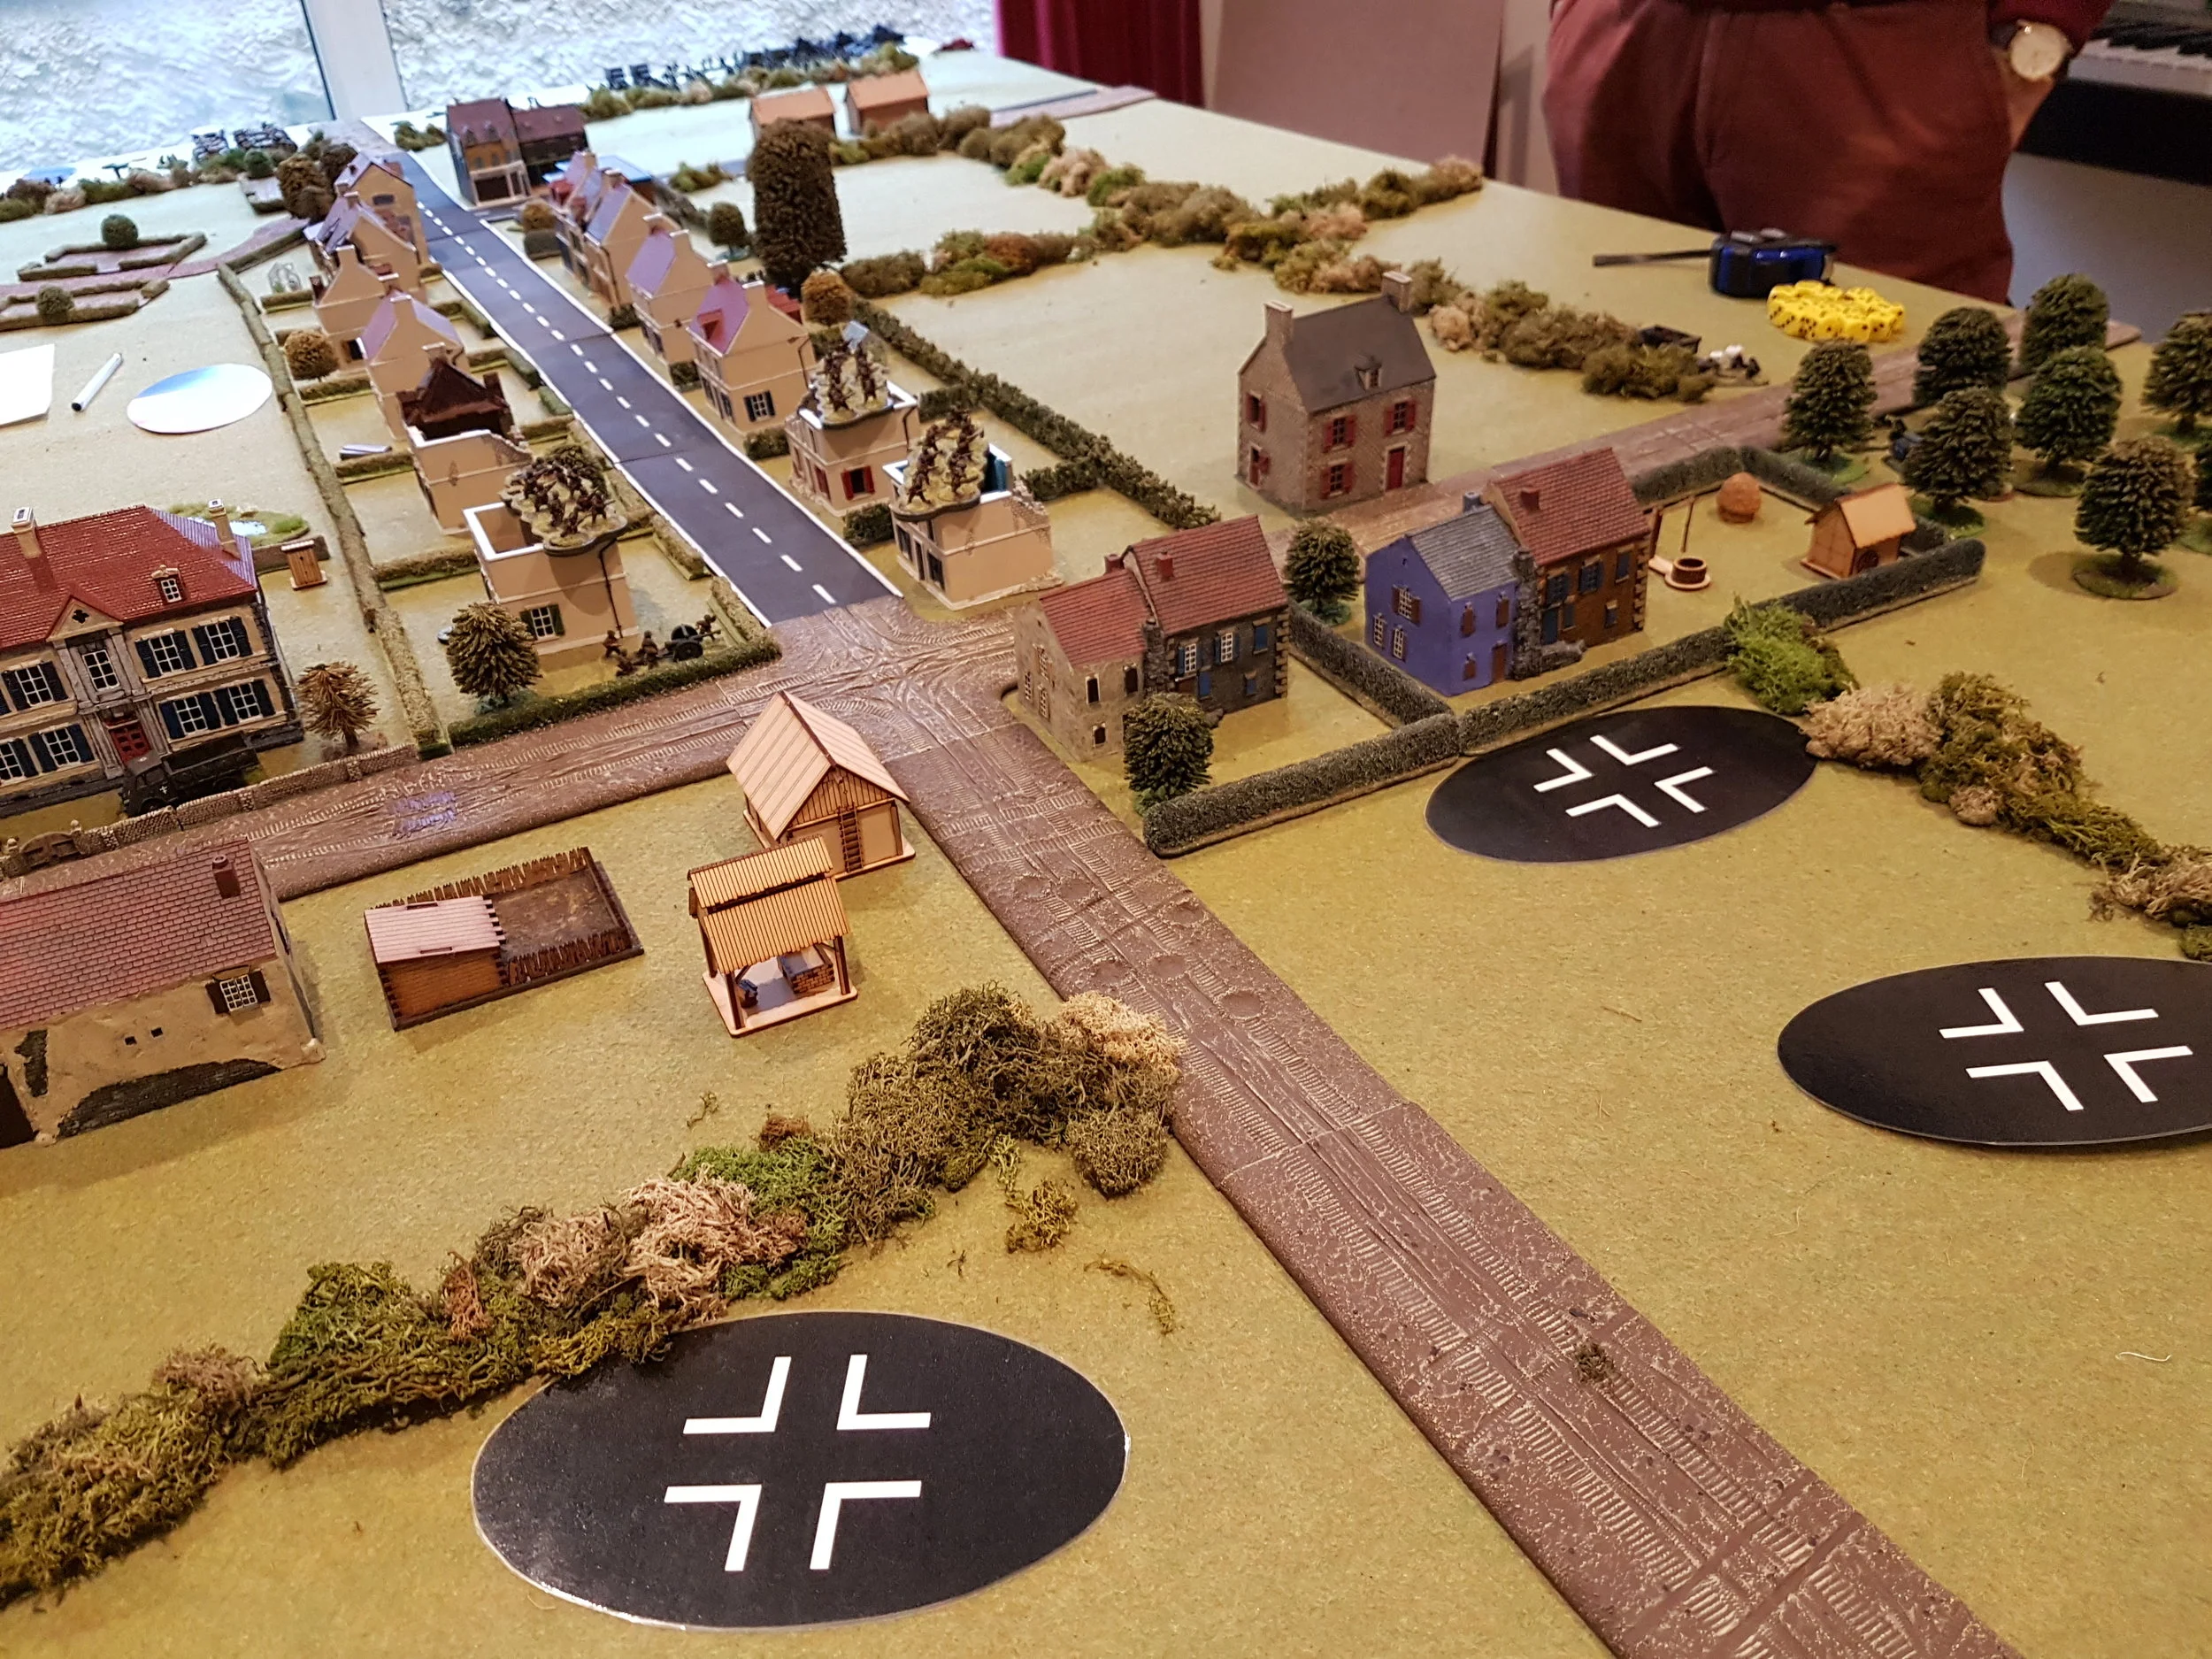
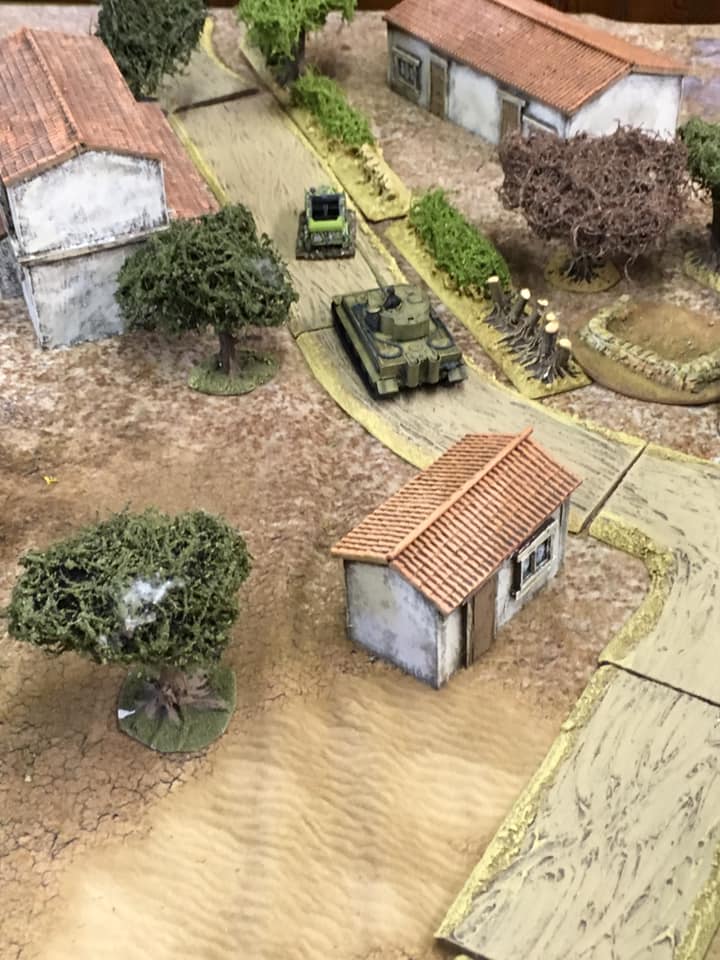
A second go at Attack on San Marco, Italy 1944 using IABSM rules. We imported/ exported half the players for good measure and to maintain some original play.

All set and ready to go we competed 12 packs of cards in 2.5 hours with Ralph Gibson and Togs aka Michael Togwell as the defending Heer with Bruce Carlton, Martyn Cartledge and Dale Askew as the British. Steve Meth and Archie ran the mobile NAAFI.

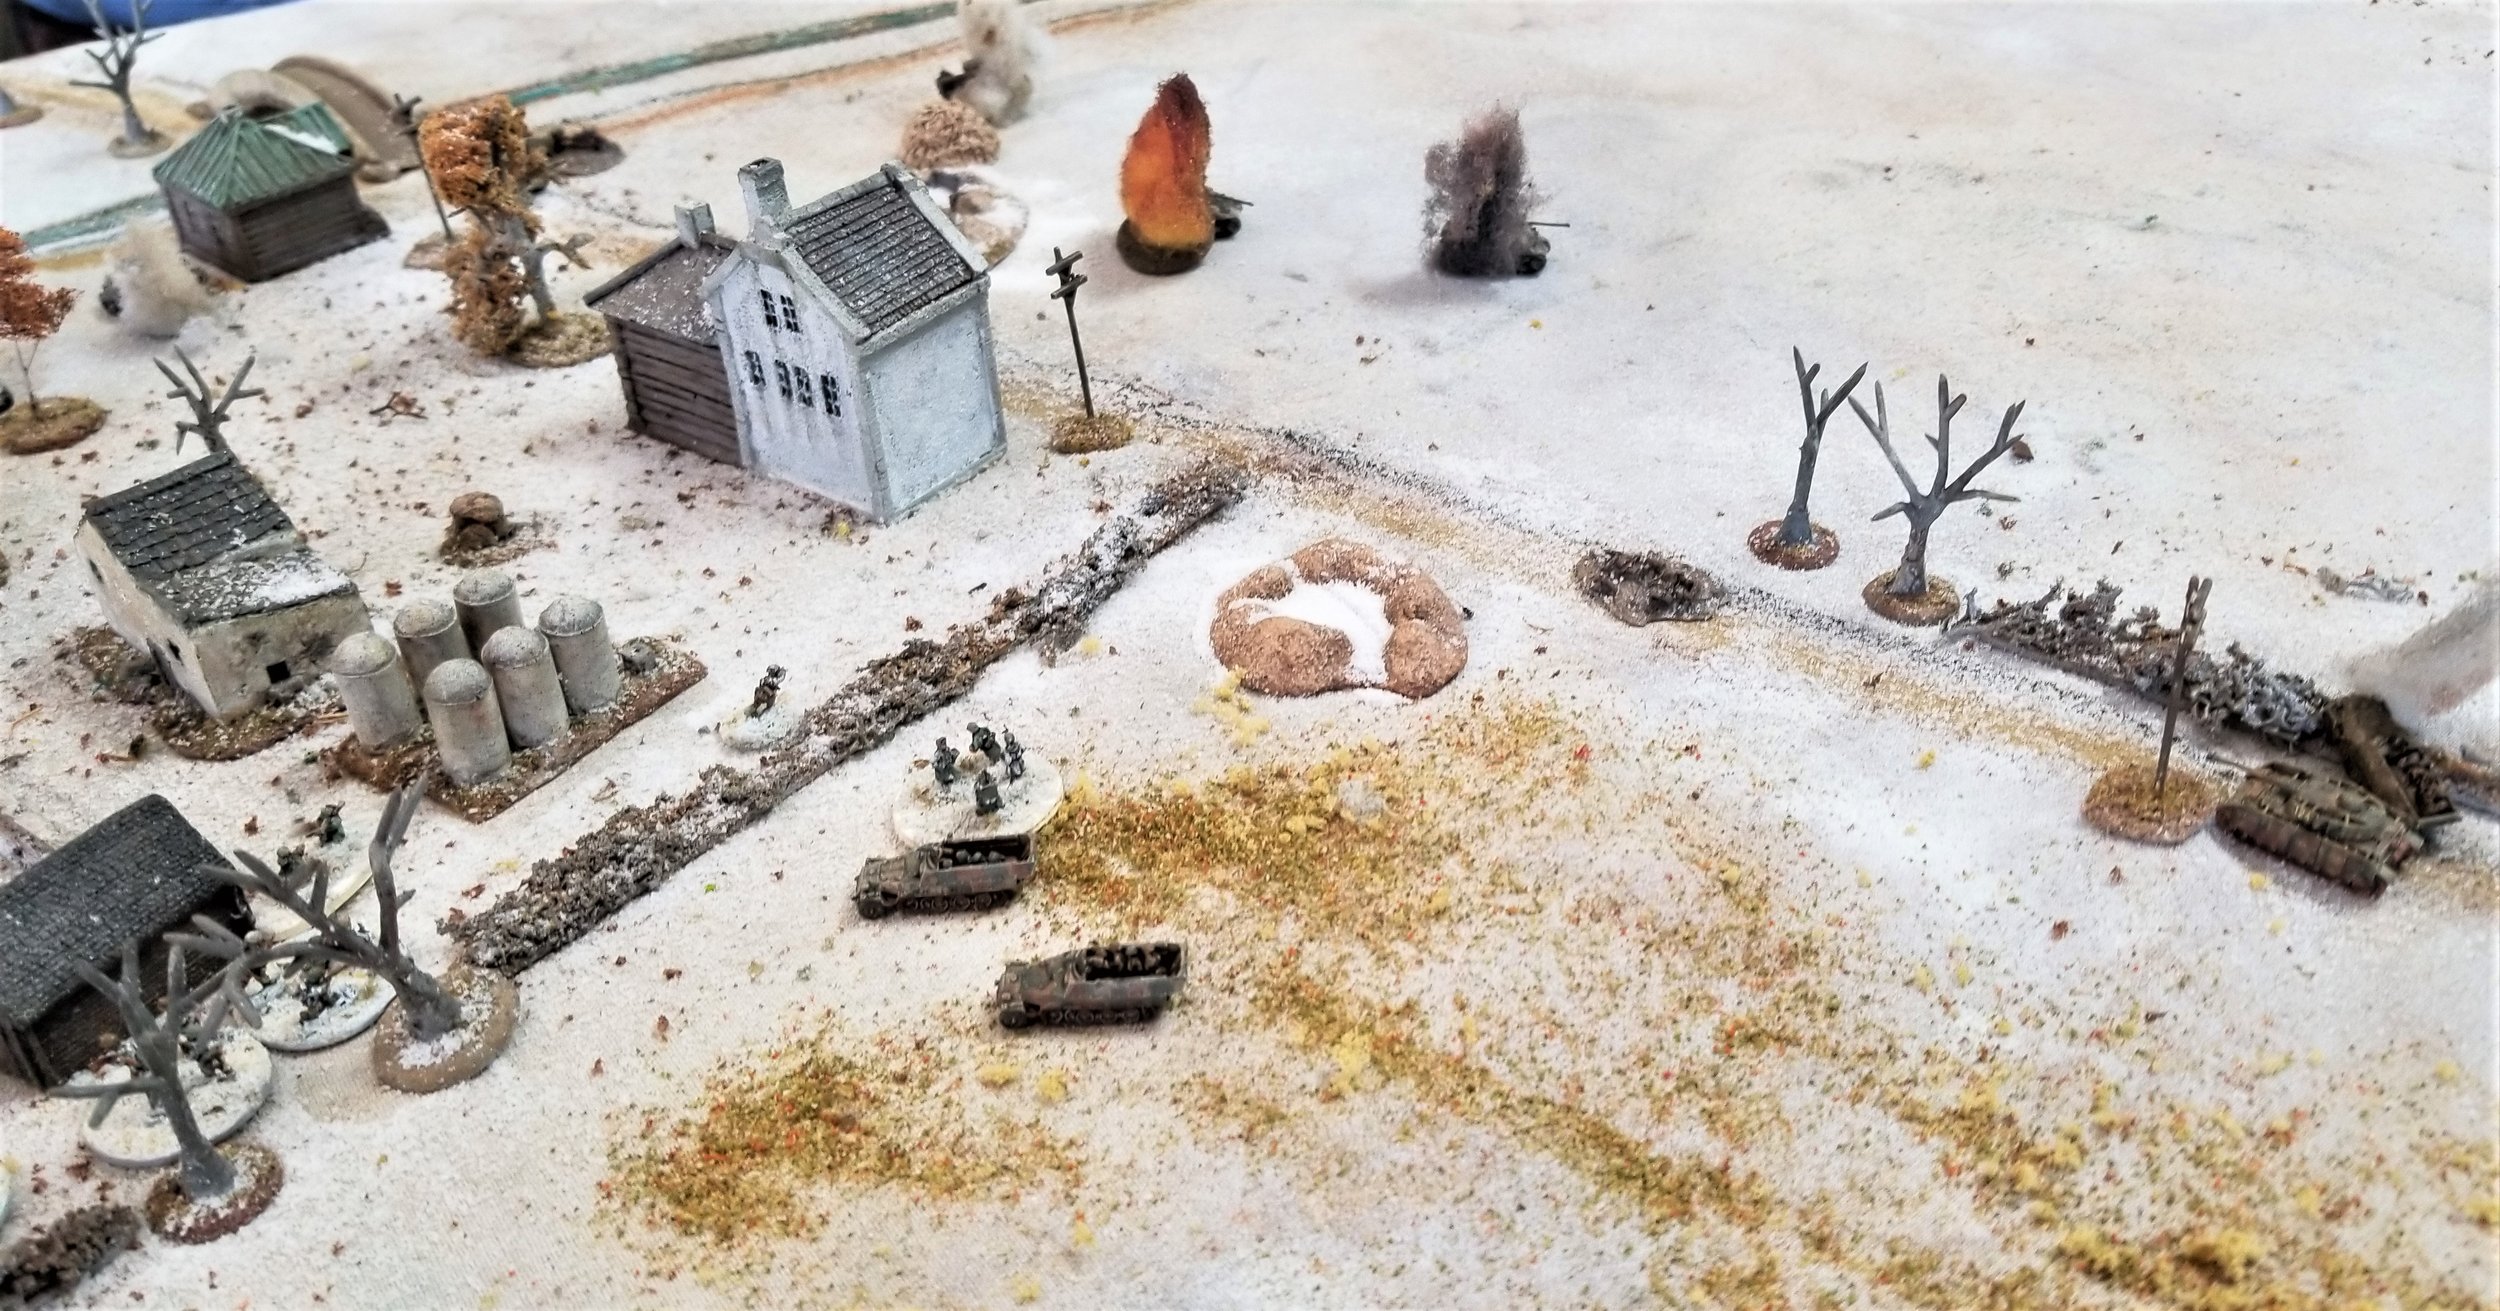
Here are some pictures:

Tim Whitworth


It was off to Benson again for another game of I Ain’t Been Shot, Mum. The scenario, written by Dave, was a Battle of Bulge encounter, with the action taking place on Christmas Day 1944.

We were to play in John’s shed which, although a great venue, can sometimes rival the Bulge in terms of temperature: it’s not uncommon for games played in the winter months to be so realistic that the players’ breaths are visible. A little disappointingly, however, today the weather was mild, and I could get by wearing only one coat!

John and Dave would play the Germans: attacking an American-held village. I would play the defending Americans, with Bevan joining us as British reinforcements once his Saturday morning chores were done! I’ve included all the briefings so that people can replay the game themselves if they wish.

US Briefing

It’s Christmas Day 1944, and here’s you, Colonel Dan Detroit of the 17th Airborne, sadly in charge of some two-bit little village in a godforsaken corner of Belgium…or is it France

The trouble is you have been put in charge of its defense and seem to be right in the middle of the Kraut’s line of attack. Feels like the whole Goddamn German army is heading for you!

A few miles behind you is the river Meuse and Dinant, which the Krauts need to capture if they are to get to Antwerp as the top brass seem to think they would like to. Having been there yourself you wonder why.

This offensive really caught Uncle Sam with his pants down, and chaos has been everywhere for the last week. However maybe things are changing now, with places like Bastogne holding out, the Krauts apparently short of gas and the brass finally getting themselves sorted out. Seems that some Limey General has been put in charge of this sector and he has herded up some Brits to act as reserve and they may even be headed this way. Maybe.

In the meantime your orders are to hold at all costs, with the forward supply depot just outside town of special importance. Some big shot three star made it quite clear on the radio that under no circumstances can the Krauts be allowed to capture it, but that since our boys need the gas as well, blowing it to hell prematurely would not be a good career move. Sounds like the usual Snafu!

You have a mixed bunch to hold with. You have some of your own Golden Talons boys (the 1st Platoon and the Support Platoon of the 513rd) and you know they will fight like hell. But how the bunch of rounded up cooks and orderlies will do.....

You also have some AT guys from a stray infantry outfit who were just passing through until you enrolled them, and some tanks and tank destroyers have just rolled, in assigned to you by Division.

You have been promised artillery support and air support just as soon as this weather lifts. Yeah right!

You have positioned one minefield and also some dummy mines (anything to slow the Krauts down) and have some wire and emplacements.

Time to go!

  • Company HQ

    • Colonel Dan Detroit (Level IV)

    • Captain William Baltimore (Level III)

    • Two Bazooka Teams

    • FOO

  • 1st Platoon (513rd) [Elite]

    • Lieutenant Steve Seattle (Level II)

    • Three 10-man parachute infantry squads

    • One Bazooka Team

    • One 60mm Mortar Team

  • Support Platoon (513rd) [Elite]

    • Lieutenant Beau Boston (Level II)

    • Three 60mm Mortar Teams

    • Three MMG Teams

    • One Bazooka Team

    • One Jeep & LMG

    • One Truck

  • 2nd Platoon (Mixed)

    • Lieutenant Sam Houston (Level II)

    • Three 10-man infantry squads

    • One Bazooka Team

  • Anti-Tank Platoon

    • Lieutenant Al Lincoln (Level II)

    • Two 57mm AT Guns

    • Two M3 ½ Tracks as tows

  • Tank Destroyer Platoon

    • Lieutenant Jack Kennedy (Level II)

    • Three M18 Hellcats

  • 1st Tank Platoon

    • Lieutenant Chris Carter (Level II)

    • Two Sherman M4 A3E8

    • Two Sherman M4 A3

  • 2nd Tank Platoon

    • Lieutenant Gerry Ford (Level II)

    • Two Sherman M4 A3E8

    • Two Sherman M4 A3

German Briefing

So it's Christmas Day. What did you expect: a Christmas Present from the old man with the long beard? Here I am, Oberst Franz Beckenbauer, in command of Kampfgruppe Beckenbauer, part of 2 Panzer Division, about to give the Amis their present.

The big attack, Wacht am Rhein, started well nine days ago, with the Allies taken totally by surprise and the Ami front line troops shattered by our offensive, whilst their High Command seemed paralysed.

The weather slowed us down, yes, but it also kept their damn air force off our backs, but now however things are more difficult.

Supplies are getting fewer every day, fuel is critical, the men are tired and some Amis have actually fought well to delay us: even now that place Bastogne behind us has not been taken, and the pace of advance has dropped

Today could be the critical day I think.

Ahead is the small town of Beauraing, with an Allied forward supply depot, and just a little further on is Dinant and the river Meuse. If we can get across the Meuse then Antwerp is ours and the Allies will be starved of fuel as their supply line is cut. If we can just get the tanks filled up in Beauraing, what is to stop us?

The troops are tired yes, but our Panzergrenadiers are the best and the new panzers are unstoppable – provided they keep moving.

My Gruppe has been reduced a little over the last week, but I still have a balanced force with a real punch – infantry, tanks, artillery, tank destroyers and engineers as well – so the Amis will know we are here! I know there are some Ami paras up ahead walled up in the town and that they have tanks backing them up, but surely we can handle them?

We must be ready for surprises (have they mined the bridge ahead or the road?) but that's what Recon and Engineers are for!

This snow is bad, for whilst the roads are good, anything off road gets slowed down and wheeled vehicles risk getting bogged down.

The cloud is still heavy, too much for the Allied bombers perhaps and certainly too much for Goering boys. If it clears later then who knows?

Time to go, forwards!

  • Gruppe HQ

    • Oberst Franz Beckenbaur (Level IV)

    • Hauptmann Uwe Seeler (Level III)

    • Feldwebel Gerd Muller (Level I)

    • One Panther tank

    • Two Panzerschreck Teams

    • One ten-man Engineer squad

    • FOO

    • Two SdKfz 251

    • Various cars and trucks

  • Aufklarung Zug

    • Leutnant Siggi Held (Level II)

    • One 8-man infantry squad (one Panzerfaust)

    • One SdKfz 222

    • One Panzer II Luchs

    • One SdKfz 234/2 Puma

    • One Sdkfz 250/10

  • Zug One

    • Leutnant Fritz Weber (Level II)

    • Three 8-man infantry squads (one Panzerfaust)

    • One Panzerschreck team

    • Three SdKfz 251

  • Zug Two

    • Leutnant Helmut Haller (Level II)

    • Three 8-man infantry squads (one Panzerfaust)

    • One Panzerschreck team

    • Three SdKfz 251

  • Schwere Zug

    • Leutnant Hans Grabowski (Level II)

    • Two 81mm Mortar Teams

    • Two MG Teams

    • Two SdKfz 251

  • Panzerjaeger Zug

    • Leutnant Pietr Schmeichel

    • Two StuG IIIG

    • One Jagdpanther

  • Panzer Zug One

    • Leutnant Heinrich Klose (Level II)

    • Two Panther tanks

    • One Tiger tank

  • Panzer Zug Two

    • Leutnant Berti Vogts (Level II)

    • Three Panzer IVJ

British Briefing

  • Motor Company HQ

    • Captain Robert Moore (Level III)

    • Lieutenant Martin Peters (Level II)

    • FOO

    • One 3” Mortar Team in a Carrier

    • One scout car, one jeep, a truck

  • Scout Platoon

    • Lieutenant Alan Ball (Level II)

    • Carrier with LMG

    • Carrier with PIAT

    • Scout Car

  • Anti-Tank Platoon

    • Sergeant Geordie Banks (Level I)

    • Two Achilles

  • Platoon One

    • Two 8-man infantry sections

    • One PIAT Team

    • One 2” Mortar Team

    • Three trucks

  • Tank Troop One

    • Lieutenant Geoff Hurst (Level II)

    • One Sherman Firefly

    • Two Cromwells

Just what you needed! Christmas Day 1944 and your comfortable billet in Dinant is now but a memory. You, Captain Robert Moore of the 3rd RTR, have been specially selected to be amongst the first British troops to be thrown in to stop the Yanks from breaking under the strain of the Hun offensive.

You have your own tank platoon from 11th Armoured Div with a small force of infantry from 159 Brigade and have been ordered to the front line village of Beauraing where apparently a German attack is imminent. Seems there is a vital forward supply base there being defended by a mixed bunch of Yanks under a Para Colonel and you are to place your men at his disposal. The Hun must not be allowed to capture the fuel or they'll be over the Meuse and on to Antwerp before the music stops. Not at all what Monty wants for Christmas,

If only the weather would lift and the Typhoon boys could join in, but otherwise it will be down to you and your boys to stop Fritz's Tigers and Panthers. Not a nice Christmas present for Mrs Moore's little boy! You know your men's fighting ability, but who knows how these Yanks will fight? If all else fails your orders are clear: the enemy must not get those supplies.

Arrival

For our game, the British arrival was determined by what time Bevan arrived (truly random!). You will need to work out a suitable mechanic : say, after eight appearances of the Turn Card, or similar.


Terrain Etc

The road is clear of snow & ice, but off road drifts will slow all vehicle and foot movement, whilst wheeled vehicles risk getting bogged down (all movement off road is at -1 pip per dice rolled for movement, wheeled vehicles bog down if they roll more 1’s than 6’s).

The hills & woods are very bad going (woods are impassable to vehicles of any kind, and at -2 pips per dice rolled for movement for foot).

The stream is fast flowing but tracked vehicles can ford it. Wheeled must use a bridge.

The weather begins with low cloud, but a strong wind is expected as the cold front goes through, and this will break up the cloud and raise the cloud base. Fine words, but there’s no air support and no artillery support available for either side!

Strategies & Tactics

As I would deploy on table, I had the opportunity to spend a bit of time working out what I was going to do. My first thought, fairly obviously, was to hang back and defend the village: let the Germans come to me as I shot at them from behind cover.

That was a fair plan, but they were sure to have lots of Big Cats and other semi-indestructible big gun platforms, so I thought that I was probably onto a long-term loser if I did that. He could pound the buildings from relative safety, and only come to get me once I was properly softened up.

Rejecting that tactics meant that I had to defend forward. Risky, but if I could get some sort of ambush going, I might get one clear round of fire at his Cats before being swept off the table in a hail of armour piercing rounds, and if I could knock out his big stuff…well I was fairly confident that the Paras and Brits could deal with the rest.

I therefore decided to put both my tank platoons as far up the table as they could go, leaving the Crunchies under cover in the town.

The terrain meant that the Germans could get on the table and set up before coming forward into view (i.e. over the northern hill or around the bend in the road), so I decided to sit, out of sight, right in the lee on my side of the hill and my side of the wood, engines running, guns loaded, as a nice surprise for any German Blinds that appeared.

My FOO was in the church steeple, my anti-tank guns covering the road, so I reckoned that when the Germans advanced forward in strength from their natural deployment area, my Blinds card came up, I could spot with them, forcing the German tanks to deploy, and then blow them away with the Shermans. That was the plan!

Opening Phase

The game began with the Germans moving cautiously onto the table. This I was happy about, as the more time they spent dithering about sorting which Blind was which and how to get them all over the bridge meant more time for Bevan to finish up his chores and get the Brits onto the table to support me.

Very sensibly, however, the German commanders had their recon unit out front and, as they moved their force forward, these poked their noses around the corner of the road to see what they could see.

Well what their lead vehicle actually saw was a 57mm shell heading straight for them as my anti-tank guns opened fire. Exit one recon vehicle!

Incidentally. for those wondering why my Blinds aren’t on the table, IABSM allows troops waiting in prepared positions to be under Hidden Blinds rather than just Blinds: nicely simulating the fog of war.

This tweak on the nose unfortunately failed to provoke the Germans into a more general advance, but several of their Blinds did keep their momentum going. Their StuG platoon headed up the hill, neatly cresting it to observe and fire down onto the town from a fairly hull down position; and their HQ platoon moved into the gap between wood and hill.

This, of course, sprung my ambush…and not in the way that I wanted. I hadn’t had a chance to put my Blinds on Overwatch yet that turn, so my tanks were effectively sitting out in the open for the Germans to shoot at. Luckily he had already moved a lot of his troops, meaning that he wouldn’t be able to bring his full force to bear on me.

As I am sure you can imagine, all hell broke loose!

John and Dave were somewhat surprised by the appearance of my tanks, but nonetheless rallied quickly and fired at them with everything they had left to fire.

Luckily for me, the Dice Gods were with me, and despite the tender ministrations of the two ‘Schreck teams and the Panther, I lost only one Easy Eight: a blow, but not a killer blow.

I returned fire as soon as I was able, and managed to knock out one Panther, one Puma and a StuG, and knock bits off various other vehicles as well. On top of that, I managed to Suppress his infantry in the wood with a bit of HE pounding, and kill off quite a few of his footsloggers in the process.

Here’s a montage of pictures capturing the action described above:

Much would depend on who got the first shot off next turn.

Unfortunately, the Cards Gods were not with me, and the Germans acted first next turn. A painful round of fire followed knocking out one of my tanks. Fortunately, I was close enough that when the Tea Break card appeared early, I could get in an automatic shot which did some damage in return.

Even more unfortunately, this happened again next turn. Suddenly I was down to just five Shermans.

All was not lost, however, as developments had been taking place elsewhere on the battlefield.

Presumably keen to get everything he could into action against my Shermans, John revealed his Jagdpanther and accompanying Panzers on the other side of the table.

This was good news, as my three Hellcats edged into a hull down position from where they were concealed behind the hill near the town and opened fire.

It took seven shots, but the Jagdpanther was smashed about so much that its crew decided to abandon ship. Other fire knocked out one of the accompanying Panzers.

More fire followed from both sides. My Shermans in the centre were wiped out after a few turns by the two Panthers, a surviving ‘Schreck, and finally a fantastic ram by a Panzer II, but they had done their job: all that the Germans had left vehicles-wise was one Tiger…which still faced my two dug-in anti-tank guns and three Hellcats! The Germans had also lost a good chunk of their HQ and Schwere platoon: cut to pieces by flying wood chips in a hail of HE fire in the wood.

The carnage from the German Point of View

The eagle-eyed amongst you will also have spotted Bevan sitting quietly in a corner (behind the Hellcats in the pic above). He, and the Brits, had turned up just in time to see the last of the German Panthers blown up.

The Brits Arrive…A Little Late!

Unfortunately there wasn’t much left for him, and the Brits, to do. There was no way that the Germans could push forward now: they were done!

Aftermath

A cracking game which, once the Germans hit my forward line of defence, was nothing but action, action, action!

Admittedly I had some very lucky dice rolling in that first encounter, but the German commanders were definitely shocked by my tactics: enough to make a mistake with the deployment of the Jagdpanther zug and leave them open to destruction by the Hellcats.

When it came down to it, I did lose eight Shermans but, ignoring with difficulty the thought of the men who died in them, I could afford to lose them…and the Germans couldn’t afford to lose the twelve tanks (mostly Big cats as well) that it took to knock my AFVs out.

The person I did feel sorry for, however, was Bevan. Turns up expecting to save the day, and the Yanks have done the job already!

Robert Avery


Operation Epsom 1944 in 20mm.
Figures from the collections of Ralph Gibson with terrain by Tim Whitworth.
Accurate tactical play generating accurate outcomes.


This is a great little scenario to kick off the campaign - not too long or complicated with only a couple of tank zugs/vzvods, a single infantry platoon and some recon on each side. We got through it in around three hours. The Soviets edge it a little with some air support and the T34/85s' superior stats over the Panzer IVs. Then again, the Germans benefited from better quality troops (more Actions) and slightly better Big Men/Commanders. All in all, a balanced pair of OOBs.

The finer details are in the Bashnya or Bust! supplement (and jolly good it is too, bravo Mr Avery). In brief, both sides needed to have infantry on the bridge (top-leftish in the photo above) by the end of the game. If no-one made the bridge, the force with more AFVs on the enemy's side of the table would win.

Below: the initial deployment of "Blinds." We adjusted the scenario to allow one blind from each force to move up the shorter side of the river - just for a bit of variety and to see buildings in action. The Germans got the jump. That's the Assault Rifle gruppe moving towards the bridge. The other two are a Panzer zug (centre) and a "dummy" Blind. The Russians led with a dummy, closely followed by tanks and a recon group on the far side. All Blinds are included in the supplement. They look great on the table.

German tank blinds move into a small wood (below) whilst the Soviet recon group try some spotting. They identified several trees and a bit of wildlife. But they remained stoically underwhelming at spotting Germans.

The first shots are exchanged (below). The Soviets went for a mad tank rush towards the bridge in Napoleonic style (Editor’s Note: too much Sharp Practice, methinks). They were easily spotted by the German infantry in the house by the bridge.

Panzer IVs deployed and brewed up a T-34/85 and immobilised another for the rest of the game (the one sitting on the red circle).

"Hans, this is so easy ..." The Panzer IVs use up all their favours with the dice gods to destroy another two T-34/85s and damage the turret of another (red circle with the dice behind it). Must get some markers for these things! At this point, the Soviets considered throwing in the towel as they only had two undamaged tanks left and their infantry had not yet entered the table. A pot of tea and maybe something a tad stronger settled the nerves.

The Germans don't have it all their own way (above and below). The heavier guns on the Soviet tanks punched through a Panzer's front armour. The Panzers returned fire but abysmal rolling (a score of 3 on 2D6 for every shot!!) led to the Soviet general needing a moment to wipe away the tears of laughter. It was a game played in good spirits, so everyone saw the funny side of it.

I mean, four consecutive rolls of 3 on 2D6? I think they only needed a 4 to hit.

Meanwhile the Soviet infantry arrives. The Big Man clearly forgot he was meant to be riding tanks. He was summarily shot and replaced with a new lead figure who obeyed orders blindly and was therefore promoted at the end of the battle.

Well there goes that plan...

Below, the Russian infantry is spotted loitering in a wood around a country mile from the bridge. It would take hours to get them moving again!

German infantry finally spotted (below.) The remaining Soviet tank in Zvzod 2 zoomed across the bridge and took up position by a demolished house. A couple of rounds of HE later and the German infantry was starting to wobble. The German cunning plan to seize the bridge was now in tatters.

Meanwhile, after their brilliant start, the German tanks took a pounding. The Soviet HQ tank obliterated the German HQ tank by tank. The HQ Panzer IV exploded in a rather dramatic fashion, spelling the doom of the chief Big Man. A foolish dash out into the open had left them hanging in a rather distasteful whirlwind of AP shells. The remaining Panzers in the wood were also destroyed in a single turn. The second and last remaining German Panzer zug sped into the trees and discovered some light Russian scout cars. They looked worried but the Germans had bigger fish to fry.

Below - Pop! The German Puma goes up in smoke (far side).

HE and MMG fire pounds the German infantry into oblivion.

The Russian infantry leg it for the bridge. As ever in a Lardy game, as the initiative swayed back and forth, it was that classic moment: whose chip would come out next? The Panzer chip would mean trouble for the Soviet footsloggers...

But the Russian infantry Big Man's chip emerged first. He deployed his rustic charm to holler at his lads and get them moving towards that blinking bridge. We ended it at that point - time was nearly up and the Germans could not really see a way of turning this around, although another couple of T-34/85s went up in smoke before the final Tea Break card appeared.

Soviet AAR: Kapitan Evgeny Dushkin [sipping on a molotov cocktail]

Never give up, that's my motto (actually, it's get ready to chuck in the towel and ask for a rematch because nearly all my tanks got exploded so quickly, then forget all that because all of my chips came out in the right order - less catchy but certainly accurate). You just never know with this random activation. That's the beauty of it.

My unsophisticated patriotic rush for the bridge worked perfectly-ish. The strategy was politically sound, based on the Soviet doctrine of stubborn sacrifice, and the tactical deployment of troops was first rate - at least it would appear so in the reports to HQ. But just between you and my un-tuned balalaika, I will confess I relied on a healthy does of Uncle Joe's luck.

We were carrying the Red Tsar's pipe into battle and after a vigorous session of rubbing it behind the trees, it finally poked the infantry into appearing and making a dash for the bridge. Luck was on my side. A lot of my chips came up and the German chips seemed to be MIA (ed - a couple actually were because they spent a turn in the box until we realised they were missing - must remember to add them when coming off Blinds!!)

Lessons learned? Those scout cars are abysmal. T-34/85s are not indestructible. Panzer IVs have a bigger punch than I expected. But T-34/85s are remarkably good at blowing up Panzer IVs in return. Oh, and read the bit in the scenario instructions that says the infantry can ride tanks into battle. We'd have been at the bridge about an hour earlier!

We win! On to Scenario #2A: Osen where we face the 101st Infantry.

German AAR: Leutnant Warsteiner, writing on behalf of Hauptmann Sauerbrauten, KIA

Kerput! Mein kampfgruppe, what a nasty series of unfortunate events. In the first couple of turns I was as smug as a smuggy thing. My tanks could not miss, Soviet tanks kept exploding, my infantry was ready to swoop onto the bridge and I had more AFVs in winning positions than the Russkis. Then the red chips just kept coming, aided and abetted by devilishly untimely Tea Breaks. I hate tea. I mean, any self-respecting general would be drinking schnapps at times like this. Then to have my HQ tank explode (seven - count 'em - seven unsaved hits on front armour: that's enough to kill it twice over) just rubbed salt into the wound.

Lessons learned? Infantry needs close support from AFVs (or other stuff). Don't commit the infantry too early in a game like this. I didn't make use of the Puma at all. Oh, and try to get to the side of the T-34/85s as that makes a kill very much more likely. I lost count of the number of times a good shot simply plinked off the Russian armour (lots of defence dice).

Ah well, the campaign needed a Soviet win to make it interesting. Let's see how Dushkin's tanks handle a face full of 'fausts and PaK 40s in the next one! Looking forward to seeing how the rules for FOOs work too.

For the Record

  • All units by Heroics and Ros: great value for money and they paint up really well.

  • All scenery: houses, roads, river, haystacks by Timecast (really impressed by these)

  • Trees by Scenics

  • Hills by Citadel of yore with annoying skulls covered with putty

  • Tea Break provided by the dauntless Mrs B

Captain Cliche


Inspired by Tim Whitworth’s upcoming Peleliu game, I thought I would share a game from the mists of time played back in 2013. The initial AAR is below, the rest of it, and the next part of the game is lost on a hard drive somewhere!

Introduction

I had a long think about how to handle the invasion. Obviously the defenders would be under intense bombardment prior to the invasion, so I had to allow for some impact on them.

The second problem was how to reflect any losses on the attackers coming into the beach. Rather than put Blinds out at a 24-36” distance from the beach, I decided to bring the invasion start point to 12” from the beach, particularly as the table was not that big! This is where the blinds would start from.

To reflect losses on the way in, the US player rolled 1D6 halved. This indicated the number of LVT’s/vehicles hit and lost on the way in. As I had an invasion force of fourteen vehicles, this seemed a reasonable amount to lose in the context of the game. I then rolled 1D6 halved for Shock on each Blind. This was to be spread out evenly on the units on each Blind. Note: I assumed the Marines were tough guys and 1D6 halved would be reasonable. Troops without such training I would roll 2D6.

Pre-Game Stonks

The attackers were allowed to hit every defensive position on the table. What these in fact represented, the attacker was not to know. As the vast majority of the defenders were in bunkers, pillboxes or trenches:

  • All sections of normal trench tested as a Poor shot with a 280mm gun (2d6+8)

  • All pillboxes tested as if a tank/AFV, with any loss converted into Shock – as they were 280mm I added +2 to the die roll. A roll of a six meant the pillbox was destroyed.

The Invasion.

Initially, there were four cards: US Blinds, Japanese Blinds, US Rapid Deployment ( to give the US Blinds a potential double move) and Tea Break.

All Japanese forces, unless Suppressed or Pinned were on overwatch.

LVT Buffalo’s had an Armour rating of 5, LVT4’s had an Armour rating of 6

Turn One

The first card out was Allied Blinds. The six US Blinds approached the beach, each deciding to go full speed using four dice. Each rolled four dice, halved for moving in water, although whether this is correct is debatable as their vehicles were designed to move in water.

The Japanese waited on overwatch until they had all moved. On the Tea Break card all the Japanese units attempted to spot. Three US Blinds were spotted. Note that the LVTs were difficult to spot as I deemed them low silhouette, and not a clear Spot due to smoke from the shelling. Blinds were deployed on table and the Japanese then Fired. In all, the Naval gun, two anti-tank guns and two HMGs fired. Only the Naval gun hit, and achieved nine hits on the lead Buffalo, effectively blowing it to pieces!

At the end of the turn, all the bonus cards were added for both sides:

  • Japanese Rally *3

  • US Rally *2

  • US Support *2

  • Heroic US Leader*1

Alas, the rest of the game is consigned to digital oblivion!

Time to revist and upgrade the terrain!

Desmondo Darkin


6mm IABSM game played at Gigabites Café January 2019


A second stab at our Ardennes game using the I Ain’t been Shot, Mum! rules from the TwoFatLardies stable. 

A German Kampfgruppe of two heavily reinforced Kompanies of Panzer Grenadiers races headlong towards Bastogne. In its way, a thin screen of second-line American platoons with supporting anti-tank platoon of 57mm guns and some sketchy medium mortar off-board assistance. 

Can they withstand the Iron Assault?

Will the Grenadiers succeed in breaking the Allied line?

In the background of the first photo is yours truly, still somewhat suffering after the stroke and unable to shuffle the card pack. My excuse anyway. 

Great game system with some very period specifics being fleshed out. 

Tim Whitworth and the Like A Stone Wall wargames group


Some pics from my solo game last weekend, including a close-up of what I'm calling "the world's luckiest Panzerjaeger I " which survived a duel with the KV-2.

James Manto


Earlier today we played the I Ain’t Been Shot, Mum V3 Rulebook Scenario #2: South of Cherbourg.

I've not played enough IABSM to really be familiar with the rules: this year will change that, and my brother and I will look to learn them thoroughly. We'll work through the book scenarios and go from there. Just a few pictures of the game with some brief commentary.


Five hours of I Ain’t Been Shot, Mum: a meeting engagement, slug fest of fun fighting for the Hill.

Axis troops quick to advance but Allied artillery pulverised one flank. Axis Panzerschreks and a troop of Panzer IVs really battered the Allied armour, and a quad 20mm Flakvierling drove off several Typhoon attacks. A draw?

Julian Whippy


Assault on the village of Sint Joost day 2 during Operation Blackcock, 20-21 January 1945

Before the Action

The table is set for day two of the assault on the village of Sint Joost, Part of Operation Blackcock in January 1945.

Vehicles that remain on the road are those that were destroyed or immobilised during the first days fighting. They will act as an obstacle to the advance on the second day.

Although the British were significantly mauled they will return with a fresh company of infantry and even more support. The war weary troops were withdrawn during the night and fresh units brought in to relieve them.

Day two will also start with one big heavy stonk by the British artillery in an attempt to force the Fallschirmjägers out of the village.

The British were forced to employ 141st Regiment (the Buffs) with their flame-throwing Crocodile tanks.

The Action

Preceded by a heavy bombardment which intensified the dense smog around the area of the river valley troops of 9DLI took up the challenge again supported by armour from 8th Kings Irish Hussars and flamethrower tanks of 141 Regt RAC.

Our game lasted three hours and about fifteen tea break cards were drawn.

The Brits attempted a flanking movement through the east woods but encountered heavy resistance from German veterans and a continued barrage from mortar supports which lasted throughout and brought the attack to a standstill.

On the centre British armour faired poorly against direct fire from assault guns and a well hidden PaK 40 in a fortified house.

Unable to get their own superior mortar and artillery support Into play, they quickly crumbled. The village would last a third day it seemed.

Here’s a link to pictures from the actual battle:

Tim Whitworth


Thanks to last minute help from John Ewing and Tim Whitworth, I was able to umpire a nice game this past Sunday, here in Vermont, of a hypothetical June 1940 encounter in France.

We had Germans come down the road under Blinds with two platoons of infantry supported by two StuG III assault guns supported by two Panzer 38(t) tanks.

The Germans moved fast, the British 2-pounder popped up to take a shot but was quickly dispatched. Things were looking grim for the Brits but then four Matilda II tanks showed up not only in the nick of time but, thanks to a random entry point D6, right on the flank of the StuGs.

A firefight ensued: one Matilda was knocked out by after three turns of firing, one StuG and one Pz38 were knocked out, whilst the other StuG and the other Pz38 were immobilized and awaiting assured destruction.

The German infantry wiped out one British squad and took the first house, with the German 105s starting to get the range when we ended...

Dan Albrecht


Played the first game on the central highway in the XXX Corps ‘Highway to Hell’ mini campaign today with Ralph and Andy of the ‘Like a Stone Wall ‘ Wargames Group at Martyn’s place. Another 12 x 6’ table, we are so very lucky.

Some 16 turns of the tea break card saw the British get a troop of Shermans off the far board edge.

British lost 2 Shermans destroyed, One Sherman immobilised and one firefly destroyed. These were mainly due to attacks with Panzer Fausts.

The Germans lost one Pak40 abandoned, 1MG 42 team destroyed, 2 tank killer teams destroyed, One infantry section captured and most importantly 2 StuG 3 Assault guns destroyed.

These rules are excellent if you follow the tactics of the time and the British were certainly doing that. Lots of infantry fire & movement and smoke cover from 2” mortars blocking enemy fire routes.

First battlefield table win to the British.

Tim Whitworth


Crete at Crisis

Crete at Crisis

Several weeks ago now I was invited by James to accompany him and Sam to the Crisis show in Antwerp.
I went with James and Nick a few years ago when we showed off James' Verdun game and then researched the Oppy Wood battle and game.
This time we were to take the big Crete game I helped James and Sam out with at Partizan earlier in the year.

James and Sam shared the driving (thanks guys) and we spent the trip planning future games and discussing the differences between Crisis and the UK shows. If you want to hear the nonsense Sam has a Podcast that you can download and listen to if you're young and hip to such things.

We arrived early evening and set up the table then went out to sample the delights of Antwerp.


We dined with WSS editor Guy and his partner at a splendid Arabian restaurant we chanced upon. Then James, Sam and I discovered Antwerp's gayest bar which was a splendidly convivial spot for several strong Belgian beers.

Fortified the following morning by a large breakfast (including waffles) we returned to the hall and added all the toys.

On this occasion we were going to use the I Ain't Been Shot rules. Previous run-outs had seen both Chain of Command and Bolt Action given a go. However neither really took advantage of the epic sweep of the table and tended to result in a game played in about a 6x6 square with the rest of the models as set dressing.
James and I had used IABSM before in the Keren game at Salute and we'd discussed it before Partizan, however James felt at the time (quite rightly) that Sam and Mike had only just come over to CoC from BA and adding yet another set of mechanics into the mix might be too much to handle.

However this time we were hoping IABSM (modified to use "Big Inches") would mean we could make far more use of the whole table and many more of the soldiers.

There now follows excessive quantities of eye candy. None of it (apart from some goats) supplied by me - all the work of James, Sam and Mike)


Only I knew where the camera was
Dead para - note entirely innocent Cretans shuffling off in the background
Sam made the flower bed things, based on what he'd seen on holiday in Crete earlier in the year
Gliders are 1/48 plastic kits. A pig to assemble apparently

The Vickers team on the hill did little damage to the Germans but proved a Stuka magnet.


Evidently this was very important at the time.


More Cretan partizans lurking innocently among the olives.


Matildas to the rescue!


The Sttuka goes about its deadly business

We had a thoroughly splendid day. Everyone was very complimentary about the game.
IABSM worked really well and kept the game flowing nice and simply but did allow many more troops across more of the board to take part.

In a slightly unhistorical outcome one of the Matildas made it to the river bed and machine-gunned down the assaulting paras - turning the tide in favour of the New Zealanders!

Crisis was a great show. It's hard work having just three people on such a big game. I felt the show was a bit more anglicised than I remember it - most of the big traders from the UK were in attendance and so the unusual things I saw on my first visit seemed less prevalent. But that's a minor (and personal) gripe - it's still by far one of the best shows around and being on the continent adds to the allure.

After the show was over we quickly packed up, jumped in the car and headed towards Ypres - which I'll cover in a subsequent post.


My fellow Vermonters and I (from the Vermont Historical Gamers Group) got a chance to play a few turns of a hypothetical Tunisia battle. Good practice at learning the rules and whetting our appetite for more Lard!

Figures and tanks courtesy of Jim Dirmaier and in game commentary from Brett McClay. Hope to get more of our group and others interested.

Dan Albrecht


The centre of Sint Jooth village

Tried out something different last night with the chaps.  A few years back WSS magazine carried a scenario for use with another set of company-sized rules centred on Operation Blackcock January 1945.  We had a group game using that set and were disappointed, mainly due to the ultra reactive, super accurate and highly unrealistic mortar fire system those rules employ. With the group now adopting IABSM as our go-to WW2 set, it was time to revisit the scenario. 

I amended the force lists to TFL format and distributed the Big Men accordingly. The scenario is a two day event consisting of two sub scenarios: one for each day of this particularly difficult battle. Off we went last night with the British advance and Day One assault on the village of Sint Jooth. 

What awaits the British column?

British troops came onto the table under Blinds, but confusion quickly set in as the two allied players debated the best way to handle the 40” limited visibility as a result of the freezing morning mist. As they pondered their position was noted by the German forward observer who relayed it to their off-board mortar battery teams.

Thereafter it was roadblock time again and again. Their attempts to clear a passage along the road by pushing immobilised and destroyed vehicles off only tended to present more targets for the mortars.

German partially disclosed Blind MG42 team covering the banks of the stream represented by the hedge/tree lines. The foreground shows the dense forestry inhabited by hunting German tank destroyers.

During this period of destruction the PBI were left to fend for themselves and attempted to quickly get to cover in the nearby woods: a task made more precarious by the regular bouts of sniping at the armoured column on the road by German tank destroyers skulking in the Forest.

Tim Whitworth


Ansdso to the first battle of 2019: a game of I Ain’t Been Shot, Mum! against Dave using one of the scenarios from the TooFatLardies Summer Special 2016. For those unaware of the Specials, and now the Lard Magazine, these are a wonderful source of scenarios, information and inspiration for all Lard games.

The scenario, by Richard Morrill, was called George of the Jungle, and was set in Burma, 1945. A Company, 9th Borders, part of 63 Brigade of 17th Indian Division, was tasked with clearing a small village near Meiktila of Japanese. The reason for the scenario’s title is that this action includes the participation of George McDonald Fraser, author of the Flashman novels, and is mentioned in his autobiography Quartered Safe Out Here. I would play the Japanese, and Dave would play the British.

The Battlefield

The British force consisted of a full company of infantry: three platoons each of three sections of eight men, a light mortar team and a PIAT team (authorised to be used against bunkers). The Company and each platoon also had a Big Man: so four in all.

In support, the British could call upon off-table artillery managed by an on-table FOO; and had a platoon of three Sherman tanks and a Big Man from the Royal Deccan Horse rolling along beside them.

The Japanese defenders could muster a single platoon of fanatical infantry: a Big Man, three squads of ten riflemen, and one squad with three grenade launchers. In support, they had two MMG teams, one anti-tank gun with Big Man, one 75mm howitzer, and a team of tank killers.

Significantly, the Japanese were very well dug-in to concealed bunkers and trenches: they would be very hard to spot.

Close Up of the Village of Wetlet

The Battle

Dave decided, very sensibly, not to split his force, but to send everything down the left flank. This, of course, neatly took out half my defending force, including one MMG team, the tank killers and the anti-tank gun, so one of my first moves once my Blinds card appeared, was to start shifting my troops on my left to my right.

The British Advance

Rapid Japanese Re-deployment

My second move was to spot his nearest Blind (the one to the left of the palm tree in the picture above, left): revealed as his tanks. This was just the target the howitzer had been deployed to deal with so, from its bunker underneath a bunch of palm trees, it opened fire on the nearest tank.

Three hits were scored, but howitzers weren’t designed to take out tanks, so all I managed to do was to scratch a bit of paintwork!

Howitzer Revealed!

Now it was the British turn to spring into action. A Blind charged towards the bunker and revealed itself as a platoon of infantry. We ruled that two sections could attack the bunker from the same direction at any one time, so it was sixteen infantrymen verses five em-bunkered fanatical artillerymen.

As the British had been forced to run it at the bunker, and hadn’t softened it up at all first, the Japanese managed to repel them: killing four Borderers for the loss of one of their own.

Another British Blind hurled itself forward: it was another infantry platoon, and this time the somewhat exhausted howitzer crew were all killed. First blood to the Brits!

First attack repelled

Second attack does the job

Unfortunately, all this charging around left the British a bit exposed, especially as I had decided to defend forward with some of my infantry. A squad revealed itself dug-in to the end of the undergrowth on the British flank, and opened fire with a Great shot at Close Range.

This was going to be horrible whatever happened, but the Dice Gods were smiling on me and I rolled three 6’s on 3D6! Carnage!

Amazingly successful japanese ambush

More was to follow. An MMG team opened fire from next to where the infantry had been concealed, and another infantry squad opened fire with great success at the British platoon trying to loop into the bottom of the village. The Japanese snipers also opened fire, and although they did no casualties, added Shock and Pins to a couple of enemy sections. Finally, the Tank Killers stormed out of the trees and bashed their “bombs-on-a-pole” into the front armour of the trailing Sherman “Fox”. They did no damage, but the tankers inside were definitely not amused!

the latest in Japanese infantry anti‐tank weaponry!

It had definitely been a most successful ambush, but could that success be turned into victory?

The British replied with a wave of fire from their tanks and infantry. A few Japanese fell, but the only significant loss was that the MMG team were forced to retreat from their bunker Shocked by HE shells from the Shermans. The British were, however, still mostly out in the open, and continued to lose far more men than the defenders as the exchange of fire continued.

The Climax

One Japanese sniper was forced off the table by advancing Brits, but the Tank Killers were on a roll. Firstly, they repelled a charge by a British infantry section, desperate to clear them from the Sherman. Then they managed to work their way onto the Sherman’s flank and make their bombs-on-a-pole work. Boom! Exit one Sherman!

The Tank Killers wanted to continue onto the next tank…but there were too many British infantrymen in the way. They would have to wait until a path cleared!

As you can probably tell, things were getting a bit desperate for the Brits now. Their battered platoons had largely gone to ground, and the weight of Japanese didn’t seem to be slackening.

Something needed to happen: so one undamaged section of infantry charged the MMG bunker to which the remains of an MMG team had just returned. Success: the MMG and its team were finally dispatched!

Once again, however, this rapid advance left the British infantry vulnerable. The final Japanese infantry squad deployed from where it had been waiting patiently behind the greenery, and blasted the Brits at Close range. A low dice roll (for a change) but still plenty of damage was done.

Final Japanese infantry squad deploys to good effect

That was really it for the Brits. They had lost over a third of the ninety-six infantrymen they had started with, and one of their Shermans. The Japanese showed no signs of being moved and, in fact, had only lost one infantryman, one MMG team and the howitzer. With a heavy heart, the British commander ordered the retreat.

Analysis

Now that was a quick game: just about two hours from start to finish.

The British were determined to take the fight to the Japanese and force them to work to their timetable, but unfortunately got a bit enthusiastic with the charges and ended up under the guns of the Japanese ambush. The high rolls the Japs made at this point just added insult to injury, and really cut deep into British numbers early on in the battle.

The British were also unfortunate in that their artillery never actually arrived, despite being successfully called in. The ranging shots had been moved to bracket the main Japanese position to the south of the village, and would perhaps ‘opened the door’ to a more general assault had a barrage or two actually landed

But, in the end, the British came on fast and hard, without properly scouting the terrain, and paid the penalty for their haste.

Robert Avery

All that were left

Japanese positions to the south of the village

The Grenade Launcher Squad


Time for another game of I Ain’t Been Shot, Mum! with John and Dave…but what to play? Dave has requested an early war encounter, so a quick look back through my library of scenarios and I settle on one of Richard Clarke’s games: Lille.

The premise is simple: Rommel’s Germans are advancing rapidly on Lille, aiming for the village of Lomme, whose capture will seal off the escape route of all English and French forces in the area. The Allies have realised what the Germans are up to, and have dispatched a small force to hold Lomme for as long as possible. The scene is set for an epic clash!

Lomme

The village of Lomme is shown in the photo, above. The Germans will enter from the south (the right), anywhere along the table’s edge. The French start anywhere they like on the table, and must prevent the Germans from exiting any troops to the north i.e. along the single road leading to the left.

Another view of Lomme

Capitaine Legume (on the left) and Major Lardich von Skinner (on the right) review their orders

The Germans

The Germans disposed two strong, truck-mounted platoons of infantry, each four squads strong, with each squad having 8 men. Their Company HQ contained three MMGs, an anti-tank rifle, and another squad of infantry. Accompanying them were two PaK 35 anti-tank guns towed by Kfz15 field cars. Finally, four Big Men would command the German infantry: more than enough to make sure everything ran smoothly.

Panzer reinforcements were due to arrive after six appearances of the Turn card: a zug of four Panzer II and a zug of three Panzer IV. Each zug had its own Big Man.

The French

The French also had two platoons of infantry, but their platoons each had three squads, with ten men per squad. They had two MMGs, and had also been assigned two ageing soixante-quinze field guns.

Unfortunately, the French only had two Big Men to command the above: the aforementioned Capitaine Legume, and the superb Sergeante-Chef Aubergine , hero of a previous action.

The French briefing also contained the promise of two platoons of tanks: three R-35 and three Char B1 bis tanks. I couldn’t, however, find any mention of when they were due to arrive, and suspected, therefore, that they were a cruel jest on the part of Mr Clarke and destined never actually to grace the tabletop with their presence. I unpacked the models anyway, and decided to decide if and when they arrived depending on what would give the best game!

Plans

Initially Major von Skinner thought he might split his force and advance onto the table along each road leading to the north i.e. at either end of the village.

His force wasn’t really strong enough to bring that off, however, so he decided upon an awesomely bold plan: he would left hook with his entire force, aiming to capture the crossroads on the west side of the village and then, dependent on what the French were doing, either drive straight off the table for Lille or roll up the enemy line from the flank.

Capitaine Legume, with such a huge frontage to protect, did split his troops. Half, including the two field guns, would protect the crossroads to his right; half would be positioned in the houses approximately in the centre of the table: ready to kill Germans wherever they appeared.

The Game

The game began with the first of the German Blinds advancing on to the table towards the crossroads.

Hoping to spot and pour fire onto the Germans as soon as possible, wearing them down at distance, the French platoon defending the crossroads deployed immediately.

The Germans arrive

The French deploy

Initially, the French tactics of immediate deployment had some success. The two German anti-tank guns had advanced into the grove of trees near the road and deployed. This was a bad mistake, as shells from the French field guns quickly blew one gun and its crew apart, with the other limping away out of sight. First blood to the poilu!

Then, however, it all went wrong. With some incredibly fast movement (Rapid Deployment and some amazing dice rolls!), the German Blinds followed their plans and began to outflank the French position at the crossroads, a move completed when the Blinds decloaked as the two German infantry platoons!

The Blinds outflank

The German infantry deploy

The French were caught by surprise and suffered badly. Their first platoon had been well and truly outflanked, and the Germans took full advantage. Two platoons fired on one, and the field guns and French infantry squads at ground level suffered badly from being shot at from the upper stories of the houses overlooking their positions.

Sergeant Aubergine brought the other platoon back to the crossroads, occupying the large manor house just to the north, and, for a time, things got a bit more equal, especially when a shot from the last remaining French field gun set the large barn opposite the manor house on fire.

Unfortunately, the French first platoon had just about ceased to exist by now, and the field guns didn’t last much longer: again it was two platoons versus one, with the Germans now close assaulting to clear the French infantry from the houses.

Germans clearing the French from the south side of the crossroads by close assault

This vicious series of fire fights and close assaults was cracking stuff, but all the action was compressed into one small area of my lovingly set-up tabletop. What a waste! Perhaps the arrival of the tanks would spread the action out a bit…

The Tanks Arrive

It was now that the Turn card dictated that the German tanks would arrive. John duly brought the Panzer II platoon on to join the troops assaulting the French position on the crossroads, and brought his Panzer IVs on in the centre of the table, protecting his right flank and hooking around the French left.

I looked at the table. It was obvious that the Germans were a hair’s breadth away from winning, even without all their armour…so I decided to allow the French tanks onto the table as well. Perhaps they would save the day for Capitaine Legume.

I didn’t want to be too unfair to John, however, so decided that the French tanks would arrive along the road at the opposite end of the village. That way some more of my terrain might get used as well!

Dave duly deployed his tanks, but was horrified to be reminded that all his armour was designated as Slow. That’s -2 per dice rolled for movement unless you’re on the road. No tactics here then: just a Stonne-like cruise up the High Street relying on the thick armour of the Char B1s to protect them as they advanced.

And if what happened at Stonne was a guideline, then actually that didn’t seem too bad.

German Panzer IV tanks await the advancing B1s

This ain’t Stonne!

Oops!

Unfortunately, this wasn’t Stonne. The lugubrious advance of the French tanks allowed two of the Panzer IVs to get into position, and their combined fire forced the lead B1’s crew to bail out.

Worse was to come.

By this time, the Panzer IIs had arrived in the vicinity of the crossroads. One of them, #14, had a shot down the road at the second Char B1. A 40mm cannon versus a Char B1 at a range of almost 500 yards: no chance!

Well, the Panzer II hit, rolling four dice for penetration versus the Char’s eight dice. Three penetrations for the Panzer II, no saves for the B1: boom! What an incredible shot!

Panzer II #14, on the road at the bottom of the picture, opens fire!

And that, as they say, was that. The French Force Morale had run out, and the survivors either surrendered or ran for it. The Germans had won the day.

Aftermath

A great game of I Ain’t Been Shot, Mum! won fair and square by bold German tactics from John.

Dave didn’t do anything wrong, in fact he fought a good defence, but once his enemy were round his flank, it was only a matter of time before the left hook took him to the canvas.

My favourite shot of the game: Achtung Gewächshaus!

Just for the record, the game was actually a bit closer than the above account implies. John had rolled really badly for his Force Morale, and the few losses that he did take were worrying. It was obvious that his men thought they were too far out in front of the main thrust, and should pull back to consolidate. Luckily for him, his morale lasted long enough to win the day…but only just!

Robert Avery


In order to launch the Ardennes Offensive (Battle of the Bulge) the germans had to make a drain in their forces in other areas to assist the large build up in the Ardennes.

Last Saturday I happened to be in command of one such drainage patrol... but sad as things can be I wasn't going to find the trip to the Ardennes all that easy.

Just as our convoy had found the main road north we encountered fierce opposition of some quite unexpected american troops lying in wait. Just were they came from or what they were doing there remains uncertain.

Our reconnaissance bikes were abruptly blown apart at the head of the convoy, at the combined effort of a Stuart tank lying in wait by the roadside and some American G.I's.

Next a bloody Sherman entered the fray, but our StuGIII was quick to send a shot at the it, forcing it to retreat.

I tried to get my kübel up to the bikes to regroup the men and lead from there. Sadly the rest of the bikers got killed before I got there. I took my kübel to the side and ordered the SS we were accompanying out of their trucks.

After a quick discussion with the SS Scharführer we send the Panther and the halftracks around the flanks. This way we hoped to force the opposition to rout or at least move around to their discomfort.

A whizzing sound made our blood freeze for some seconds and the smoke from the StuGIII had me shake my head and take a second look... it was gone! Blown to smithereens!

I ordered the MG's to set up in a nearby buildup and took command of the SS troops. I ordered the Scharführer to stay behind and direct the mortar fire against the crossroad.

A chain of blasts sounded as the Panther took several direct hits from a bazooka team lying in wait at the cross. Ernst - commanding the Panther - must have thought there was more than bazookas to the blast as he promptly backed the Panther away.

Tough opposition indeed. The recce units had gotten around the side of the Sherman and Stuart only to detect an entire platoon lying in wait behind the hill. Finding the trigger and the reverse gear at the same time proved hard and the recce unit got shot up. One 250 blew up, one ran off and the last one backed and fired.

By now I had gotten two sections of the SS to the crossing and the last one was out of my reach.

These young boys had the best equipment the Reich had to offer. And thank the almighty for that! Because on the other side of the road another US platoon was heading our way. I ordered the boys to open fire as soon as the platoon (or a significant part of it) was out in the open.

Four G.I's dropped instantly, never to get back up. The other – clearly inexperienced – grabbed for their rifles not knowing where to shoot or how to do it.

The Stuart had detected our presence in the woods and started shelling us. We took some casualties. I quickly inspected the wounded men and instructed those that weren't badly hurt to get back in the fight. No one could get through to us at this point so we had to do our best to survive. Luckily my talk worked and they kept the spirit for a while.

Without any warning I suddenly saw Ersnt bursting through the woods going down the road and into the cross. The panther was roaring and I had no idea what he was doing. My radio had a thick bullet hole in it so I had no idea what was going on anywhere.

He turned the corner and kept going down the road, when suddenly an ear deafening crack sounded. The engine of the panther no longer roared. I don't know exactly what happened, but I saw plenty of G.I's running out of the smoke from the wreck.

In the distance I could hear the rumbling of a Sherman making it's way. As I had no way of knowing whether it was the one we saw before or perhaps reinforcements, I ordered retreat.

With the rest of the SS section I put up a tough defence while the other SS ran back. Eventually we couldn't hold the position any more and we hurried back through the thick of the smoking StuG. The direction the wind was blowing didn't give us the best cover though and soon we had to make a run for it.

It quickly became obvious that we had taken quite heavy casualties with regards to materiel. Most of men were alive, but some were severely wounded.

I ran to the MG's and repositioned one them to cover as wide an area as possible and ordered the rest of the men to start embarking in the trucks and getting the hell out of there.

Our 250/1 came racing by with smoke coming out of the back. The crew informed us that the rest of the halftracks were lost after a toe-to-toe dance with the Sherman and some infantry.

I then ordered the MG's to abandon their position and get into a truck. The last SS section was beyond my shouting distance and we had to leave them behind.

The Blitz drivers got the pedals to the metal and hammered out of the place. This encounter had cost us way too much. A StuG, a Panther, two 25+'s and 8 motorbikes! And that's not counting the loss of men!

I think we'll have to find another route to the Ardennes....

The forces:

Americans: two full platoons, two HQ sections, four Big Men, a sniper, bazookas, Sherman M4 and Stuart - everything but the vehicles deployed hidden

Germans: one SS zug, one Panther D, one StuGIII, three Sdkfz 250, ten infantry on motorbikes, two MMG, three 50mm mortars, four Blitz Trucks, one Kubel. Four Big Men.

Amokfigur