In the weeks following the D-Day Boot Camp, I’ve been building an American force and adding to my existing Germans in preparation for a Normandy game I want to put on for my usual group of fellow-minded gamers

My group tend to prefer to play narrative-style games where all the players play one side with the opposition played by an artificial intelligence system, so the choice of which rules to play was important.

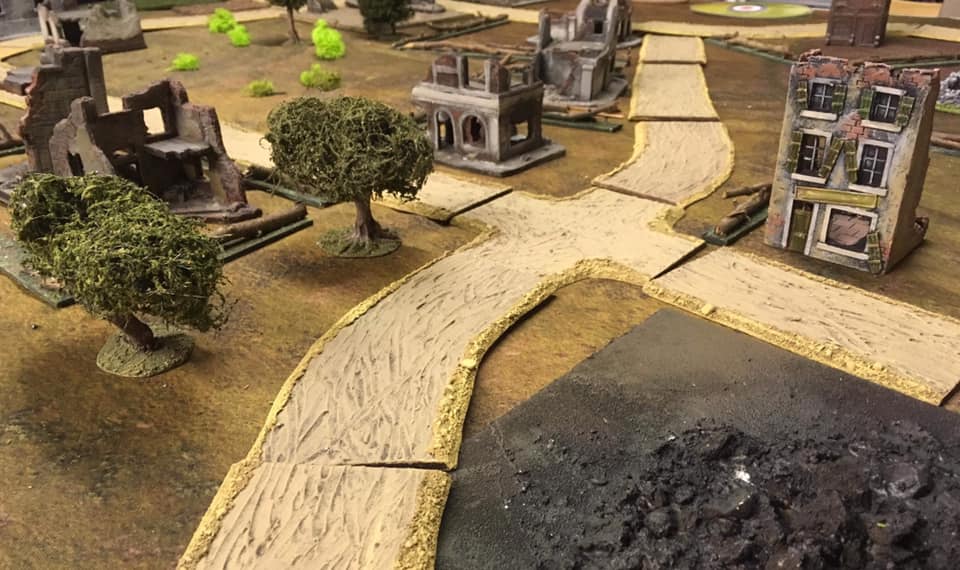
I Ain’t Been Shot, Mum, the original Two Fat Lardies WW2 company-based game with its random activations, its Blinds and spotting seemed ideal for the scenario I had in mind. Nothing wrong with FOW rules, but they are more designed for those epic WW2 massed armour games and, well, when you read the scenario you may understand…

The Hamlet of Le Mer(de)

Introduction

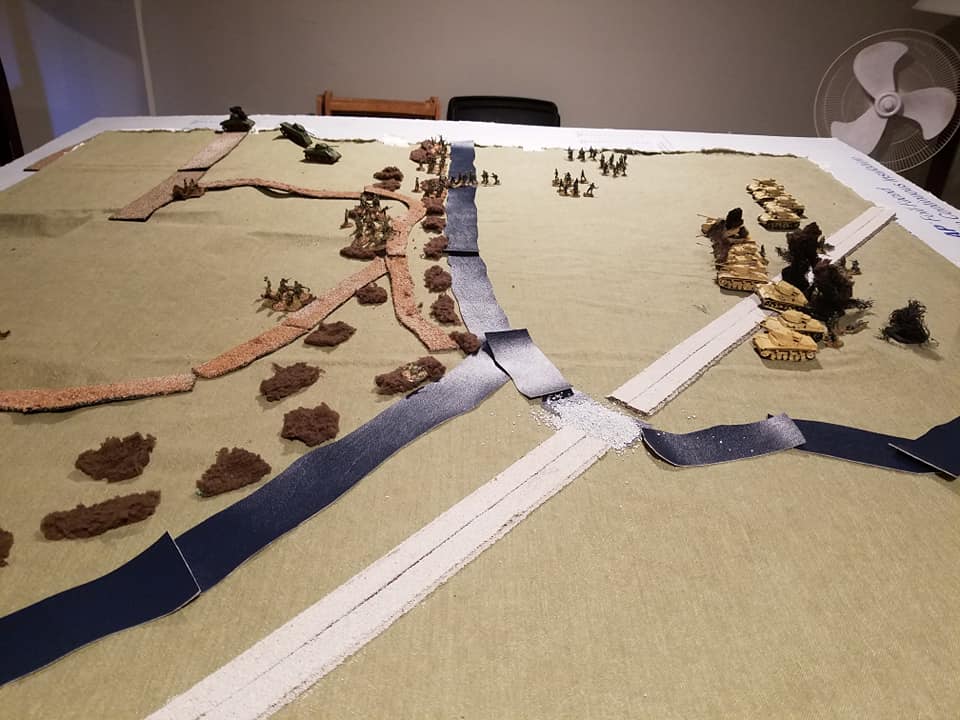
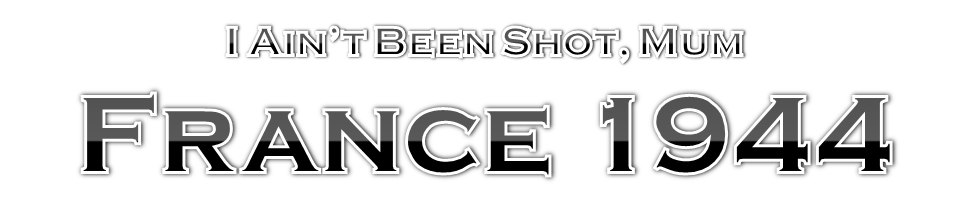
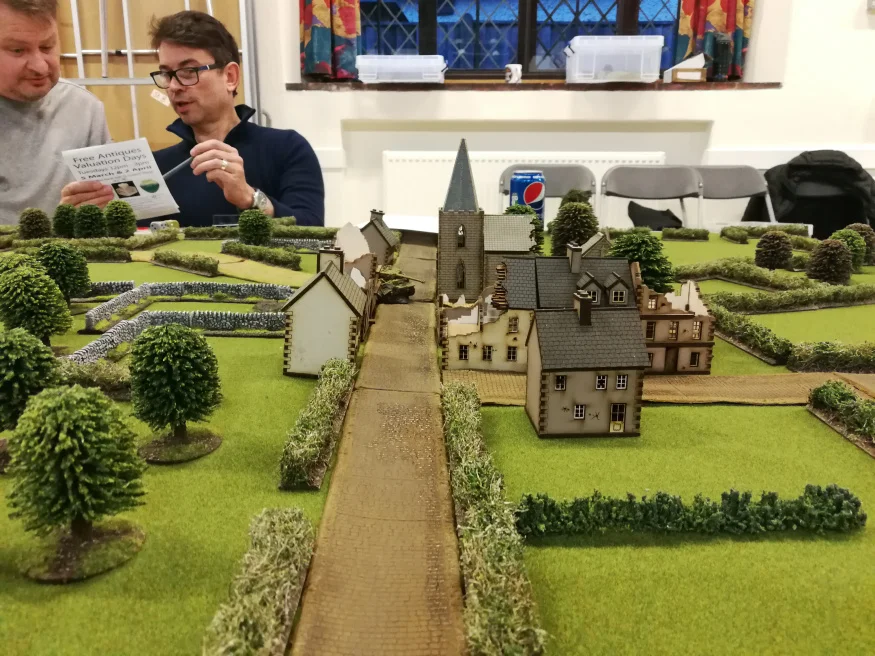
It is the night of the 5th of June at what had been a fairly insignificant crossroads in the village of Le Mer, some 5 miles North West of Carentan.

The tows of two gliders from the 101st Airborne, carrying a battery of 57mm Tank Destroyers ( towed 6pdrs to non-American readers), have overshot the drop zone and, being fired upon by AA, have been forced to loose their wards blindly. As it happens, the gliders land on our sleepy little village where, luckily for them, two platoons-worth of the 101st have also dropped nearby, and have started to converge on the sleepy little hamlet.

A platoon of 1058th Grenadier Regiment has been billeted in the village to protect a battery of anti-tank guns whose prime movers have broken down on the way to coast: left behind when the rest of their Company moved on to Carentan.

Neither side knows the other is there…

Background: The Germans

Lieutnant Shutlz stared angrily at the small glass of Cognac sitting on the makeshift table in the warehouse he had made his temporary headquarters in this shitty little hamlet of Le Mer: more aptly it should be called Le Merde, he thought. Famous or infamous for the factory that produced the awful looking bicycles everyone in the area rode.

The Cognac didn’t help his mood, he had risen from the ranks fighting in Russia and had never developed the taste for the stuff that his fellow officers had , it was only marginally better than the swill they called wine here. He was from Bavaria, now a good Bavarian Dunkel beer and you were talking. The Cognac’s only saving grace was it was alcoholic and you could get pissed quickly on it!

Why did he need to get pissed ?

His bloody Company Commander had left his platoon here to guard two shitty guns and their crews whose tow trucks had broken down. They’d all carried on to Carentan to deploy for the damn Allied Invasion!

Personally he didn’t know what the fuss was about: they could have France, bloody hole; they could keep Russia too. Why any self respecting German ever wanted to leave Bavaria, never mind Germany, eluded him!

To cap matters Private Dingler, or Private’s Dingler ,as he was always running off to take a leak, had run in from one of his 20 minute forays outside, (for a fag he’d said but the platoon knew better) had panickly shouted that he had a loud crash in the field to the wet of the Village, ‘Loud Crash’ he thought how anyone could hear anything over the noise of passing Allied Bombers , and the booms from their falling bombs!

To make matters worse he’d tried to contact Company HQ earlier in the night and found the Radio was on the Fritz ……again!!!!!

Probably a waste of time but he’d better deploy the platoon just in case, which was sure to increase his popularity with Sgt Muller!

Background: The Americans

SHIT SHIT SHIT SHITTY SHIT! was the 1st words that came to the mind of Sgt Dingler 101st Airborne. The only bright spot was the fact the two gliders bringing in his battery of 57mm guns had landed fairly safely, despite being released and abandoned by the bloody air Corp when they’d had a few flak guns shoot at them! Fairly being the term as the Lieut had been the only casualty, knocked unconscious on the ‘landing’.

So he was in command!!!!

He’d got the guns out of the Gliders and one of his gunners head off to reconitre the village he’d seen by a few window lights to the east of where they had landed, he guessed someone may have spotted or heard them crash!!!!

The only redeeming thing so far was another of his gunners had made contact with a couple of Riflemen from the 501st, who were part of a mixed platoon of guys coming in from the east of their position.

Willy Summers’ Platoon.

Lt. William ‘Willy’ Summers nervously crouched at the gap in the huge hedge, that led from the field he had crossed, on his way to the the village he had spotted on his way down, before he became entangled with the tree. There had only been one on the edge of another field , and no matter how he tried to manoeuvre somehow he had landed at the top. 20 minutes of quiet cursing   frantic cutting, and not a few cuts and bruises had got him to the bottom,  where he found 10 of his men from his stick, standing and crouching amusingly watching his predicament. 

Finding as much dignity as he could muster he had them through various more fields picking up various troopers from just about every company of the 501st and even a couple of 82nd Airborne,  he wouldn’t be totally surprised if there were not some Limey Paratroopers in the mix, though he had collected a mortar crew.

One of his scouts had found an opening on to a dirt track road, which he now intended to  use to take the village ahead. He signed his makeshift squad leaders to spread their squads on each side of the track, and hugging the hedgerow  they would advance towards what looked like a bombed out building on the edge of the village.

Preparation

The first half of the evening was spent sorting out the activation cards for the two sides. The Americans, being Elite, got a Rapid Deployment card which gives them an extra four dice of activation for moving when under a Blind. Two Tea Break cards were added , so initially the pack would consist of just five cards: a Blinds activation for each side, and the above two cards.

The initial part of the game is set at night so all spotting distances were halved.

For those not familiar, IABSM uses Blinds for units not yet spotted with at least one extra Blind to add the fog of war - it’s meant to represent a couple of scouts who are assumed to melt away if spotted.

The possible German units available were each given a playing card identifier, and an identical card was placed in a reinforcement pack. More cards were added of different suits, representing “non-units”. This pack was shuffled and a number of cards were drawn and assigned Blinds. We therefore had no real idea what German forces were in the village: if a “non-unit” card was drawn, its Blind would be removed on being spotted.

To add to the fog of war, rather than putting German Blinds down onto the table at the start of the game, we just put down four “zones of deployment”, and when it seemed appropriate, we would randomly deploy a German Blind a random direction and distance (a D6+4 inches) from the deployment zone marker, then place the Blind as close to available cover as possible.

The First Night’s Move

We then played out the first night’s moves…but nothing particularly exciting happened in these moves as units moved on Blinds, though there was a very cinematic feeling to the various units blundering around with no idea where the opposition was.

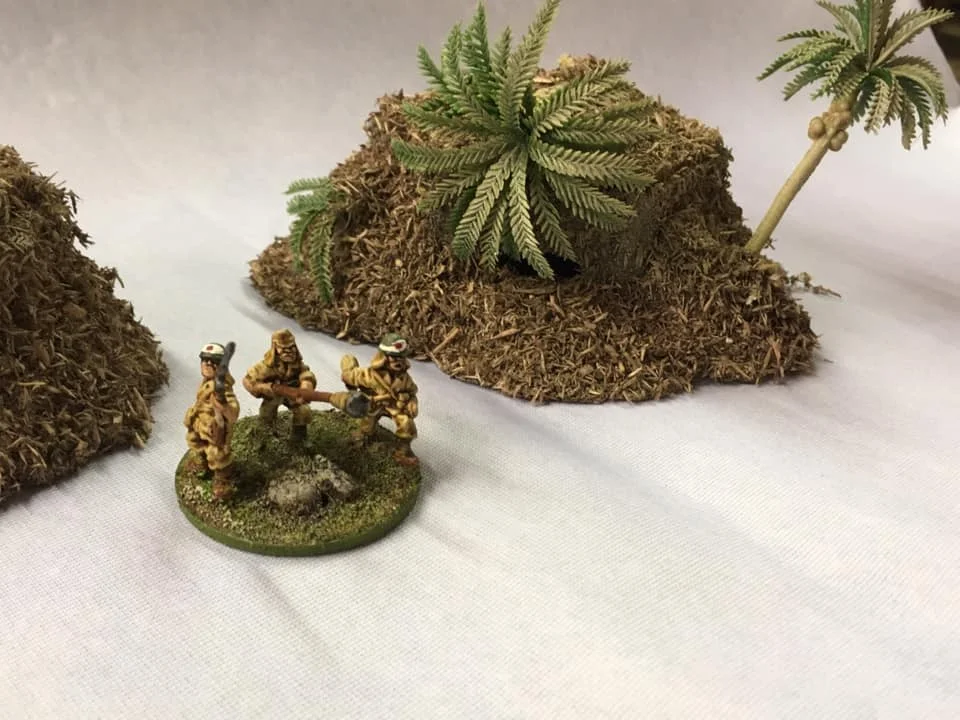
The American AT gun Blinds split: one headed for the hedgerows by the one road; the other, which was sitting a bit exposed , pulled their guns into the broken ground to the north of them, hopefully to get a firing position on the road coming from that direction.

Heading for the hedgerows

Occupying broken ground

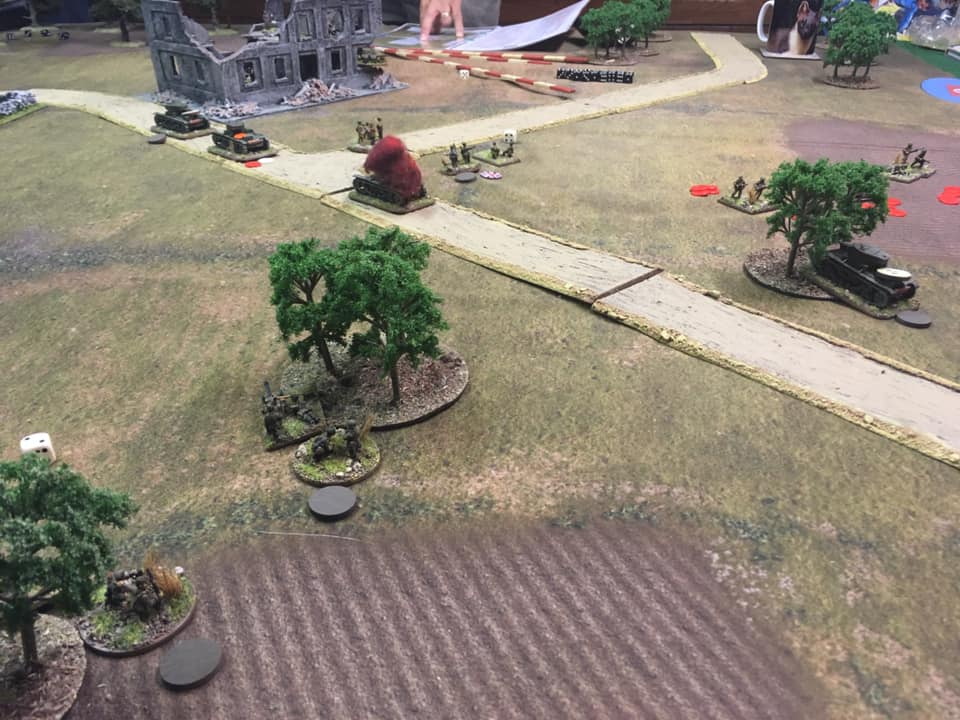
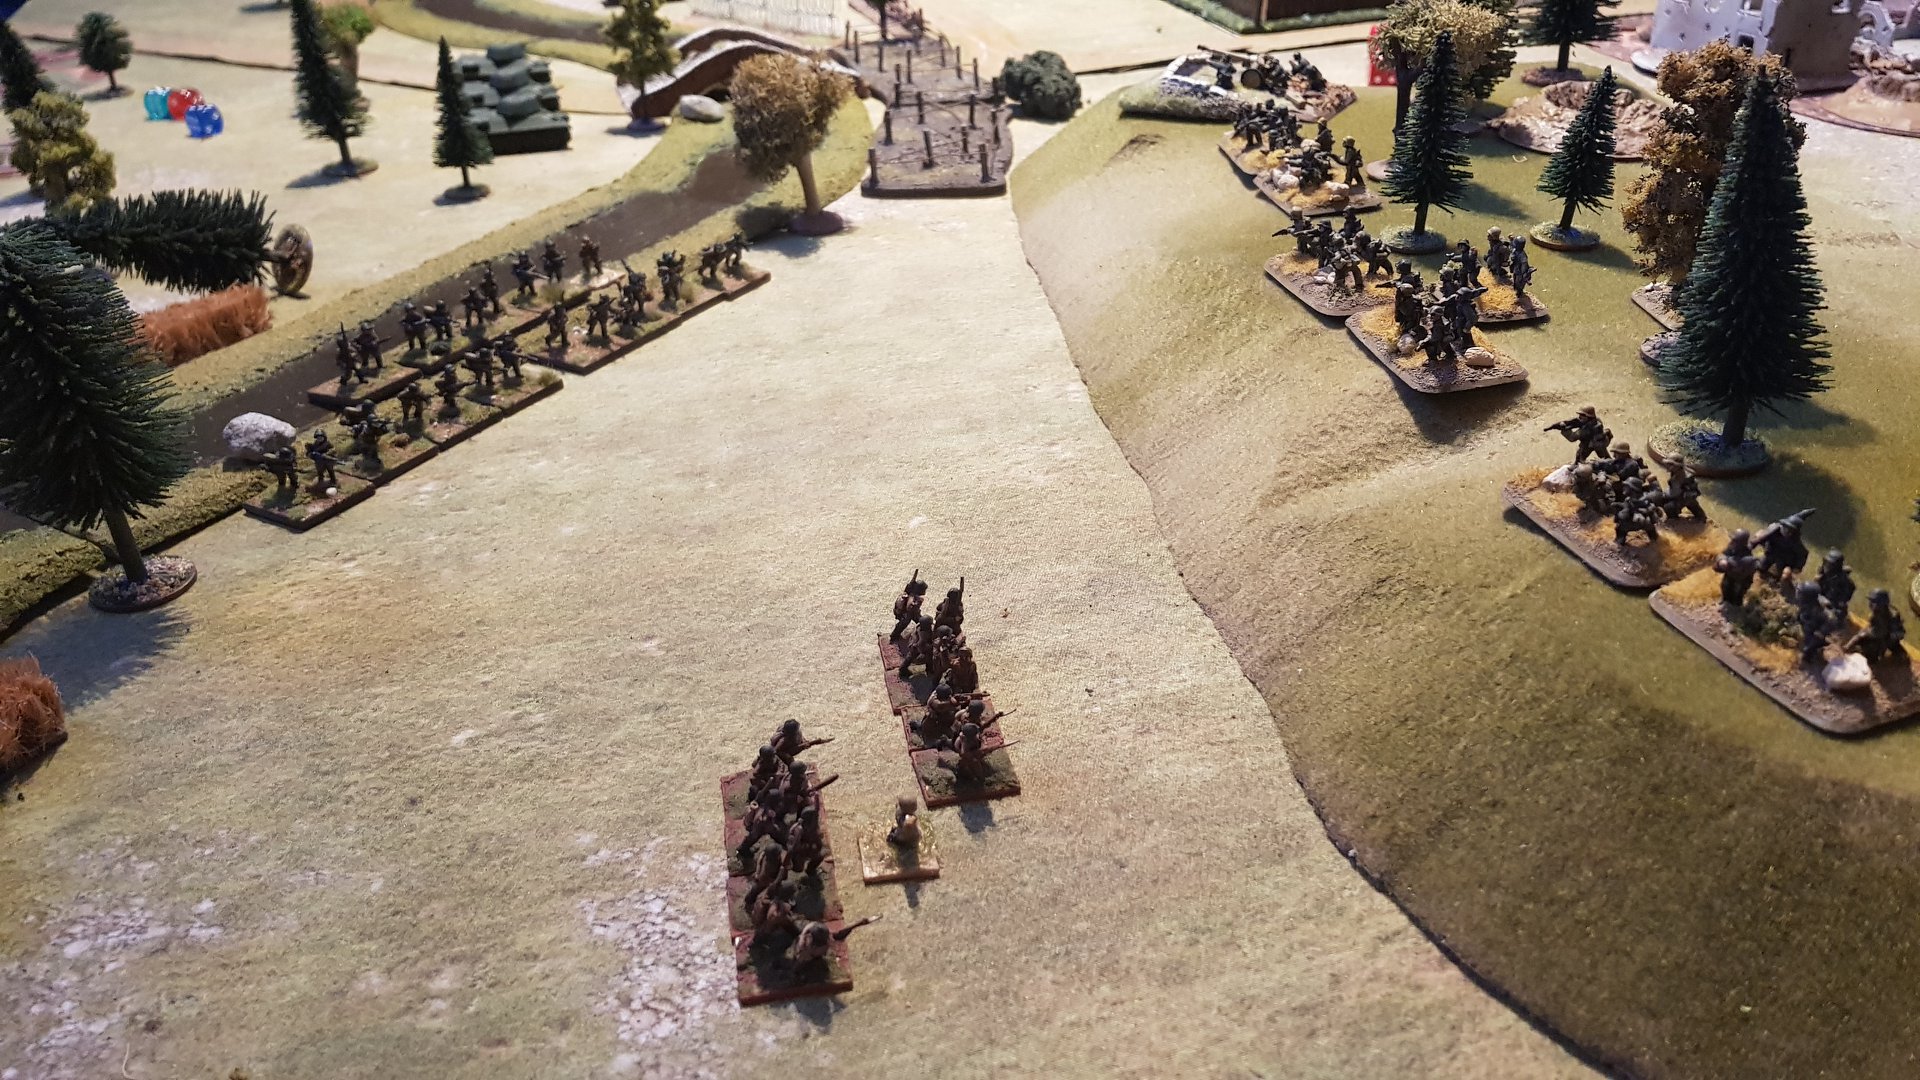
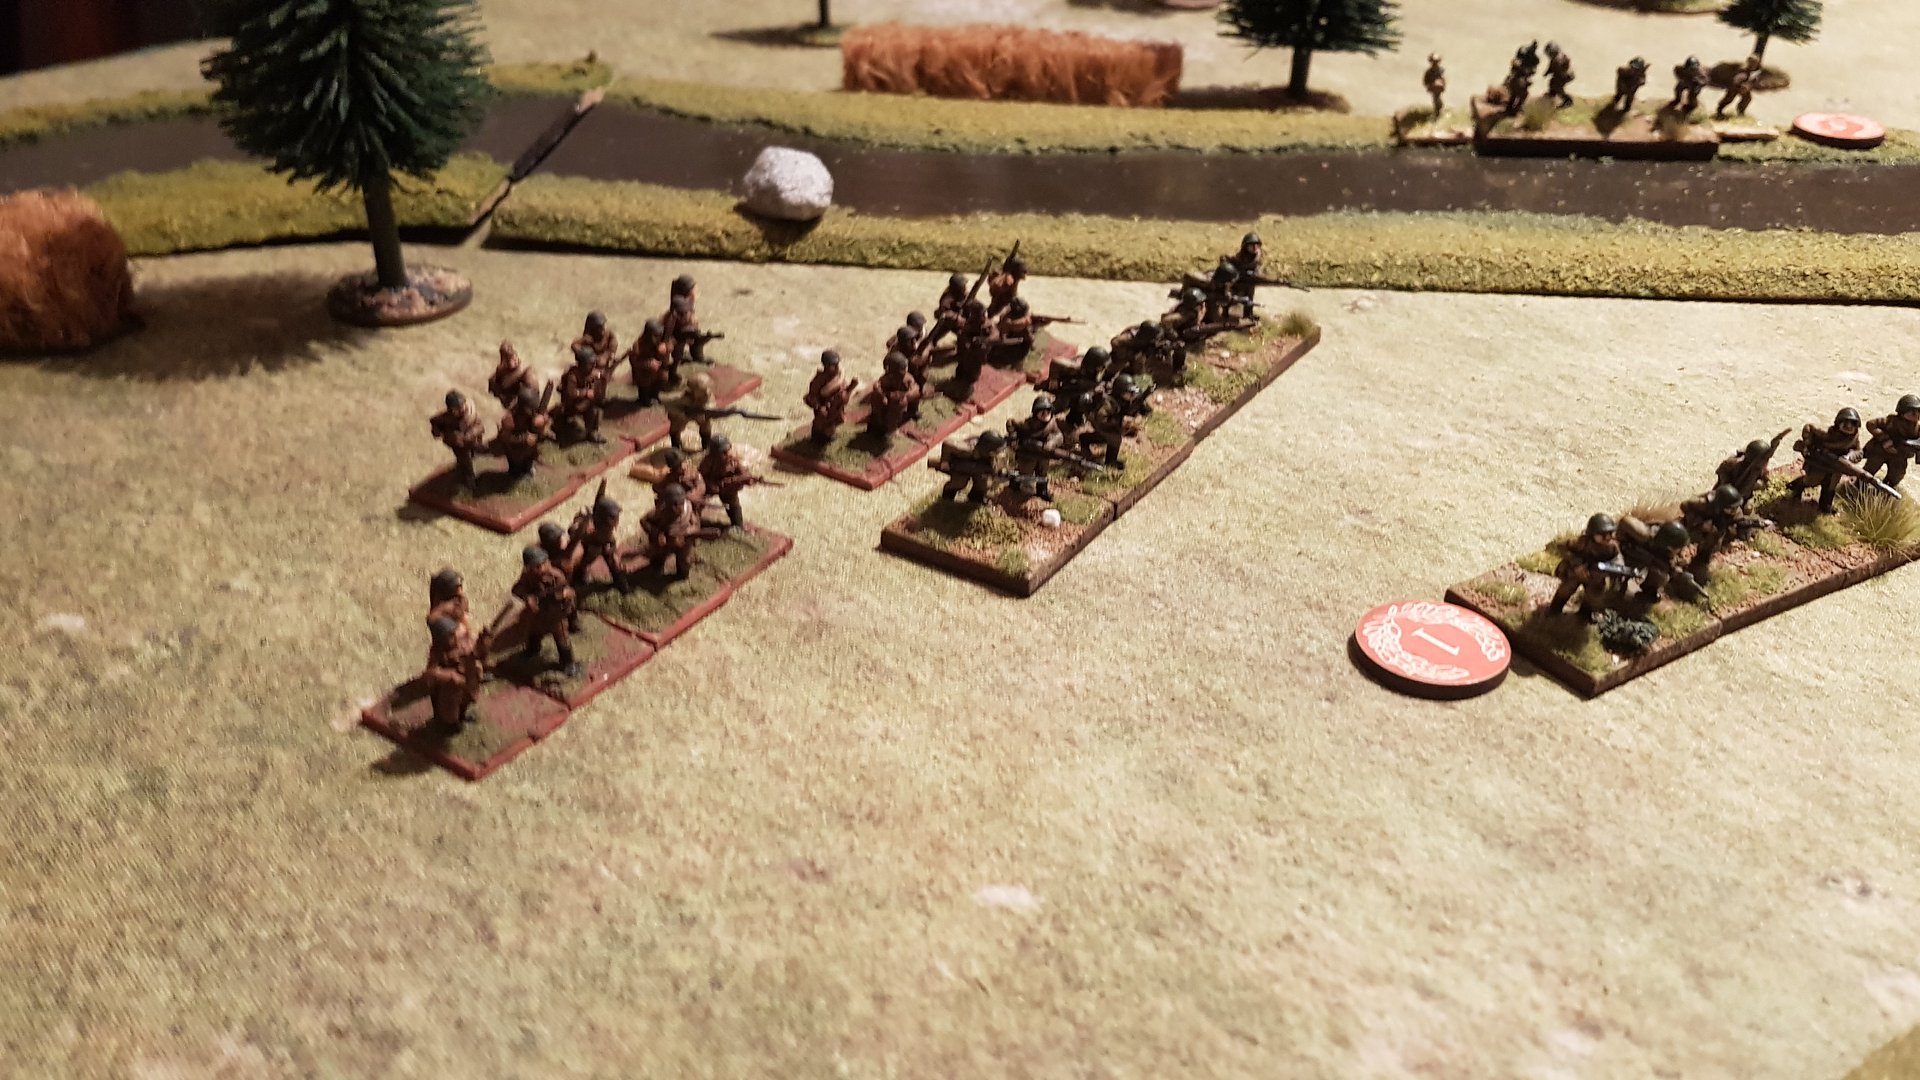
The infantry platoon on the right (west) moved towards the road but sent a scout Blind to check out the group of buildings to the north of their position:

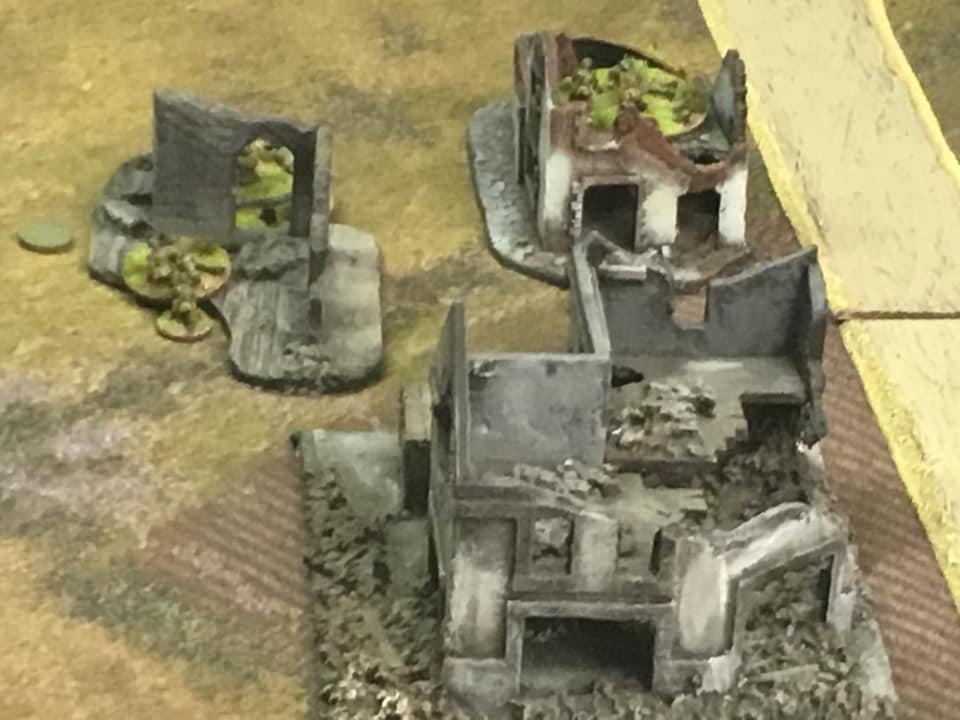
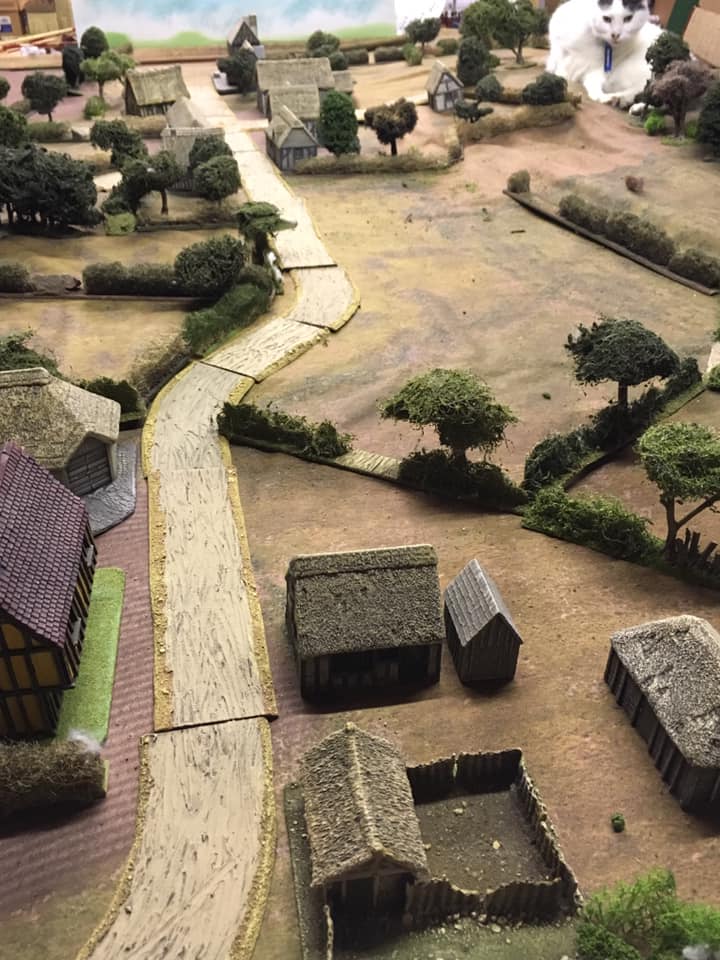
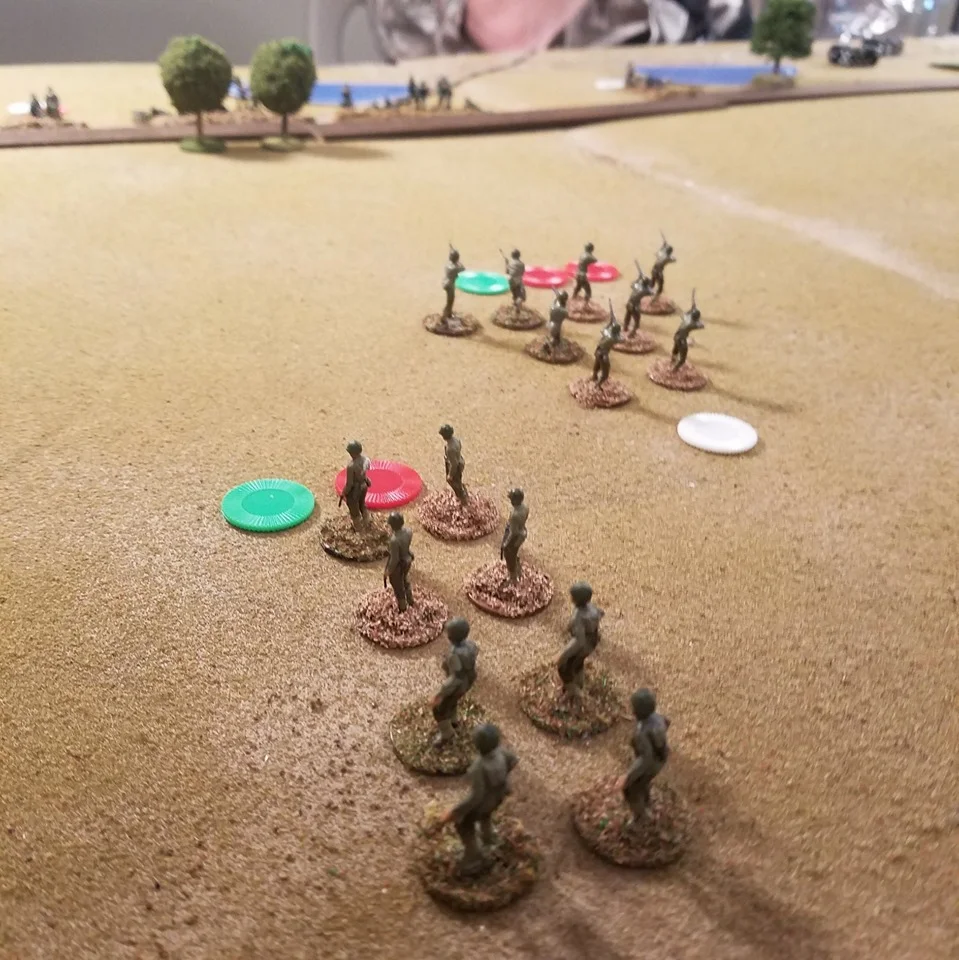
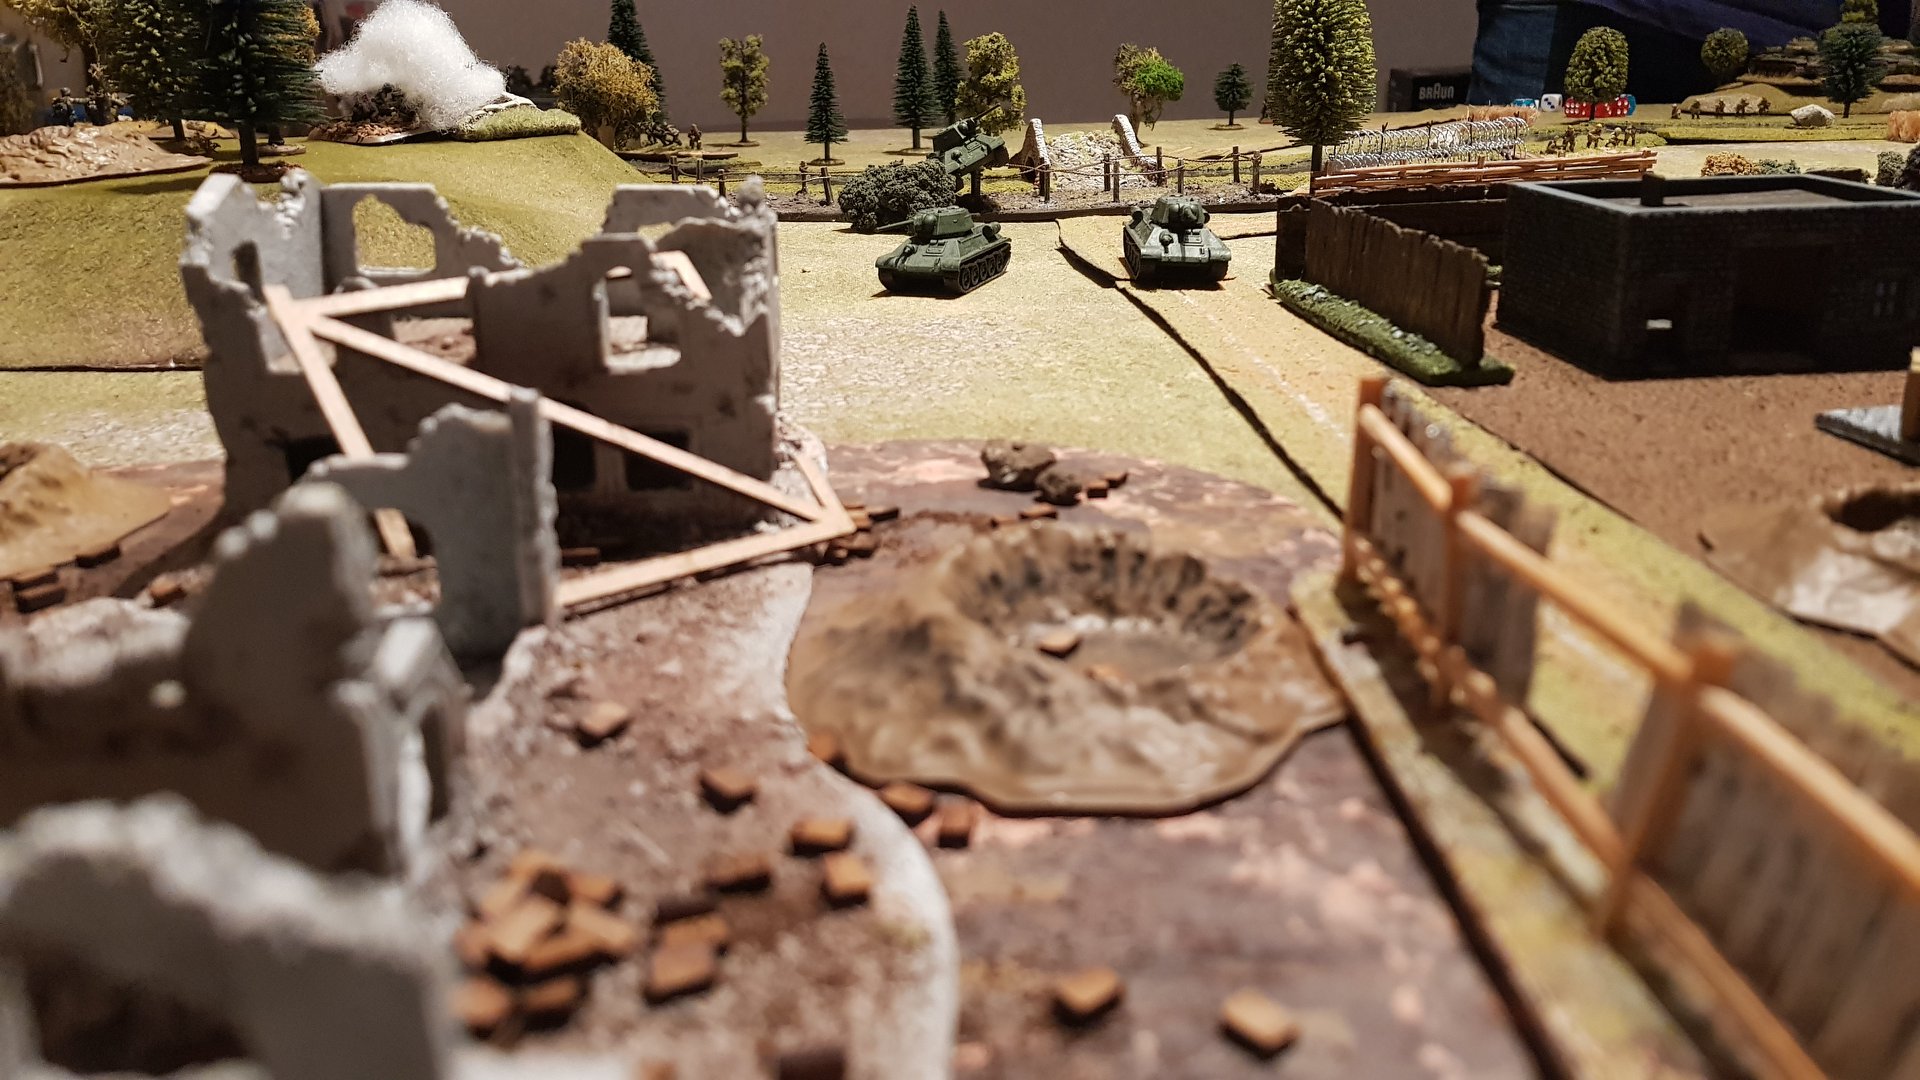
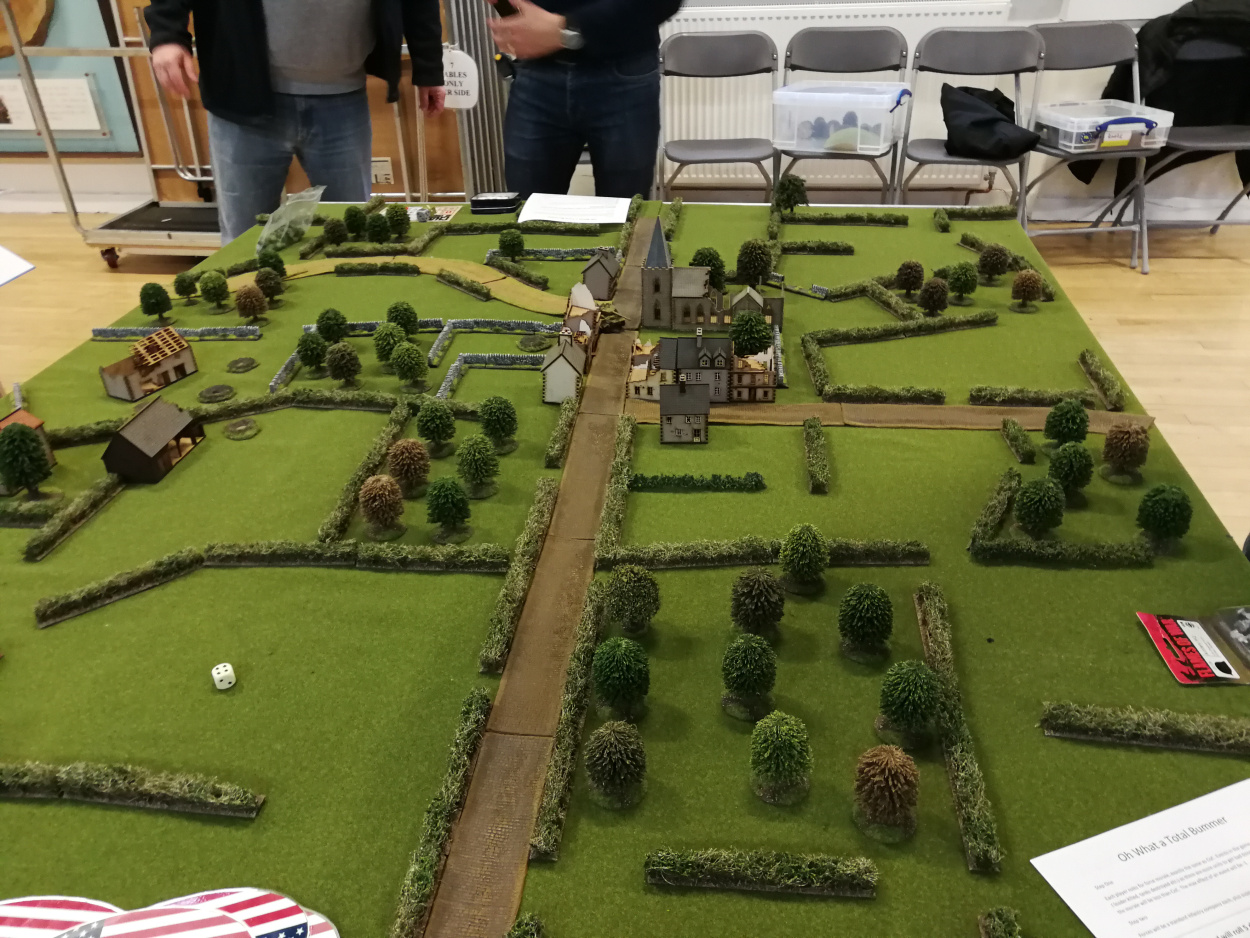
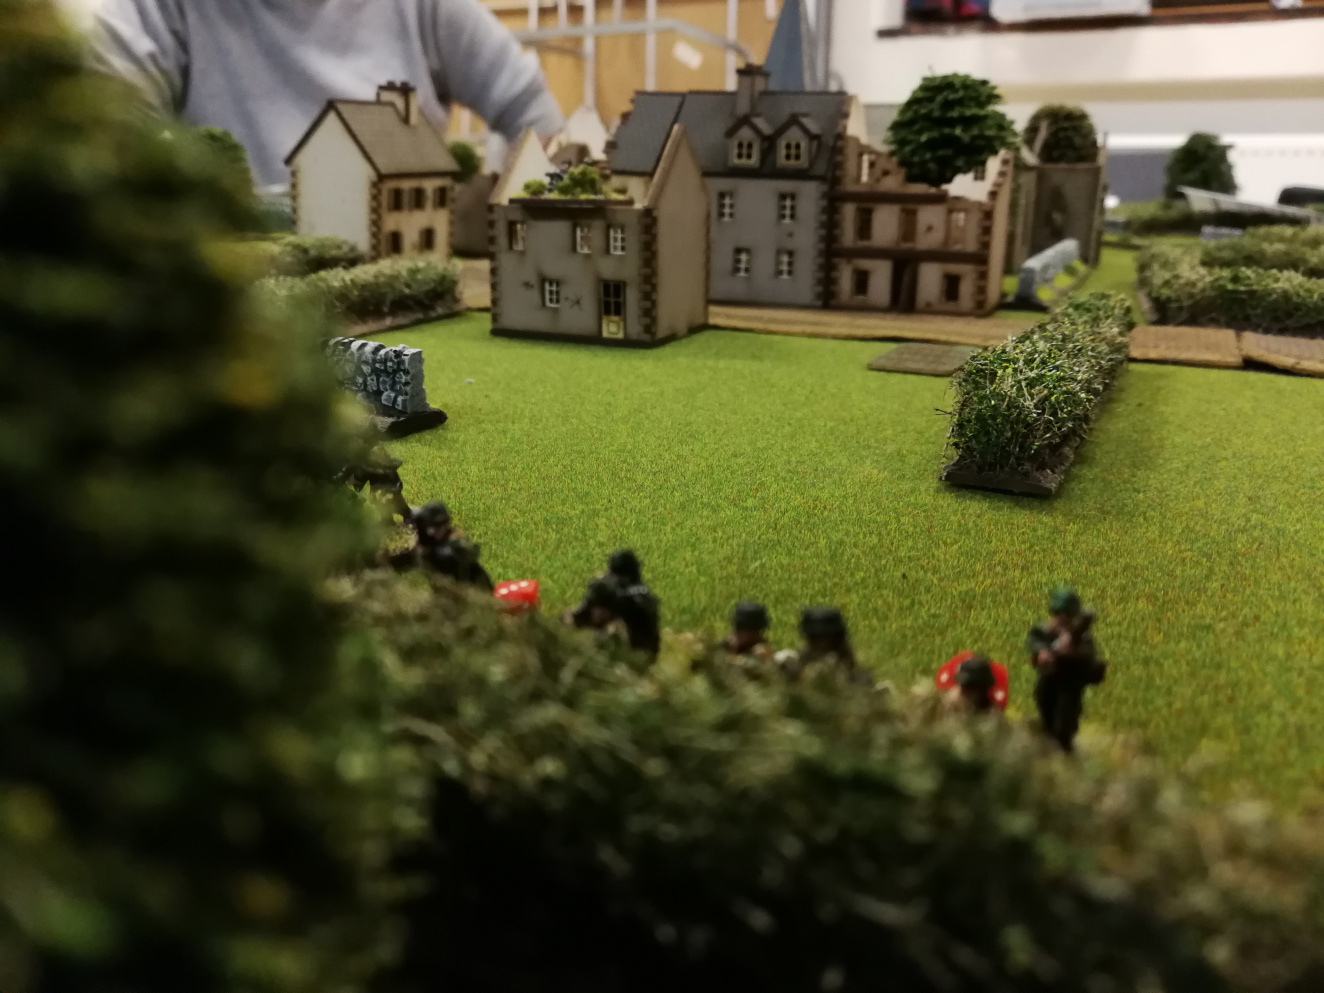
The platoon to east (Summers’ platoon) moved very slowly (bad dice roles) down the hedgerows each side of the road until it reached the crossroads, directing one squad into a ruined farmhouse:

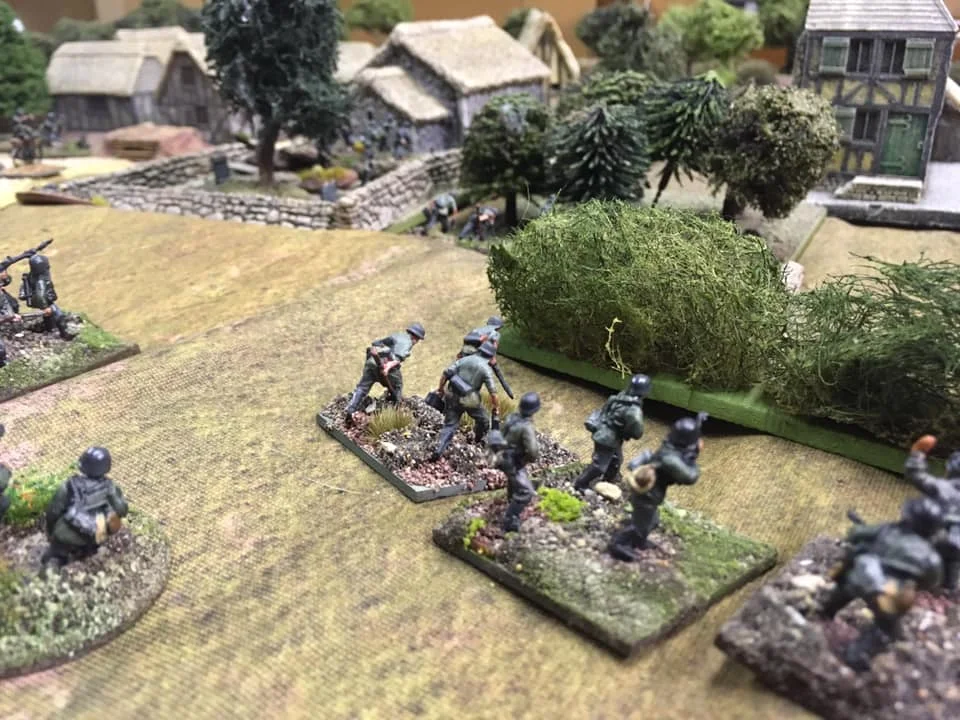
The Germans sent out Blinds to the three buildings being investigated by the American scouts: two into the four storey building to the north of town and others to the building around the northern most crossroads. Others were deployed to the other four storey building, and two headed for the ruin that Summers was heading for.

The Blinds that were left were deployed either side of road from the German deployment zone placed on the southern entrance to the table.

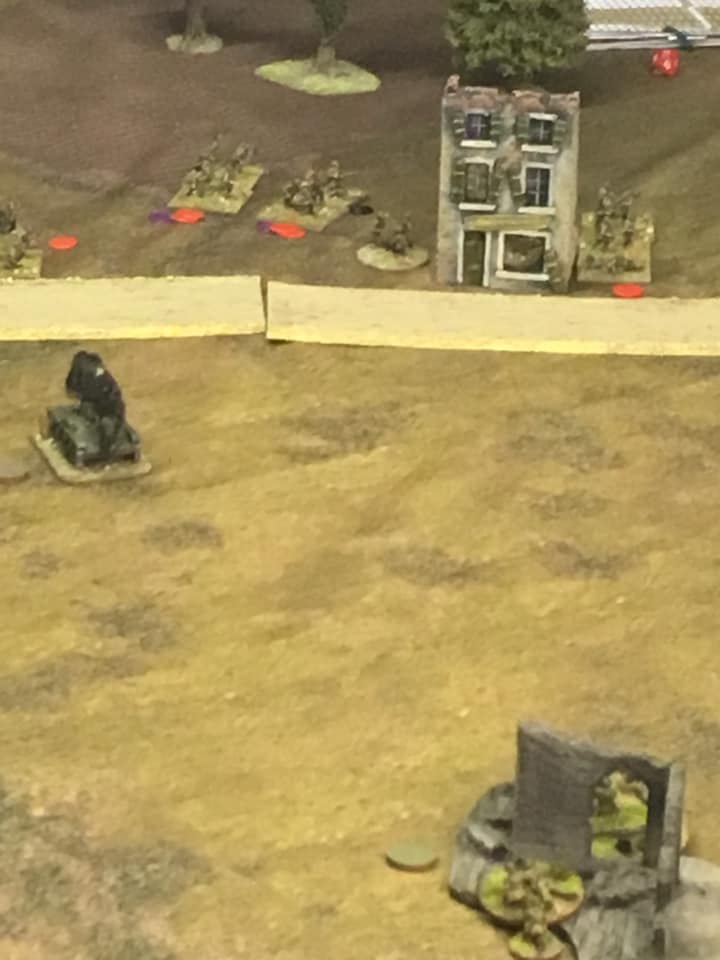
Lots of failed spotting roles were made as evening went on, and only as we were about to call it a night was anything spotted: unfortunately for Lt Shultz he was spotted directing troops.

3rd Grenadier squad was also spotted, lurking near the base of a building, by eagle-eyed American gunners.

The Second Night’s Play

At the end of the first night’s play, Lt Shultz had been spotted standing in the middle of the road directing his troops around the village. Most had made it into good positions (we think) apart from 4th Squad that had been moving towards the four storey building nearest to him.

Lt Summers had sent his 3rd Squad into the bombed out farmhouse, but they they had spent the whole move getting to the first floor (second floor to U.S readers). We had originally just decided to take that squad off Blinds but in the break realised the whole platoon on the Blind had to be revealed. Likewise we realised that all of Lt Shultz’s platoon needed to be taken off Blinds, so we rolled for where they were: finding 2nd Squad at the far end of the Southern road by the bombed out Mansion. 3rd Squad had been one of cards pulled out in initially set up , so would have to randomly arrive as reinforcements on start of subsequent moves.

This decision turned out to be a wise one as the now revealed 1st Squad lurking behind the hedges directed them to Lt Shultz, and with a very easy spotting role (it’s still night) they opened fire on what was an easy target.

Lt Shultz must have had good hearing, and heard weapons being cocked, as he dived to the ground as his two aides were turned into pink mist by the volley of shots by 4th Squad.

It didn’t help him much, as two troopers from 1st Squad promptly crept round the edge of the hedge and let him have it. Despite trying to use the bodies round him for cover he developed two new body cavities and decided to retire from the game.

All the German Blinds tried to spot where the firing came from, and the German squad finding themselves standing in the road when a whole pile of gunfire started dived into the ground floor of the nearest building (although for game purposes they were stuck on the roof).

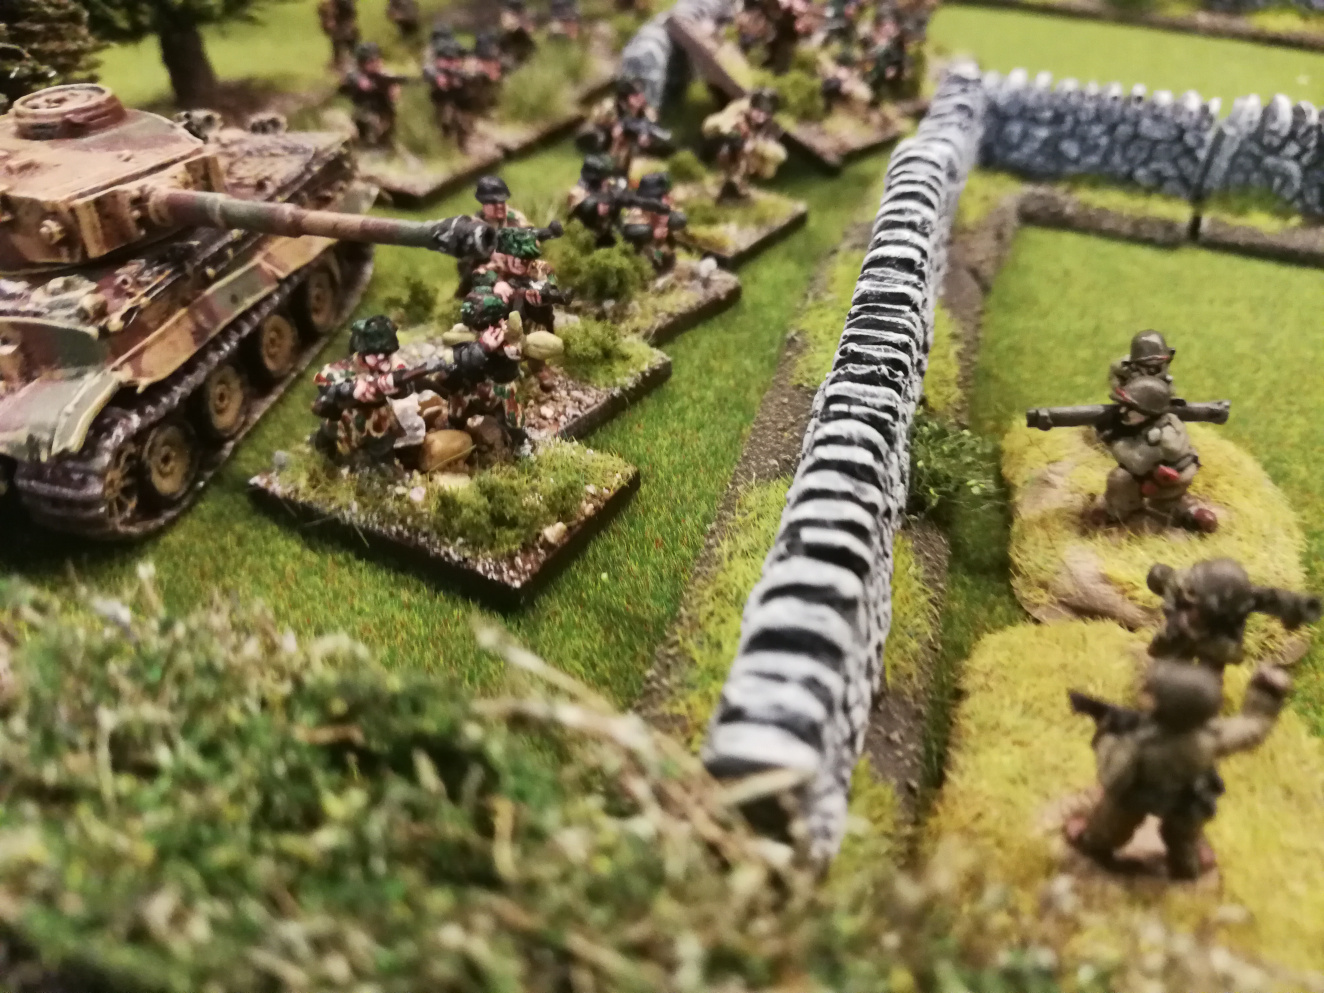
1st German squad on roof, figures at base are 2x Panzershrek teams taken off Blinds later

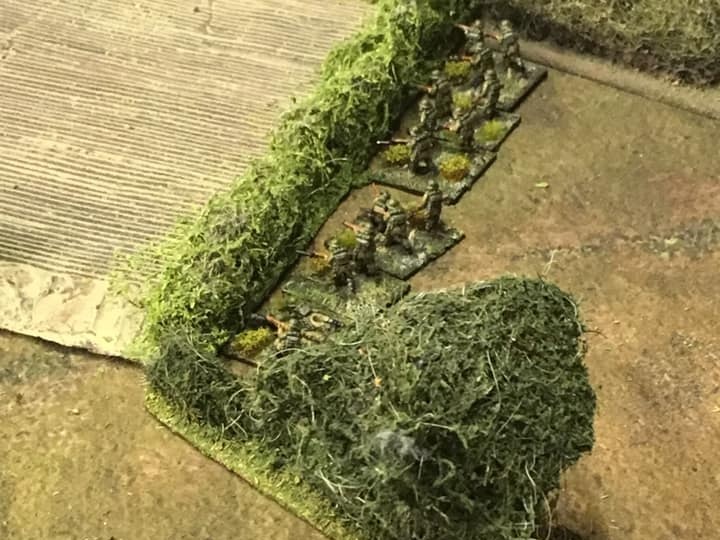
The German 2nd Squad at far end of table hearing the same shooting , dropped into the hedge line and started to make their way down to the crossroads.

2nd German Squad carefully moving back to village.

Then for what seemed to be a theme for the night, the second Tea Break card came out ending the move before the American Blind card came out, leaving the un-spotted anti-tank gunners and the 1st U.S Para platoon un-moved.

At the start of the second turn, it was decided to pull all the German units on table off Blinds, to ease play.

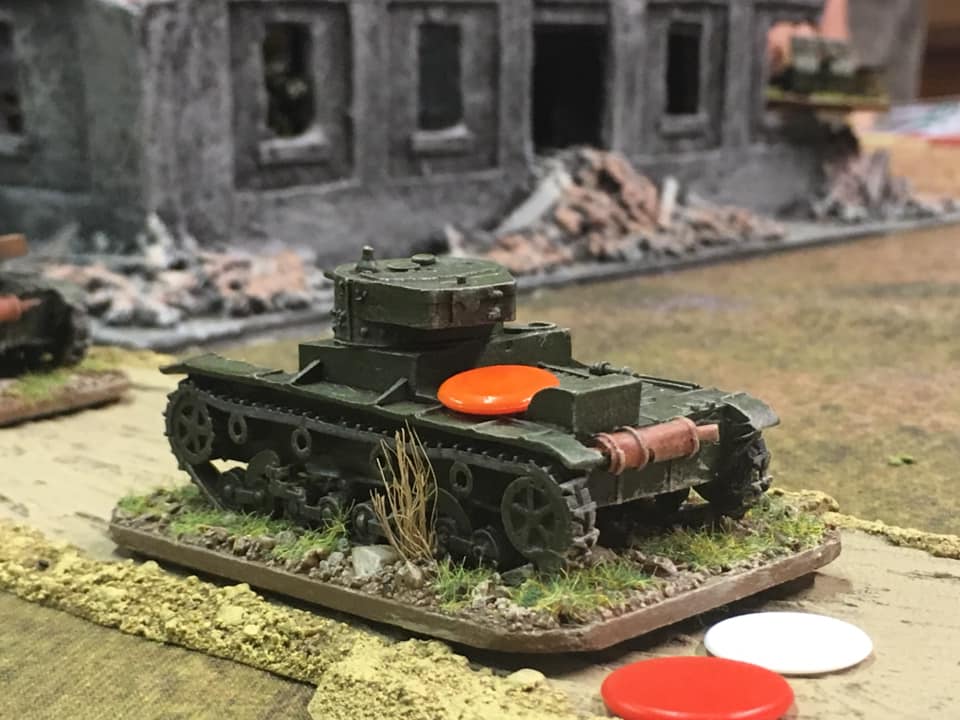
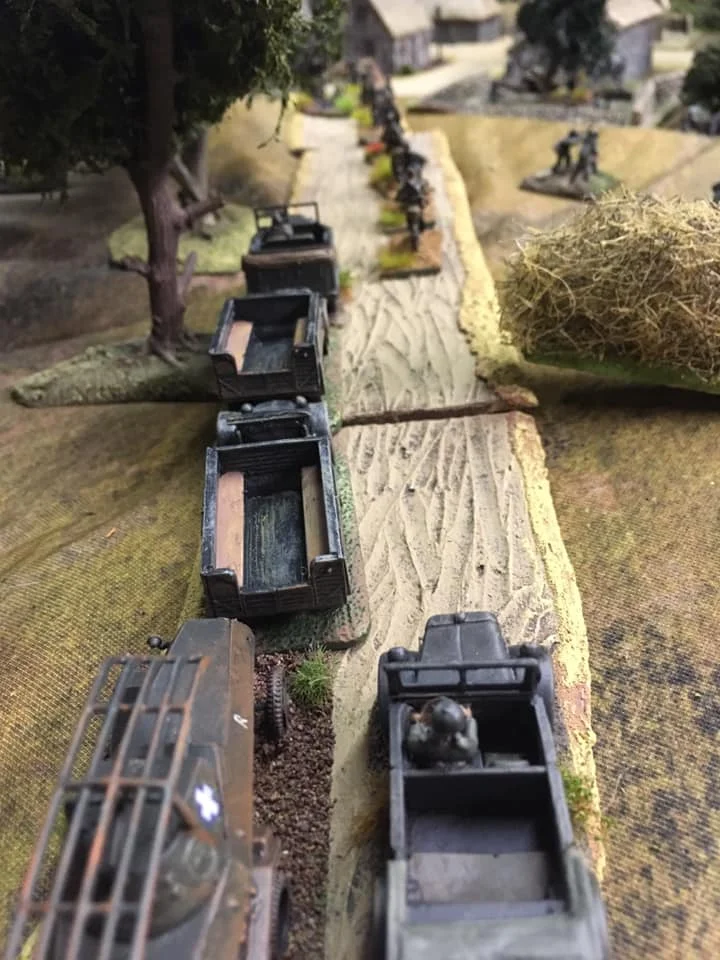
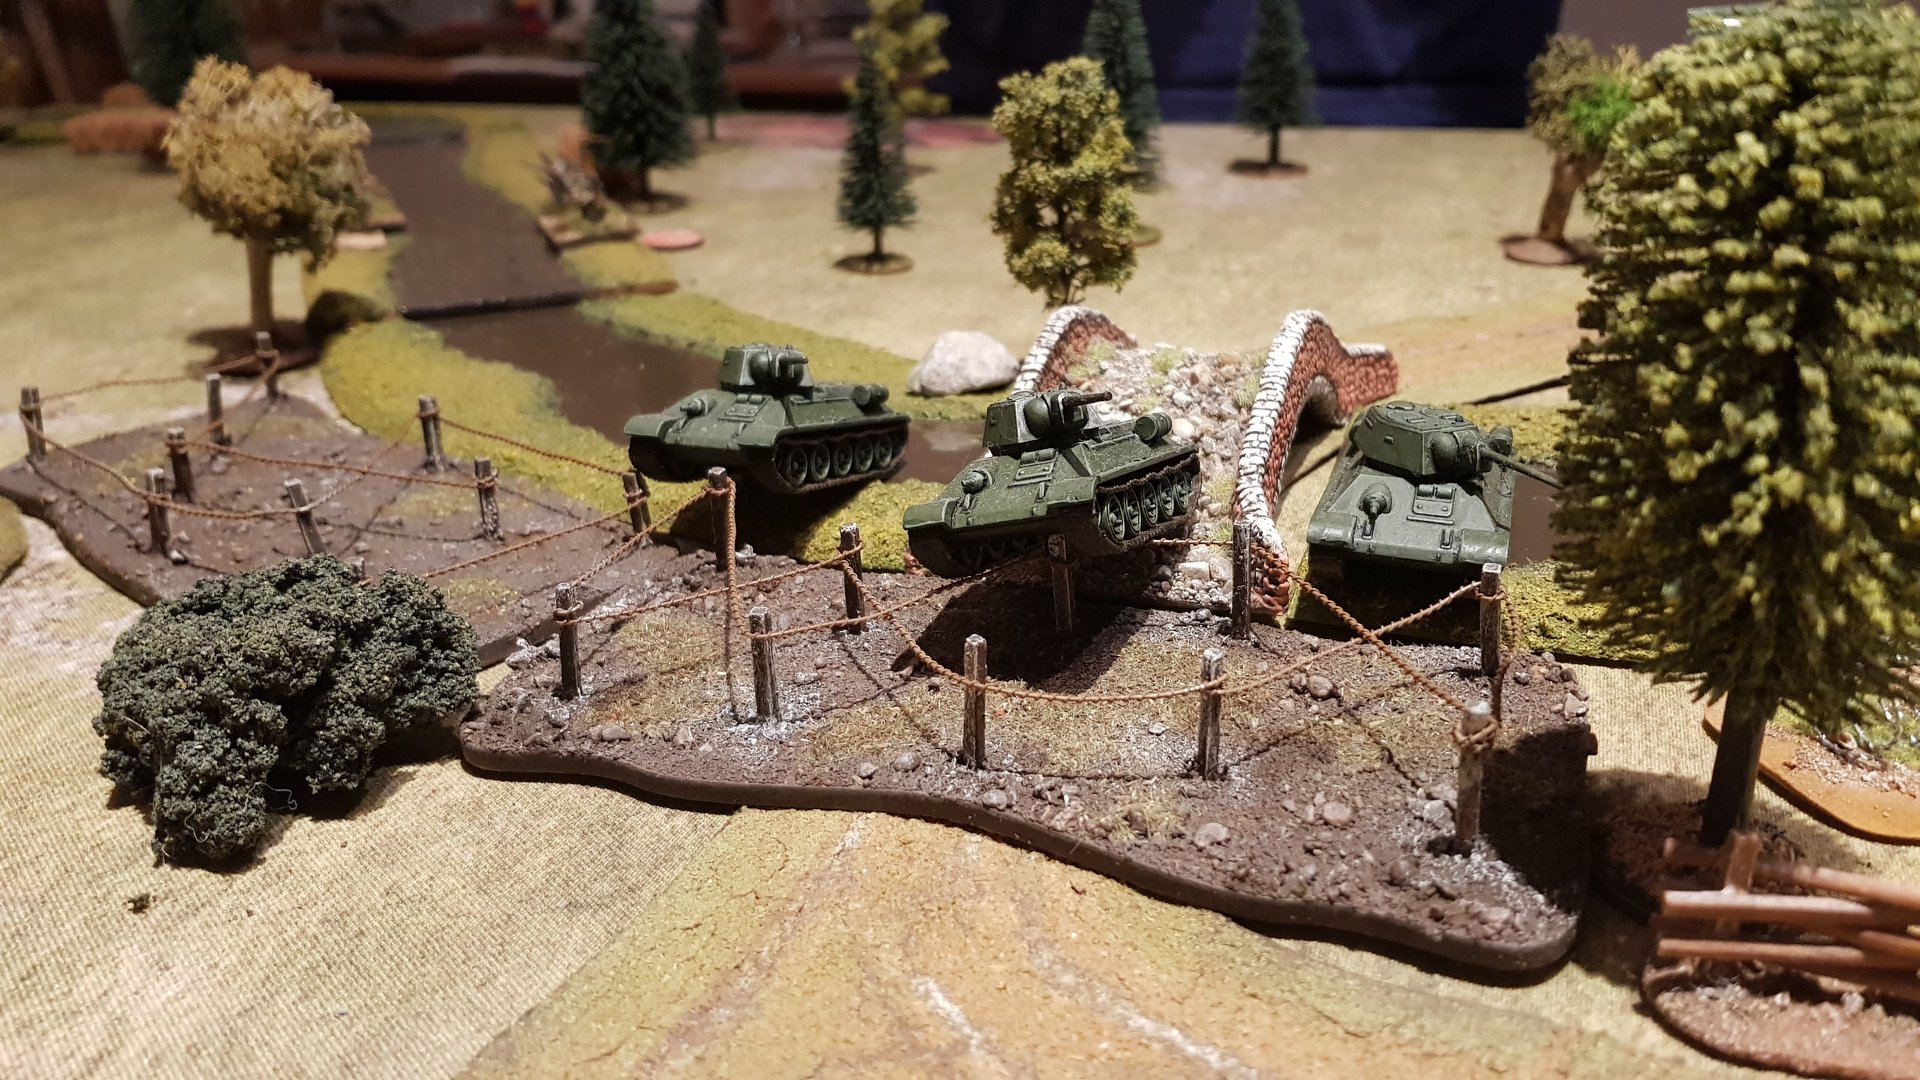
Having already deployed one German infantry zug, we needed to draw three cards for their reinforcements, and managed to pull out 3rd Squad; the armoured car unit of the Panzer Lehr; and a unit of old French tanks that were being used by the local German forces: a Somua and three Hotchkiss H35’s or Renault R35’s (I’ve forgotten which).

Then, working from the most likely Blinds already on the table to the most unlikely, we drew cards to reveal if it was a blank or real unit. This revealed that the two Panzershrek teams were in the lower floor of the building shown above; one of the Pak 40’s was in the lowest floor of the other four storey building ; and finally that one MG-42 MMG team was in the rough ground right in front on Para 4th Squad covering the road to the east.

The other MG-42 MMG team was in the one of the outlying hovels at the north west side of the table.

And finally the last PaK 40 was stuck by the ruined mansion at the the most southerly end of the table. Strangely enough its deployment and that of the German 2nd Squad fitted the original narrative in that was close to the road where it’s towing vehicle had broken down and the squad had been deployed nearby to protect it.

Despite all above being put on table, the next series of spotting roles led to a lot of confused troops as after the first flurry of gun fire any unit and the subsequent scrambles for safety, everyone had lost sight of each other.

The 6th Para Squad had moved to cross hedge and enter the ruined farmhouse, but had got stuck in the hedgerow and only just managed to get into the gap between the hedge and the farmhouse.

And before the US Blinds card came out we had the second Tea Break card…so despite their no show for last two moves the Para anti-tank guns and the 1st platoon of Paras were left on Blinds. The fog of war!

At this point we decided to role to see if dawn was breaking, but night was firmly entrenched.

We also rolled for reinforcements and the 3rd German Squad appeared on the northern edge of the table: gingerly making their way back after having stopped off at a local tavern

Summers’ platoon then sorted itself out with 6th Squad finally managing to move into the ground (US: first) floor of the ruins.

It was obviously a dark night because nobody could spot the MG-42 team in the broken ground, and they must have still been looking down the road as they spotted nothing either!

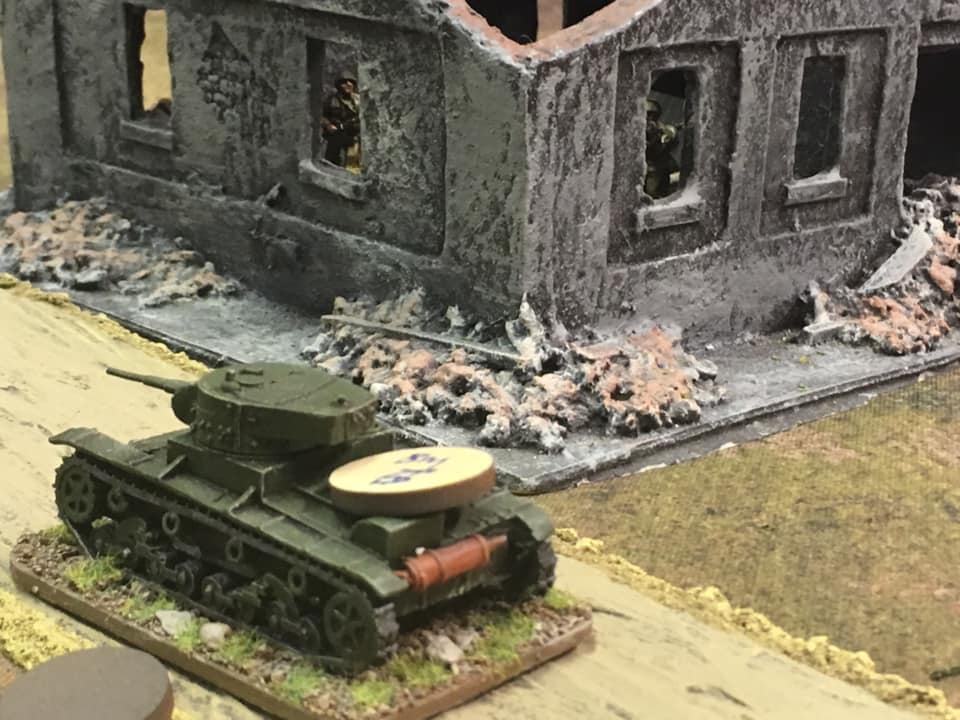
The German Panzershrek teams moved to either end of the building they were in, and the totally forgotten Sgt Mueller who was their commander ( and now to his horror platoon commander) was located where he was hiding with the first PaK 40 in the four storey building (he can be seen at top of building in photo above).

And, of course, the US Blinds card didn’t come out before the second Tea Break card came out again! We therefore left the unrevealed American units on their Blinds: they do get an extra activation dice on Blinds…if you ever get to use it!

We then rolled for the night again, but dawn had still not broken.

And Germans got more reinforcements: three Panzer Lehr armoured cars (Sdkfz 222’s) who randomly appeared on the western road leading into Le Mer right behind the Blind concealing the second half of the US anti tank guns. This could get interesting and a lot would depend on whose card would appear first.

Meanwhile, the German 2nd Squad was still slowly moving down the hedgerow and this continued.

Then the US 5th and 6th Squads failed to spot the German MMG and vice versa.

Then the US Blinds card was drawn: hurrah!

This quickly prompted a’ discussion’: Pete wanted to make the guns fire twice at the armoured cars, but I thought about this: the guns had still been effectively moving forward, and had not been unlimbered for action, so we used one activation dice for them to spot, one to unlimber and only allowed one for the shot. According to the rules, the first shot should be aimed, but we argued against that…despite which it hit the lead vehicle and disabled the armoured car: knocking out the engine and stunning the crew (two Shock) for two activations.

Meanwhile 1st Platoon dived into the hedgerow and moved up towards the crossroads on hearing the commotion behind them; and Sergeant Mueller dived over to the other side of the building and saw nothing.

The forgotten MMG team in the hamlet saw nothing .

The Panzershrek teams heard a bang but saw nothing!

The second armoured car (which had survived the anti-tank gun’s opening volley due to the ruling above) hadn’t spotted the gun which had taken out their colleagues, so decided to carefully move up behind their suddenly stopped lead vehicle, with the commander propping himself on top of the hull to peer over the hedgerow to see if he could spot anything. He didnt!

At this point it was 10 o’clock and Zeberdee called time for bed.

Game Session Three

We drew or daylight and finally the faint glimmer of early morning light began to dawn which we decided would drop spotting roles but only -2 as opposed to -3 and drop the multiplier for spotting.

We left it with the one of the anti tank guns having just disabled the lead SdKfz 222 on the road which came into Le Mer from the west; with the commander of the second armoured car standing on top of his car peering over the top to see what the hell had shot his comrade. As it happened, he was about to find out: one of the first unit cards drawn was for one of the anti tanks guns. Pete wanted to immediately fire at the disabled armoured car, but it had a stunned crew for at least another move and had he fired, the gun would have been a sitting duck for the other two armoured cars who could then safely scream round the corner and let them have it. So Pete reserved the gun’s activation, effectively putting it on over watch.

Meanwhile, leaving the warehouse building by the northern road they had come on, Squad 3 moved forward along the hedge and the 1st U.S Para platoon moved along the hedge on the western road, then crossed the hedge and took up positions around the western corner of the cross roads.

All the other units continued to try and spot what was going on, but the only success was Sgt Hawkeye in 2nd Platoon (the platoon’s other Big Man) who thought he saw movement in the rough ground in front of their bombed out farmhouse and spotted the MG-42 position. 1st Platoon’s card had already come out, but 3rd Squad had held back its action and opened fire on the hapless machine gun, and despite very lousy chances took out both its loader and commander.

The second Tea Break card came out, and the rules allow un-activated units to fire if they have a target at Close Range, so the reserved AT gun did, putting three shots into the hapless lead armoured car…but only blowing it up on the third shot: the first two just put more holes in the engine.

The end result was a spectacular explosion which pretty much buggered everyone in the immediate area’s night vision

On the next move the only thing that happened was the lone gunner left on the MG-42 returned fire taking out one of the paras (we were having a good set of die roles: he was on a reduced chance as a lone gunner) and the second AT gun on the western road deployed with the other gun to watch the armoured cars. It also got a bit brighter.

With the new move the first card out was for the second US platoon, who’s third squad promptly let the lone MG-42 gunner have it. This drew the first German squad’s attention, who moved from one side of the building they were in to the other to see what the hell had been shooting.

As it happened, one of the Panzershrek gunners in the floor below was able to tell them where it came from.

Likewise the second squad, on hearing gun fire to their front, moved off road to the shadowy building on hill to their right.

Everyone then had tea again.

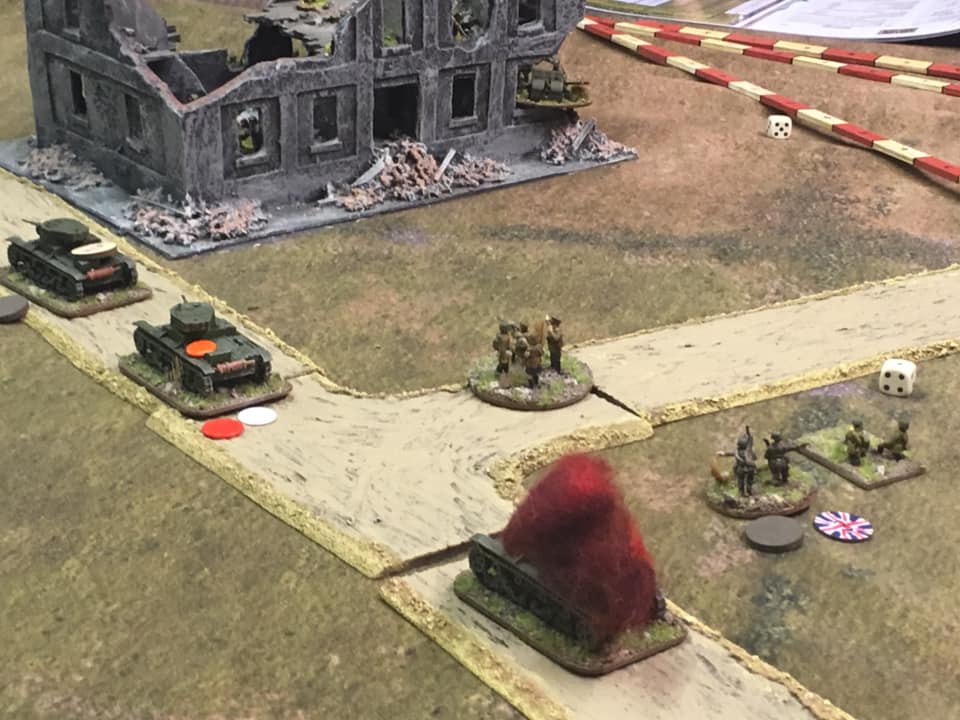
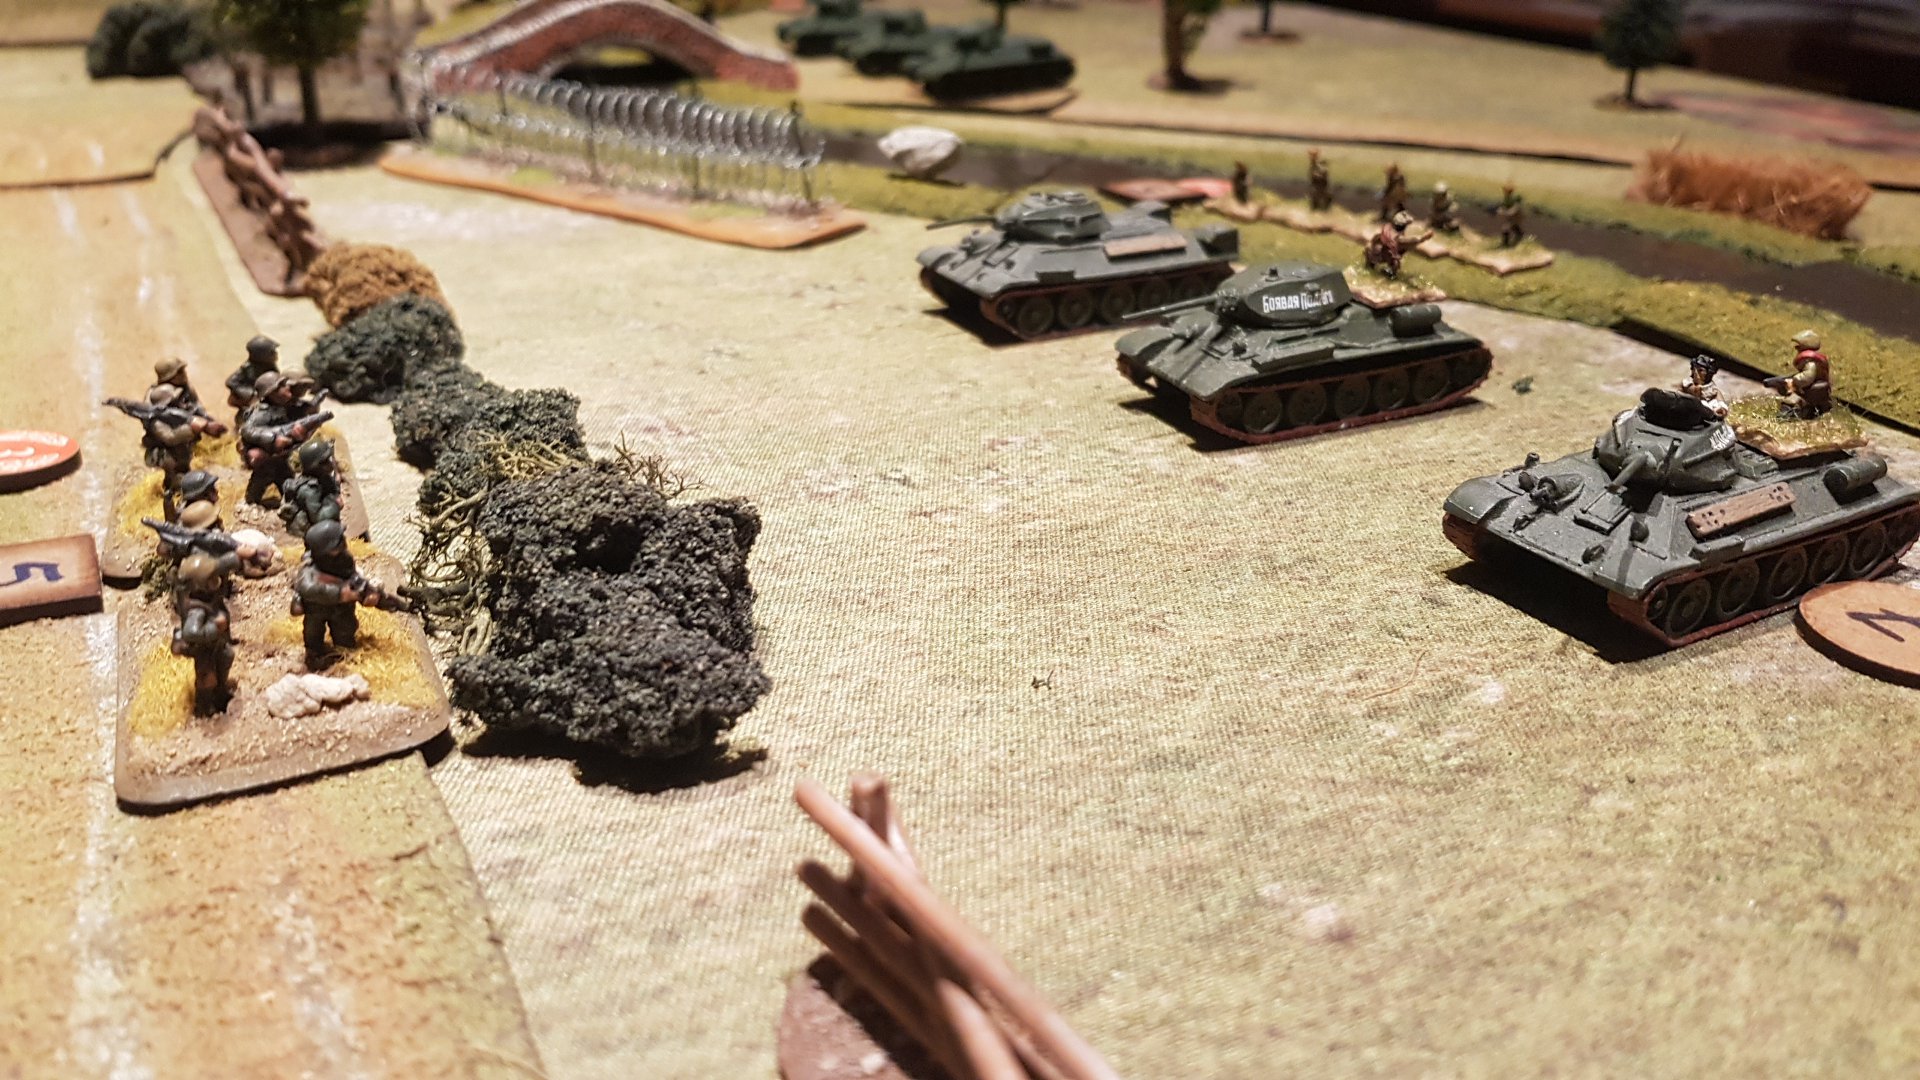
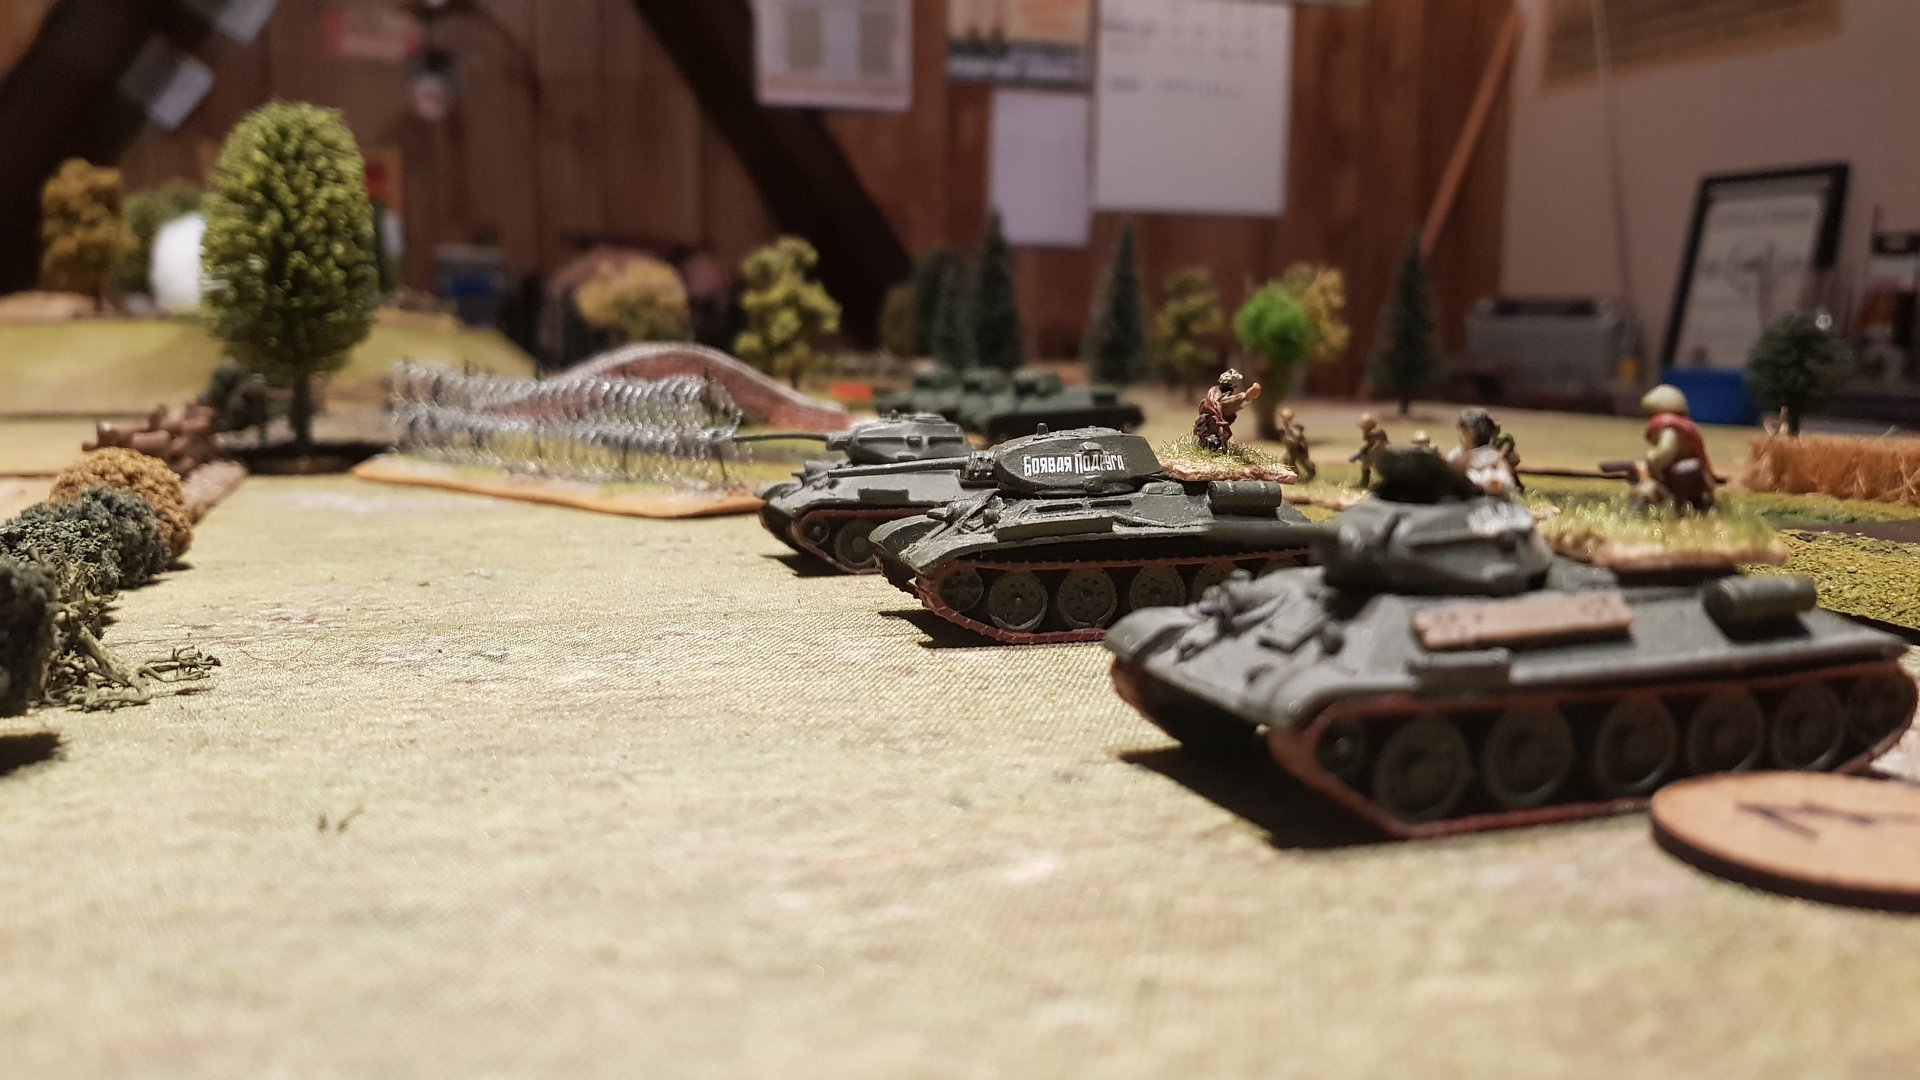
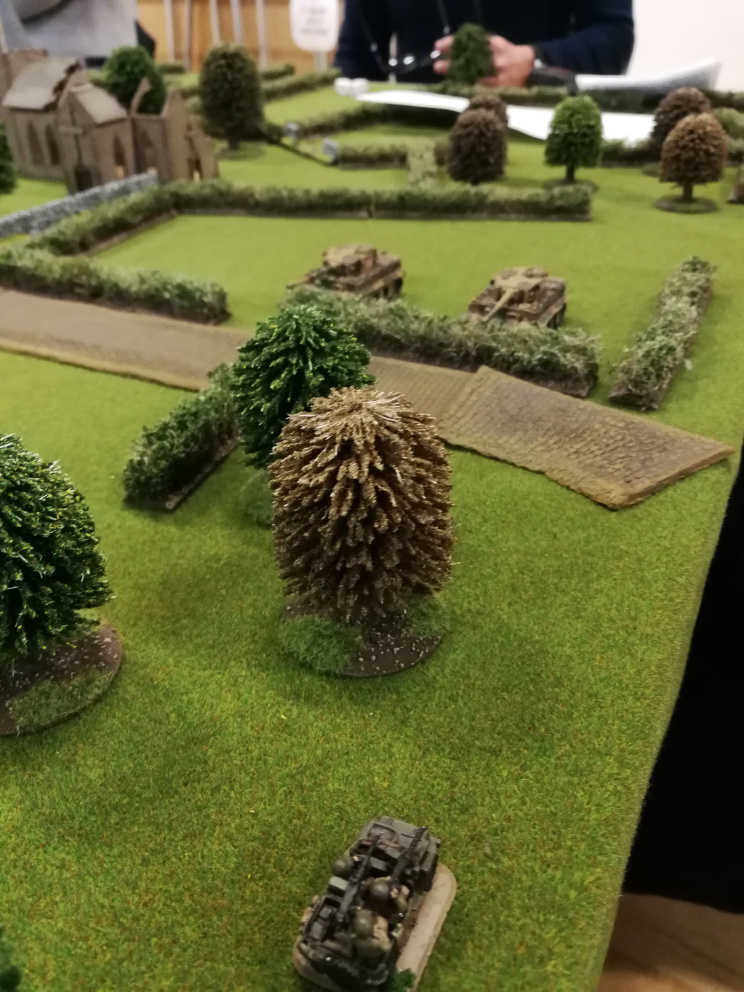
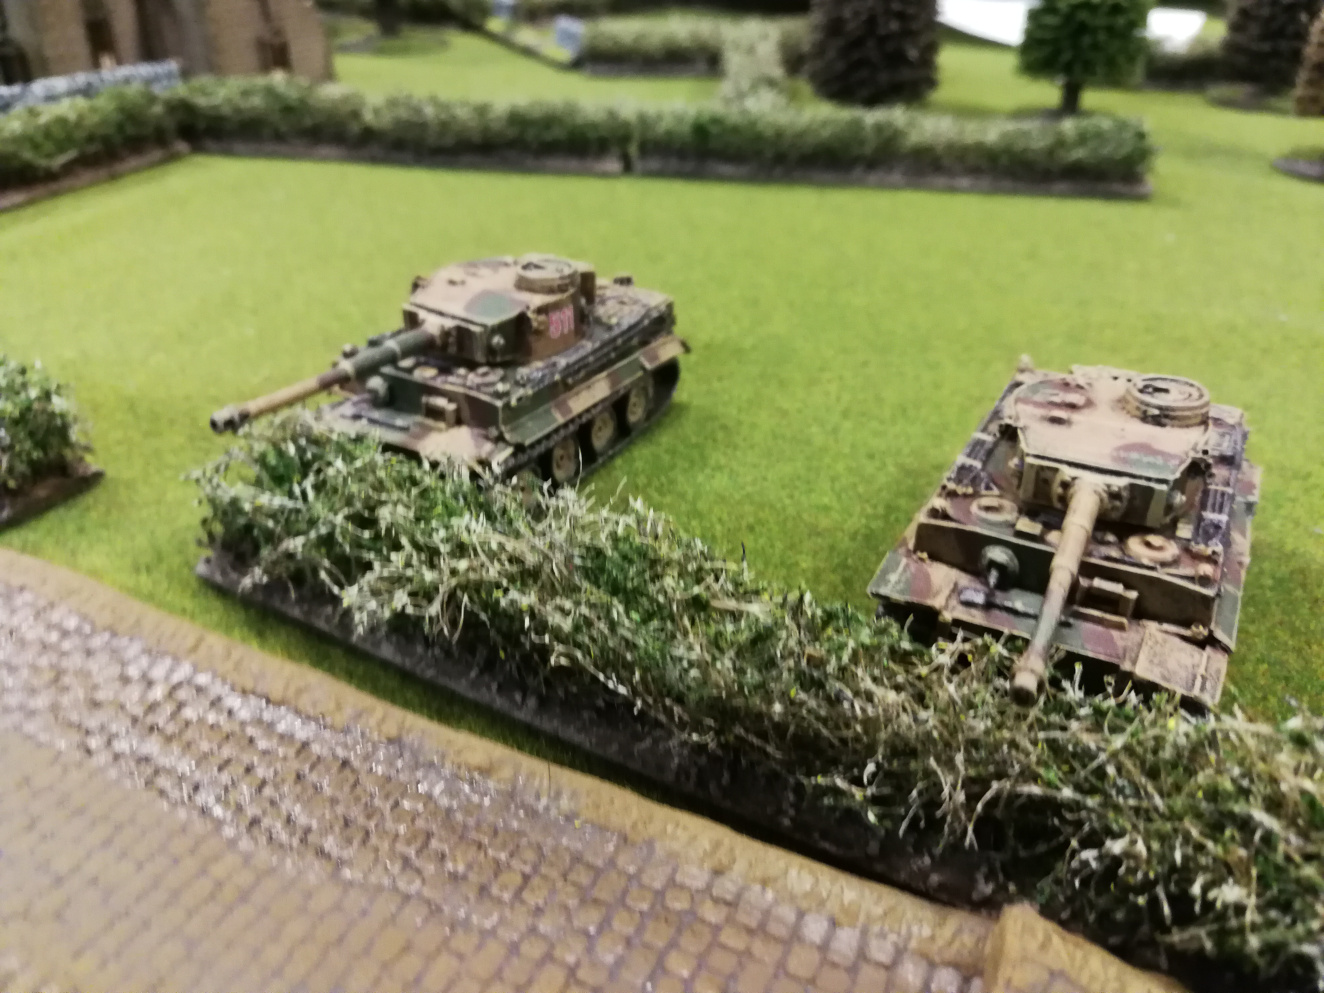
As dawn was about to come down with a crash, Summers’ platoon could hear the sound of tanks and could see coming down the east road what looked like a column of tanks ( I had got another German reinforcement role: I needed a 6 , and four commandeered French tanks in German service arrived…a Somua and three Renault R-35’s).

To say both units sides were surprised was an understatement. Summers’ 2nd Platoon’s 1st Squad dived into the hedgerow, the bazooka team took up position on the crossroads, and the mortar crew stood amazed and told Summers ‘Tanks’ ! This was perhaps not their wisest decision. The tanks came to a screaming halt with their commander spotting the hapless mortar crew and diving into the turret and shutting the lid. There had been a discussion about unbuttoned or buttoned ( you could see the glint in Pete’s eyes about shooting the commanders or even his famous “mortar through hatch”, but I had been reading about British tanks moving at night, and if the Germans took the same practice only the lead tank would be unbuttoned, the rest would would just follow the light in front, a practice even more likely with all the gunfire). Then we got two more Tea Break cards again, and moved on to the next turn.

As it happened, the next move was pretty much the German response move. The tanks’ card came out first: the lead tank opened fire and killed one of the mortar gunners and Pinned the rest. Two of the others took up position either side of the road and machine gunned the the hapless mortar crew, putting more suppression on them. The mortar crew, in desperation, fired a smoke round to obscure their position. The fourth tank moved cautiously through the gap in the hedge row to get a flanking position on the farmhouse.

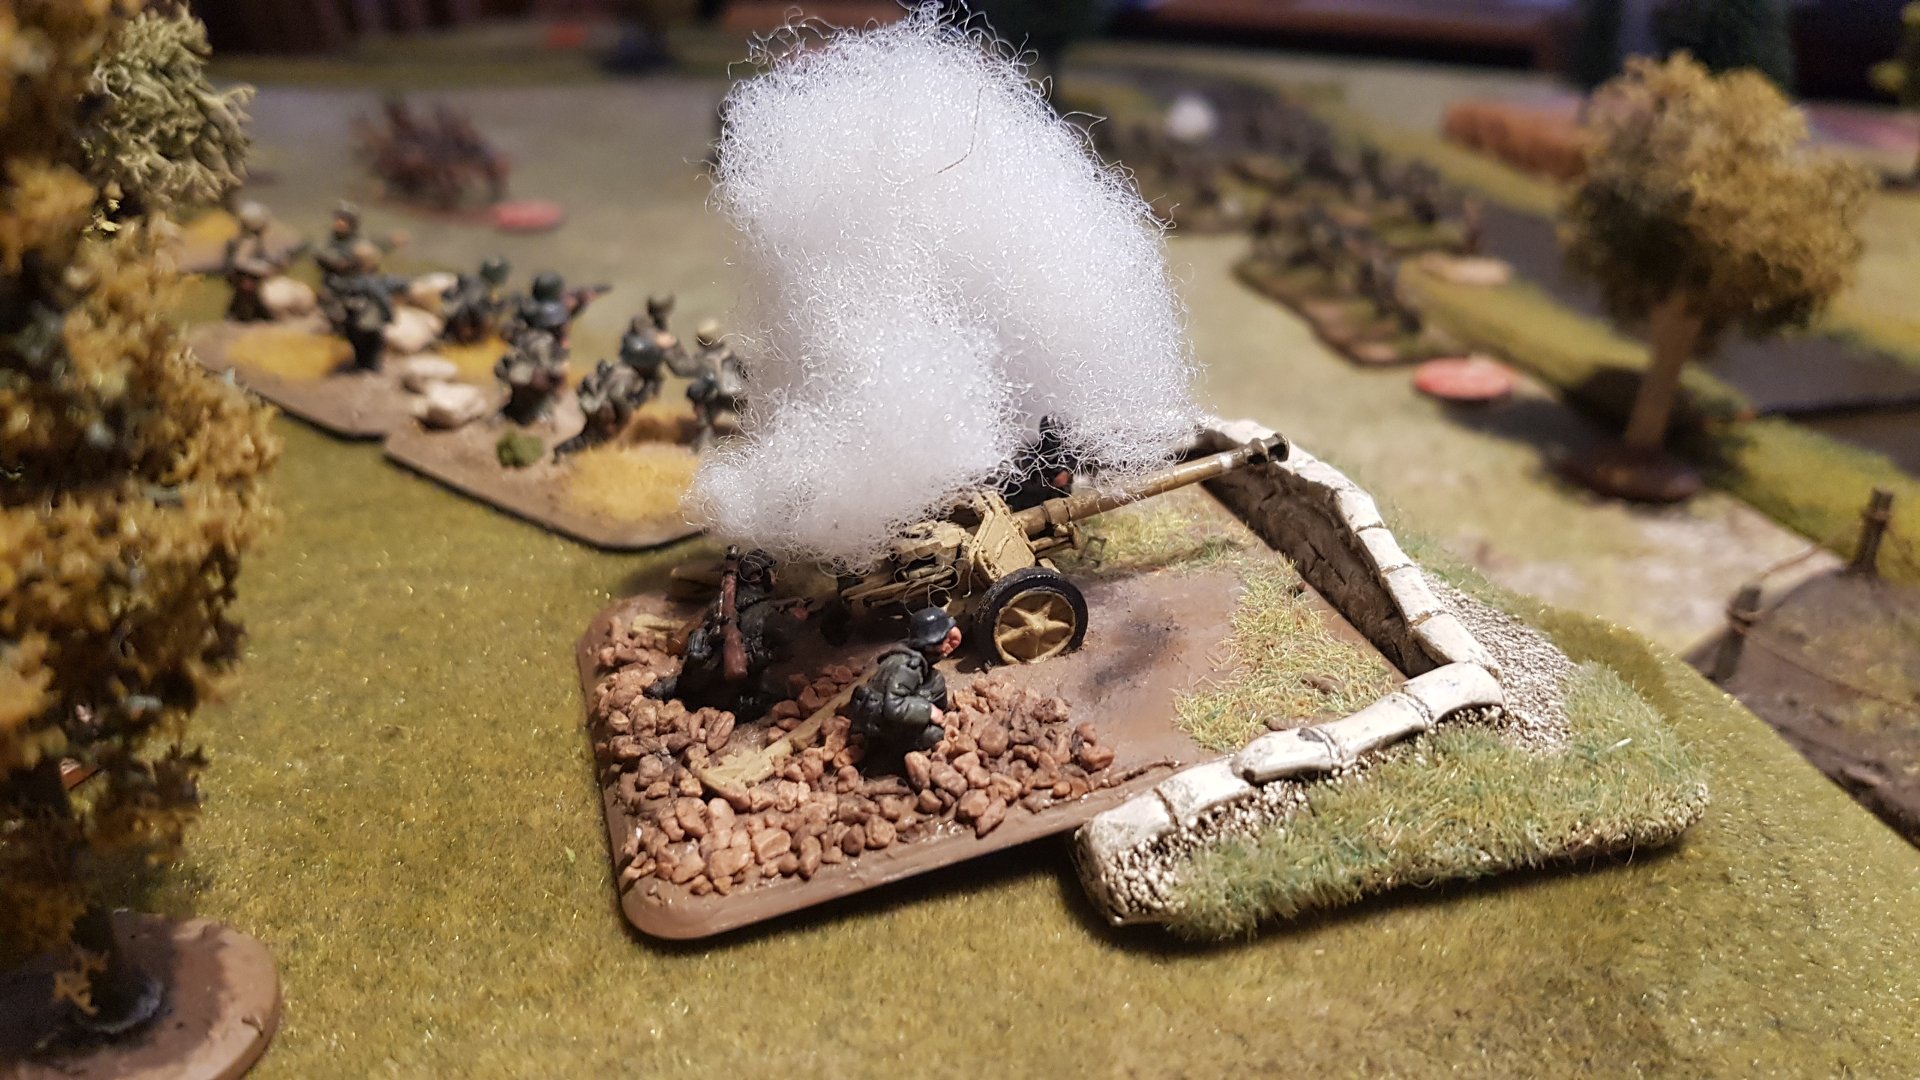
The third German squad had by now spotted the US anti-tank guns covering the southern road and opened fire on them, killing one of the crew, who returned fire and managed to annoy one of the local pigeon population.

The second German Squad opened fire on the farmhouse, putting suppressive fire onto their opposite number in Summers’ second platoon.

First German Squad opened fire on the farmhouse, putting supressive fire down on their opposite numbers in Summers’ 2nd Platoon; and 2nd Squad, having found there were no windows on the northern side of the barn they were in, decided to join the tanks on the eastern road.

Summers decided to send his Bazooka team to move up the inside of the hedge to ambush the tanks, not knowing about the German 2nd Squads’ move to join them.

It was home time for the players. Just to explain the slow progress of game , generally the other player don’t arrive till about 8 ish, and leave at 10 so by the time of a quick natter we probably only get about an hour and half’s play each week, which for most groups would be a problem but with the table being safely undisturbed in the games room is not a problem for ours.

So we leave it with the Americans currently holding the cross roads. Their guns are holding back the armoured cars on the western approach, but likewise cannot move due to their threat. The second pair of guns are in a precarious position under fire from German infantry and unable to move in case they are caught in the open.

Summers has the problem that he is facing four enemy tanks (he doesn’t know they are crap French ones) and currently has only two Bazookas with the addition of the one from 1st Platoon to deal with them as all the guns are effectively pinned in position.

The Body Count Begins To Rise

A slow session move-wise this week, we were slowed down by the fact our usual rules guru (every club has one: OTT has a Justin) Kevin was not feeling well, so there was more than a little delay as rules were checked more than normal.

There was upside for the Paras in this, in that we realised we had only been giving them three Actions and dice, when in fact they get four for Elite squads of eight men, which we only found out when we were looking at the the effect on squads when losing men.

The second thing was that the second Tea Break card on the first turn did not come out till the end, so everything activated.

So what we got last night was a game of two halves even though we only played two turns.

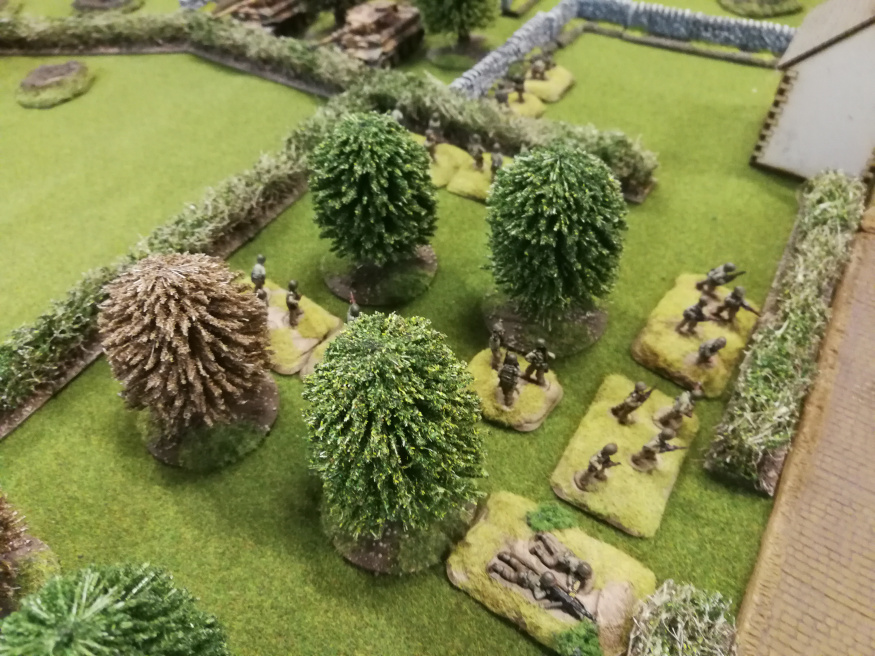
The first card drawn on turn one was the German infantry platoon. 2nd Squad, in the woods, continued its careful move through the wood toward the tanks. 1st Squad opened fire on the Americans at the bottom of the farmhouse, killing one. 3rd Squad had the most luck: reducing the 57mm gun crew to one man.

A couple of American Anti-Tank cards came out. We decided we needed to put the ones covering the armoured cars on overwatch lest we got a game-y charge by them before they could fire: perhaps one of the few faults of the rules is that all overwatches come off at end of a turn, maybe a local rule change for future games to amend so that units stay on overwatch till next activation.

Then the tanks card came out. The one already in position opened fire on the farmhouse, but only managed to Pin the troops in the top floor. In theory we could have given it a bonus for shooting at a packed target, but decided the floor would break it up (for the small gun anyway: we may have allowed the bonus for 25pdrs and 105s).

The 2nd American Para platoon’s card came next, and both squads opened up on the Germans across the road who had shot at them, forcing two casualties on them (this is when we spotted they should have had an extra dice as the ground floor squad had two dead so reducing its dice to three). The 1st Squad, with Summers, moved down the hedgerow to stalk the tanks, and the mortar crew scrambled into the safety of the hedgerow, not knowing that the tanks had moved off the road.

Various other cards came out. First up was German guns: the one at southern end of the table not spotting anything and the one at the north spotting nothing as well. The third American gun, the same; and the German Armoured cars successfully spotted the guns watching the road they were going to enter on.

When the American 1st Platoon came out there was a little bit of a discussion.

One was sit and do nothing, in case they got caught in open, which I thought was a great idea with two units of armour either side of them which could catch them in a pincer. The most it was going to do was delay the inevitable: staying where they were meant that the second hedgerow across the road prevented them from firing at the Germans in the four-storey building; moving to it would leave them into being chopped up by the armoured cars if they broke through at the end of the road.

So the Bazooka team was moved to cover the road , and two squads crossed the hedgerow and dived into the bank on the road side of the second hedgerow.

Then the Big Man for the US Anti Tank guns came up, so he helped man the the remaining gun and shot at German third squad: they now have two annoyed pigeons and a smoking kestrel!

We finally got the second Tea Break card but were not sure we would get a full move in before Zebedee said time for bed again. The pub was discussed, but Keith had forgotten his pennies, so we pressed on.

Again the German infantry and tanks went first, and with reduced numbers and lousy dice only managed to Suppress the squad on top of the farmhouse: the first we’d had, it had been remarked unusually for this game, casualties had been caused but no Suppressed results.

The first American platoon (above ) went next. Obsessed with shooting, Pete wanted to fire at the chewed-up German squad, but that could have left them open to being shot at by the armoured cars if the cards went wrong so, after some discussion it was decided to run a squad to the broken ground between hedges under the cover of smoke from their mortar. This would put them into a position from which they could assault the German position next activation; prevent the other Germans from firing at them (fire and movement: as old as the hills but seems to have passed everyone by!); and they managed to cause another casualty to the Germans, which becomes important later…

The German gun crew then tried to spot the troops on the road but failed: it took Keith about five minutes to convince Pete they had a line of sight.

The US AT guns and German armoured cars continued to pin each other down: I think the armoured cars were doing a grand job as this meant that the American AT guns could not turn to face the tanks.

Summer then activated 1st Platoon, which got to shoot at the chewed-up German squad for one more casualty, which dropped it to one activation and one dice, and the Bazooka crew tried a shot at a retreating German tank (the Somua had had lousy movement dice) as it was in partial cover as it was moving through the gap in the hedgerow: “I can see the back” was the cry, “But can you see three corners?” This last was pinched from Tanks. The gun missed - just.

The last Tea Break was pulled, and Zebedee shouted bed time again.

Cuharee!

Well with this session things began to heat up. Firstly the armoured cars on the Western Road activated first and decided to charge round the corner and blast the two guns, Unfortunately they were borrowing Gerry’s dice and only managed to Pin them.

The 1st Platoon Big Man activated next: ordering one squad to put down suppressing fire on the four storey building and the other to attempt to launch an assault. The shooting killed one more German , and the remaining three decided to vacate the building but only managed to get to second floor, The assault failed due to lousy dice , the squad getting stuck in the broken ground.

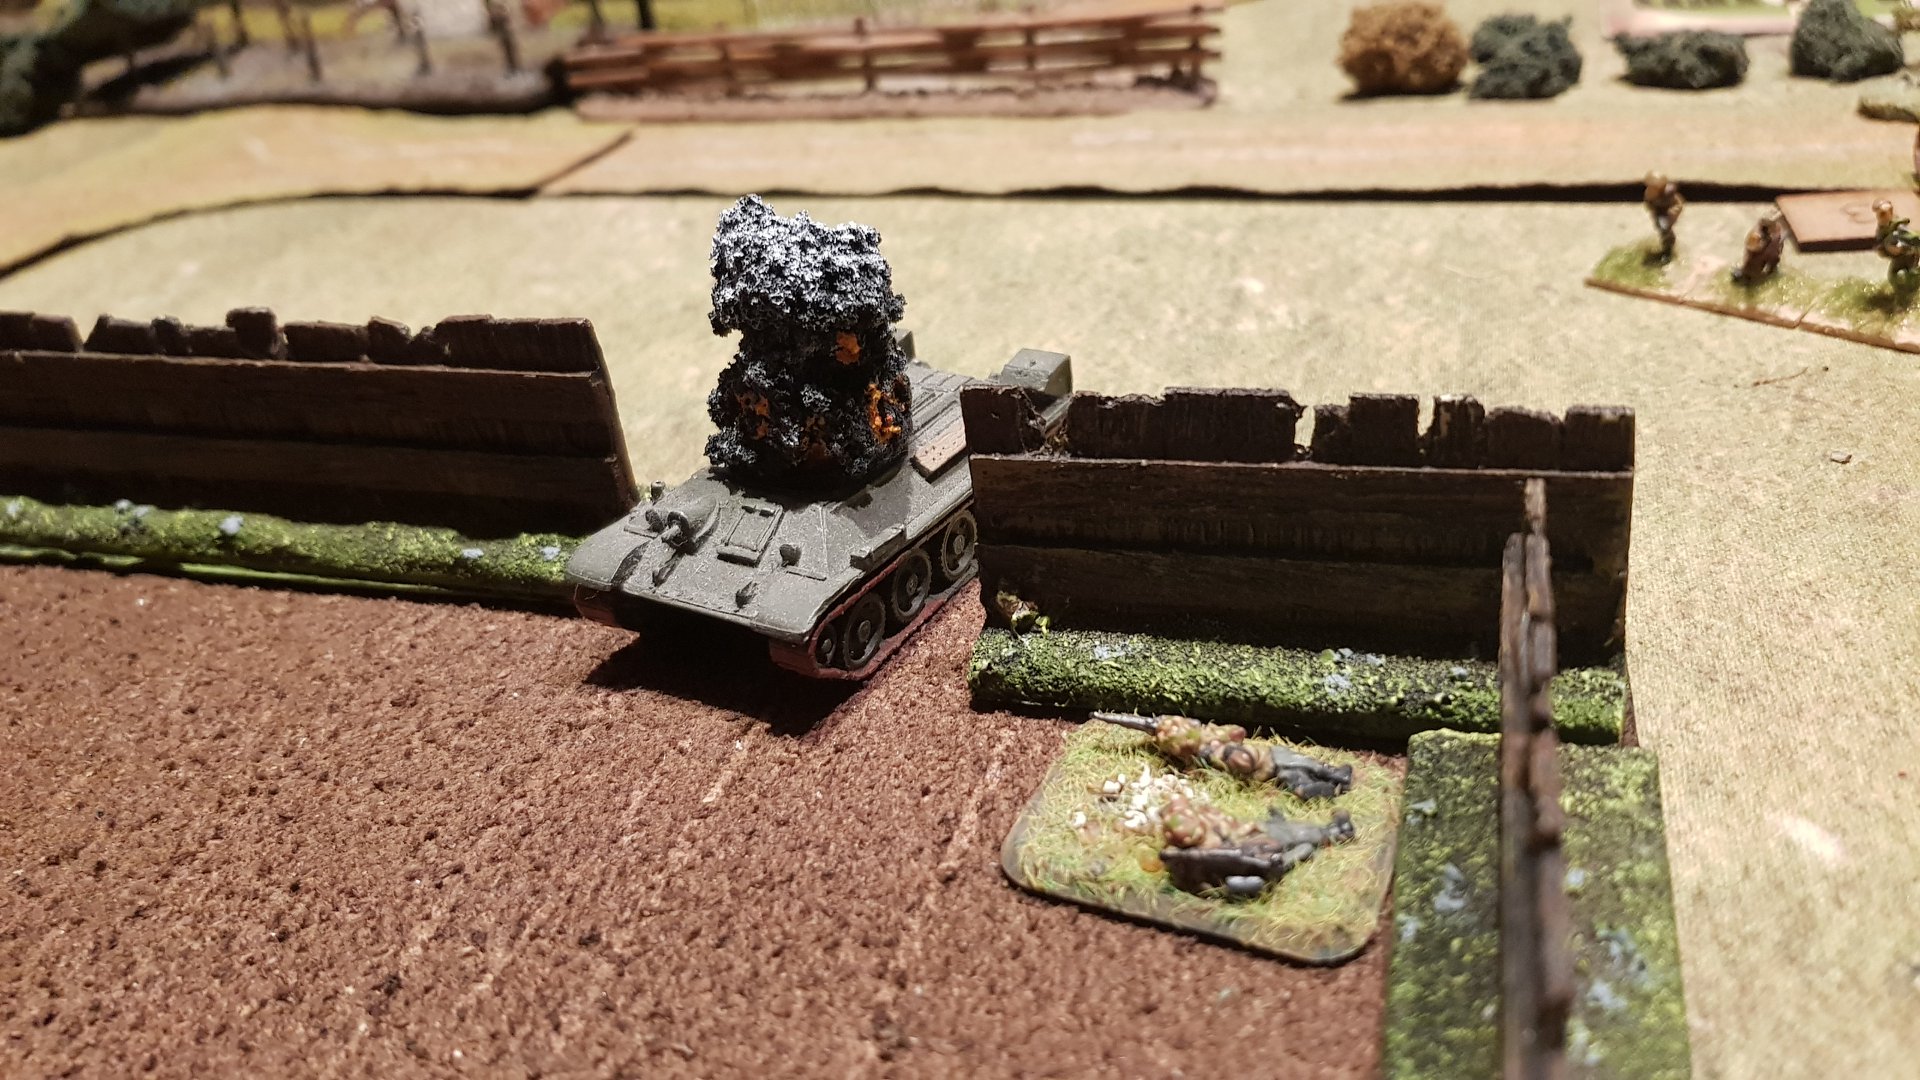
At this point the first of the two guns activated, and it appears American dice are better than German as they promptly blew up one armoured car.

The third and final gun activated and moved to the rear of the glider, moving slowly to get a shot at the tanks on the eastern edge of the table.

Summer, for 2nd Platoon then activated. Most of his platoon had no targets now, so he reserved his shooting, and the Bazooka tried again on the medium tank. This time it blew the arse off it, and its Big Man commander dived out to the nearest light tank.

Then the second gun activated and promptly blew up the second armoured car, though the Germans did manage to finally kill one of the American gunners before the explosion.

Sgt Muller, the German infantry’s hapless commander, gave up trying to to join his chewed up squad and retired after the Panzerschrek team that had shot past him the previous session (this would have an effect later on).

Tea Break

In the next move the the third AT gun activated first and fired a shot at the tanks: two hits were registered but one only managed to put a temporary movement effect in place, and the other bounced off. They fired back, Pinning the gun but otherwise little effect, German dice being lacking in pips.

1st Platoon’s Big Man operated again, so the mortar started to put down smoke in an attempt to allow 2nd Platoon’s squads to extricate themselves from the farmhouse in order to escape further fire from the enemy tanks and, with no targets left for the suppressing squad, the assault squad charged in . Taking one look at the screaming Americans, the three remaining Germans wisely decided they had an appointment in Paris and fled the table. So the squad charged into the building to find no one there and only an empty bottle of Cognac (Lt. Shultz last finally got some revenge). The other squad moved up in support behind the building.

In the meantime the third German squad, having run out of gunners to shoot, decided to cross the road and take up position in the building across the road from Sgt Muller. The MG 42 team sitting in the hamlet at the northern end of the road also moved position: into another building as they suddenly realised they had an American gun they could see.

Run Away!

Tea Break.

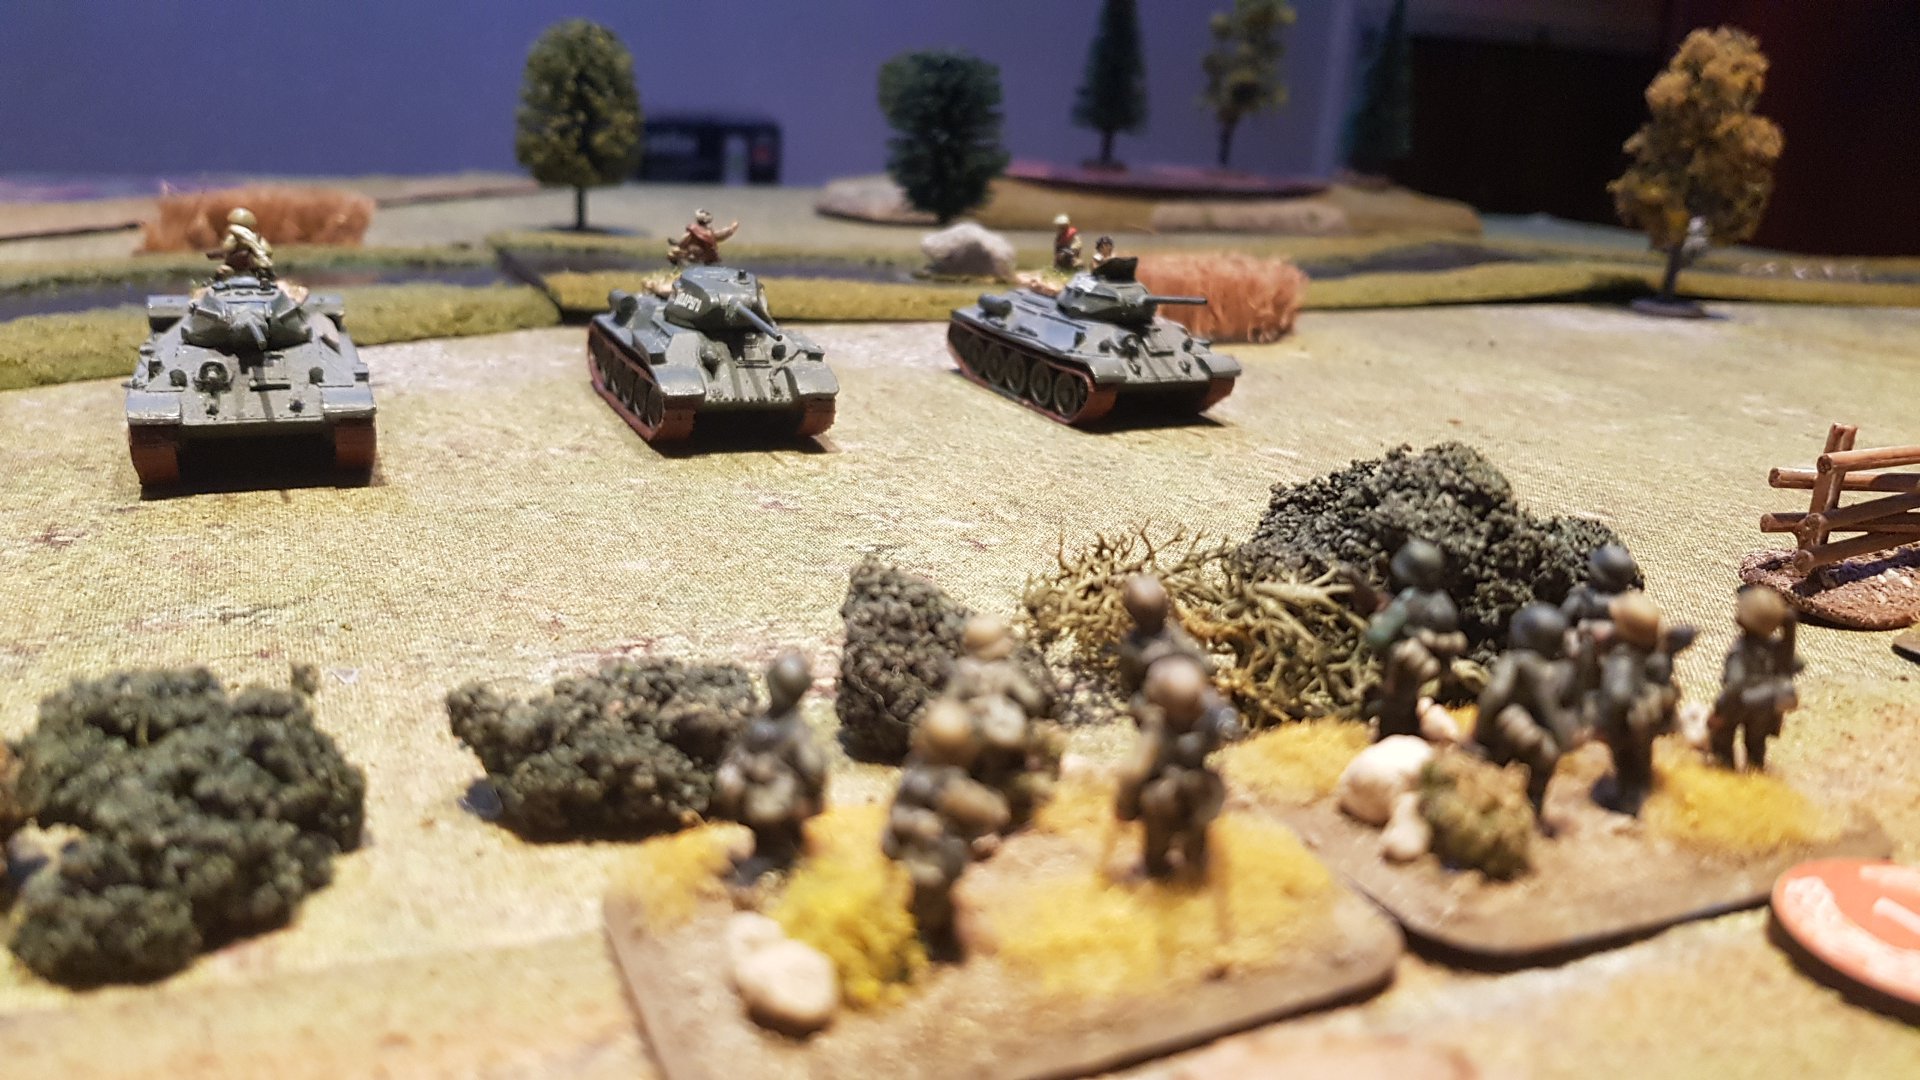
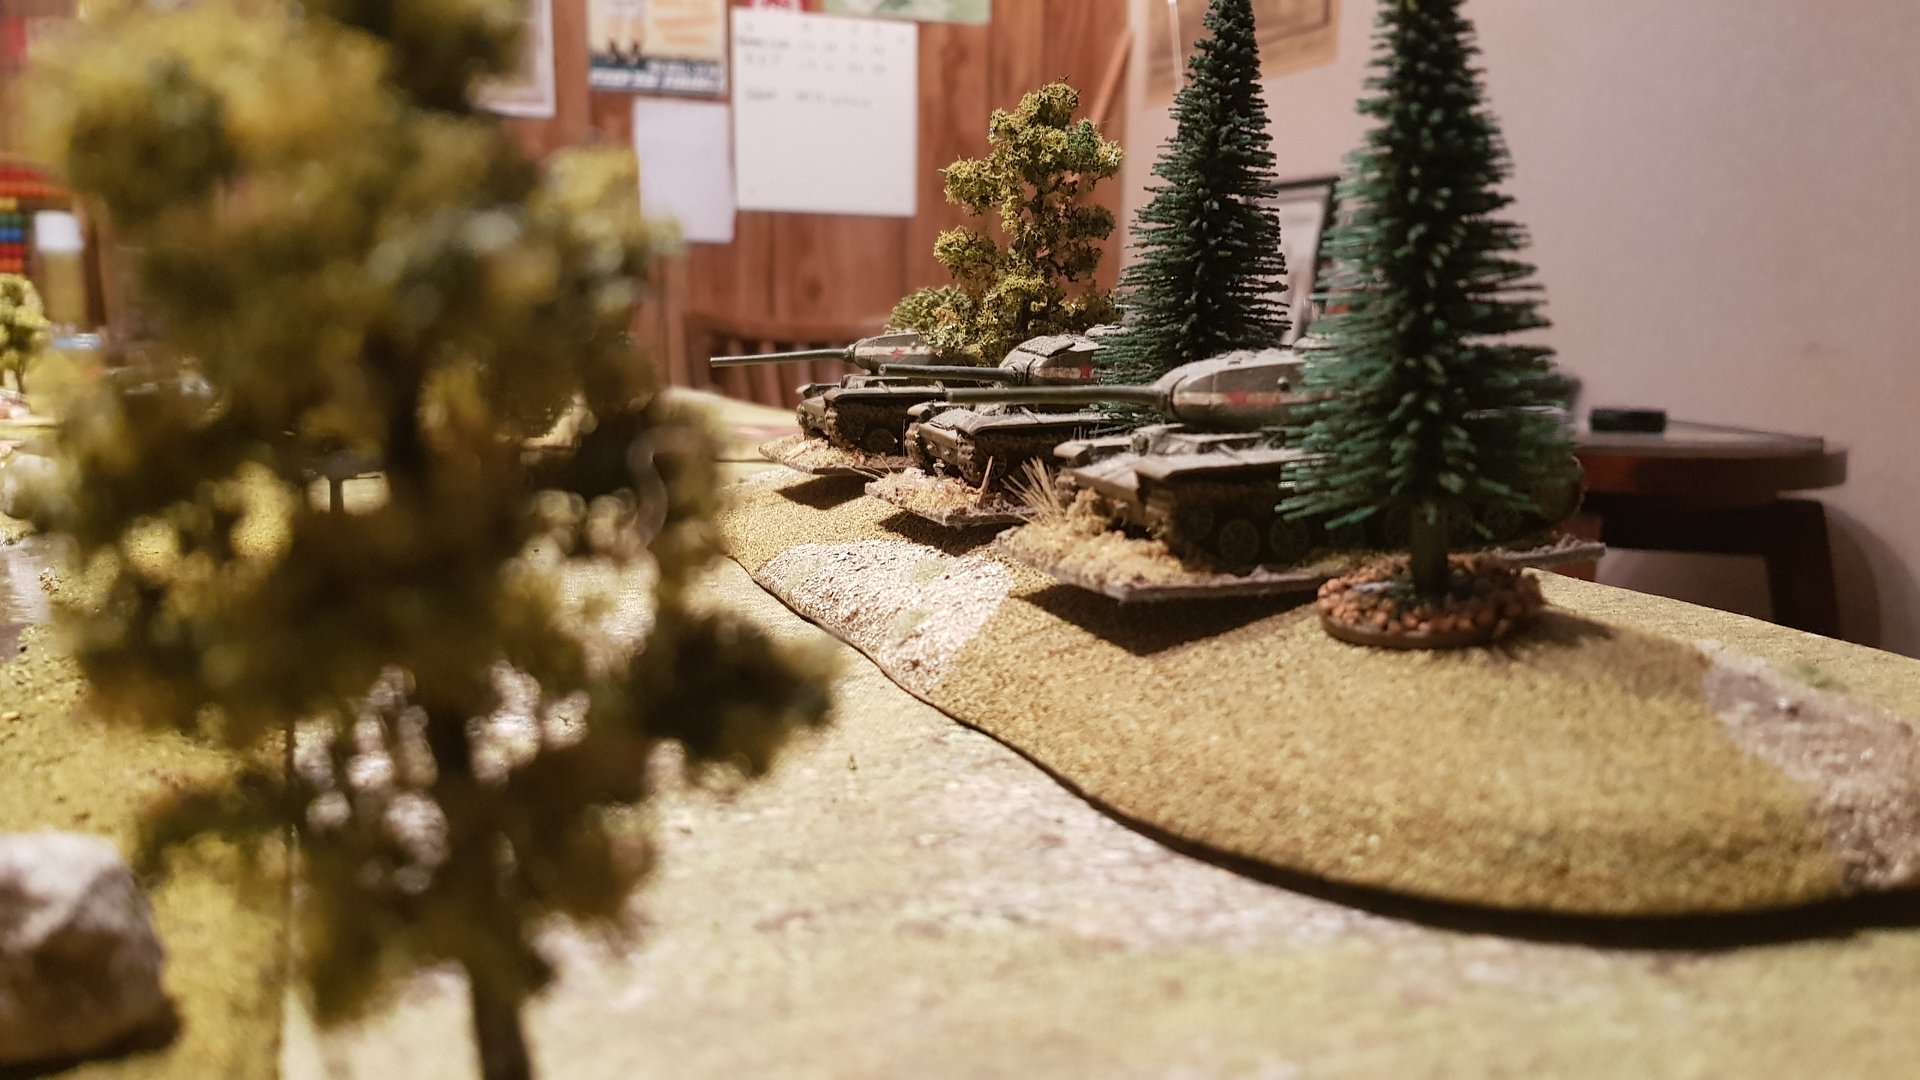
The three German tanks decided discretion was the better part of valour and moved out of the line of fire of the AT gun, realising their peashooters were having little effect.

Having sent his Sergeant back to fetch the rest of the platoon , 1st Platoon’s Big Man decided to launch his unused second squad at the second four storey building on the road. The third squad, in the building just captured , put down suppressing fire and killed one of the Panzerschrek crew. Second squad successfully caught the forgotten PaK 40 crew on the ground floor napping and wiped them out, but then was thrown out of the building by Sergeant Muller, who charged down with his two lads and the remaining Panzerschrek crewman, managing to kill four Americans for the loss of just the latter.

In the meantime the newly positioned German third squad opened up on 1st Platoon’s squad (who had been putting down suppressing fire) and killed one of them.

The forgotten MG 42 team, having spotted the AT gun, opened up on it, killing one gunner. This gun promptly moved around the other side of the glider, out of sight.

Then it was Zebedee time again!

Time To Go!

The final session of this part of the battle was difficult to keep track of. Despite intensive re-shuffles of the cards in the deck, the moves tended to be “Germans activate, an American unit activates, and then both Tea Break cards appear”.

The upshot of this was the German tanks were able to move right across the table to take up position by the warehouse that had been third squad’s previous home. Here they took up position and began to shell and machine gun their opposite numbers in the four storey building that had supported US 1st Platoon’s second squad attack on Sgt Muller . Sgt Muller decided to dash across the road to better direct the fire from his third squad on the same target. His completely forgotten second squad moved to the hedge to find that both the tanks and any Americans had gone: they felt a bit like the lone US Para at the end of the Longest Day , who spent all of D-day moving to the shooting to find it had all gone by the time he got there.

The forgotten PaK 75 on the end of the southern road could see lots of activity around the above building and, feeling bored, decided to lob a few shells at it…particularly as no-one could see where they were firing from.

This concentration of fire pretty much shot the American third squad to bits, with them now down to only two men, who had to be dragged to safety by their Big Man. On the odd occasion they activated, however, they managed to kill two men from the German third squad.

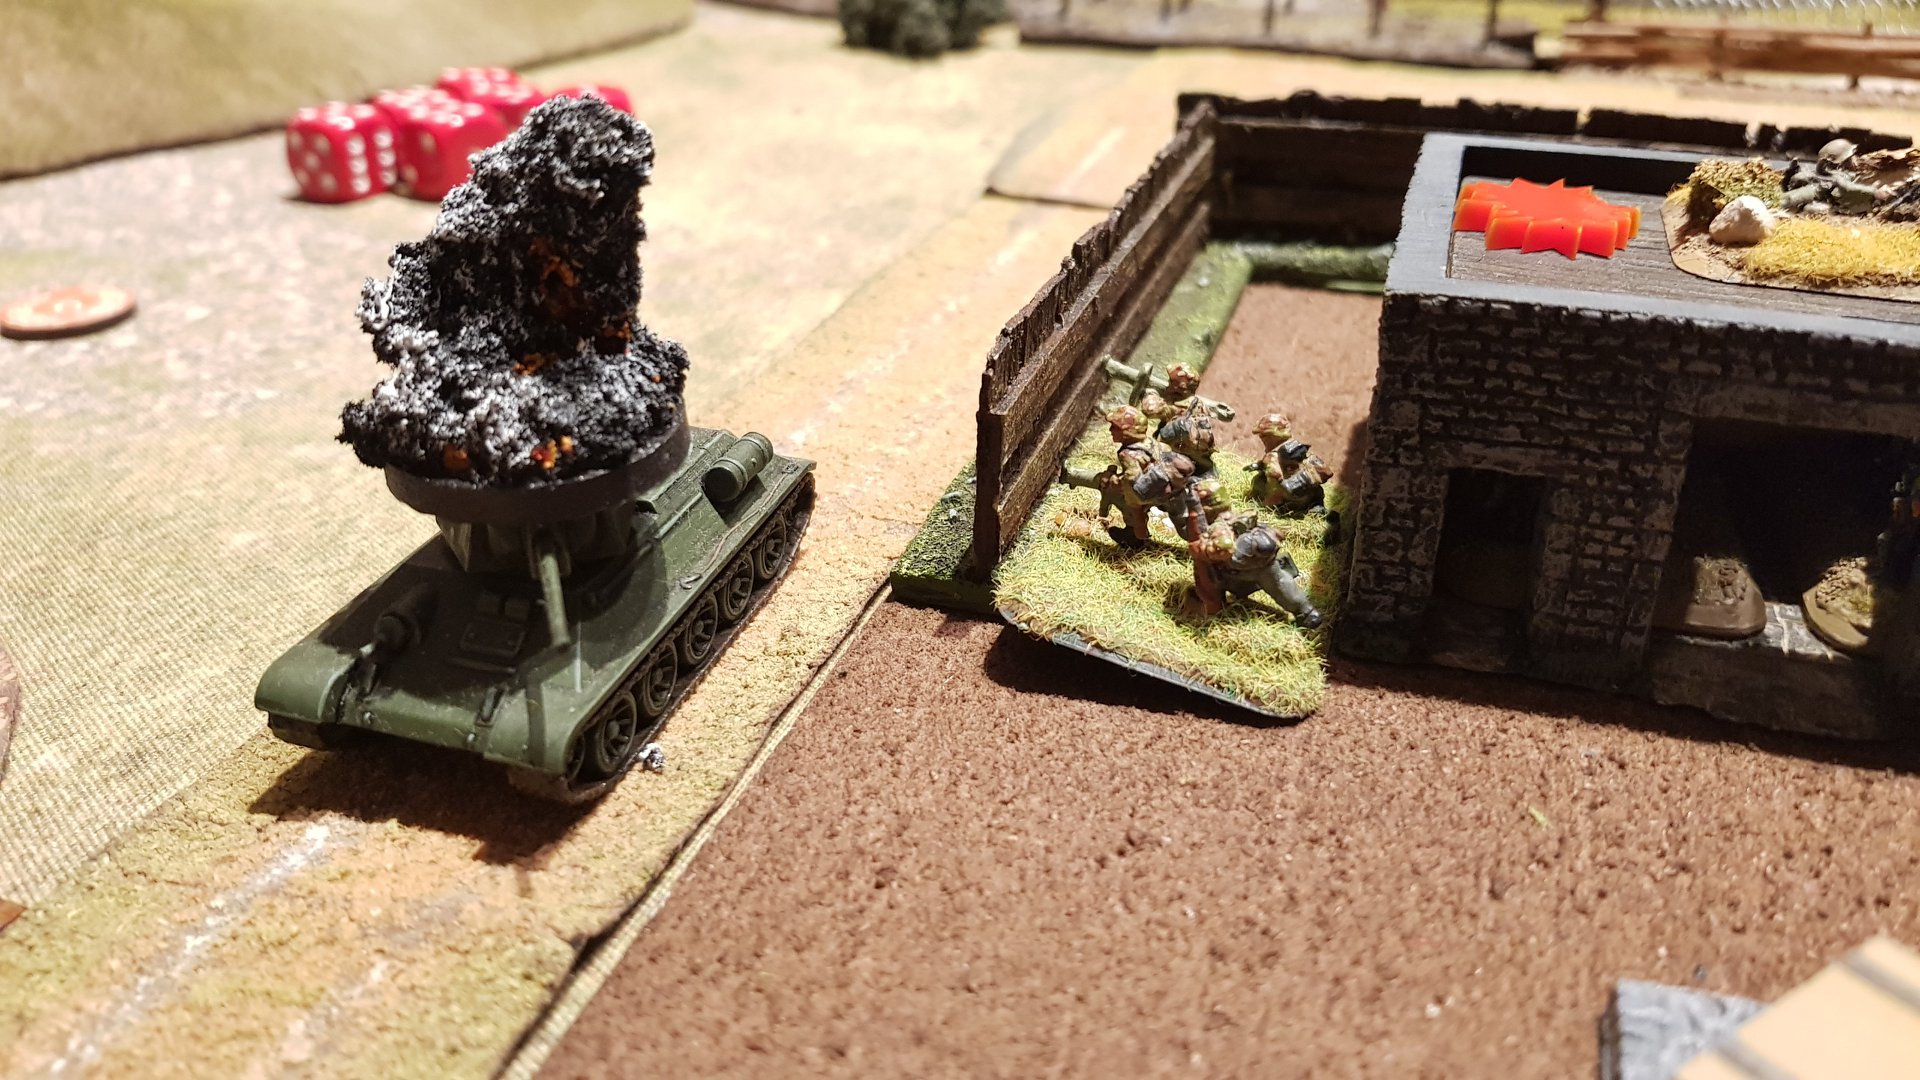
In the meantime, in the odd times they activated, the American guns had begun to move to the cross roads, leaving one in position to cover the Eastern road. Lt Summers, seeing that the tanks had gone, gathered his troops and leap-frogged his squads to assault the coal warehouse in preparation for attacking Sgt Muller squad at the end of the town.

Sgt Muller had a dilemma, despite the fact that he seemed to have taken care of the enemy troops attacking his position. Not knowing second squad’s location, he was down to around nine effectives: with his command squad and the six remaining third squad-ers. His tank support was down to three light, not particularly effective tanks. One of the guns his command had been left behind to protect had been destroyed by the American paras which, although he had momentarily dealt with their threat, he had no idea of the size of their force and, according to the tanks’ commanders, more Americans were gathering in the town and it was almost certain they would assault his position with possibly overwhelming force, using the various town buildings to cover their approach from his tank support.

Discretion being the better part of valour, he gathered his remaining troops, fired a Very pistol , the pre-arranged signal to withdraw to any of his men still surviving in the area, and used the cover of the tanks to withdraw in order to join up with units of the Panzer Lehr he knew were moving into the area.

The first day’s action was finally over.

Bob Cockayne


Just play-tested Scenario 20 from the Anzio supplement. Neil, my regular opponent, took the Germans whilst I fielded my newly-painted Yanks.

The battle centres on the German attack on Able Company of the 180th Infantry Regiment on the third day of Operation Fischfang. Twelve German tanks head down the "bowling alley" with infantry following some turns behind. The Americans are defending a bridge over the Carroceto Canal with three platoons of infantry backed up by a number of cooks and bottle-washers sent forward in desperation. The Yanks have seen the Germans coming and called for armoured reinforcements, but there's no sign of them yet!

The first platoon of German tanks deployed on table almost immediately, and spotted the Americans as a swarm of bazooka shells headed their way. No damage was done, and the Panzer IIIs (yes, they were still using them!) swung round and began area firing on the American trenches. Another platoon of German tanks, Panzer IVs this time, joined in, and a terrific firefight ensued between the German armour and the four bazookas and single HMG that the Americans had.

The Germans couldn't overrun the American trenches as the canal was in the way and their infantry hadn't arrived yet, but were, as history, able to blast away at anything in a Vallejo Brown-Violet hat! The Yanks quickly began taking casualties: one section racking up nine wounds as their men threw themselves desperately on top of the accompanying bazooka team in an attempt to prevent the loss of their only anti-tank assets!

The Germans, however, were a bit like ducks in a shooting gallery, as the road was the only hard surface around: everywhere else was a sea of glutinous mud and the "Bogged Down" card an ever- present threat. Lined up neatly almost track to track, they lost three tanks in as many minutes, particularly as the Yanks could move around to fire at their side armour. The "Cooks & Bottle-Washers" were particularly impressive: Cook-Sergeant Landau proving that his bazooka firing was infinitely better than his meatloaf!

The Americans were, however, starting to run out of men, and once the cannon fodder had been, er, eaten, as it were, the bazooka teams started suffering as well: two being KO'd in the same turn. At that moment, the first of the German infantry arrived as well, who could cross the canal, and things were looking a bit grim for the 180th.

The Allies had, however, now obviously recovered from the initial shock of the German advance (General Lucas had finished his grits presumably) and their superior off-table assets started to come into play. First an air-strike KO'd a tank from the third German panzer platoon (more Panzer IIIs) and then the shells from a battery of 105mm guns started landing. Two German platoons were caught right in the blast area, suffering badly, and a Panzer III was blown to bits by a direct hit!

With three American Shermans appearing along the Dead End Road, the Germans began to retreat: not realising that their four infantry platoons (slightly battered by artillery, admittedly) and remaining three tanks now faced only two US platoons, both of which were under strength (suffering from the depredations of the previous few days fighting) and the three Shermans, who couldn't reach the fighting anyway as they had reached the end of Dead End Road and were faced with traversing the same sea of mud that had caused the Germans such problems.

A victory for the 180th mainly due to a loss of nerve on the part of the German commander. A strong push might have cracked the American morale or, better, forced them to fall back due to simple lack of manpower to continue the battle. The American victory conditions also meant that he could not have just left the Germans in place, but had to clear them from the field. A little more faith in Fischfang, and it could have been the Germans eating the Cook-Sergeant's evening meal rather than the victorious Yanks.

Robert Avery


This was our first game of I Aint Been Shot, Mum designed to learn the game in preparation for playing a selection of scenarios (and hopefully mini campaigns) from The September War supplement in September because you don't get an 80th anniversary every year!

I'm not entirely new to Lardy games as I have experience with Through the Mud and Blood and I'm quite a fan of Chain of Command but this is my first dabbling with World War II at company level. I've even spent from March to July making two companies specifically for this project!

So with my armies made, a card deck prepared and the rules read over we began.

We picked situation #04 from the randomly generated scenario list in the IABSM v3 rule book, A Hasty Defence, as it seemed somewhat appropriate for the invasion of Poland.

The first few turns went by pretty quickly as everyone advanced under Blinds (and because the deck was only four cards strong at this stage). A few dummy Blinds kept things tense until eventually, and somewhat inevitably, advancing Germans in the corn fields spotted the Polish in their defensive trench.

Thus began a largely fruitless firefight that didn't quite resolve itself even by the end, but kept the participants honest and us entertained at getting to throw dice in anger.

Meanwhile on my right flank a platoon of eager Panzer I tanks found a platoon of TKS tankettes waiting to plug any gap that may appear.

A quick check of the tank rules revealed this was going to be a tough tank battle as everyone was solely armed with MGs. Nevertheless the Germans were so keen that their platoon card managed to come up again before the Polish armour could do anything!

So five minutes later...

The tankettes just about held on as the turns went by but the first volley resulted in SO MUCH Shock I can only assume that it took a moment for the crews to realise that they weren't actually being hurt by the fire. Still, it kept their Big Man occupied sorting them out while they tried to recreate the same terror in the Germans.

While that was going on the centre of the table became the real interest as the main German advance came off their Blinds and started to add fire on the trench and prepared to try and overrun it.

By the time this had started to look particularly threatening to the anchor point of the Polish defence, the first additional platoons began to arrive! Unfortunately they arrived and took quite a bit of fire as they were largely in the open that first turn. This was the point I learned to value keeping an Action back to take cover...

That lesson learnt, I still needed to get my MMG teams on the table. This was also where I learned that it will generally be better to get these teams in somewhere protected early on. Like, say, in a trench the scenario gives you before the game starts, and bring the mobile tanks on later… moving swiftly on!

The game was split quite evenly at this point with a couple of squads per side getting hammered but neither side looking too shaky.

Then the German armour made a bold move. They got some decent draws from the deck, including a bonus move (which we felt was a fair inclusion for this game before we started) and so swung around to lead a charge right into the heart of the Polish defence while their armoured counterparts tried to deal with their remaining Shock.

It was probably due to thinking that the Panzer I could stand up to more damage than it actually can but they charged hard straight into the middle of the Polish back line. Fortunately for the Polish defenders they had two AT rifles and three deployed MMGs ready!

From here the command tank was completely destroyed from a head-on shot, another had its weapons destroyed by the second AT rifle, and the MMGs had mixed results that also resulted in two further tanks’ weapons destroyed!

From here with the prospect of assaulting a position still so manned and time pressing on, my German opponent decided to call it and fall back.

Overall we were both pretty happy with the game and results and hope to get another game or two in before the September anniversary begins.

John Cooper


Postscript

Here are some other pictures of my Polish forces for “The September War”, all in 10mm:


We tested the Peleliu game planned for The Other Partisan show last night and it was thoroughly enjoyable.

Using IABSM v3 and the theatre-specific rules from v2, we played our first stab at Peleliu.

Here are a few pics:

The vehicles shown are from:

  • LVT2 are Frontline Miniatures; BPM or diecasts

  • LVT 4(A) are Britannia, Die cast or home 3D

  • Shermans are Armourfast

  • DUKW are Frontline Miniatures (resin).

Figures are Britannia, Kelly’s, Stonewall with some Revell plastics.

We also put together some specific card decks for the game, including a couple of critical effect cards that will be crucial to how the game flows:

As for the scenery, it’s mainly scratch built with trees from eBay.

Japanese bunkers were constructed as follows: Barry Foster built the basic shape from a preformed craft box and covered it in Das clay. We then painted it with Sandtex paint and added some of our home made jungle floor mix.

Tim Whitworth and the Like A Stonewall Wargames Group


Major Mick Dundee at Bardia, 1941 game 1

I`m part way through Robert Avery's Operation Compass scenario/campaign book, using the great "I Ain't Been Shot Mum" rules from Toofatlardies. The next three games cover the assault on Bardia, a coastal fortress held by the Italians. In the first game the 6th Australian Division attack a fortified position held by Italian Infantry and Artillery.

The battle is covered in Barrie Pitt's Crucible of War, as well as the Official Australian online history. Both make great reading. I made my Big men fictional characters: this was a battle with heroism and tragedy on both sides.

The paper wargames journal on the table in this photograph is as a result of my returning to bad habits! I`ve kept one of these on the go for years and I`m meant to be blogging this sort of thing. Now I`m back in Cyprus I`ll see how I get on, but I used the paper journal to plan these three games.

To create the Italian strongpoint I used light sand coloured felt to represent the trenches. This is the lighter coloured sand dug out and piled around the trenches. The anti-tank ditch is a darker brown colour to represent its depth, as are the dugouts. The main wire at the front of the emplacement was made using strips of cloth from an old ragged tea towel, and the wire perimeter of the outpost itself made from much thinner strips of a stone coloured felt, twisted and looped.

It works for me!

Major Mick Dundee of 22 Aus Inf Brigade has only a single platoon of Infantry, plus three Matilda II tanks. The good news is that he has outflanked the fortified position and is attacking the weaker Italian flank. The tanks went onto the table, being spotted almost immediately. The following Infantry remained on their blinds a little longer.

Tenente Alphonso Pachino of the 62nd Italian Infantry division, has two full platoons plus a reserve, as well as MMG and dug in artillery. His men are in trenches, and he has placed himself, with his reserve, in the rear dugout. Most of his forces were spotted automatically since the tanks were almost on top of his trench line. The tanks were also enfilading the trench line. After a "Hussar!" of a dice roll the machine guns from the tanks minced the Italian Infantry.

Major Dundee then lead his own Infantry forward, Australians, elite in close combat. The day was about to get a lot worse for Tenente Pachino.

With the Italians losing section after section of Infantry to the bayonets of the Aussies the Tenente lead out his reserve in a bid to stem the rout that seemed imminent.

I really like the Italian Officer figure in his pith helmet firing his Beretta pistol. This is a Minifigs 12mm figure, but it fits perfectly with my Pendraken 10mm. Style over substance... that`s my WW2 Italians all over!

The picture shows the Tenente leading out his reserve sections.He inspired his gunners to immobilise a Matilda, but its a tank that is quite rightly hard to kill.

Even so the immobilised tank still used its machine guns to spray the reserve as they charged to the rescue.

Pretty soon the Aussies came to grips with the Italian reserve, killing two and inflicting four more shock. The Tenente failed his survival roll and his men promptly ran away.

The fighting around the central Italian gun pits grew nasty as the Aussies closed in, although the Italians managed to kill one man and inflict two Shock. Not really enough since they lost four men and received four Shock points too.

At that point I called it job done. Mick Dundee had proved that he had a bigger knife than the Italians, although to be fair it was the Matilda Tanks of 7RTR that really won this. They focused on the Infantry, and especially on killing that Italian MMG, largely ignoring the danger of the Italian artillery. A risky strategy but it paid off.

Really nice to get back to IABSM. I`m looking forward to the next couple of games. Let's see how Capitane DeNiro does against Mick and his Aussies!

A Wargamer in Cyprus


Dear Mummy,

I am back up in the blue with what’s left of my chaps from 11th Hussars. The regiment has gone back to Alex to refit but I am staying to find out about our new cars, the old Rollers having finally been killed off in Operation Compass. Troop Sergeant Reggie Quilp has joined me, and really a more clever fellow never set foot in Libya. He has the new cars working like Billy-ho, but these KDG Chaps are very new. Not veterans like us cherry bums!

We were sent out by the Colonel of KDG, (that’s the Kings Dragoon Guards Mummy dearest.) tasked with a recce out to the old fort at El Aghiela, off the via Balbia road beyond our line at Mersa Brega. The Troop Sergeant wanted some action, but it was a still night and these KDG chaps wanted to kip under their cars. I decided that I would take a nap. Sleeping in the Rolls was really a bother but in one of these new Herringtons I can just about manage, so we parked up in the rocks east of the fort.

The Colonel had told us that the rifles had a section of chaps under a corporal in the Fort. These are territorials, Tower Hamlets if you please, but they seem well trained. The Aussies had also sent a pair of portee 2pdr anti tank guns. I`m not sure what all this is for to be honest. Didn`t we see off the Italians a few weeks back at Beda Fomm?

In the middle of the night armoured cars approached from the west. Nobody had bothered to tell us that KDG had a second patrol out that night. As they turned off the track to come around east of the fort I counted eight wheels on the side of their cars. I turned to Troop Sergeant Quilp and said, “My God! Are those Germans?”

Having completed Operation Compass, I decided to get some of my Afrika Korps painted up and begin with Rommel's opening attack in February/March 1941.

Sources conflict on the exact occurrences at El Agheila fort, but it seems clear that an attack that the German's considered a probe, was seen as overwhelming force by the defenders. The Commonwealth had only a small garrison in the fort, but it was protected by mines.

This was something of a wasted opportunity, since the fact that the defenders fled told Rommel all he needed to know and prompted his subsequent early attack at the Mersa Brega position.

Since I followed the career of 2nd Lt Herbert Farthingdale for Operation Compass (Bumfluff to his friends after an incident in boarding school) I decided to do the same for the Benghazi handicap, or less politely rout, of the Commonwealth before the advancing Germans. Herbert, from the 11th Hussars, knows just about everyone, and can always tag along with a tank or armoured car formation whatever the unit. Herbert writes letters home to his mother, forming the basis of the narrative.

Actually there were Officers from 11th Hussars left with the KDG to learn about the new Marmon Herrington armoured cars, so Bumfluff is, for once, not being unhistorical... as such...

It`s been a while since I played I Ain't Been Shot Mum, but they are still a quality set of rules! I wanted to return to them with a smaller game before Bumfluff has to charge out against the Panzers in the Tower Hamlet's Rifles Bren Carriers at Mersa Brega. Still, in retrospect this was more a Chain of Command sized game.

The Germans:

  • A platoon of Infantry

  • A troop of 8-wheel armoured cars

  • A troop of five mixed armoured cars and light tanks.

  • Three Big Men

The Commonwealth

  • A troop of Armoured cars (I swapped one out as a Rolls Royce to denote Bumfluff`s car)

  • A single section of Infantry supported by an A/T rifle element

  • Two 2pdr A/T Portees

The Game

The terrain pre-deployment. I suspect that I placed the village on the wrong side of the road!

The German attack develops

An armoured car duel develops, which the KDG eventually lose. German Infantry debouch from their trucks and form up to assault. It`s only a matter of time for the defenders.

The Corporal and his Tower Hamlet`s rifles fight well, driving off the Recce Group, and actually knocking out a Panzer II with the Boys AT Rifle. They cannot stop the attacking German infantry, who destroy the Aussie portees.

And ultimately it is Bumfluff's car and the last surviving KDG that are forced to withdraw.

Next time...

Bumfluff is drafted into the Tower Hamlet's Rifles to assist their Carrier platoon in the defence of the sand dunes before the Mersa Brega Position. With the 5th Light Division of the Afrika Korps bearing down on him what could possibly go wrong?


A refight of this Russian invasion of Poland game, taken from the second September War scenario pack.

The Russian attack focused on both flanks in a pincer attempt on the Polish held village. On the left flank a Russian Human Wave attack destroyed a Polish AT gun and accompanying section. Whilst on the Russian right flank a similar attempt, encouraged by the roving Commissar, failed miserably and resulted in a mass retreat.

Again the Russian air support failed to appear. Qwar, qwar, qwar....

Poles 2 games Russians 0.

Tim Whitworth


July game of Vermont Historical Gamers group in South Burlington Vermont. Great scenario and game.

Played fairly true to history. US had no answer for the Panzers (several bazooka teams took some long range shots but they all missed). German infantry came on the board and things were looking grim.

However, with their three fire missions from 105mm battery, the Americans rolled three of three direct hits and completely decimated two German platoons. German right flank made a forlorn attempt to cross the creek but were driven back. See captions for some color commentary.

Dan Albrecht


I just got back from France and Normandy so I was in the mood for a D-Day game. I also wanted something basic and that would allow for both sides to do some manoeuvring, so a straight out assault on dug in stationery troops was out. I came up with the move in from Asnelles by the B Company 2 Devons and the counterattack by the 916 Grenadier Regiment later in the day on June 6 1944.

The two German Grenadier companies had 2 3-section Zugs. I rated them as poor troops. This company had two attached MMG teams. The German orders were to get off the north edge of the table. A pair of StuG IIIs would show later.

For the Brits, B Company of the 2 Devons had all three platoons, but I also rated them as poor troops for this game. Between being seasick and inexperienced they were not fully up to their game. A troop from the Sherwood Rangers were assigned as support but were running late. Their orders were to advance south and get off the table.They began on the north board edge.

As was historical, the German's counterattack falters on the outskirts of Asnelles.

Overall loses for the Brits are two Shermans, one Platoon CO, and 21 men.

The 916th lost four men in 1 Kompanie and two in 2 Kompanie. But both StuGs are gone with one crew lost and now the British artillery will start to get established. But the Germans certainly gave the Devons a bloody nose.

Mark Luther


Another IABSM Lite scenario, set in Italy '44 again. The British (Carl, Rod) are tasked with taking the farm of Santa Anna, a German (Colin) strongpoint. They have a troop of Churchill NA75s, a carrier section and two infantry platoon, as well as a Vickers. Ranged against them are two understrength German platoons, a couple of MG42s, a StuG, and their CO's new pride and joy, an SdKfz 251/10. Probably a hand-me-down from elsewhere :D

View from above the farm, looking South

The Germans went for a fairly agressively forward deployment, with an infantry section on the E/W road, the StuG in the vineyard and the half-track by the avenue of trees leading up to the farm.

Perhaps unsurprisingly, it got a bit bloody when the first British platoon deployed off Blinds in the field, and then waded in to close assault one of the German sections. Result, 1-0 to the boys in khaki, as the survivors hightailed it to the farm.

The valley becomes rather a killing ground....

About that point, the two MG42s (one in the farm, one in the villa by the vineyard) as well as the Vickers which had deployed in the church tower, all opened up on the area of the field, and turned into something of a killing ground. It's fair to say none of the units involved in that scrap around the field did much useful for the rest of the game, not helped by the StuG popping up and dishing out HE and the inevitable pins. Meanwhile, over on the German right, the other platoon was dug in by the avenue, and the British sent the carriers and the other platoon that way, behind a heavy screen of 2" mortar smoke (I'll say this for Carl, he never fails to follow that bit of the British manual!)

After taking some fire from the carriers, that platoon fell back to the farm, and took up some carefully loopholed positions along the south wall.

The carriers and the Blind carrying the other platoon carried on with their sweep around the German right, while the Churchills deployed off Blinds, offloaded on the StuG twice each and to a man, missed. Wisely, Colin took this as a cue to be somewhere else, pulling it back onto the hill, and the British elected to deepen the smoke around that area anyway, causing the next few runs through the deck to result in quite a bit of 'no, can't see that for the smoke'. Bit of a two edged sword.

Reconnaissance in Force

The halftrack deployed, missed the Churchill it could see once and had a second bounce off the armour. The Churchill inexplicably chose not to return fire but advanced into the smoke with its troop-mates. After a couple more rounds of jockeying for position one Churchill pulled back and nailed the 251/10, causing the CO to have to bail and then dodge a fusillade of small arms fire from the remains of the platoon in the field.

About then we called it for time: pretty clear that one StuG was unlikely to take out all the Churchills (although in campaign history it's not been unknown!). At which point, the armour support can pound the farm till the occupants are pinned, and the flanking force can go in. Almost certainly a British victory.

Thanks as ever to my players Colin, Carl and Rod, and to Rich and Nick for an excellent set of rules.

Mike Whitaker


Szack, Eastern Poland, 28th – 29th September 1939.

This game is taken from the TFL supplement: The September War Part Two.

Part of the narrative in the booklet is thus:

Soviet troops consisting of the 112th Infantry Regiment, some 13.000 soldiers supported by fifteen T-26 tanks and fifteen guns, arrived at the village of Szack on September 28th.
The Polish force near the village numbered 4.000 men of the Border Protection Corp, including General Wilhelm Orlik- Rückermann, and sixteen anti-tank guns.

Having taken the village, the Soviets then charged the Polish positions with infantry
supported by the T-26 tanks. The Poles waited until the Soviets were right on top of them before opening fire with their antitank guns, destroying eight tanks.

The Polish troops now launched an all-out counterattack: covered by their artillery, the soldiers of the Border Protection Corps charged at their enemies with bayonets fixed. By the afternoon the village was back in Polish hands.

The game, played last Friday, takes up the story from that point on. Charged with the task of retaking the village the Soviets again attacked in force. Dave again brought his Polish figures and was ably assisted by Barry whilst Steve brought his early Russian troops to be used by myself, Richard and Bruce. Steve and Archie elect to play umpire and tea masher.

A beautiful set of cards

As ever scale is 20 mm and we played on a 1.5 sized version of the scenario giving us a table width of six feet and a length of just over nine. Because of this increase in the grand scale we again adopted the use of the Lard; one lard being the equivalent of 11/2 inches.

The Russians all deployed on Blinds and had a couple of false Blinds available to them. The deployment area was the 1st foot and a half in across the entire southern base edge whilst the Polish were considered to be in the process of recovering the lost ground and so only 60% of their force was available to start the game under hidden Blinds with the other 40% being available upon the turn of the Polish Blinds card.

The terrain was mainly open vast areas of clear space for the Polish troops to sweep with their machine guns and anti-tank guns; the majority of the wooded area being around the two roads on the on the Russian baseline.

Having chosen their objectives play began and each side took things rather cautiously. The Russians had deployed tanks and a couple of Blinds on the two roads and made quick headway towards a village. The downside of that was that they became within auto spotting range, exposing the vehicles and disclosing the Blinds. Behind them and in the trees were their infantry and support weapons.

The Russians had the disadvantage of not having their vehicles netted into a radio net and in that respect every vehicle was its own unit waiting to be activated upon the turn of its individual card. This took a bit of getting used to at every game we've played so far have allowed AFVs to move by platoon but the Soviet play soon got used to it.

A couple of Tea Breaks later and the Soviets had brought out most of their infantry combat the mass of anti-tank guns that had set up around the Polish objective, the farm next to the church. Those guns had been pretty effective from the off, one gun disabling the forward T-26 on the left flank. It took the draw of an heroic Soviet leader card to have the local tank commander open up his turret, climb down off the tank with his magic spanner in hand and ‘repair ' the temporary fault preventing movement and thereby release the vehicle back into play. For it was certainly needed. It was looking bad for the Russians with all that open terrain to cross to get to their tormentors.

A Soviet T-26 takes damage

And then it happened as if by magic: Steve drew from the pack the Human Wave card enabling all the left hand flank Soviet infantry platoons to join together in one suicidal dash towards Polish defences. Whilst not making a particularly great movement throw a lead section did reach the walls of the farmyard and Polish anti-tank guns. They had support within distance and annihilated the gunners who put up minimal resistance against the organic onslaught. Soviets lost a couple of men in exchange for eliminating their worst threat. Technically at that point the Soviets had one having completed their mission of capturing one objective intact and having no hostile troops within close proximity however either by luck or judgement we continue to carry on.

The Soviet Human Wave attack is successful in clearing the farmyard of Polish anti-tank guns

The Soviet right flank showing the advance of the three T-26 tanks and the Polish infantry platoon defending the cemetery. The objective is indicated by the streetlamp adjacent to the cemetery entrance

Several opportunities for Soviet air support came and went as did chances for the Polish to obtain their off-board artillery, the forward observation officer frustrated at the time being taken to deliver the first ranging shot. That was disappointing as the table was festooned with Soviet infantry squads spread out in the open across a large area-a very tempting artillery target indeed but alas no reply from the battery.

On the right flank Soviet armour had advanced, probing towards the village with three T-26 light tanks cautiously approaching a previously located Polish infantry platoon in the buildings across the road from the church. Using a combination of move and fire techniques they advanced, spraying everything they could see with their machine guns but, given the amount of cover the Polish troops enjoyed, the results of that harvest were few and far between. Very rapidly one of the tanks was immobilised by fire.

The infantry on that flank had remained in the wards on the southern edge but cautiously advanced to give some belated fire support to their tanks; who were close to gaining the second objective. The Polish players so that dispatched a section of infantry across the road into the cemetery to contest the second objective in the churchyard. That infantry unit became the focus of firepower on that flank as it provided the only barrier to total success for the Soviets.

A view of the church and the cemetery with the adjacent objective number one. The Soviet T-26 tank is engaged in a firefight with the Polish infantry section to the top of the picture. They remained a thorn in the side for a significant period until defeated by weight of firepower from supporting Soviet armoured fighting vehicles .

Over on the left flank a Polish platoon had deployed in the north-westerly farmstead on the southern side of the road and they rapidly engaged the swarms of Soviet infantry who, following their mass attack, had remained milling about in the open without orders. The slaughter was relentless and every available gun was trained on the Polish threat in the farmyard. The firefight was significantly in favour of the Polish behind their cover and slowly Soviet losses in the centre and left increased to an almost critical level.

The first objective was located in the central farmstead south of the main road. This is where the battery of three Polish anti-tank guns had set up. They were subsequently overrun and destroyed by a Soviet Human Wave attack. The remnants of that attack are now seen in around the farmyard, with some precariously remaining in the open and taking heavy fire from the barns at the top of the photograph.

We had played for about 2 1/2 hours now with limited beverages being consumed: the game was that intense!

However looking at the board after the heroic Polish section had finally succumbed to the weight of firepower on the right flank and decided to bug out leaving the objective undefended it was agreed that the Russians had a achieved a complete victory albeit as some heavy cost. 'Uncle Joe' didn't mind as he had got millions more men ready to run into the maelstrom that would follow for the next four years.

Tim Whitworth

Soviet infantry sections in the south-east woods


My second game at this year’s Operation Market Larden (the Evesham Lardy day) was a rather exciting game of I Ain’t Been Shot, Mum. The scenario, written and umpired by Mike Whitaker, involved a clash between British and German reconnaissance forces somewhere in Italy in around 1943.

The Morning Game: Noddy in Action

I had seen people having a good time playing the game in the day’s morning session, so was very much looking forward to getting stuck in. Friend Dave had been one of the three players, and although he wouldn’t give me any clues as to what the scenario involved, he did advise that I played the Germans: something to do with superior firepower!

So I played the commander of a British reconnaissance force who were responding to reports of lots of sudden German activity along the main road from A to B…I can’t remember the exact location! My mission was to investigate and see what was going on. At my disposal I had a strong platoon of reconnaissance infantry consisting of three sections and an HQ element that included one Vickers machine gun, all supported by a platoon of Universal Carriers.

The British end of the table

As can be seen in the pictures, the table featured a long straight road running between two small villages. Away in front of me to the north-east was a villa on an area of high ground; near the cross roads were some wheat fields (waist high crops) surrounded by a hedge and a stone wall; otherwise typical open Italian terrain.

The Game

My plan was simple. As I had no idea what the Germans were up to, the first thing to do was to find out. Under Blinds, my carriers shot forward straight down the road followed by a platoon of infantry. My rationale was that the carriers were quick enough to get out of there if they met anything too heavy, but could also provide a base of fire to allow a bit of ‘pin and manoeuvre’ with the following infantry. I also wanted to own the centre of the table as fast as possible rather than being forced to place catch up later on.

In response, the Germans moved a wave of Blinds onto the table from their end: one thrust being from the high ground by the villa, the other towards the far field surrounded by the stone wall.

The carriers quickly positioned themselves in the grove of trees just to the left of the crossroads, reporting that they could see something down the road on the other side of the junction. My platoon, still under a Blind, headed forward to investigate, rapidly coming across the downed wreckage of a small plane (probably a Storch). There were no bodies in the wreckage, however, but a trail of crushed corn leading into the far field towards the German baseline.

All became clear: downed plane, secret plans obviously on board, officers carrying plans escaping through the corn, go get the secret plans!

This was all very well, but those German Blinds were awfully close to the other end of the field.

Ah well, “in for a penny” and all that: my infantry platoon, still under a Blind, plunged into the cornfield and headed after the escaping secret plans.

Things now happened very, very fast indeed.

The picture above actually shows the situation after the clash that immediately took place. To summarise:

  • my platoon moved forward to stone wall and captured two German officers plus aforementioned secret plans

  • before I could do anything else, German Blinds revealed themselves as a small platoon of infantry (just two squads) but backed up by four SdKfz 250 half-tracks: three with 20mm autocannons, one command version with an MMG

  • After a horrendous round of autocannon fire, my platoon was Pinned then close assaulted by the Germans. A huge melee broke out (my 24 Pinned men versus 16 Jerries) ending up with my platoon being sent reeling backwards having lost both the fight and possession of the officers/secret plans

I hadn’t been able to destroy any halftracks during the melee, but had done them some damage and quite badly beaten up the German platoon

The observant amongst you will have noticed in the picture above that I have another of my Blinds approaching the wall. I was definitely “in for a pound” now, as this was another of my platoons, who immediately moved forward and close assaulted the Germans themselves.

Meanwhile, however, my HQ element had joined the carriers in the small grove by the crossroads, and set up the Vickers gun to protect my left flank.

Vickers plus company commander on the left flank

This proved a very sensible, may prescient, thing to do, as the Germans were sending infantry down from the villa towards the flank of the fight in the cornfield. The Vickers opened fire at the side of the German column at what was close range for the machine gun, and one German squad lost all interest in continuing the fight, retreating back to the villa leaving a line of grey-clad bodies behind it.

Meanwhile, my second platoon of infantry had begun their assault. Another horrendously costly close combat took place…but this time finishing in my favour with the wall, officers and secret plans all ending up in my possession.

Those pesky half-tracks were still there, however, and pouring fire into my men, now crouched behind the stone wall desperately waiting for the carrier I had brought up to move forward, pick up the prisoners and secret plans, and then all to bug out as fast as possible.

The combined fire of the half-tracks proved too much, however, and my platoon evaporated under cannon fire, leaving two downed German officers (clutching the secret plans) frantically calling upon their kamarades to cease fire for long enough for them to climb over the wall!

I had one more trick up my sleeve, however: PIAT teams.

Now the PIAT is not a very good anti-tank weapon. It has a short range, is difficult to load, and packs only a middling punch. I had, however, by now managed to get two of the three PIAT teams at my disposal (one from the infantry, one from the carriers) into a position from which I could shoot at the two lead half-tracks. It took three or four shots, but one went up in smoke and the other’s crew abandoned their severely damaged vehicle.

Meanwhile, my Vickers gun had managed to disperse the other German infantry platoon coming down from the hill…and my third infantry platoon had charged forward from its “back” position (two up, one back: always have a reserve!) and re-taken the wall, officers and secret plans.

Wall re-taken, two half-tracks down, PIAT team in the right foreground about to turn round and deal with a third

We paused for a second to assess the situation.

The British had possession of the wall and secret plans. They had about a platoon and half’s worth of men. In support, they still had the three Carriers and the Vickers. And two PIATs.

The Germans had two half-tracks (one in quite a vulnerable forward position) and…oh, no infantry left. Yes: all the German infantry had been removed from the table either as a result of the Vickers on the flank or the four close combats at the wall.

It was victory for the British. The officers and secret plans were bundled into a Carrier and whisked off to HQ whilst the two German half-tracks presumably beat a hasty retreat.

That had been a tough game. Okay, so I had the plans, but I had lost most of two platoons of infantry to get them: a costly exercise indeed.

My thanks to Mike for running what was an excellent game, and to my two opponents John and Bob: my usual apologies for my playing style!

Robert Avery


Tonight’s game of Operation Sealion: scenario six, The Drive Inland.

It is Day S2 of the German invasion, and the reconnaissance battalion of the Wehrmacht 26 Infantry Division is heading towards the sleepy village of Herstmonceaux.

The reconnaissance unit is light in vehicles and most of the troops are mounted on bicycles ‘liberated’ from a sports shop in Pevensey.

So far British resistance has been patchy comprising of pockets of Home Guard and the occasional unit of regulars but the British are now frantically attempting to form a solid defensive line to the north of the landing beaches.

What will this day hold in store for Hauptmann Ralph Sturmer and his company?

The Game

The Germans entered the table not under Blinds as it was determined within the preamble that the British had full sight of the approach route with their FOO spotter in the village church tower.

Entering the north edge of the table with a maximum of two platoons per move the Germans initially brought on bicycle infantry and sought to establish a forward position within the church cemetery, surrounded by its stonewalls.

The second platoon made a concerted dash along the tree lined pathway towards the north east barn in attempt to outflank the village and arrive at the two farms adjacent to the targeted exit point on the eastern side of the table.

There was no response from the British at this point. However the German bicycle troops in the cemetery did locate a British pillbox at the entrance to the village.

Failing all their attempts to identify the contents of the pillbox, the Germans were surprised to receive fire from their flank from a section of Home Guard troops in the orchard near the church.

Turn 2 saw a further platoon of bicycle troops appear, along with some elements of support including a 50mm mortar and an anti-tank rifle.

The German outflanking attempt continued but just as they felt they were making headway the German cyclists encountered a full British Home Guard platoon taking cover behind the hedge row. This immediately brought them to close combat and they were routed back in the direction of the north east barn.

The next turn the Germans brought on the armoured cars and attempted to rush down the High Street to the centre of the village. However the British had got something waiting for them. An ace up their sleeve. The British brought out their Northover Projector into play and it promptly disabled the lead German armoured car.

The Germans took evasive action as a result of these two setbacks with little headway being made yet more bicycle riding platoons having been brought into the table along with company headquarters and the remaining support weapons.

It looked like the German advance may have been brought to an early standstill with them electing to sit on the high ground and set up the machine guns to cover the village.

It was not to be an easy life and the contents of the pillbox made themselves noticed by putting an anti-tank rifle round through the next armoured car!

As they scrambled to get a grip on the village they received fire from all quarters. The first armoured car had only been temporarily immobilised and it set off to drive through the village to deal with a British Vickers machine-gun that has set up with a clear line of fire able to sweep the German entry point. Indeed it caused great disruption and had to be dealt with accordingly.

Somewhat warily the armoured car car crew set off to deal with the Vickers however they were met with a blast of small arms fire at their open top vehicle from some British regulars at the rear of the village. This resulted in the armoured car racing off the table in reaction to the surprise and never to be seen again during the course of the game.

This is a scenario that calls for the British to set up kill zones and overlapping fields of fire with their limited resources to be able to have any effect on the German advance. However we were successful and after 2 1/2 hours playing time and several cups of tea the Germans had lost almost 50% of their number mainly as a result of the British off table artillery getting a bearing on their position and dropping a ferocious barrage upon them.

Nonetheless a wonderful evening was had by all and we look forward to playing it again.

Not going to give away any more of the secrets contained within this game and thereby won’t spoil it for anyone who wishes to purchase the scenario book and play it through for themselves!

Here are some more pictures:

Tim Whitworth


Dawn breaks once again over Mike Whitaker's fantastic Omaha beach game at Posh Lard. Many thanks for a great day Mike ... although I think you were relishing those German MG Bonus cards a little too much!

James Tree


Fellow Lardy Desmondo Darkin travelled abroad to play an impressive game of IABSM put on by Paul Spence.

The action represented the assault on Sword Beach on D-Day and, I think you’ll agree, looks amazing.

SWORD Beach..... East Yorkshire and 13/18th Hussars approach the beach.

The landing

We are ashore! Lost DD tanks on the way in but we have cleared a lane for the Funnies to move to the seawall. Andy has destroyed the bunkers in WN20. The Germans are about to open up with small arms.

Off the beach at last. Infantry pouring off in the follow up waves and heading for the streets of Ouistreham. Andy is further behind but destroyed the opposition in WN 20.

The East Yorkshire Regiment drive into the town. No.4 Commandos were sacrificed to keep the Germans from concentrating fire on my exit. Andy has no opposition, all Green Fields and Beyond for his boys!

Game by Paul Spence

Photos from Desmondo Darkin & Paul Spence


Great game recreating night assault by Americans. Game was historically accurate with Americans making some initial progress but timely arrival of Panzergrenadiers in halftracks (plus some great dice rolling by two Panzer IVs!!!) forced the Americans to call retreat.

Americans lead by Brent Coulthard and Brett McLay. Germans by Steve Smith. Used "Sharpening up IABSM" Command Cards by Derek Hodge which were easy to use and very understandable. Kept overall random flavor of IABSM unit activation but allowed a little more leadership ability.

Dan Albrecht


This year is the 75th anniversary of the successful assault on Pegasus Bridge by glider infantry of the 2nd Battalion, the Oxfordshire and Buckinghamshire Light Infantry, British 6th Airborne Division, commanded by Major John Howard. The successful taking of the bridges played an important role in limiting the effectiveness of a German counter-attack in the days and weeks following the Normandy invasion.

The Soldiers of Oxfordshire Museum (SOFO) is putting on an exhibition to celebrate the anniversary, and it looks as if a few of us might be able to run a demo game of IABSM one weekend at the museum to help bring the event to life for the general public.

All the running for this is being done by friend Dave, so all I had to do recently was to take part in a playtest of the game to be run…

At this point we ran out of time (we had been dilly-dallying around playtesting things rather than playing hard) so the game was declared a draw. The Brits had the upper hand to the right, the Germans had the upper hand to the left, but time was ticking on and the first serious British reinforcements (Paras!) were apparently about to appear.

A good game, and lots of food for thought for the exhibition game.

Robert Avery


Late War in Germany. I was trying to hold back the Red hordes the other night – we had a great time and feel like the rules are running more smoothly now we've played a few times.

It was a very close game, but it didn't look like it was going to be: the Germans were on the wire with only three regular platoons and one of Volksturm, four tank hunting team, two HMGs, and two PaK 40s…much of which disappeared in the initial bombardment (damn those Katyushas!) or was avoided by the positioning of the Russian advance and didn't get into play.

Meanwhile, the Ruskies were fielding three tank platoons, three infantry units (one of SMGs) and had two bombardments and a Katyusha strike (so able to cover all the main deployment areas). Note to Self: Don't deploy forward into combat areas at first if you have even the vaguest idea the Russians might have artillery...

Remarkably, I as the Germans managed to squeak a narrow victory by holding the buildings at the last :)

More info in the pic comments...


Case White: the Assault on Sochaczew, 13 September 1939
Using TFLs ruleset I Ain’t Been Shot, Mum with a scenario by Rob Avery taken from the Lardies Summer Special 2017, Dave made a welcome return with his Polish and pitched them against my early war Germans. An interesting attack and defend scenario with a time limit so it’s Blitzkreig or bust for Gerry!

The Poles are all on hidden Blinds and the German force entered on Blinds.

Led by Richard Hudson in his ‘little tank’, Dale Askew and I could only watch in wonder as he speed full speed towards the town with his entourage of Panzer I tanks. In the town Dave and Barry Foster waited, anti tank guns and anti-tank rifles at the ready…

Tim Whitworth, with extra pics by Richard Hudson


Today’s scenario was nice and straightforward, and would be used to test out Des’ suggested IABSM/CoC mash-up i.e. I Ain’t Been Shot, Mum! rules, with the Chain of Command activation system. Andy and I had to take a small village somewhere in the Bocage country. Facing us was the all singing and dancing ‘Kamp Gruppe Bartram’ led by Daren.

We managed to set up a rather spiffing table with the club’s terrain and Des’ lovely ‘Empires at War’ Normandy buildings (the 15mm versions of the ones seen on this blog before). The main picture below shows our view of the battlefield, and we hit upon a nice simple plan. I would take two of our platoons of infantry and push through the orchard to the right of the road whilst sending our recce jeep along the right flank whilst Andy would take our Sherman platoon along the left supported by the remaining infantry platoon. The enemy would be pinned in place once discovered then destroyed.

Things started very well with all of us getting into the swing of the new activation system easily enough. We decided to push my attack through first and soon I had two platoons in the orchard and the jeep barreling around bocage as it headed for the lateral road on the right. Then the shit hit the fan! My lads in the orchard must have been fresh from England as they failed to spot the PanzerGrenadiers that lined the hedge at the far end of the orchard until they opened up a murderous fire on my Napoleonic looking column.

Pretty soon I was in all sorts of trouble as the German machine guns chewed through section after section and soon one of my platoons was pretty much out of action. My return fire was not the best but I did manage to cause some casualties assisted by the company mortars but I was forced to pull back out of sight to regroup and re-asses whilst the Germans slipped away to take up new positions in the village.

Just when I thought things were pretty bad, they got worse. My recce jeep bumped into something along the road and I actually felt my jaw drop when Daren gleefully put out two Tigers: indeed, both Daren and Des laughed at my reaction. I did have a go at one of the behemoths with my .30-cal before scooting back desperately trying to get into cover but both efforts were futile and one of the giant beasts pumped a HE shell into the plucky Jeep.

As the right flank was now well and truly shut down we decided that Andy best get forward on the left so he pushed his Shermans forward followed by the infantry.

However pretty soon the sharp crack of an 88 signalled the appearance of 2 more Tigers! The American tankers tried valiantly to take on the big cats but pretty soon their platoon commander and one other tank were burning. There was one small glimmer of hope though as the remaining infantry platoon managed to creep forwards whilst the tank duel was going on and soon a couple of bazooka teams were in position to get a flank shot at one of the Tigers. If they could get a successful shot away we might just be able to overpower the remaining one with the concentrated fire of the surviving tanks.

But it wasn’t to be, the GI’s manning the rocket launchers were just too jittery and their missiles either sailed harmlessly past the massive tank or glanced off the thick steel (how they missed is still puzzling me, just how do you miss a Tiger side on?!!). Darren then turned the Tiger’s turret on the hapless bazooka men who would have been blasted to atoms if they weren’t close assaulted by a fresh platoon of PanzerGrenadiers.

With this further defeat Andy and I decided that enough was enough, most of our infantry was knackered and our tanks had been well and truly assaulted by the Tigers so we decided to concede defeat. Strangely though the surviving tanks disappeared during the retreat, and even stranger when we tried to get them on the radio to ask where they were we received this message back: ‘Woof, woof’. Odd.

Despite the defeat it was a cracking game and we all agreed that the new activation system vastly improved things and even I said I’d love to have another game so hats off to Mr. Darkin for coming up with the rules, we did come up with a few tweaks here and there but nowt too much which shows how well they worked.

Apart from the rules more thanks to Des for putting the game on and for bringing his lovely village set, the figures and models were Daren’s but now in the collection of Andy which is great as we will still get to play with them as they are crackingly well done.

Iain Fuller