Picture1.png


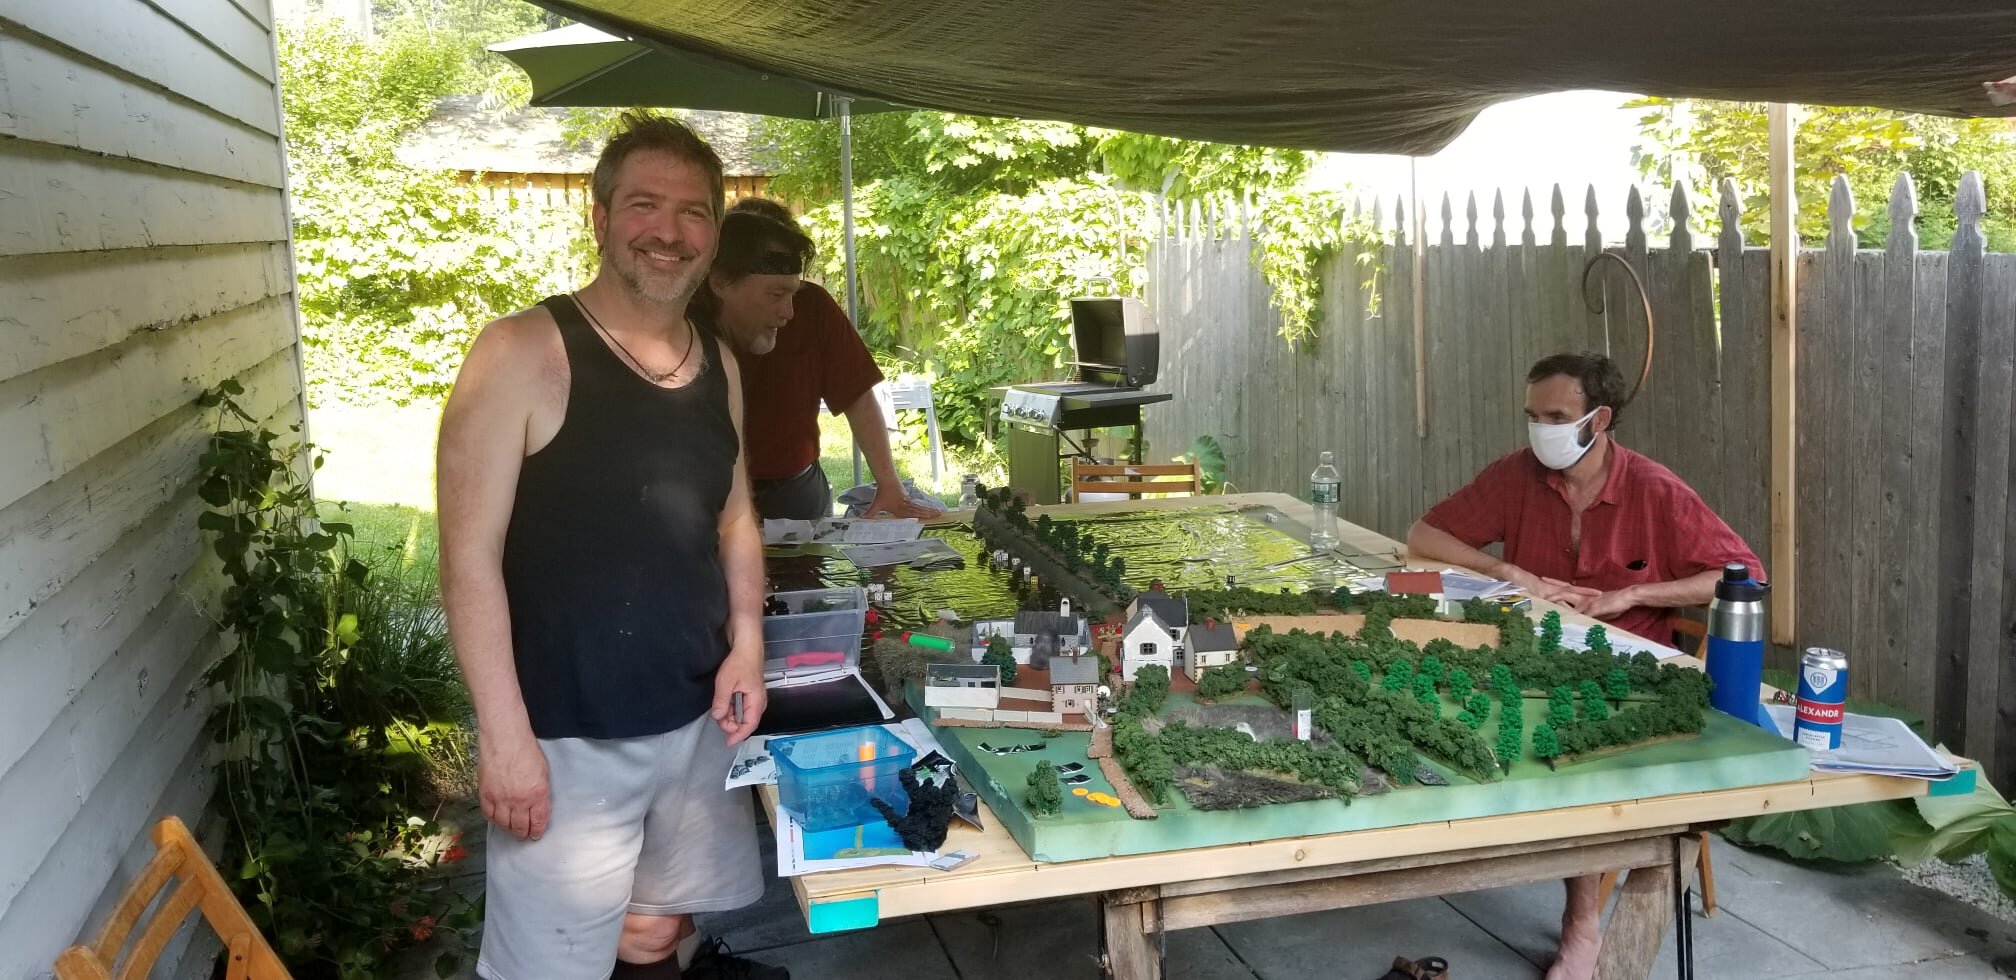
Off to Dave’s for my first face to face game of I Ain’t Been Shot, Mum since before lockdown!

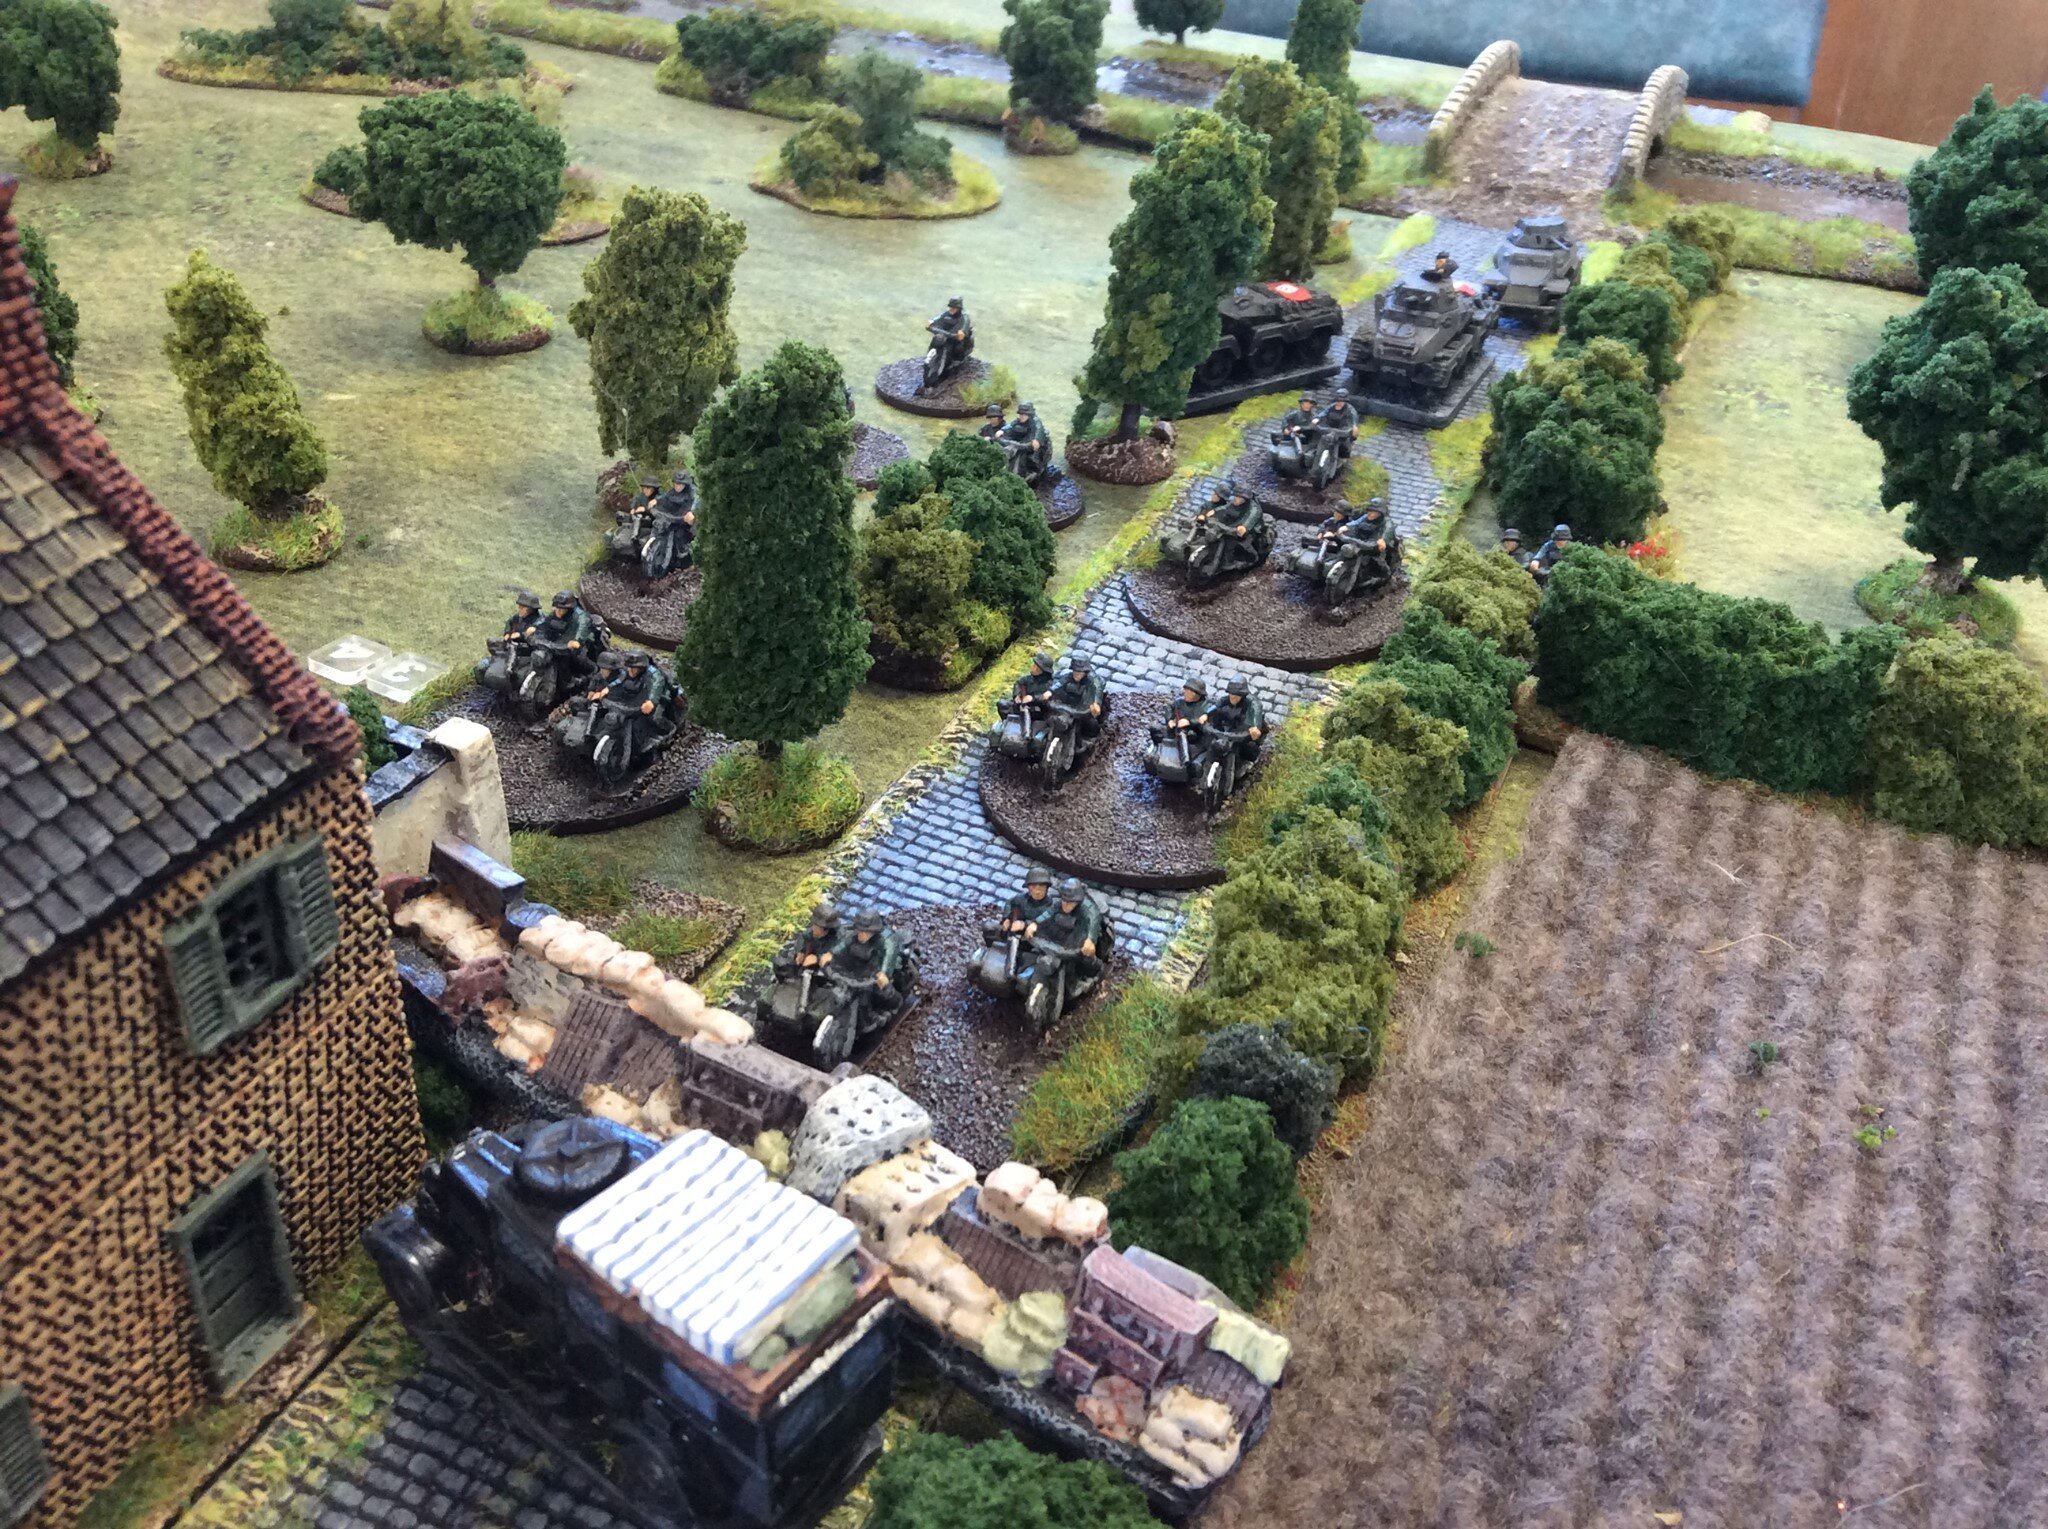
The scenario was set on the Eastern Front in 1943, and based on an historical encounter. Elements of the Soviet 5th Guards Tank Army (played by me) had to advance onto the table and take a village, Prokhorovka, defended by German armour. Yes, unusually for IABSM, this was to be an armour versus armour game with no infantry present.

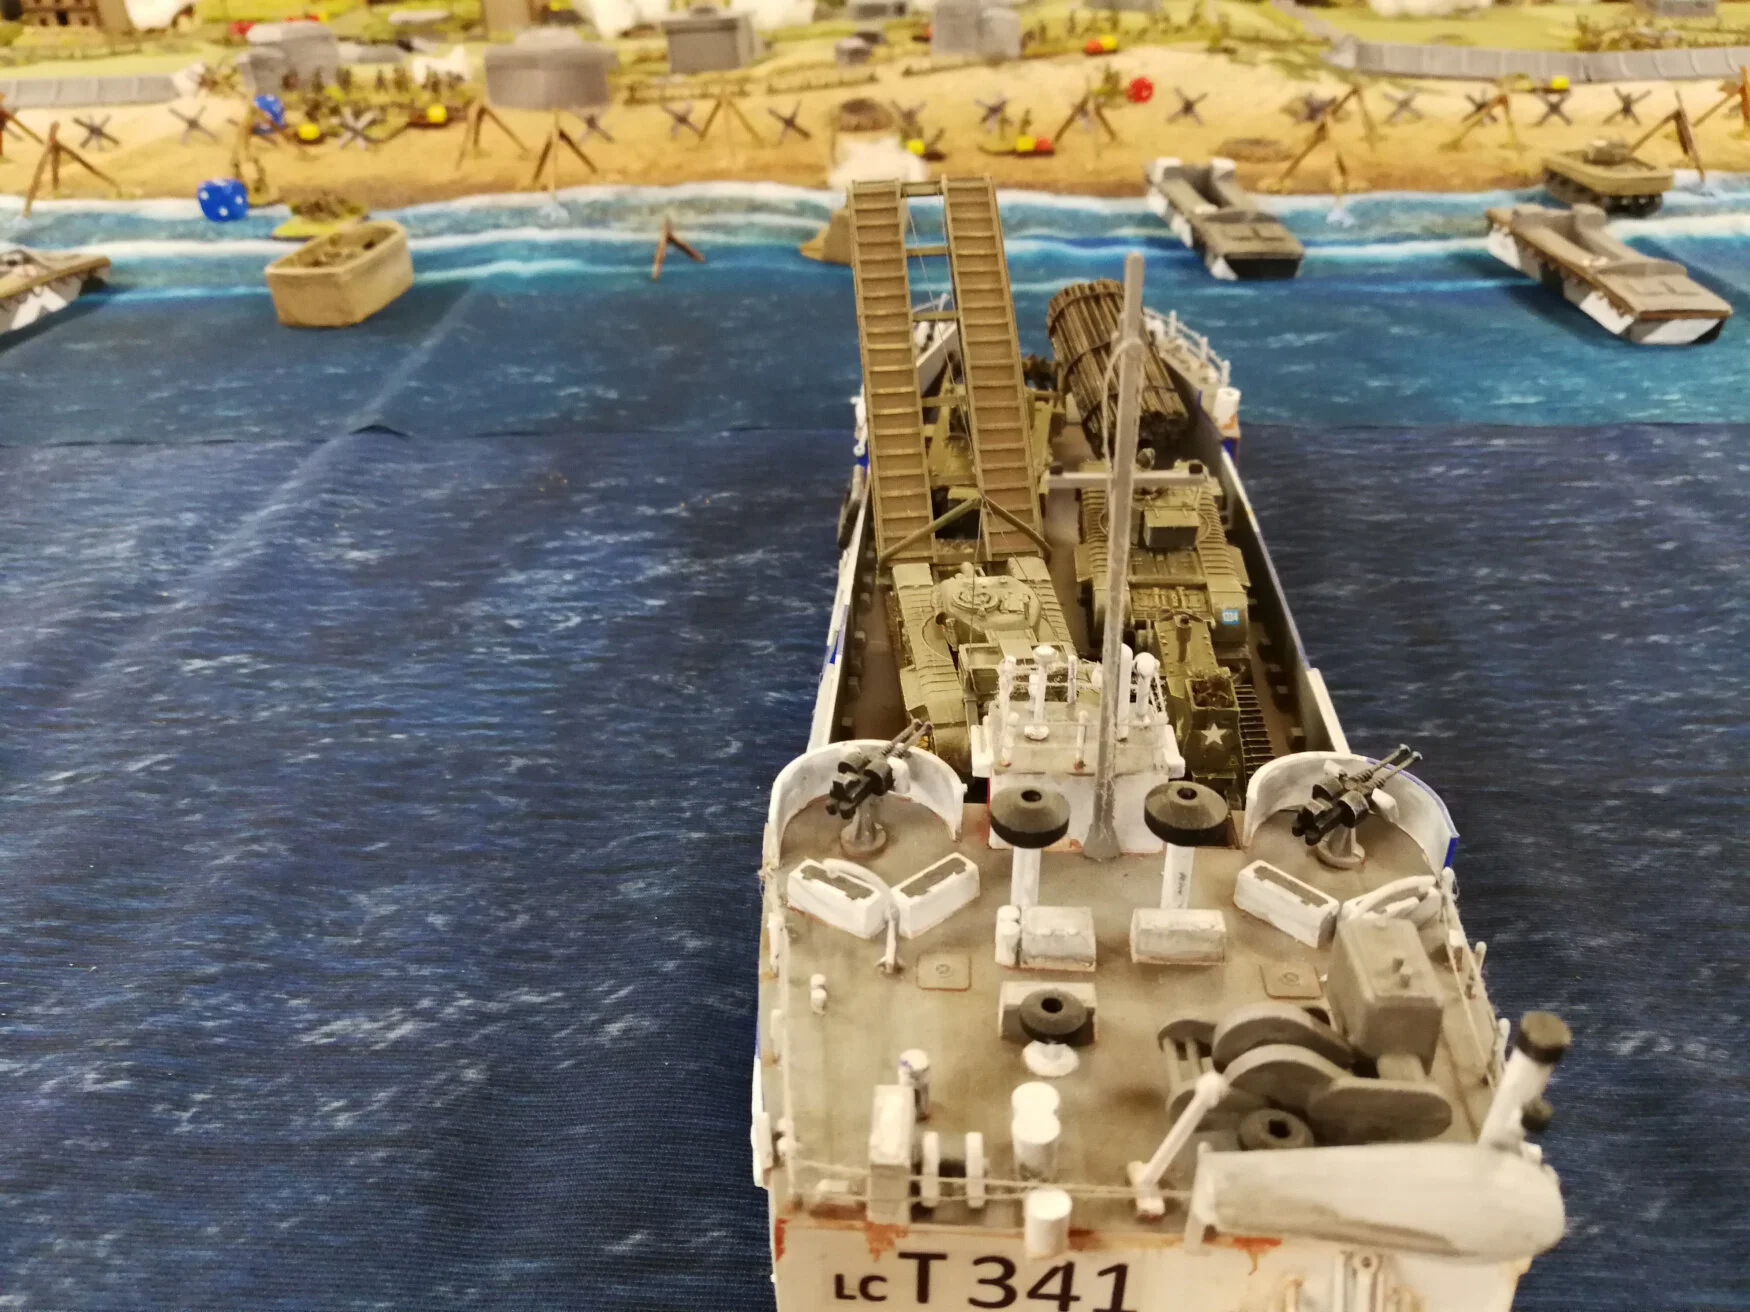
I had what looked like an overwhelming force: a first wave of an HQ element, two platoons of three t-34s each, and a third platoon of three BT-17s. Following that, I had six more platoons of armour split into two more waves for a total of six more T-34s, three venerable KV-1s, three SU-76s, two SU-76is and, the piece de resistance, two SU-152 big beast tank killers.

If that’s what I had, I was a little nervous about what I was going to face. I’d been told to watch out for the new German Tiger tank: presumably I’d be facing about 20 of them!
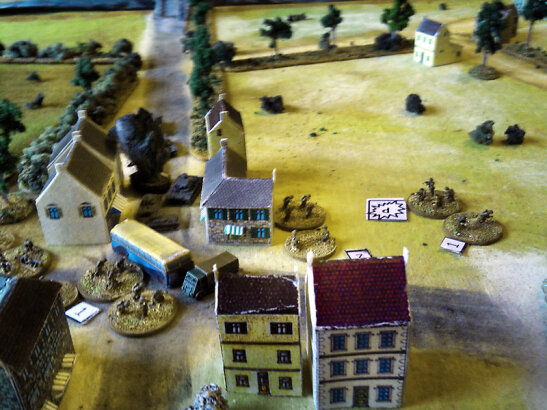
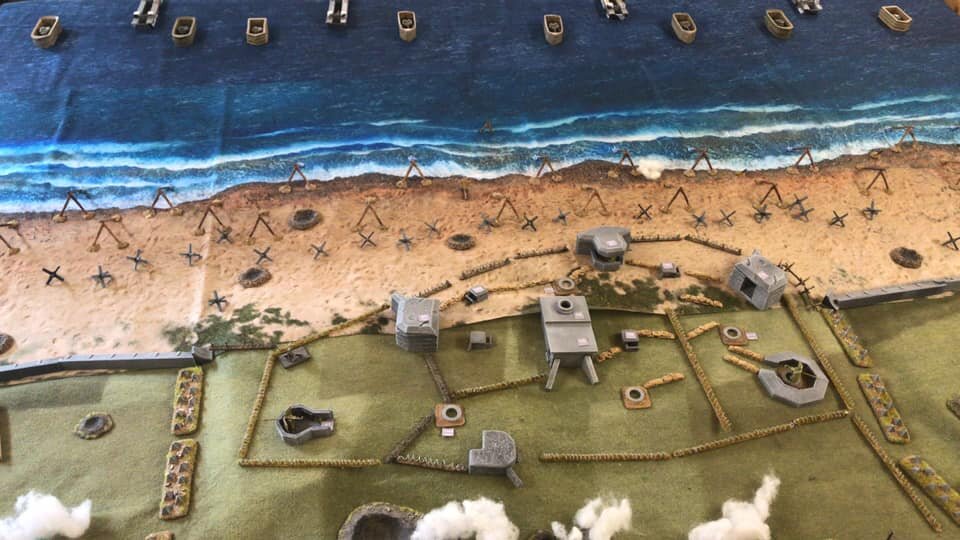
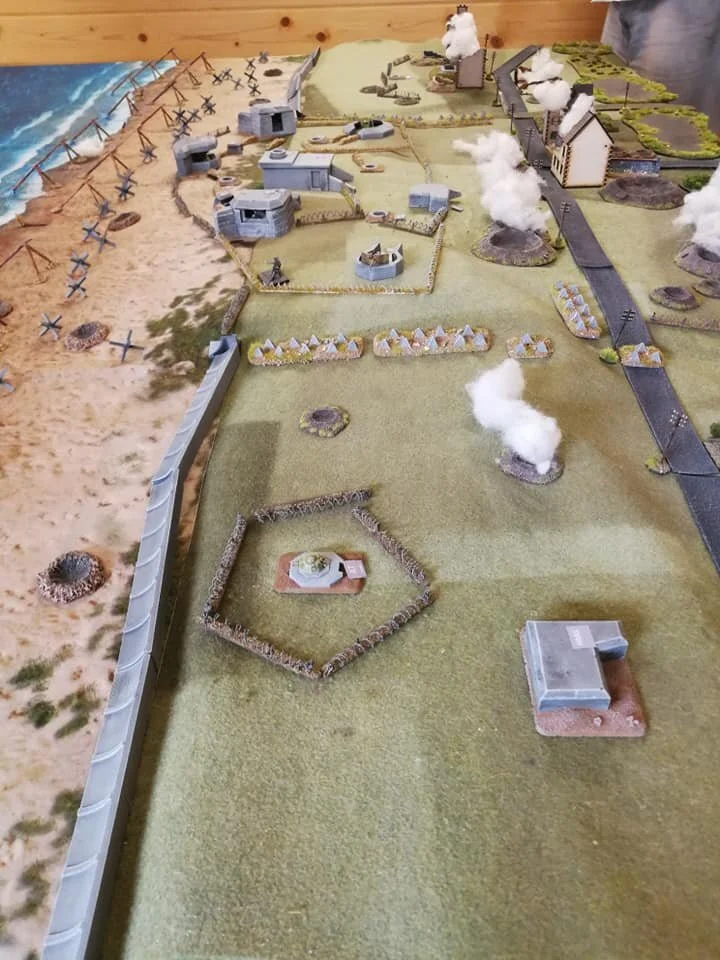
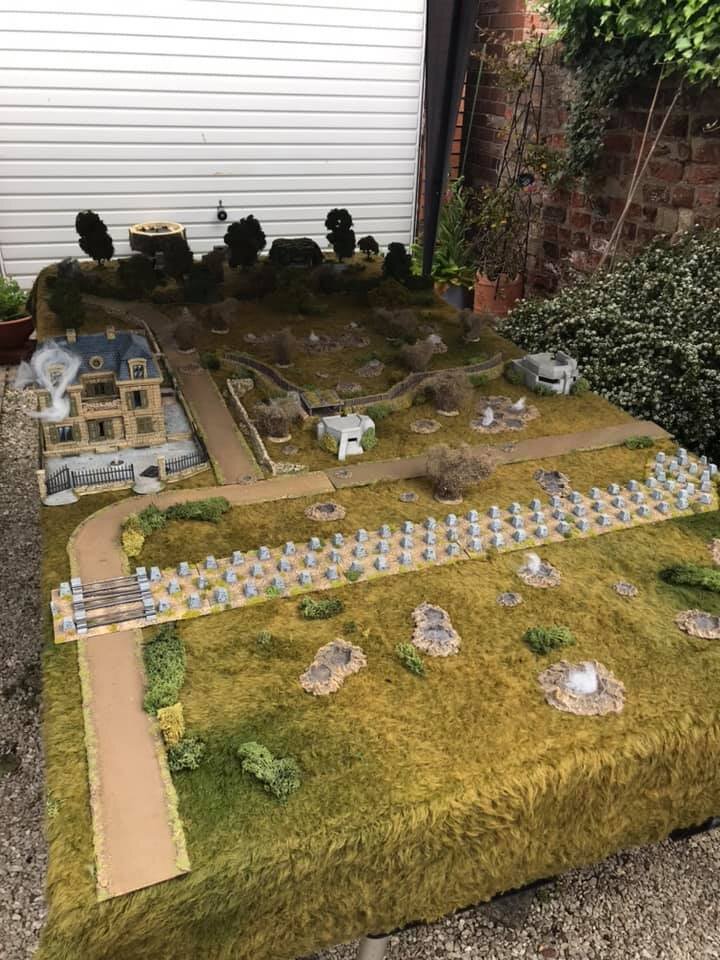
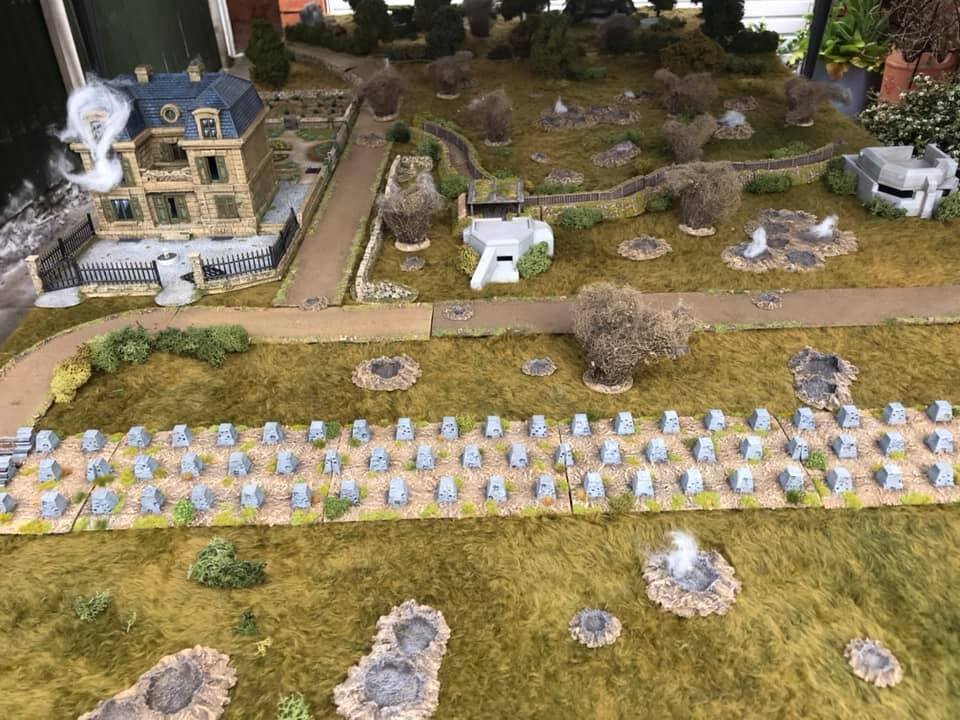
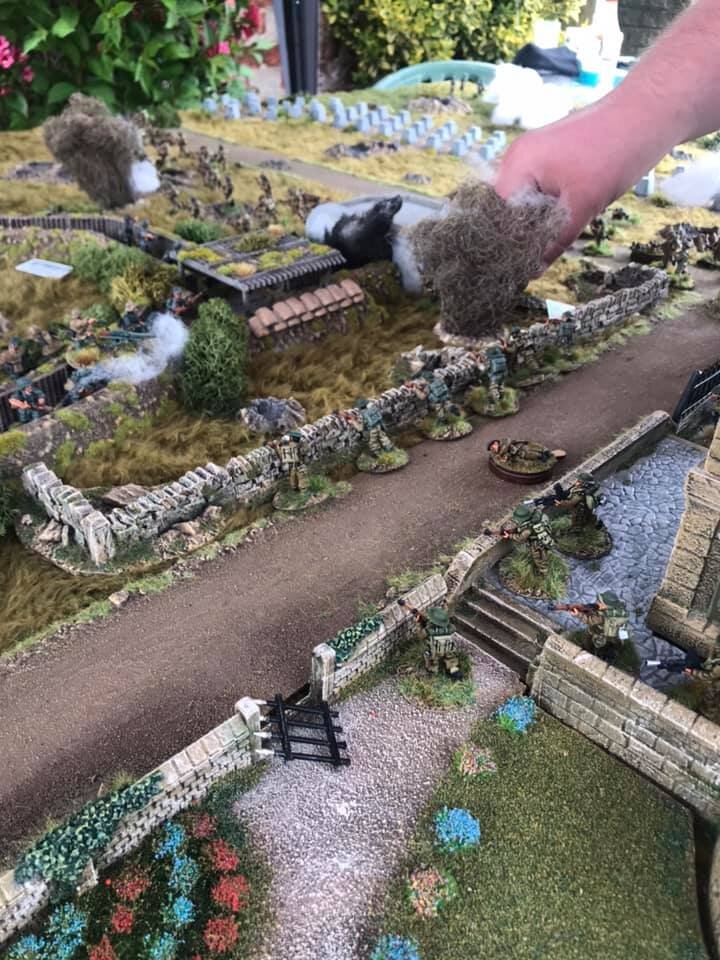
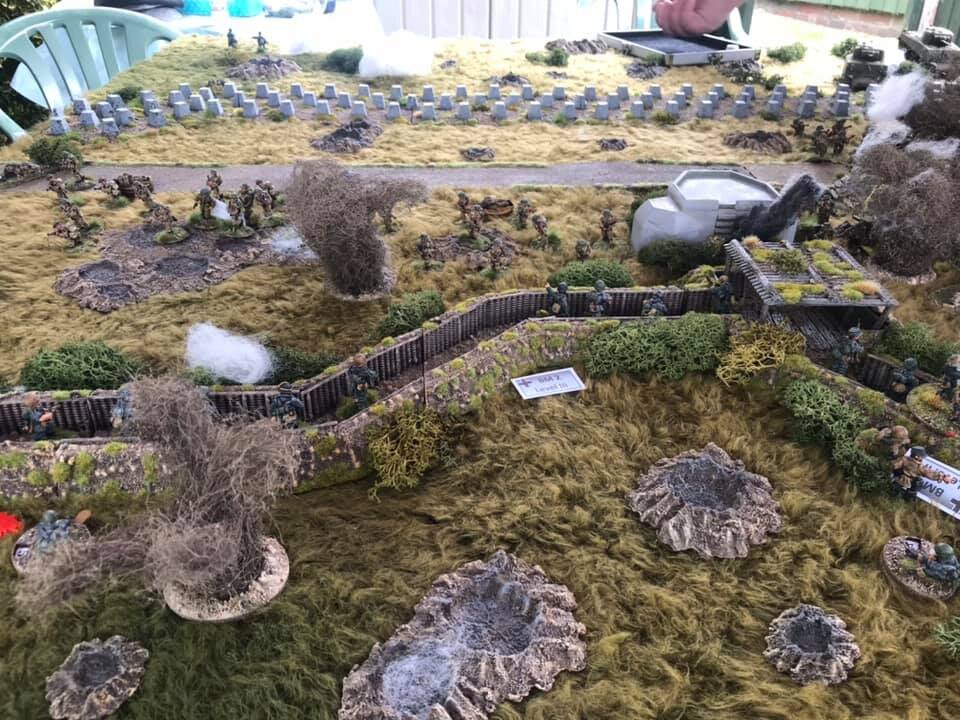
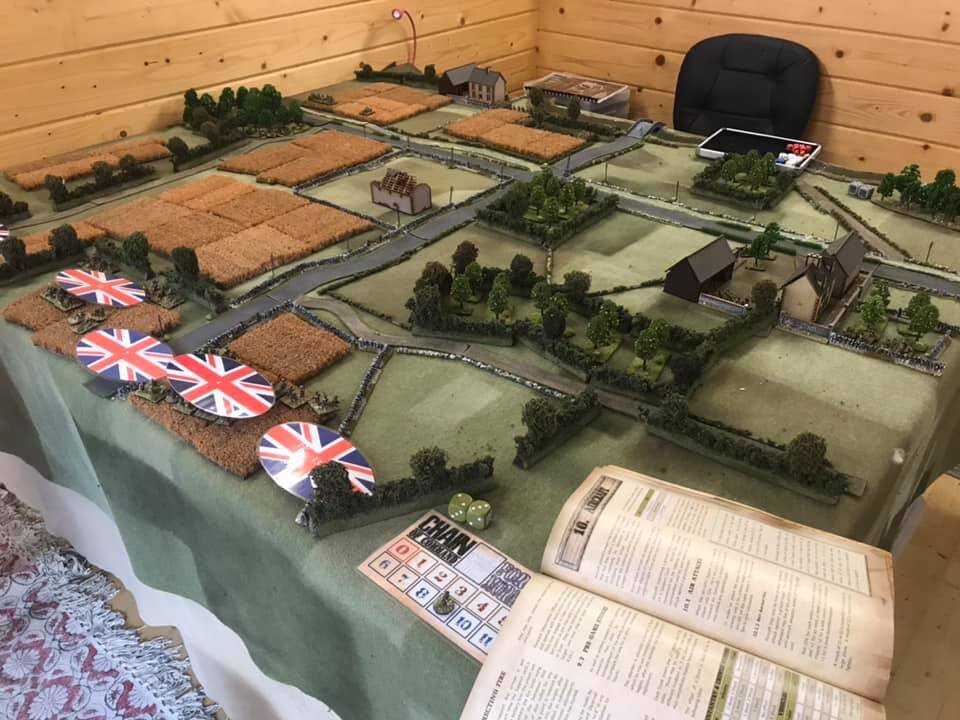
The Field

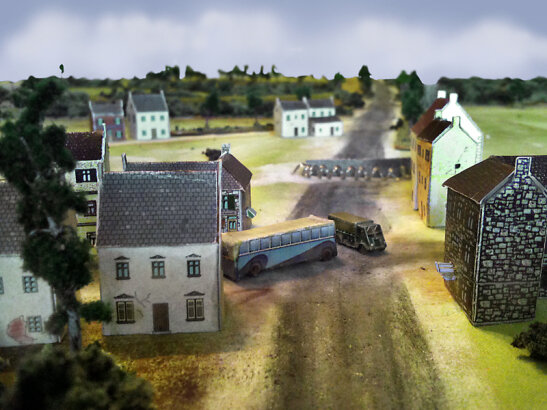
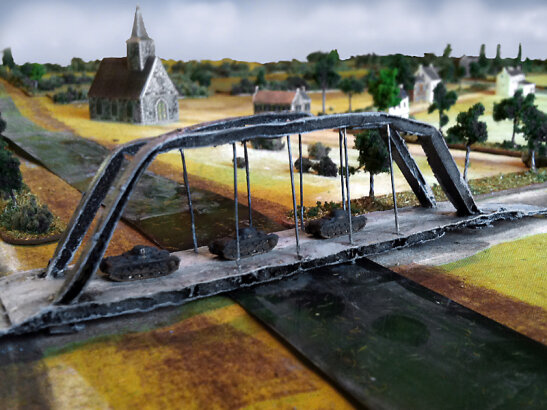
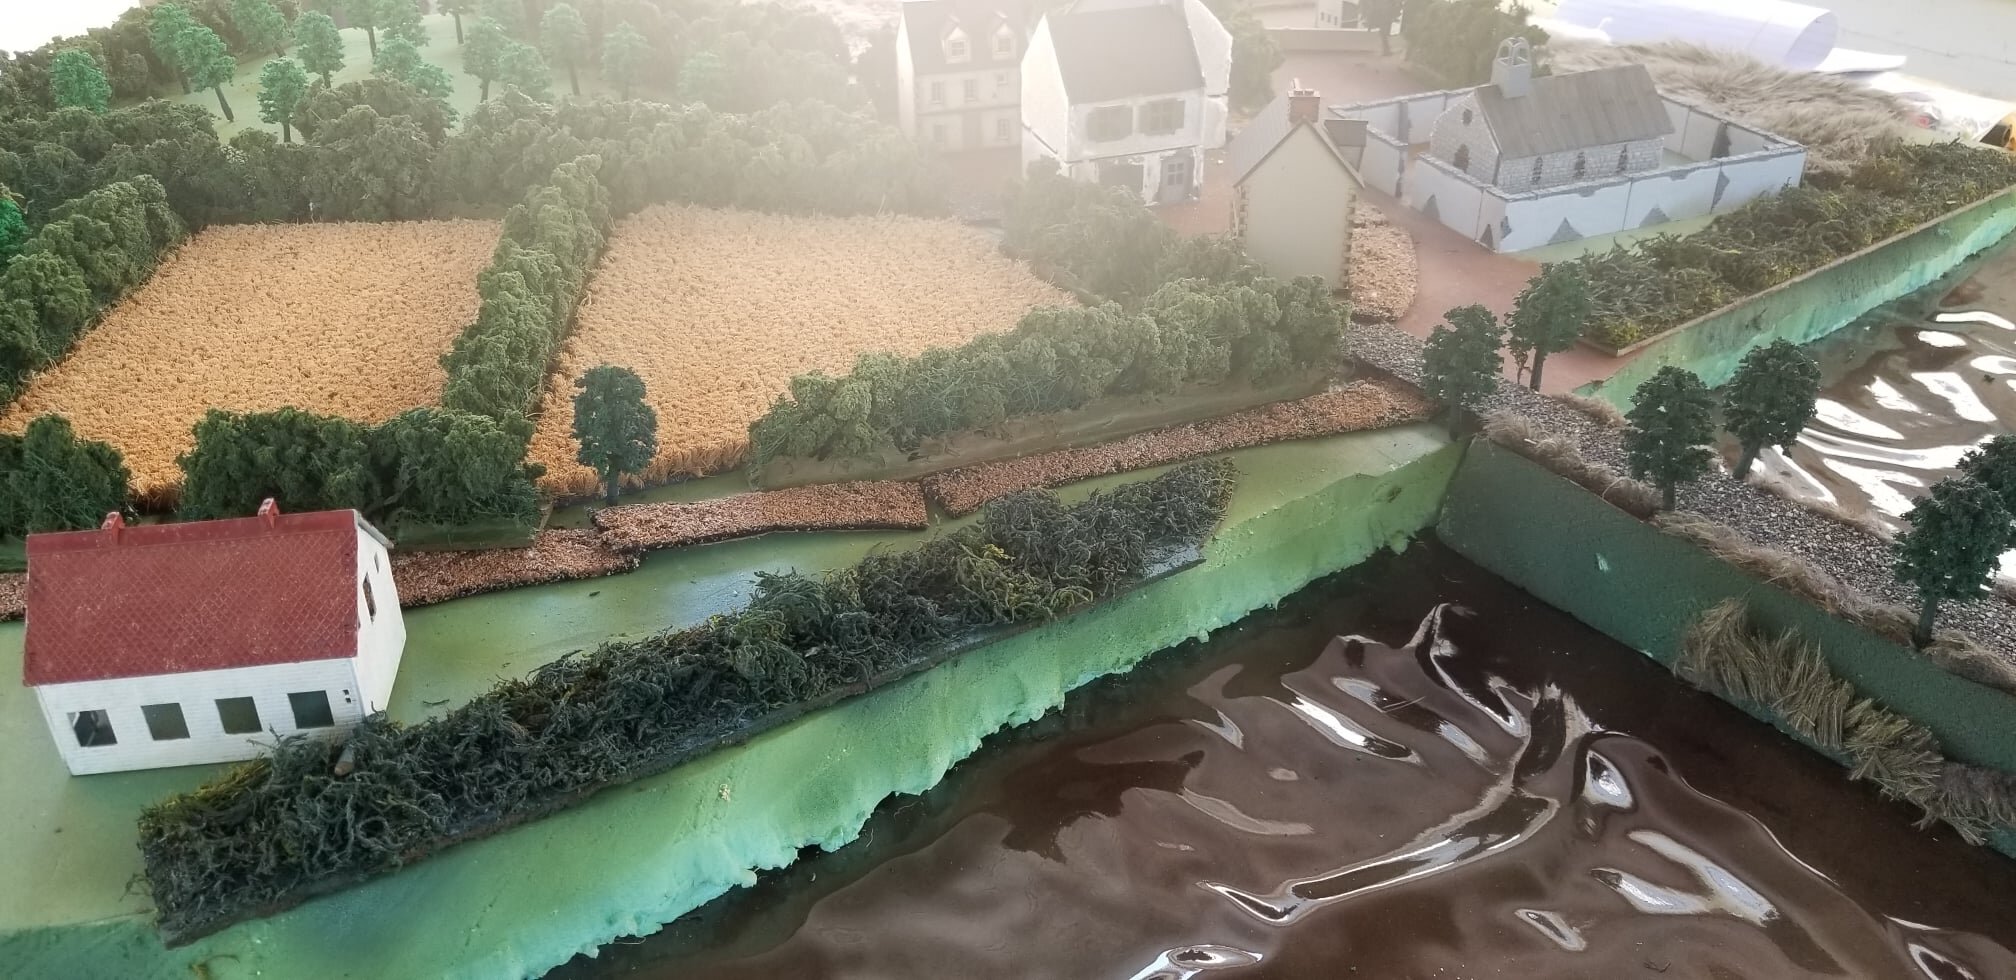
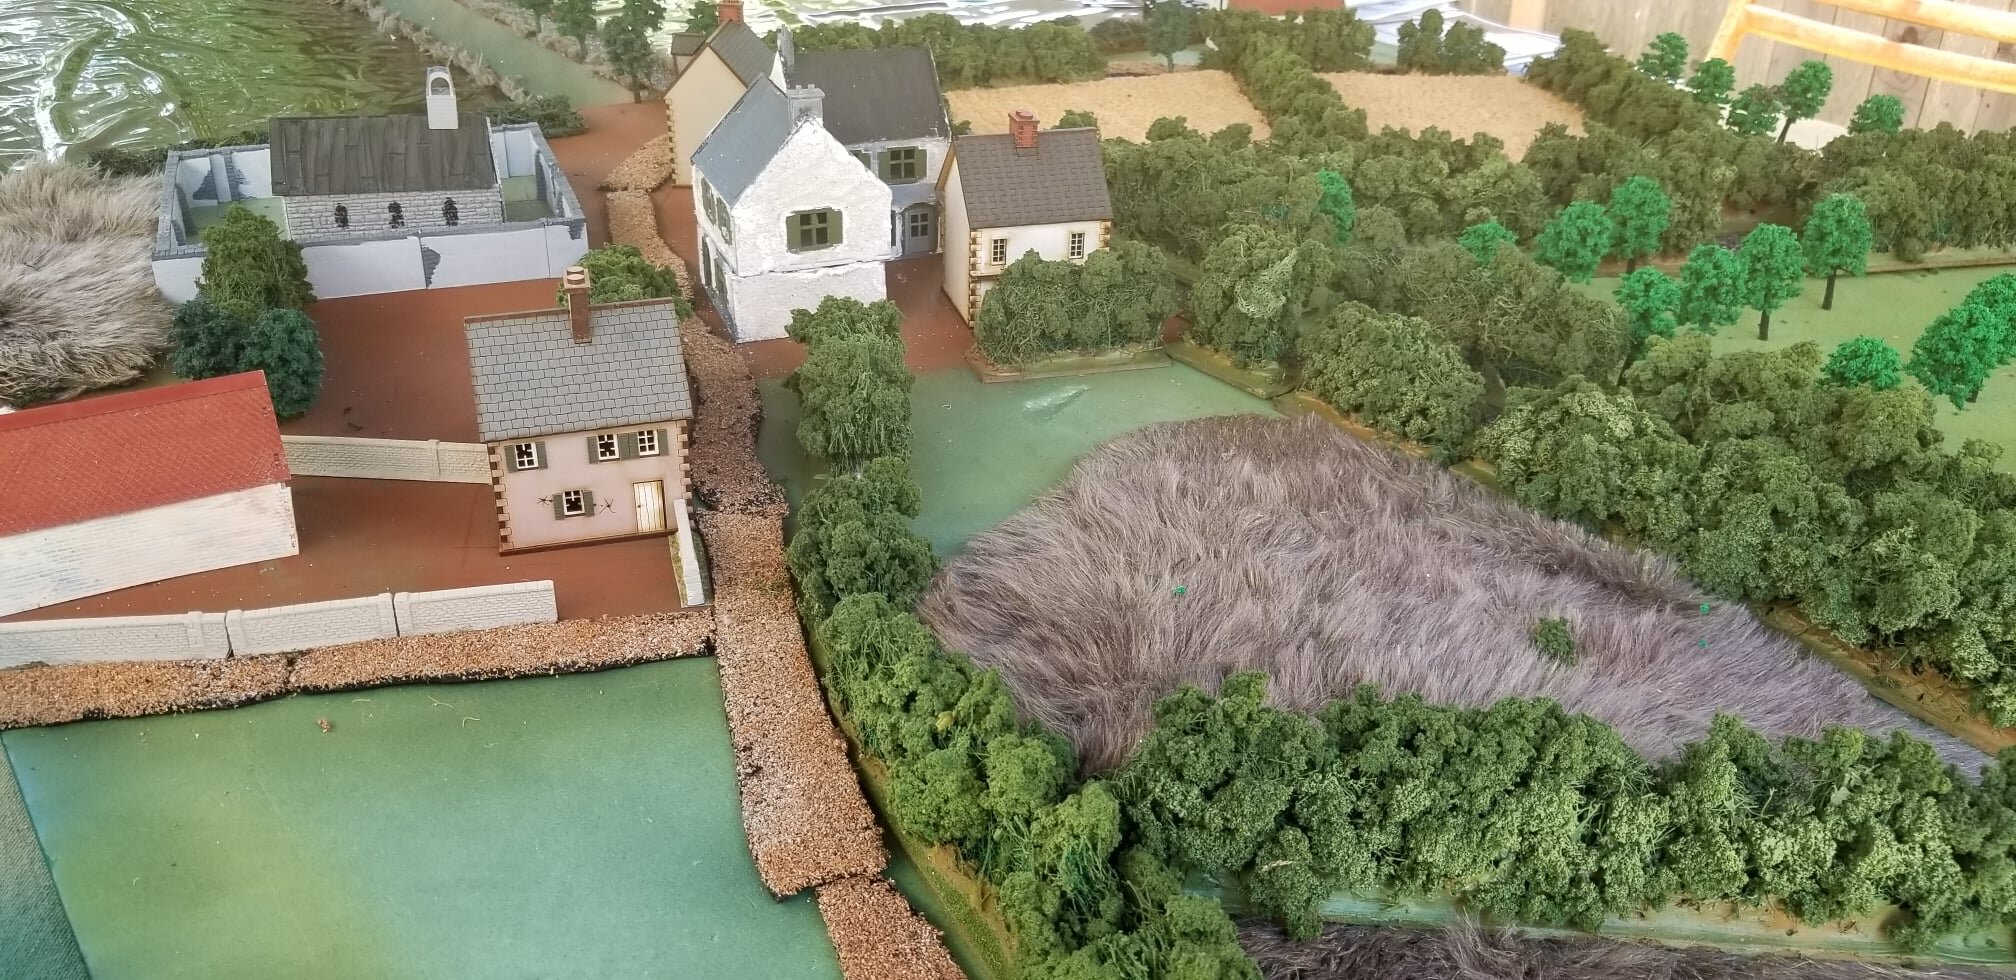
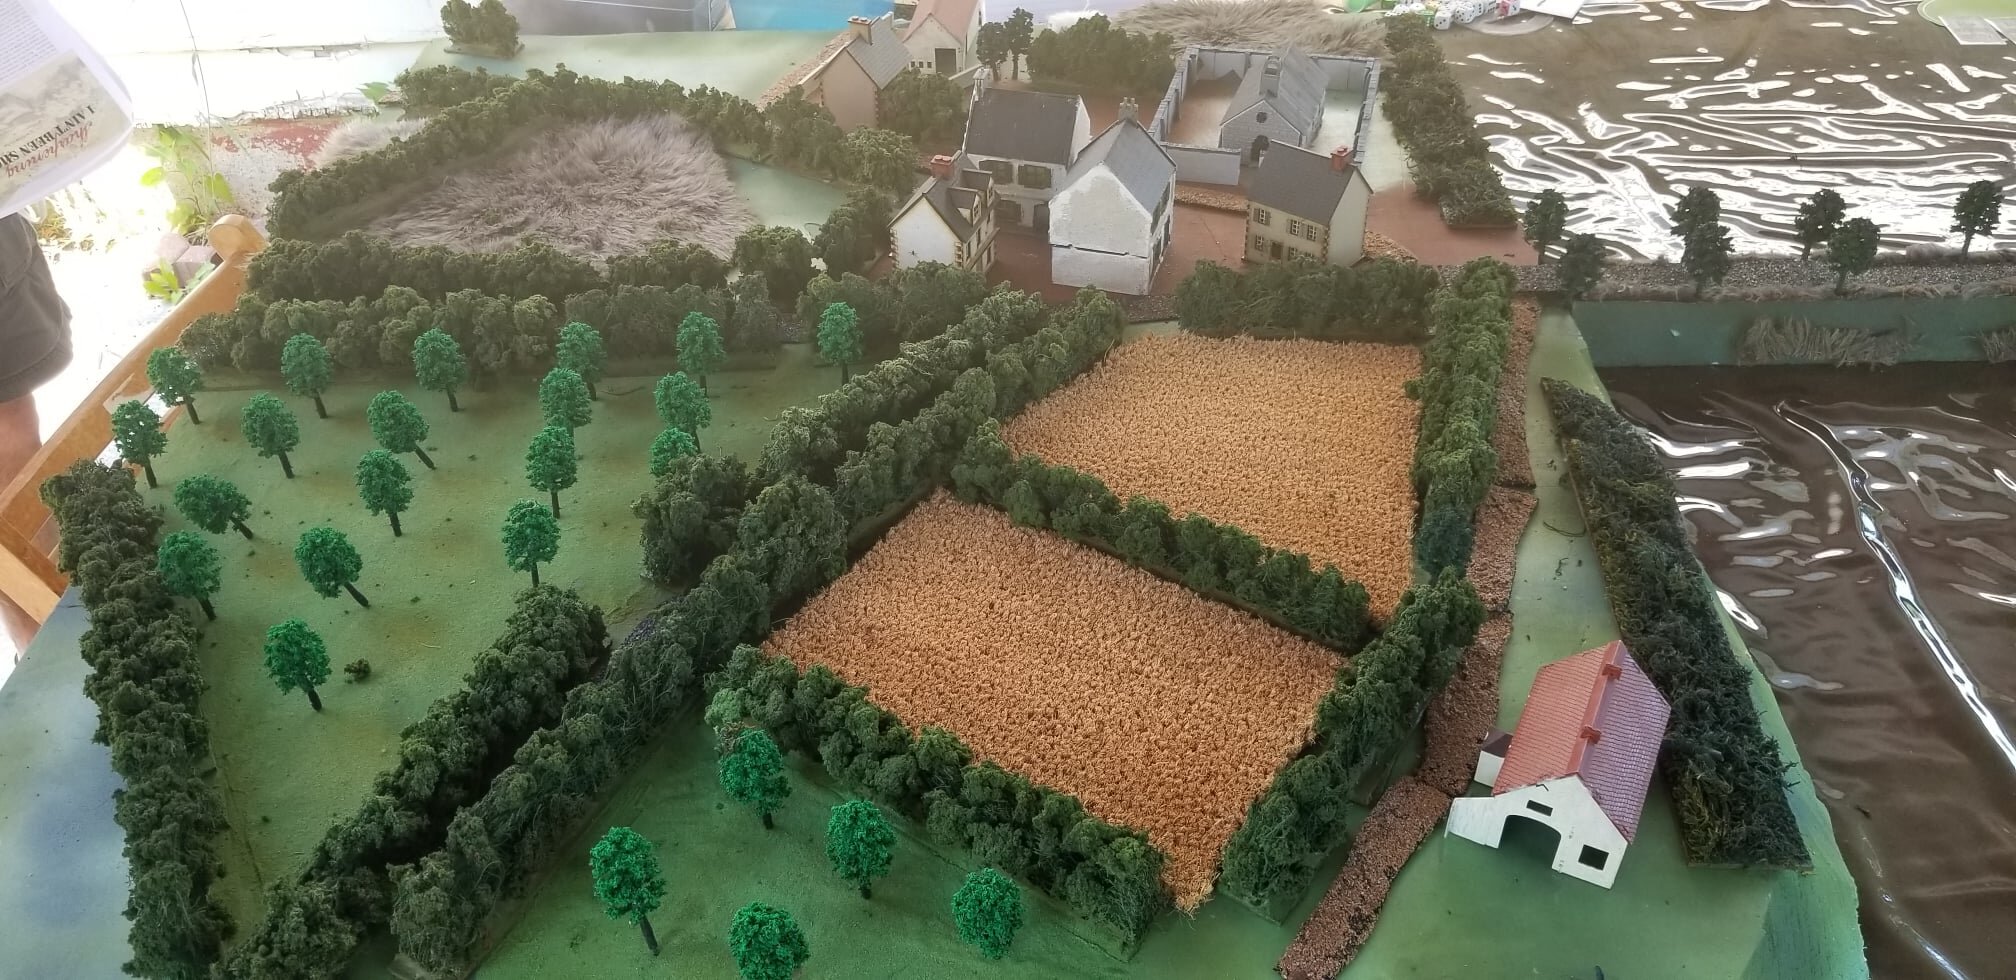
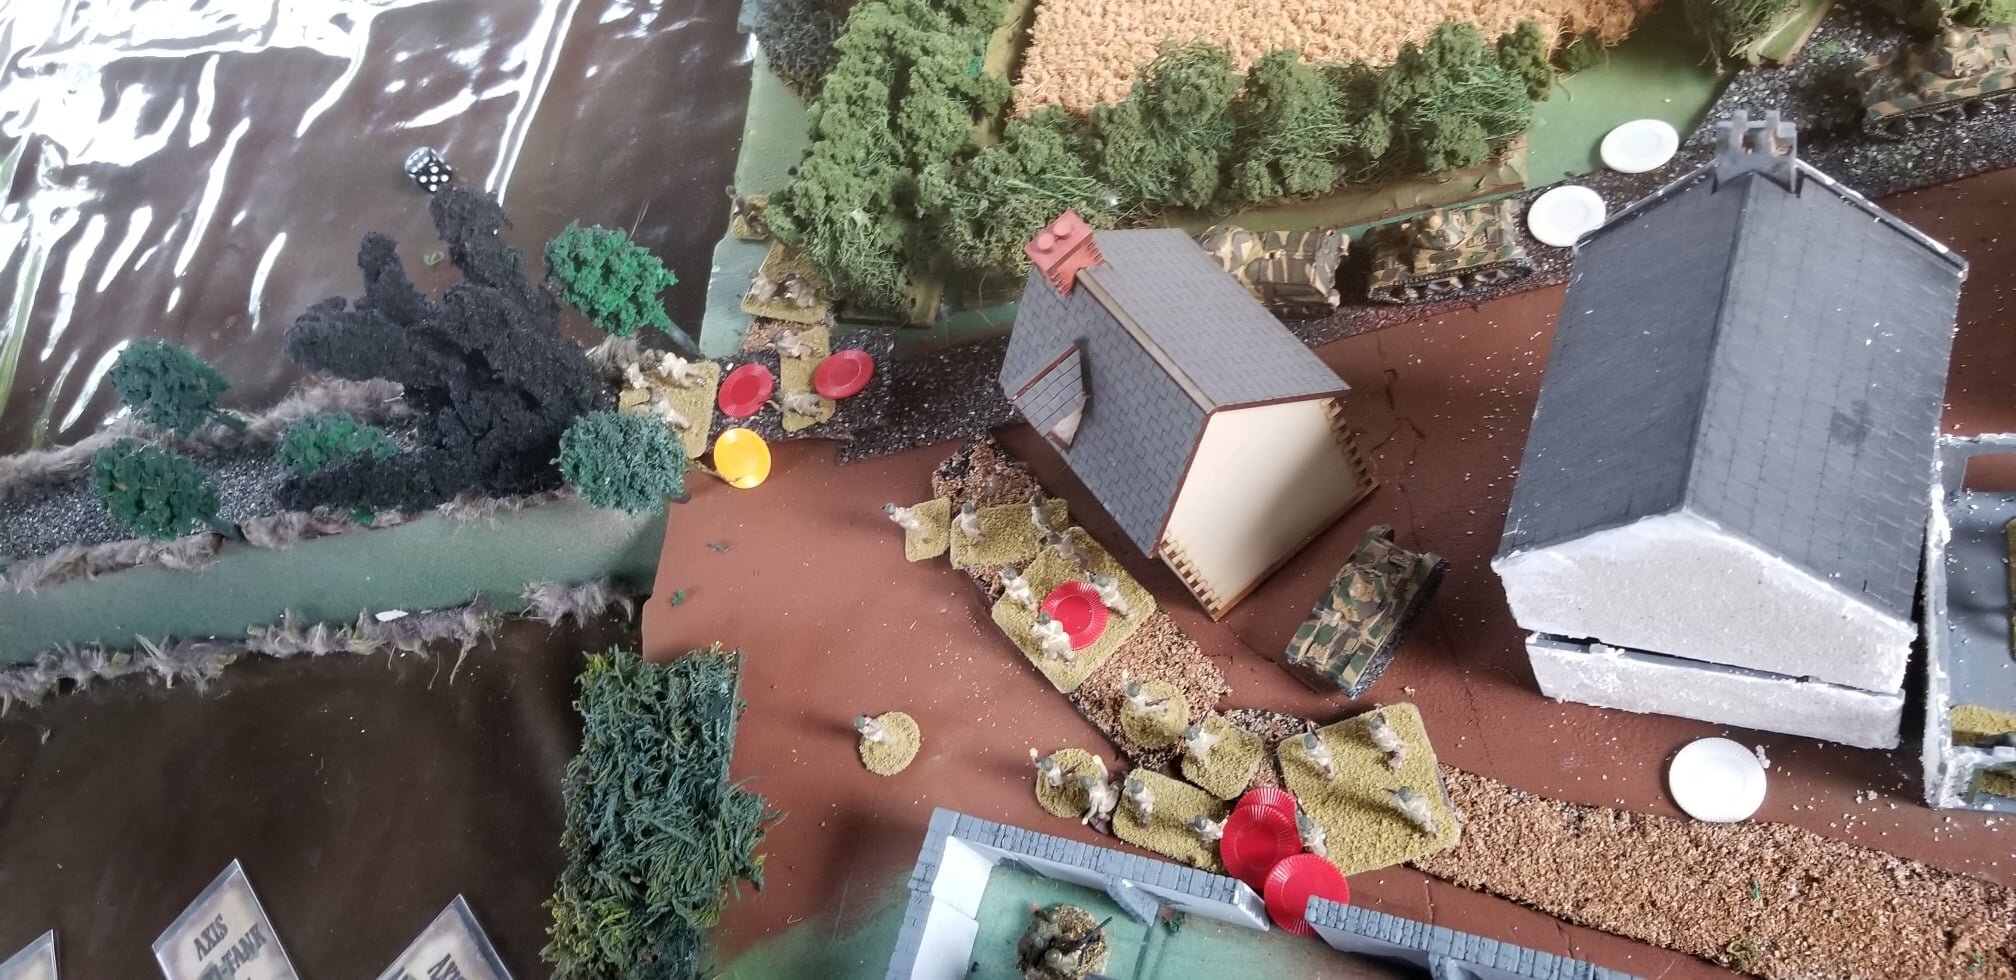
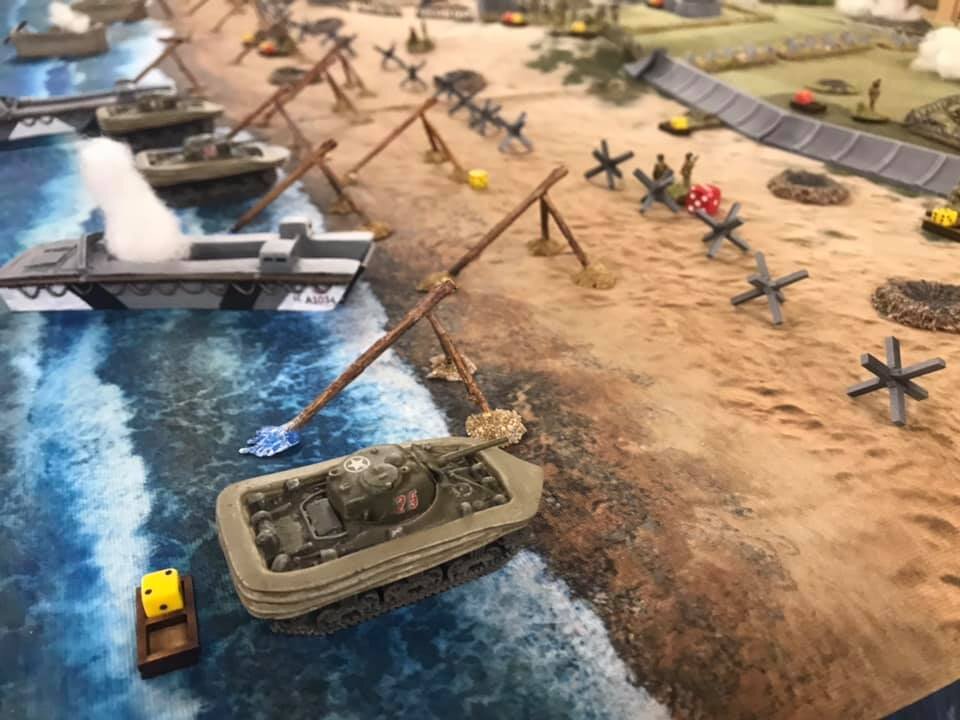
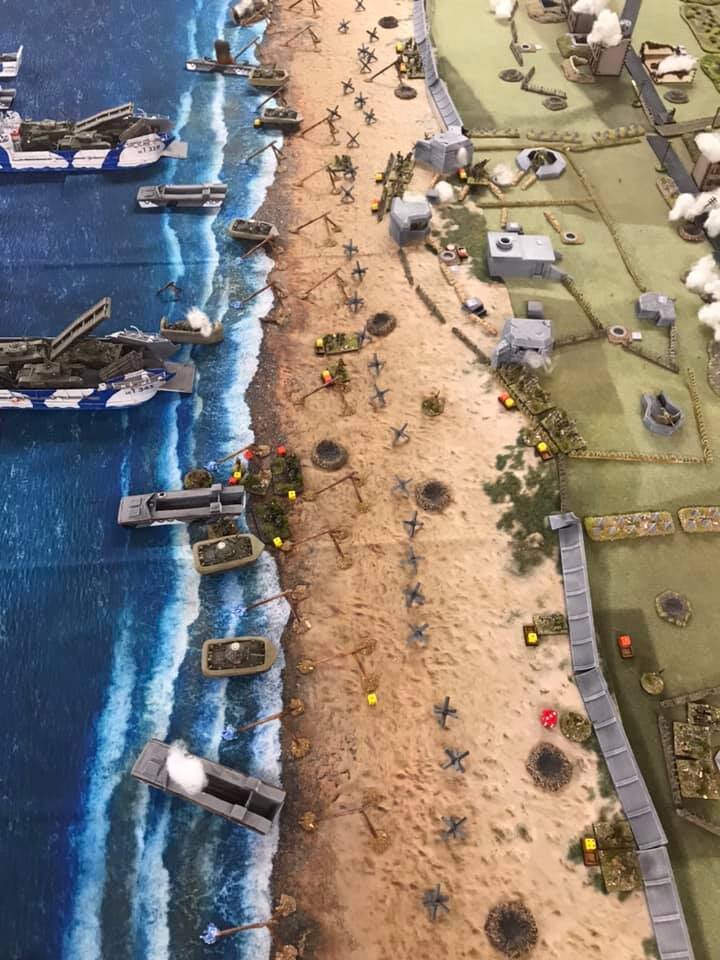
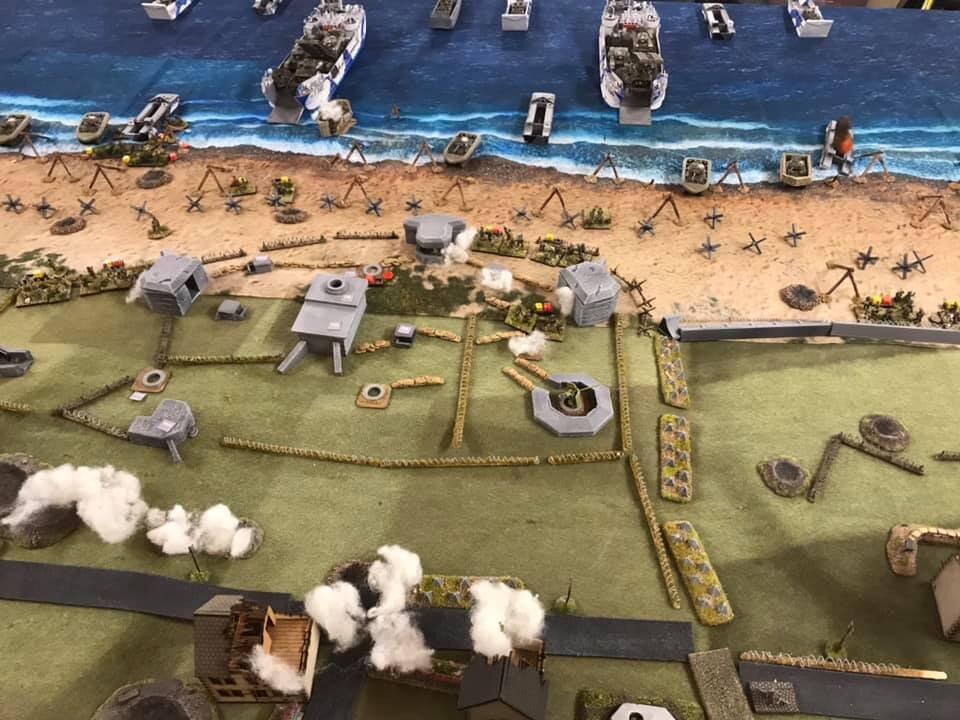
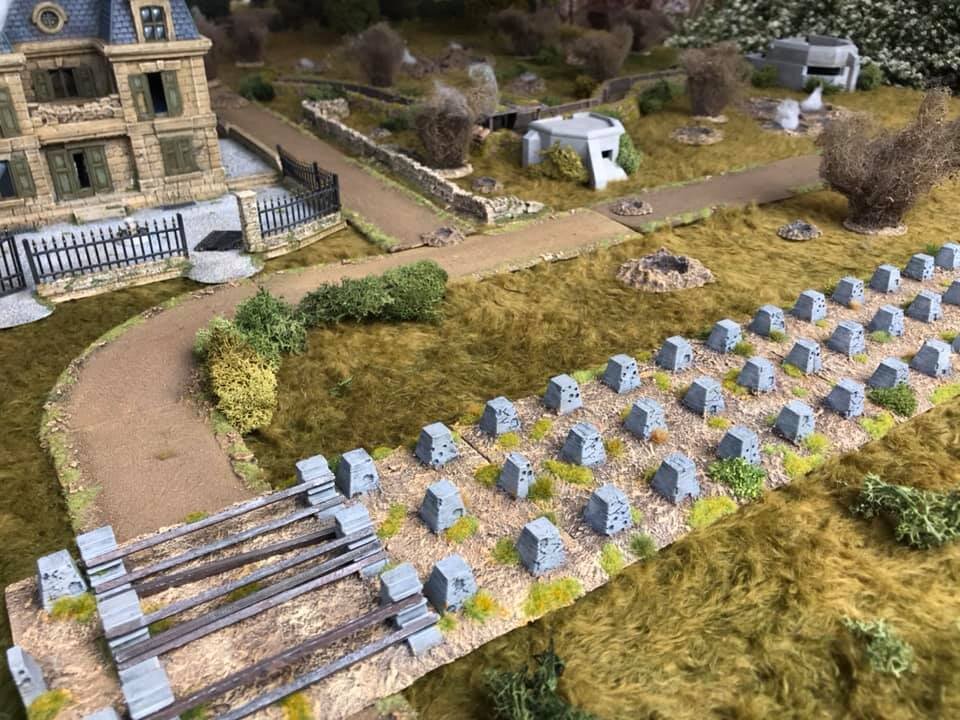
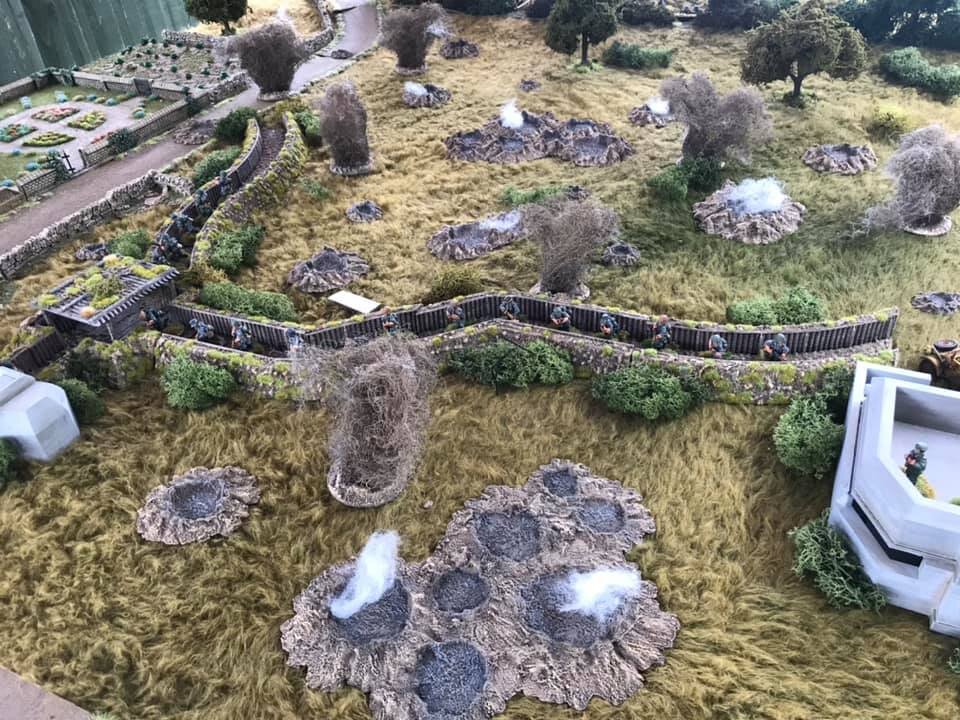
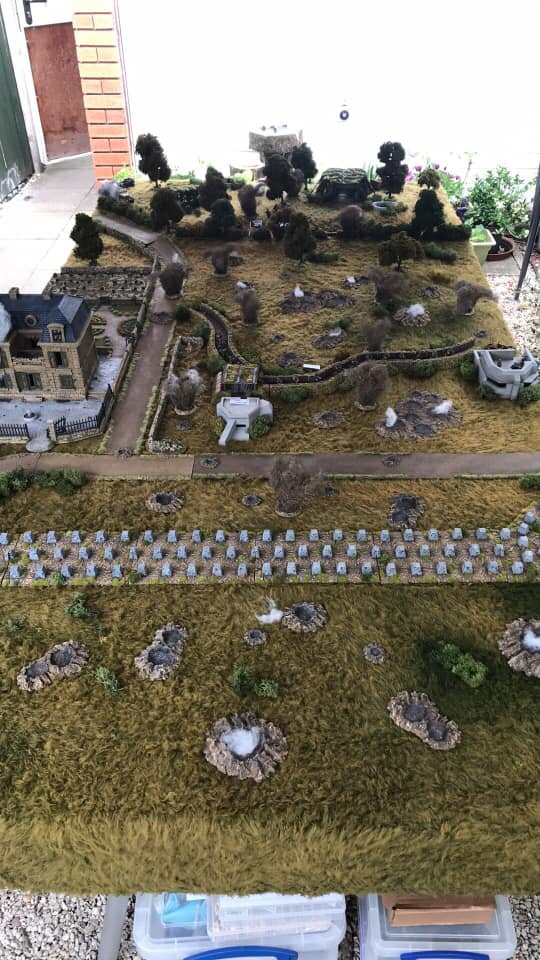
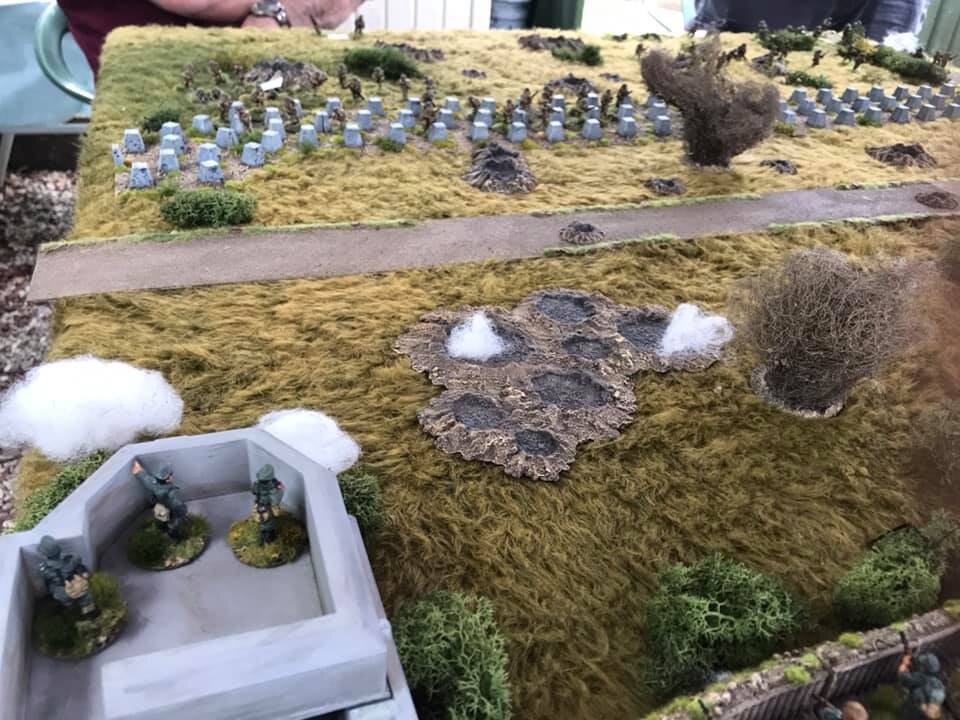
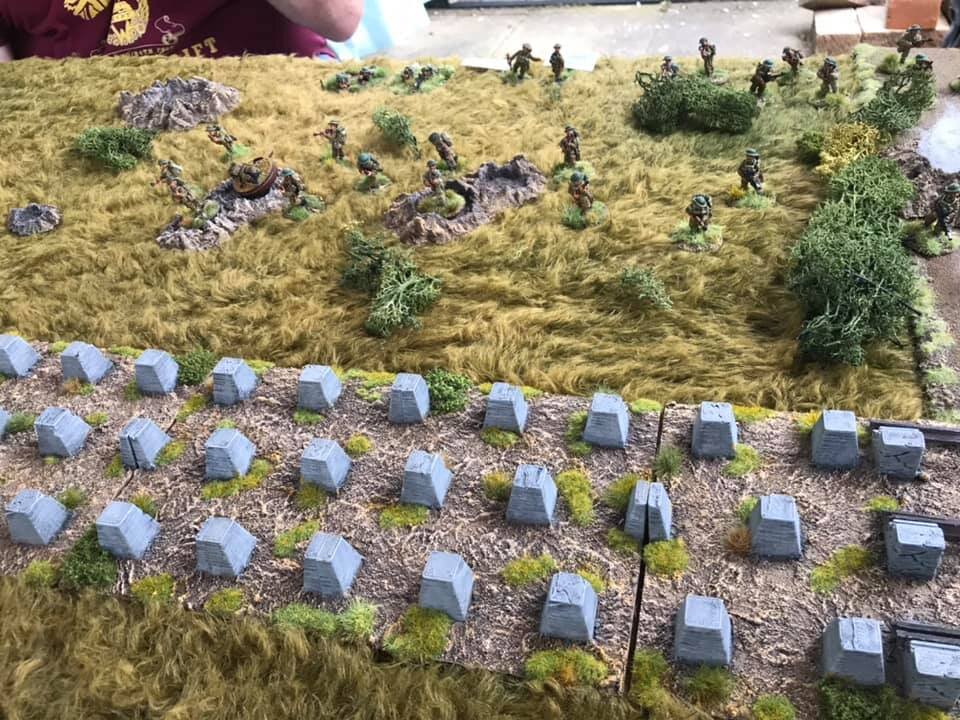
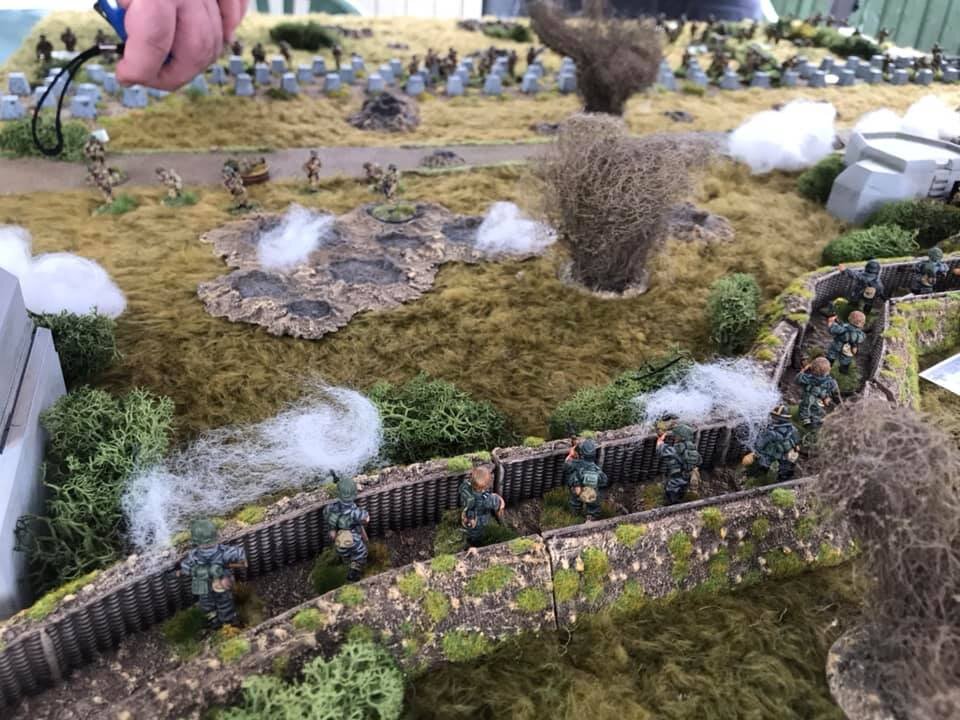
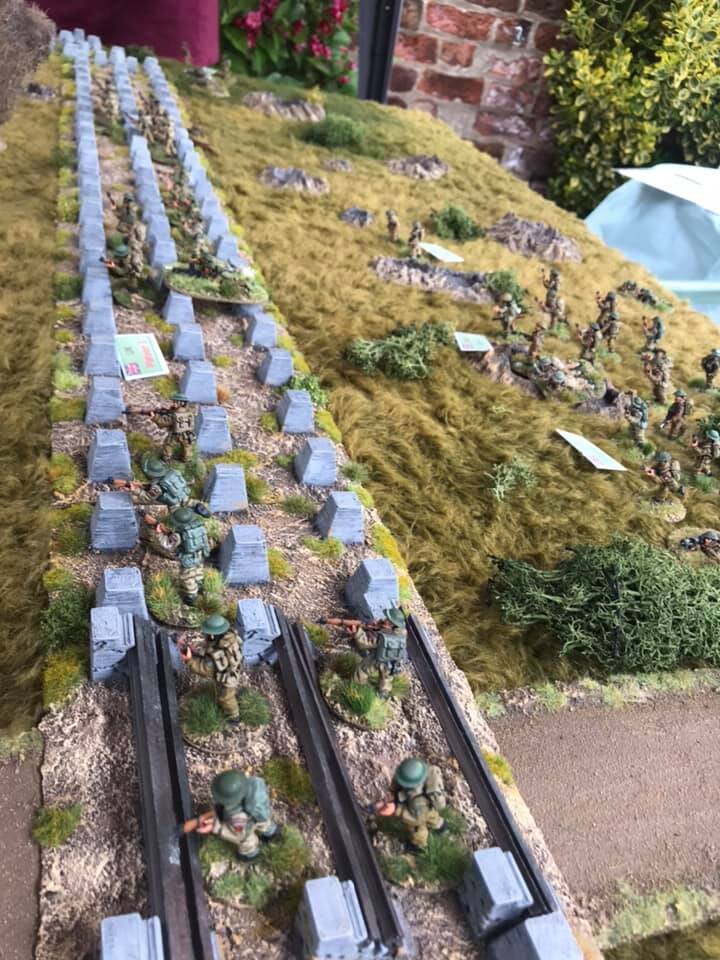
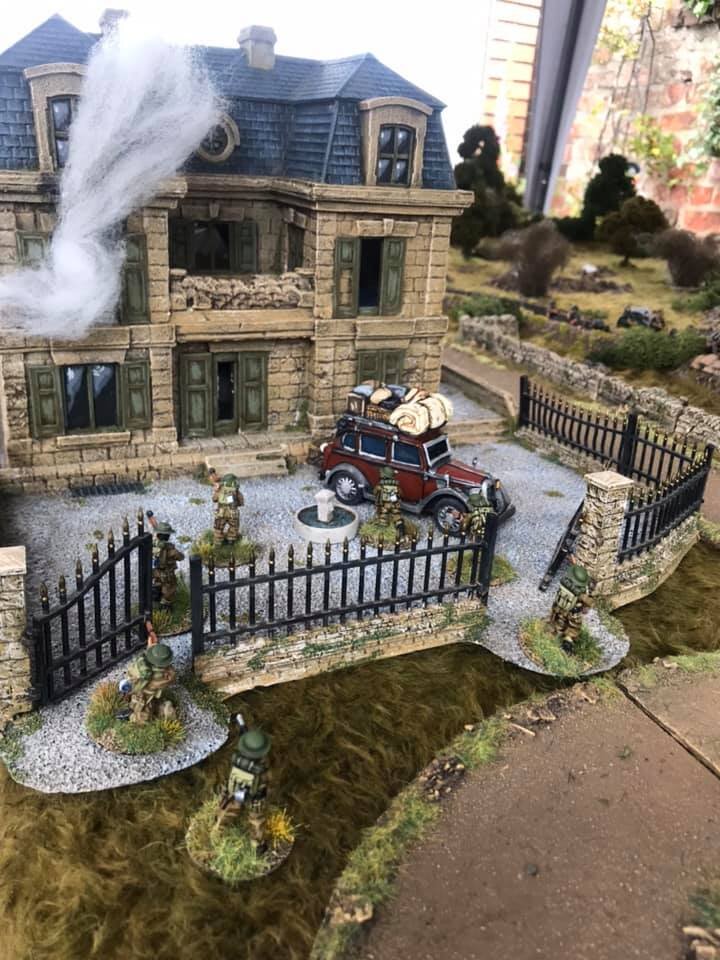
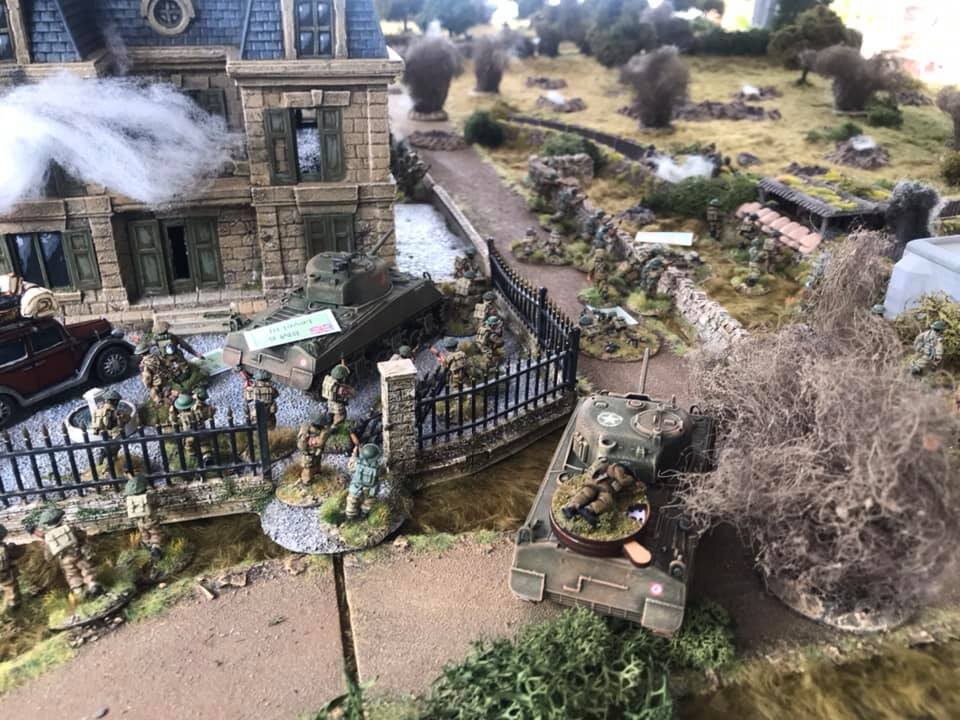
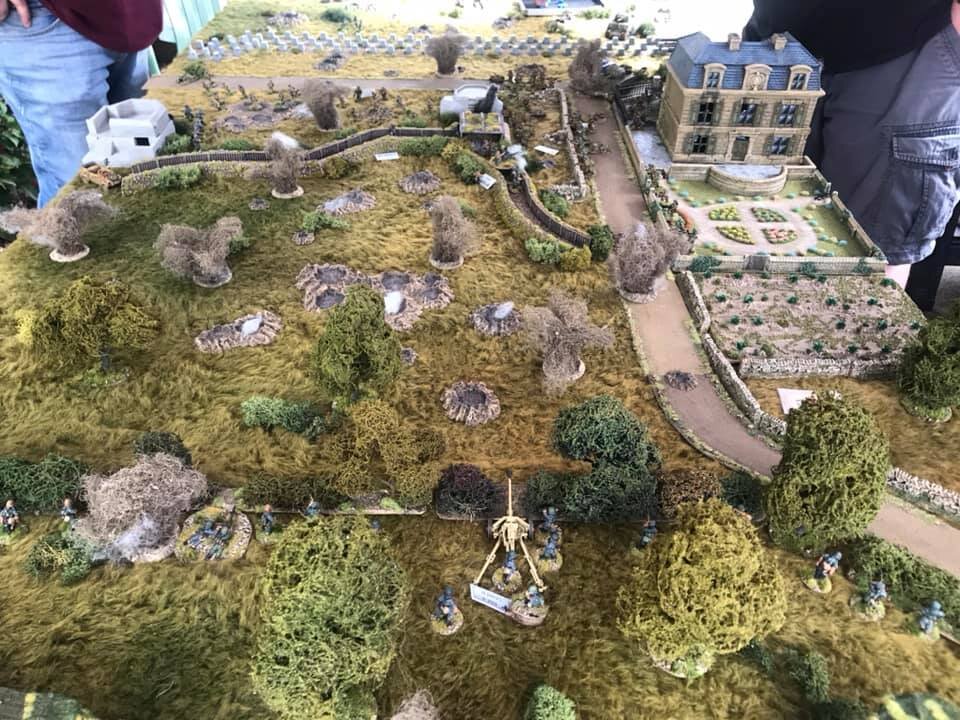
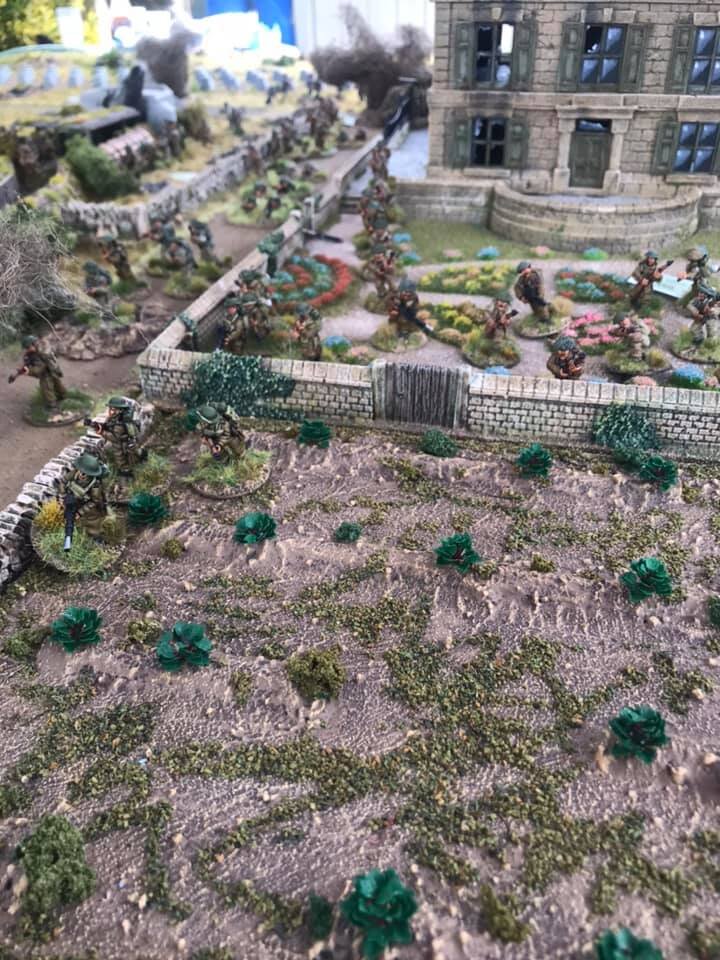
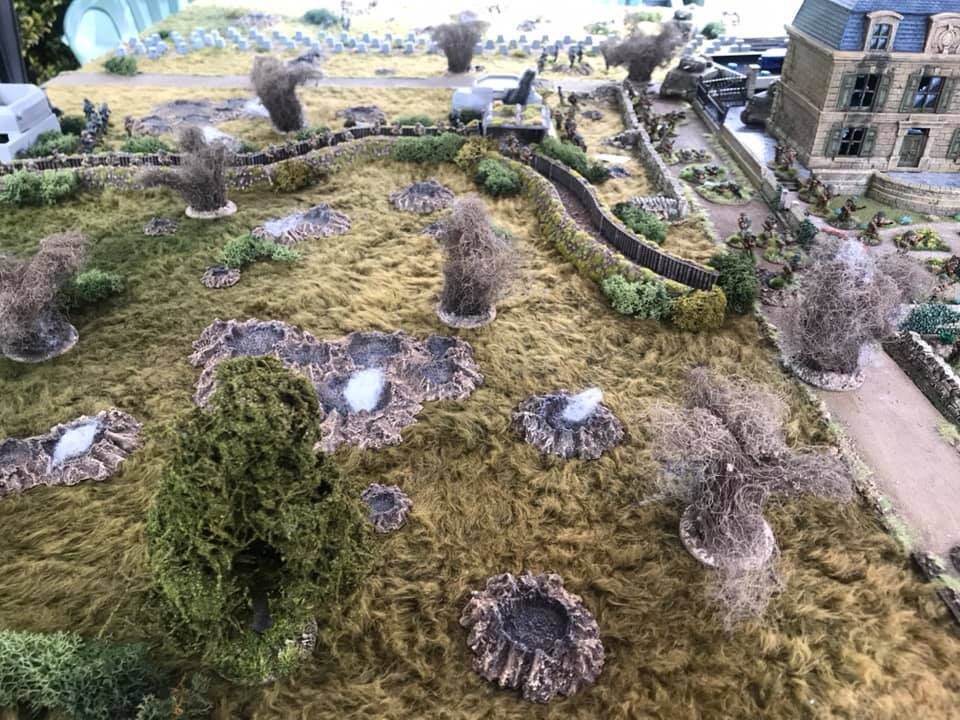
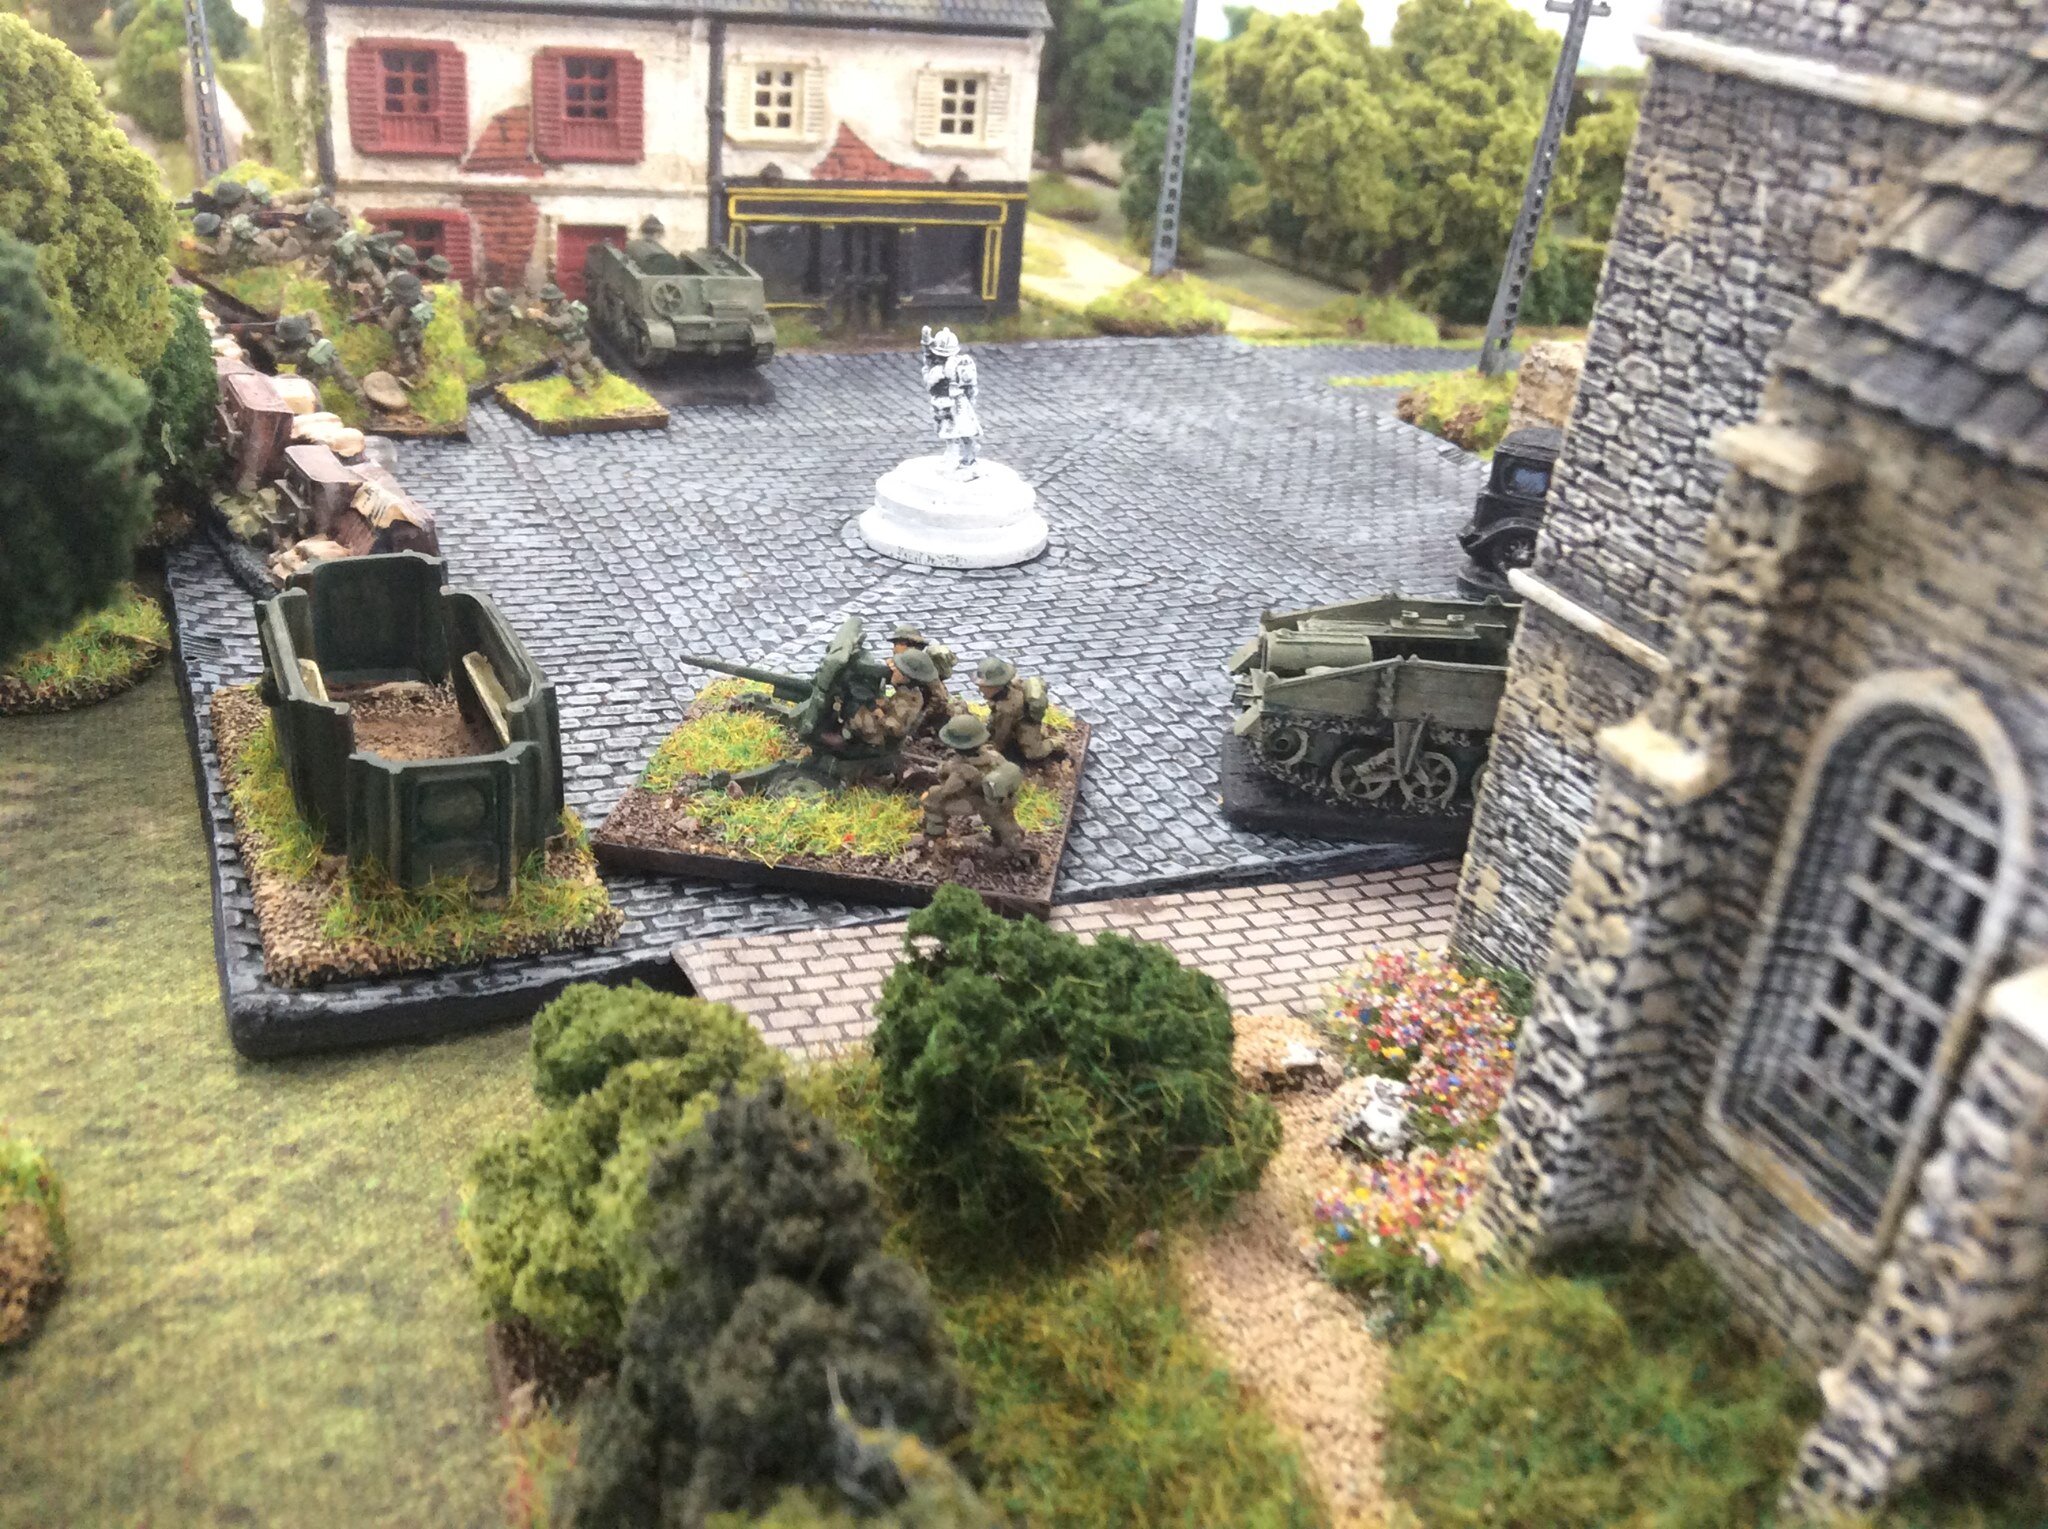
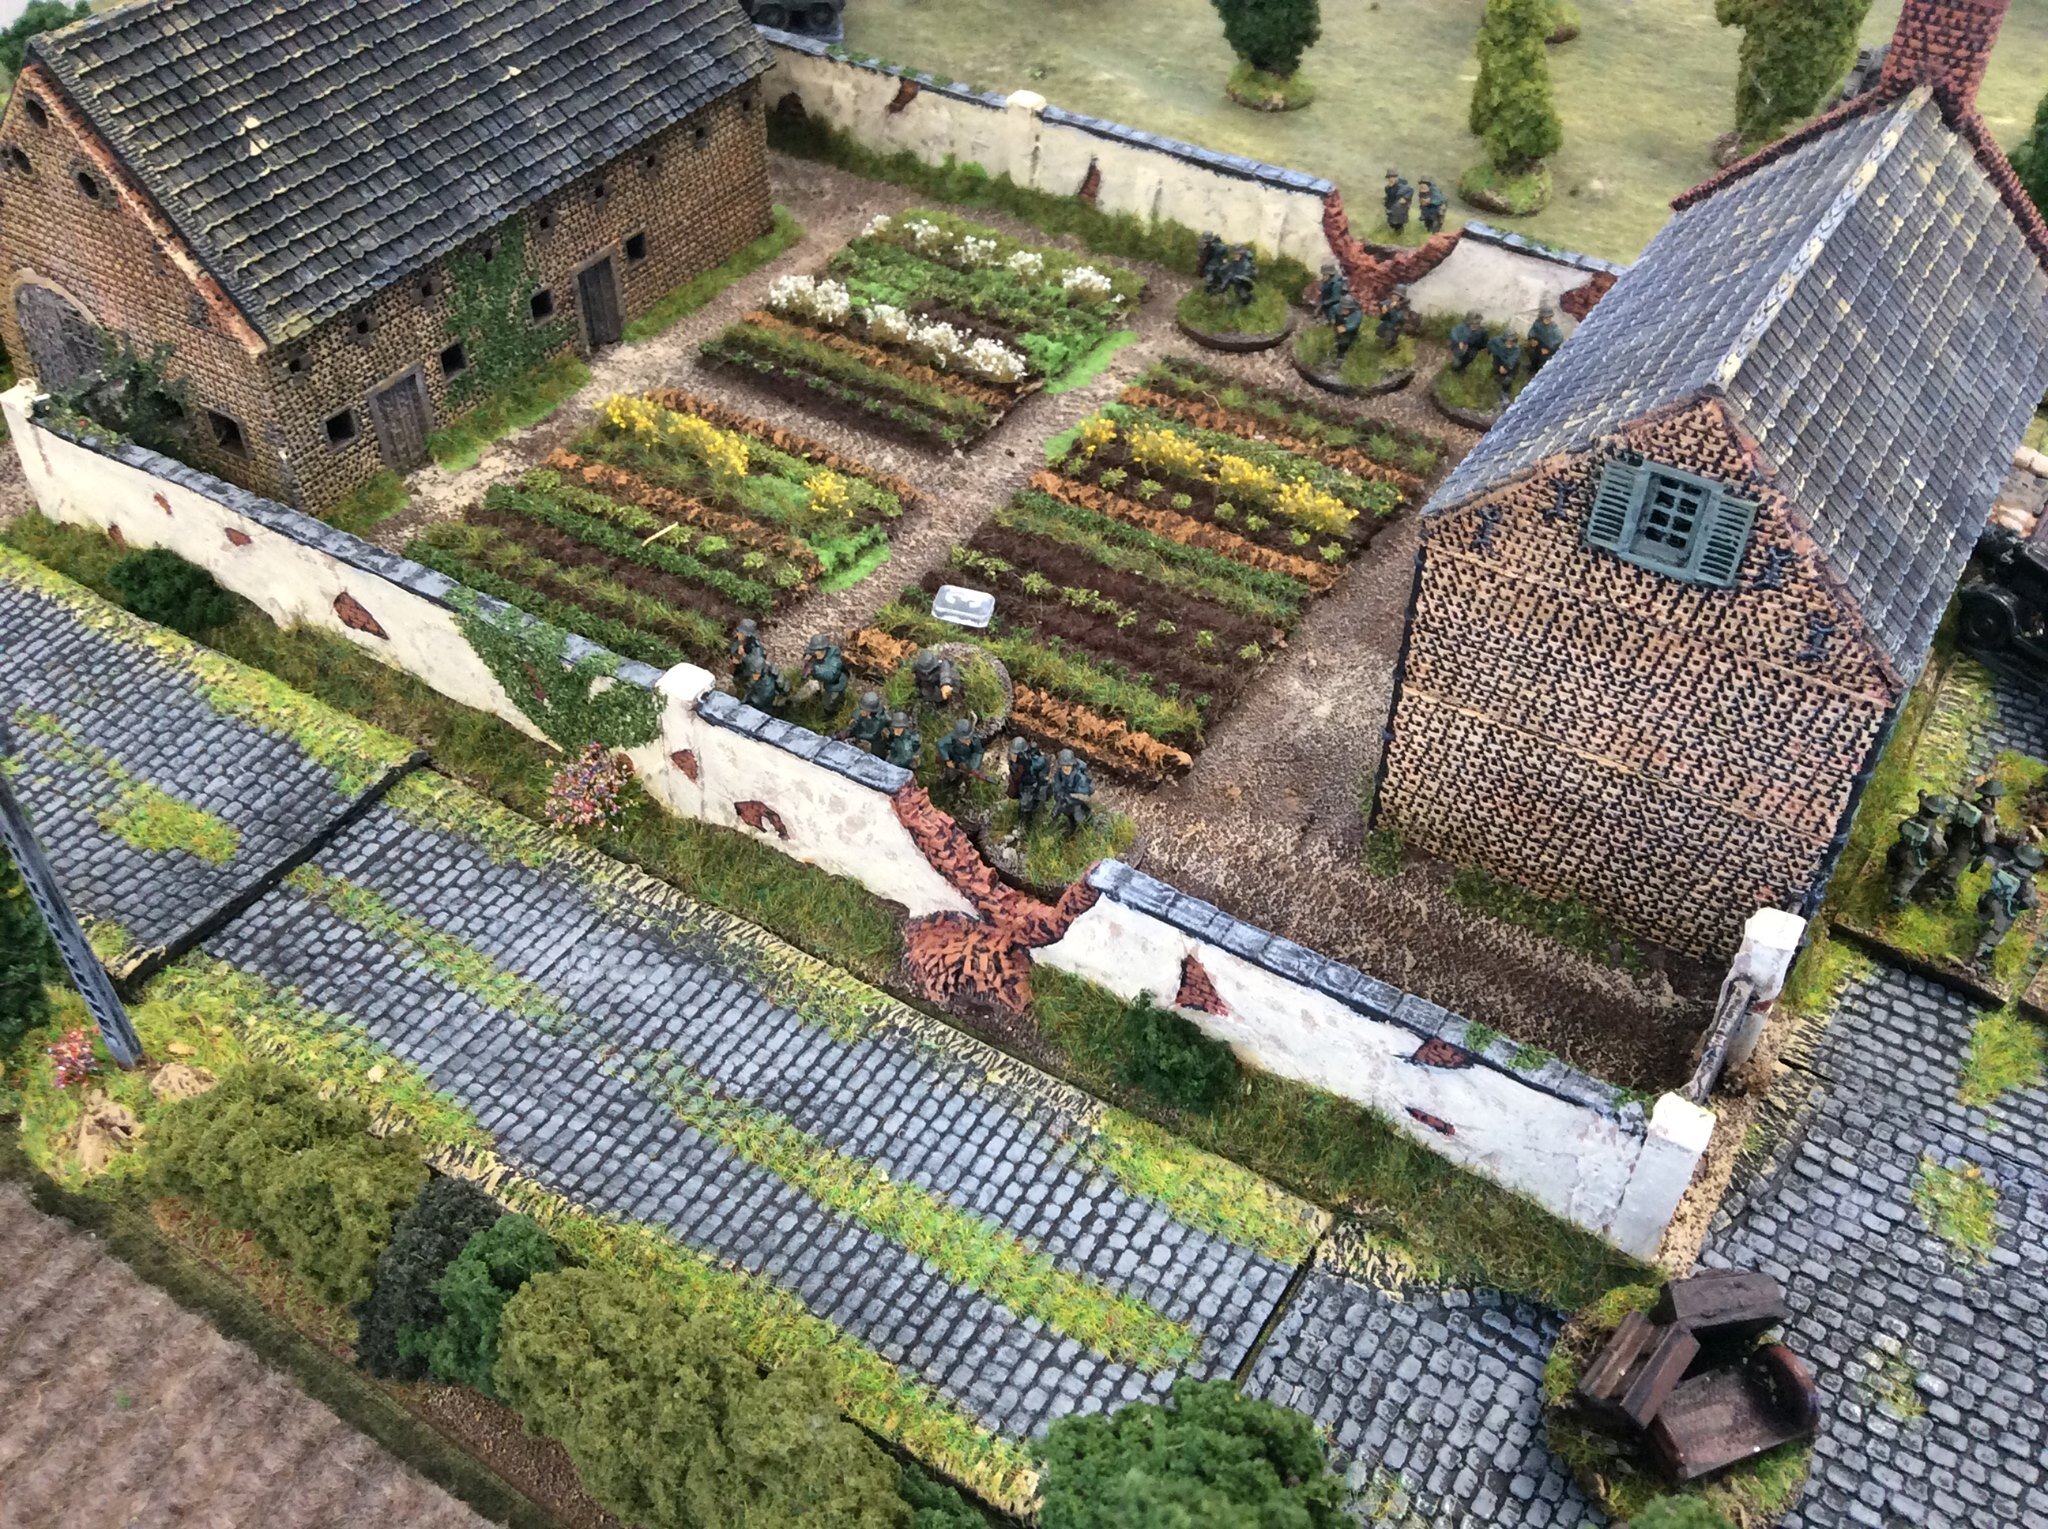
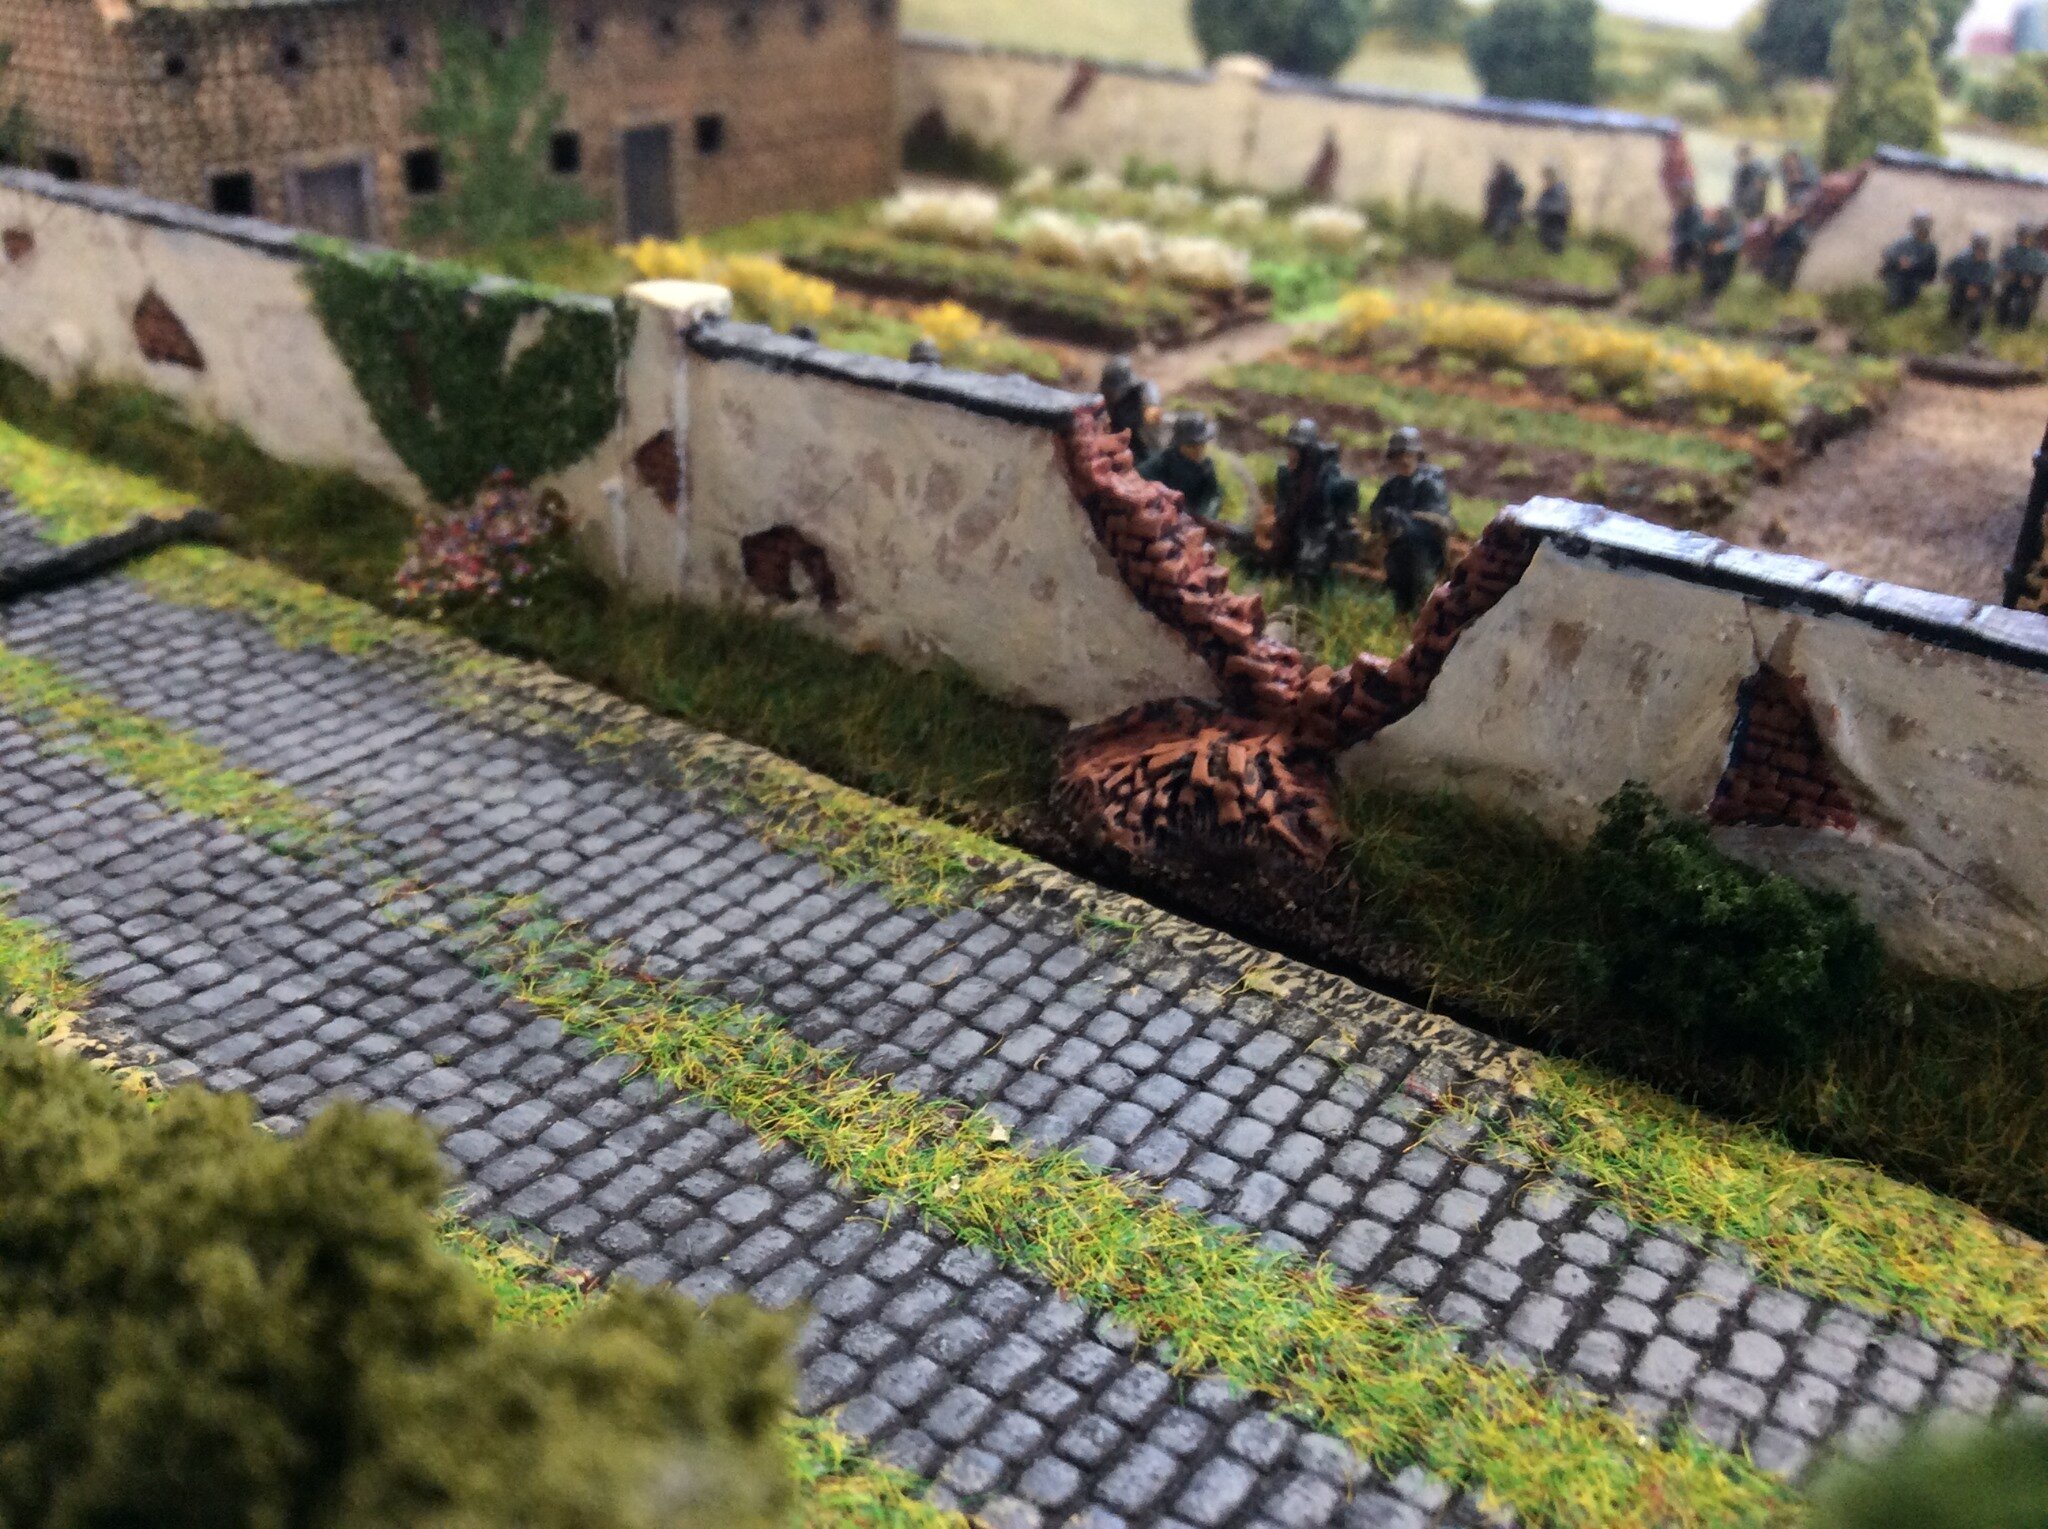
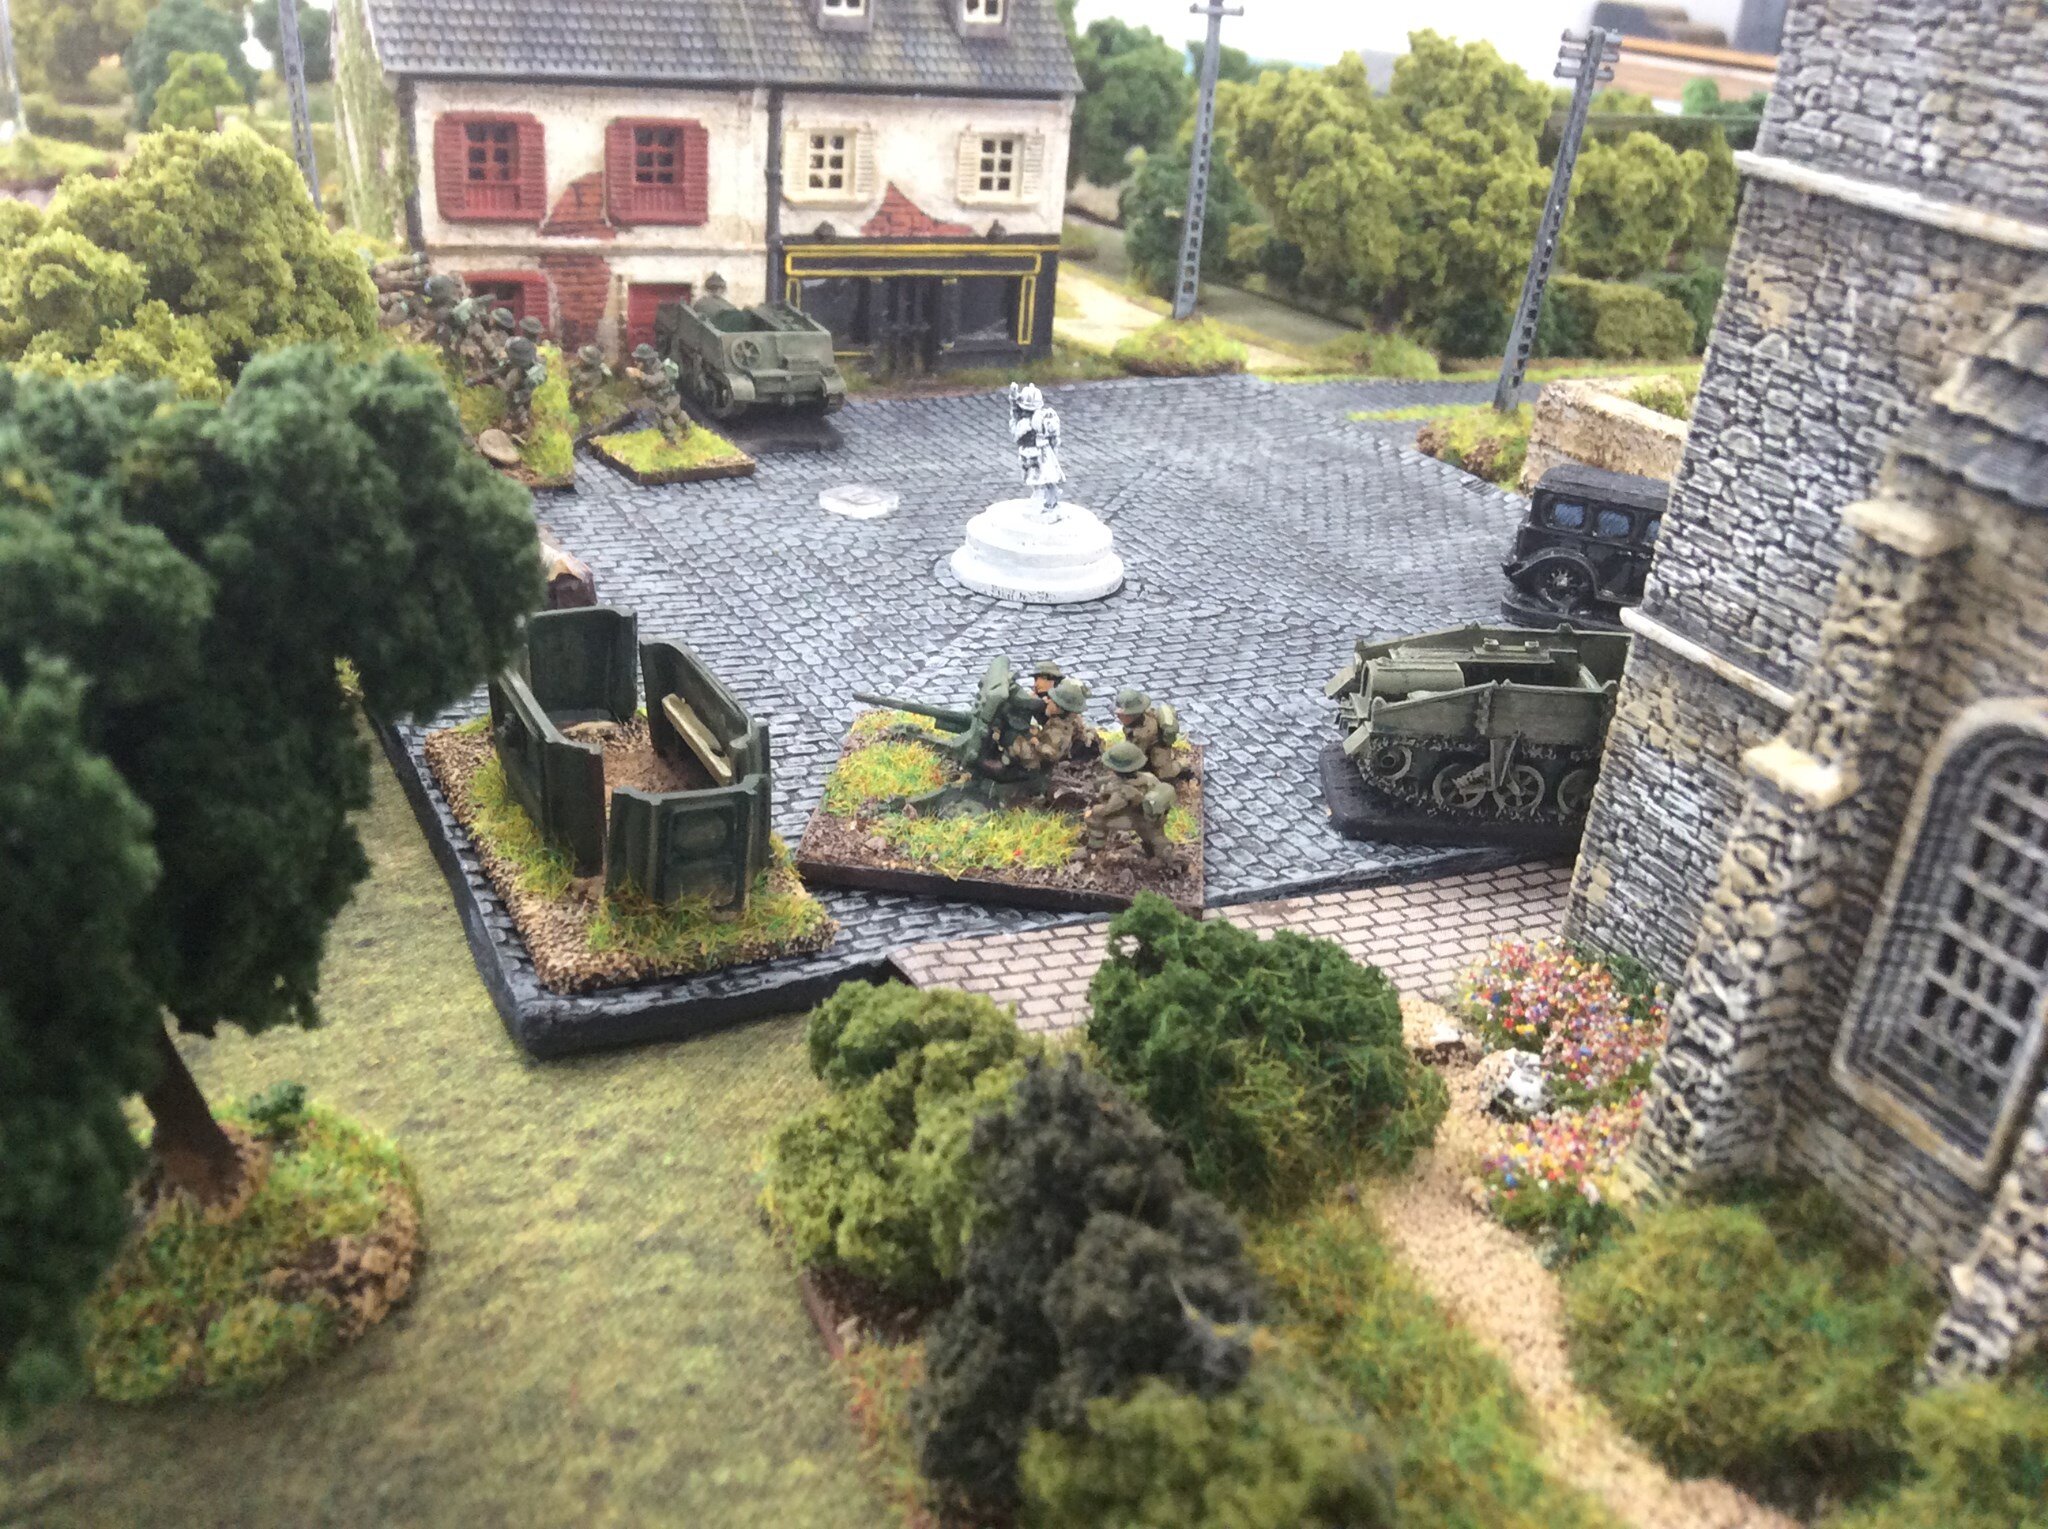
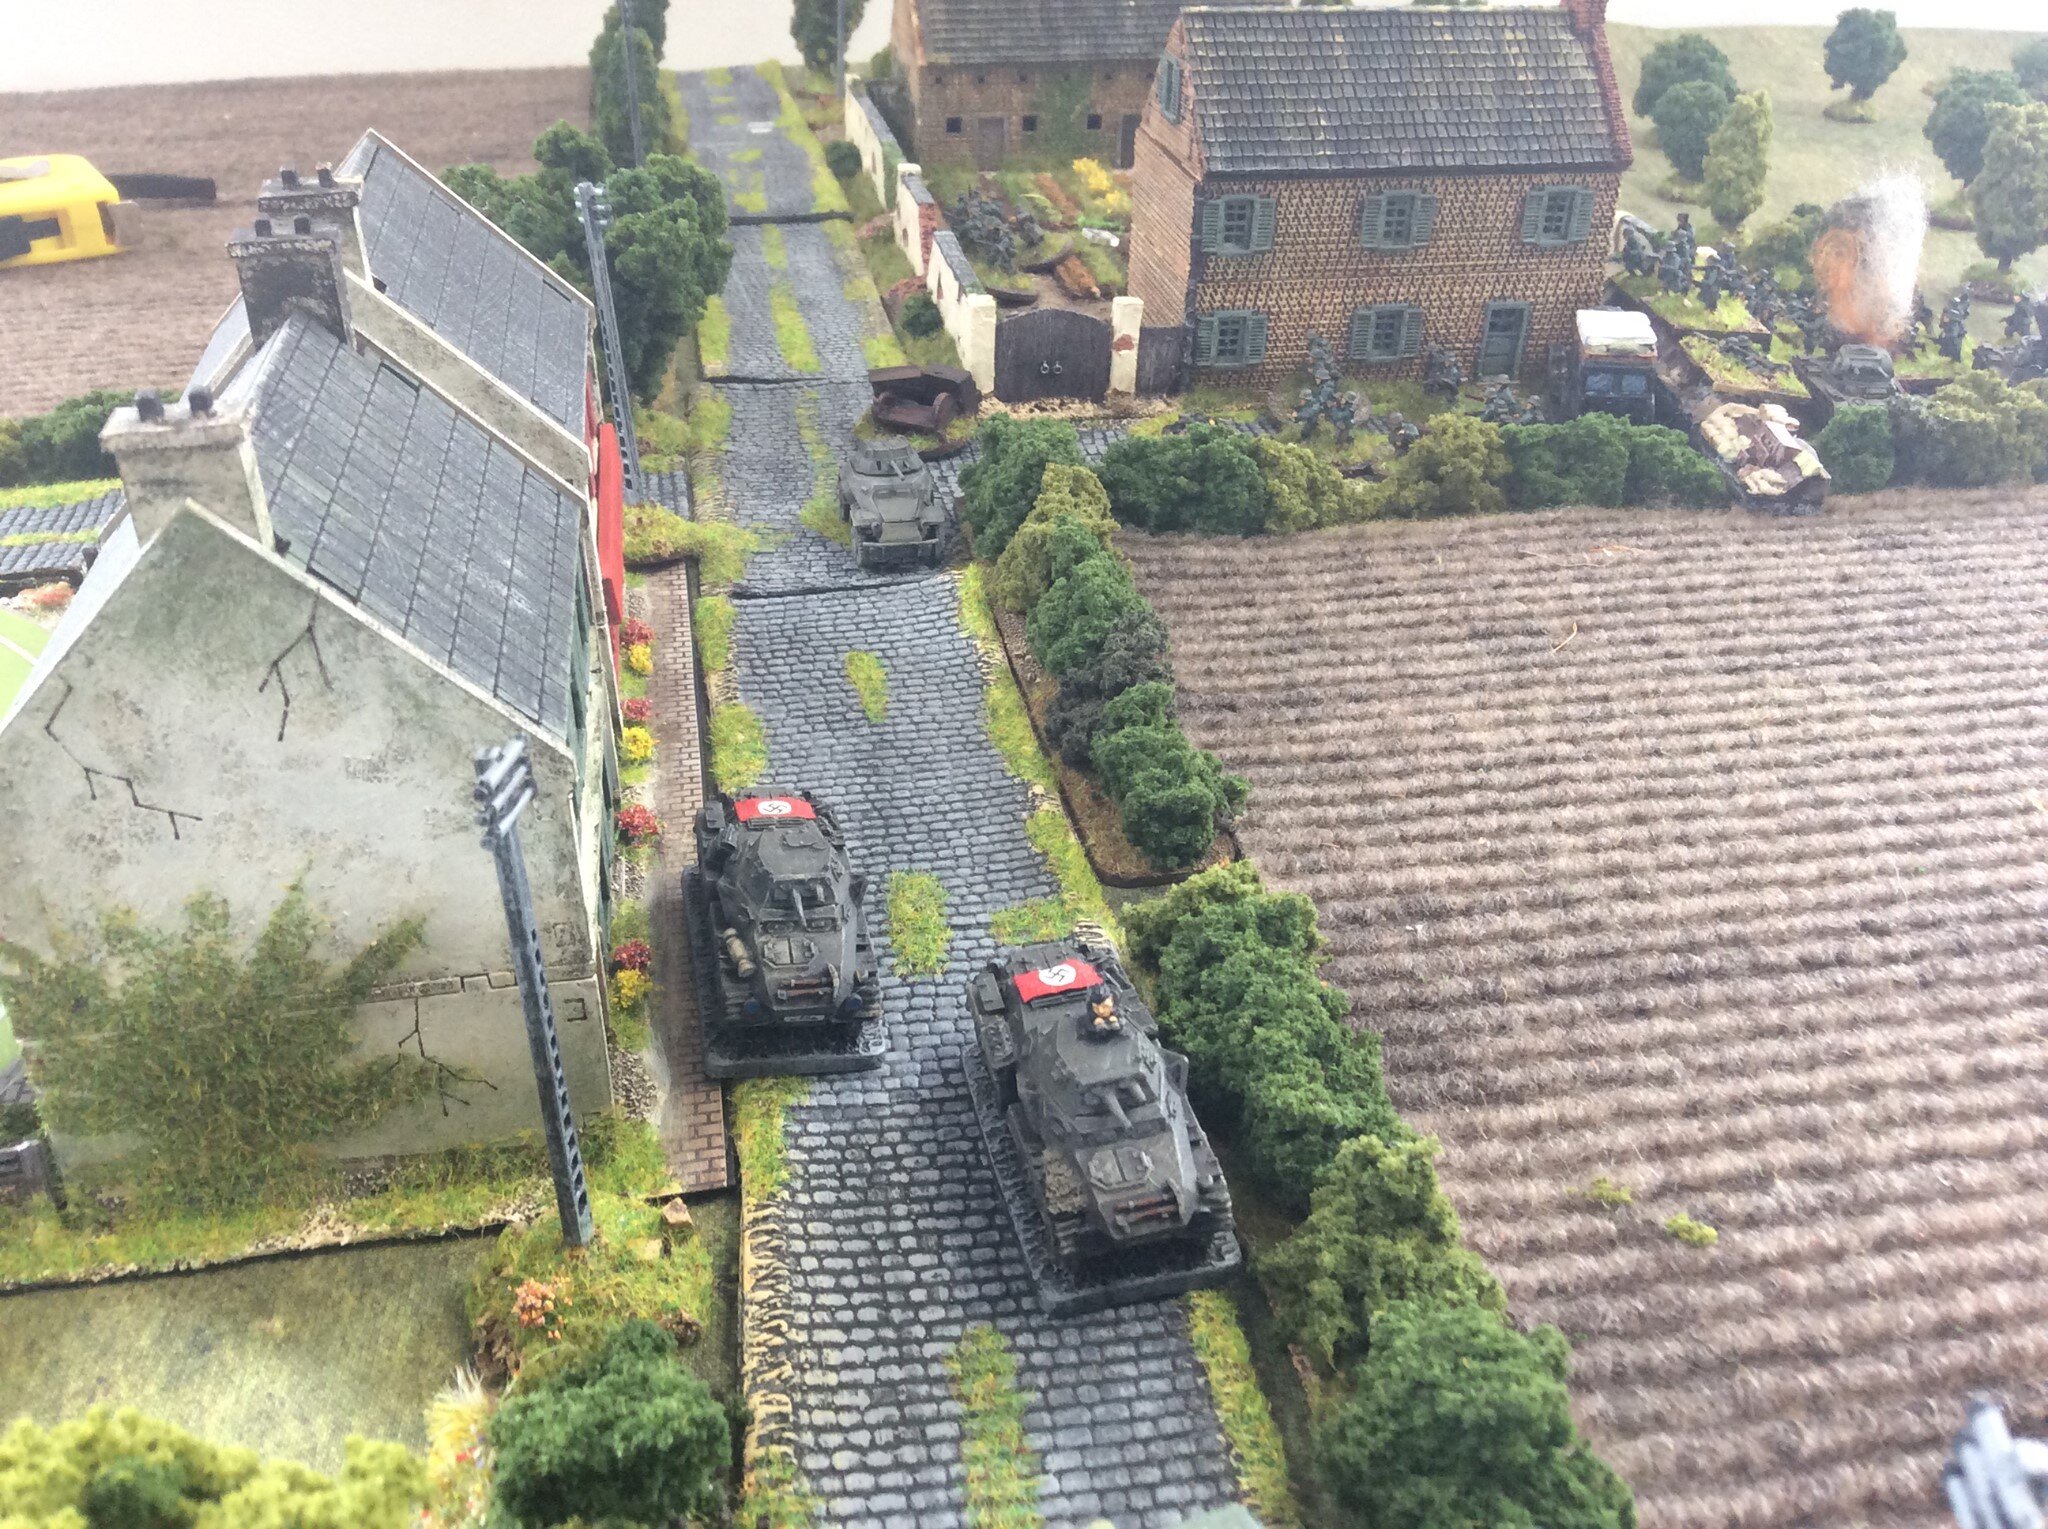
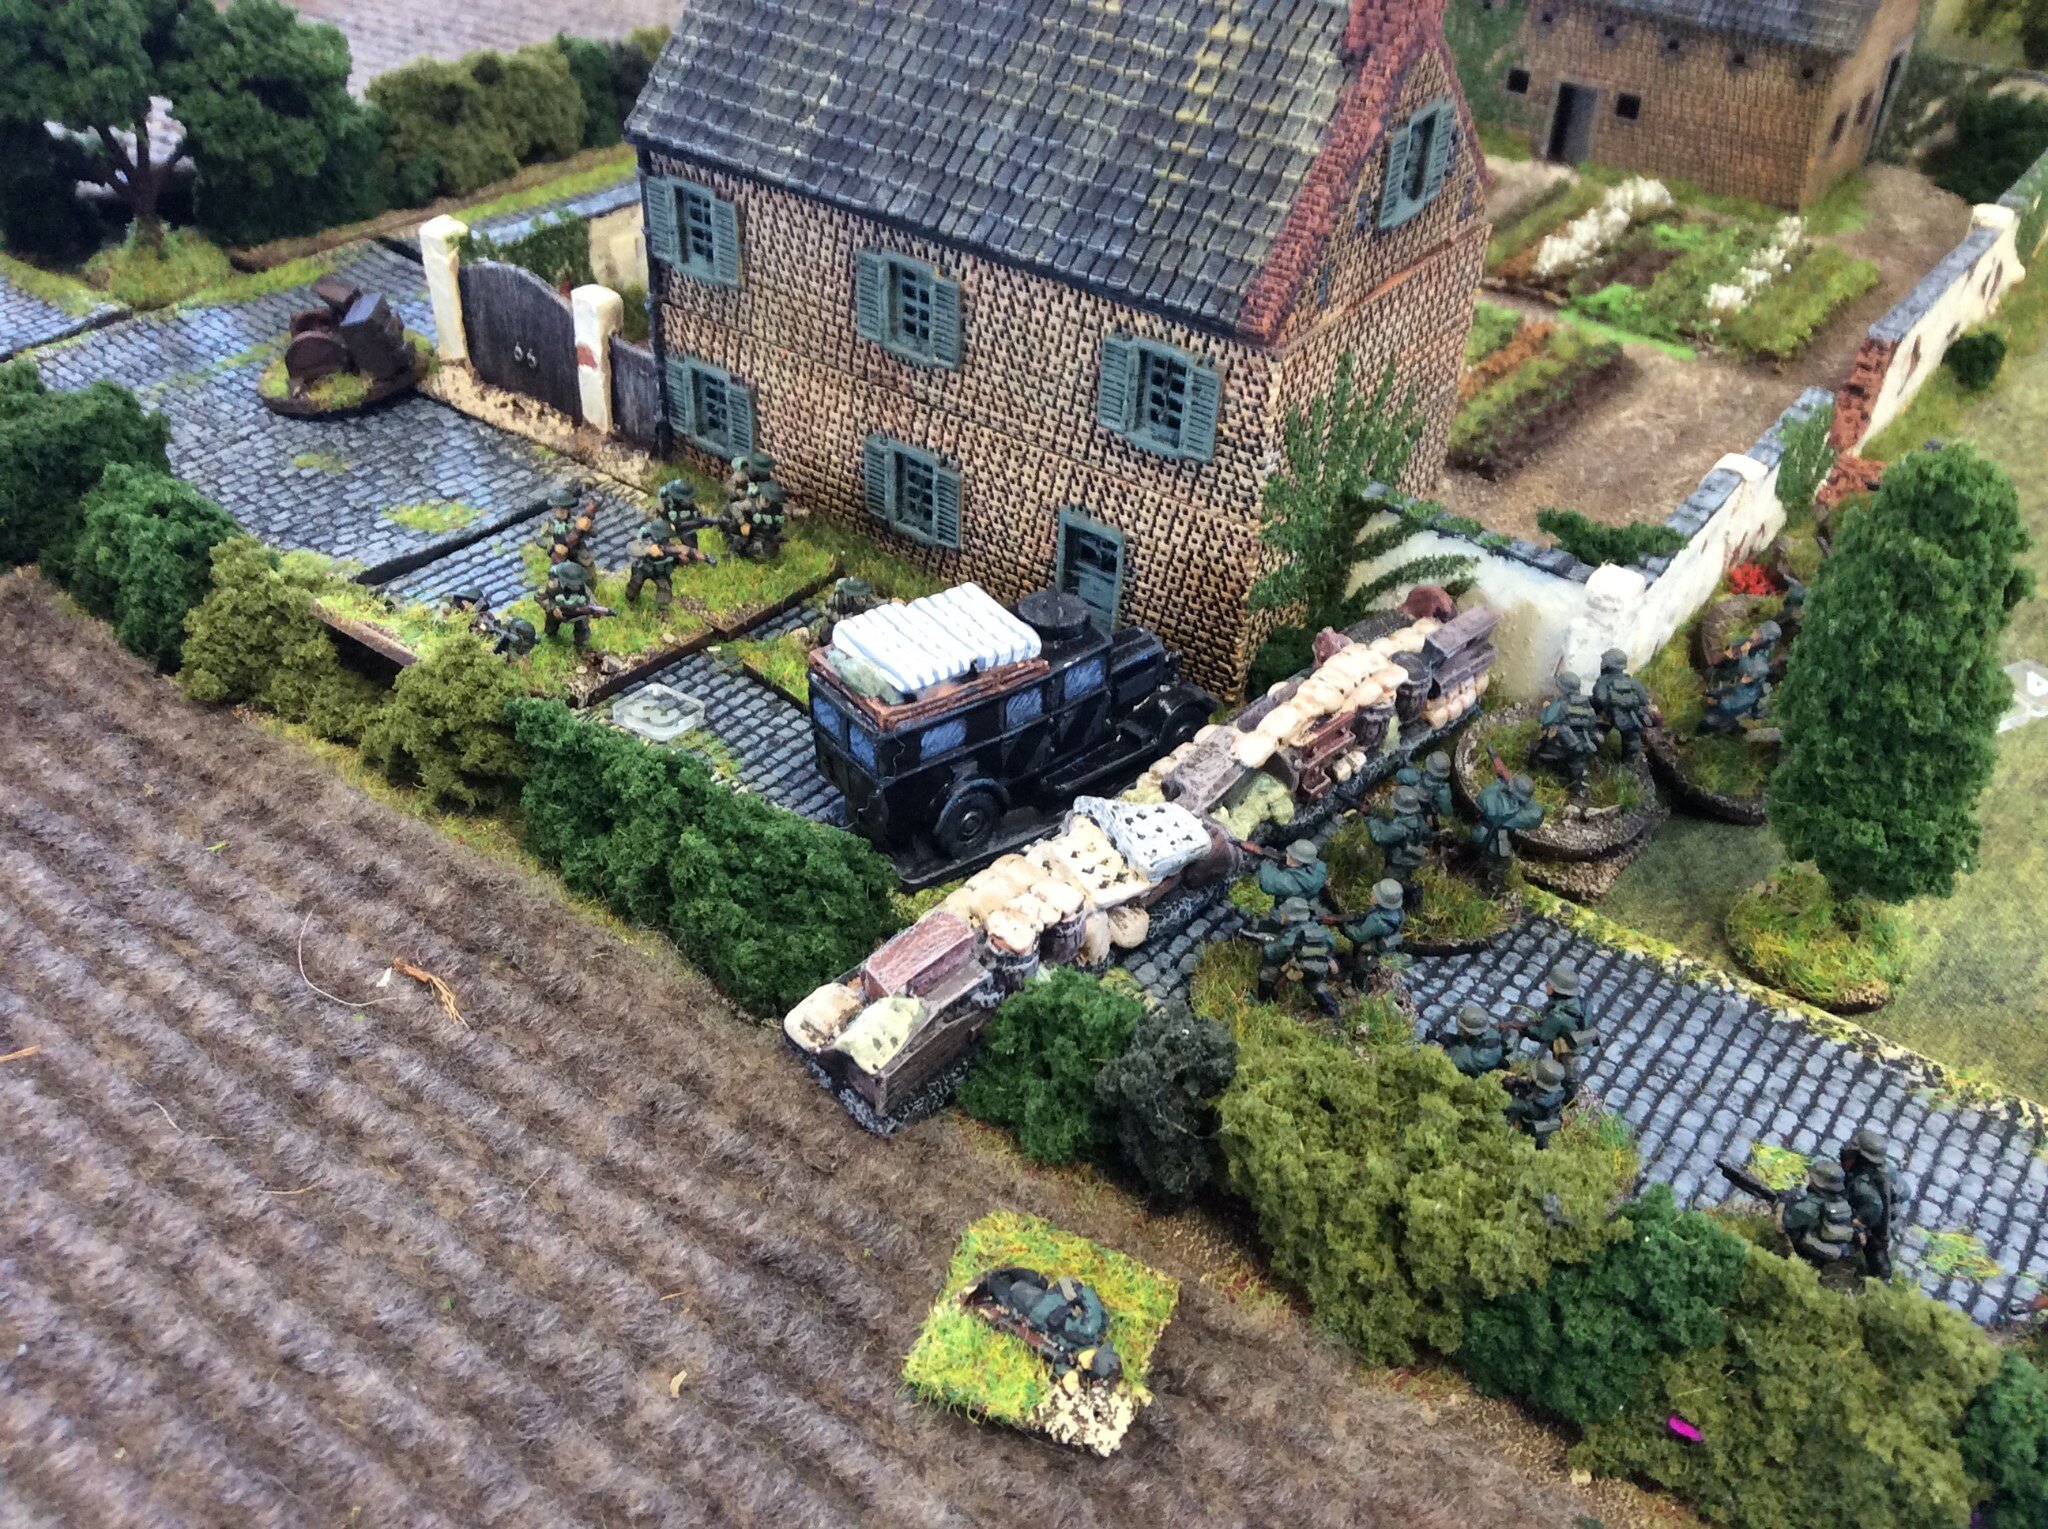
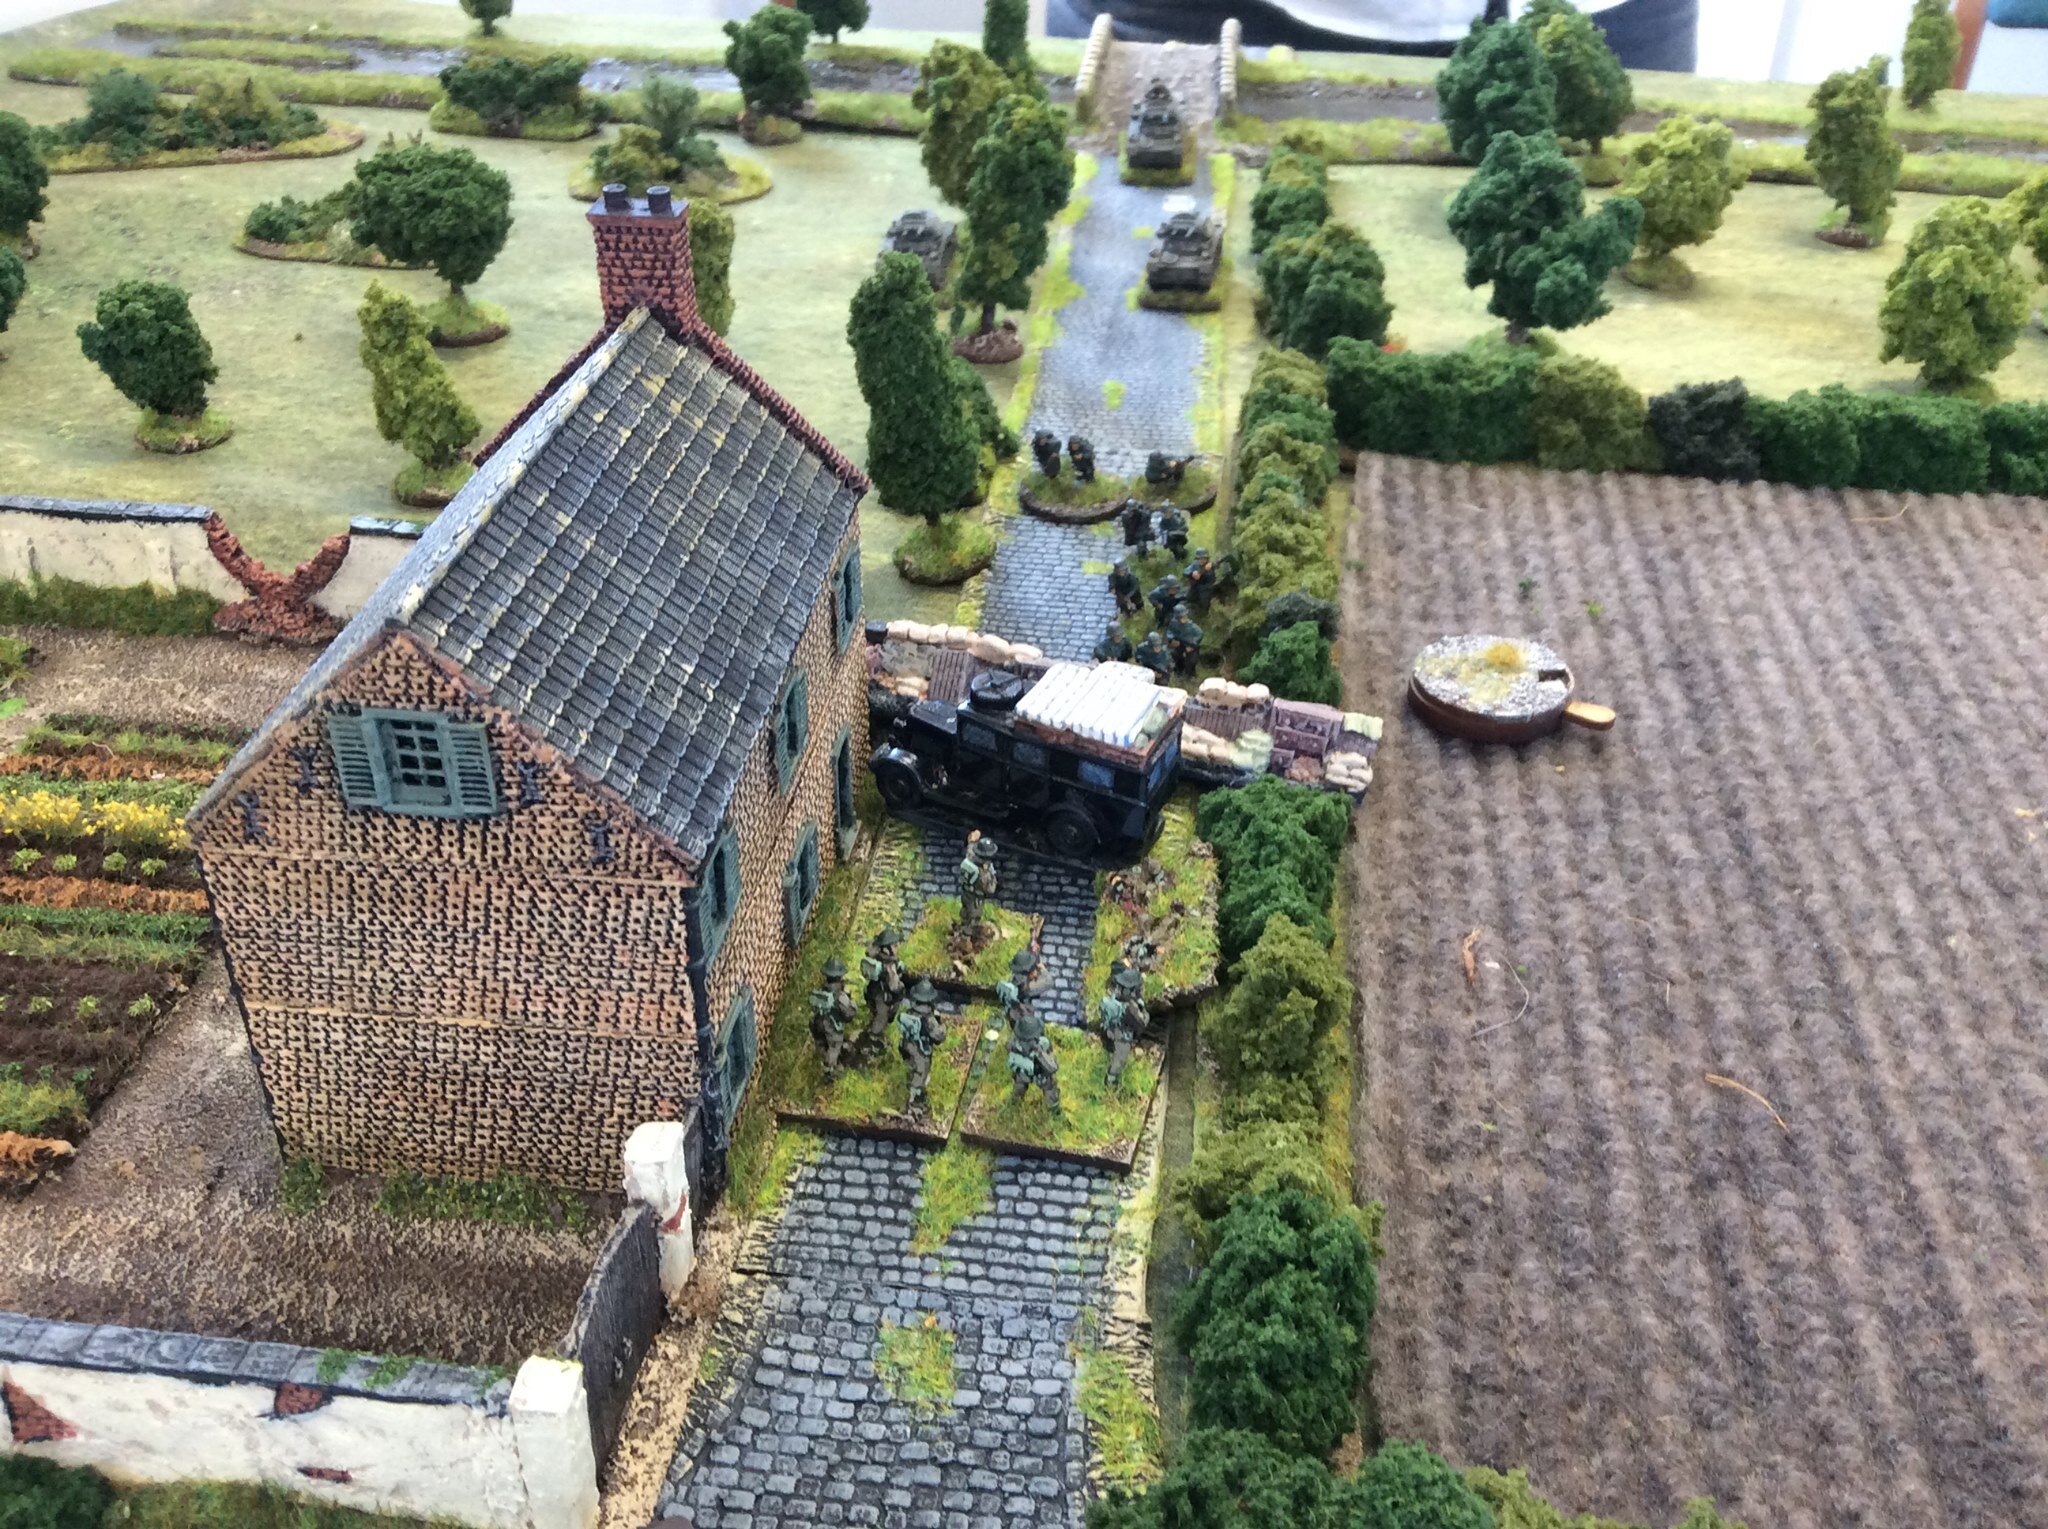
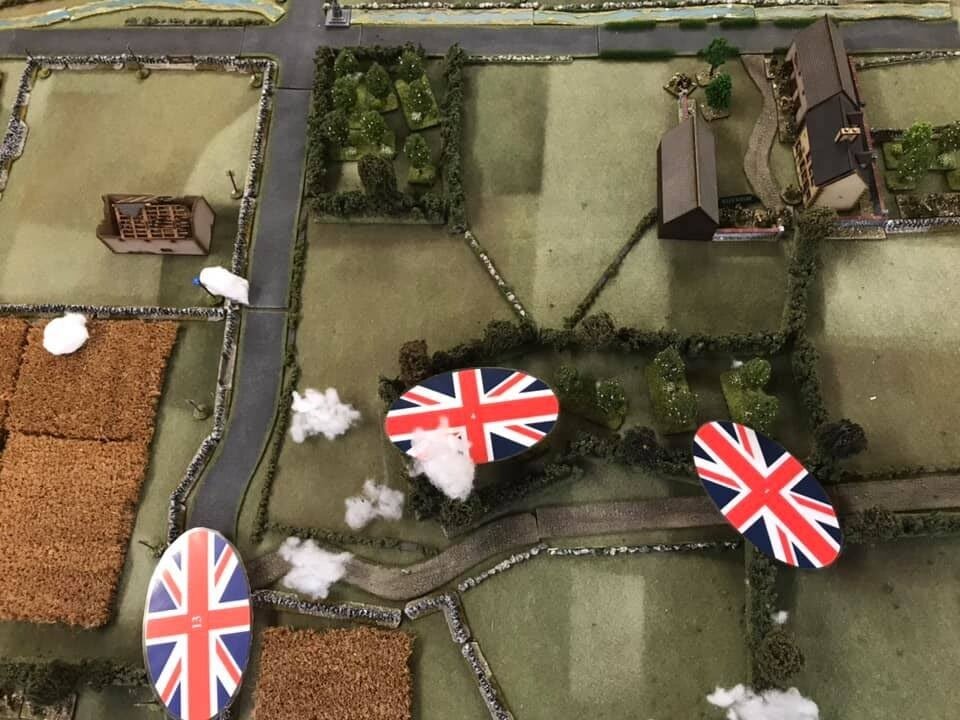
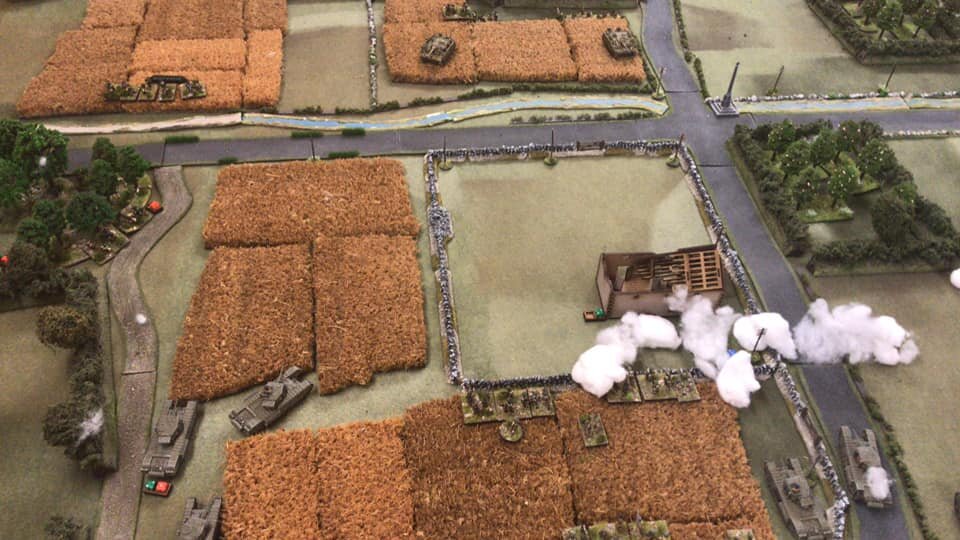
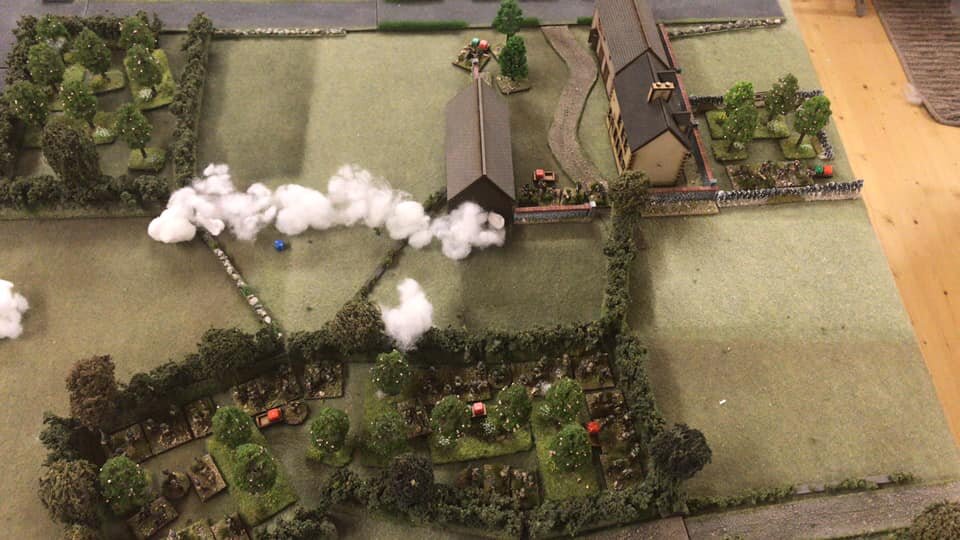
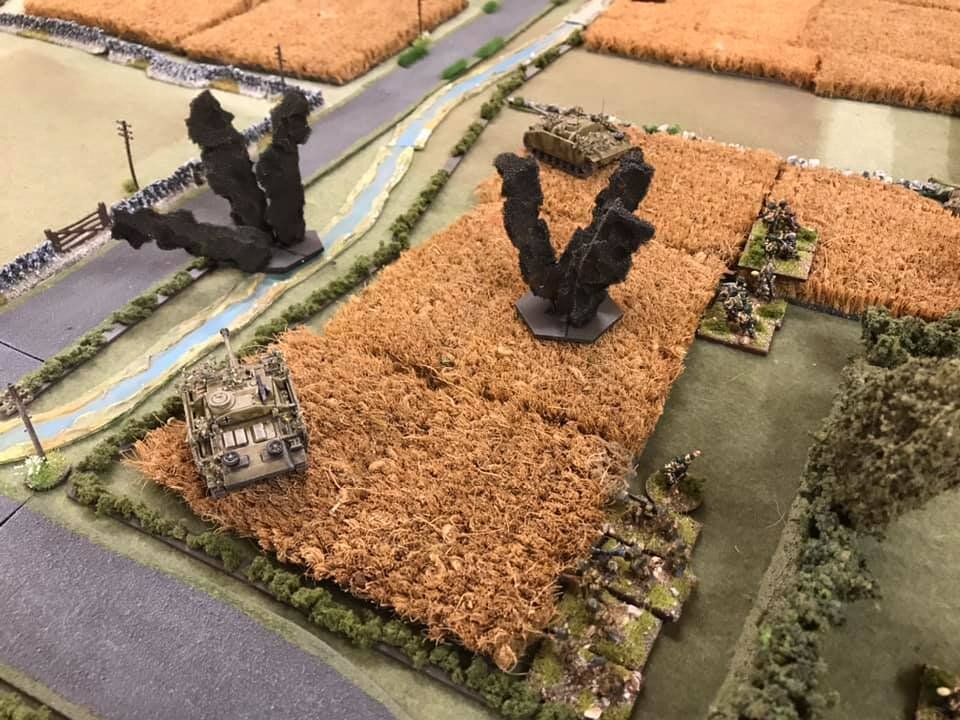
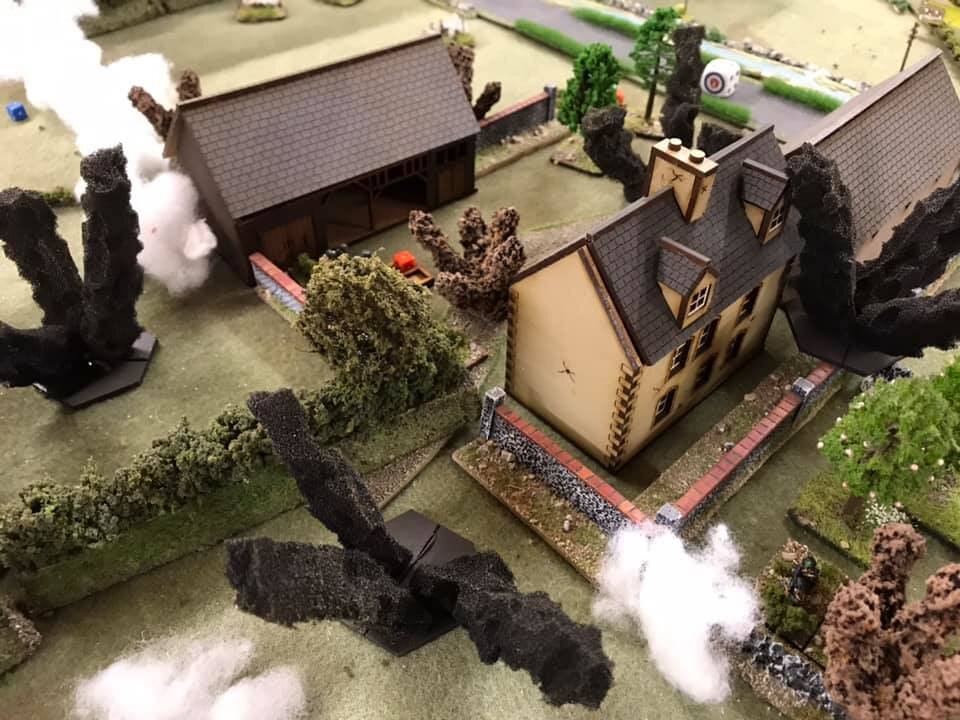
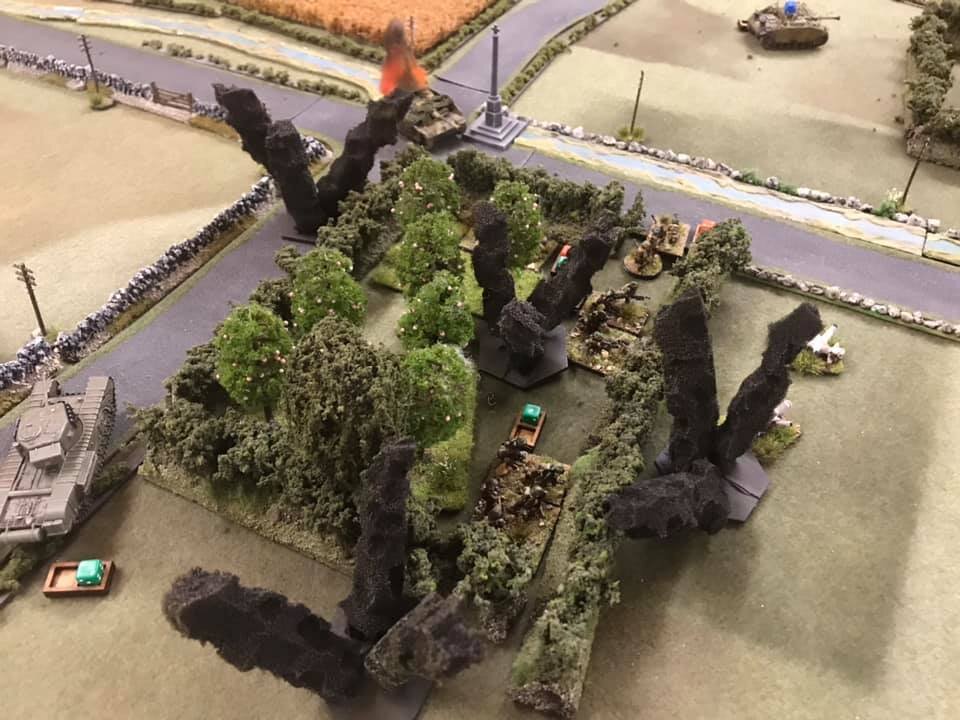
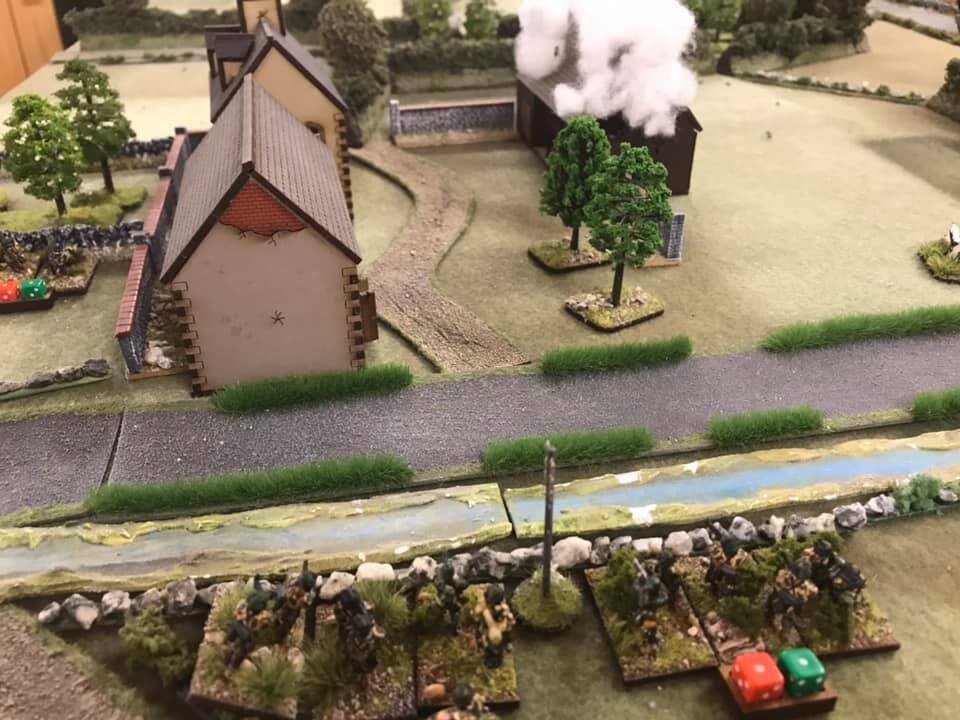
The field was good tank country: flat and open. I was coming off the end of a road just where it hit a ridge. In front of me was a dried out stream crossed by a couple of bridges and, on the other side, Prokhorovka itself.

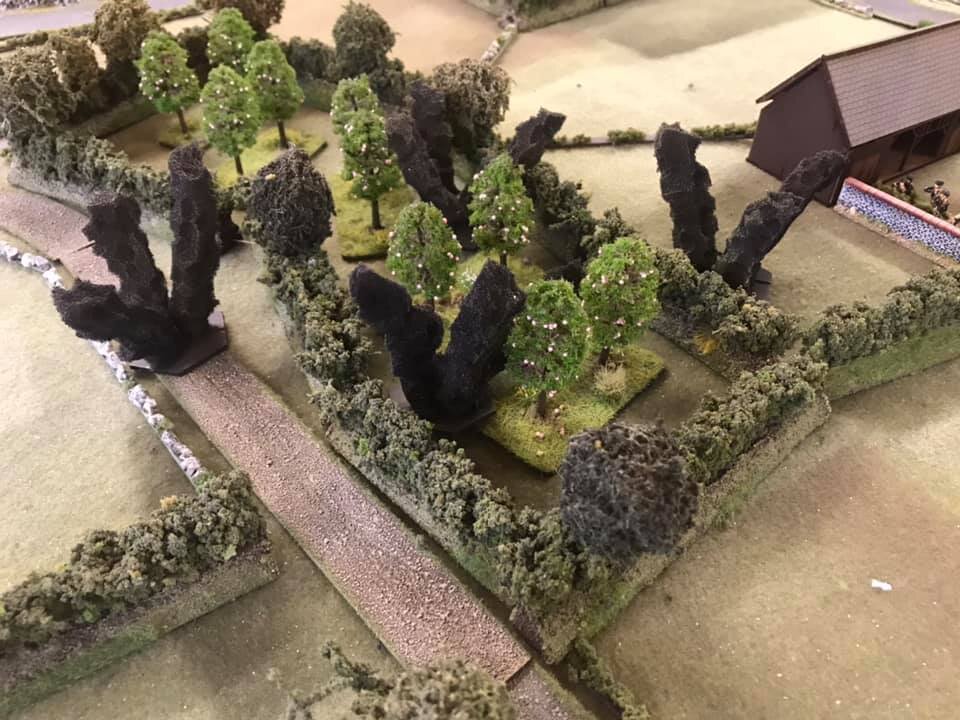
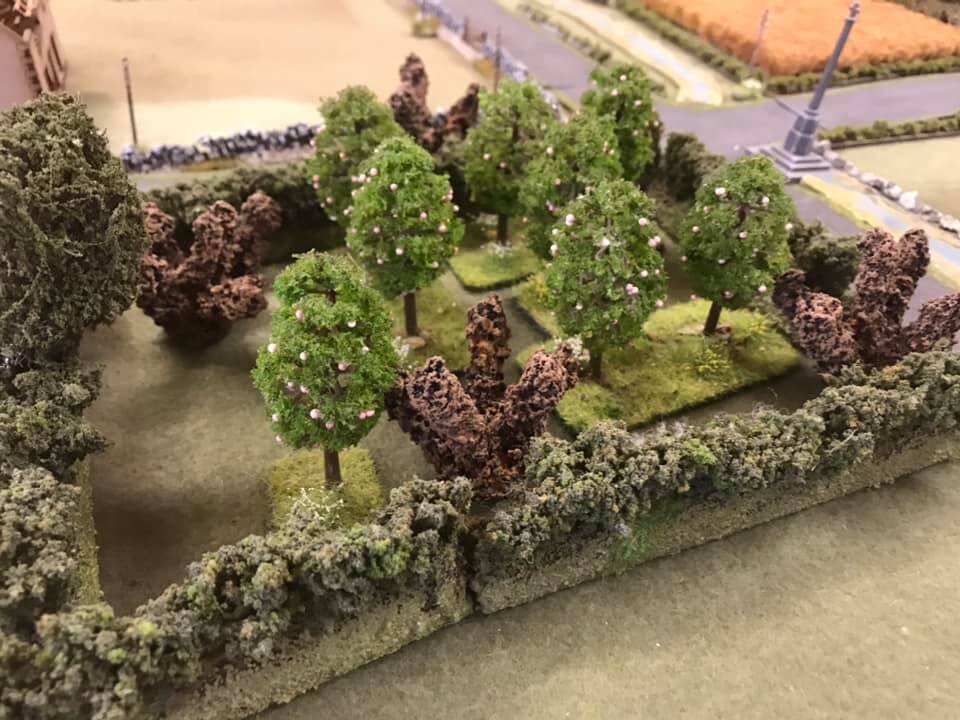
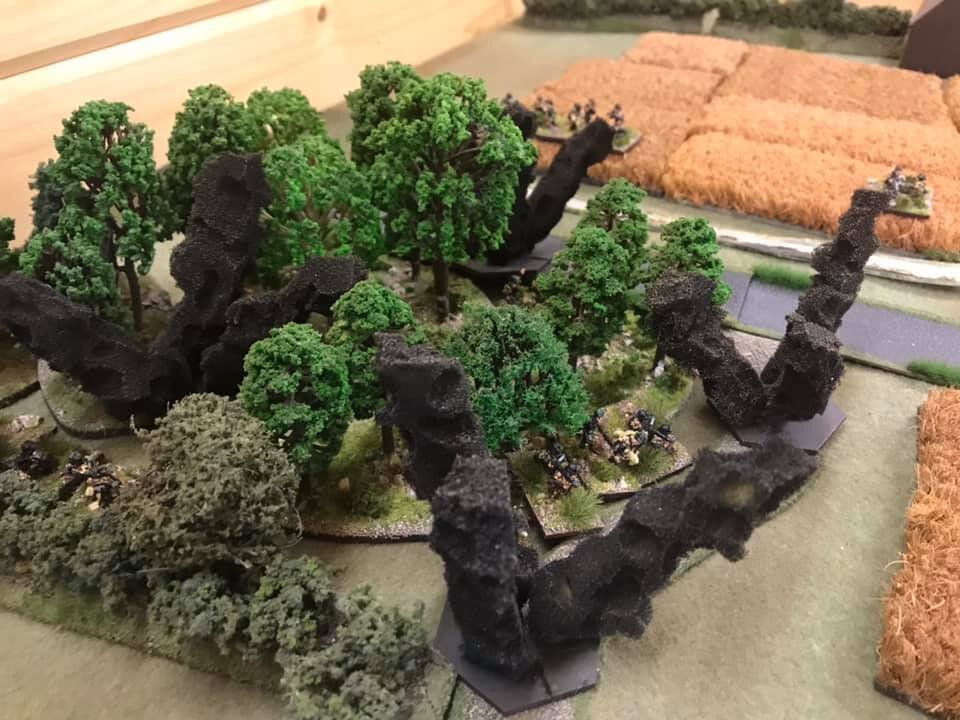
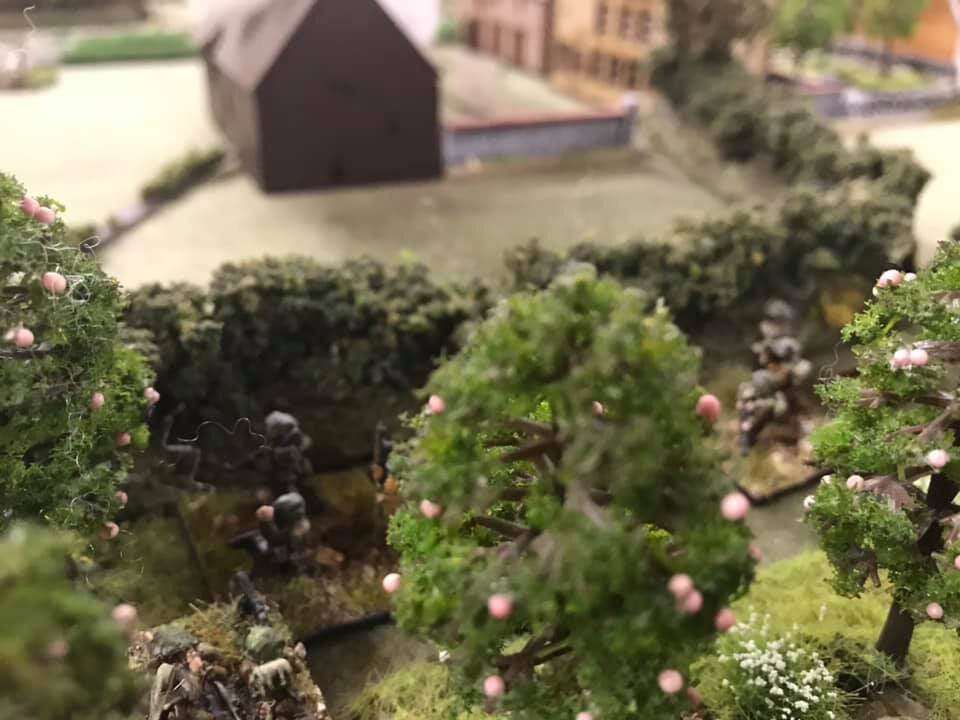
The few bits of woodland on either side of my axis of advance were negligible: so it was effectively a bowling green bisected by a ditch all the way to the buildings.
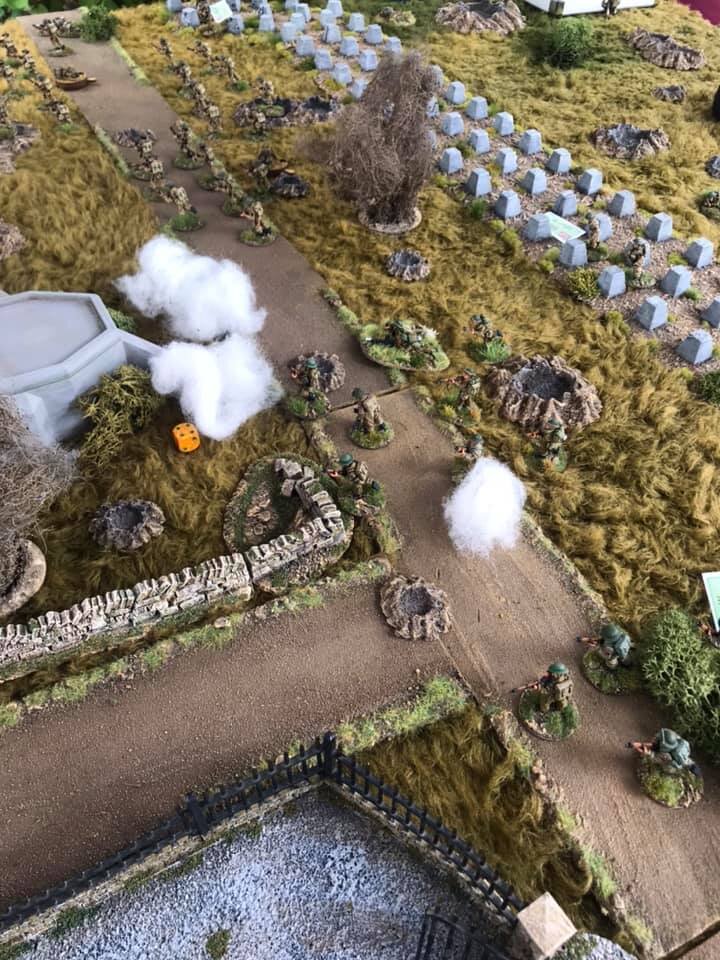
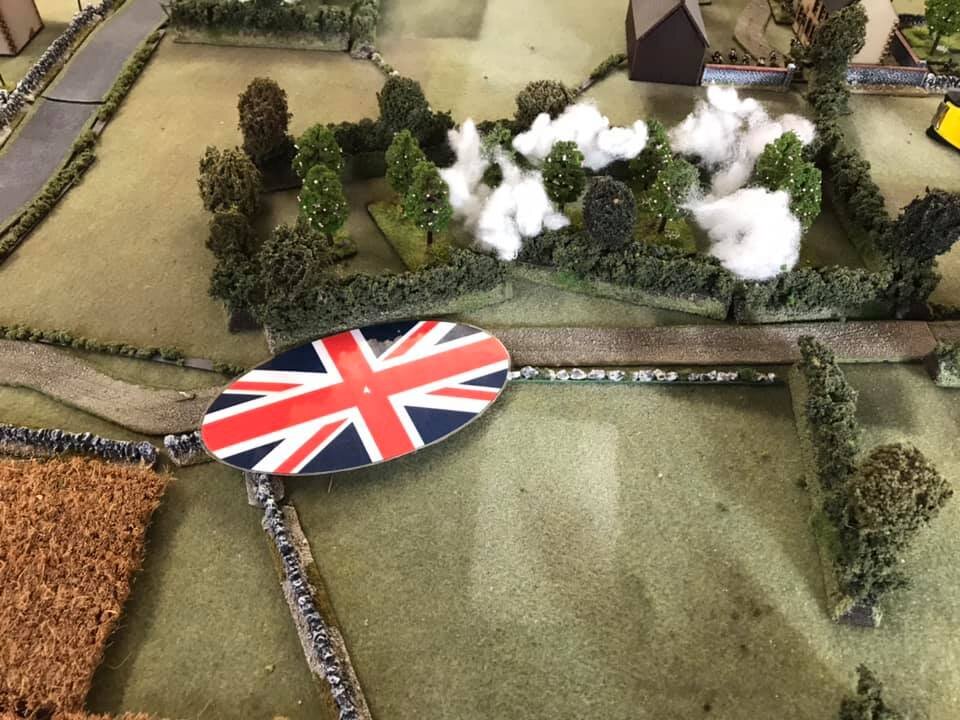
A Pre-Game Stonk

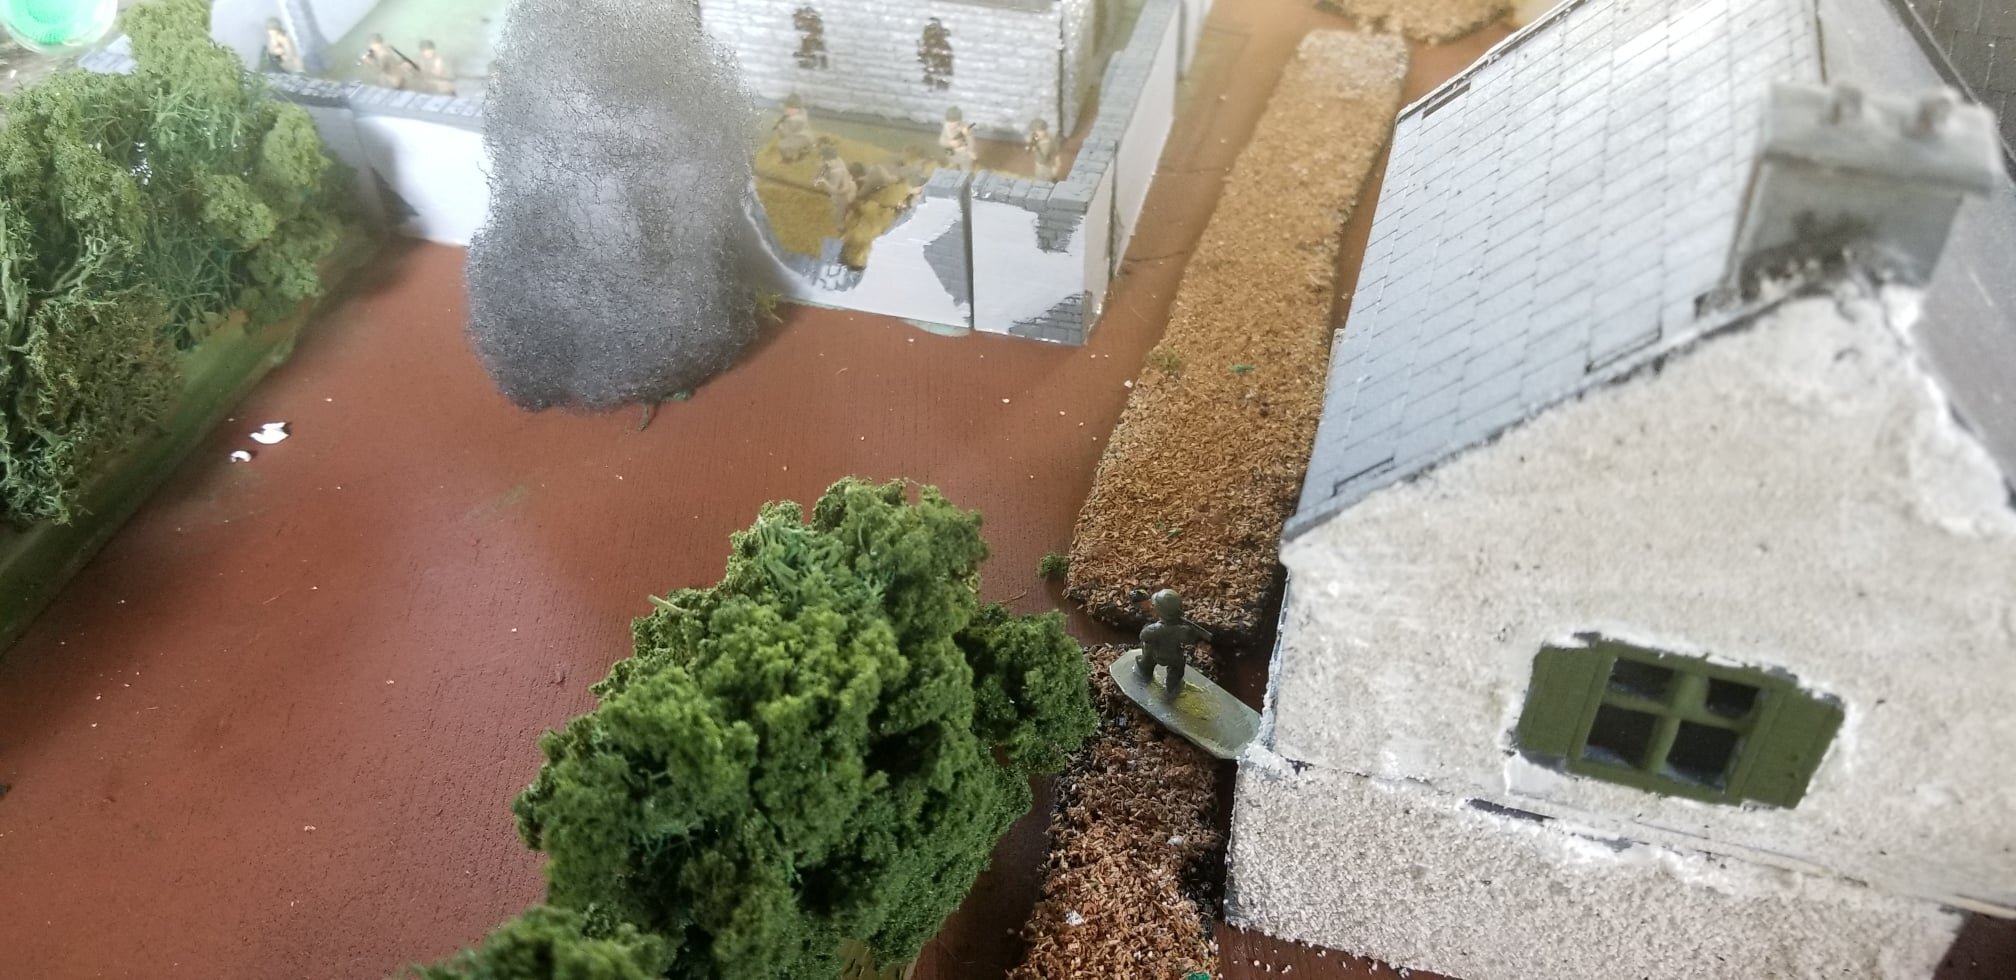
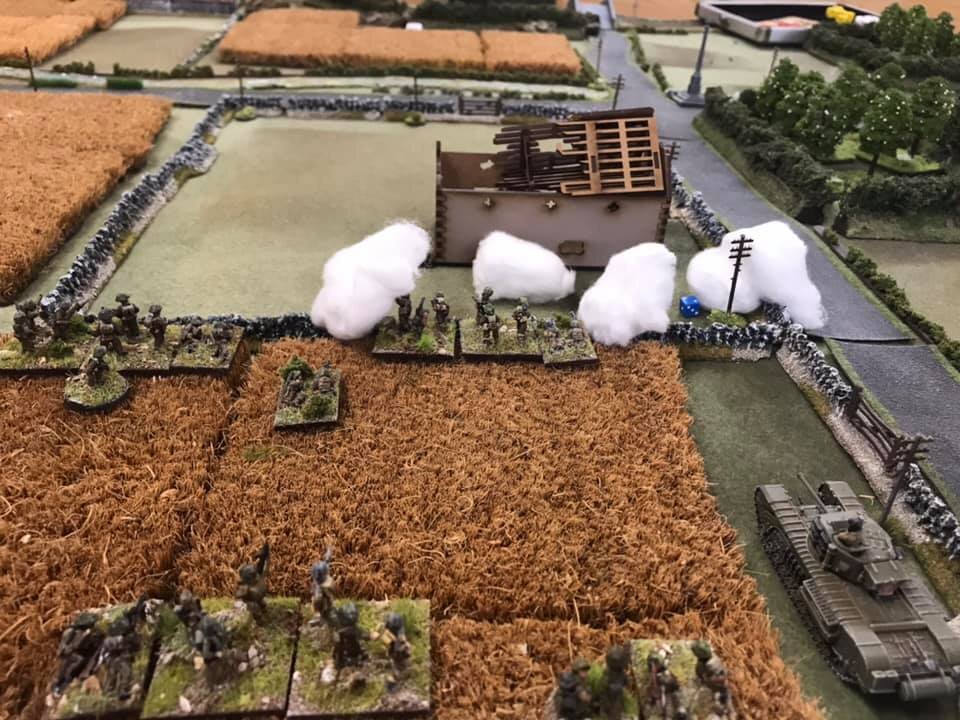
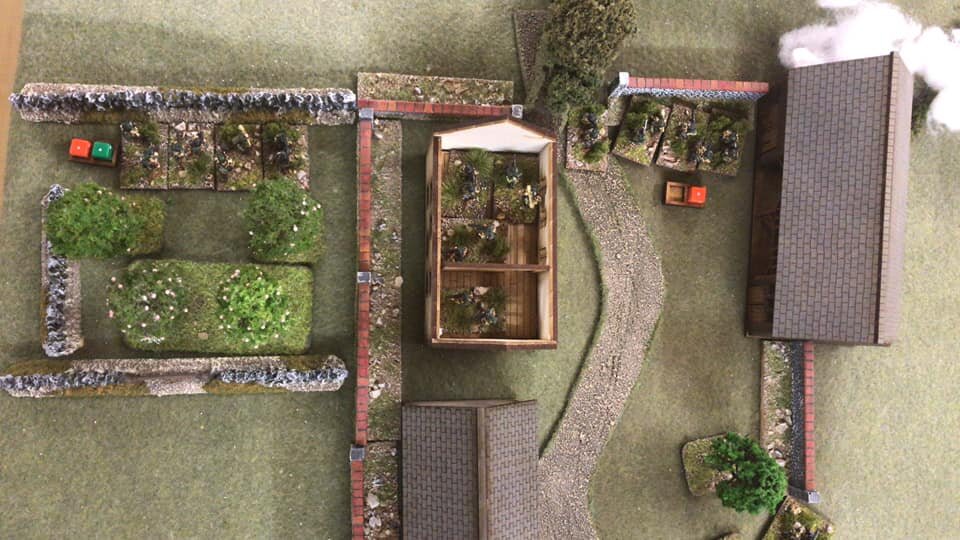
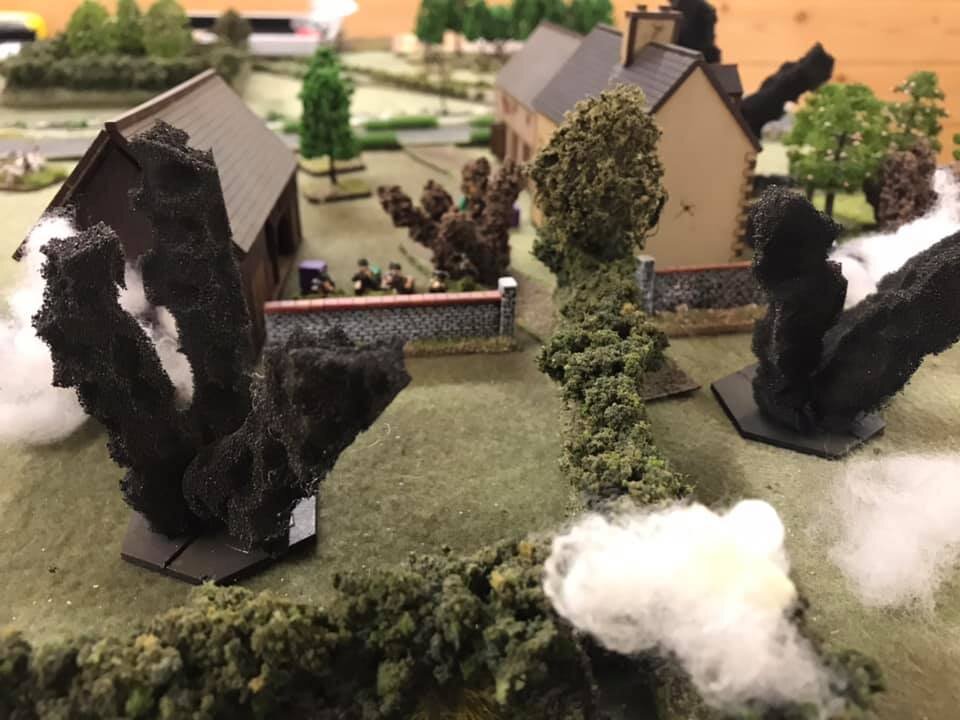
The game began with a pre-action stonk from my off-table artillery. I centered it on the village itself (our comrades there being either willing to sacrifice themselves for the good of the Motherland or deserving to die for being collaboraters) and was lucky enough to hit three Blinds, but we’d have to wait to see the effect until after they were revealed.

The Battle

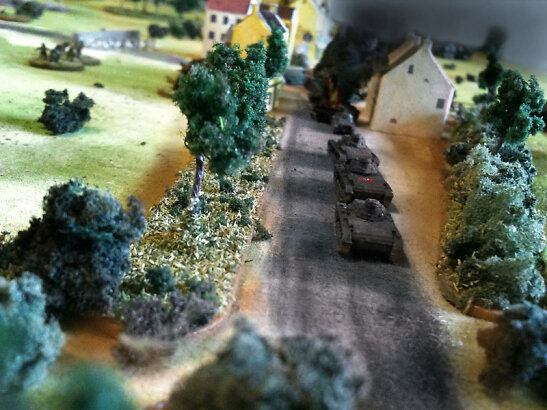
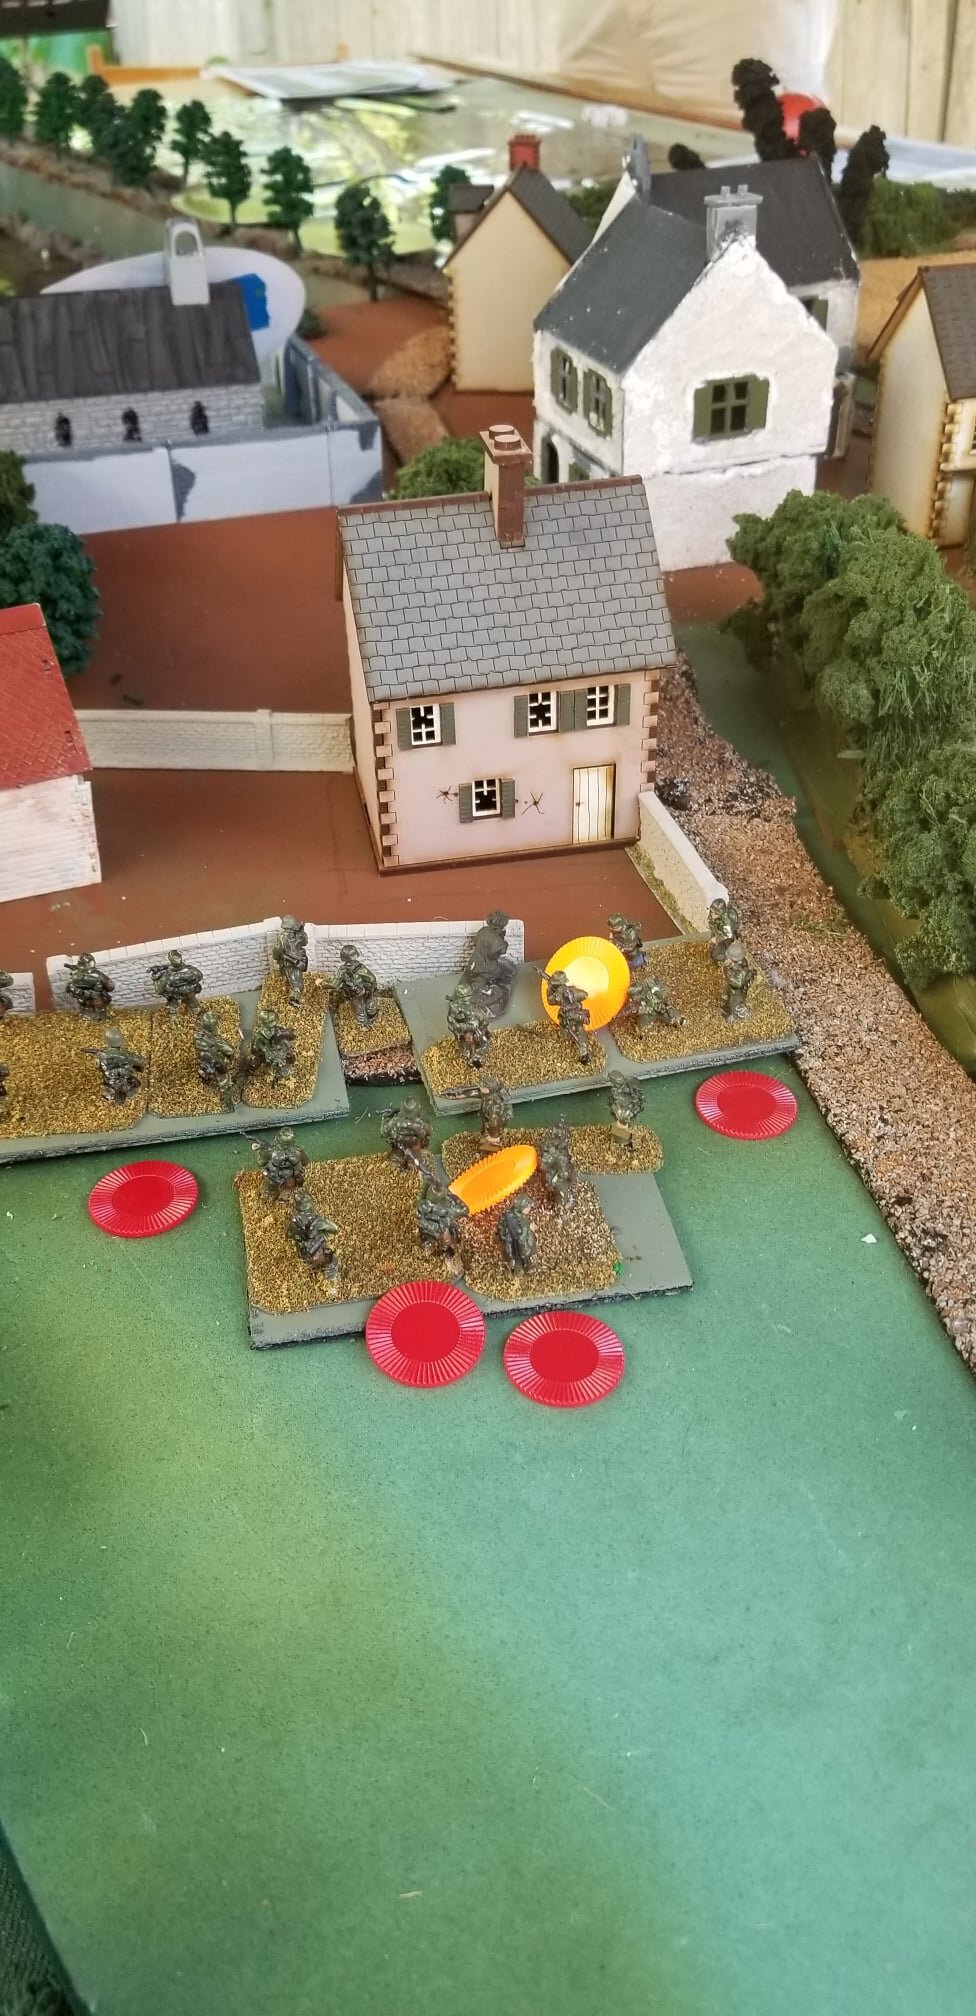
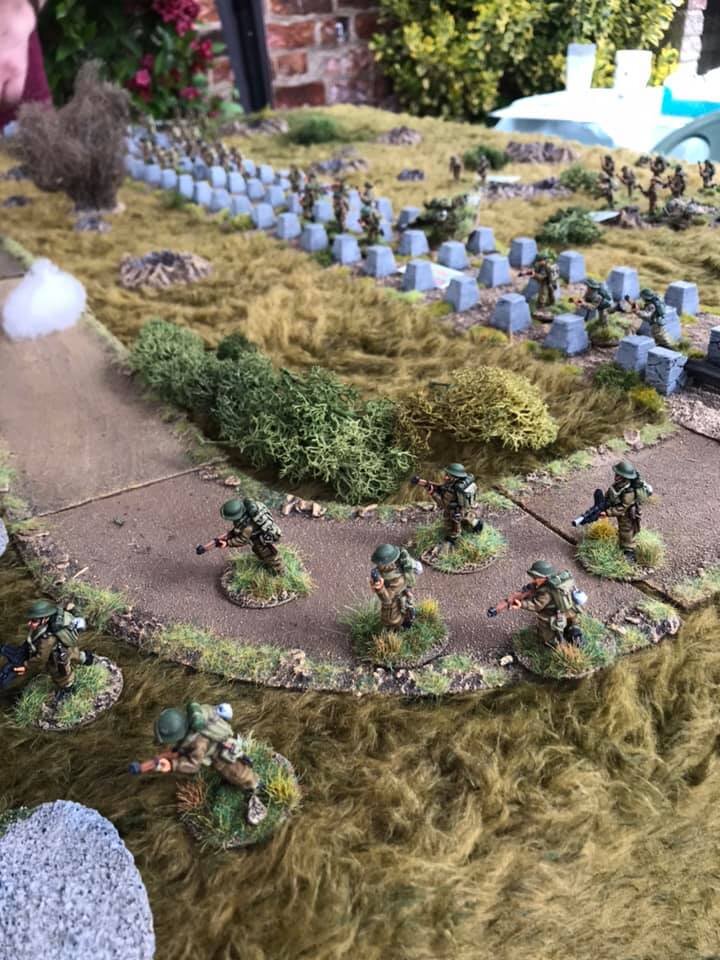
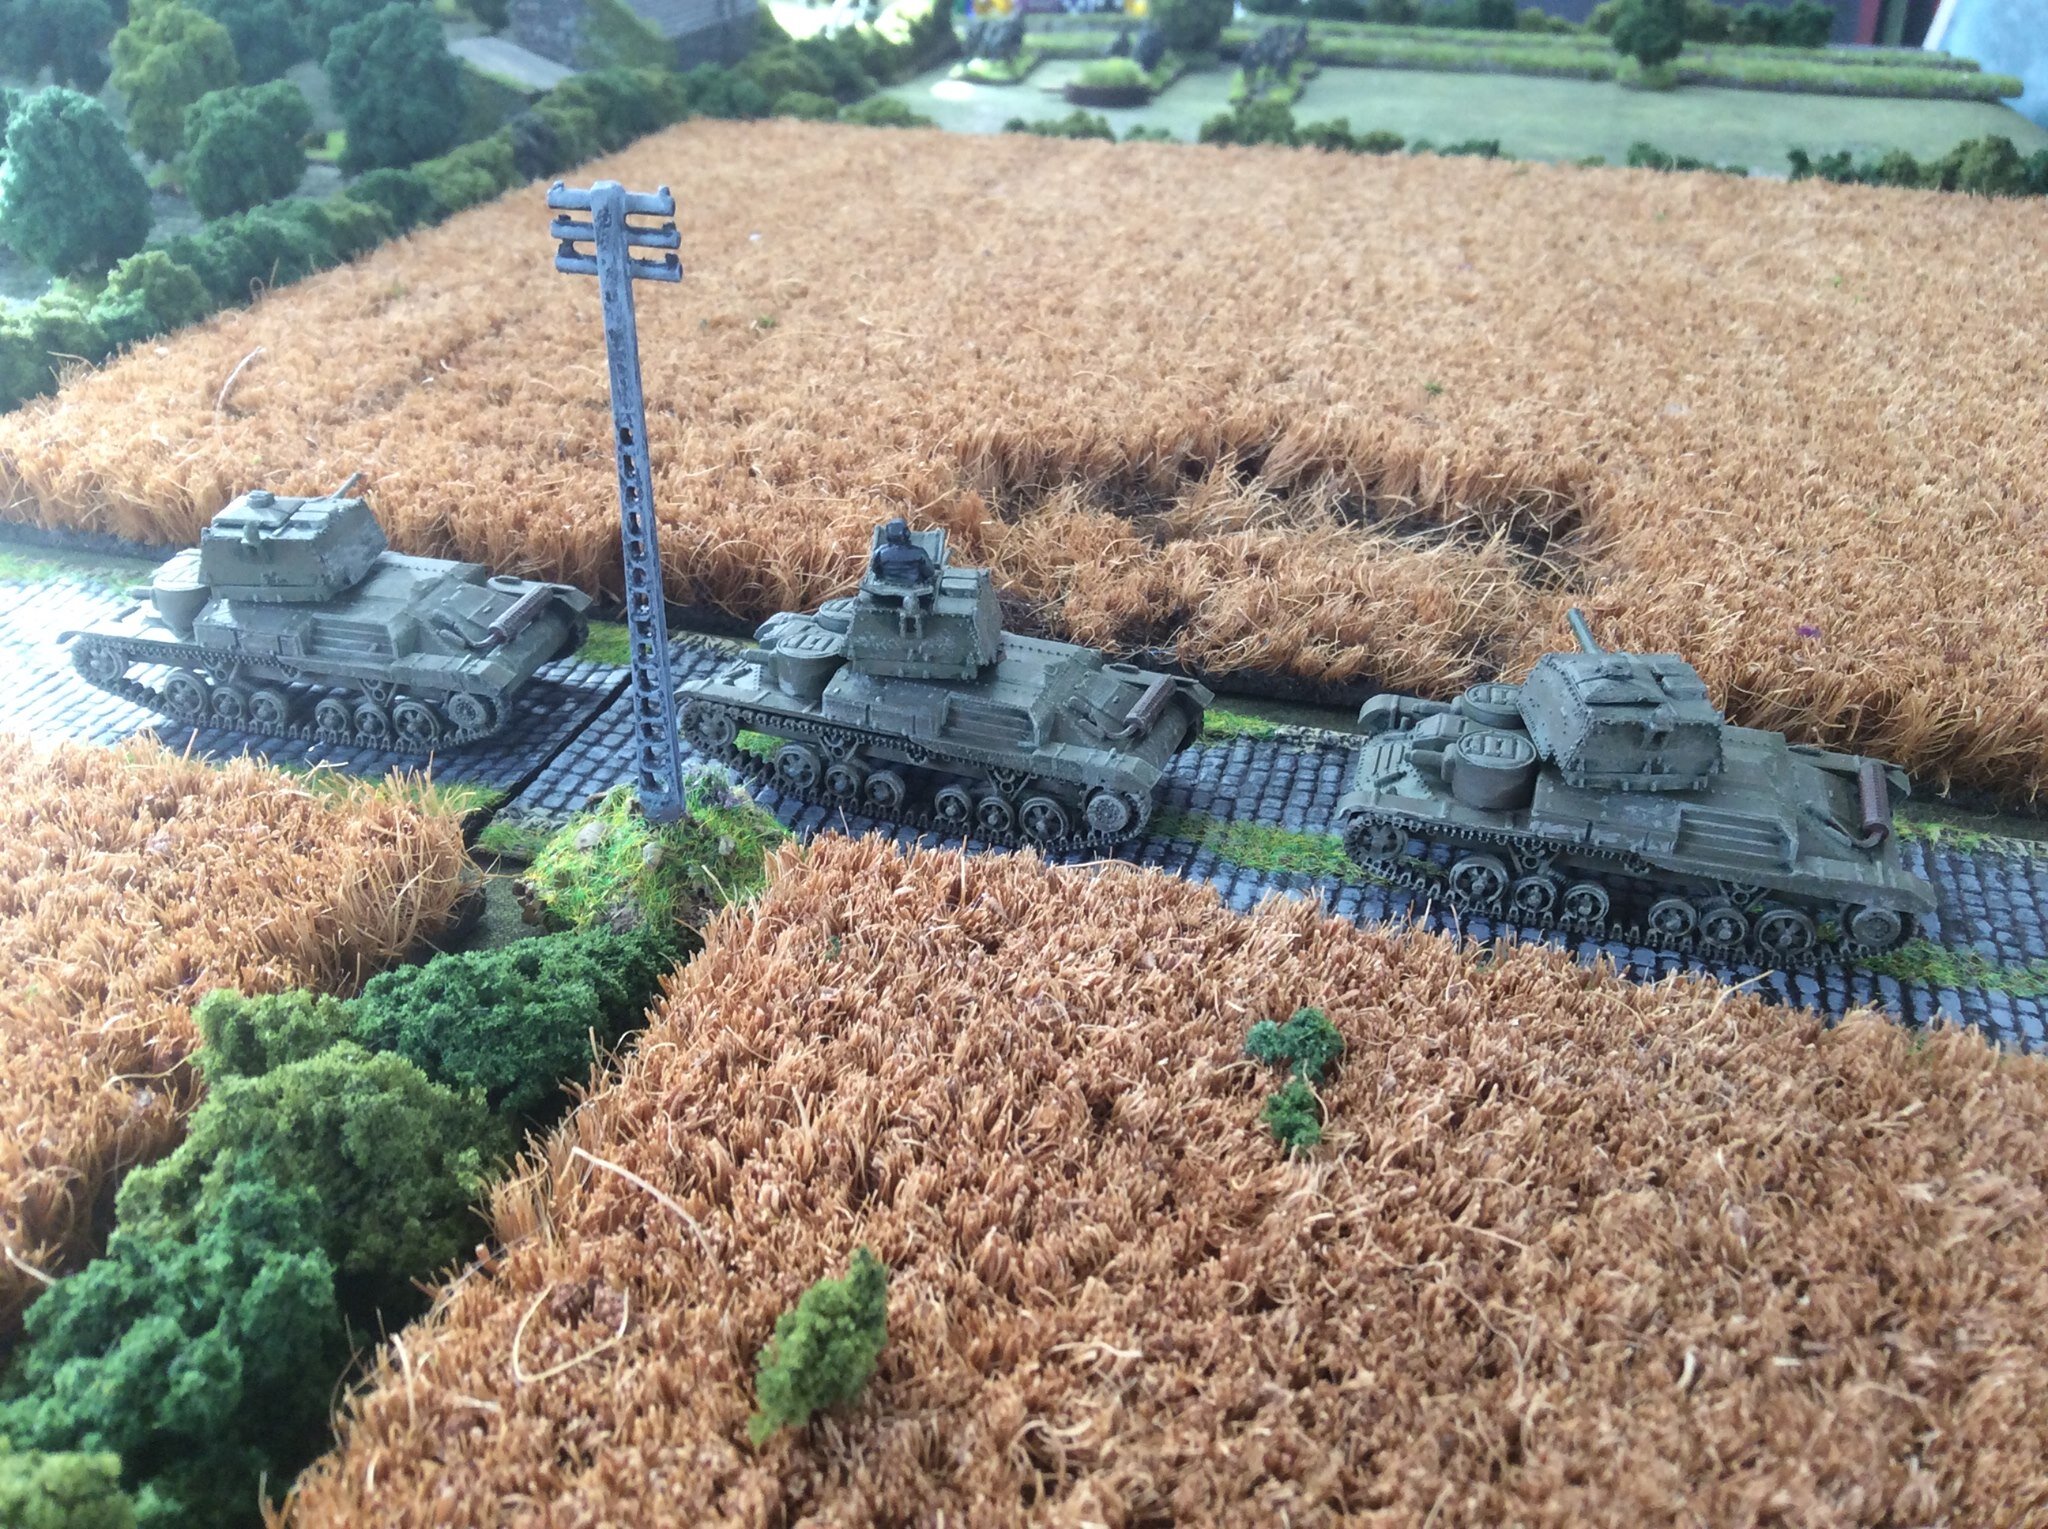
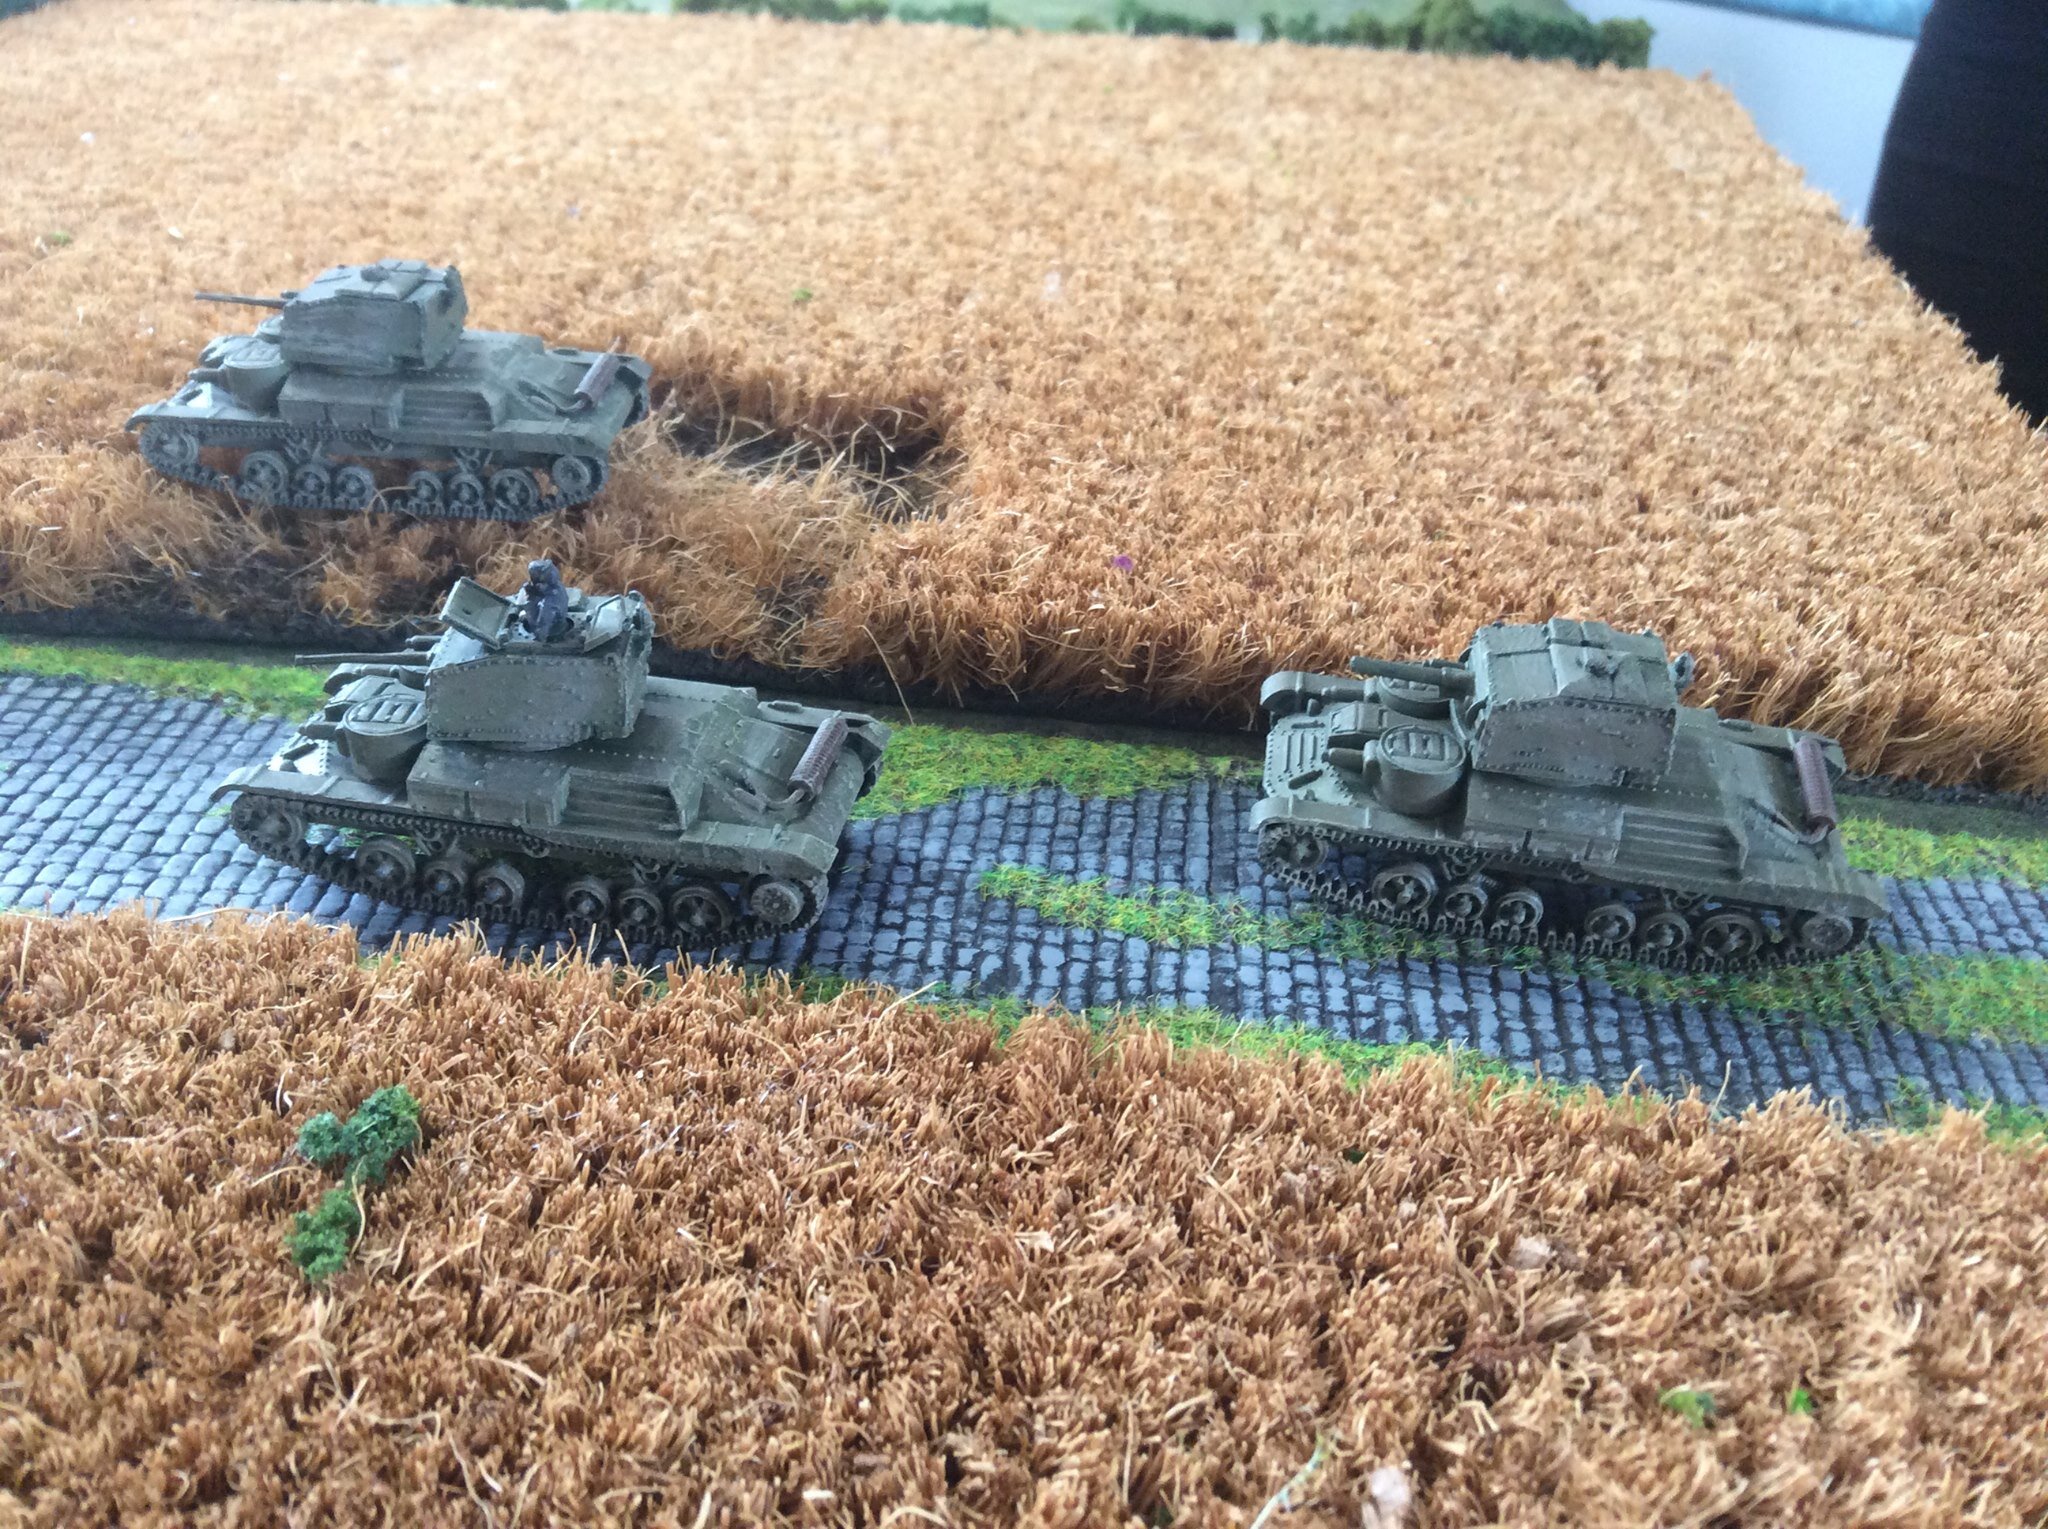
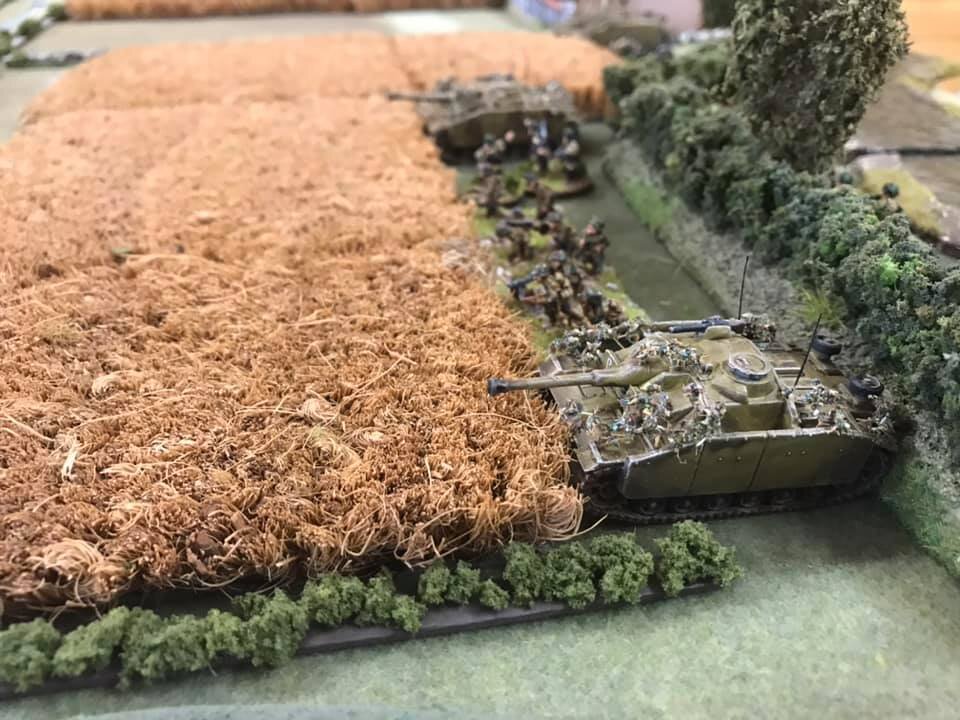
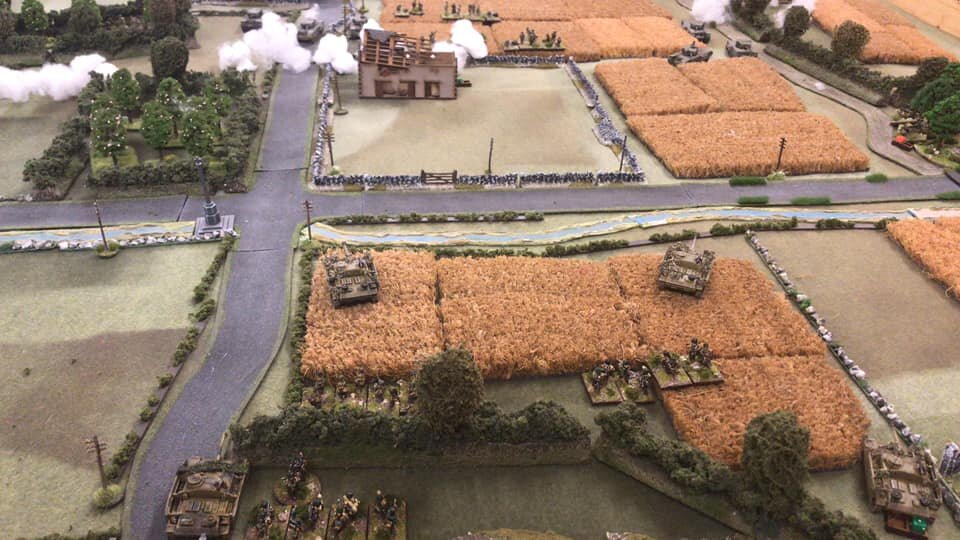
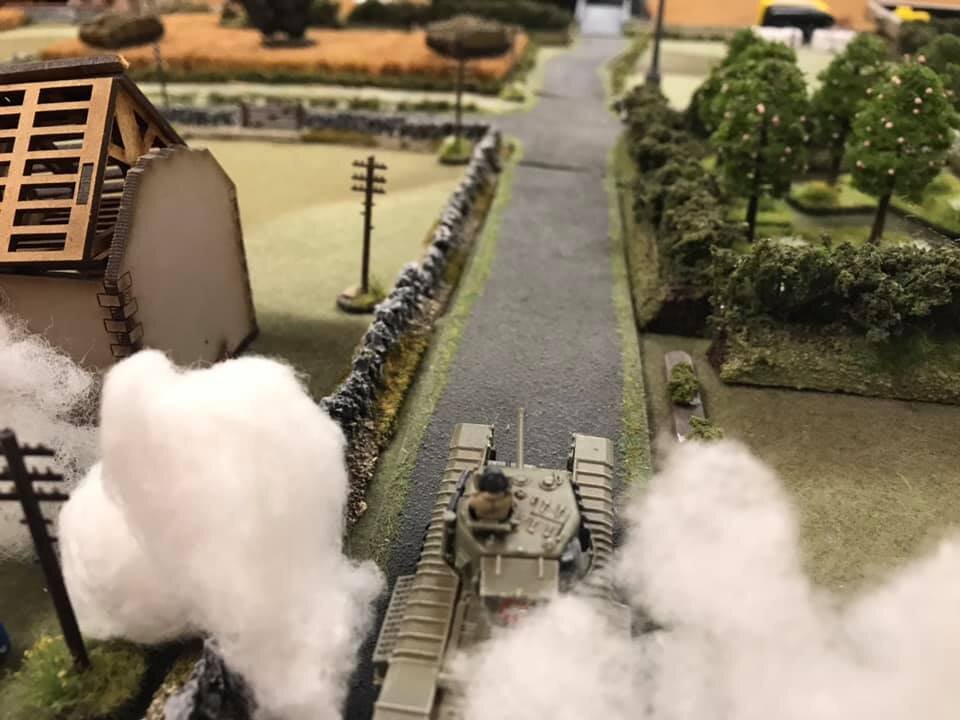
With that out of the way, I drove confidently onto the table. As far as I was concerned, my first wave were a scouting party designed to draw the fire from the enemy so that my second and third waves could kill them.

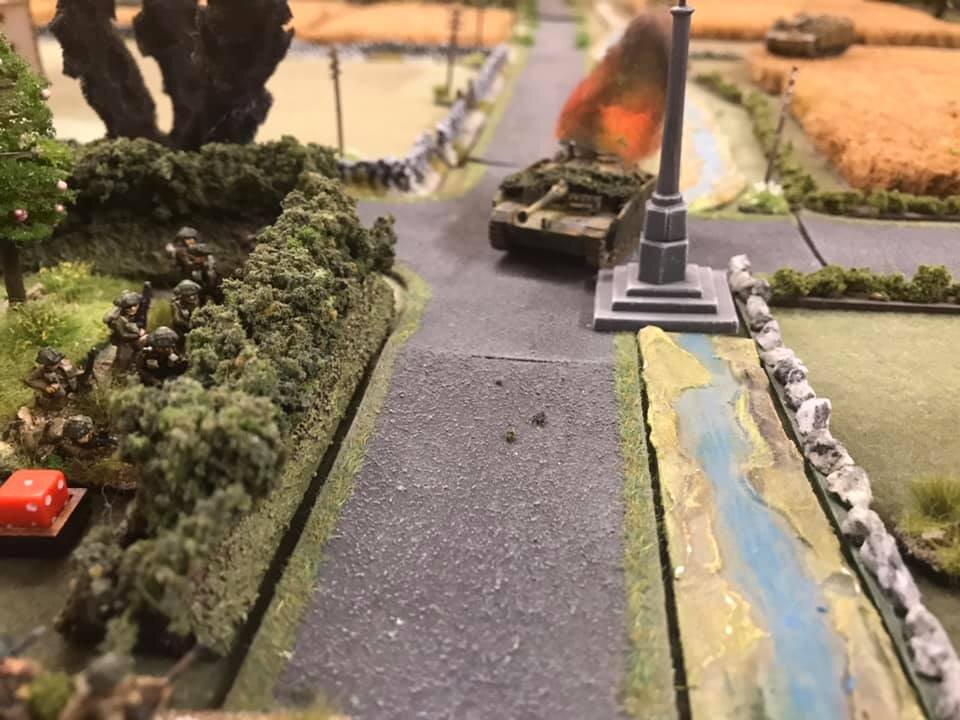
That said, there was no point in being stupid about this. My T-34s manoeuvred into a hull-down position on top of the ridge, whilst my BT-7s on the left and HQ platoon on the right, went forward shouting “shoot at me, shoot at me”!

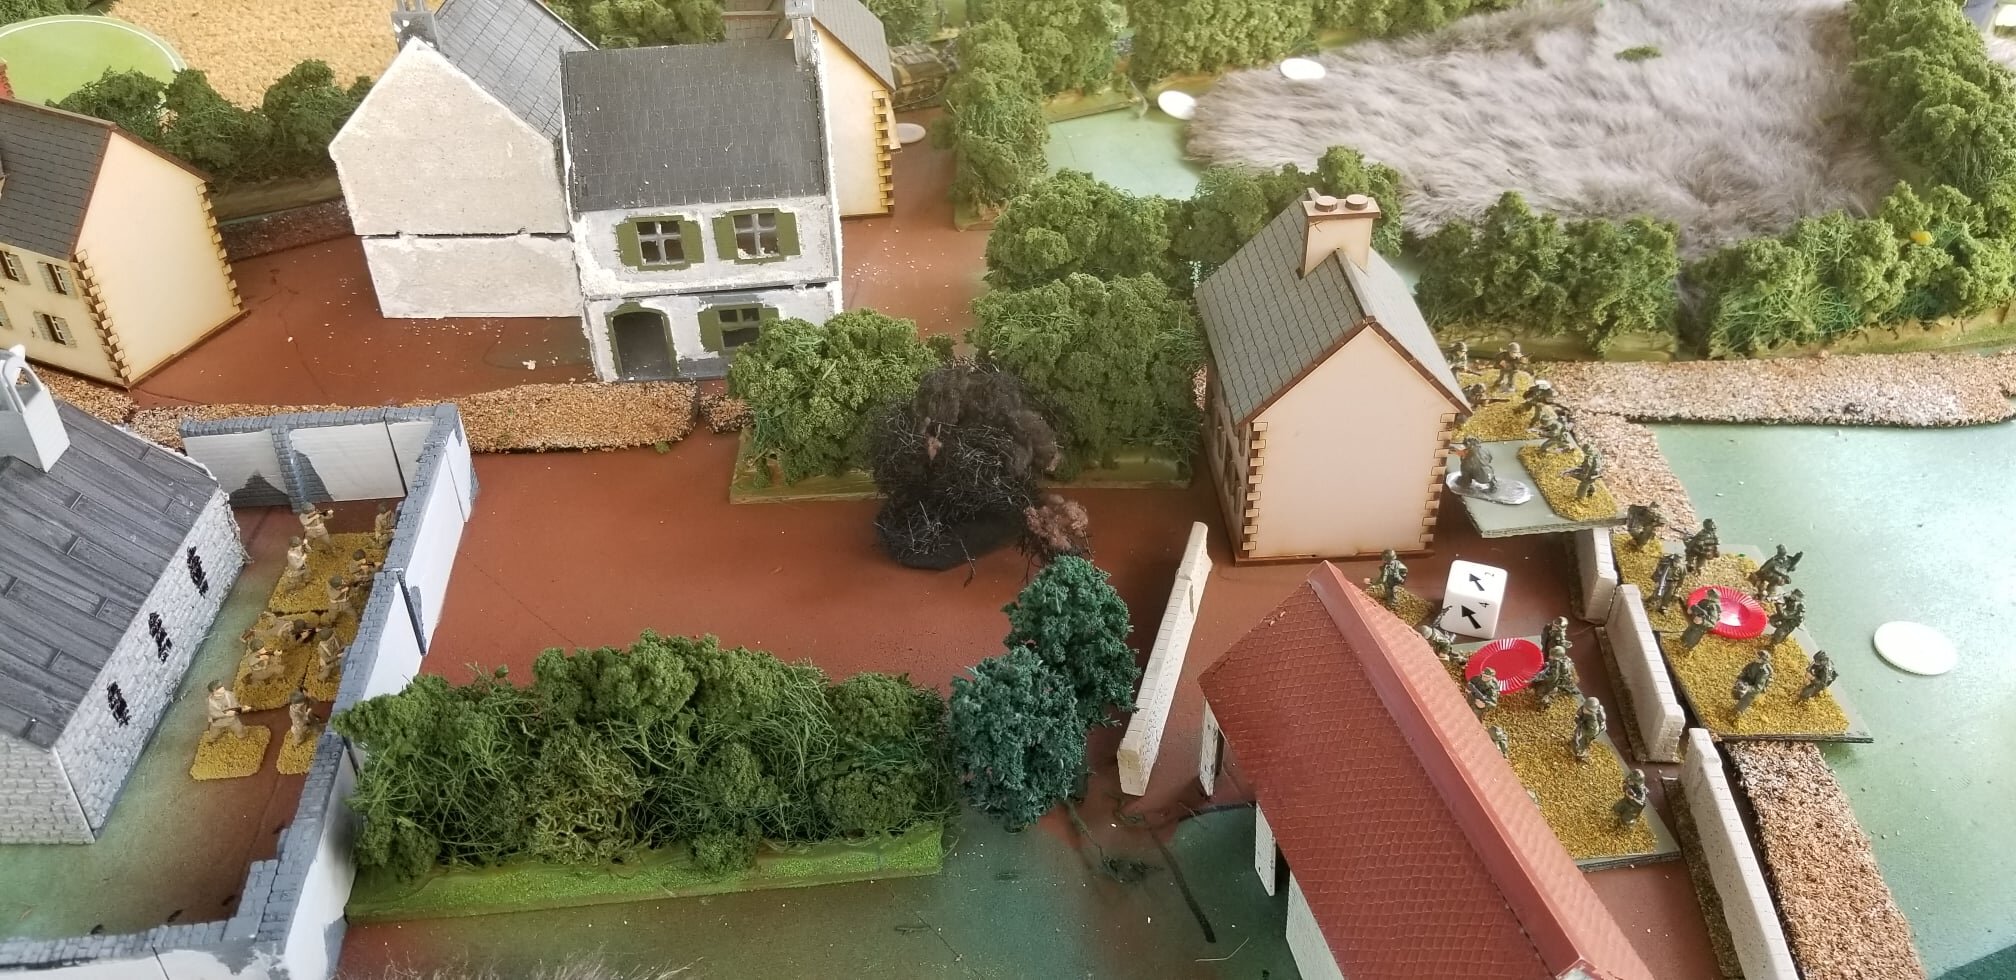
Well the Germans did just that: all German tanks came off their Blinds and opened fire.

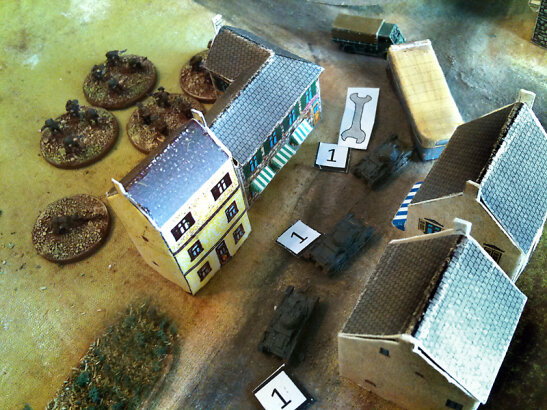
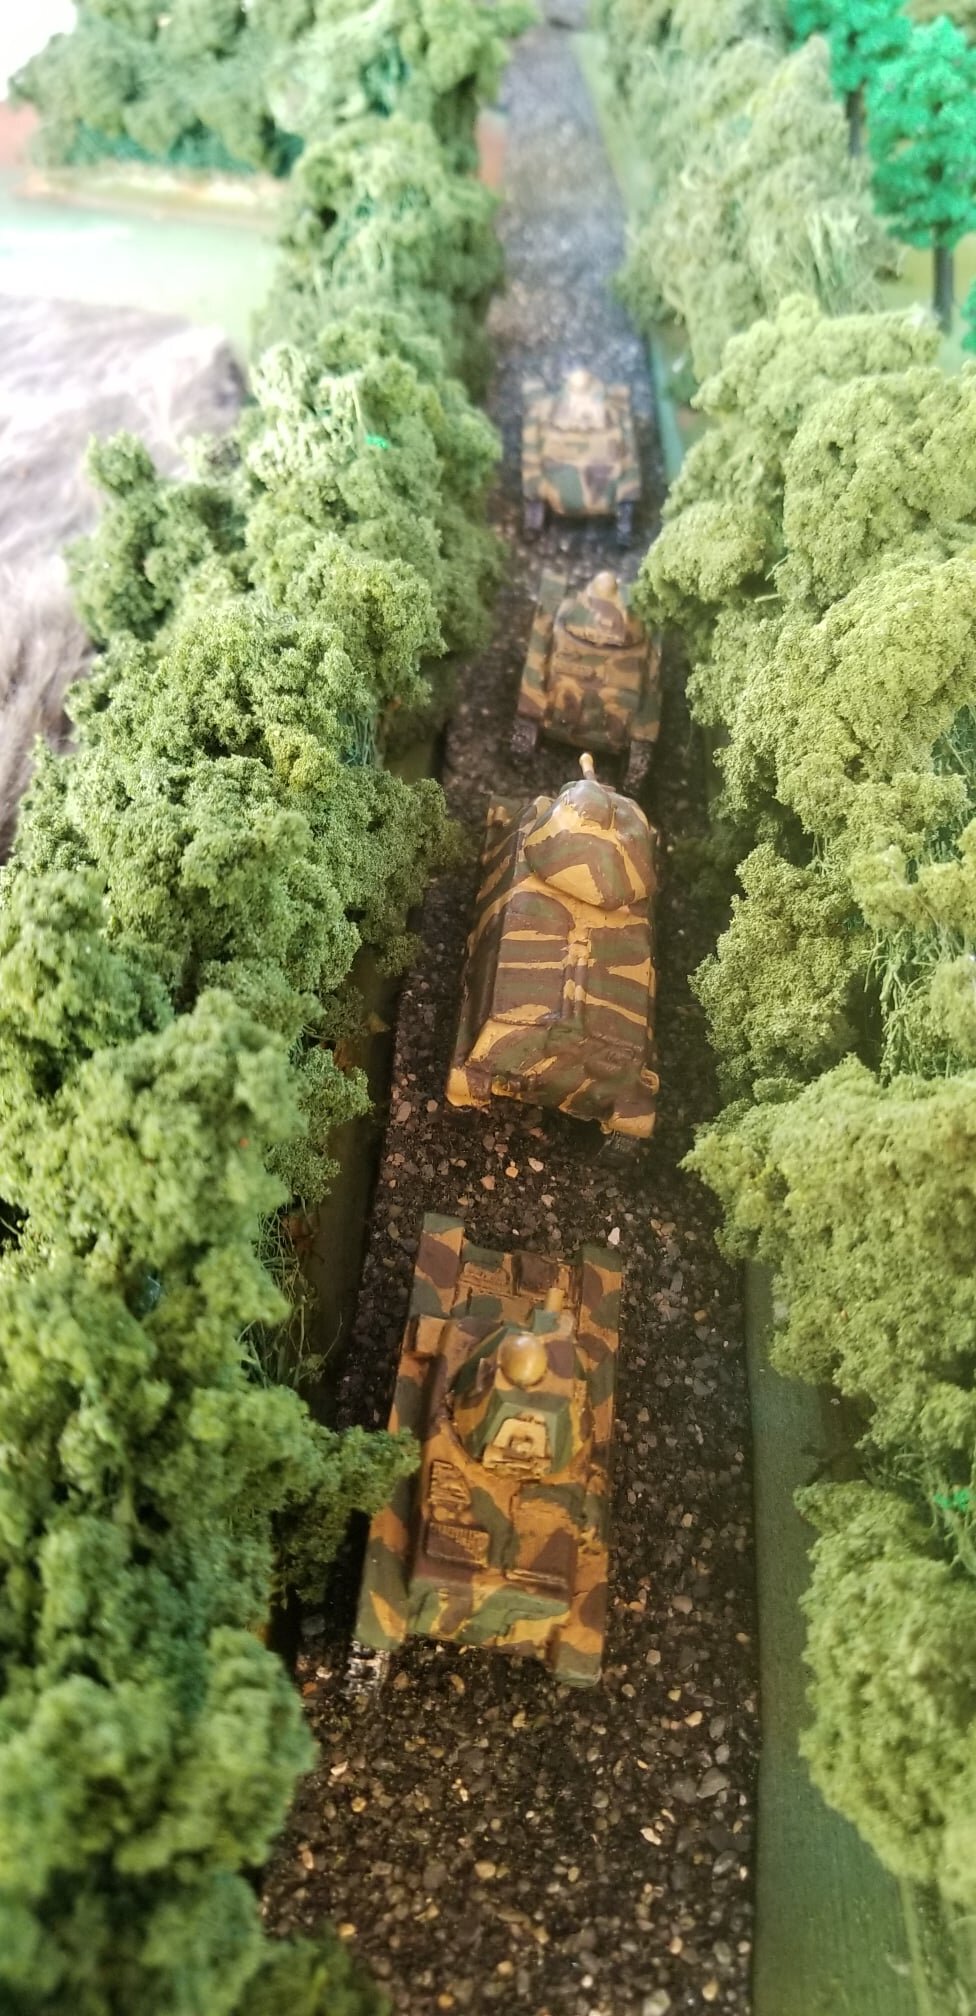
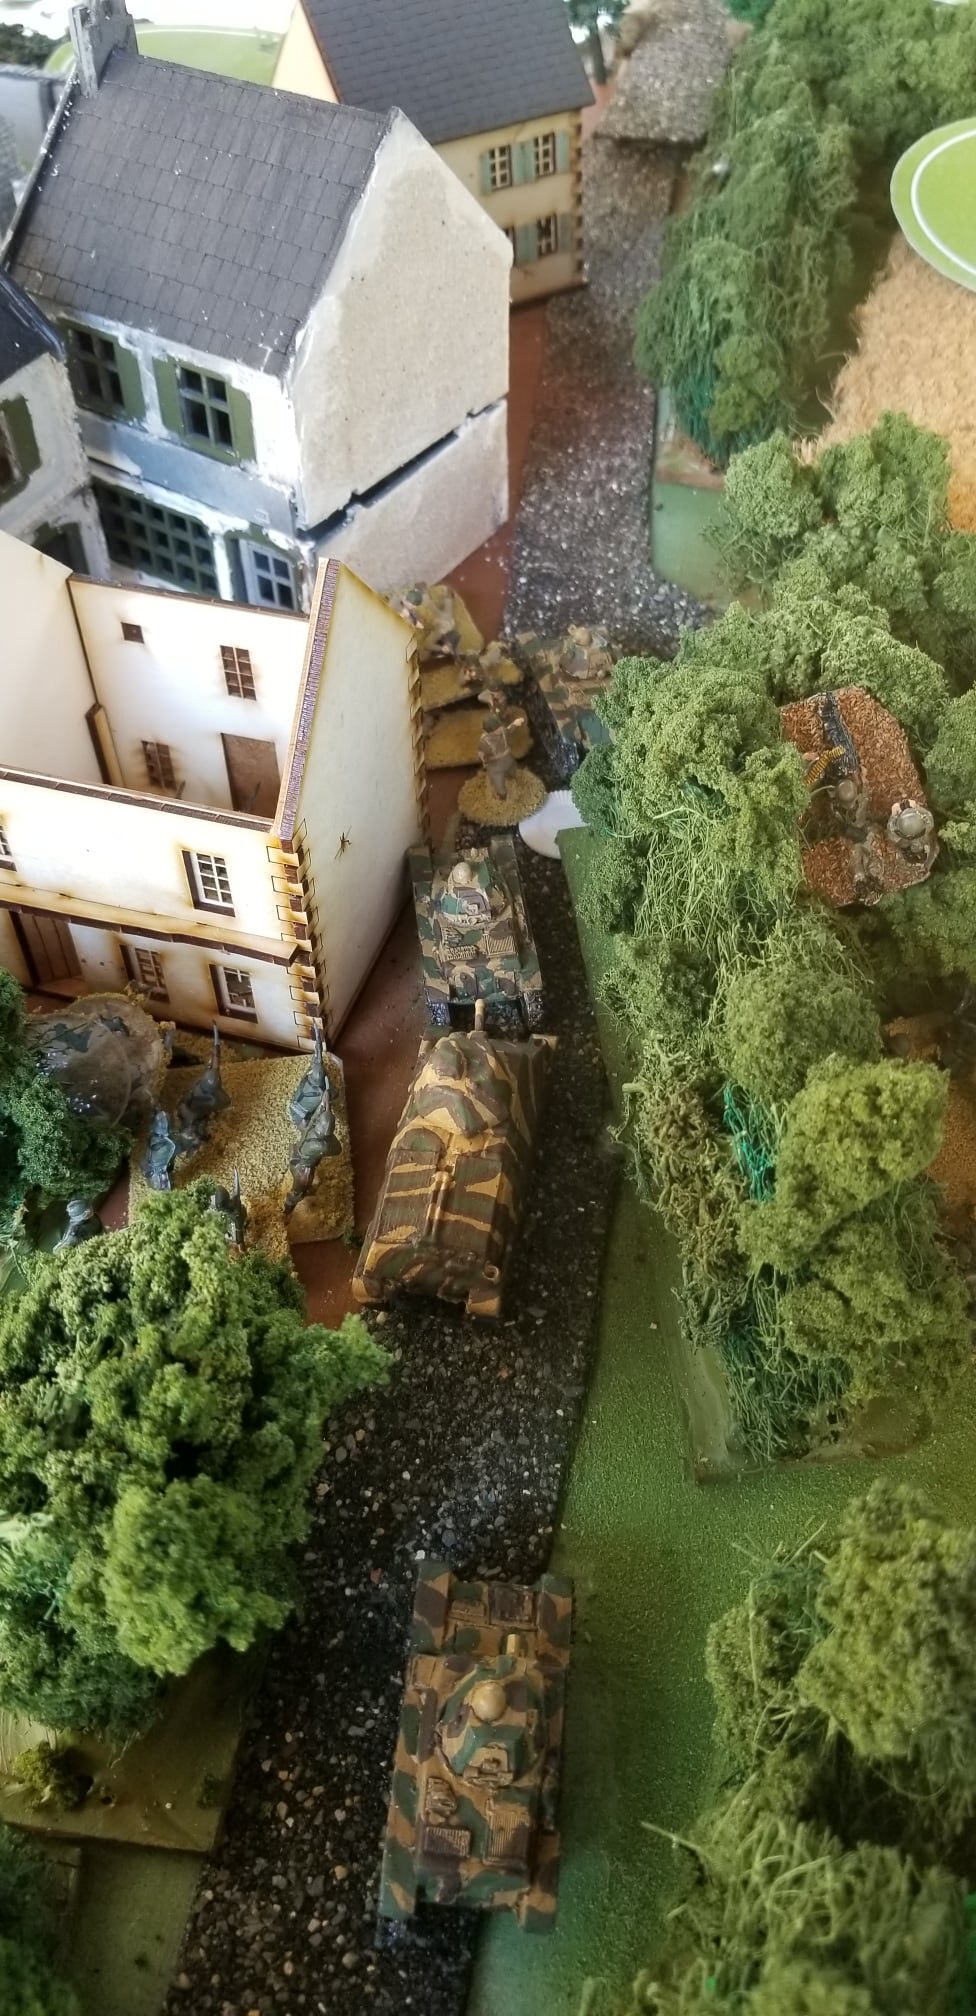
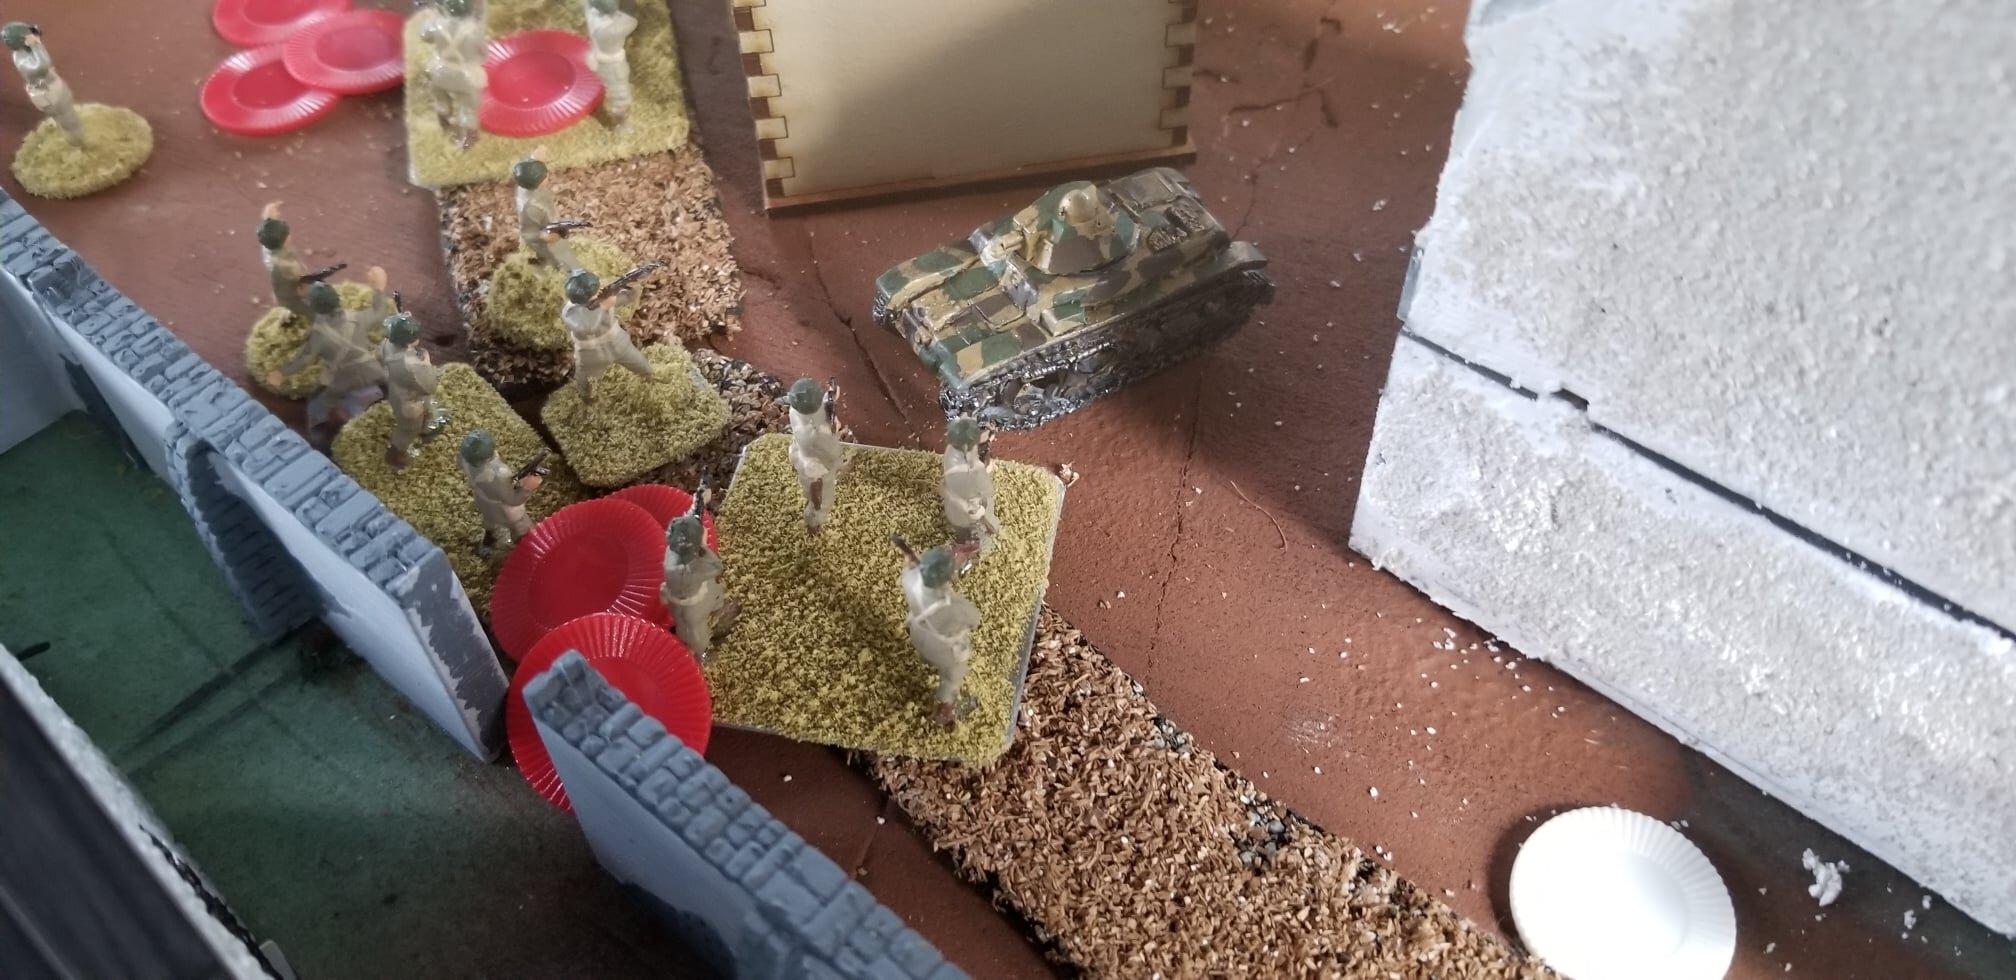
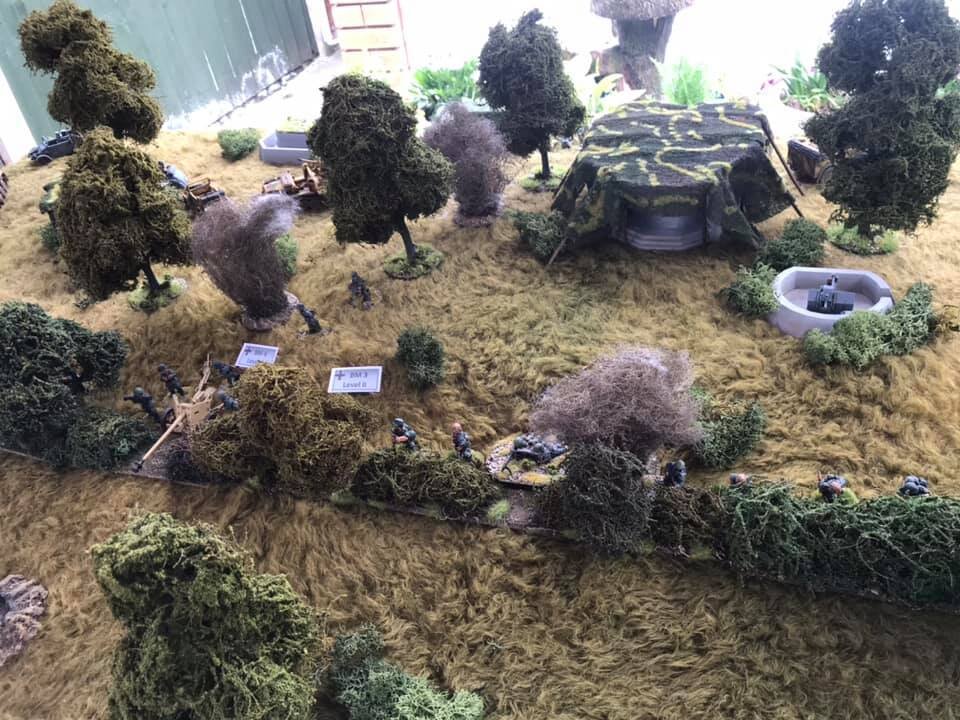
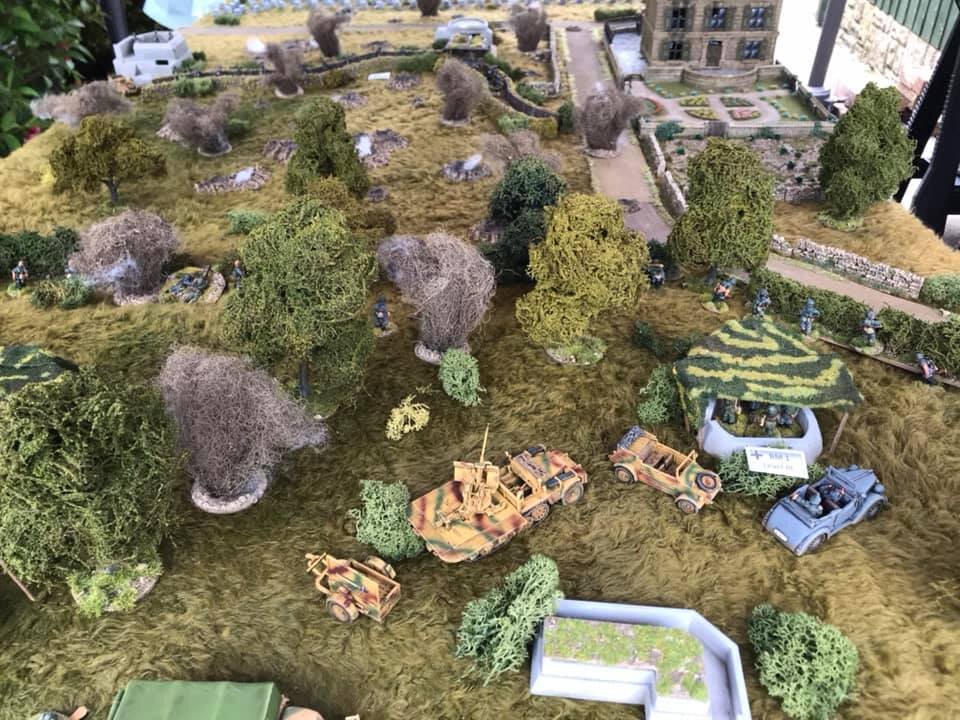
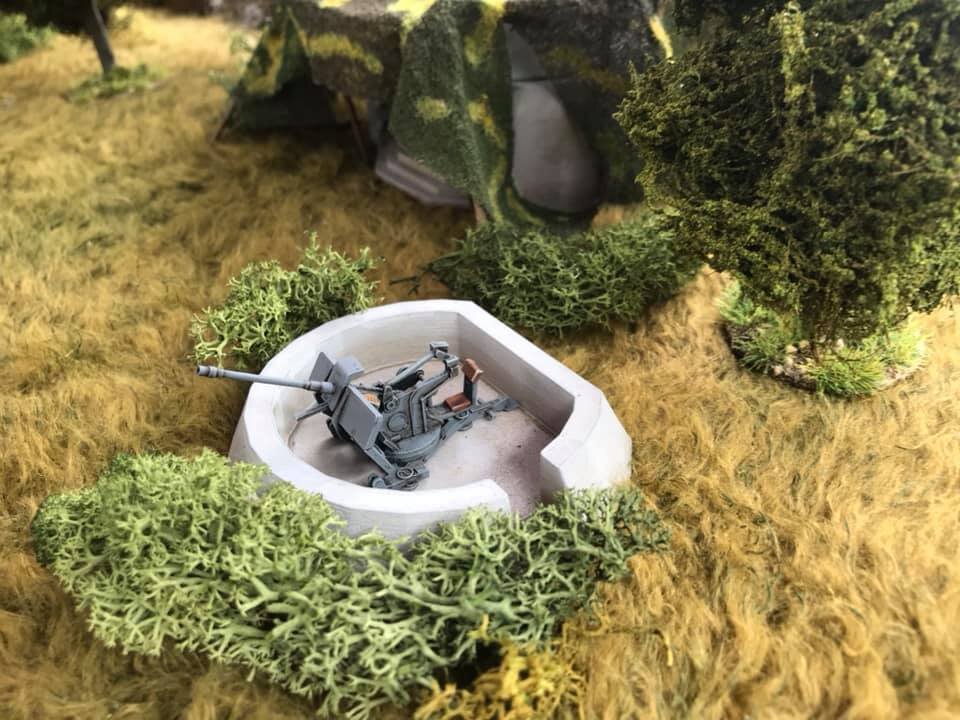
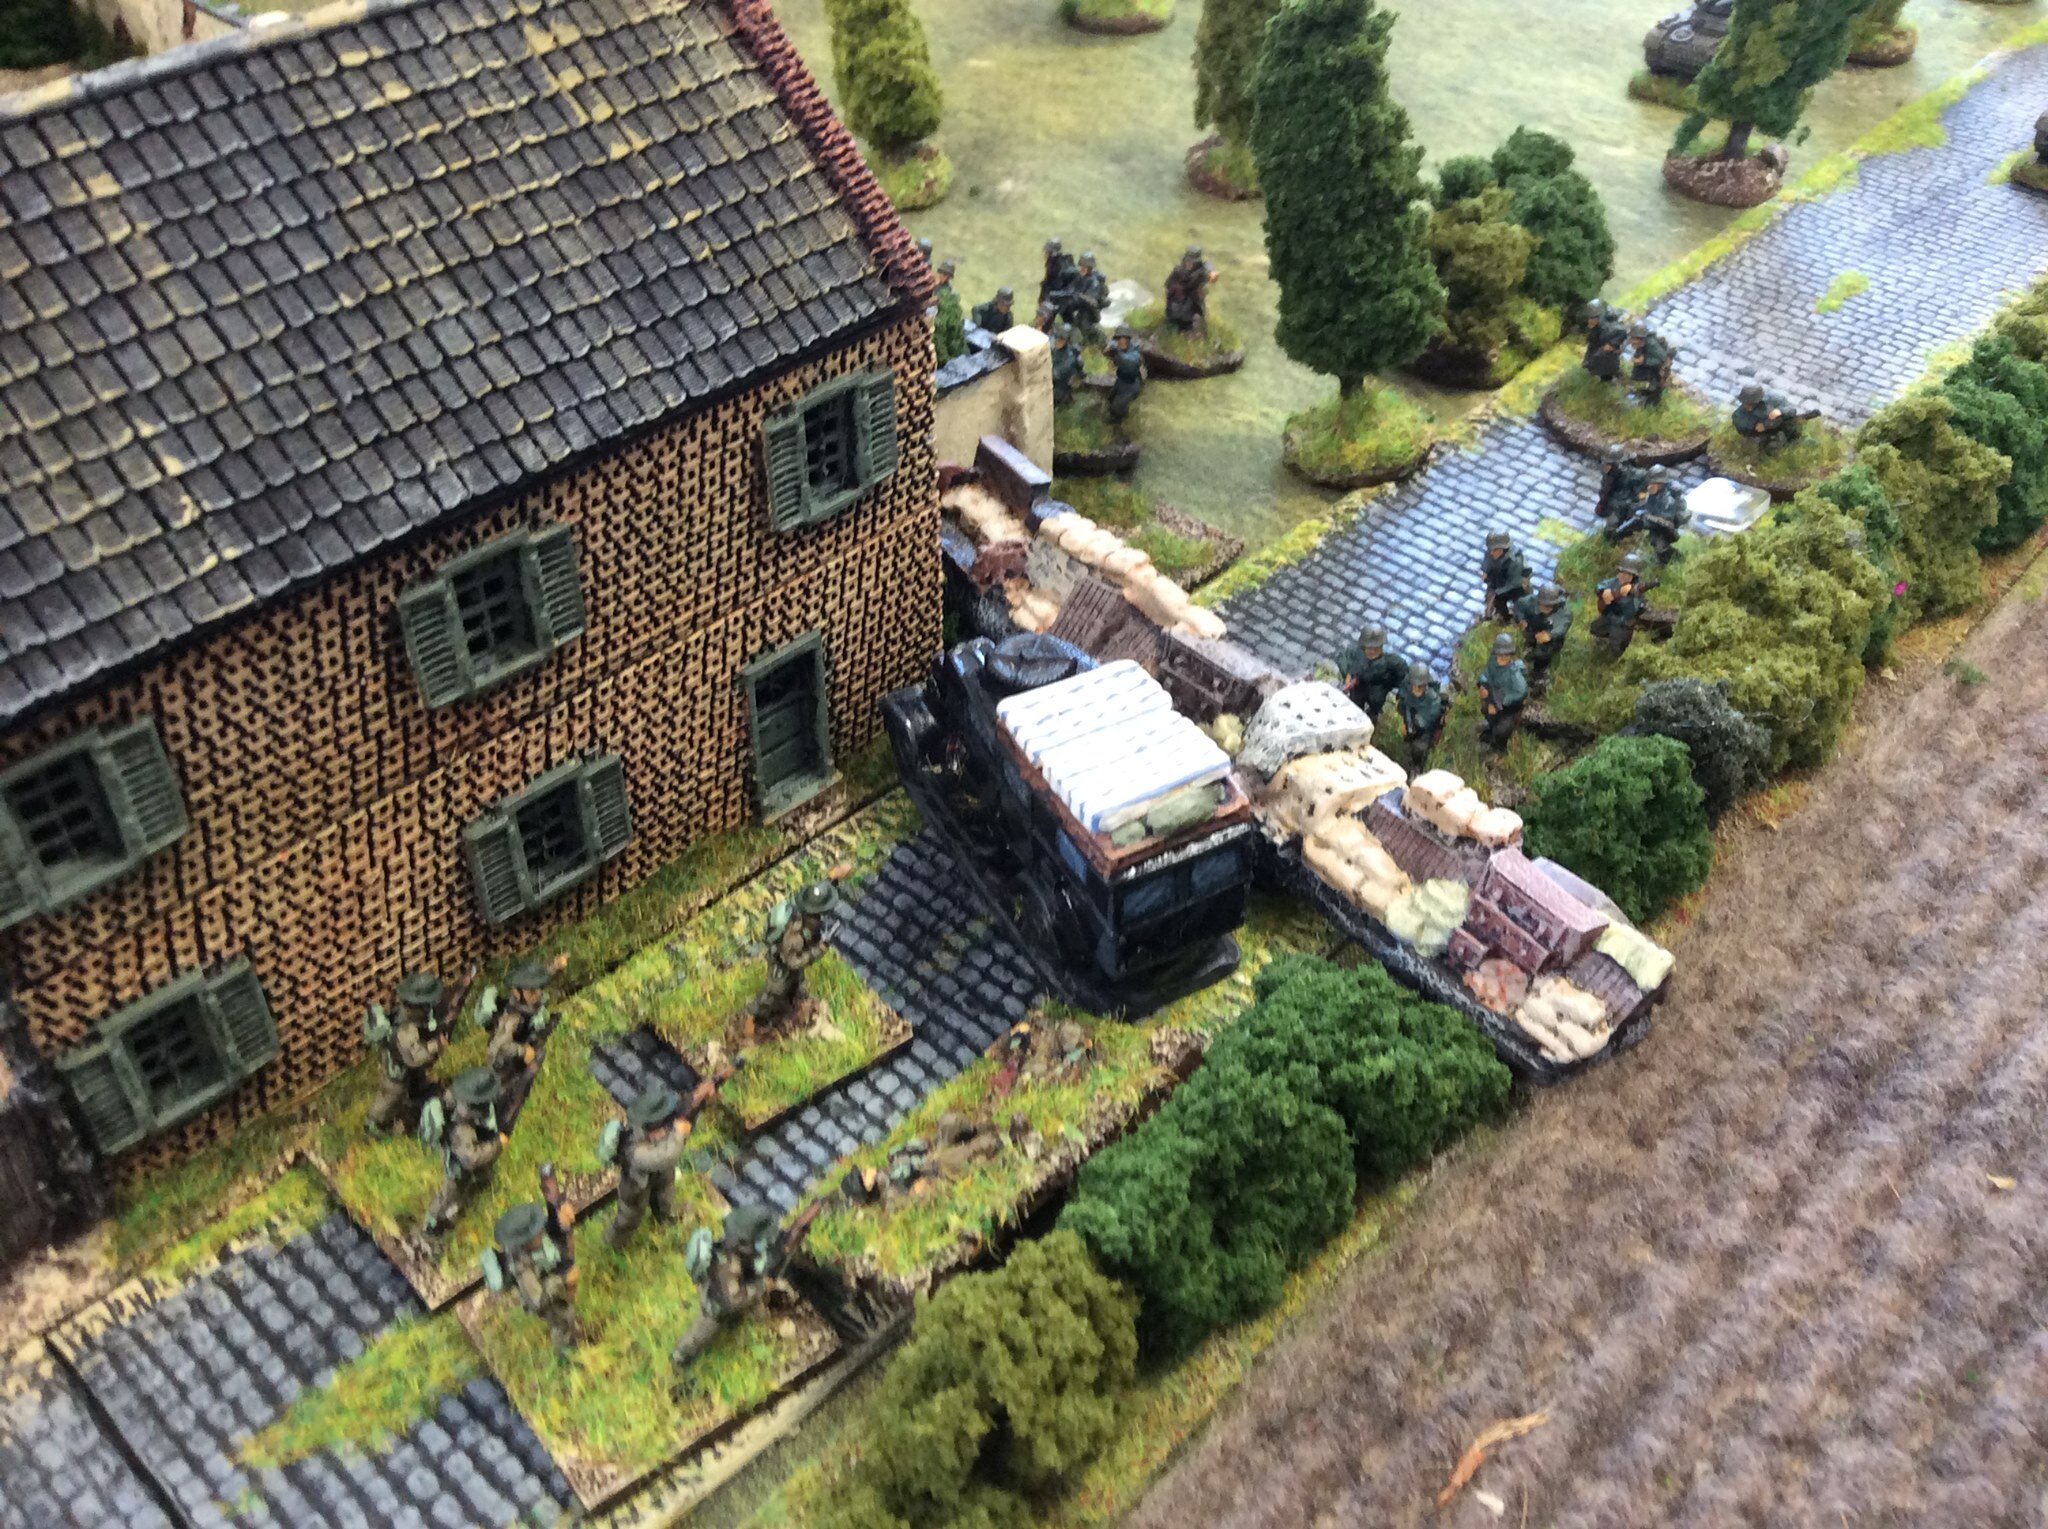
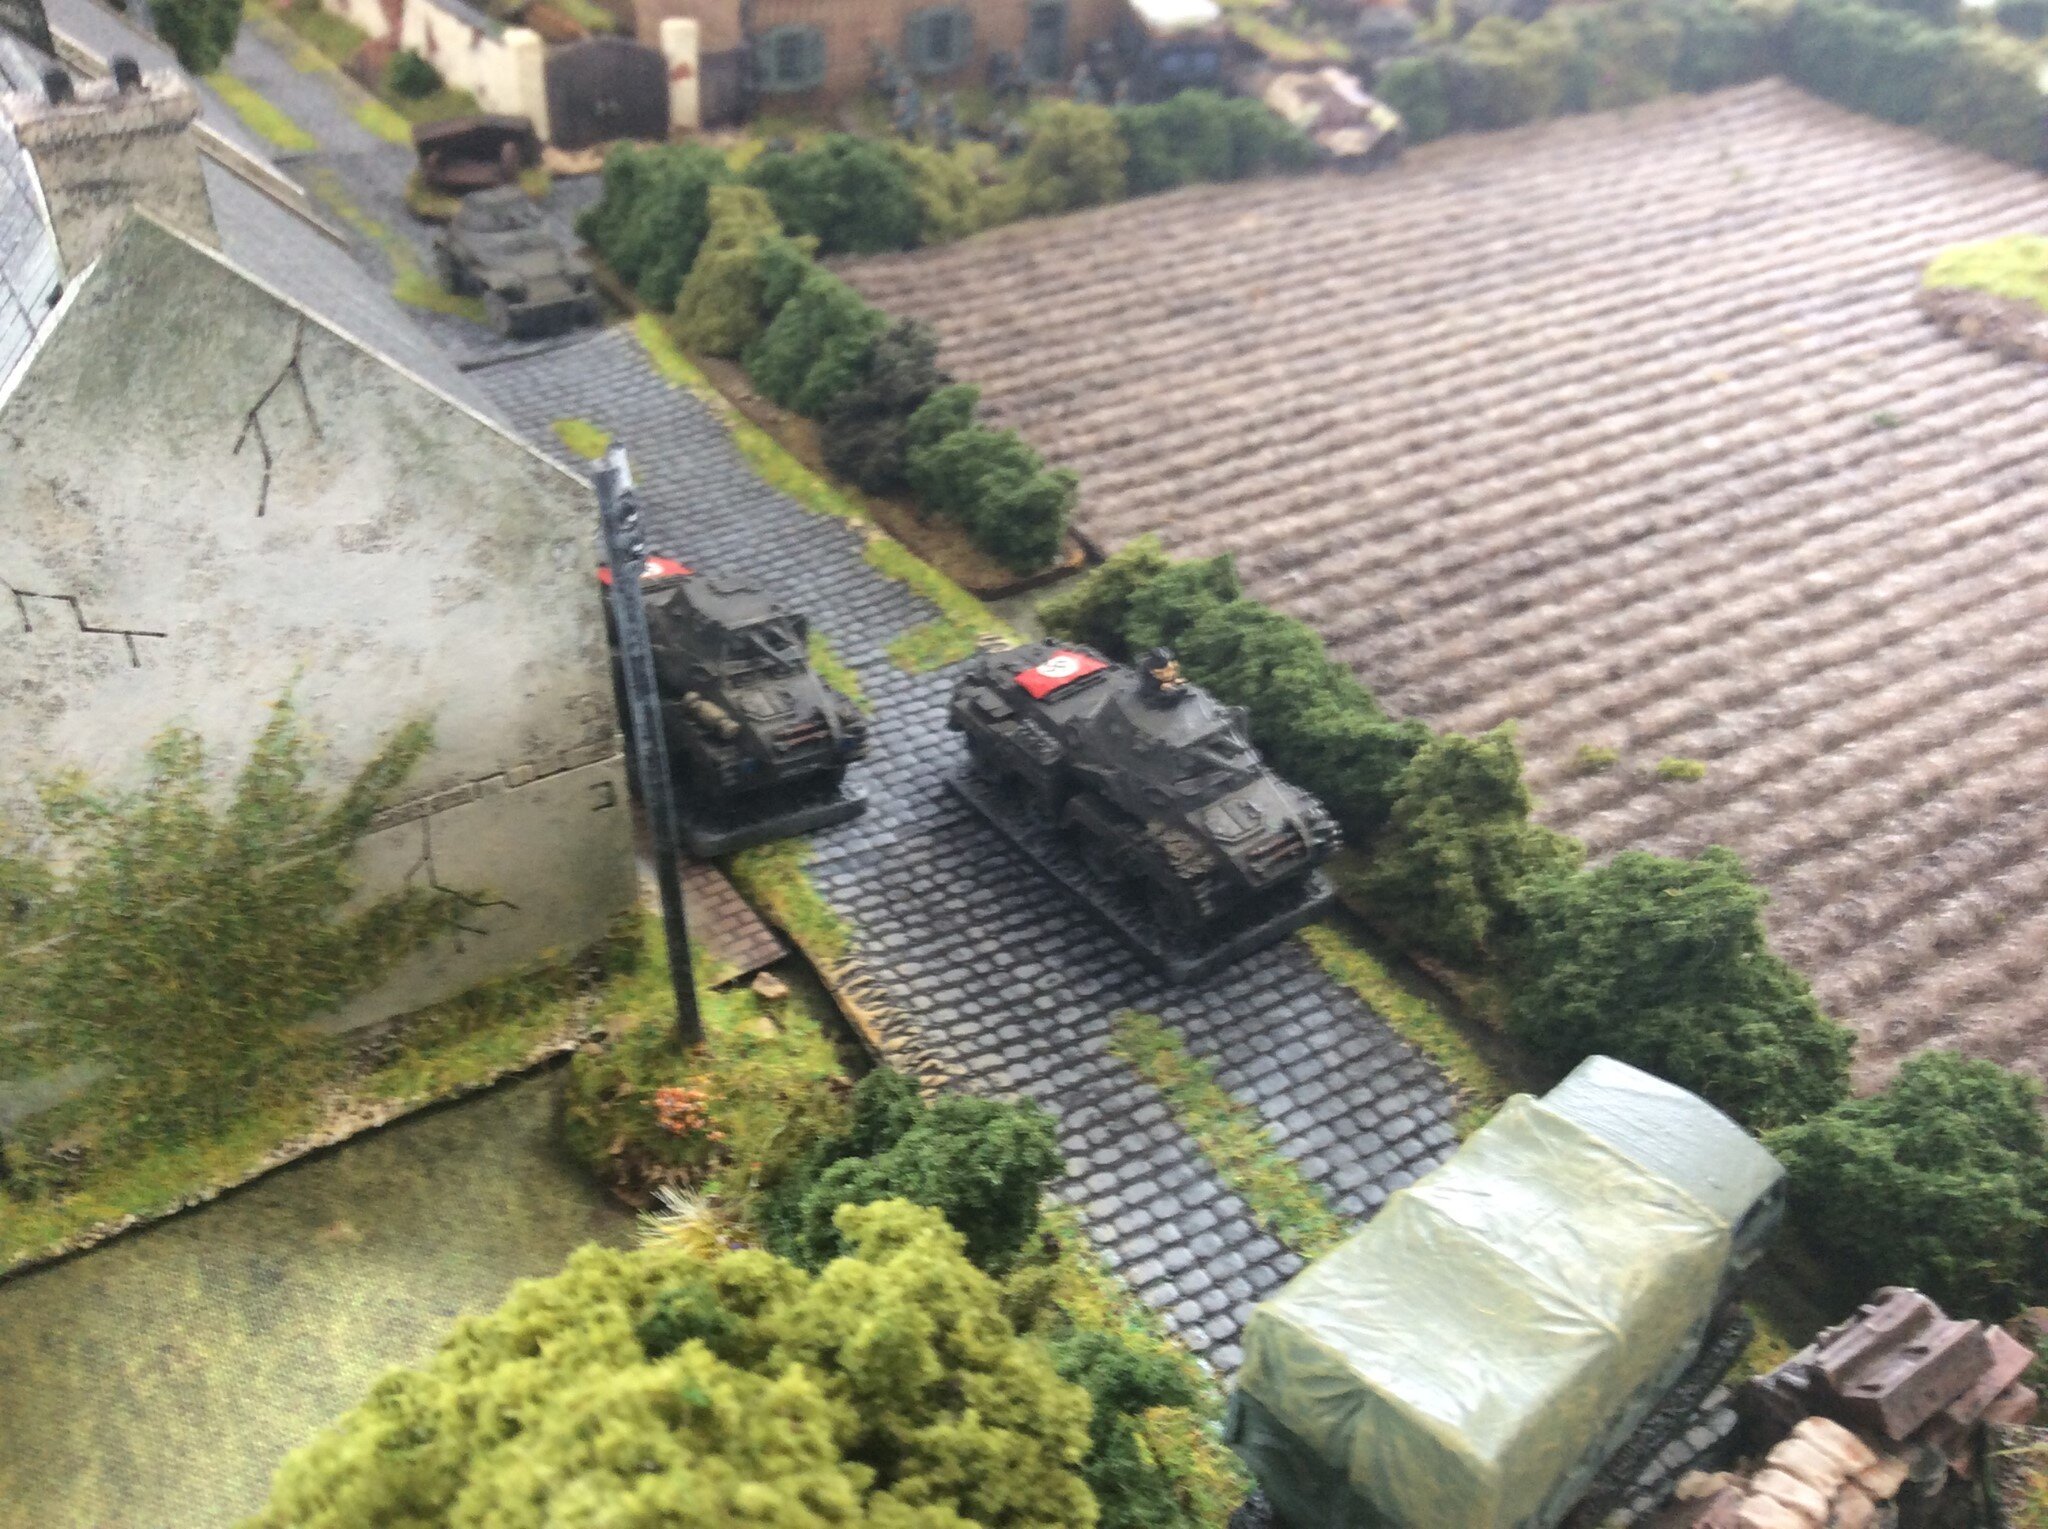
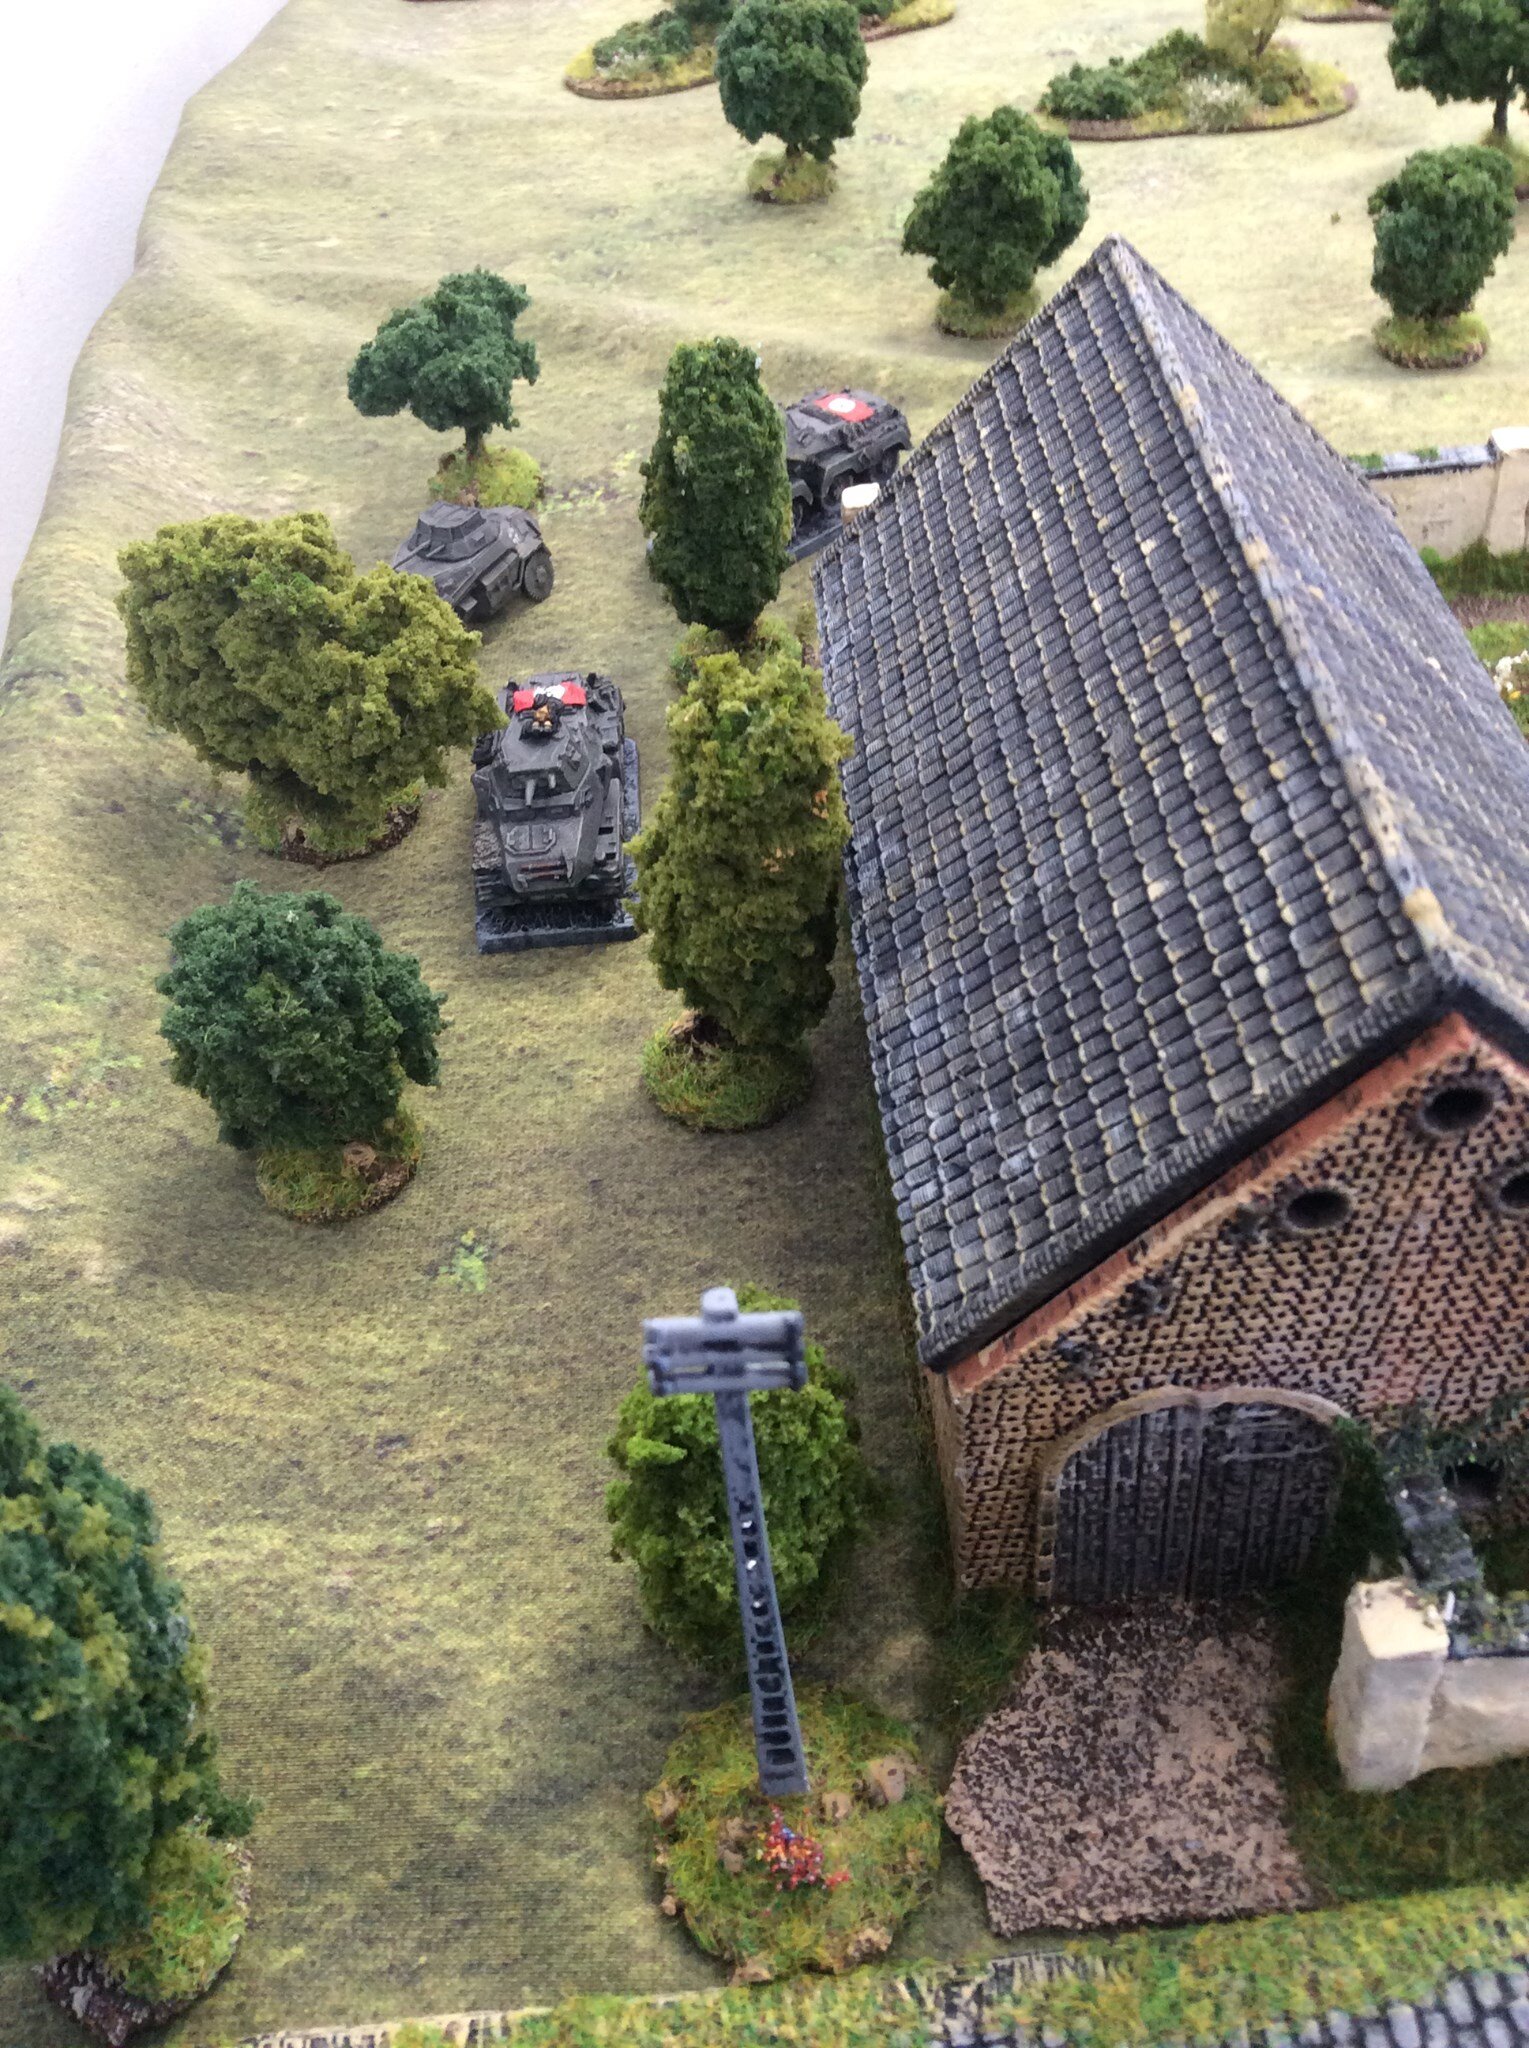
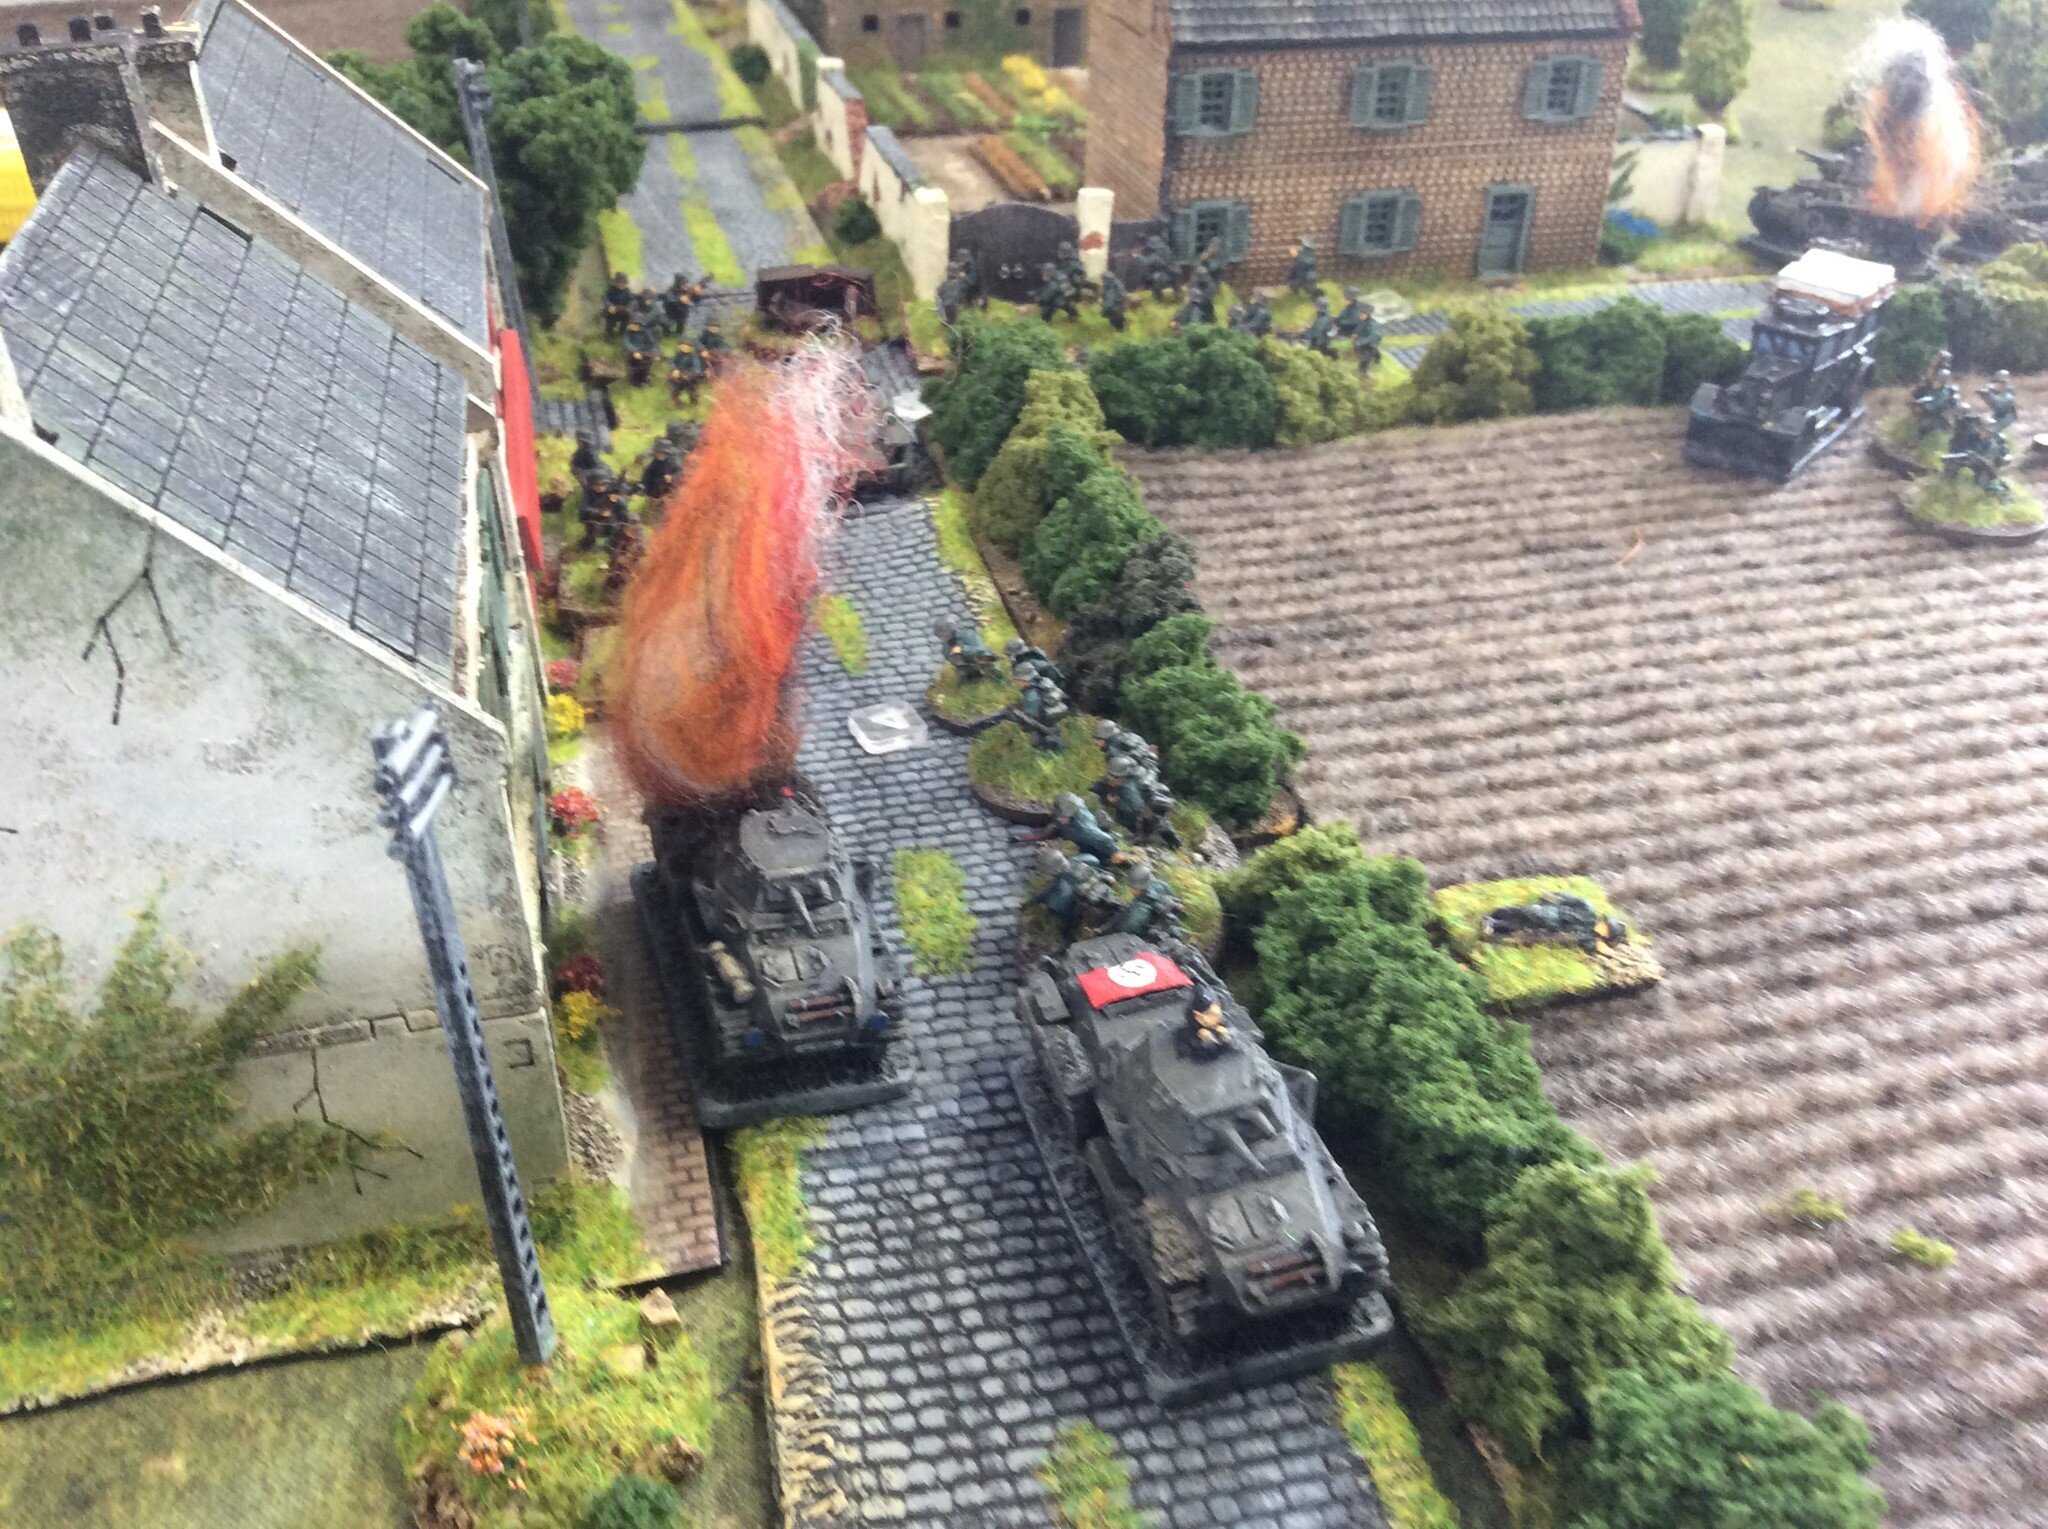
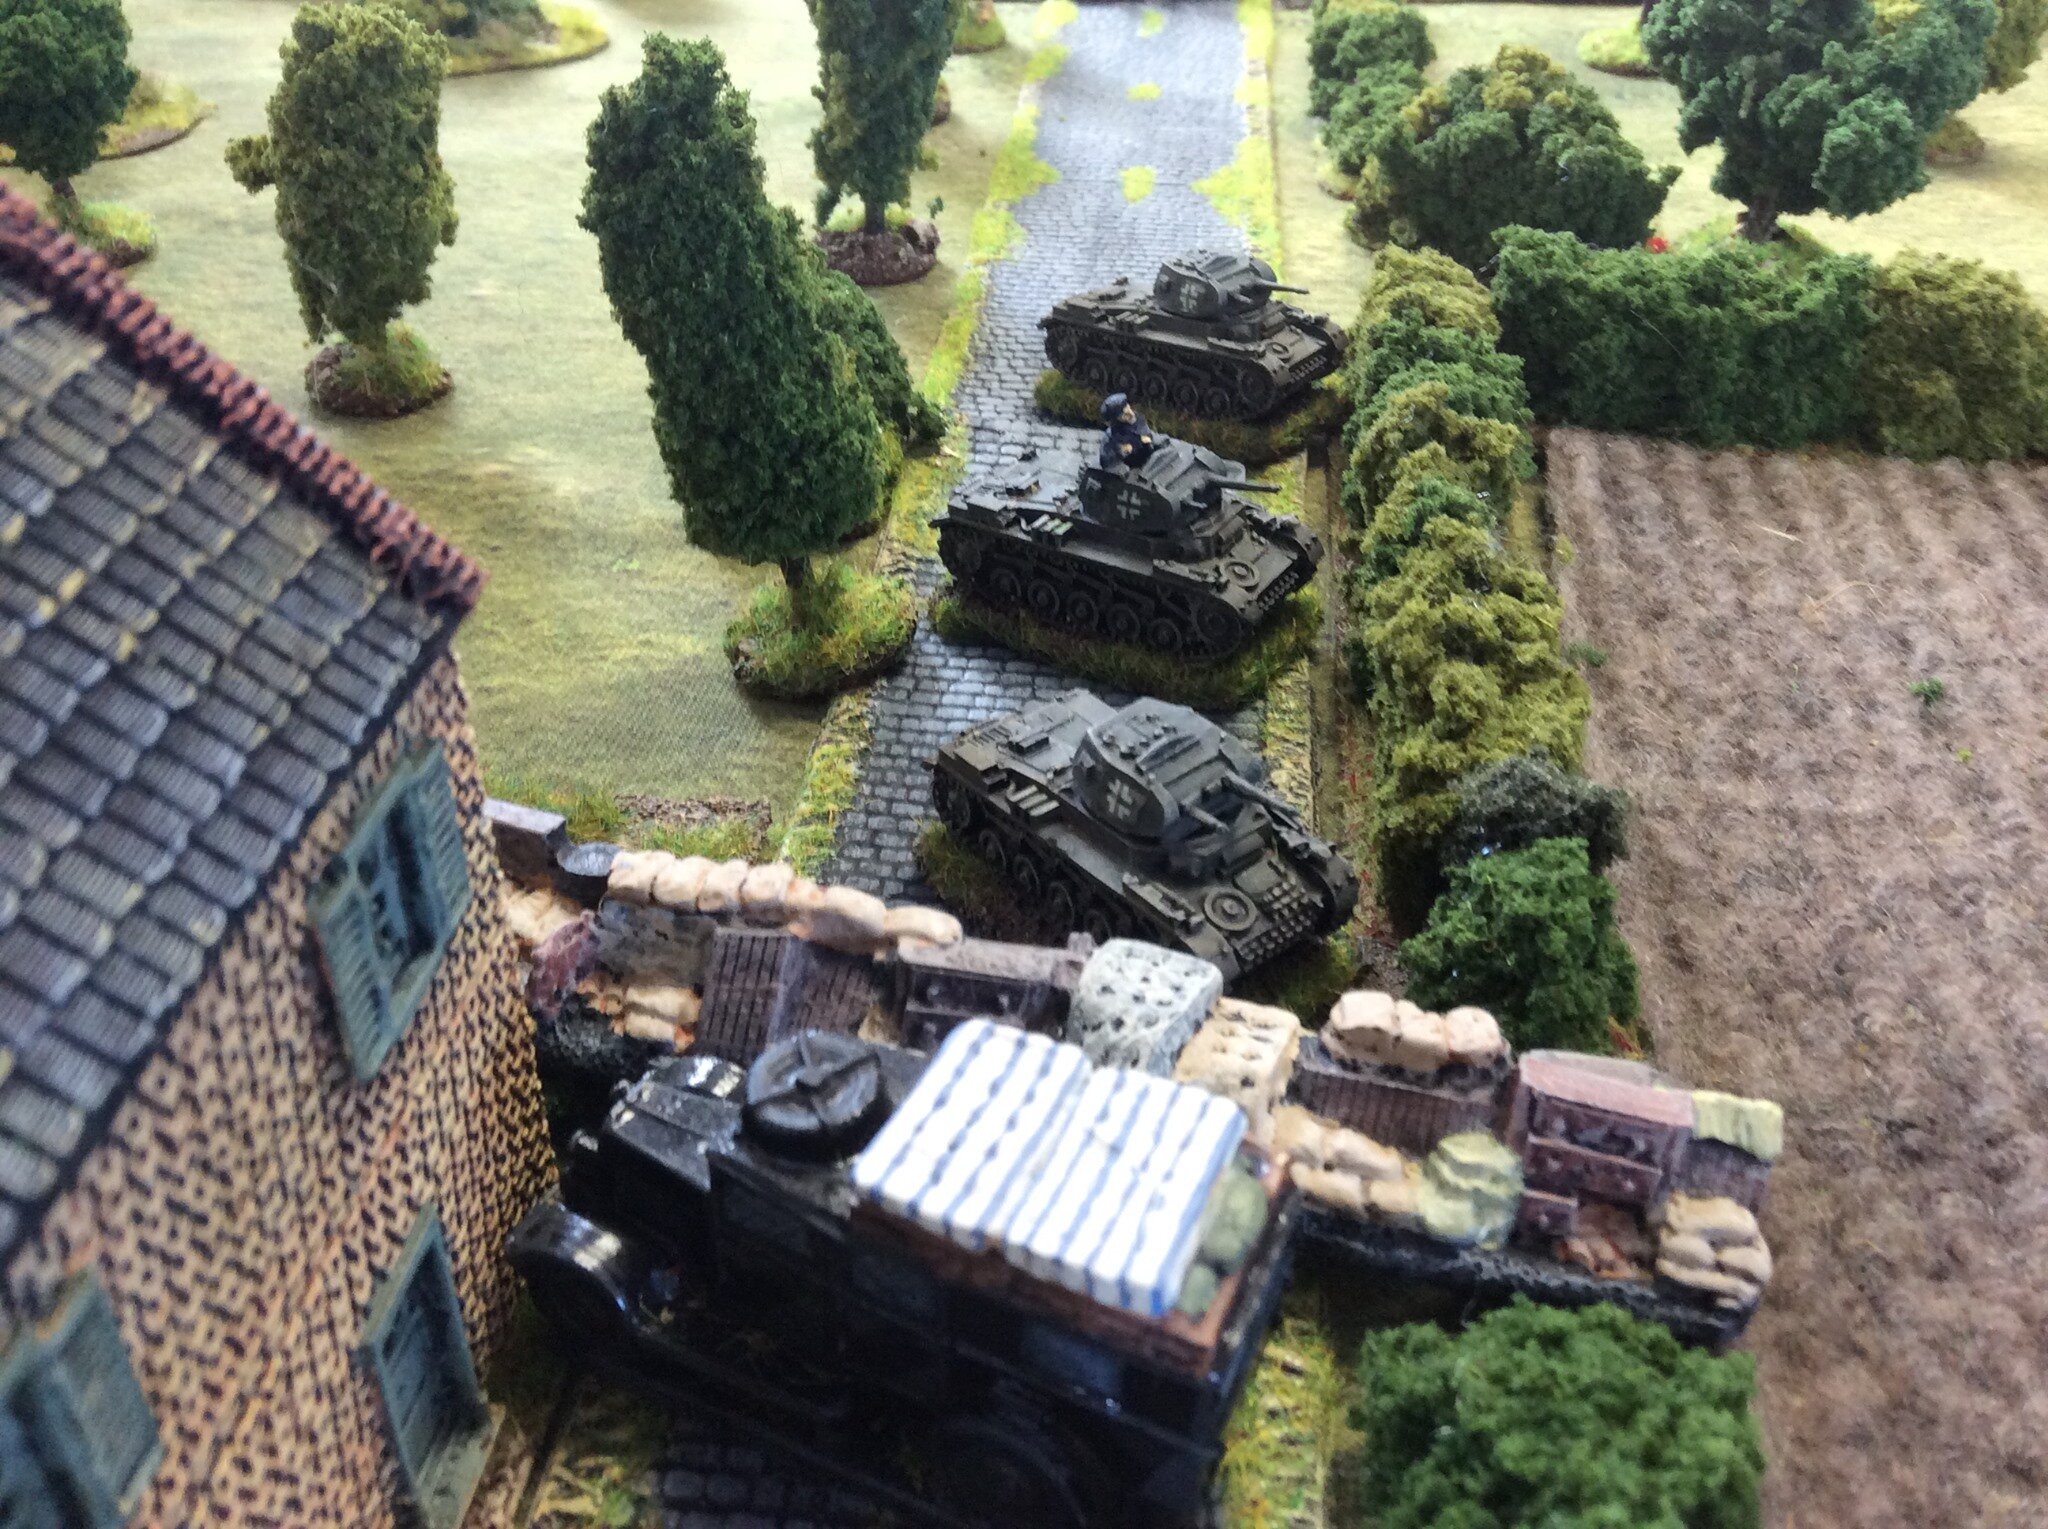
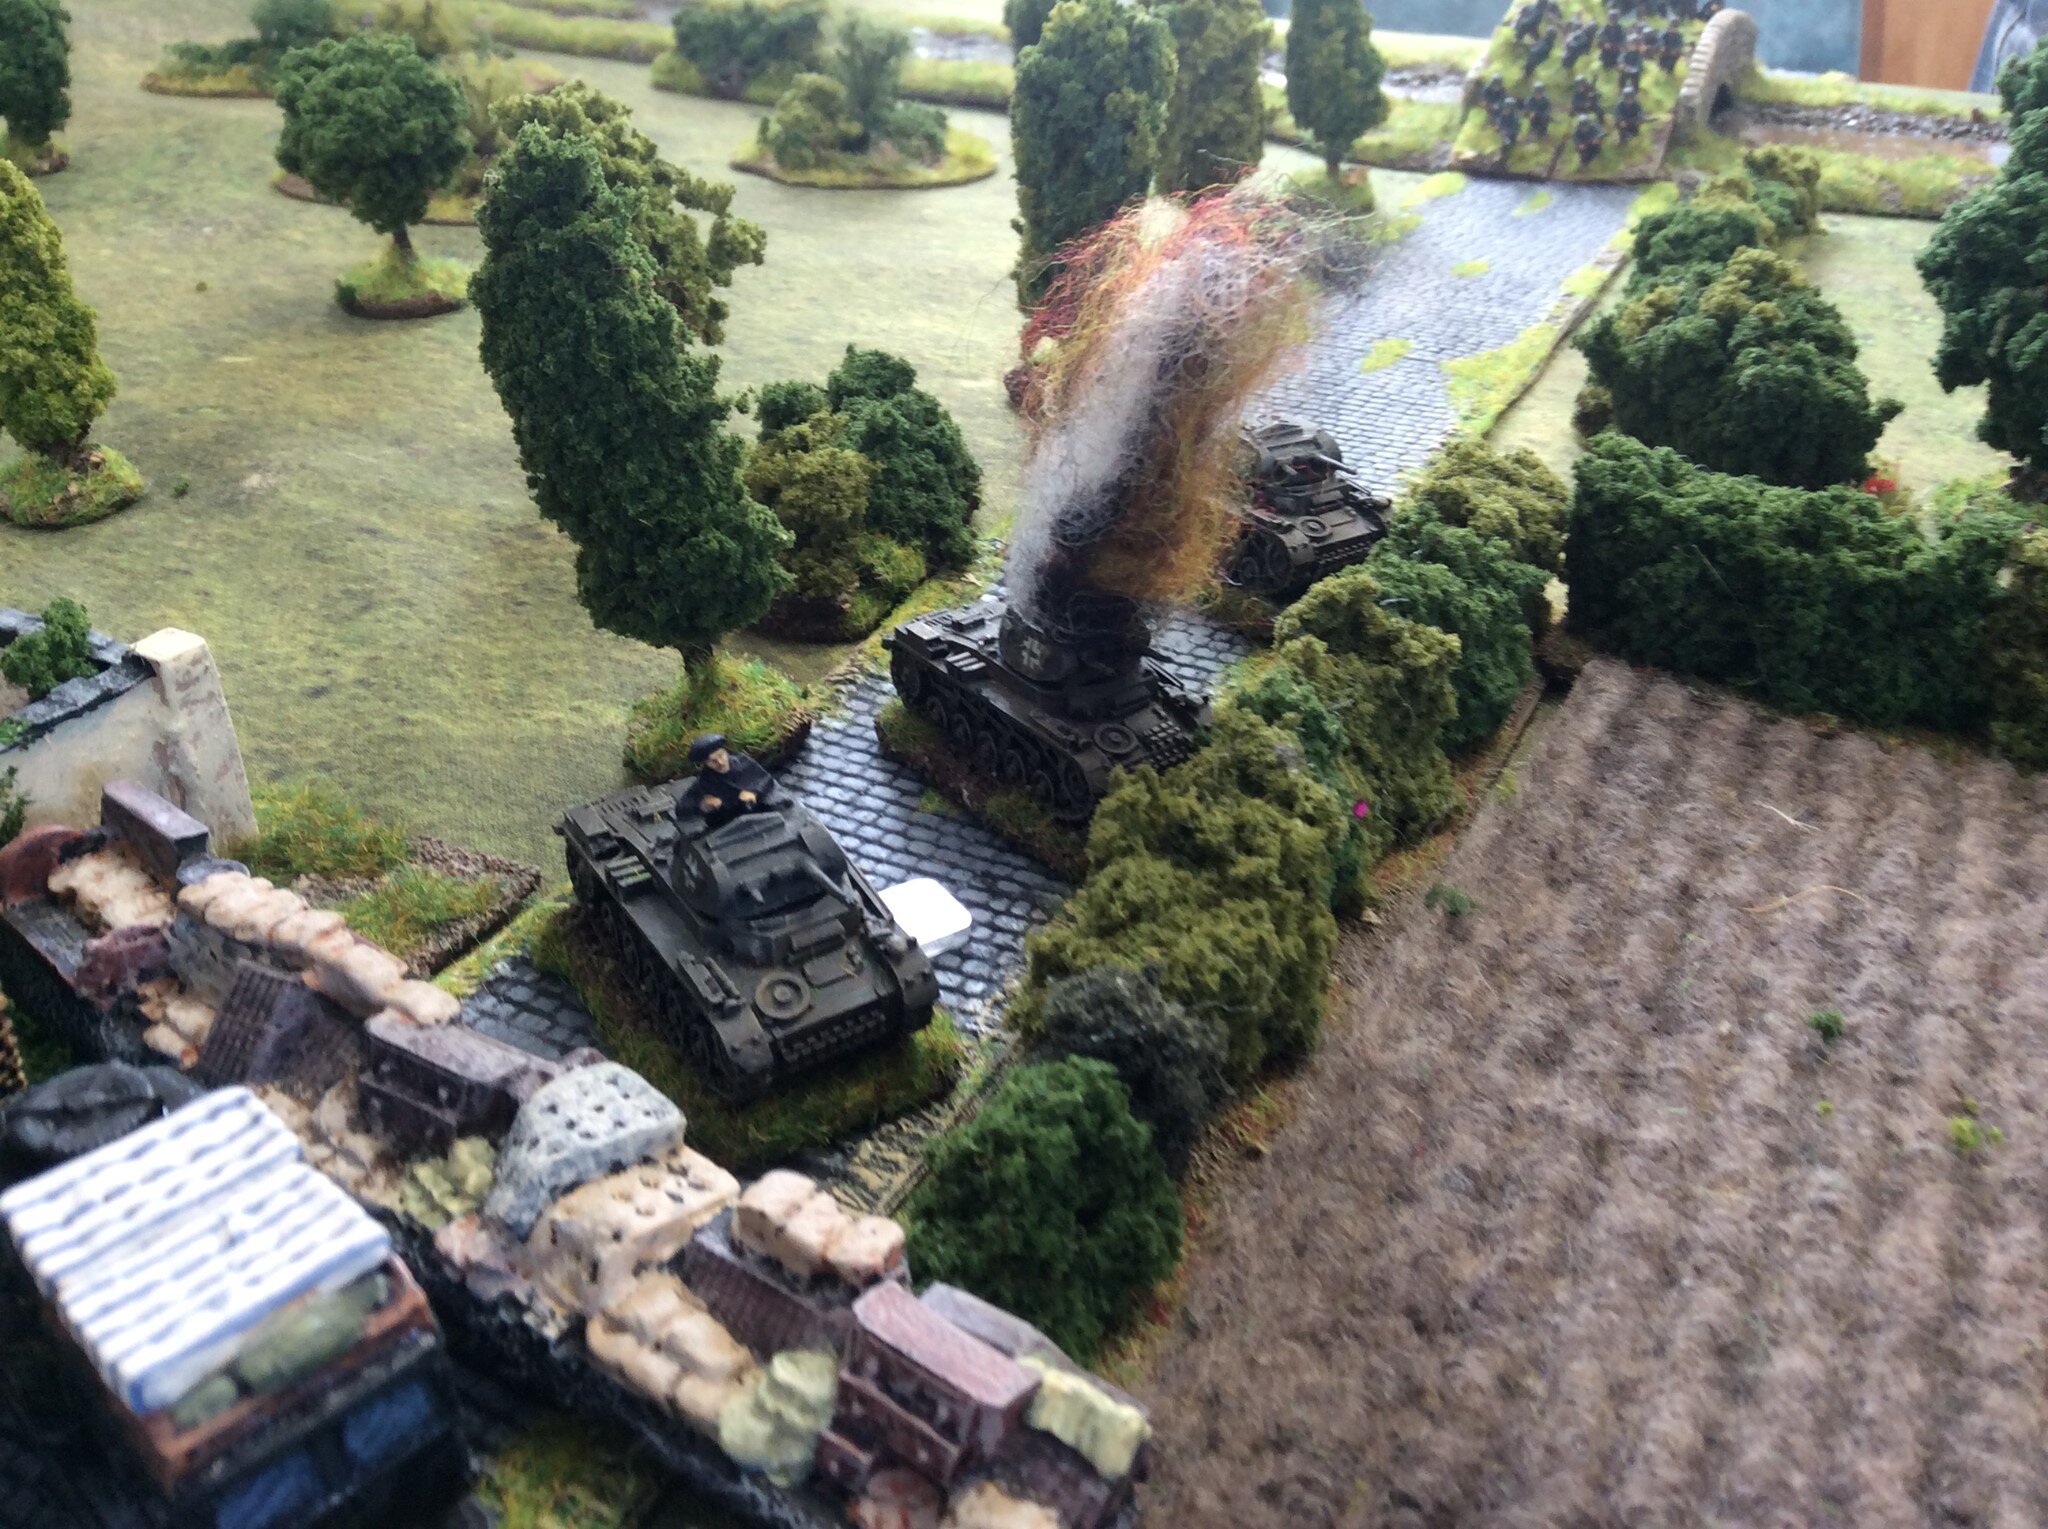
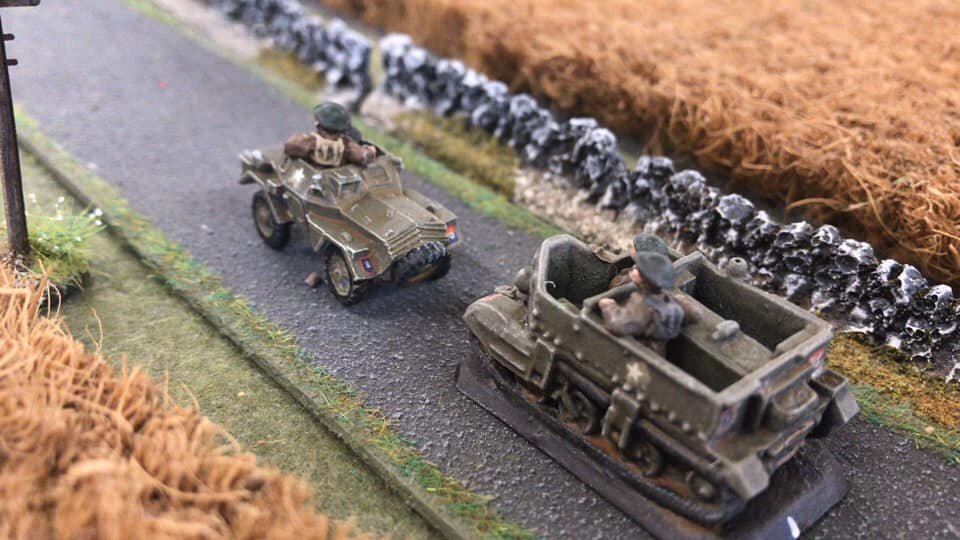
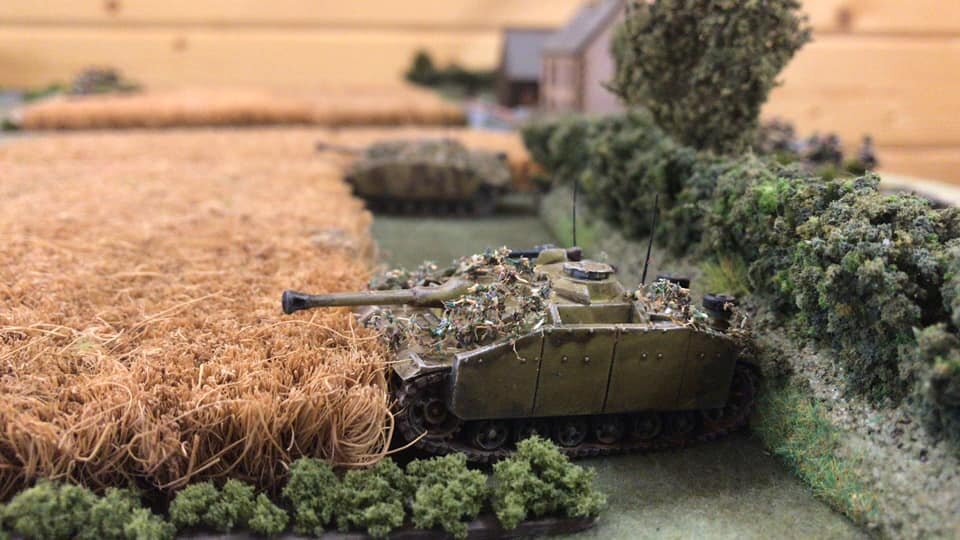
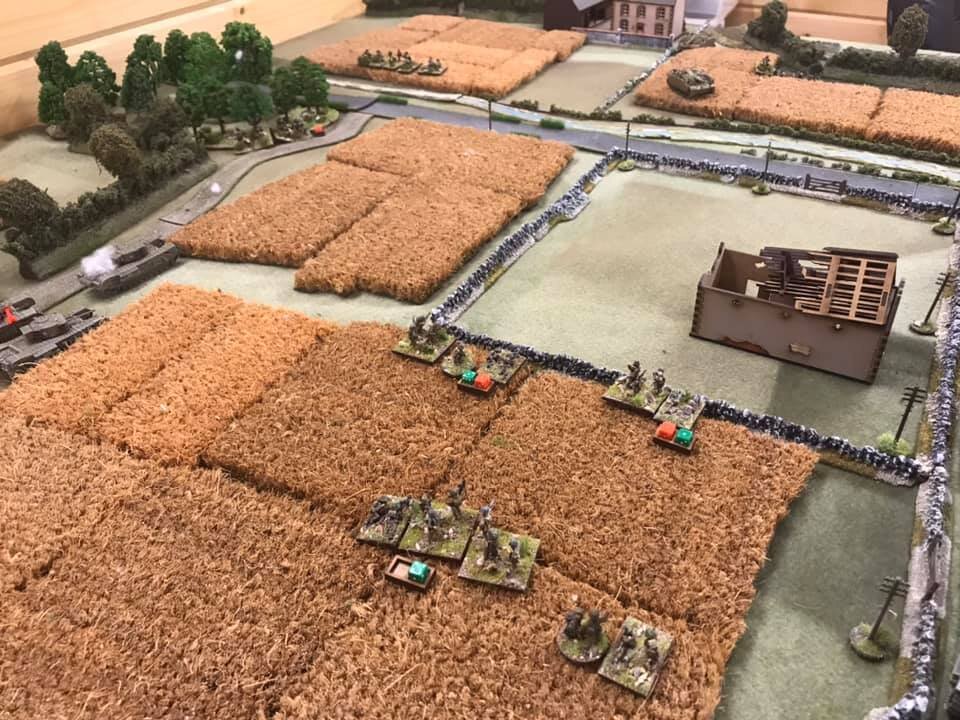
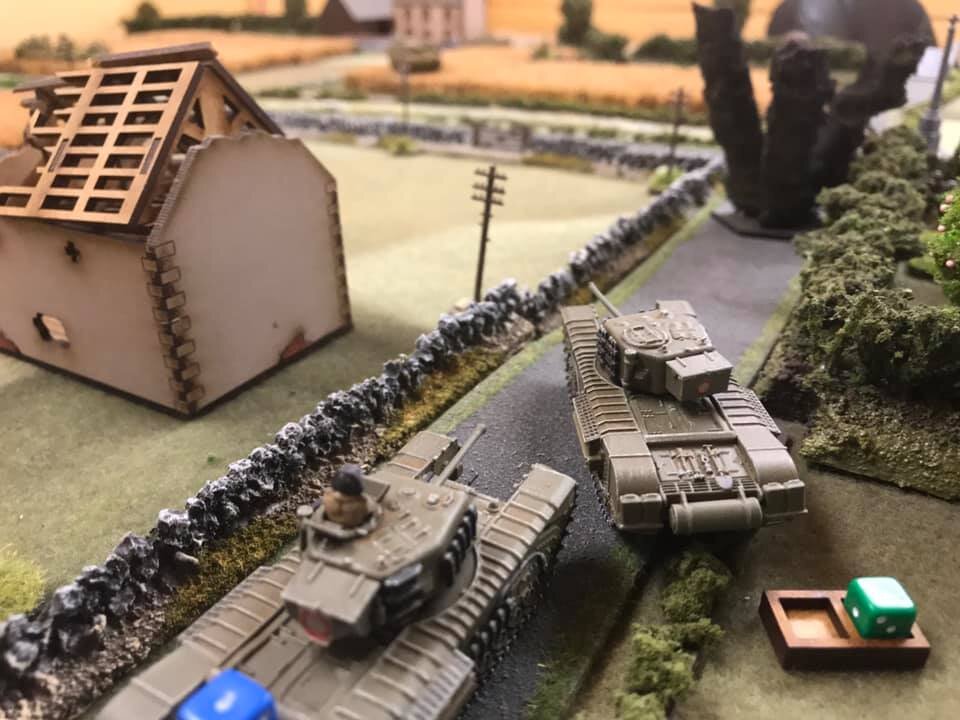
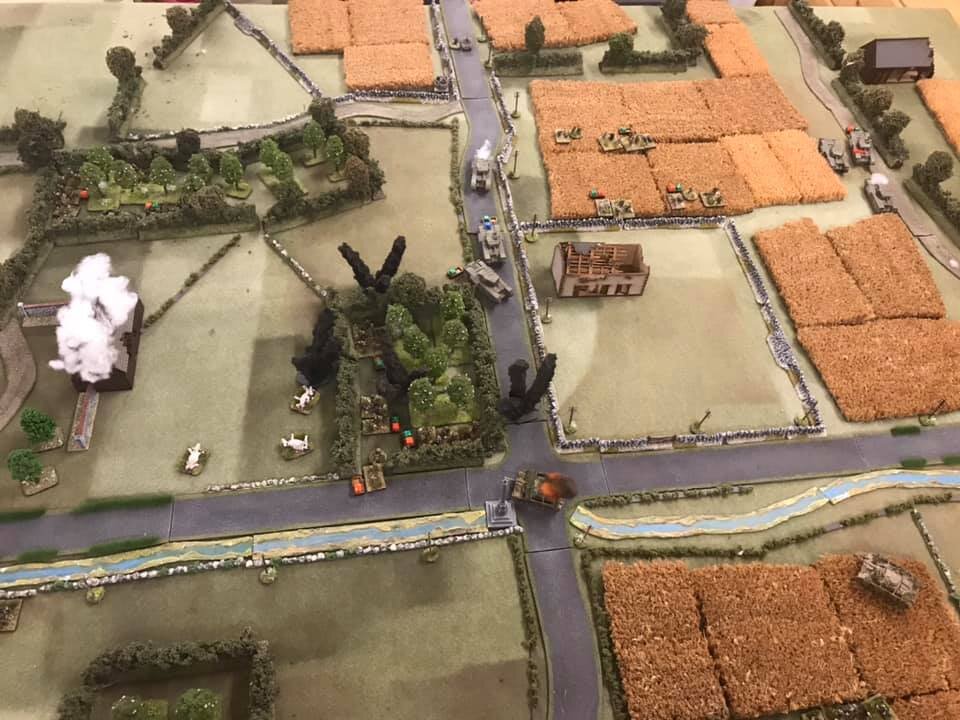
Right in front of the bridge was a platoon of three Panzer IVs. Behind the ditch to the right were another three Panzer IVs. In the centre was some AA and HQ elements and, gulp, a Tiger I. Off to the left were a couple of low-lying StuGs. Effectively nine serious AFVs and a couple of APCs, so I outnumbered the Germans 3:1.

Death from Above

Before we resolved the German shooting, however, it was time to work out the effects of the pre-game stonk.

It did rather well!

One Panzer IV had its main gun knocked completely out of alignment so was left with only harsh language and an MMG to resist the approaching red wave and, even better, a shell had obviously landed almost on top of the Tiger: four points of Shock and a permanent minus to its firing.

Dave was not too happy!

The Opening Volley

He was a lot happier, however, once he’s fired his opening volley.

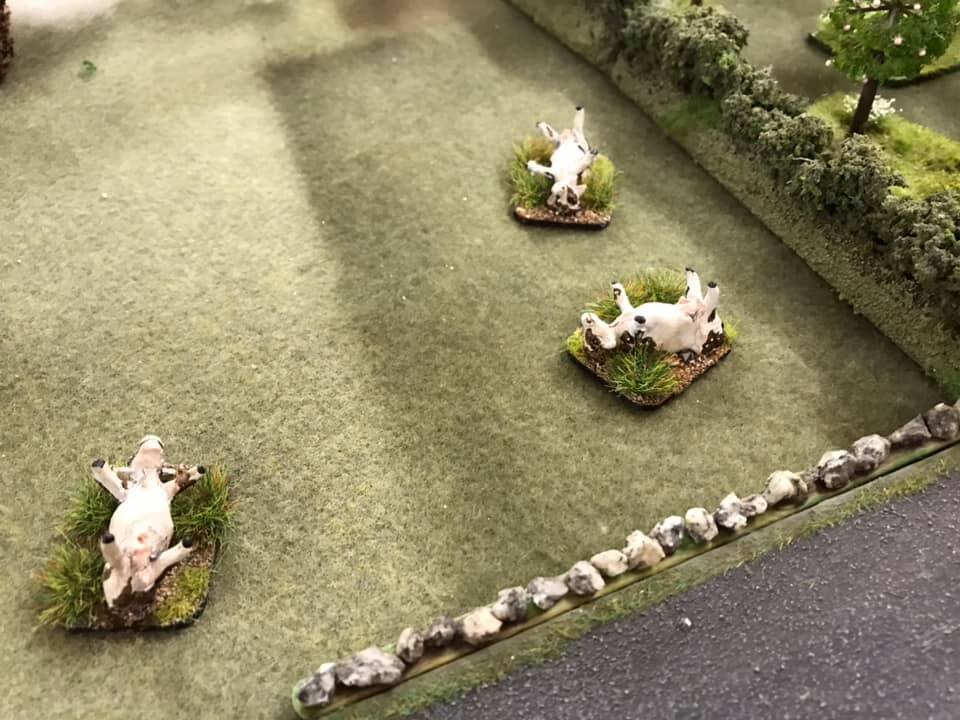
Five Panzer IVs and the two StuGs opened fire on my first wave. This could have been very nasty but, fortunately, Dave took the bait and chose to shoot at my BT-7s and HQ platoon, out in the open as they were. Two of my BT-7s, a T-26 and one T-34 exploded immediately: very much one shot, one kill.

Ouch: down to 2.5:1 odds!

Now, however, it was my turn.

My six T-34s, hull-down behind the ridge, opened fire in return. Two tanks in each platoon concentrated their fire on the three Panzer IVs in front of the bridge, the other two tanks fired at one StuG and one of the other Panzer IVs.

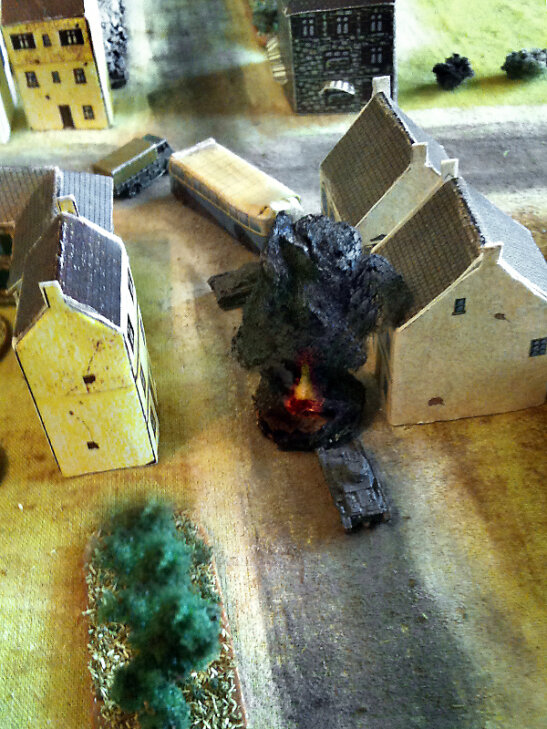
The platoon by the bridge was fairly well knocked out. Two main guns out and the other with lots of damage: they weren’t really a threat any more. One StuG and another Panzer IV also went up in flames: good shooting!

The Germans returned fire again, and although my one remaining BT-7 unbelievably sailed through unscathed, I did lose one of my T-34s (to the Tiger, I believe).

The Second Wave

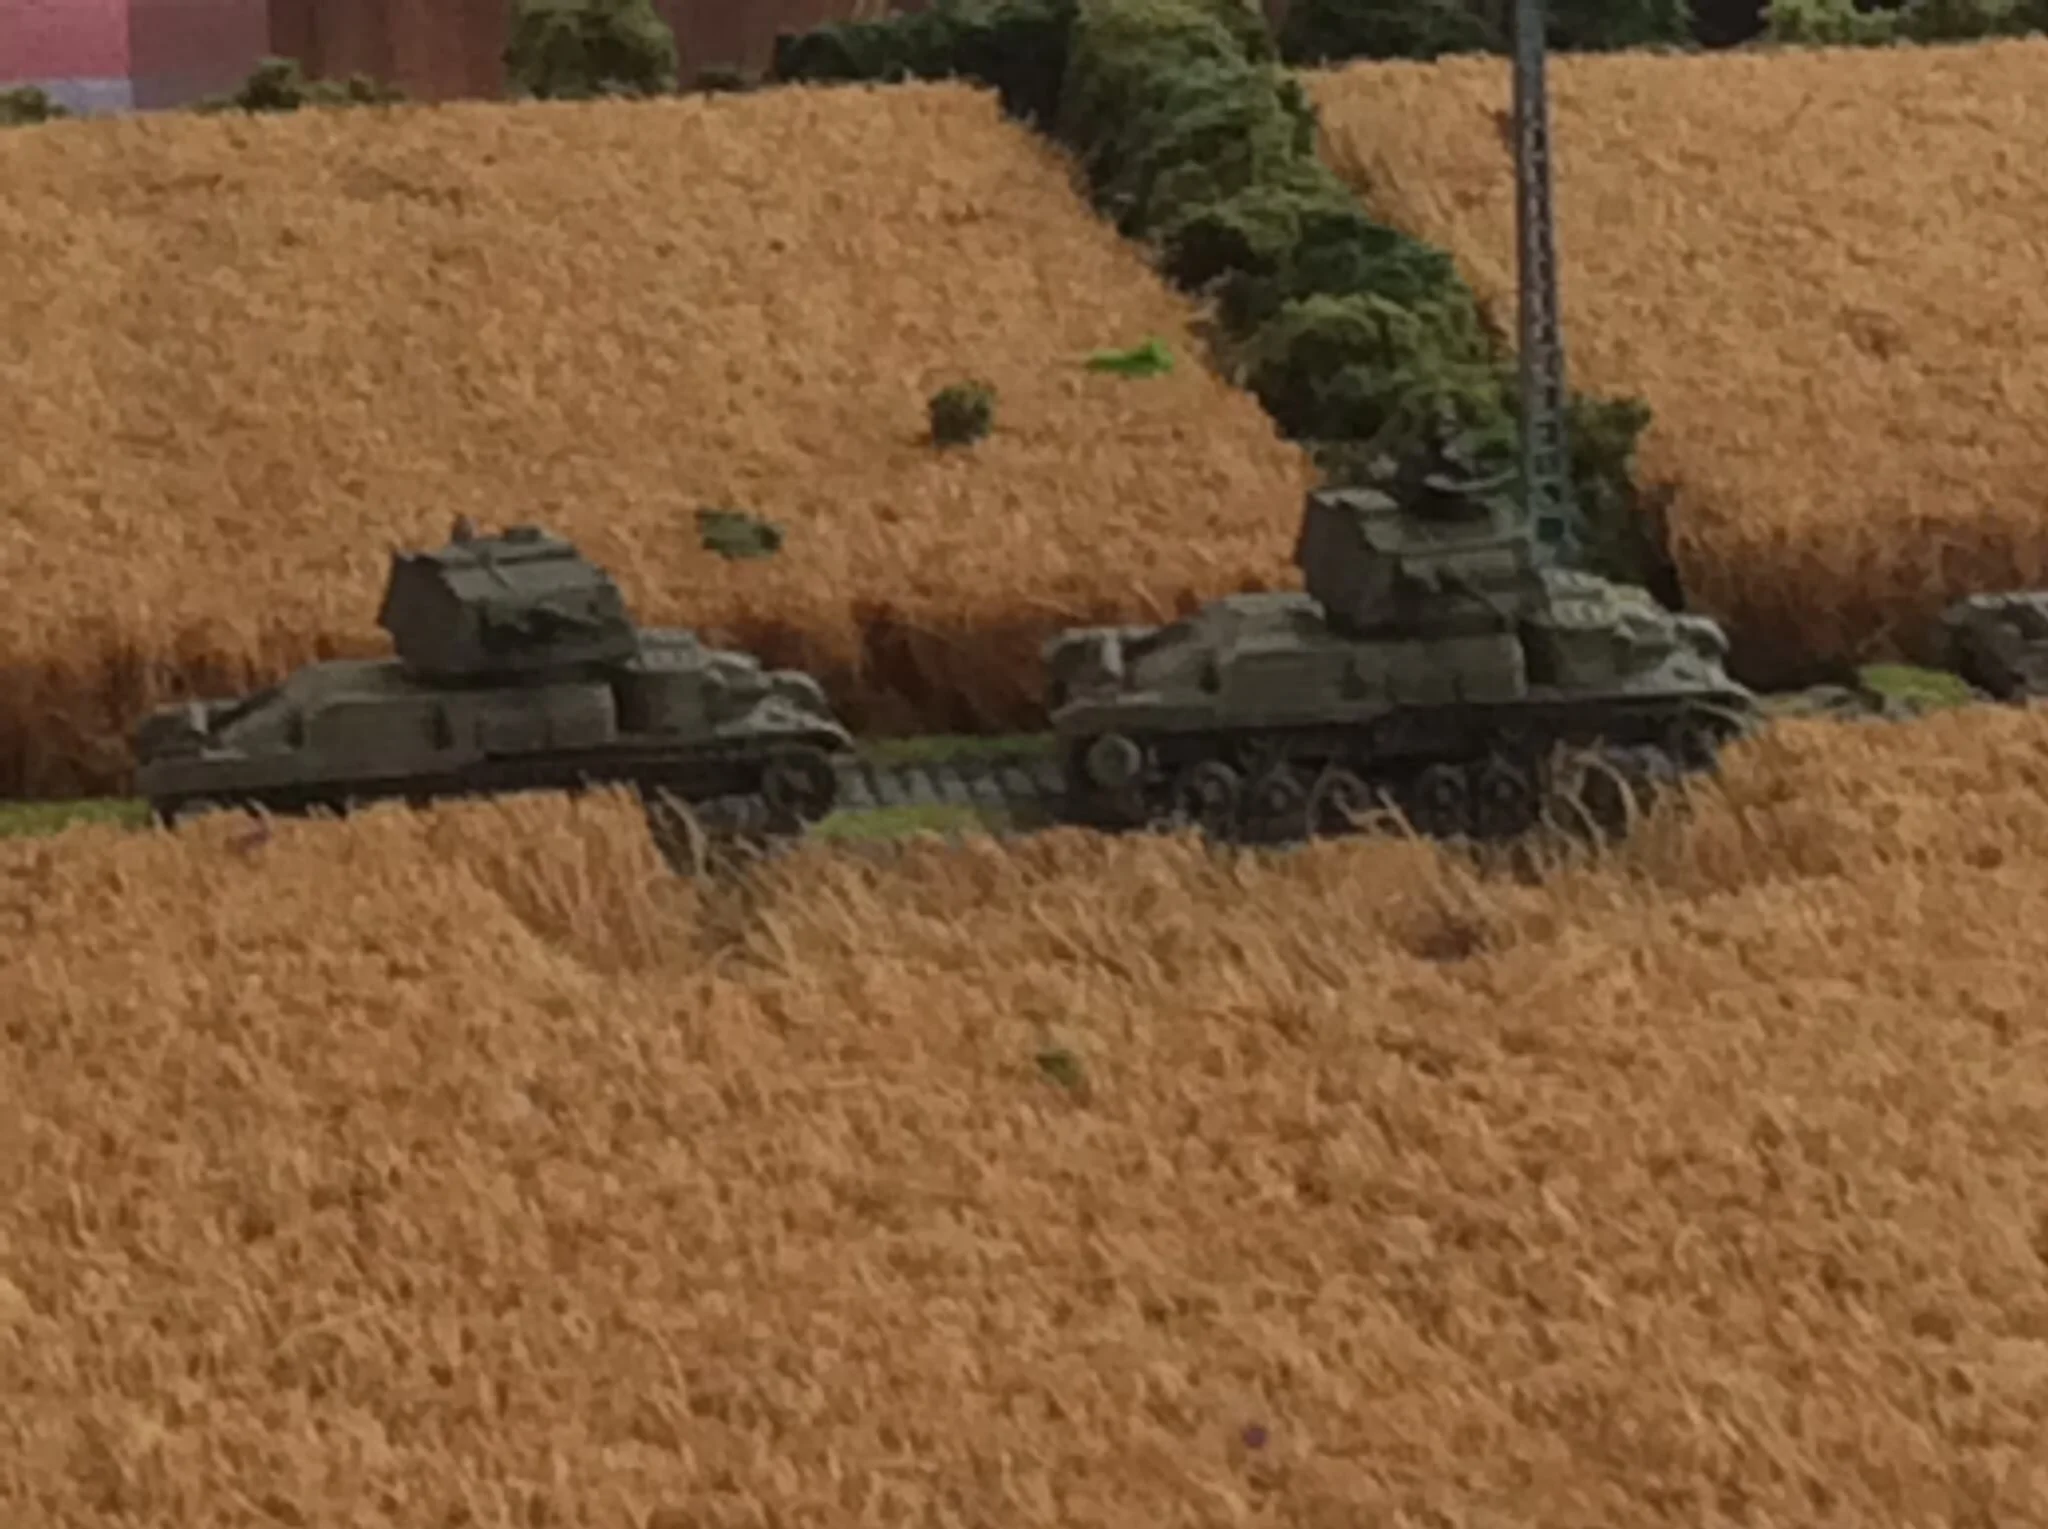
Now, however, my second wave arrived: three KV-1s, the two SU-152s and two SU-76s for a bit of covering fire.

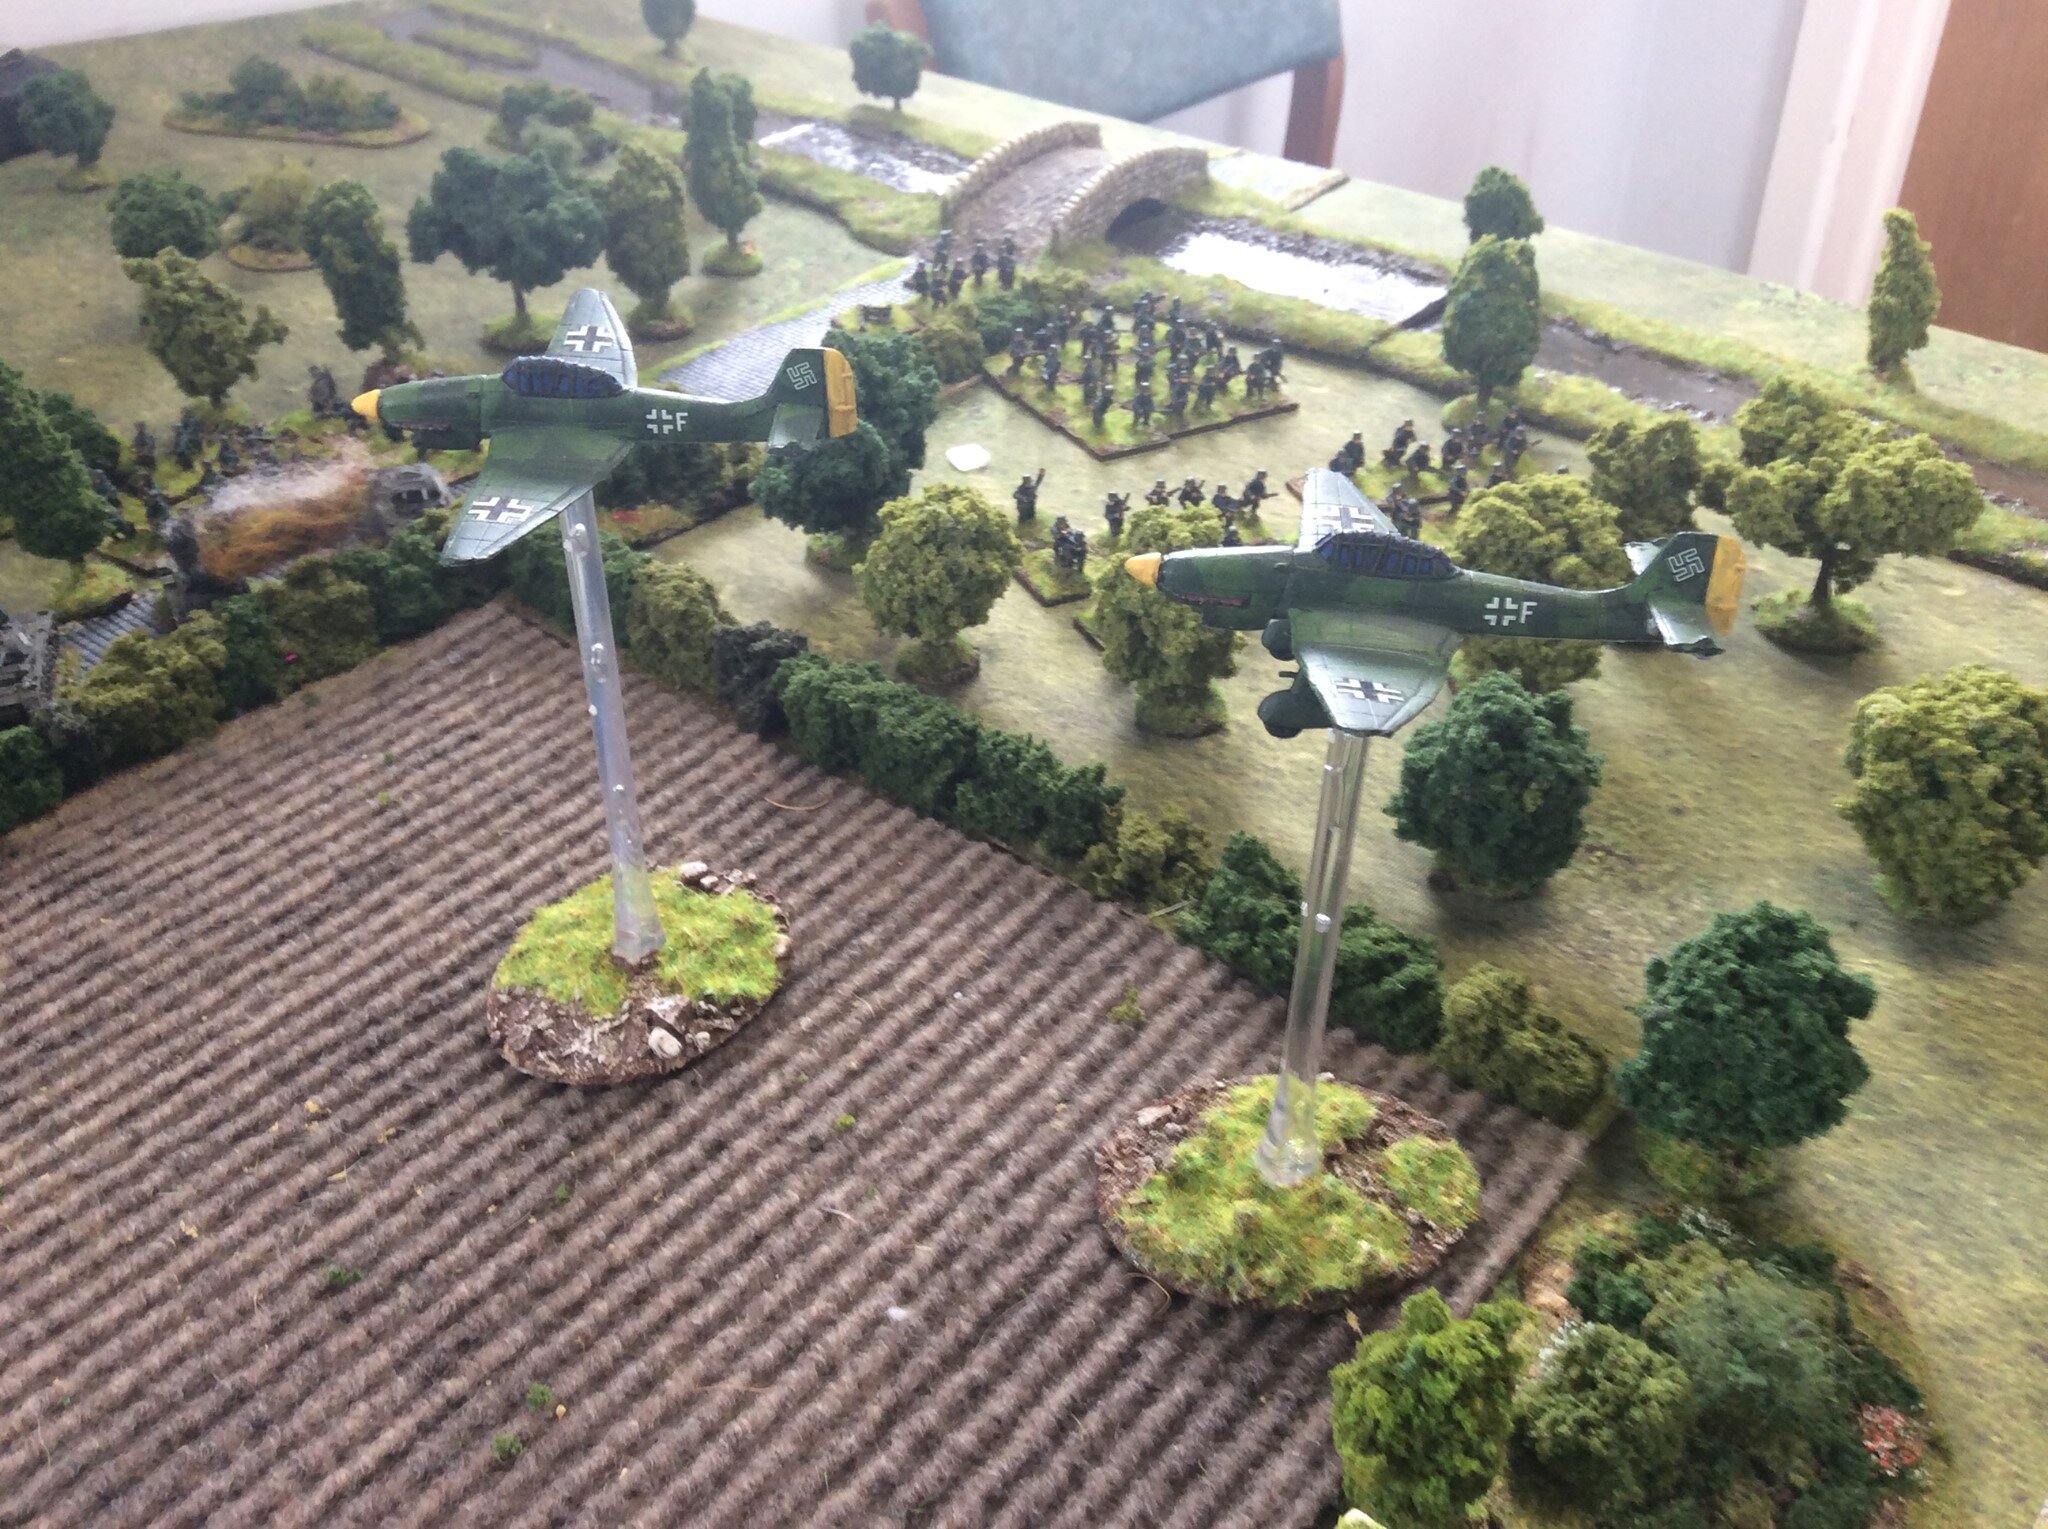
Almost immediately, a Stuka swooped down from overhead and narrowly missed one of the KV-Is: a narrow escape! My one remaining BT-7 lost its main gun, but then the cards fell for me, and it was my turn to shoot again. The other StuG lost its main gun, the crew from a Panzer IV from the rear platoon had to bail, and I even managed to have one of the SU-152s permanently immobilise the Tiger by blowing one of its tracks off! A few more shots forced the crew to bail from their immobile pillbox.

It was now really all over bar the shouting.

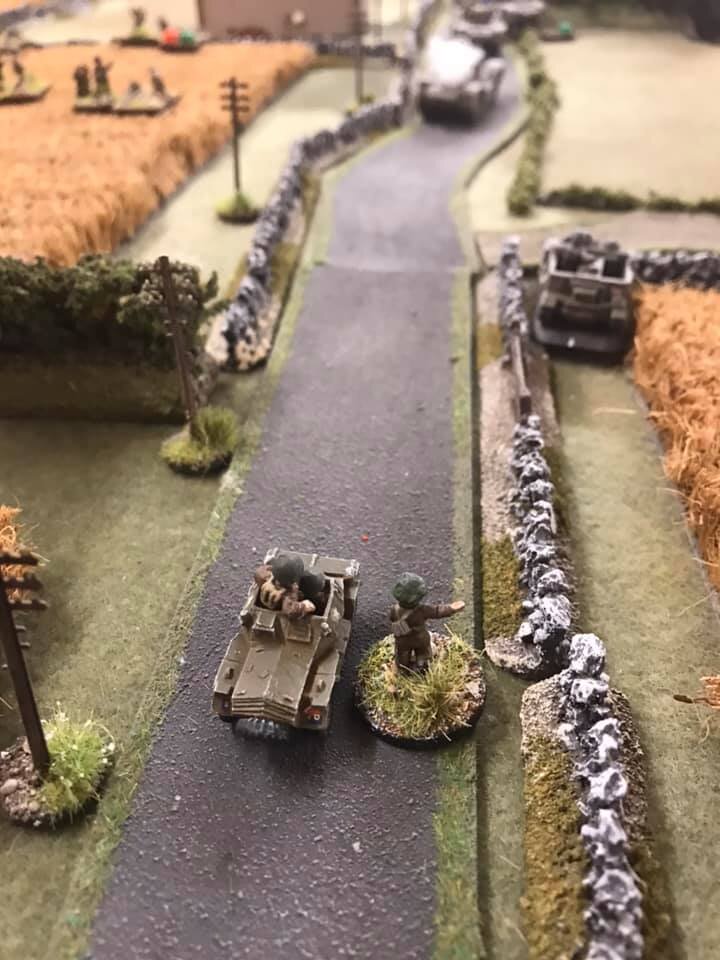
A couple of amusing incidents: one of my KV-1 moved ponderously forward and attempted to drive over the dry stream. With some glee, Dave told me that actually it wasn’t a dry stream but a Soviet-built anti-tank ditch that my KV had just fallen into, putting it out of action for the remainder of the game! This apparently really happened at the real Prokhorovka: anyone on the Soviet side who knew about the anti-tank ditch had been killed in fighting on the previous day, so the Guards blithely rolled forward and nineteen of their tanks ended up kaput in their own ditch! I bet the Commisars had a field day!

The my BT-7, main gun out, shot forward and attempted to machine gun the battered Panzer IVs on the bridge into submission. No damage done, but most amusing!

Conclusion

An interesting scenario. If I hadn’t held back my T-34s and just steamed forward, then it would have been a very different story, especially if I hadn’t been lucky enough to give the Tiger four Shock with my initial stonk. As it was, with my main body hull down, it was me conducting the duck shoot rather than the Germans.

Losing five tanks in the opening volley was painful, but they were my crappy tanks and well worth it as I then knew where all the Germans were.

I think the forces I had were easily enough to overwhelm the Germans: the only thing that might have made a difference is if they had had hull down positions as well. Then, I think, I would have need all three waves and possibly a fourth!

A great game of IABSM: ideal for getting me back into the swing of things.

Robert Avery


garveliens.png


On The Road To Gravelines is the fourth scenario from the Defence of Calais scenario booklet. It covers the British attempt to get a convoy of trucks from Calais through to Dunkirk out along the road leading north-east from the town to Gravelines. You can read an extract from the scenario on the "Buy Stuff" pages.

The game began with the British convoy, headed by a couple of A13 Cruisers and a platoon of Rifles hitting a German barricade guarded by a couple of squads of infantry and an armoured car. I was playing the British. The lead A13, with Big Man Major Foyle on board, and the enemy armoured car immediately opened fire on one another at just about point blank range. The armoured car suffered an immediate engine fire, but managed to knock a track off the A13, immobilising it! A serious loss for the Brits. Meanwhile, the two German squads scattered into nearby buildings, desperately calling for reinforcements.

One squad managed to get close enough to the immobilised A13 to chuck grenades at it, all of which proved too much for the crew, who promptly bailed out and ran back down the road to Calais! By this time, however, the 1st Platoon of Rifles had managed to get a couple of sections into houses looking down onto the barricade, and did some serious casualties to the tank-busting Germans. The other A13, "Ram", had moved off the road to the left, looking for some way of getting past the barricade, now effectively doubled in size because of an abandoned British tank! Major Foyle took advantage of a Dynamic Move card to jump on board Ram.

Both sides spent the next turn or two bringing up their other forces. The British trucks scattered off the road into cover, still under Blinds, making way for the small 2nd Platoon of Rifles to come through from behind. The Germans revealed two full Platoons of infantry, supported by a couple of MMG's and loads of Big Men.

On the right of the main road, the Brits prevented the Germans moving up the flank by placing a section of infantry and the main force commander behind a house that dominated that sector. Unfortunately, although it covered the flank, this force was effectively pinned in its position as the Germans moved forward their two MMG's and a couple of squads of infantry: if they moved out from behind the house they sheltered behind, they would be riddled with bullets! This meant that they played no further part in the battle!

The Germans had also moved two squads of infantry way to the left of the road, either trying to outflank on this side or concerned about what the British Blinds might be (a convoy of trucks makes a significantly large collection of Blinds!). Unfortunately, they ran straight into A13 "Ram", and one squad was brutally Besa'd down. I should perhaps mention at this point that the British tanks had no HE on board, so the British commander was beginning to wonder just how he was going to shift the German platoons from their buildings!

At this point the German armoured car raised its ugly head again. If you remember, it had suffered an engine fire at the hands of the first A13. That fire had flukily been extinguished and, eager to KO another British tank, the SdKfz222 rushed forward and placed itself right next to "Ram"'s  flank! Whose card would come up first? Well, it was "Ram"'s and with a ponderous creaking noise, its turret turned slowly to the side and blew the armoured car into its component parts!

Meanwhile, the British 2nd Platoon had moved up, two sections strong and led by a Big Man. They occupied a school near where "Ram" was disposing of the armoured car, and had badly shot up a German section in a nearby house with a devastating accurate barrage of rifle and LMG fire which also killed the Big Man with them. This was too good an opportunity to miss, so out of the school thundered the platoon, across the gardens, and engaged the pinned down Jerries in a bit of close combat: winning the ferocious hand-to-hand fight and turfing them out of their abode. Well done the Rifles!

This proved, however, to be the high watermark of British success. Although 1st Platoon (3 sections strong, but with one section pinned in position to the right) had successfully been engaging the other German platoon, there were just too many damn Krauts to make a breakthrough: especially when the first of the German reinforcements arrived: three PzIII's! "Ram" managed to take out one of them (six consecutive hits!) but was then crippled by an infantry attack from the flank. One MMG was reduced to a single crew member, the German sniper and another Big Man killed, but it just seemed that whenever one German was killed, another two popped up in his place. Reluctantly Major Hamilton ordered the convoy to retreat back to Calais, covered by the remaining Rifles, and then broke contact himself.

This was, despite the vast disparity in forces, a really, really good game: proving that you don't need some points-system-fair-fight to enjoy yourselves! The action was firmly based on historical fact (if you knew the time it took me to find a contemporary map of the Calais/Gravelines road!) and followed history fairly accurately: the Brits unable to break through due to sheer weight of German numbers, but surprising their enemy with the ferocity of their fighting. A great game, even if I lost!

More pictures are in the gallery, below:

Robert Avery


hames.png


This weekend saw the first Burton-upon-Trent "Beer & Lard Day": a day's wargaming designed to give those people unable to easily travel down to Lard HQ for our annual events an opportunity to try out games from the TooFatLardies stable of rules. My role was to run the games using I Ain't Been Shot, Mum!, the Lardies' WW2 company level ruleset. I ran three different scenarios on the day, the first of which was 3RTR at Hames-Boucres: the third game from the Defence of Calais early war scenario pack.

The game began as a squadron of British tanks (a Squadron HQ of an A9 and an A10; two troops of three A13s each; a troop of three MkVIb light tanks; and a couple of recon Dingos) headed in column along a sunken road towards the village of Hames-Boucres (a few miles from Calais) with orders to deal with a few "rogue enemy tanks" that had apparently been spotted roaming around the countryside. Ahead of them was a crossroads and, as they approached, the lead British tank (a MkVI) spotted three Panzer IVs coming in down the road from the left, two Panzer IIs coming in down the road from the right, and some unconfirmed German troops under Blinds heading down the road straight in front of them.

The Germans reacted first, with two of the Panzer IVs heading off road towards a hedge from behind which they would be able to enfilade the British column. The driver of the third Panzer IV was obviously having problems finding the right gear: kangaroo-hopping forward only a few yards for two activations! Meanwhile, the two Panzer IIs did the same thing: quickly lining up behind a nearby hedge and opening fire with their cannon, but only managing to chip the paint on the Squadron Commander's A10. The German Blinds headed straight down the road towards the crossroads.

The British reacted quickly as well. The light tanks at the front of the column moved to the right of the road and engaged the Panzer IIs, managing to jam the turret of one of them with their Vickers .50s, causing its crew to abandon ship. The rest of the British tanks apart from the Squadron HQ, lined up next to each other behind another hedge, despite warning that this meant that enemy targeting them could switch fire from tank to tank without huge penalty.

Two of three German Blinds then revealed themselves as a platoon of four truck-towed PaK36 anti-tank guns and a platoon of two truck-towed 75mm infantry guns. Over the next couple of turns, the anti-tank guns raced forward and set up firing positions facing the British line, with the 75s doing the same thing but much further back.

Meanwhile the two leading Panzer IVs and the Squadron Commander's A10 had been exchanging fire: the result being the demise of the Squadron Commander and his tank! The A9 that carried the Squadron 2iC, having no main gun ammunition as there hadn't been time to load any so great was the rush to disembark and get out of Calais, had moved forward and, partially shielded by the smoke from the now-burning A10, had engaged the final Panzer II with its MGs.

The German anti-tank and infantry guns now opened fire, knocking off two of the lined up A13s and one light tank. In return, one anti-tank gun lost most of its crew: sprayed by MG fire from another Vickers tank. In addition, the remaining British A13s then shot at the two Panzer IVs to their left: knocking one out entirely and disabling the other.

As this happened, however, the lag-behind Panzer IV crashed through the hedge behind which the line of British A13s was sheltering, having snuck all the way down the edge of the battlefield. The left-hand A13 turned to engage it, but was hit in the flank, knocking a track off, its crew again abandoning ship. More shots from the German AT guns took out the remaining British light tanks and the 2iC's A9.

At this point the British decided to retreat: even if they dealt with the last Panzer IV, their A13s had no HE ammunition with which to engage the German AT guns at long range, and there was no way they could close the gap over open ground in order to get into effective MG range.

A great opening game with the action proceeding almost exactly the same way that it did in May 1940. Then, the British held their own against the German panzers, but were forced to withdraw after the arrival of enemy anti-tank guns supported by infantry. The British player, Dave "Frog" Frogget, was a complete wargaming novice, and made the typical novice's mistakes of bunching his tanks and not either firing from cover or on the move. All that Steve, the German player, had to do was take full advantage...and he did!

Oh, and if you're wondering about the unusual terrain cloth, I left one of mine at home and had to use a pair of curtains found in a cupboard as a substitute!

Robert Avery


coulogne (1).png


Yesterday I did get the chance to pull together an I Ain't Been Shot Mum game for the club - largely as a couple of the other chaps had expressed an interest.

To make things easier I decided to use a scenario I have run before - the Coulogne one from the Defence of Calais scenario book (with appropriate changes to reflect the kit I actually have available). However, whilst I remembered all the necessary figures and terrain, I managed to forget my proper camera - so please forgive the rather poor pictures from my BlackBerry.

The scenario played out somewhat differently from last time - possibly not least as it was 2 players on an 8 x 6' table last time and 7 players on a 6 x 4' table this time (there was rather more interest than I had originally anticipated). The Germans arrived on blinds, as usual, but this time the blind on other far side of the canal actually contained a platoon.

The initial German assault on Le Colombier took a bit of a pasting from the British troops in the village but the German Panzer IIs outflanked them and the British was caught in a rather painful crossfire. With the Germans running around their left flank the remaining Brits, with the 2 pounder anti-tank gun decided to pull back, but were spotted and were almost wiped out.

The British unit on the hill south of Orphanage Farm initially did well. It revealed the German platoon across the canal and caused some casualties; however, the Germans repeated had lucky return fire and soon the British numbers were dwindling. The Germans tried to bring down their artillery on the hill but the initial ranging shots were uncomfortably close to their own infantry and the Forward Observer chose not to fire for effect! With their casualties increasing the British decided to withdraw from the hill and try to take a position with their Boys anti-tank rifle flanking the German armour. Unfortunately their initial shot only temporarily immobilised one of the Panzer IIIs and revealed their position whereupon they came under some devastating machine gun fire.

Meanwhile the German light armour's advance had stalled in Le Colombier and their infantry was forging ahead without them. The units who had flanked the village were moving through the fields north of Orphanage Farm when the remainder of the British Searchlight HQ unit opened fire on them. The fire caused a couple of casualties but brought down a hail of return fire, including some HE from the Panzer IIIs. With their flank secured the Germans continued to advance and ran straight into an unspotted British section who decimated the lead German squad. Unfortunately the Germans regrouped and poured fire into the Brits, who were forced to withdraw.

The German platoon over the canal had stalled but finally began to advance and their lead unit located the final British platoon, who were positioned to guard the bridge the Germans were trying to cross. The Germans rushed in to assault the first British unit but were thrown back and rest of their platoon began a firefight from across the canal.

With time growing short we had to end the scenario early; however it was quite clear that the British weren't in a position to hold the main German advance for much longer and so I declared the game a German victory despite a valiant attempt by the British.

Whisperin' Al


image-asset.png


Finally – after long waiting – last Sunday we put some of our new toys on the table and we played with the I Ain’t Been Shot Mum rules an introductory scenario from the supplement The Defence Of Calais by Robert Avery. We choose this small scenario because we thought that it would be a great start for our mates Bill and…Bill who had only theoretical experience of the game so far. Four guys on the same table and everybody had to command something. John was commanding the German Panzers and the two…Bills were commanding the British. When the game started I was typically with the German side. However after a couple of turns I found myself more with an umpire’s role than my original role. No complain about that!

The Background to the Battle

Les Attaques, France. May 1940. 1400hrs.

Les Attaques is about 7 kilometres south-west of the town of Calais. It was of high strategic importance, containing two possible stop-points in the bridge over the Canal de Calais and a narrow crossroads immediately afterwards.

About 50 men of the 1st Searchlights were furthest from Calais, dug in in the small village of Les Attaques. They had been assigned to the outer perimeter of Calais’ defences with some Boys anti-tank rifles and a handful of Bren guns. At about 2pm their position was approached by three enemy light tanks. They managed to get a foothold over the canal bridge, but were then driven off by the concentrated fire of Barr’s men.

The scenario’s map and our table:

The Battle


Vaggelis


coulogne.png


Our final game of the weekend was a chance to try out the latest edition of I Ain't Been Shot Mum by the Too Fat Lardies. I decided to select a scenario from the Defence of Calais supplement (suitably adjusted for 3rd edition and for my available forces). Lenin took command of the defending British and I took the Germans.

The British troops, from the 1st and 2nd Searchlight Regiment under the command of Col. R.M. Goldney, were positioned in and around the small town of Coulogne and the nearby village of le Colombier.

They were facing elements of Assault Group Kruger of the 1st Panzer Division and only had a single actual anti-tank gun and a few Boys rifles.

Having decided not to advance along the south bank of the canal, largely to avoid the bottleneck at the single bridge, the Germans began on a narrow front between the canal and the Les Attaques/Calais road. This several limited the advantage of their numbers.

The attack began slowly (largely due to checking that things hadn't changed from previous editions of the rules and because I hadn't thought through a proper plan). The anti-tank gun targeted the first Panzer III but failed to penetrate, which was unfortunate as it then came under heavy fire and was silenced. However, the two Boys anti-tank rifles faired somewhat better. They weren't able to brew up the tanks but managed to keep chipping away at them which hampered the German advance.

The Germans chose to try to outflank the British position in the village but some stalwart defensive fire from the village caused several casualties and one flanking force then came under fire from another British group on the hill ahead. A long slugging match ensued with the Germans being held up for far too long until they eventually whittled the defenders down and broke through.

It was then a race up the main road towards Calais to see if the Germans could exit the table before the time limit.

The German column advanced quickly up the road with one of the remaining undamaged Panzer IIIs in the lead but then the other parts of the Searchlight Regiment revealed themselves, both in front (blocking the route to the objective) and to the flank.

The combined fire not only took its toll but it forced the German advance to grind to a halt and gave victory to the British as their delaying tactics had been successful.

Whisperin' Al


Had a great time this past June 6th hosting/umpiring a game of the German counterattack at Cauquigny on the afternoon of June 6th, 1944 against the 82nd Airborne. The force composition was based upon the TFL Scenario book, All-American, but I used the more detailed map in the Skirmish Campaigns book, Normandy '44 First Hours.

Overall, the game results replicated history as the Germans overwhelmed the 82nd Airborne which had few anti-tank or support weapons. The 82nd was commanded by Steve Smith, Jim Dirmaier and my brother Christ Albrecht while Harry Voelkel and

Brett McLay commanded the Germans.

Figures are mostly Airfix and SHQ. Tanks are 1/87 scale custom resin by a guy on eBay. Houses are Sarissa while the church wall is custom 1/87 3D print by Diabolical Terrain (find him on FB). Bocage and fields are home made, grass of teddy bear fur and the all purpose sisal doorway mat.

Dan Albrecht


Picture1.png


DDAY, 15mm IABCYM assault on SWORD beach, “Cod” defensive position.

First game against my mates in months and months, so I decided to put on our favourite invasion game. Andy and Iain took the Brits and I was the defenders ( and Rulesmaster😄).

Game consists of a two company assault with DD tanks and LCT and LCM supports on “Cod”, a strongly held position bristling with AT, mortars and MGs. The aim is to secure the two exit roads and neutralise Cod.

The opening phase brings the Brits on table moving in turns to the shore. DD tanks can be swamped in deep water, or hit underwater obstacles in the shallow. LCI’s can hit mines and obstacles too. Once ashore there are AT and AP mines, AT obstacles, seawalls, barbed wire and all those German defenders.

Every game we have played gives a different feel. In this game nearly all the DD tanks made it ashore, highly unusual. The LCI’s dodged a few mines too, but most made it ashore. In other games the losses on the way in to the beach have really hurt the Brits, not this time.

I wont go into details as I hope Iain will do one of his epic write ups on his blog. There are descriptions on the photos.

It was a superb evening and so happy to be gaming with my mates again.

Des Darkin

Iain Fuller took plenty of other picturesduring the game. Here’s a gallery:

From Iain Fuller’s Tracks & Threads Blog:

A fortnight ago I finally managed to get the first game of the year in round at Des’ magnificent shed o’war, and it was a cracking way to hopefully start up face-to-face wargaming again. We would be having another crack at a D-Day game (rude not to really as it was near enough the anniversary!) using Des’ lovely 15mm collection of figures & terrain and our mash-up rules that combine IABSM with the dice activation of CoC which we have, in true Lardy style, entitled “I aint been Coc’d yet Mum” or IABCYM.

In this scenario myself and Andy T. would be assaulting the strongpoint known as ‘COD’ to the allied planners with orders to neutralise it then move forward to clear the exits from the beach to allow the follow on forces to barrel off down the roads to points inland, Des would take control of the dastardly defenders and try to prevent us from doing so. To achieve this task we were given identical forces which were based upon A & B Coys, 2/East Yorks with each of us taking command of a company assault group, both consisting of:

Wave One

  • 2 platoons infantry in LCI

  • 1 assault section RE, for beach obstacle demolition

  • Troop, 13\18 Hussars (4 x DD Shermans)

Wave Two

  • LCT with 22nd Dragoon’s and 79th Assault RE. 1x Flail, bulldozer, AVRE bridgelayer, AVRE facine.

Wave Three

  • 3rd platoon and HQ section of each company.

  • 2 x Vickers HMG sections

  • Mortar platoon in Bren carriers

  • 6pdr AT troop with Bren carrier tows.

The defensive nest (Wn20, ‘COD’) that we had to take on consisted of 1.Komp/736 Inf Regt/716 Division manning the following defences:

  • 1 x HMG

  • 2 x LMG in Tobruks

  • 2 x 50mm mortar in tobruks

  • 2 observation posts

  • 1 HQ

  • 2 x 37mm ATG open positions facing the rear area

  • 1 x 37mm ATG in the 180 degree bunker

  • 2 x 50mm ATG in 90 degree bunker

  • Trenches, wire.

Further back and to the rear of the main defence nest were these additional positions:

  • Beach house 1 complex

  • 37mm tobruk

  • HMG bunker

  • Beach house 2 complex

  • 37mm open top bunker

  • Two sections in trenches

  • 1 x LMG in Tobruk.

  • Rear command bunker

  • 1 x LMG in Tobruk.

Our plan was quite simple: hit the beach and Andy’s right hand platoon and my left hand platoon would concentrate on the defensive position whilst the other ones tackle the flanking positions. The DD tanks and ‘Funnies’ would support this effort depending on if they make the beach or not with reserve platoons to be fed in where needed. One of the great things about these D-Day games is the absolute uncertainty in just how much of your force either 1. manages to just arrive on the beach and 2. makes it up the beach to get to grips with the defenders. So with everything ready we launched our attack.

For once the run in to the beach went (ahem) swimmingly for both of us with none of the DD tanks being lost to swamping or crashing into each other (you have to roll each time you move in the ‘deep’ parts to check for swamping and there’s a chance that you can drift too). However upon hitting the beach 3 of my DD tanks promptly hit mines which unbelievably they all managed to survive my LCI’s also made it past the submerged obstacles safely and all my lads managed to exit them without serious losses from enemy fire too. Over on the left Andy had slightly less luck losing one DD tank to a mine and one to AT gun fire and one of his LCI’s also went up which caused serious casualties on his left hand platoon, killing the CO and reducing the unit to little more than an overstrength section. The defending Germans then started up a hail of fire which again I seemed to dodge the worst of whilst Andy’s already battered platoon suffered even more. Notwithstanding this we both pushed our troops up the beach as quickly as possible supported by the fire from the now defrocked DD tanks from the surf whilst our assault pioneers started to clear obstacles.

Pretty soon the assault troops had passed the obstacles but now had to cross the mined area of the beach. It was here that my right hand platoon’s luck ran out somewhat taking the worst casualties yet from mines, however the left hand platoon heading for the bunker complex carried on with their run of good luck and made it to the wire completely unscathed by the mines. Unfortunately for Andy’s left hand platoon they seemed to be absorbing all the bad luck from my lads and by the time they hit the sea wall they had lost so many men that they were broken and completely combat ineffective although his right hand platoon managed to make the wire without too many more casualties from mines.

The next phase of the battle saw our central platoons successfully cross the wire and start to clear the bunker complex, again with the great help from the DD tanks back at the shore, and soon were nearly through the position. My right hand platoon tried to assault the FT turret Tobruk which lay to their front without success but I started to take it under fire from the DD tanks and as the ‘Funnies’ were now inbound I reckoned we’d be able to by sort it out pretty soon. Unfortunately time was getting on at this point and so we called the game but it was clear that ‘COD’ had fallen and the reserve platoons would be used to push through to help clear the exits whilst the DD tanks could have shot up the positions in the beach houses with impunity until the defenders broke. I think that the Germans suffered from some bad luck with their activation dice and had problems stemming from the initial bombardment and us getting a lucky hit on the CO which all helped hamper the defence and our great luck in managing to get nearly all the DD tanks ashore safely helped out immeasurably.

I am looking forward to is the next time we play it in an all-dayer as Des’ plan is to have a further table set up with the area behind the beach so we play through to that table after the defences have been cleared. Having said that these games are so brilliantly unpredictable I bet we get stuck on the beach as all the DD tanks drown and we get slaughtered by mines! Anyway, whatever happens it’ll be ace.

It was a cracking game, just look at the table and toys we got to play with what’s not to like there!, and a fantastic way to get going again. Massive thanks to Mr Darkin for allowing us round to play and to Andy for always being a great bloke to have at the table (and thankfully on my side for once!), I’m a very lucky chap to have wargaming mates like these! Onwards and upwards now, here’s to more games in the near future.

Iain Fuller


Alfresco gaming today: June 6th 1944 D Day

D Company 6th Btn Green Howards. Company Commander Major Ronnie Lofthouse, CSM Stanley Hollis.

Landing on Gold Beach ‘King Green Sector’ West of Ver-Sur-Mer. Having cleared the beach and now pushing on to Mont Fleury battery.

Michael Curtis


Picture2.png


Great game of IABSM with Jenny Owens today using the “Les Attaques” scenario from Robert Avery’s excellent “Defence of Calais” scenario book.

The Territorials from the Searchlight Battalion and the anti tank guns held off the Germans for a while, the British reserves didn’t appear and the German tanks pushed on towards Calais.

Phil Turner


Picture1.png


IABCYM game this afternoon. First three turns of the dice driven version of IABSM.

A British company supported by two troops of Churchills are tasked to capture the crossroads and the small bridge. Artillery support is readily available and a pre game stonks have messed up Monsieur Gartier’s Orchards. Opposing them are three infantry zugs and a zug of STuGs.

British Morale is 9, the Germans 8 (air attacks on the way to the deployment area has left the Germans a touch nervy).

The Game Begins

The British advanced on Blinds with two infantry platoons advancing, expecting a hard fight for the orchard. Churchill troop A moved under a Blind to support. The final platoon was spotted by the German Commander who was installed in the two storey building, rolling 11 on the spotting dice, but no German fire poured down. The Germans used their dice to put zugs on Overwatch and remove Shock off hidden units. The spider sat back, waiting for the prey.....

The British pushed into the orchard expecting a close combat..... empty slit trenches were all they found.

The Germans activated their FOO and called in fire on Platoon C. This takes time to arrive, and the Germans do find it difficult to get this, but if it arrives it can be devastating.

The British decided on turn three to lay a 2” smoke screen in front of the deployed platoon C, and the first troop of Churchills deployed on table and poured HE on the two storey building on the edge of the table. This is a house rule - you may fire at a physical feature and “brass it up”. However, you can only inflict Shock. No kills, no pinned or suppression. Clearly the two storey building is an obvious FOO location, so it was deemed a legitimate target. The result was somewhat disappointing for the British ( in a two player game they would obviously not know if there was anyone impacted by the HE fire)

The turn ended with the British some what relieved that first line had been captured, but the concern was where was the enemy? A long one that with over 6 phases per side.

Turn four will see the British move to capture the next orchard and watch the flanks. For the Germans the prey edges further into the trap....

The Game Continues

The British FOO got a ranging shot close to the StuGs near the bridge and they wisely have dispersed as much as cover will allow. The German infantry have hunkered down around the bridge praying Lt. Percil is no good with maps.

On the left Churchill Troop A wont move forward without infantry support so it is holding position peppering the StuGs with AP but with little impact. In the centre Platoon C has taken the barn but is waiting for Platoon B to attack the orchard and remove that threat from their attack route. Troop B is holding place, but “ Devastator” had to be abandoned when its gun was badly damaged by an AP round, the crew losing their bottle and abandoning the beast.

Platoon A and B are heavily engaged in a firefight with the zug in Le Bleu Ferme. The sneaky zug deployed off a blind, fired using three dice and then went prone. The British had little to aim at, but combined four sections firepower got one or two of the defenders and pinned the MMG. Bad news for the Germans was that Oberleutnant Neumann was killed by steady British fire. Bad Things happen was not kind, the Germans rolling a 6, so losing two morale. They are at 6 vs British 9.

All to play for and now the 25pdrs are in the game.

Two More Phases

The weather out in the real world was too nice to stay inside today so only got the two phases per side done. The British got the second support request approved and Battery B opened up, and almost on target! Le Bleu Ferme was smothered in 25pdr HE. The damage was not as bad as it could of been in terms of hits, but for the Germans, the problem was these were almost all Kills.

In the centre British Platoon B has begun the assault on the orchard covered by a 2”smoke screen and supported by Churchill tanks. No fire came from the orchard so the Churchills inched forward and engaged the StuGs but to only limited effect.

On the far side the StuGs continued to disperse as another ranging shot from Battery A landed too close for comfort. StuG “ Lowenbrau” managed to cause enough shock that the crew of “Determined” abandoned her and fled for the safety of the rear. The continuing action is slowly tilting in the favour of the StuGs.

No Bad things Happened to either side

With the British barrage now on table, the Germans must hope loads of 6’s are rolled and the Turn ends, the barrage ending. If not, the troops in Le Bleu Ferme will be in deep trouble.

A Sudden & Bloody Conclusion

The British had been making steady progress in the centre with Platoon B supported by Churchill tanks securing the orchard beside the crossroads. Le Bleu Ferme on their flank was blasted by 25pdr HE while the StuGs to their front were hit by Battery B. Platoon A awaited orders to attack Le Bleu Ferme, while Platoon C ready to cover any German zugs that showed their heads. Things were progressing well.

Platoon B dashed for the orchard and found no opposition, quickly capturing it and defending the hedgerow line. The PIAT team moved forward to fire on the forward StuG. The Churchills inflicted some shock and the crossroads looked within the Brits grasp.

The Germans suffered badly in the barrage in Le Bleu Ferme, and as soon as it ended pulled out leaving comrades dead and wounded and fell back on the second line. Zug 2 and 3 were still hidden, and they chose to remain that way until the Brits advanced further. One was close to the bridge, the other on the far right, looking across the British advance.

In a phase, the game was decided. The German player rolling a D6, indicating two phases in a row. Also a 1 was rolled and a support request confirmed (it was requested phase before). The German player needed a 5 to request, but used two “Mums Dice” to reduce that to a 3, which they duly rolled. The deviation dice rolled a “On Target” and the orchard beside the crossroads disappeared in smoke and shrapnel

Dice were rolled and at the end of the phase six infantrymen were dead and four Shock taken. Lt Jefferies was also dead.

The Germans had the next phase as they rolled D6 and promptly rolled a 1 again, so the barrage kept firing. Inside the orchard the death toll rose and the shock mounted.

At that point it became clear the lead Platoon was a write-off and the attack had faltered. The CO called off the attack and told Platoon C to fall back and Platoon A to hold position. The remnants of platoon B struggled back later in the evening a sorry state.

A Clear German Victory

The scenario was certainly favourible to the defenders, but I had forgotten really how powerful a defense can be in these rules. Yes the British had the choice of avenue of attack, but I think the firepwer I gave the Germans easily countered that. The British artillery should of had a bigger part to play, but was largely ineffective.

A great game and once again reaffirmed my belief the Toofatlardies produce the best WW2 Company sized rules.

British OOB

  • 3 platoons regular infantry, 1 additional BM per platoon.

  • CO in Bren carrier

  • FOO in Dingo AC

  • 2 troops of Churchill tanks

  • 2 Batteries of 25pdrs

  • 2 sections of pre-game stonks

German OOB

  • 3 zugs of infantry with additional BM.

  • CO BM 3

  • 2MMG assugned to the zugs

  • 4 StuGs

  • 1 mortar battery

Aftermath

In retrospect the British force was too weak to take the objectives, but they did their best. If you are inclined, make the game a two day affair. Let the Germans hold their end of Day One positions and let the Brits attack again with fresh forces on Day 2. This would reflect the problem the Germans had in continually trying to stop fresh attacks with no fresh troops of their own

Time to pack up!!

Des Darkin


Picture1.png
 

Excellent game of IABSM with Jenny Owens today. The British could not stop the German advance towards Dunkirk.

Phil Turner


Picture7.png


With no sign of any real-life games on the horizon, I decided to bite the bullet and ask to join a virtual game of I Ain’t Been Shot Mum run by my friend Bevan.

My previous reluctance to try anything virtual was mainly down to the fact that I spend a lot of the day working via Zoom now, and although it is truly a marvelous communication tool, it’s also quite draining to use. Nevertheless, with the Beardless King (daughter #2) busy with schoolwork and Kavan (daughter #1’s boyfriend) back at Uni, it was Zoom or nowt!

The scenario was a simple one set in France 1940. I would play the Germans, and would start the game in situ defending a bridge against an anticipated attack by a French armoured column. At my disposal I had three Big Men, a platoon of infantry, a platoon of anti-tank guns, and a support platoon consisting of a couple of MMG teams.

Here’s how I set up. The French are expected from the far left-hand corner:

The Plan

Bevan had sent round the briefing and table plan 24 hours before the game, giving everyone a chance to make plans. My plan was simple: to keep as far away from the French as possible!

If this was an armoured column, then it was likely to consist of well-armoured tanks with a pop-gun main gun and MMGs. I wasn’t too worried about HE from the main guns: it was unlikely that I would be facing Char B1 tanks with their 75mm guns, and there’s not a lot of damage done by the 37mm and 47mm guns carried by the other French tanks.

I was, however, worried about the effect of close range (under 18”) MMG fire on my anti-tank gun crews, especially as I was using the rubbish early-war German AT guns known as “door knockers” as their shots, even if they hit, would generally just bounce off.

I therefore had, as you have seen above, set up to defend from a distance: clearing his scouts (Dummy Blinds) and spotting his troops as soon as possible, then opening fire with everything I’d got, preferably defilading the axis of the French advance.

How It Worked

For those not familiar with how these virtual games can work, Bevan had set up the table with his webcam perched on a bookcase looking down on the battlefield.

Trevor, Dave and I could all see the table on our computer screens, and there was an open mike that we could all use to issue orders, hurl insults etc. Bevan rolled the dice and moved the kriegspiel-like counters (although you can equally well use figures); Dave and I worked out the dice rolls; with Bevan adjudicating any disputes.

The Game

The French duly entered the table where they were supposed to, meaning that just after the first round of spotting took place, the table looked like this:

As you might be able to work out, the first of my plan has achieved its objective: my Dummy Blinds and spotting have already disposed of three French Dummy Blinds.

The French then did exactly what I had hoped they would do, and crept cautiously forward, spotting every hedgerow, house, tree, blade of grass as they went. My troops kept very, very still!

The French Blinds then split. One moved straight ahead and crossed the main road, one went into the house, and one turned and lined the hedgerow by the house.

This gave me a chance to spot them and, with thirteen units able to use their entire turns to spot, I had soon seen exactly what I was up against: six Hotchkiss H-39 tanks and a weak platoon of infantry.

As predicted, heavily armoured tanks with a pop-gun main gun. Knocking them out would be a problem, but I did have another advantage: H-39s only have a crew of two, a driver and a much-overburdened commander, who has to look where the tank is going, issue orders to the driver, load/aim/fire the main gun and shoot the machine gun. In the rules, this meant that they couldn’t move and fire in the same activation, which also meant problems with such things as a platoon “Hunt” order.

Even better, more by luck than judgement, all the French tanks/squads were over (sometimes only just over!) 18” from my men. I opened fire with everything I had, forcing one Hotchkiss crew to abandon and knocking over a handful of infantrymen despite their being under cover in the house.

My excessive shooting, most of it ineffectual (you would not believe how many shells bounced off those tanks during the game!) had the desired effect: the French stopped their advance. I don’t blame them actually: each turn I had the ability to pump out a maximum of ten aimed AT gun shots (4 guns and a bonus fire card), and with a Big Man with two of the guns and the cards turning my way, there was a veritable storm of steel (as Alex would say!) pouring down the table.

The French stayed where they were for another couple of turns, and although no more of their tanks were taken out, they had all soon started to accumulate Shock…three or four points of which would be enough to force a tank crew to abandon ship.

We could all see that the writing was on the wall, so the French finally decided that they had no option to advance. Unfortunately, they had left it too late. The Shock on their tanks (I just couldn’t take the armoured monstrosities out!) mounted even more, and Dave and Trevor realised that they had left it too late and ordered the retreat.

A technical victory for the Germans: although I hadn’t “wiped the French out”, I had “cleared the battlefield of all French troops”.

Aftermath

A great game, even if everybody felt some frustration during the event. I was frustrated because I just couldn’t KO the French tanks, the French were frustrated because they just couldn’t take my men out at that range, and Bevan felt frustrated because he’d hoped to see more action. He was probably exhausted as well from rolling so many AT hit dice!

What would I have done if I were the French?

Well, Capitaine ‘Indsight has vingt/vingt vision, obviously, but I think my knowledge of the capabilties of the H-39 would have made me use very different tactics.

I would have charged forward as fast as possible with my tanks (the H-39 has an improved engine over the H-35, so doesn’t usually have a Vehicle Breakdown card in the deck) forgetting about my main gun and concentrating on getting into a decent MMG range, concentrating my fire on one German position at a time.

Four kills would take out each AT gun: once within 18”, an average roll of ‘7’ on 2D6 gets you two hits even as a Poor shot, so each turn, if you have three tanks concentrating on one AT gun, you’re killing 0.99 of an AT crew member per turn*. Given that throughout the entire game I only managed to force one French tank crew to abandon, and that being closer does nothing for the AT guns’ penetration, I reckon that taking the Germans out is therefore pretty doable. But, as I said, Capitaine ‘Indsight was late to the battle, and there were an awful lot of anti-tank shells heading the French’s way!

A great game, and I am now sold on virtual games, certainly until we can get back to facing each other across the tabletop.

Robert Avery

*50% chance of activating in a turn, three tanks in a platoon, average of 2 hits per tank, chance of a kill is a third so 50% x 3 x 2 x 0.33 = 0.99.


This AAR is lifted from the Internet from a Hungarian language blog. Google Translate gave me a basic English text, but a text needing plenty of editing. Here, then, is my version, with my apologies for anything lost in translation. 

End of May 1940, Calais region. The Germans have surrounded the British Expeditionary Force, one part of which has taken refuge in a small village. There is no chance of rescue: proud Albion's army is in retreat everywhere. The battle seems to be lost, but the British would not give in and would try a desperate break out. 

Both sides were commanded by experienced wargamers. The Germans, commanded by yours truly, lined up along three sides of the table, with the British troops concentrated in the village in the middle. 

The German force was as follows: 

  • One platoon of leg infantry 

  • One platoon of motorized infantry in SdKfz 251 half-tracks 

  • One platoon of light tanks consisting of one Panzer I and one Panzer II 

  • One platoon of medium tanks consisting of two Panzer 38(t) and one Panzer III 

  • One reconnaissance platoon consisting of two SdKfz 231 

image-asset.jpeg

If I remember correctly, the British force ranged against us consisted of: 

  • One platoon of leg infantry 

  • One battery of two 2-pounder anti-tank guns 

  • One 3" mortar 

  • Four Matador trucks, one of which contained the Company HQ

The game began with the Germans advancing their reconnaissance units, including the light tanks, on the right wing; and their tanks and half-tracks on the left wing. In front of them, the British anti-tank guns protected the path to the village, and enjoyed considerable initial success.

The first few British shots at the German right wing attack shook one tank and damaged both the steering mechanism, the turret and main armament of another. On the left wing, the situation was even worse: after a few shots all three medium tanks were destroyed. Fortunately, the German half-tracks had got close enough for the infantry they carried to dismount and attack.

image-asset (3).jpeg

The German infantry charged forward, and despite heavy mortar and machine gun fire succeeded in routing the British infantry. 

The British anti-tank guns still seemed dangerous but their shots at the reconnaissance armoured cars went wild: there was much cursing at the dice! 

Meanwhile, the German light armour arrived and opened fire on the gunners with their machine guns. Many were killed, with the others seeking refuge in the grass: one gun was rendered hors de combat. It was amusing to see the British Company HQ scrambling for their lorries and attempting to flee the scene. 

The German armoured cars, having narrowly avoided fire from the British anti-tank guns, bumped into the fleeing British lorries. They opened fire, and KO'd one Matador. The other lorries, however, successfully made their escape. Those British soldiers left behind were still running everywhere and hid and prayed. 

image-asset (6).jpeg

The last anti-tank gun on the main square targeted the approaching light tanks. First shot, and the Pz II was set on fire. The second shot jammed the turret of a Pz I, but third emerged from the smoke undamaged and headed for the village unperturbed. 

In the final act of the battle, the German infantry forced the final British anti-tank gun crew to surrender, and heavy machine gun fire took out another British truck. The battle ended here. 

Although part of the British force escaped, many were captured or shot. Four guns and some mortars and machine guns were captured. The Germans, however, suffered an embarrassing loss of armour: three medium tanks, one light tank and one armoured car were destroyed; with another light tank and armoured car needing serious repairs. A significant set back for the invading Germans! 

All in all a very good game. 

KVadasz


Well, Lard Island last night saw Robert Avery join us for a trip to Syria as column of the Royal Scots Greys bumped into the Vichy French.

The game was set, historically, a couple of days after the fall of Merdjayoun, as Todcol advanced north to Jisa el Burghaz to screen off Vichy forces in the central mountainous region. Three Allied columns had headed north at the outset, on the left one took the coastal road towards Beirut, on the right one headed up the plain towards Damascus, whilst in the centre one maintained communication between the two in the hilly country of the intervening mountains.

Needless to say this middle route was hard going, and after the fall of the central nodal point of Merdjayoun the Allied decided to withdraw most of their forces in this region and merely screen off any Vichy troops in the area. The Royal Scots Greys, who had just been converted from horse mounted cavalry to lorry borne infantry, were now sent northwards to under take this role.

Under their Colonel, Todd, they, along with elements of the 6th Australian Cavalry Regiment - an armoured formation - moved up through tough, hilly terrain. Dispersing into a wide screen they felt the full weight of the Vichy counter-attack that recaptured Mardjayoun and threatened to push on into Palestine. It was this surprise action that I wanted to replicate.

The British had one squadron (Company) of the Greys mounted in truck. They had a troop of three Mark VIb light tanks and three Universal carriers mounting Vickers MMGs. Two Bofors guns provided support against what had up 'til now, been a strong Vichy presence in the air.

This force, commanded by Robert, Harpers and Biffo had no particular idea where they were going, but were just told to provide me with their order of march.

The French were in strength, with on full company of the Legion, a platoon of four R35 tanks and a platoon of Chasseurs Libanaise.

The table, all 6' by 7'6" of it, was essentially a winding road running north to south about 2' in from the western edge (6' in lenght). To the left of this the terrain was largely hilly, with a small village about 18" from the northern table edge. half way up the table a road branched off to the right, and headed, in a curving manner, off to the north-eastern corner. To the south of this road was a small olive farm, with a few scraggly groves, before more hills resumed. To the north was a central area of open terrain, before a large hill dominated the top half of the board, being around 5' by 3' in size, stretching from the north-east corner (where the road exited) almost across to the village on the road.

A dried up river bed ran along the southern side of the branch road.

The game started with three French blinds entering the table on the N.E. end of branch road - tucked tight in to the side of the large hill.

The British column being put on the table (not on blinds) along the main north south road as per the order of march given to me by the players. At the head of the column, in the village near the northern edge, was the tank troops. Stretching back down the full length of the road was the convoy of truck (all spaced as per the rules for fast or wheeled vehicles - it stretched some distance). A Vichy straffing had seen all of their men jump from their vehicles to find whatever cover there was, and they started the game in the dust next to their transport. Behind them the carriers and Bofors were still off-table. This was now going to be a test for them how quickly they reacted to the French threat.

The British began by attempting to get into some position of advantage, with their first troop running for the cover of an orange grove just to the south of the village. The tanks headed off road to the western edge of the big hill. Number two troop tried to get some cover in a road side drainage ditch and in some rocky ground just on the north side of the T-junction where branch road met main road. Three troops took advantage of some undulating ground to nip round the back towards the farm, with their leading sections jumping into the dried up river bed to the north of the farm, on the southern edge of branch road.

The French advanced with their tanks down the road. On the big hill their Chasseurs Libanaise headed for the summit. A platoon of the Legion headed south through the dried up river bed. Both sides were now jockeying for position having blundered into each other.

The first shots of the day came as the British second troop spotted the white kepis of the Legion moving down the river bed. Firing across the open ground they killed one man, and clearly really annoyed the Legionaries. The whole platoon lined the edge of the river bed and poured fire into the Jocks who enjoyed rather less cover in an 18" deep drainage ditch, and consequently suffered rather worse. However, this action was suffice to allow 3 troop to move round into the farm and occupy it and the olive groves without disturbance.

A second wave of French now followed the Lebanese troops up the hill, this was where the French main blow was planned to fall. Now the Lebanese Chasseurs opened up with their single Hotchkiss MMG on the British light tanks that were quite sensibly avoiding the better armed and heavier French tanks. It was to no avail, and the Australian tankers were quite happy to reply round for round.

The British carriers now arrived and moved into the olive groves around the farm, whilst the first Bofors dropped in a ditch by the road junction in order to counter the French tanks. On the big hill the French deployed their HQ troops, and quickly brought smoke down to mask the Bofors, as well as adding their three MMGs to the fire going in on the light tanks. One of which now pulled back to a hull- down position behind a rocky patch, its miniscule turret presenting the French tankers with a vaguely tempting target.

One French tank decided to leave the road, hoping to deal death and destruction amid the Australian light tanks, but the Bofors, thus far starved of a target, put paid to it's advance, first causing minor engine damage and then blowing the turret clean off.

On the right the Chasseurs Libanaise were to even the score, immobilising a Mark VIb with their MMG and then causing the crew to abandon it.

On the left the Legion in the river-bed attempted to rush across to the rocky slopes of the hill to the east of the farm, thereby outflanking the Jocks therein. A hail of fire from No. 3 Troop stopped them in their tracks and allowed the British to send one section up the hill to themselves bring enfilading fire down on the somewhat frustrated survivors of the first fusillade.

But now, with a cheer and cry of "Vive la France" down the western slopes of big hill swept two platoons of the Legion and the less enthusiastic Lebanese. In the orange grove Squadron Sergeant Major Corky Caldwell moved swiftly amongst his men, holding their fire until the enemy emerged into the open at the foot of the hill. Now fire sprang from the mouths of twenty odd rifles, and the front ranks fo the French went down in the crimson sand. A party of Senegalese troops set about two of the Mark VIb tanks, attempting to wrench off the tracks with their rifles and to fire into the vision ports, but the crews stayed calm, their turrets rotating as they fired into this seething mass.

Now up came the lead Australian carrier, its Vickers blazing into the mob, as more and more men fell for a France that some had never seen. High above them on the big hill, Capitaine Legume swung his machine guns to bare on the orange grove. Amongst the first to go down was SSM Caldwell, and his men felt his loss painfully. Where brave resistance had been their watchword they now sought cover where they could. Only those men unaware that their brave leader had fallen still continuing to put fire into the stalled French platoon.

With one Platoon decimated by fire, the second Legion platoon veered off to the right, into the village seeking shelter from British fire. Behind them came the Lebanese to secure the position. From the big hill a bugle call rang out as Legume called off further attacks, and the French now sought to consolidate their gains.

The position now stabilised with the British holding the junction and all ground to the south, whilst the French held the village and the big hill.

The French had failed to seize the important junction, their objective, the British had failed to move up to Jisa el Burghaz. An honourable draw.

Historically the action that took place on this terrain saw a Squadron of the Scots Greys face the Vichy counter attack alone, and without support they fled the battlefield, Merdjayoun falling later that day. This scenario allowed a bit more balance.

Hopefully Robert enjoyed his visit to Lard Island where we treated him to a delicious doner kebab with chilli sauce and green chillies (personally I like extra chillies and no lettuce - just onion, cabbage, tomatoes and cucumber). As a consequence he is probably in hospital as I type this.

Richard Clarke


Used my Japs for the first time yesterday: a little outing to Malaya and an encounter battle with some Indian Army types.

The Japs had five light tanks (Ha Go's) and two strong platoons of infantry. Unfortunately the company's heavy weapons and medium tanks were still at Payne Ting Station and thus unavailable for this action. Each platoon was three squads strong, but with a fourth "mortar" squad of three light mortars.

The Brits had a far more balanced force: three platoons of infantry, two British, one Indian; four Indian Pattern carriers (Brens only) and a Lanchester armoured car with its twin-Vickers turret and another Vickers in the hull. In addition, the Company HQ boasted a couple of Boys ATR's and two Vickers MMG's.

The battlefield comprised lots of jungle, a couple of "splash across" rivers, one road, and one abandoned building.

The Brits formed a column and headed north up the road. The Japs quickly deployed their tanks, and sent them south down the road, but with a platoon of infantry in the jungle either side with a False Blind even further out. Even under Blinds, however, this proved such slow going that all the action took place in the third of table closest to the Japanese baseline.

The Brits on the road thundered forward pdq, running straight into the Japanese tanks. A fierce fight developed between the three lead Japanese tanks, spraying machine gun fire right, left and centre, and a British platoon on the right of the road, supported by the Company HQ on the left. It soon became apparent that Ha Go's are made out of papier mache, as three of them succumbed to enemy fire: one taking nine hits with a Boys ATR before being abandoned!

Meanwhile, the Japanese had deployed their platoon on their left of the road, ie facing the deployed British platoon, and had formed a firing line with one squad to pin them while two more formed column and moved forward and to the flank.

On the other side of the road, a Japanese Blind had moved up towards the flank of the meddlesome British Company HQ. A Rapid Deployment chip followed by the platoon chip was too good an opportunity to miss: the platoon's three light mortars rained down onto the enemy, and the three squads of riflemen charged forward with the Company and Platoon commander at their head. Banzai!

There was another British Blind there which was revealed as two of the four carriers, their LMG's being put to good use as the Japs charged in. A huge melee developed, and the British were overwhelmed by sheer weight of numbers and bounced back 12" down the road.

Meanwhile the British Lanchester armoured car had shot forward past this melee and had engaged a squad of Japanese infantry and one of the two remaining Ha Go's at point blank range. This Lanchester was obviously one on loan from the Argyll's, because the bloody thing just wouldn't die! The squad attacked it, the tank shot five shells into it: no damage! Meanwhile it's Vickers were proving to be a right pain in the Rising Sun! Finally it was forced to retire and, as it had Japanese troops on all sides, had no choice but to turn tail and sprint down the river. This unfortunately exposed it's rear end, and a final shot from a Ha Go blew it all the way back to the Mull of Kintyre.

During all this excitement, the victorious Japanese had sent one squad down the road after the retreating Brits, and formed the other two into a firing line and were peppering the remains of the British platoon on the other side of the road. Not only this, but the Japanese sniper was having the best day of his career: not a single shot missed during the entire game as he accounted for three Big Men, an MMG team and a couple of infantrymen whose sections needed pinning!

The other two British platoons now revealed themselves and moved forward. The British (as opposed to Indian) platoon was in front and prepared to assault the two Jap sections in front of them. Unfortunately, this mass of men was too good a target, and six light mortars rained down at the juxtaposition of all three sections. A slight touch of gamesmanship, perhaps, but my opponent said that that was exactly what he would do were circumstances reversed, so that was okay then! Two turns later, the sections were carrying 5, 5 and 3 wounds respectively, and all thoughts of charging into combat had disappeared!

Back on the road, the Jap section chasing down it ran straight into the other two carriers and the remains of the Company HQ. It was a real Scooby Doo moment as the squad skidded to a halt and charged back up the road again, with the carriers in hot pursuit, followed now by the Indian platoon who had decided that the British platoon was attracting far too much fire to be worth standing next to.

The Japs headed into the jungle, but had been badly hurt by the carriers. Mass fire from four Brens is quite unpleasant! The Indian plan was to keep shooting the Japs then go in with the infantry. Unfortunately the Jap light mortars ruined everything: dropping shell after shell onto the Indian sections forming up to charge. The two remaining Ha Go's were also moving forward, preparing to engage the carriers.

At this point the Jap sniper polished off the last British Big Man, and the Brits decided to retreat. Although beaten, they had given the Japs a real bloody nose: definitely in no position to follow up the retreating enemy, Ha Go's or no Ha Go's.

This proved to be a cracking battle: much closer than the report above perhaps suggests. If the last two Japanese tanks hadn't been imminent, the Indian Carriers would quite possibly have done enough damage for the Indians to wipe out the Jap platoon in the tree line. This would have left around two British platoons (in strength) against one Japanese one, and victory might have gone the other way. As it was, the Lanchester's charge forward had proved suicidal, and Neil was left cursing the fact he didn't have it handy for the endgame.

What was very interesting was how closely this battle mirrored actions from the Malaya campaign: the thrust of the "unstoppable" Japanese tanks being answered by the Brits hurling everything they had at them; a Lanchester doing real damage everywhere it was; Japanese mortars landing everywhere and, of course, the Japs pinning the front and attacking the flanks. The only dodgy note was the success of the Japanese sniper!

I highly recommend giving this theatre a go. The British/Indians and Japanese have such different forces that it's quite unlike a game where each side has a couple of platoons and a handful of tanks/guns. The close terrain, but lack of buildings, gives a very weird wave structure to the game: all slow, slow manoeuvres punctuated by lots of horribly close range firefights and melees. False Blinds proved much more important than in any other game I've played, as spotting was so difficult, and the road was at the same time the only place where you could move at normal speed but the most dangerous place on the table.

Robert Avery


After reviewing the IABSM3 rules earlier in this issue, the least we could do is to report on a playtest using those rules! We had played IABSM during its first incarnation and we've played Sharp Practice several times, so we were already familiar with the major parts of the rules system. I had painted up three boxes of Plastic Soldier Company WW2 Russians, so we had several squads, AT guns, and heavy weapons, plus a few 1/48th scale Hobby Boss tanks. After reading through the rules a few times, making some shock counters, plus a few odds and ends, we were ready to at least try a small game. 

It's late fall in 1941 on the road to Moscow. A German recon force has been ambushed and set on fire along the main road, plus there are reports of a heavy Russian attack. A German kampfgruppe consisting of a platoon of PZIVDs and a platoon of mechanised infantry in halftracks is rushed to the scene to prevent the Russians from seizing a vital crossroads. The Russian force consisted of two KV-1s and a KV-2 with one squad of SMG troops riding on the tanks. They were backed by a sniper (we wanted to see how the system worked with these), two infantry squads, two 45mm AT guns, and a 81mm mortar section with two mortars. At this stage we had no idea about the scenario balance, so it was a credit to both sides that they went along with the game to try the system out. Both sides used blinds to hide the advance of their forces. 

We were using a 4x6 table, which with the number of vehicles we had was not a good choice and it should be recommended that larger tables be used for more than a platoon of armour per side if using 28mm or 1/48th kits. 

The blinds moved up fairly quickly and when the first one was revealed it was a bit shocking to the German side: a KV-2 was sitting dead centre along the main road! The Sdkfz-251/10 that spotted it opened with its 37mm AT gun, but would have needed a miracle and didn't get it. The return fire from the KV-2 immobilized the halftrack, then the Russian 45mm AT guns revealed themselves and knocked the halftrack out for good. 

The German PZIVDs deployed and tried to use cover to engage the KV-2 along with the AT guns. The KV-2 shook off the several hits it took, but the SMG squad riding it were not so lucky. One of the dismounted German squads in the barn opened fire on them, killing several. The first PZIVD went up in flames after being hit multiple times and the Germans were reeling. 

Another blind was spotted and unfortunately for the Germans it was a KV-1 moving up on the Russian left flank. The Germans responded by turning one of the PZIVDs to engage this new threat while the other two squads of infantry moved to take up defensive positions. 

The KV-1 and -2 then engaged a pair of PZIVDs in a battle that went on for a number of turns. 

The Russian AT guns began to shell the barn that a German squad was in, but got more than they bargained for when the return fire knocked out the crew of one of the AT guns. 

The KV-1 was then immobilized by a hit from a PZIVD and for a second it looked like the Germans might get back into the game. However, the PZIVD was then itself knocked out by the KV-2, which sat like a fortress in the middle of the board, taking everything the Germans could throw at it. Also, another KV-1 appeared on the Russian right flank and the Germans then moved to counter it. 

A brief counterattack by a squad of Germans and a halftrack knocked out the final Russian AT gun, but then the halftrack was hit and knocked out. 

The KV-2 then began to do something it was designed for; knocking out buildings. The German squad in the farmhouse took a battering and had to fall back. 

The last two PZIVDs got the benefit of the card draw and were able to fire on the Russian armour first the next two turns, but couldn't score any knockouts. The return fire destroyed both of them and with that the game ended as the Germans would be forced to withdraw. The Russians still had mortars and two squads of infantry that had not even deployed yet! 

A few observations from our first game...

First, the rules are a huge improvement over the first version that we tried years before, so that was good. The infantry firing chart and the anti-armour charts need to be on a reference card as those are what gets used the most as far as we could tell from this game. 

I think that there was some confusion on our end about running vehicles as a platoon or individually. It appears from the rules that you should have a Big Man in charge of vehicle platoons to issue orders, but what if there isn't one? We couldn't make heads or tails of that during the game, so we'll need to look into that further. 

The infantry and anti-vehicle firing systems are fun to use and there is some excitement when seeing if a vehicle can block a number of hits to it with its armour saves. 

I've always been a big fan of the shock system that is used in these rules and I like how it degrades the performance of the units during the game. 

We felt that the game's base systems work well and can be easily picked up by gamers in a group setting. Once everyone understands how the card system operates and you get through the first few turns the game proceeds pretty quickly. 

In terms of problems there were a few, but fortunately they were pretty minor. First, there is some preparation time required to run a game, most notably getting the right cards, quality of troops, and Big Men organized. Nothing that takes hours, but it does help to come prepared. 

We found that snipers are particularly nasty as well as early Russian armour, which really unbalanced the scenario in hindsight. We were just learning the system, so no big deal, but in the future we'll look at these things more closely. 

I think the biggest thing that skirmish gamers may need to get used to is the number of troops that you will need for a group game. We're talking about needing (in our estimation) at least a platoon per player and some of the scenarios have quite a bit of stuff on the board. These rules are definitely designed for large skirmishes, i.e., company sized engagements with maybe two platoons of infantry plus heavy weapons along with support. Now some might argue that it will slow the game down, but actually IABSM3 handles large amounts of figs pretty well with the card system, plus infantry don't last long in these battles! 

Overall, it was a very fun game and we liked the rules. I'm already working on getting some more infantry and vehicles painted up for even larger battles! For the cost of the rules you certainly can't go wrong.

Republished from Warning Order #33

with kind permission of the Wasatch Front Historical Gaming Society


image-asset (4).png


Jez and me hadn't played a game of IABSM for ages. I realised that this would be my 57th game this year, and so decided to call it Heinz's Revenge.

Lately we've been playing quite a few tank orientated games at Wally HQ so I decided that we should address the balance with more of an infantry game.

Jez really likes to use tanks, and in fact vehicles of any sort. I thought I'd surprise him with a scenario allowing me to use a massed infantry attack.

The scenario was set in July 1941 shortly after the invasion of the Soviet Union.

Jez was told that his force was charged with securing a crossing point over the river. His force, full of vehicles was essentially a force to allow a recce in strength to take place. His infantry were all Elite and possessed four initiative dice, his vehicles were all Veteran and there was six Big Men in his force. 

The table consisted of an unfordable winding river with numerous copses, boggy areas and a couple of small farms with cropped and ploughed fields.

Jez was told the existence of a bridge on the western end of the river, but was not told about the second bridge towards the eastern end of the river. I had decided to tell him about it if he arrived within 12" of its location.

True to sneaky form, I decided to place a bunker complex on table, telling Jez he knew its location but not if it was occupied. 

Jez's German Aufklarungs Force

Forward Observer in SdKfz 250/5 in contact with four off-table 105mm howitzers. 

Company HQ 

  • Hauptmann (D6+2) [Can act as FO]

  • One Rifle squad (8 men)

  • One SdKfz 251 Halftrack

  • One SdKfz 251/10 Halftrack

  • One SdKfz 10/5 AA Halftrack

  • One M/C Combo

Platoon 1 

  • Leutnant (D6)

  • Feldwebel (D6)

  • Three Rifle squads (8 men each)

  • One AT Rifle (2 men)

  • One SdKfz 251/10 Halftrack

  • Three SdKfz 251 Halftracks

Armour 1  (all veteran)

  • Leutnant (D4)

  • Two PzKpfw III G (Veteran)

Armour 2 (all veteran)

  • Leutnant (D4) [Can act as FO]

  • One SdKfz 221

  • Two SdKfz 222

  • One SdKfz 223

Armour 3 (all veteran)

  • Feldwebel (D4)

  • Three SdKfz 231

Gun 1 

One SdKfz 11 Towed 75mm Infantry Gun

Gun 2 

  • One SdKfz 11 Towed 75mm Infantry Gun

National Characteristic Cards

  • Air Support x 2

  • Rally

  • Dynamic Commander

  • Heroic Leader

  • Blitzkrieg Bonus

  • Recce Force (A/C only)

  • Gun Bonus

  • Artillery Support

  • Rapid Deployment

  • Vehicle Breakdown

Kev's Soviets

Platoon 1 

  • Senior Lieutenant (D4)

  • Three Rifle Squads (10 men each)

  • AT Rifle (2 men)

Platoon 2 

  • Junior Lieutenant (D4)

  • Three Rifle Squads (10 men each)

  • AT Rifle (2 men)

Platoon 3 

  • Senior Sergeant (D6)

  • Three Rifle Squads (10 men each)

  • AT Rifle (2 men)

Platoon 4 

  • Junior Sergeant (D6)

  • Three Rifle Squads (10 men each)

  • AT Rifle (2 men)

Platoon 5 

  • Commissar (D4)

  • Three Rifle Squads (10 men each)

  • AT Rifle (2 men)

Support 1 

  • Two Maxim MMG (3 men each)

Support 2 

  • Six 81mm Mortars (3 crew each)

Support 3 

  • 12.7mm AA HMG (3 Crew)

Gun 1 

  • Horse Drawn M27 76mm Infantry Gun

Gun 2 

  • Horse Drawn M27 76mm Infantry Gun

Armour 1 (Green, operate on individual cards)

  • Two T-28

National Characteristics Cards

  • Commisar

  • Uhraieeee x 2

  • Soviet Tank Killers x 2

  • Hesitant Leader

  • Hesitant Troops

  • Heroic Leader

  • Gun Bonus

  • MG Bonus

  • Mortar Bonus

  • Vehicle Breakdown

I allowed myself four Big Men in my substantial force though rated the troops as poor with only two initiative dice maximum. The T-28's I decided should be green crewed as well!

The Battle

When Jez and I usually play we only have time for a three hour game maximum. Usually I have a small defensive force and Jez has a fair sized attacking force. This time it would be different with the advantage of numbers firmly on my side. I wanted to see Jez panic as the German commanders had when initially when hit by human wave attacks.

I deployed AT rifles separate from their Platoons, but to operate on the same chip, well in advance of my main line of defence in the small fields around the western farm.. These would hopefully halt the lightly armoured German AFVs which I envisaged making a run for the bridge early on. I placed my 12.7mm AA HMG, a Maxim, and my six mortars in a copse on my side of the bank, in the loop of the river where they could command the battlefield.

Next to the bridge I deployed a 76mm Regimental gun and sniper to pin troops in the farm should they dismount from their armoured vehicles as I knew they would. Supporting them and hidden by the copse with the mortars were two T-28's my ultimate reserve in case the Germans captured the bridge.

My second HMG and a sniper were located in a small copse on the northern riverbank to protect the second, unspotted bridge. In the boggy areas, adjacent to this feature, I had deployed two Platoons of infantry, with a further two platoons sharing the same blind on the southern bank hidden by the copse.

Finally in a small copse on the extreme eastern table edge I deployed yet another infantry Platoon and my second 76mm gun.

I hoped to launch an assault via the second bridge throwing the enemy into confusion whilst their forward progress was held up by AT rifles and snipers. My mortars would support either the attack or pin troops in the farm. 

The bunker was revealed to Jez on his baseline in a large copse, guarding access via the road. Jez was told he could deploy within 12" of either northern table corners.

So much for the plans then....

My blinds came up first and I easily spotted a mass of armoured cars heading towards the farm. I decided to hold all my dice and as Jez's 'Blinds Move' came up he spotted a blind in the cornfield, west of the farm. Deciding it was a fake he advanced a SdKfz 231's right through the blind.

Big mistake. I hit him in the rear with a close range shot from my AT rifle. Ka-boom, vehicle destroyed.

This really shook Jez. He soon recovered though and his remaining heavy armoured cars blazed away, killing an AT rifle crew member and causing three wounds.

Ominously, other blinds of Jez's occupied the woods to the east. Relieved, I was praying at his point that Jez was not going to make a run for the bridge as I had concentrated most of my infantry in the east near the second, as yet undiscovered bridge.

He spotted blinds in the small copses on the northern bank and discovered the bunker to be empty, and was as yet unworried. However, his arse began to grip the chair when he successfully spotted my six mortars and two HMG's in the river bend.

As 'Tea Break' came up Jez was forced to place his Panzers and armoured infantry on table. They were just behind the farm, in cover.

The next turn saw Jez dismount and occupy the farm whilst one Panzer drove right along the road, another skirting the farm to the north.

When my 'Blinds Move' came up I decided the time had come to mess with his mind.

A blind left the boggy ground it was hiding in and occupied the large wood in the centre of the table. An AT rifle located on the northern edge of this feature started popping away at a Panzer III hitting it with alarming accuracy though failing to penetrate.

I spotted a 75mm infantry gun in the eastern woods and decided foolishly to shoot at long range with my infantry and 76mm gun located in the copse to its front, to no effect.

The photos do not do the spectacle justice as twelve squads each of ten infantry launched into the advance to contact.

I have never before used a wave assault in IABSM but judging from the look on Jez's face I will be doing so again. He was absolutely terrified! Jez was incredibly impressed with the number of troops he was facing. He had thought initially that I would only have a skeleton force but by now he realised he was on the defensive himself.

Luckily for me I activated an AT rifle in a yard near the second farm and managed to hit his forward observer a couple of times, unnerving him somewhat.

The action switched to the western side of the table as Jez killed my AT rifle near the first farm and then successfully assaulted and killed another AT rifle with his infantry, clearing a field, and outflanking my remaining AT rifle. He also spotted my fake as a fake and began to realise that a run for the bridge may work.

A Stuka descended from the clouds and dropped its bomb, engines screaming, before pulling out of its dive and flying away. Had the pilot managed to look back he would have realised that his detonation was in fact on top of a SdKfz 223! Blue on blue! Jez was not impressed. I seem to have a magnificent record of friendly fire when others have air support, and I do not.

My 'Mortar Bonus' chip arrived. the first time any of my mortars had had the chance to fire. I dropped a shell onto a section of Schutzen in the farm. Killing a couple of vipers! However, scoring a lucky 17, a pinned German section destroyed my Maxim HMG without it firing in anger.

Jez continued to mop up AT rifles with MG fire from his AFVs but he was somewhat surprised when my 76mm Infantry gun fired at his Panzer III, jamming its turret with its first hit, and forcing it to withdraw upon tea break or its next initiative with its second shot. Lucky for him that the third shot missed!

Things were looking a little uncertain for me near the farm so I decided upon 'Heroic Leader' to motivate a section and lead them from the central woods to assault Jez's Big Man led Panzer III. Minor damage forced it too to withdraw.

However, my exposed infantry squad were shot to red ruin by Halftrack MGs. Surprisingly the Big Man survived, but collapsed to the ground, no doubt sobbing.

It was a brave but foolhardy tactic, nevertheless one I would try several more times in the game.

Over in the east, Jez's 75mm infantry gun fired into the mass of Soviets heading toward him causing several casualties. However, suddenly a Big Man rose from the throng on the ground to cry Za Rodinu, for the Motherland! A loud 'Uhraieeee' sounded as the chip was pulled from the bag and three section of Ivans assaulted and wiped out the gun crew capturing the piece.

Other infantry Platoons headed further north when their chips were drawn, one Platoon however, headed back over the second bridge in an attempt to manouevre back into a defensive position.

The next turn saw Jez's armoured cars get the bit between their teeth and head in the direction of the bridge as he realised that time was running out.

My 12.7cm finally was destroyed by autocannon

He killed my last AT rifle with another infantry assault and was now a mere 12" away from the bridge.

I now drew a couple of 'Tank Killer' chips in quick succession and proceeded to attack the front and rear of Jez's Company HQ, still near the second farm and still awaiting their chip to be drawn.

The brave Ivans lobbed grenades at his 251/10 Command vehicle, immobilising it and also managed to immobilise a 251/1 at the rear.

However, when 'Tea Break' arrived next chip the smile was wiped off my face as both assault squads were hit with close range 2cm AA, Hanomag mounted MG34, Motorcyle Combo MG34 and 251/10 37mm AT cannon wiping out all except one man who dazed was captured and no doubt executed for his foolish bravery.

As Jez's Armoured cars continued their progress towards their objective my 76mm gun opened up again, missing wildly.

Once again as 'Tank Killers' was drawn I rushed a section from the central woods and permanently immobilised a SdKfz 222 with a flank hit.

Jez's infantry had been pinned with accurate sniper fire in the previous two moves but made a run for the bridge, shooting and butchering my victorious tank killers in the bargain, and finally setting foot on the rickety bridge.

My infantry Platoon which had captured Jez's 75mm in assault manhandled it to the edge of the wood intent on using it on the German HQ vehicles.

In a final act of suicide I assaulted Jez's SdKfz 10/5 2cm mounted light AA gun with yet another section. Managing to jam the weapons traverse they too were wiped out by yet more concentrated MG34 fire.

My fifth and final section to meet the same fate that day.

With the drawing on the 'Tea Break' chip, and it being lunchtime we called it a day.

Jez had managed to set foot on the bridge but not control it. It is arguable whether he could in fact have successfully held it close as it was to two T-28's.

My mortars had fired once as a platoon and twice as single tubes with no real effect and had been very disappointing. The number of chips in the bag seemed magically to prevent their chip turning up (I know, I know Clivey its 50% probability of a chip turning up - but it didn't!)

Jez's Company HQ also, armed to the teeth, had their chip turn up only once and relied on the fact that when 'Tea Break' came up they were within short range and could shoot my brave troops to ruin.

Spectacular is the only word to describe 120 Soviets running towards you!

I really wanted them to get into the German's but lacking 'Uhraieeeee' chips, also noticeably absent from the draw, and only in possession of two initiative dice with which to move meant that progress was slow. Luckily, Jez's lack of automatic weapons in that vicinity of the table meant that they hadn't accumulated wounds or it would have been a massacre.

The attacks on the AFVs, by the infantry were suicidal but often very effective. There was a real air of desperation about the savageness of the fighting worthy of a report in Signal with brave German's facing hordes of Ivans.

The game was a cracker, one of the best IABSM games I've ever played.

I shall use Human Wave assaults again. Back to the drawing board....

Kev


Playtesting IABSM III:

Ce este asta?" What colour there ever had been there had drained from Major Vlad Impalescu's face, what was it indeed. He adjusted the binoculars again to make sure he wasn't seeing things. Five turrets! What sort of tank was this.

"Nu ºtiu!" Bogdan Inzamud was equally at a loss. Their R2 tanks looks pathetically insignificant when compared to the Soviet monster that had been lurking amid the ruins of the factory complex. He wanted to run, to get away from this limbering beast that, bristling with guns, was surely unbeatable. "Run!"

At least that was what he had intended to say, but somehow it can out "Fire!". Around him the popping of several 37.2mm guns showed him that his command had been picked up by the other tanks in the platoon, and shell after shell was streaking towards the iron behemoth.

Had the armour of the T35 been iron then Serzhent Andropov would have been happier. In fact it seems that the metal sheets that protected the tank were little more than old dustbins that had been rolled flat and riveted into place. In seconds two turrets and the main gun were out of action and the driver was crashing his way through the gears in an attempt to get away from the small but effective olive green tormentors in Romanian colours.

In the main office building Igor Blimie's platoon were occupying the rubble left after the Stukas had visited yesterday. It was a shame that the roof had gone as the Romanian infantry that had occupied the ridge some distance away were now dropping their 60mm mortar rounds in with frustrating accuracy. It was fortunate that the enemy seemed to be having problems with his machine guns, but for now Igor could but watch as the enemy tanks that were operating to both the west and the south seemed to be waiting for something to happen. The small R35 tanks were firing into his positions with their low velocity 37mm guns, but the damage was insignificant. Why were the enemy waiting?

Ivan Kompostiip waved his flags frantically. Never before had he commanded his platoon in action, but he was determined to fight well to defend the revolution. In his BT5 cavalry tank he could well be seen as the successor to Semyon Budyenny, the hero of the Soviet Union. Across the ridge and there before him lay the industrial complex. Off to the south he could see the Romanian tanks, he waved his flags again and the five small tanks swung to follow him. His only regret was that he had no bugle.

Leytenant Nikka Grabescu rotated the small one man turret to face the oncoming threat. Only three of his five tanks were atop the small ridge, two others were behind it in the dead ground. Quite clearly he could see the flags being waved by the red tanker, and the fast moving light tanks swing to face him before rushing across the steppe at an unlikely pace. The R35's cracked out their welcome, one BT5 slowing down as its turret was clearly damaged, but the rest rushed onwards.

"Move to the enemy's rear, attack them from the flank and the behind", Ivan had read the manual on tactics and knew just what he should do. As he crossed the ridge the two hidden Romanian tanks cracked out a welcome. The low velocity guns were too light to be ideal, but at this range it was difficult to miss. Rounds thudded home, tearing bits from the tanks.

It was a swirling fight, more akin to an aerial dogfight than a tank battle, but ultimately it was the heavier armour of the R35 that decided the day and the poor morale of the red tankers. Within a minute two BT5s were scuttling away, their bottle gone. Ivan fought on until his tank began to burn, only then slipping out and making his escape across the endless steppe.

The Romanians did not halt to trouble themselves about a few Soviet tankers, their tanks were now closing in on the industrial complex, sealing off all exits. For Igor Blimie there would be no escape, he could fight on, maybe win an hour for the defenders of Odessa, but lose his life in the process. His company quietly disposed of Commissar Nikolai Krossdressavitch and surrendered to the Romanian victors.

A relatively bloodless victory for the Romanians, they despatched two light Soviet armoured cars and either destroyed of drove off the T35 and a platoon of BT5s before simply shutting off any escape route for the Soviet infantry. This was another opportunity to develop further the tank battle system, which worked well, and we nailed 60mm mortars too.

Richard Clarke