Operation Reindeer, which began on 4 May 1978, was South Africa's second major military operation in Angola, carried out under the Apartheid regime, the first being Operation Savannah.

The South African operation consisted of an assault by 2 South African Infantry Battalion on two South West Africa People's Organisation (SWAPO) base complexes, Chetequera and Dombondola, near to the then-South West Africa/Angola border; an assault by the elite 32 Battalion on SWAPO's Omepepa-Namuidi-Henhombe base complex around 20 km east of Chetequera.

This AAR is a Chetequera playtest and refight put on ay Historicon 2010 by Mark Kinsey and friends.

The Playtest

In preparation for Hisoricon, Jon and I played through enough of the scenario to find a few things that need to be fixed. But then that's the point of playtesting. We used M'Baso/IABSM for the rules. Here's some eye candy from the game.

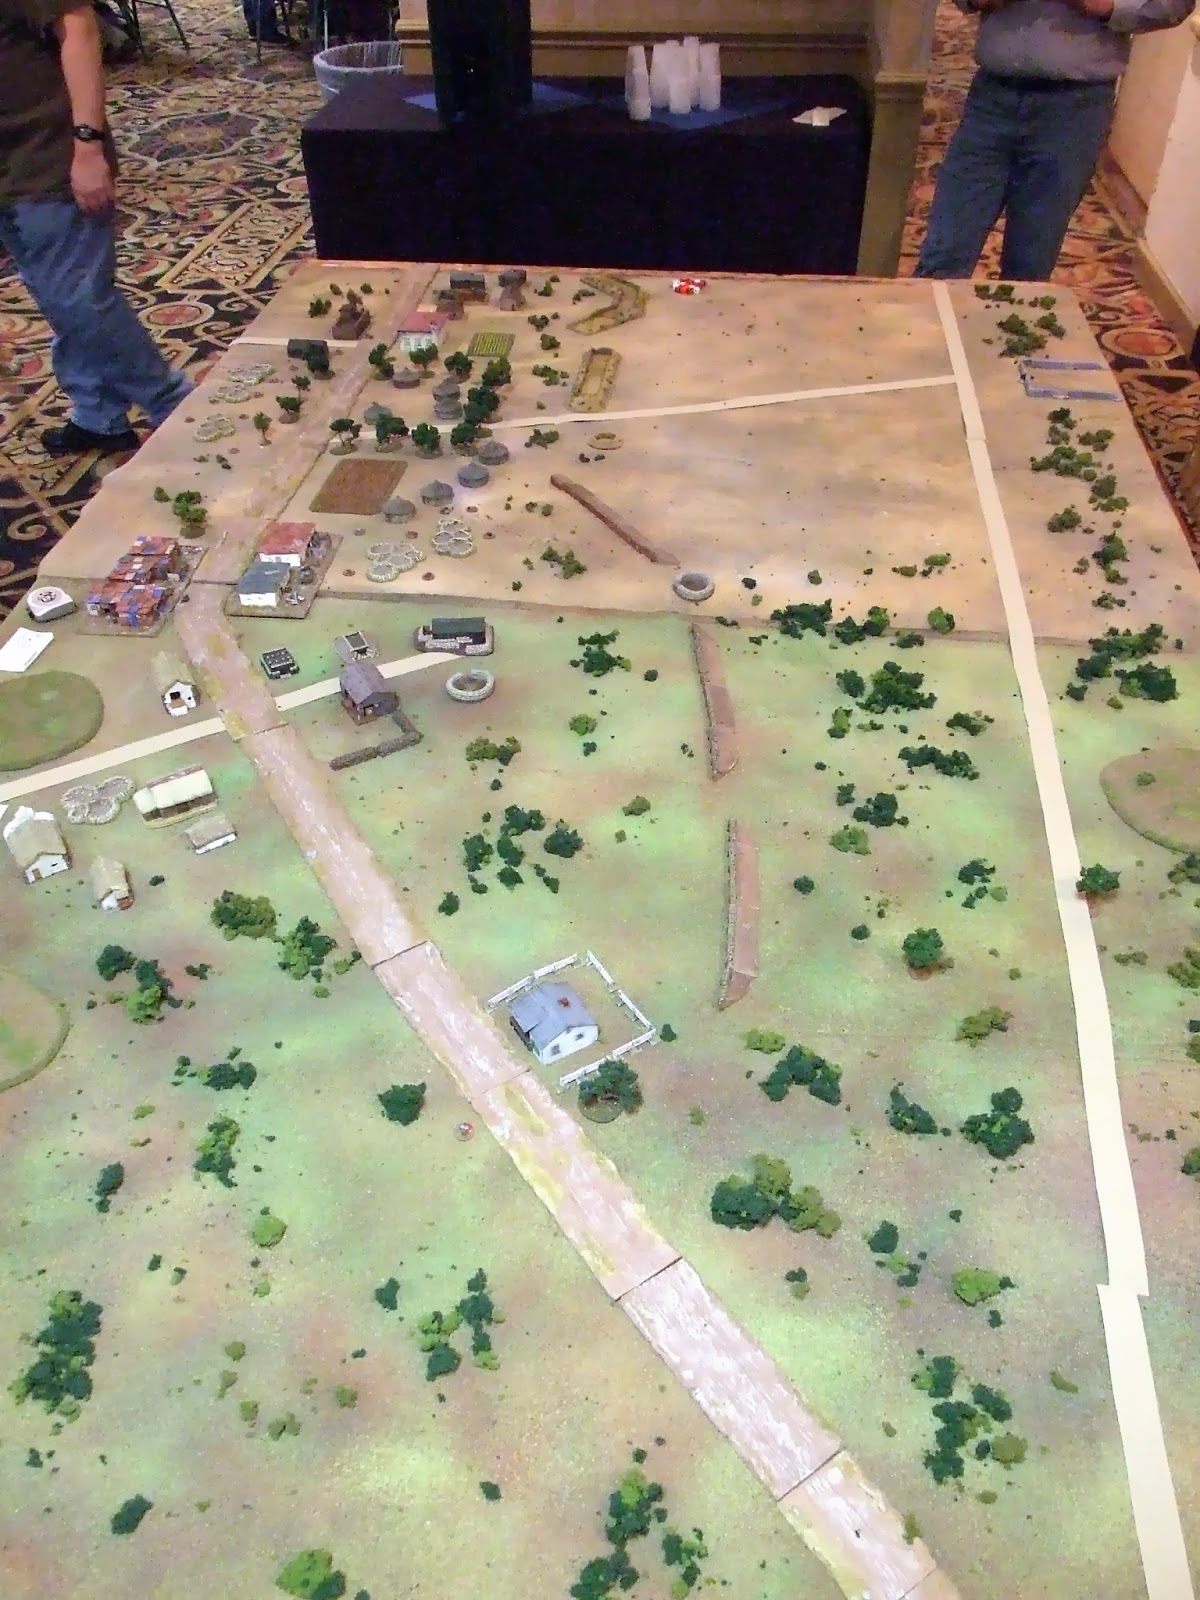
The latest iteration of the terrain setup.

This area represents just a small corner of a SWAPO base containing several hundred defenders with recoilless rifles, 14.5mm AA, and 60mm mortars. It was assaulted by by a combat Team with fourteen Ratel-20's and four Eland-90's. A second Combat team with four additional Eland-90's and three Support Troops in Buffels held stopping positions at a nearby crossroads and set up an 81mm mortar in a nearby Kraal. Many of the Ratels were held up in the thick brush and only six made the final assault. Of the four Eland-90's, two were knocked out by recoilless rifle positions.

The Canberra preps the base with bombs

Buccaneer does the same with rocket fire

Air support prior to the assault consisted of four Canberras, and two Buccaneers. Additionally, two K-Cars with 20mm guns were on hand for close air support during the assault, mostly to fire on SWAPO attempting to flee the assault. Since this is just a small portion of the base, an attack by a single Canberra and one Buccaneer should be adequate. Historically the communication between the SAAF and SADF was poor, and as a result there was 30 minutes between the air assault and ground assault. More than enough time to remove any pin or suppression effects.

The K-car is shot down by a ZPU-2 as the Eland-90's trade shots with the SWAPO recoilless rifle teams

What I'm going to attempt is to have the scenario give a "feel" for the period and the assault. So while being inspired by the events at Chetequera, it is not a strict simulation of the events. A simulation of the actual events would be boring and frustrating for any SWAPO player, and perhaps a bit dull for any SADF player. 

The Ratel-20's storm the trenches. It gets ugly fast. Lesson learned, don't close assault unpinned troops in trenches.

The Ratel on the left was disabled (engine damage) by a recoilless rifle team. I like the balance between the recoilless rifle team and Ratel armor. No huge brew ups, just vehicles disabled through various means. SWAPO teams armed with just AK's can't do much except force morale checks, but often that's enough.

Chetequera at Historicon 2010

Below is a view of the Northern edge of the camp seen from West (North is to the left in the photo). The South Africans start the game a bombardment from a Canberra and Buccaneer and then assault down the road with two Eland-90's a K-Car helicopter gunship. On turn 3 they receive four Ratel-20's evenly spaced 9" from the trench line.

The aerial bombardment is mostly ineffective (need to change that up a bit next time), and then as predicted the Eland armoured cars are hung up by the Recoiless Rifle team in the bunker. When the Ratel's show up the fight is still going on with no knock out blows by either side.

The armoured car commander musters his courage, charges to the edge of the barbed wire and rolls a 17! In the IABSM system this magic number destroys any crewed weapon. The damage also killed the Big Man crewing the gun.

Rest in Peace Big Man. Long live Little Big Man!

The Ratel commander realizes time is against him and rushes the trenches after two turns of little movement. It comes as a cost though. The SWAPO second in command, nicknamed "Little Big Man" mans a recoiless rifle, turns it and attacks a Ratel in the rear as it rushes by rolling an 11 on 2D6.

Things are fast and furious near the end with a second Ratel being knocked out by more great shooting. The South African player pushes forward to the board edge as Ratel's are recycled for a second wave of attack. Several gun crews are killed and infantry rush forward along the trench line to take their place (this is something that happened in the actual attack). I give them an 8+ on 2D6 to man the gun and then it can be used on the following turn. One Ratel gets stuck on the trench line (1 on a D6), but manages to free itself on the following turn (50% chance). With this and some great movement die rolls the South African player manages to get six Ratels off the board by the end of the game, narrowly eking out a win.

I messed up the rules a bit and things were chaotic at times, but everyone had a really great time. 

Mark Kinsey


The Battle of Cassinga took place on 4th May 1978 during the South African Border War. The battle involved South African forces raiding a suspected SWAPO base at Cassinga, Angola, and, covered in the game below, the intervention of a Cuban armoured force operating out of the nearby Techamutete village.

Mark Kinsey and Jon Yuengling re-fought the battle at Fall-In, 2013, using a combination of I Ain't Been Shot, Mum! and B'Masao.

The Play Test

Jon and I gathered at Dragonhead Distributors in Allentown, PA today to knock the dust off our Too Fat Lardy knowledge and playtest the Cassinga game before next weekend at Fall In.

I like to head to a convention with a setup photo in hand and have the terrain packed away from the playtest (or at least from a setup in my basement). Really cuts down on the guessing.

In the end it didn't look as awesome as the image in my head, but I think it can be improved upon with a little more effort. I'd like to add in the dirt trails and a few other things, but we were pressed for time and took far too long to set this up. We used a 6' x 10' setup and the buildings, trees and trenches I have got were a little swallowed up by the massiveness of the board..

Here the anti-tank platoon is arrayed in a stop line to slow down the advancing Cubans coming from the near board edge.

We recruited a passerby named Michael and inducted him into Lardy gaming. The Cubans lead with their recon element, followed by their tank platoon of T-34's.

After several turns of fighting and shots from the anti-tank platoon RPG's and Mirage III's and a Buccaneer firing AP rockets the anti-tank platoon is completely immobilized on the road. Two T-34's have been KOd' and others damaged. This has created a traffic jam that has slowed the advance of the other Cuban platoons.

The anti-tank platoon receives orders to withdraw to LZ Rennex as the Buccaneer attacks the column again.

When we ended the game two of the three platoons from Company C had managed to depart from LZ Rennex, but the anti-tank platoon was being very hotly pursued by a Cuban Mechanized Platoon in BTR-152's. 

So what did we learn? We overused the hesitant commander card for the Cubans and they did not get their entire force on the table. Also the air support while effective did not KO as many vehicles as I would expect. I think both of these should be easy tweaks and then the battle will rage farther across the table and create even more tension for both sides.


This is the south end of the battlefield looking up towards the center of the town and LZ Rennex at the top right.

Fall In 2013

The airborne landing and assault on the SWAPO camp at Cassinga, Angola by South African Paras has been a success, but now it must be saved from disaster! A Cuban Armoured column of T-34/85's and BTR-152's is grinding up the road from Techamutete. Can the South African Anti-Tank Platoon hold them off long enough for their unit to exfiltrate by helicopter from LZ Rennex?

This year I only went to Fall In for one day and really only to run my one big game and socialize. It was scheduled for 1 - 5 pm on Saturday and we used all of our time and a little bit more. We set up at 11:30am and were done by 12:30pm, so I had some time to get a breather before the game. Parking was at capacity when I arrived at 9:30am, so the day involved a bit of walking back and forth to the car in the far parking lot.

Below is a view with the walled Cemetery on the bottom left, and LZ Rennex at the dice pile. The Cubans enter from the top left. The South Africans have a small Anti-tank platoon and support from 2 Mirage III CZ's and a Blackburn Buccaneer. They must leave the battlefield by Helicopter from LZ Rennex with C Company (3 platoons) and the AT platoon intact. Rules were "I Ain't Been Shot Mum" (version 3) with modifications from the B'Maso ruleset from Too Fat Lardies.

The Game

Both the Buccaneer and Mirages get involved early, taking out the Cuban Recon Platoon. Here the Buccaneer misses the Cuban BTR-152 column.

An AT team has been discovered in the building just up the road. The Cuban player is on the left and South African on the far right with Jon in the middle. What is that set of Blinds moving up the trail to the left?

One of the C Company platoons of the South African paras has deployed off blind and is trying to set up a defensive line against any Cuban infantry on the south end of the clearing.

The Cuban Tank platoon of T-34-85's has finally been spotted on the eastern trail. There is no movement bonus on the trail, but the Cubans are using it anyway. A lucky RPG shot from an AT team in the trench line takes out the lead tank.

The Buccaneer is back to finish the job on the BTR-152 Platoon. Elsewhere, two of the three Paratroop platoons have left by helicopter on the north end of the battlefield. A SWAPO sniper in the walled cemetery is killed after firing several rounds at the South African Forward Observer. The third platoon is trying to make it's way back to the Landing Zone but is impeded by Cuban Mortar fire.

The remaining four tanks of the tank platoon move up the trail to the clearing. Through a combination of RPG fire and Air Support one has its main gun taken out, another immobilized, one has a -4 to move, and the other is KO'd. But before this happens they manage to get several shots on the helicopters which have landed nearby (without driving them off). Over on the main road a platoon of Trucks towing the Anti-Aircraft guns is badly mauled by the last run of the Mirages before they have to go back to base. The Cuban Big Man in his GAZ69 jeep is narrowly missed. The AT teams have almost run out of RPG ammo and are in full retreat.

They turn their attention on the fleeing platoon instead, pinning it in the open. Another BTR-152 platoon reaches the clearing and adds their fire to the mix. Back over on the main road, a different BTR-152 platoon has bumbled into the minefield the South Africans have placed on the road just north of the first house.

The LZ is in chaos now, with what few teams that are not pinned or under shock attempting to board helicopters.

In the confusion the embarkation officer boards the helicopters early! Each of my three Puma helicopters represents a group of helicopters that can carry a platoon of men. Van Zyl the embarkation officer has to get off the helicopter to encourage a group of 14 men aboard (it is his special skill in the scenario).

Air support has not come in for two turns and the Para platoons casualties continue to increase. The Cuban MG platoon sets up in the adjacent tree line near the "camp followers" area of Cassinga and opens fire, again crippling the platoon. They are rewarded for their effort with a round of better late than never rockets from the Buccaneer which takes out two of the trucks and injures one of the MG teams.

The South African Level III Big Man Colonel Jan Breytenbach removes two shock from a South African Para Section and then boards a helicopter. 

As the helicopters lift off, they leave behind 12 dead and 25 men who are forced to surrender to the Cubans. As a result the Cubans are awarded a Major political victory. A minor strategic victory goes to the South Africans from the excessive amount of damage that they inflicted on the Cubans. In the end there wasn't a single Cuban platoon that hadn't taken extensive losses. But this is a hollow achievement. The South Africans were not here to fight the Cubans, only SWAPO, and that goal had been accomplished before this scenario even began. Their only goal here was to leave with as few casualties as possible.

Jon declared it the best game we've ever run. We had a lot of people stopping by to watch the game and three people watched the entire dramatic final hour of the game. My only minor disappointment is that I had my camera on the wrong settings so they turned out a bit grainy. Still it was a very exciting fast moving game that came to a dramatic conclusion at the end, everything I was hoping for.

Mark Kinsey


Right column bring the warehouse under fire with the M-113.

The South Lebanese Army while investigating the report of an arms cache in one of the neighboring villages came under fire prior to withdrawing, Associated Press has reported today from Beirut.

While it has not been confirmed, unidentified members on staff say it was a poor showing for the SLA. No additional comments have been received from official sources.

Now for the PLO view…

It was a great day for the PLO. Two columns of the SLA attempted to enter the village looking for arms and supplies. One column was to approach the village, clear a roadblock and support the second column approaching the village’s stores and warehouses.

Left column under fire while approaching the roadblock.

Trouble started early as the right column moved faster than expected and their M-113 was quickly engaged in a firefight from one of the warehouse buildings. After taking three hits by RPGs the M113 retired to check on the damage to the APC.

This left the four squads to secure the warehouse complex. One squad unfortunately had trouble crossing the road and was brought under fire by a PLO LMG team firing from the roof. A squad was able to take one building but was forced to pull back after the M113 and a third squad pulled back. A fourth squad did reach their objective, but was unable to contact the left column. They also pulled back with the other three squads.

The left column was unable to remove the roadblock as they were under fire. Once they secured the PLO position they received orders to pull back to the start line.

(The PLO leader at this position has a different stand on this as he was holding off a superior force and he only left once his position was untenable. He escaped with his own life and his RPG team and the truck. It was our only truck.)

While causalities were similar, 7 PLO for 8 SLA, the fact that the PLO held the field allowed them to recover arms from the causalities and check on their wounded.

Jon Yuengling

SLA pulling from one of the warehouse buildings.

 LMG team bring the SLA squad under fire.

 The PLO commander at the roadblock returning the truck.


Cold Wars convention 2011:  Mark Kinsey and myself ran two games dealing with Lebanon 1982 and Dr Mercury had two 28mm games covering the conflict as well. All in all the Vista Room in Lancaster was a little bit of Lebanon (in the Middle East that is).

The second fight was “Lebanon 1982 - Clearing the Orange Grove”:  an infantry fight based on a scene in Waltz with Bashir. This was to have the IDF moving through an agricultural area on the coast road. 

This operation was smaller with only a platoon of infantry. Each player had control of a M-113 with three fire teams. 

This operation followed doctrine with the infantry working with the APC. This time the PLO came off for the worse. Their teams put up a good fight, but the combined firepower of the IDF contained any PLO threat. 

Jon Yuengling


Cold Wars convention 2011:  Mark Kinsey and myself ran two games dealing with Lebanon 1982 and Dr Mercury had two 28mm games covering the conflict as well. All in all the Vista Room in Lancaster was a little bit of Lebanon (in the Middle East that is).

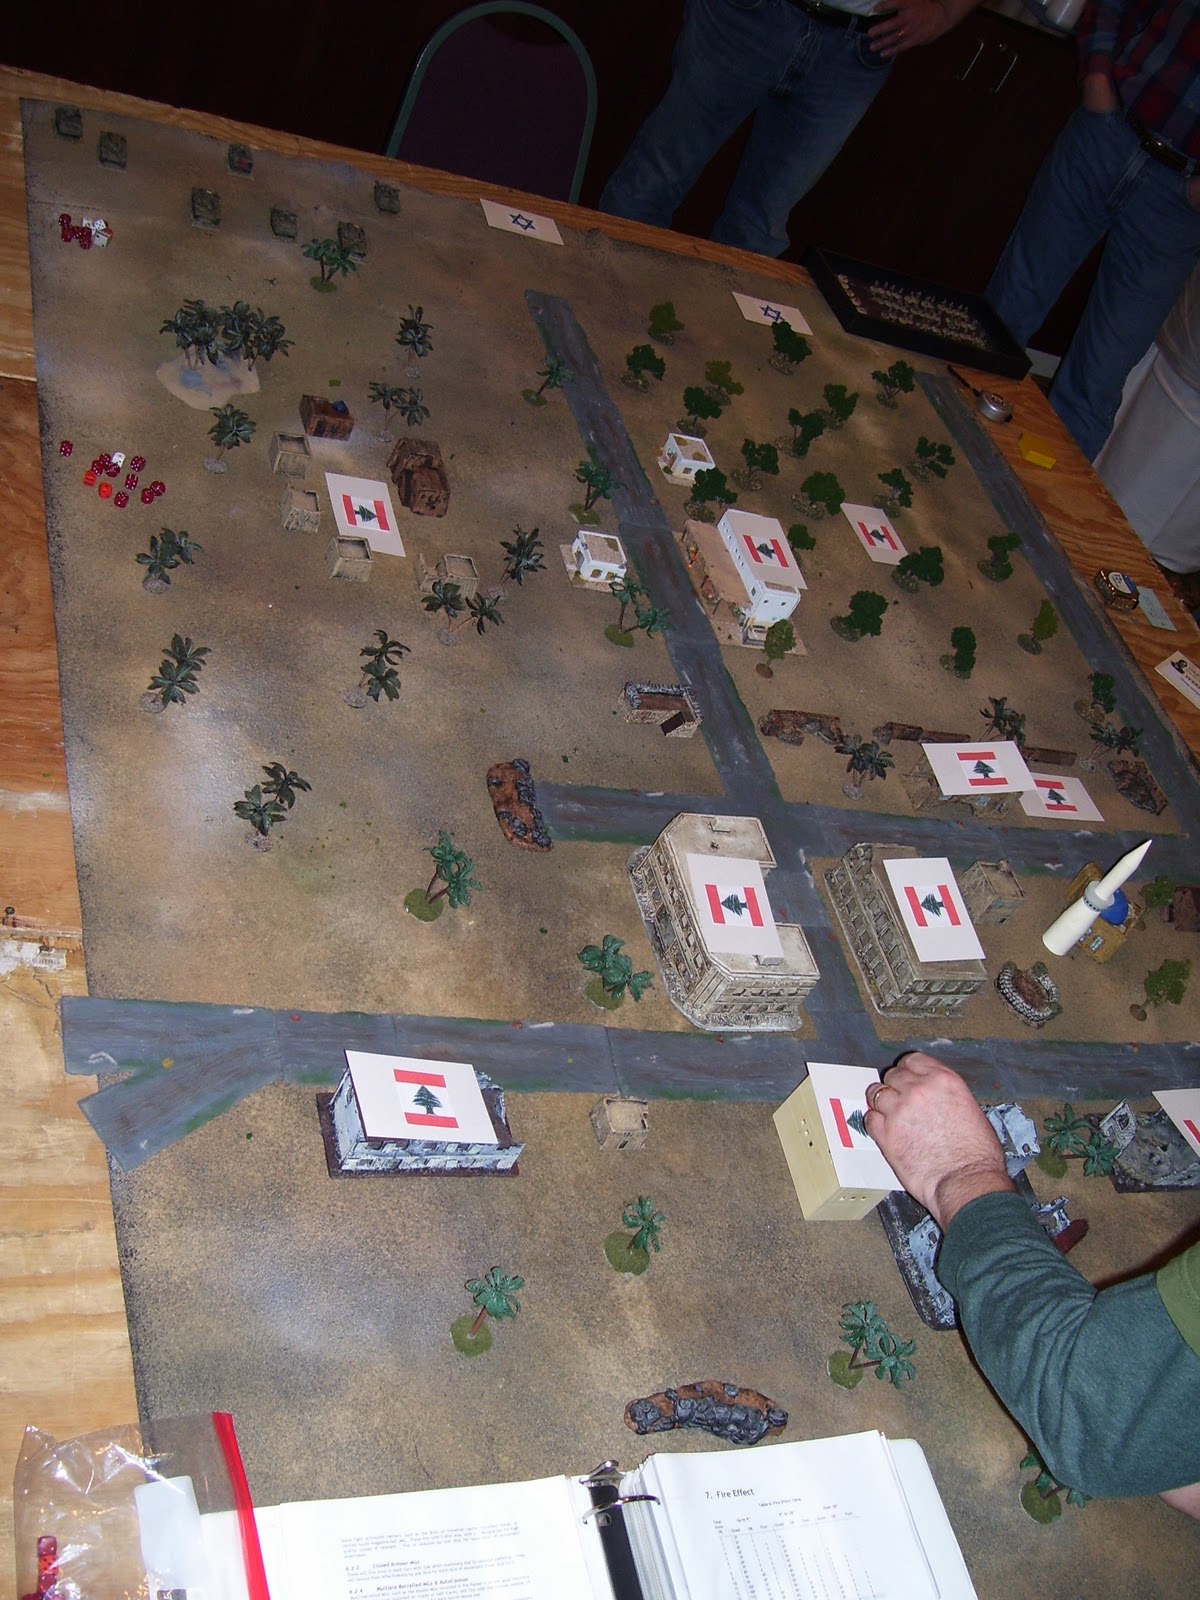
The first fight was “Lebanon 1982 - Fight at Ishiya”. This is a village in the Bekaa where the IDF is looking to move north as fast as possible while destroying as my of the PLO infrastructure as possible.

The Battlefield - Image from Doctor Merkury

Unfortunately it didn’t work out that way. The IDF had a platoon of infantry with Magach support.  While they had two perfectly good roads to use, they set up on the table edge and started to move through the rough terrain. Now as a game master I should have place the figures on the road and said you start here. My fault.

The IDF started by approaching a cluster of houses and found a PLO arms cache, but also civilians, militia and a news crew. Now after failing to spot the news crew (even though I had figures on the table) they proceeded to use the machine guns and Magach tanks on the people and buildings getting a clean kill on the entire news crew. 

Things could not get worse for the IDF, well they could and did. For over three turns they continued to pummel the buildings. It took an order from over the radio to get them moving, ever so slowly. In desperation (on the game master’s part) I said something like, “I paid a lot for that latex road and you guys need to use it. 

Once they got on the road they moved towards a market building and encountered a second PLO team with a machine gun. This slowed up the column again and the reinforcements. The IDF received a jeep platoon. 

At this time the Syrians appeared on blinds (we were using a Lardies rules). It was funny that the IDF was not concerned about the new column approaching the village center. The Syrians had two platoons of T55s and a platoon of BTR60s. 

It was only when the command tank was hit by an RPG and received engine damage that the IDF realize they were in trouble. The command tank earlier lost their commander. The Syrian Infantry and lead platoon of T55s fired on the tank and the crew bailed to a building. More on that latter.

The rest of the IDF column made a run for the edge and it looked like they were going to make it, until the PLO moved their one heavy asset, a Charioteer, to stop them. There is something humorous in having a 1950s tank (or tank destroyer) frightening off the IDF. Only by luck was the PLO tank unable to get the last M113 in the column. (In the future I need to write up some PLO specific tank rules. Should make for interesting and comical battles.)

Back to the tank crew. They were holding up in a building being shot at by a platoon on Syrian and a defiant group of PLO. There situation did not look good, so the jeep platoon went in to recover them. Luck was still with the Syrians as they were able to get into a firing position and disabled the jeeps and captured their crews and the crew of the tank. 

This game was a PLO and Syrian victory. I think the IDF commander was lucky to have been an early causality, if not Ariel Sharon would not have been happy with the results. 

Jon Yuengling


7 June 1982, South of Sidon

by Macaulay Connor

Today this reporter came upon the results of a recent and bloody Israeli sweep south on Sidon. At least three IDF soldiers were killed in an ambush.

On this the second day of the Israeli Operation Peace for Galilee Israeli infantry were sweeping north through an orange grove near this unnamed market town. While there were reports of Fatah militia in the area, numbers were unknown.

Two roads bordered the grove and heads north towards the market. The IDF appears to have been following these parallel roads when an ambush occurred causing the loss of three soldiers who were on an M113.

While we cannot approach the village at this time I can say we can hear heavy weapons coming from the village itself.

While the IDF is limiting their comments on this engagement, this reported was able to find out from resident that Fatah did take some losses.

After Action Report

It has been to long since Mark and I play IABSM and it showed. We missed adding in a few of the IDF cards and took a couple of actions before we got back our sea legs.

Unfortunately this effected Mark’s IDF more than me. He ended up get a M113 to far in front of the column and was hit by RPG7s. Between this and AK47 fire the M113 came out the worse for ware.

Once Mark was able to get his two infantry sections on the table he was able to clean out the militias with limited loses. His superior Big Men allowed the IDF to move faster than my running Fatah troops.

The game came to an end when the IDF was able to get to the village and than faced a HMG. Over all I (as the PLO player) feel that the PLO won as we destroyed (ok immobilized) an M113 and killed 4 IDF soldiers, three of which were in the M113. The PLO lost only 12 men (out of 18 active men).

Jon Yuengling


The scenario used a company of 173 Brigade infantry reinforced by three ACAV tracks and three M48A3 tanks searching for the newly arrived NVA 95B regiment that was establishing a base in South Viet Nam near the Cambodian border. It is unusual in that the PAVN forces are strong enough to put up a semi-conventional fight combined with guerrilla tactics.

Terrain is very simple with triple canopy tree cover punctuated with areas of tall grass. The grass is light cover. Among the trees spotting is heavy cover while movement isbroken ground due to lack of low growth beneath the trees. The table was 6 x 5.

Date: May 1968

US Mission: Search and Destroy

The infantry – armor company (Frontier) can enter the table only after at least one of two LRRP teams (Dogpatch 1 & 2) on table report spotting a PAVN platoon size force. Triple canopy prevents air support but there are two Huey slicks available for extracting compromised LRRP teams and Medevac can land in tall grass. A full battery of artillery is in support with no fire authorization required.

You must cause PAVN forces at least 40% losses causing survivors to flee back into Cambodia. You have a blocking force on one side of the table. Only the two LRRP teams are on Blinds.

PAVN Mission: Three Strong

You have five platoons of NVA regulars (replace the 60mm mortars with one RPG in the company Support Platoon) , one reduced VC guerrilla cadre (two squads), one platoon of  three 81mm mortars and one platoon of  three HMG’s. A Level II Commissar is present.

You are to hold a base area in the South by causing unacceptable losses to the US force making them break off the operation. You have eleven Blinds.

The Game

The first couple of turns saw Dogpatch 1 & 2 (LRRP) enter the table searching for PAVN. One team searched the NW, the other ESE table sections. Contacts were made and reported quickly but each team took two casualties before evading. All casualties were carried off by the teams.

Frontier One

Not this game, but one of Benito's: US Infantry in the field

First infantry platoon (Frontier 1) withACAV 1 & M48 Tank 6 (T6) entered the ESE side of the table quickly becoming engaged by an NVA platoon. Instead of hit & run the NVA stood. The fight was fierce.

ACAV 1 was taken out by an RPG but the badly shocked crew escaped without losses. T6 fired canister and infantry fire was brutal. An NVA squad assaulted a US squad leaving only two survivors on each side but the US fell back six inches.

The end result was the total destruction of the NVA platoon, with the US forces losing one ACAV & twelve men.

Policing the area, Frontier 1 recovered nineteen NVA bodies including a Big Man, two PW’s, one LMG & one RPG.

Frontier Two

While this fight was being resolved 2nd Platoon (Frontier 2) entered to the right of Frontier 1 and came under ineffective fire from another NVA platoon. Fast reaction by Frontier 2 quickly eliminated an NVA squad and caused the rest of the platoon to break contact.

US Battalion Command (Big 6) came on the air asking for a sitrep (situation report). The infantry CO (Frontier 6) reported the contacts and that he was reorganizing before pushing on. Big 6 was unsympathetic, “Well get moving.”

PAVN command was caught with forces scattered to cover all possible US entry points. PAVN Blinds were being rapidly moved to confront and hopefully ambush US forces. The mortar FO had been badly placed and was hurrying to reach a good observation position.

Frontier Six Reacts

Another of Benito's games

Frontier 6 called his 3rd Platoon (Frontier 3) forward to replace the battered Frontier 1 while Frontier 2 covered the right flank. Then, irritated by Big 6 prodding, Frontier 6 led a squad of 1st platoon forward and spotted more NVA. The squad fired and T6 roared upshooting canister then going on Rock ‘n Roll. End of game for another NVA platoon.

Meanwhile 2nd platoon was probing with a squad. More NVA spotted! ACAV 2 came up but misjudged distance and was immobilized by an RPG. Crew okay, so it continued to fire. Frontier 2's Big Man led two squads onto the NVA flank and rear and assaulted. The NVA took losses and ran, with the only US casualty being, sadly, Frontier 2's Big Man.

With only one intact NVA platoon, the reduced VC platoon and the HMG’s and mortars left, PAVN command ordered a withdrawal. Unfortunately for them the table side they chose as a safe exit was the same one the Free World blocking force was covering.

Conclusions

A clear US military and political victory with thrity-six confirmed, and at least sixteen estimated enemy KIA; together with three MG’s, two RPG’s and a rice cache taken against the loss of eighteen men, one Big Man, and two ACAV vehicles.

The military victory was a bit incomplete since the PAVN HQ escaped, but luck was against regiment 95B, they only achieved one real ambush.    

As for the game, the methods of LRRP teams don't fit standard rule procedures so we adjusted how cards and rules are used for them. In fact, the LRRP activities were almost a game in themselves: much as the patrol phase is in CoC.

Charles Eckart


Our Saturday battle was a good time as we got our friend Doc Mercury over to play. He now has a large force of PLO/Militia to paint up and got his first taste of Lebanon 1982 with Mark and myself.

This battle changed many times as we were setting it up, and at times as the referee I was not sure what the players wanted to try out...but I do need to remember to always make the IABSM/CDS cards and the sides set before I get to the gaming venue! Mark wanted Syrians, Doc did not care and I was planning on using PLO as that is what I had cards for.

The action was very fast as the two platoons headed across the town looking for PLO and a way to exit to the north.

Here is the long road with the referee in the distance

The PLO was found by the IAF (or was it a drone) running towards one of the major buildings

After a couple of inefficient shots by the PLO the IDF found this relic on the battlefield and fired on it. The IDF player was a little miffed that it was all caught on camera and the T34/85 was not operational. Always remember to not fire on anything near a mosque:

The tank as a decoy allowed the PLO to assault the tanks. Luck was not with the PLO today as none were damaged and the infantry cleaned out the building.

As the Merkavas went past the market a group of Syrian commandos attacked the column. They had as little luck as the PLO.  They held the market only a turn before being forced out by the infantry.

Here we have the infantry holding the market

While all of this was happening the Syrians brought on three T55s. Their only success was against an empty M113.

A good game and a great learning experience for me the referee. I look forward to our next game.

Jon Yuengling


These are the pictures from a game that Mark and I played one Thursday night back in November 2010. It used IABSM/CDS to fight a battle between an IDF convoy re-tasked to locate a downed pilot and Syrian militia.

Looking over the expanded town. We have to remember to remove the beer bottle next time!

The remains of a Syrian tank taken out by the IAF greet the IDF.

Here is the column working its way into town.

Here we see a command M113 with an officer directed the column to a new objective. Finding an IAF pilot.

Here the led Magach is taken out by fire from this building. Fire came from all four floors. There were four RPG shoots and a recoilless rifle.

Unfortunately (for my militia) the IDF cleared the building floor by floor. While the IDF lost an entire tank crew, the infantry was able to clear the entire building with only losing three soldiers. The militia was less luckily, losing sixteen men, one of which was their Big Man.

While the IDF did recover the pilot (working on a figure for that) the losses were heavy.

Jon Yuengling


This game took place at a Whitley Bay 3D Gamers evening in February 2016, with Dougie offering up a 10mm Falklands game using the Lardie’s I Ain’t Been Shot, Mum rules. Myself, Dougie and Alex took the valiant Brits advancing at night to clear out Nick’s evil Argies in the run up to Goose Green.

I’ve not played IABSM before, but I have played CoC and Sharp Practice so the mechanisms were familiar. With this being at night it made it difficult for the Argentinian platoon to spot the advancing British company. The games started with all under Blinds:

The Brits were really going for a straight on attack, and the two dummy Blinds were in the foreground feinting around the flank. Poor movement dice overall meant that the 1st Platoon approached the dug-in Argentinians unsupported and was soon spotted and subjected to withering fire!

As the Argentinians revealed themselves (single platoon supported by a .50cal) the first British platoon suffered heavy losses

The rest of the British force continued their advance, closing in on the Argentinian flanks, and the first Argentinian platoon finally succumbed to British return fire.

And the British began to close in despite the threat of the .50cal.

The other British platoons finally came into play (the dummies causing the defenders to waste some actions). The .50cal was taken out of play the superior British fire discipline began to tell.

With fire coming from front and rear the defenders were soon pinned and the British closed in for the kill:

At this point it was clear the Argentinians would have surrendered. They had done well fighting off the first platoon but in a static position it was only a matter of time before the superior discipline of the Brits seized the day (or night!).

The rules worked pretty well and it shows what you can do with quite a small number of figures. The photos do not do justice to the lovely paint jobs on the 10mm figures and the bespoke terrain. Good game and thank to Dougie for putting it on and Alex and Nick for partaking as well.

Count Belisarius


Umpire's Briefing

It is early afternoon on 15th July 1984, a few miles west of the Inner German Border (IGB).

The ground is mainly open country, with fields of crops. There are some open trees along the roads leading east , and some small orchards around the village. The green areas are dense forest, and count as Heavy terrain, vehicles must also check for bogging down. British units may deploy as far forward as the track to the east of the village. The Soviets may enter anywhere on east edge.

The British may receive some reinforcements: either a tank troop or one Striker with Swingfire.

If they do, the Soviets will receive support from a Hind D Helicopter.

British Briefing

After several weeks of increasing tensions, during which it became clear that the large exercise the Warpac were holding was really a covert mobilisation, at 05.00 this morning the poo has hit the spinning thing and the Soviet army has crossed the IGB and invaded west Germany.

You are Captain Roger Roughshaft, 2IC of Bravo Company, the Royal Green Jackets, part of 4th Armoured Division, the British Army of the Rhine's (BAOR) covering force. You were deployed from barracks two days ago and your first action earlier this morning didn’t go well:  the enemy bundled you out of the village of Helchteren much quicker than you had hoped. You have managed to extricate most of your force, and are now dug in to defend the village of Stellingbostel

Your job now is to slow the Soviets down again, hopefully hold the village until night fall, and then withdraw your troops to the next position, winning time for the rest of the BAOR to dig in along the river Leine.

You have your two platoons of B Co. and a Milan section. A troop of Chieftains have just turned up to assist in the defence, which makes you feel more confident of holding the Soviets this time.

This is not a suicide job:  do not allow the enemy to pin you down and prevent your withdrawal, or destroy your command. Your job is to make the Soviets deploy, inflict as many casualties as possible and make them fight to get past the village, but live to fight another day (or probably later today).

Your forces:

  • Company HQ
    • Capt Roger Roughshaft  (Level IV)
    • CSM Corky Caldwell (Level III)
    • 1 x 2-man Sniper team (Level I) 
    • 1 x Blowpipe MANPAD
    • 1 x FOO connected to 3 x Medium Mortars
    • 1 x FV432, 1 x Landrover
  •  Milan detachment
    • Corporal (Level I)
    • 2 x Milan ATGM teams
    • 1 x FV432
  • 1 Platoon
    • Lt Hugh Jarce (Level III)
    • Corporal ‘Ginger’ Bush (Level II)
    • 1 x Radio Operator
    • 1 x 2-man SFMG Team
    • 1 x FV432
    • 3 x Rifle Section (8 men each)
    • 3 x FV432
  •  2 Platoon
    • Lt Reg Butler (Level III)
    • Corporal Jack Jones (Level I)
    • 1 x Radio Operator
    • 1 x 2-man SFMG Team
    • 1 x FV432
    • 3 x Rifle Section (8 men each)
    • 3 x FV432
  • Chieftain troop
    • Lt Charlie Wells (Level III)
    • 3 x Chieftain tanks

All British infantry may start the game dug-in.

The table viewed from the East:  the left flank of the Soviet entry point

Soviet Briefing

After years of provocation, our forces have finally been forced into action against the evil NATO armies to prevent them attacking the Eastern European countries signed up to the Warsaw Pact.

This morning we have crossed the IGB in a pre-emptive strike to destroy the armies of NATO and remove the threat to our borders.

You are Captain Alexander Orlov currently in command of the advance guard of 10th Guards Tank Division in 3rd Shock Army. Now we are in the west, your task is to find the enemy and identify where his weak points are to allow the division to rapidly bypass the enemies strong points and penetrate deep into their rear.

Having found a route between the villages of Helchterren and Hechtelyou now need to clear the village of Stellingbostel andexploit to the west and get over the river Leine before the British can fully prepare their defences there.

You cannot afford to get bogged down unless you want to be looking down the wrong end of a pistol in the very near future.  You have had the Colonel shouting down the radio all day demanding speed, and are aware that he has the General chewing him out. Best get moving again as soon as the artillery barrage finishes.

Your forces:

  • Company HQ
    • 1 x BMP1 with Captain Alexander Orlov (Level III)
    • 1 x BMP1 with 2 x AGR17 2-man teams
    • 1 x BTR60PU with 1 x FOO for a battery of 2S1 122mm SPguns
    • 1 x ZSU23/4
  •  Tank Platoon 1
    • Sergeant Igor Blimeh (Level II)
    • 4 x T72
  • Tank Platoon 2
    • Lt Yuri Bigboi (Level II)
    • 4 x T72s
  • 1 Platoon
    • Lt. Ivan Irjtuvart (Level II)
    • 3 x Rifle Section (6 men each)
    • 3 x BMP1
  • 2 Platoon
    • Lt Alexei Salmondski (Level II)
    • 3 x Rifle Section (6 men each)
    • 3 x BMP1
  • 3 Platoon
    • Lt Leon Abalakov (Level II)
    • 3 x Rifle Section (6 men each)
    • 3 x BMP1

You have three 12” x 12” pre-game artillery stonks you can place anywhere on the table, and may receive some support from frontal aviation.

The view from the right of the Soviet start line

The Game

But, of course, the Soviets weren’t alone. When the British blinds card came up, Lt Charlie Wells troop of Chieftains spotted the right flank platoon of T72s and opened fire on them:

In a very short time three T72s were burning and the fourth had lost a track and was permanently immobilised. It would spend the rest of the game trading shots with one of the Chieftains, neither managing to get a penetrating hiton the other!

The Soviet right flank seen from a Chieftain's point of view:

The Soviet left flank is shown in the picture below. Just visible in the wood ahead and behind the McDonalds are the two British Milan teams, who have just fired at the T72s and missed.

The Russians were assisted by their Armoured Bonus Move card which came up every turn and is responsible for the BMPs, which have raced up to the Lidl store and dropped off their troops for a bit of retail therapy.

The burning T72 in the right corner is from the second T72 platoon’s brief fight with the Chieftains. The Russian FOO managed to put an aiming point on the section in the orchard, which was the highpoint of his action as his card never came up again.

The Russians were so worried by the Milans that they pulled the tanks into the town.

The succession of Armoured Bonus Move cards also meant that the second BMP platoon now overtook their colleagues and charged up the main road, leaping out of their BMPs and trying to occupy the orchard behind the supermarket and the large building next to it, only to find both already occupied by British infantry who were not impressed at the rude interruption of their cuppa.

Both Russian squads were eventually ejected with heavy casualties (don’t go into close combat without softening up the defence first) and their BMPs rendered hors de combat.

The first platoon occupied the factory by the railway and settled down to exchange shots withthe Brits in the fast food joint. The Russkies in the supermarket also tried assaulting the Brits in the orchard, but were sent packing.

At this point the Russians settled into a bit of a stalemate, trading shots between their T72s and Charlie Wells' Chieftains:  neither getting a decent hit, firing a Sagger from a BMP and missing, and losing another BMP to the third Chieftain which had moved to the corner of the main road.

Their Hind also made an appearance, fired a Sagger and missed:  the Brits fired at it with their blowpipe and also missed.

The British infantry damaged another T72 and a BMP with their Carl Gustavs and LAWs...and we ran out of time .

We decided to call it a victory for the Brits, who had only lost five men and a few Shock points, whereas the Soviets had lostbest part of two platoons of infantry and a platoon of tanks, and clearly weren’t going to be pushing the Brits outof the village without some extra assistance.

So that's how our second game of my cold war version of IABSM ended. I'm using Boris Don't Surf, Mum as  working title in order to differentiate it from Nick Overland's I Ain't Been Nuked, Mum. I need to look at a few things (aerial guns and rockets mainly) but generally it seems to work well. 

Egg