anzio17.png


As we move through this excellent scenario pack we are now actually nearly arriving at the end. We decided to play one big one before we called it a day for now, as I need to get my WW1 skills up for Newbury!

This is a big one with two companies of Germans attacking a strong unit of Americans with plenty of supports. It is even bigger than I thought as the Germans Platoons have four Sections in them, so a sorry goes out to the British troops who had to join the enemy for the day! As always I took the good guys and Steve the Jerries; after all they are my figures so what can one expect.

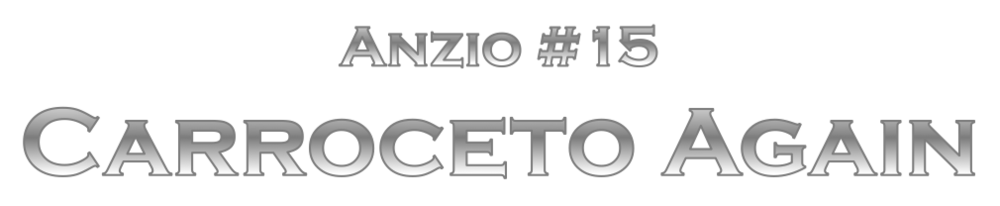
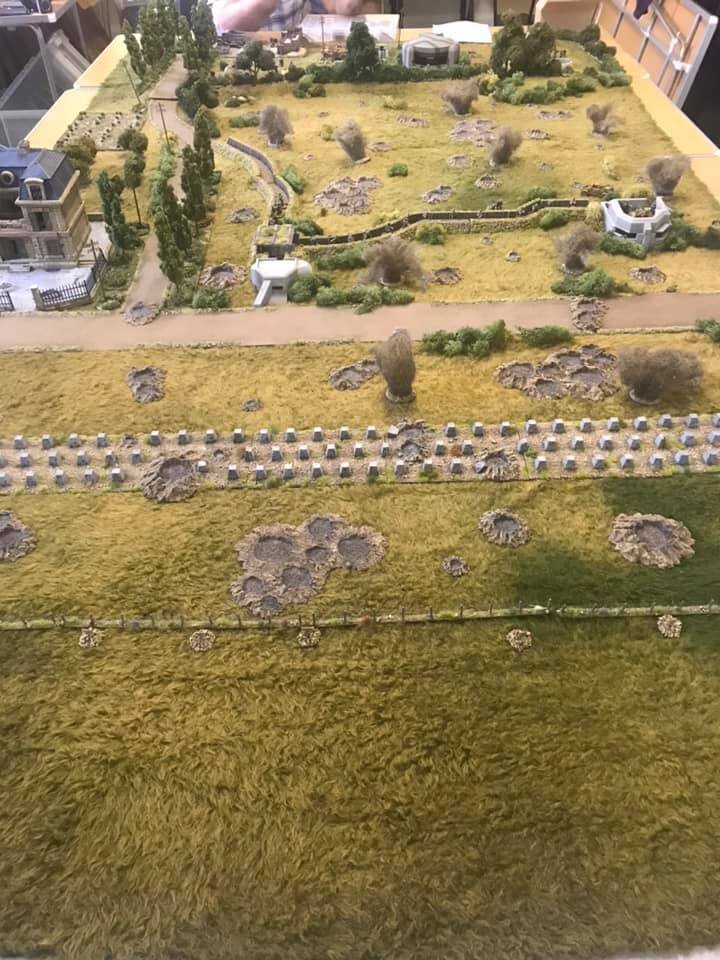
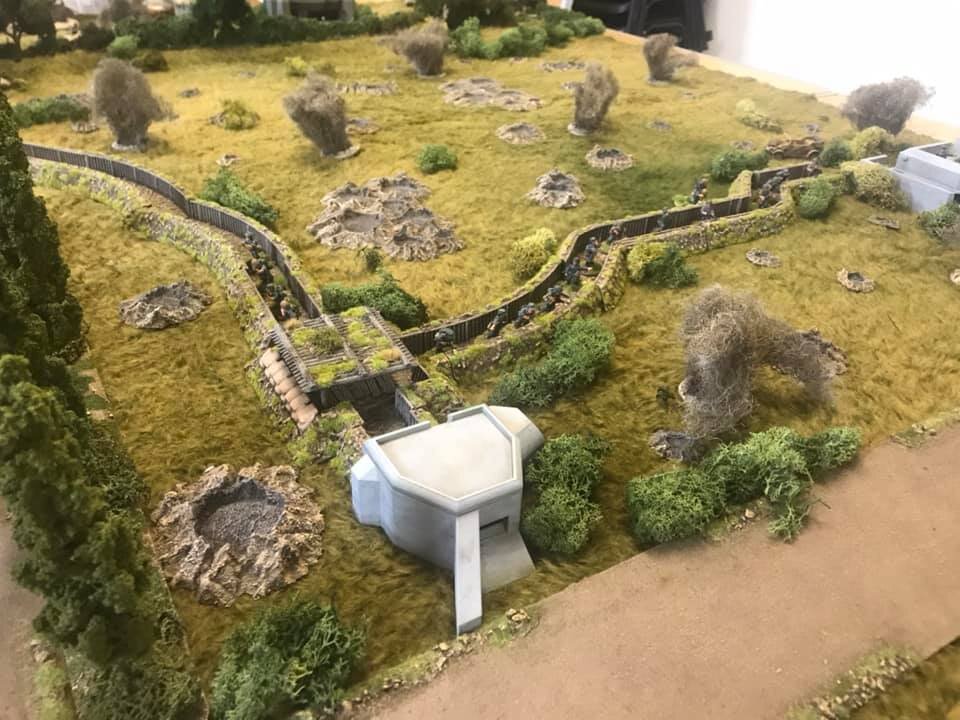
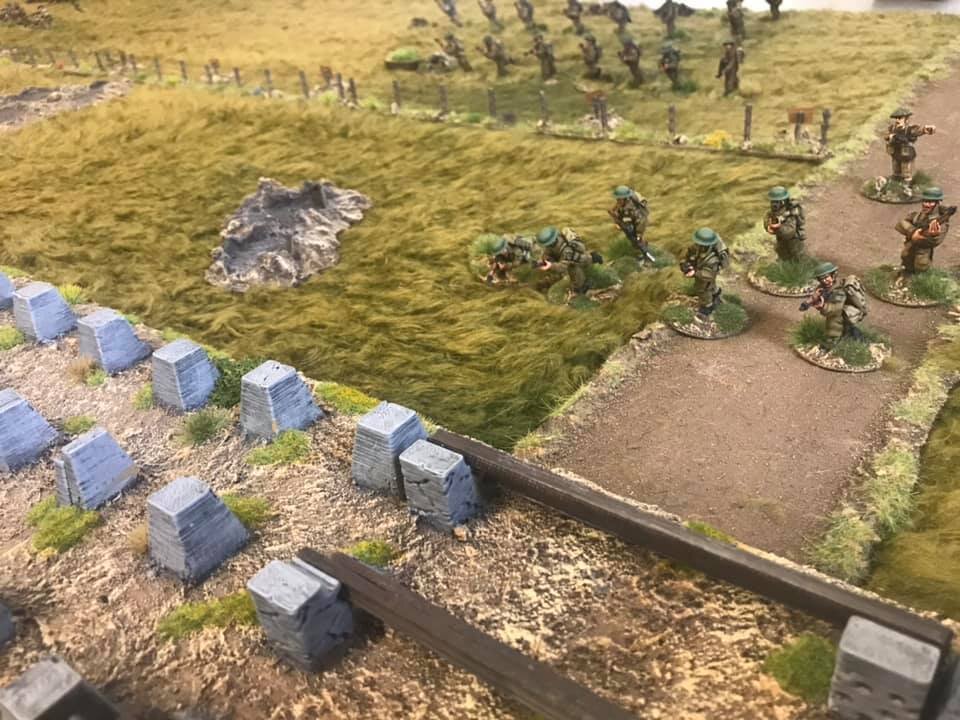
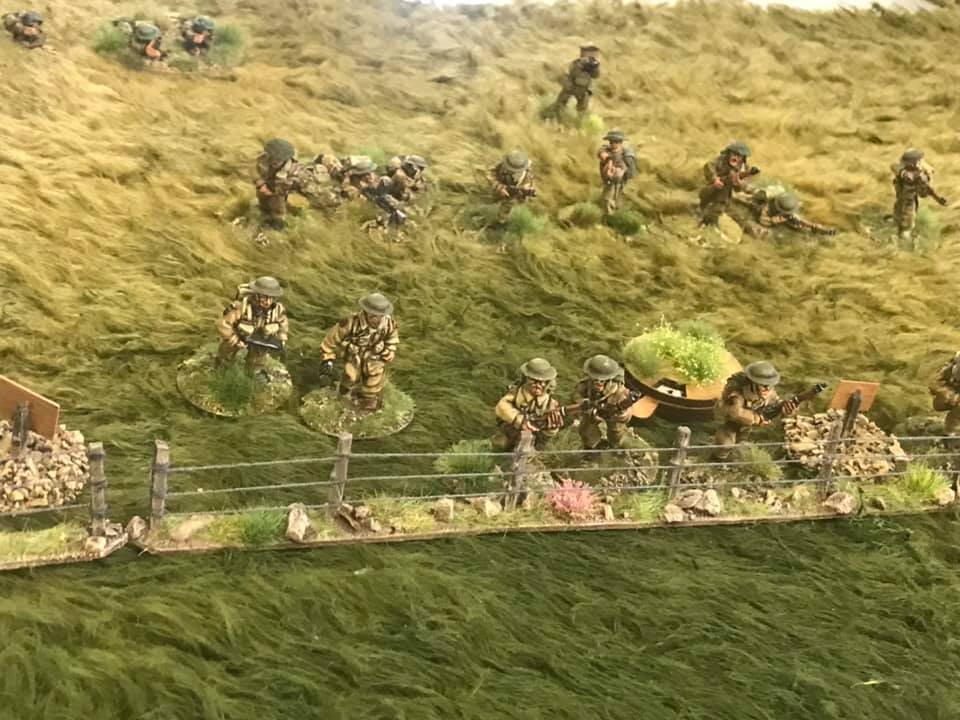
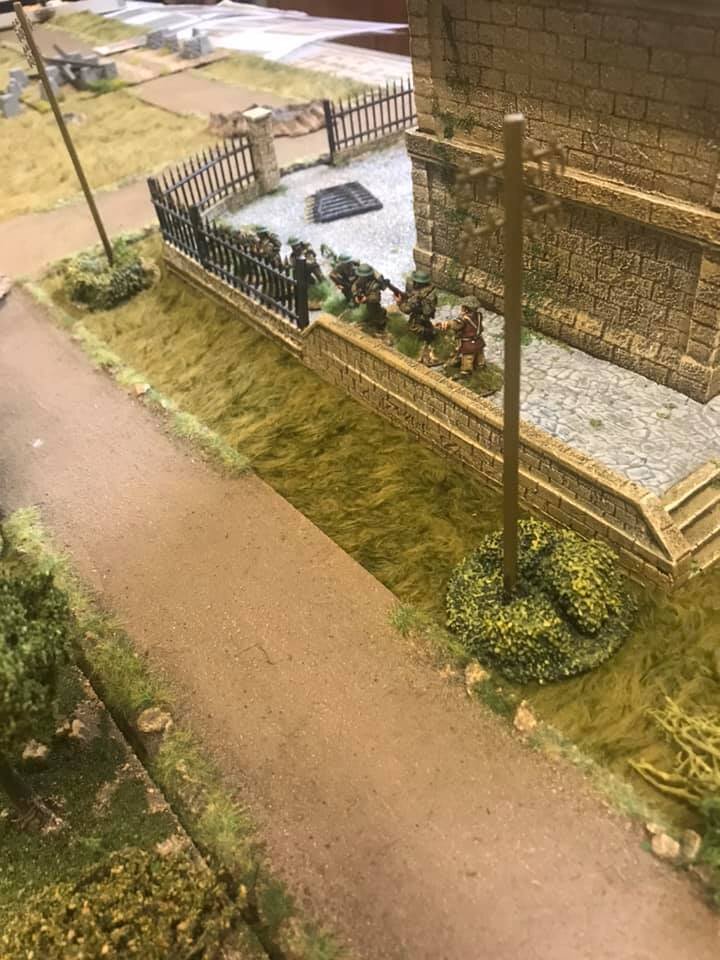
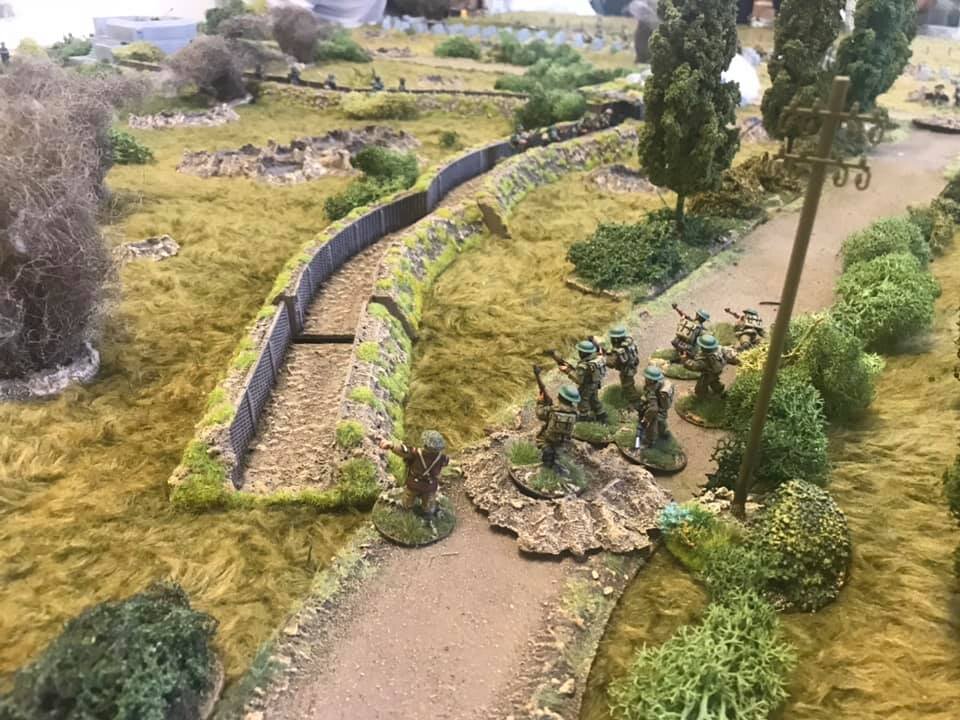
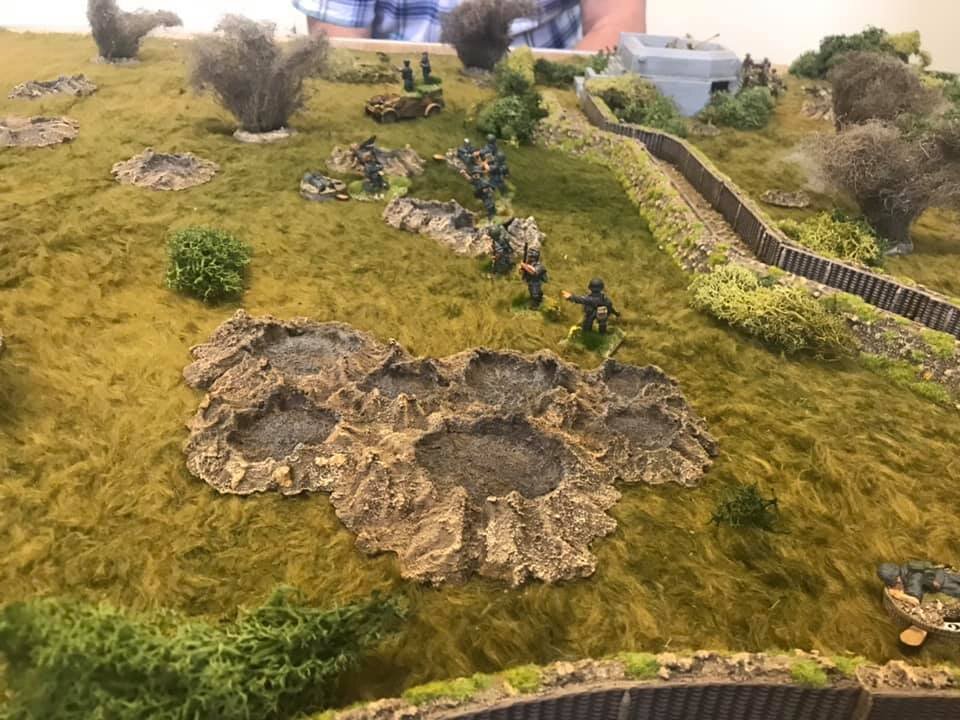
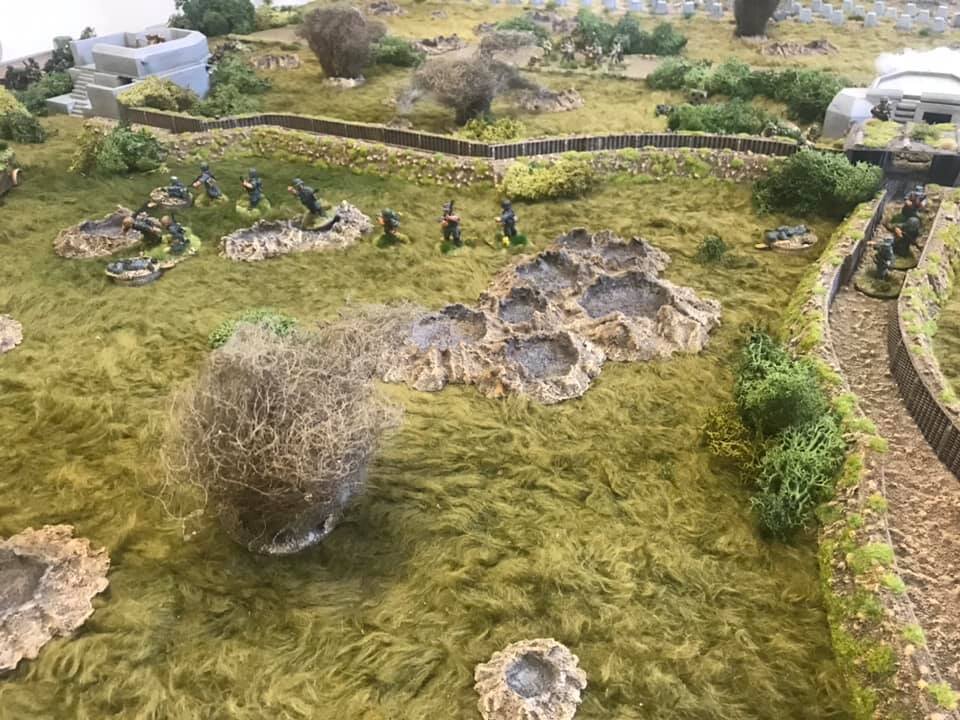
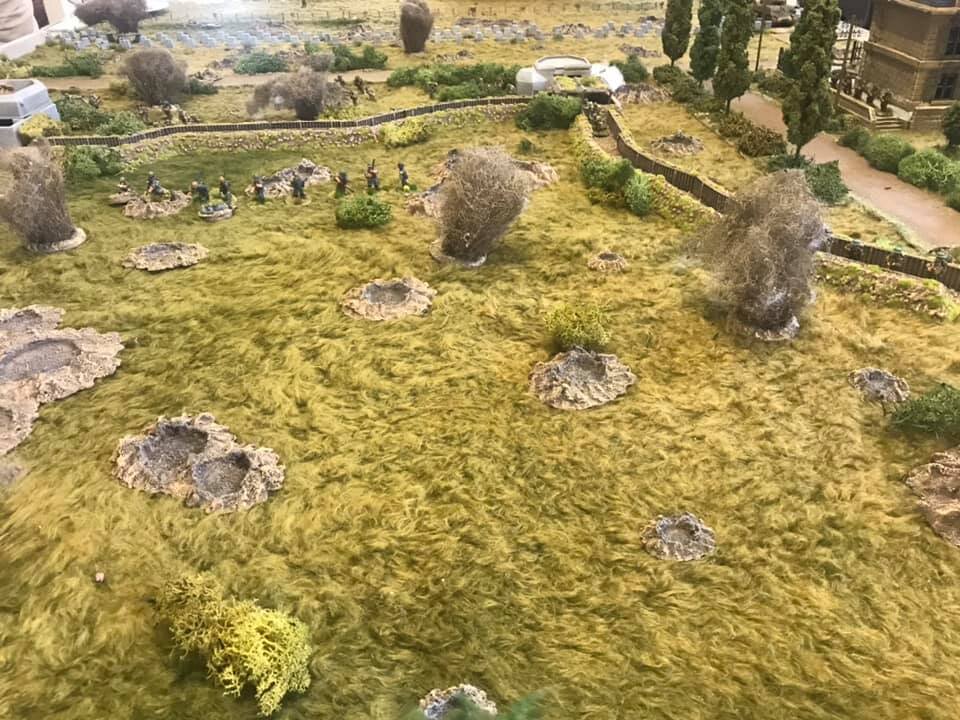
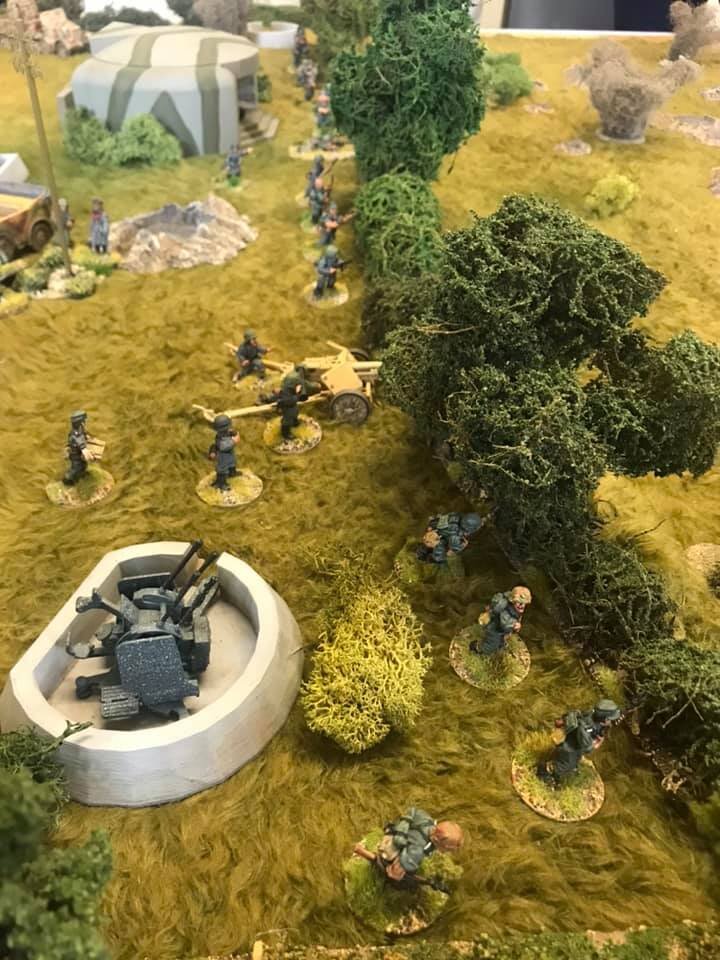
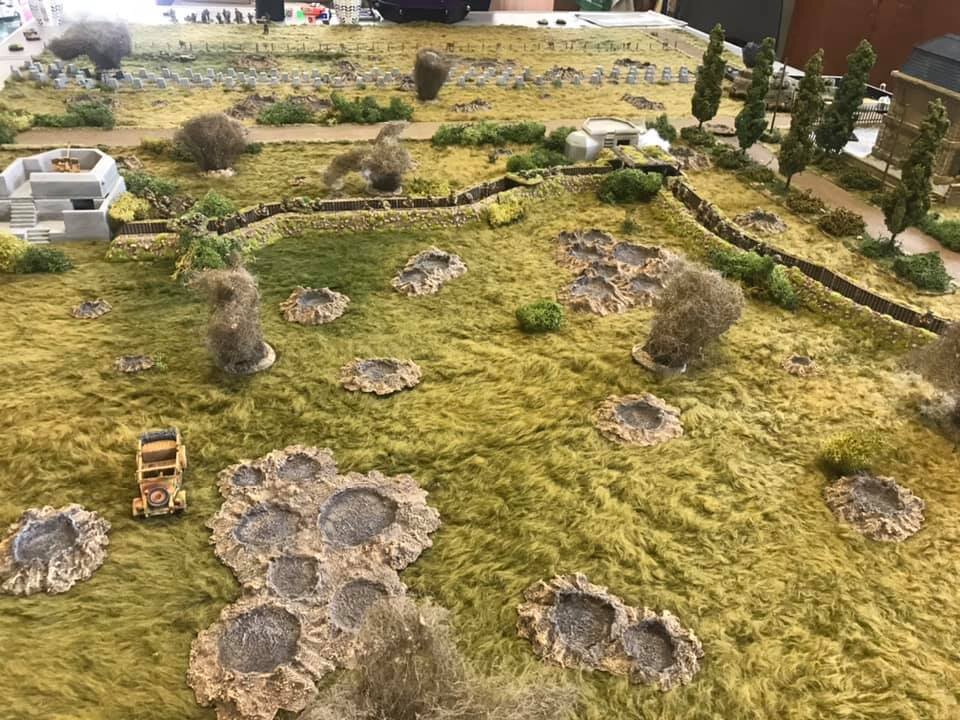
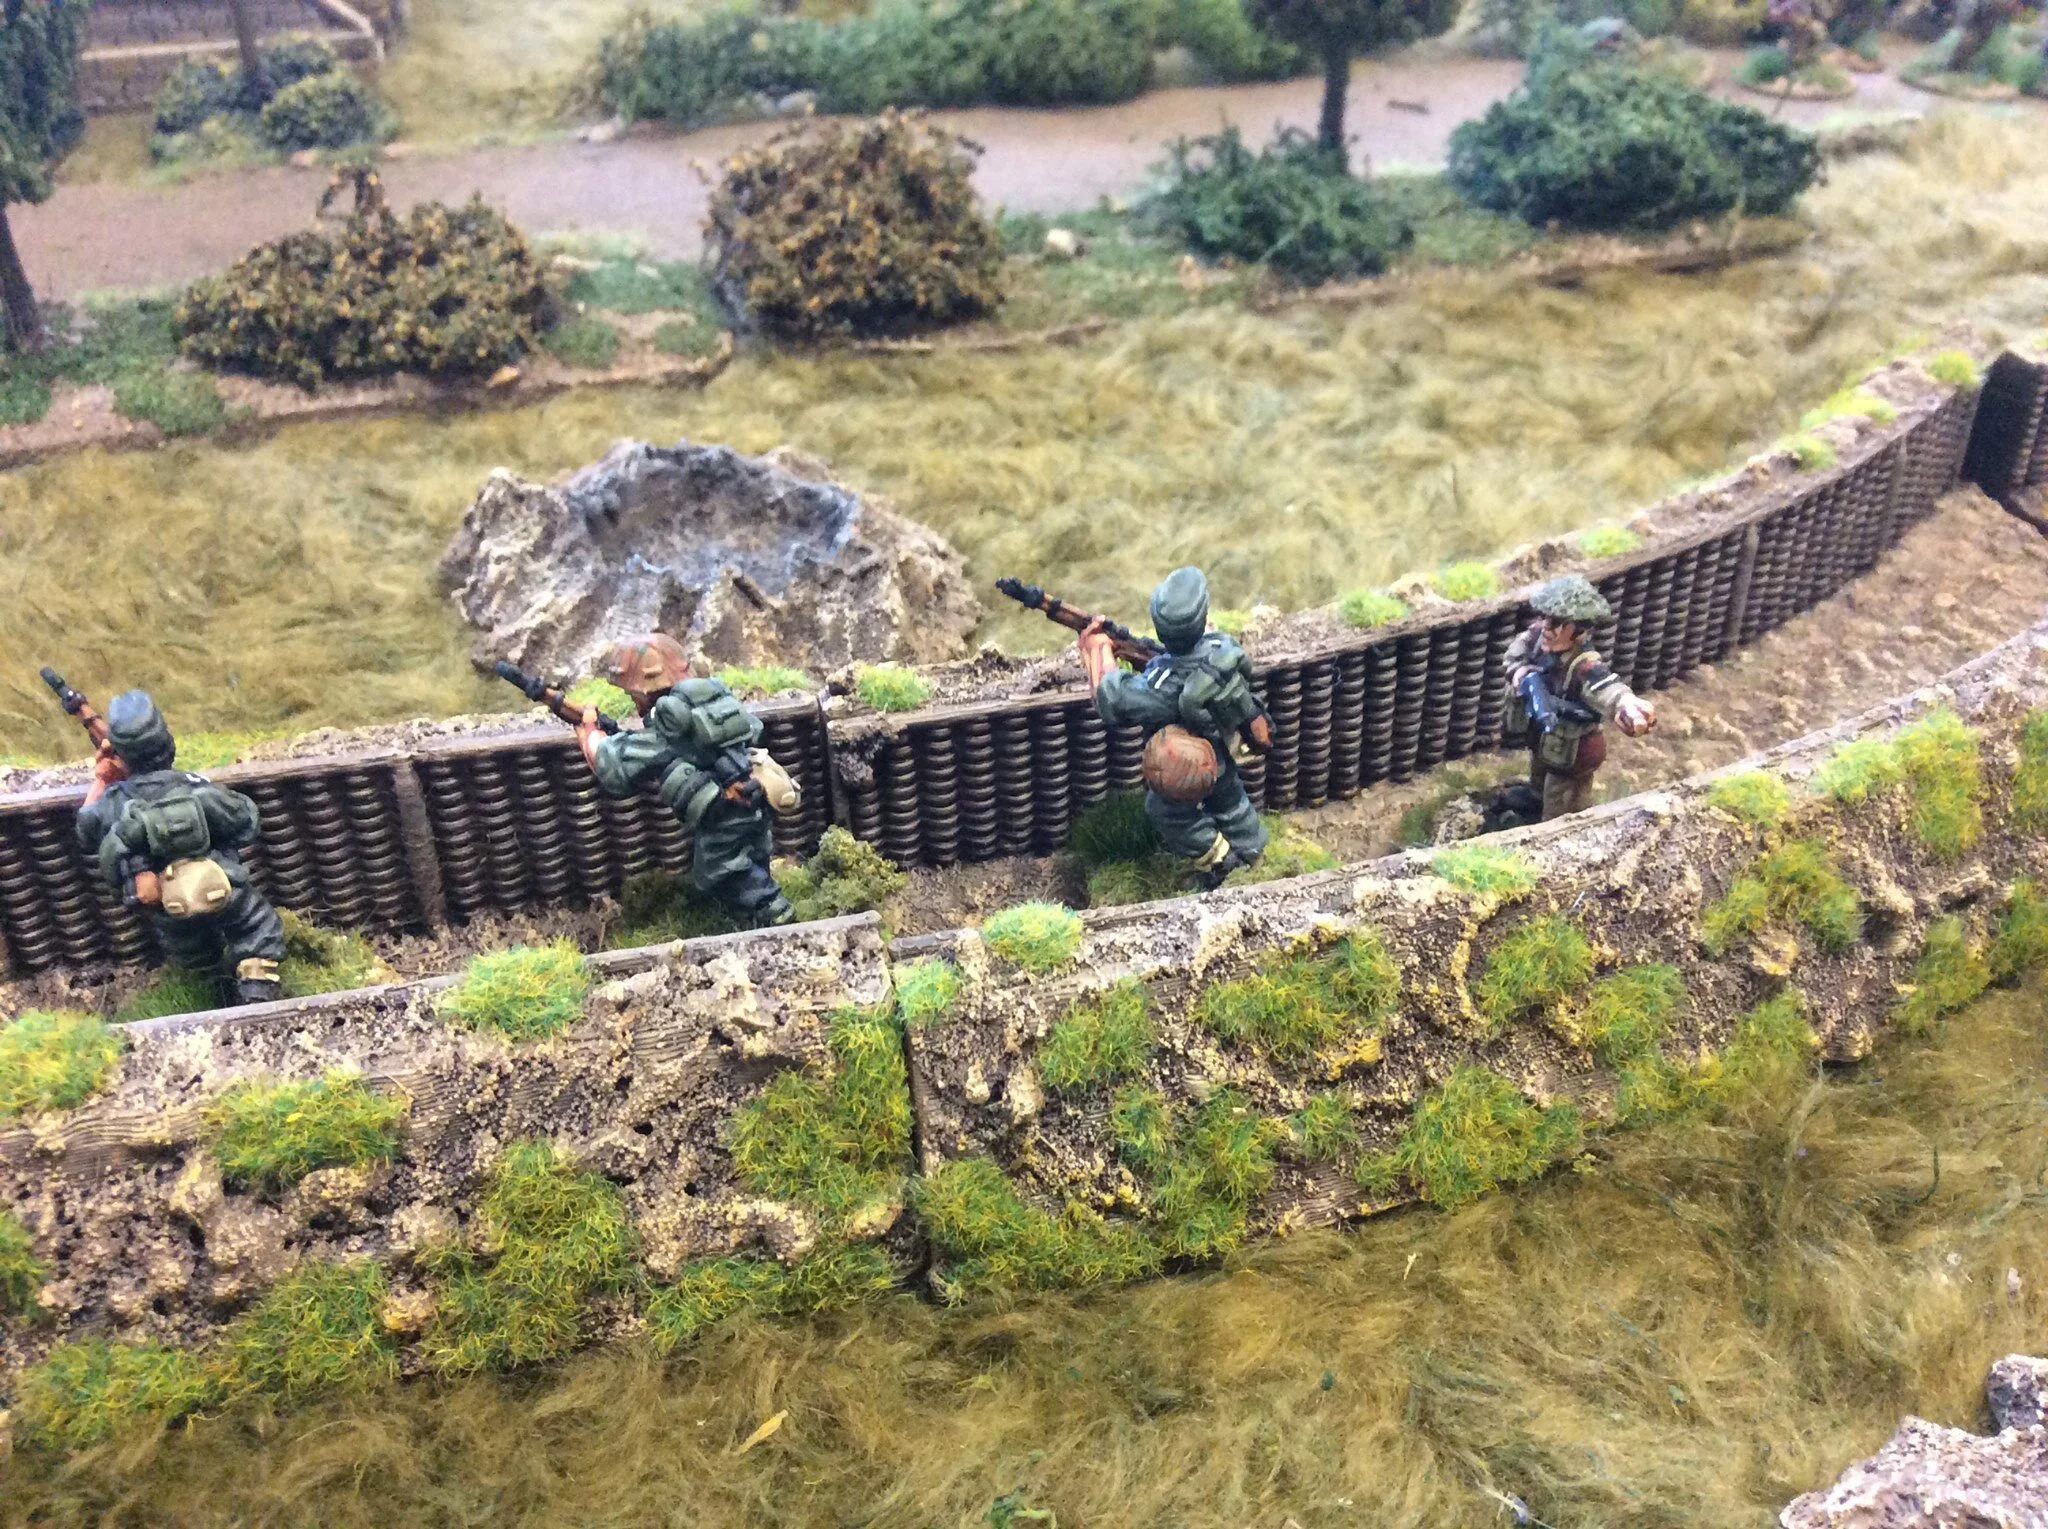
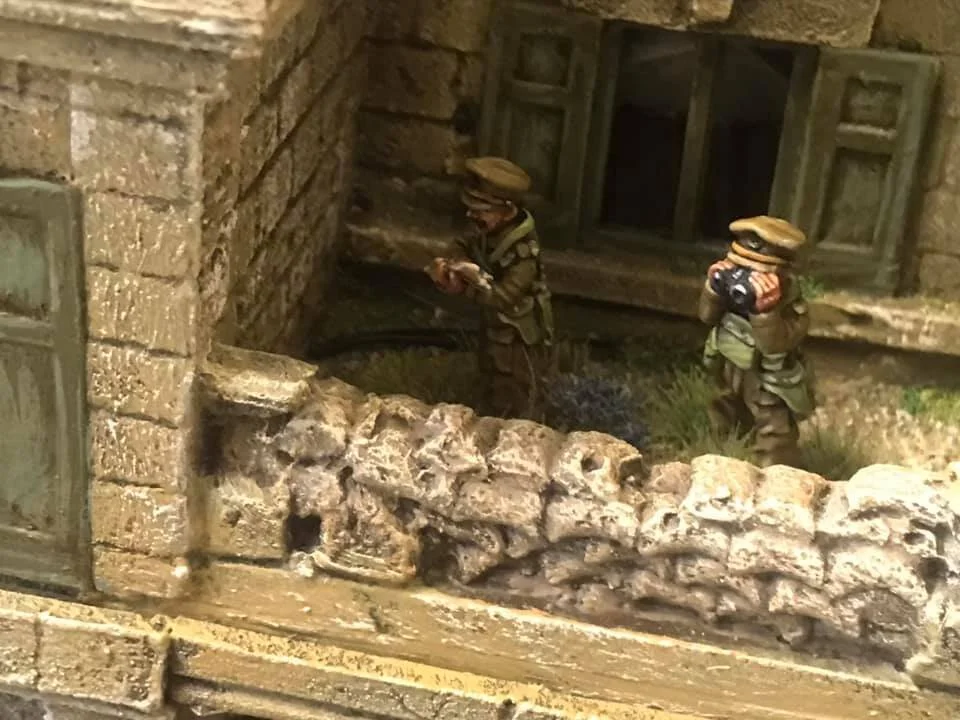
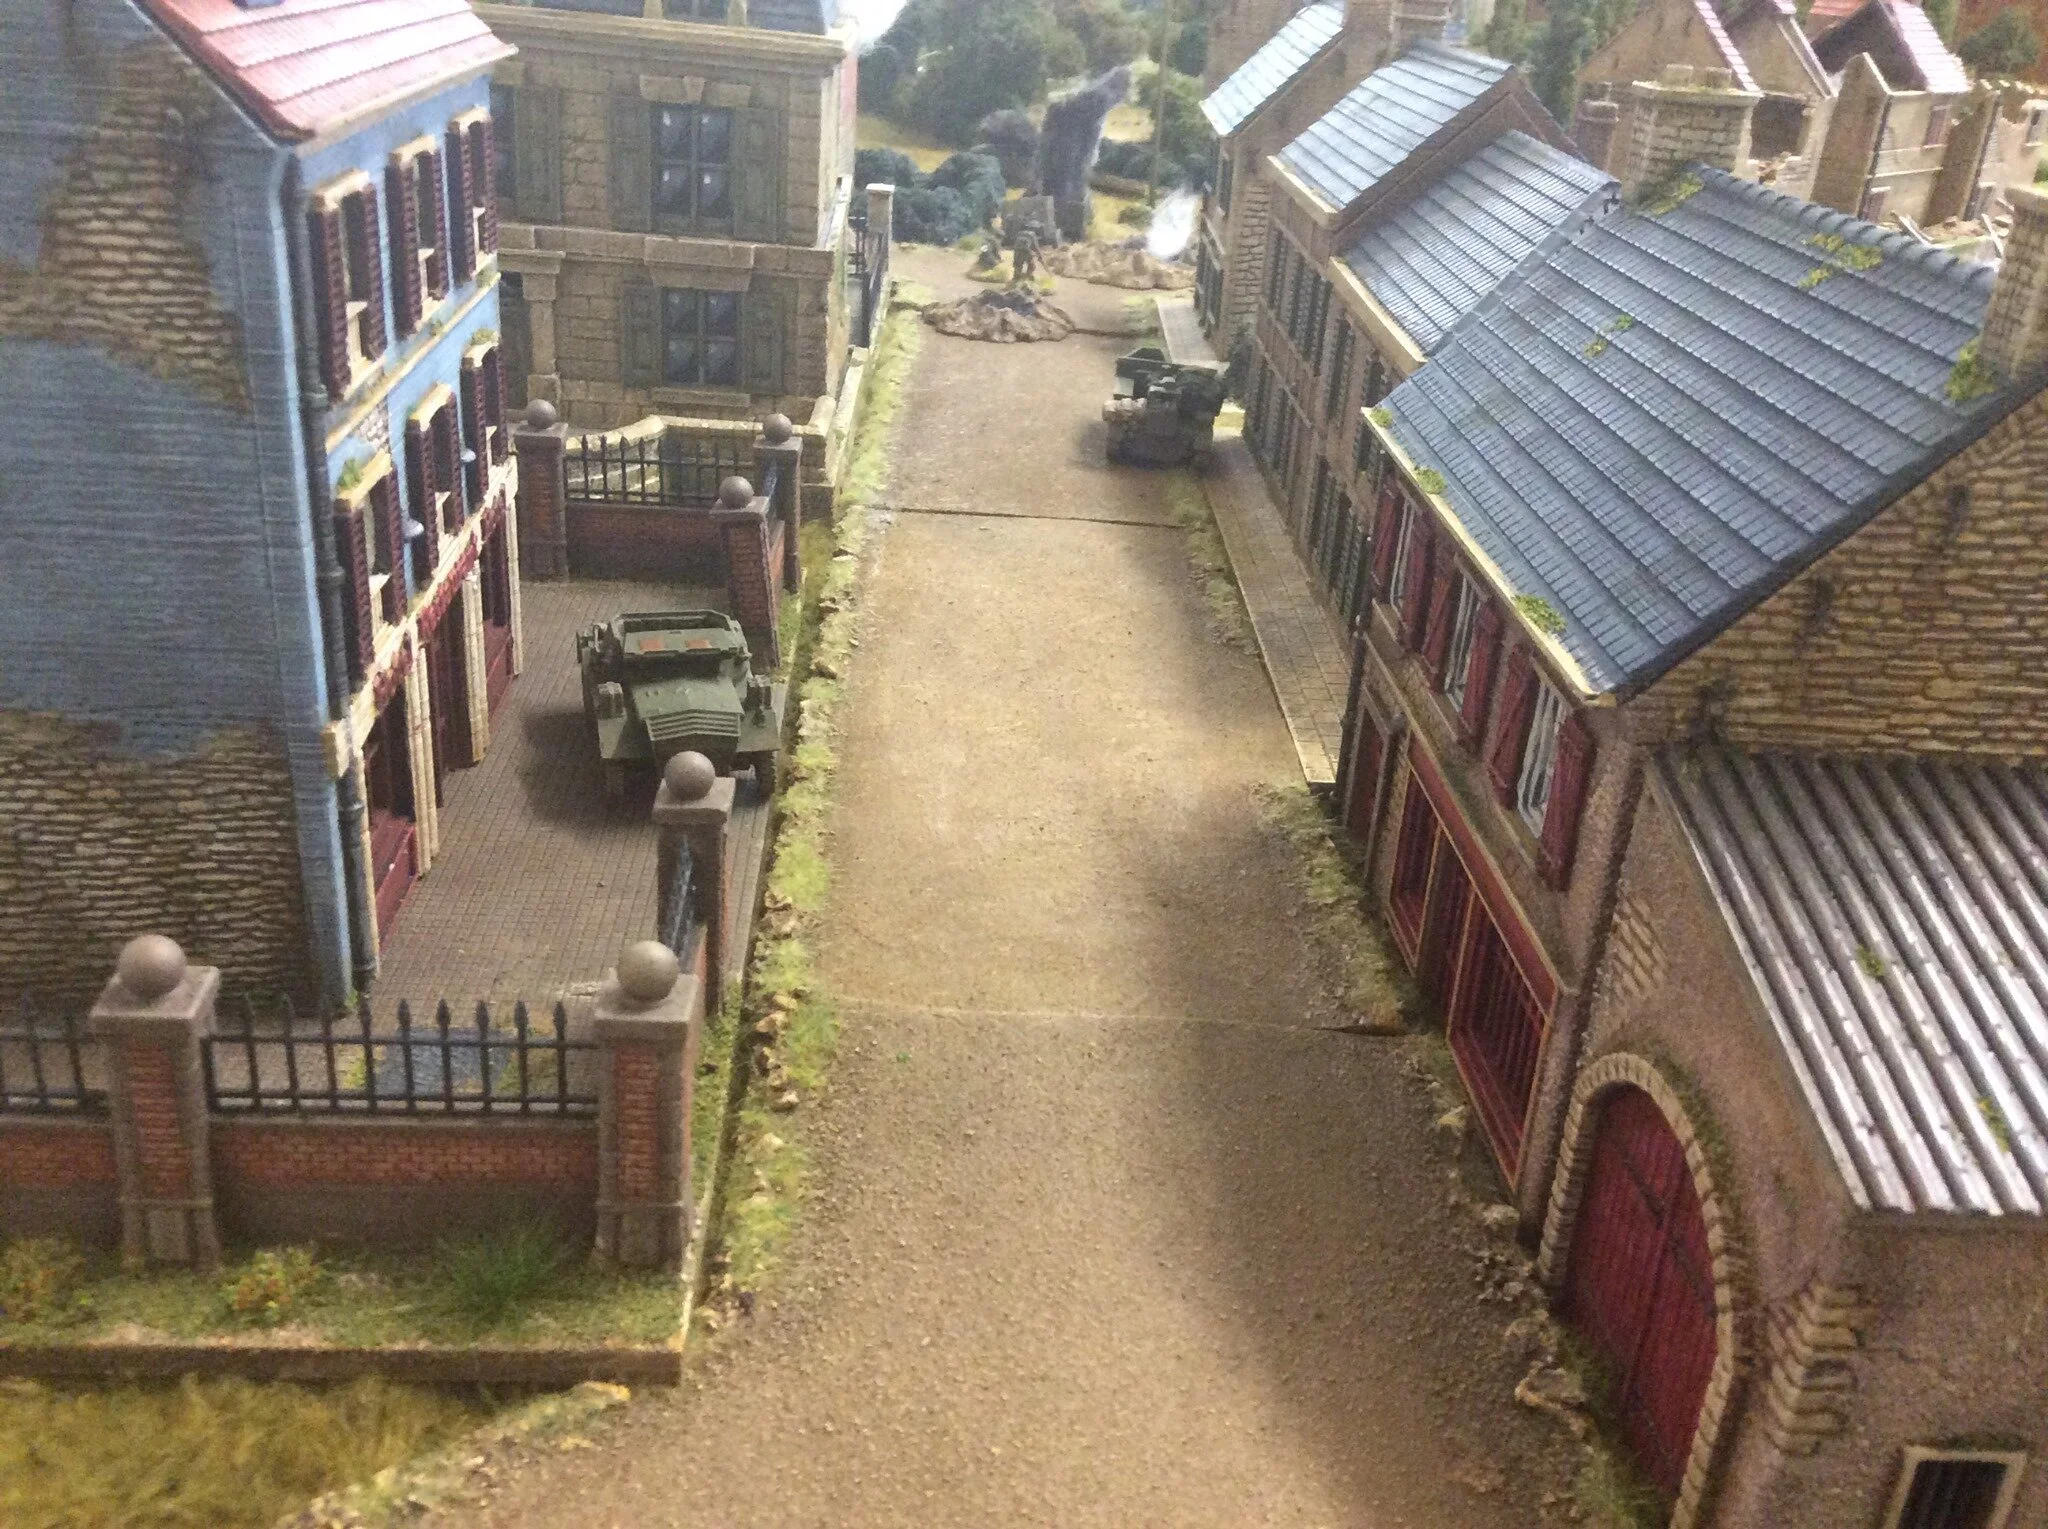
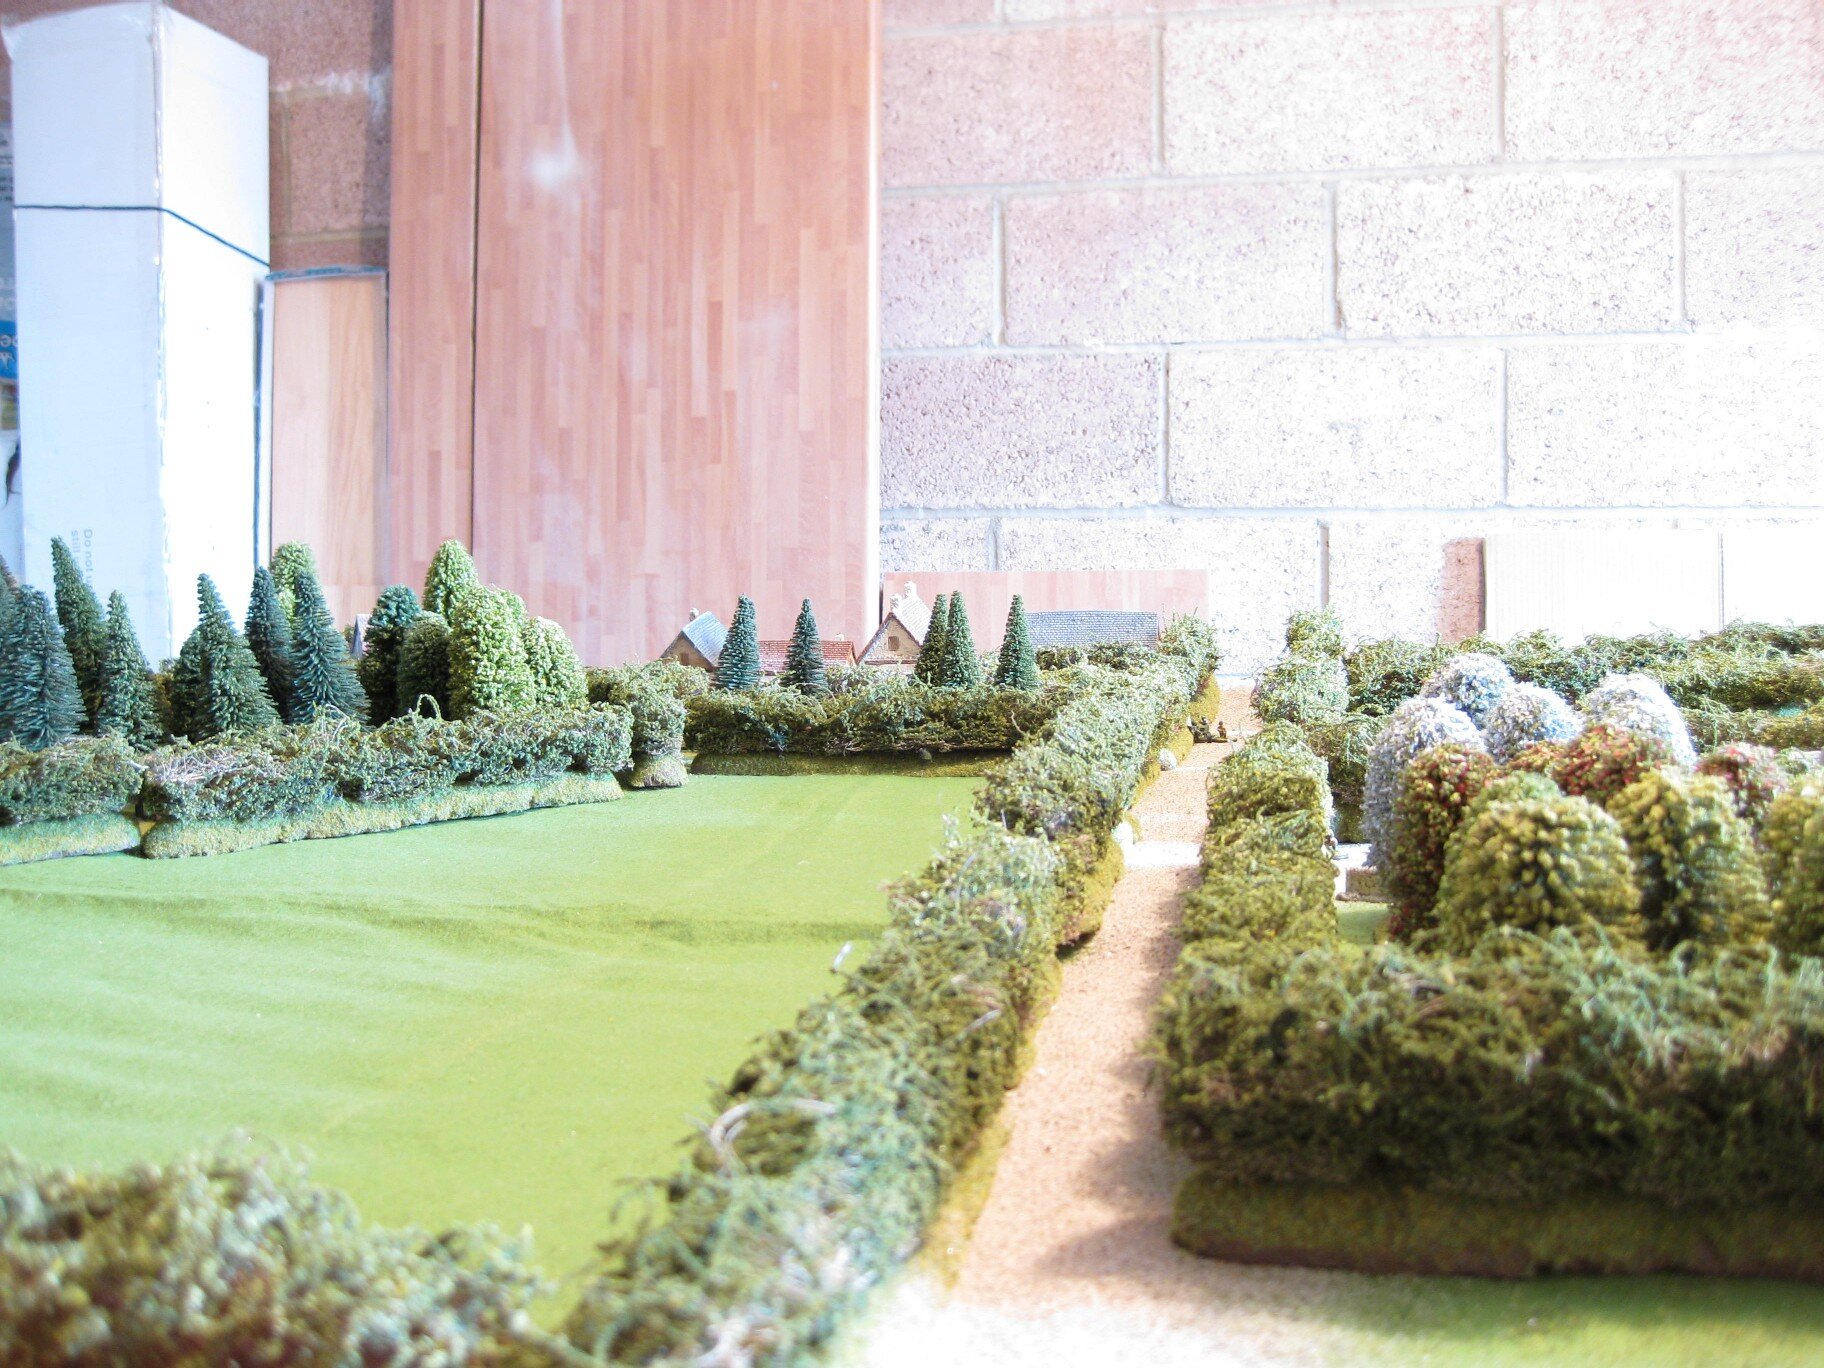
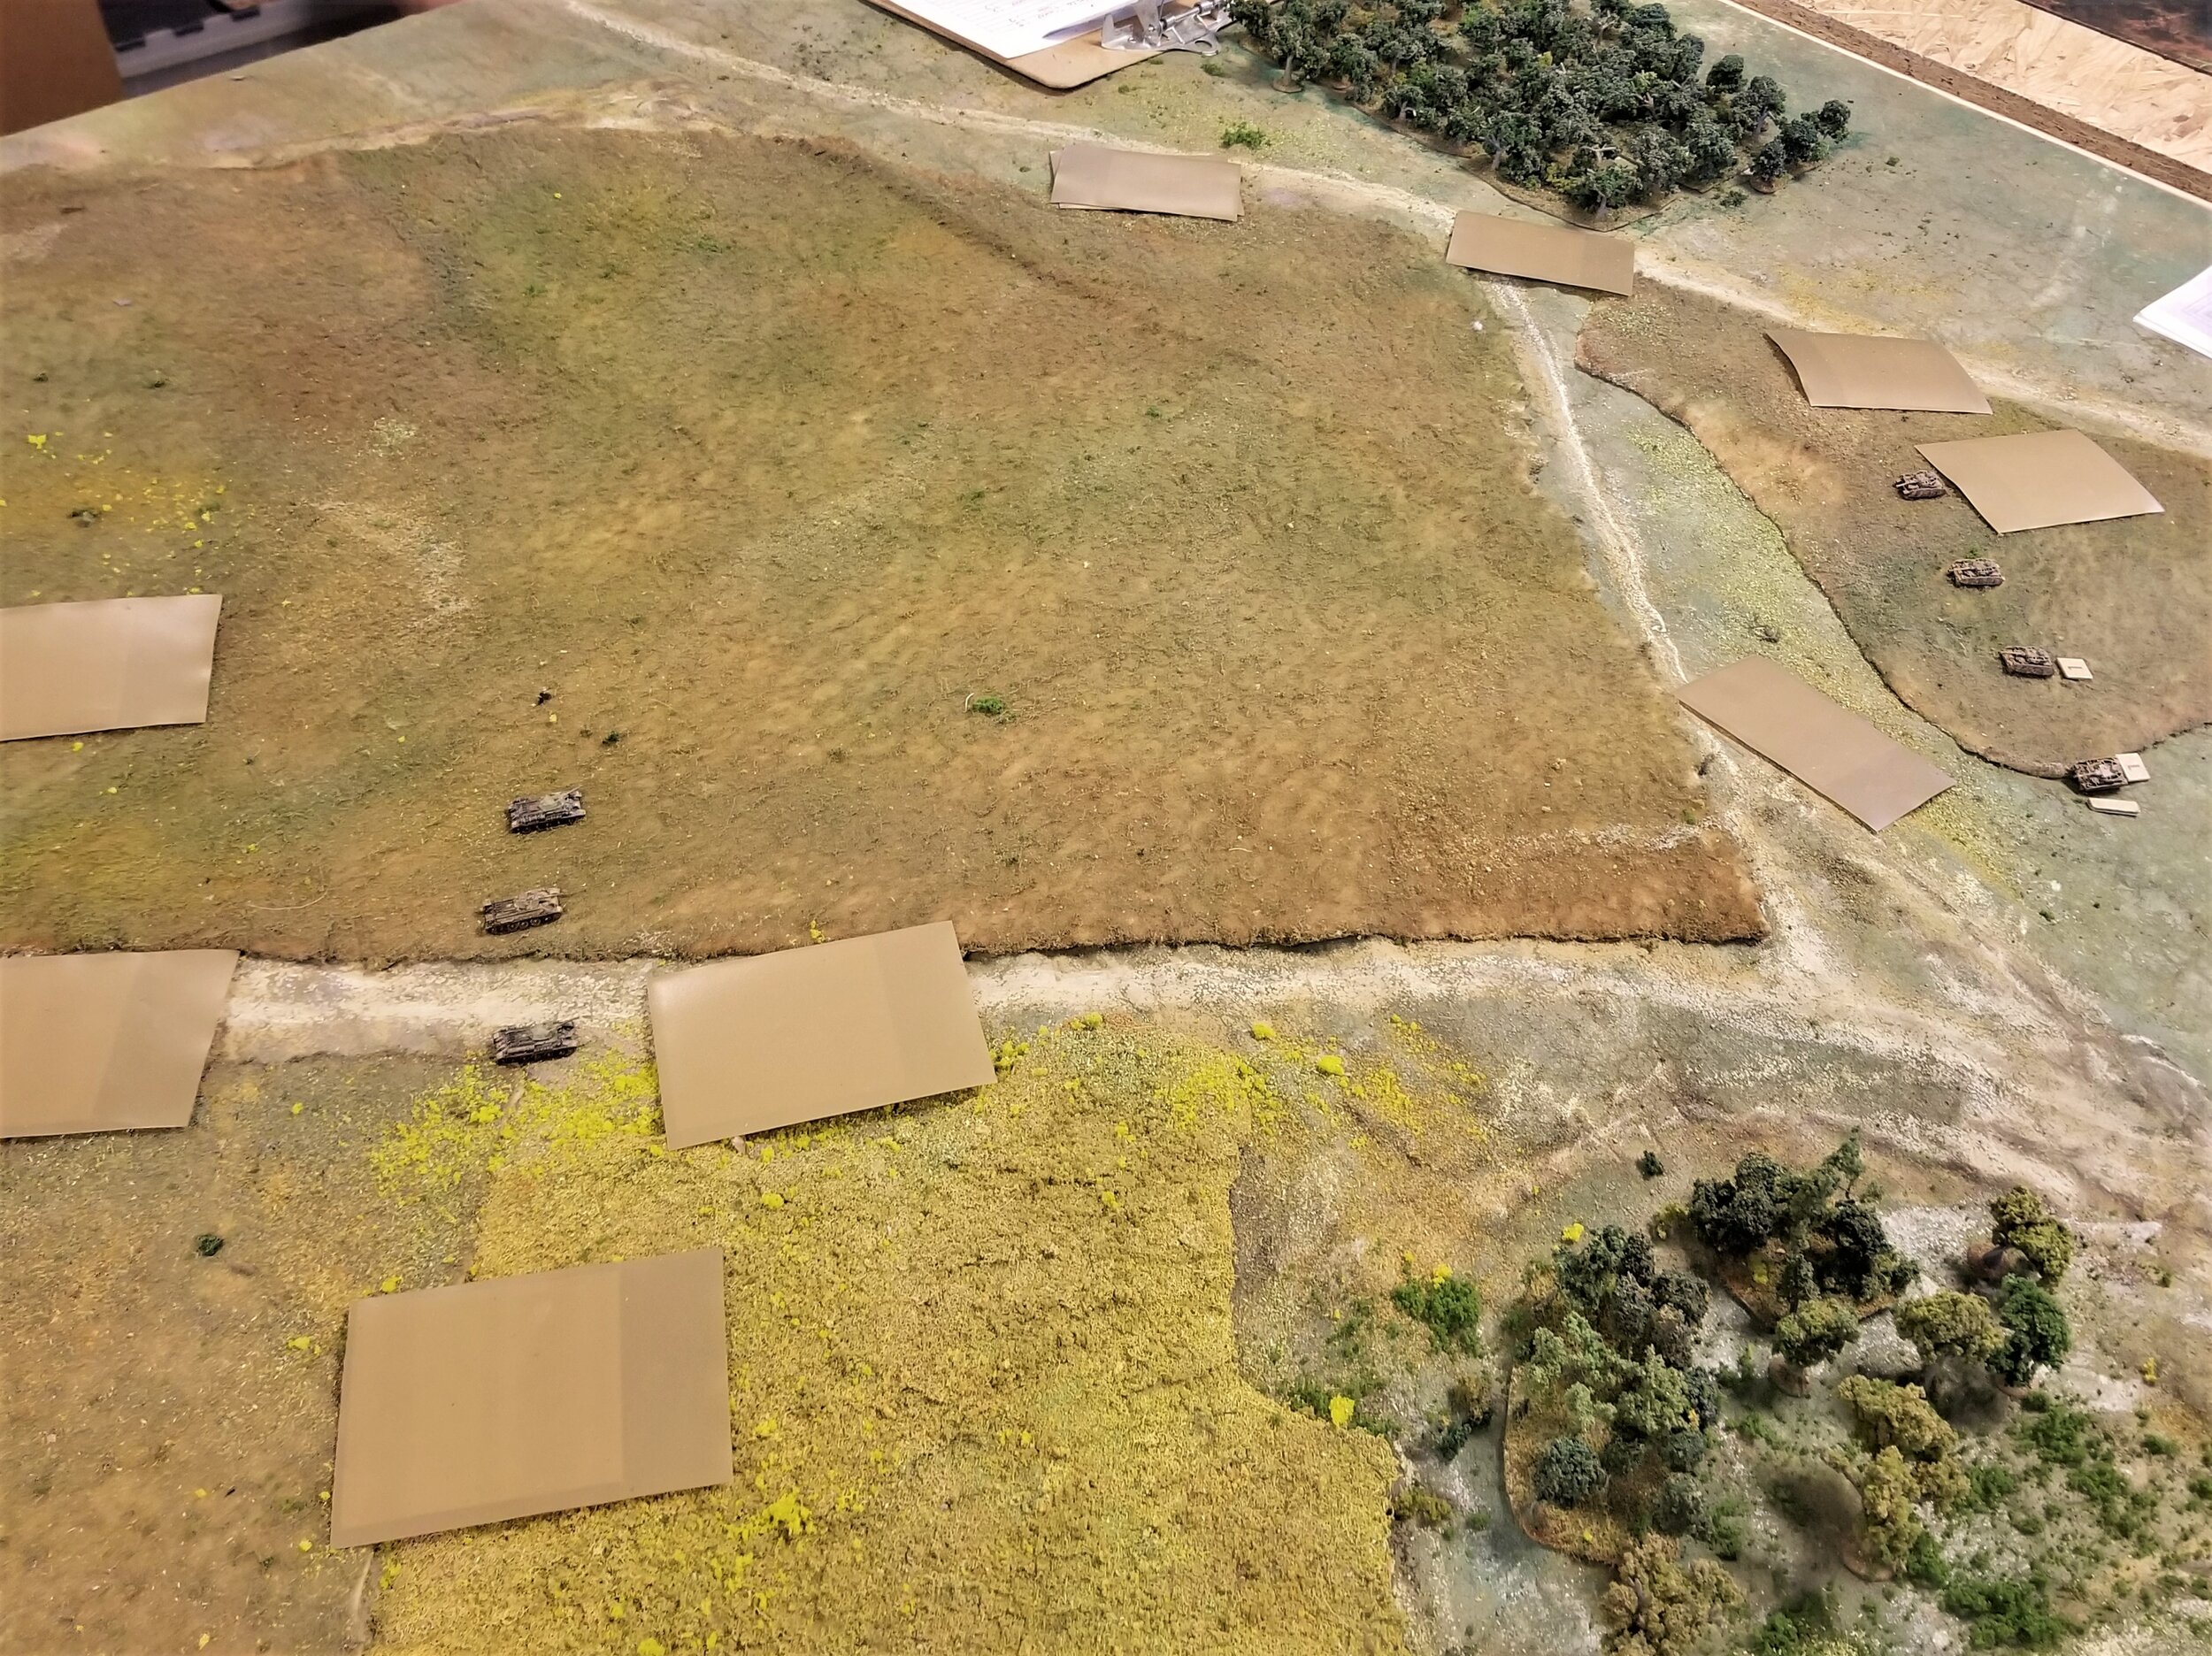
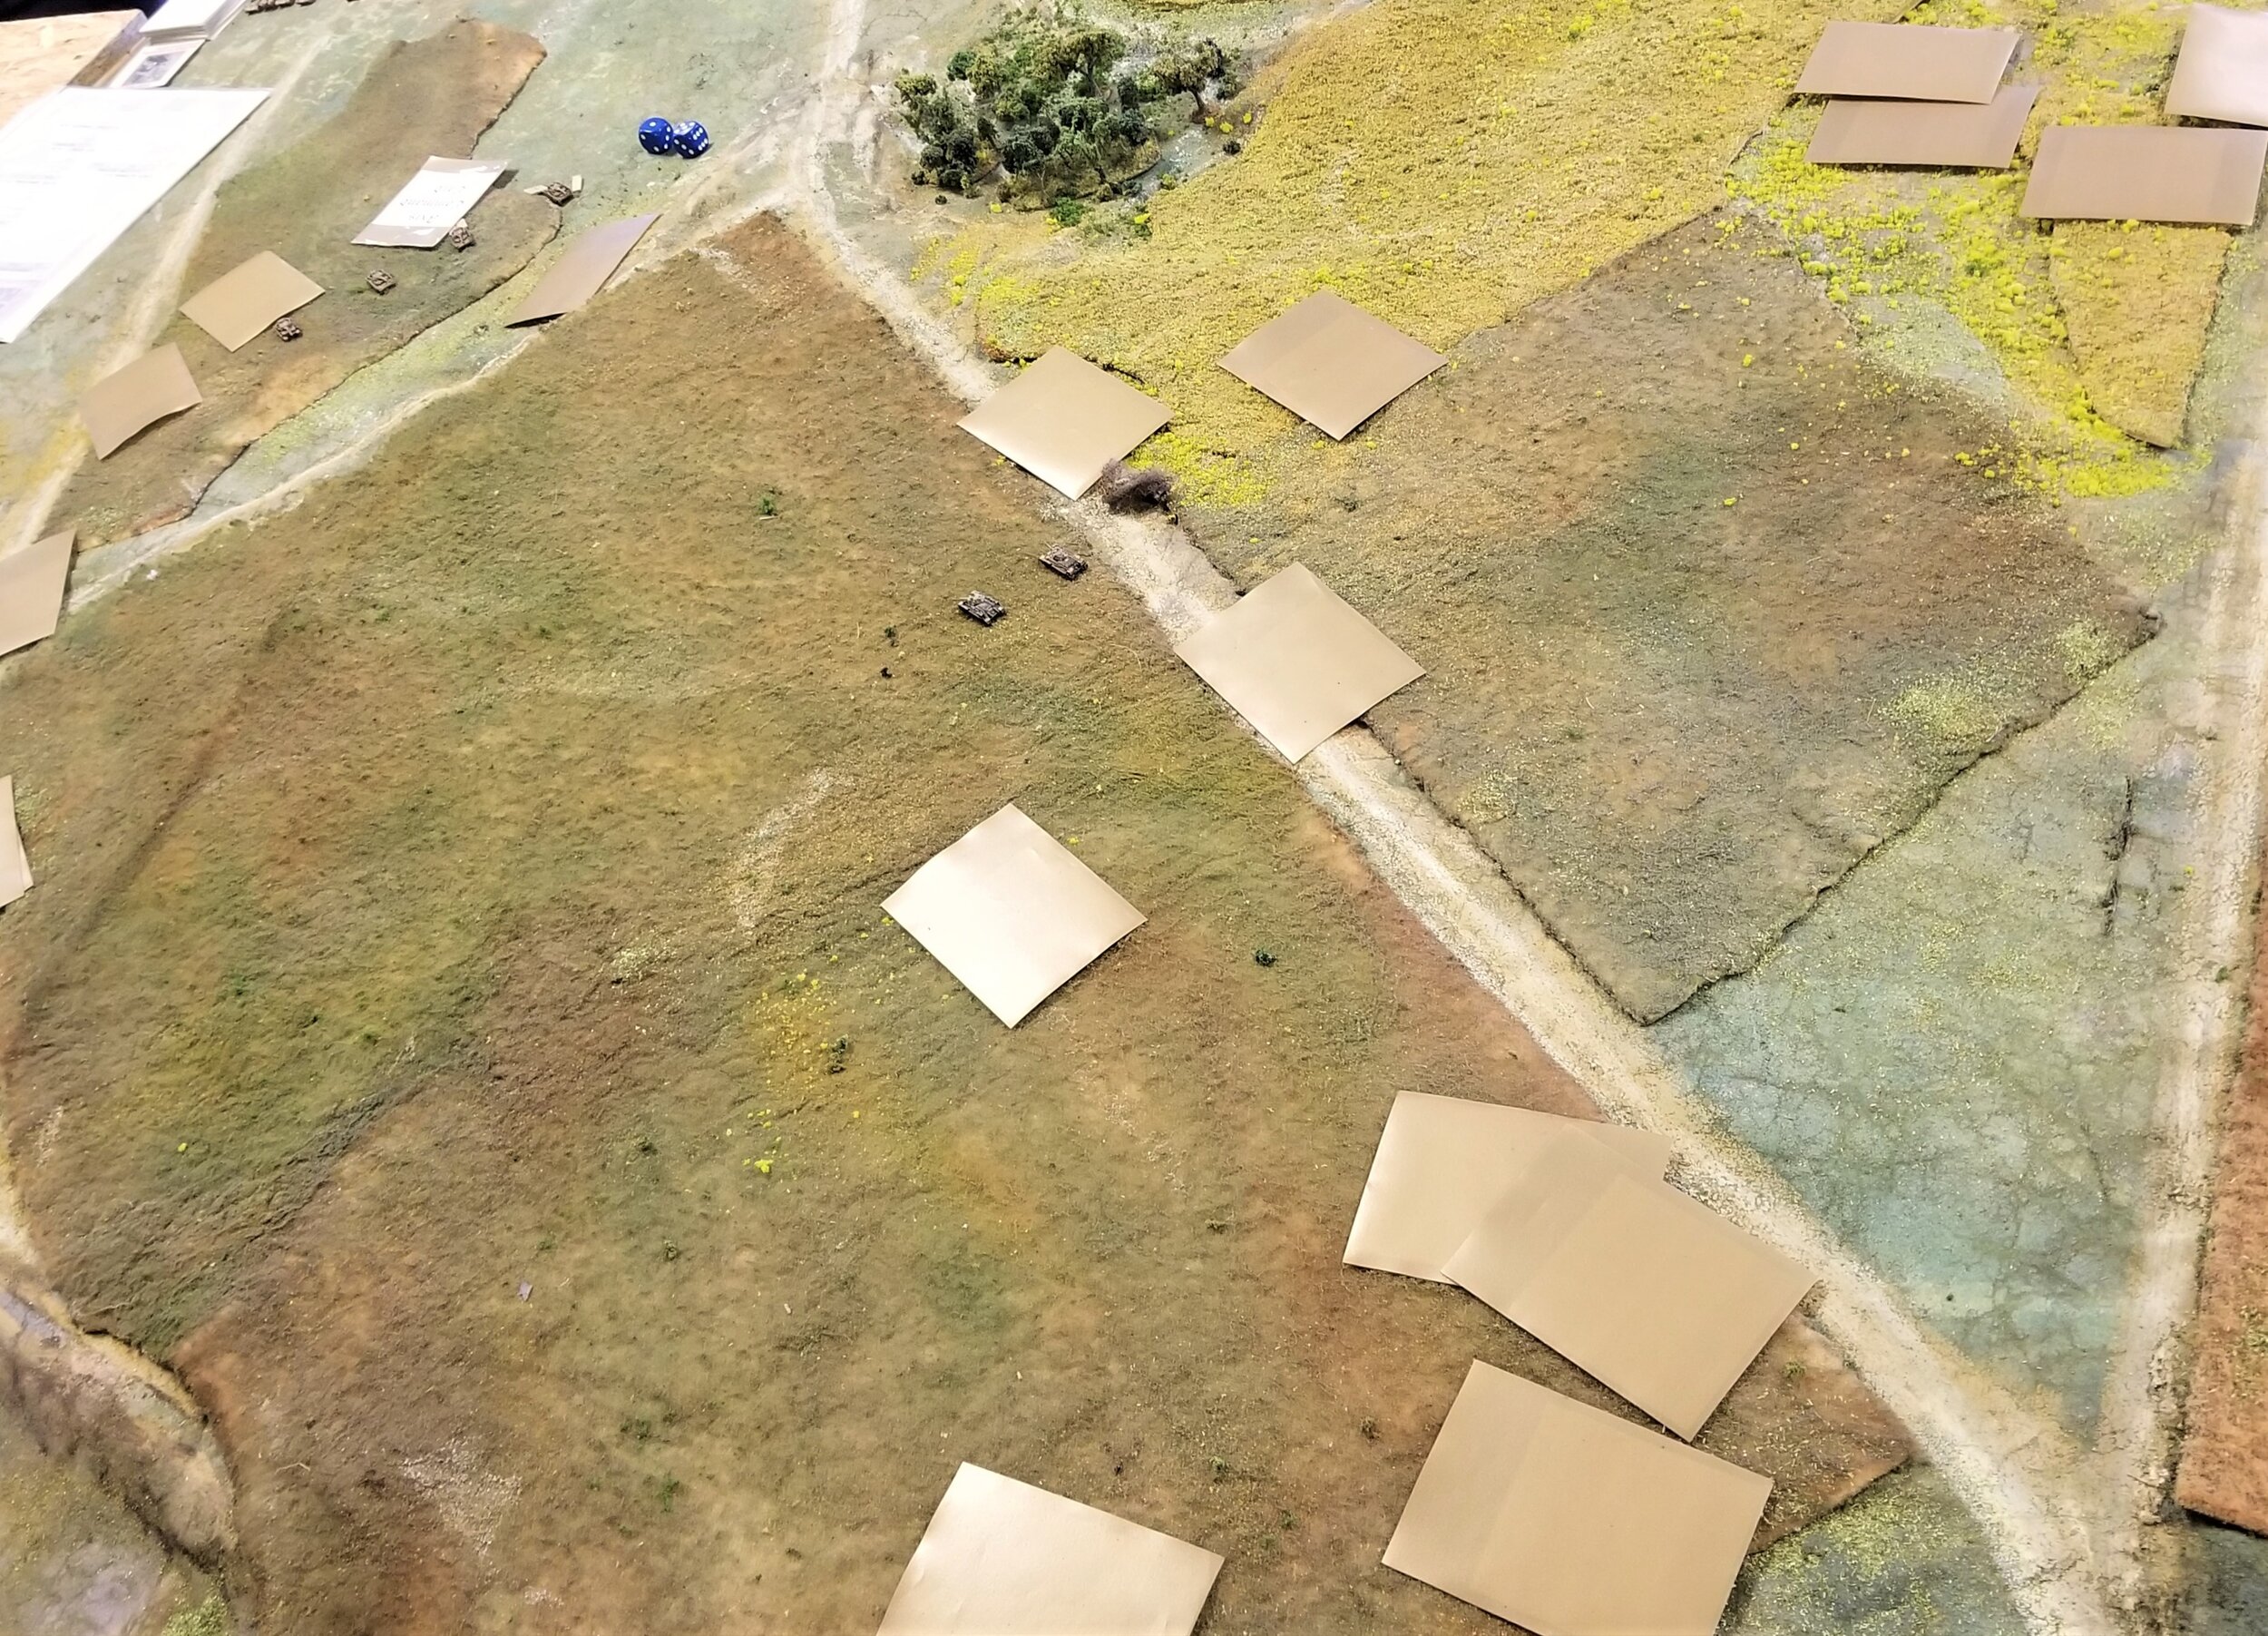
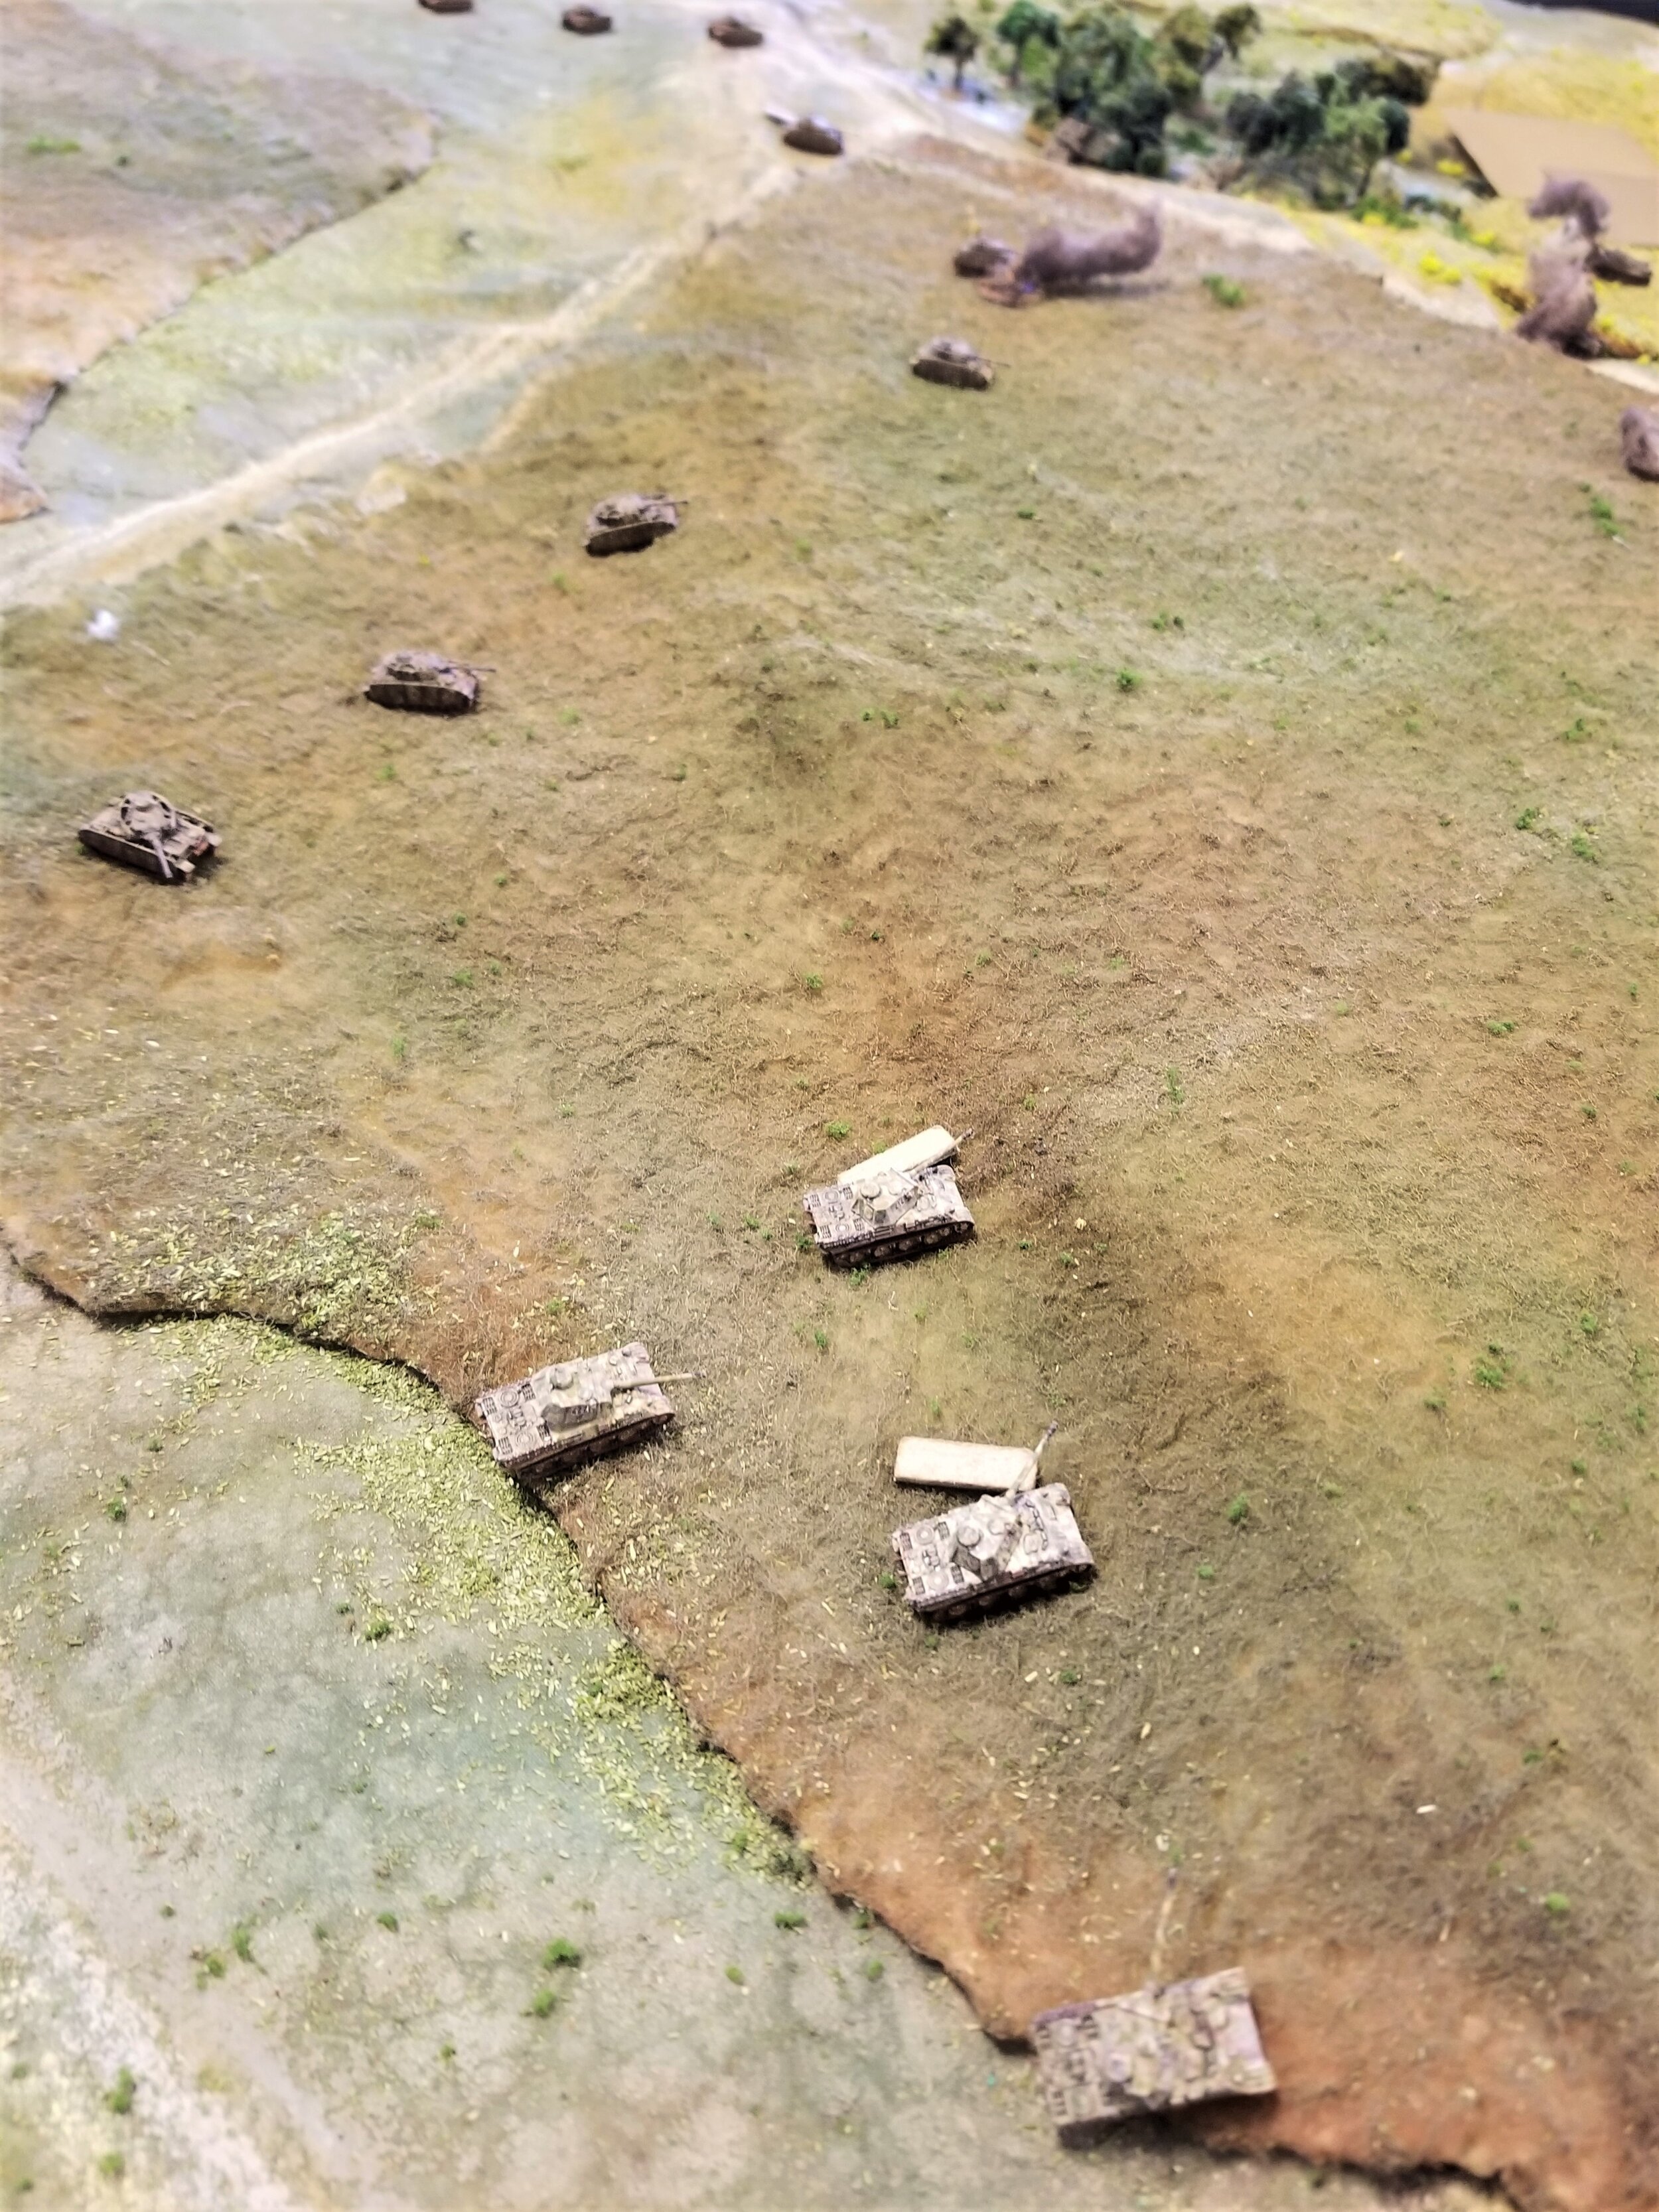
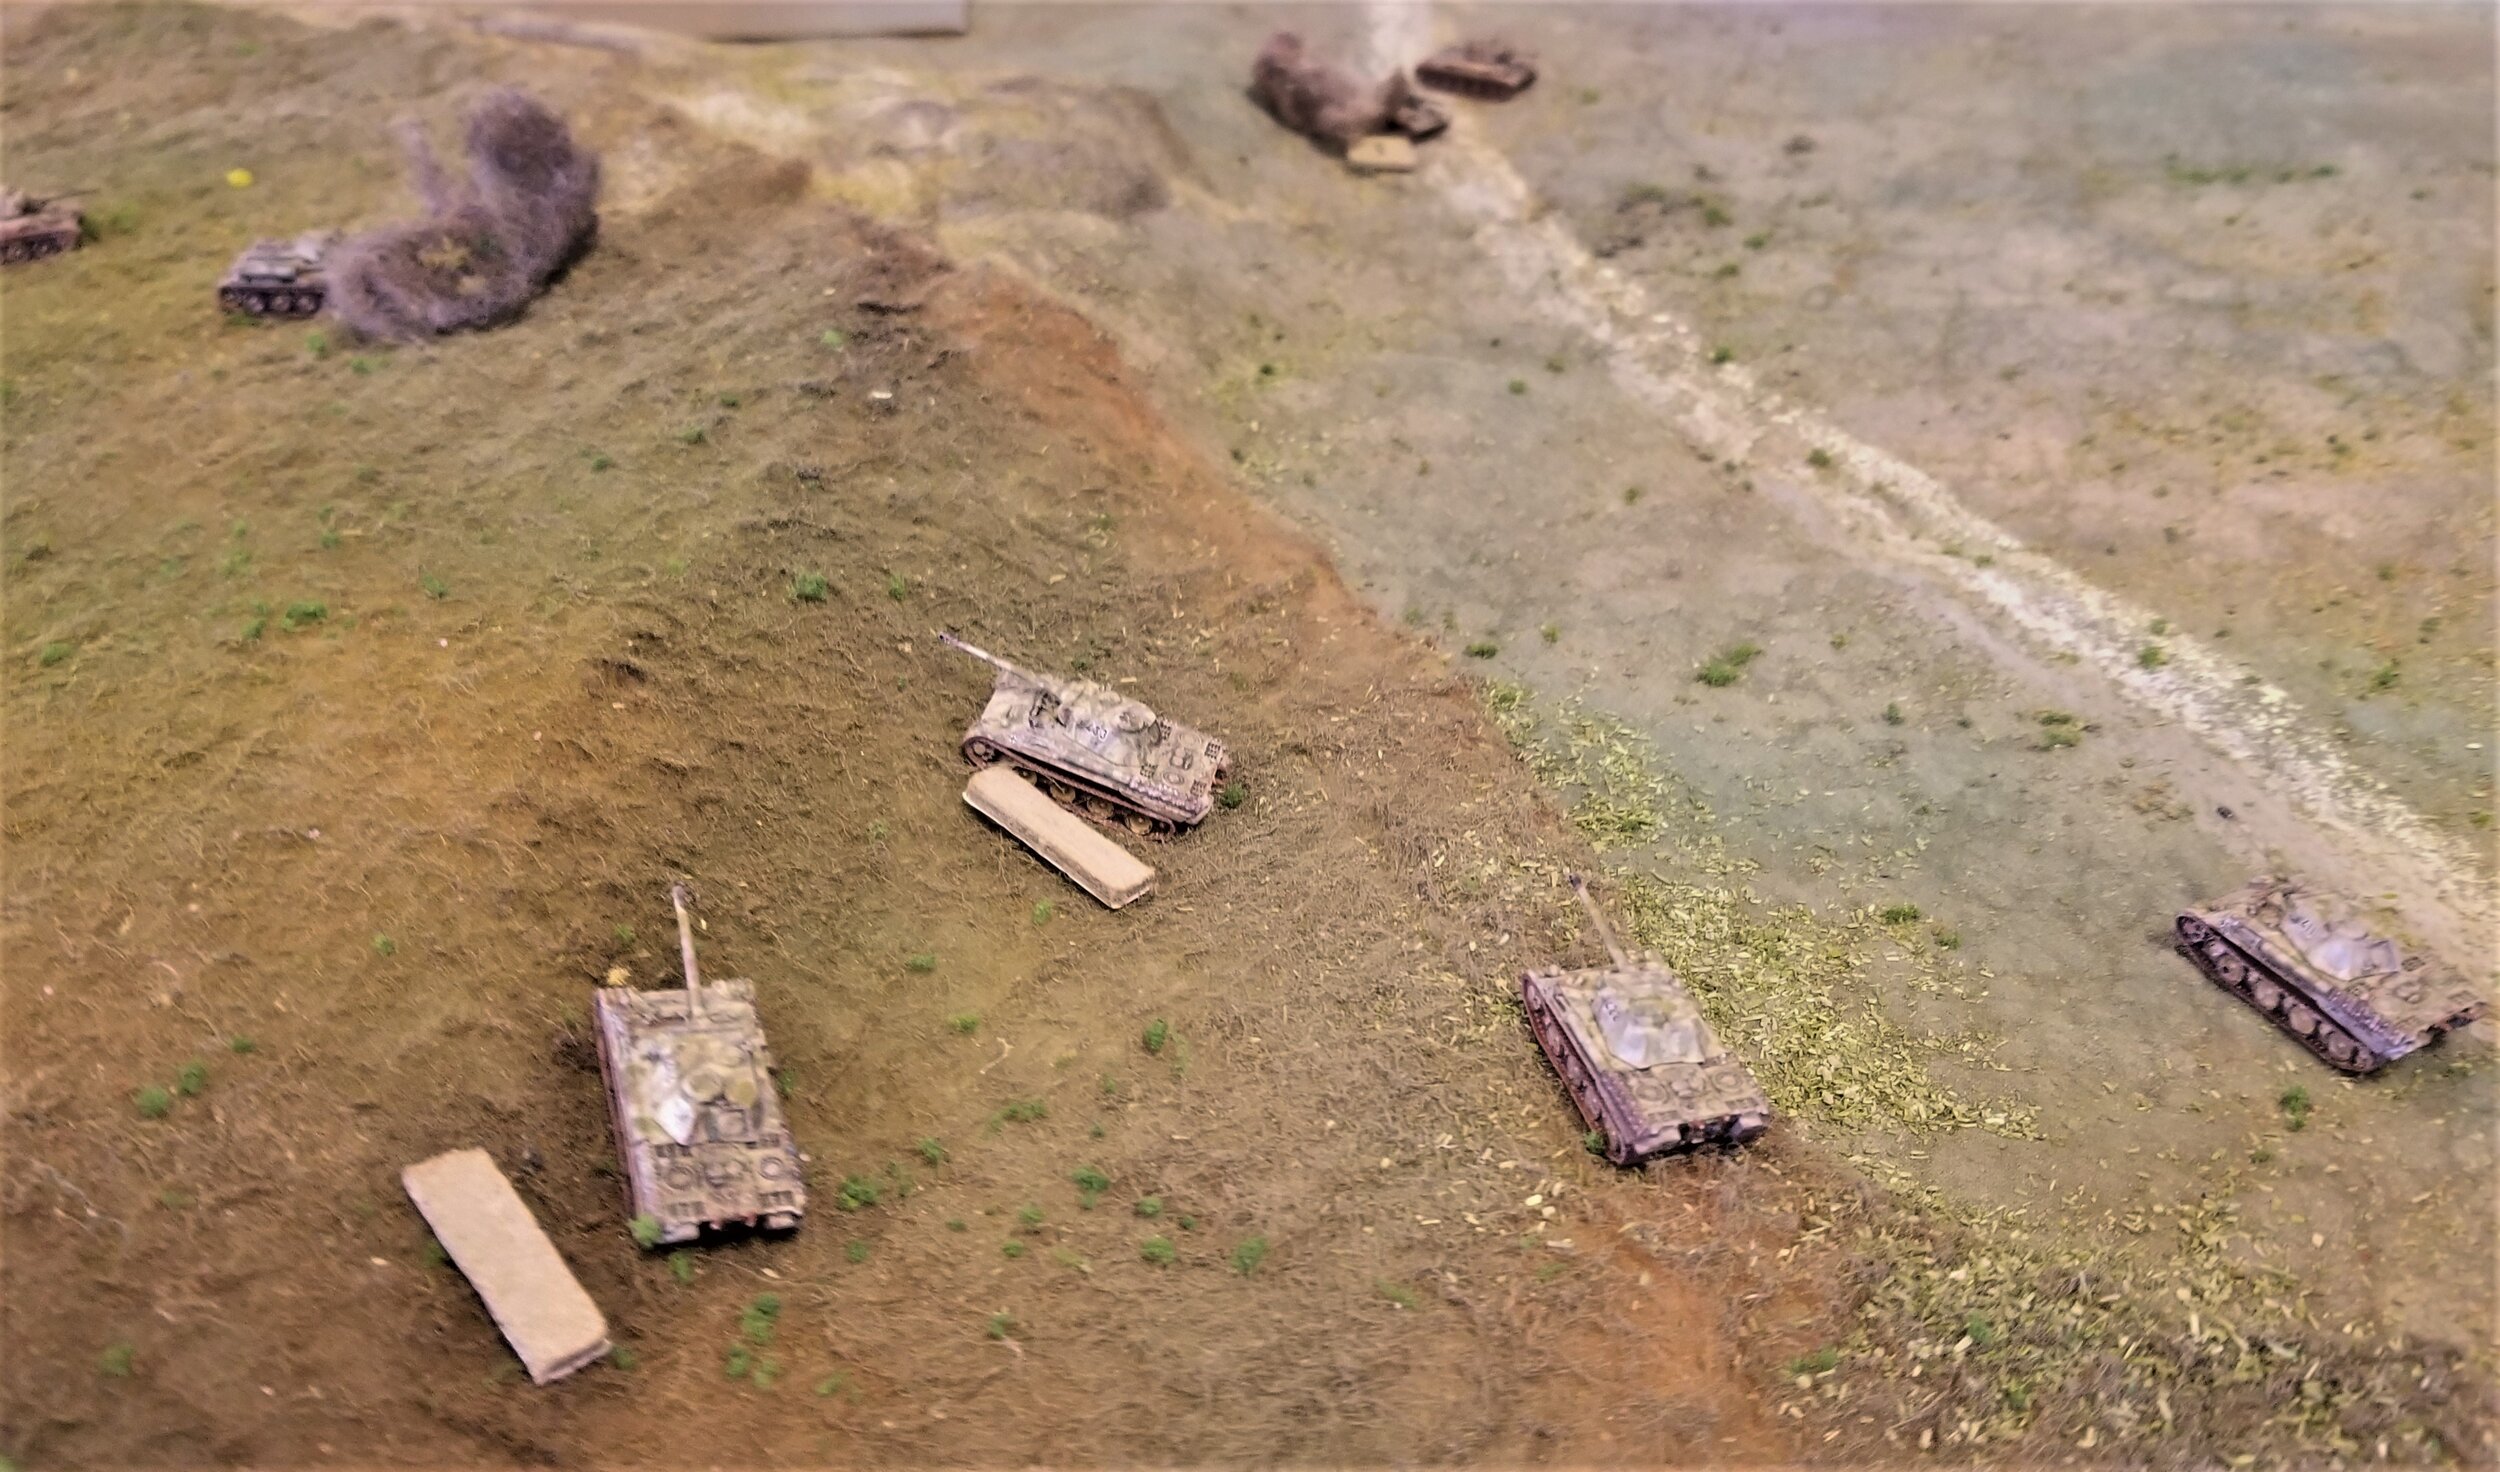
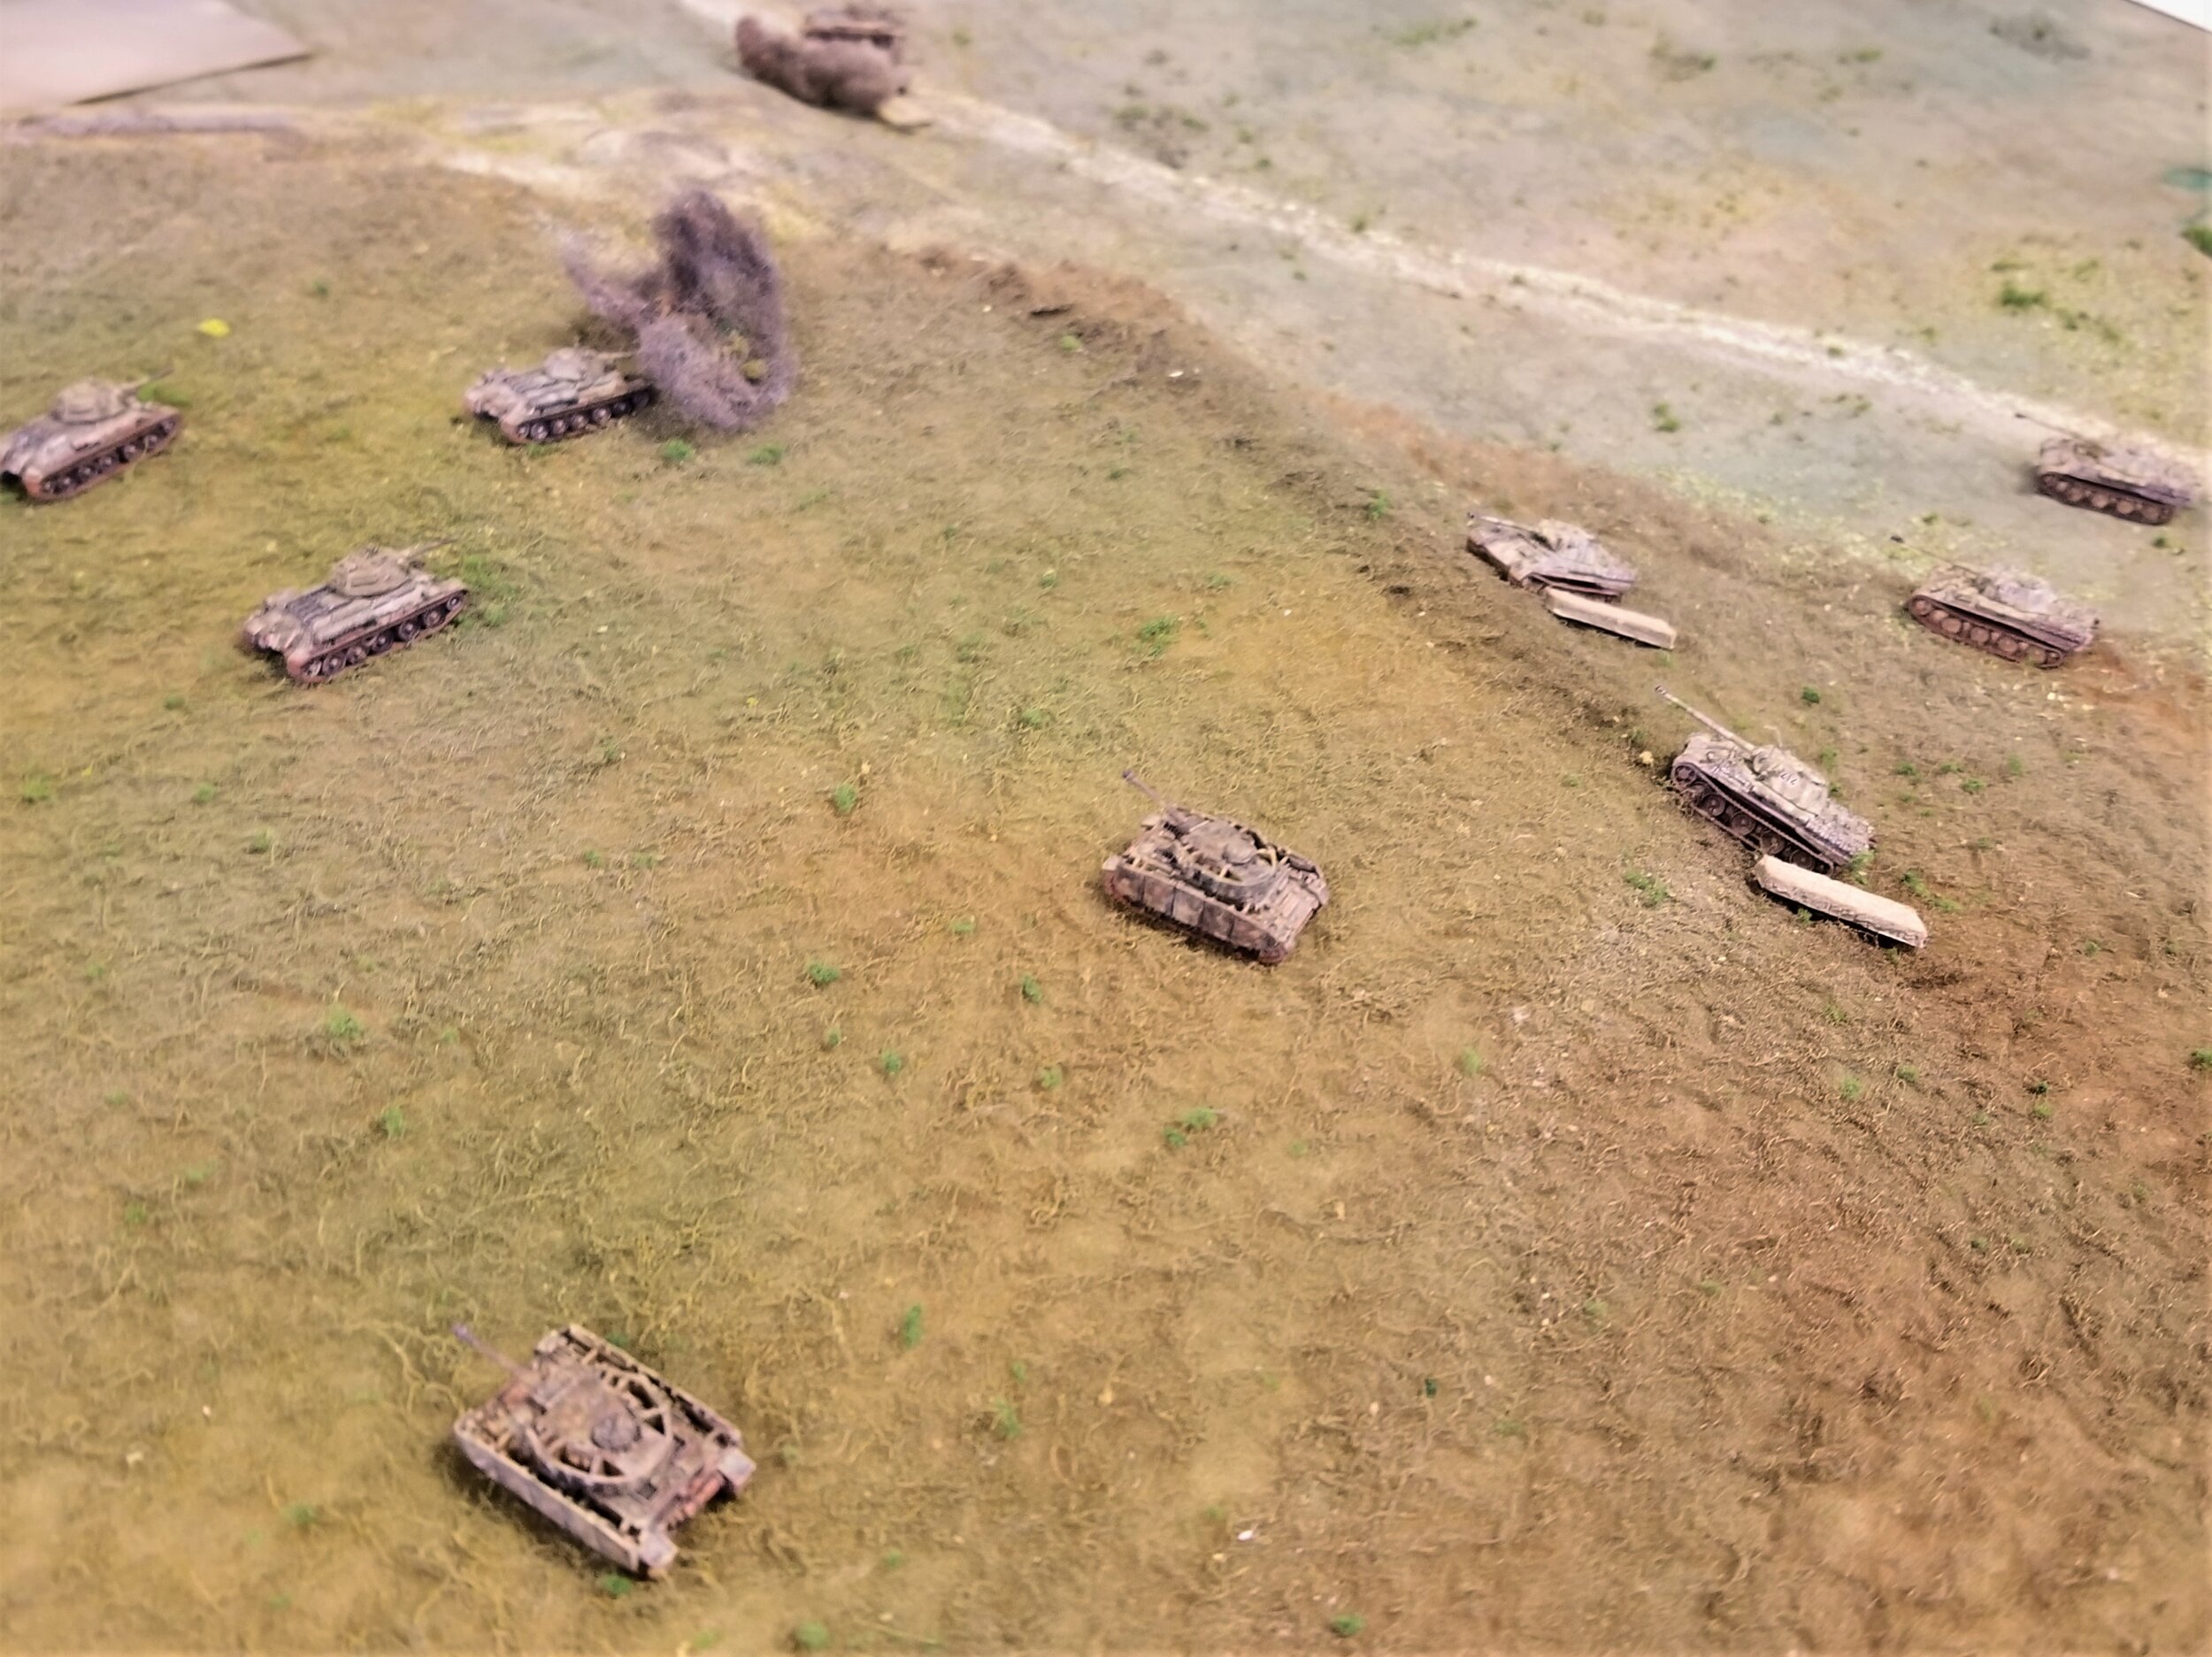
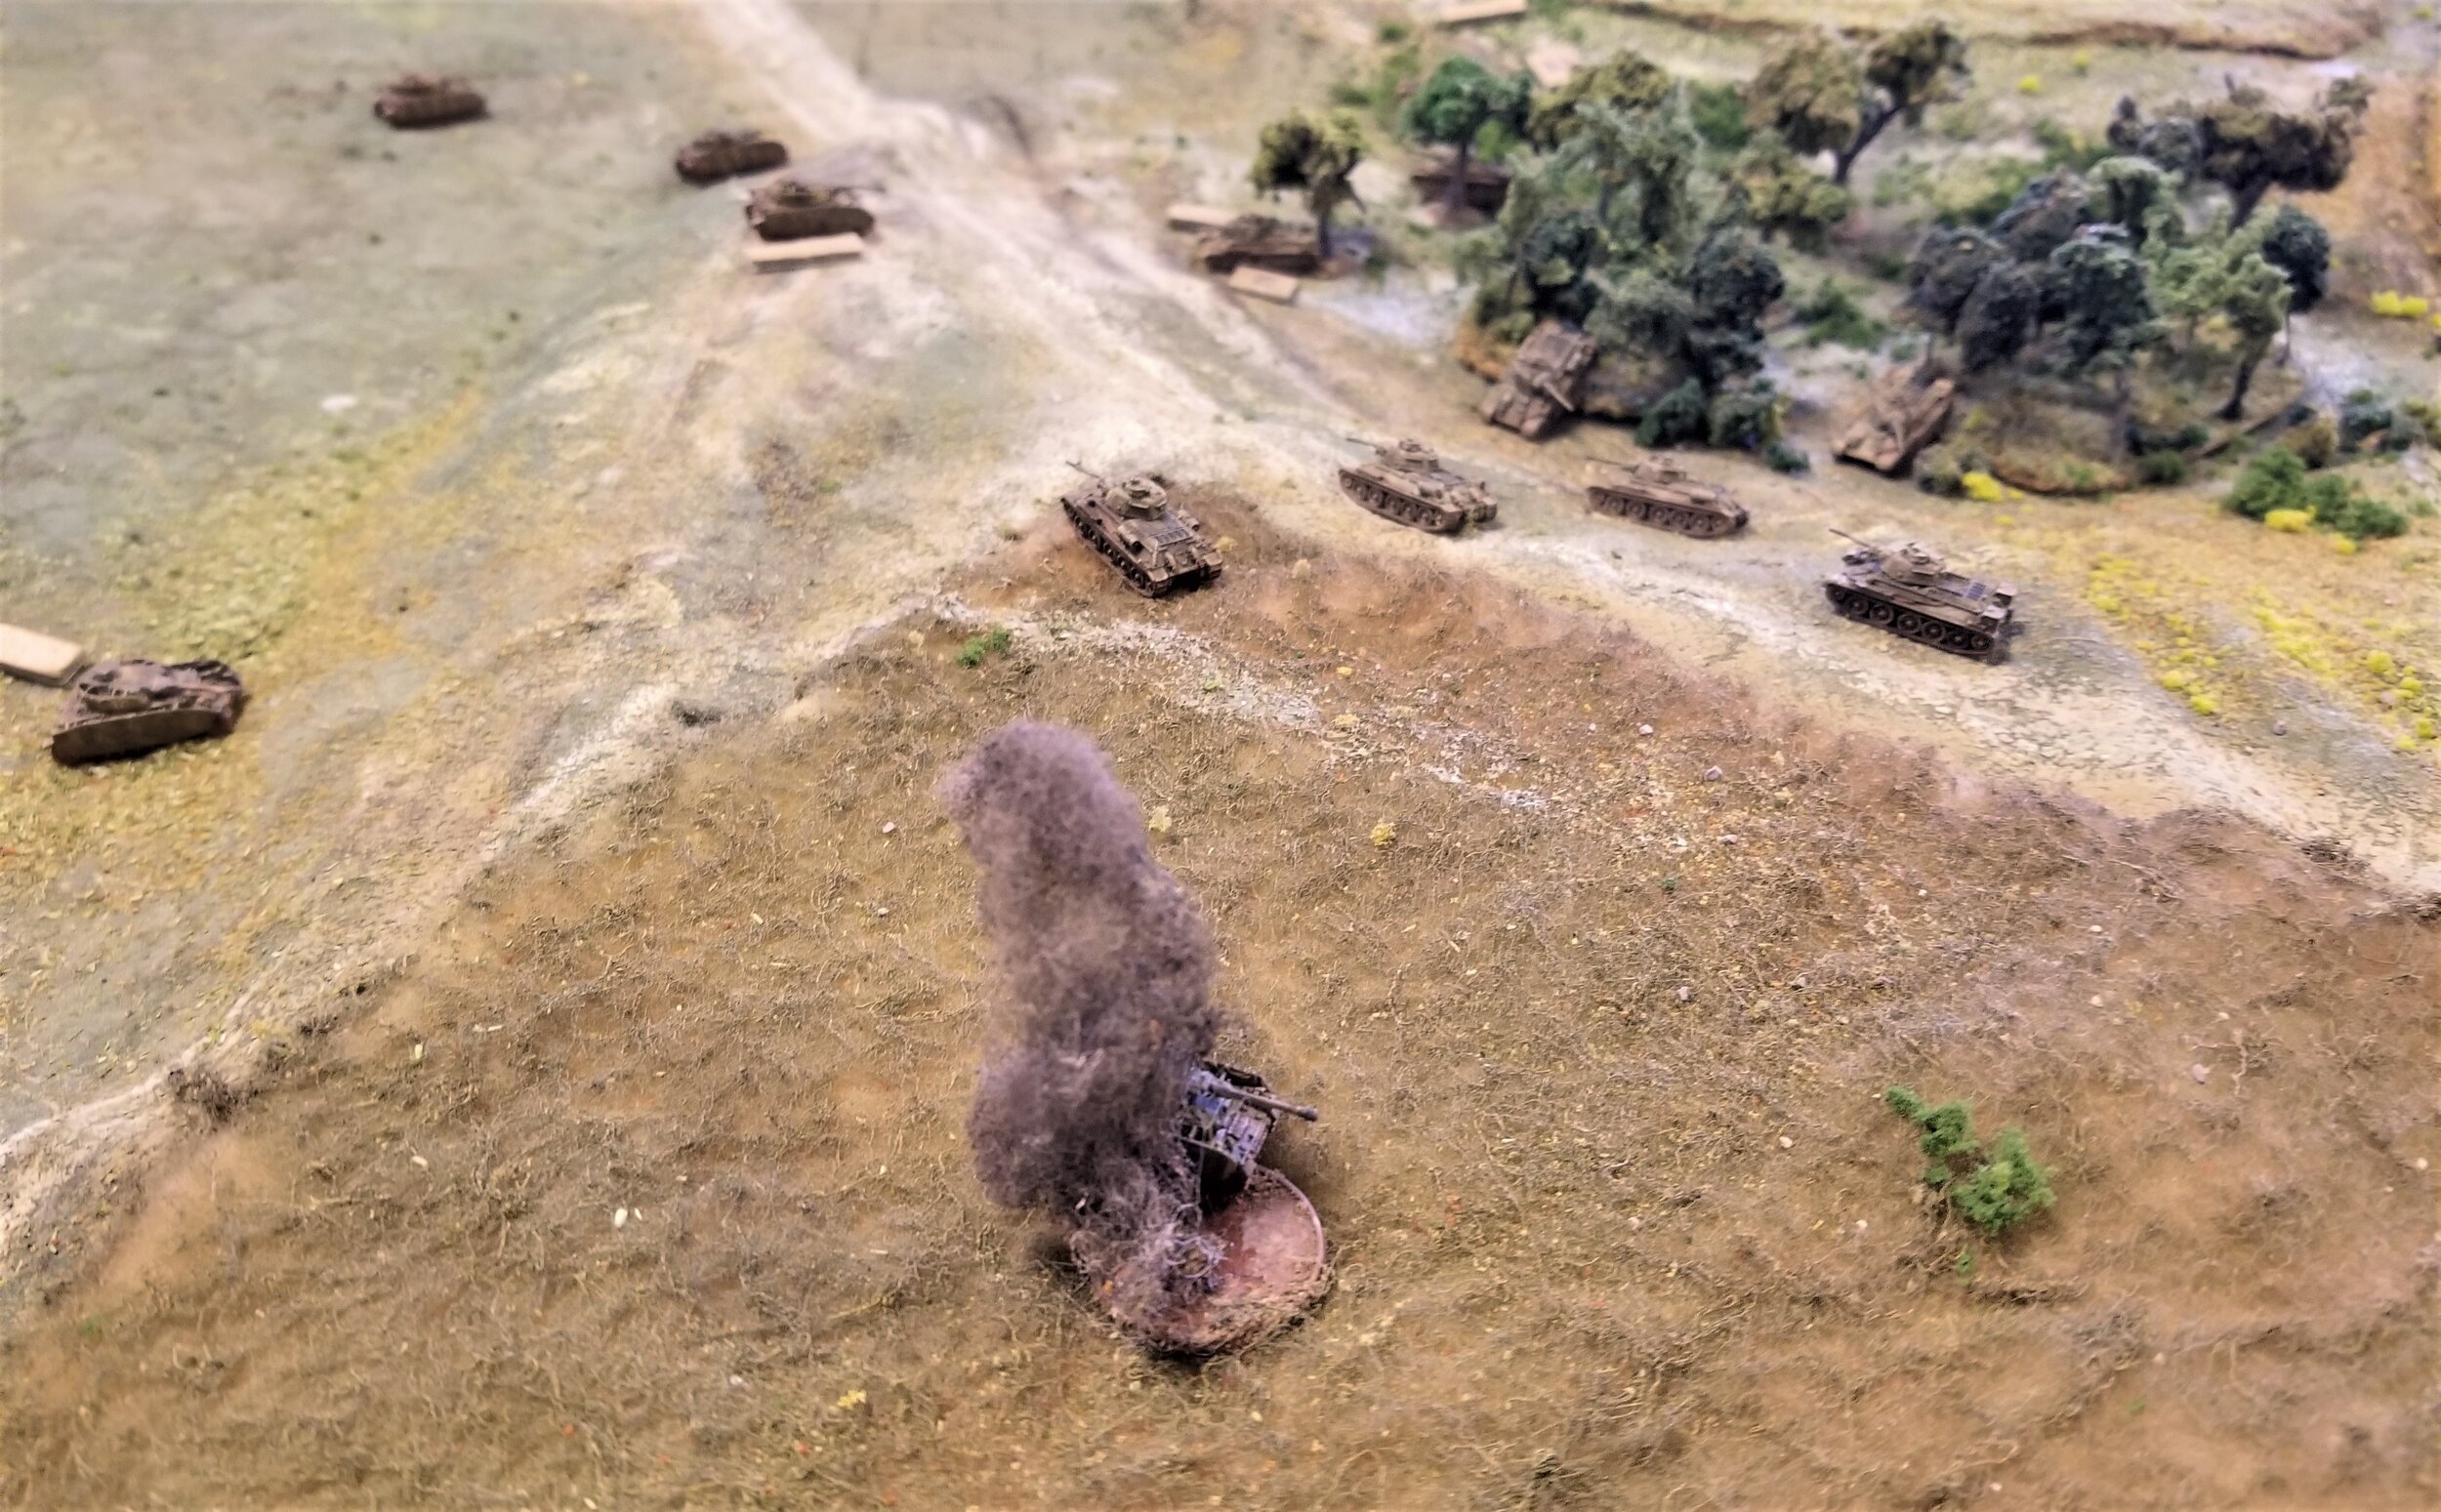
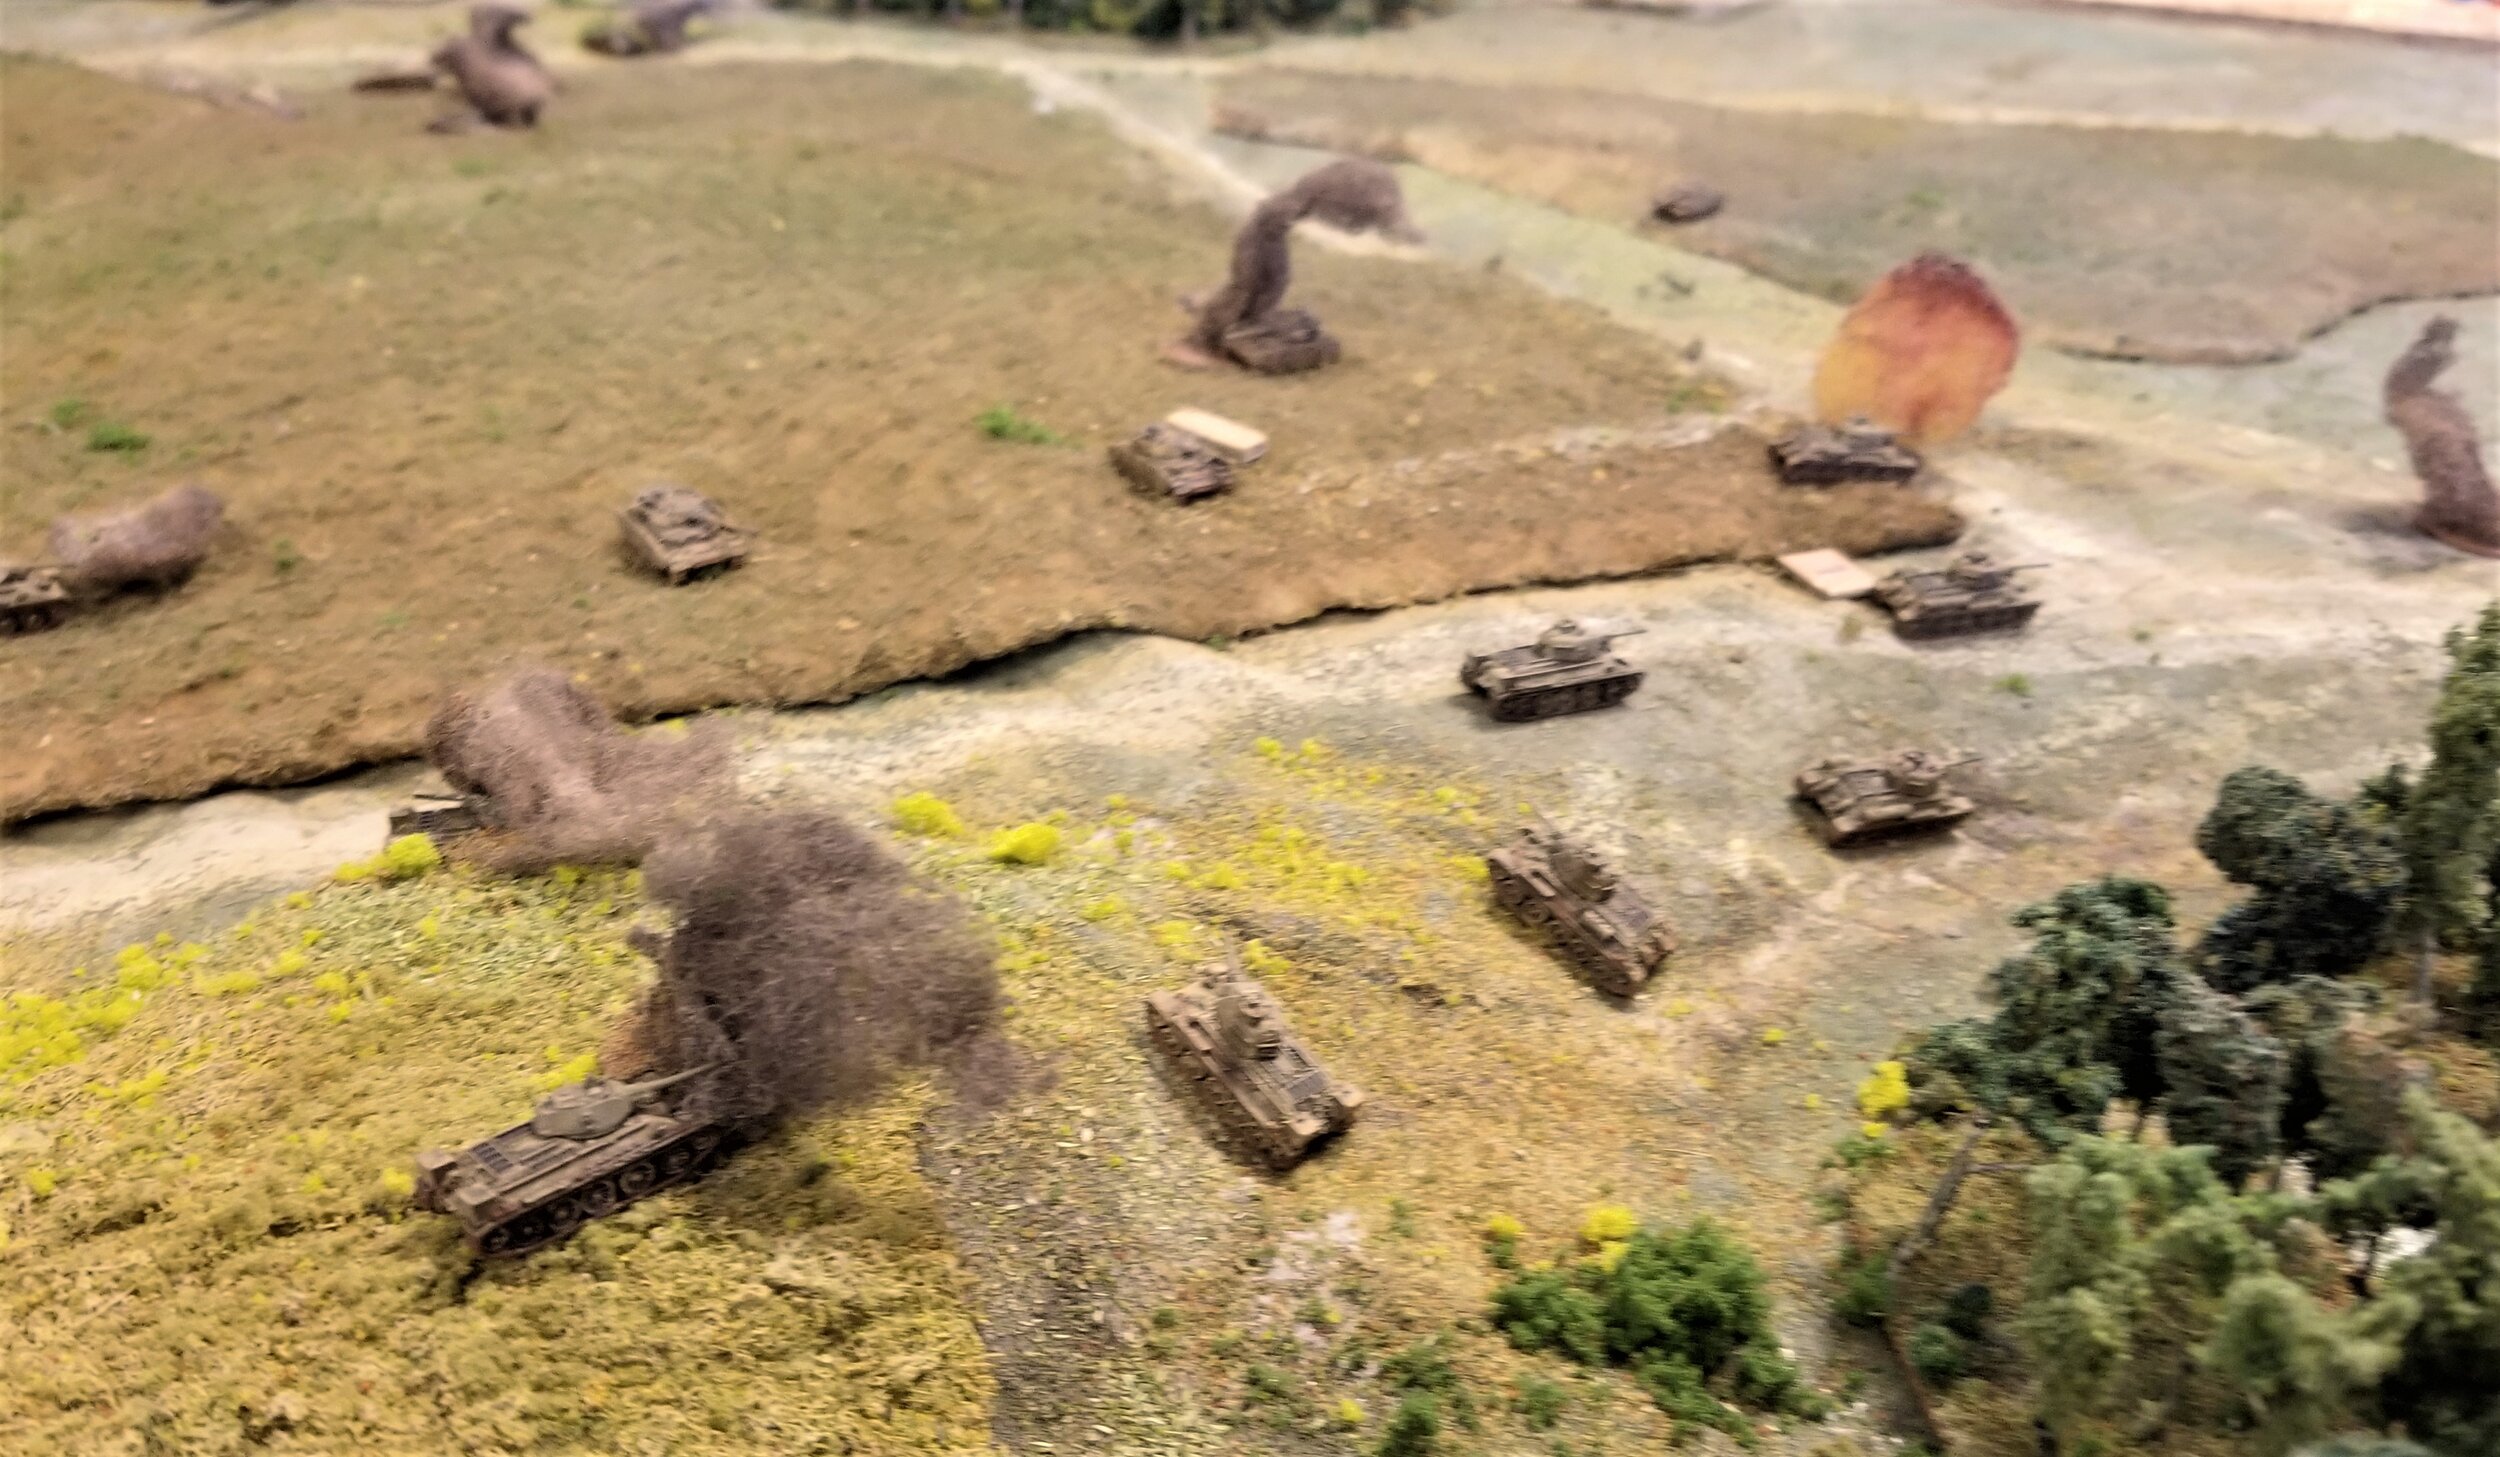
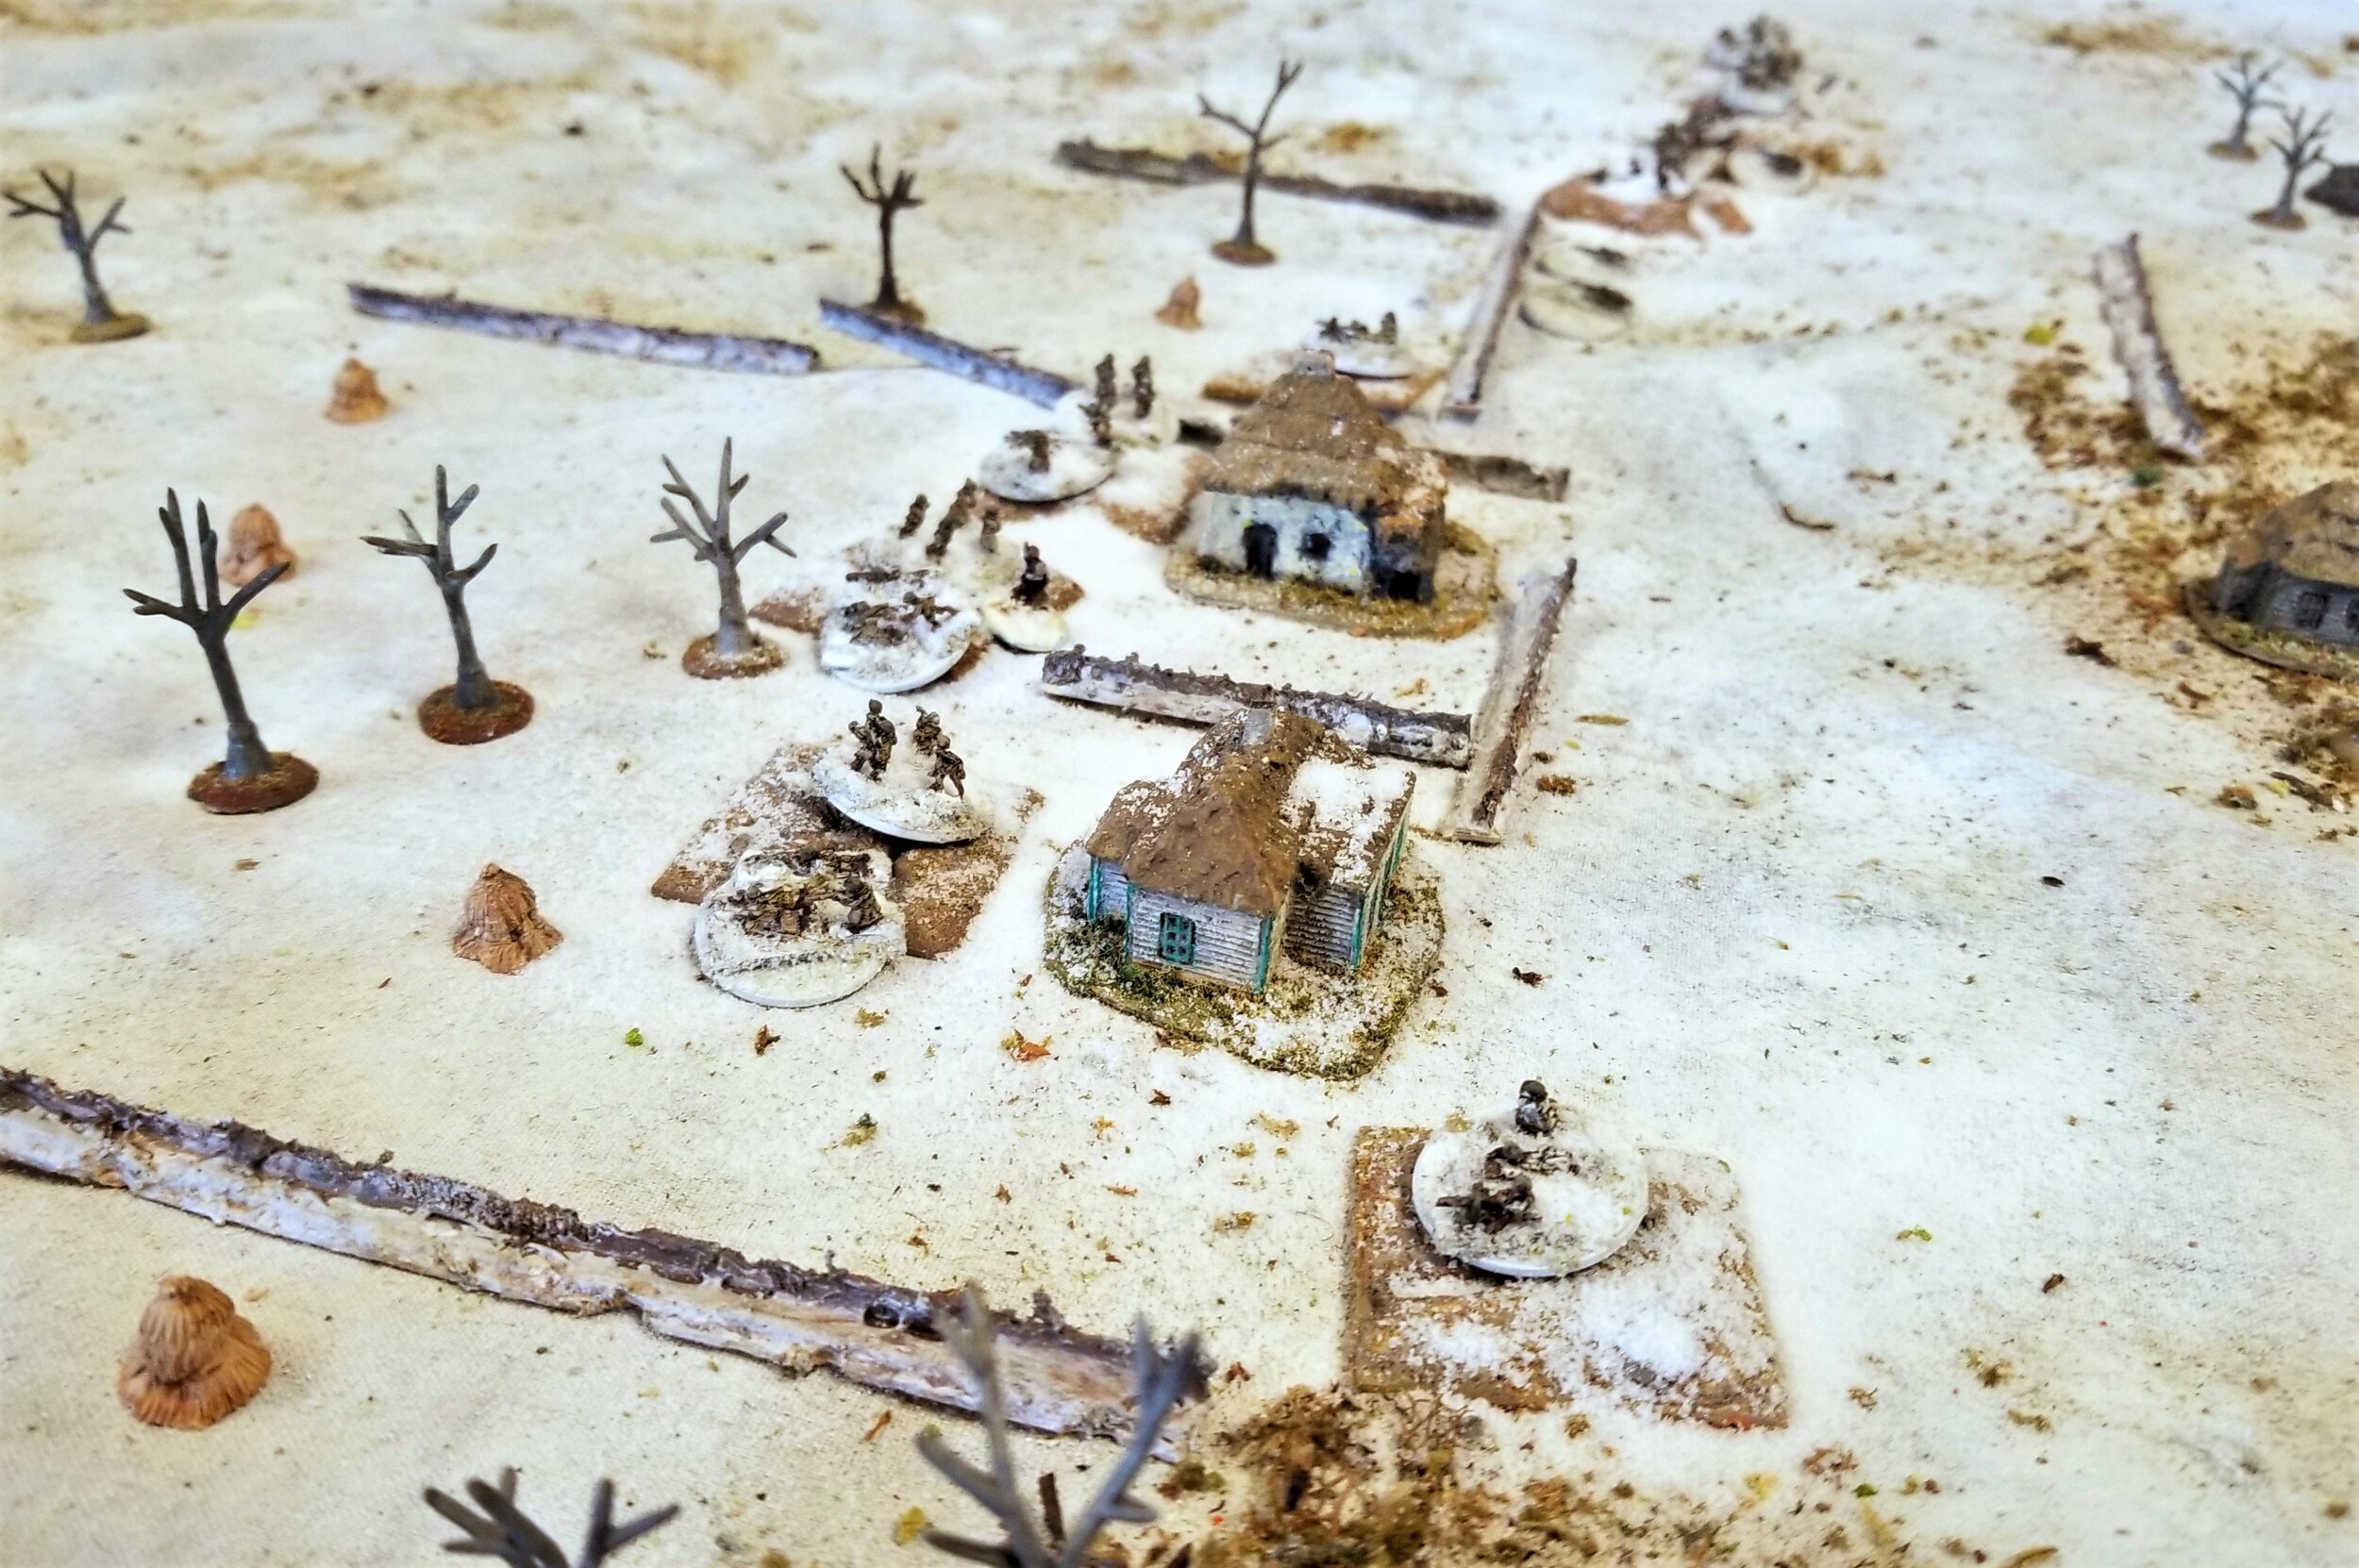
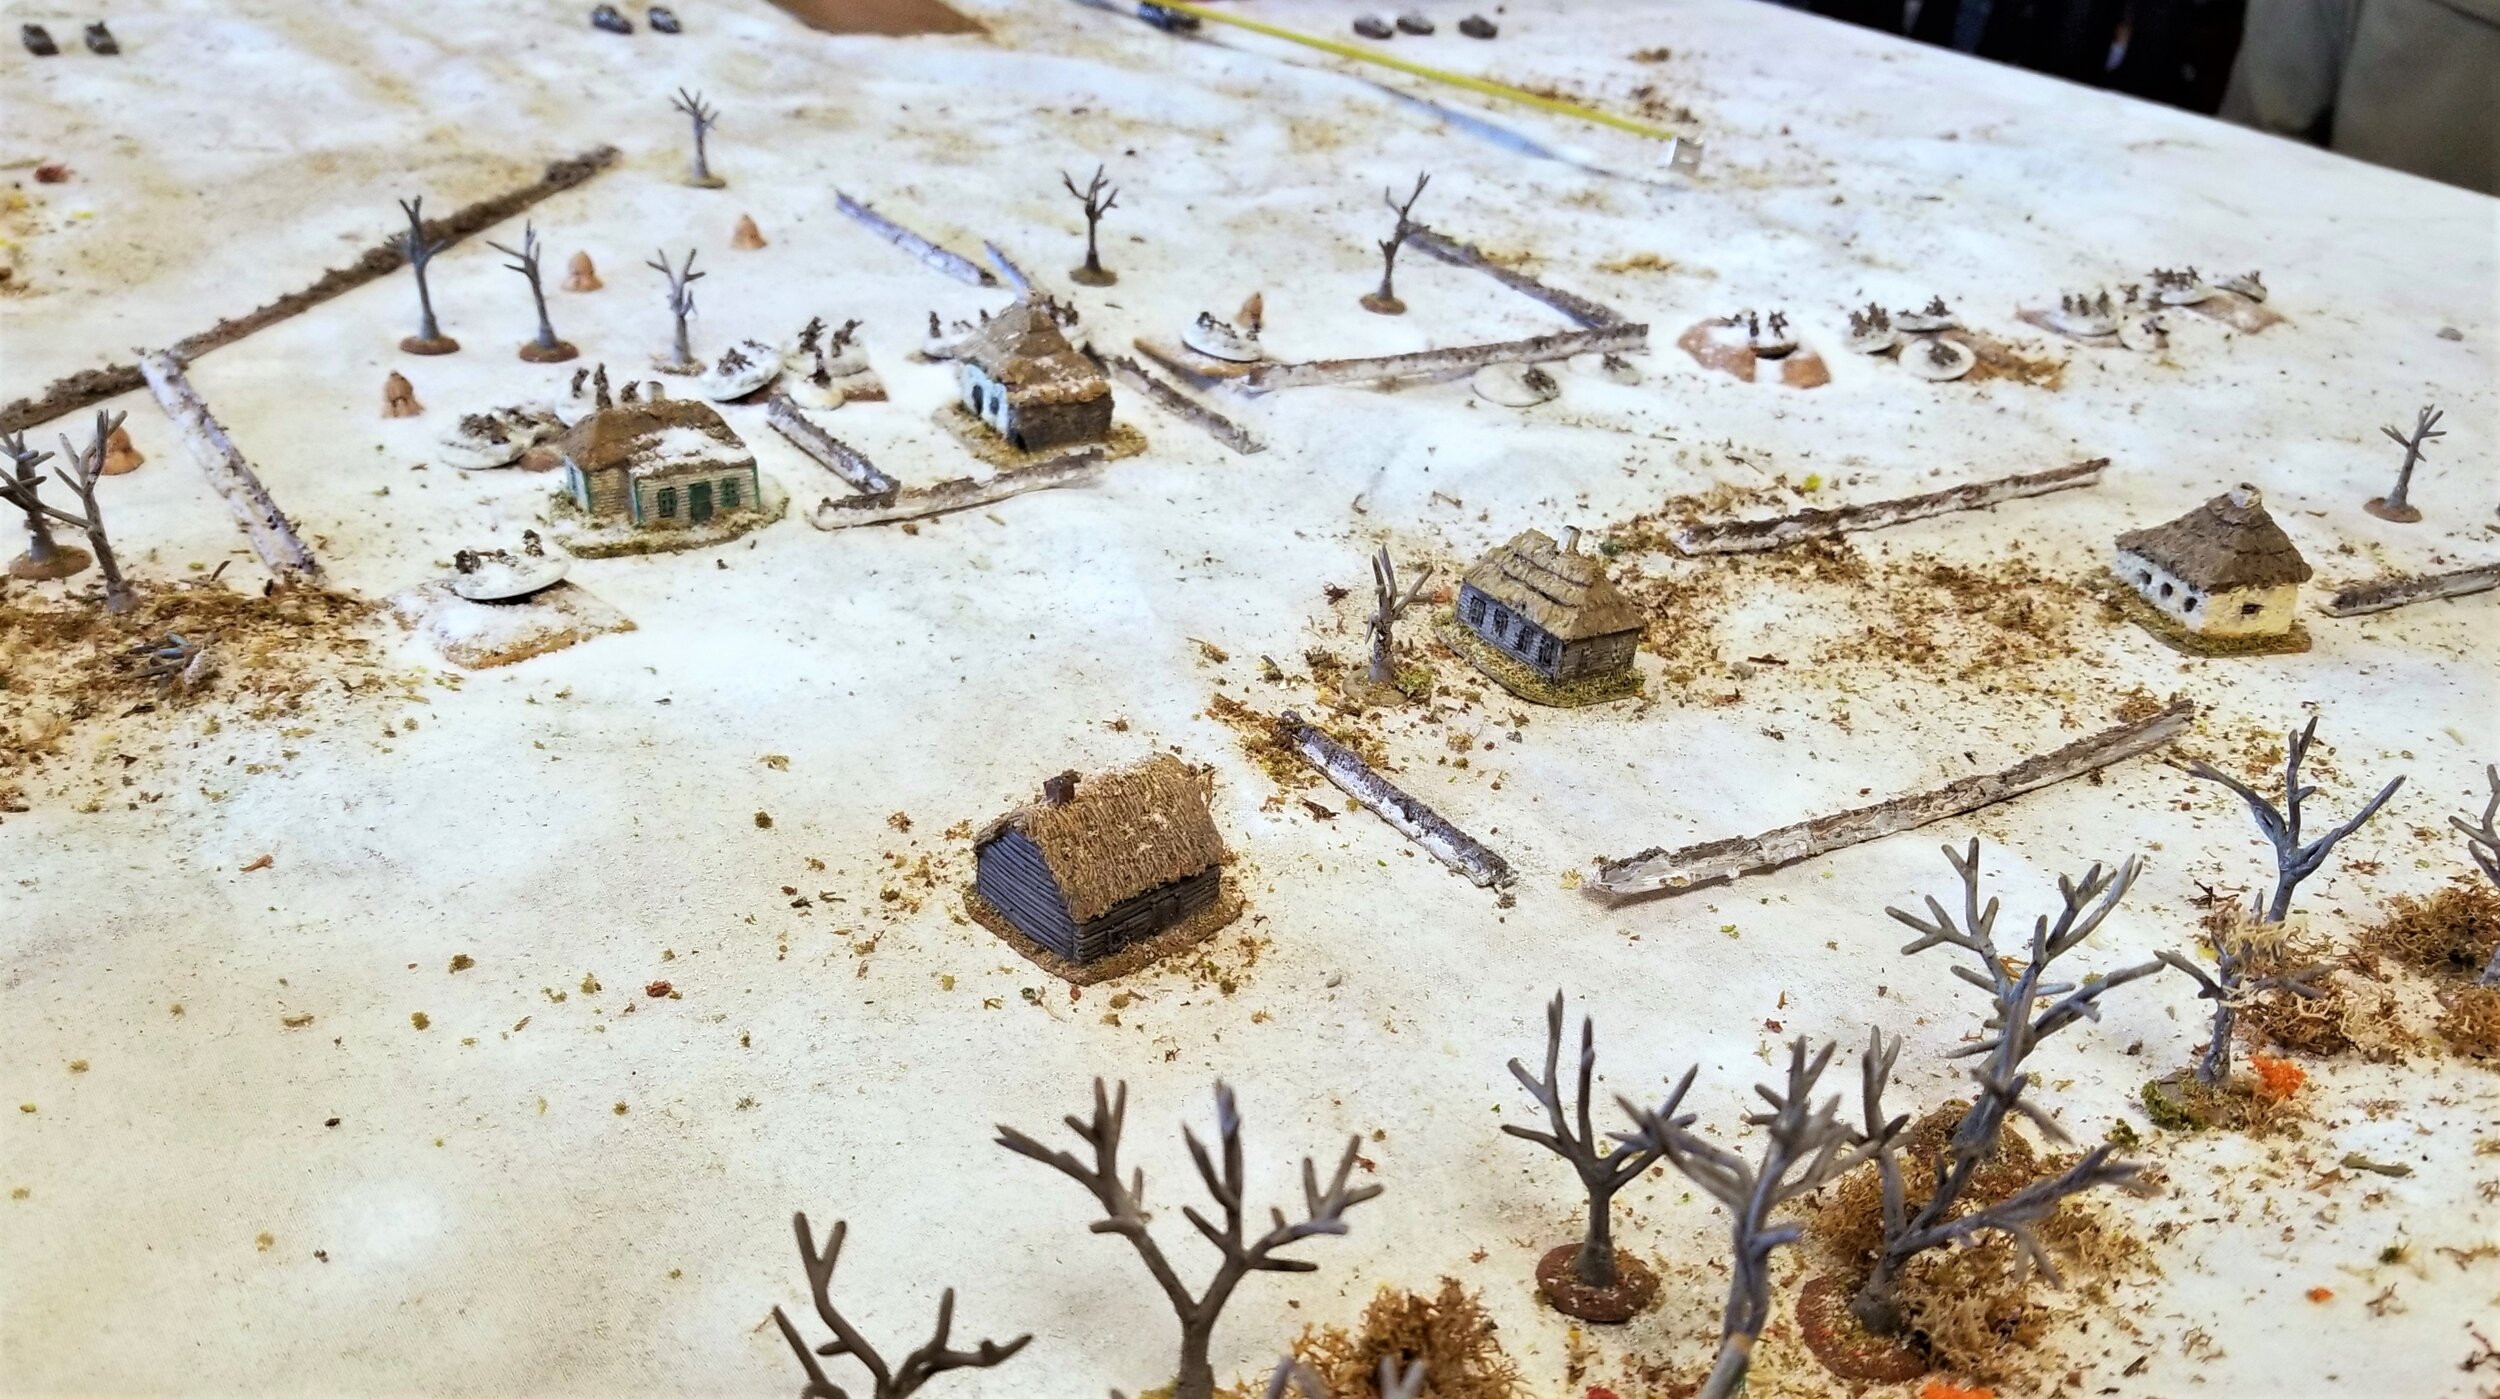
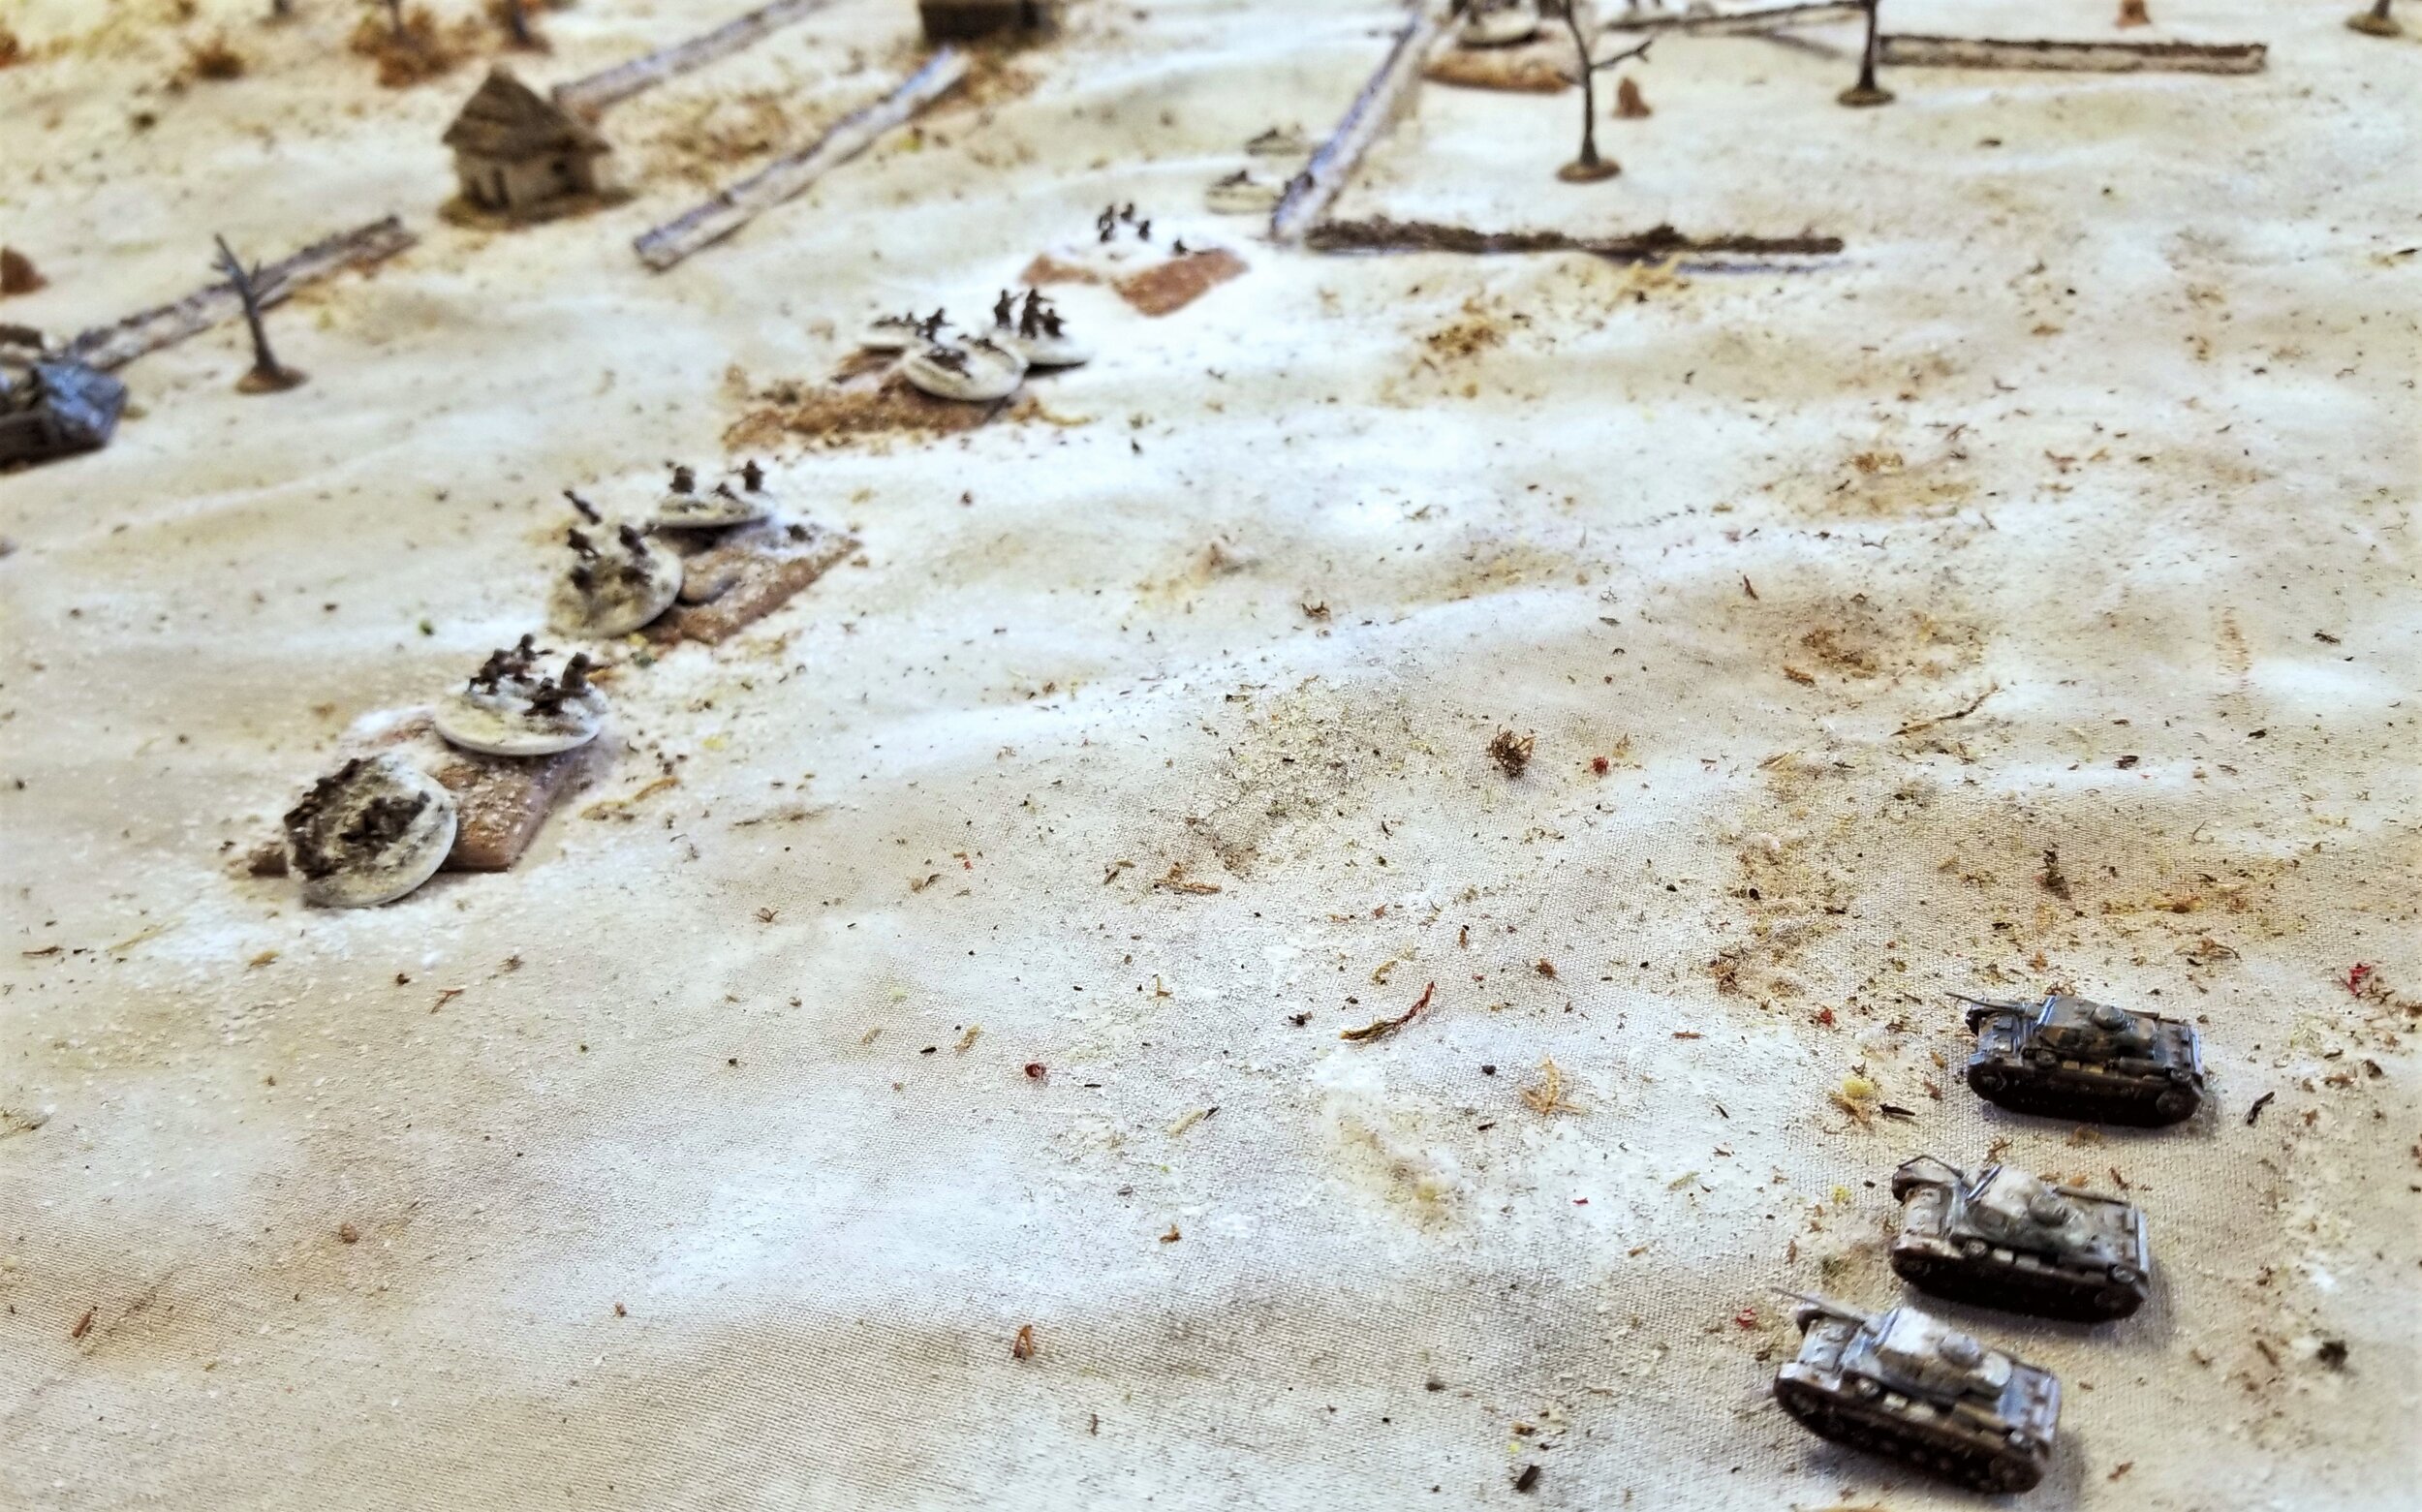
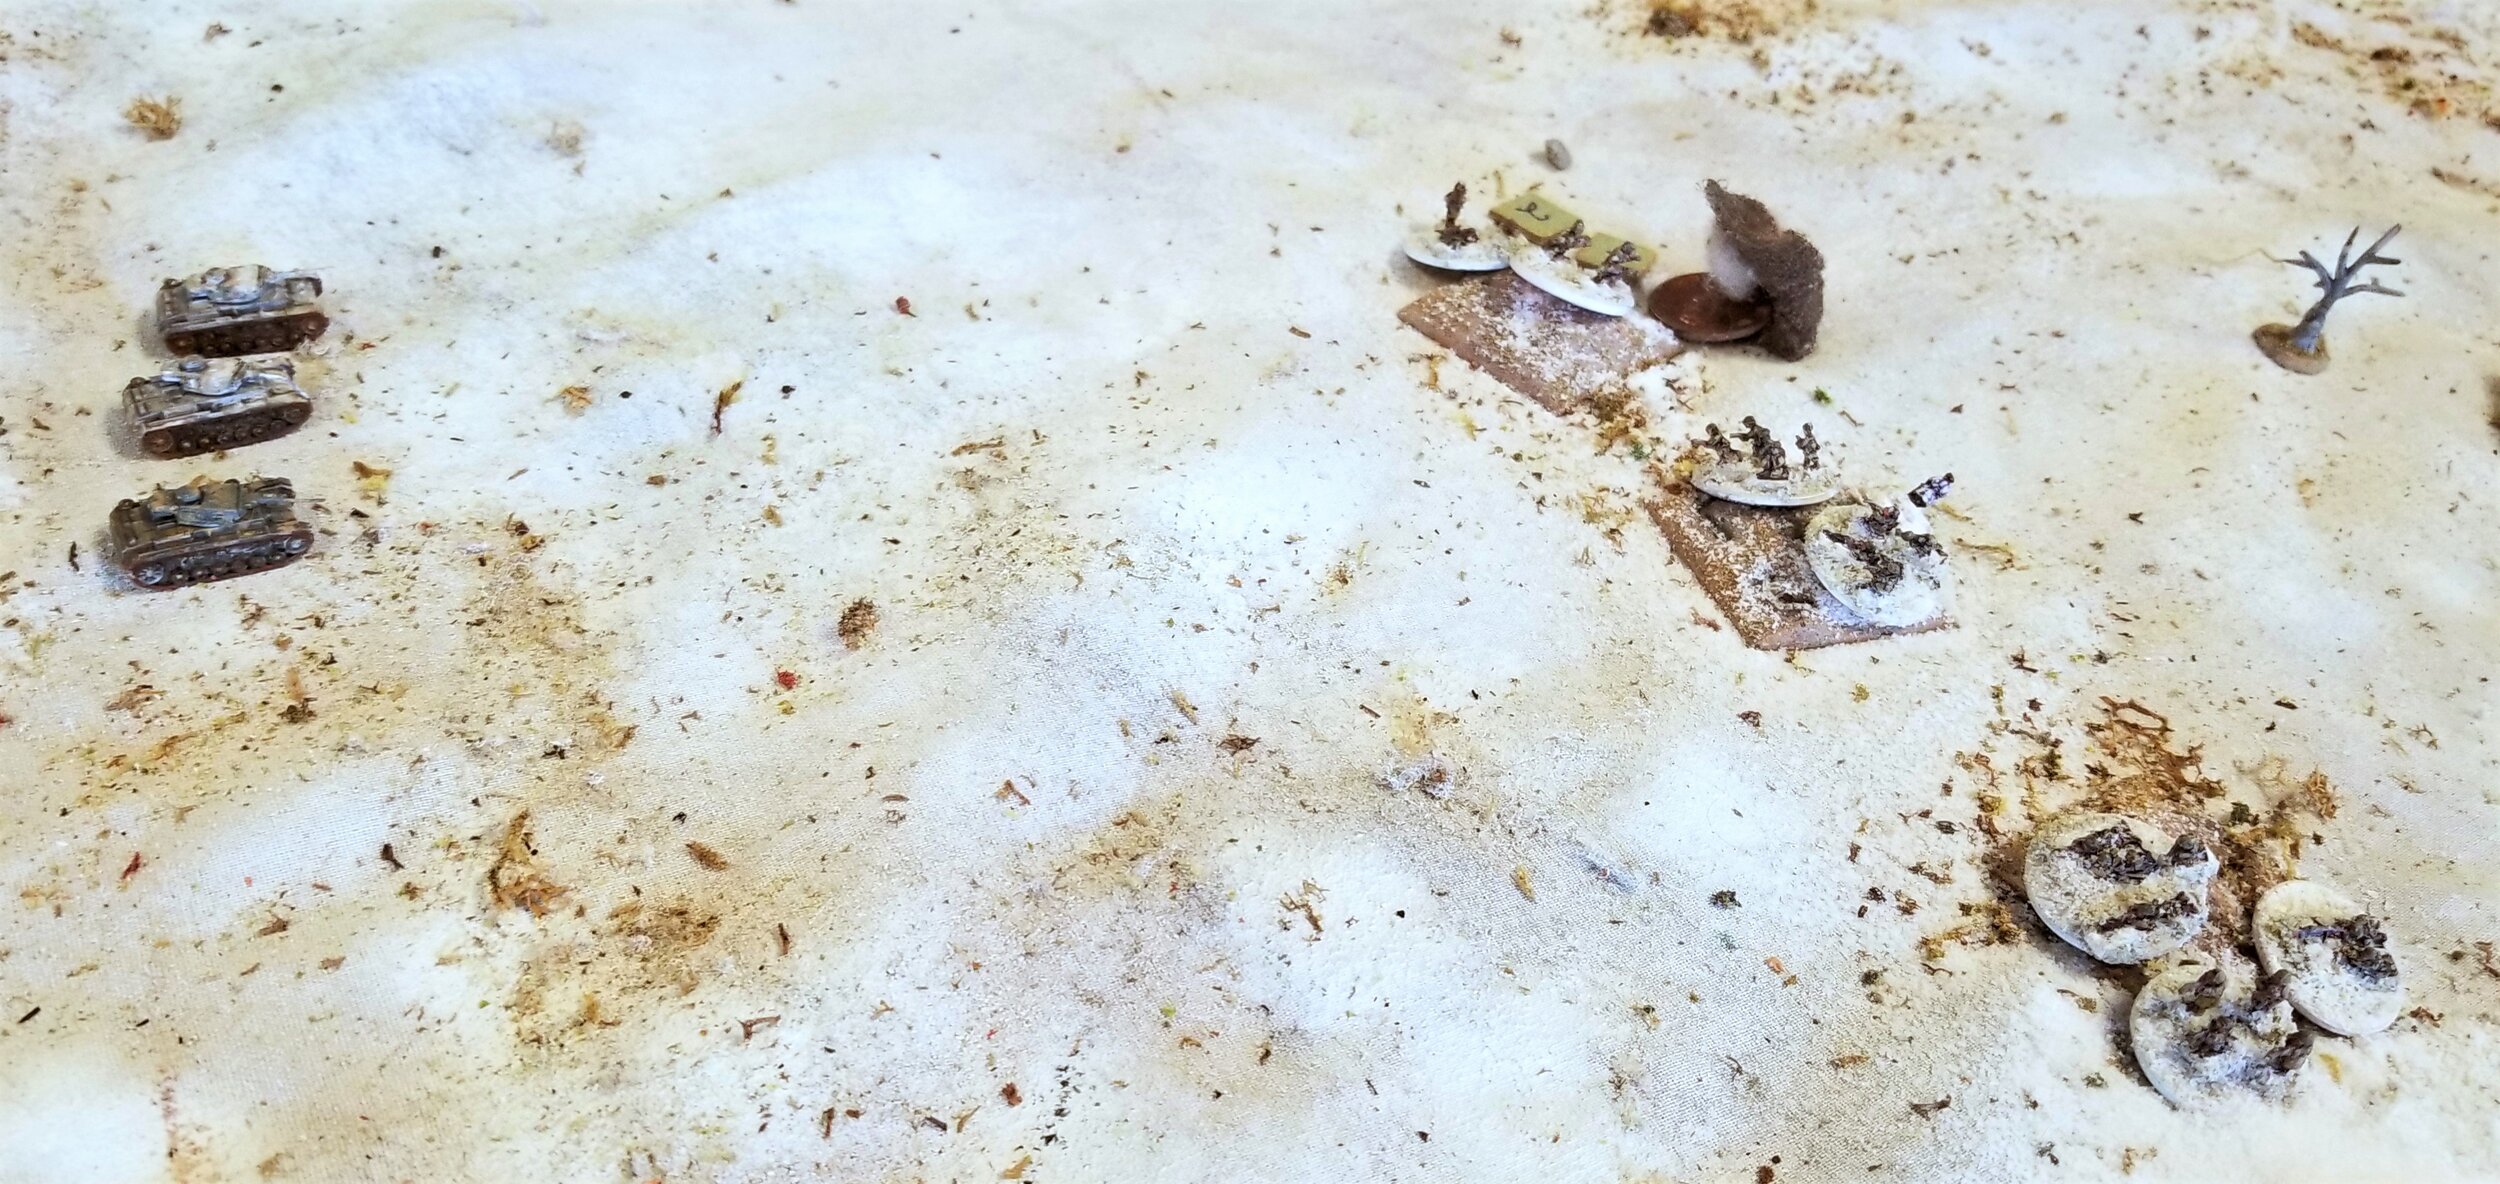
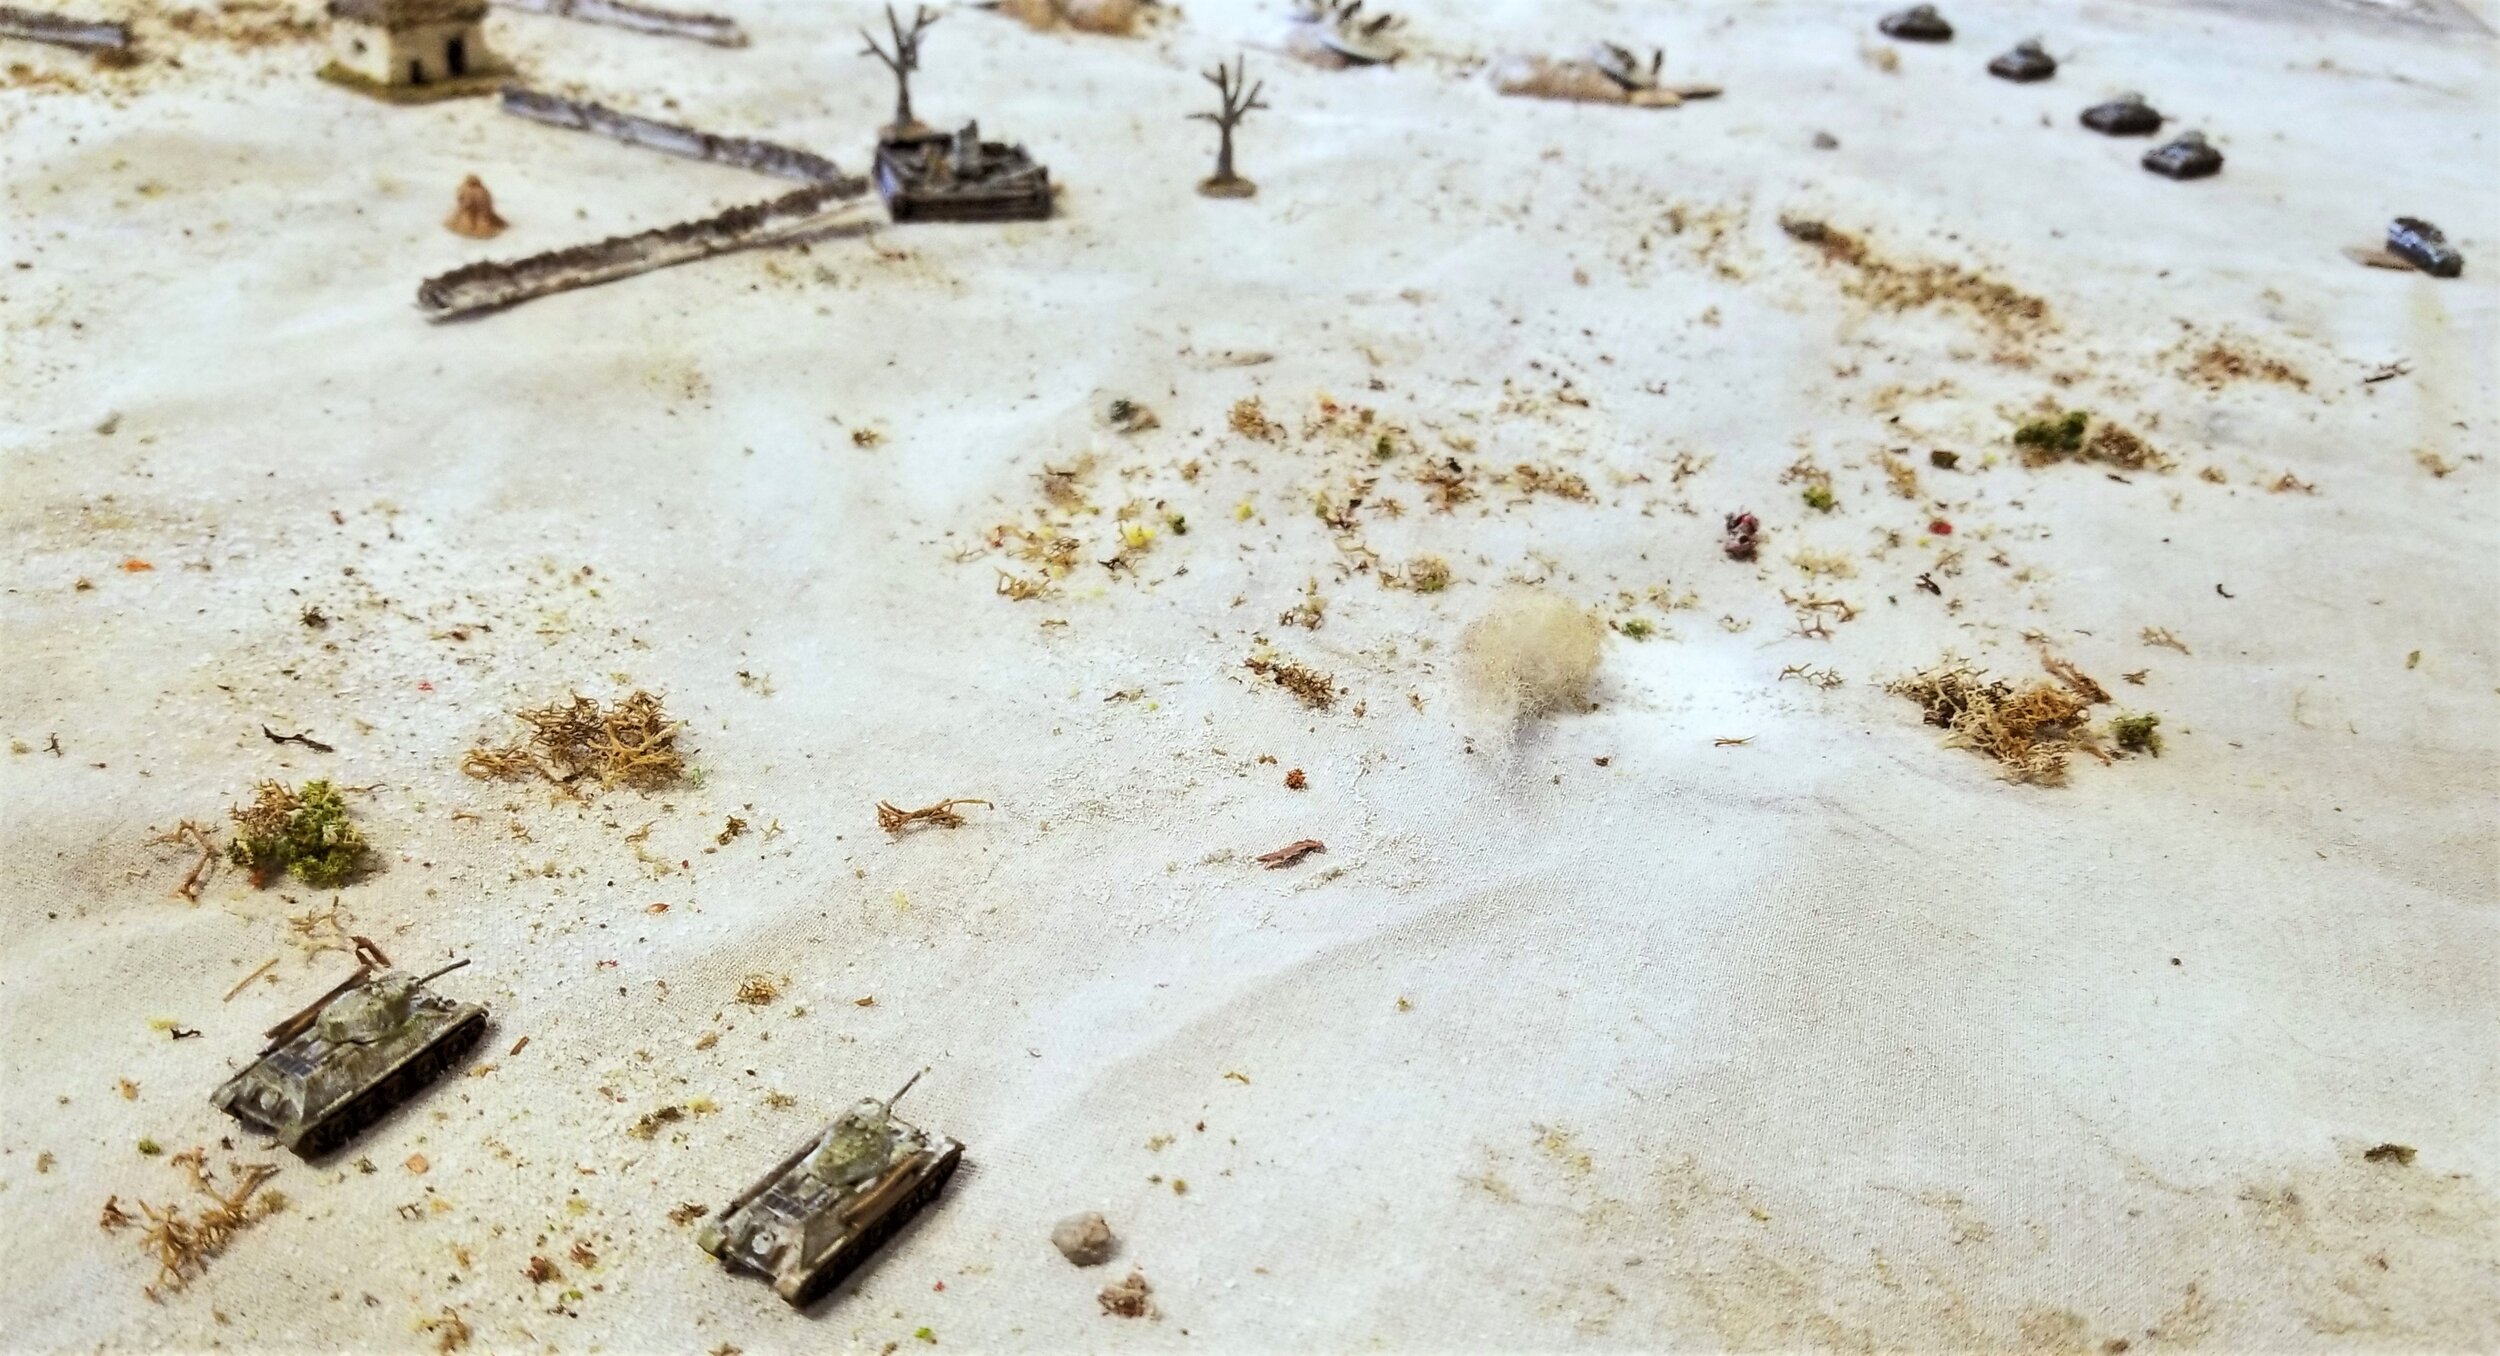
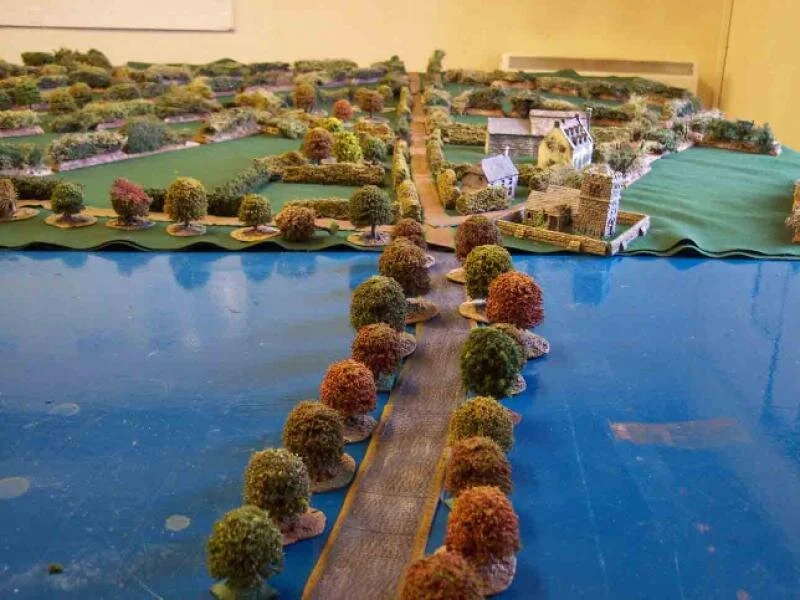
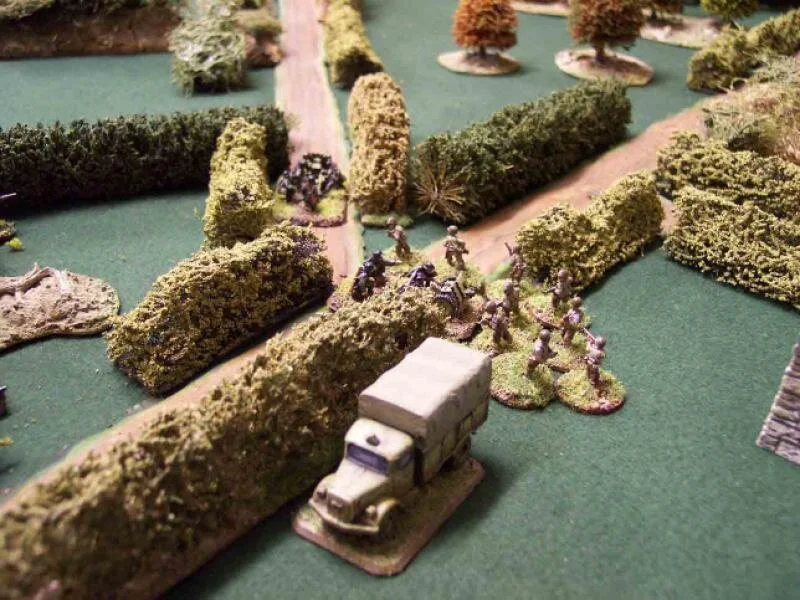
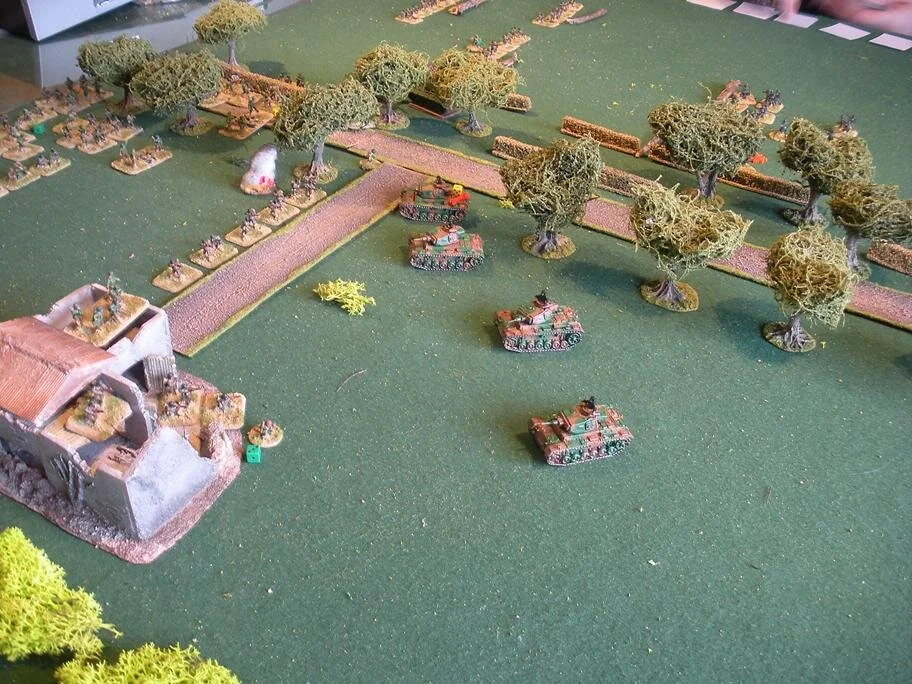
Photos 1 and 2 show the terrain. This is basically consists of one building with a road running down the middle of the table. This building was to be the focus of most of the action and as it is the only real cover on the table you can understand why. The surrounding fields are all wet and so all off road movement was a danger any tanks moving.

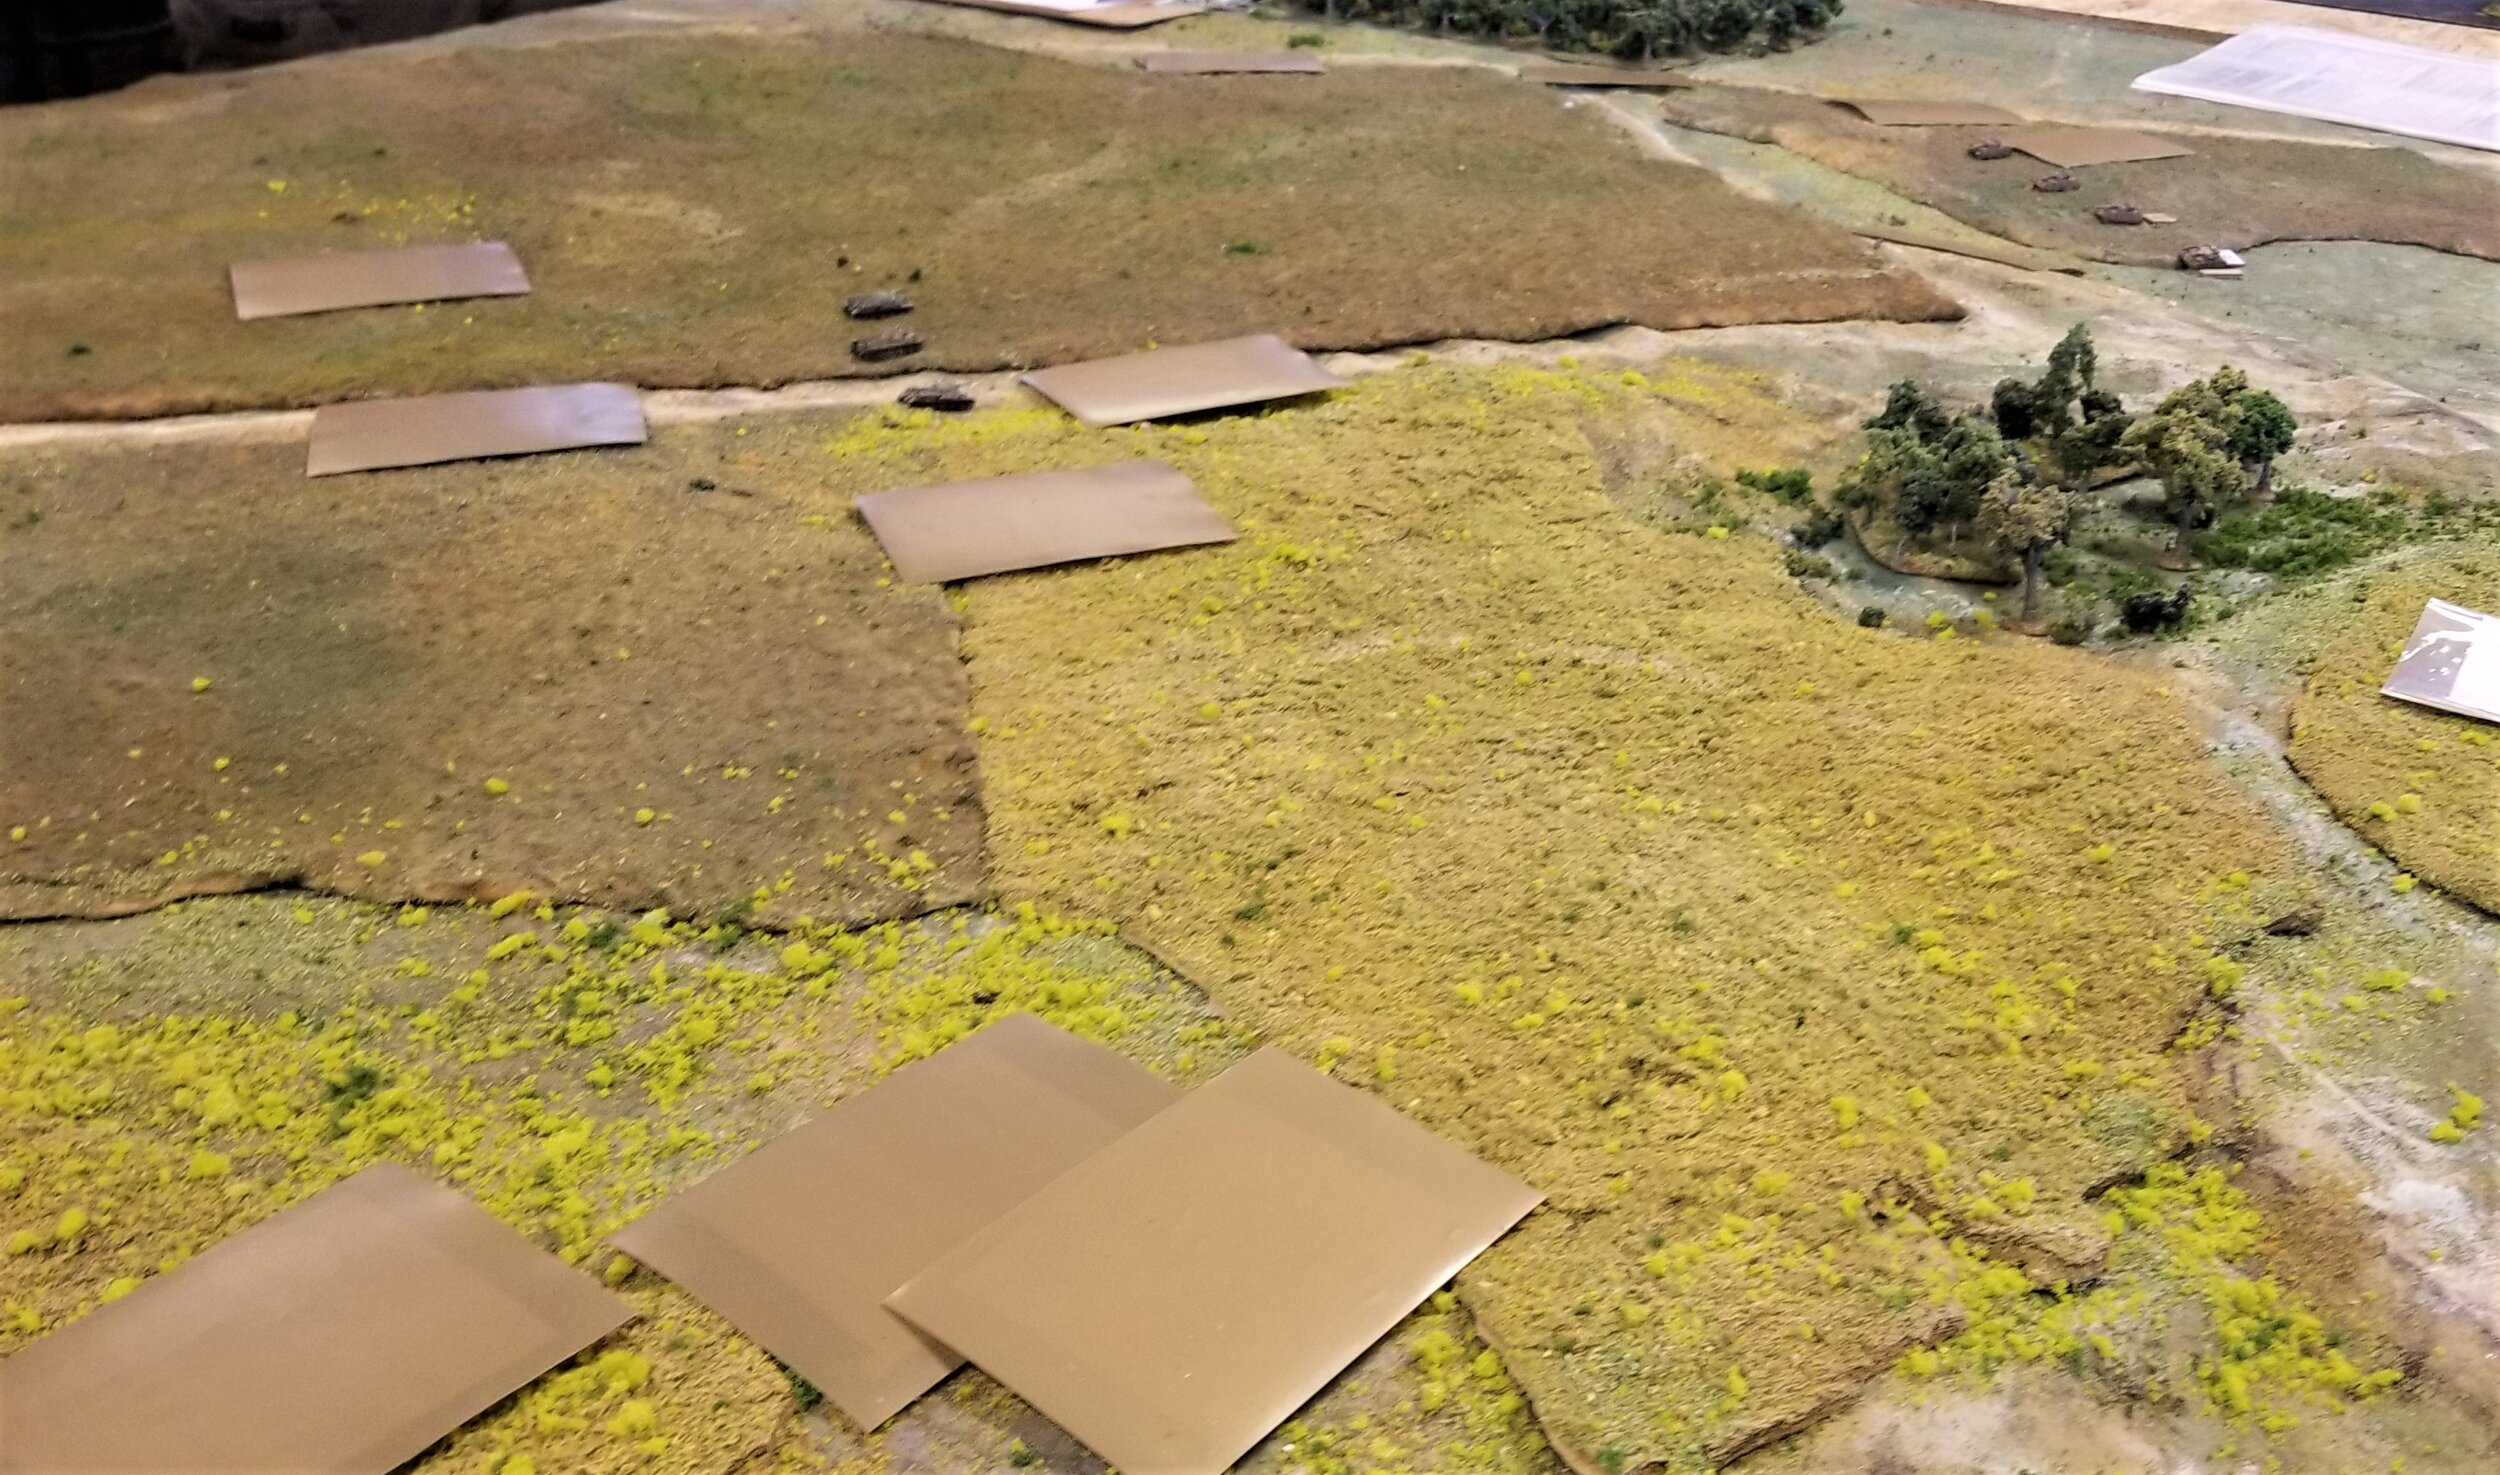
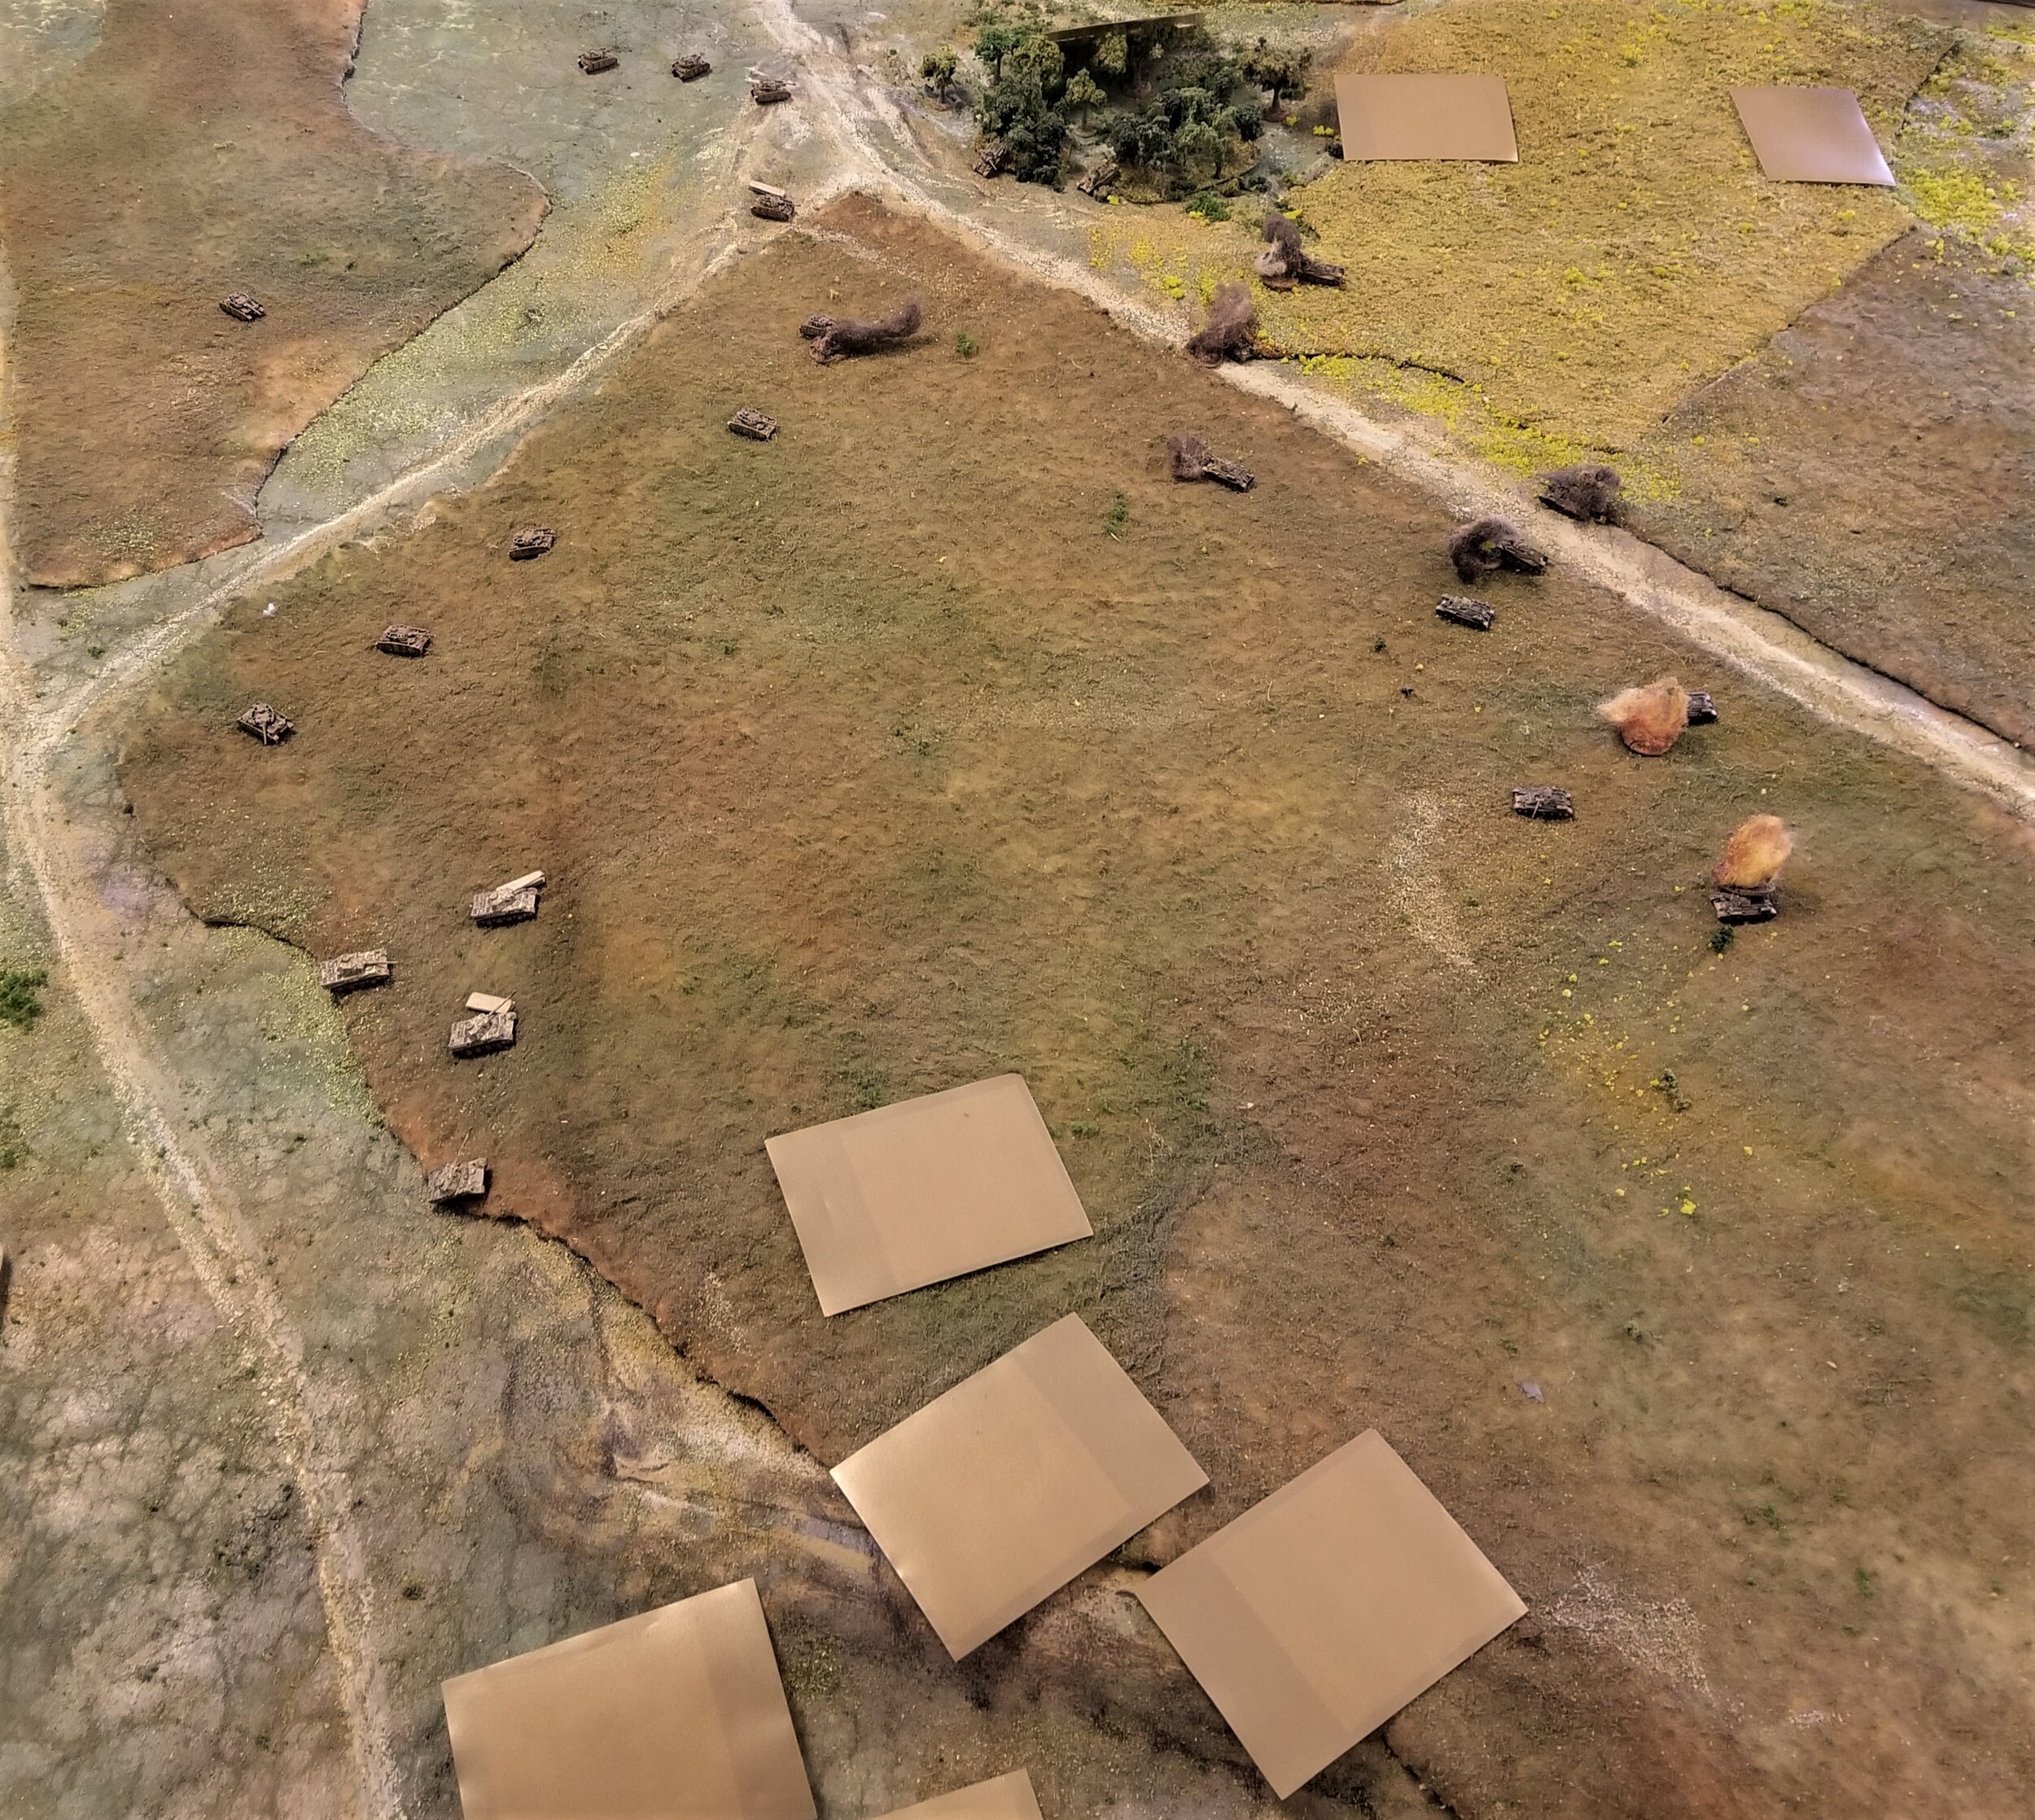
Photo 1 shows the field from the Germans position and the road they have to clear to win the game. Photo 2 shows the nature of the open terrain that covers all the rest of the battleground.

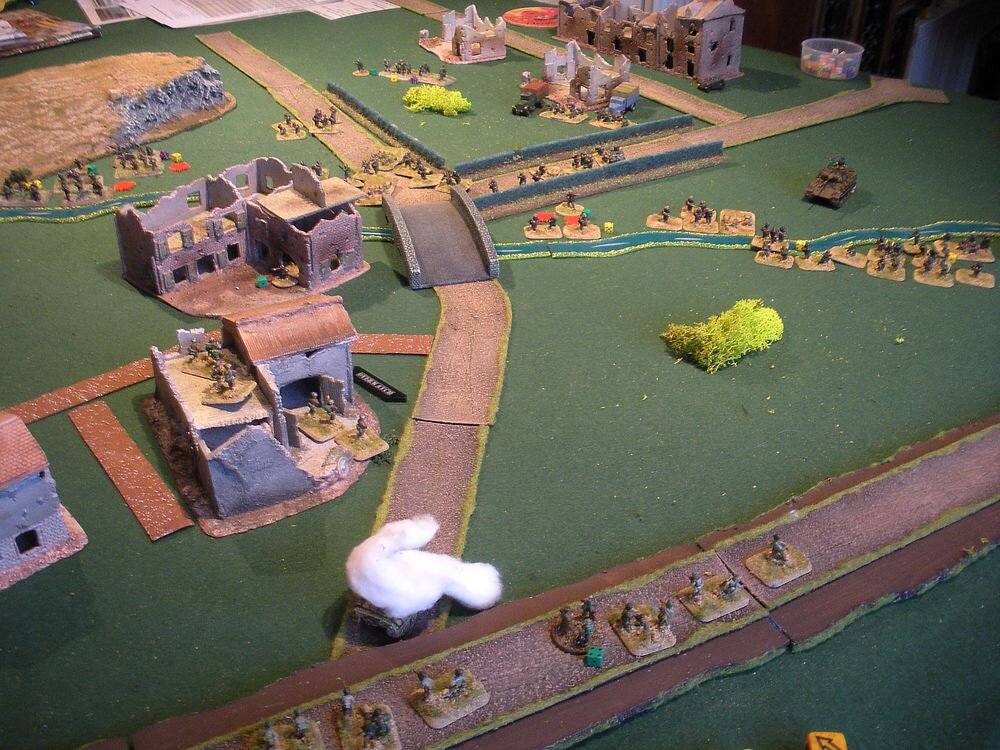
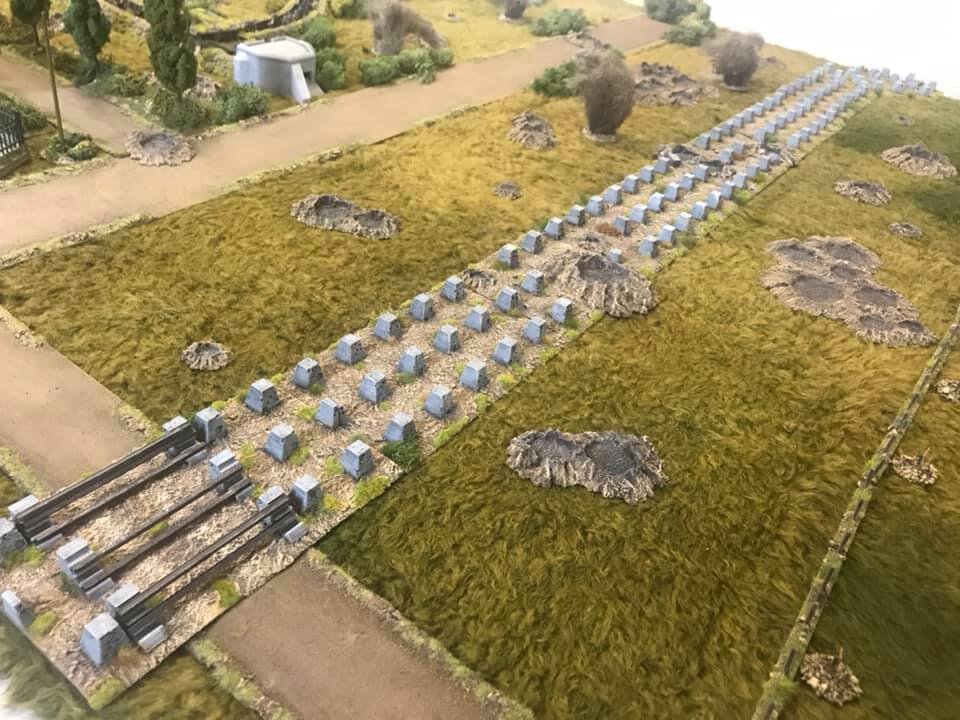
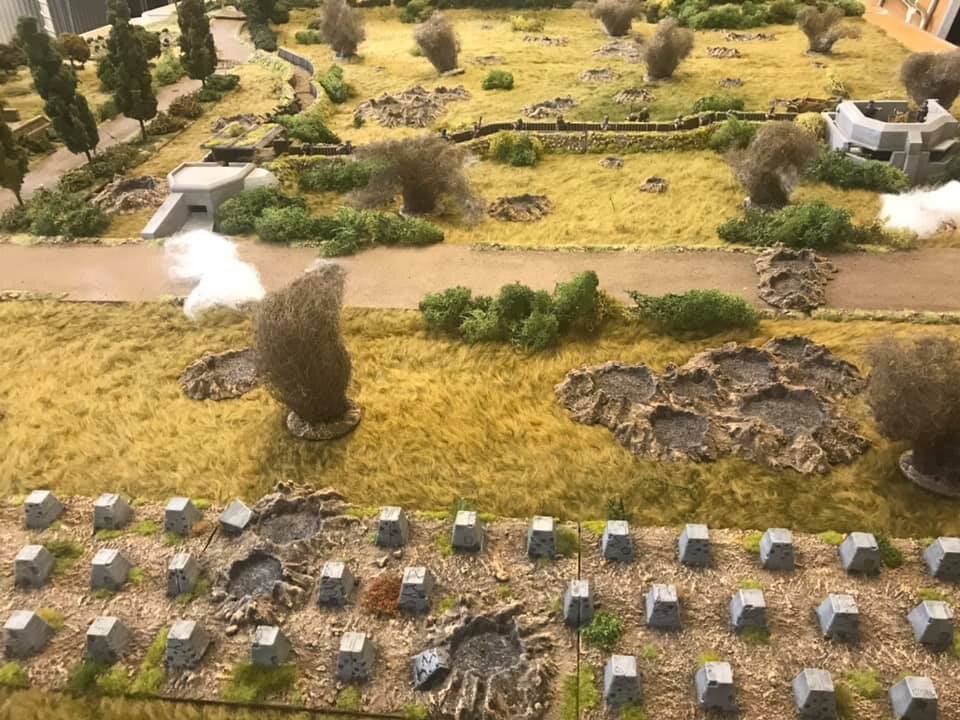
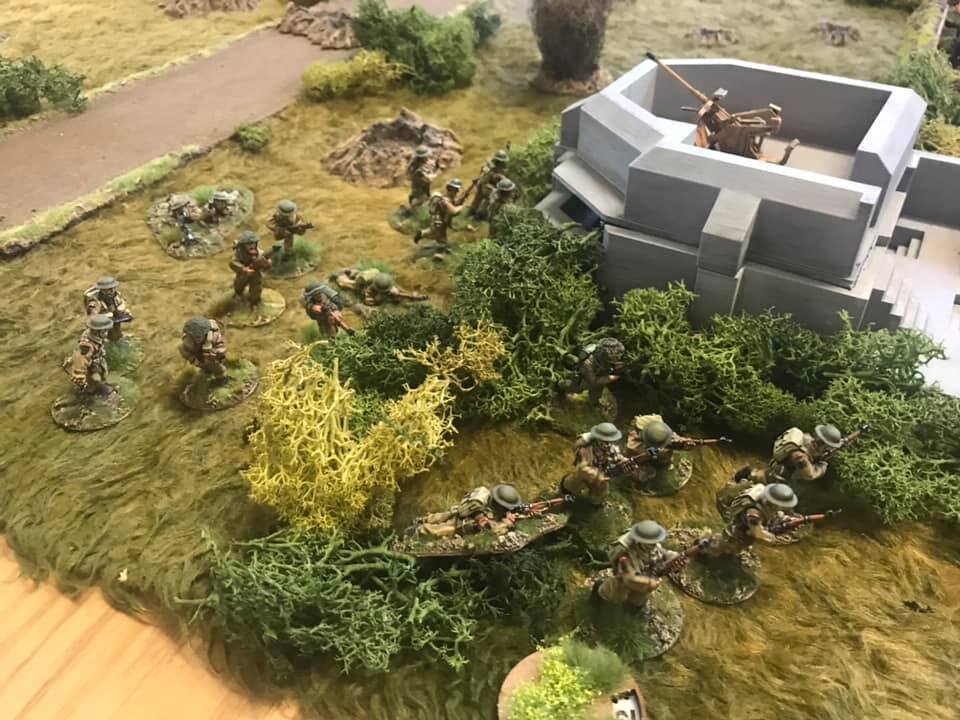
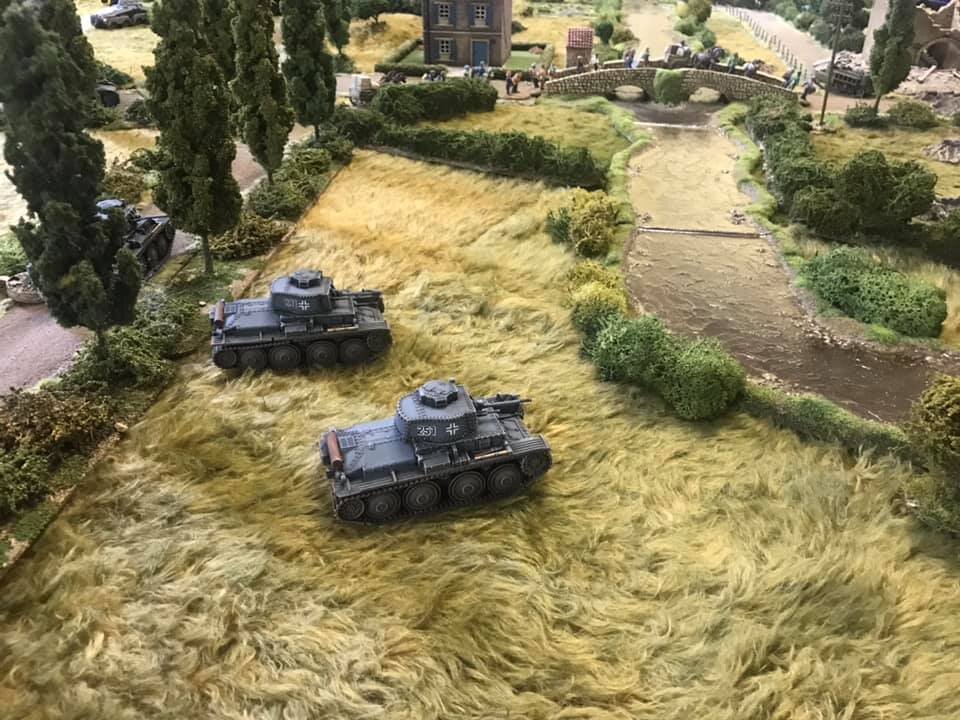
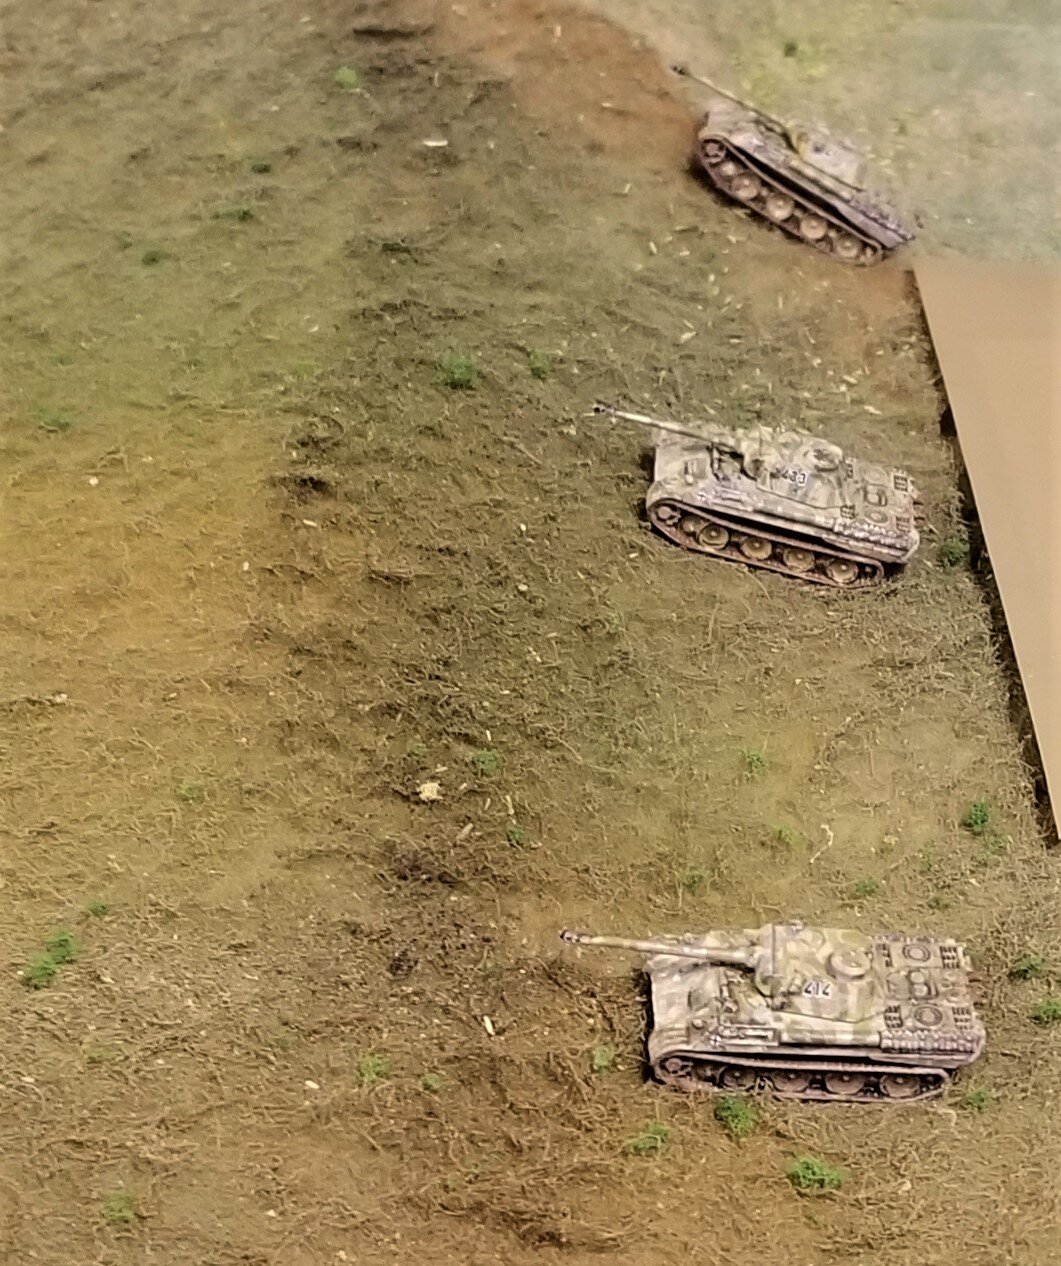
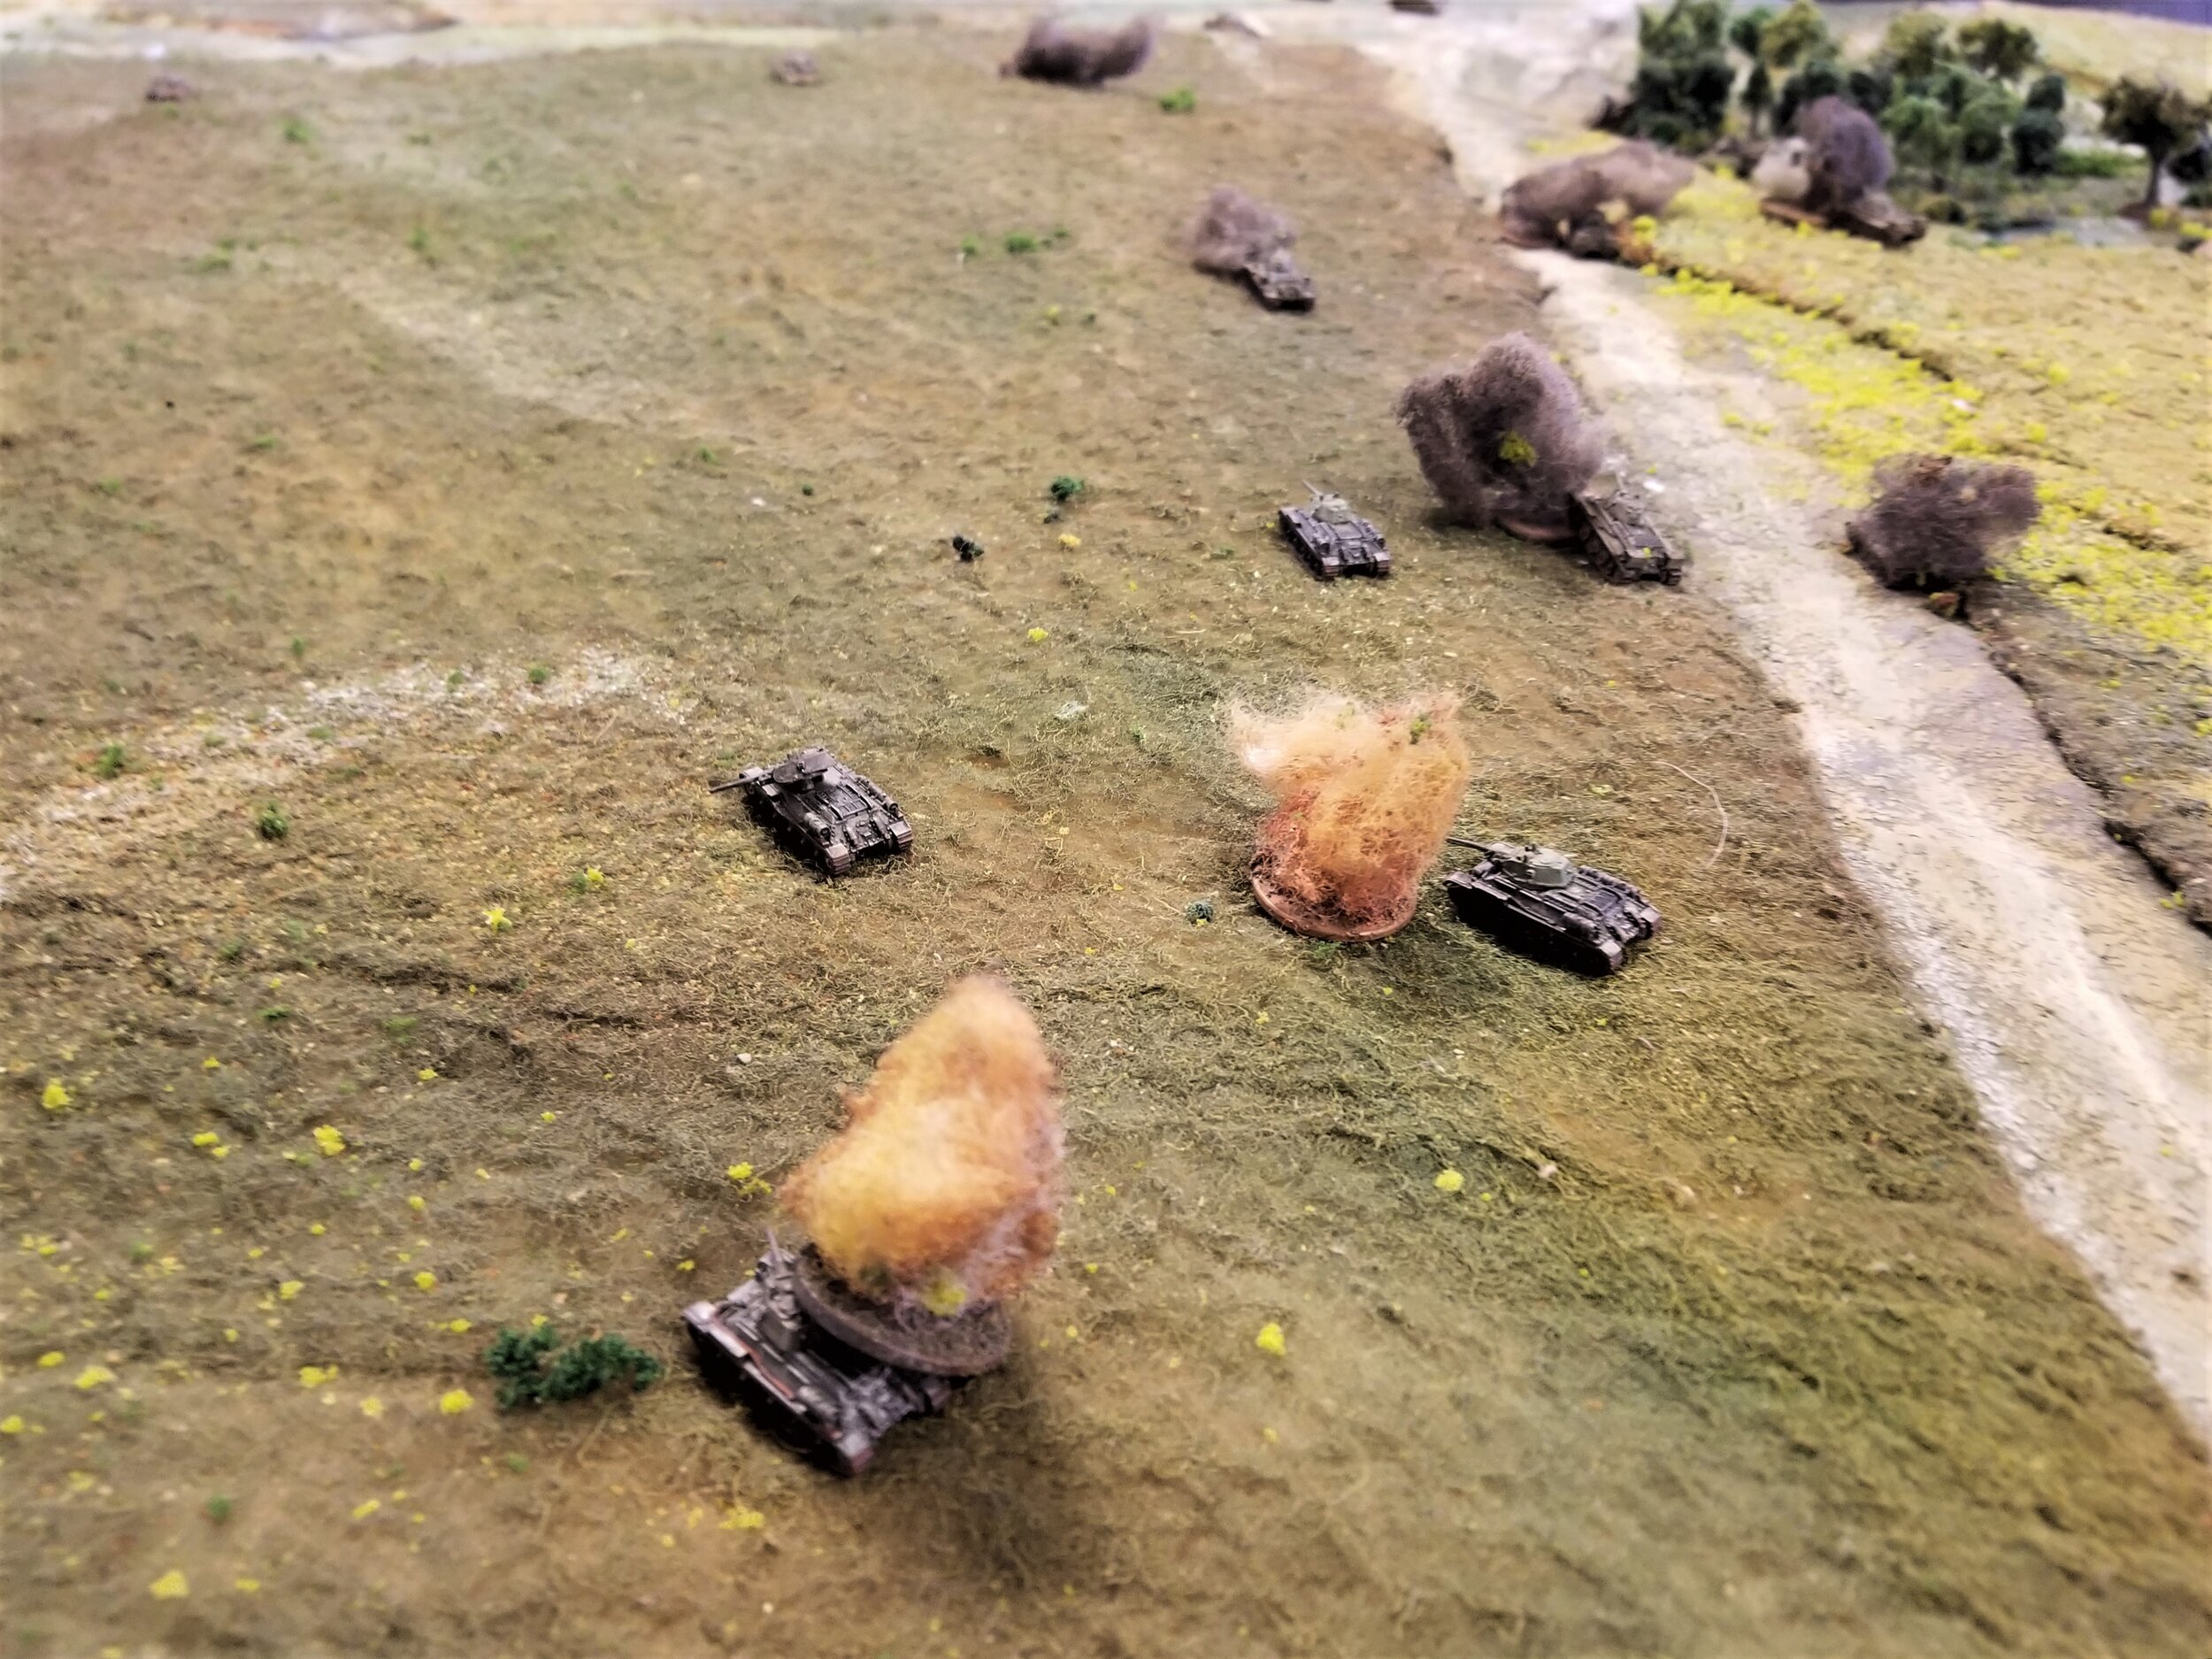
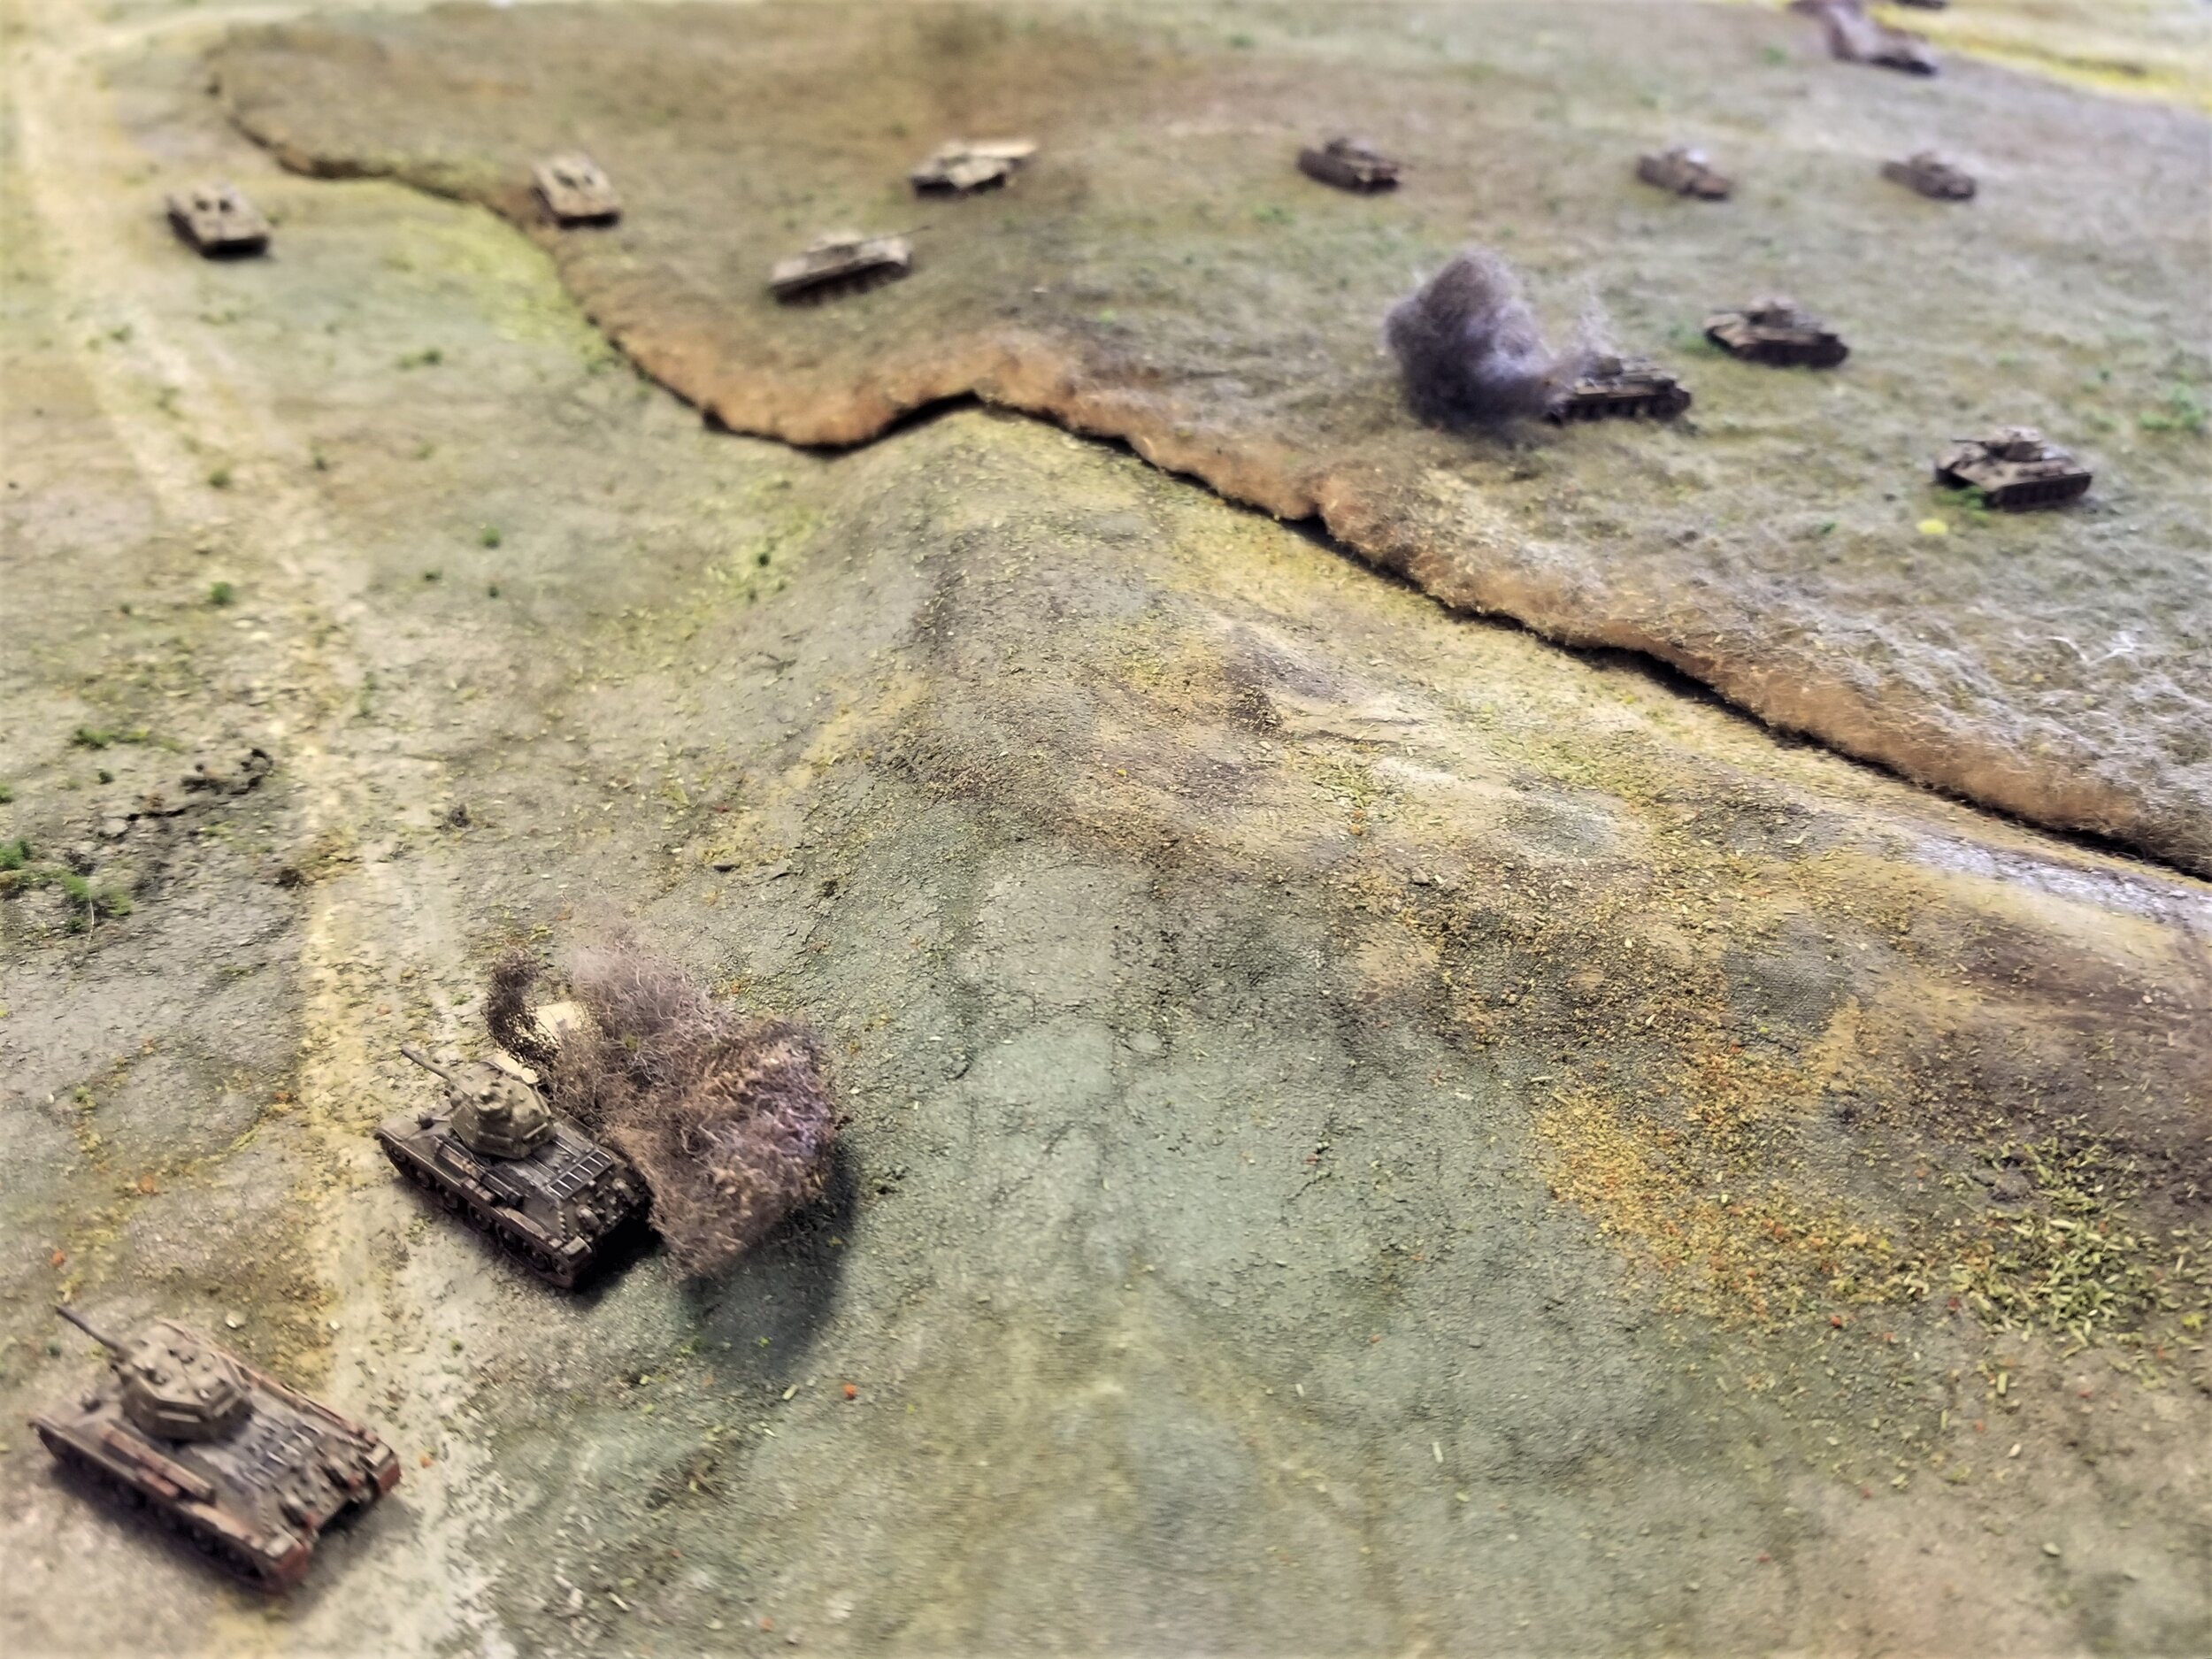
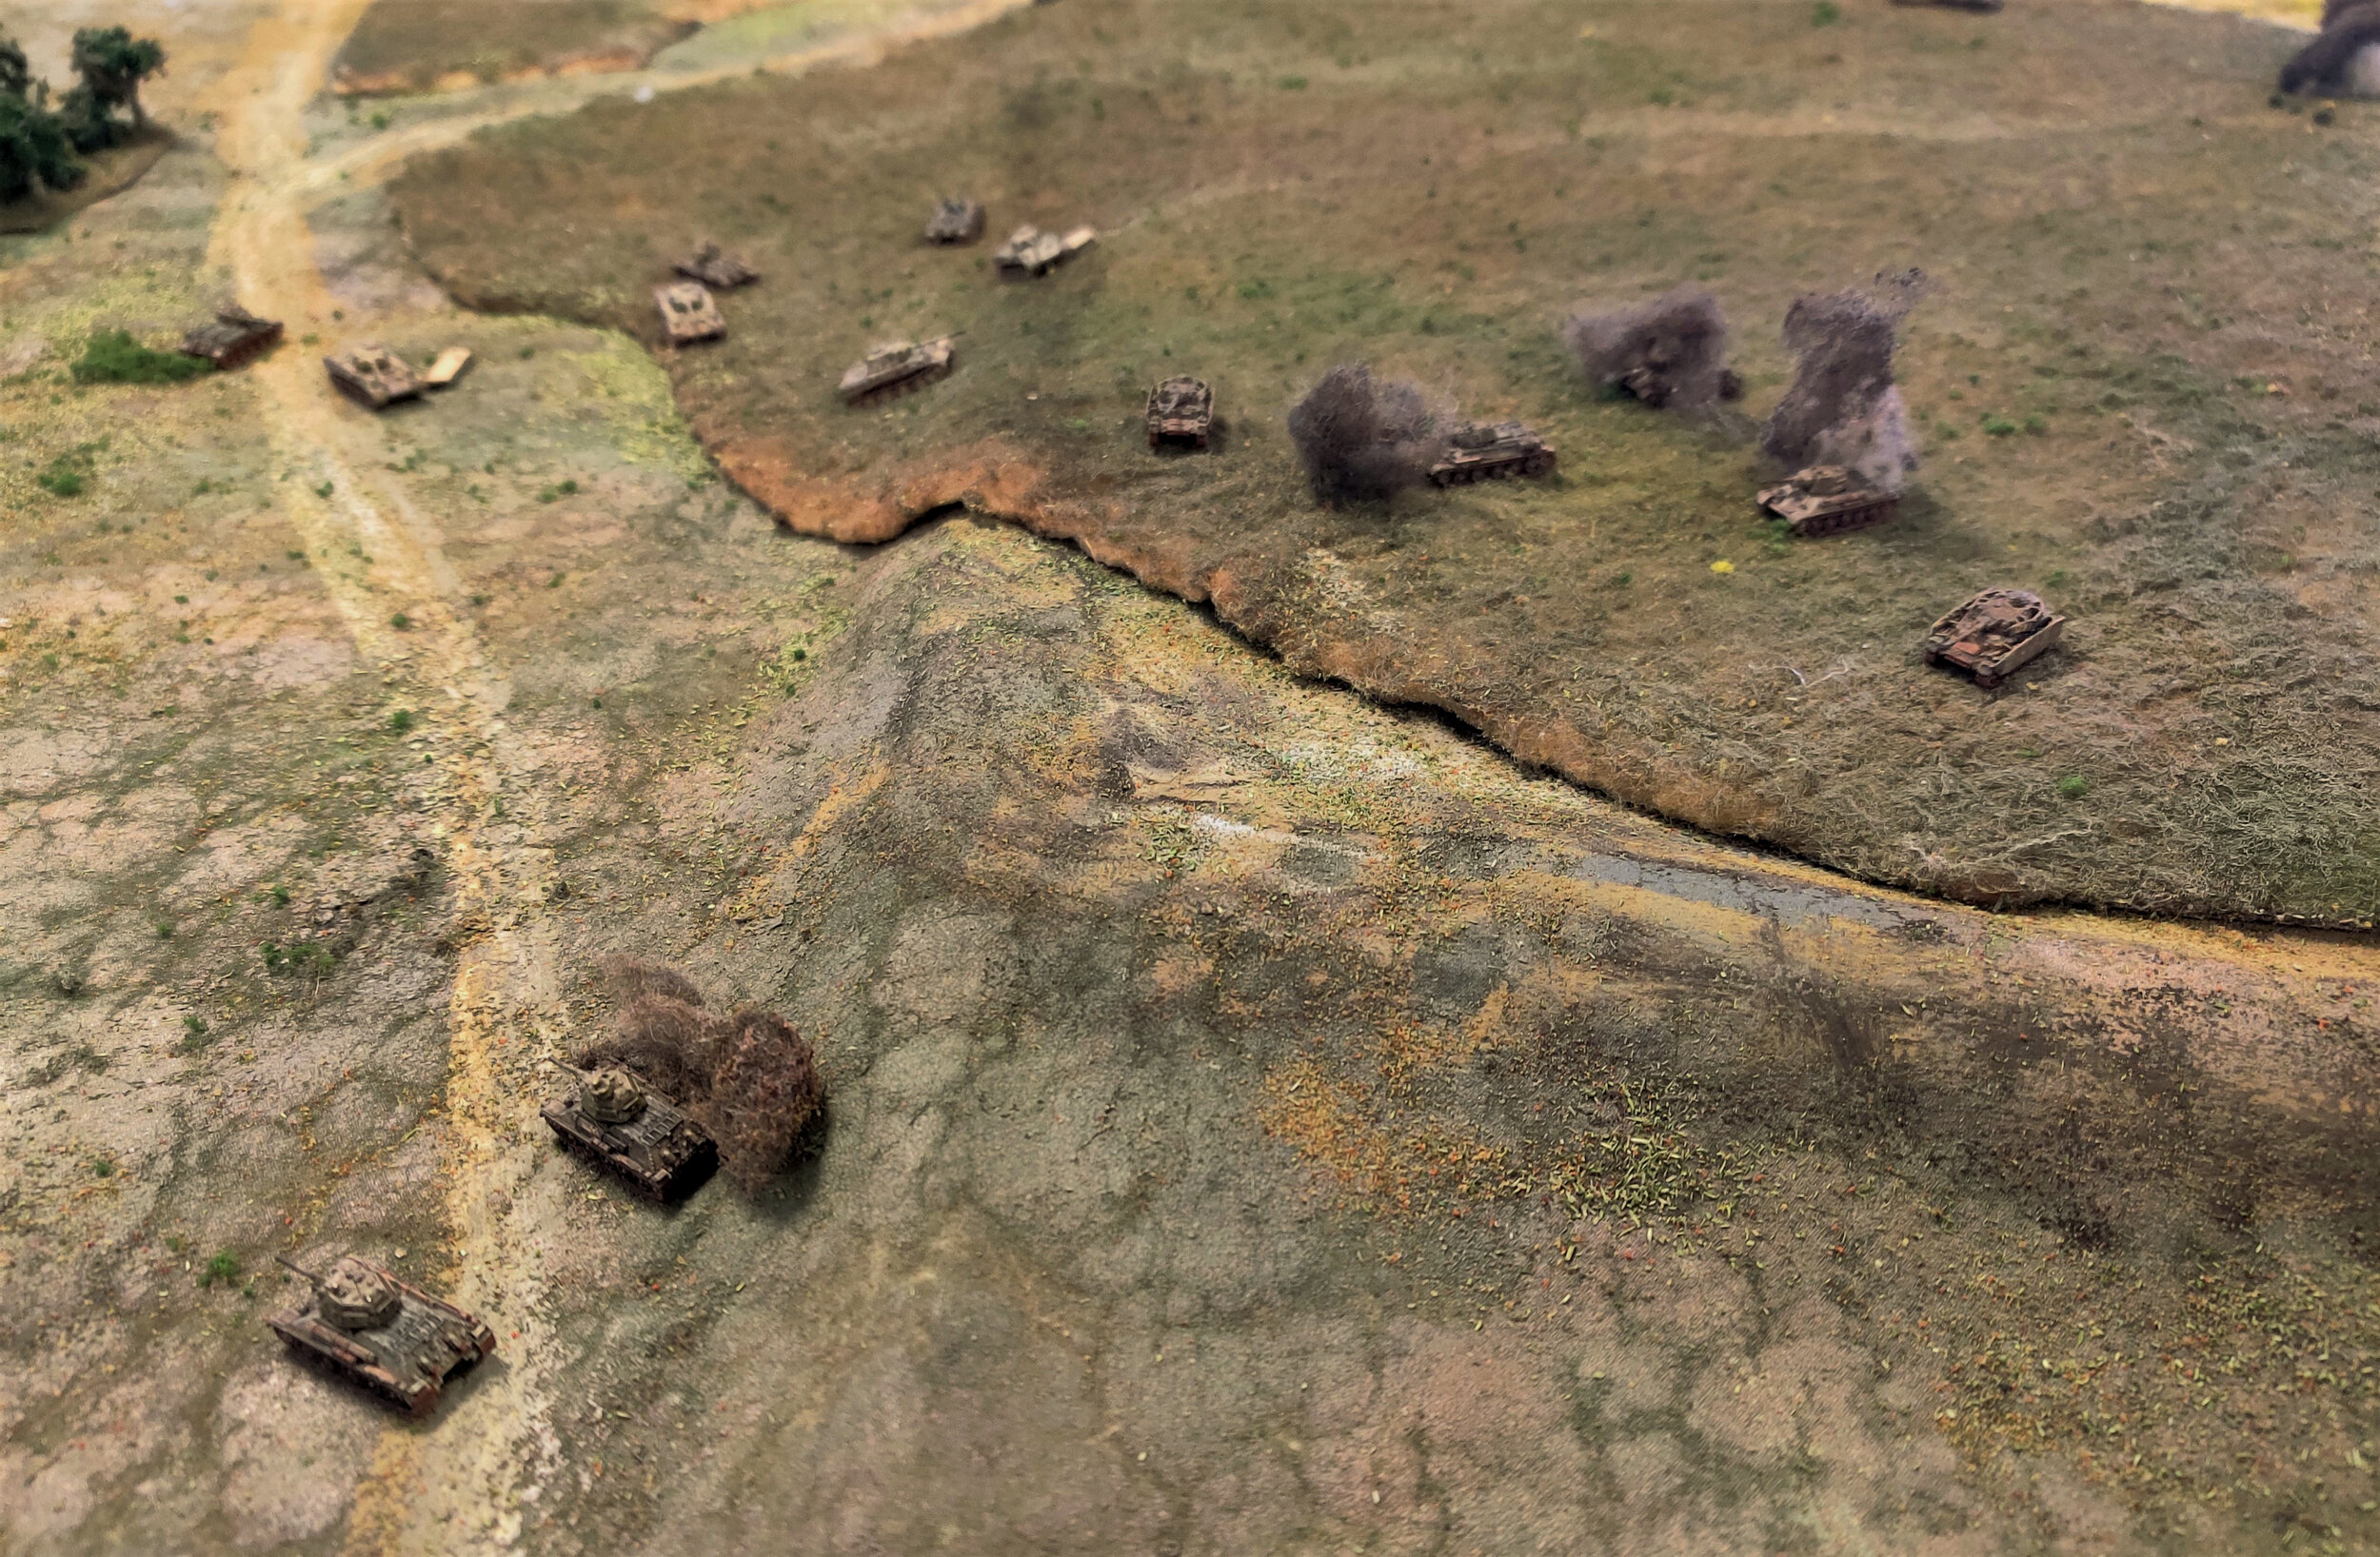
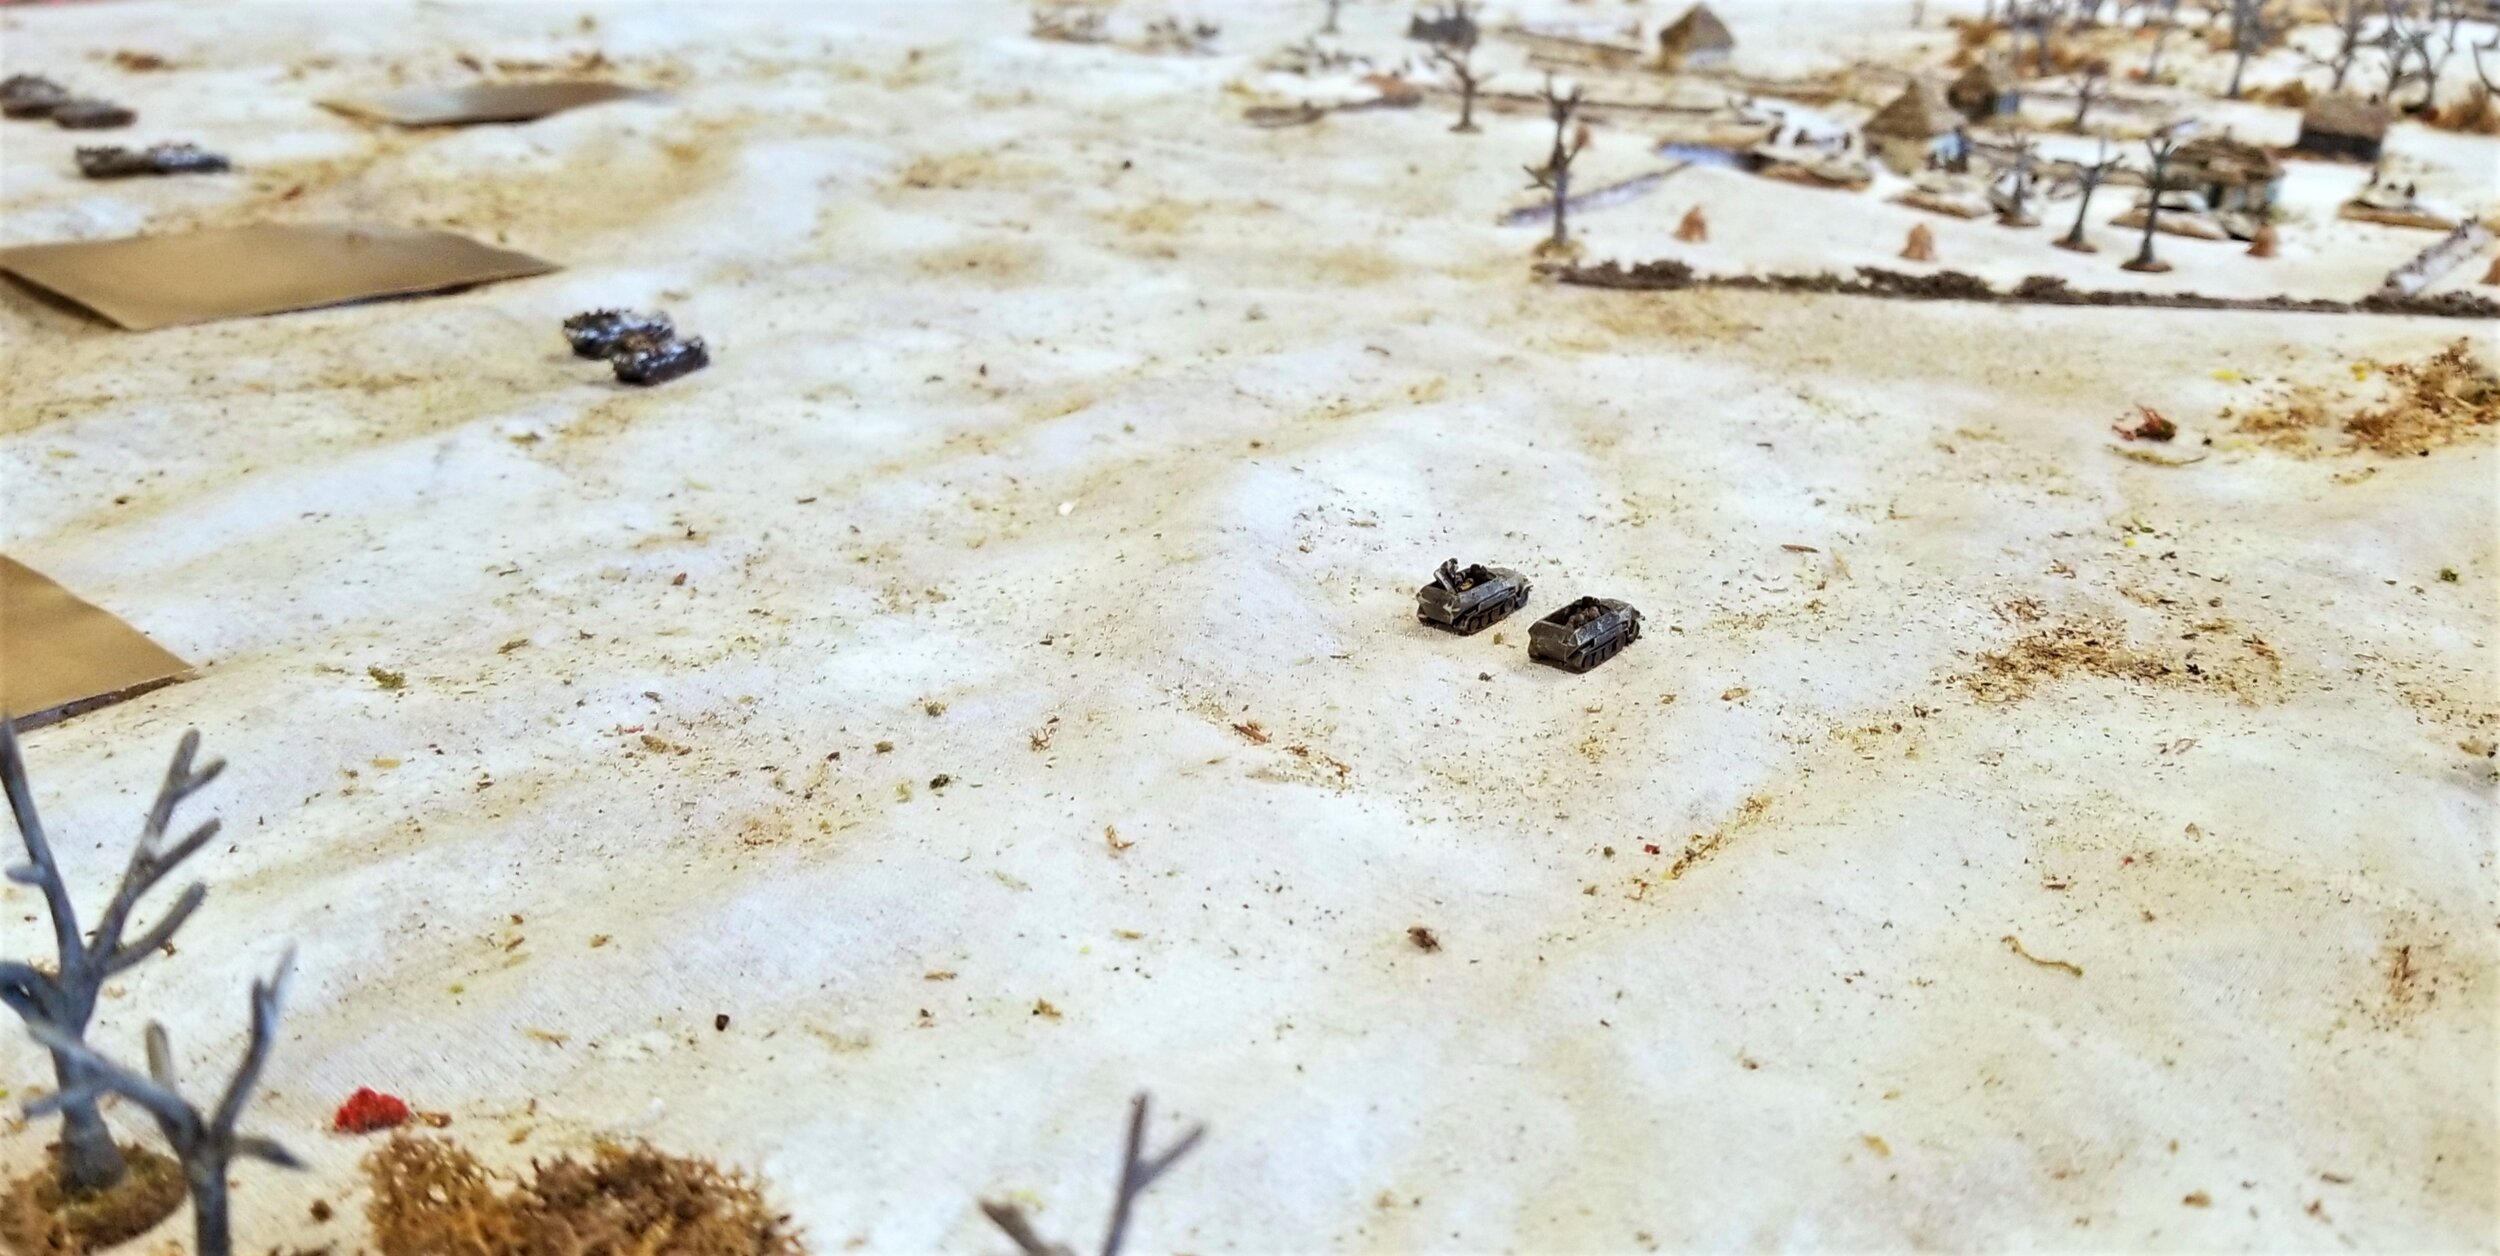
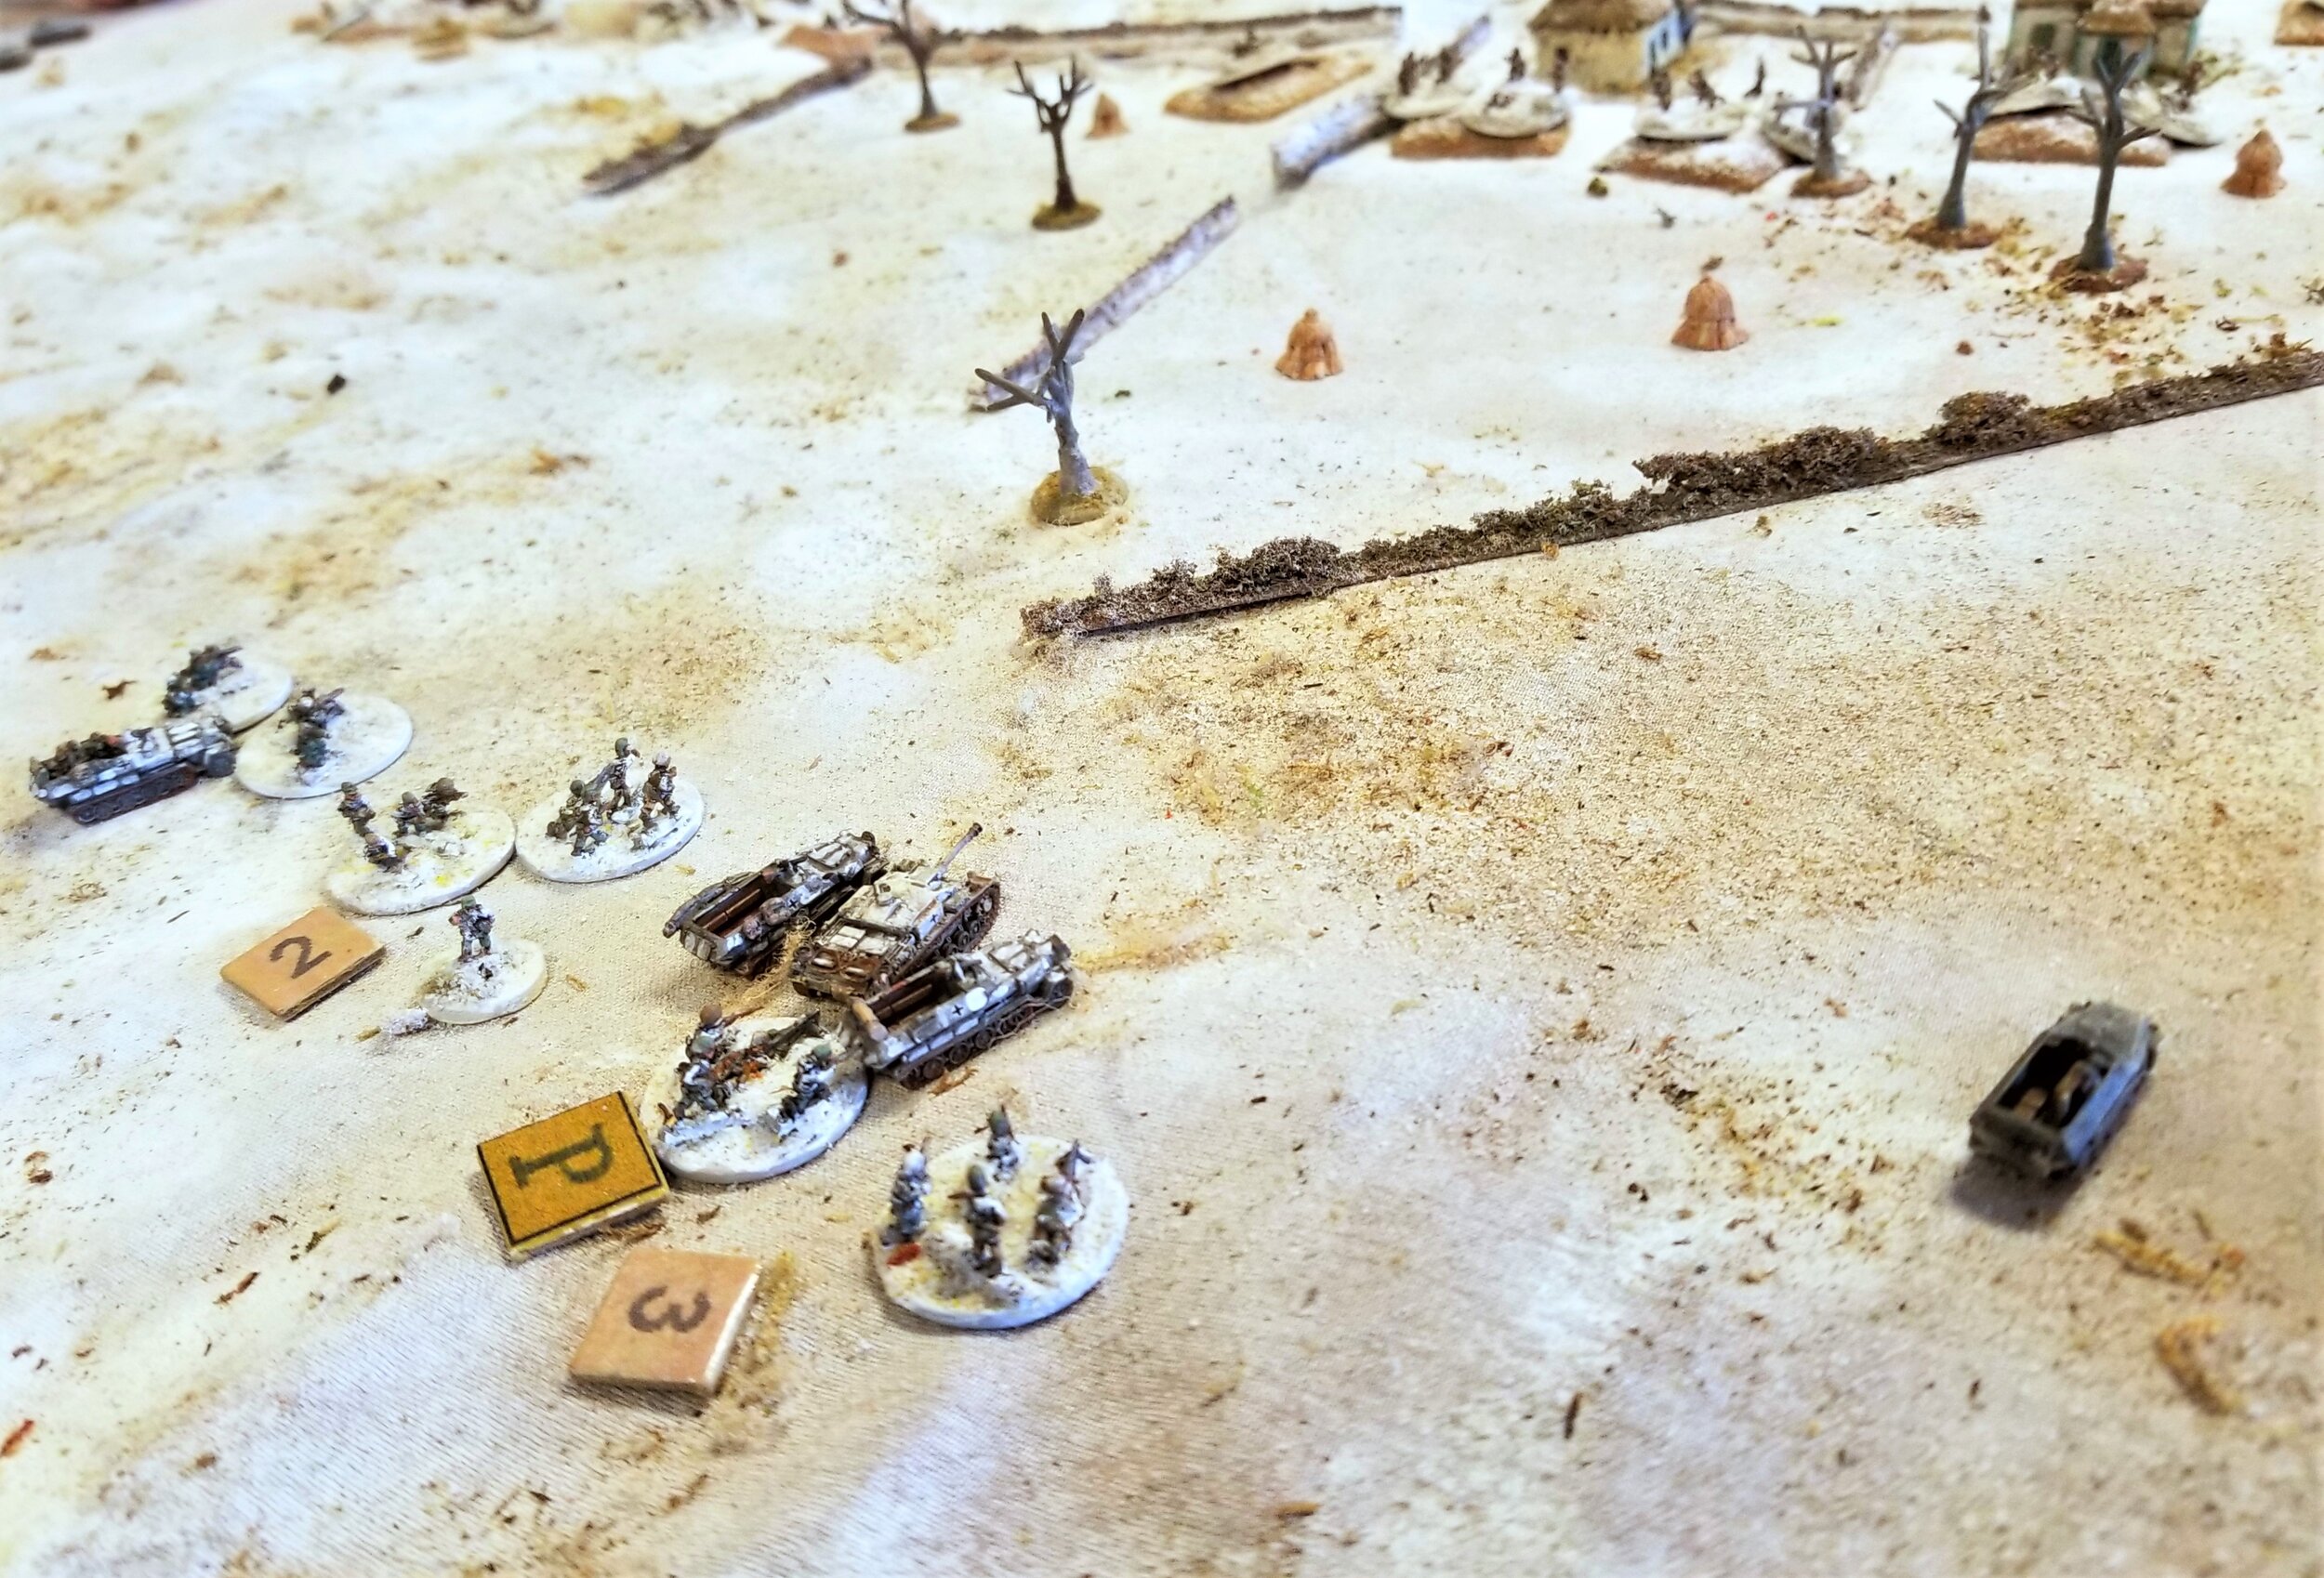
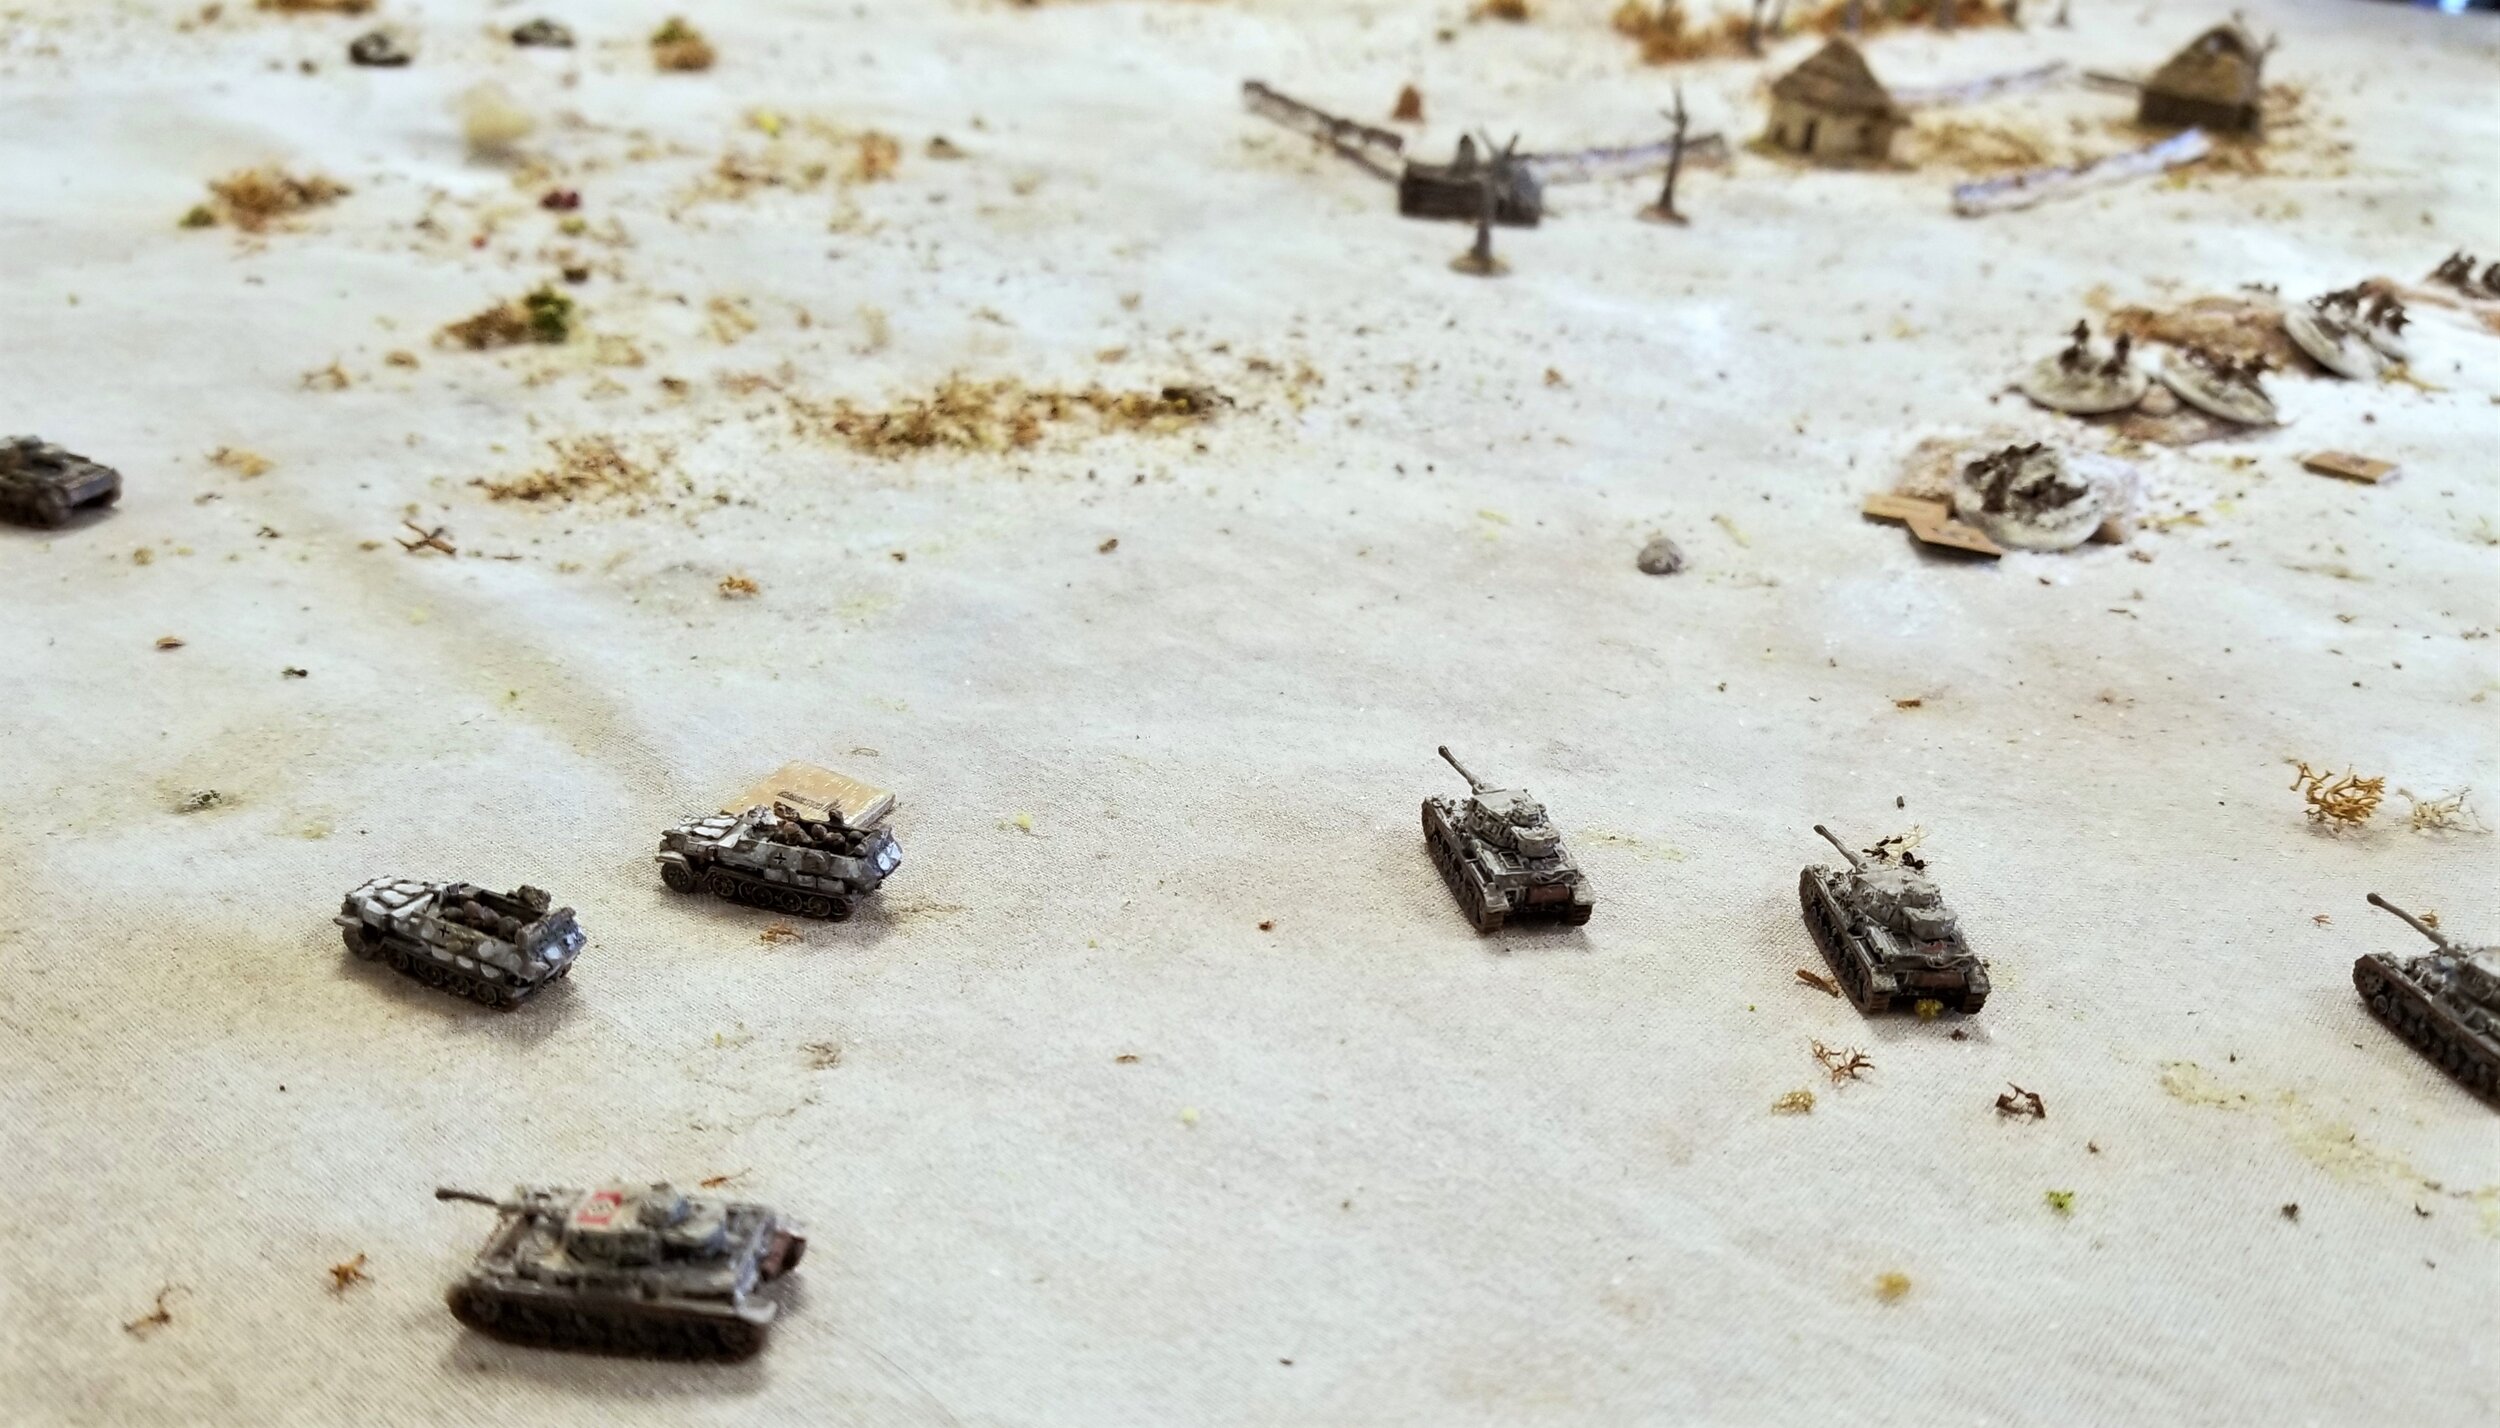
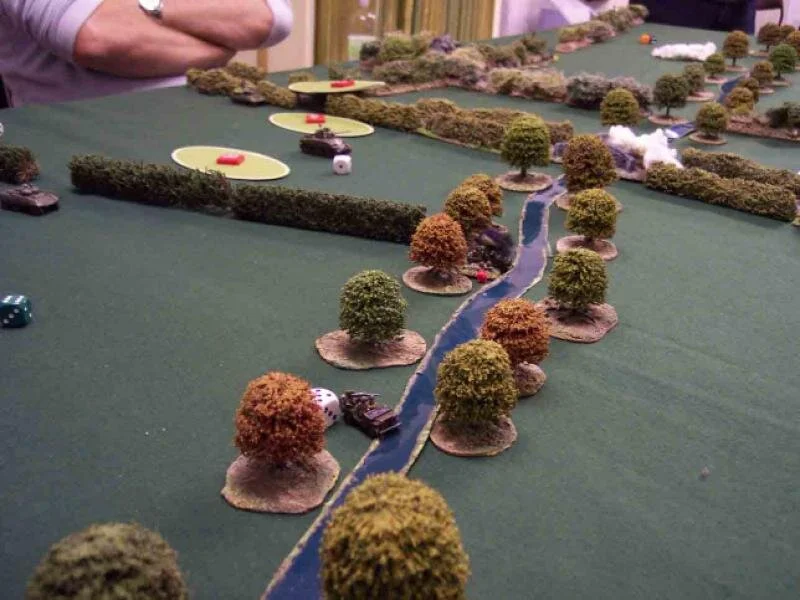
This was not a game for the faint hearted and the action started immediately as Blinds went up the road and also to the west. These Blinds consisted of the Infantry and surprisingly four Panzer IIIs who were darting up the roads. The Germans had the better of the exchanges to the west and the loss of the British officer here was key (1 in 10 chance, oh how I laughed; not!). As you can see in Photo 3 the American Support Section on MMGs and HMGs were shocked. Luckily the tanks were also surprised and let them get away, Steve forgot to carry out any actions out when he took the tanks off the Blind.

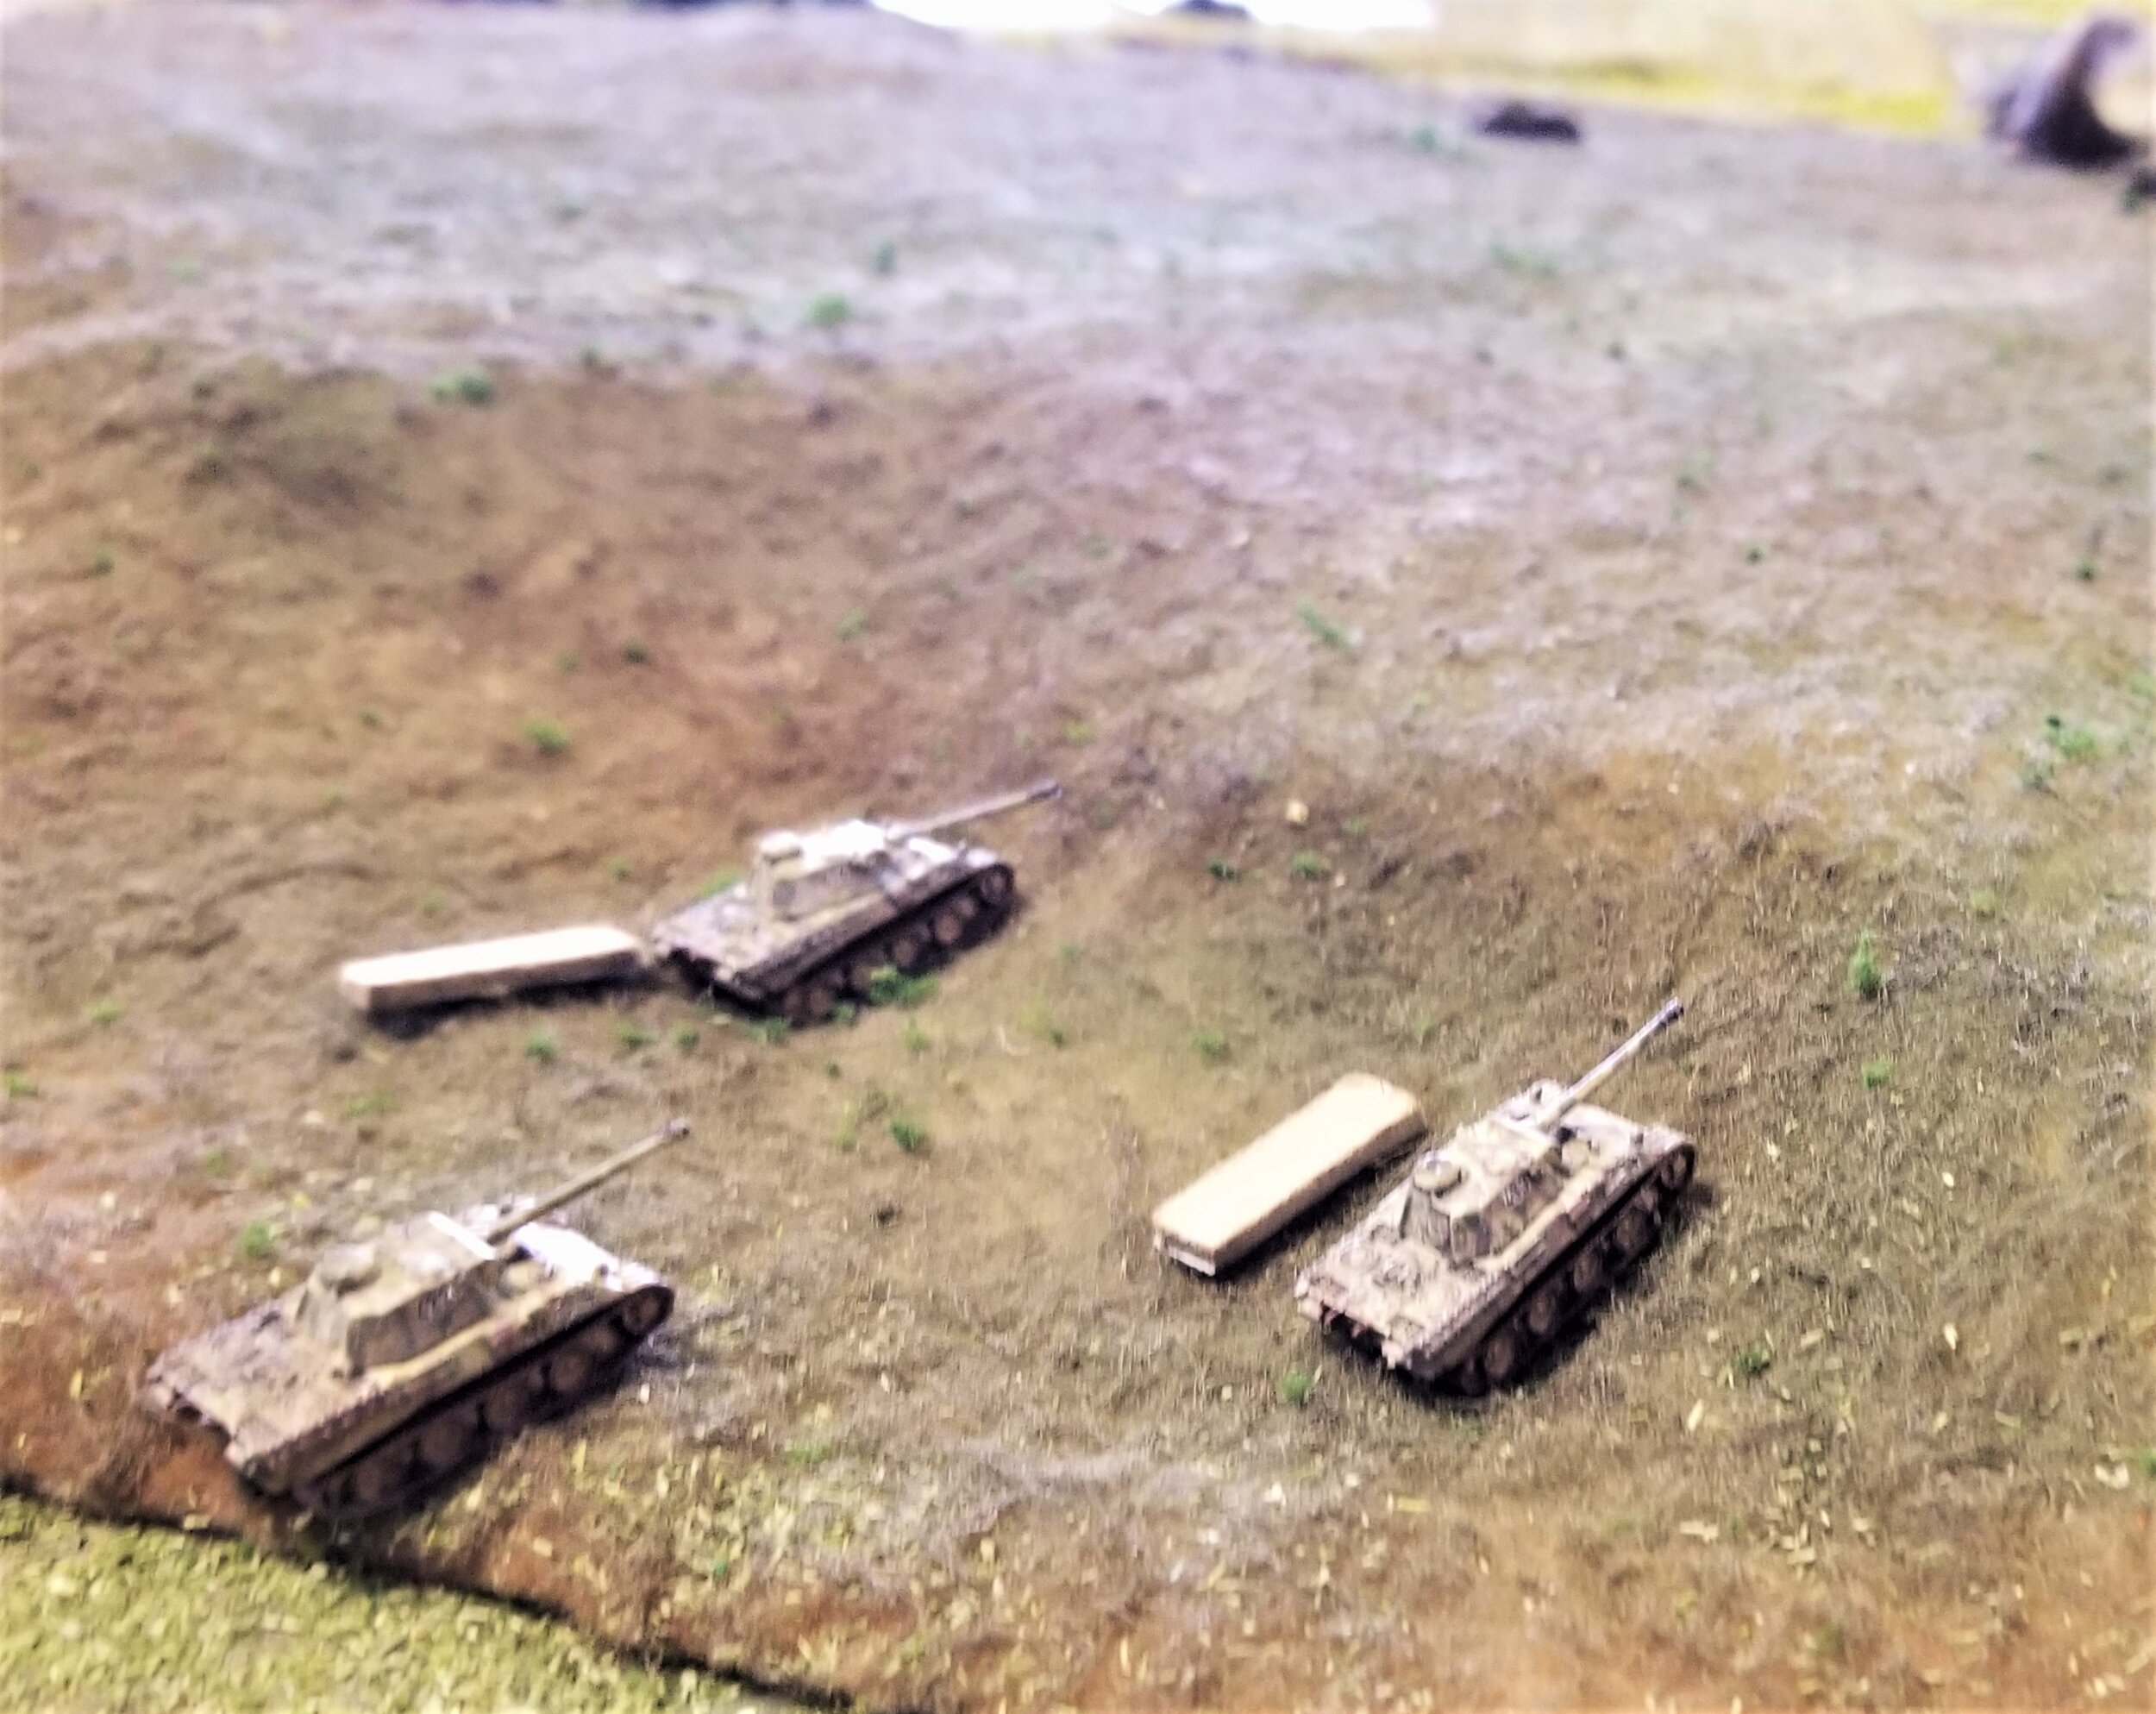
At this point the Panzer IIIs turned off the road towards the house. I decided as it was getting messy to bring all my troops onto the field. My idea was to use all my firepower to hit the Germans as they came onto the field. Good plan, I thought, but I would soon see.

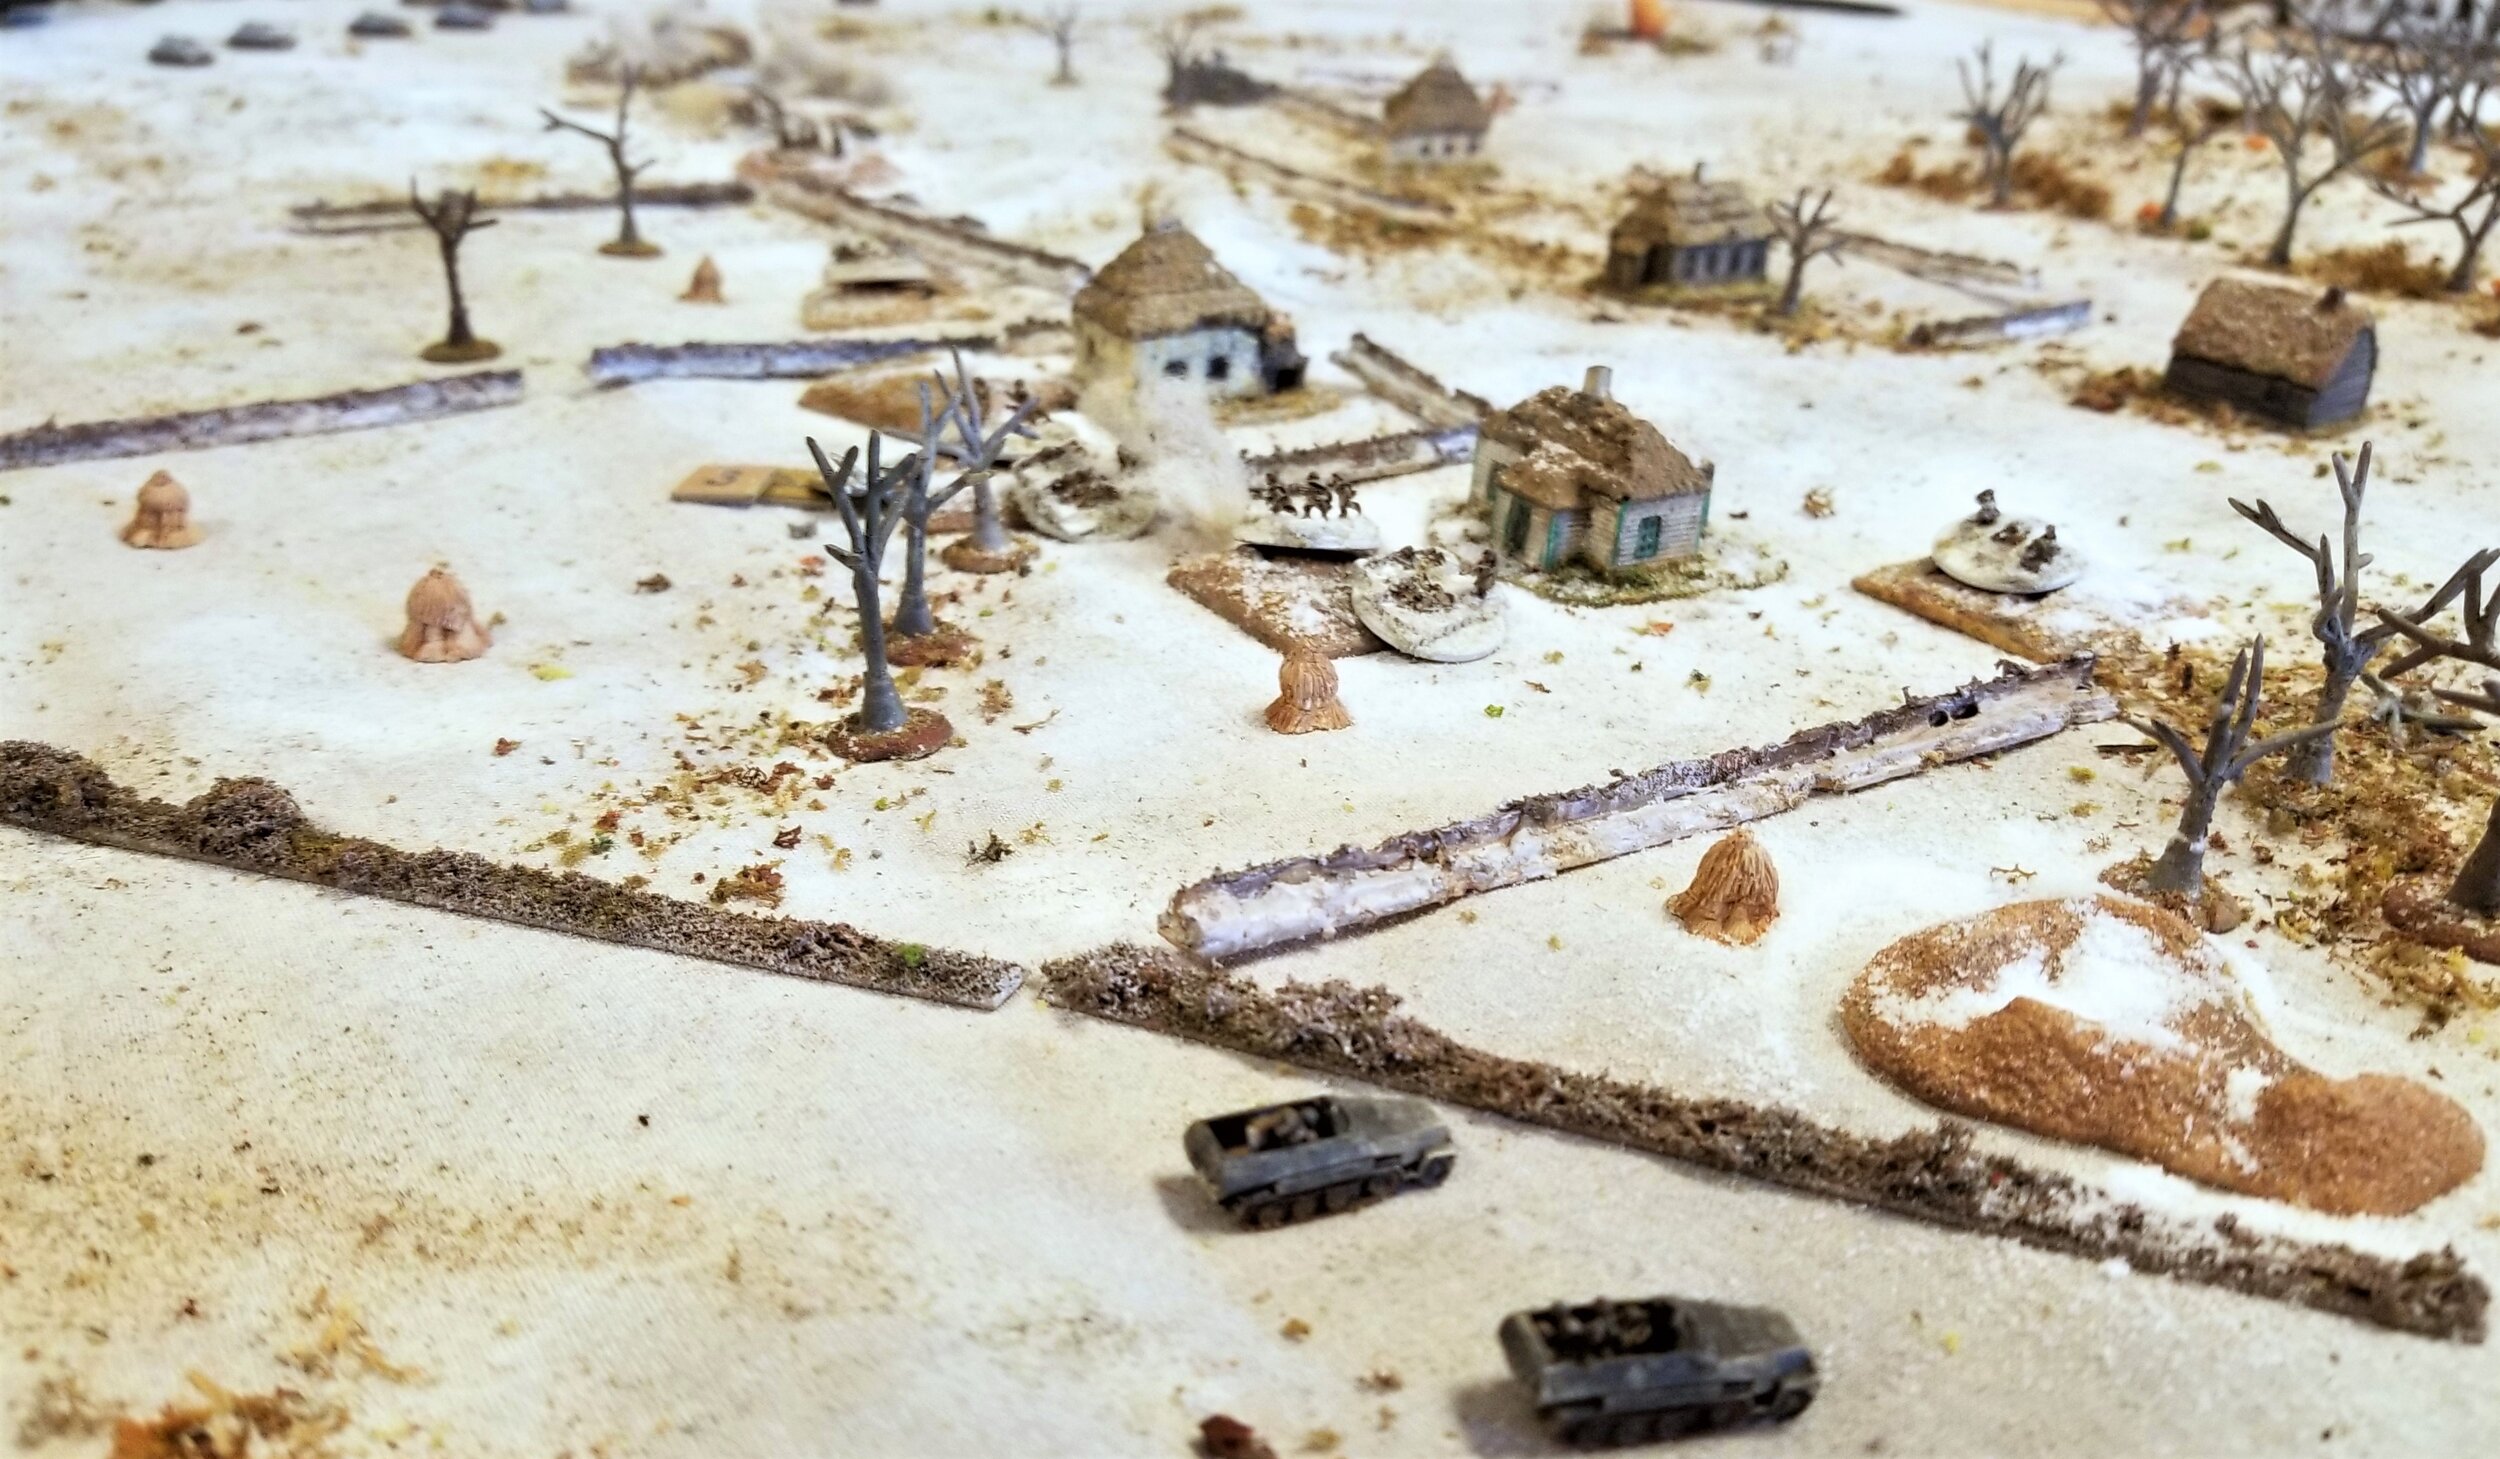
The action now gravitated towards the solitary house and the main action would stay here for the rest of the game. In the west the Germans beat the Americans and the HQ Sections which then moved there couldn't do much except hold the Germans for the rest of the game.

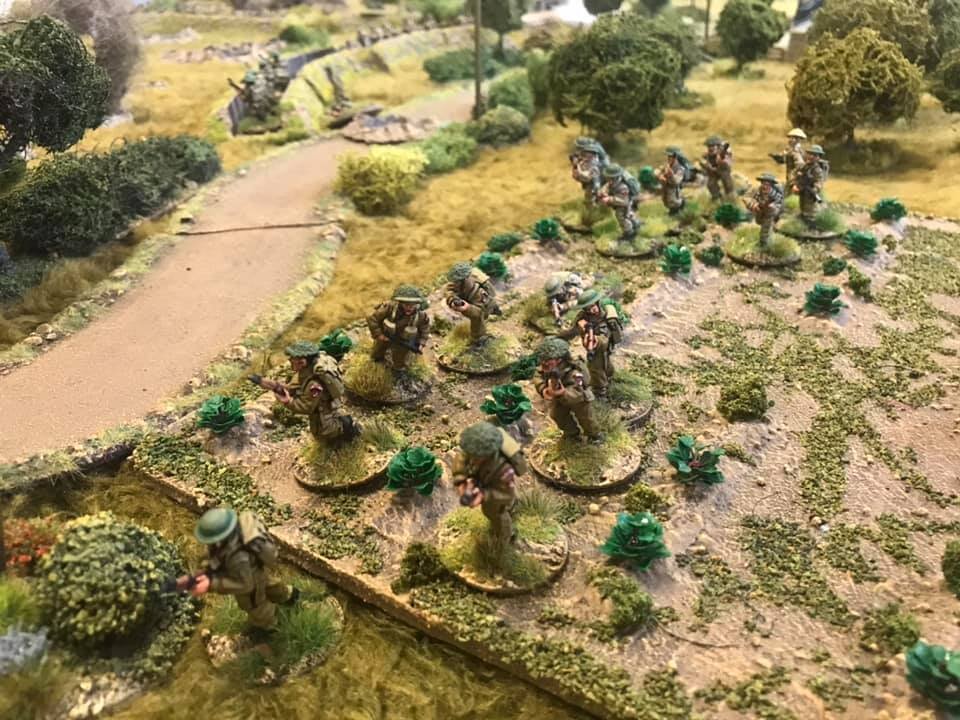
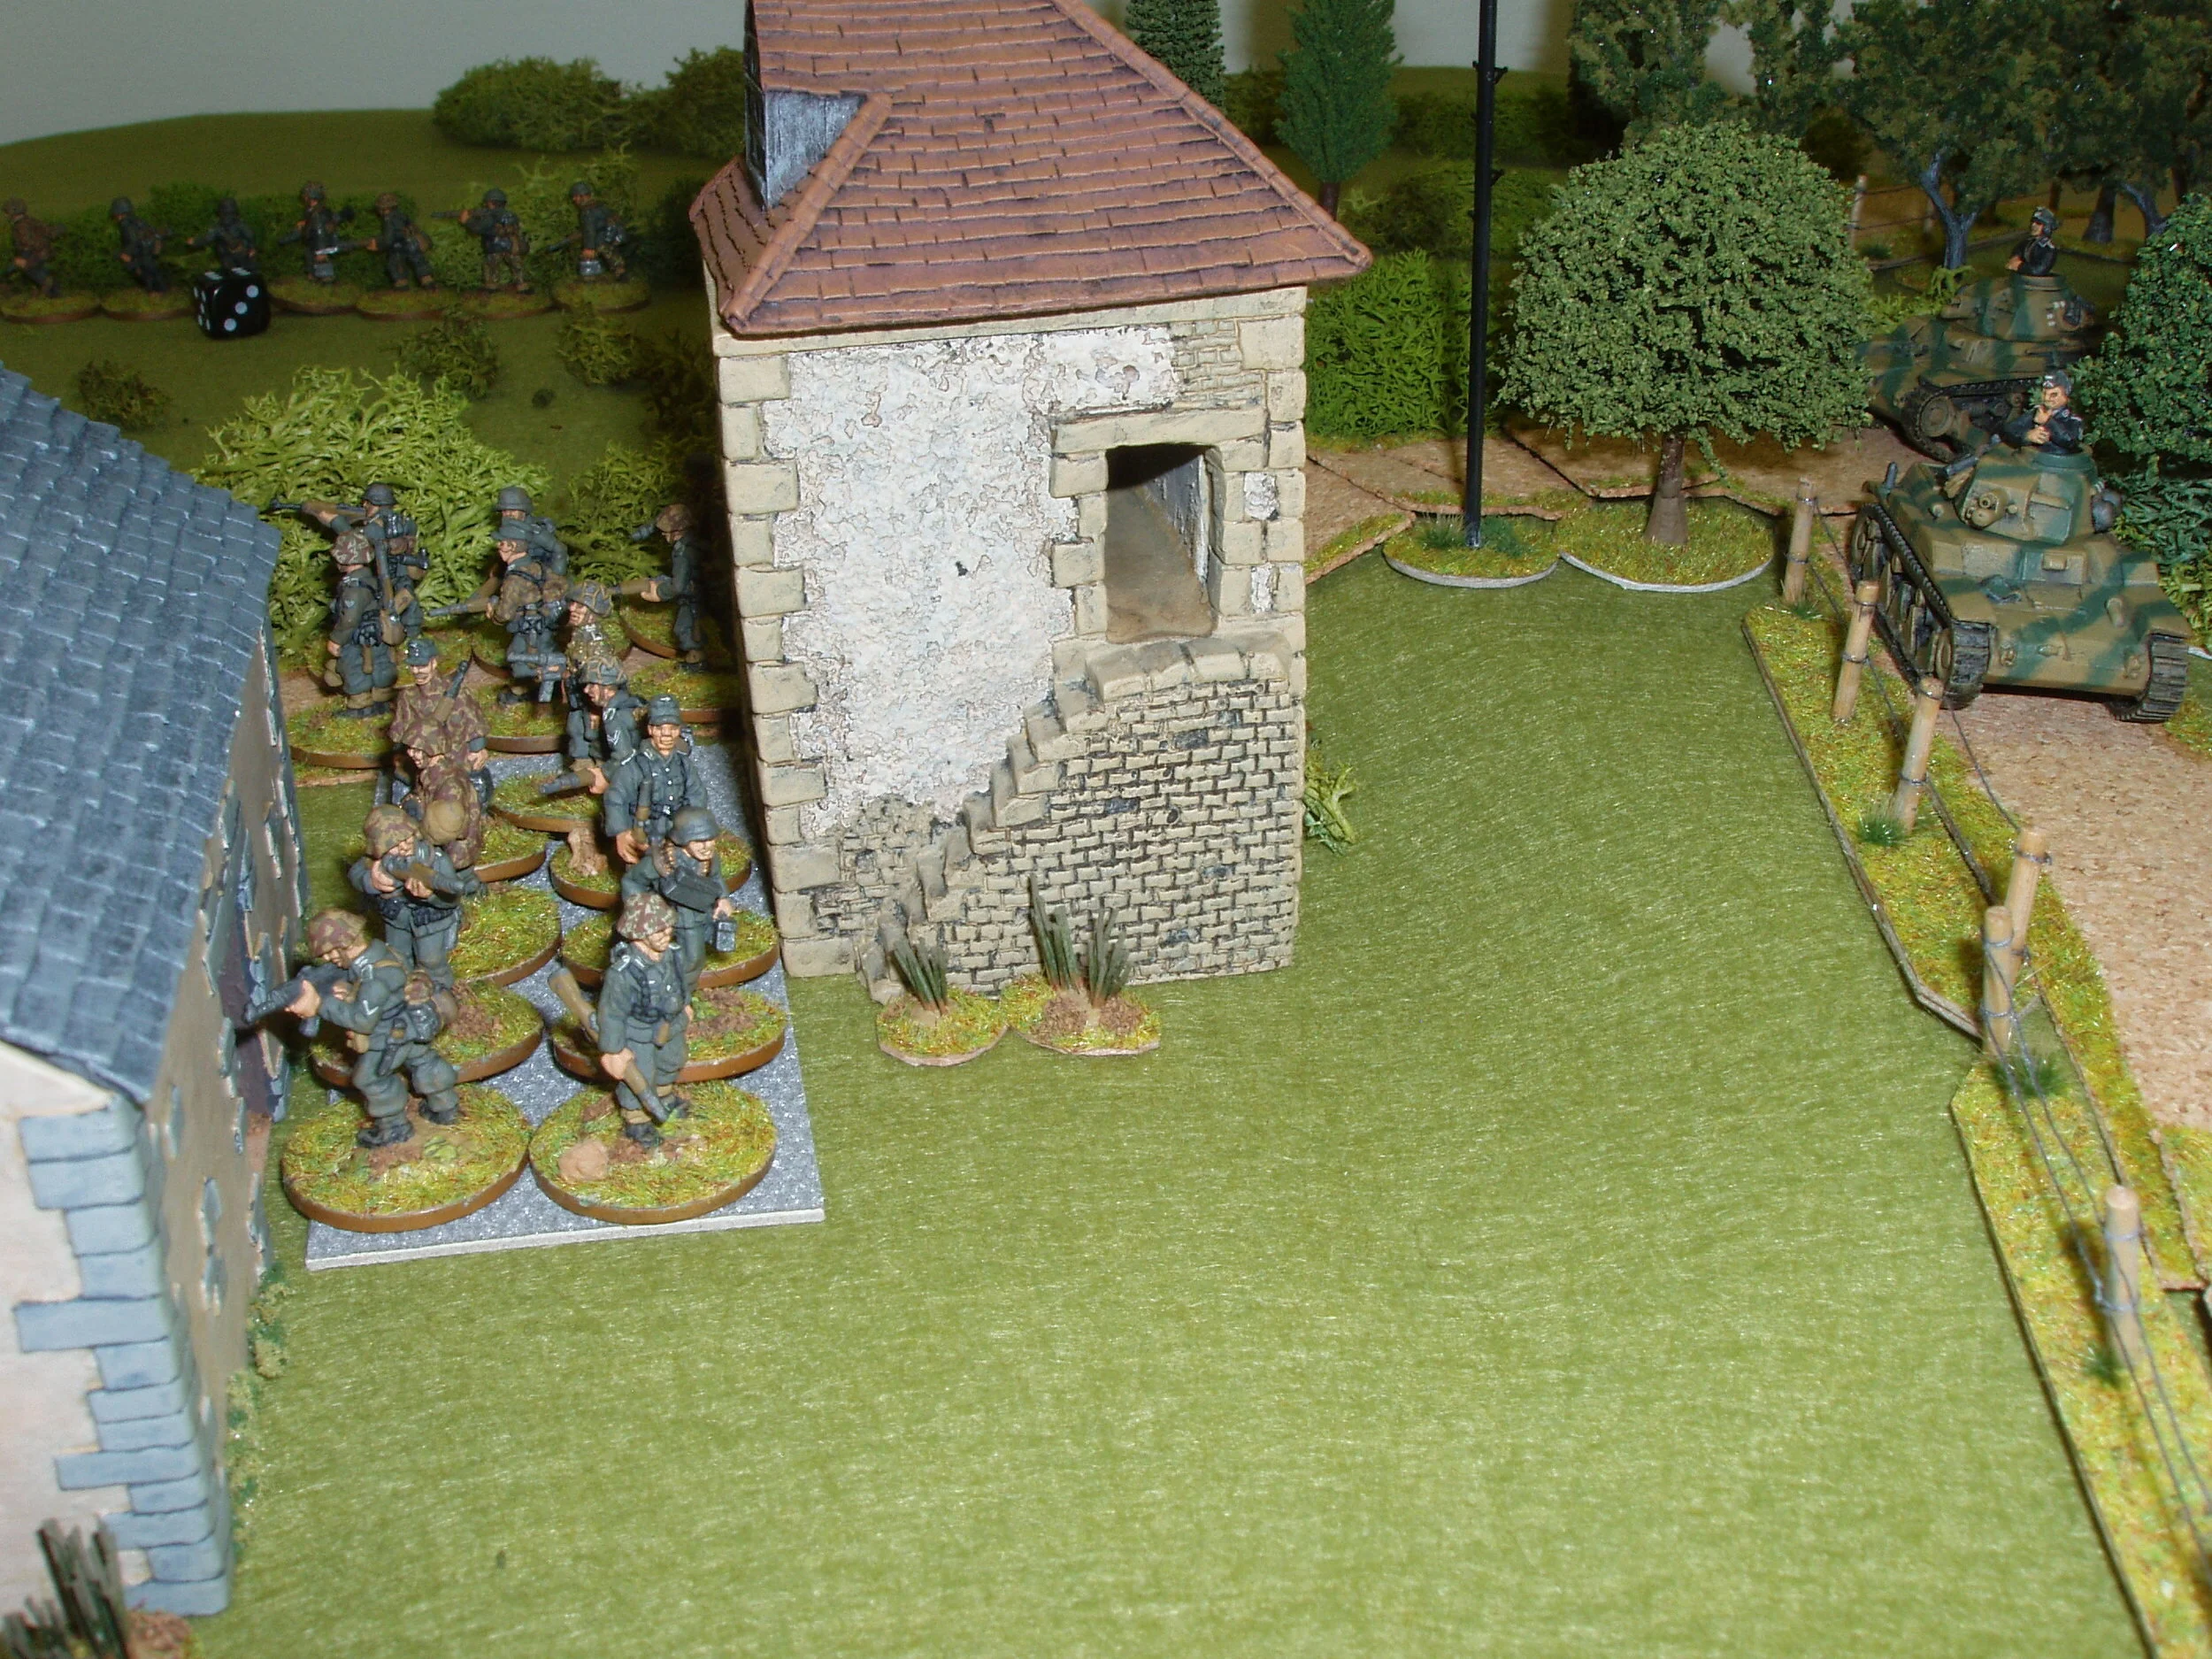
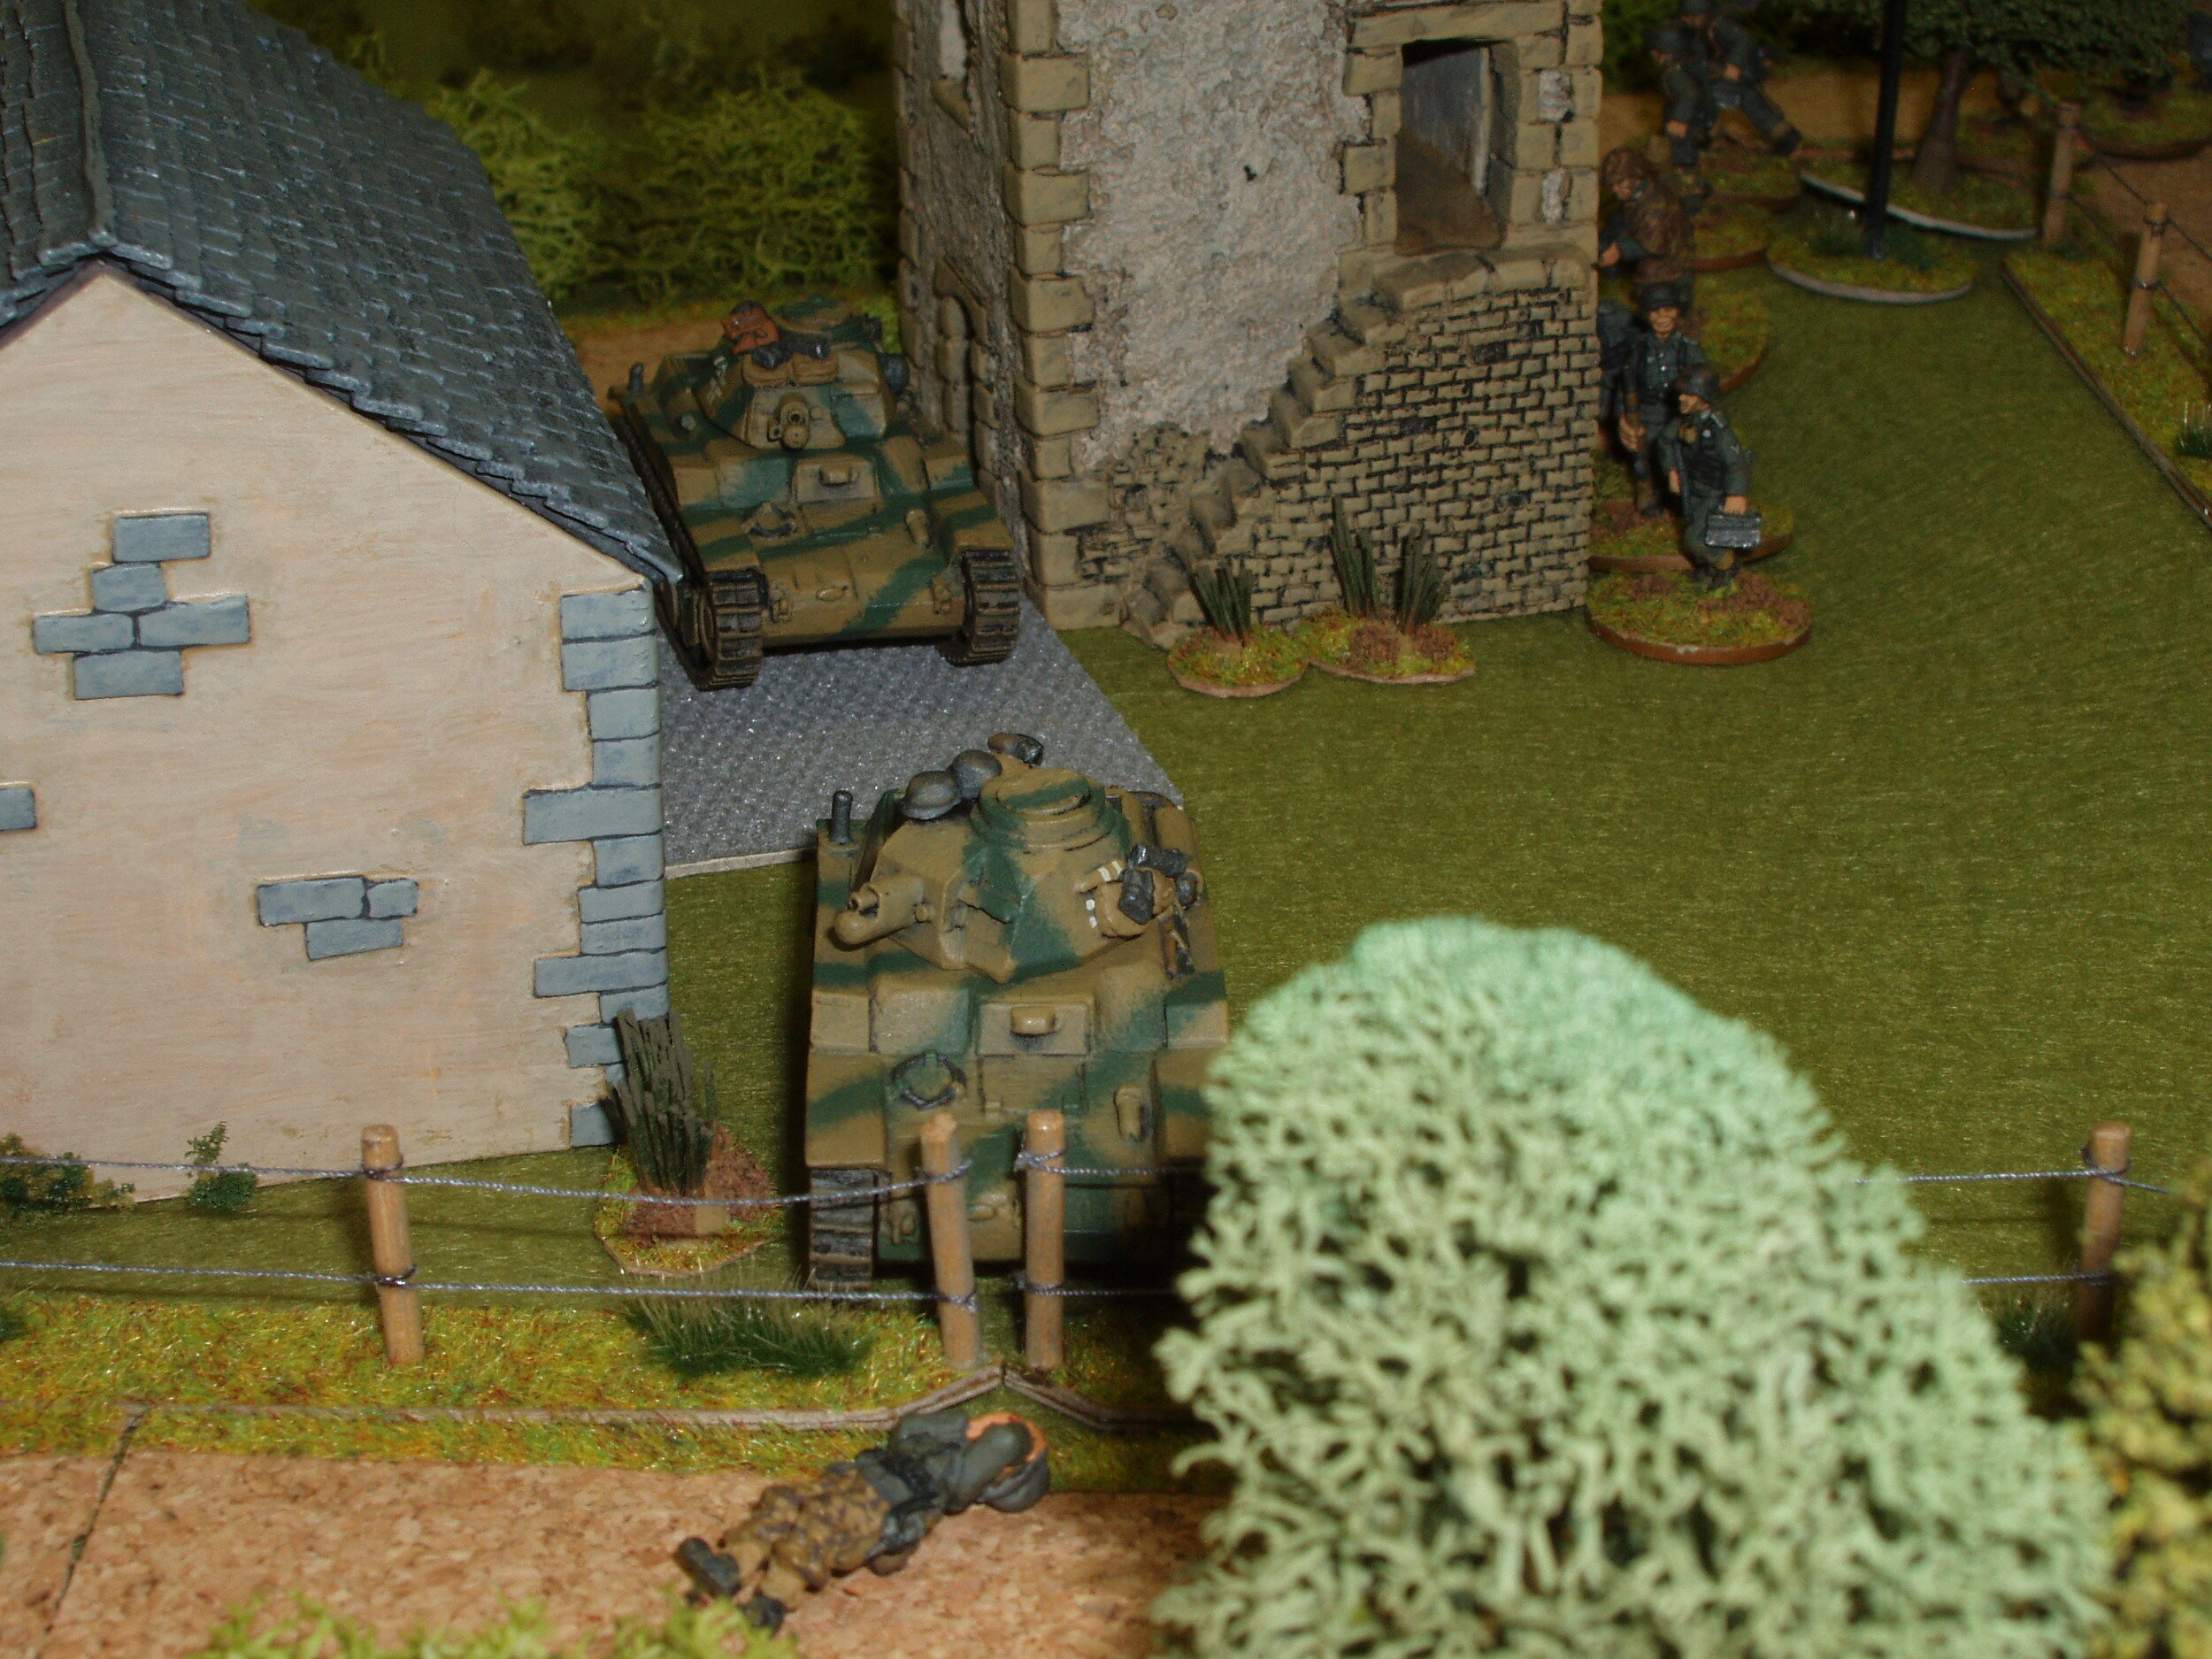
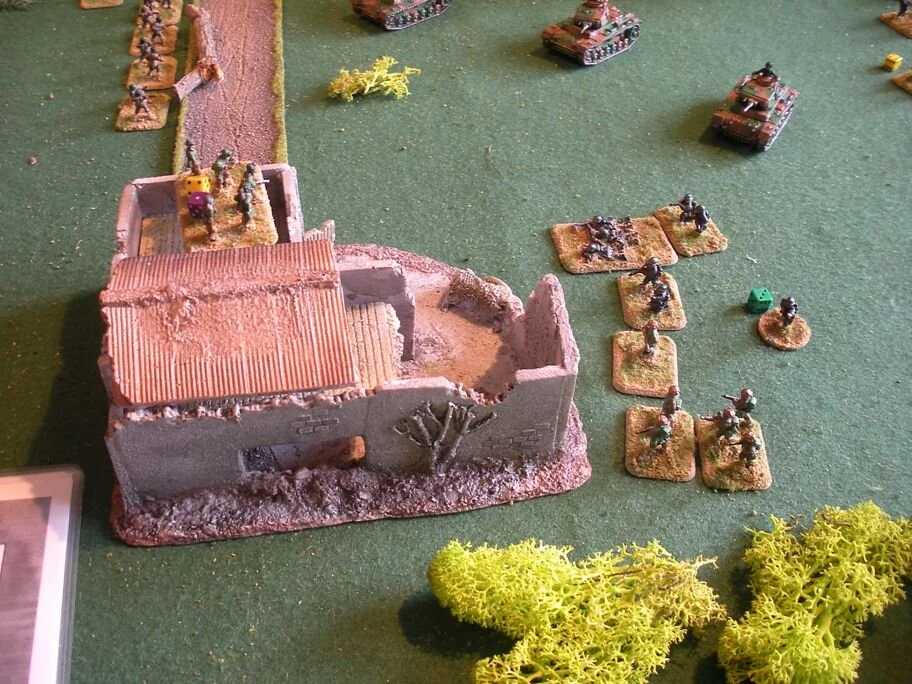
As one can see there was a MMG and Section of Americans in the house and also the same outside guarding the open flank.

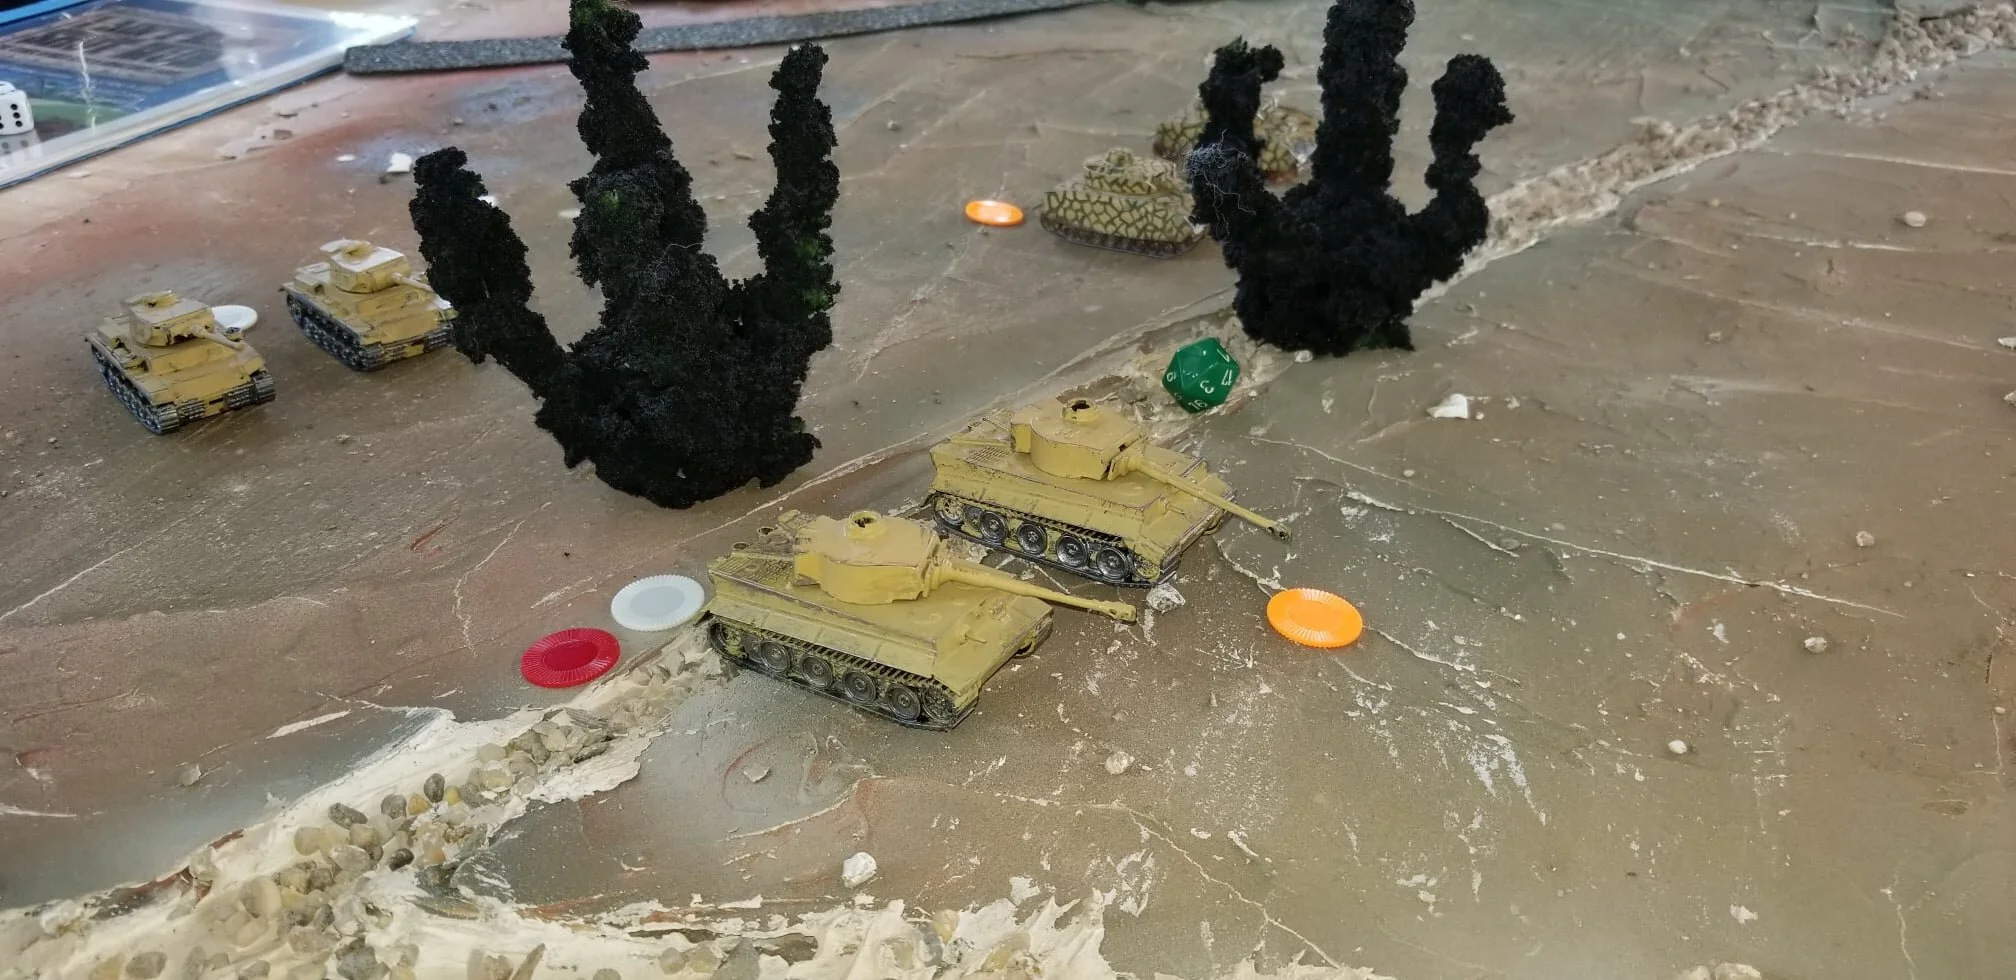
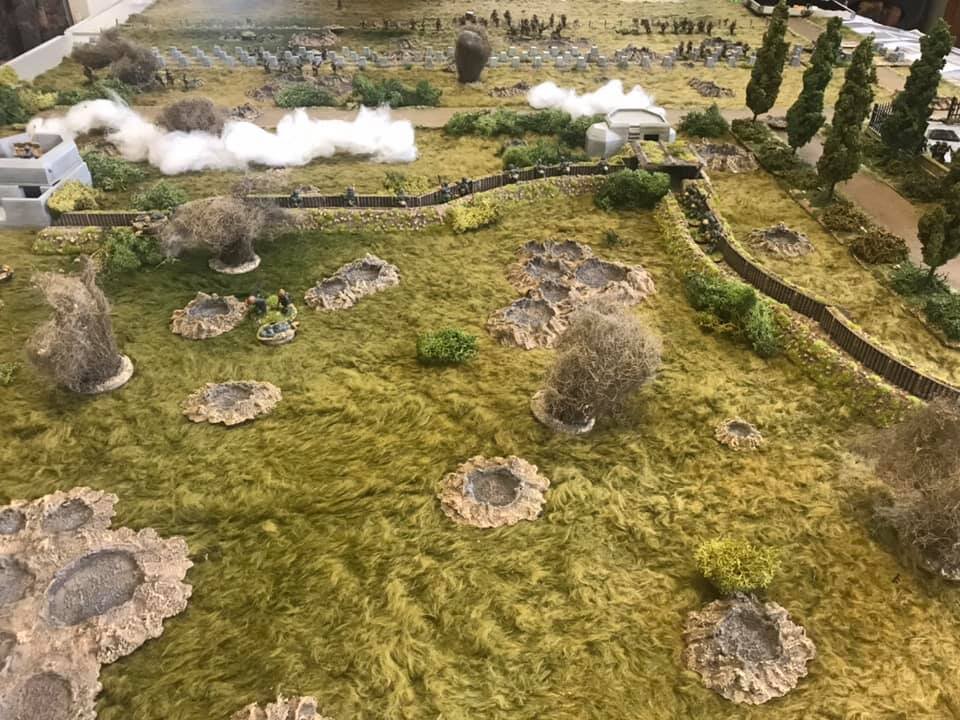
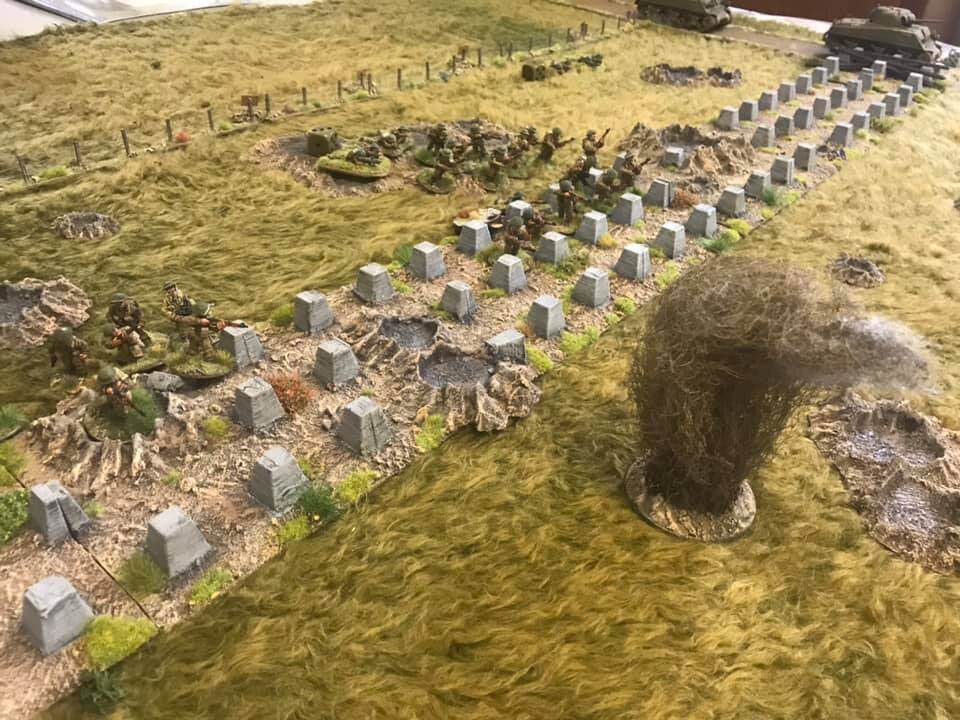
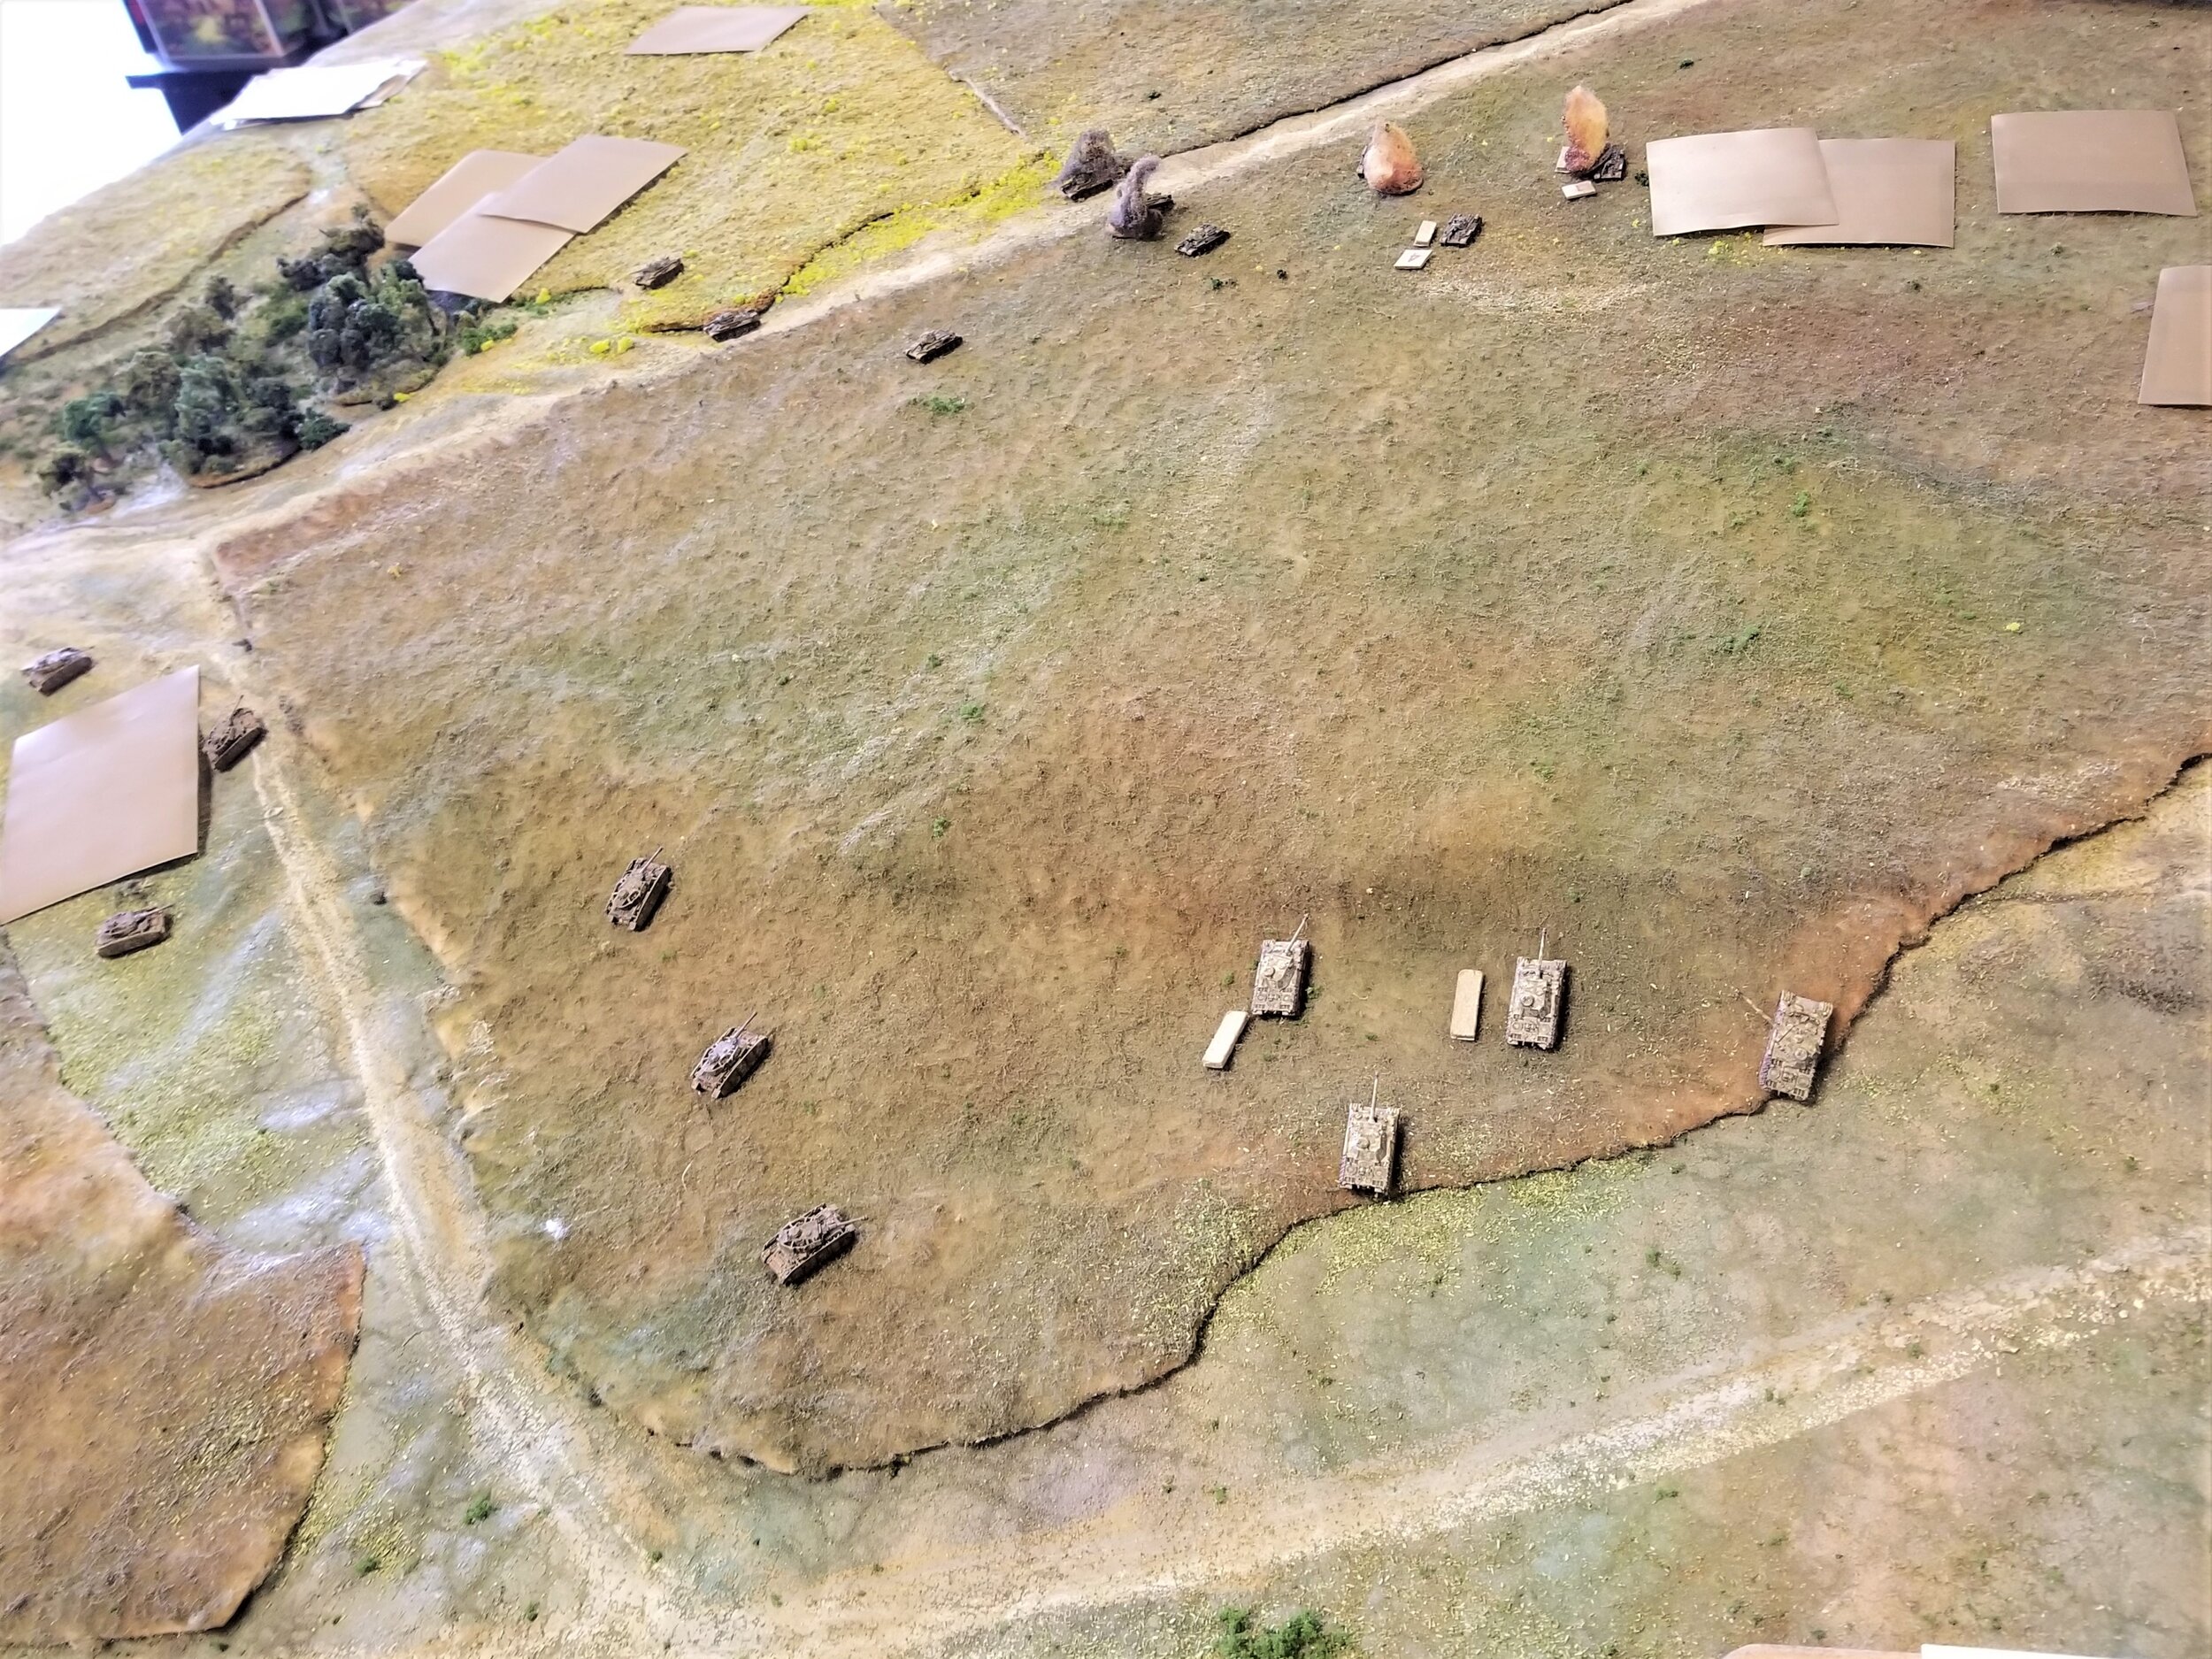
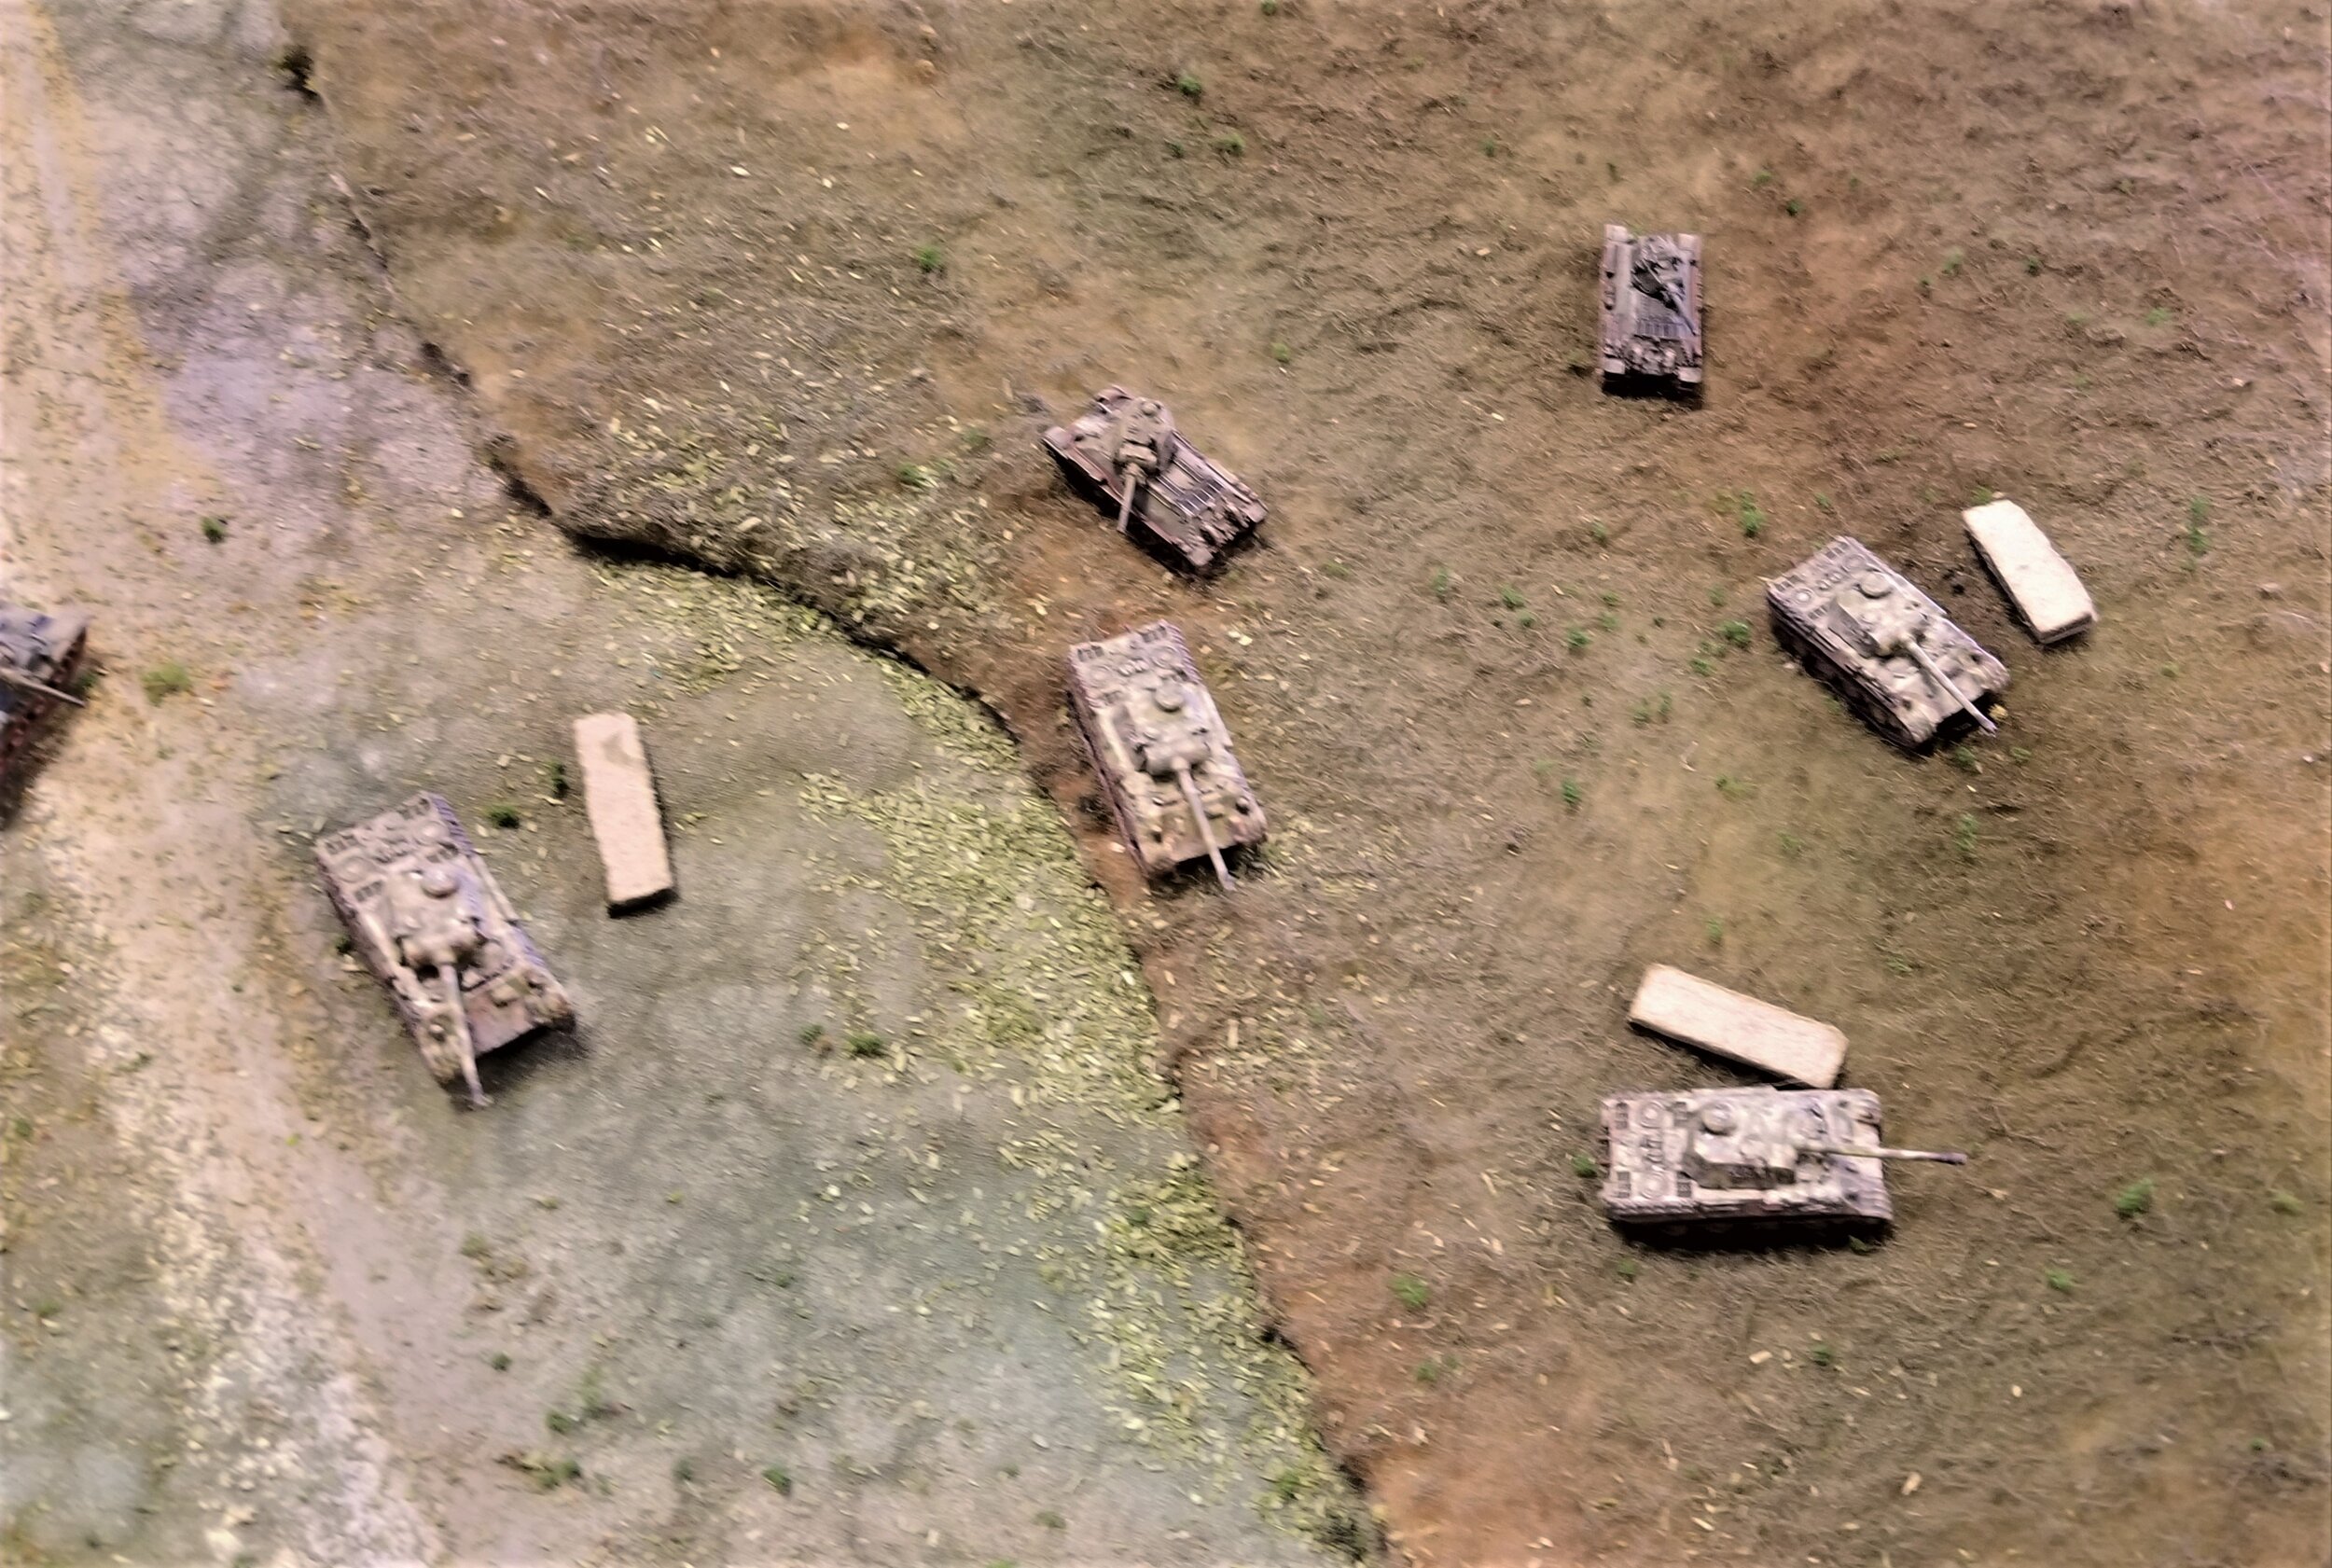
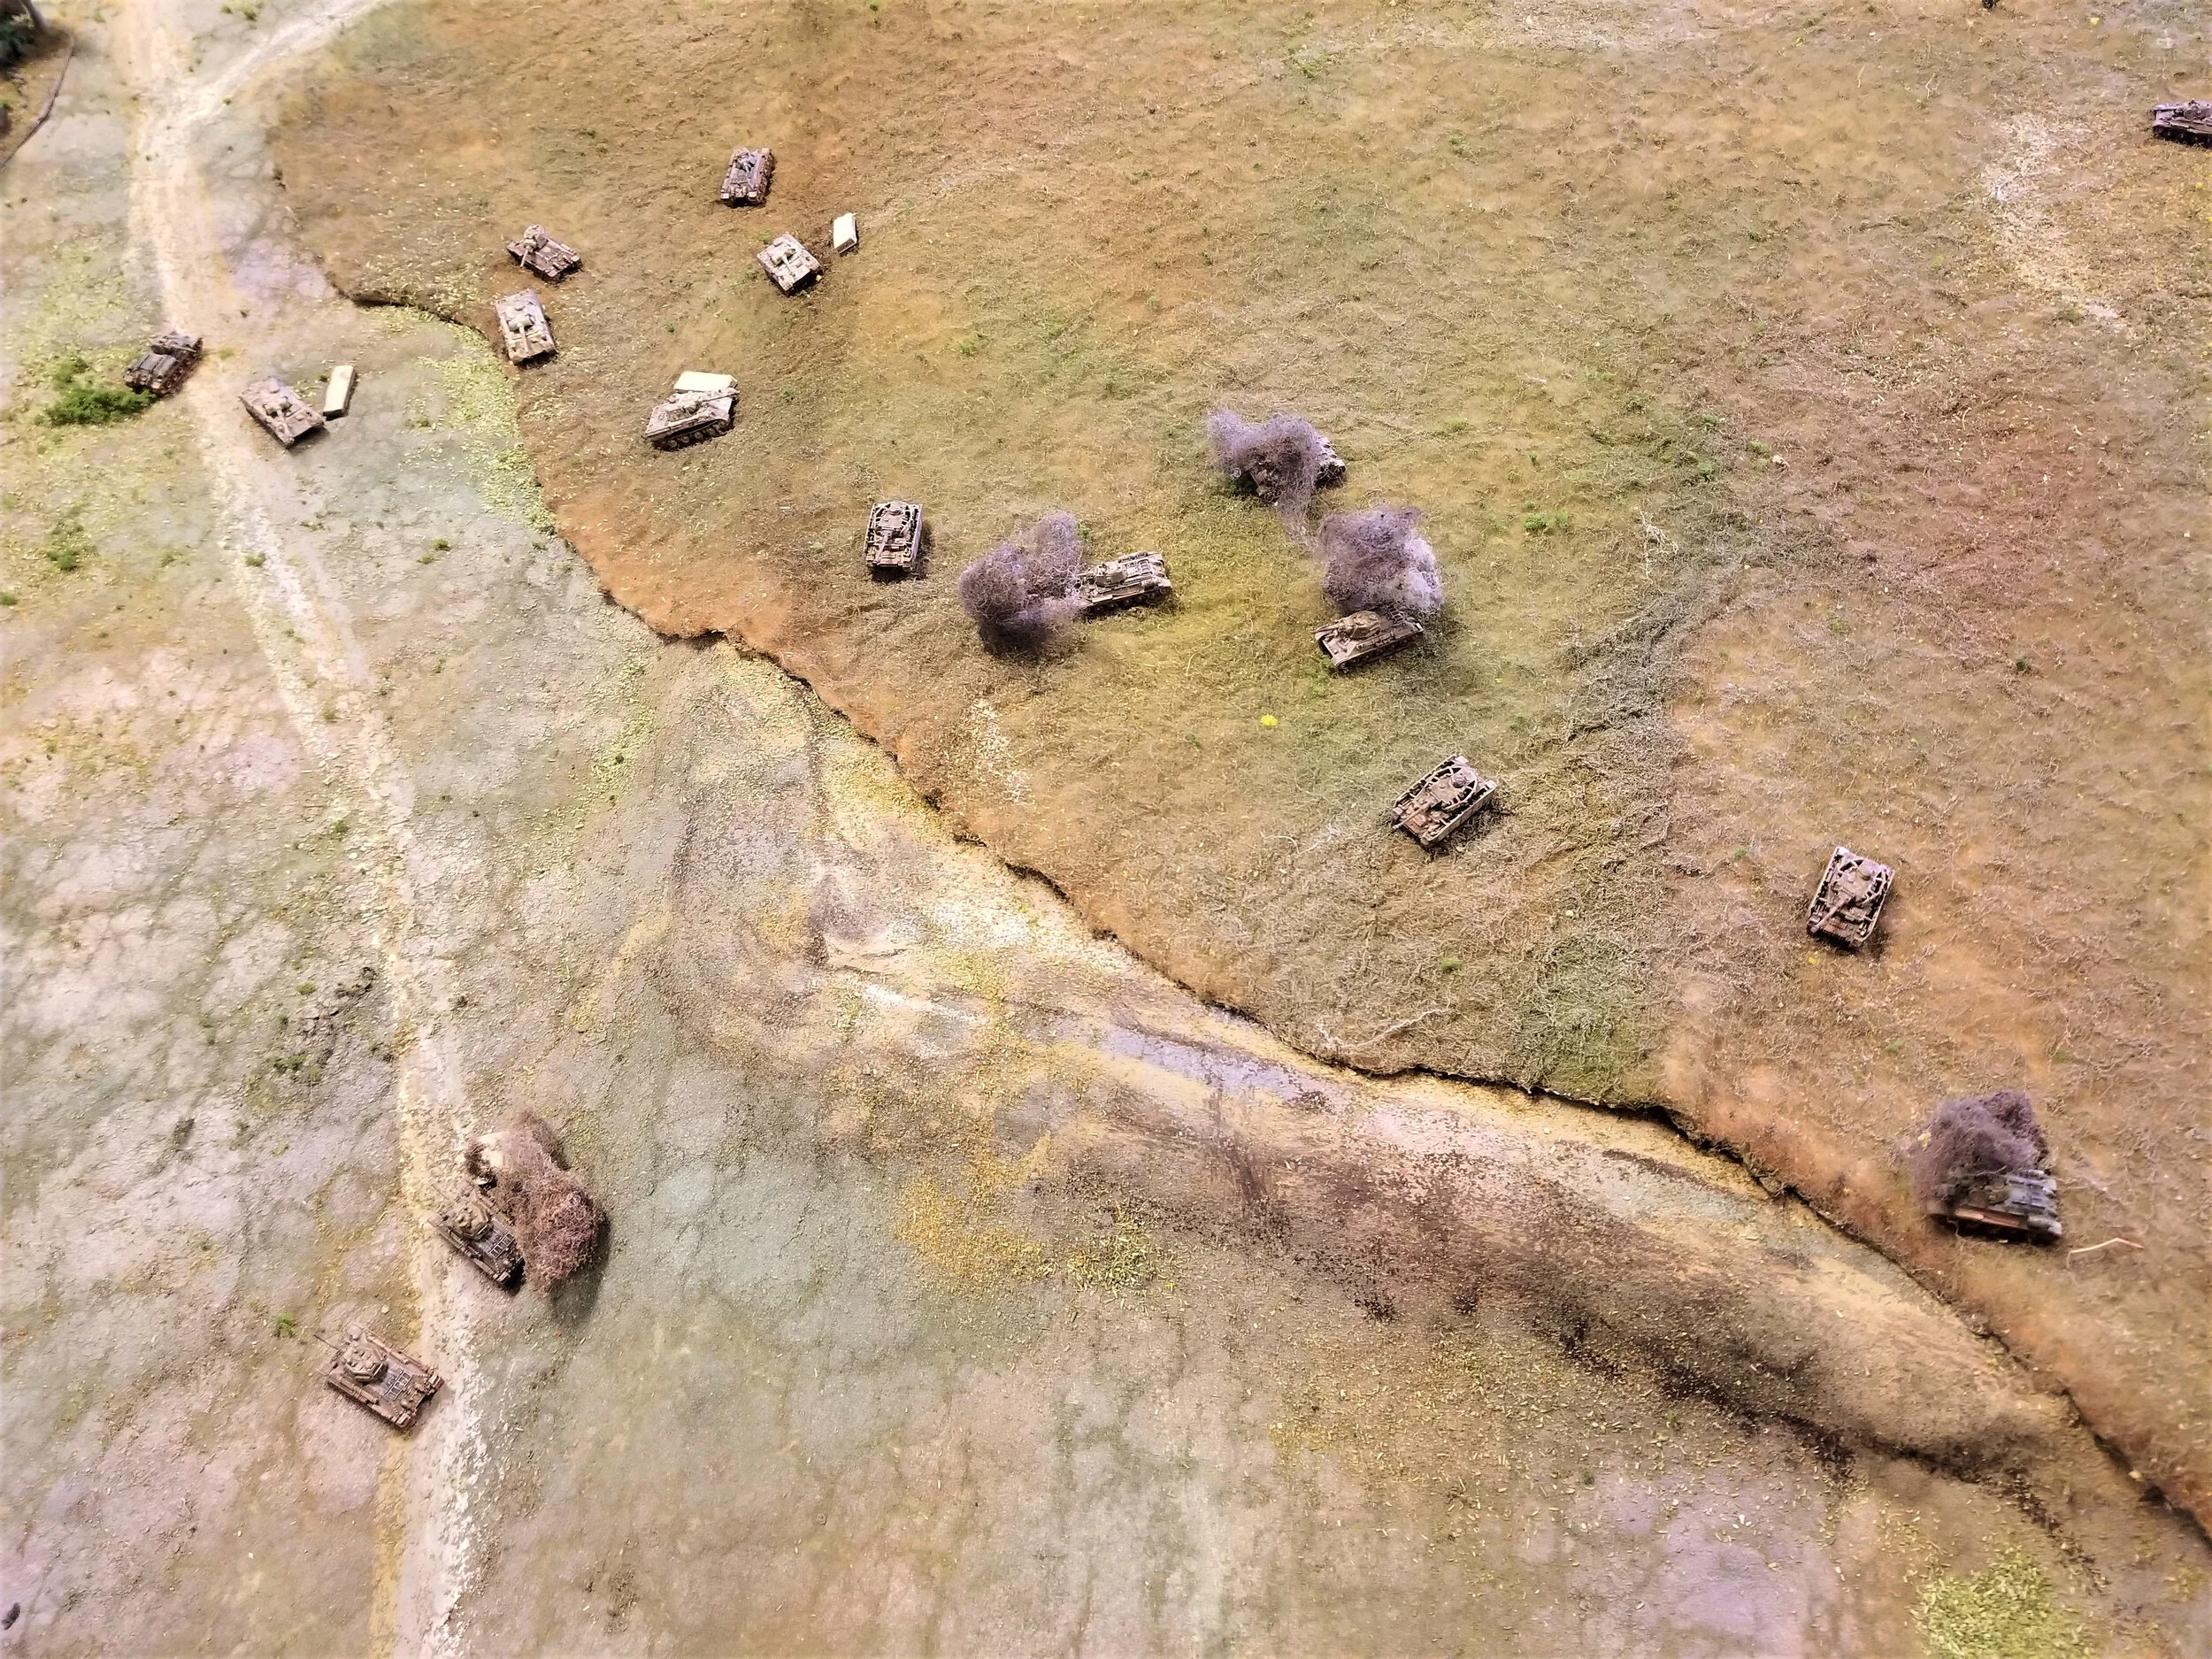
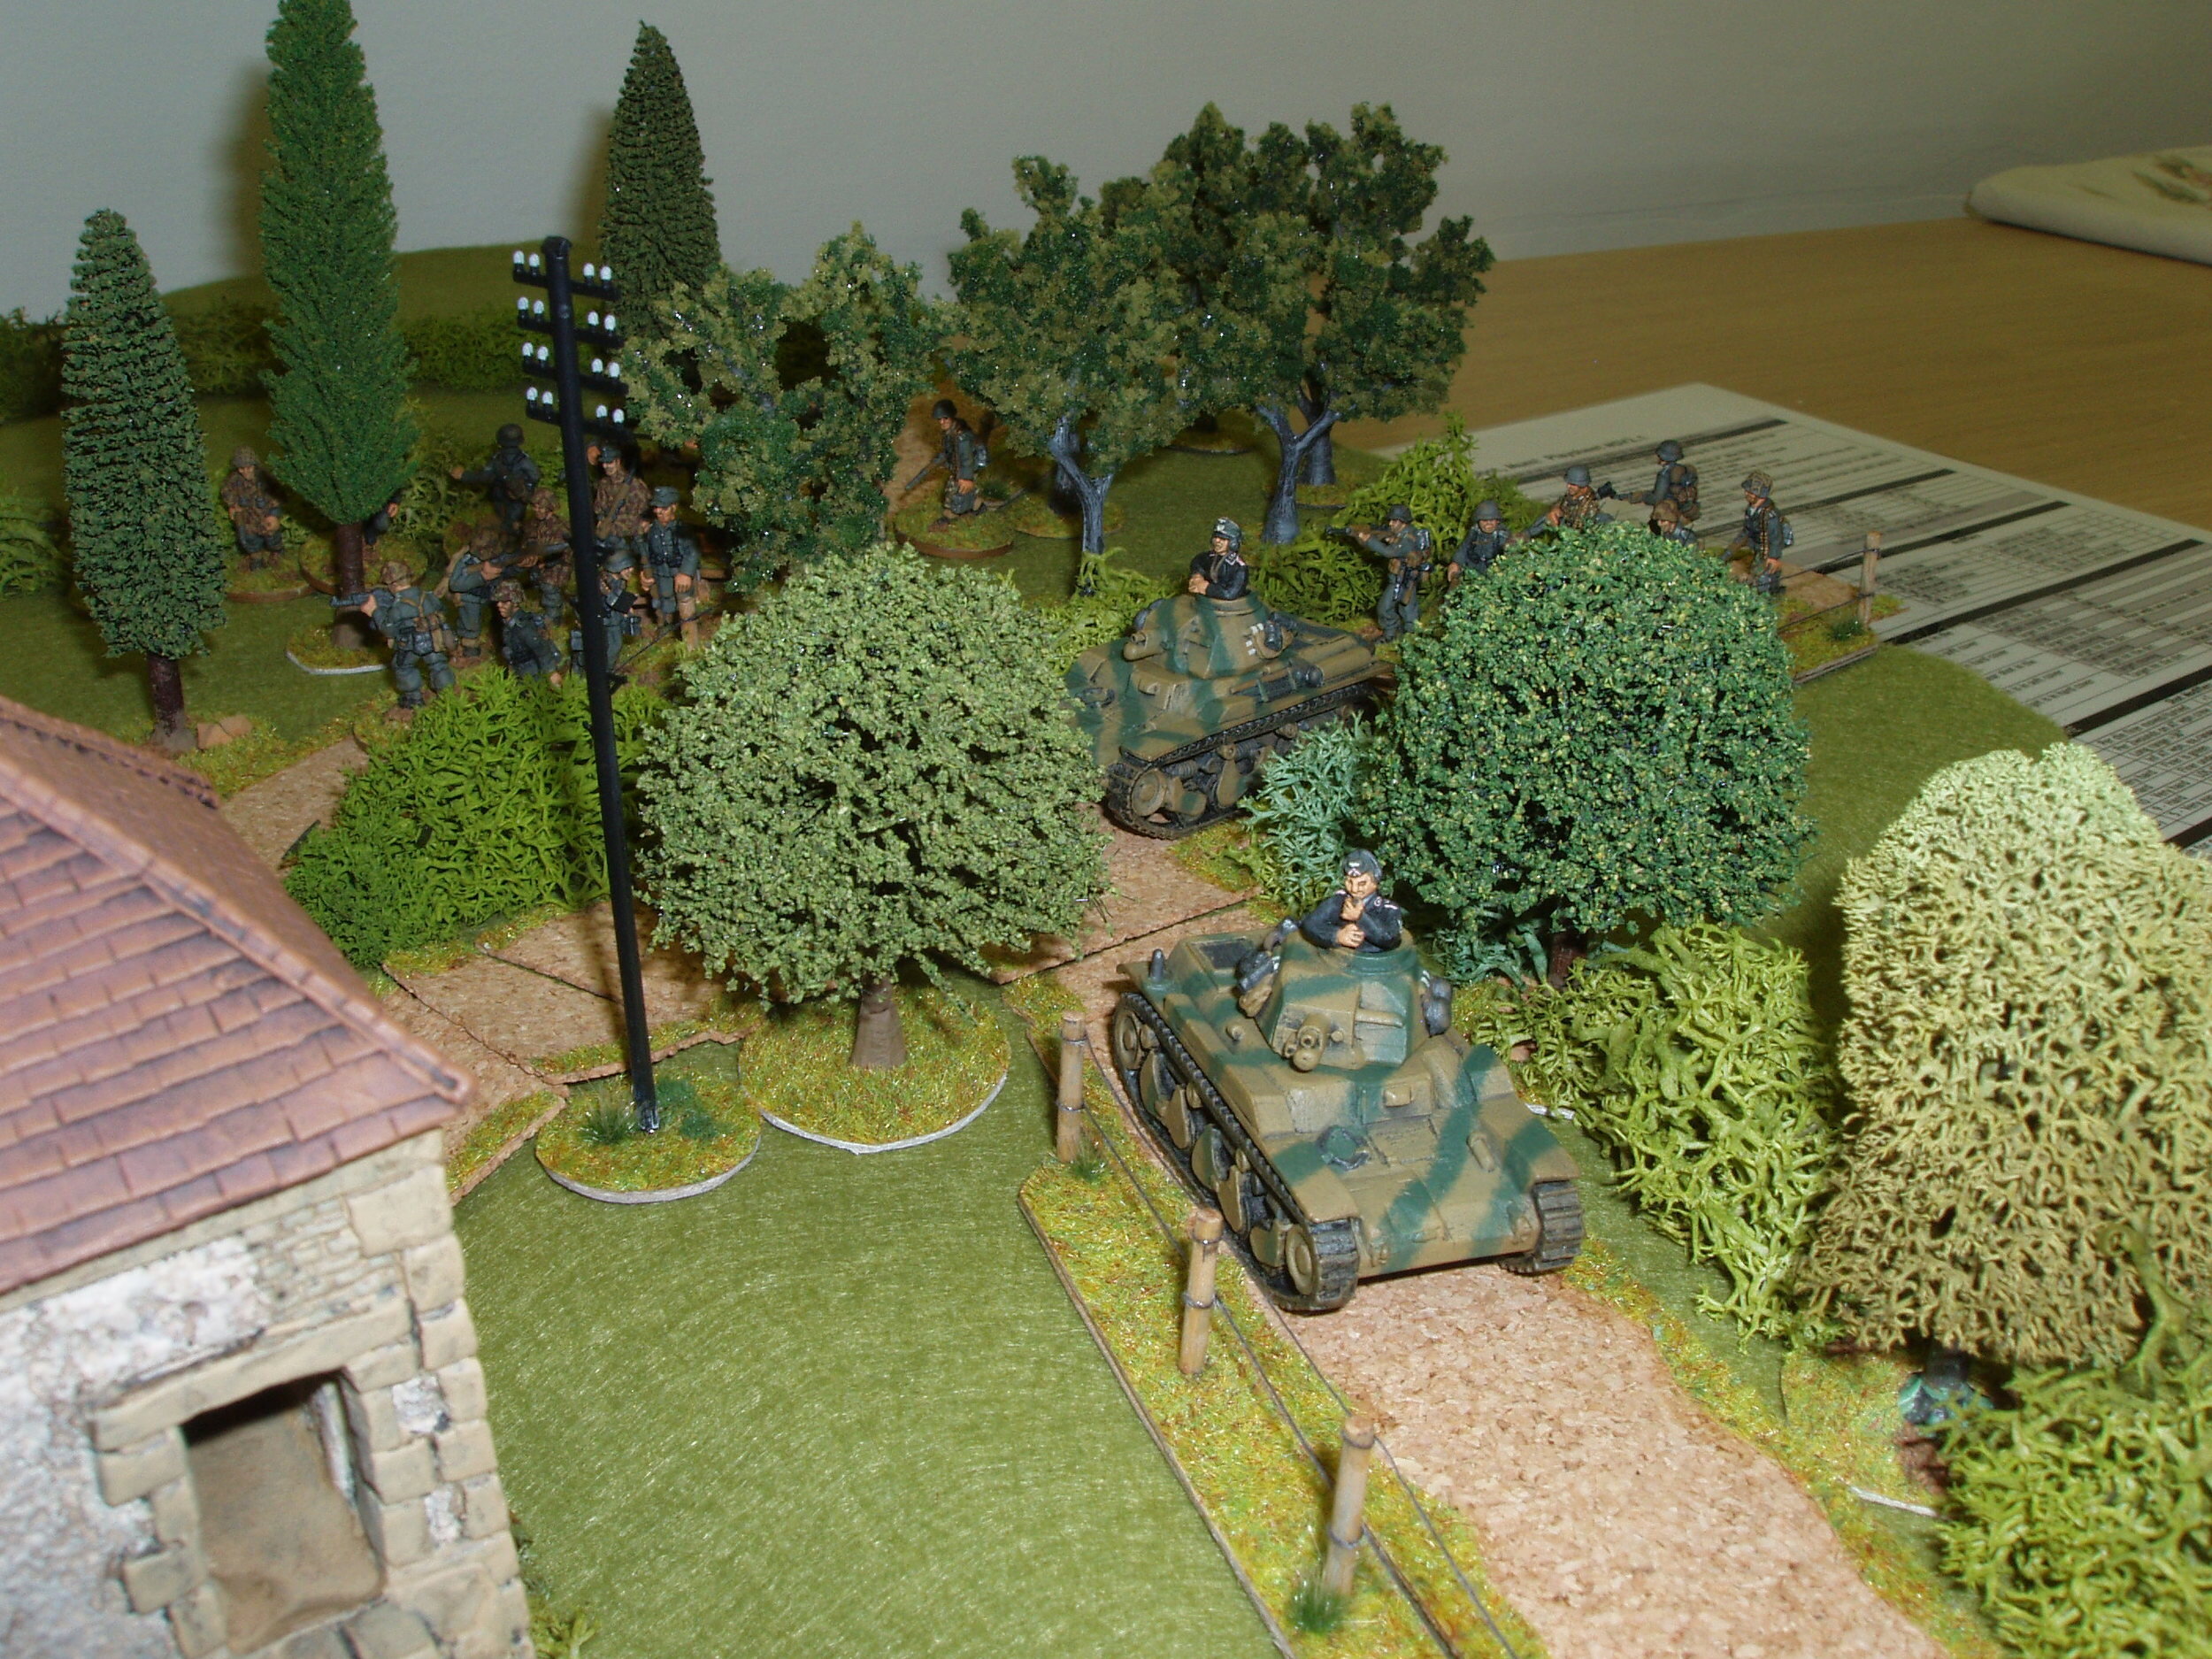
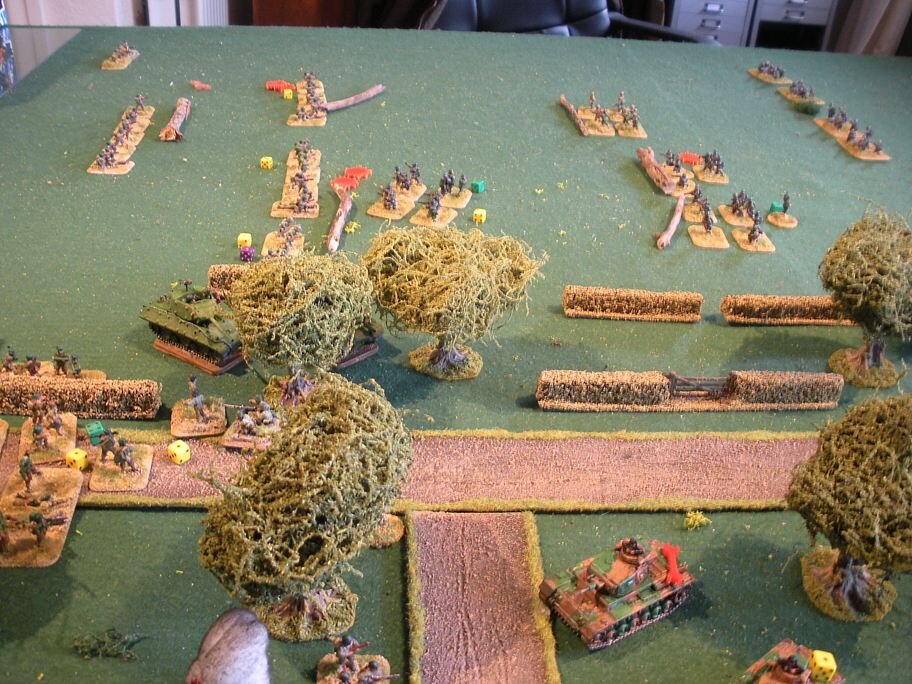
The action was now general across the whole board. In this busy photo you can see the Germans victorious in the centre and west. The tanks have chased away the MG section and in the background you can see the Germans attacking the suppressed American sections. This was not a good watch for me at all.

If you are wondering why there are sticks all over the place, these are actually used for sections which have gone into cover.

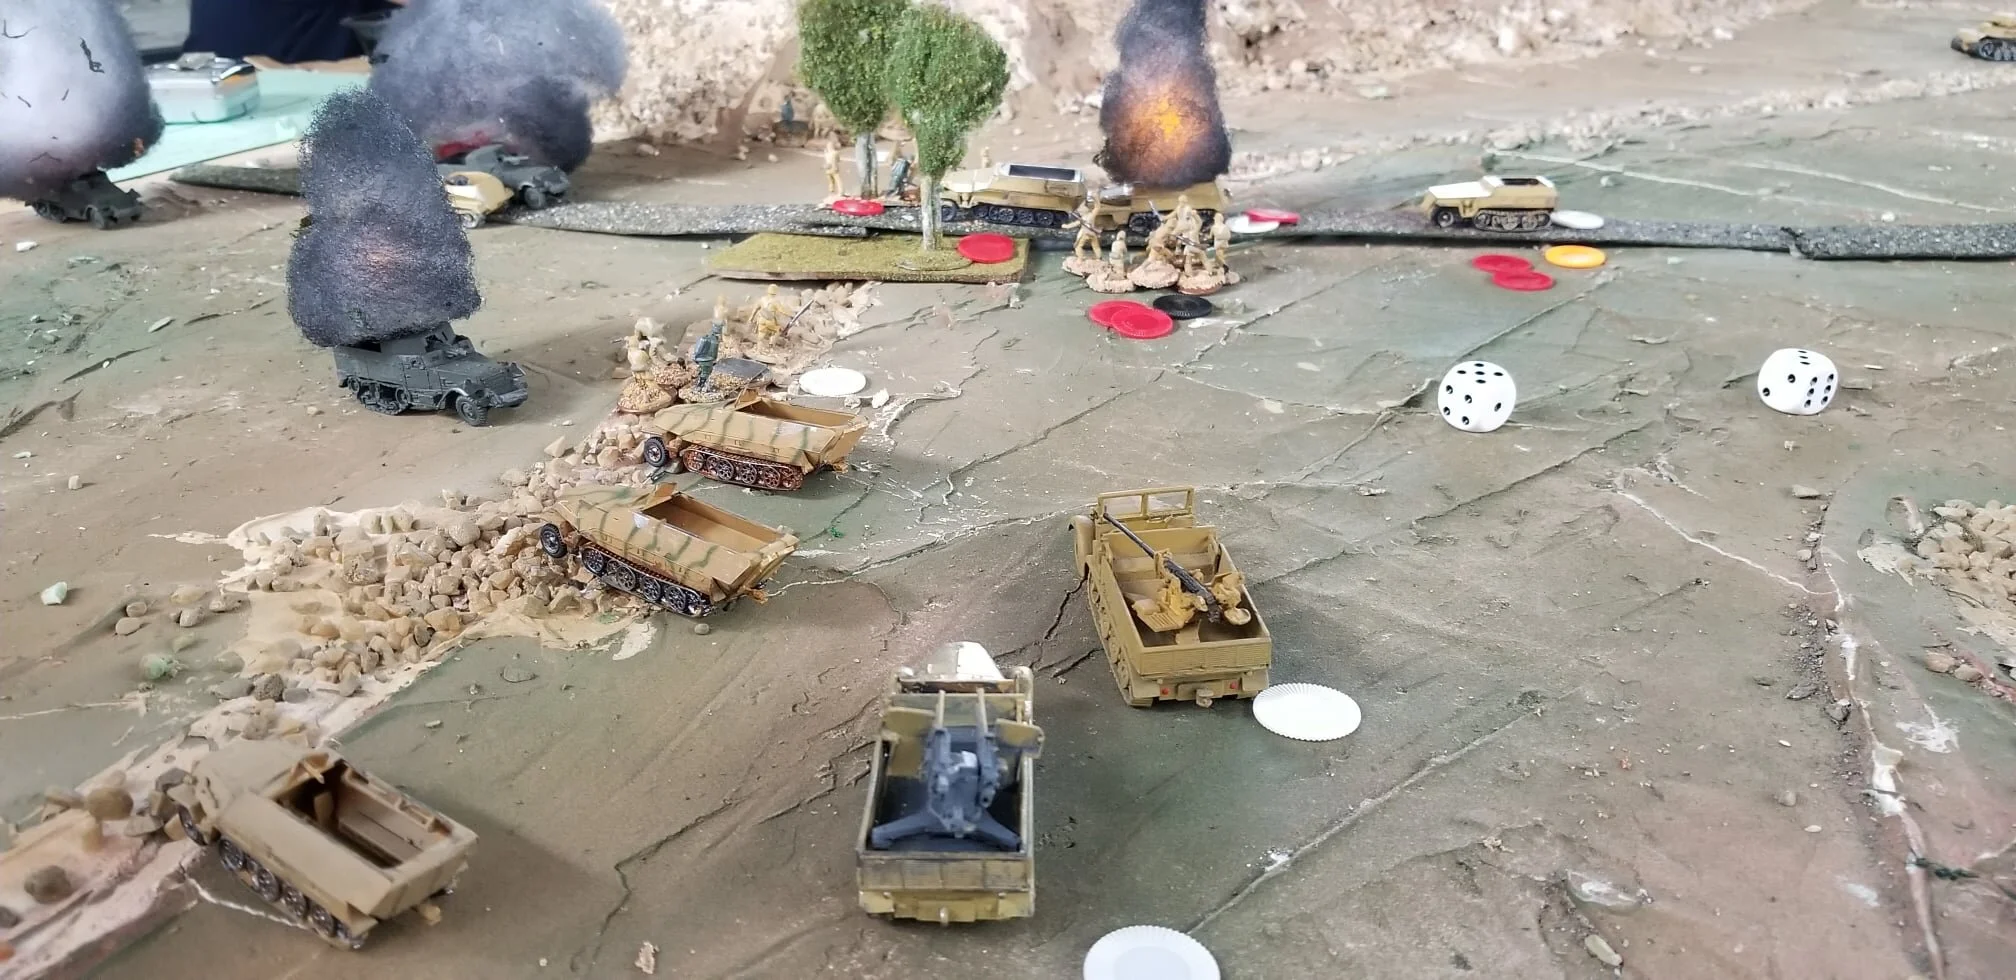
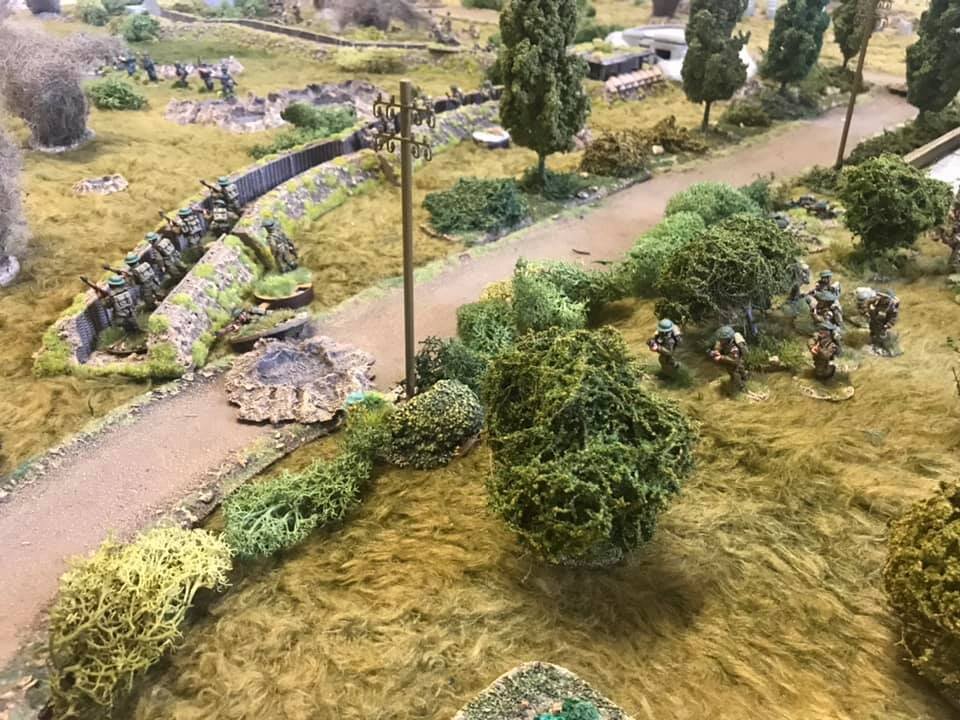
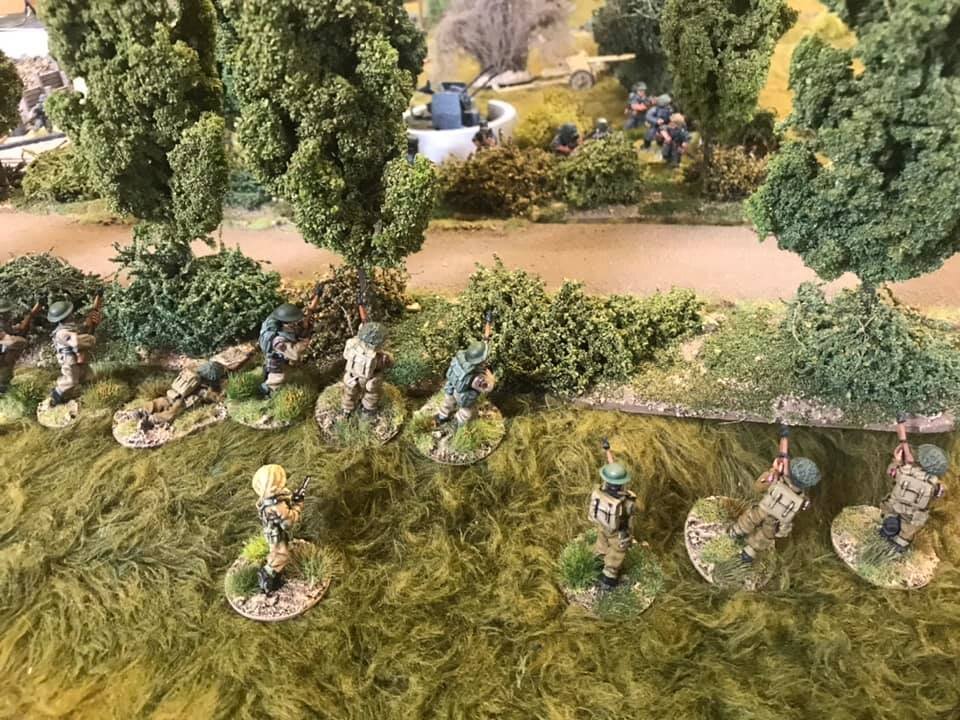
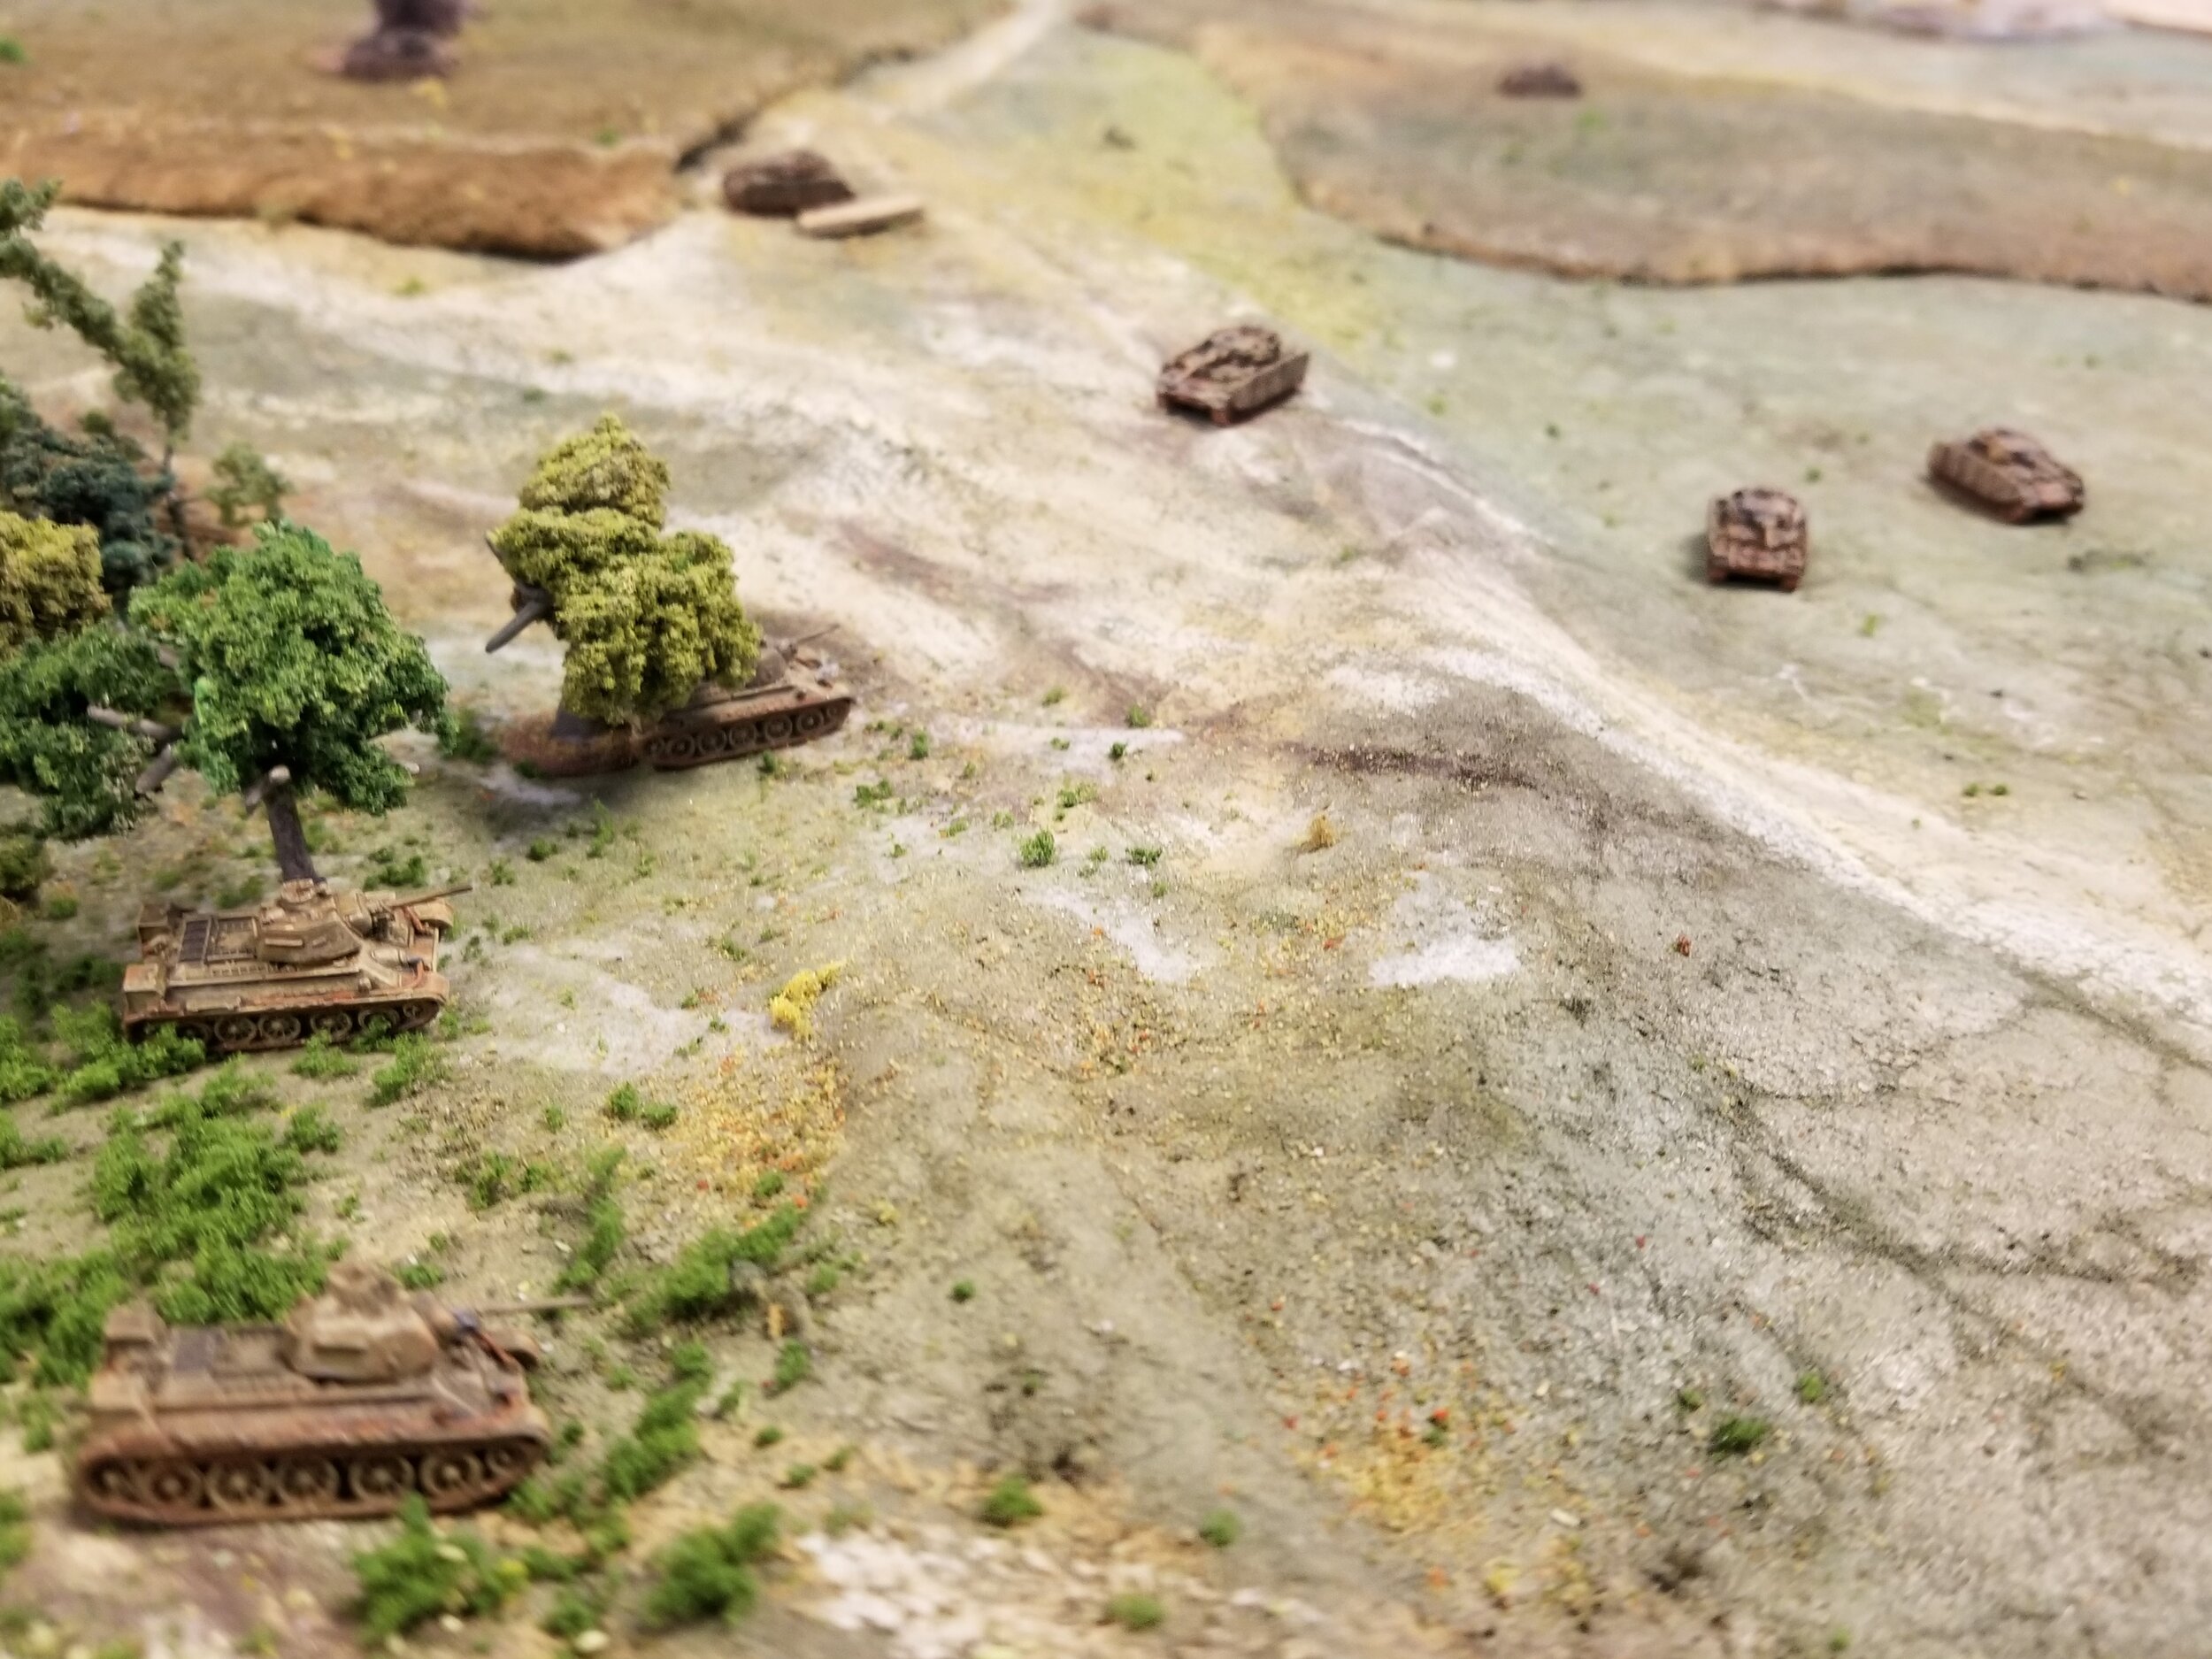
Now my cunning trick came into play as the Panzers had left their flanks open to both the M10s and Bazooka teams. This was what we had been waiting for. Well not quite as Artillery, M10s and Bazooka all missed or slightly damaged just the one Panzer. In the end I actually managed to kill one Panzer from a Bazooka hit in its flank, but for the firepower I threw in there it was minimal return.

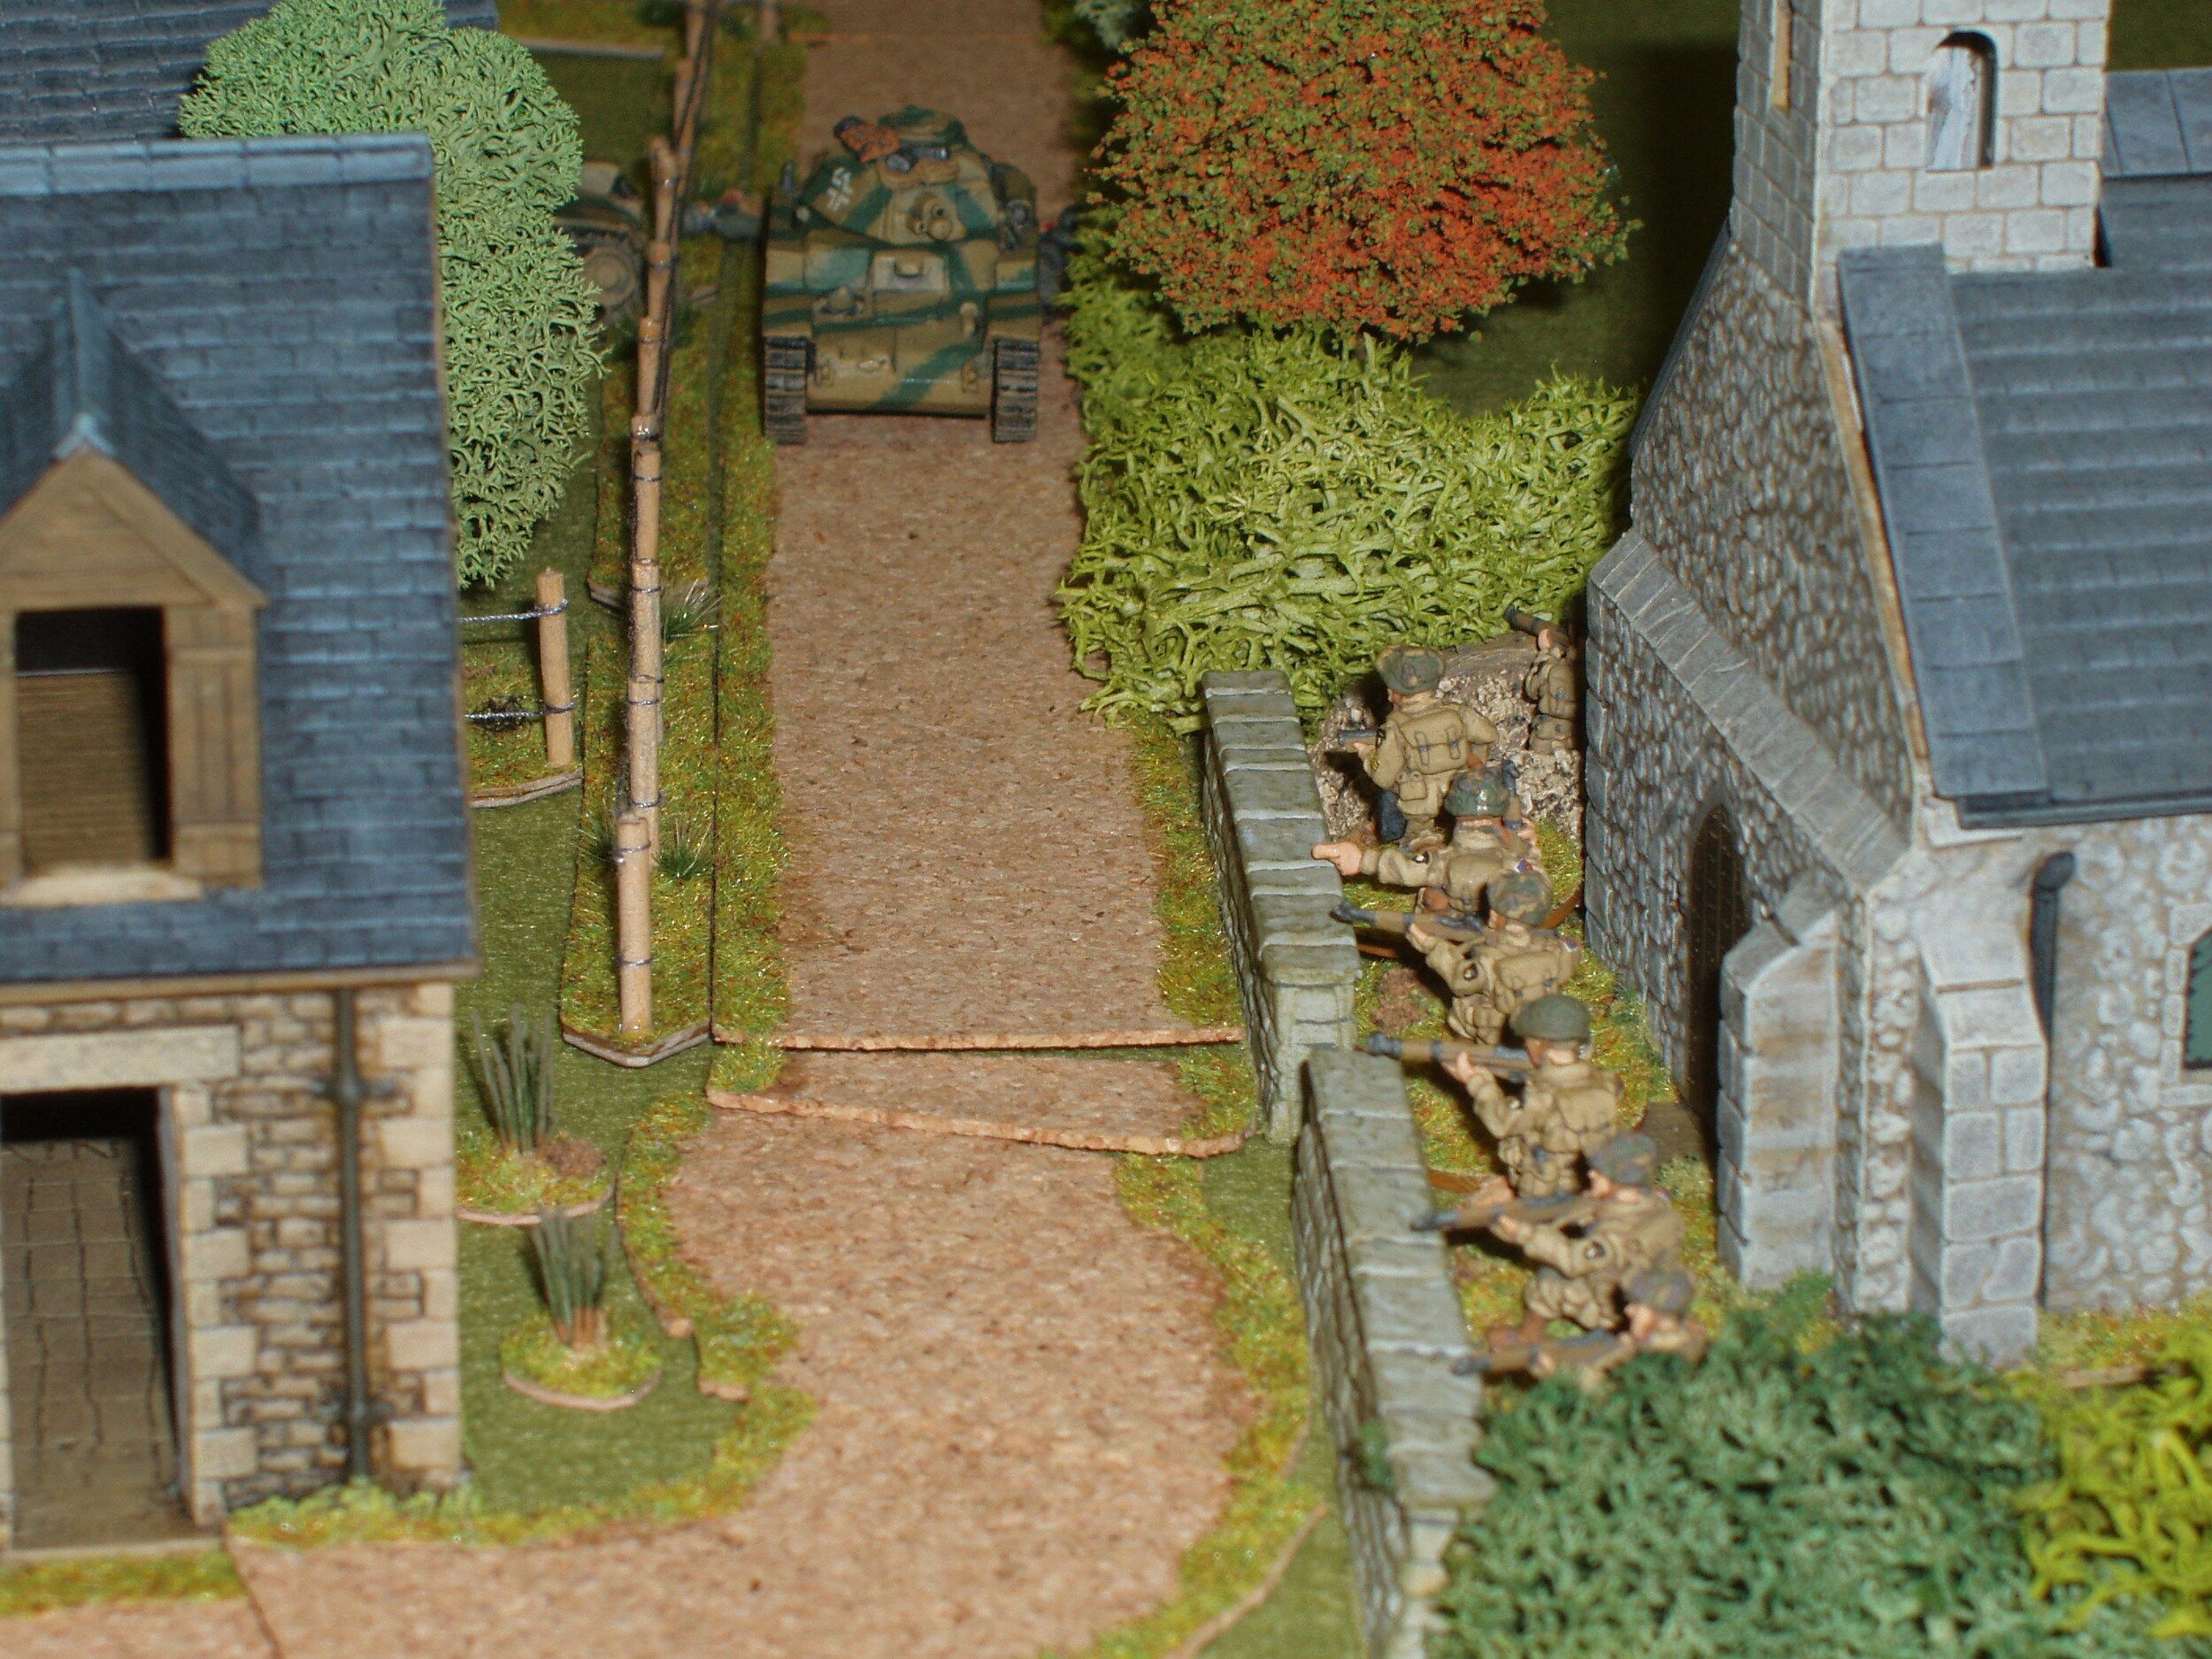
Again in the background you can see the German charge in clear detail as they pushed the Americans out of their slit holes. The Germans had all their MGs on this flank and this firepower was just too much for me.

The action now moved totally over to the house as Steve brought his 2nd Platoon onto the field in this area. He played the same tactics both times. For the Blinds arrived and then cunningly next up was the Bonus Move before I could spot them and they then proceeded to charge the House

The first attempt was three Platoons, i.e. 33 figures and leaders, against my MMG and one Section. To cap it all we noticed Blinds don't take off for movement dices; this showed how many times this has happened before.

Miraculously we just survived this attack as the MMG team beat its enemy. This was the last highpoint of my defence. In the next turn the victorious other half of the Germans cleared the house, or rather both had too many pins and retreated.

I managed to get two MMGs into the building and actually thought I would be safe as I had infantry rushing towards the building as well. But again the old Blind - Bonus move action did for me.

This time it was four sections against two MMGS. Not good odds at all and this time the Germans took the building without actually too many losses.

This was game over for me. He had too many men in the area and enough tanks on the field that would now destroy the M10's and AT Guns.

I still had a lot of men on the field but with the Germans now having the advantage of terrain and numbers as well as quality, I felt the chances of my winning were too small to continue the battle.

All in all a great game. Funnily in the end the casualties were minimal with most coming in the Close Combat, and shock counting more than normally. I was doing well, except for being to kill tanks, until I was hit with those perfect infiltration tactics of Steve and his powerful Germans.

Craig Ambler


Picture1.png


Phil and Jenny have supported Clotted Lard right from the get-go and have graced the show with some lovely games in that time with Jenny's ability to create a glorious table around their chosen theme and this year it was around a favourite set of rules for me, I Aint Been Shot Mum, that I played to destruction a few years ago with my Normandy collection of 15mm figures but here recreating the famous battle for Stonne in the May of 1940.

The fighting in this table-top engagement focussed around the main street as French recon elements clashed with the German armoured spearhead before French armour and each sides infantry joined the fray amid the maze of houses, back yards and streets.

Carojon


Picture1.png


So D-DAY dawned and the brave British troops began their liberation of Europe. 15mm scale game using the dice activation version of IABSM. Two company assault with DD tanks and Funnies on Queen Beach, clear two exits and neutralise COD WM.

Wont do too much of an AAR, but it was brilliant fun with my first ever assault ( I am always umpiring for my mates to try this out). I lost two LCA on the run in, three of my four DD tanks sank, One LCA and a DD tank collided ( I have drift rules) an LCT actually drifted into the survivors of a sunk LCA!!!

On the plus side the Funnies all landed and played a full part in the game: the Petards destroyed bunkers, bulldozer cleared mines and obstacles ( but lost a track!) flail cleared a path before being hit, the fascine petard AVRE took out a bunker as well.

Phil did far better than me by getting most of his infantry off the beach, my chaps were in a bad way and I hate to think how they would have fared taking secondary phase objectives!

Iain arrived to command the C company and promptly crashed two LCA together, drowning one whole platoon! Later on he threw the remains of the company on a direct assault on COD while I took part of A company on a flank attack. Casualties were high in C Company.....

Warren did great service to the Fatherland and for a time had us on the ropes

Overall British losses were very high. We never played a game where so many swamping/collisions occurred. Yet we still managed to get ashore and do what we needed to do.

IABSM continues to do the business, and with the dice activation bolted on produces a splendid game.

Des Darkin

And here are some more pictures, this time from Iain Fuller:


image-asset.png


Another great game from the Anzio: Wildcat to Whale scenario pack by Robert Avery. This is the return match from scenario 2 played over the same ground but this time with the Germans trying to wrest the ground lost only days earlier back from the Allies. Should be easy enough with all these Elite Germans! As is normal I will be taking the Allies whilst Steve takes on the Germans.

Here is the map with the wrecked building showing testimony to the vicious fight previously. The view is from the rear of the Allied position and shows the ground the Germans will be attacking across.

The Germans forces are large: having two full companies and well equipped both in support weapons and tanks. The Allies have excellent troops but they are a real mix of British Guards, Americans Paratrooper and even some Sappers, and with only with M10s in support they are not the best equipped Allies you will even see.

The Germans were able to advance their Blinds almost up to the Allied frontline, but luckily most of them were shown to be scouts and were removed. At this point I thought it would be the quickest game we had played as I would be swamped with Platoons hitting my weak sections, but, lo, all the Blinds were dummies. Why didn't they move slowly and spot?

This calm was not going to last very long though as the German Paratroopers towards the North were getting especially ambitious, although it may have had something to do with the strong presence of tanks they had with them. The Scots Guards entrenched in front of them were very happy they had purloined a PIAT team to support them.

The MMG looking out of the window had the support of the Irish Guards which made it feel a lot better. The numbers of Germans here was certainly getting frightening and a fire fight started here which went on for most of the game except for one burst of exciting action that came later.

If the masses of Germans coming on the northern edge was large, the Germans coming on the western side were enormous. To be honest though this log jam was in my favour as he could not get them all into action at the same time. Still just about the largest grouping of men I have seen in an IABSM scenario. I think in the larger games troop management comes to the fore, and I would have left most of the German troops on Blinds and used specific troops for specific tasks.

To the north the Scots were having a hard time of it as the numbers of Germans were just too much. The Germans though suffered especially from the Allied artillery which managed to hit the troops on the hill several times throughout the game. Not sure why he didn't spread them out after the first hit.

In the house behind the suppressed Scots were the Irish Guards who had another MMG to assist them. The Germans behind are massing and can just be seen making their first move to cross the stream to attack the causeway.

The Grenadier Guards and American Paratrooper had a great view over all the field and were concerned with the Germans move towards the stream. Both M10s (painting some up now) advanced to get a better firing angle on the advancing Germans who were taking a long time coming forward.

The blurry photo, above right, shows the Germans crossing the stream and also trying to attack the Irish Guards in the nearest building. In the background the resistance of the Scottish Guards is almost at an end. They have held up the Germans for longer than expected, and even if the PIAT didn't damage any of the tanks it hit, it was still an heroic stopping of the Germans.

Now was the time things got interesting as I moved my Tank Destroyers out to try and actually get him to move his tanks. As soon as I did this for some reason he sent a section over the stream to hit my MMG in the Railway station. This was not a good move as the MMG and supporting Guards had far more melee power than the Germans and destroyed them, although of course not without some loss to themselves. The MMG was then destroyed by tank fire, but the Guards survived.

The Germans to the east finally decided to attack the embankment with one platoon attacking the American Paratroopers section dug it at the top, although unluckily only getting two of the sections involved. Again this was closer than it looked and the American bravely hung on to the ground and badly damaged the Germans. This was the main turning point in the game and he never tried that again and wasted his large force advantage in the area.

This hazy photo (I must tried harder), shows the position at this time from behind the Allies line. What is does shows is that despite some very hard fighting the Germans have actually not taken any ground and the Allies are still in the position they held at the beginning. The casualties on both sides have been horrendous but of course the Germans have suffered more being mostly in the open.

The move by my M10 gained the immediate bonus of hitting and destroying one of the Panzer IVs that was hanging around the Railway. This upset my mate somewhat and he could see the fight slipping away. This excellent view shows the Irish Guards still easily holding the Station. Various Germans Platoons are just hanging around behind the stream and not actually doing a lot, which seemed strange to me but was apparently the plan. In the far distance you can just see the Panthers taking the scenic and long route round the village.

Several quick turns with not much happening ended with the Panthers in position and from which he easily destroyed my M10 guarding that flank before it could retreat to safety. I also had my first ever collateral damage as well, when the Bazooka Team that had retreated from the bridge found that hiding behind a tank was not always a good idea. This I thought was it and the Germans really would go for it. The M10 had done exactly as it did historically and been hurting the German infantry with its HMG. Nothing of the sort as the damage I had done had hurt my mate and he gave in. His Germans had only taken the one building in the end and lost a lot of men.

This series of photos shows the table at the end of the game. Personally I thought my mate's resignation was premature but he had lost heart with his men being in the open and being shot at by my entrenched infantry. His tactic of a slugfest didn't work and he was also unable to bring his MMG and tanks to really bear, something I also did in the last game. So we both need to learn to play the game and use our forces better.

In hindsight with this big a force he should have managed it better and left some of his forces off table. The masses of men look impressive but in the end either became a traffic jam or nice targets. Playing with a large force is certainly different from just playing a normal game. Of course it is easy to criticise and I had the easy job and just sat still shooting Germans whenever I could, with the excellent troops I had.

Looking at the photos you can see that the German masses have gone and one can see why the constant pressure told on his forces.

All in all another excellent game from the Anzio: Wildcat to Whale scenario pack with some enormous forces and equally brilliant fun. Next one up is Scenario 1 which is a more free flowing fight between mobile American and Germans with minimal cover and so a very different game. Brilliant!

Craig Ambler


anzio11.png

Table Set-Up

After a long lull, we recently got in another game of IABSM 3 using a scenario from the "Anzio, From Wildcat to Whale" book by Robert Avery. This game was set during the German counterattacks that took place once the allies had exhausted themselves trying to break the German perimeter. Apologies for the few and crappy pictures - I forgot the camera and just had my phone… plus the game was a good one and I forgot to take many pictures.

I was set to play the Germans for this one and the ref had sent out the map and briefings, so I was able to organize my two reinforced companies for the attack and make a thorough plan. My objective was to drive the length of the table, cut the Via Anziate, and isolate the British force to the north. The map showed British entrenchments immediately in front and minimal cover between those and the road. A ditch paralleled the road and made a useful jumping off position fro my final push if I could reach it in force. So I made my plans to pin the right side of the British trenches, assault the left side with overwhelming force, including armour, then push down the left and leave some blocking positions to protect the flank of my drive. That was the plan…

After we set up the table and minis and after a fair amount of British teeth gnashing over the pre-attack artillery stonk, the Brits got their blind card first and much to my surprise jumped out their entrenchments and started hauling ass to the rear, making for the safety of the ditch. Well, that was a bold move on the part of their CO and a great opportunity to mow down a bunch of them in the open Except that these were the fastest moving Highlanders on record! A combination of great movement rolls and favourable card sequence meant the Highlanders scurried back to the safety of the ditch (which was apparently deep enough to completely hide in). Oh well, the plan would still work, I would just be putting in my attack further down the table. However, as the troops began moving up, the units on the left (the leading elements of the main force) outpaced the units on the right (the pinning force). The British commander then used the safety of the ditch to move troops to my left - exactly what the pinning force was supposed to prevent!

THE BRITISH RETREAT

THE GERMANS ADVANCE

With the original plan looking bleak, I decided to switch the axis of attack and started sending new arrivals to the right while initiating a strong pinning attack on my left with two platoons and a couple of StuGs. This had the desired effect - the Brits continued to put reinforcements into that side of the table and I started moving troops to my right. The 75mm infantry guns under personal direction of the first company CO made the top of the hill and began to shell the British positions in the trench. The 81mm mortars came in and dropped a couple of rounds on the same positions as well. The British armor arrived and rolled up to engage the StuGs. However, they needed more gunnery practice as they mostly missed the assault guns and the shells that hit simply bounced off. Shortly thereafter two Panthers came off blinds on the other side of the table and smashed all four Shermans in a matter of seconds.

BURNIN' SHERMANS!

STUGS

With the British armour out of the way and any PIAT that stuck their head up drawing a mass of MG fire, I was able to use the guns of my armour (along with the 75mm infantry guns) to whittle away at the right side. Then I started sending in the assault sections. The first couple were thrown back, but they inflicted losses and the highlander's line was getting really thin. While the British were occupied with my on table troops, I was able to move up on blinds and concentrate three relatively fresh platoons against the remnants of a single platoon of highlanders. When it got late and we called it, I had pushed into the ditch and was in excellent position to push across and take the road. Some British reinforcements were on the way, but they were not going to be in time to clear out my strength on the right. The lead platoon on the right and both platoons on the left were pretty badly chewed up, but the Germans had a narrow win.

Another really great game that felt just right. We have now had a handful of games using the IABSM 3 rules and this one went very smoothly with a minimum of rules reference. Considering the size of the scenario and the variety of troops, it also played along quite quickly. Definitely looking forward to the next one.

Brian Cantwell


image-asset.png


We played one of Rob Avery’s excellent Anzio IABSM scenarios for the first time this weekend: Scenario 10, Highway 7, January 31, 1944. The US Third Division is trying to push out of the Anzio beachhead through tough Herman Goering Panzer Division vets. The Americans are loaded with armor and have a big, albeit green, infantry force, but have no off board artillery to pave the way across a very open, featureless battlefield. And worse yet, they have to take 4 fortified farmhouses on the far side of a virtual tank trap—actually a sharp below grade railroad cut across the entire width of the board. It is spanned by a single bridge, probably wired to blow up.  

The US forces ably lead by Lee, Brandon, and Will have a plan: Use the creek bed and bold movement on blinds to run all their infantry to the below grade rail cut, cover the advance with smoke from their 60mm mortars and armor and rush the German left and roll up the defenders from that side, covered by their tanks from the far side of the cut. The Germans, ably lead by the crafty John and Mike, have four MMGs and five elite squads of infantry entrenched in and around the strongpoint houses, with a 50mm AT gun and a 75mm infantry gun dug in on the ridge behind the houses. Two StuGs lurked out of sight behind the houses as well. They have just discovered their explosive charges on the bridge will not “go boom” and have called for artillery to try and drop the span before the seven American tanks can creep on over.

US RIGHT ASSAULTS UNDER SMOKE COVER

3RD PLATOON PAVES THE WAY—AND GET WIPED OUT

The Germans had trouble spotting the US who managed to get into the ditch with little opposition and no casualties. The US mortars and tanks put down a lovely smoke screen on the right to blind the defenders….but it also screened them from any sort of preparatory fire, so they remained intact until the US infantry burst through the smoke clouds to launch their close assault. The 50mm AT gun opened up on the US tank destroyers during this build up and a dual ended with the gun missing the thin skinned M-10s over and over while their opponents whittled down the crew with HE to one man. At that point, the German commander himself, drawing a heroic action chit, ran over and helped sight and fire the last round…only to also whiff. He then ran back to the right flank to assist his MMG team, only to be driven out of the structure as tank fire set it ablaze.

2ND PLATOON FINISHES THE JOB

STUG BEHIND THE LEFT FLANK

Once all three US platoons were forward and ready to go, the 3rd platoon had its platoon card pulled. To it went the honors of being the first wave to run out of the smoke into the waiting arms of the defenders—one NCO, a squad and a MMG team, with a StuG peaking part way around the fortified house. All three squads and their lieutenant were wiped out first by fire and then finished off in close assault, but took out a few defenders as well, including the German NCO. All 3rd platoon was no more, that is except for their bazooka team who lingered in the rear. Next, the lieutenant for 1st platoon was drawn and he pushed his men into the fray. They took the house by close assault, but their leader went down in the process. 1st platoon then moved into the house, making the StuG uncomfortable through bazooka fire. But there they had to sit, leaderless, and too loaded with shock to do much but fire. Continuation of the assault would have to fall on 2nd platoon or HQ platoon far behind. The American Captain, realizing he needed to be up at the sharp end of the spear, soon ran forward in hopes of helping reorder 1st platoon.

GERMAN CAPTAIN ORGANIZES THE DEFENSE

ALL BUILDINGS BURNING

Meanwhile, the US armor would not be moved to cross the perilous bridge and made good use of their time and position to reduce the other 3 farmhouses to flames, driving their occupants out into the trenches behind the buildings. The second German assault gun tried to come out and dual with the M-10s across the ditch, but it too couldn’t hit a thing and went up in flames. It was a terrible day for German optics. We called the game at that point. The defenders were still strong, but somewhat disarrayed: Most of their infantry was okay, their 75mm infantry gun was still in action, and their one slightly bazooka damaged StuG was inching back to cover. The defenders were going to be hard to shift with the heavily depleted US infantry. Great game by all!

THE LAST DITCH!

FINAL POSITIONS…1ST PLATOON READY TO TAKE HOUSE #2

Joe Patchen


Picture1.png


Fun outdoor WW2 Skirmish Game recreating the attack of Herman Goering Panzer Division on the 82nd Airborne and 1st US Infantry (Big Red One) on July 11, 1943 in Sicily.

Based upon Scenario #6 Piano Lupo 3 from the Sicilian Weekend IABSM Scenario book but using map and some unit suggestions from Belly of the Tiger scenario in Skirmish Elite, Combat Jump Sicily book.

Excellent turnout with both experienced and new players. Germans were commanded by Brett McLay, Steve Emerson and Jon Fry while Americans were commanded by Steve Smith, Dave Goodwin and Elroy Davis and yours truly as host.

Game played fairly true to history with American naval artillery as the key decisive stroke to break up the attack of the panzers along with some "great shooting, Tex" by the crews of the 57mm AT guns.

Dan Albrecht


image-asset.png


We set up our gaming tables outside on a lovely July day to recreate the cold and damp Anzio campaign battle at Carroceto, January 25th 1944. Our scenario played out very much like the actual battle described in Robert Avery’s excellent "Anzio Wildcat to Whale" campaign booklet.

Our British Guards commanders stuck very closely to the historical plan--unbeknownst to themselves. A preliminary bombardment around the railway station was followed closely by smoke to screen the attack through and around the cuts in the elevated embankment. That was followed by a series of tough and vicious hand-to-hand fights around the station. It played out like the real thing. In fact it played out so similarly that the first officer casualty in the British assault was Lieutenant The Honorable V.S. de R. Canning, just as in the battle.

STONK, SMOKESCREEN AND HAND GRENADES

The British swung their four Shermans and their three Bren carriers (both still on blinds) through the cut in the embankment, past the smoke toward the right.

The Germans were frustrated in not getting their well placed three MMGs  and two supporting 75mm infantry guns and two self-propelled 150mm  armed Hummels into the  fight around the railway station  and this drove them to reveal those units off blinds early on. Their  fire whittled away a considerable portion of the British infantryman and  put in question  the attempt at the railroad station. 

HOLDING THE TRAIN STATION

THE GUARDS PUSH INTO TOWN

DEFENDERS IN THE ATTIC

mmediately after the German heavy weapons opened up, the Germans became aware of the Shermans and the personnel carriers coming out of the smoke and off of blinds. Immediately, a long but losing duel began with the British armor. Meanwhile, the Guardsmen made excellent use of their 2 inch mortars to vigorously mask the medium machine guns and 75mm infantry guns that were pelting them as they pushed towards the railway station.

The Germans gave a good account of themselves around the train station and their machine gun emplacement behind the village near the bridge was a continual source of British attentions. Their sniper deployed a bit too far forward and the tanks advanced and ran him off before he could do much damage.

The MMG nest at the bridge was continually masked by smoke from the mortars. Repeated close assaults on the emplacement from their flank were thrown back by the grenades and pistols of the machine gunners. A good portion of two platoons went down  trying to knock out this one machine gun. 

THE HEAVY WEAPONS PLATOON FIND IT ISN'T HEAVY ENOUGH

OBERLEUTENT OVERSEES ONSLAUGHT

As this was taking place, the British armoured thrust up the middle had unfortunately stalled.

This gave the German tank killer team a welcome opportunity to slink down the creek bed and rush the tanks right under the not particularly watchful eyes of nearby British infantry. Two Shermans were brewed up before the tank hunters could be shot down.

TANK KILLER TEAM SCORE A KILL

TANK KILLERS CHASING KILL #2

Eventually, the bloodied British threw all the Germans out of all the buildings around the train station and the station itself—and then one medium machine gun team snuck into the back corner of the station. The one remaining Hummel SP on the other side of the stream made it hard for the Guards to reinforce and hit the gunners in flank, but they would eventually do so.

GERMAN SP GOES UP IN FLAMES

SECOND SP HOLDS THE RIGHT FLANK

HEROICS AT THE BRIDGE

Meanwhile, the overall British commander in personal charge of the one squad of British infantry borne by the three Bren gun carriers persisted in his drive up the right flank over the stream and toward the cluster of buildings known as The Factory. The British second objective was the local Fascist party headquarters building at the Factory. The carrier section got lucky with their Bren guns and finished off the medium machine gun on the second story of the building across from the Fascist party HQ, clearing the way for a dash at the goal.

CARRIER SECTION BLITZES FASCIST HQ

CARRIER SECTION BLITZES FASCIST HQ

The very next turn, the Captain boldly (one might say foolishly) drove straight up to the front door of the Fascist party headquarters. At that moment, of course, the last intact squad of German infantry lept at them from the upper story, grenades flying and rifles blazing. Against all odds, the equally numbered but highly disadvantaged (albeit well lead) squad of Guardsmen nearly wiped out the German defenders in the first round of close combat and sent them fleeing. The second objective had been captured, and the day was won.

GARDEN PARTY

Lee and Robert had a well thought out defensive set up and responded dynamically. The British persisted bravely and showed an imaginative and flexible attack that pried open the defences and won the day. Well played Brandon, Mike, and Will. 

Joe Patchen


image-asset.png


My mate and I decided to have some games of IABSM after a bit of a gap. I have had the Anzio pack for several years now but never really looked at it, but on closer examination after recently receiving the updated for IABSM 3 I found out that I had been missing something. All the scenarios are interesting and with a lot of variations, and the advantage that there isn't a lot of terrain to buy.

As can be seen from this photograph taken looking over the two villages looking west the terrain is fairly close with the villages of Aprilia and Carroceto. This photograph is one taken by an English tourist in the 30s as the more observant among you will notice that the railway line is not completed yet.

The British will come over the embankment in the distance with the objective of taking both villages. The Germans are heavily outnumbered but are entrenched and have some good support weapons as well. It will be a close fight as always.

Steve will be the Germans whilst I take the British hopefully forward.

The early action was slow with the British advancing cautiously using the smoke as cover, and moving under the embankment (yes they are). Classic British advance, marred by lack of skill but more of that later. The Germans are out there somewhere and surely these houses must be occupied.

Then suddenly the first Germans appear and are about to unleash the death knell to the British Platoon to its front, when it realises that the stonk had affected it badly when action was most needed. This lucky break drove British morale to new heights. With one British ensconced in the house to the right everything looked rosy for the Allies at this stage, although the unit in the centre which had failed to reach the enemy in a charge was a concern.

To east the Allies are getting grips with an Infantry Gun and some Tank Hunters which are hidden in the building in the distance. Just out of the picture are the two Hummels who suddenly have found their distance and shocked the British with their immense firepower (150mm indeed, that's the last time I let Steve bring his own models!).

On the embankment the section giving covering fire isn't in good health mainly from mortar fire and those Germans in the building have now miraculously rallied. Why are all my tanks in a line waiting?

This is the railway station (photo, above right) and the unbreakable rock for the British. In here were placed a MMG and infantry section with their officer. The stonk obviously didn't harm them too much as they shot the British in droves. First the section in open about to attack its fellow section in the first building as seen earlier, and then the British section that had gained the building opposite. I never did force them all out of this building

For good measure you can see the 80mm mortars in the background which never missed a shot, and took out the section on the embankment in two deadly salvoes.

In the east again one can see the British section that just assaulted the infantry gun, and failed badly. This was then destroyed by the Hummels for good measure. Finally the Bren Carriers moved forward and to minimal effect tried to shoot the infantry gun, but there were obviously shaken when they noticed those Hummels across the stream as they totally missed.

The end, as the Germans still hold the Railway Station and the Hummels have destroyed the infantry to the east. Where you may ask were the Allies tanks and indeed that was the question I had throughout the game.

At this point I conceded, mainly due to the lack of officers for the infantry. My dead pile was amazing and I really hadn't made any dent in the German defence. All in all the British performance was poor and there was no co-ordination at all between different arms.

Despite the result it was an excellent game. I was always in the fight but the real threat I couldn't counter was Steve always throwing 5 or 6 for casualties and myself throwing 1 for leaders. In the end I had one leader left and only three sections at any strength at all.

I played badly and was too slow advancing and should have been more aggressive. I also couldn't get my men of the blinds early enough and the Germans have several turns of one section against them which allowed the Platoon and MMG in the village to take out one of the Allied Platoons without too much damage to themselves.

Next week it will be the return match with the Germans attacking the same villages.

Craig Ambler


capuzo.png


Fellow Lardy Zippee recently began working his way through the Operation Compass scenario pack using 6mm figures. Unfortunately the tripod on his camera fell apart just after he had set up the terrain. Here's the AAR, but the only pictures available are eerily deserted (pun intended).

The campaign opens with a British armoured car attack on some trenches: a deceptively simple scenario which begins as a strong force from 11th Hussars spots an Italian trench position...

If the British had done the sensible thing and worked the flanks (thus unknowingly avoiding the minefield in front of the Italian trenches) it would have been a very dull affair. As it was the British behaved in a very 1940's style and pretty much charged the trench line on their Rolls Royce steeds, not even bothering to spot!

BEFORE ANY ACTION, LOOKING UP THE RIDGE (NORTH-WEST) TOWARDS THE ITALIAN TRENCH LINE THAT COVERS THE ROAD TO FORT CAPUZZO

As referee, I was partly responsible: worried about how easy the British would find the game unless they encountered the minefield, I told them that the Italians appeared to have cleared the ridge to their front to open lanes of fire, heavily implying that the going was therefore perhaps less difficult on the straight forward approach. I needn't have worried given the gung ho cavalry charge mentality that was quickly adopted by the 11th Hussars!

As the British charged forward, the Italian artillery landed in timely fashion just to the front centre of the minefield and kept up a sustained and accurate fire. Here I added huge clouds of dust and sand to hamper spotting and allowed a roll for minor damage to the cars from flying shrapnel: I think this immobilised one and jammed the turret on another. 

The remaining cars pushed on, hit the minefield and lost another four to immobilising detonations. This actually ended up frustrating the Italians, as they then couldn't force the Hussars to retire with small-arms fire. Ultimately, however,  three Rolls Royces were abandoned and one retired from the field seeking repairs. It did take some unusual umpiring to handle repair attempts and abandonment rolls in the midst of a barrage or minefield! 

In reply Lt Col Combe (the British FOO) brought down the RHA on the east trench but slightly overshot and was unable to redirect through the Italian barrage, so this was only sporadically landing with any effect. He kept trying to manoeuvre further west to get a LOS but the bogging and manoeuvre dice were unkind to him. 

PRE-GAME VIEW LOOKING ACROSS THE TABLE FROM THE EAST, ITALIAN TRENCHES ON NORTHERN RIDGE, BRITISH BLINDS ON THE TRACK TO THE SOUTH

In the meantime the first MkVI light tank troop drove full pelt up the road, losing one tank immobilised and abandoned in the minefield, with another receiving a turret jam from desperate Italian AT efforts after it bogged down next to the trench line. However the troop eventually made it to the high ground above from, where they set about spraying the trenches with machine gun fire (I allowed this to be more effective than the fire from below the ridge). The second troop of 7th Hussars sensibly tried to find the edge of the minefield, being led by TSM Howarth (in a borrowed car - his was abandoned in the minefield - the only runner left to 2nd Troop), and managed to skirt the western edge and drive off up the road, whilst TSM Howarth added his fire to that of the remaining MkVIs. 

Lt Halliday (one of 2 runners left in 3rd Troop) drove around the east edge of the eastern trench and down into it (irretrievably bogging the car down and leaving it very vulnerable to Italian AT efforts, which were to prove fruitless) but enabling him to sweep the trench itself with MG fire like shooting rats in a barrel. Between this and fire from the 18/25pdrs, the Italian 2nd platoon was effectively wiped out. 1st Platoon (west trench) with Sgt Shorba were heavily washed by the MkVIs on the ridge, but survived with eight men, one dice and the Sgt leading a charmed life. 

We closed the game by the real-life clock as there was no turn card for this scenario - my only criticism of this (and I think the next scenario) as without it really the Italians have no great hope. In the end it was a fun game, even if we proved somewhat rusty: it being quite a while since we last played IABSM.

Zippee


Another great days gaming with Jenny Owens and Phil Turner today.

June 6th 1944 D Day, Gold Beach ‘King Green Sector’ West of Ver-Sur-Mer. Green Howard’s assault on Mont Fleury Battery.

More Pictures

Alan Curtis, Phil Turner


Picture1.png


Shots of the game today with Jenny Owens and Phil Turner. Lead units of 7th Panzer supported by elements of Tottenkopf Div bump into a BEF company company with attached Anti Tank guns deployed to contest a river crossing somewhere in Flanders.

The Germans were repulsed with a bloody nose….

The Set Up

The Game

Extra Pics

More pictures:

Alan Curtis, Phil Turner, Jenny Owens


allam10.png


Jon Wimbush posted the following AAR and pictures from a game featuring the Neuville au Plain scenario from the "All American" D-Day Airborne supplement:

North of Ste Mere Eglise the third Platoon of Dog Co of 505th PIR found themselves doing the job originally set aside for whole of 2nd Battalion. Lt Turnbull had 3 full strength squads with extra LMGs and had 2 separate LMG teams formed from his mortar squad who had lost their 60mms but found a couple of unattended 30cals. The platoon's bazooka team was also beefed up thanks to Lt Col Vandevoort dropping off a 57mm AT gun and crew. The orders were to stop the Germans advancing South down the highway into Ste Mere Eglise – if things got too hot he could call on Easy Co for support in pulling out. Without enough troops to form a solid line, Turnbull placed his 2IC Lt Michaelman in a farmhouse West of the highway whilst Sgt Niland held the East of the line in an orchard; he himself took up a central position in another orchard with the third squad. One LMG under Cpl Kelly was set to deny the highway to any infantry whilst the second one was in the attic gable window of a farmhouse South of Turnbull's position with a field of fire to the distant hedgerow bordering the flooded fields to the north. The 57mm was tucked into the mouth of a turning just East of the highway so that it covered the first few hundred yards of the highway; the bazooka was further ahead to the West set to hit any armour hugging the far bank to avoid the 57mm fire.

A company from the 1058 Regt of 91st Luftlande Division bolstered by 3 assault guns had been ordered to push through the flooded area and up the slope to Neuville Au Plain before sweeping down into Ste Mere Eglise to support the attack of the 1057th Regt. They were led by Haupt Hempentrager, supported by Lt Wiener and Feldw Bratwurst and had a FOO in contact with the company's pair of 81mm mortars. The assault guns consisted of a Stug III G and two Marder IIIs. Hempentrager led the column with 1st platoon with each platoon followed by an assault gun and the HQ section bringing up the rear with 2 MG42s.

Hempentrager and Plt 1 were immediately spotted as they left the flooded area. Cpl Kelly directed the fire of his LMG team from the west of highway tumbling several landser in the dust and sowing confusion in the ranks. Quickly recovering, two of the sections forced their way through the hedgerow and into the orchard beyond whilst Haupt Hempentrager tried to take out Kelly's team with the remaining section. The Heroic Leader card saw Kelly get carried away and lead his team into the centre of the road for a better field of fire and the remaining dice saw Hempentrager fall along with the bulk of his section. Beyond the crumpled forms a Stug III clanked its way off the causeway. Kelly pulled back but some quick footwork from one of the German sections who had burst through the hedge brought them up on Kelly's flank with enough dice left to mow the LMG and Kelly down. Meanwhile the 57mm crew let their inexperience get the better of them when they opened fire on the Stug at long range. 2 aimed shots and a desperate snap-shot saw a near miss and two shells bounce off the frontal armour. The Stug started blasting the end of the lane with HE and 2 of the crew were hit and they picked up 3 CRAP points (Cohesion Reduction and Panic). Turnbull's second in command, Lt Michaelman, was so incensed by Kelly's demise that he immediately led his squad in a counterattack on the orchard and their superior weight of fire sent the Germans reeling back with the whooping paratroopers hot on their heels.

A second platoon of Germans was spotted following the Stug and they immediately started heading East to outflank the position. Meanwhile they had to run the gauntlet of Turnbull and Niland's squads who with Big Men and extra MGs were laying down fire with 6 dice. From further South the LMG in the gable end began chattering away to add to the carnage. Even the hedgerow couldn't prevent this platoon with Feldwebel Bratwurst from picking up a steady drain of killed, wounded and disruption. The sharp crack of the 57mm was again drowned out by the blast of 75mm HE rounds which put paid to the last of the gun crew. Ominously another heavy diesel engine announced the arrival of another assault gun.

Michaelman chased the survivors of the German section who had killed Kelly, and butchered them like diseased pigs under the apple trees before the remnants of the surviving German section started blazing away through the hedgerow and two high velocity gun barrels pushed through the foliage and the stunning blast from the muzzles sent leaves and apples in all directions. Michaelman and his men desperately fled through the trees but splinters and shell blast knocked down the Looey and half the men. The survivors gratefully reached the shelter of the farmhouse they had so unwisely vacated a few minutes beforehand.

By now the third German platoon had moved up in support of the assault guns and began working their way through the shattered orchard. A second Marder also clanked off the causeway and started roaring up the road towards the abandoned 57mm whilst the Stug swung into the highway behind it. The first Marder ground around passed the orchard to the West in order to engage the farmhouse where the survivors of Michaelman's squad were taking up firing positions. At the base of the highway the German FOO began calling down mortar fire on Niland and Turnbull to try to give Bratwurst's platoon some relief. The first rounds whistled down beyond the farmbuildings and out of sight. The second batch caught Sgt Niland's squad along their hedgerow and they realised how those big earthen banks may be great for stopping MG fire, but they offered no protection to the vertical. Several troopers were hit and Niland was forced to pull back to the hedgerow behind. Turnbull was now advanced by himself with the squad to the West all but wiped out, the AT gun knocked out and the squad to his east forced to pull back whilst 2 assault guns were squeaking down the road and German infantry were turning both flanks; reluctantly he called up Lt Col Vandevoort to send him his promised reinforcements to cover his withdrawal.

At this point the Marder drove straight into a rocket from the bazooka team and burst into flames. The Stug rumbled up behind it and tried to fire through the smoke at likely hiding places. Bratwurst's second platoon took advantage of Niland's redeployment to race across the field and into the vacated orchard. The third platoon massed around the farmhouse whilst the FOO shifted his fire onto Turnbull's position. Behind him Lt Wiener led 2 MG42 teams up the highway. Suddenly the remains of Michaelman's squad began flinging grenades and blazing away with everything they had left, forcing the Germans back down the slope. The surviving Marder immediately began to shell the farm reducing the squad to 3 men.

Niland directed his squad's fire on the second platoon which had started infiltrating through the orchard to the east of the road and, realising that they couldn't match the firepower of the paratroopers, Bratwurst decided to trust in numbers and ordered his 3 sections into the assault. Only 2 sections managed to make it as Bratwurst himself was delayed kicking one of his sections out of the bushes where they had gone to ground. It was all over horribly quickly ("Gott in himmel! Hilfe! Aiiieeee! Argh!" Etc) as most of the Germans were killed and the dazed survivors were marched away under guard. On the opposite side of the battlefield the German third platoon shoved into the farmhouse but were amazed to be driven straight out again with casualties by Michaelman's 3 troopers – not enough dice left to fire but still plenty of fight left when it comes to knife-work. Further East the bazooka team engaged the Stug. Their first shot was a shocker (snake eyes) as the rocket struck a branch in the hedgerow in front of them and careered off to the side but the second was a beauty (11) and the gun mounting was struck leaving the Stug unable to fire. Further shots convinced the crew to reverse down the highway and head back to the rear. The mortars continued to whittle away at Turnbull's squad while Lt Wiener directed the MG42s from the highway.

At this point 1st Platoon of Easy Co came up under Lt Peterson. He also had Sgt Samson with him who was widely considered to be an absolute genius at laying down fire with a 60mm mortar. As they moved up toward Michaelman's farmhouse the bazooka team began to work their way west along their hedgerow in order to engage the surviving Marder which had resumed blasting Miachaelman's squad. Niland crossed back into his orchard and chased Bratwurst's survivors out at bayonet point.

With full platoons on each side of Michaelman's farm it all came down to the draw of the cards. The Marder came up and the last survivors of Michaelman's squad broke and ran. Easy Co were next out and stormed the farm to engage the Germans beyond. In short order everything was either GI or dead with 4 shocked prisoners joining the other Germans from earlier in the cage. Samson announced his arrival with a row of mortar shells on the highway which wiped out one of the MG42 teams. The bazooka team finished their redeployment and stuck a rocket in the running gear of the Marder. This left the crew to high tail it after the Stug and Feldwebel Bratwurst. The remaining MG42, Lt Wiener, the handful of surviving infantry and the FOO chose to pull back rather than join Haupt Hempentrager amongst the glorious dead.

Lt Turnbull was left to ruefully apologise to Lt Peterson for calling on his aid. Everything had appeared so bleak until the bazooka turned the tables on the assault guns. Had he been a little more patient he could have swung across with Sgt Niland and taken the Germans in the flank without risking the ire of Vandevoort by calling for help when the Regiment was under pressure elsewhere.

Lots of fun. The American airborne carried out prodigious feats of arms and outdid the historical outcome. Hempentrager was lucky to die on the field as he would certainly have been shot by the Gestapo on this showing. Not really his fault though, they had done really well until the bazooka team stepped up and the fragment of Michaelman's squad continued to wrongfoot the German third platoon. The mortars did a fine job for both sides (so more realism there) but the incredible firepower US elite forces can lay down was the true difference. The Germans were just gradually degraded in a firefight and close combat was a complete nightmare so once their supporting armour was knocked out it was all over.

Jon Wimbush


Picture1.png
 

I try to run a Kursk IABSM game every July and this year was no exception. This one was going to be an all armor one based on the action of Kampfgruppe Stachwitz on the southern front of Operation Citadel on July 10, 1943.

Panzer Division Grossdeutschland was working its way north towards Oboyan but had to dispatch a strong unit of panzers (KG Stachwitz) to the SW to deal with units holding up the 3rd Panzer Division.

William would command the panzers, while Simeon, Jon and I took the Soviets of the 22nd Tank Brigade, 6th Tank Corps.

The Russian tank hordes are coming in from the near, SE corner while KG Stachwitz begins from the opposite NW edge.

The Russians had three companies of ten T34s each and a battalion CO vehicle.

KG Stachwitz had a unit of four Panther Ds (subject to the breakdown card), ten Panzer IVG/Hs and some off-board Tiger Is. The Tigers could cover the left flank and would roll a D4 to see how many could fire at 18" plus range.

Russian crews had two activations (three for the company COs) while the Germans had four activations. So it was Soviet numbers and speed vs German training and firepower.

So I didn't get any pics of the very end of the game, but this is pretty is the wrap. The T34s that made the dash around the Panthers were all knocked out or forced to bail out.

Of the 10 PzIVs, 2 were KO'ed, 1 was immobilized and 1 had engine damage. All 4 Panthers had some damage-3 were immobilized and 1 had their gun inoperable.

Of the 30 T34s only Jon had 1 vehicle escape intact. The Bttn CO in the back was also untouched. He will be tasked with leading the next wave from he front.

Very enjoyable game that had loads of movement and action that was a closer affair than the final results would indicate

Mark Luther


Picture1.png

A 6mm IABSM game played at Gigabites Cafe in July 2021

Mark Luther


image-asset.png


This was the afternoon game of IABSM from the 2015 Market Larden event. As the GM who had been due to run the game had unfortunately had to drop out, Geoff Bond stepped up and ran this game using the scenario and figures that had been brought for the morning session. Here's a quick report from Dave Rushton, one of the players.

The advancing Russians approached the village from the NE, splitting their forces on the outskirts. One force with armoured cars leading, then T34s plus tank riders, supported by SP Guns headed towards the village, whilst more T34s plus infantry headed through the fields for the NW approach road.

The Germans had deployed in depth, with infantry (plus Panzerschreks) in the cornfields NW and NE, artillery hidden well to the south behind dwellings, MGs deployed to cover the cross roads, and the Panzer covering both approach roads in cover.  Hence the early Russian probings had no results, and they seemed to become increasingly interested in the Church, which was empty. An initial Russian artillery stonk achieved little, as did a later airstrike against the Panzerjaeger force.

The German mortars opened up first and had some success, followed by a strike against the Russian SP guns as they slowly went past the cropfield to the NE. One gun was wiped out, but at heavy cost eventually to the German infantry who were hit by MG fire and then two T34s.  However, the Russian infantry soon reached the open ground near the crossroads and were in turn hit by the German MGs. The Russian armoured car section also took serious damage.The Russian tanks force to the NW managed an early serious hit on the Panther tank, destroying it's main gun and causing it to withdraw.

Meanwhile the two Jagdpanthers appeared to the south, moved to the highest ground available and commenced firing at juicy targets. The German Wespes had also abandoned cover and were engaging the two T34s to the NE. 

Unfortunately, that was where the game had to end. With a complete infantry Zug still undiscovered and about to open fire at close range, the Germans were confident. However the damage to the Panther would give the Russians confidence and allow freedom of movement. 

Dave Rushton


allam10.png


I have been desperate to play a game of IABSM V3 since their recent release, but have been busy putting a Napoleonic collection together. Yesterday at the club gave me an opportunity to see the rules in action, and I thought they were great. Five of us played the game with two of us having played a couple of games previously, so it was a bit of a "hand holding" session as we all got to grips with the basics.

I selected the scenario Neuville au Plain from the All American scenario book, by Dave Parker, which covers the Normandy battles of the 82nd Airborne Division. This particular scenario has all arms represented so gave us a chance to see the full mechanics in action.

MAP OF THE BATTLEFIELD, GERMANS ENTER ON THE ROAD FROM THE NORTH (BOTTOM)

The historical battle on June 6th had 3rd Platoon, Dog Company, 505th Parachute Regiment, commanded by Lt.Turnbull, holding the village of Neuville, with a forward section placed in the farm (table centre). They had a bazooka team, a 57mm AT gun and a liberal sprinkling of machine guns to assist them in their defence. Their objective was to prevent enemy forces proceeding south down the road to St Mere Eglise.


VIEW FROM THE WEST WITH THE FARM CENTRE TABLE AND NEUVILLE TOP RIGHT


The American defenders were able to call on support from an additional platoon from Easy Company 505th.

The German forces in the area were the 1058th Grenadier Regiment from the 91st Luftlande Division and they had a full company supported by three assault guns and some medium mortars.


TABLE FROM THE EAST WITH NEUVILLE IN THE FOREGROUND AND THE ROOF OF THE CHATEAU CENTRE BOTTOM


The Paras in our game took up fairly historical positions holding the orchards in front of Neuville and blocking the north/south road with the section in the farm, backed up by the 57mm ATG on the crossroads in the village to their rear. The Germans entered the table on blinds on the road from the north and being quickly spotted by the US troops proceeded to break out into the fields with two sections supported by two assault guns going to the east flank whilst one platoon supported by the StuG probed the road and the farm complex.

THE NORTH/SOUTH ROAD SEEN FROM THE GERMAN PERSPECTIVE. THE FARM ON THE RIGHT SAW A BITTER BATTLE.

The use of blinds really adds flavour to the game with that feeling of uncertainty as both sides started to feel out each other's position. The Americans being deployed in cover and hidden only deployed dummy blinds, which greatly improved their spotting efforts but left the Germans very uncertain as to what they might "bump" as they approached buildings and orchards desperately trying to spot the enemy troops.

The battle kicked off when the platoon approaching the farm in the centre bumped the airborne defenders, promptly losing a section in the initial firefight. The Germans fell back to nearby hedgerows and called in their mortars and StuG for support in suppressing the defenders. The section commanded by Sgt Mitchum kept up a fierce fusillade throughout the game and his presence held the defenders firm.

The 57mm ATG took its opportunity to support the farm by shooting up the StuG on the road, causing damage to the vehicles gun sights and forcing it into cover.


ONE OF THE MARDER III ASSAULT GUNS SUPPORTING THE GRENADIERS APPROACHING NEAUVILLE ON "HUNT" ORDERS


With the furious battle going on in the centre the main German effort focused on penetrating the US defences via the orchards in front of the village. The first section entering the trees with the MMG section in support was immediately engaged by a Para section under 2nd Lt Fonda who during the ensuing battle was killed, not before his force had pushed the German troops back to the hedge row bordering the plantation.


THE GERMAN COMPANY COMMANDER HAUPTMANN PFEFFERBEISSER AND ZUG 3 LEADER FELDWEBEL BRATWURST OBSERVE THE INITIAL STAGES OF THE BATTLE


With both flanks of their attack pinned down in an attritional firefight, the German commander went for the direct approach by sending his third platoon across the field in front of Neuville supported by the other Marder. This was met by a fusillade of fire from the Para mortar section armed with two 30cal machine guns having lost their mortars in the drop but finding the machine guns en route to the village. They also loosed of a couple of bazooka rounds that narrowly missed the Marder, and with the losses inflicted on the German infantry and the death of their Zug Commander, this force was also forced back into cover.

With the arrival of 1st Platoon Easy Company into the defences, that stabilised American losses, we called it a game.

The Germans had lost a platoon of infantry and the American defenders, one and half sections, but the defenders were holding firm in a very strong position with all the indirect fire support and anti tank assets still available.

We felt the game really captured the command and control difficulties that this kind of battle generated. Unlike other WWII games I have played, you can't make "swooping" moves across open terrain in front of enemy troops without getting badly shot up. You actually have to adopt the tactics of the day by attempting to pin with part of your force whist manoeuvring with the other and keeping your leaders close and in touch to keep events under control. It was also notable that as the game went on commanders started to sacrifice some of their fire to save an action to take cover making their troops a harder target to the inevitable return fire.

The play of the game is greatly enhanced by the Fire Table that IABSM uses. This chart not only resolves fire combat but sorts out the morale results all in one go, "brilliant"!! This means reduced die rolling, less checking and more gaming. In addition any potential casualties are resolved simply using a d6 (1,2 = no hit, 3,4 = shock, 5,6 = dead) which means you can learn to resolve combats really quickly. I am looking at other rules I use far more critically now as I am starting to feel life is too short to be wasted on numerous checks and lists of factors.

The game really roles along and even though you are using cards to determine activity we squeezed in 12 moves of play in an afternoon of gaming, and most of us hadn't played the rules before.

Congratulations to Too Fat Lardies for a great update to their original rules, I think I will be playing a lot of IABSM in future.

Thanks to Ian, Steve M., Jason and Nathan for a fun game

Carojon


allam02.png


The 1057th Grenadier Regiment Counterattack

Martin


OK Rich I will give it a shot then; however as I design and umpire most of our IABSM games I usually find it difficult to actually remember much of the detail!

The 82nd Airborne folder actually contains photos from 2 games. The first set, posted by captainquincy (my mate Neil), is indeed the terrain around Cauquigny; for a report of that game click here. Incidentally, both these games are from the bunch of Airborne scenarios I sent you late last year; we're about two thirds of the way through play-testing them and I'm pleased with the results so far.

The second set of photos posted by The Gnostic (that'll be me) show last week's glider game. This is the terrain just south of Fauville. We've played a version of this game twice now. The first game was only very loosely based on the real action but Neil provided an absolutely hilarious AAR. . The latest game was the more historical version and gave the better game, although I'm not even going to try to match Neil's fantastic action report. So here goes:

The game represented the actions of Howell force.

At 2.00 p.m. on 6th June, the seaborne elements of the 82nd AB division (Force C or `Howell Force') landed on Utah beach. Howell Force included an armoured task force, consisting of Company C, 746th Tank Battalion; Troop B, 4th Cavalry Squadron and Company F, 2/401st Glider Infantry Regiment. The mission of the task force was to link up with the airborne forces to provide a more powerful anti-tank capability. Howell Force reached Les Forges by early evening but found that the Germans occupied a wooded hill to the north (Hill 20) and an enemy salient extended north-east to the Ecoquenneauville – Turqueville ridge. This not only separated the 82nd AB, fighting at Ste Mere Eglise, from the 4th Infantry Division but also dominated the valley below, which at 9.00 p.m. was destined to become glider landing zone W. It was vital that the valley be cleared for the incoming gliders; consequently, Howell Force attacked northwards along the road with the reconnaissance elements in the lead.

For the game the Germans had a single infantry company , from the 795th Georgian battalion, supported by two MMGs, three PAK 40s and a couple of panzerschreck teams. These were deployed on a map so that the allies were faced with an empty battlefield. Obviously they were also unaware that they were on a landing zone.

The American main force consisted of a platoon of Shermans and a company of glider infantry. These were preceded by a troop of US cavalry (jeeps and armoured cars) for recce purposes. The recon troop entered the table, on blinds, on move one. I then left it up to the Americans to decide when they had enough information, from the recon troop, to bring on their main force. The players actually decided upon a pretty thorough recon phase and planned to deploy their main force on turn four (turns were determined by a blank card). The recon did quite well, ferreting out a couple of AT guns, a panzerchreck team, a MMG and a platoon of infantry. The latter was found the hard way, on move one, when they drove straight into the German position; losing an armoured car and a jeep to panzerfausts.

Unfortunately, the gliders were due to land on move 6 (the players were unaware of the exact timing); so the main force had barely entered the table when the gliders arrived. One Waco landed amongst a platoon of Jerries and were promptly wiped out. Another landed in 'no mans land' but the occupants managed to make their way back to safety; despite being machine gunned along the way. The third glider, a Horsa, landed amongst the Yanks; taking out a couple of their own MG teams in the process! The Yanks were expecting reinforcements in the form of Airborne artillery; so weren't too chuffed when I informed them that these were mainly Headquarters troops and were under my (umpire) control. I ruled that, upon landing on a hot LZ, they would simply head for the nearest cover; whereas the players naturally wanted them to join a co- ordinated assault with their own forces - tough!

The biggest problem for the Yanks was actually the stream across the width of the table. Despite being informed that it ran into a flooded river, they attempted to cross with a couple of tanks - oh dear bogged. By the end of the game the Germans held one side of the stream and the Americans the other. The Americans had managed to get some tanks across the bridge but the lead tank was lost to panzerschreck fire and the survivors were too afraid to advance because of the presence of infantry in the hedgerows. I also allowed the Germans to bring on a couple of Marders as reinforcements. This was not strictly historical but the Germans had used SP guns in their earlier attack on Fauville, a couple of hundred yards off their table edge. This was also the only armour left from our previous game (the attack on Fauville) so I wanted the Germans to see the consequences of having lost their armour support in the previous game.

At one point it did look like the Yanks had managed to get a platoon of glider infantry around the German flank but a bad run of cards saw the attack stalled by off table mortar fire and direct fire from the Marders - nasty! In the end the result was pretty historical with the tanks failing to cross the stream and the landing zone remaining in German hands. So all in all a good game and it's on to Ste Mere Eglise next.

The Gnostic


allamplay1.png


Over the past few months the Lardy element here at Durham Wargames Group have been furiously play testing in preparation for the up and coming IABSM supplement All American: The 82nd Airborne Division 6th June to 9th June 1944 by Dave Parker. What follows is a taster of one of those games and is the fourth in a series of five scenarios played over the same terrain. I have posted photos of this game in the 82nd Airborne folder in Photos. The primary mission of the 82nd Airborne Division on D-Day was to secure or destroy certain bridges that crossed the Douve and Merderet rivers, which both ran behind Utah Beach. Although the 82nd Division paratroopers were supposed to land in three groups to the east and west of the Merderet River, various problems resulted in the men being scattered over a wide area. Portions of land surrounding the Merderet river valley had been flooded by the Germans to hinder airborne operations.

For the last 3 days there has been fierce fighting for the causeway between the small hamlet of Cauquigny and the bridge at La Fiere. The position is at stalemate. The 1057th Regiment, 91st Luftlande Division has now switched its effort south towards the bridge at Chef du Pont leaving a company to defend the Cauquigny end of the causeway from which they expect an imminent attack. Unbeknown to them 1/325th Glider battalion has discovered a sunken road across the floodwaters and is approaching from the rear. (see pics 1, 2 & 3)

It was a dark and stormy night...

Expecting an attack from across the causeway, the Germans deployed their forces in the village and next to the floodwaters. When two American blinds appeared at the far end of the causeway their decision appeared to have been vindicated. However, when more blinds started to approach from the other side of the village they began to wonder (see pic 4).

Being a night attack visibility was very limited and the two sides would almost be on top of each other before being spotted. This promised to be a short, sharp and bloody affair.

The Americans plan was to send their main force of 2 platoons (each consisting of 3 squads of 10 men) straight into the village as quickly as possible to try and catch Jerry unaware. The third platoon and the 2 MMG teams would make a flanking movement to their right and hopefully meet up at the head of the causeway.

Reaching the main farm building unopposed Platoon 1 "decloaked" and one squad took the barn. The other crossed over the opposite hedge to work their way down the side of the field. (see pic 5)

The farmhouse had a blind under it so they steeled themselves for a melee. What happened next will live in DWG folklore for a very long time. The next card turned was Heroic Leader and without catching his breath and with a ferocious yell of "Action - diddely - Jackson" Lt. Ned Flanders (for `twas he) sprinted the short distance to the farmhouse's back door, kicked it open and with a "Hi-diddly-ho, neighborinos!" took on the section of gob-smacked Germans inside. The result of the close combat was stunning but, in retrospect, entirely predictable. Ned threw six d6 and got 1 kill, the poor Germans threw sixteen d6 and got none! The shocked remnants fled through the front door with God's own stormtrooper in hot pursuit. (see pic 6)

Spotted from the barn, two 75mm guns revealed themselves and were rushed by 2 squads of Ned's platoon. These were taken after a vicious struggle along with an ammo truck. The supporting German section in the orchard beyond wiped out almost to a man. (see pics 7, 8 & 9)

As these and the so far intact Platoon 2 pushed on into the village, on the American's right flank things had turned out a bit sticky. Platoon 3 had run head first into the bulk of the German forces and were taking heavy casualties. (see pic 10)

They could do no more than retreat back across the hedges when they could and hope that some support would arrive.

At this stage the ticking clock and the lure of beer got the better of us and we called it a day. Historically the attack failed and it looked like it would be very difficult to dislodge Jerry this time. As the glider boys regrouped their hearts sank, where was Ned? Where was the Hero of Cauquigny? Say not that he had fallen!

The final scenario (aka The Rescue of Ned Flanders) promises to be a treat.

Captain Quincy