Another excellent Winter Wonder Lard at Bristol Independent Gamers (BIG). Thanks very much to David Hunter and Andy Crow for organising the day, Ellen Colling and Jim for allowing us to use BIG and to Michael Curtis and Jenny Turner for all their help in running the games. Also a big thankyou to Joe, Paul,Scott, Paul, Kevin and Ben for making the games such good fun !!

The game was based on the tank battle on the Calais - Dunkirk Road, near St.Omer on 22nd May 1940.

On That day a patrol sent out from the Calais defences reported German tanks on the road between Calais and Dunkirk and fighting towards St.Omer.

Staff Officers at Calais disputed this, stating that there were no substantial German forces within 30 miles of St. Omer and this could only be a stray reconnaissance patrol.

A British Force was ordered towards St.Omer to drive off these random German troops, but came into contact with lead elements of 1st Panzer Division, who were attacking French troops on the edge of the town.

Phil Turner

From a Wargames Soldiers & Strategy Magazine Facebook post:

From Phil Turner’s post on the IABSM Facebook Group:


It’s over to Dave’s for a late war, eastern front game of I Ain’t Been Shot Mum.

I was playing the Soviets, leading a column from 57th Guards Brigade towards the river Oder. My orders were to clear a way through to an undemolished bridge across the river. At my disposal I had two platoons of T-34/85s plus tank riders, a recon platoon, a couple of MMG teams and a tank destroyer platoon of two SU-100s. In reserve, or coming up from behind, was a heavy tank platoon of IS-III’s and a motor rifle platoon in trucks.

Mark, playing the Germans, had orders to stop me. He had a large platoon of infantry with a couple of panzerfausts per squad, a couple of MMGs, two Pak-40 AT guns, a Panther and a StuG.

Both sides were told that they had access to off-table mortars, and I also has air support on call.

The battlefield was long rather than wide. My troops would enter from one end, along either of the two roads, being able to place two Blinds on table each time my Blinds chip emerged from the bag.

I began by bringing on my Scouts and a Dummy Blind. The scouts were in M4 scout cars, but I was concerned about bumping into enemy armour and losing an entire squad at the time, so dismounted them and had them advancing towards the left hand woods in front of their transport.

As you will see in the photo below, the Dummy Blind (sent straight towards the right hand woods) has bumped into some enemy Blinds concealed in the woods.

The first line of German defence was now revealed: a platoon of infantry and an MMG team in the two patches of woods.

The scouts had done their job, and I now needed to get them out of there and bring up enough troops to push through the enemy line.

Unfortunately the Germans weren’t going to let my scouts off that easily, and I quickly started taking heavy casualties.

In fact so heavy were my casualties after a couple of rounds of enemy fire that my Scouts were all either killed or fled the table! That left Lt.Komarov, their commander and a Big Man, on his own on the battlefield, facing potential disgrace for the loss of all his men.

There was nothing for it but a suicidal charge towards the German machine gun nest in the woods. Komarov did get actually get there, and did kill one gunner, before being shot down…but at least his family was safe from possible retribution!

As per my plan, I now brought on my main force aiming to suppress the German infantry with HE fire from the tanks and then charging home with my SMG-armed tank riders: text book stuff.

Unfortunately the enemy infantry had teeth: panzerfaust teeth to be exact, and with a skillful bit of shooting, knocked out two of my T-34/85s in fairly short order.

Such was the enemy’s positioning as well, that although I could sneak an SMG platoon up the left hand side of the field, outside of the arc of fire of most of the Germans in the woods to their front-right, I couldn’t yet do the same on my right: I needed to weaken the infantry in front of me considerably more than that before an advance there made sense.

You’ll notice in the photo above that there are three T-34/85s on fire and I said that the ‘fausts hit two of them. That’s because the German supporting armour and anti-tank guns had also now opened fire, albeit at long range.

My T-34/85s were now needed to fight the enemy armour, so it would be up to the Soviet infantry to clear the tree line themselves.

On my left, this wasn’t a problem: the platoon got into position still outside of the German arc of fire and then charged home, SMGs blazing. One half of the enemy front line removed from play!

This was all taking too long: I badly needed to get my tanks back to fighting his infantry in order to push forward and achieve my objective before nightfall, enemy reinforcements or anything else Dave could throw my way.

I brought on my SU-100 tank destroyers and, in quick succession, knocked out the StuG and Panther with a combination of fire from the tank destroyers and T-34/85s.

Not an easy process, however: I was now down to just three T-34/85s i.e. I had lost four our of the seven with which I had started the game!

Whilst the tank destroyers kept the enemy AT guns pinned with some HE fire of their own, my tanks went back to shelling the Germans in the right hand woods. Soon they were worn down enough and Pinned for long enough for me to get the other SMG platoon into them: the front line was now clear

Time was ticking on: I knew this from the fact my reserves had arrived. If I didn’t move quickly, I was facing a draw from winning the position but not fast enough or, even worse, a loss due to my losses and not breaking through fast enough.

The gap between the woods looked a bit suspicious to me, and I had a squad of engineers, but no time: so I slammed the Blind containing the IS-IIIs through the gap.

Sure enough, with a loud Boom! the first IS-III disappeared in a shower of burning metal!

That was it, however: not a proper minefield just something designed to slow me down again, and the referee was looking at his watch!

Desperate times call for desperate measures. My lead T-34/85’s chip came out, rapidly followed by the Armour Bonus Move card.

That was it: pedal to the metal and the driver floored it down the road. You want me up the battlefield, I’ll go up the battlefield. Two decent rolls, a bonus for being a Fast Tank and I was over the crossing and level with the farm houses.

One anti-tank gun was Pinned, so no bother there, but the other…

I was a sitting duck, but only if the gun’s chip came out of the bag before the final Tea Break chip of the game (we were now in extra time!).

Naturally the next chip out was indeed the German AT Bonus Fire chip: surely I was now stuffed!

The gun fired, and hit! And it was flank shot: nine dice needing 4-6 to penetrate. Gulp!

Mark picked up his dice and let them fly…a torrent of 1’s and 2’s appeared: not a single penetration!

The next chip out was Tea Break and Dave declared the game ended…but who had won?

I had just about cleared the enemy from the field (all Mark had left was two AT guns, a sniper and, I think, a squad of infantry versus my five tanks and three platoons of infantry) but had I done enough to get forward?

Dave pondered for a second, then awarded the Soviets the win!

Apparently, the crossing on which the lead T-34/85 was now sitting was the point which he had decided was where I needed to reach. Although I didn’t know it at the time, it was also so point at which the final German squad’s ‘fausts just came into range, so I had been doubly lucky in the way the chips had fallen.

A great game that came down to the wire. Instant promotion to the commander of the T-34/85 that had reached the crossing: he could replace Lt. Yegarov who had gone up with his tank almost as soon as deploying from his Blind.

My thanks to Dave for umpiring, John for pulling the chips, and to Mark for his valiant, if doomed, opposition!

Robert Avery


Had a nice game of I Ain't Been Shot, Mum last week at a St. Albans, Vermont mini-con recreating defense of St. Lambert-sur-Dives on August 20, 1944 by Canadians against escaping 2nd Panzer Division.

Canadians: Two Shermans plus 2 and 1/2 platoons versus German force of 2 Panzer IVs, 1 Stug, 1 Sdkfz 7/1 Flak and 3 1/2 platoons

Scenario OOB and map from the excellent Skirmish Campaigns book, Falaise Firestorm which easily adapts to IABSM or Chain of Command.

See photos for AAR.

Dan Albrecht


Des Darkin and Iain Fuller had a great game of IABCYM, the dice driven version of I Ain’t Been Shot Mum. Here’s the various materials published on the IABSM Facebook Group collected together in one place:

Setup a table for a 15mm game set in Normandy late June 44. Not a real place, just putting out my terrain that I have built and painted over the last 6 months. Some nice buildings painted by Standbo as well on show. Will be a British operation to capture or clear the village of Le Plessy. We will be using the dice driven variant of the IABSM rules - IABCYM.

Welsh Guards survey the scene.... “where is the bloody infantry? “

Game kicking off today and the Essex Yeomanry are smoking the Germans out in more than one way! Iain Fuller leading the brave Brits. Using the dice activation today and working well as usual. Flank attacking at present and bloody fighting in the orchards. We are using support points as well in the game.

And here’s the video report:

Des Darkin


This is an AAR of a solo I Ain't Been Shot Mum game I played recently in 6mm. I put the AAR together in Microsoft publisher.

The scenario is a cut down version of the "Home Run at Osmanville" scenario from the "29 Lets go Large" article in the TFL 2014 Xmas Special. I only have room for a 4'x4' table at the moment so I made the table smaller and cut down the forces accordingly.

Scott Miquelon


Finally! I've only owned the rules for I Ain't Been Shot Mum since Christmas, but due to far too many other things going on at the club, and far too much stuff to paint, I haven't had chance to grab someone for a game. Fortunately, Gavin and friends game on a Wednesday, and we agreed to meet up for a game last week.

BRITISH BLINDS AFTER THEIR FIRST MOVE - IGNORE THE FIGURES, THEY'RE JUST UNDEPLOYED BLINDS AS YET! 

We went with one of the scenarios from the rulebook - "Action At Galmanche" - basically a company of British infantry and two troops of tanks attempting to clear out a village held by a German company plus anti-tank support. Pete took the Hun, I took the British, and Gavin took the card deck and the rulebook.

Gav and Pete have played a couple of times before - the preceding two scenarios, IIRC - but this was my first time, so things were a little slow, with a fair bit of checking the rules etc. My opening artillery stonk turned out to be a bit of a dud, largely because I'd completely forgotten Pete's inherent level of caution. So I plastered the area I'd have littered with Panzerfausts, MGs and a Pak40, namely the front edge of the woods, and hit... precisely nothing, because there was precisely nothing to hit bar the FOO for his off-table mortars.

Nothing much happened until the two blue blinds (a tank troop and platoon 2) got within sight of the easternmost village, at which point a German section opened fire from one of the buildings. And something entirely realistic happened - the British section took about 6 shock, got pinned and stayed right where they were. Closely followed by my tank troop coming off blinds and having a pretty good go at pounding the building into rubble with HE - obviously in a scenario like this, the tanks are HE-and-MGs-on-tracks.

By then, Pete's FOO had made contact - I love the system IABSM uses for this. Once he asks for support, the "Support" card goes into the activation deck. Next time it turns up, he can roll to see if the fire arrives. Of course, there's friction here, since there's no guarantee the card will show up before the "Tea Break" card, simulating the battery being busy, lines being down, etc.

"INCOMING!!!!" SEVERAL BRITISH UNITS SCATTER FROM UNHEALTHY QUANTITIES OF INCOMING HIGH EXPLOSIVE. 

I'm guilty of misreading the table here, and Pete missed out on a roll first time he should have made, so when he finally got contact, he got some 105mm artillery for one round, rather than 81mm mortars.

Man, do they hurt.

Another entirely convincing result, too - the three British sections caught in it (plus two blinds) copped several shock, and pinned results (oh, and the mortar and crew were wiped out). I was very very glad that the card for that platoon came up before the Support card next turn, as all three surviving sections hightailed it for any available cover.

We managed a couple more turns after that, in which I pretty conclusively established that the woods were empty, but it was getting on for 11pm, so we called it a night.

Reaction? Love the system as much as I thought I would, and will be introducing it to the club ASAP. Huge thanks to Gav for hosting and umpiring.

Mike Whitaker


Saturday's game of I Ain't Been Shot, Mum! featured John and Dave playing a scenario that I wrote for the Xmas 2005 TwoFatLardies Christmas Special: Moiste Cabbage and a Quick Cognac.

The scenario is set in France in May 1940 amongst the cabbage patches that border the Moiste river. A German probe has discovered a previously unknown ford across the river is unguarded, and has dug-in to protect the crossing whilst reinforcements are summoned. The French have spotted what is going on, and dispatch Captain Cognac and his men to re-capture the ford as soon as possible.

The picture to the right (excuse the horse!) shows the battlefield. The Germans would begin the game dug-in around the ford in between the two houses in the centre of the table. They consisted of a platoon of infantry support by a squad of engineers with a flamethrower; two anti-tank guns; and a single medium machine gun. They could also expect two lots of reinforcements to arrive at some point in the game: the first, a zug of two Panzer IV tanks; the second, another platoon of infantry, this time in half-tracks, supported by a couple of medium mortars.

The Germans had deployed their infantry platoon within the house nearest the giant horse; their engineers immediately behind the hedge in front of the barn (the other building near the ford); their MMG in the barn itself; and an anti-tank gun way out on either flank.

The French, who would start the game around the farm in the bottom left hand corner of the picture, had at their disposal two large platoons of infantry, each of three squads; a couple of medium machine guns; a single soixante-quinze 75mm field gun; a Panhard armoured car and a couple of Somua tanks. They could also expect two lots of reinforcements: the first, a single Char B-1 bis tank; the second, another platoon of infantry.

The French (played by John) opened the proceedings by advancing strongly forward with their armour and one platoon of infantry.

The infantry hopped over a couple of hedges and took up positions amongst the small copse of trees by the road junction. From there, they dispatched one squad forward to scout forward towards the barn. This proved to be a costly mistake, as the German engineers, infantry and MMG opened up at Close range and did horrendous damage to the hapless polis.

The few survivors quickly scattered back the way that they had come.

The French now knew where the German positions were, but were a bit nervous about bringing their armour forward until they had sussed whether their enemy had any anti-tank capacity. The Panhard armoured car therefore drove down the road towards the ford, desperately on the alert for anti-tank guns.

Well, they found some. Or rather one, as the Germans realised that the gun that they had deployed on their right, in a small patch of trees, was only able to shoot at targets in the field right in front of them: all other parts of the battlefield were blocked by hedges, other trees etc. The gun on their left, however, dug-in amongst still more trees could see the Panhard and promptly opened fire, knocking bits off the armoured car and ruining its tracking!

The Panhard retreated a bit, and started a duel with the anti-tank gun crew which would last most of the game. The French found their autocannon was jolly good at Pinning the anti-tank gun crew, but not very good at actually killing them. 

Meanwhile, the French brought up the first of their Somuas. It was sufficiently armoured not to have to worry about the anti-tank gun too much, especially if they were pinned, so it trundled down the road towards the ford determined to blow the Bosche out of their positions.

This was a bad mistake, as the German engineer flamethrower, who sneakily hadn't fired at the infantry, moved slightly forward and took the Somua out with one squirt. It was such a good squirt, in fact, that it emptied the flamethrower's tanks of fuel, but it had done its job, and half the French armour was now a burning wreck. The other Somua moved up and engaged the anti-tank gun crew: their fire was as effective as the Panhard's autocanon!

The engineers now felt the wrath of the French:  the other two squads of infantry along with the field gun poured fire onto the single squad of German pioneer types, very quickly rendering them ineffective. 

With the engineers taken out, the only obstacle to a general French advance was the anti-tank gun of the German left: still gamely firing despite the huge amount of ordnance that had landed on its head!

The other French platoon moved forward, along with their HQ squad, intending to overrun the gun. A German infantry squad moved to block them, but was sent scurrying back after it carelessly ended up on the wrong side of a hedge right underneath the French infantry's guns.

At the same time as the above, the first French platoon resumed its advance: the French being determined to just overwhelm the Germans through sheer weight of numbers.

Things looked a bit grim for the Germans, but this was the time that their first set of reinforcements showed up: two Panzer IVs arrived at the ford and immediately engaged the remaining Somua. Both the lead Panzer IV and the Somua knocked bits off each other until the German tank took a critical hit and was destroyed. The remaining Panzer and the Somua couldn't actually see each other at this point (there was a lot of debris around, including two burning tanks) and as neither was prepared to move out of 'cover' first, an uneasy stalemate prevailed.

At the same time as the above, the French field gun switched its attentions to the house holding the German infantry, setting it alight with its very first shot. The Germans were forced to leave the burning building and take what cover they could. Meanwhile, the German anti-tank gun on their left had finally been silenced (overrun by French infantry); the remains of the first French platoon had reached the remains of the engineers and were locked into close combat; the German MMG had been forced to join the engineers when the barn was also set alight by the French field gun (that was obviously firing incendiaries!); and the first French reinforcements, the Char B-1 tank, showed up. There was a lot happening!

Unbelievably, the German engineers managed to repel the French infantry's assault, even though they were outnumbered about 2:1. There weren't very many engineers left afterwards...but the French infantry platoon had been reduced to just six men and had no intention of going back into the attack.

Encouraged by this success, the remaining German Panzer IV accelerated forward, determined to take the fight to the two remaining French tanks. At this point, more German reinforcements were spotted (the infantry platoon in half-tracks) and the French commander ruefully ordered a retreat.

Yes, he had another platoon on the way, but that would mean that one and a half French infantry platoons supported by a single tank and a single field gun needed to assault almost two platoons of German infantry, one of them in half-tracks, with a Panzer IV and an anti-tank gun in support. It just wasn't going to happen!

All in all a great game of IABSM. The scenario worked very well, and the smallish size of the game was a pleasant change from the vast two-company-a-side games that we usually play. I shall be continuing to mine the specials for future scenarios!

Robert Avery


After a couple of 6mm Franco-Prussian War games, it was back to IABSM for our regular Saturday night battle. To make a change, I wanted to play a scenario that I hadn't written, so it was off to the library of TooFatLardies Summer and Christmas Specials to see what I could find.

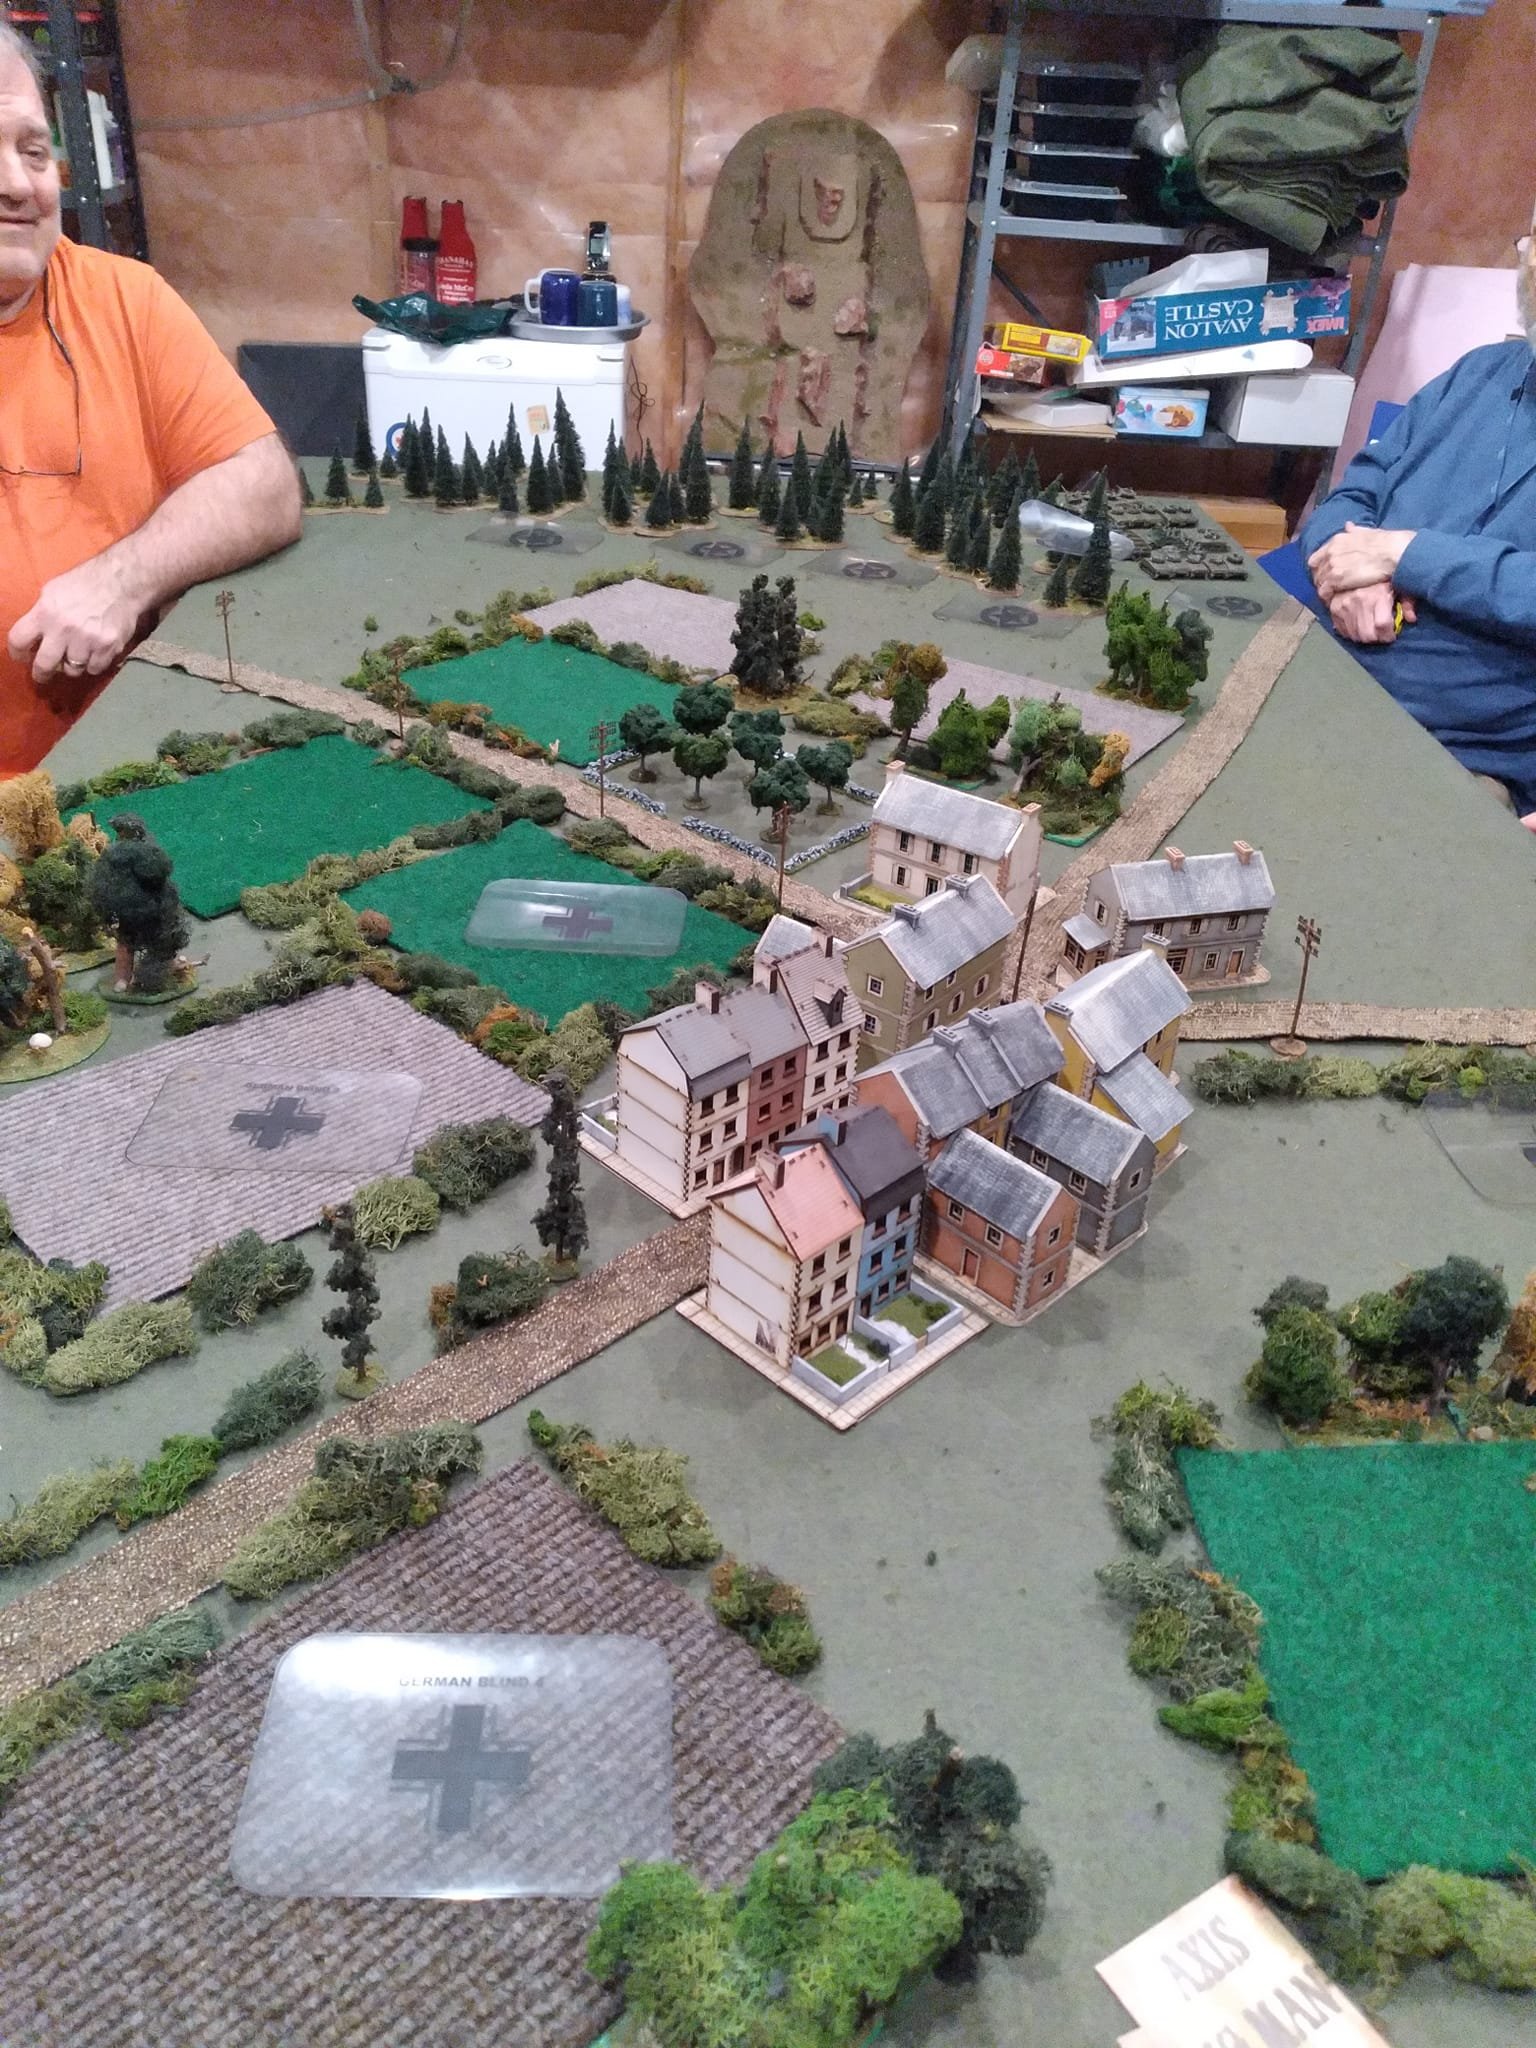
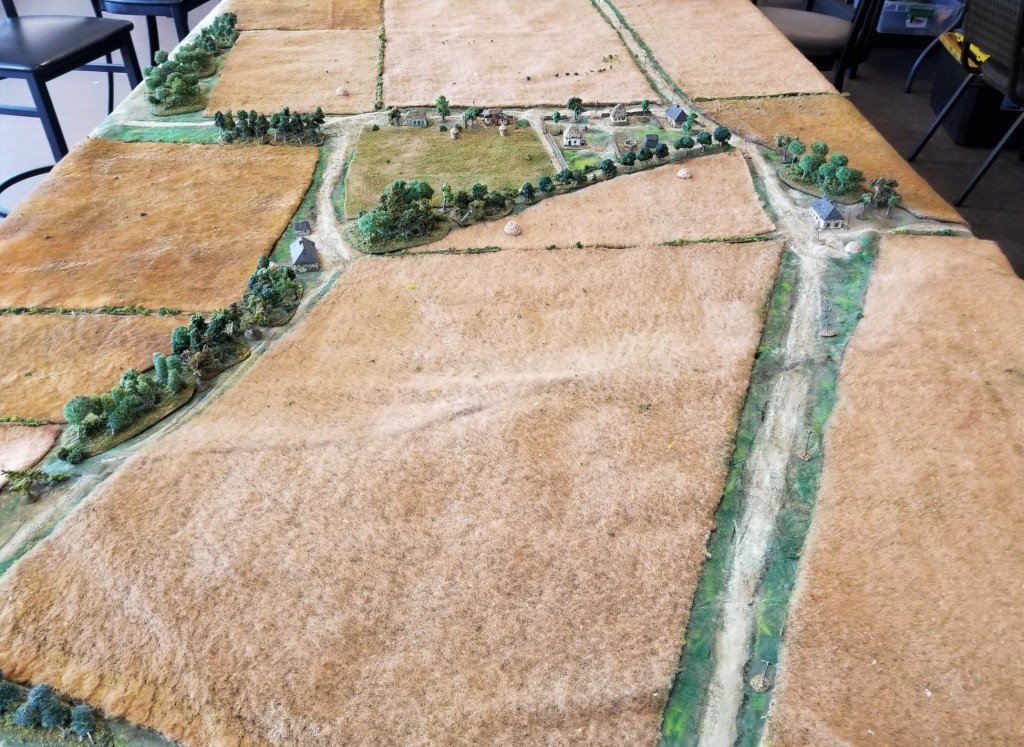
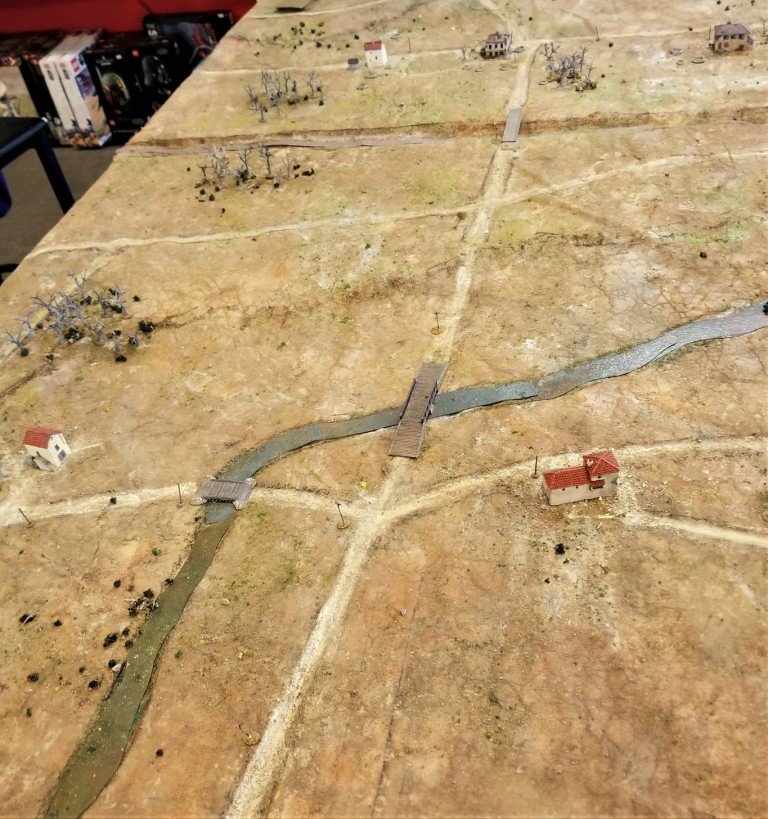
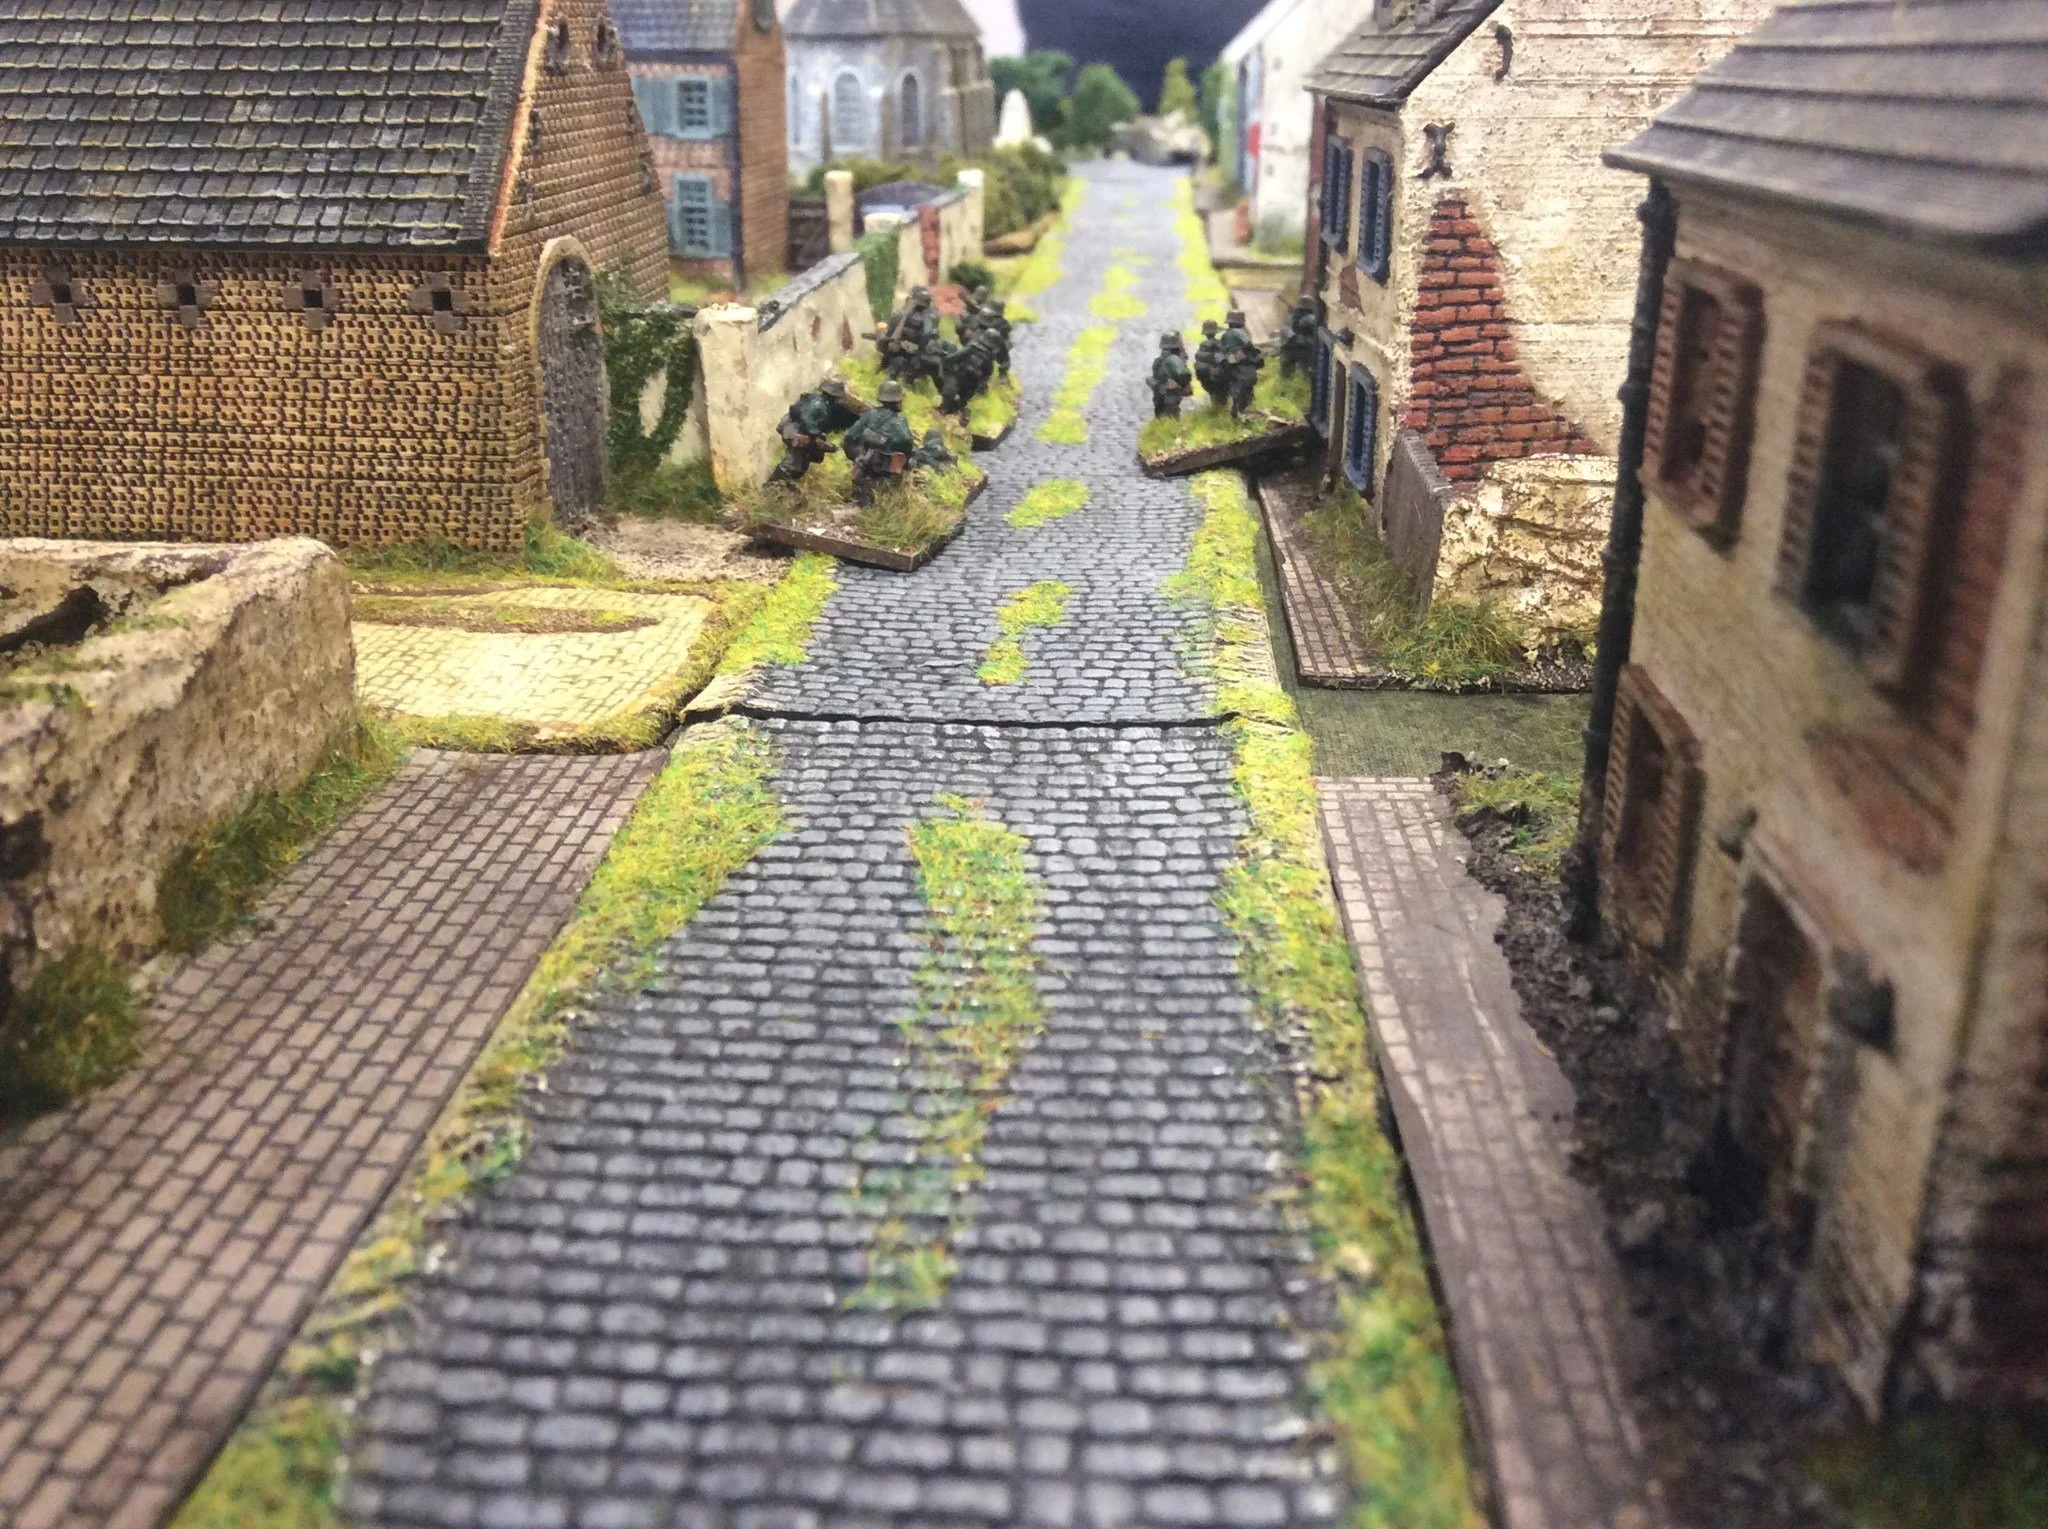
Back in 2006, Chris Stoesen (author of the Call This a Ruddy Picnic? and In The Name of Roma! scenario packs) wrote a series of scenarios for a Saar 1939 campaign i.e. the short and highly unsuccessful attempt by the French to invade Germany right at the start of the war. The Christmas 2006 TFL Special contained the Tanks Forward scenario from the campaign that seemed to suit perfectly, so that's what we would play.

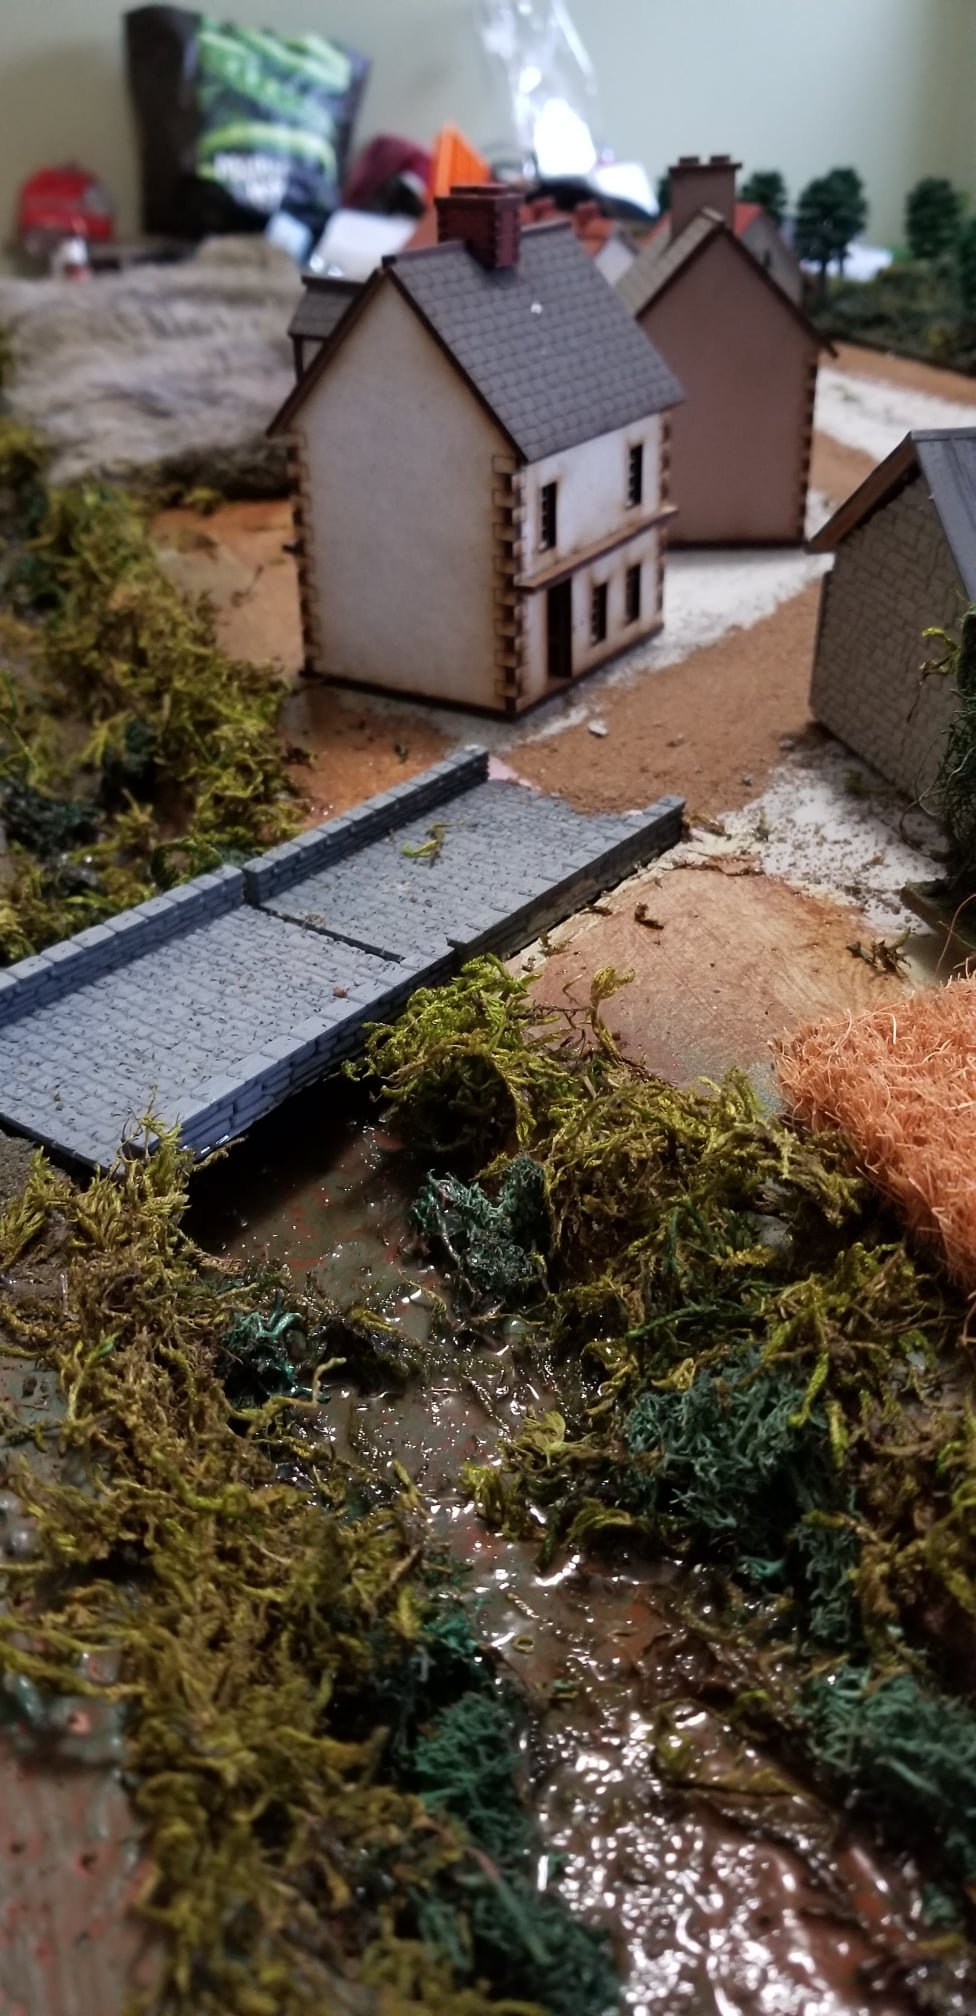
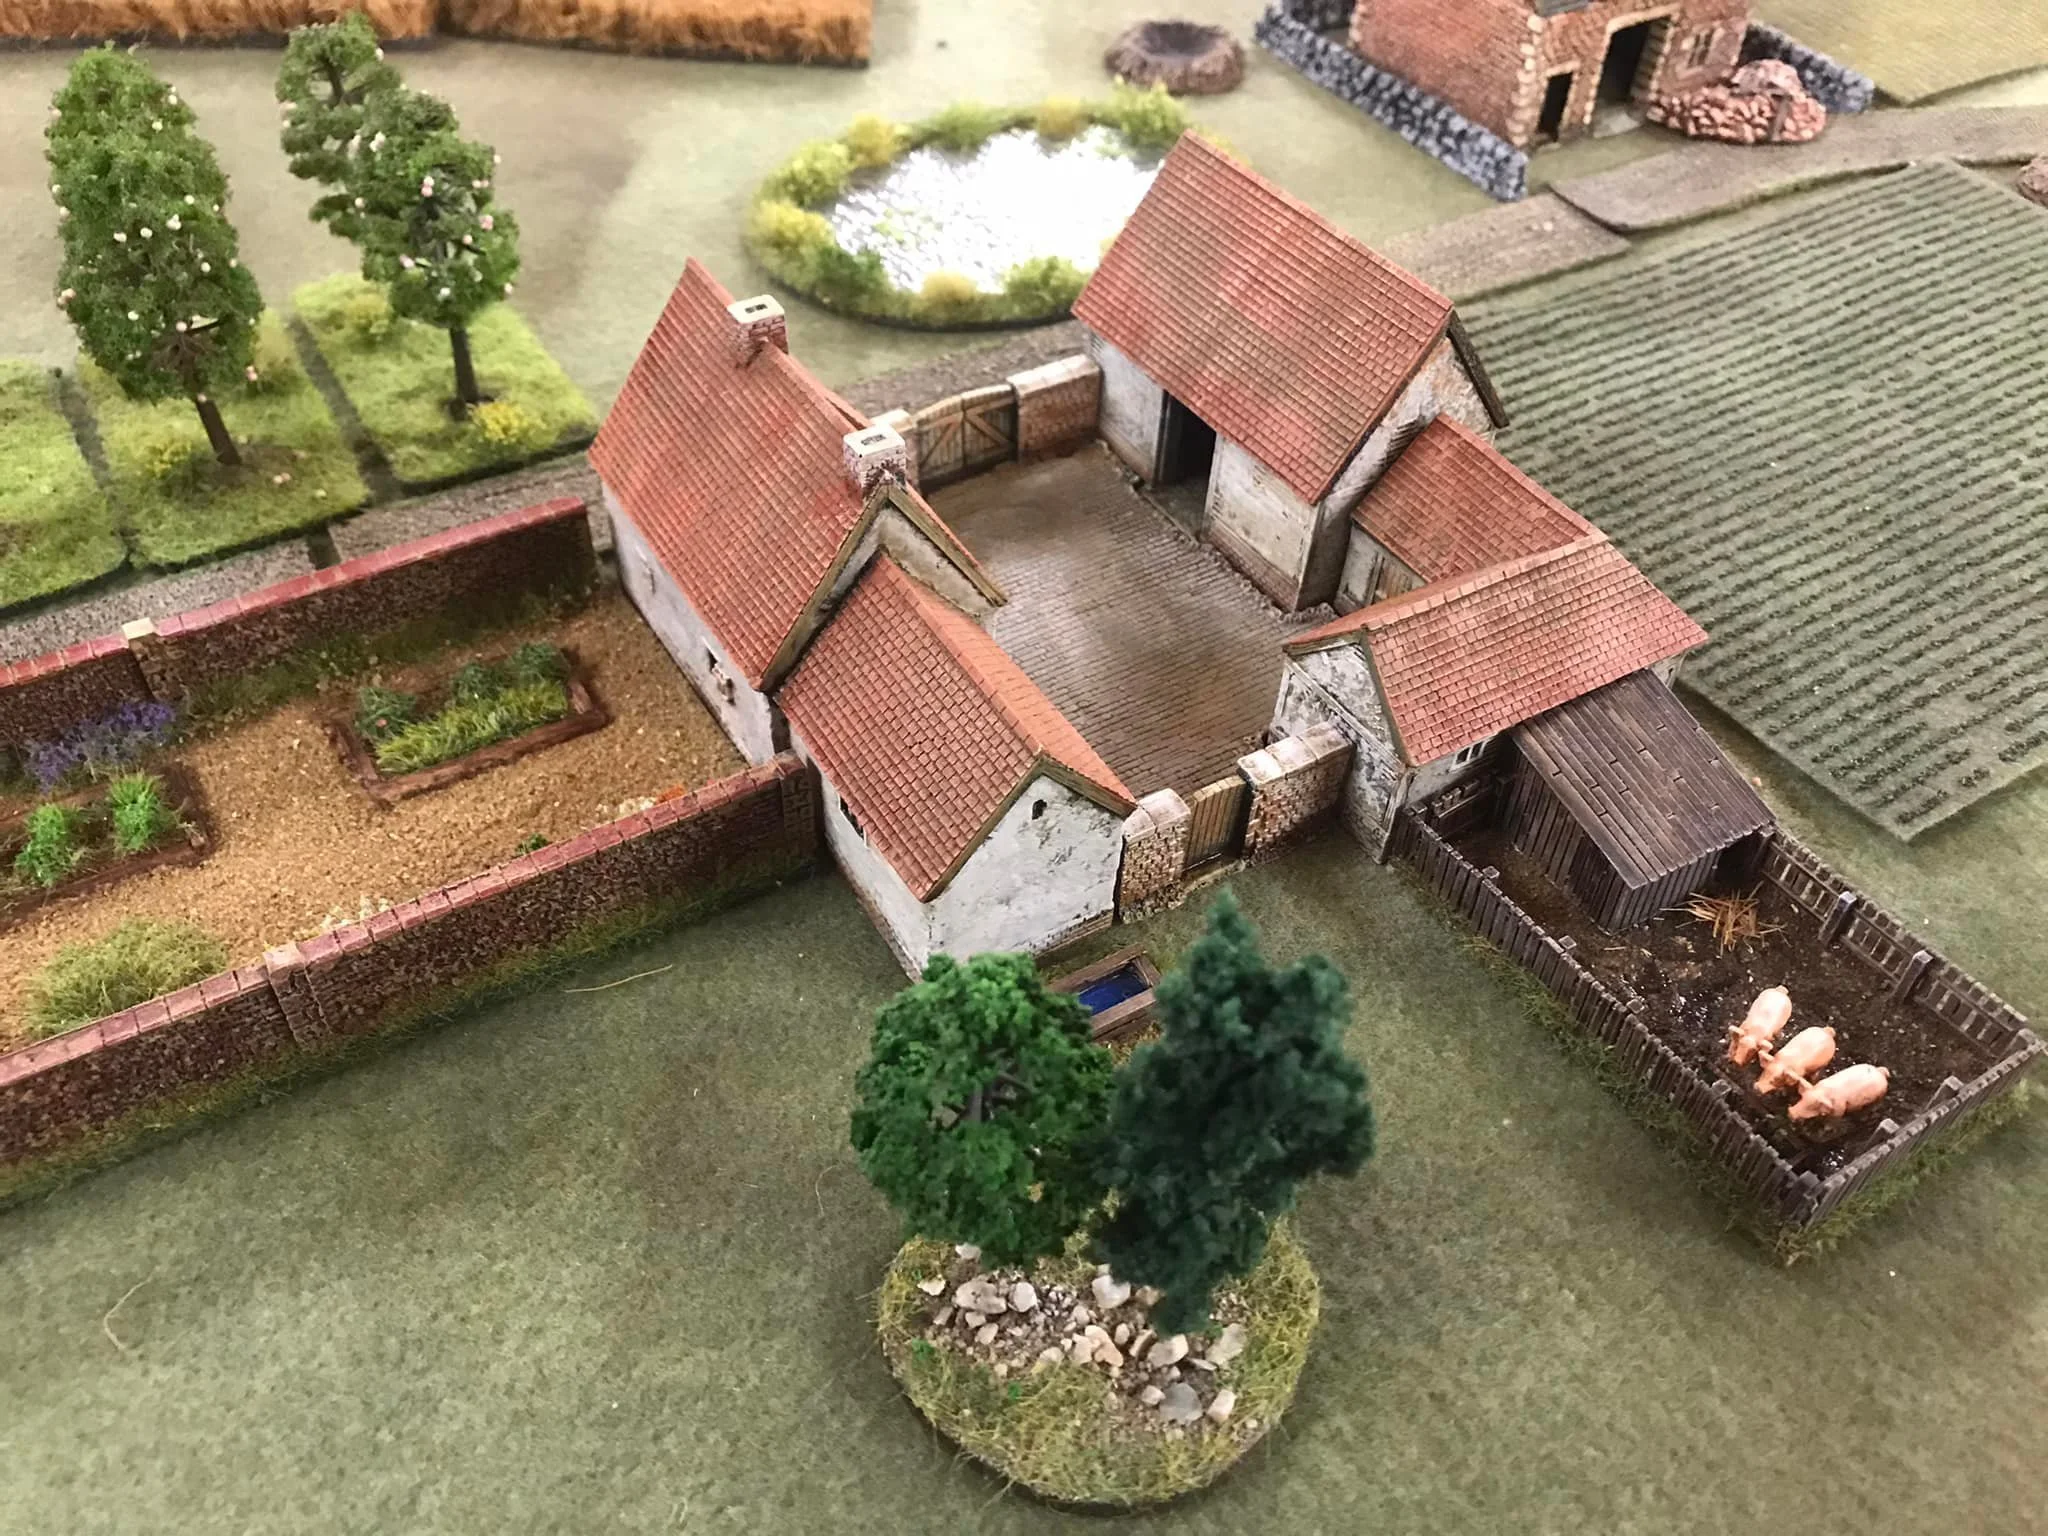
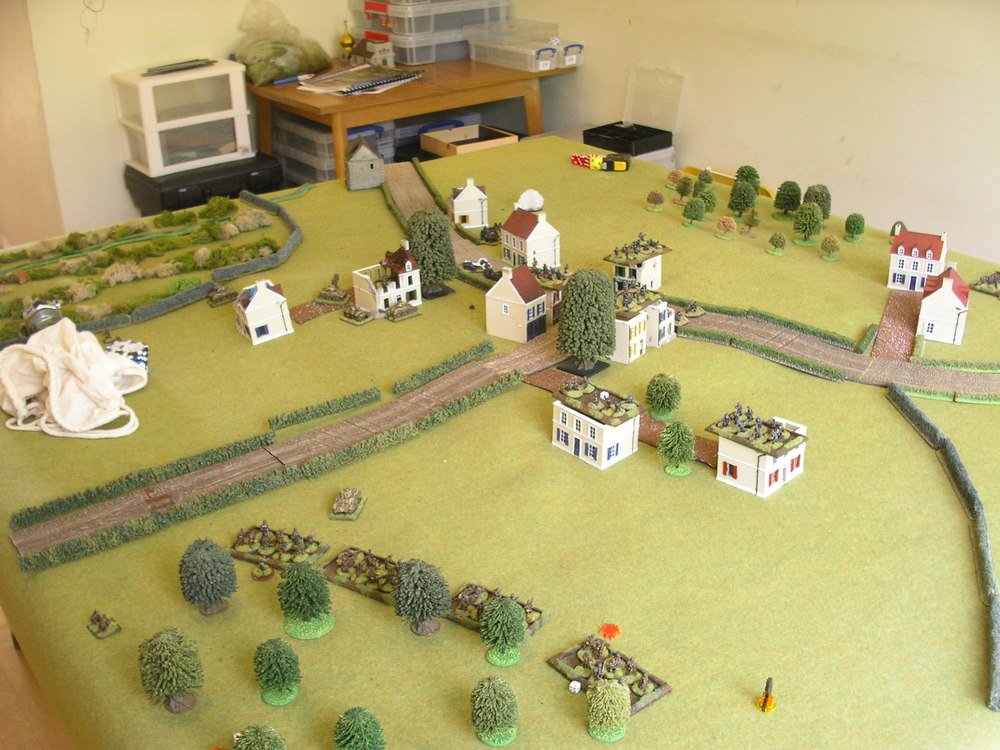
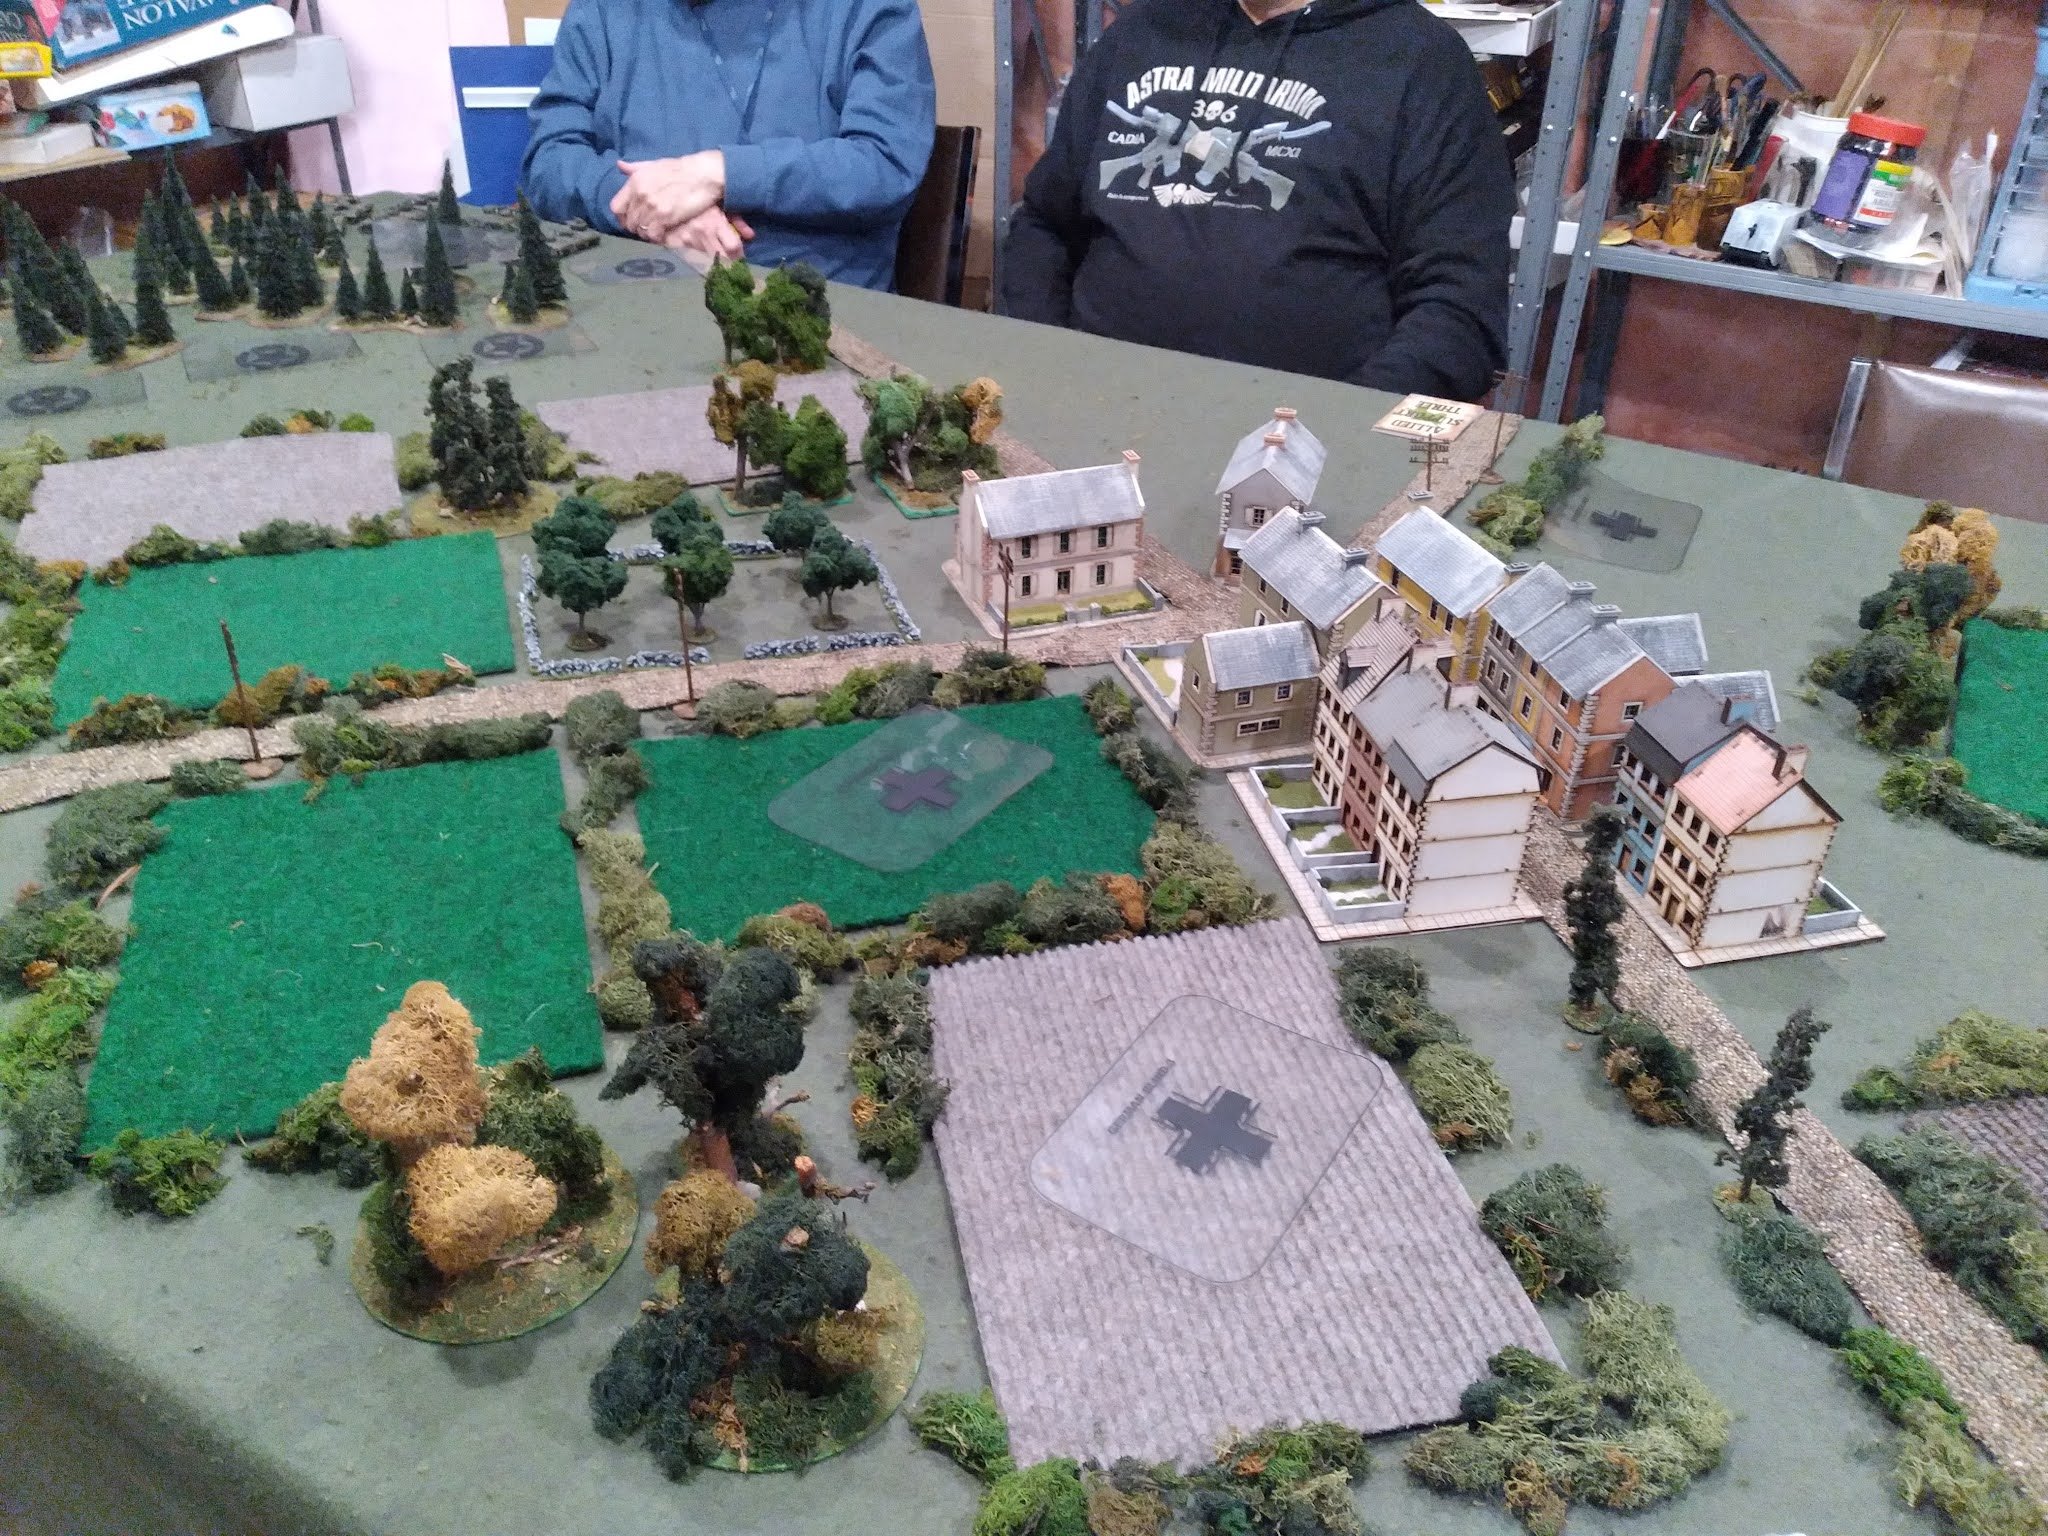
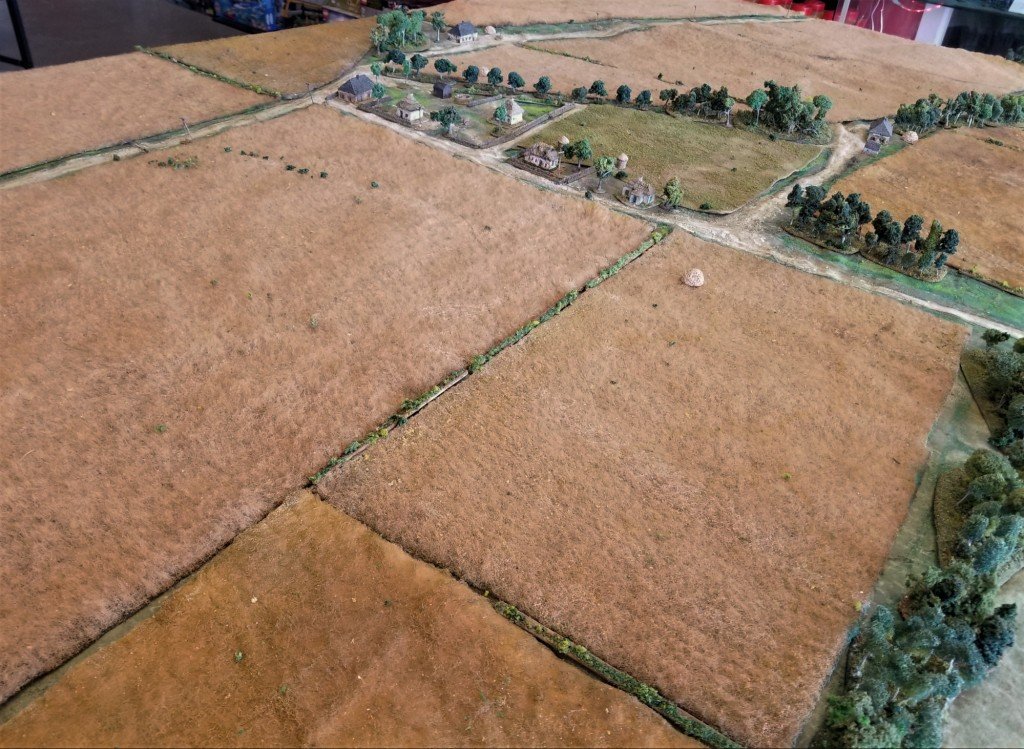
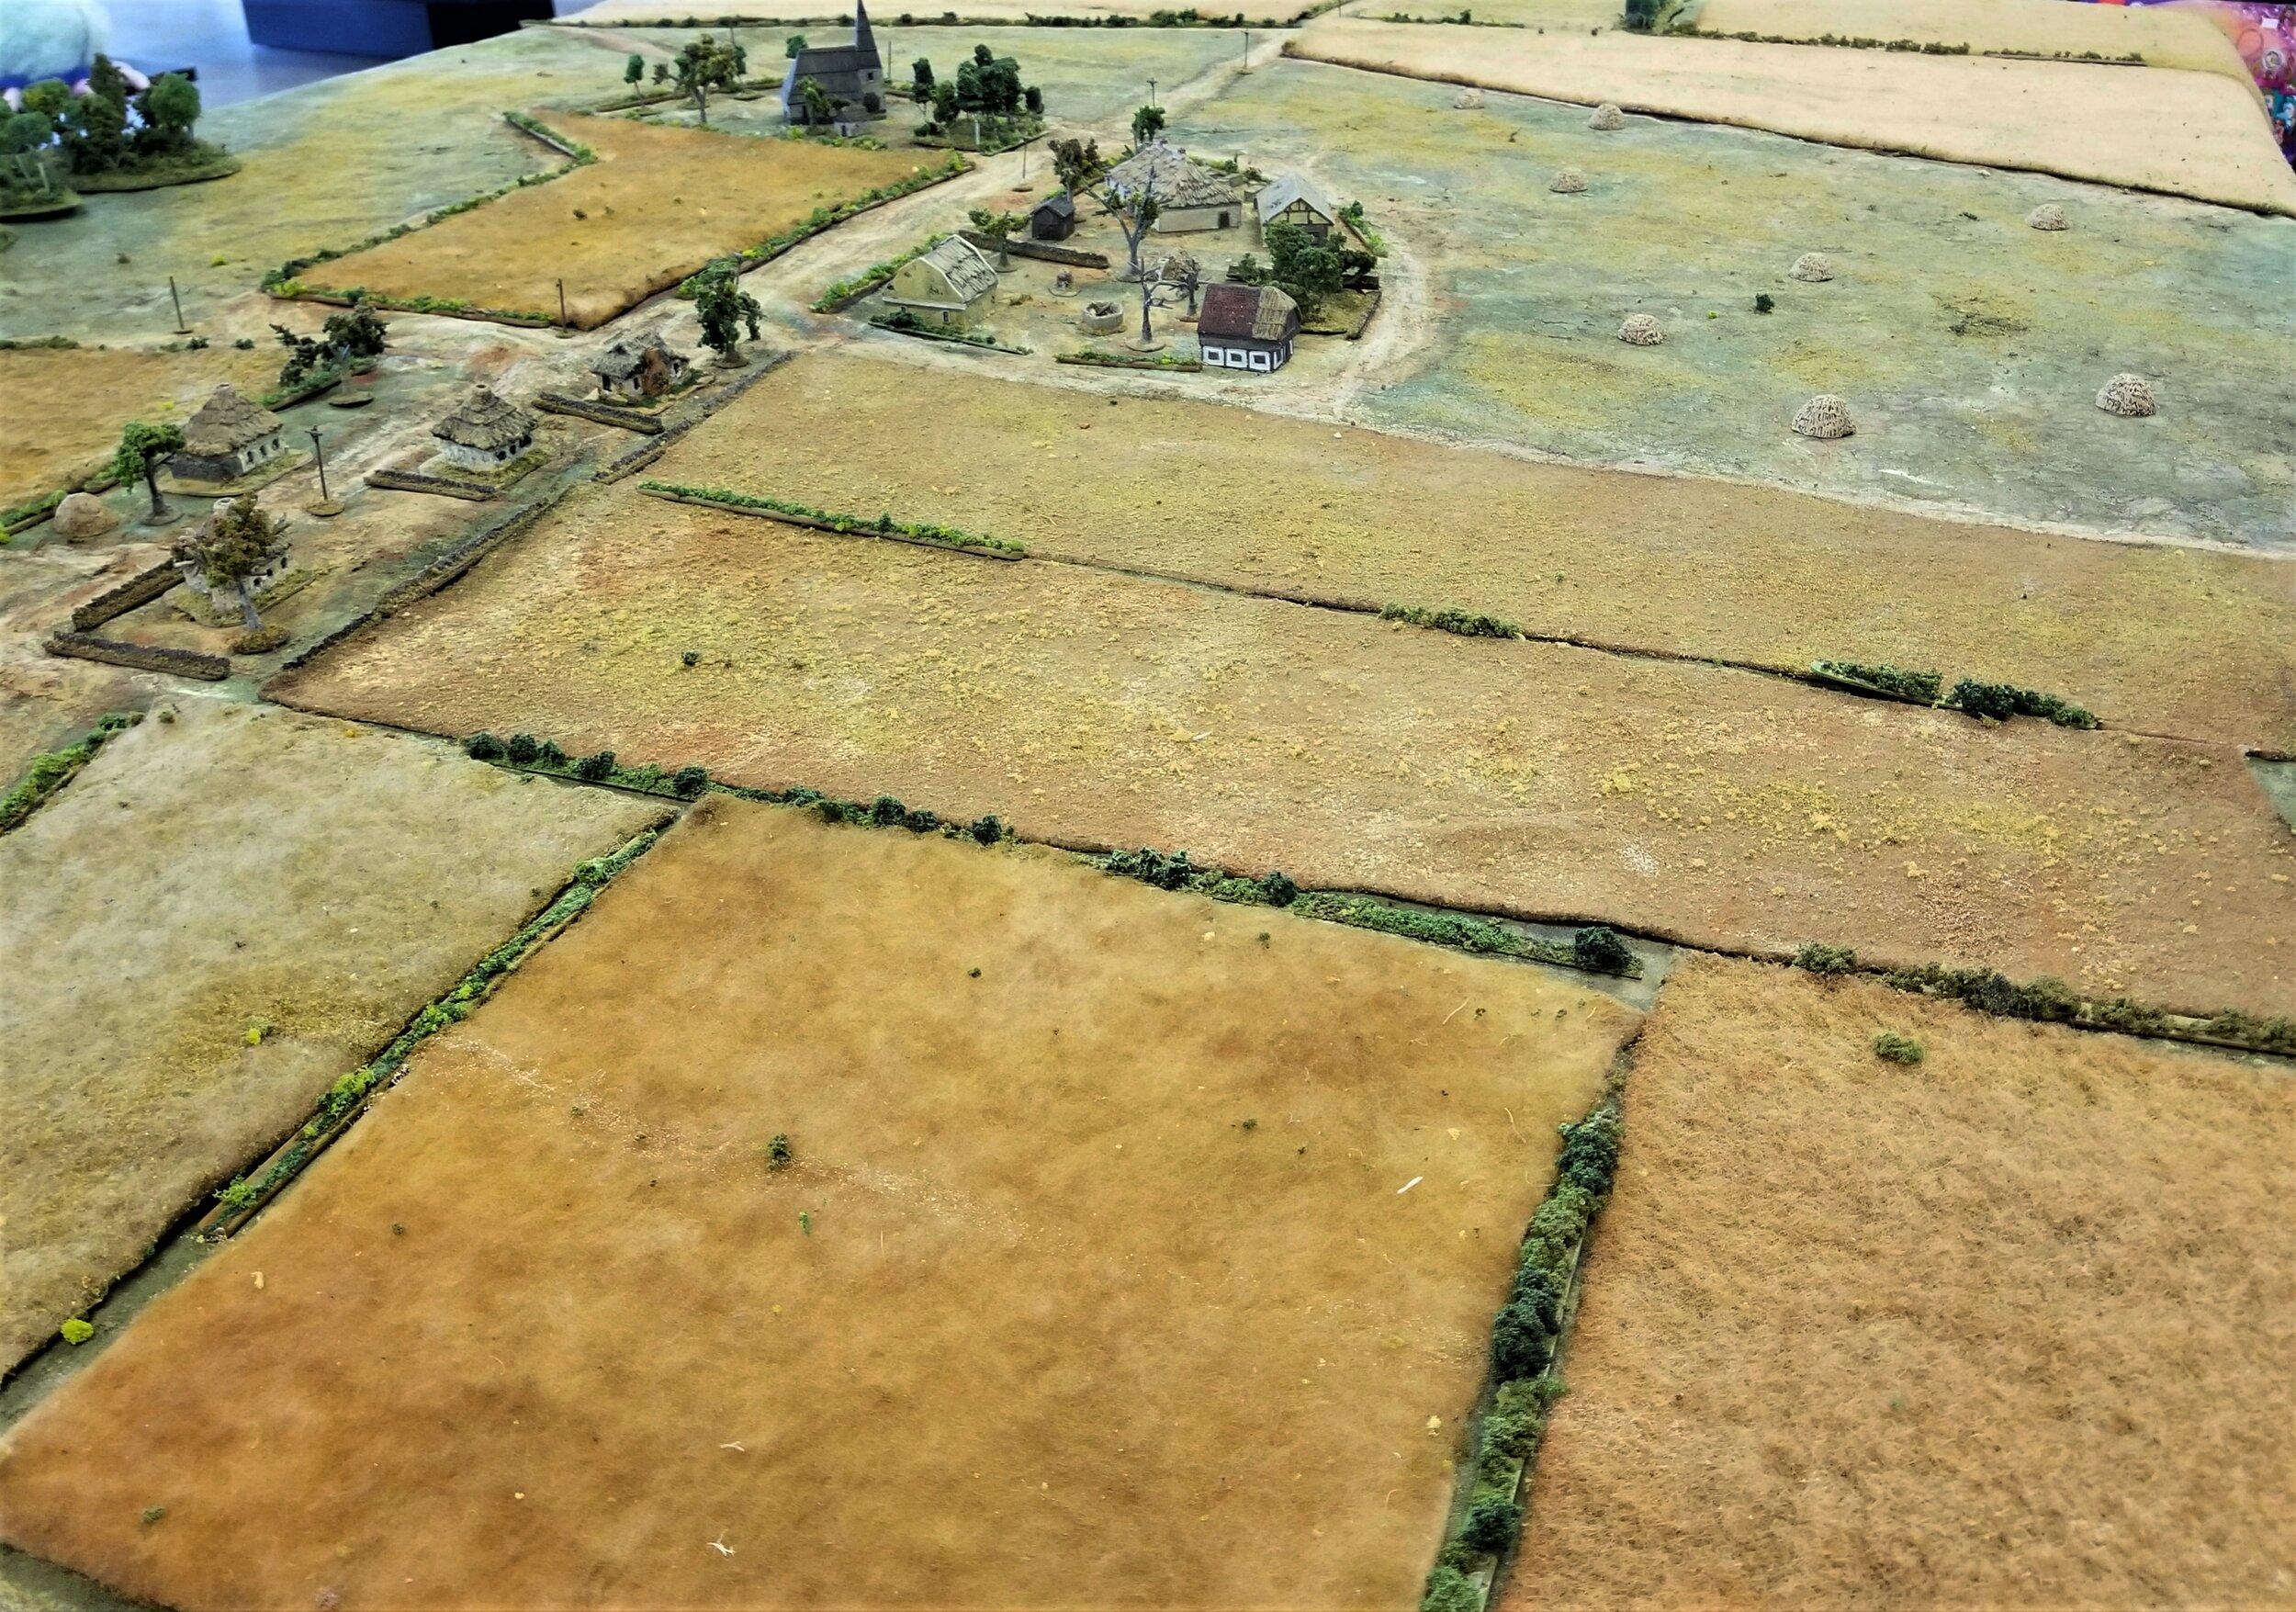
The Germans are defending a small town in the Saar region. At their disposal, they have a Company HQ consisting of two squads of infantry, two machine gun (MMG) teams and an anti-tank rifle (ATR); two platoons of infantry, each two squads of ten strong; and two PaK 35 'door-knocker' anti-tank guns (ATG). The Germans also have four Big Men and access to off-table mortars via an FOO. As it is early in the war, and this is not the main theatre, the German infantry squads start on three Actions, but drop to two Actions after two casualties.

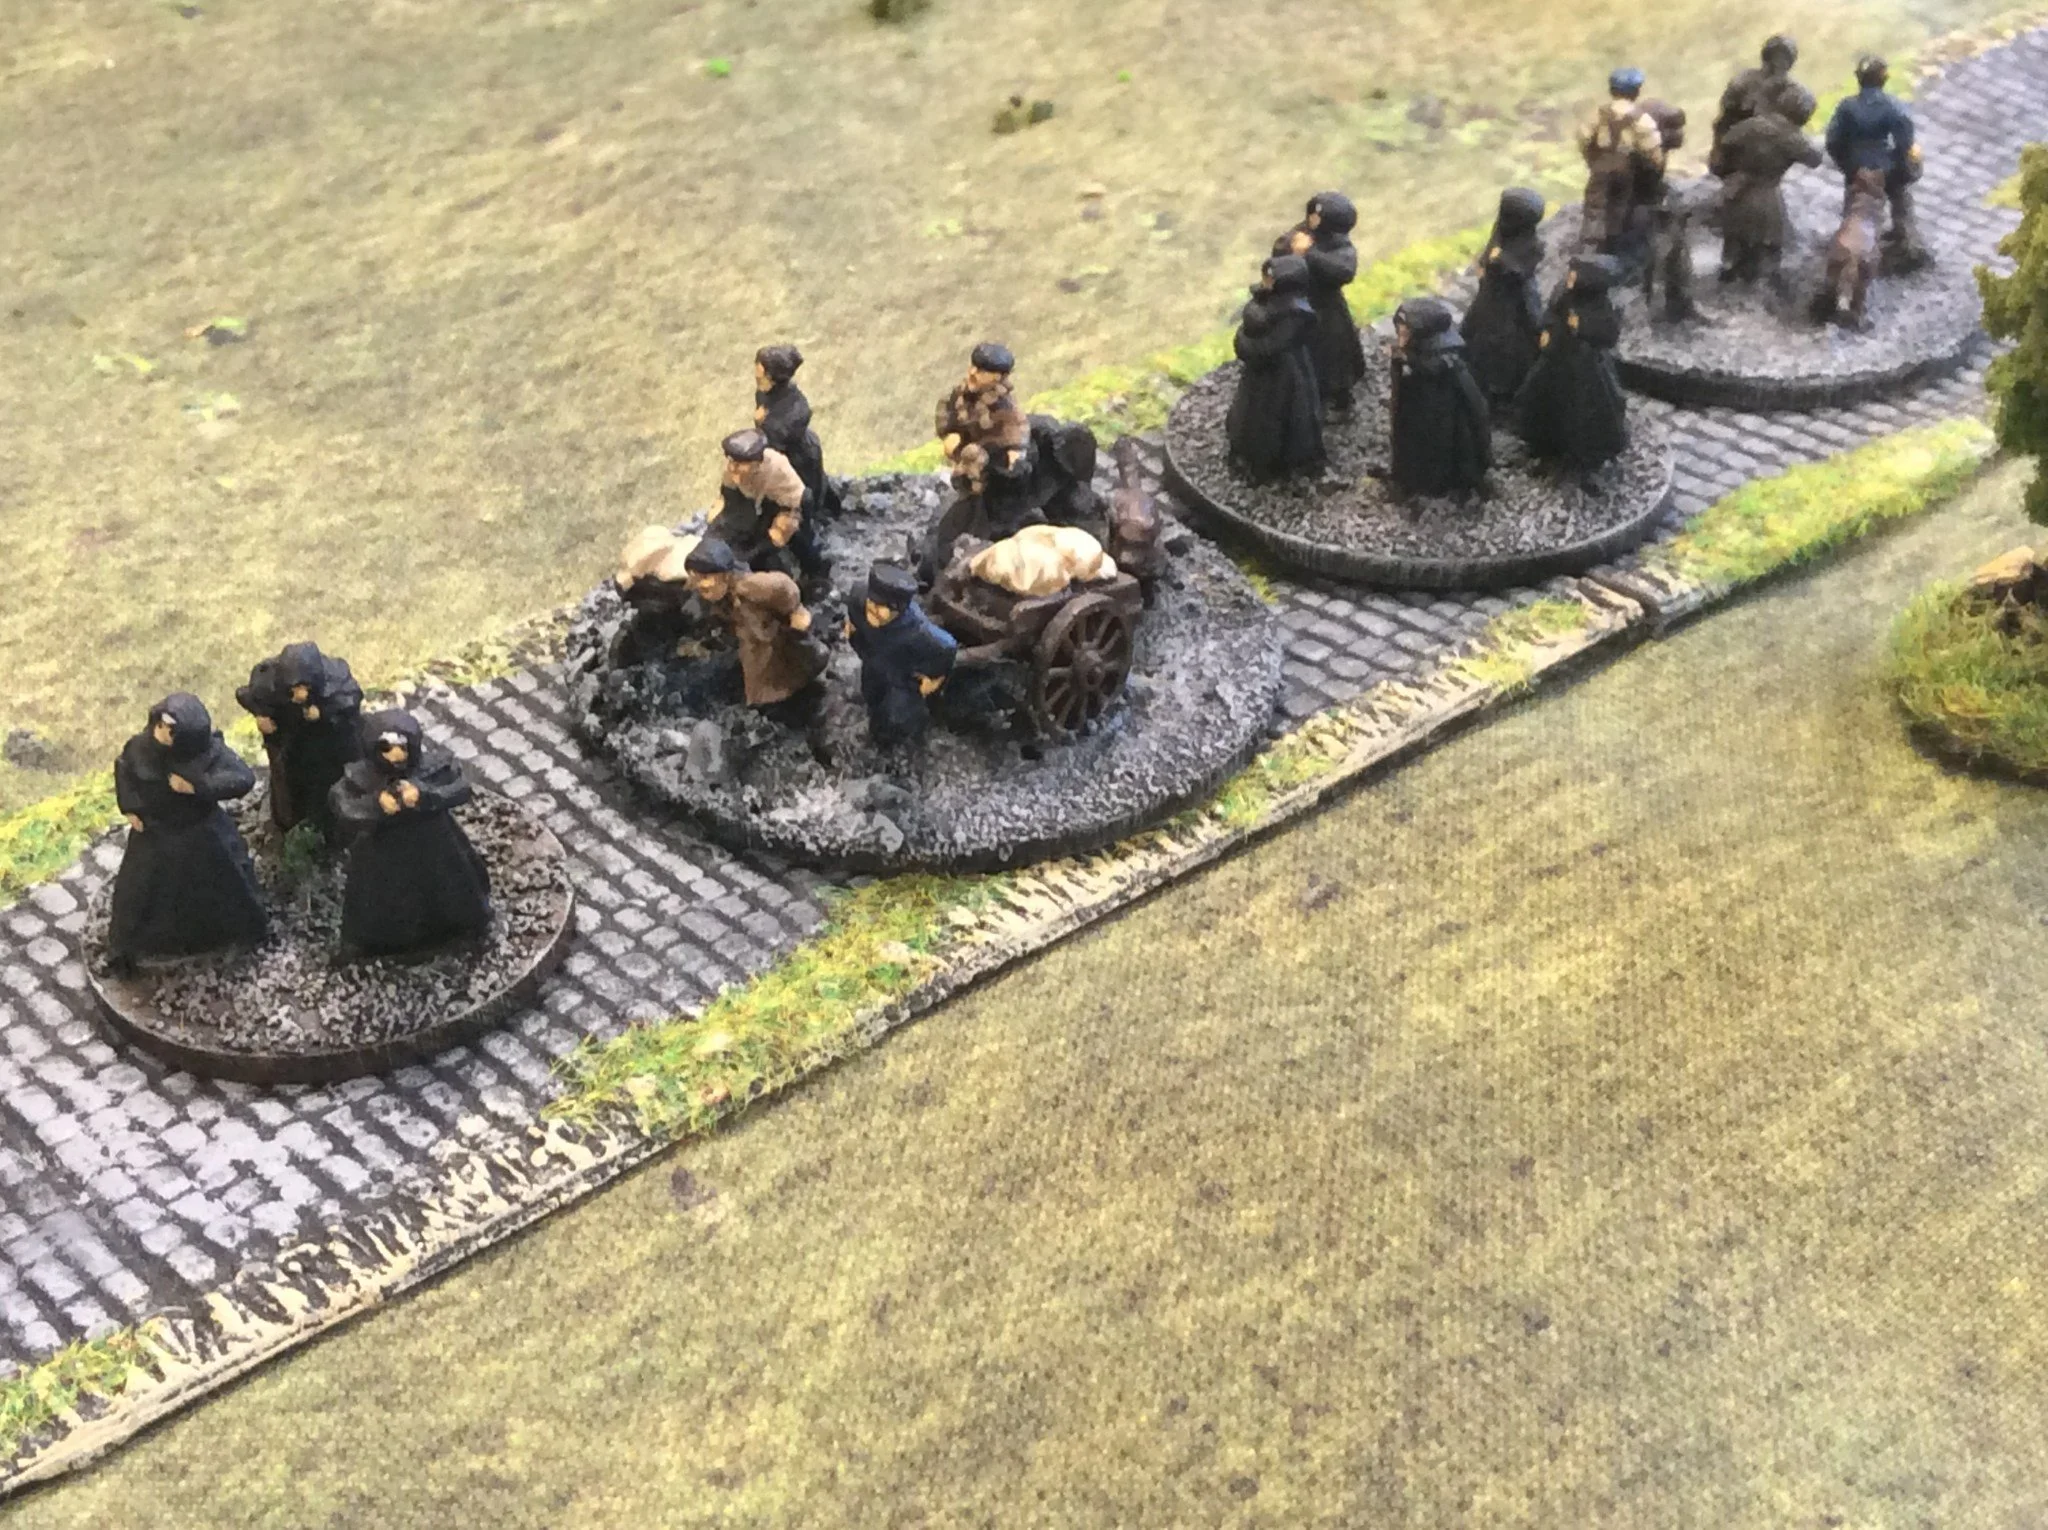
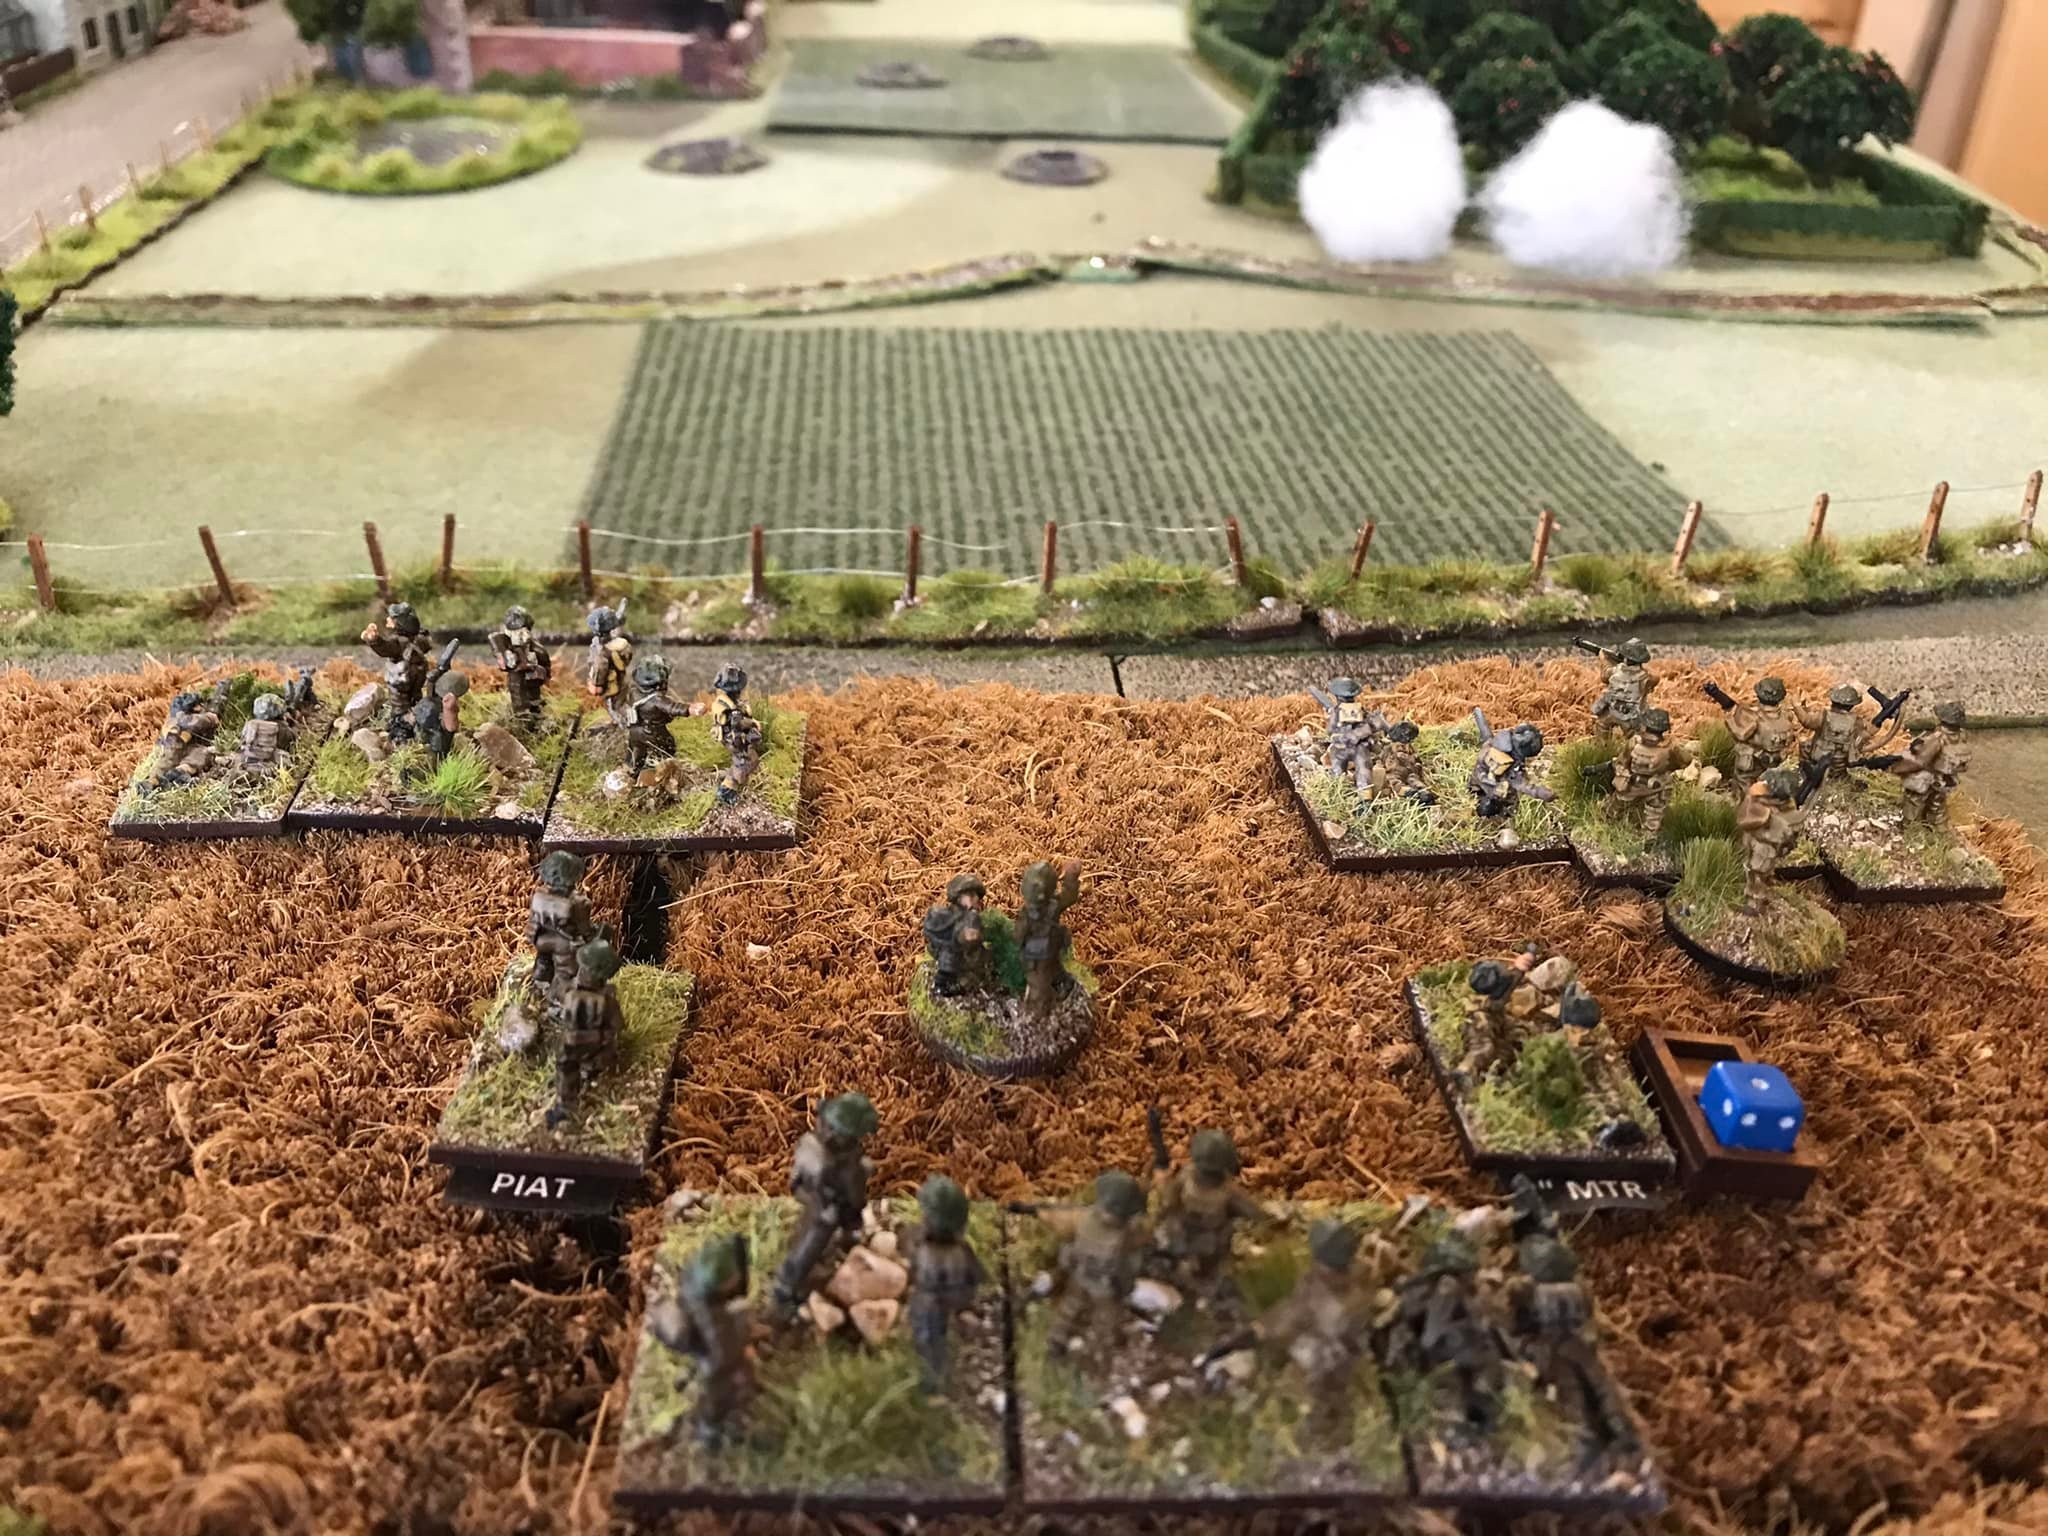
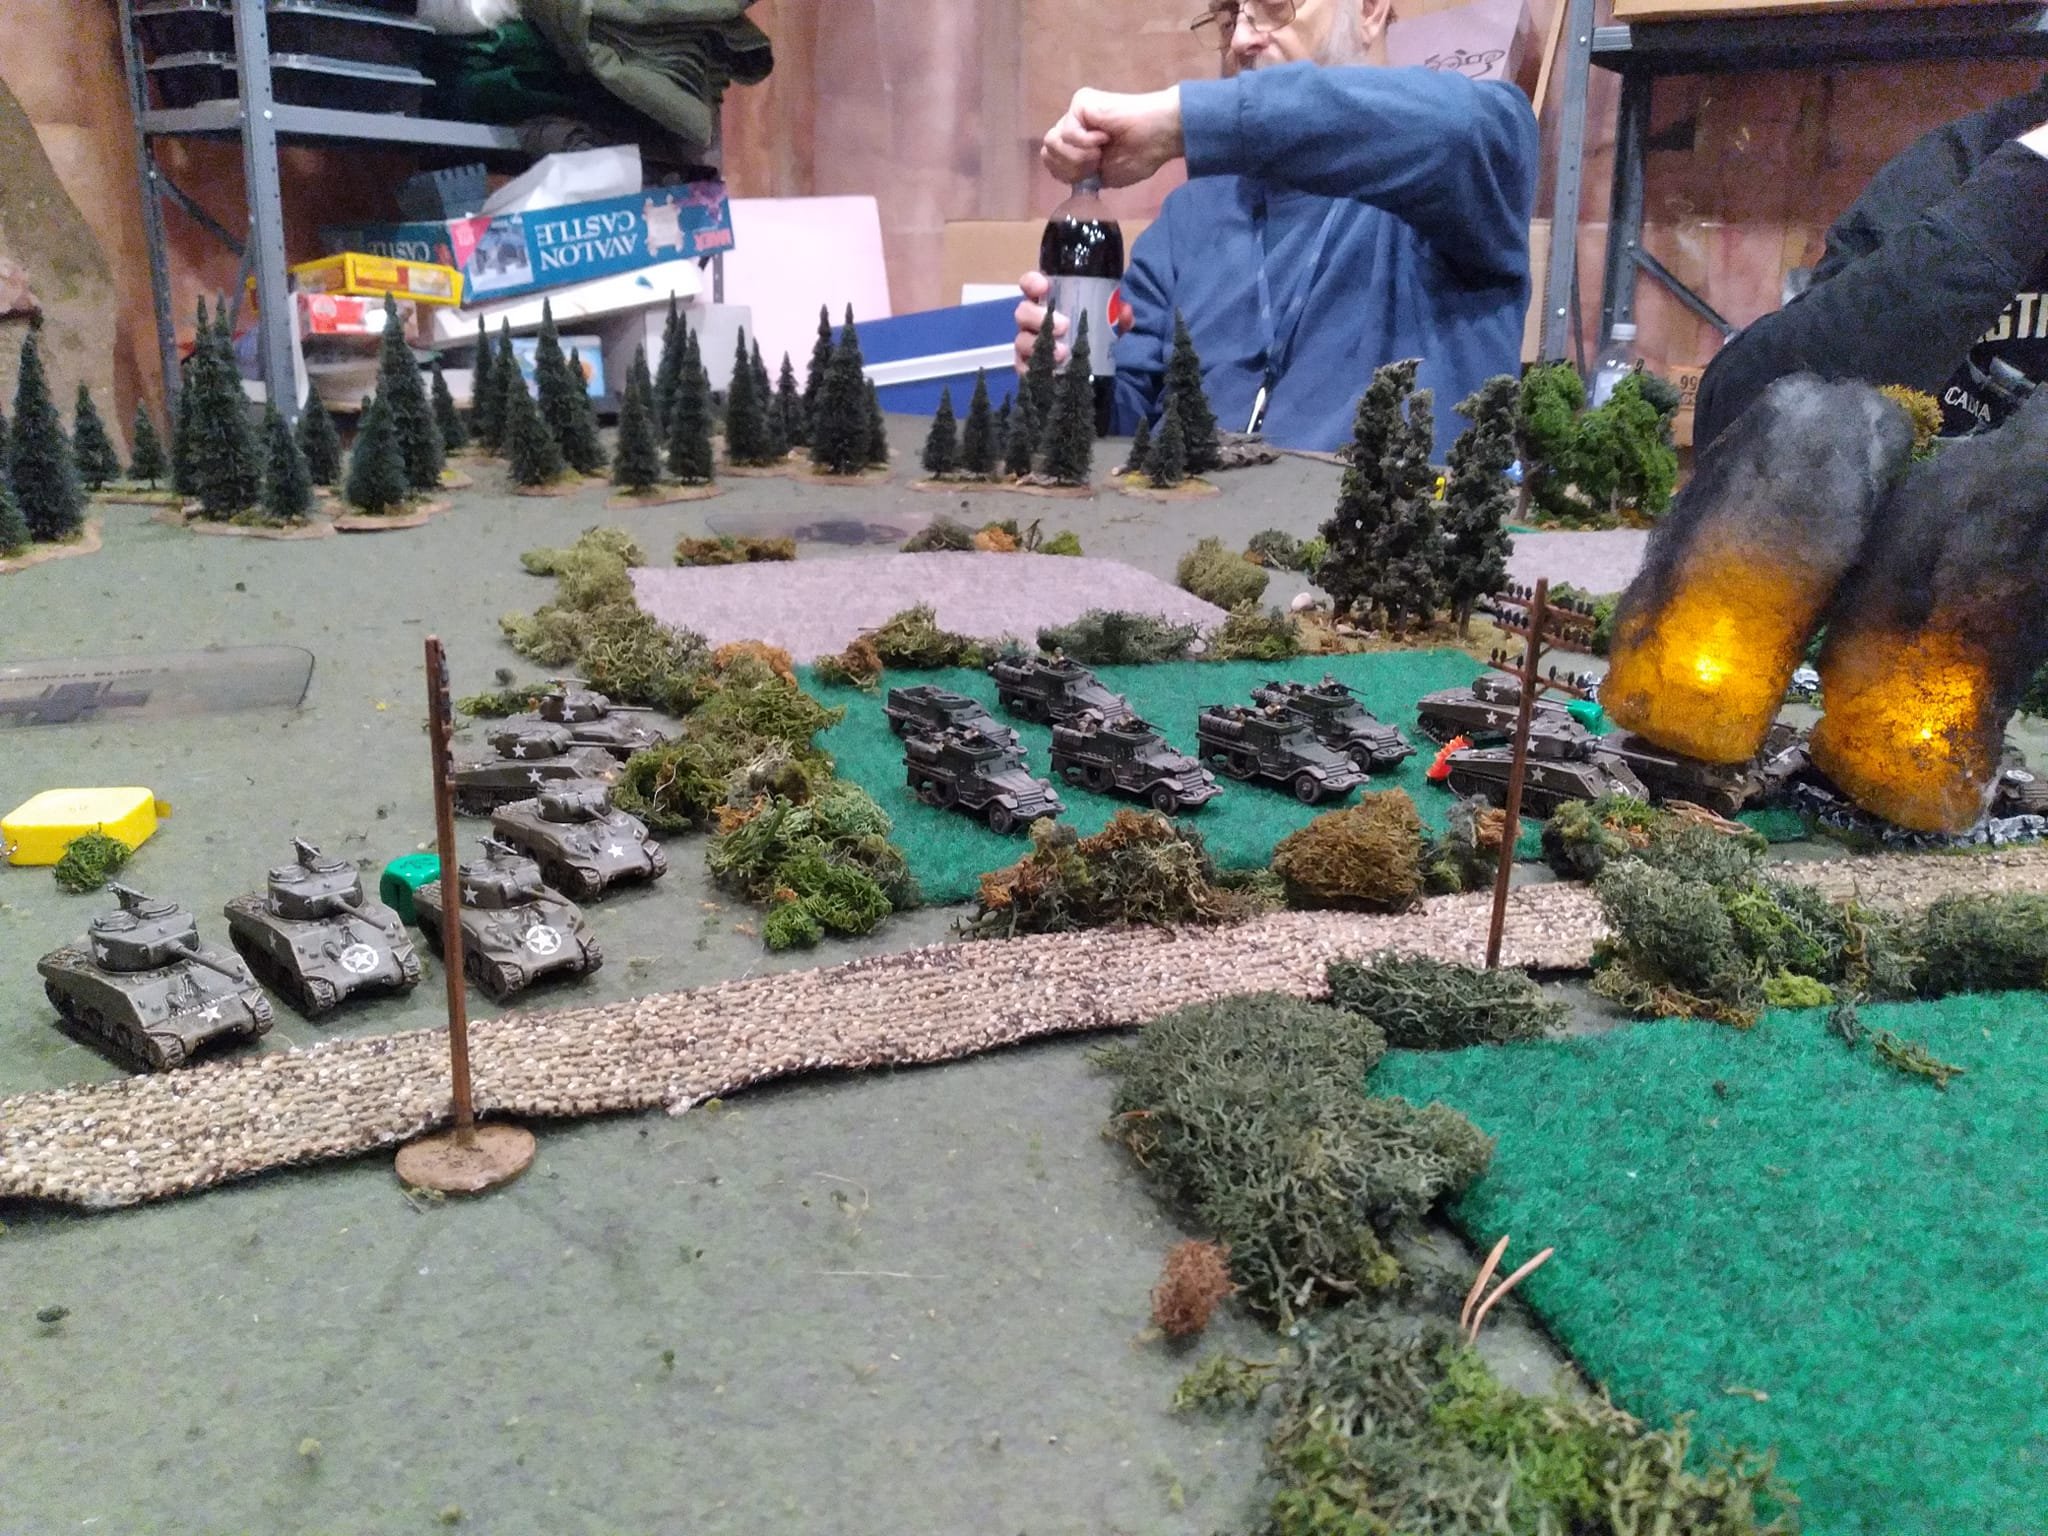
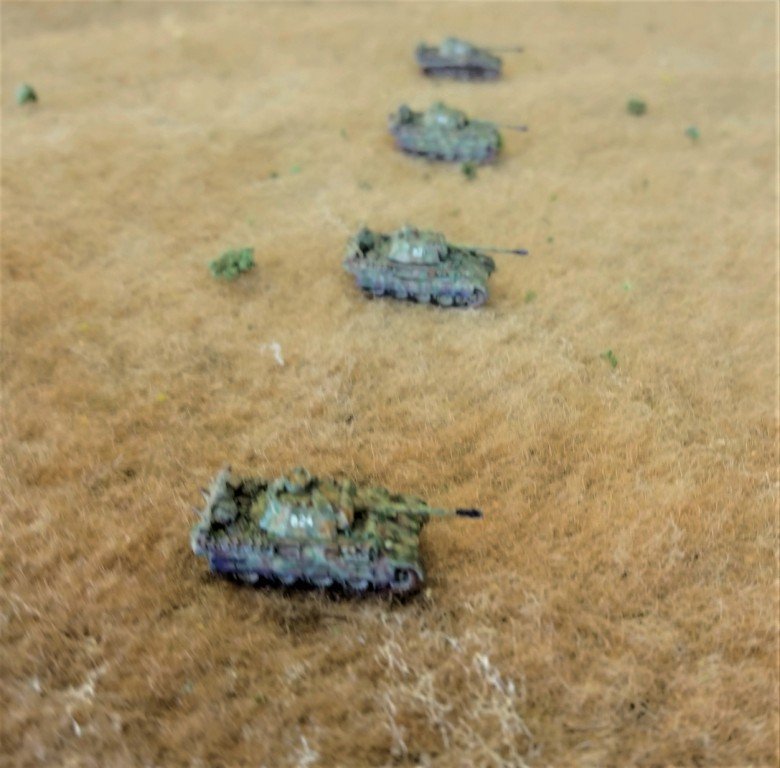
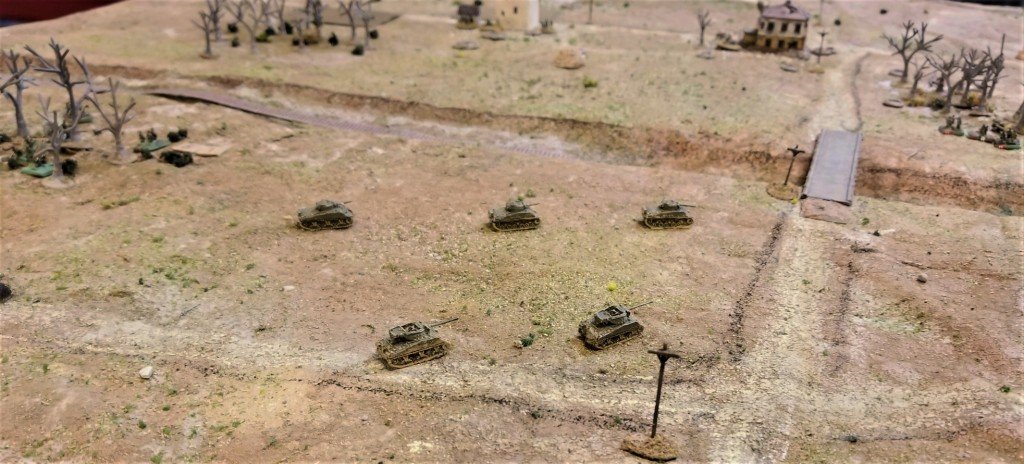
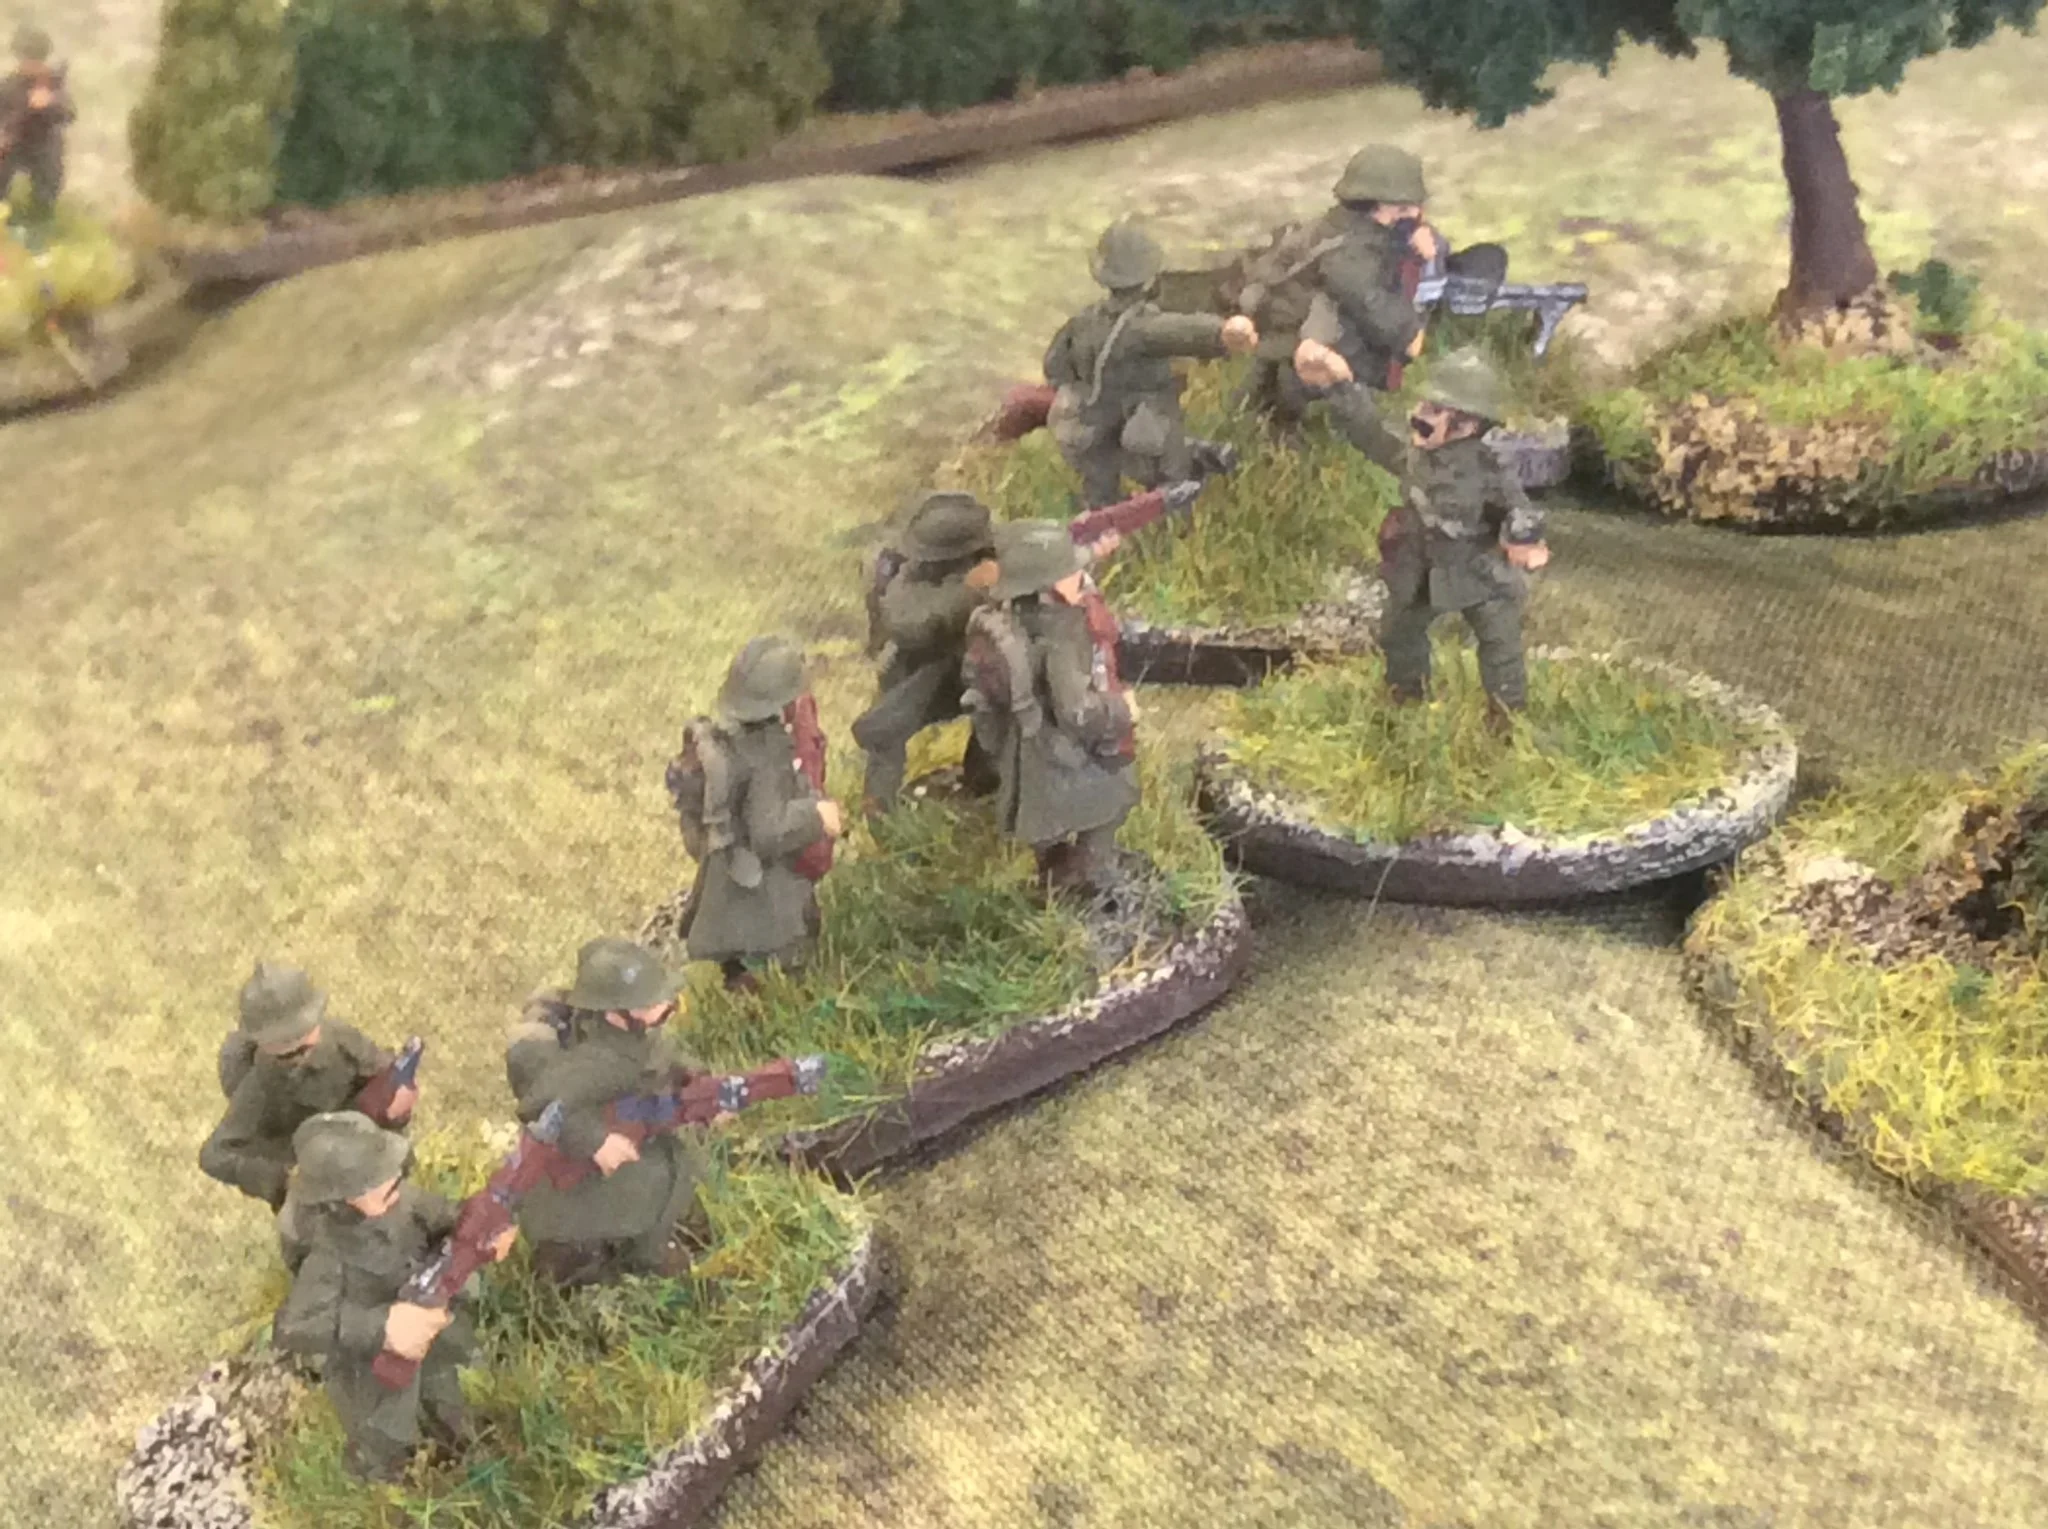
The French have orders to clear the Germans from the village and get most if not all their tanks off the opposite edge of the table. Under the command of two Big Men (one with the infantry, one with the tanks) the French have a Company HQ of a squad of infantry and a 60mm mortar; two platoons of infantry, each three squads of ten strong; and a company of five light infantry Renault R-35 tanks.  An impressive force on paper, but the infantry are not very good (starting on three Actions but dropping to two Actions with just one casualty); and the tanks are armed with 37mm pop-guns that whilst able to deal with most early-war armoured vehicles are not ideal for winkling infantry out of a village!

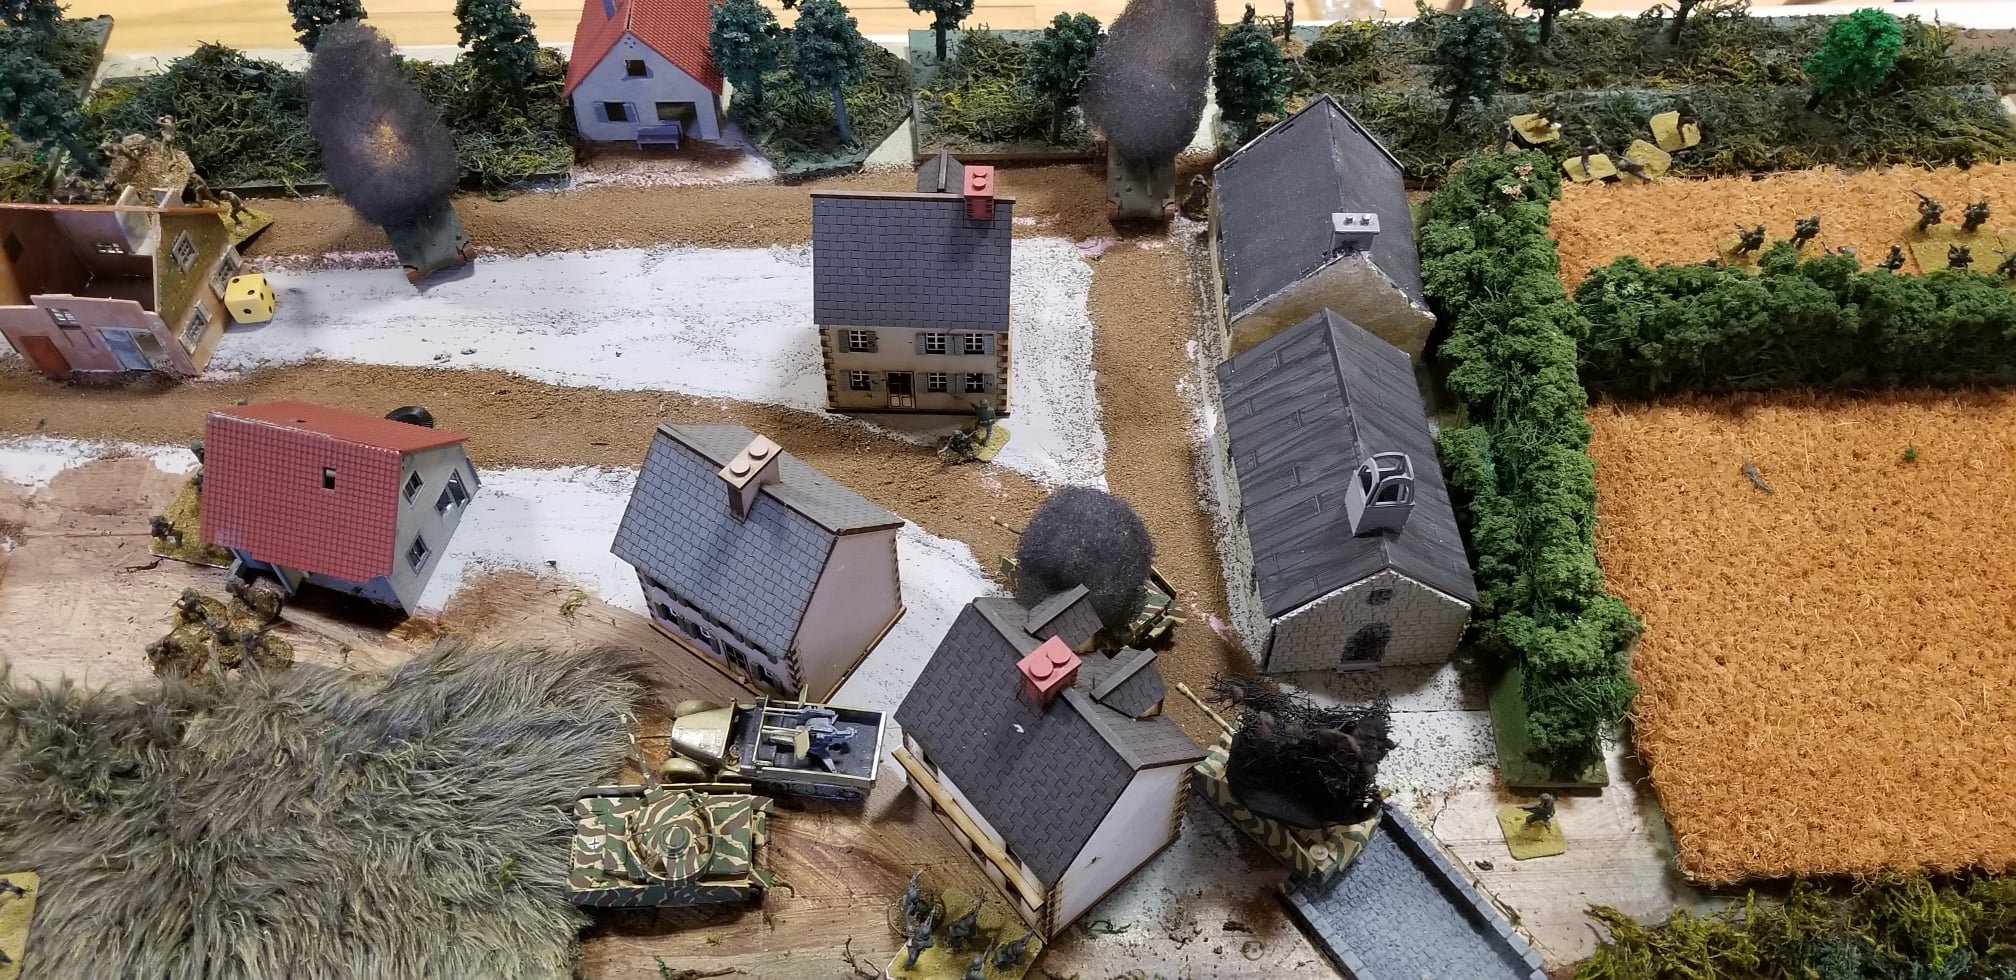
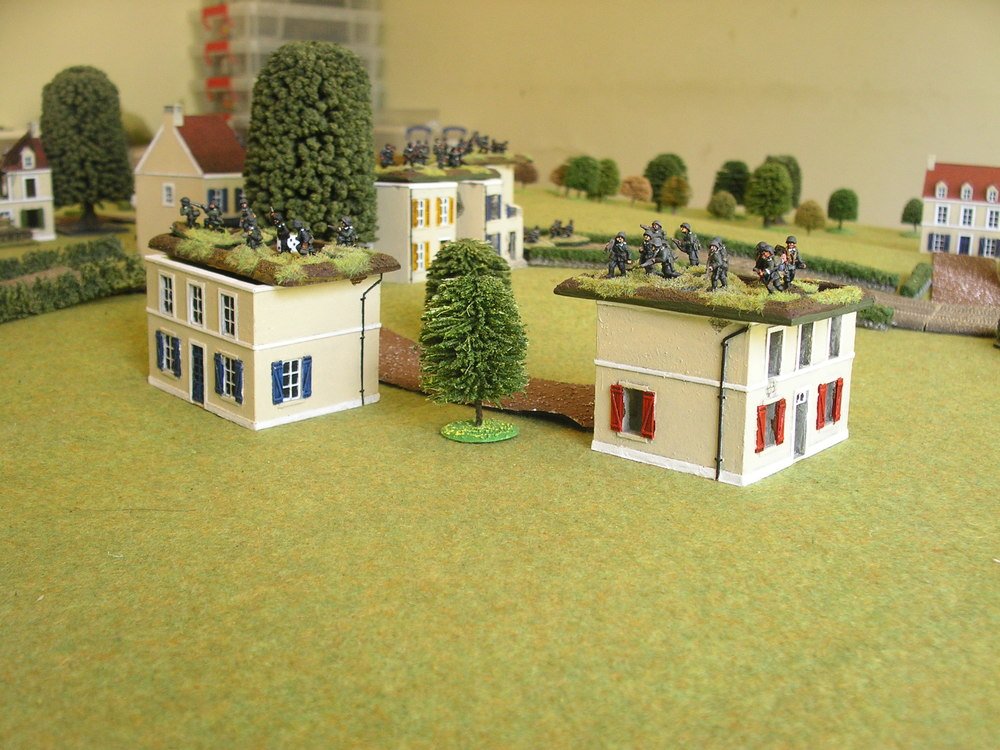
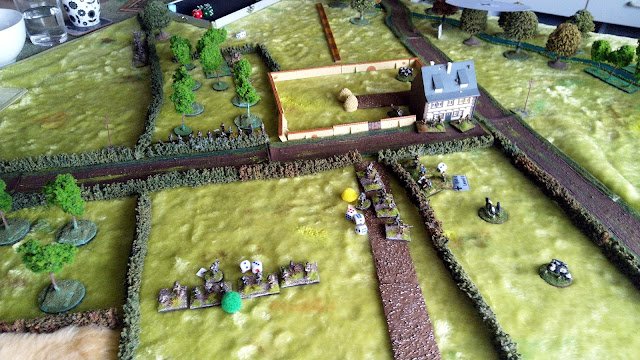
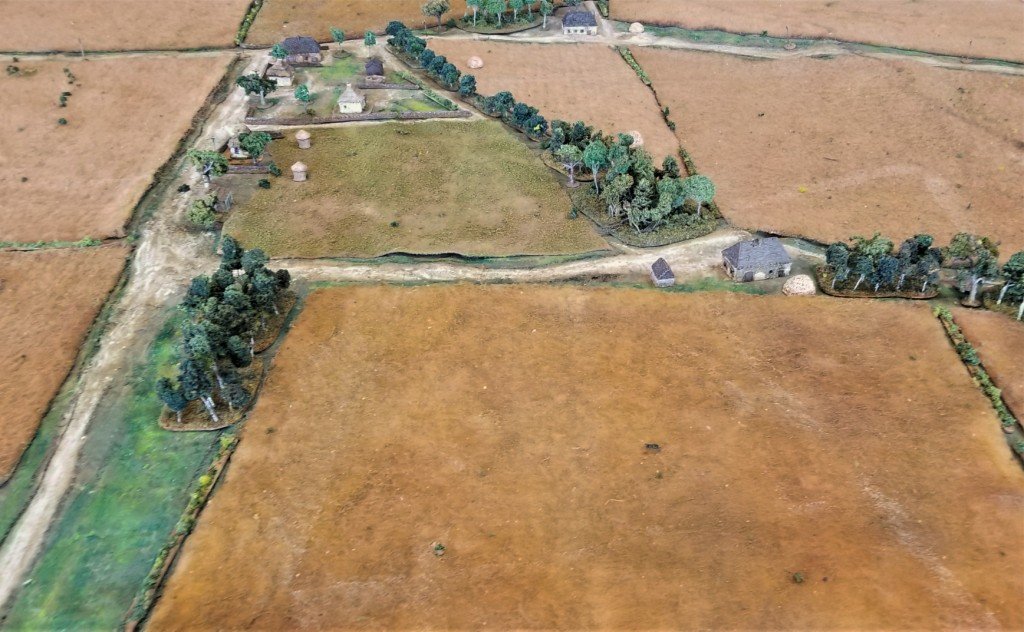
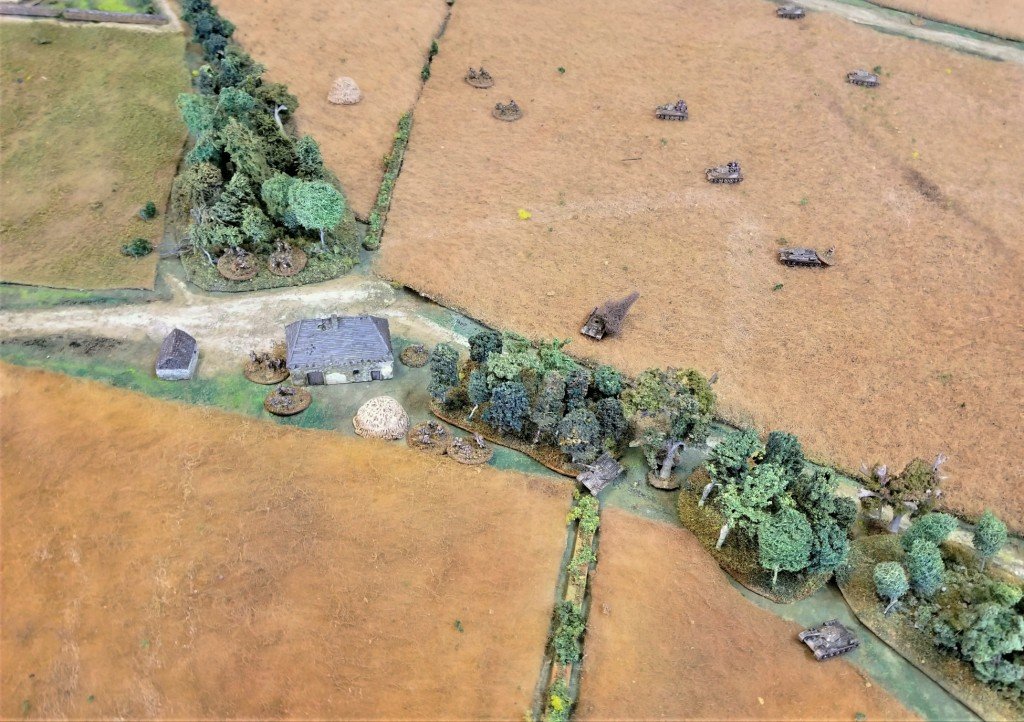
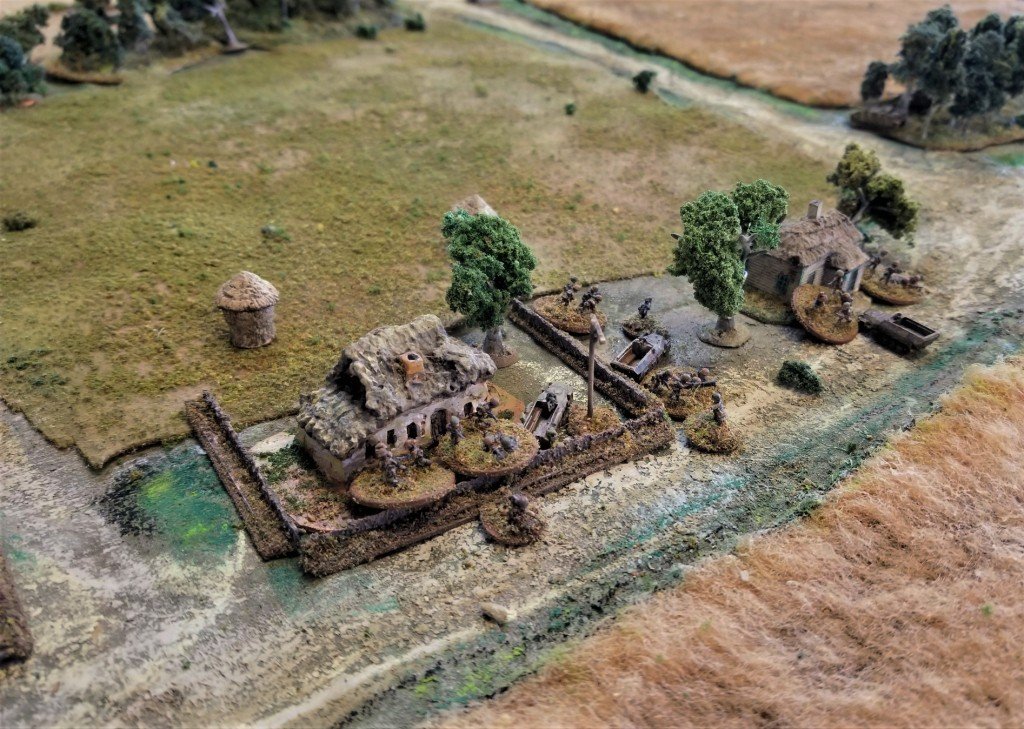
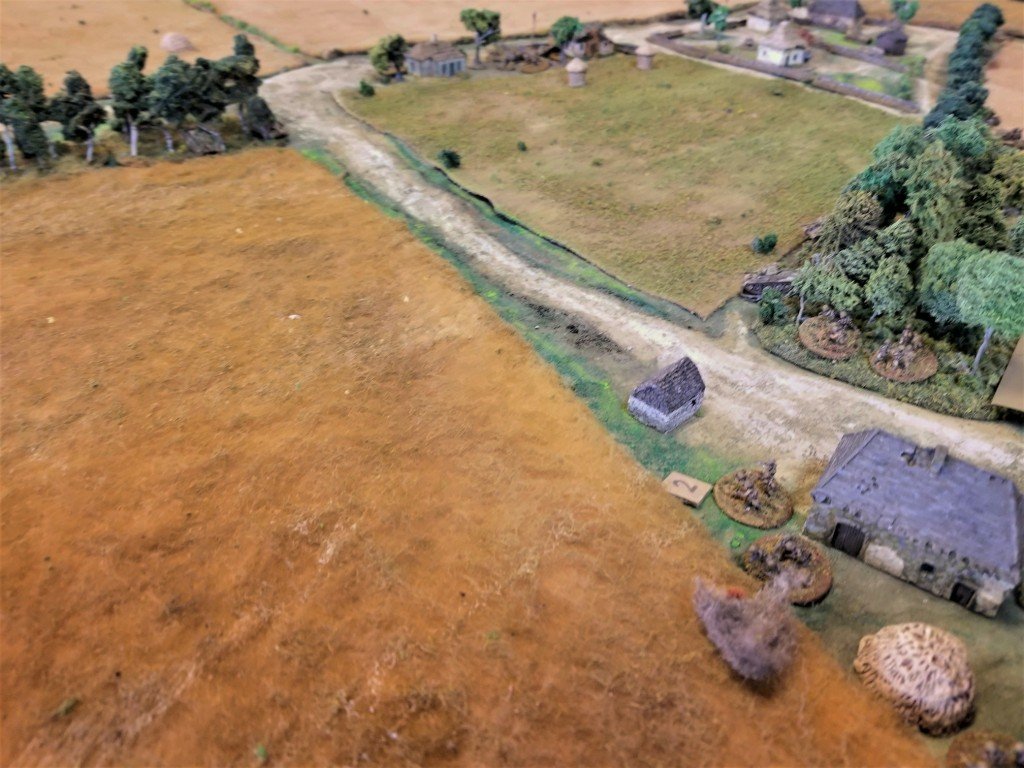
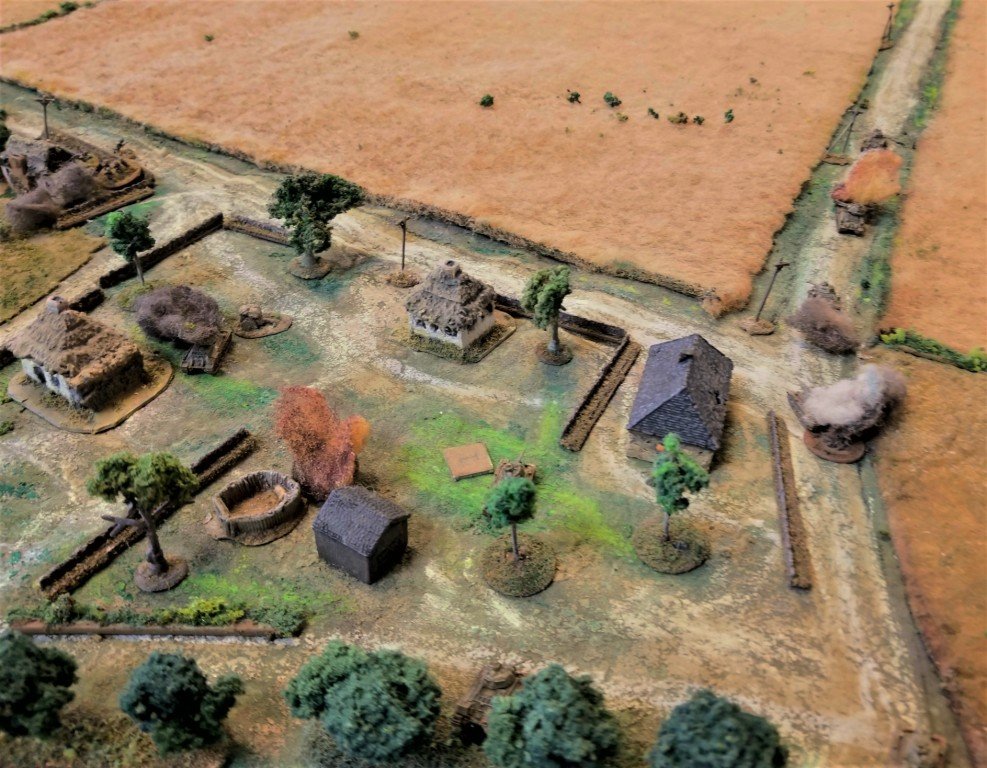
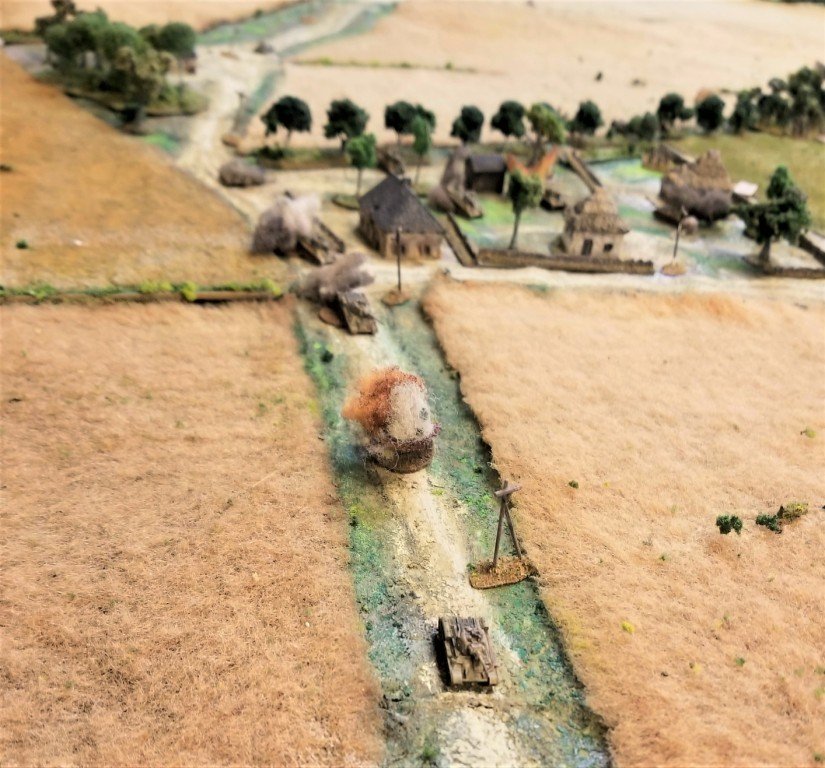
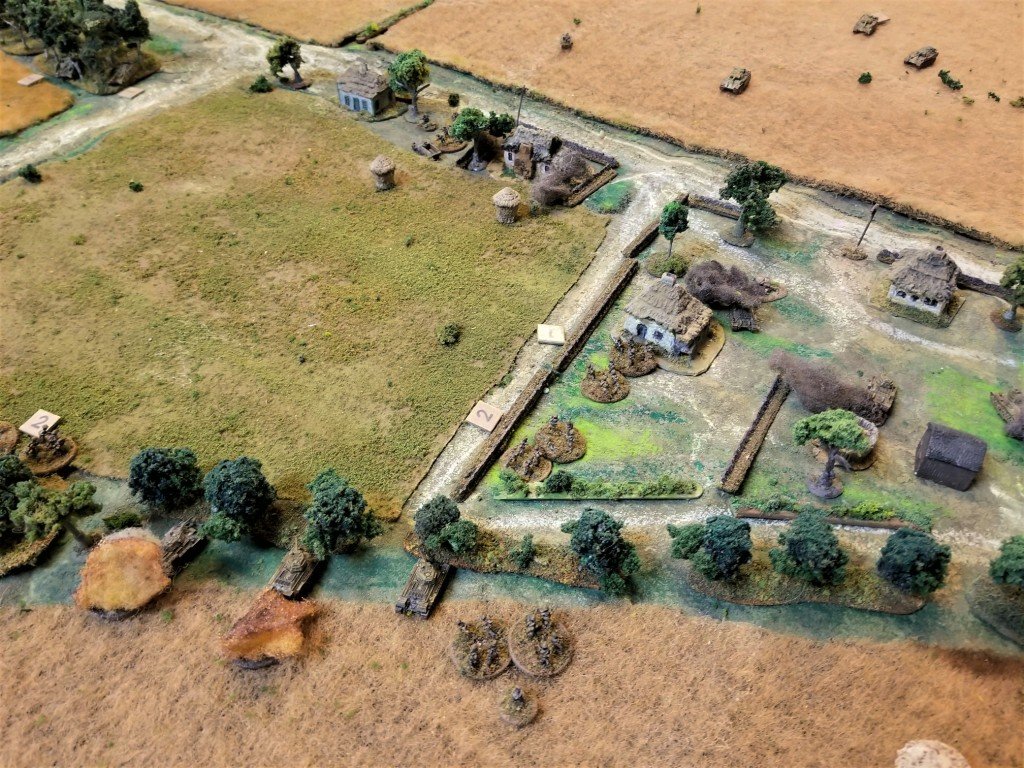
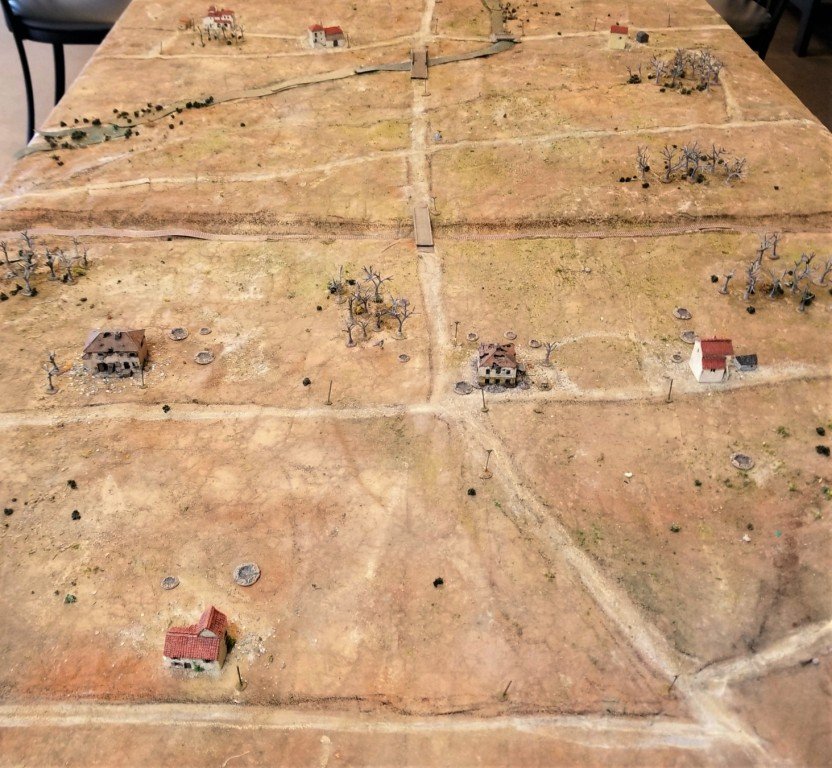
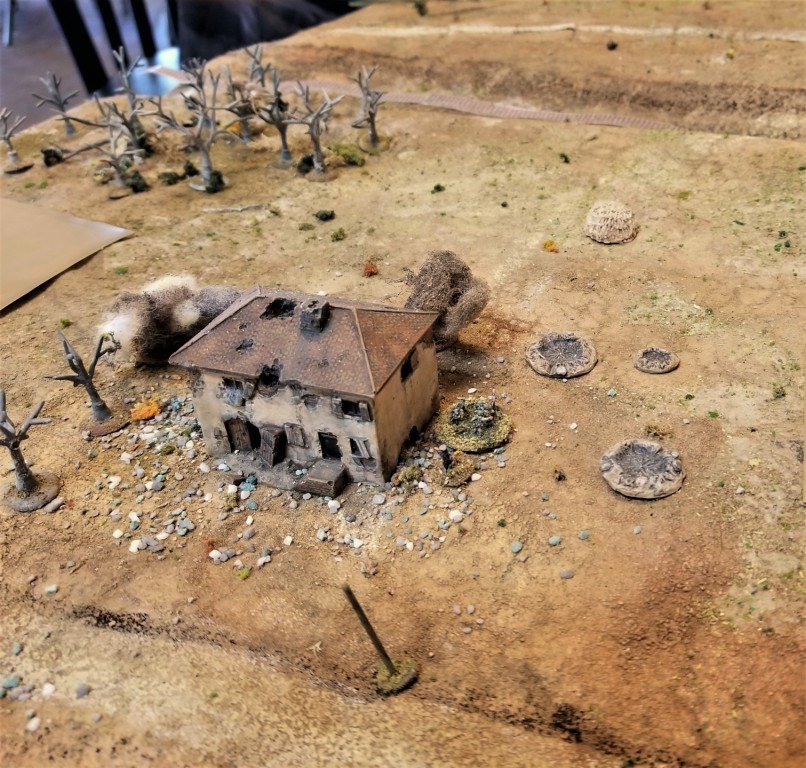
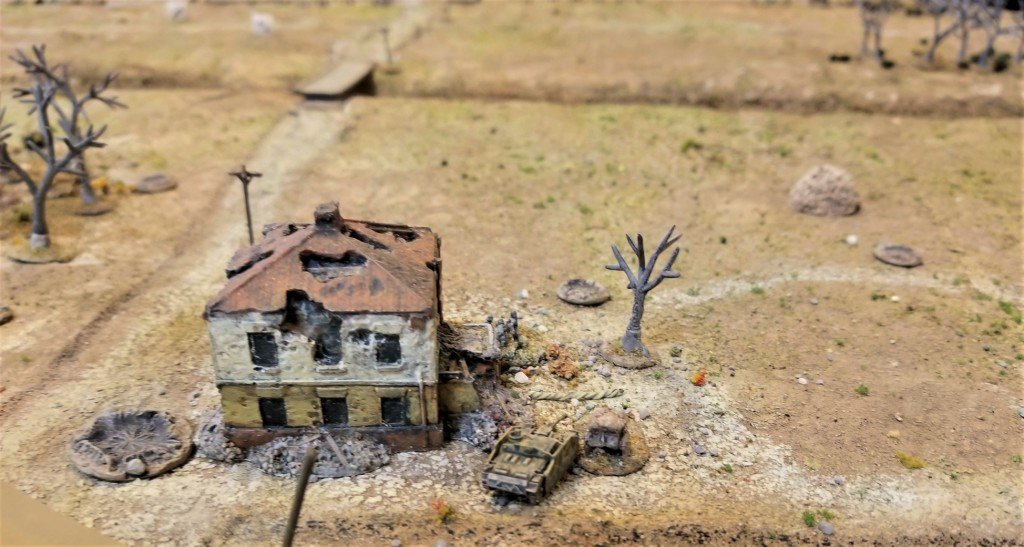
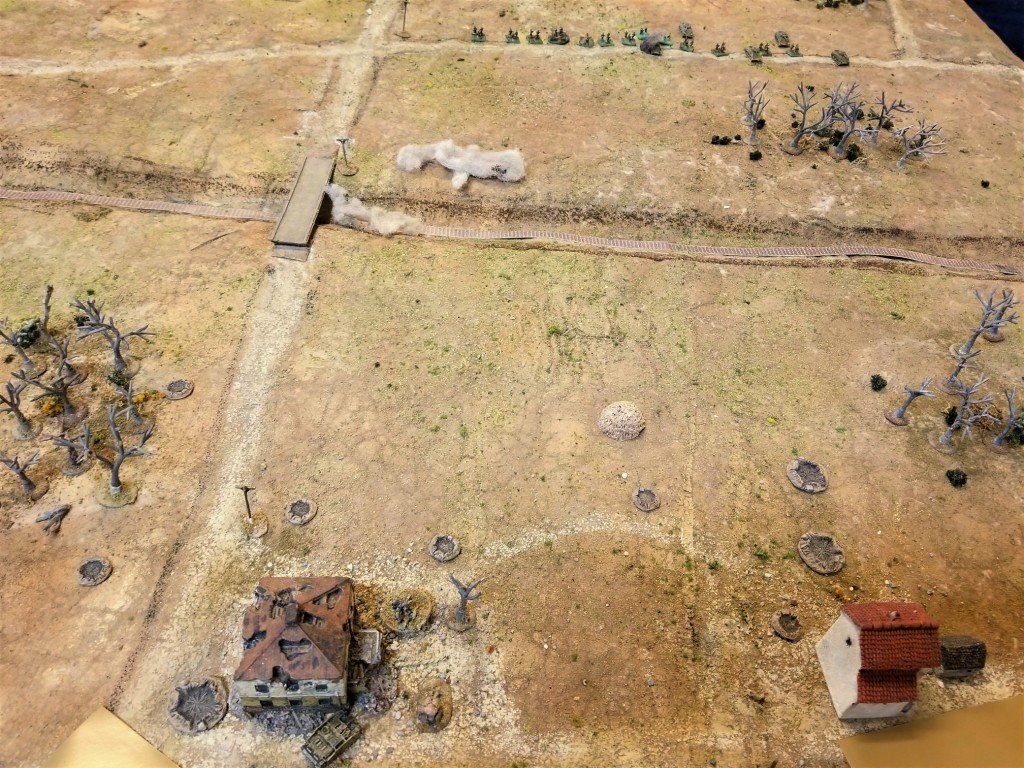
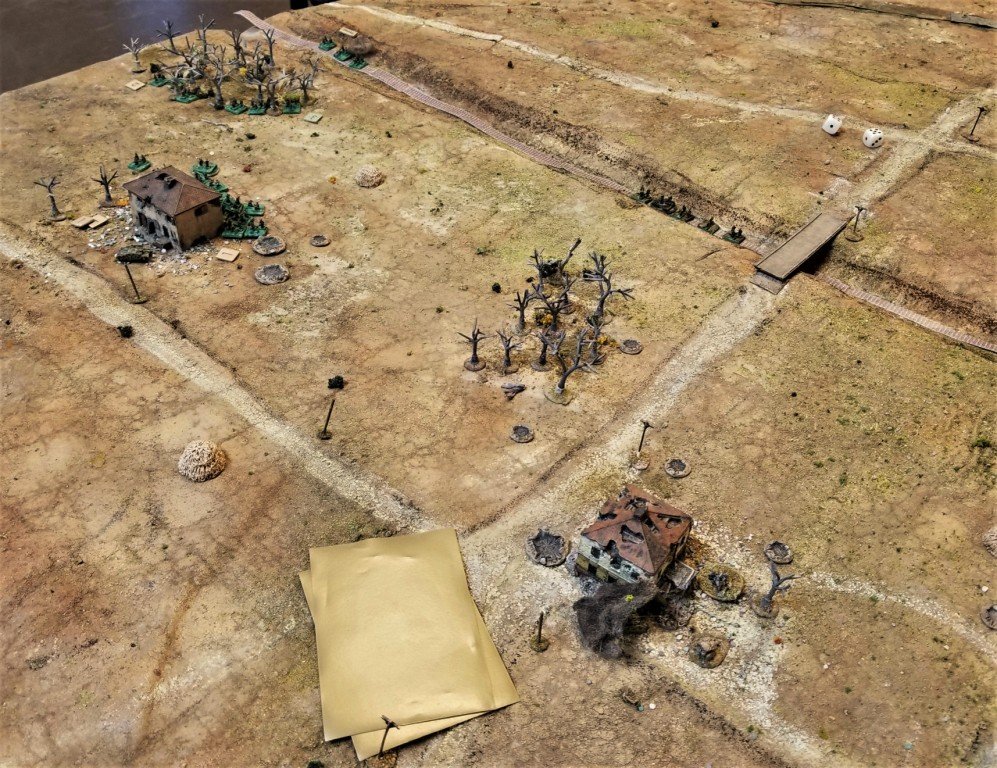
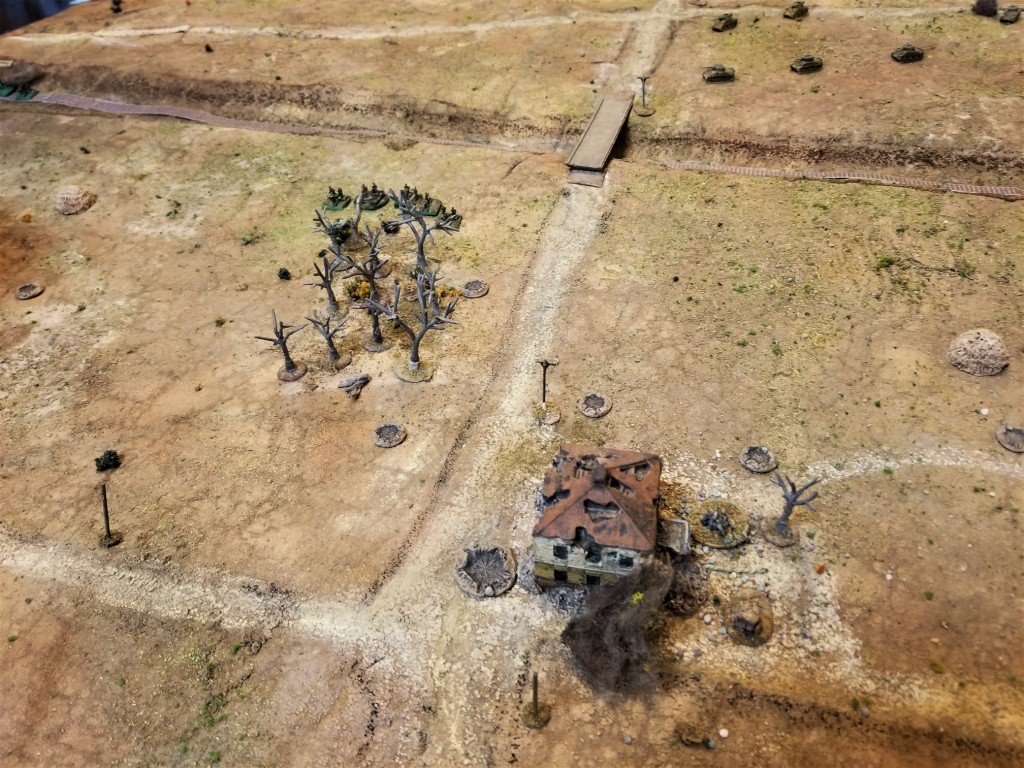
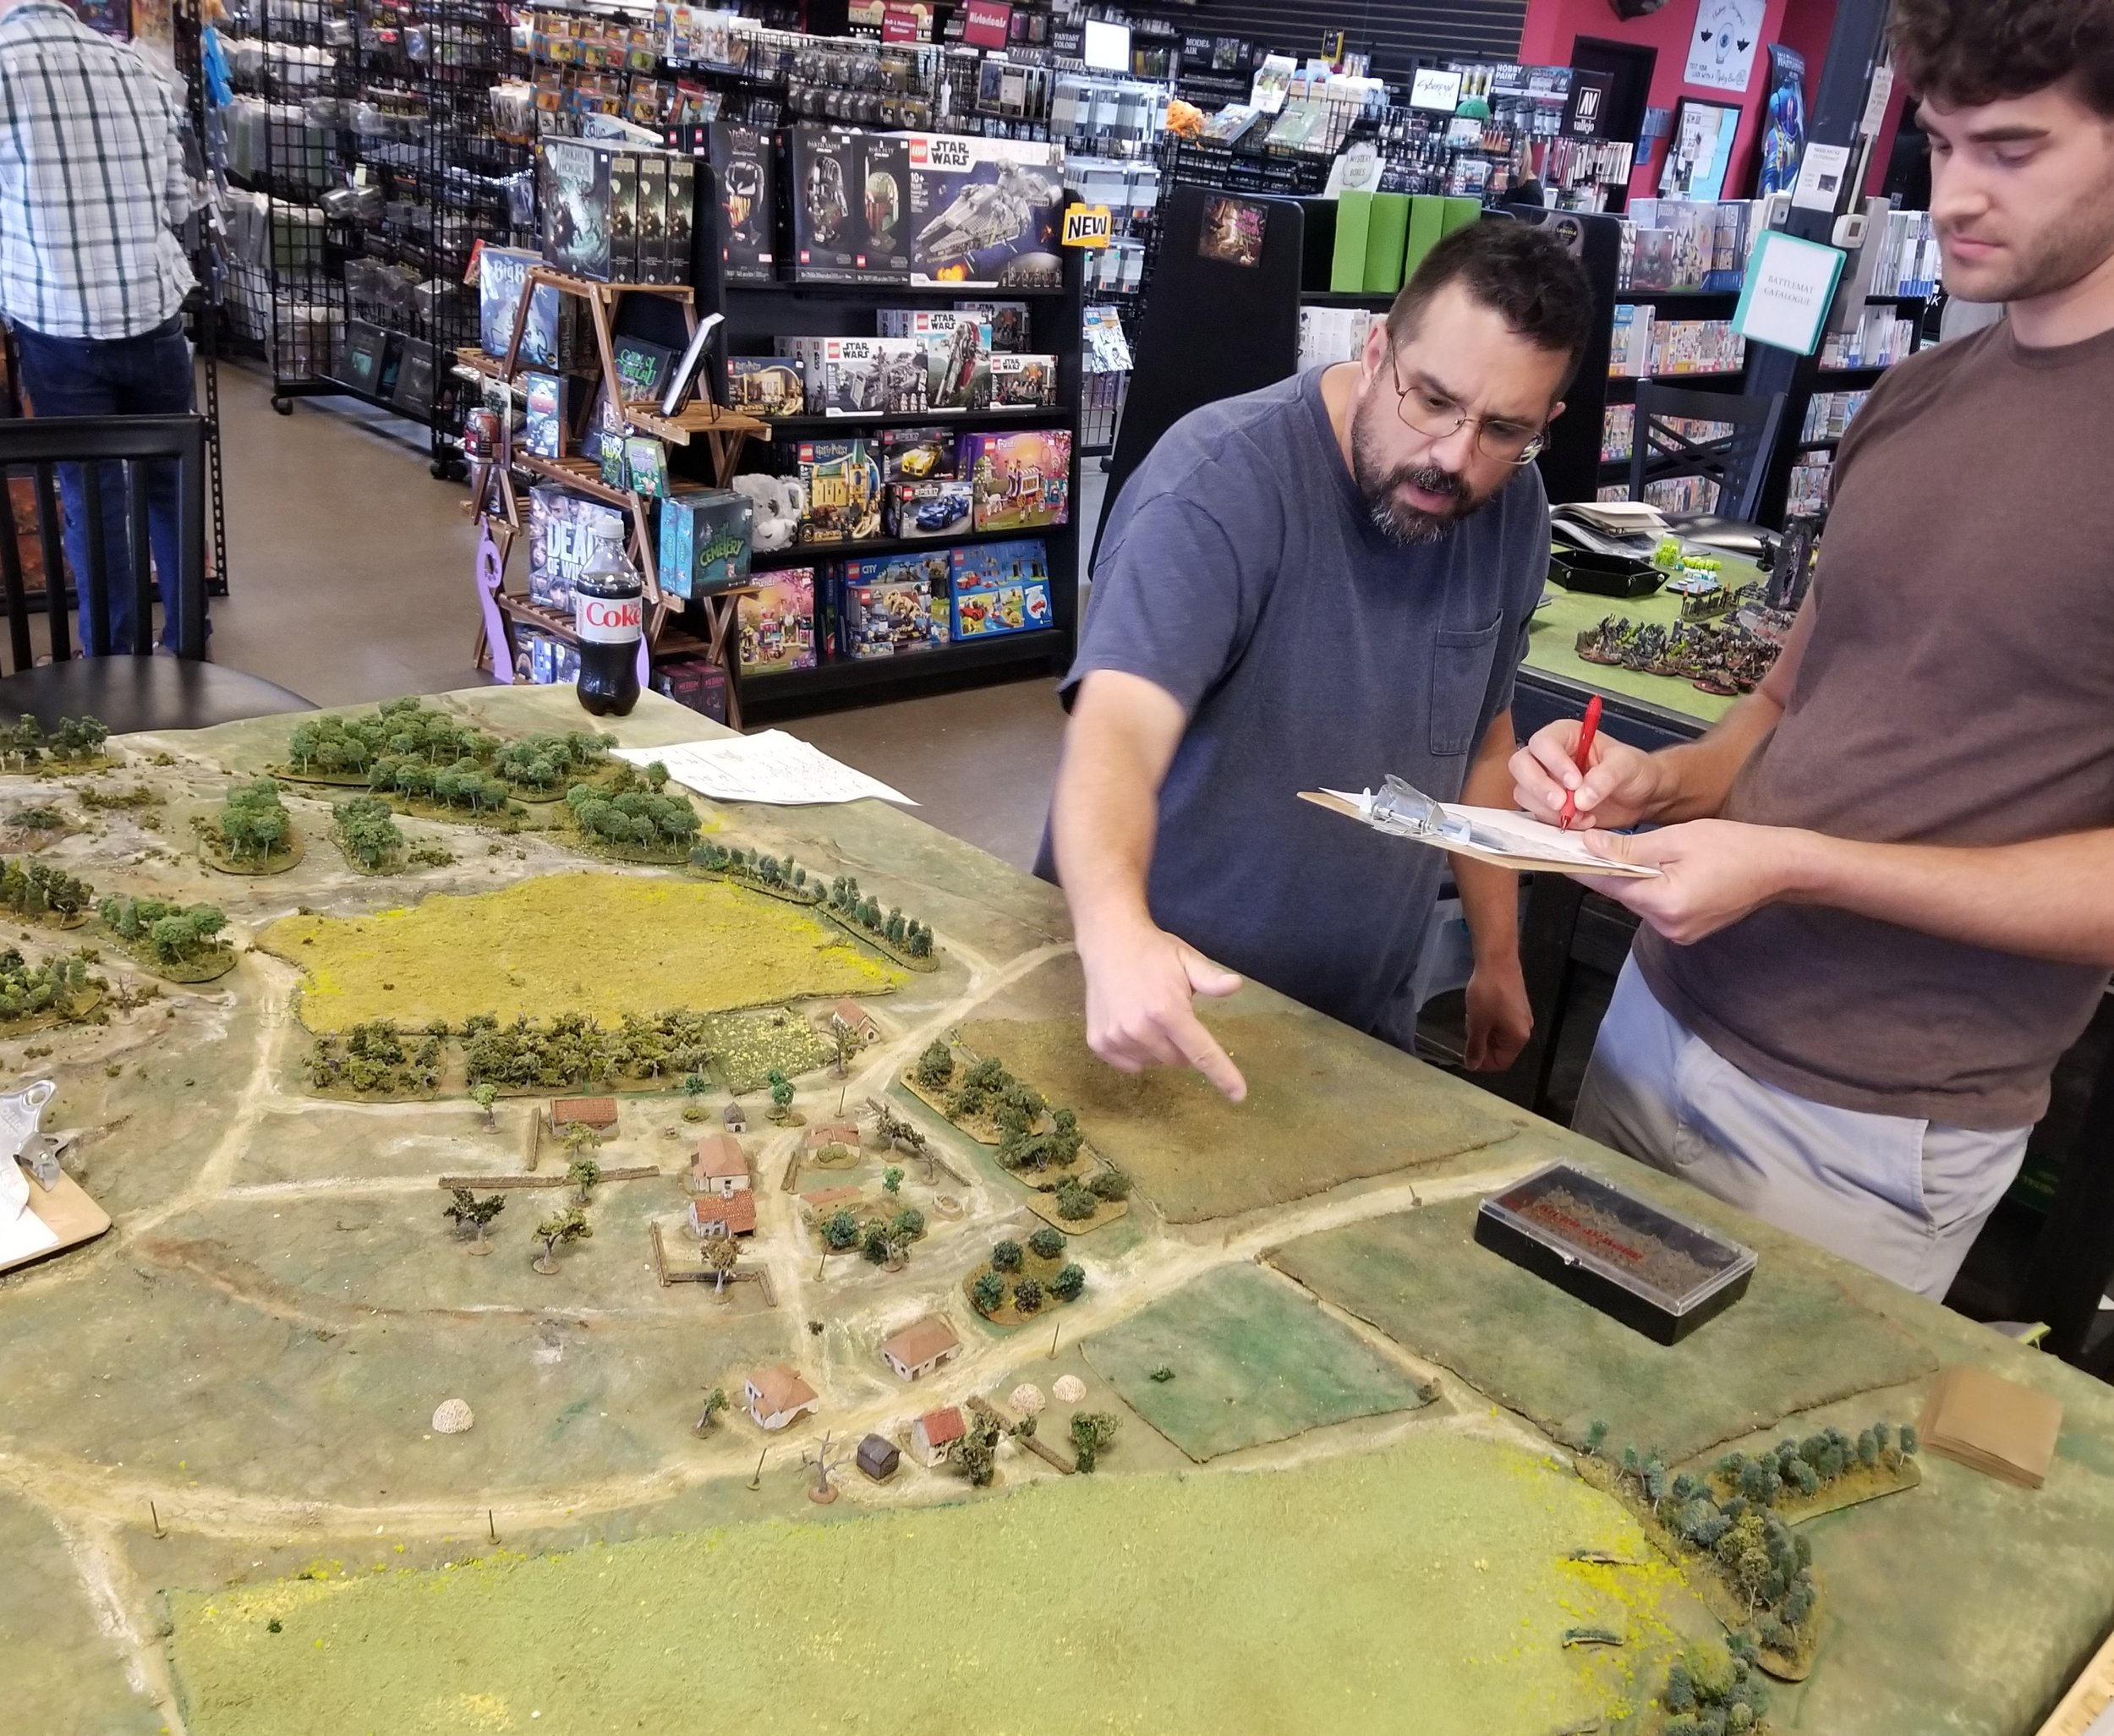
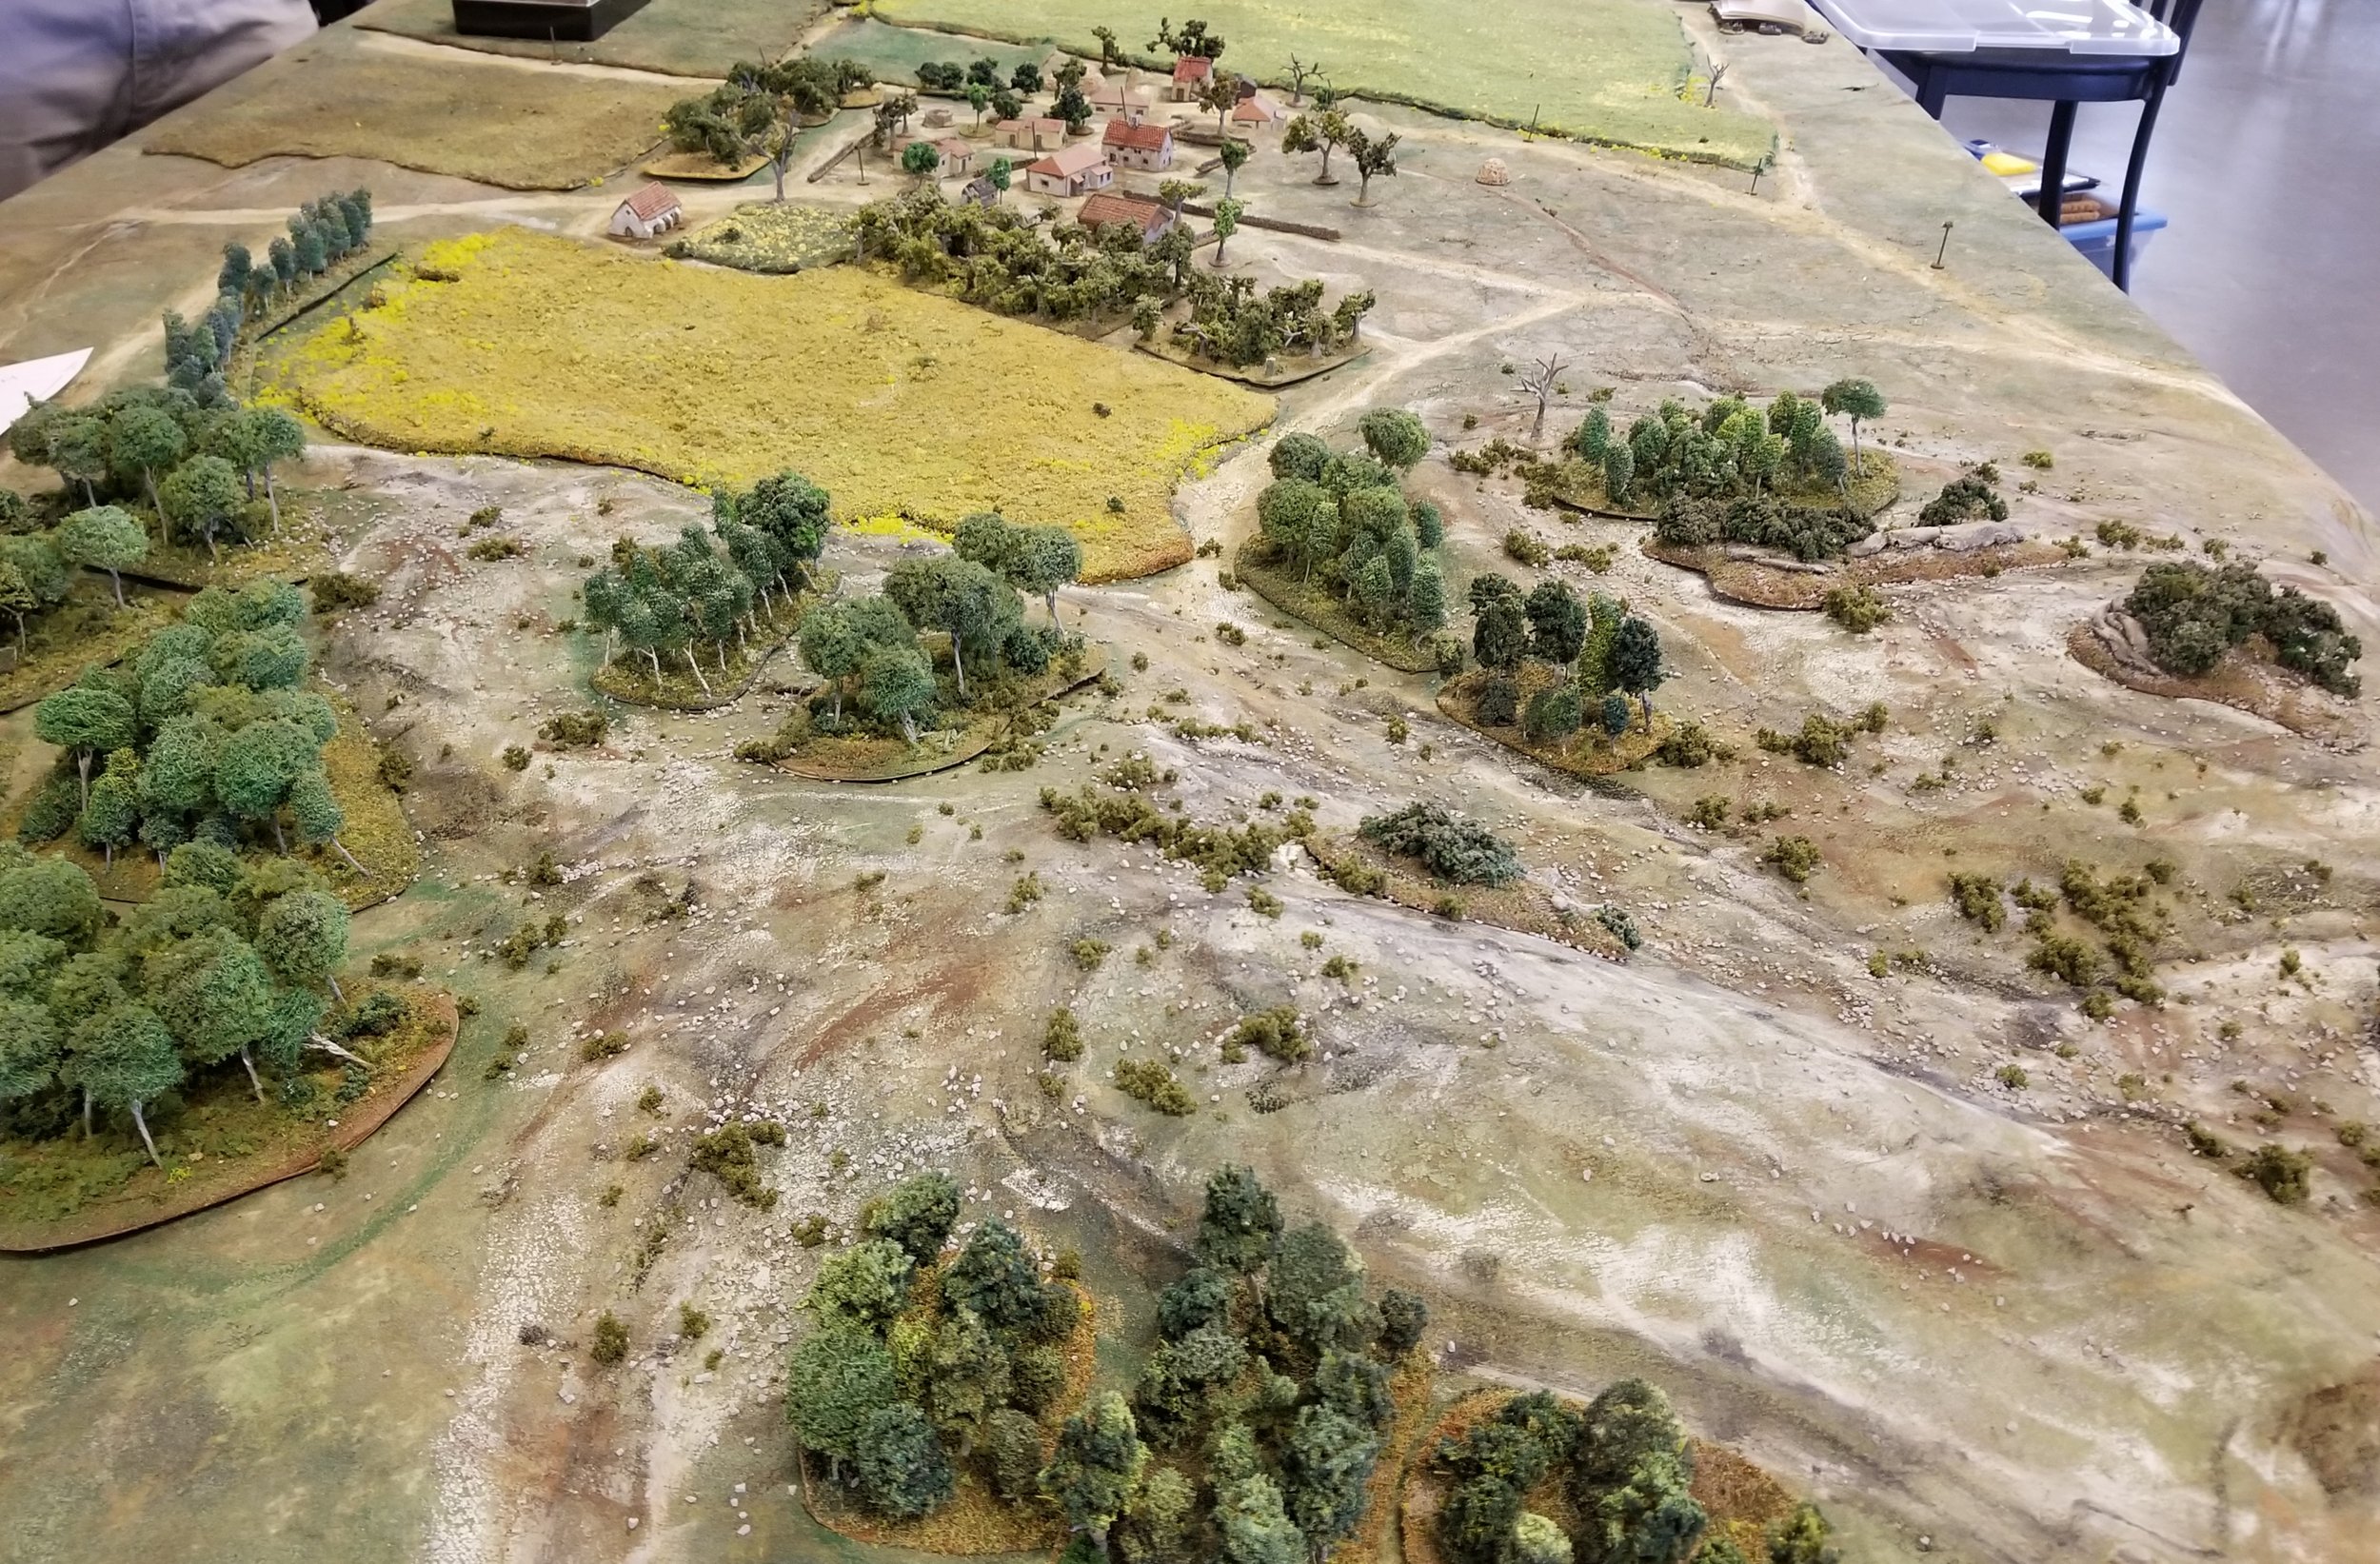
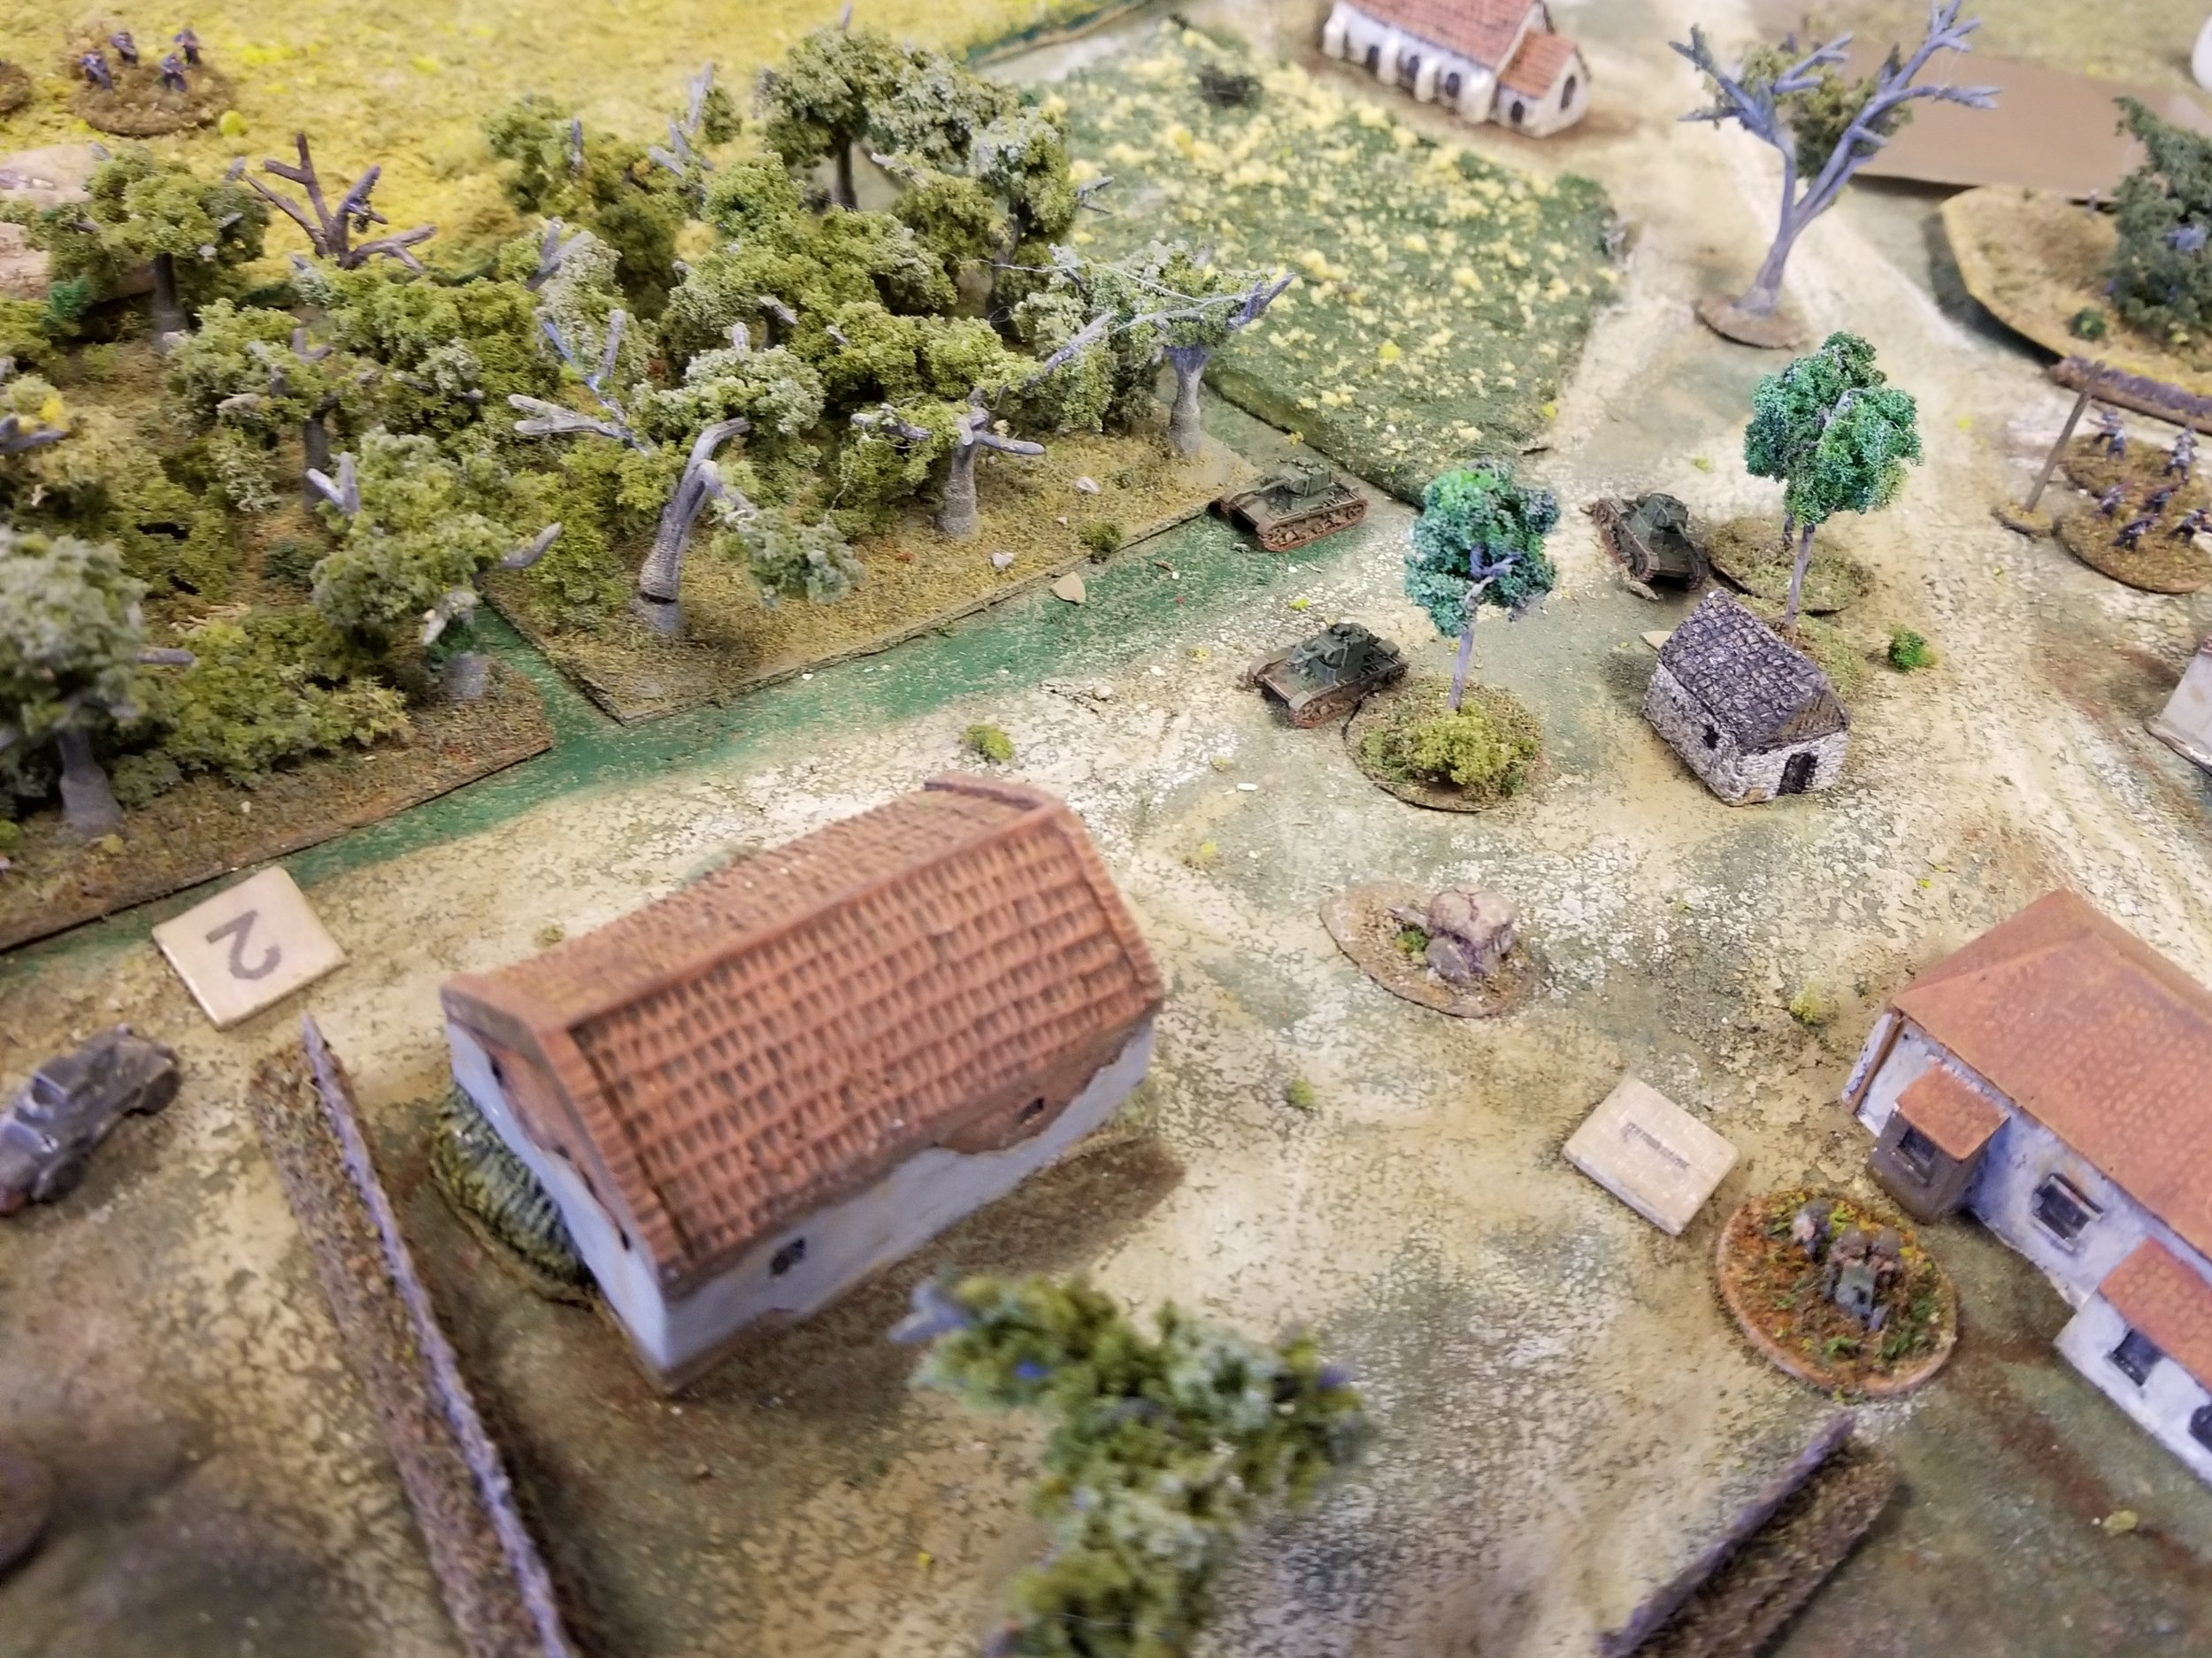
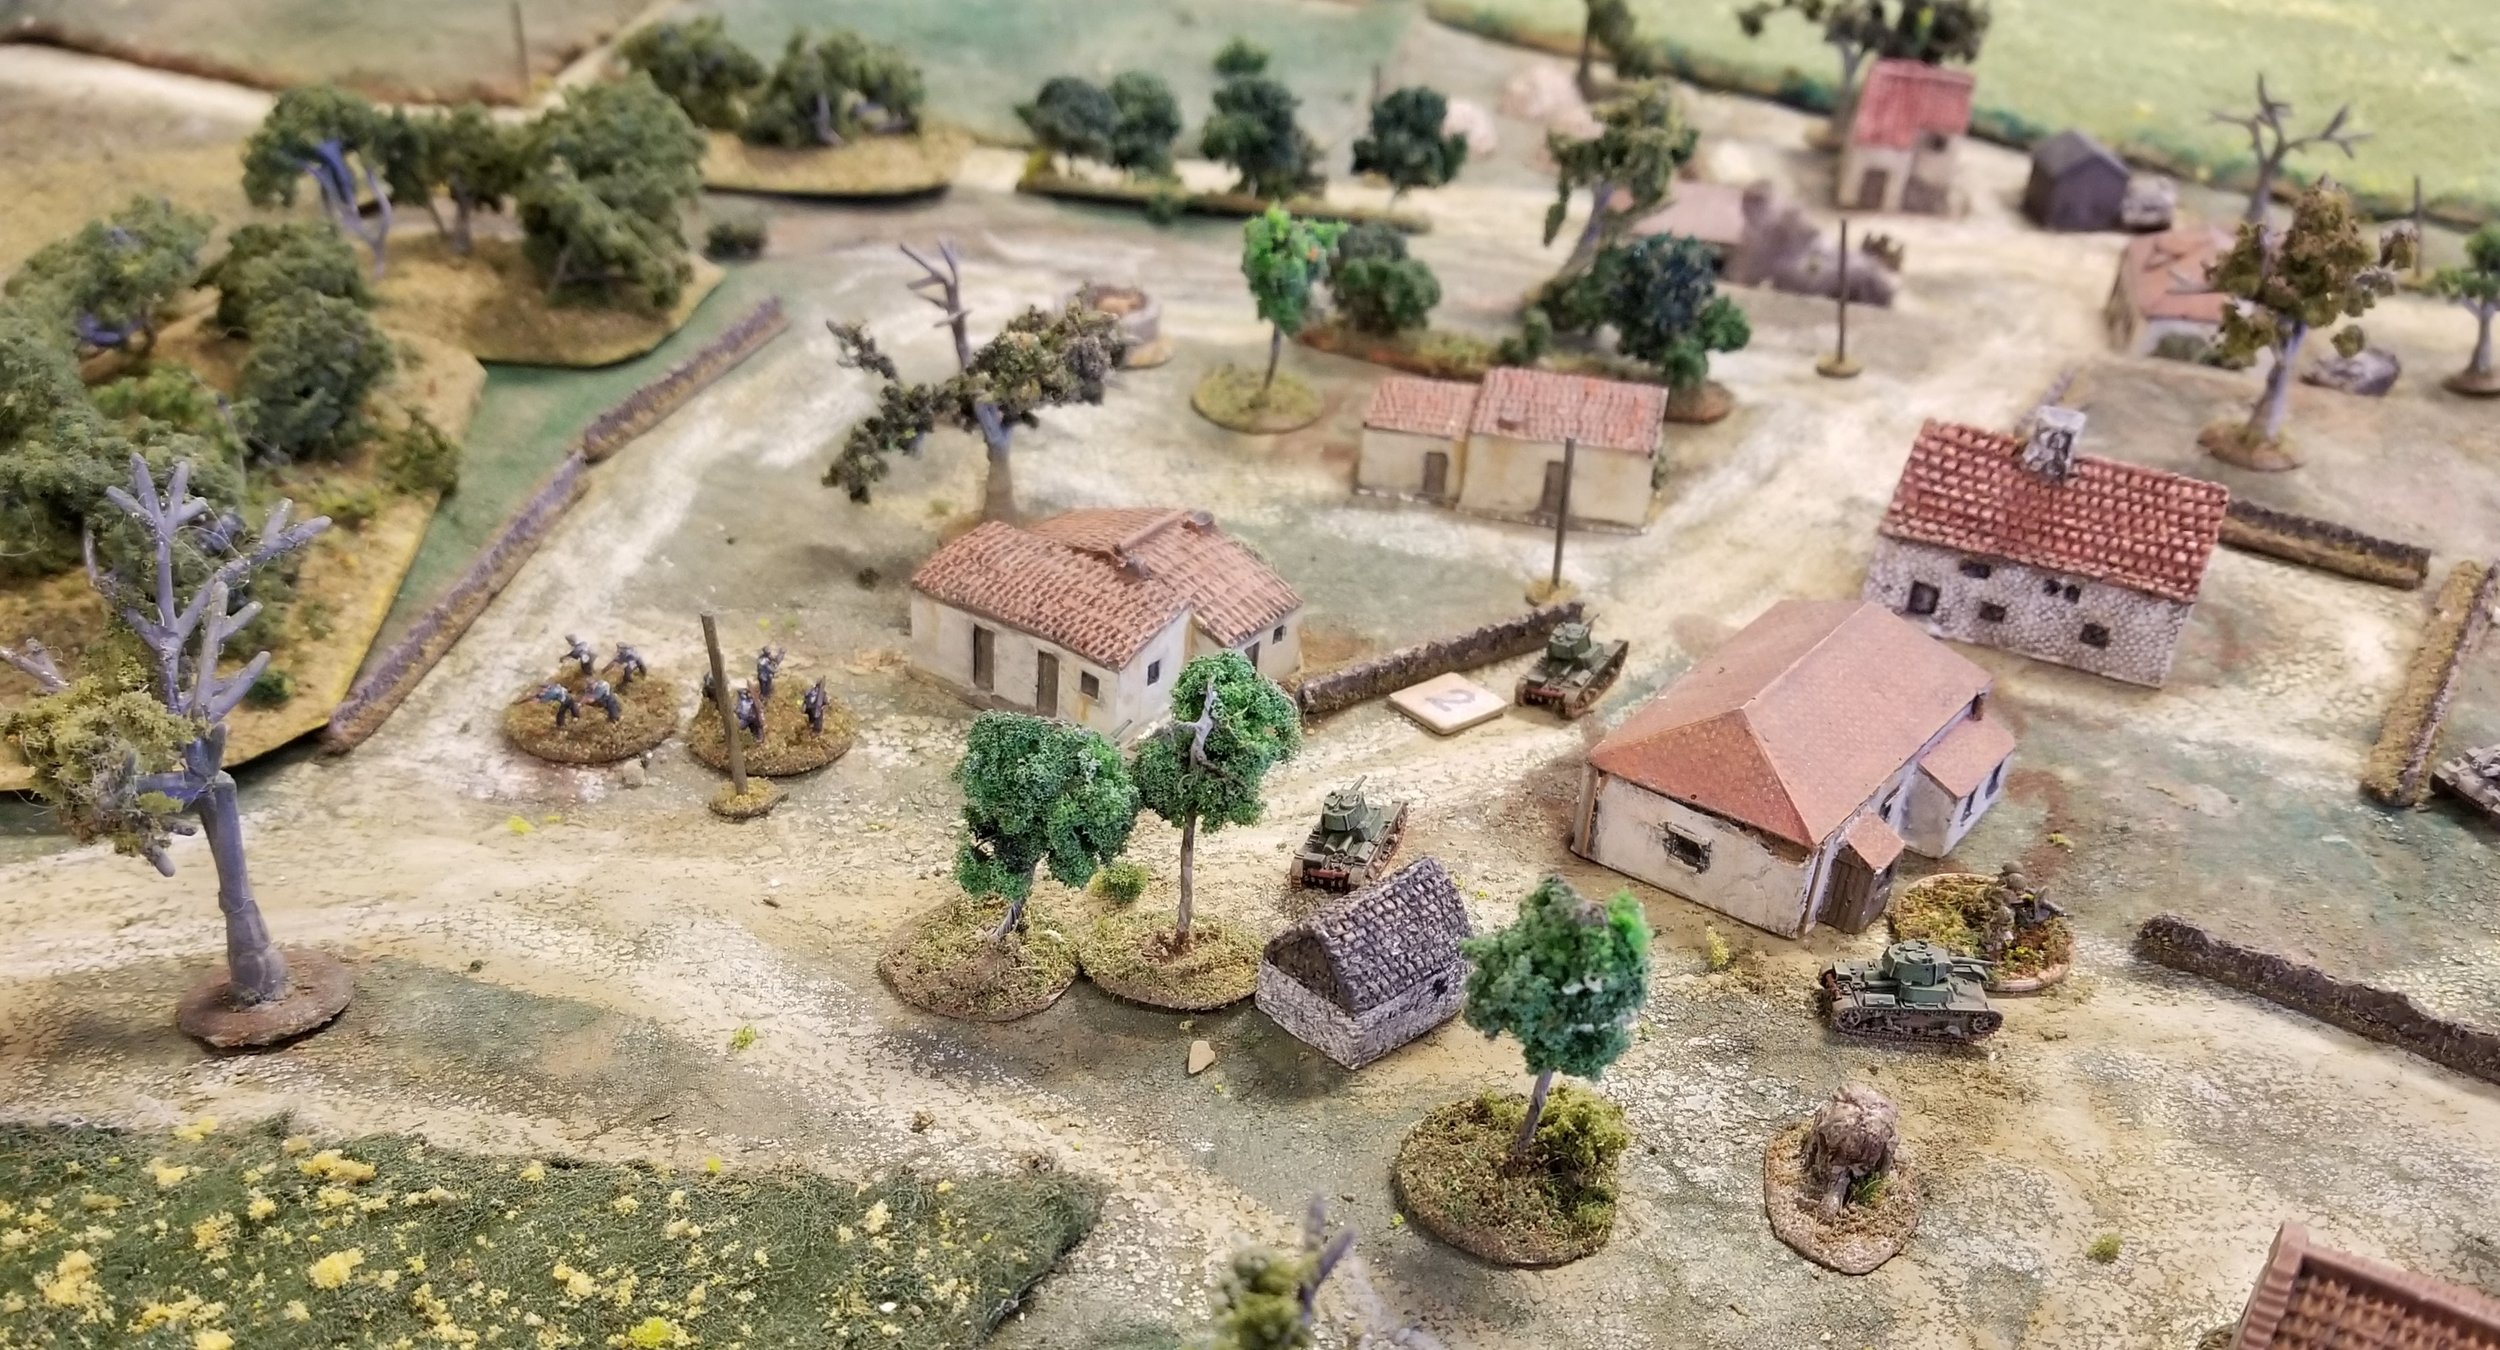
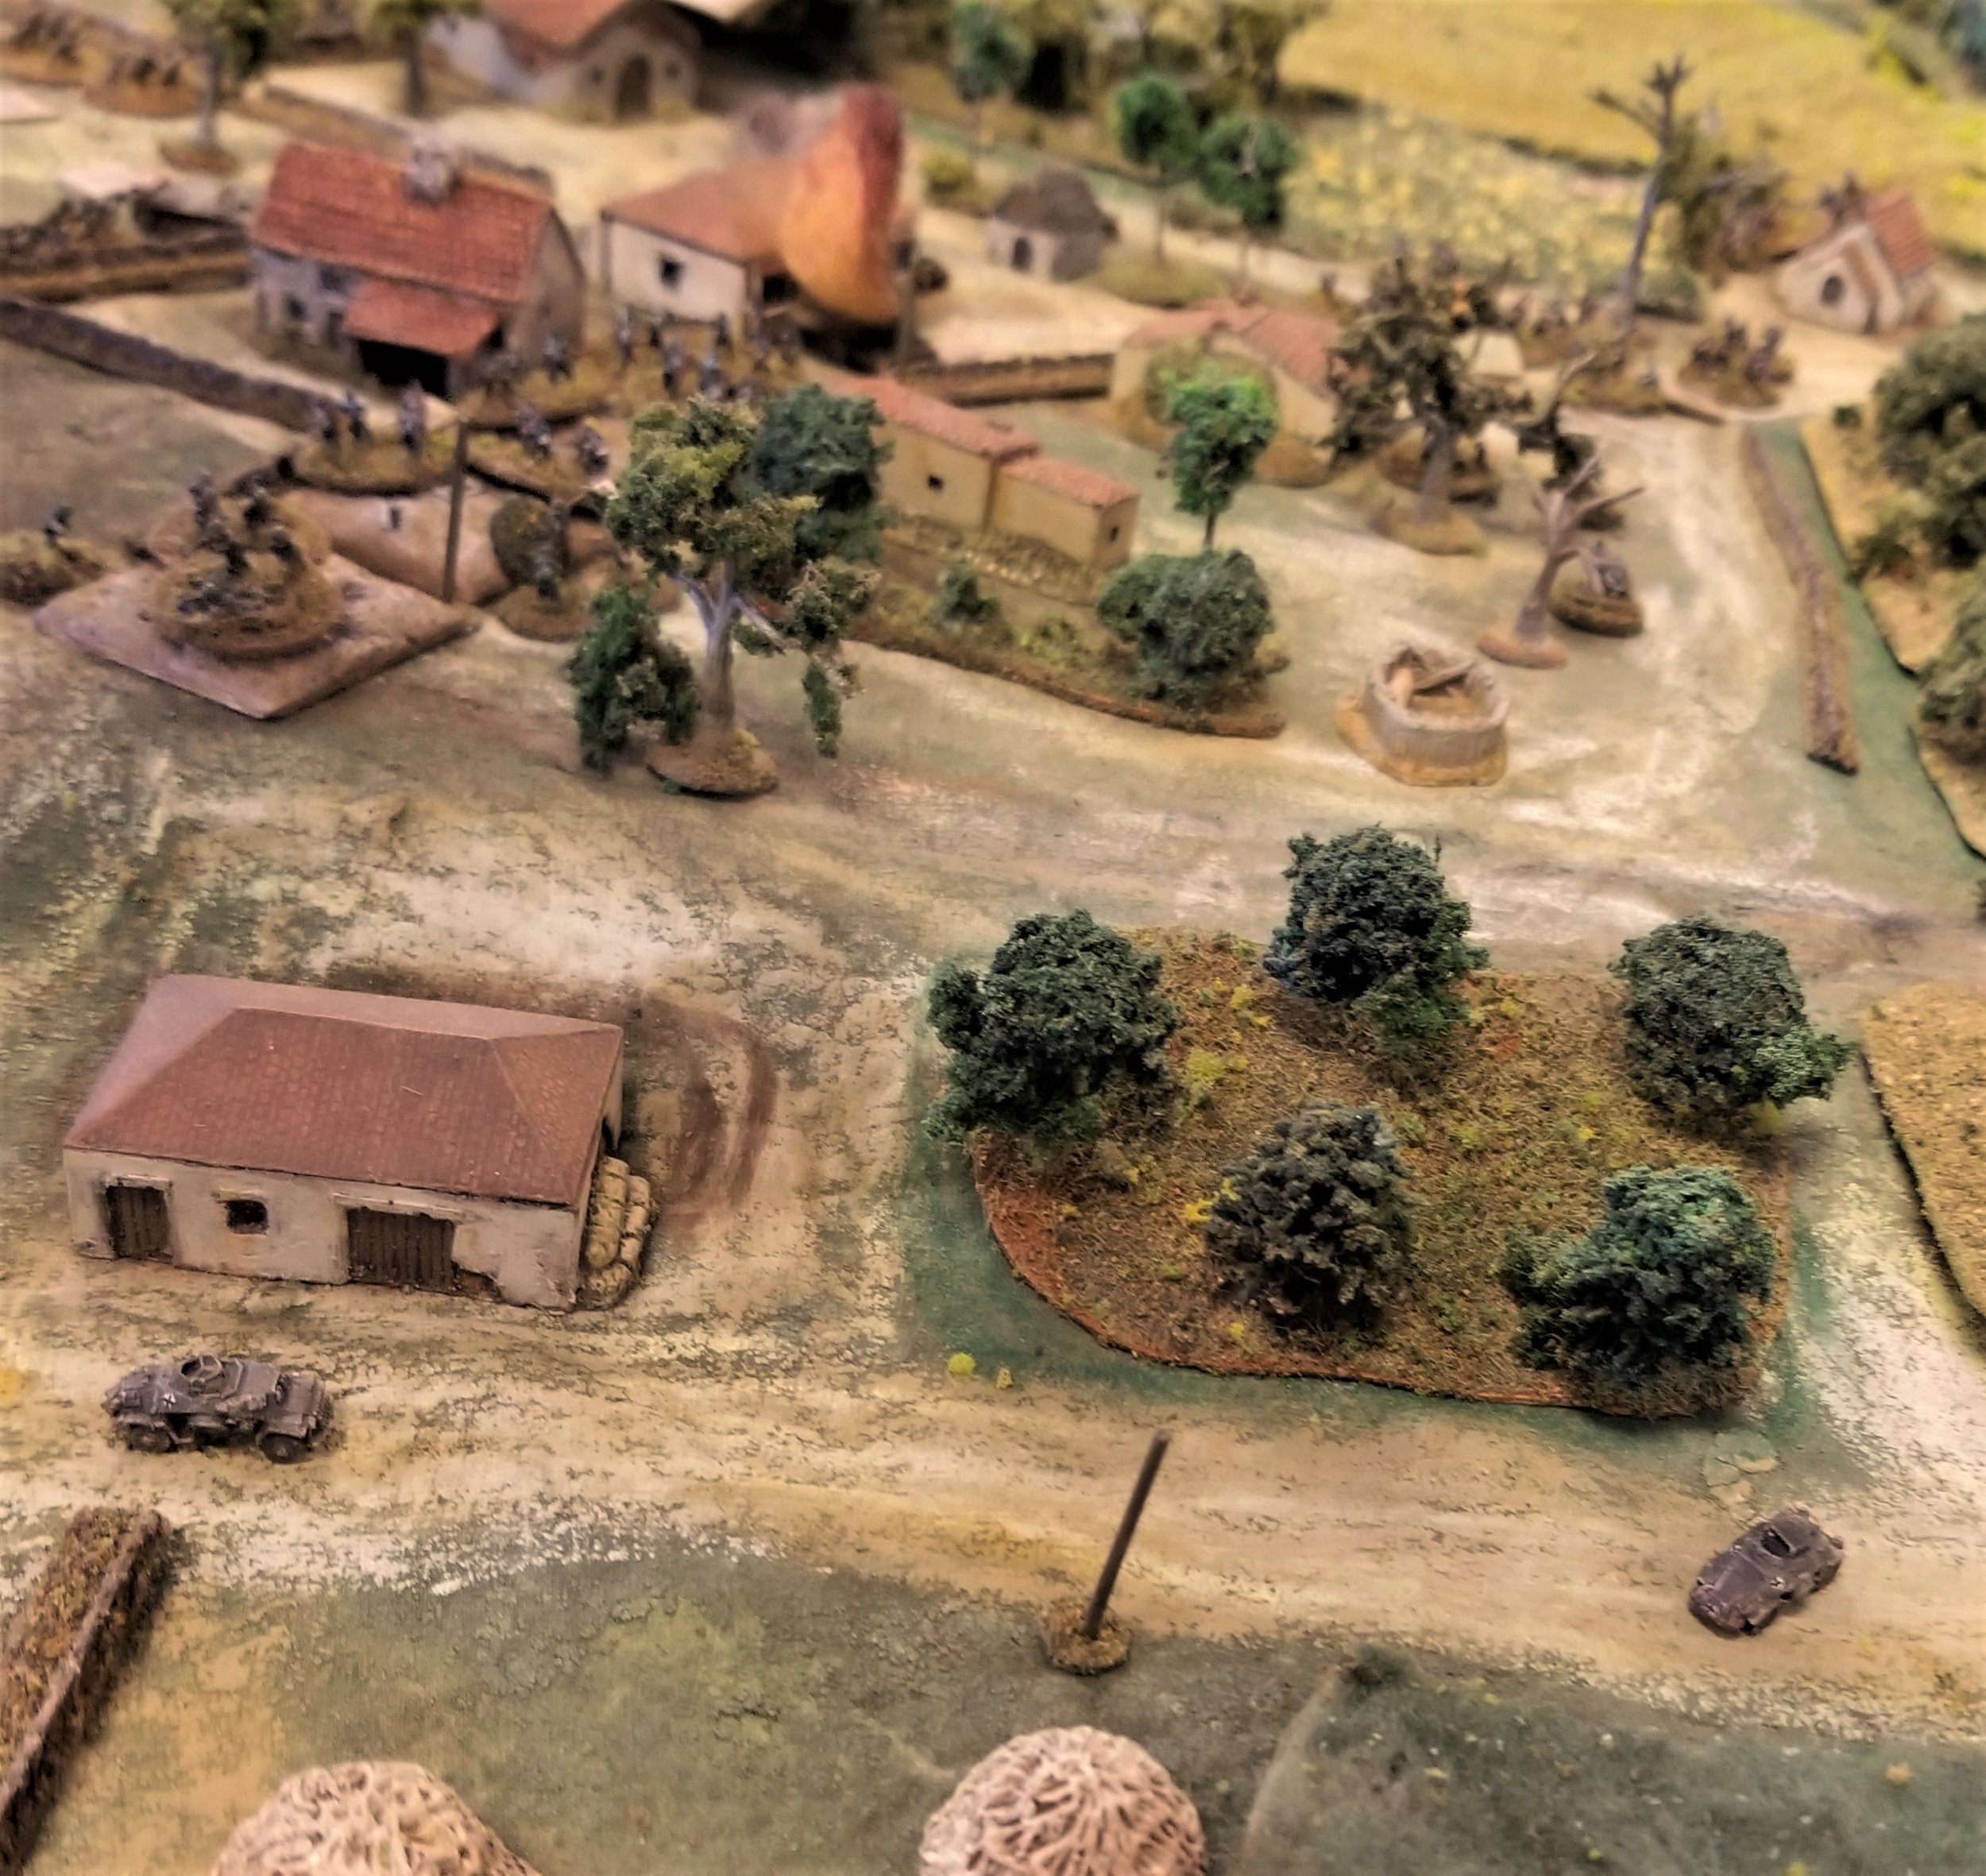
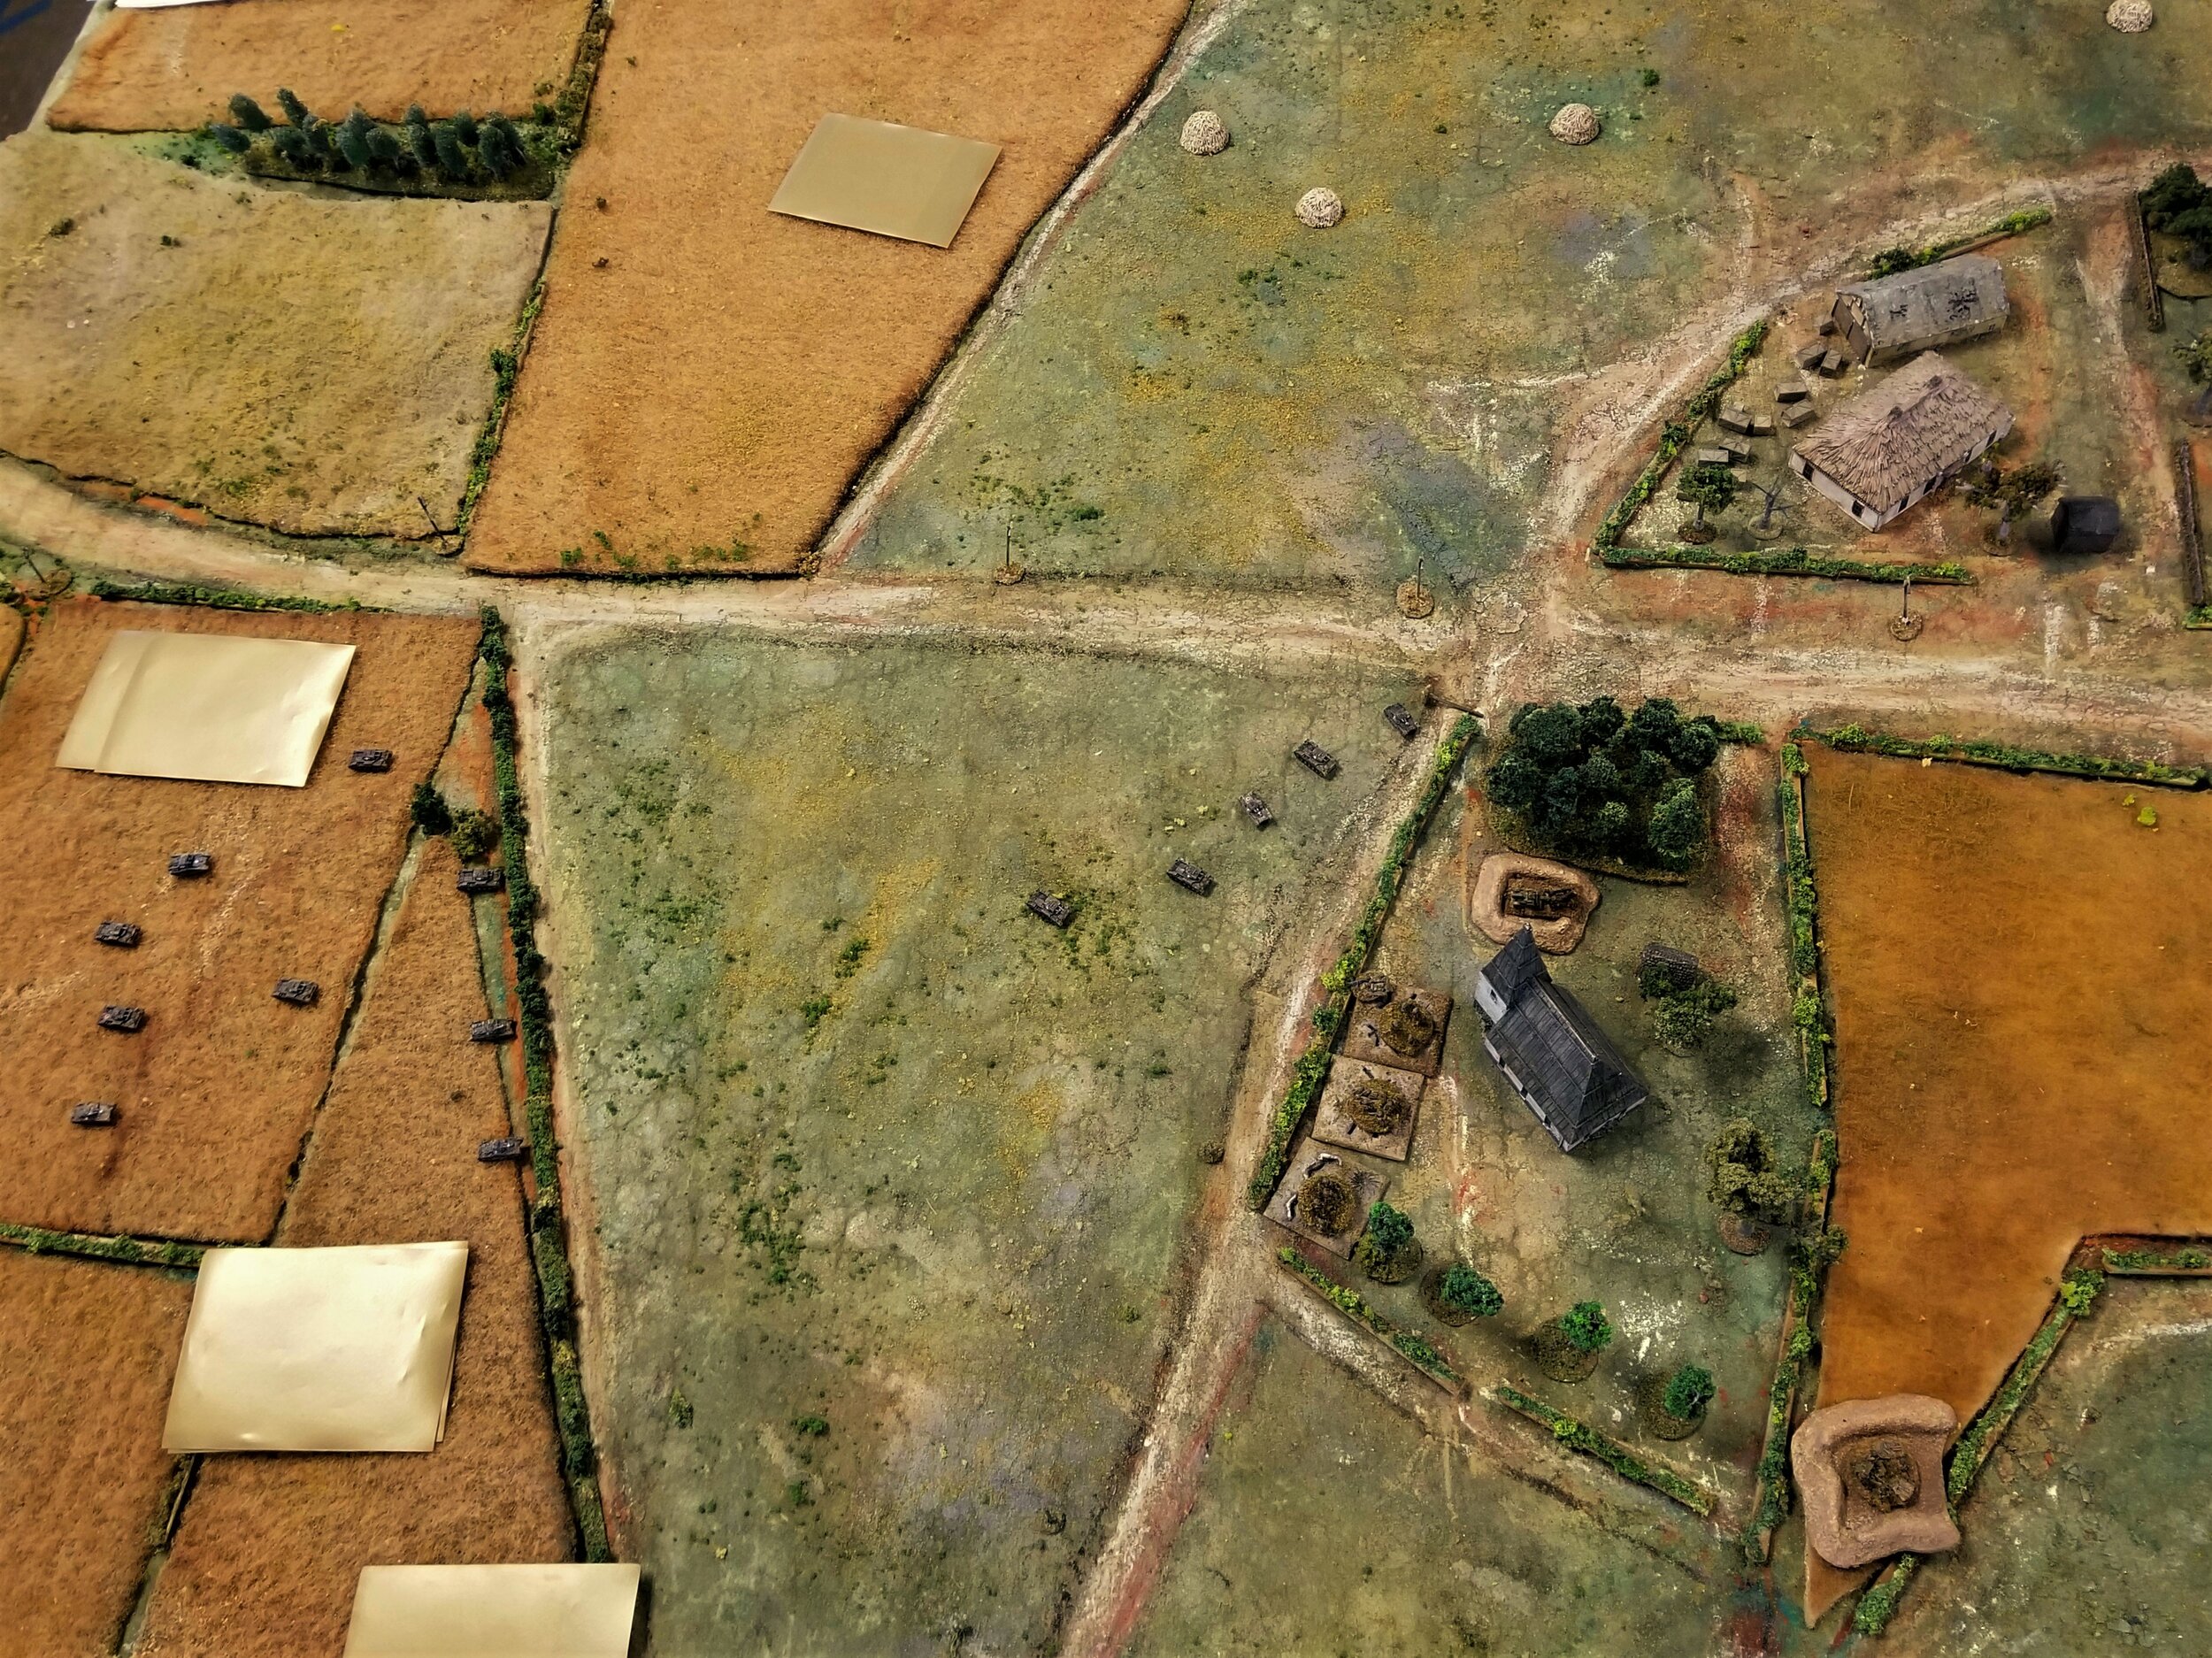
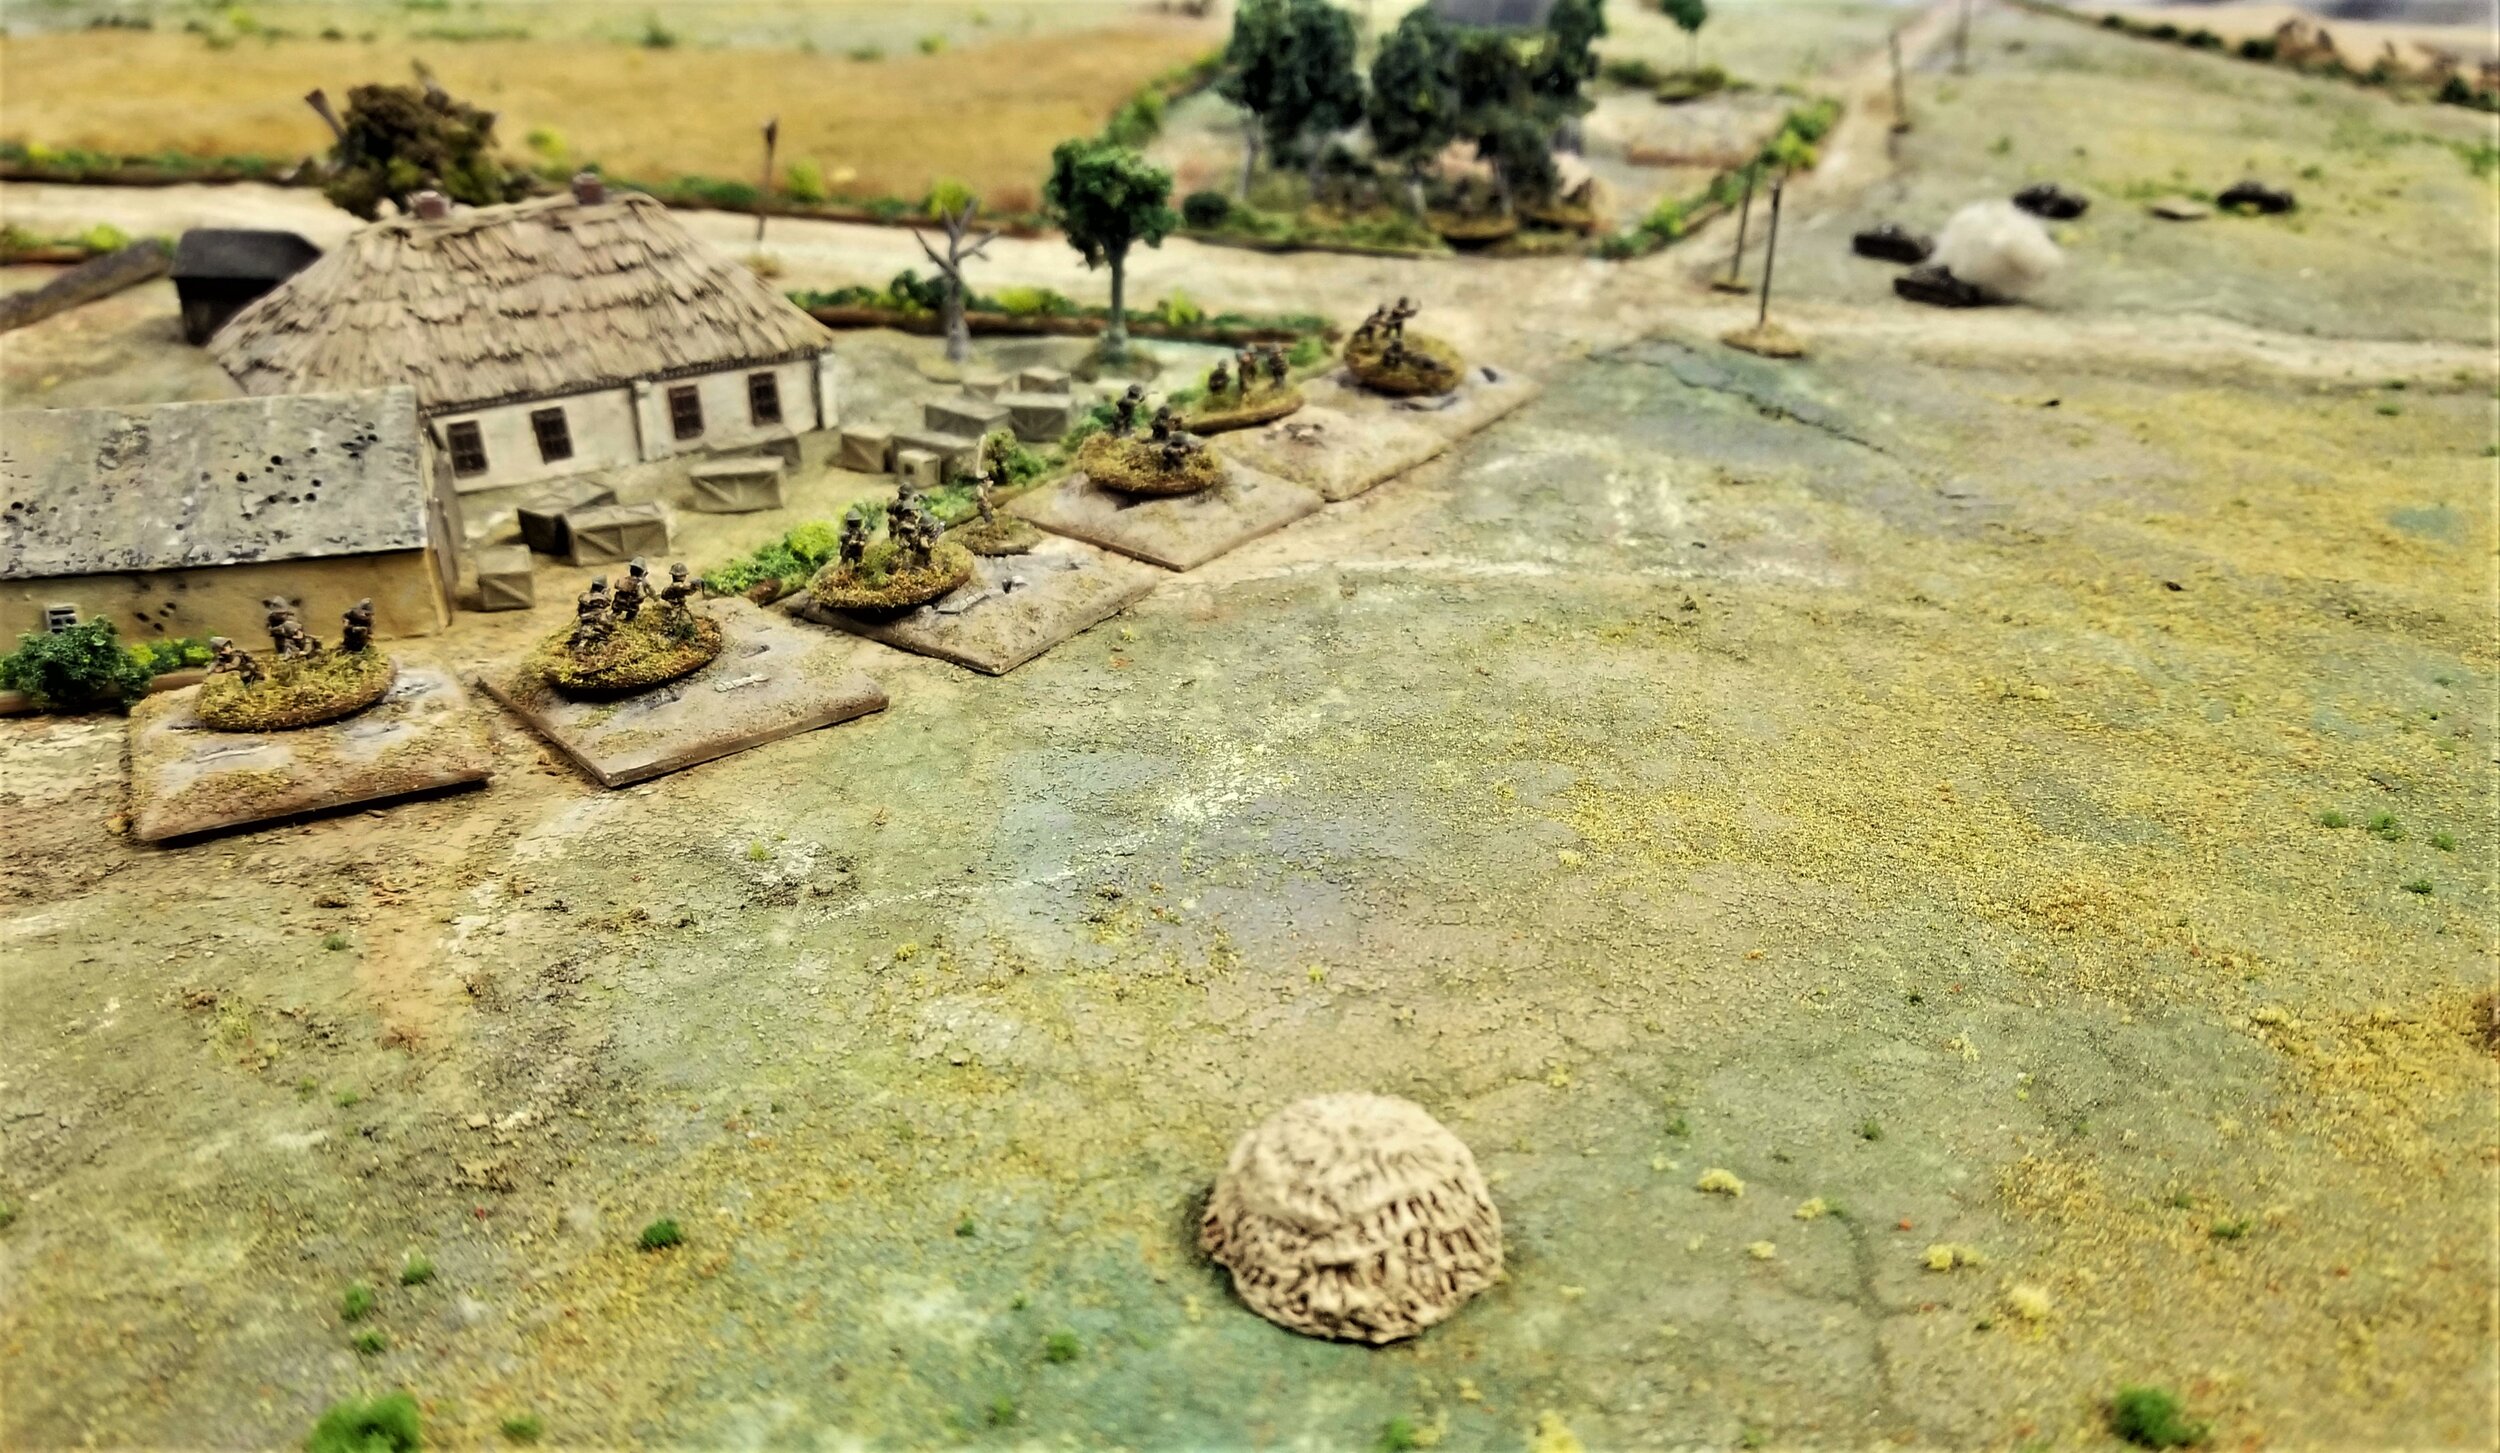
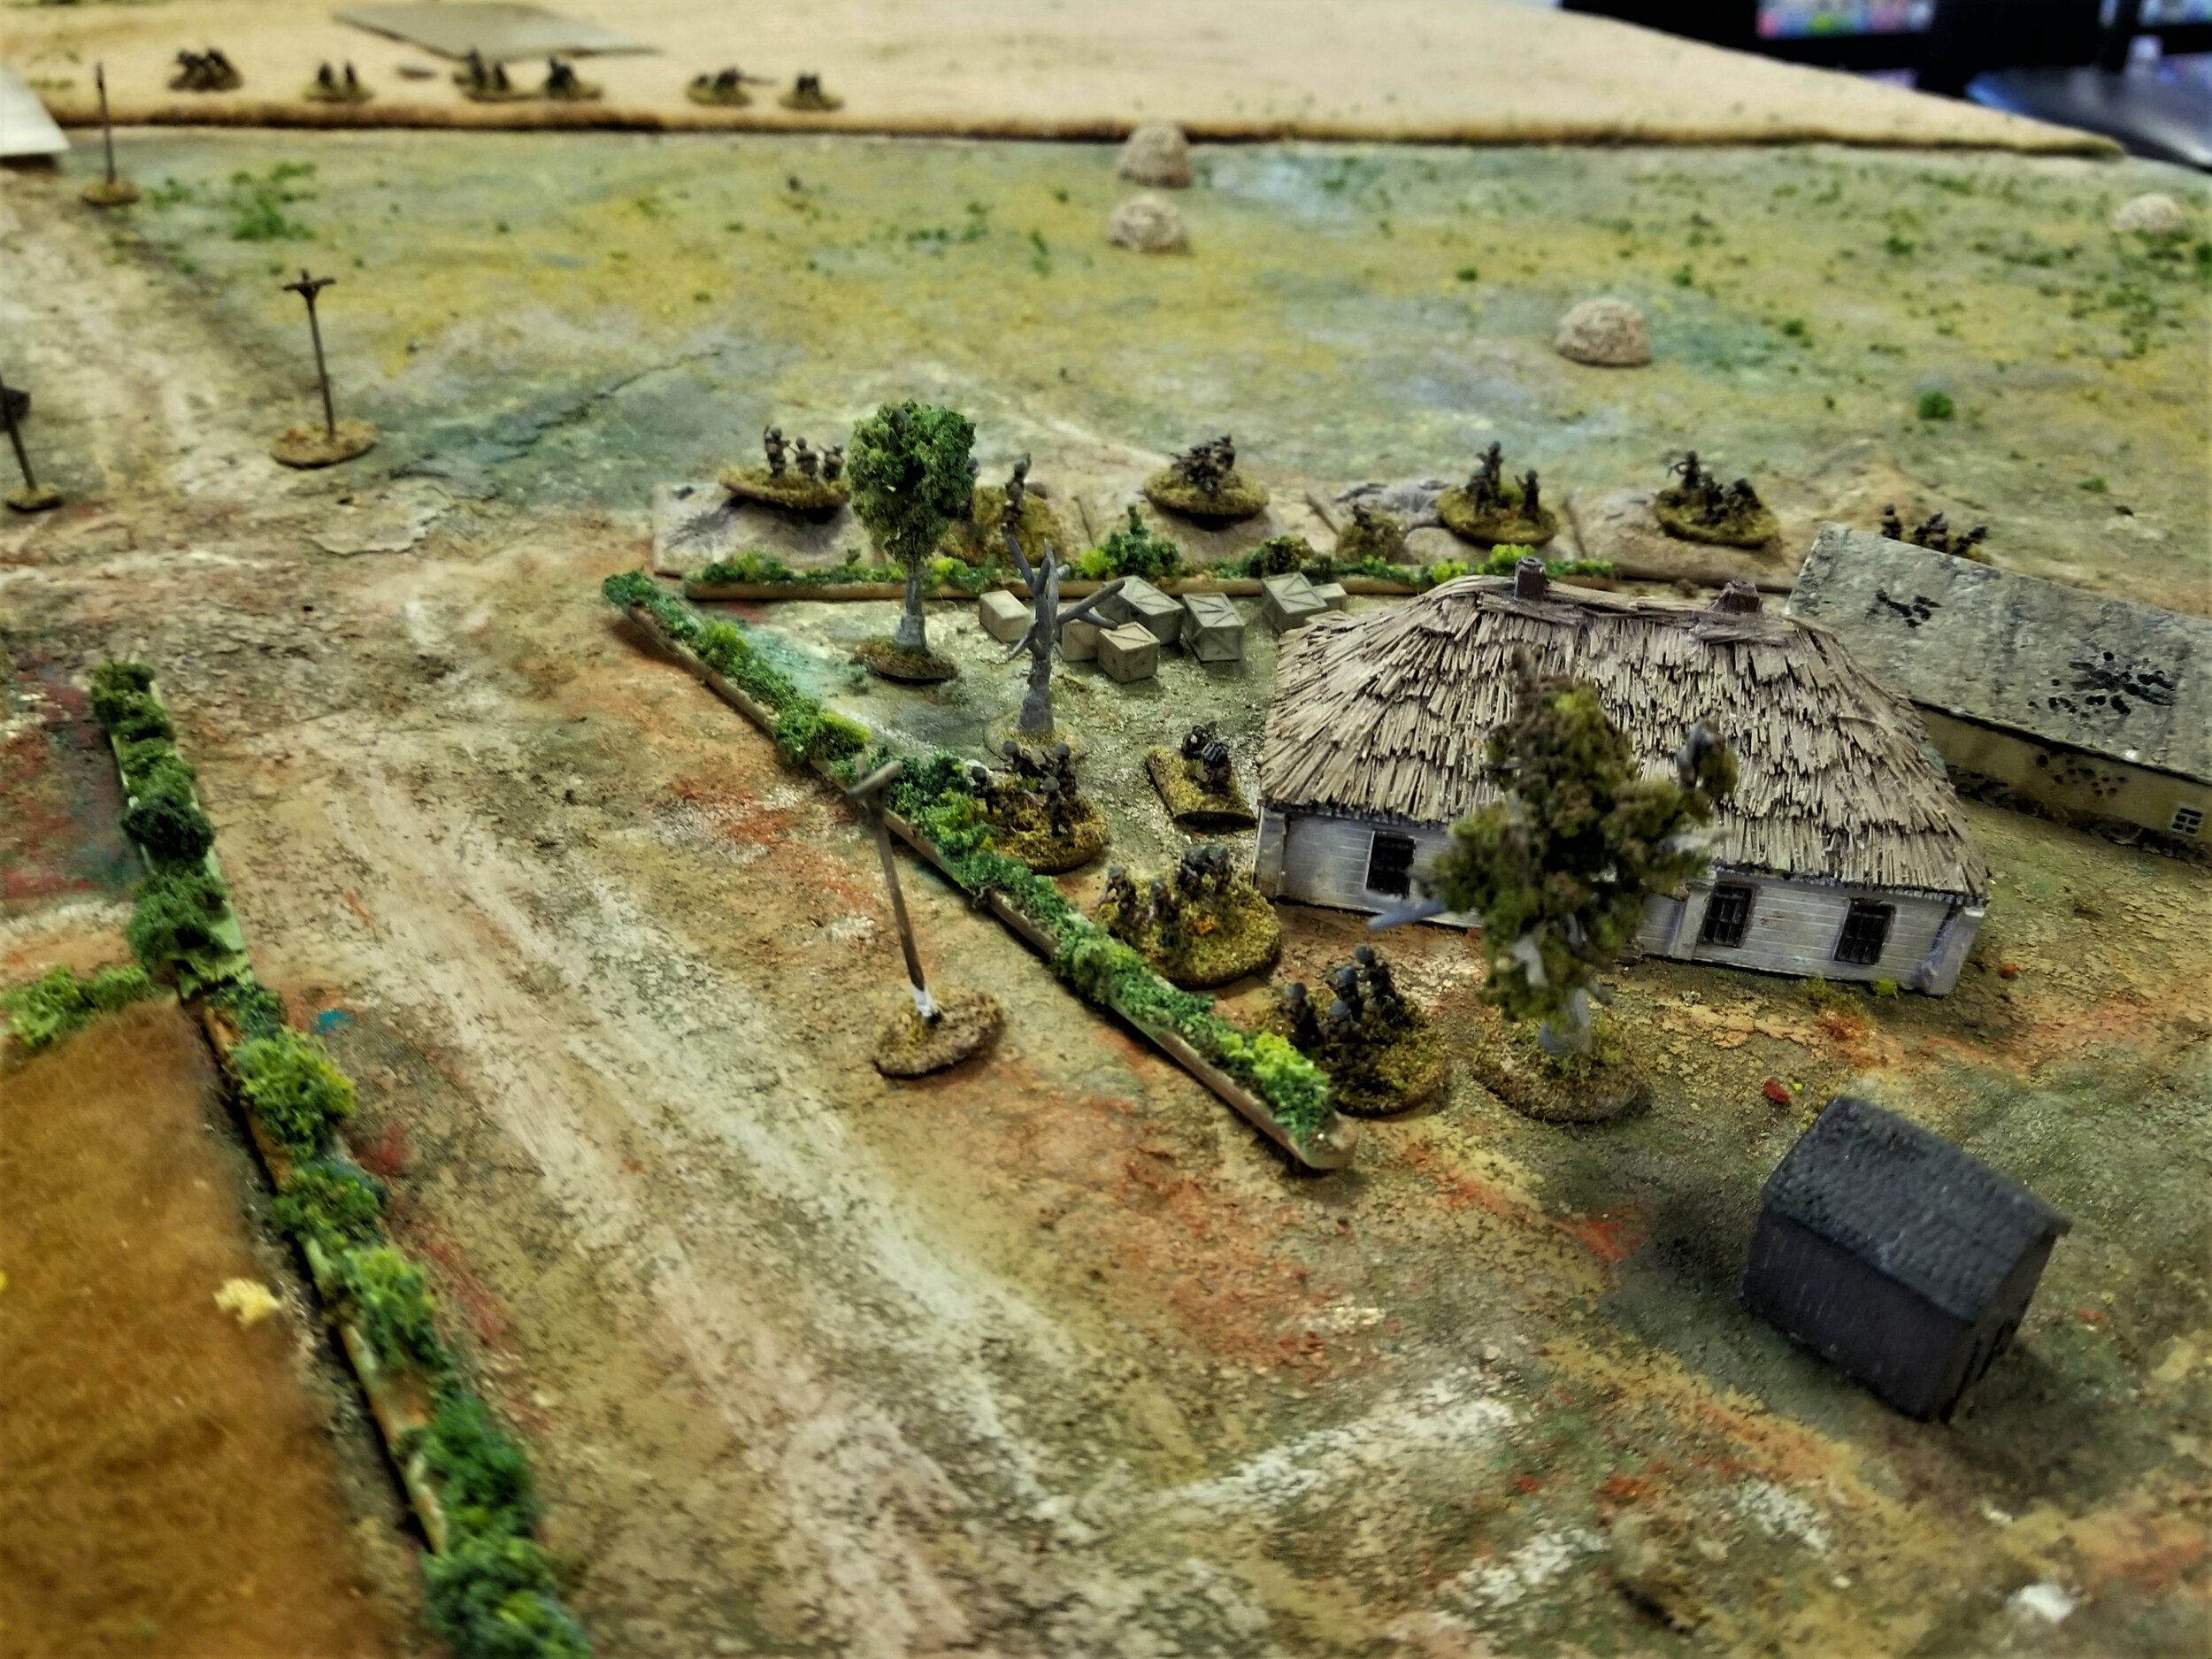
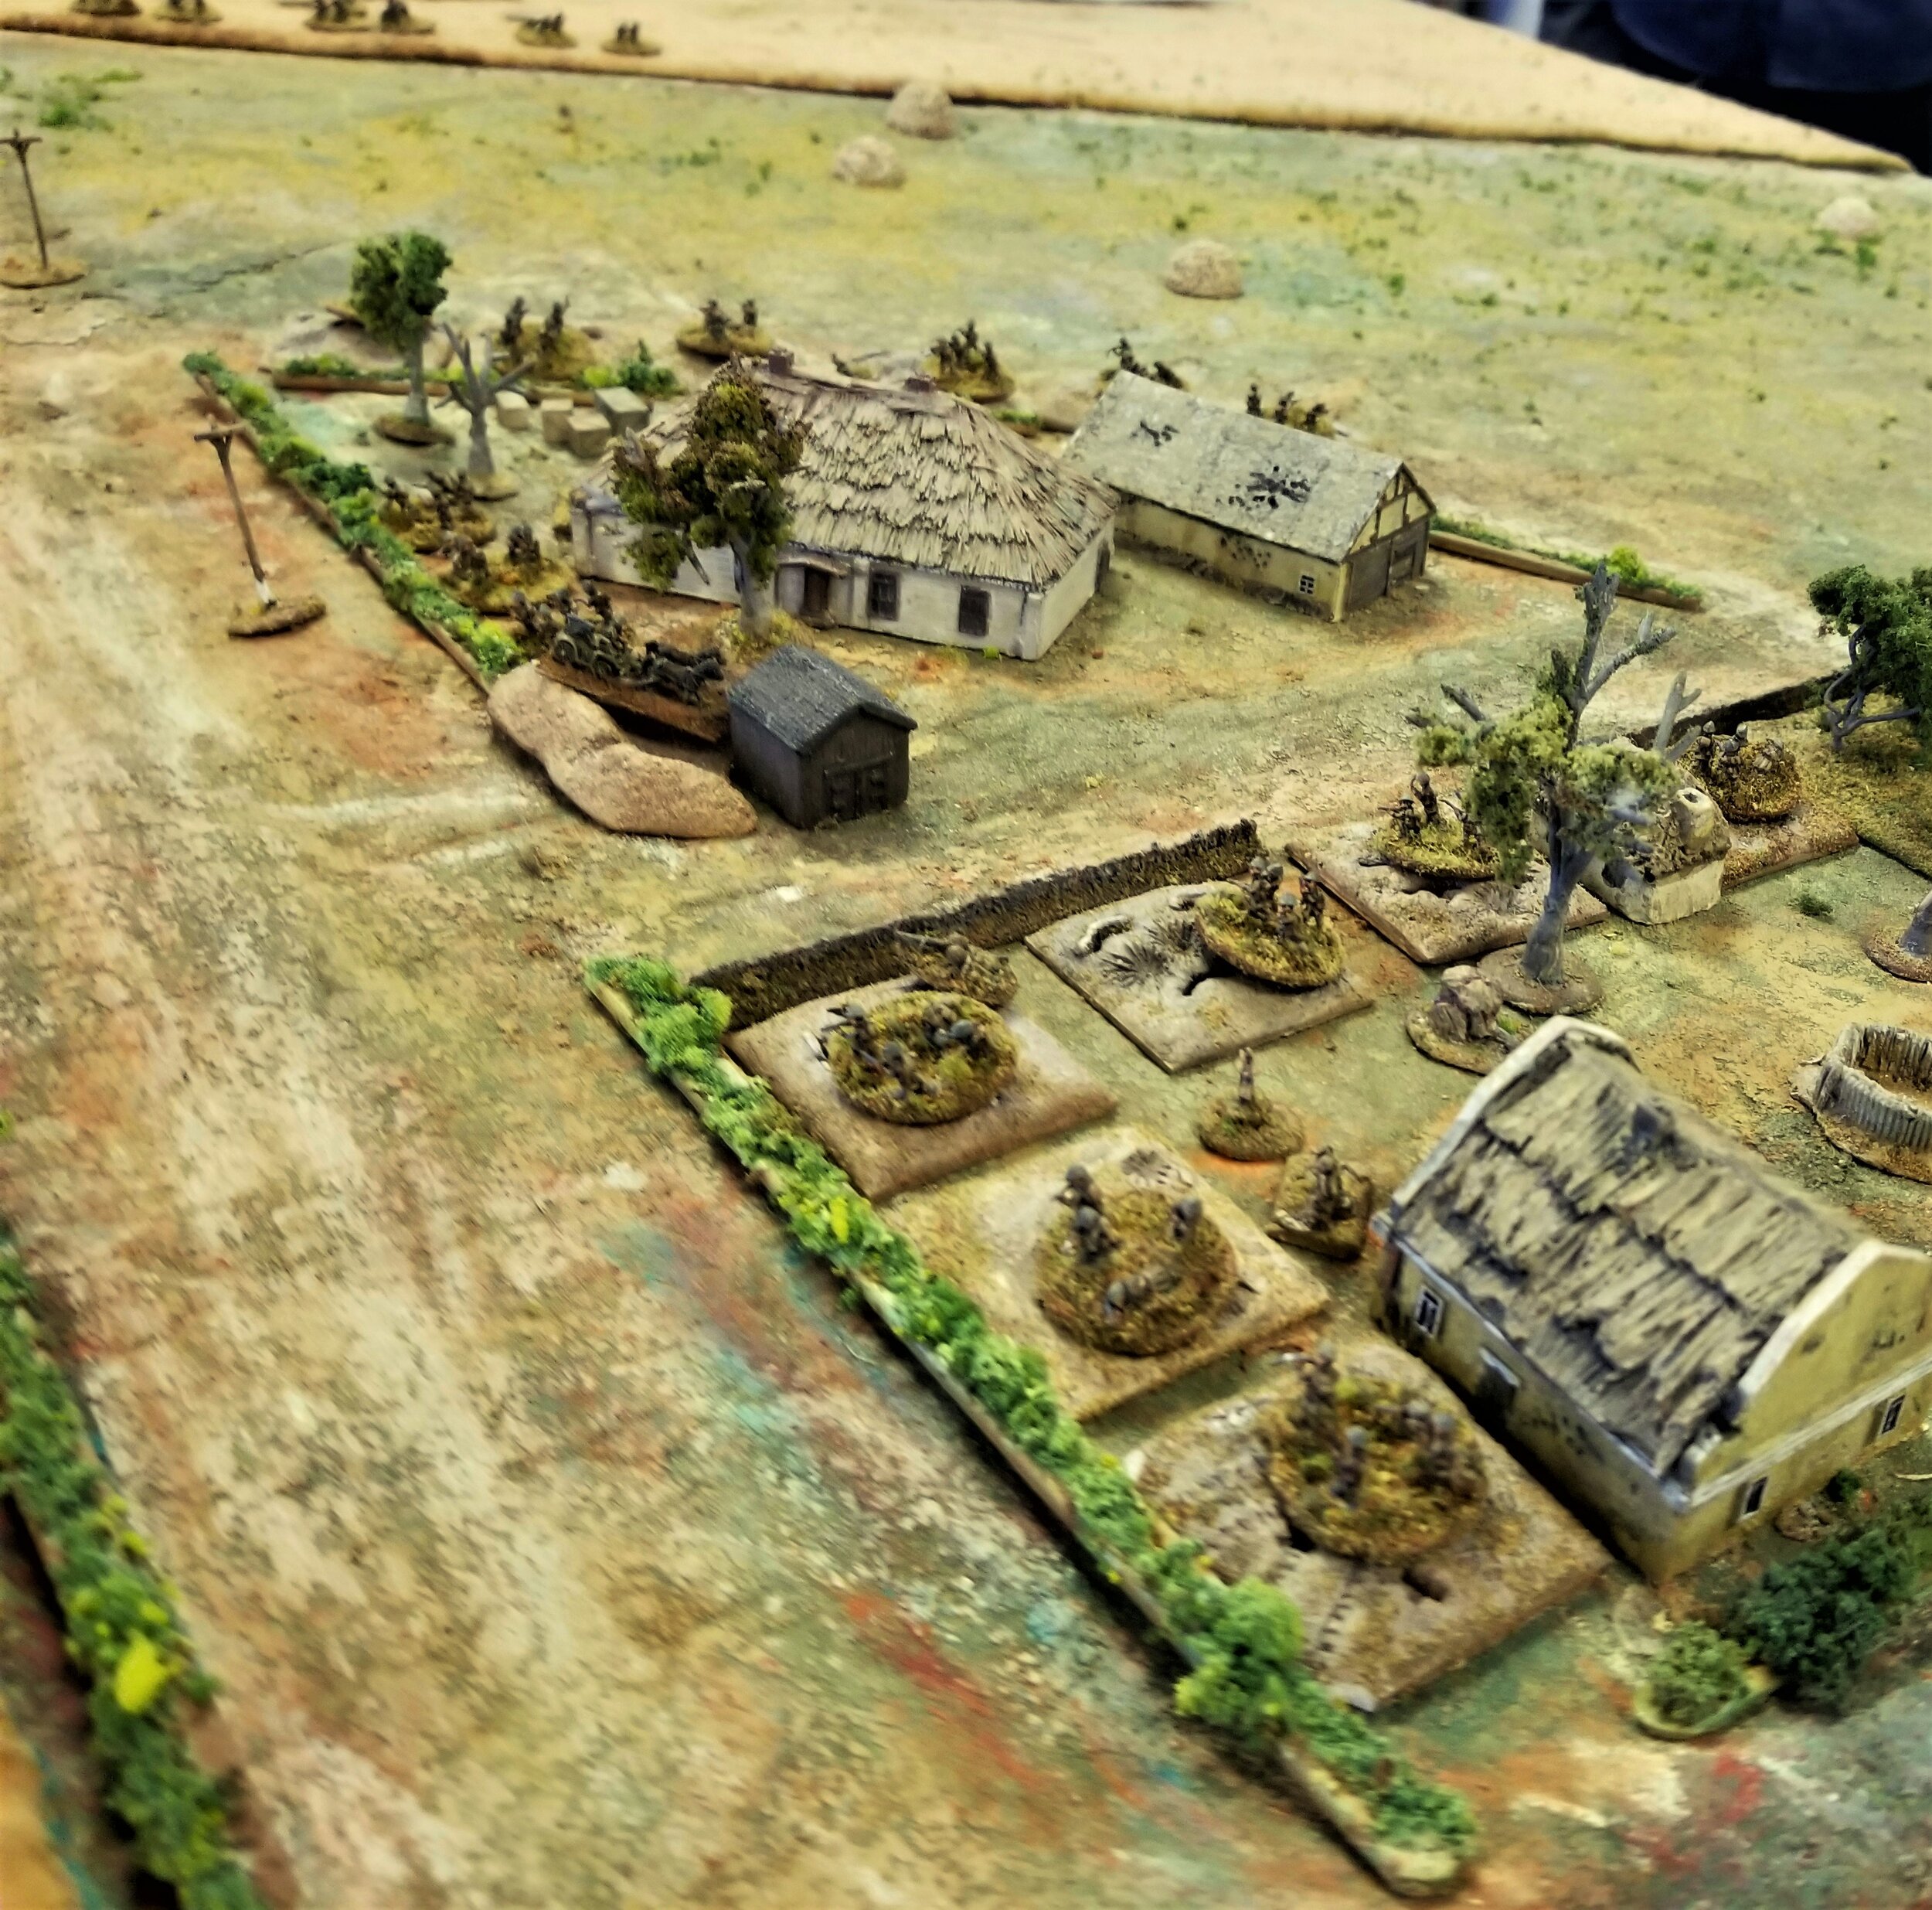
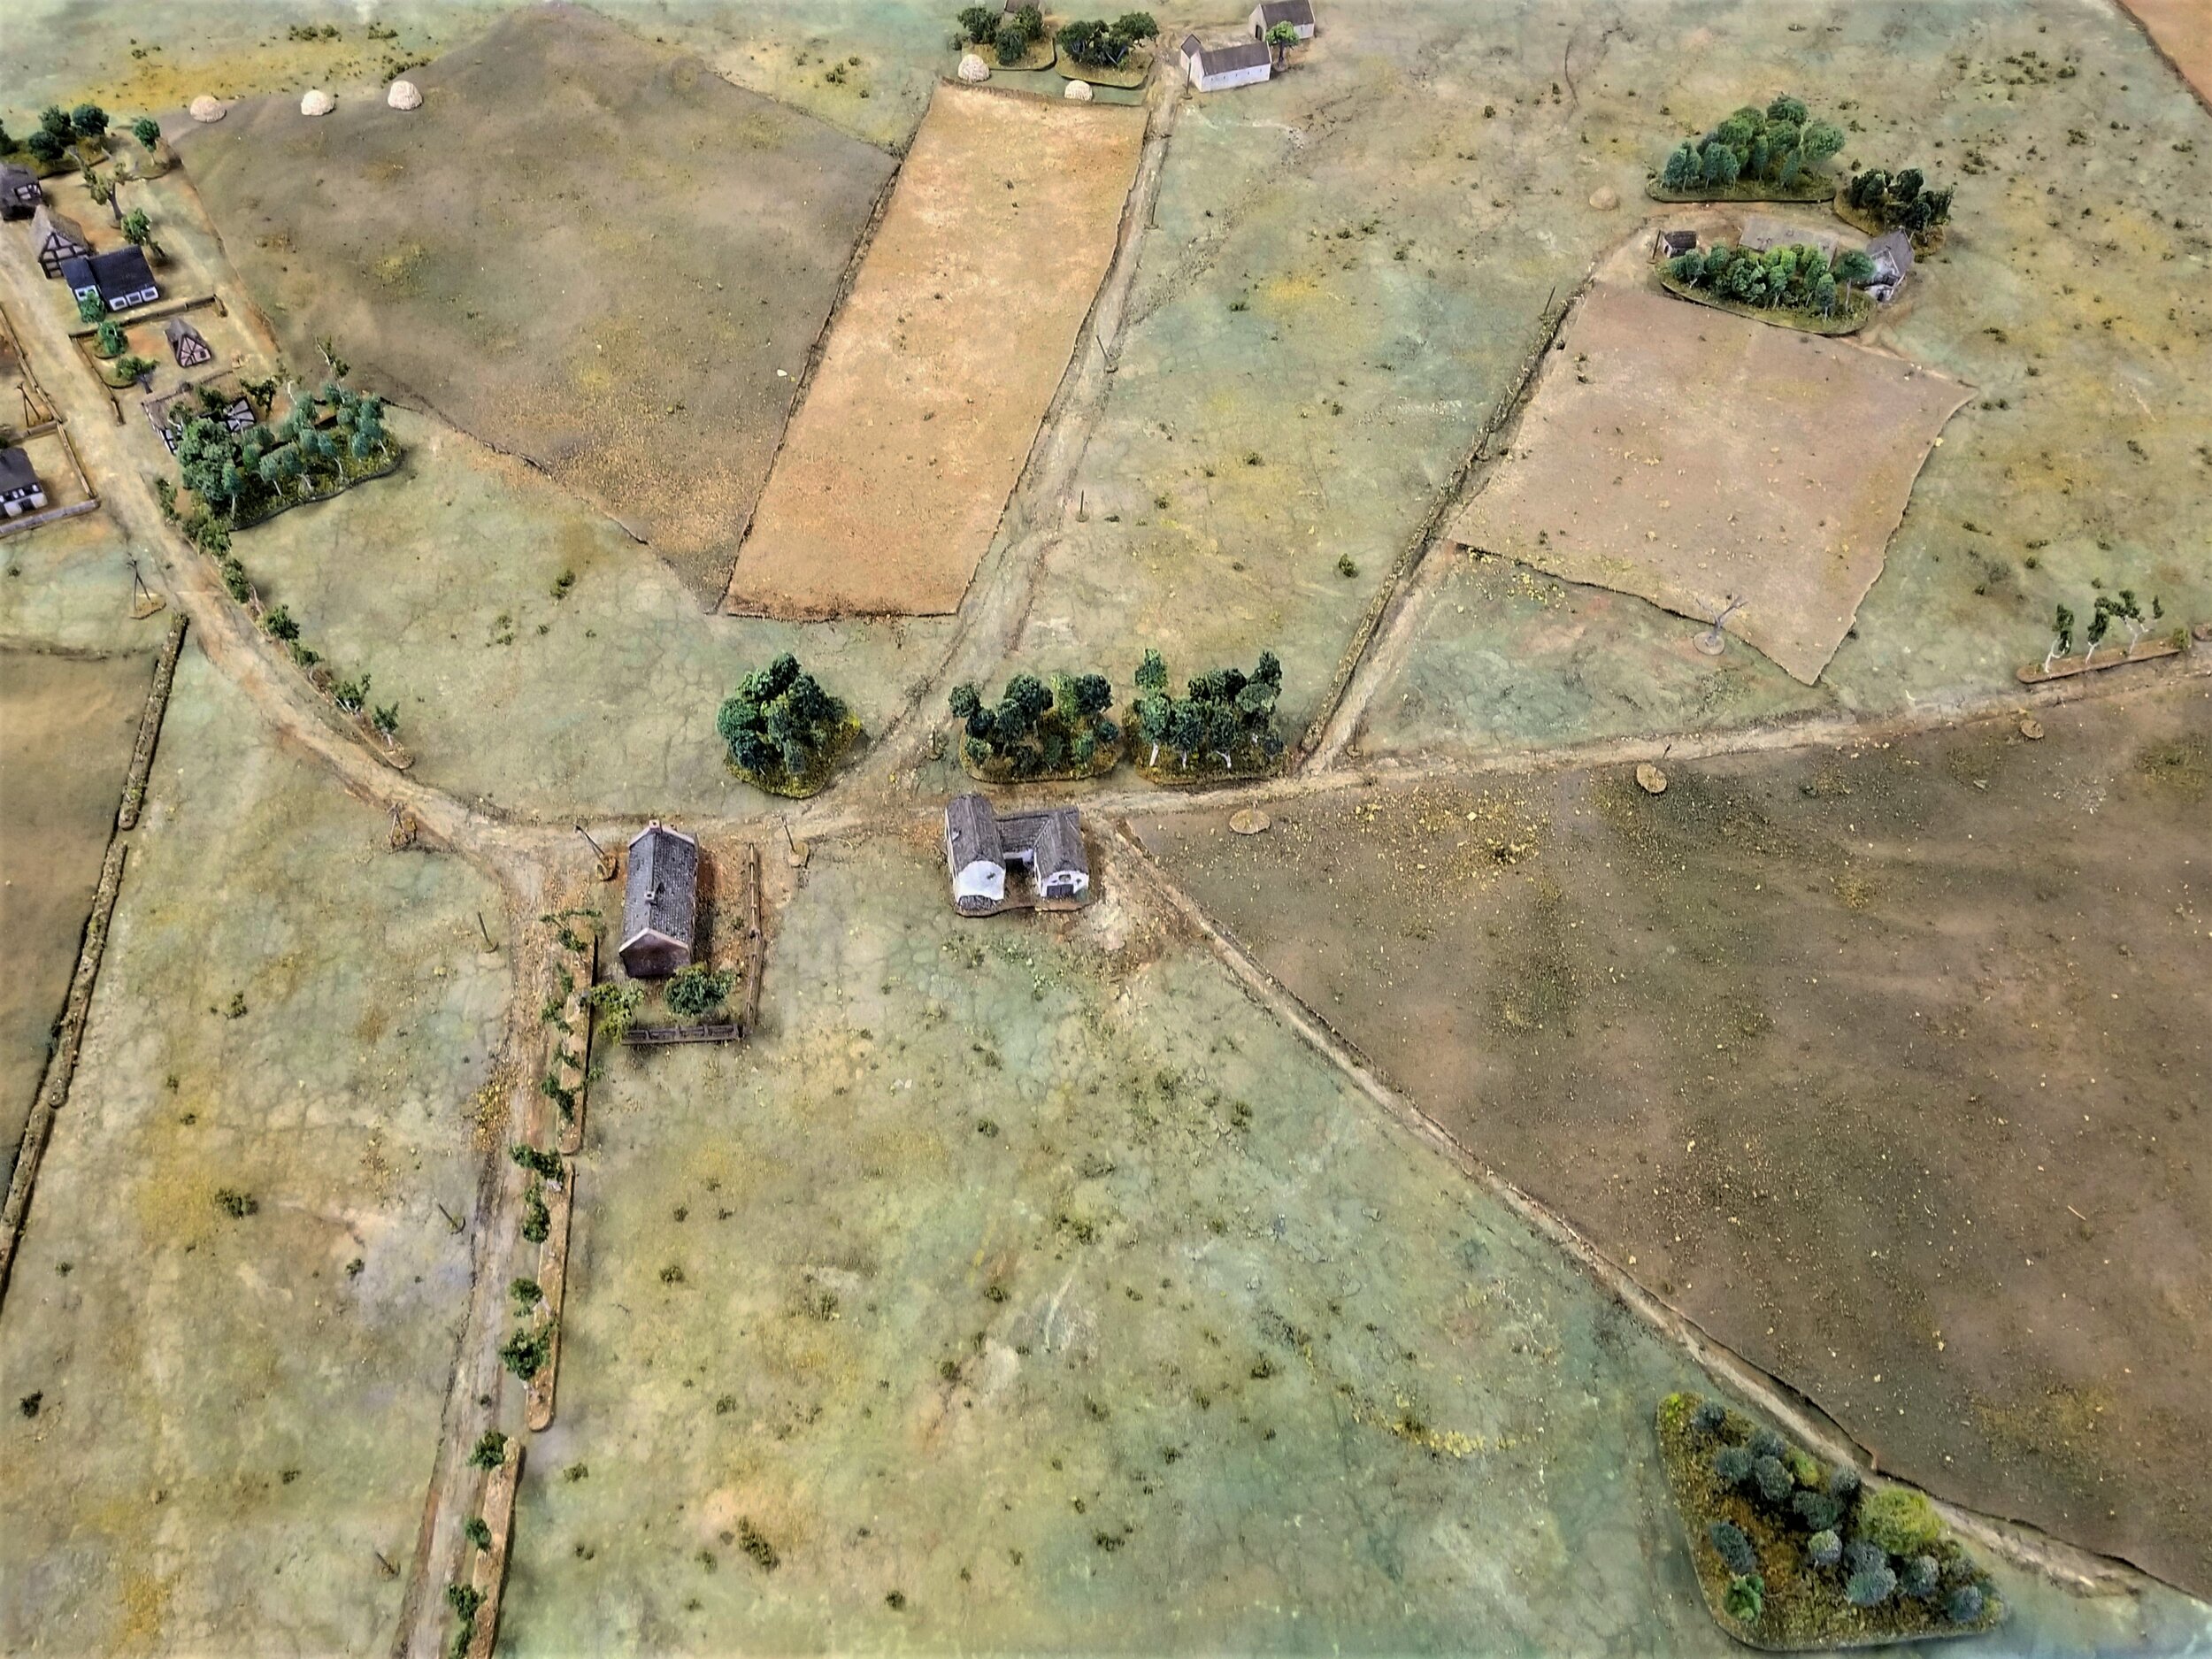
I played the Germans. Not sure where the French would attack from, I needed to keep my options open. I placed the Company HQ at the back of the village behind the house at the T-junction. This would be my reserve: to be deployed as and when the main axis of the French attack became clear.

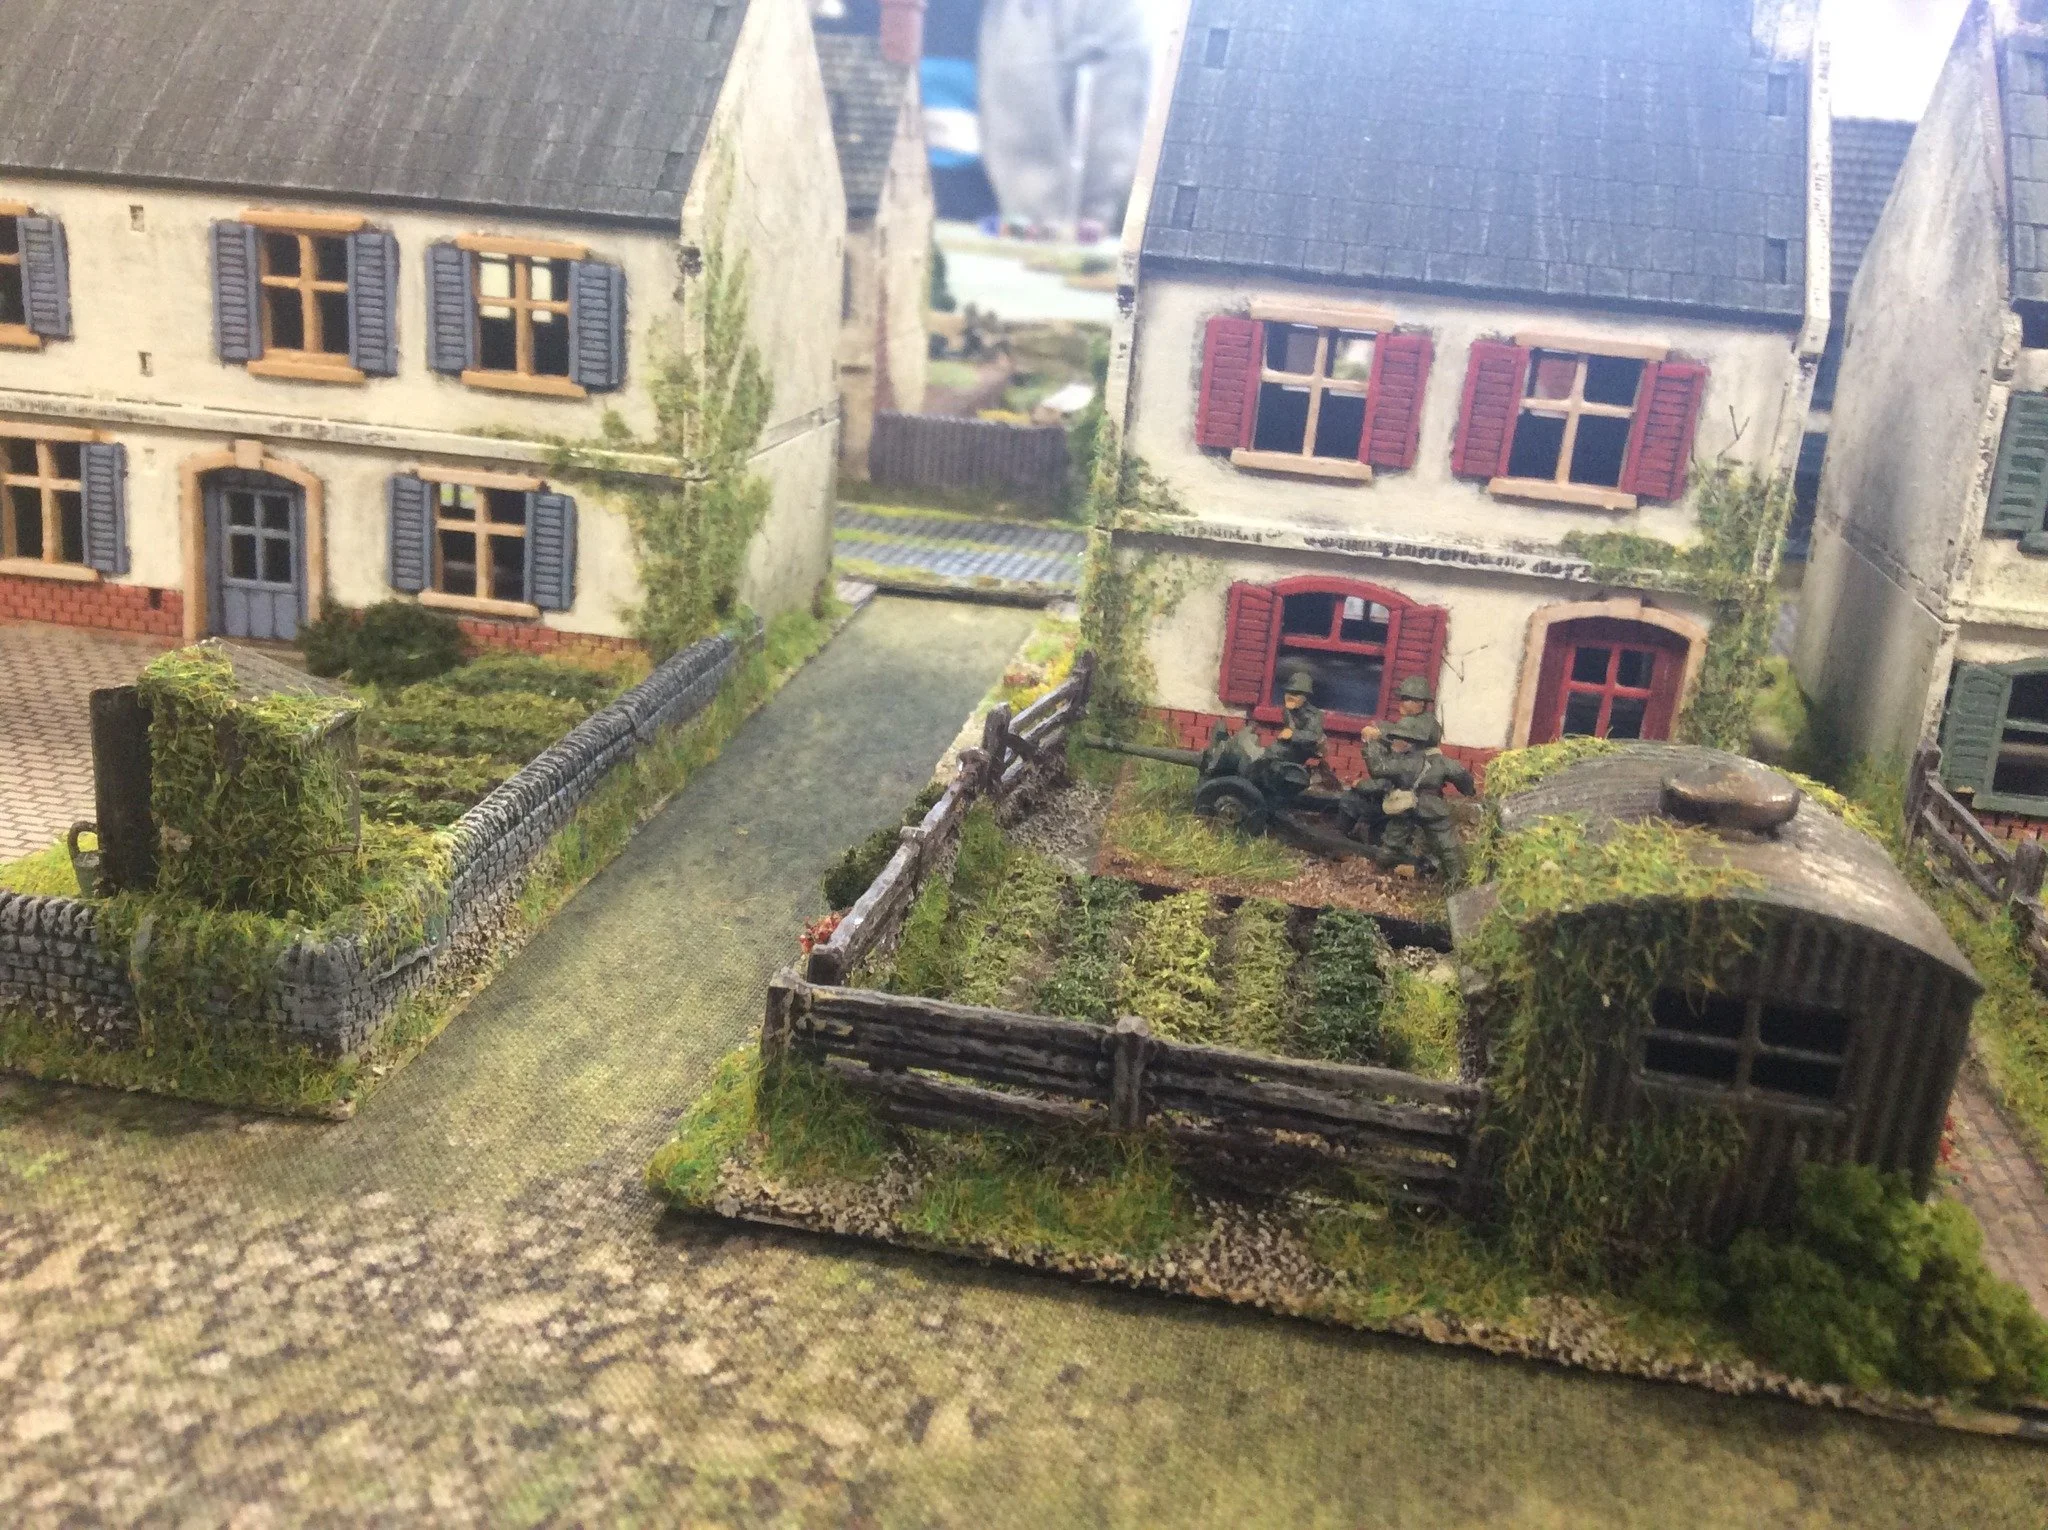
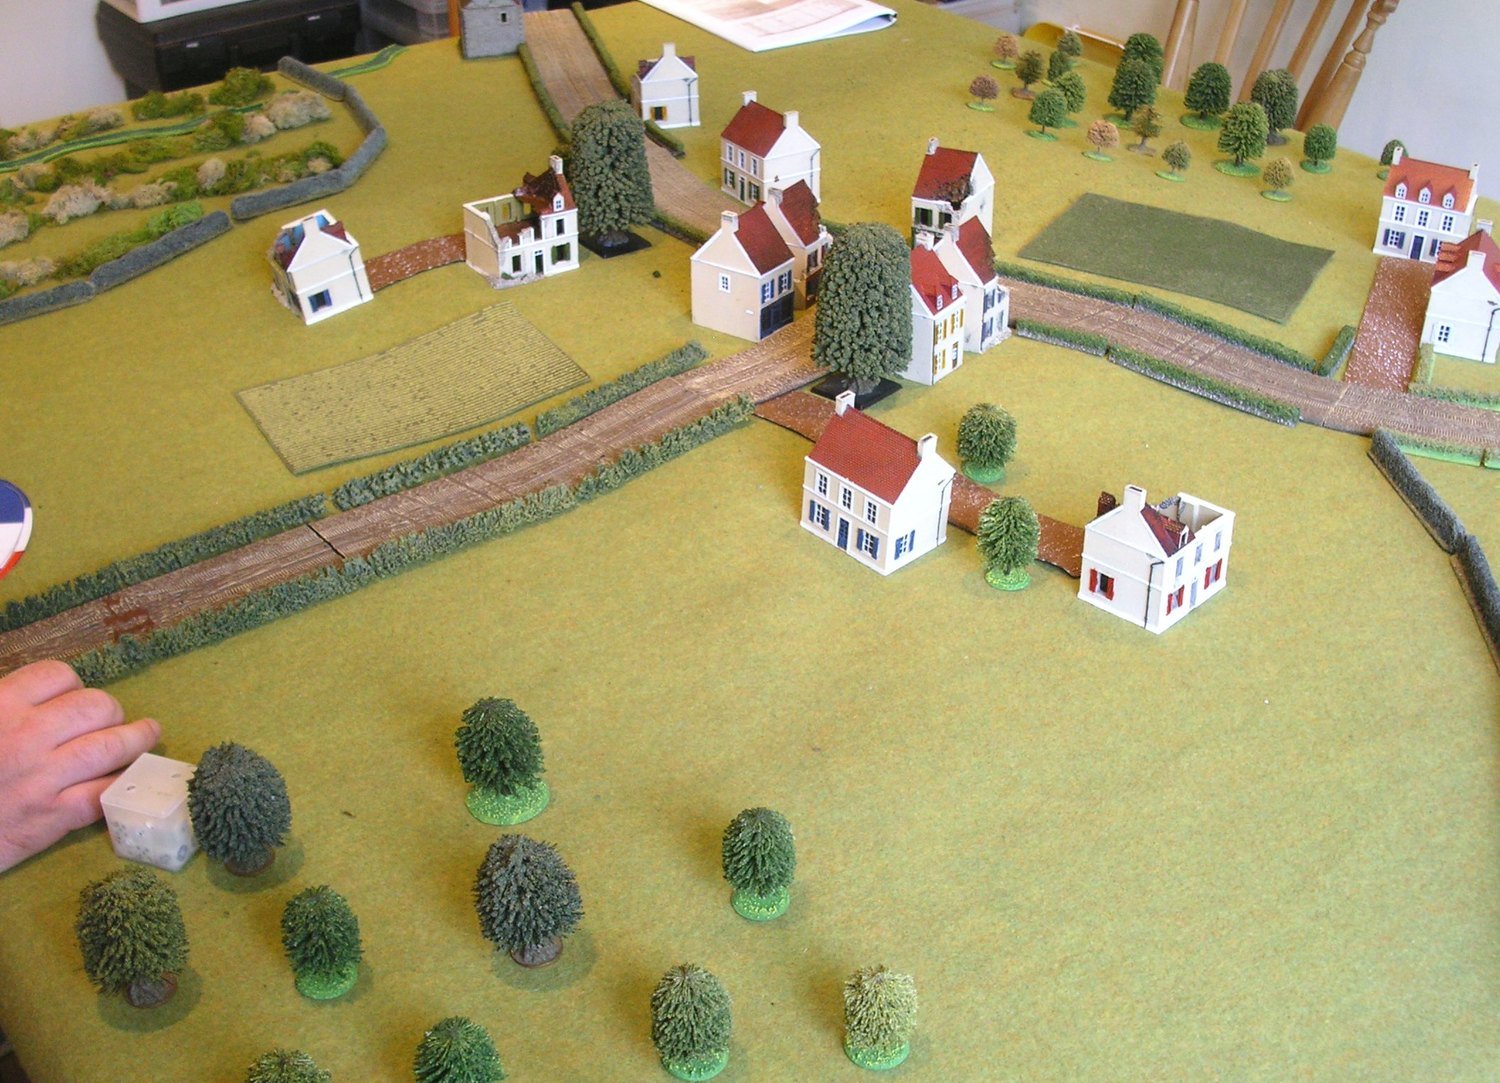
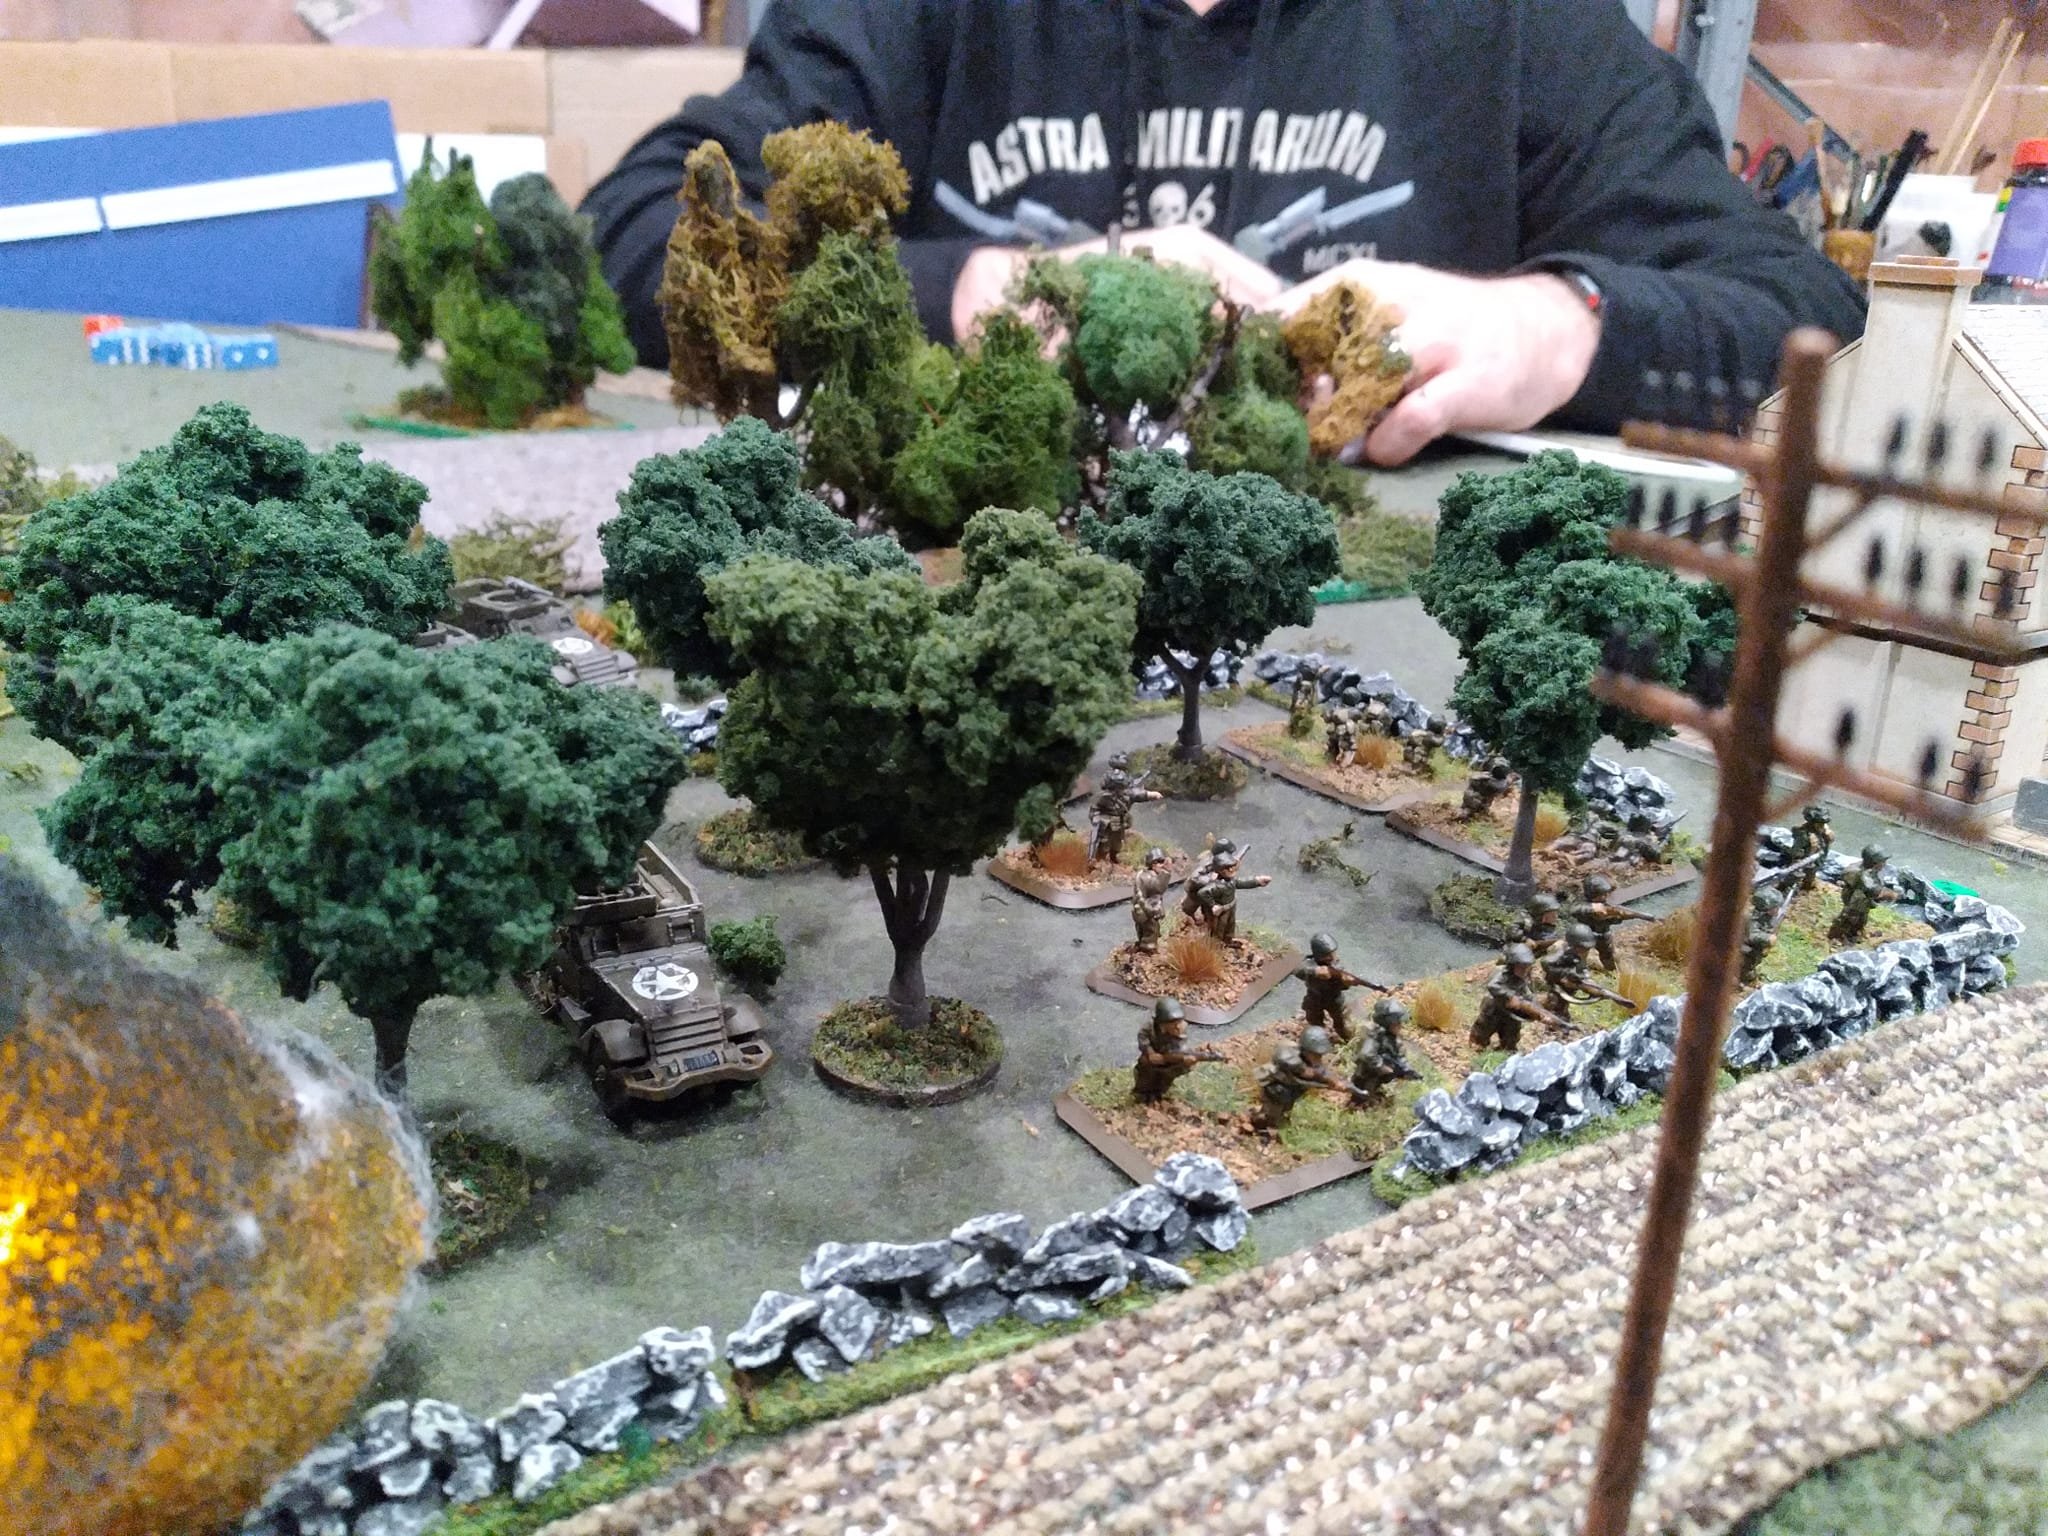
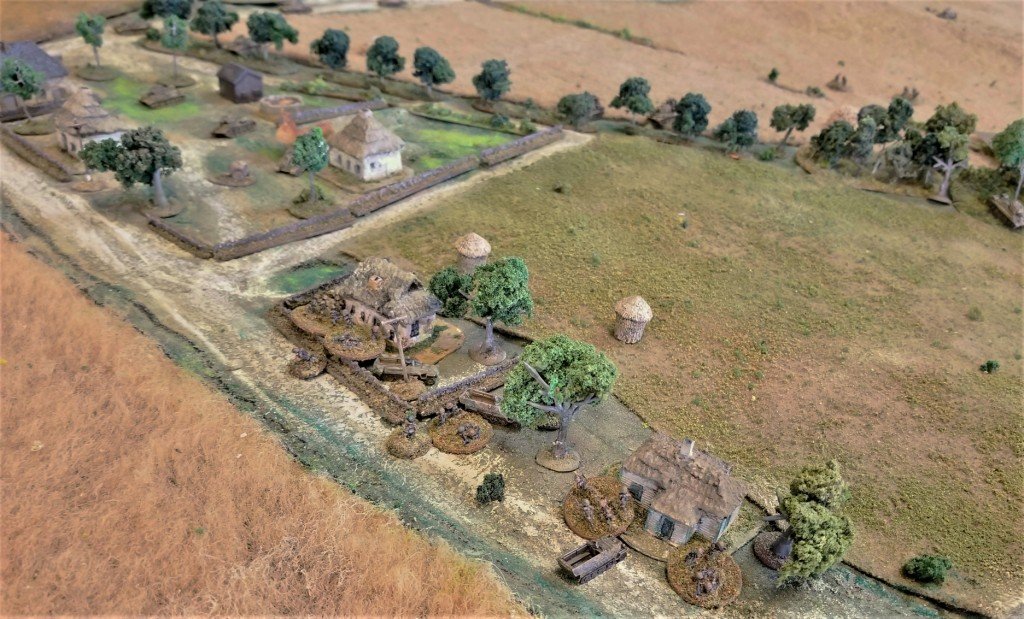
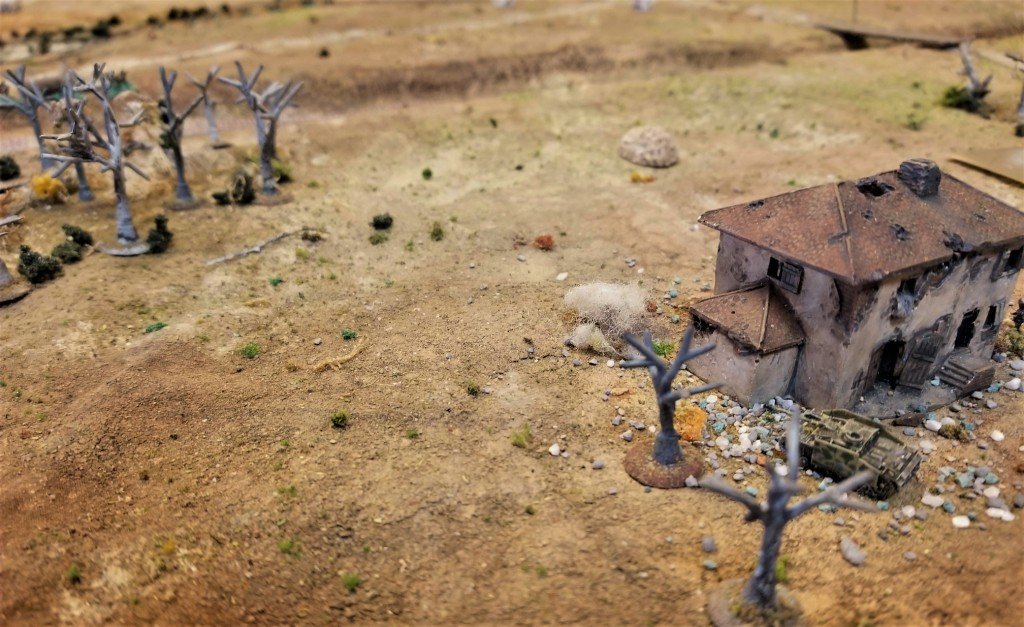
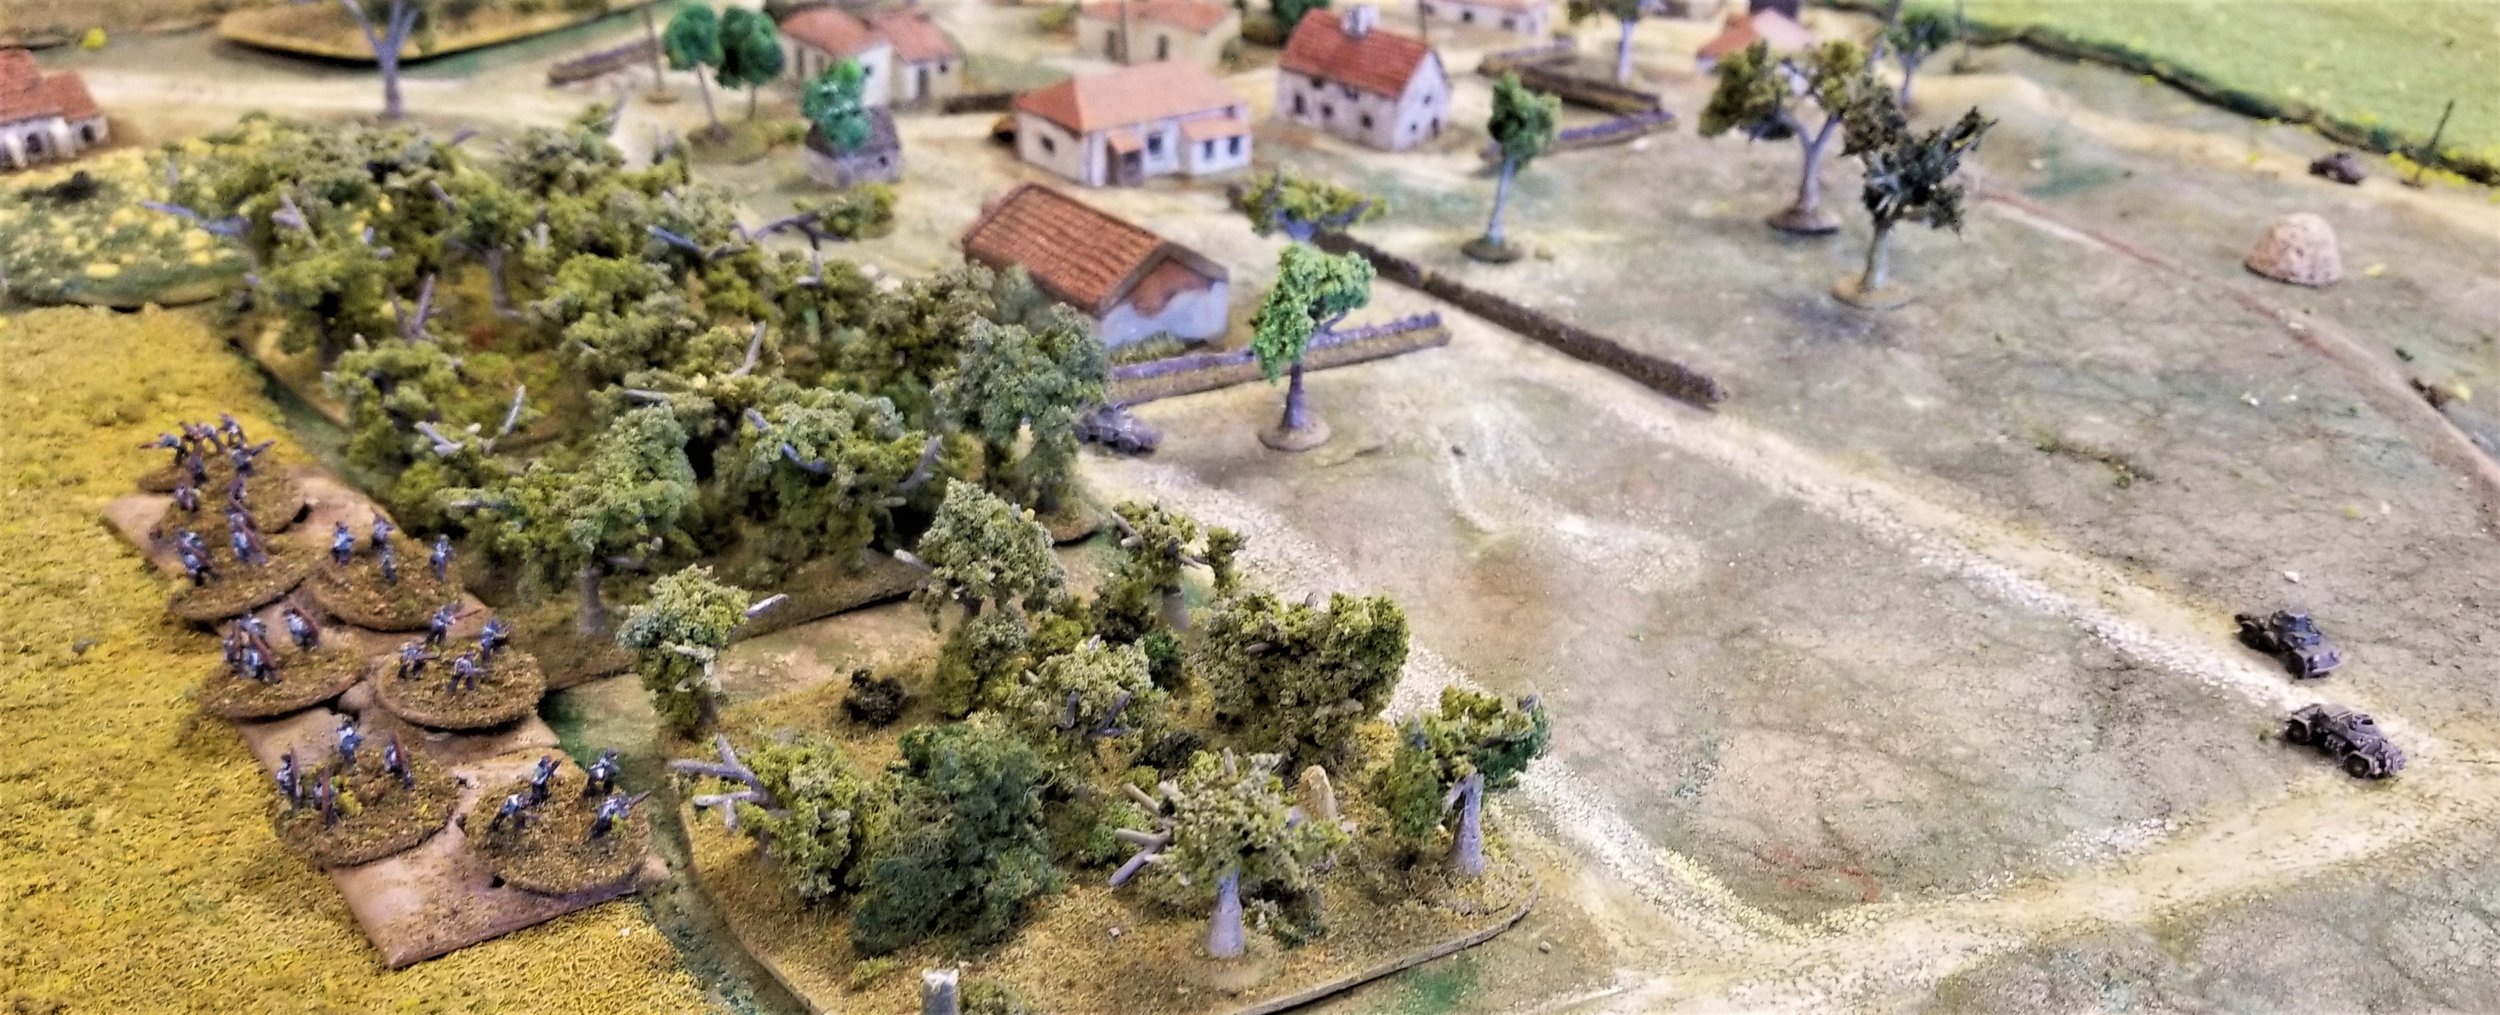
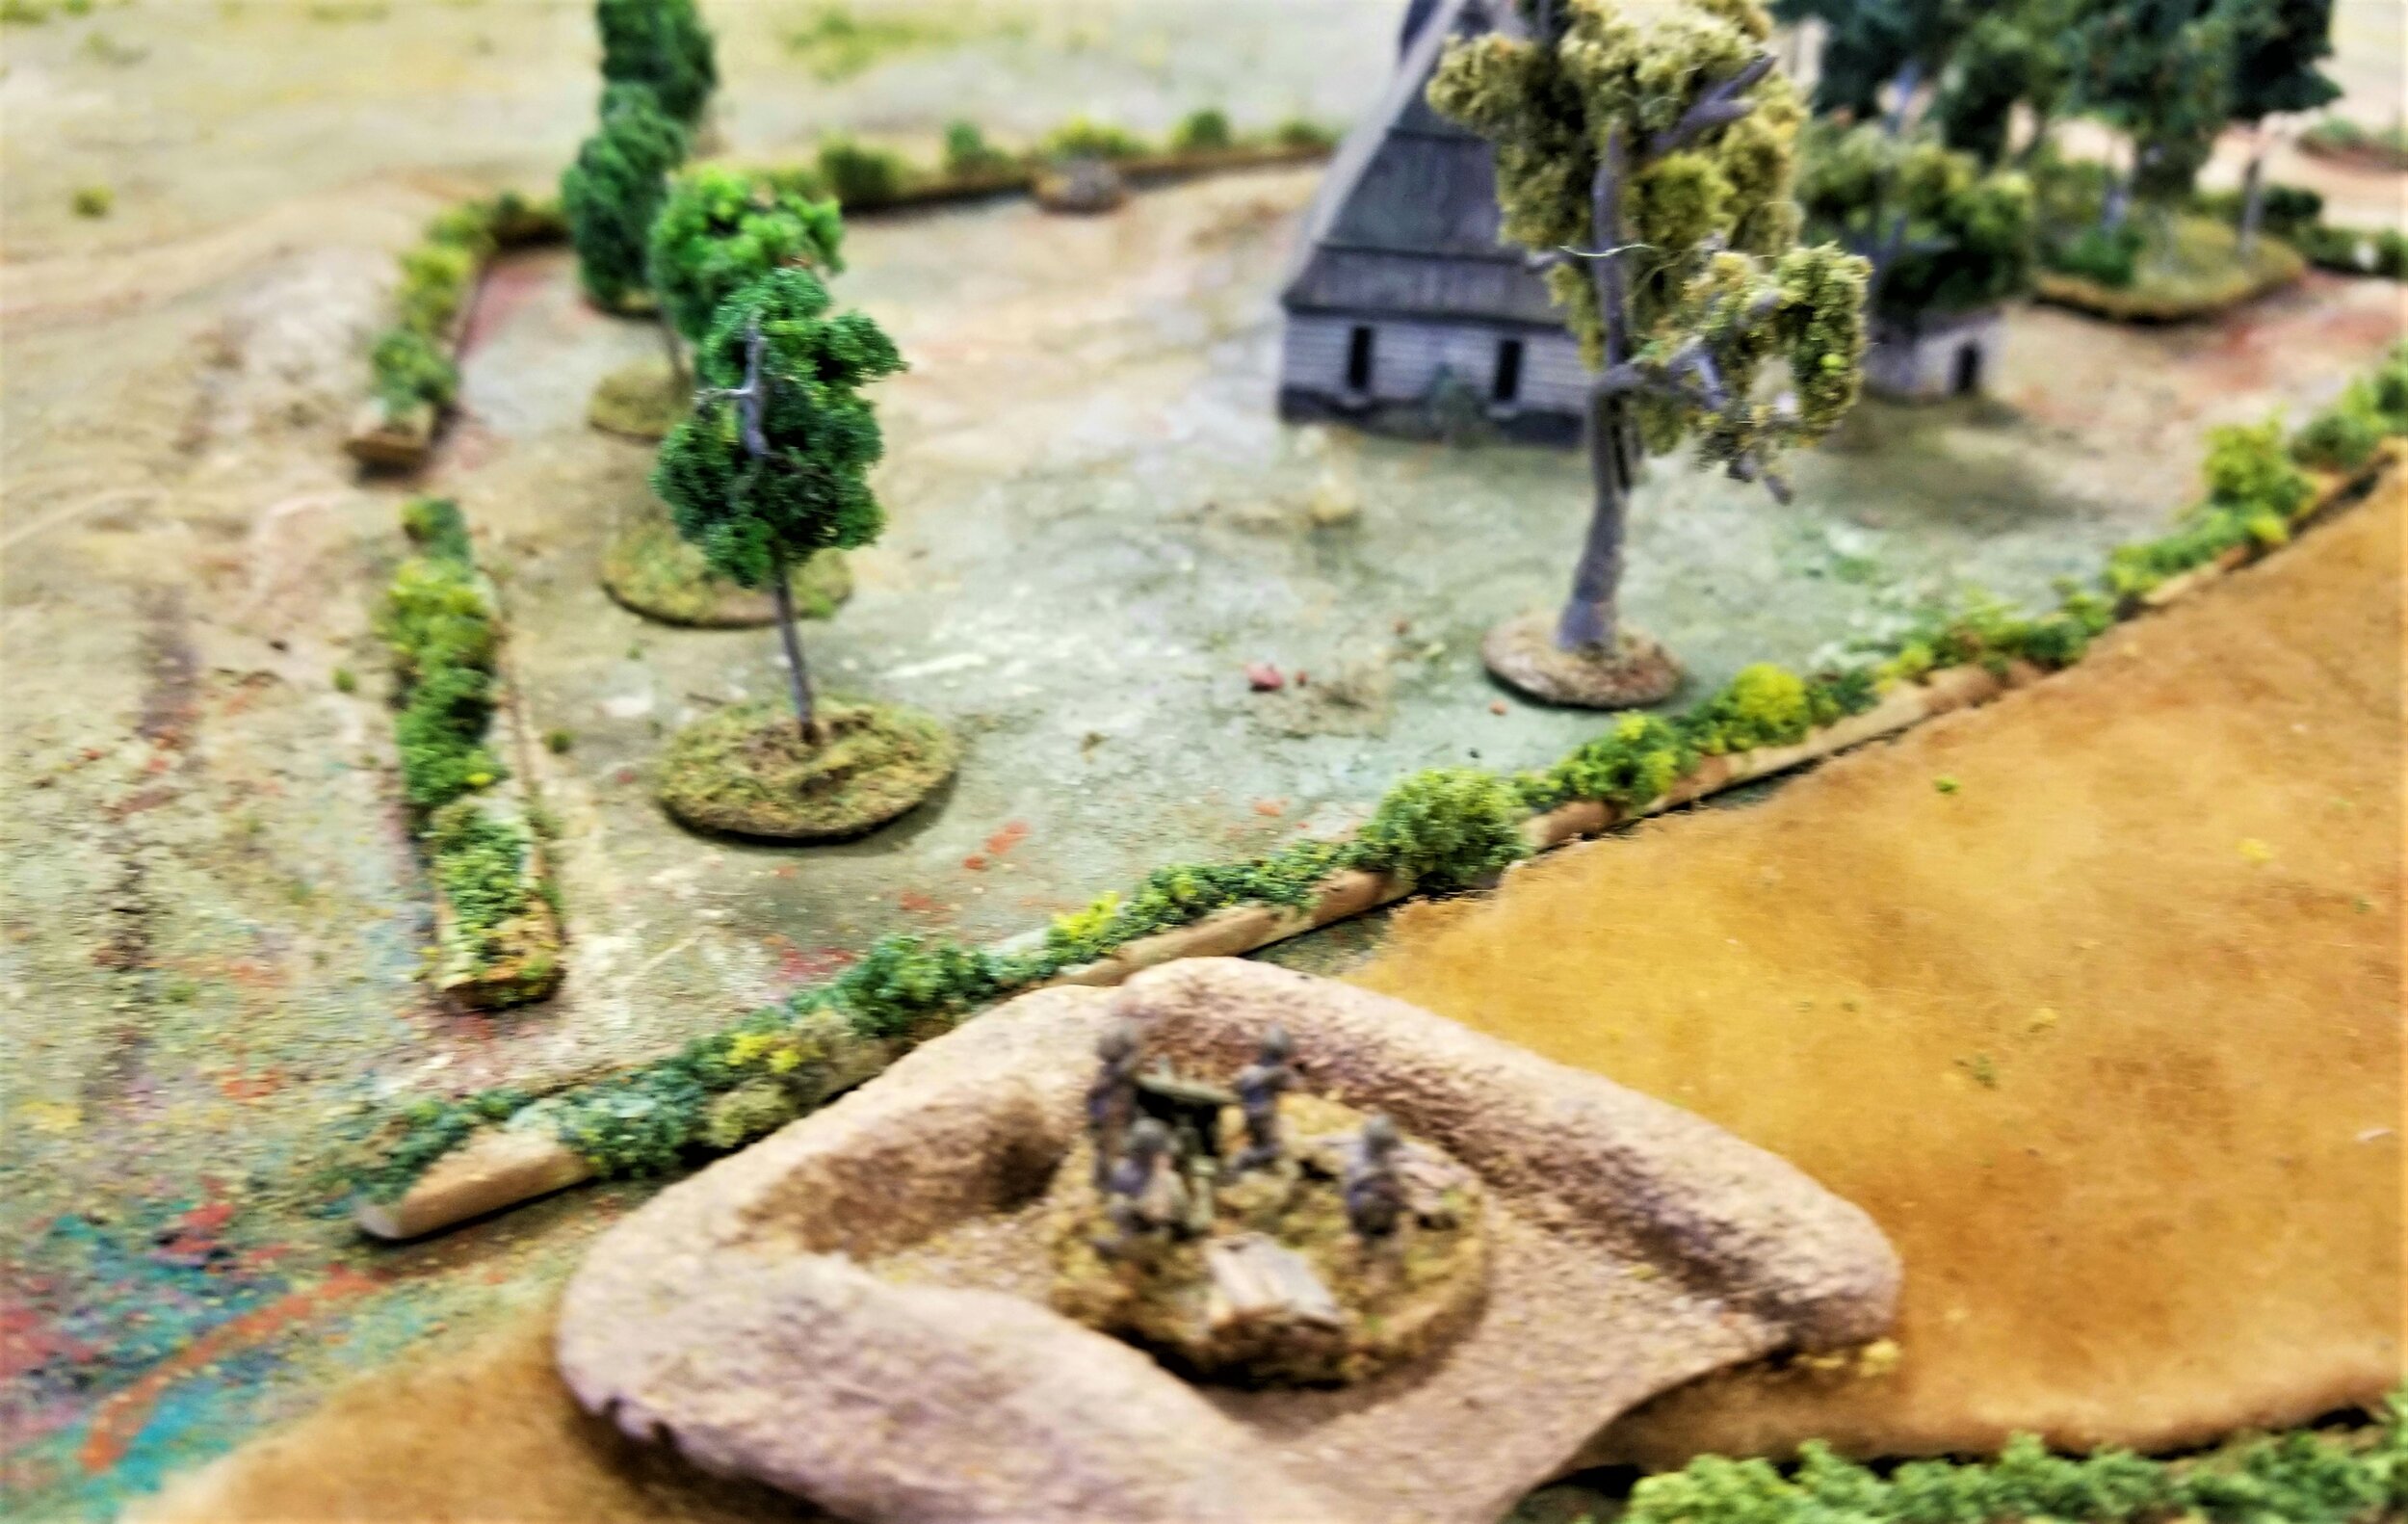
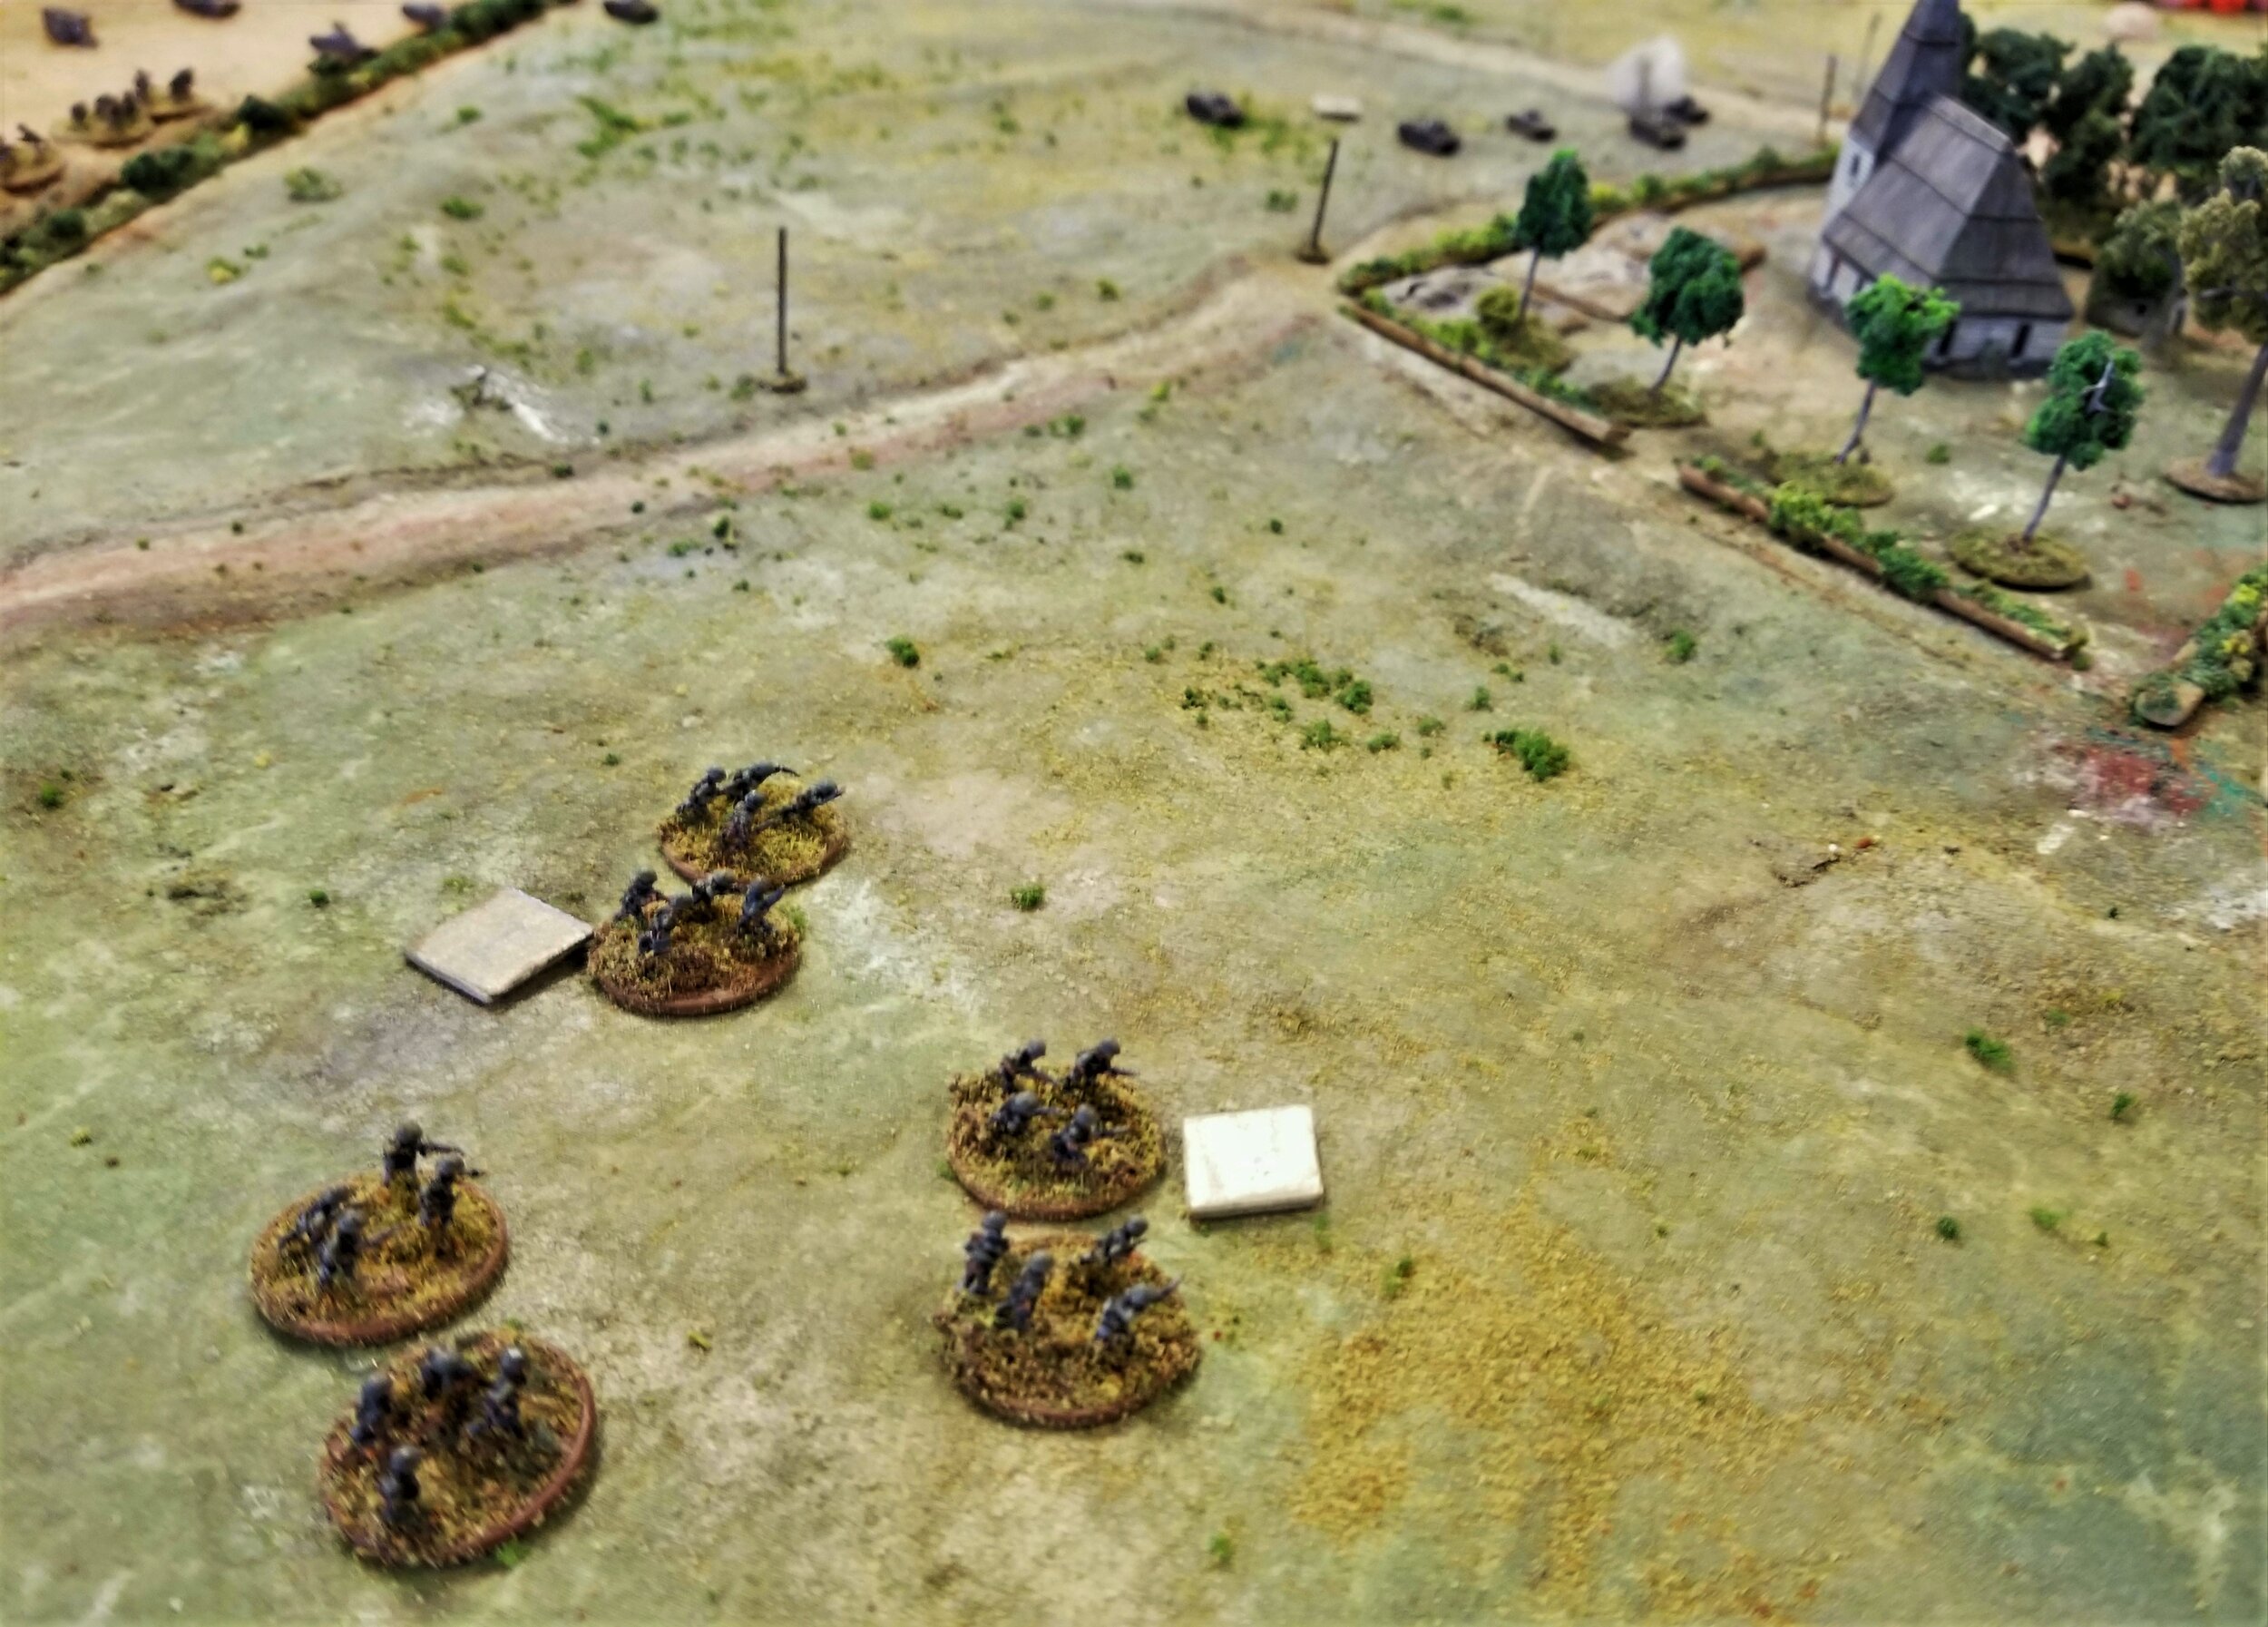
On the left and forward, I occupied the houses with a platoon of infantry (2nd Platoon), backing them up with an anti-tank gun nestled in one house's garden. I was hoping for a quick shot at a tank before retreating into cover. On the centre-right and slightly forward, I placed the other platoon of infantry (1st Platoon). This left me a bit light on the right flank, so that's where my other AT gun went...although it was hung back behind a hedge.

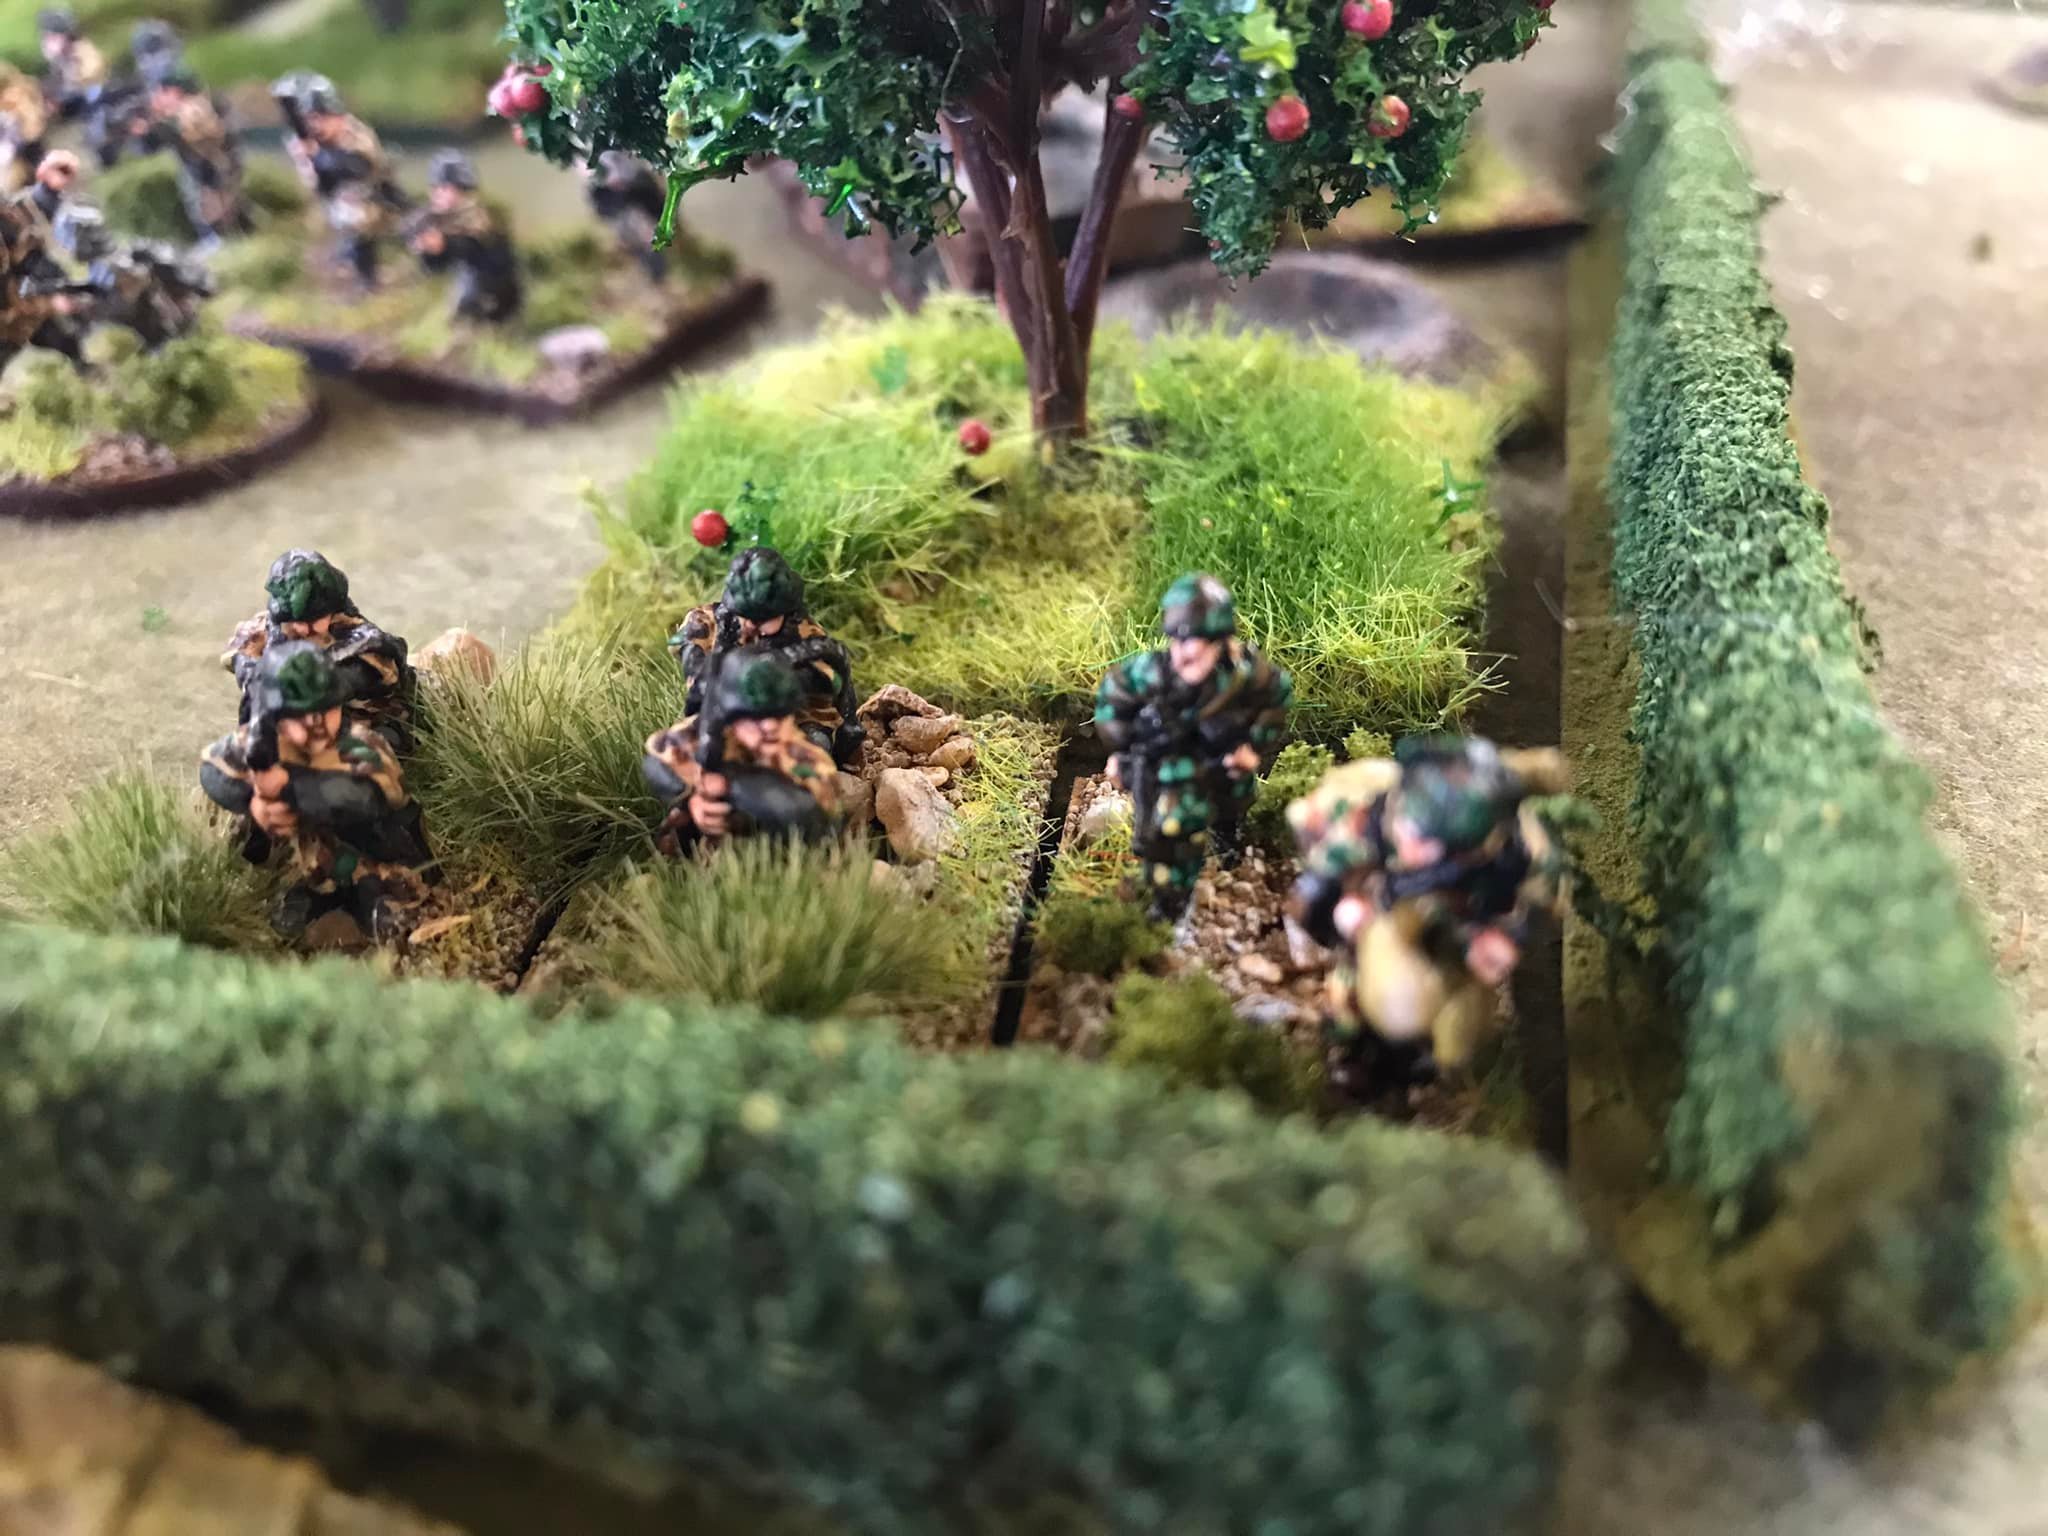
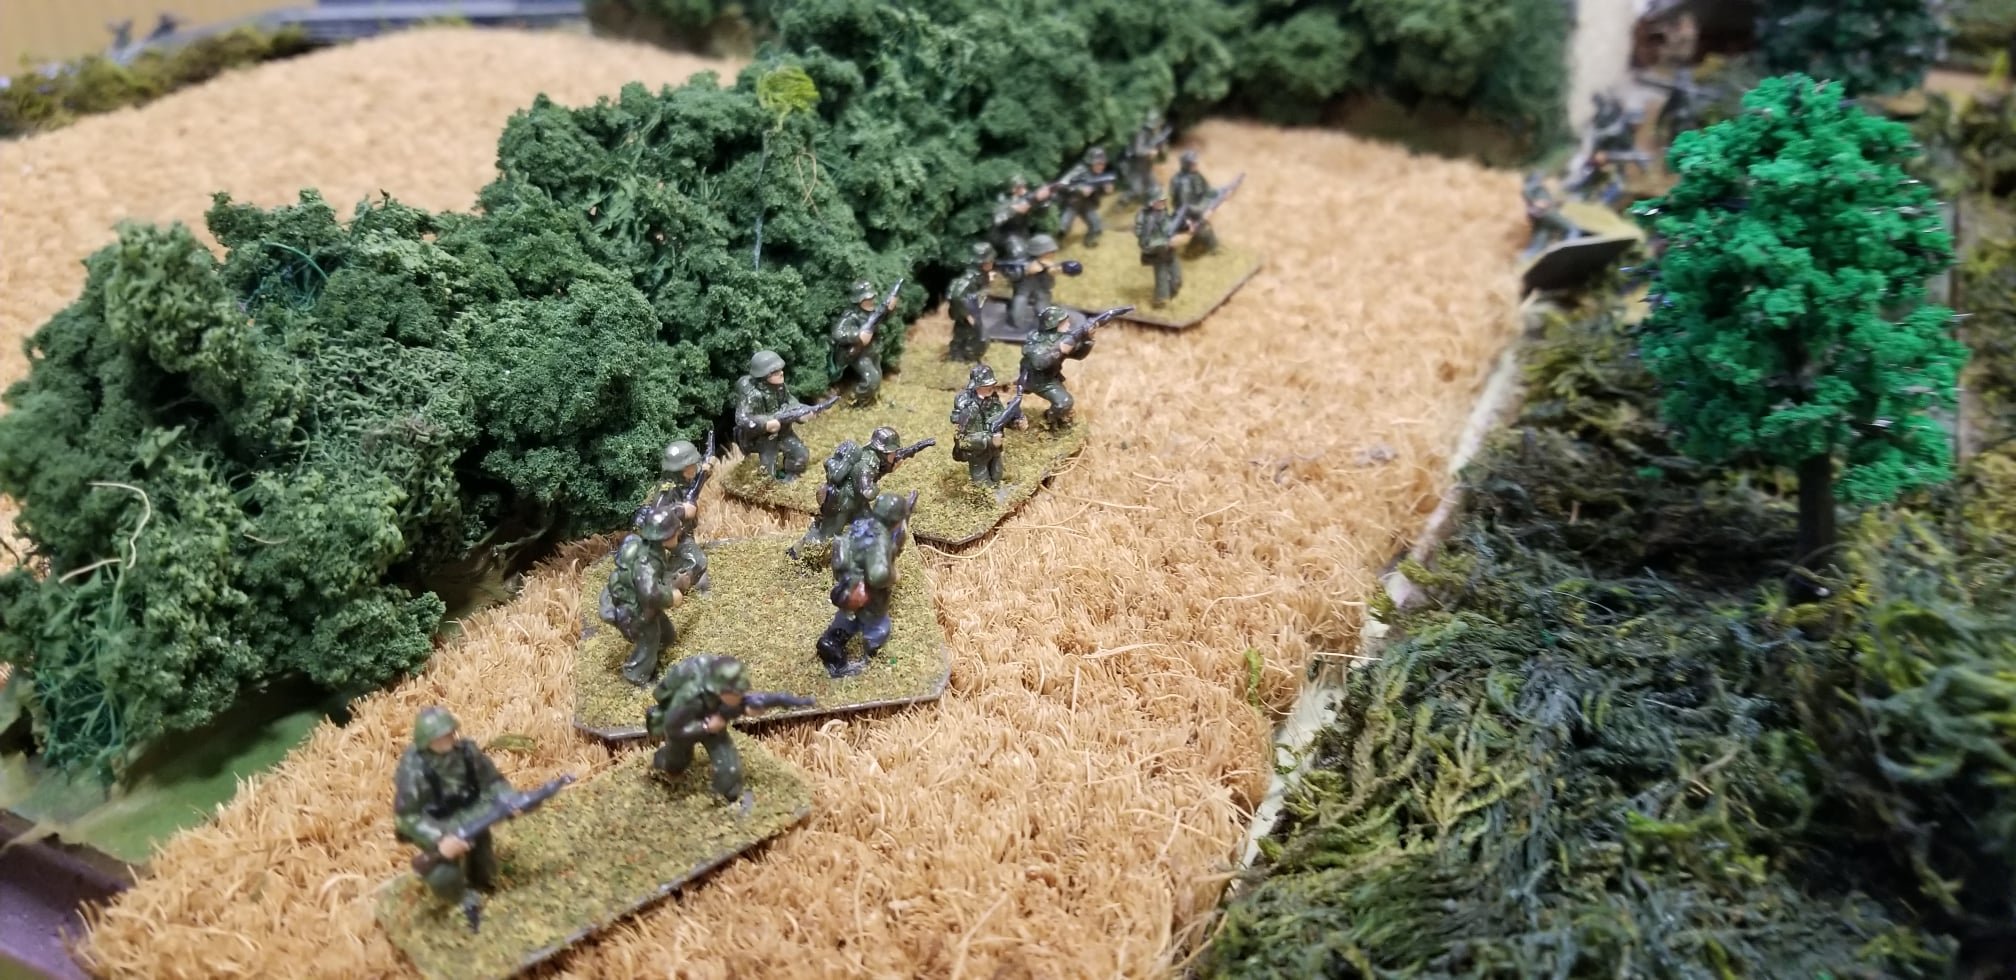
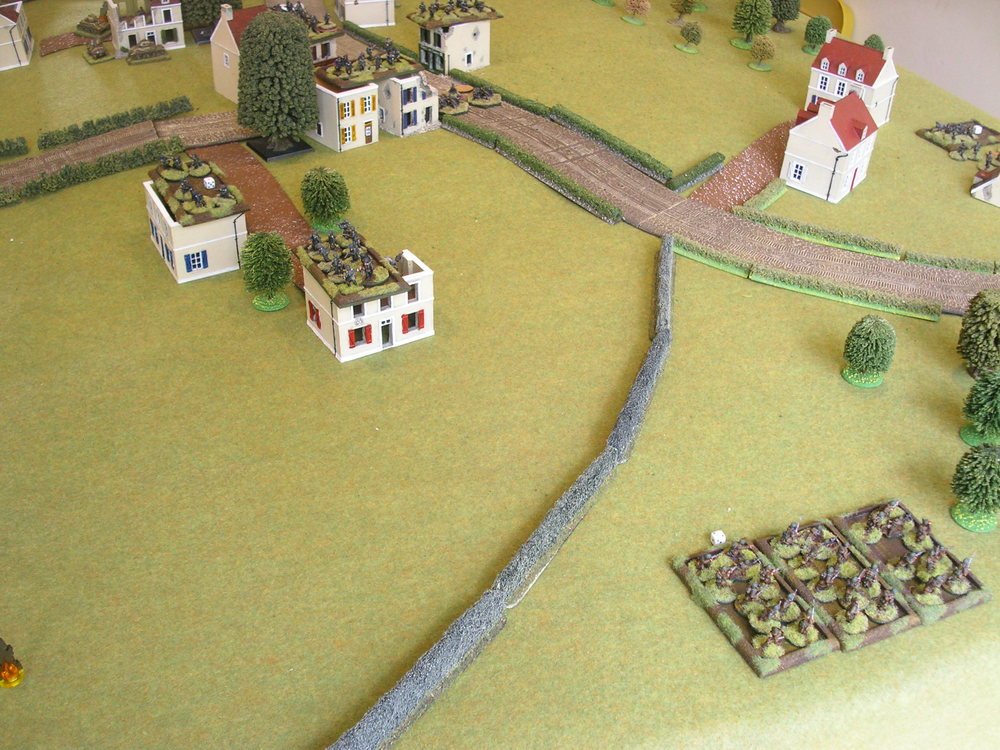
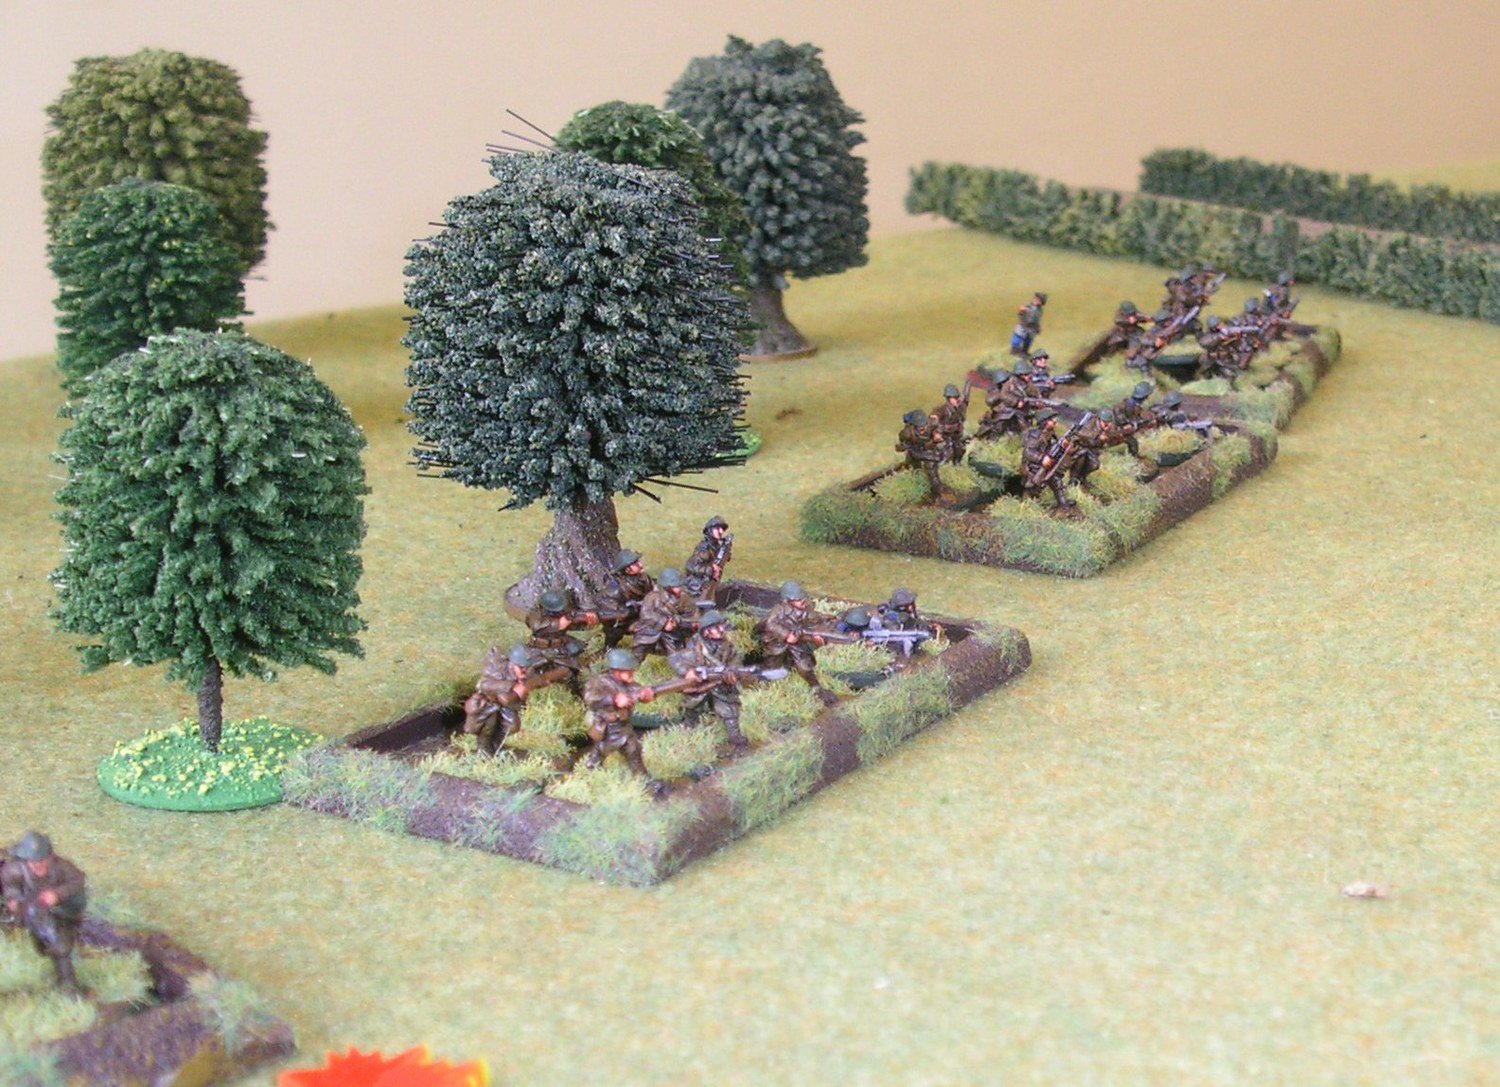
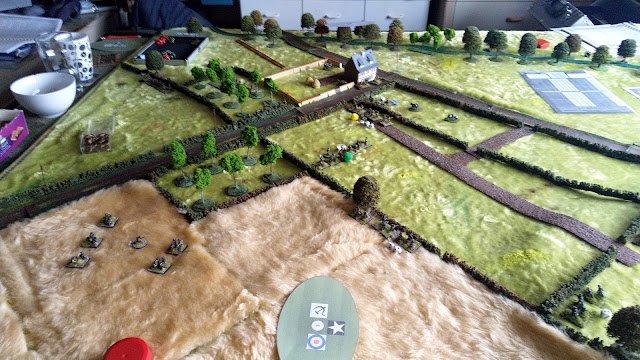
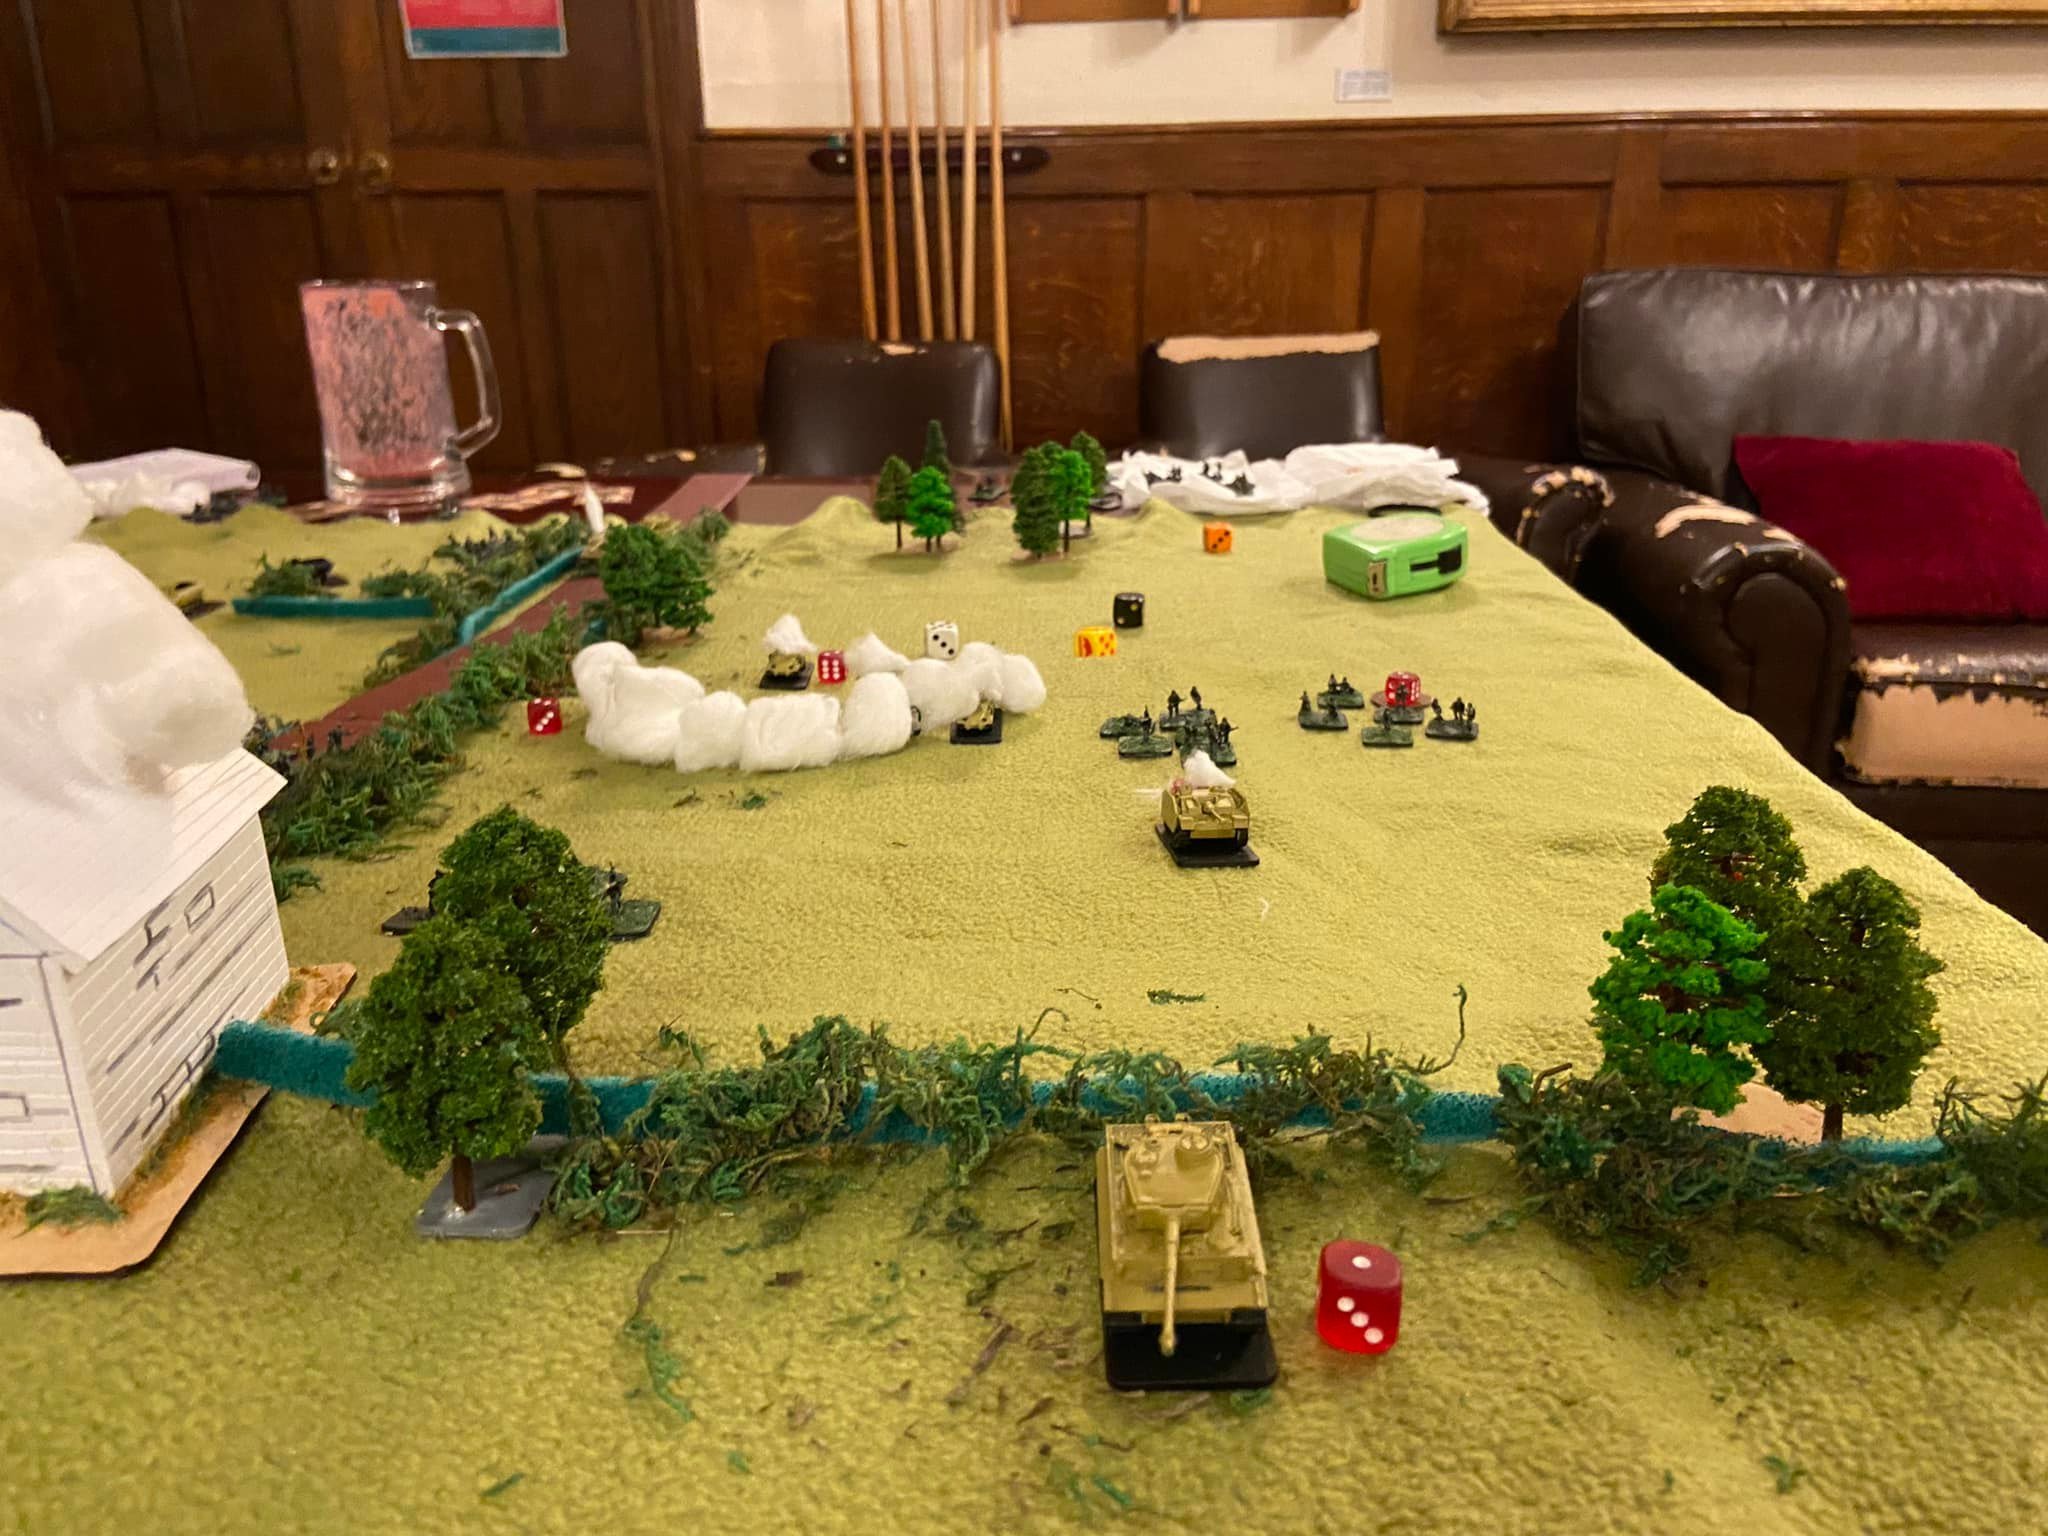
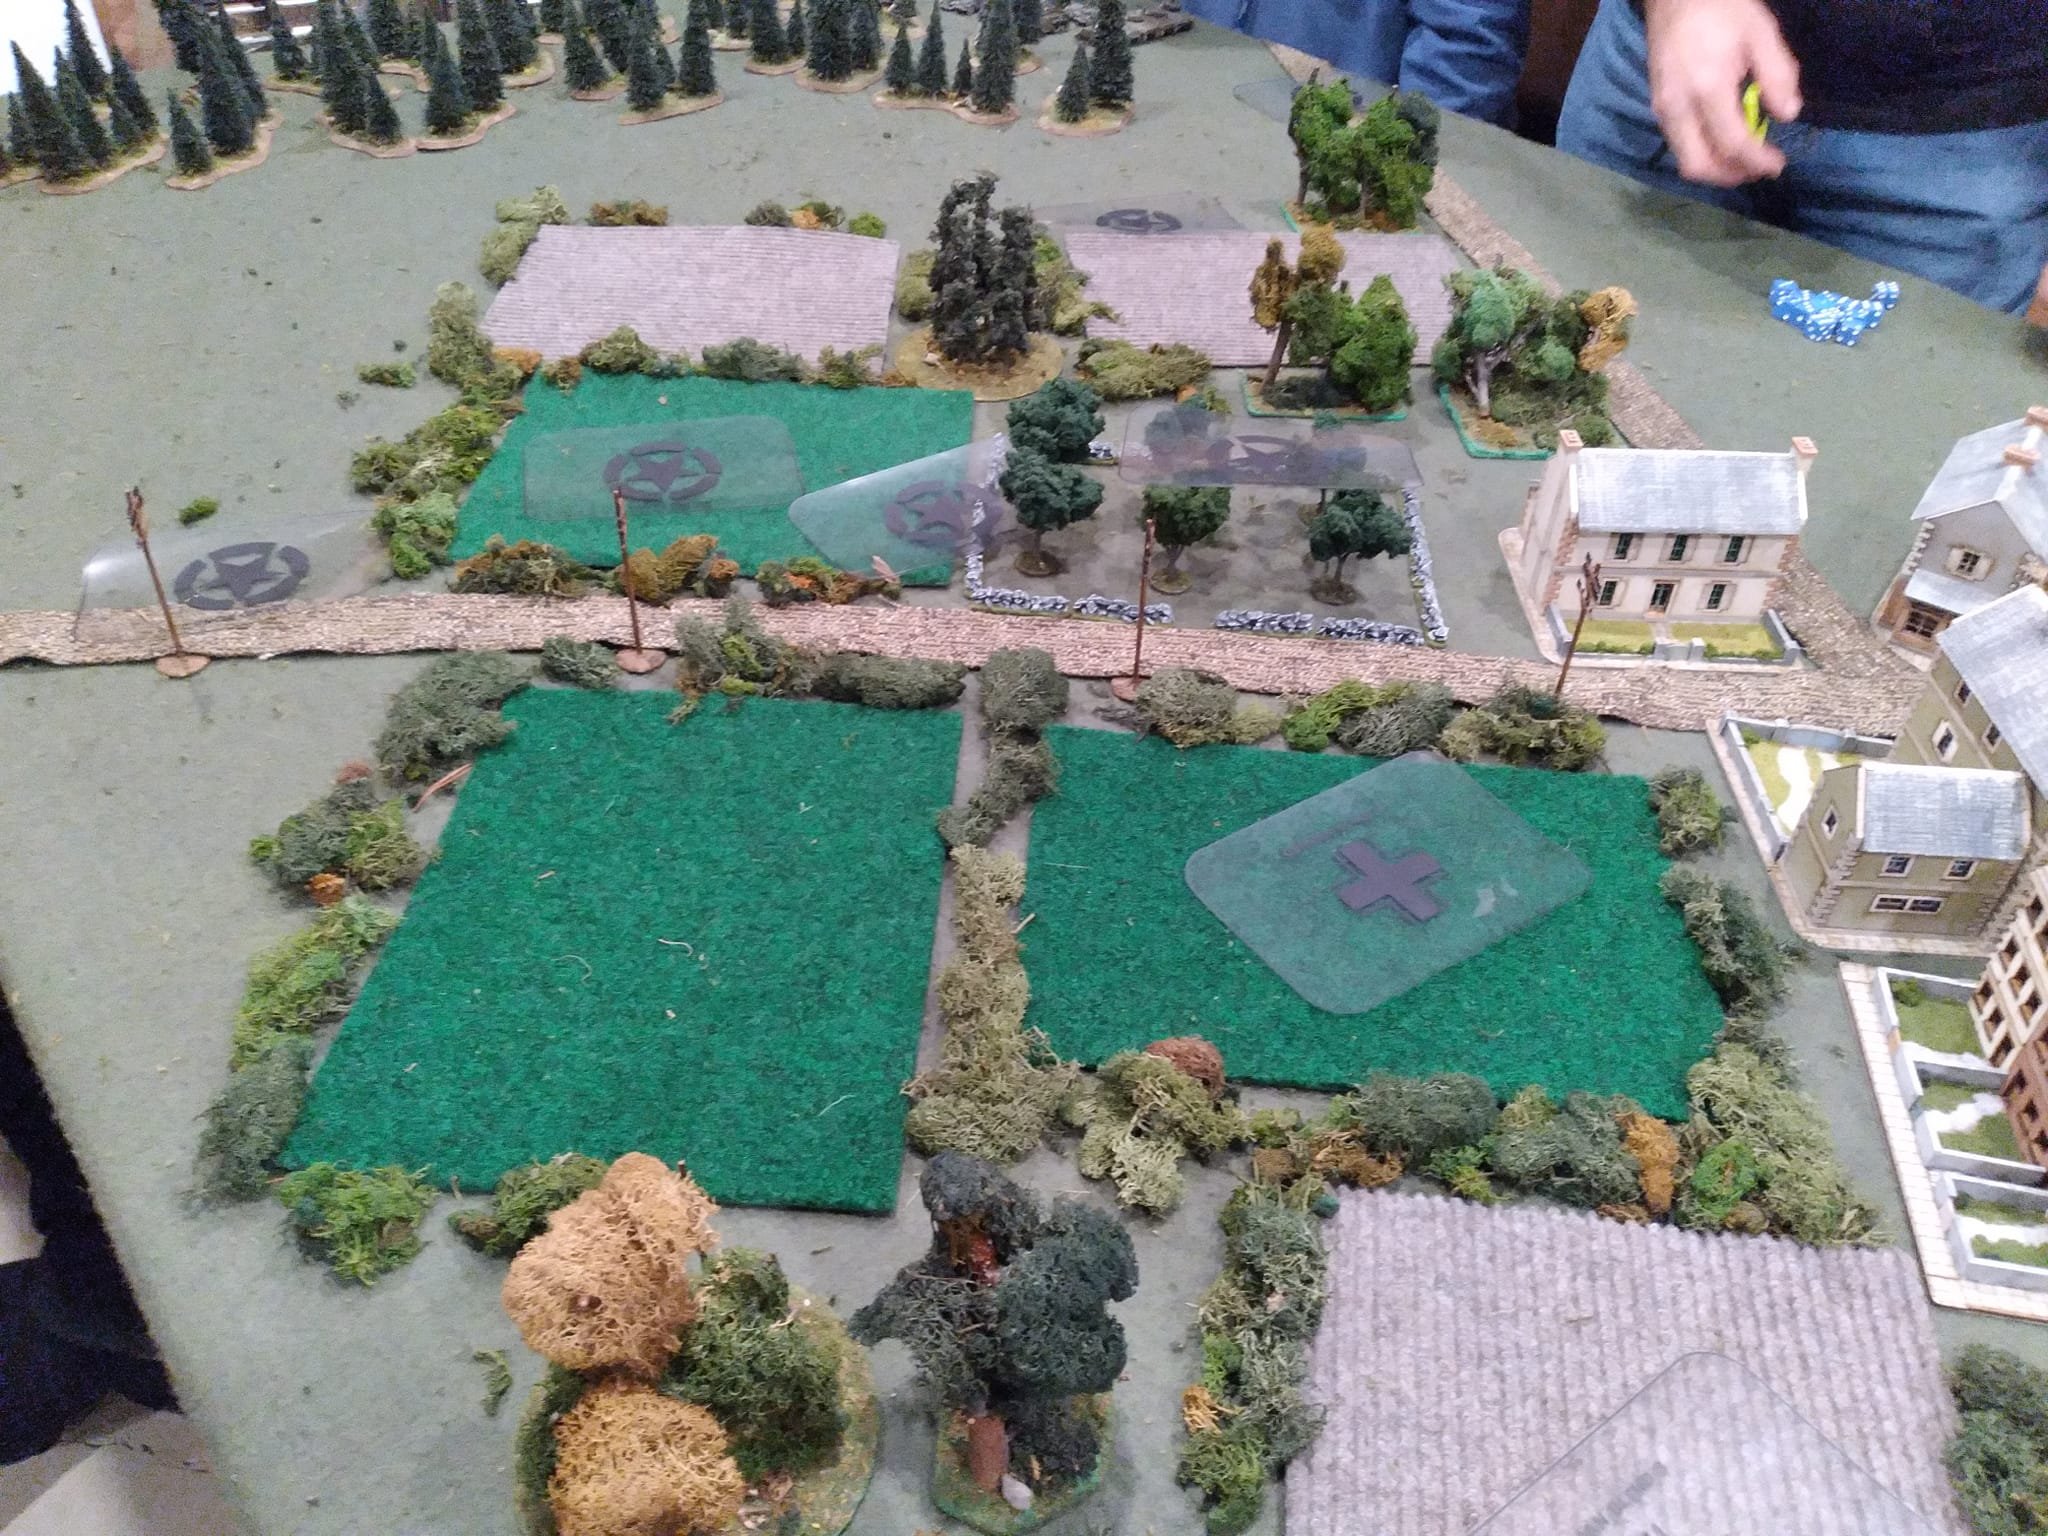
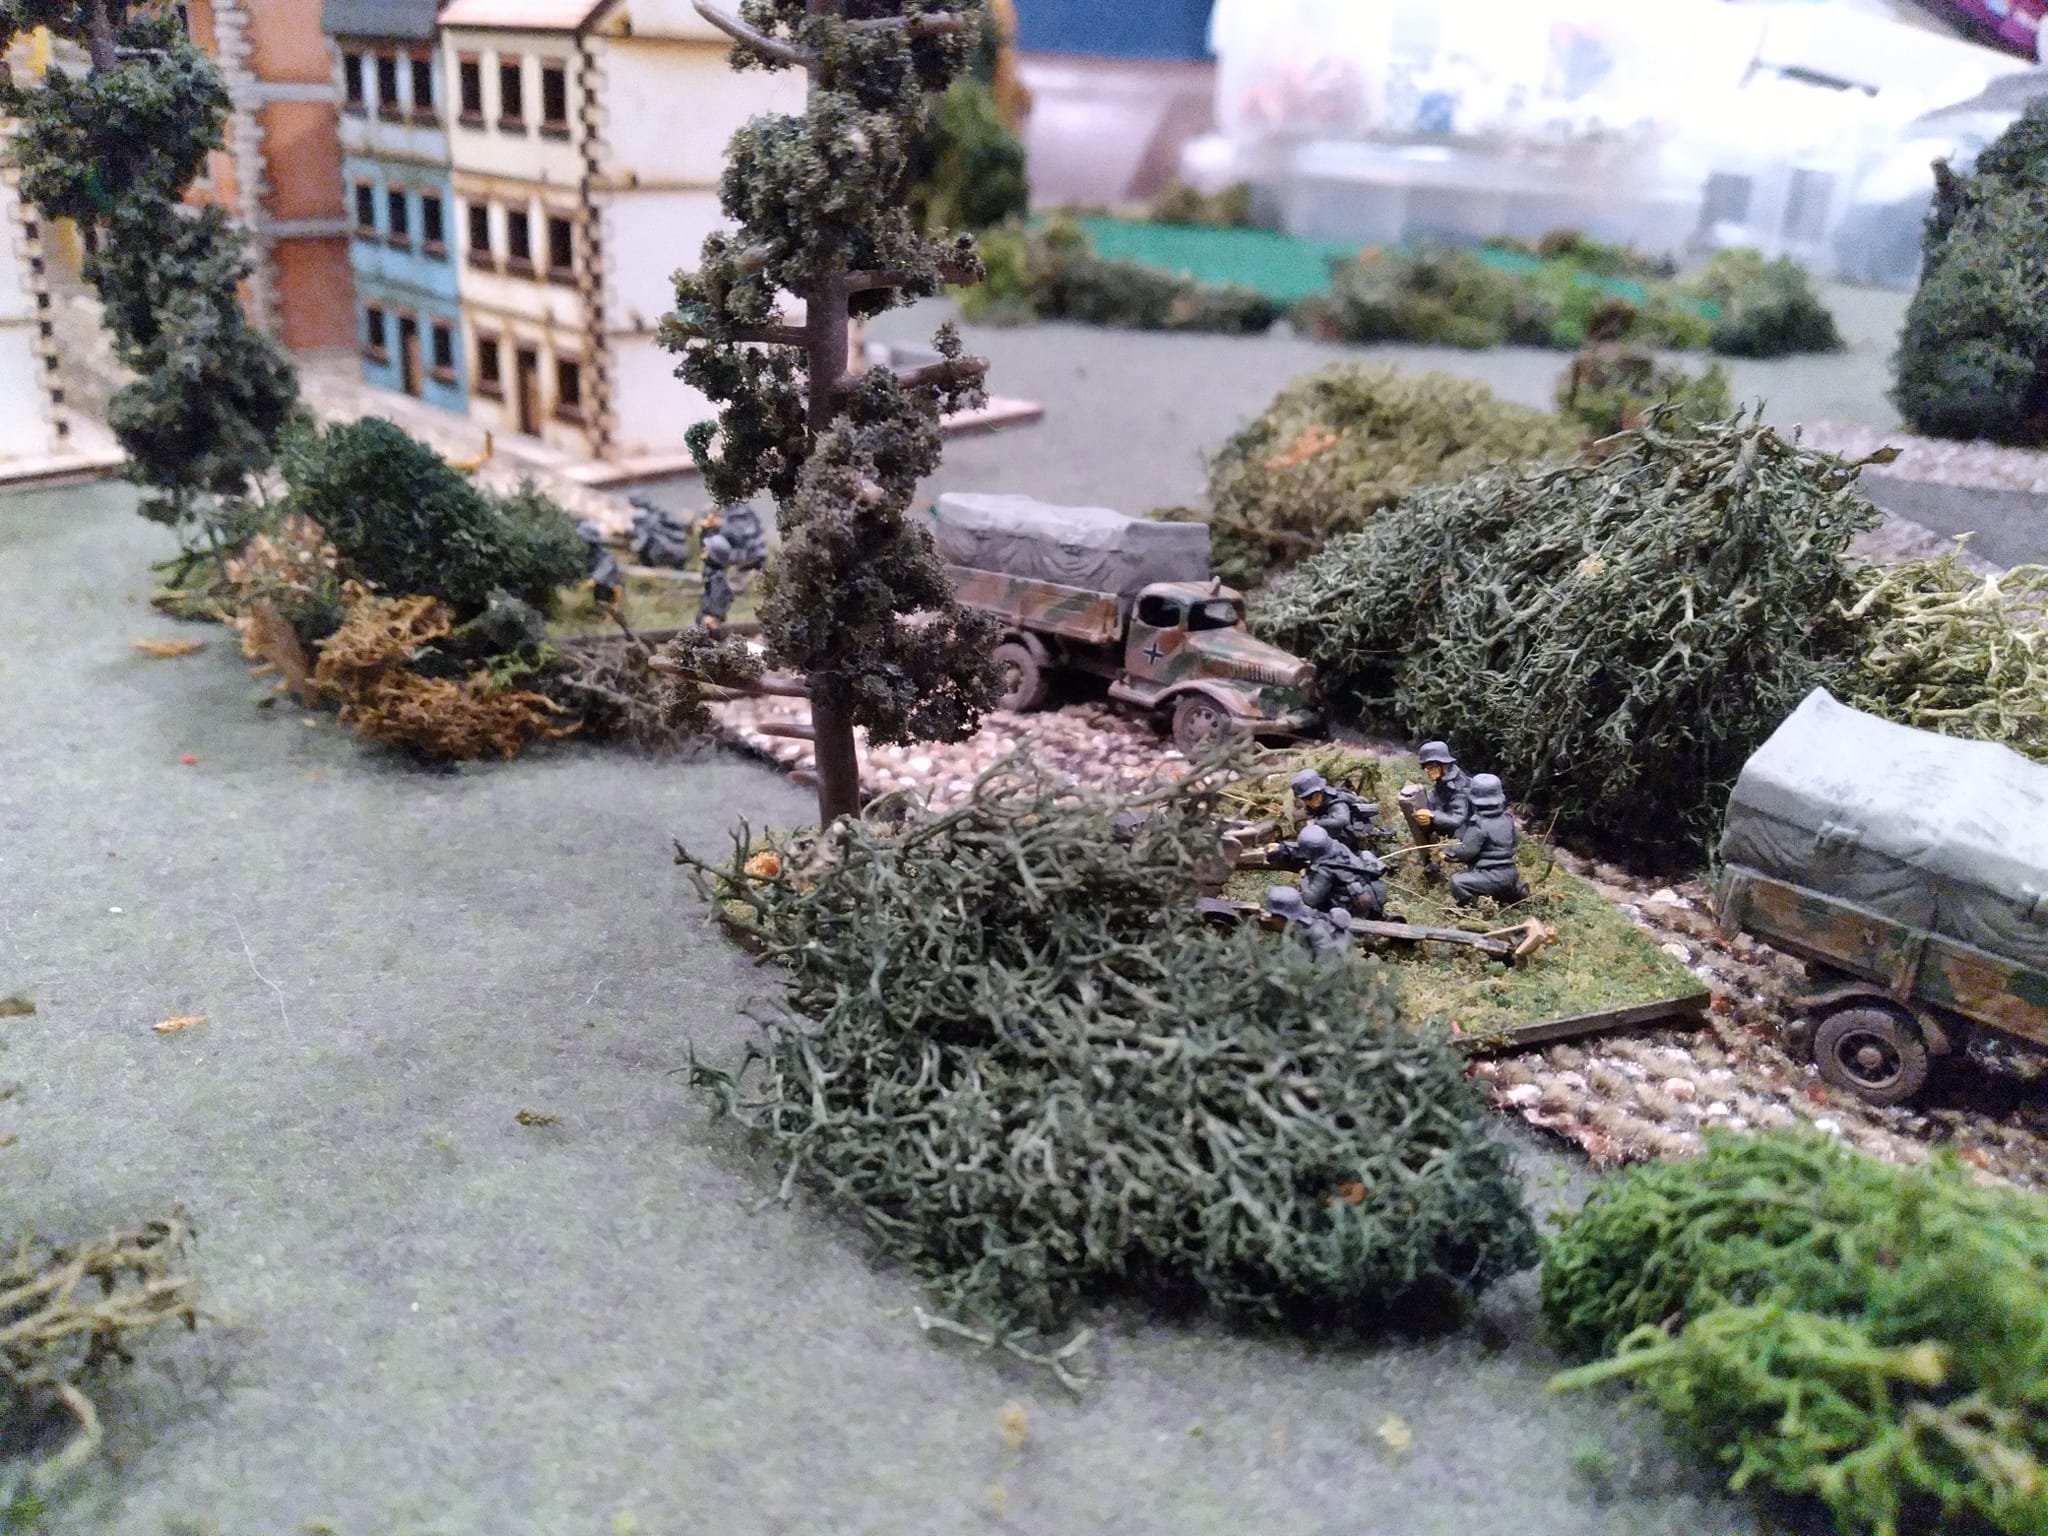
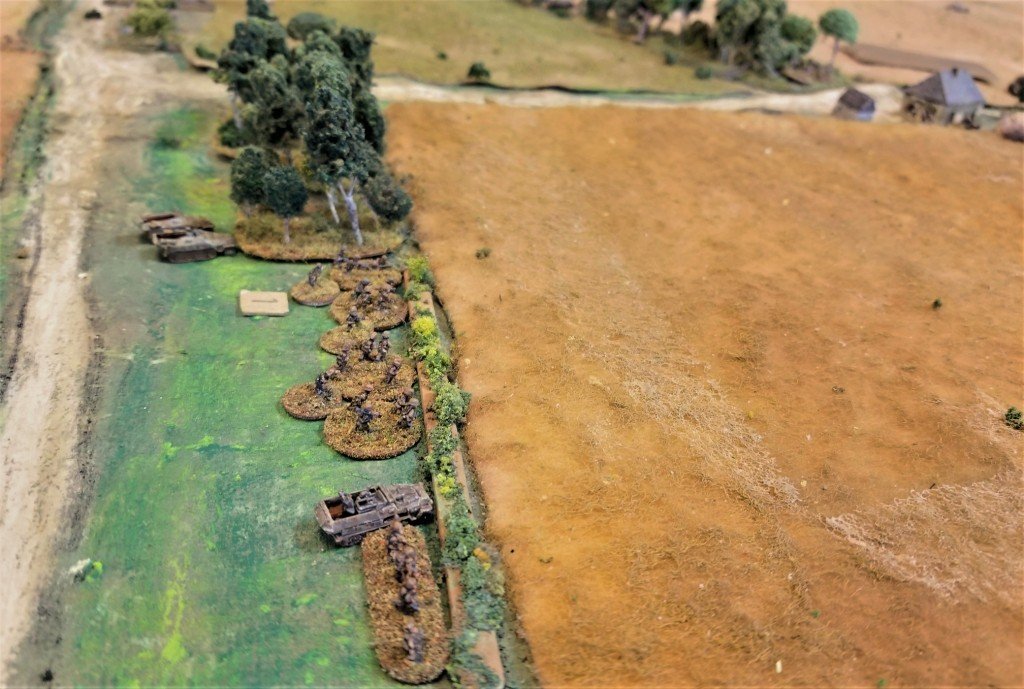
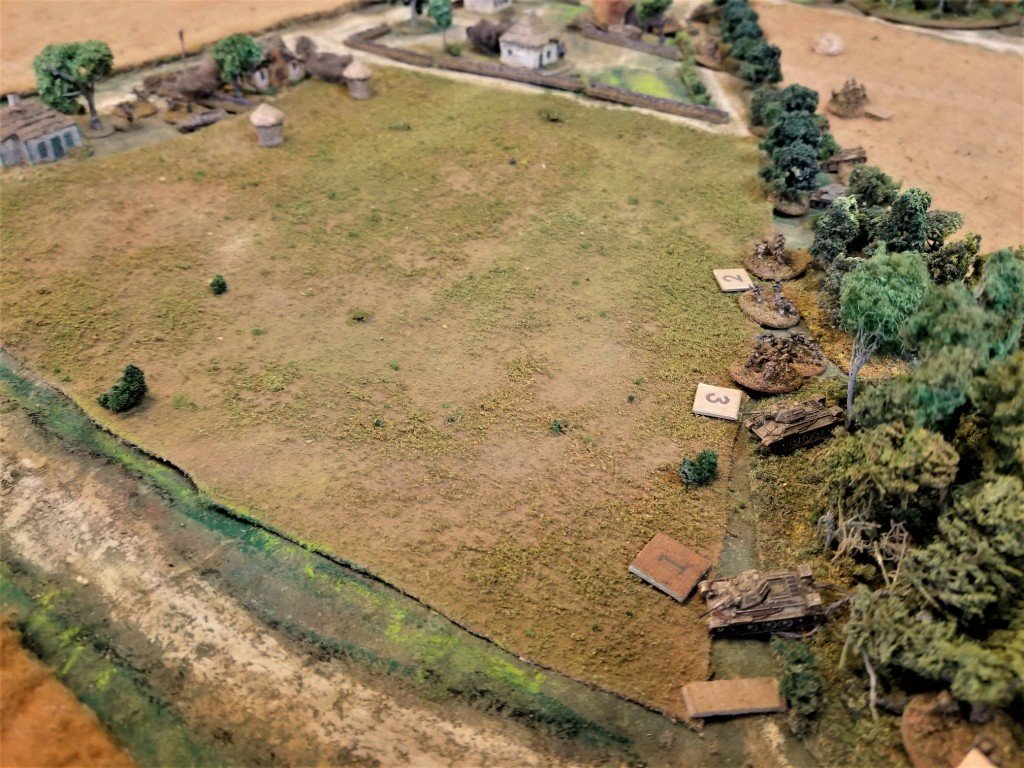
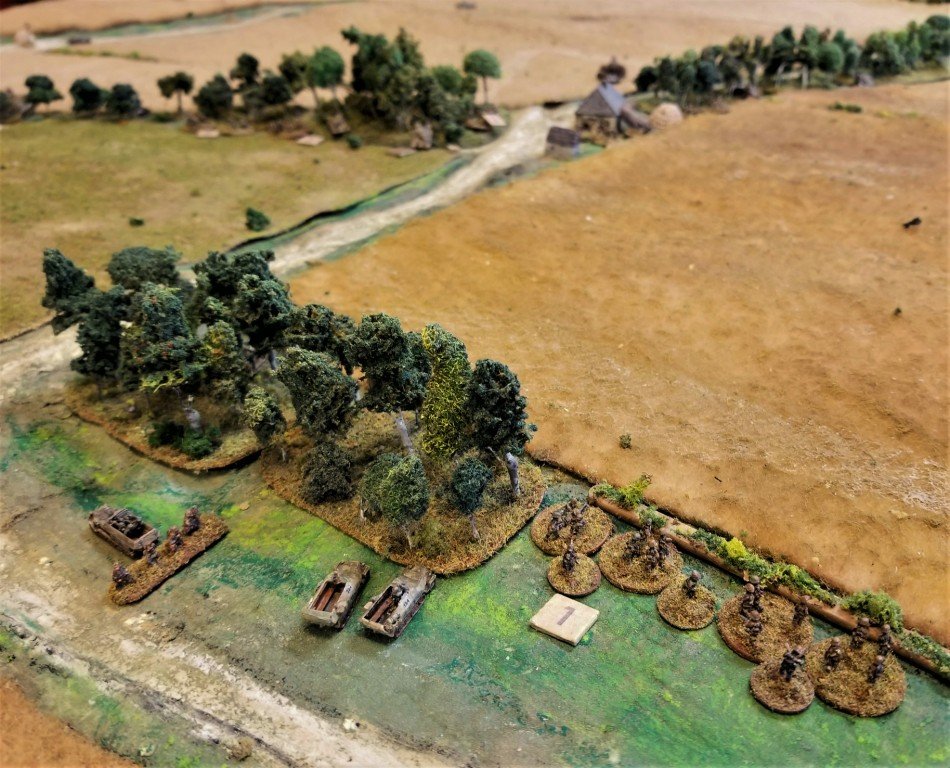
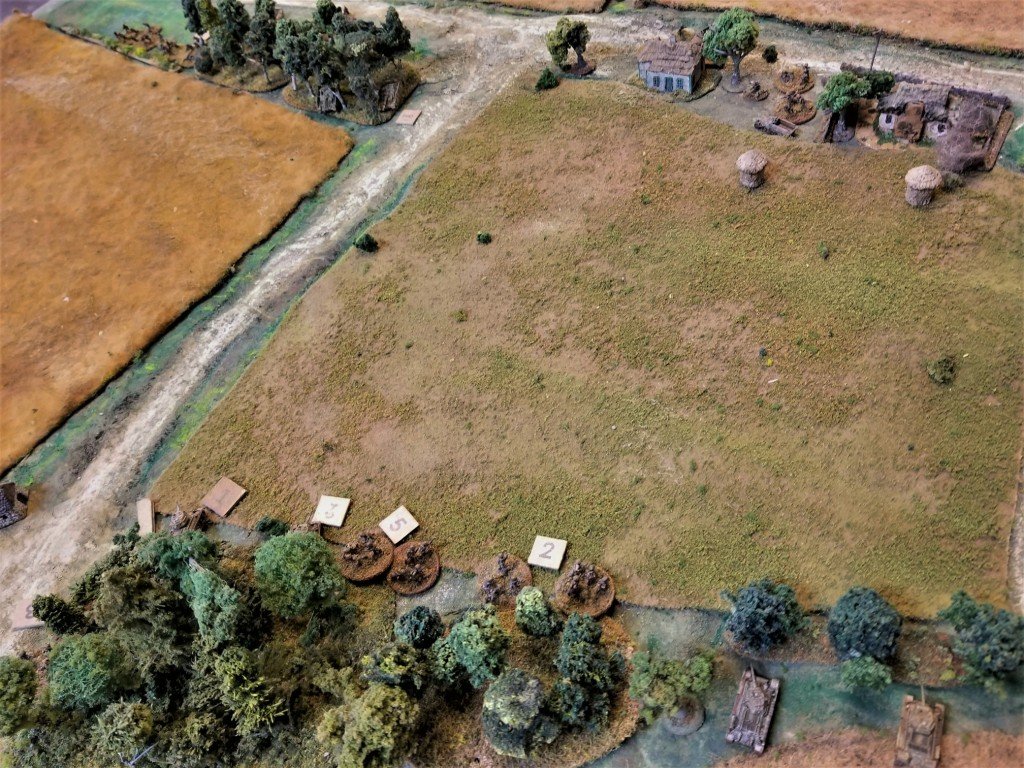
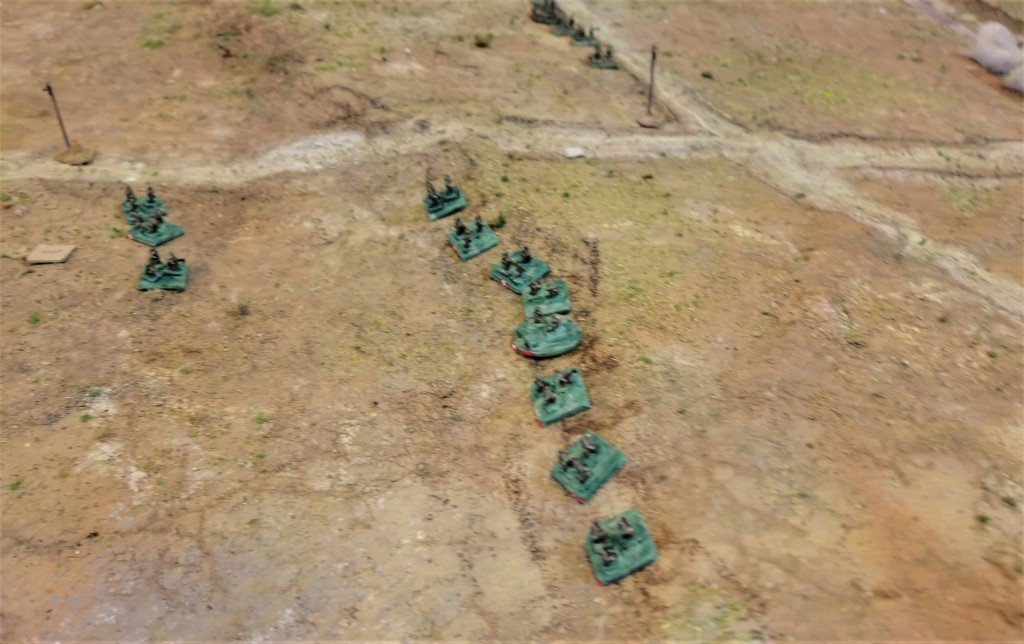
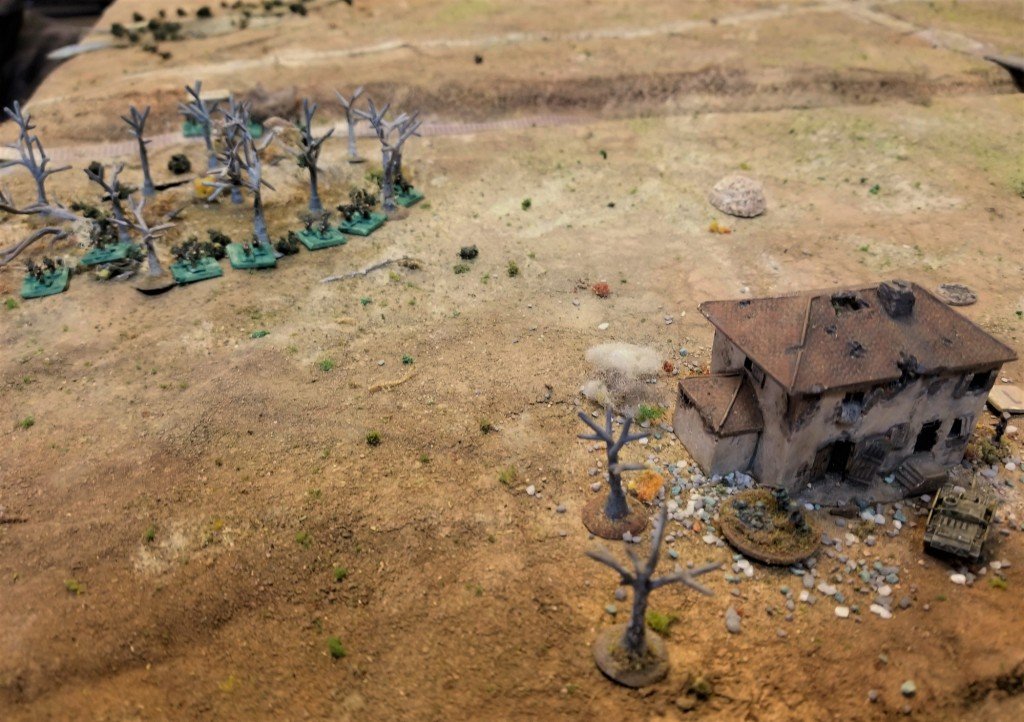
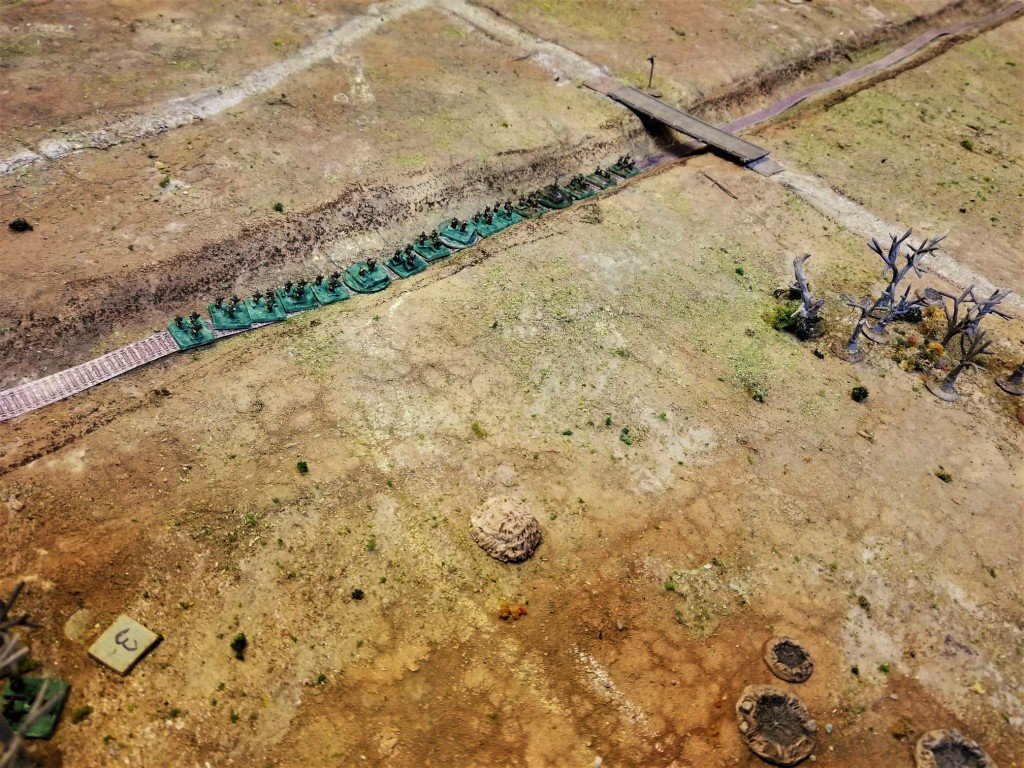
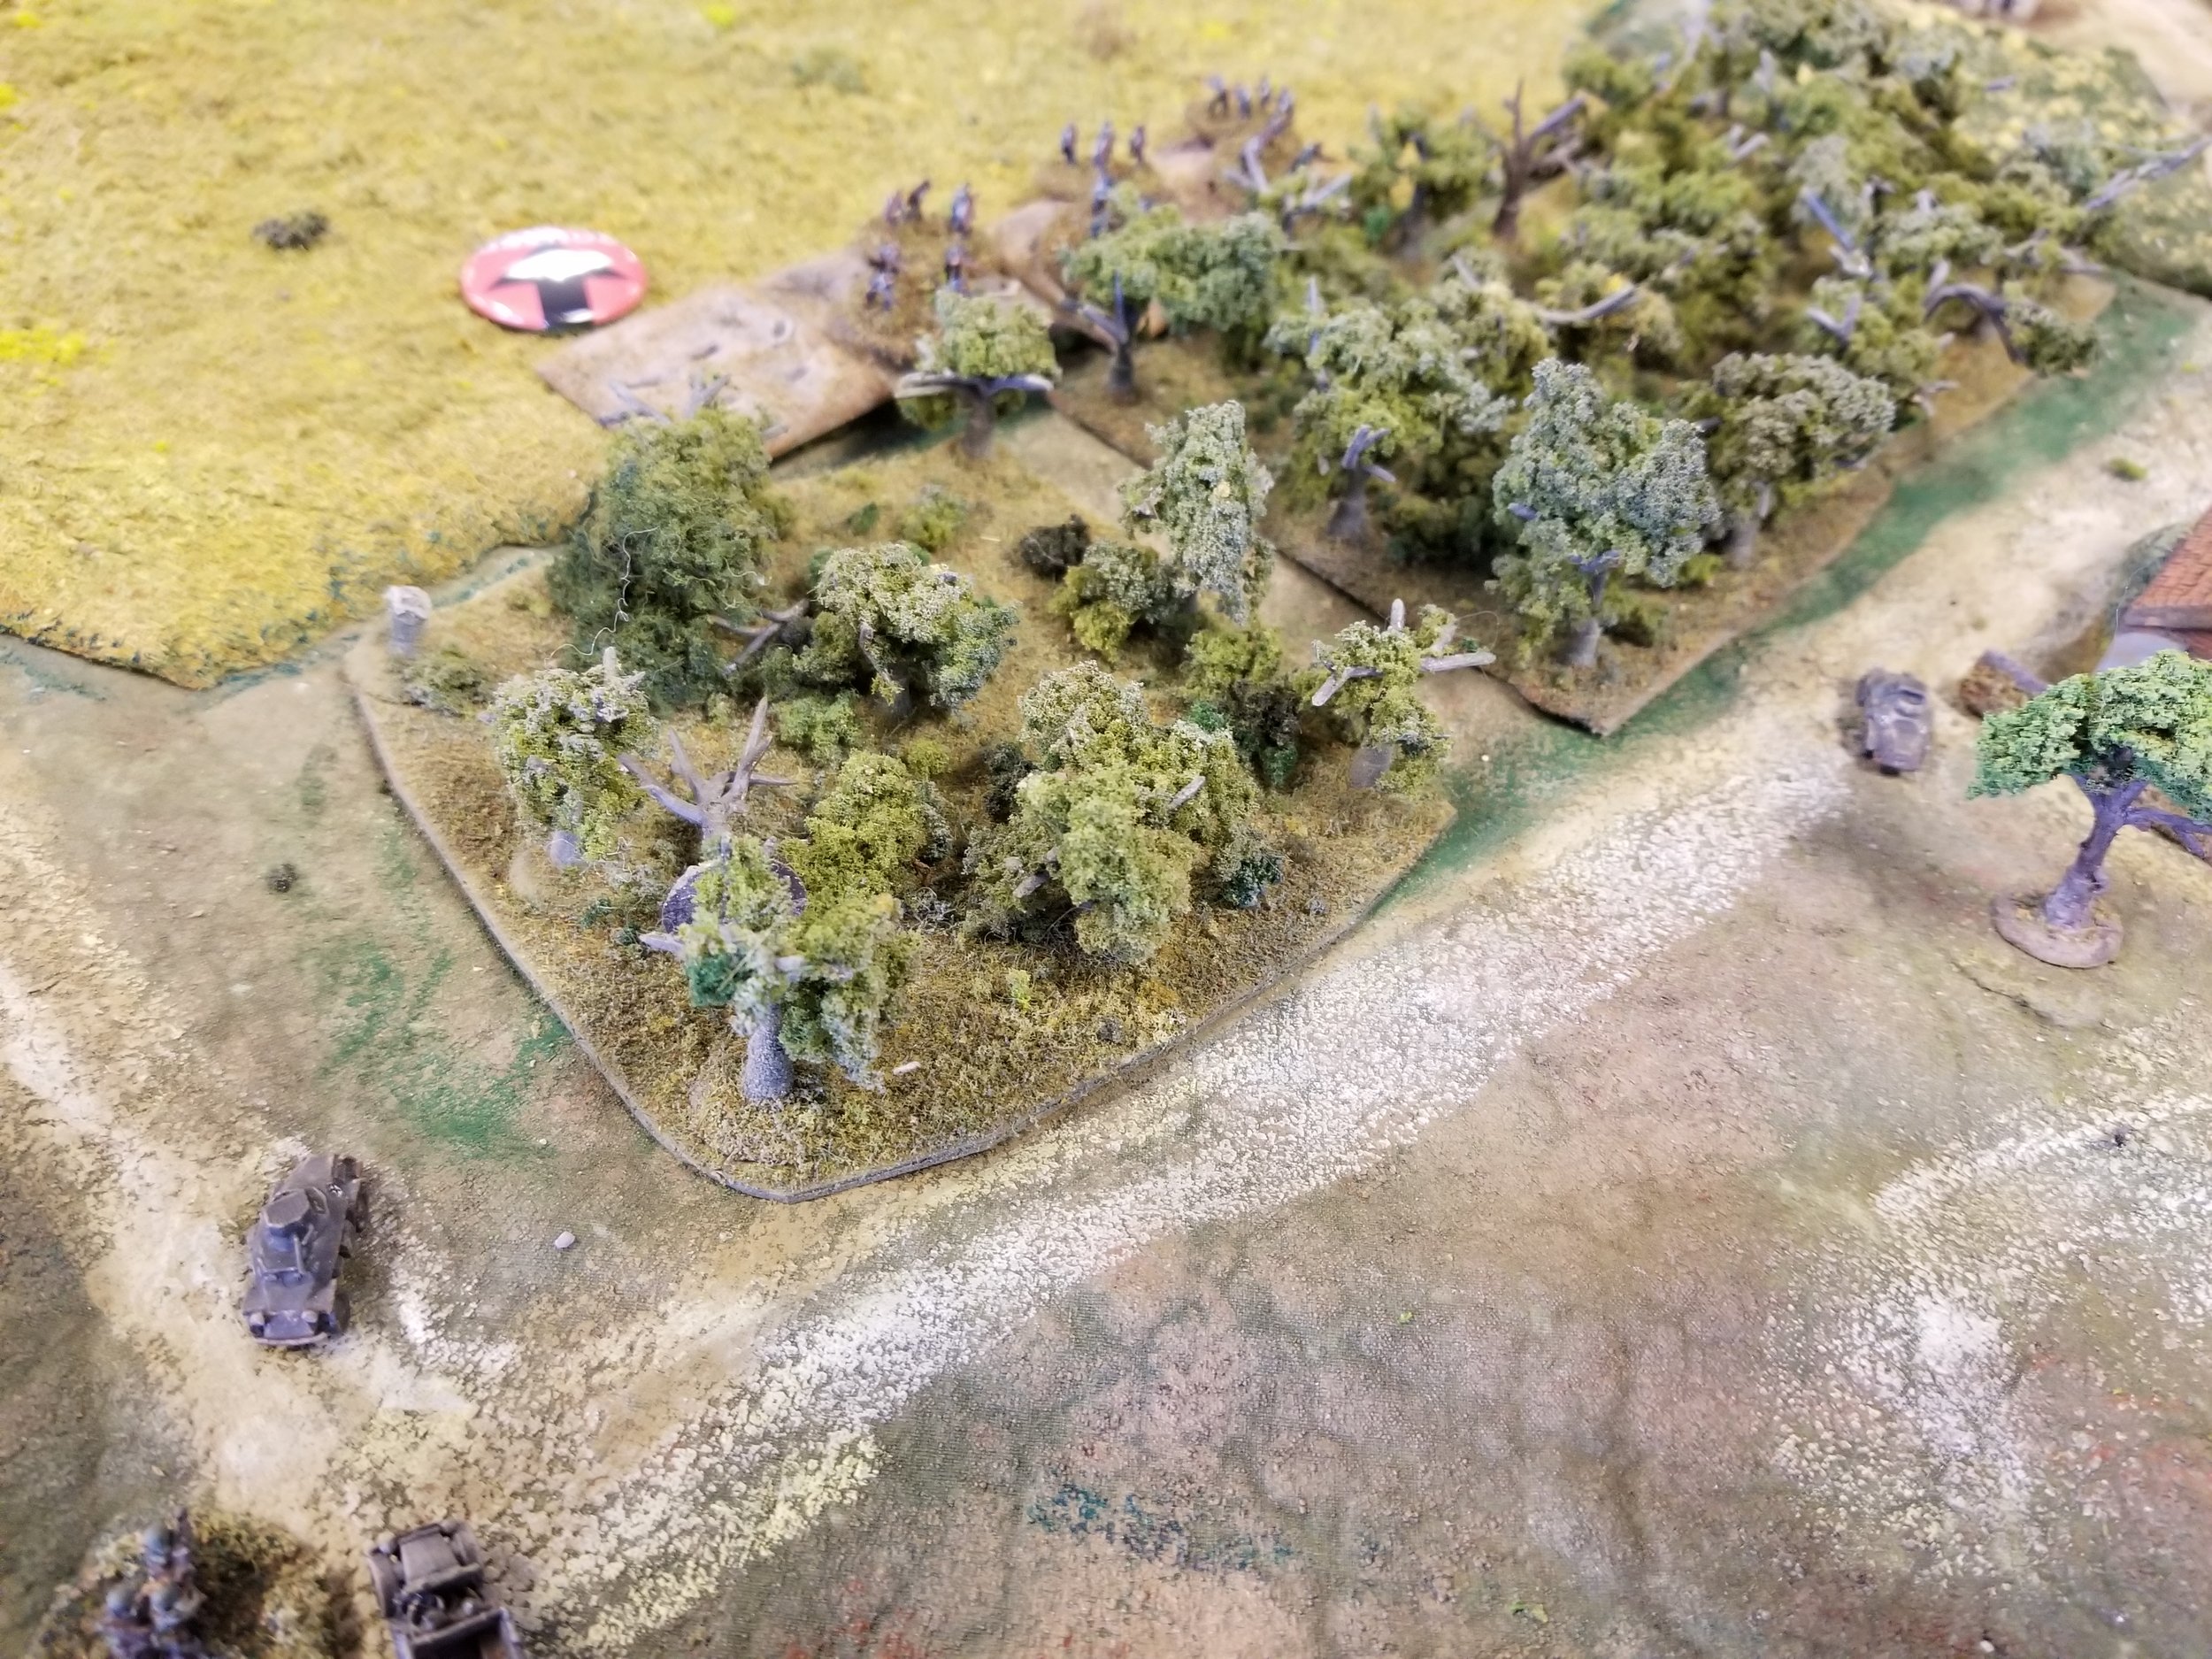
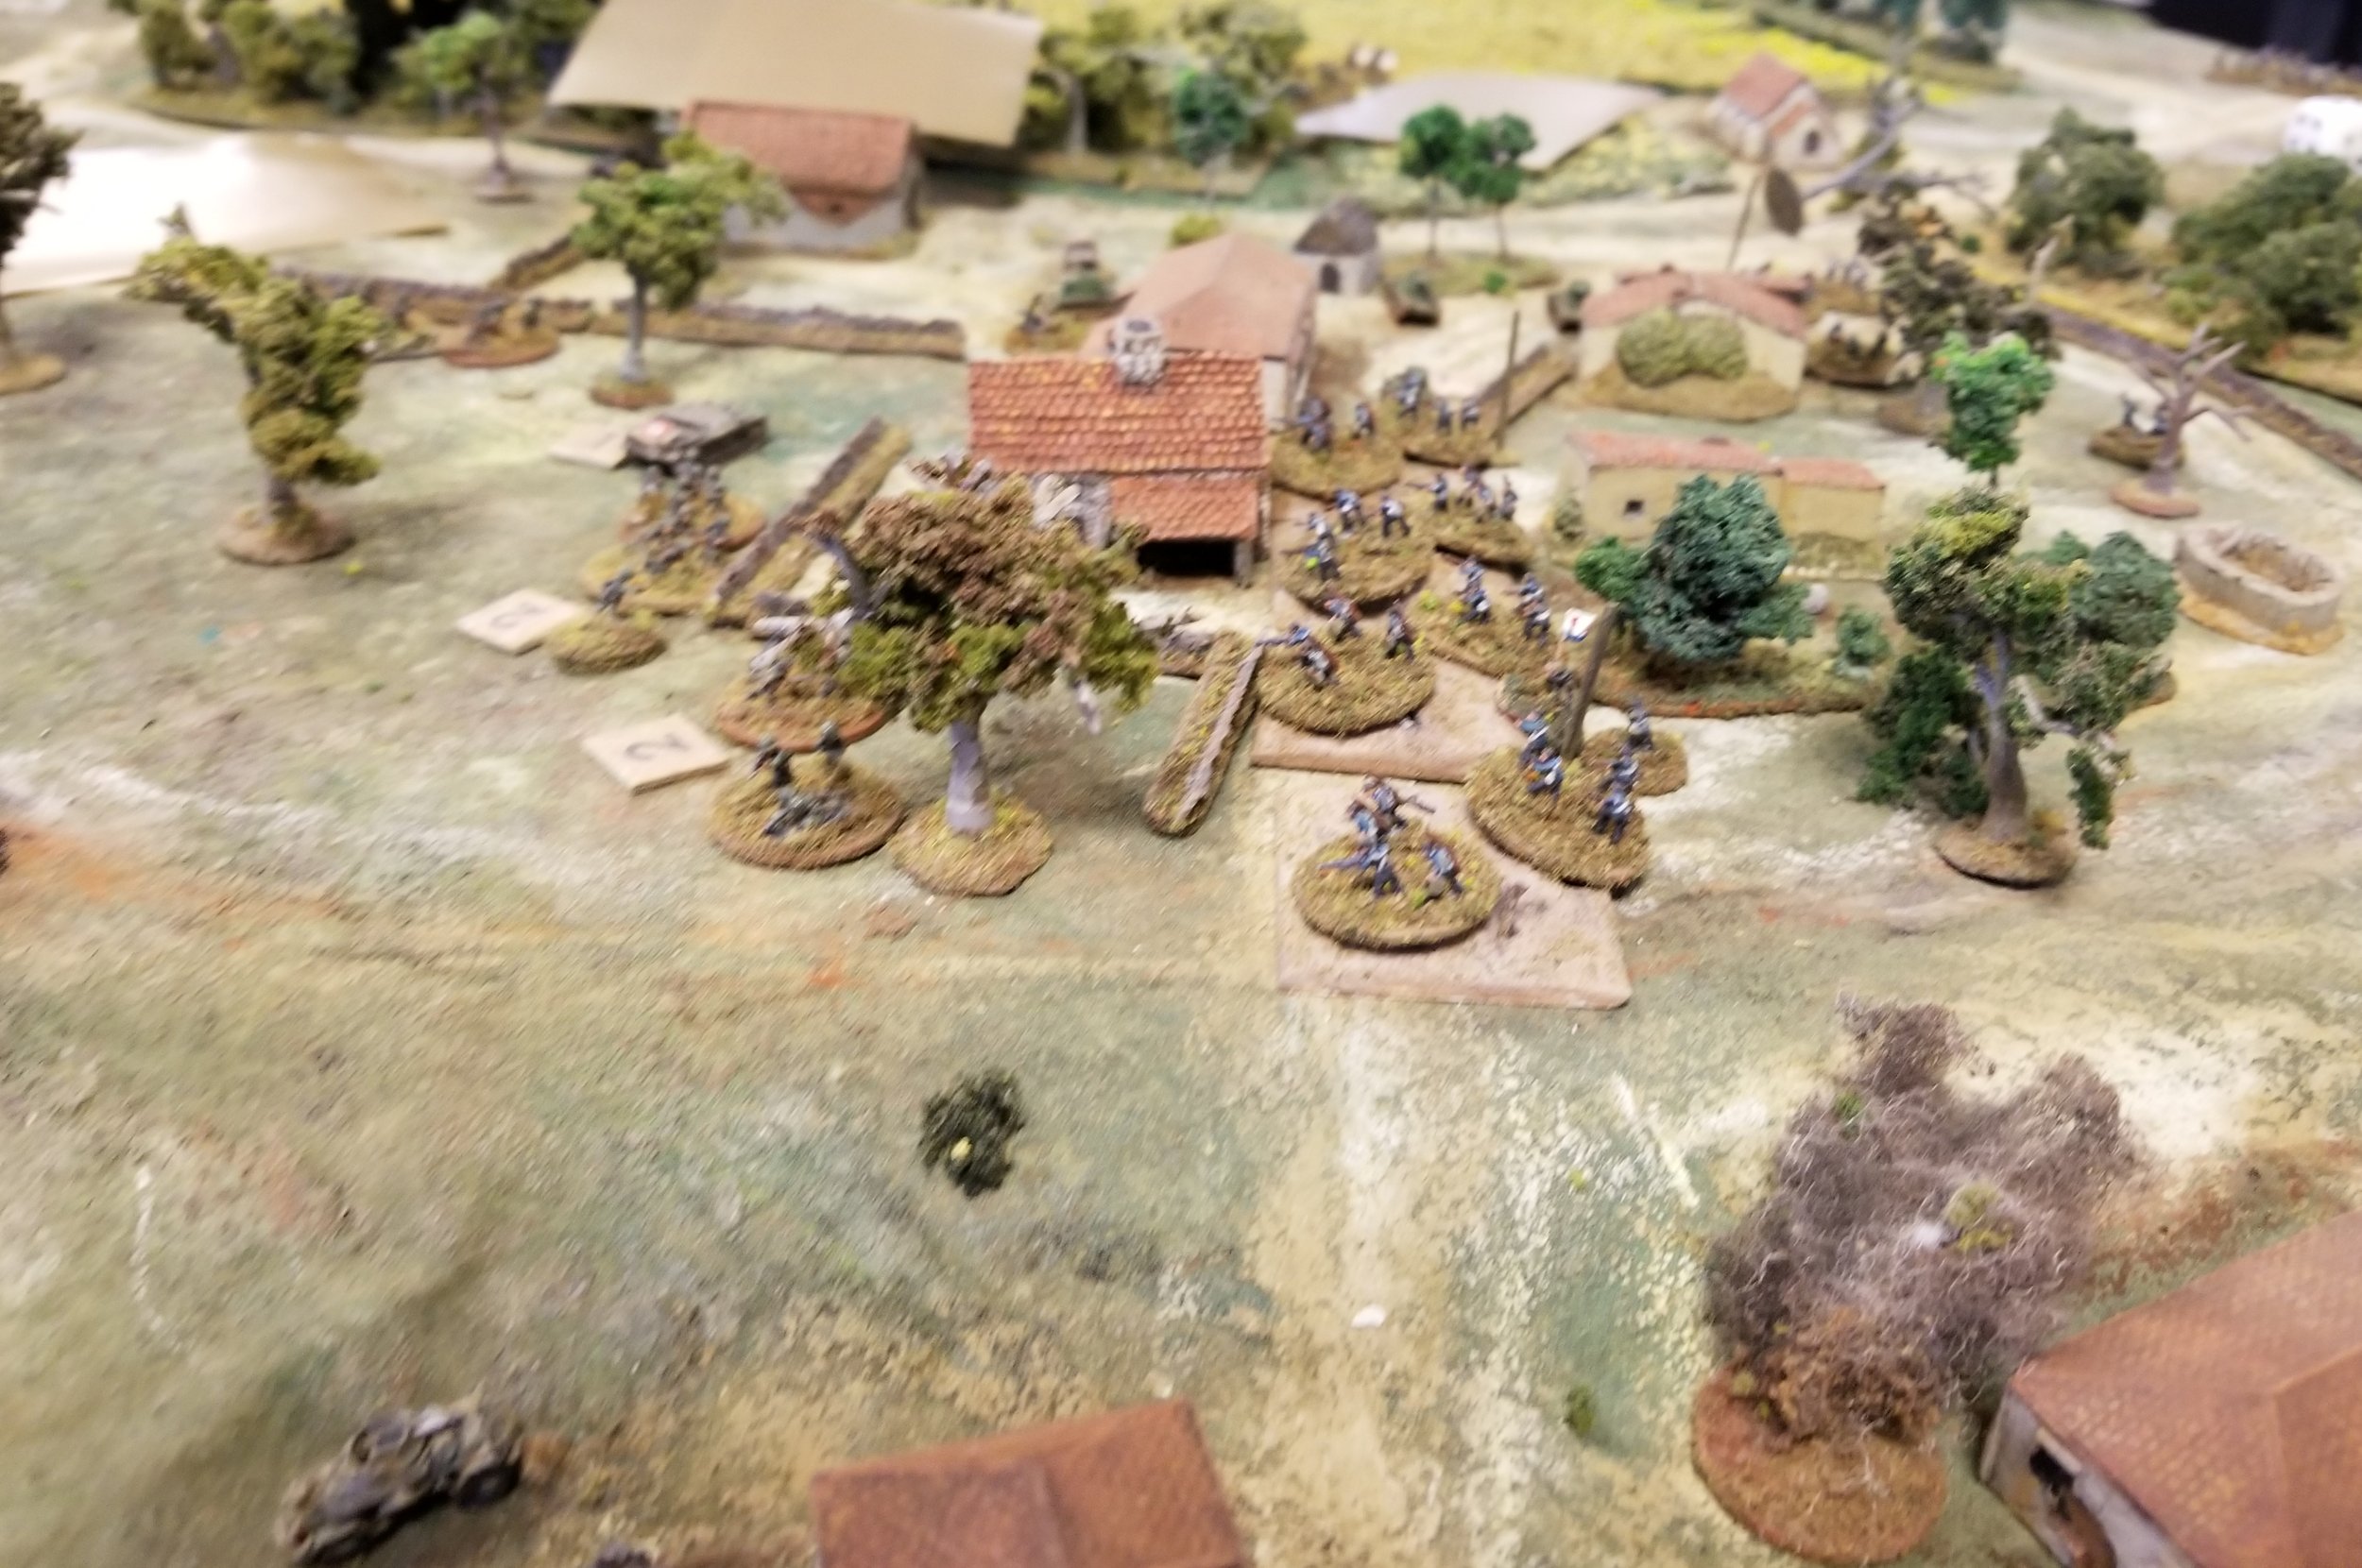
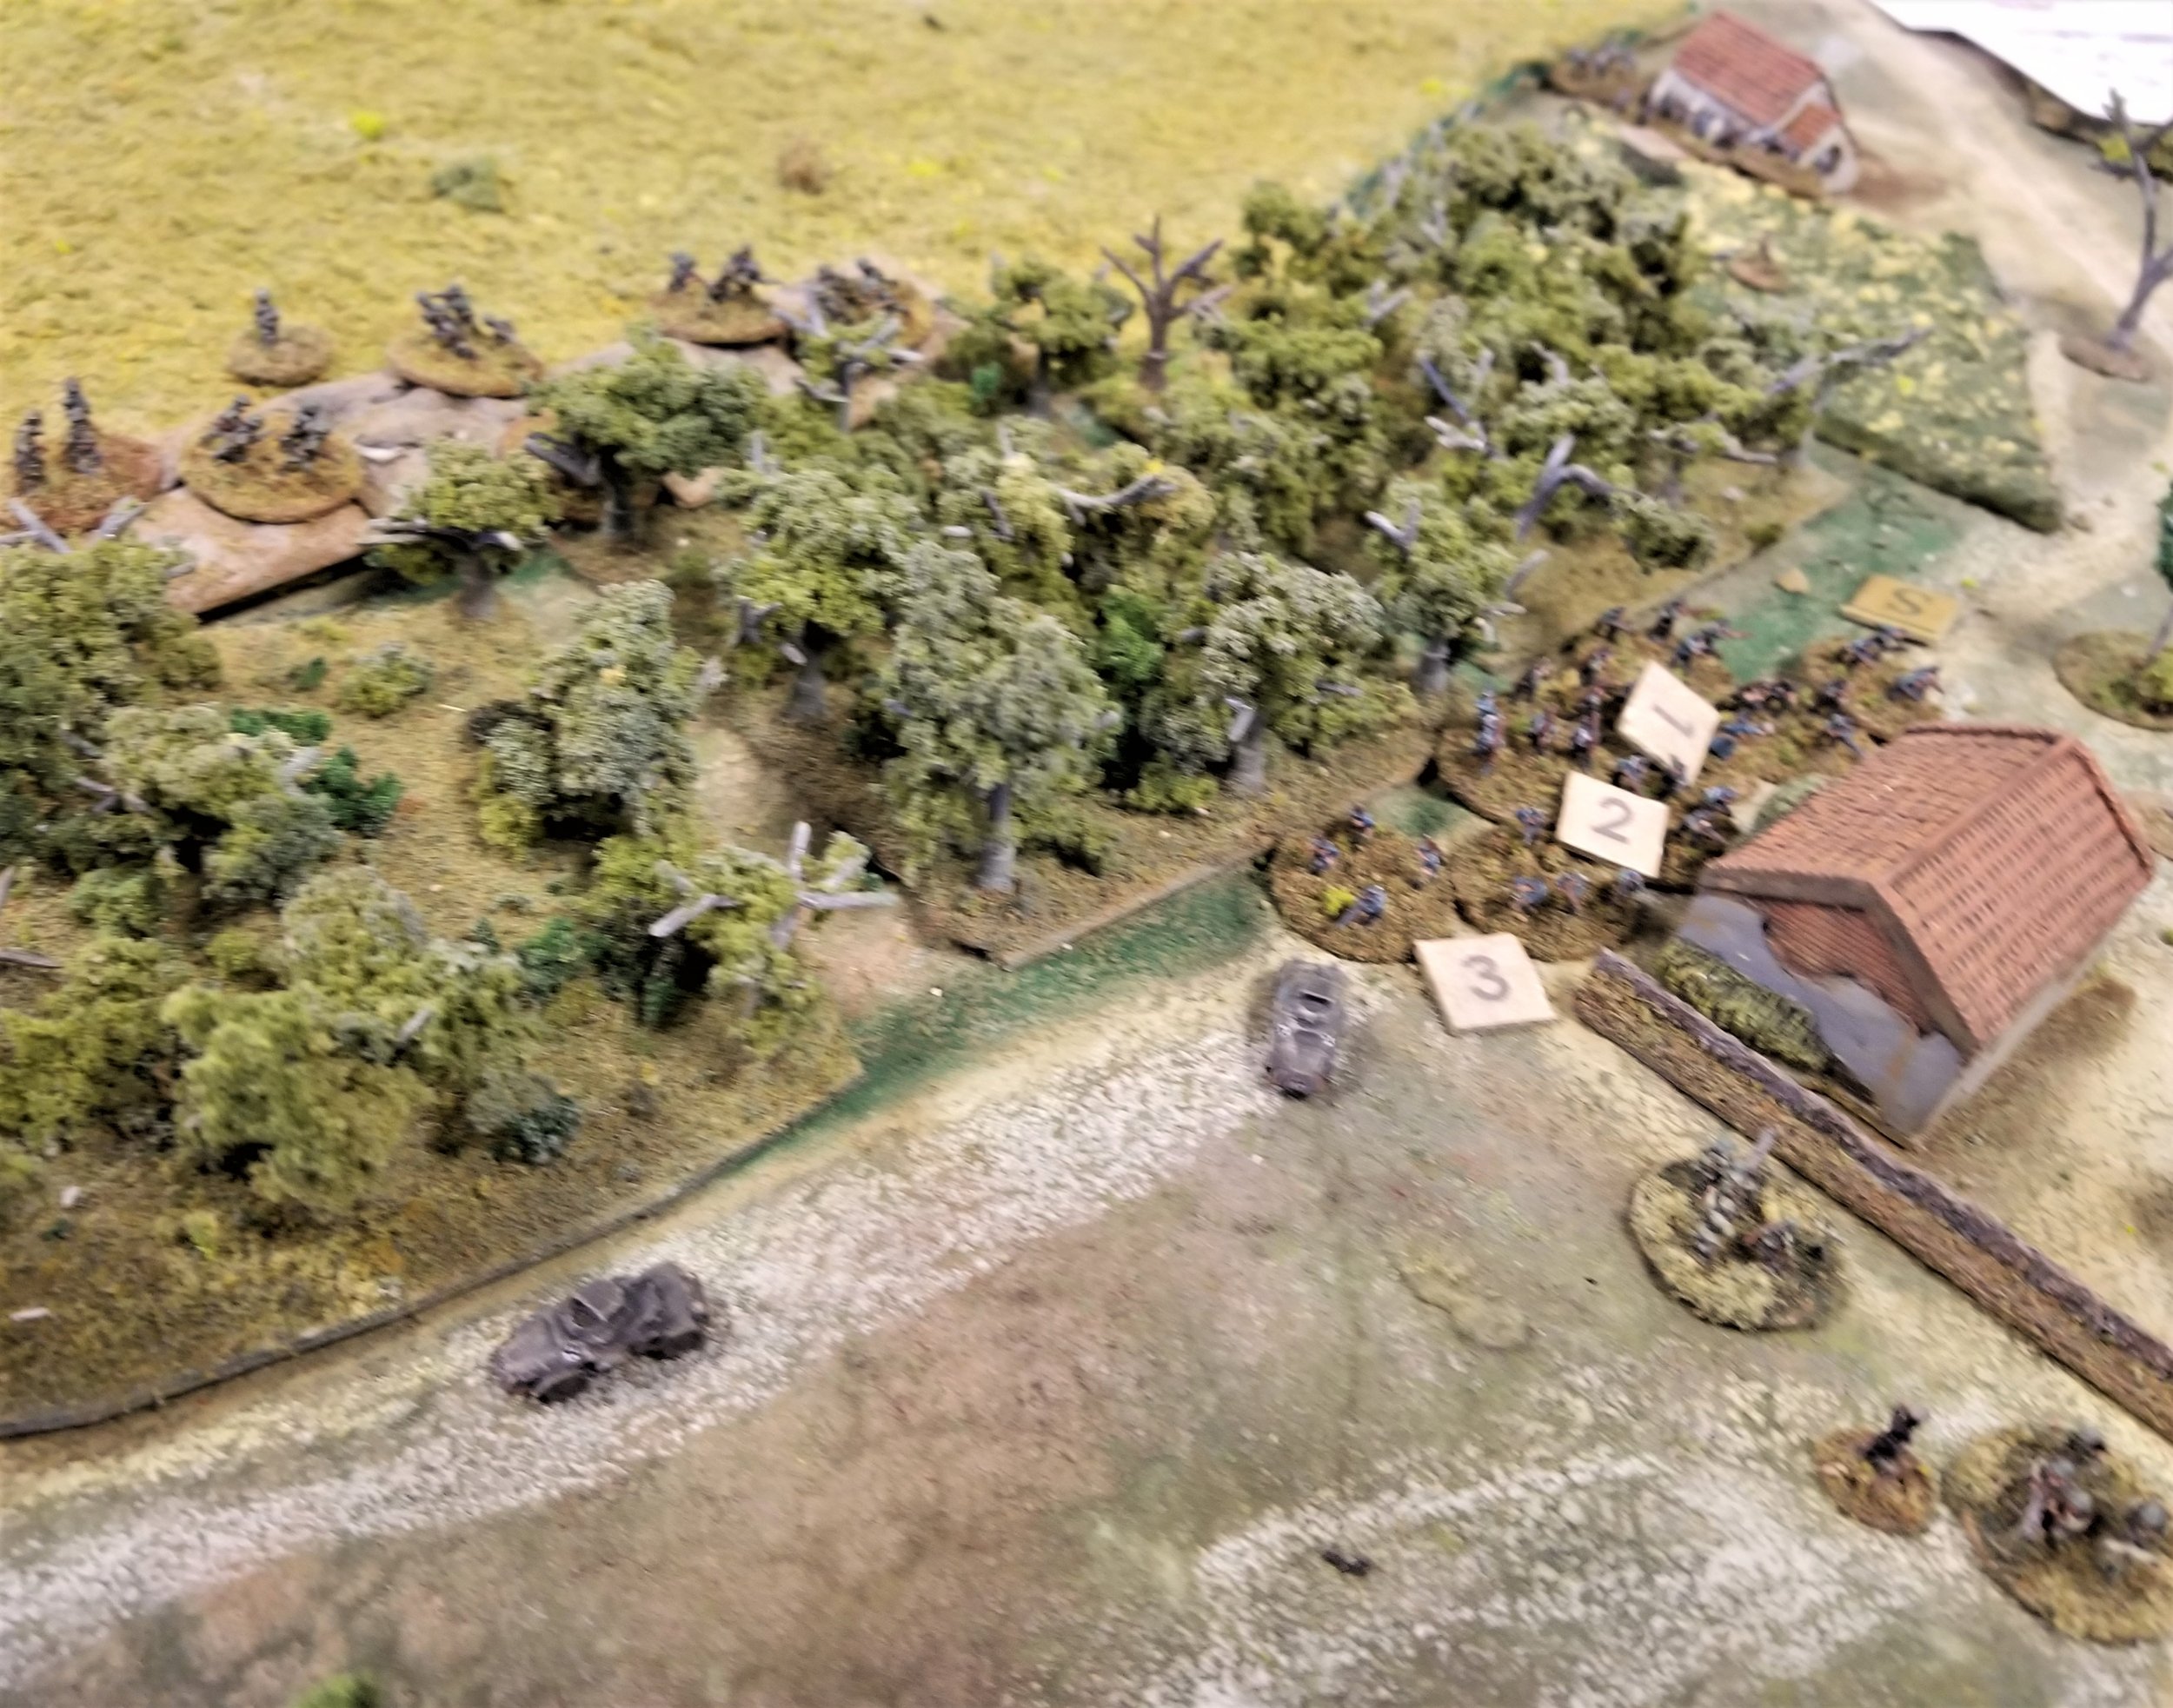
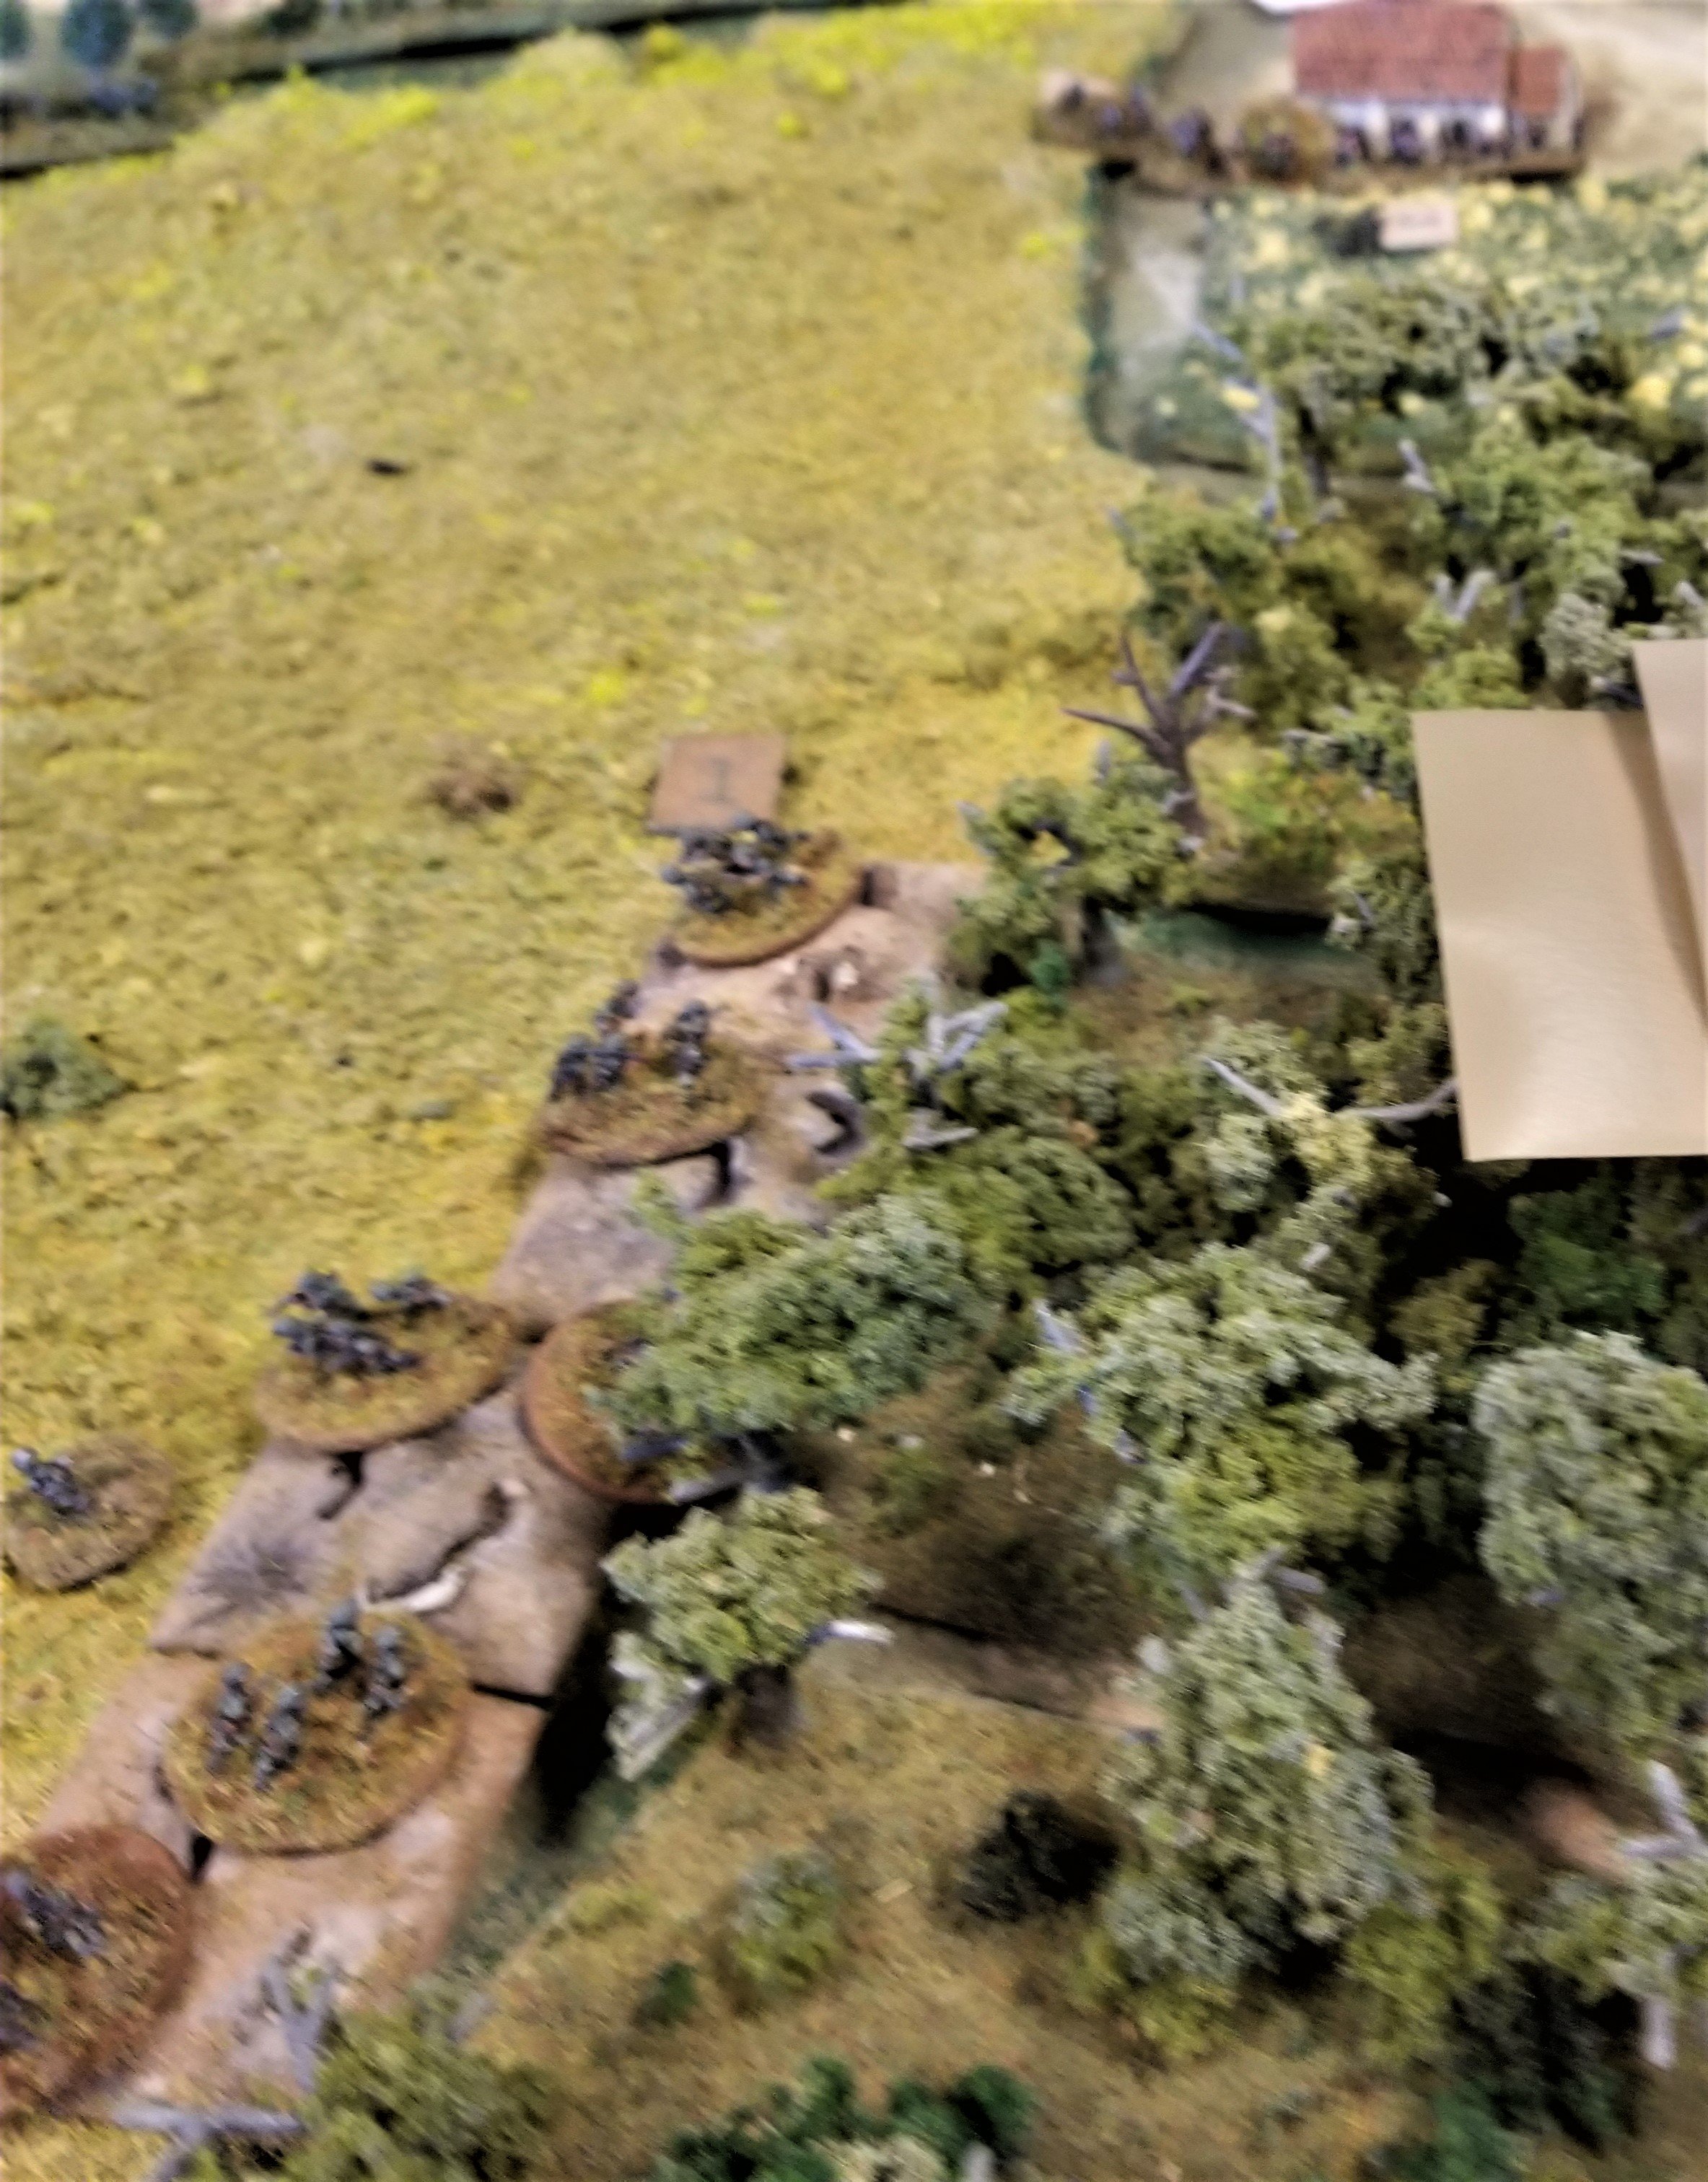
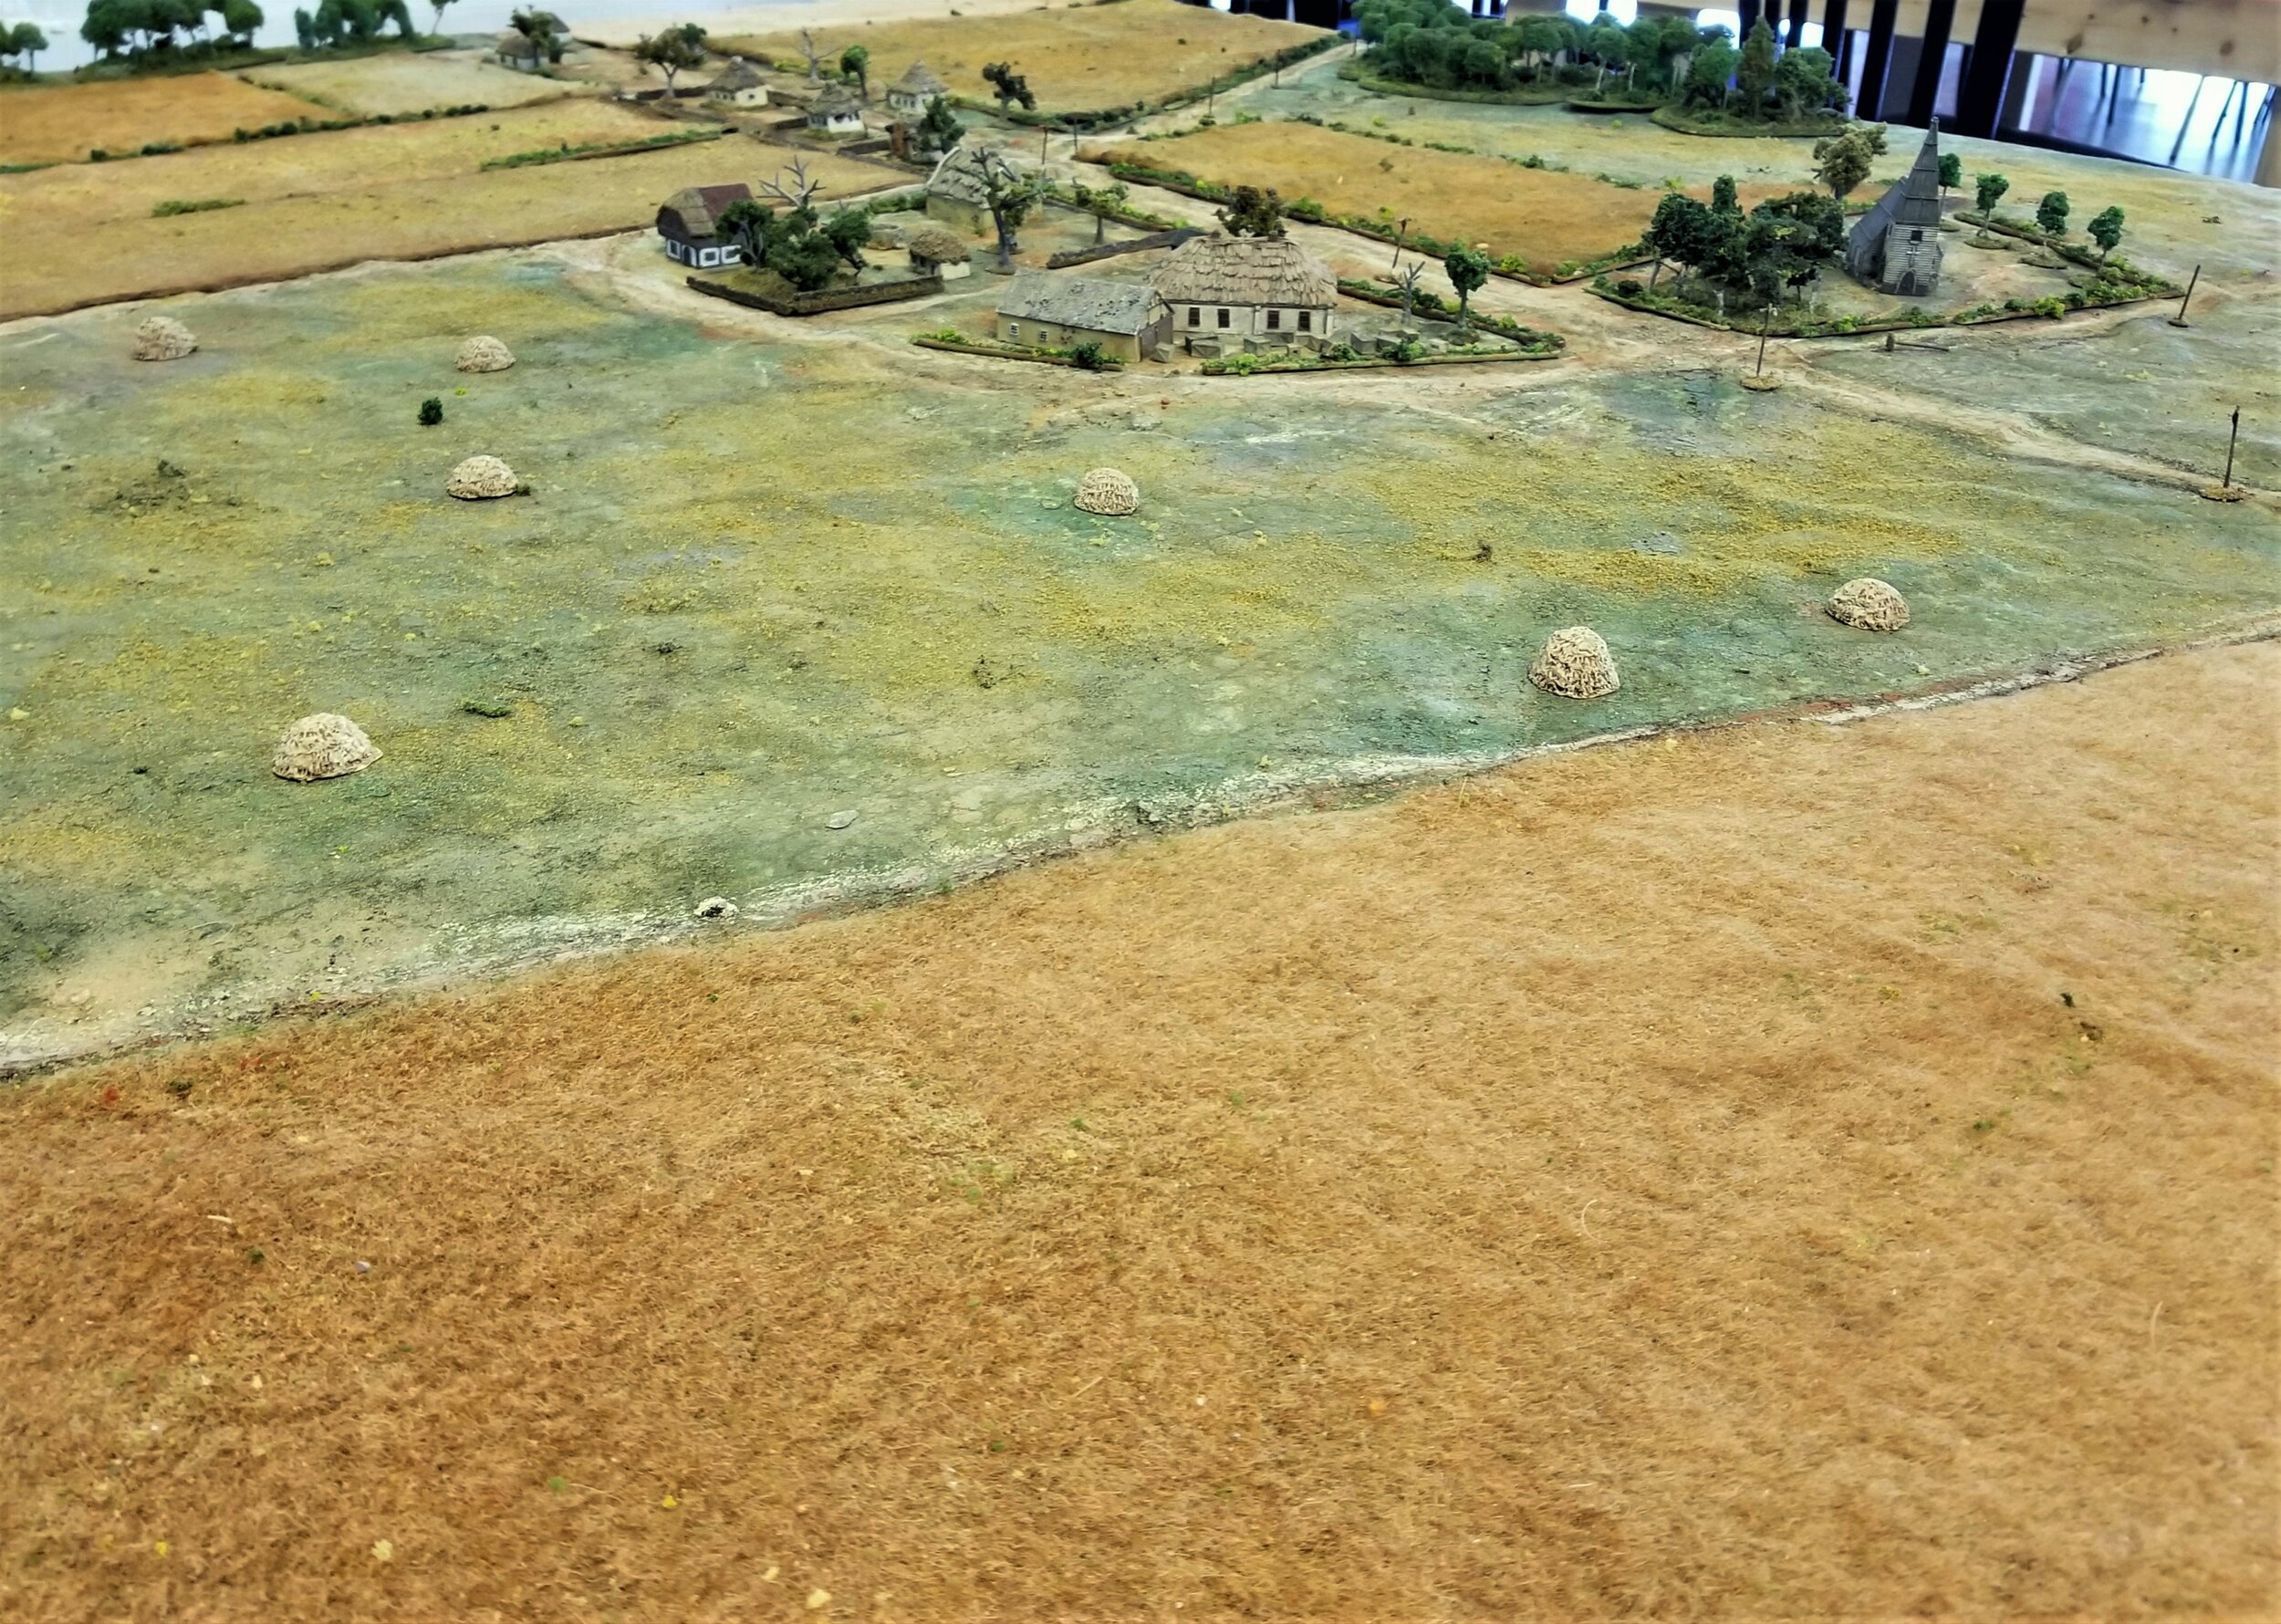
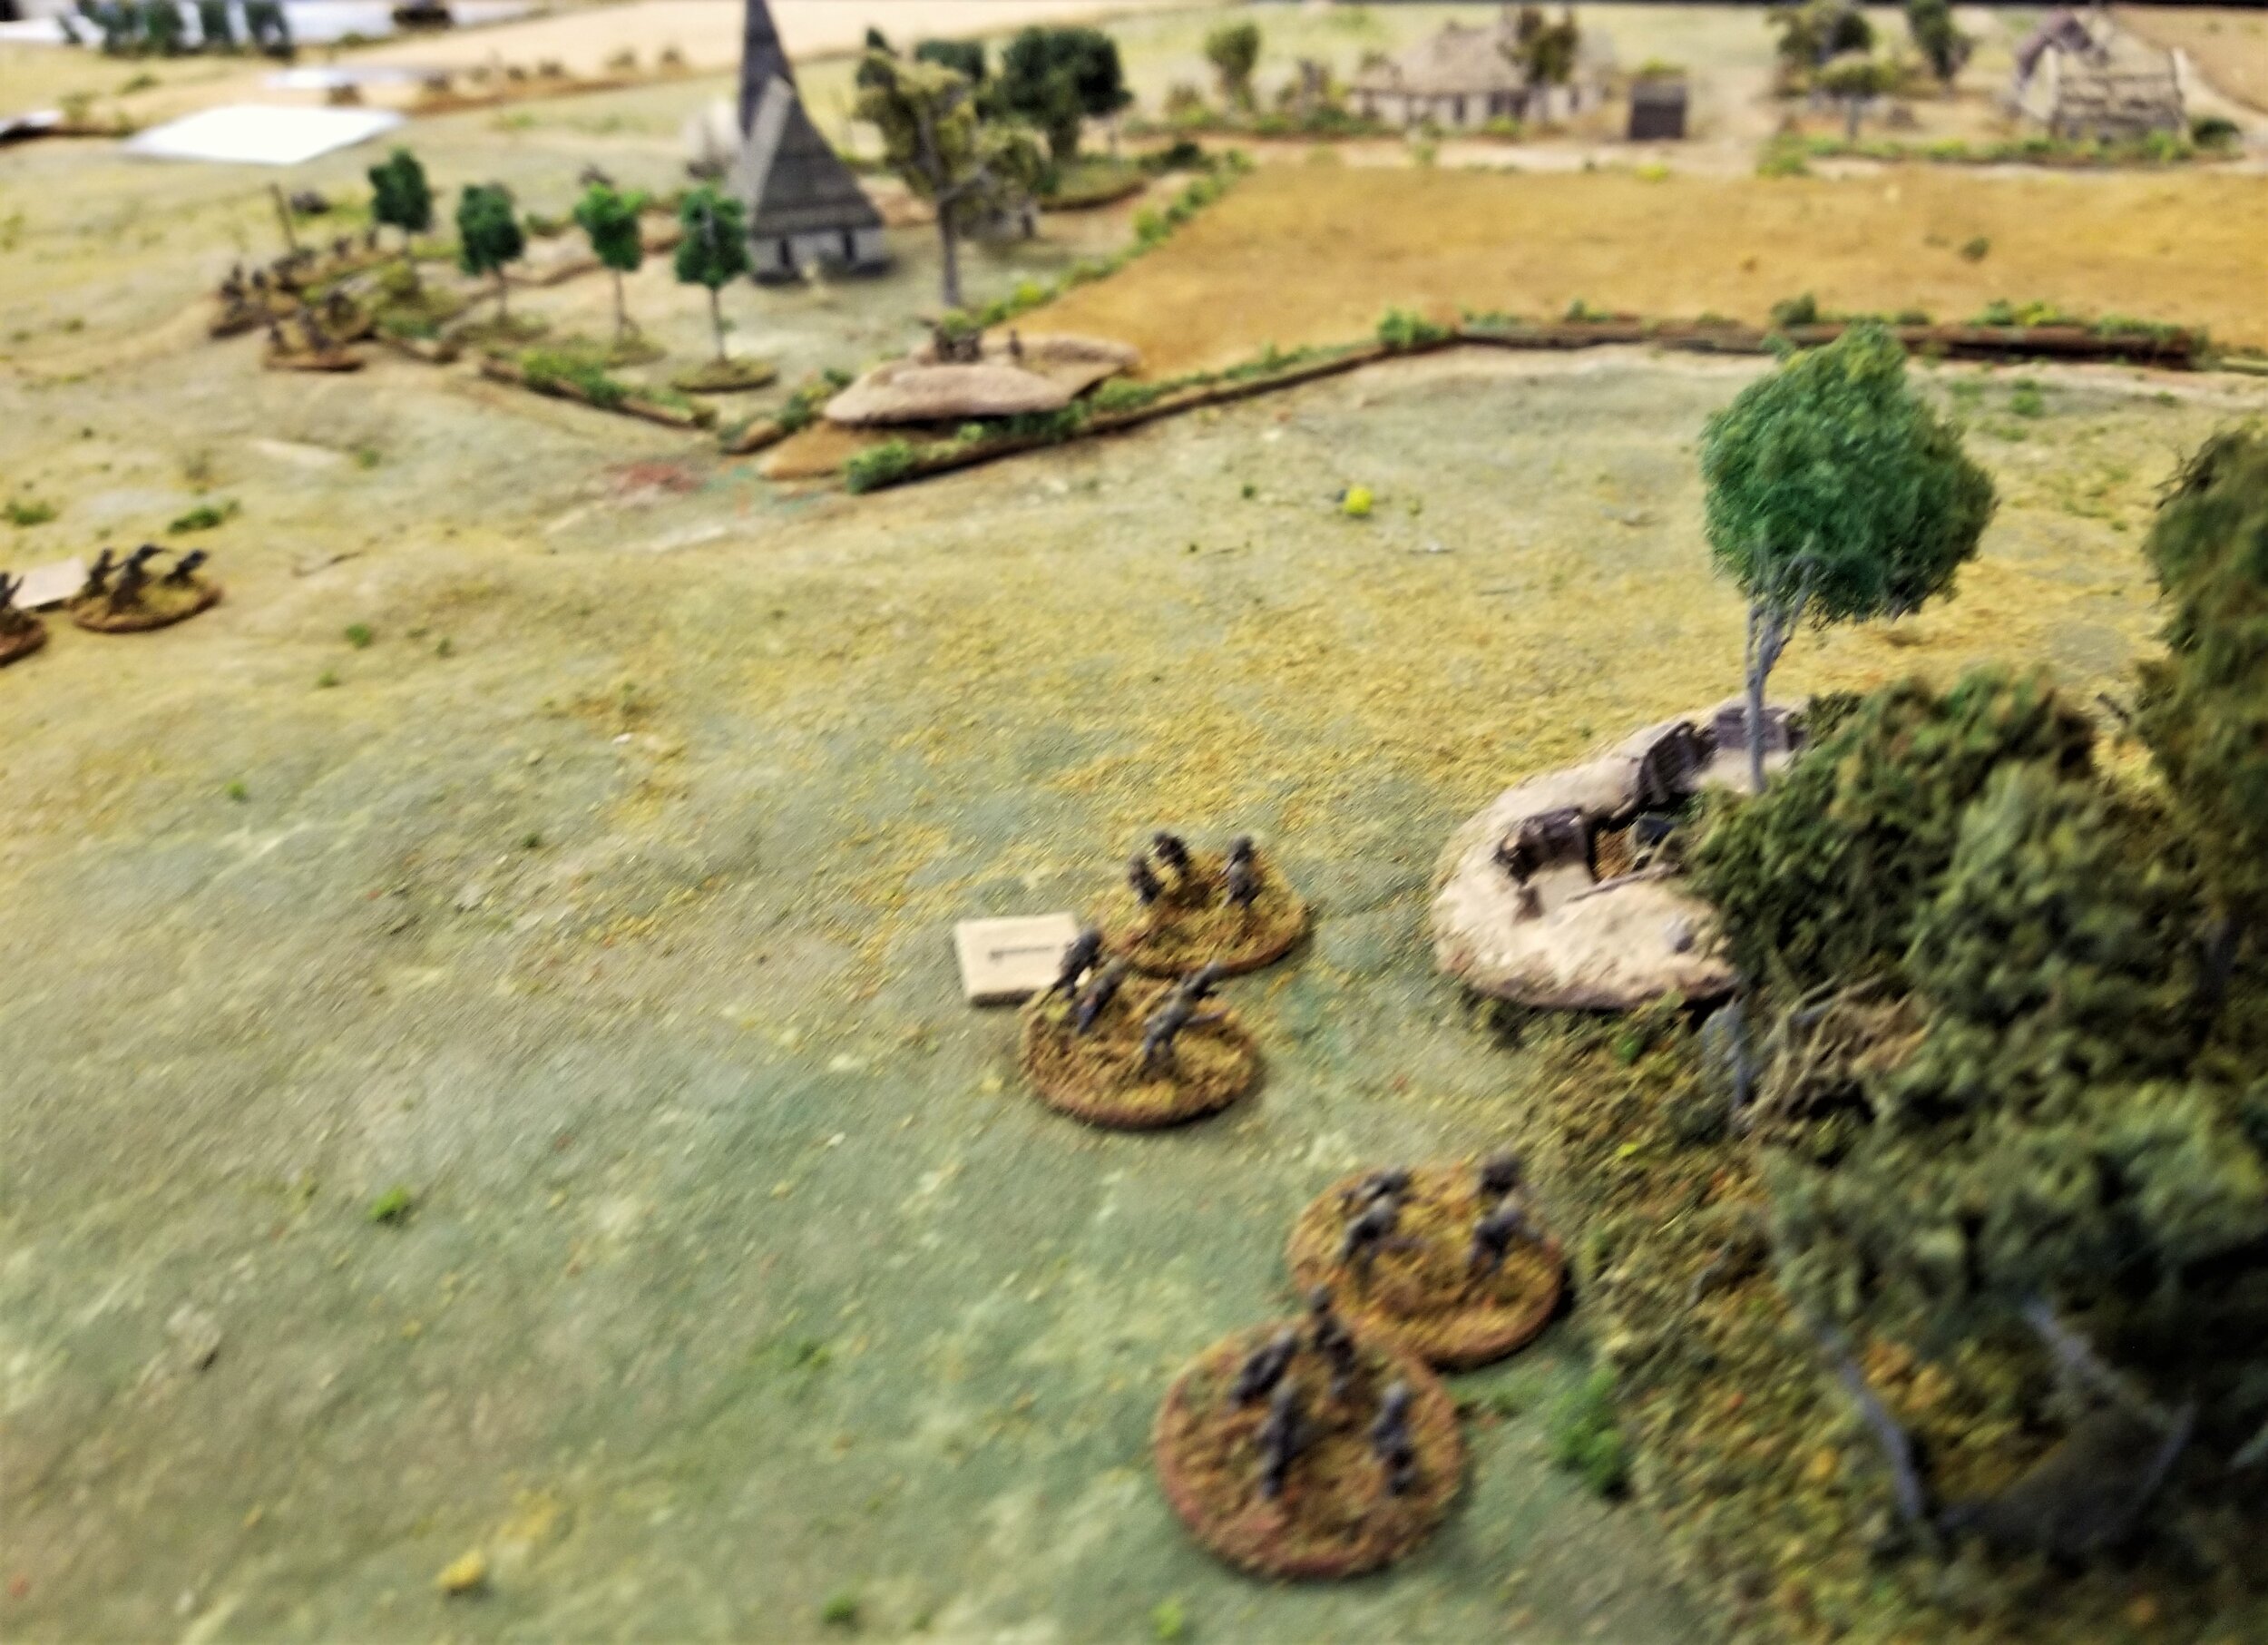
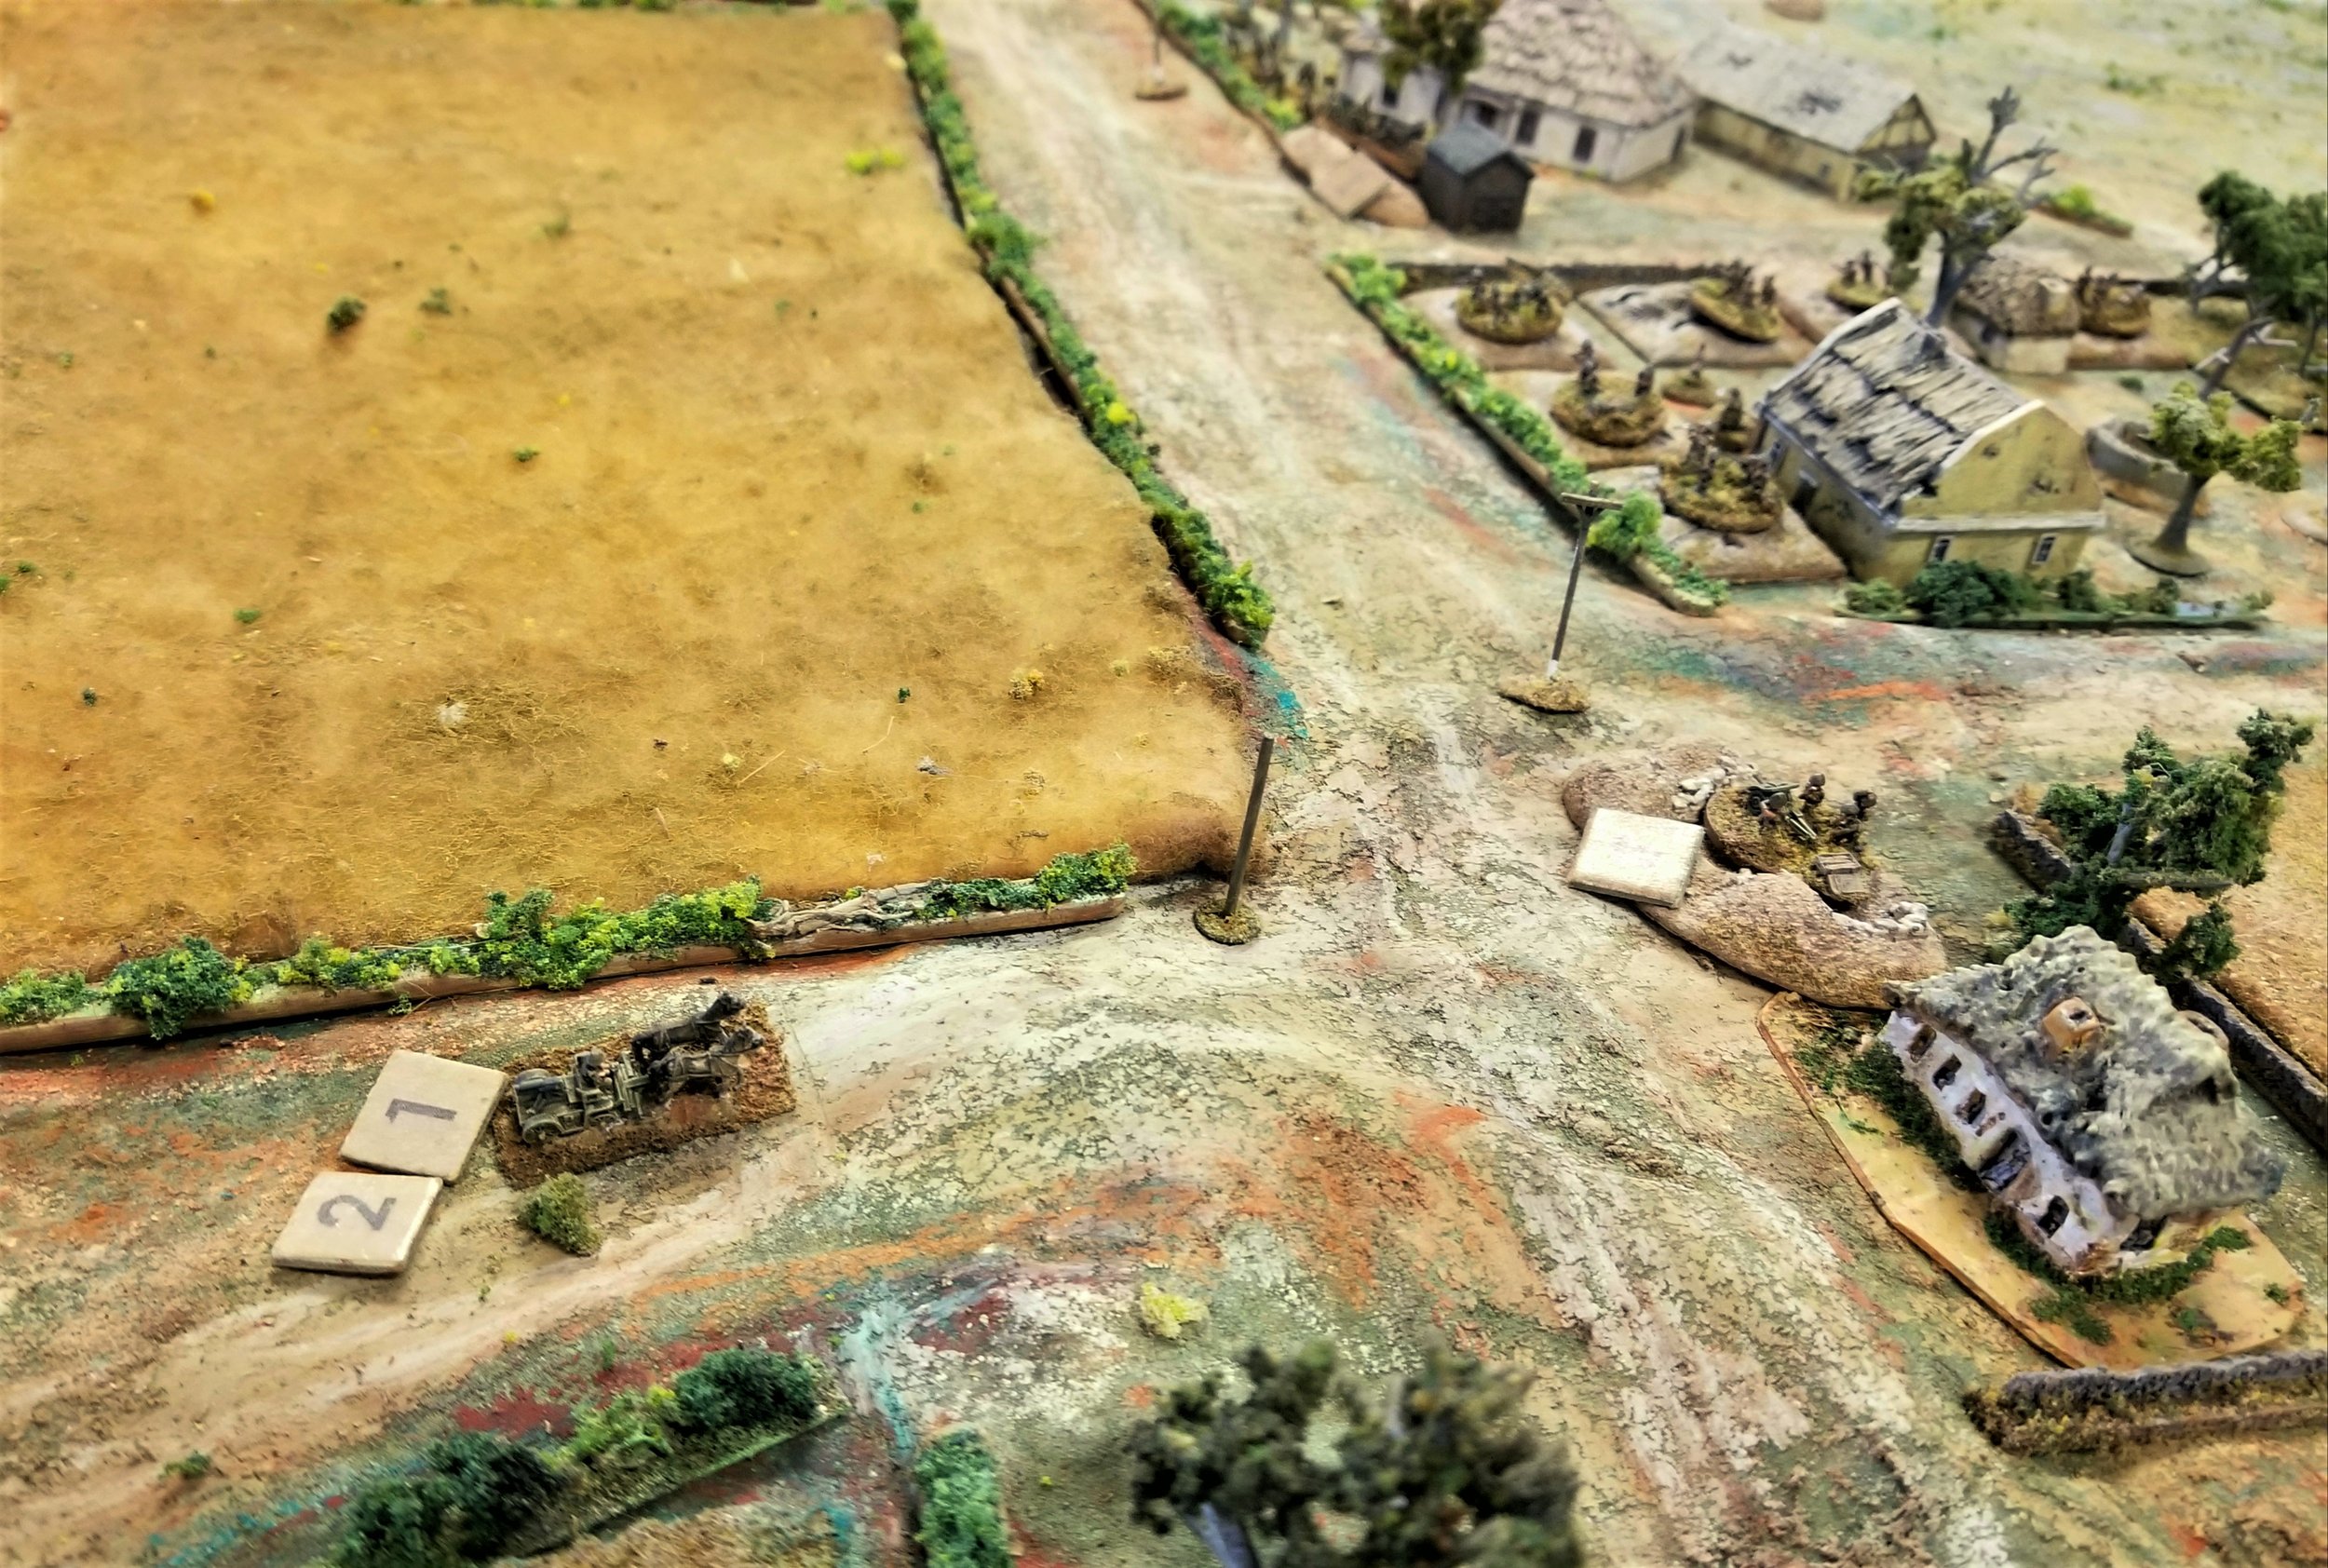
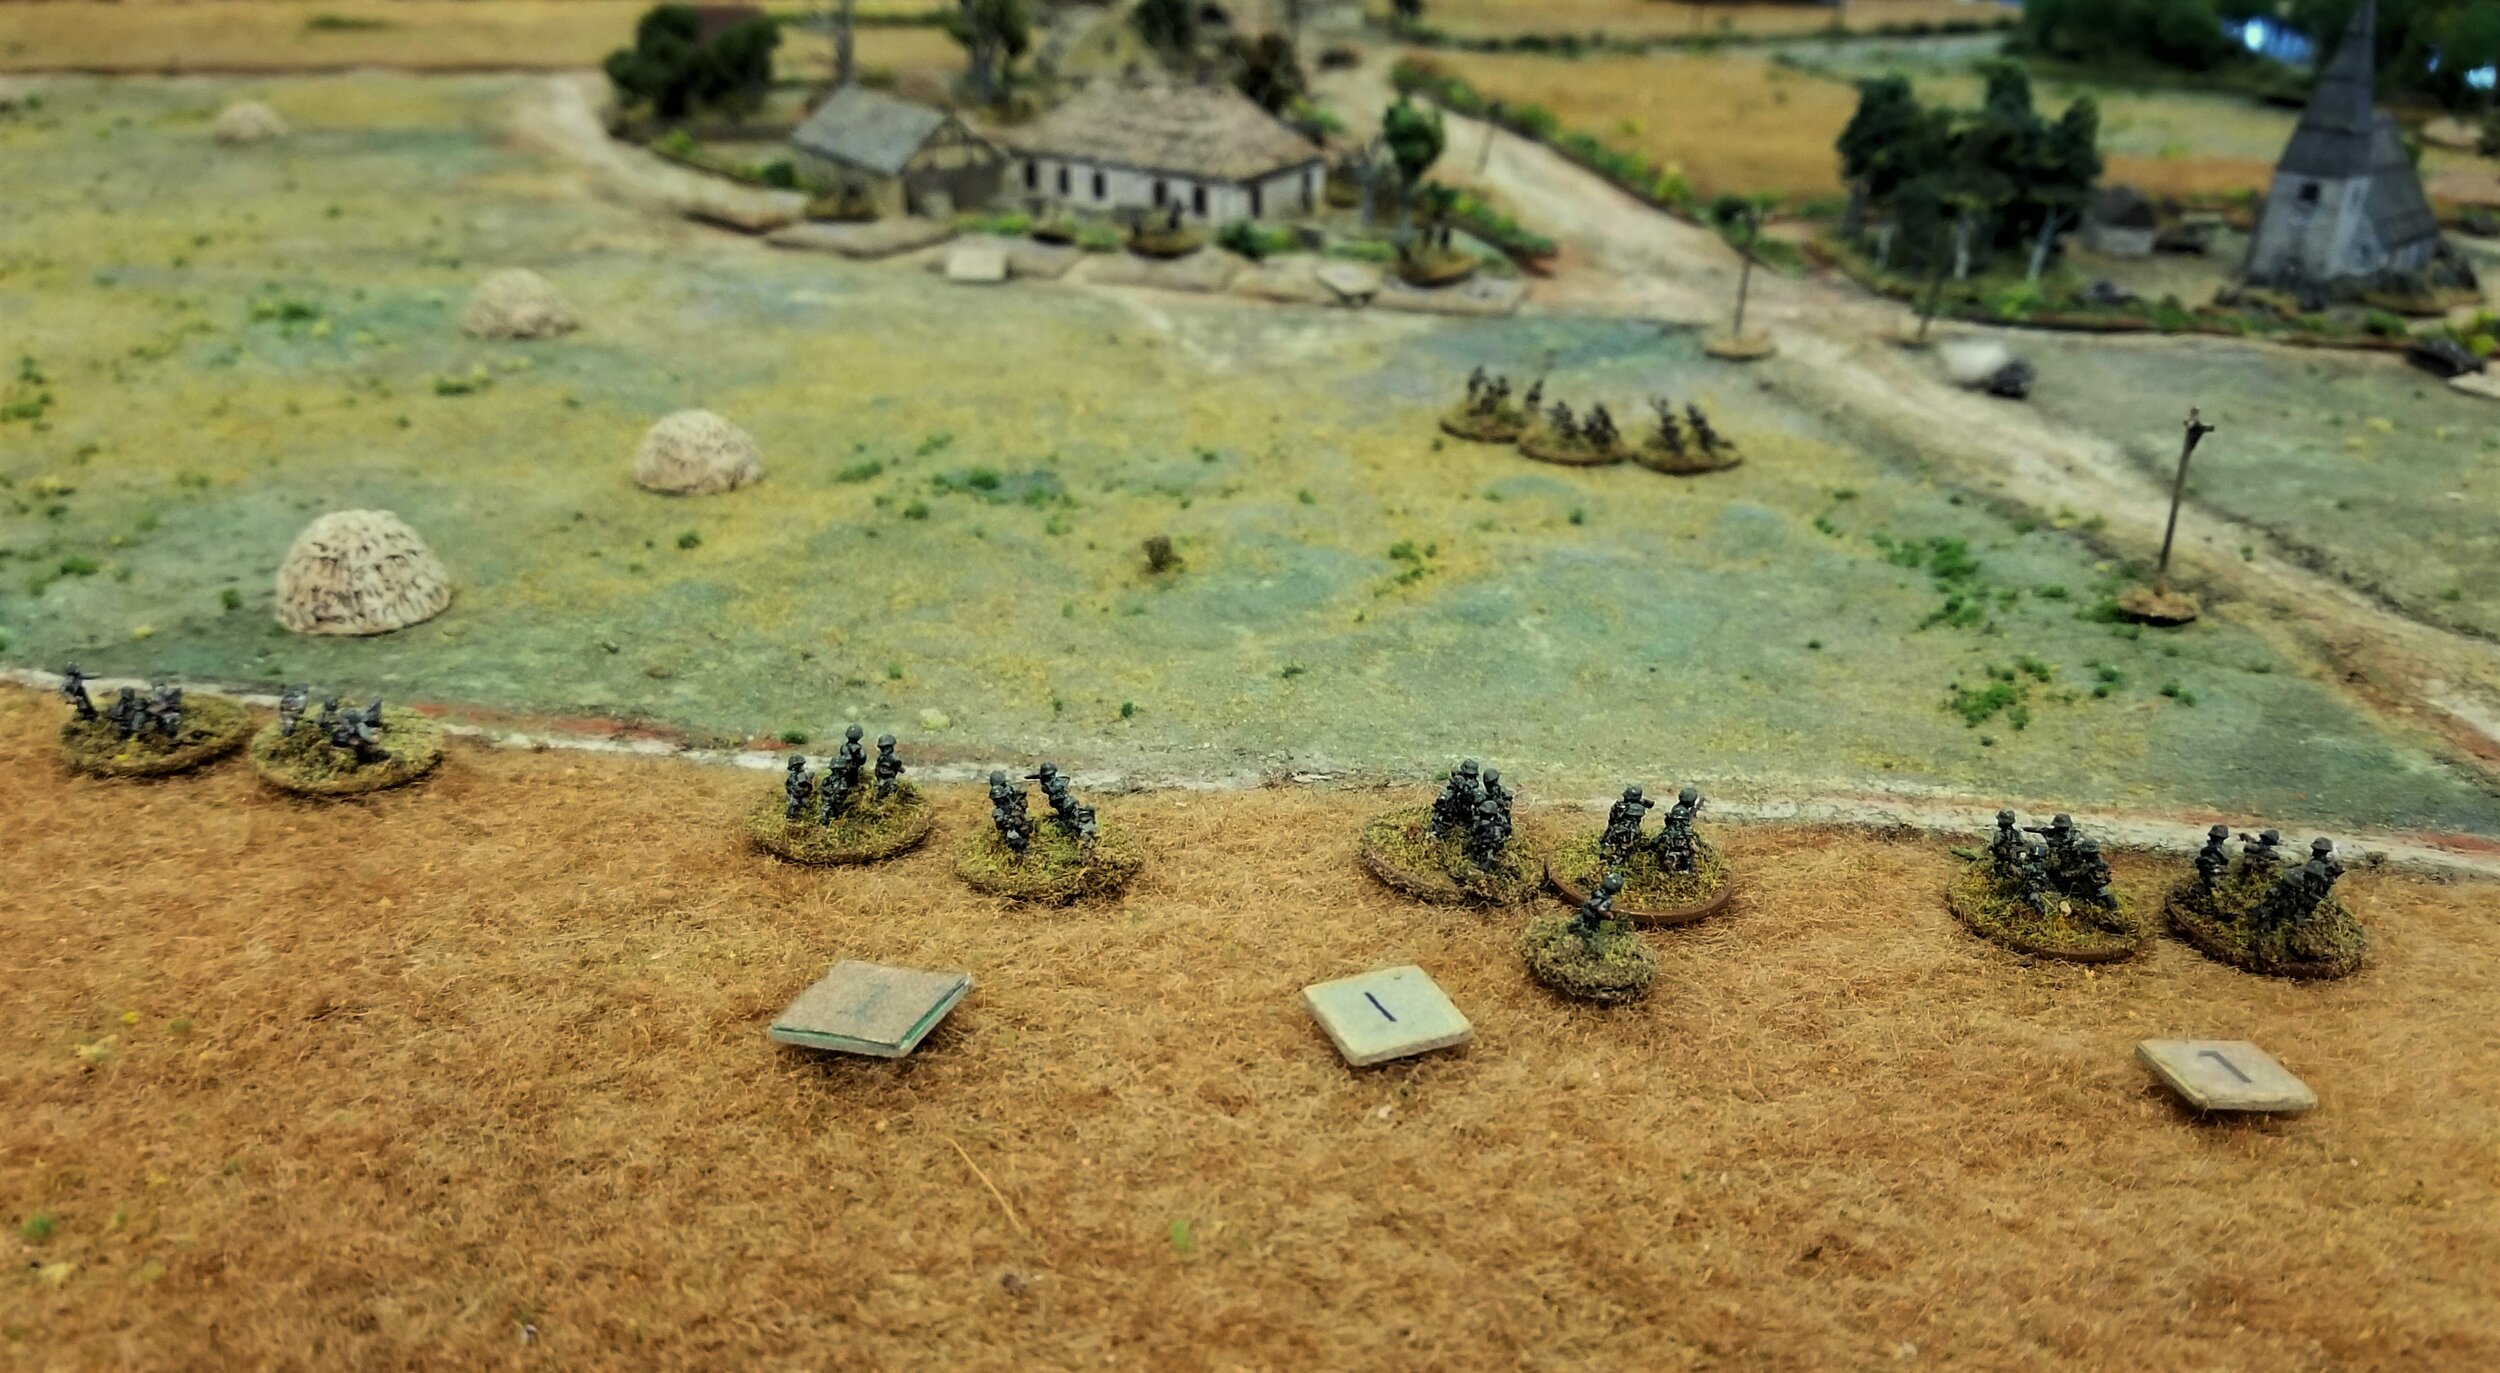
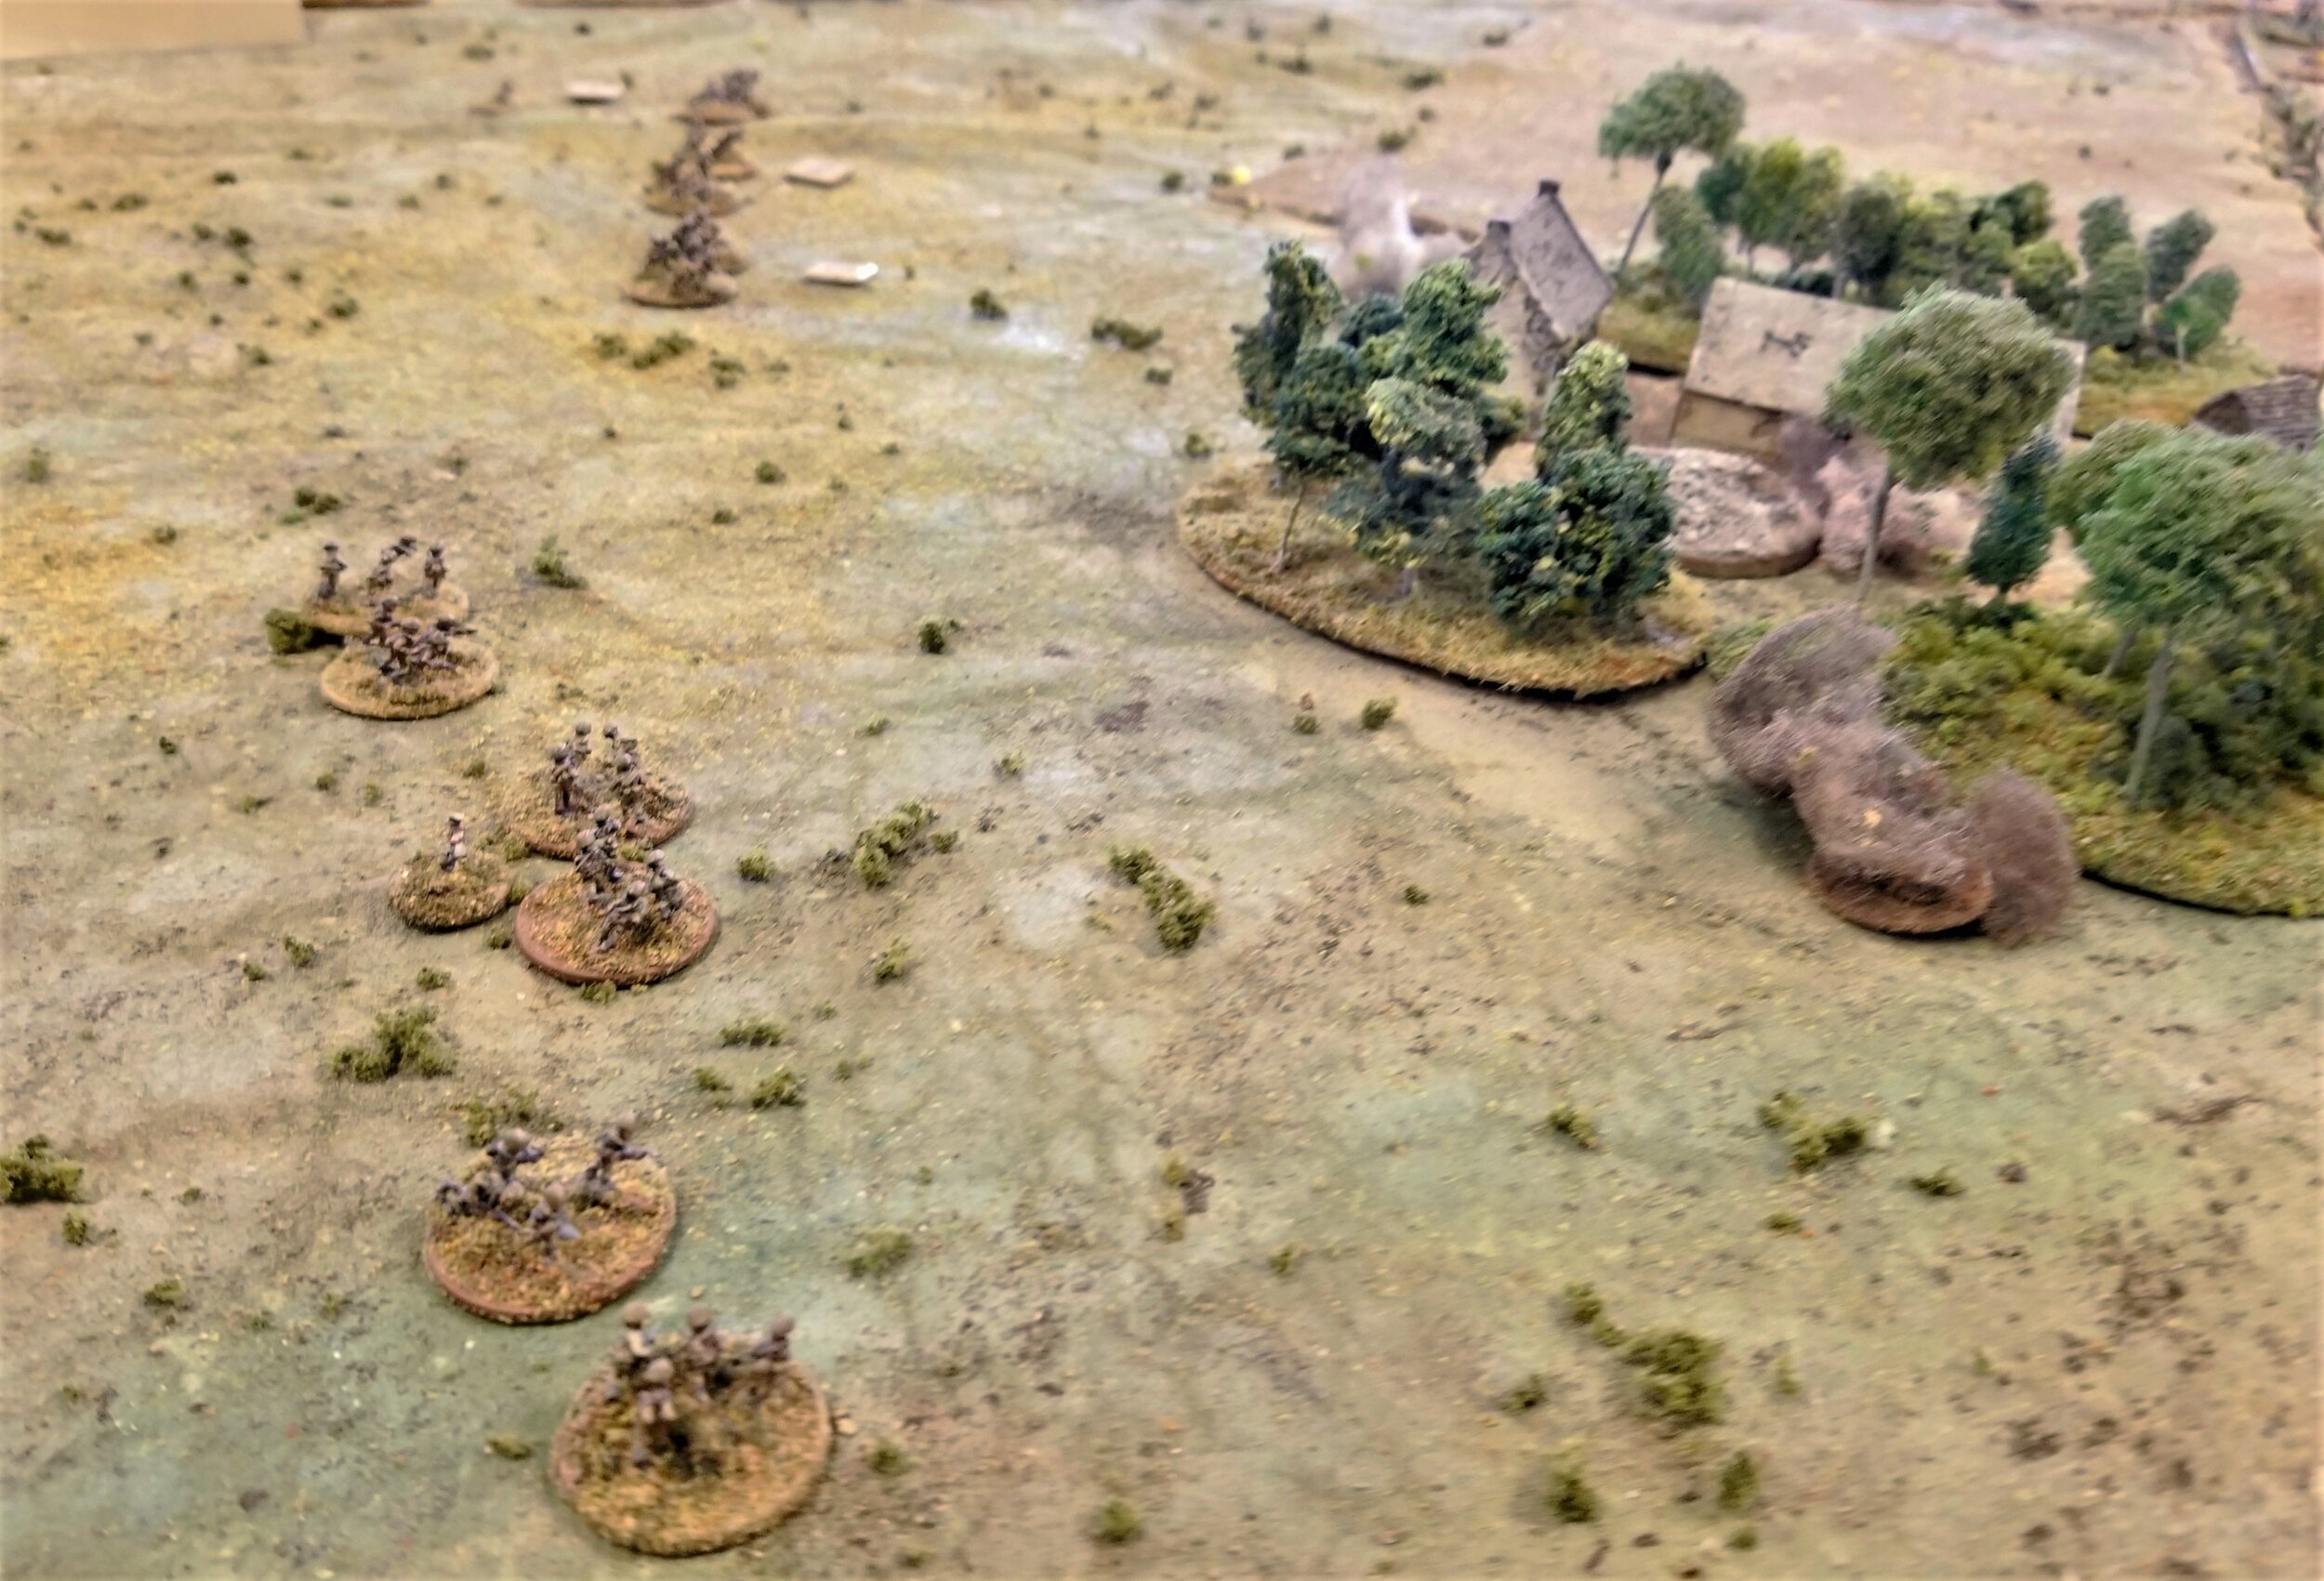
The French advanced quickly onto the table, with a whole platoon of infantry backed by the Company HQ occupying the edge of the wood about 150 yards in front of 2nd Platoon's position. They quickly spotted the AT gun in the garden, and let rip with fire that killed one crew member and forced the others to drag the gun back behind the house. So much for getting a quick shot off at a tank!

My infantry returned the favour and, for the rest of the battle, 2nd Platoon and the French platoon in the woods would be locked in an inconclusive firefight. I think, on balance, my 2nd Platoon took slightly more casualties (four men dead) but they certainly weren't in any danger of being moved and, just as the game was ending, my FOO had successfully called in the off-table mortars and was just getting their range!

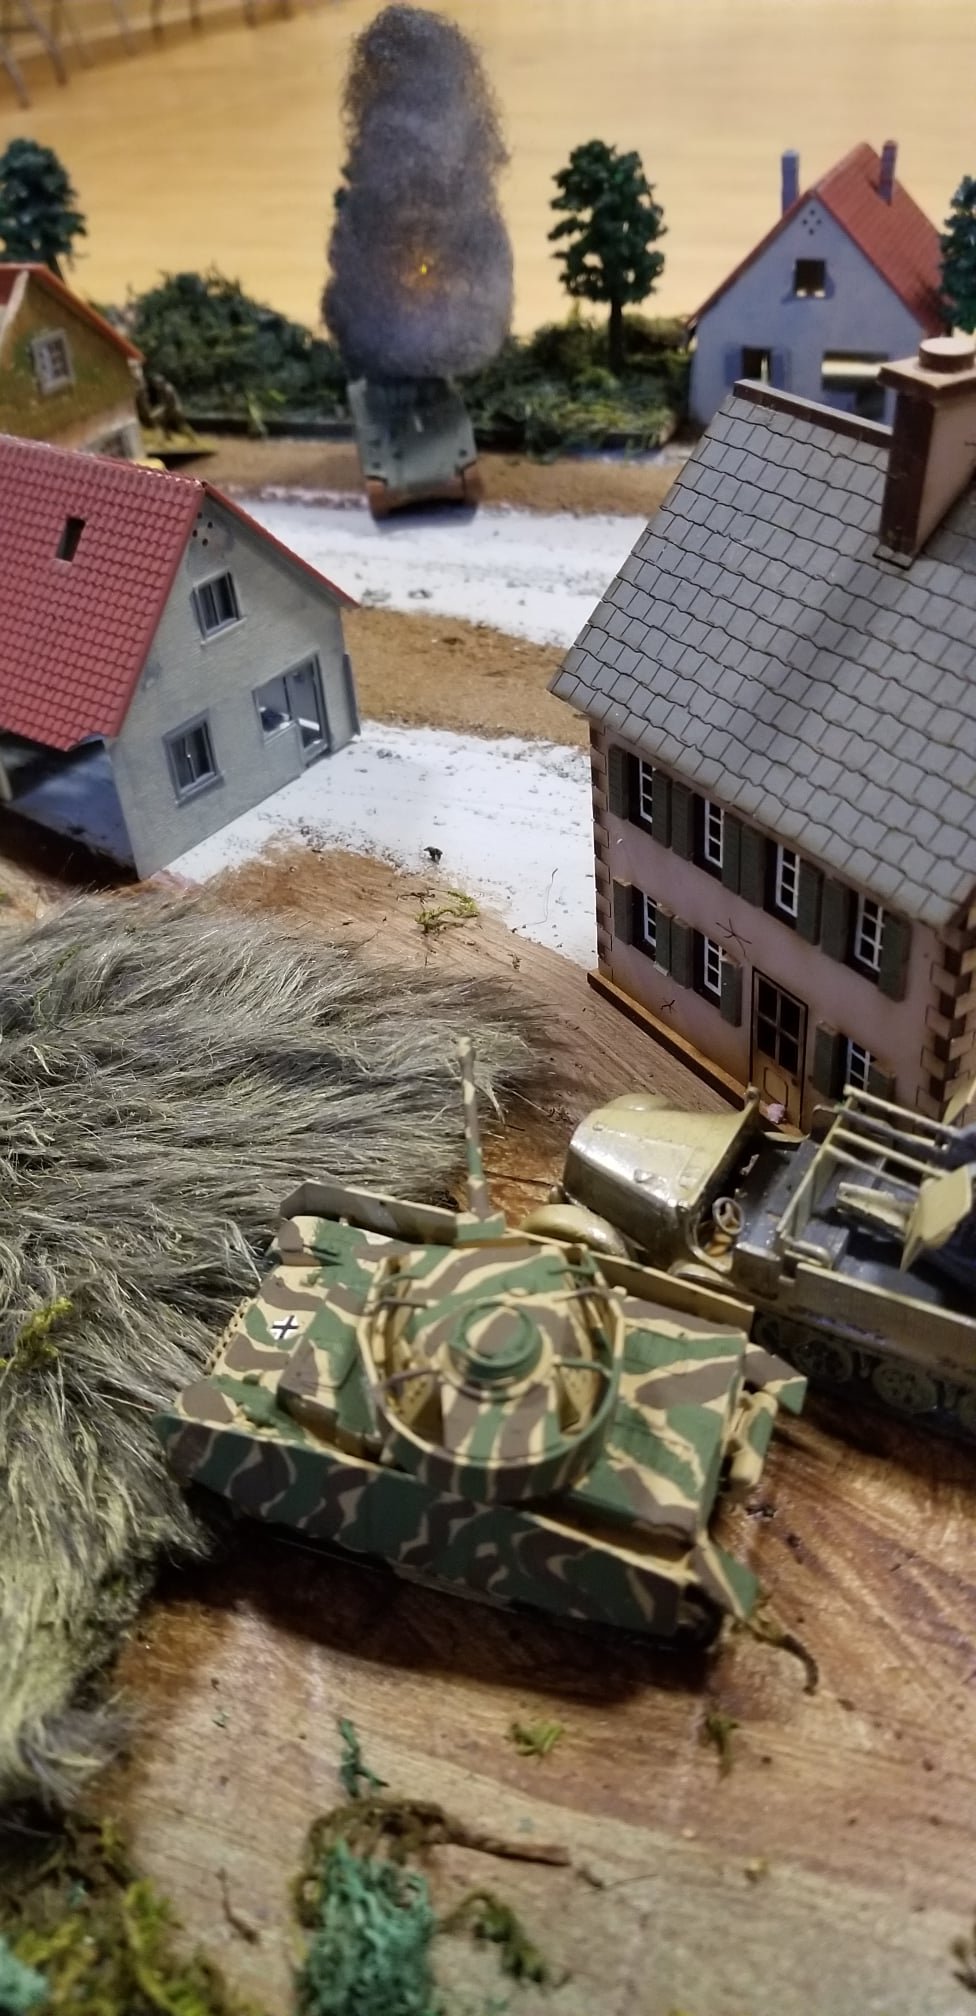
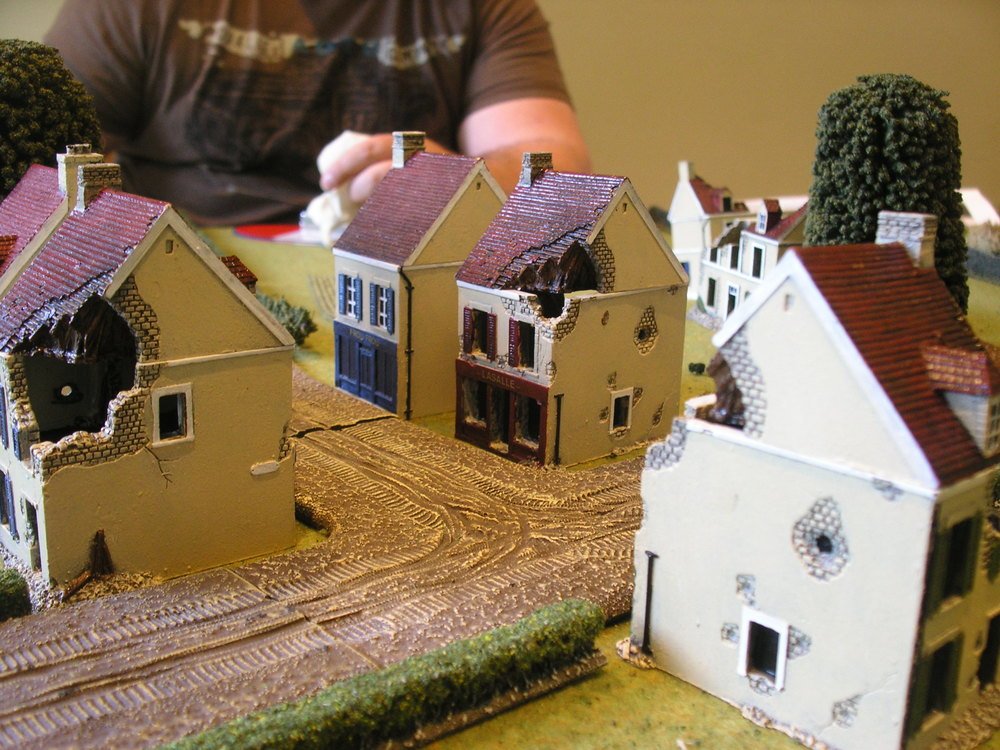
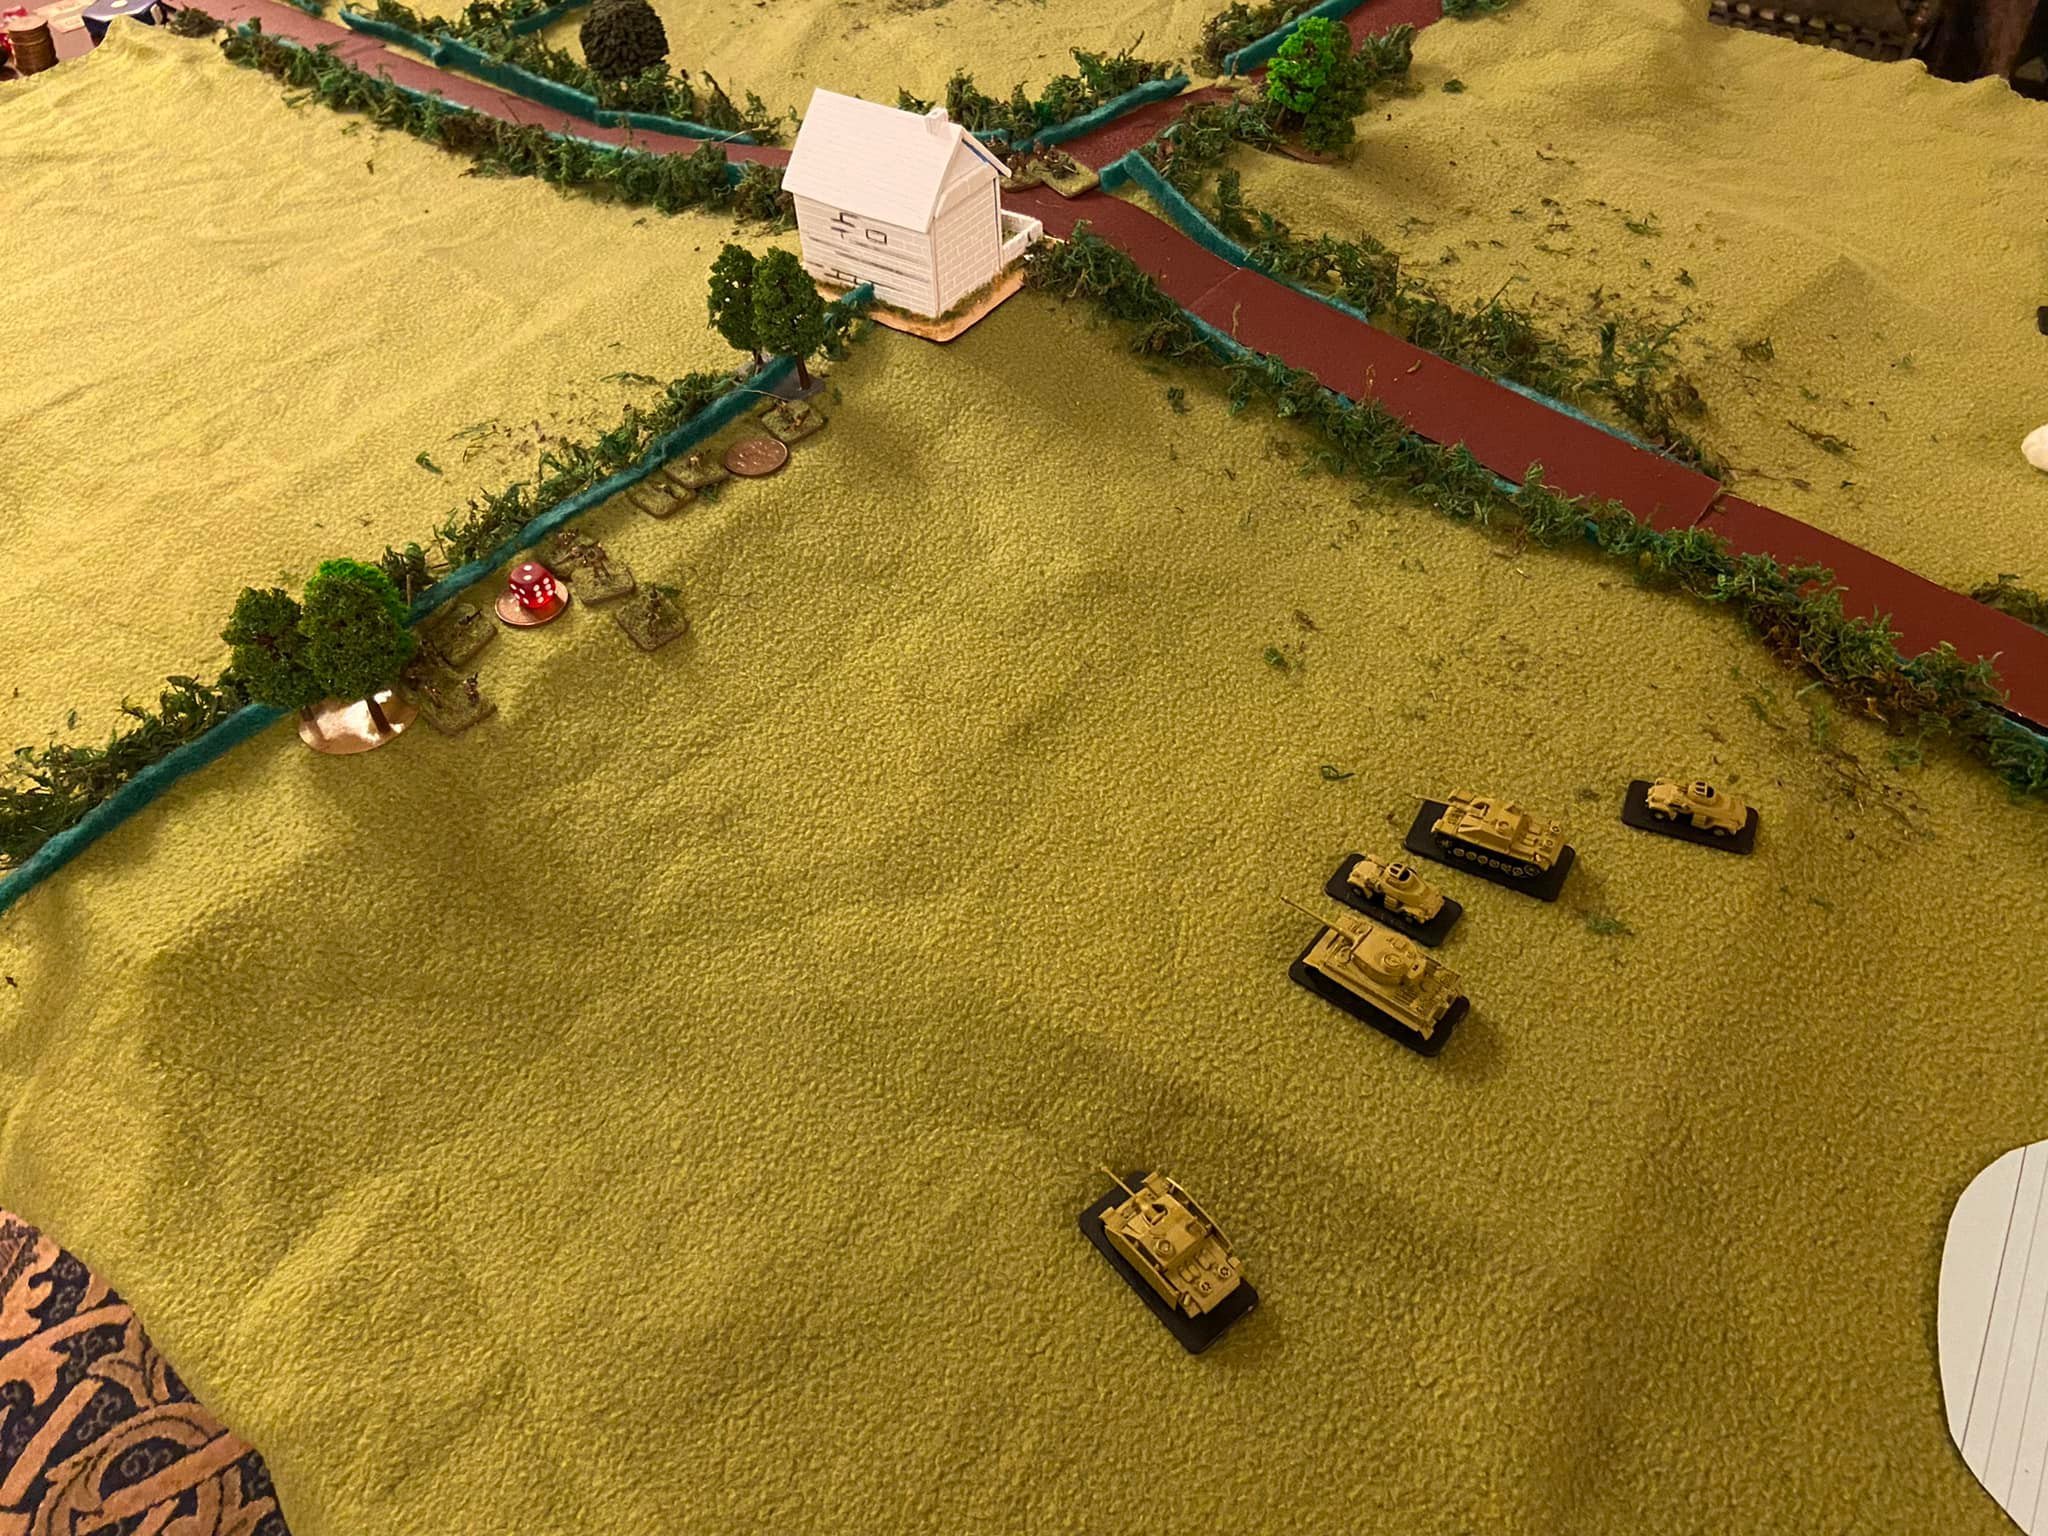
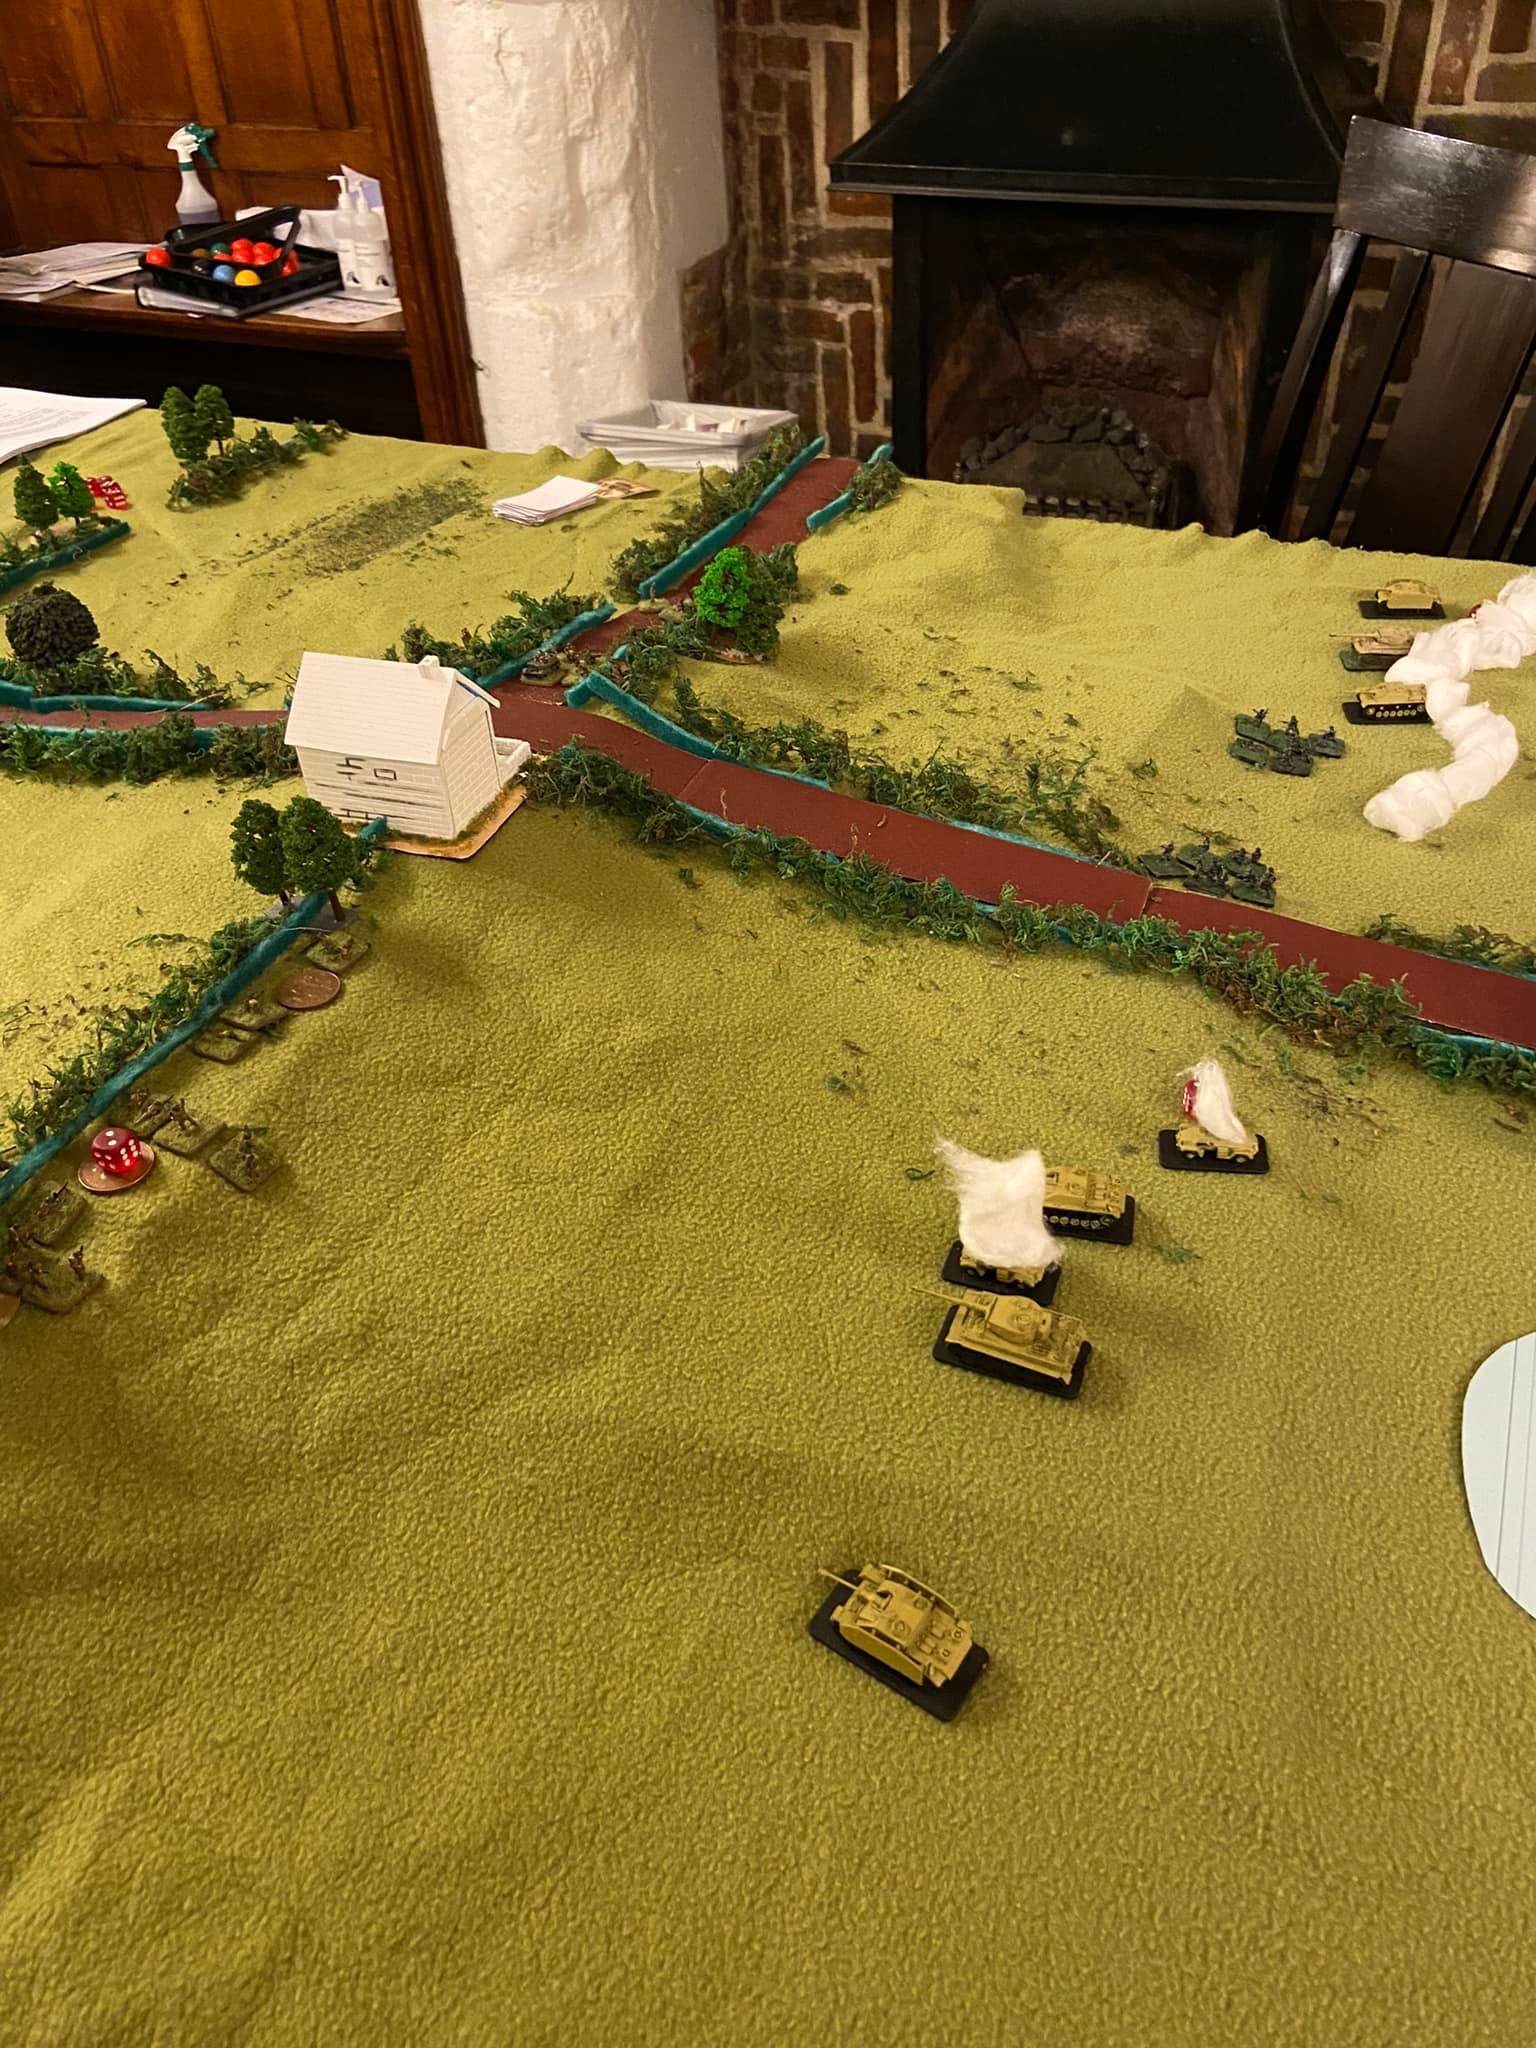
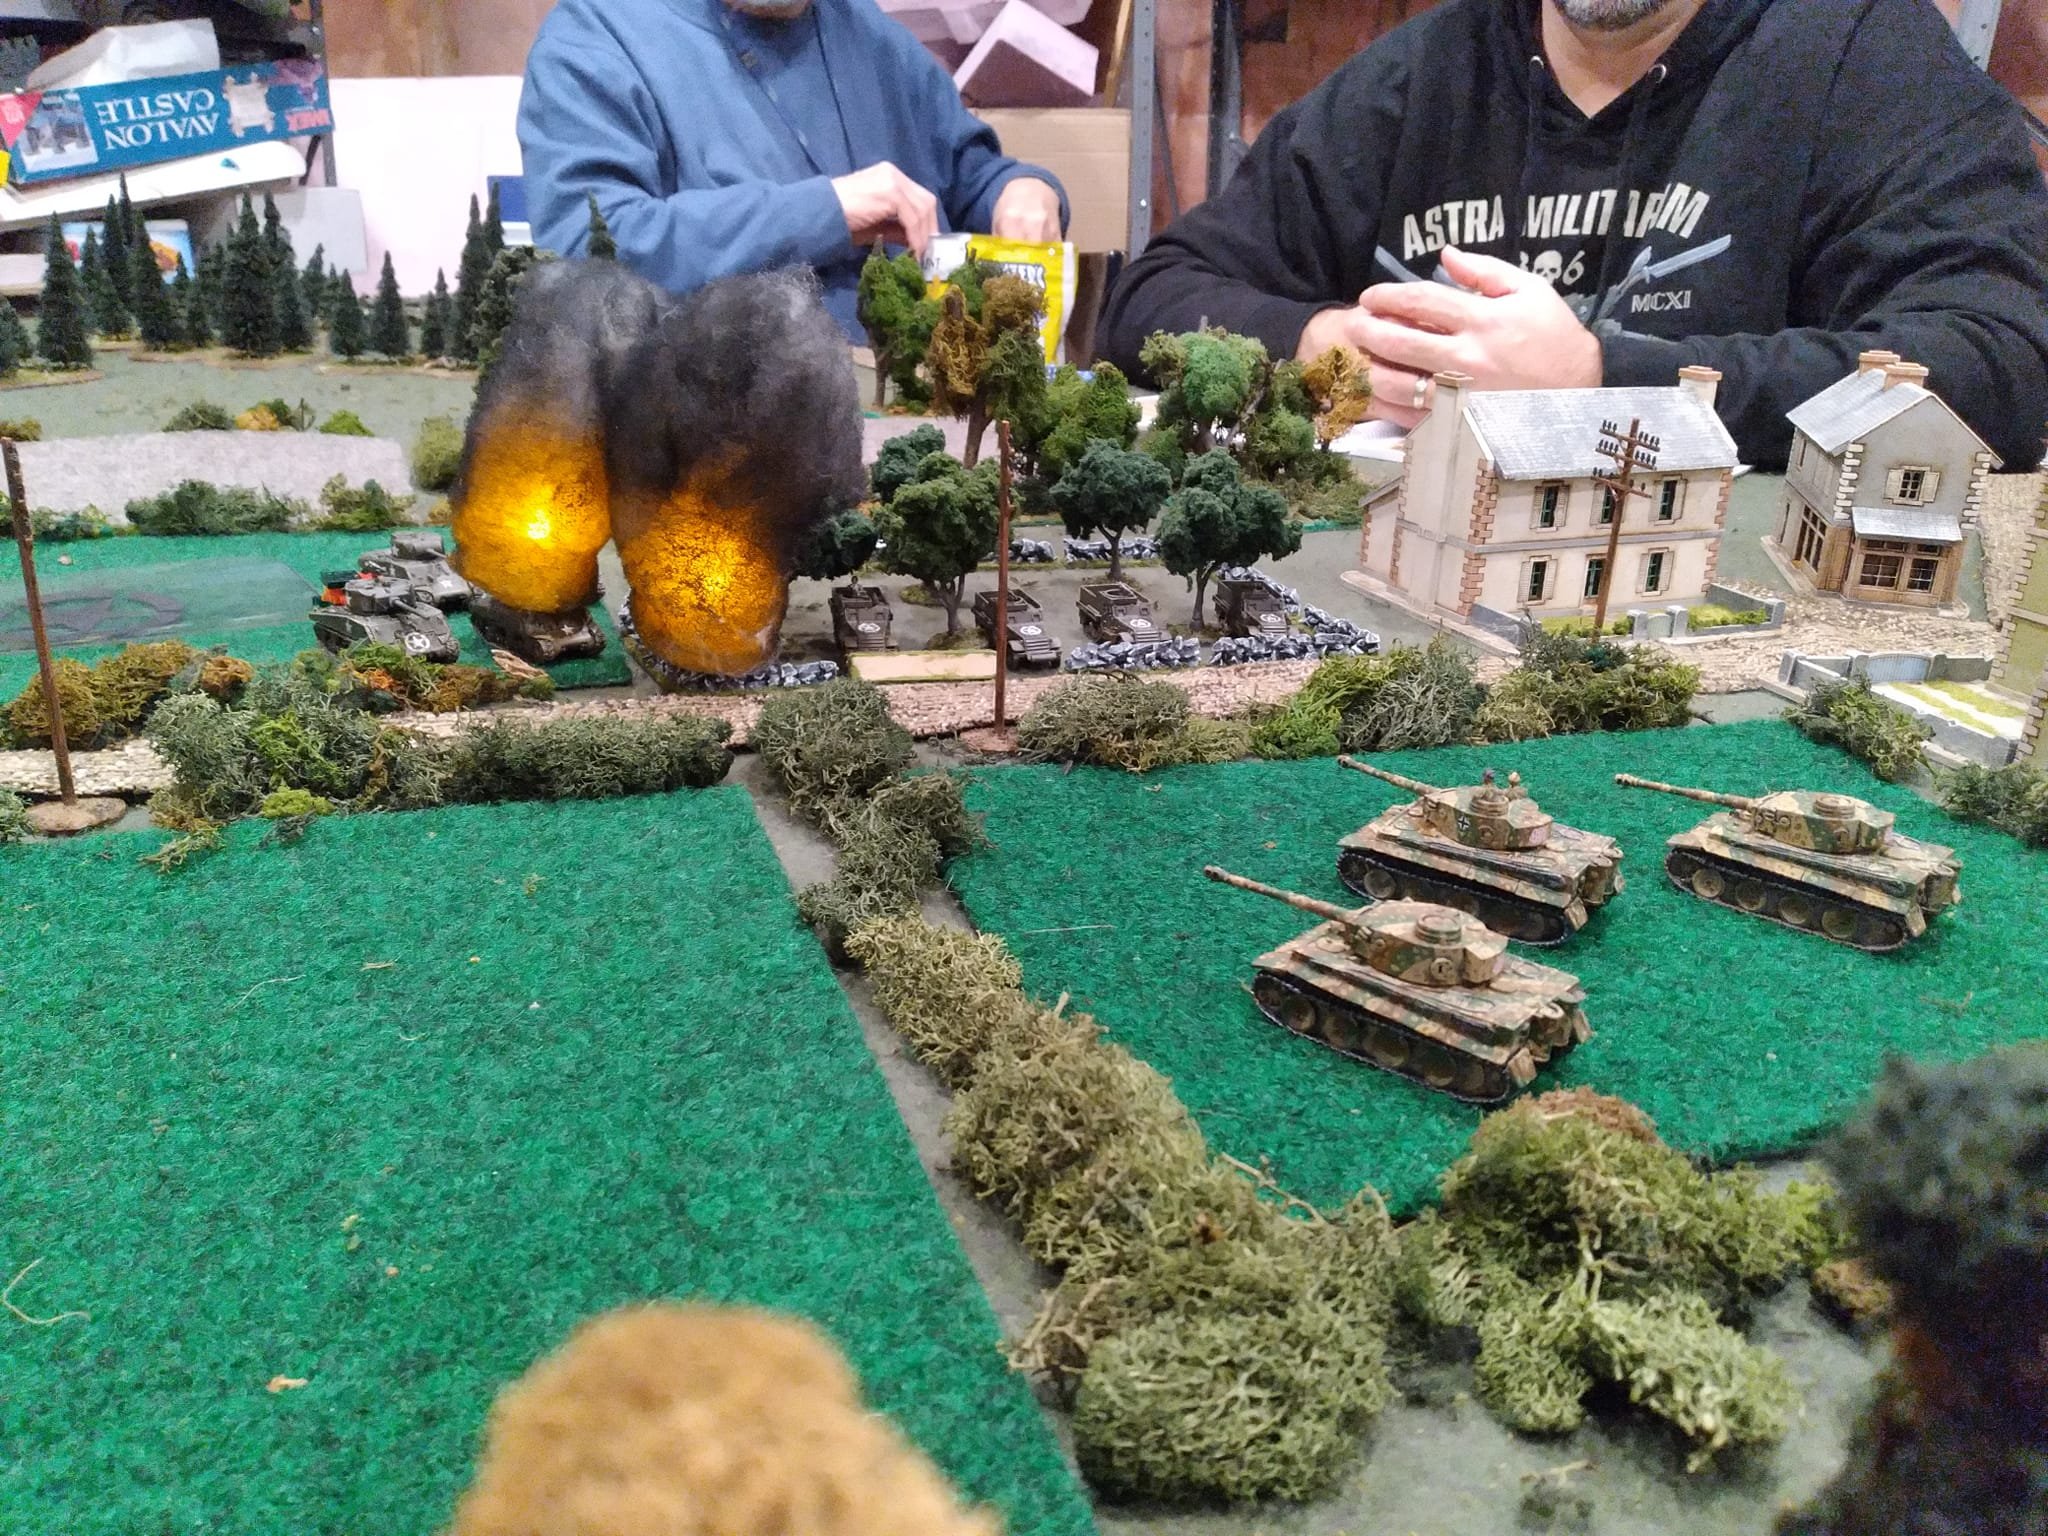
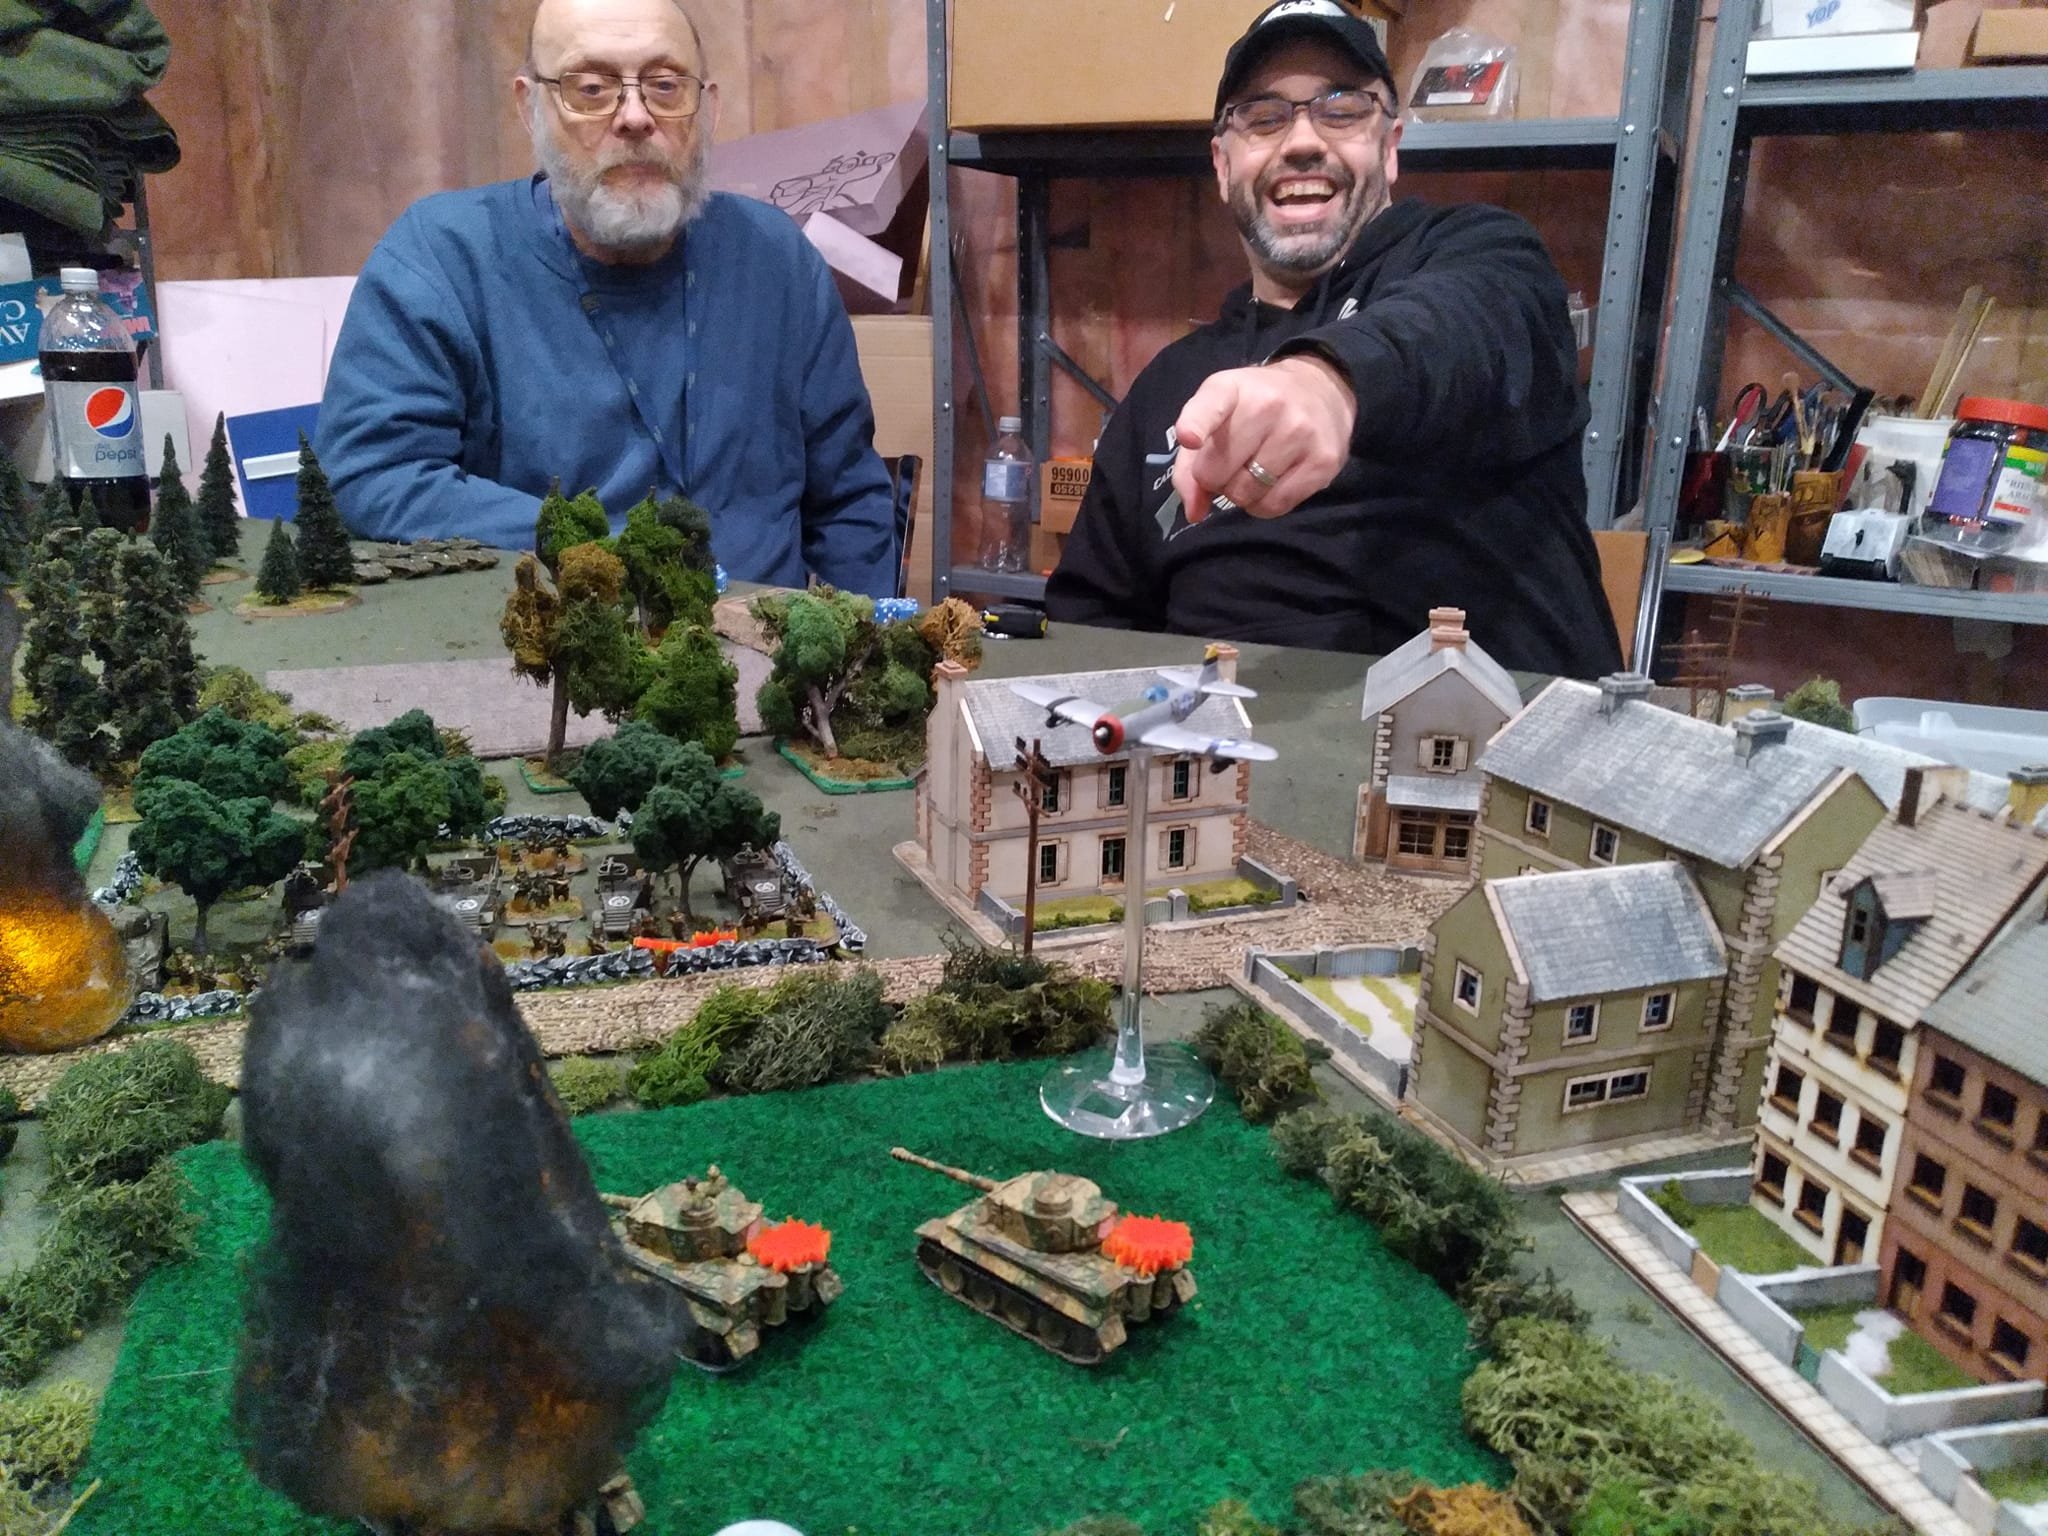
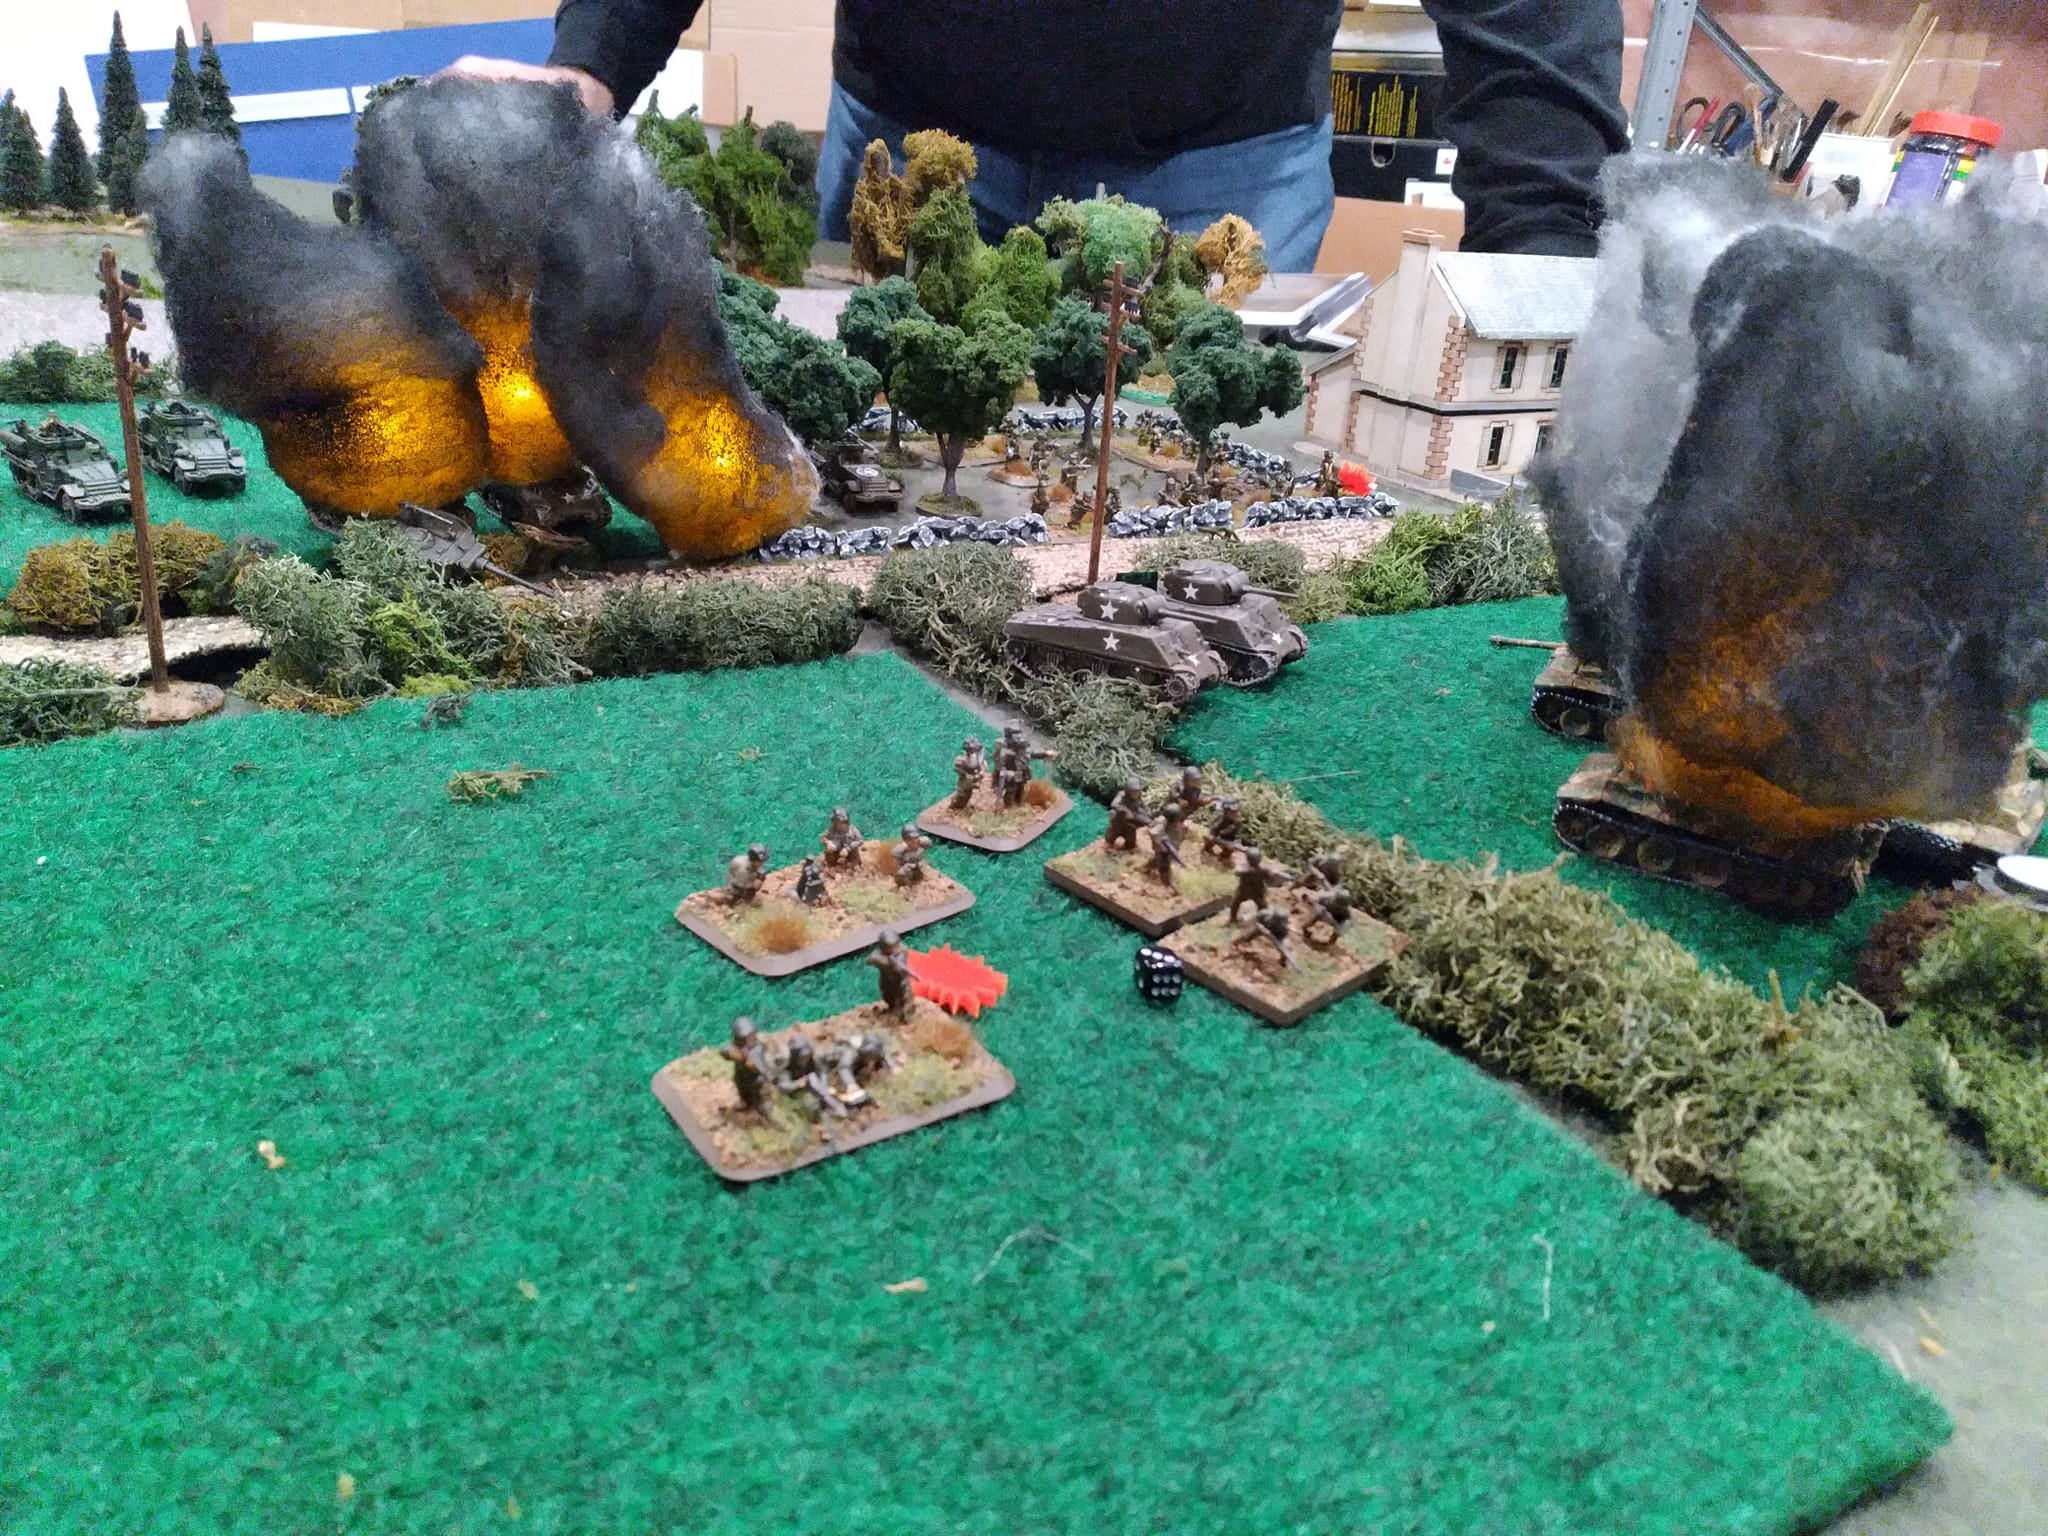
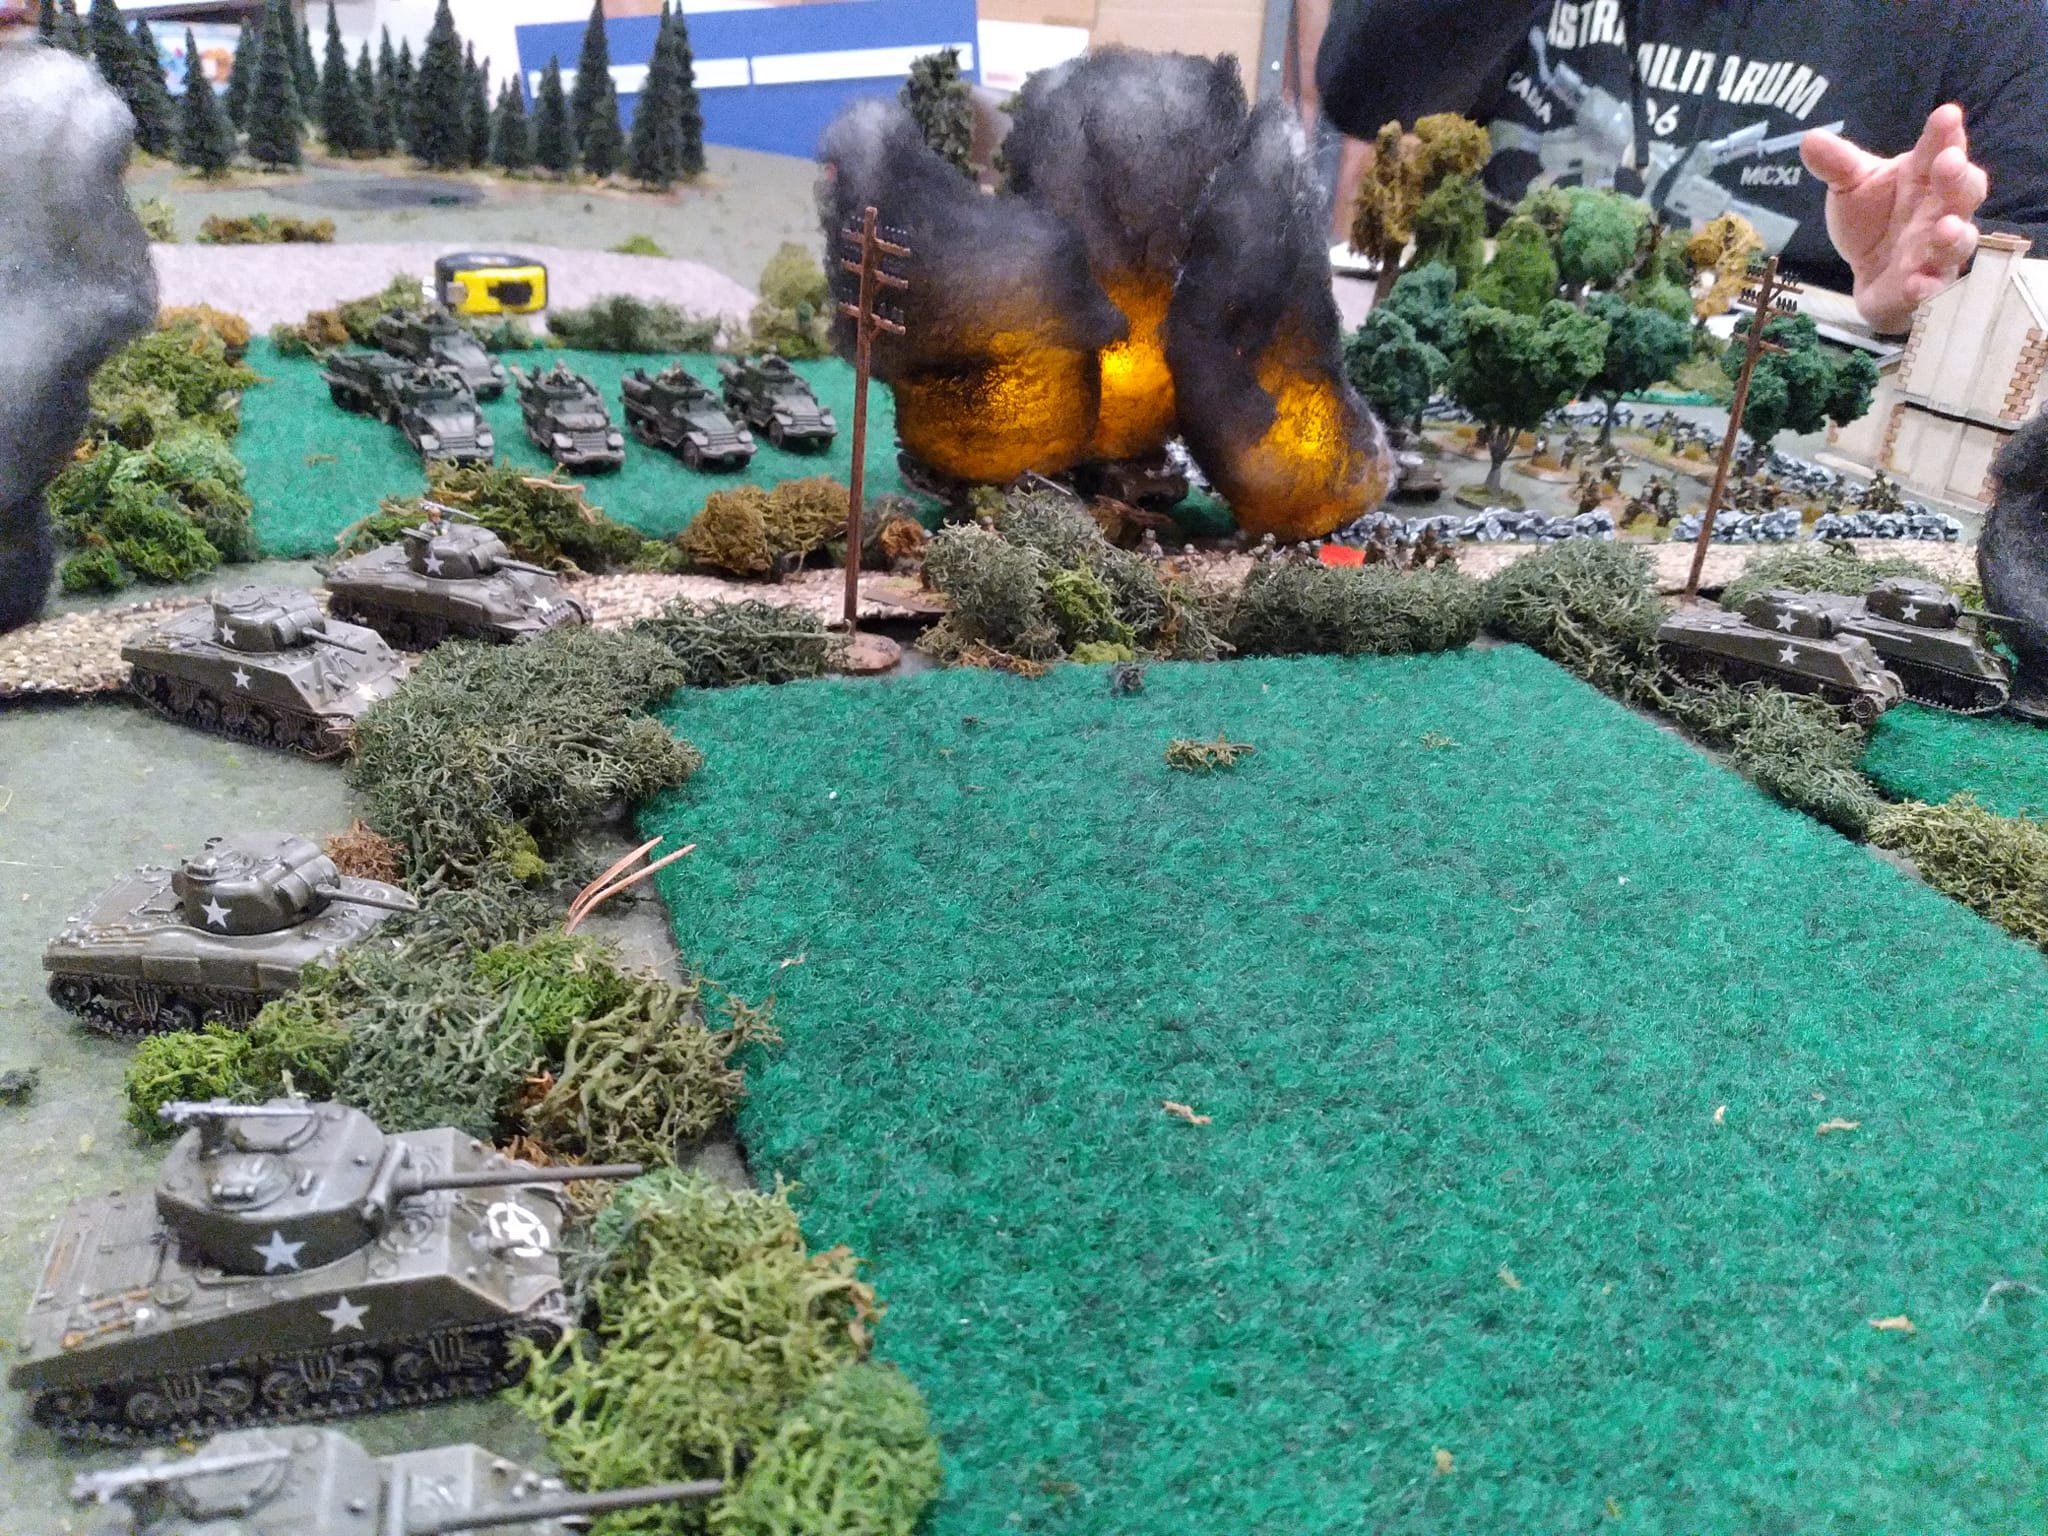
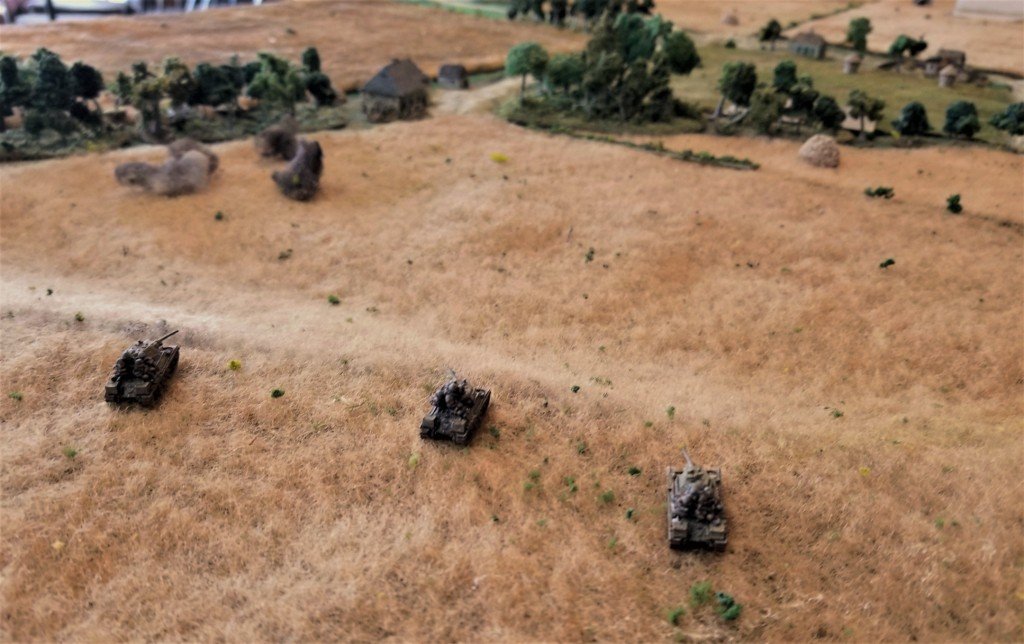
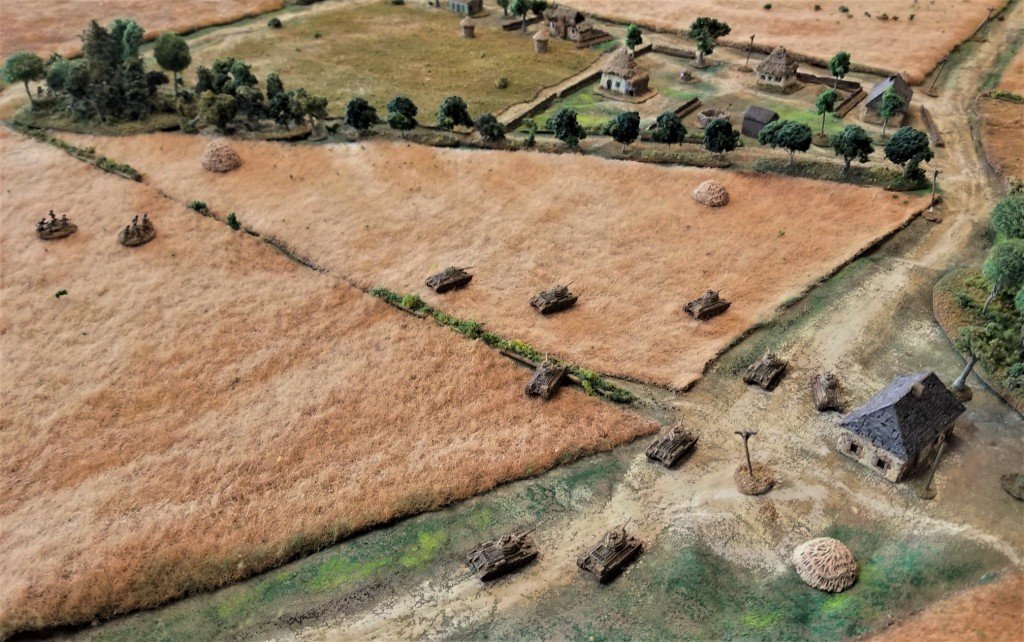
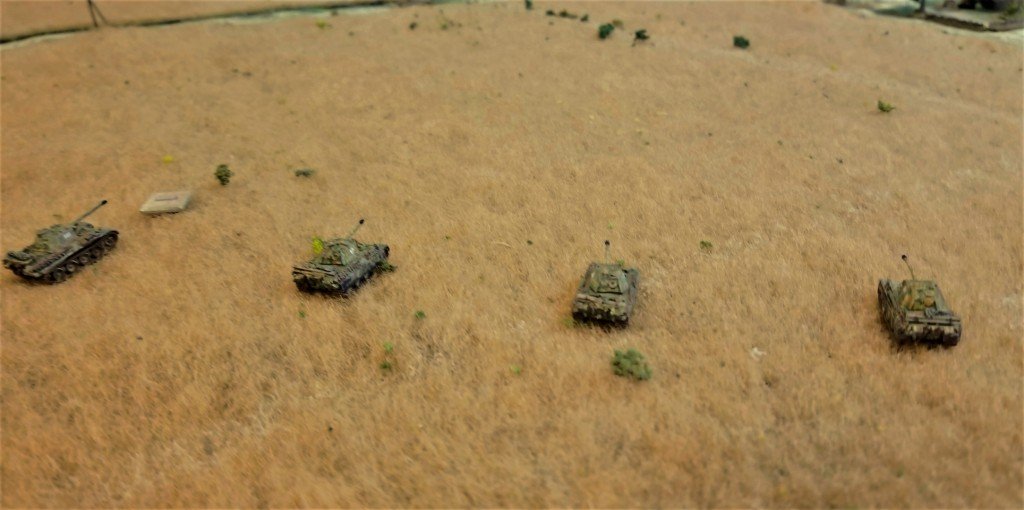
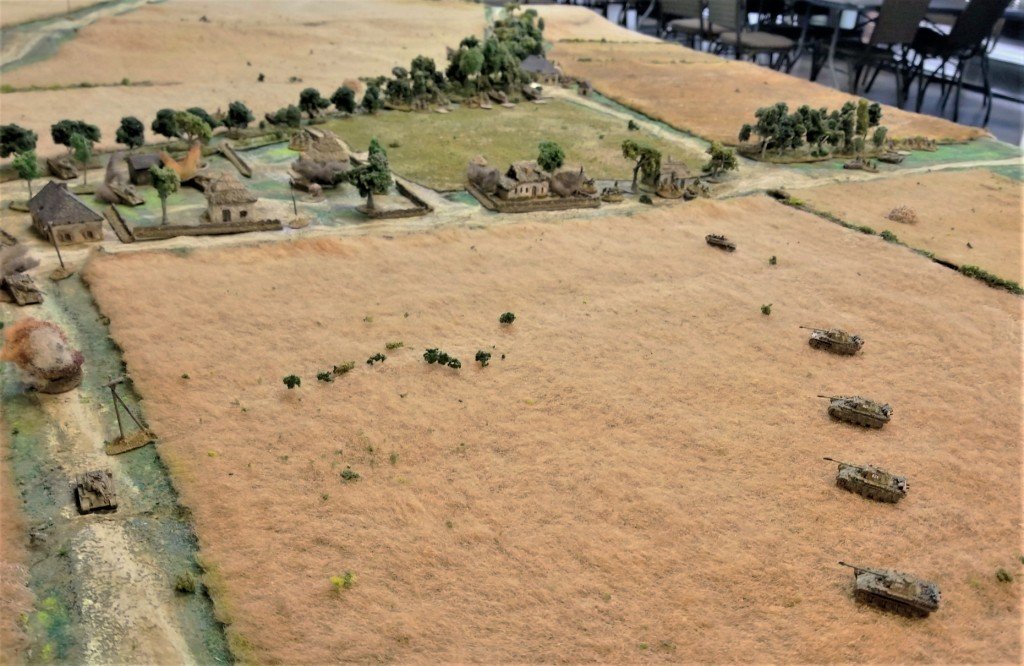
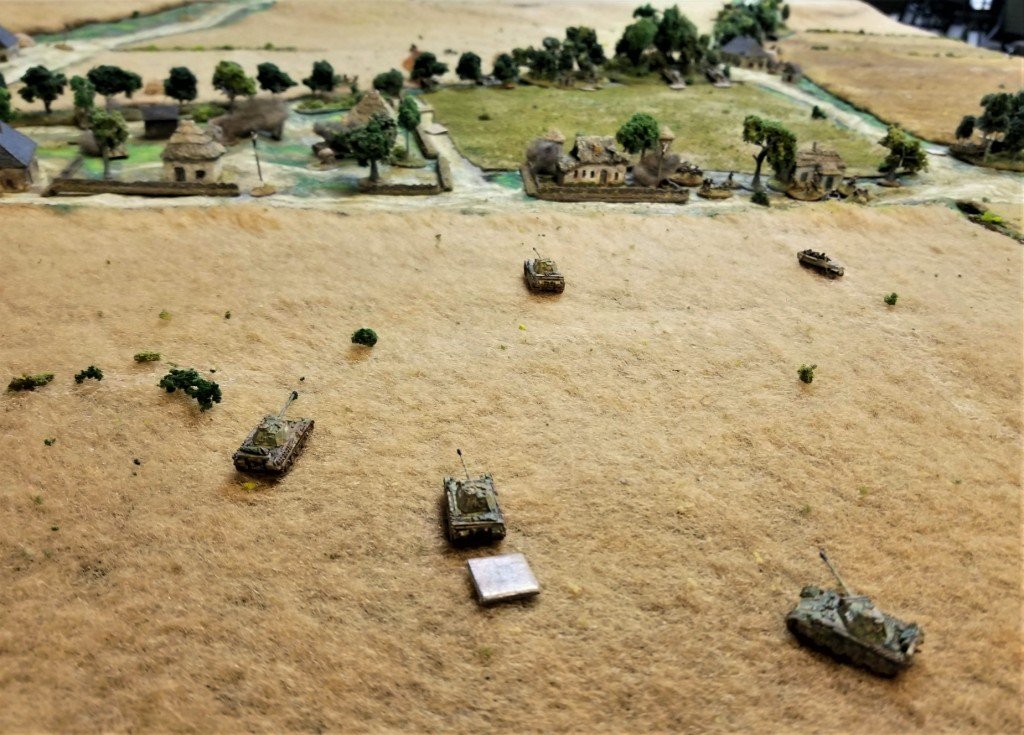
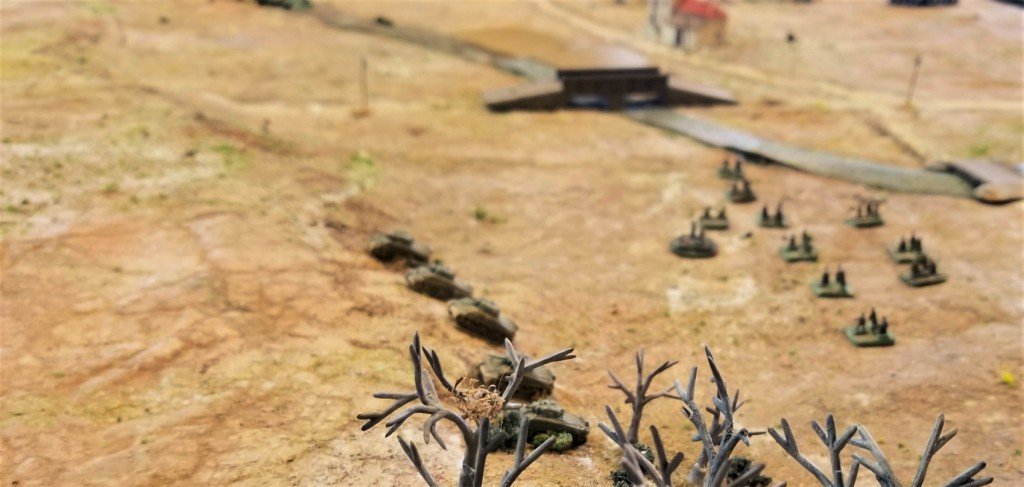
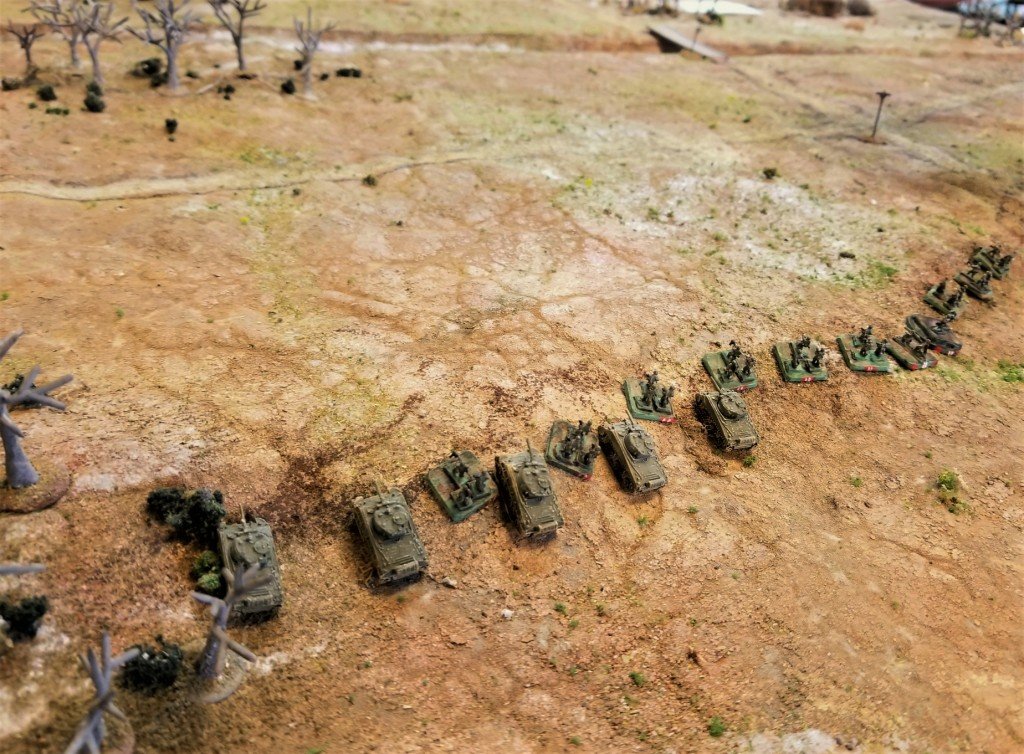
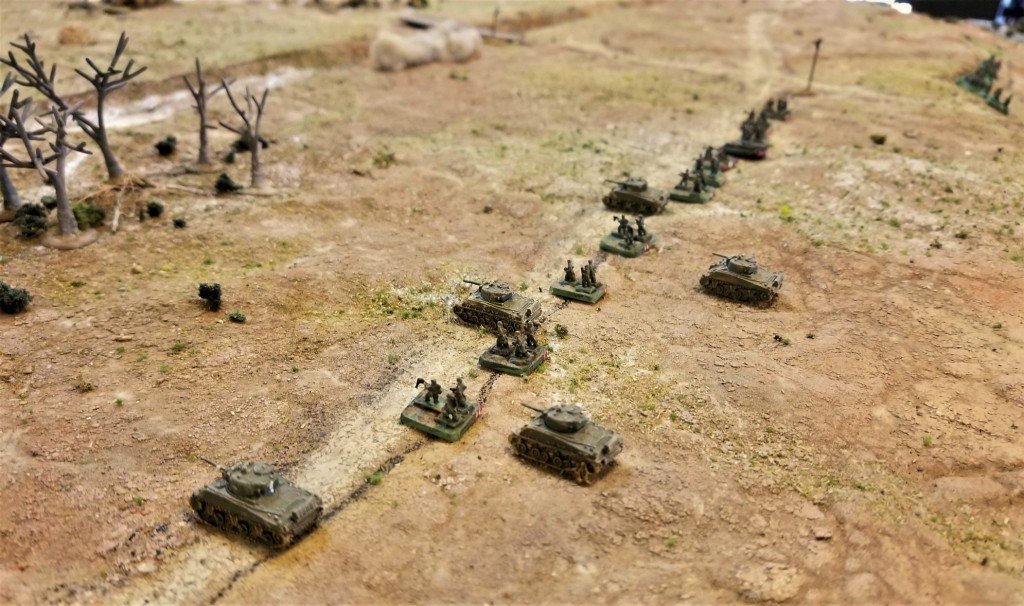
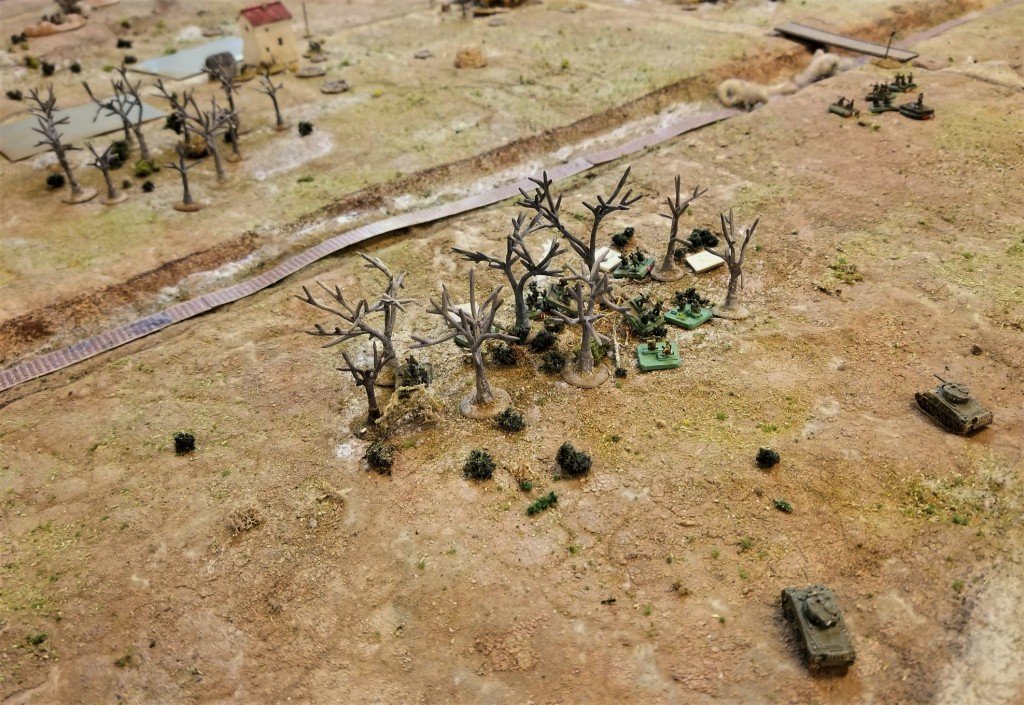
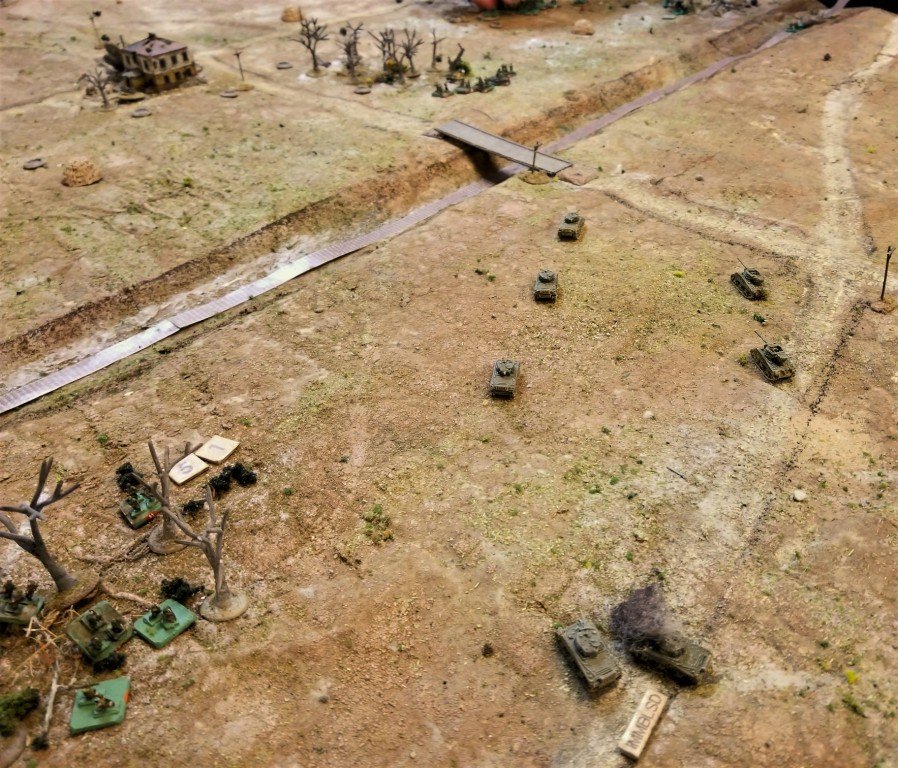
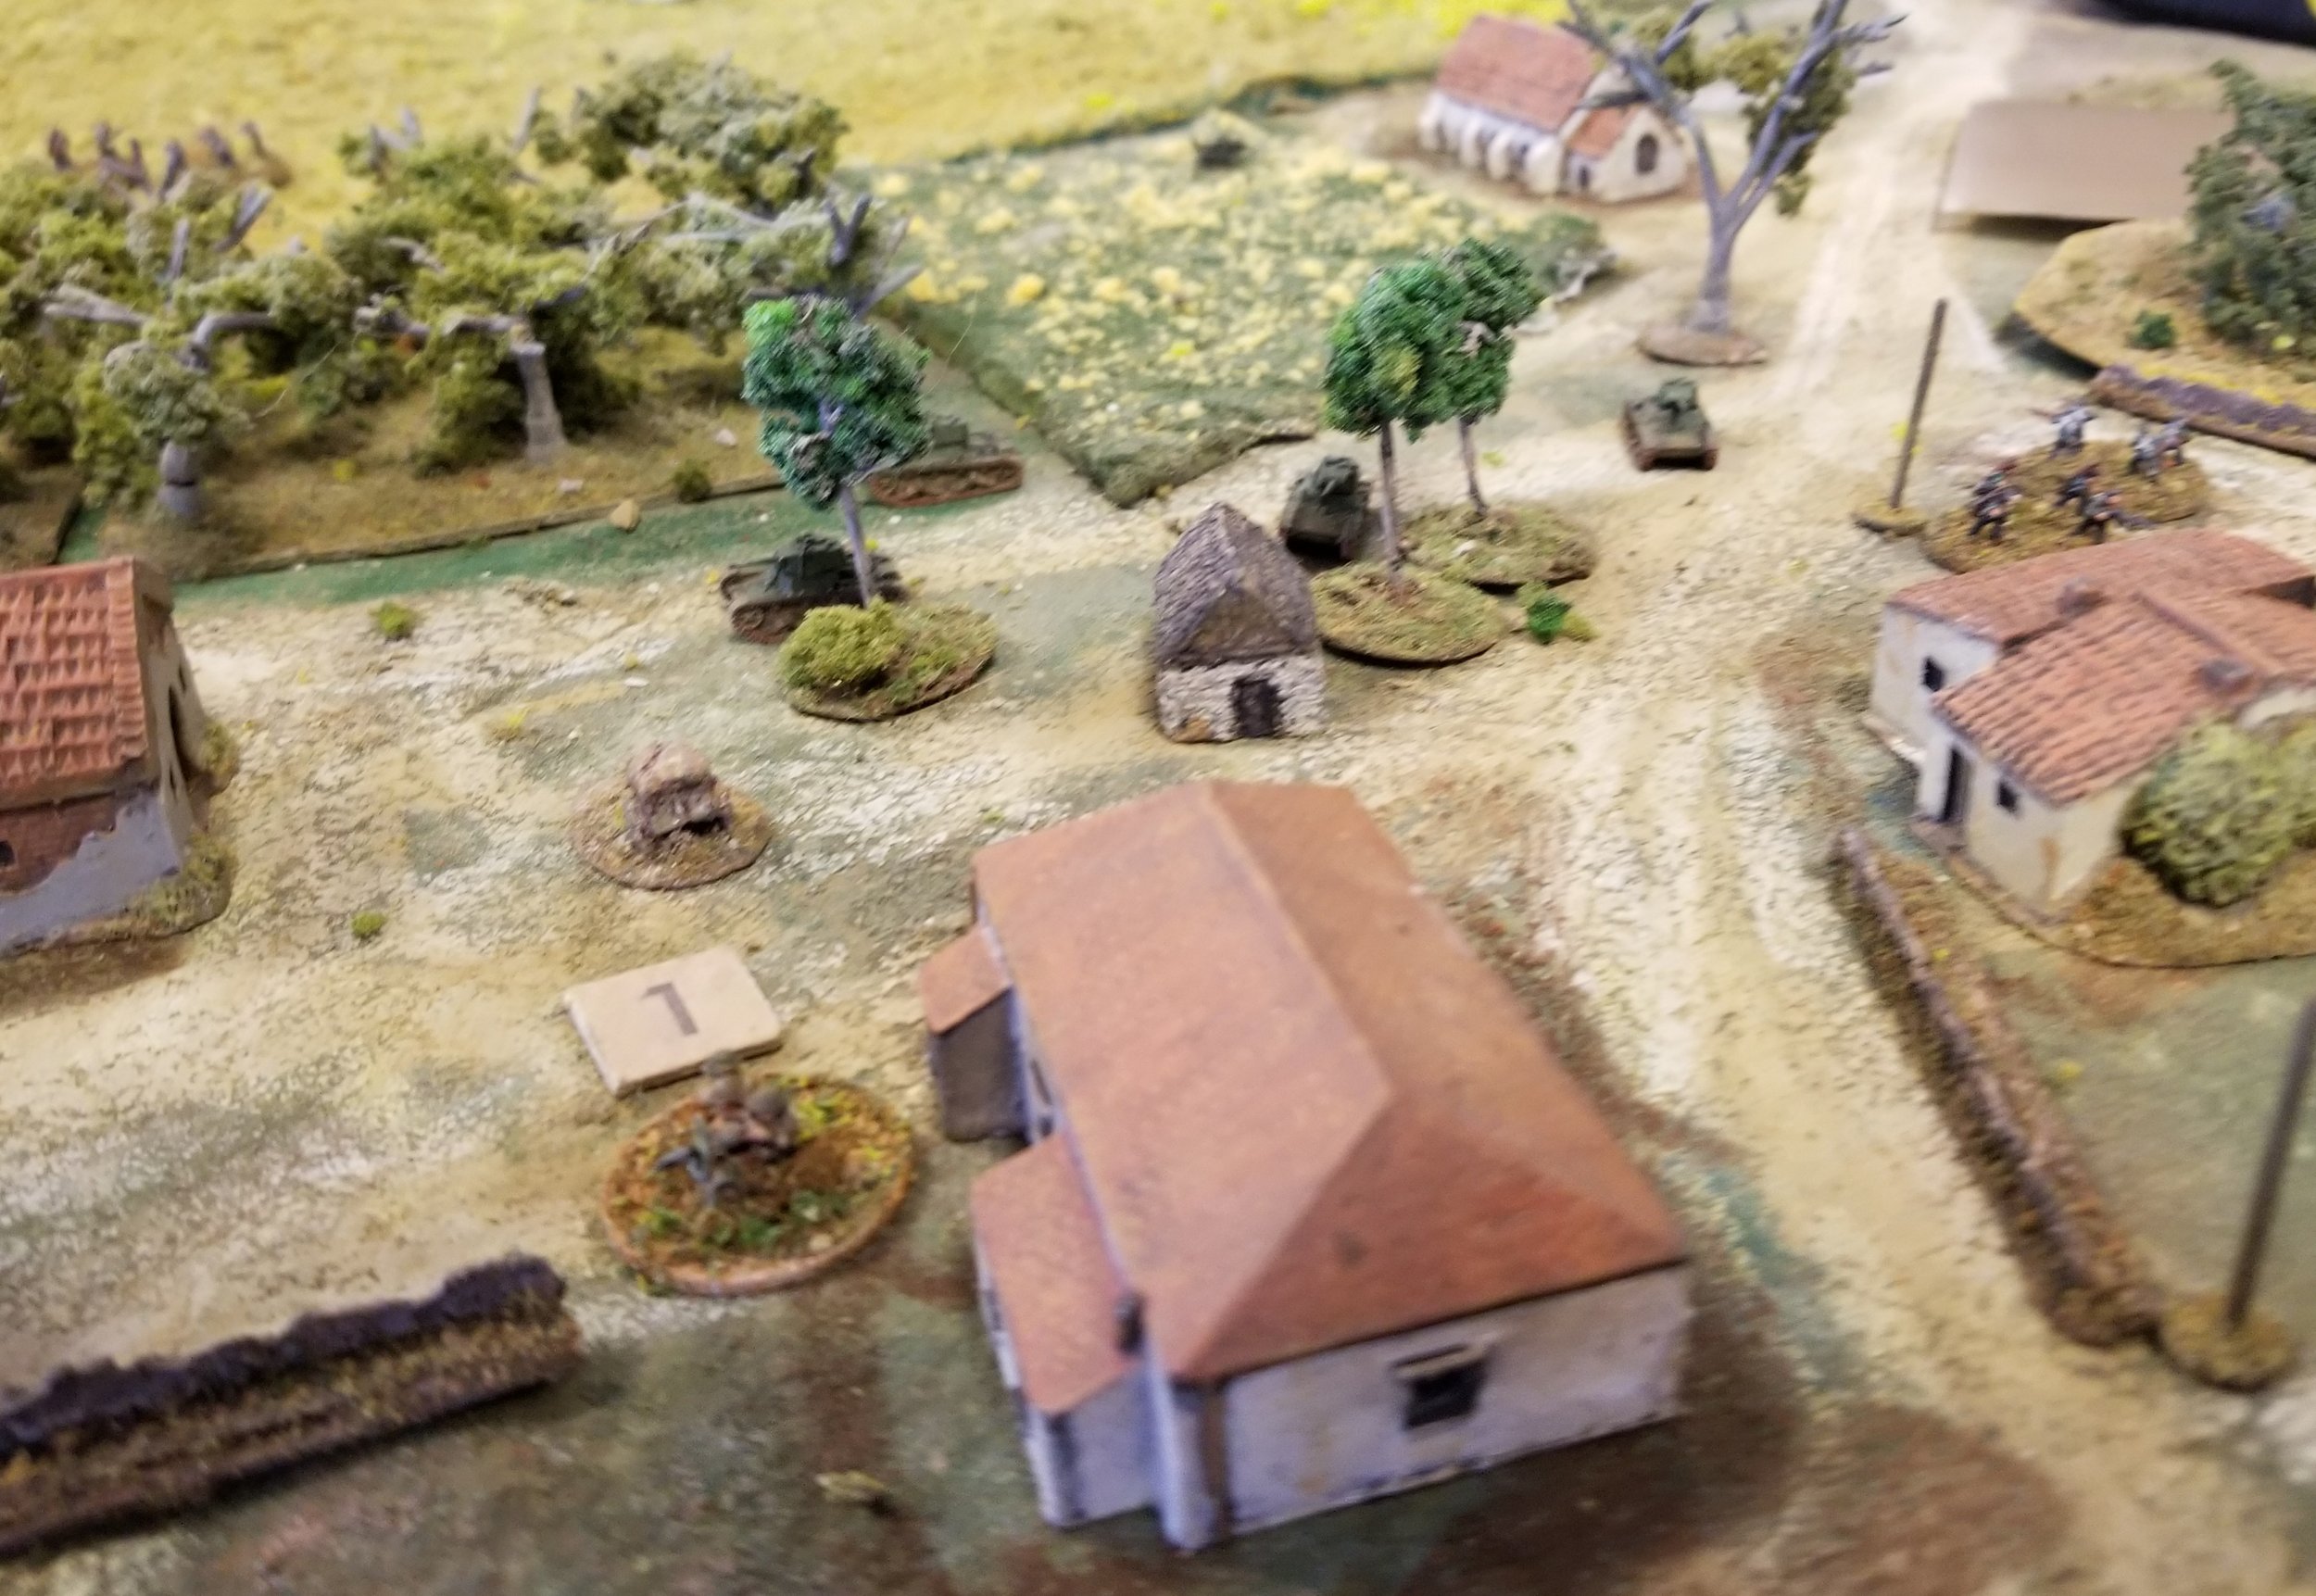
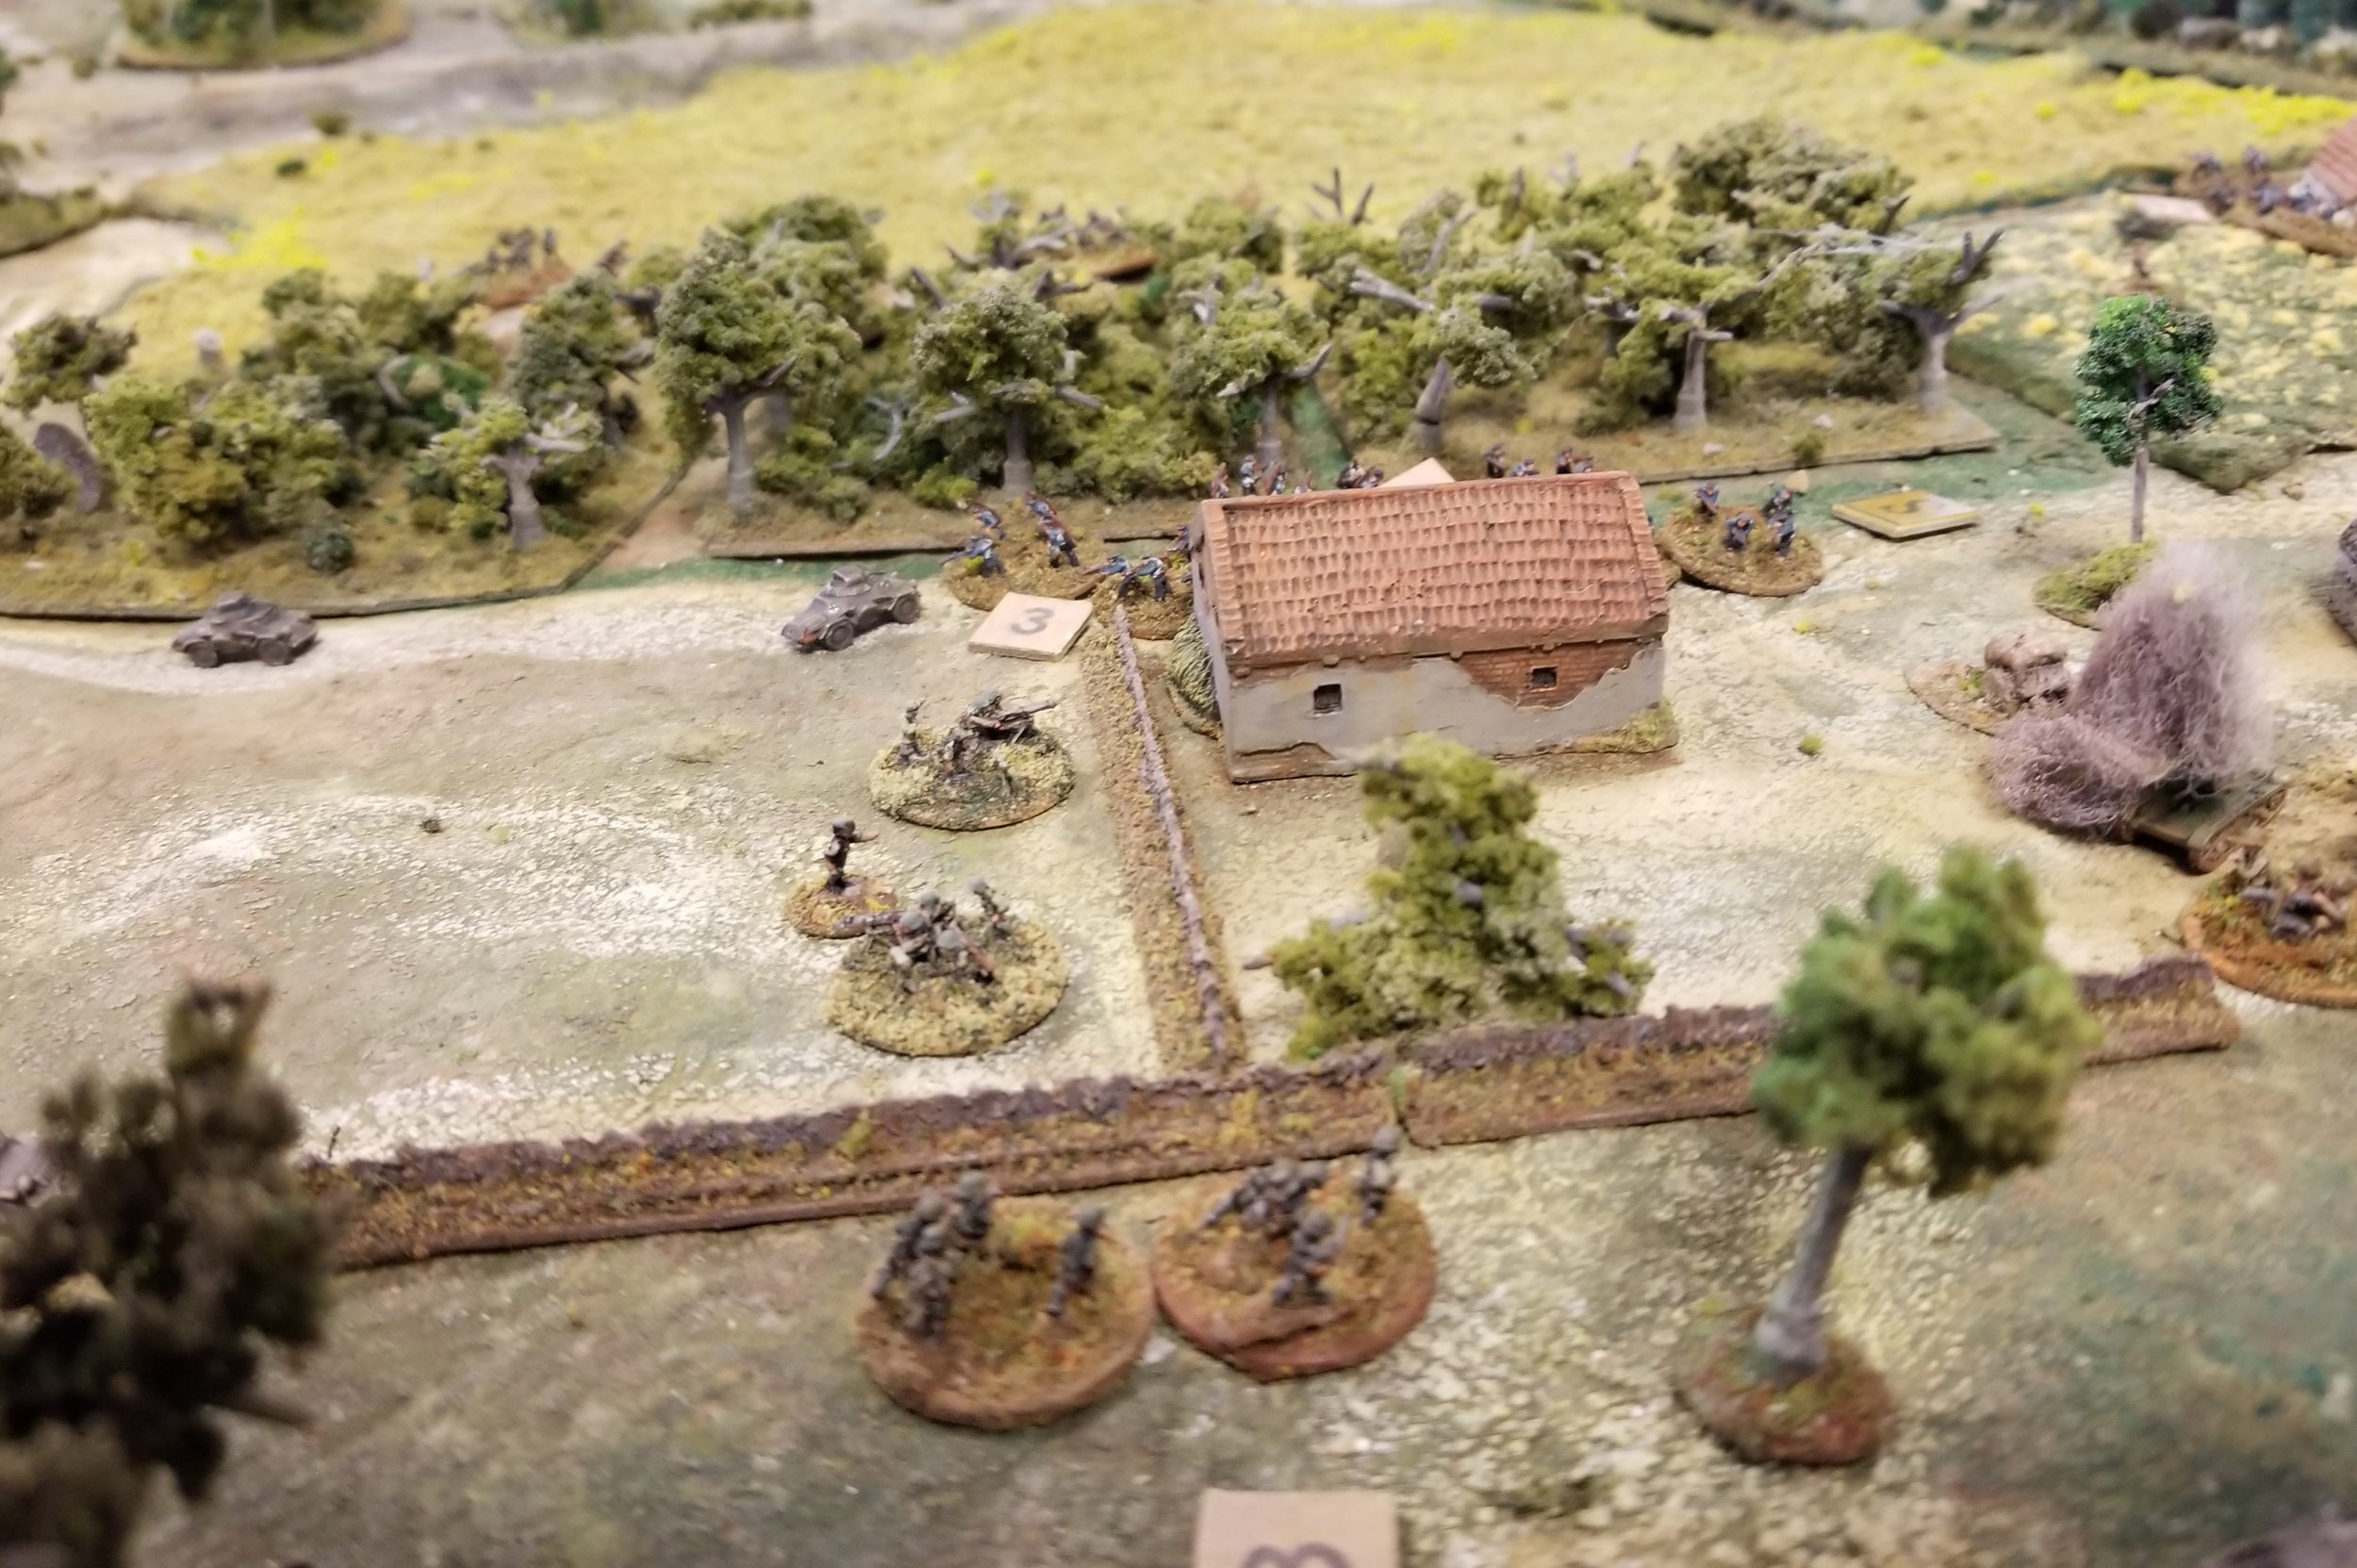
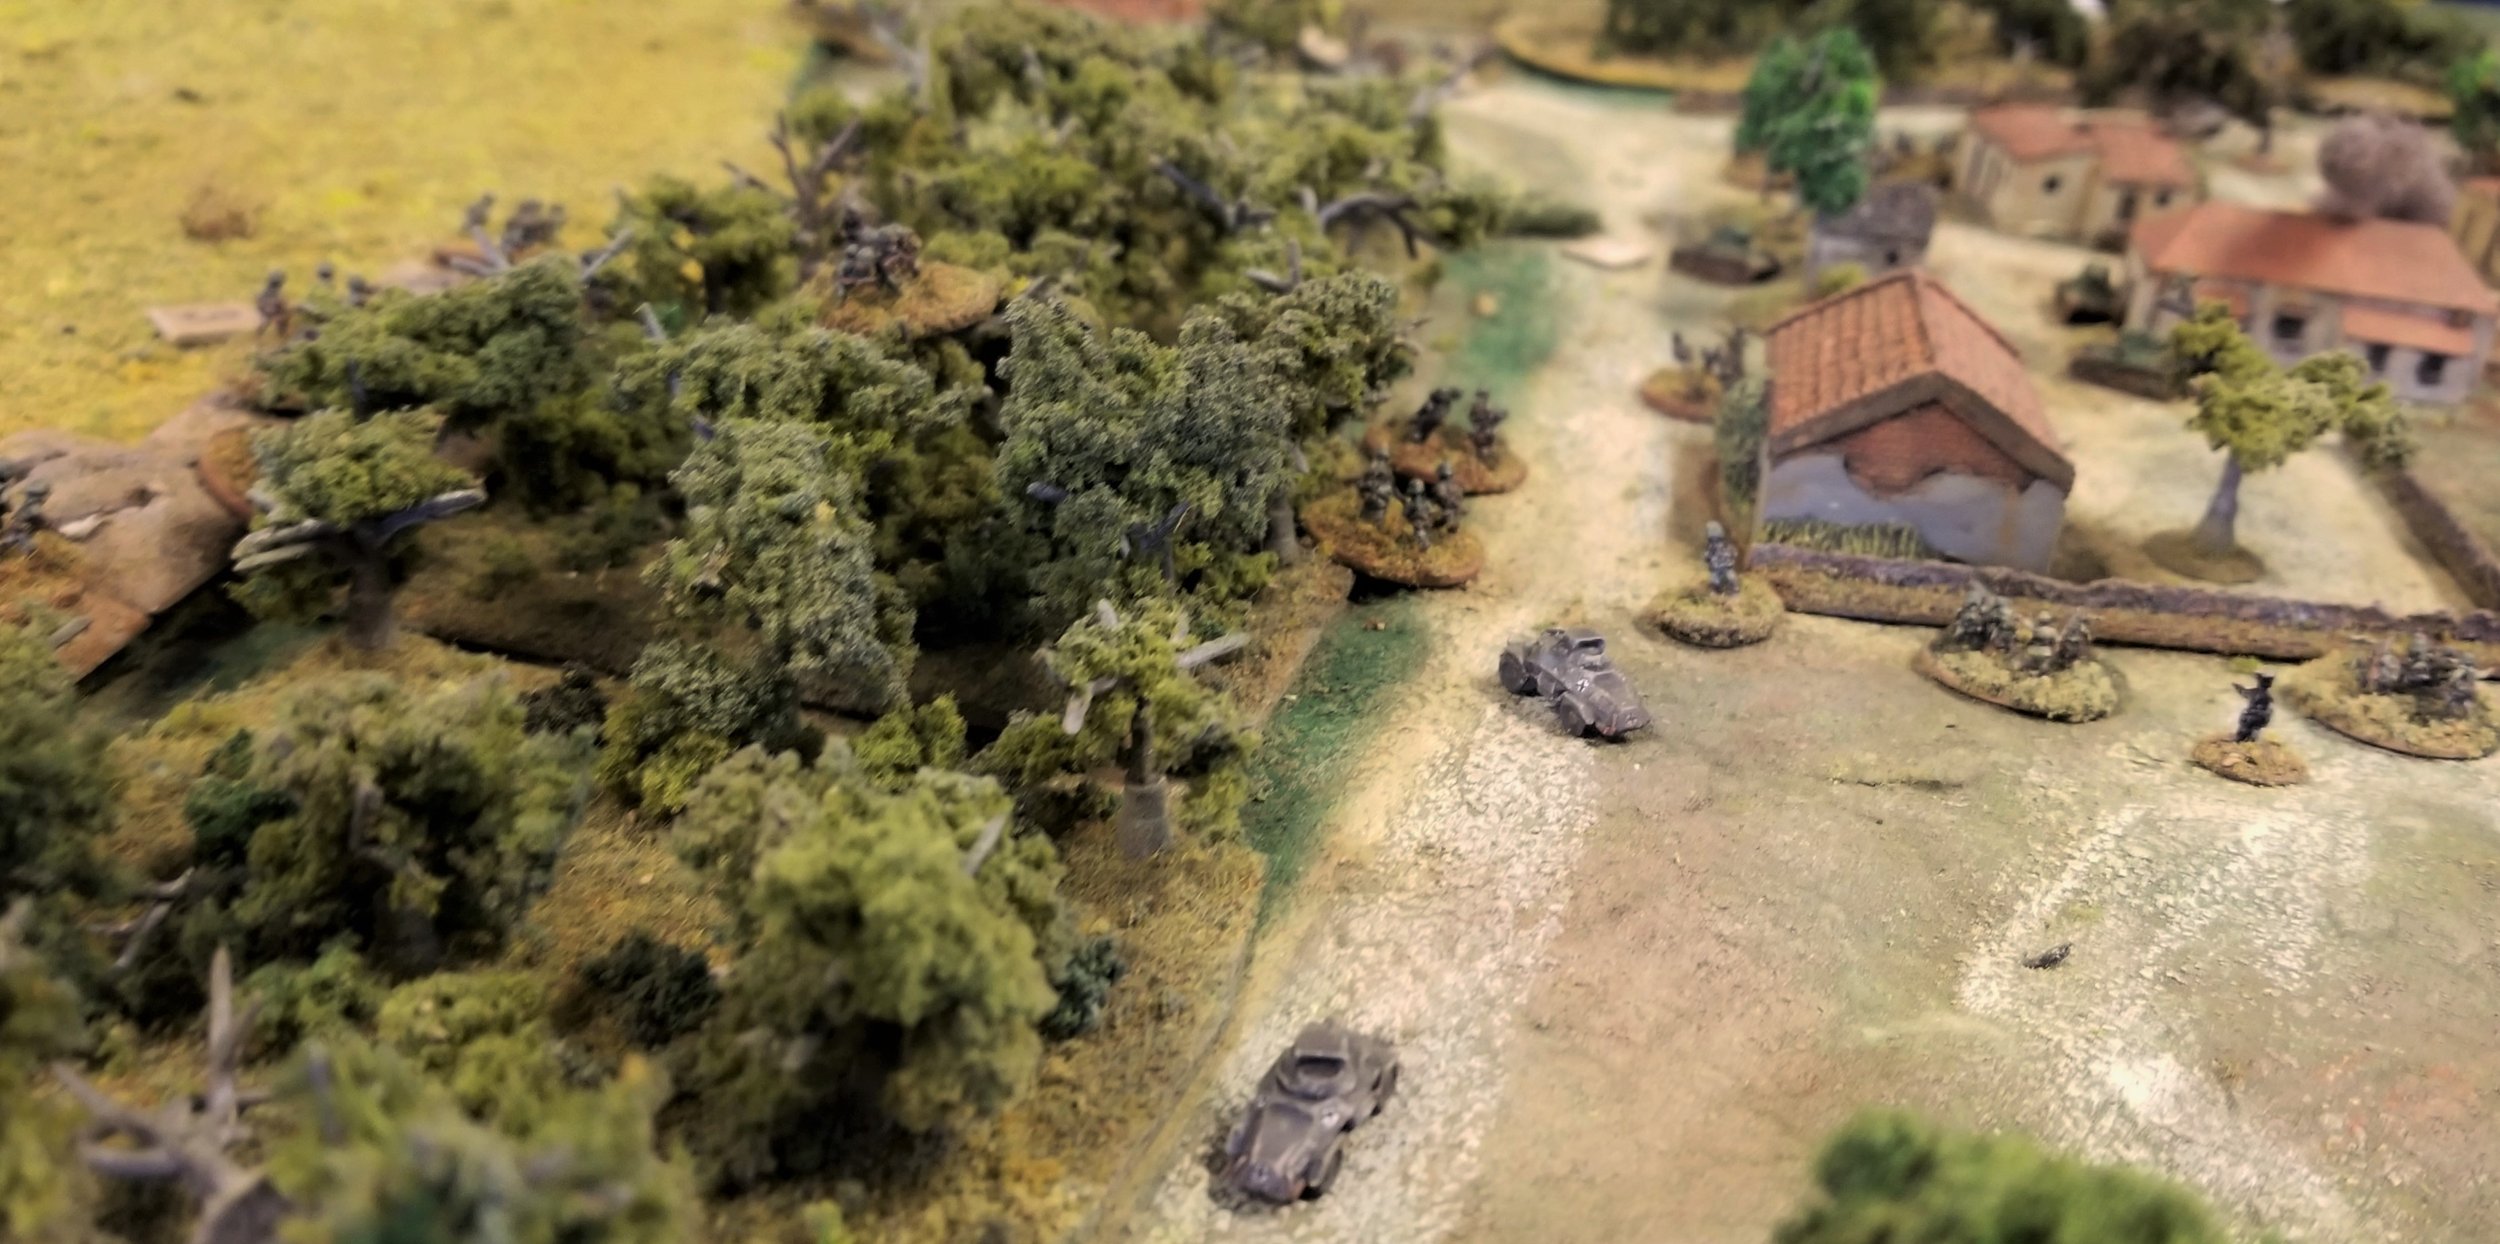
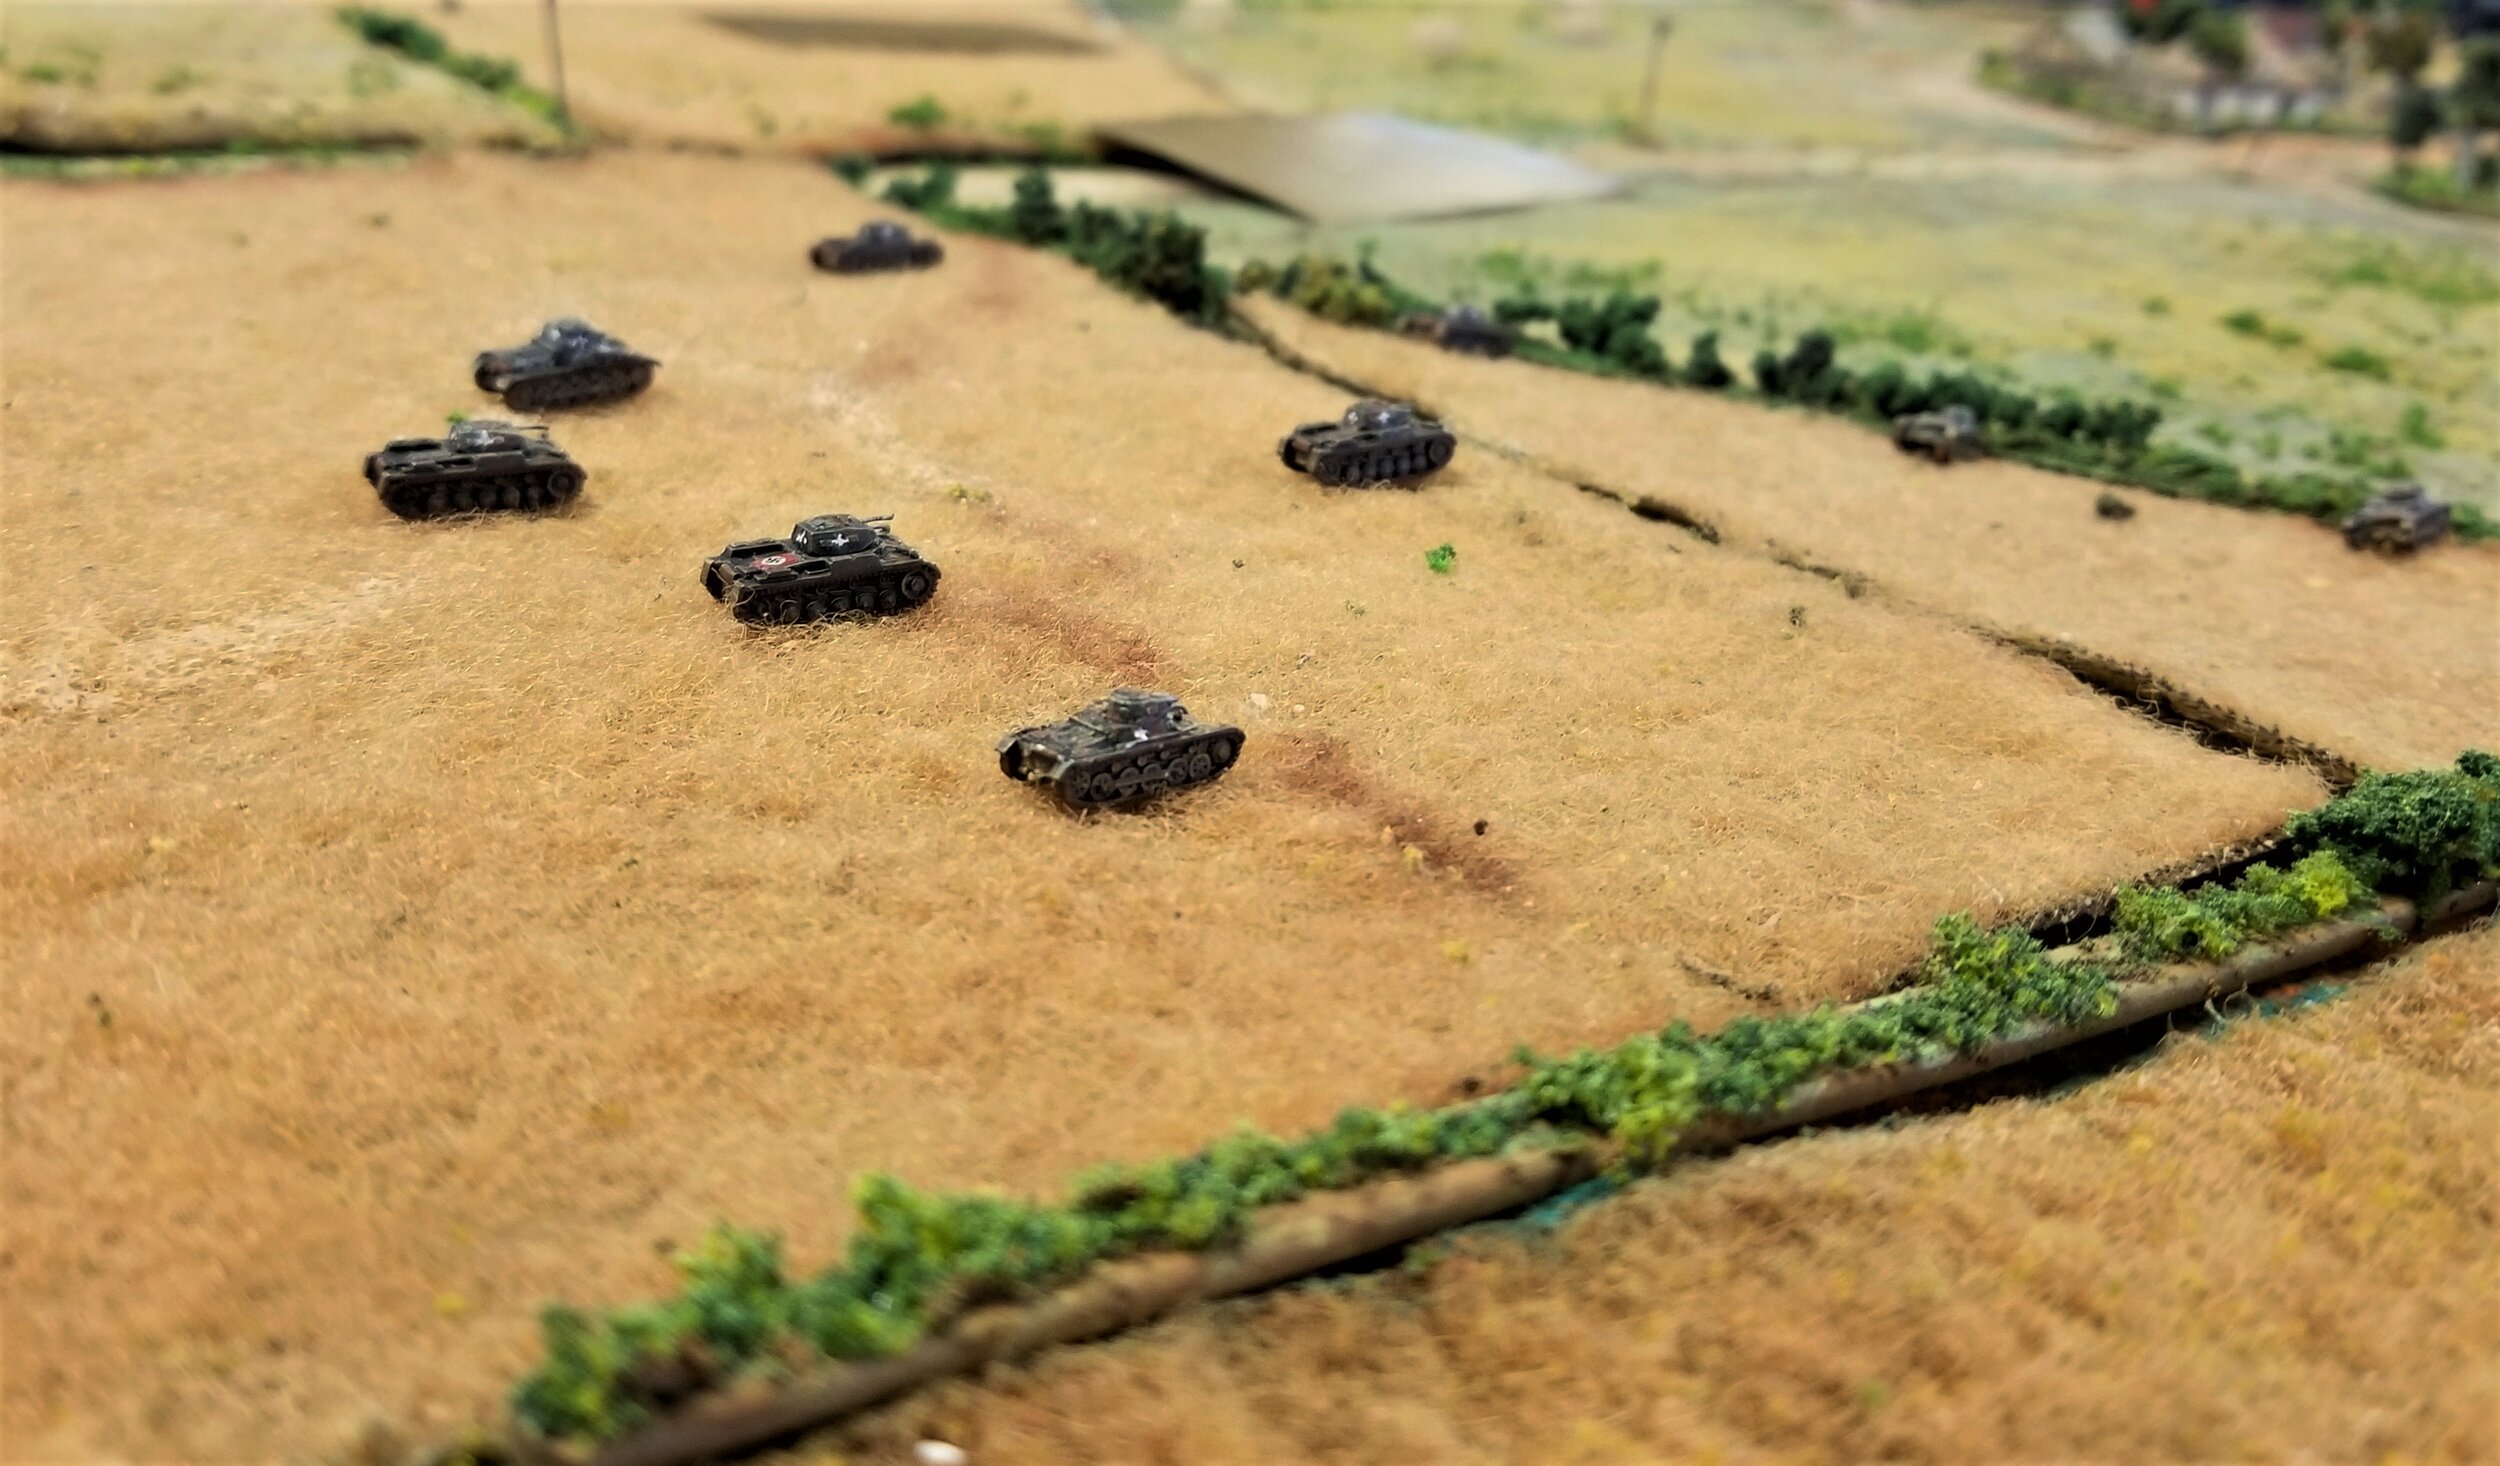
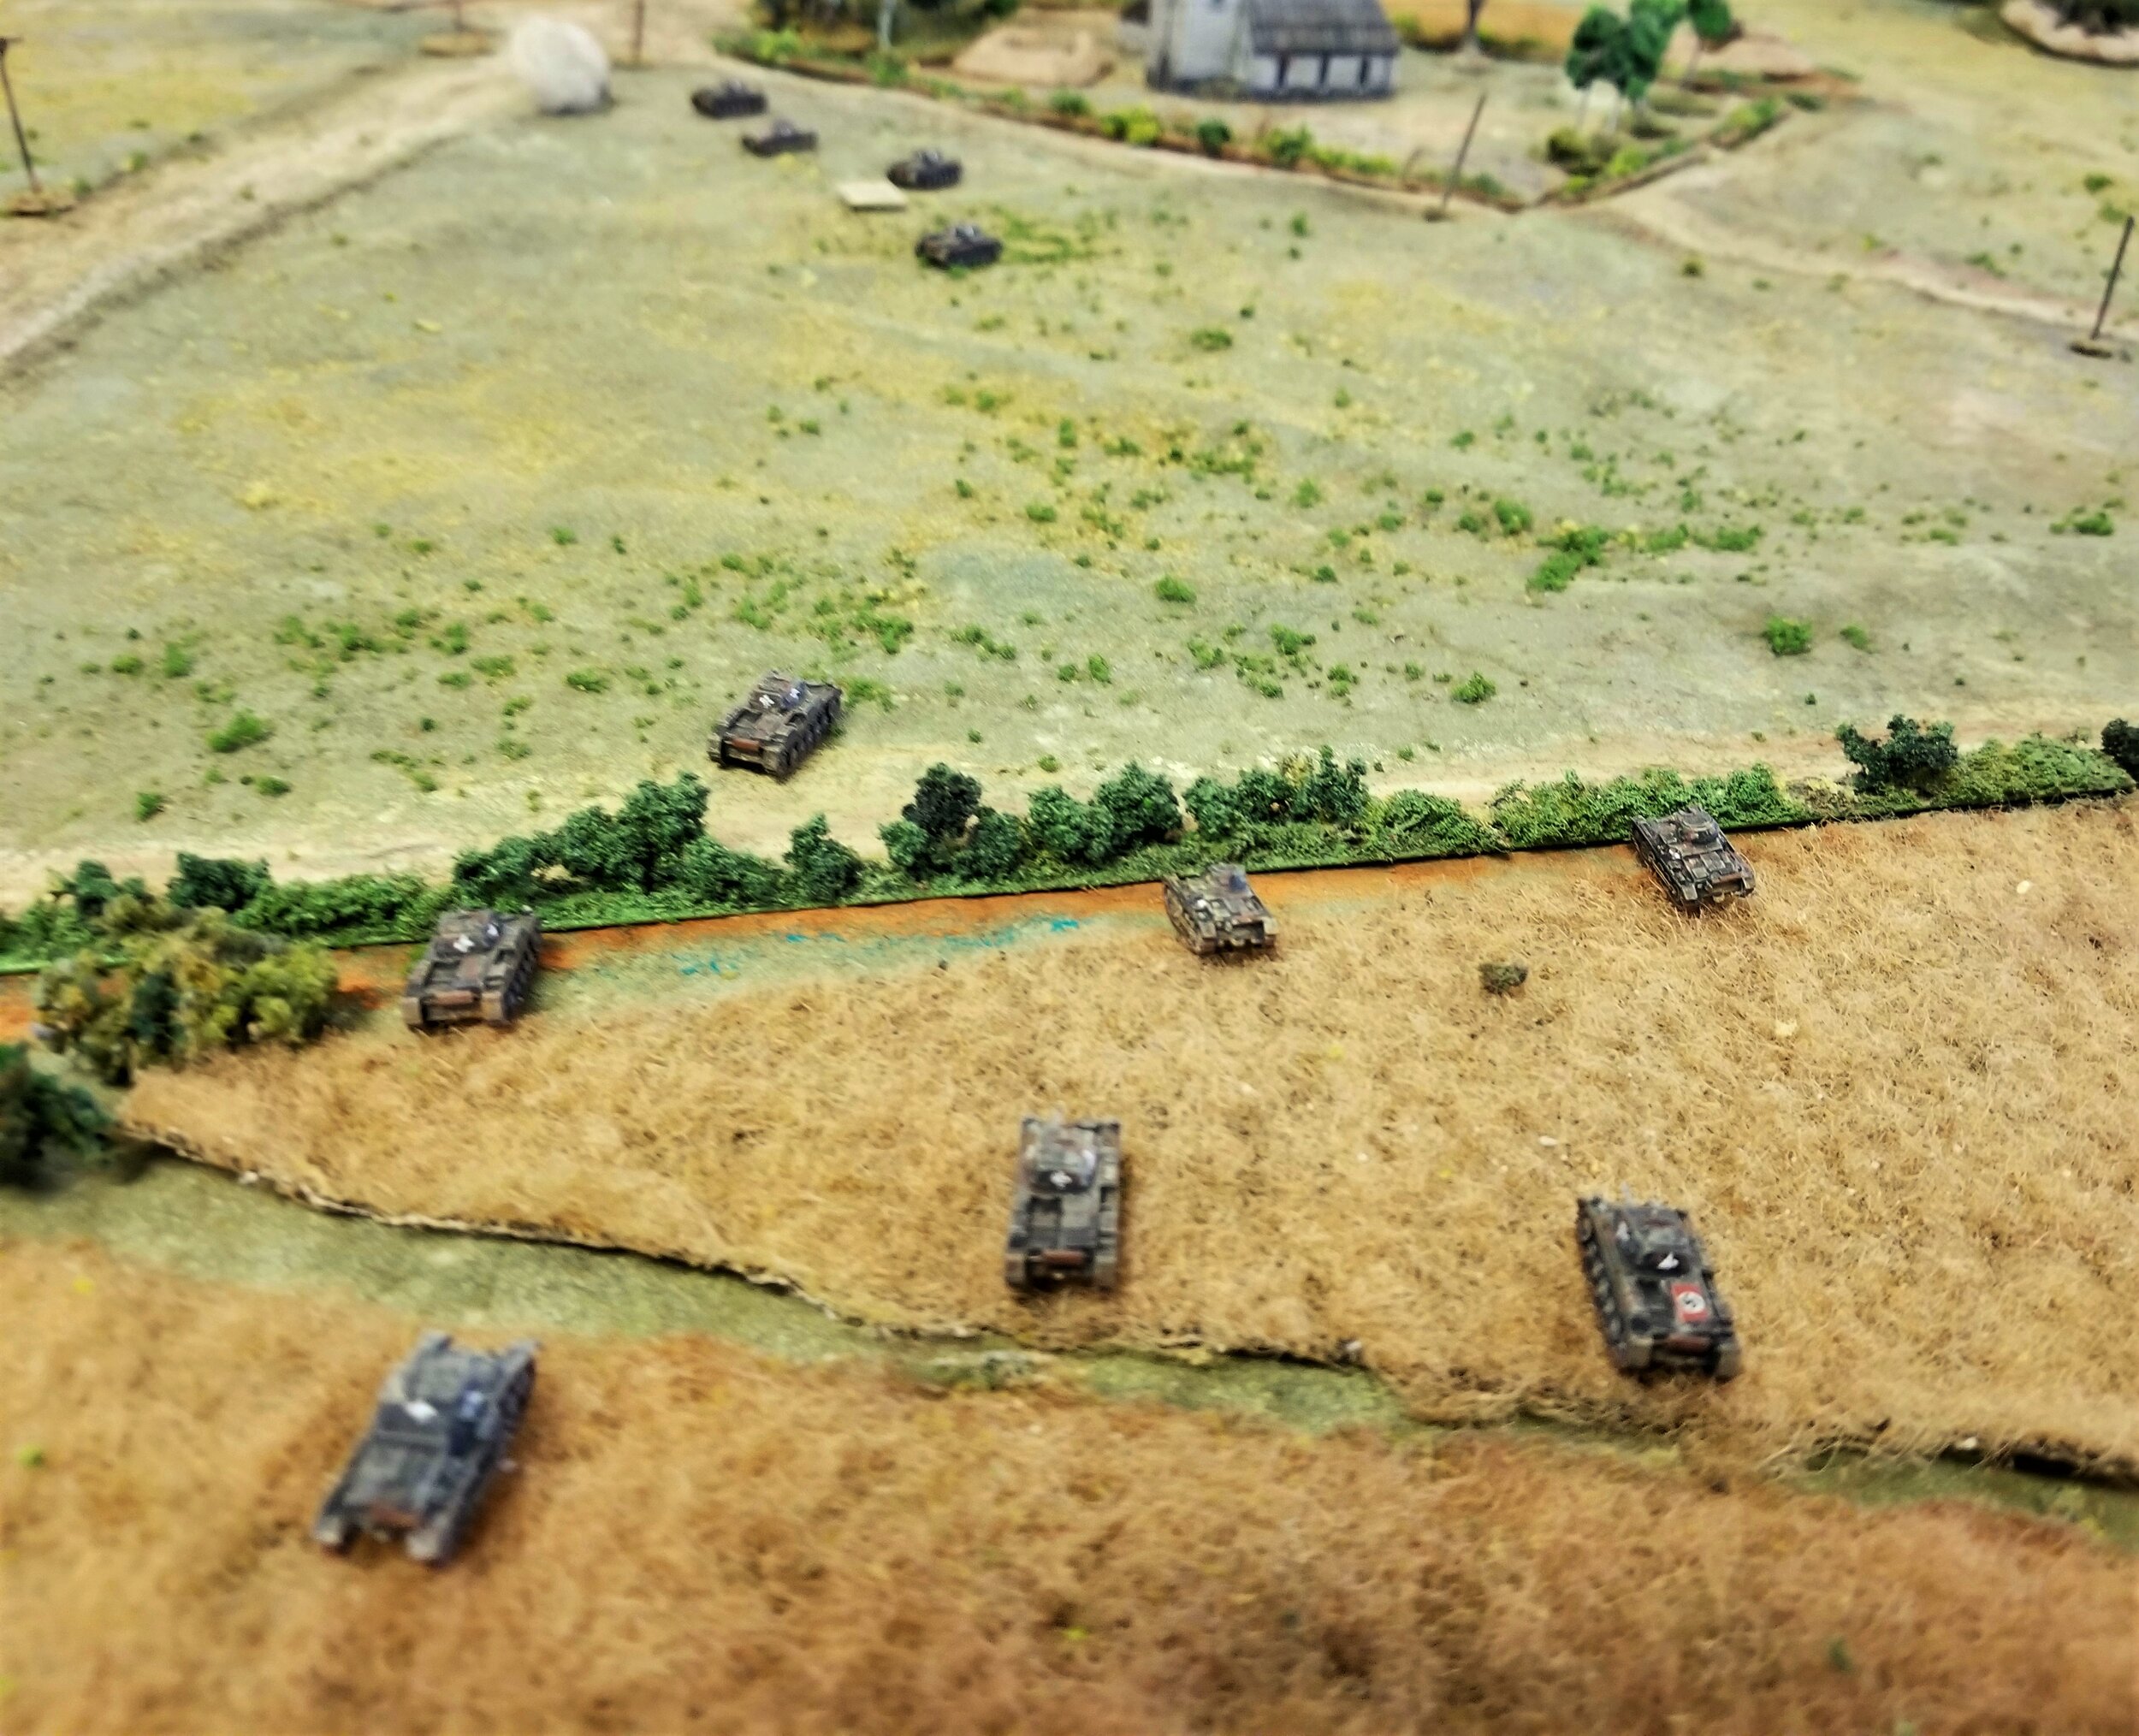
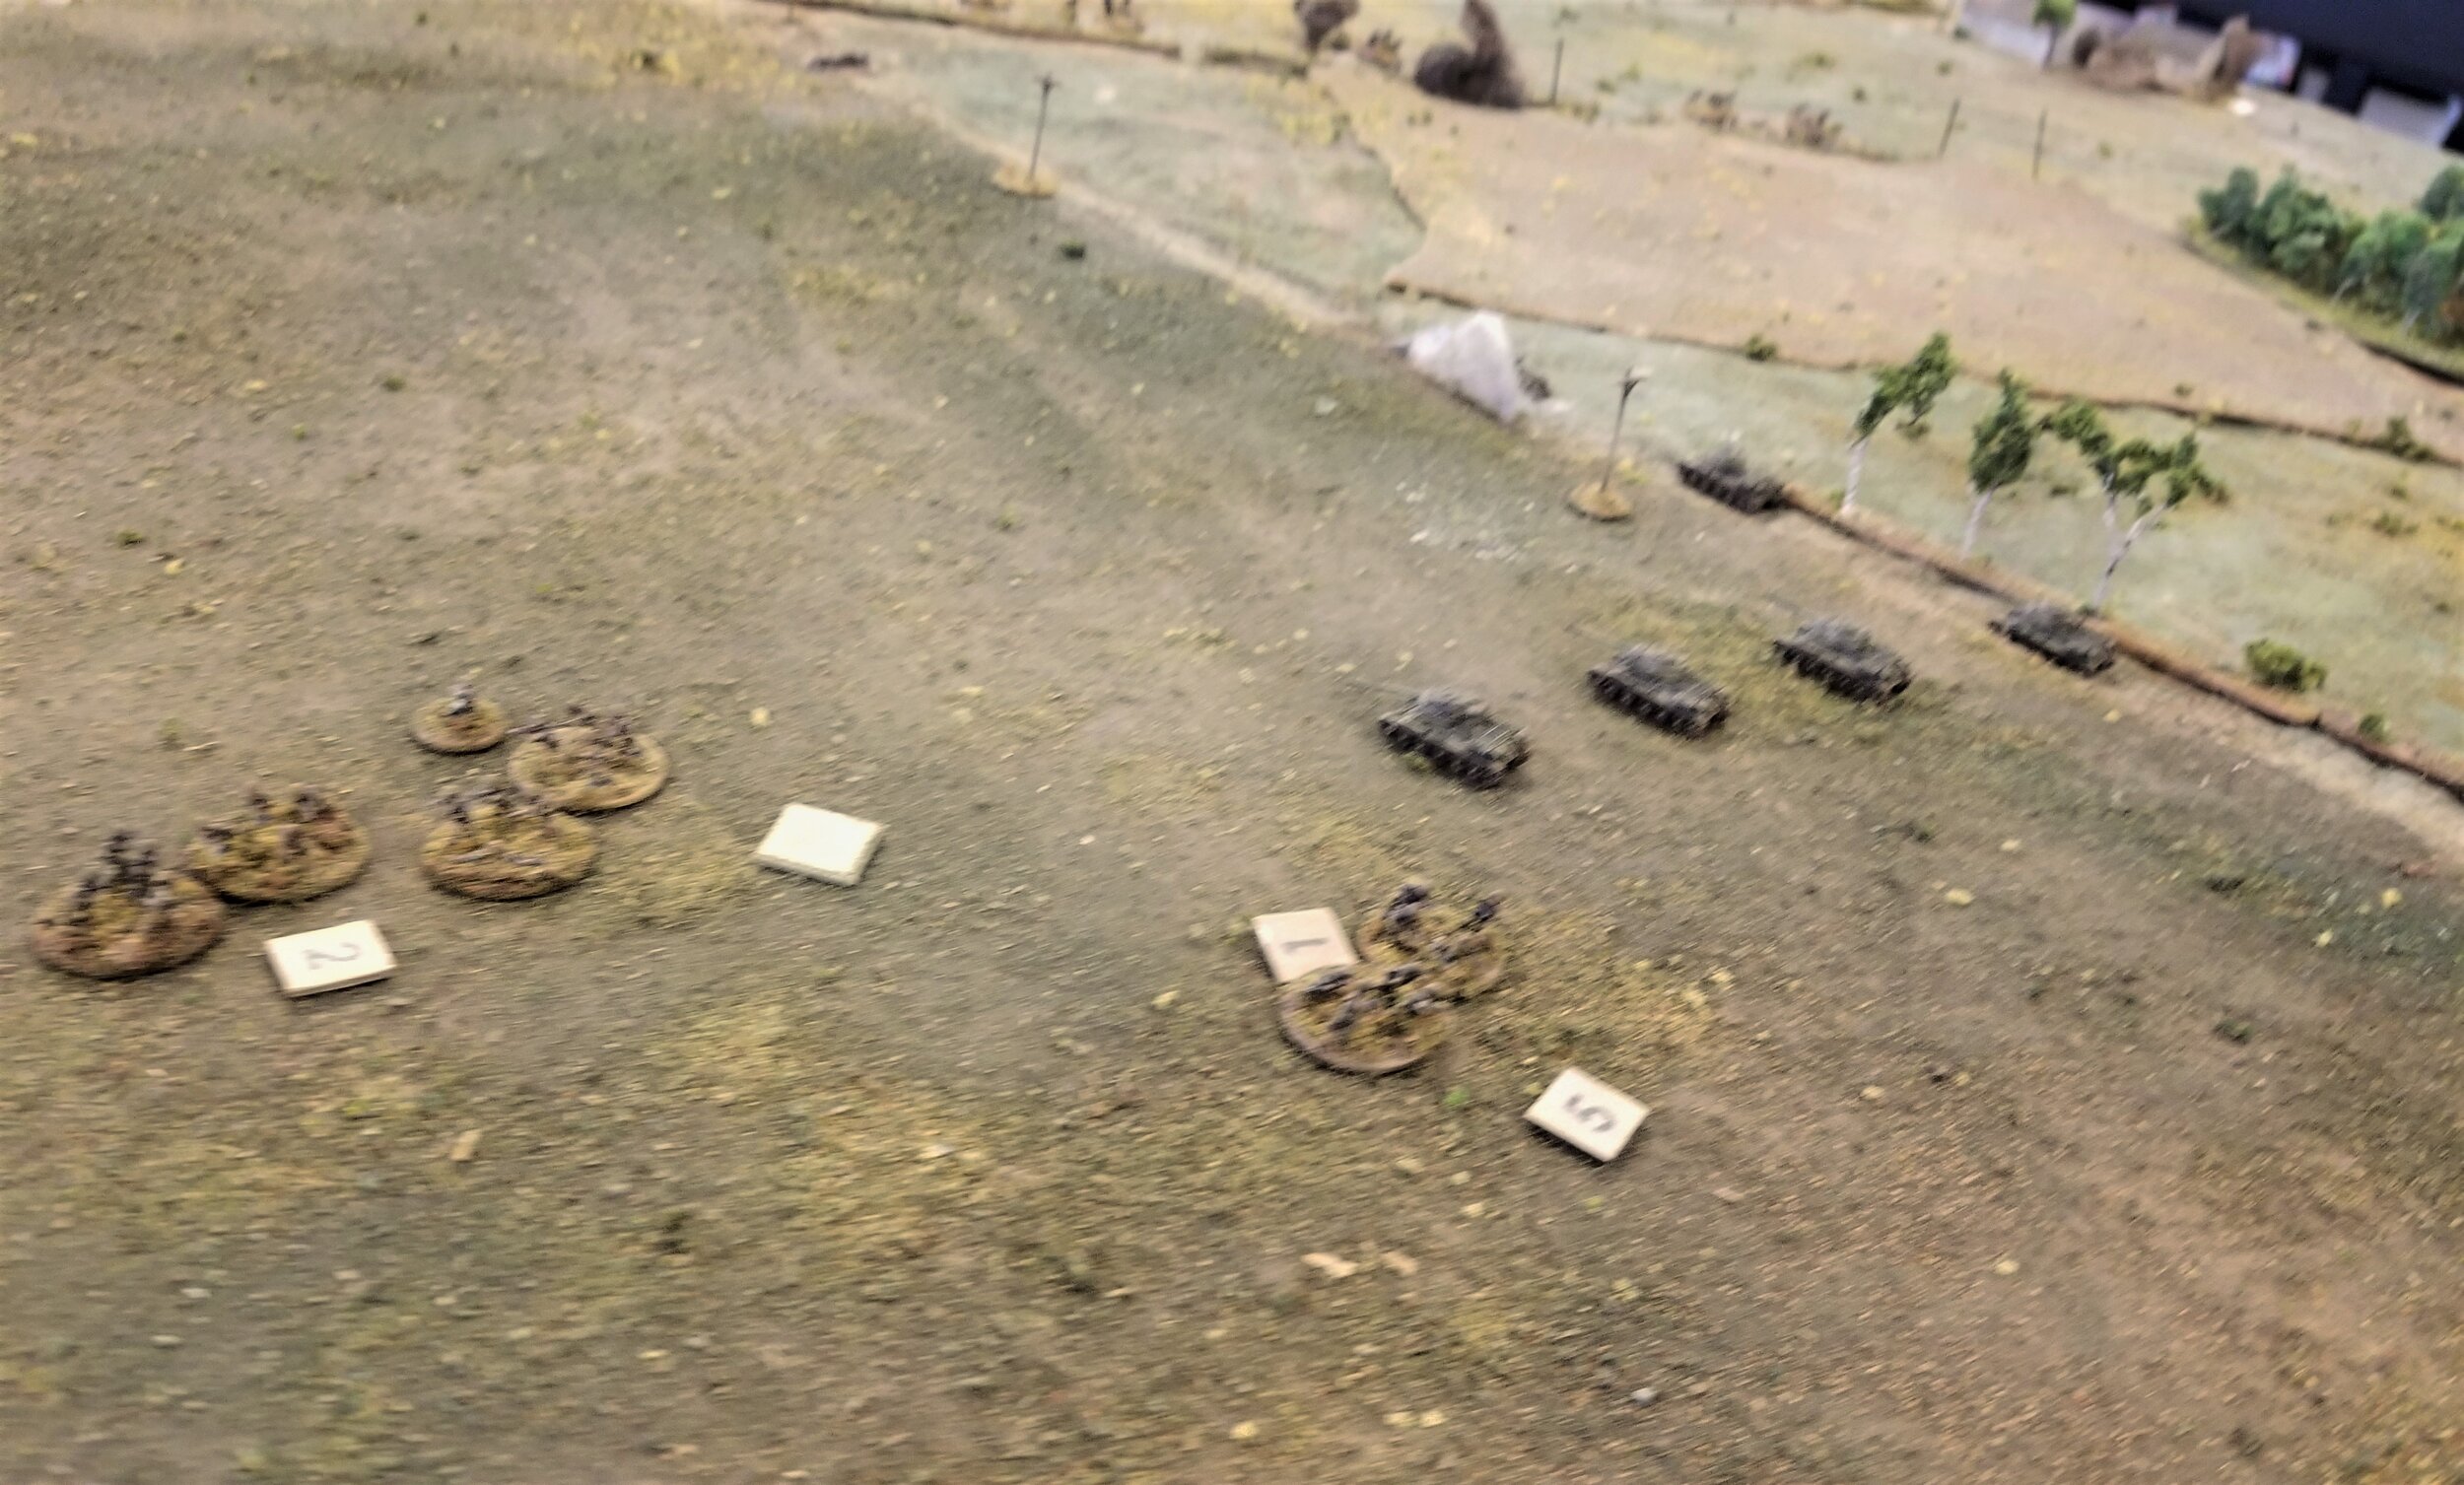
My infantry on the right were confronted with five French tanks coming up the hill towards them. Not much point in shooting at the tanks with rifles from this range, so the left hand squad revealed its position by shooting at the French infantry in the woods. One tank fired at this squad, but the round literally bounced off the house doing no damage except to Pin the infantry down until Tea Break. Neil had made the classic mistake of splitting his armour and infantry: his tanks could Pin my troops in the houses with HE, but he had no infantry to charge my troops once they were Pinned.

Whatever the figures on the table thought, the sight of five French tanks coming up the hill towards me was doing my morale no good at all, and I started to rush both AT guns and the ATR team over to that side of the village to help stop the French attack. 

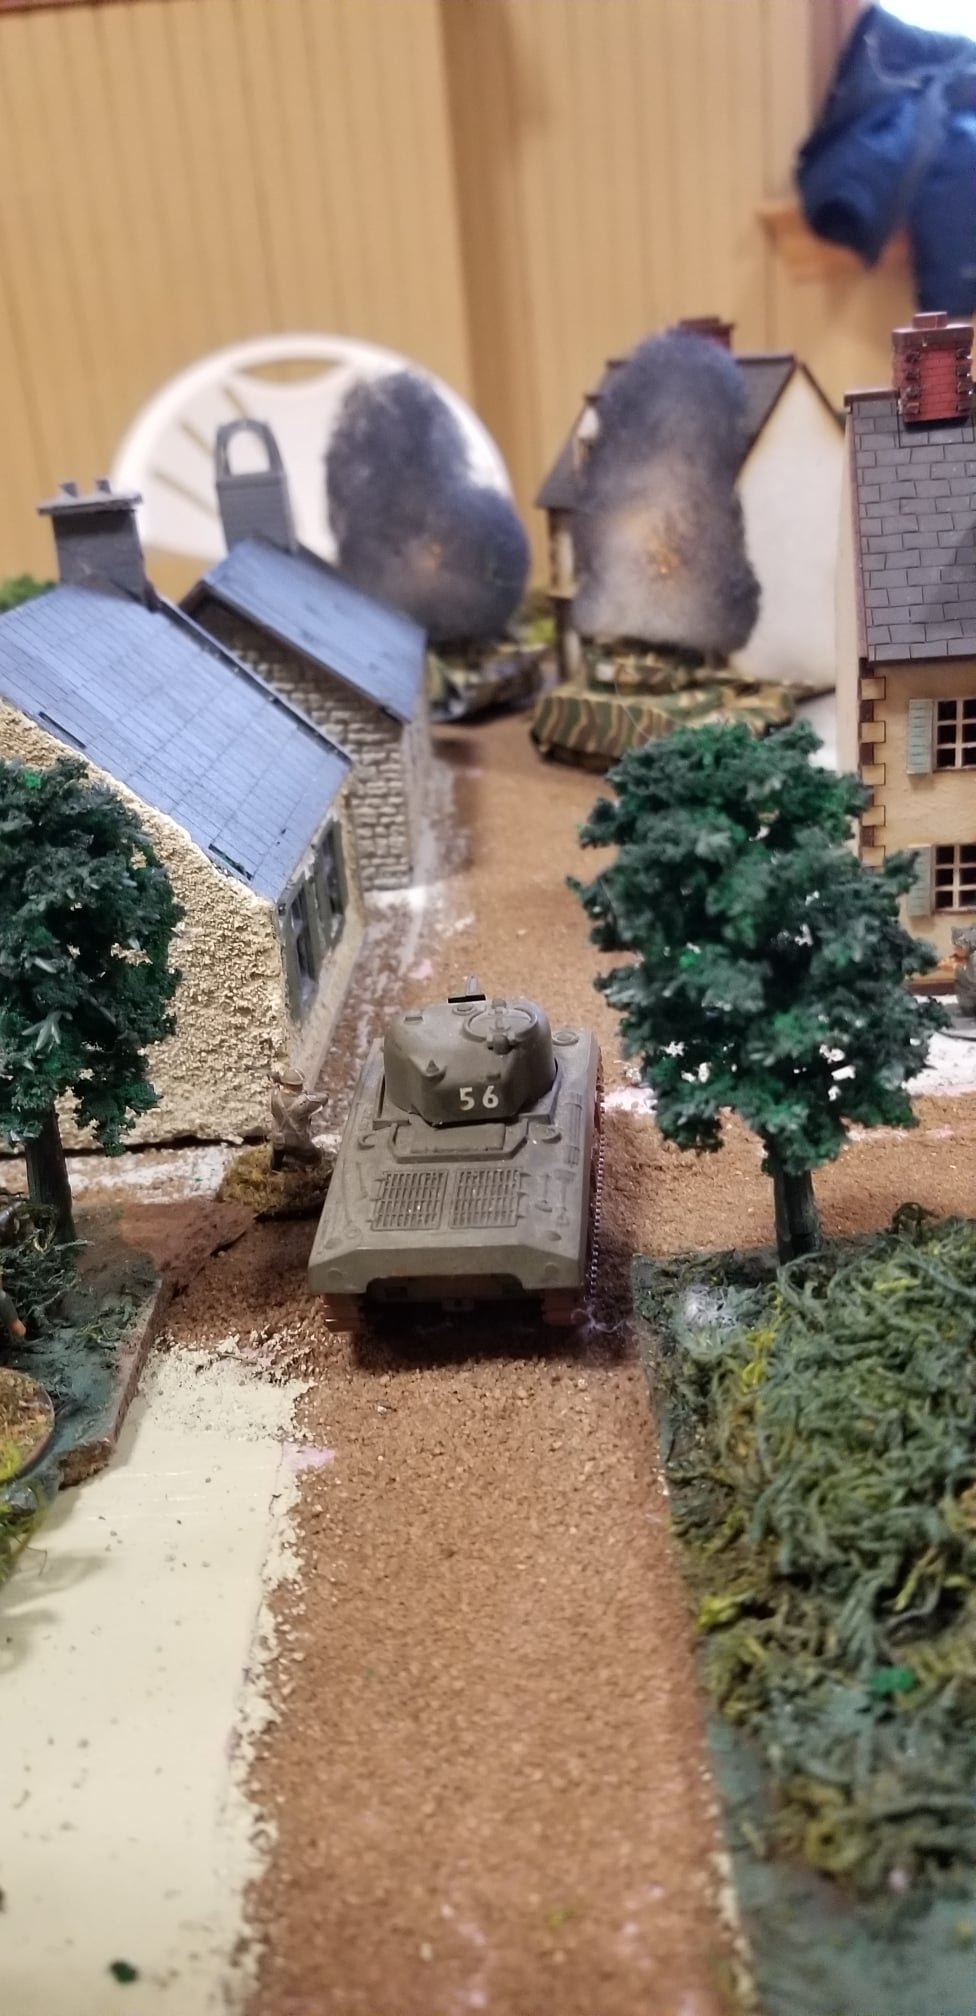
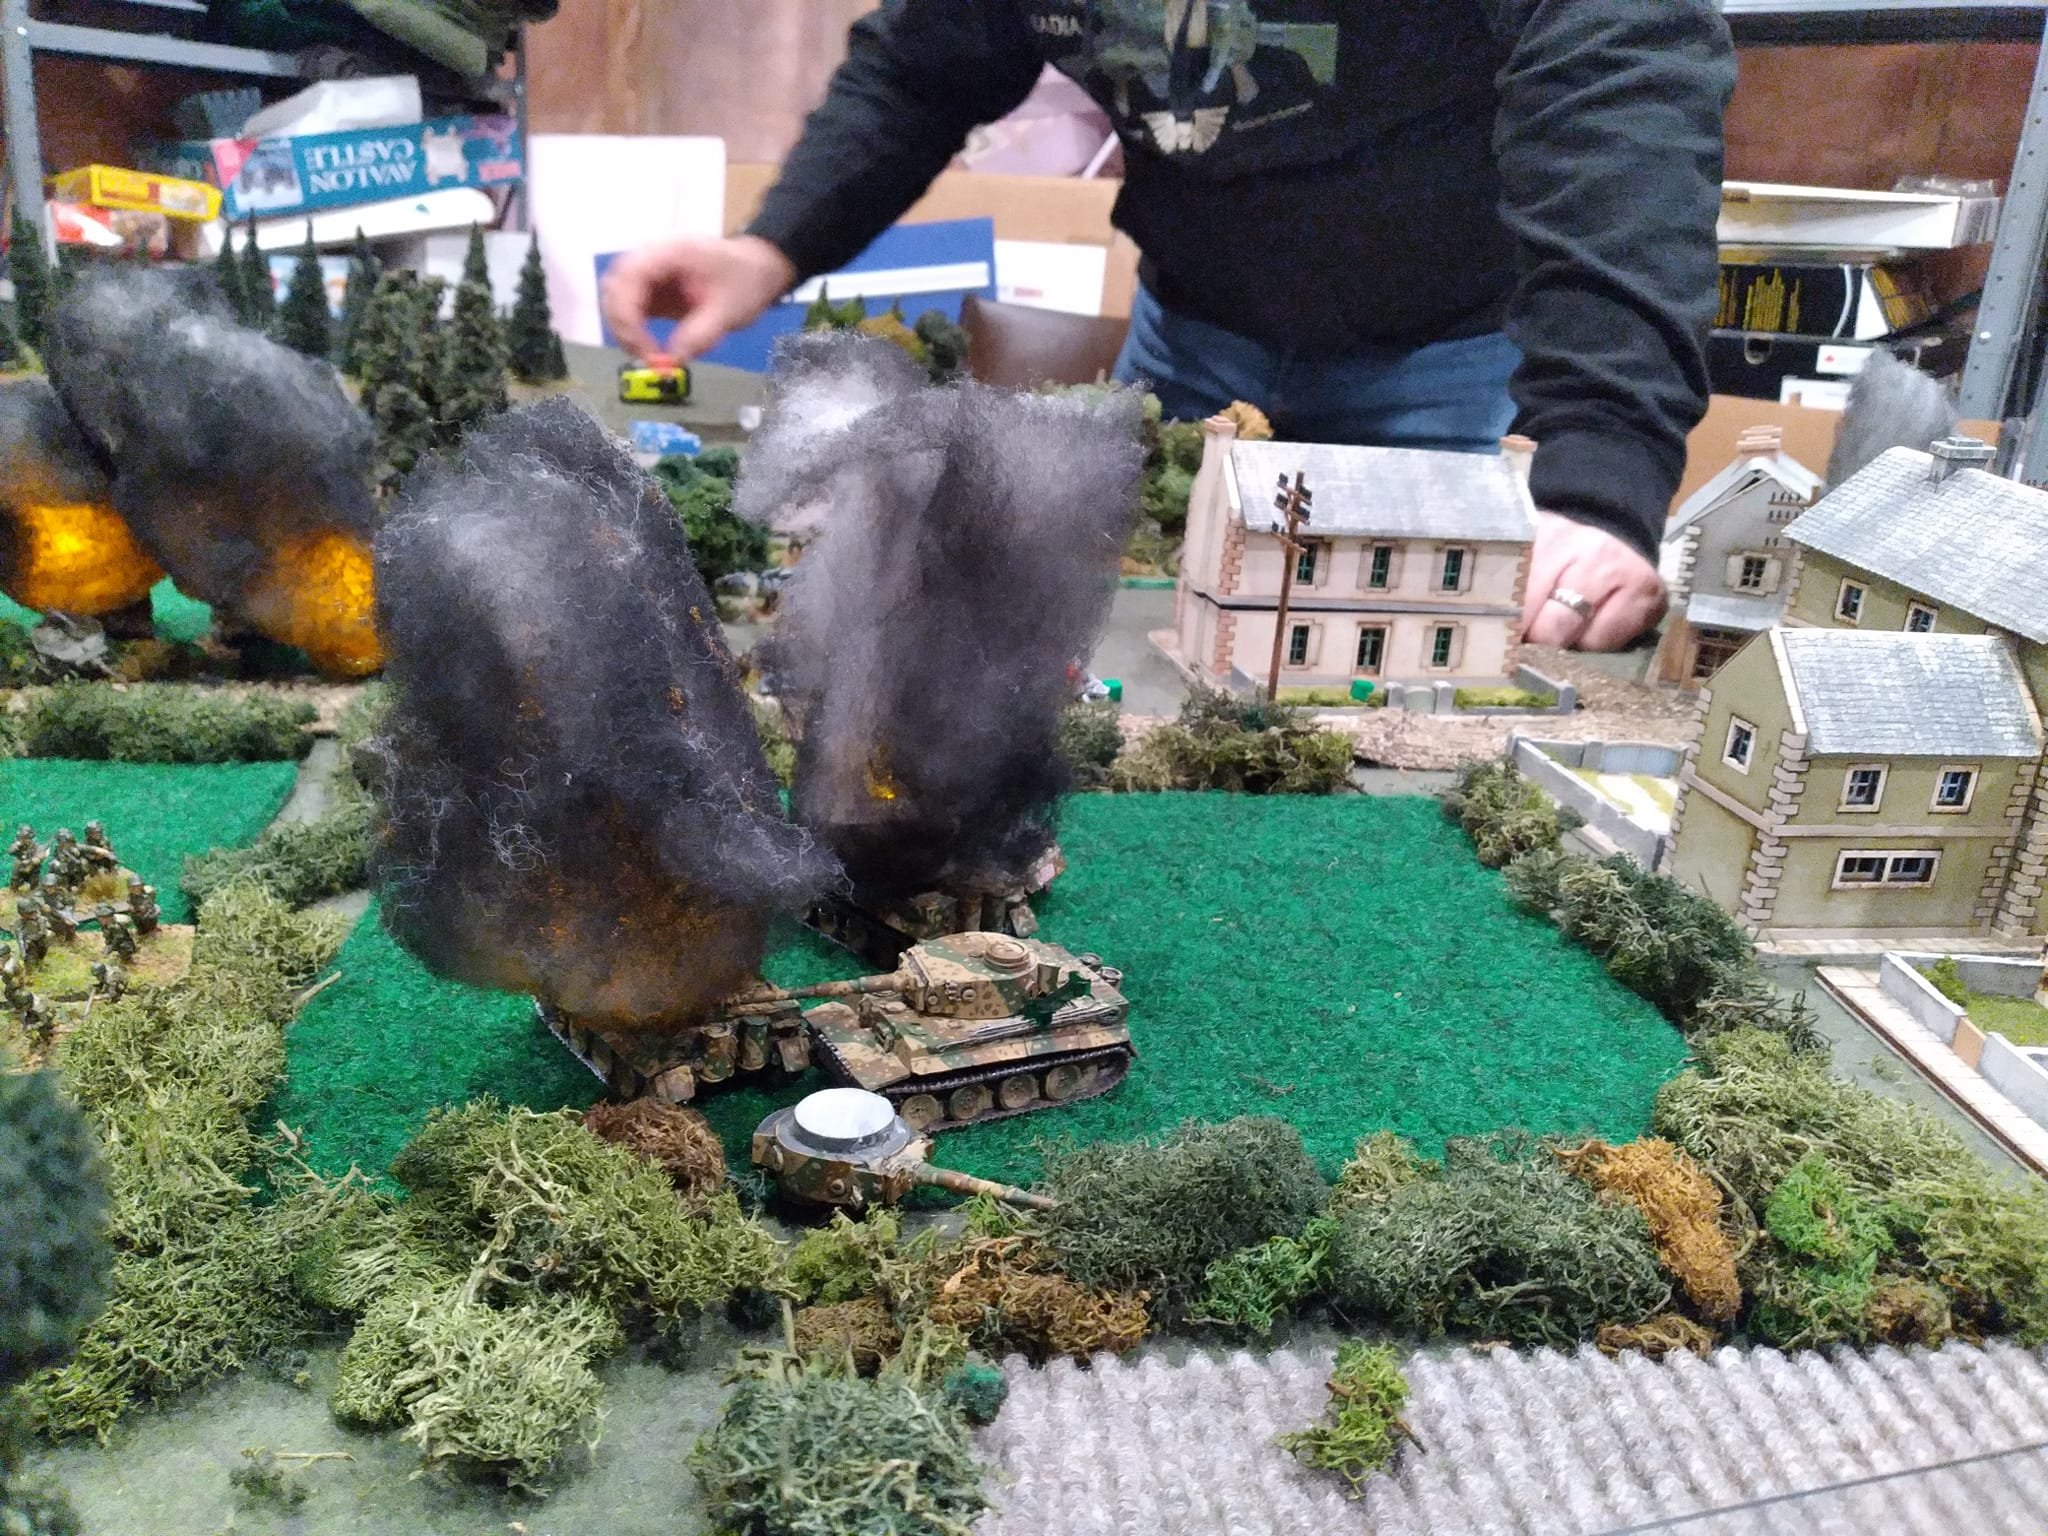
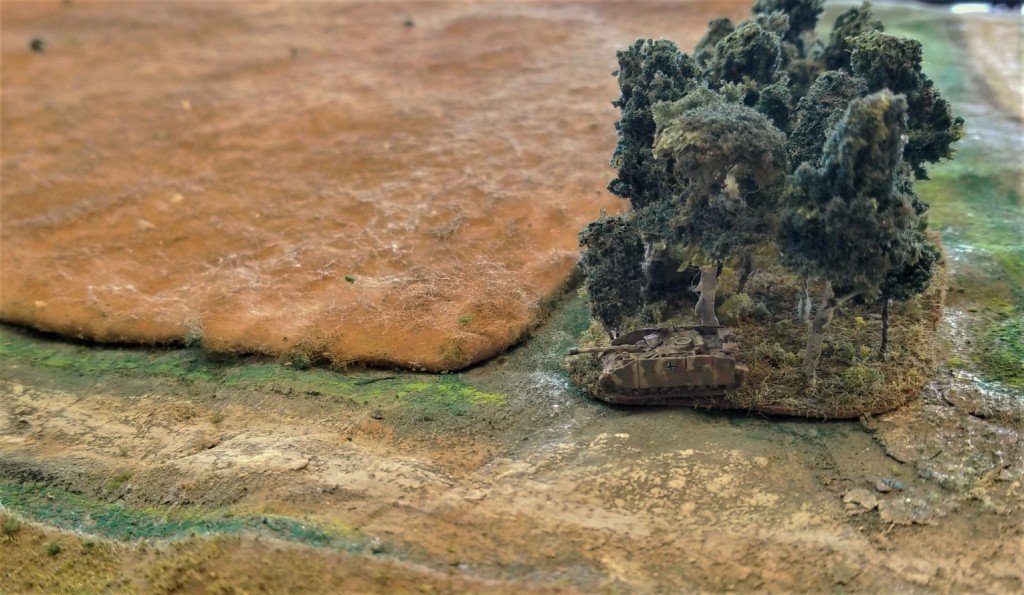
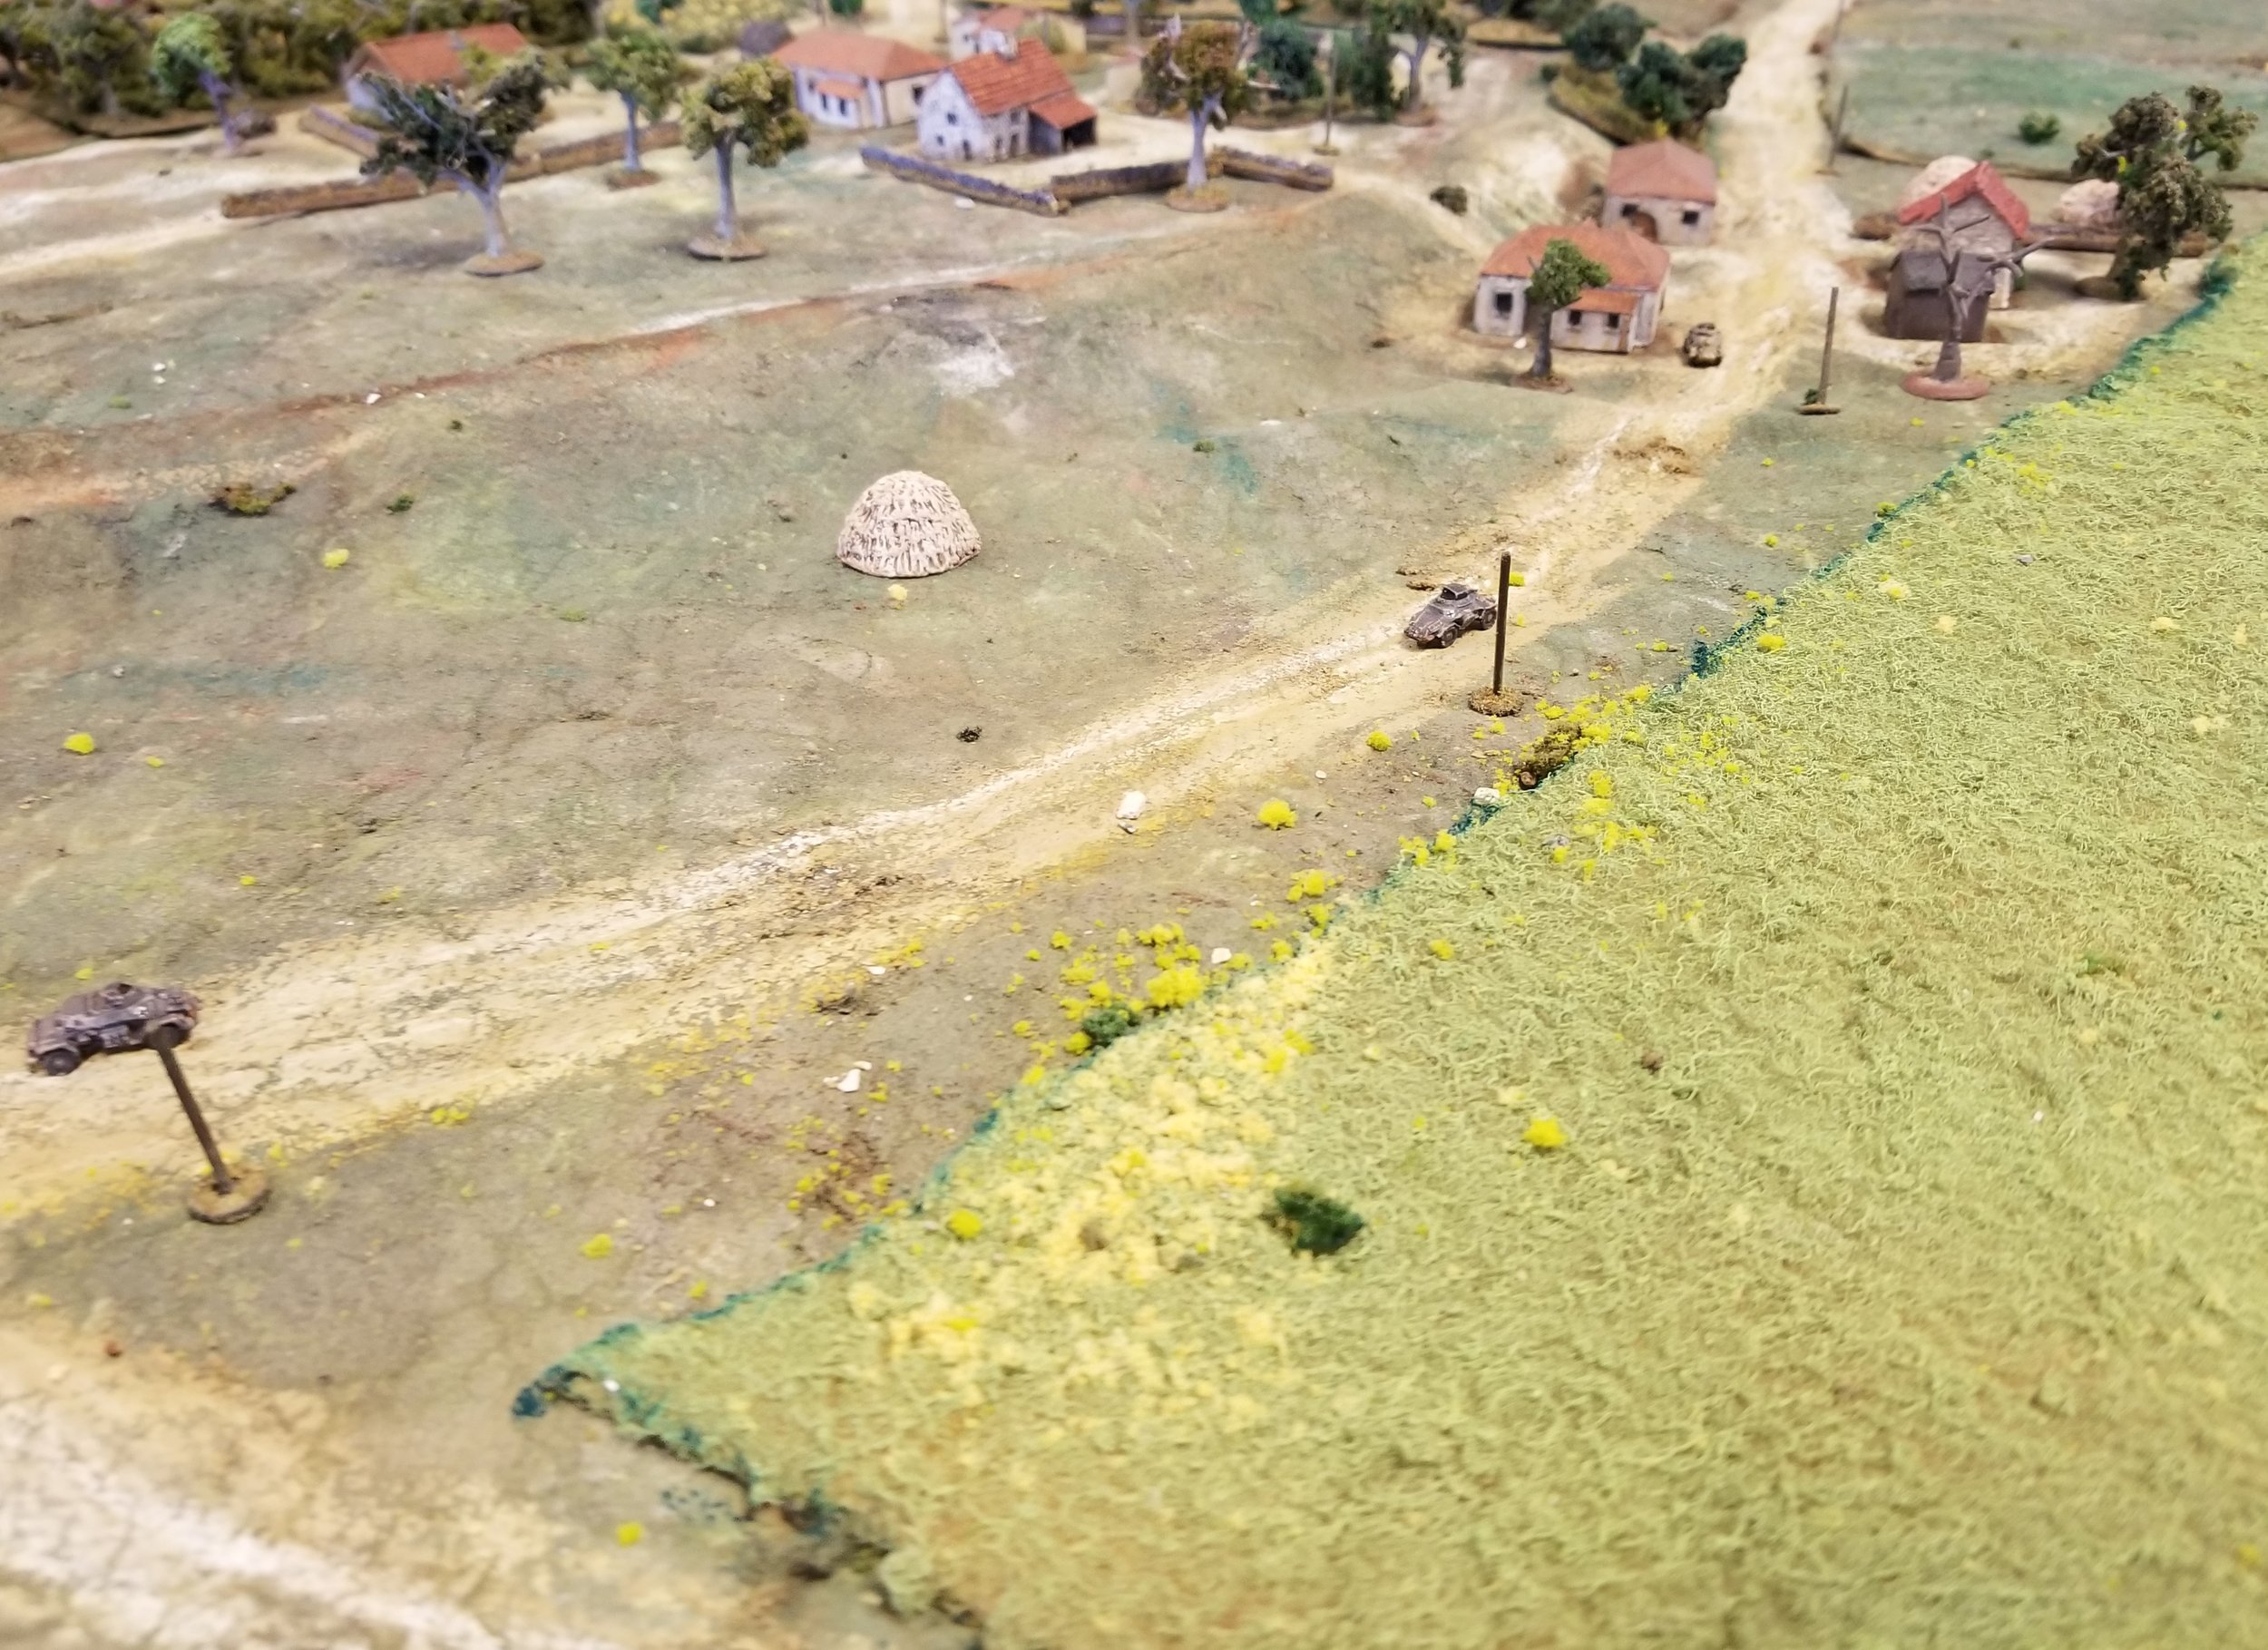
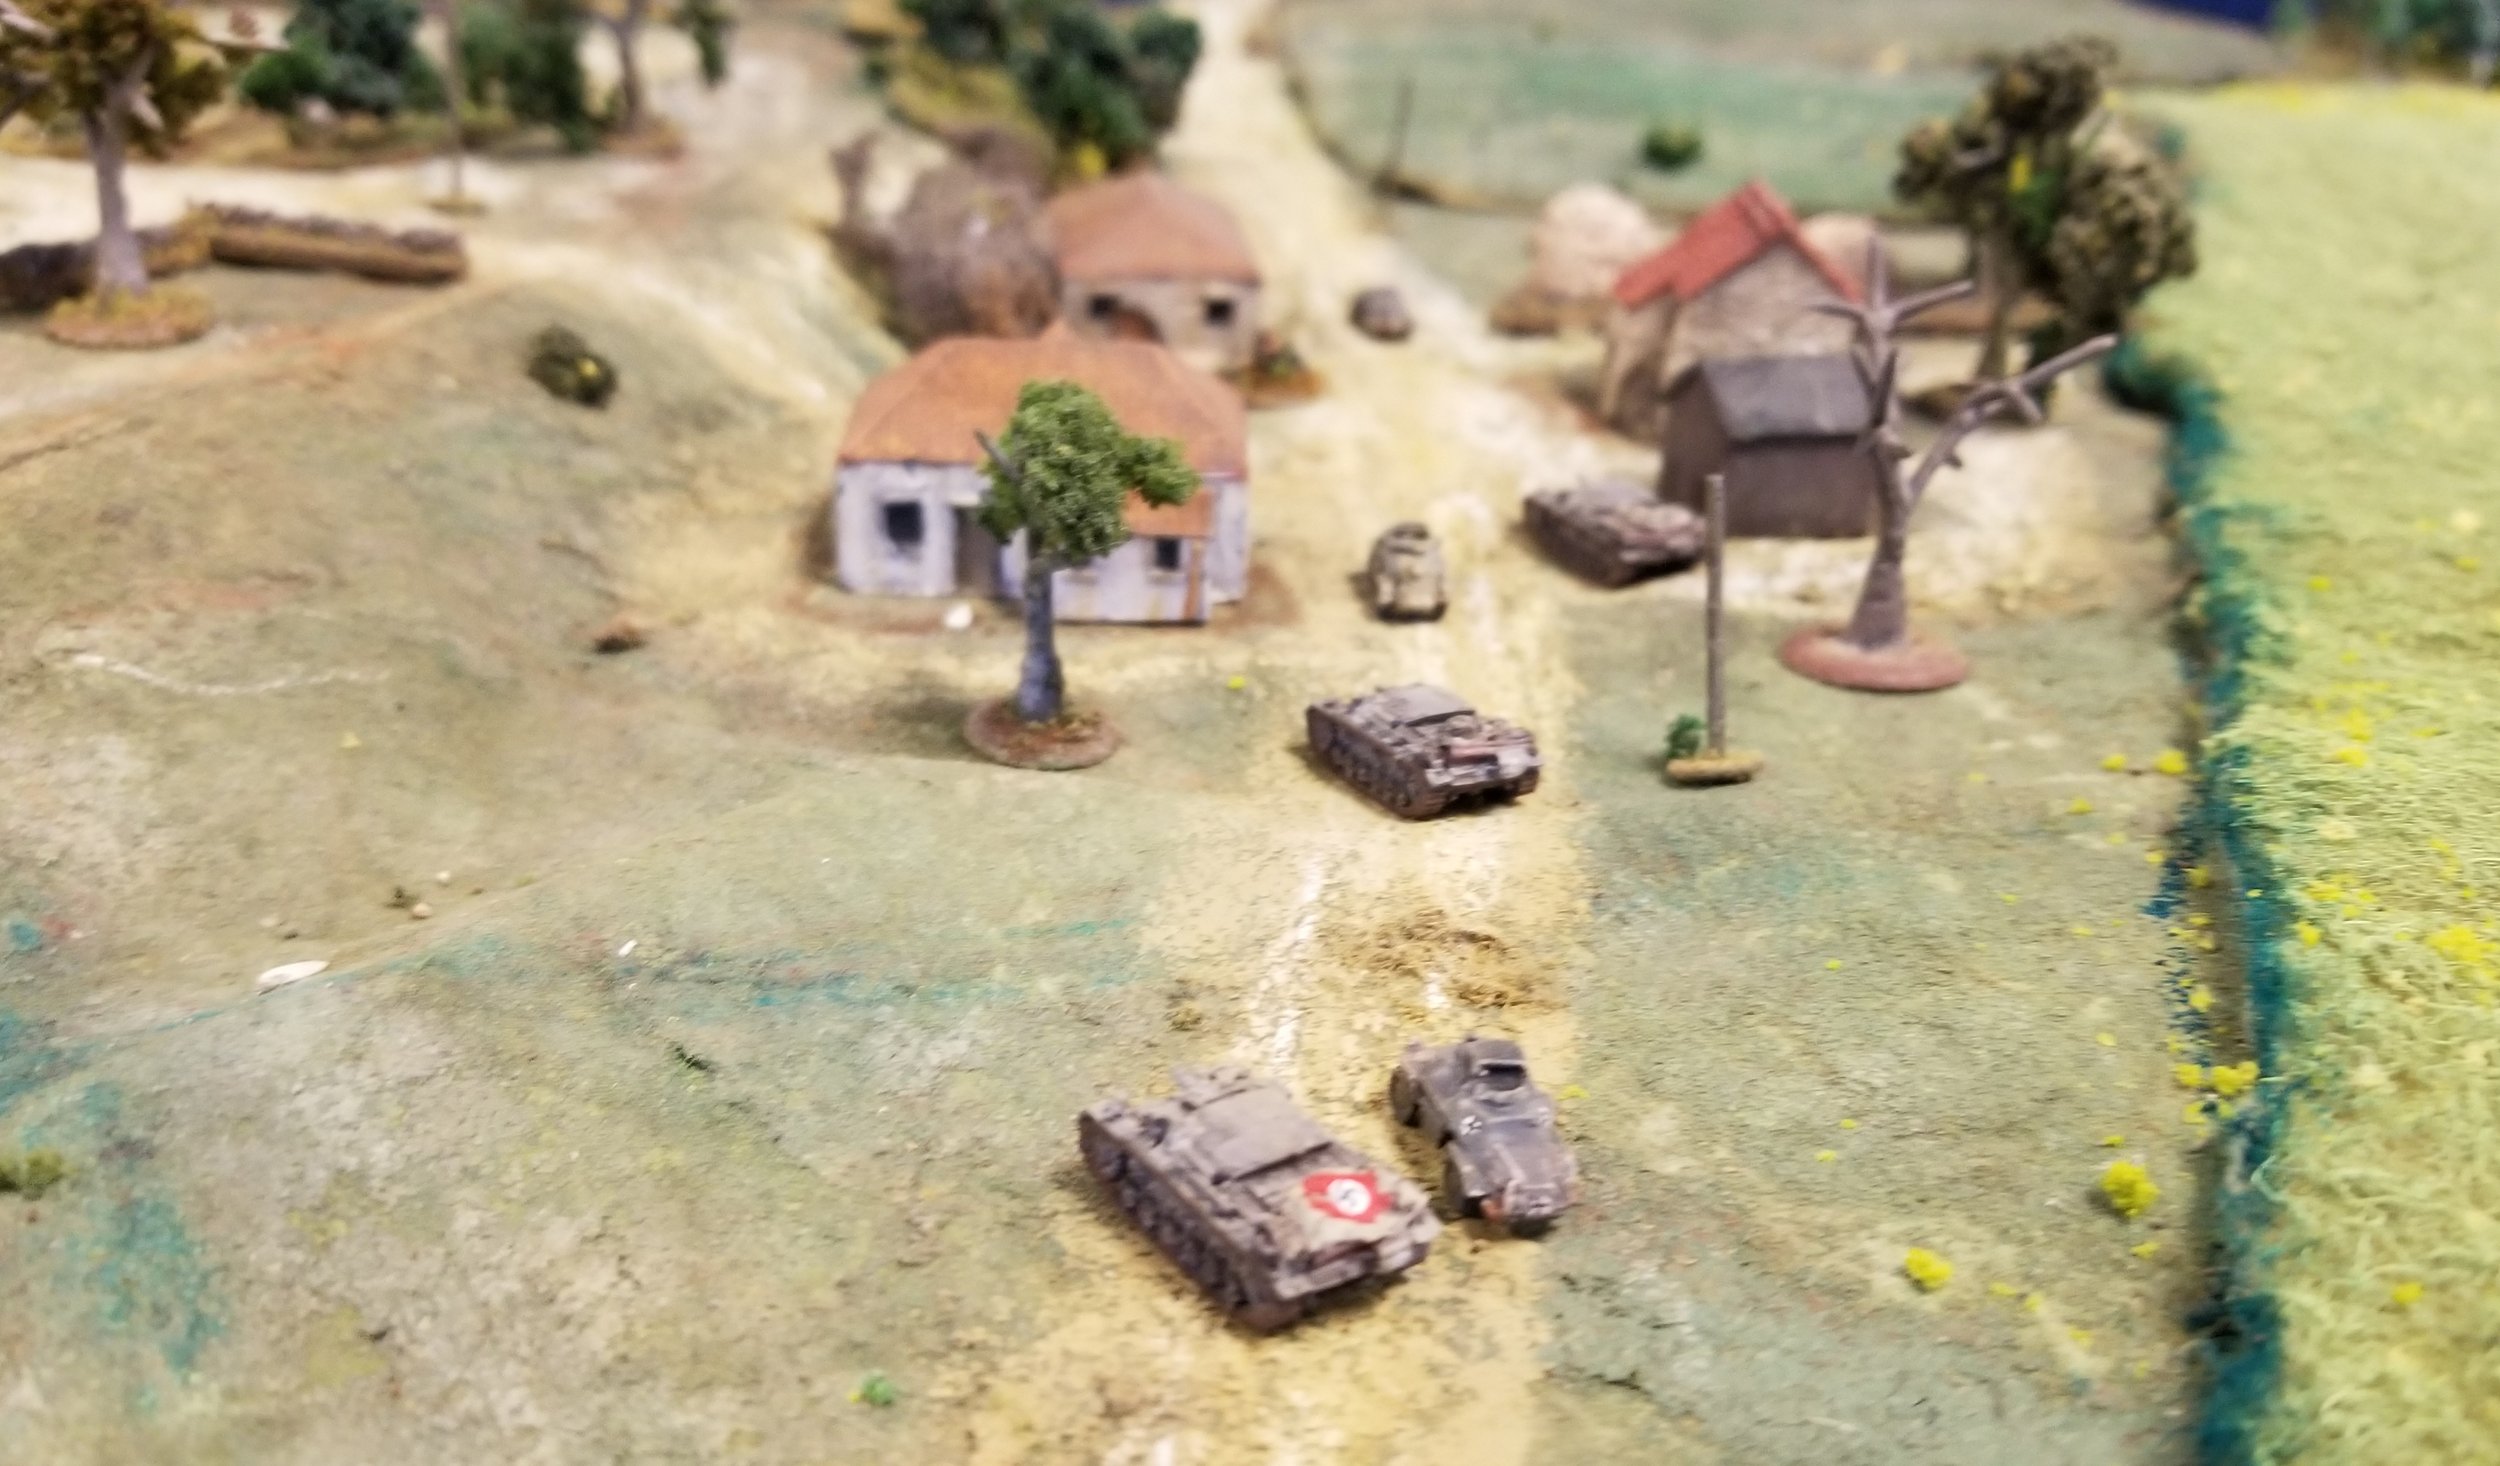
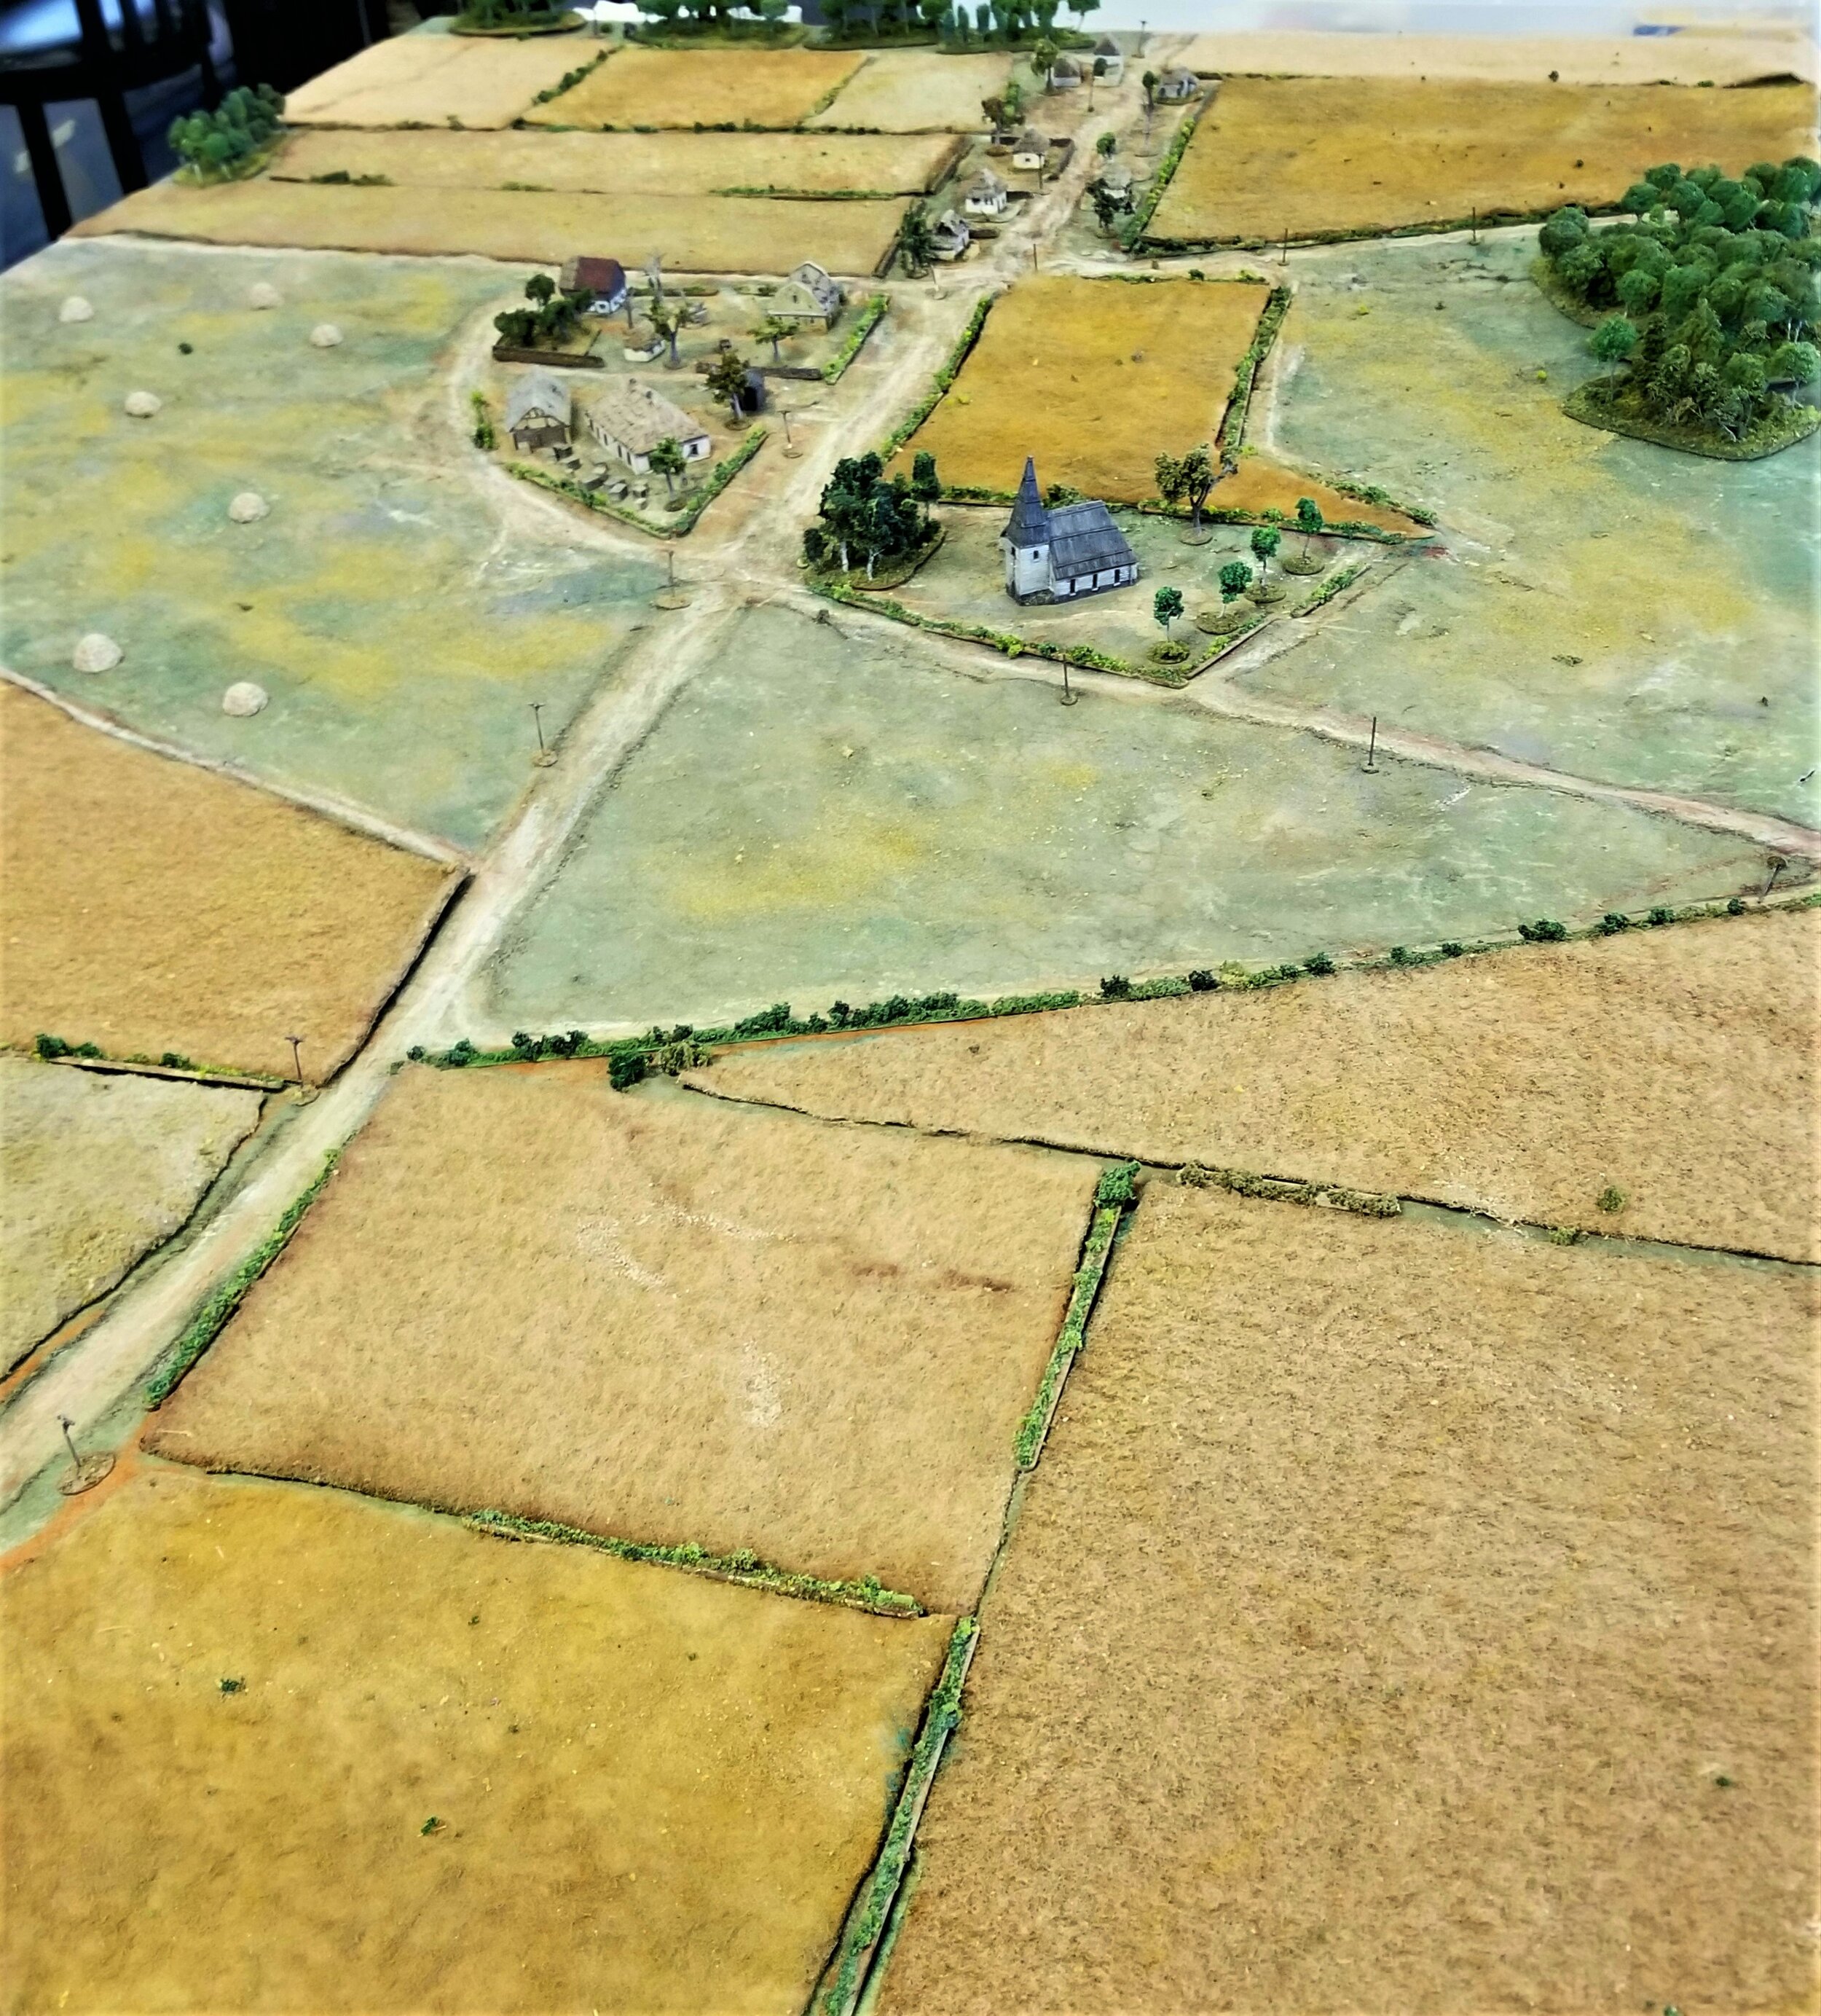
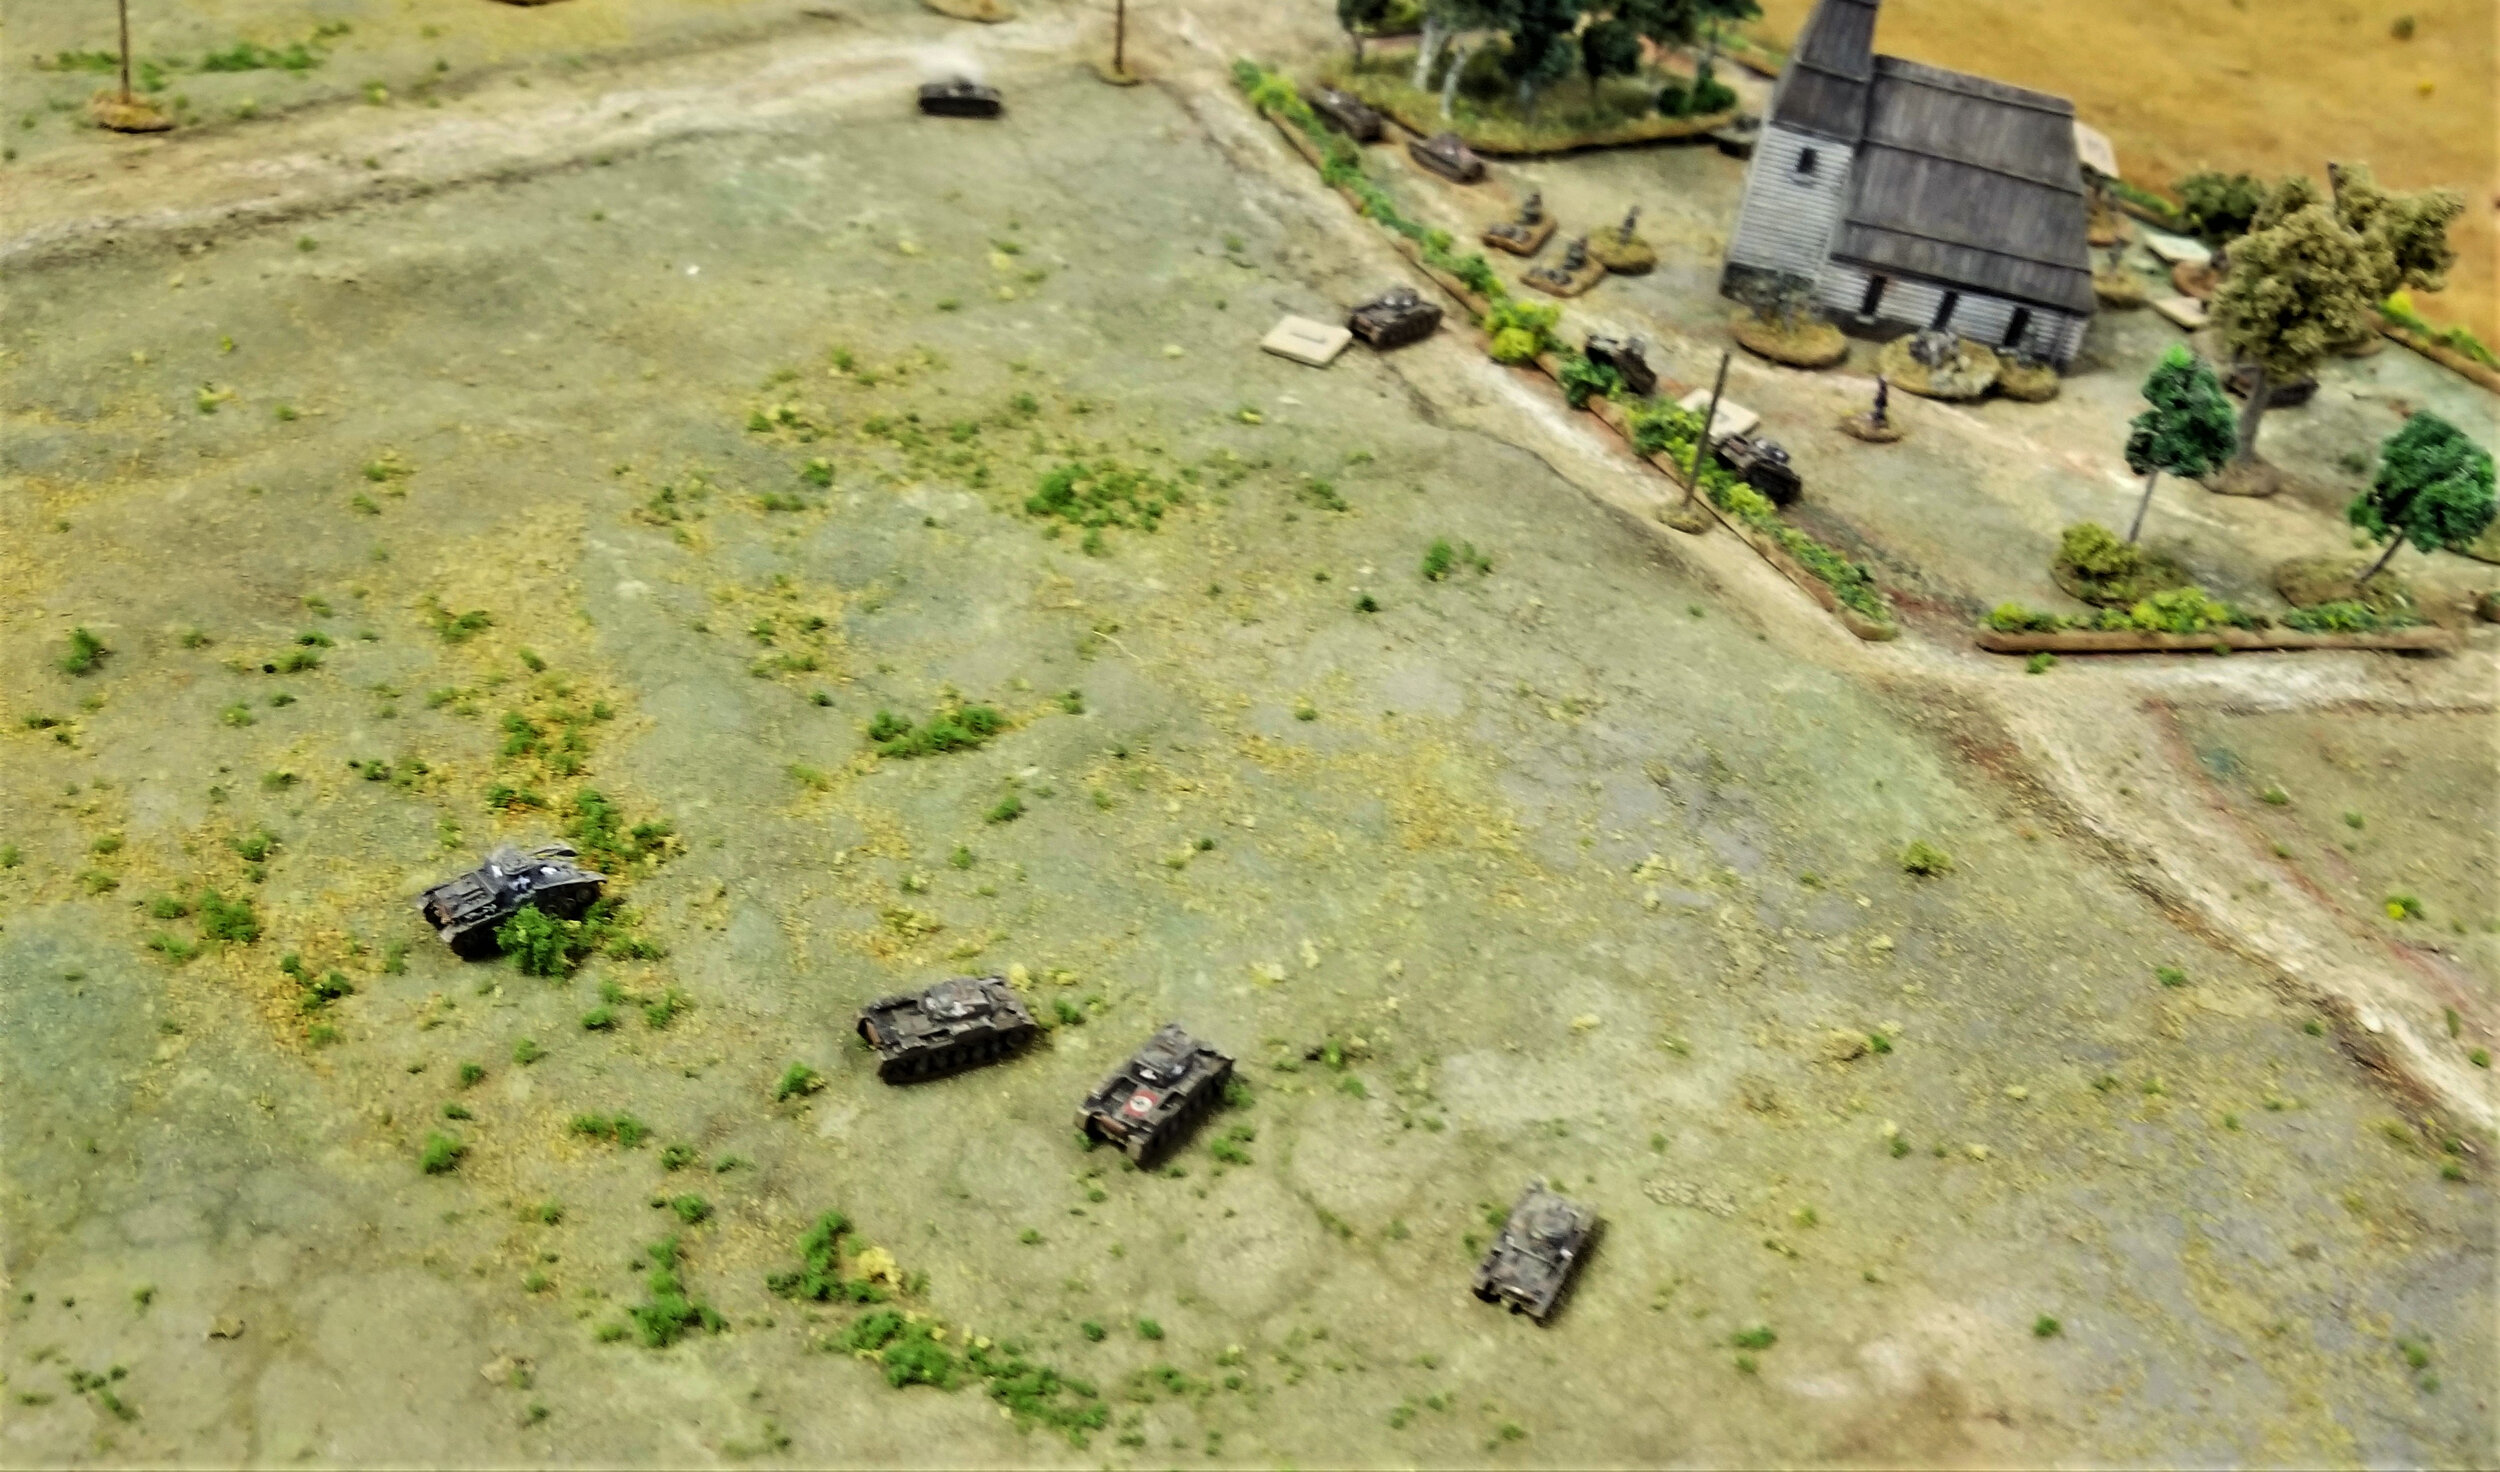
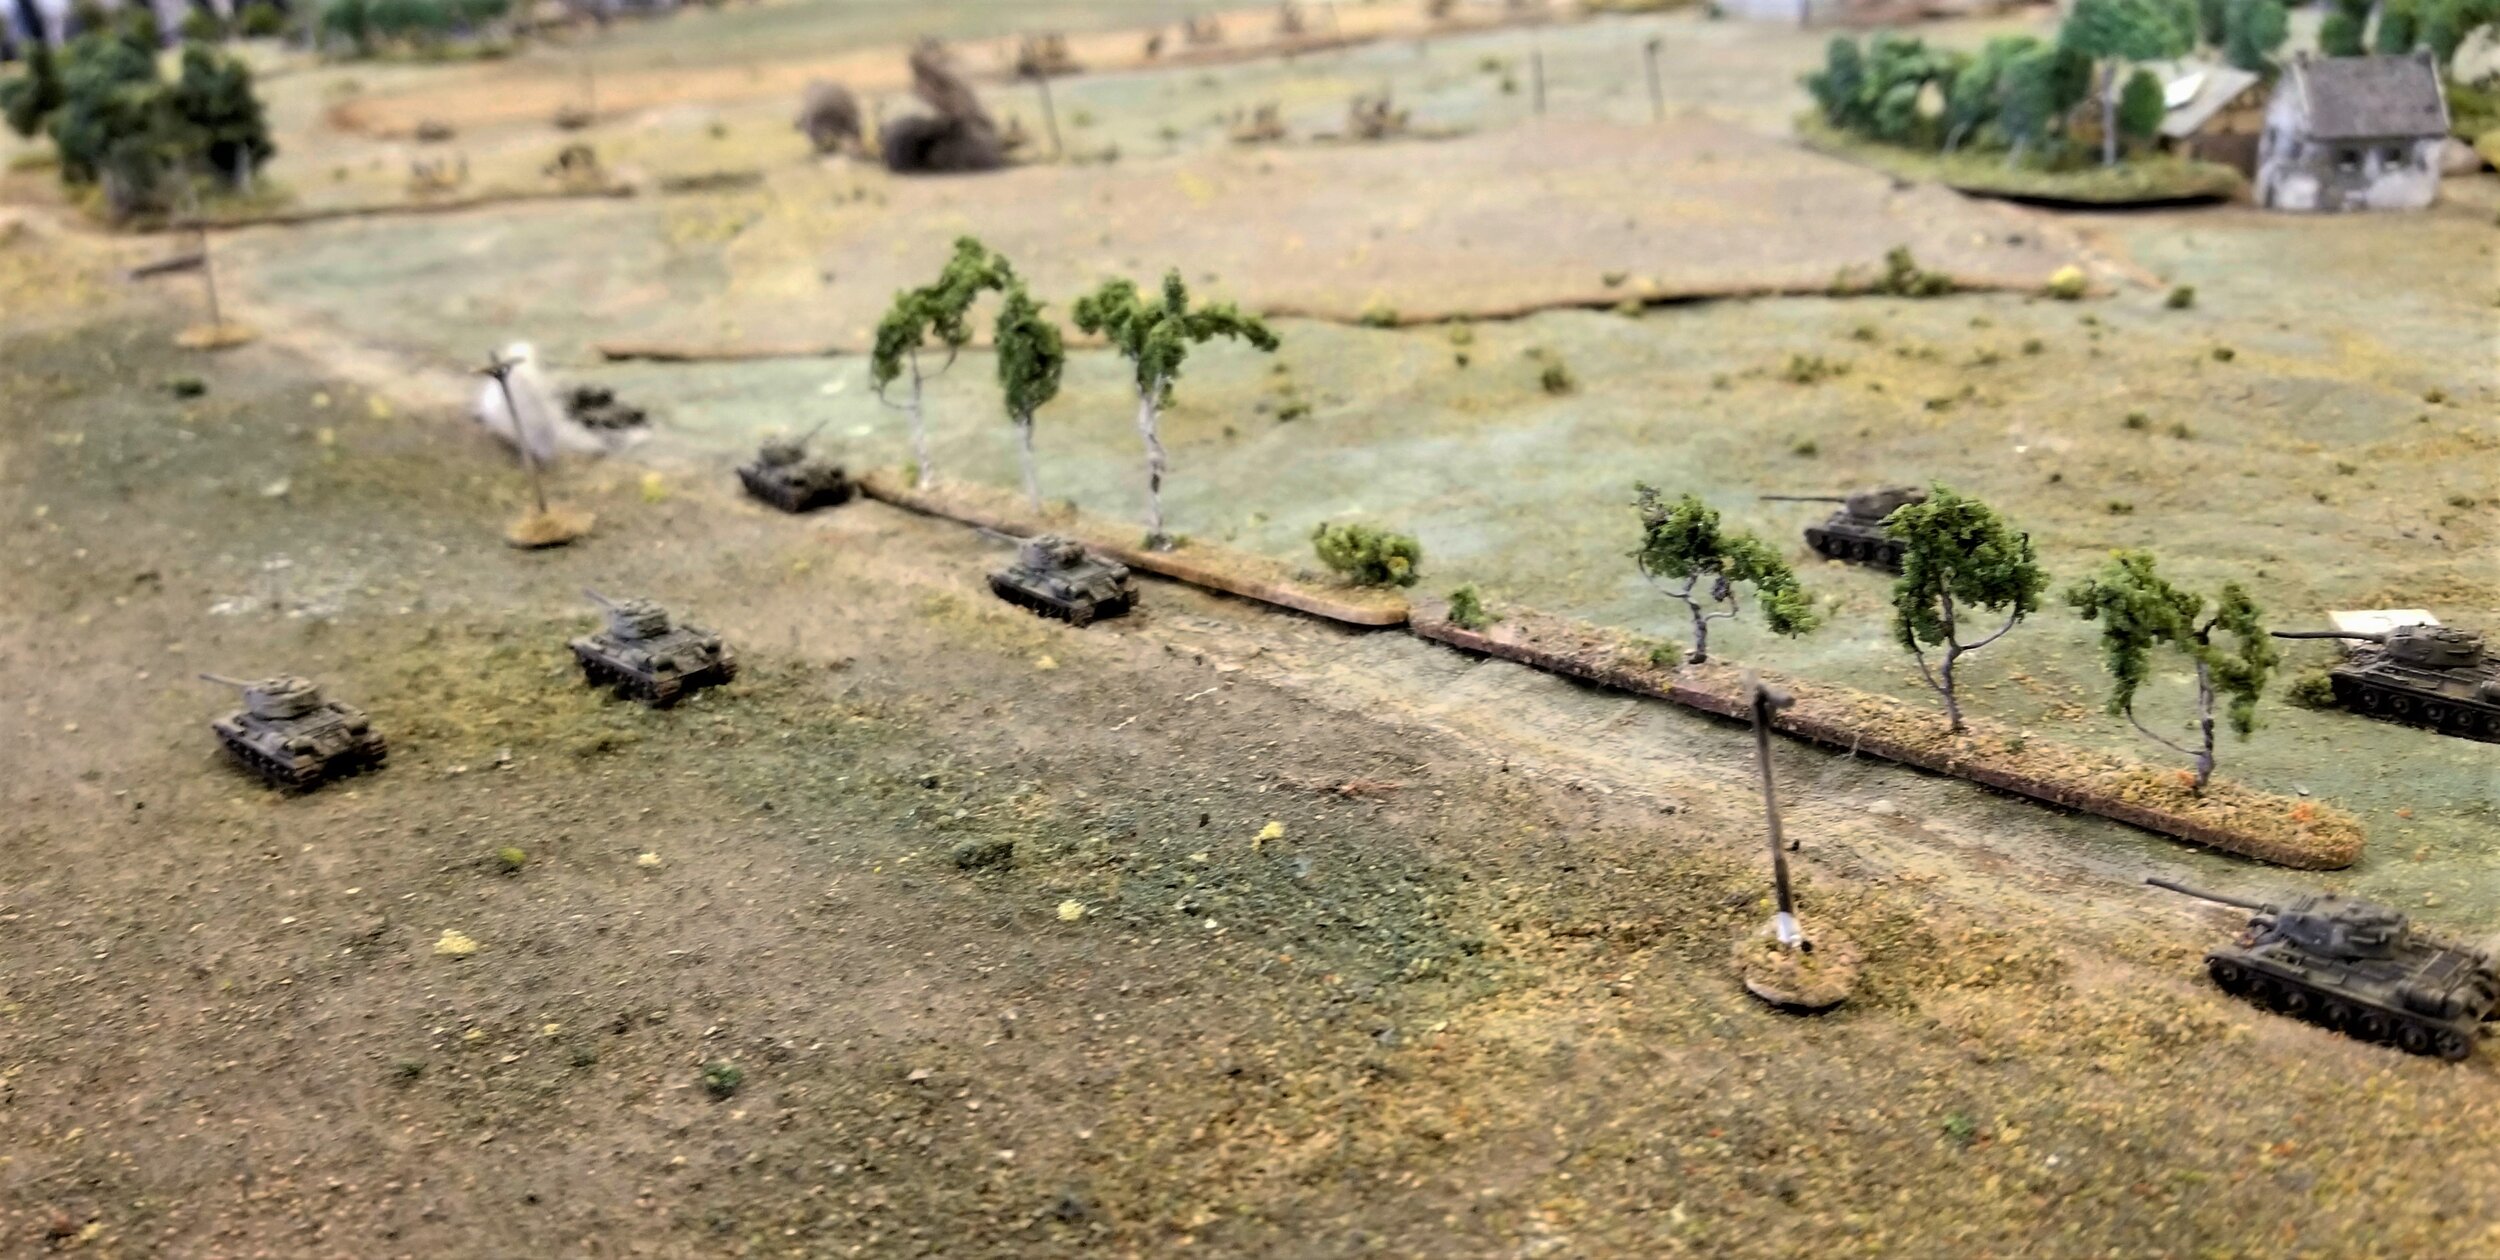
The tanks were coming up the hill fast (we had both forgotten that R-35s are 'Slow' tanks): so fast, in fact, that the command tank broke down just as it came level with the village. The Big Man on board refused to abandon his vehicle, and spent the rest of the game acting as a mobile pillbox.

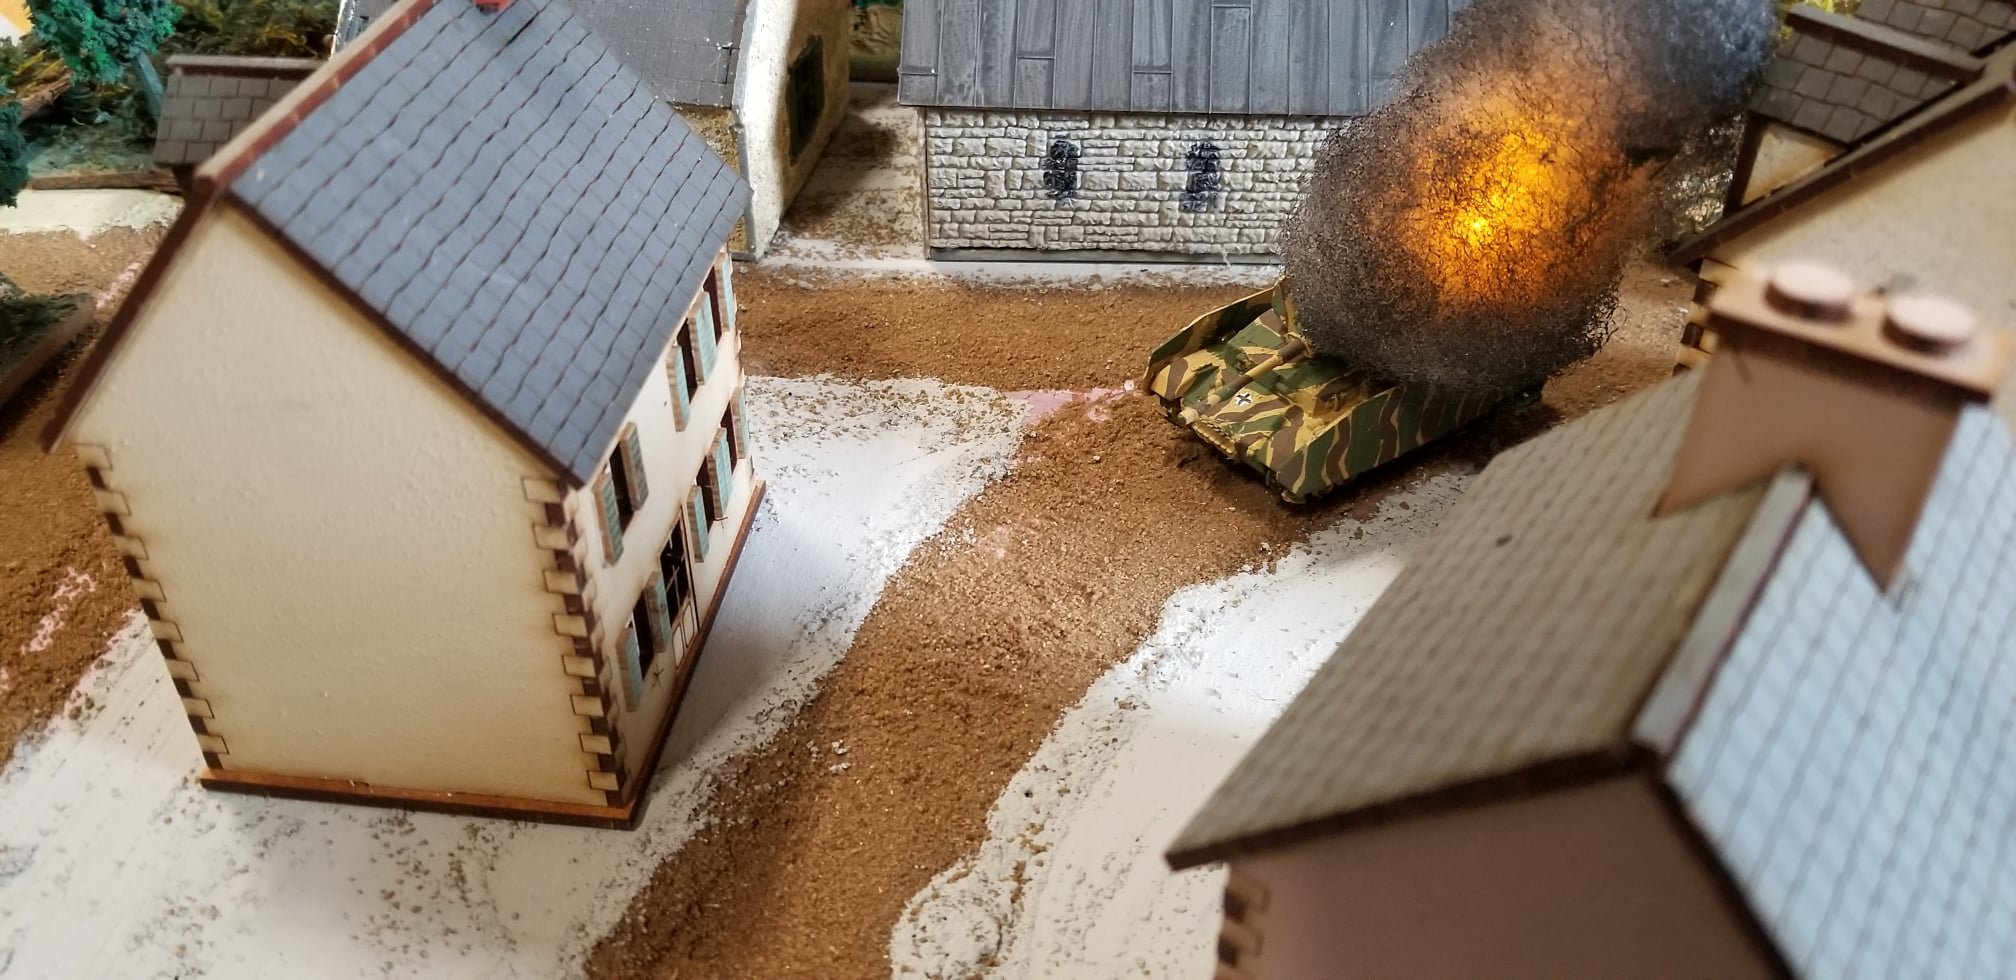
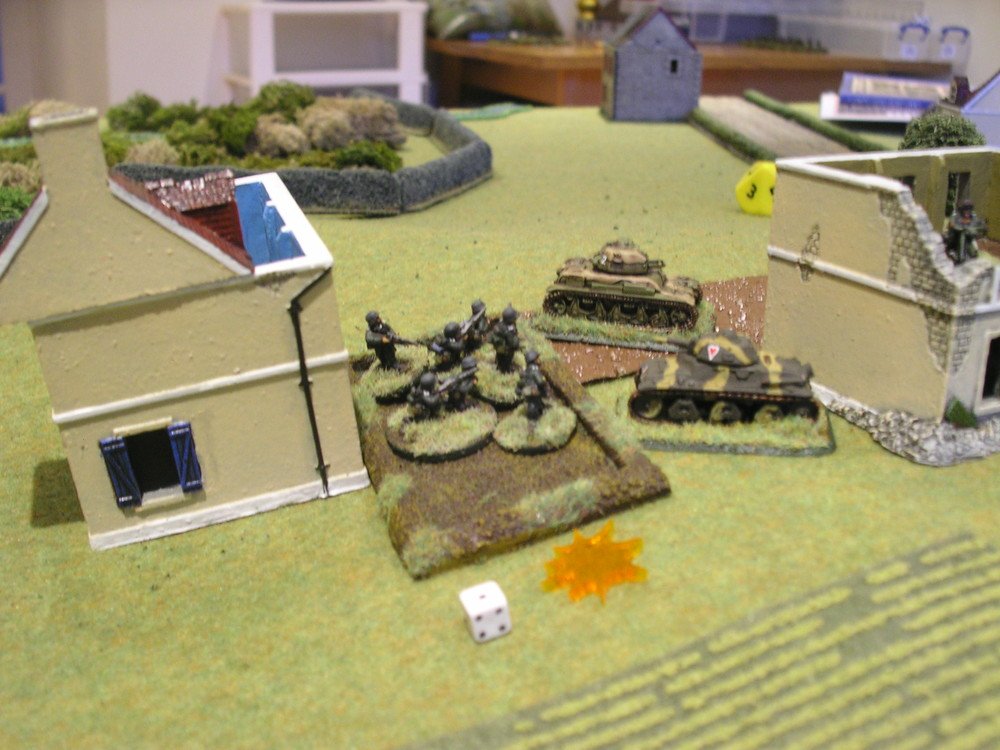
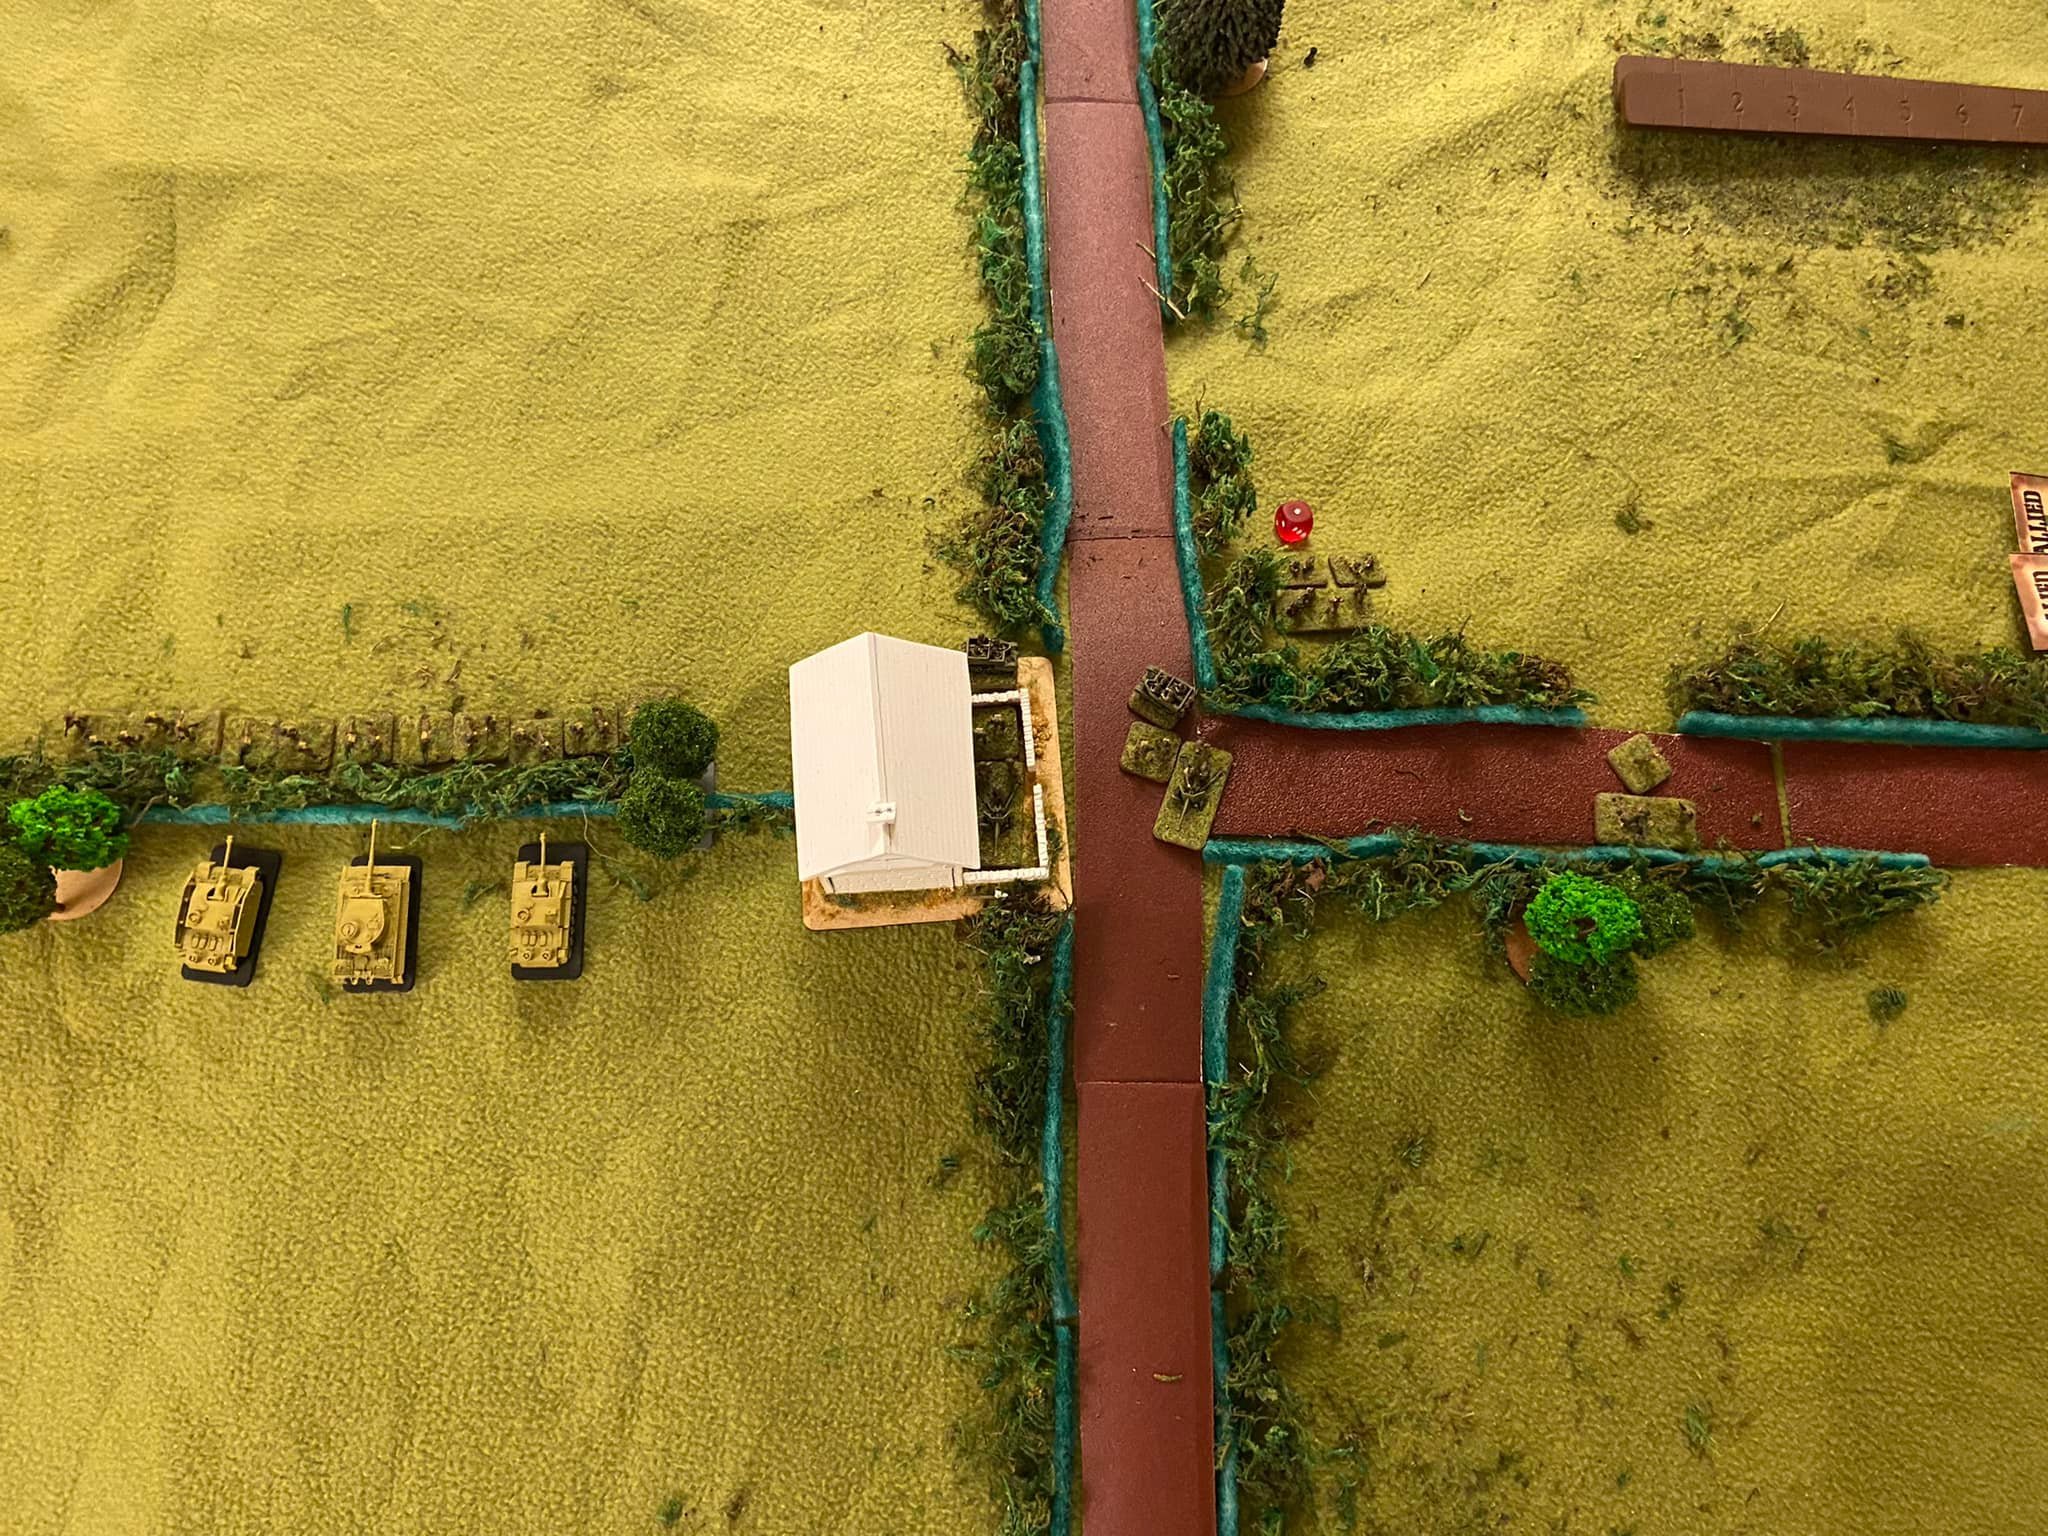
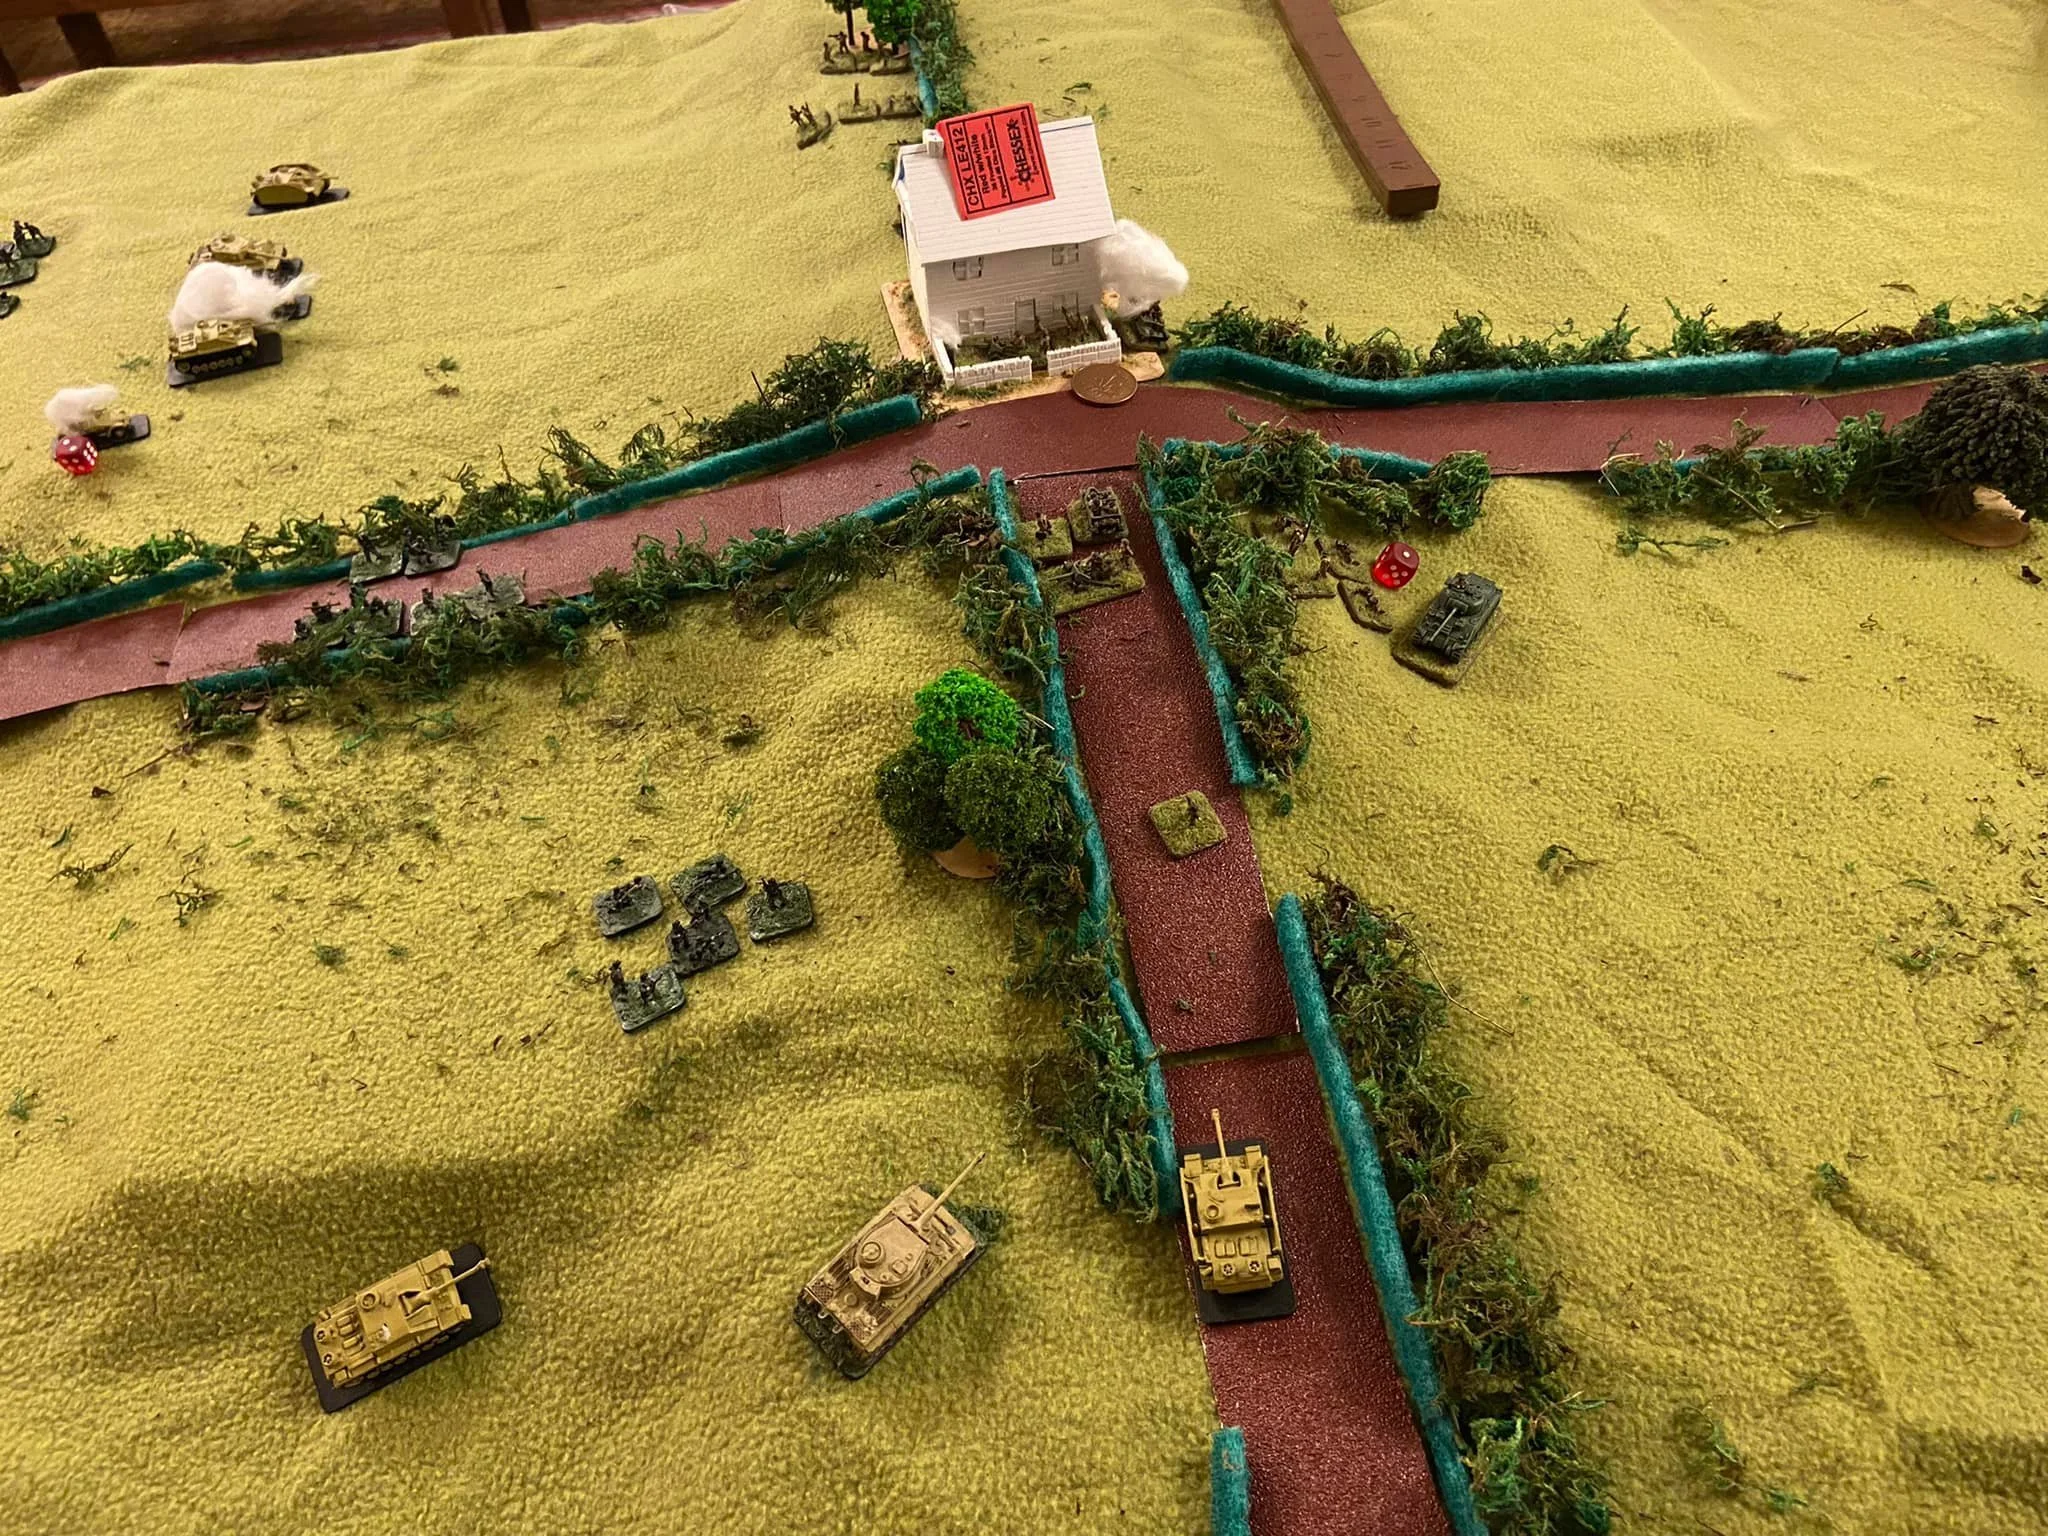
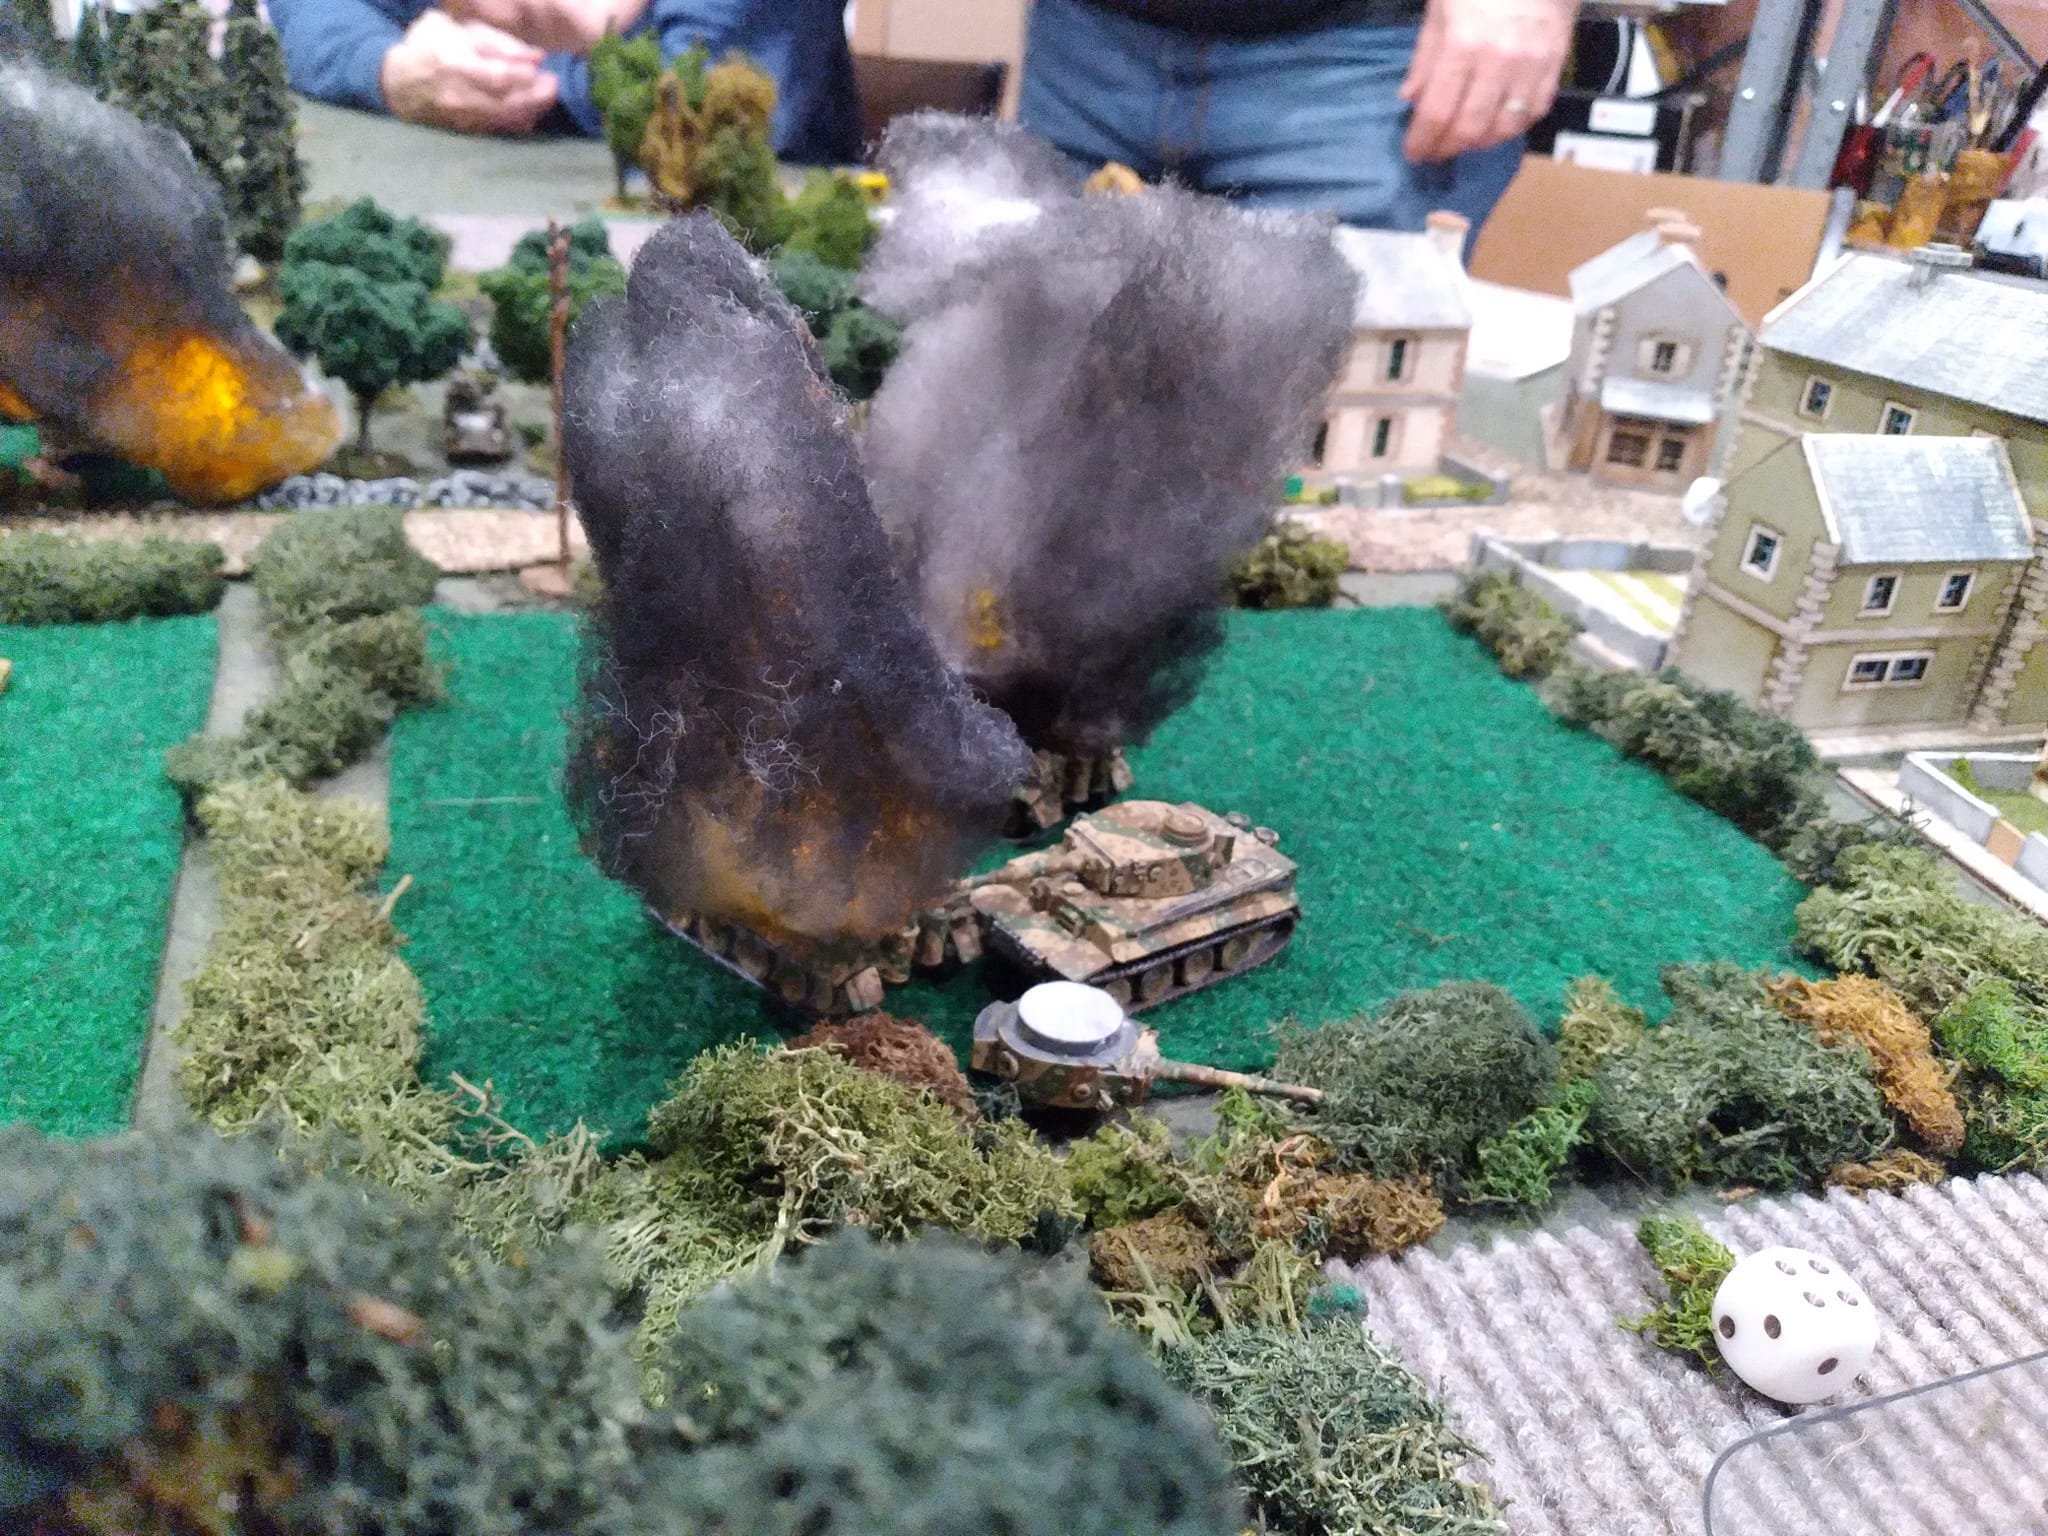
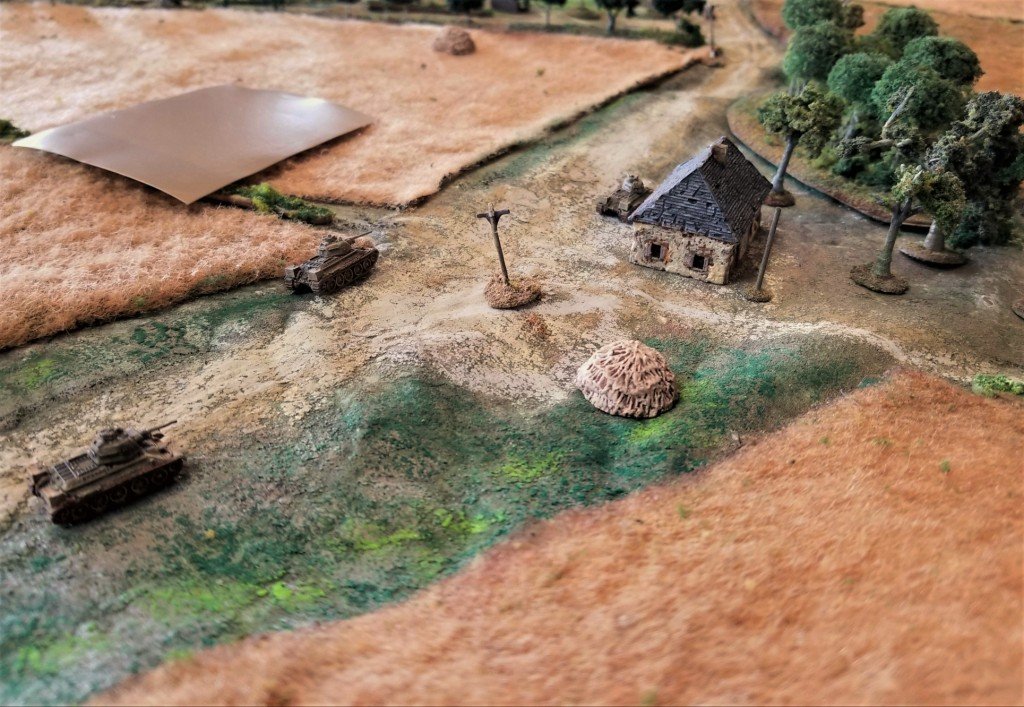
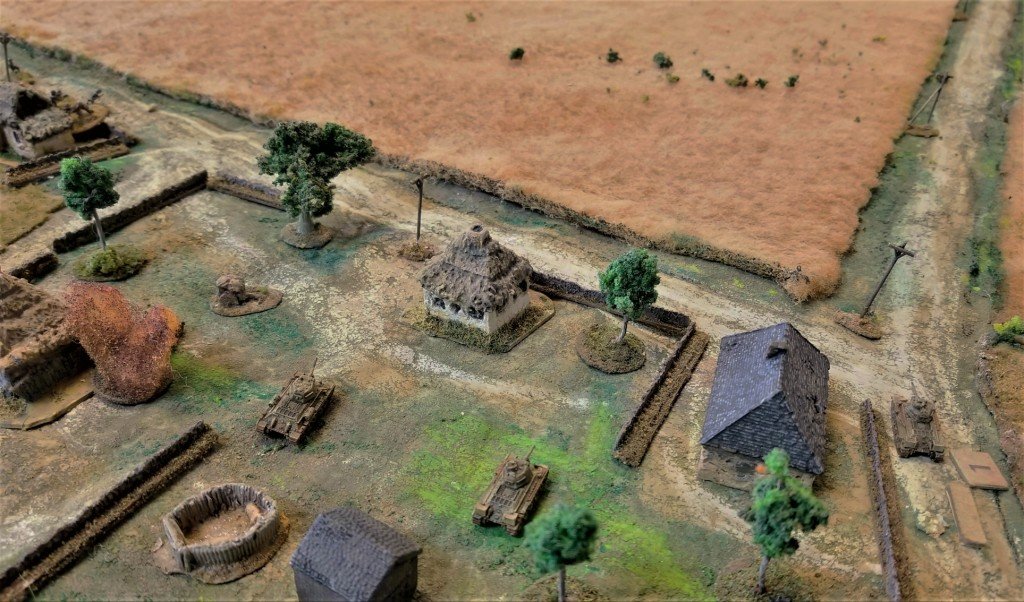
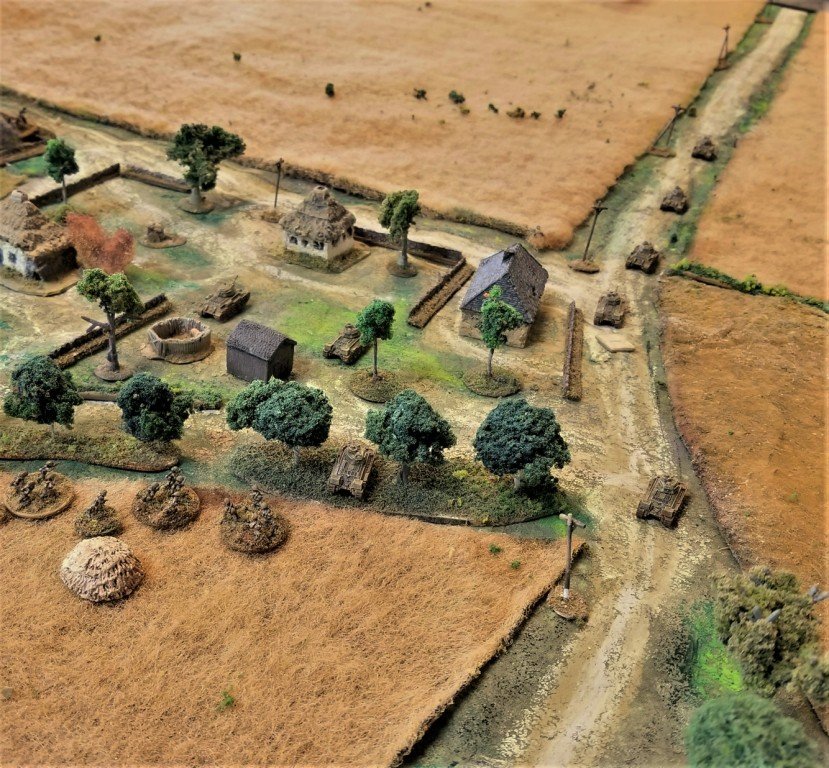
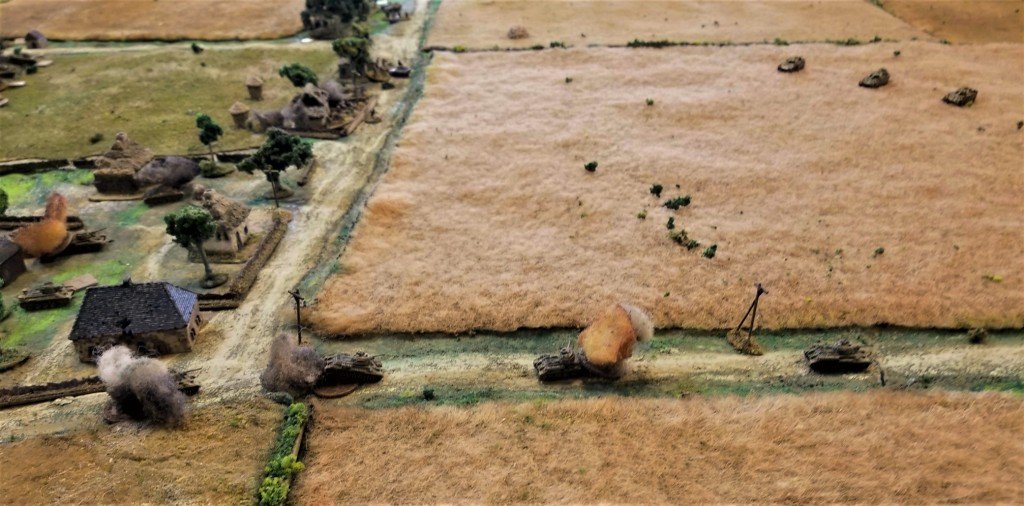
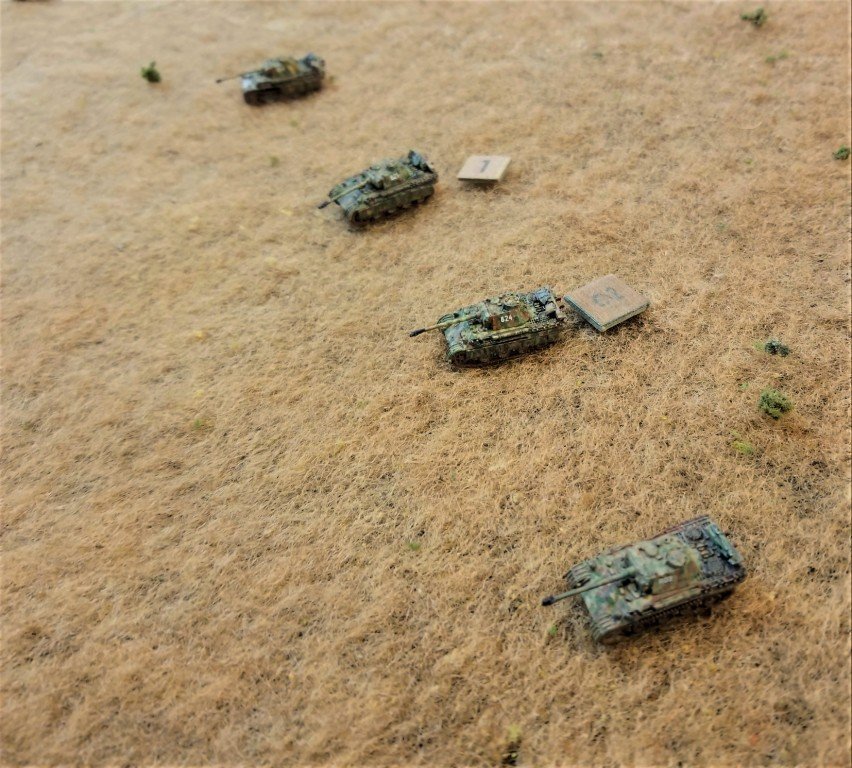
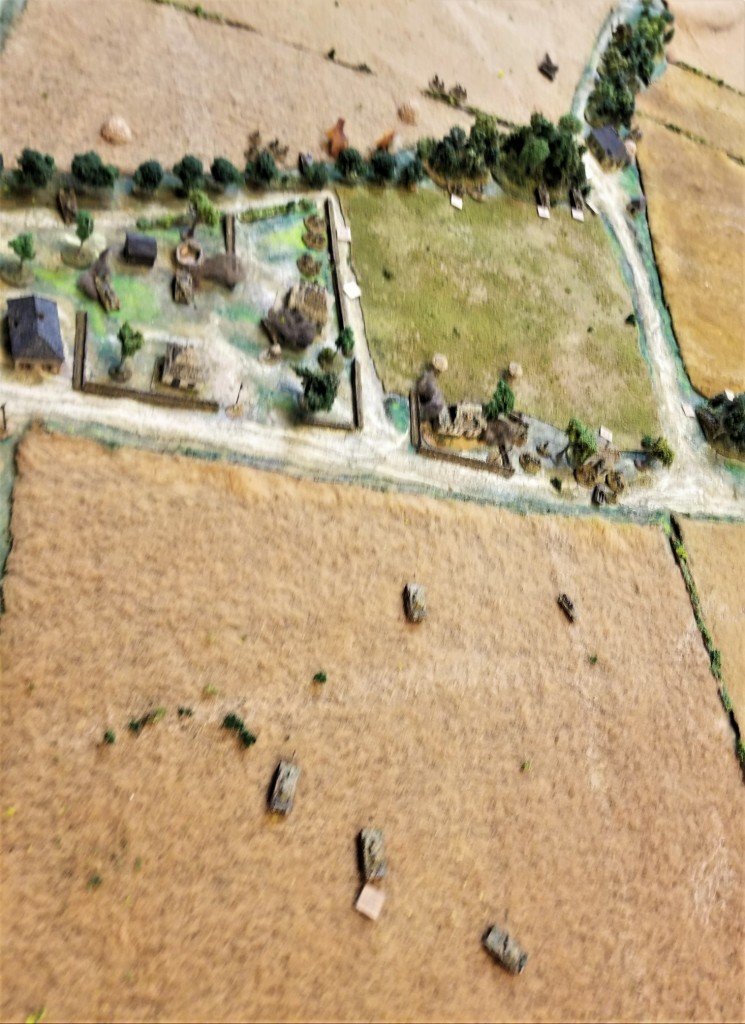
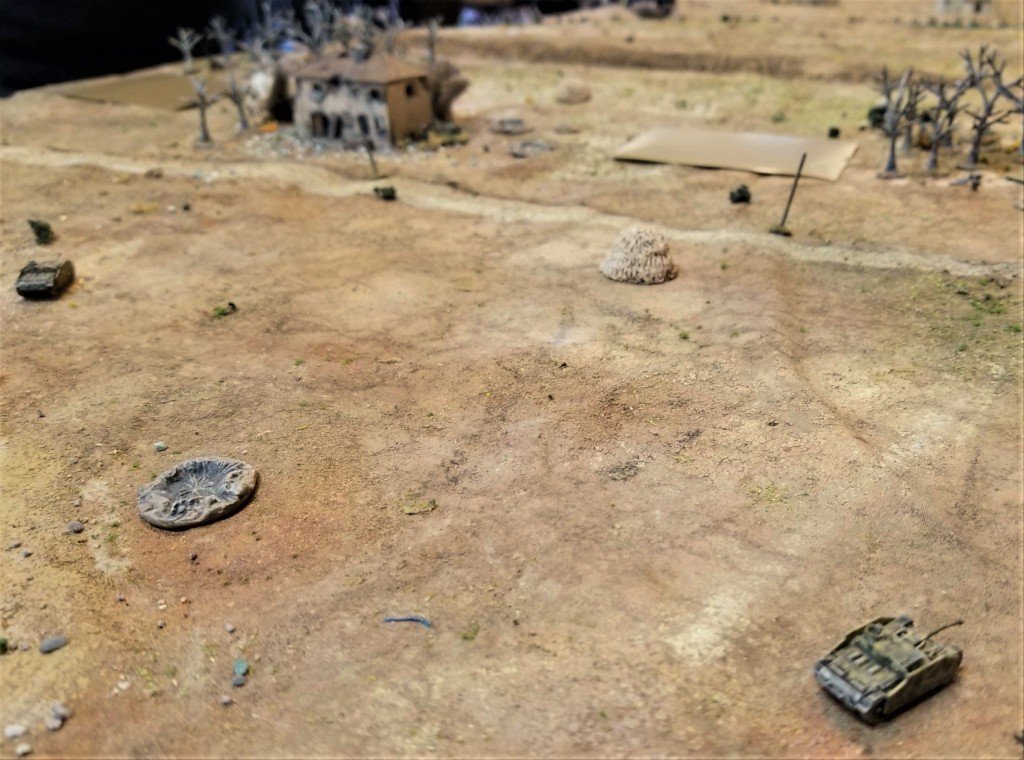
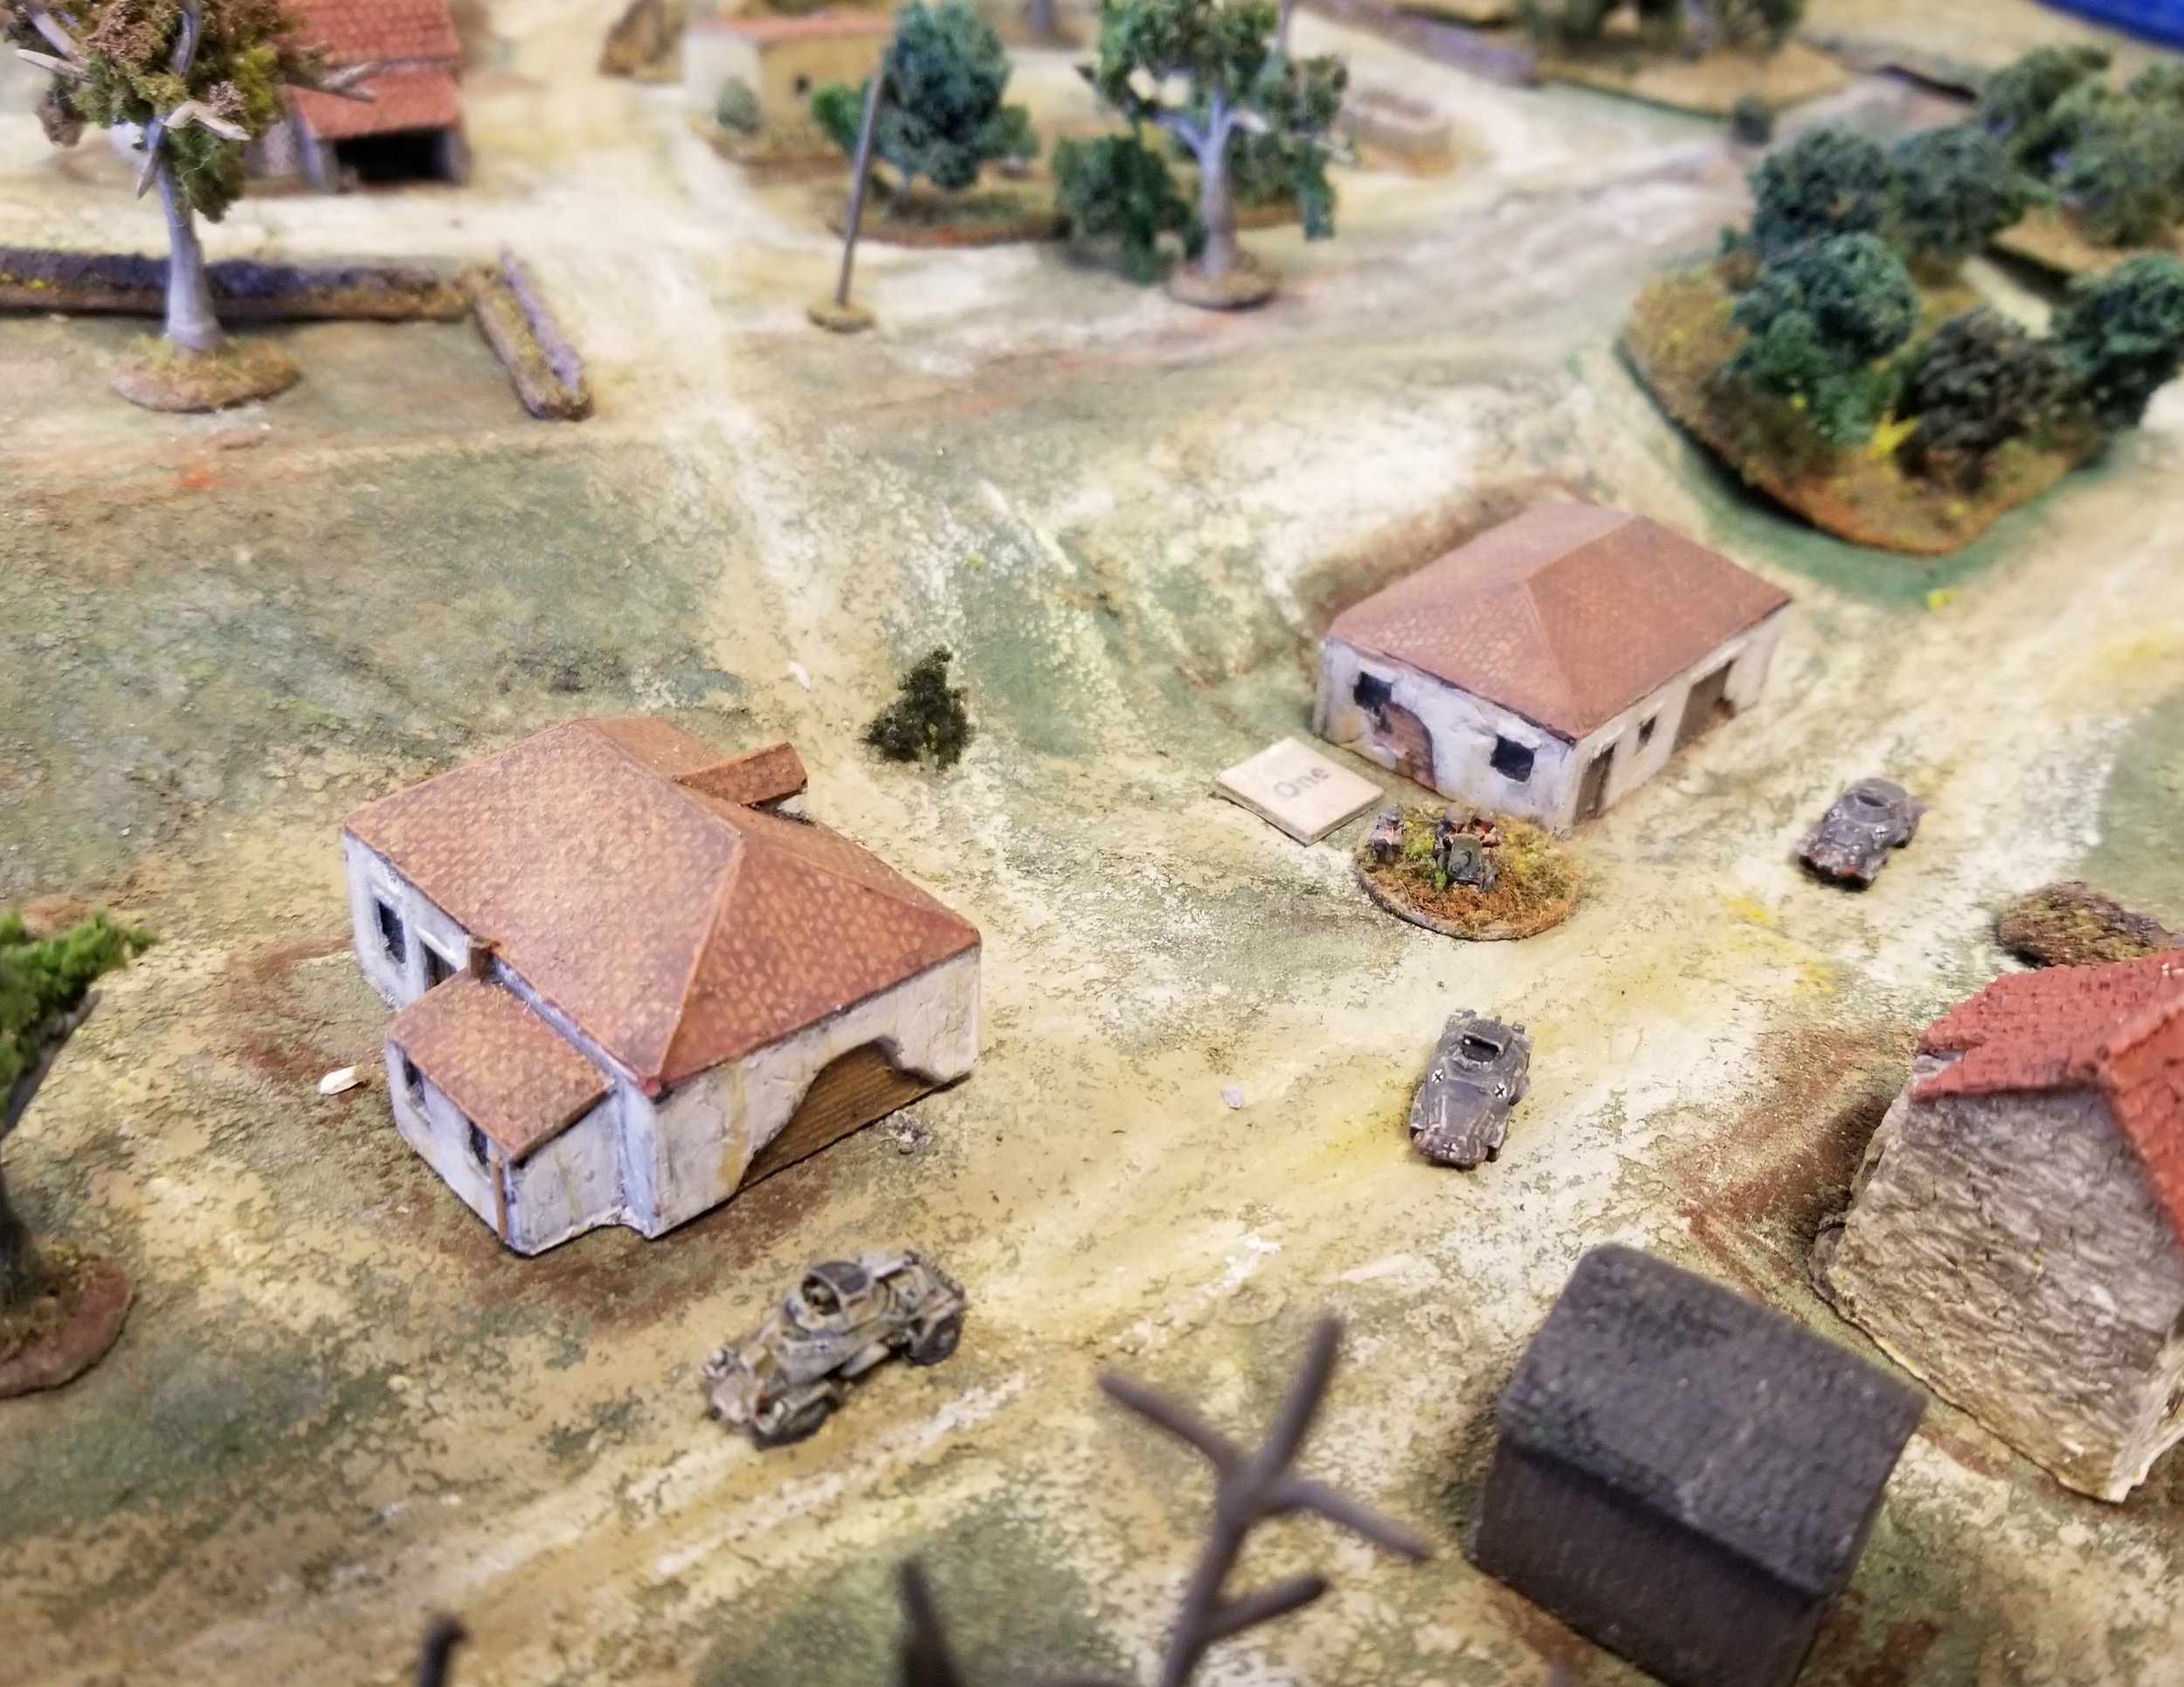
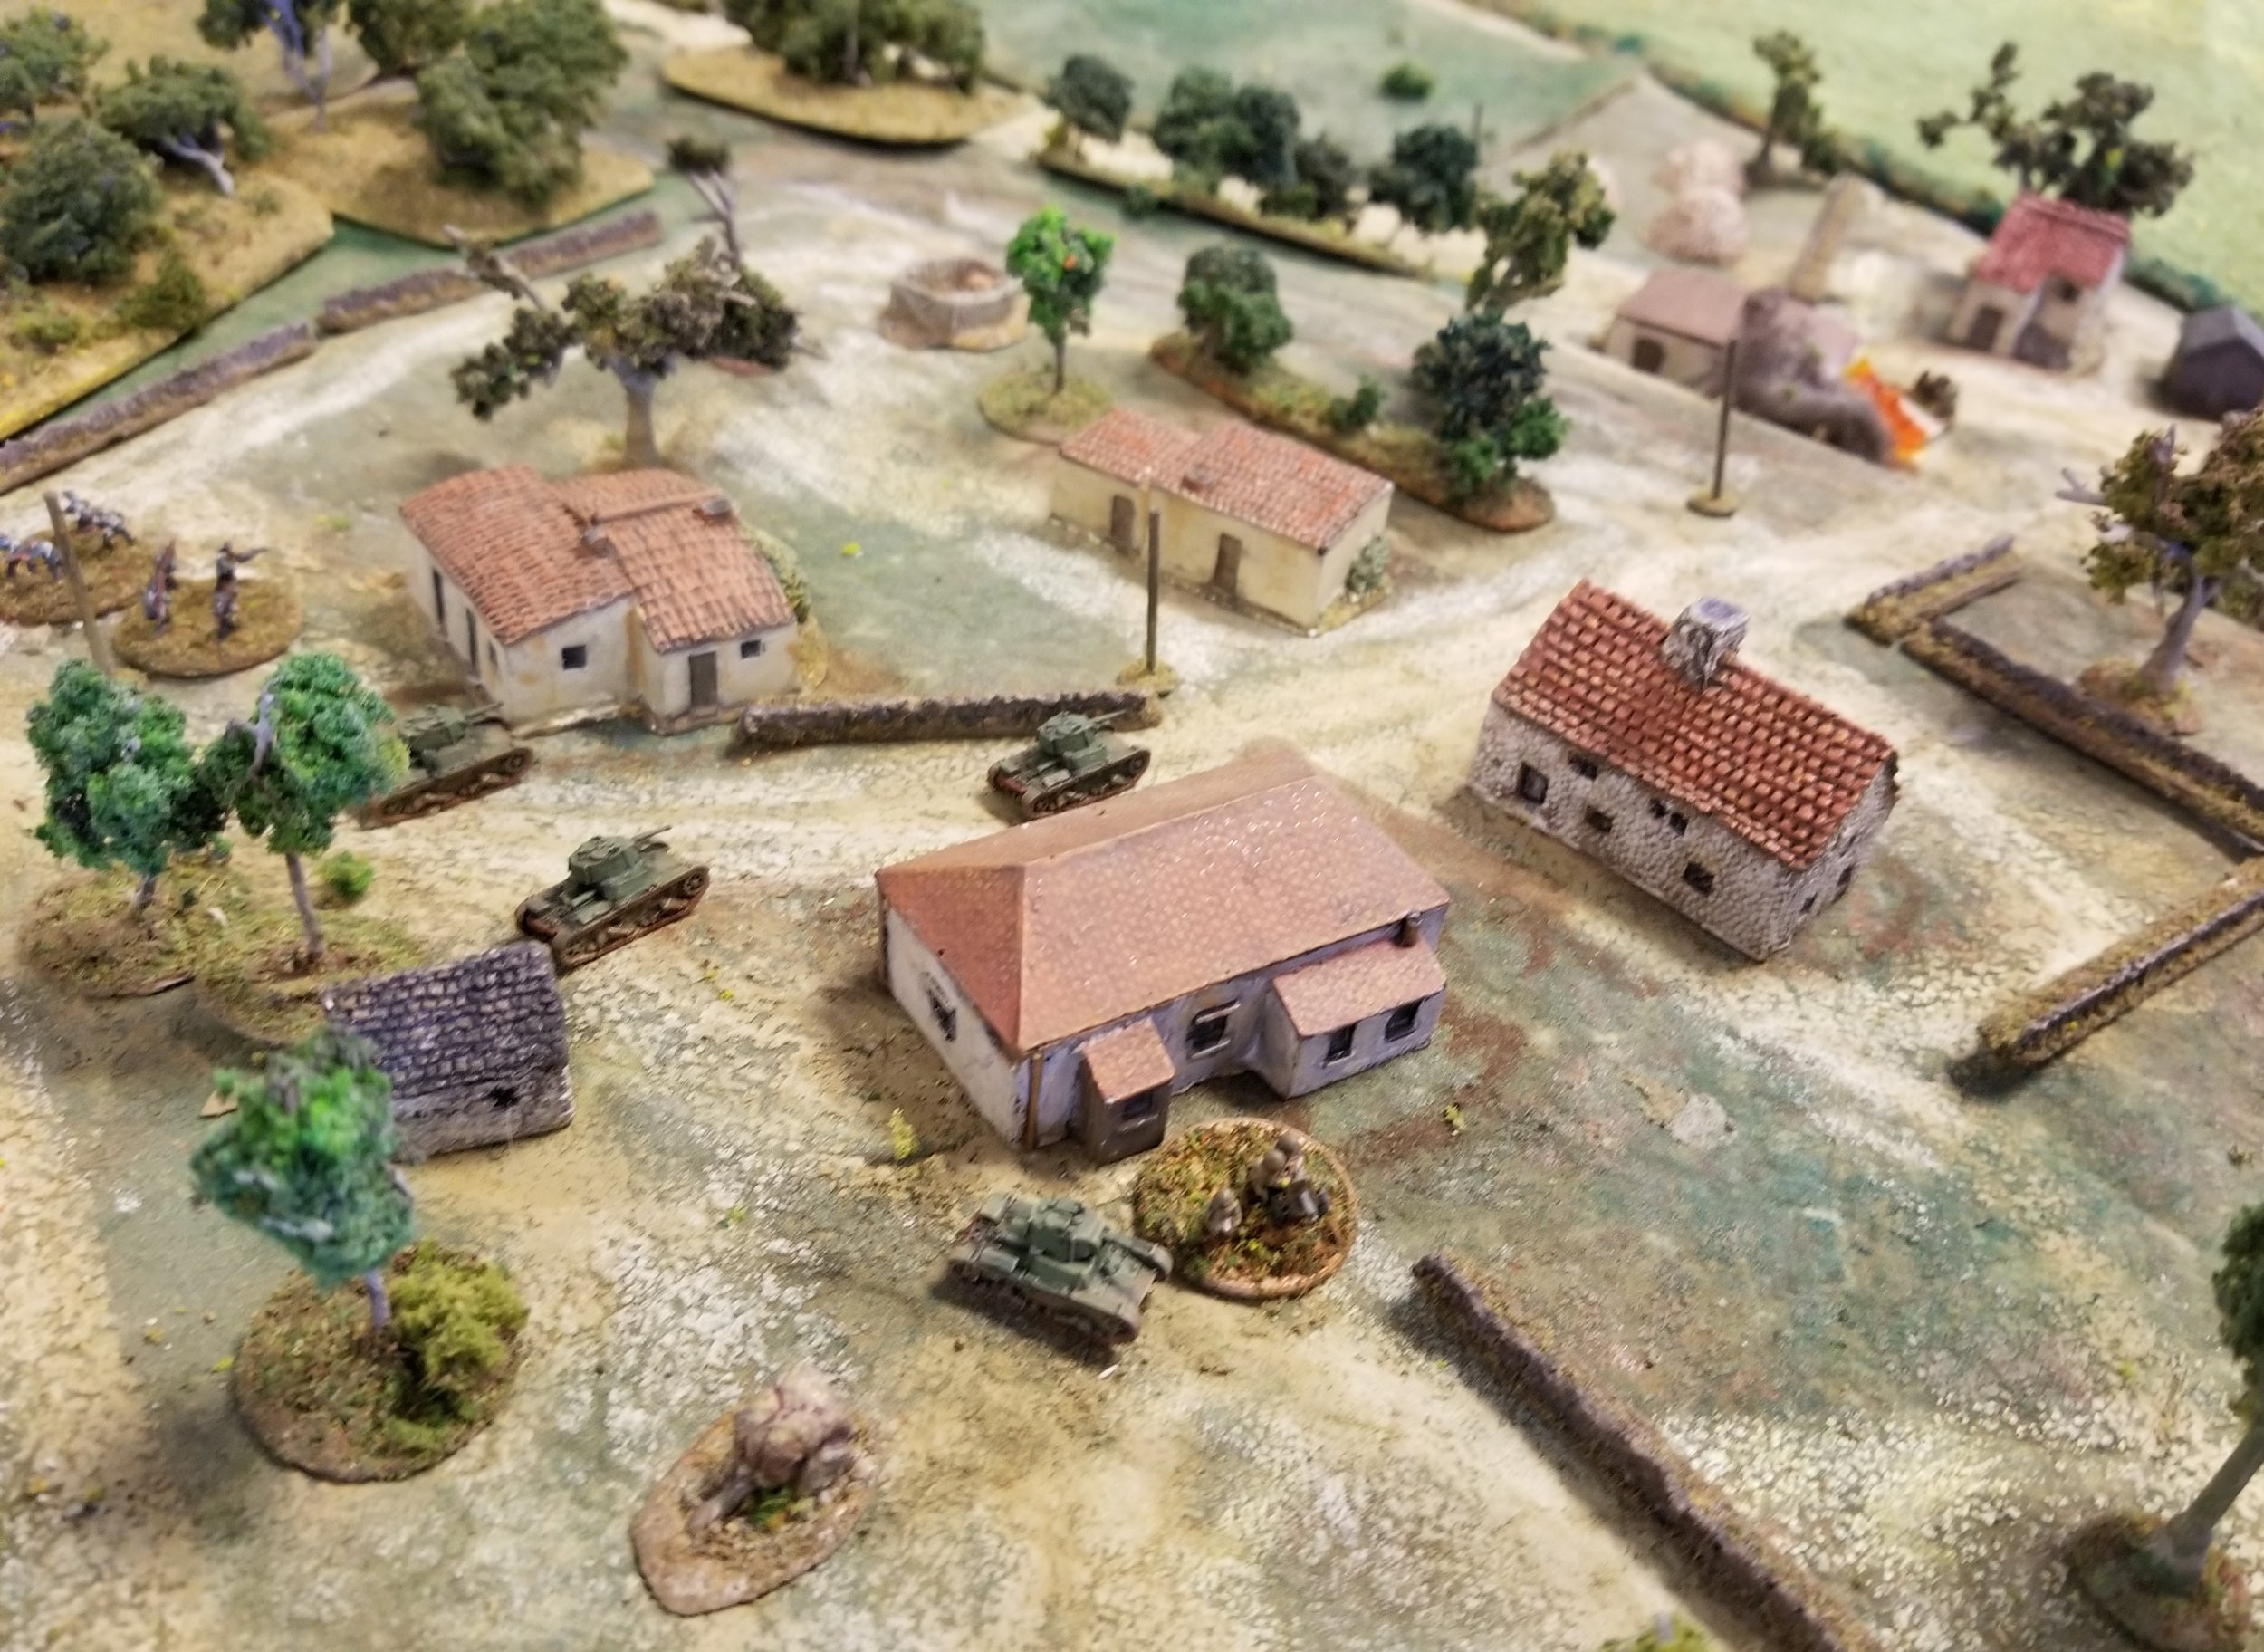
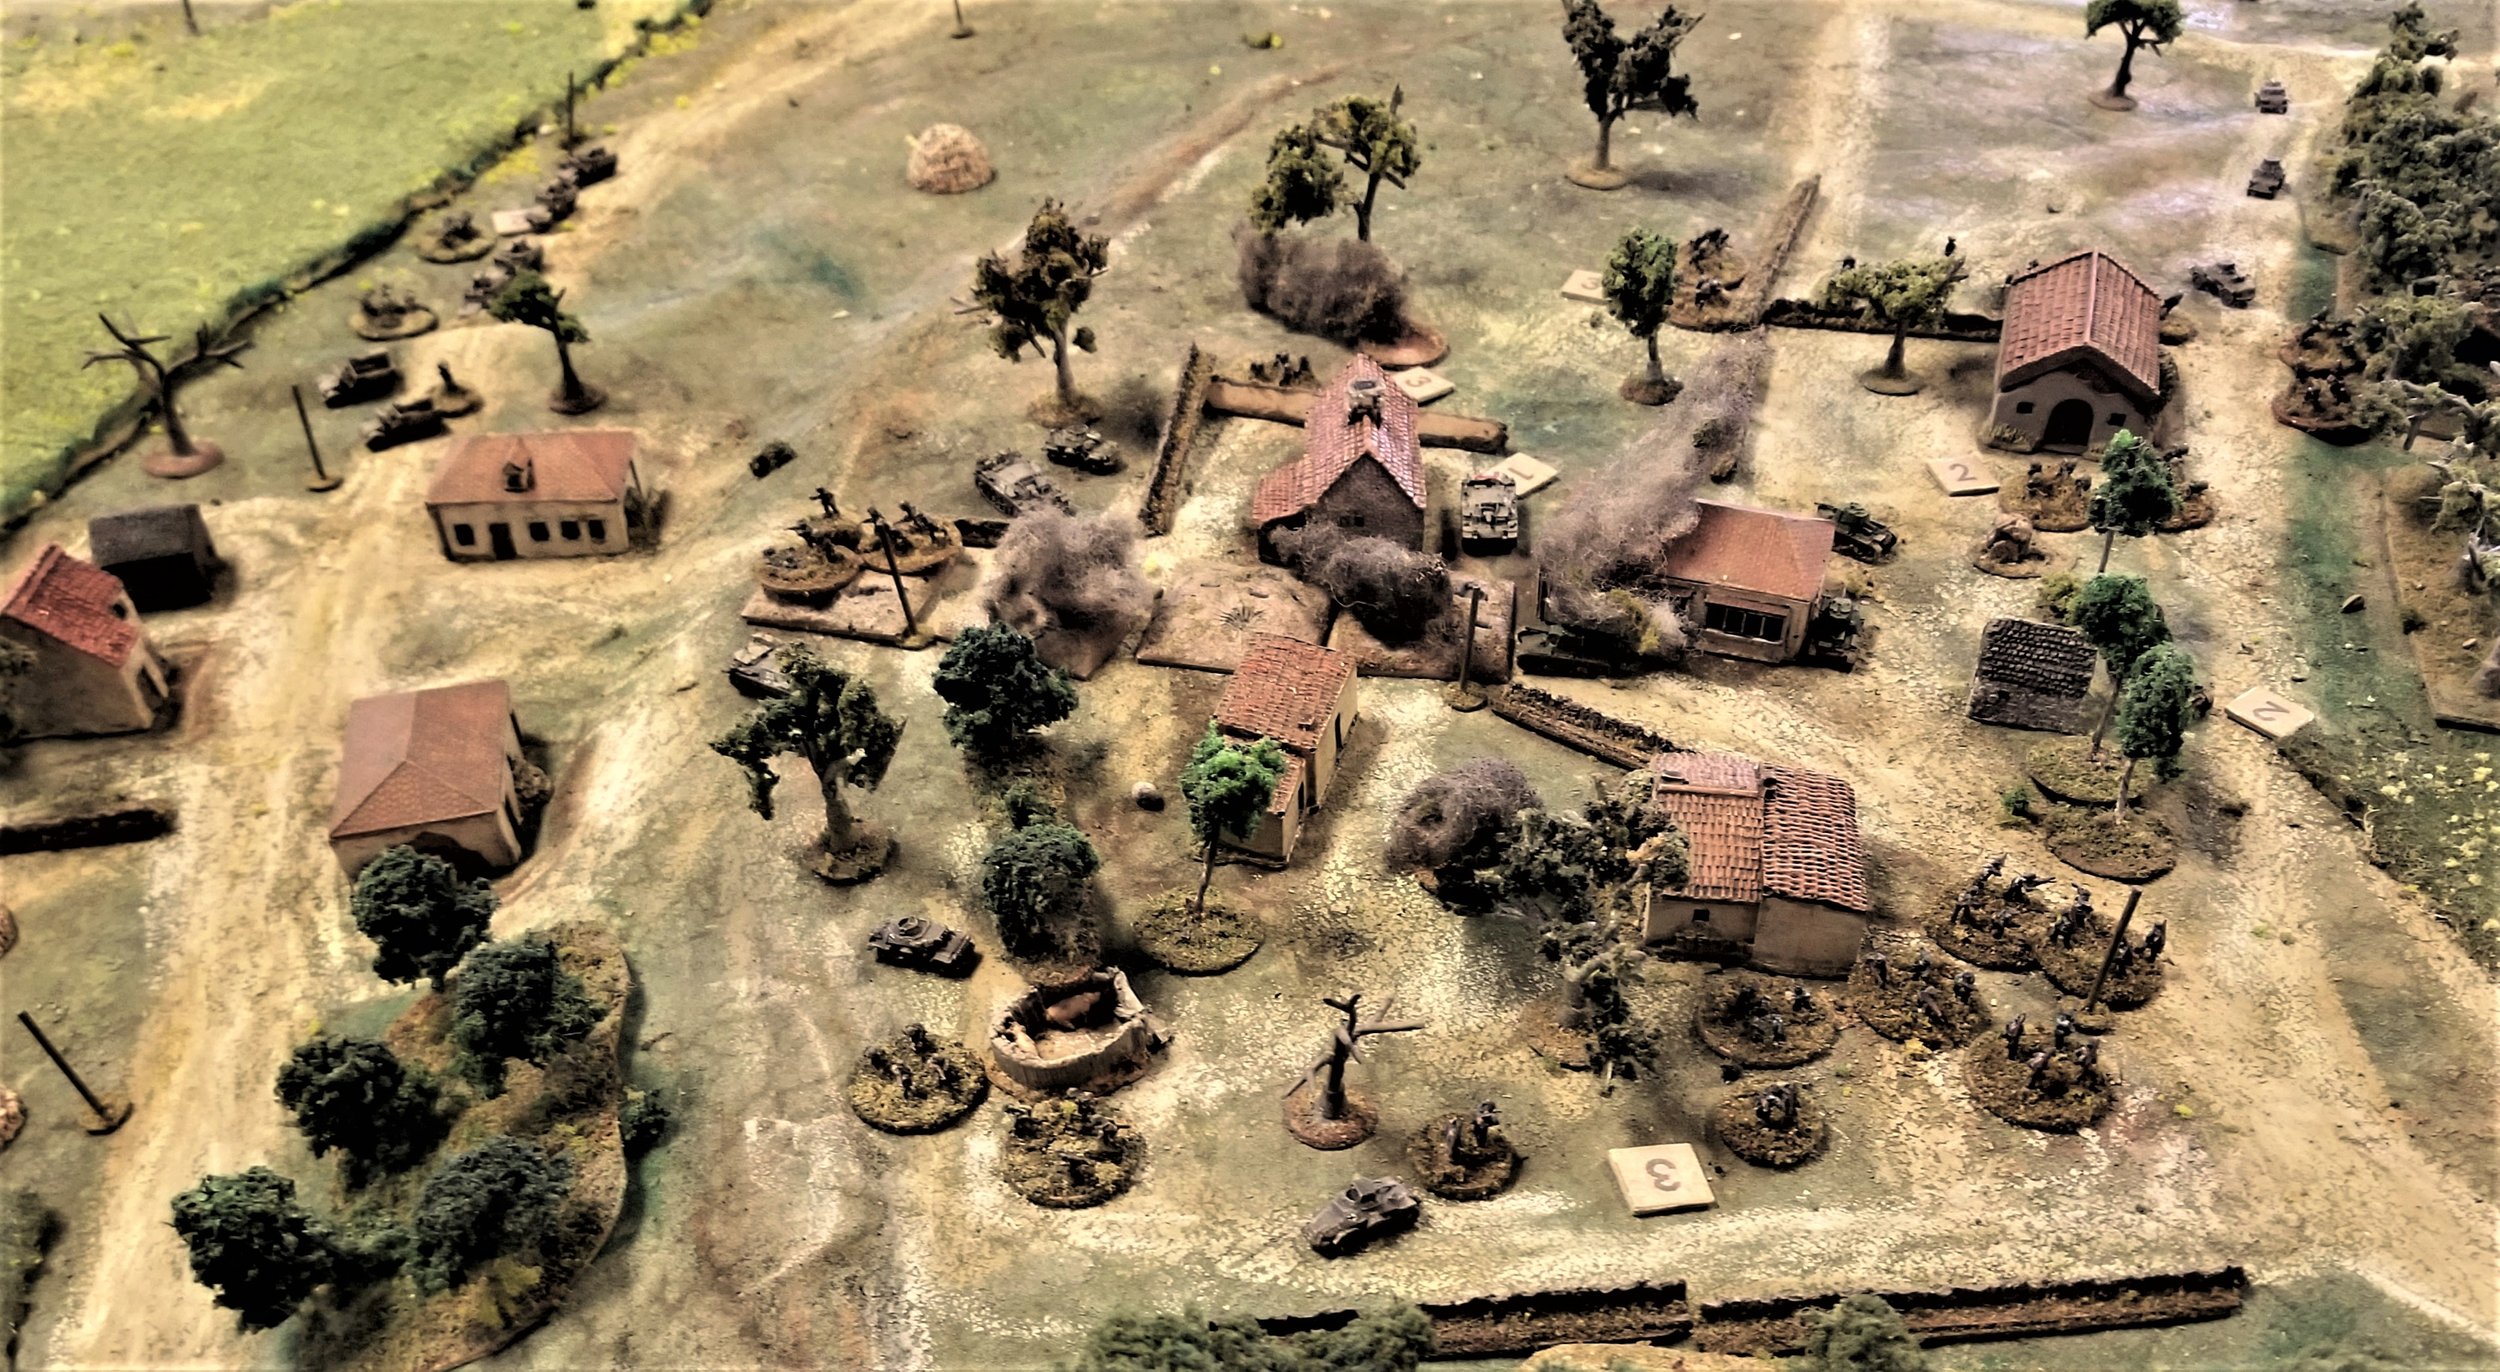
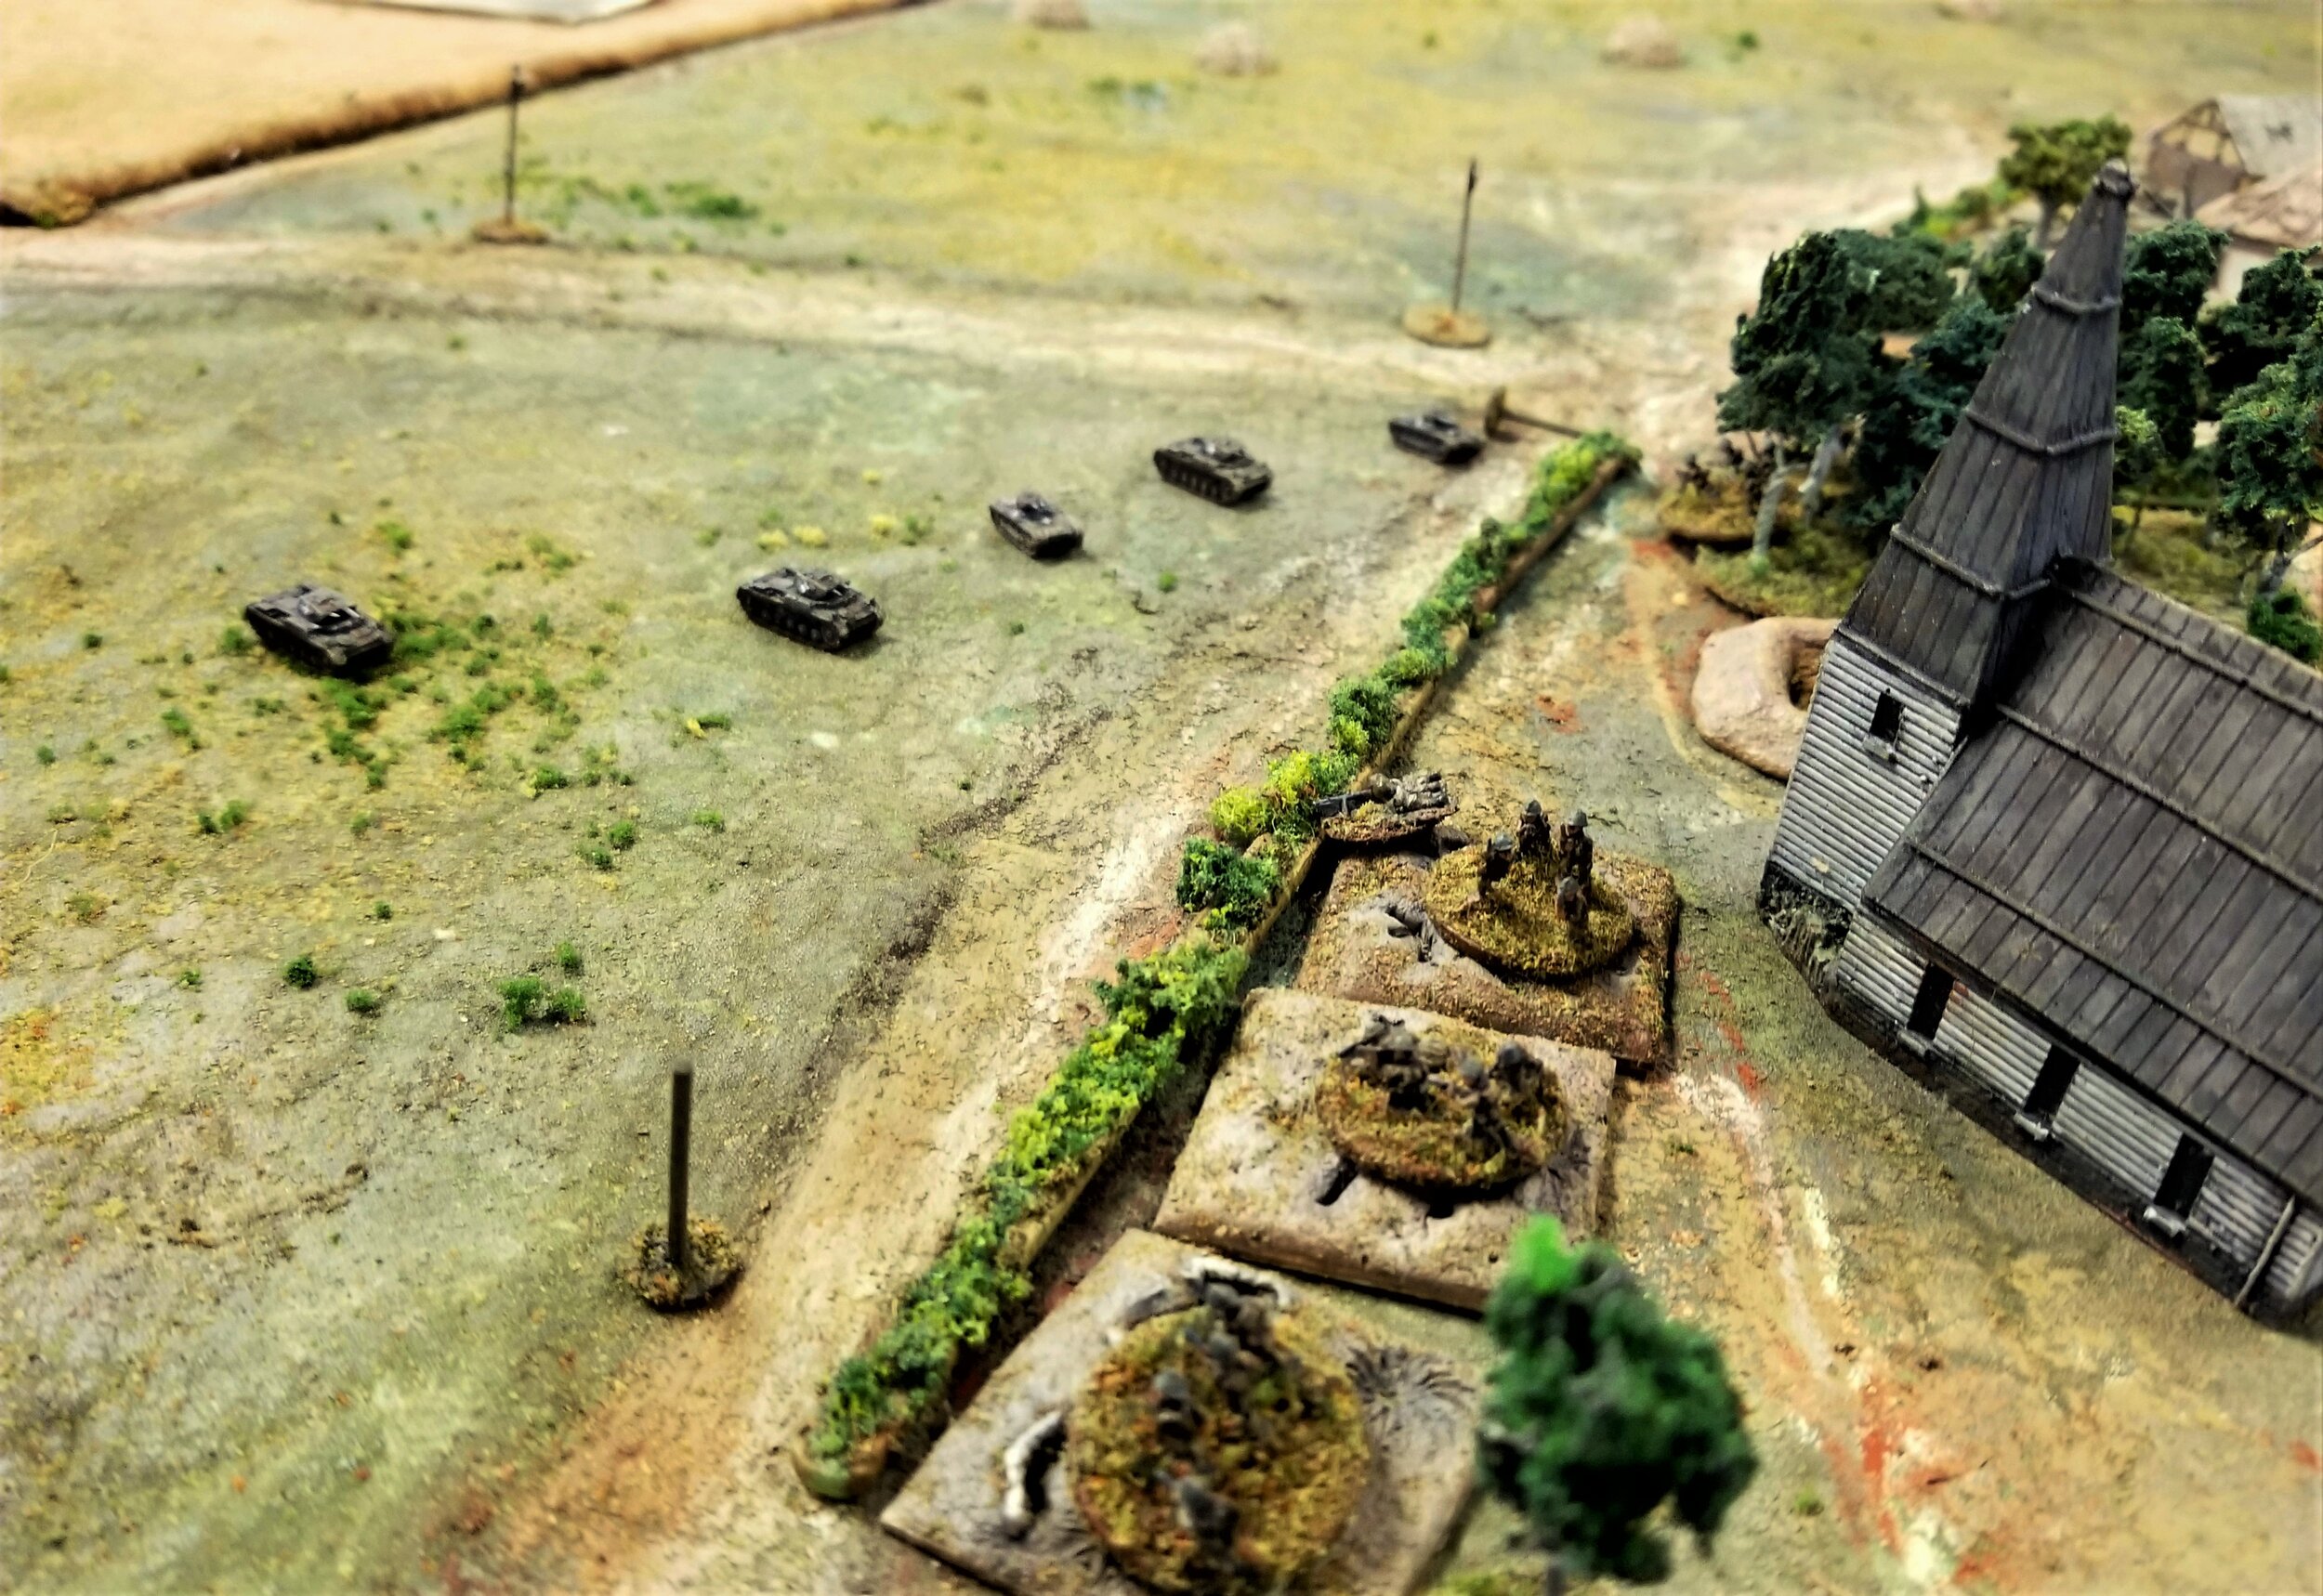
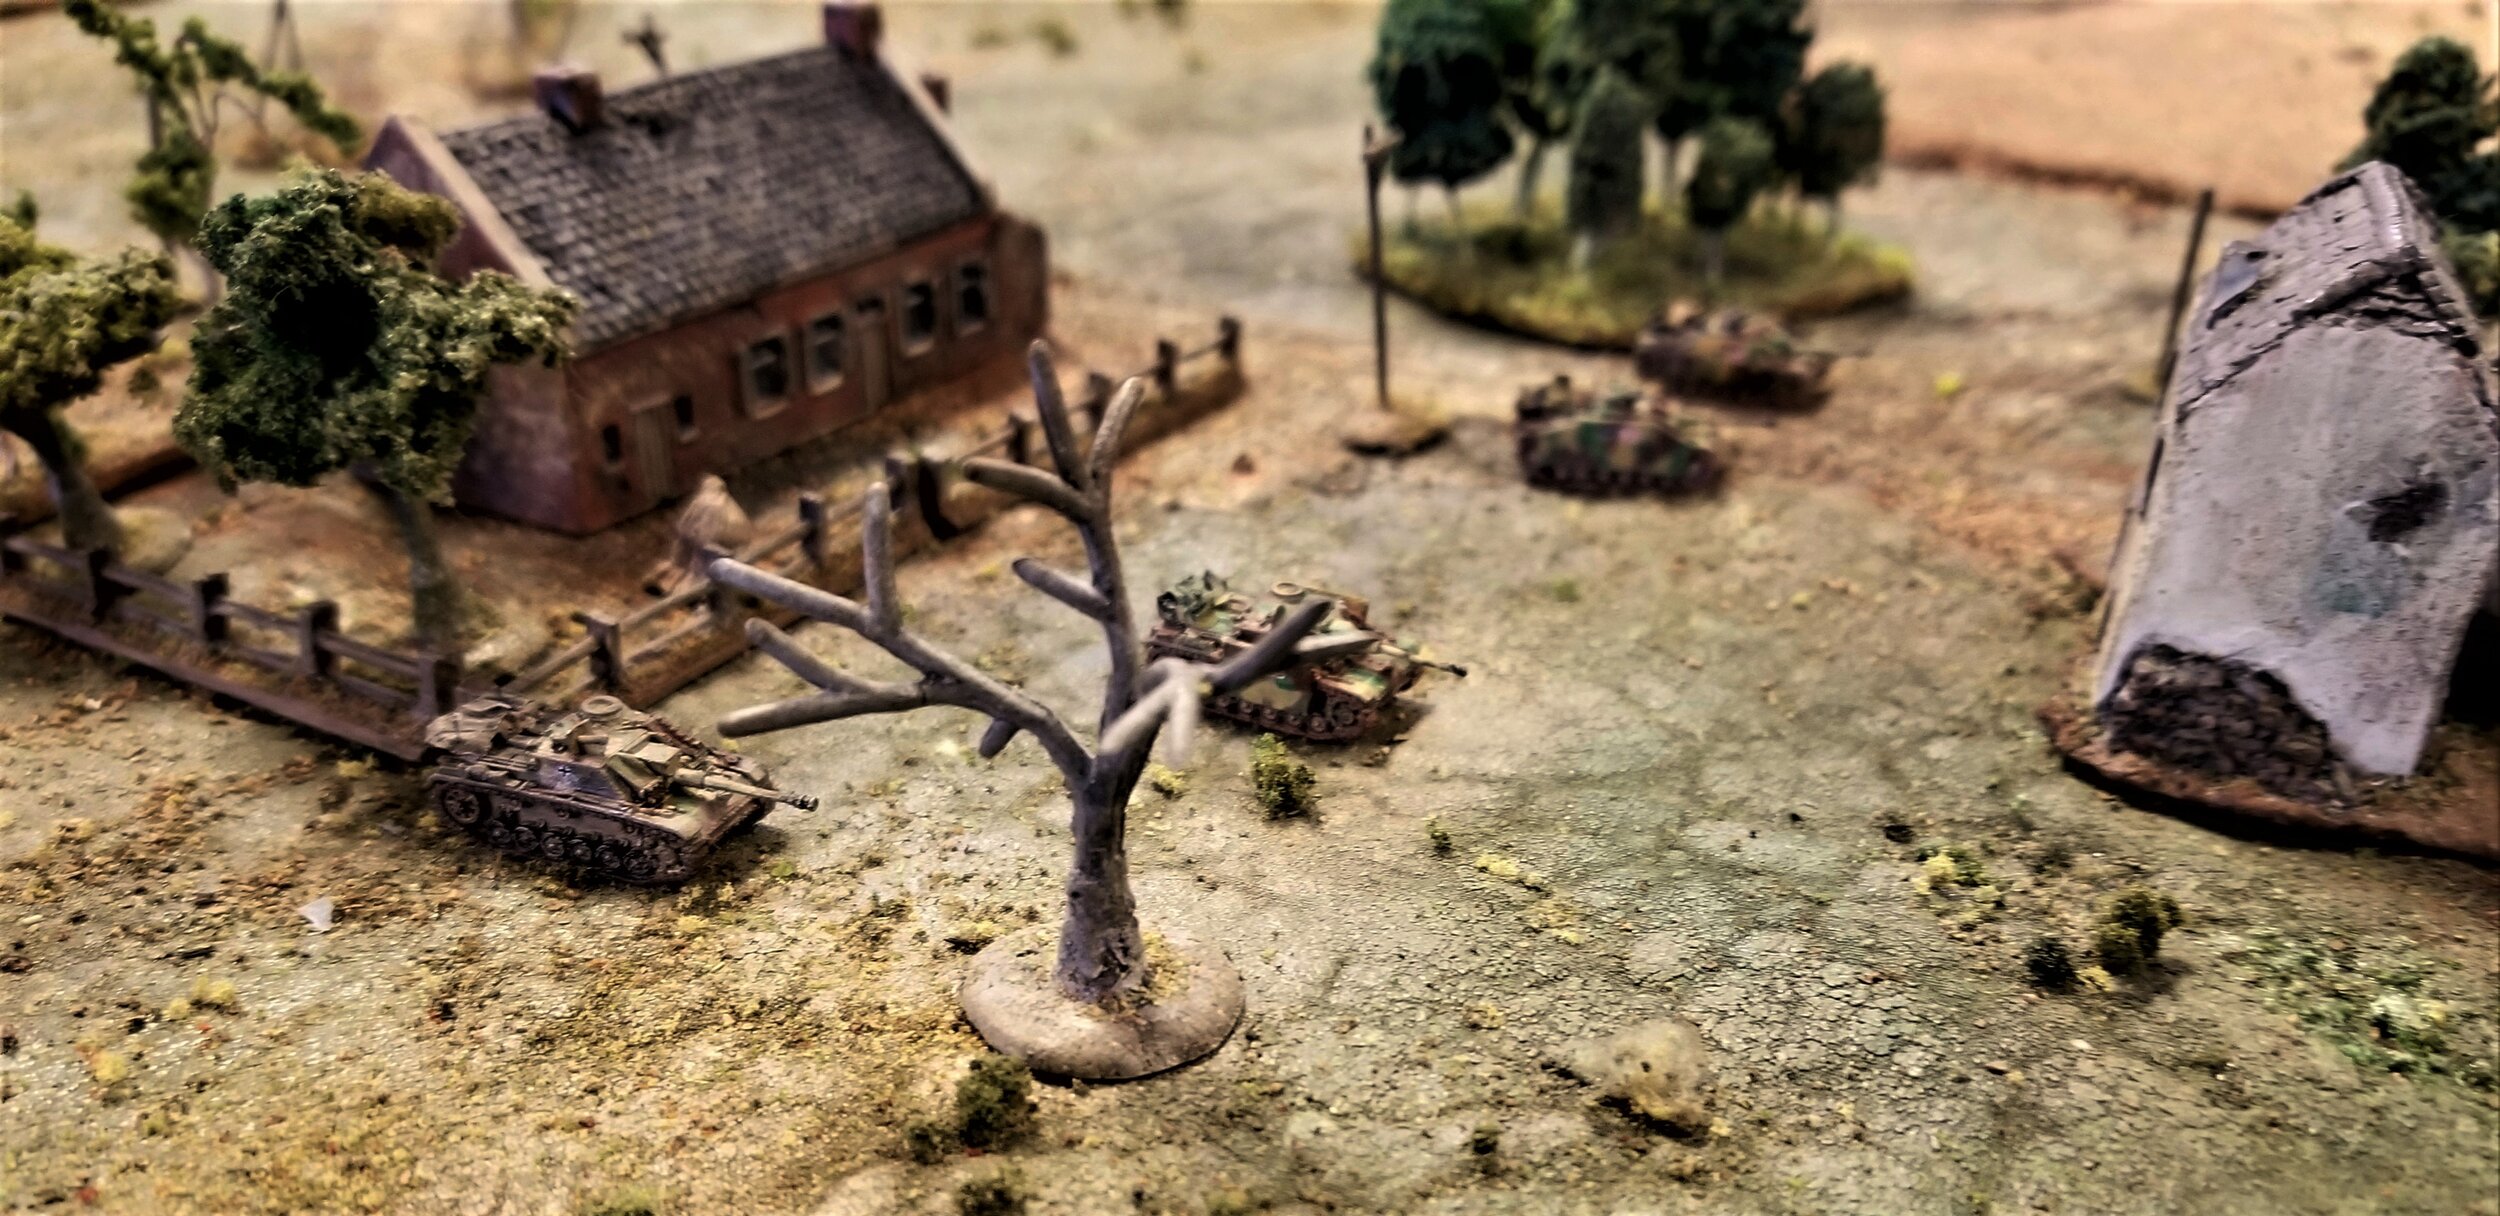
Two R-35s reached the village, one on a track leading up to the main road where my three AT assets lay in wait for them. I revealed AT gun number one and fired. Boooiiing! All shots bounced off the Renault's armour. Up came the AT Rifle team: same thing. Finally, the other AT gun: yet again, the same thing. One thing about the early war tanks: they might be slow and have pop guns, but they don't half have pretty decent armour when facing only PaK 35s and an ATR.

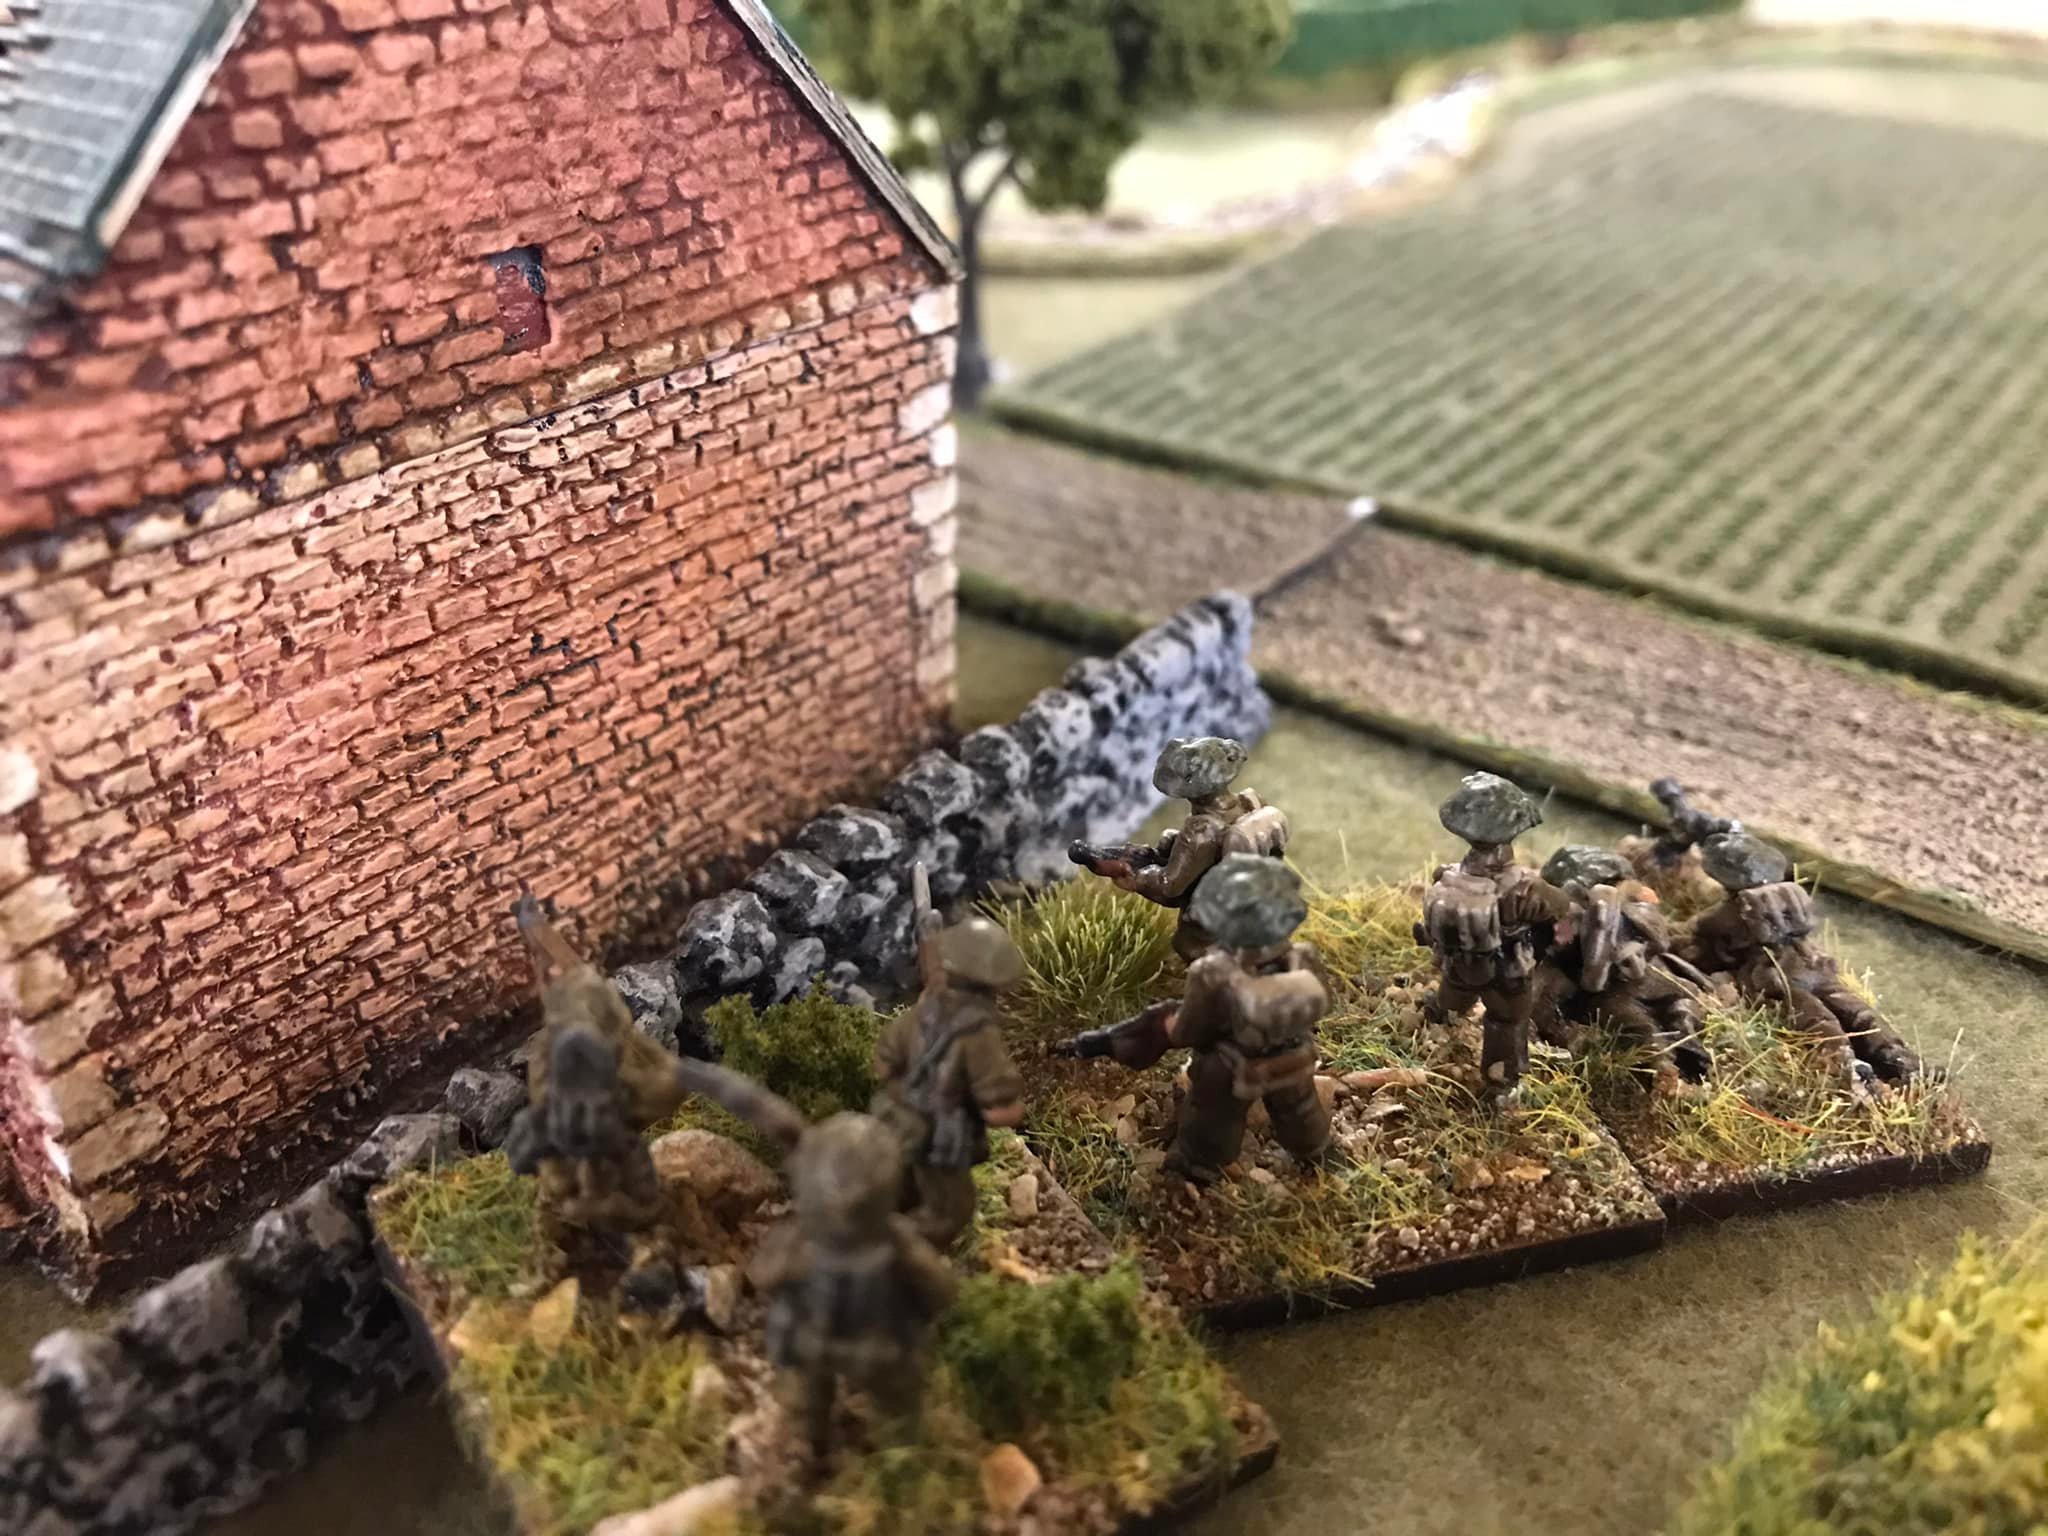
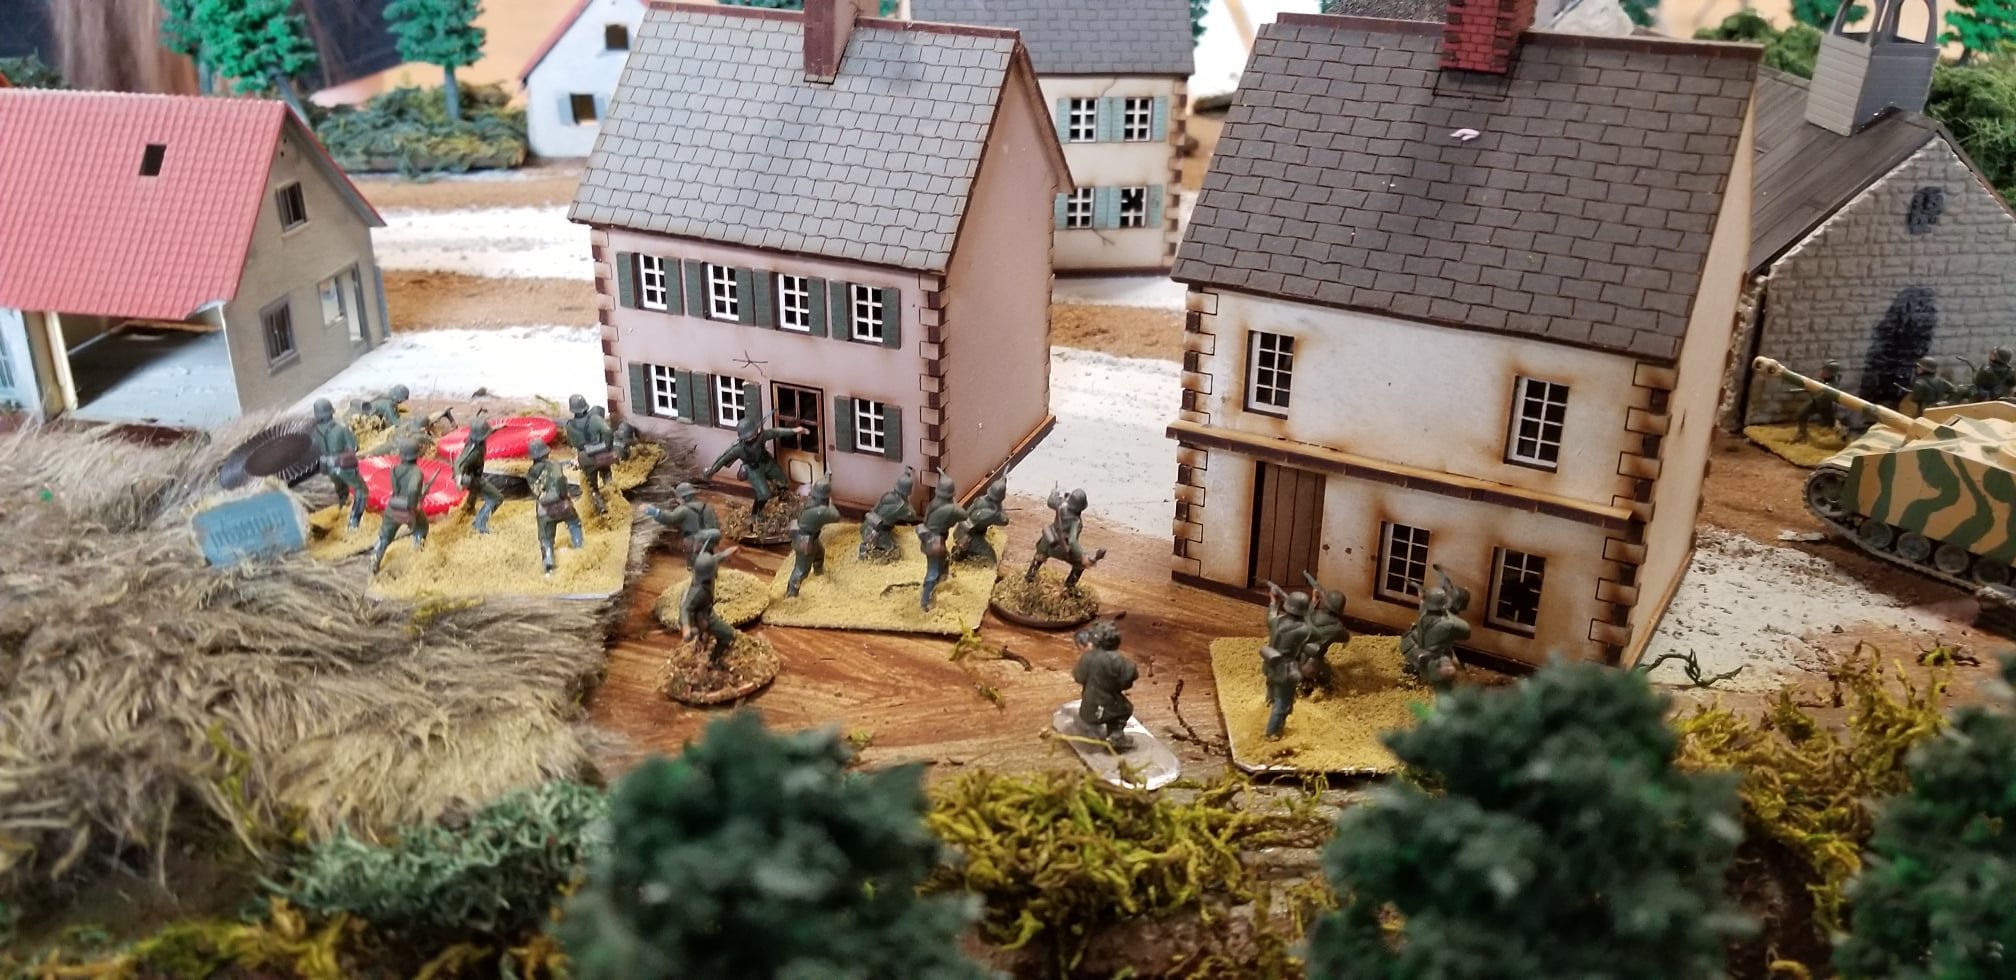
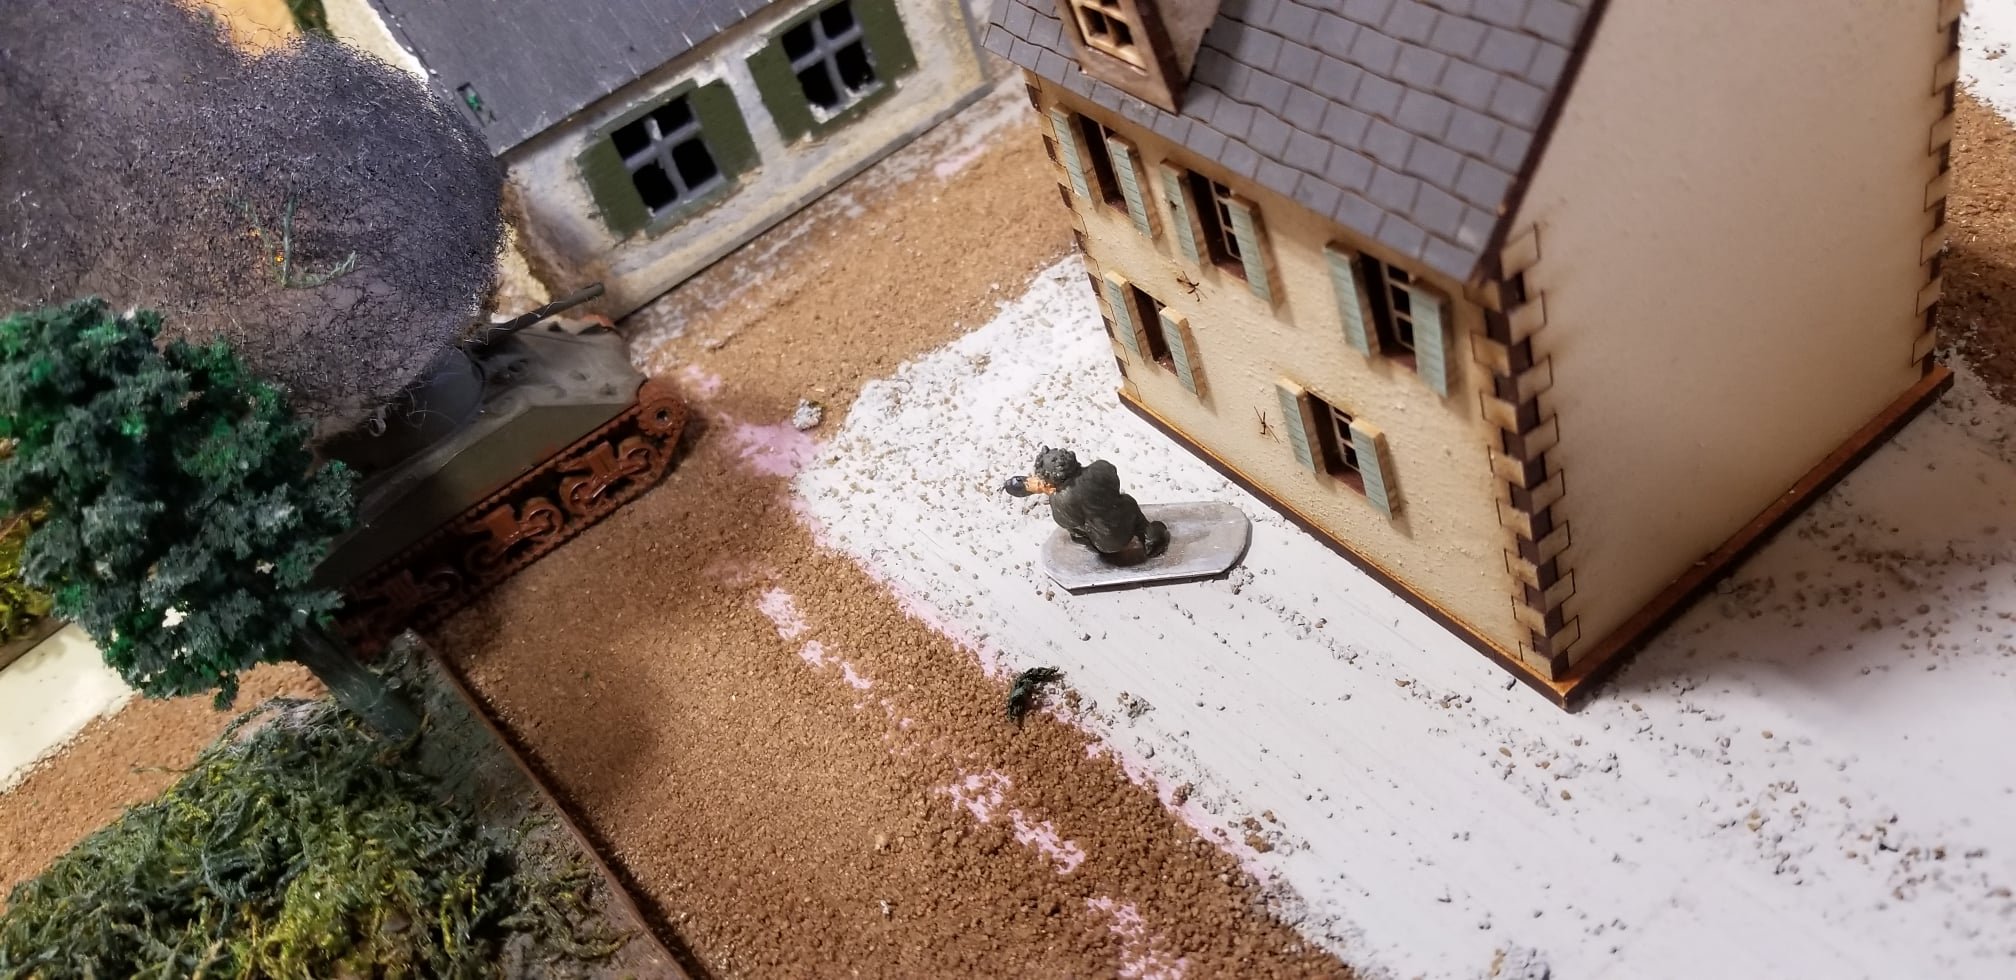
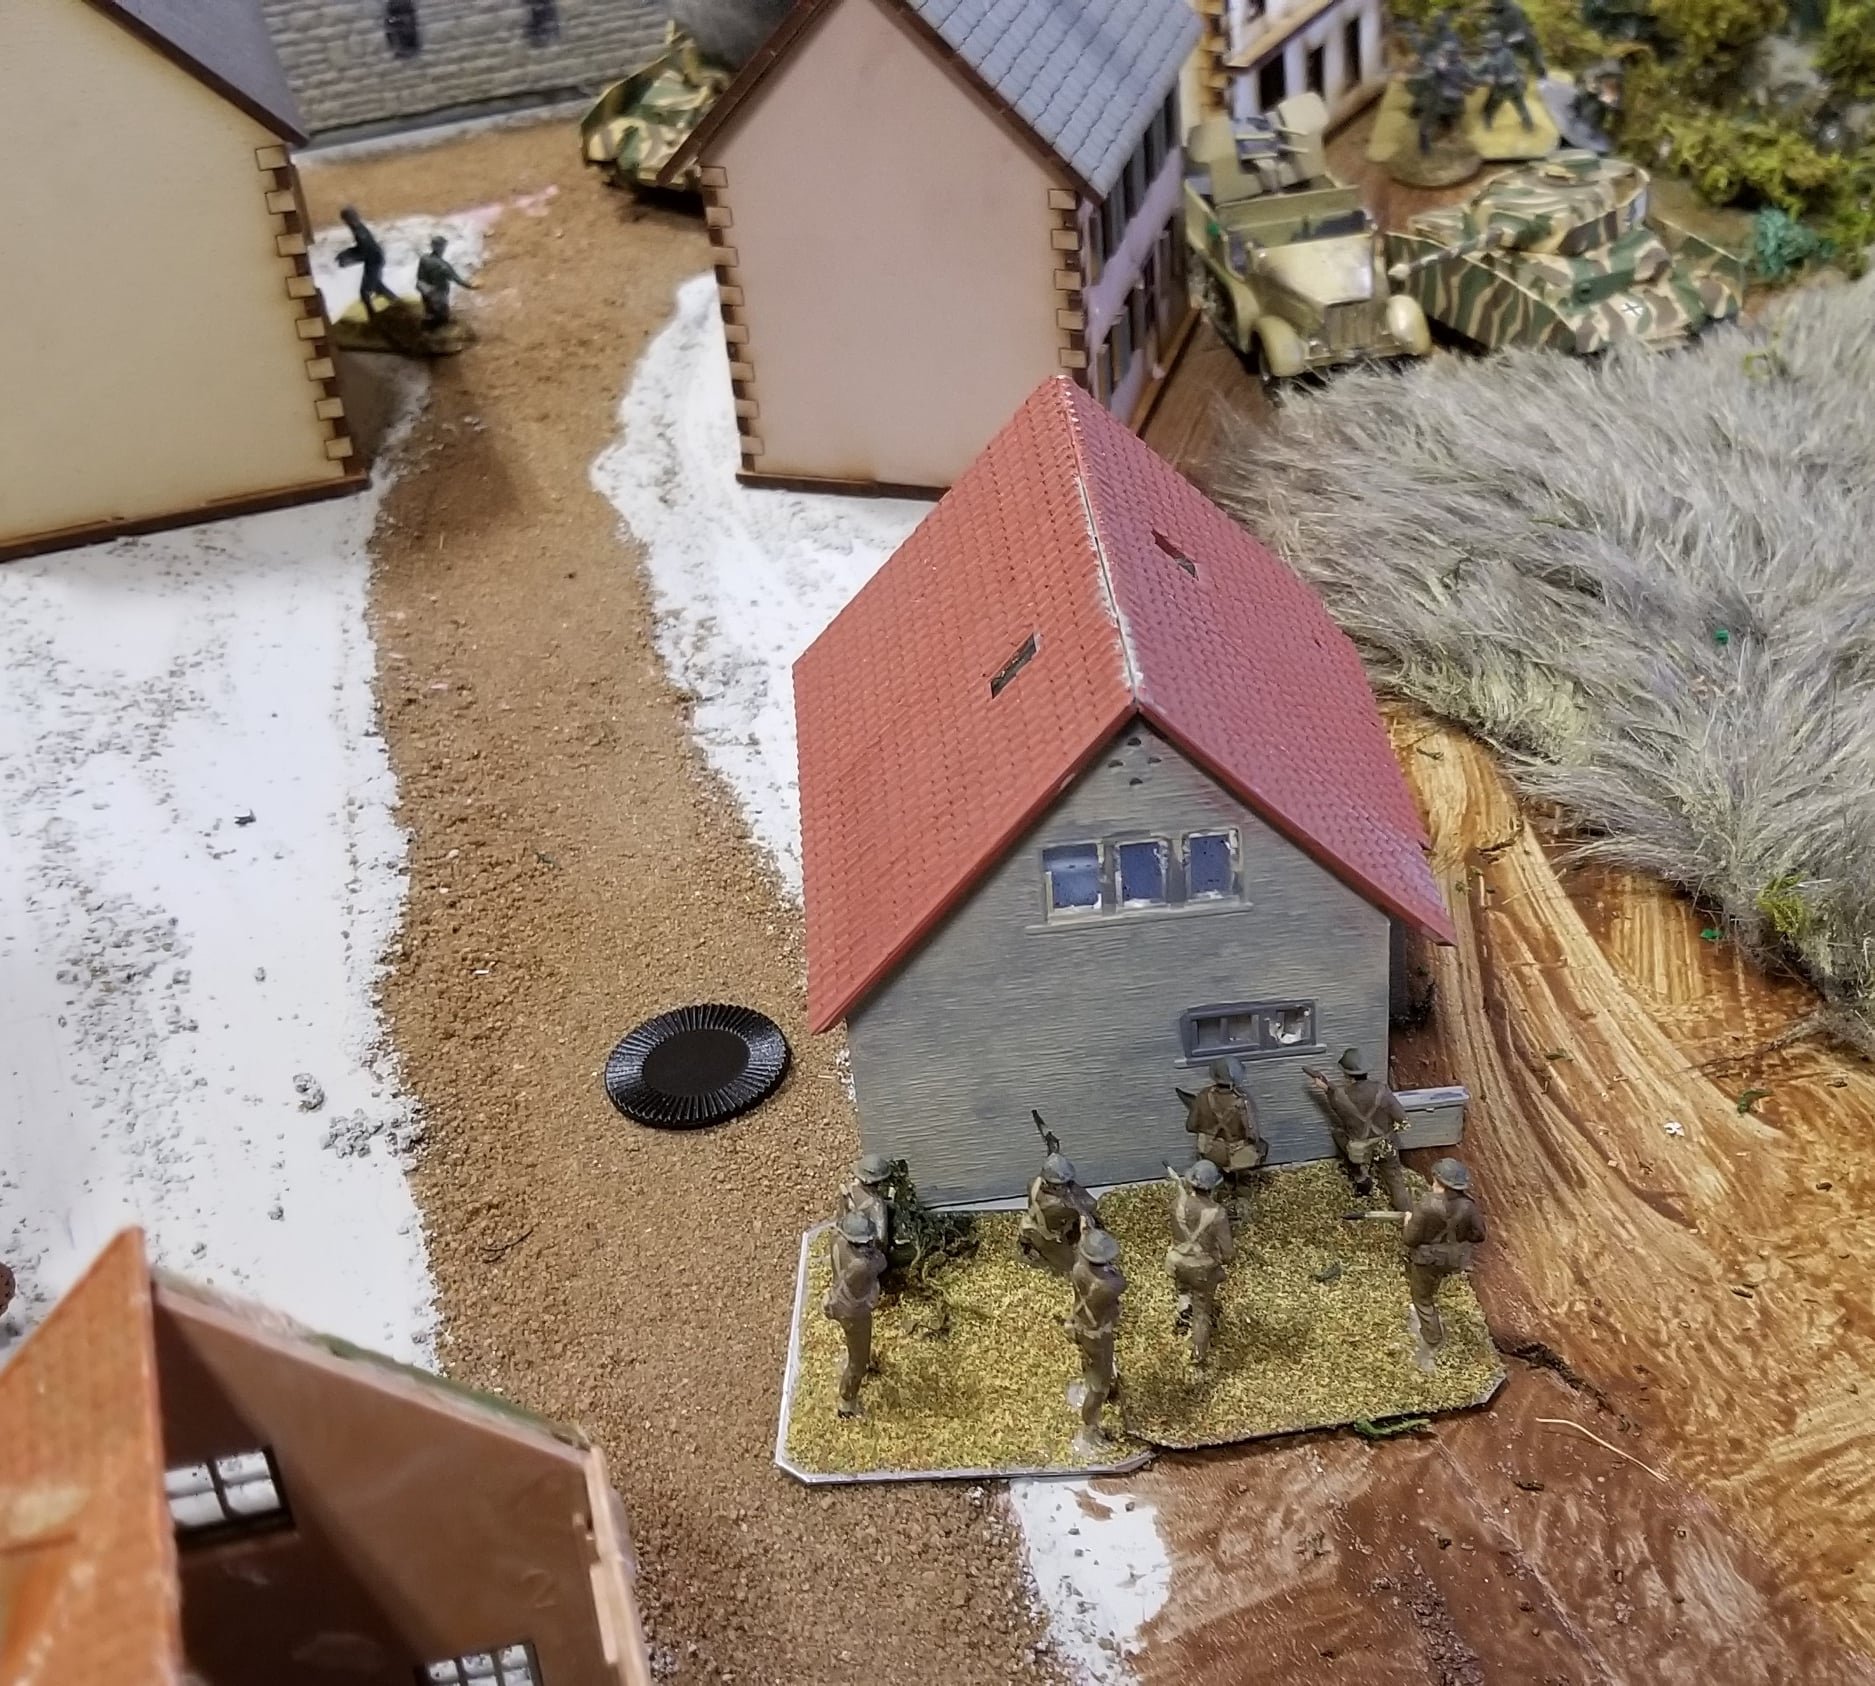
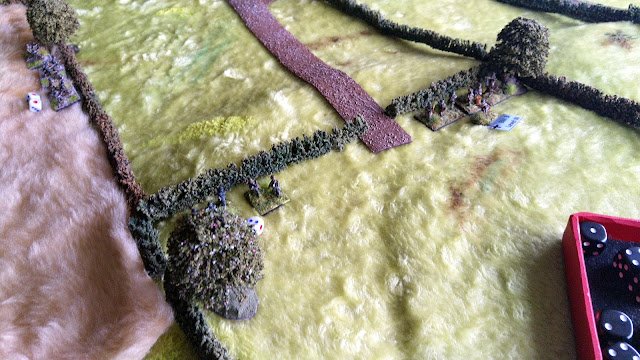
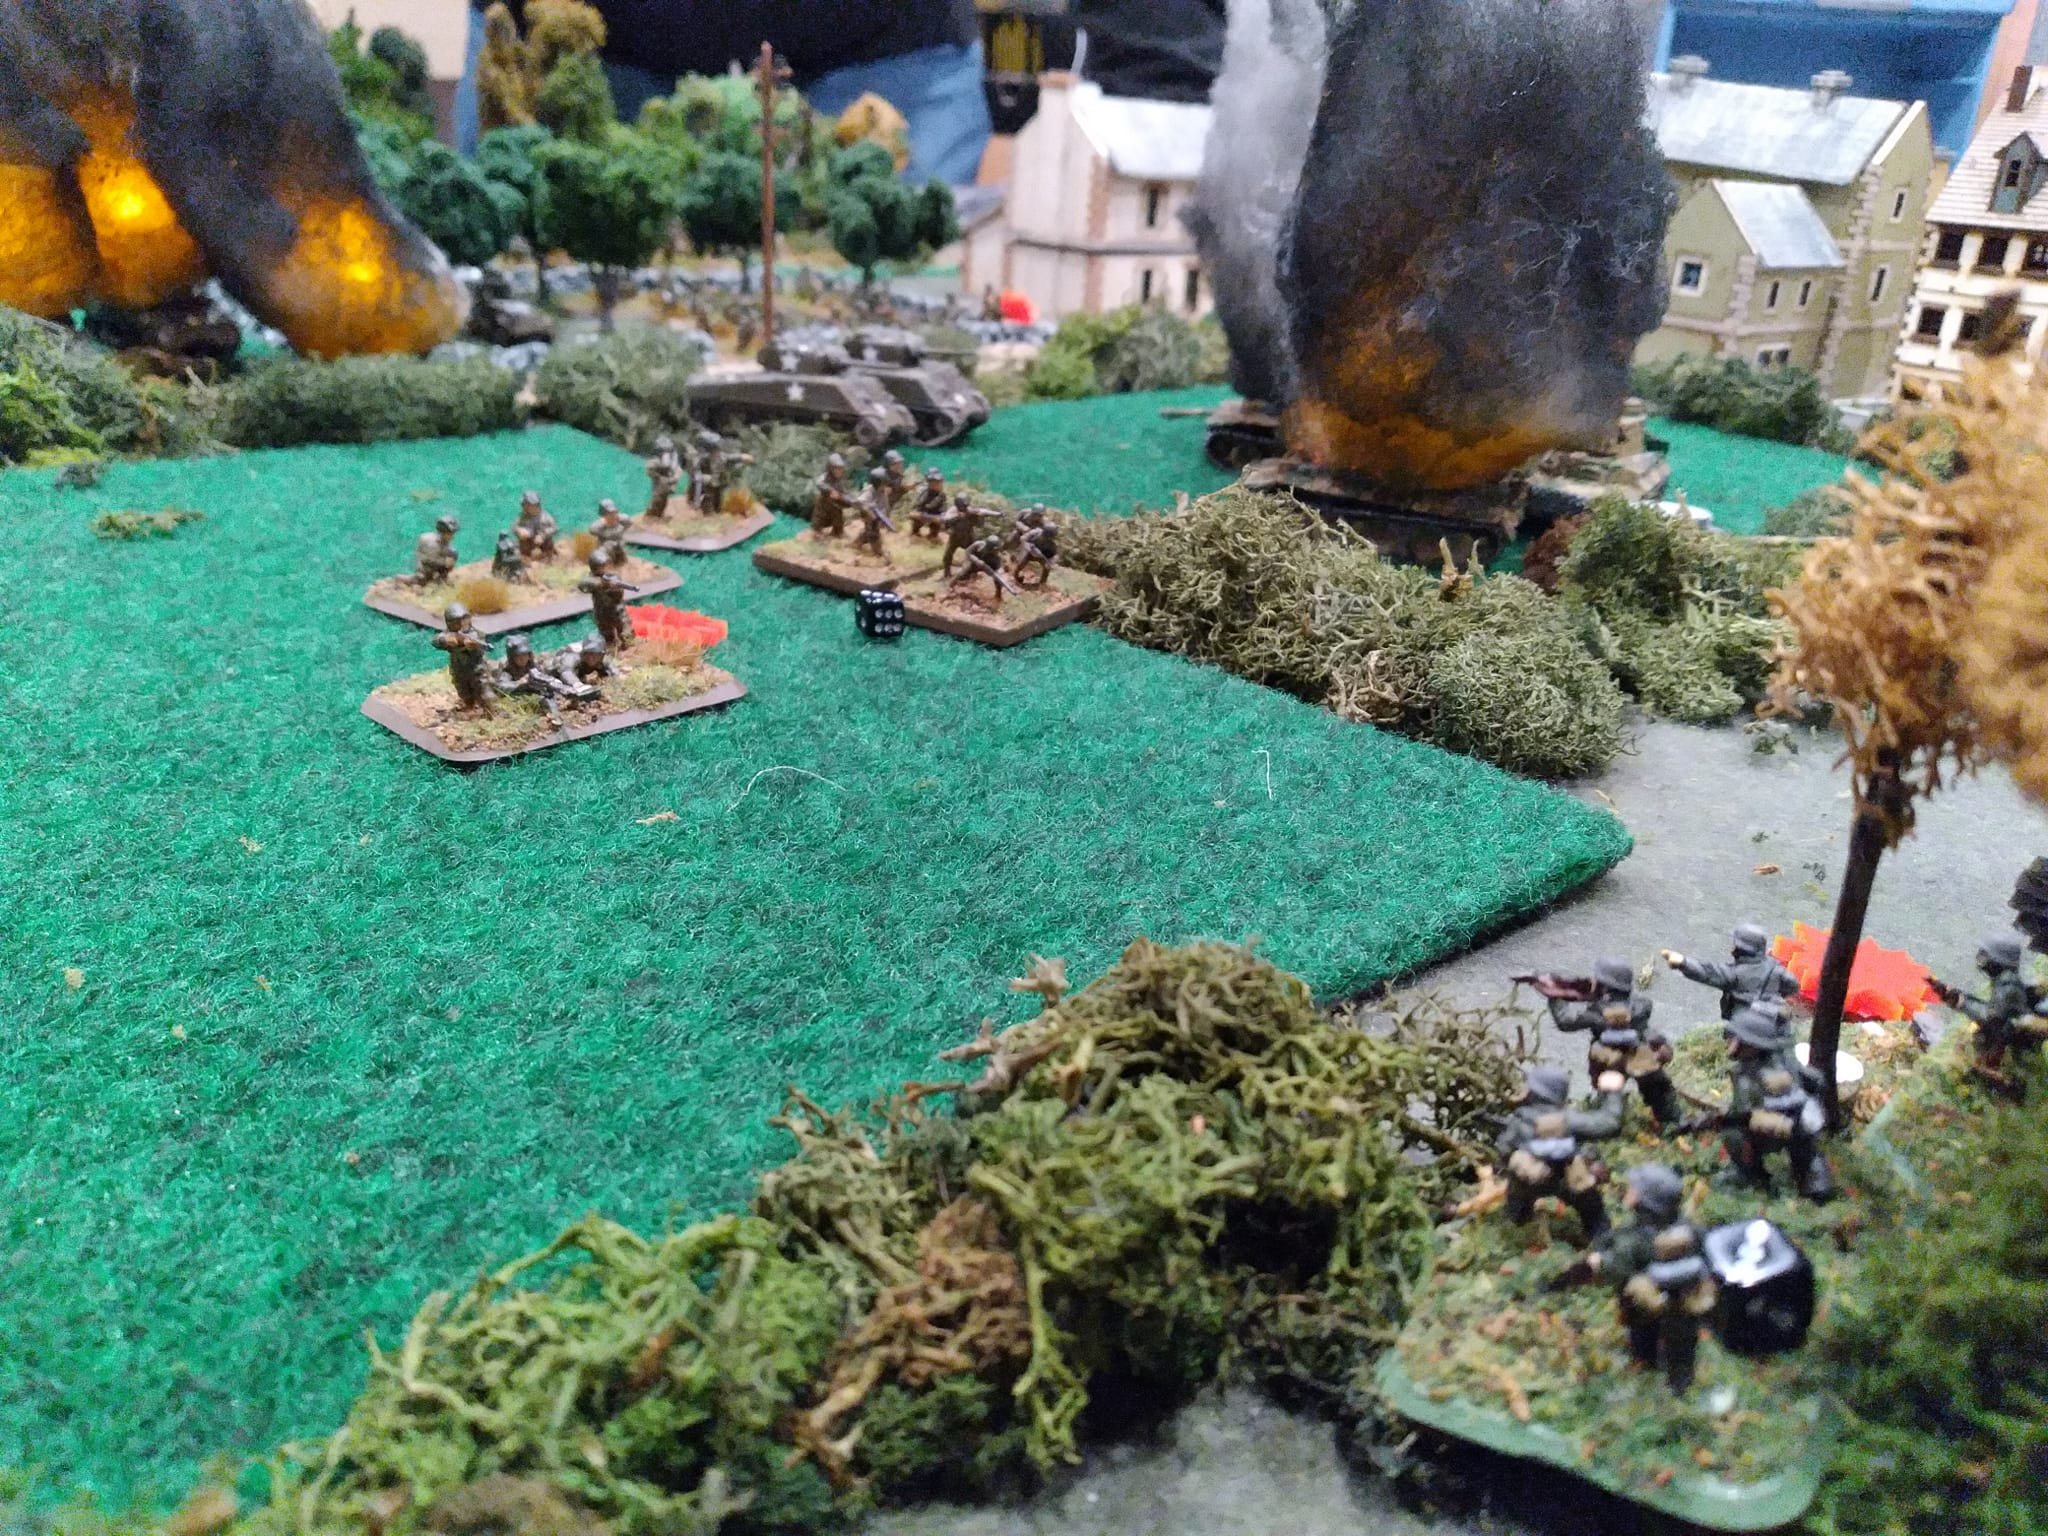
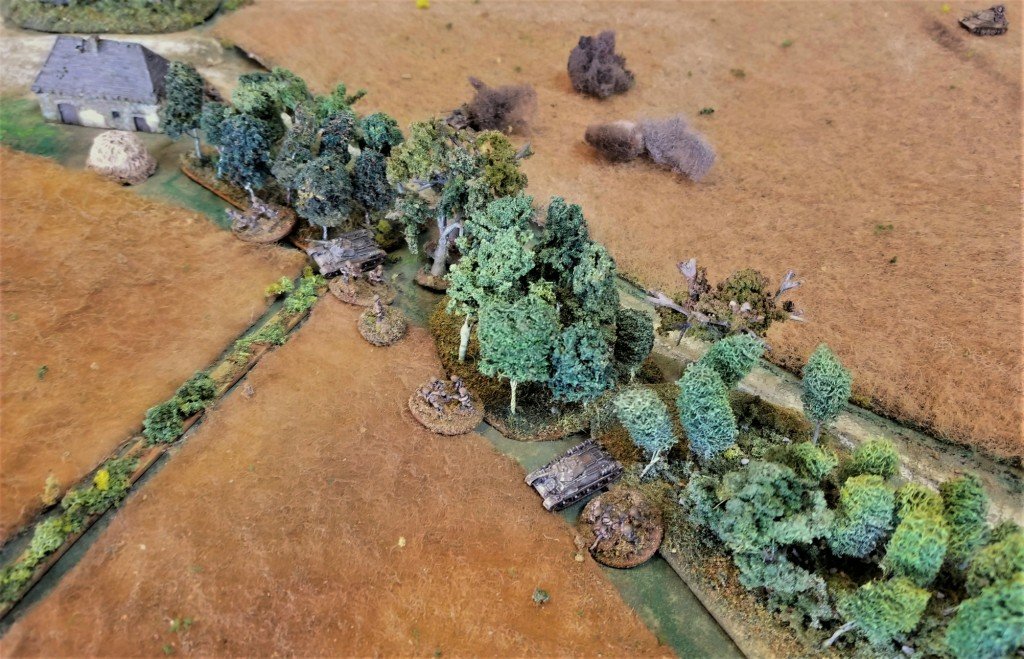
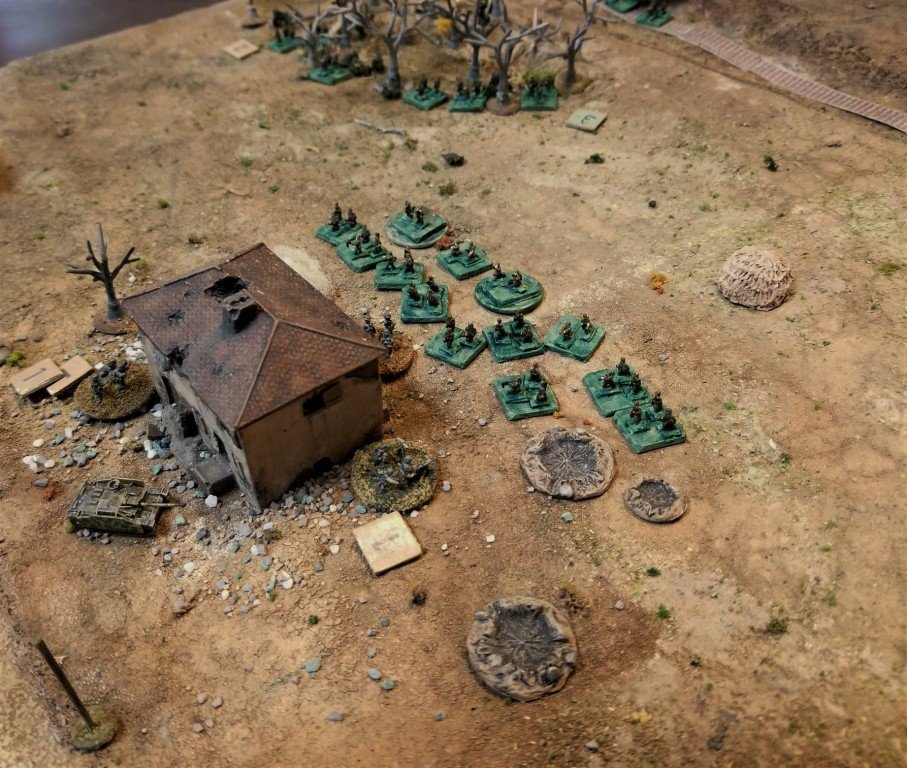
Meanwhile, another French Blind was working its way up behind my left flank. I needed to devote some resource to dealing with it, so needed to get these tanks under control fast. Two of the tanks were now in the village so, incredibly bravely, one of my Big Men led a squad from 1st Platoon out of the house they were sheltering in and into close assault on the two French tanks.

As the tanks were so close, I could easily get behind them. An attack on each, with me rolling two dice and needing 3's versus the tanks' armour of 5 needing 5's or 6's. These R-35s are made of stern stuff: the only effect on them was one point of Shock. Next turn, of course, the tanks swiveled their turrets, other tanks took aim, and my infantry died in a hail of machine gun bullets. Poop!

Worse, the French commander's tank then switched its fire to one of my AT guns and wiped out all but one of the crew. Things were looking a little grim!

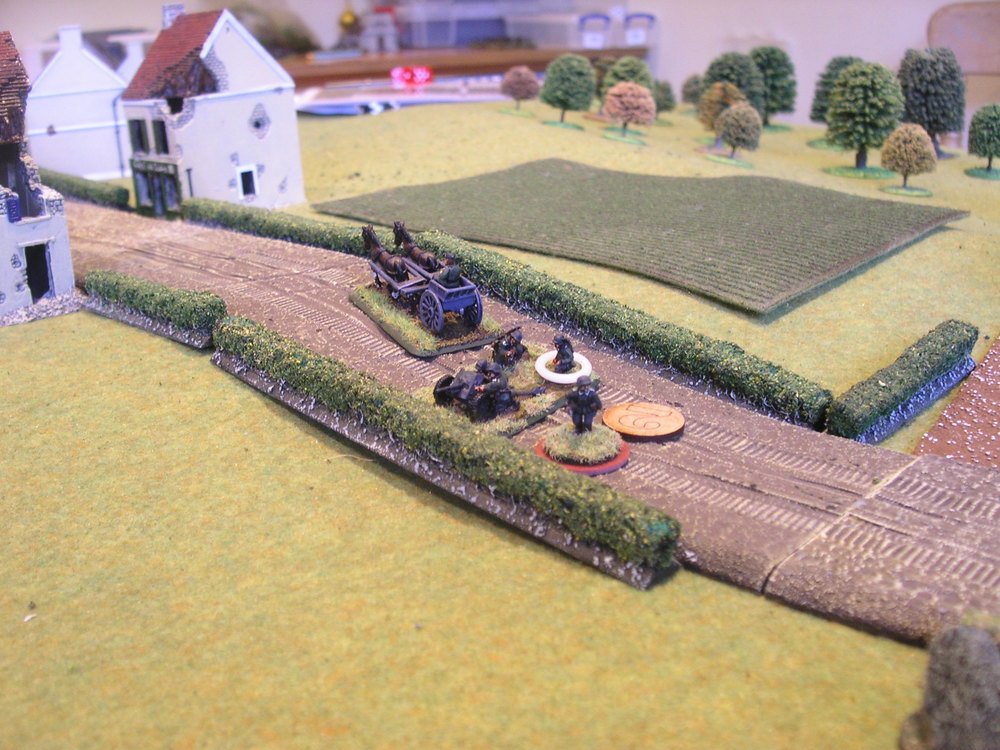
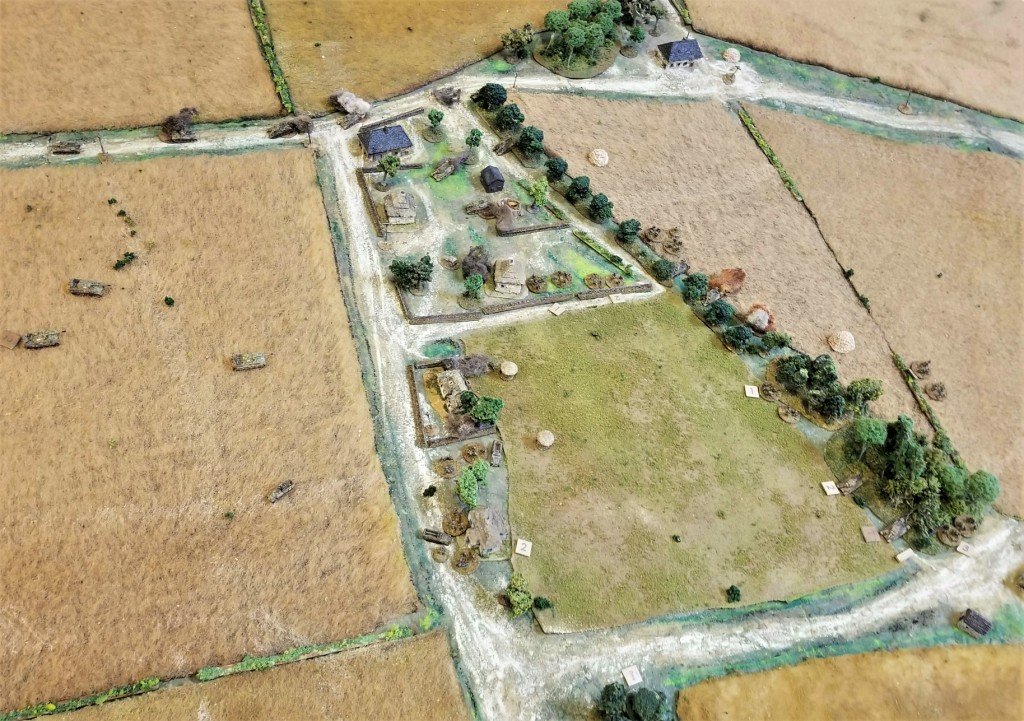
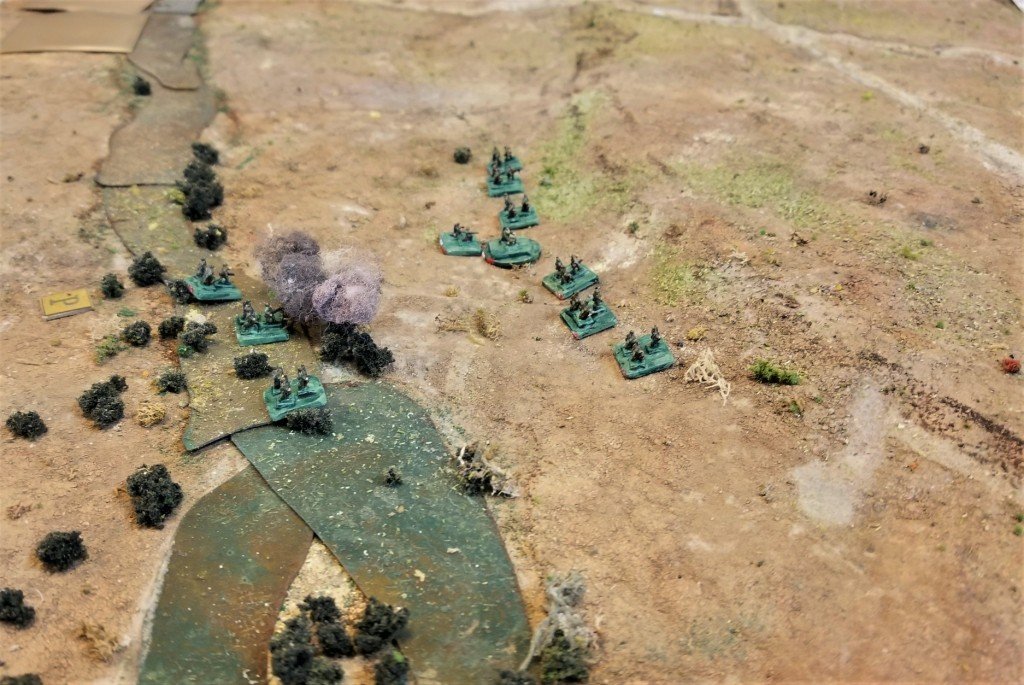
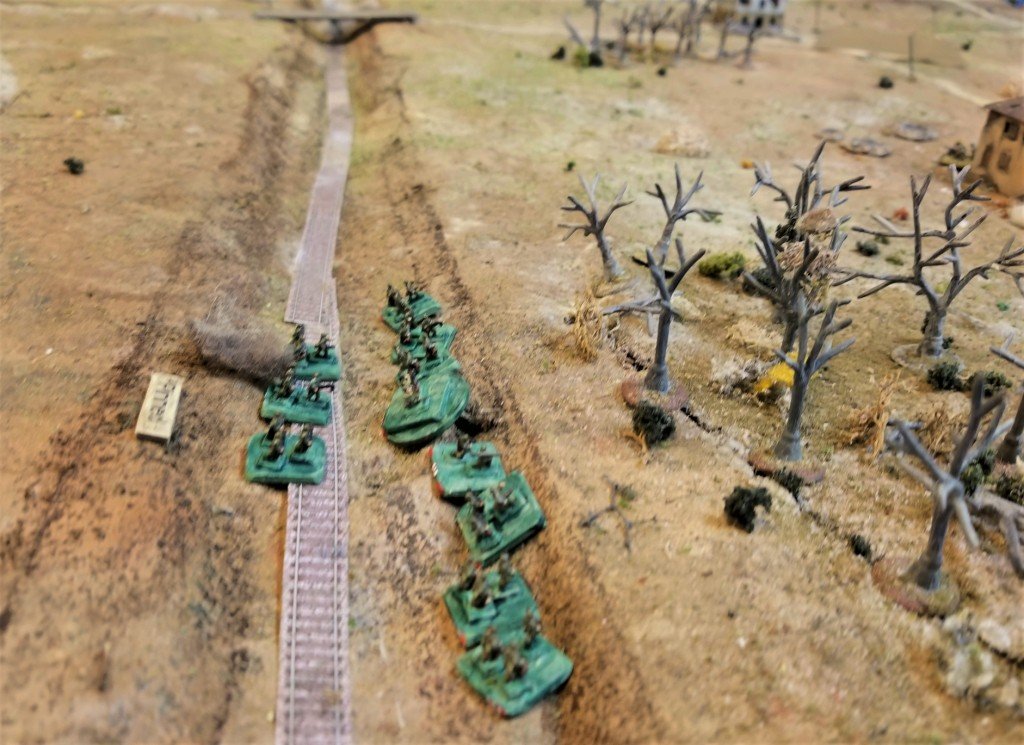
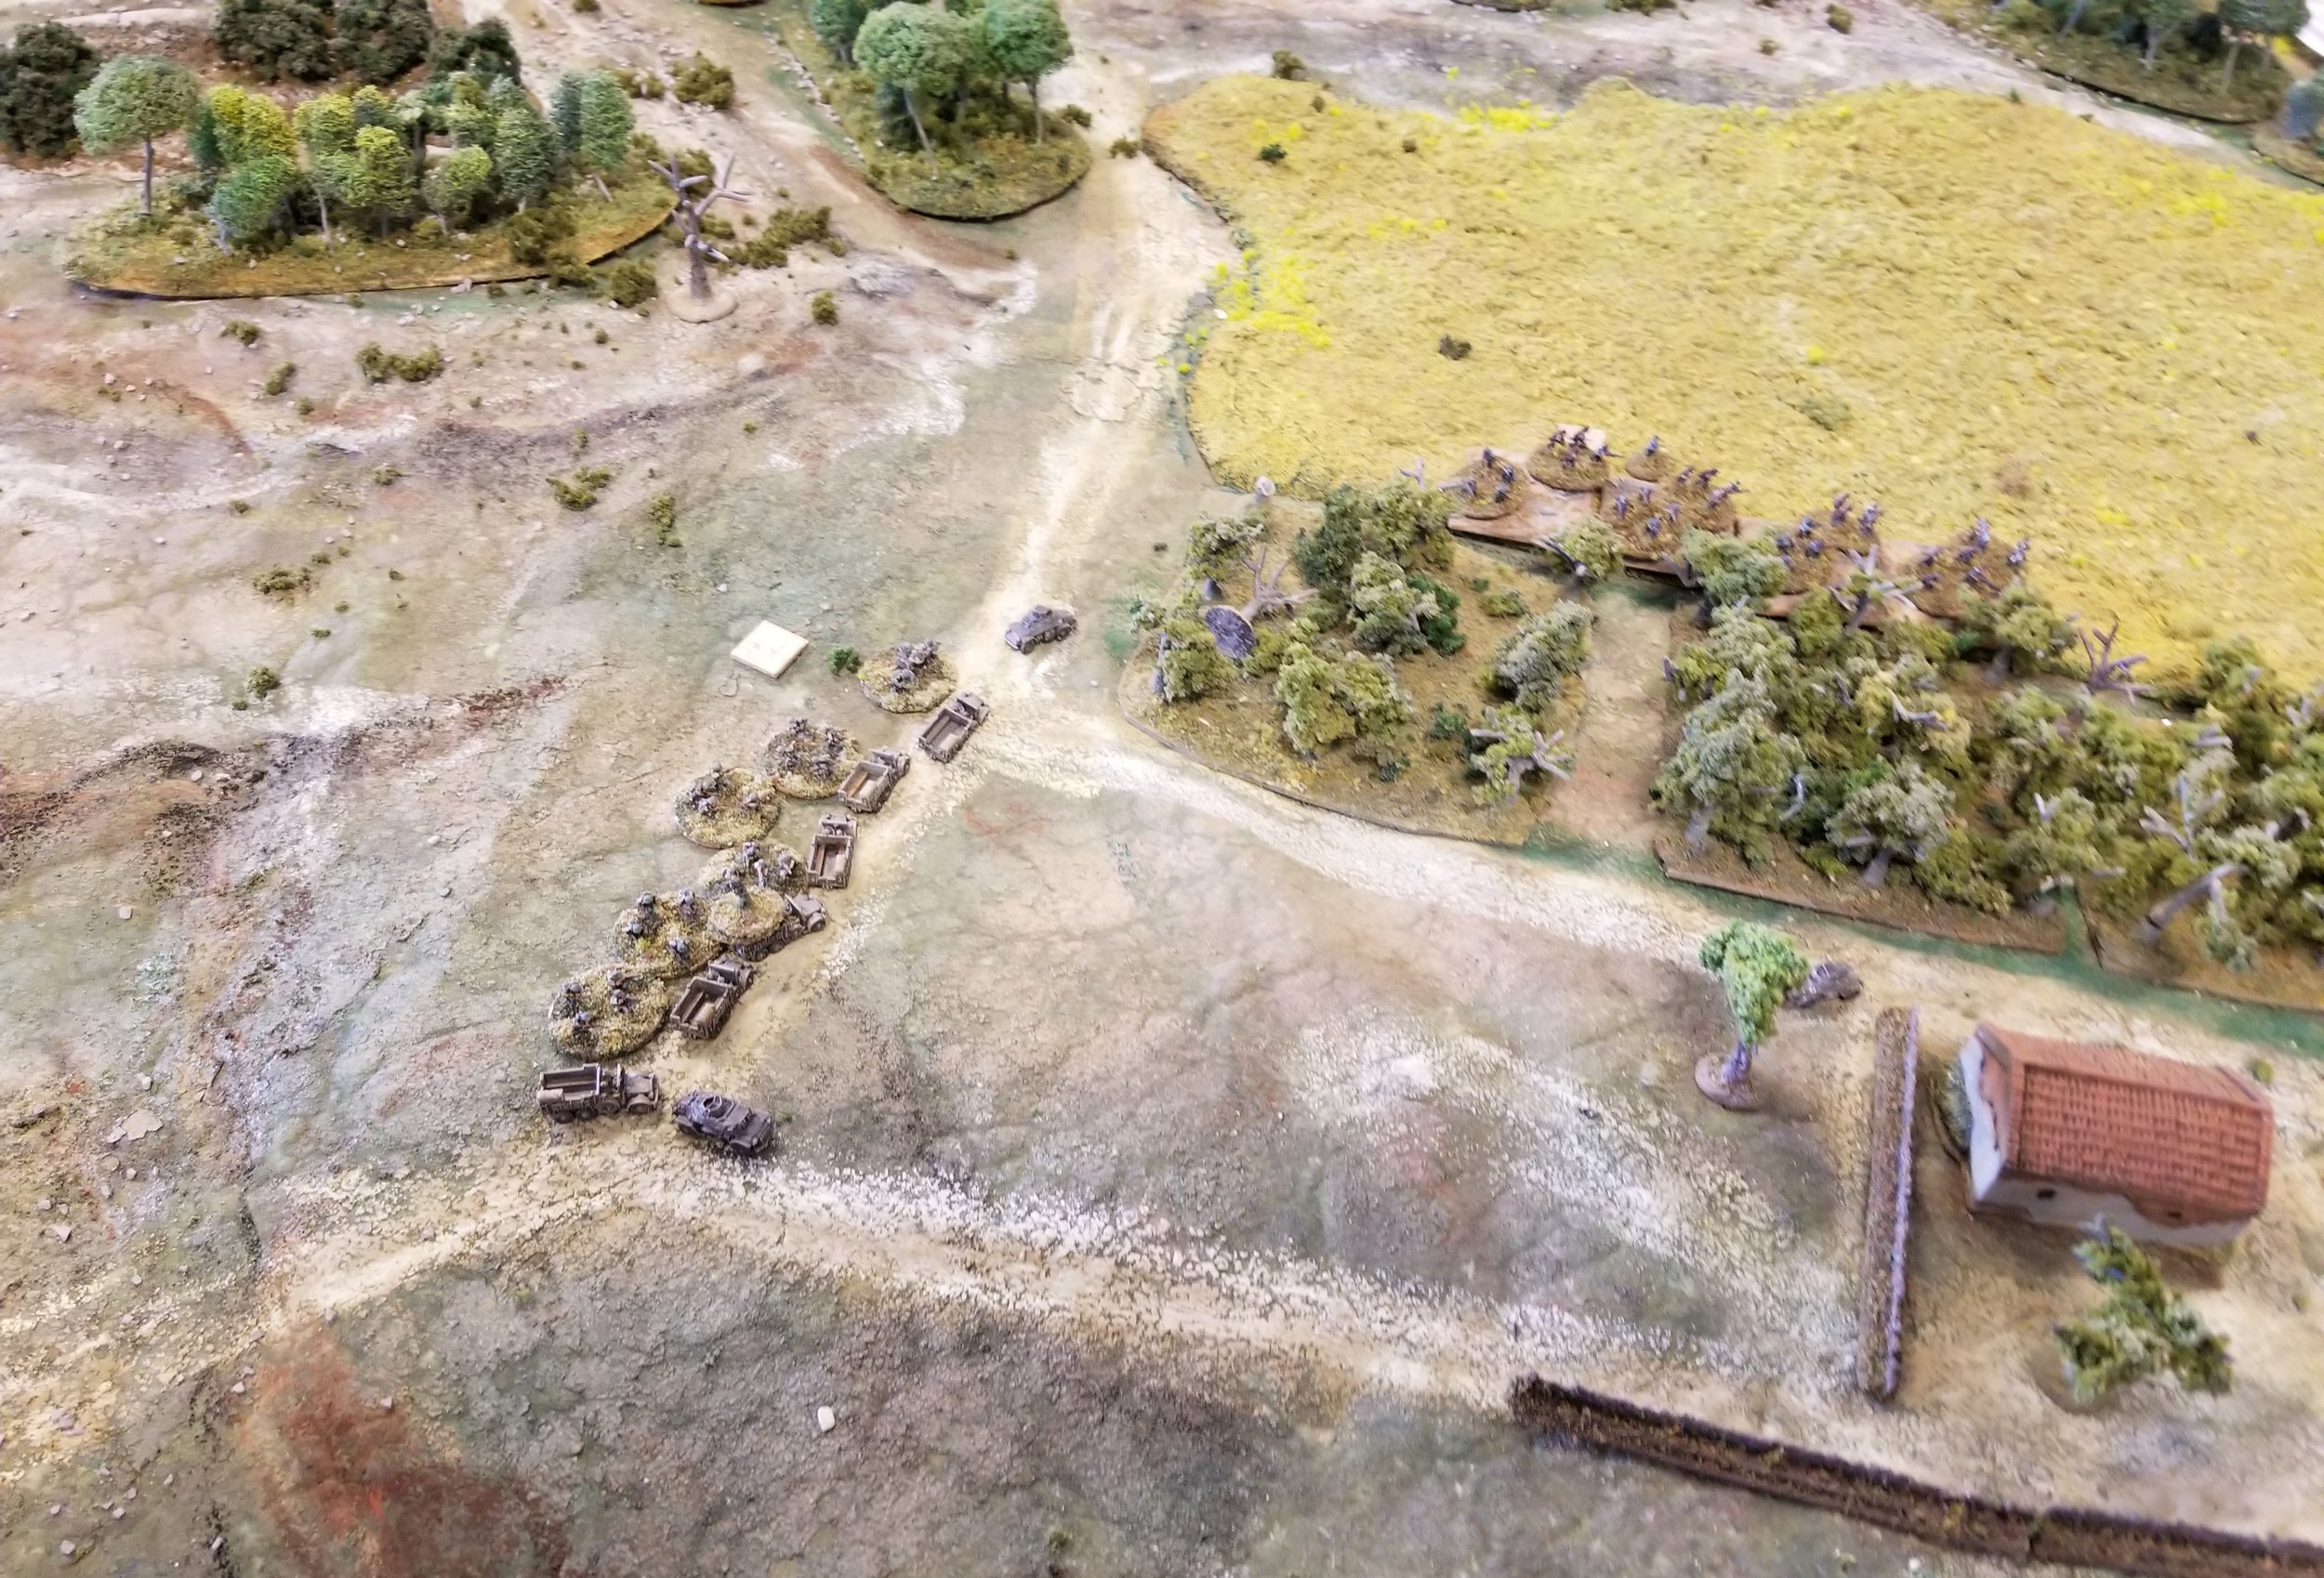
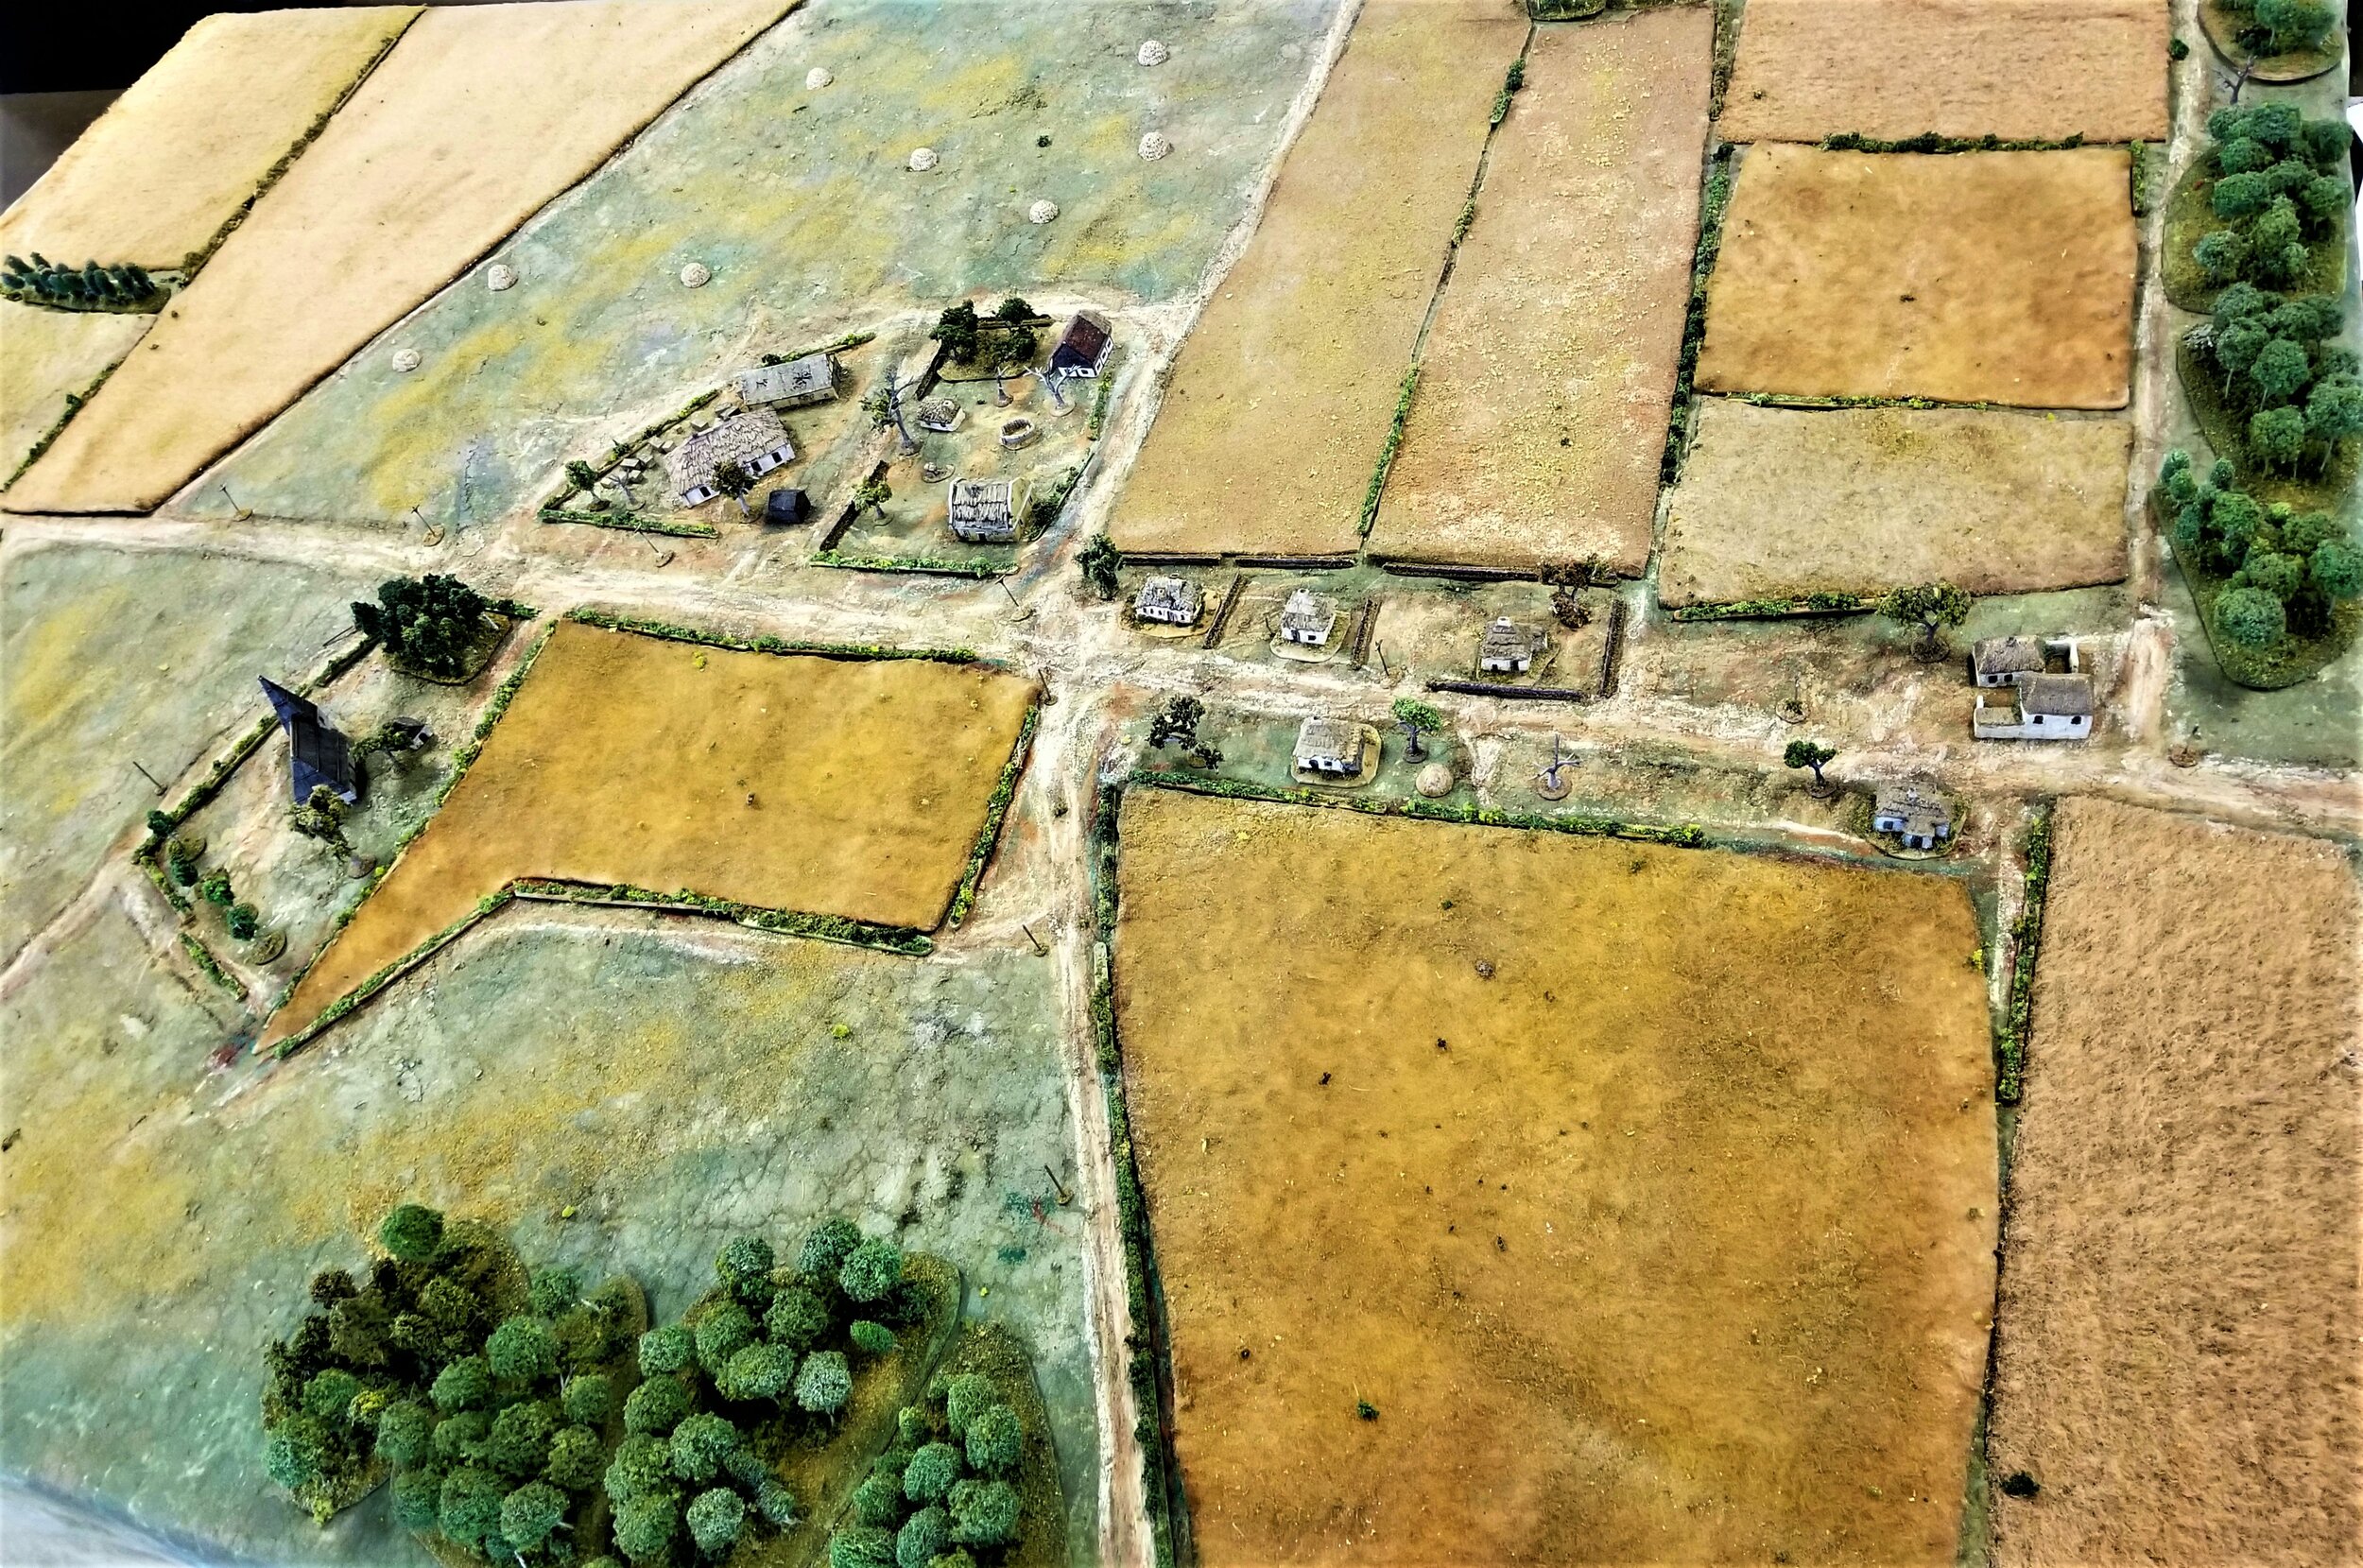
The only consolation was that that French Blind on my left was a bit stuck doing nothing, as the French Blinds card seemed determinedly unavailable, and it was too far forward for the French Big Man to intervene. This meant that I had time to get my HQ MMGs over to the left, led by a Big Man, set up shop, spot the Blind, and open fire. The tightly packed French column (three squads deploying from a Blind) got mullered!

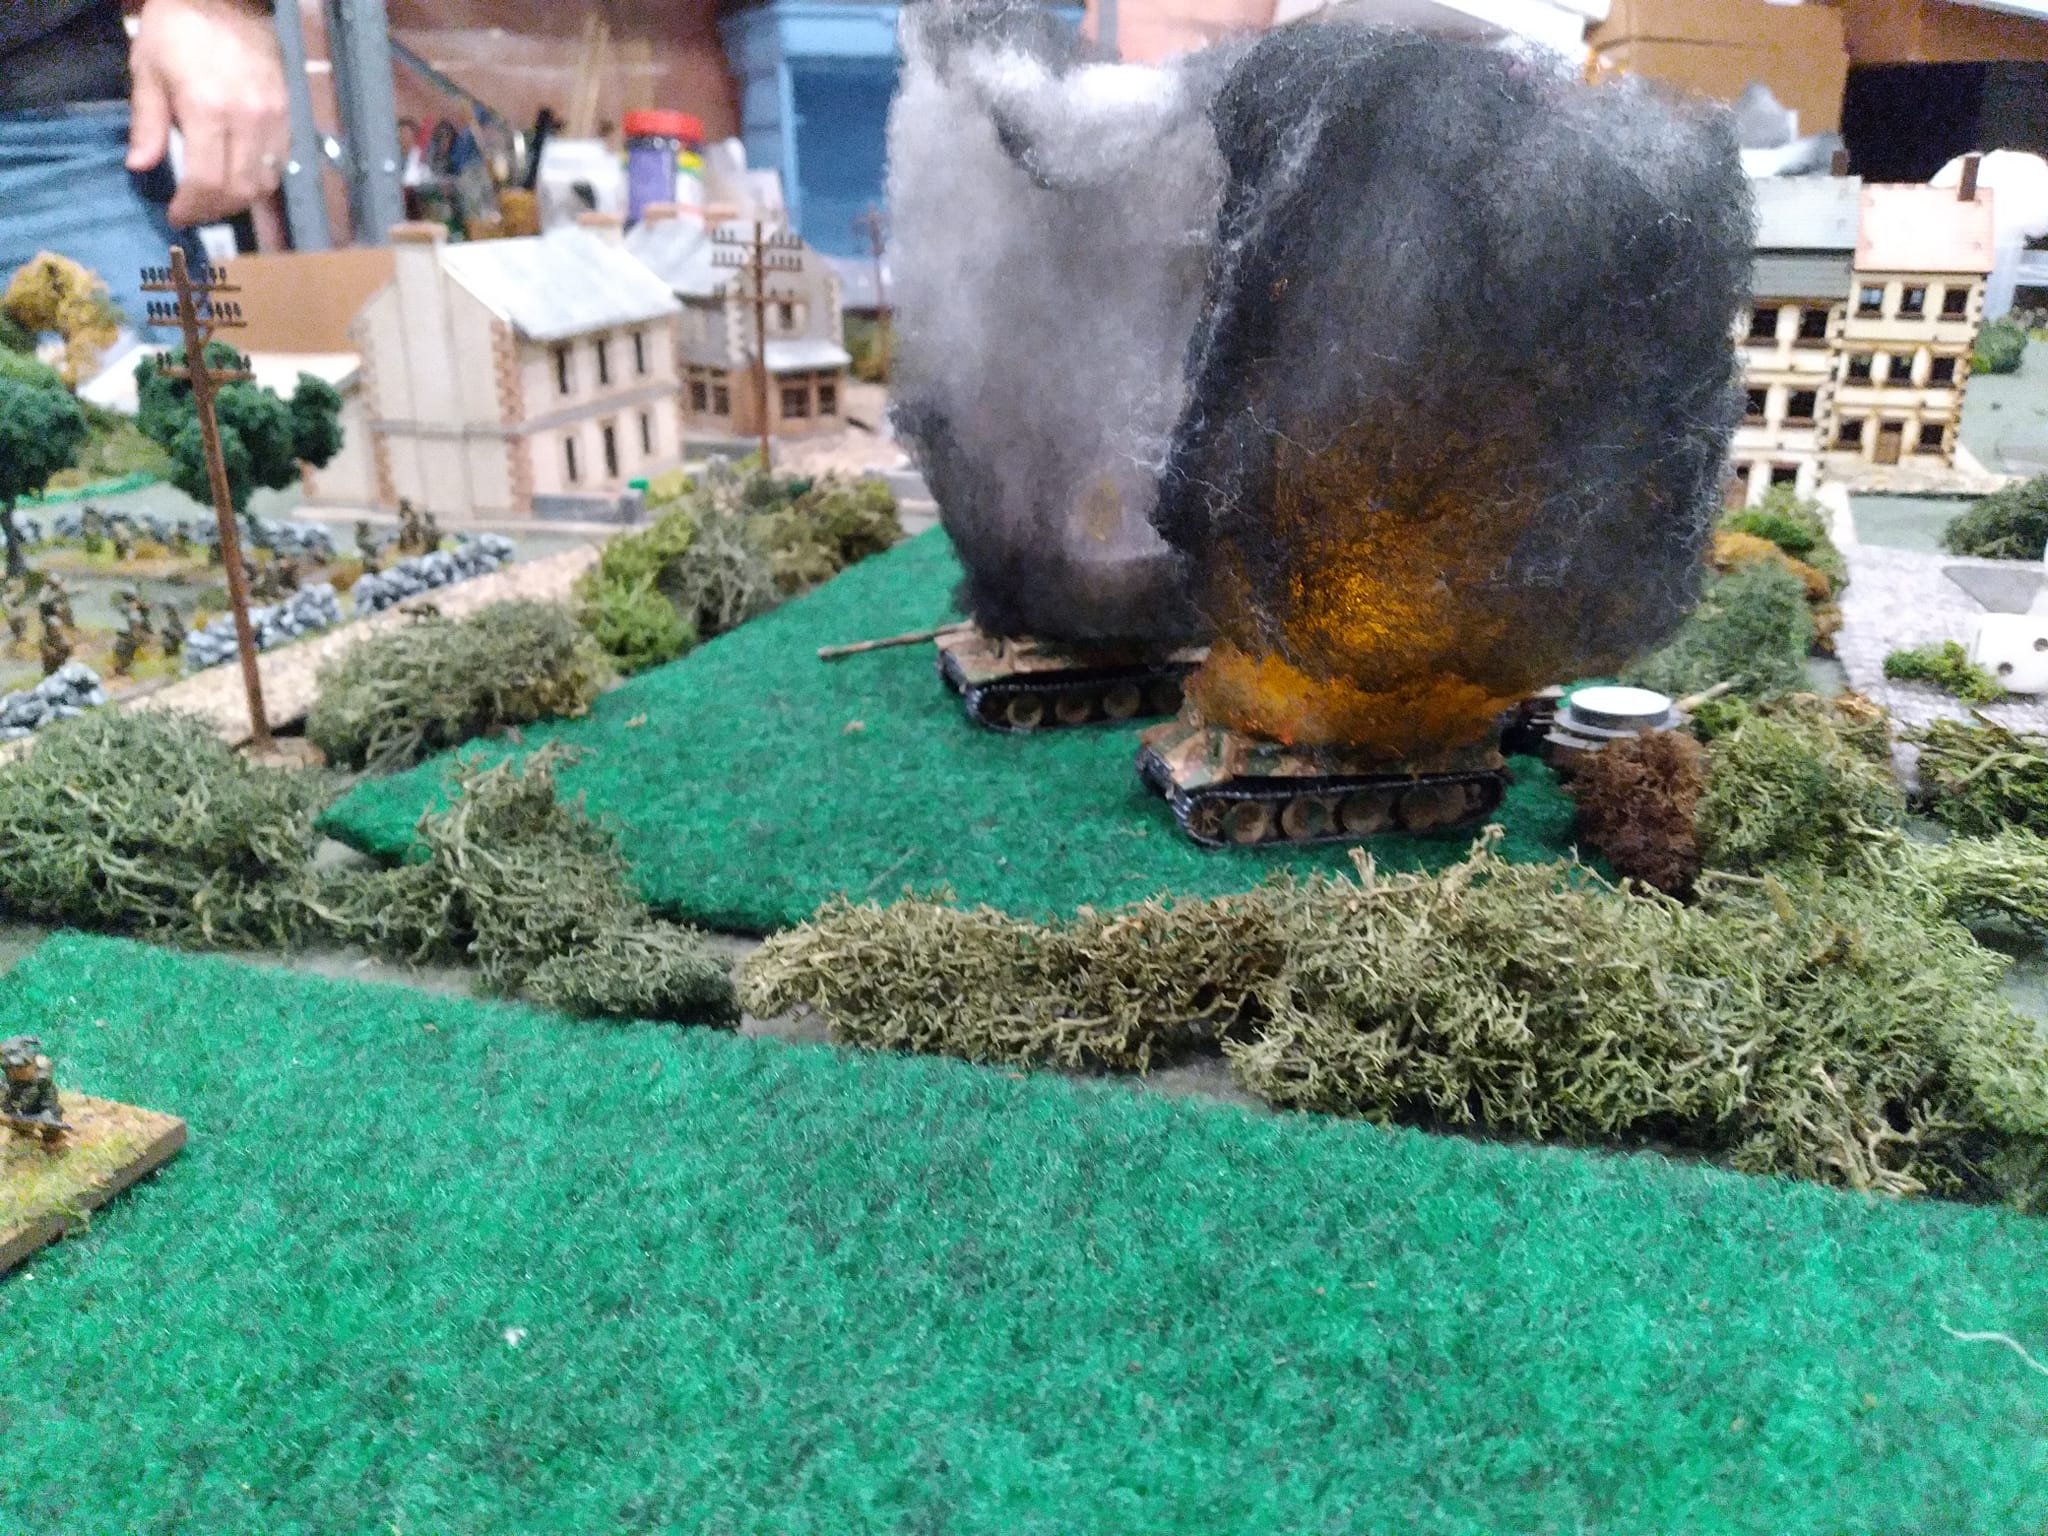
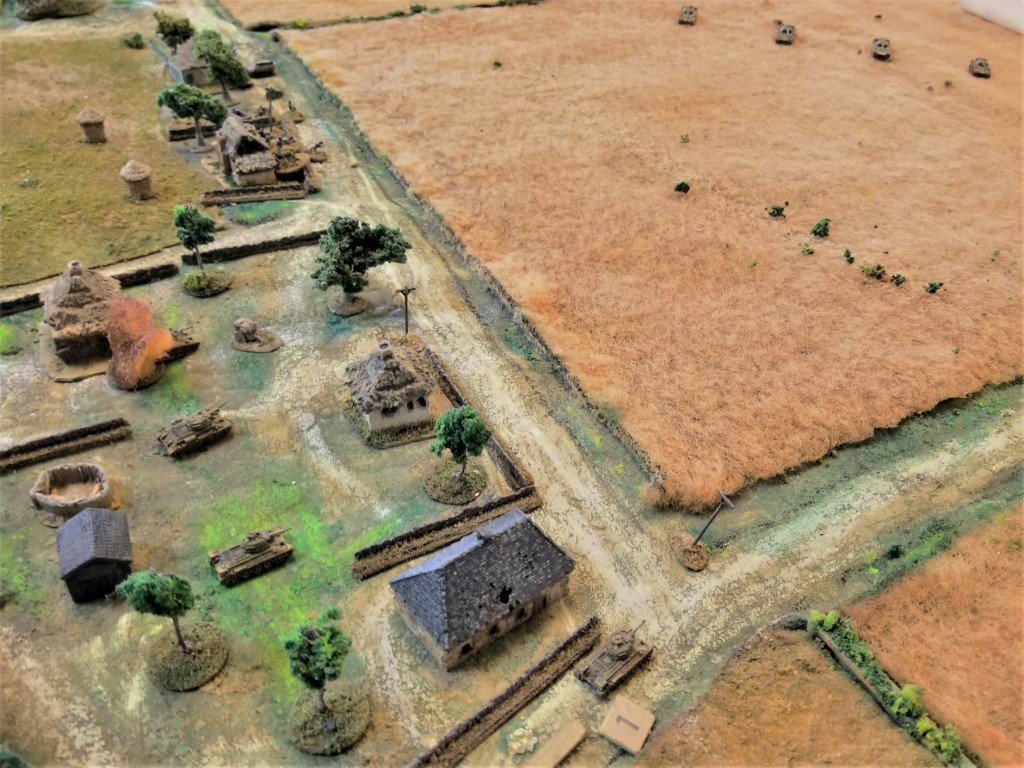
My AT assets opened up again, this time with more success. Although the fire from one gun and the AT rifle bounced again, the other gun scored a lucky shot that immobilised one of the R-35s and forced its crew to abandon ship.

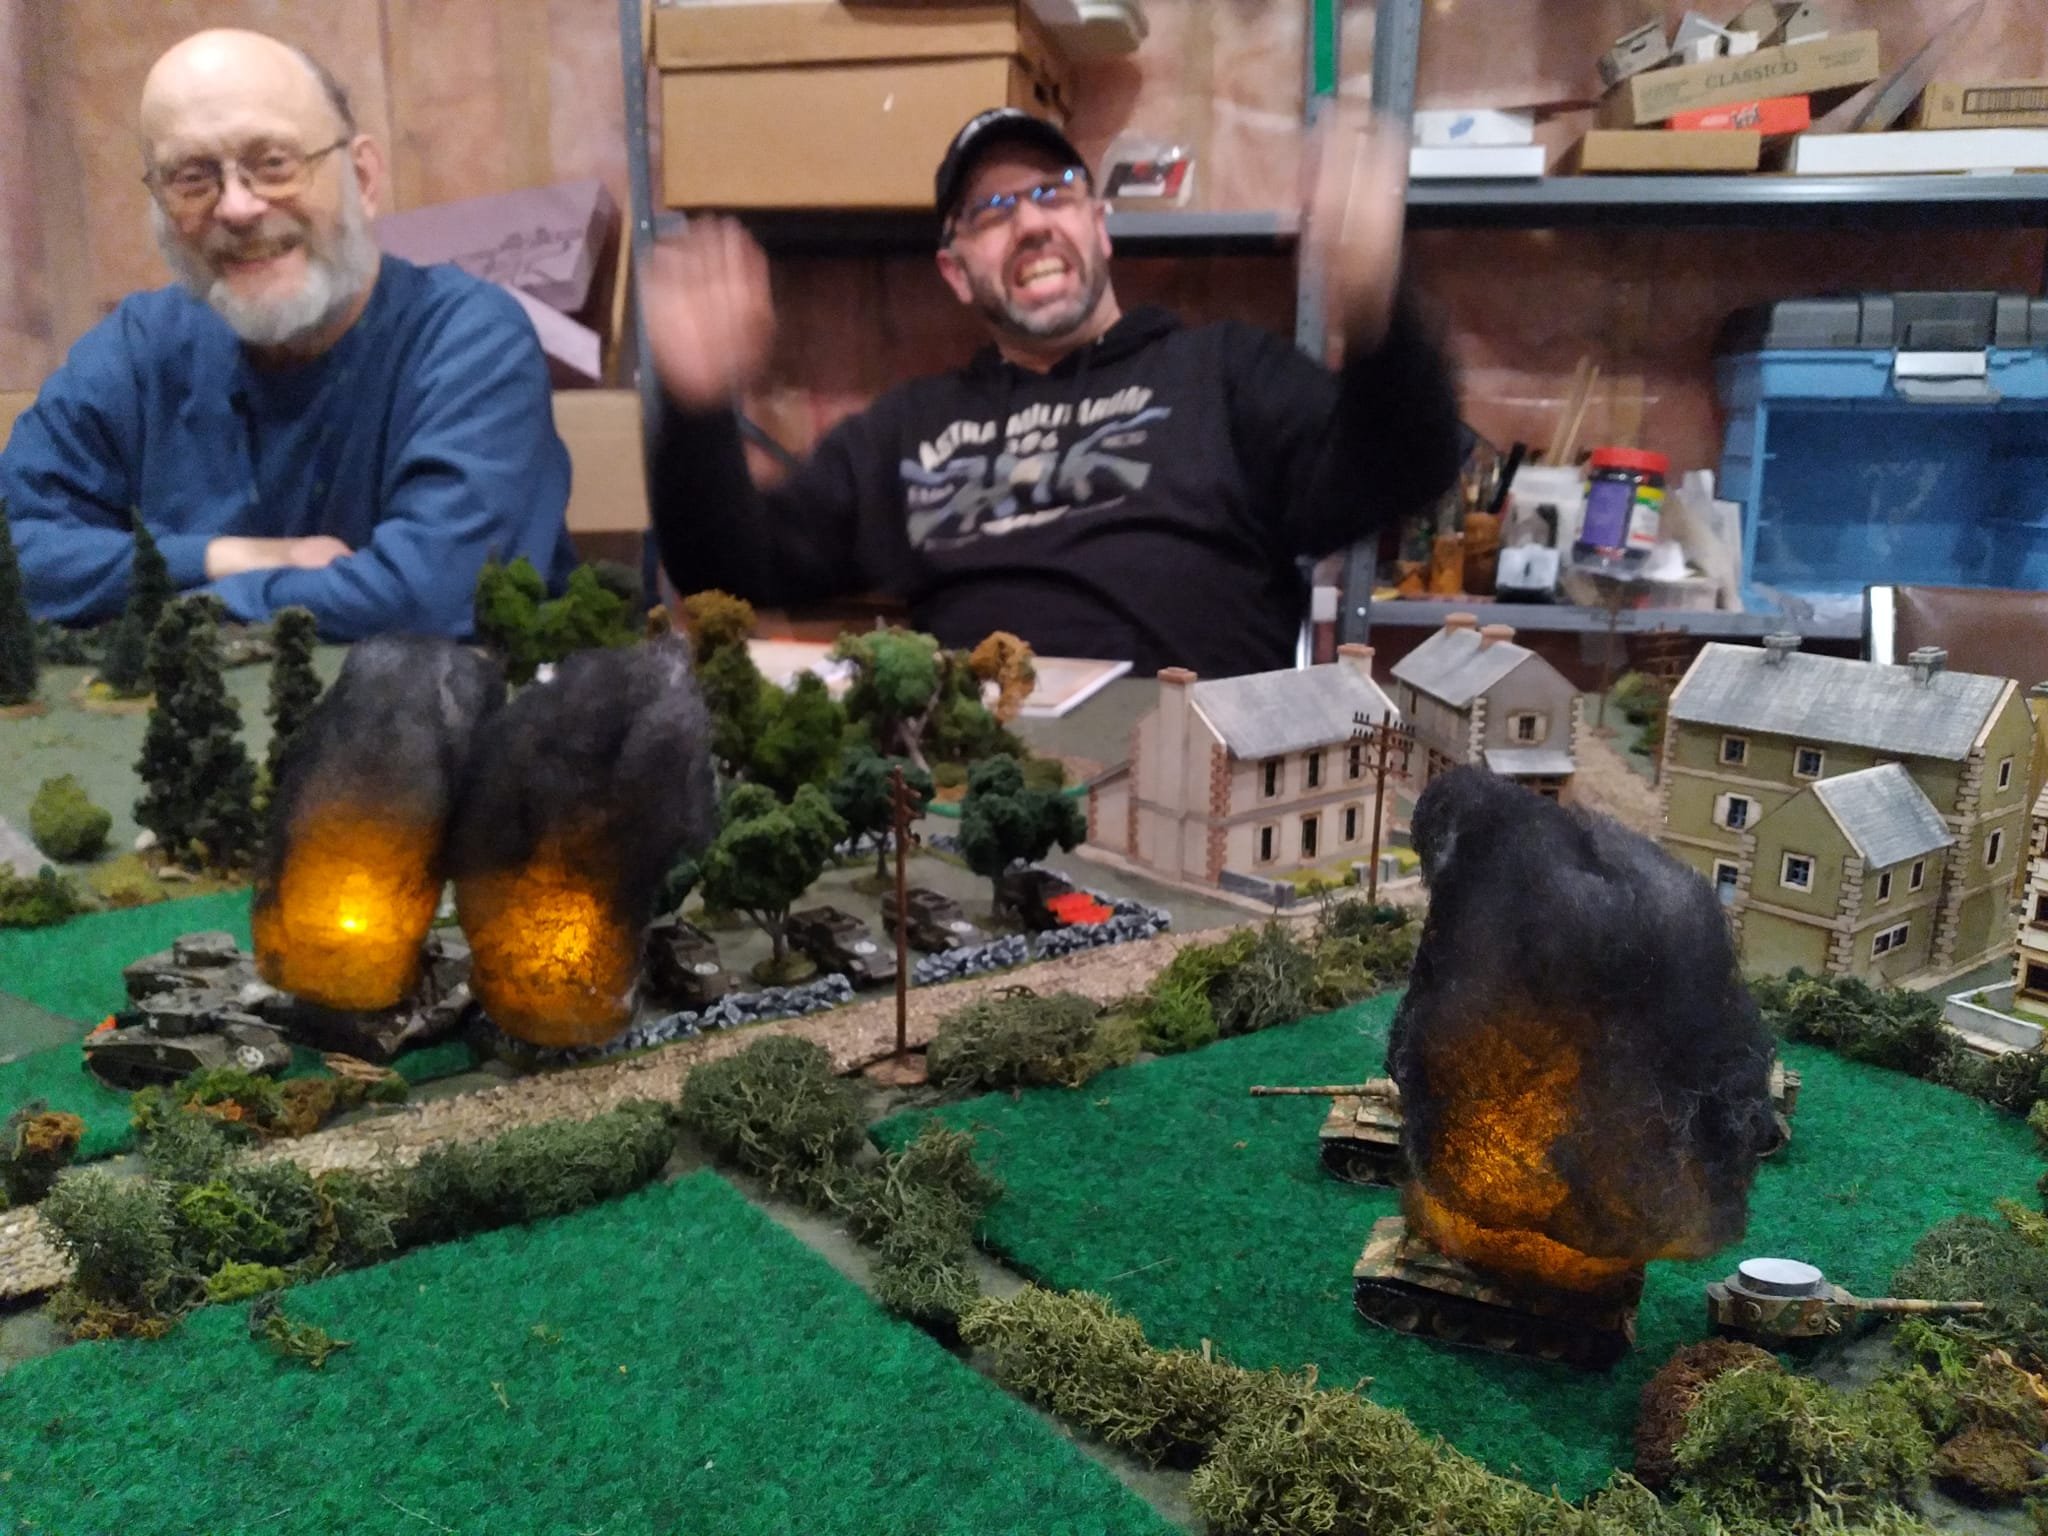
At this point Neil called the game. My 2nd Platoon had his infantry in the woods pinned in place just waiting for the mortars to fall onto their heads. His other platoon was stuck out in the open under fire from two MMGs and, now, one of my reserve squads. He was also now down to only three tanks, and I still had three AT assets and two squads of infantry to deal with them. It was, he felt, un peu trop!

The French pulled back, satisfied that they had probed in depth (!), leaving the victorious Germans still in possession of the village.

From my point of view, it had been a good game, where I certainly felt under pressure all the way through. I did agree with Neil that the Germans seemed to have too many troops to make it a completely fair game...but as I hadn't for once written the scenario, I could perform my traditional victory dance without guilt!

Robert Avery


"Vacqueville '44" is a historical scenario from the 2014 TFL Summer Special, courtesy of the the man himself, Nick Skinner. I suspect it may have been sitting in his files a while, as it's clearly an IABSM 2 scenario, so a bit of tweaking was called for :D

Short summary:  the US on their way inland from Omaha Beach have to deal with a German strongpoint in the hamlet of Vacqueville (just south of Vierville-sur-Mer). The Summer Special has a nice map, but I provided Carl and Tom (the Americans) with a reconnaissance photo from NCAP with some suitable annotations from which to form a plan.

AndyB took the Germans, who are very limited in terms of command, and rigged a fairly spirited defence, helped greatly by channeling the Americans around a minefield placed SE of the main farm complex to the SW of the farm track just before it pierces the hedge. He had a tripod MG42 and a PAK 38 firing from the south-westernmost buildings to discourage the Americans from end-around-ing in that direction, which pretty much meant the American attack was through the orchard to the NE of the farm.

One American platoon wound up pinned against the SW/NE hedge, while one came up the bocage-lined road and the other worked its way through the orchard from the SE. Their main problem proved to be a couple of infantry sections, one in the whitewashed house, one against the bocage. While the later was relatively swiftly reduced to zero actions, it did give the approaching platoon something of a bloody nose.

ACHTUNG! MINEN! (MINEFIELD FROM A BRILLIANT IDEA COURTESY OF JOHN BOND)

FARM BUILDINGS NEAR THE CAMERA ARE 4GROUND, THE FAR TWO ARE 3D PRINTED.

By the time that first German section had retreated in disorder, the one in the whitewashed cottage had started to give a very good account of itself, causing most of that approaching American platoon to be very keen to keep its head down.

About then the turn card finally put in its sixth appearance, and the telltale rumble of armour could be heard. Sadly, not German. To add insult to injury, the American FOO finally managed to get some sense out of the battery of 105s on the other end of his radio, and (fortunately fairly inaccurate) shelling began.

THE AMERICANS HAVE THE ORCHARD, BUT THE GERMANS IN THE WHITEWASHED COTTAGE AND THE CARRIAGE BARN DO HAVE A PRETTY GOOD FIELD OF FIRE...

Sadly that's about where we had to leave it - we're definitely getting quicker with IABSM, and the practice definitely improves matters, though I will be switching from the official QRS (which misses a whole load of small special case rules that happen a lot) to the one from the Sgt Perry's Heroes blog.

Not sure who'd have won this:  if the Panzershrek team made it to a suitable vantage point in time, I think the Germans might have been in with a shout, if nothing else because there'd have been a blazing Sherman or two blocking the road. Andy B did a great job holding off the Americans as well as he did.

Mike Whitaker


Played one of the introductory scenarios from IABSM with Stephen 'South of Cherbourg'.

This is an all infantry scenario with regular Wehrmacht defending against advancing US troops. Been ages since we have seen Stephens Yanks on table with any rule set and ages since we have played IABSM.

Very enjoyable it was too despite less than stellar card sequencing for Germans even with two 'Tea Break' cards in deck, I had two turns I got virtually no activations whilst Yanks had several.

Must say this sort of system really appeals to me as I prefer this to standard you go I go styles overall and IABSM works pretty well for the Company-a-side game it covers.

We failed to finish (spent way too much time waffling about our frustrations with ongoing Covid crap) but did get to see lots of action.

The on table 60mm mortars teams (3 of the buggers) seemed pretty effective especially compared to my largely ineffectual off board 81mm mortar battery.

This of course assume we were doing things correctly which not a given after so long away from rules, and still find some parts rather under explained despite this being a third edition.

We fluffed the auto spot and close combat rules somewhat forgetting that close combat is automatic when units end up 4" apart.

Still a fun outing and whets appetites to revisit them again in future.

Sergeant Steiner


This Saturday in Cambridge we played through 4B of Blenville or Bust. We reversed roles, with the Germans pushing up the hill to the houses and ridgeline, with a Polish company defending.

Elements of the Polish armoured brigade in France:

  • Company HQ with two Big Men, FOO and 2 x 2-inch mortars

  • MMG Platoon with 3 x Vickers guns

  • 2 x 6pdr anti-tank guns

  • 1 x Sherman Firefly

  • 2 x Veteran infantry platoons, with two sections and a PIAT team each

German deployment:

  • Company HQ, with FOO & Sdfkz 222

  • 3 x Infantry Platoons, with two Sdfkz 251s

  • 2 x Panzerzug, with four Tiger Is and four StuG III Assault Guns

The Game

A sustained German attack faced an uphill struggle when it tried to clear the strategic road junction at the top of the ridge of allied defenders. A tattered armoured vanguard eventually made it through machine gun fire, mud, and thick Normandy hedges to break through the allied east and west flanks. But with a single allied machine gun and an anti tank gun heroically holding the junction and more German reserves held up by engine failures and French paddocks, and a fresh allied platoon still lying in ambush to the south, the two forces were left in a deadlock.

With the British defending the ridge line and the house, the Germans initial attempts at spotting identified a trio of heavy machine gun teams overlooking the German advance on the right.

The first panzer platoon immediately opened fire on the ridge scoring two 17s, destroying two of the teams in the ridge - before advancing through the thick hedges and into a British mortar smokescreen.

Meanwhile, the German left, a second panzer platoon of a Tiger I & 2 Sturmgeschütz IIIs, pushed through to the hedgerow on an armoured bonus card - coming face to face with a full British platoon, who summarily jumped the hedge and failed in an attempt to quickly place charges on the tanks. The tank platoon reversed down the hill away from the British, as two Sdfkz 222 armoured cars moved up to take out the exposed troop. As they did so, a British anti tank gun in the garden of the house quickly took out both vehicles, destroying one, immobilising the other- and taking out the Company HQ in the process.

As this happened, the British machine gun on the right retreated into the house in the face of the advancing panzers, with the other anti tank gun on the road repeatedly missing its shots. As the panzers finally made their way up the hill, the British command fled down the hill and a Firefly emerged from the bocage, but before it could let off a shot, a round from the leading Tiger had destroyed the Sherman.

At long last, the German reinforcements arrived, including the German command and a further two Tigers supported by half tracks. But just as they arrived the lead Tiger containing the chief Big Man suffered an engine failure, forcing the convoy up through the fields.

In an effort to stop the relentless haul of fire coming from the house on the hill, a Stug on the right lined up a shot and blasted the house, causing a fire to quickly spread forcing the gun team to flee - but not before (somehow) an extremely well placed machine gun AP round managed to penetrate the rear of- and kill off -one of the German assault guns.

On the other side of the fight, the anti tank gun in the house, directed by the British big man, decimated the two German assault guns, leaving just the Tiger and supporting infantry platoons. Before the Tiger raced back up the hill to finish off the British platoon on the other side.

Here’s the tale of the battle in pictures:

James Moulding, David Dahlborn


A banner weekend! People were available so I serendipitously had my FIFTH face to face game in THREE weeks!

This past Saturday Scott brought his never played with before WW2 Americans up for a game of I Ain't Been Shot, Mum. Americans attacking over some generic Normandy type terrain. They got 6 platoons to the German 4. They also rolled well and got a Forward Air Controller. Mikey helped Scott run the Americans and Patrick helped me with the Germans.

Scott took an American Armored Coy HQ plus 2x tank platoons and 2x Armored Rifle platoons, a MMG platoon and a platoon of M10 tank destroyers.

I took a Grenadier Company HQ with MG42s, 2x infantry platoons, a Pak 40 AT gun platoon and a platoon of Tiger 1s.

A clear, but bloody American victory when we called it at midnight.

The Germans had lost about 30 KIA (including AT gun and tank crews), a Pak40 and 3 Tigers, but they'd be lucky to get the remaining two Pak40s away I think. The Americans had lost about 45 or so KIA (including tank crews) and 6 tanks with another heavily damaged, all of which will probably be replaced within the week.

James Mantos


A 6mm IABSM game played at Gigabites Cafe in December 2021.

This was a somewhat generic game based on actions to the east of Warsaw in August 1944 where the Soviets had sent masses of tanks through thin lines of the German defenders. The panzer units were then forced to scramble to cut those units off before they totally disrupted the front.

Casualties were a lot closer than I knew. Jon's StuGs had one inoperable main gun and one with engine damage. His grenadiers along the southern field had taken nine casualties (of 24). In the village he had one section left. The only real loss to the Panthers was the gun of the Tank Ace's vehicle

My infantry lost two of their platoon COs and 18 casualties, but shock was building up. My armor on the other hand had four good tanks left.


Jon suggested we do a game with US troops for Veterans Day (Nov 11), and since I had no US 6mm minis he would supply them. So I stole another scenario off of Rob Avery's Vis Lardica site that would be a simple set up. For variety I wanted a game that was in Italy so the Highway 7 scenario from the Anzio pack looked good.

The scenario takes place on January 31, 1944 with units of the US 3rd Division trying to expand the Anzio beachead out through the dug in Herman Goering Panzer Division.

And this is a good time to call the game as I was out of AT weapons. No ‘fausts or ‘schrecks. Both StuGs gone and the Pak 38 down to 2 crew.

Overall casualties for the US were 29 out of 90 with a couple of Big Men down. As green troops their activations would be 0 when down to 4 men/squad. At this point they had one good platoon in operation.

The Germans lost one full section and 1 MMG team and 2 other men along with the IG. Fun game with some challenges for the US players.

Mark Luther


Battle of Stonne game played at Bristol Independant Gamers on 30th October 2021.

On 13–14 May 1940, German tanks crossed the Meuse river under the command of General Heinz Guderian. The village of Stonne and the woody hills of Mont-Dieu were the single area where it was possible to try to stop this German advance. German forces moved various elements to this area to secure Stonne.

The 1st company of the Grossdeutchland Infantry Regiment, supported by tanks of the First Light company of the 7th Panzer Regiment were among the first to reach Stonne and were involved in the heavy fighting to control the small, but strategically important village.

Among others, the Germans faced troops of the 10th company of the 51st Infantry Regiment, supported by reconnaissance armoured cars, tanks of the 1st company of the 45th Tank Battalion and 3rd company of the 49th Tank Battalion (Char B1bis tanks)

The village changed hands 17 times over the course of three days of fighting between 15 May and 17 May 1940.

This game ended with French forces outflanking the Germans, but without the strength to evict them from the village.

Phil Turner, Jenny Owens

Joe McGinn took a few photos as well:


This was a 6mm IABSM Caucasus 42 game played at GigaBites Cafe in October 2021.

I had been wanting to get my 6mm Soviet Naval troops on the table for awhile so this scenario was designed around that thought. The game was based on the fighting in north Caucasus in August 1942. The Germans were closing in on the port of Novorossiysk from the north and the Soviets had set up blocking positions before Verkhnebakanskiy. This represents the 83rd Naval Infantry Brigade's fallback spot. They were facing the 125th Inf Div with some StuGs and armored cars.

After I launched a close assault on the entrenched Soviets and won, the Russians felt they had done what they could. Our recce infantry had moved over to the right flank and the armored cars were in a position to blast the retreating troops.

Three of their T-26s were abandoned. They also lost their company CO and one of their platoon leaders. Total Russian casualties were 34 of 96 infantry. Both ATR were lost along with two of the MMG teams.

The Germans lost one SdKfz 222 and had a StuG damaged. The mounted infantry lost 14 of 24 and my ground pounders lost 18 of 72 including a platoon CO.

A costly victory for the Germans.

Mark Luther


Picture1.png


After a late war game I thought some early actions in the Poland 39 campaign would be in order for a September IABSM game. I stole this scenario directly from Rob Avery's excellent Vis Lardica site. See AAR here.

The Germans now had overwhelming firepower to throw at the Poles.

Their casualties had been acceptable: only four tanks were KO'ed or immobilized. Five casualties on the MMG platoon. Twelve casualties in 1st platoon, two in the 2nd platoon, and twelve in the 3rd platoon. Total of 21 dead along with the 2nd Platoon leader.

The Poles had twelve Regulars dead and thirteen in the KOP platoon. one taczanka and one ATG wiped out.

Definite victory to the German attackers!

Mark Luther


A 6mm IABSM game played at Gigabites Cafe Sept 2021. This was a pretty basic Soviet attack on the defensive line NE of Seelow , 16 April, 1945. Elements of the 26th Fallschirmjaeger Regiment were dug in forward/east of Alt Langsow and the 301st Rifle Division and 220th Tank Brigade were ordered to overrun them and head to Neu Langsow.

MInor victory for the T34s

This was a pretty one sided affair with the Oderbruch getting a great deal of credit for our tardy advance.

Overall the 84th Tk Bttn lost 4 T34s outright with 2 immobilized with engine damage and 1 losing its main gun 3 out of 10 were still runners. The IS2s immediately had 1 vehicle bog. The SU76s also had 1 bog also.

1054th Rifle Rgt lost 32 of 72 men and one platoon CO.

The FJ lost 17 of 72 inf and 8 of 10 MG crew The PzJag IVs never even came on table.

Time for the second wave.

Mark Luther


anzio18.png


Taking advantage of being off work for a week, last night I travelled the many miles to the Farnborough Wargames Society to meet my regular opponent Neil for a game of IABSM. Neil had two friends from the Society, Jon and Steve, who had played Charlie Don't Surf, but now wanted to try IABSM as part of their gradual indoctrination into the ways of Lard.

The scenario played was #18 from the Anzio scenario pack, Wildcat to Whale, and involved an historical action that took place 16th February 1944 as part of Operation Fischfang, the German counter-attack on the Anzio beachhead. Here a strong company from the Parachute Demonstration Battalion attached to the Herman Goering Panzer Division would assault the American line at the point between the positions of the US 30th and 7th Infantry Regiments where careless deployment had allowed a gap to form.

The tabletop was typically flat, with the only cover available being natural folds in the ground. The US position was centred on a collection of three farmhouses near a road running east-west across the table, with two small platoons from the US 30th Regiment under cover in trenches to the west of the farmhouses and another two small platoons from the US 7th Regiment under cover in trenches to the east of the farmhouses: the gap being the farmhouses themselves.

The German Fallschirmjagers entered the table cautiously, beginning the game by pushing only two Blinds forward. These were quickly spotted by the Americans, and revealed as a single rifle squad and a platoon of two 81mm mortars. The American trenches proved hard to see, so the Germans pushed another couple of Blinds onto the table, both of which again were quickly spotted: revealed as a platoon three Panzer IV Hs and an infantry platoon. As all the US infantry had to use against the tanks were two bazookas, they called for reinforcements, and the Turn card went into the pack.

Meanwhile one US platoon had been spotted, 4th Platoon from 30th Infantry under command of Lieutenant Art Schmidt, in trenches just to the west of the farmhouses. The Americans opened fire, but a combination of the range, some tactically clever use of smoke from the mortars, and the fact that the Germans were advancing by rushes using the folds in the ground as cover, meant that almost no damage was done. The Germans returned fire: their squads using 5d6 (6d6 with a Big Man) due to their elite nature and two LMG teams!

The Germans continued bringing Blinds onto the table and eventually had all three of their infantry platoons advancing forward, again by rushes from fold in the ground to fold in the ground. They had concentrated on the centre and western side of the battlefield (their right), and brought their tanks forward as well. The Americans had revealed the two platoons to the west of the farmhouses, and the nearest platoon to the east of the farmhouses, and were laying down as much fire as possible, but were definitely getting the worst of things as the weight of German fire from numbers, equipment and skill levels significantly compensated for the American trenches.

As the Germans continued to storm forward, the Americans were gradually being whittled down, Lieutenant Schmidt's platoon in particular losing an attached MMG and almost the whole of one squad. The other squad kept firing however, and would play a key part in delaying the German advance throughout the rest of the game. In fact, when the battle eventually ended, Lieutenant Schmidt still held his position and had eight men left in his remaining squad (see picture, right).

Then the US artillery arrived: three off-table 105mm howitzers. Although initial ranging shots were poorly placed, they were rapidly zero-ed in by the American FOO from his position right at the western end of the US line (no Germans shot at him throughout the entire game despite the fact that he was in the only Jeep on the tabletop!) and landed first on the German Company HQ, taking out one MMG and suppressing the infantry squad; then on a platoon of Fallschirmjagers, effectively stopping them dead; and then on to the German mortars, taking one of them out. It is worth noting here that the artillery rules worked really well: there was a distinct and flavour-adding contrast between the much slower but observed American fire and the rapid but unobserved German 81mm mortar fire.

At this point the Germans were generally under 18" from the American line, with one of their platoons heading straight for the three empty farmhouses that were their objectives. The final American platoon to the far right (east) of their position had decided to move to reinforce the centre, but was spotted and caught out in the open by the German mortars, losing their attached Big Man and an MMG in a horribly effective stonk. The survivors quickly headed for a hedge that provided the only cover available, and effectively joined the US firing line but still leaving he farmhouses unoccupied.

Luckily for the Americans, however, their reinforcements now arrived: three Wolverines from the 191st Tank Destroyer battalion and another small platoon of infantry from 30th Regiment. They arrived right in the gap between the two American positions, with the tank destroyers immediately targeting the German tanks that had, so far, only managed one area fire shot at the US infantry: naturally targeting Lieutenant Schmidt's platoon, as every other German seemed to be, but to little effect.

Although one of the newly arrived American squads managed to occupy one farmhouse, the other got caught moving up and was forced to ground under heavy fire. This allowed the leading German squad to get into the northern-most farmhouse, although fire from the surrounding American troops rapidly reduced their numbers to four men and a dead Big Man.

The German tanks and US tank destroyers began a duel that would last the rest of the game, with large amounts of Italian scenery and German paint work being ruined as the American Wolverines could hit anything they aimed at but not penetrate, and the Germans just couldn't hit anything. Net result: one abandoned German Panzer IVH.

At this point the game ended as we were out of time. The Germans had failed to capture two farmhouses, so had only achieved half their victory conditions. The Americans had allowed the Germans to take one farmhouse so had failed their victory conditions. An honourable and extremely hard-fought draw was awarded to both sides.

Had the game continued, it could have gone either way. Probably the American tank destroyers would eventually have tipped the balance in their favour, as happened historically with the US .50 cals mounted on the Wolverines doing horrendous damage to the advancing Germans, but it would only have taken the armoured duel to go to the advantage of the Germans for victory to probably have been theirs. Certainly the superbly armed and trained German infantry were more than a match for the US footsloggers, although now that the ranges were coming right down, it would have been who fired first that really counted.

Hero of the day goes to the Lieutenant "Ironically" Schmidt of 7th Infantry, who held his position despite being under devastating fire for turn after turn. Loser of the day was the American sniper, who obviously had his telescopic sight on the wrong way round: multiple shots throughout the game, not a single hit! An excellent evening's gaming all round, however, and I look forward to running more games at Farnborough whenever life allows!

Robert Avery