Three companies of Canadians (Willie, Andrew and Walter) faced German Fallschirmjäger (Bart) and infantry (Mark) in a fictional setting around the Battle of the Reichswald, 1945.

The Allies had a huge superiority in tanks (16 to 3 for the Germans ) but bad weather prevented the intervention of the Allied air forces. Moreover, the ground was very soggy from days long rainfall.

We played 12 turn with the now familiar 3rd edition of the IABSM rules. The Canadian advance proceeded very cautiously. By the end of the day the German lines were still intact. so the Germans could claim victory.

The Stipsicz Hussars


Here is the third after action report of a demo game with the scenario "Let’s get at the Bastards" from the supplement Cymru am Byth of the Too Fat Lardies.

On the 9th of August, 1944, northeast of Vire in the bocage, the Welsh Guards supported by tanks of the Scots Guards have to capture a group of buildings on the heights named Le Haut-Perrier. The position is held by elements of the 9. SS Panzer Division Hohenstaufen.

Sergeant Perry


Here is the second after action report of a demo game with the scenario "Let’s get at the Bastards" from the supplement Cymru am Byth of the Too Fat Lardies.

On the 9th of August, 1944, northeast of Vire in the bocage, the Welsh Guards supported by tanks of the Scots Guards have to capture a group of buildings on the heights named Le Haut-Perrier. The position is held by elements of the 9. SS Panzer Division Hohenstaufen.

Sergeant Perry


Here is the first after action report of a demo game with the scenario "Let’s get at the Bastards" from the supplement Cymru am Byth of the Too Fat Lardies.

On the 9th of August, 1944, northeast of Vire in the bocage, the Welsh Guards supported by tanks of the Scots Guards have to capture a group of buildings on the heights named Le Haut-Perrier. The position is held by elements of the 9. SS Panzer Division Hohenstaufen.

Sergeant Perry


Scenario #01 of the IABSM campaign book "Operation Compass": the Road to Fort Capuzzo. Dug-in Italian infantry (actually Libyan colonial troops played by Karim) are attacked by a total of thirteen British light tanks and armored cars (Walter and Elias). The Italians are completely outgunned, since they do not have antitank weapons.

The British suffered losses only when they drove through a minefield, with one tank destroyed and three immobilized. For the rest, the Italians had to take what was sent their way. Even the Italian off-table artillery only managed to inflict minor damage with HE shells. A very unbalanced scenario, but good to start the campaign. And close to what happened historically...

The Stipsicz Hussars


Report of a game last Saturday in James "Hot Lead" Manto's Basement 'O Rabbits. Figures are 15mm, Battlefront and QRF. French from the collection of Patrick Faye, Germans from the club's Kampfgruppe Hotlead with a few of my own infantry thrown in. Rules are I Aint Been Shot, Mum by Too Fat Lardies.

THE BATTLEFIELD. COUCHY-END-BOIS IS THE SMALL VILLAGE AT BOTTOM RIGHT OF THE PICTURE. THE GERMANS HELD THIS VILLAGE AND THE WOODS AND TWO HILLS JUST TO THE LEFT OF THE ROAD THAT RUNS THE LENGTH OF THE RIGHT TABLE EDGE. THE FRENCH ARMOUR ATTACKED THROUGH ST. PIERRE-LES-LAPINS AT TOP LEFT OF TABLE EDGE, WHILE FRENCH INFANTRY ENTERED THE WOODS AT CENTER LEFT OF THE TABLE.

The scenario was inspired by 4th DCR's counterattack into the flank of 19th Panzer Korps between May 20 and 26, 1940. So a mixed bag of dragons porte, and assorted tanks are making an attack on a German leg infantry company with some 75mm iGs and pak 36s. Dependent upon turn of the card and die rolls German armoured reinforcements and Stukas show up to help.

The spring air was warm and pleasant at the open window where Leutnant Otto Gammel sat at breakfast. As he devoured his ham and eggs, he decided that this was the cushiest OP he had enjoyed since he had crossed into France. The top floor of the Mayor's house offered a commanding view of the fields and roads leading away from Couchy-en-Bois. The Mayor had insisted that Gammel stay here, loudly denouncing the Republic and praising Hitler for being tough on reds. Whatever, Gammel thought. He was more interested in the politics of the Mayor's daughter Madeleine, who had lingered a long time after she had brought him breakfast. In the corner of the room, Gammel's radio operator went through his morning comms check with Battery. If he had to be at war, the FOO thought, this was a good morning for it.

FRENCH MORANE SAULNIER STRAFS COUCHY EN BOIS. THE FRENCH GOT EARLY AIR SUPPORT AND A GREAT SPOTTING ROLE - OBVIOUSLY GERMAN DISCIPLINE WAS LACKING.

Within Couchy-en-bois the landsers were enjoying the warm morning and a chance to rest their feet. Some where kicking a football in the square, others sat smoking and reading letters. Gammel was finishing his coffee as he became aware of the droning of an aircraft. He set down the coffee cup and stood by the window. The troops below were waving at the fighter as it circled overhead. Gammel frowned. It looked awfully stubby for an ME1109. Now it was coming straight for him, lights along the wing winking red. "Scheisen!" He barely hit the floor before the room filled with glass and wood splinters. Another pass, and he could hear cries from below for stretcher bearers before the plane sped away.

FRENCH RENAULT TANKS MOVE THROUGH ST. PIERRE-LES-LAPINS AND ENGAGE GERMAN PLATOONS ON THE HILLS ABOVE.

In the woods east of Couchy-en-bois, Captain Walter Harnadek watched the MS climb away. "That should damn well never have happened. Field phone!" He snapped out his hand to the signaller, intending to blast the young leutnant who had so obviously forgotten his platoon's concealment discipline. He was interupted though by his CSM, who was pointing south towards the village of St. Pierre-les-lapins below them. "Bugger me, sir, if that ain't Frog armour." Harnadek dropped the field phone and brought up his Zeiss field glasses. "Bugger me if you're night right, Feldwebel. Alarm! Action front!" The first tank rounds were beginning to land among his startled landsers as Harnadek made a mental note for more lectures on concealment and camoflague.

FRENCH HEAVY ARMOUR PRESSES FORWARD WHILE FRENCH INFANTRY DEBUS AND TAKE UP FIRING POSITIONS WITHIN ST. PIERRE LES LAPINS.

Lt. des Chasseurs Alfred Blondin stood in the turret of his Renault 35 and watched the rest of his troop racing forward. Finally, a crack at the Boche. He remembered DeGaulle's lectures on speed, concentration of force, and daring. This was the way to fight, he thought. Blondin flinched briefly as a few rounds whistled over his head. The Boche on the hills to front had woken up. Hopefully he and his troop could slice through them quickly. They would certainly be faster into the fight than the lumbering Char and Soumas of Capt. Crapaud to his left. There was a loud clang from the R35 to his side, then a loud grinding sound from its engine as the tank slewed to one side. Blondin spotted the AT gun and ducked down to crank his turret traverse. Maybe these one-man turrets weren't such a great idea, he thought.

In his shattered OP, Lt. Gammel watched the French attack developing two kilometres away. The view through his binos kept moving, though, because Madeleine was pressing herself against him and crying "j'ai horreur des avions!" becomingly. Gammel had the coordinates and could have dropped a fine stonk on the village, but his operator shrugged helplessly and indicated the radio set, riddled with French bullets. "Verdamt!" His 150s might was well be back in Stuttgart. "Umm, should I leave you two alone, Herr Leutnant?" the gefreiter asked helpfully.

Meanwhile, Major Daniel L'Huter (fondly known at St. Cyr as the grossest of the gross) watched his infantry push into a copse of trees while his infantry and AT guns deployed. The fight from St. Pierre-les-lapins could be heard clearly now, while Couchy-en-bois was silent and menacing after the air attack. Across a ploughed field he could see German infantry and at least one AT gun in a woodlot. "We're ready to attack, mon capitaine" advised his CSM. "Non. Too dangerous. Let's soften them up." "But sir, at extreme range we will be ineffective." "Leave the thinking to me, CSM. Open fire."

FRENCH INFANTRY AND SUPPORT WEAPONS MASS THREATENINGLY IN THE CENTRE, WITH THREE ARMOURED CARS IN SUPPORT. THEY WOULD DO LITTLE IN THE BATTLE.

THE GERMAN 2ND PLATOON HOLDS THE TREELINE AGAINST L'HUTER'S FORCE. EVENTUALLY IT WOULD BE DRAWN OFF BY HARNADEK TO REINFORCE THE GERMAN RIGHT. INFANTRY FROM MY COLLECTION ON THE BROWNISH BASES.

Capt. Harnadek watched his landsers struggling as the woods were lashed by enemy fire. The French had set up at least two HMGs in the village below, apparently in the central courthouse. "Get that AT gun firing again!" he shouted at his CSM, who nodded and moved off at a crouching run. Harnadek moved slowly along the line, encouraging his men. To his amazement he found a section of gunners lying under cover, their low-slung 75mm guns silent. "Who said you could nap?" "Herr Captain, it's too dangerous!" said the section IC. "Either you get these guns firing or you'll be shooting shells out your arses!" Kicking and cuffing the gunners, Harnadek got them up. "There, that courthouse. Give it to them!" The officer watched in satisfaction as they began firing.

THE FRENCH ATTACK PUSHES HARD AS THE GERMANS TAKE CASUALTIES, SHOWN BY THE BLACK MARKERS. AT THIS POINT WE DISCOVERED WE HAD MISUNDERSTOOD THE BRIEFING - WE HAD TWO SECTIONS OF 75MM INFANTRY GUNS, NOT TWO GUNS. HENCE HARNADEK'S HEROICS RALLYING THE SECOND SECTION.

Blondin was surprised at the tenacity of the German defenders. Despite the pounding they were taking, the Boche fire was increasing, and now they were adding small field guns to the mix. He watched as another HE round slammed into the courthouse, which was beginning to sway and collapse. A section of MG gunners emerged coughing and bleeding, their brown uniforms red with brick dust. At that moment he became aware of a terrifying and familiar wail, and glanced skywards. Stuka! It was coming down now, not over him but over Crapaud and his CharB, "Rosalie". He waved frantically at Crapaud, who was nonchalantly lighting a cigarette in the turret. Pompous ass, look up! Blondin said, and at that moment the Major glanced skywards, to see a 500 bomb falling square onto his turret. The Char B disintegrated in a cloud of black smoke and whirling scrap iron.

GERMAN ARMOUR COME IN THE NICK OF TIME. A TURN LATER, A PAIR OF GERMAN SP AT GUNS APPEARED AND BEGAN FIRING INTO THE FLANK OF THE SURVIVING SOUMAS.

When Blondin raised his head again from his turret, it was to face a new threat to his front. Three low grey shapes had appeared to his front, their turrets spitting fire. Autocanon rounds were beginning to fall around his tank and clang off his front armour. German panzers had evidently come to the rescue. Merde. "Driver, reverse!" As his Renault began to back and turn, Blondin saw a Souma tank to his left shudder, hit in the flank. It too began to turn for the rear while its partner engaged two more low gray shapes. He had to hand it to the Boche, they were good at getting tanks to the right place at the right time. There were lessons to be learned here, and he was determined that he would learn them for the time of revenge to come. "Let's get the hell out of here!" he ordered his driver.

Firing began to die down along the line as the French fell back through St. Pierre-les-lapins. In his wood, L'Huter shrugged philosophically. "La guerre, c'est un adventure toujours." Clearly the tank boys had failed. "Come on, boys, let's go."

In Couchy-en-bois, Lt. Gammel emerged from the mayor's house. "Observe anything interesting, Herr Leutnant?" asked a sergeant with a smirk. Gammel didn't notice .. he was watching three French armoured cars approaching. So was the young platoon commander, but he was watching them like a mouse watches a snake. "Get your f'n MG going!" Gammel shouted, then ordered the crew to open fire when the Lt. stood silent. A long burst, then another, and the French vehicle halted. Kar98 fire opened up from the other houses in the village, and the French cars decided that discretion was the better part of valour and withdrew. Gammel turned to the young subby. "When you don't have big guns, use what you have to scare 'em. They're as scared of you as you are of them. At that point he saw Capt. Harnadek's kubelwagon drive into the square. Gammel nudged the young platoon commander. "Now him, him you need to be scared of."

According to the referee, as Germans we could have had more armour assets show up, but at midnight we decided that the French advance had stalled. Kudos to James for stepping up to the plate and umpiring. We continue to learn the TFL system and generally like it. When both sides complain about the way the cards break, the system definitely works. The chance to play with early war armour was great fun - it depends more on morale than on the ability to destroy the enemy.

The Mad Padre


Last Thursday I got in a cracking game of I Ain’t Been Shot Mum – here are some pics and a quick report. As part of my ongoing WW2 East African campaign project, I’ve been trying out some scenarios based on the Battle of Keren in Feb-March 1941. Last time out we tried a Cameron Ridge scenario using both IABSM and then Bolt Action; this time we played out a game based on the battles for Brig’s Peak, the highest peak at Keren – so called because ‘that’s the one the Brigadier wants.’ Brig’s Peak was viciously fought over and changed hands a couple of times, but the British never managed to hold onto and it remained under Italian control until the surrender in March 1941. 

The British started with four infantry sections, a sniper and a 2” mortar on Brig’s Peak itself – their mission was to hold off the Italians until the end of the game. They were led by RSM ‘Basher’ Mactaggart (a Level 3 Big Man) and Lance-Corporal Jones, and also had a Forward Observer who could call up the fire of a pair of 3” mortars in support. All troops were rated as Elite, although each section had to take a dice roll before the game to see if it had already suffered any casualties: I got off very lightly, only taking a few points of Shock. 

The Italians had six infantry sections, a Fiat-Revelli MMG, and additional support from a pair of mountain guns. They were led by three Big Men (levels 1, 2 and 3). All were rated as Veteran. 

Playing IABSM in 28mm, we simply used one card for each section (so the Allied Platoon 1 card meant Allied Section 1 instead), and just doubled all the distances. We also decided to deploy all units on table at the start of the game, rather than using Blinds – this gave us a slightly faster playing time (2½ hours), which was what we needed on a weekday evening with work the next day! We also added in some extra cards: Allied Ammo Shortage; Allies & Axis Rally; Allied & Axis Heroic Leaders (there were many brave feats during the battle on both sides); and two blank cards to represent the treacherous rocky slopes which characterised the Keren battlefield (if one of these was drawn, the next section/ Big Man would be unable to move that turn.) Terrain-wise, we used a sand cloth with some rocky terrain pieces on top (not quite a vertiginous as the real terrain, but fine for a wargame!) The small peak in the centre was Brig’s Peak itself. 

The battle started with a hail of fire from the Italian mountain guns deployed on the Italian right – despite the cover of Brig’s Peak, the British units took a number of hits. Not for the first time, lucky dice rolling on my part meant that casualties were minimal, and my British sniper got the gunners’ heads down with a number of Shock points caused by his sharpshooting. 

The firefight continued across the battlefield and, as the turns rolled on, the Italian numbers began to tell. My section deployed on the left was in good shape and was being well-supported by the 2” mortar team at the rear of the peak and the two Big Men; however, the Italian MMG chewed up the sections holding the front of Brig’s Peak, and the Italian Tenente ordered an advance on the Italian left and centre. 

RSM Mactaggart was about to rush back to rally his men, when he tripped over a rock and was forced to stay put! Fortunately, the British FO had managed to call up the 3” mortars and caught an Italian unit with the first salvo, causing no damage but pinning the section. With a few lucky cards and two Big Men leading the attack, the Italians rapidly approached the peak and drove off the defending units, now down to their last few men and heavily shocked. 

At this point the Italian Heroic Leader card came up, so we allowed the Tenente an extra turn to assault the peak – the three Italian sections heroically scaled the peak and drove off the defenders with grenades. At this point I certainly thought it was game over, but the next card happened to be Allied Heroic Leader! 

This allowed RSM Mactaggart to lead his final remaining rifle section in a final, desperate charge to drive the Italians off the peak. With around ten dice vs the Italians’ fourteen or so, I thought it was unlikely to succeed, so I was amazed to roll six kills against two. The Italians lost by four, and fled down the slopes, closely followed by a hail of Mills bombs and falling rocks. With that, it was all over. The British had a close victory, although were in no state to hold the peak and would have been forced to withdraw had we played a few more turns. Lots of fun and a great chance to use a mixture of Italians, Brits and Askari models. Maybe we’ll replay using Bolt Action next week?

Pictures of the game:

James Morris


Part of Russian 6th Army's attempted counter attack against Panzer Gruppe 1 on 10 July 1941 as the Panzer Gruppe broke through Soviet lines heading south east just north east of Berdichev in the Ukraine.

Elements of 2nd battalion of 10th Motostrelkovaya-Regiment of 10th Tank Division supported by a KV-1 and a weak T-26 platoon from 20th Tank Regiment are trying to cut the road behind the lead elements. The attack point near Skakovka out of woodland across fields encounters a stopped column of trucks in the outskirts of the village, which is where a reduced 5.kp company of Inf-Regt.156 of Inf- Div.16 (mot) plus a couple of AT guns has stopped for a break (the trucks parked at the side of the road) - there is also a broken down Pzkw IV of PzD.11 trying to repair a track. The Germans had enough warning to seek what cover there was in the village before the Soviets reached the near edges of the woods across the fields.

We played on a 6' x 4' which was enough though a bit cramped - the eastern 1/3 of the table was not much used.

For much of the game the left hand German platoon and the CHQ remained mesmerised by the two Soviet blinds opposite (which were of course dummies). The first movement was a German FOO team sent forward on a blind to a hillock to spot for the mortars. A really good spotting roll exposed them and they were deluged with fire for a few turns until eliminated (I'd forgotten how to handle this eventuality but we managed to come up with something workable).

The Soviet blinds mainly tried to force the German right flank, which turned out to be held by the (swiftly fixed) panzer IV and although the Soviet lead rifle platoon was roughly handled by mortars, small arms and direct fire HE it occupied attention long enough to enable the other blinds (when their poker chips came up) to move behind it and enfilade the German flank.

The Soviet centre was held by a rifle platoon (one of whose sections was virtually annihilated by a German MG in a cottage) and by the CHQ with the attached company 50mm mortars and an 82mm mortar. These were erratic but occasionally effective. The Soviet sniper scored an early success by killing a German platoon leader.

As this move included the Soviet armour the German player was concerned. Meanwhile the Event chip had been cropping up and after 8 appearances a German Pzkw III platoon appeared from the other end of the table. About the same time a Soviet MMG spotted the one remaining German blind which turned out to be a whole rifle platoon moving up the road in close order...

By the time we packed up the armour had started to engage one another with startling lack of effect. The Panzer IV was about to be forced back by a T-26 hit and the KV by a PAK36 hit (3 hits, 3 saves on the last 3 of 11 dice) and was low on 76mm ammo. The Panzer IIIs were deploying to engage but their first shots had been misses.

At the end the Soviets were firmly blocking the road but the German armour was still active. The German infantry were less well off, mainly in the open, and there were about 2 Soviet platoons in cover in charge reach. The Soviet player was determined to follow his road cutting orders and not to charge. The German player did not use his CHQ at all because it was watching the enemy dummy blinds.

Edward Sturges


I was able to get in a half a game of IABSM on Saturday night (1/21/2012) and completed the game on Sunday night. Needing a scenario, I grabbed scenario 1 from the rule book and used it. Never one to leave well enough alone, I modified it to change the British to Germans, the Germans to Soviets and set it in the Ukraine in August of 1941. The table layout was the same but much of the fields were cut off as I had a short 5' by 4' table to work with. This would cause a number of early casualties. If I had to do it over again, I would drop some of the collective farm and leave the fields. Also, I need to make some fields. Anyway....

Our Story August 1, 1941: The 11th German Army continues to push toward the Bug River. In an effort to surround the Russians in a Kessel of their own, the 11th Army sends out men to find the enemy and attempt to herd them towards the river to pin them in place. One such expedition was undertaken by Hauptmann Hermann Schmidt of the 285th Regiment. Hauptmann Schmidt has three fully manned platoons at his disposal. His Company headquarters is reduced as it only has one full strength squad. Each platoon has a light mortar. Ordered to advance upon a collective farm, the company has advanced through harvested wheat fields towards the collective.

The Collective farm was defended by elements of the 469th Rifle Regiment of the 8th Soviet Army. The soviet commander is joined by a commissar, two maxim machine-guns (this forms his headquarters) and two platoons of three 10 man squads.

The Germans entered through the fields and quickly found and began to engage the Russians deployed in the first set of trees. The distance from the table edge to these first hedge/tree line was way too close. Most of the troops counted as auto spotted. The Germans attempted to close assault immediately with two squads from the first platoon. Both were repulsed but suffered no shock. The second two squads decided to soften the Soviet positions up rather than follow the fate of their peers.

The next platoon to arrive attempted to turn the flank of the Russians in the initial tree line. It took several turns for them to do so as they advanced much more cautiously than the first platoon. Eventually they were successful.

Once the Germans were in the trees with the remnants of the Russian platoon, they were able to roll up the Soviets and destroyed two platoons to a man.

The German third platoon and had a much longer distance to travel. The Russian's moved their headquarters to attempt to intercept and halt the German advance. Unfortunately for the Russians, this did not occur until they had already lost their first platoon.

Once deployed, the two Soviet MMGs with the headquarters were able to cause significant trouble for the third platoon. For several turns they managed to pin or suppress two squads until they were broken. The remaining two squads laid fire down on the Russian second platoon while the headquarters squad flanked their position as well.

It was at this point of the game where my three year old decided he wanted to play the game too.

By this point the Russian troops were pretty much destroyed. The casualties were very high on both sides. Starting the game too close together leads to a very bloody game. For a first game of IABSM 3, it was a fun learning experience. I am looking forward to the Early War supplements to be released and see if my assumptions of force structures match. I used the cards and the markers for the first time. I was dubious of the markers when I first saw them. Now, I really like them.

Chris Stoesen


Well another gaming evening at Wally HQ last night and another hard fought game.

We used Scott Fisher and Nathan Forney's Skirmish Campaign book "Russia '41 - Drive on Minsk", along with Tom Ballou's Xmas Special article on converting Skirmish Campaign scenarios for IABSM.

I chose the "Counter-Attack at Bereza" , 24 June 1941, scenario to fight.

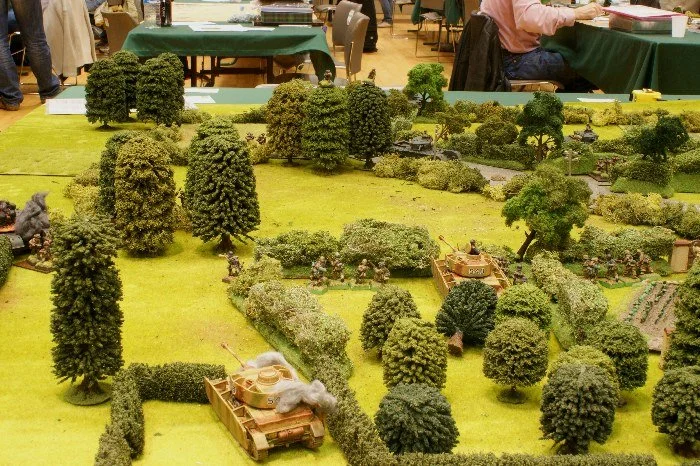
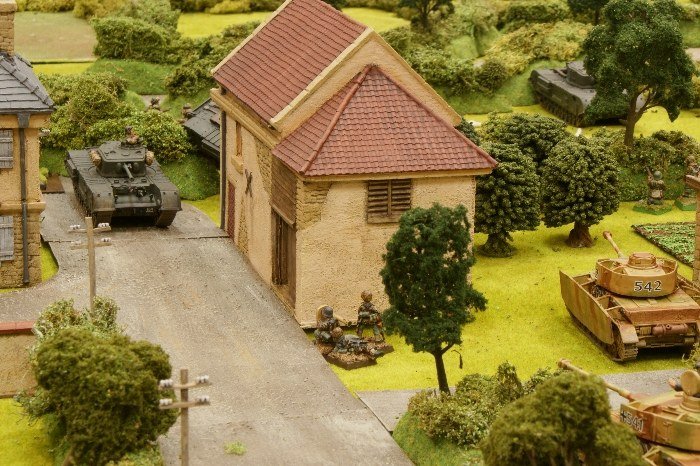
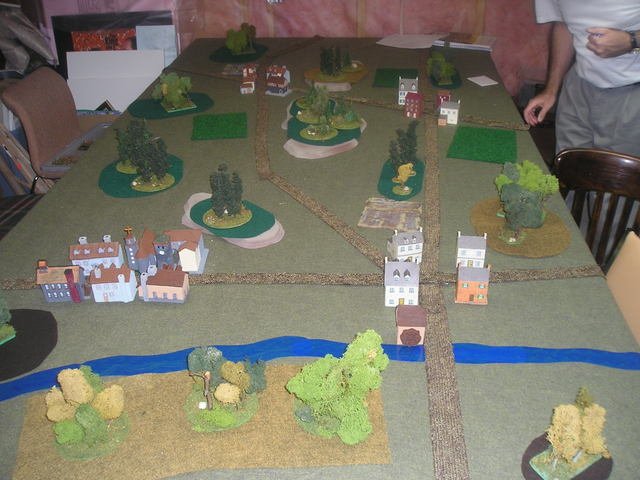
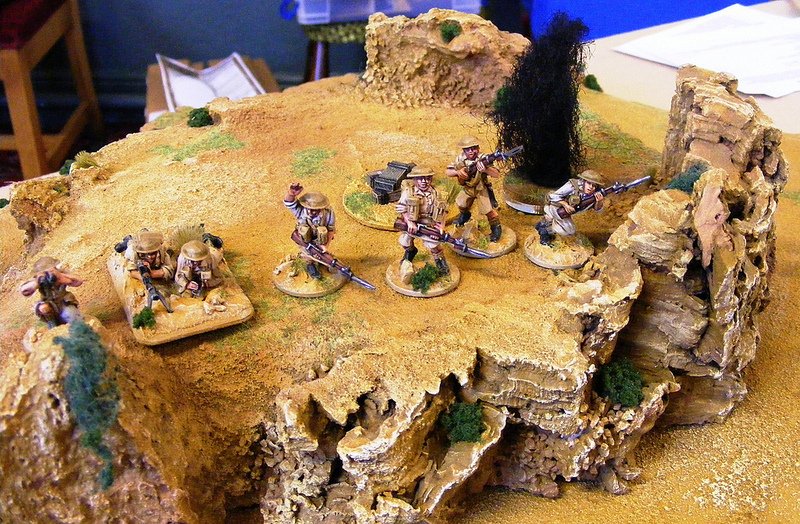
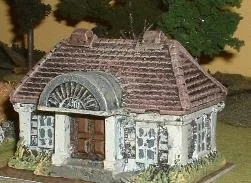
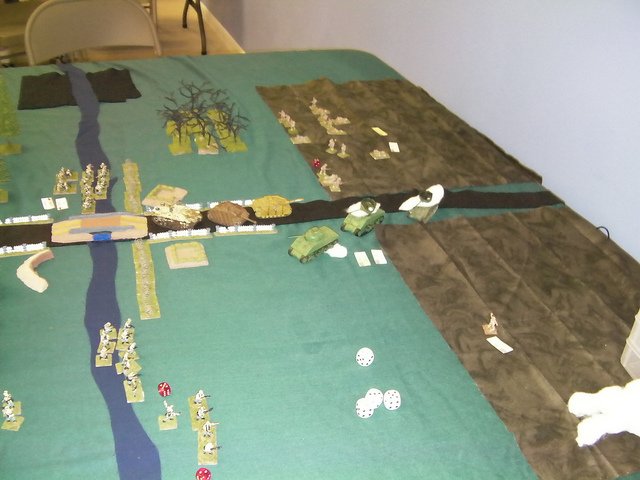
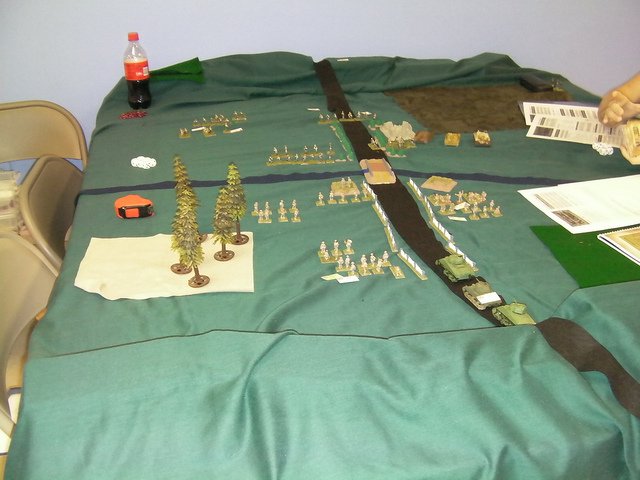
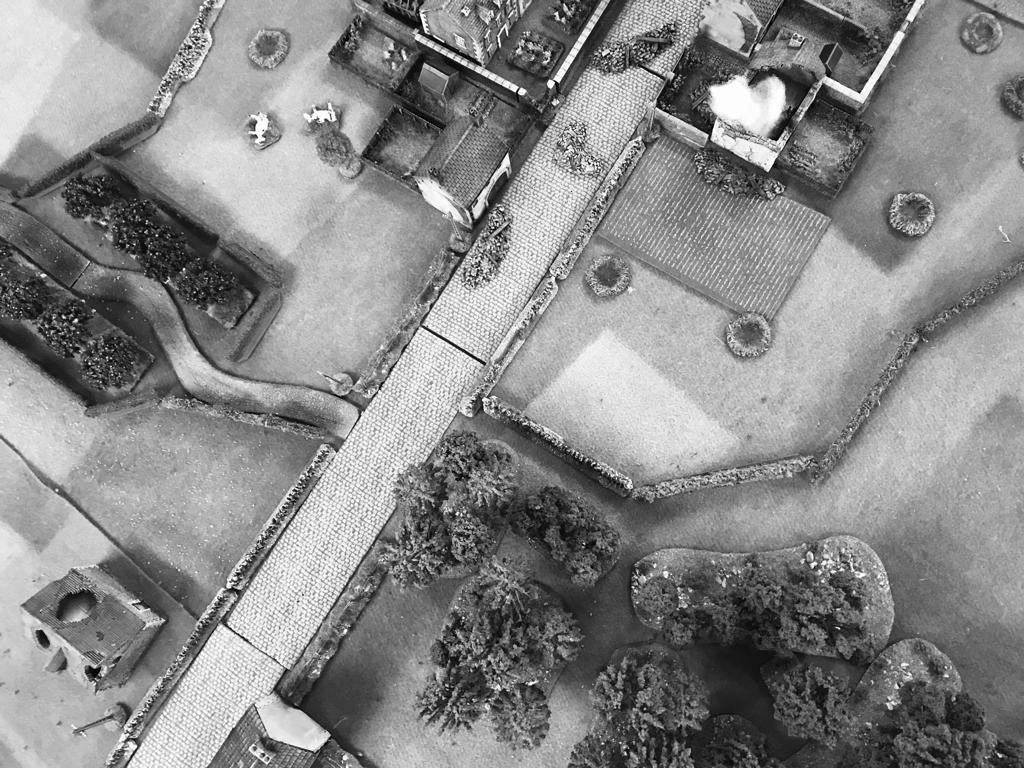
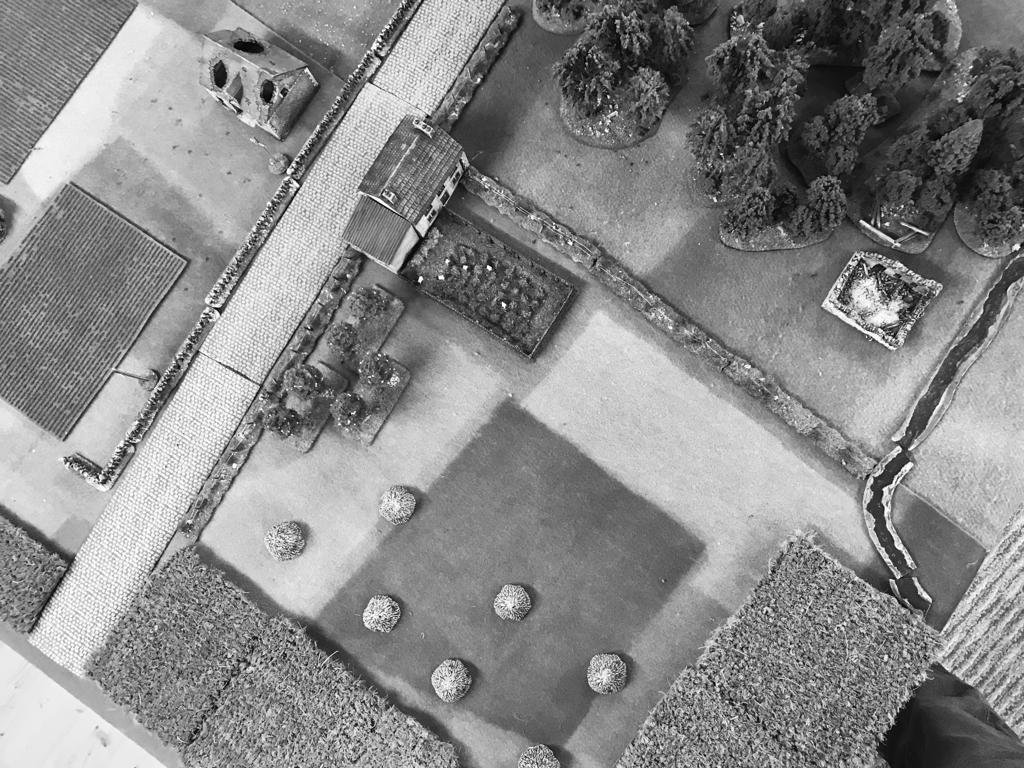
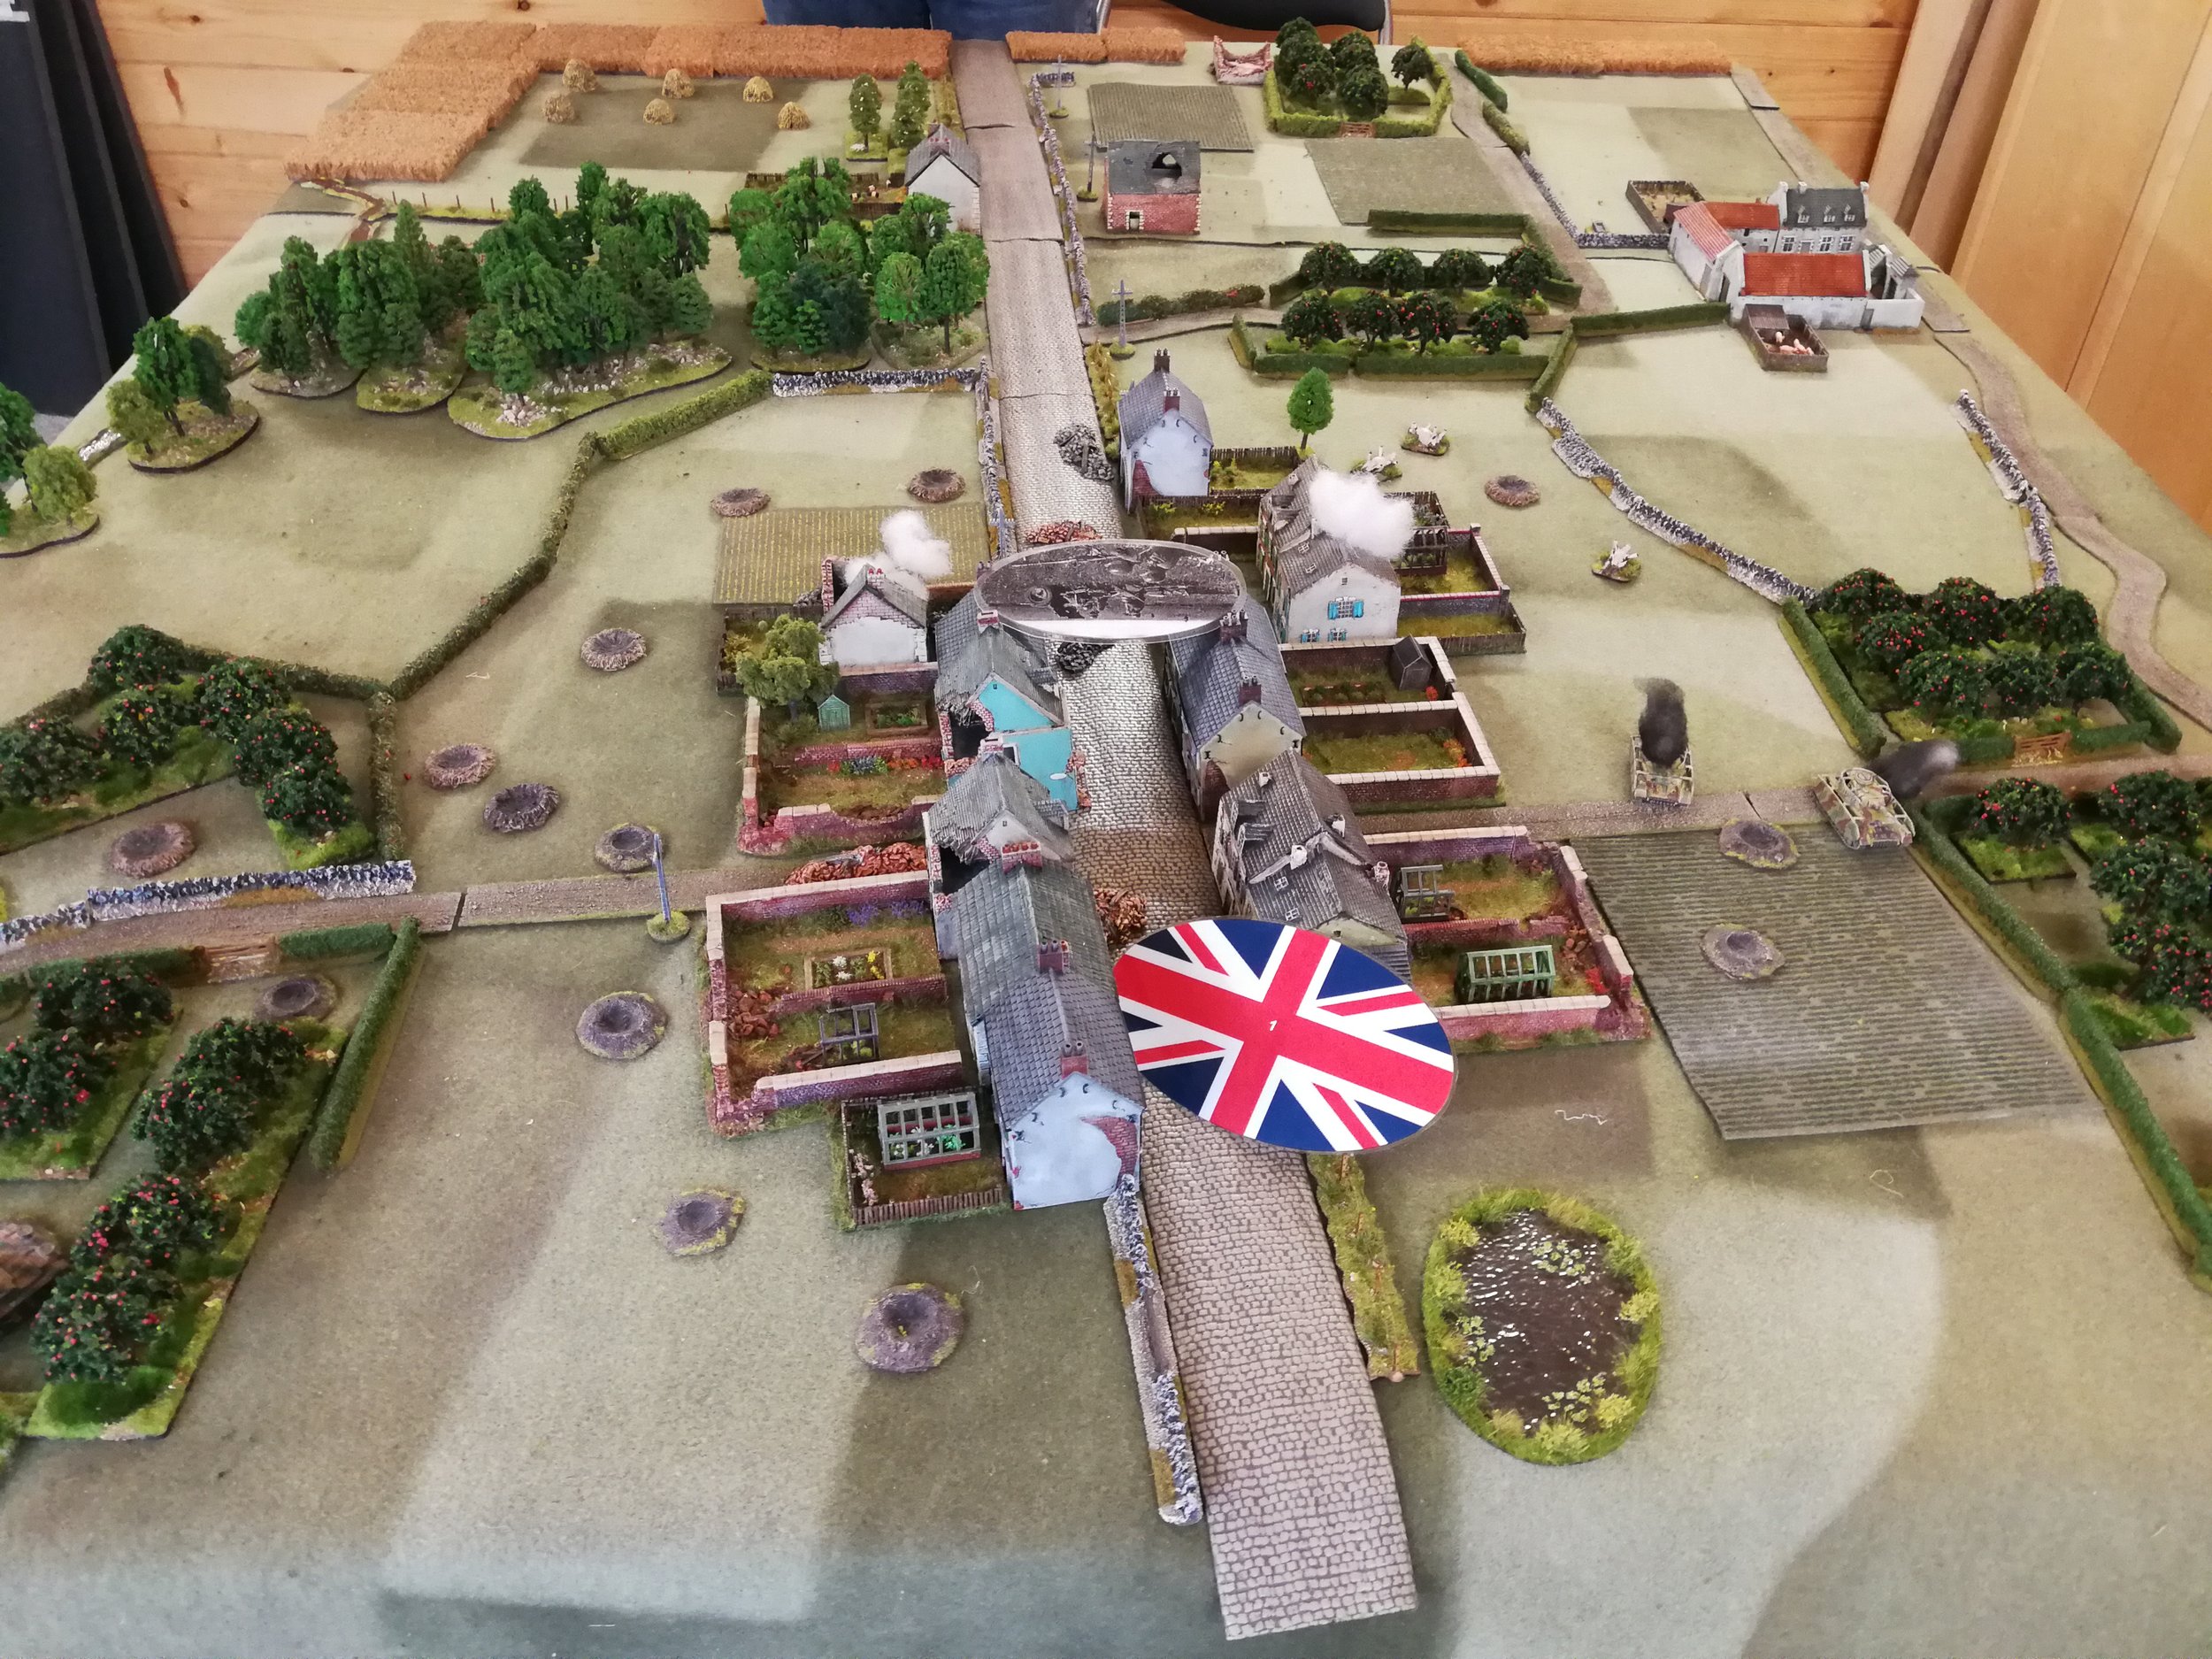
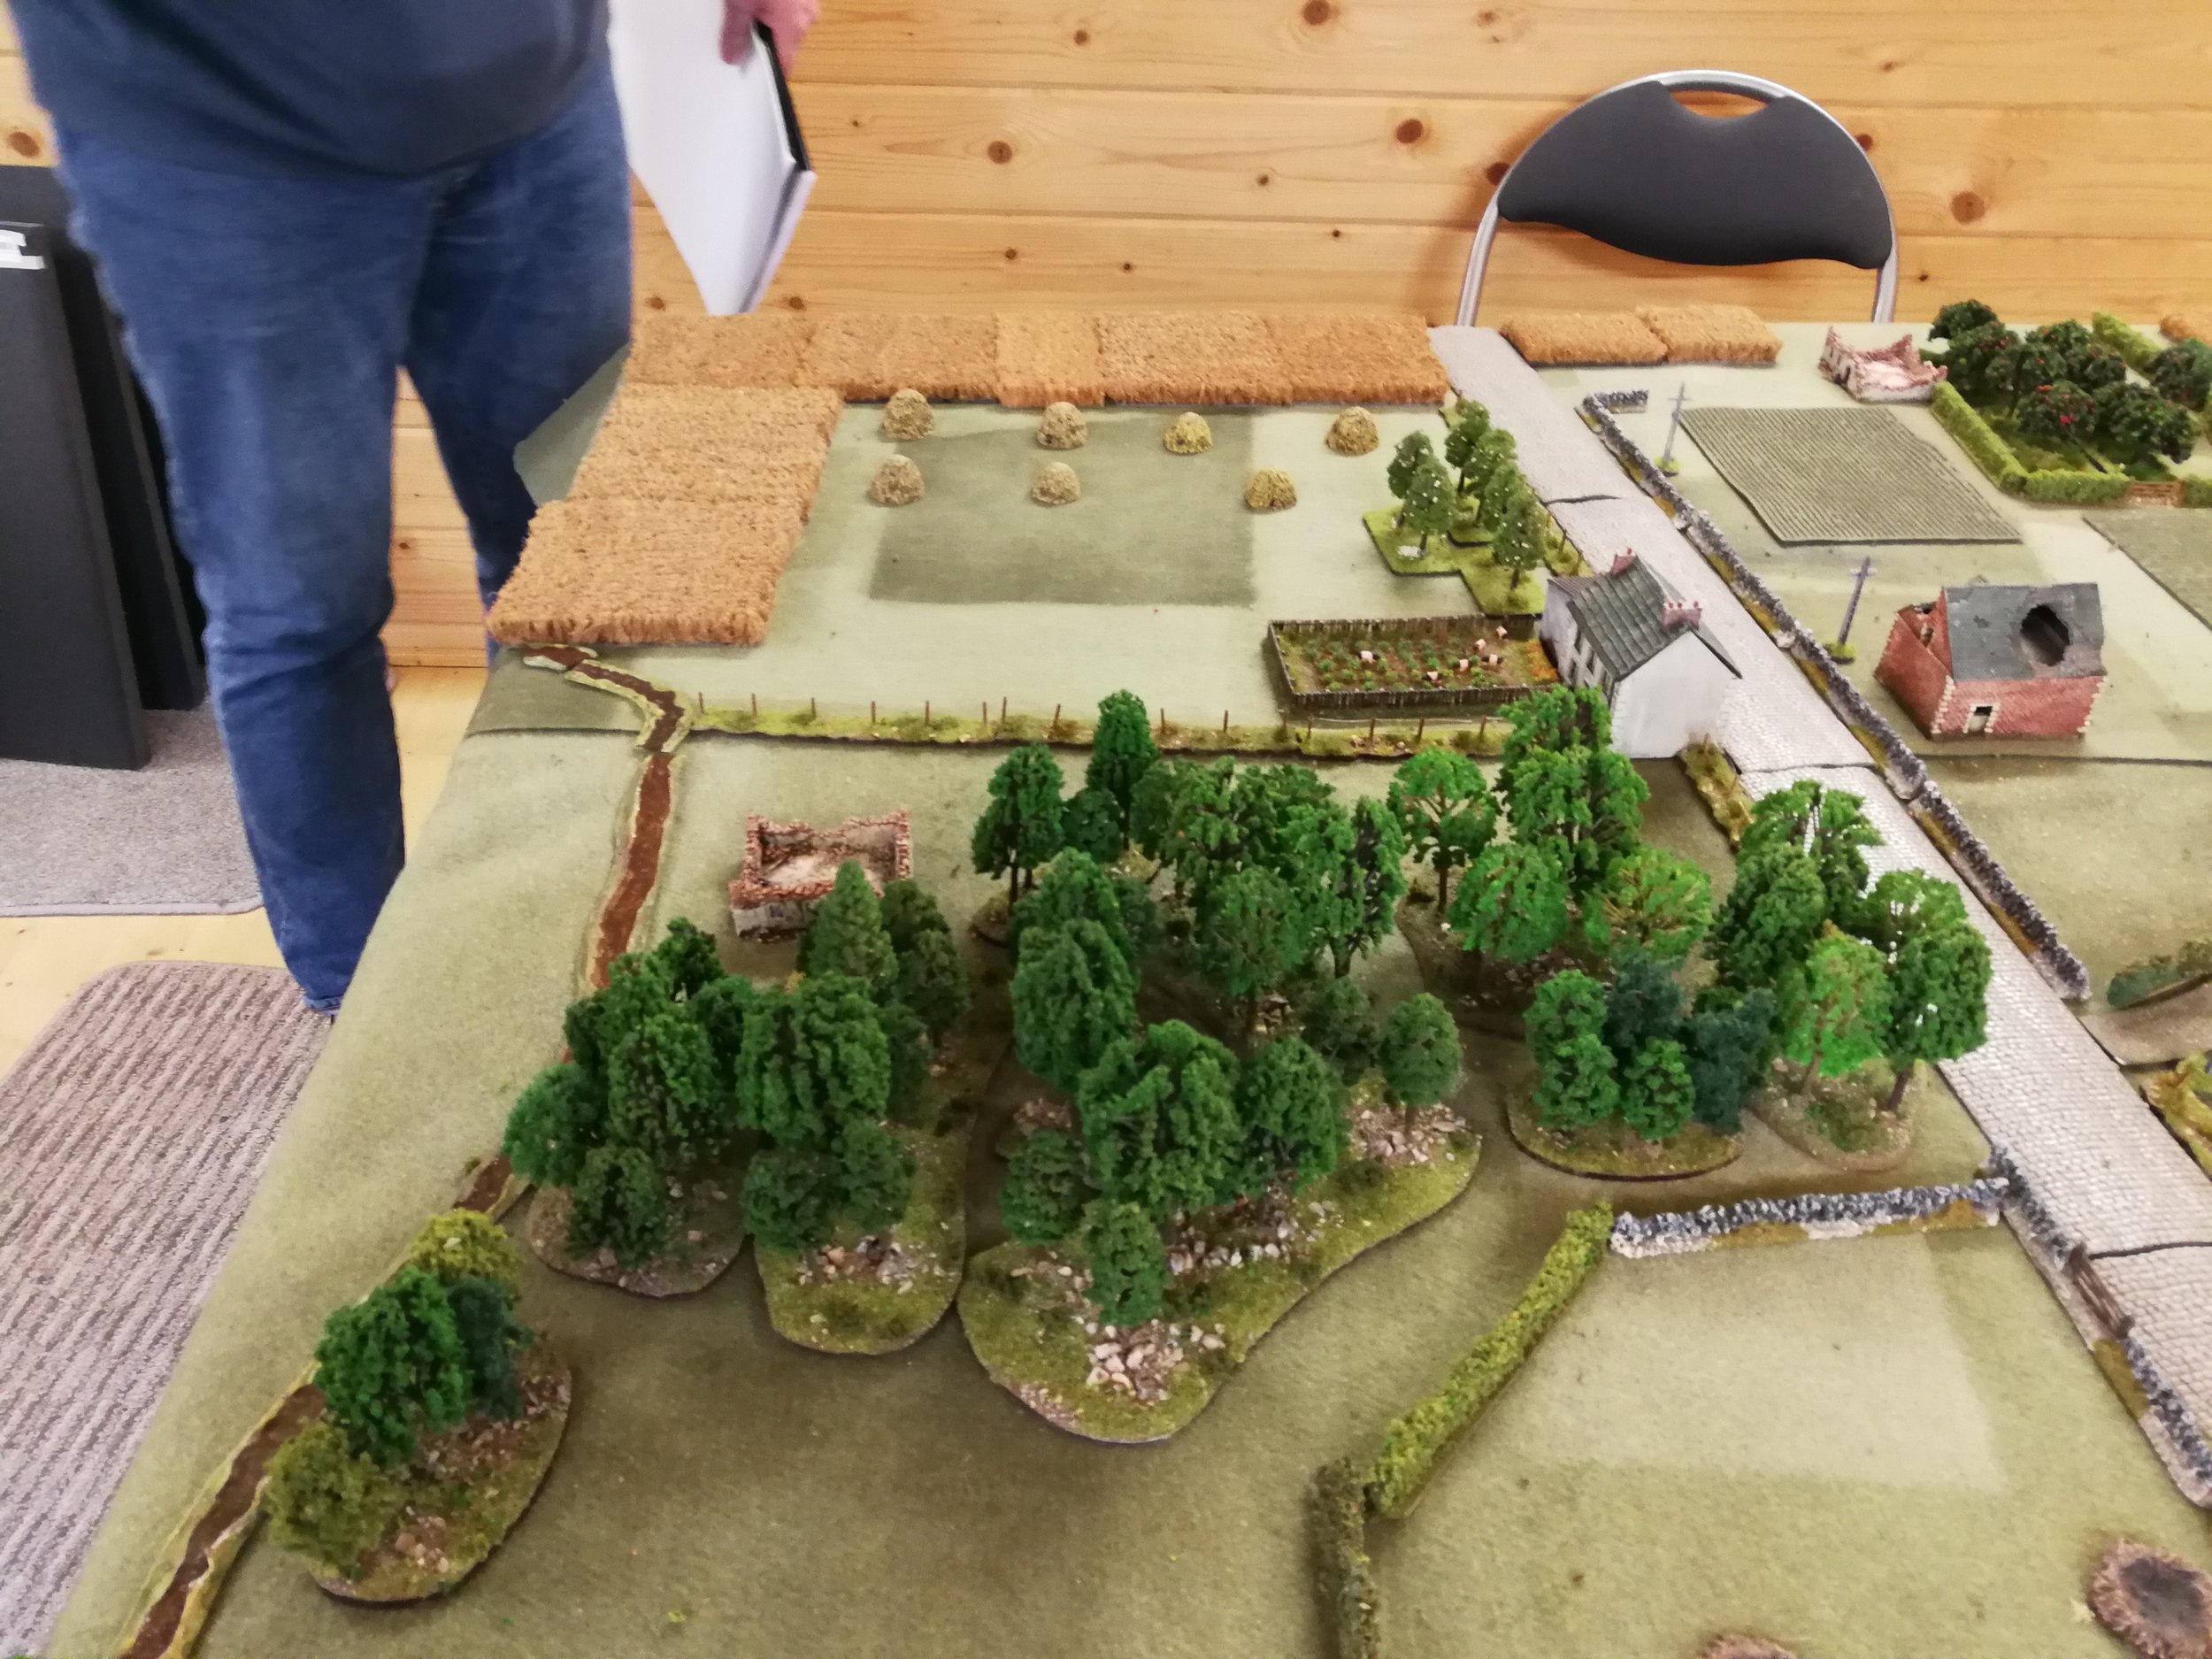
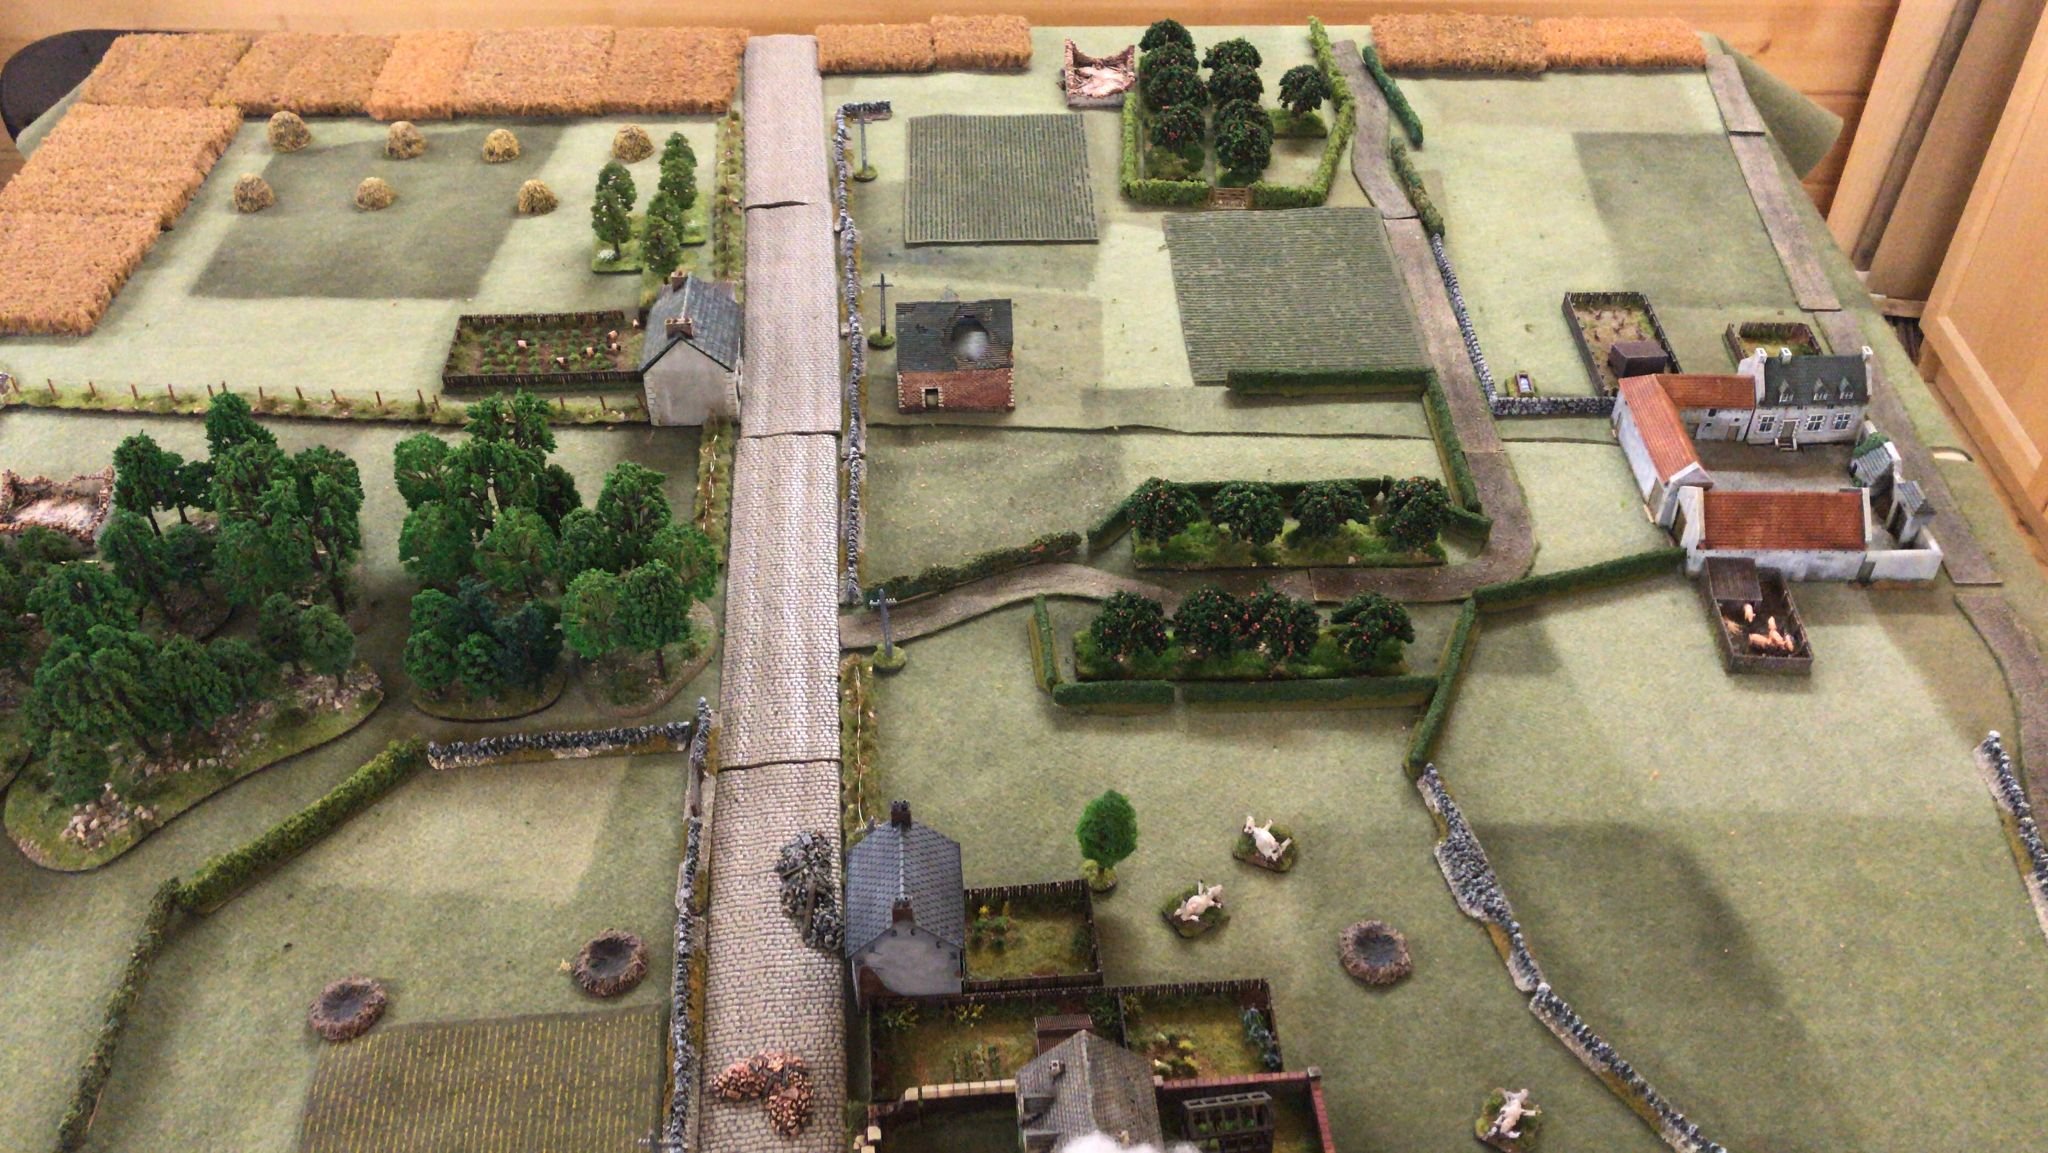
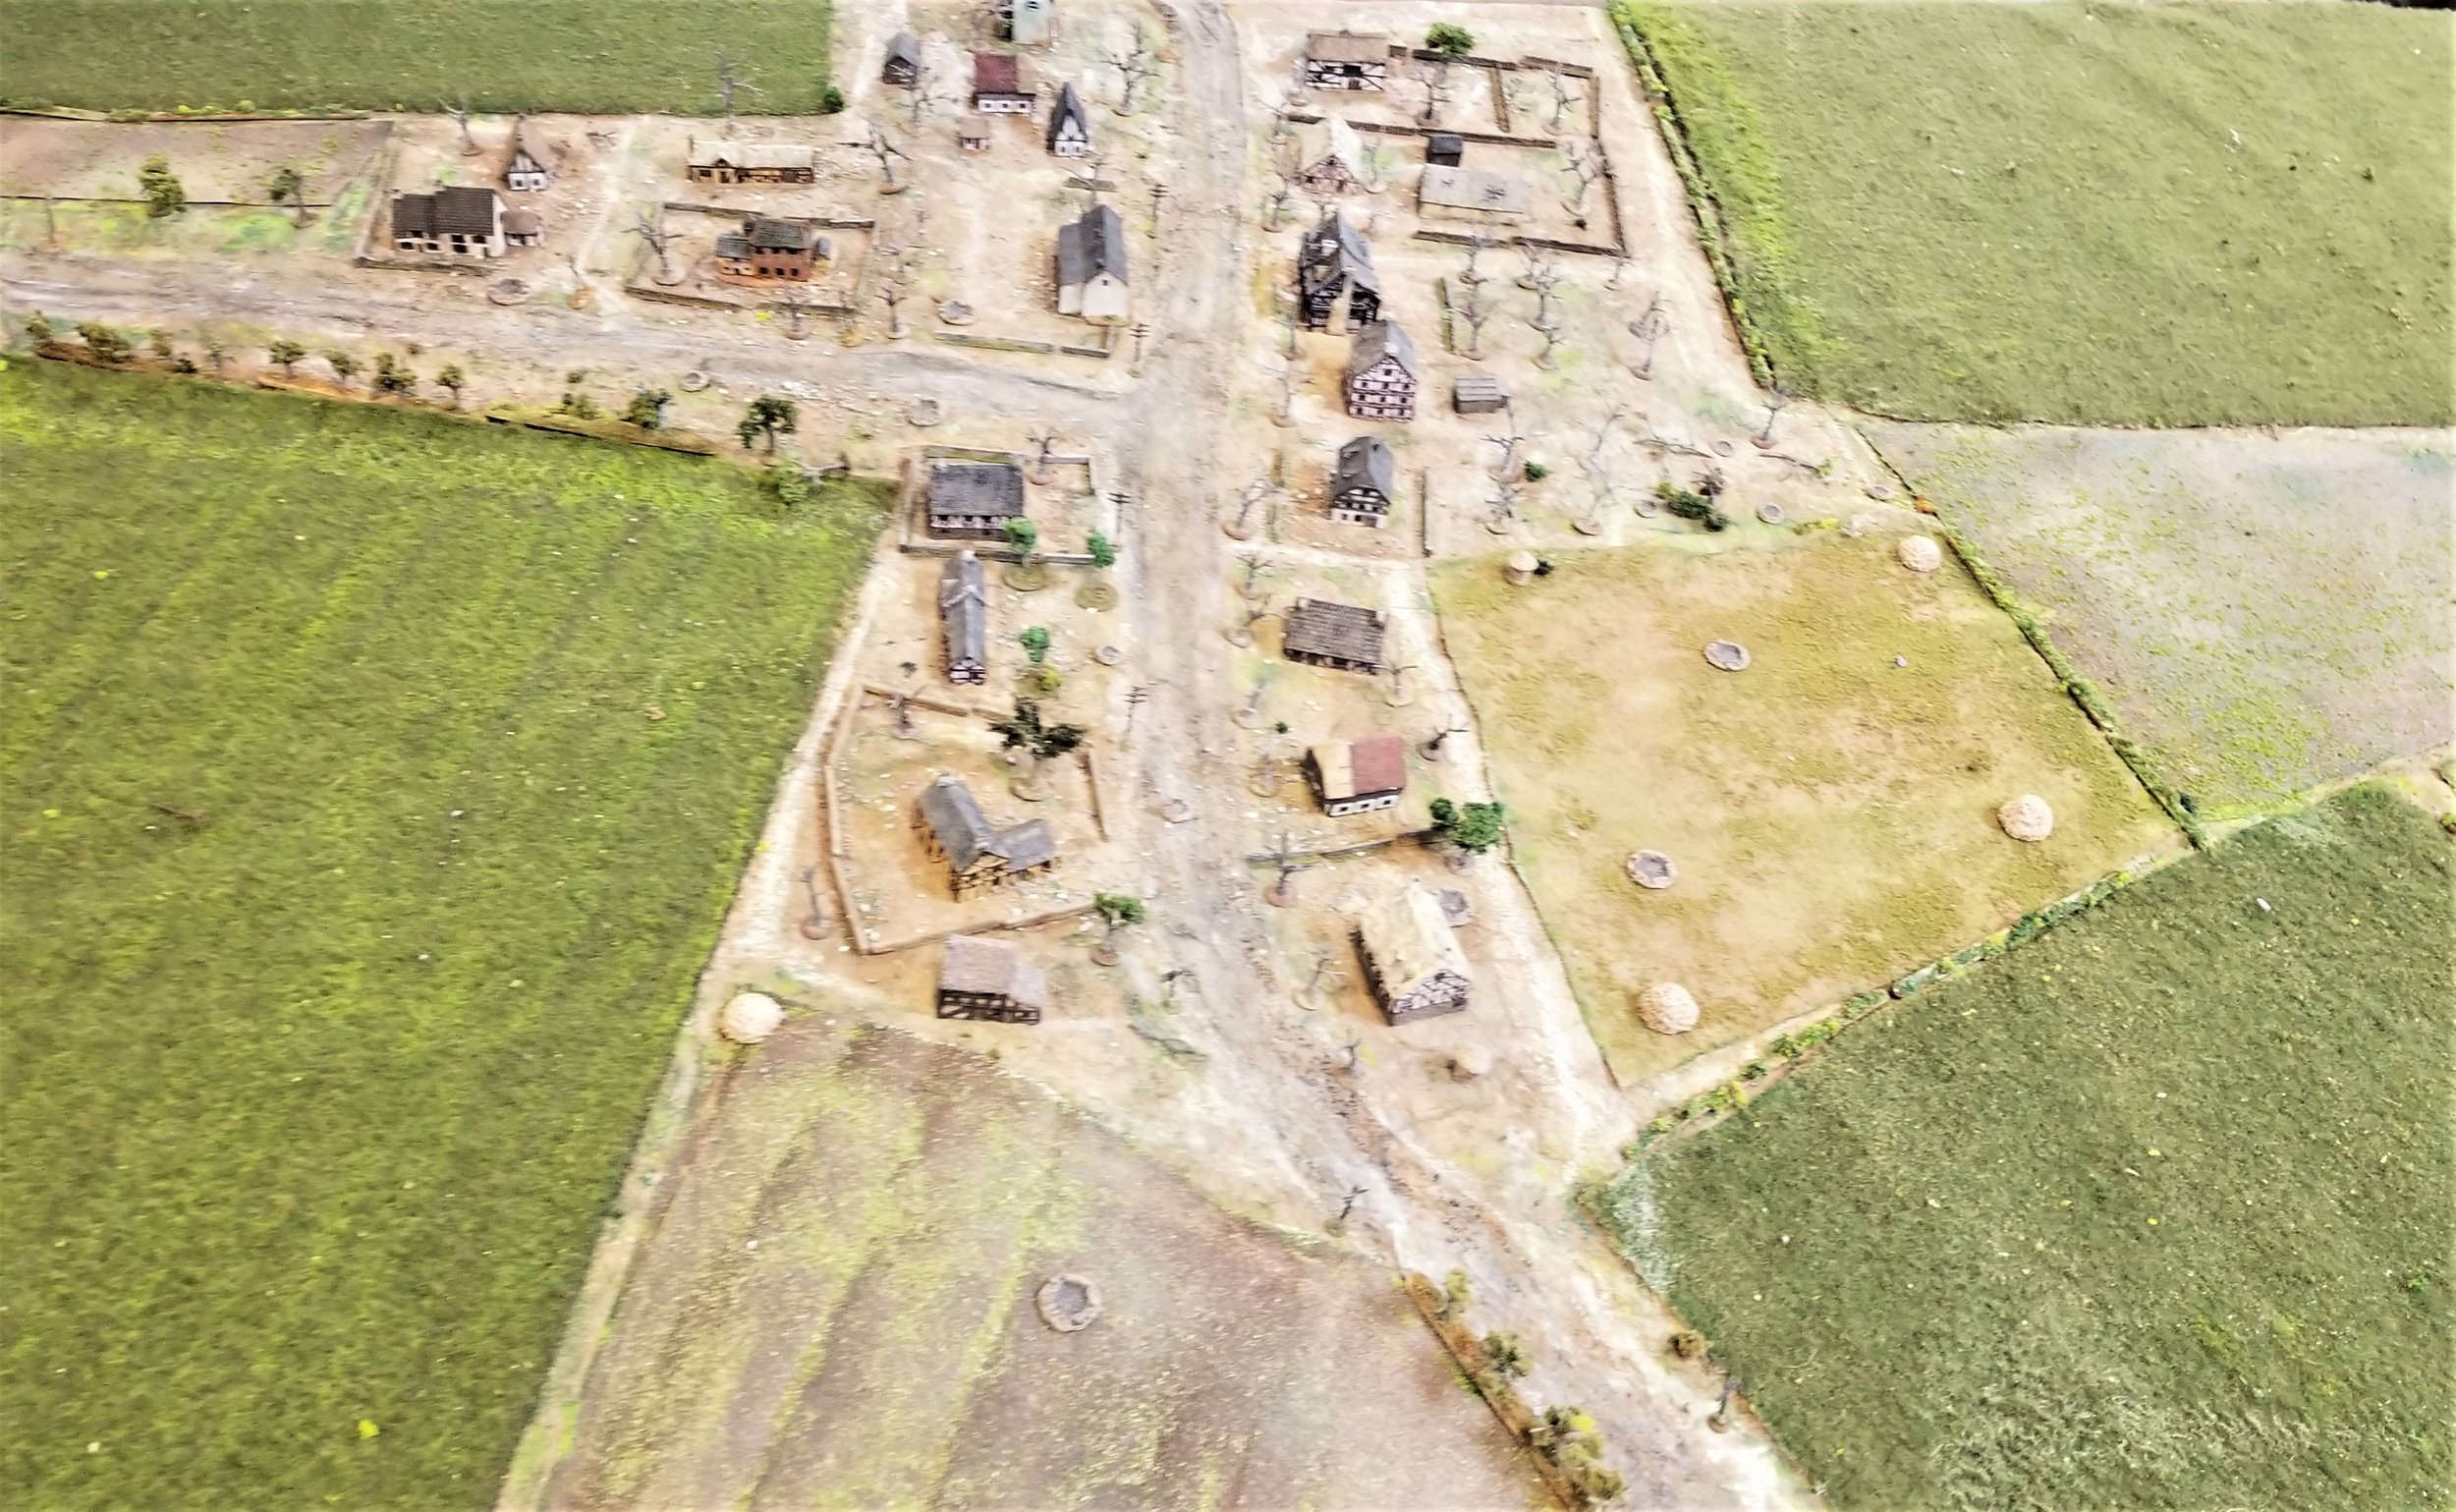
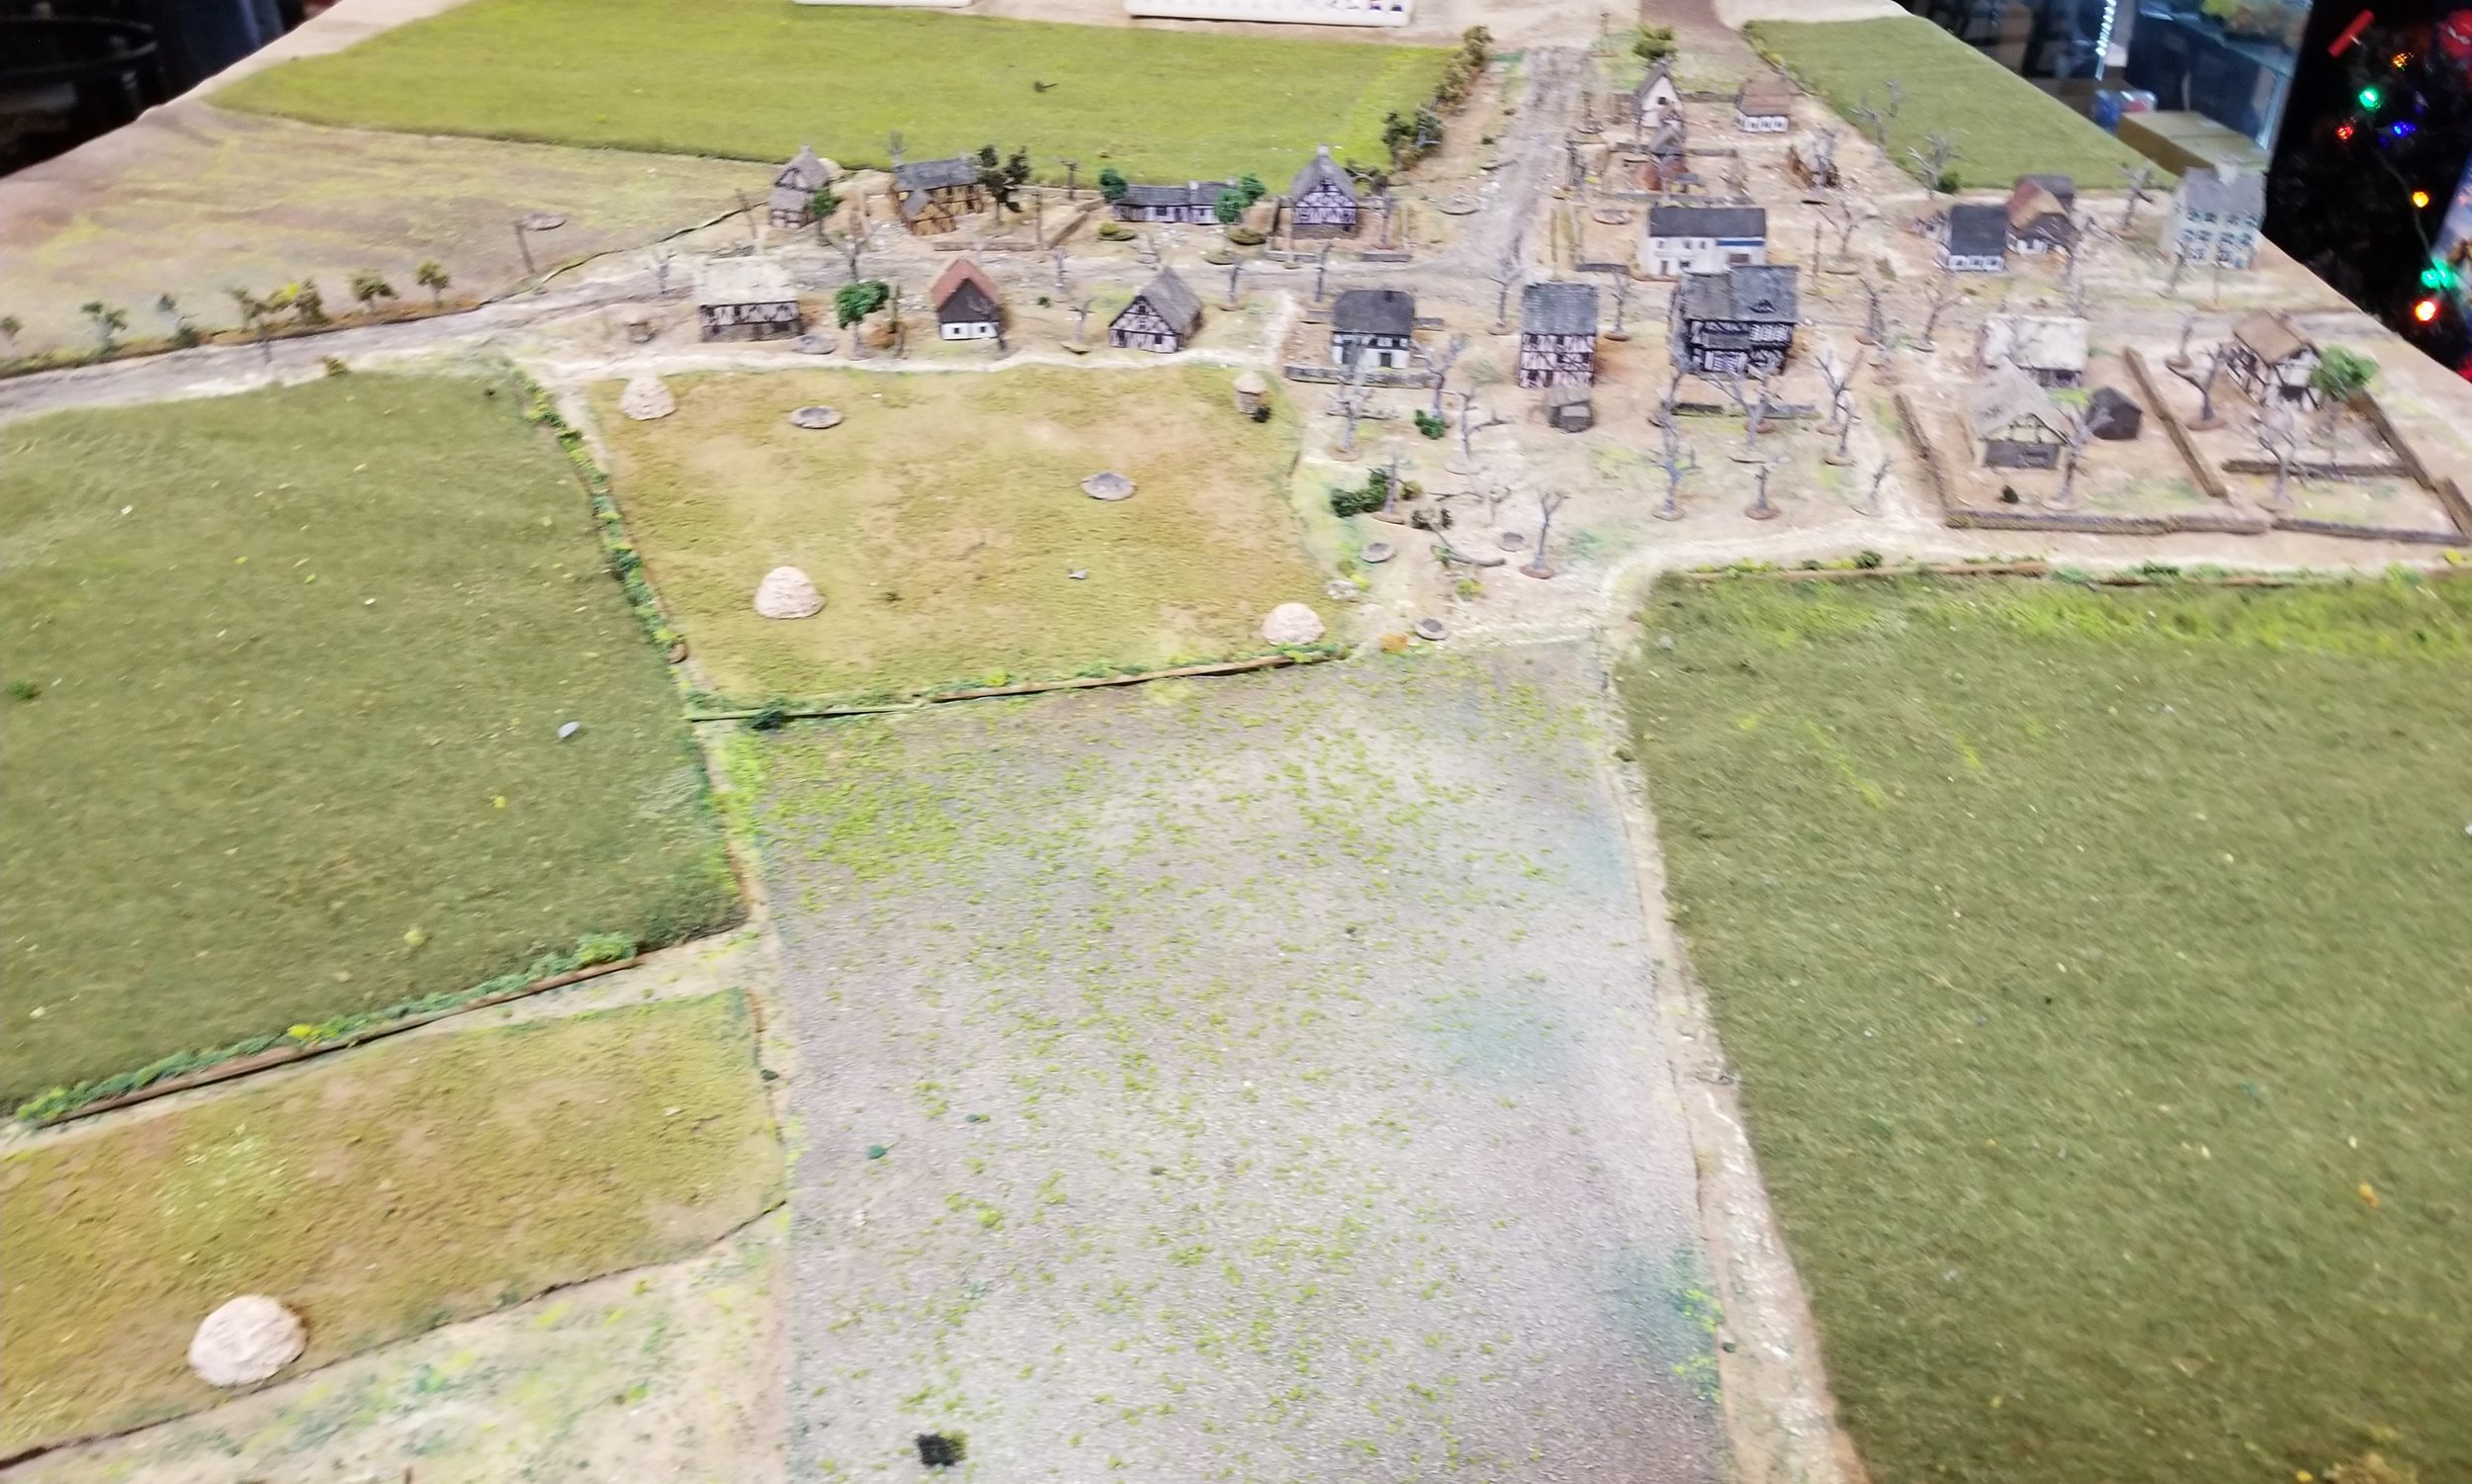
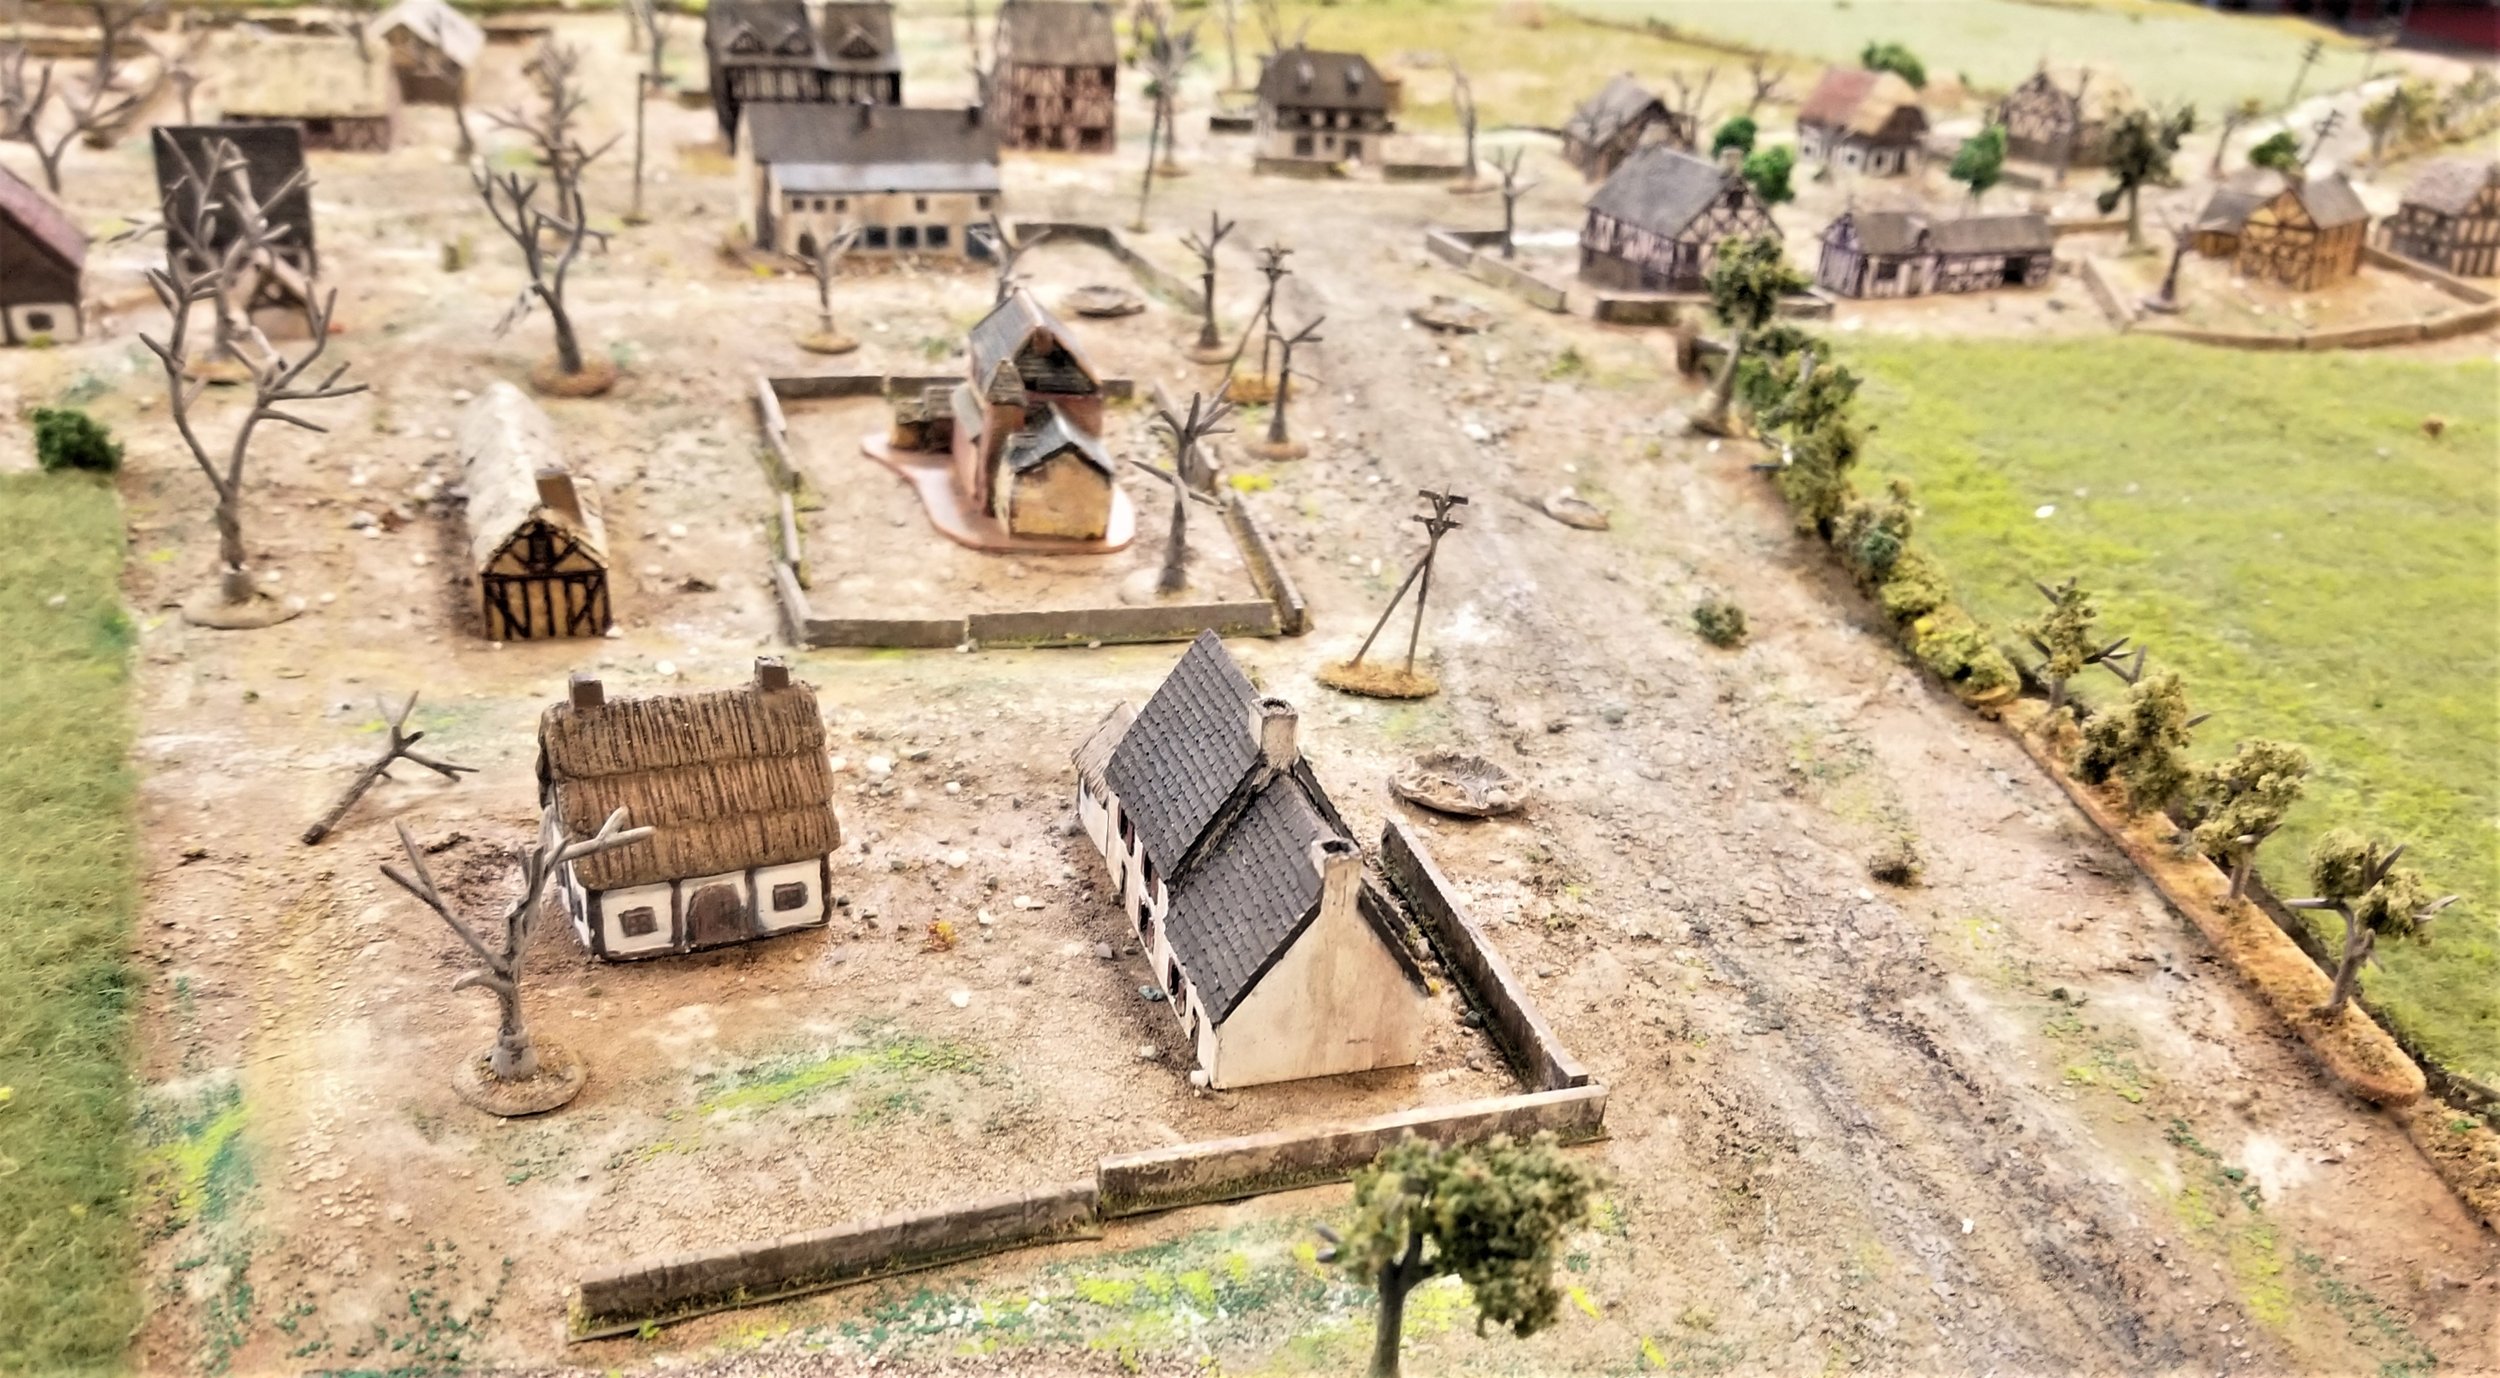
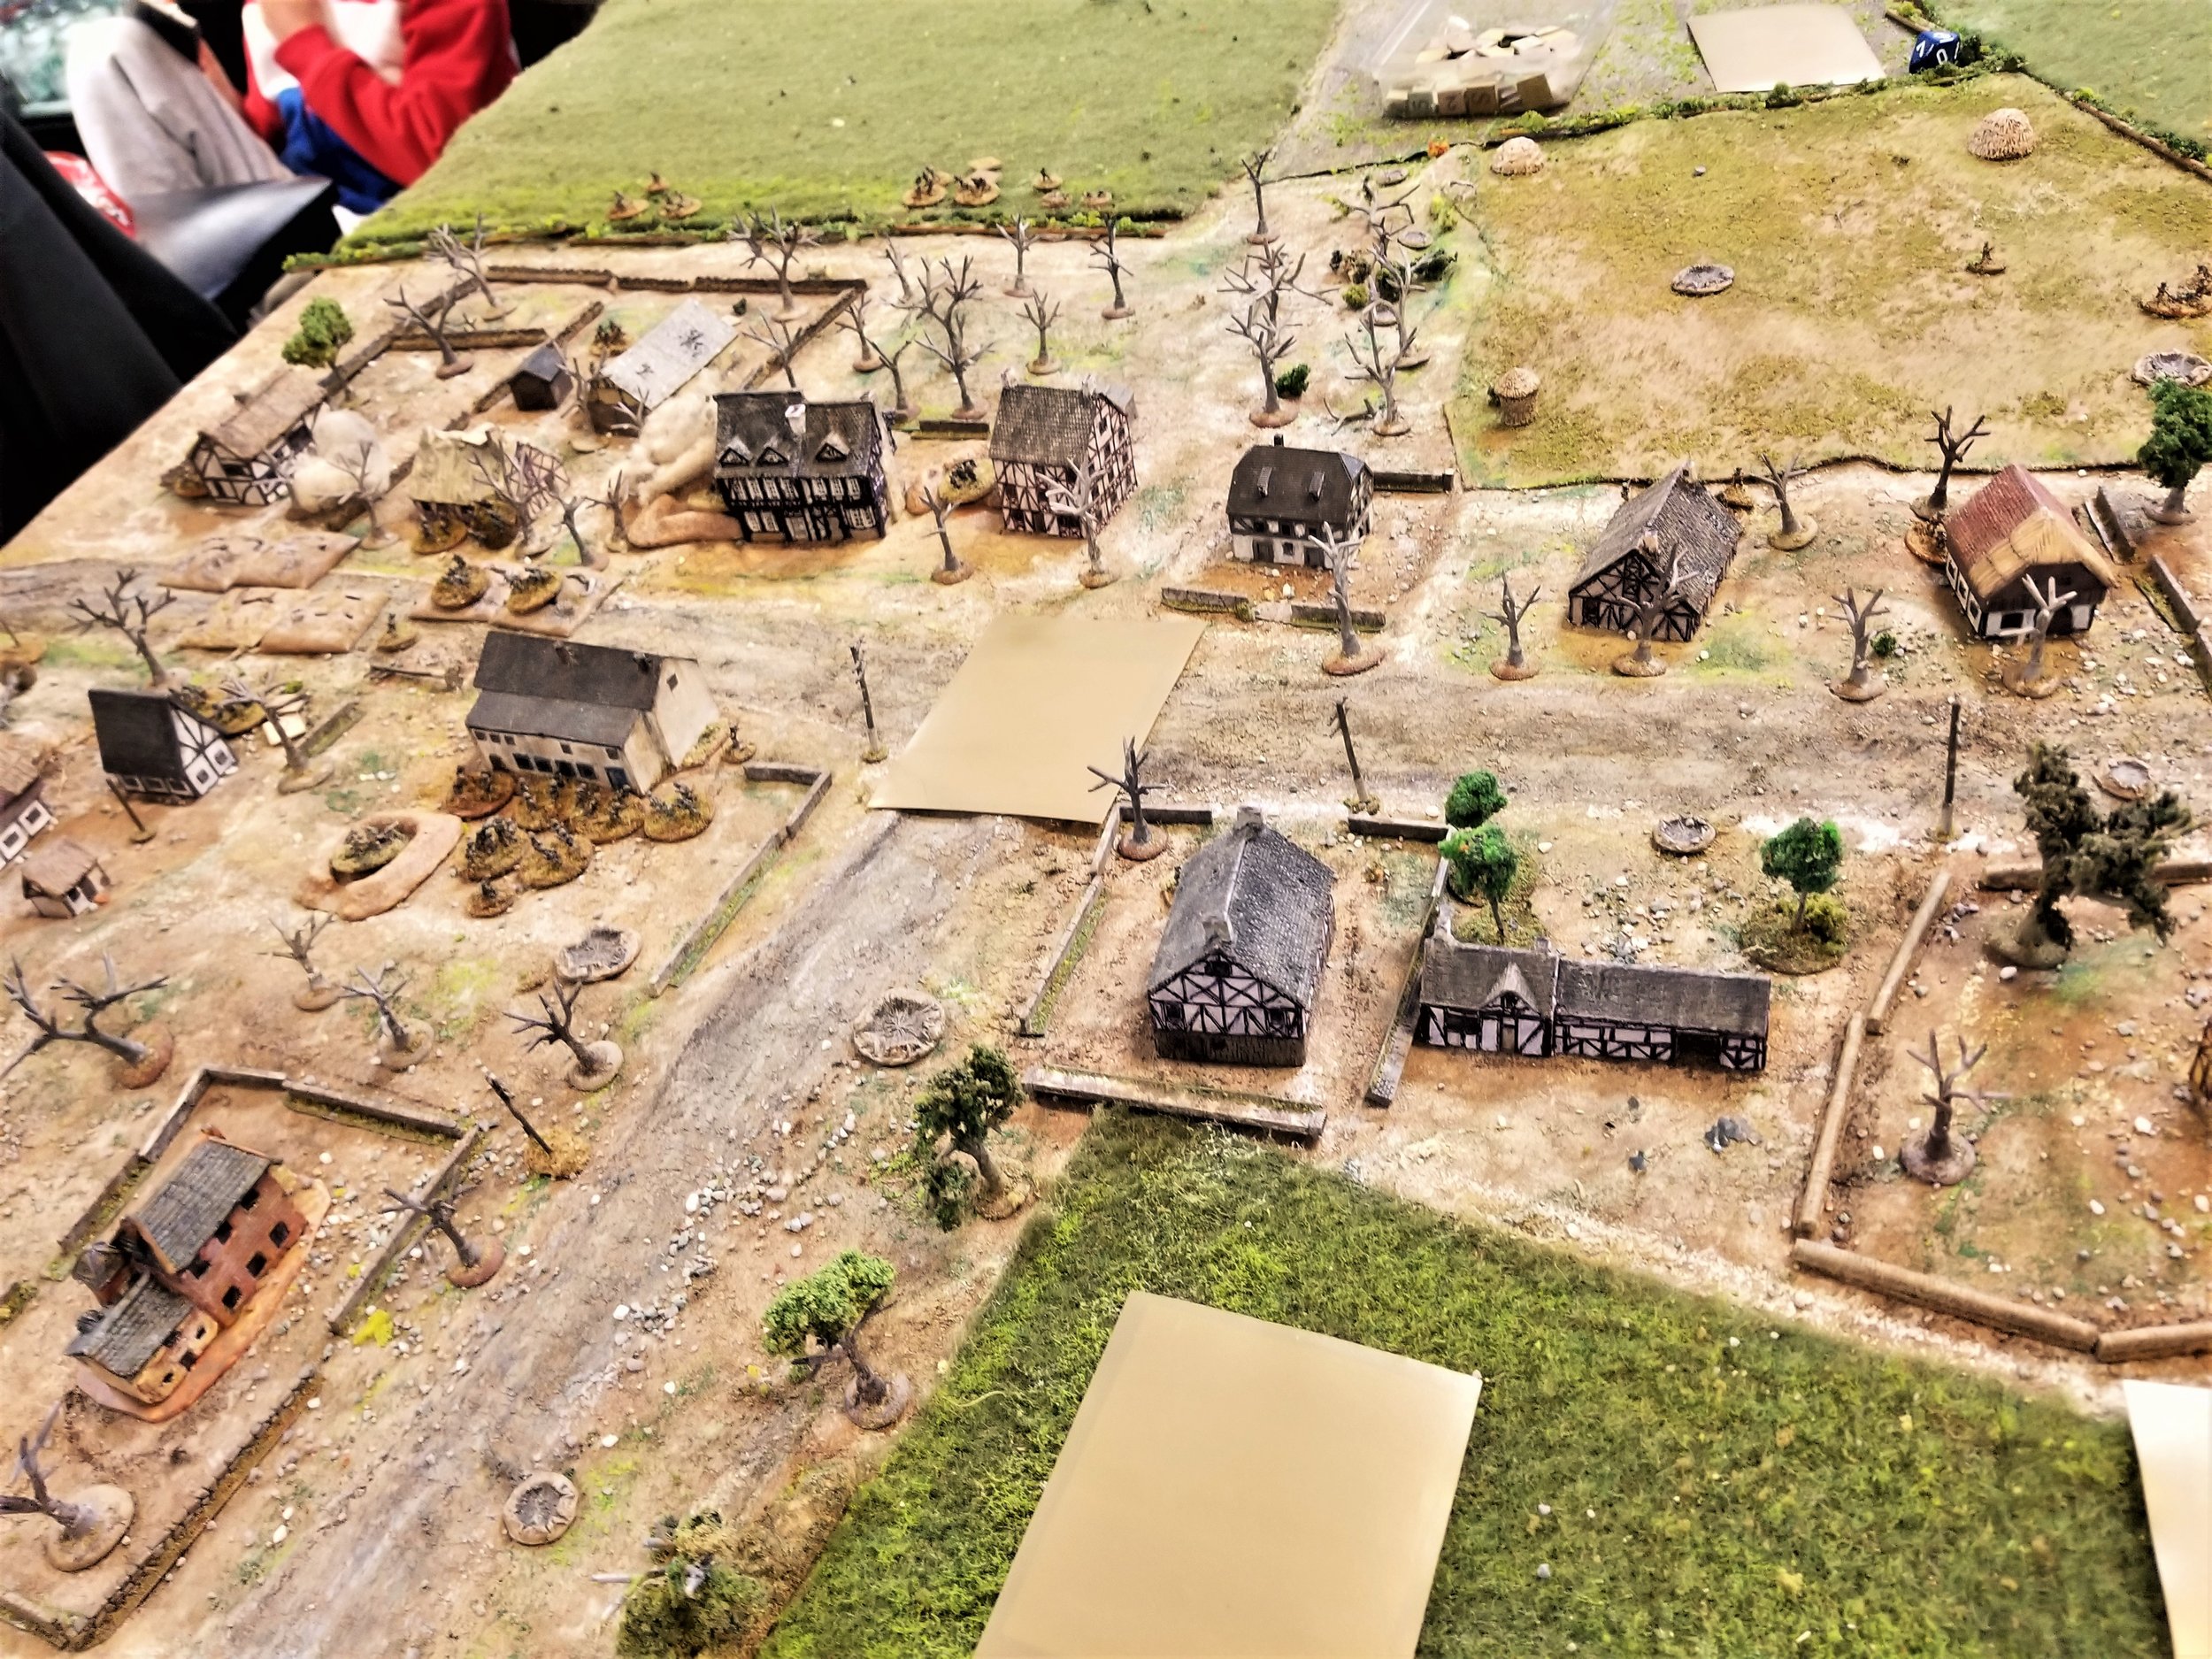
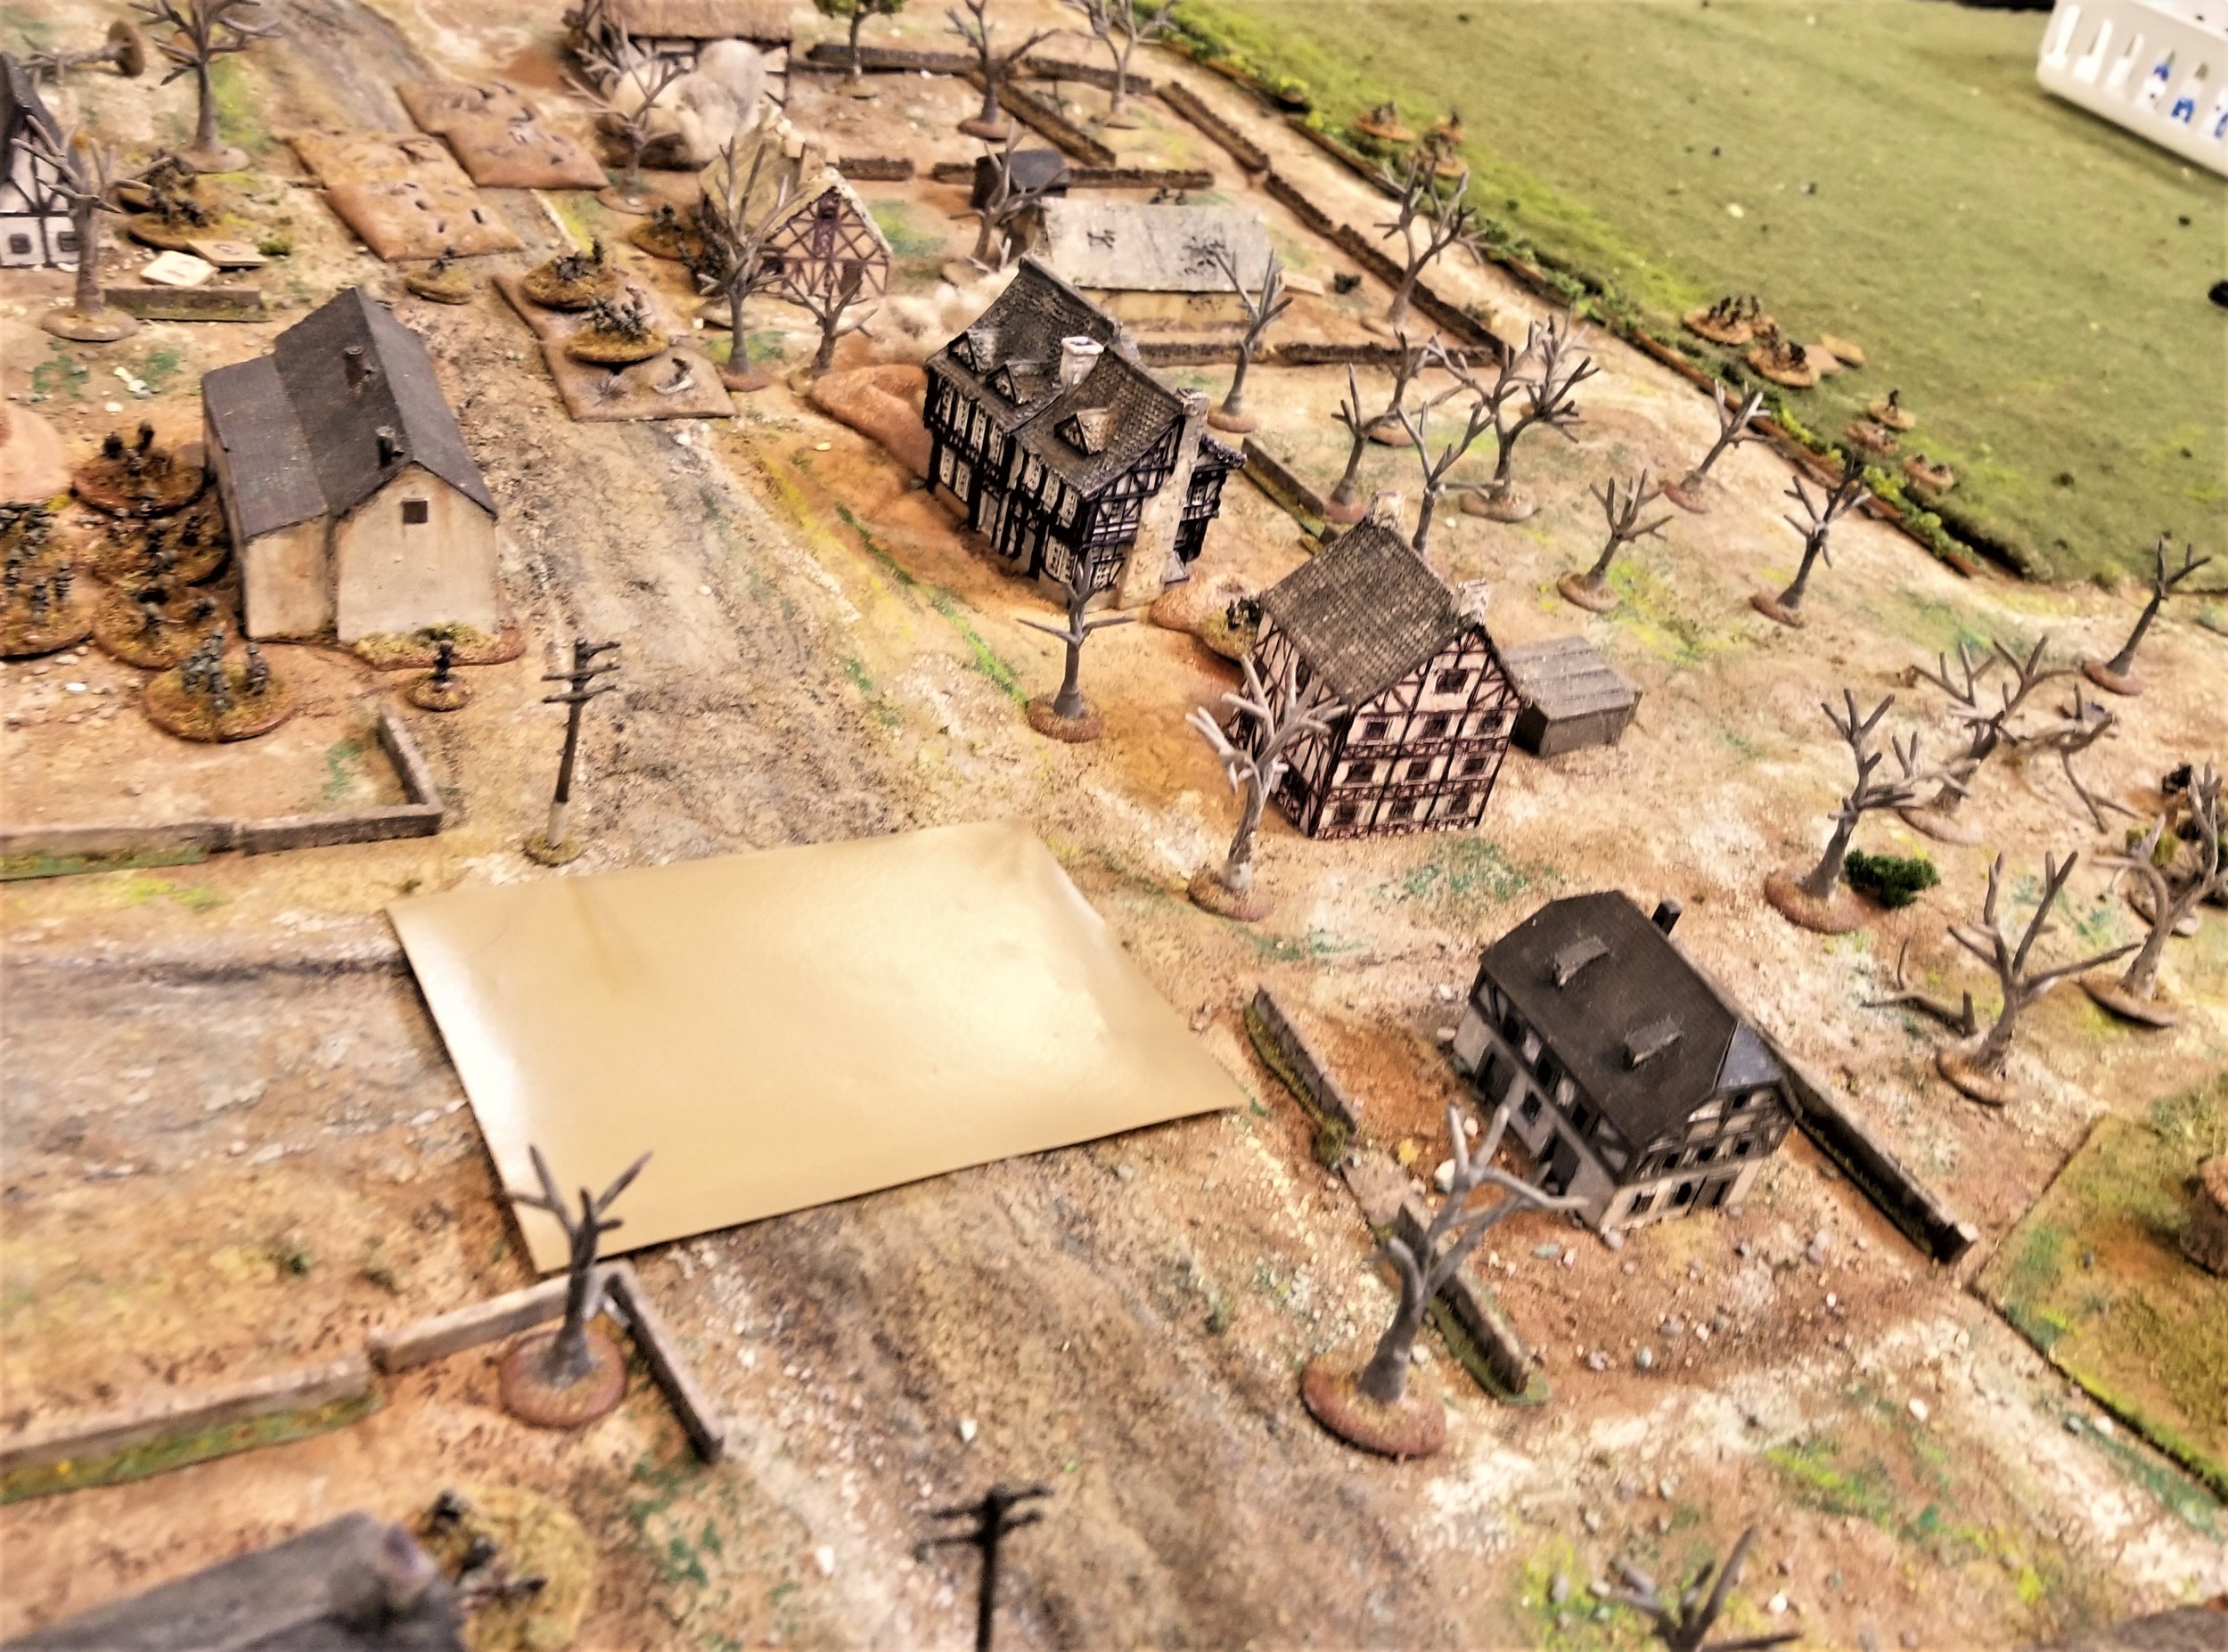
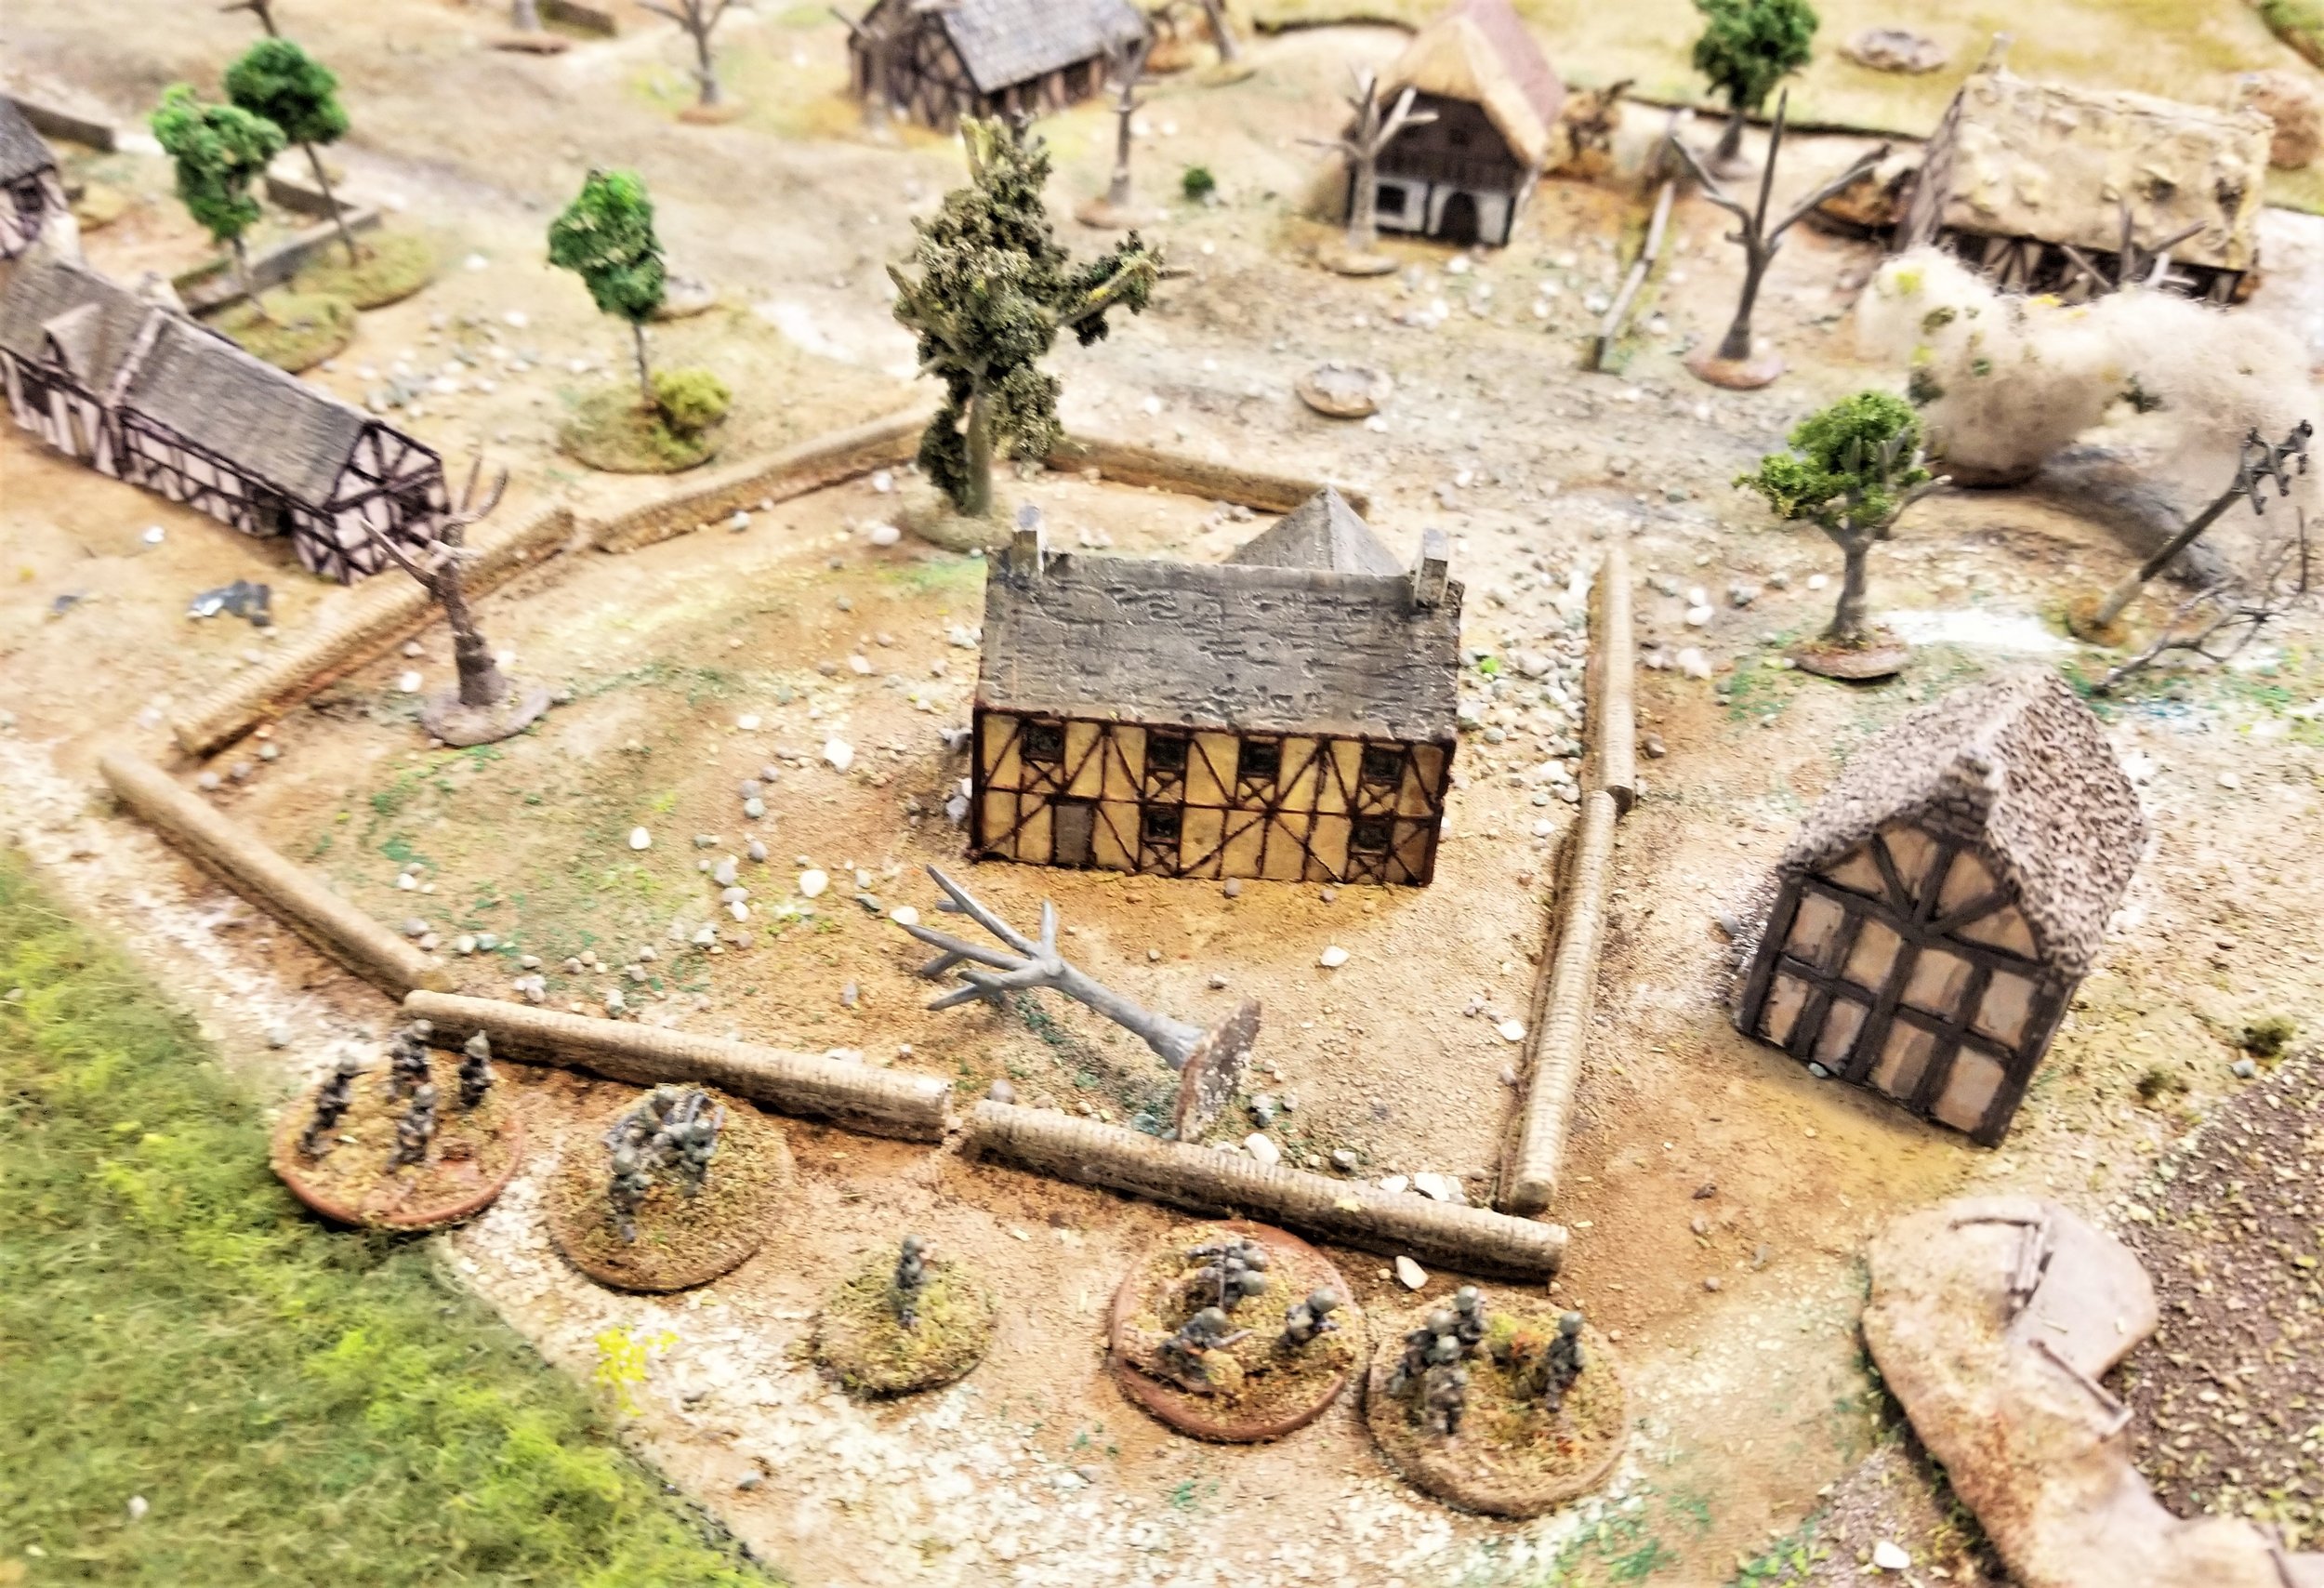
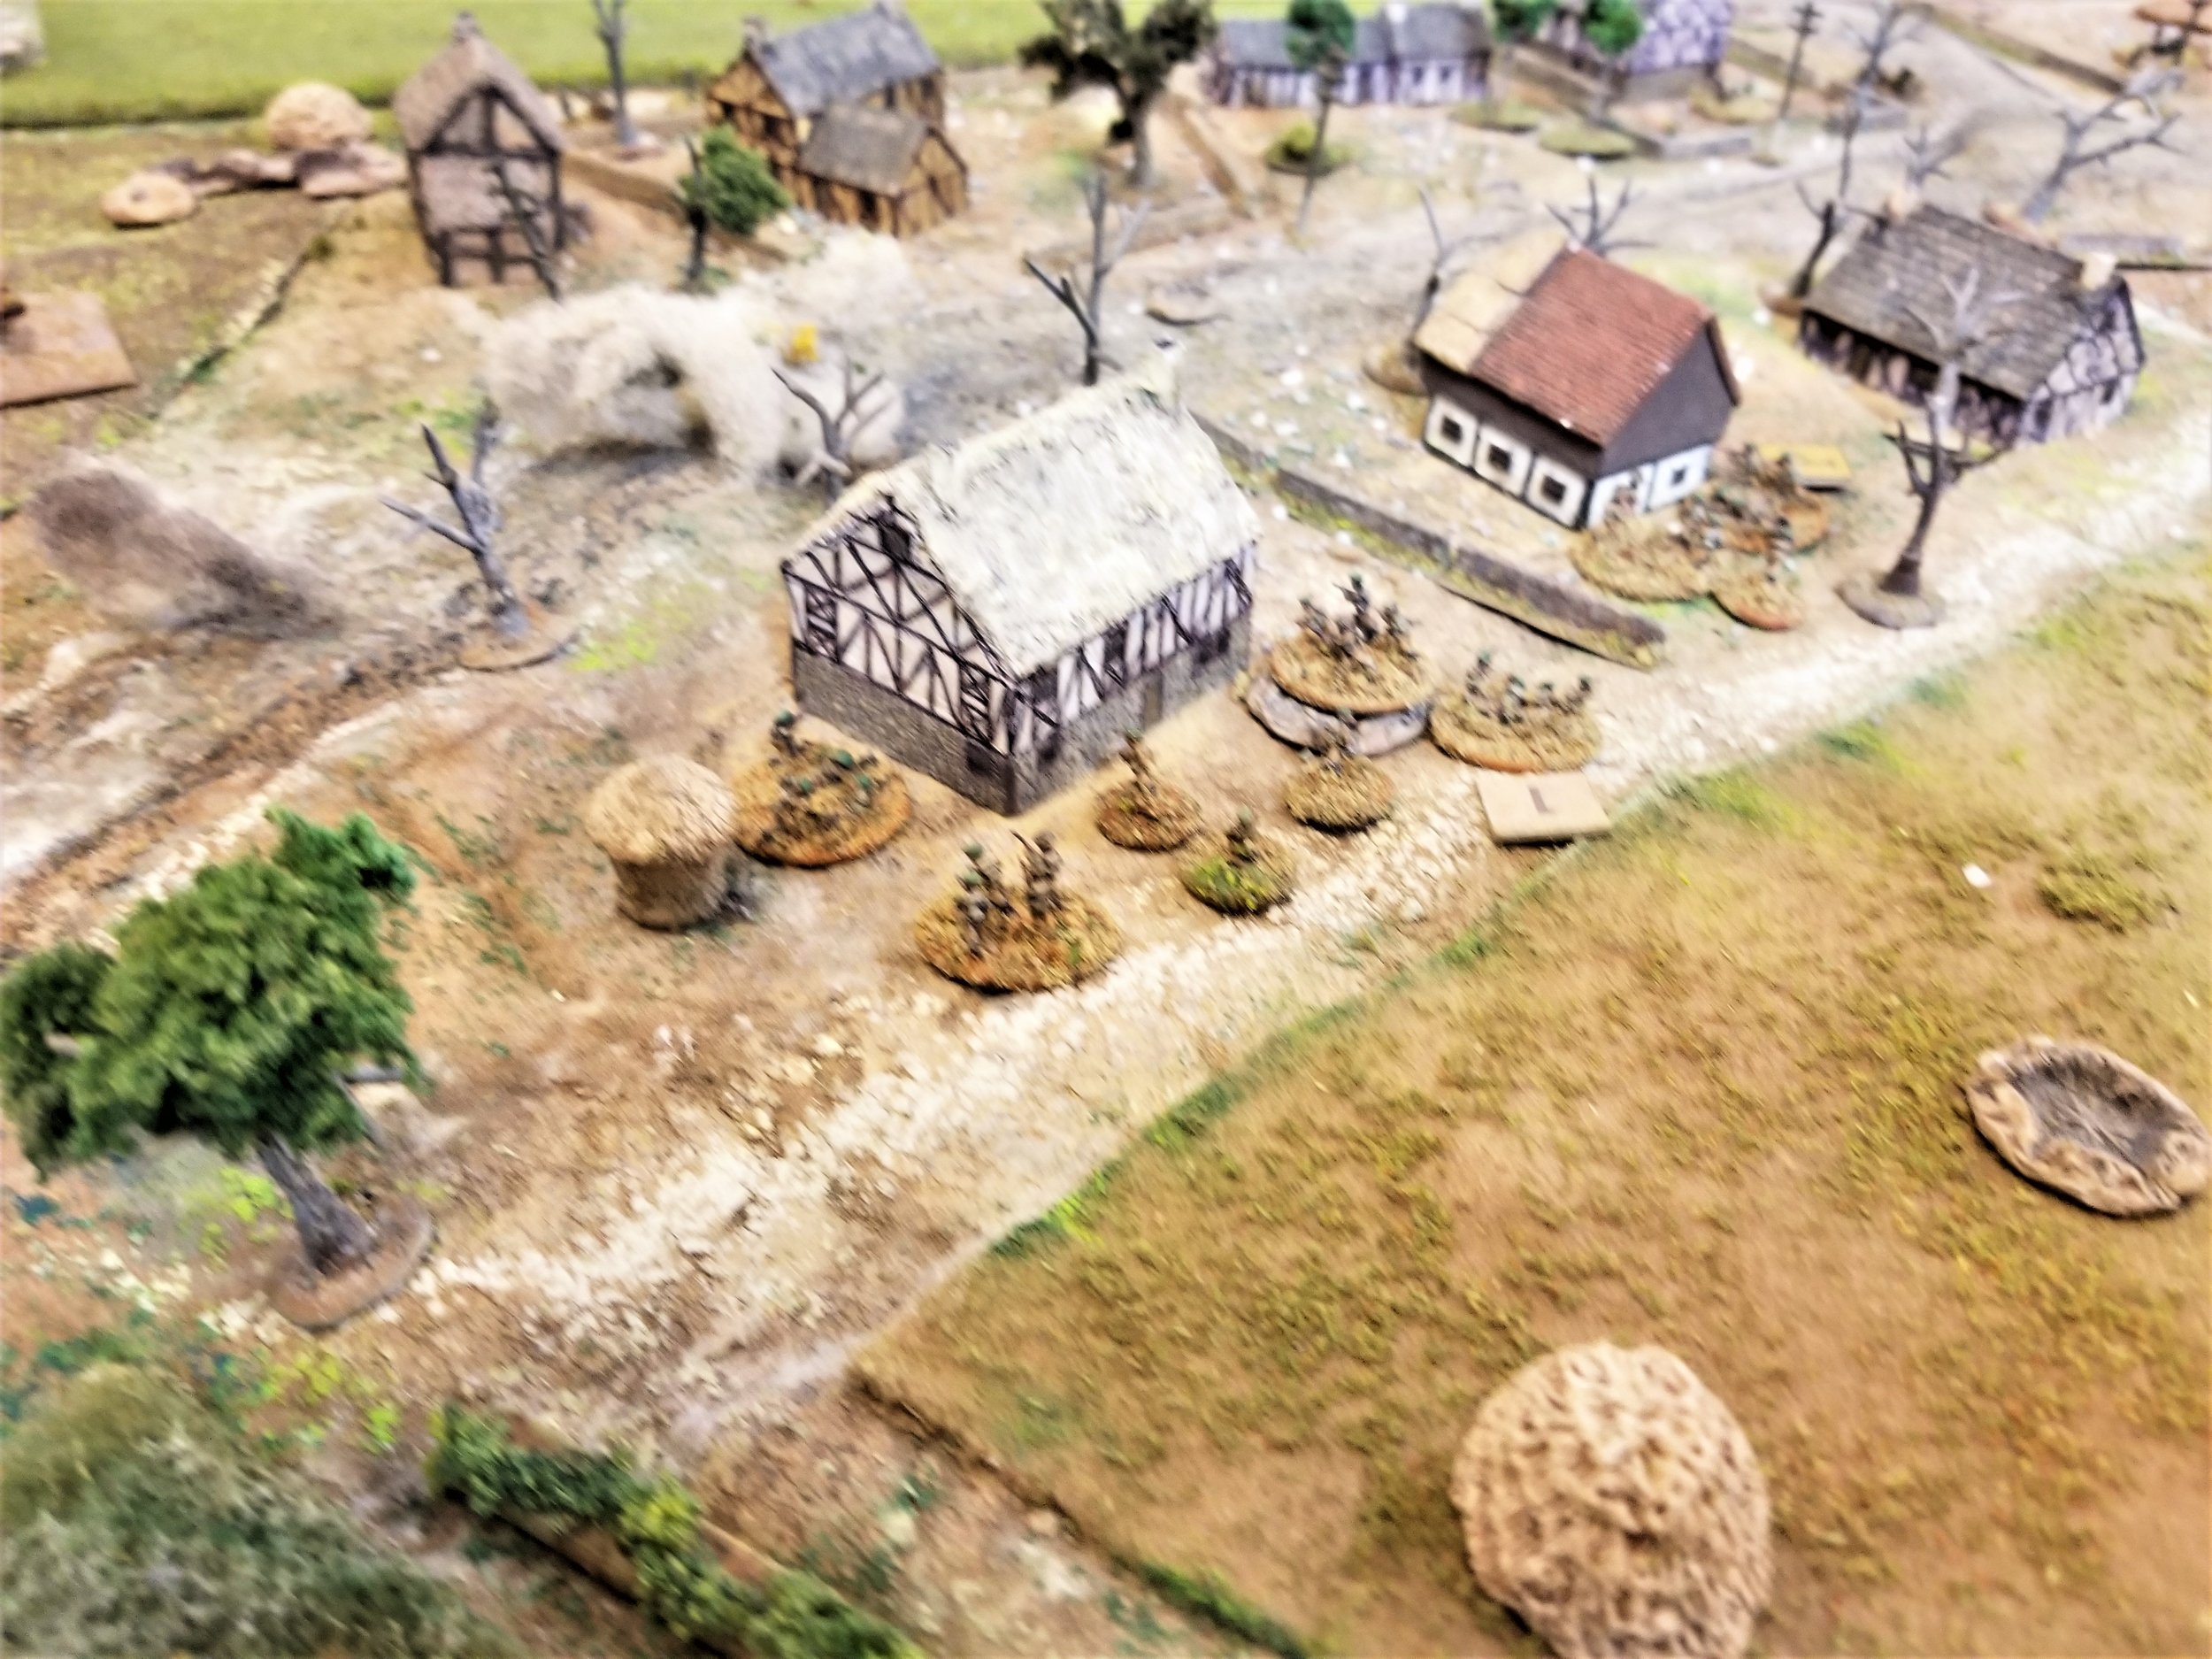
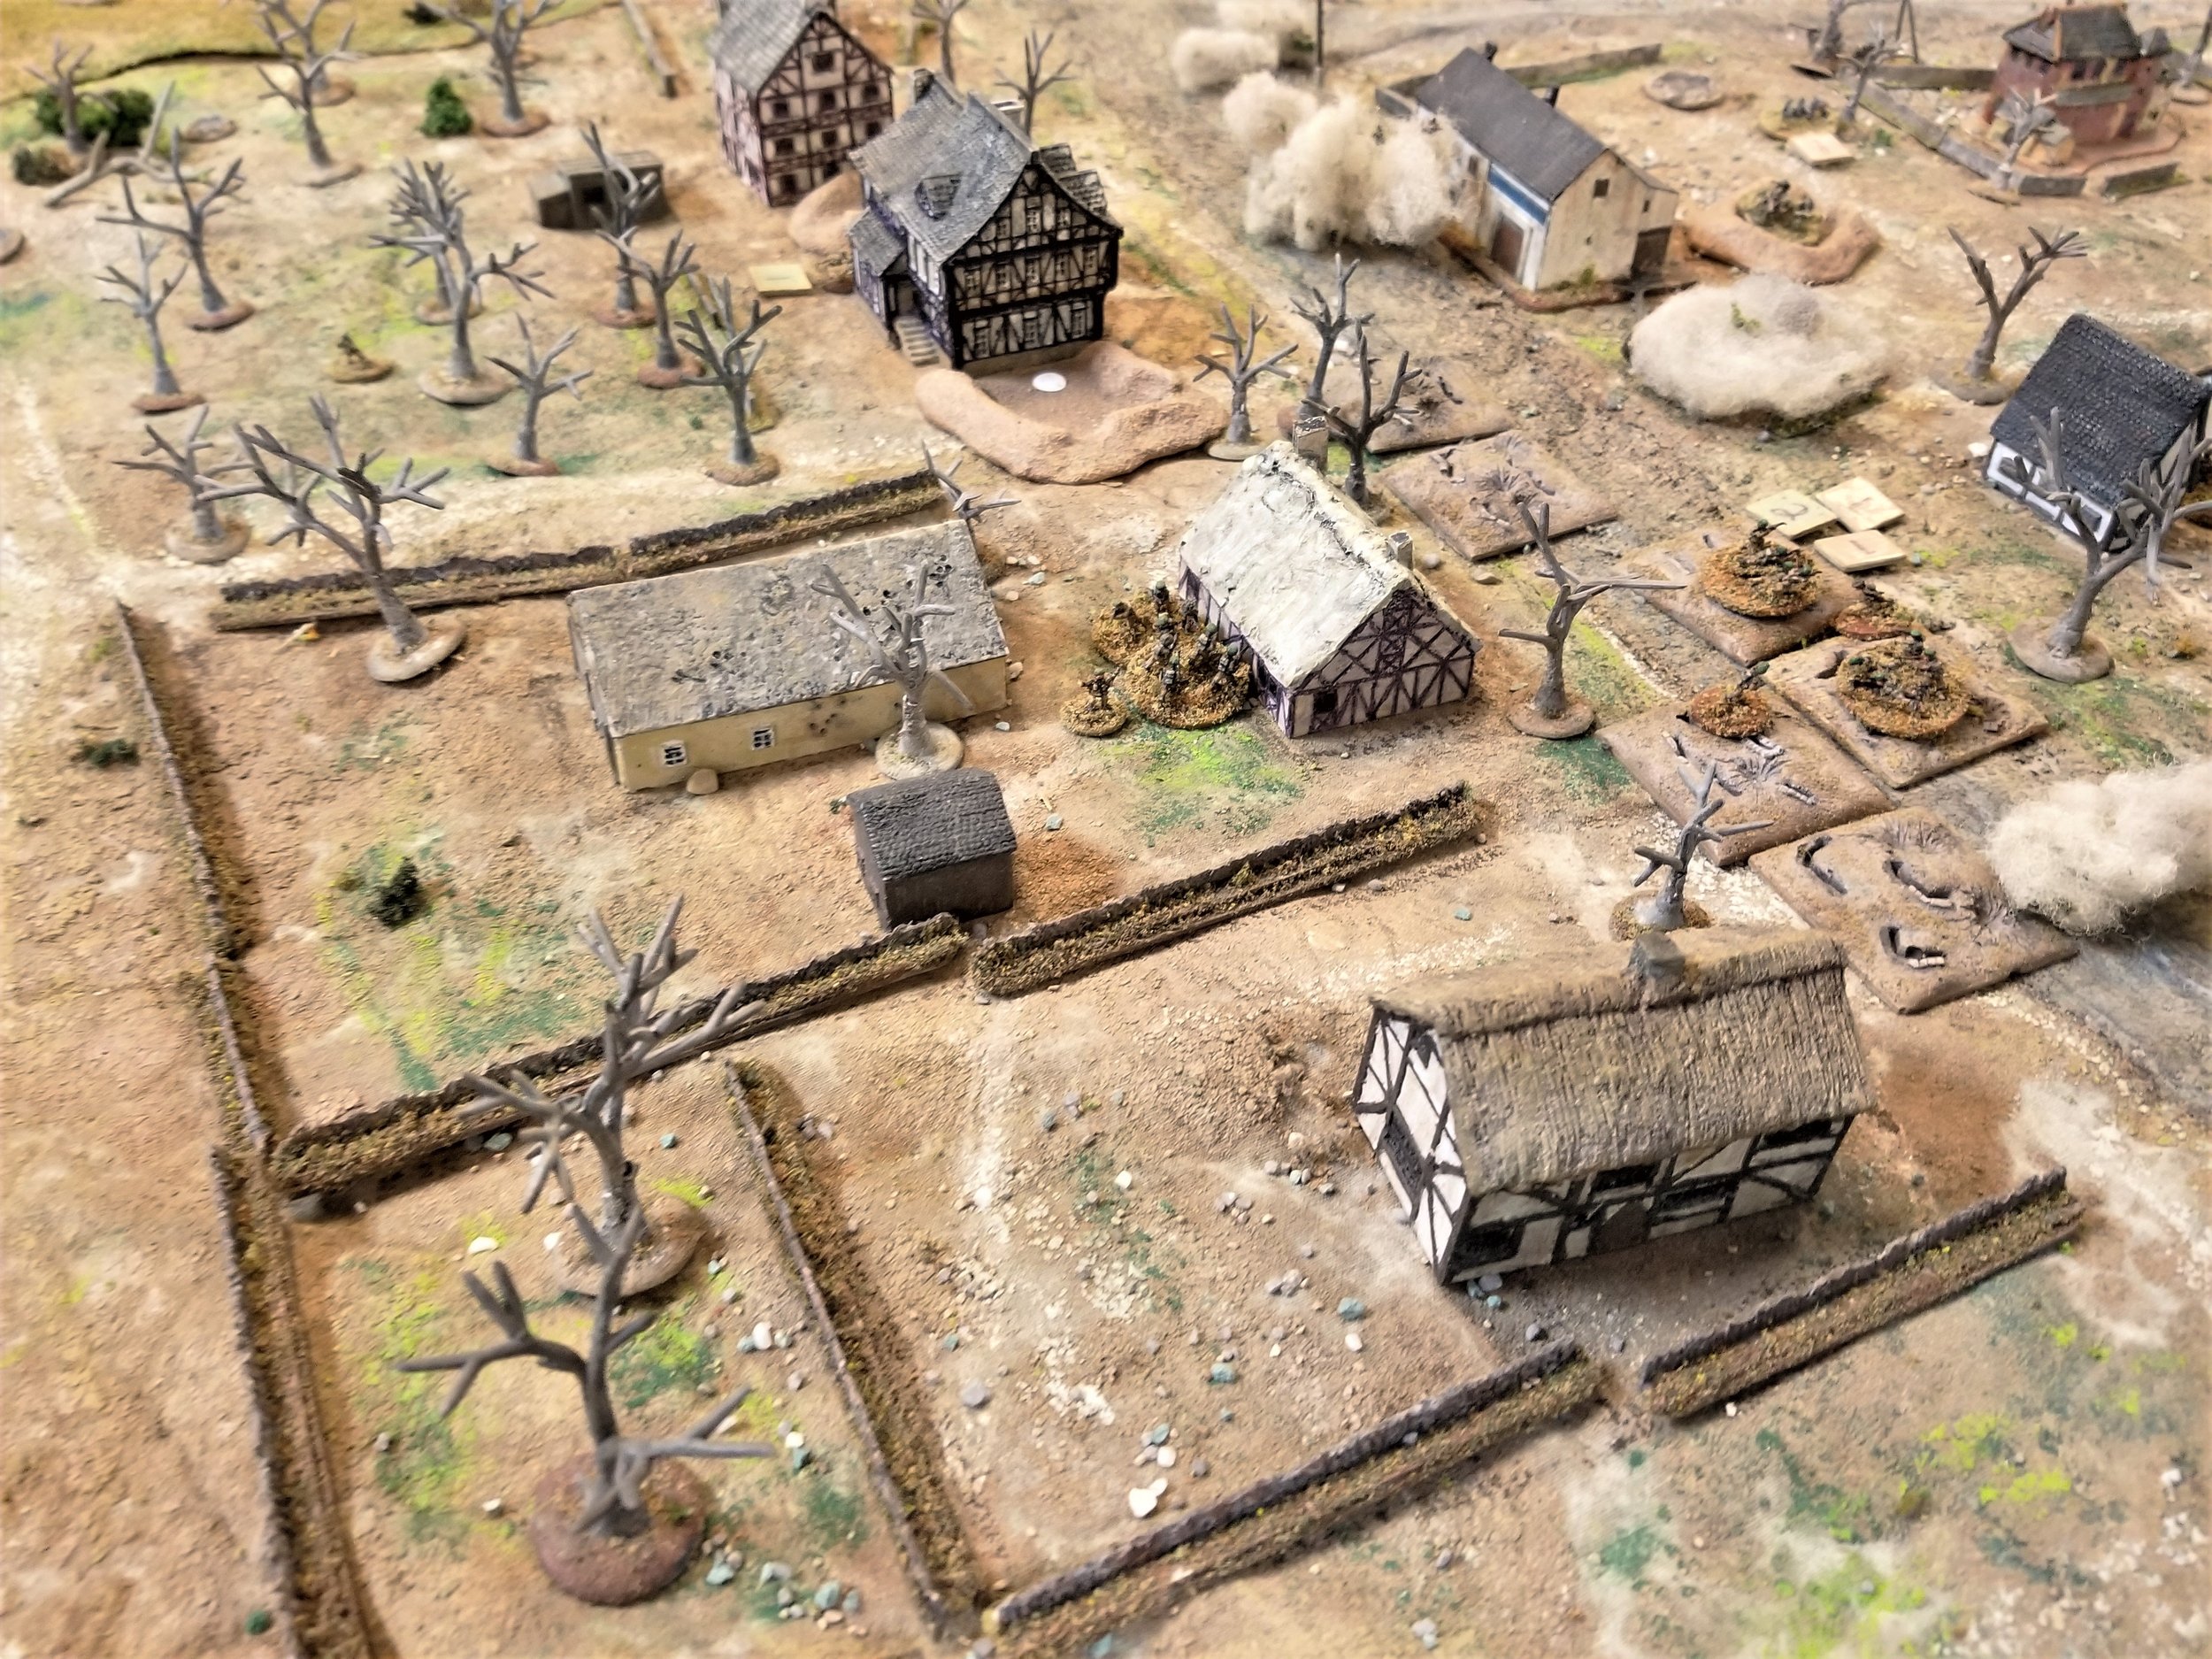
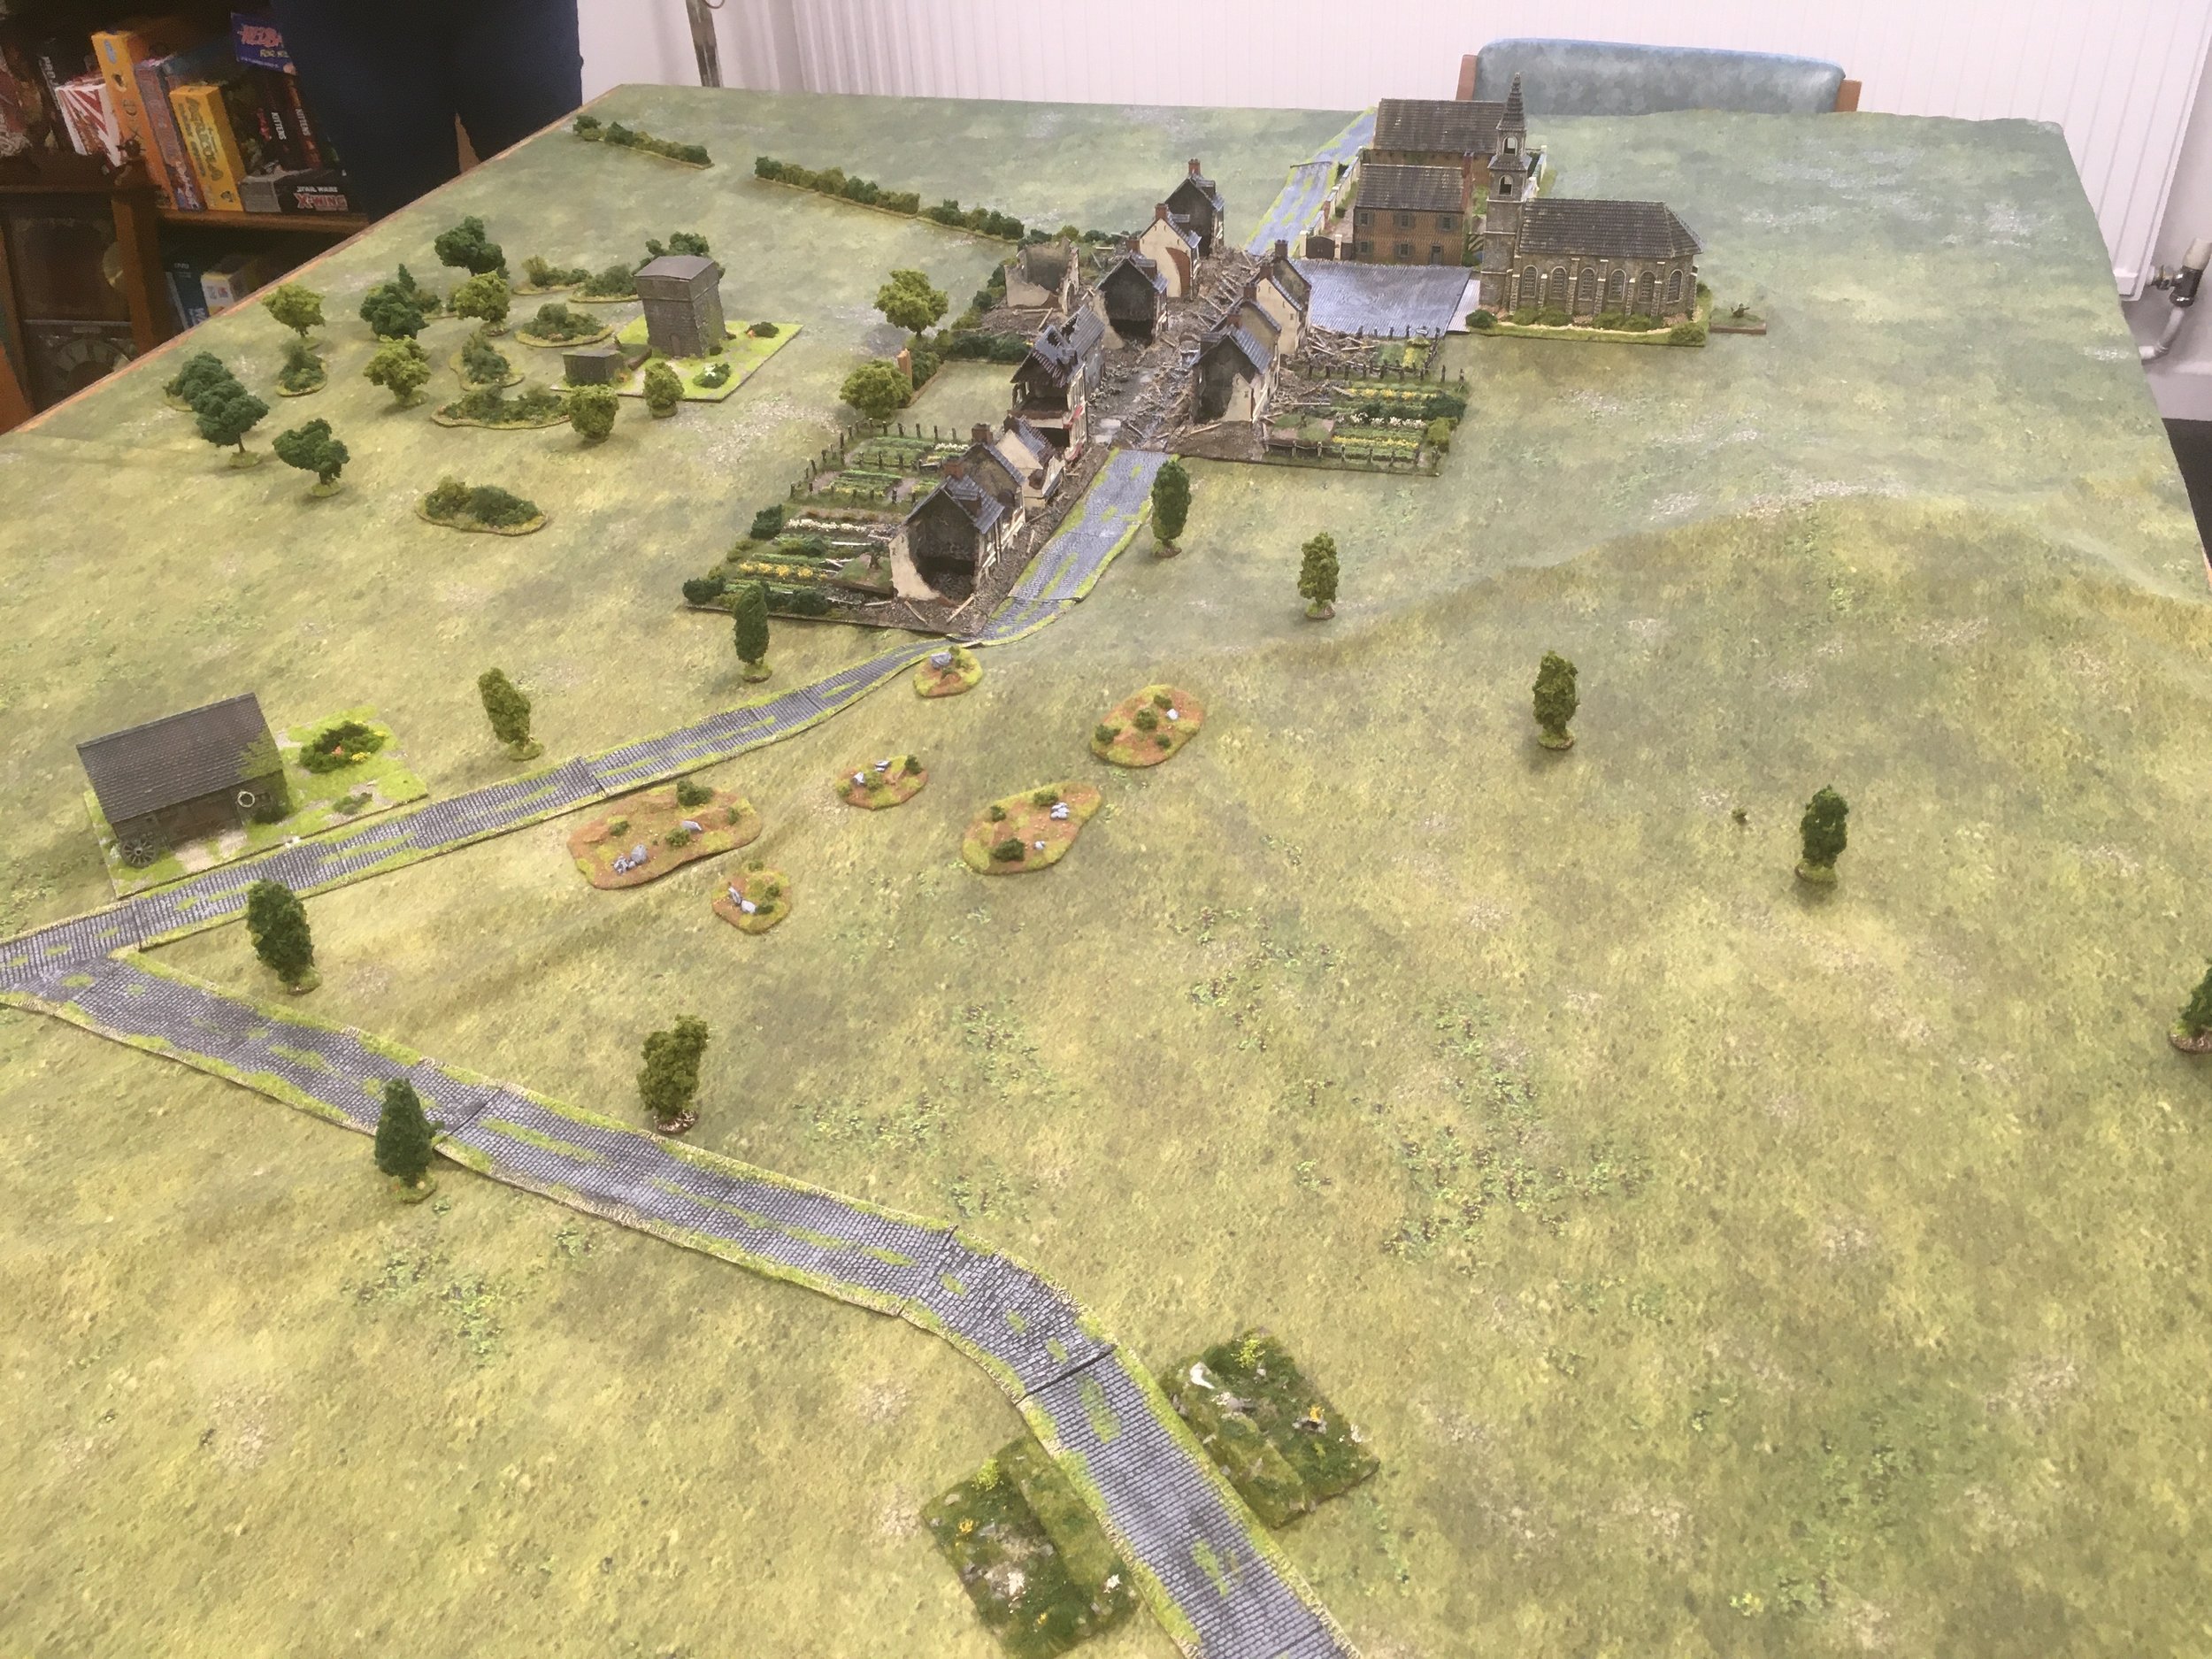
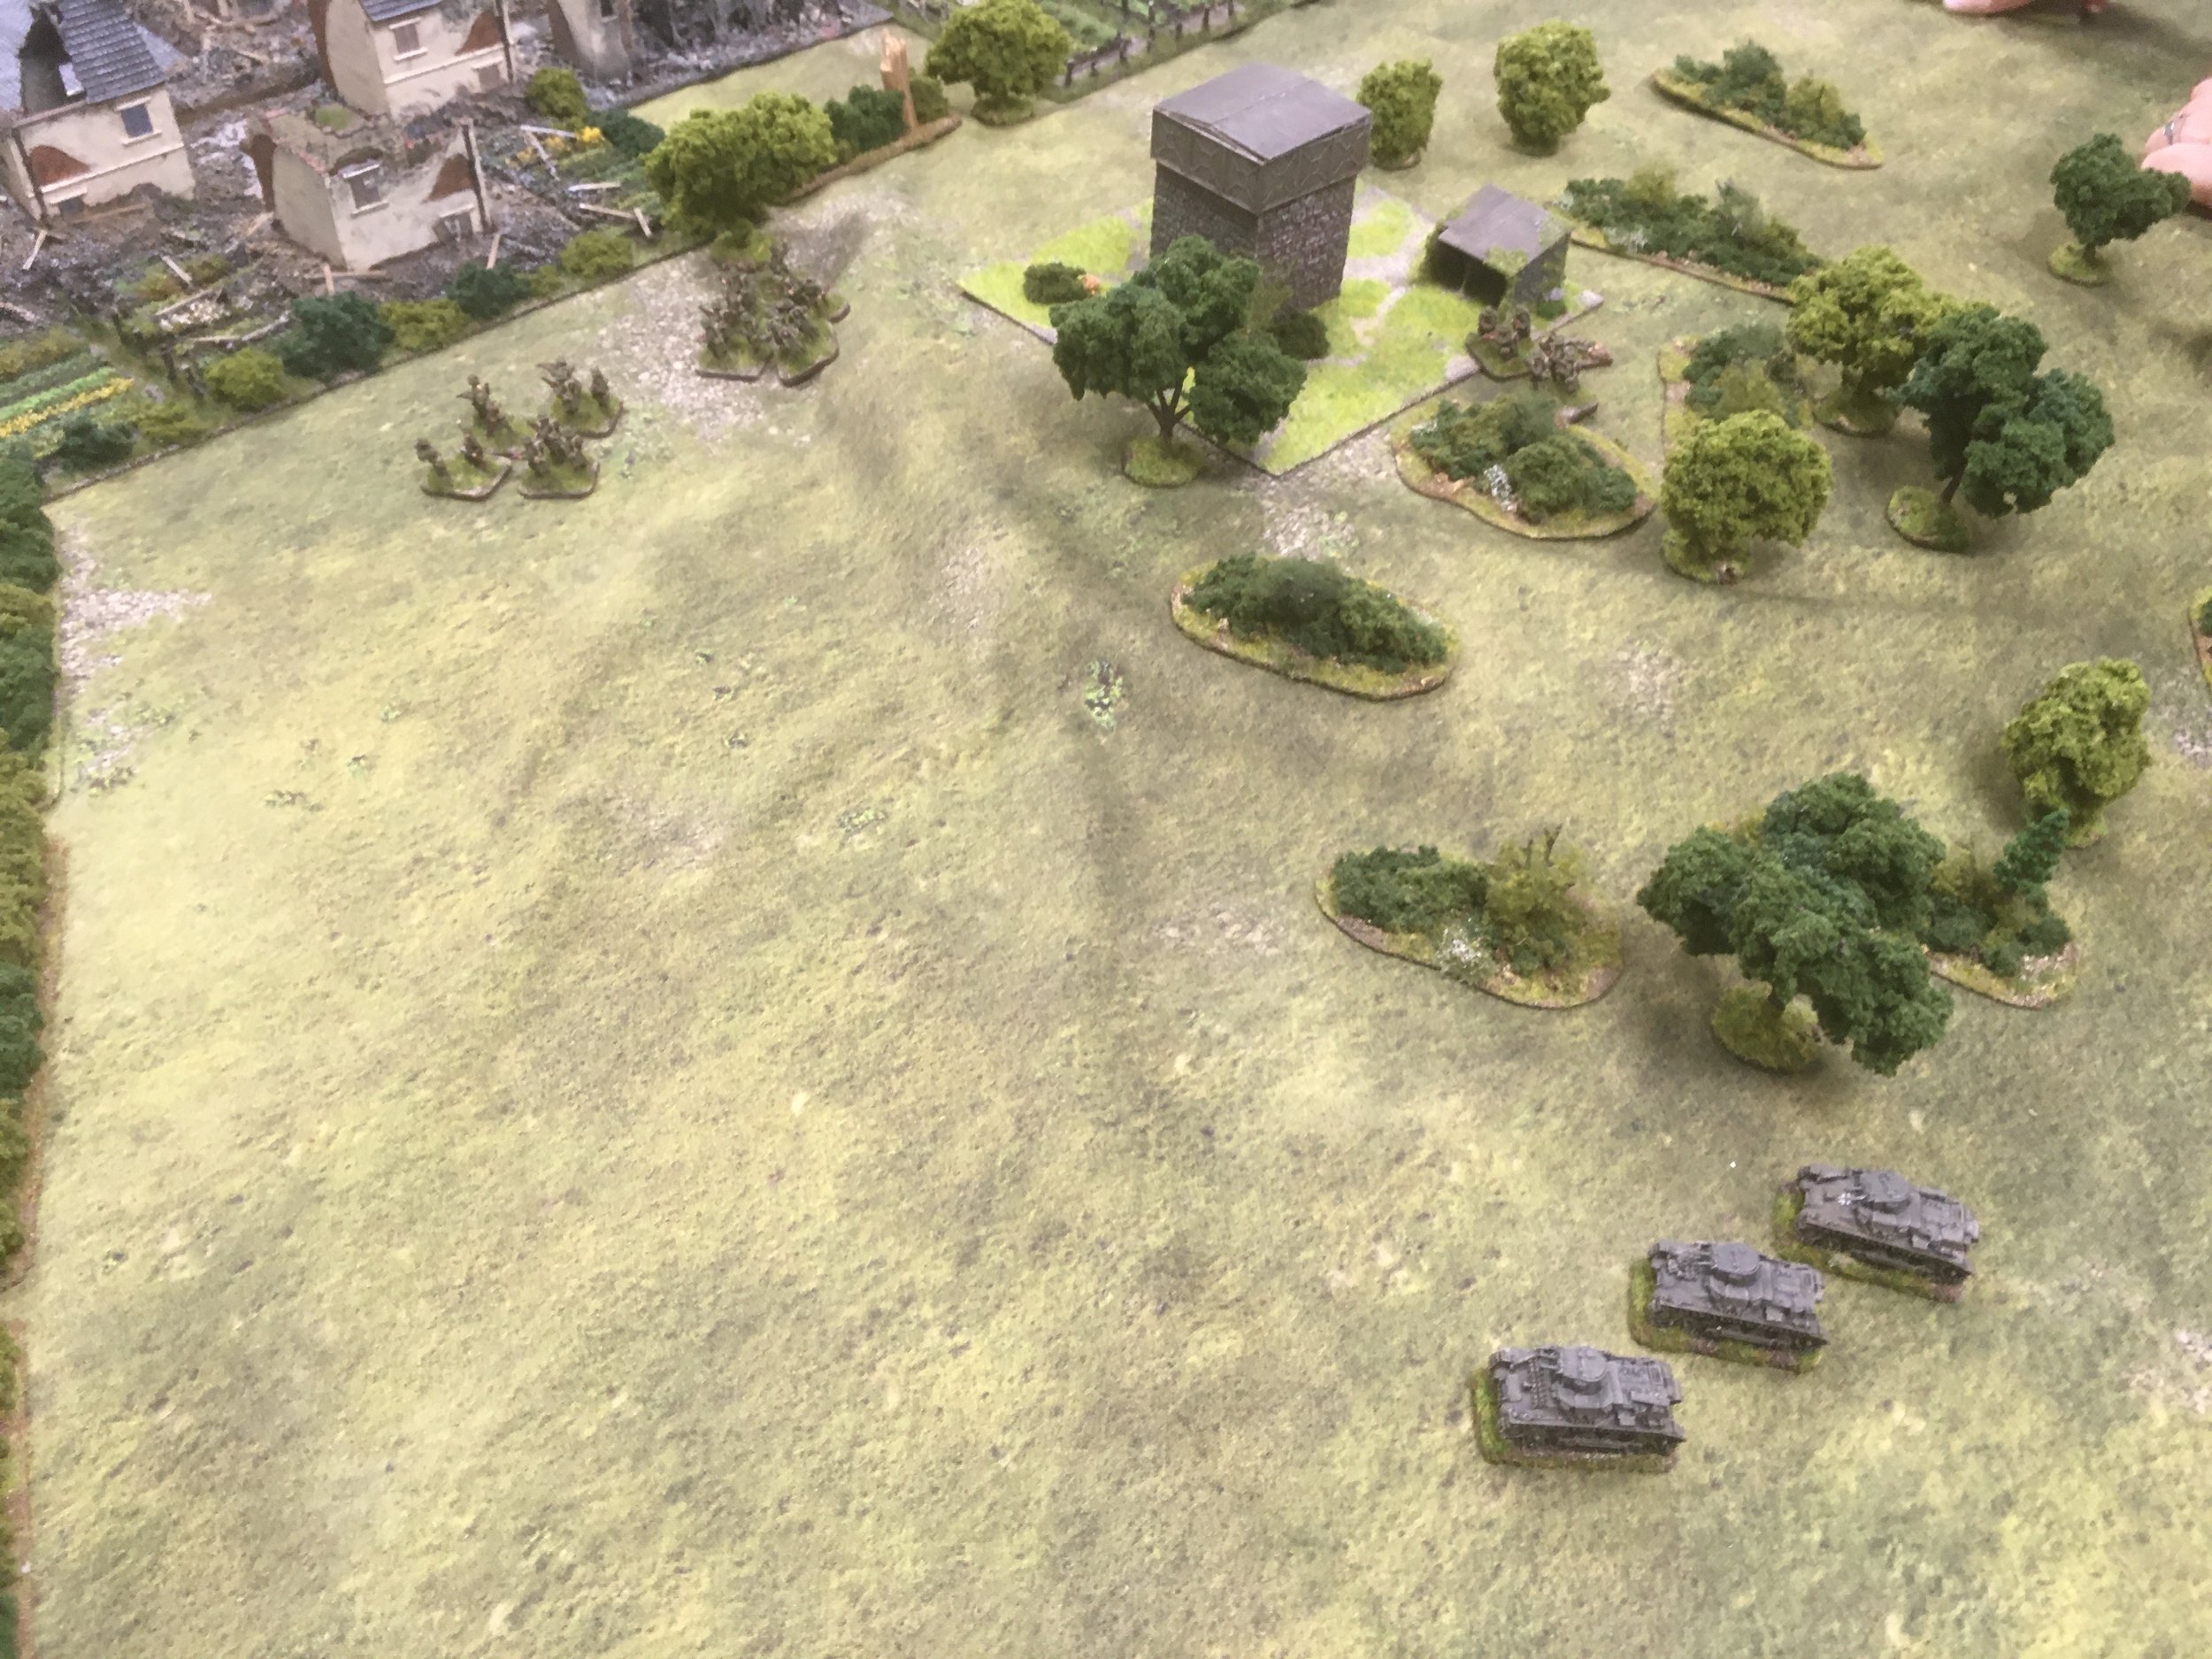
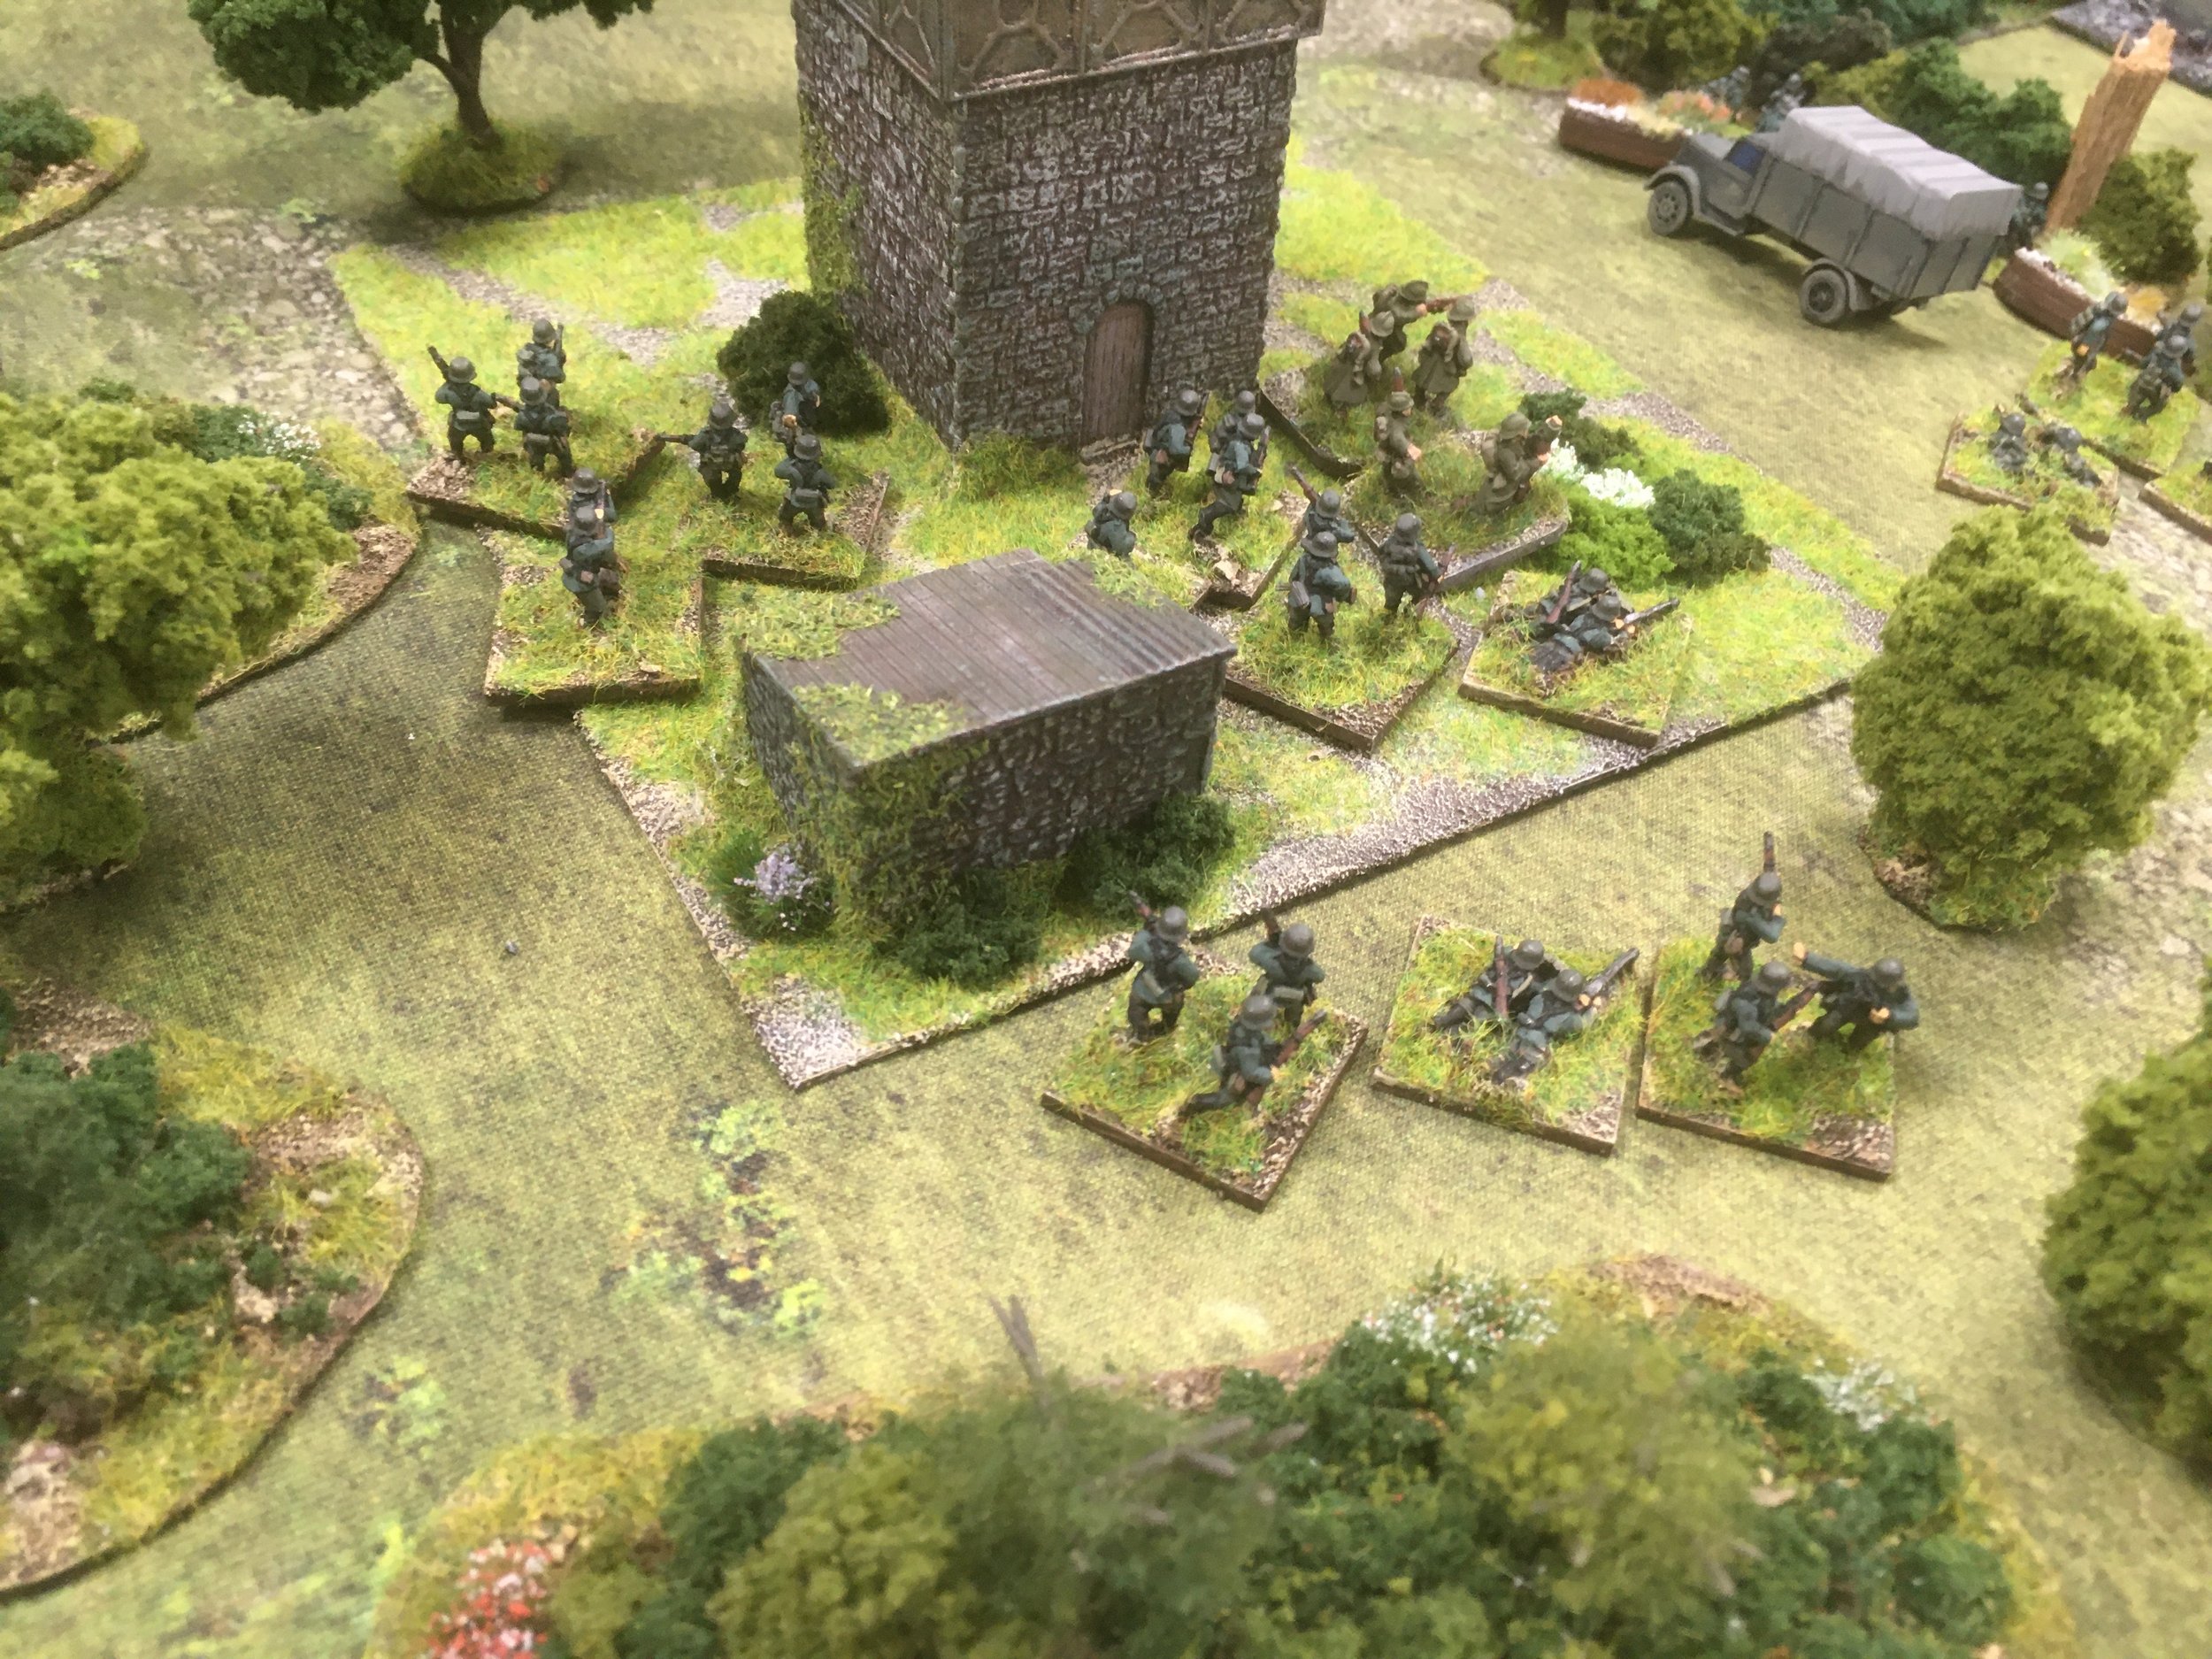
The German's had to occupy two buildings; a house and a barn, within ten turns. The view of the table can be seen from the German start line on their western table edge, looking eastwards. The terrain consisted of a road running EW bounded by light woods to the north, south and east, and two gullies north and south. Large fields of crops were a feature of the centre plus the two building objectives.

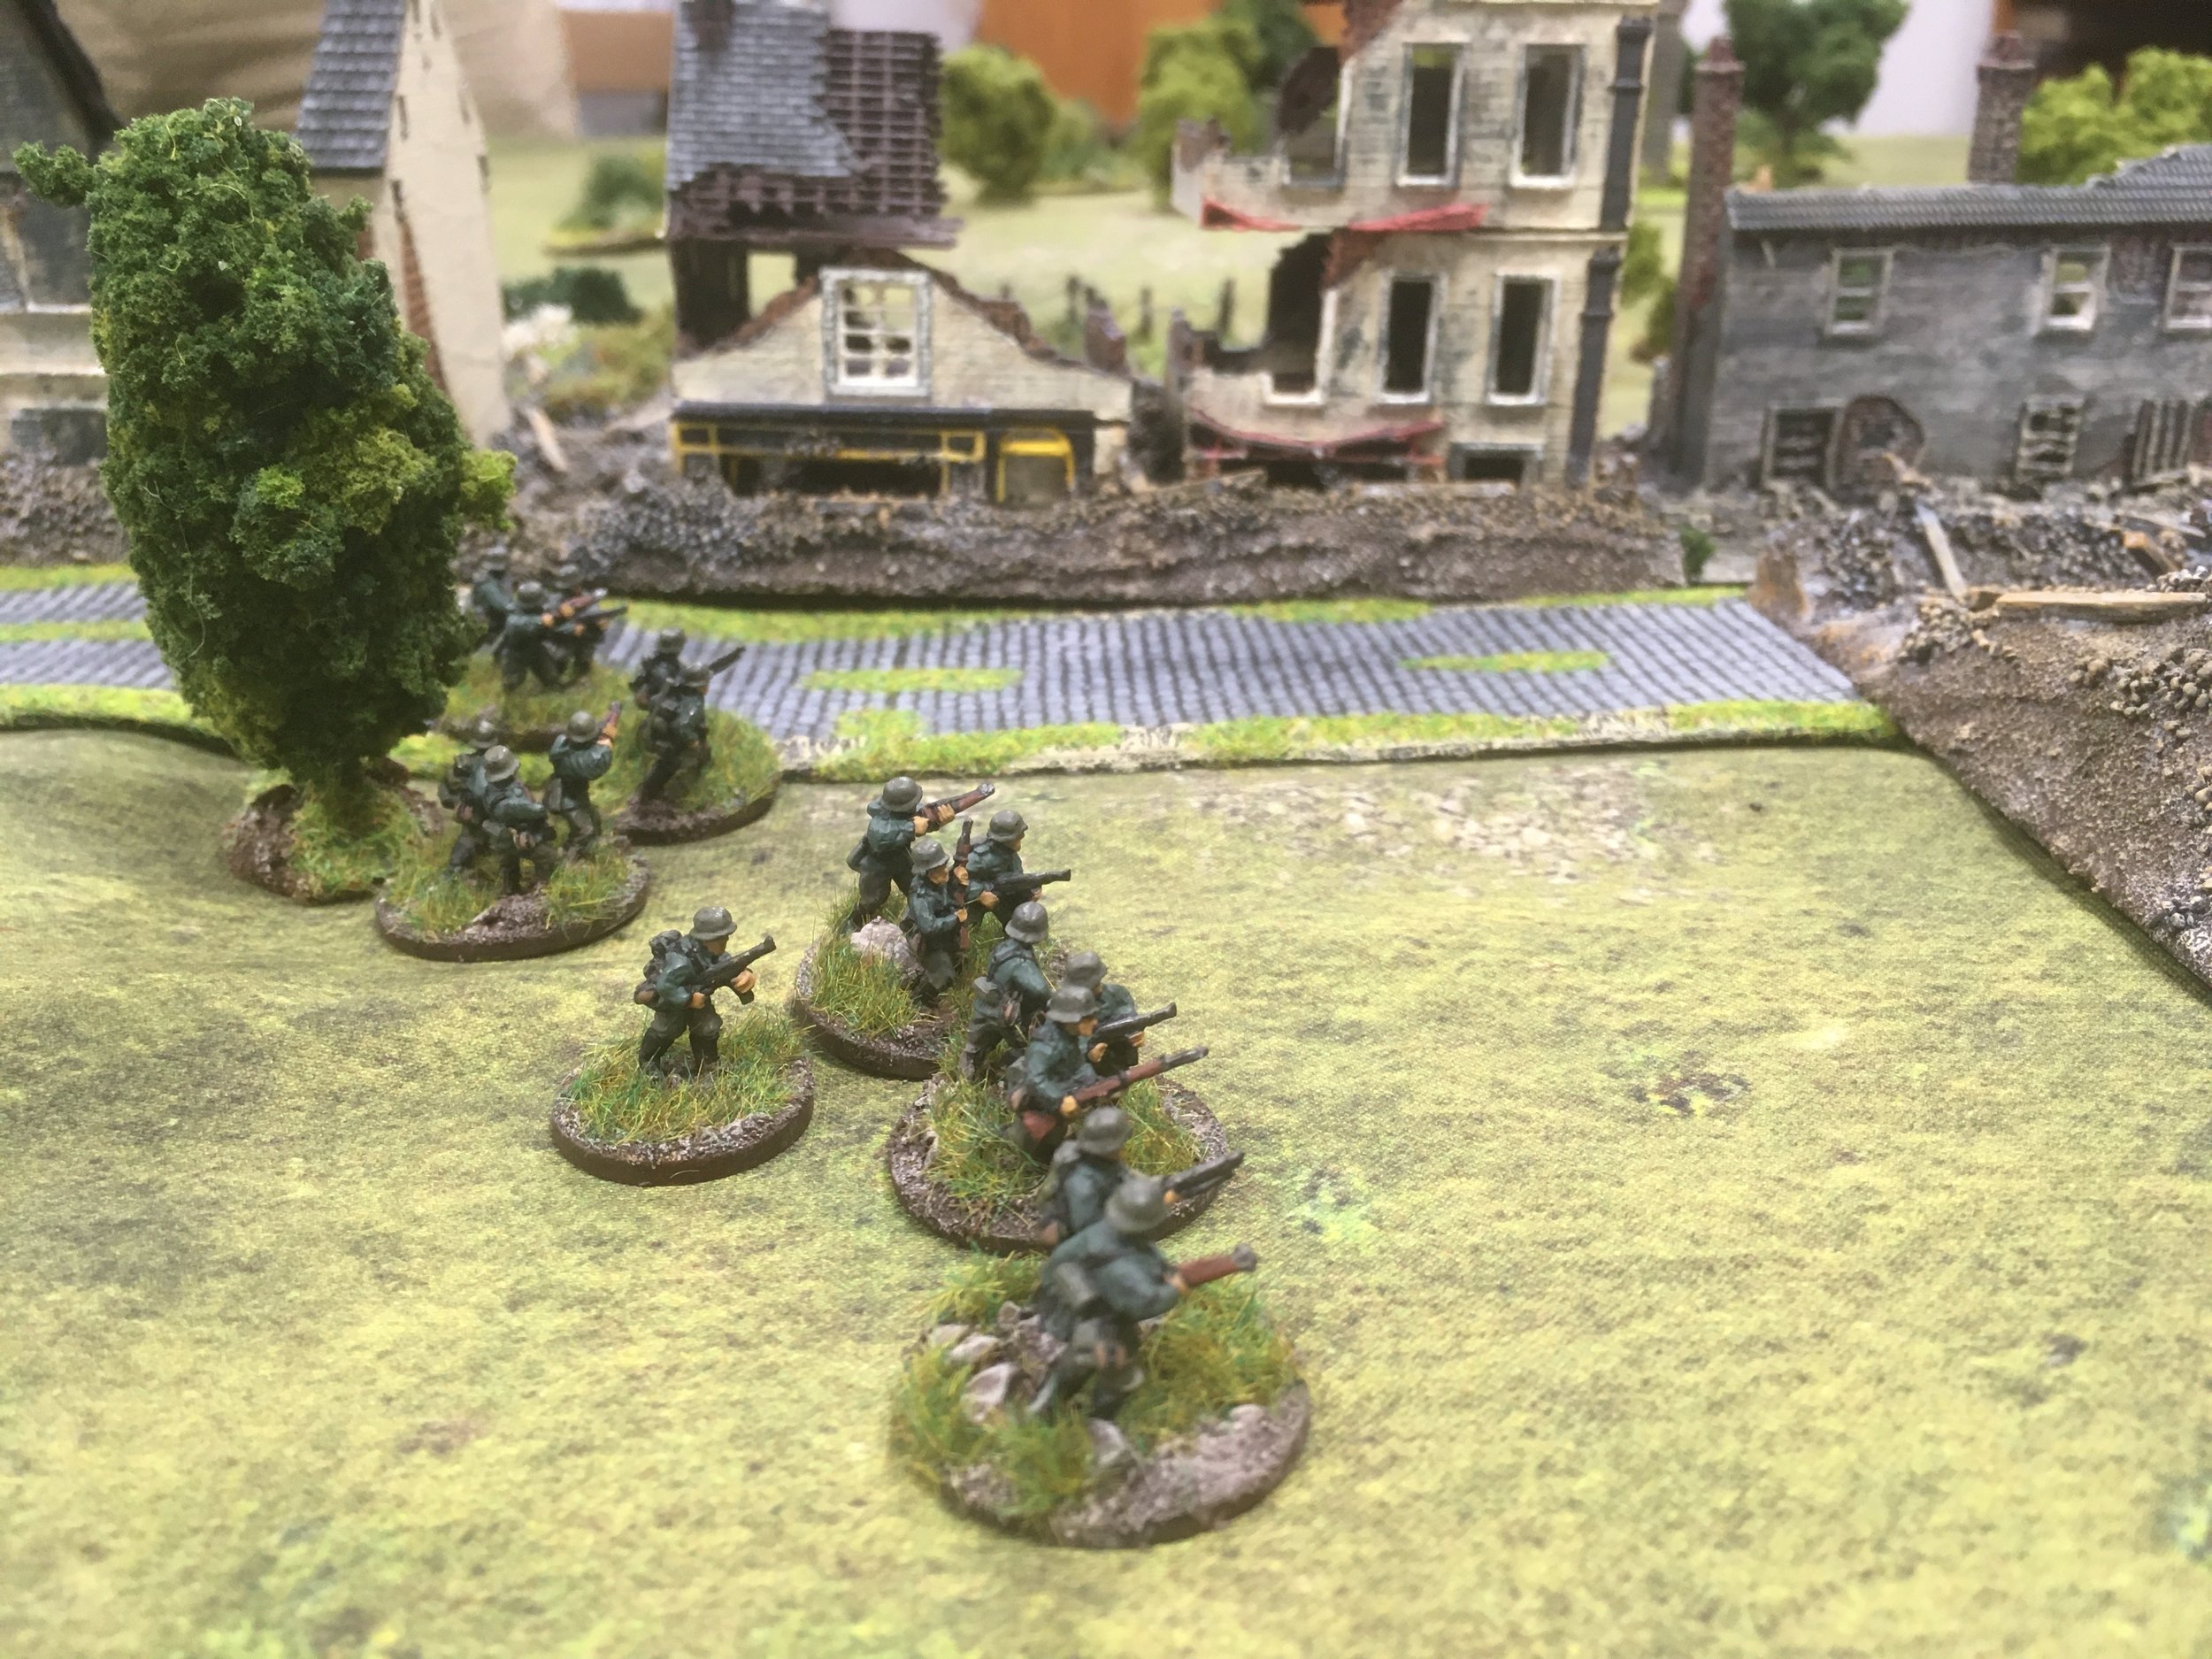
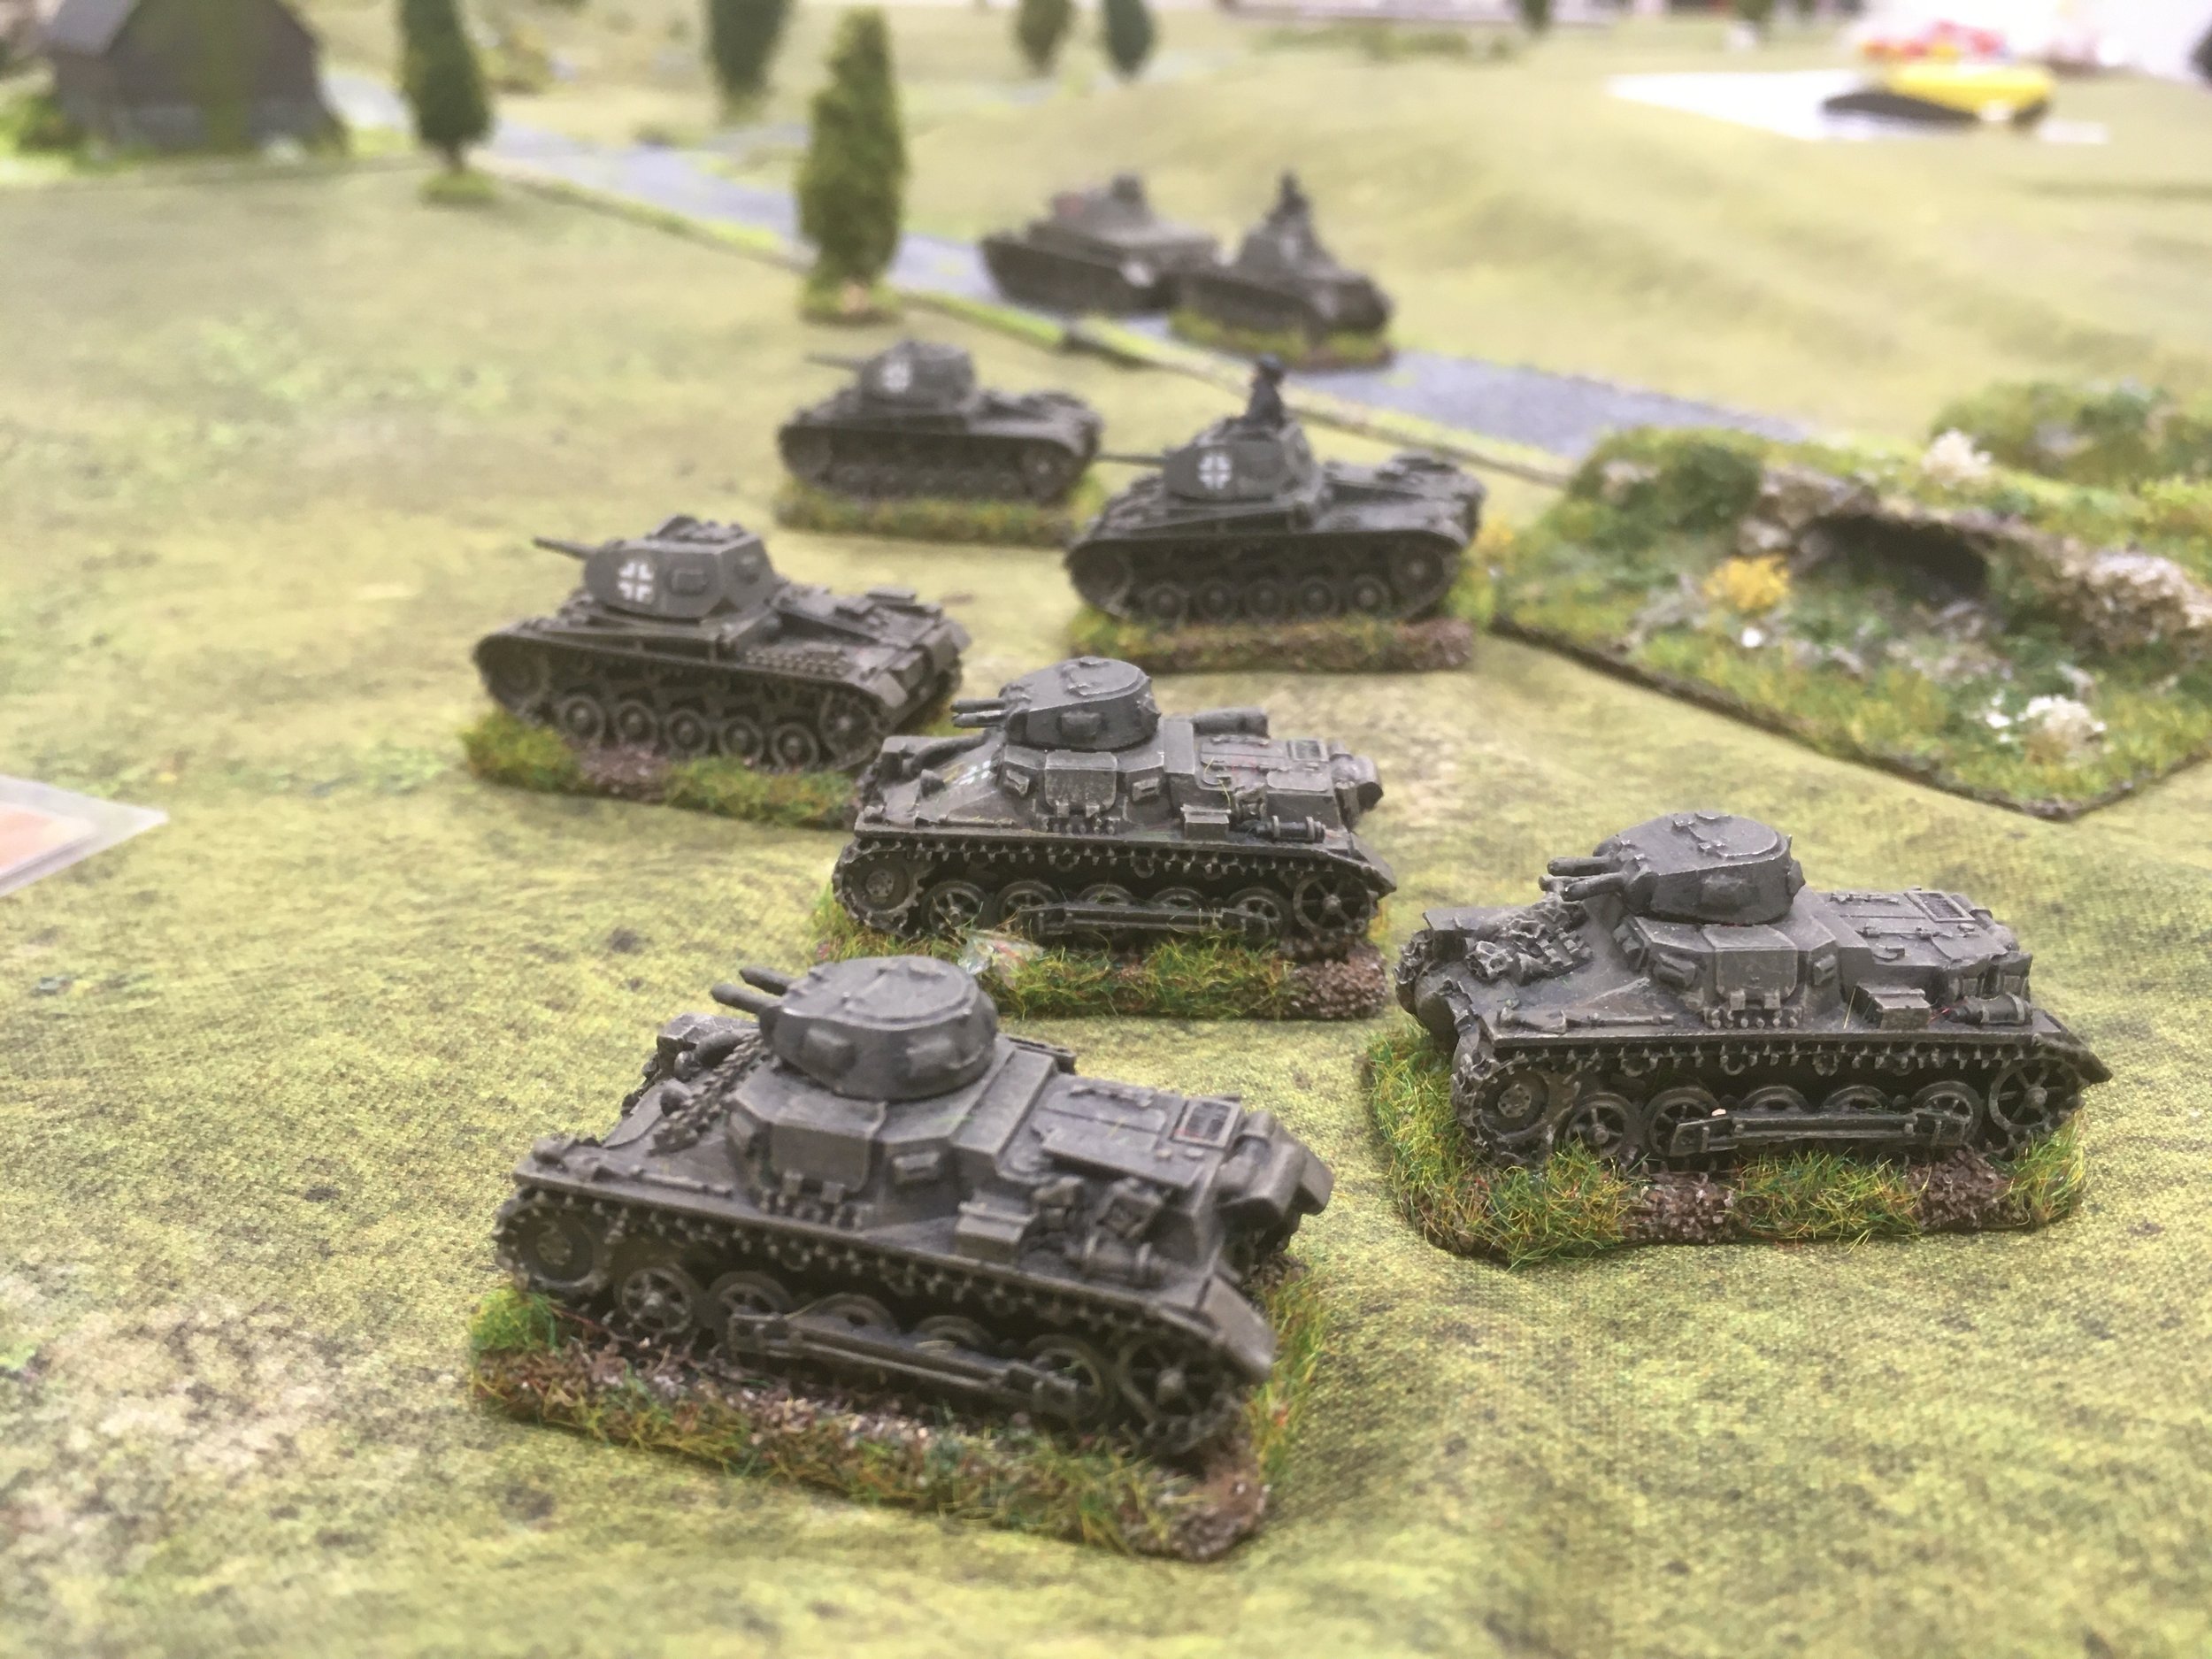
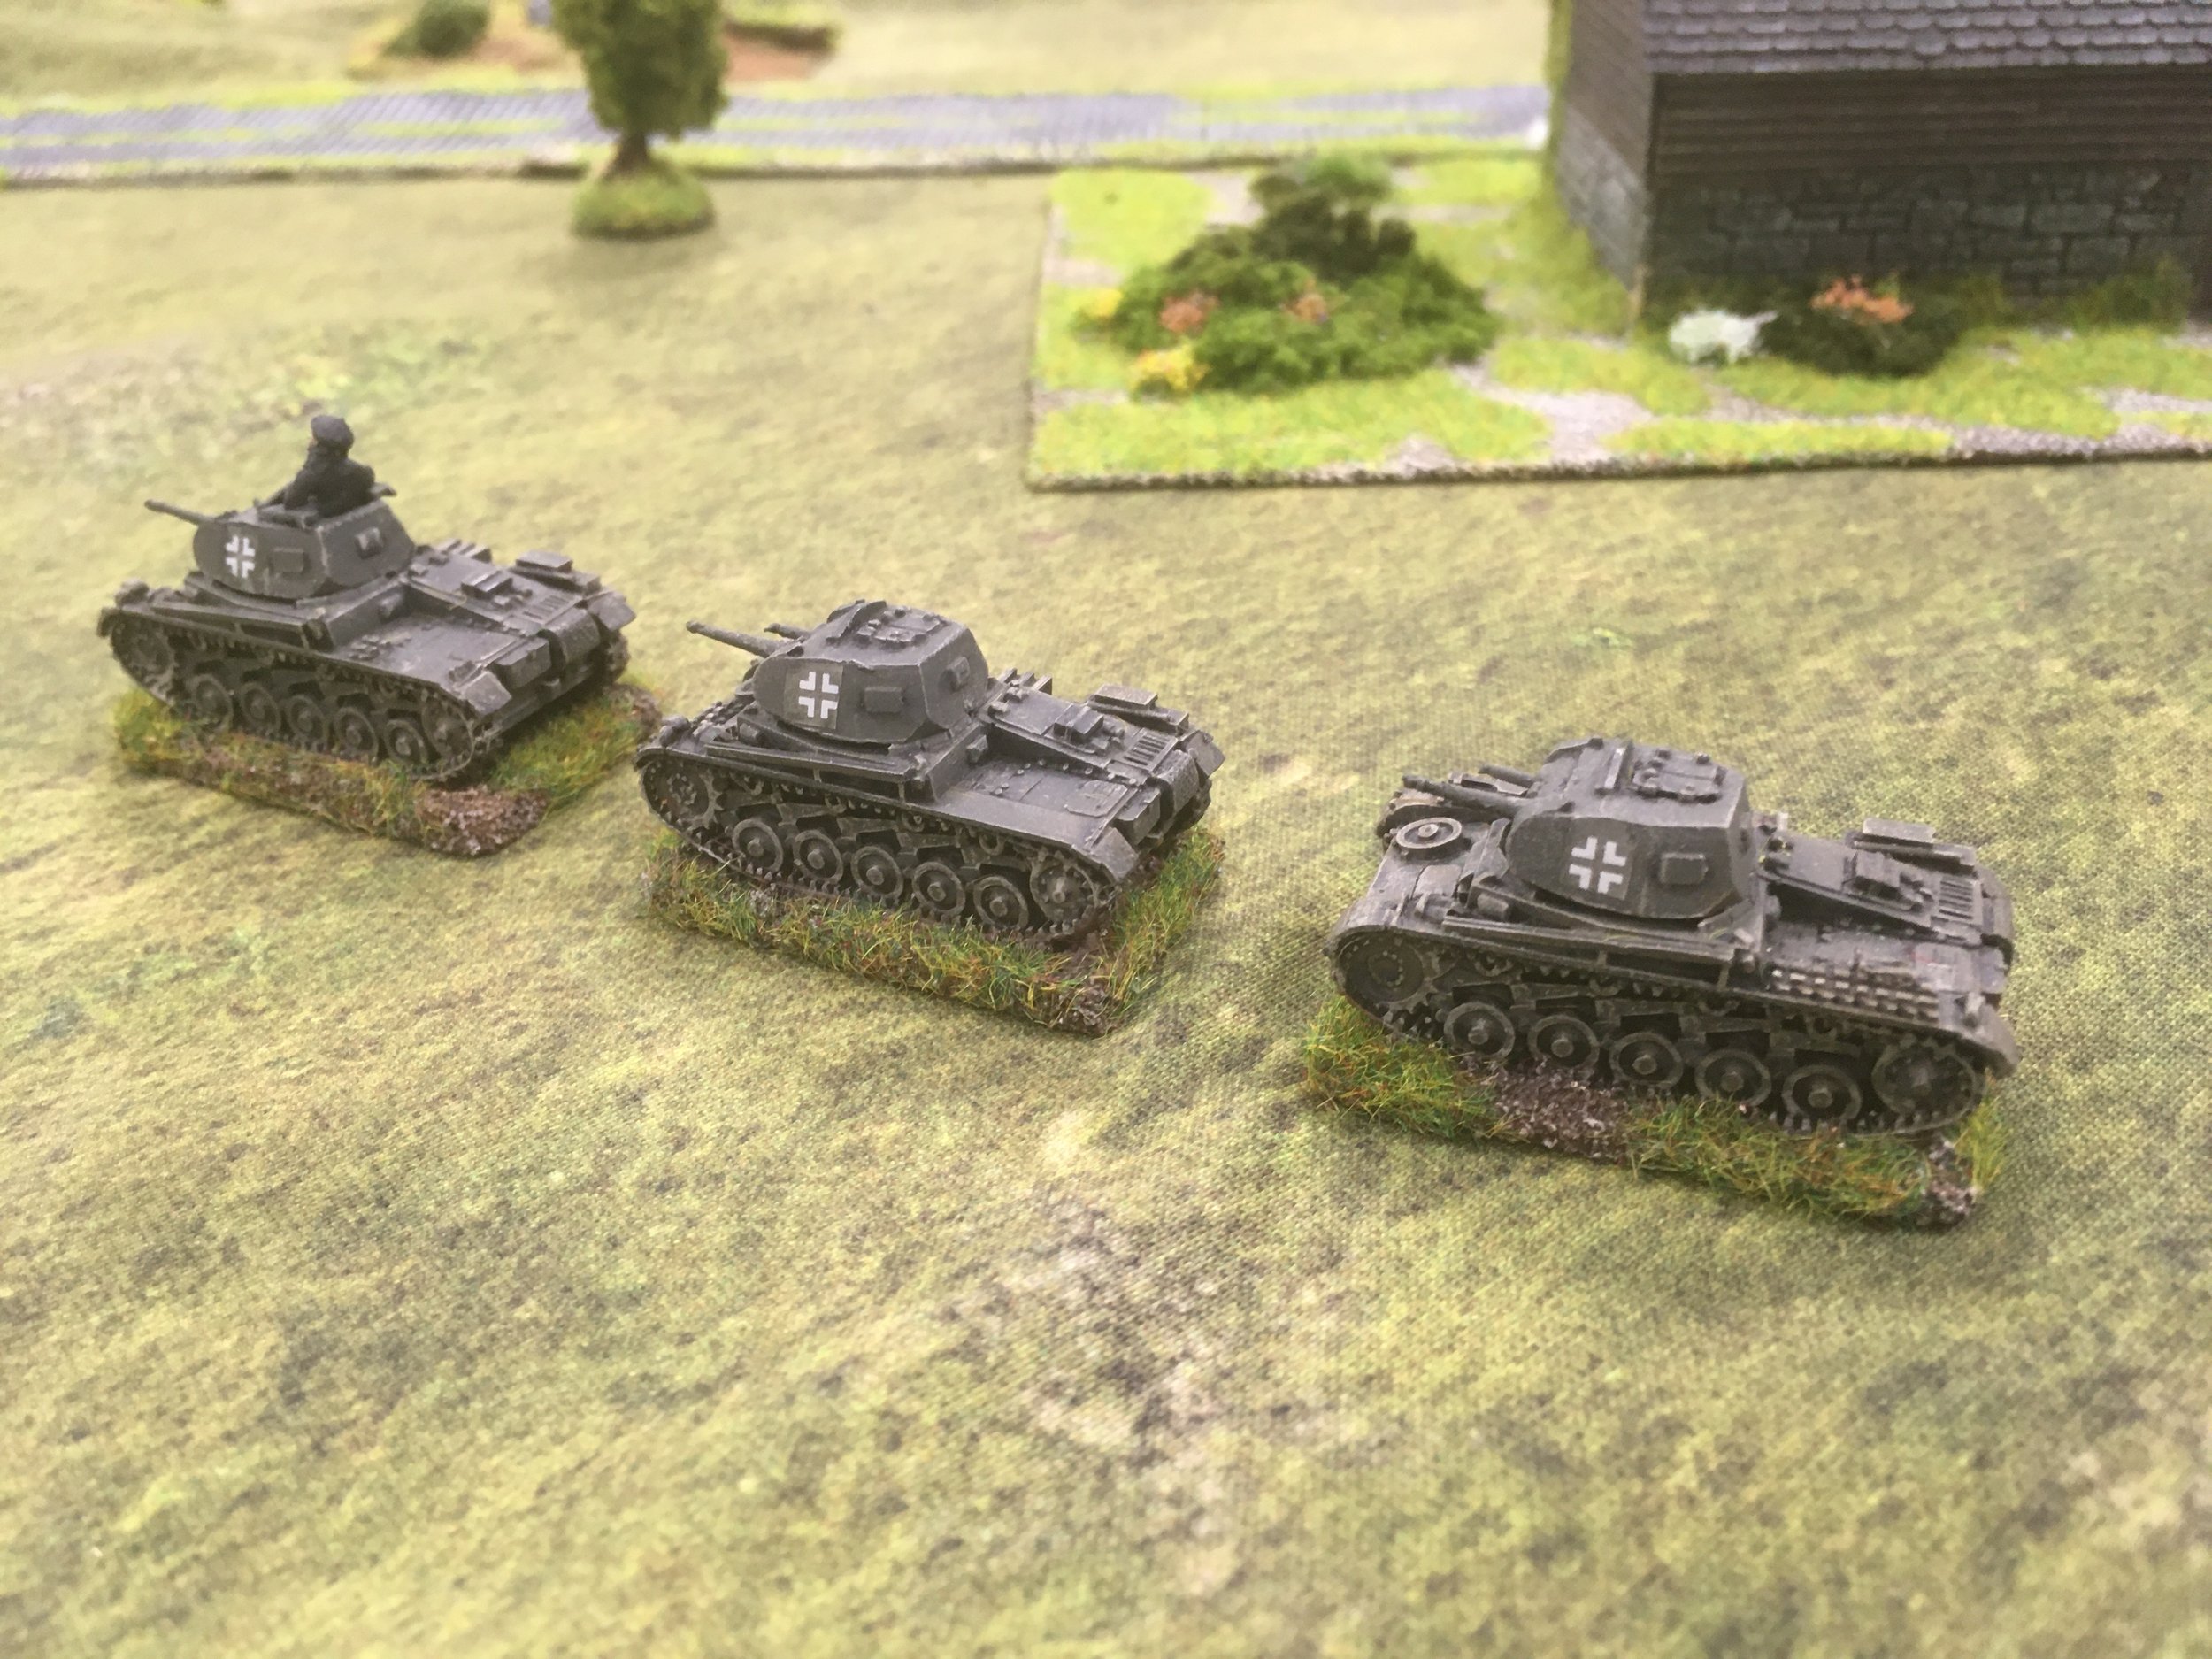
Max and Clivey base force had two, two Big Men led Platoons each three squads plus a 50mm mortar, of Mechanised Infantry, plus two Panzer IIIG and two Panzer IIC each with a Big Man. For variable attachment they acquired a Company HQ SdKfz 251/10 with 37mm AT gun and Big Man overall CO.

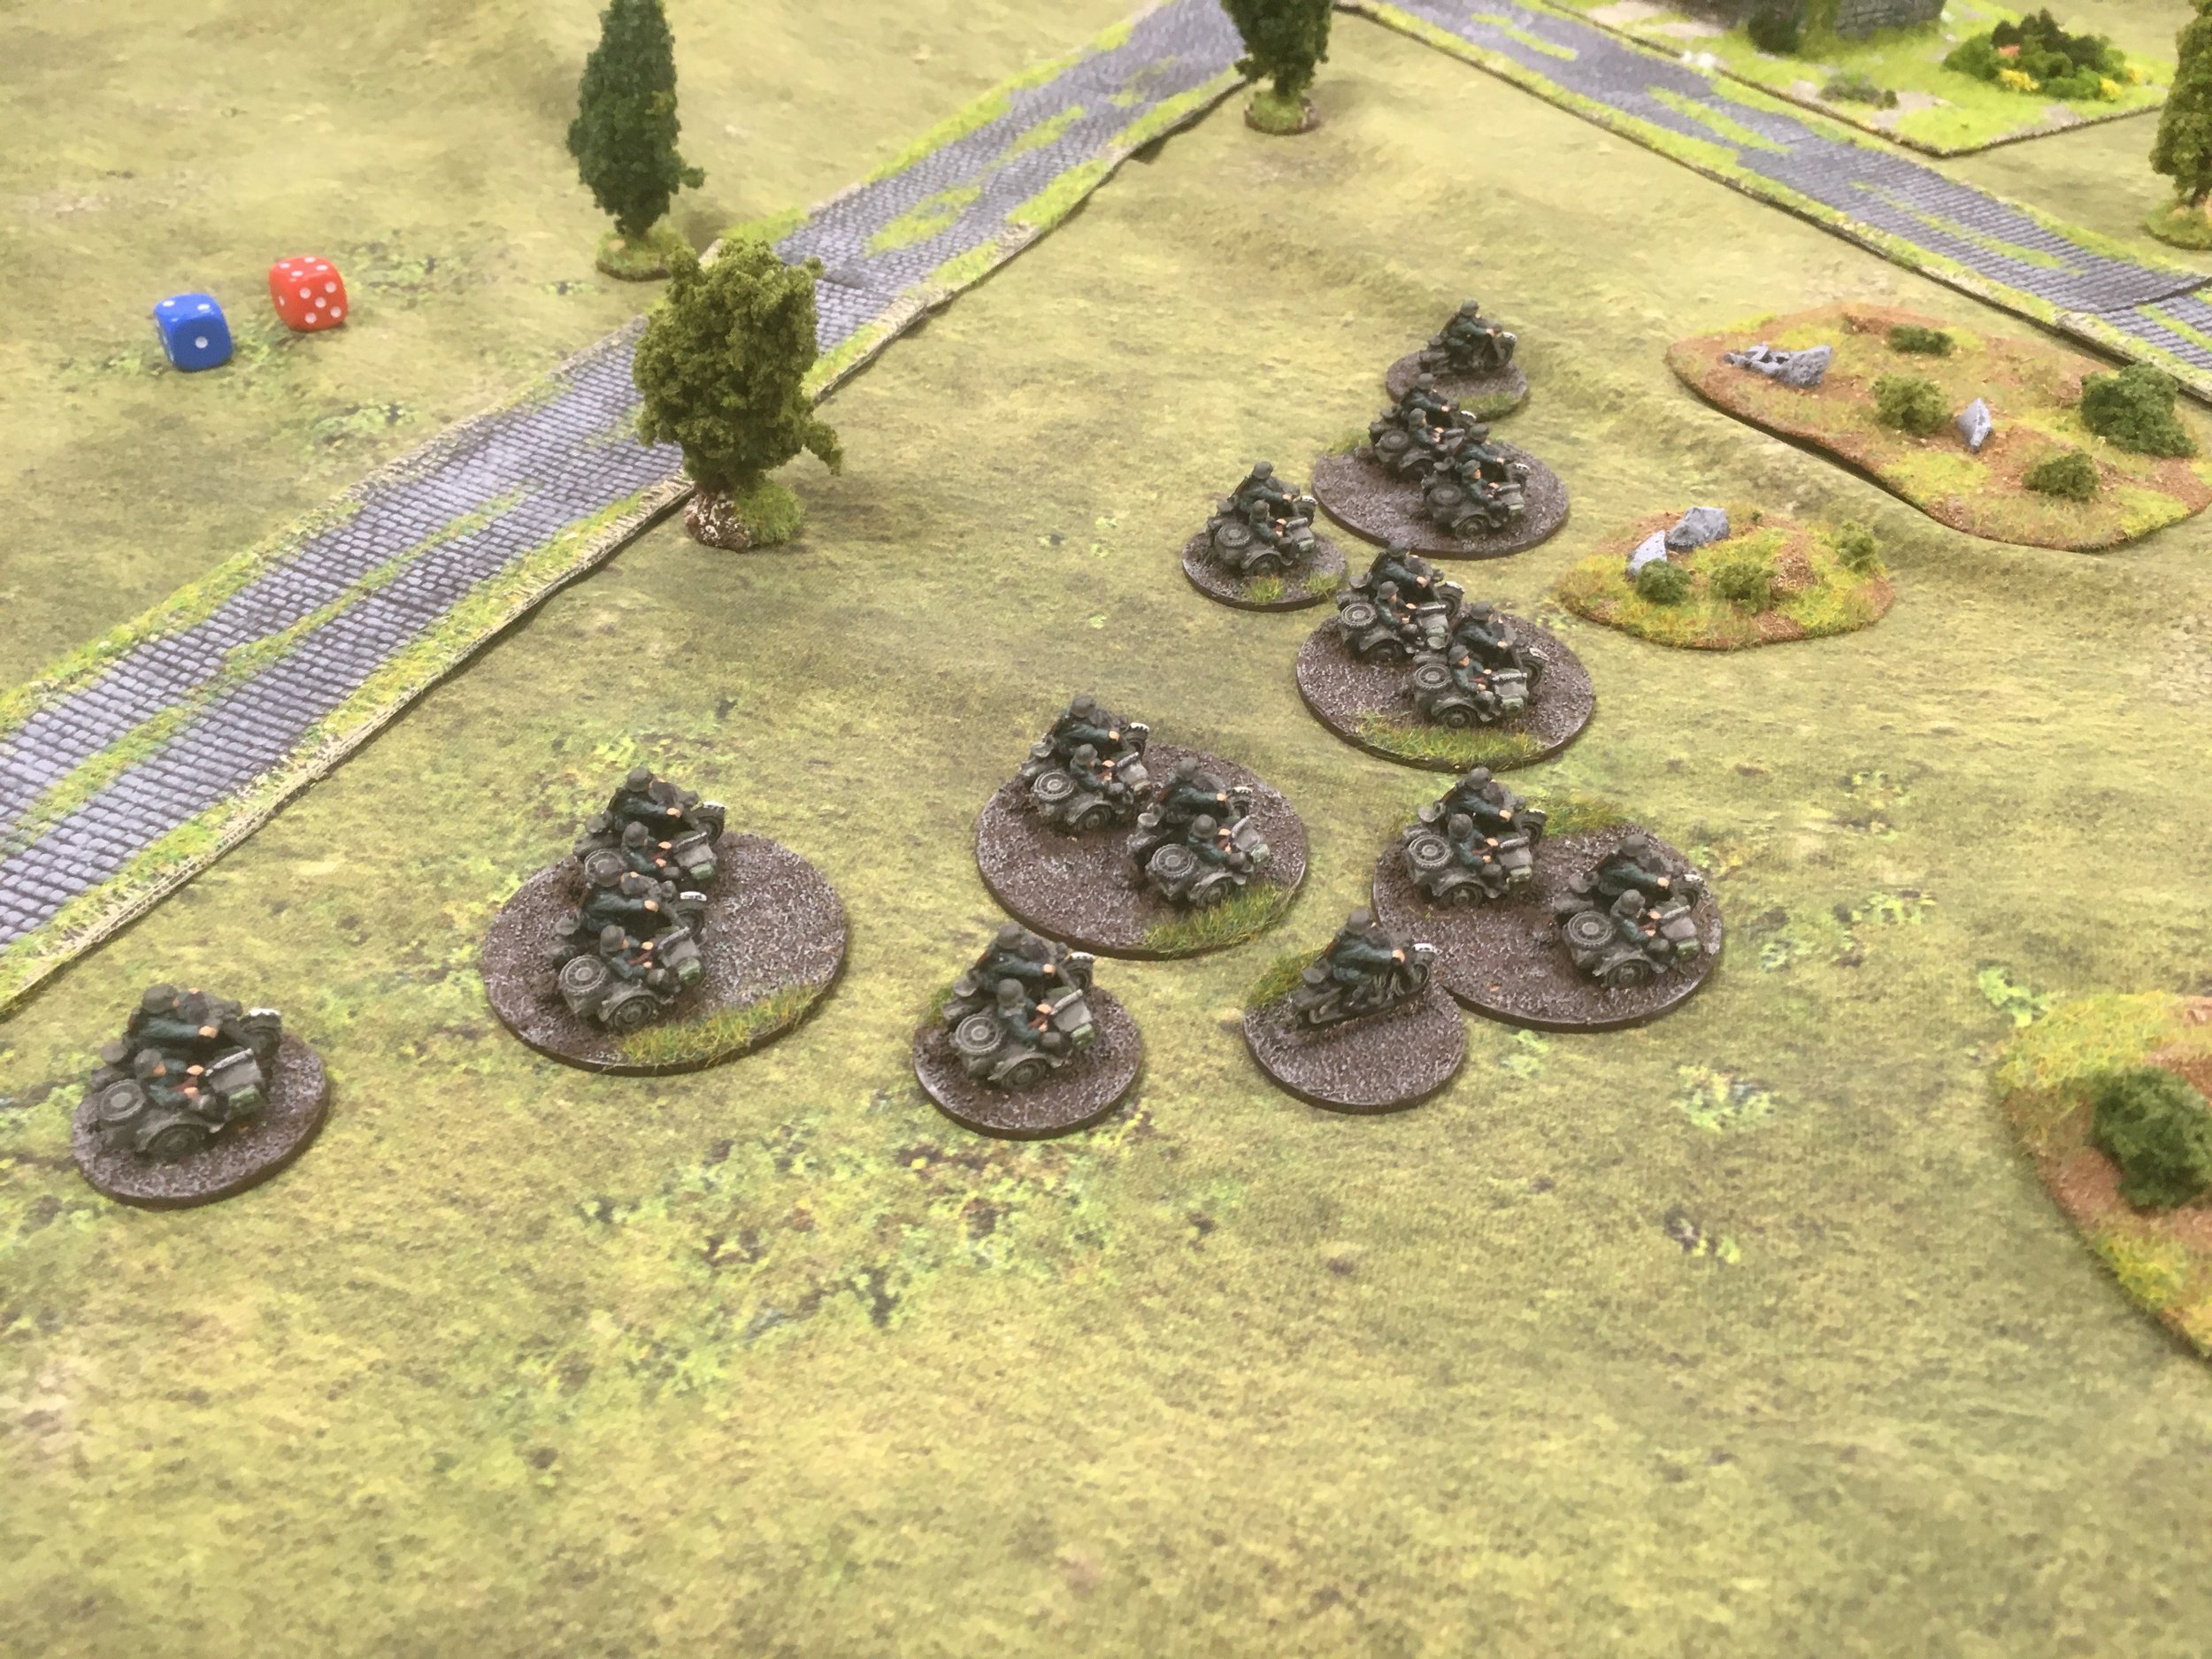
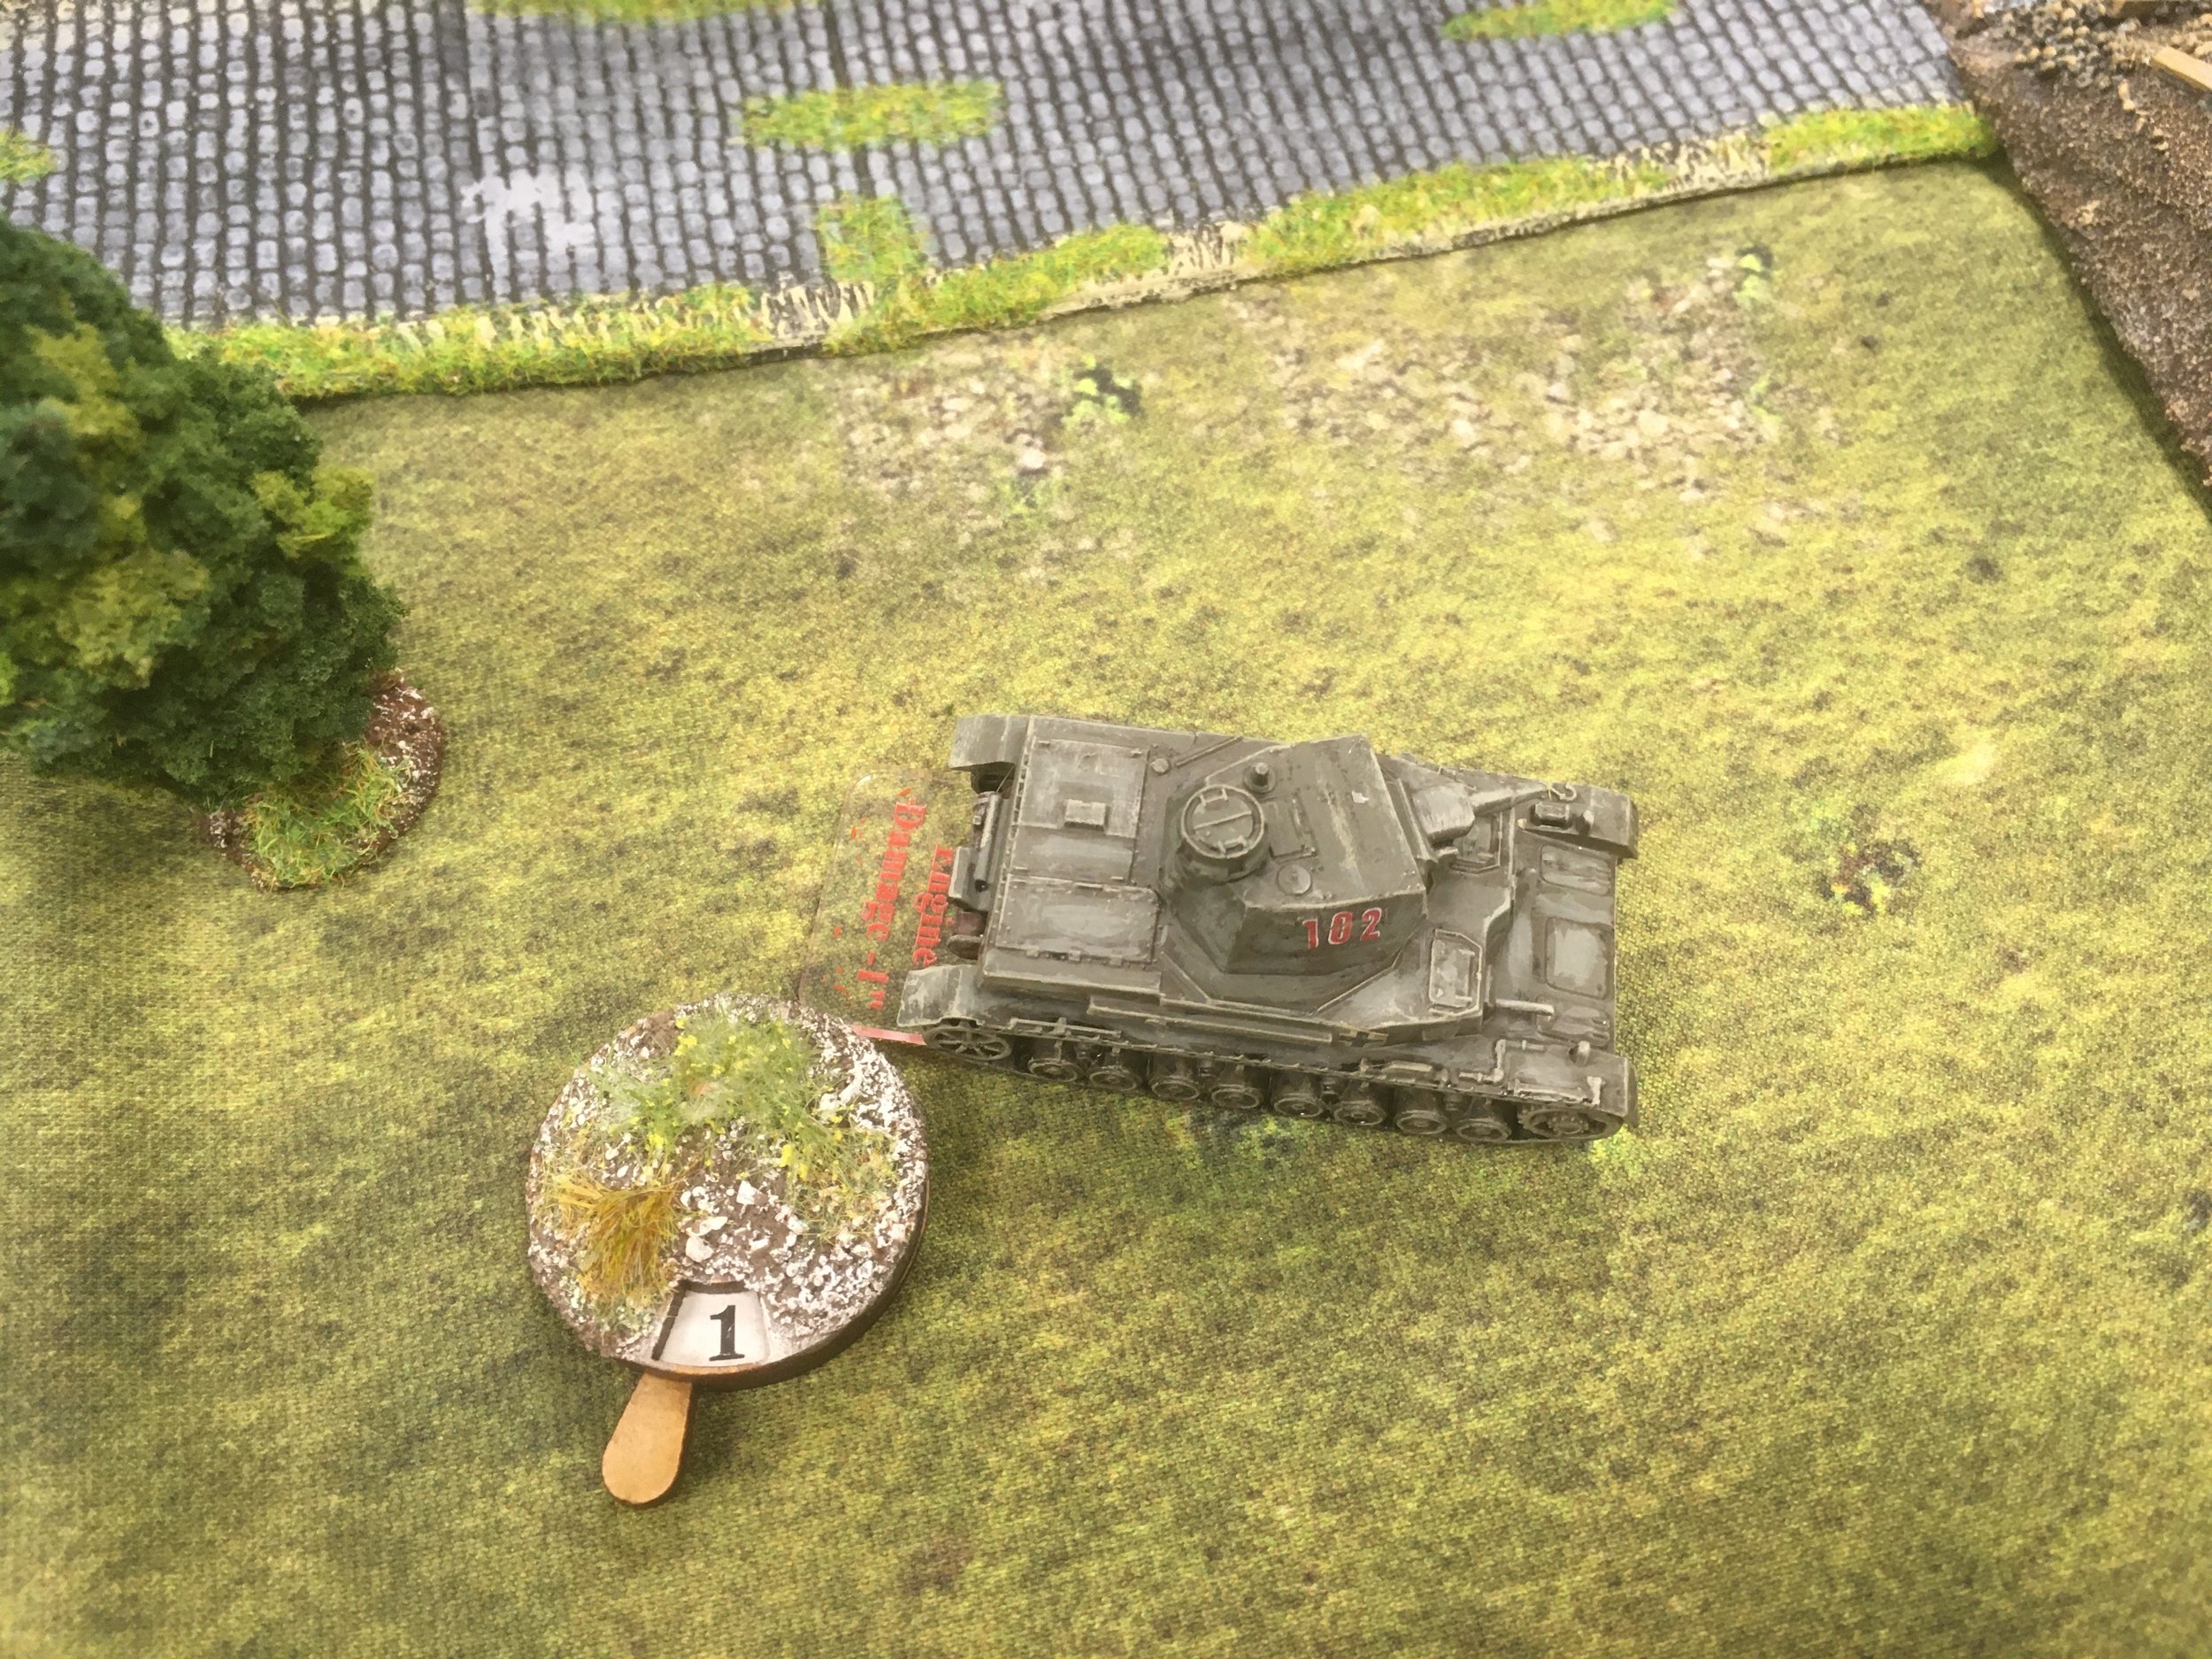
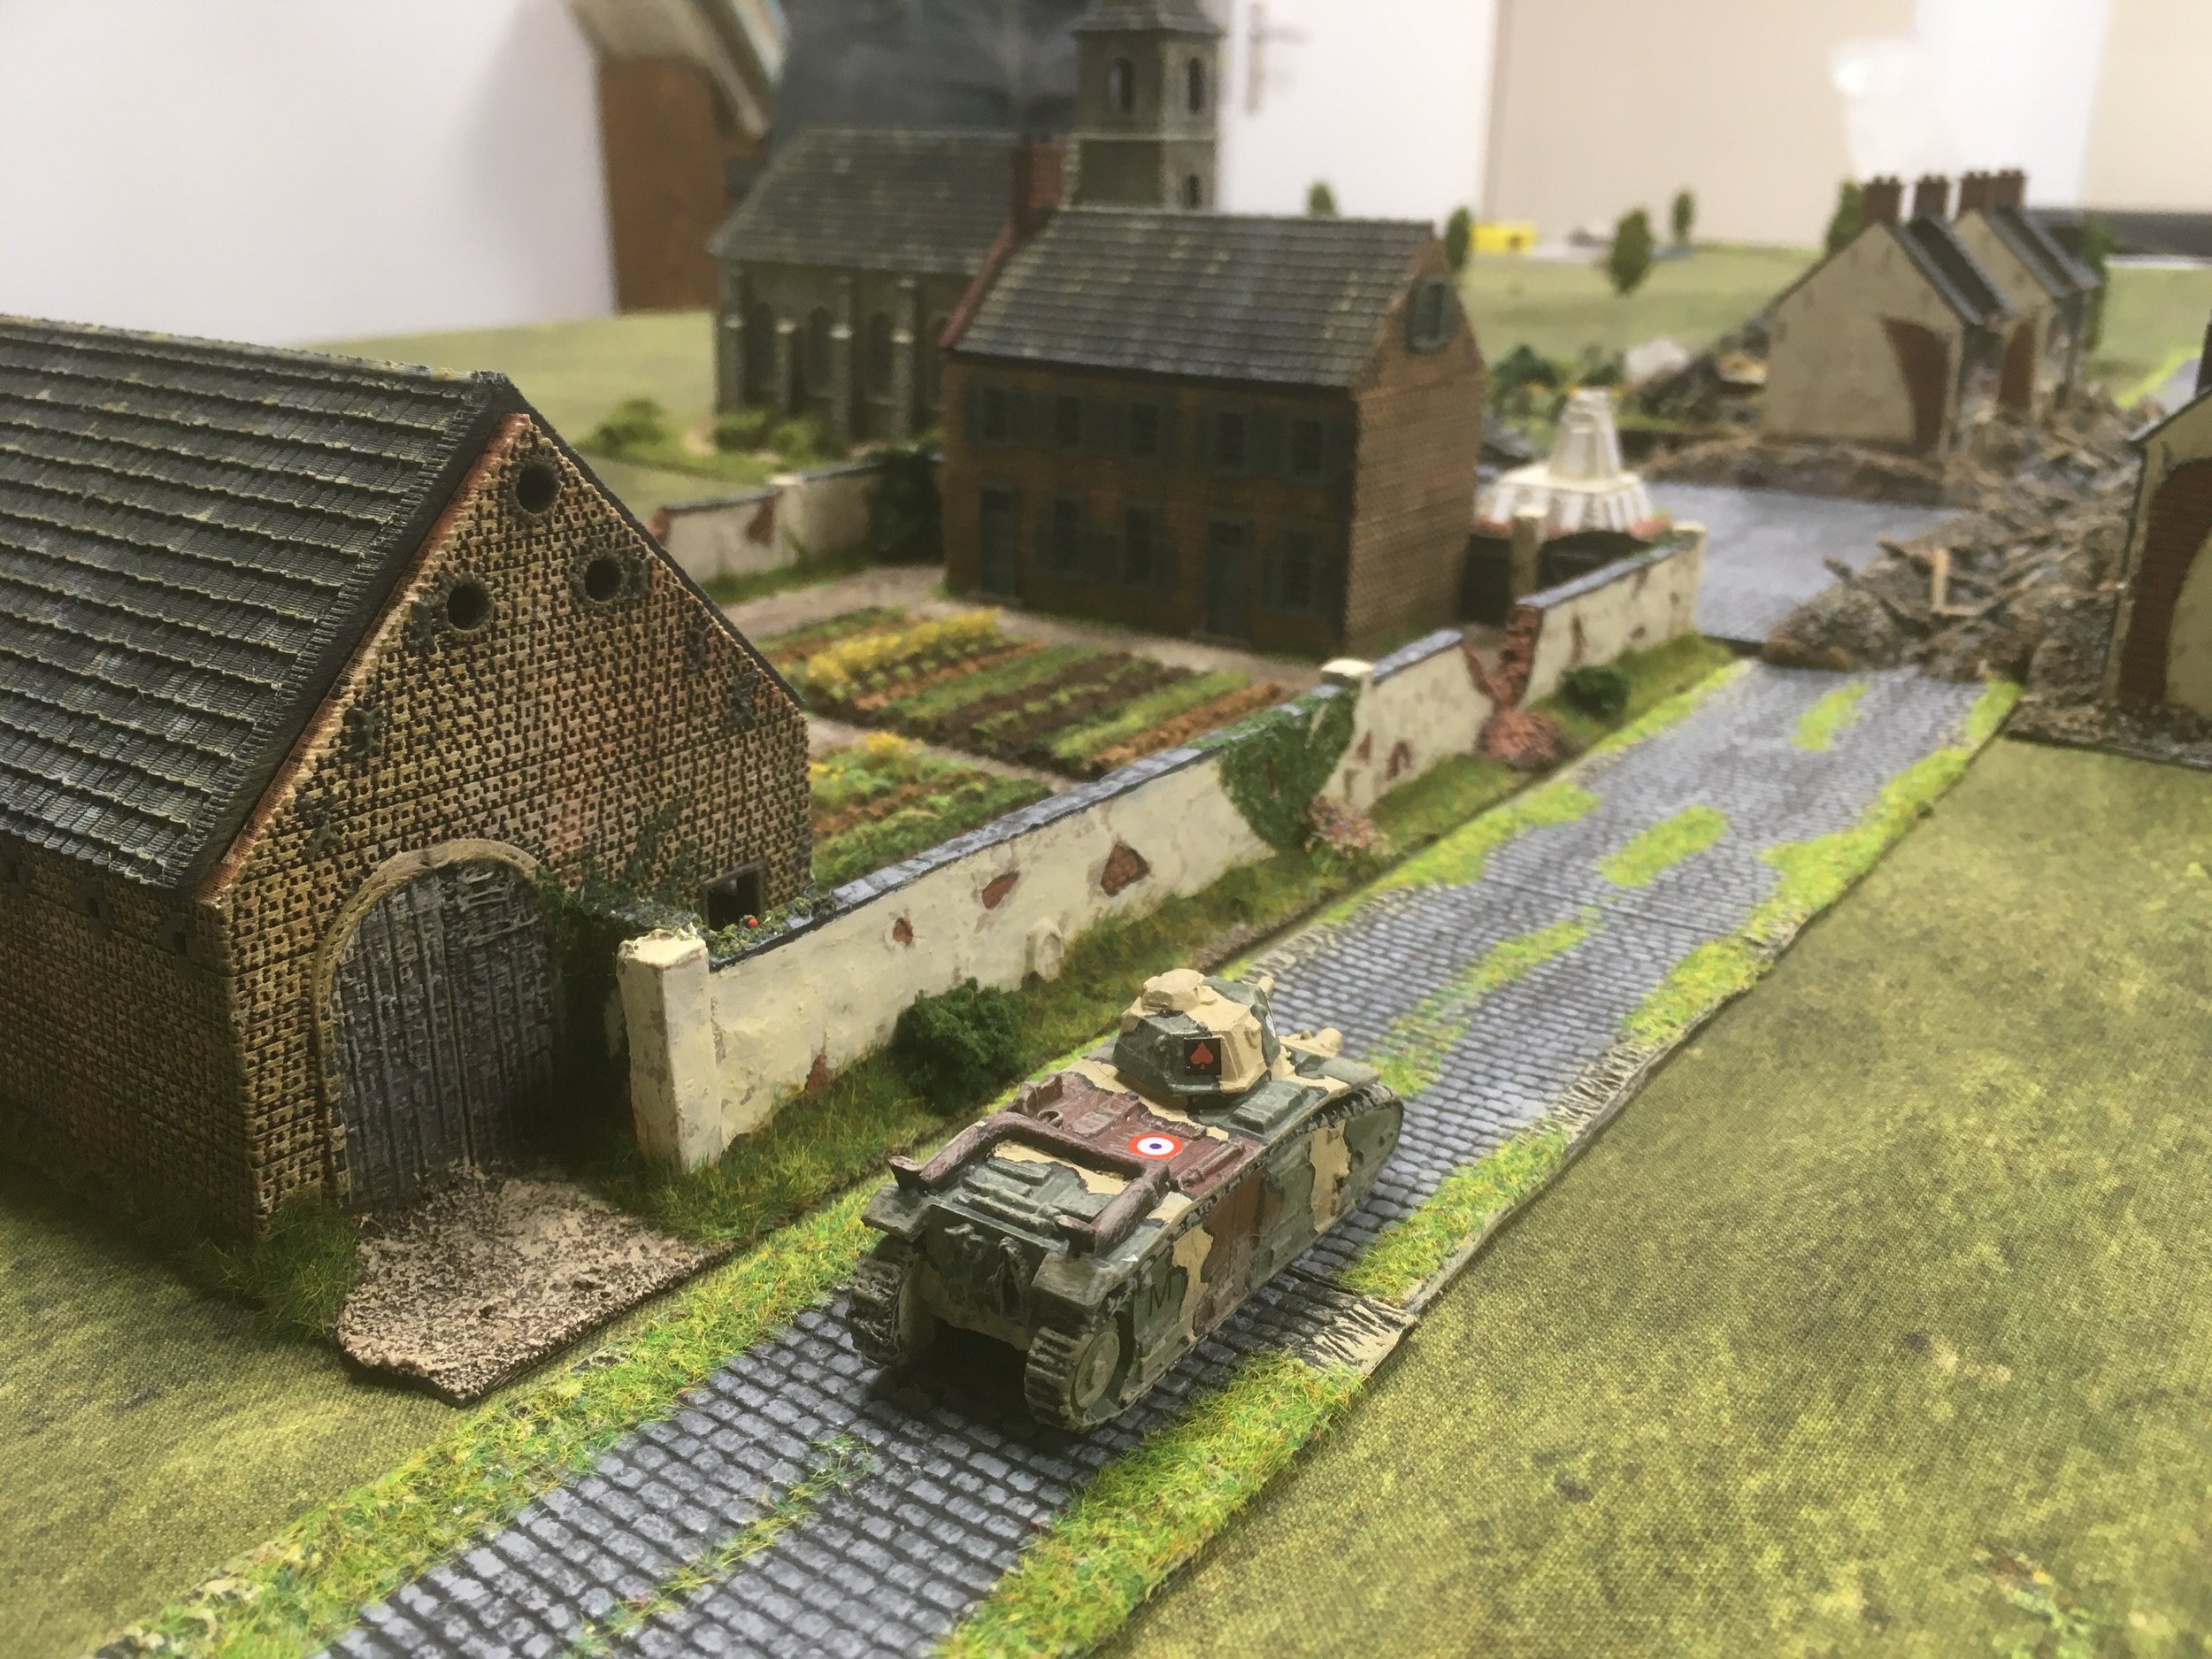
My base force consisted of a command BT7, and a three BT7 Tank Platoon plus two Infantry Platoons of each three ten-man squads and a Big Man. My variable attachments were two BA10 armoured cars and a further Big Man led Platoon of Infantry. A sizeable force. The actual scenario called for T26's but I own BT7's instead.

My troops were significantly inferior in quality, being poor, and less than half the amount of Big Men (3:7).

However, unperturbed I decided to put up a helluva fight and sell my men's lives dearly (rare for me!).

I had to deploy within 12" of my table edge. My BT7 Command was to arrive upon the relevant 'Reinforcements' card being drawn on my baseline (turn 3). However, my variable attachment BA10's and Infantry Platoon could arrive on the southern table edge, again upon the relevant 'Reinforcements' card (turn 4). I had planned that my BA10's would turn up in the southern wood and my infantry in the SE wood. The problem was to make sure that these areas, in particular the southern wood stayed out of enemy control ensuring my troops safe arrival.

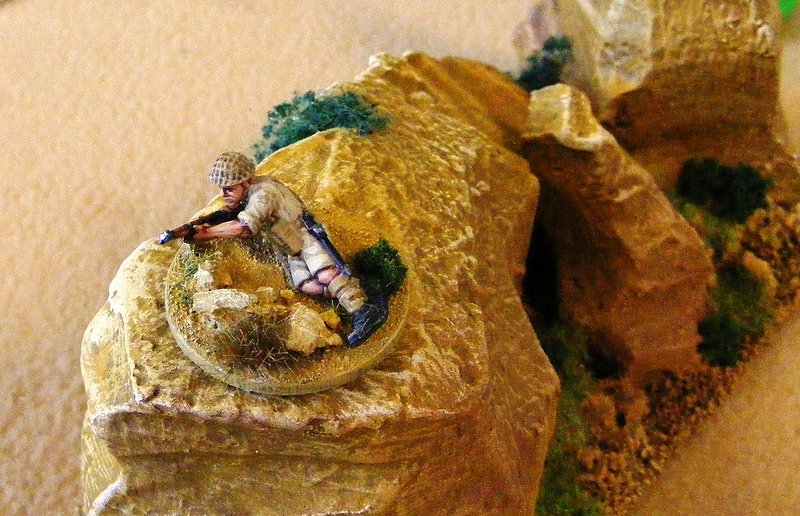
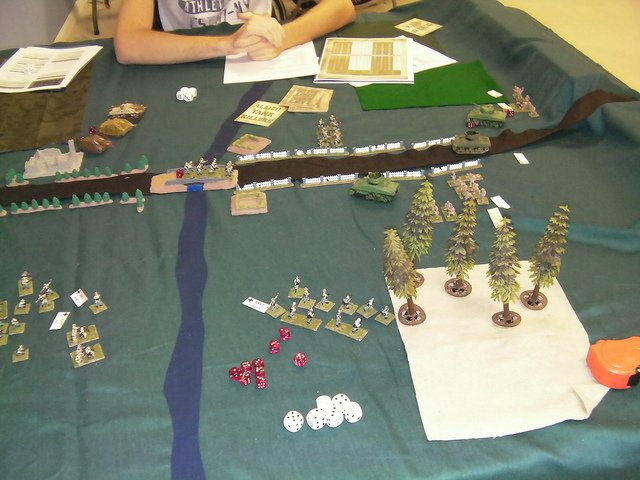
I deployed my BT7's in light woods at the SE table corner hoping to blast anything that appeared in the centre or near the southern wood.

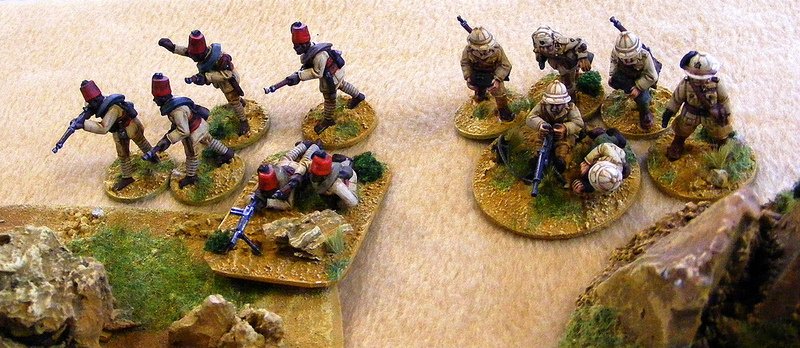
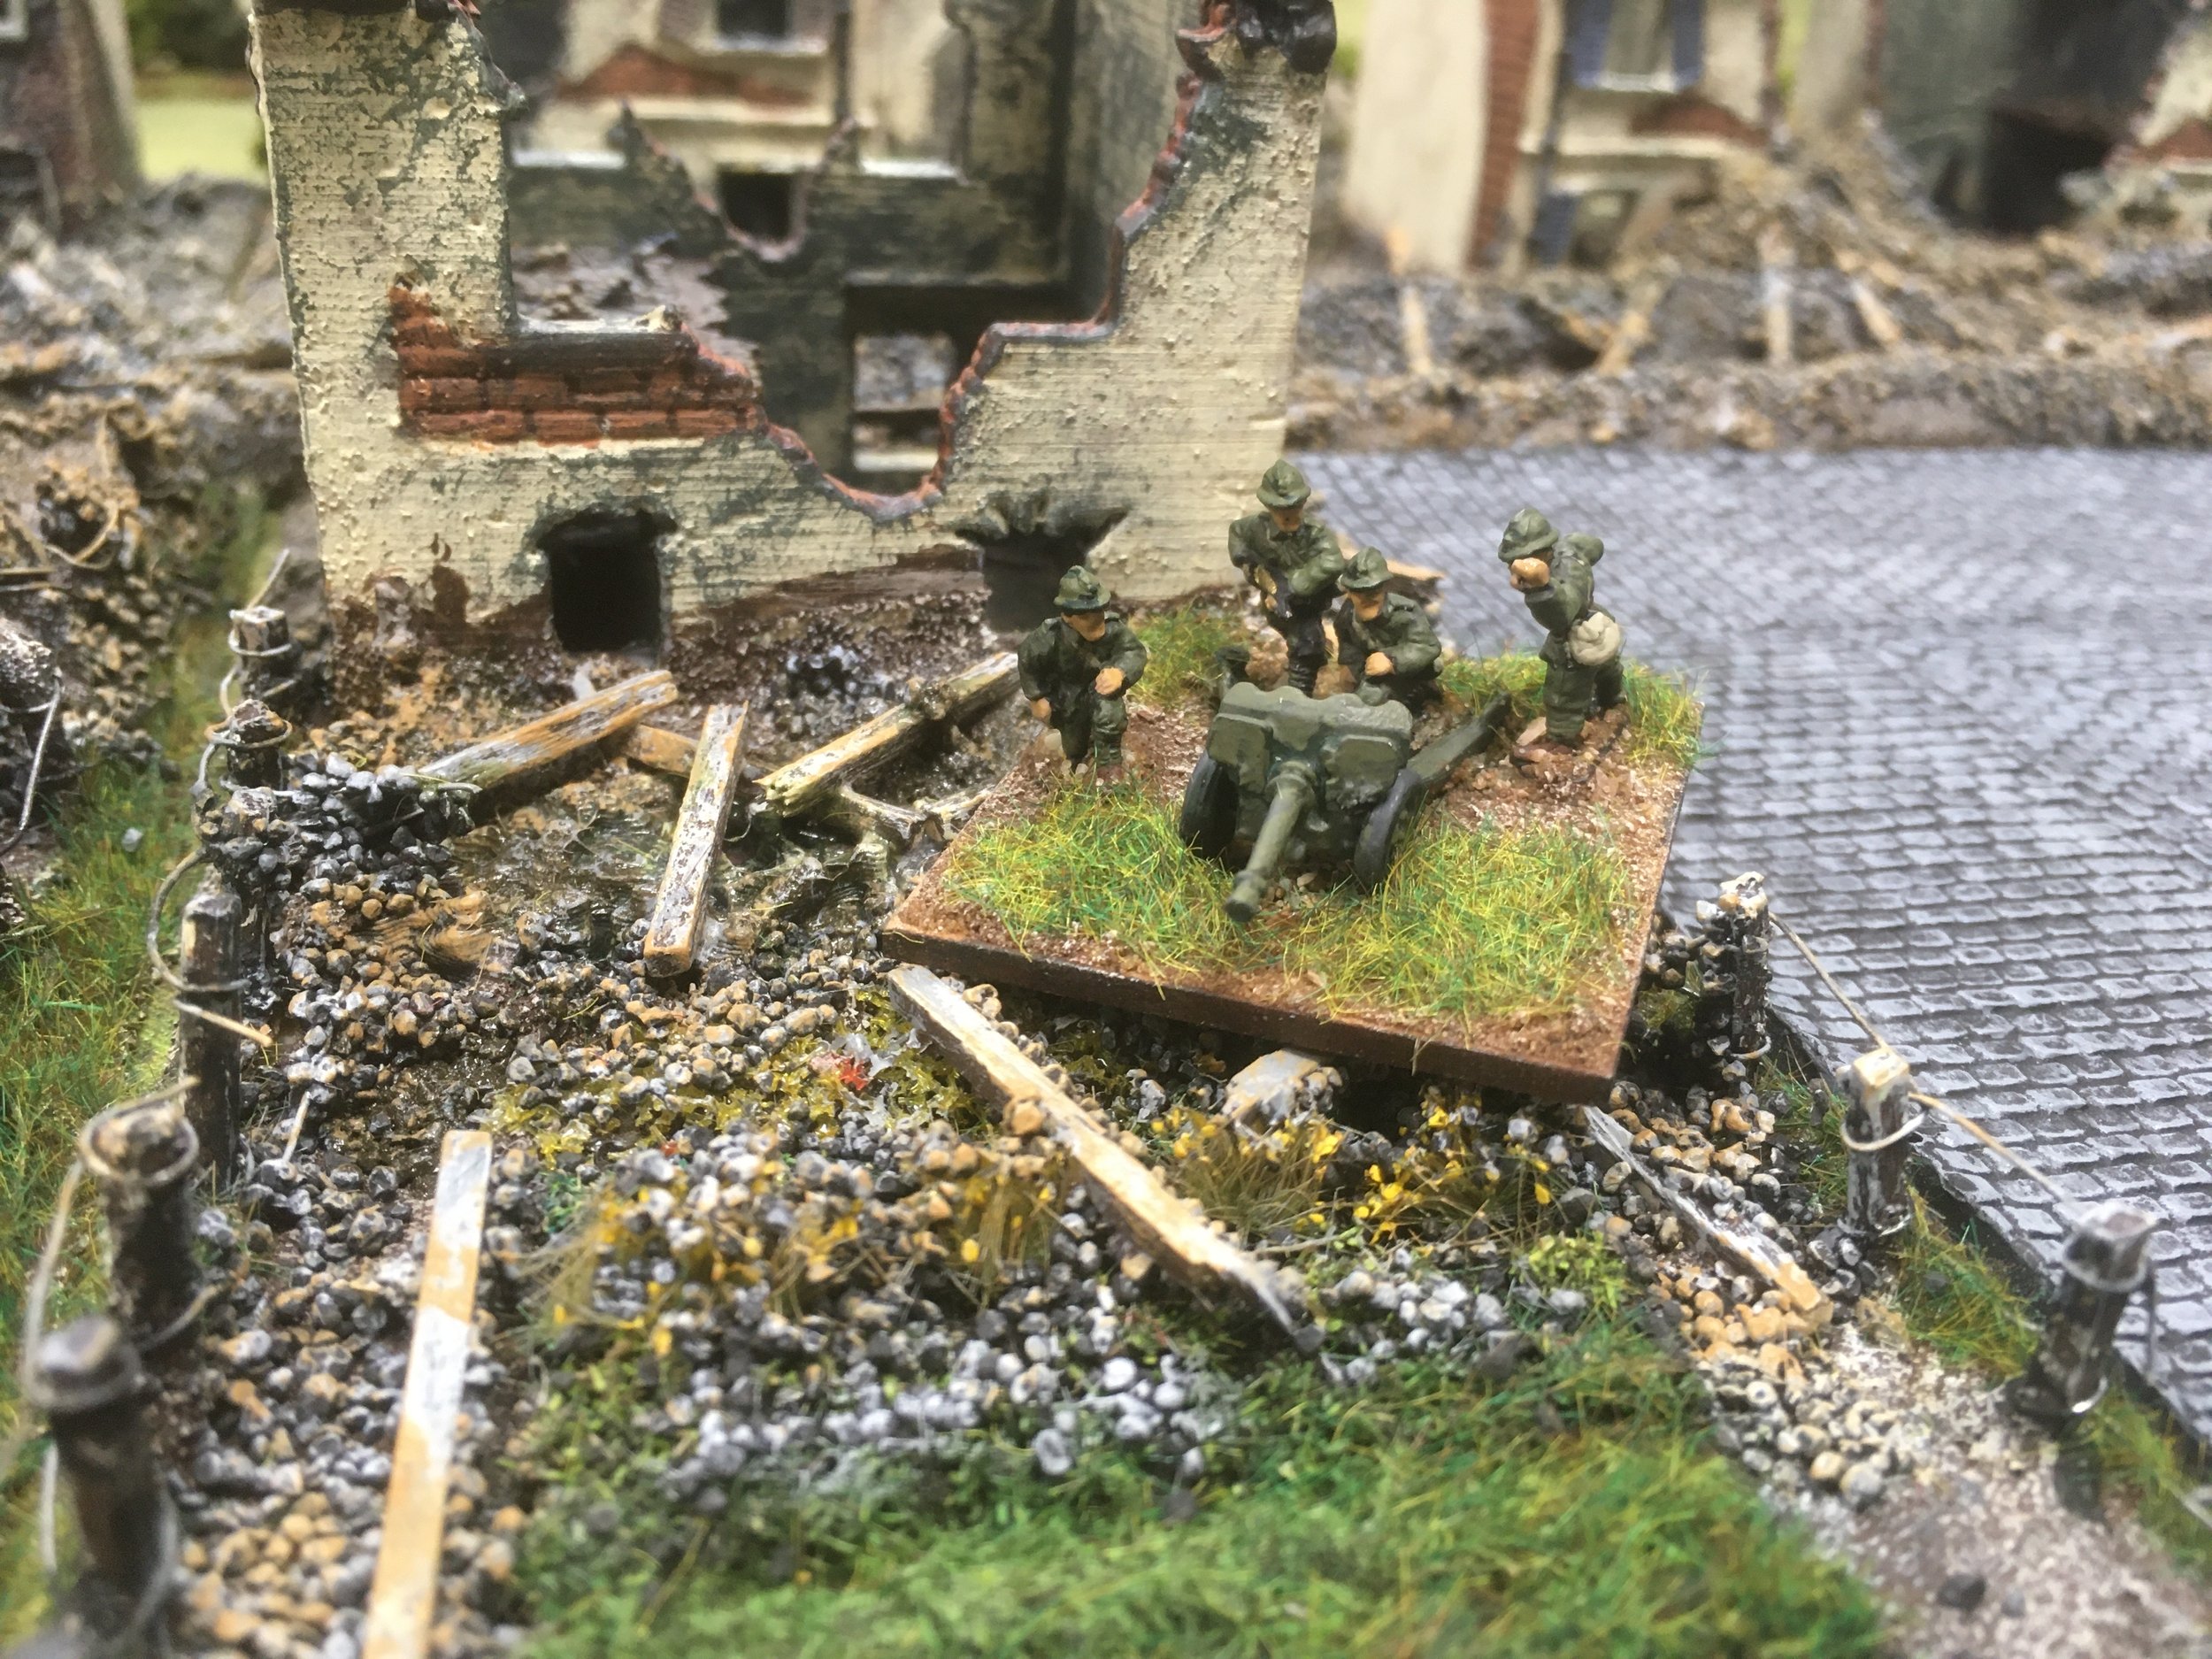
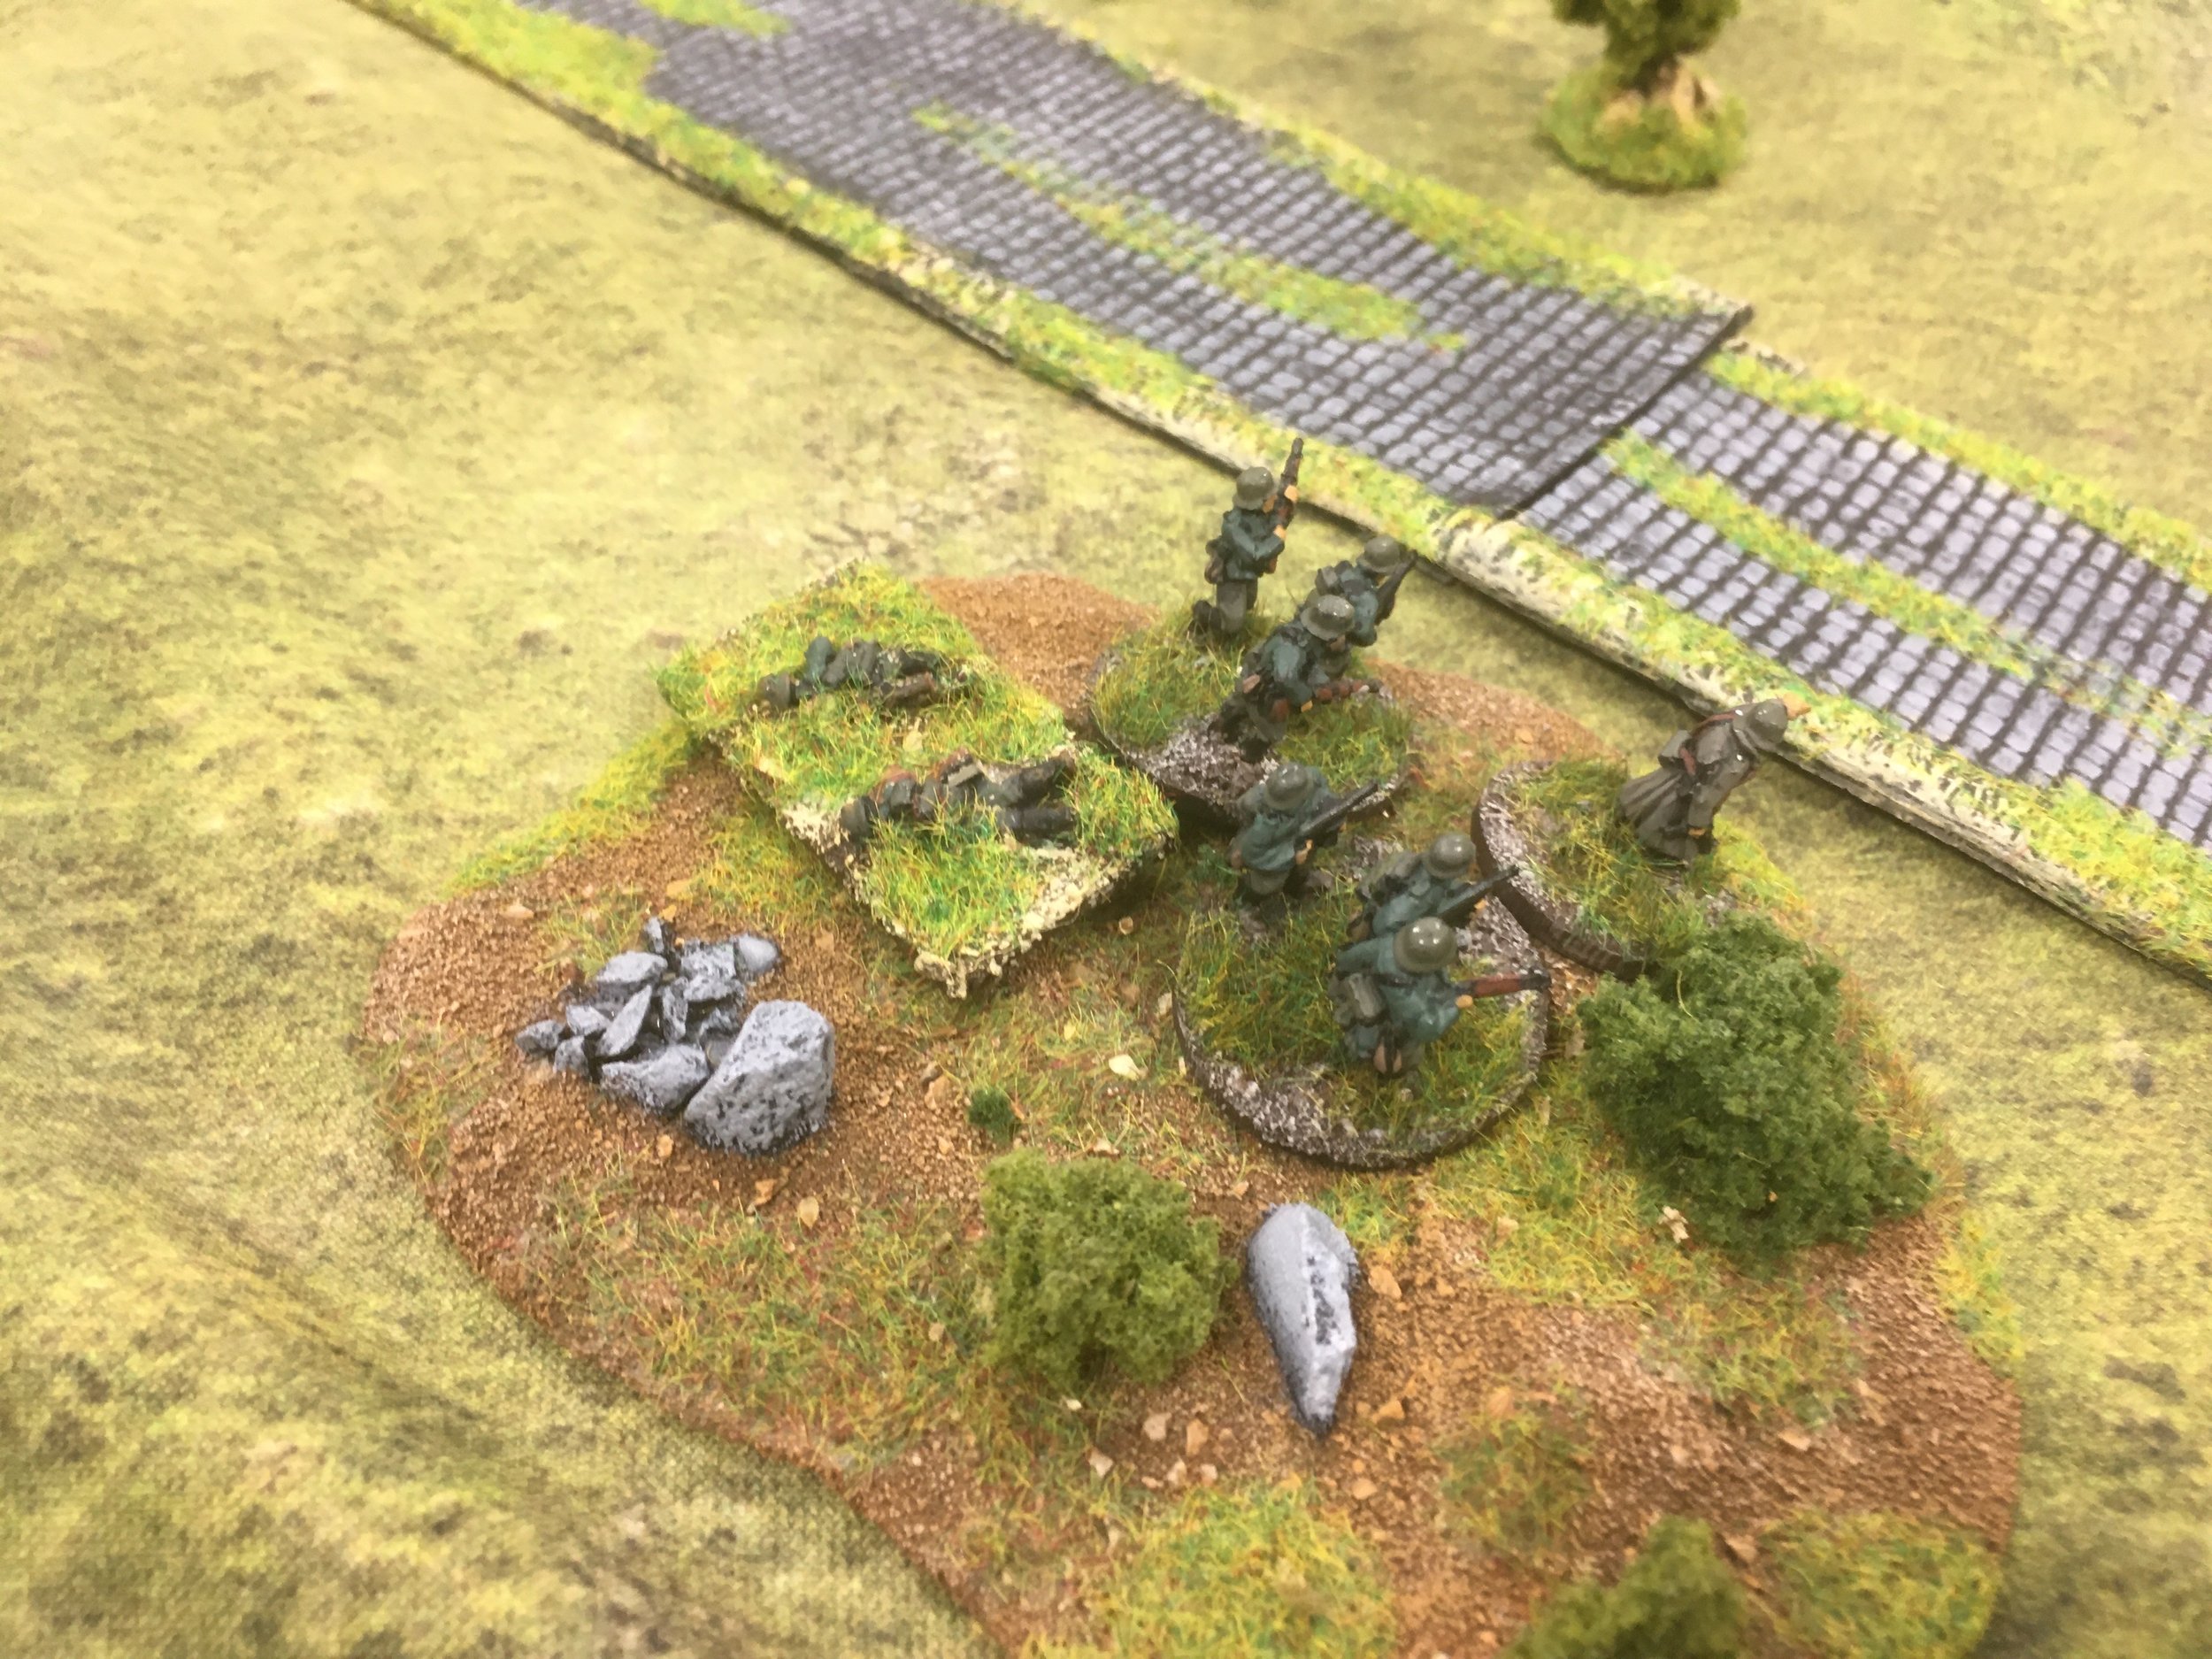
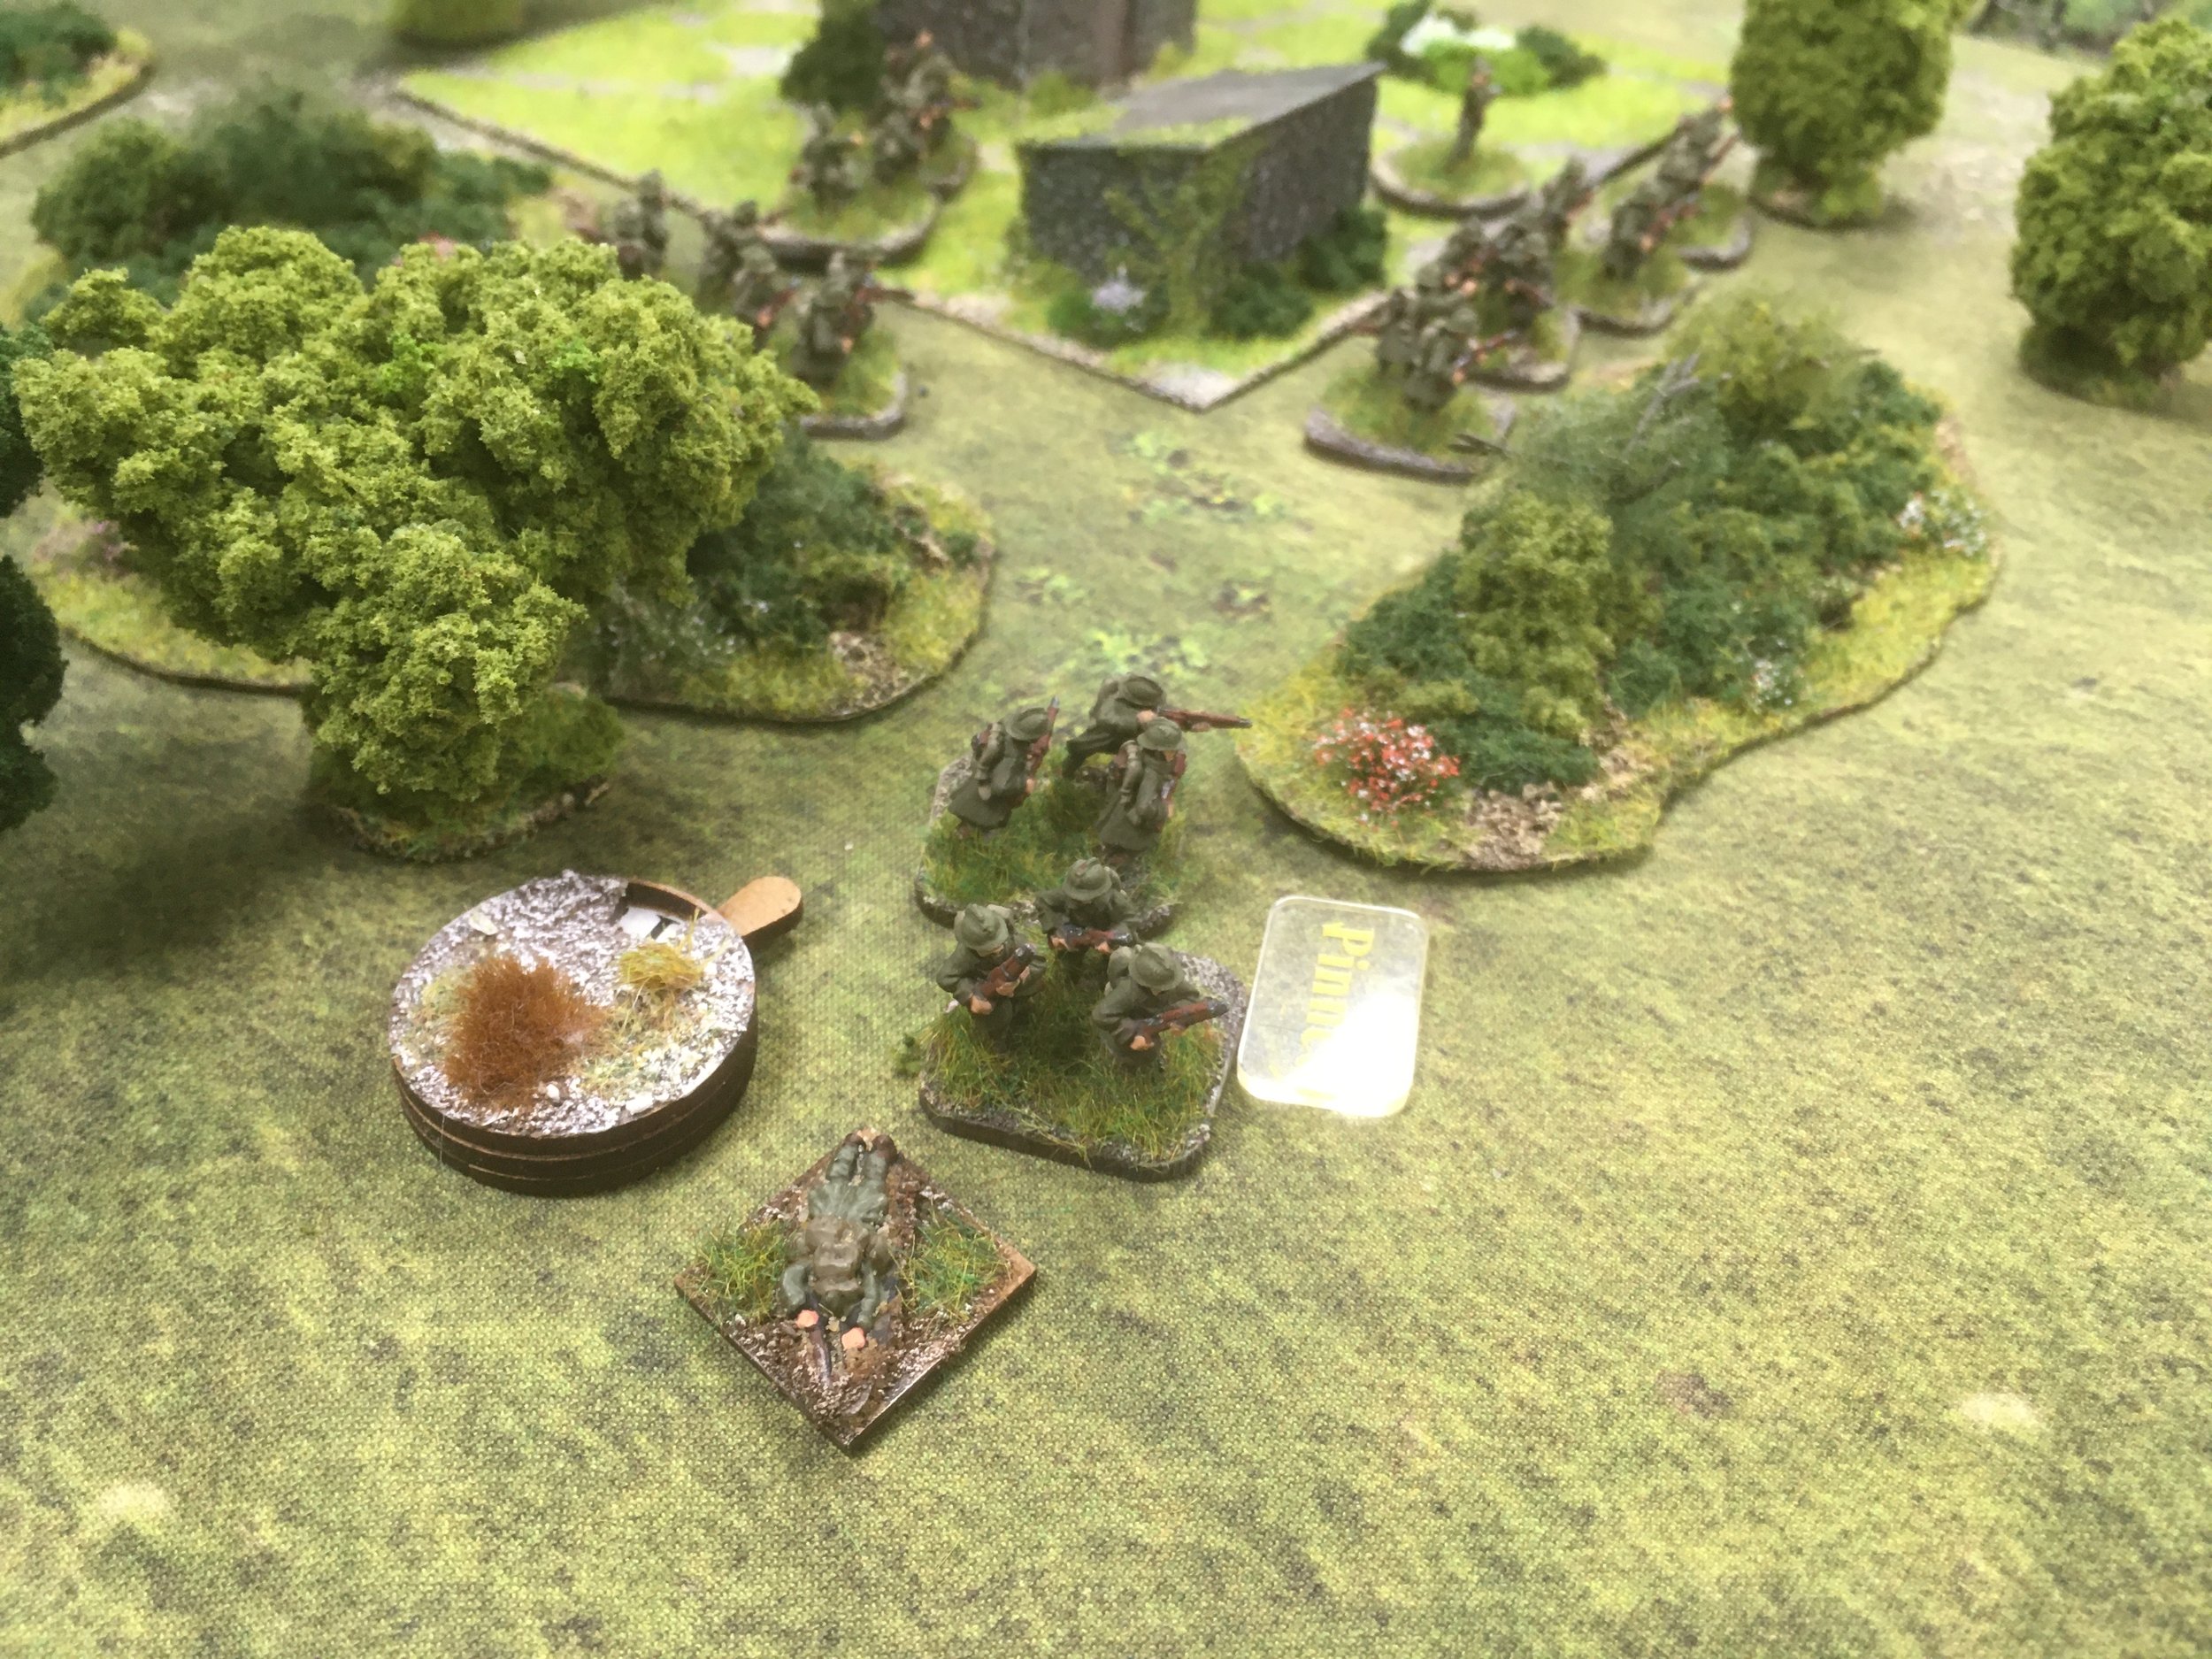
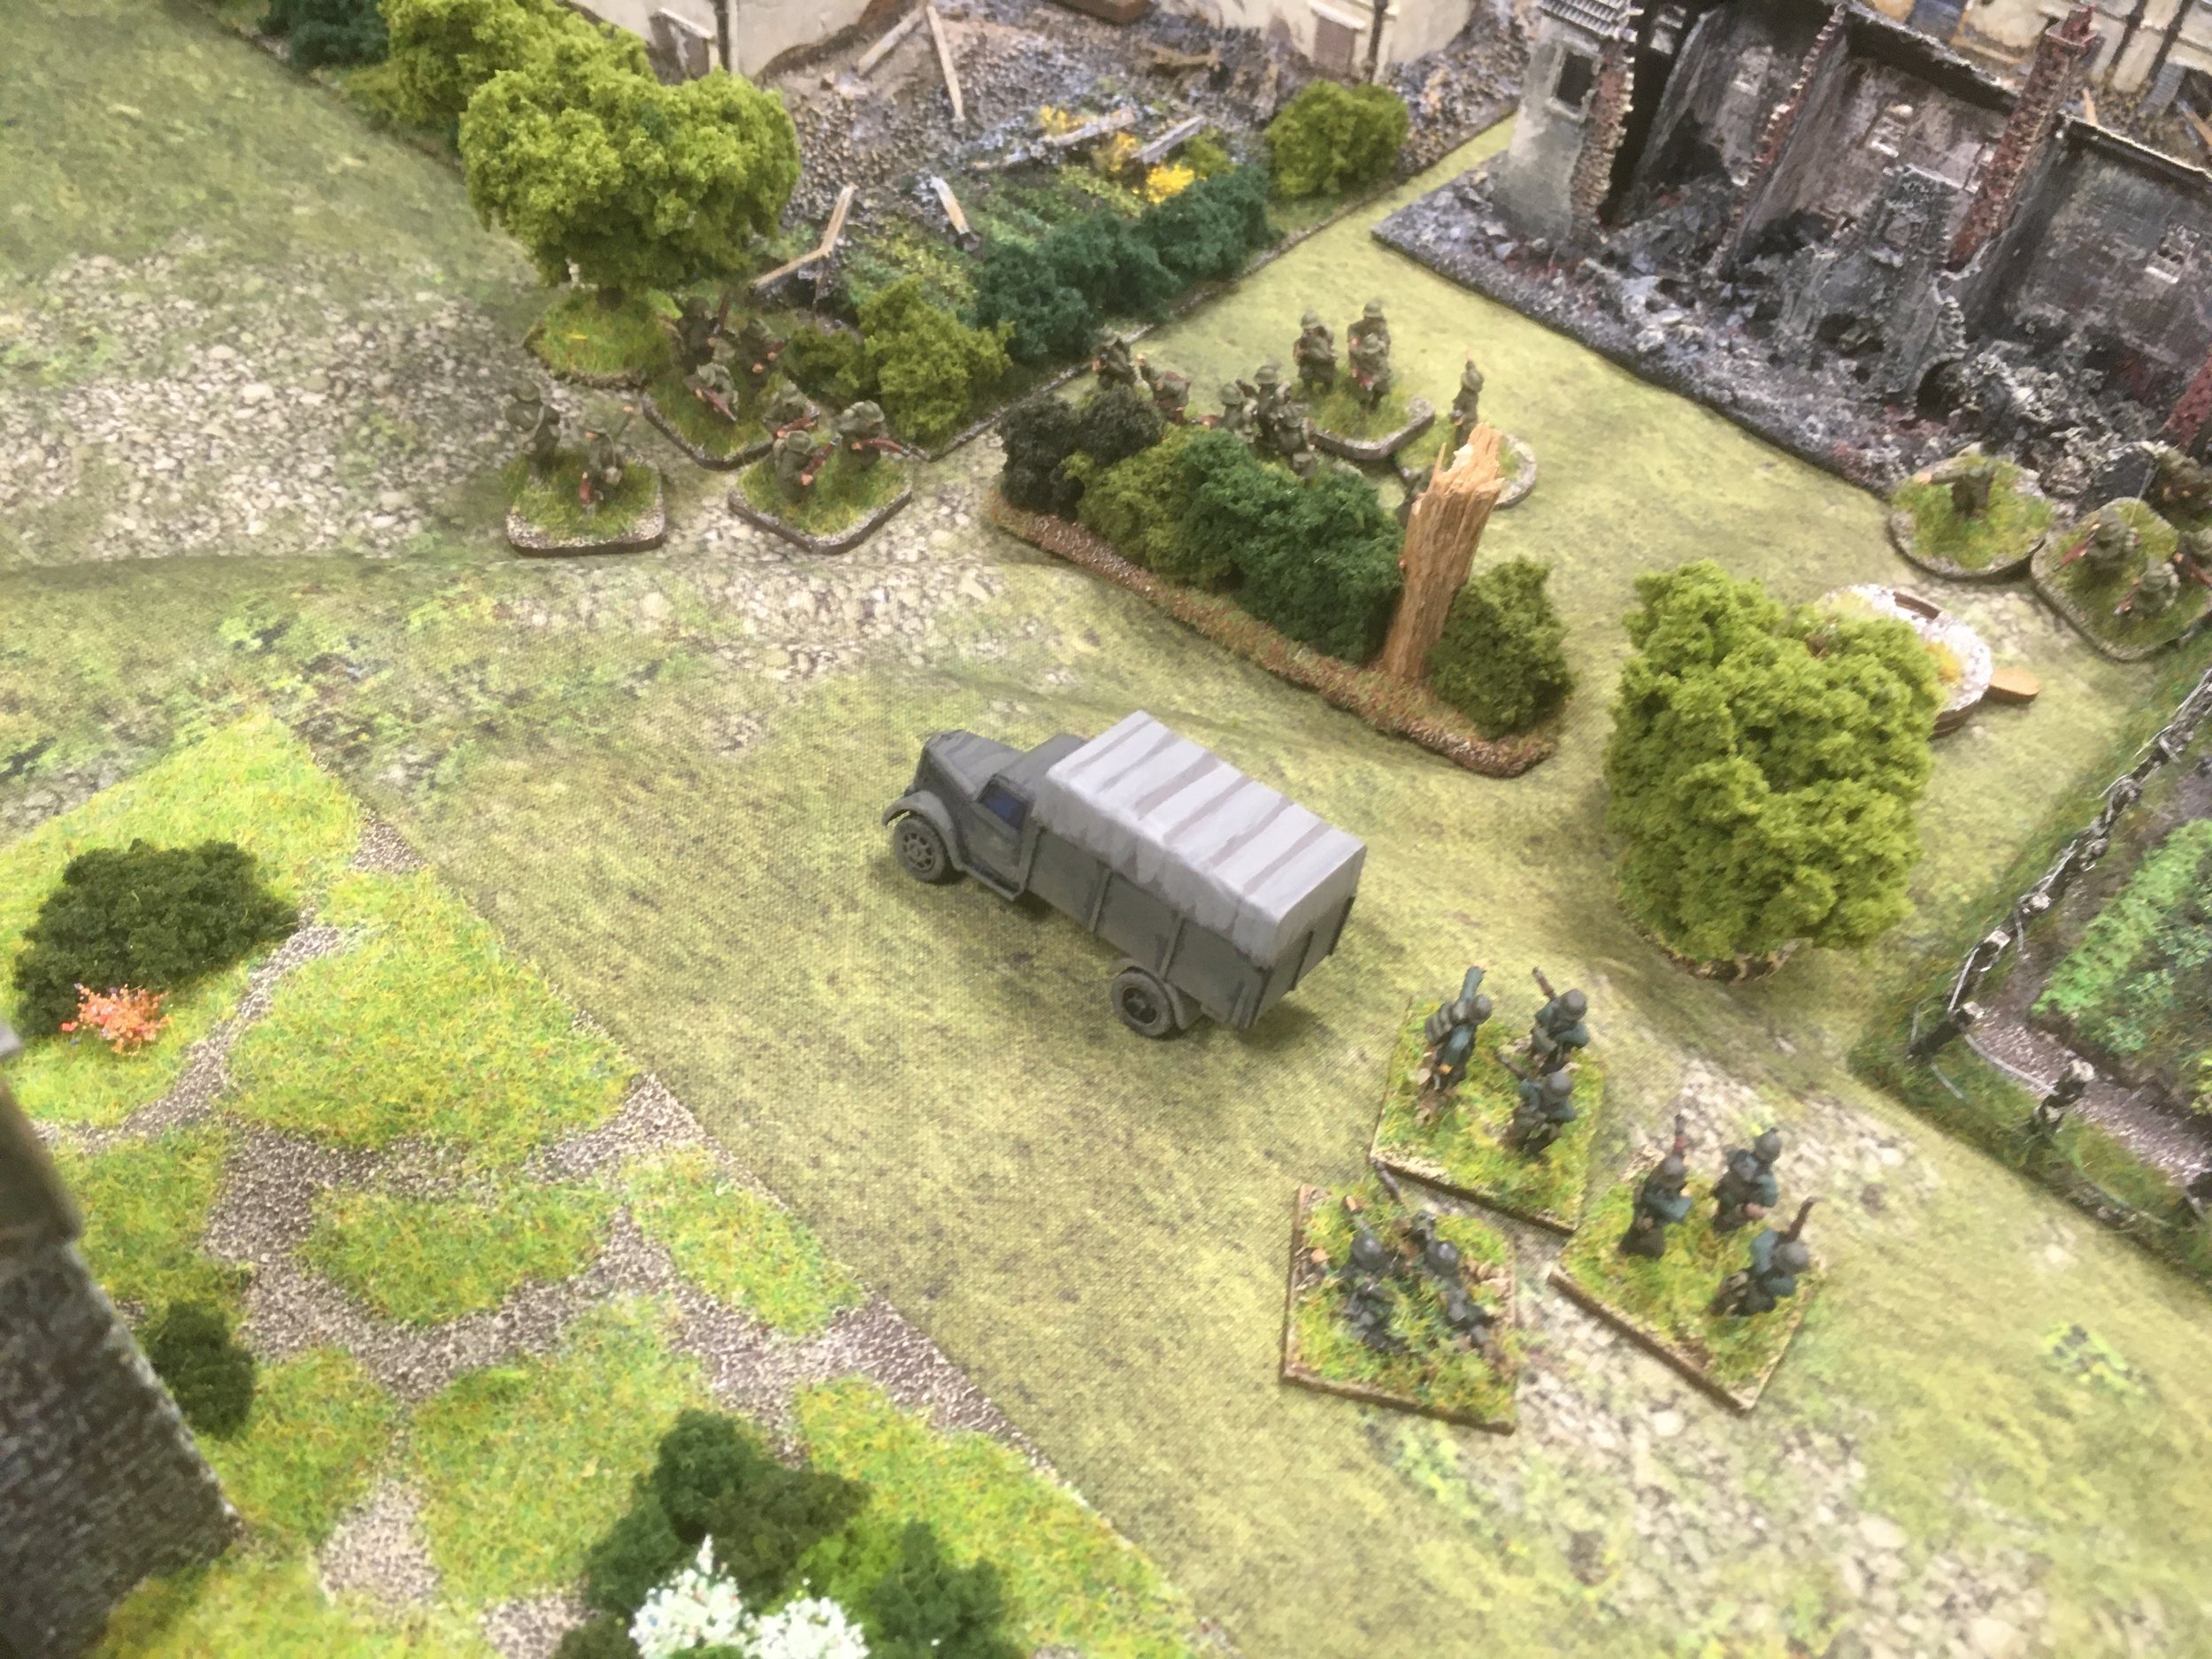
One infantry Platoon was deployed in light woods behind the house objective, the other behind a field of crops adjacent to it.

Fakes were deployed one between the infantry Platoons and one in front of the BT7's. Their job was to identify enemy blinds ASAP preventing them from using swift movement and particularly the German 'Rapid Deployment' card. Their secondary task was to make the German's think that they were infantry Platoons. Finally My BT7 command was to arrive in the extreme NE corner and make the German's think it was massed armoured reinforcements.

As all of Max and Clivey's commands were in vehicles they would almost be spotted automatically at first 'Tea Break'. I had given up all hope of holding the barn as it was too close to the German's much faster moving troops.

My 'Blinds Move' card turned up first . I decided to reserve all dice to spot and fire later in the move, if necessary, after seeing where the boys schwerpunkt was to land.

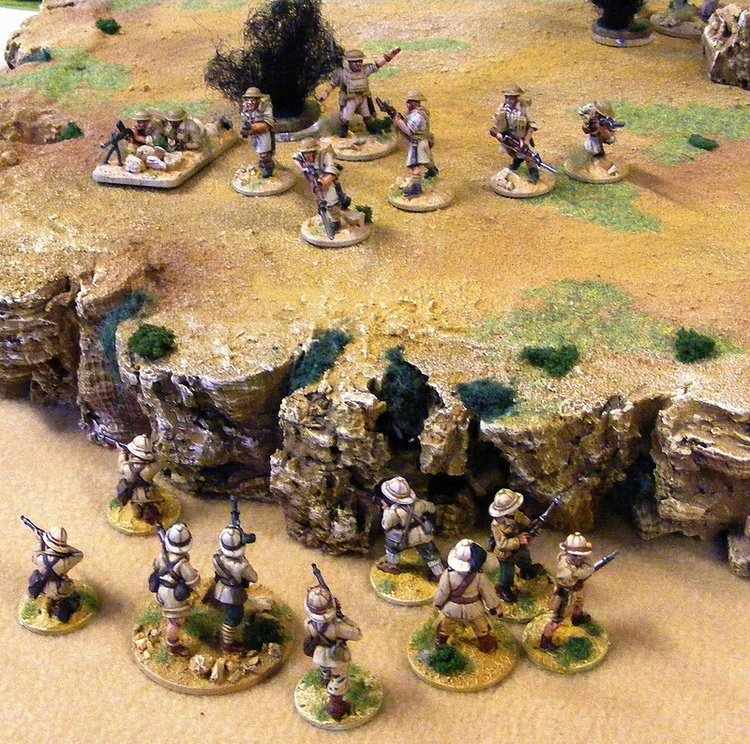
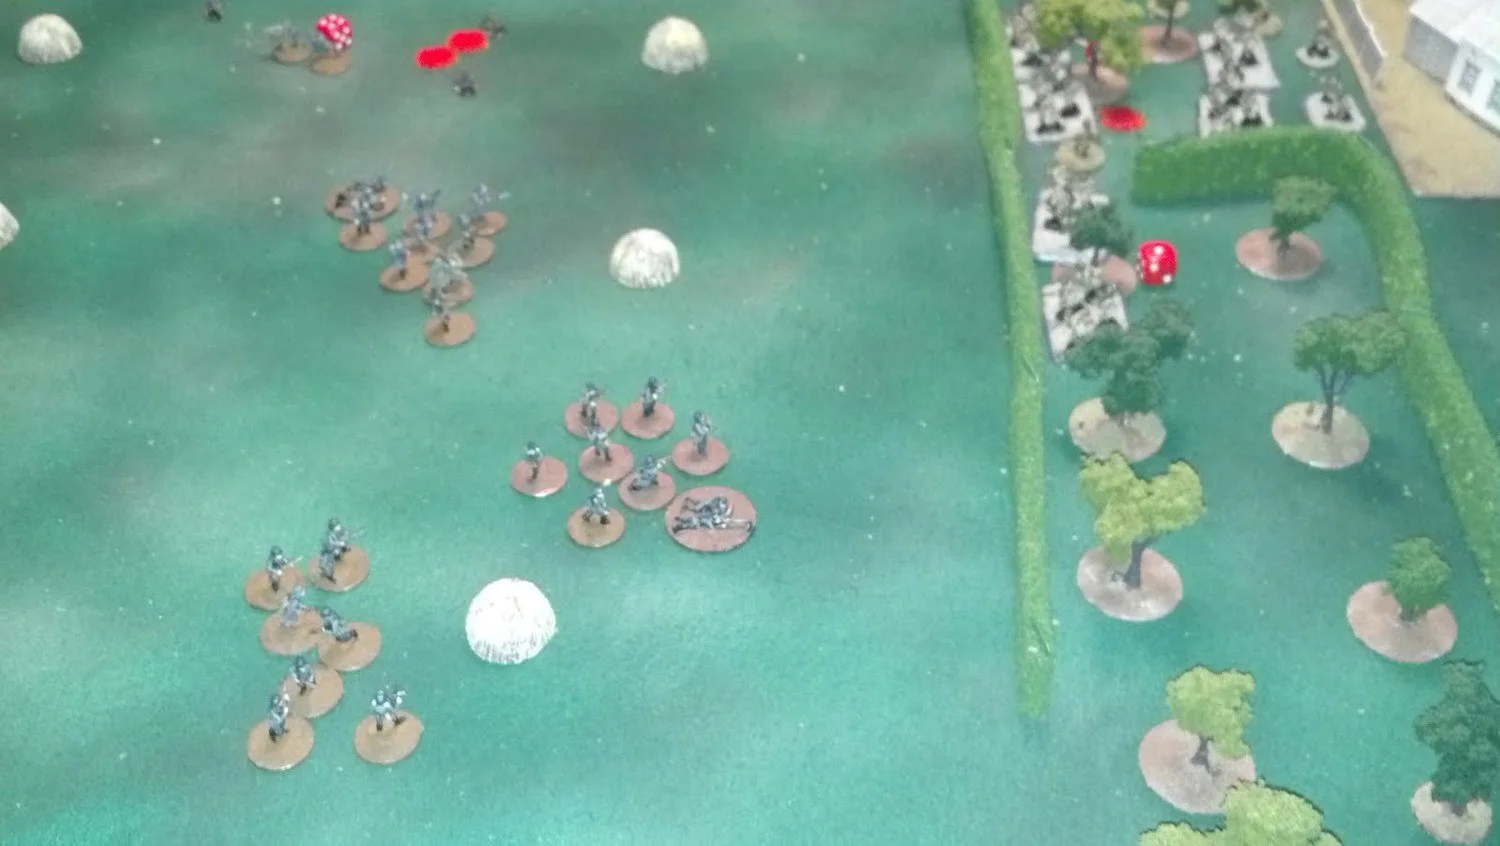
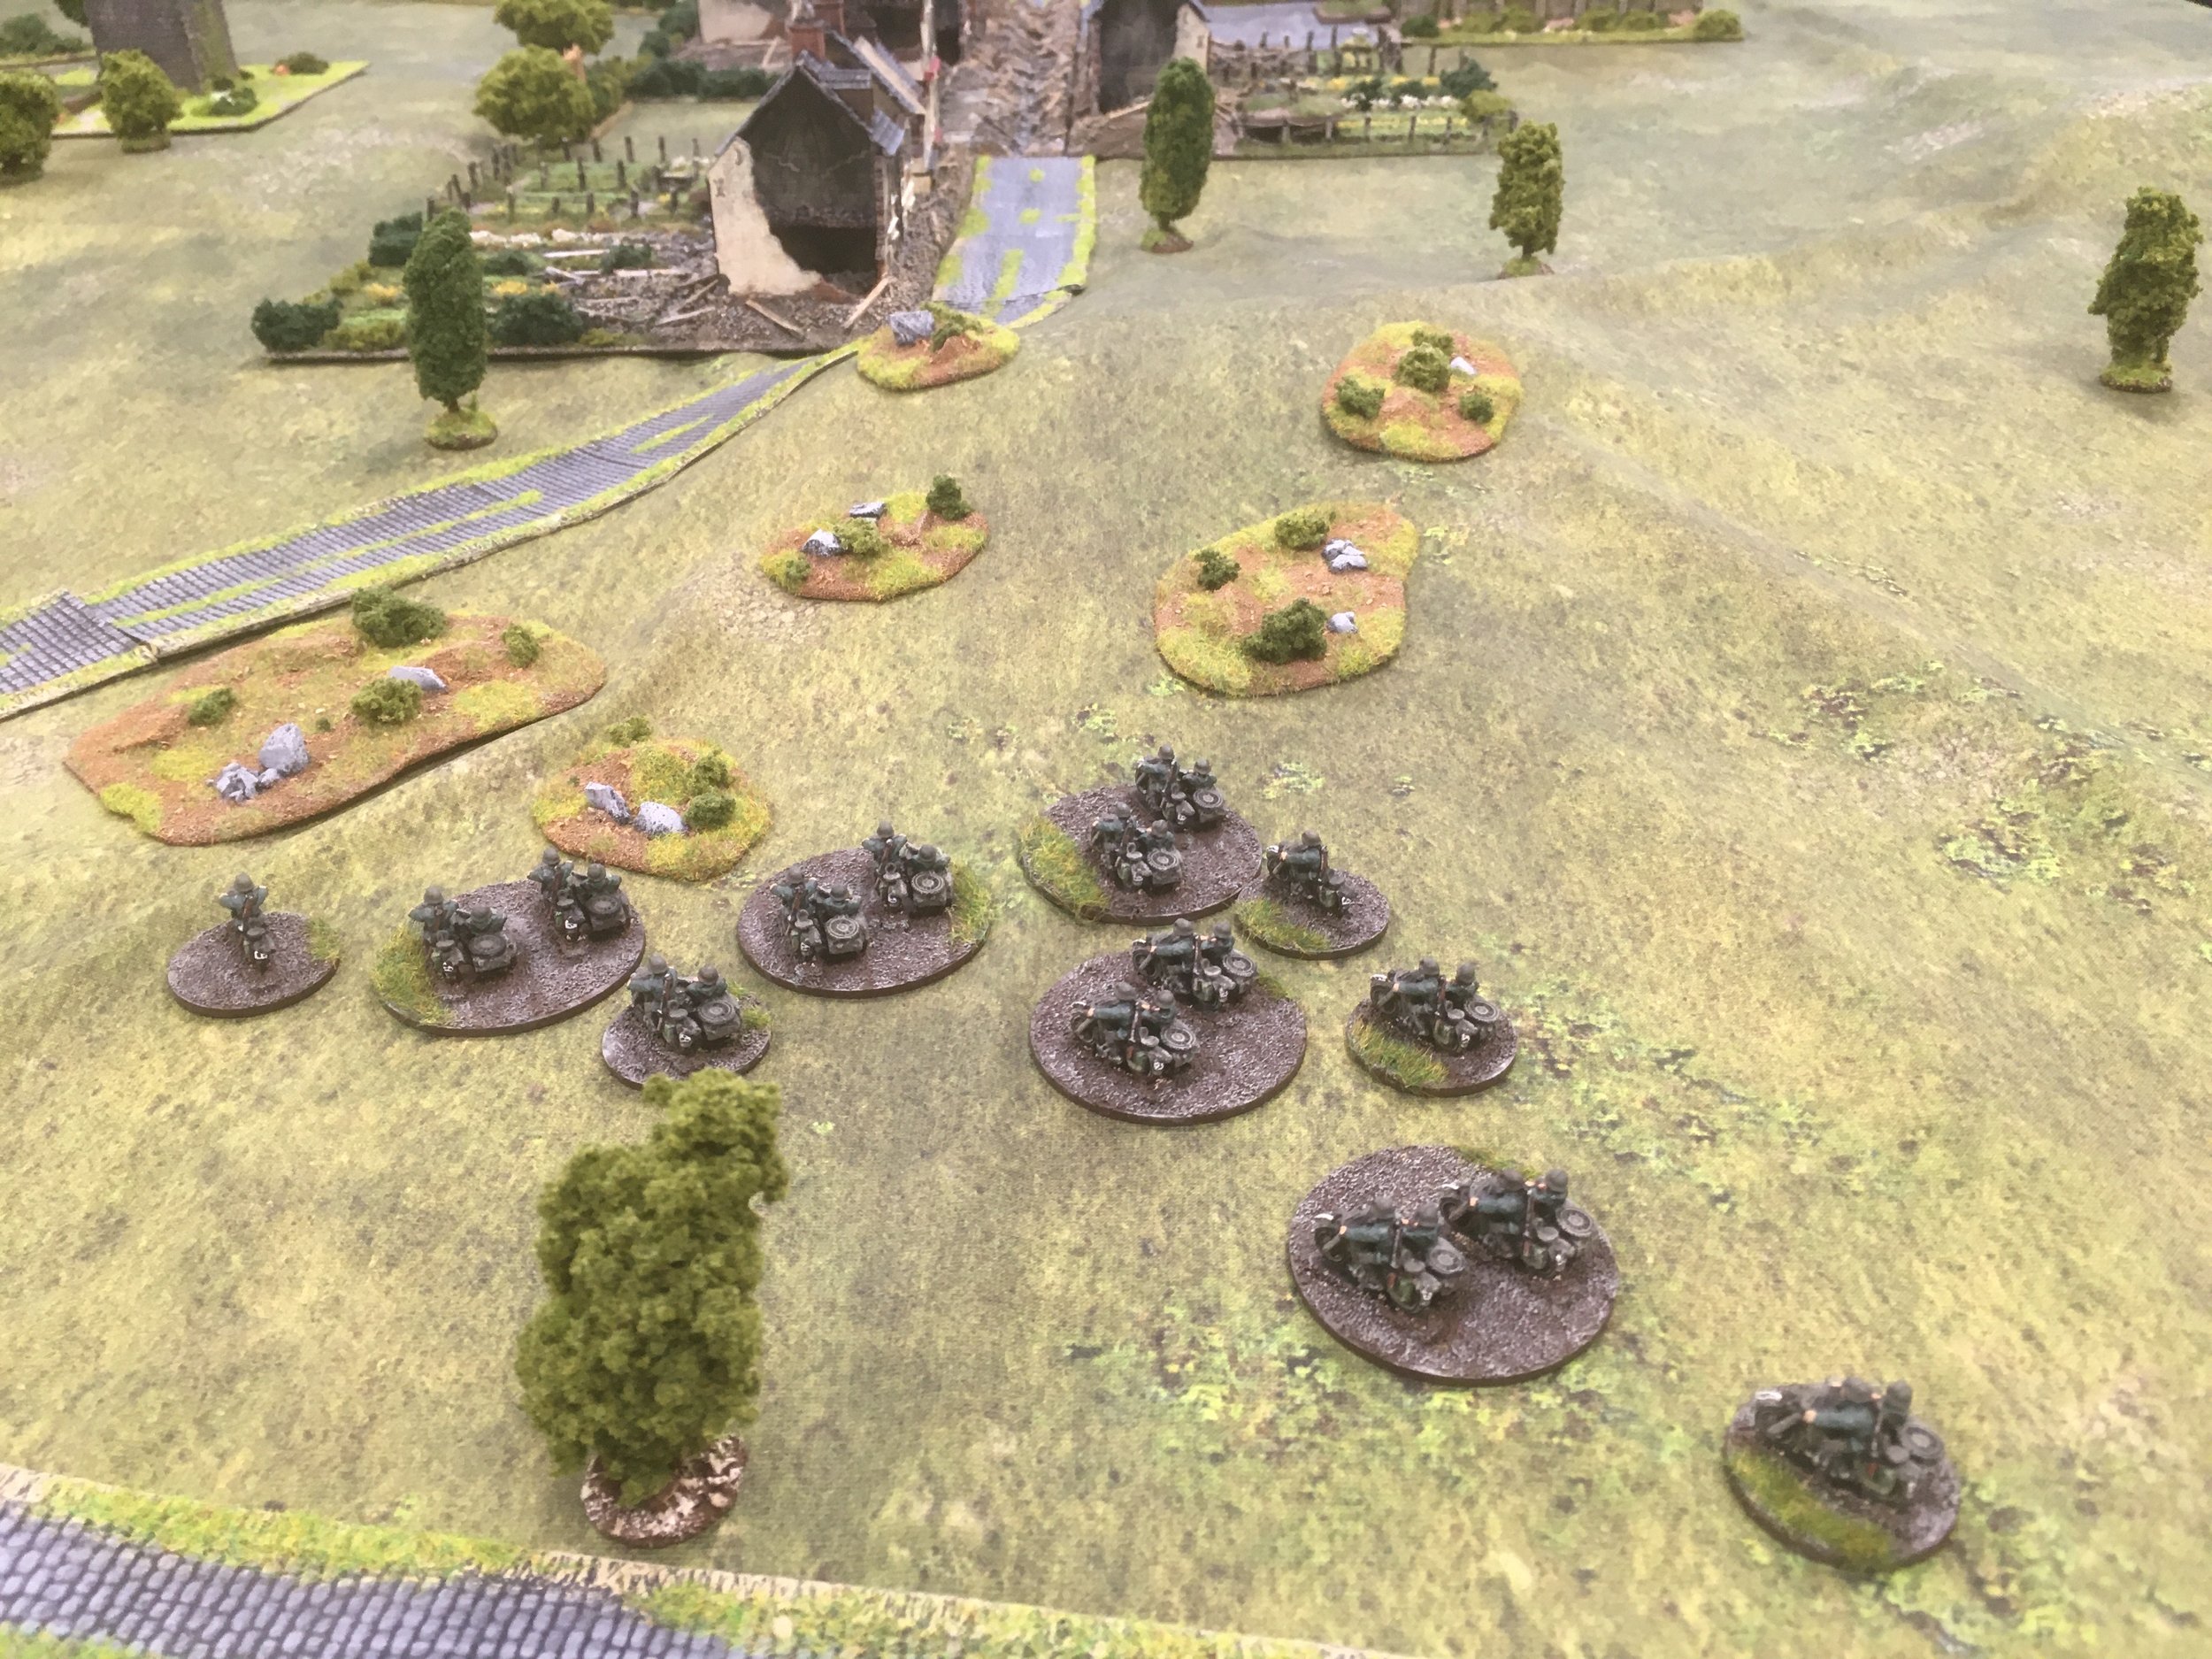
Three German blinds entered the southern wood to my horror with another two behind it! I spotted a Platoon of Hanomag mounted Infantry and two fakes in the wood, with one of my fakes.

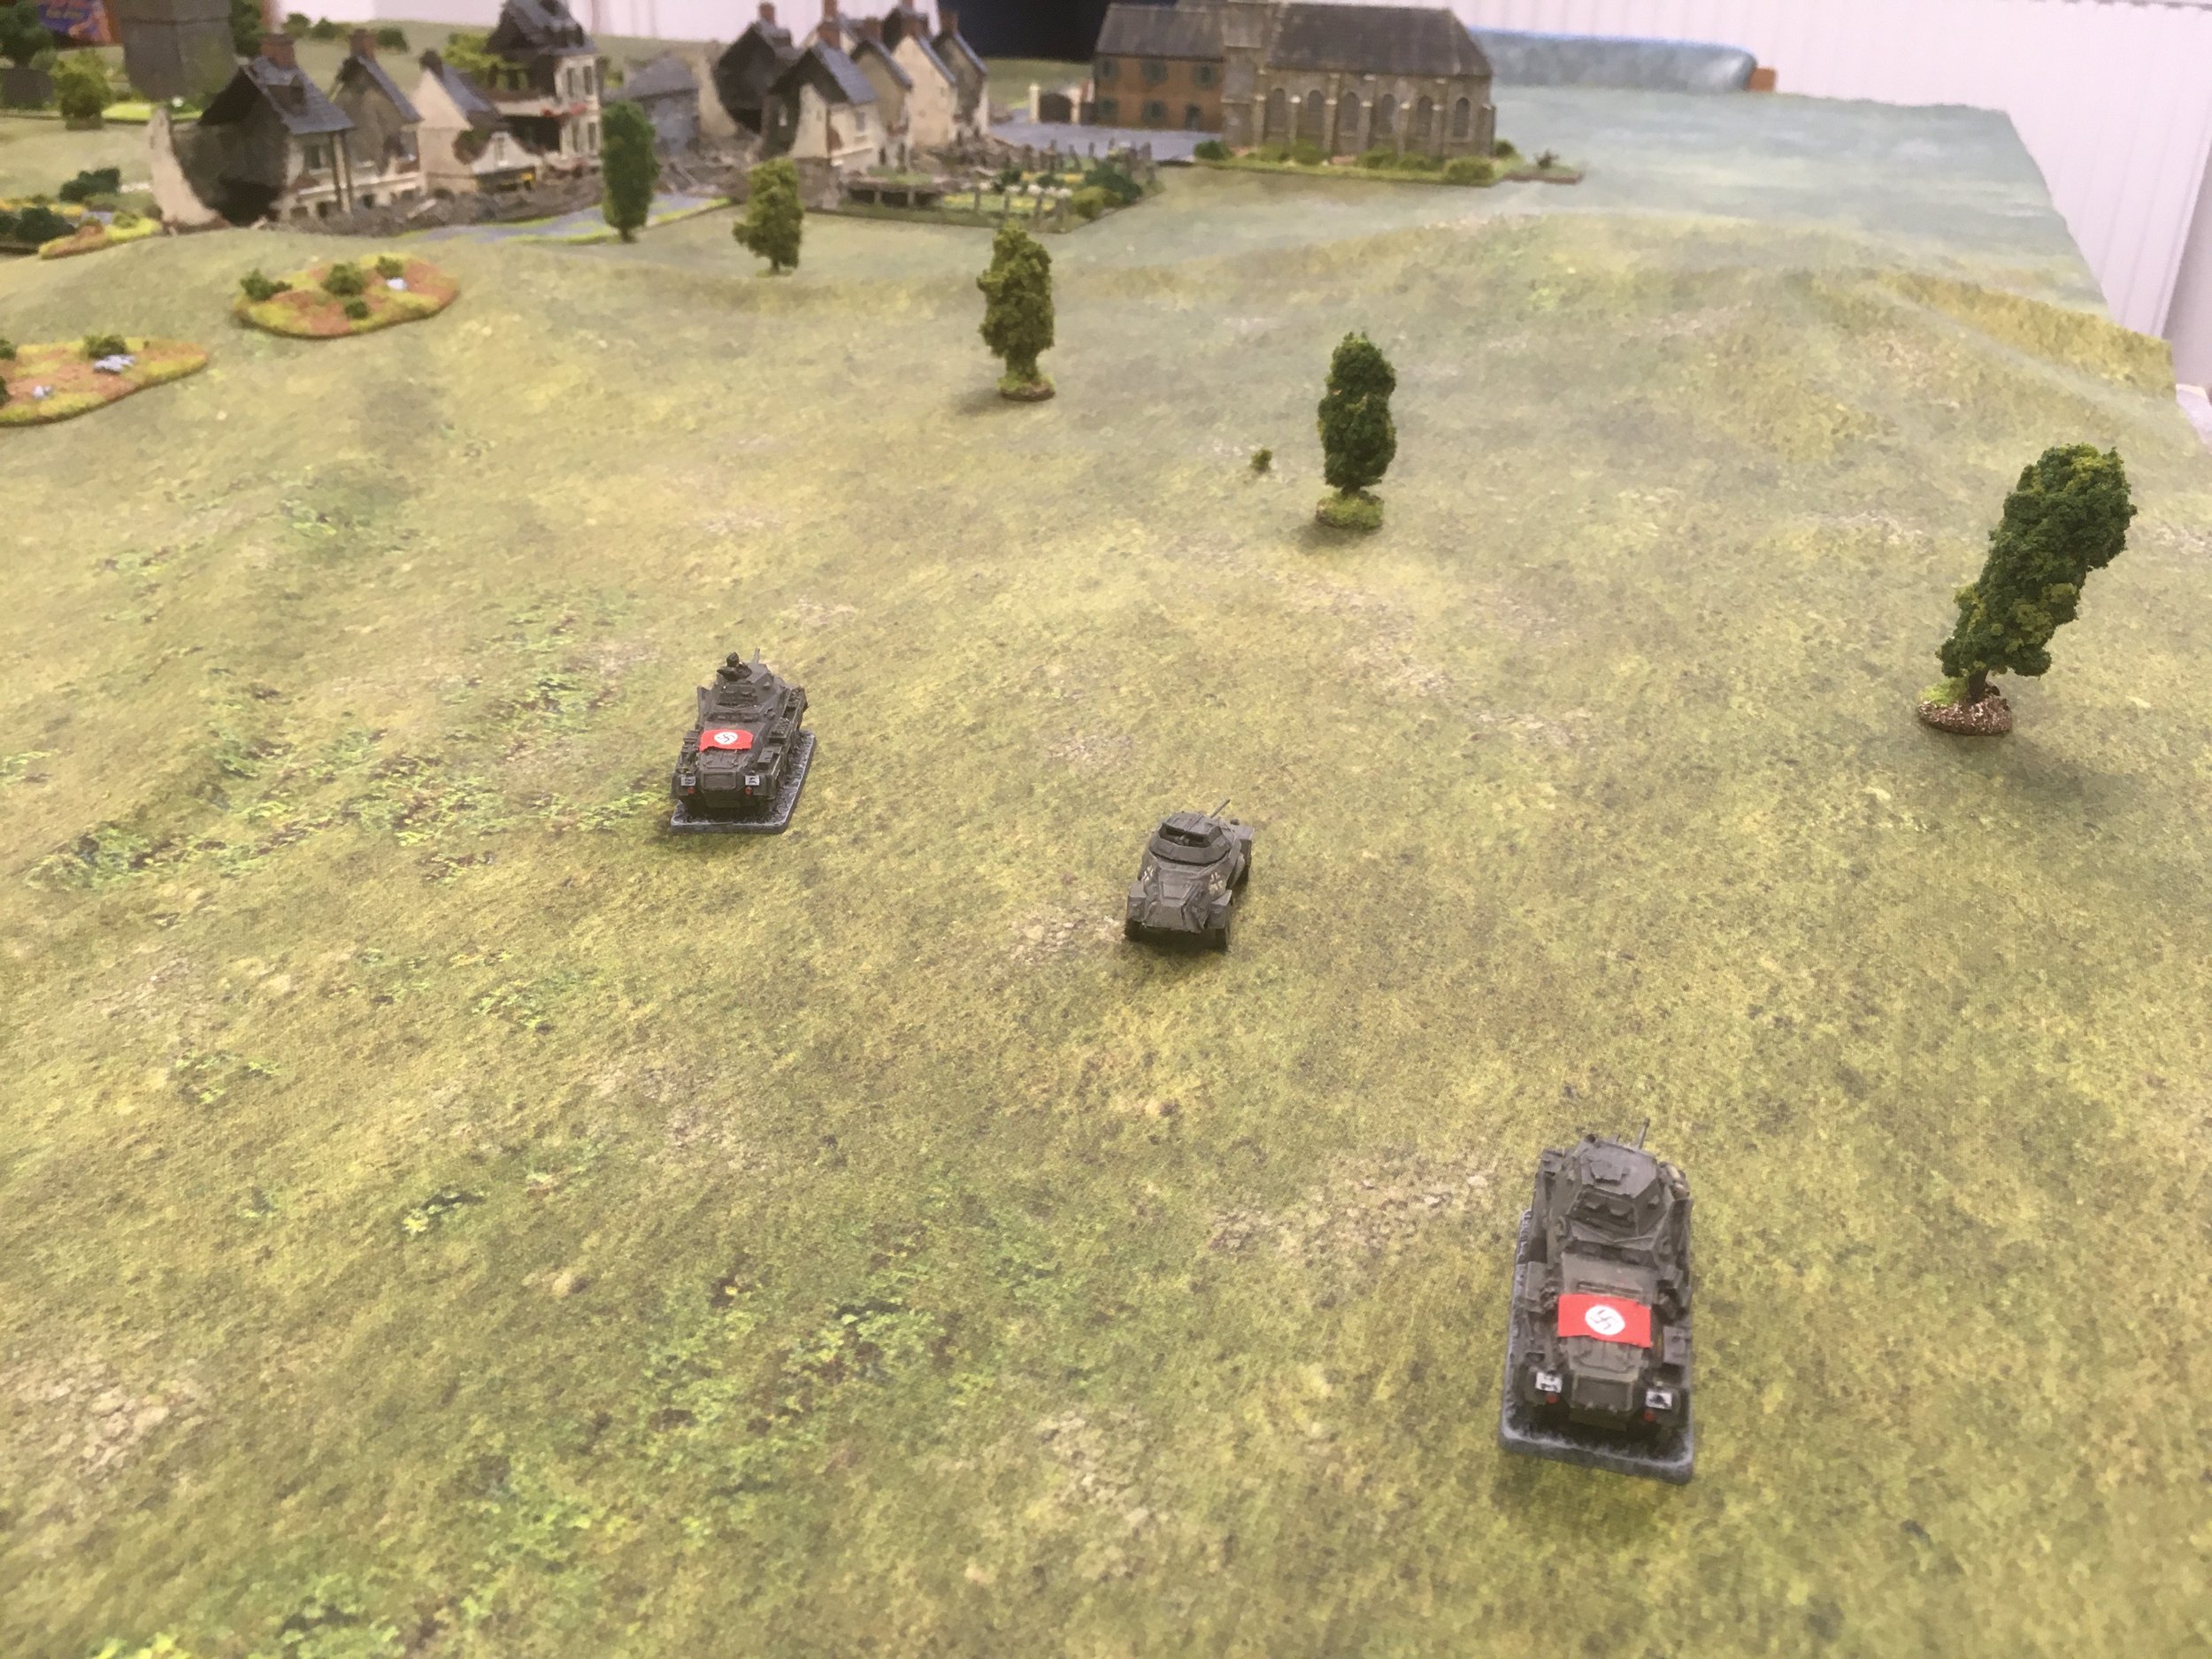
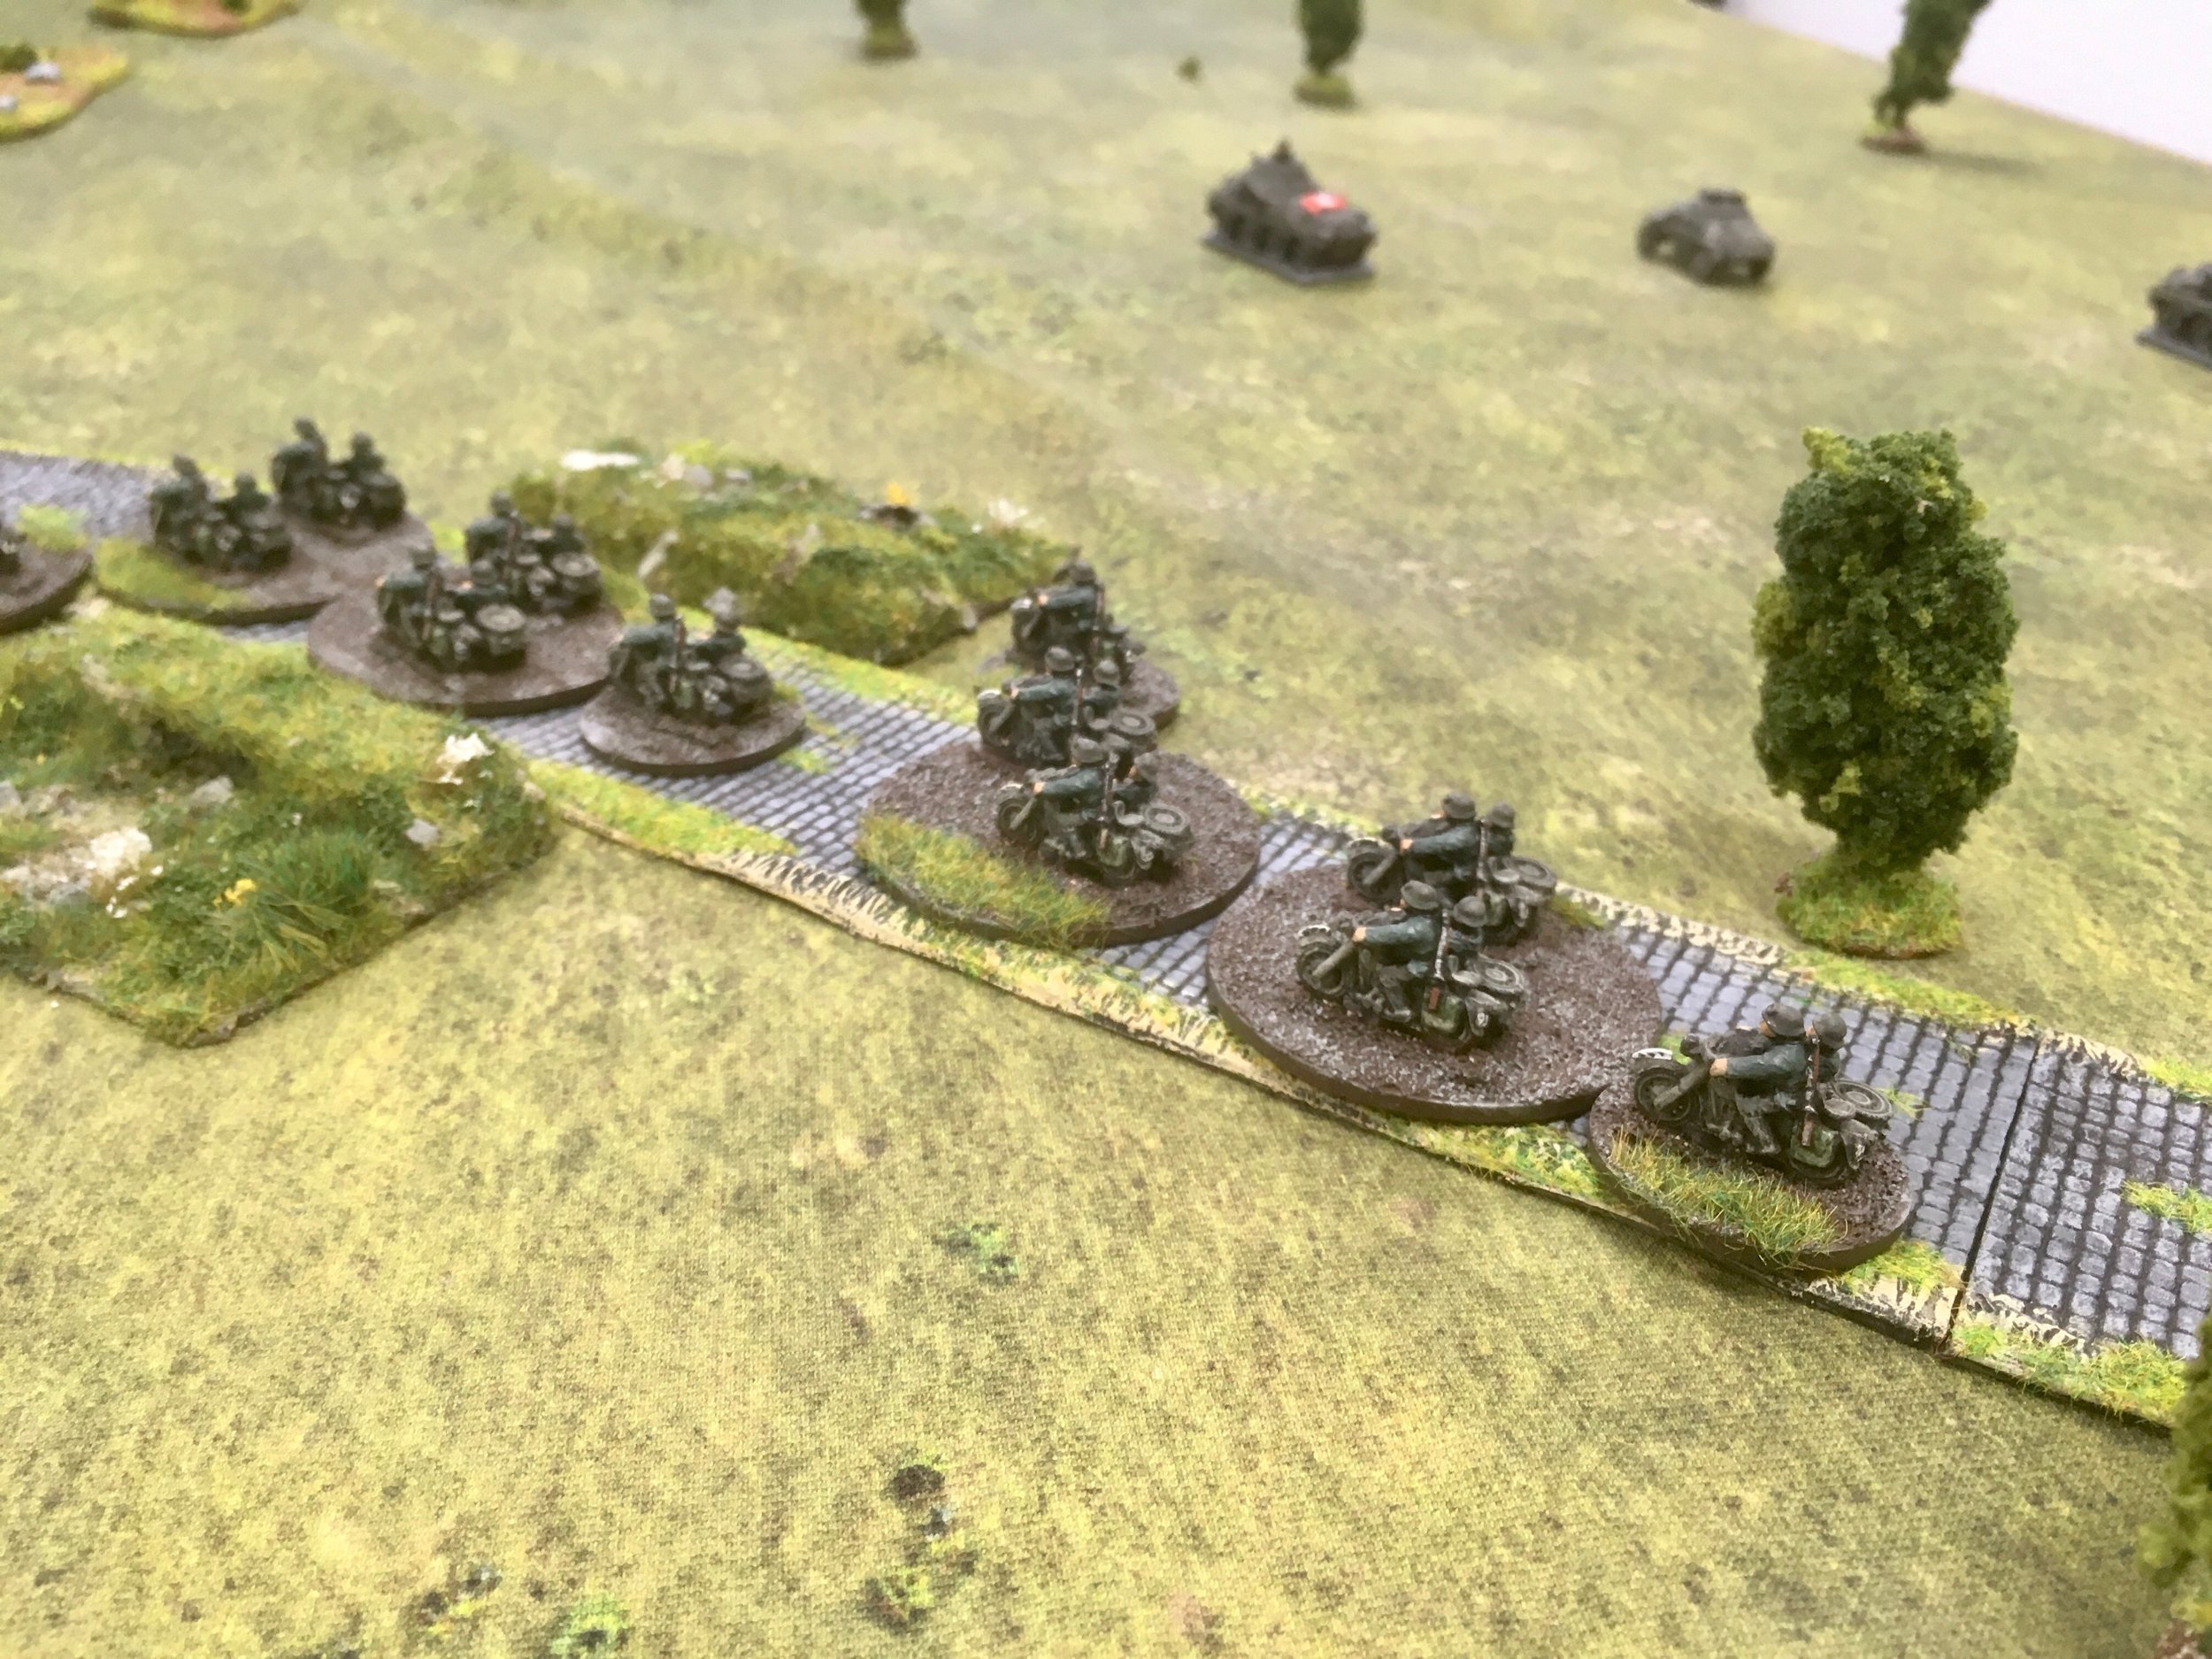
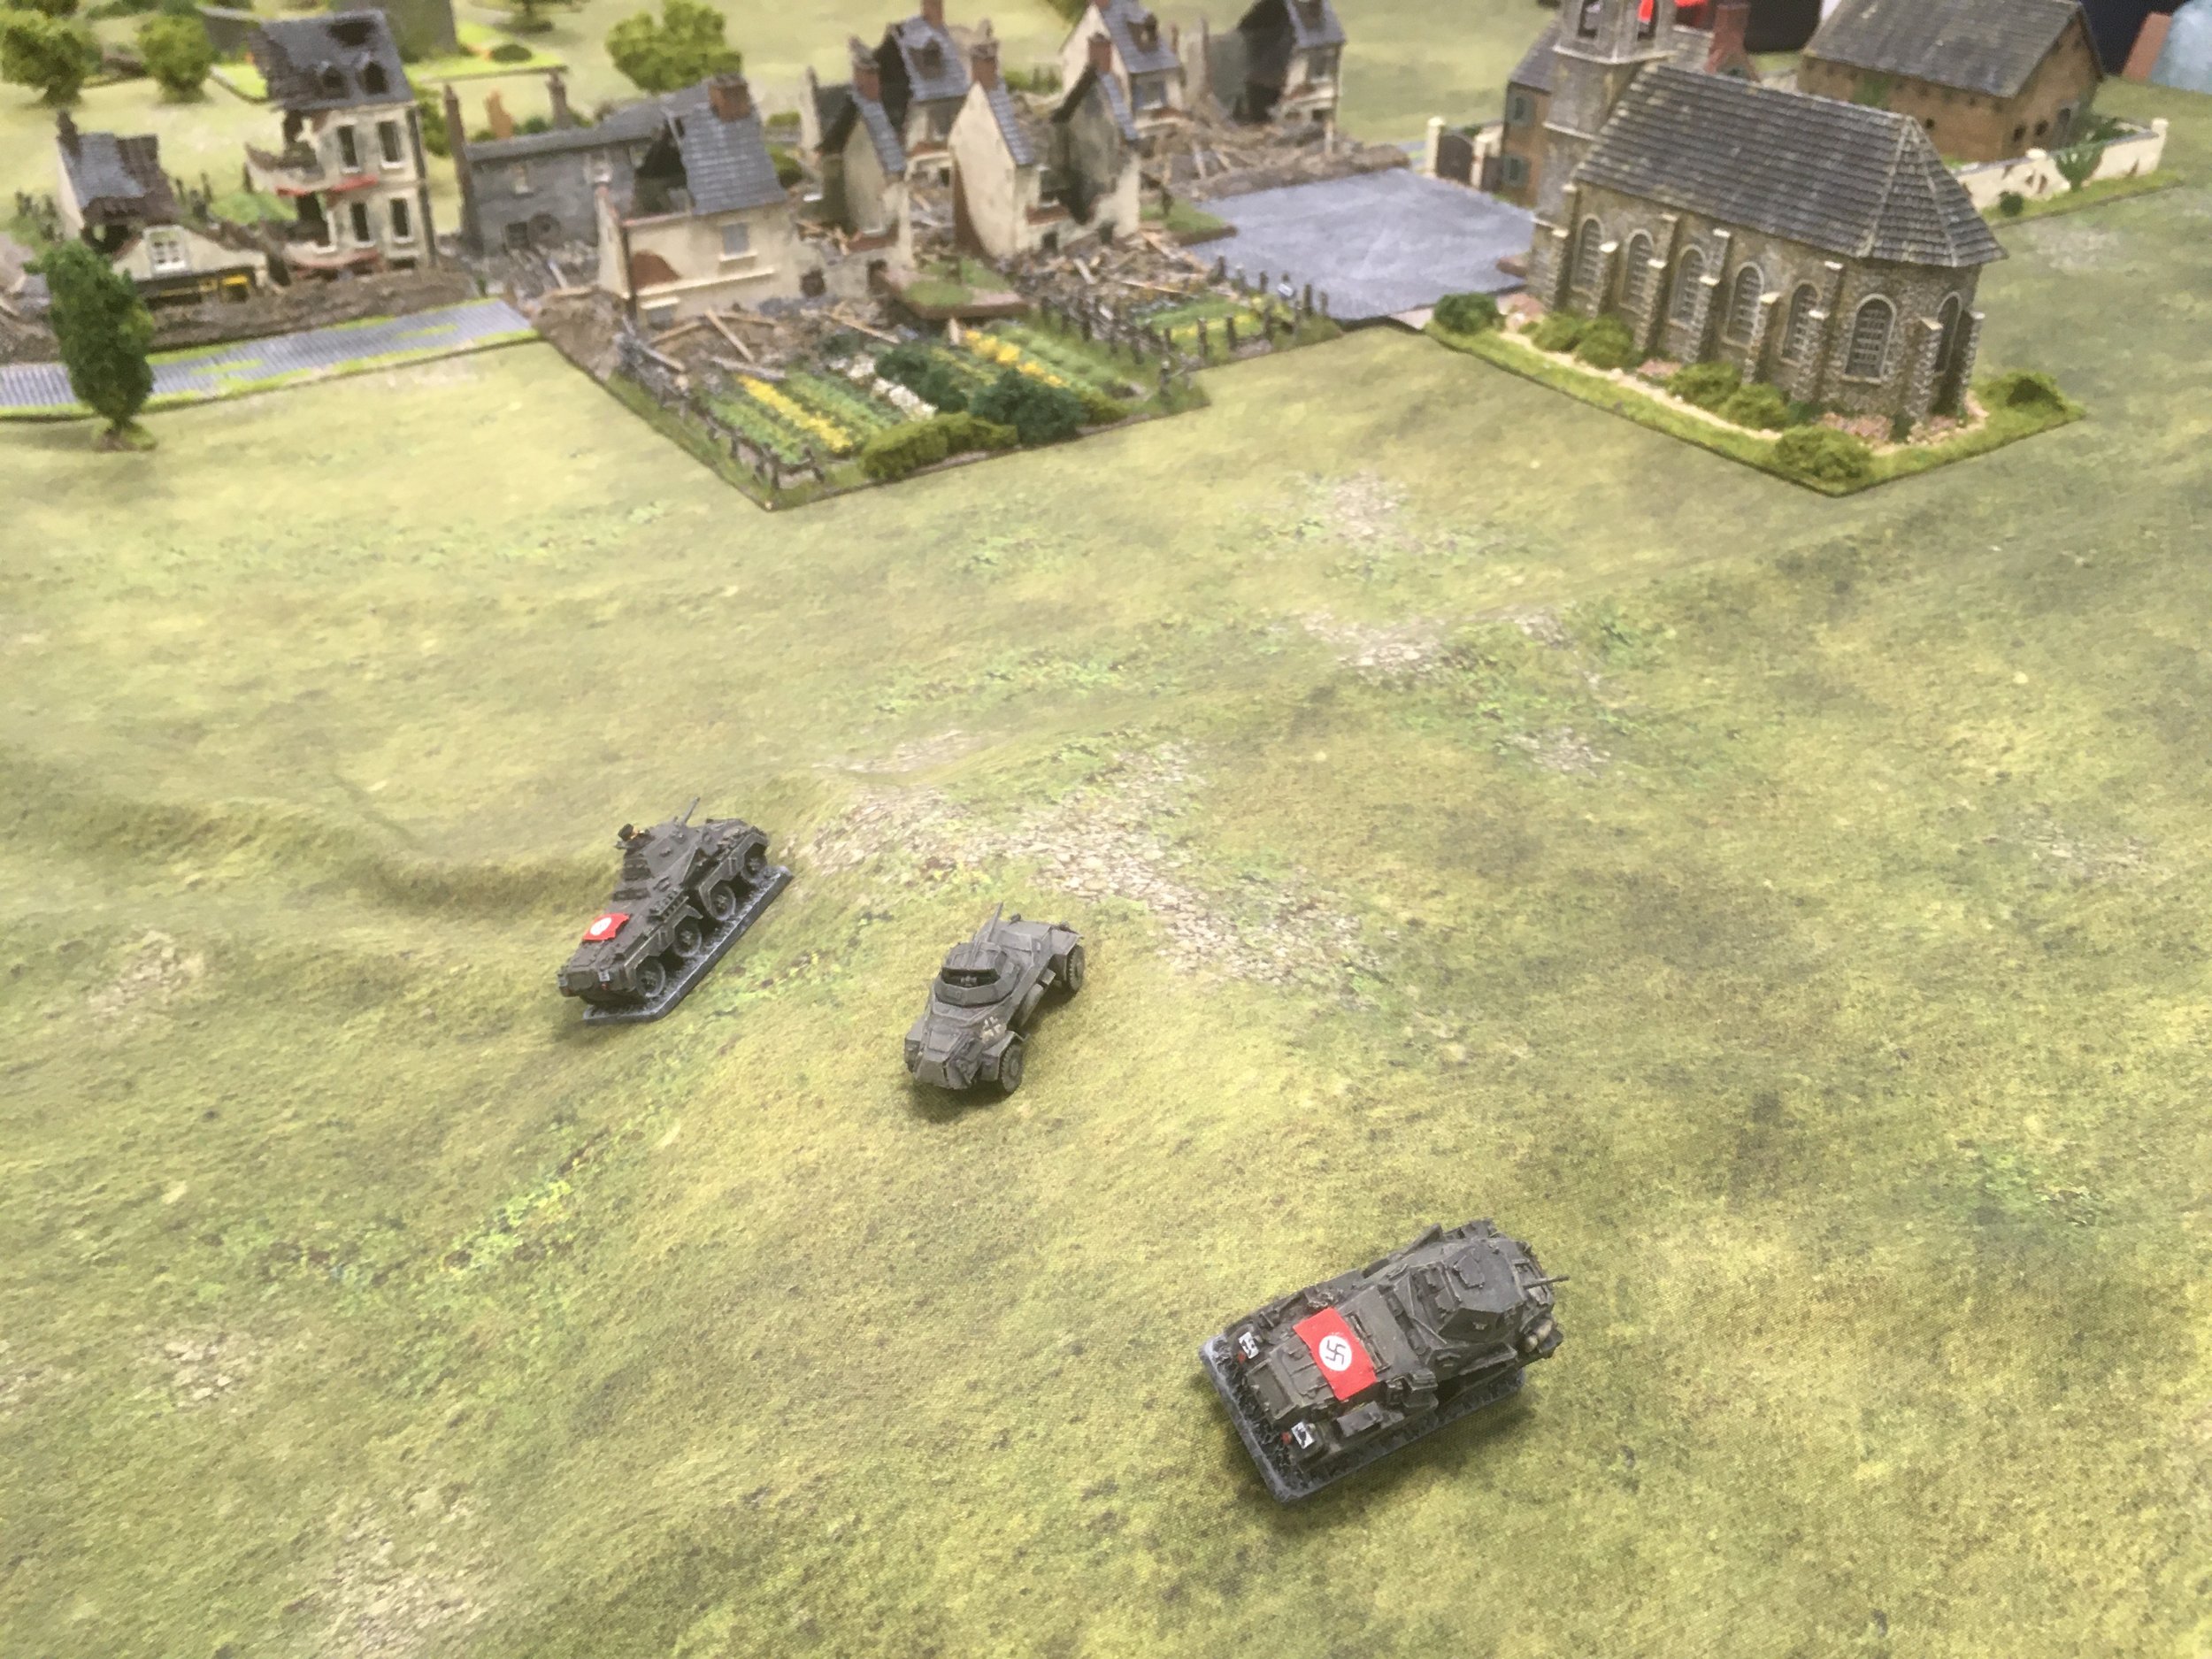
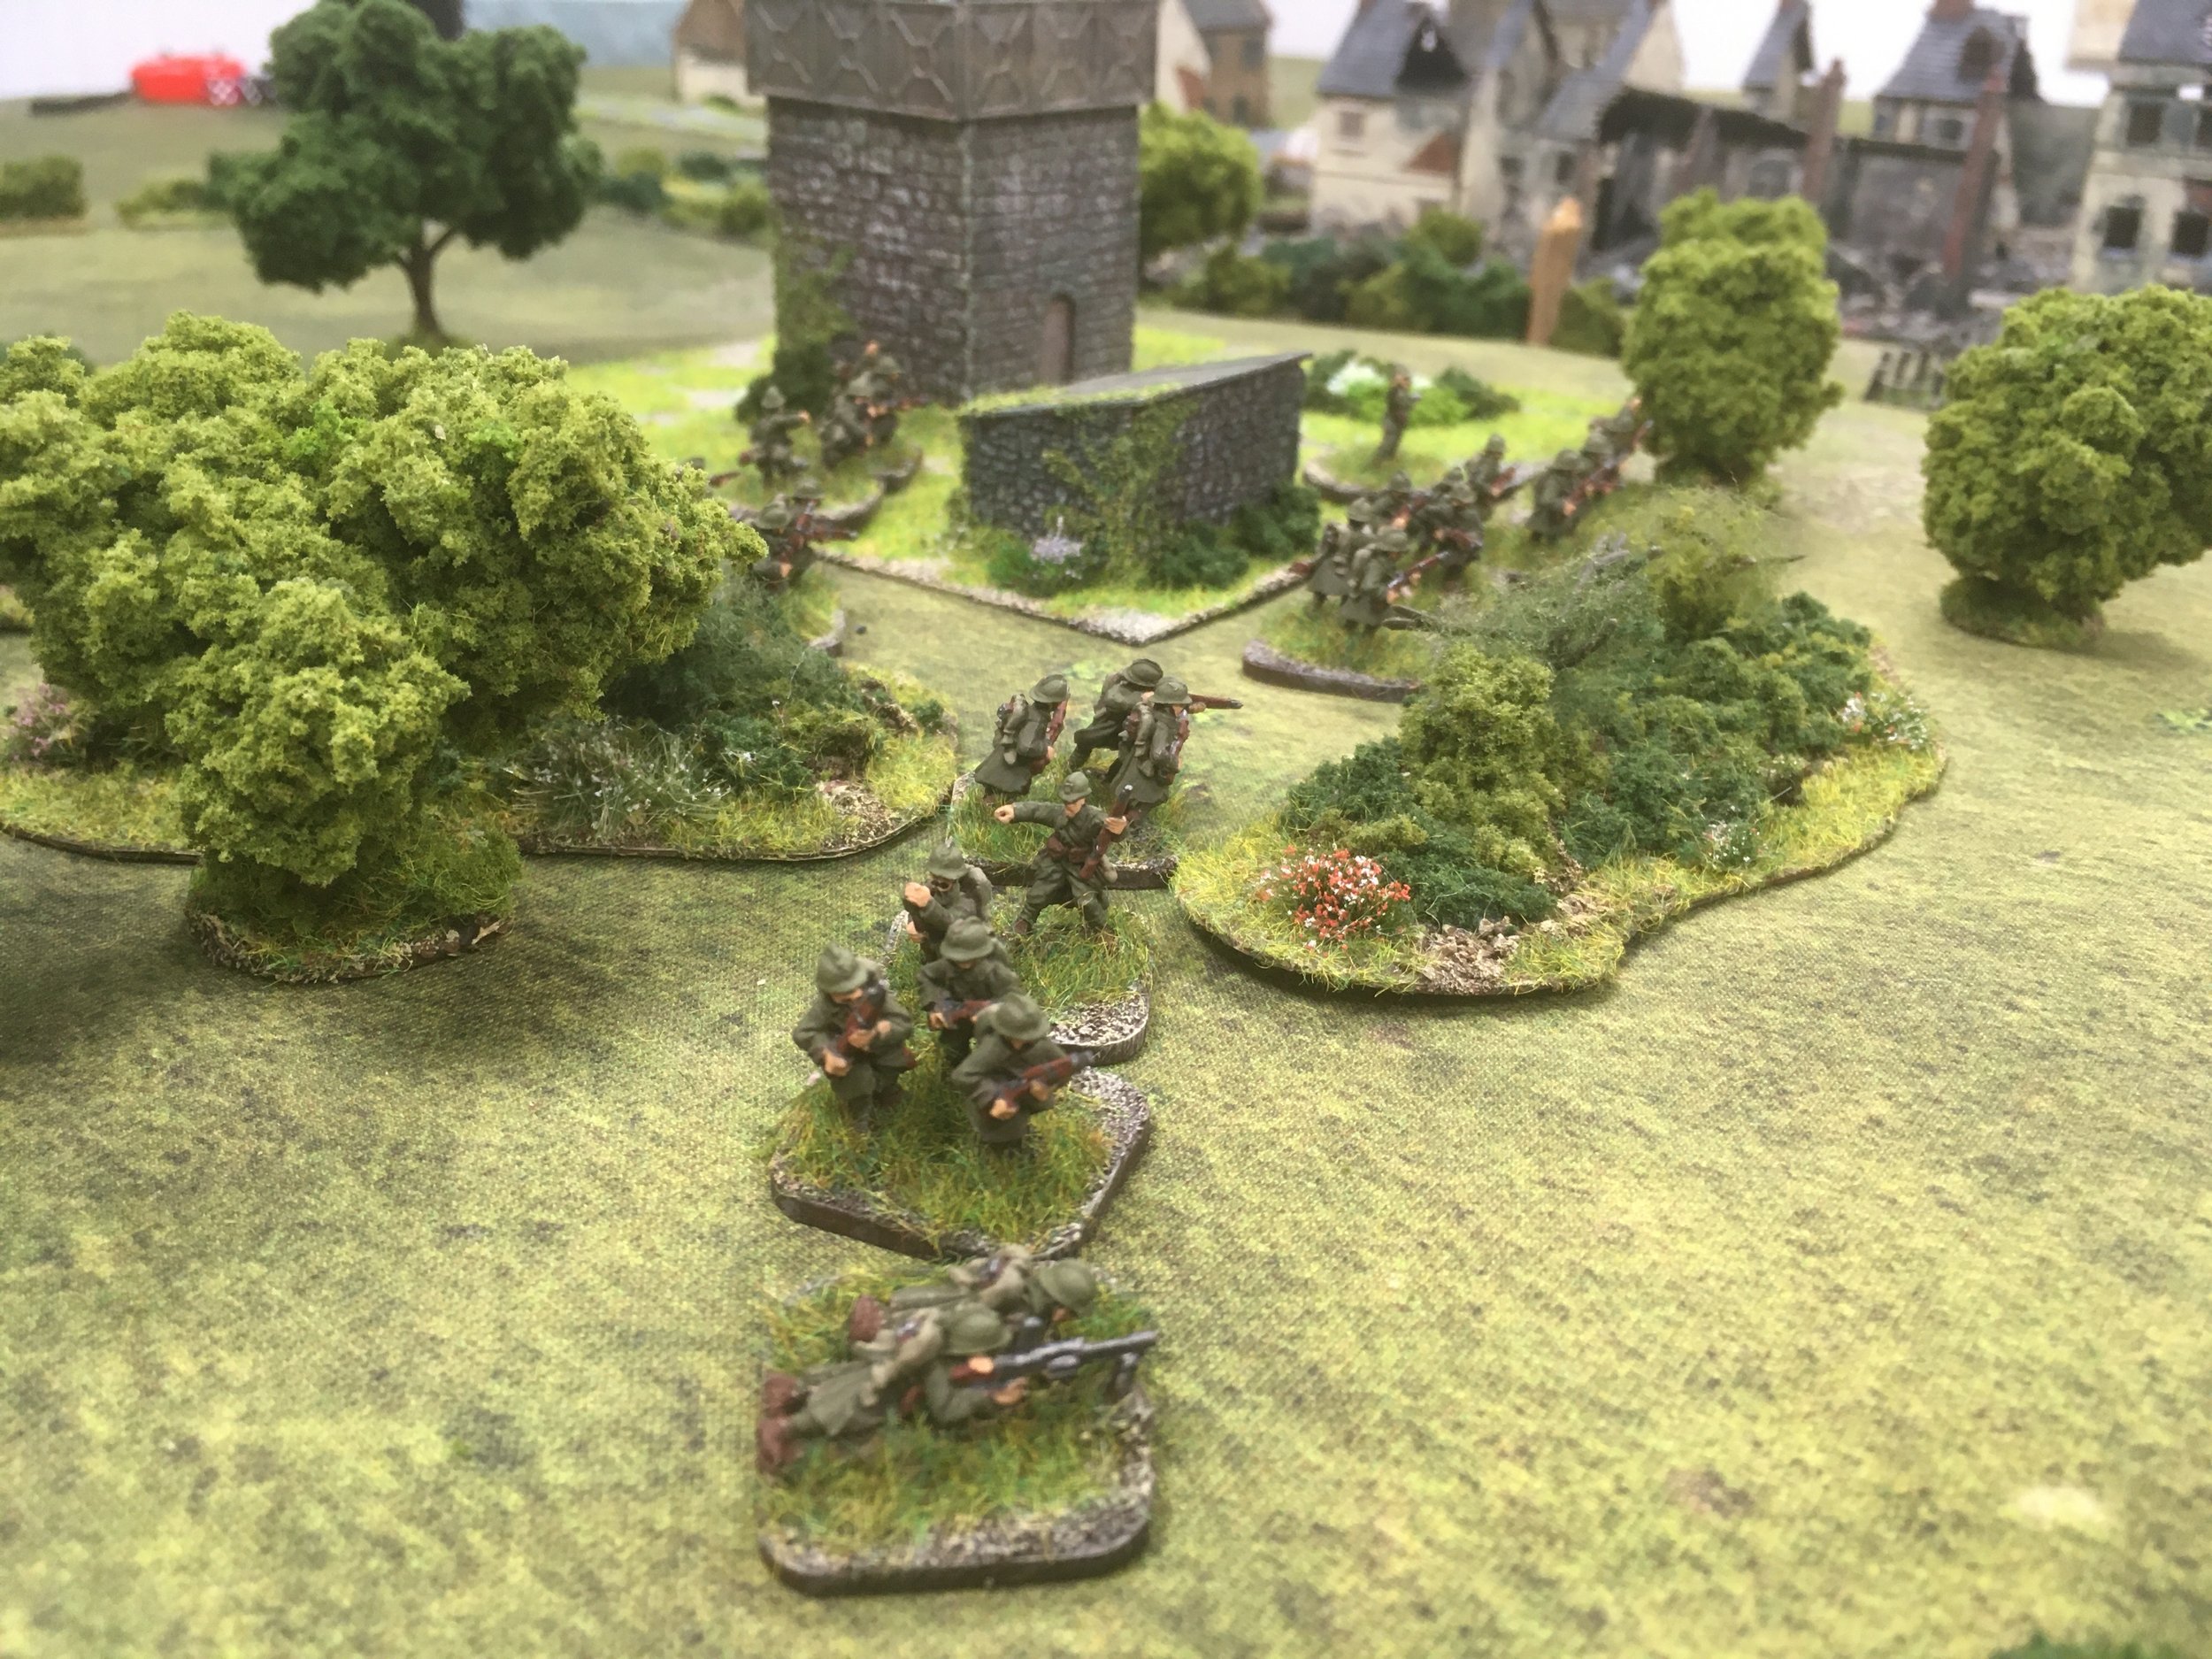
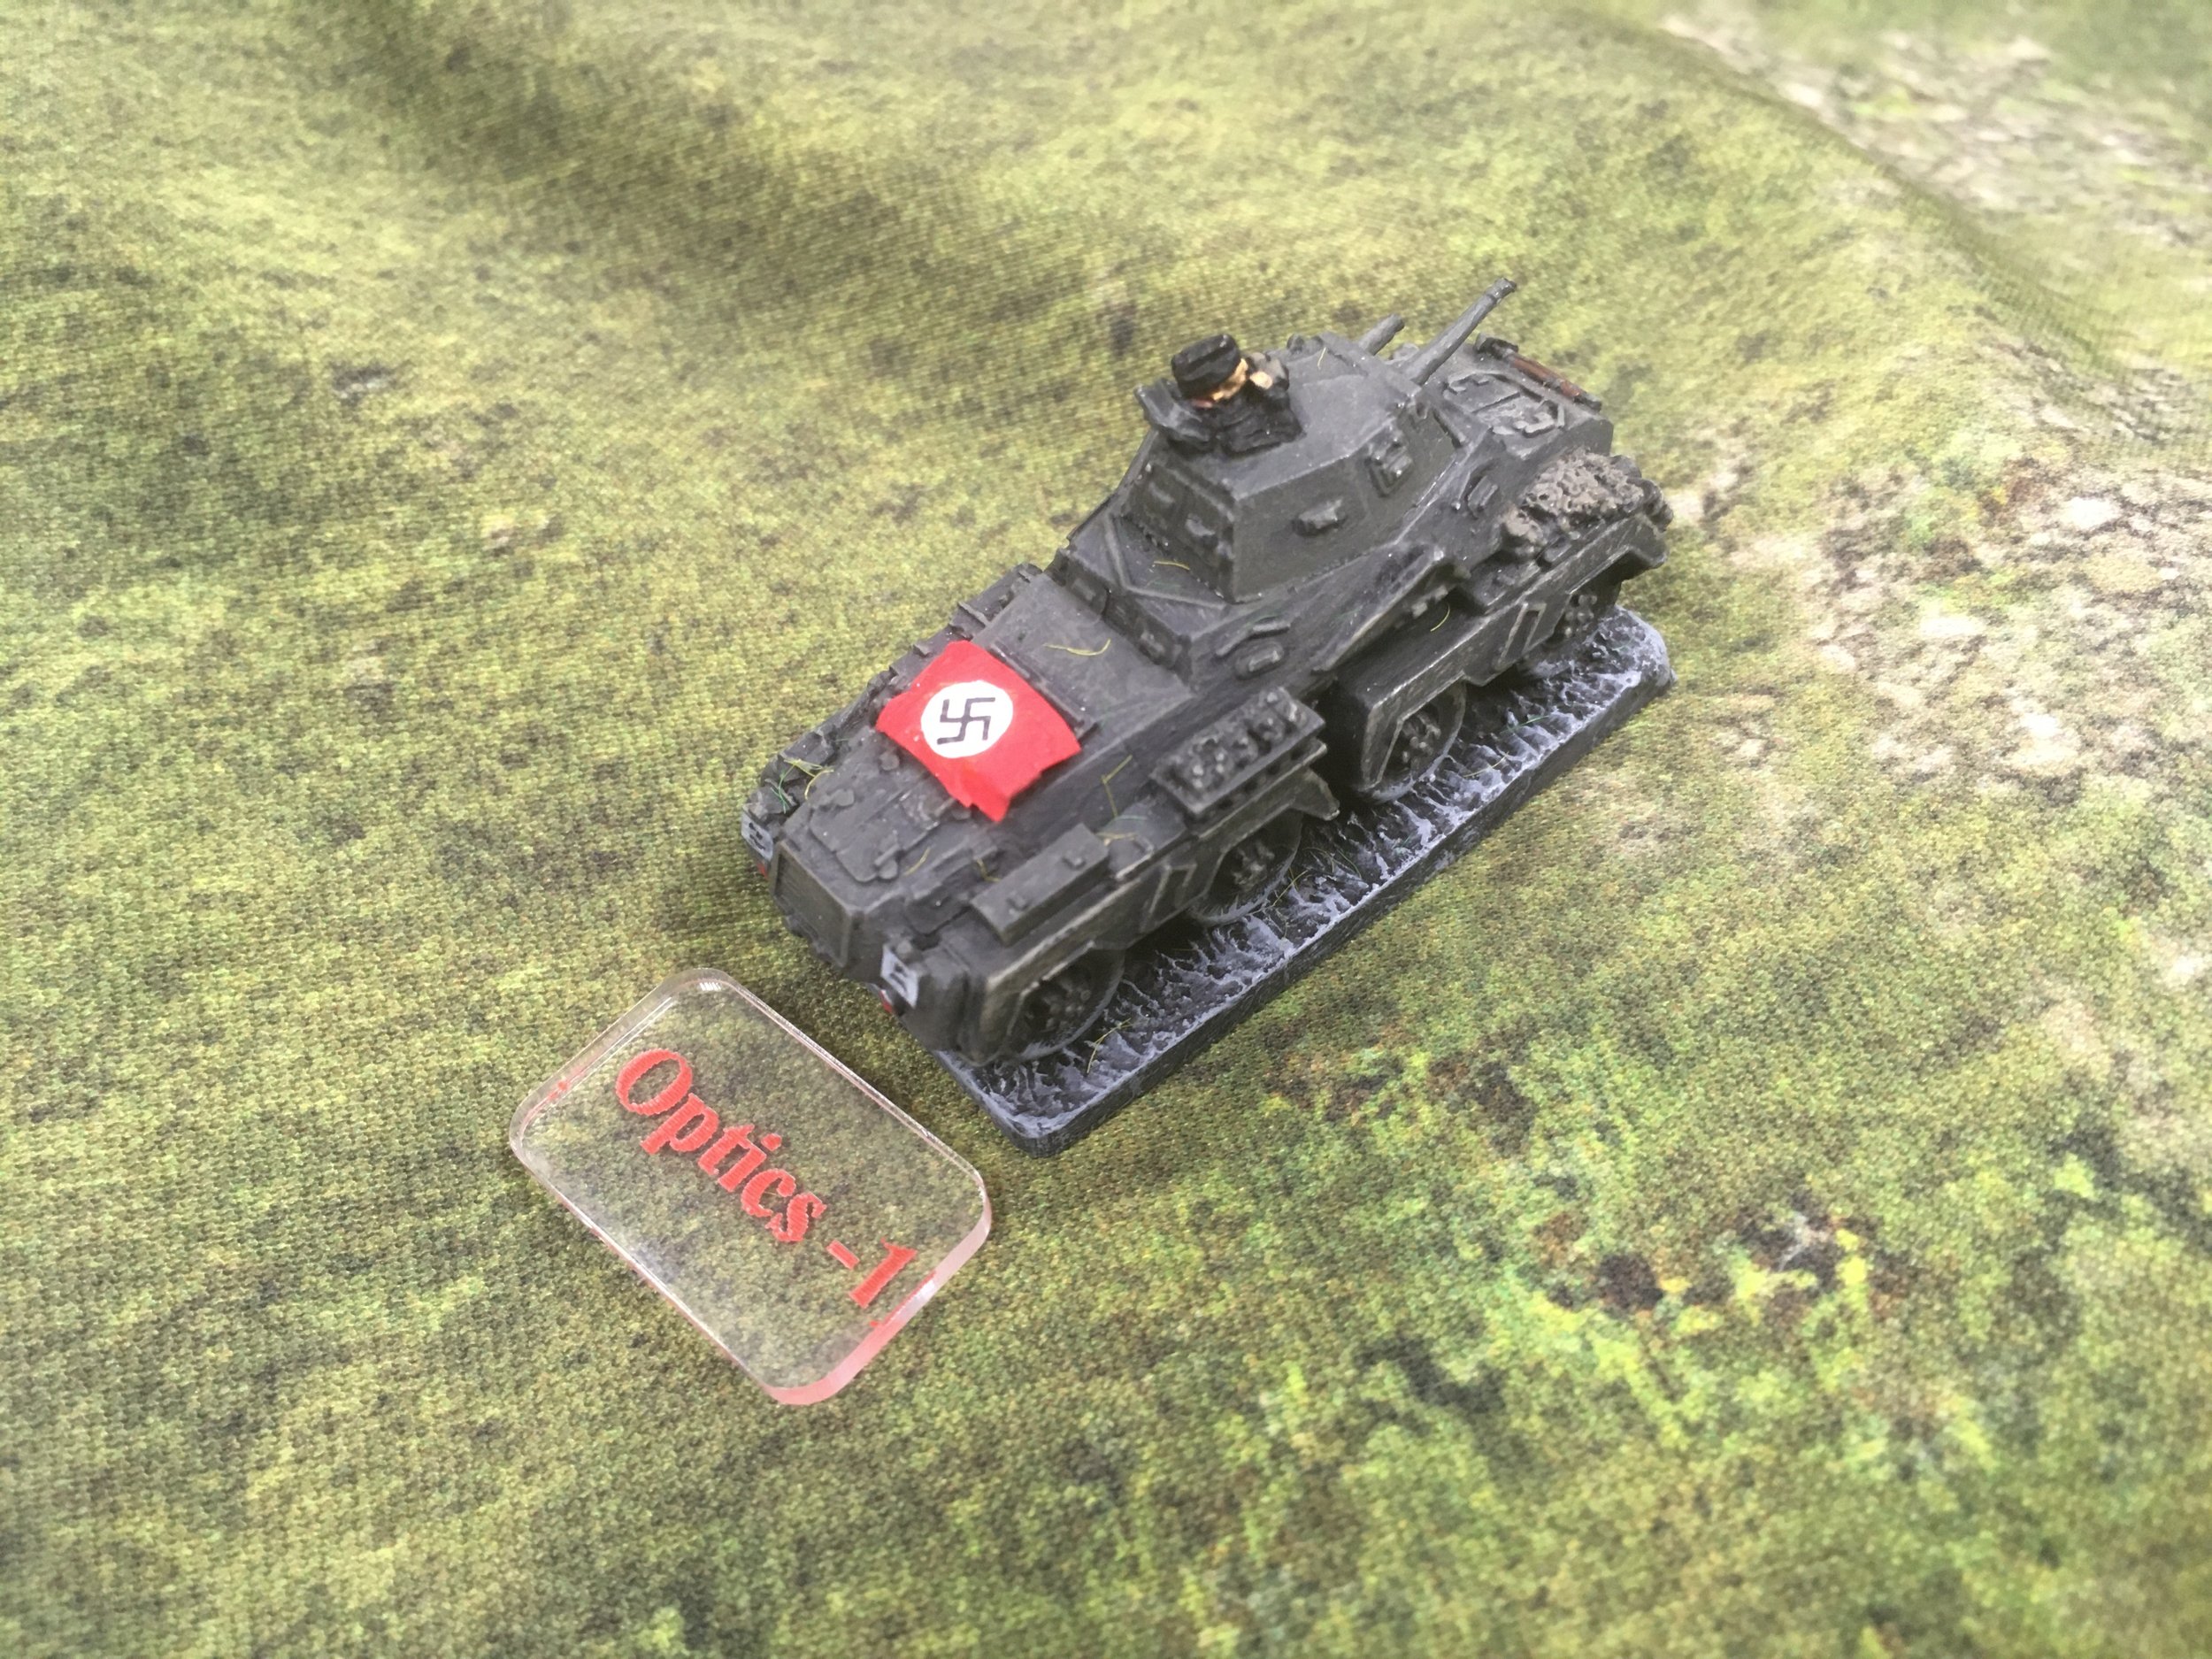
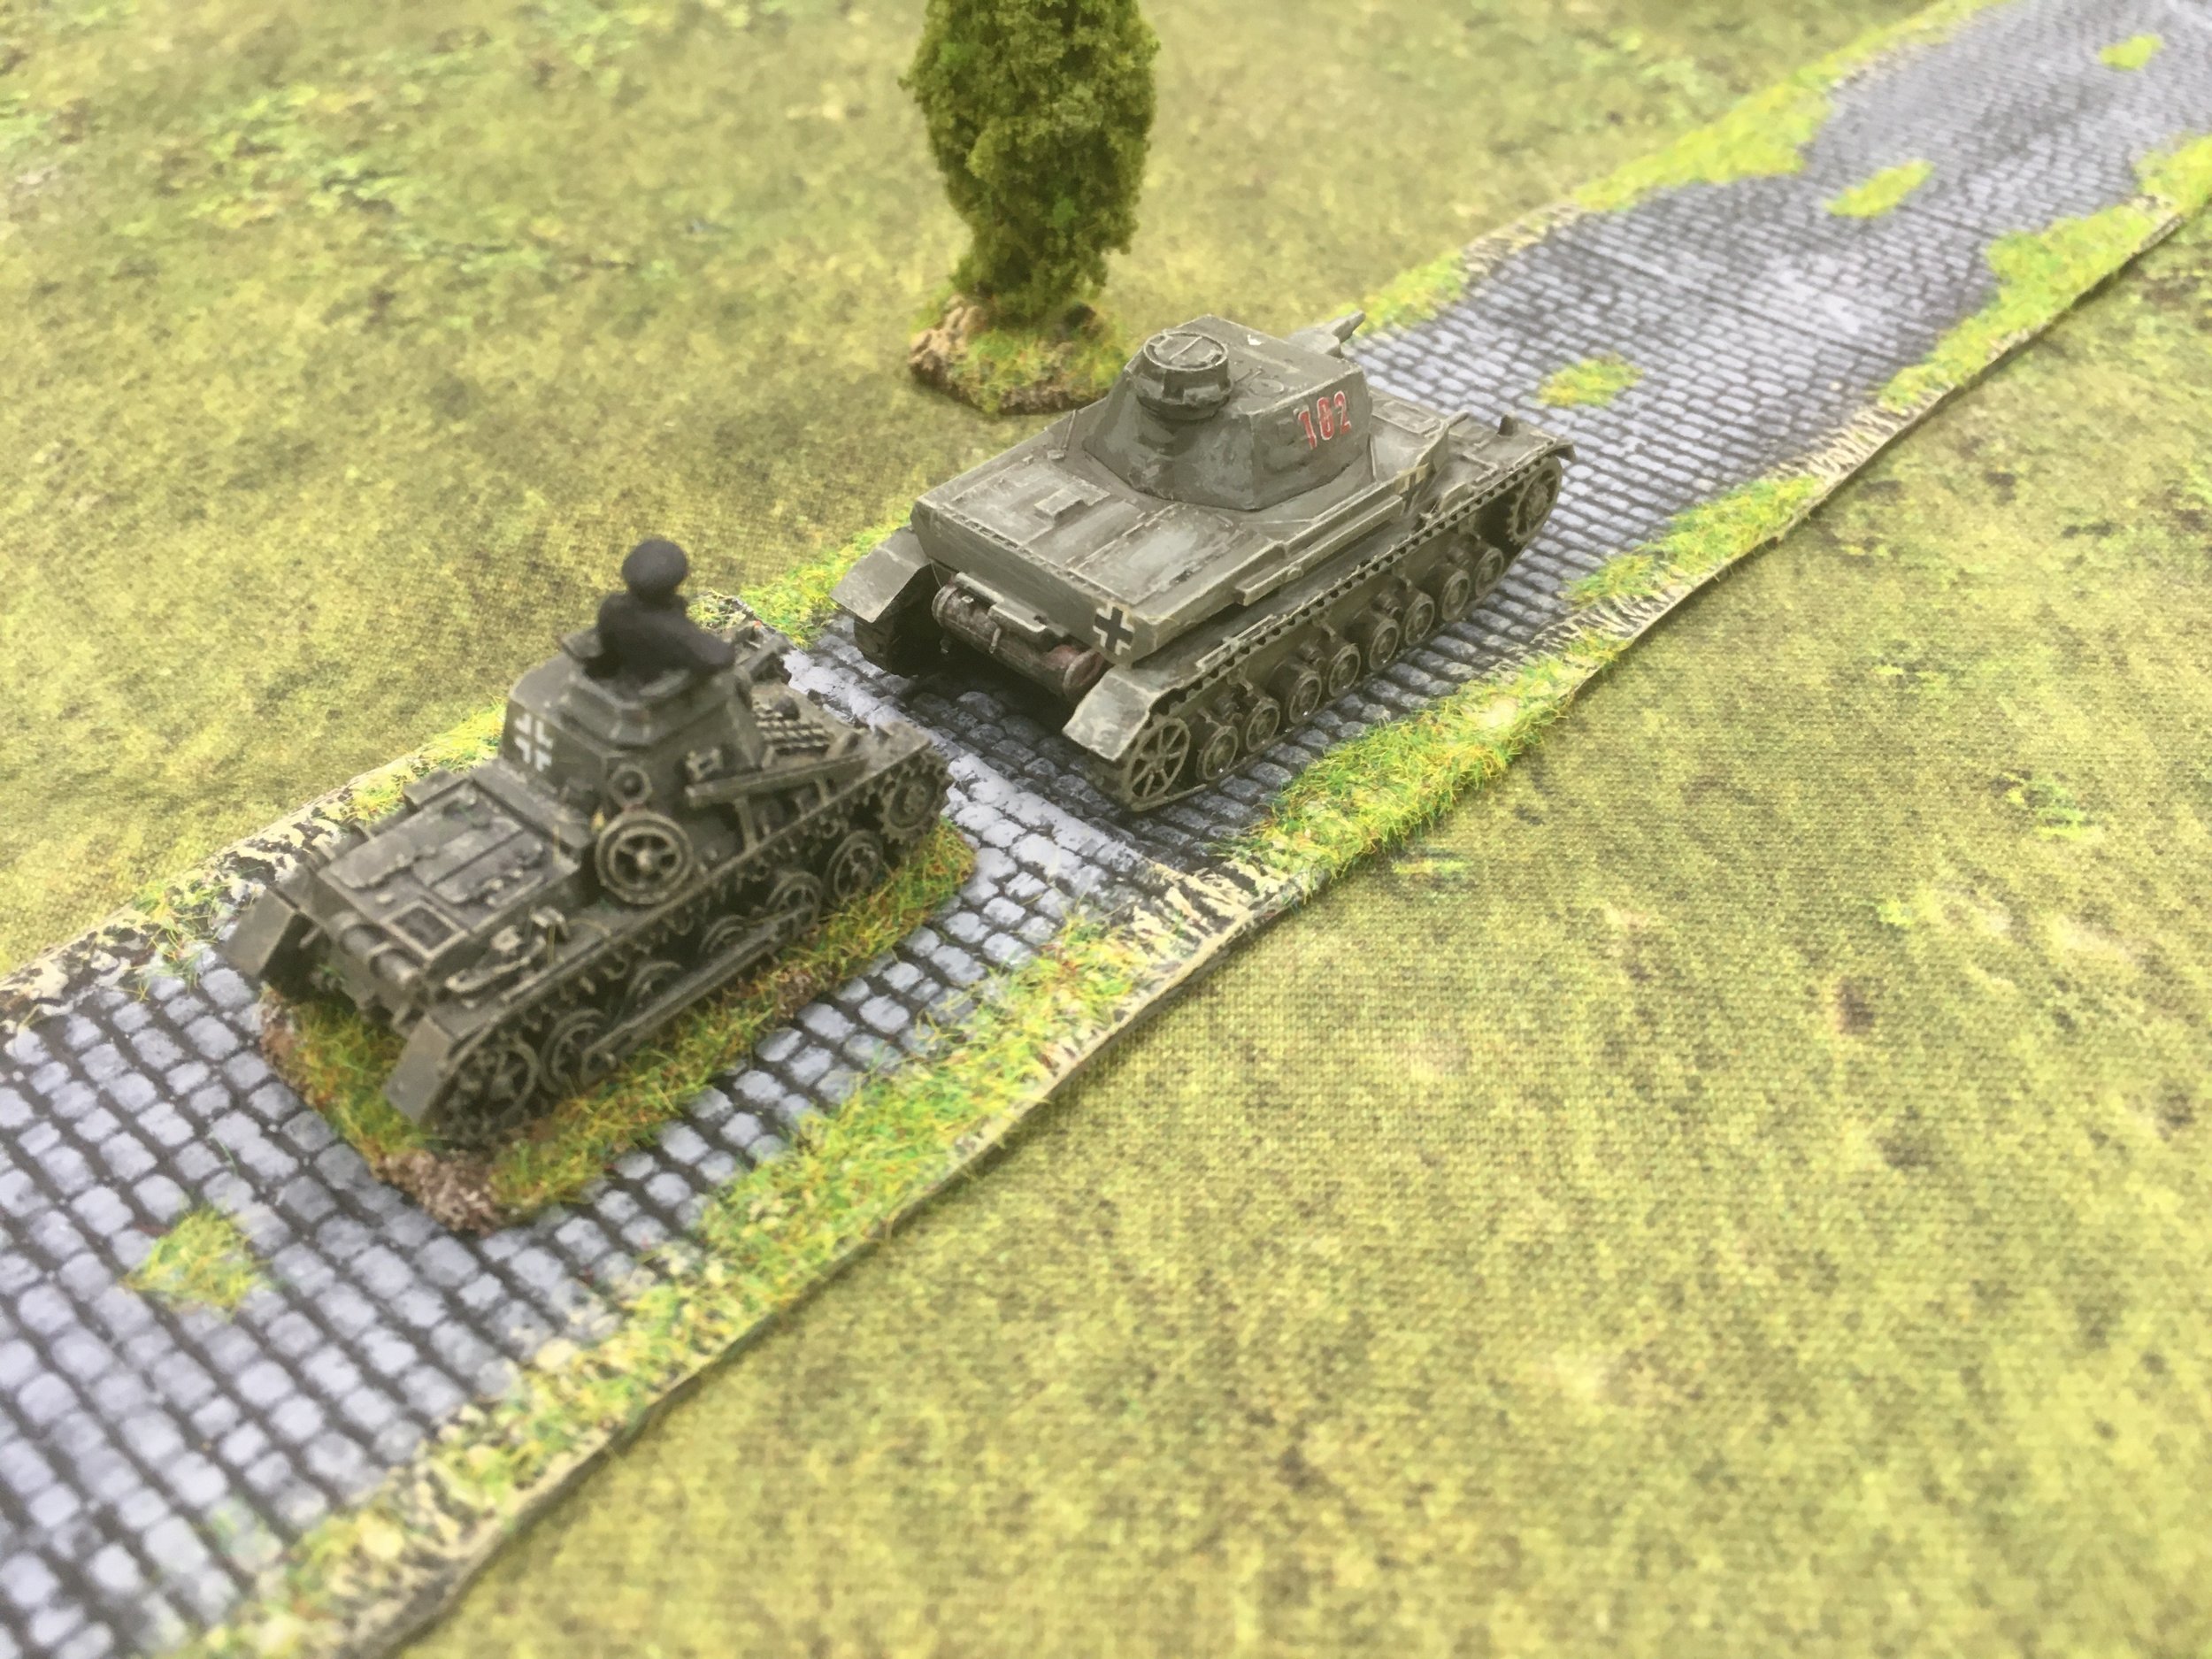
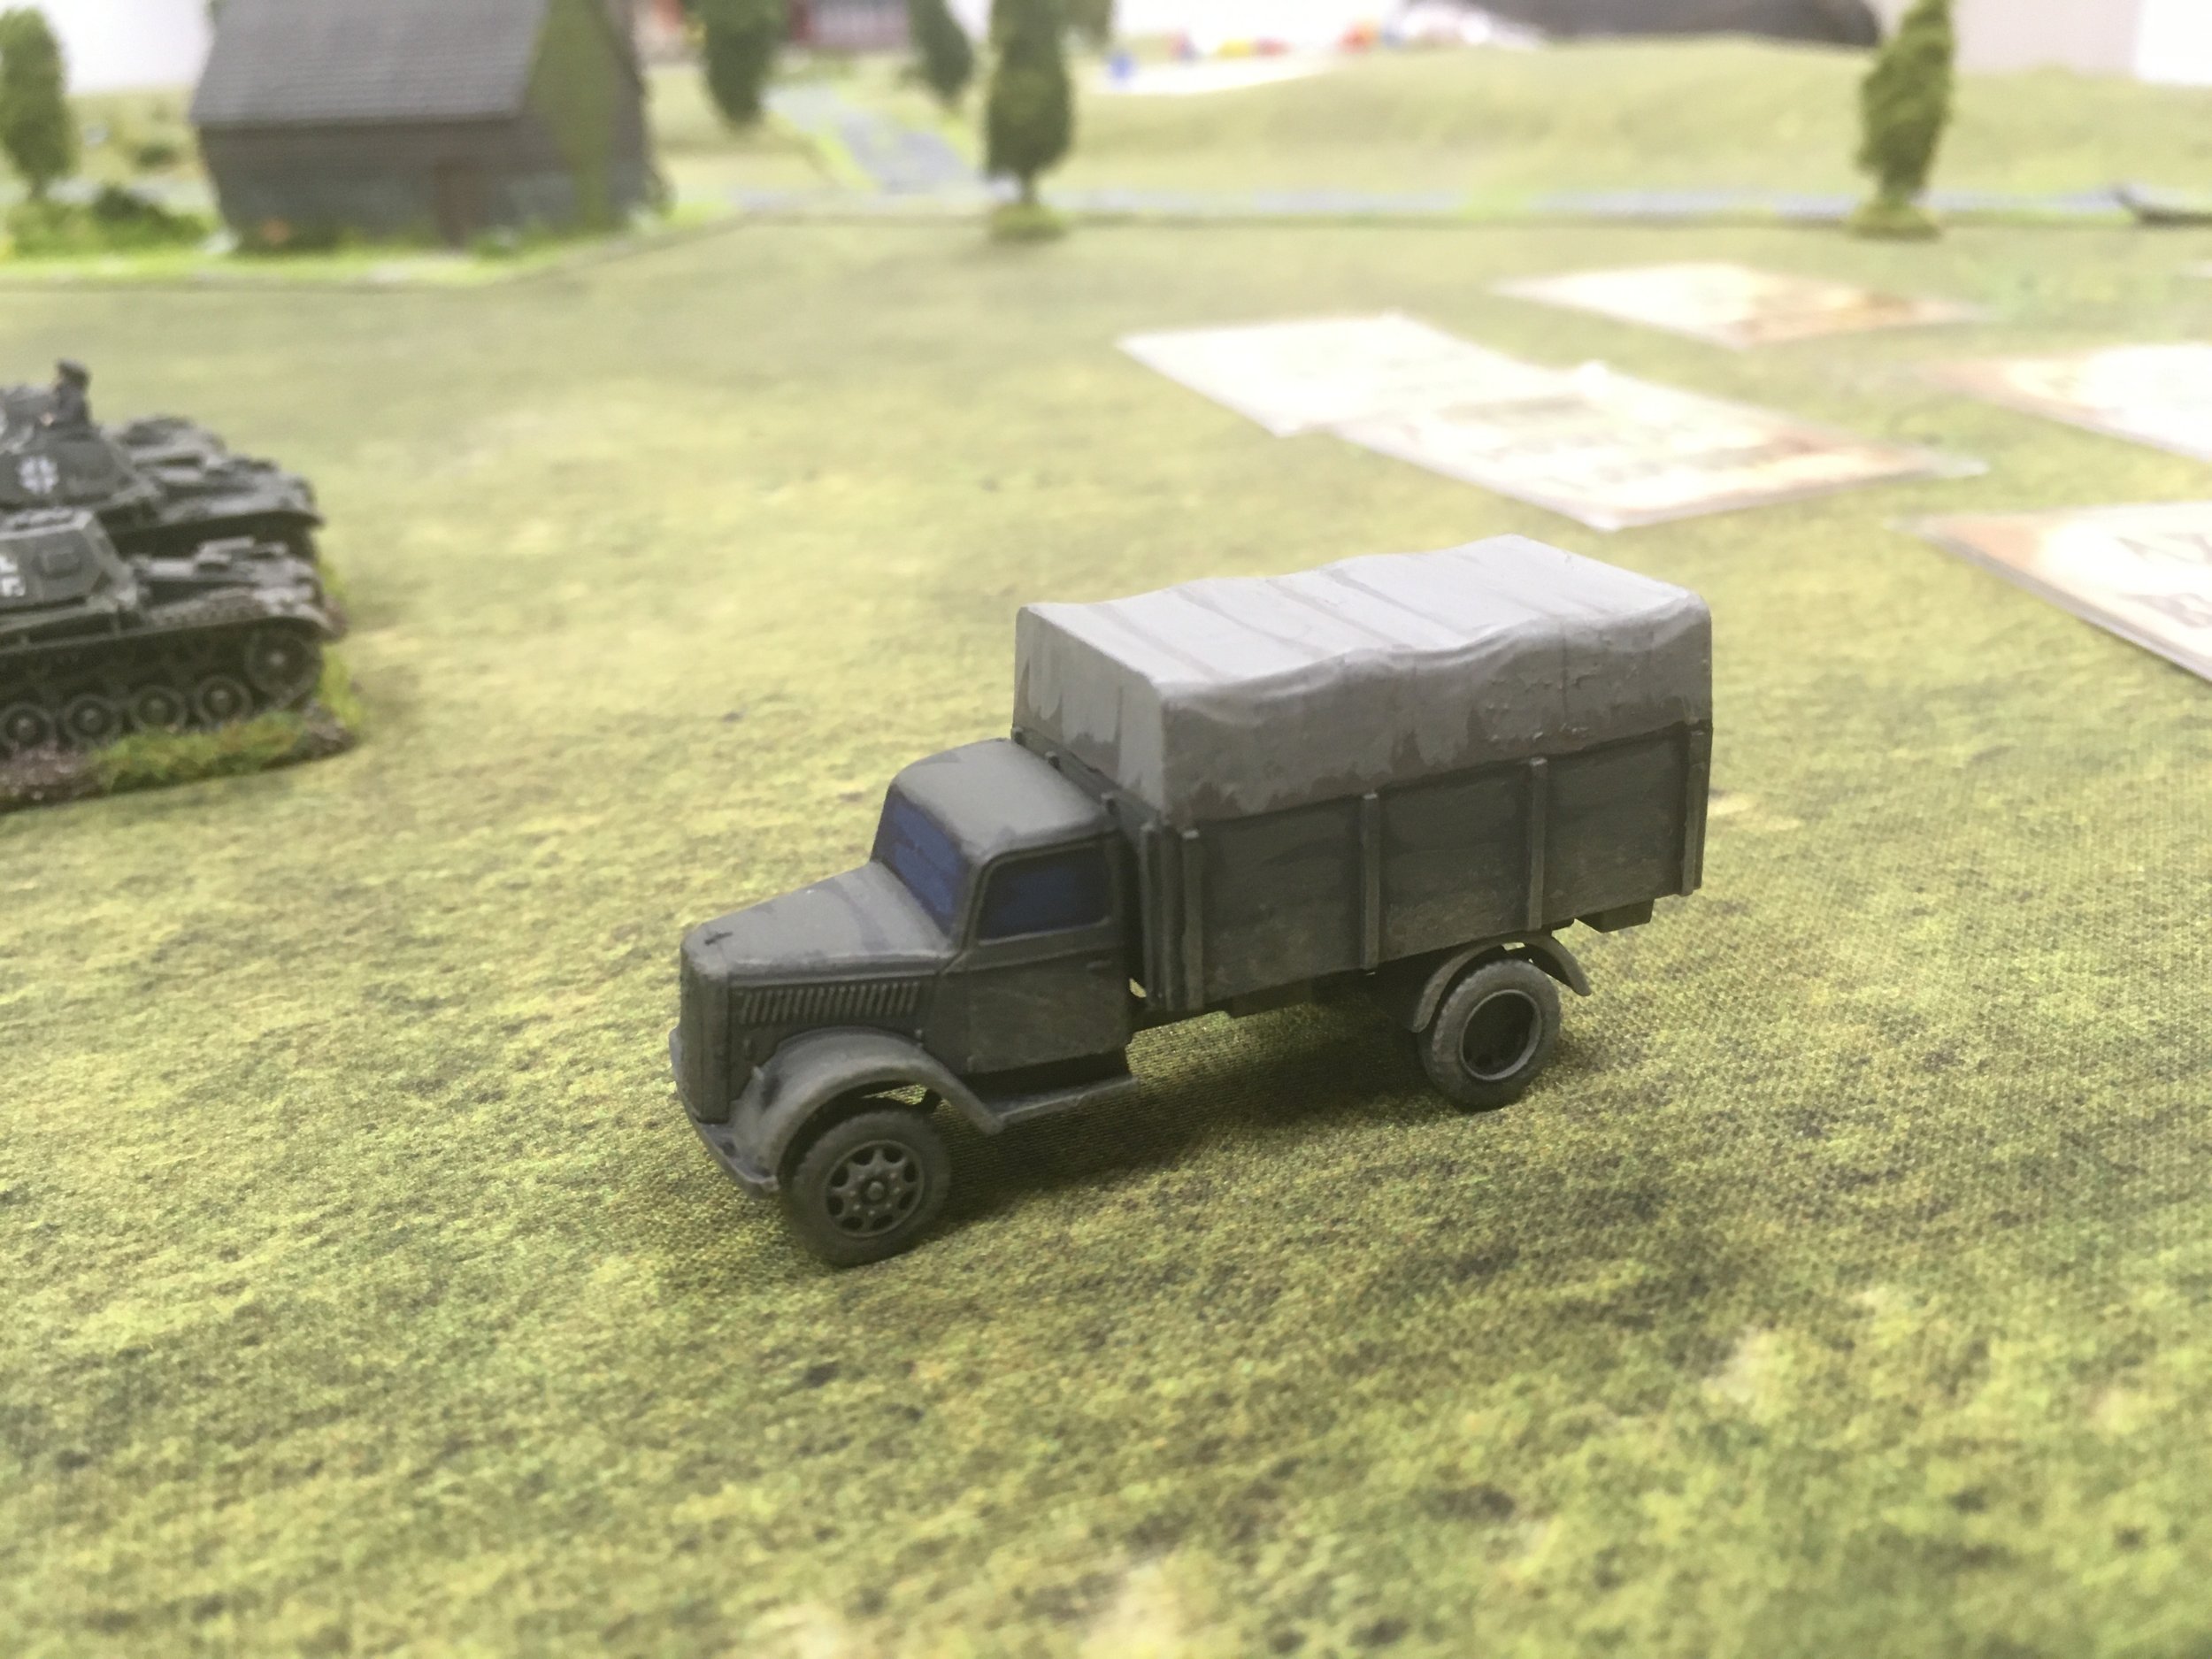
The next turns saw four other German blinds racing up the table. Two straight up the road and two in the western woods. I spotted the two road ones as another Platoon of Hanomag mounted infantry and two Panzer II's.

My BT7s engaged the halftracks in the wood with long range fire, spooking one badly enough that it dropped its occupants the other two retreated out of line of sight behind the wood.

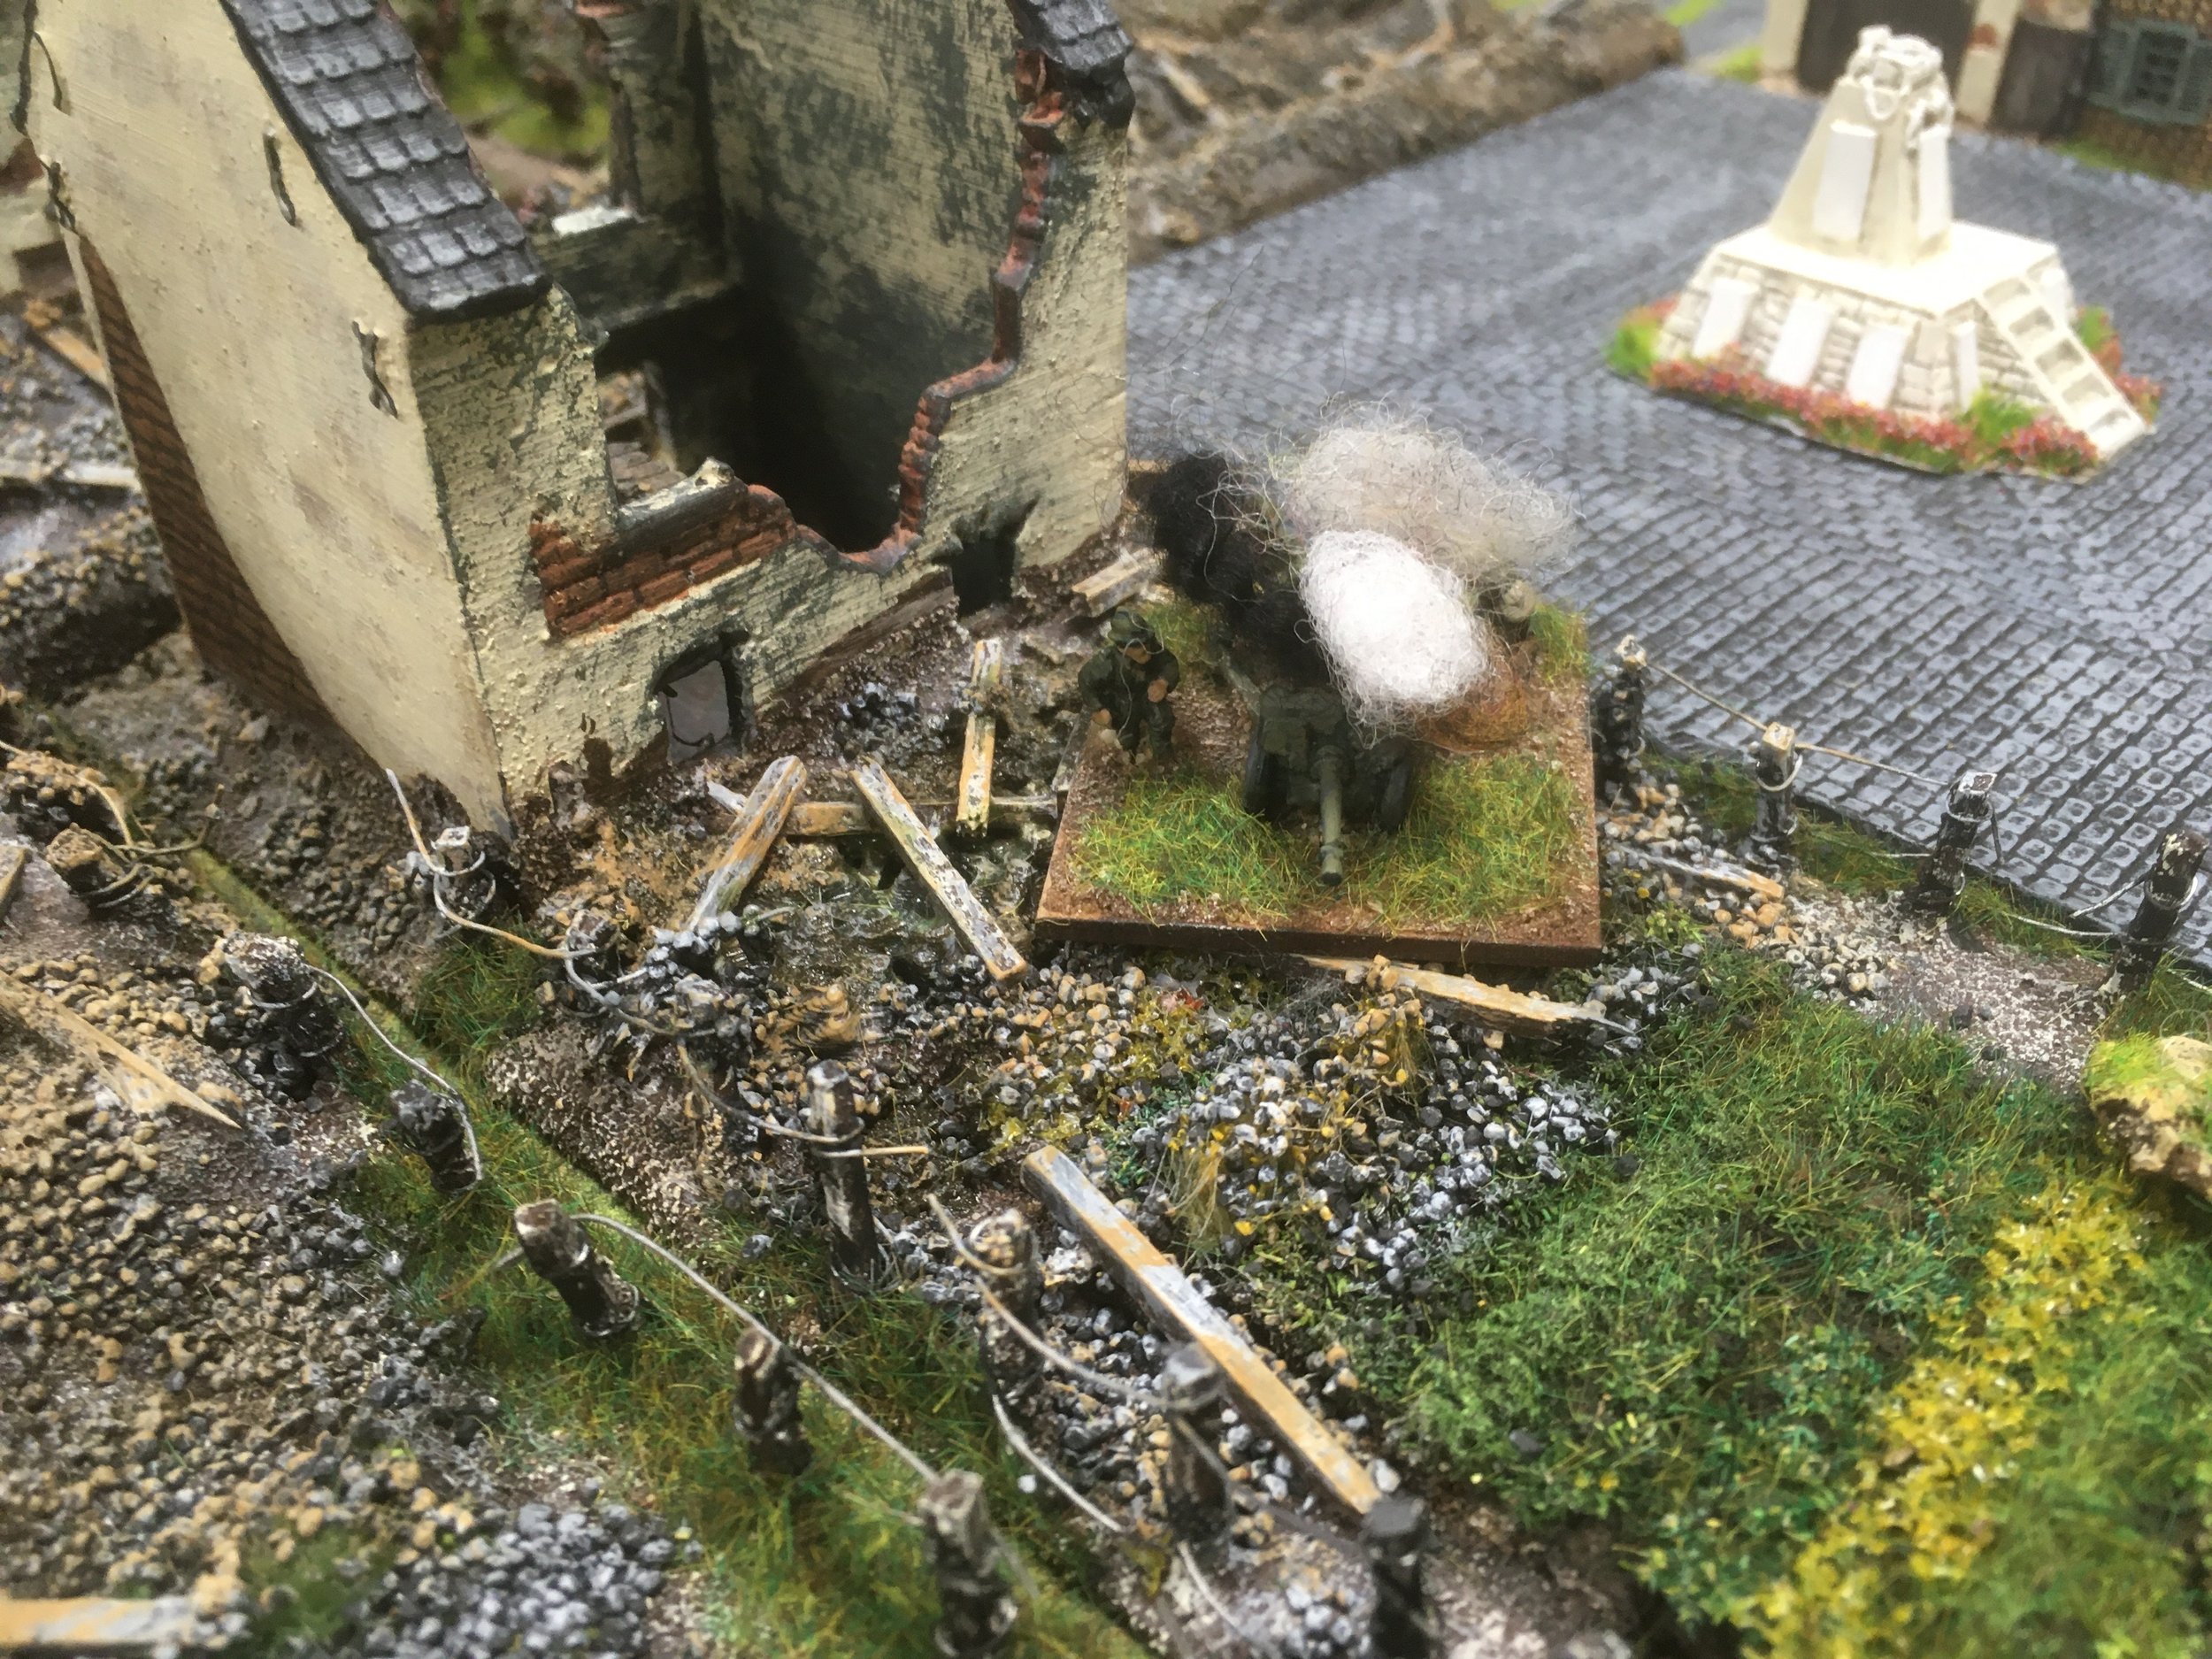
One BT7 hit and destroyed a Hanomag in the centre which had occupied a field near the barn. A couple of German mothers would get telegrams from the Fuhrer!

I manouevered my fakes into the two gullies and pretended they were infantry Platoons, while all my troops played the waiting game.

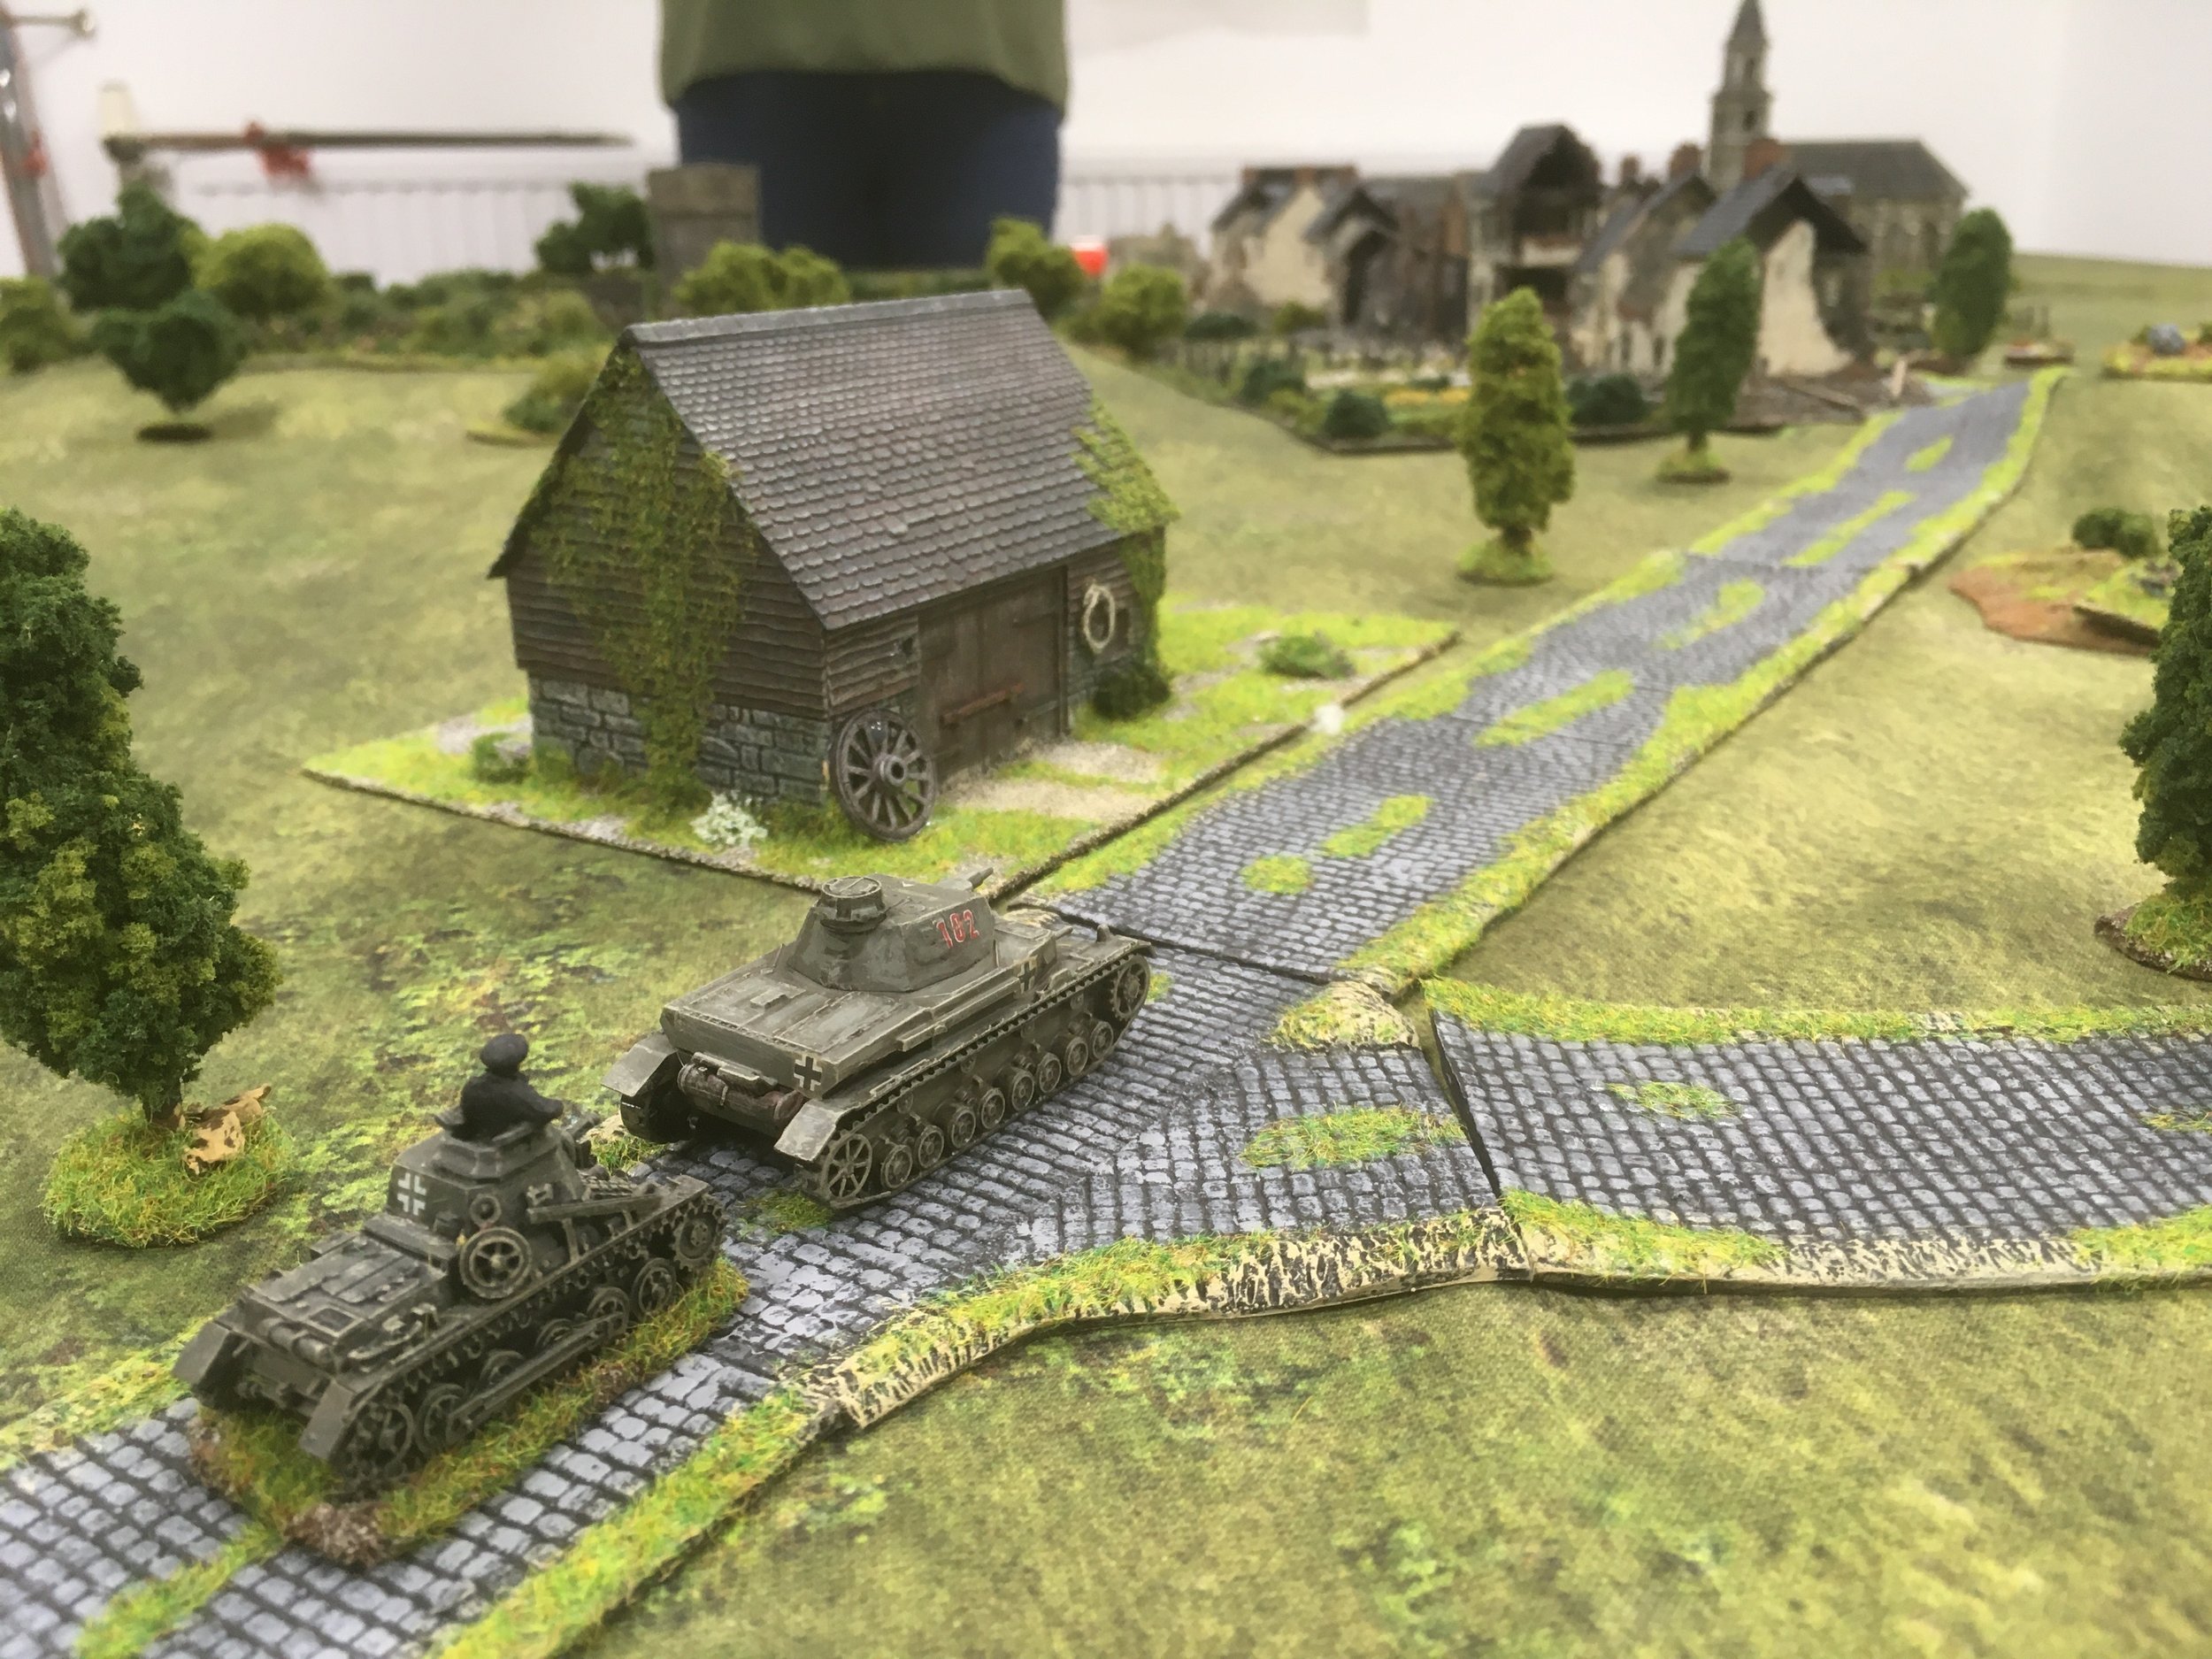
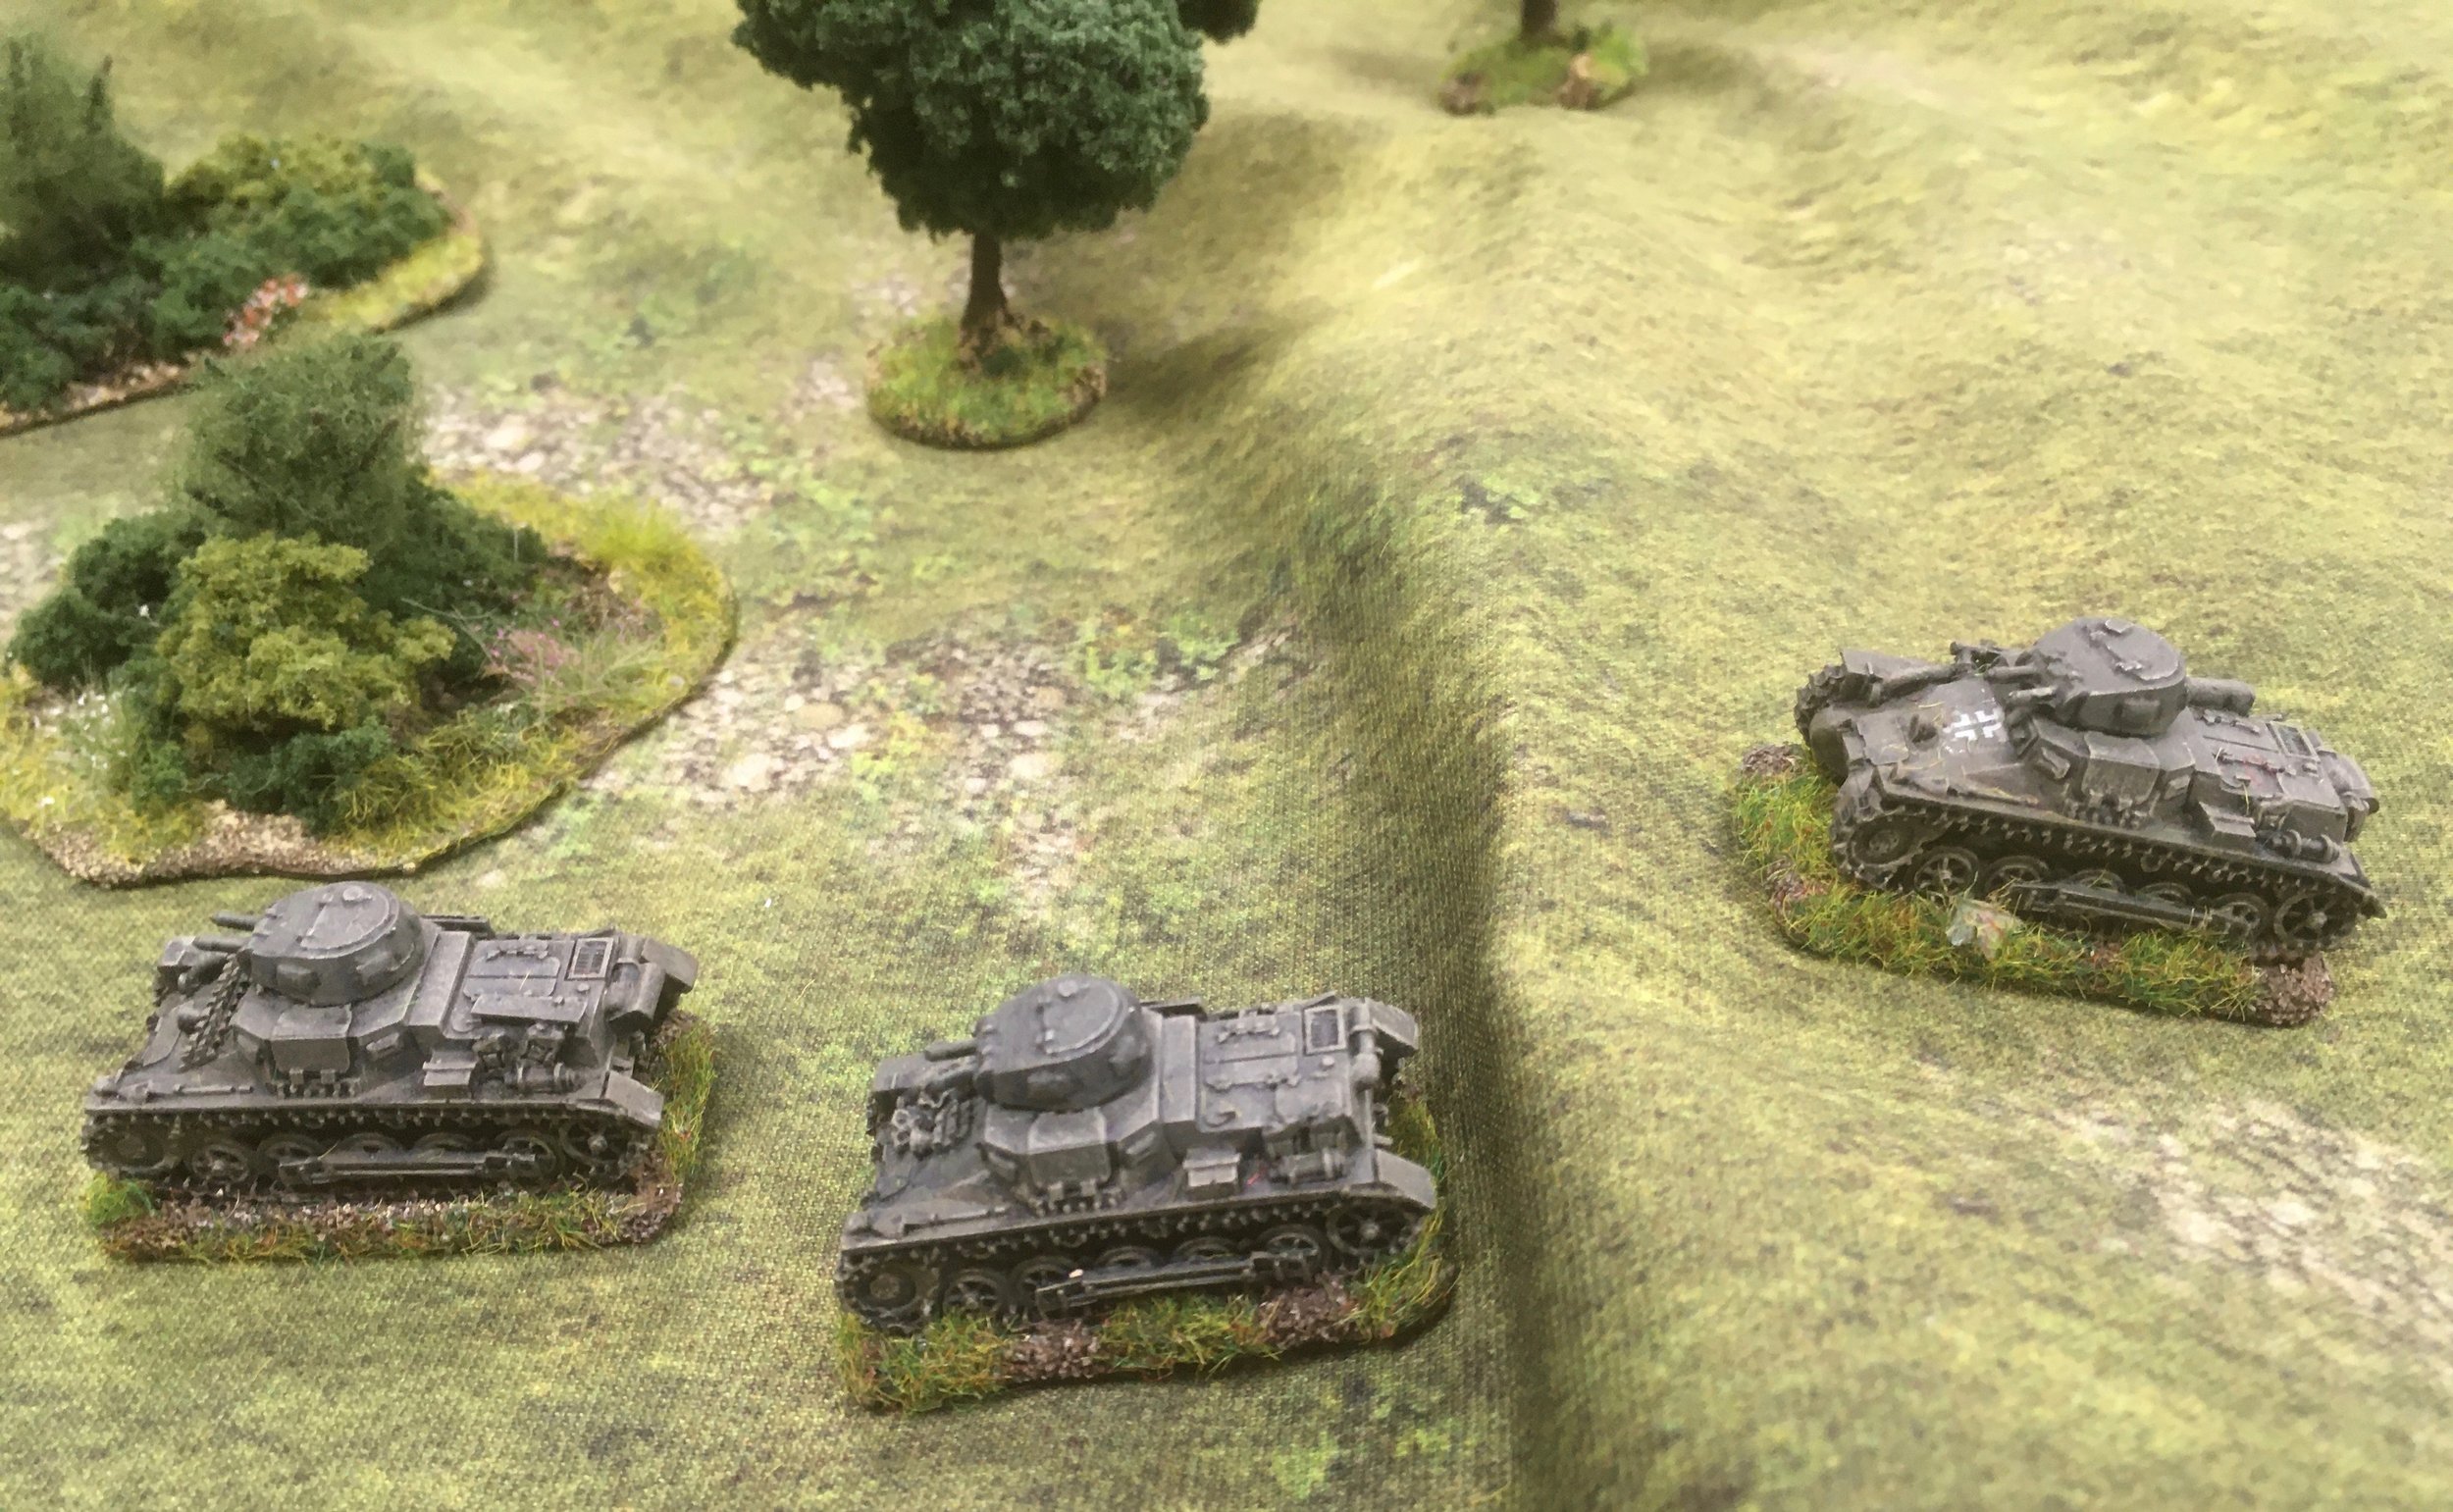
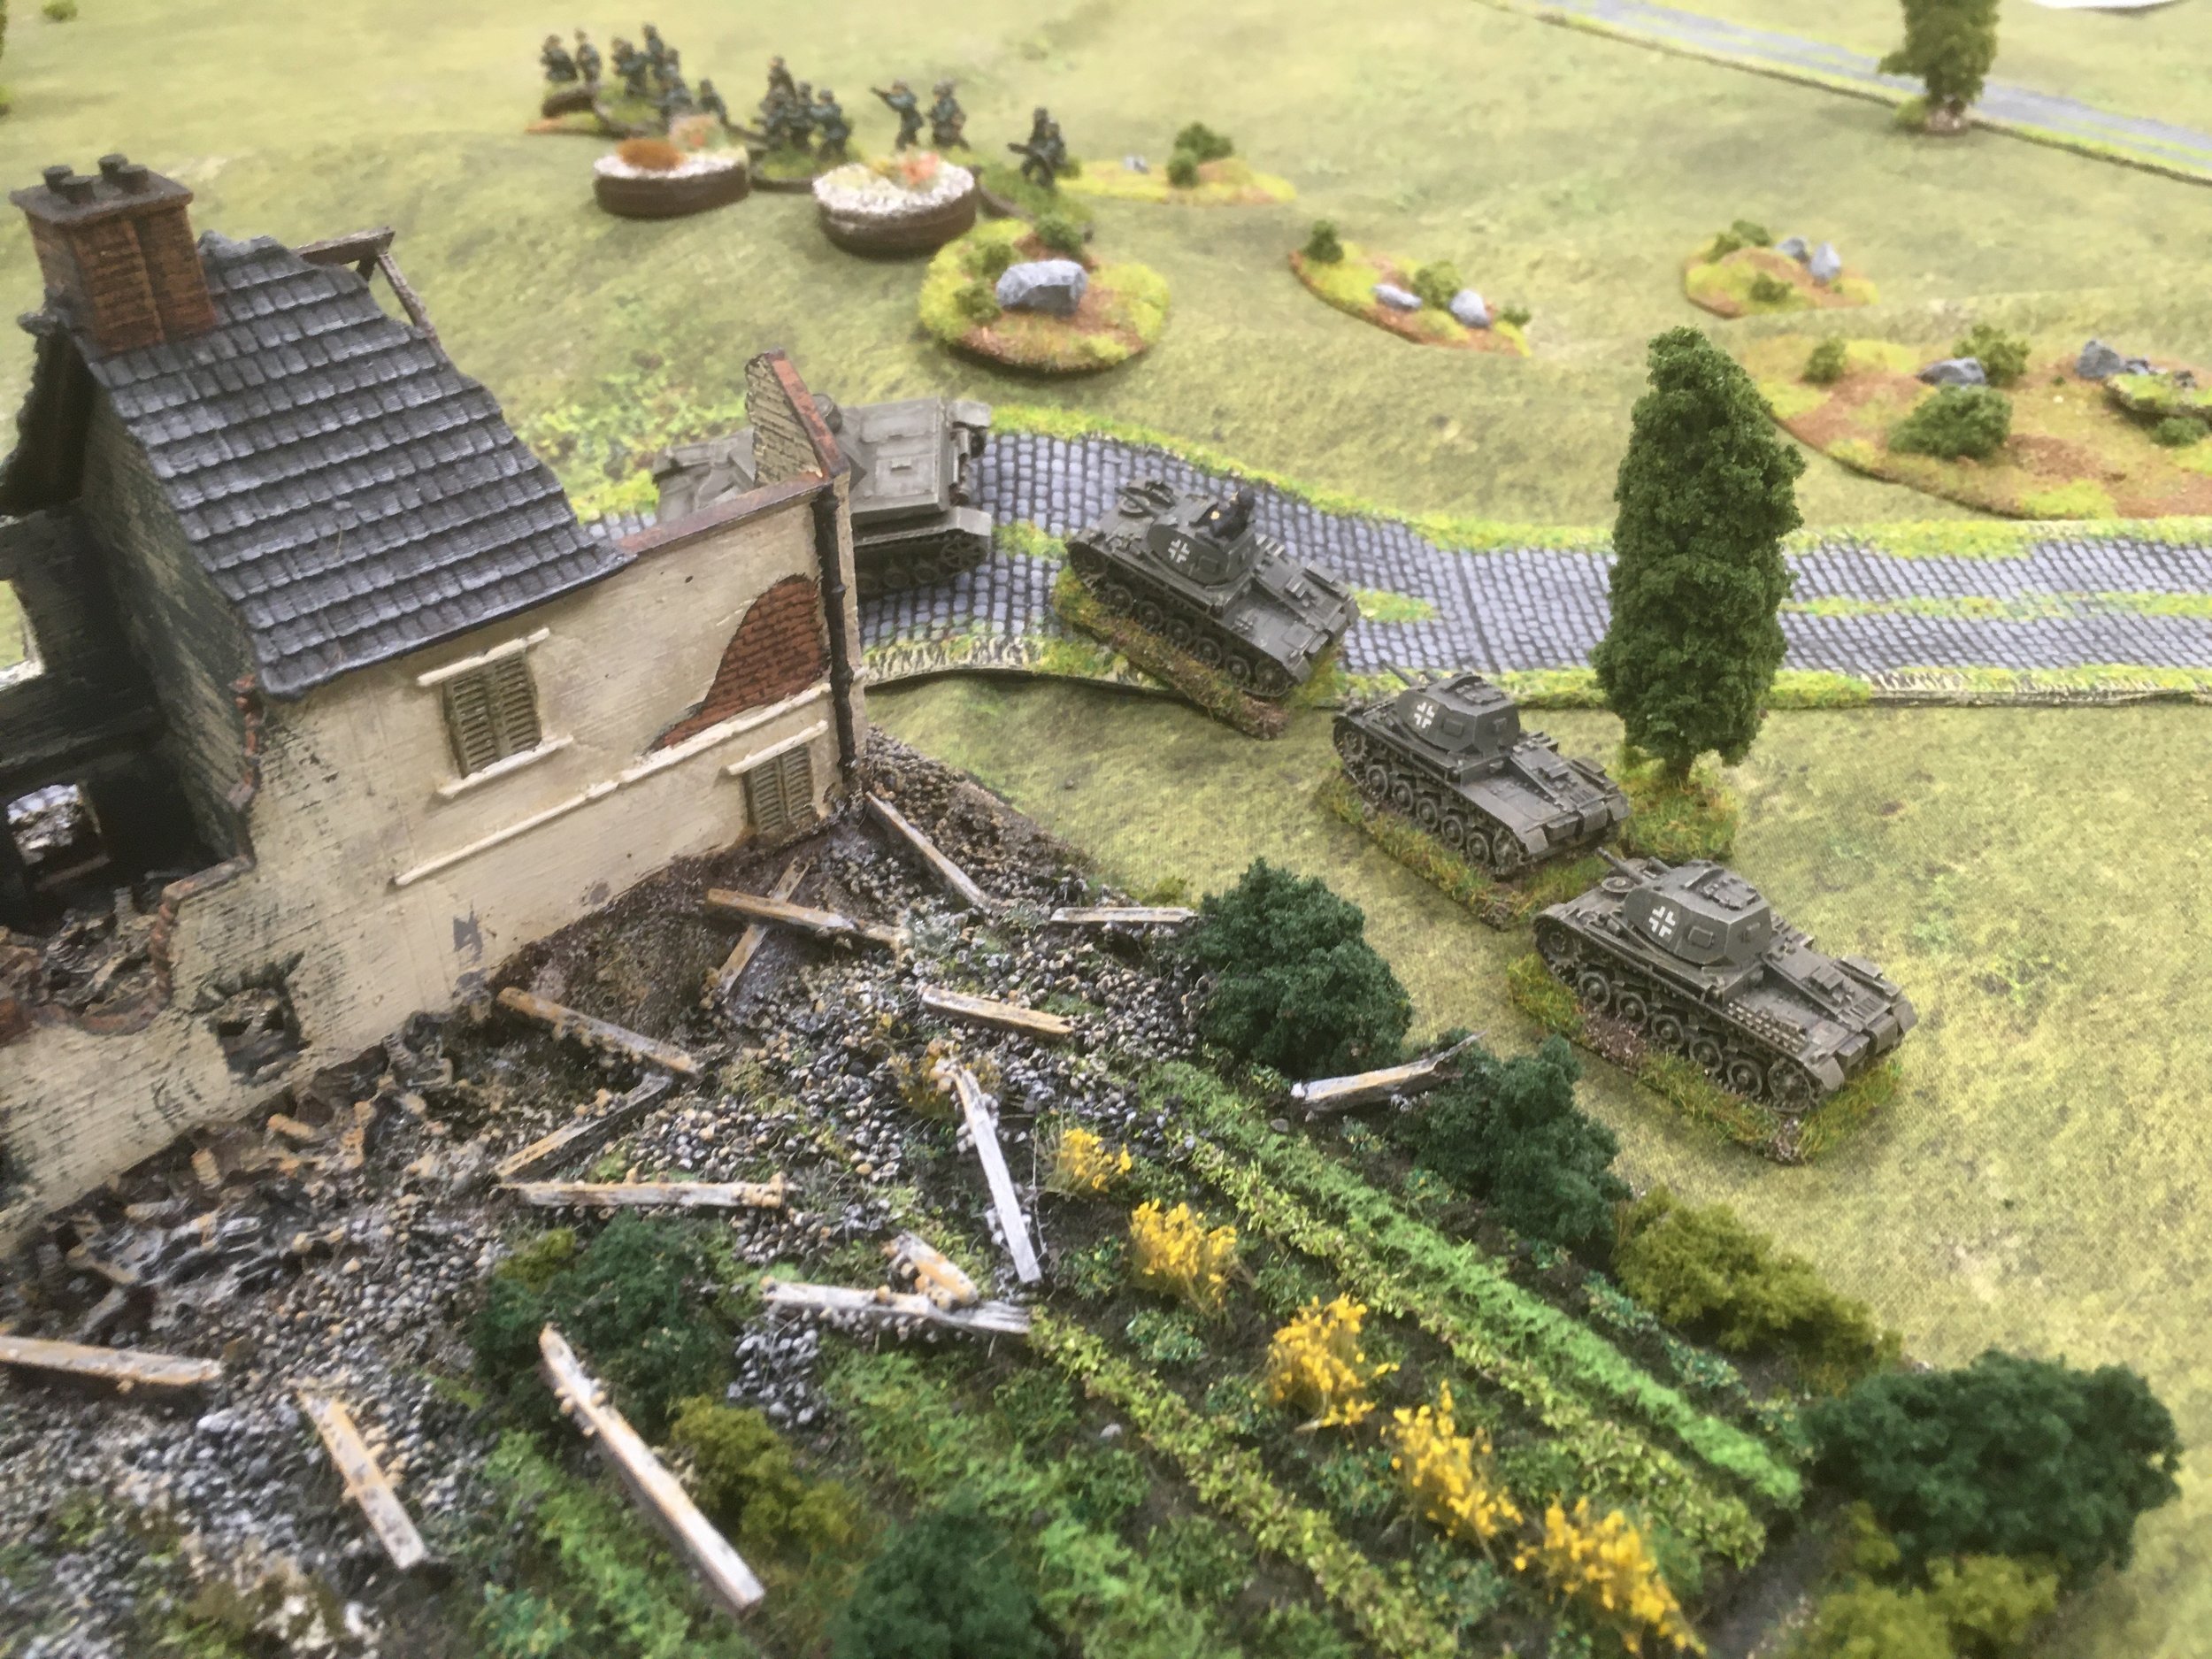
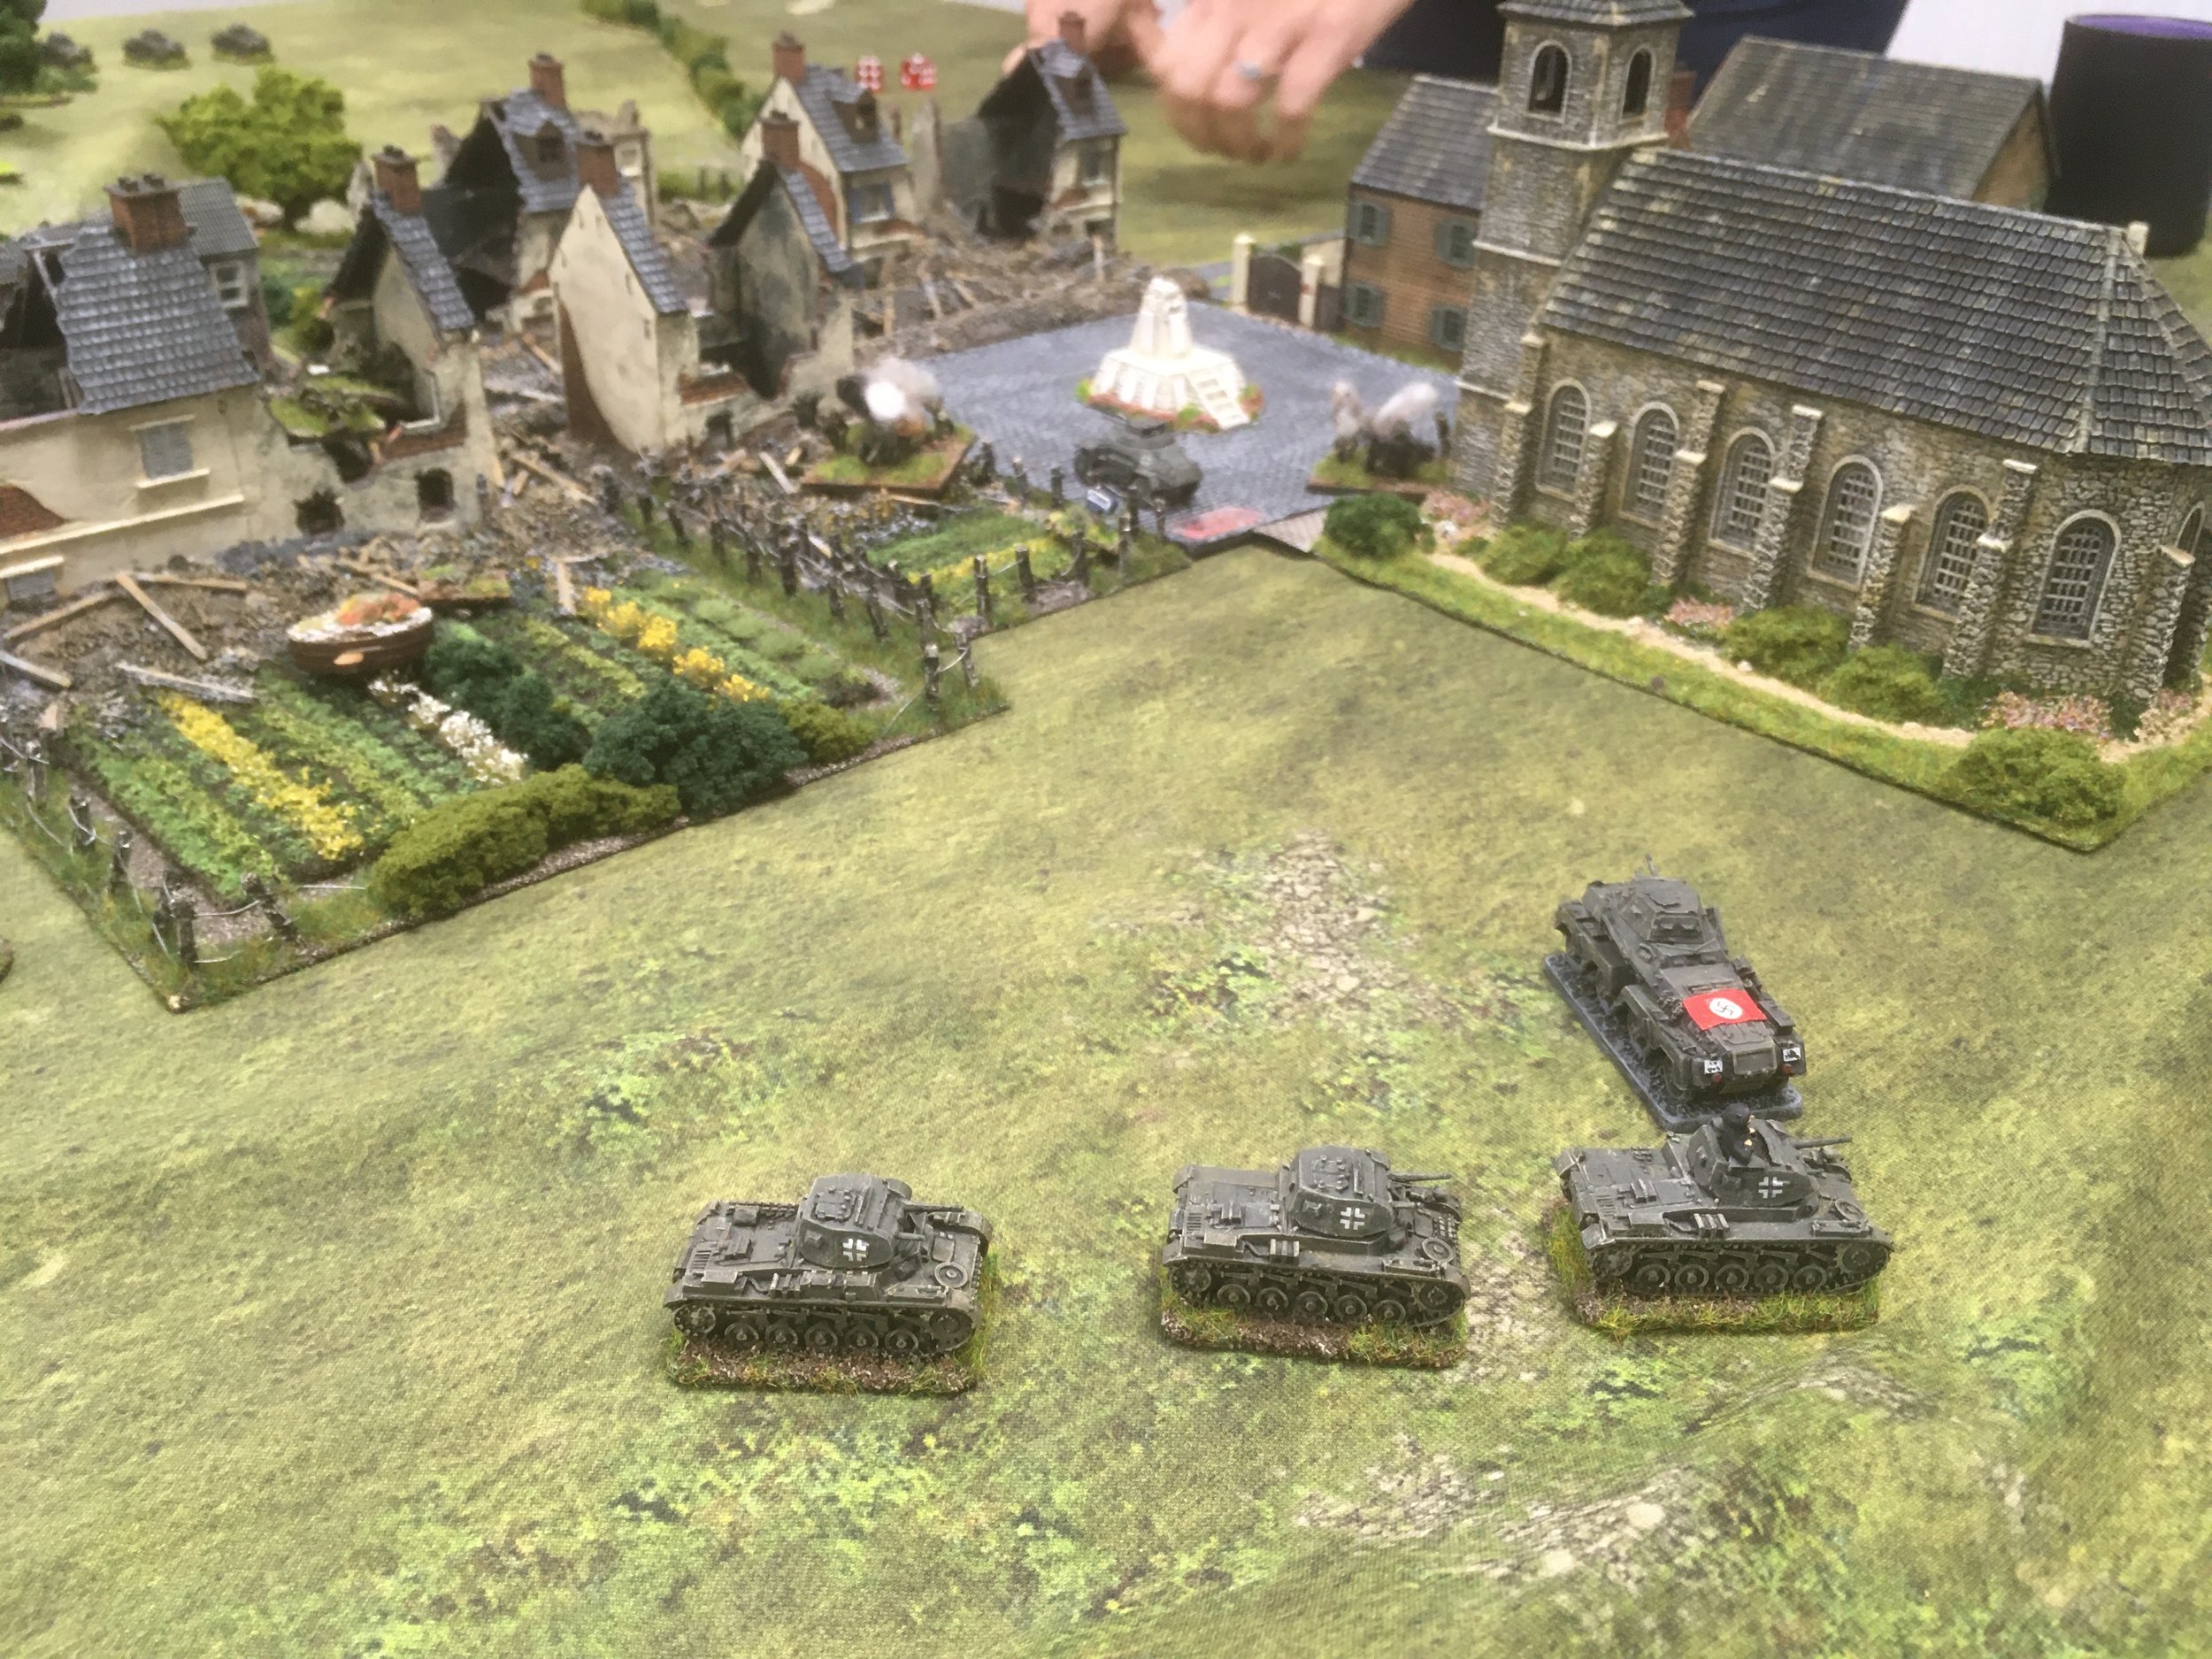
The German blinds behind the southern woods turned out to be the Commander in his 37mm armed halftrack and two Panzer IIIGs. These sped round the wood to engage, albeit unsuccessfully, my BT7's at long range.

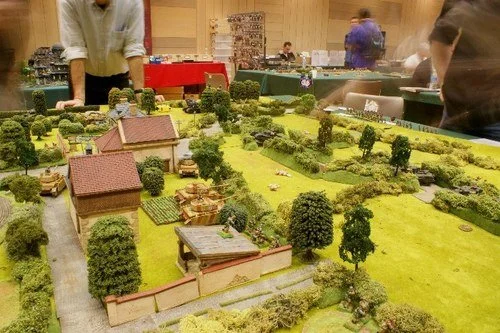
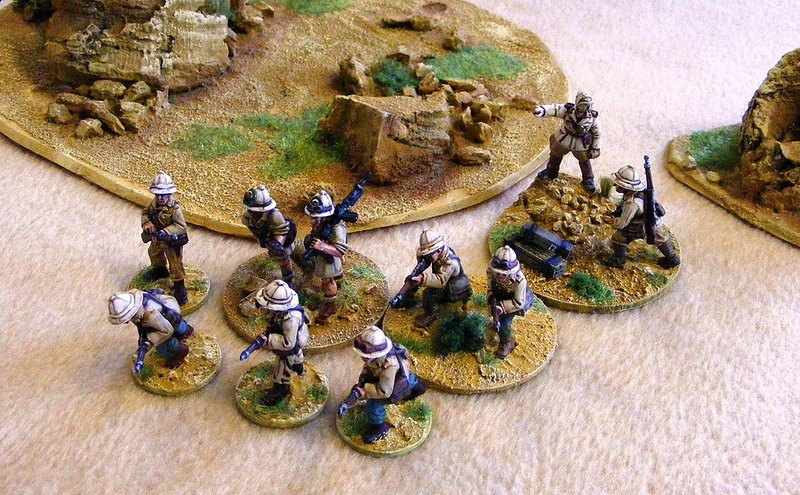
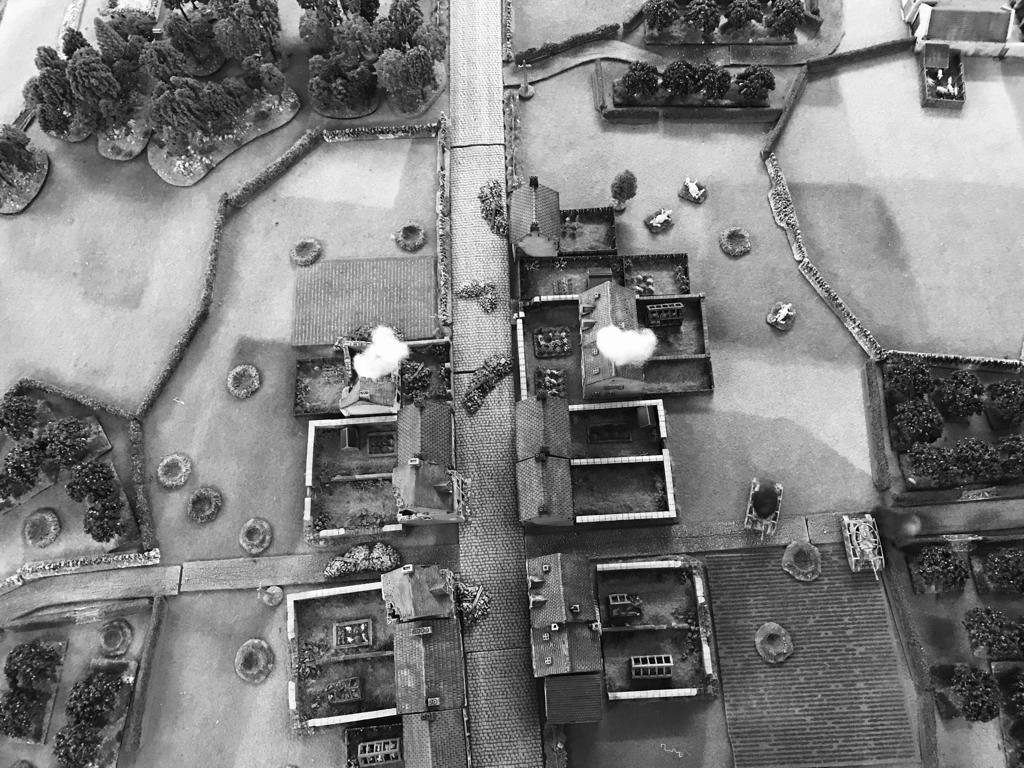
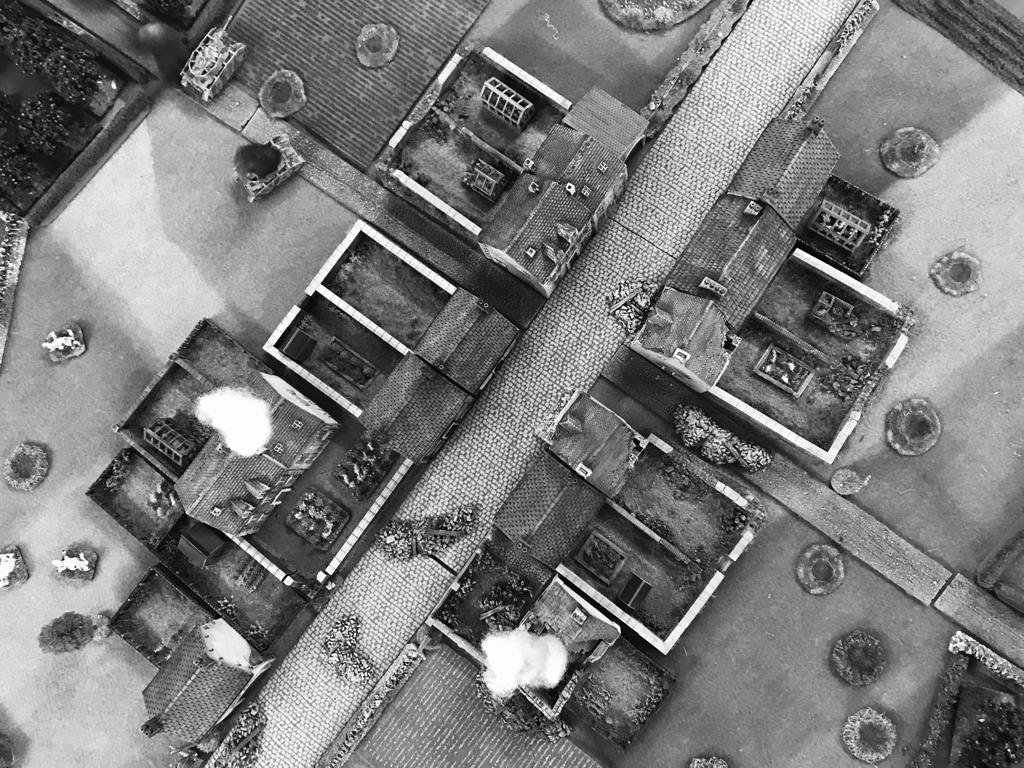
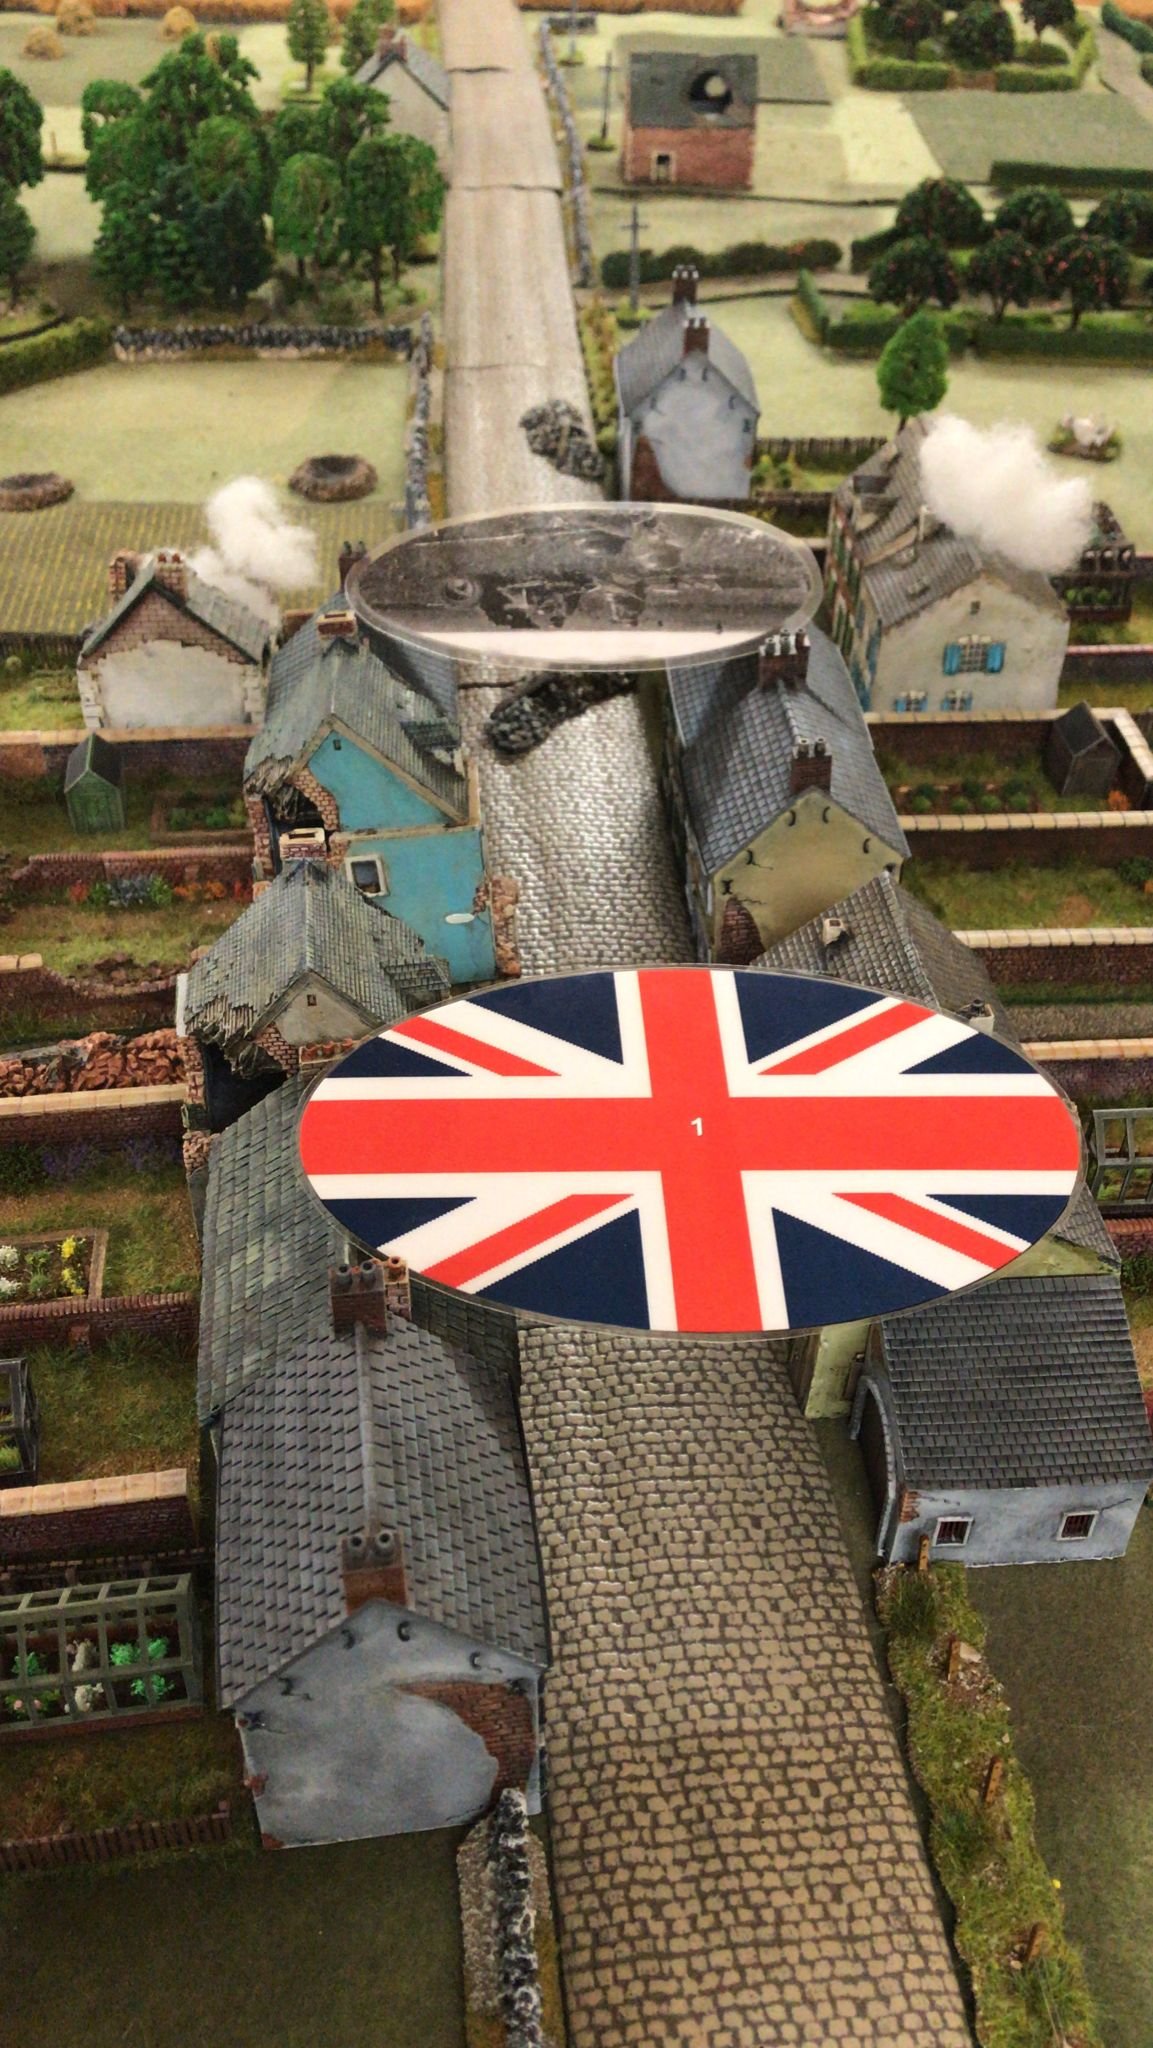
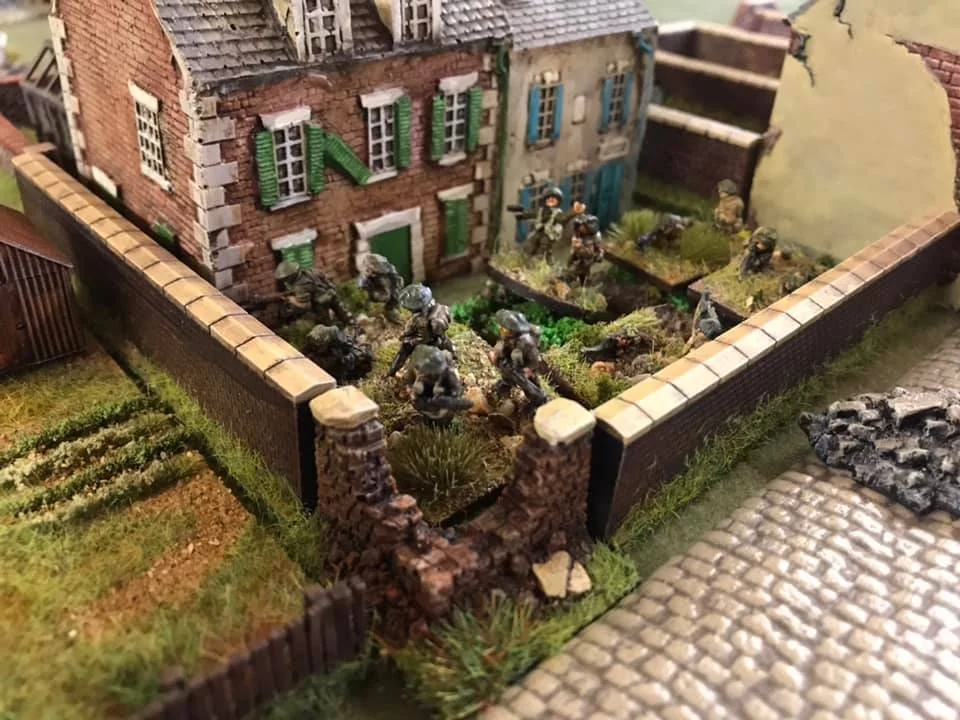
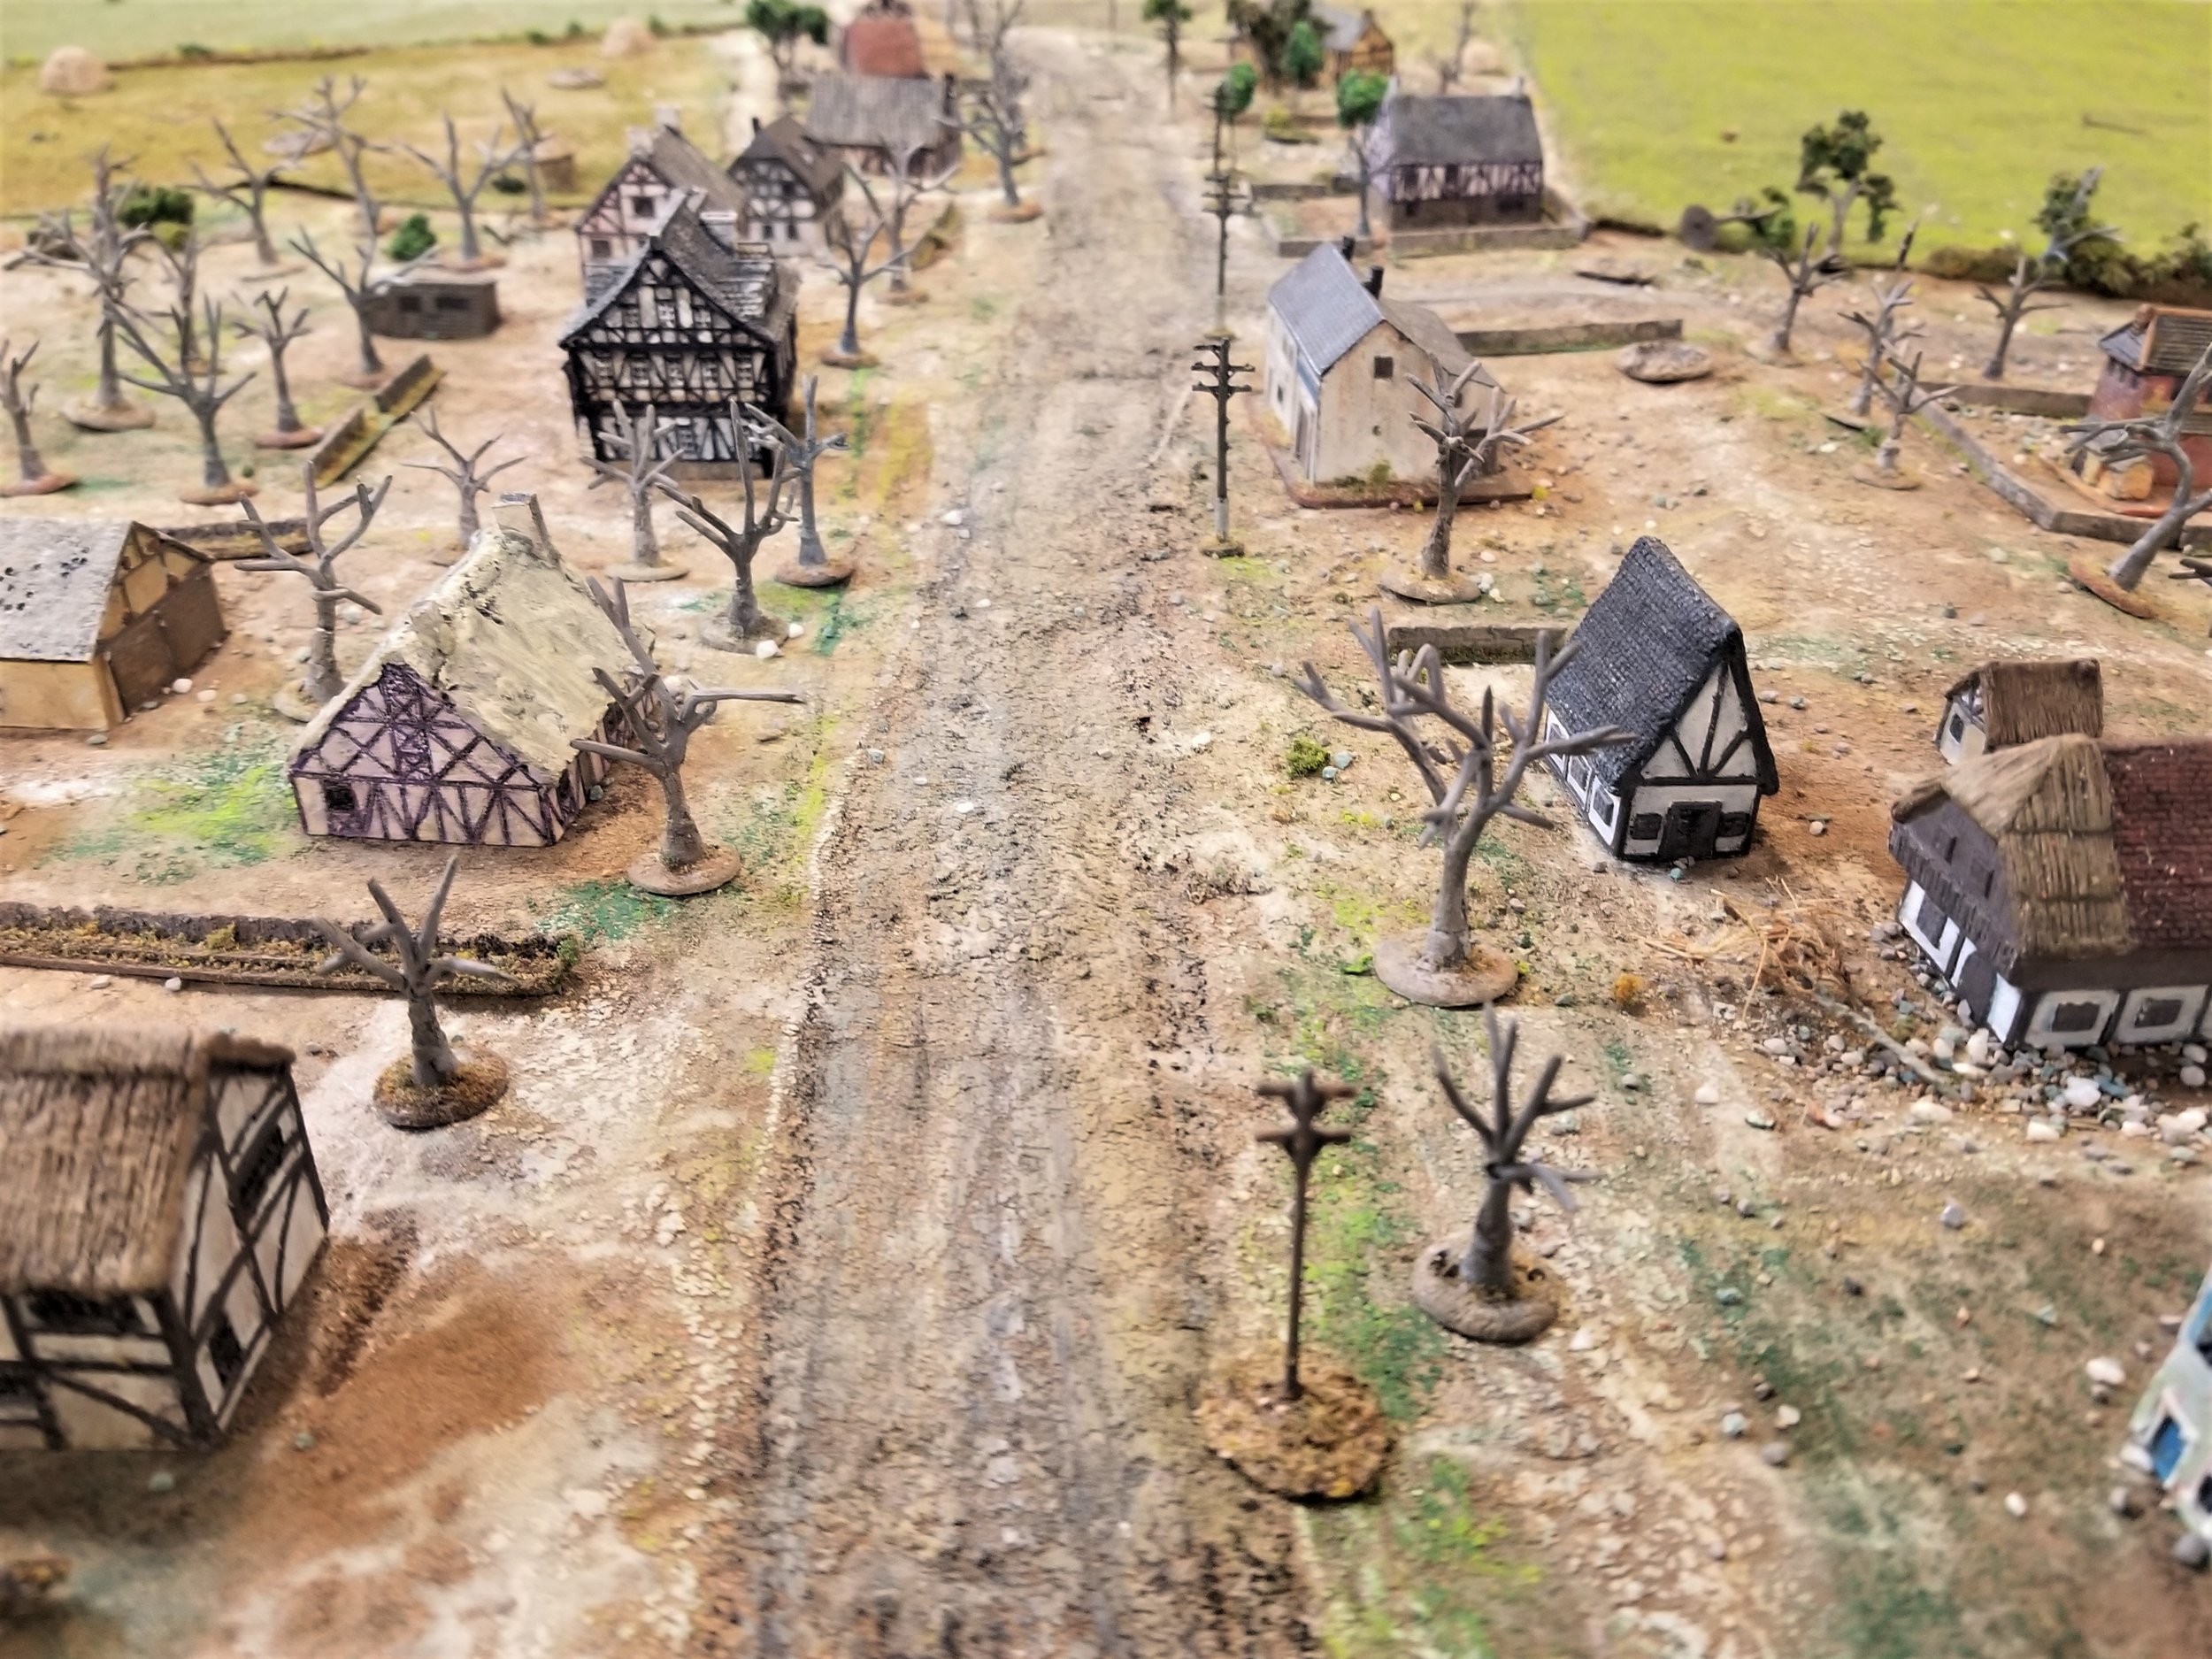
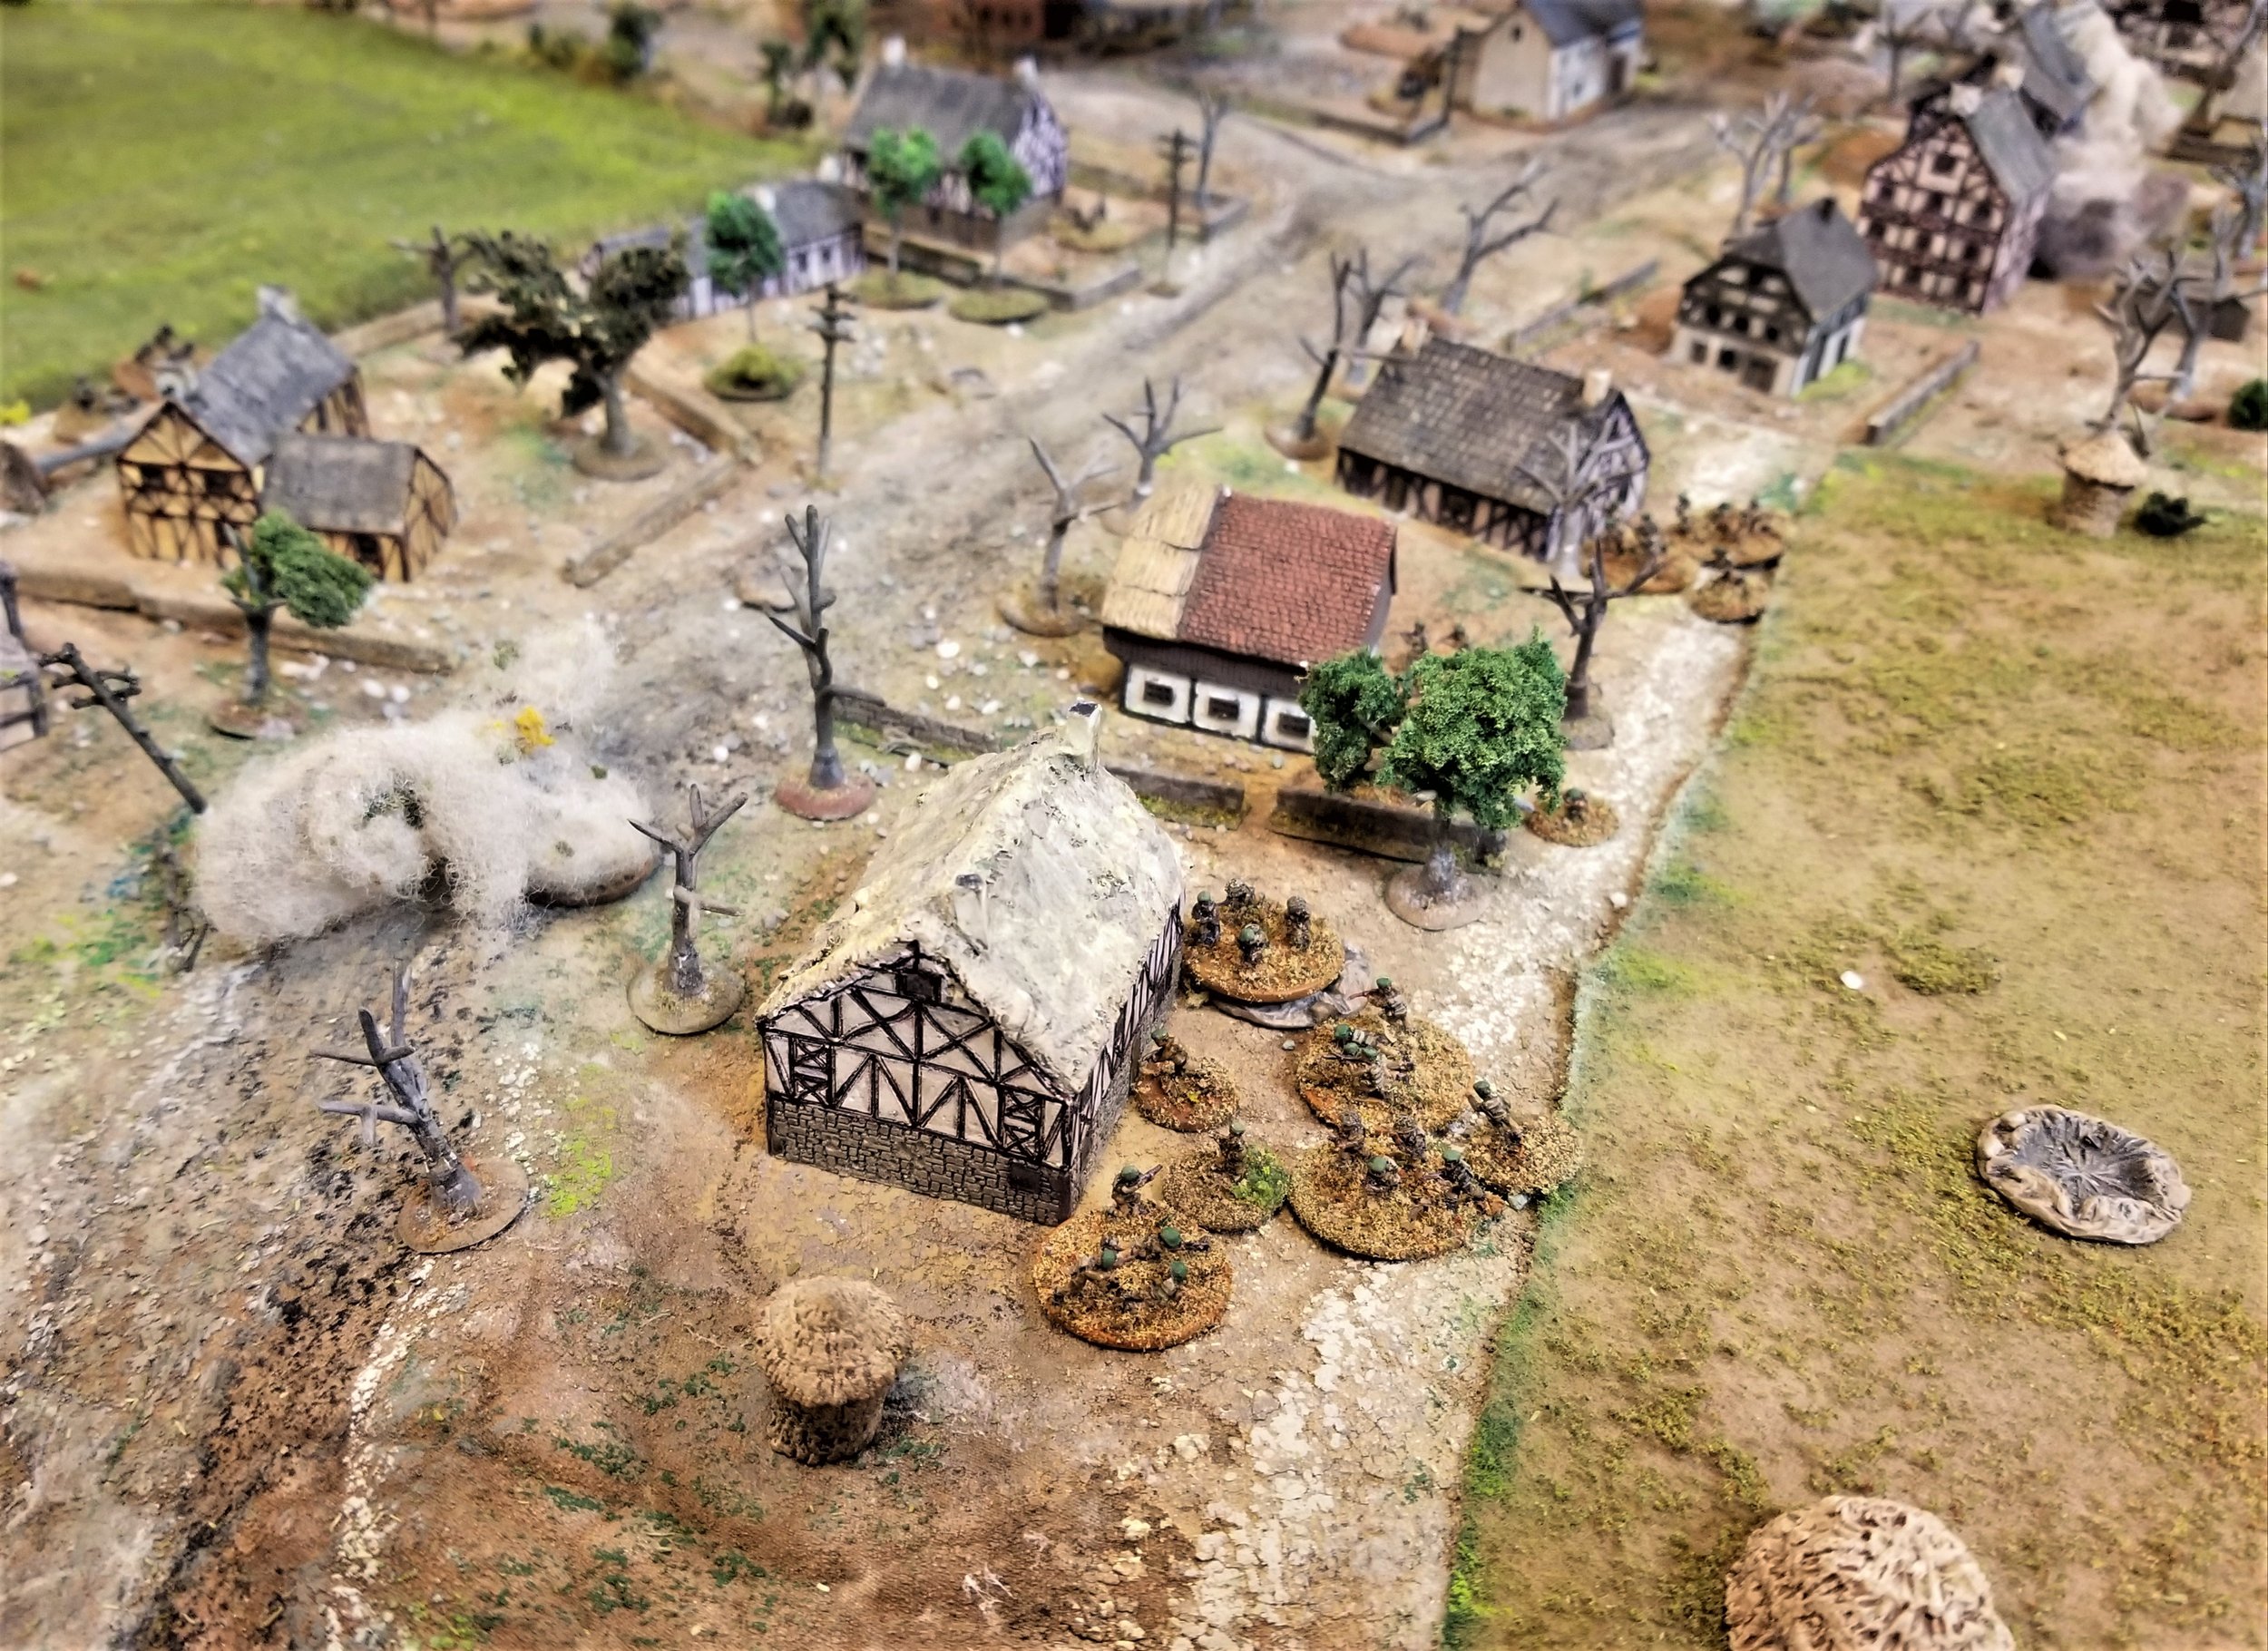
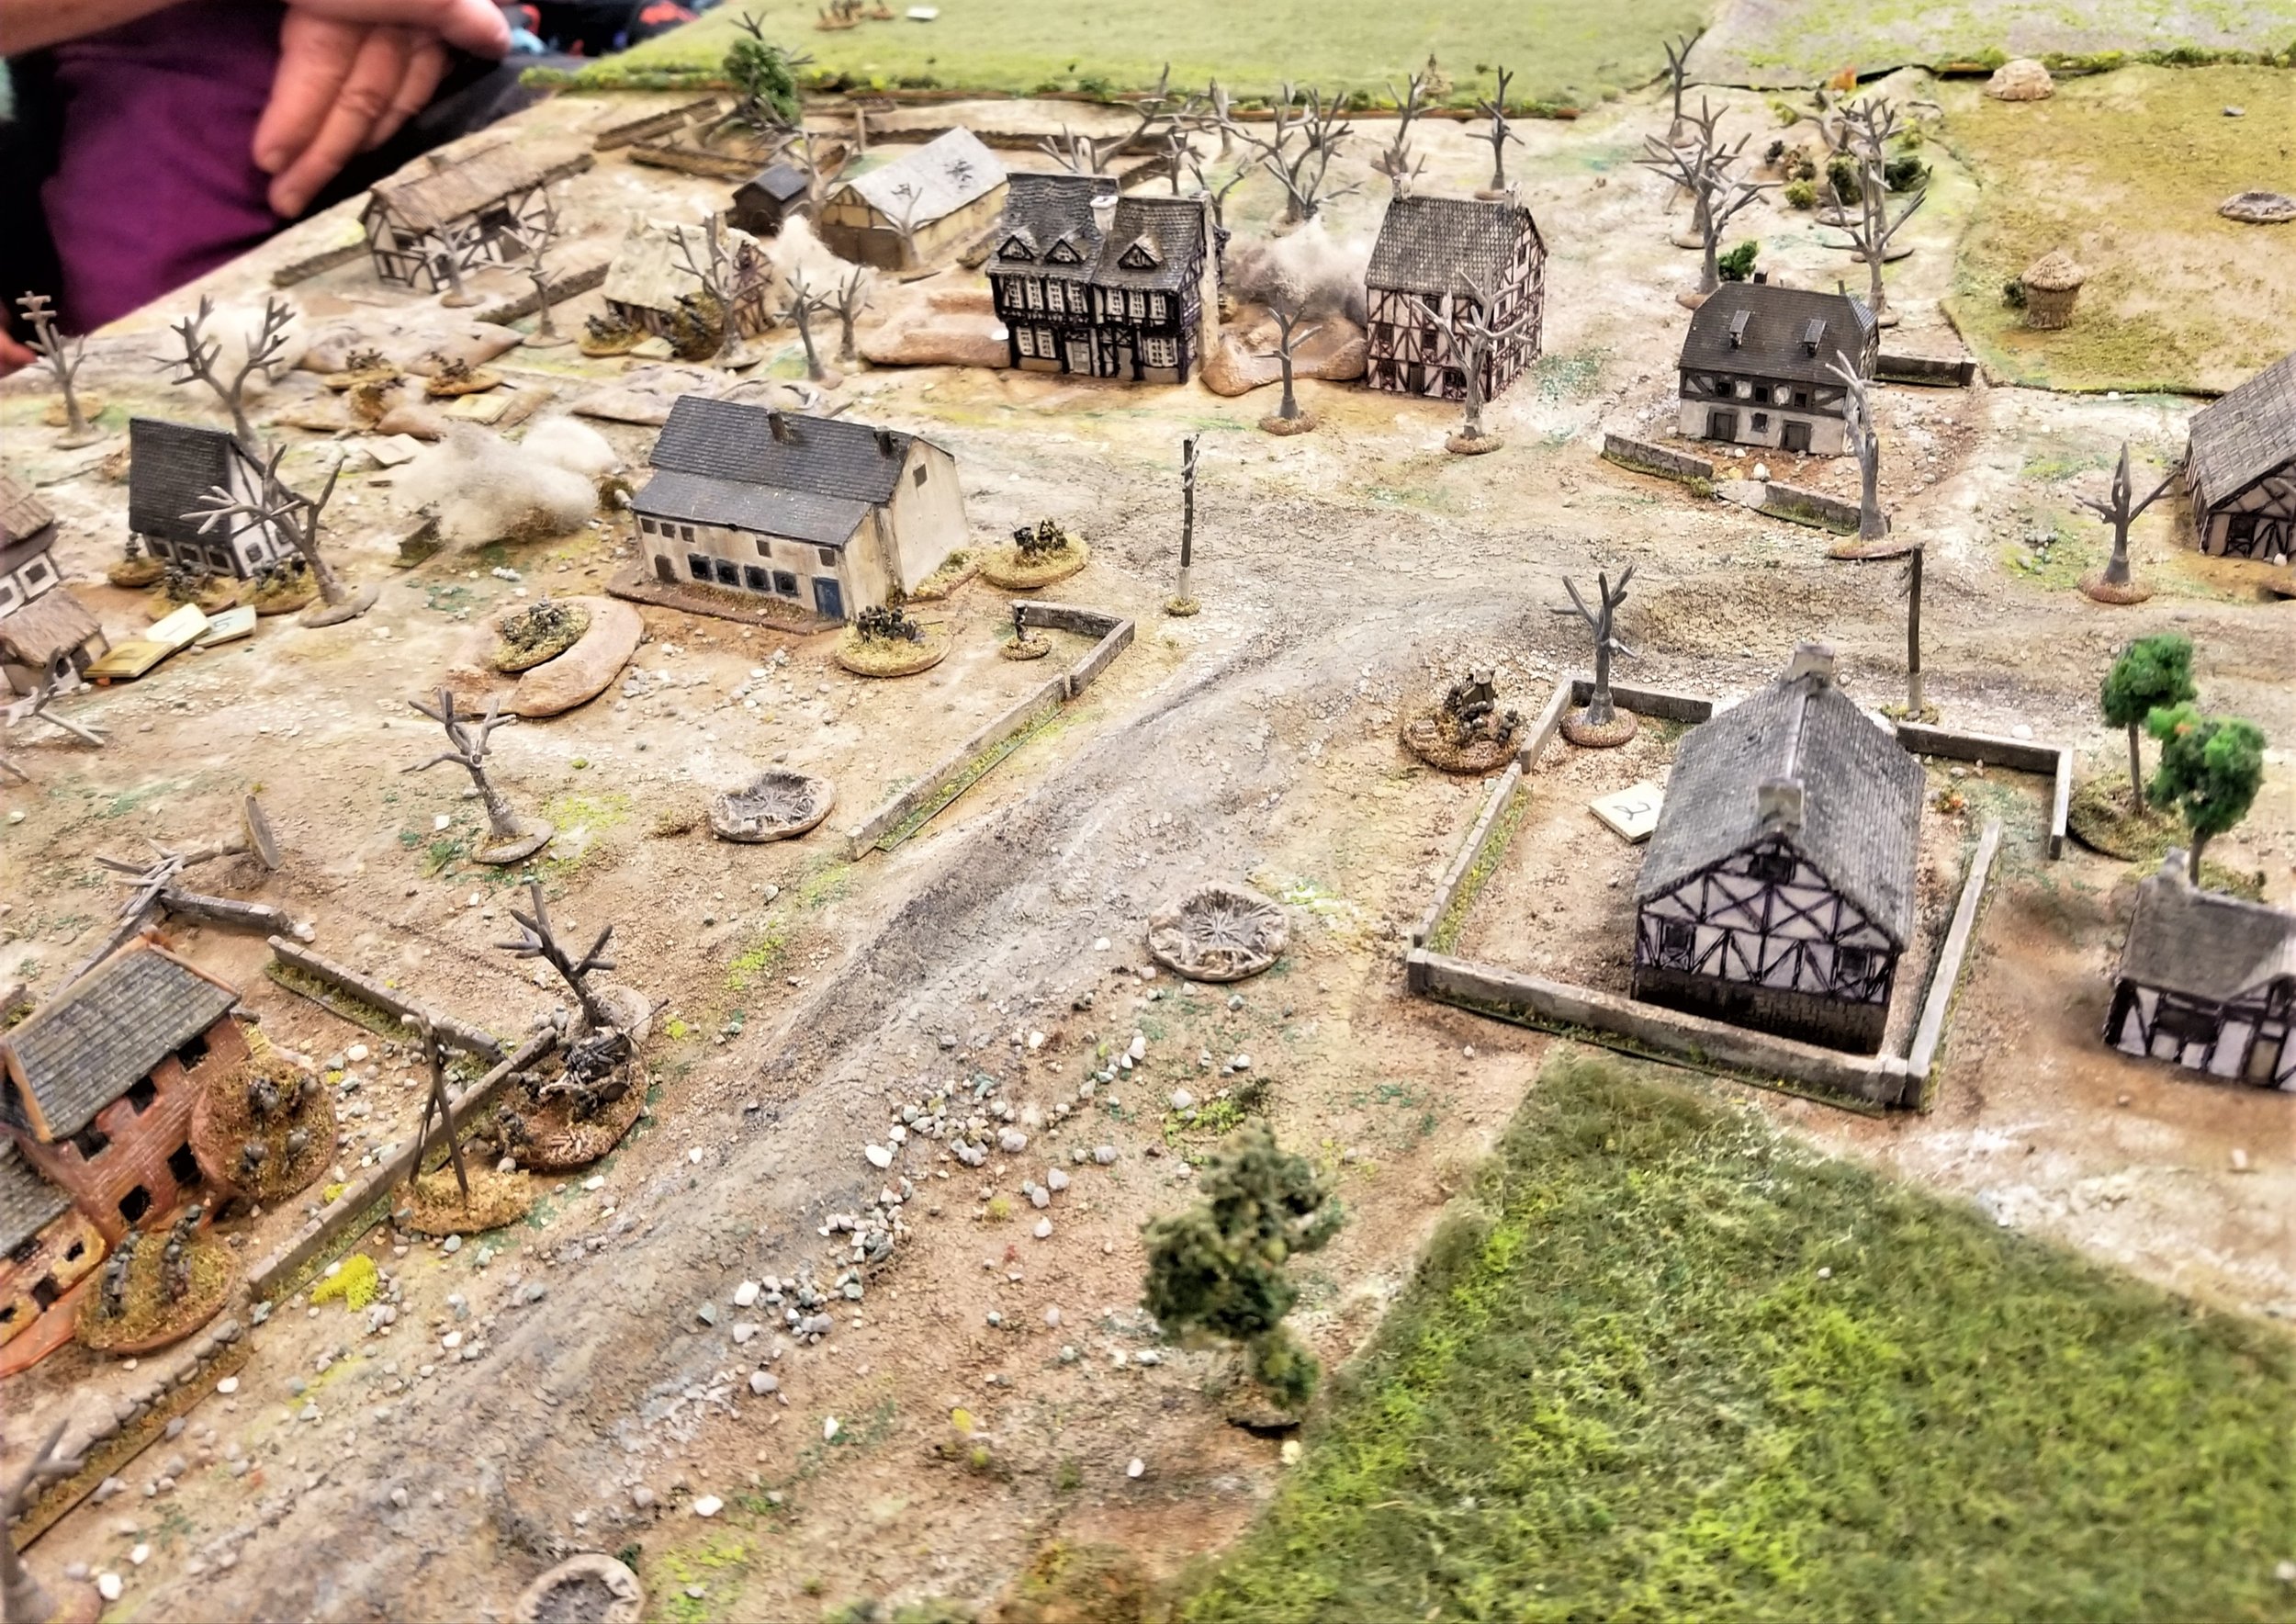
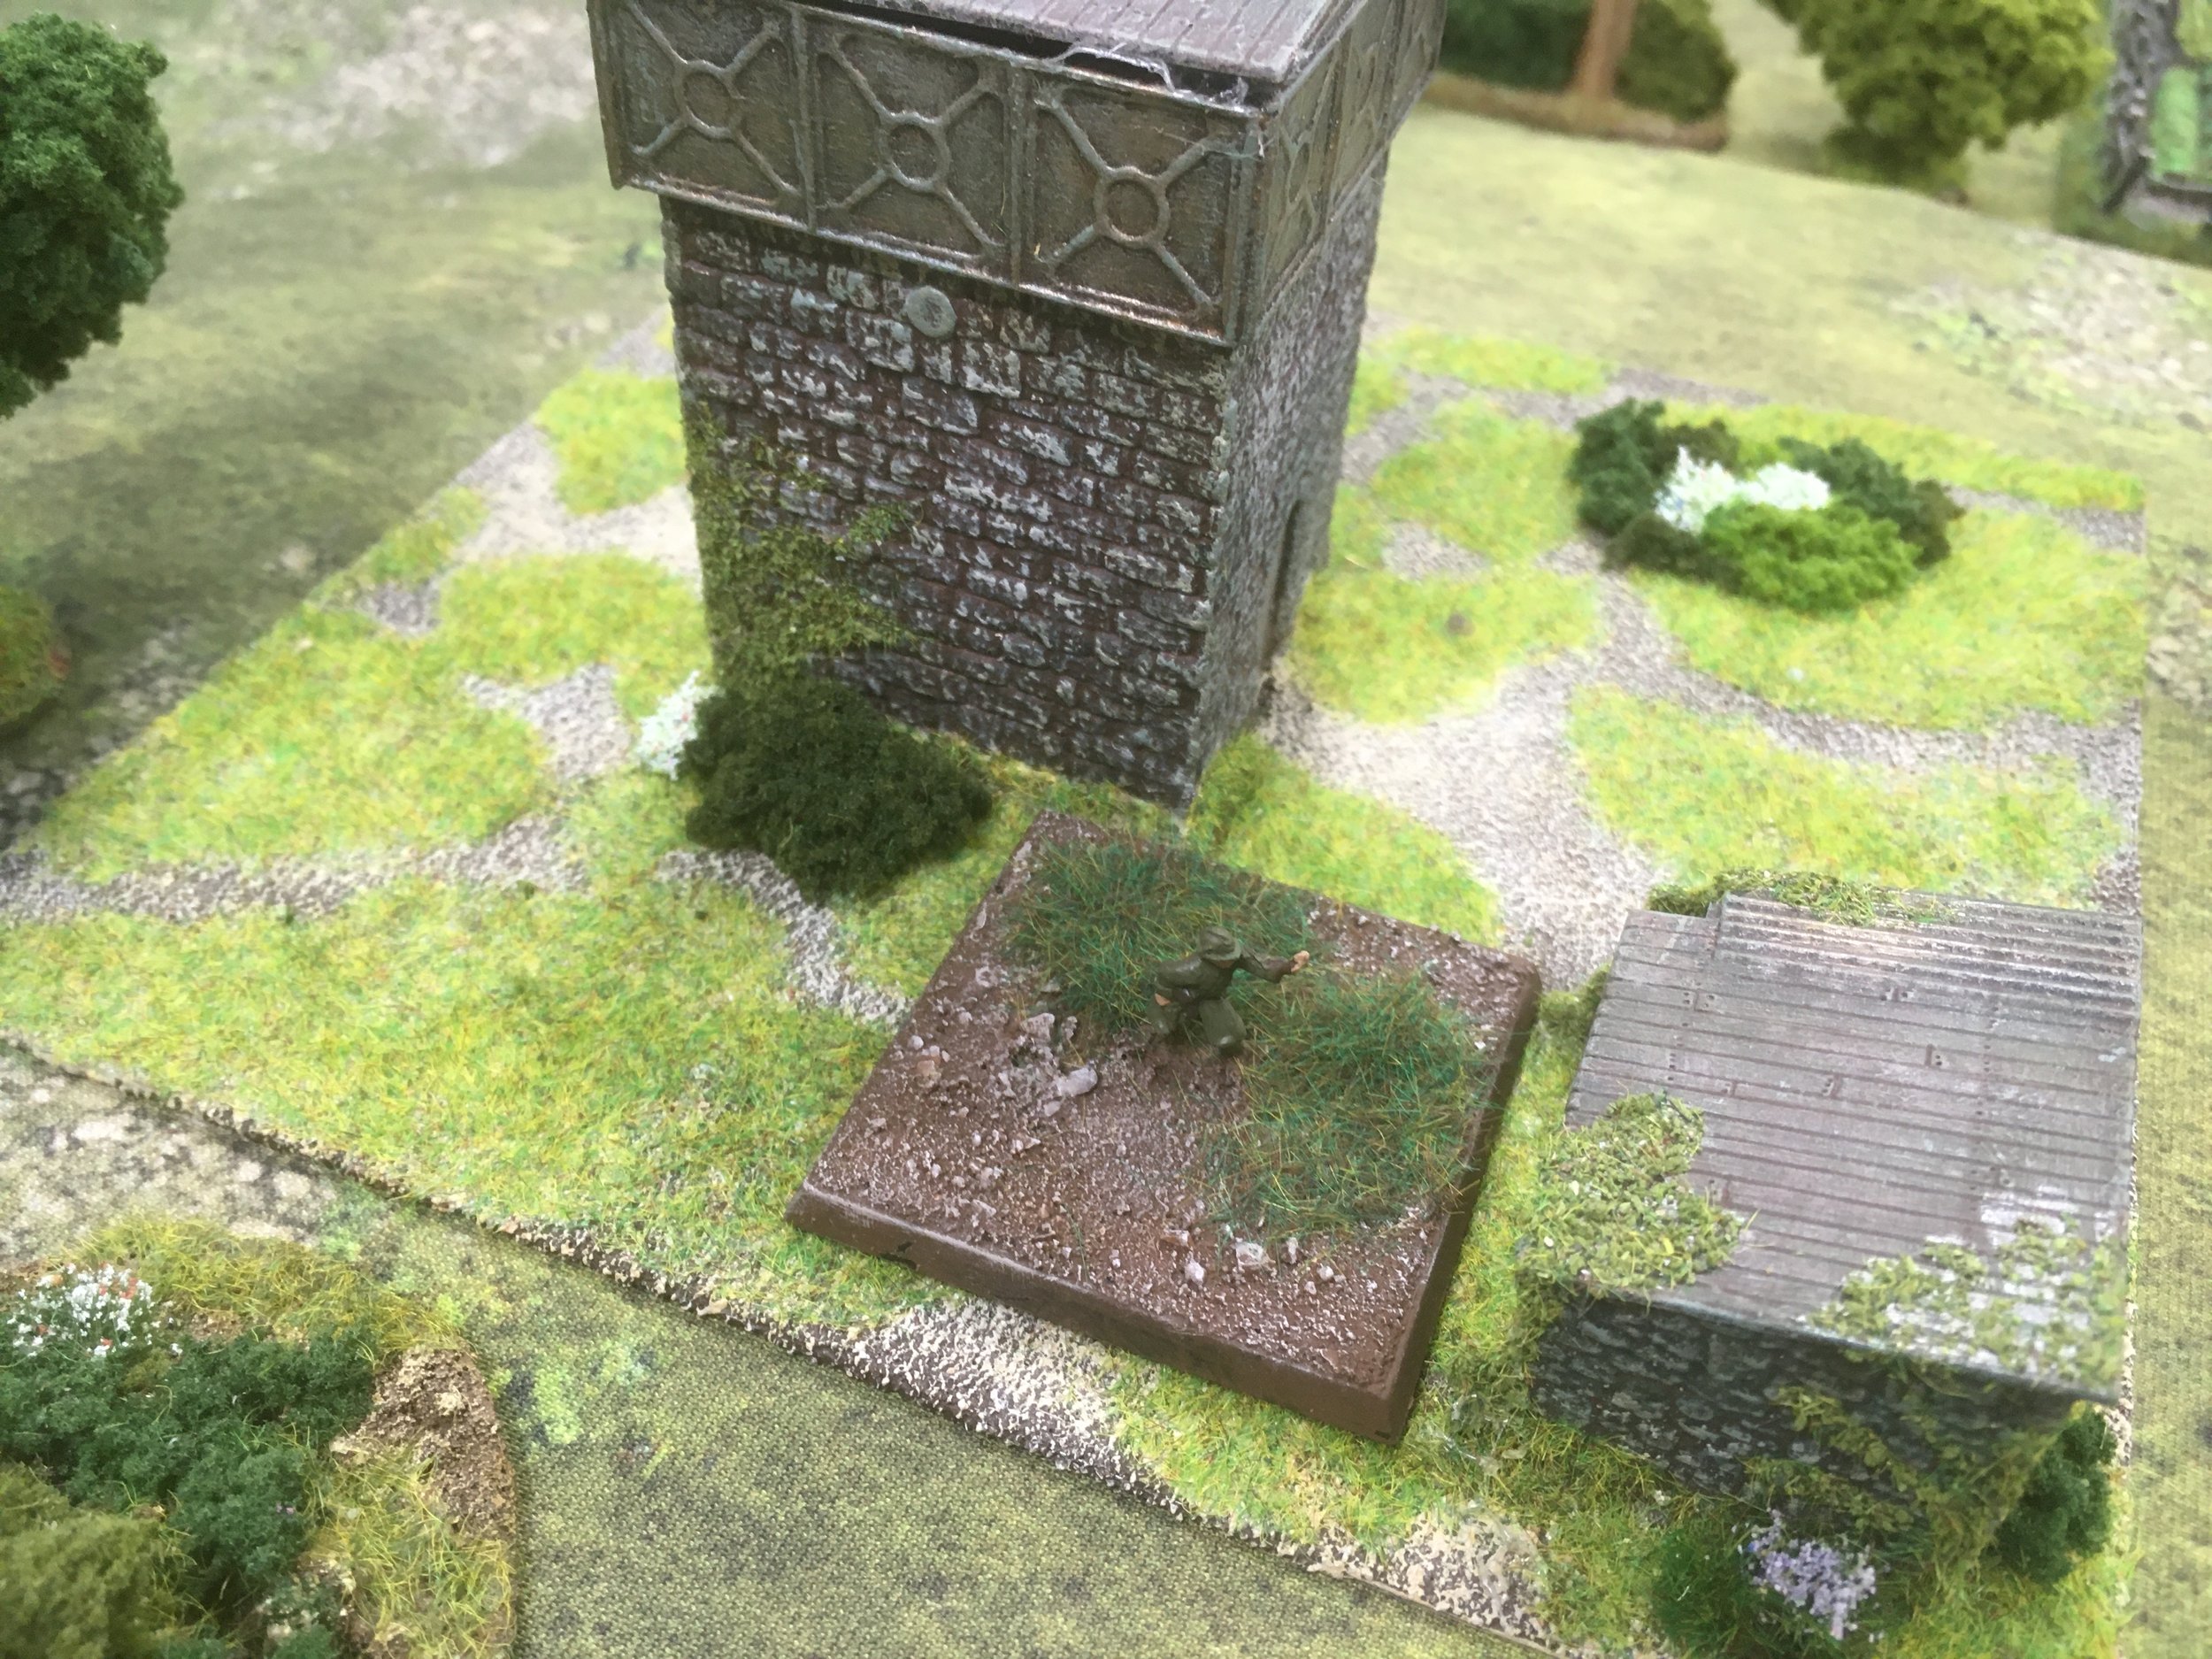
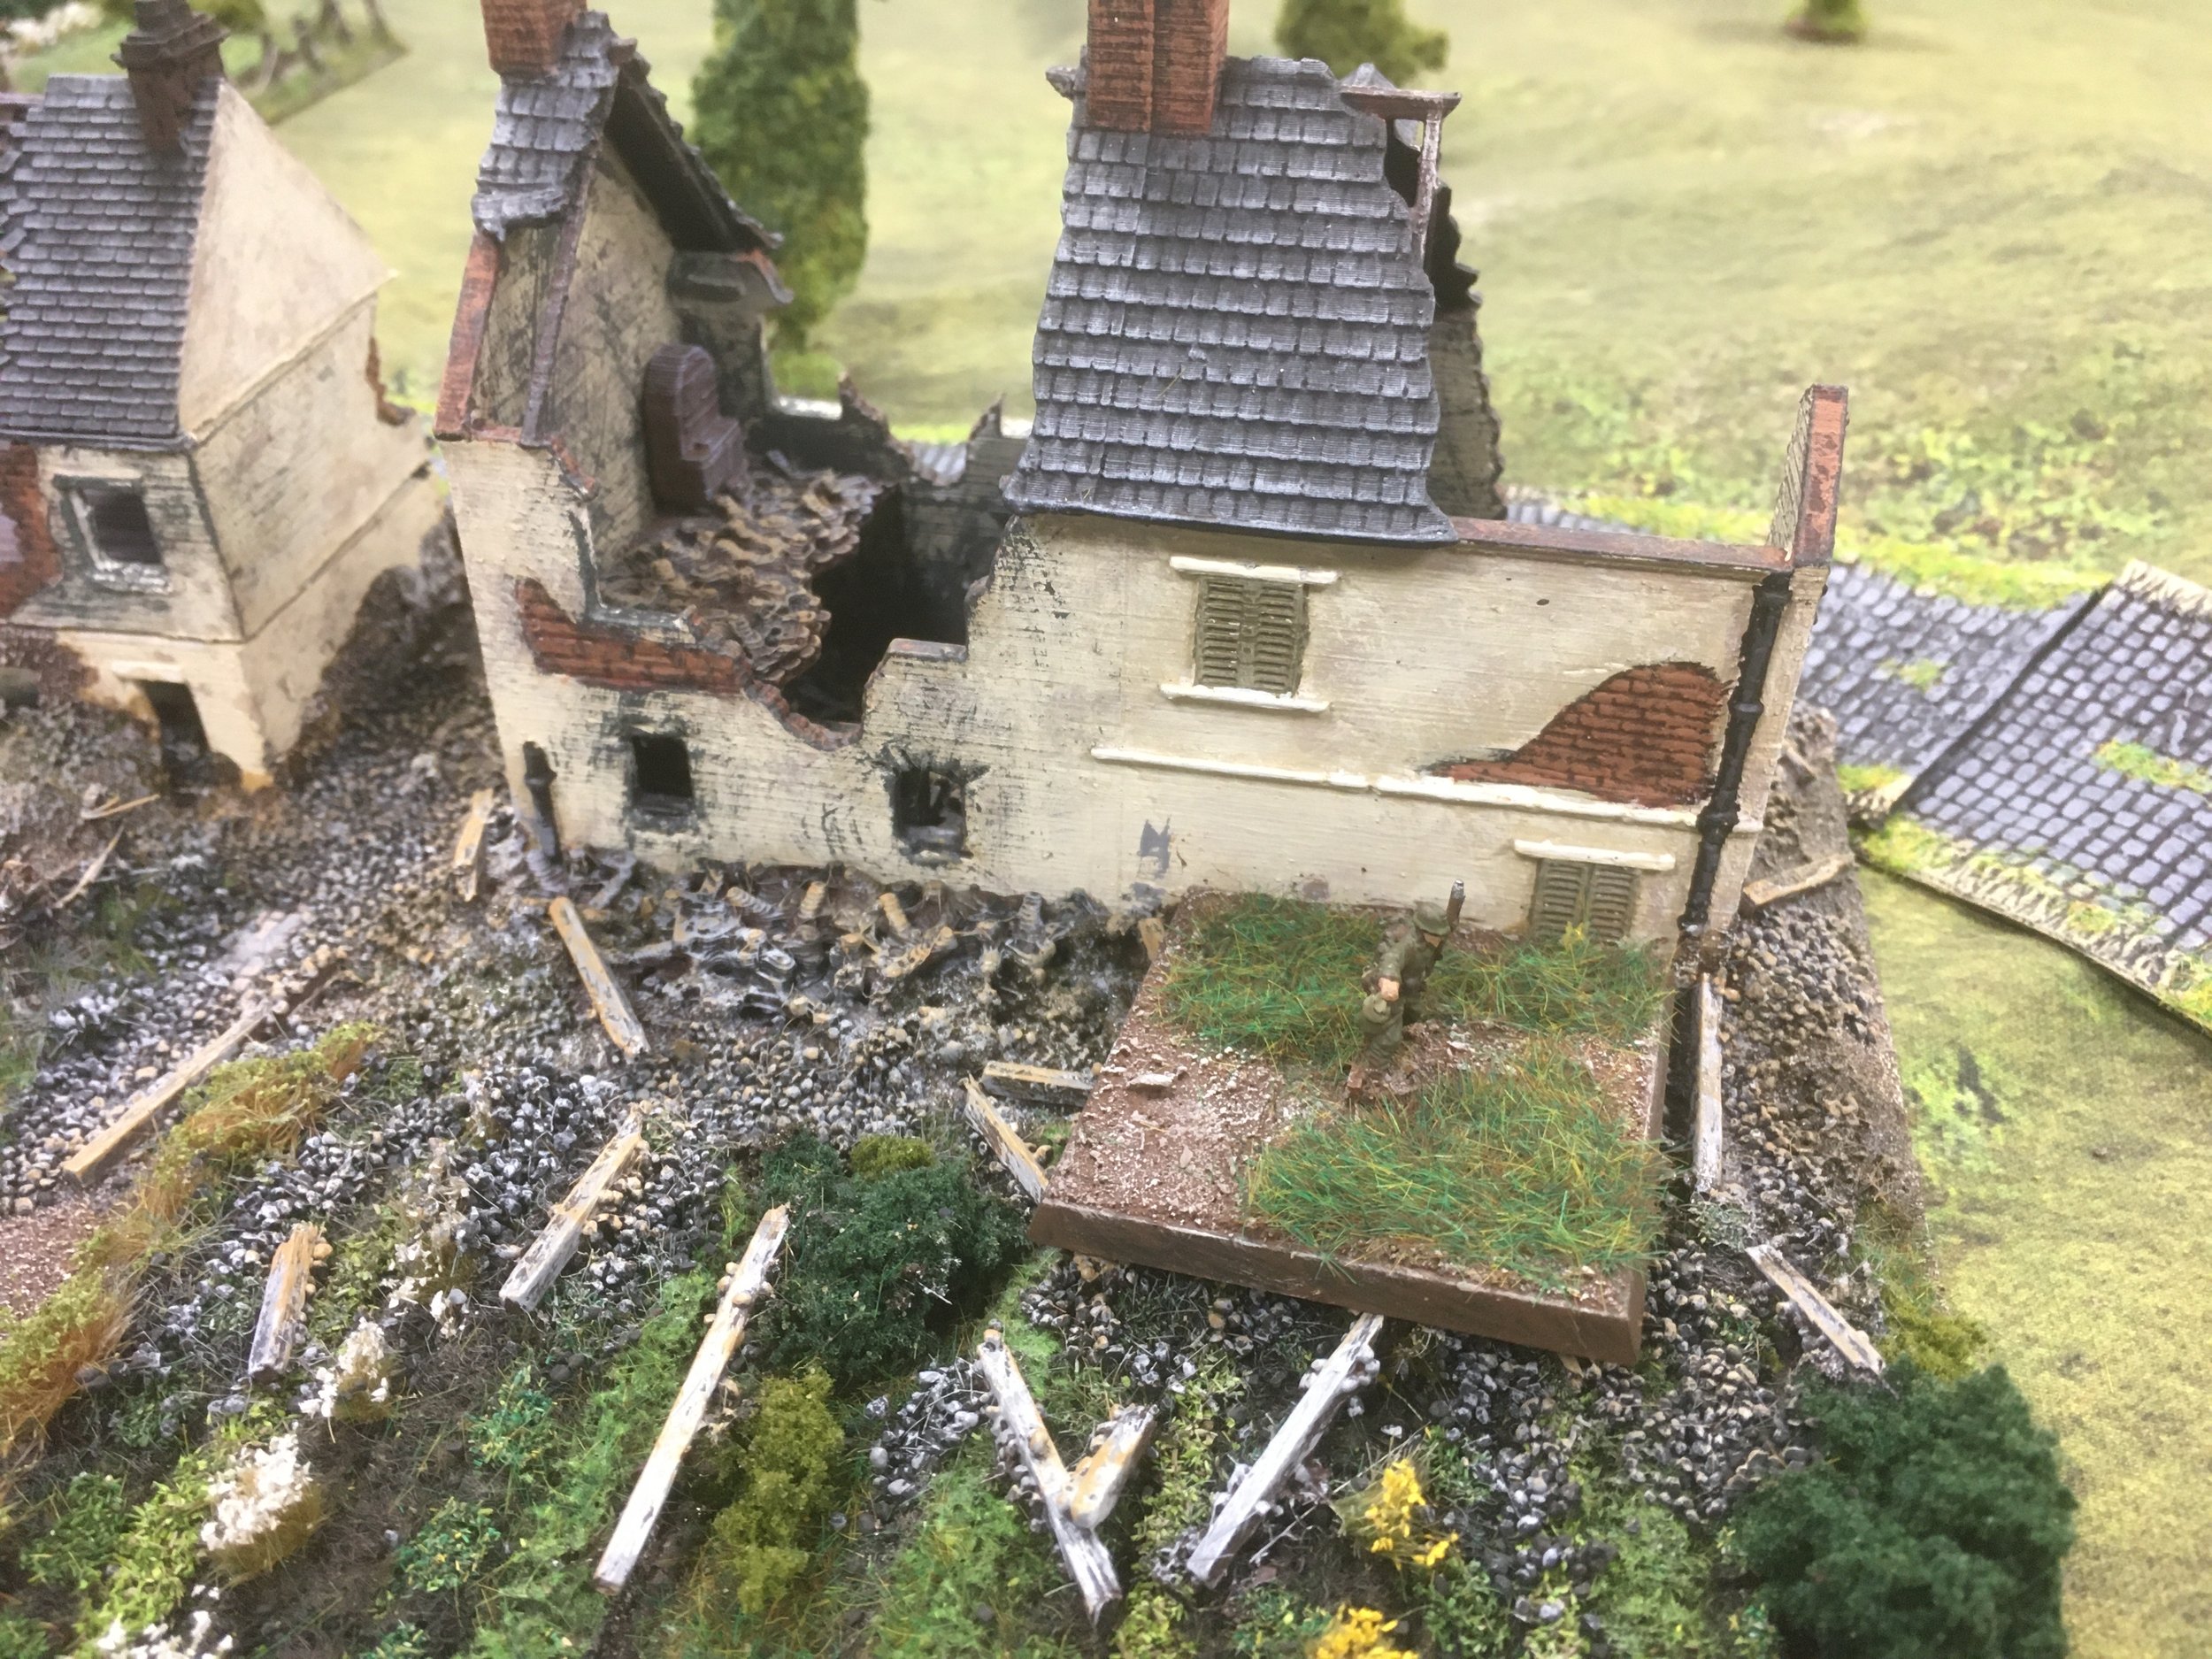
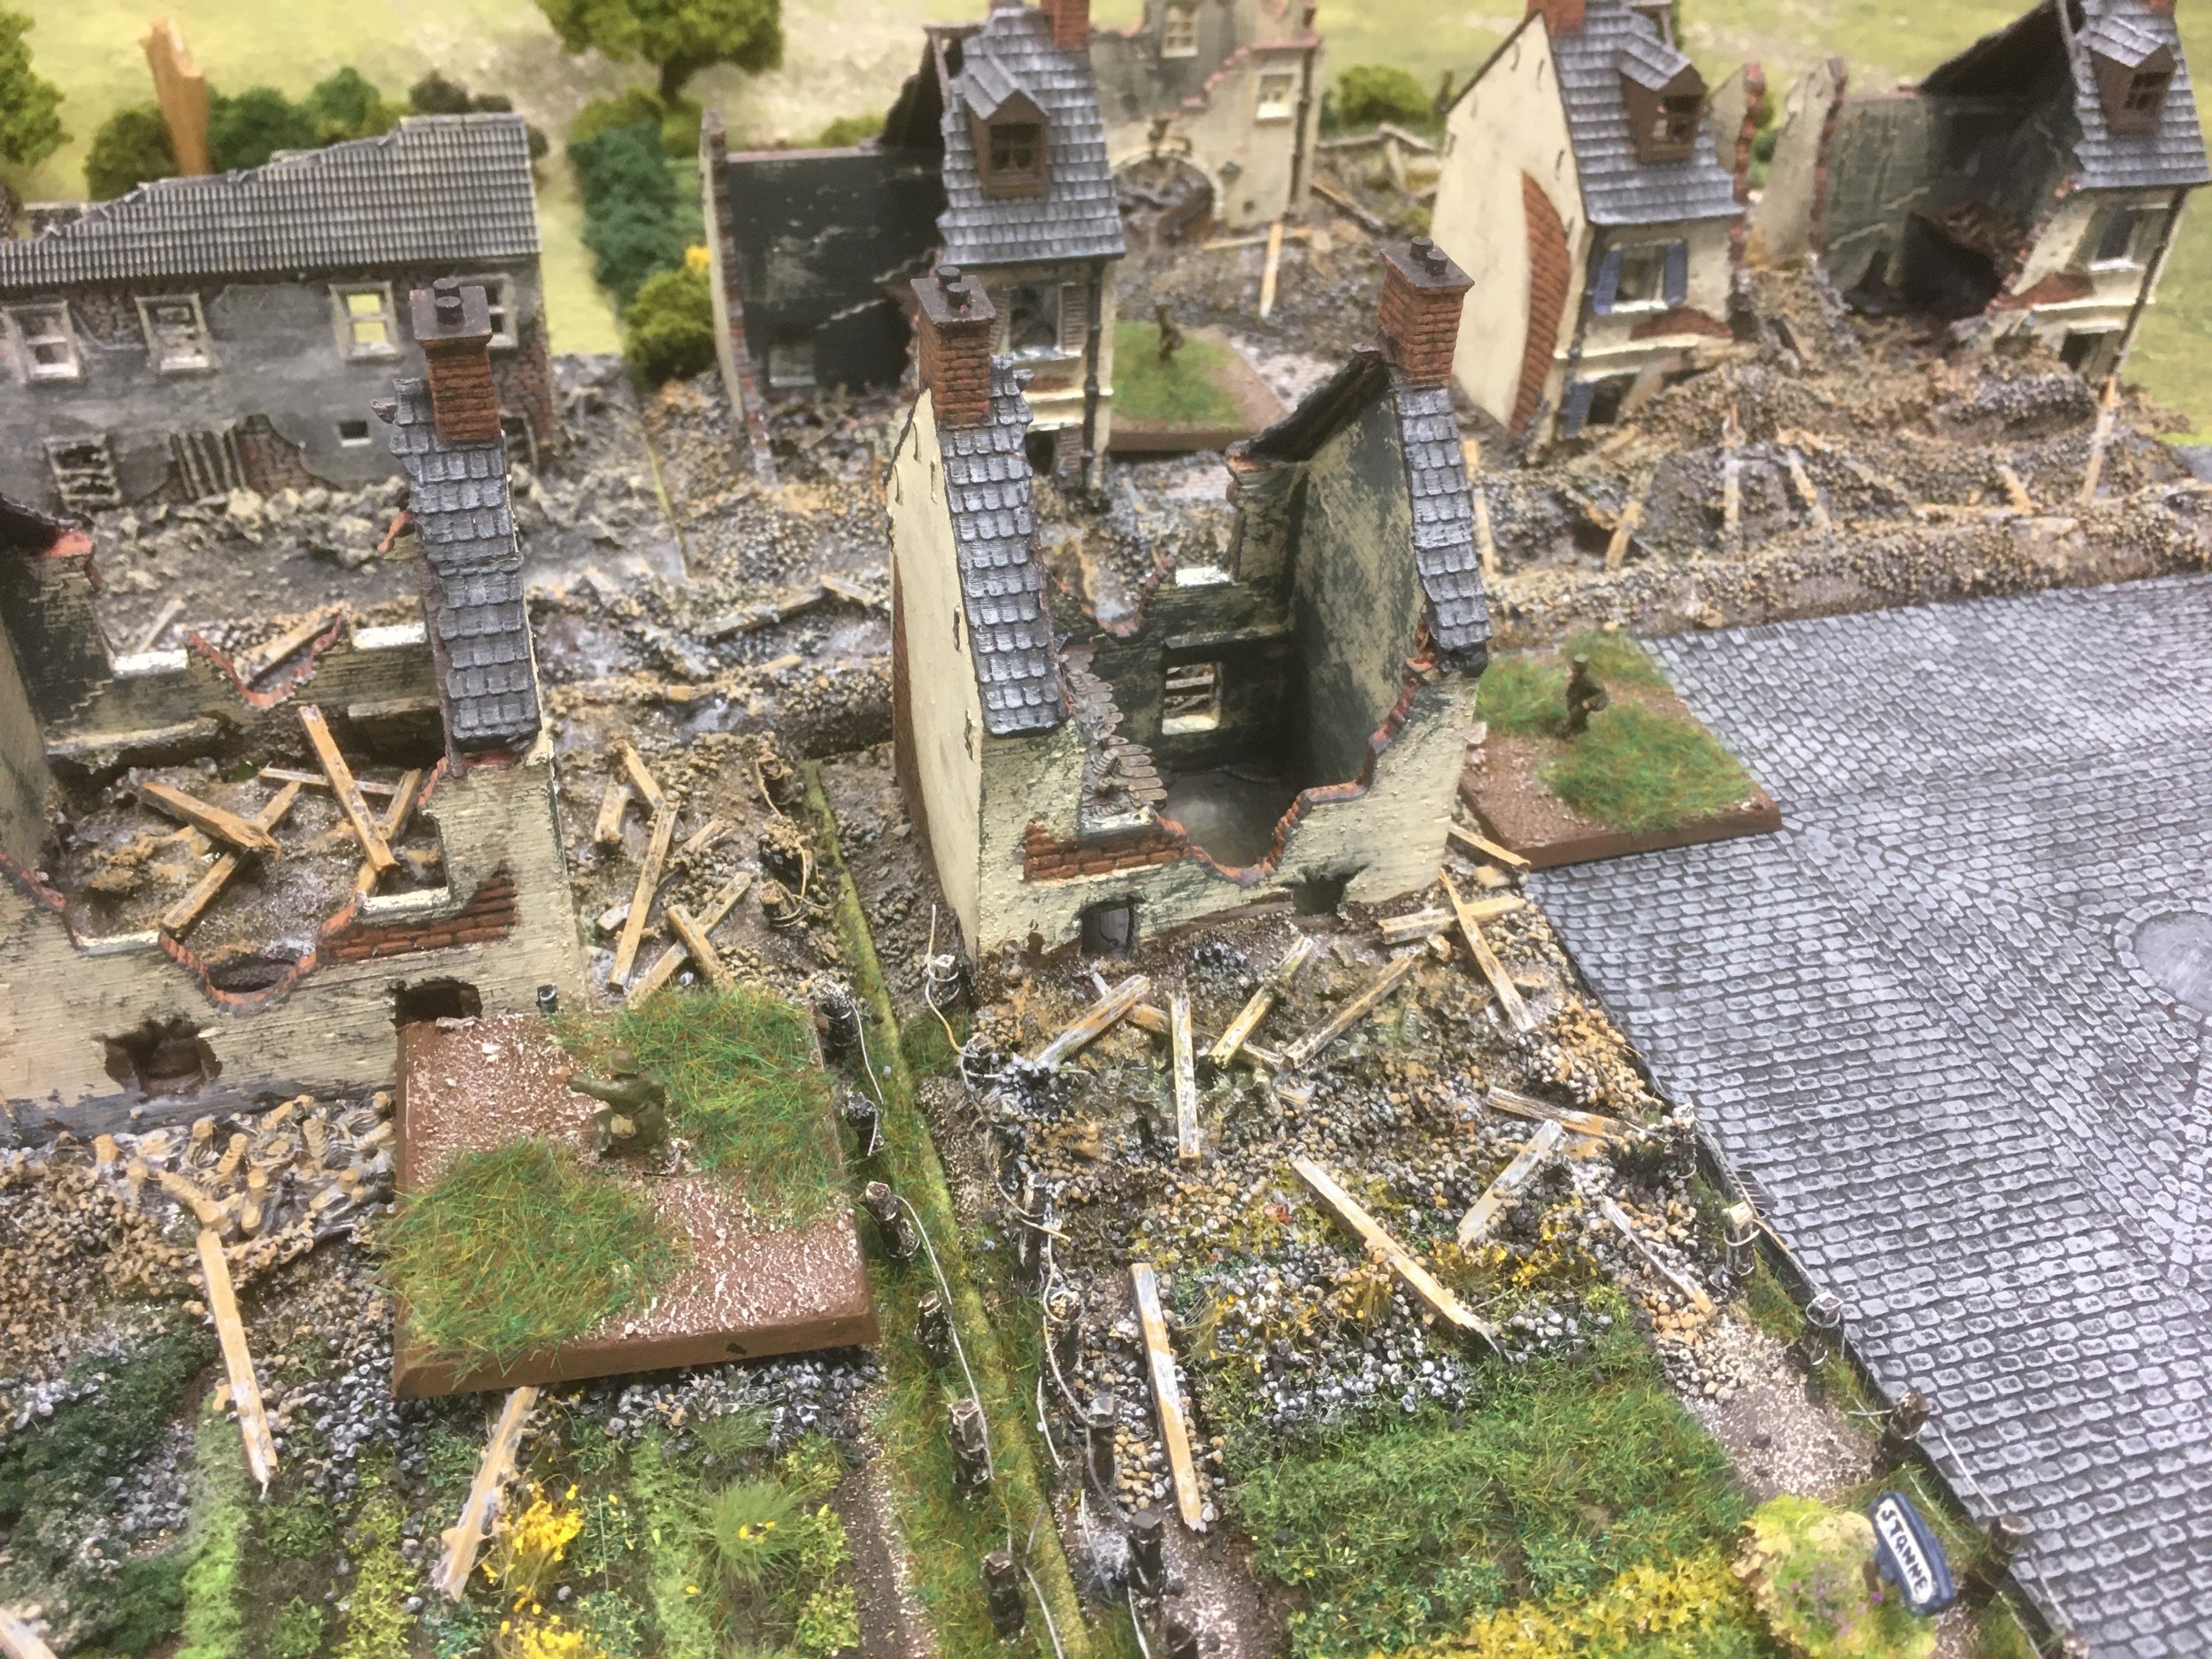
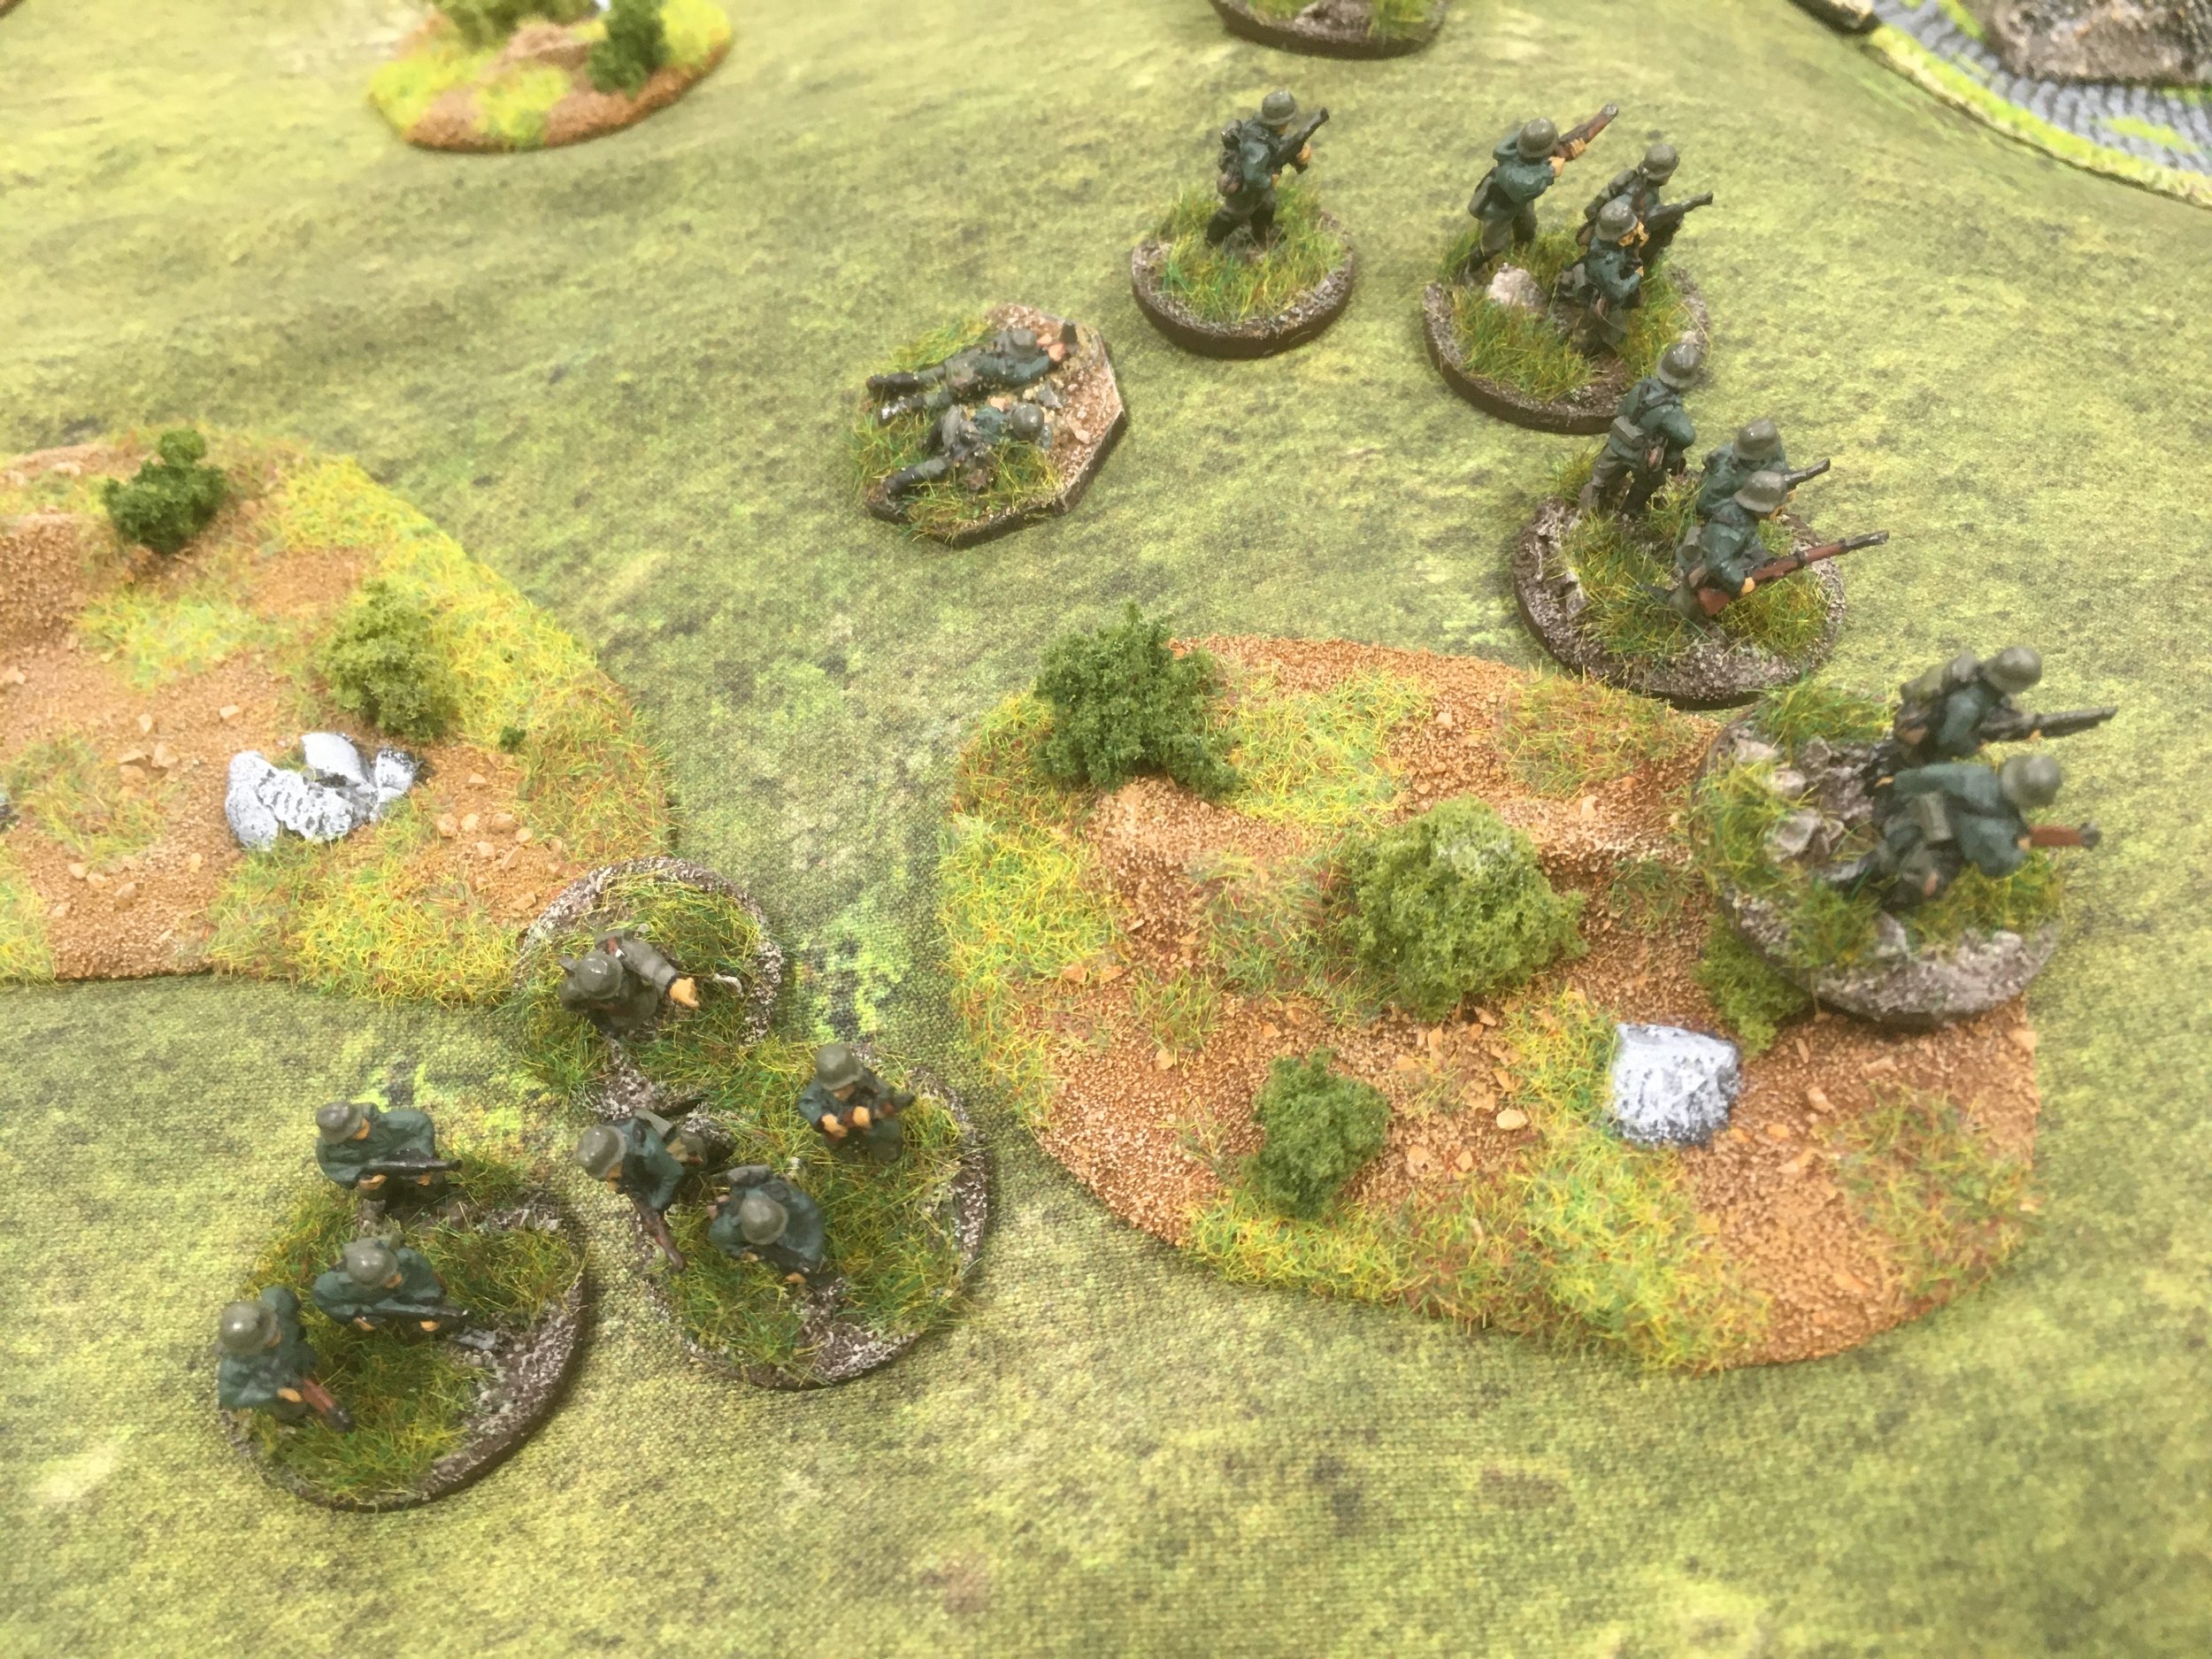
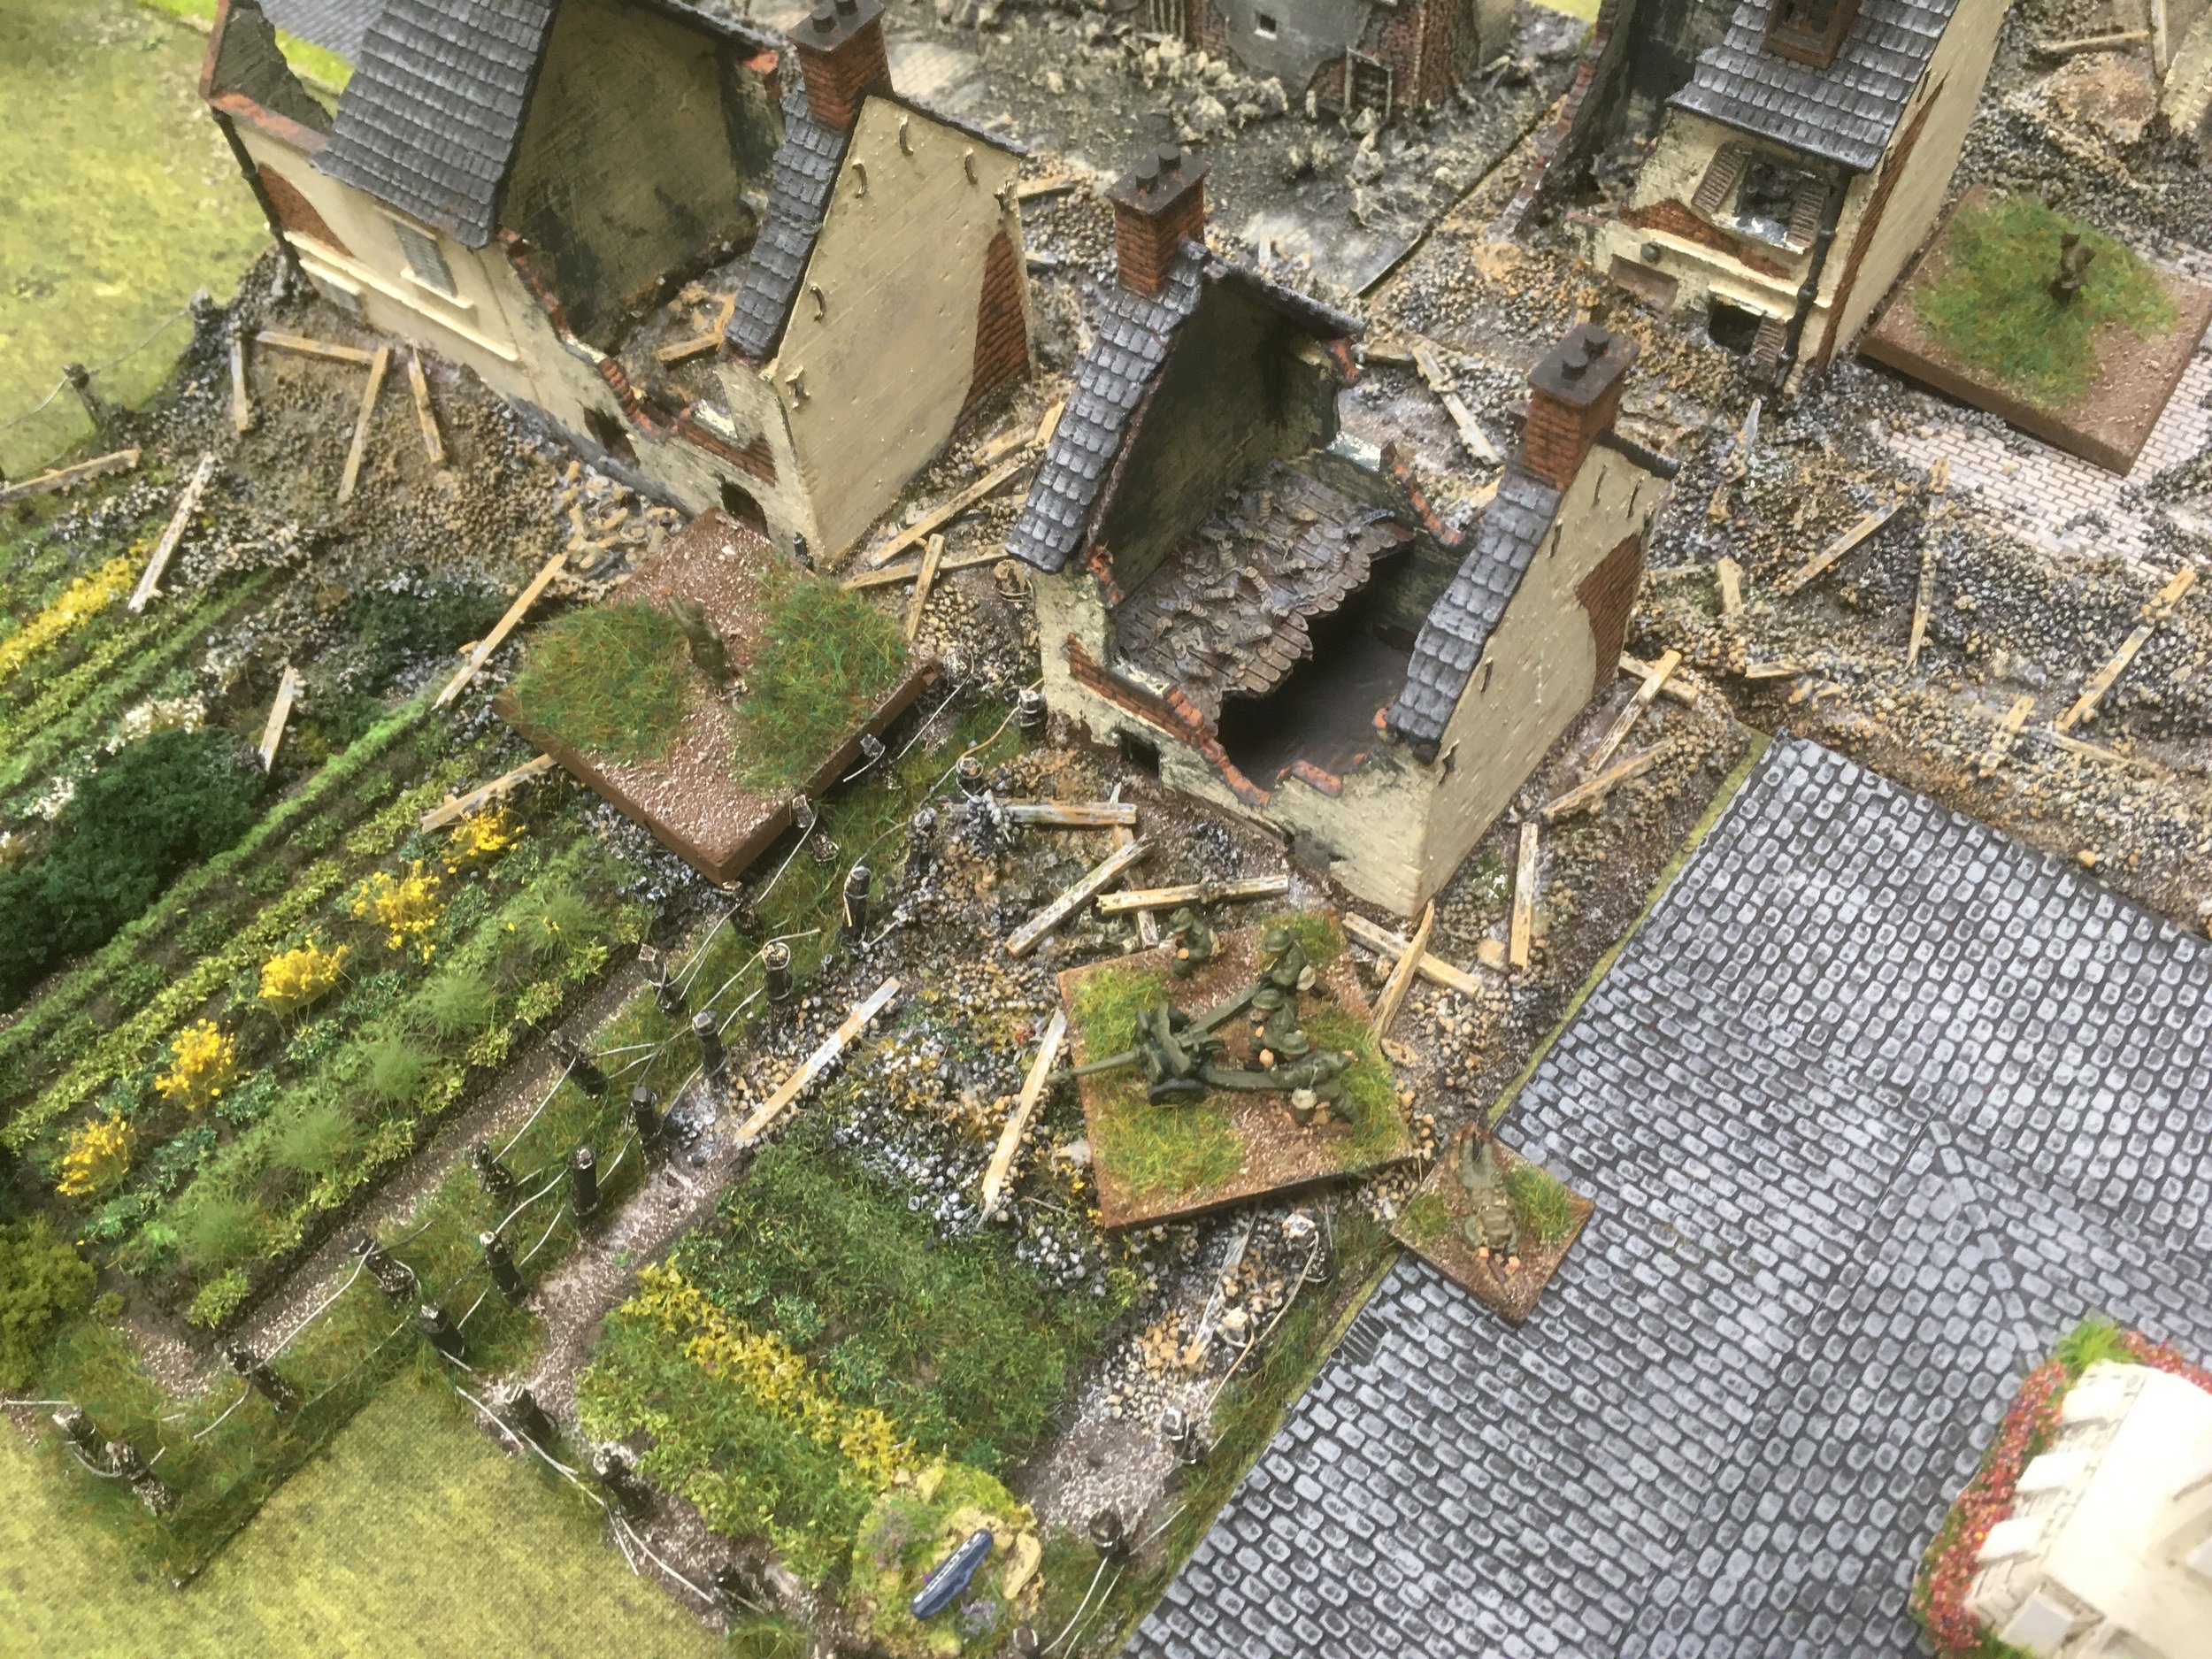
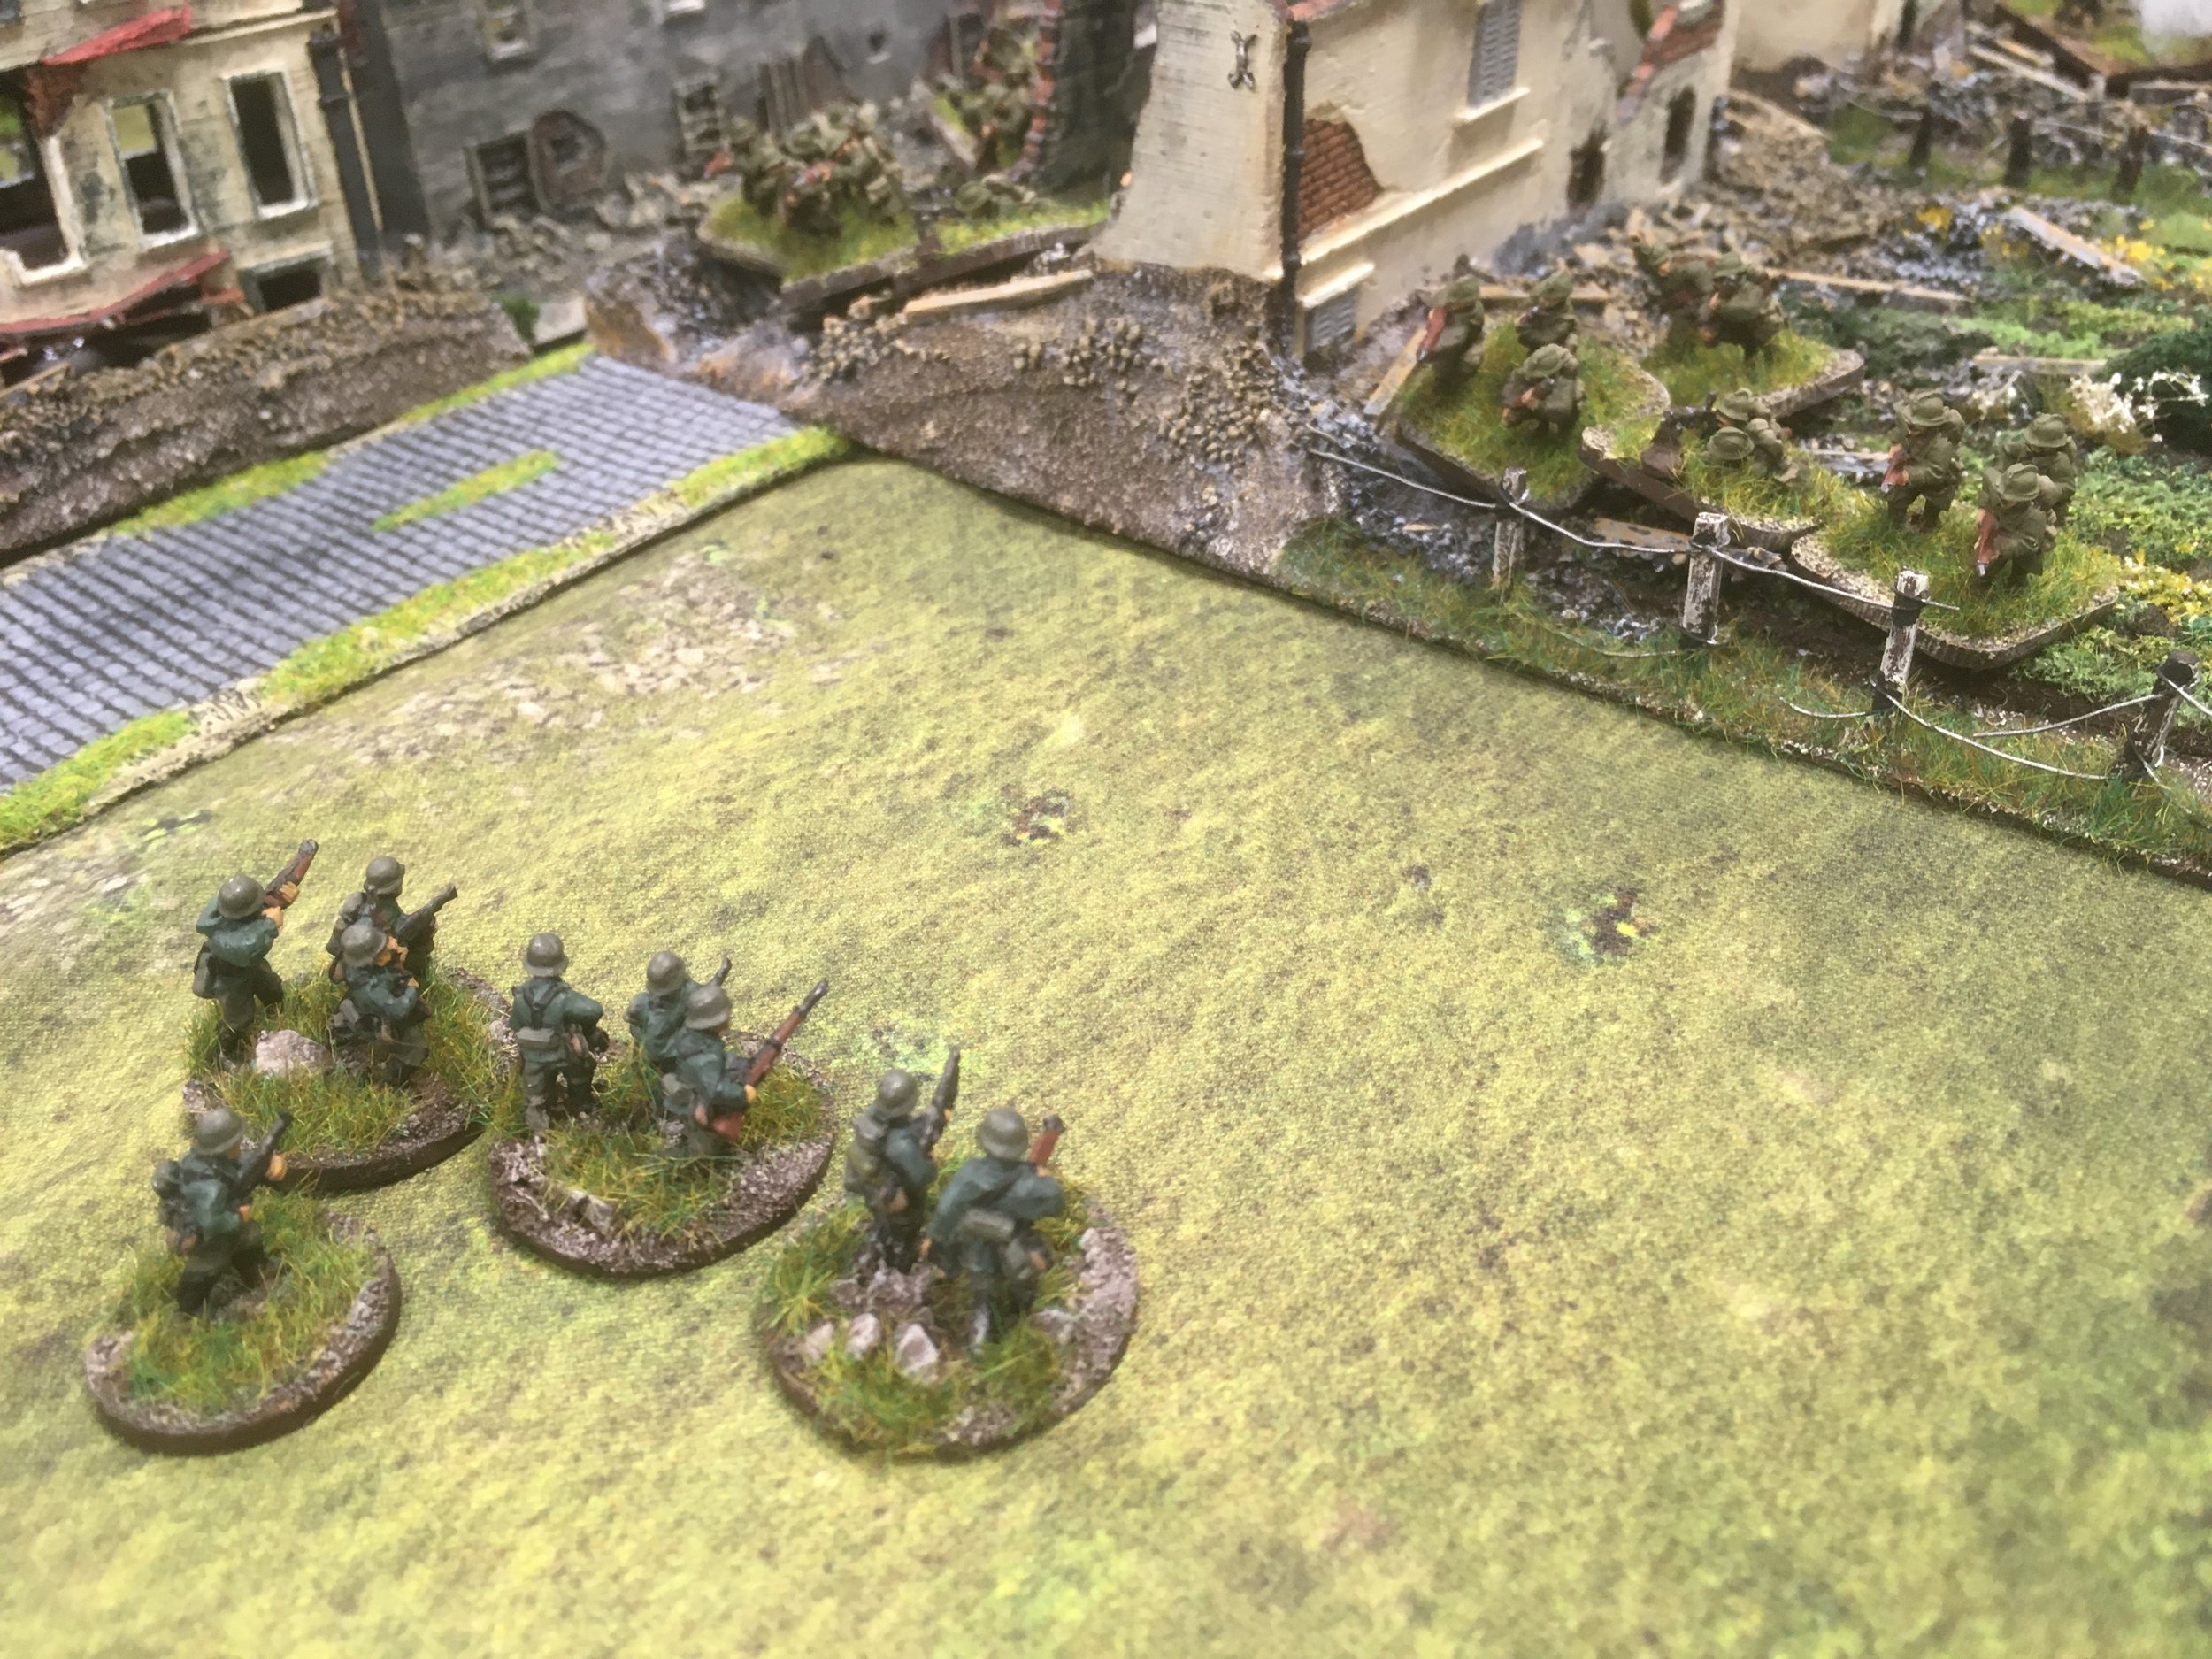
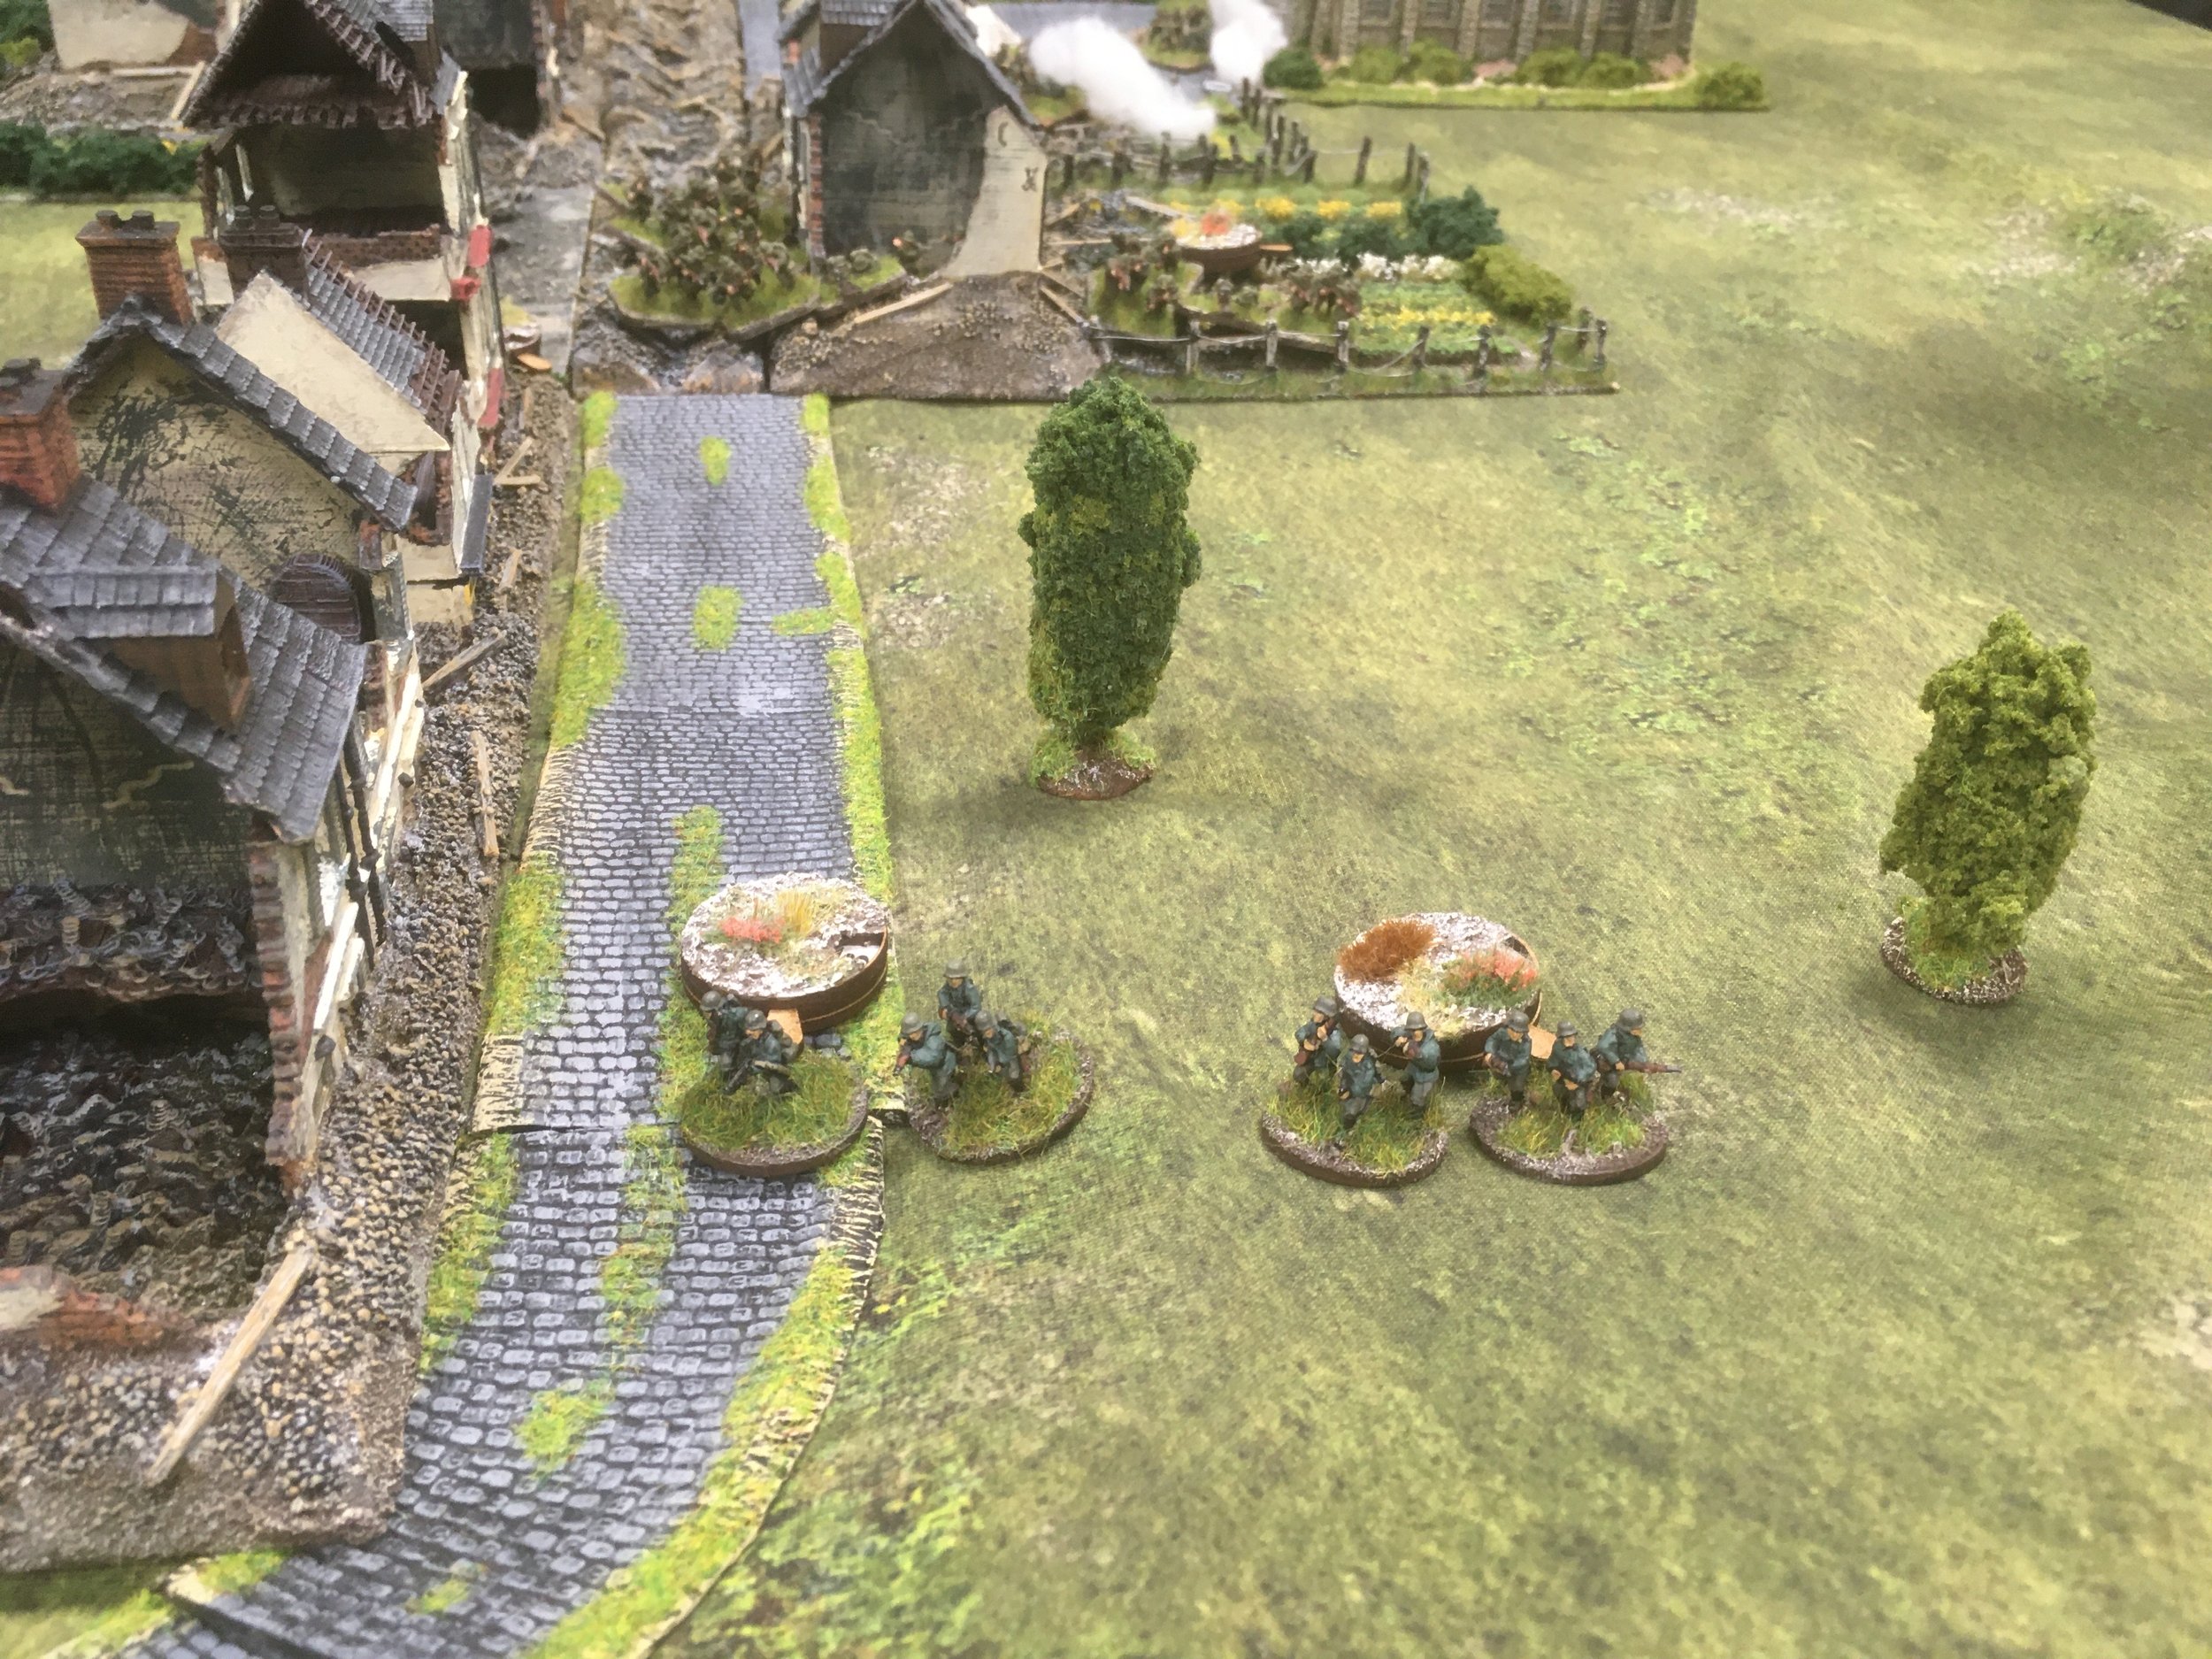
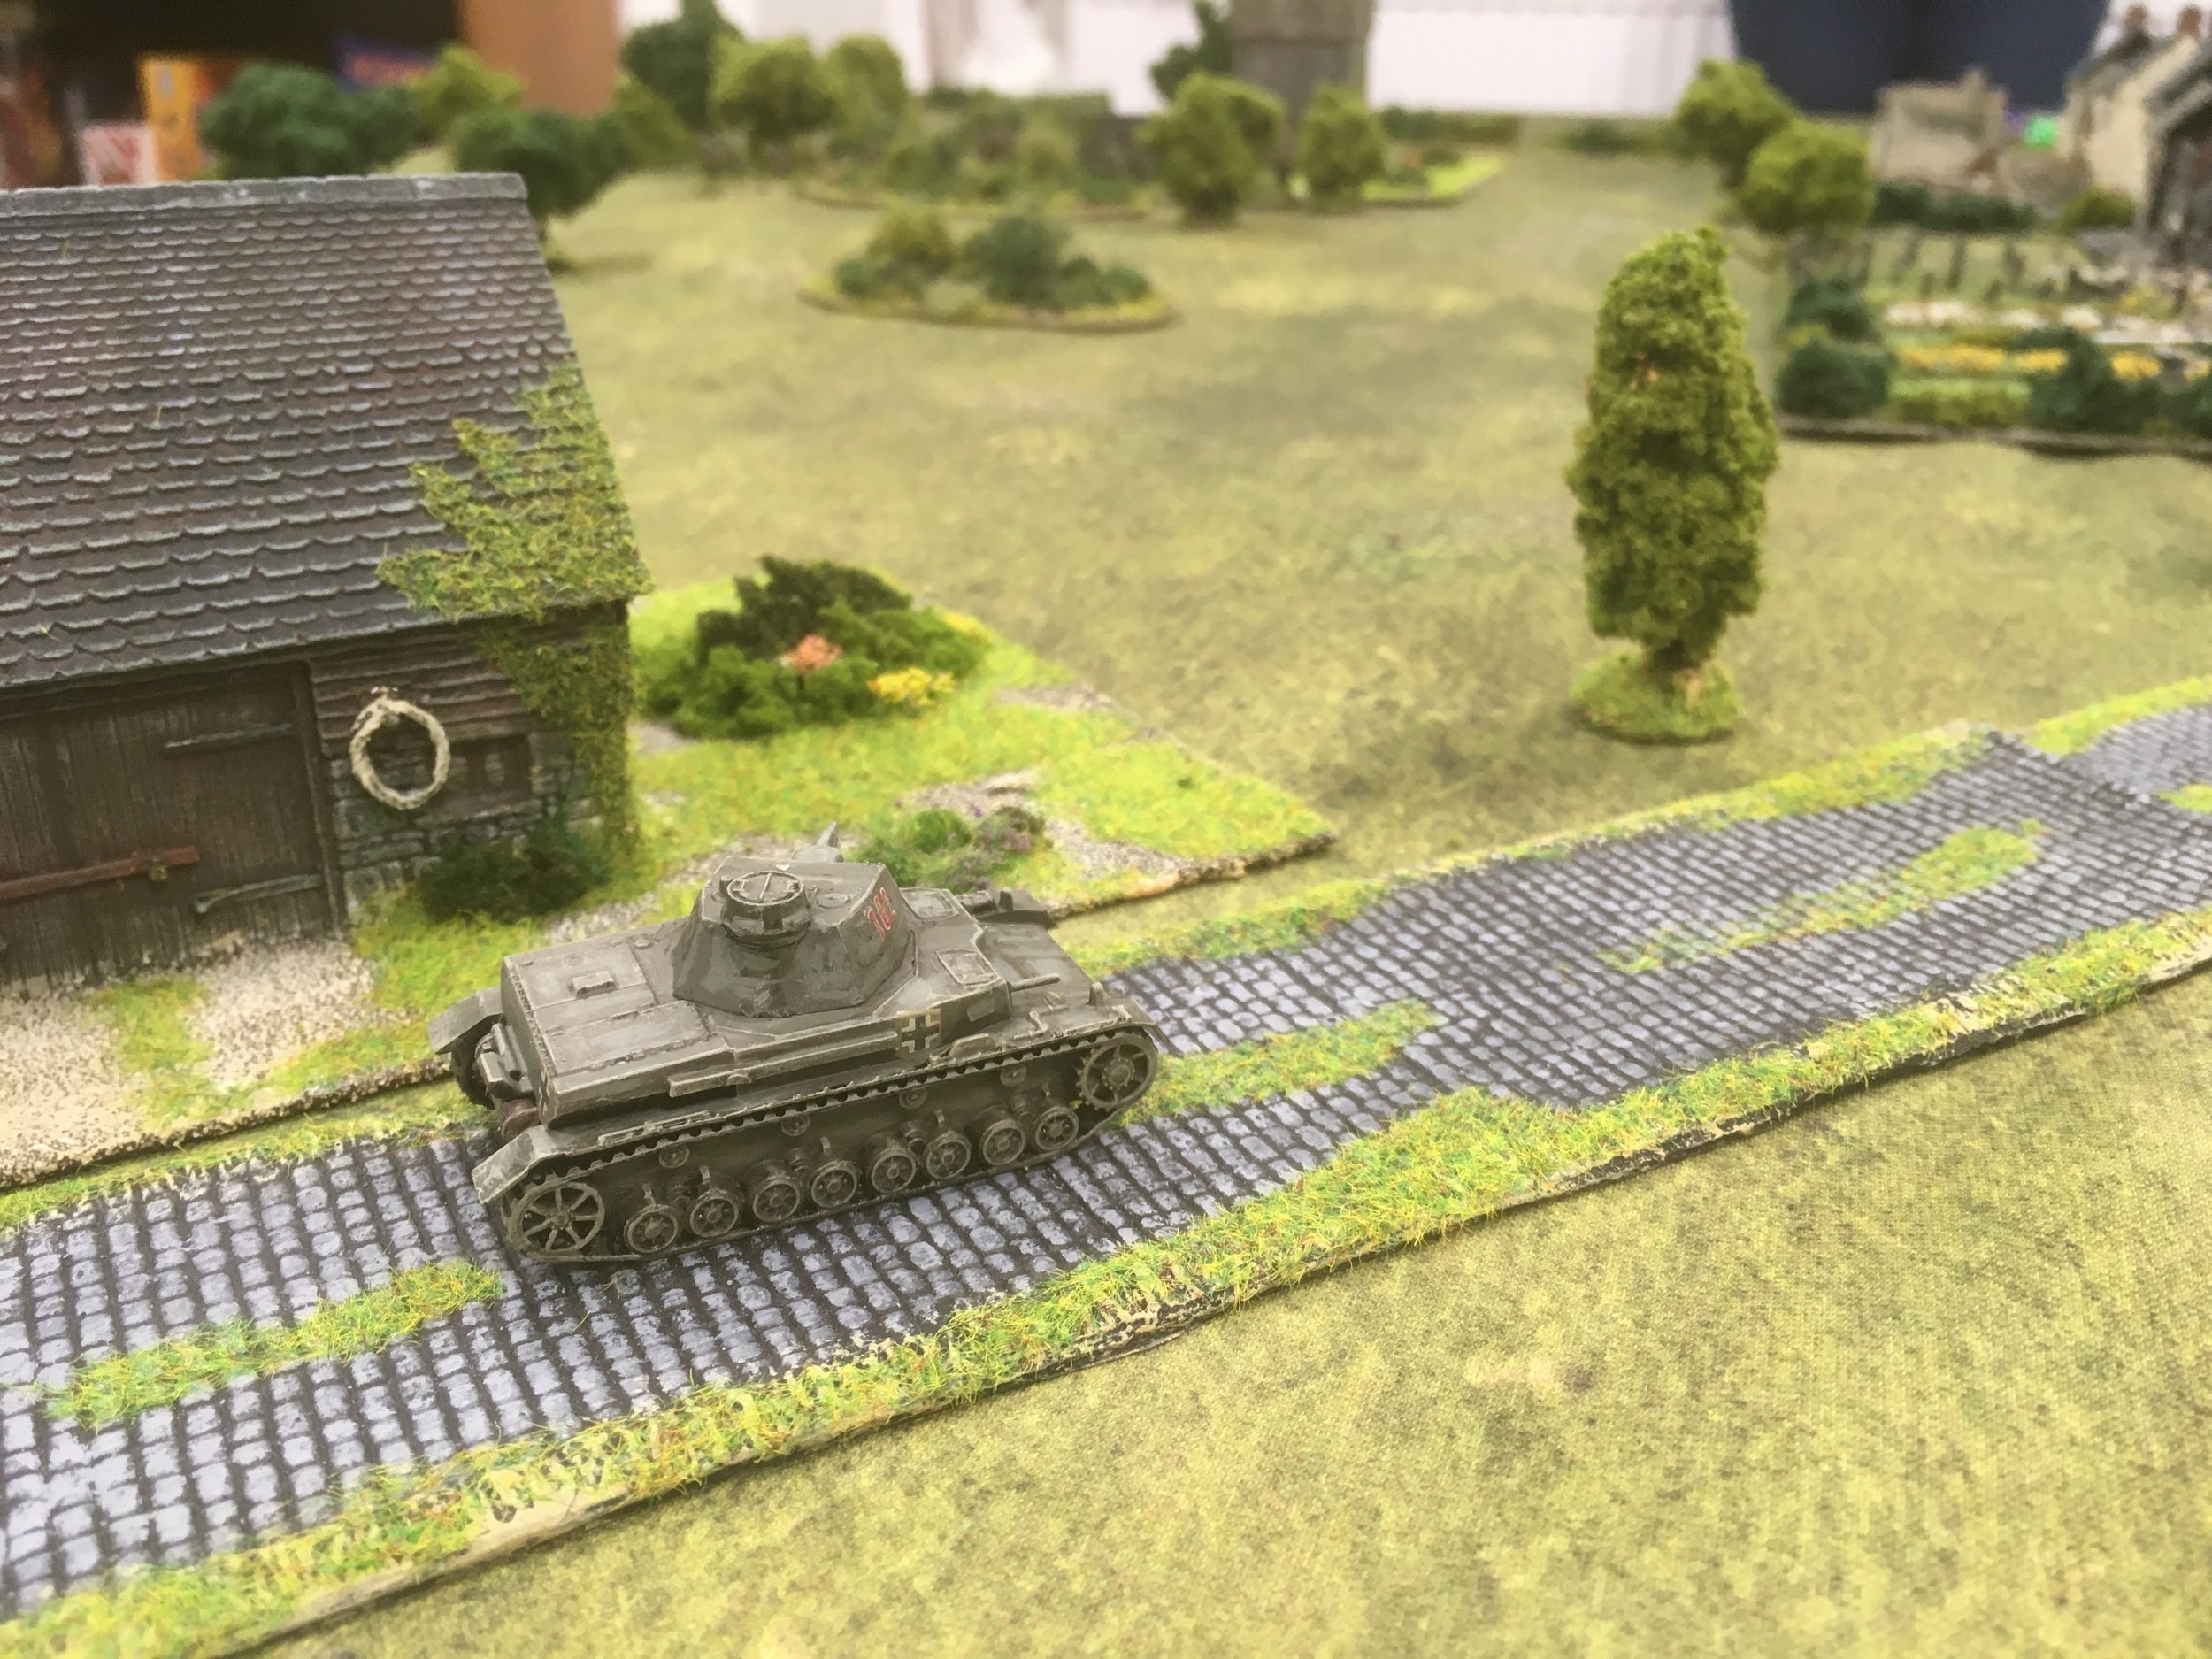
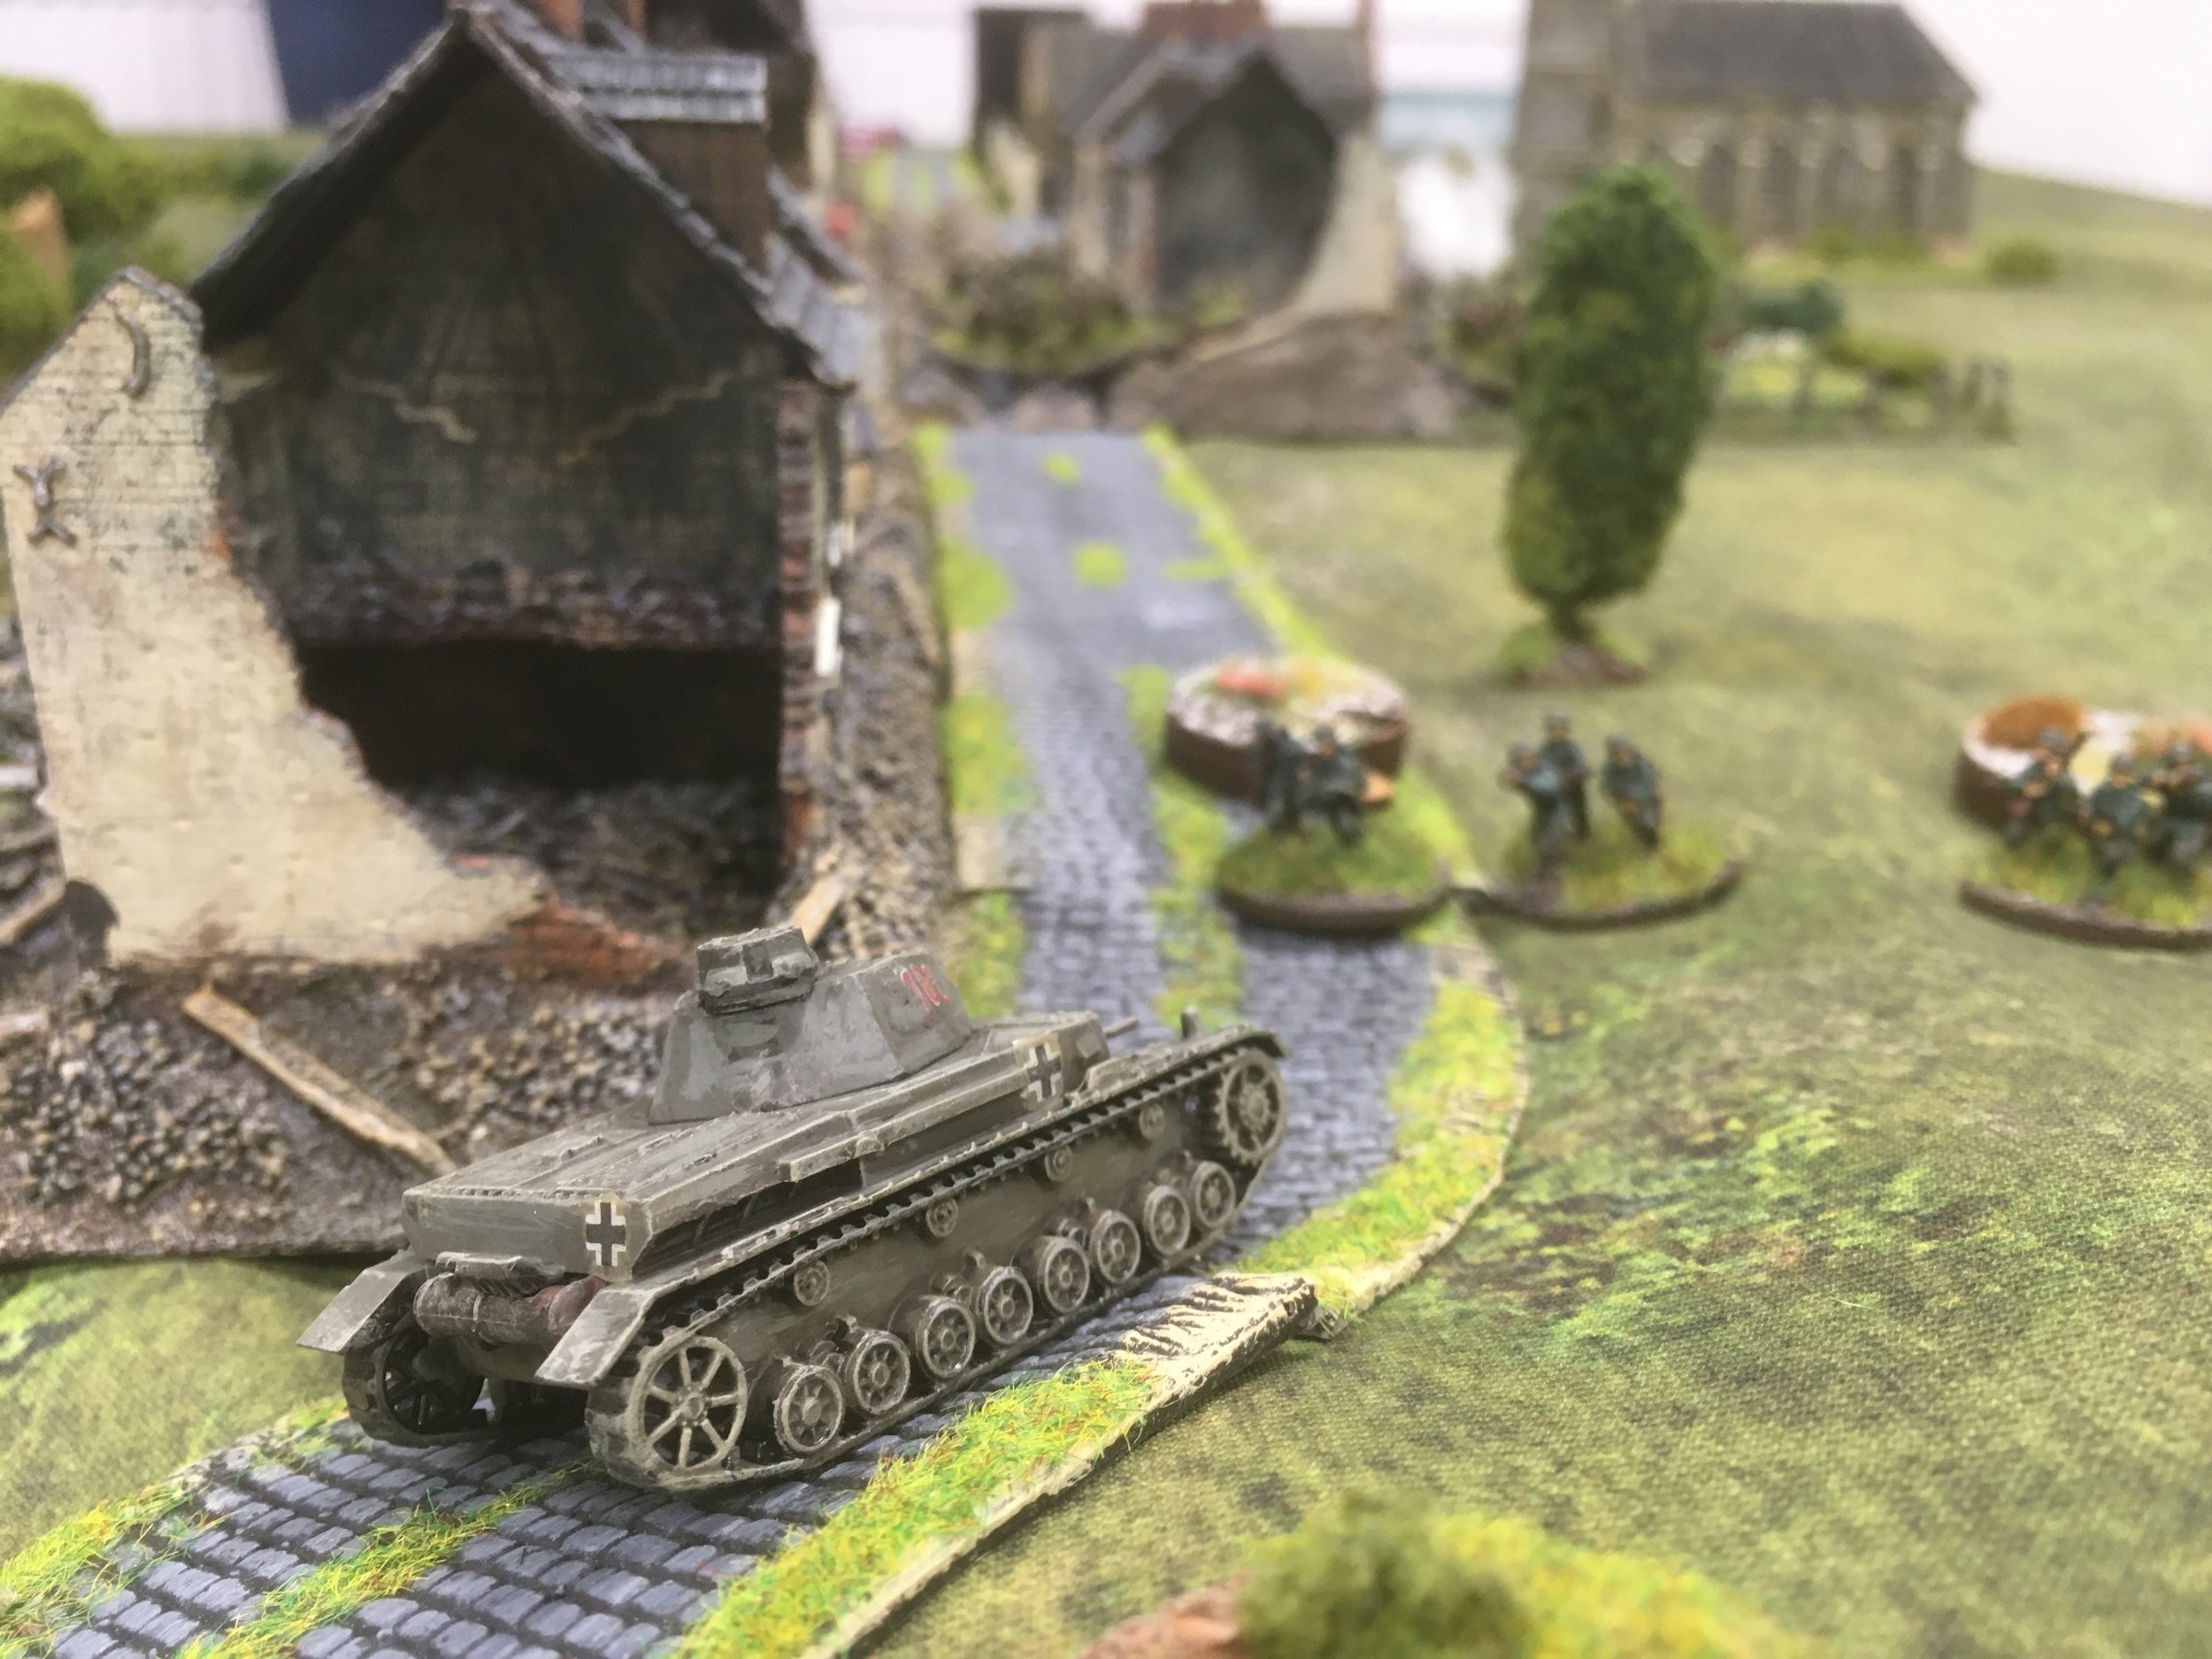
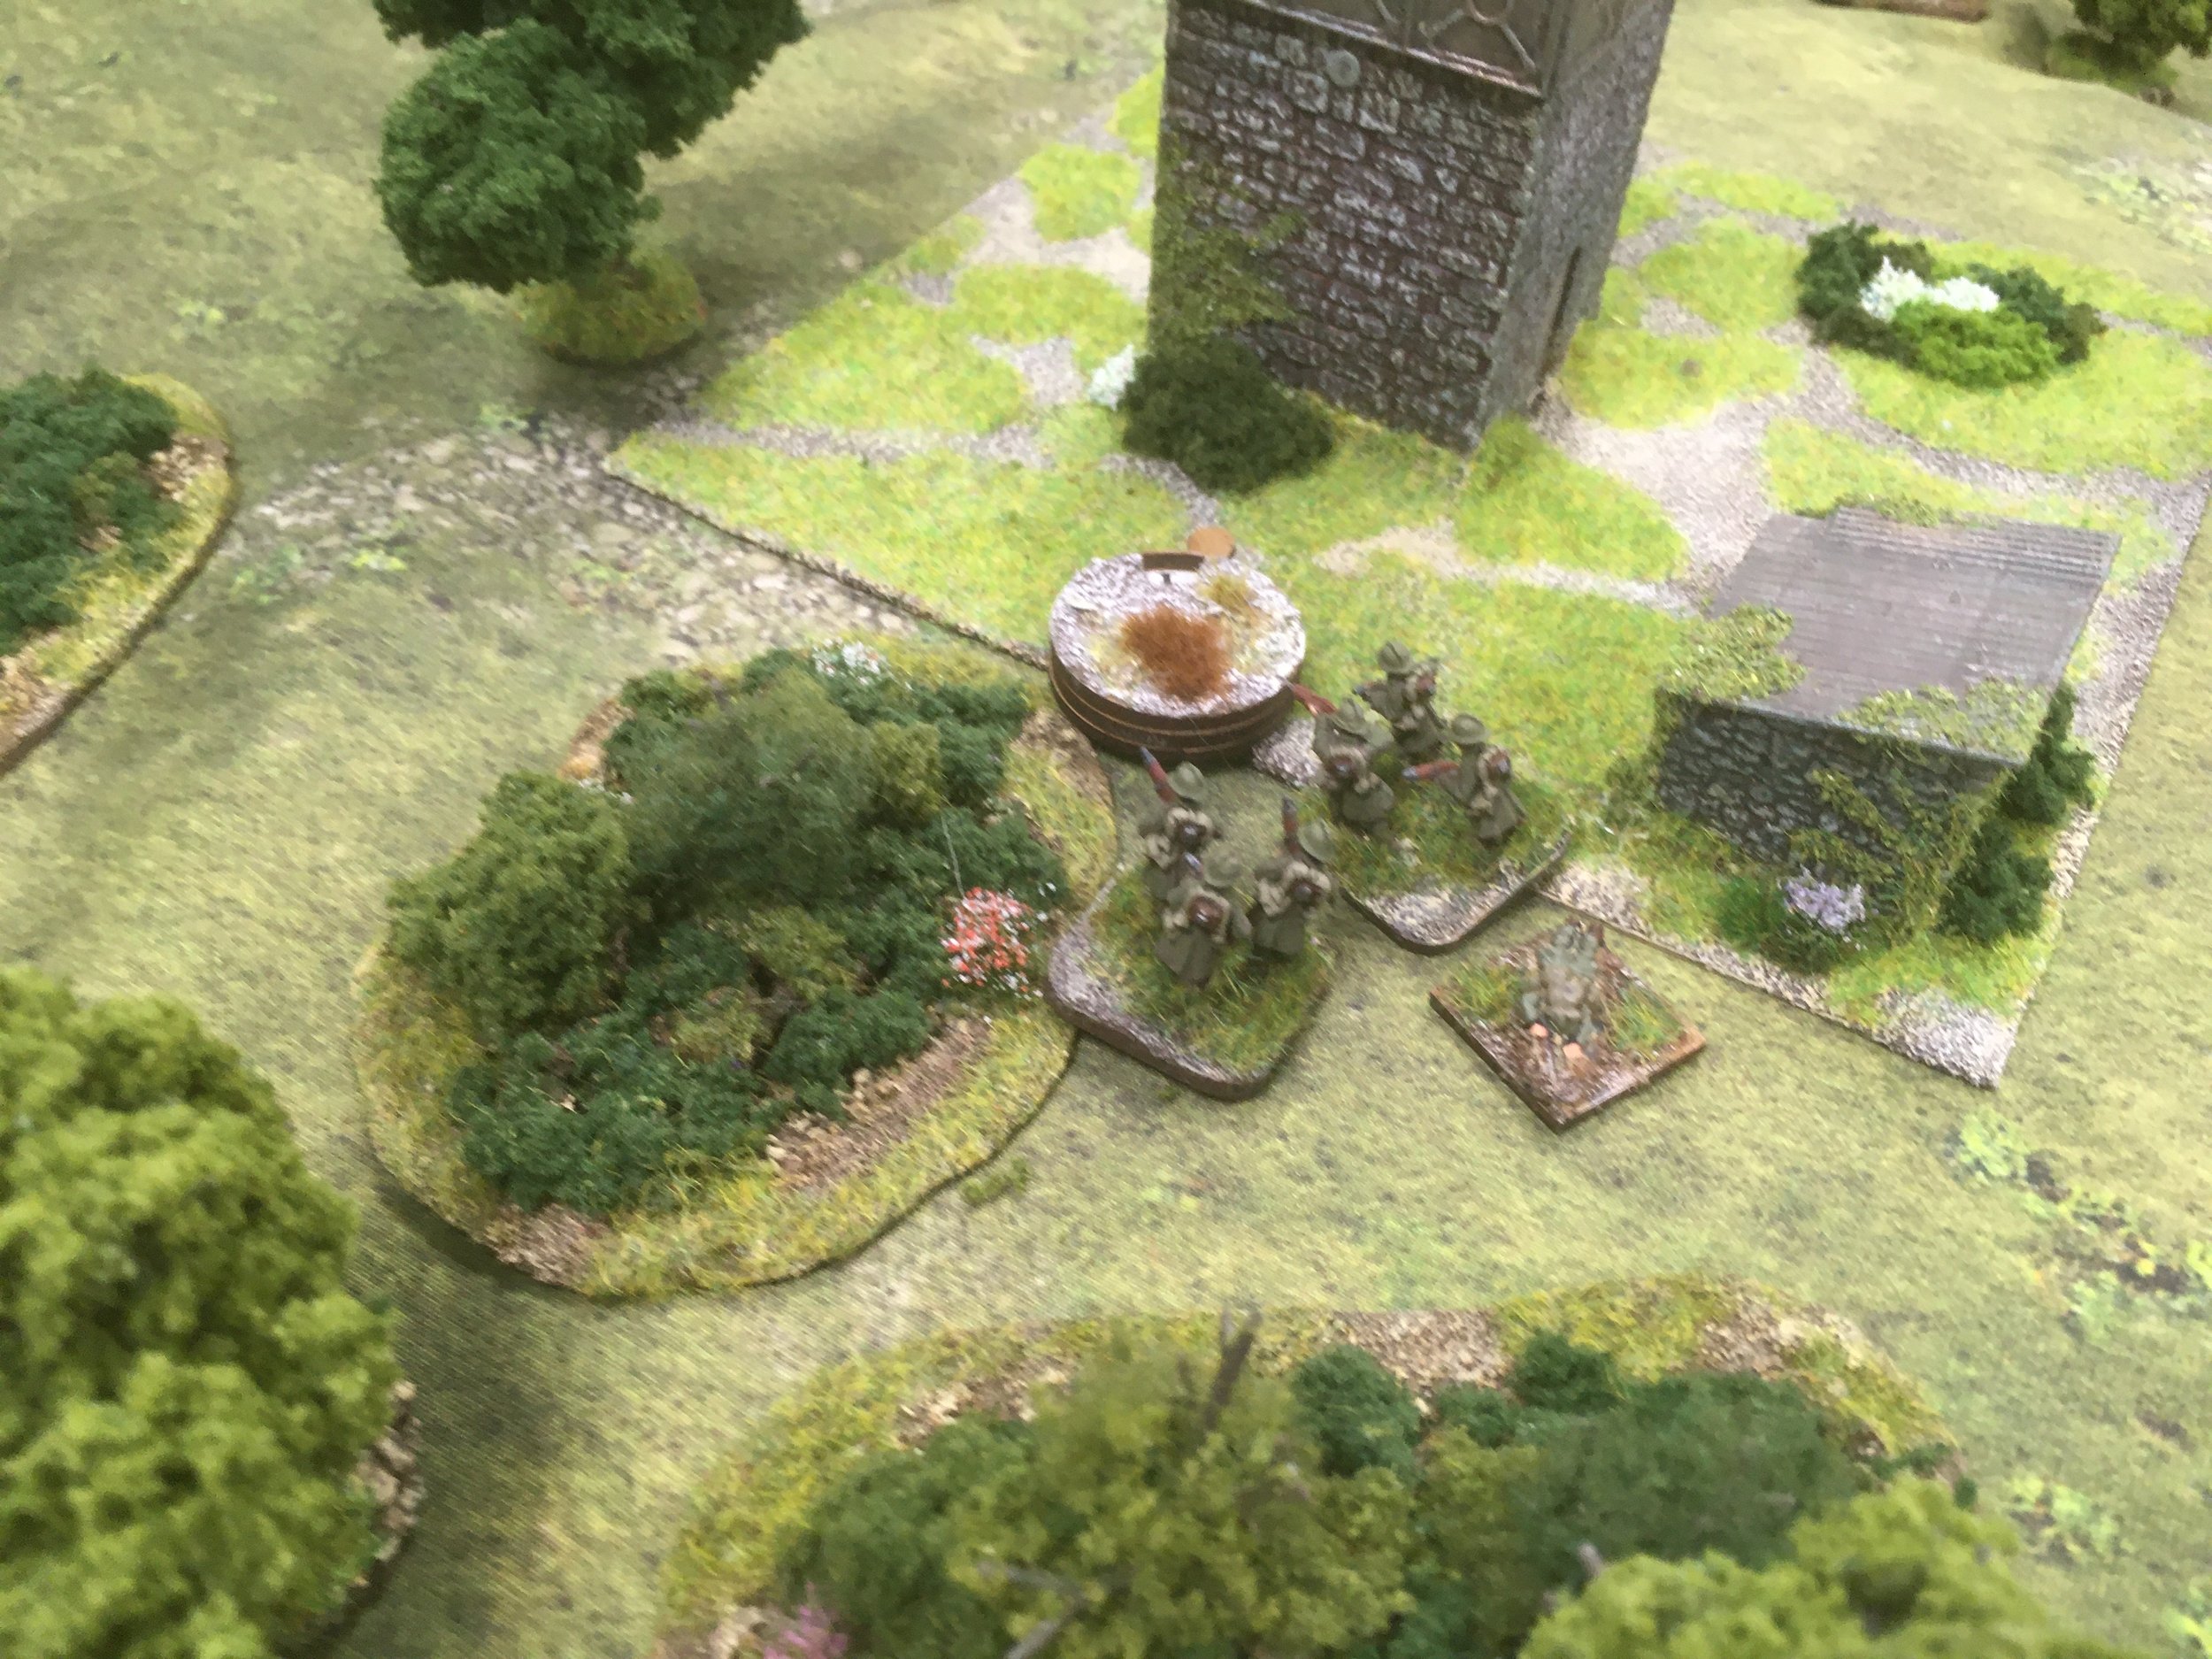
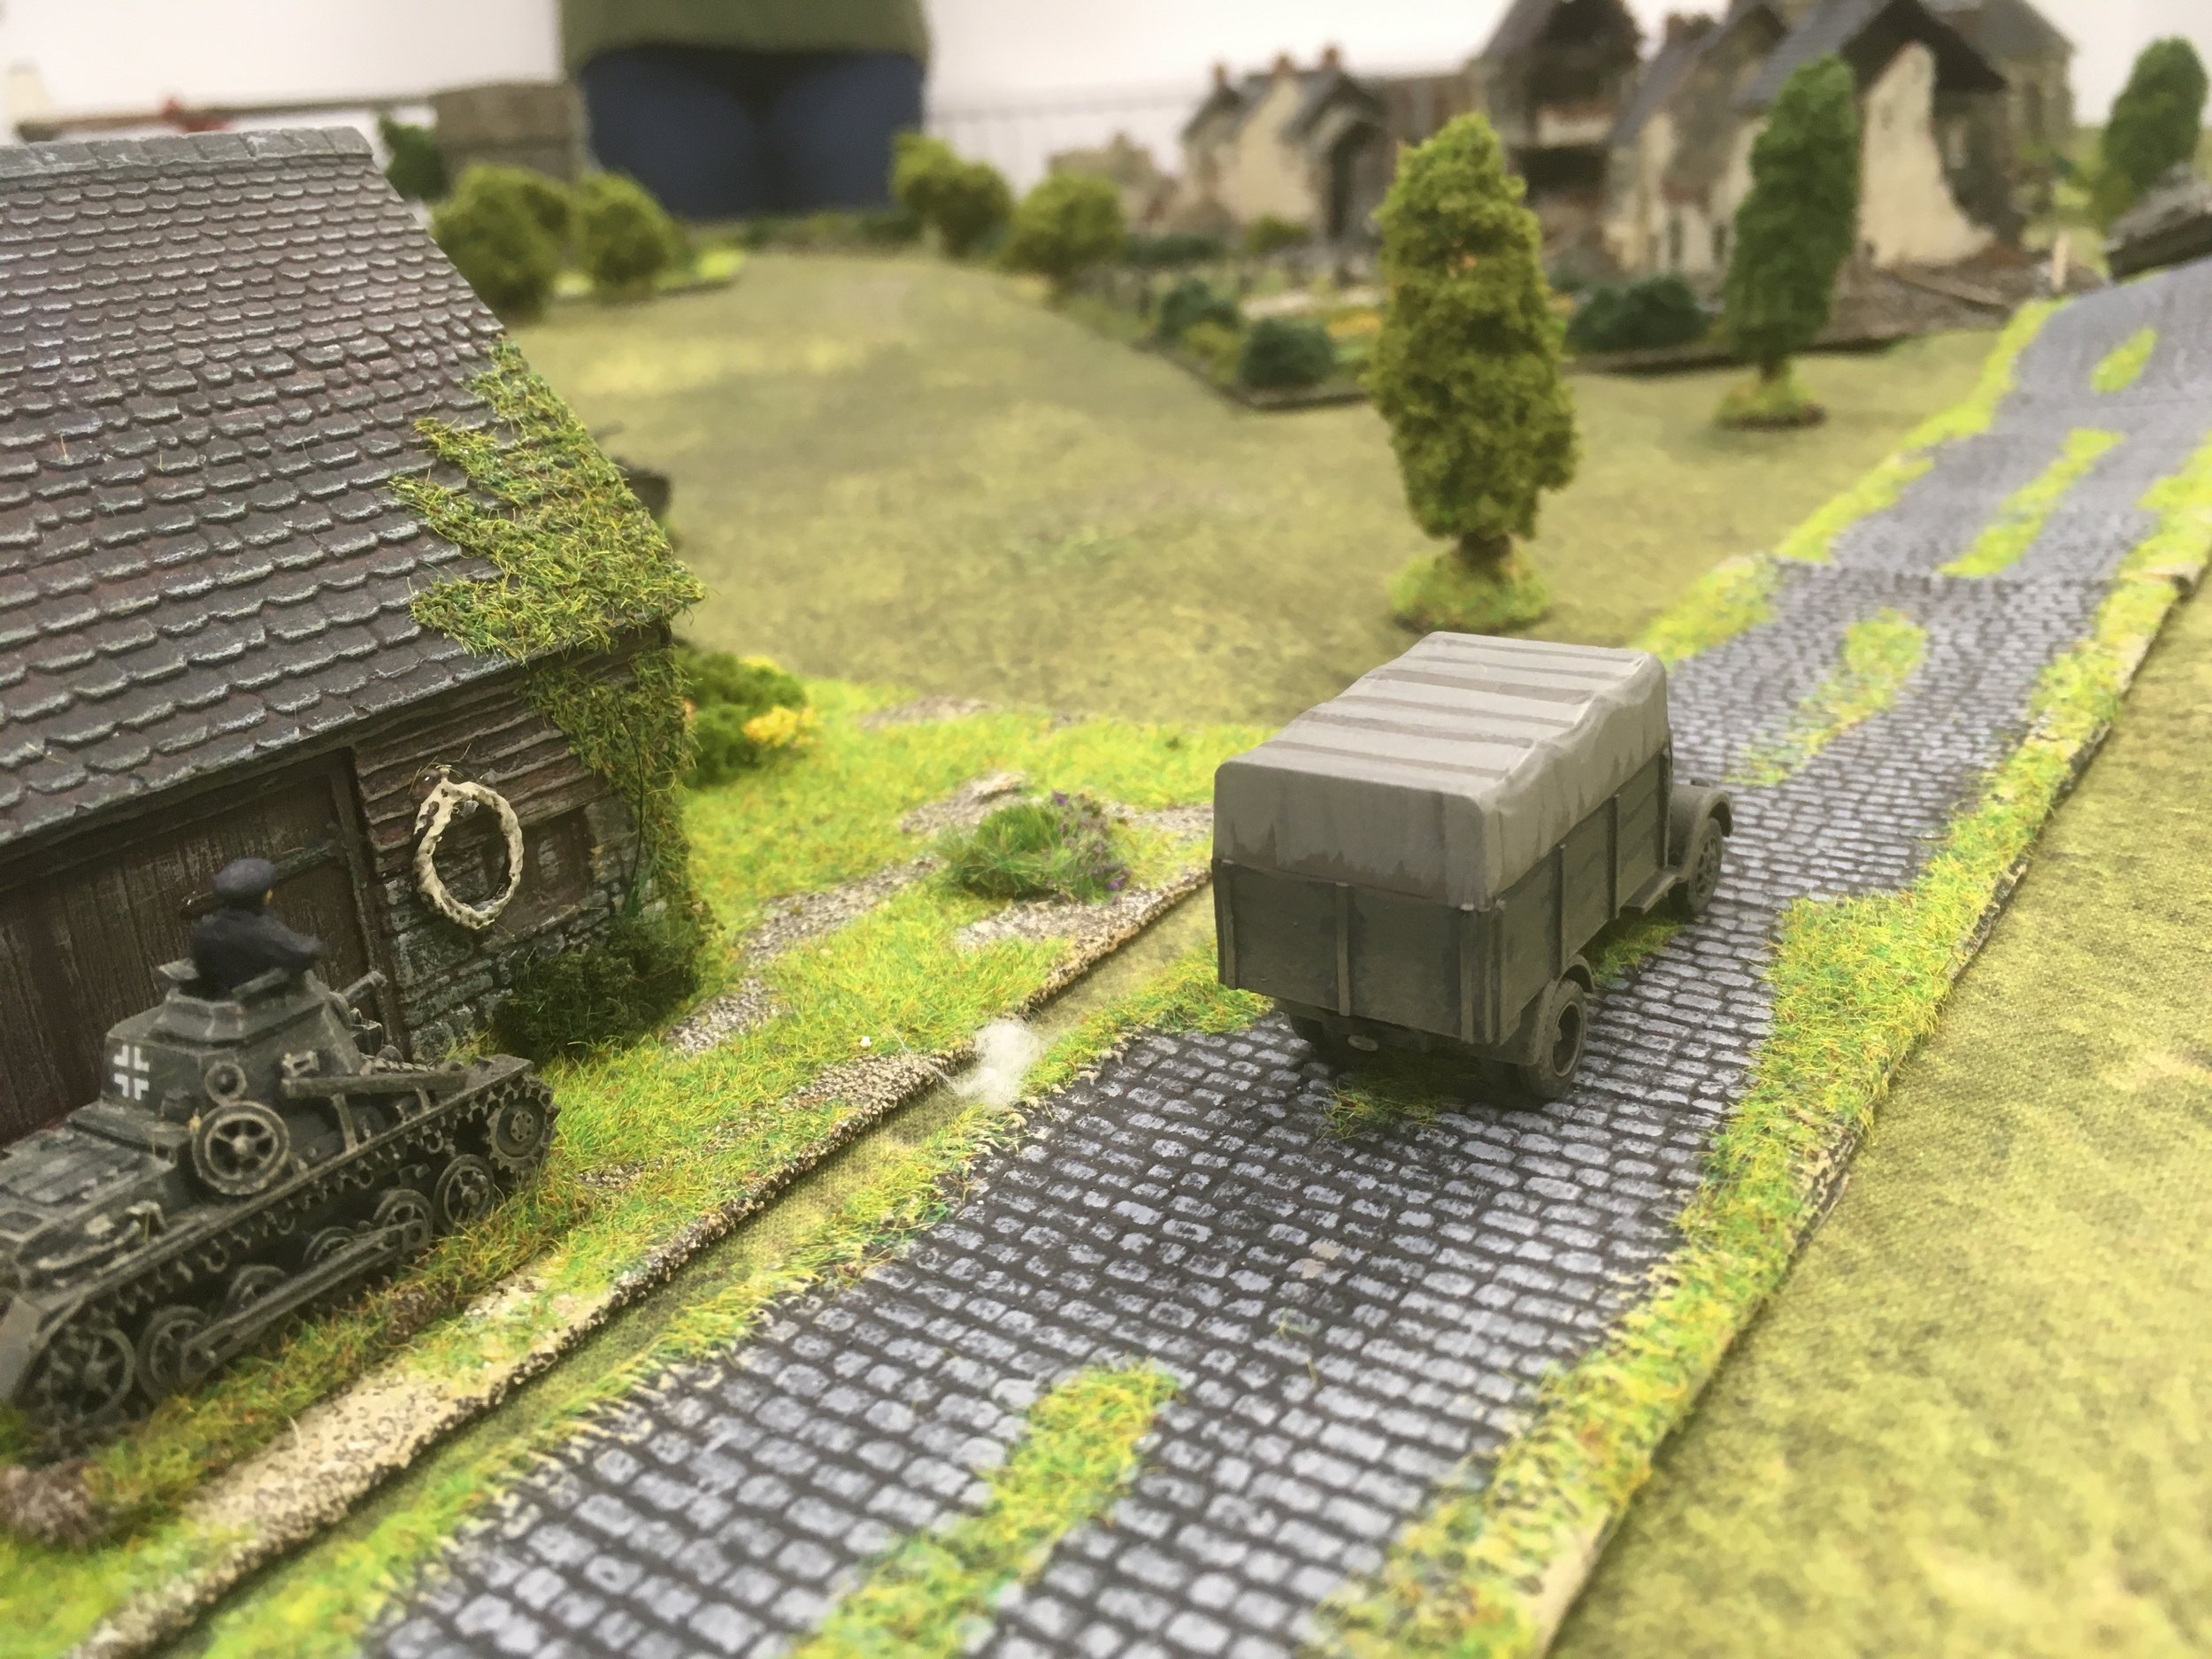
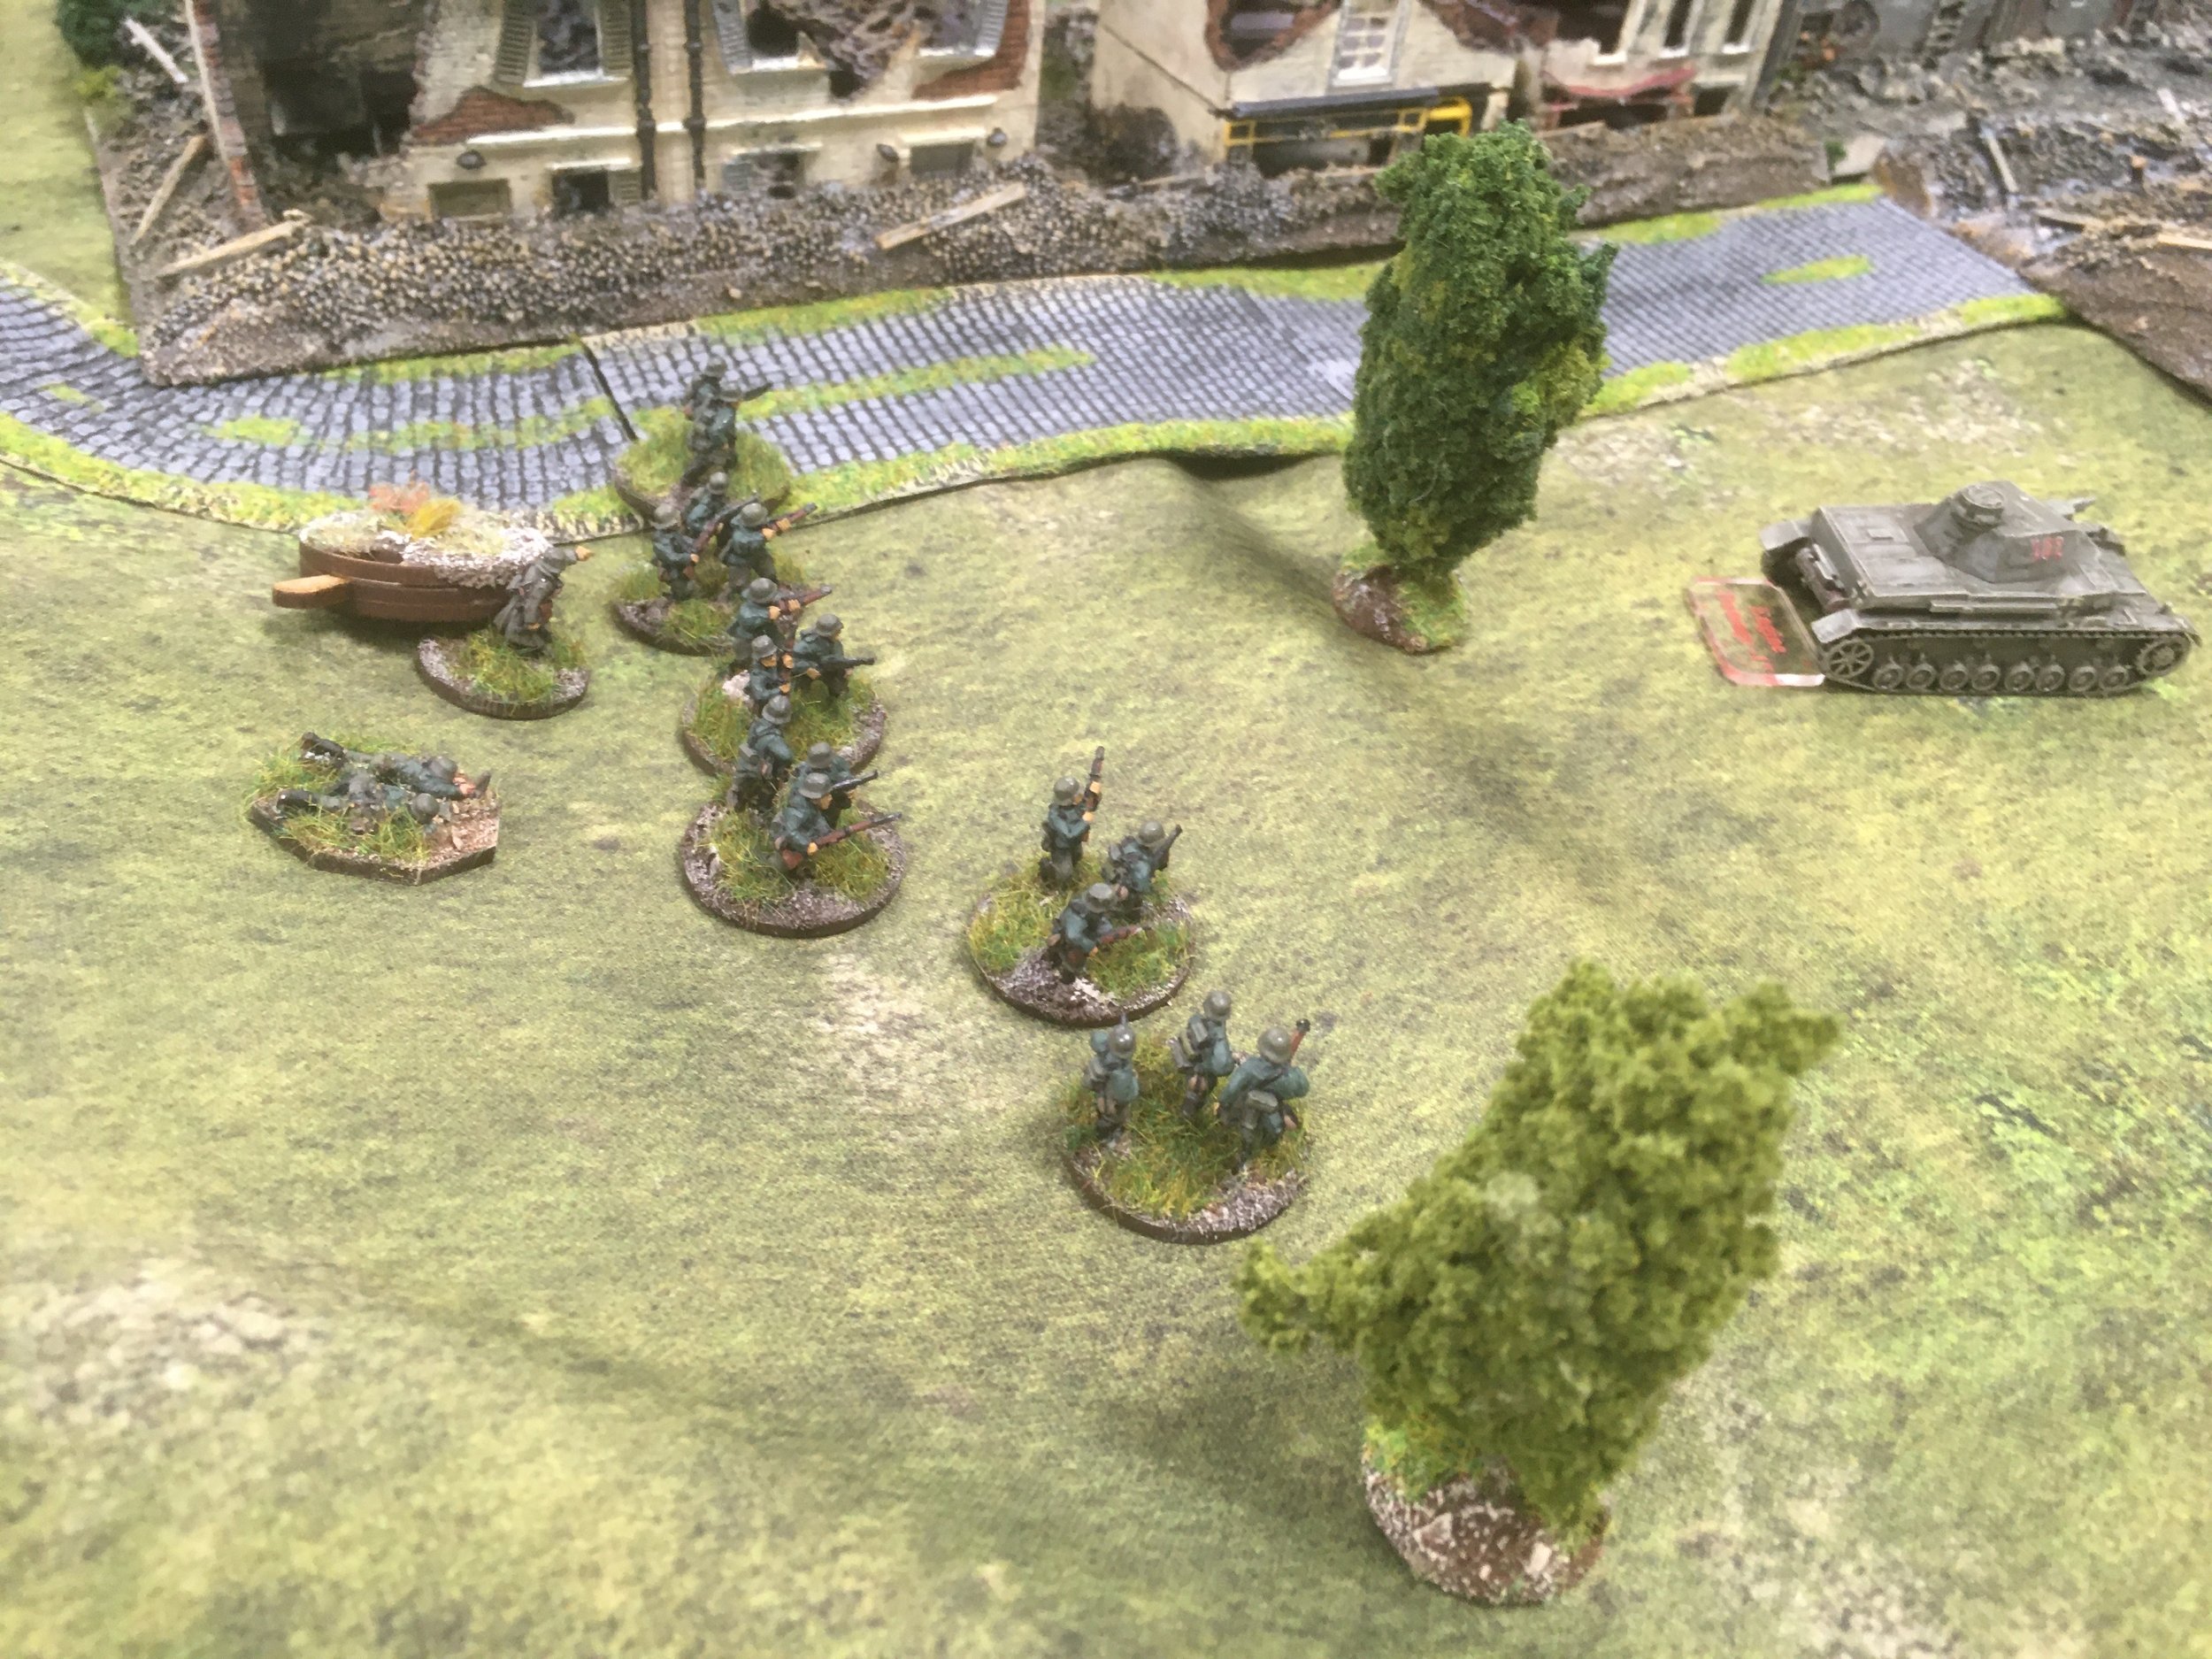
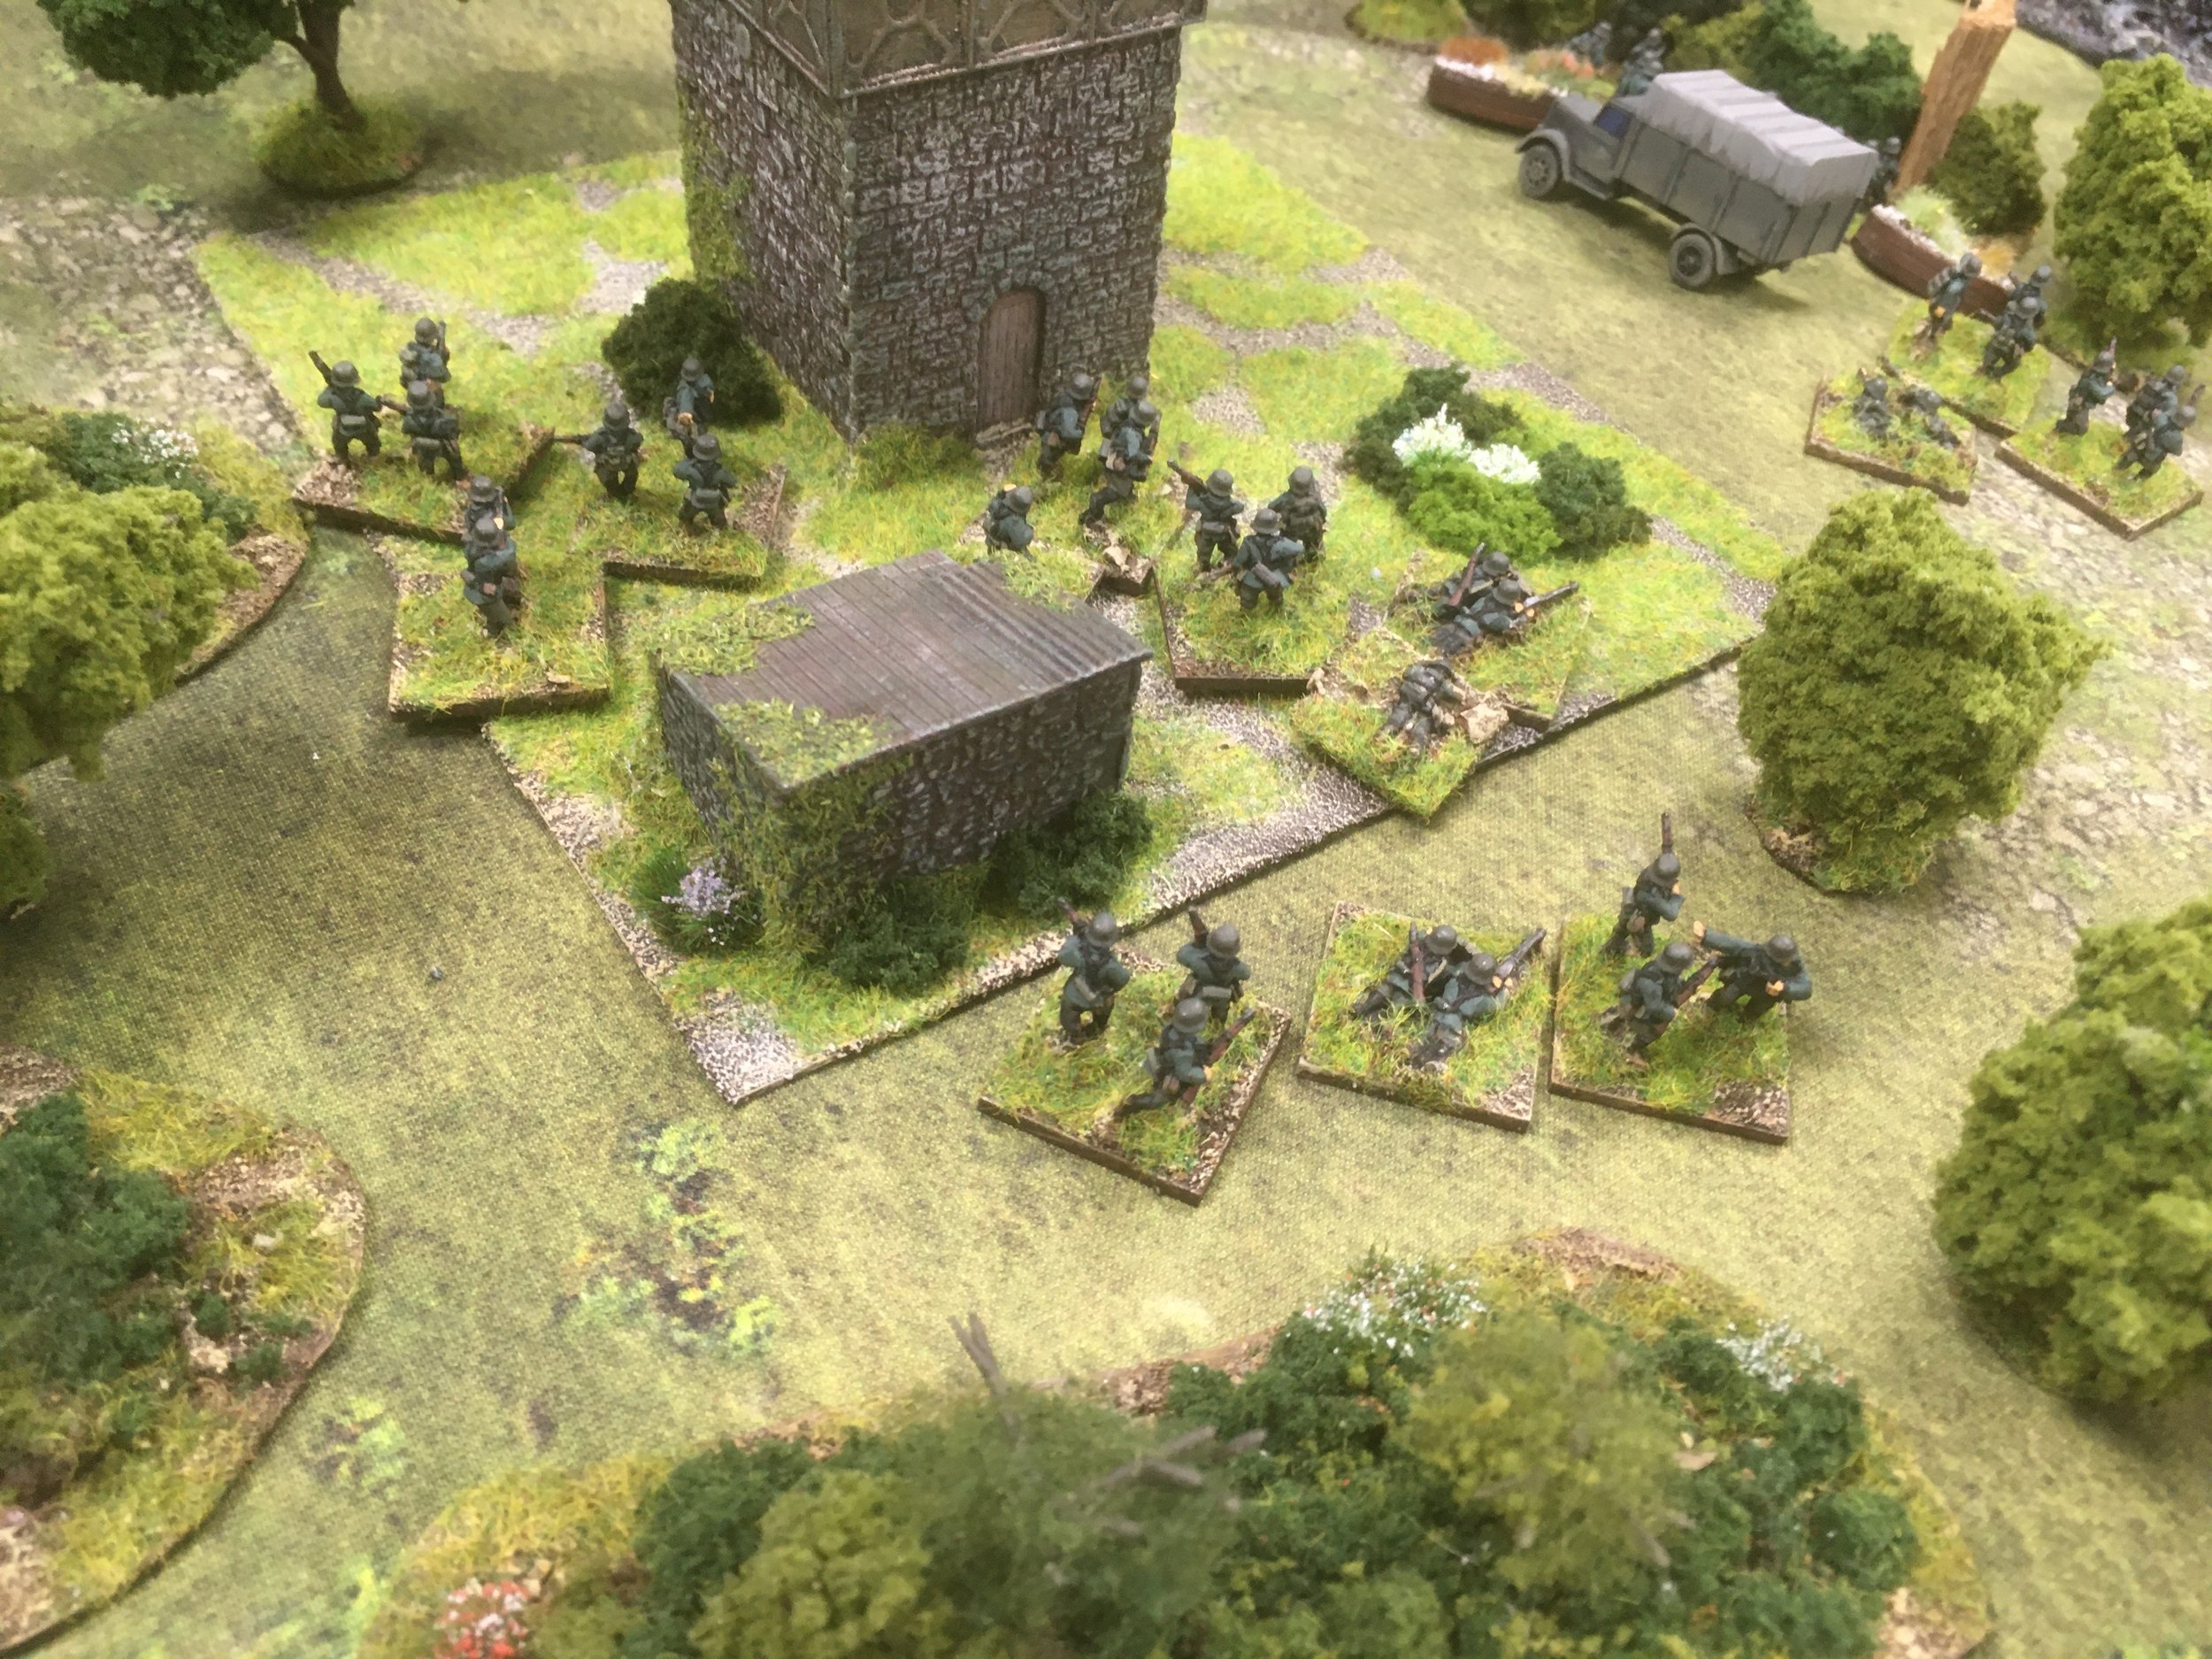
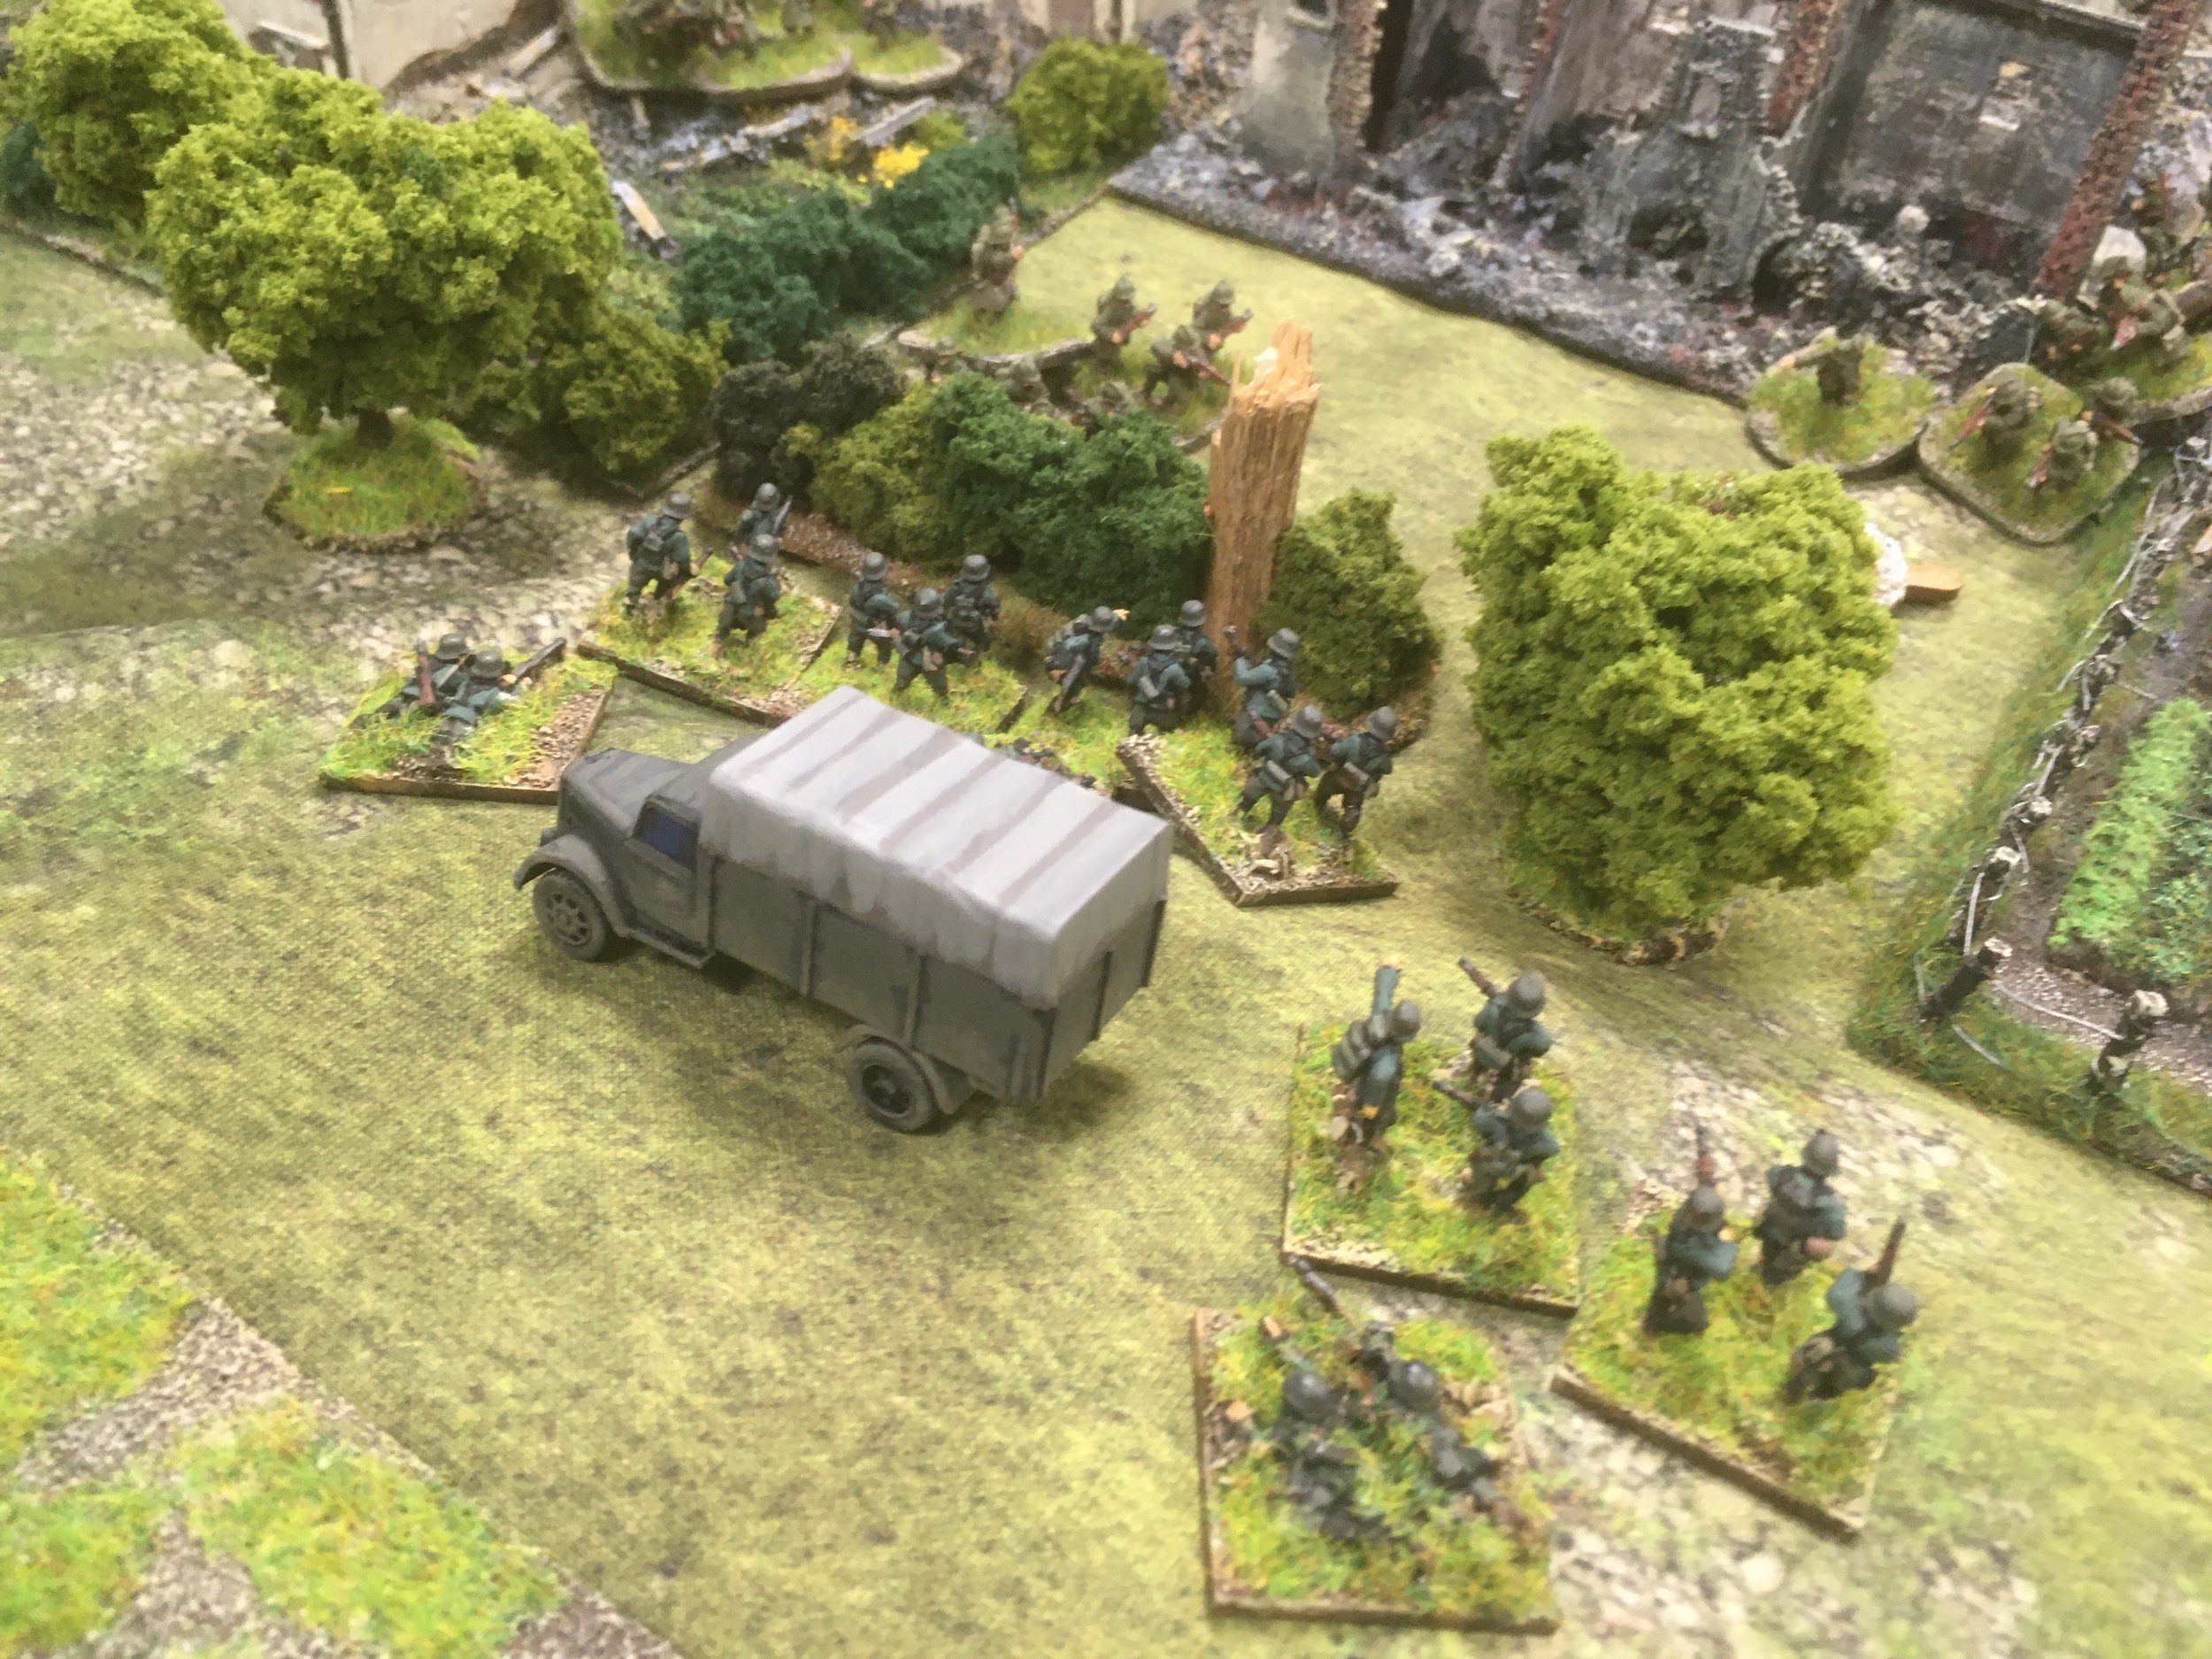
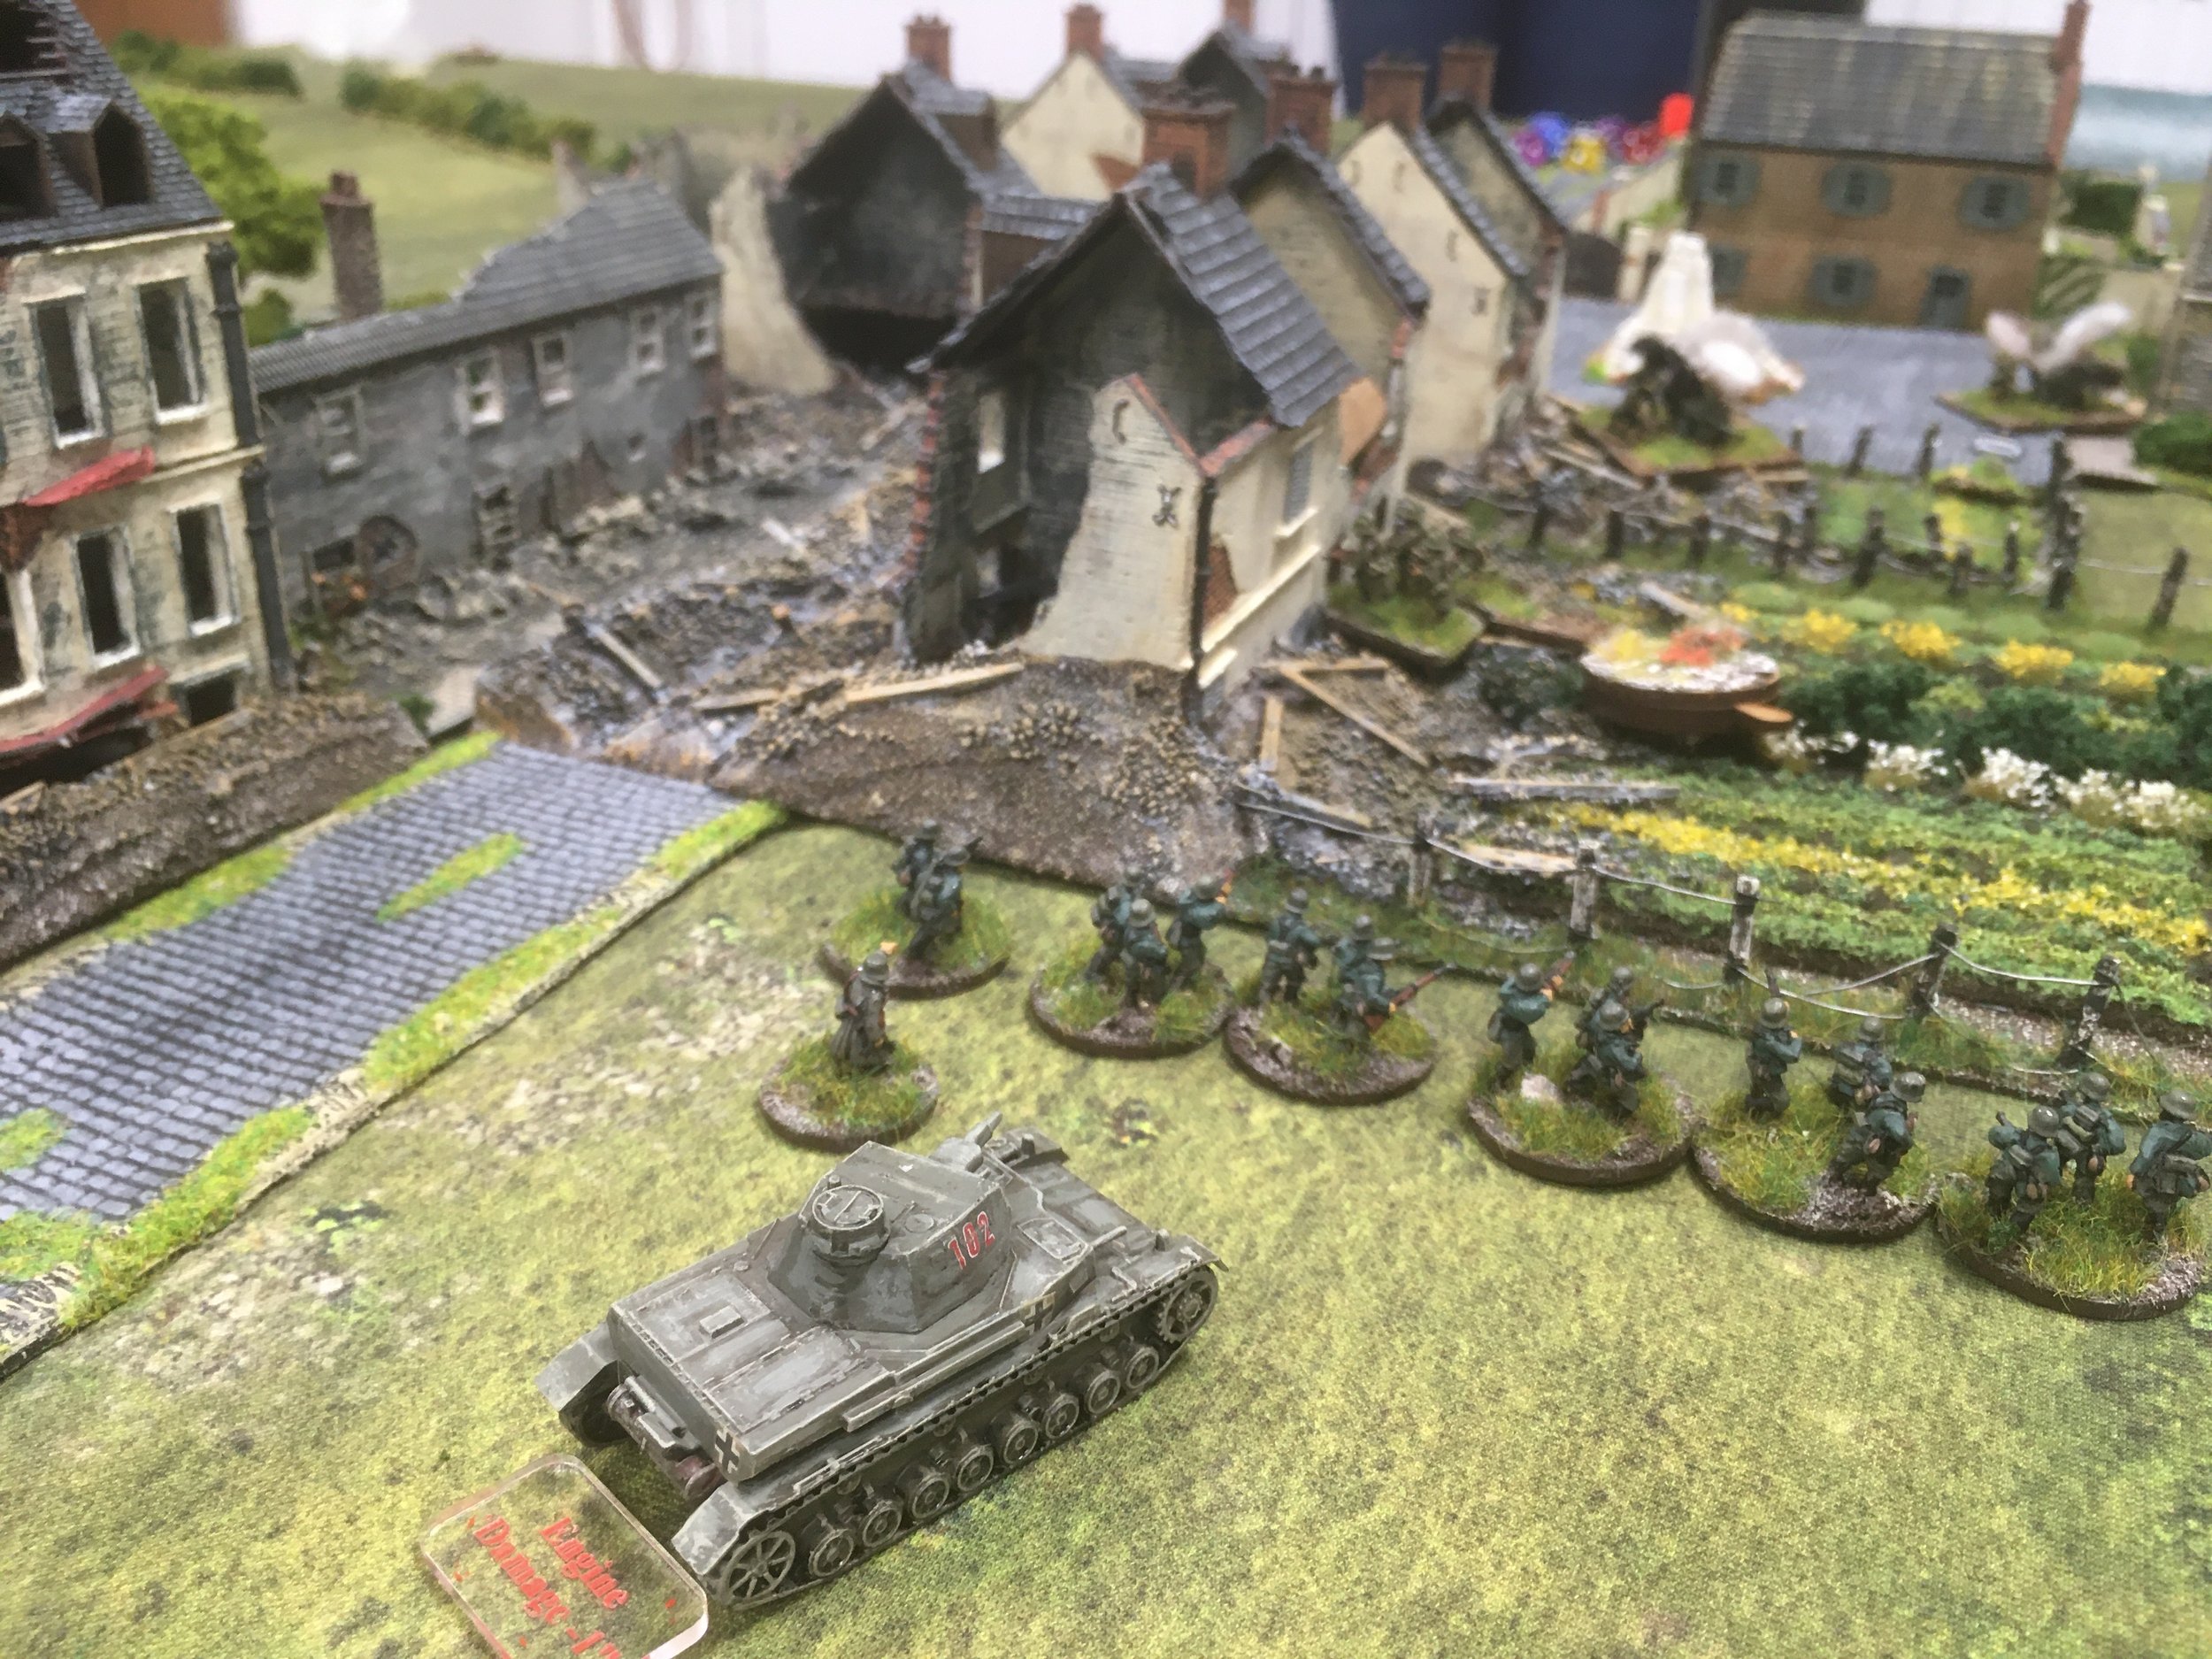
The next moves saw the German's take and occupy the barn and the adjacent fields to the north and south with their infantry.

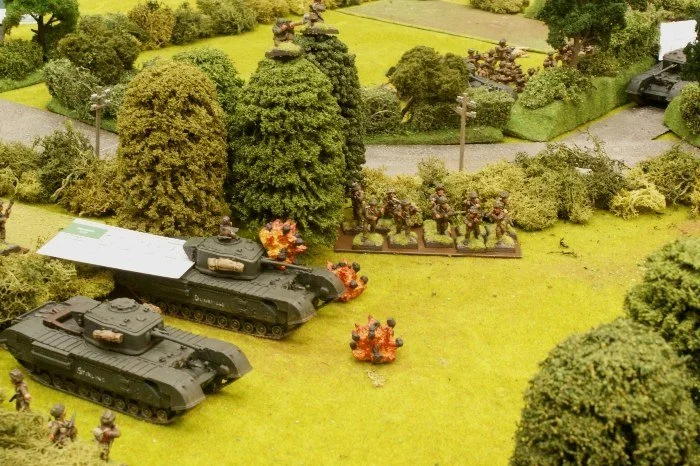
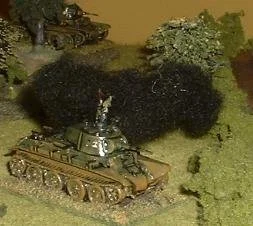
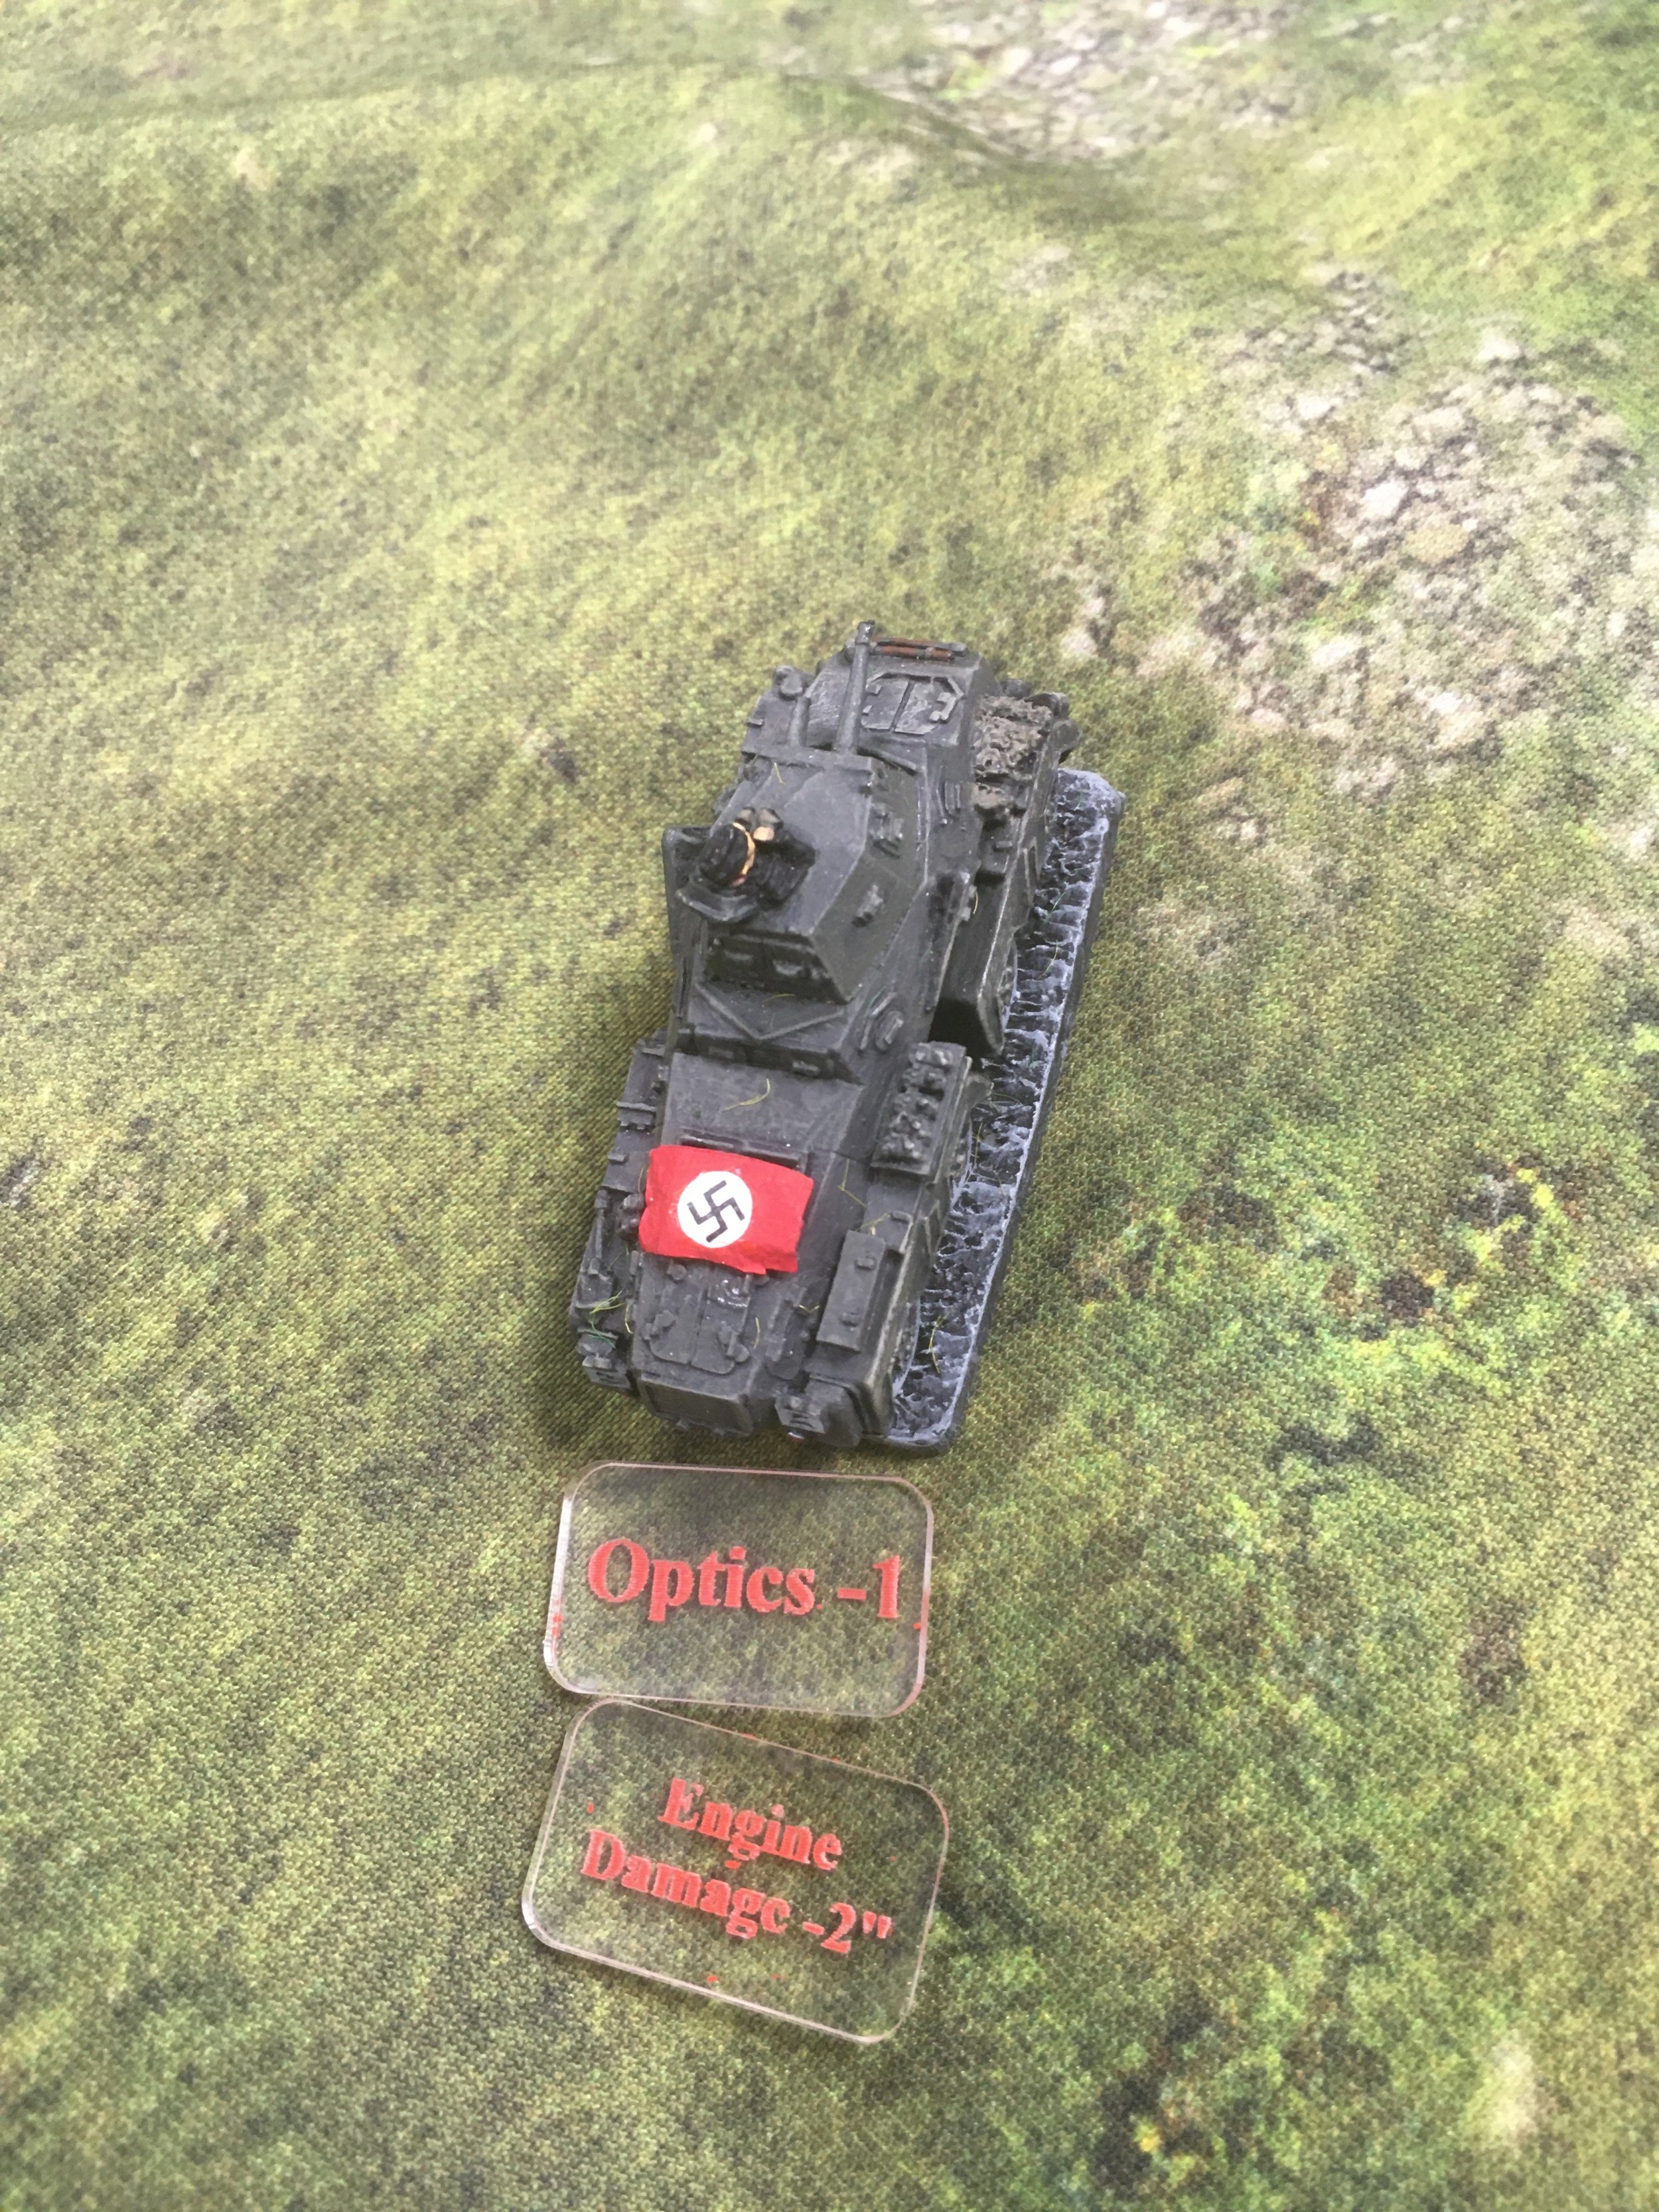
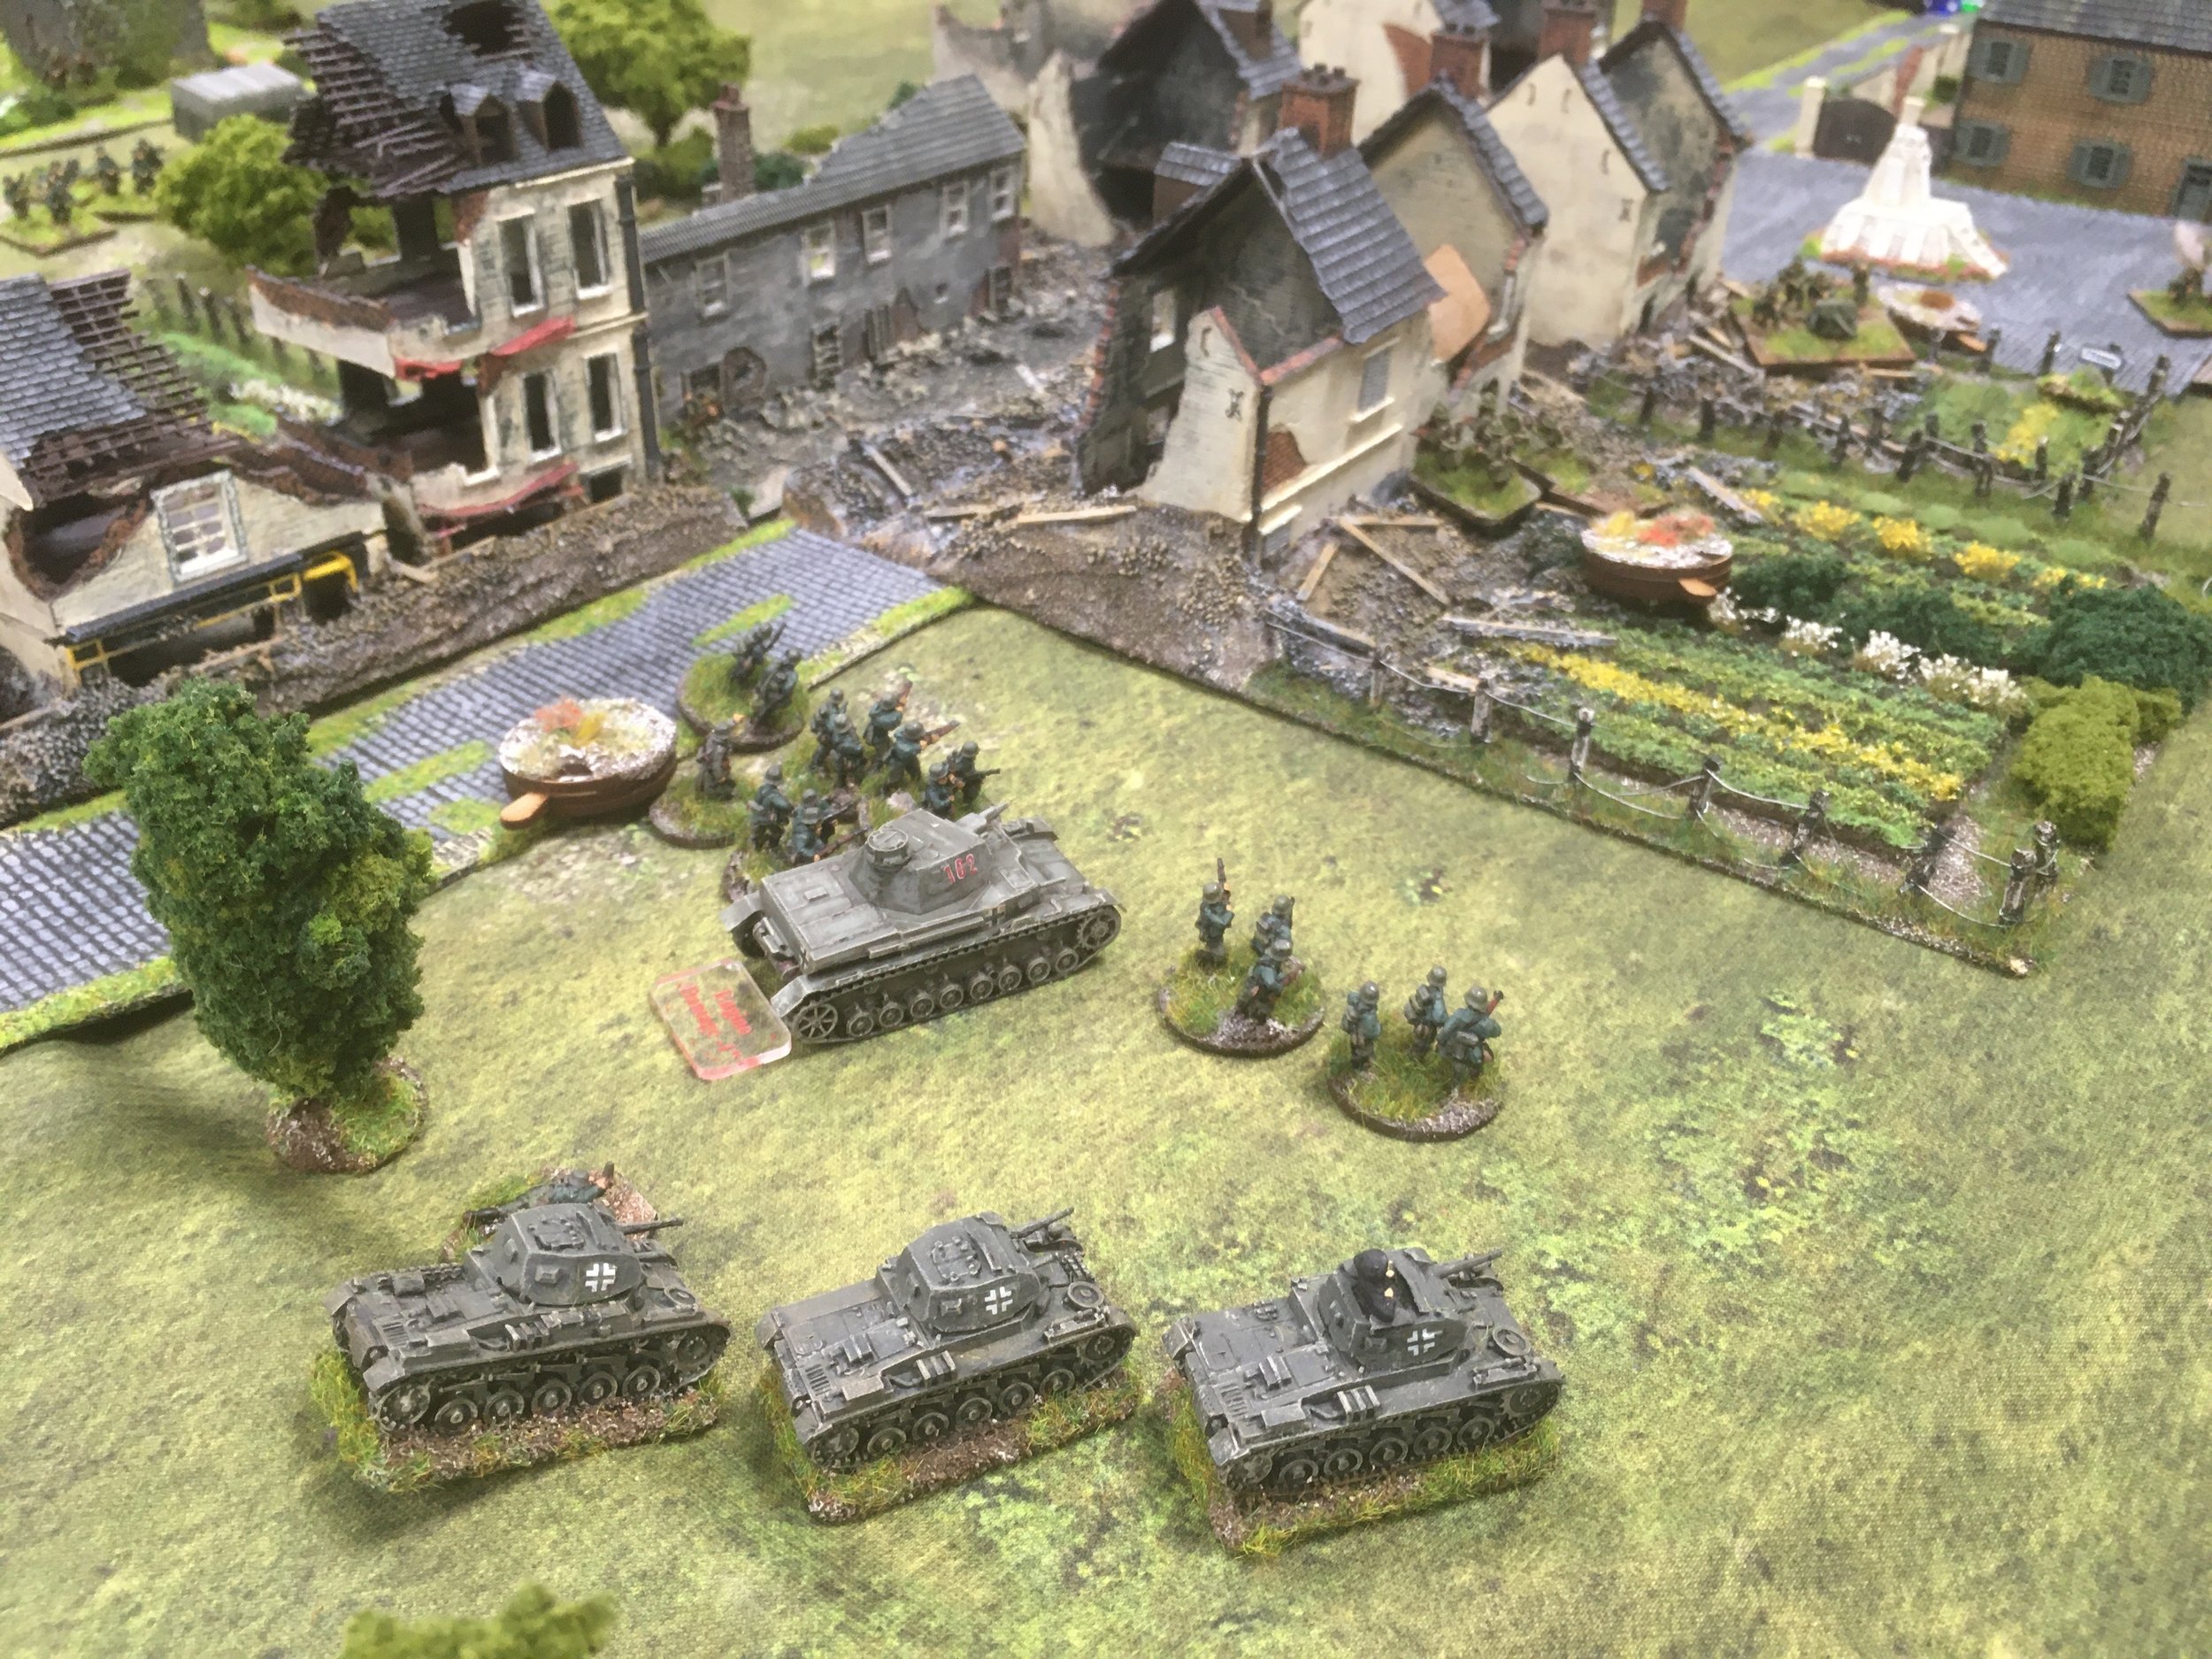
The Panzer IIIs, using their Veteran status and Big Men advantage plus their 'Blitzkrieg' movement managed to fire successfully on the move, knocked out two BT7's and forced the remaining one to retire with a turret jam and knocked out 45mm main gun. Disastrous - it was down to my infantry now.

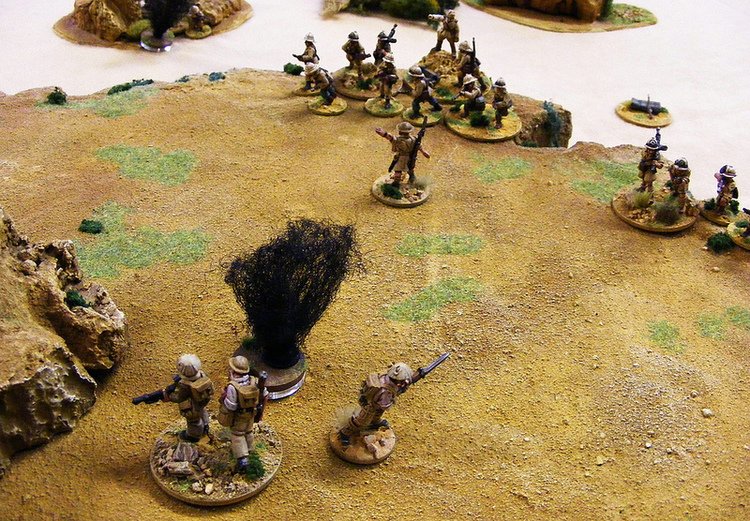
Just as things looked bad my Command BT7 appeared as a blind in the eastern woods. Max and Clivey, knowing me well suspected KV1's. The threat of the unknown blind, out of LOS worked wonders.

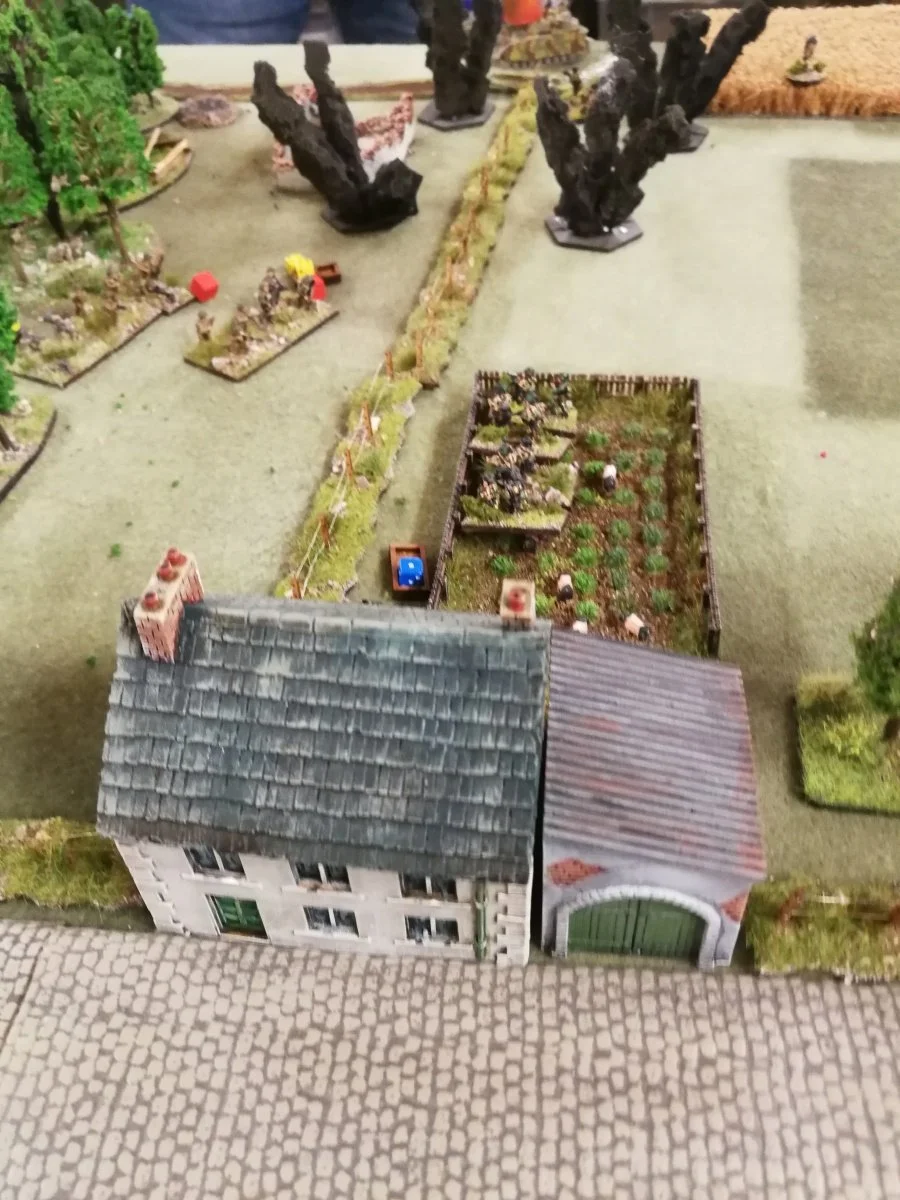
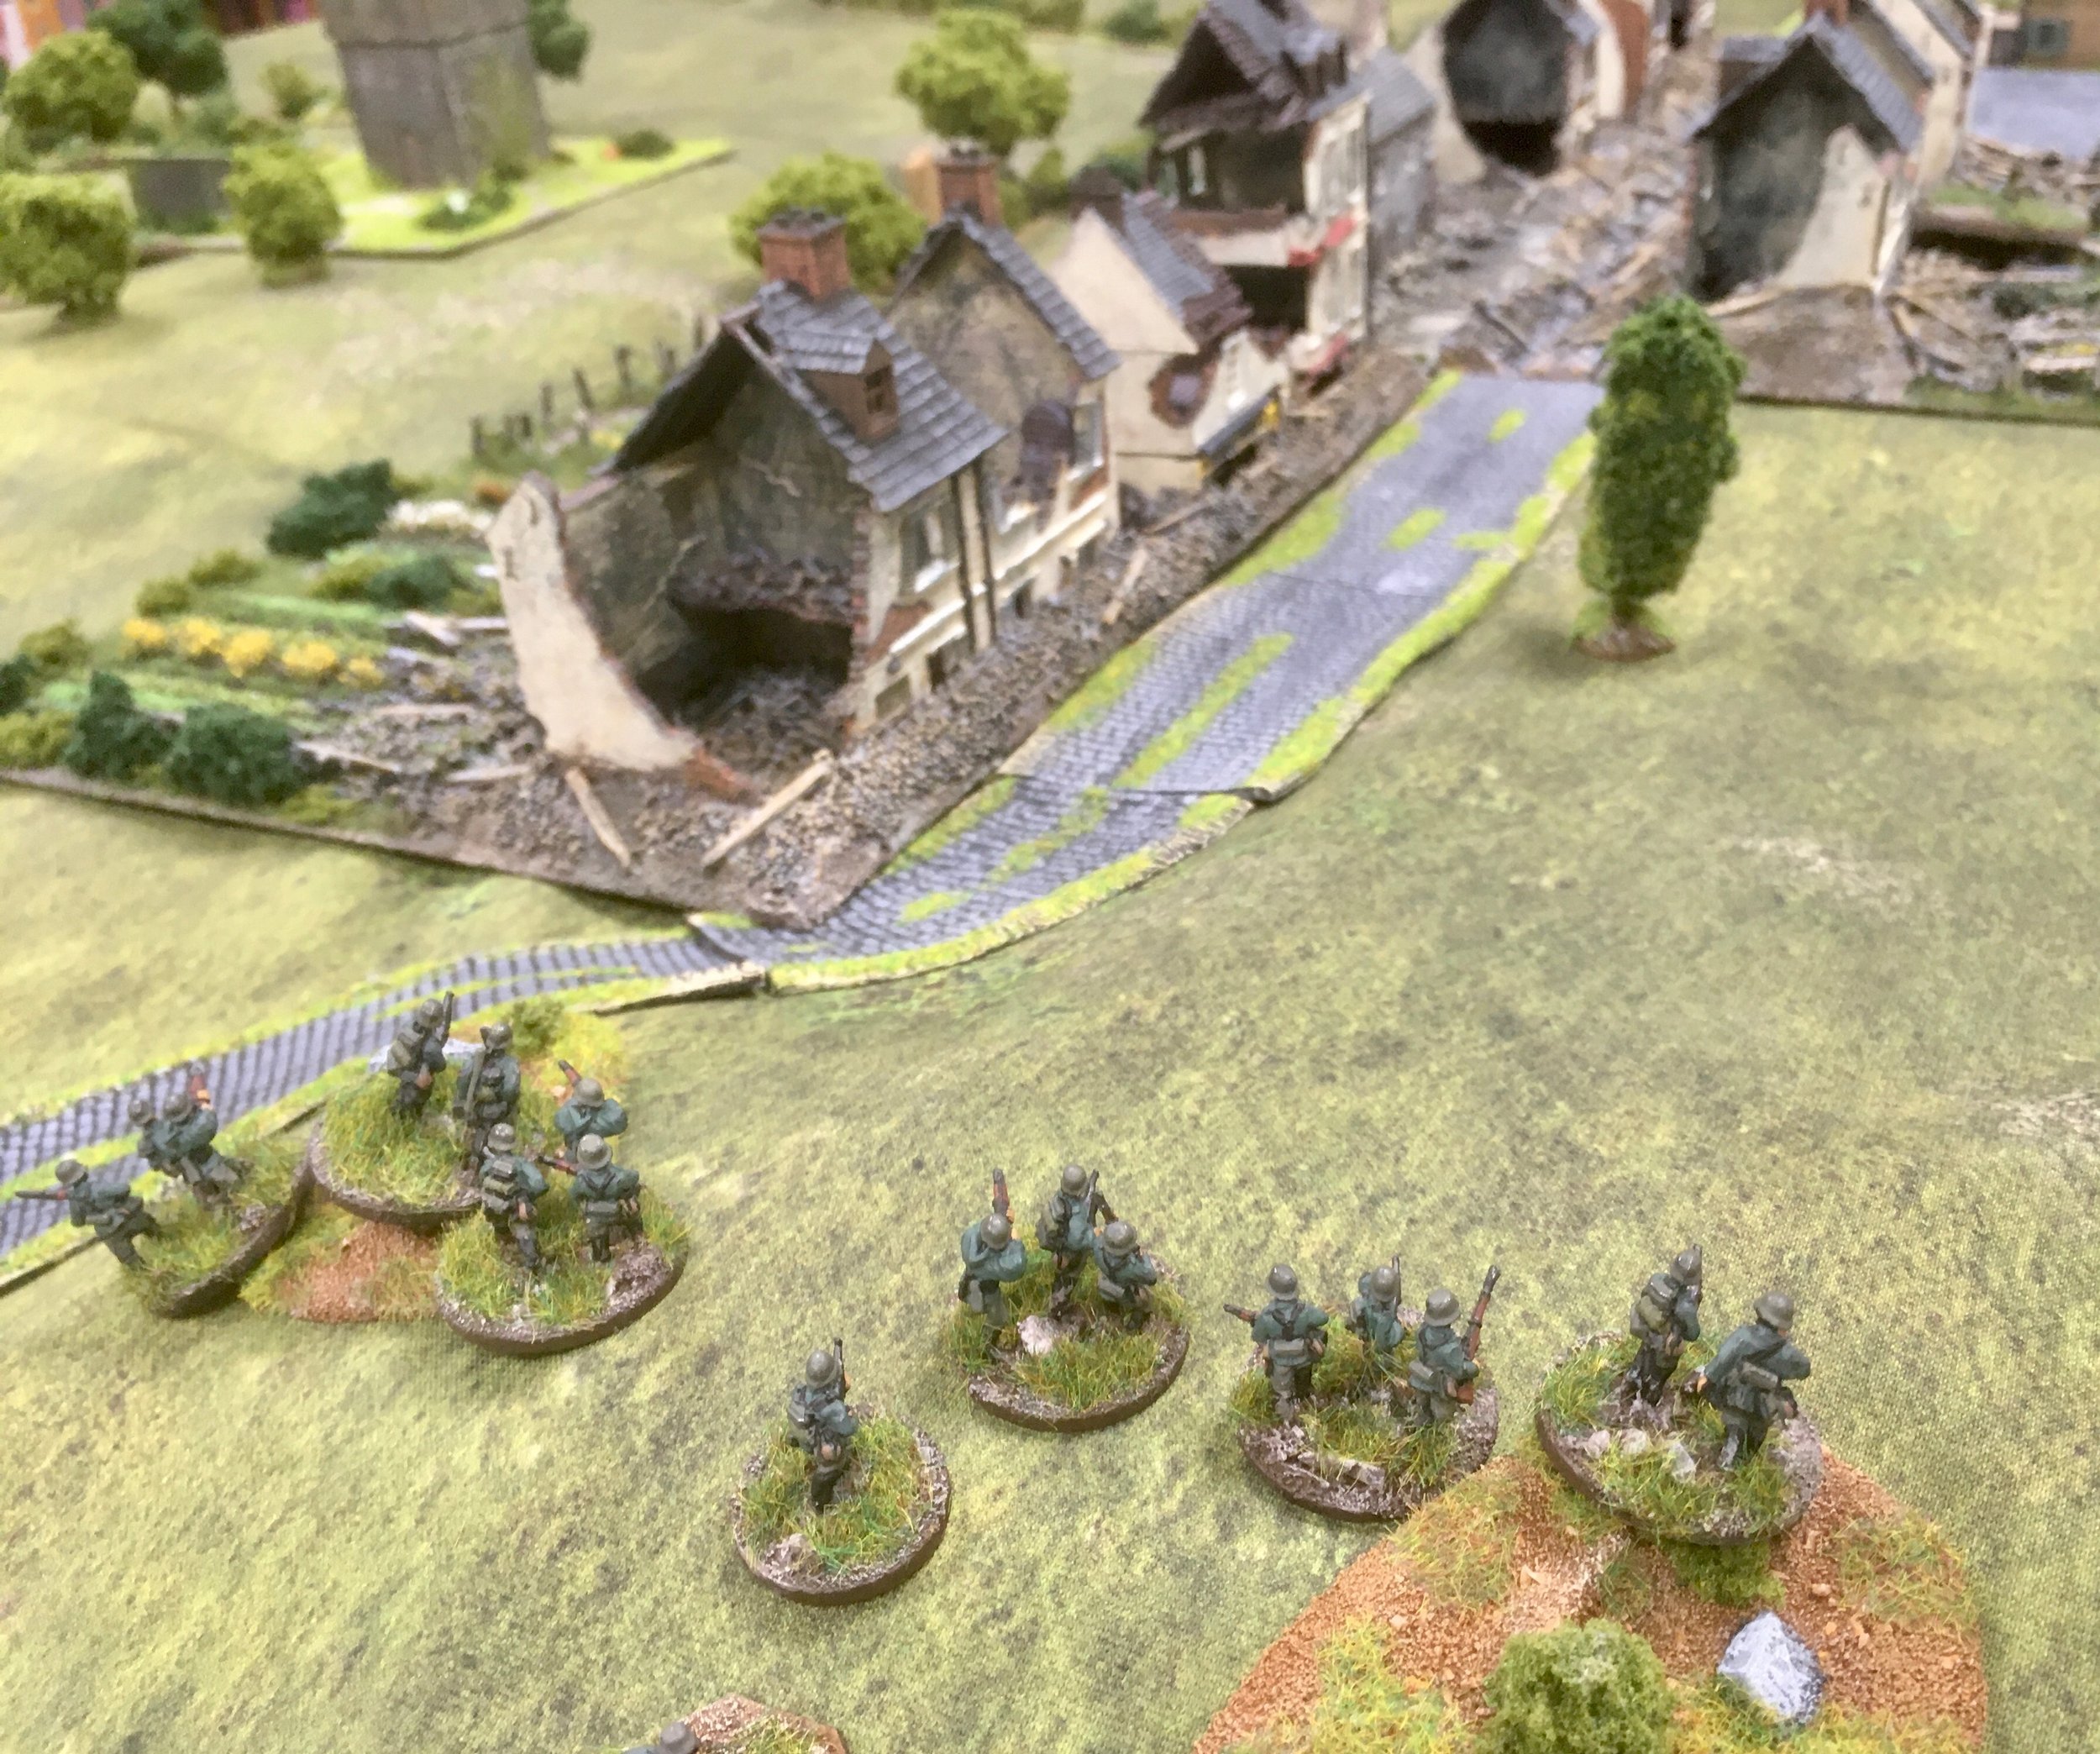
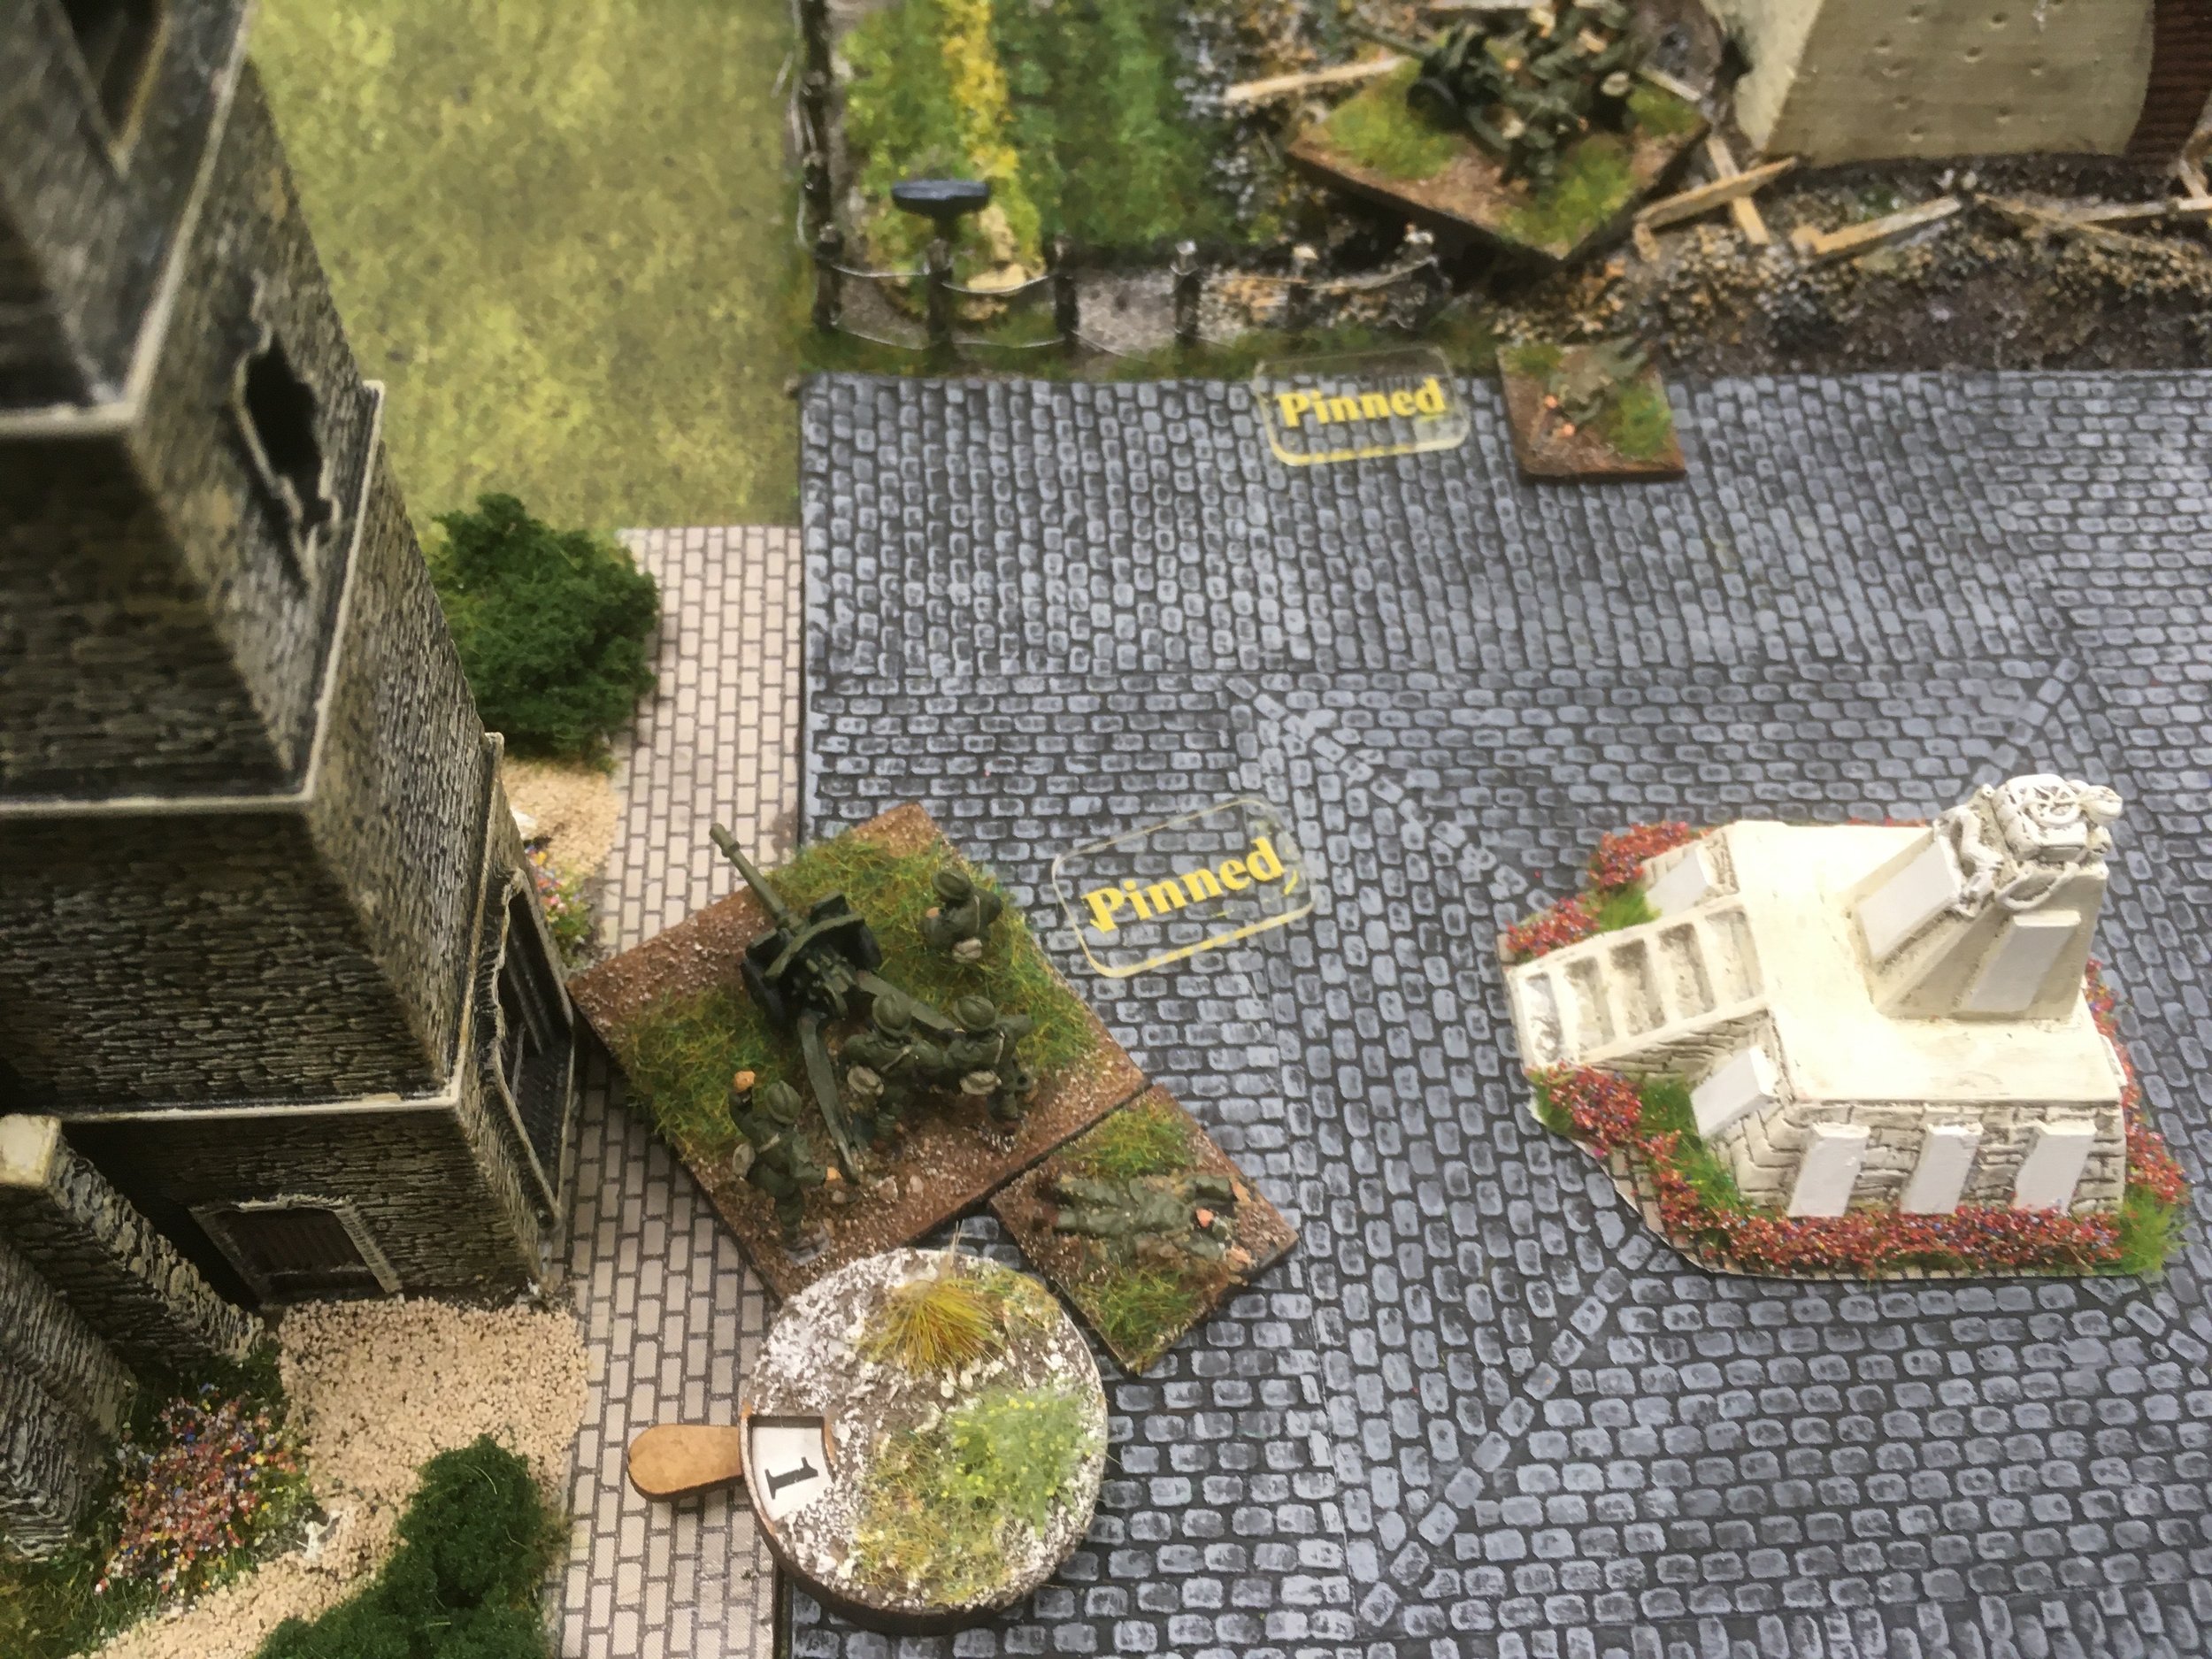
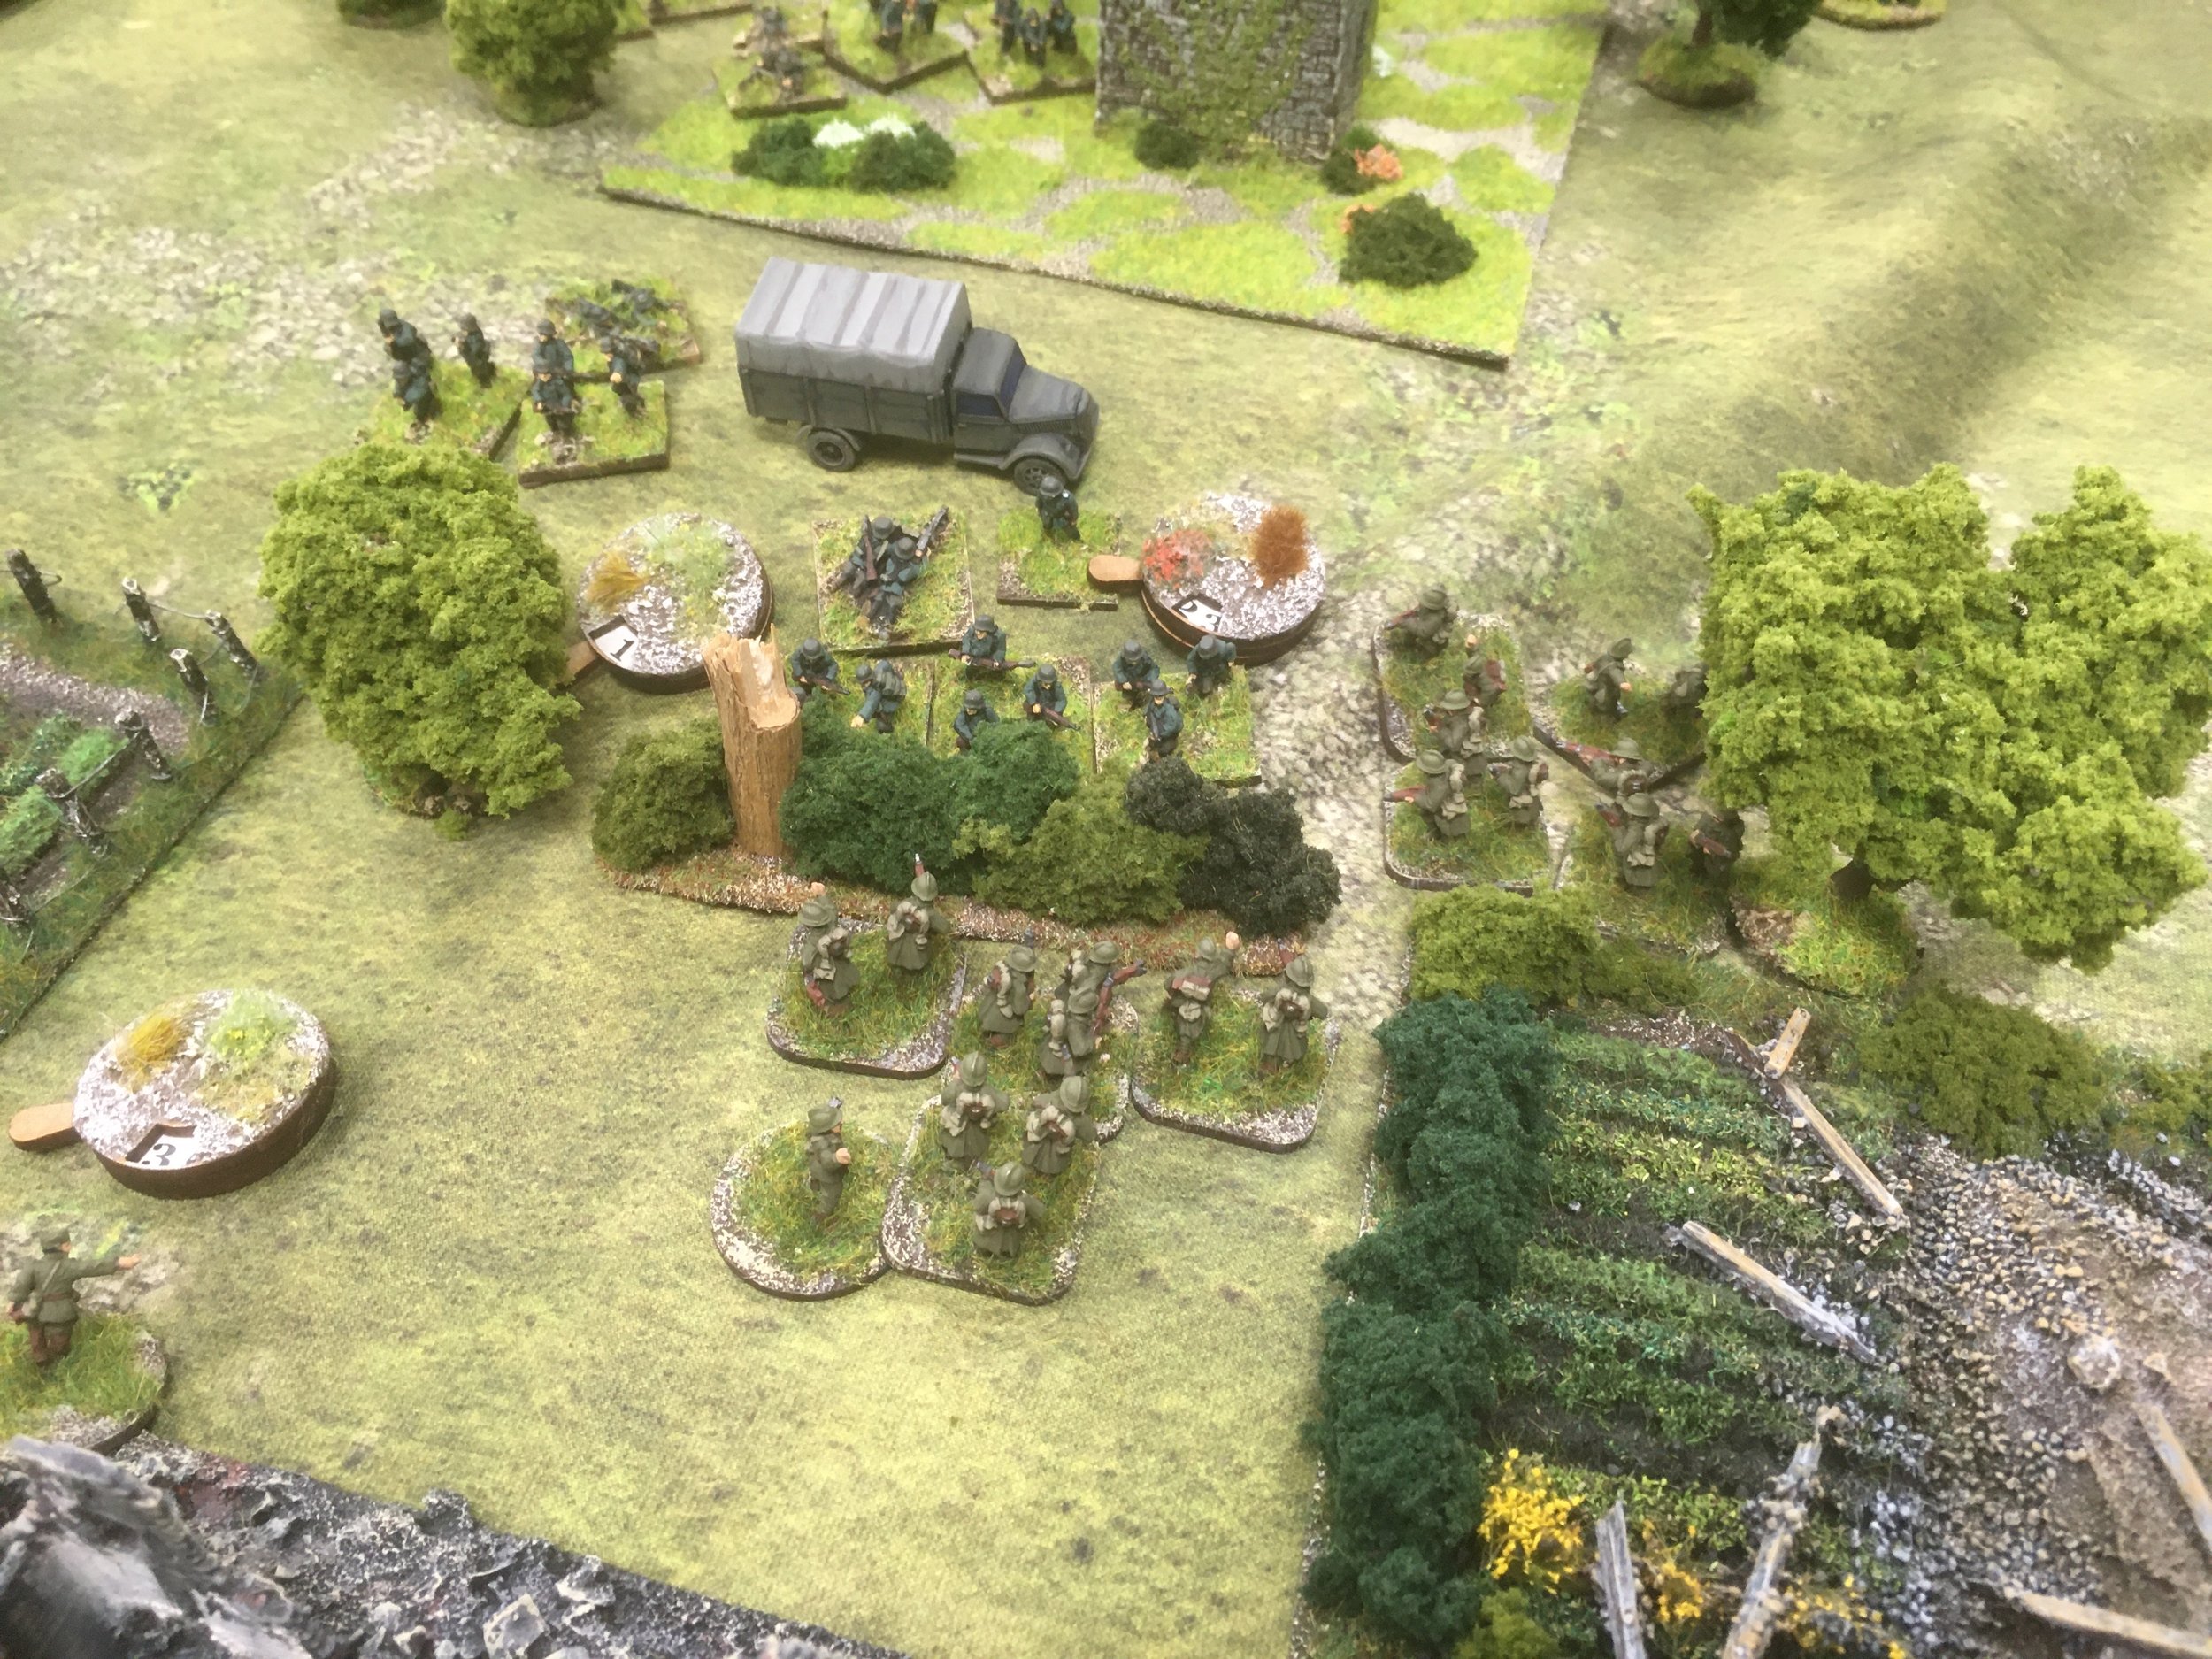
I moved an infantry Platoon blind into the cornfields near the house and my fake in the southern gully made a run for the barn through the fields making like more infantry.

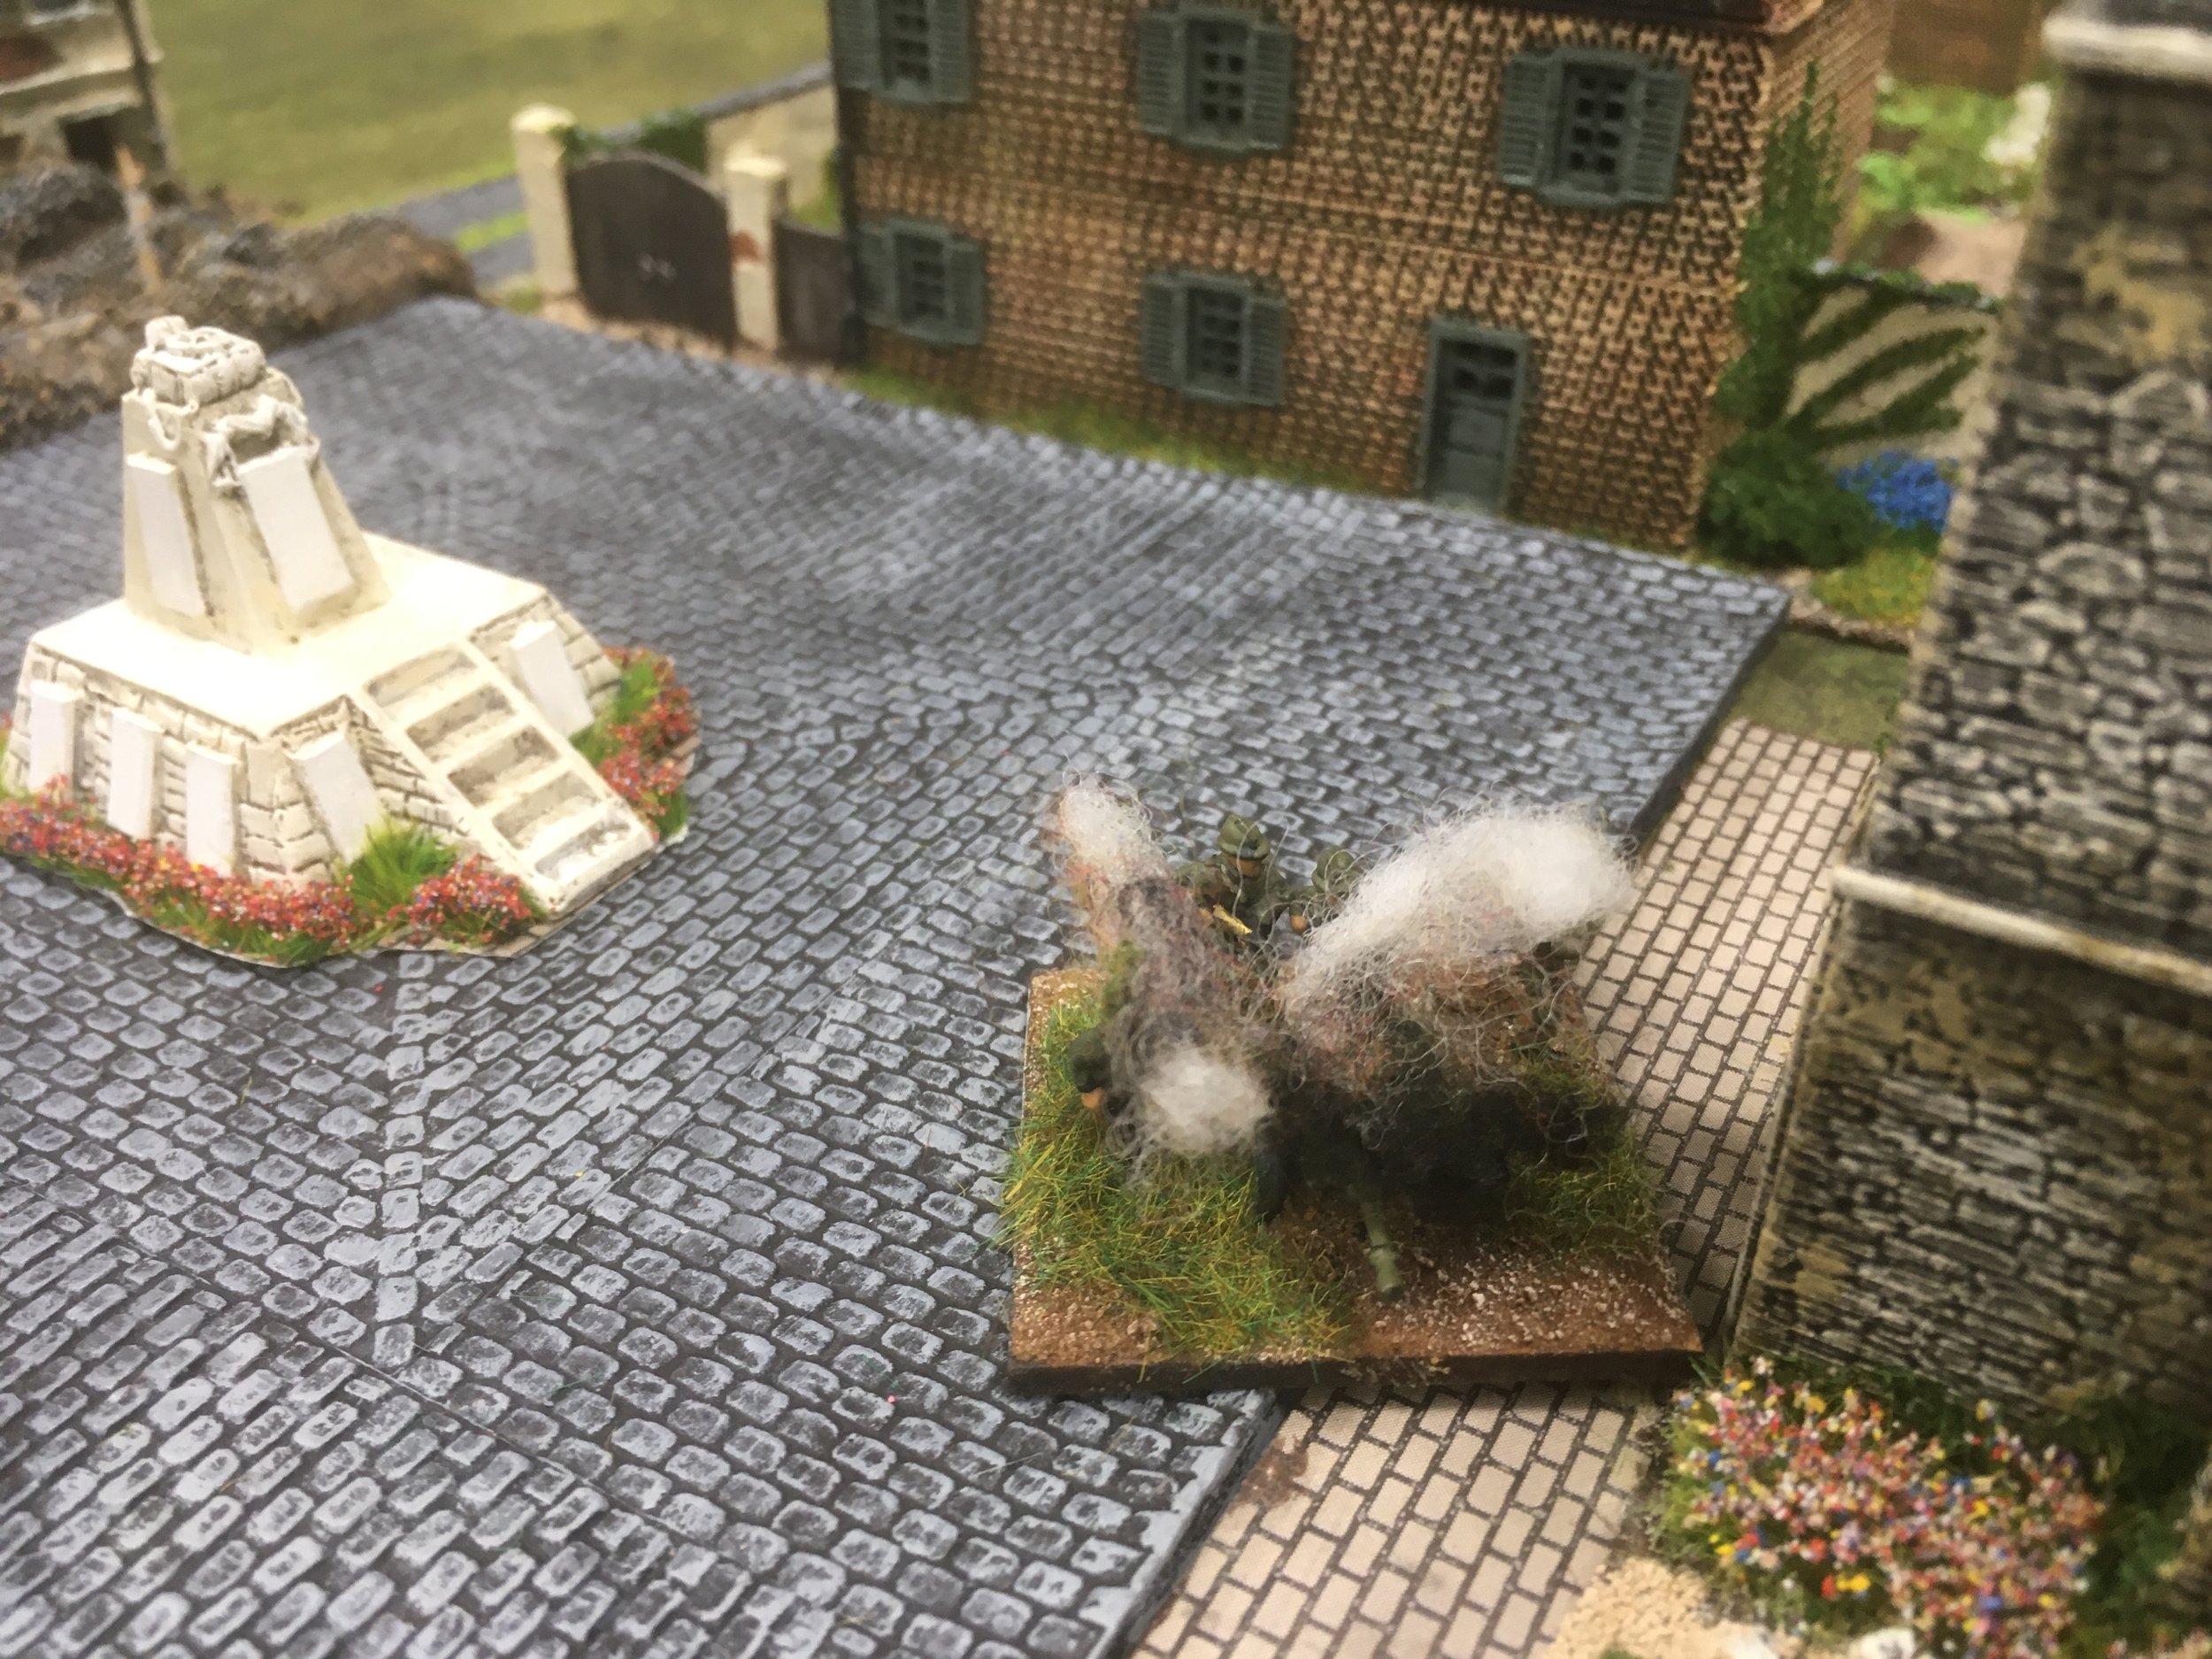
Next turn my fakes were spotted by the boys whose looks turned to horror as two BA10's turned up in the southern woods and machine gunned the infantry section hunkered down there into a red ruin. I decided to occupy the gully again, but this time with a genuine Platoon of infantry. My other Platoon advanced into the second gully, whilst the third remained undetected behind the house in the woods.

The game degenerated into what only can be termed a helluva scrap. Under IABSM Soviet infantry are unpredictable. They have a very good tank killing capacity plus using the 'Uhraiee' card can get really nasty and assault when you least expect it. Their firing is not to hot though as they are only in possession of two initiative dice.

Net result is that German players get really nervous when playing against Ivan.

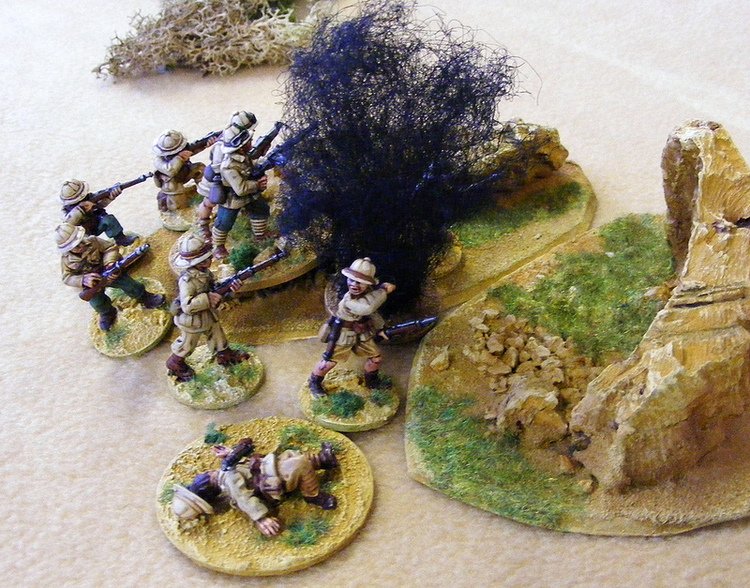
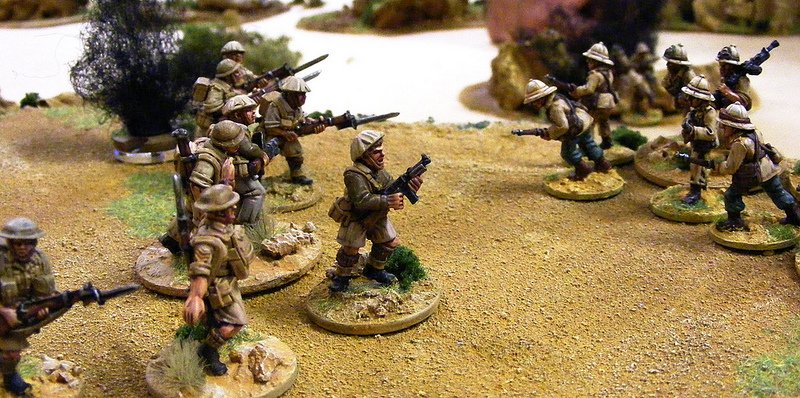
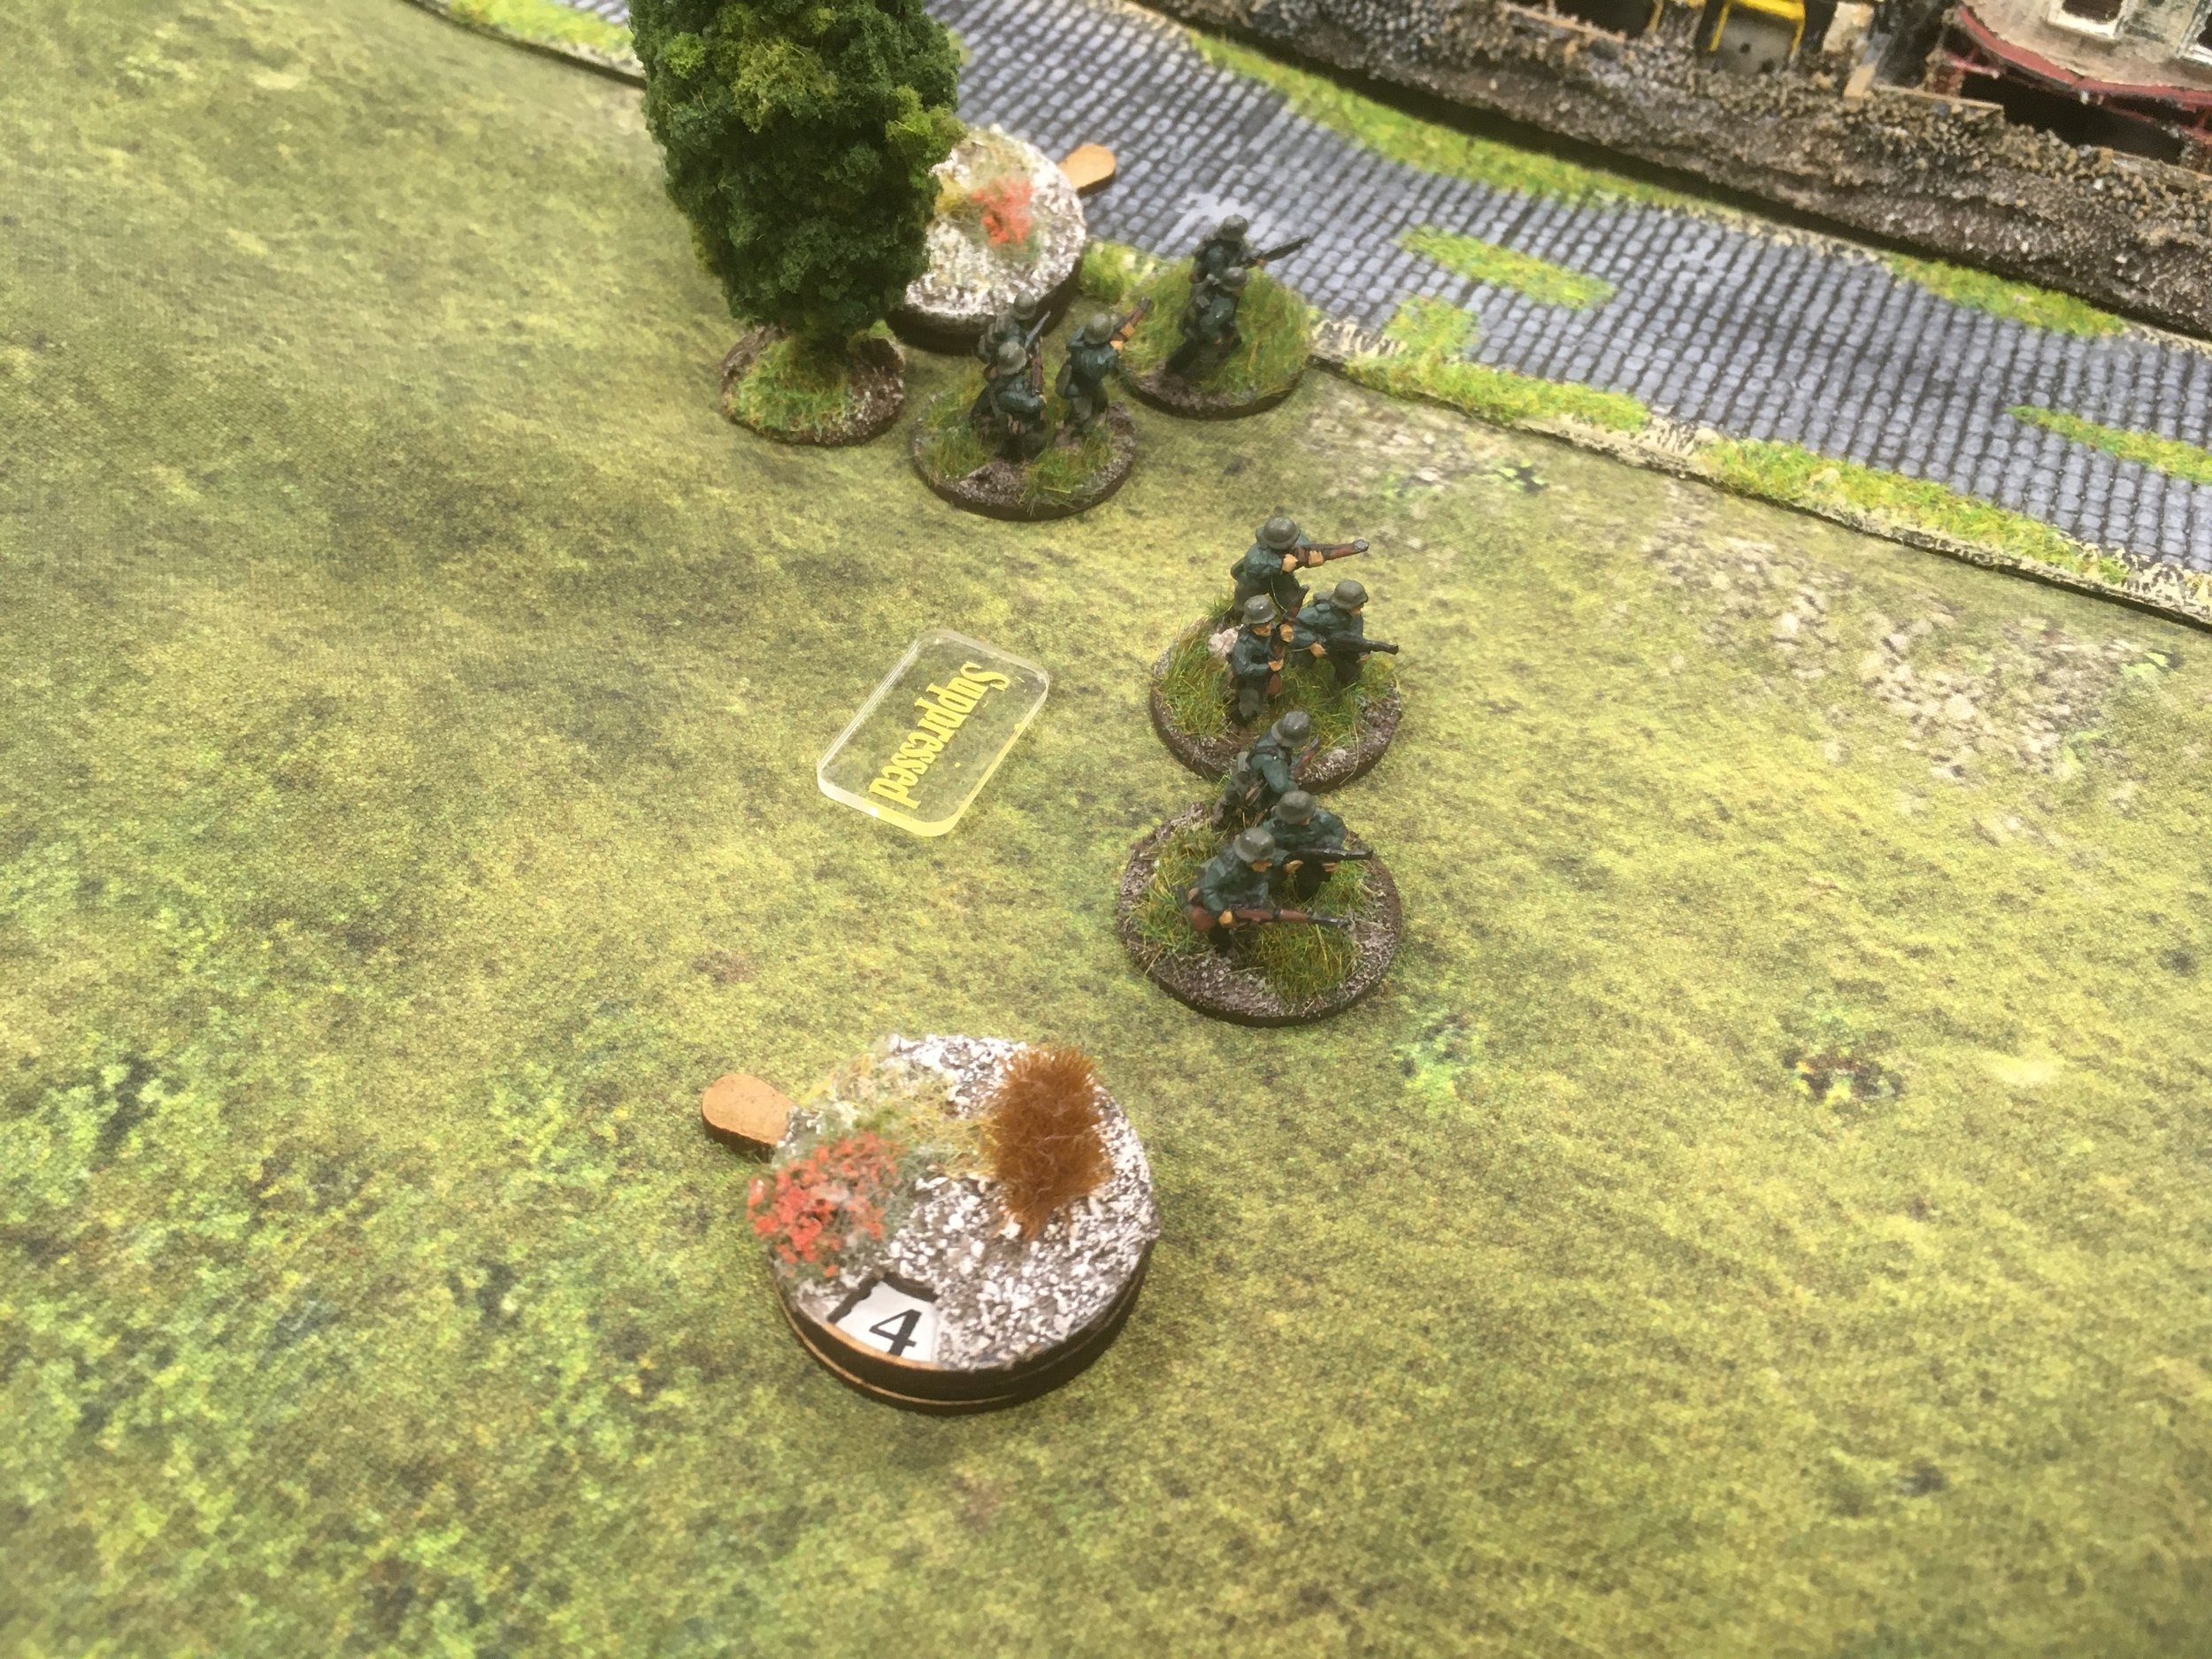
I decided that if I laid off the German's, their halftrack MG's would crucify me. Time was on my side as the German's had been held up by my reinforcements appearance. I rushed into the assault from the gully. Three Soviet squads Vs one German squad plus an MMG from a halftrack.

I lost heavily and was forced to retreat. As the boys Identified another Platoon in the gully I decided to reserve my dice making it difficult for them to advance upon me. As the position was shielded by crops. There was a stand-off here as the supporting Panzer IIs held their dice preventing me from moving either.

In the centre my infantry Platoon was down to 25%.

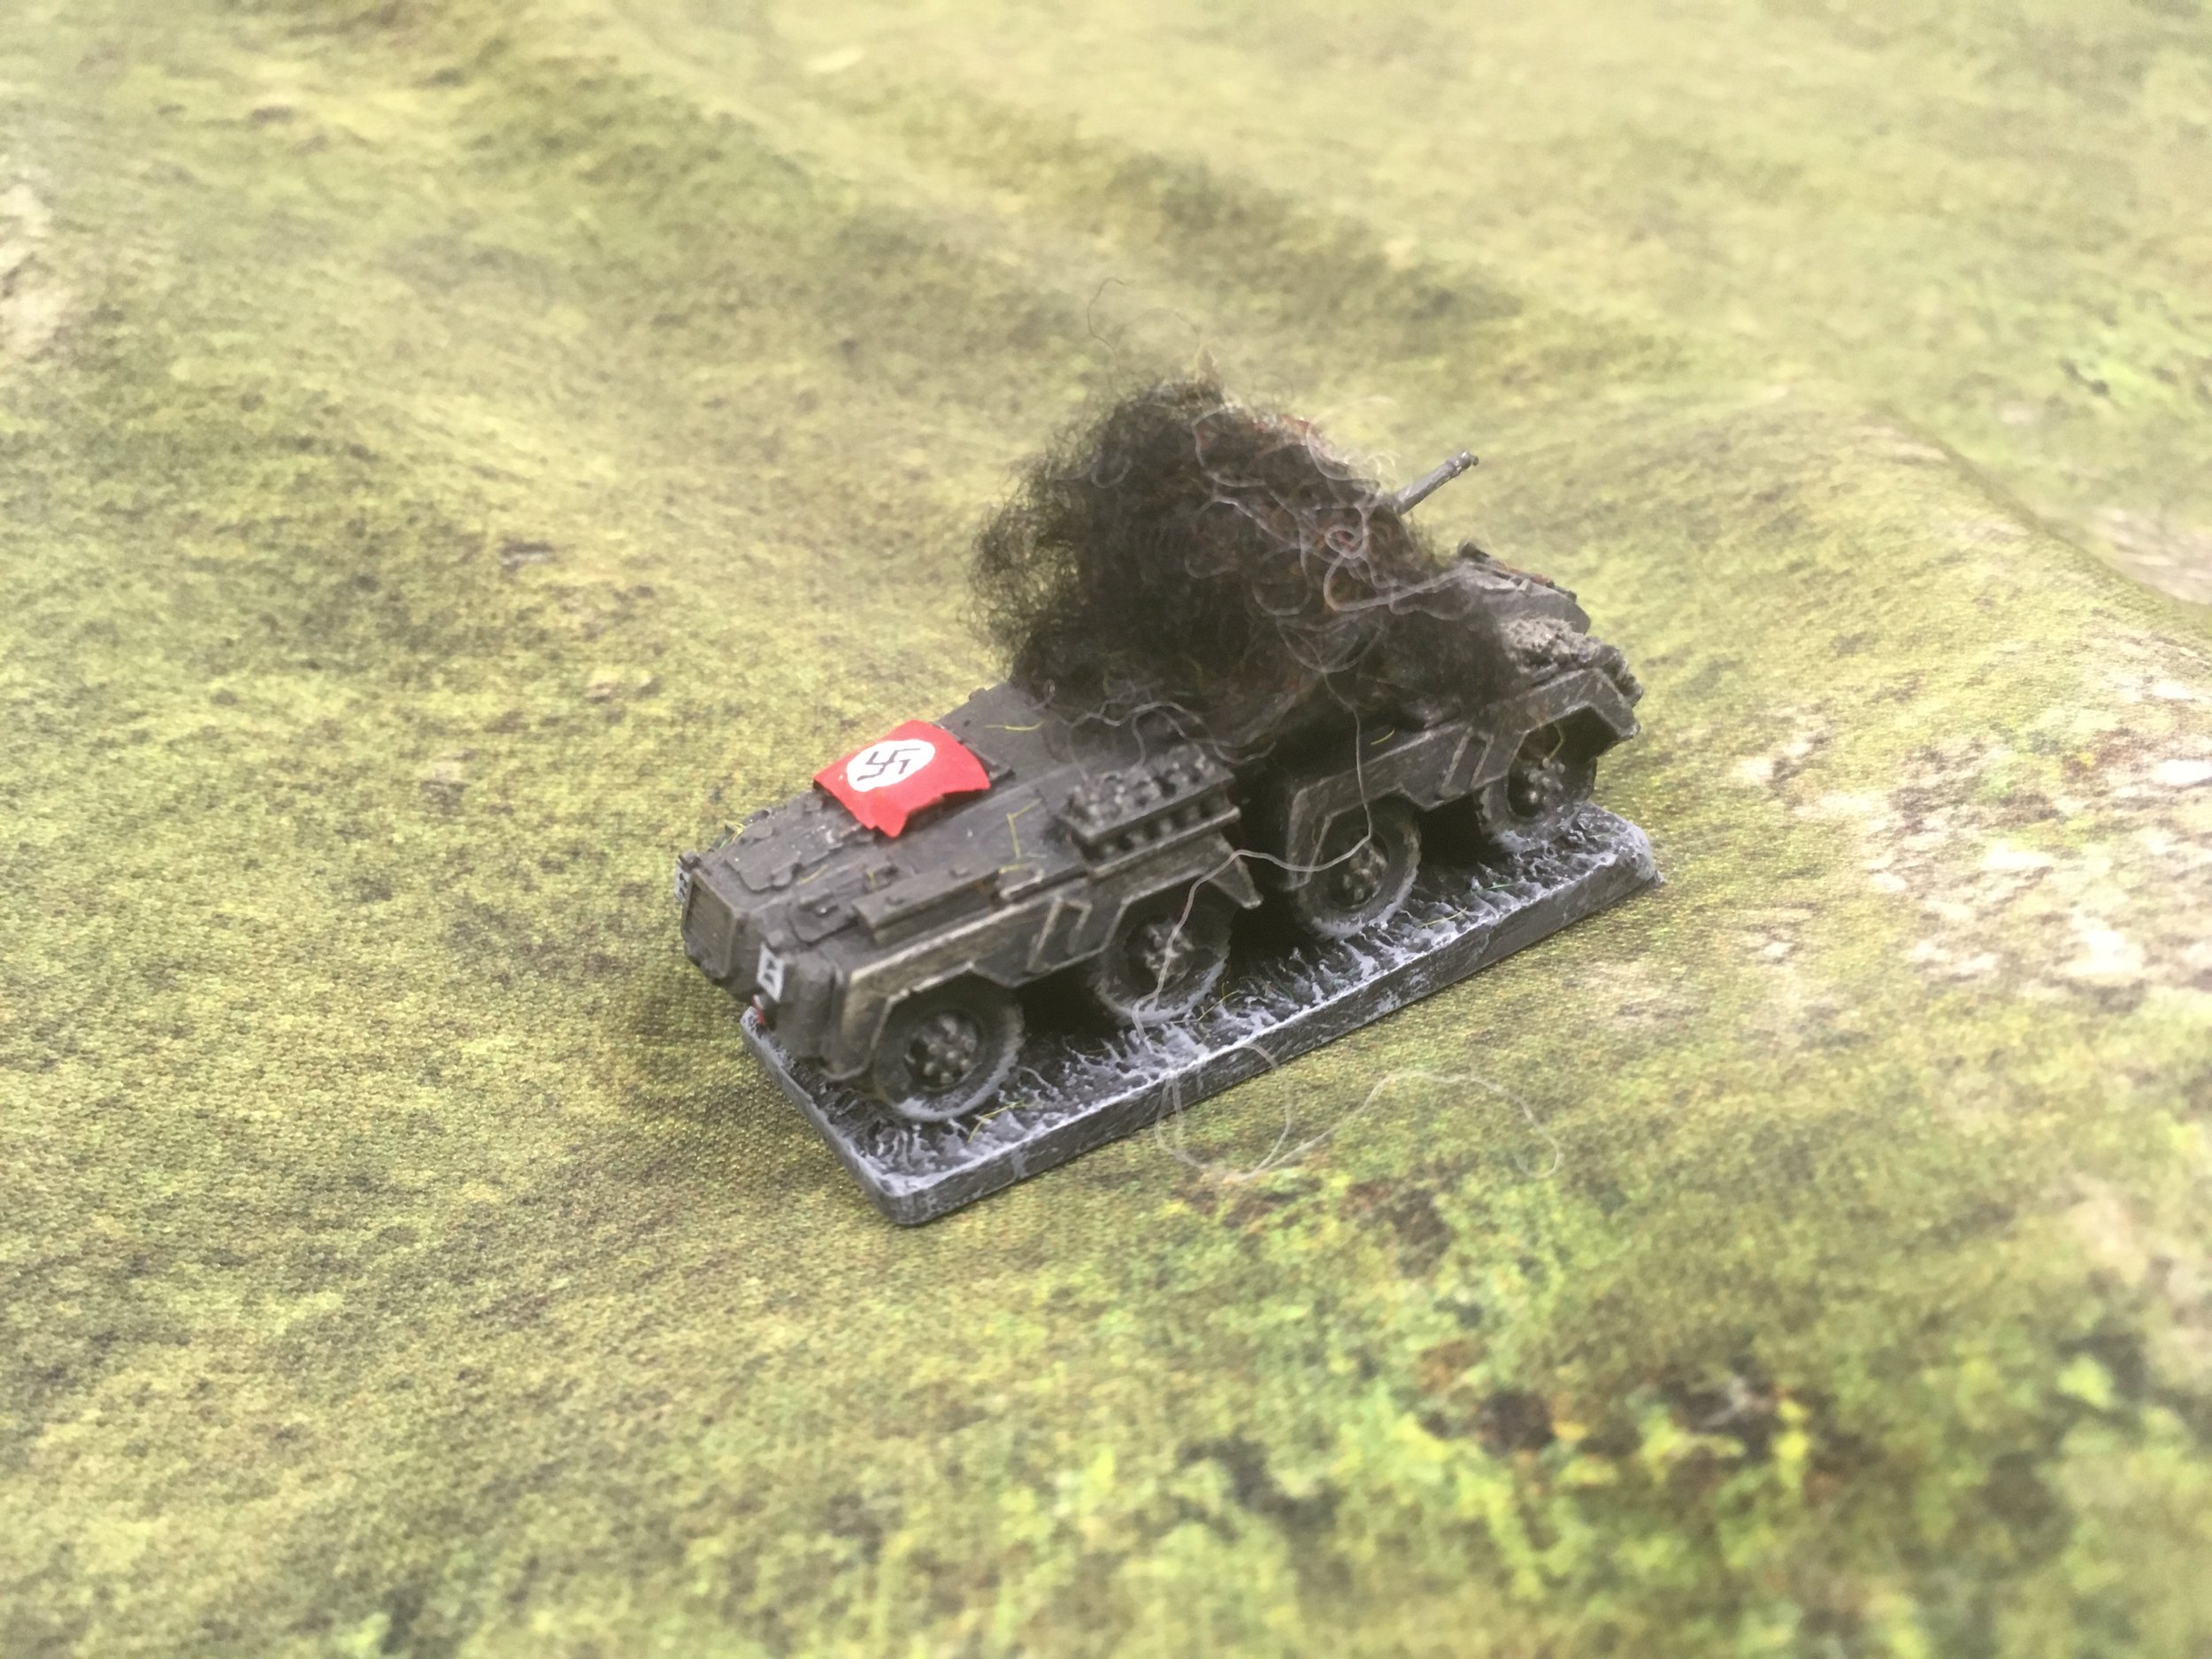
Panzer IIIs and 37mm Halftrack had also knocked out both BA10's although I did hit and destroy one Pz III with a rear shot.

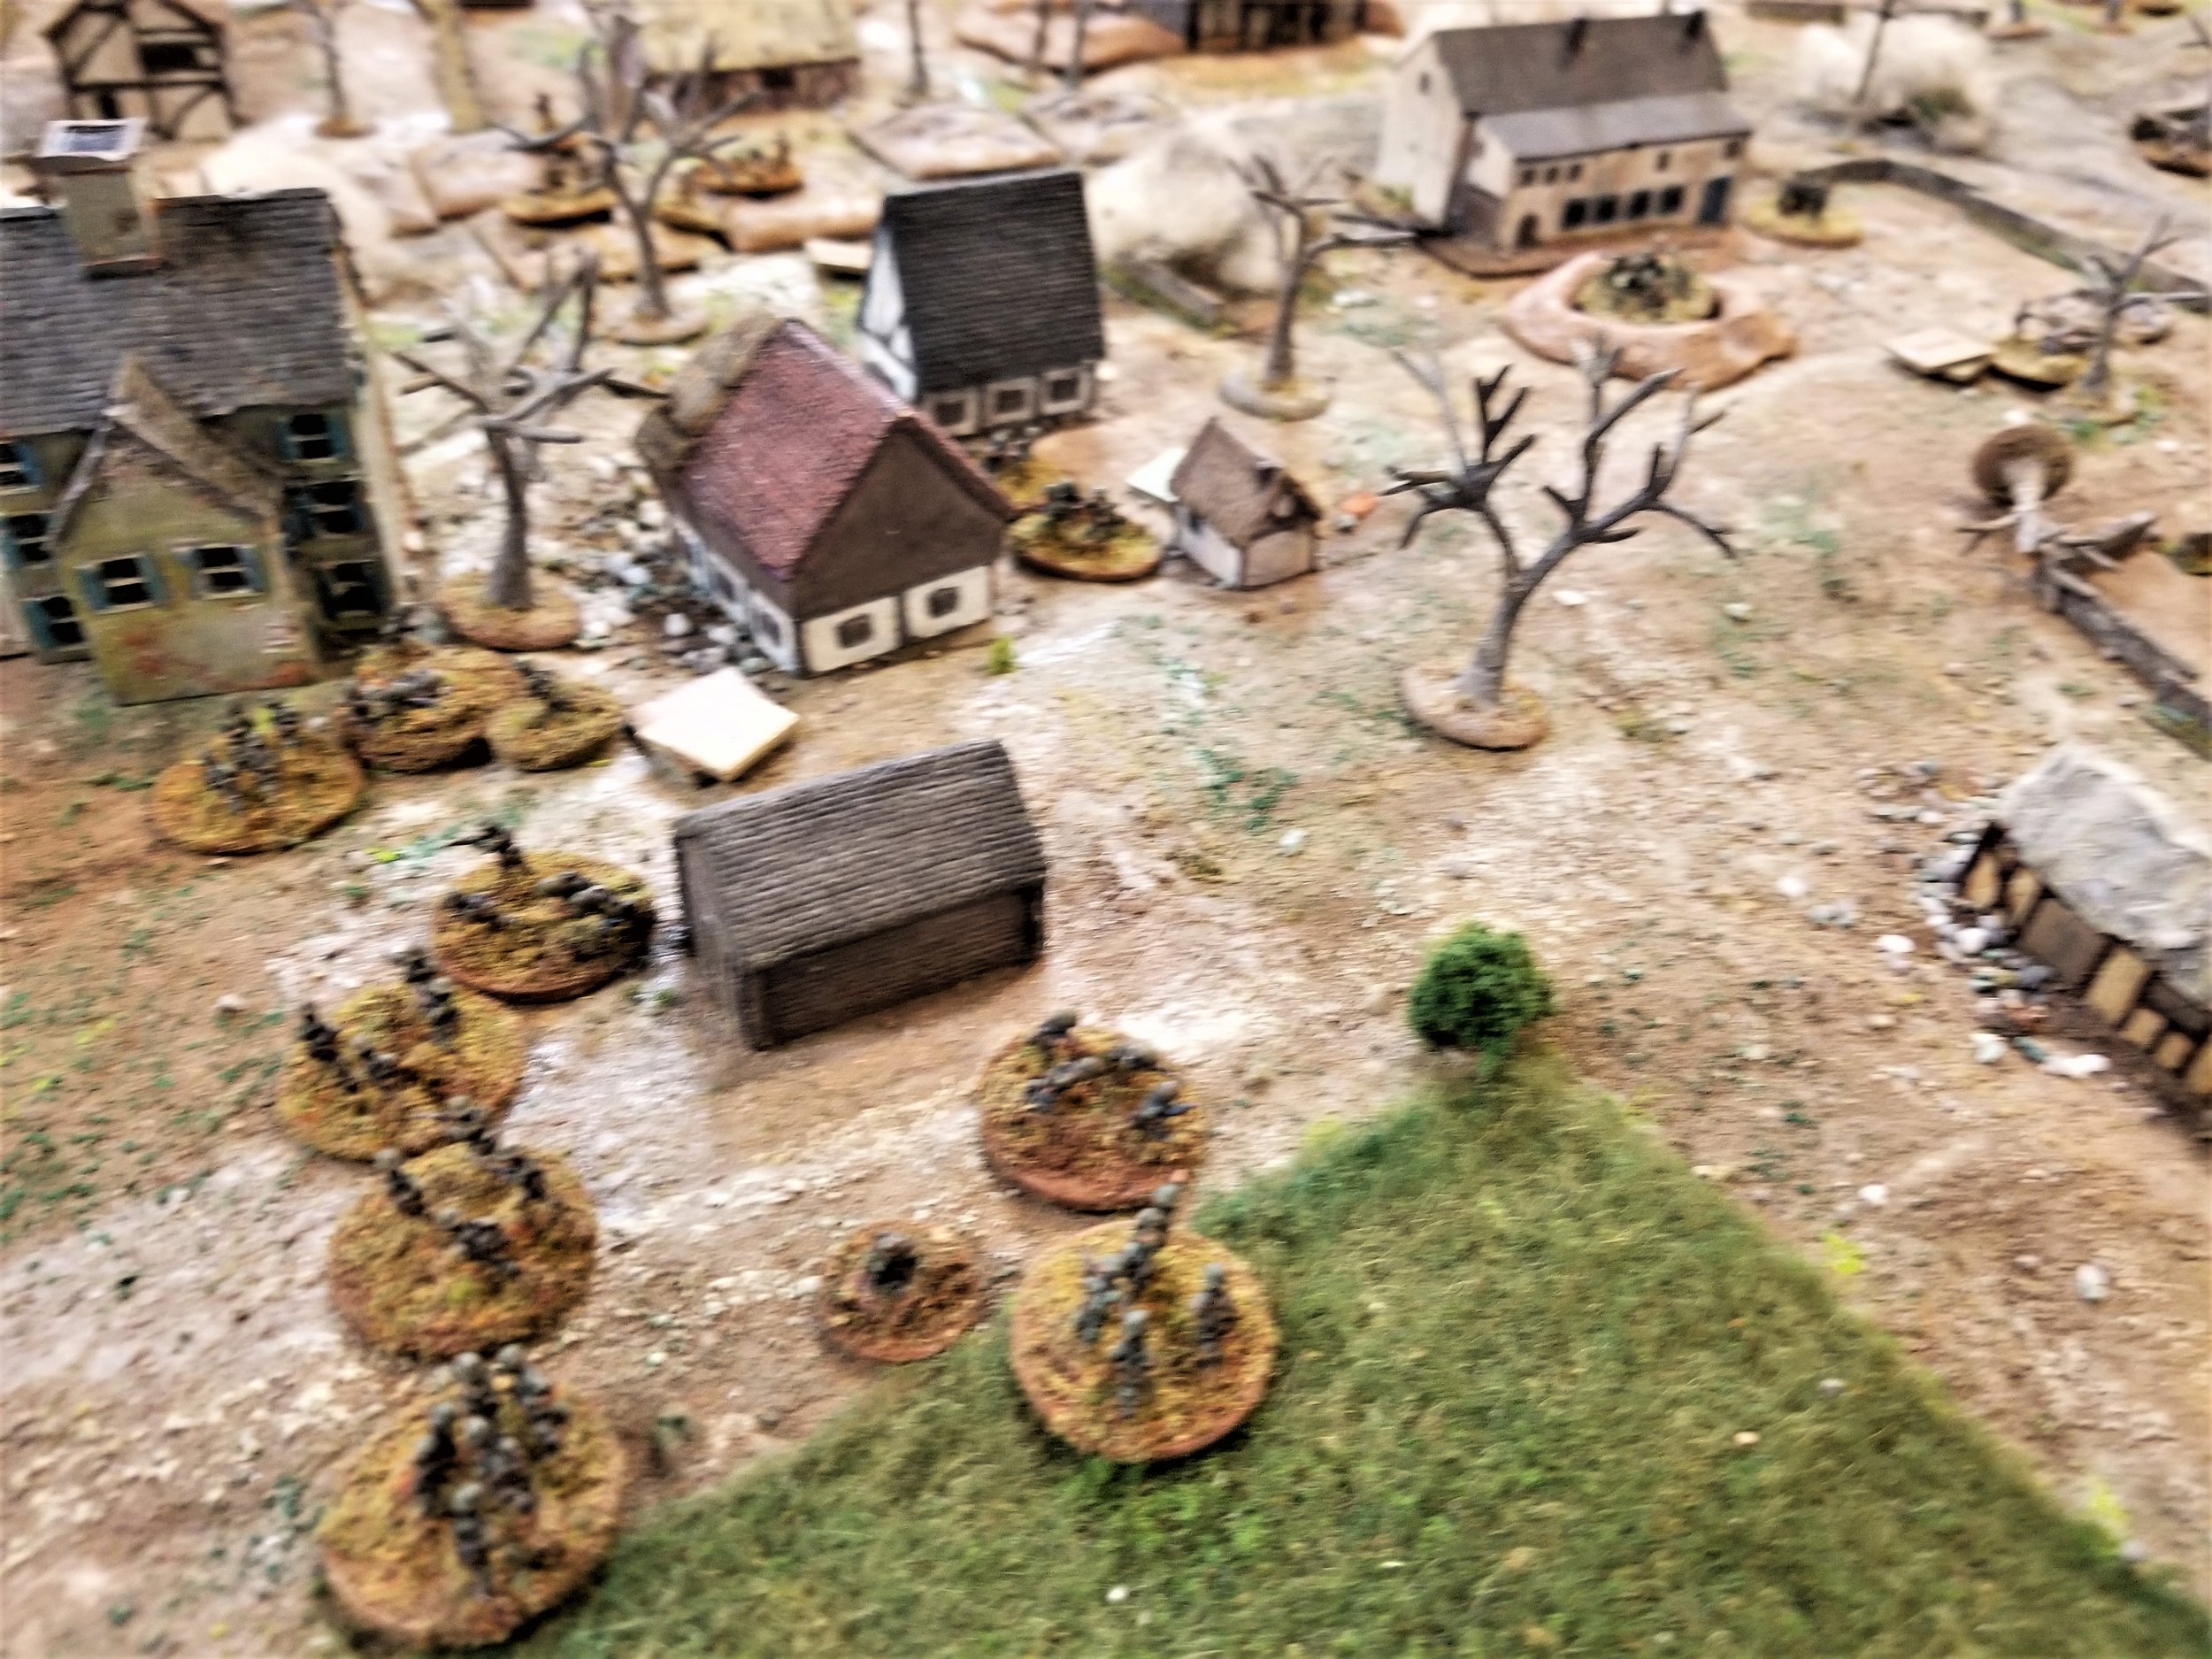
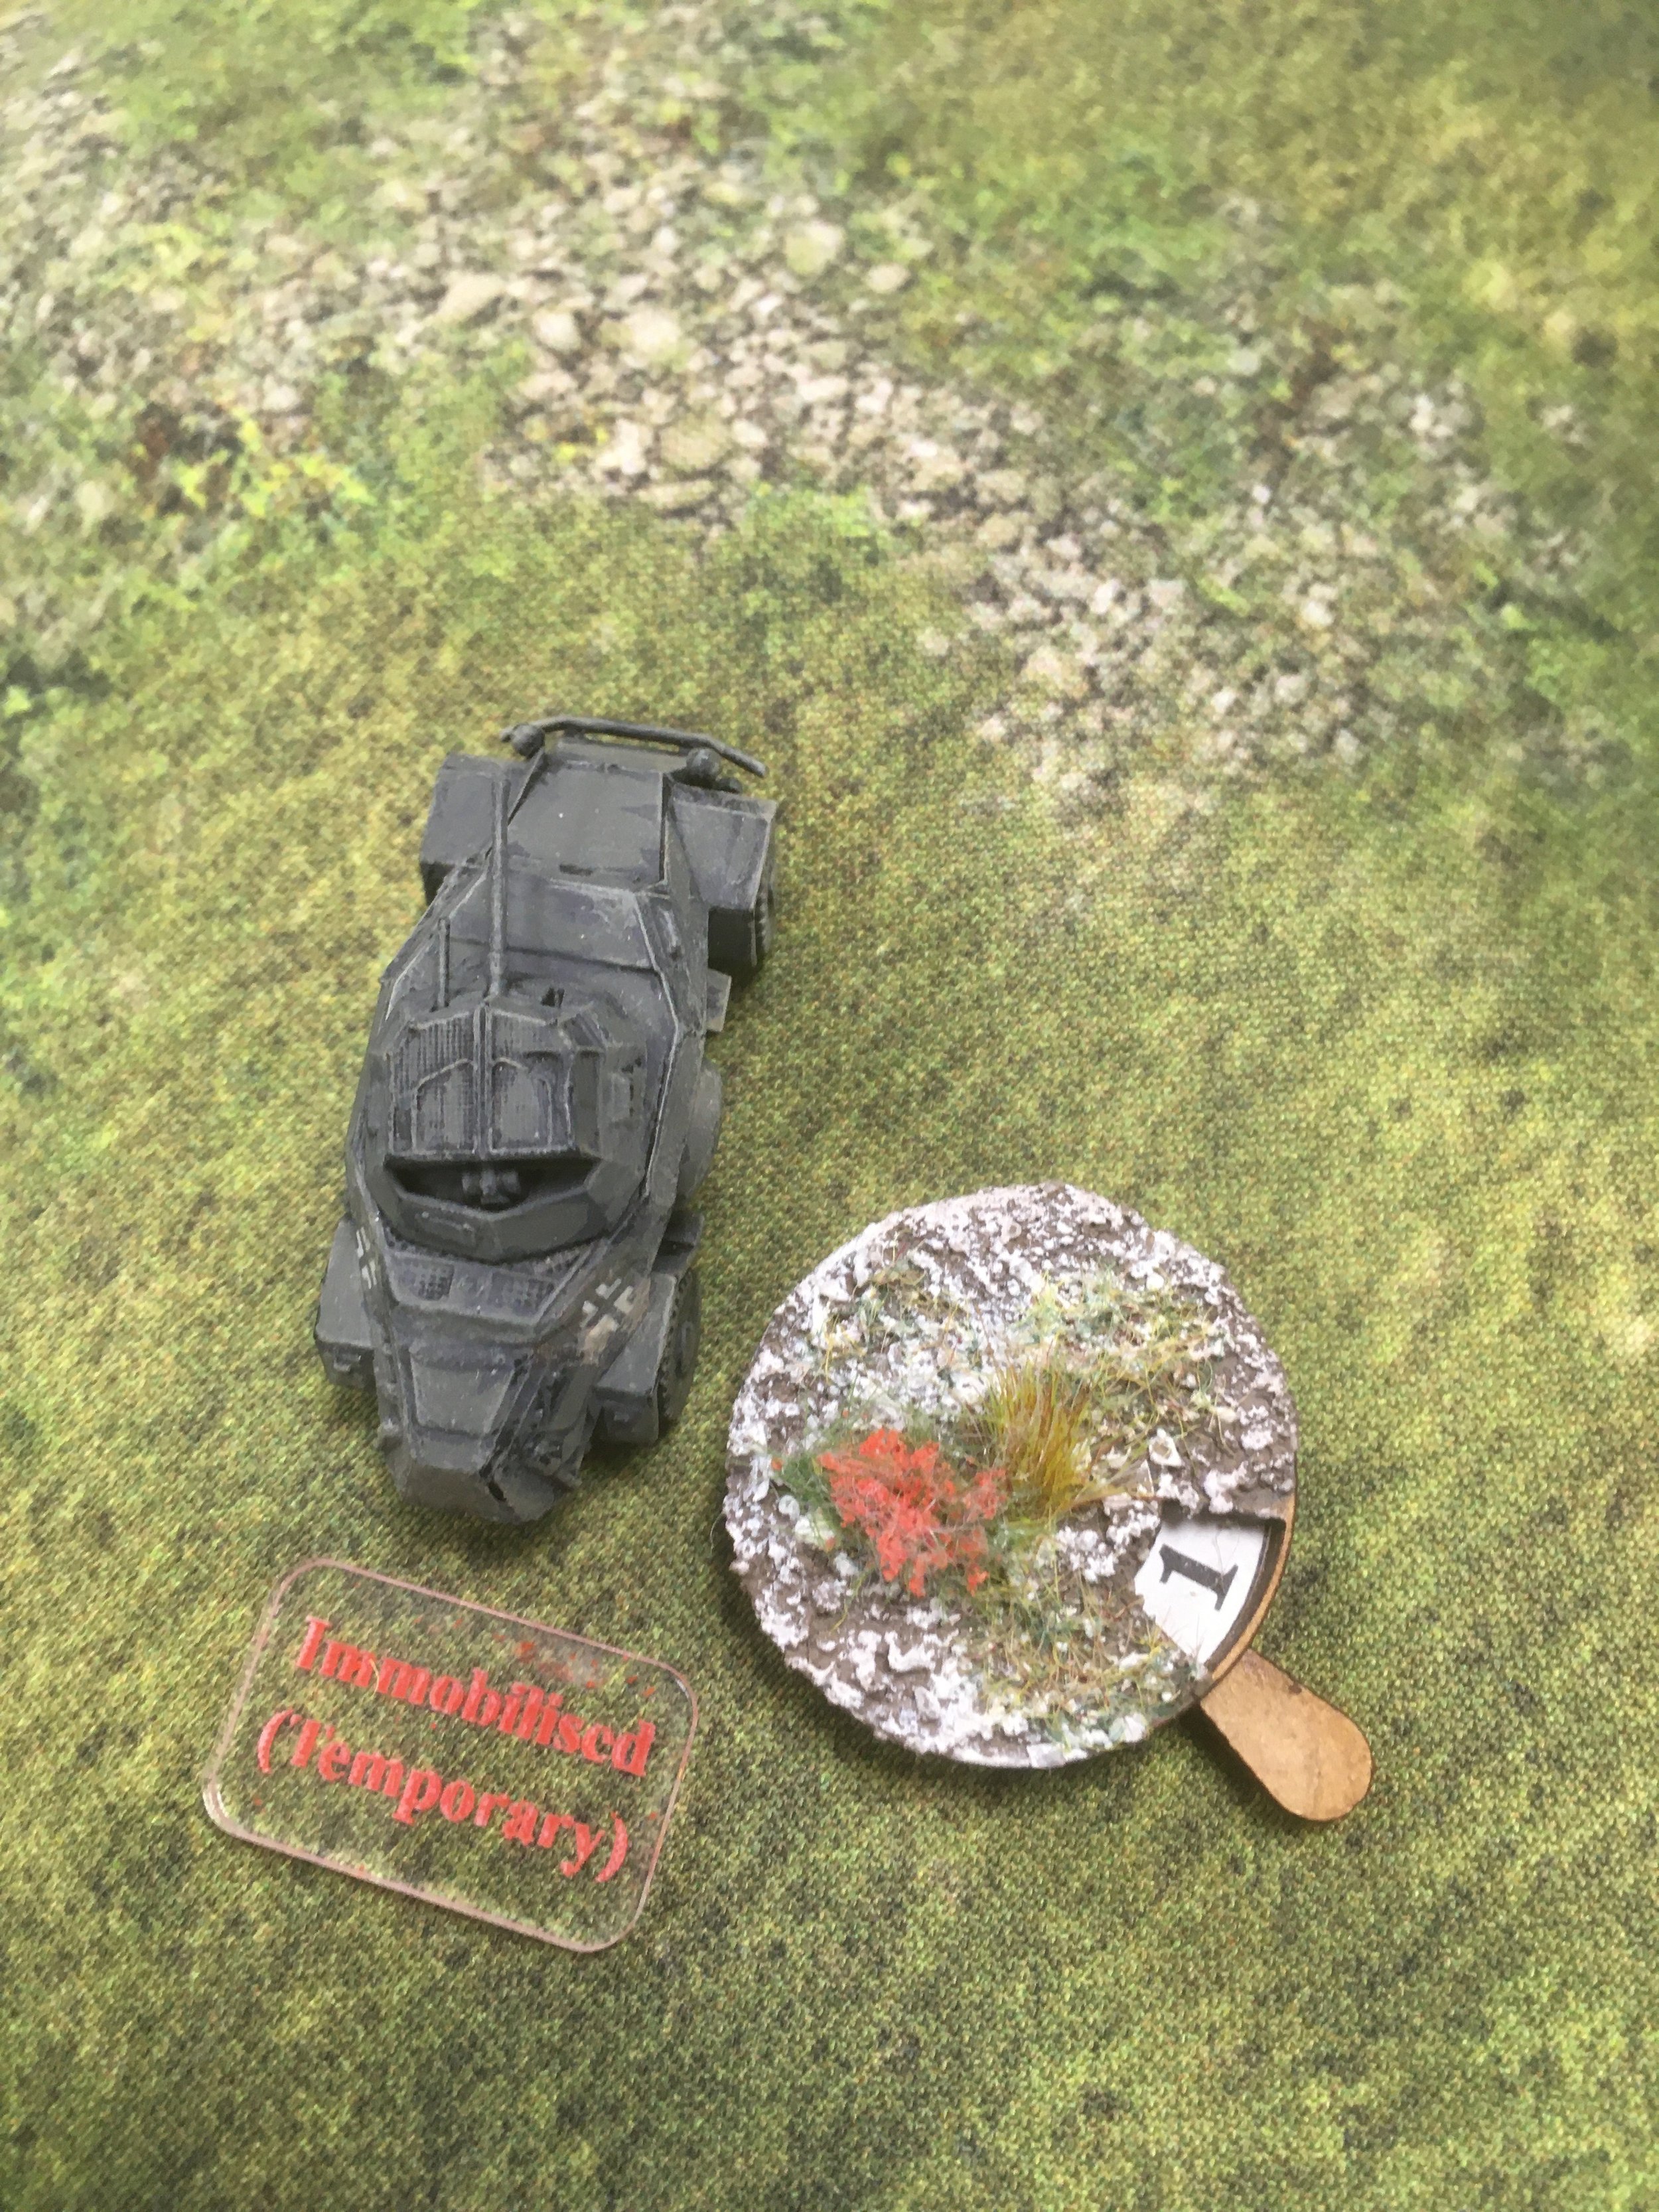
Luckily my unit card came up at the beginning of the next turn and so I climbed my Platoon out of the gully and into an assault on one section of German infantry in the northern woods adjacent to the barn. They were wiped out to a man and I occupied the woods and fields. One Panzer II was knocked out by my Command BT7 which made a run for it and paid the ultimate price too.

It was the critical point of the game as I was in position to threaten the barn and its defenders.

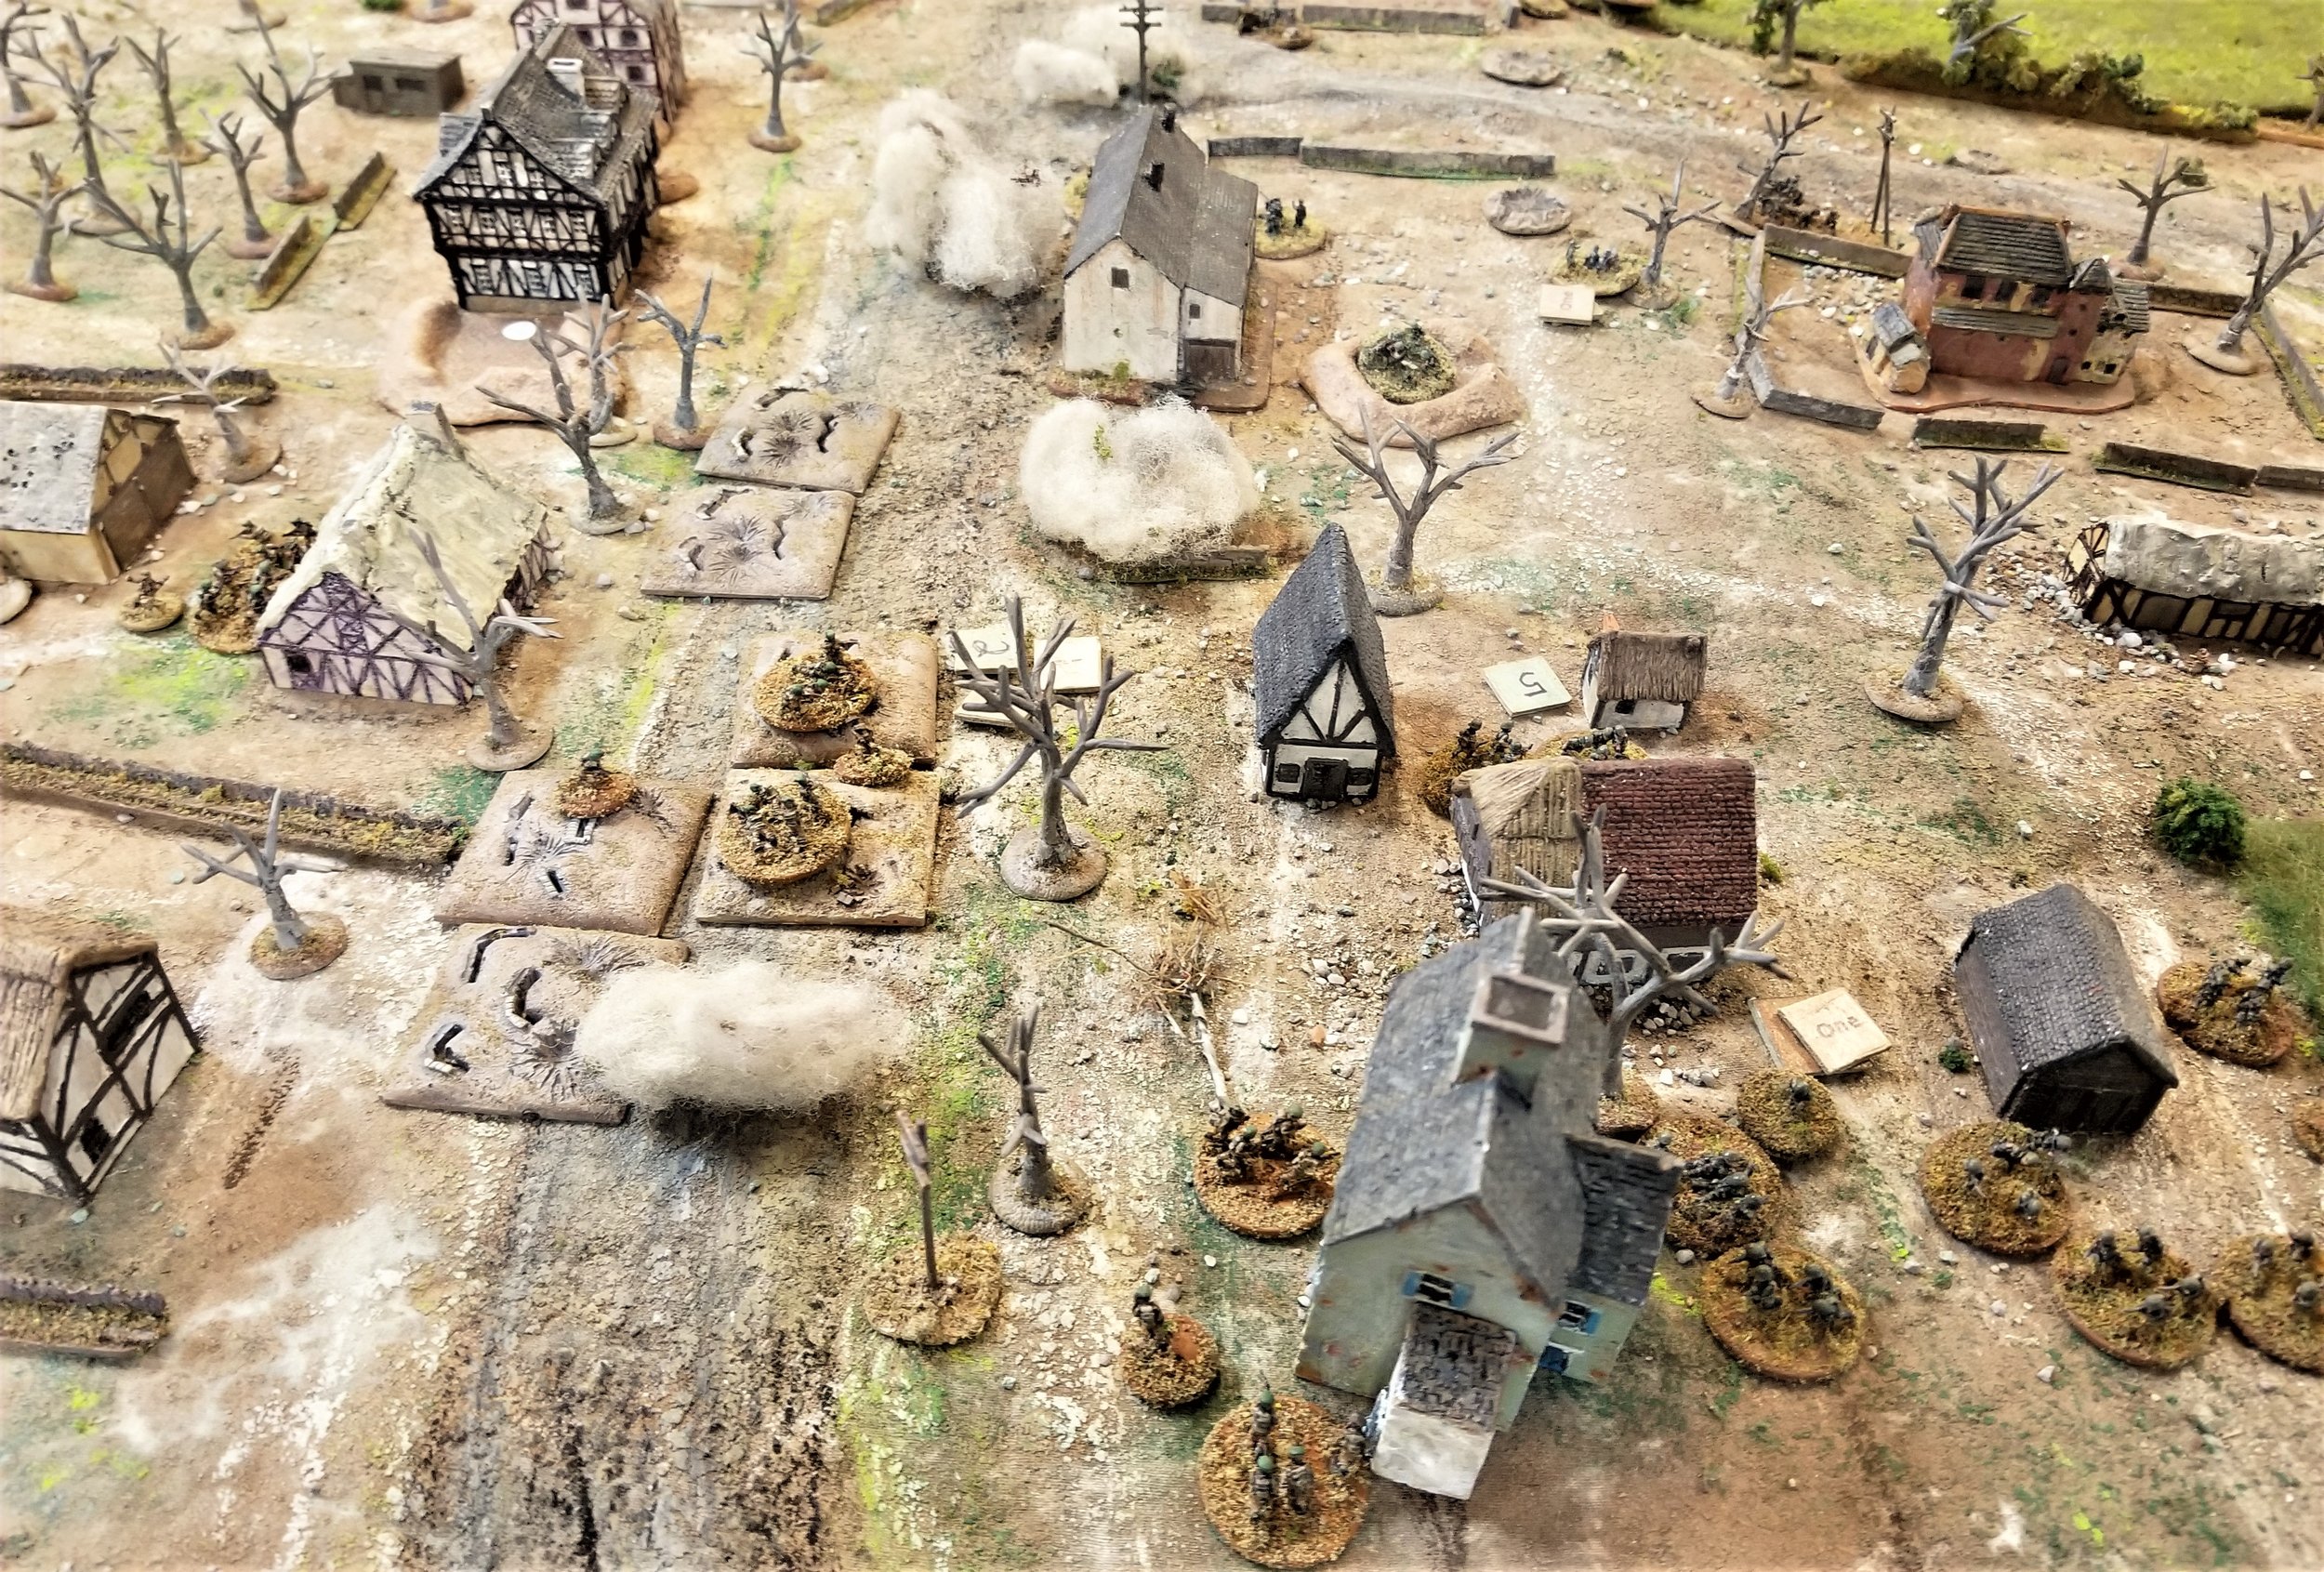
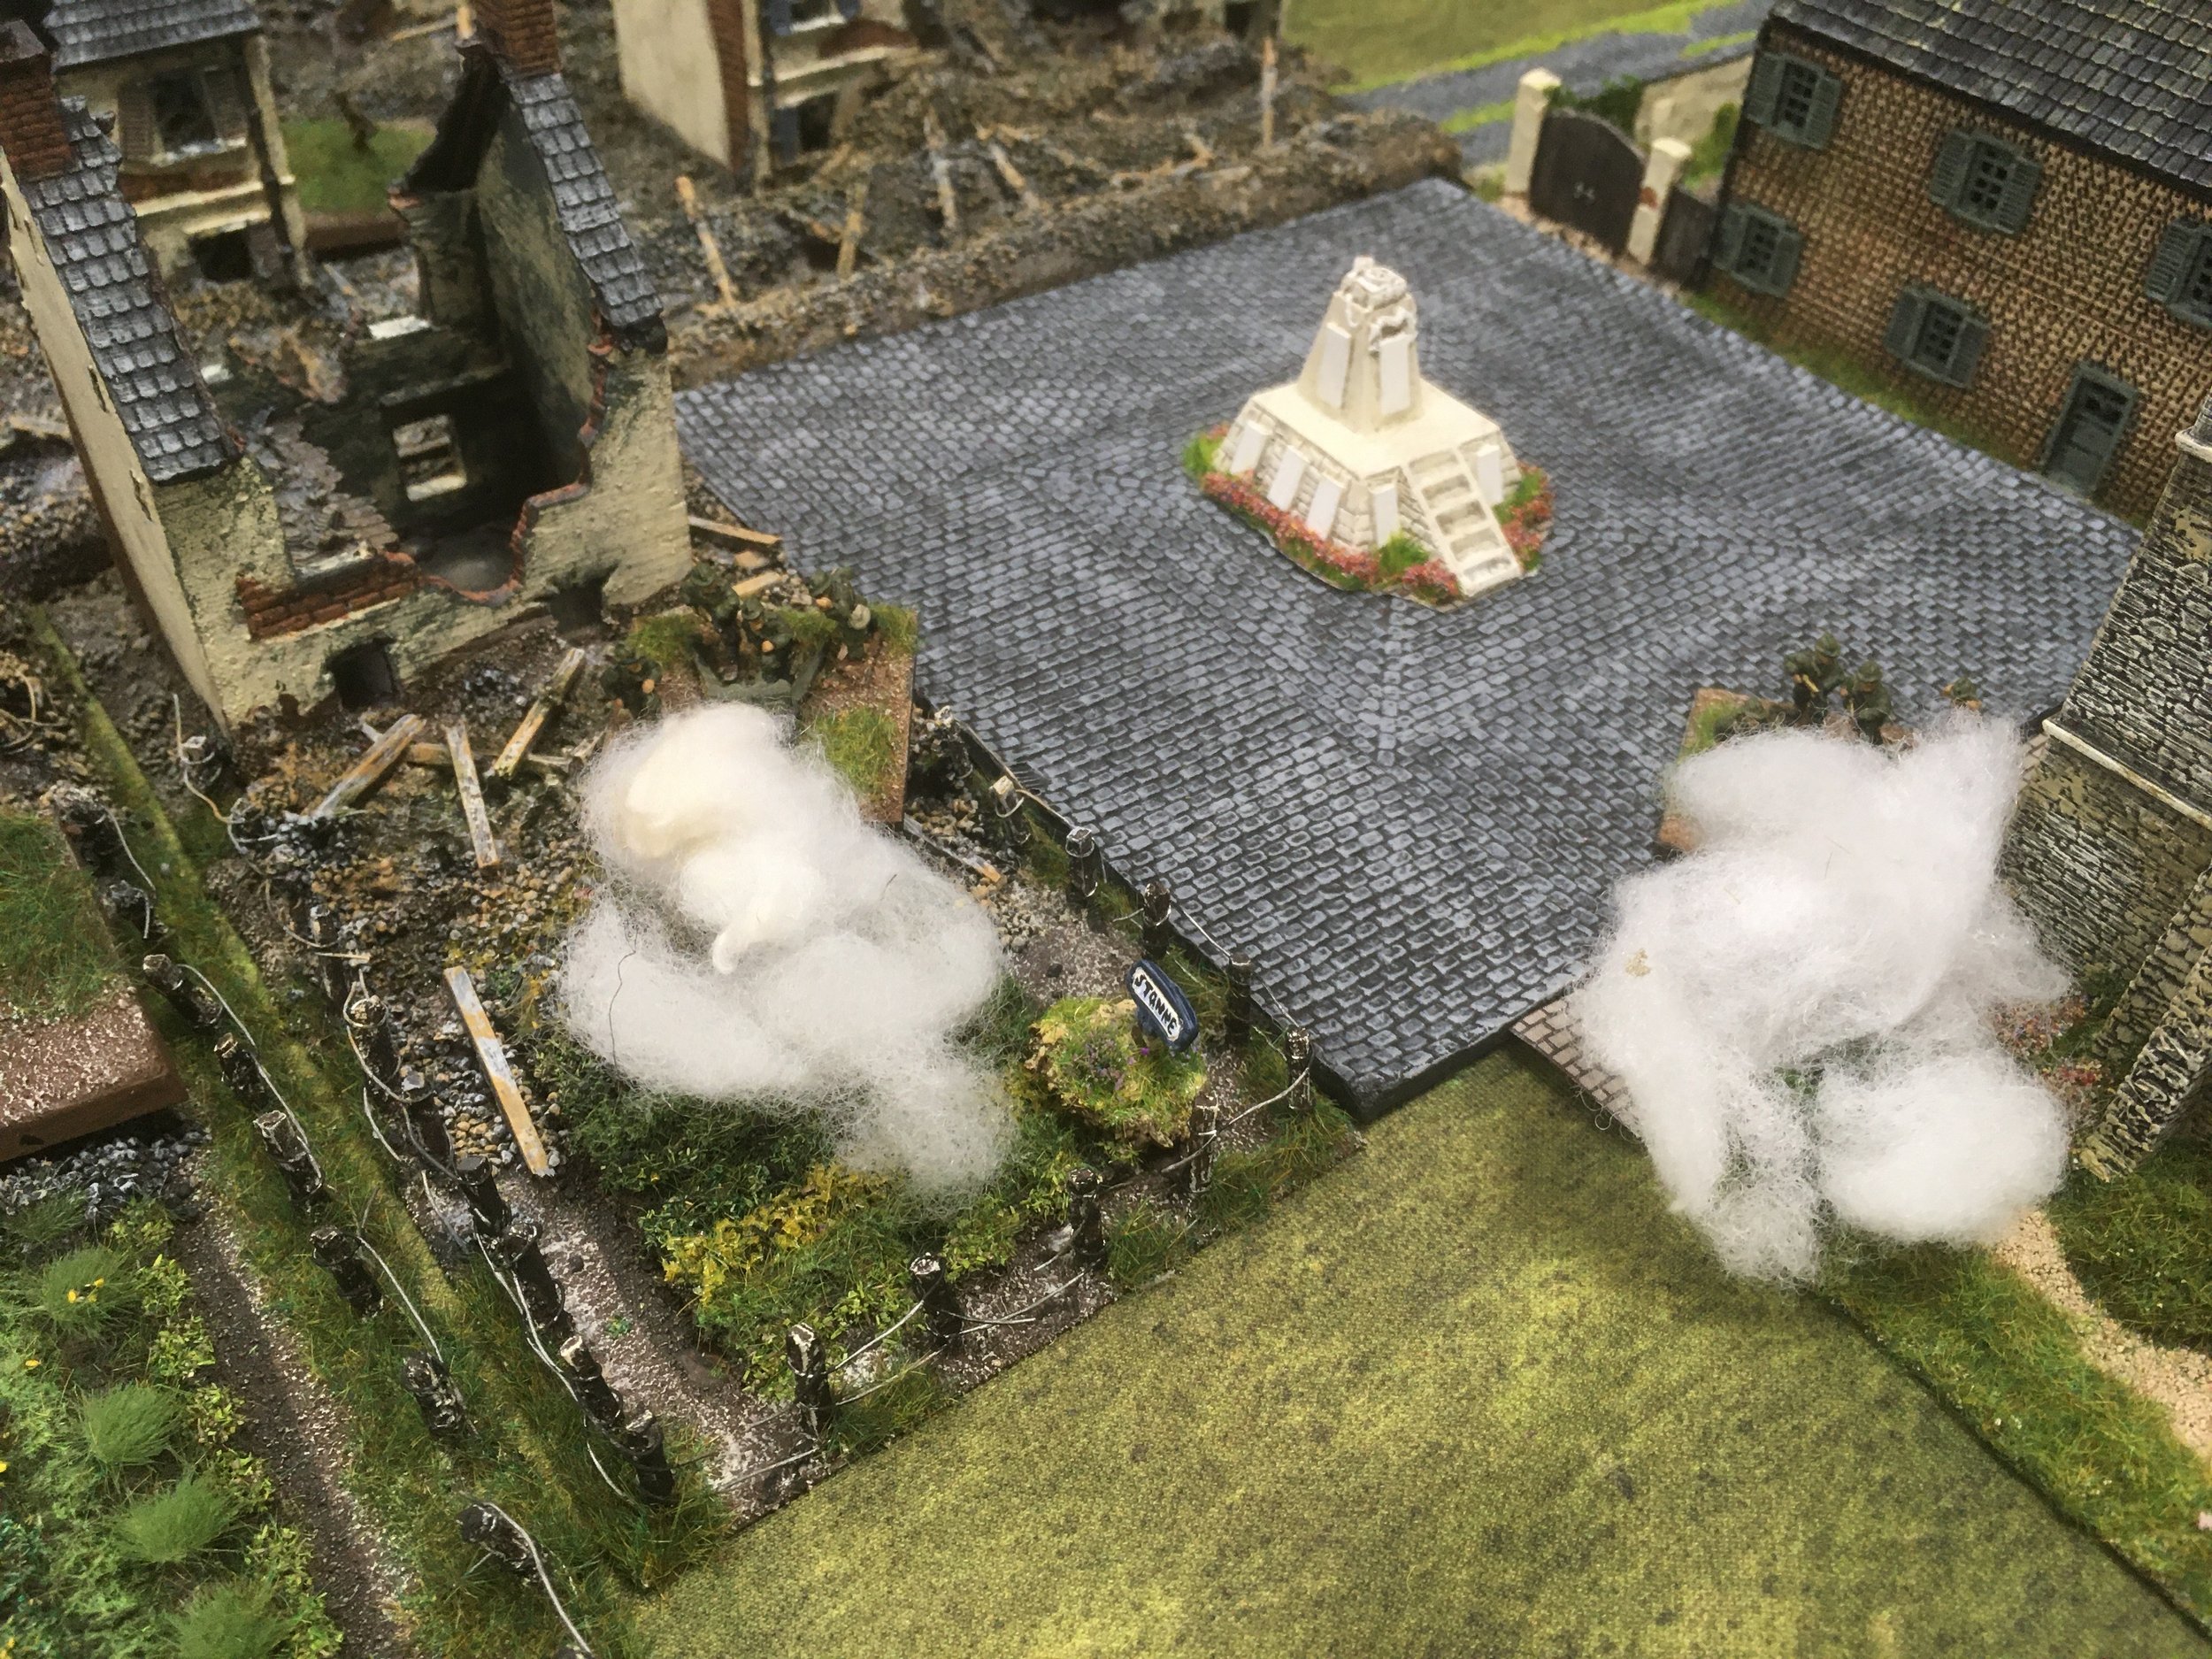
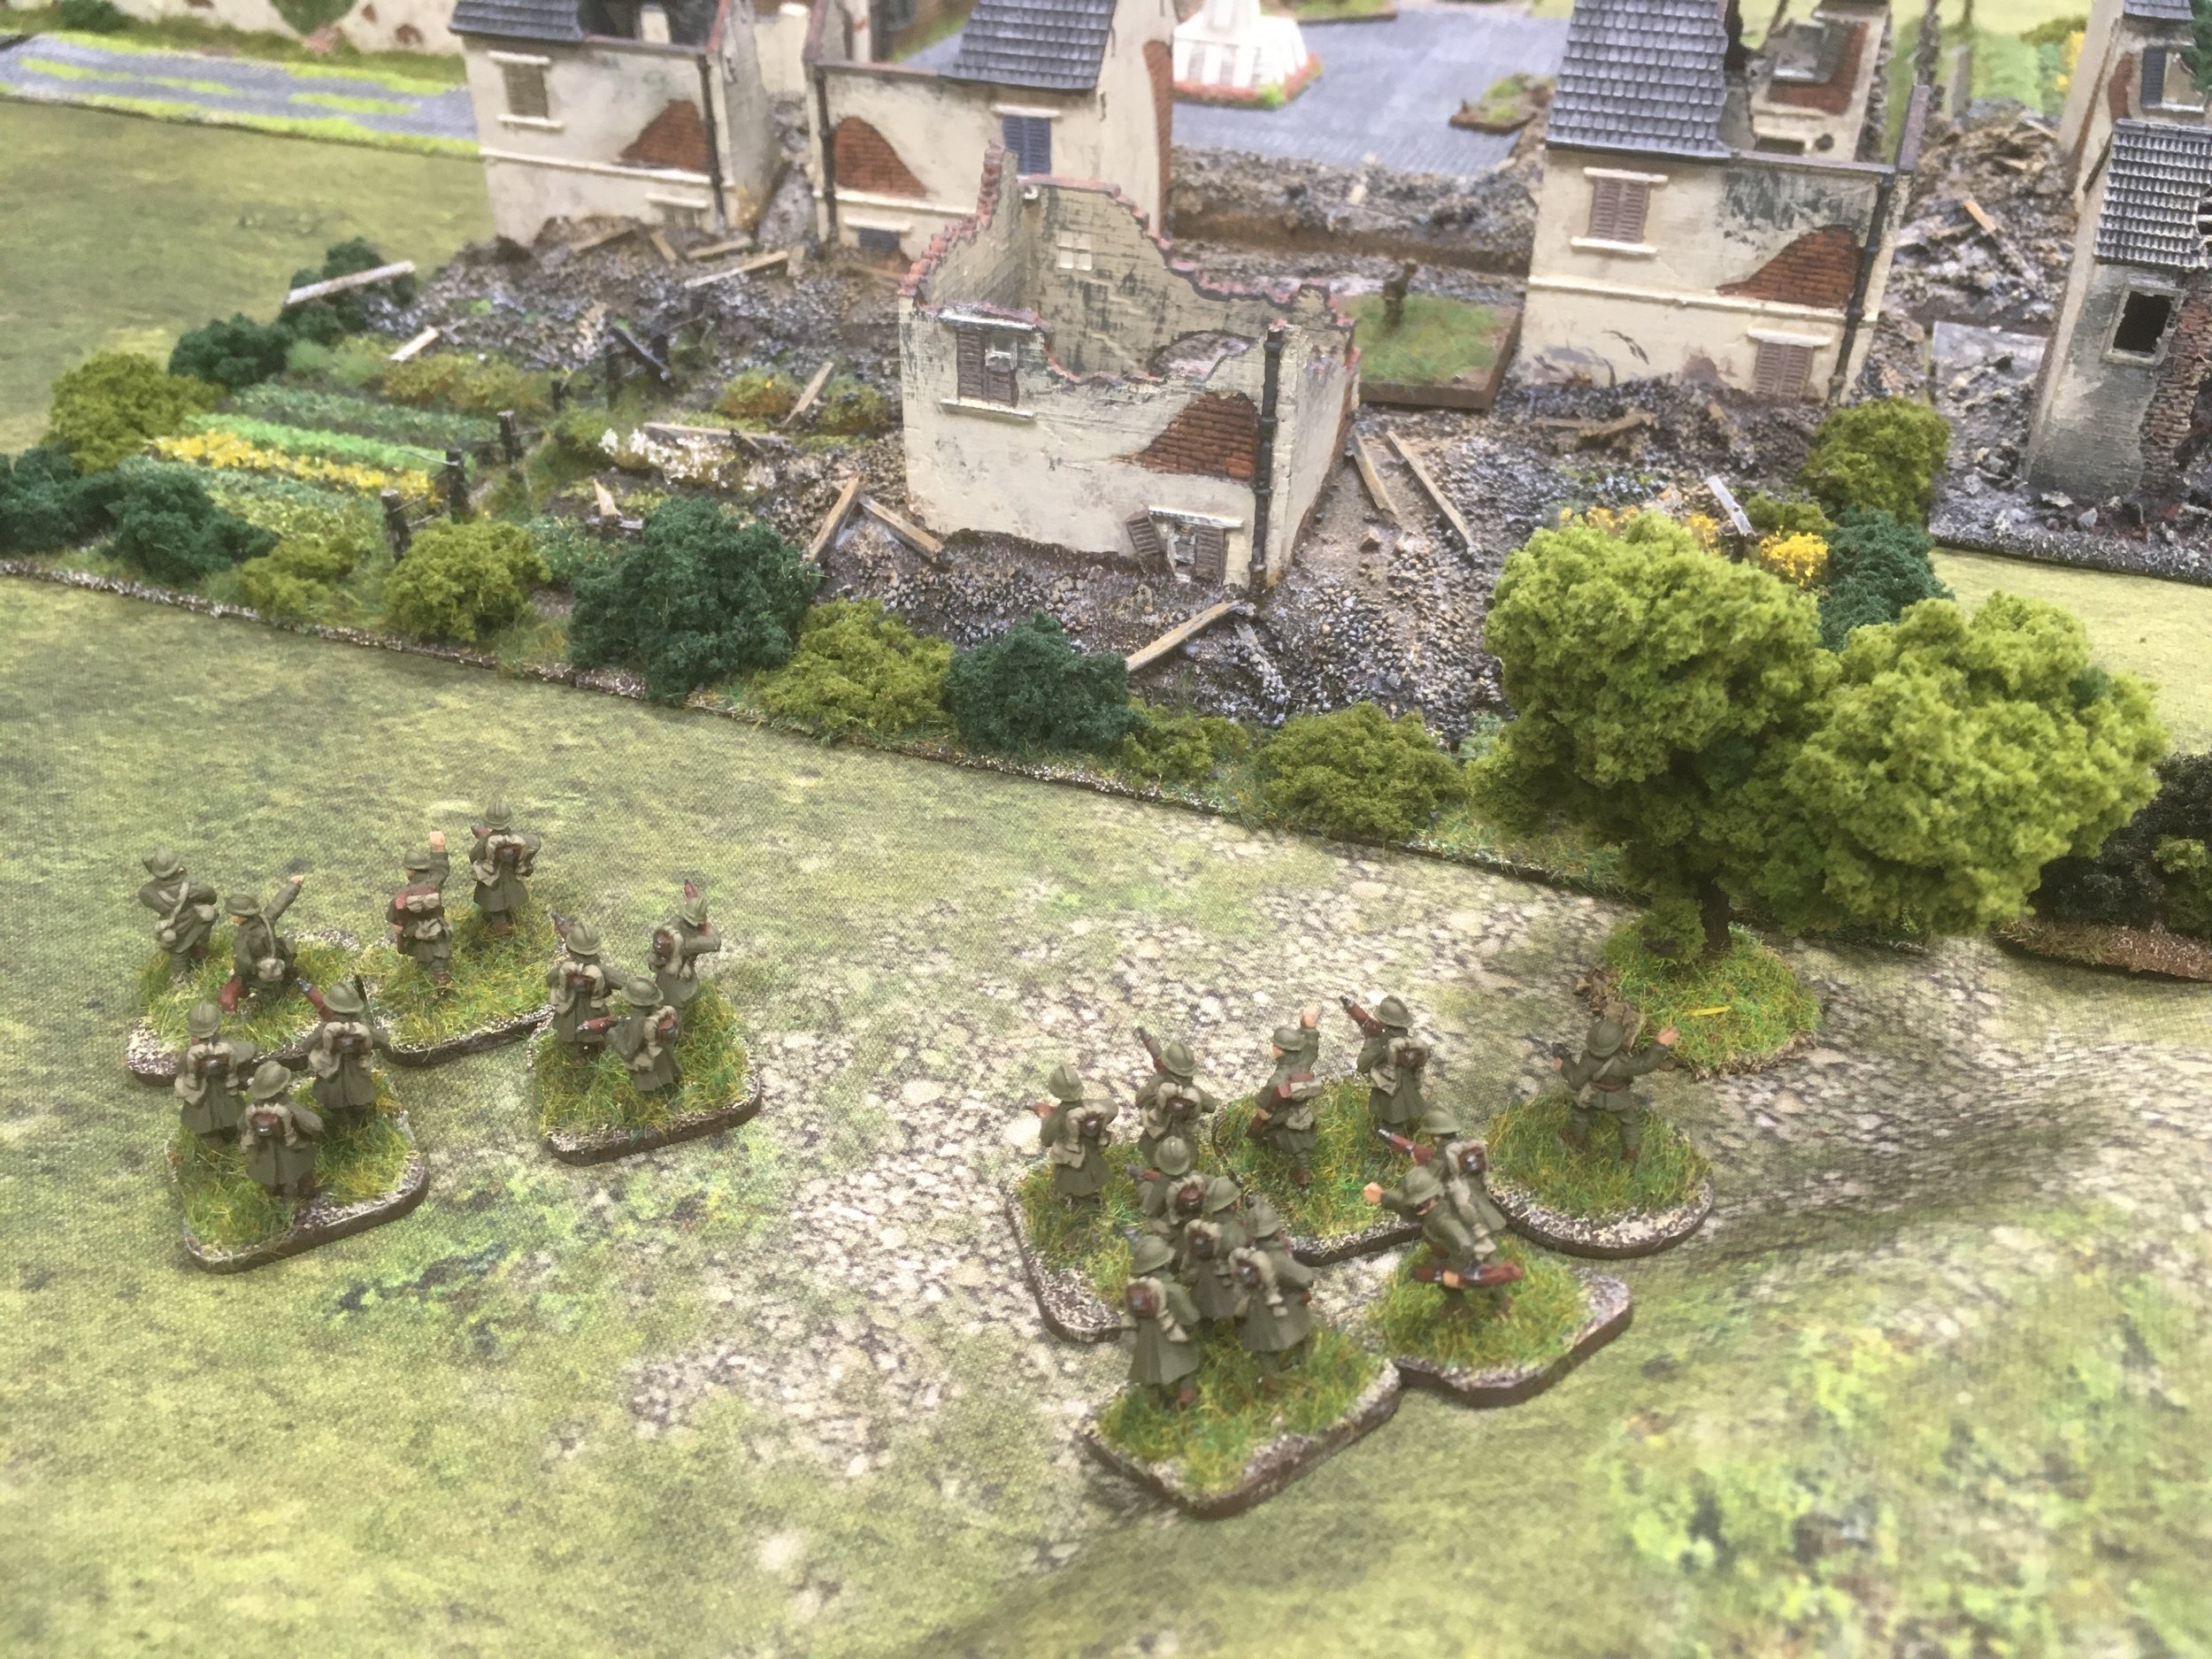
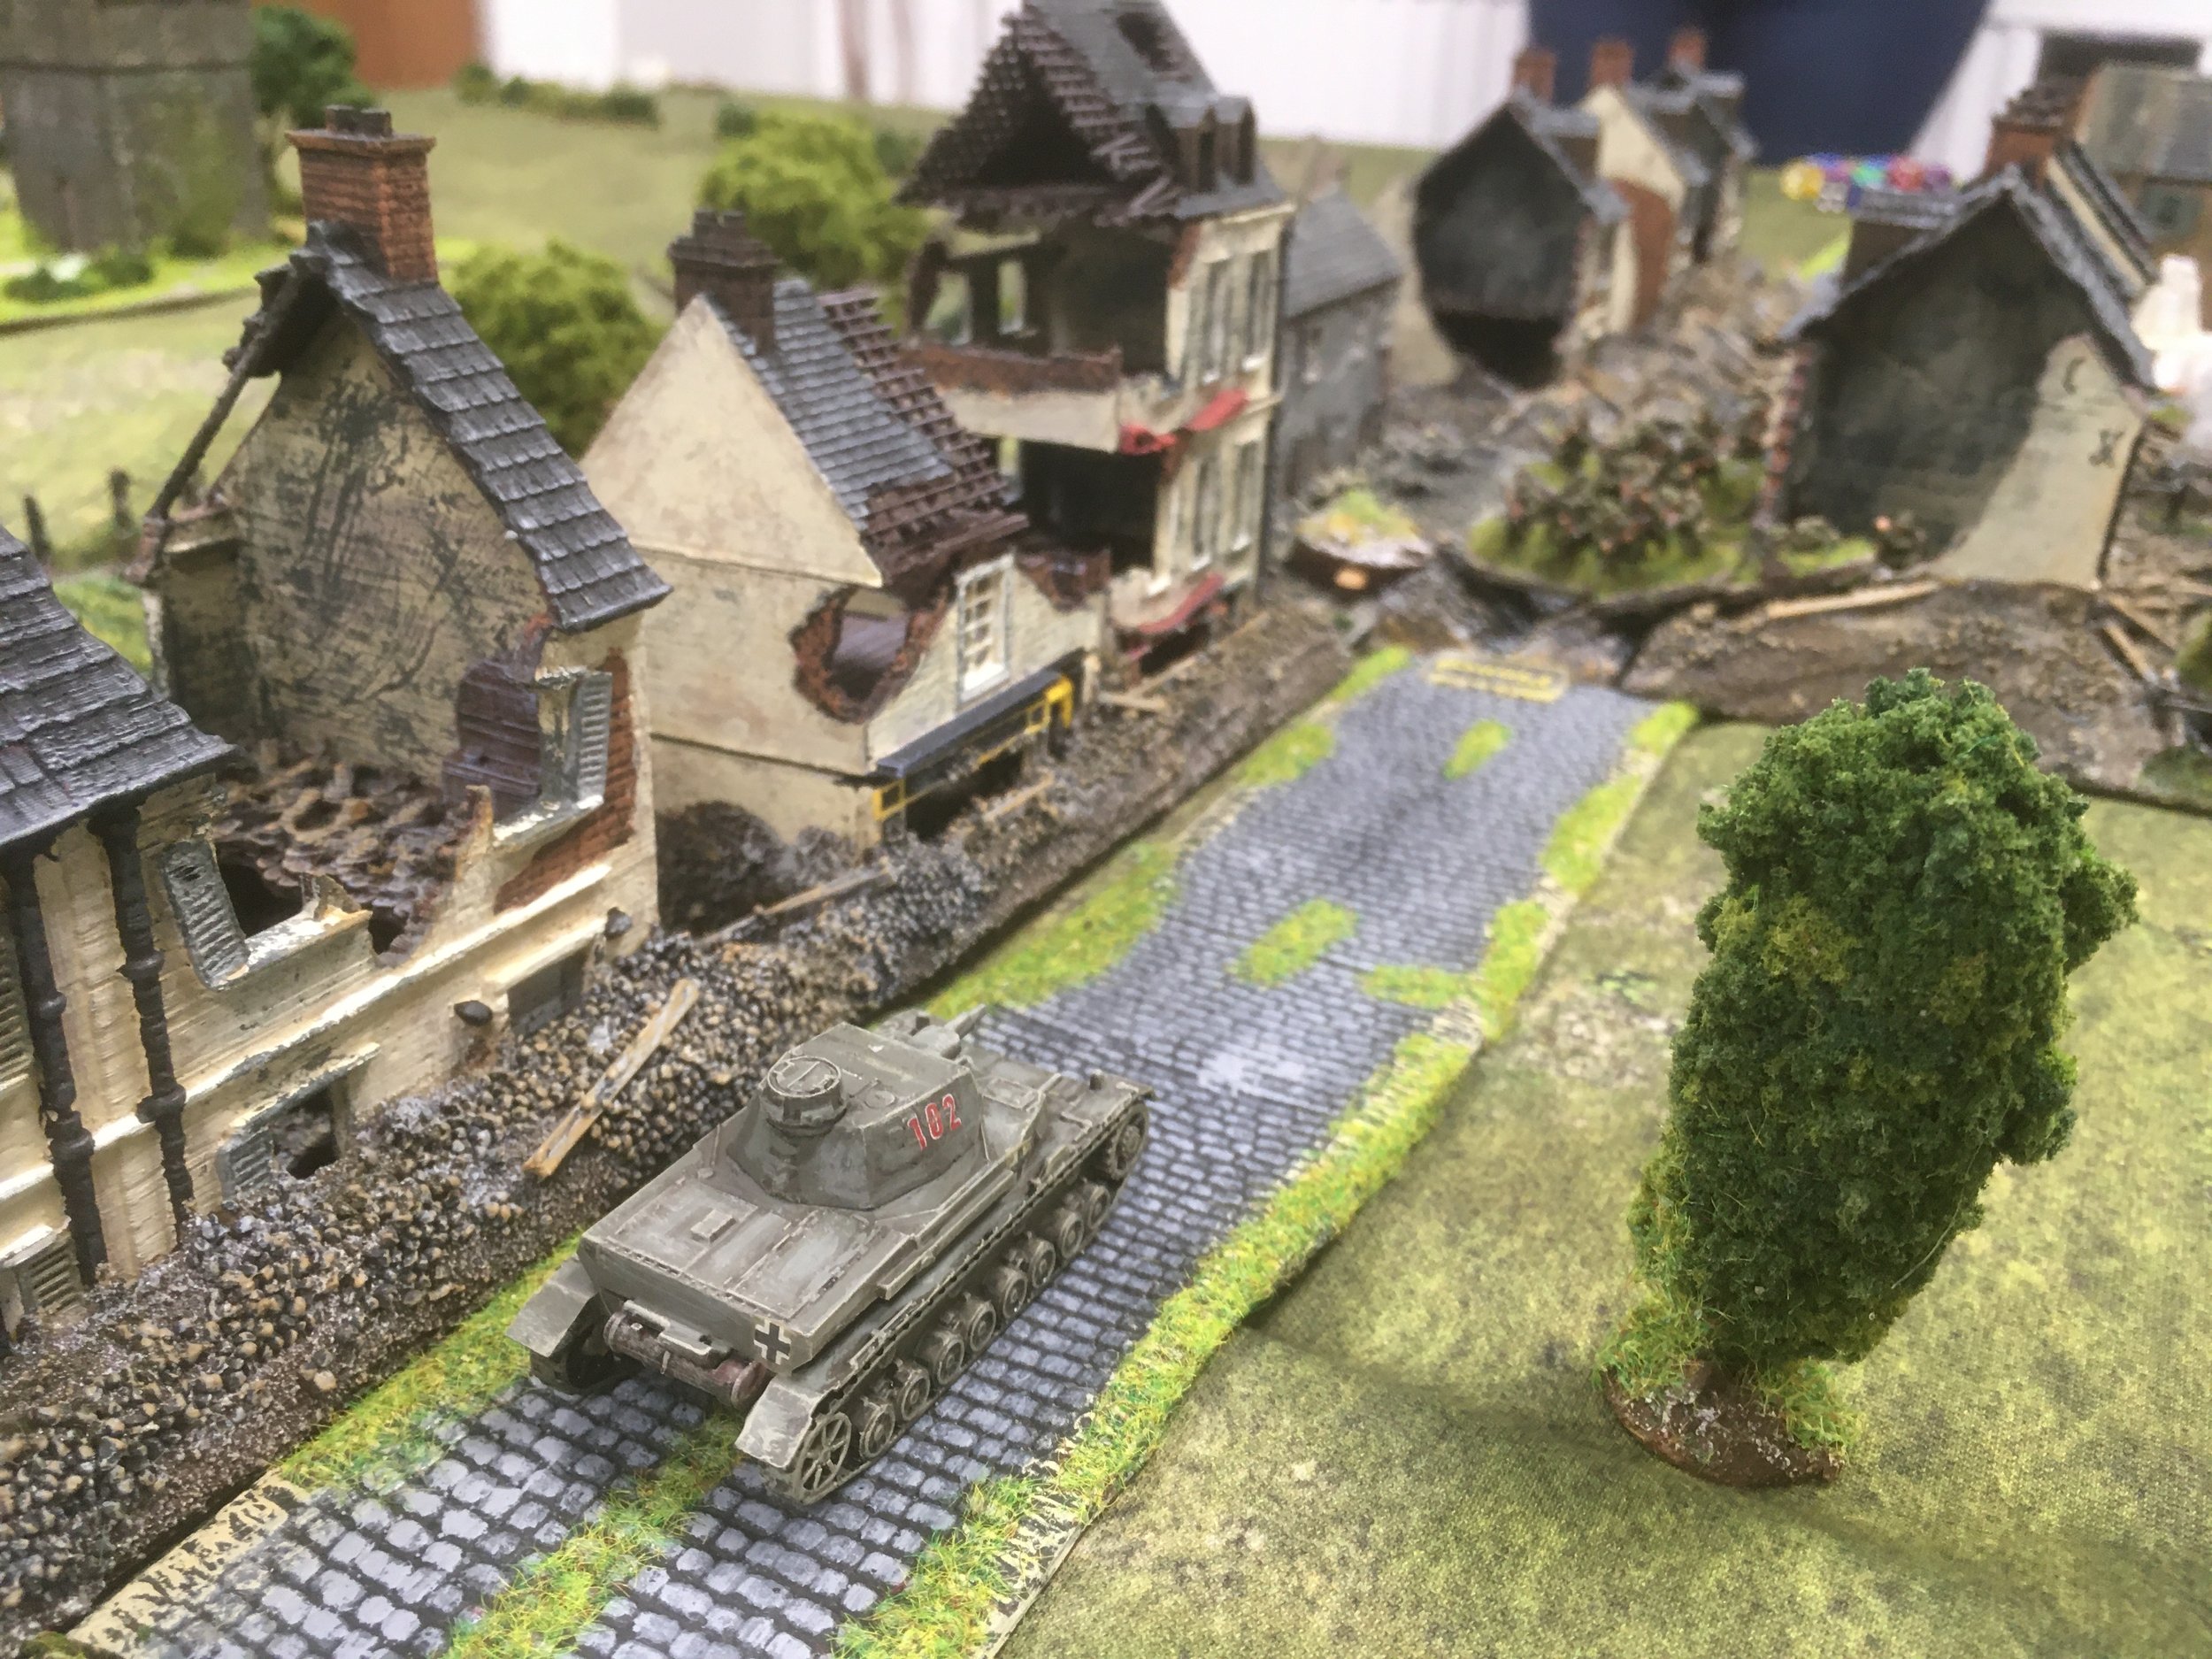
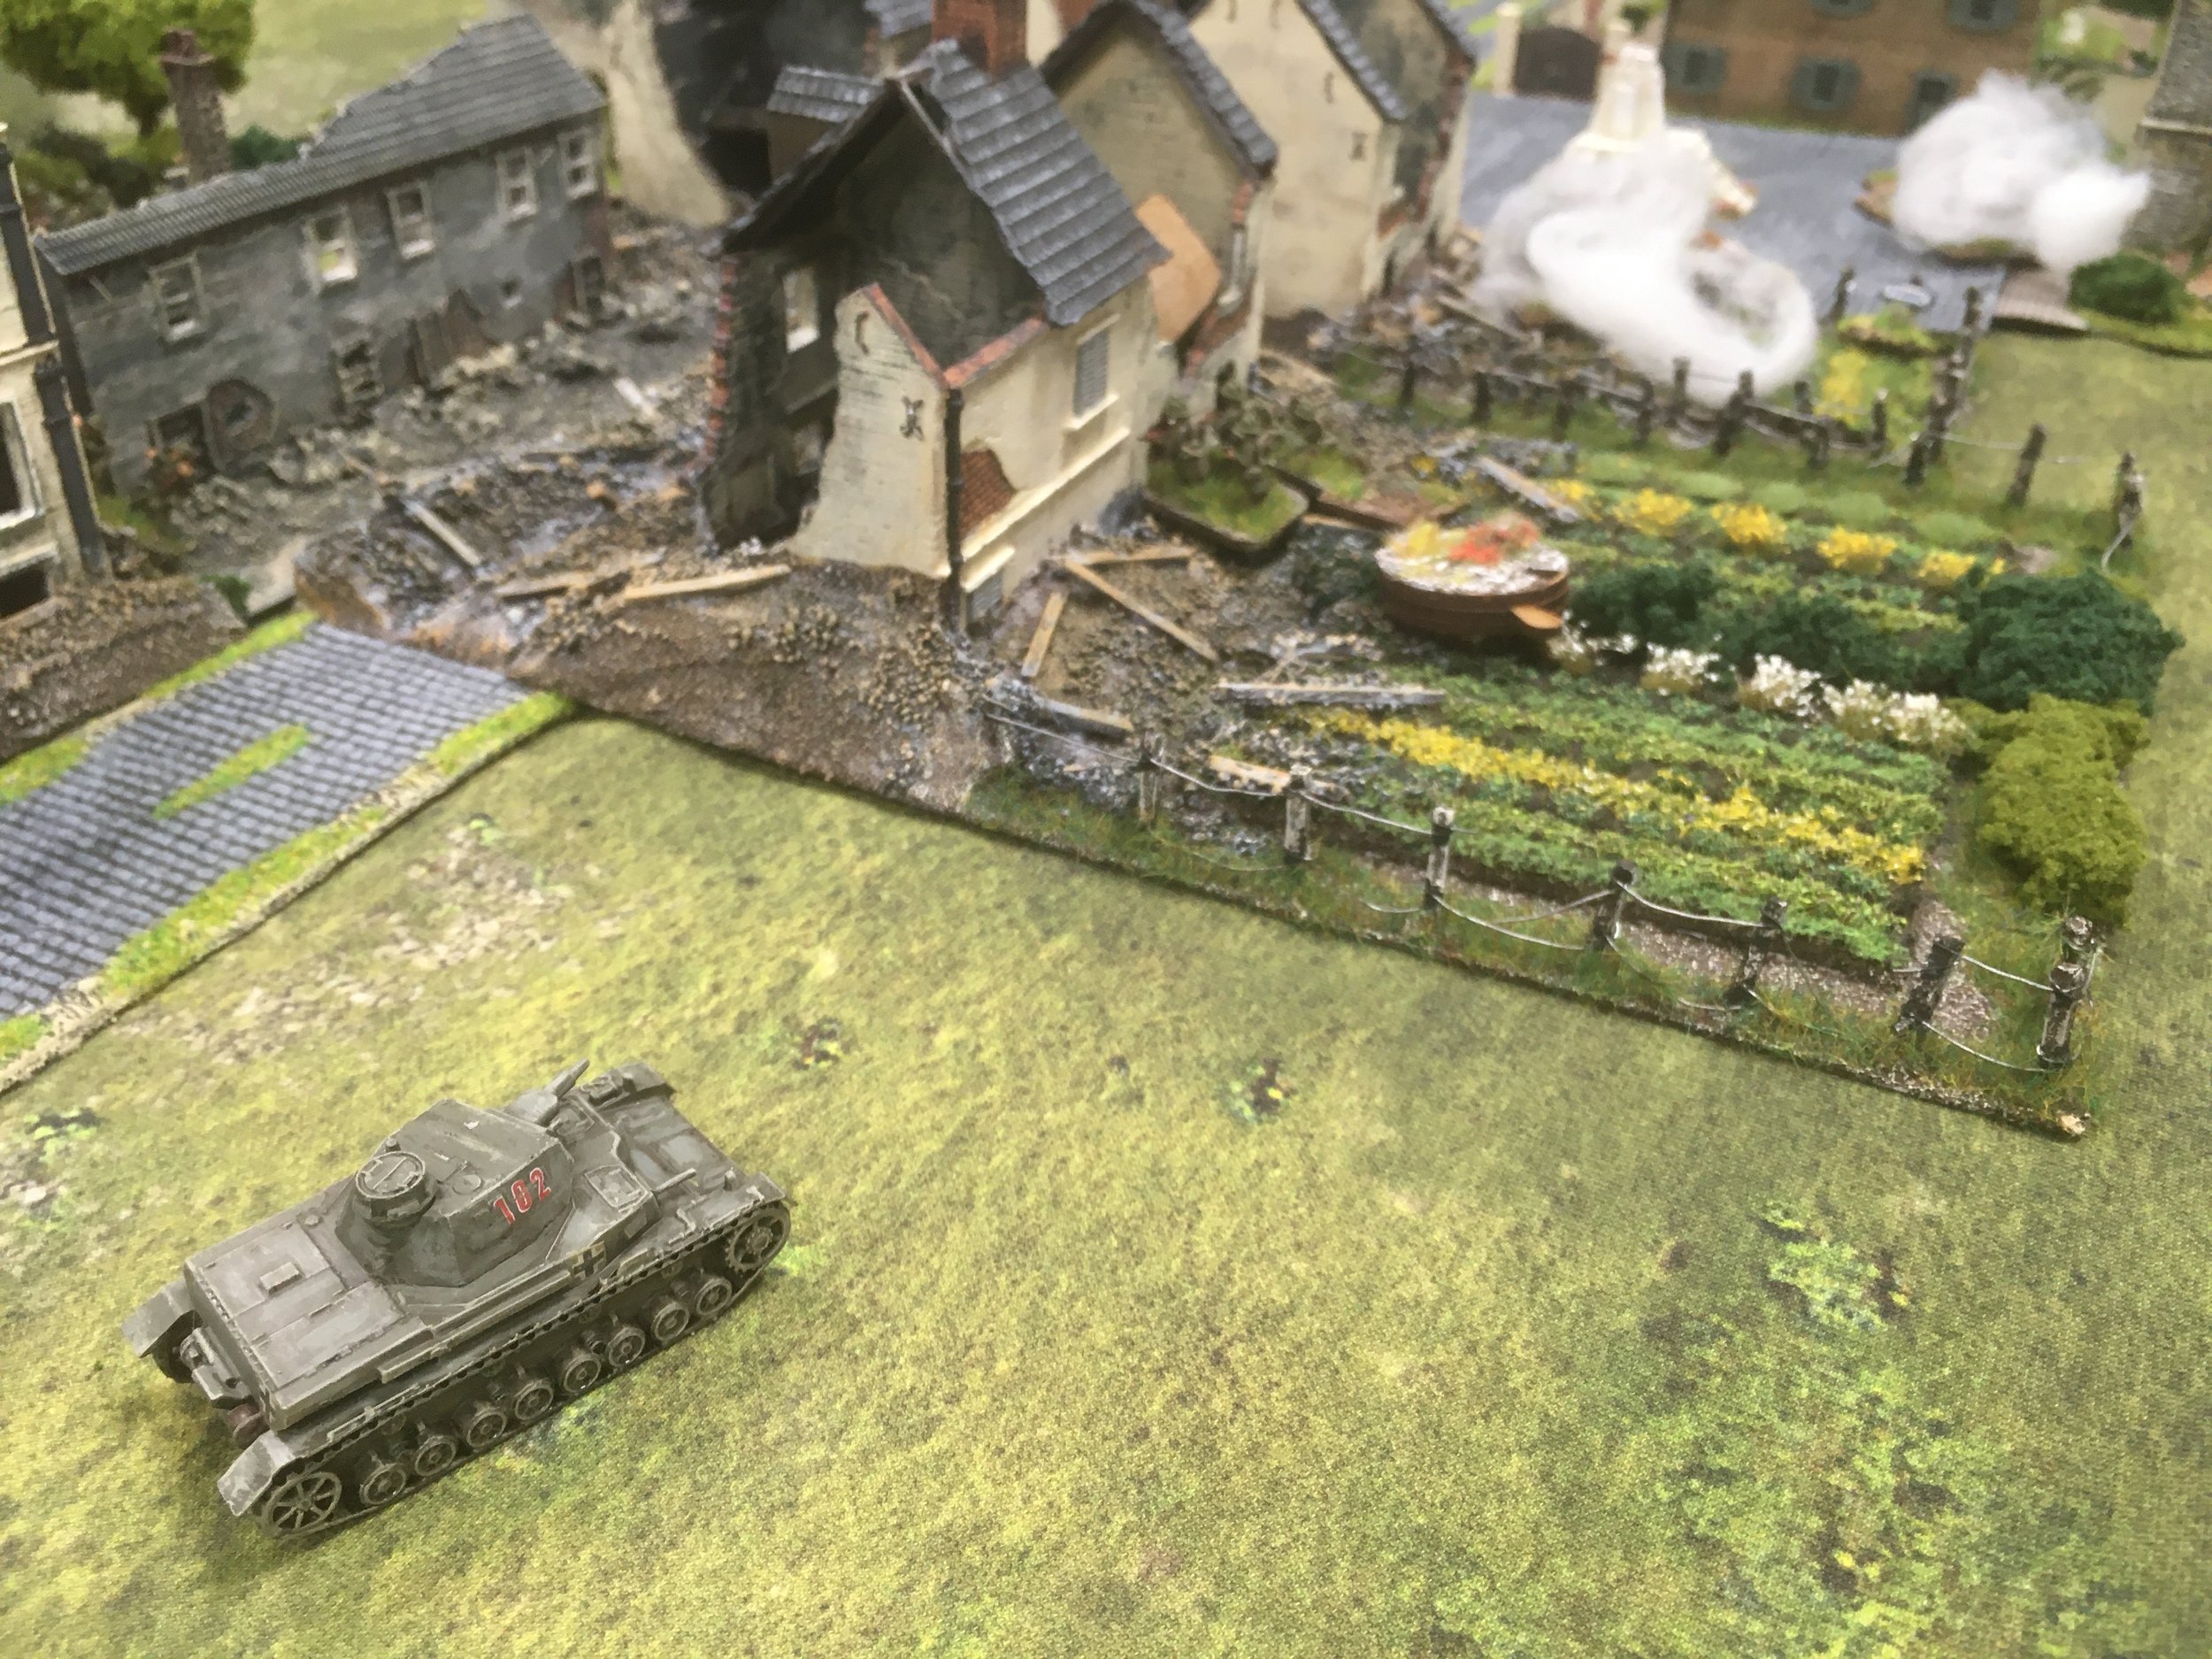
The boys shot my Soviet platoon in the centre to pieces with MG support from the Hanomags and then advanced swiftly. One squad took the house and then discovered a Soviet Platoon 5" away in the woods. This fired at the "Tea Break' reducing the German defenders by 50%.

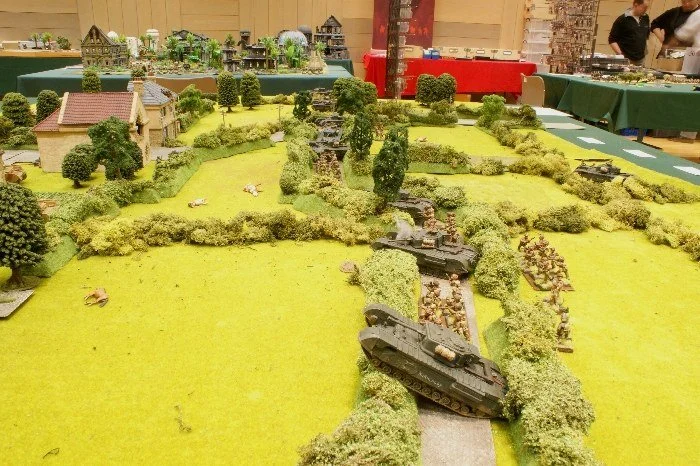
The game ended at turn ten with the German's holding the objectives but severely threatened in both. Taking them would have been difficult for my guys but the German's had only just done it in the time required.

The game was excellent and full of surprises on both sides. The telling factor was the support of the Hanomag mounted MGs and the superior fire and movement tactics of the German infantry, coupled with the large numbers of Big Men.

I was cautious for a change with my infantry but on the whole they performed admirably.

Kev


The first I Ain’t Been Shot, Mum! game was quite well received and the group was eager for another action.  One of the players requested more tanks, so I cast about a bit for another action and settled on the the French counterattack by SOMUA S-35s of the 3rd Light Mechanized Division against the panzers of the 3rd Panzer Division on the morning of May 13, 1940.  The Panzers had pushed the French Dragoons out of Orp in the morning and were reported to be moving to Jandrain when the French launched the attack by the 1st Cuirassiers.

Google Earth is one of my favourite tools for generating realistic looking battlefields when good period maps are not available, especially for Europe, where many of the features will remain as they have for generations: the towns and roads get bigger, but much of the rest seems to be pretty much the same.  For this game I zoomed in on the region between Orp and Jandrain and we used that as the basis for our table.  The terrain in this area is largely flat farm land, and  main feature of the terrain was the long line of woods surrounding a stream that ran to the east of the main north-south road between the towns.

The French forces consisted of 3 understrength platoons of SOMUA S-35 tanks and a platoon of motorcycle reconnaissance troops, led by the Company Captain, and two additional Big Men: a Lieutenant in one tank platoon, and a Sergeant in the motorcycle troops.  Two Blinds started deployed on the road, with the rest entering on the French Blinds card.

The German forces consisted of a Light Panzer platoon (mixed Pz IIs and Pz Is), a Panzer II platoon, a Panzer III platoon, and a Panzer IV platoon.  These were supported by a platoon of armoured cars and a platoon from the divisional anti-tank battalion with four PaK 36 anti-tank guns.   The Germans also had a forward observer in a radio car with contact to a battery of 10.5 cm howitzers.  Unbeknownst to the French, the Germans had been able to send some elements forward and establish positions.  The Germans started with two Blinds on the road and had two groups deployed hidden on table, one in the woods east of the road and another in the woods along the west table edge.  The German PzKw III and PzKw IV platoons had to be the last two Blinds onto the table and they unfortunately rolled the maximum for their number of dummy Blinds, providing them with more decoys than they needed and requiring them to fight longer with their light units against the superior French armour.

The game opened with each side sending Blinds forward to try and spot the enemy. With the flat terrain, sighting distances across the wide plain to the west of the road were quite long and the recon elements of both sides were revealed. The French motorcycles decided to bail off of the road before anything with guns started to light them up, and drove off toward the woods, where they forced the hidden unit there onto a Blind, but were unable to spot the units through the woods. The first unit of S-35s was soon revealed as well and opened fire on the lightly armoured SdKfz 222 armoured cars, brewing up one of them. The other promptly scooted away and began to try and move across the stream to provide sighting against any French movement up the east side of the battlefield.

The German units on the Blind discovered by the French reconnaissance platoon revealed themselves and opened up on the dismounted French motorcyclists.  The hidden elements consisted of two PaK 36s with an attached Big Man and three PzKw IICs, and their combined fire pretty well crippled the recon troops.  The squads began taking a lot of wounds, which in IABSM provide a negative penalty to movement and shooting.  Since the troops were also in the woods, they suffered additional movement penalties, with the net effect that they could not move away from the withering fire and could only stand there and rack up wounds.  Eventually I made a GM ruling that any section with more wounds than effectives was routed and dispersed/surrendered and pulled them from the table.

In the meantime, the French armour began to fire on the German ambushers, shooting off a well aimed shot each turn and advancing slowly forward.  The PaKs and Pz IIs engaged the French armour but their shots just bounced off of the thick armour of the SOMUA tanks.  Most units in IABSM have one card per platoon, allowing coordination of the platoon's sections, but the French armour has a card for each tank to reflect the poor communications and overworked commanders of their vehicles.  However, if not under fire themselves, the French officer Big Men could activate their entire platoon.  The German fire was concentrated on the lead French units, allowing the French Captain to coordinate the actions of the following platoon.  The advancing French slowly got the better of the German ambush, destroying one of the guns and three Panzer IIs, but not before one of the French vehicles wandered within close range of the remaining PaK 36 and was immobilized and eventually abandoned.

The French advance had been focused up the main road, allowing the Germans to steadily bring Blinds onto the table and use terrain to prevent them from being spotted by the French armour.  These began working their way across the stream to move up the east side of the table and counter the French Blinds advancing there.  The Germans sprang their other ambush of another two PaK 36s and three more Pz IICs.  The PaKs began long range fire against the SOMUAs, which was predictably mostly useless, while the PzIIs began moving down the west table edge hoping to get in behind the SOMUAs.

Late in the game the French had a run of bad luck, twice drawing the Petrol Shortage card and then rolling the '6' required to immobilize a tank.  As the night was winding to a close, the German heavy armour finally arrived, with the Pz IVD platoon leading the way.  The first exchange went badly for the Germans as one of the Pz IVs was brewed up by the S-35s, but subsequent fire from the German tanks led to another immobilized S-35 and the loss of the main gun from another.

At this point our game time was running out and we called it a night.  The French counterattack had stalled, with four SOMUAs immobilized and another combat ineffective with a busted main gun.  The remaining three French tanks remained on their Blind, slowly slogging through the woods and stream on the east edge.  The Germans for their part had lost three Panzer IIs, two PaK 36s, one Panzer IVD, and an armoured car, but were in a position to overwhelm the remaining operational SOMUAs and to possibly exit the south edge with some armour.  In addition, much of the French armour was within the beaten zone for the German artillery in the unlikely event that the golden card sequence needed to call in artillery in these rules happened to come up.  Lucky rolls for French crews to continue manning the immobilized tanks could definitely have added an additional toll to the Germans, but it seemed likely they would hold the field on this day.  A perfectly historical result that closely mimicked the actual French counterattack of May 13, 1940.

Unfortunately, I got caught up keeping the game running at the end and didn’t get any pictures of the end game or the clash between the S-35s and Panzer IVs.

The group once again really enjoyed the game, which is a great result since these guys are all primarily board game players.  The table looked quite nice, although I really need to work on getting some fields of crops and such.  The scenario seemed to offer a good challenge to each side, and although there are definitely a couple of tweaks I might make, it seemed to provide a decently balanced game.  The French armour was very tough and significantly outgunned the Germans, especially the Pz IIs available at the outset of the battle, but the command and control issues built into the rules, along with the Germans' ambush positions built into the scenario, seemed to compensate. Another game is planned for next month.

Brian Cantwell


Since moving to Virginia, I've been meeting a number of different groups of gamers around the area. One such group meets at the FLGS (Your Hobby Place in Martinsburg) and usually plays various historical board games. However, Jim was interested in playing I Ain't Been Shot, Mum! from Too Fat Lardies. I'd had the rules for a while and had been wanting to try it out, so I was happy to set up a game.

I wrote a scenario based on the encounters between the French 3rd DLM and German 4th Panzer near Hannut in May 1940. With a first game, the smart play is to start small… but I am not always smart . I wanted to get a good taste of how the rules handled things, so threw in a little bit of everything. The French had a couple of infantry platoons, some MMGs, and a pair of 25mm ATGs. A platoon of SOMUA S-35s were in reserve along with a couple of 47mm ATGs. The Germans had a company of infantry to start the game, backed up by some MMGs with the company HQ platoon, a platoon of off-table 75mm infantry guns, and a patrol of a couple of light armoured cars. Coming up behind the forward German elements were three tank platoons:  a light panzer platoon of PzKw Is and IIs; a section of PzKw IVD; and a platoon of PzKw IIIs. The German mission was to push armour off the other side of the table.

IABSM incorporates all of the standard Two Fat Lardies staples (or rather, TFL games mostly incorporate IABSM mechanisms, since that game came first): card based activation, deployment of troops on 'Blinds', and the role of Big Men on the battlefield. The French had a number of Blinds on table (which could be units or dummies and in addition, each terrain feature was considered a Blind, so the French could be anywhere. The Germans deployed the infantry on four Blinds with a section of MMGs and the FO for the 75mm guns tasked to support two platoons on the left moving against the town. The HQ kept two MMGs and was to support one platoon and the recon armoured cars moving against the farmhouses on the right.

The first turn saw the French Blinds card come up first, so they were able to reserve their dice in case Germans later came into view. The Germans then moved forward and began trying to spot the various French Blinds. A successful spotting check verified the farmhouses were empty, but the HQ platoon foolishly tried to sprint across some open ground in front of the orchard. Suddenly French small arms fire erupted from the low stone wall enclosing the orchard. An entire platoon of French infantry was packed into the space! The HQ platoon was decimated, with many casualties and wounds (a colourful term in the game for negative cohesion), and would play only a minimal role in the rest of the game.

The Recon armoured cars rolled forward up the road on the right and paused to machine gun the French infantry in the orchard while trying (unsuccessfully) to spot some of the Blinds. The German infantry on the left moved up cautiously through the woods and revealed a couple of French dummy Blinds. The first German tank reinforcements arrived in the form of a platoon of Panzer Is and IIs, and were committed to supporting the infantry against the town on the left. As some Frenchmen were discovered on the edge of town, the tanks rolled out to hose them repeatedly with 20mm and MG fire.

Back on the right, the third German Shutzen platoon was attempting to move forward to seize the farmhouse and outflank the orchard. However, apparently the hedge at the end of the field was covered in razor sharp thorns as my troops had great difficulty getting over it, leaving them caught out in the open to be fired on by the French in the orchard and some MMGs further back. One section was badly mauled, but one reached a marginally safe position.

With time getting on, the armoured cars began to press up the road looking to ID more French Blinds. They succeeded in locating the French 25mm ATGs: the hard way! However, the thin-skinned armoured cars survived the onslaught with only some engine damage to one car. The tank fire against the town was followed by an infantry assault. Despite a substantial advantage due to defending the buildings, the French were driven from the front of the town and German troops moved up to take the first row of buildings. In the last turn, the SOMUA platoon deployed off of their Blind and fired off a barrage of shots against the light panzers, but succeeded in only damaging a couple of engines.

At this point we ran out of time and called off the game, but it was clear that the French enjoyed a substantial advantage. The unit holding the orchard was a little beaten up, but so was the German platoon near them. A couple of Panzer IVDs had arrived to help, but were very slow in deploying forward. The Germans had seized the front of the town on the left and inflicted a lot of damage on a couple of French sections, but still had a number of French in the town that would have to be overcome in close street fighting. They would get little help from the light panzers, as the thinly armoured and lightly armed tanks would be no match for the advancing SOMUA S-35s.

I knew that I had put together a game too large to likely finish with the first try of a new set of rules, but as stated above the real purpose was to try out the rules and see how things worked. The game was fun and I'll happily play it again… but probably only until Fireball Forward gets finished! I generally like games with a little chaos in them, as it seems to better reflect first person accounts from the war. Not knowing exactly when things will move or whether your infantry can make it over the hedge adds interest and forces you to make really sound judgments, or to take risks. However, the rules are very British, meaning that they are written in a manner that is long on flavour and short on specifics. For instance, when firing, rather than have a list of modifiers, each shot is simply classified as GreatOkay, or Poor. In and of itself this is not a bad thing, but in a game without an umpire, it does add to the resolution of each shot as you have to stop and make sure that you have an agreement with the opponent as to what each shot is rated.

Like a lot of other British game rules I've played, it also tends to have a separate mechanism for each type of action, which definitely adds to the learning curve and makes a reference sheet essential. I also have a love-hate relationship with card-based activation: I like the randomness and the ease it brings to inserting special events, but dislike the waiting around while each individual unit takes its turn. However, most of those issues are either acceptable parts of the game's charm or just things that I can get better at with increased play. However, the firing chart is unfortunately central to the game and a real drag on it. Having to total up several dice and cross reference the results on a full-page table to find the results of each shot is just a pain. Other gamers may not be put off by it as much as myself I guess. We definitely need to give it another go (or two) to give the mechanics a fair shake.

Brian Cantwell


Michael Broadbent an I tried out the IABSM rules with the Rising Sun supplement by the Lardies on a small game to test out the mechanics of the rules. Of course we had a few teething problems which I'll be addressing with the group forum, but overall we were very happy with the outcomes.

My own painted force of Japanese of two squads (one with lmg the other with knee mortar [sniper included in one of the sections]) and one Hollywood Japanese Big Man pitted against two Elite Aussie squads (sniper, 2in mortar included) with two Big Men, one HMG and a platoon of medium mortars in support. The latter was not on board.

I split my two sections up the protect the bunker with the lmg inside the bunker and a small screen of flankers and forward outpost. A reserve of Japanese was situated behind the bunker on another feature.

Michael's forces advance up the centre with a flanking force and destroyed the outpost and sniper. The lmg open up an inflicted a number of casualties. I decided a Banzai charge was on offer and so charged his flanking force only to take more kills including the big man then Michael. We called it there, but it was only to test out the rule system and we will be gaming more of this period in a few weeks when Michael paints up more Aussies an I finish painting a further section of Japanese with some support weapons.

Here are some photos of the game using Michael's terrain. The figures are all from Company B/Brigade Games. The Type 95 is from the same company and was thrown in for some eye candy. This was my first attempt at painting an AFV. Oh, and I've worked out a better way in painting my Japanese, in particular their faces etc.

Please enjoy an I do recommend the rule system to anyone who has been chasing the grail for a long time.

Helen


1st Platoon plus HQ, 4th Kompanie, 2nd Fallschirmjaegers ran from one end of the table to the other whilst inflicting thirty-two casualties and nailing two Shermans from 2nd Platoon plus HQ of B Company, 2 Para, and only losing one squad to excess losses. 

Nick is a wizard with the Lardie dice: way too many beers and pies show up when he's rollin!

johnanddave45


The 1st Platoon and HQ section of 4th Kompanie, 2nd Fallschirmjaegers and three STuG IIIGs completely whacked 1st Platoon and HQ section B Company, 2 Para plus three Shermans in eight appearances of the Tea Break Card, not counting the Tea Break Card turned as the first card in the game. MG42s and -34s are not to be trifled with! The whole thing took an hour and forty-five minutes.

Due to a combination of poor tactics, a scenario design flaw and awesome die rolling on one side and horrid on the other, the Brits finished the game with a Sherman on the table and eight routed figures off table...out of forty-six!

johnanddave45


My turn to host a game of I Ain’t Been Shot, Mum, so I chose a scenario from the first September War scenario pack that would allow me to field some of my new motorised infantry vehicles: #24 Ambush in the Beskides.

The game would feature a German attack on a prepared Polish position. The Germans would have the numbers, but had a time limit, and those Poles were very well dug in!

View from the German side of the table

To defend the two villages shown on the far side of the picture above, the Poles had a small company of motorised infantry: three two-section platoons, two two-gun MMG teams, three AT guns and a couple of 81mm mortars. Starting the game off table were a platoon of reconnaissance tankettes and a platoon of Vickers tanks.

To take either of the two villages and achieve victory, the Germans had a full company of schutzen and a full light panzer company consisting of 22 tanks, all Panzer Is and IIs.

The Action

The game began with the Germans sweeping forward under Blinds. In fact, there were so many Blinds needed that I had to ship in some Italian imposters to make up the numbers.

The Germans arrive

The Poles chose to remain under cover and spot, and pretty soon there was a line of German tanks on table and ready for action.

So many tanks! I had to use all my Panzer I and II models plus ship in some Panzer 38 (t) as proxies.

Both sides opened fire with their long range weapons: the Poles with their mortars and the Germans with their infantry guns, but neither had much effect. The Poles couldn’t see any infantry yet and their mortars didn’t do much against tanks; the Germans were firing at well dug-in infantry.

Things only began to get interesting when the Germans got close enough to spot the Polish infantry positions in front of the two villages, and the Poles revealed their anti-tank guns, all emplaced on the central hill (so able to fire over the villages at the advancing enemy). The Poles also received their first re-inforcements: a platoon of tankettes.

The German tanks began raking the Polish trenches in front of each village with their machine guns and 20mm cannon. Casualties were steady rather than gross, but it did keep the Polish infantry well pinned down.

In return, the Polish anti-tank guns began inflicting significant casualties on the German armour. At one stage it seemed as if each time a Polish gun fired a German tank went up in flames! John, running the Poles, was rolling very well, and when the Polish anti-rifles added their fire, things began to look a little grim for the Germans.

Now was the time for them to send in their infantry. Unfortunately it was all still under Blinds, and with the chip bag bursting at the seams with so many Polish and German platoons/weapon teams already on the table, the German Blinds chip was doing a very good impression of the Scarlet Pimpernel!

The German Panzers kept plugging away at the Polish trenches, losing a steady trickle of tanks to Polish AT fire, but gradually the Polish infantry were being whittled down.

On the Polish right flank,where the German attack had been concentrated, the remnants of 1st Polish platoon had to retreat out of their trenches, with the situation only partially recovered by the arrival of the Polish tanks. Here are some shots from the middle phase of the game:

Endgame

Unfortunately for the Germans, the day was getting on, with the battle due to end with the arrival of nightfall and the promise of more Polish reinforcements arriving. Their infantry had begun to de-cloak from their Blinds, but it was really too late to make a significant difference. With their Panzers still under fire from the central hill, the German commander ordered a retreat.

So the Germans had failed to take either of their objectives (one in each village) but really only because they had run out of time. Both John (the Poles) and Dave agreed that the Germans would eventually have overrun the villages…in fact, it was probably only a turn or two away…but that’s the way the cookie crumbles: their time was up.

Counting up the casualties, we were all surprised to see that only eight out of twenty-four German tanks had been KO’d: it certainly seemed like more. That was really the extent of the German casualties, apart from a few newly-decloaked infantrymen getting hit and killed by mortar fire. The Poles, on the other hand, had lost three of their six infantry sections and half their tankettes: they would certainly have been at a serious disadvantage in numbers had the Germans been left to press home their attack.

The key to the game, really, were the three Polish anti-tank guns dug-in on the central hill. Without them, the Germans would have literally driven over the Poles in the first few turns.

All in all, an excellent game, with both sides leaving the house chatting through what they could have done differently. Captain Hindsight, as they say, really does have 20:20 vision!

Robert Avery


Sunday saw myself and Philip pitch up at Des’ shed o’war to play the second game in his set of linked battles of a (fictitious) British attack on German positions north of Caen in 1944. I had played the first game against Des a few weeks ago but I stupidly forgot to charge my phone so couldn’t take any pictures hence the lack of report on it! Figures and models are all 15mm from Des’ stunning and impressive collection and all the lovely terrain is his as well. Rules used are our dice activated version of IABSM -I Aint Been CoC’d Mum, as seen in the 2019 Lardies Annual.

‘O’ Group, Btln. HQ, 14 Essex Regt, just North of Plessy:

“Right then chaps, listen in. Yesterday ‘A’ Company tried to break through and suffered a bloody nose from some very determined defenders from Kampfgruppe Darchin. However they did manage to write down the Jerry forces (we expect the defenders to be short at least one platoon and definitely 2 Panzer IV’s) and secure a good start line for todays attack running through the two orchards and the village. 1 Platoon from A Company has remained in the north part of the village and will be under command for today’s action, you will also be supported by battalion 3″ mortars and a troop of Churchills from Brigade’s attached Squadron, I have ordered up a stonk from the Gunners too which will be your cue to get the ball rolling. Your task is to take the remainder of the village and breach any further defences to open the road to Caen. I’ll leave you to co-ordinate with mortars and tanks. Good luck.”

‘O’ Group, C Coy. 14 Essex:

“Alright then everyone it’s our turn now. When the artillery starts to land on the orchard behind the village I want 9 Pltn to push forward a small patrol from their position in the right hand orchard through to the end of the orchard across the road to try and spot if the Jerries have anything in the Farm complex or along the hedges between there and the orchard that is getting stonked, once patrols are back then to advance through orchard, take any enemy under fire and develop attack either on the farm or into the central orchard beyond the village. 7 Pltn is to move through the orchard it is located in on the left to the end nearest enemy and then locate any enemy in the wood to the front. Once located enemy is to be engaged with fire then assaulted if feasible. 8 Pltn is to deploy behind 7 Pltn and pass through on my order to carry on the attack on the left flank which will be the main effort. Once they are moved through then 7 Pltn will act as Coy reserve. 1 Pltn, A Coy is to clear the rest of the village and then will be deployed to either support the attack on the woods or to the right flank. Troop of Churchills to be deployed as I see fit to either shoot infantry into positions held by enemy or tackle any armour. Once the line of the wood to the farm has been secured then await further orders. All clear? Good. Questions?”

And so we began…

There was a German blind in the village immediately to my front which I quickly scouted out to find it was nothing more than a few stay behinds making noise as cover for the enemy to withdraw. With that knowledge I started moving 1 Pltn forward all the time trying to spot any nasty surprises in the wood to the left. At the same time I moved my own patrols forward on the right (dummy blinds) to try and spot any Germans in the farm or in the vicinity of the central orchard. As both dummy blinds spotted nothing I then moved 9 Pltn forward until they reached the end of the orchard where they finally were fired upon by the survivors of the enemy section that had withstood the pre-game stonk of the orchard. They also drew the attention of a Panzer IV lurking next to the farm! 1 Pltn had also spotted a Panzer IV lurking in the wood and both platoons swiftly got their 2″ Mortars busy smoking the enemy tanks to block their view. 1 Pltn quickly dashed for cover in the houses and gardens to avoid the incoming HE fire from the tank but also sent their PIAT team forward in a dash to the garage building at the end of the village. This building looked like it could be used to get a tricky shot away on the tank in the woods and 216 Jenkins on the PIAT quickly made his way up stairs and to the window. Having a spring action bomb thrower came into its own as he managed to get a couple of shots away (try doing that indoors with a Bazooka or Panzerschreck!) which didn’t do any damage but this attention and the smoke blocking its view caused the tank to withdraw. Meanwhile 9 Pltn was quickly winning the firefight with the Germans in the central orchard whittling the defenders down quickly.

Next up 7 Pltn advanced through the orchard and spotted an enemy AT gun and immediately took it under fire from 2 sections and the platoon 2″ mortar, pinning the crew and causing casualties. About this time too the Company CO along with the 3″ Mortar FOO moved into the rear of the village and immediately got on the blower to bring down fire on the German section in the central orchard to help nullify the threat there and to help the attack progress. The mortars came in quickly and bang on target (a feature of the day happily for me!) and with the combined efforts of the fire from 9 Pltn and the stonking pretty soon the defenders were all killed with only their NCO seen legging it for safety. Now that this position was cleared 1 Pltn was ordered up out of the village to move towards the vacated enemy position. I also called the Churchills forward to advance between the village and 9 Pltn on the right as I now knew the location of the enemy tanks and thought this position would be a good one to hold them in before committing them further.

Over on the right 9 Pltn pushed a section along the hedges towards the farm to check it out which was countered by the Germans moving their Panzer IV across behind the farm on our right flank and firing on them, which was quickly countered by a smoke round from the 2″ completely blocking it’s view causing it to withdraw and allowing 9 Pltn to move the PIAT team forward under its cover. With that threat dealt with 9 Pltn then advanced the remaining 2 sections out of the cover of the orchard aiming for the hedges to the left of the farm which unfortunately wasn’t as empty as I thought and erupted with the terrifying sound of a MG42! The resulting fire decimated one section and caused casualties in the other one supressing them both. However fire from the third section lining the hedge, the platoon mortar and supporting fire from the tanks and 1 Pltn quickly eliminated this new threat and the lone survivor was seen abandoning the MMG and making for the rear.

Meanwhile, over on the left flank, 7 Pltn had slipped a section out of the orchard tasked with working around the flank of the enemy AT gun which was still being shot up by the rest of the platoon to assault what remained. Unfortunately they instead were taken under brutal close range small arms fire from an enemy infantry section located just inside the treeline. Although the section suffered terribly the enemy also suffered from a withering fusillade from the remainder of the platoon which quickly either killed or routed the ambushers. With the threat of the enemy infantry gone and the AT gun also neutralised 8 Pltn pushed quickly through 7 Pltn’s position and deployed ready to push through the woods with 7 Pltn now moving into reserve as per plan. 8 Pltn were soon in action as their left hand section made contact with the retreating crew of the AT gun and much to everyone’s surprise came off worse in the ensuing close combat! Then the tank that had been in the wood earlier appeared at the rear of the wood and started lobbing very inaccurate HE shells about (poor Philip had terrible luck doing this all day much to my amusement). 8 Pltn quickly pulled their men back and the shout went up “Bring up the PIAT”, and with that the plucky team dashed forward through the trees but couldn’t quite get into a position to get a shot off. Luckily for them though the German tanker ordered his vehicle to reverse and the driver gave it a bit too mush and the metal beast presented itself side on, the first shot from the PIAT missed but the team worked quickly and got another off which slammed into the tank and caused it to brew up immediately! With the enemy seemingly cleared from the wood 8 Pltn then sorted itself out into formation to await further orders.

And then the tank battle started. After being thwarted in its attempt to chew up 9 Pltn by judicious use of smoke the Panzer IV on our right moved round to the left of the farm again and started to engage the Churchills and a tank duel quickly started which seemed to take over the battle for a good while, and resulted in one Churchill being knocked out but the Panzer IV suffering slightly from non-penetrating hits that caused it to briefly pull back out of line of sight of the remaining two British tanks. This was also when a third Panzer IV revealed itself and lurched forwards making for the right of the wood and looking to insert itself between 8 & 1 Platoons whilst using the orchard to cover itself from my tanks. Once again the shout went up for the PIAT and the ever ready Jenkins from 1 Pltn rushed forward into the road through the orchard and with his last 2 rounds dispatched the advancing Panzer. With the death of this tank the Churchill troop commander ordered his other surviving tank to sweep round the orchard along the main road to try and take the remaining Pz IV in the flank either dispatching it themselves or in concert with his tank. Sadly this wasn’t to be as the Germans had a Jenkins of their own and it was ambushed by a hidden Panzerschreck team as it neared the burning wreck of the recently brewed up panzer.

Taking stock of the situation I knew that I had wiped out one enemy section, one was reorganising and badly shot up in the cornfield on the left past the woods, one MMG and an AT gun were also kaput and 2 tanks were knocked out but I knew the enemy must still have some troops left so I decided to soften up some possible locations before renewing the attack. I had already been mortaring the wood to the rear of the battlefield as I figured that is where I’d place an AT gun if I was defending but now decided to switch fire to the two buildings either side of the road just past the wood. After I had stonked this position for a bit I was going to push 8 Pltn through the wood to take the buildings and hence secure the exits from the village. 7 Pltn were to get ready to advance through 8 Pltn once this was completed whilst over on the right 9 Pltn, whose two sections still stuck in the open were now taking harassing fire from the remaining panzer, would try to go for the PIAT hat-trick whilst the remaining Churchill moved up to help. 1 Pltn was to wait for the last Pz IV to be taken care of before moving into the central orchard and setting up a base of fire to help 7 & 9 Pltns to advance further.

Unfortunately for me my mortars, which had been spot on all day, now decided to go way off target and the stonk on the two houses landed way off over on the left flank landing on the shot up enemy section in the cornfield. More misfortune followed as the two sections from 8 Pltn that I was moving up under cover of the barrage stepped out a bit too lively and just broke cover from the woods triggering an ambush by an enemy section lurking in the flowerbeds, the devastating close range fire saw the PBI take casualties and they fell back to the edge of the wood. Luckily the mortars were dragged nearly back onto the original target and the ambushing German section now found themselves under the fire of the battalion mortars. However this didn’t mean the end of the suffering of 8 Pltn as a MMG configured MG42 now opened up from the edge of the cornfield further piling on casualties and causing the 2 sections to break back through the woods. While this sanguinary scene was playing out over on the right 9 Pltns PIAT team had worked its way along the edge of the farm through the pigsty and was ready to fire a shot off on the last panzer. Philip was now fully suffering from PIAT terror and switched the tanks full attention on the plucky team killing one of them and causing the survivor to fall back into the pigsty (insert own jokes here!). What this did do, however, was to allow my Churchill to move up into a position to take the German tank under fire again which it did, and whilst hitting the target didn’t cause it to brew up it did convince the already rattled crew to bail out and head for the rear.

With this action we decided to call it a day. Philip’s lads had put up a very spirited defence causing a lot of casualties to my lads with both 8 & 9 Platoons suffering a section+ losses each and my supporting Churchills down to 1 tank too. However with my mortars now on target and causing casualties to the Germans in the flower beds and the largely intact 1 & 7 platoons ready to move forwards once the mortars had finished their work we said that the Germans would have withdrawn and the Brits would have consolidated on the line they held from the far edge of the wood, the central orchard and along to the farm. So the scene is set for the next battle when B or D Company take over but will probably be facing a fresh German unit.

Many thanks again to Des for putting the game on and for Philip for being a cracking opponent as usual, it was a tense but fun affair with a grate narrative and some fantastic bits of action. Also I do have to say again what a joy it is playing on such a terrific table, top work Des!

Iain Fuller


Breakout from Le Plessy fought today with Philip Andrews and Iain Fuller. I umpired the second game in the series with the Brits trying to push through the German second line.

In the first game the British had cleared part of the village and surrounding orchards and they would now have to push on and clear the woods and surrounding farmland. The British had a fresh company and took mortar support, a Churchill troop and an extra infantry platoon. The Germans were a weakened Kompanie with three Panzer IV’s and took extra MMG and Pak support.

This was an intense game with the dice ebbing and flowing, with lots of double moves. In the end the Germans had held but were in a poor state, the British commander also decided that the last push would be too bloody and decided to stop the assault. Good ground had been taken and the Germans were in a bad way.

Great to watch this unfold and see how both players plans unfolded.

Roll on game 3

Des Darkin


A game played at Gigabites Cafe in Marietta, GA back in December and it gave me a chance to get my Commandos on the table for the first time.

This scenario came from the Forgotten Battles from France to Germany, January to April 1945 scenario book from Anschluss Publ. The gist of the game is that the defending Germans are expecting the British to come from the west and have placed their defenses accordingly. However the Commandos have worked all the way round to the east and are launching their attack from that edge.

This means that not only does the German player have to not know this but there has to have enough table to the west to make that attack look plausible.

It was a bloody game for some units.

The SS Training unit lost 23 men form just 2 platoons. 1 platoon was still unbloodied. 1 MMG was wiped out and the AA guns had all displaced.

Jon's 1 Troop had 27 casualties (of 48). 2 Troop of Sean and Beca had 25 casualties and lost 1 Section Co-leader.

The tanks were still off board and 3 Troop and the weapons Troop just moving into town.

The Germans didn't really have a good chance to 'win' this one, but they did cause a lot of hurt on the Commandos.

Mark Luther


Something of a lost battle report here from last Autumn (a couple went AWOL), with Phil and Jenny running a 15mm I Ain't Been Shot Mum (IABSM) game down Bristol Independent Gamers (BIG) with Andy joining Jenny to defend Stonne and me donning my coal scuttle helmet with Phil to storm across Northern France Blitzkrieg style!

IABSM is a company level TFL game that has been around some time now but this was the first time I'd had a chance to play it.

That however was the end of the game, and although badly mauled the French were still holding part of the village and the Germans had failed in their orders to secure Stonne!

Steve