First Game of To The Strongest

Whilst I was up in Edinburgh playing IABSM the other week, I also had the opportunity to watch a game of To The Strongest, a set of quick-play Ancients rules based on drawing playing cards as opposed to rolling dice, and using grid-based movement rather than tape measures. Well it all looked quite fun, and a useful way of getting some of my Ancients figures out onto the table for the first time in years.

I’d rather have been playing my own Vis Bellica rules, obviously, but the fashion these days is for quick-play, so if I want to get some games in with the group I usually play with, it was TTS all the way!

A quick trip to the BigRedBat’s shop (you can click on the pic of the front cover to go there) and I purchased a copy of the rules and a suitably grid-ed mat. Army lists are free to download, along with a rather handy army calculator that does all the hard work of picking your force for you. Everything arrived quickly and correctly, so all in all a jolly good start to the TTS experience.

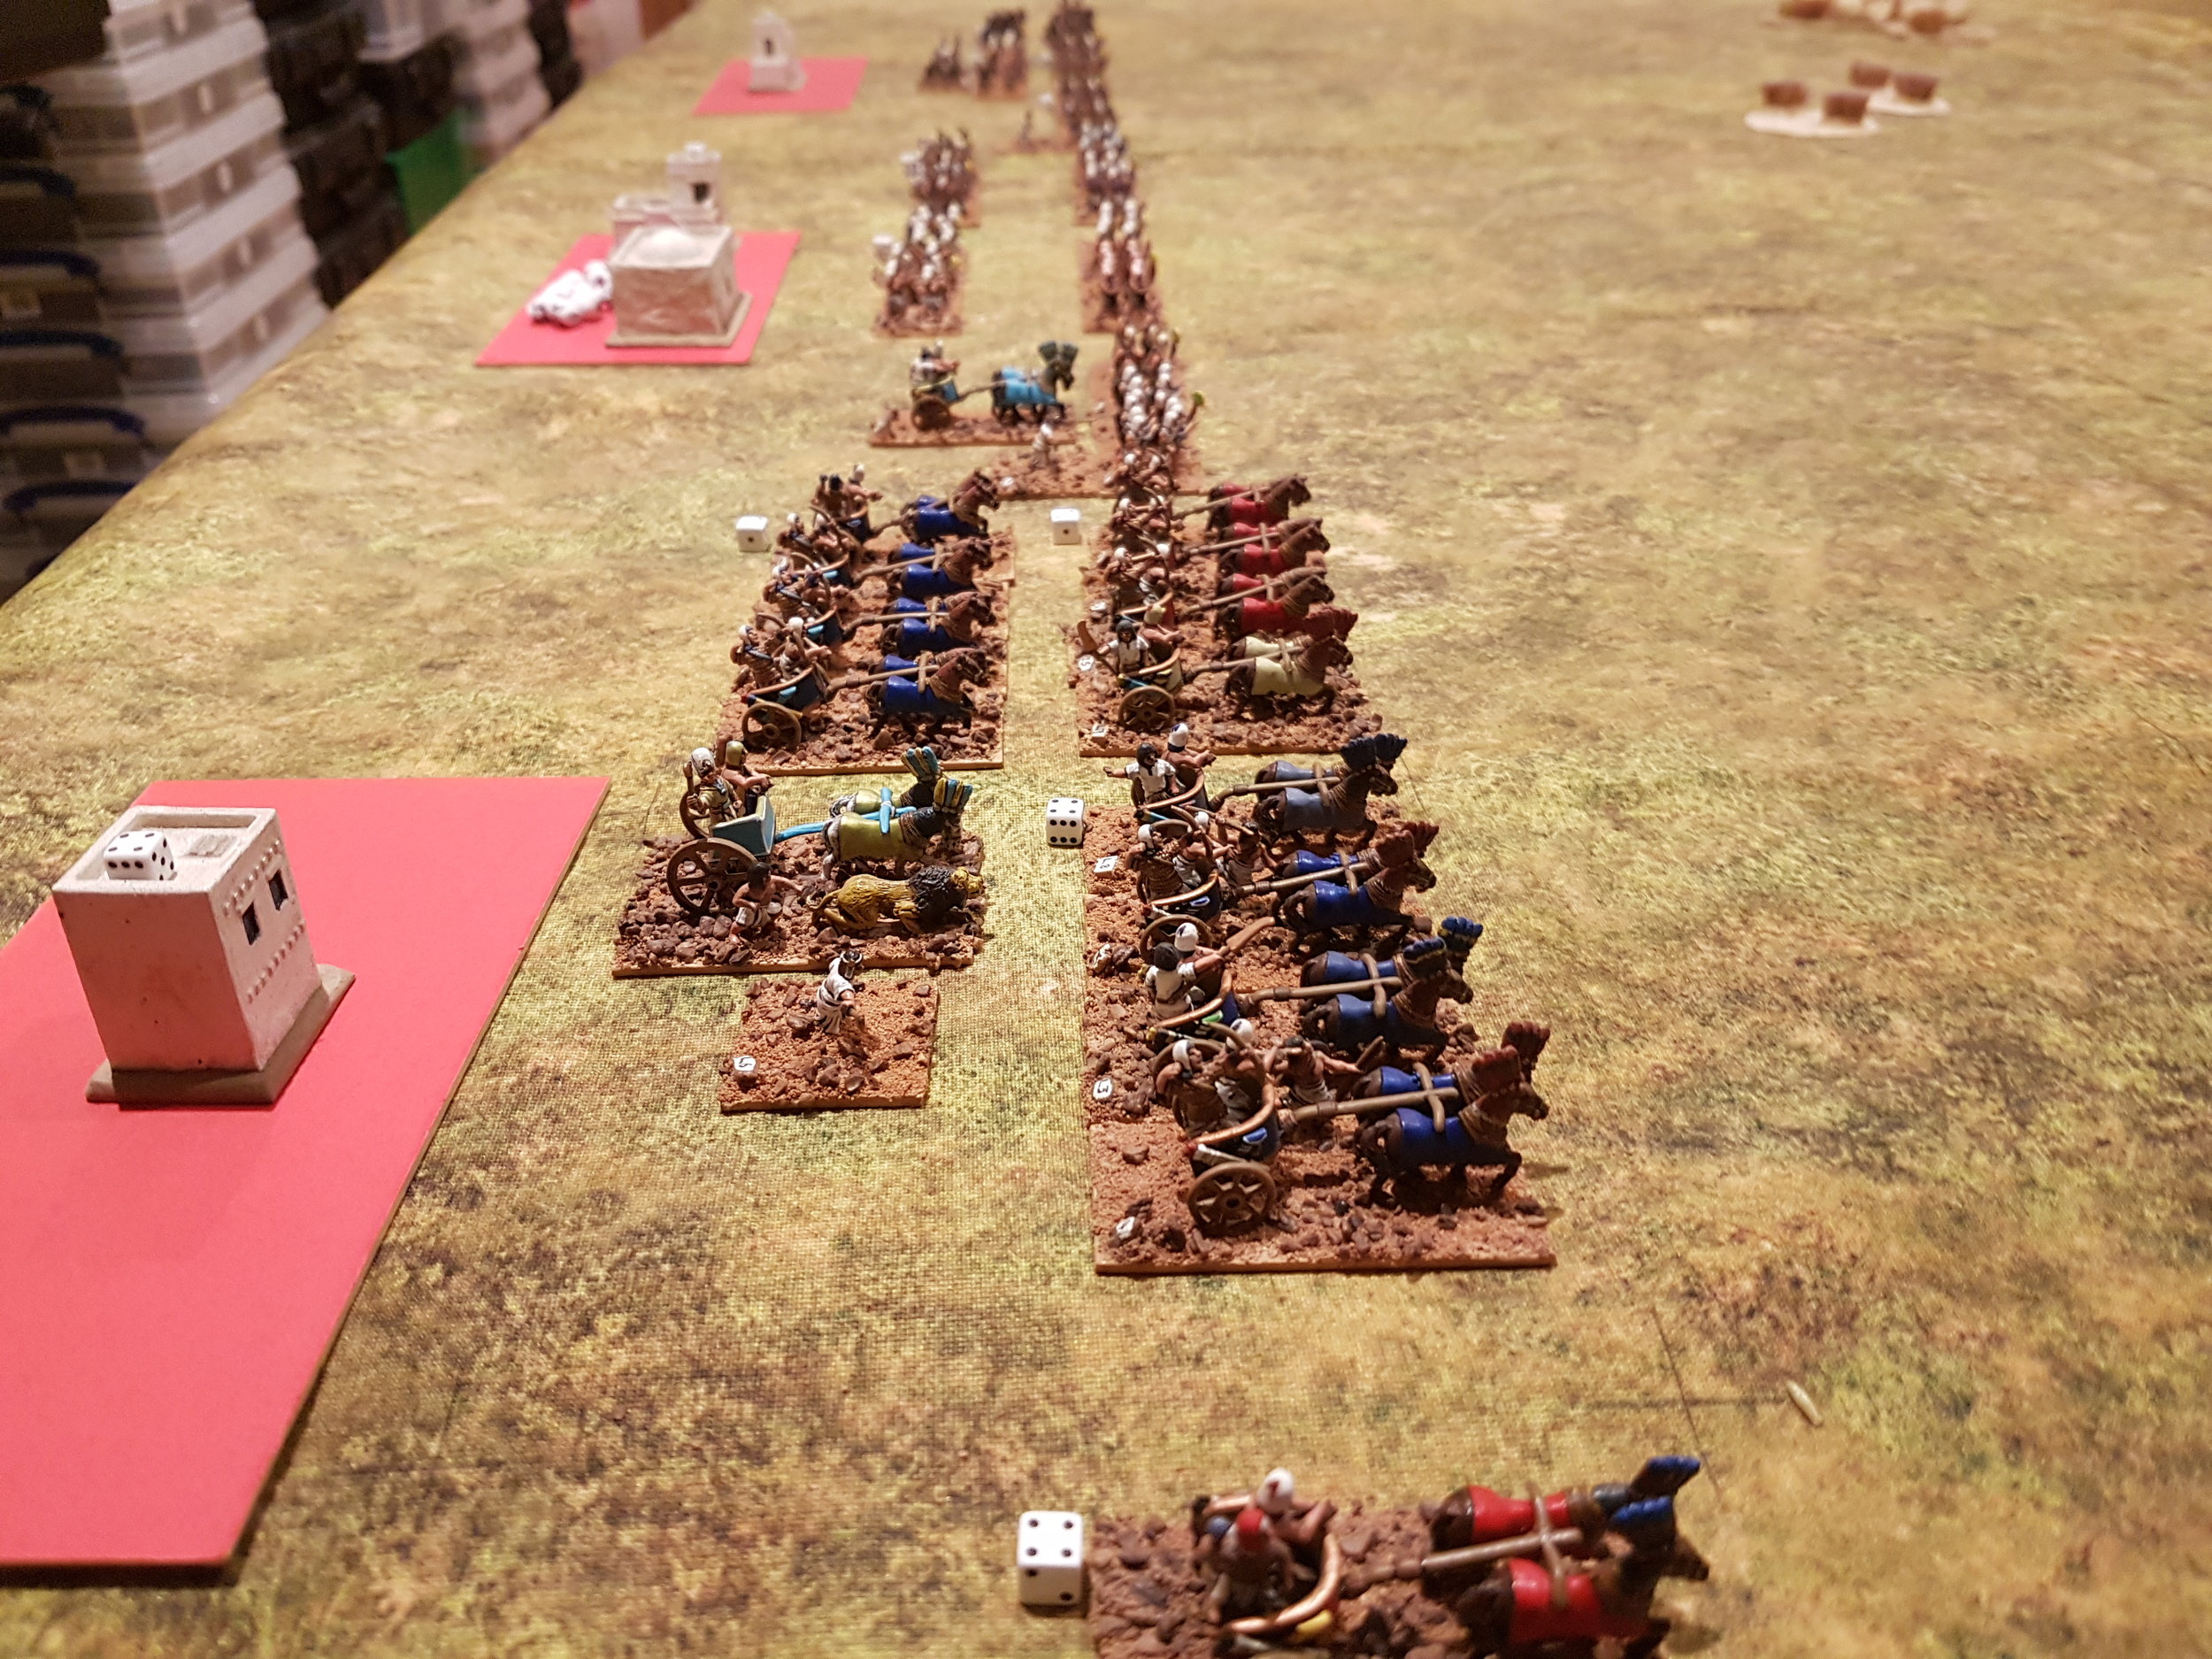
All my 15mm figures are based as elements for Vis Bellica, but I soon realised that combining two VB bases would give me a suitable TTS unit with a frontage of 12cms, perfect for the 15cm grid mat I had bought, and allowing me to show a unit as disordered merely by putting the two VB bases at angles to each other. VB bases with a narrower frontage (elephants and light chariot units) could be fielded as four VB narrow bases.

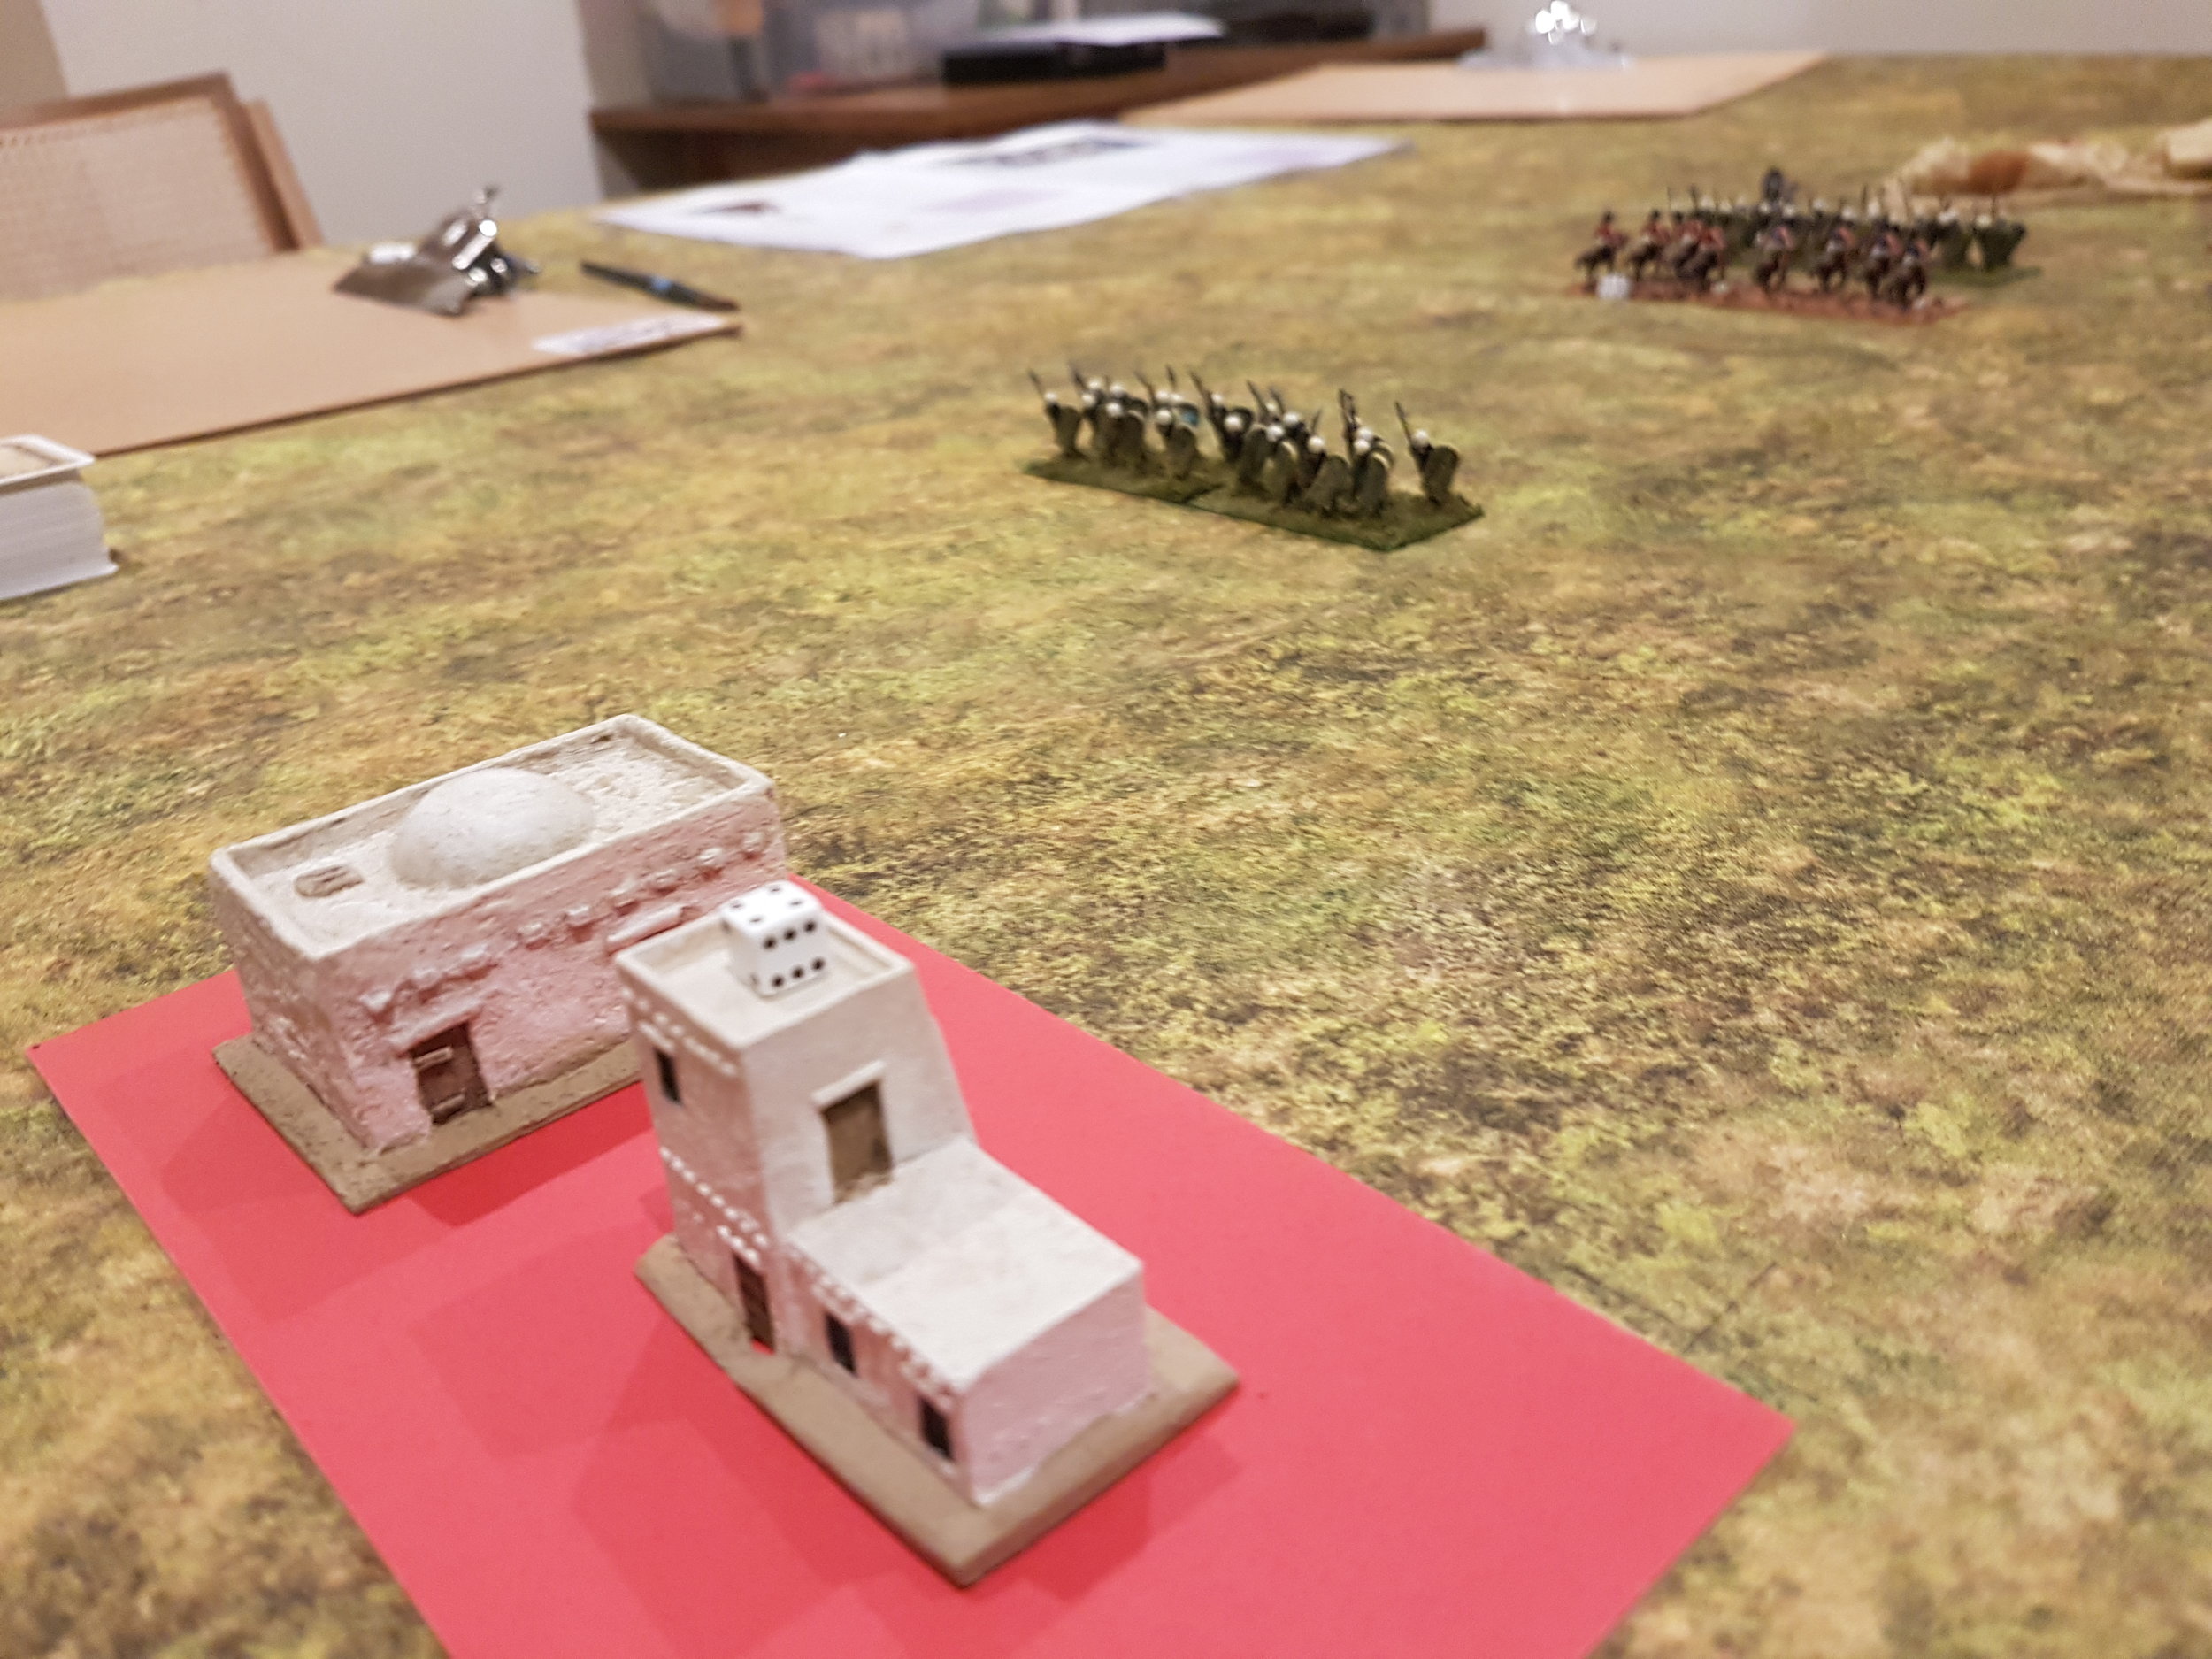
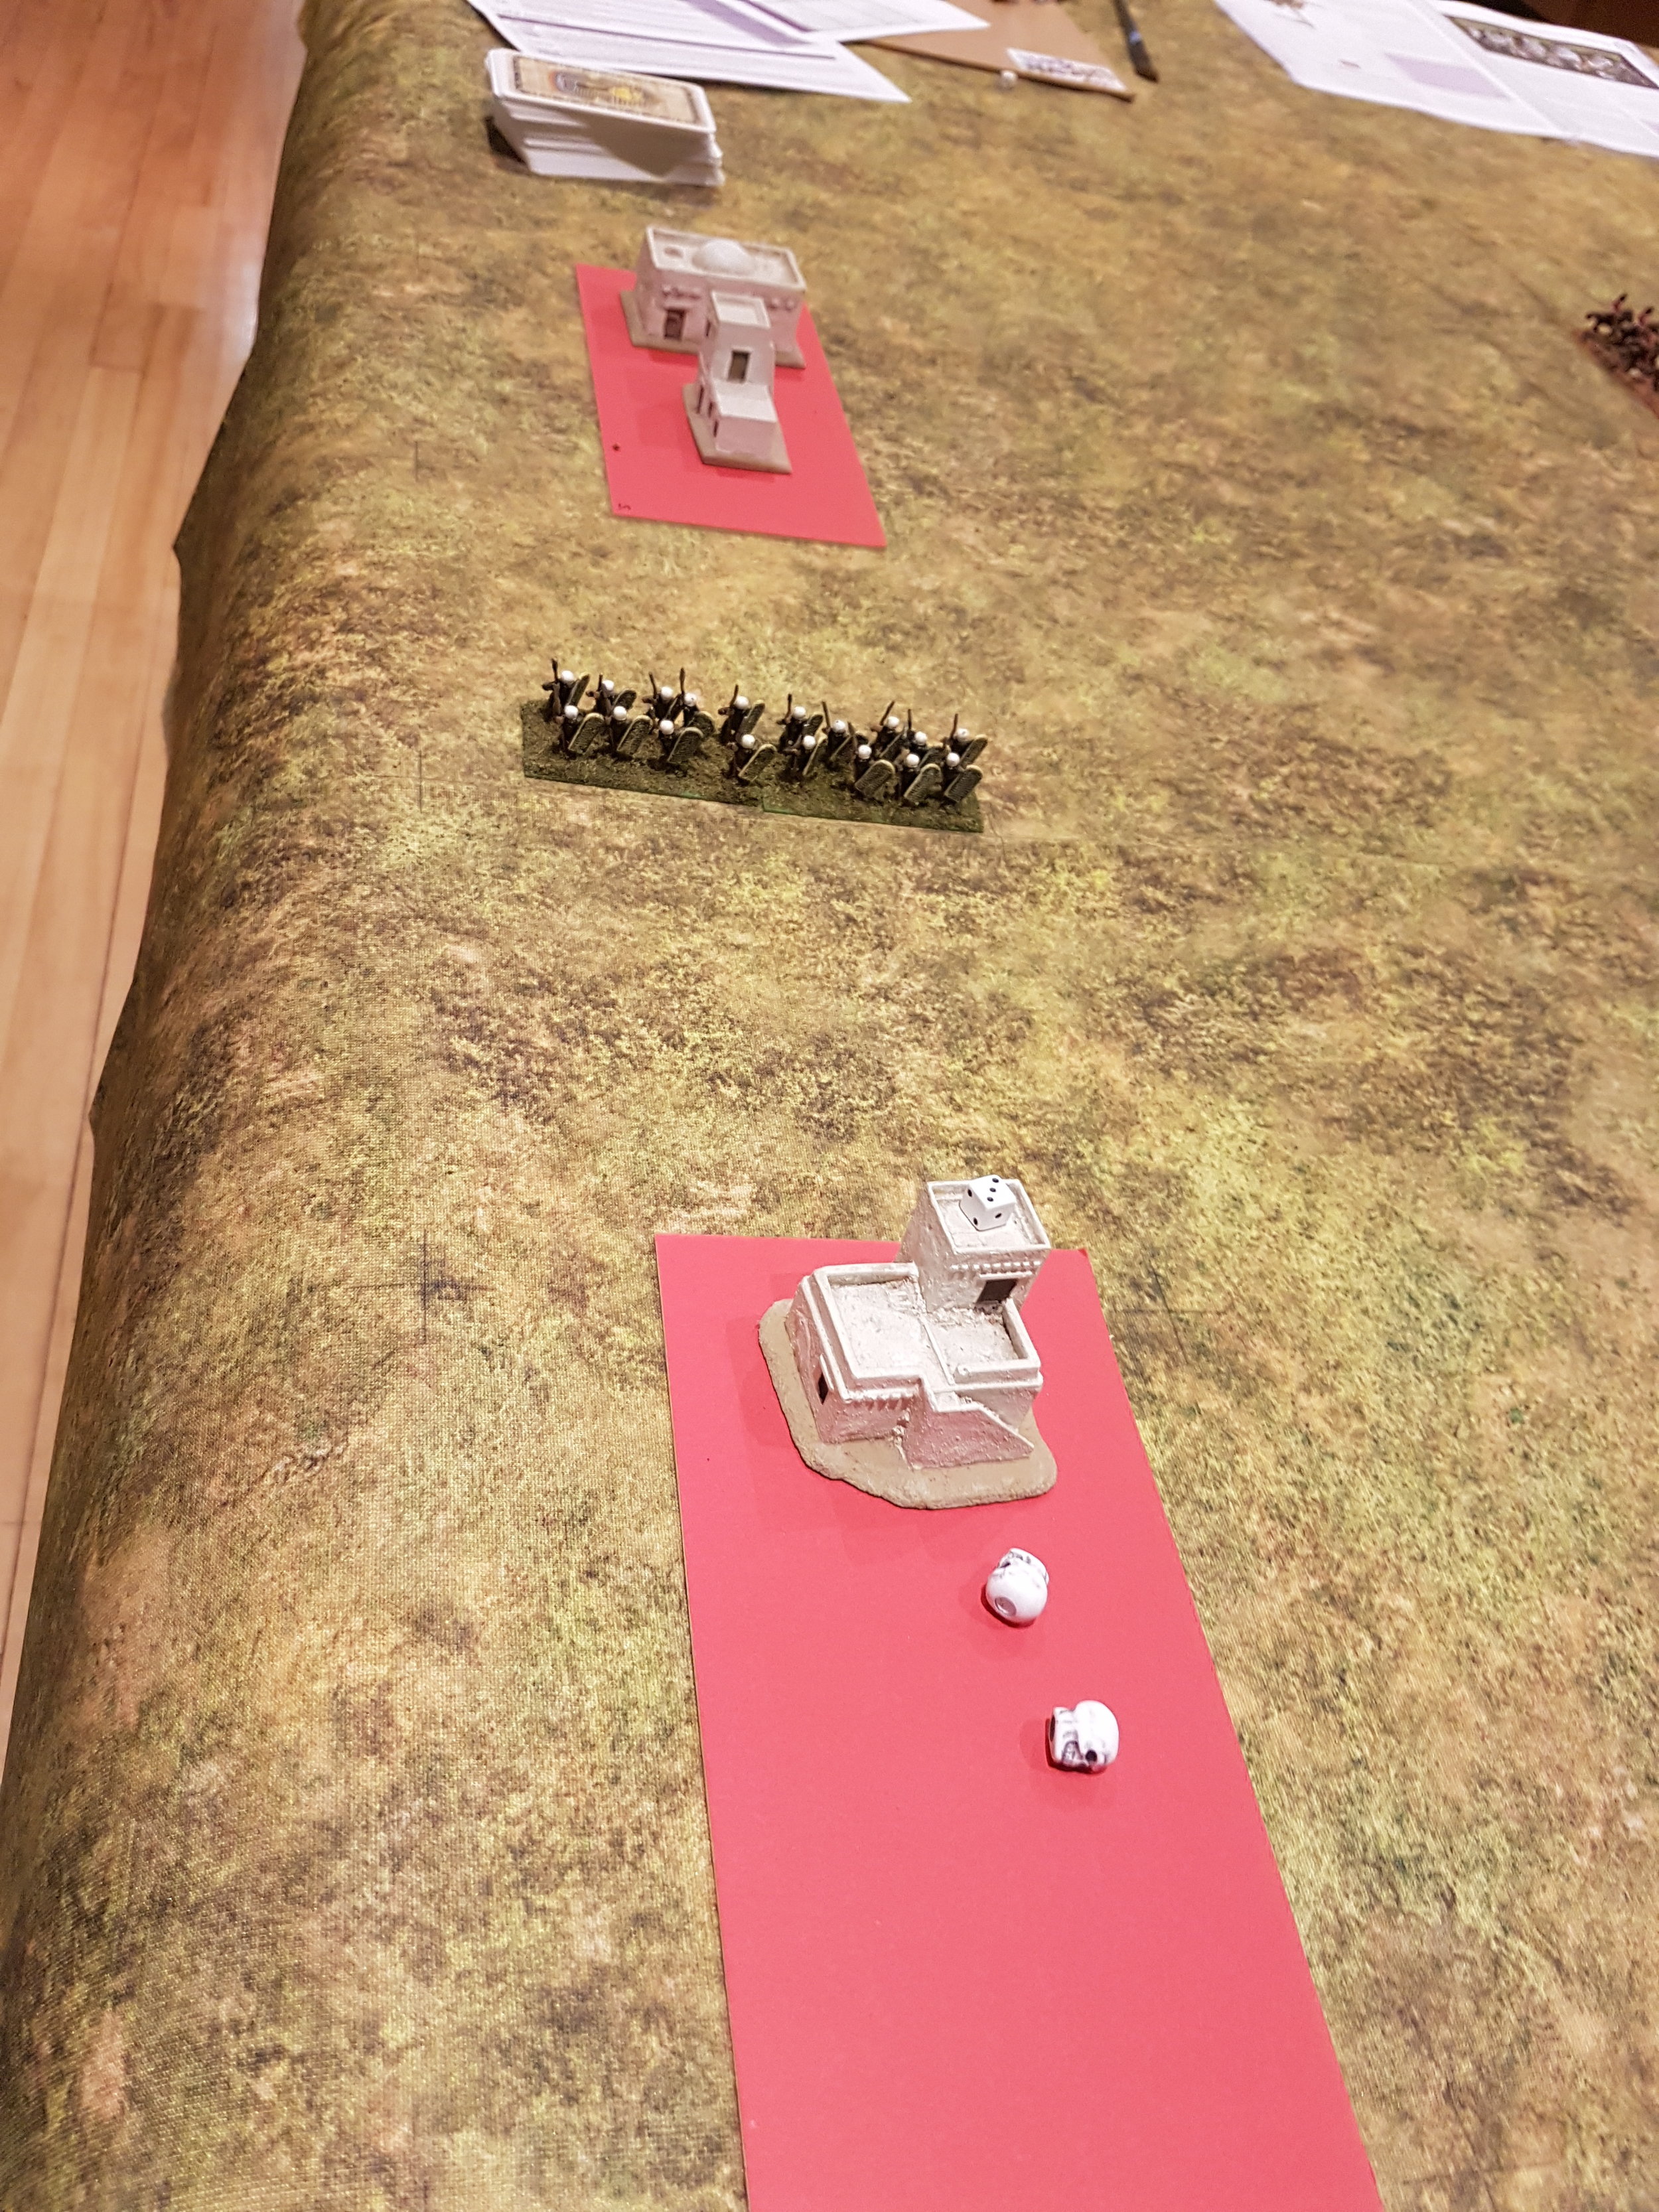
Formed and disordered units for TTS, along with a dice to mark ammo. Note grid intersection just to the right of the ordered spearmen.

What this would also mean, of course, is that I effectively needed double the size of a normal VB army for a TTS force…so double the number of figures!

Luckily, I went big when I bought my VB armies, so was able to field a force of New Kingdom Egyptians and Assyrians without the need to do anything except remove a bit of dust from the figures.

I did however realise that my hoplite and Macedonian armies were going to be short a pikeblock or four: TTS phalanxes are double depth, so I’d need to field them as four VB bases, and even I didn’t have a four-times-normal sized Greek or Macedonian force. The same was true for Celtic warbands, so my Ancient Brits might also be short of a few warrior units. Ah well, if I like the rules I’ll just have to buy some more figures…

Ed.’s Wife’s Note: Any excuse! He bought them already, before he even tried TTS out.

The Cast

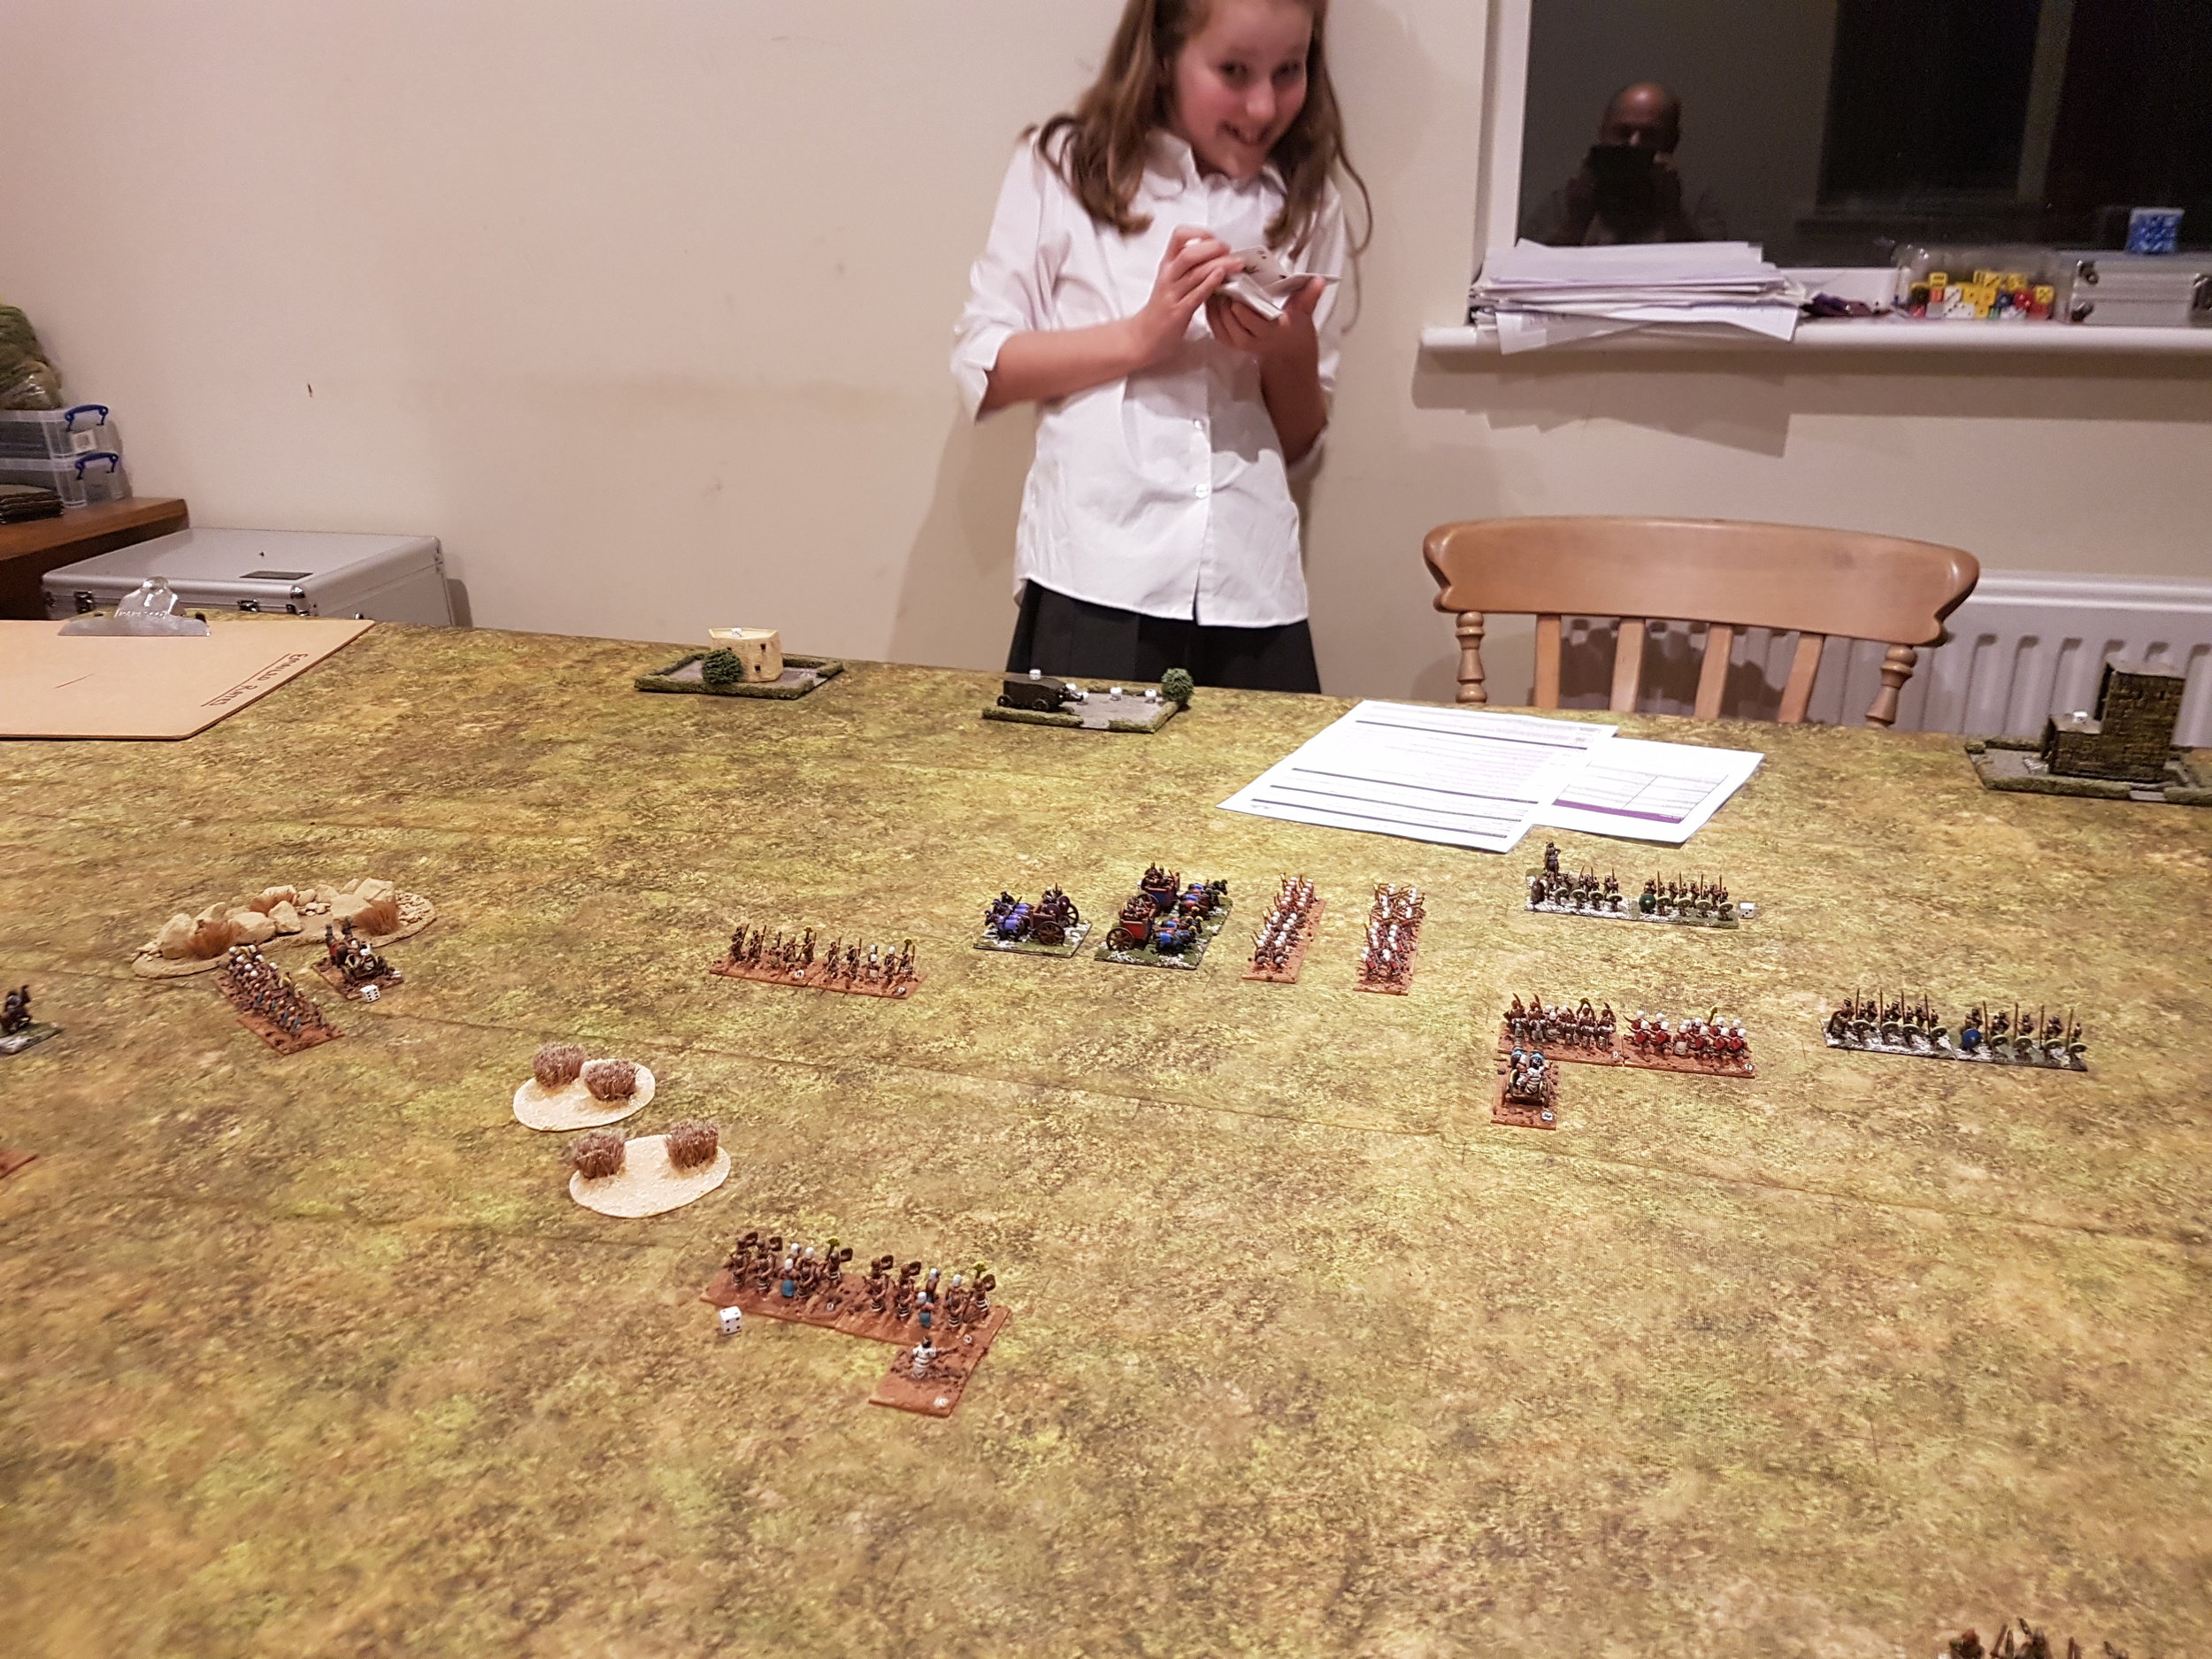
TTS is advertised as a game ideal for novice gamers, so bearing that in mind my opponent for my first game was my ten-year old daughter. As it was game one, and she has never really wargamed before, I set up all the figures before we started:

The Egyptian (Pharoah Dad)

Command 1:

  • Attached Senior Heroic Mounted General

  • Two veteran light chariot units

  • Two light chariot units

  • Hero

  • Camp

Command 2:

  • Attached Heroic Mounted General

  • Two spearman units

  • Two archers units

  • One axeman unit

  • One Marines unit

  • Hero

  • Camp

Command 3:

  • Attached Heroic Mounted General

  • Two units of bowmen

  • Two units of skirmishers

  • Hero

  • Camp

The Assyrians (the Beardless King)

Command 1:

  • Attached Senior Heroic Mounted General

  • One unit of veteran 4-horse heavy chariots

Command 2:

  • Attached Heroic Mounted General

  • One veteran cavalry unit

  • One cavalry unit

  • Hero

  • Camp

Command 3:

  • Attached Heroic Mounted General

  • Four shieldwall units, one veteran and two raw

  • Hero

  • Camp

Command 4:

  • Attached Heroic Mounted General

  • One unit of bowmen

  • Two units of javelinmen

  • Hero

  • Camp

Each side therefore ended up with 12 victory coins. Each time you lose an asset, you lose one or more coins. Lose all your coins and you lose the battle.

The Game

The game began with a strong Egyptian advance across their entire front. Activation of units seemed very simple and easy to understand, and choosing which units to try and activate first and pulling the cards did indeed prove quite fun.

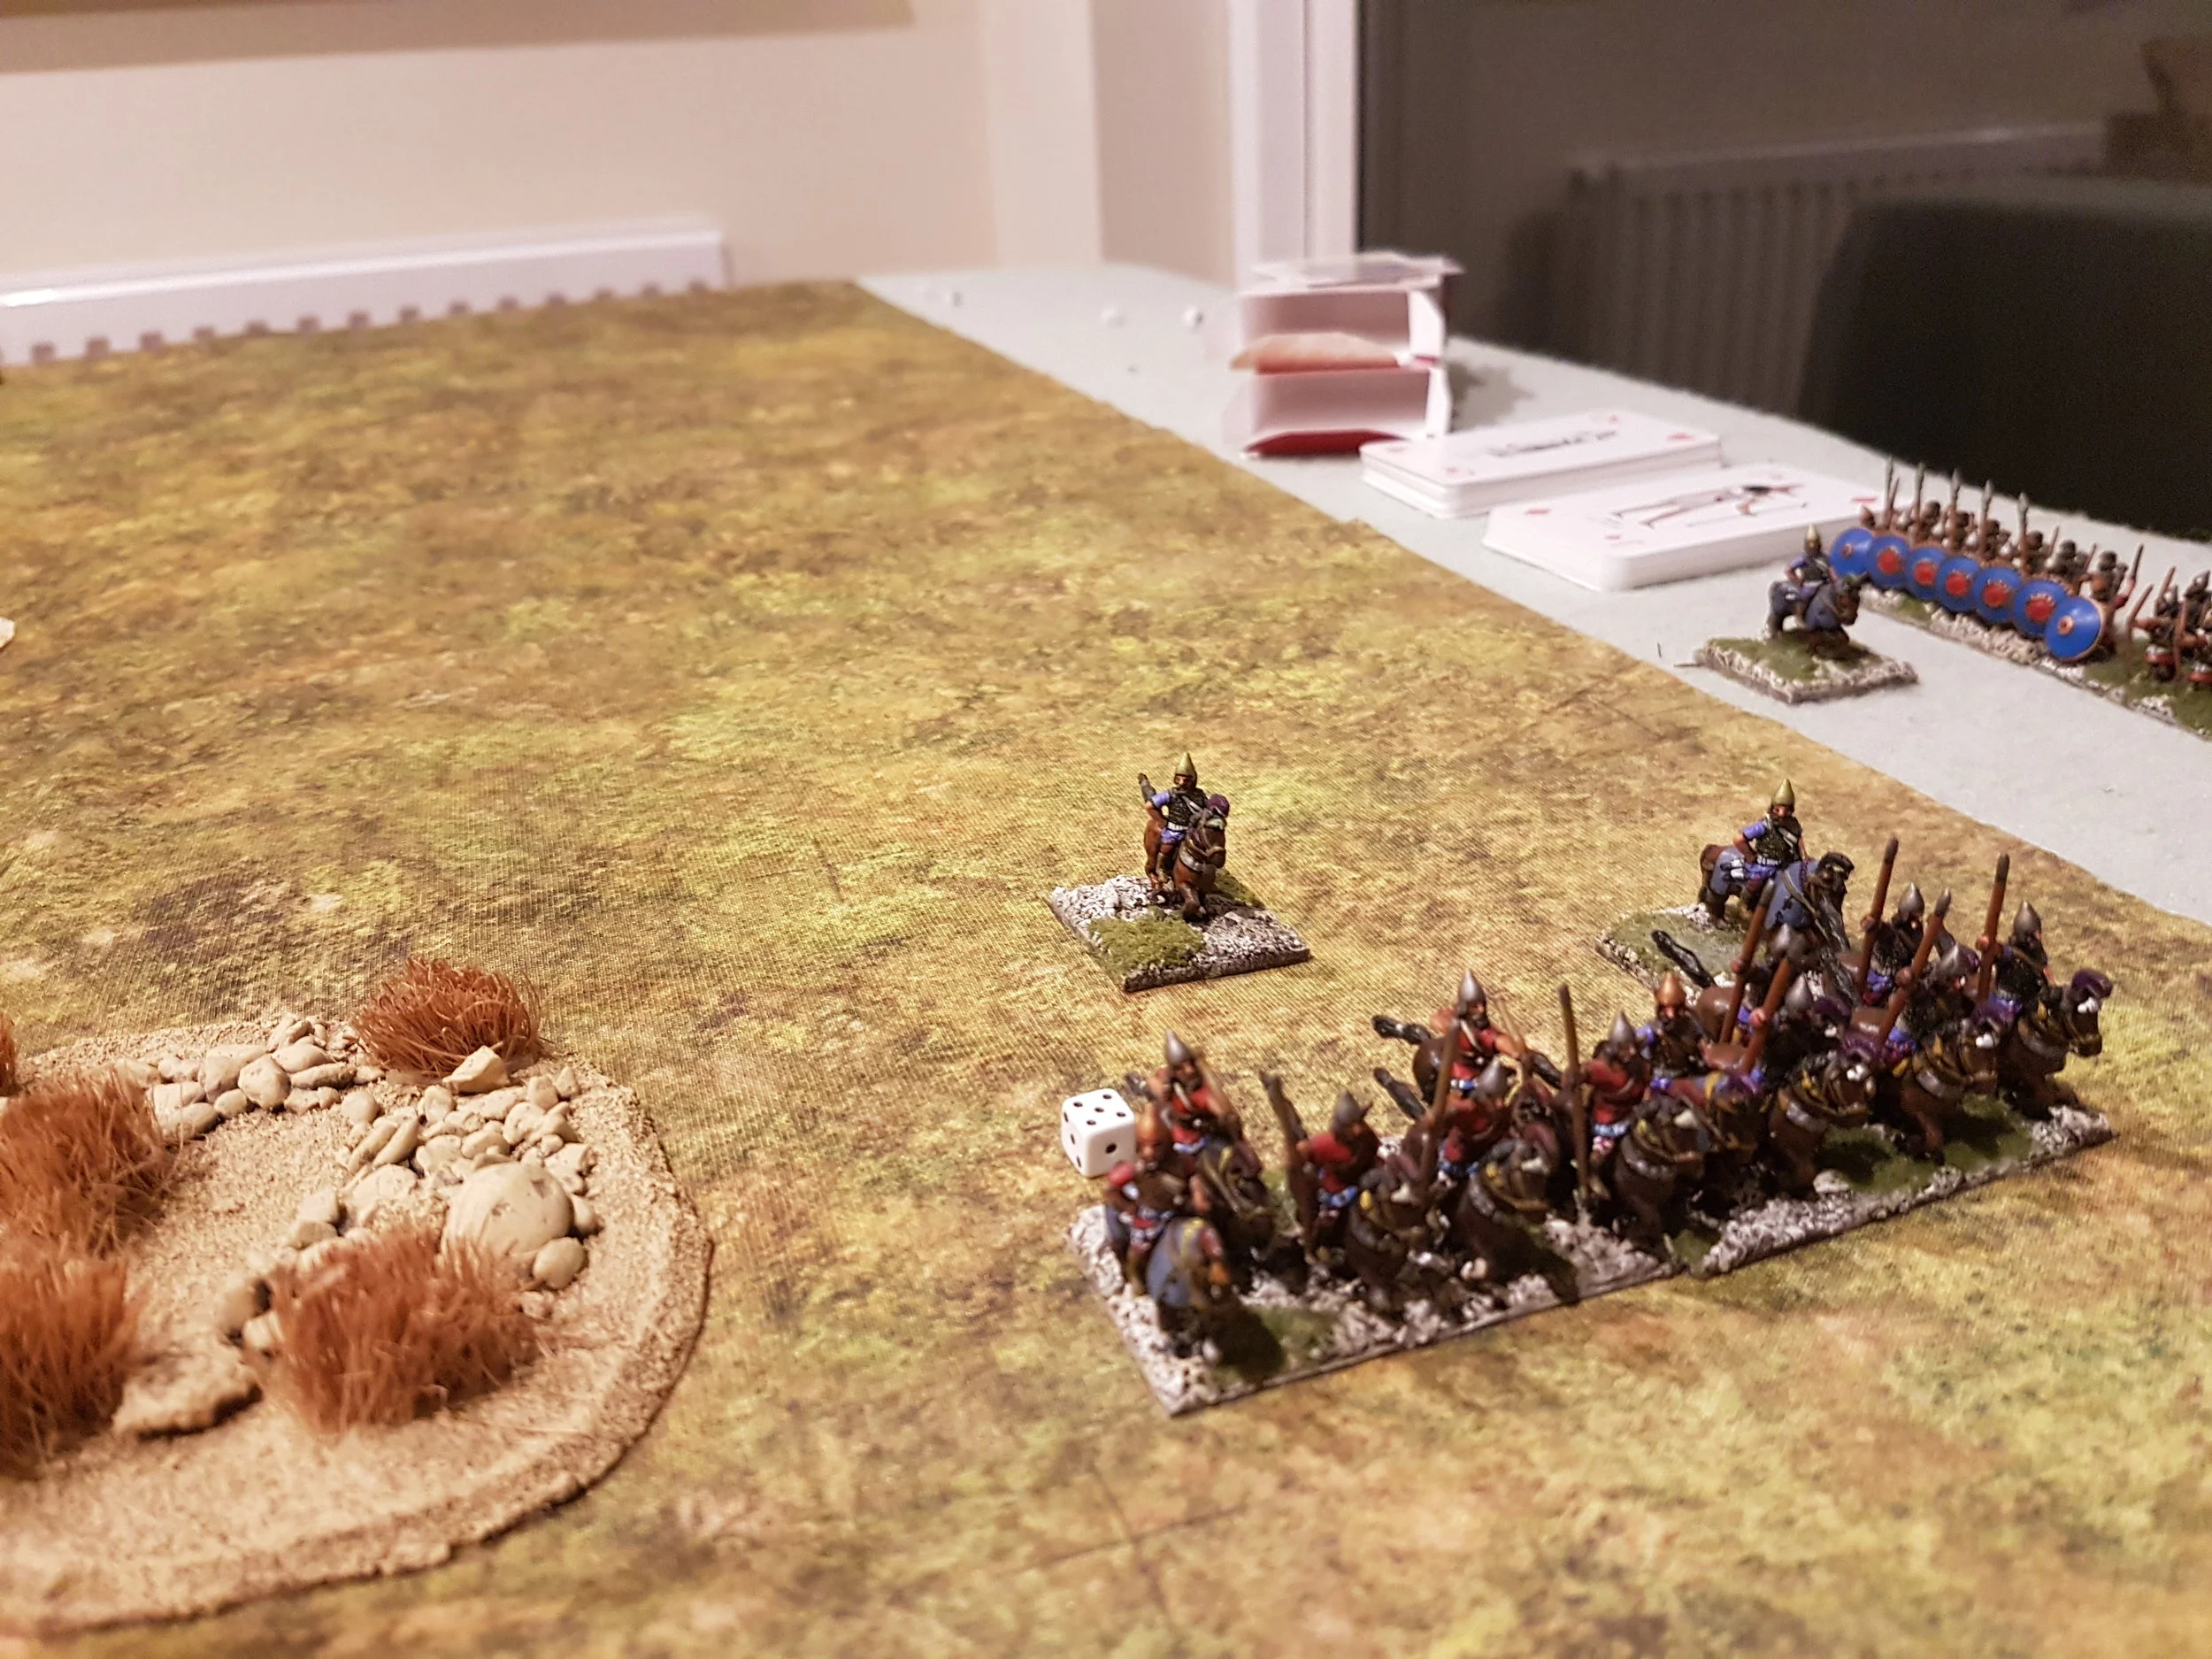
The Assyrians also moved forward strongly, with their cavalry heading straight for the Egyptian chariots seemingly unphased by the superior number of pyramid builders.

I then realised that I had a slight problem. My light chariots, being of the light troops variety, couldn’t charge the Assyrians head on: I could only shoot them and evade their charges whilst trying to get around their flanks and rear. Unfortunately, the Assyrian cavalry were just as fast as my chariots, and one unit of veteran chariots was soon no more than a pile of kindling and dog food, with the mildly exerted Assyrian Guard cavalry sailing forward looking for their next victims.

The chess game between the two units of Assyrian cavalry and three remaining Egyptian chariot units would take up most of the rest of the game, as I tried frantically to stop his cavalry running over my light troops whilst looking for a way through to his flanks, rear and camps. The Beardless King was, however, equally determined: forming an inexorable line of cavalry that just kept of coming.

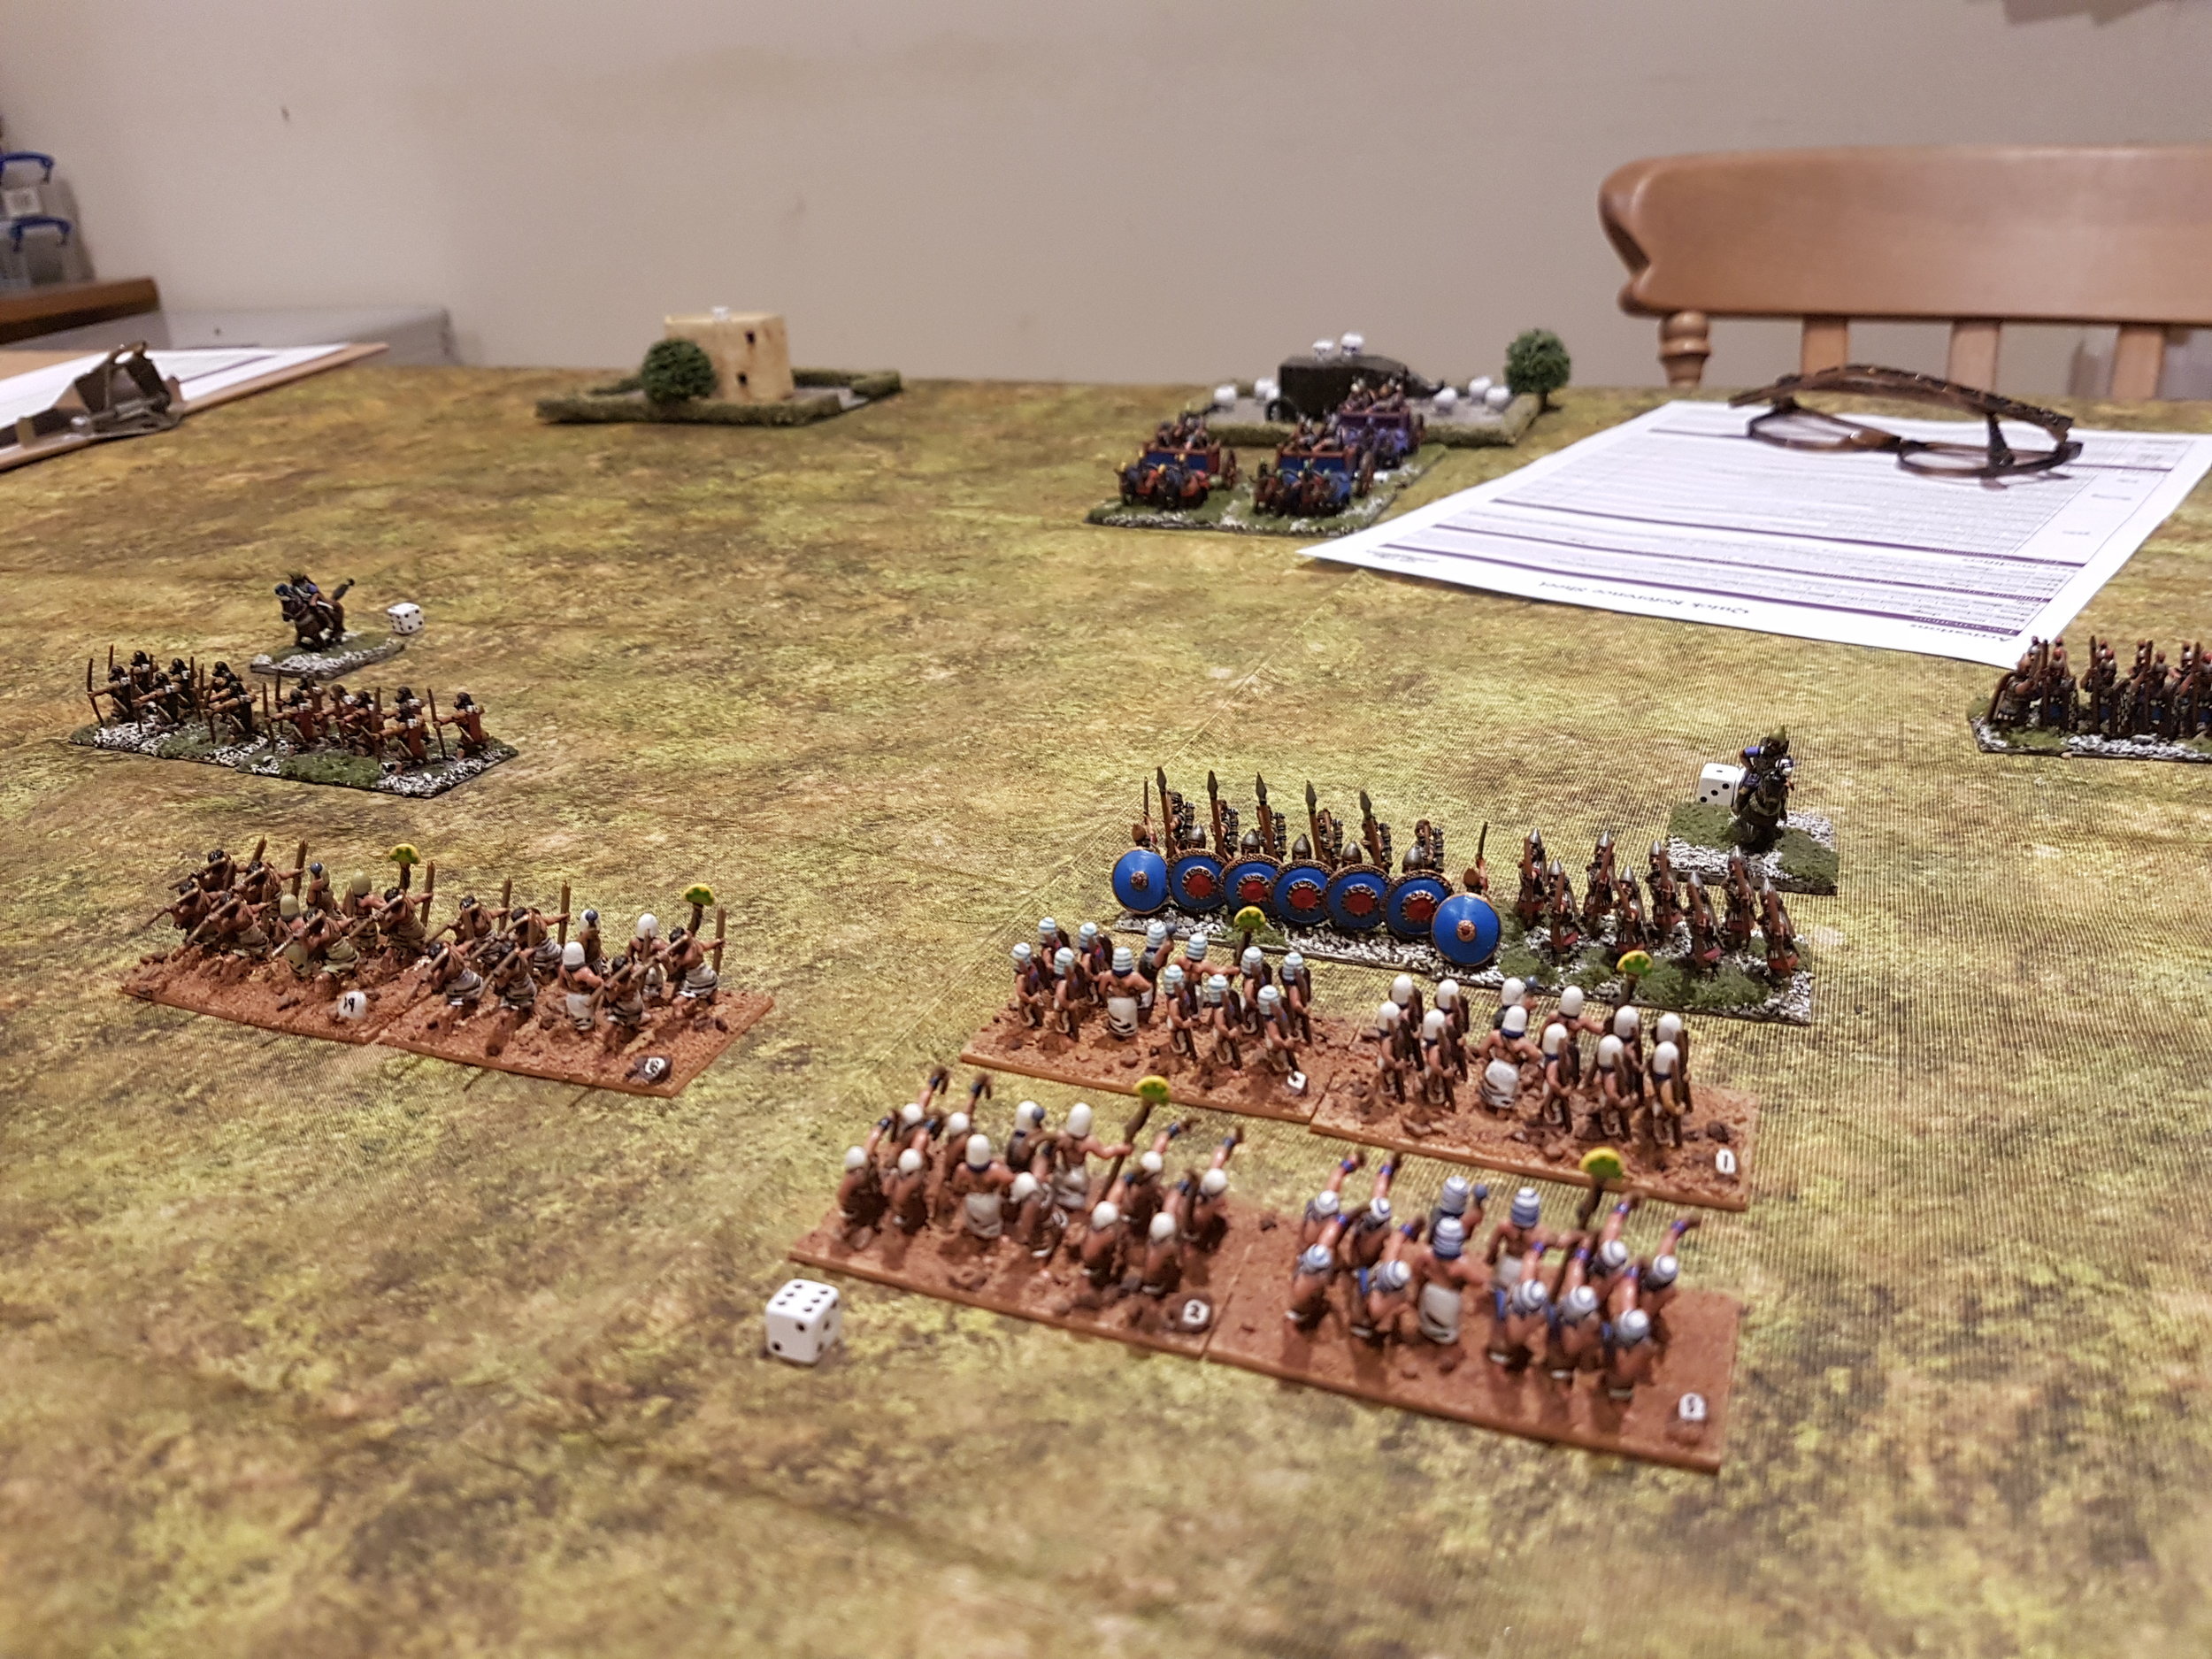
Meanwhile, in the centre, the two lines of infantry had come together: first the arrows flew in either direction, then the units got stuck into each other. The Assyrians had the advantage of having combined units of spear and bow-armed infantry, but I had stacked my spearmen and bow units two to a hex (i.e. a unit of archers behind a unit of bowmen) with some success.

Unfortunately, just as I was about to firmly win in the centre, the Assyrians committed their reserve into the combat (at my suggestion, I hasten to add!) slamming a single unit of veteran four-horse heavy chariots into my exposed flank.

But it was actually on my left flank that I lost the battle!

There, each sides’ light units had clashed, with victory going to the Assyrians. I had already committed my reserve to prop up the chariots, and one pesky unit of Assyrian javelinmen broke through my light troops and managed to sack not one, but two of my camps!

The enormous cost in Victory Coins of losing two camps was too much for my Egyptians, and they fled the field.

A somewhat embarrassing defeat!

Post-Match Analysis

Well that was actually a jolly fun game. We got loads of the mechanics slightly wrong, but know what to do right next time.

The figures looked good on the table, and I am pleased that Simon Miller, the author of TTS, shares my belief in the importance of holding your line of battle strong whilst seeking to punch through or outflank that of your opponent, exactly as VB does. This wasn’t a question of a fight between a series of individual units, but two armies clashing, with victory going to the army that held its overall shape for longest.

I shall definitely have more games of To The Strongest, and am now very tempted by the English Civil War version: For King and Parliament. I’d better get those extra hoplites and pikemen painted up first though!

Here are a few more pics of what turned out to be an excellent game:

Polish Tank Crews

I like a tabletop battlefield uncluttered by intrusive markers, so like to take any opportunity to replace a marker with something that looks more in keeping with the surrounding.

A good example of this is “Bailed Out” markers for tanks: especially useful when playing early war WW2, when you can expect far more bailed out than destroyed tanks.

I have the TFL marker pack that has some transparent oval disks with “Bailed Out” on them. I have some FoW markers: circular pieces of plastic in a variety of nice colours with little logos on them. But what I really like is a small group of painted crew figures that can be placed next to the bailed out vehicle in question.

I have these for my Germans, Soviets and British, but am mostly playing games set in the September War (Poland 1939) at the moment. Now the Poles don’t have a lot of tanks, but we’re just coming up to the period when those tanks were being used (and lost!) in almost every encounter. Time for me to paint up some Polish tank crews.

Battlefront used to be excellent for this. Every tank came with one or two standing crew figures that were designed specifically to represent bailed out and then fleeing crews. As far as I can tell, they don’t do this any more, which is a colossal shame, but I carefully kept all the ones I didn’t use just for a time like this when I needed some.

Somewhat ironically considering Poland’s fate in 1939, the above are a combination of Soviet and German tank crewmen painted up to resemble Poles. They are not perfect: the commander’s beret is a bit the wrong shape, and the crewmen should be wearing dark green mini-helmets rather than the padded version worn by the Soviets, but at a range of three feet (and just for a marker!) no-one is going to notice.

Sorted.

Q13 AAR: Stalemate in the Crop Fields

Time for another game of Q13, so time to get the space Dwarves back onto the tabletop to battle another of my so-far-untested forces: the Tah-Sig.

This would be an encounter battle fought across a battlefield consisting of crop fields separated by a series of access roads and narrow strips of open ground. The storyline was that this time it was the Dwarves who were the aggressors: outnumbering the Tah-Sig by a fair amount and needing to get as many units as possible off the table on the Tah-Sig side.

Click on the picture below to see what happened:

Battlefront BTR-60s

I’m still working my way through the extra Arab-Israeli forces I bought in the Battlefront Fate of a Nation 25% off sale. My aim was not so much to reinforce my existing Six Day War forces, but more to add what I needed to re-fight actions from the Yom Kippur War too.

The latest example of this is the Battlefront BTR-60 APC company for the Egyptians/UAR:

These are lovely models that go together and paint up really well.

I now have three different paint schemes for the Egytians/UAR. I have a terrible grungy brown colour for the ex-WW2 tanks and assault guns; a quite bright yellow for the Soviet 1967 vehicles; and this very pale yellow (the most historically accurate of the three!) colour for the Soviet 1973 kit.

Anyway, these are highly recommended. Just one word of caution: the gun barrels are quite fragile: just take a little care when either clipping them from the sprue or dry-brushing.

IABSM AAR: The Second Battle of Tomaszow Lubelski

The last week of September 1939 saw a combined “Northern Front” Polish army join the attack towards Tomaszow Lubelski. Due to bad communications between the different Polish divisions, the result was a series of largely uncoordinated attacks by Polish unis arriving from the north-east, launched in the direction of the city only to be shattered wave-by-wave by the German defenders.

This scenario would represent one such attack: with Polish and German forces brawling for control of the centre of the table. Four objectives would be placed there, with each side entering the table and attempting to take and hold them. The game would end after ten appearances of the Turn Card, at which point victory would go to the side that held the most objectives. If, however, one side managed to hold at any point three of the four objectives, then the game would end immediately, with that side wining the battle.

Click on the picture below to see the extraordinary events that followed…

Q13: Vornid Infantry Re-Based

Although I like my Vornid infantry (15mm sci-fi: homicidal plants with thorn guns from Khurasan), I haven’t used them very much because, up to now, they have been based a singles and the way that the figures are made means that the bases don’t fit into any of my sabots. That means that using them involves moving lots of single figures round the table individually: a right pain!

I therefore decided to re-base them: each squad of ten Vornid based individually converting to six bases of five Vornid each. That gives me the same three squads, but the capacity to field ten fireteams if needed for another system.

I had two four-squad platoons (i.e. eight squads) but they proved a bit unwieldy. I therefore painted another squad up and now have three platoons of three squads each, all efficiently based for moving round the table.

Here’s my revised Vornid company, plus one of the individual platoons. You can see the detail of the entire force in the Vornid gallery.

Arab Israeli AAR: Rumi El Bakhara

I hadn’t gamed with old friend Neil for at least 18 months, so it was a pleasure to get a date into the diary and push some lead around the table again.

We decided to have a battle set in the 1967 Six Day War between an Israeli and an Egyptian (UAR) force. The game would be a fictional encounter battle using the TooFatLardies Charlie Don’t Surf Vietnam rules adapted for the theatre and available elsewhere on this site.

Click on the picture below to see all:

TFL Painting Challenge: Another Big Update

Two months to go before the end of this year’s challenge, and I can see that activity is really hotting up.

In no particular order, today we have:

  • Travis Hiett with some AWI civilians

  • Joe McGinn with some more Napoleonics

  • More Shieldmaidens and supporting Norse-types from Carole

  • La Haye Sainte in 15mm from Sapper

  • Andy Duffell sends in a mixed bag of Nazis, Soviets and ancient French

  • Mervyn is still in Middle Earth

  • Stumpy with a mix of Napoleonics and WW2 BEF vehicles

  • And last, but by no means least, Steve Burt with (allegedly) the last of his Assyrians

As always, clicking on the name of the person in the list above will take you straight to their gallery (opens in a new window).

Here are today’s pictures:

A Lovely 15mm La Haye Sainte from Sapper

Joe’s Dismounted Dragoons

BEF Carriers from Stumpy

Half-track crew from Andy Duffell

IABSM North of the Border

A quick trip to Edinburgh to visit daughter #1 at university gave me the chance to catch up with old friend Mr Hodge down at the South East Scotland Wargames Club.

Derek put on a game if IABSM set in France in May 1940, using his excellent 10mm figures.

That's not me with Derek btw but my opponent!

I played the French: commanding seven H-39 tanks (good armour, but armed with a pop gun), two 25mm anti tank guns (good panzer killers!) and a platoon of infantry.

Facing me were five Panzer 38(t) tanks (excellent at this time of the war), two Panzer IVs, a platoon of motorcyclists, and some other infantry that never arrived or got off their Blinds.

I deployed my tanks along the treeline and waited for Rommel's boys to attack. This they did, their motorcyclists appearing first: dumping their metal steeds as soon as I hit them with some HE, and then rushing forward towards a nearby field.

Meanwhile his P-38(t) tanks had appeared and advanced towards my line over open ground. My tanks engaged, and a firefight broke out: his five Panzers versus five of my tanks and, soon, my two anti tank guns.

His tanks were considerably better than mine, but stationary and out in the open. Mine were carefully concealed in the edge of the wood, and some lucky dice rolling meant that soon three of his were abandoned for the loss of two of mine.

When one of his Panzer IVs also succumbed to anti tank gun fire, the Germans decided that they'd had enough and retreated. Victory to the French!

All in all it was a good, if quick, game. My tanks performed much better than I was expecting (one of them proved almost indestructible despite being hit many times) and the tactics chosen by the Germans suited my deployment perfectly.

My thanks to Derek and the rest of SESWC for their hospitality, and I'm already looking forward to the next time I'm up.

A Bit of Fun

One of my more unusual scifi armies are the Vornid. These comprise a base of Khurasan’s plant infantry supported by a variety of Ravenstar’s Horrid bio-vehicles. You can see the gallery by clicking here (opens in a new window).

As you’ll see, I’ve been using Slishians (from Hydra Miniatures) as Big Men, but have now found a rather amusing alternative:

The enemy sure looks like plant food to me!

Not sure who the manufacturer is (I bought these on impulse some time ago and have only just got around to their layer of the lead mountain) but these are, of course, models loosely based on Audrey II, the “villain” of the musical comedy A Little Shop of Horrors.

Great fun, and have encouraged me to expand and re-base my Vornid army: but more on that later…

More Brigade Models SciFi

The last time my Hura (four-armed aliens from Clear Horizons) took the field, they were soundly beaten, with their defeat due, in art, to a lack of AA protection and no electronic warfare capacity.

As Clear Horizons don’t produce any AA or EW figures for the Hura (I mean, why would you!) I have decided to use Brigade Models’ sci-fi Polish range to fill in the gaps. I’ve already posted the AA half-tracks, now here’s the EW vehicle:

Officially this is the Suwalska ‘Hetman’ command vehicle, but it does very nicely as an Electronic Warfare specialist for the Hura.

Now all I have to do is save up for a few Suwalska APCs…

TFL Painting Challenge: Big Update

It looks as if we have all been very busy over the last week or so: there have certainly been lots of entries for the Painting Challenge.

In no particular order, we have:

  • Carole with some fantastic dungeon scatter terrain pieces

  • Travis with some more AWI figures

  • More Gladiators from Lloyd

  • Mr Helliwell starts a new SYW force

  • There are Star Wars and Zombies from Chris Kay (now there’s an idea…)

  • Ken sends in a mixture of figures and scales, including two slightly naughty pieces (shock, horror!)

  • Despite swearing never to paint another Napoleonic, Mervyn sends in some more…plus a few Middle Earth types

  • World War II Soviets and Nazis from Chris Cornwall

  • And last, but by no means least, more Soviets from Ralph Plowman

As always, clicking on the name of the person above will take you straight through to their gallery.

Keep them coming: we’re in the final quarter of this year’s challenge now.

Also, don’t worry if you’ve submitted nothing so far this year (Geoff, Cabey Cabey, Jim, Mr Clarke, Keith, Koen, Garrett, Chris, Dave, Craig, the Mad Padre, Andrew, Richard, Thomas, Old Pivot, Ashley, David, Brian and Willie B): there’s still plenty of time to get painting and photographing and join the thirty-two of your fellow Lardies who have registered some points.

Here are today’s pictures:

T-62 MBTs

Regular visitors will know that I am adding appropriate units to my 1967 Arab and Israeli forces in order to also be able to play the 1973 Yom Kippur war. First up are the Egyptians, who can now field a platoon of T-62 MBTs:

These are Battlefront plastics in 15mm: part of their Fate of a Nation range.

The models go together well, although the downloadable instructions could be a little clearer: I went badly wrong when building the first turret, necessitating some fairly dramatic surgery later, but fortunately the damage doesn’t show.

Apart from that, recommended.

Games Day in Marietta

Fellow Lardy Mark Luther has asked me to mention that his local group will be running a free Games Day in Marietta, GA on November 10th this year. Here are the details:

We have a full day of historical miniatures games that include Sharp Practice (AWI, Napoleonic, 2nd Seminole War), Chain of Command (SCW, and Normandy WWII), Coastal Patrol (Baltic), and Kiss Me Hardy.  Plenty of non TFL games too-Blood and Plunder, Gangs of Rome, Wings of Glory WWI, Combat Command, Men Who Would be King, SAGA and more.  

There is also a Charity Raffle  We'll have room for drop in games.  On site food and beverages with an incredible beer assortment.

And its FREE!  

IABSM AAR: Push Towards Lowicz

As part of a counter-attack that had already thrown the Germans back some twenty kilometres, the Polish 16th and 26th Infantry Divisions crossed the Bzura river near Lowicz on the morning of 14th September 1939, and the Polish 4th Infantry Division reached the road linking Lowicz and Glowno.

At this point, however, the retreating Germans were reinforced by the 4th Panzer Division, which had been withdrawn from the fighting in the outskirts of Warsaw, and launched a counter-attack of their own against the advancing Poles. This battle would recreate the encounter battle that followed.

A cracking game of IABSM in which a bold coup de main won the day. Click on the pic below to see all:

Shilka

As Battlefront had another sale on their Arab/Israeli range (25% off this time) I thought I’d better take advantage and add the appropriate figures to allow my 1967 Six Day War Egyptians and Israelis to continue their fight into the 1973 Yom Kippur War.

First off the painting table is the ZSU-23-4 "Shilka": a lightly armored Soviet self-propelled, radar guided anti-aircraft weapon system.

These are lovely models that really take the paint well.

From Wikipedia:

“The acronym "ZSU" stands for Zenitnaya Samokhodnaya Ustanovka (Russian: Зенитная Самоходная Установка), meaning "anti-aircraft self-propelled system"; the "23" signifies the bore diameter in millimeters; the "4" signifies the number of gun barrels. It is named after the Shilka River in Russia. Afghan soldiers nicknamed it the "sewing machine" due to the sound of firing guns. It is also referred to by its nickname of "Zeus", derived from the Russian acronym.”

I’ve already got the ZSU 57-2, which has got two enormous guns rather than four little ones, and I was originally a bit confused as to why four smaller guns would be better than two big ones. The answer is that the ZSU 57-2 had no radar sighting system, couldn’t fire on the move, and couldn’t carry enough ammo to allow for worthwhile sustained fire. Obvious when you think about it!

Apparently the Shilka was very successful, and actually led to a change in NATO tactics. Let’s hope that holds true when I field them for the first time.

Last of the Squats!

Finally finished the last of the Boontown Space Dwarves: a platoon of Clansmen.

Now if you remember, when I started painting the Boontown figures, I was quite disparaging about the quality of the sculpting. I felt the Shaker cannon was, quite frankly, not a very good model, and the crew figures very average if not poor.

I changed my mind a bit about the range with their T-26 walkers, and a bit more with their Hearthguard, but the Clansmen have definitely reversed my opinion.

These are great fun figures with nice, clear definition, especially on the faces/beards and their Schwarzenegger-like arms. Okay, so the guns are still a bit crap, but overall I like them. Not “recommended”, but still a worthwhile addition to any Space Dwarf force.

And that, for the Space Dwarves, should be that. As far as I know, I now have every 15mm Space Dwarf/Squat/Grudd etc figure out there in the marketplace. If I haven’t, please let me know, and I will remedy the situation asap!

Right: onto the Yom Kippur war figures forming a significant layer of the lead mountain…

Nice Comment on TMP

Not sure if anyone saw this, but here’s a nice comment on my last AAR (see below: The Narew Crossing) taken from The Miniatures Page’s forum:

I don't mean to tell anyone else how they should or should not play their wargames …

But this AAR is a great example of how I LIKE my wargames to go!

Hardly matters what the figure scale is, or what the ruleset is. Maybe it matters a little, but not a lot.

What matters are the interests and spirit of the gamers … the game master more, and the rest of the gamers a little less but still to an important extent.

From the AAR:

The game was a screening mission. Provided the bridge remained in Polish hands (i.e. no German troops were in base-to-base contact with the bridge) each time the Turn Card appeared, Polish engineers would roll a D6. Once the total rolled hit 25, any Polish Big Man could order the bridge blown.

Kudos for a thoughtful construction of a scenario, with scenario-specific rules related to victory conditions.

Long range exchange of fire continued on for a couple of turns, until … the Germans, realised that (they) had no hope of winning the game at this distance, and would need to get up close and fight … through to the bridge the hard way!

These kinds of comments, which appear several times in the AAR, show how the AAR writer's (also game master's) thinking runs. The scenario was constructed, with some success it seems, to create tactical problems that the gamers would have to solve. More kudos!

That left the last remaining Panzer (a Panzer III) free to drive forward onto the bridge itself, scattering the Polish engineers still setting their charges. Although we did have a quick debate as to whether the Panzer counted as "troops", I conceded that it probably did (Bevan: "well you tell me: you wrote the scenario!")…

When I read this, it cemented my opinion -- these are guys I'd enjoy gaming with! Lots of competitive spirit in the play of the game, but no rules-lawyering or victory-conditions-maneuvering to gain an advantage.

Again, not meaning to tell anyone else how they should play, but for me, I find little interest in a parking lot of tanks and a bucket of dice, or in haggling over whether a single strand of barbed wire is an obstacle to AT cannons ("where in the rules does it say that barbed wire is a linear obstacle to infantry movement, but not to heavy weapons fire?").

What I do find interesting … fascinating … obsessively engaging … is just about everything we see in this AAR.

Nicely done.

-Mark
(aka: Mk 1)

Nice to be appreciated!

TFL Painting Challenge: Update

Seems ages since I last did one of these, but it’s probably only about a week or so. Entries from the regulars are a constant with, pleasingly, more of the more infrequent contributors also coming out of the woodwork.

In no particular order, today we have:

  • Joe McGinn with a group of Light Dragoons

  • All for one and one for all from Sapper: Mousquetaires de la Garde and some Swedes from Sapper

  • Matt Slade has more WOR

  • Steve Burt sends in more Assyrians: archers and another chariot

  • The first of two Andrews: Andy Duffell is in the dark (ages).

  • Andy Helliwell has a submission in three different scales

  • Mervyn is sick of Napoleonics, so tries some pilgrims instead

  • There’s a similar entry from John de Terre-Neuve: all sorts of periods and scales

  • The Hat is back: Lloyd Bowler has some tiny forts to display

  • And last, but by no means least, Mr Plowman has zombies

As usual, clicking on the name of the person in the list above will take you straight to that person’s gallery (opens in a new window).

We’re into the final quarter now, so I expect to see you all grabbing brush and camera and submitting away. Still plenty of no-shows so far this year: come on, you can manage at least one before now and Christmas!

To inspire you, here are today’s pictures:

IABSM AAR: The Narew Crossing

It was back to Poland for our latest game of I Ain’t Been Shot, Mum and an extraordinarily exciting encounter that went right down to the wire.

On September 7th 1939, reconnaissance units from one of the Panzer Divisions of General Nikolaus von Falkenhorst’s XXI Army Corps captured Wizna after Polish mounted reconnaissance squads abandoned the village after a short fight and retreated to the southern bank of the Narew. When German tanks tried to cross the bridge, it was blown up by Polish engineers. This game would recreate the German attempt to force the Narew Crossing.

Click on the pic below to see all: