First Painting of 2020

If you’re a regular visitor to this page, then you’ll know that I have recently built a 15mm Sumerian army using Museum Miniatures’ superb “Z Range” of CAD-designed figures.

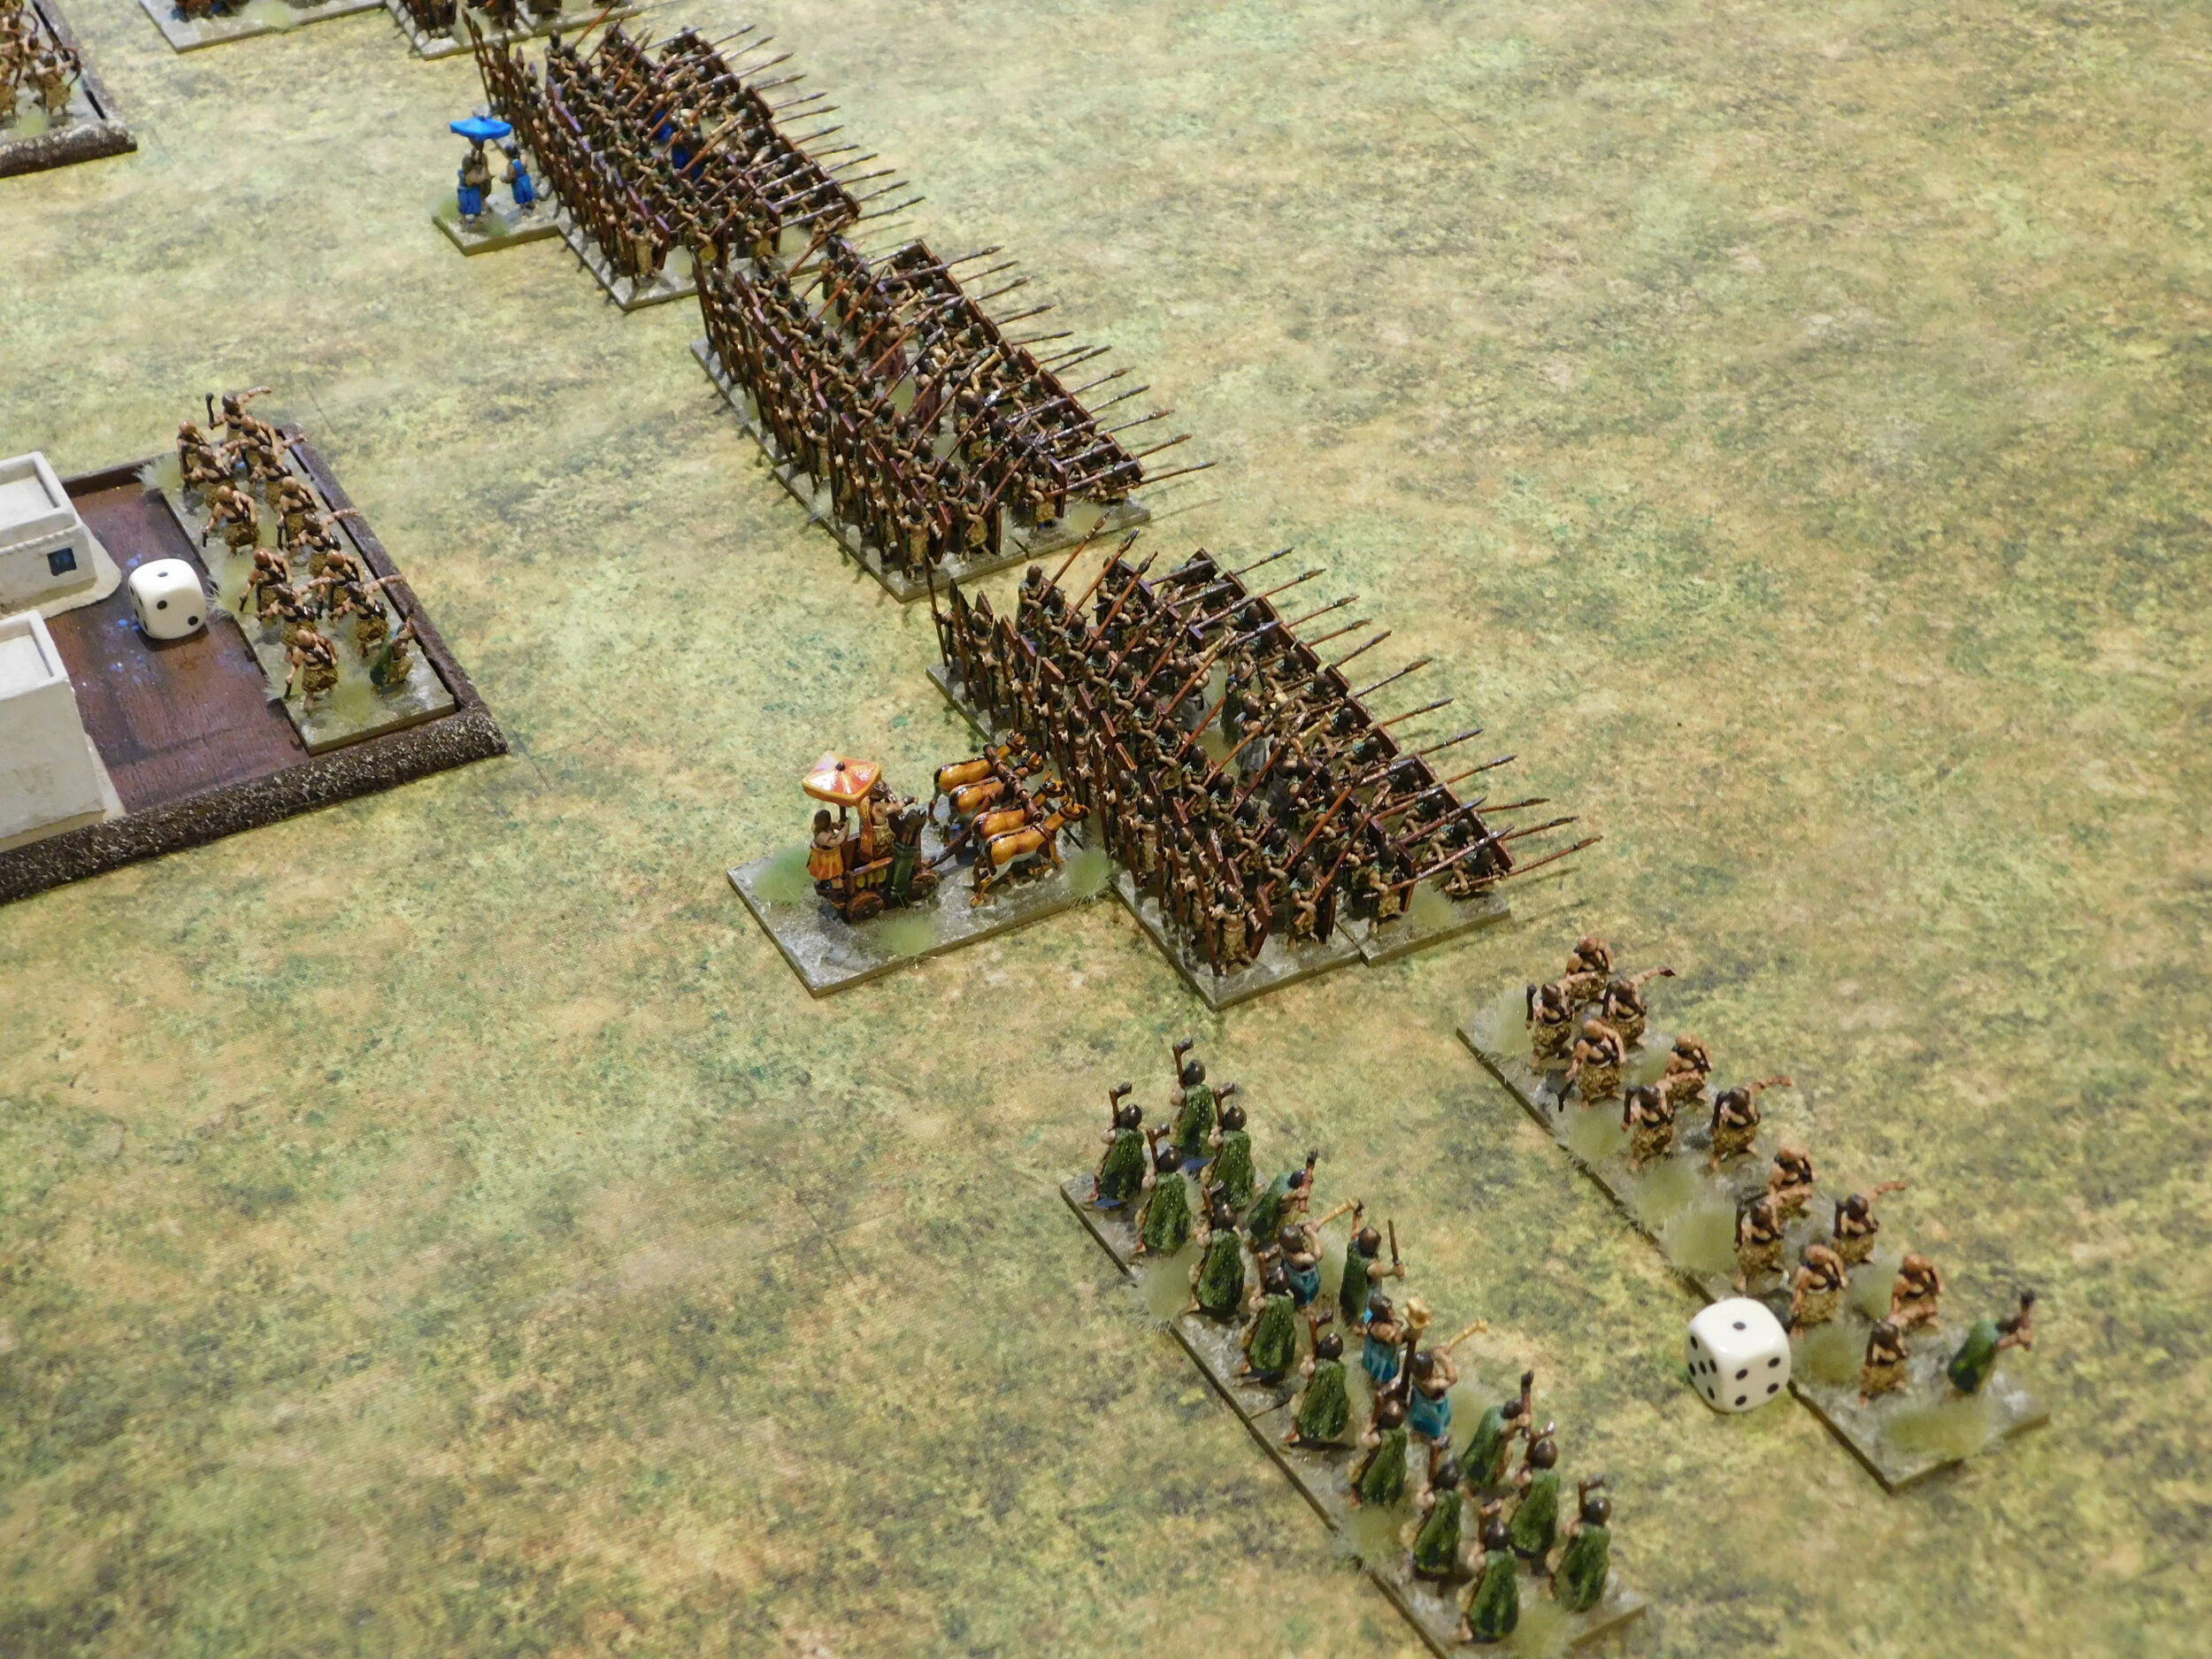
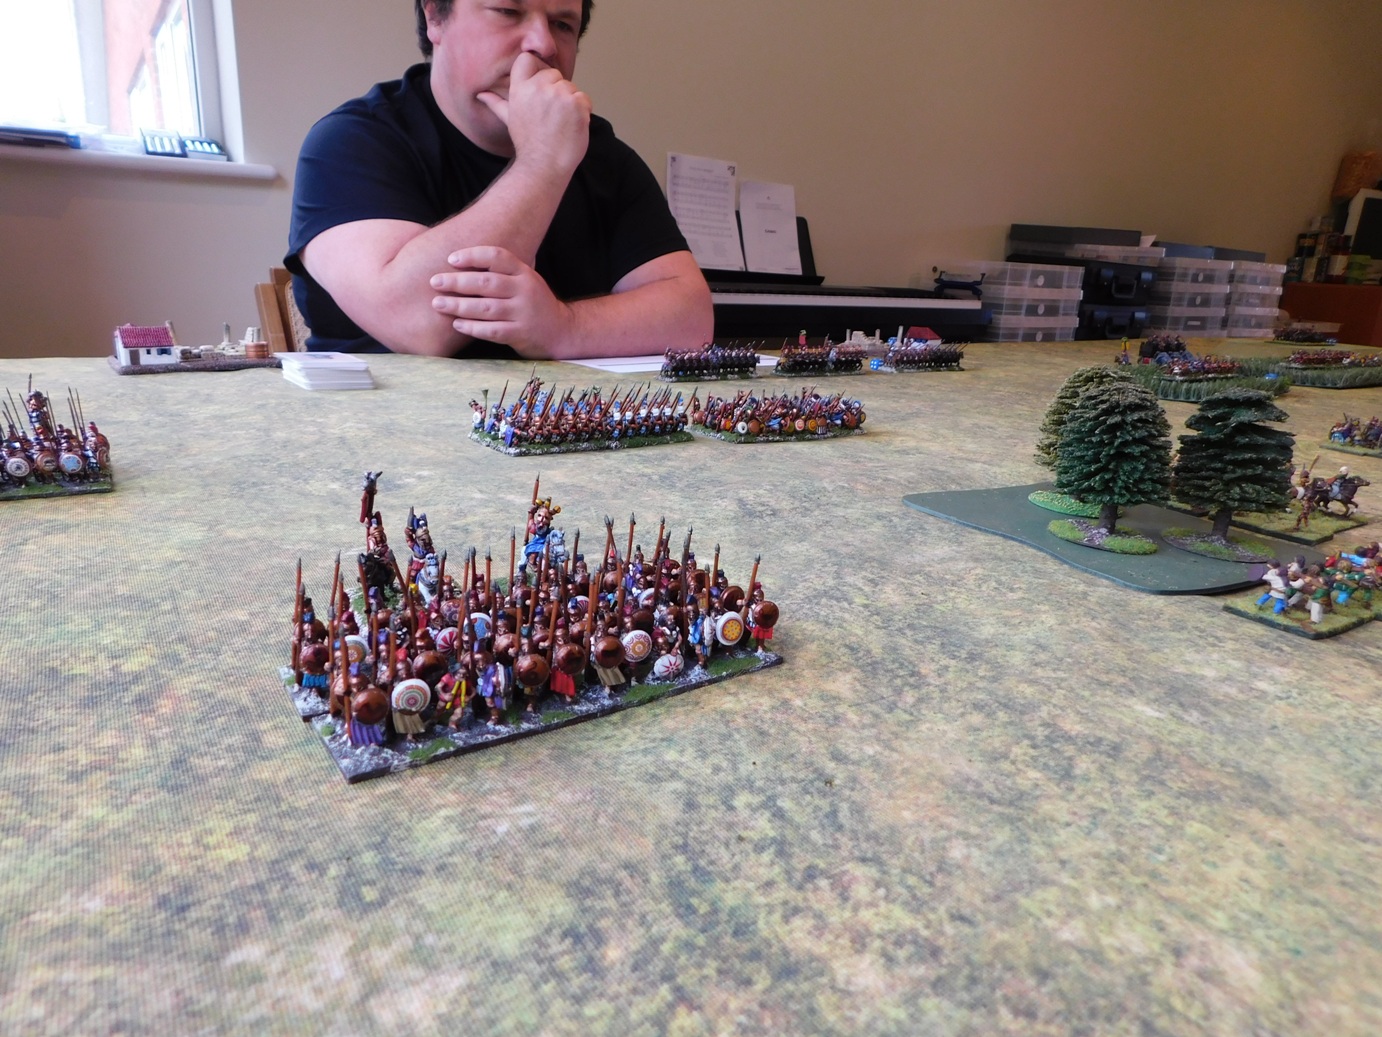
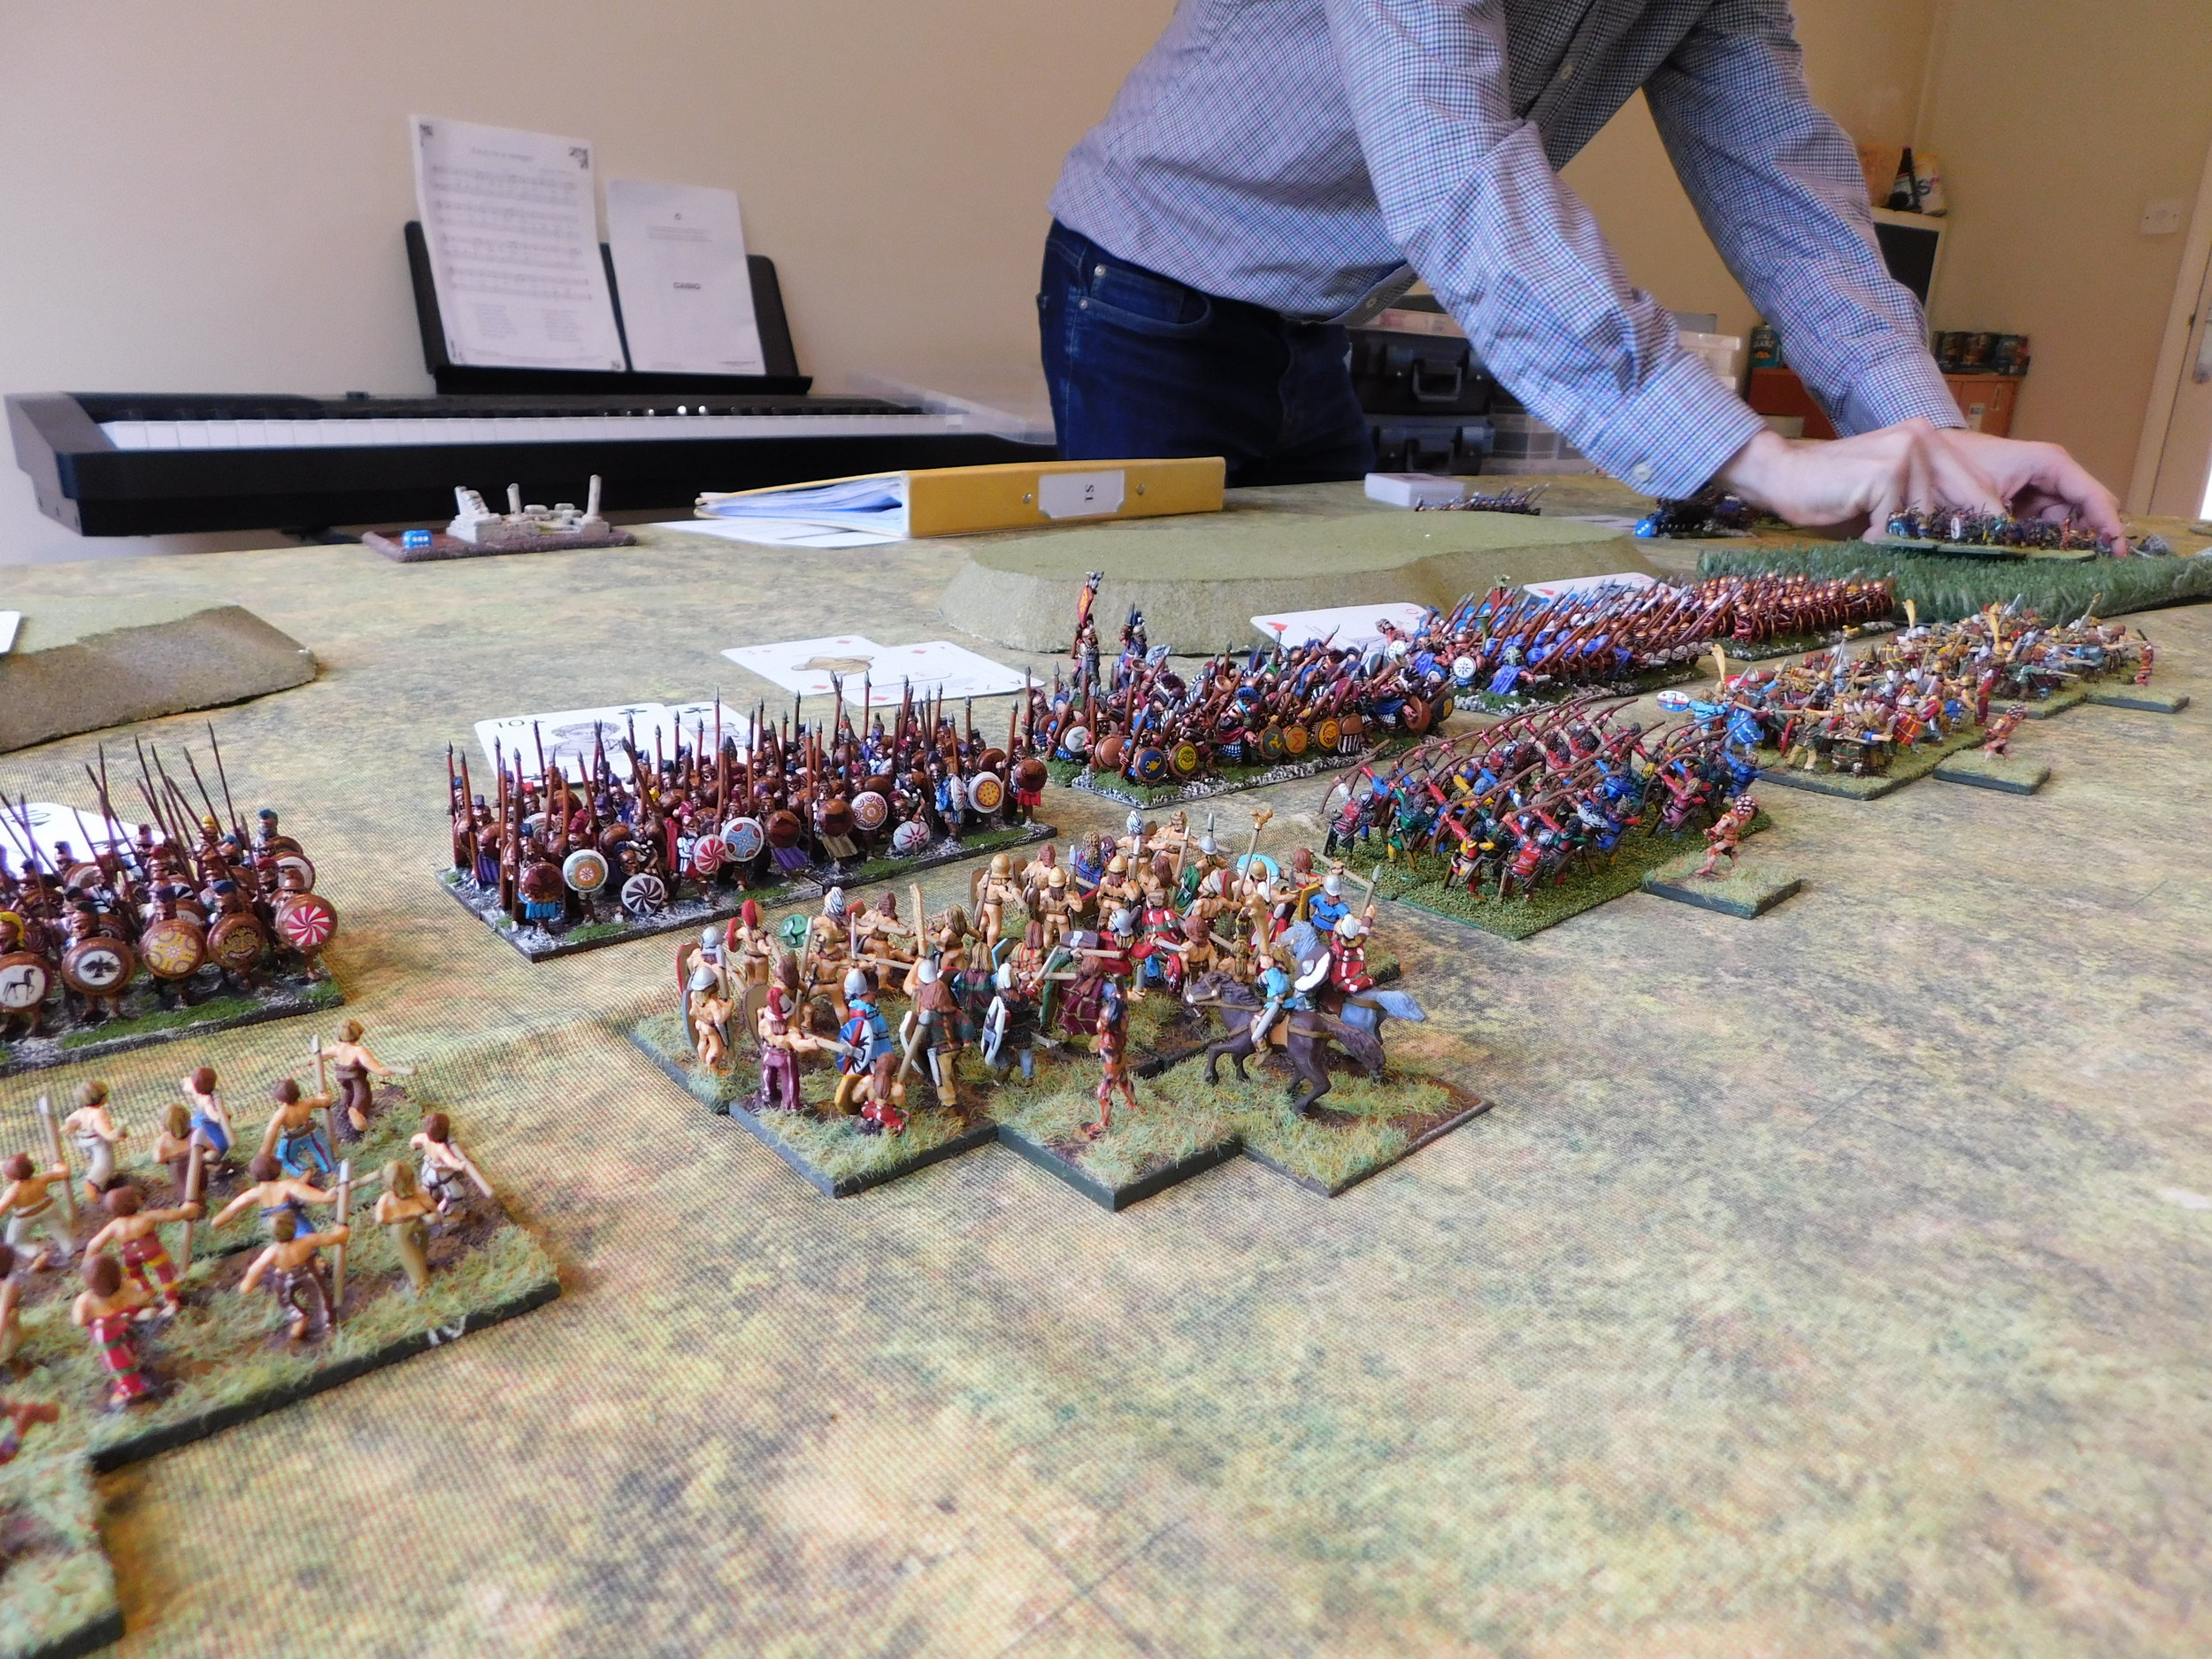
I was browsing their website wondering whether to go for their Z-range Classical Indians when I noticed that they had also released some Z-range Greek Hoplites. Now I need at least another three Hoplite spear blocks, each 48 figures strong. I actually have 48 figures from another manufacturer waiting to be painted, but doing two of the blocks towards the end of last year (i.e. 96 Hoplites) had quite put me off painting them. Those cuirasses take ages to do properly.

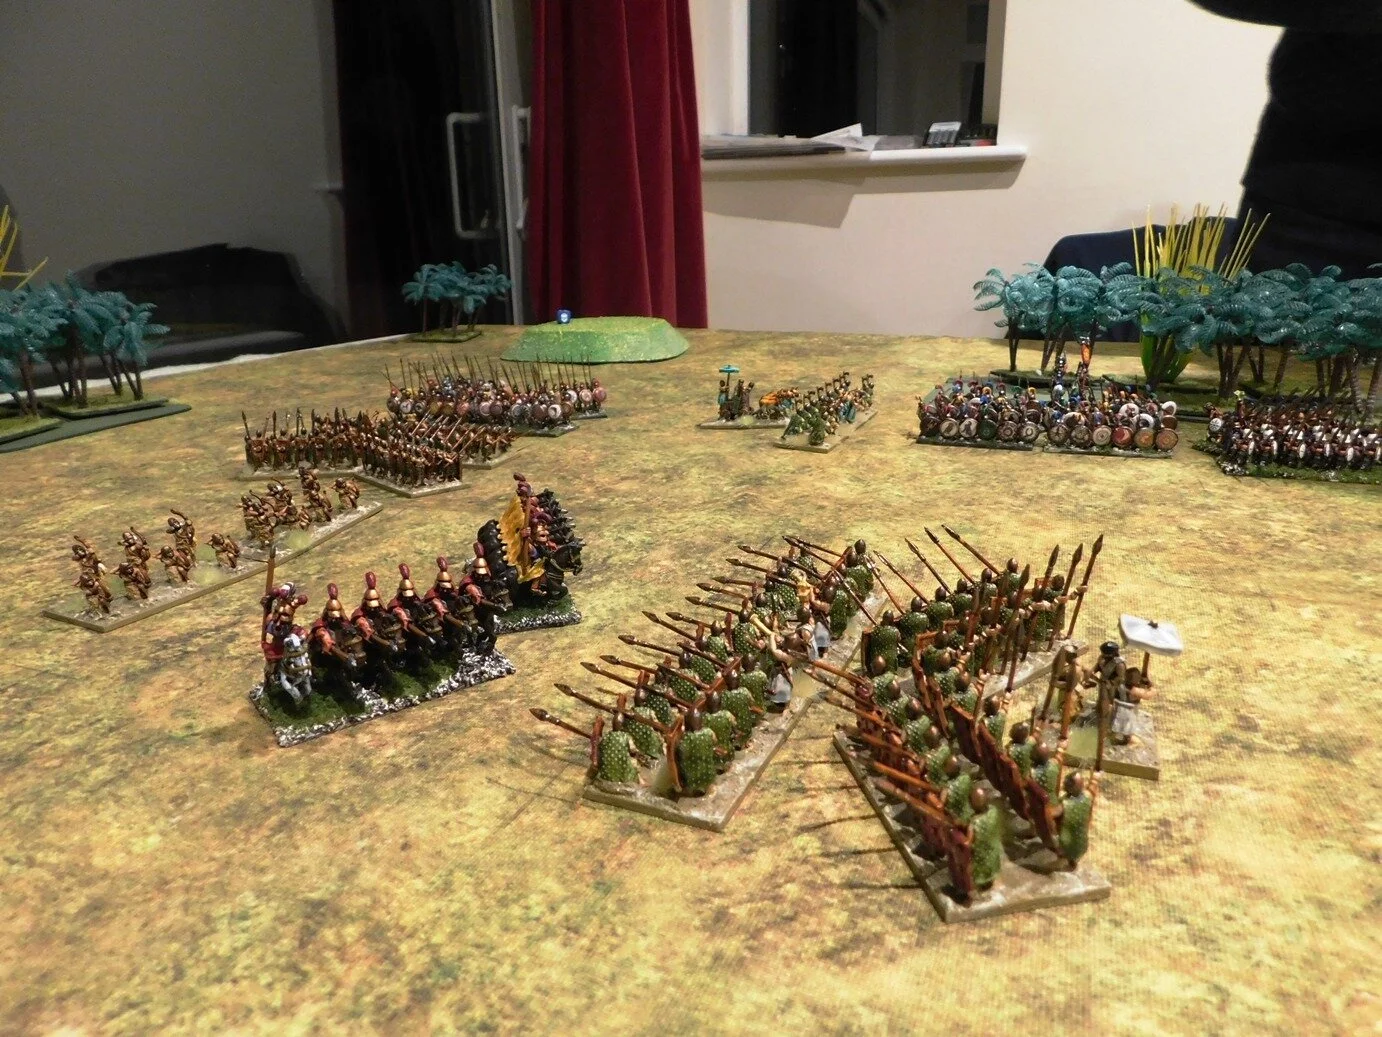
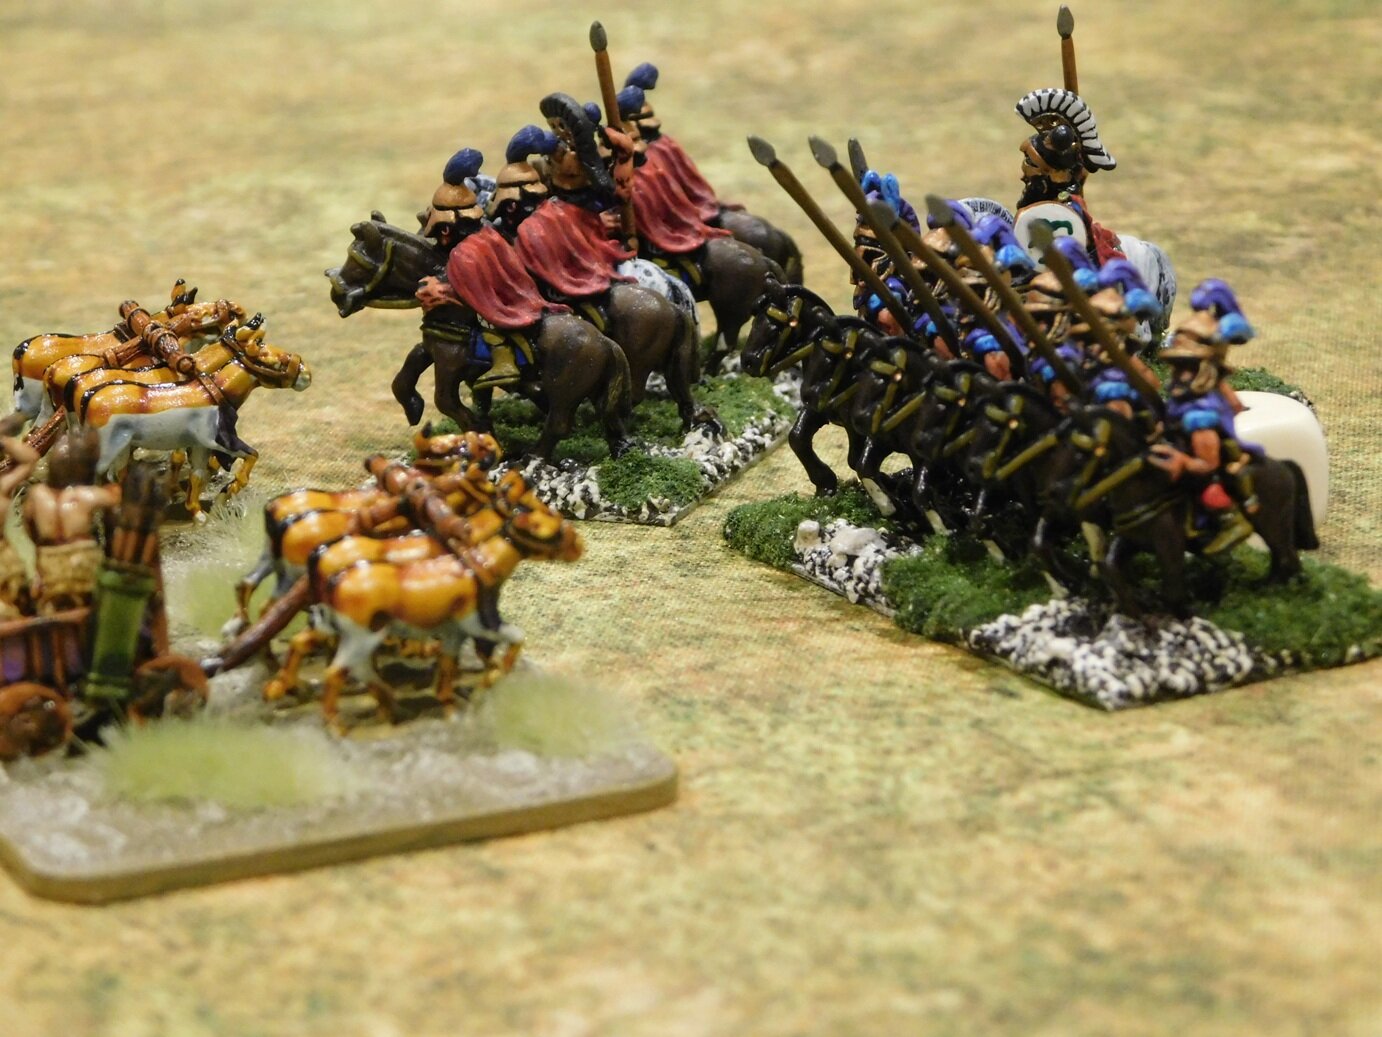
So I had a look and noticed that Museum produced a set of Hoplites with no clothes on and another with only a little kilt to cover their, er, dignity. Ideal: Z-range figures with no cuirass to paint! One odd thing: the Hoplites come in mixed packs of kneeling, thrusting and standing i.e. you can’t buy 48 of the same pose. Maybe I could have rung up and seen whether I could have had some custom homogeneous packs run up for me, but I thought I’d give the mixed unit a go.

Hmmm…not sure.

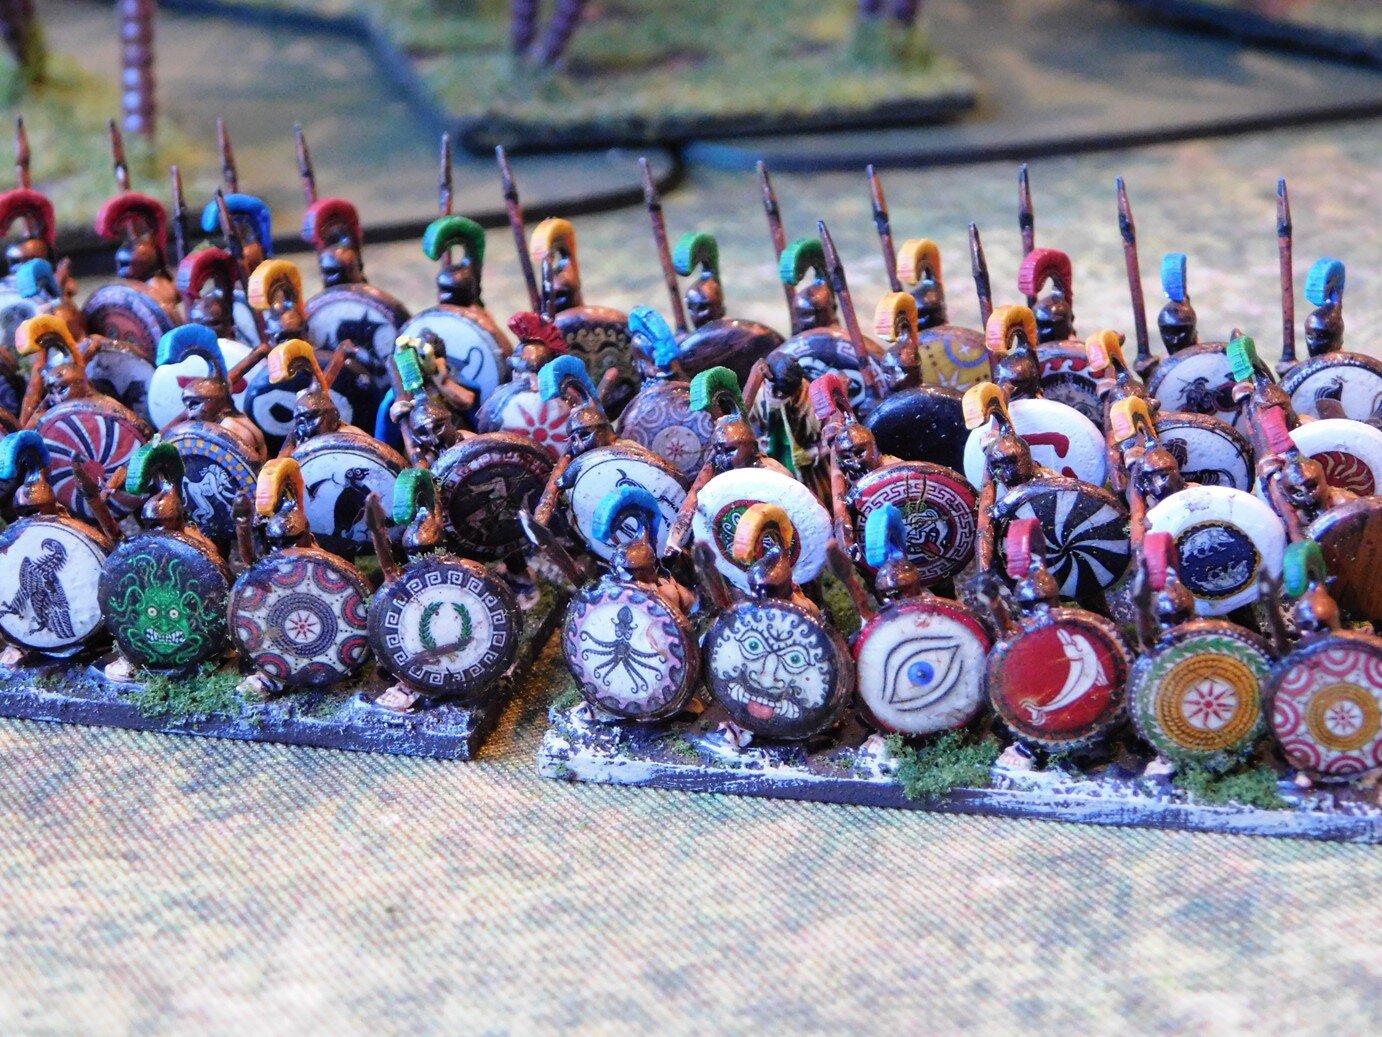
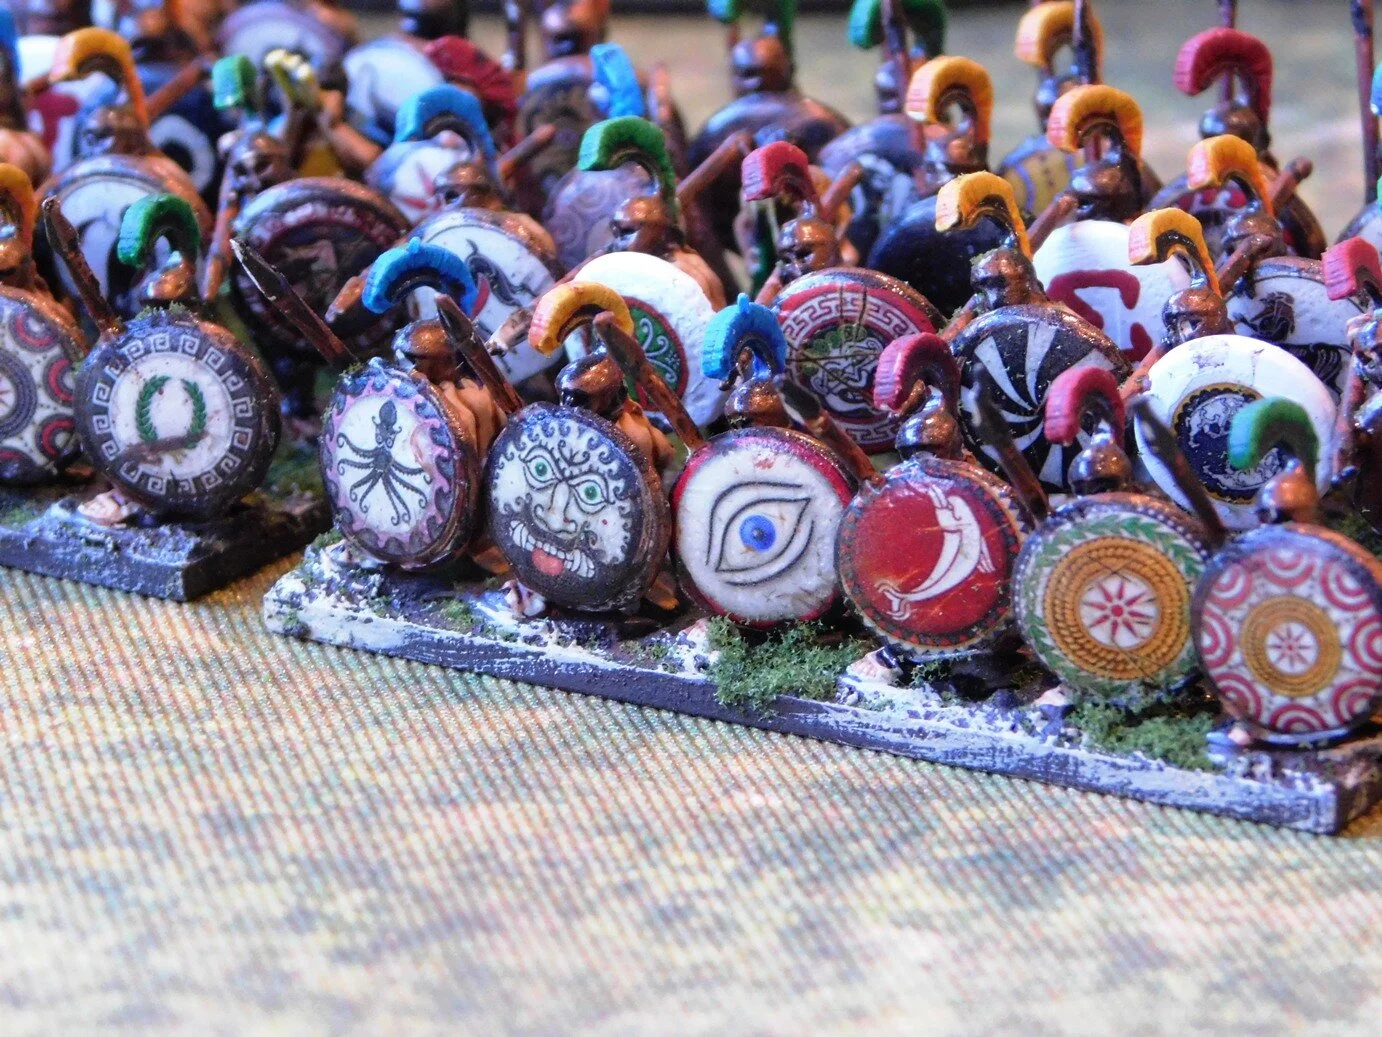
Good points: easy and quick to paint up, nicely animated, shield transfers from Little Big Man Studios are superb.

Bad points: I prefer my Hoplite blocks to have all the same pose, and somehow the kilts made me paint everything in prime colours instead of varying the crests and kilt colours more. At least my daughter likes my “rainbow Hoplites”!

Feel free to let me know what you think. I still need another couple of Hoplite blocks, and the Museum Miniatures ‘nearly nude’ range does make it easy to do…

An Afternoon of "To The Strongest"

Second weekend of the year and I’ve managed to get in an afternoon of “To The Strongest”.

Bevan and I managed two games. The first was a grinding clash between two quite similar armies: I played the Akkadians, Bevan took an Athenian Hoplite force. Each side had a core of a number of deep blocks of close-formed infantry (Spearmen for the Akkadians, slightly superior Hoplites for the Athenians); but the Akkadians had their veteran four-onager heavy chariots plus Royal Bodyguard axe- and bowmen versus a mix of low quality cavalry and lights for the Greeks.

As mentioned, the game was a truly grinding clash. The Akkadian chariots, out on their right wing, threatened to curl around the Athenian left flank, but began the game seemingly unable to move. This meant that the Greeks could come forward and join a general line-against-line engagement that slowly started to bow the Akkadian battle line backwards.

But somehow the Akkadians held on. The Royal Bodyguard axemen did stirring work, the line began to straighten slightly, and then the heavy chariots finally got going and smashed in from the right. In the end, this was a colossal victory for the Akkadians, who didn’t lose a single unit and managed to capture the Greek camp. Here are some pictures:

For the second game, I took the Ancient Britons, with Bevan playing the Sassanid Persians.

The Brits had a huge chunk of (somewhat unwieldy) warriors in the centre of the field, and large numbers of light chariots/cavalry and infantry on each wing…so many lights, in fact, that (much to Bevan’s surprise) his all-horse Sassanids were matched in terms of scouting points.

Looking at the set up, I was confident of victory: there was no way his incredibly small force was going to beat the Ancient British steamroller!

Unfortunately, Bevan and the Persians begged to differ, and what followed was the dissection of my army with surgical precision. First my lights were stripped away unit by unit as I struggled to get my warriors moving, and then enough of those warriors that did move were beaten for me to lose (given that I’d lost a lot of coins through my lights). It was a superb demonstration of how to use a horse archer and cataphract based army.

Fortunately I did manage to kill at least one of his units, so technically the afternoon as a whole was to my advantage, but the way my Brits were annihilated didn’t make it feel so!

Here are some more pictures:

Three Games of To The Strongest

Off to friend Bevan’s house for an afternoon of To The Strongest. Playing at 130 points a side (the standard for the World Championships) you can easily get three games into one afternoon session.

My first game was commanding a longbow-heavy English HYW army against an impressively painted Viking army.

The Vikings rushed forward as fast as they could, eager to get into hand-to-hand with my massed archers. I was equally eager to stop them doing so, so with my Knights and Billmen protecting my left flank, I sat back in the centre and sent flight after flight of arrows into the advancing hordes.

This tactic worked quite nicely, so by the time his men actually got up to my battle line, many of his units had already taken one or two hits (three would remove them from the table). That’s when John discovered that my archers were all veterans with extra two-handed cutting weapons: just right for finishing off already-pin-cushioned Viking units! A victory for me.

The next game promised to be very interesting: it was time for a bit of civil war as I used the same army as in game one but now faced another English HYW army.

Our forces were thus very similar, except for the fact that Steve, my opponent, had two longbow and one dismounted knight units in each of his foot brigades rather than the three longbow units that I had. Steve’s army make up was thus actually more historically accurate than mine, with the added difference that his longbowmen were all standard types, giving him a slightly bigger headcount.

I decided to adopt the same basic tactics as last time i.e. my archers would shoot from distance whilst the heavies protected my left flank. Steve adopted a similar deployment, so I thought it was all going to be about who had the best luck with the cards (TTS has playing card based game mechanics).

In the end, however, that’s not how it worked out. In the centre, Steve advanced his melee foot units towards my line, giving me the opportunity to target each one individually with my longbows. This generally resulted in them disappearing from the table, meaning that when the rest of our troops did clash, I only had to win a third of the combats to win the game (the heavies just faced each other, manoeuvring for some kind of positional advantage, throughout). A second victory.

I fancied a change for my final game, so volunteered to take the Vikings, this time facing Peter and his Ancient Britons. This, again, was two quite similar armies, with the only real difference between them being the British light chariots/horse.

And it was indeed the light chariots/horse that made a difference. I made a terrible mistake early on in the game by leaving my right flank floating. This allowed Peter to get a couple of units of light horse in on my flanks, disordering a couple of my Hyrd units. This allowed his warriors to hit them at a distinct advantage, my right flank crumpled, and my opponent neatly rolled me up on the right and in the centre! Another nice tactic that Peter used was to refuse his own right flank, meaning that any units I had there (one third of my army) spent the entire game chasing after contact with the any enemy units. The end result was a fairly catastrophic loss!

So all in all a great afternoon’s gaming. Thanks to Bevan, John, Steve and Peter.

Sumerians Finally Hit The Tabletop!

A great start to my Xmas holiday with an afternoon of gaming To The Strongest, so also a chance to get the Sumerians that I have been so assiduously painting over the last few months onto the tabletop.

First off was an encounter with the Ancient Britons. Weird how I would never think of playing a non-contemporaneous battle when playing WW2, but accept it as normal for the Ancient period. Doubtless the Brits were on holiday, and when asked where they wanted to go, just replied “Errr…”

Moving swiftly onwards, I had to deploy first, so it was chariots on the left, militia in the middle, and good troops on the right. Opposite me, the Brits had adopted a very traditional deployment: chariots and light horse on the wings, infantry in the middle.

In a nutshell, the battle went as follows. The Britons opened the game by moving forward really quickly. I responded by sending my chariots forward on the left, but they spent just about the whole game dealing with his light chariots and horse, who just wouldn’t stay still long enough to be properly mullered. On the right, the same thing happened with my Royal Guard axemen. I tied his chariots up, but that was all. That left the infantry in the middle to win or lose the battle. My troops were largely militia raw troops, his were screaming barbarians: I lost!

So on to a second battle, where although the Ancient Brits were unchanged, I switched my Dynastic Sumerians into the slightly more advanced Akkadians. With no raw militia, I was slightly more confident of success but my opponent, Bevan, was very clever and tactically astute: all his light chariots and horse went on one flank, whilst his infantry advanced in echelon towards me.

Those of you who are equally tactically astute will of course know exactly what happened next. His light chariots swarmed all over my ponderous battlecarts: if I chased one, it evaded, and then the others attacked my flanks and so on! Meanwhile my infantry just couldn’t get a grip on his foot and found themselves always facing two units or a threat from a flank. I lost again, and lost badly!

Our final game saw me using the Akkadians again, but this time facing another geo-anachronistic foe: a Pyrrhic army composed mostly of Hoplites. This was more my type of opponent: no hordes of light chariots to annoy me.

I deployed with my battle carts facing his cavalry on my right, my Household Axemen and Bowmen facing his elephants on the left, and a straight up infantry face off in the middle.

My battle carts literally smashed his cavalry from the field (apart from a nasty charge from his lancers), and then proceeded to take his left hand camp, with the other only a turn away from falling as well. On the other wing, my bowmen saw off his elephants without too much difficulty, which left an infantry clash in the middle. This was more even, with the fortunes of war swinging backwards and forwards. My successes on the wings, however, meant that although we each lost the same amount of infantry units in the centre, his army lost its morale first.

So two losses and one win for the first Sumerian outing: not a bad performance. Here are some more pictures of the day’s gaming:

Ancient, Ancient British!

I play To The Strongest in 15mm, but on a 28mm-sized grid. I love the look of the huge armies that you have to field to fill the space.

The problem, of course, is that you have to have the aforementioned huge armies in order to play and if, like me, your collection was gathered to play (my own) Vis Bellica rules, then you find yourself short of lots of figures.

Three of my existing chariots

No problem, I hear you cry: an excellent excuse to buy more…and indeed it is. So there I was, mooching around Warfare, wondering whether to buy the final pack of Ancient British chariots that I needed to complete my 130 point army when I saw a chap selling painted Ancient British (or Gallic etc) figures, including chariots.

Now these figures were old, and painted in quite a basic style, but on inquiry were being sold for only £1 per chariot. Hmmm…four new chariots at about £5 each which I then have to paint, base etc, or just buy four of these and be done.

Well, I prefer to paint my own stuff, but then I looked down at these poor figures, all jumbled together in a box, suffering a bit from lead rot (which shows you how old they were) and thought “no, I won’t buy new, I’ll give these old veterans a new home”. After all, figures are not just for Christmas, they are for life!

So here they are: four ancient Ancient British chariots that look more like 20mm than 15mm; are basically painted (although shroffed up a bit by me); are suffering from lead rot (hence the very heavy coat of shiny car lacquer I’ve given them): but given a new home and a new lease of life. Only a shame I couldn’t have taken them all…

Second Sumerian Spear Block

Here’s the second of the six spear blocks that I need to field a To The Strongest Sumerian army in the style of my ancients collection.

Once again these are the almost unbelievably detailed 15mm Museum Miniatures figures painted (all except the bronze) with the new GW Contrast paints. I did the whole lot in one weekend, averaging about 45 minutes for 12 figures.

Only another four blocks to go!

First 15mm Sumerian Spear Block Finished

I’ve already posted pics of half of the spear block, here’s the block now I’ve added the other half:

I am really happy with these. The speed that you can achieve a detailed paint job with Citadel contrast paints is extraordinary. I know I sound a bit like a fan boy, but I painted one row of these (i.e. 12 figures) from start to finish in about forty minutes: a miracle, and such a relief when you have 288 to paint in all.

I’m not 100% sold on having the command figures in the middle of the second row, but it certainly makes for a striking unit. Only another five spear blocks to go!

Incidentally, CP Models are now doing a 28mm version of the above. They are using the same 3D printing files, so the figures are identical…just bigger! They look amazing:

First of the Sumerians

When I first saw the new Museum Miniatures Sumerians, I knew I just had to get some. Designed by CAD, they looked absolutely amazing.

The thing with Sumerians, however, is that you need to have an awful lot of them: to play To The Strongest (my current system of choice for Ancients) you need five or six spear blocks, with each spear block containing (the way I base) 48 figures. That’s 288 infantry: a significant investment in both money, and perhaps more significantly, time.

So a test unit was called for: 48 figures were ordered i.e. one spear block’s worth.

This was to be a double test: one for the figures themselves, and the second for the new Citadel Contrast paints I keep banging on about. I couldn’t face painting 288 figures my normal way (basecoat, wash, highlight i.e. paint each figure three times) but maybe I could if I only had to paint each figure once.

Sold!

The figures are as good as promised, and the paint as well. To emphasise again, the flesh, kilts, spear shafts, cloaks and shields are painted with one coat of a Contrast paint each. Only the bronze is double-painted, but that’s using non-Contrast paints.

Right, once more into the breach: only 264 spearmen to go!

TTS Battle Day: Wars of the Roses

Time for another day of To The Strongest: with friend Neil bringing over his vast collection of 28mm Wars of the Roses figures for us to play with. These are all professionally painted Perry Miniatures plastics, including some hobelars specially put together for the occasion.

We managed three games in all.

The first, with me playing Yorkshire, was a nail-biting backwards-and-forwards kind of game where either side could have triumphed. As it happened, my mounted Later Knights, accompanied by Richard of York himself, suddenly managed to burst through the enemy battle line and find the way open to looting the Lancastrian camps. A hard fought victory.

The second, with me now playing the noble house of Lancaster, was again looking close. The two main lines had clashed in the centre of the field, and the luck was swaying backwards and forwards, when each sides’ one unit of Later-Knights-plus-Royal-Personage charged into each other. Luck was obviously on my side, as Richard of York (my erstwhile self but now enemy commander!) was wounded and carried from the field. This gave me the edge and gradually the opposition crumbled. A narrow victory.

Onto the third game, with Neil making sure that I would play to win and not gift him a consolation victory…which just goes to show how little you can know about someone you have known for years! Play to win? I was playing to grind him into the mud! Anyhow, this was a very cagey game: very different to the previous clashes. Neil hung back, not really moving (annoyingly keeping his troops out of the range of my single cannon, the only one on the field) and waiting for me to make the play.

I edged forward, thinking that perhaps I could get a bit of advantage on the right hand side: maybe two archer units vs one, kill them, then try and curl around the edge of his now-slightly-decreased line. Neil read my intentions, however, and moved troops forward to counter. A clash began to develop, and one not in my favour. He moved more units in and my right flank was beginning to crumble, when both of us realised that he had now moved forward into cannon range. Bang went the gun and finished off a unit of Men At Arms, giving me the initiative. Neil sent forward his Household Knights and King to plug the gap and force me back onto the defensive…and then either bang went the gun again or in went my Household Knights (I can’t remember which) and off came the head of Richard of York again!

A horrible piece of luck for Neal which once again swung the game in my favour.: making it a three-victory whitewash to me.

A great day’s gaming, however, but an interesting demonstration of how a non-normal distribution game mechanic can swing a game in seconds. Oh, and Neil wants to know if anyone wants to buy two 28mm Wars of the Roses armies, one with the command figure slightly dented! Here are some pics:

TTS AAR: The Sasanids Ride Out!

The final game in my recent set with Neil was my Sasanid Persians versus, again, the Pyrrhics.

This promised to be quite interesting: an army composed of extra heavy cavalry and horse archers against a mostly spear and pike-armed force.

In the event, however, it turned out to be quite a mundane battle. My horse archers quickly got around his flanks and started shooing anything that moved. In the centre, I held back until his heavy foot advanced past a line of hills running down the centre of the battlefield, leaving only one unit each side to guard their flanks.

As the two main lines came together, the single unit of heavy clibanari that I had put with each horse-archer command was just coming into play, pinning his flank units in place as the lighter cavalry shot at and charged their flanks.

With his flanks crumbling, his main line getting nowhere, and horse-archer nipping at his Hoplites’ heels, Pyrrhus decided that discretion was the better part of valour and surrendered!

A workmanlike victory for the Sasanids.

Even More To The Strongest

More pictures from a recent day of To The Strongest gaming.

First game was a replay of the last: me and my Ancient Britons vs Neil and the Pyrrhics.

Unfortunately, this time he protected his flanks well, and kept his battle line very closely together. I tried the same tactics as before: warbands in the middle, outflank with the chariots, but this time just couldn’t get through.

On my left flank, he advanced as quickly as possible and used his cavalry to drive my chariots back until they were forced off table. His cavalry were then free to take one of my camps and then turn back towards the rear of my line. meanwhile, the elephants and lights on his left flank were doing exactly the same thing: drive my lights back with charges that might not actually connect, but do force my lights to evade and evade until they are no longer relevant to the main action.

In the centre, my infantry were held by his Hoplites and pikemen until his cavalry appeared in my rear…and that, as they say, was that!

A loss to the Ancient Britons.

Robert Avery

More To The Strongest

Just to leaven the flow of I Ain’t Been Shot, Mum! battle reports that have been flowing through this site, here are some pictures of another day spent playing the Ancients ruleset To The Strongest.

One of the great things about the game is how fast it plays, so an afternoon’s gaming can often involve three games of TTS…and so it was the last time that friend Neil came around to play.

The action began with Neil playing a Pyrrhic army against my Ancient Britons. Not exactly contemporary or contemporaneous, but not spectacularly unbalanced either.

I placed my warbands in the middle of the field, and my massed chariots on either flank. Neil lined up his Hoplite and pikemen on his right flank, his cavalry in the middle, and his elephants and light infantry on his left wing.

Unfortunately for Neil, his Hoplites took too long to advance forward, which allowed me to engage and pin his centre whilst I sent a mass of chariots around behind his left flank. This led to me rapidly capturing his camps, and then threaten the rear of his main line: a victory to me.

Here are some more pictures of the game:

TTS Battle Day Game 3

Onto the third battle of the three that took place as part of a TTS battle day with friend Bevan. Regular visitors will know that by this time I was down two-nil, so rather keen to finish the day with a victory! The sides would be Pyrrhic (played by Bevan) and Ancient British (played by me).

The Ancient Brits are a favourite of mine: in fact, they were the army I used to use when I played WRG 6th competitions in 28mm some thirty years ago…when your chariots were known as the Ancient British Panzer Division.

Under TTS, the Ancient British have an even greater proportion of their army as light chariots than under WRG 6th, so I decided to keep things very simple and employ that well known AncBrit tactic known as “the horns of the Highland Cow”!

This actually worked surprisingly well. My light troops on either flank overwhelmed his light troops through sheer weight of numbers and, most pleasingly, before his Hoplites could start trying to chew through my warbands.

As my chariots curled around onto his rear, the Pyrrhics realised that this was not going to be a Pyrrhic victory so much as a Pyrrhic disaster, and surrendered.

End of the day score: Bevan - 2, Me - 1 .

A great days gaming with what is a delightful little rule set!

TTS Battle Day Game 2

Game two of our To The Strongest battle day involved using Bevan’s collection of 28mm medievals: a clash between the Feudal French and the Feudal English.

The sides were fairly homogenous: each consisting of a core of Knights supported by some missile shooting peasants…longbows for the English, crossbows for the French. The English also had a couple of units of billmen.

We used the terrain rules as laid out in the book, which led to quite an unusual battlefield and both sides squatting opposite each other in one corner.

Bevan had warned me that TTS medieval was very little about tactics and more about just smashing into each other and trying to make sense of the resultant carnage, and he was proved quite right.

Initially, however, I did try something quite tactical: marching a unit of knights up the side of the forest on my left flank and attempting to curve round the end and hit some English infantry in the flank. This almost worked, but was stymied by the cards and some defensive advances by the rest of Bevan’s army which, if you want the technicalities, put my advancing knights into another unit’s Zone of Control (there’s a lot of ZOC-ing in TTS!) and therefore stopping them completing their mission.

After that failed, it was my turn to receive an English charge, one that punched through my line as the perfidious English aimed themselves at some mercenary crossbowmen rather than rising to the chivalric challenge posed by my knights. This lead to a general breakdown of everything into a smashing, crashing melee from which both sides emerged with just one or two victory coins left apiece.

It was then just a matter of who broke another unit first…with Bevan taking the honours as another unit of crossbowmen fell to an armoured steamroller.

A great, fun game that I look forwards to repeating next time we play.

Two-nil to Bevan, with one game to go.

First of the Ancient British Foot

A bit more painting left over from last year: four bases, so one To The Strongest deep unit, of Ancient British foot in 15mm. The figures are Forged in Battle, excuse the shed!

Quite like these. The shields are partly painted and partly using LitteBigMan transfers. What decided which to use? Well, I couldn’t be bothered to cut out the holes in the transfers for the double-boss shields, so only used the transfers for the simple single-boss shields. I did try to do one: but it was annoyingly difficult and time-consuming!

Here’s the back view. The tartan and stripe patterns look better at wargaming distance than under the microscope.

I now need another four units of these: the thought of painting which fills me with horror! The Hoplites are bad enough, but at least they are homogeneous: these all have to be painted individually. Anyone got a pile of well-painted Ancient Brits they don’t want any more?

Christmas Painting

I always seem to get a lot of painting done over Christmas.

I think it’s because there’s nothing else to do apart from eating and drinking heavily (check), watching tv (check), arguing with the family (check), snoozing (check)!

Anyhow, three more units for my Ancients refurbishment completed:

Another four bases of Celtic light cavalry to pad out my chariot units

Another three Celtic chariot bases, meaning I can now field the minimum number required

Four Sassanid Persian elephant bases, so one full unit in To The Strongest, four units in Vis Bellica.

The Sassanids Are Go!

With the below, my Sassanid army in 15mm for To The Strongest is now finally legitimate i.e. fulfils the minimums required by the army lists.

So, here are two units of Heavy Cavalry - armoured men on unarmoured horses - plus a couple of heroes.

Naturally I haven’t quite finished yet: a unit of elephants and another unit of levy foot are sitting on the painting table waiting for a bit of attention. They’ll have to wait for the Ancient Brits to be finished first, and I’ve got that final unit of Hoplites to finish, and don’t even mention the Macedonians! So much painting, so little time!

6th Game of To The Strongest

This game was a replay of the last i.e. a clash between two homogeneous Sengoku Samurai forces. You can see the sides in the post from December 12th.

The Battle is about to begin

I deployed half my foot samurai on each of the left and right flanks, with my Ashigaru right-centre and my mounted cavalry left-centre. As before, my plan was to hold the centre and then loop around whichever flank opened up first.

Neil, as last game, deployed quite in depth. He placed his “mobs” on his left; his big Ashigaru command mixed in with his cavalry in the centre; and his main samurai command on his right.

This was a much closer game than last time. On the right, I pushed forward quickly with one Samurai command and an Ashigaru command, leaving the other Ashigaru command in reserve. Over the course of the battle, this wing would hit the enemy line several times , but not quite manage to gain a significant advantage. In fact, towards the end of the battle, I had to commit my reserves to prop up this section of my line or risk being pushed back.

My right wing advances

In the centre/left-centre, my cavalry moved forward and managed to get a positional advantage on the Ashigaru facing them. Again, however, no mater how much I tried, I couldn’t quite get in a blow hard enough to crack Neil’s line and, again, towards the end of the battle, my troops began to look a bit “thin”. Fortunately I had a spare unit of foot Samurai from the left that I could move right in order to cover my camps against enemy breakthrough, so the situation remained at least stable.

My left flank moves forward

On my left flank, I advanced strongly and, again, had mixed success. Although, as above, I couldn’t break through Neil’s line, my command of three foot samurai units managed to kill three of the four foot samurai units in front of them for the loss of only one of their own. This left me with two units, one of which I used to reinforce the centre, the other managing to manoeuvre around a rocky outcrop and get behind the enemy line.

At this point, both sides were down to around four to six Victory Coins, and each side had three to four units disordered i.e. about to break at a cost of two Victory Coins per unit: so it was definitely turning out to be a very close run thing.

As it happened, in the endgame, the cards fell my way. My unit of foot samurai that had managed to get around the end of Neil’s line had a series of activations that allowed them to take one of his camps, and one of my reserve Ashigaru Teppo units, firing for the first time, blew a unit of disordered mounted samurai away. With that, Neil’s Victory Coins were all gone, and he was forced to retreat. The day was mine!

Analysis

Another cracking game of To The Strongest. Again, the maxims of trying to break your opponents line and making sure you have a reserve held true, with flank charges and taking camps being very successful routes to victory.

Back to painting the 15mm Ancients now: loving the Samurai armies, but they are very small!

And Now The Sassanids

Another ancients army that I need to bulk out for To The Strongest is my Sassanid Persians.

Fortunately, I had plenty of cataphracts already painted, so all I need to add to bring the force up to regulation ratios is some of the heavy cavalry that supported the superheavies.

That requires four heavy horse units, which I have decided to field as two units of what I would call Clibanarii (armoured men on felt-armoured covered horses) and two units of Heavy Cavalry (armoured men on unarmoured horses). They have exactly the same stats in TTS, but it’s nice to have the variety should I ever need it.

Here are the Clibanarii:

Lovely 15mm figures from Forged in Battle’s Empires range. Highly recommended.

The grey Clibanarii at the back have come out beautifully, but the turquoise lot at the front haven’t quite worked the way I wanted. I think the contrast between the white and turquoise is just too great to look good at this scale. No matter: I’ll know better for next time!

Looking good!

Not looking too bad!

5th Game of To The Strongest

Wargaming buddy Neil told me that he had a couple of large 10mm Samurai armies in his attic somewhere. They were based for Warmaster Ancients but, with a bit of jiggery-pokery, translated nicely into two Sengoku Samurai armies for To The Strongest.

The sides, largely homogeneous, were as follows:

The Soft-top Box Samurai

  • Senior General

    • 3 x Mounted Samurai

  • General 1

    • 3 x Foot Samurai

  • General 2

    • 3 x Foot Samurai

  • General 3

    • 2 x Ashigaru Spearmen

    • 2 x Ashigaru Teppo

  • General 4

    • 2 x Ashigaru Spearmen

    • 2 x Ashigaru Teppo

The Hard-top Box Samurai

  • Senior General

    • 4 x Mounted Samurai

  • General 1

    • 6 x Foot Samurai

  • General 2

    • 1 x Foot Samurai

    • 3 x Mobs

  • General 3

    • 4 x Ashigaru Spearmen

    • 3 x Ashigaru Teppo

Mounted Samurai from the Soft-top Box Clan (the red markers are Heroes)

The Game

Neil and I each deployed one command at a time. I was playing the Soft-top Box Clan (i.e. the figures from the box with the soft top!) and deployed my mounted Samurai on my right, opposite Neil’s mounted Samurai; one of my Ashigaru commands in the middle, opposite Neil’s large Ashigaru command; and both units of Foot Samurai on the left, opposite Neil’s mob unit and unit of Foot Samurai. I kept one Ashigaru command in reserve behind my centre.

My plan was to hold the right and centre whilst my superior numbers on the left beat his right, and then swept on into the rest of his line from the flank.

The centre of my line (the teppo are behind pavises)

The left of my line

The key difference between our two set-ups were that, without a reserve, Neil’s line was stacked two deep in places. This would have a significant effect on the forthcoming action, as where he had a numerical advantage, he would have difficulty bringing these superior numbers to bear.

The action began on my right, where my three units of Mounted Samurai faced off against his four units of the same. I took advantage of some rocky terrain and tried to lure him into attacking me, but Neil was too canny to fall into that trap. I therefore bit the bullet and charged forward: his double-stacking meaning that I could fight two-vs-two rather than four-vs-three.

The action on the right unfolds

My initial charge met with mixed success. One unit of his cavalry were destroyed, but one of mine became disordered and was forced to retreat and rally. I renewed my attack, this time supported by a unit of Ashigaru spearmen and, eventually and largely due to the cards very much falling my way, his cavalry crumbled and were removed from the field. This would then leave the way clear for the CinC’s Mounted Samurai to get past his line and capture Neil’s left hand camp.

Meanwhile, on my left, I had pushed my Foot Samurai forward, intending to being superior numbers to bear on that end of Neil’s line. Unfortunately, the Yellow command got a bit tangled in the terrain, and I ended up with one unit destroyed, leaving two more units facing four units of his Foot samurai. This would usually spell disaster, but some how these two units refused to be beaten. Despite being disordered again and again, the brave Yellow Samurai rallied each time and, at the end of the game, were still very much in the battle.

This left me with four Ashigaru units facing Neil’s six Ashigaru units in the centre. Again, however, Neil’s stacked line meant that we each had four units in play and, again, the cards fell in my favour, and I quickly destroyed two of his units. I was then able to bring in my reserve force of four more Ashigaru units, guns fully loaded, and win the resultant eight-vs-four combat. Neil should have been able to support his Ashigaru with his command of peasant Mobs, but the fact that by this time my cavalry had broken through and was threatening his camps meant that he had had to withdraw them in order to defend his baseline.

Ashigaru action in the centre

Once Neil had started haemorrhaging victory coins, it was hard to stop, and eventually he ran out and was forced to retreat. Somehow I had managed to inflict a pretty hefty defeat on him: I had lost only four coins by the end of the game, Neil had lost twenty!

Post-Game Analysis

Although we both agreed that the cards had very much fallen my way, we also agreed that Neil had perhaps stacked his units too deeply to begin with: my rapid advances never giving him the chance to properly deploy. Significantly, I had run into difficulty on my left, where I had also stacked units deep, so it seems as if that is something to avoid.

Although I did seem to win by a lot, it never seemed to me as if I were winning, except right at the end. A good game, made interesting by the homogeneous forces involved.