Romans and Normans

Here’s a couple of bits of painting I’ve managed to complete.

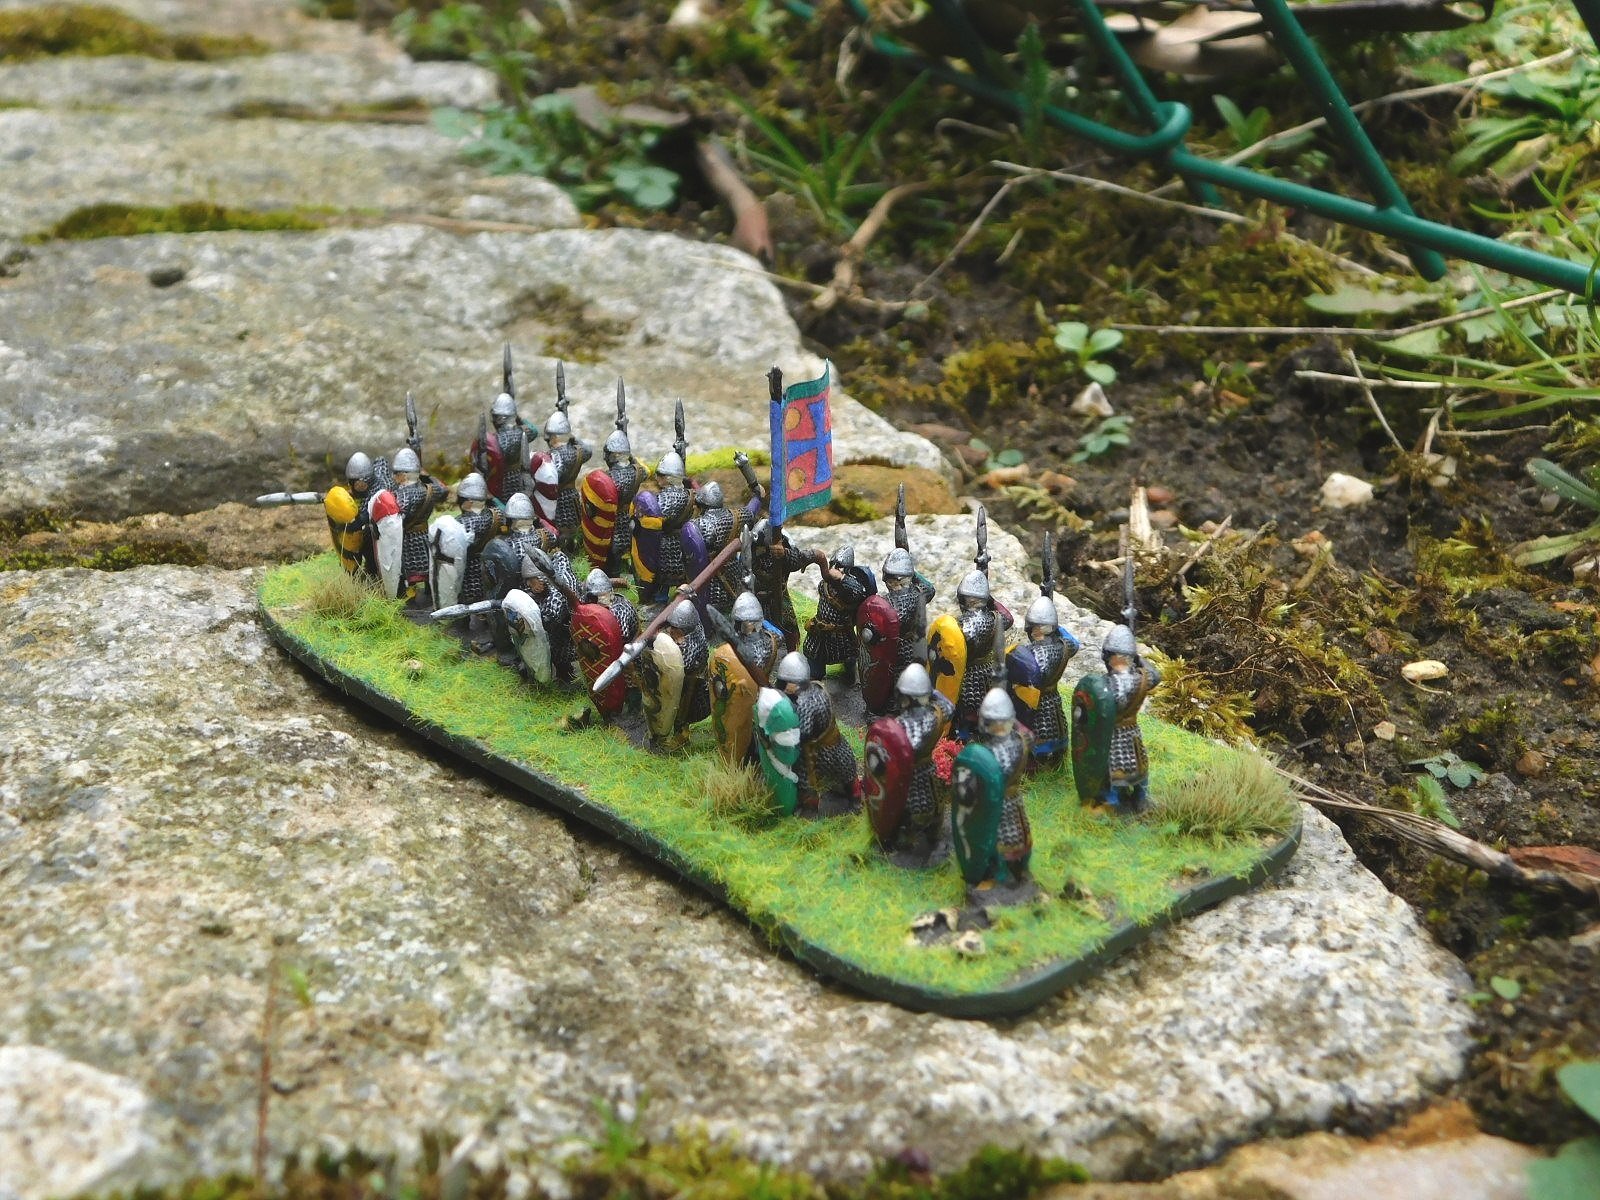
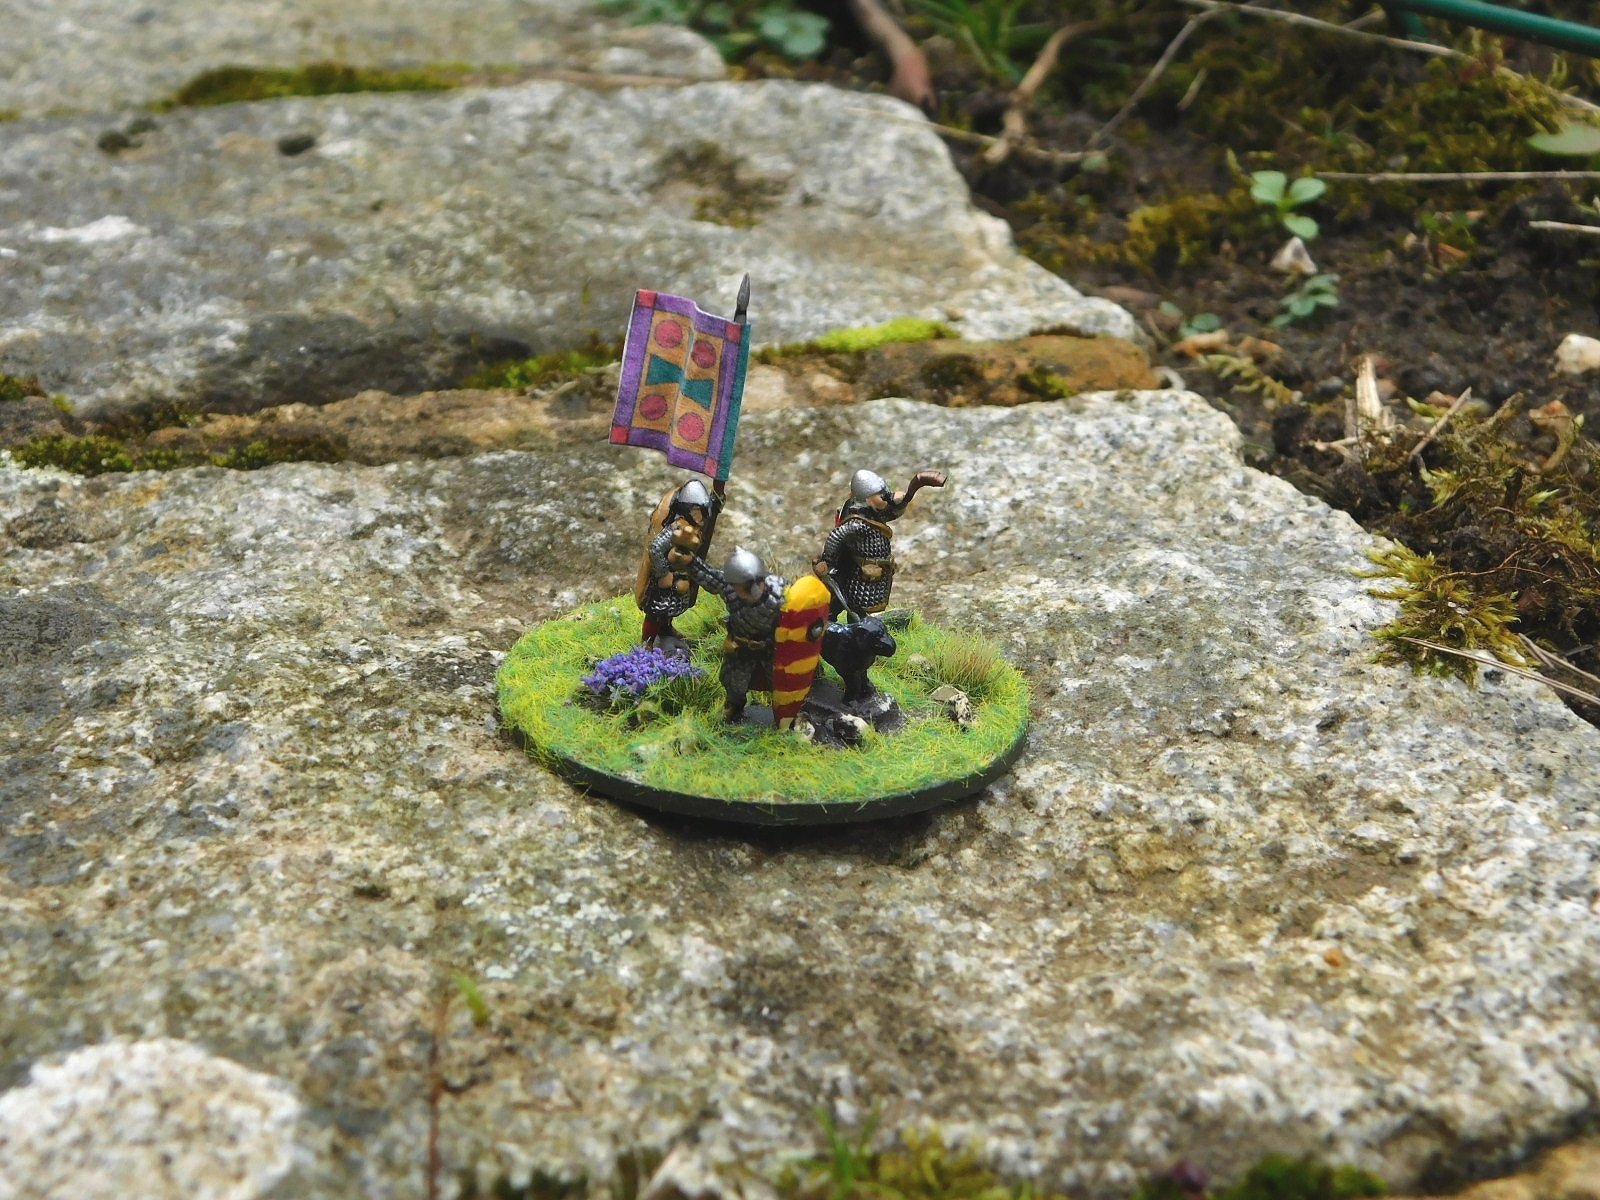
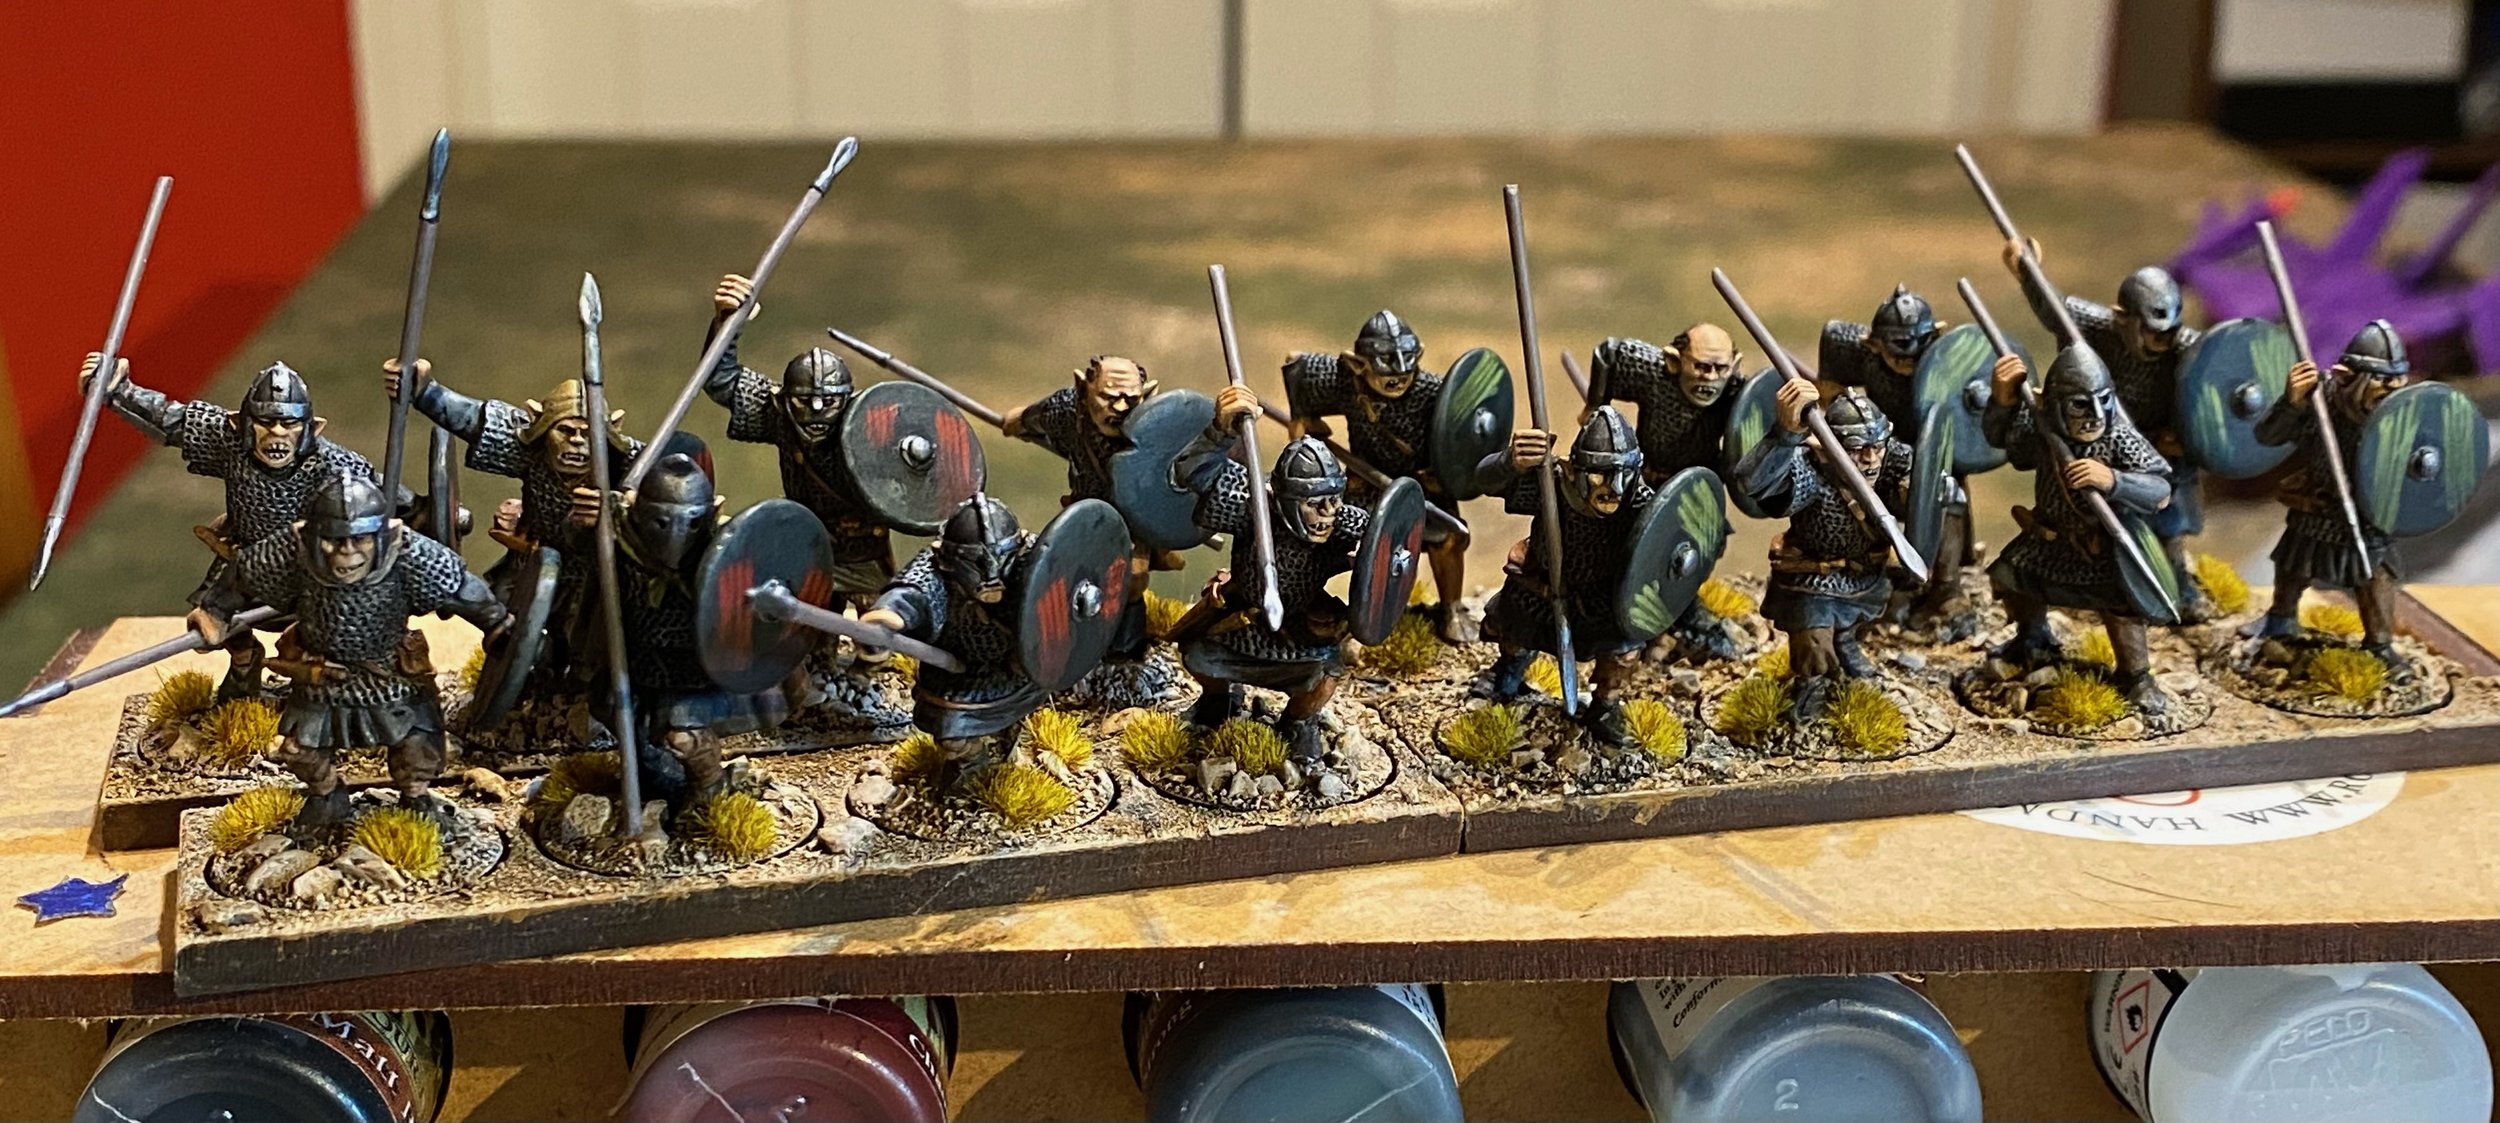
First up, a unit of unarmoured milites for the Normans. Very much a question of one down and two to go on these: I’m writing this post instead of working on the next unit!

These are more from the Museum Miniatures CAD designed 15mm ‘Z’ Range, and very nice they are too. I went for the bright colours because these are wealthy individuals looking to look their best on the battlefield.

Next up was unit of Roman legionary engineers, which I will use as the Camp Servants that appear in the Marian Roman army list for To The Strongest that I work from.

These are 15mm Baueda figures ordered from Magister Militum. What I particularly like is that no two figures in a pack of eight are the same: that’s a decent variety for such a niche sculpt. I think I could have done a better job on the faces, though, and, for some reason, the Army Painter matt varnish has come up a bit glossy…but that will fade with time.

Right, better get back to those Normans…

TTS AAR: Sicilians versus the Tang!

Yes, I know it’s not any sort of historical or even geographical match up, but this is Ancients/Medieval gaming so that’s convenionally allowed!

Nice

Anyhow, it was off to friend Peter’s house for a quick game of To The Strongest using his big figures. I would play the Italo-Normans as a try out for expanding the 15mm ‘pure’ Normans that I’m currently painting up into a Sicilian army; and Peter would play a nicely painted, bring-and-buy Tang Chinese army he’d had hidden away for years.

The armies were actually quite evenly matched. The Sicilians consisted of a core of Knights, some veteran, supported by spearmen, some with bows, and some lights. The Tang had a core of cavalry and cataphracts supported by, you guessed it, some spearmen and some lights, with his troops having extra crossbows rather than bows.

The Sicilians were outscouted and, I must confess, out deployed. On my left flank, all my cavalry faced all the Tang cavalry. In the centre, three quarters of my infantry faced his. But on the right flank, a good 25% of my infantry were facing empty space. Doh!

Time to make the Tang an offer they couldn’t refuse!

Comparing notes after the game, both Peter and I were convinced that we would win the cavalry clash that was almost certainly coming on my left wing: Peter because he had more lights supporting his heavies than I had, me because my cavalry were a bit better quality than his. We both duly advanced our horse forward as fast as possible.

It was in this first cavalry clash that it rapidly became apparent what sort of day I was going to have: I lost both my cavalry generals in rapid succession, drawing so many Aces that Peter actually asked me whether I wanted to check I had the right number in the deck!

I had disordered two of his units in the first clash, so was posed to sweep all before me, but have just lost both my cavalry generals: they should be behind the knights on the hill and those toi their left!

The writing was fairly much on the wall from that point onwards. My cavalry, all now out of command, were gradually beaten backwards, and although a bit of good luck could have given me an advantage, those Aces kept on coming.

The photo below shows one of the moments that could have turned the game: I have lights on the flank of some disordered cataphracts, they’ve drawn a ‘2’ to get into charge position (meaning that they have an 80% chance of going in) and what do I draw? Yes, you guessed it, another Ace!

Meanwhile, in the centre, my infantry weren’t doing much better. Although both my generals were currently still breathing (that would change: I lost one of them later on in the game), I hadn’t had any success in either getting my right wing into play or even getting my centre into any sort of effective action.

With my victory medal count rapidly diminishing as my cavalry gradually gave way, the only way for me to win was to defeat his infantry quickly, but Peter cannily kept pulling back so that I just couldn’t get to grips with them. Add in losing another general to the mix to effect my ability to spur my men forwards, and you can see that it just wasn’t going to happen.

Seeing I had only a couple of victory medals left, Peter now changed tactics: coming forward and targeting my light units with everything he had. Their departure proved the final straw for the Sicilians, and they fled the field!

A most enjoyable game despite my defeat and frustrating habit of drawing Aces, and I could console myself with the fact that this must mean that next game I won’t be drawing any Aces at all…as the laws of probability work like that, don’t they?

Don’t they?

Well, they will in my decks!

A Few More Assyrians

I needed a rest from painting Normans, so I thought I’d fill out my Assyrian army a little bit more.

When I started playing To The Strongest, I resurrected all the Ancients armies that I used to use for Vis Bellica, the only problem being that a VB element was approximately half the size of the elements I use for TTS. Not a problem for most of my armies, as I always over-collected on what I’d actually need to play a game, but it was for the Assyrians: the trouble being that as it was a small, expensive (in points terms) army, I didn’t have multiple identical VB elements that I could combine into a smaller number of TTS elements.

So here’s one TTS element (or, I suppose, two VB elements) of Assyrian heavy infantry, spearmen with big shields in front, archers behind. The figures are from Essex: always dependable figures that do exactly what it says on the tin!

The other issue with matching older figures is, of course, that one’s painting style changes over the years. These days I almost exclusively use Contrast paints, my Assyrians are painted using a black undercoat with acrylics on top , so I had to effectively re-learn how to paint that way. Annoyingly, I couldn’t get the cuirass to look as good as the figures I painted some fifteen years ago. I suppose I’ll just have to buy some more to get more practice in!

TFL Painting Challenge: Late March Update

I haven’t had a chance to updater things since 4th March, so quite a few entries to process.

Do visit the individual galleries via the NavBar, above, but here’s a selection to wet the whistle:

More Norman Milites

The Normans are coming along nicely now: the last two bases of Milites rolled off the production line this weekend, along with the brigade leader, Bishop Odo in on-foot pose.

Again, the shields were the real pain to do, but do look good at tabletop distance.

That’s about half the Normans done now: just a brigade of knights not in chainmail, the archers and the lights.

IABSM AAR: North of Caen

Here are some pictures of game Alex Sotheran has been playing using the first scenario from the I Ain’t Been Shot Mum rulebook: North of Caen. These were posted in the IABSM Facebook group.

AAR: TTS European Championships

Friend Peter had organised a new competition for To The Strongest - the European Championships - and wanted to know if I was interested in taking part. Now I don’t really do competition battles any more: ghastly memories of arguing over minutiae in WRG 6th or similar and ultra-competitive behaviour (usually from me!) souring the experience…and the TTS tournaments are all played in 28mm and my collection, as you all probably know, is exclusively 15mm.

I checked the diary, however, and it turned out that, unusually, I had a completely free day that Saturday, so I said to Peter that I would come along and help and, if needed, make up the numbers as a super-sub should an odd number of players turn up (assume the joke about expecting an even number of odd players to turn up!).

I duly arrived at Ewelme (you-elm apparently) Primary School early yesterday morning and enjoyed half an hour of peaceful reflection eating my breakfast sandwich in an idyllic rural setting until everyone else arrived. To be honest, it was worth the half hour travel time for that alone!

Peter was lending me a Burgundian Ordnance army, so handed me a box full of troops and then it was fingers crossed to see if I would get any games…but as it happened, even numbers were present. No matter: I was happy to time keep and generally help out, and there were some spectacular looking armies to admire, even if they all looked very big to me!

About 15 minutes in, however, one of the players was forced to up-sticks and head home to sort a family matter, so I quickly grabbed the Burg’s and settled down to fulfil my super-substitute role.

My opponent, Andy, was using Almoravids: a very nice looking set of Spanish Berber types, all of whom were already deployed and ready to rock. We agreed that keeping to the tournament schedule meant we couldn’t go through the usual scouting, terrain and deployment process, so I just slammed the Burgs onto the table in a long line and off we went.

I am about to sub in for John, on the right

It was a great battle. The very first javelin thrown by the Almoravids went straight through my CinC, Charles the Bold’s, visor and killed him instantly! I followed that up by managing to draw five Aces in seven cards and it looked as if a hideous defeat was about to follow…but the Burg’s are a resilient lot, and somehow managed to fight their way back to a 100:73 point victory. I do remember one set of Knights smashing the Black Guard from the table in one charge, and killing a couple of enemy generals, but not much more than that!

Then it was onto game two: fighting Michael and his Later Italian Condotta with Swiss Allies, or Venetians for short. This was another cracking game, involving my Knights coming up against some very menacing looking pike blocks. Star of the show was my little Organ Gun artillery unit, which held up the Swiss pike block for two or perhaps three turns as it marched relentlessly towards my camp. The crew of said gun even managed to do the Swiss some damage in the melee! This stout and quite frankly incredible defence allowed me to get some Knights onto the Swiss flank and, much to the shock of all concerned, send them fleeing for the rear. Much to my surprise, another win at 108:58 points.

At this point we broke for lunch and a tour of the school-church-alms house complex, all built by Alice Chaucer, thrice-married grand-daughter of Geoffrey, and the first female Knight of the Garter. Fascinating stuff that included a secret stair and the minstrels’ gallery where Henry VIII allegedly first, er, succeeded, shall we say, with Anne Boleyn.

Onto the afternoon session, and bad news for the super-sub. Another player had withdrawn from the tournament meaning that numbers were uneven again. I was all prepared to return to the bench when someone else, Mark to be exact, said that they would be happy to sit this game out to give me another go. This was gentlemanly behaviour in the extreme, so it was time to face Chris and his Later Swiss. More pikes!

This, third game was also excellent. The Burg’s were caught napping, out-scouted and then pinned back against the edge of the table by some extraordinarily fast marching from the Swiss (I still don’t know what they do with their pikes when acting as mounted infantry LOL). I was sure I was doomed, and told Chris the same, but he assured me that all was not lost…a bad mistake on his part as his prophesy began to come true. Still pinned against the edge of the table, a camp lost to the enemy, the Burg’s stuck their heels in and began to push back. A couple of enemy generals were dispatched (it was a bit of a theme for the day) and some non-pike units broken, but it was a combination of missile-fire to disorder then send in the Knights to punish, which finally broke a Swiss pike block sending loads of victory medals my way. If we’d played on, the game could still have gone either way, but I ended the winner with a score of 102:79 points.

At that point I returned to the substitutes’ bench and spent a very enjoyable couple of hours wandering around the games, admiring both the action and all the very lovely figures on display.

Time for the results and I was amazed to find that I had come fourth. This was obviously partly due to the bye I had received in the fourth round, but was very welcome news indeed. Even more surprising (doubtless particularly so to those who have gamed against me!) was that I was also voted Most Chivalrous Player of the day. Even my family were gob-smacked by that one!

So many thanks to Peter for organising a great day, and for everyone else there, particularly my three opponents Andy, Michael and Chris. I had a whale of a time and am now wondering from whom I can borrow an army for the next one!

IABSM AAR: Russian Civil War Action

The core I Ain’t Been Shot Mum system is really very flexible indeed, and here’s an example to prove my point.

Taken from the IABSM Facebook Group, here are some pictures of a Russian Civil War game played by Lee and friends. Technically 20-odd years prior to the period, and ran very smoothly:

I love the sabot bases: they work really well.

Overlord 2023/Valour & Fortitude

I went to Abingdon Wargames Club’s Overlord 2023 show at the weekend. This was the first one back after lockdown and COVID, and a very pleasant little show it is too.

Whilst it’s not the biggest show in the world, it had all the important elements needed: demo games, trade stands, car-parking, reasonable food and drink, and only a £4 entrance fee.

I didn’t buy anything, for a change, I’m still painting Normans and working on the lead mountain, but I did get to play in a very nice 6mm game of Valour & Fortitude: the fast-play, skeleton Napoleonic/19th Century rules from the Perry twins.

It’s quite a brutal game, in the same style as the Neil Thomas rules I have been using for the post-Napoleonic 19th Century period, in that battalia take a few hits then go shaken then are removed from the table, all of which can happen in one round of melee…but it was a fun encounter where myself and a chap who’s name I didn’t catch, as the French, successfully defended a river/bridge against large numbers of Prussians.

My thanks to Si, Mark and John for running the scenario, and to my opponent and fellow player for making it an enjoyable game. As I said, above, the French hung on, just, for long enough to win…but it was the very narrowest of narrow victories!

If you can get to Abingdon without too much trouble, put Overlord into your diaries for next year: definitely worth going to.

TFL Painting Challenge: First March Update

Apologies for the lack of recent posts: real world work has been incredibly busy!

Here’s an update with entries stretching back just over three weeks…and there are some huge entries as well.

This week we have Andrew with his medievals, Chris with a howitzer, Lloyd with a truly awesome number of little ‘planes, Matt with a legion of Star Wars Legion figures and a few other bits and bobs, Mervyn with some Strength & Honour bases, Asley with some cracking sci-fi figures, and Stumpy with some Napoleonic command stands

Do please visit the individual galleries, but here’s a taster:

TTS AAR: Vikings Resurgent!

Time for a quick game of To The Strongest. Today’s game would feature the Vikings, commanded by Yours Truly, versus the Burgundian Ordnance, commanded by John.

The yellow caps are lance markers, the red meeples indicate veteran Huscarl units.

Two very different armies: my Vikings are a foot-only army comprised mostly of big shieldwall units (I’ll call them warbands) with a few lights thrown in; the Burgundians are a combination of lethal and indestructible Knights with some useful missile-armed spearmen in support.

I knew I would lose if I let the Burgundians pick me off one unit at a time: the only way to win was to move forward and attack en masse so that my battle line could absorb the initial charge of his Knights then swamp them with numbers.

I also knew that my light bowmen were useless against the Knights (the arrows would just plink off!) so determined to send both light units up the far left flank and try and get behind his battle line and into his camps, knowing that he didn’t have enough units to face my warbands and defend his rear.

I therefore moved my warbands forward in a long line, being careful not to let the more impetuous Vikings surge forward in an uncontrolled manner.

This meant that when the main lines did clash the outcome was exactly as I had predicted: the warbands hit by the Knights were badly disordered at first contact but not destroyed, and then other warbands piled in to help.

Keep your eyes on the light units to the far left as well: they are doing what they were supposed to do!

By now I was whittling down his army, especially on my right flank. With so few Burgundian units on the table, he just couldn’t afford to lose many and, as we reached the climax of the battle, I had wiped the four units on his left and left-centre for the loss of only one of my warbands.

That meant that I only really needed one big push to win the day and, rather pleasingly, that came from (yes, you guessed it) one of my light units finally taking the first Burgundian camp.

With half their army destroyed and their baggage taken, that was enough to send the neo-Frenchmen packing: the Vikings had won the day!

Norman Crossbowmen

I needed a rest from doing kite shields, so decided to paint up some crossbowmen bases. These would have started to appear from about 1000CE onwards.

Again, these are very nice figures from Museum Miniatures. I have painted them up as relatively ‘official’ units, all wearing padded armour a bit like a fabric version of a hauberk.

I like the poses on these figures, particularly the ones I have used at the back who are using the stirrup to pull the string back.

I’m also going to do a couple of bases of light crossbowmen, but these two bases are the backbone of the missile defence of the army.

As you can doubtless see, I had problems with the shields of the command group, so I wasn’t completely free of the shield-curse yet!

More Normans

The Normans, excellent 15mm figures from Museum Miniatures, are continuing to roll off the production line.

Following from the armoured milites, we have the first of their foot equivalents: either Spearmen or Shieldwall dependent on which list you use.

As most of each figure involved chainmail or helmet, I changed from my usual Contrast Paints method to the method I used to use back in the day: black undercoat then paint up in layers from there. Not too shabby a result, I hope you will agree!

Once again, it was the shields that caused me the biggest bother, as it’s quite a large area to paint free hand. Again, I used the “decals that are a bit small then paint up” method: using the decals almost as a guide to what to paint where. Note that they don’t show as quite so rough on the figures actually on the tabletop: one of the downsides of having a good camera is that they take a real picture!

CDS AAR: Valley of Tears at Winter Wonderlard 2023

Yesterday saw the annual Winter Wonderlard Lardie Day in Bristol.

I couldn’t be there myself (real world interfering with gaming again!) but here’s the first of the AAR using TFL company-sized rules from the day, with Steve Blease and his “Valley of Tears” Golan Heights scenario using Charlie Don’t Surf .

There were two sessions: see pictures from both, and others taken on the day, by clicking on the picture, below:

TFL Painting Challenge: First Feb Update

Everyone has been very busy over the last couple of weeks, so lots of huge entries to log.

This update we have first entries from Mr Hodge and Mr Kay, plus more entries from Matt, Carole, John, Stump, Andrew, Lloyd, Mervyn and Nick.

Do visit the individual galleries, but here’s a taster:

TTS AAR: A Defeat for the Legions!

Time for another game of To The Strongest with John.

Rather than play a standard pick-up game where each side lines up on opposite sides of the table, we went for a more scenario based encounter, with the Romans starting the game in three columns: their main legionary force in the centre, their horse to the right and their lights to the left. The Celtic types facing them were largely deployed as one might start a standard game, but with enough exceptions to make things interesting.

To have any chance of victory, the Romans needed to deploy for battle as soon as possible: a task completed fairly easily as the superb drill of the legionaries kicked into play. There was a gap in the line on the road itself: the Cohorts VIII and IX not performing as expected!

Note that the yellow markers indicate that the Romans have pila ready to use.

The Celts announced their intention to move forward en masse. Their wings duly did so, but for some reason (the vagaries of the cards) their centre units hung back. This gave me a real opportunity to defeat them in detail on either flank before turning to crush their centre.

On the right, my single unit of legionary cavalry, supported by some auxiliary horse archers, duly moved forward to engage the enemy horse and chariots rapidly trying to curl around my flank. I also brought four cohorts of infantry (two units in TTS terms) across in support.

This really was a good opportunity to win on this flank, but the Gods decided otherwise: consecutive 2’s drawn from the pack meant that my legionary horse sat stationary rather than charging home.

My supporting legionaries were, however, able to charge home, dispersing the Celtic cavalry in front of them (kudos to the single Cohort X base for its contribution to the fight) but this wing was still very much in dispute rather than going my way.

Things weren’t going my way on the other wing either. For some reason, my main legionary force, including the double-size Cohort I with the aquila or Eagle Standard, also hung back, meaning that rather than fighting two enemy warbands with two Roman units, I now risked a delayed fight tying up my units until they were overwhelmed by more Celts coming into the fray!

And so it came to pass: the Celtic warbands in the centre ‘woke up’, and headed forward…

It would now be much more of a traditional stand up fight, and all would be well if I could get the Roman ‘mincing machine’ into action: I needed to bring my men together, make full use of my remaining pila, and rotate units in and out of the front line as required.

Unfortunately none of that happened!

Having split my line to deal with each wing of the initial enemy attack, I couldn’t get free enough of the rampaging Celts to get it back together again. So rather than fighting as one command, my Romans had to fight as three isolated commands on the left, in the centre, and on the right.

Secondly, my legionaries had obviously packed their pila away for the march, as not a single volley had any effect on the opposition. I also suffered a wave of officer casualties including the two tribunes commanding the main body of the legion. On top of that, even John remarked that the cards had turned against me: I was missing hits that should have gone in and failing saves that should have been easy. It was just not the Romans’ day!

My cohorts were gradually disordered and then wiped by the Celts using their superior numbers, and I just didn’t have the coins to withstand those losses for long.

So a defeat for the Romans probably stemming from my failure to wipe the enemy wings at the beginning of the battle. I’d made a bold tactical decision that had a good chance of success, particularly on the right, but it hadn’t worked and I’d suffered the consequences against the remorseless Celtic hordes commanded by John!

First of the Normans

My big project for the first part of 2023 is a 15mm Norman army using the excellent CAD designed figures from Museum Miniatures.

First up are a brigade of veteran milites or knights: cavalry in mail with their big kite shields and carrying lance.

These are painted mostly with GW Contrast paints, which I find give the right balance between how the finished models look and the speed at which I can turn them out.

I wasn’t looking forward to doing the shields, and they were indeed the toughest part of the process.

I wanted to use decals, but Museum has no arrangements with anyone for that, so I looked through what Little Big Man Studios has in their catalogue for other ranges and ordered anything that looked a bit Norman.

In the end,the decals meant for Khurasan’s range of Normans was the closest fit, although even their decals were a bit small: I had to use the decal more as a starting point than as the finished product, something you can see if you look closely at the red and yellow striped shield in the image above: you’ll see the decal in the middle with my painting around the outside. Time consuming and annoying!

The flags came from Wargames Designs: very easy to use provided you’re not completely cack-handed with a pair of scissors!

Although I hemmed and hawed for some time, I eventually decided to go with my original plan and mount the figures on the big bases I like to use for To The Strongest and For King & Parliament. Yes, it reduces the flexibility of what I can do, but the ease of use and look are good enough compensations. The big bases are Warbases vehicle bases and nicely fit my TTS grid.

CDS AAR: Valley of Tears

We're not in Vietnam anymore...

Steve Blease ran through his 6mm Yom Kippur 'Valley of Tears' CDS variant game which he'll be running at the Winter Wonder Lard III Lardy Day in Bristol later this month. Here are a few shots of the action: