IABSM AAR: Blenneville or Bust! #3C: Pierrecourt

Tim Whitworth and chums continue to play the Blenneville or Bust! campaign. We seem to have missed out on an AAR for the second scenario, but here’s the report for their third game: Pierrecourt.

The Germans are defending, the Americans attacking. Who will prevail? Click on the picture, below, to see all.

IABSM AAR: Blenneville or Bust! #01: West of Pierrecourt

Tim Whitworth and friends have started playing through the Blenneville or Bust! scenario pack: a pyramid campaign set in Normandy in 1944.

In the first encounter, #01 West of Pierrecourt, American reconnaissance troops probe forward looking for a bridge over the river that will take the weight of their armour, but the Germans lie in wait…

Click on the picture, below, to see what happened.

IABSM AAR: Bashnya or Bust! #01: Near Osen

Here’s an After Action Report from a game from this weekend that I was due to play in but eventually could not make because of scheduling issues!

Friends Bevan, Mark and Dave have started to play through the Bashnya or Bust! scenario pack for I Ain’t Been Shot Mum, and here’s the battle report from the first game: #01: Near Osen.

Click on the picture below to see all:

IABNM AAR: Action at OML3

Must…resist…

I’ve spent the last few weeks trying to resist all the new Team Yankee Cold War kit from Battlefront. As I’m already in the middle of building up armies for a new period (English Civil War for those of you not paying attention. Yes, I mean you, Clarke, at the back!) I just can’t handle anything else at the moment.

All this Cold War goodness, however, got me thinking about what rules to use. Regular browsers will know that I play Arab/Israeli games with an adapted form of Charlie Don’t Surf!, but the early 70’s is just about as far as they will go without more work.

More thinki, and I remembered I Ain’t Been Nuked Mum! : a proper Cold Wars adaptation of IABSM that I remembered seeing at the third Operation Market Garden games day in Evesham.

A little bit of Googling and I found the Maxim to Milan blog, featuring some excellent IABNM battle reports. Sadly, the blog hasn’t been updated since 2015 but (and I hope Nick doesn’t mind) here’s one of them recreated here on VL. Those of you who’d prefer to see the original on MtM can click here to do so.

Click on the picture below to see all:

IABSM AAR: Blenneville or Bust! #02: Avaux

Great little I Ain’t Been Shot Mum After Action Report from Rob Goodfellow covering a game played using the second scenario of the Blenneville or Bust! scenario pack.

After an American recon force drives off its German opposition, British armour tries a thrust through Avaux..but the Germans are waiting for them.

Click on the picture below to see all.

IABSM AAR: More Arras from the Weekend

Yes, I know we have had two lots of Arras already (three if you count the 15mm game from a couple of weeks ago) but here is another set of photographs taken from this last weekend’s Salute-warm-up Arras game.

These are all by Phil Turner, one of the players in the game, and are lifted from the IABSM Facebook Group.

I would recommend a look at these, even if you think you’ve “seen it all before”: there are some cracking close ups well worth gander!

Click on the picture below…

IABSM AAR: Arras: Another Run Through

Here are more great shots of Michael Curtis and Friends’ Arras Counter-Attack demo game planned for Salute this year.

This was the second run-through of the weekend, with a slight change to the British start position to see whether that would speed up the “action” part of the game.

Click on the picture below to see all.

ECW: The Battle of Montgomery

I’ve been playing the Ancients rules To The Strongest for some months now, and really enjoying it as a fun, fast-play, grid-based game that gets plenty of figures onto the table and avoids most arguments about whether one unit is 33mm or 35mm from another etc. Looking for some army lists (free to download), I noticed that BigRedBat also do an English Civil War variant to TTS called For King and Parliament. I’ve never really played Pike & Shot before, but this sounded like a good way to start, so I bought a copy and started working out what figures I would need.

Conveniently, there’s a sample scenario with OBs in the back of the rulebook covering the Battle of Montgomery, 1644, so I used that as the basis for the start of my collection. As those of you who visit this website regularly know, the Christmas holiday provided time to paint enough troops to field the Parliamentarian side of the battle, so when John offered to bring round his collection, we were ready to give FK&P a go.

Setting up the battle is simple. Royalists are up on a ridge. They outnumber the Roundheads with two cavalry brigades and two infantry brigades. Parliamentarian infantry, one brigade, is on a hill opposite, with a cavalry brigade next to them. Off table is another brigade of cavalry which is currently out foraging.

view from the roundhead right

Parliamentarians

Cavaliers

The Battle

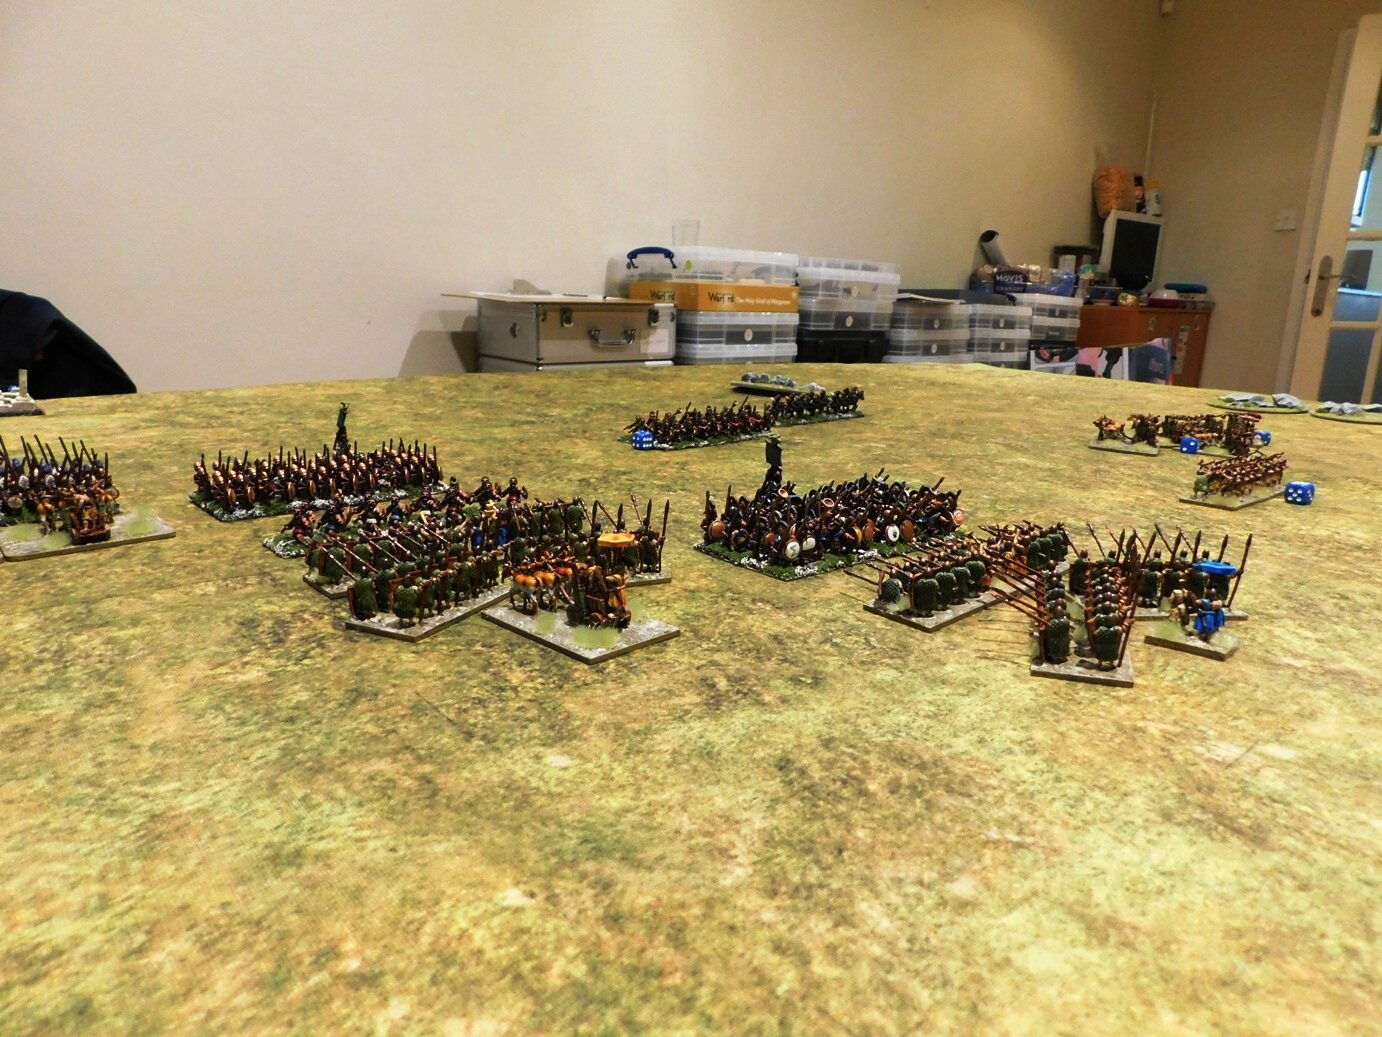
As I was badly outnumbered in the centre, my plan was to win on my left flank, hopefully helped by my returning foragers, and then roll up his line from the left before he could beat me in the center and on the right.

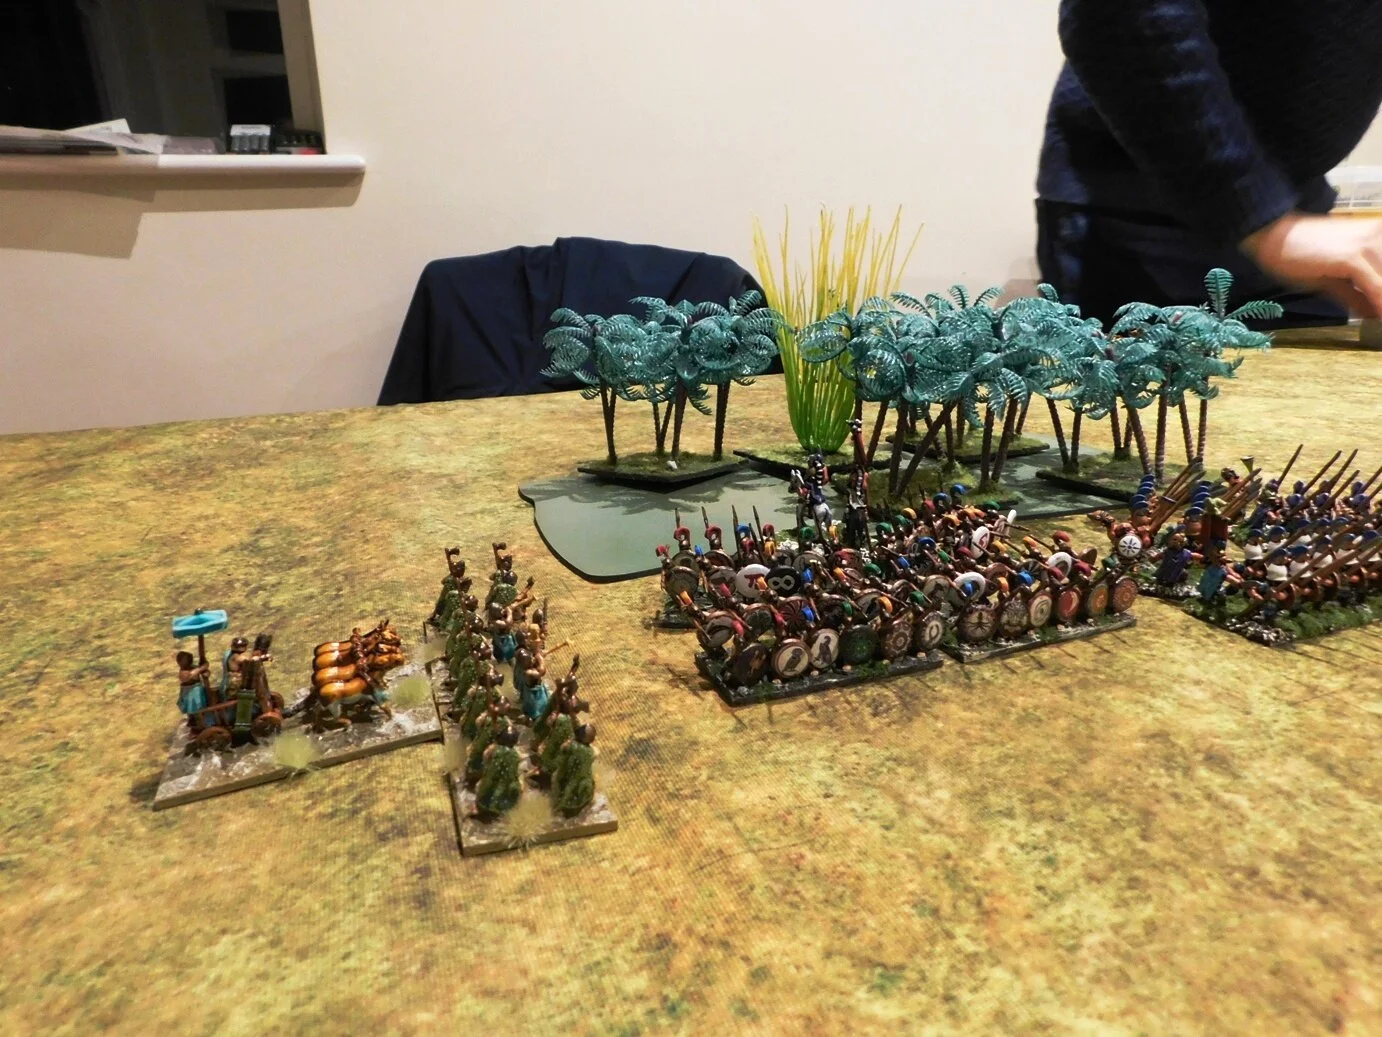
I had the first turn, and therefore concentrated my efforts on my cavalry: my infantry remaining still. One regiment of cavalry swept forward and charged one of their opposite number. Unlike TTS, multiple combat cards are regular in FK&P with, in this instance, five going down. Result: three hits, not enough saves, enemy cavalry destroyed. This was a good start, but the same thing happened to me on the Royalist go, so after one turn we were honours-even and no sign of the foragers.

Fortunately his infantry were obviously still having their hair done (Royalist fops!) so hadn’t moved towards me.

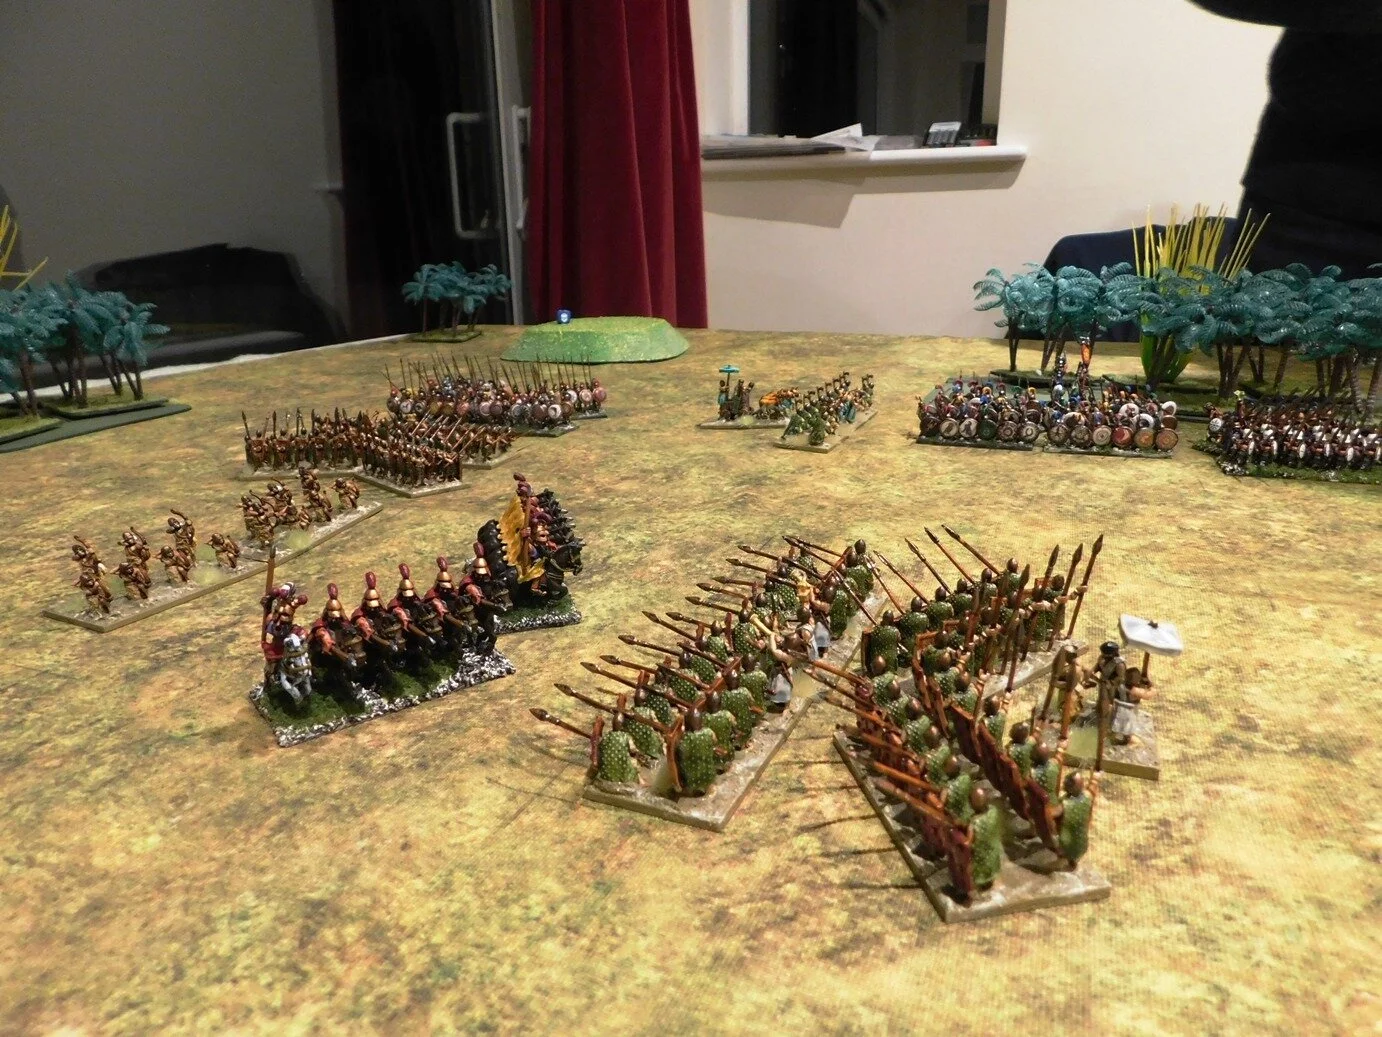
Second turn, same sort of result as the first, but disastrously my Commanding General had (somewhat foolishly) joined the cavalry charge and was killed in the melee. This cost me a serious number of victory coins as, in FK&P, losing officers is really painful, and that’s in addition to losing their command abilities. Worse, this time some of his infantry were on the move. Things were looking a bit grim.

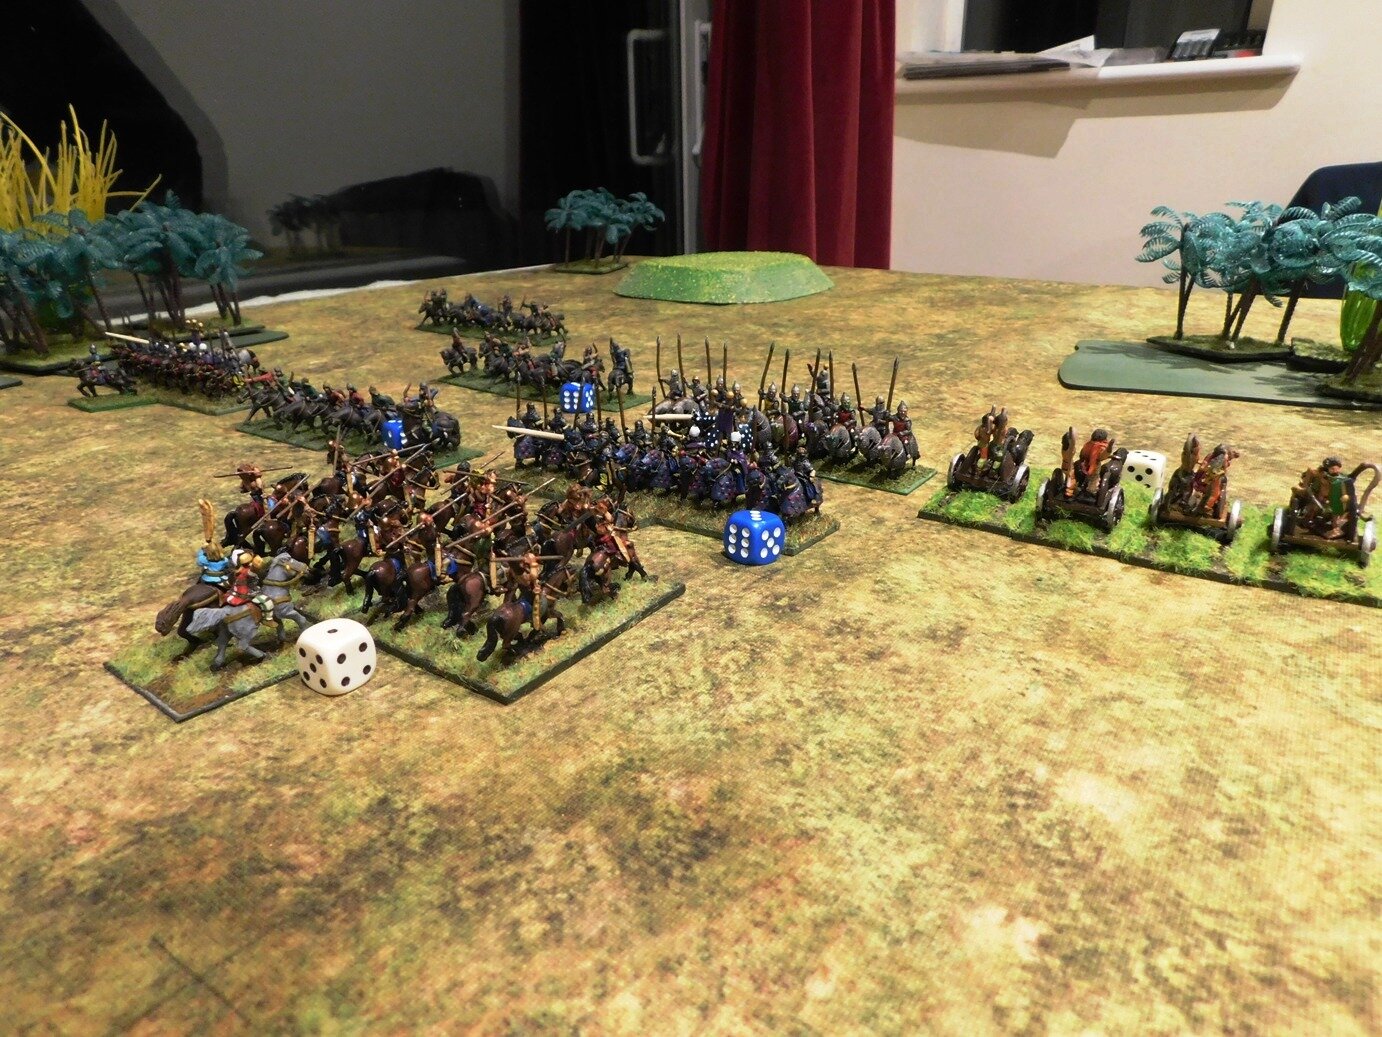
Third turn, however, my foragers arrived and tipped the balance on the left. Now here’s the real fun of FK&P compared to TTS: if you charge on the flank you don’t get a measly one extra attack card: you get double what you’ve earned for a frontal attack!

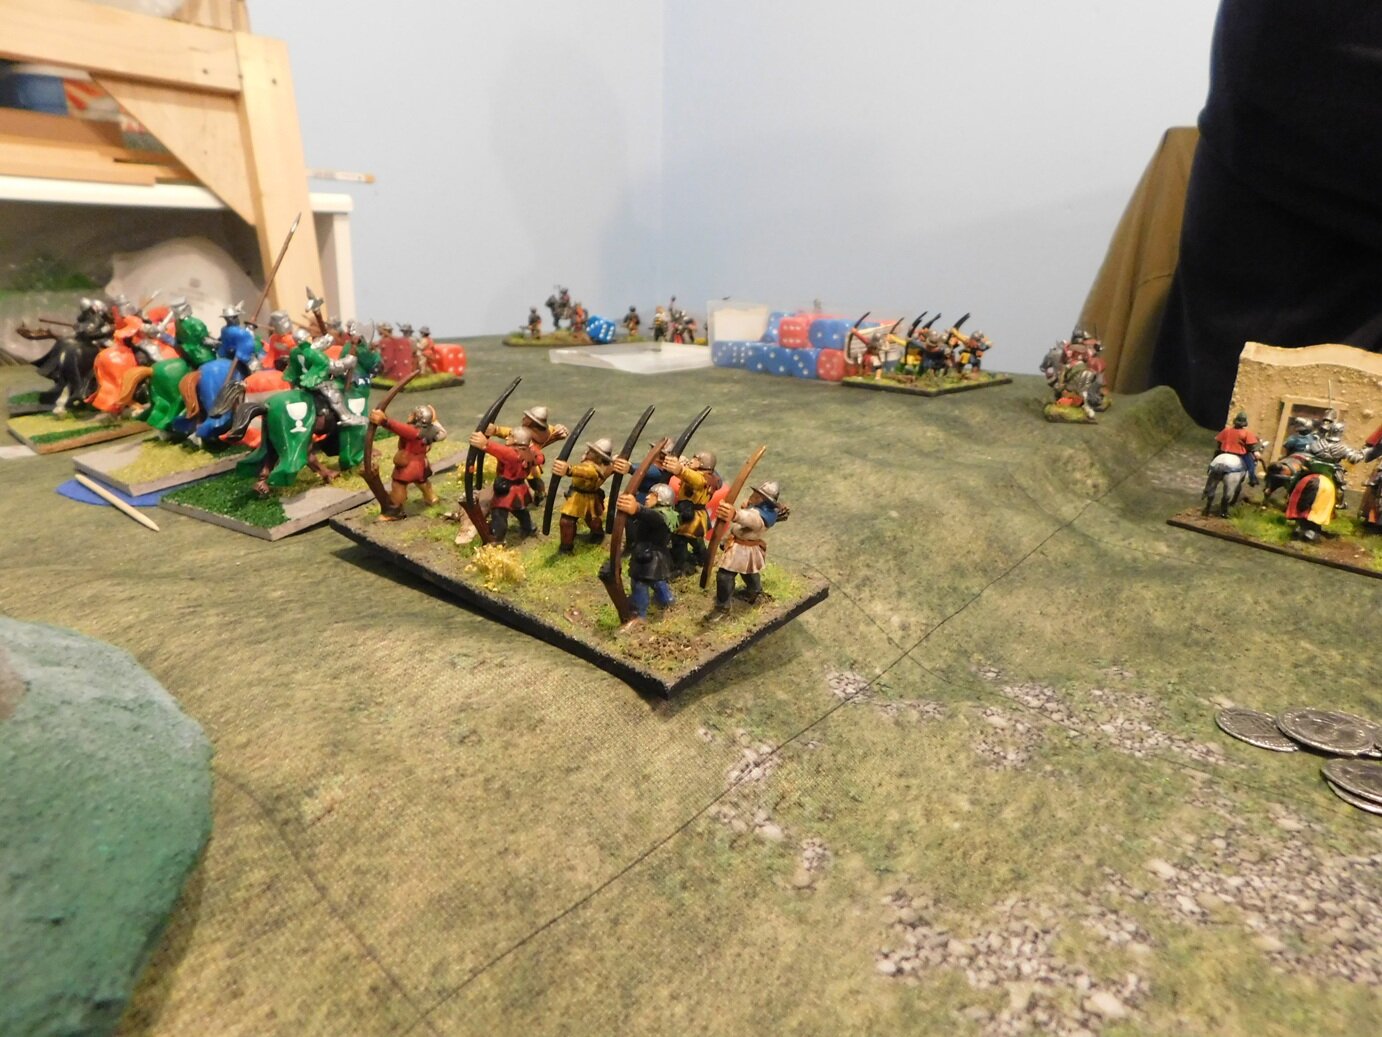
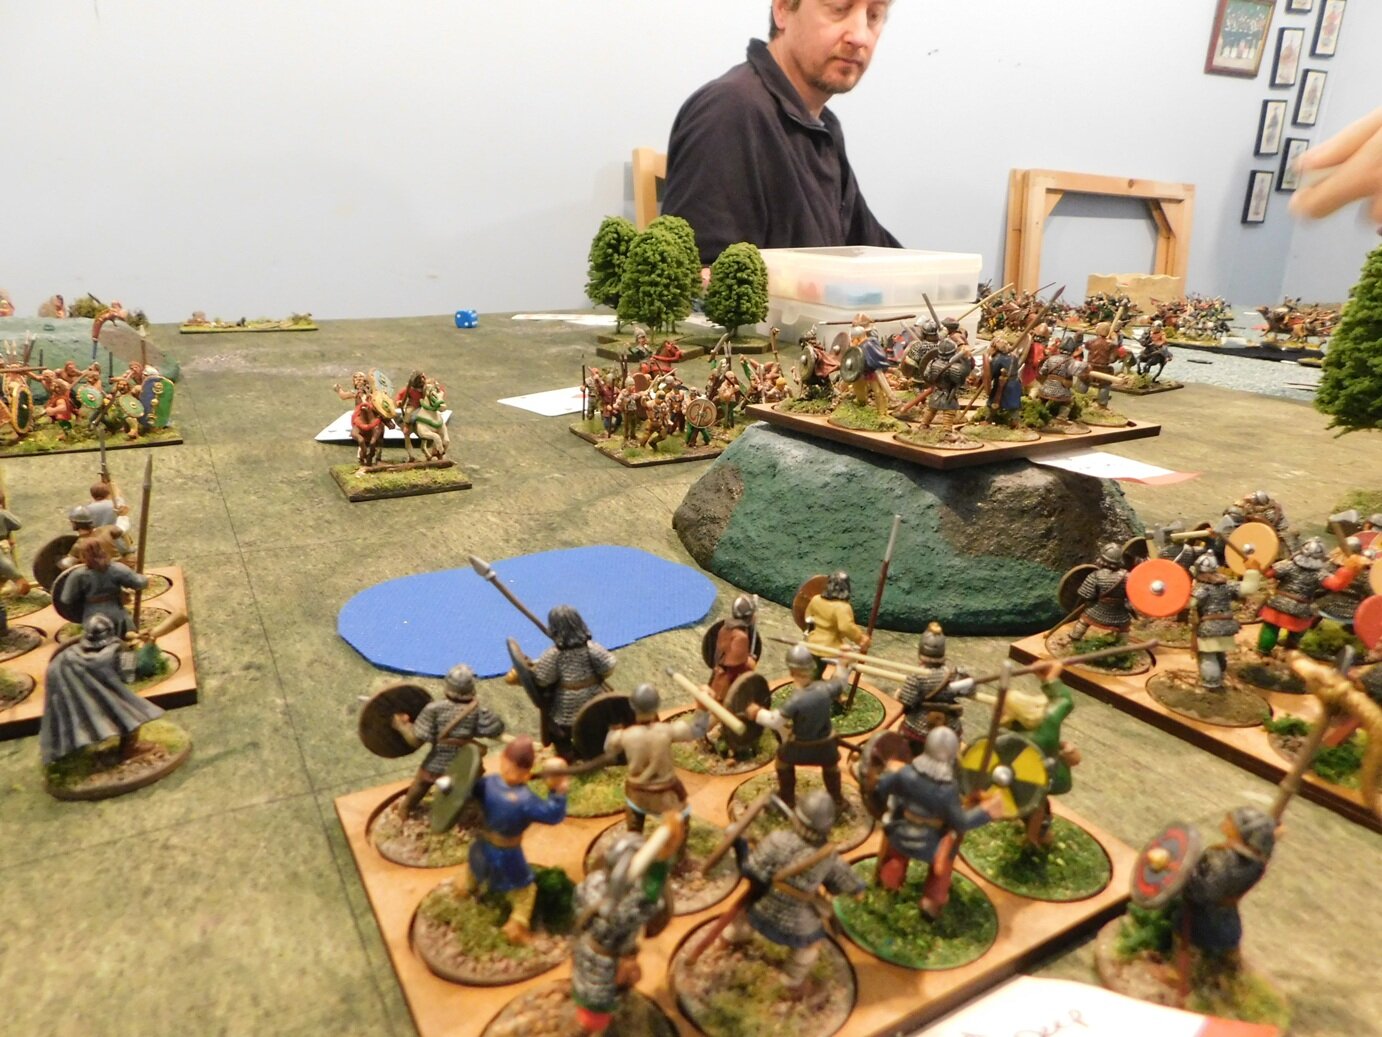
Here’s two shots of my returning foragers hitting the right flank of his cavalry:

And here’s all the lovely attack cards I got to play!

Note that despite the huge numbers of cards played, a couple of cavalry units did survive being hit in the flank…but not when they were hit again and again.

End result: a cavalry victory…but would it be enough bearing in mind what was happening in the centre?

No more Royalist cavalry to fight!

The Infantry Battle

By now the advancing Royalist infantry had cleared away my Forlorn Hopes and had just engaged my main battle line. By this time, I was suffering from a bad loss of victory coins: one more lost unit and that was it! You can see the cavalry melee just finishing in the background, so I wasn’t getting any help from them yet, and the only high point was that the Royalist infantry (pike heavy, so at an advantage in combat) were attacking piecemeal as they hadn’t been able to co-ordinate their attack.

Royalists coming up the hill

But wait, I hear you cry, what’s that other unit in the distance, by the bridge. well that, my friends, is the Derbyshire Horse: an untried regiment that had passed its first test and already seen off a partially blown enemy cavalry regiment.

The Derbyshire’s charged forward gloriously and, just as my left hand infantry battalia was about to crumble, smashed into the open flank of the enemy infantry assaulting them.

Huzzah for the Derbyshires

The enemy infantry were smashed from the field, relieving John of the last of his victory coins: Parliament was victorious!

Aftermath

A very successful game that literally came down to the last action. Had the Derbyshire’s not done as they did, I would likely have lost that last one unit: the red-clad infantry battalia was on its last legs.

John and I both agreed that For King & Parliament gives a great game and will be fighting other battles of the English Civil War soon. For me, as well, it’s back to the painting table to add some more units to my forces, so the old credit card is about to take a hammering!

My only regret: I have a horrible feeling that I shall be missing all the attack cards next time I play TTS!

Robert Avery

IABSM AAR: Arras (a different game!)

Michael Curtis and friends are putting on a demo game of I Ain’t Been Shot, Mum at Salute this year. The scenario chosen is the Arras counterattack of May 1940.

Demo games need a lot of preparation, and a good few run throughs before they are ready for public consumption. Click on the pic below to see this one:

Those of you who regularly visit this site will know that we had a different Arras battle report last Tuesday. Here’s the link so that you can compare the two.

IABSM AAR: A Late Christmas!

Here’s a rather nice battle report from Alex Sotheran covering a game played just before Christmas last year, and taken from Alex’s excellent blog Storm of Steel.

The action is once again set in Malaya in late 1941, and covers an action very similar to the encounter at Slim River.

Click on the picture below to see all:

An Afternoon of "To The Strongest"

Second weekend of the year and I’ve managed to get in an afternoon of “To The Strongest”.

Bevan and I managed two games. The first was a grinding clash between two quite similar armies: I played the Akkadians, Bevan took an Athenian Hoplite force. Each side had a core of a number of deep blocks of close-formed infantry (Spearmen for the Akkadians, slightly superior Hoplites for the Athenians); but the Akkadians had their veteran four-onager heavy chariots plus Royal Bodyguard axe- and bowmen versus a mix of low quality cavalry and lights for the Greeks.

As mentioned, the game was a truly grinding clash. The Akkadian chariots, out on their right wing, threatened to curl around the Athenian left flank, but began the game seemingly unable to move. This meant that the Greeks could come forward and join a general line-against-line engagement that slowly started to bow the Akkadian battle line backwards.

But somehow the Akkadians held on. The Royal Bodyguard axemen did stirring work, the line began to straighten slightly, and then the heavy chariots finally got going and smashed in from the right. In the end, this was a colossal victory for the Akkadians, who didn’t lose a single unit and managed to capture the Greek camp. Here are some pictures:

For the second game, I took the Ancient Britons, with Bevan playing the Sassanid Persians.

The Brits had a huge chunk of (somewhat unwieldy) warriors in the centre of the field, and large numbers of light chariots/cavalry and infantry on each wing…so many lights, in fact, that (much to Bevan’s surprise) his all-horse Sassanids were matched in terms of scouting points.

Looking at the set up, I was confident of victory: there was no way his incredibly small force was going to beat the Ancient British steamroller!

Unfortunately, Bevan and the Persians begged to differ, and what followed was the dissection of my army with surgical precision. First my lights were stripped away unit by unit as I struggled to get my warriors moving, and then enough of those warriors that did move were beaten for me to lose (given that I’d lost a lot of coins through my lights). It was a superb demonstration of how to use a horse archer and cataphract based army.

Fortunately I did manage to kill at least one of his units, so technically the afternoon as a whole was to my advantage, but the way my Brits were annihilated didn’t make it feel so!

Here are some more pictures:

IABSM AAR: Rumble in the Jungle

Here a nice little after action report from Alex Sotheran, taken from both the IABSM Facebook group and Alex’s Storm of Steel blog.

The game was Alex’s first using I Ain’t Been Shot, Mum!, and involved a solo game set on the Malay peninsular at the time of the Japanese invasion in December 1941. Although knocked together by Alex himself, the scenario resembles #02: Ban Sadao from the Fall of the Lion Gate scenario pack.

Click on the picture below to see how Alex got on:

IABSM AAR: On the Northern Shoulder of Kursk, Fight 6: German Assault on the 1st May Collective Farm

Here’s the final episode from Just Jack’s incredible “On the Northern Shoulder of Kursk” series of battle reports.

Here the Germans launch a last-ditch attempt to take the 1st May Collective Farm is the face of the usual determined Soviet defence.

This is another truly epic report (146 photographs plus plenty of text) so well worth a look. Click on the picture below to see all:

Check out Just Jack’s blog by clicking here.

Three Games of To The Strongest

Off to friend Bevan’s house for an afternoon of To The Strongest. Playing at 130 points a side (the standard for the World Championships) you can easily get three games into one afternoon session.

My first game was commanding a longbow-heavy English HYW army against an impressively painted Viking army.

The Vikings rushed forward as fast as they could, eager to get into hand-to-hand with my massed archers. I was equally eager to stop them doing so, so with my Knights and Billmen protecting my left flank, I sat back in the centre and sent flight after flight of arrows into the advancing hordes.

This tactic worked quite nicely, so by the time his men actually got up to my battle line, many of his units had already taken one or two hits (three would remove them from the table). That’s when John discovered that my archers were all veterans with extra two-handed cutting weapons: just right for finishing off already-pin-cushioned Viking units! A victory for me.

The next game promised to be very interesting: it was time for a bit of civil war as I used the same army as in game one but now faced another English HYW army.

Our forces were thus very similar, except for the fact that Steve, my opponent, had two longbow and one dismounted knight units in each of his foot brigades rather than the three longbow units that I had. Steve’s army make up was thus actually more historically accurate than mine, with the added difference that his longbowmen were all standard types, giving him a slightly bigger headcount.

I decided to adopt the same basic tactics as last time i.e. my archers would shoot from distance whilst the heavies protected my left flank. Steve adopted a similar deployment, so I thought it was all going to be about who had the best luck with the cards (TTS has playing card based game mechanics).

In the end, however, that’s not how it worked out. In the centre, Steve advanced his melee foot units towards my line, giving me the opportunity to target each one individually with my longbows. This generally resulted in them disappearing from the table, meaning that when the rest of our troops did clash, I only had to win a third of the combats to win the game (the heavies just faced each other, manoeuvring for some kind of positional advantage, throughout). A second victory.

I fancied a change for my final game, so volunteered to take the Vikings, this time facing Peter and his Ancient Britons. This, again, was two quite similar armies, with the only real difference between them being the British light chariots/horse.

And it was indeed the light chariots/horse that made a difference. I made a terrible mistake early on in the game by leaving my right flank floating. This allowed Peter to get a couple of units of light horse in on my flanks, disordering a couple of my Hyrd units. This allowed his warriors to hit them at a distinct advantage, my right flank crumpled, and my opponent neatly rolled me up on the right and in the centre! Another nice tactic that Peter used was to refuse his own right flank, meaning that any units I had there (one third of my army) spent the entire game chasing after contact with the any enemy units. The end result was a fairly catastrophic loss!

So all in all a great afternoon’s gaming. Thanks to Bevan, John, Steve and Peter.