FK&P AAR: Pinkney's Court Again

I’ve now had a chance to play the Pinkney’s Court scenario another three times.

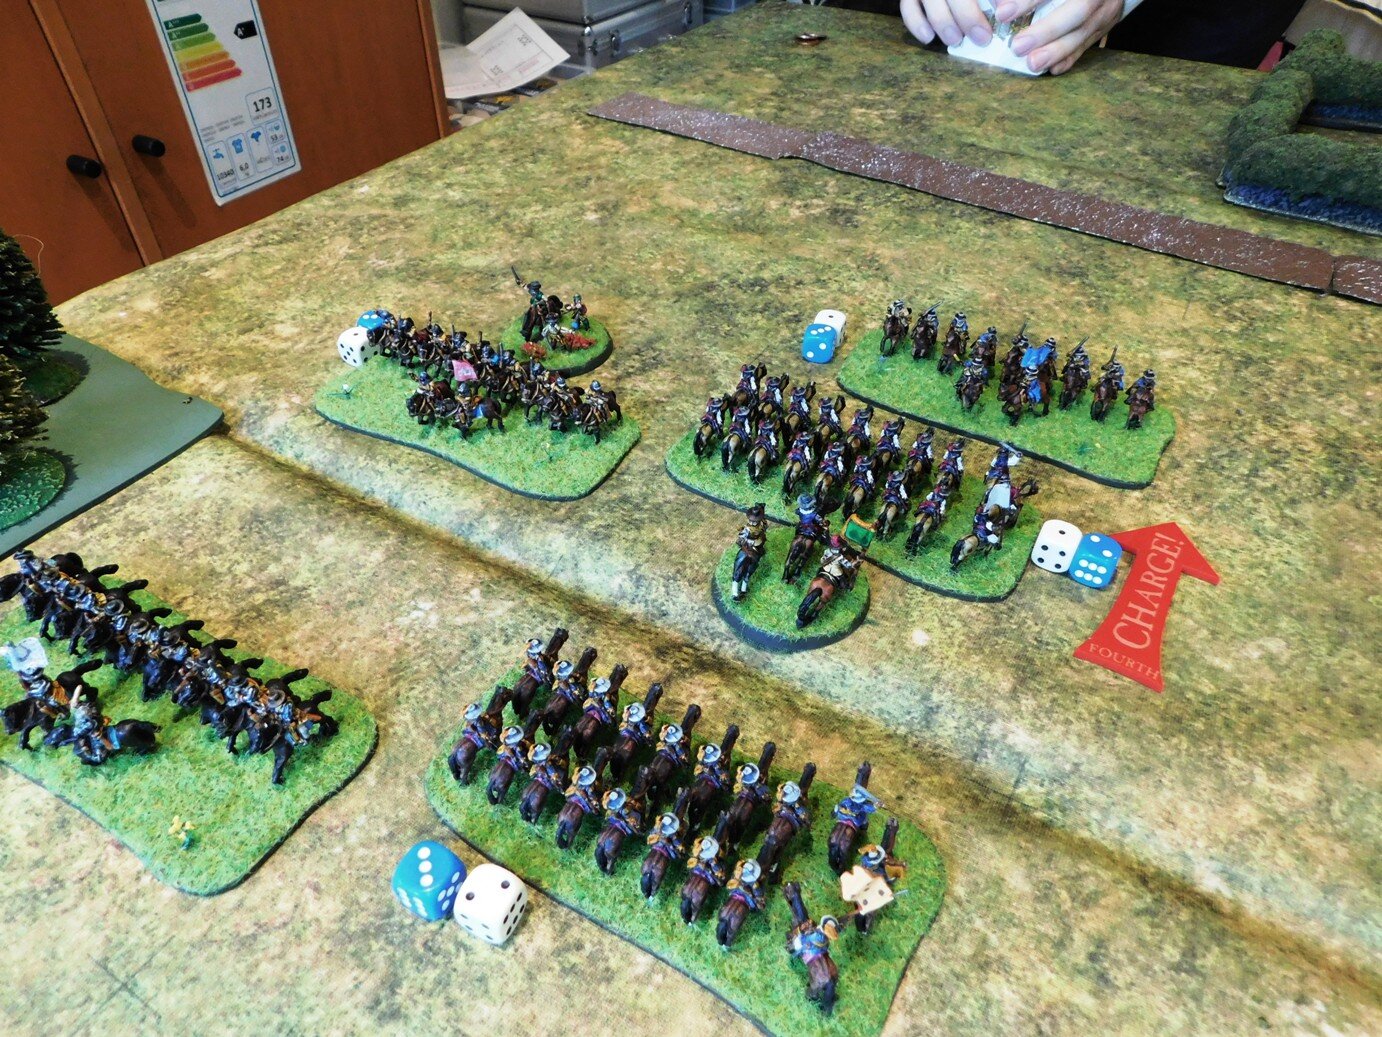
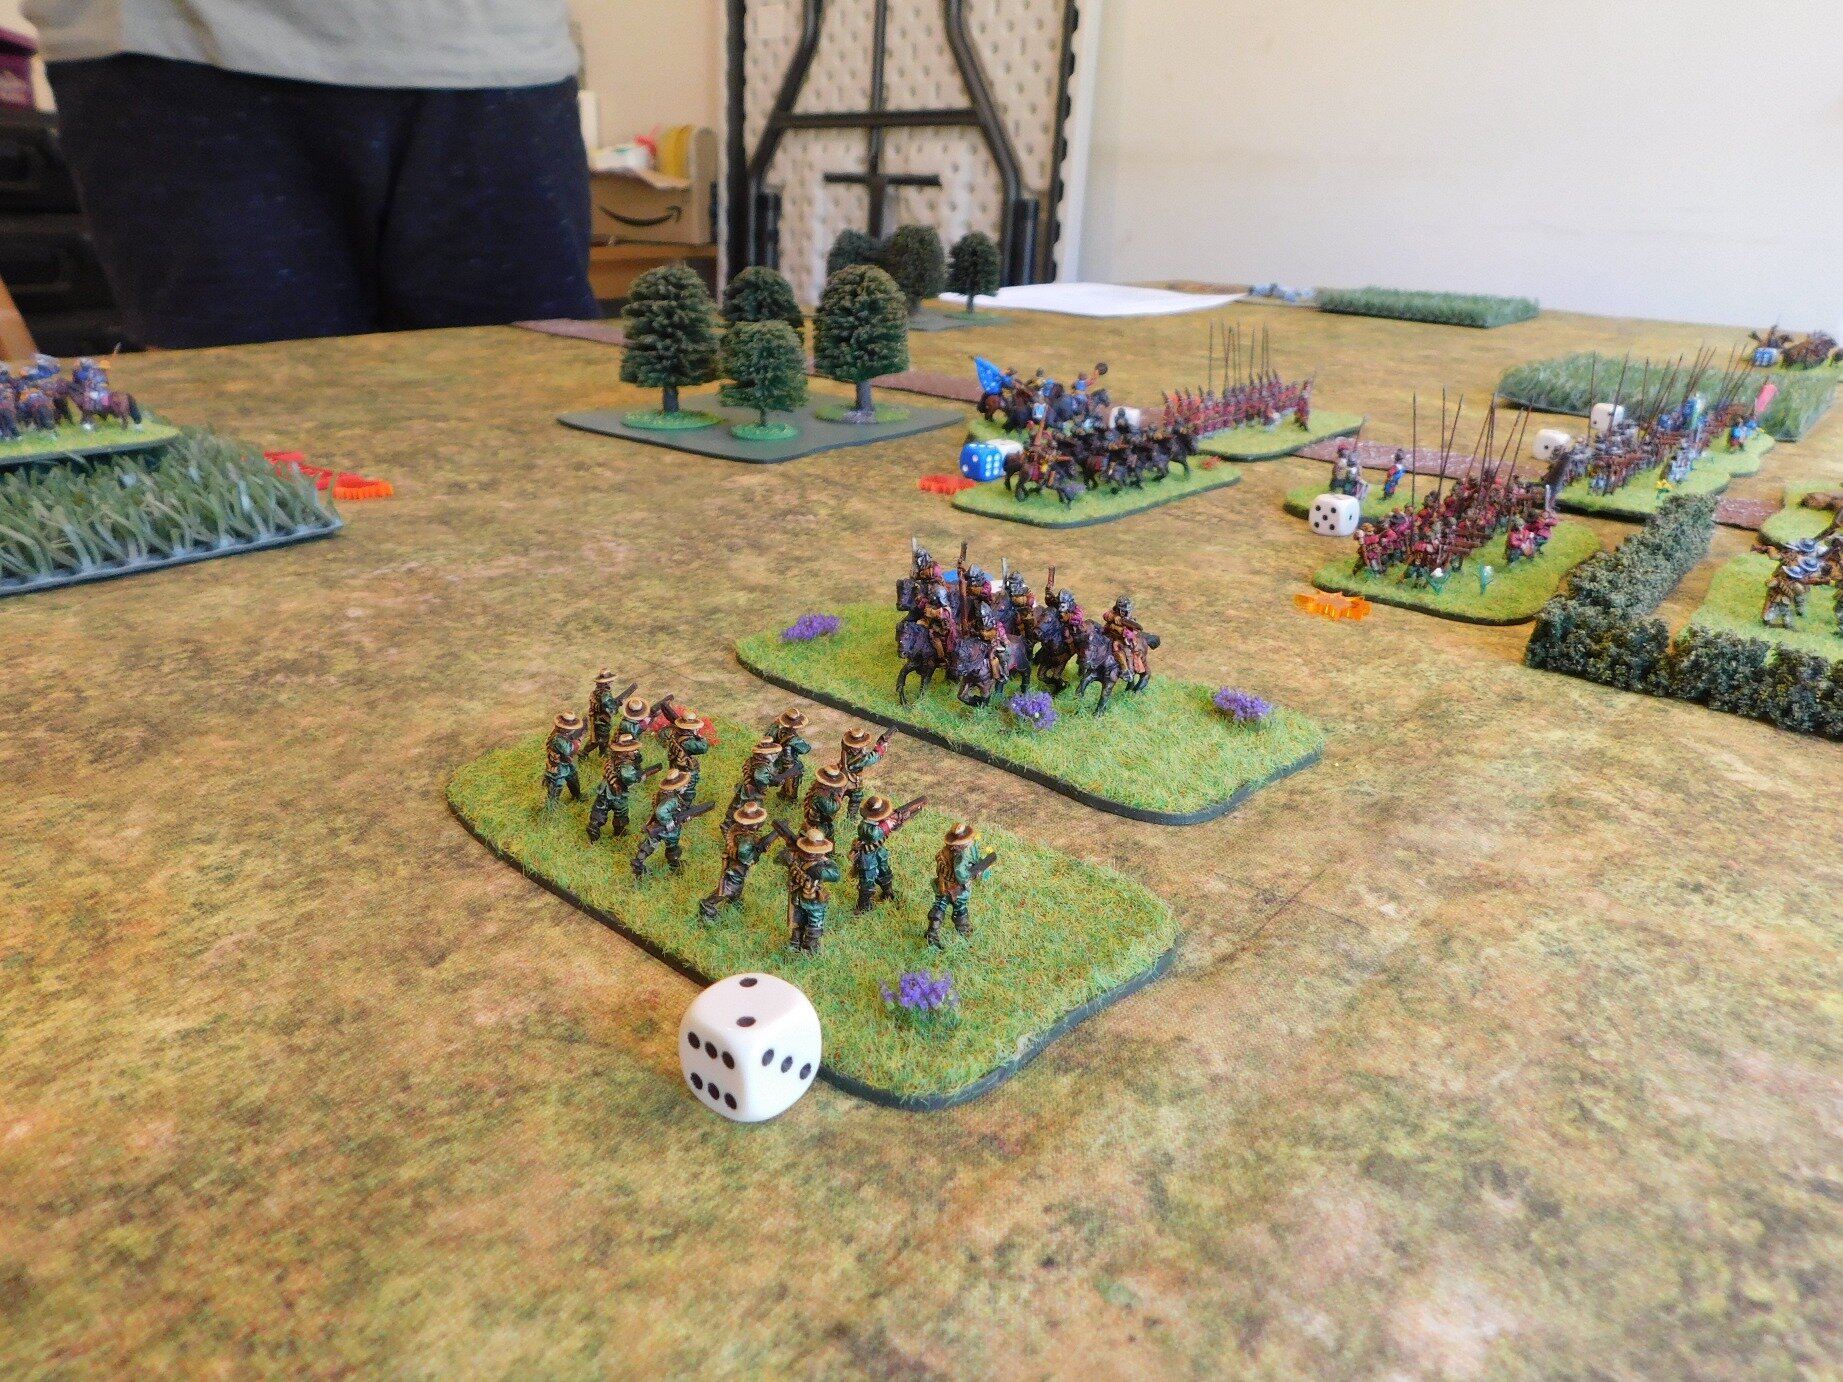
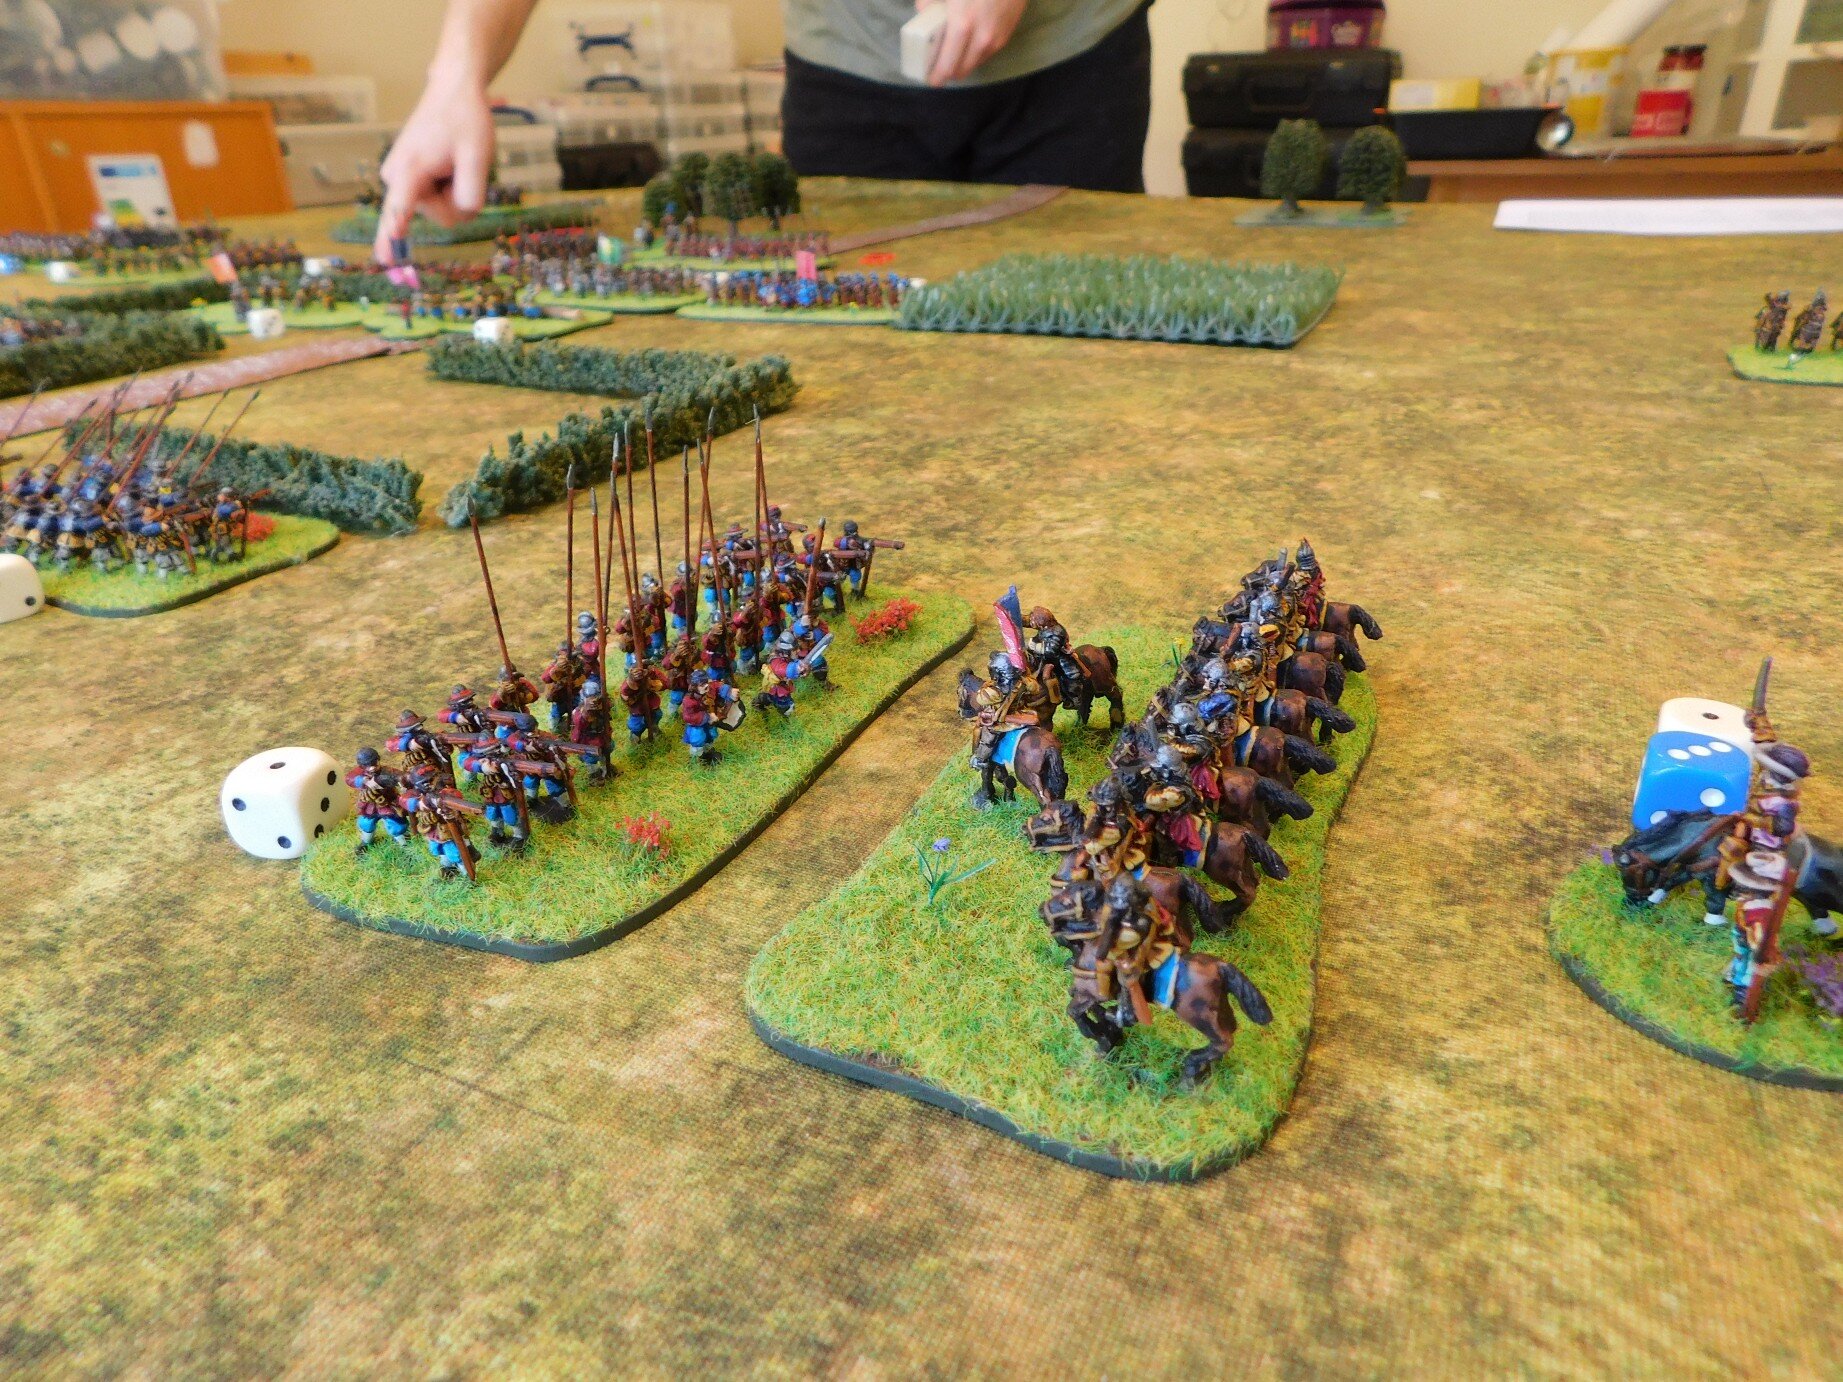
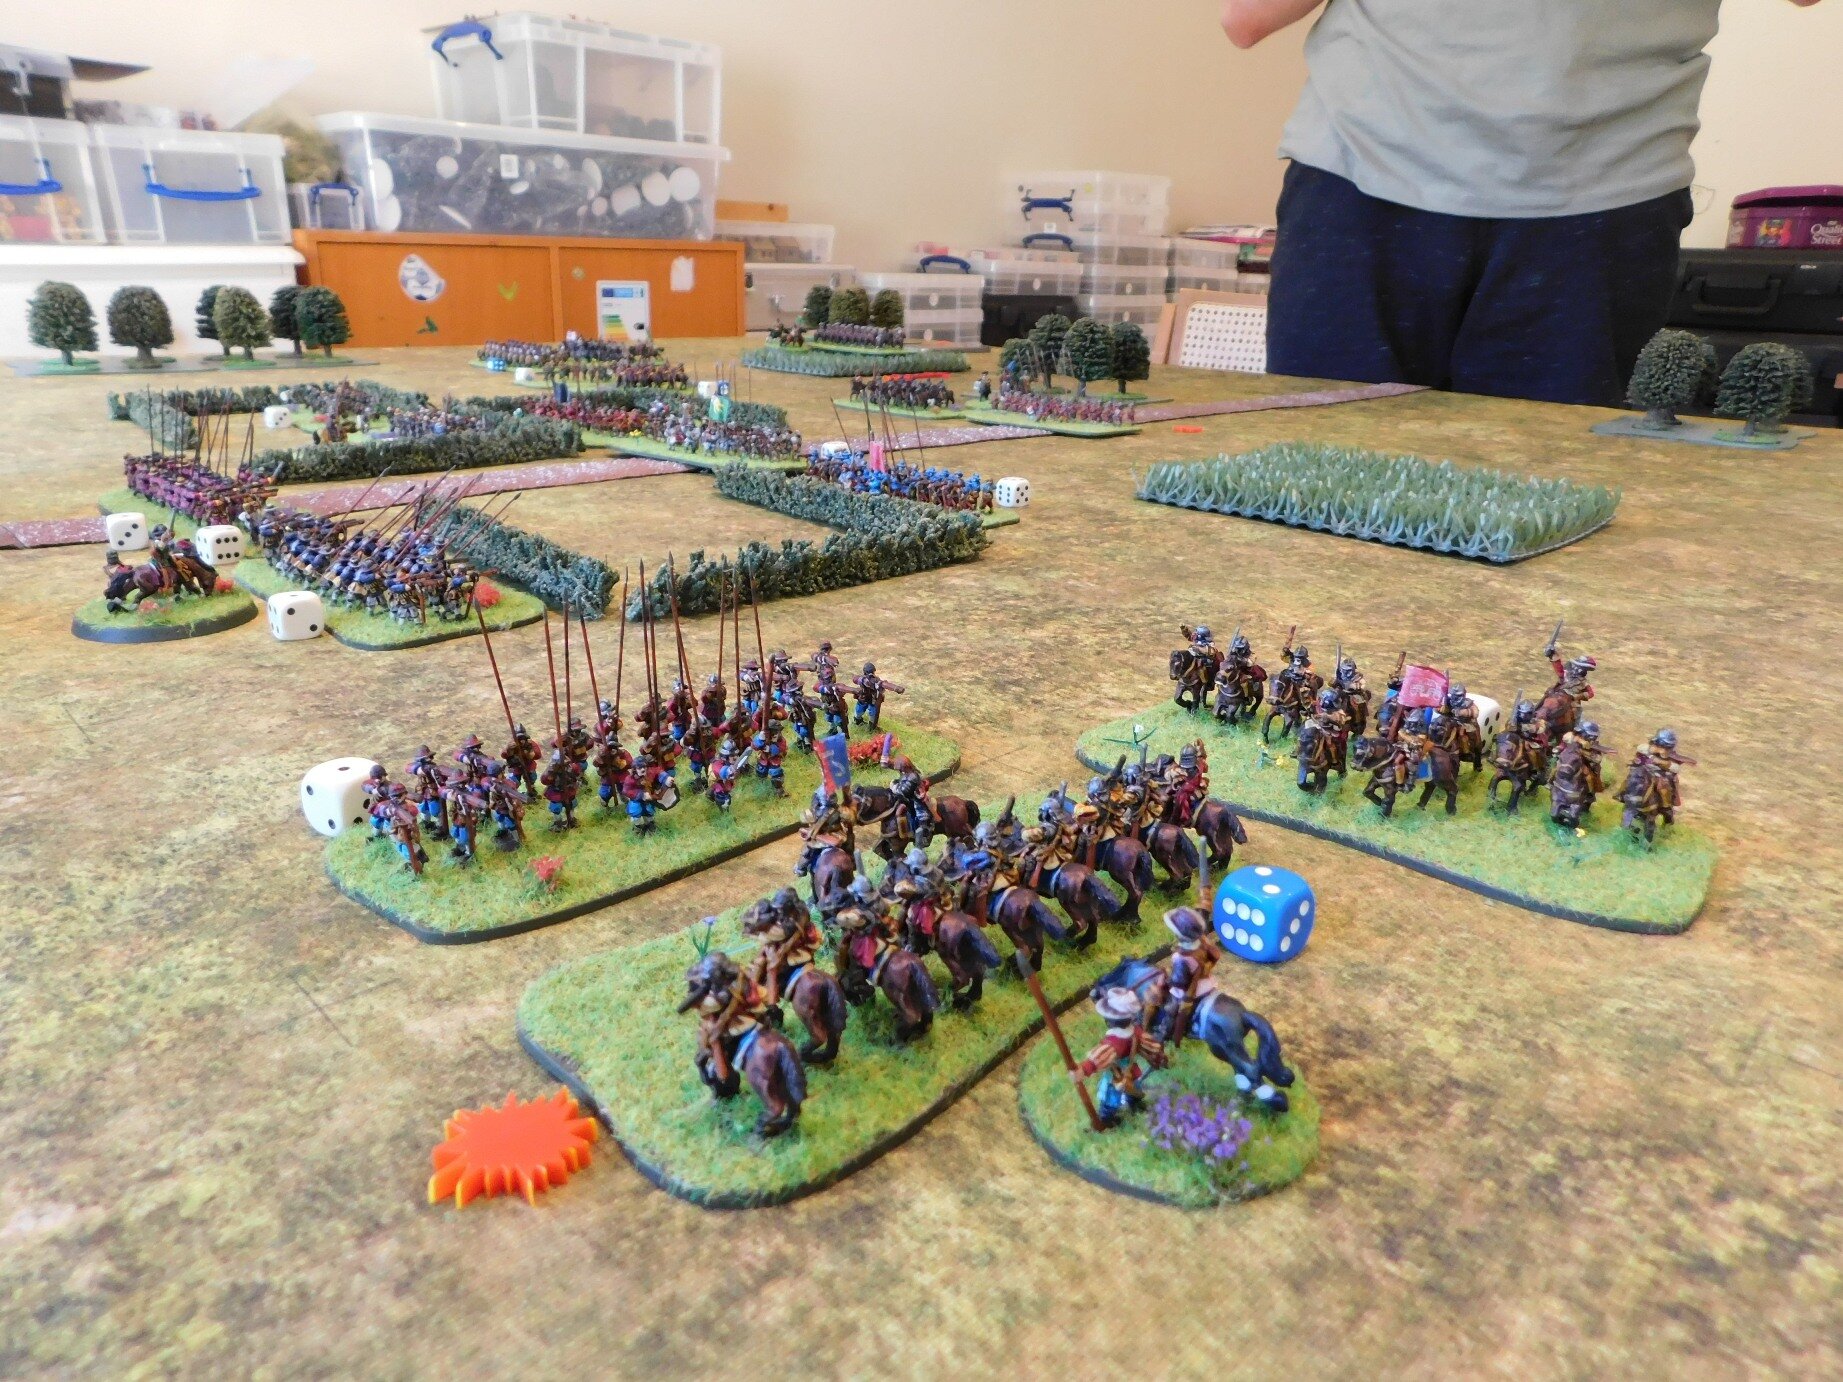
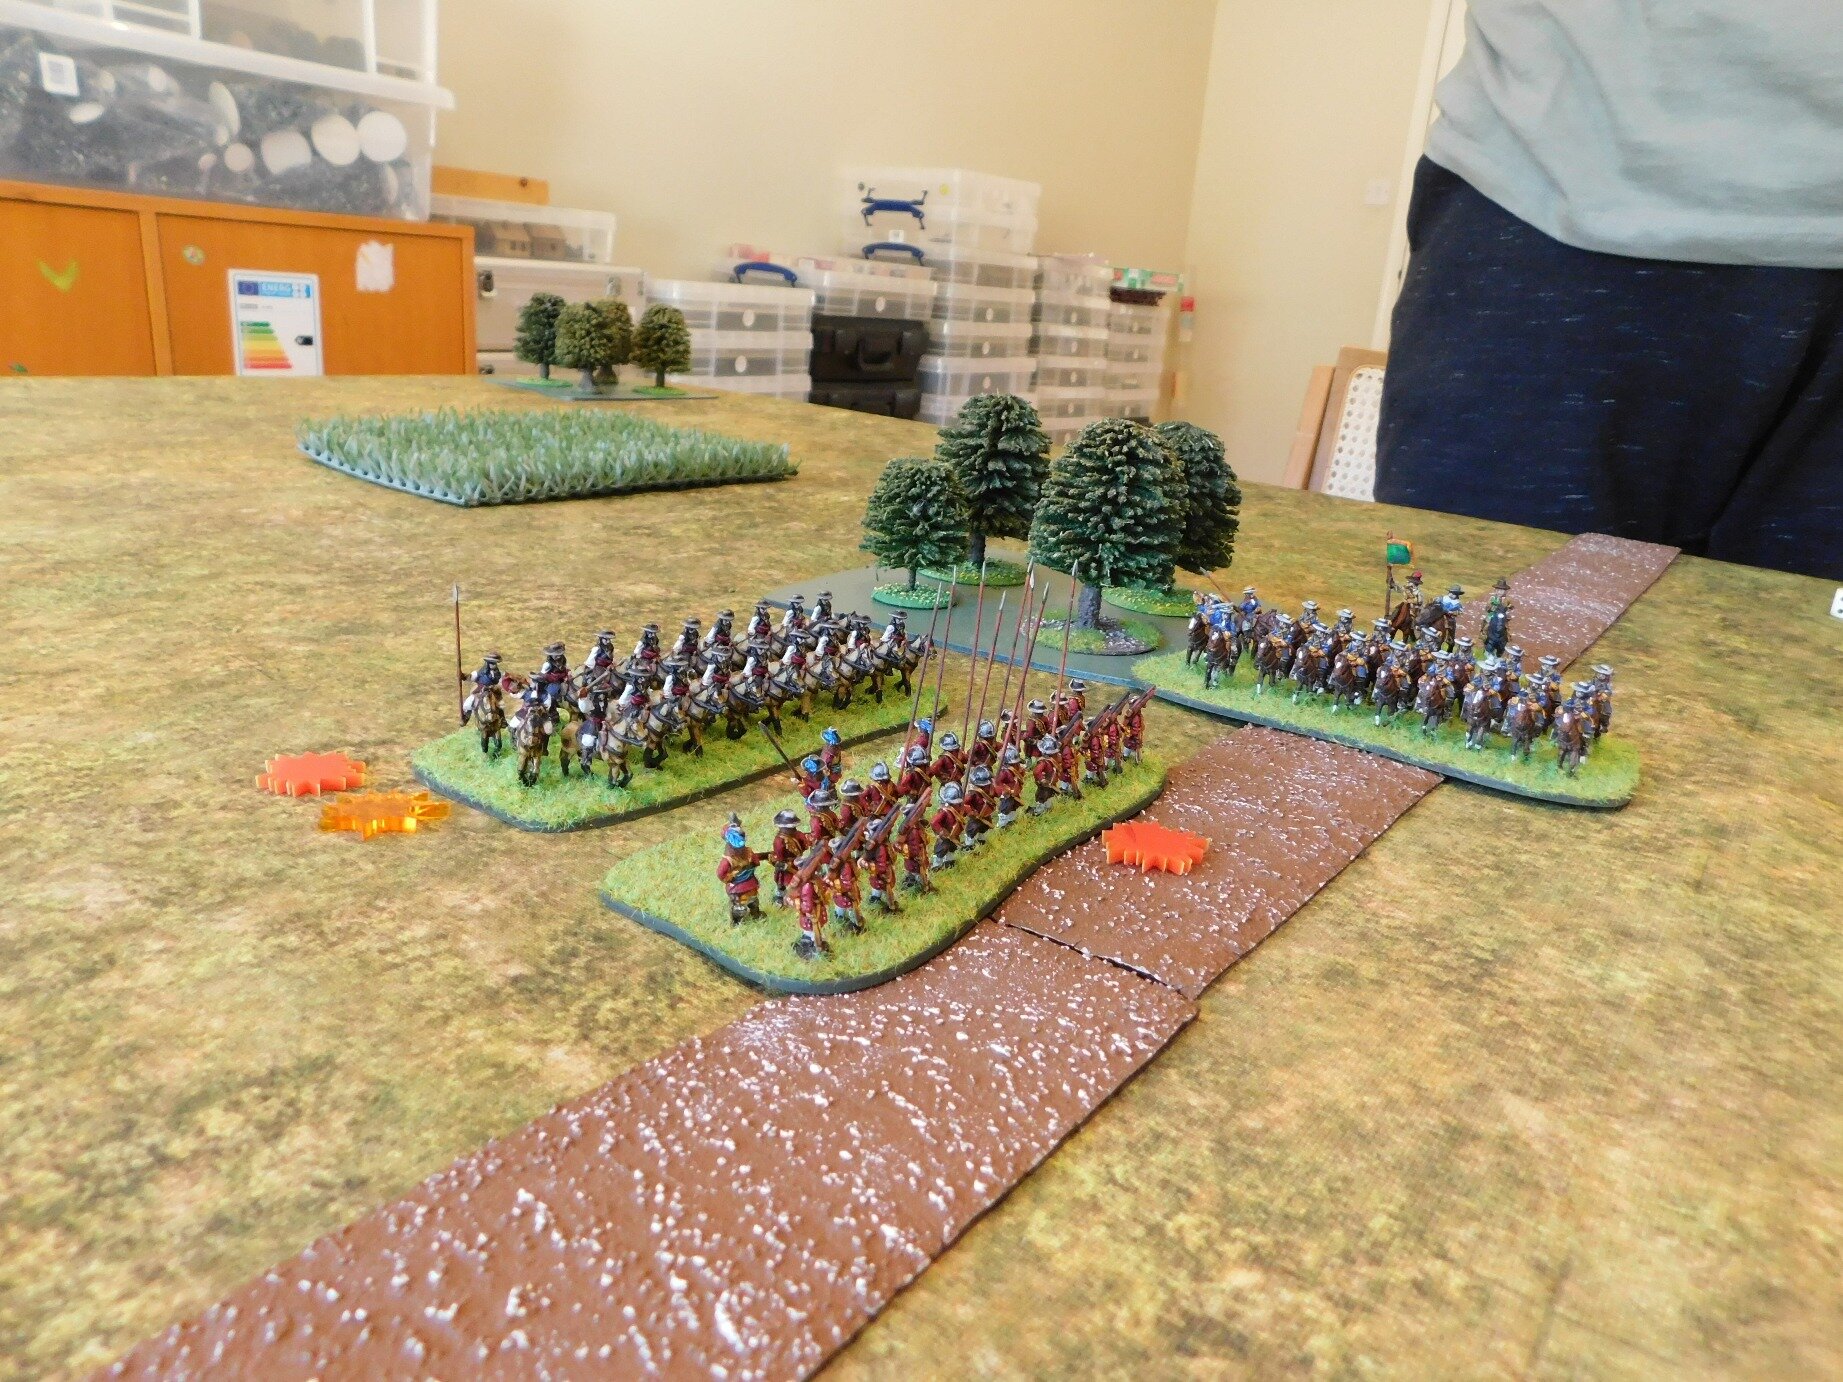
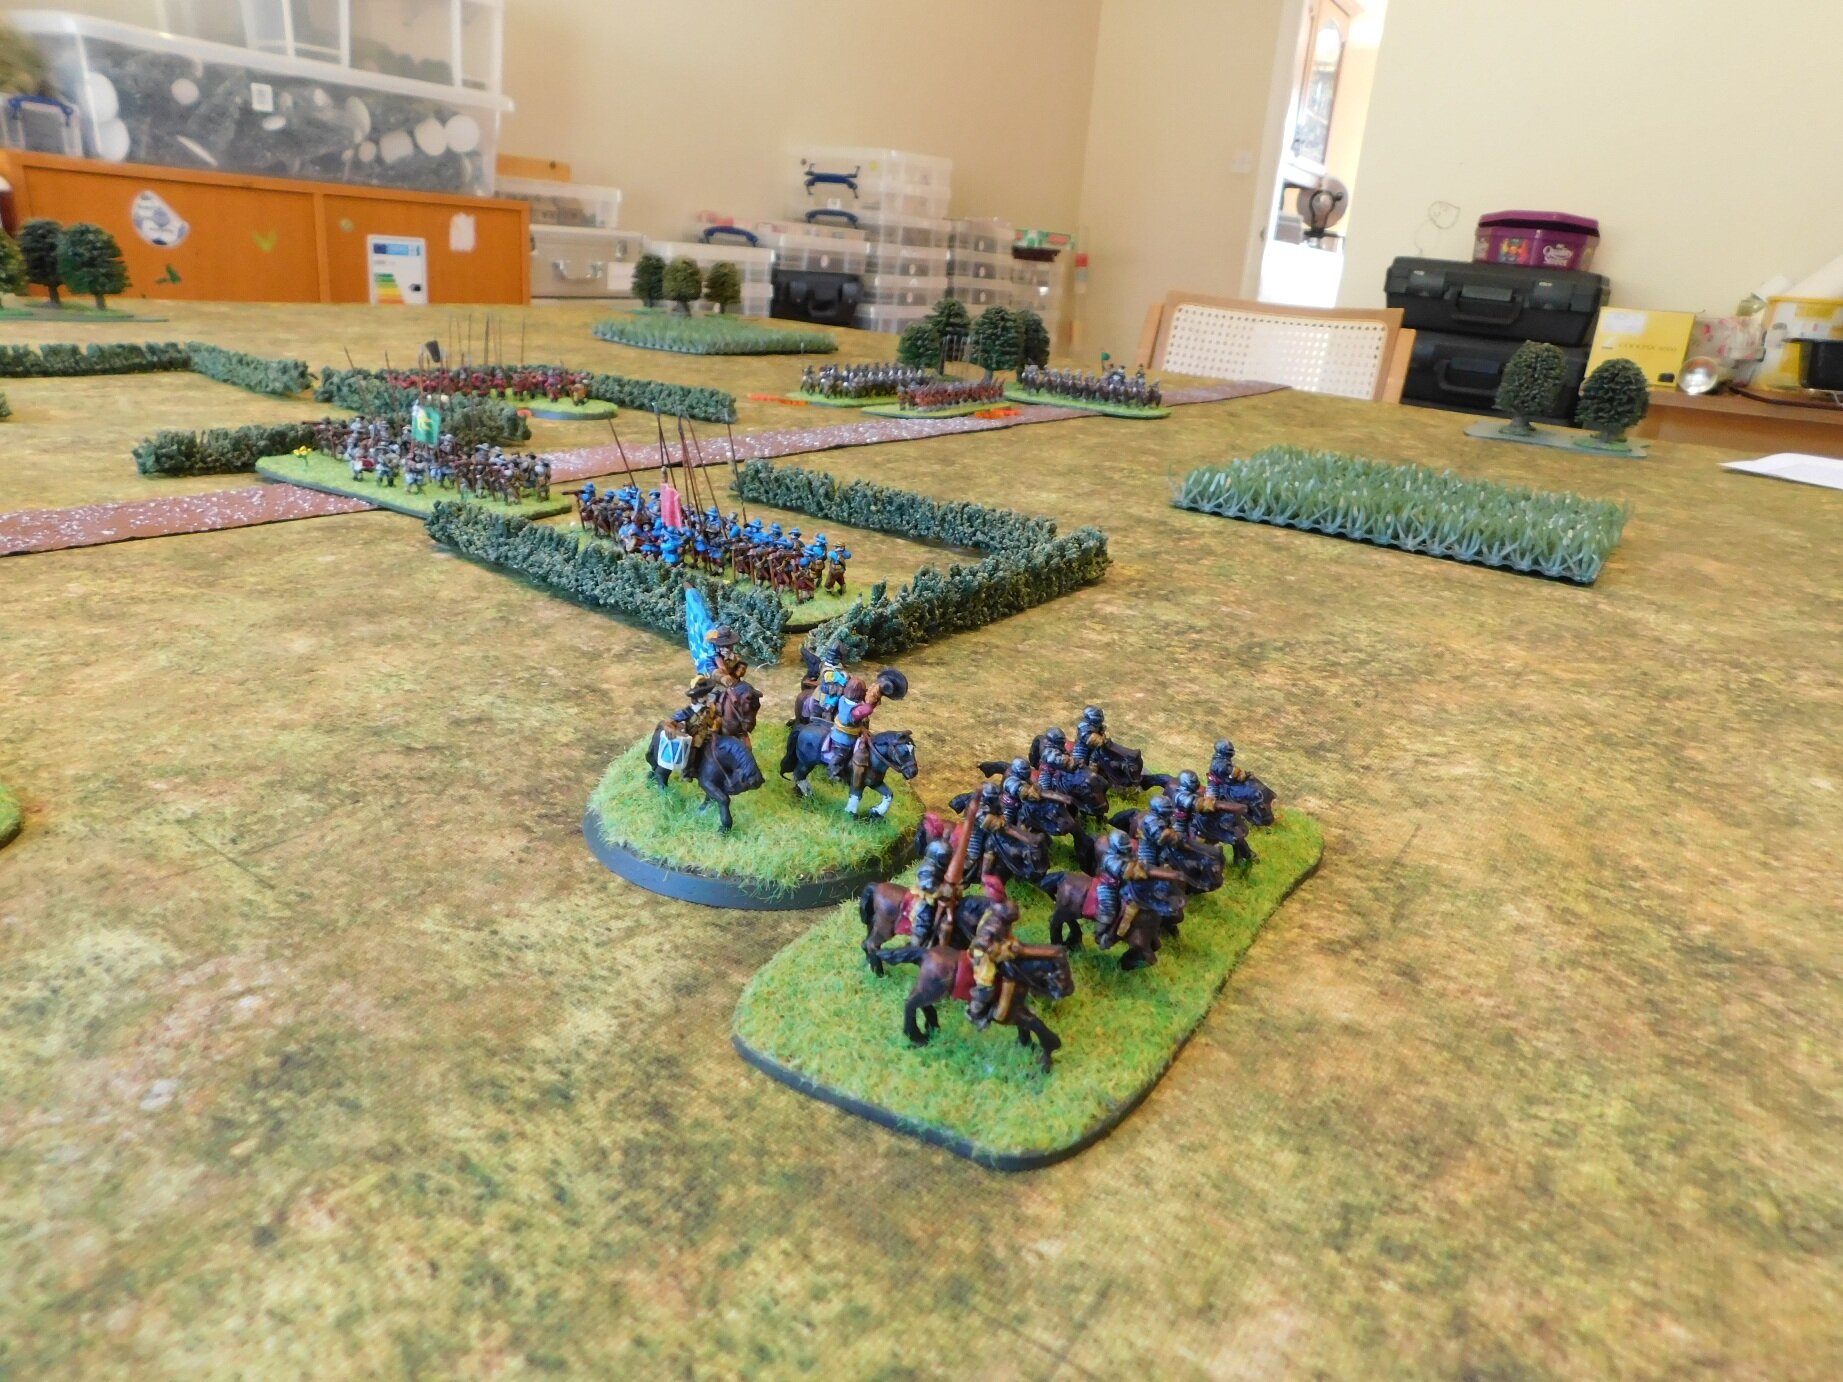
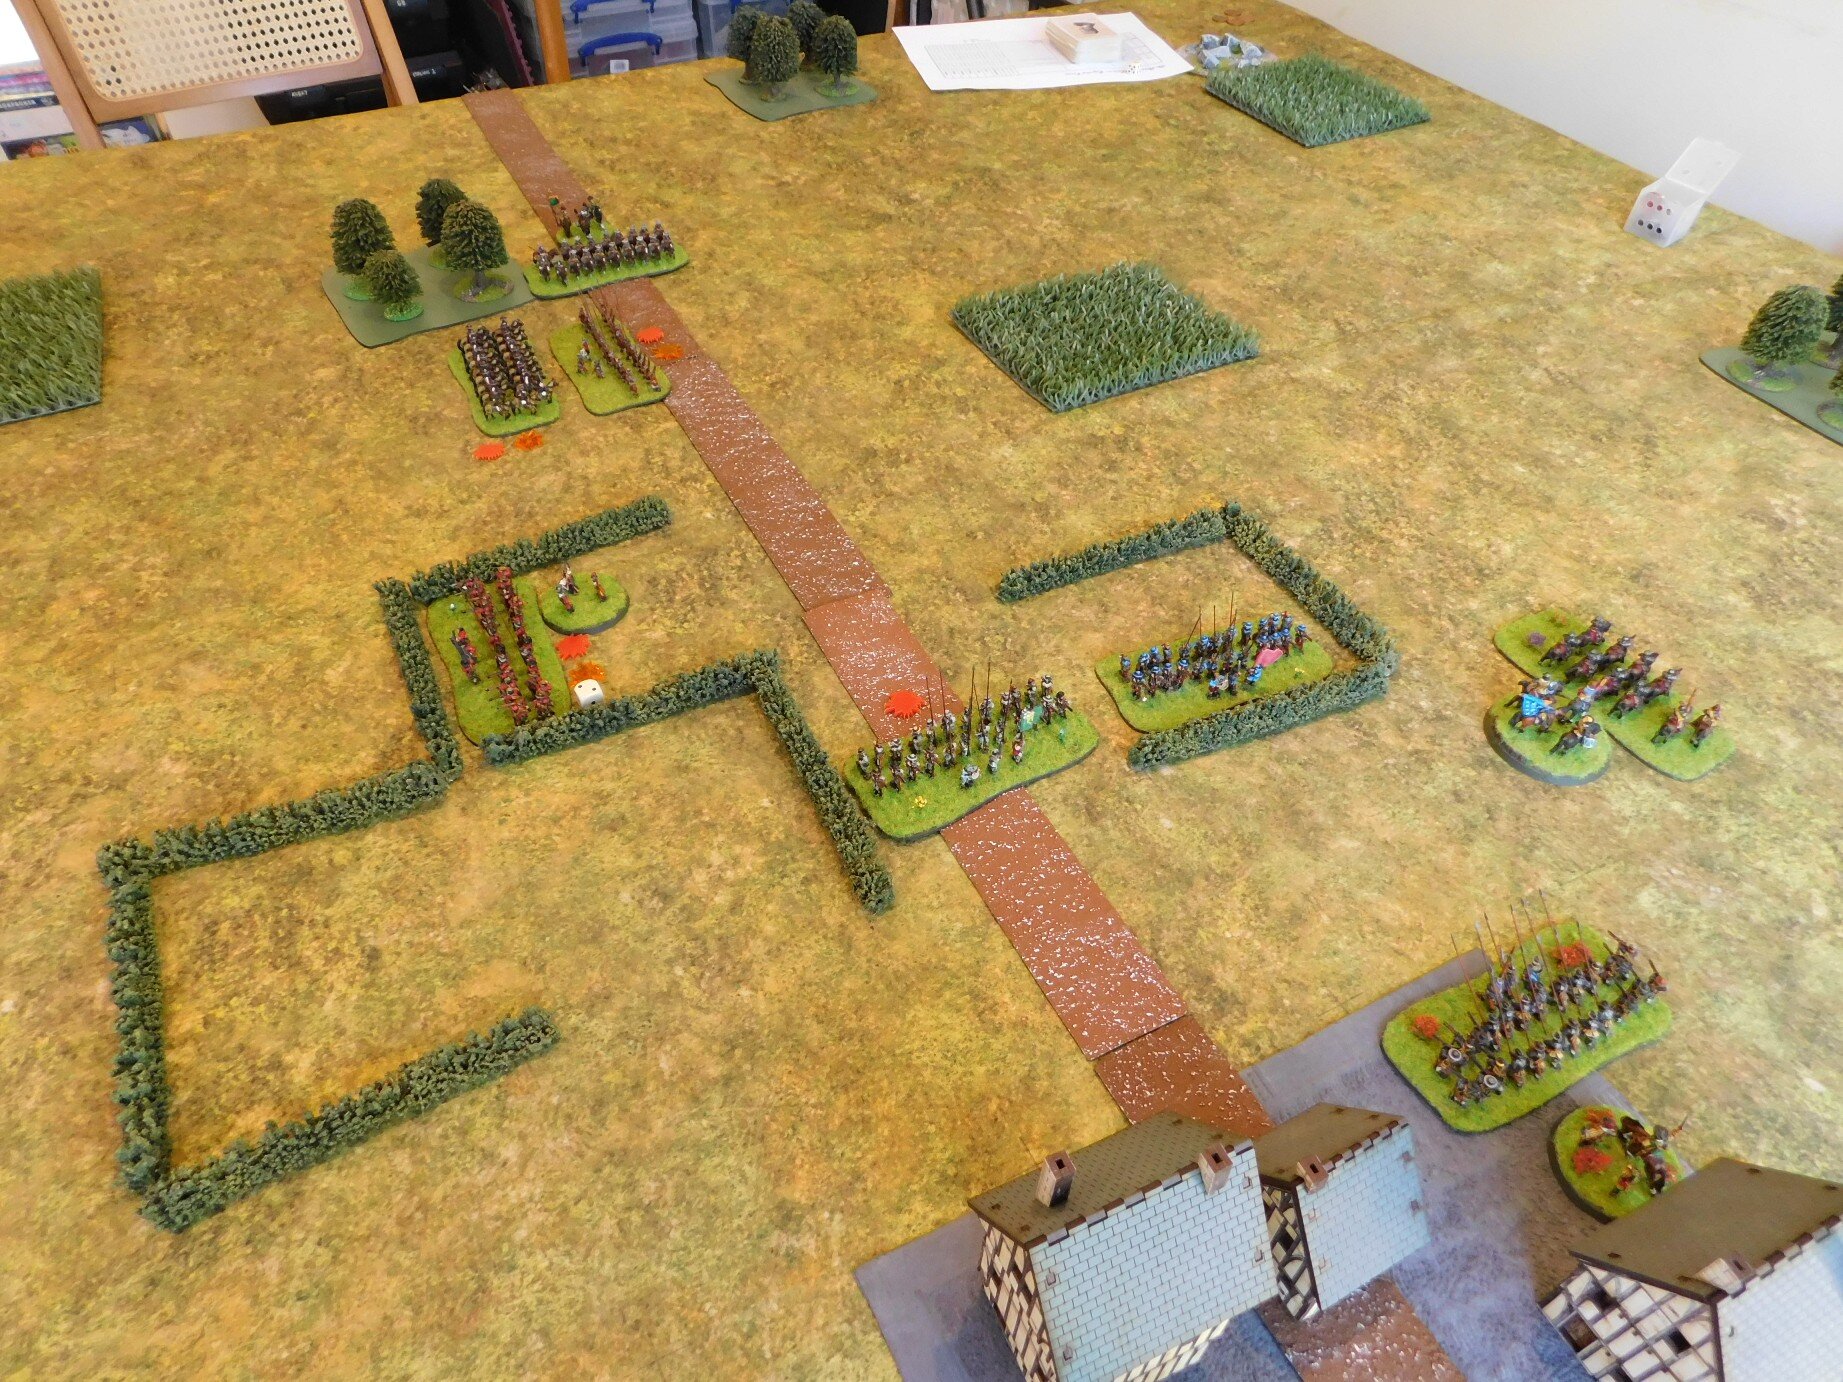
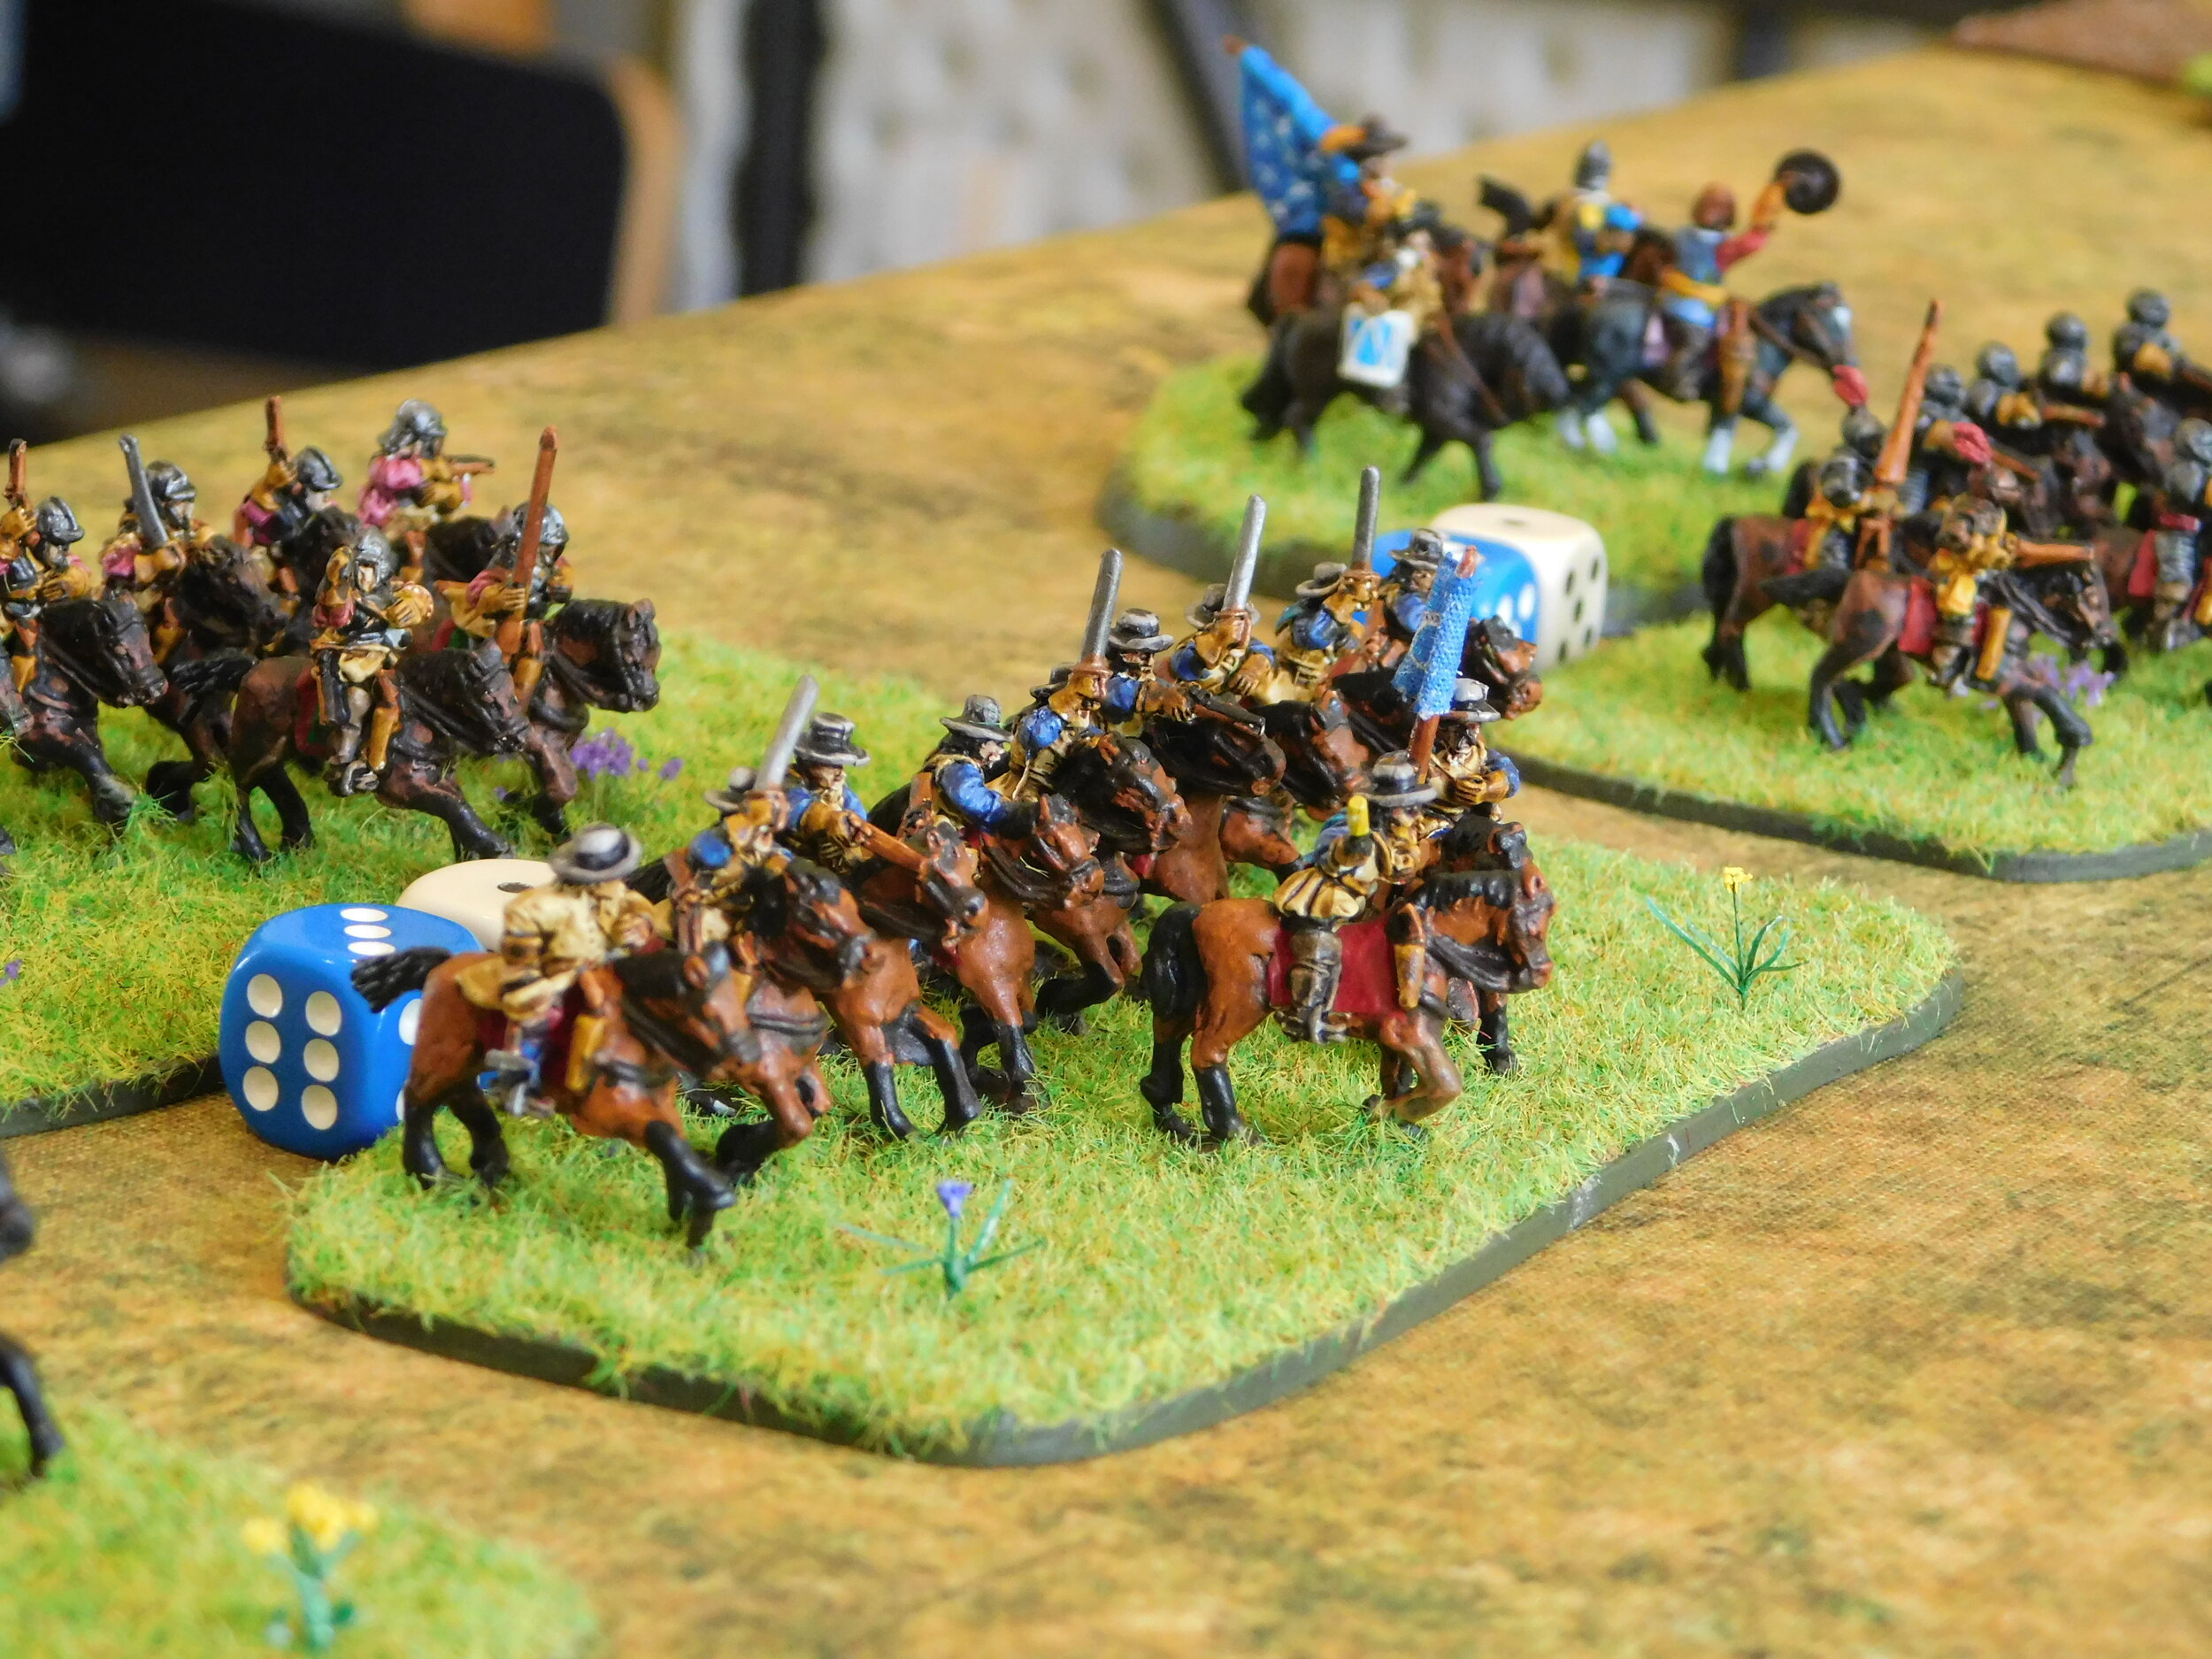
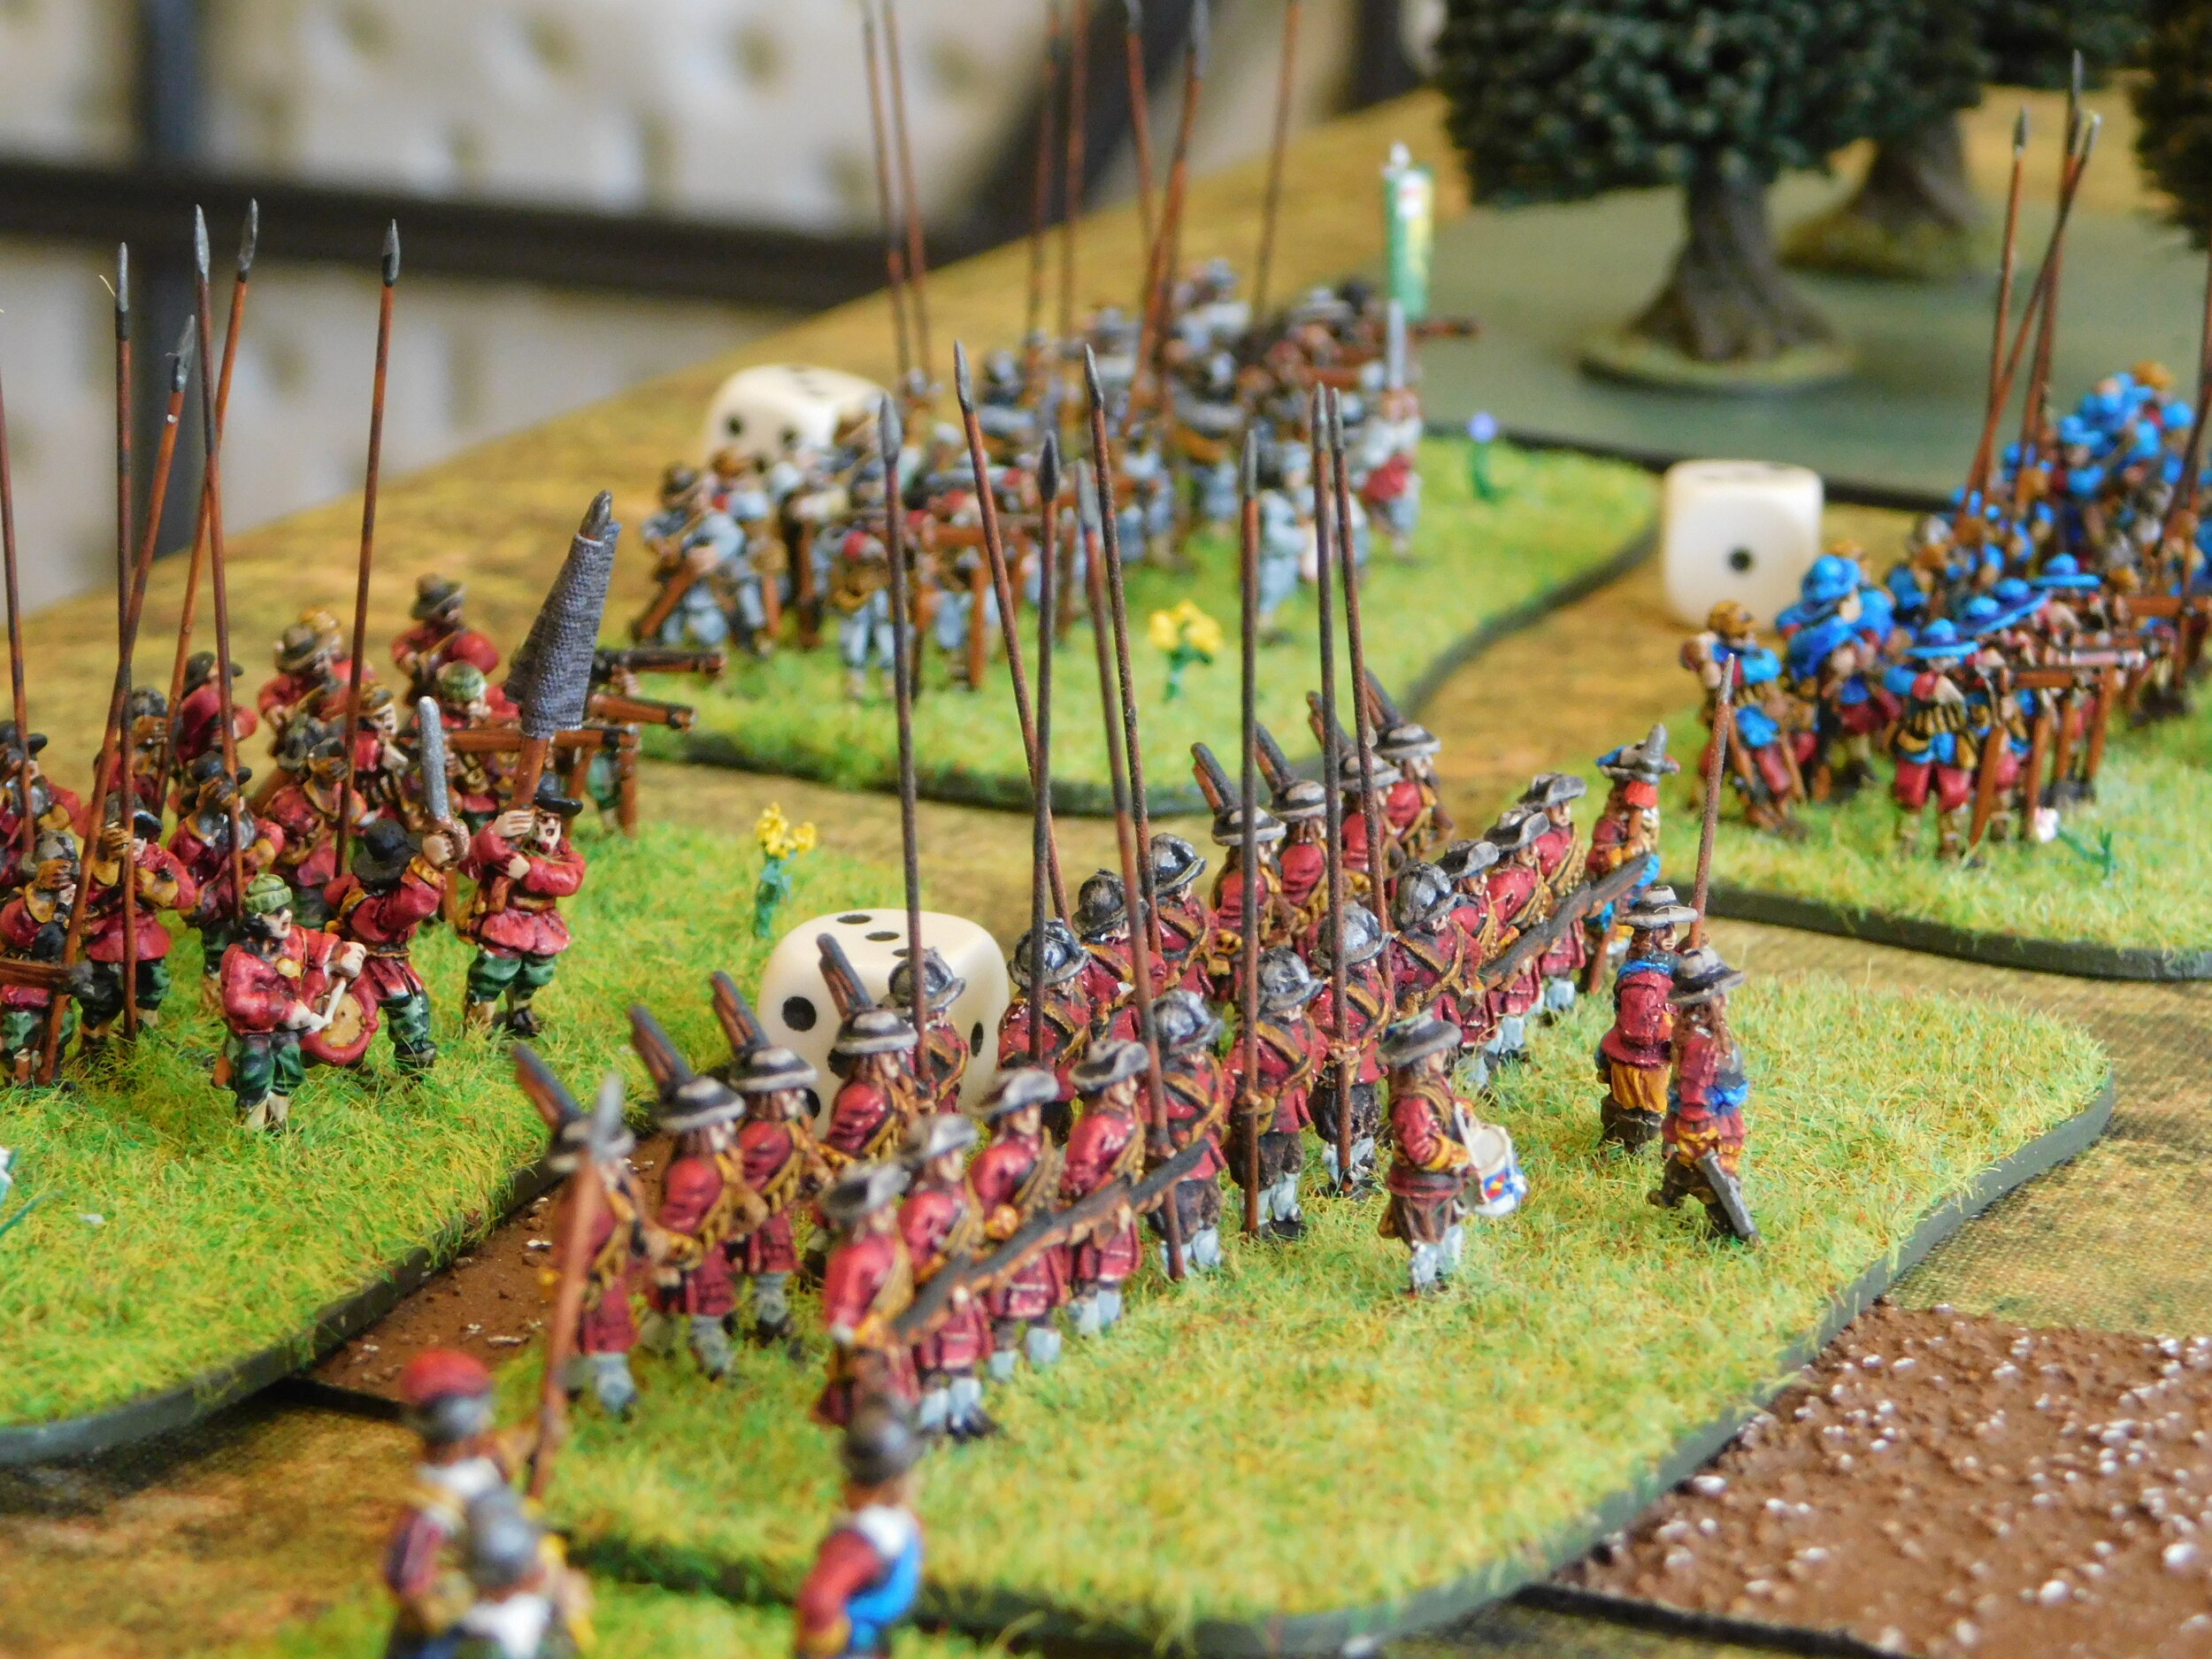
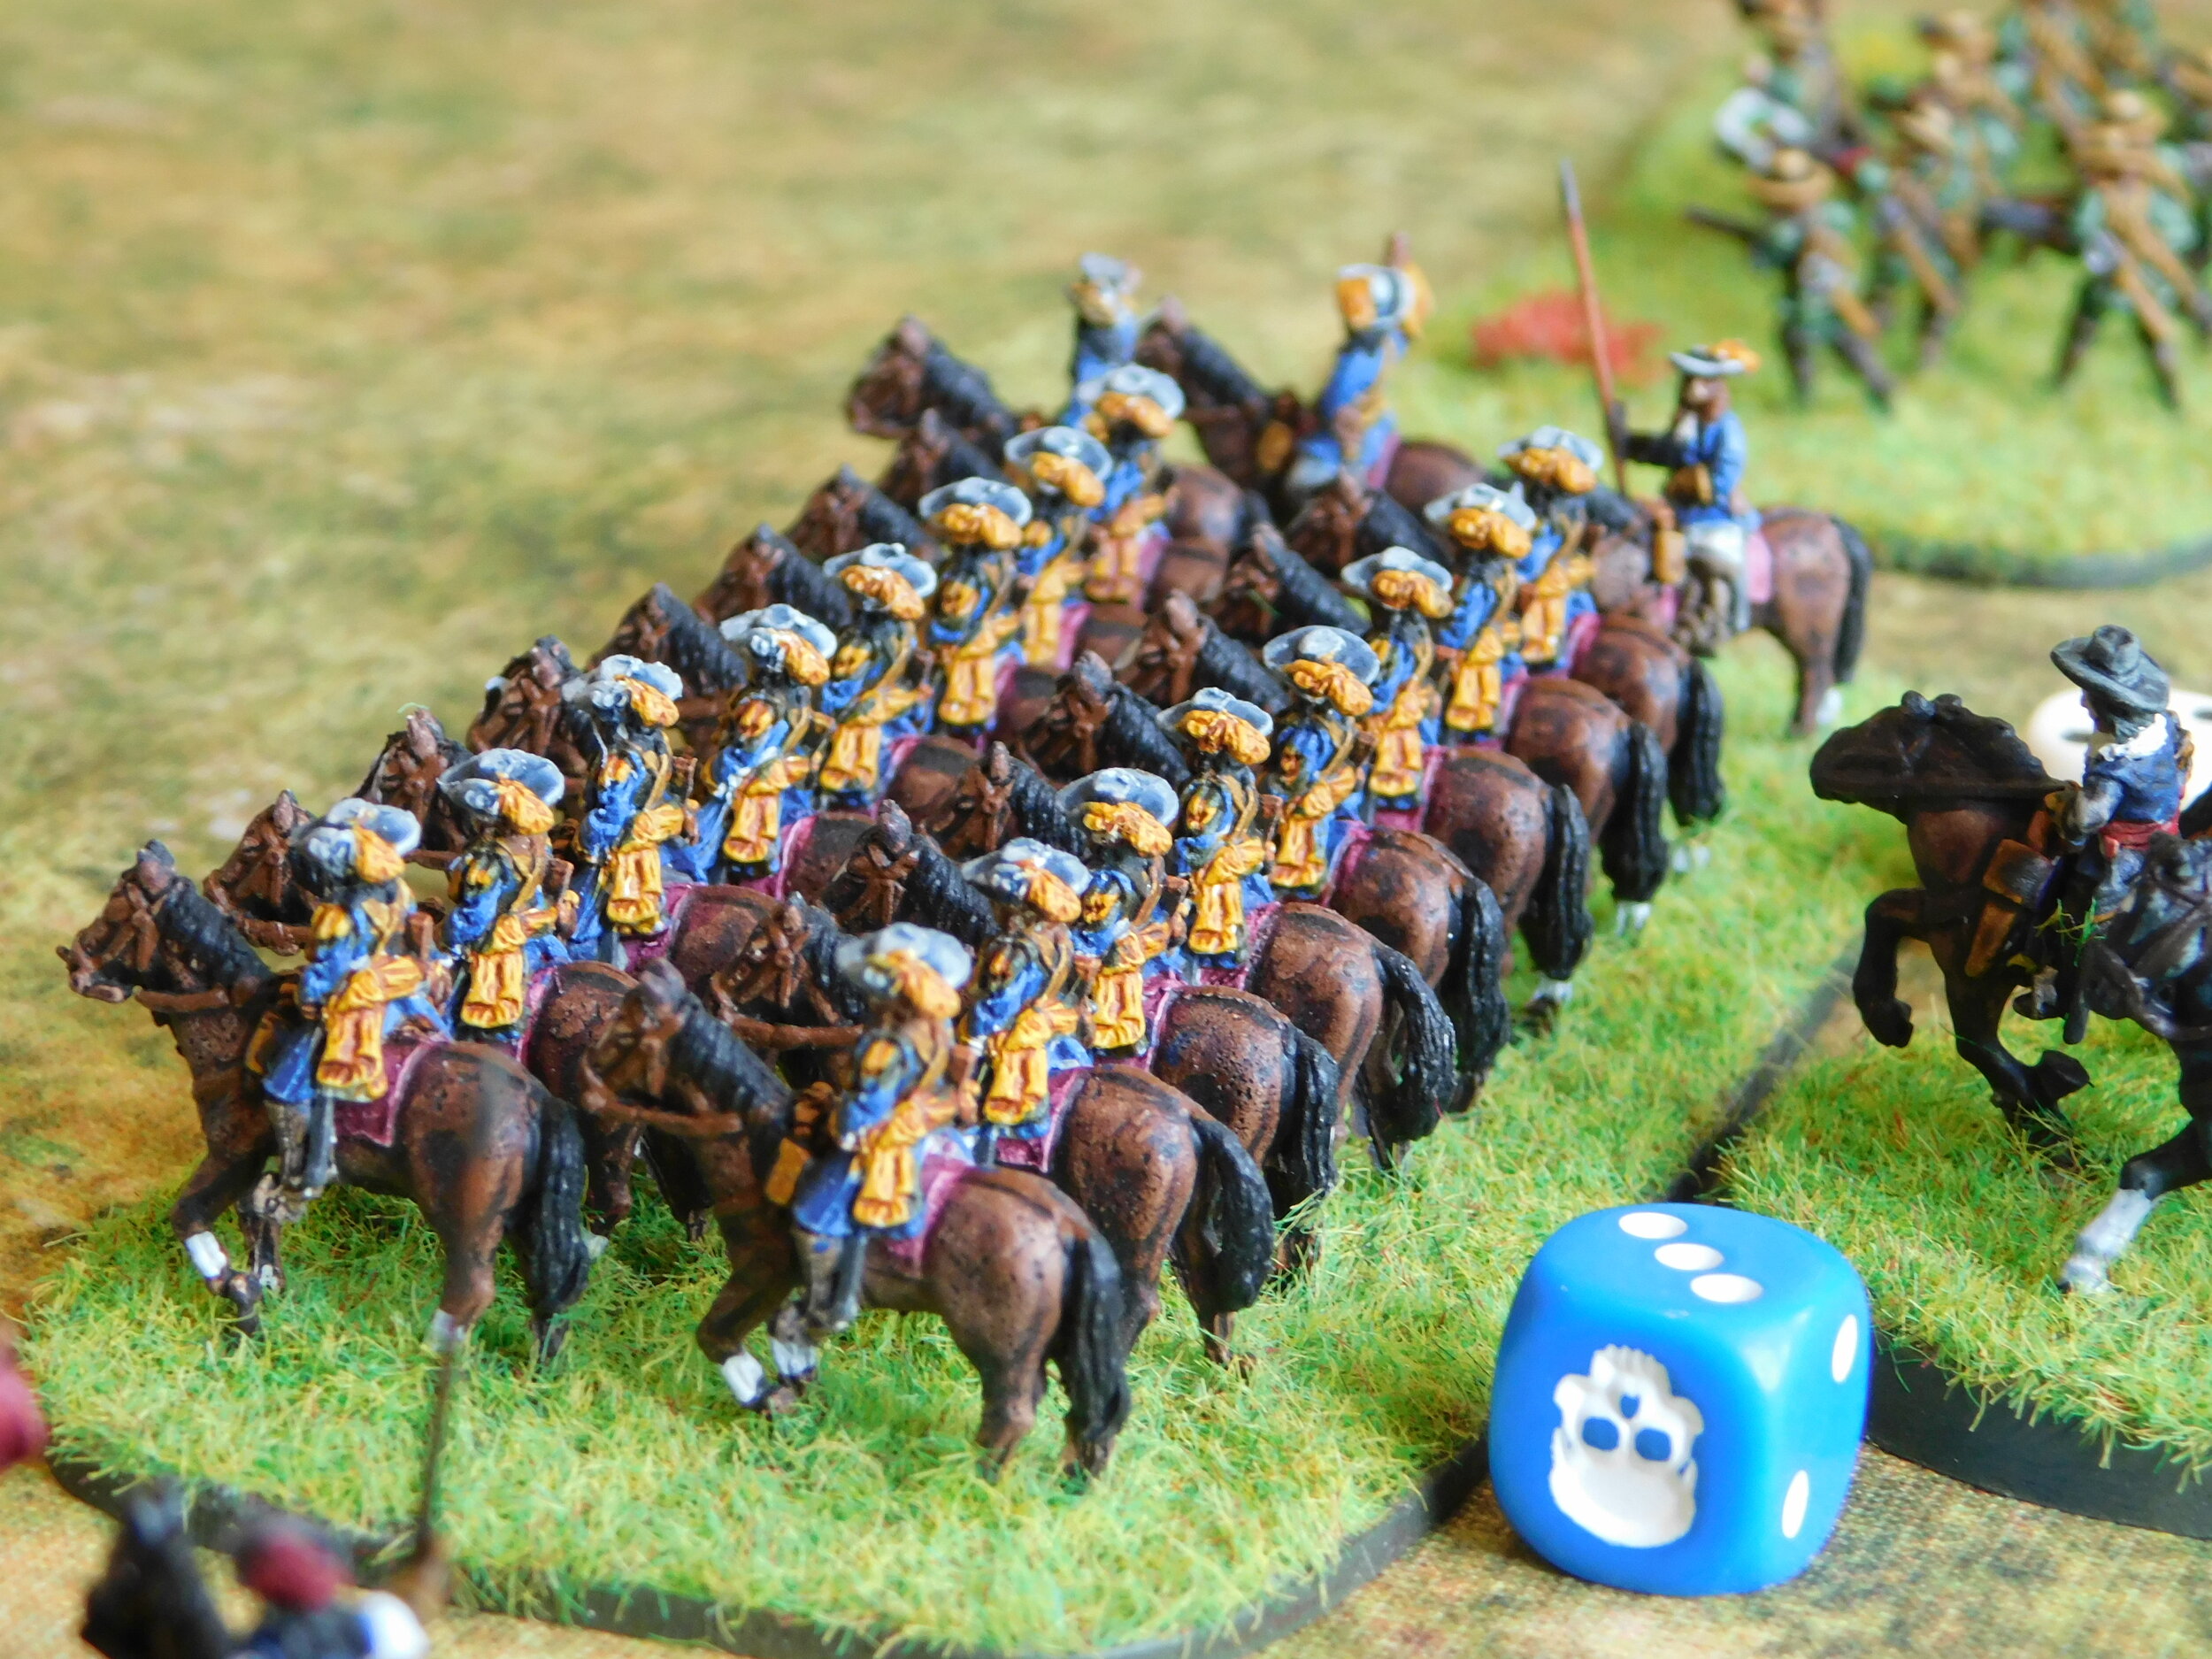
The first game, versus Bevan, was a complete disaster. The more nimble Swedish-style Royalist cavalry sliced and diced their Parliamentarian opponents, destroying all three units for the loss of only one of their own. That meant that I had to divert troops to shore up the position, leaving me short of infantry (and victory coins!) for the clash on the other flank. A crushing defeat!

The other two games, against Kavan, however, went much better. The first was a close run thing, but I eventually prevailed. The second was a glorious, overwhelming victory caused, I hasten to add, by the most amazing run of luck at the cards. In each of the initial three clashes, I hit three times out of five: not bad when you’re needing an 8+ on a 1-10 evens chance. Much like my men in the game described above, Kavan’s troops never really recovered.

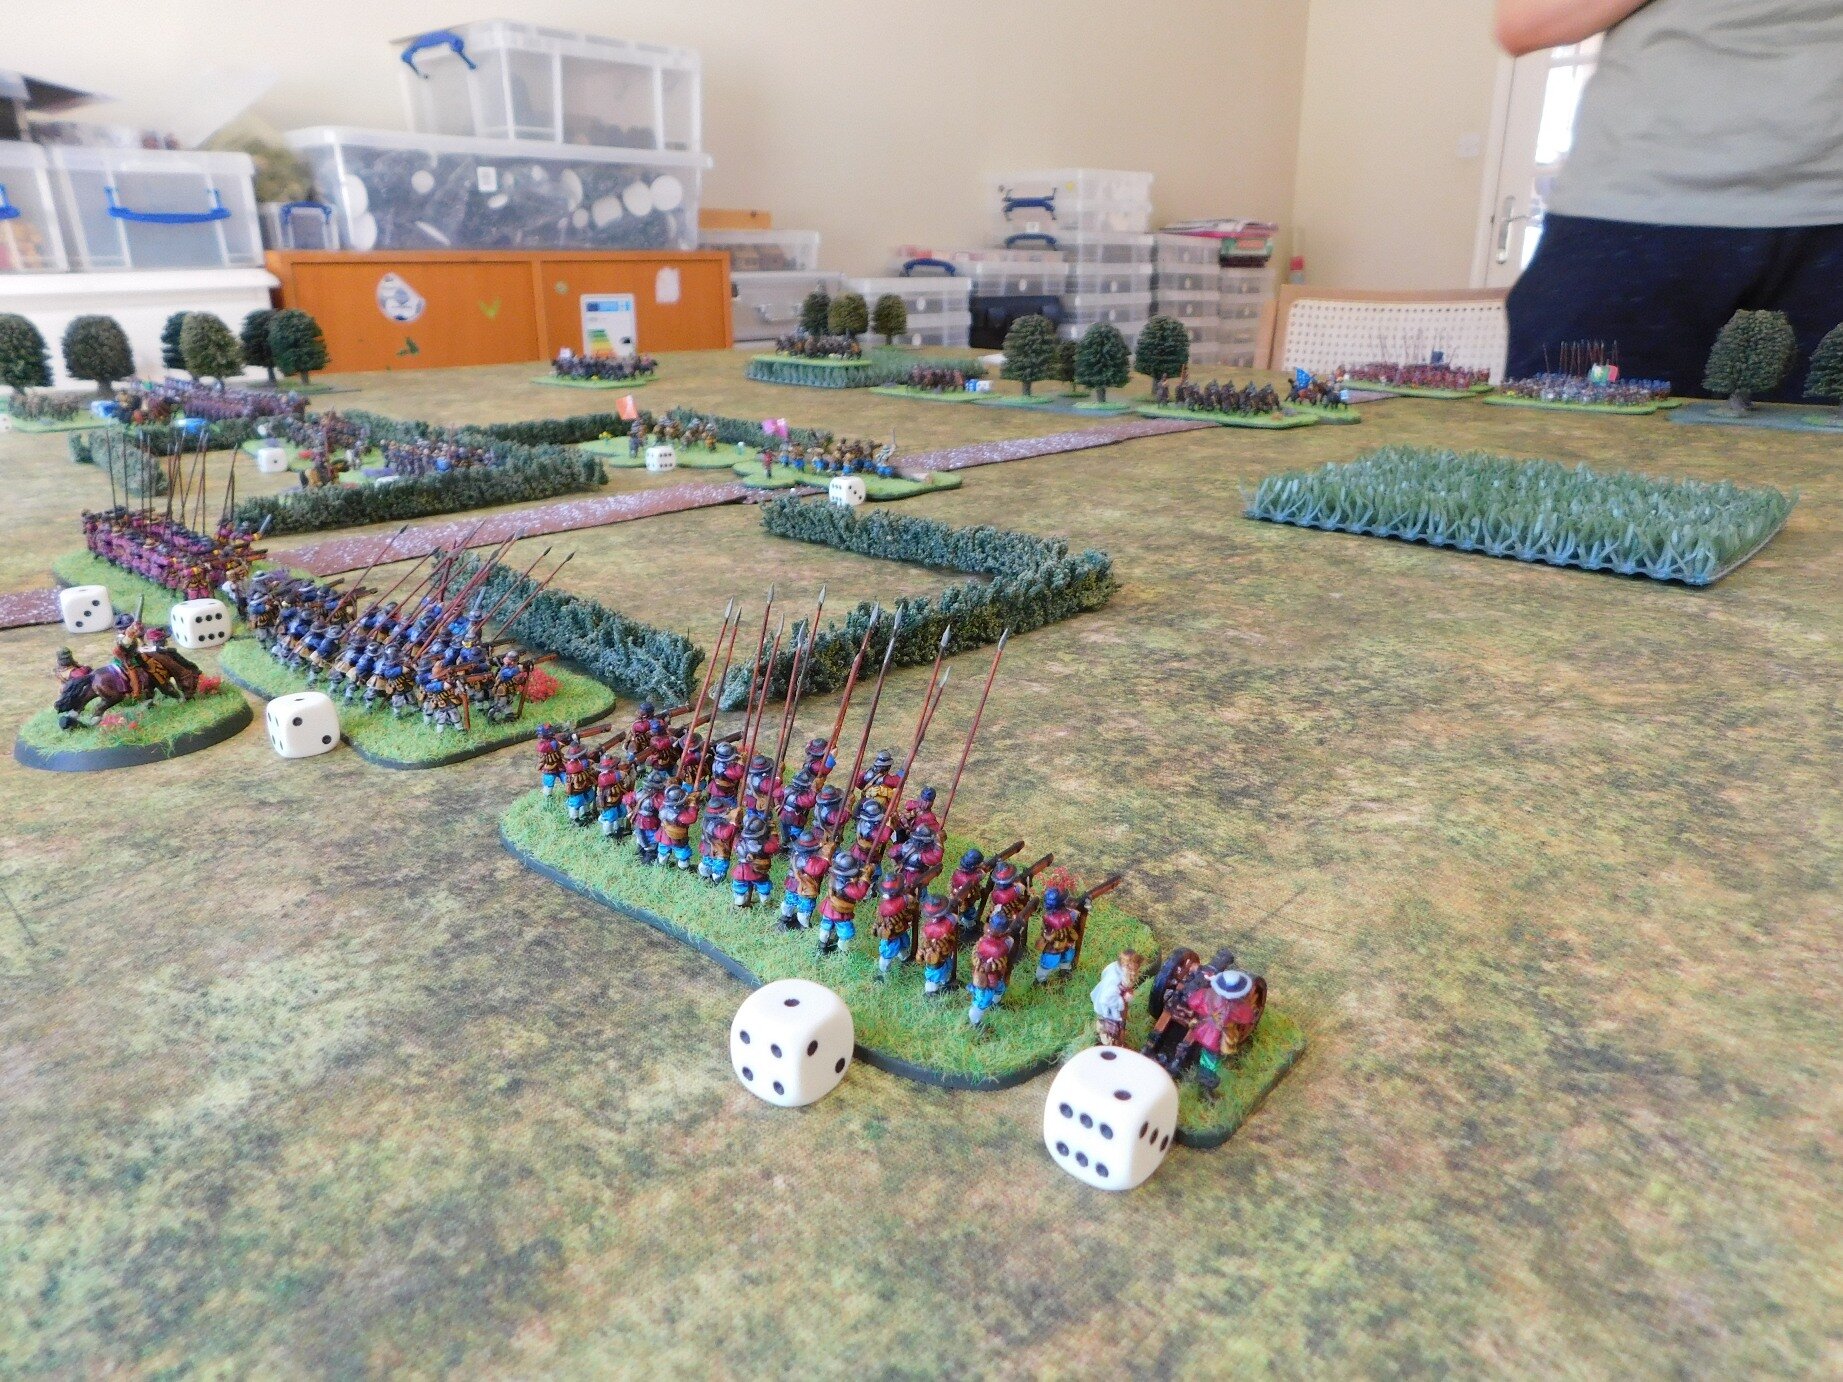
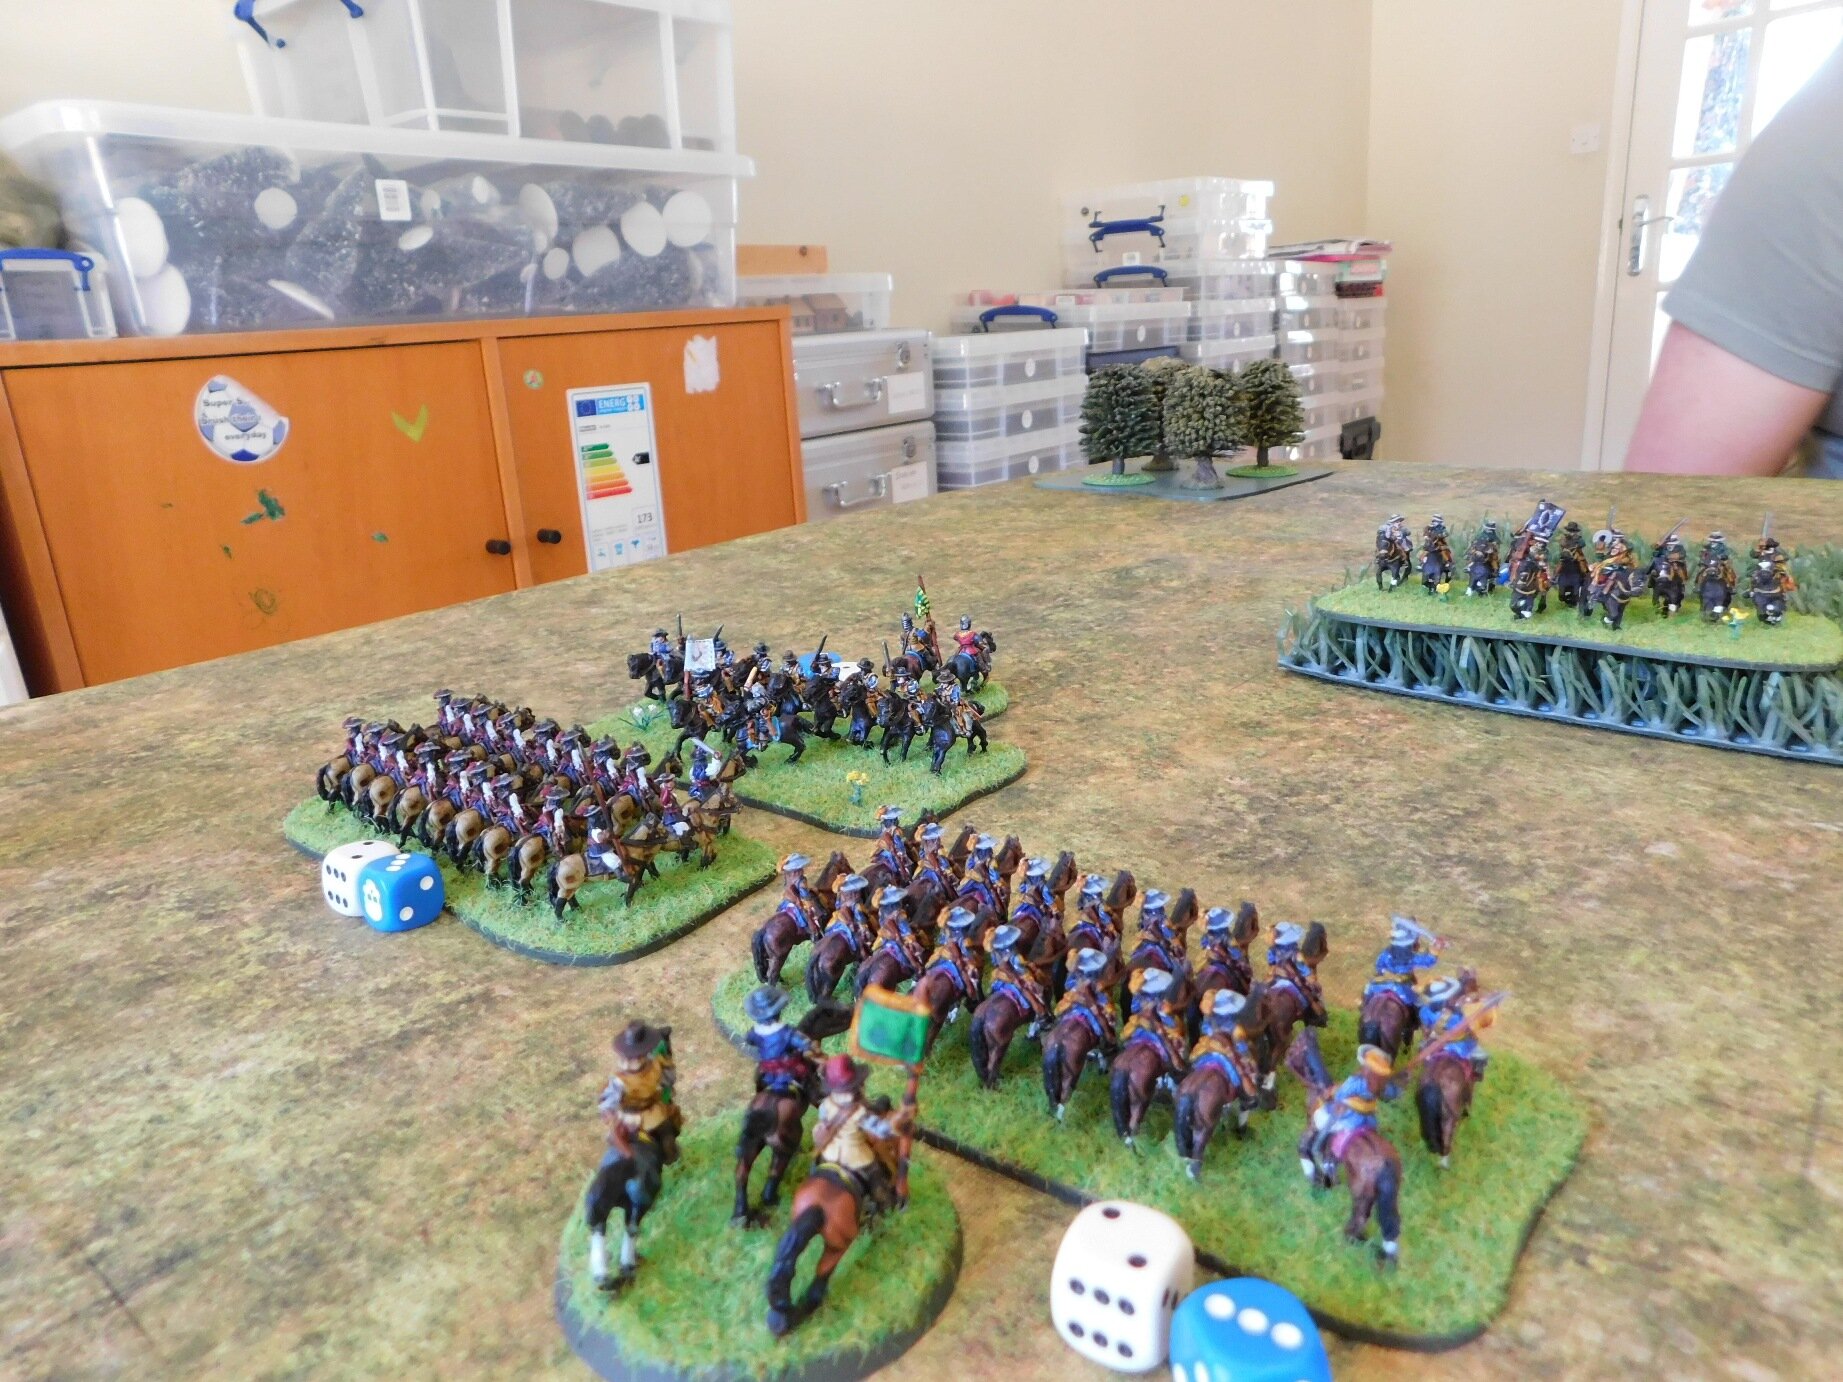
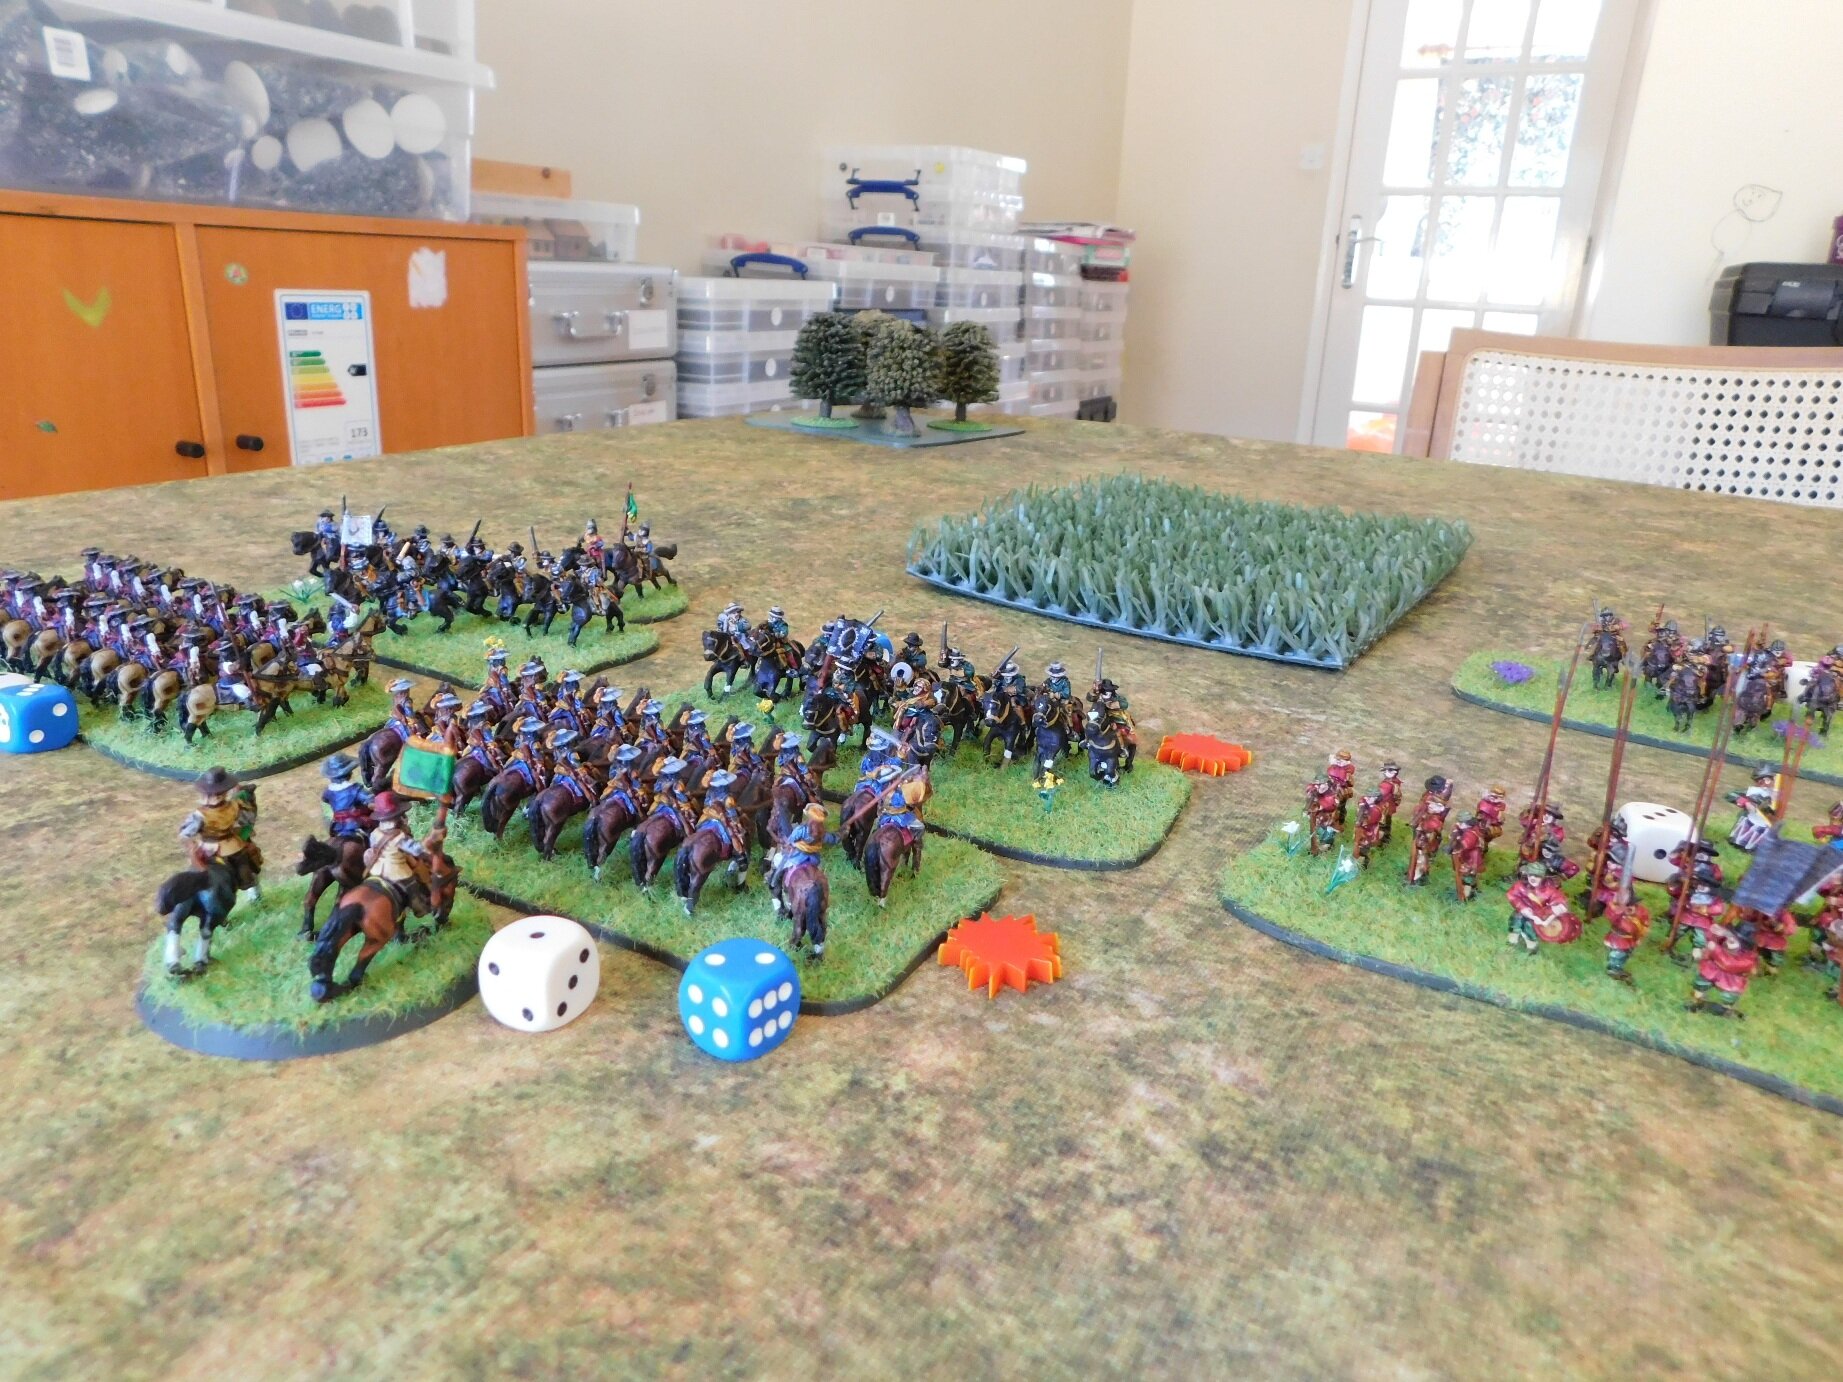
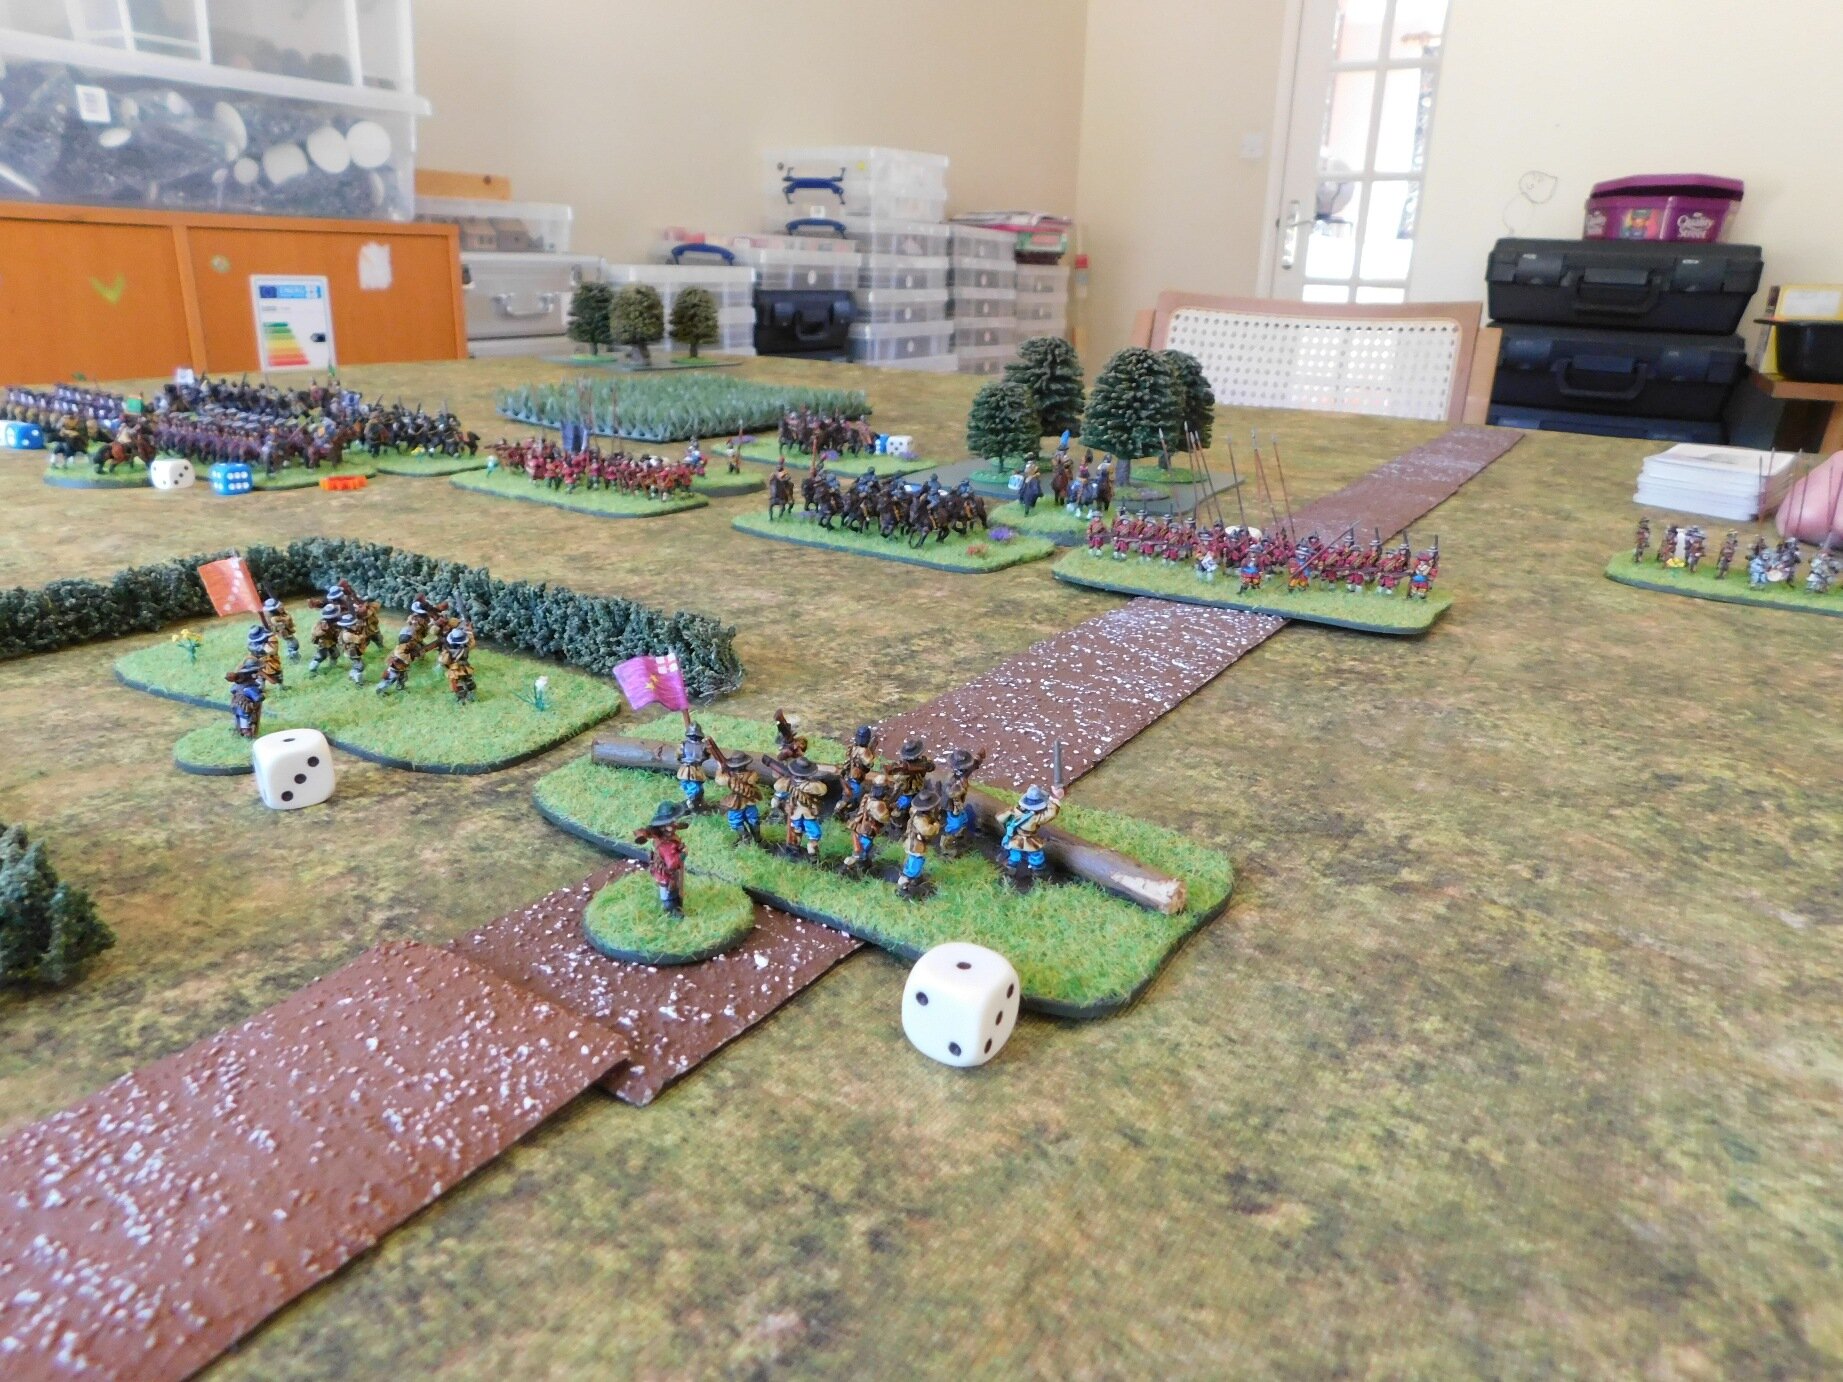
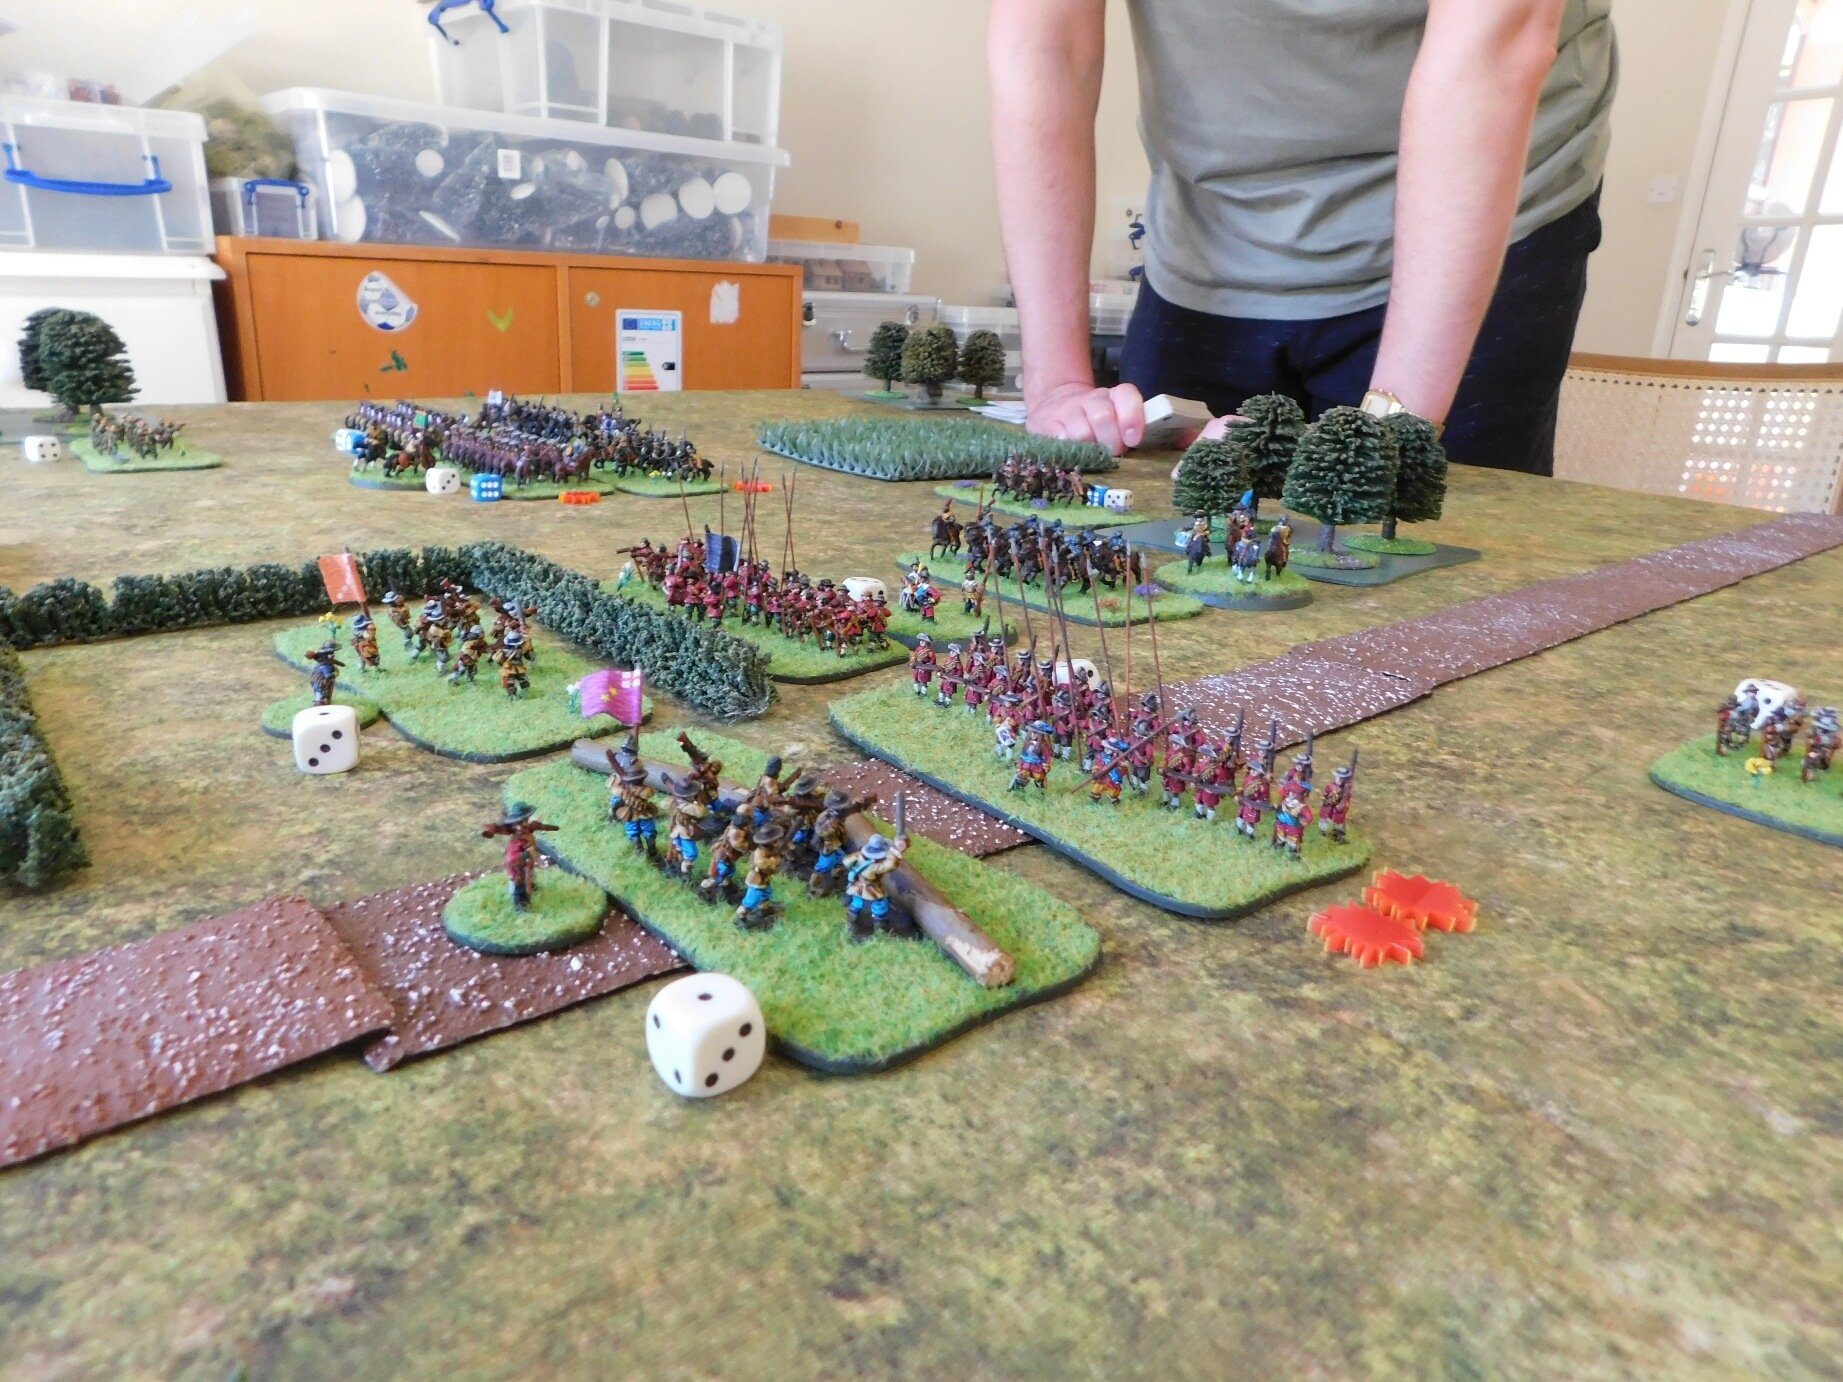
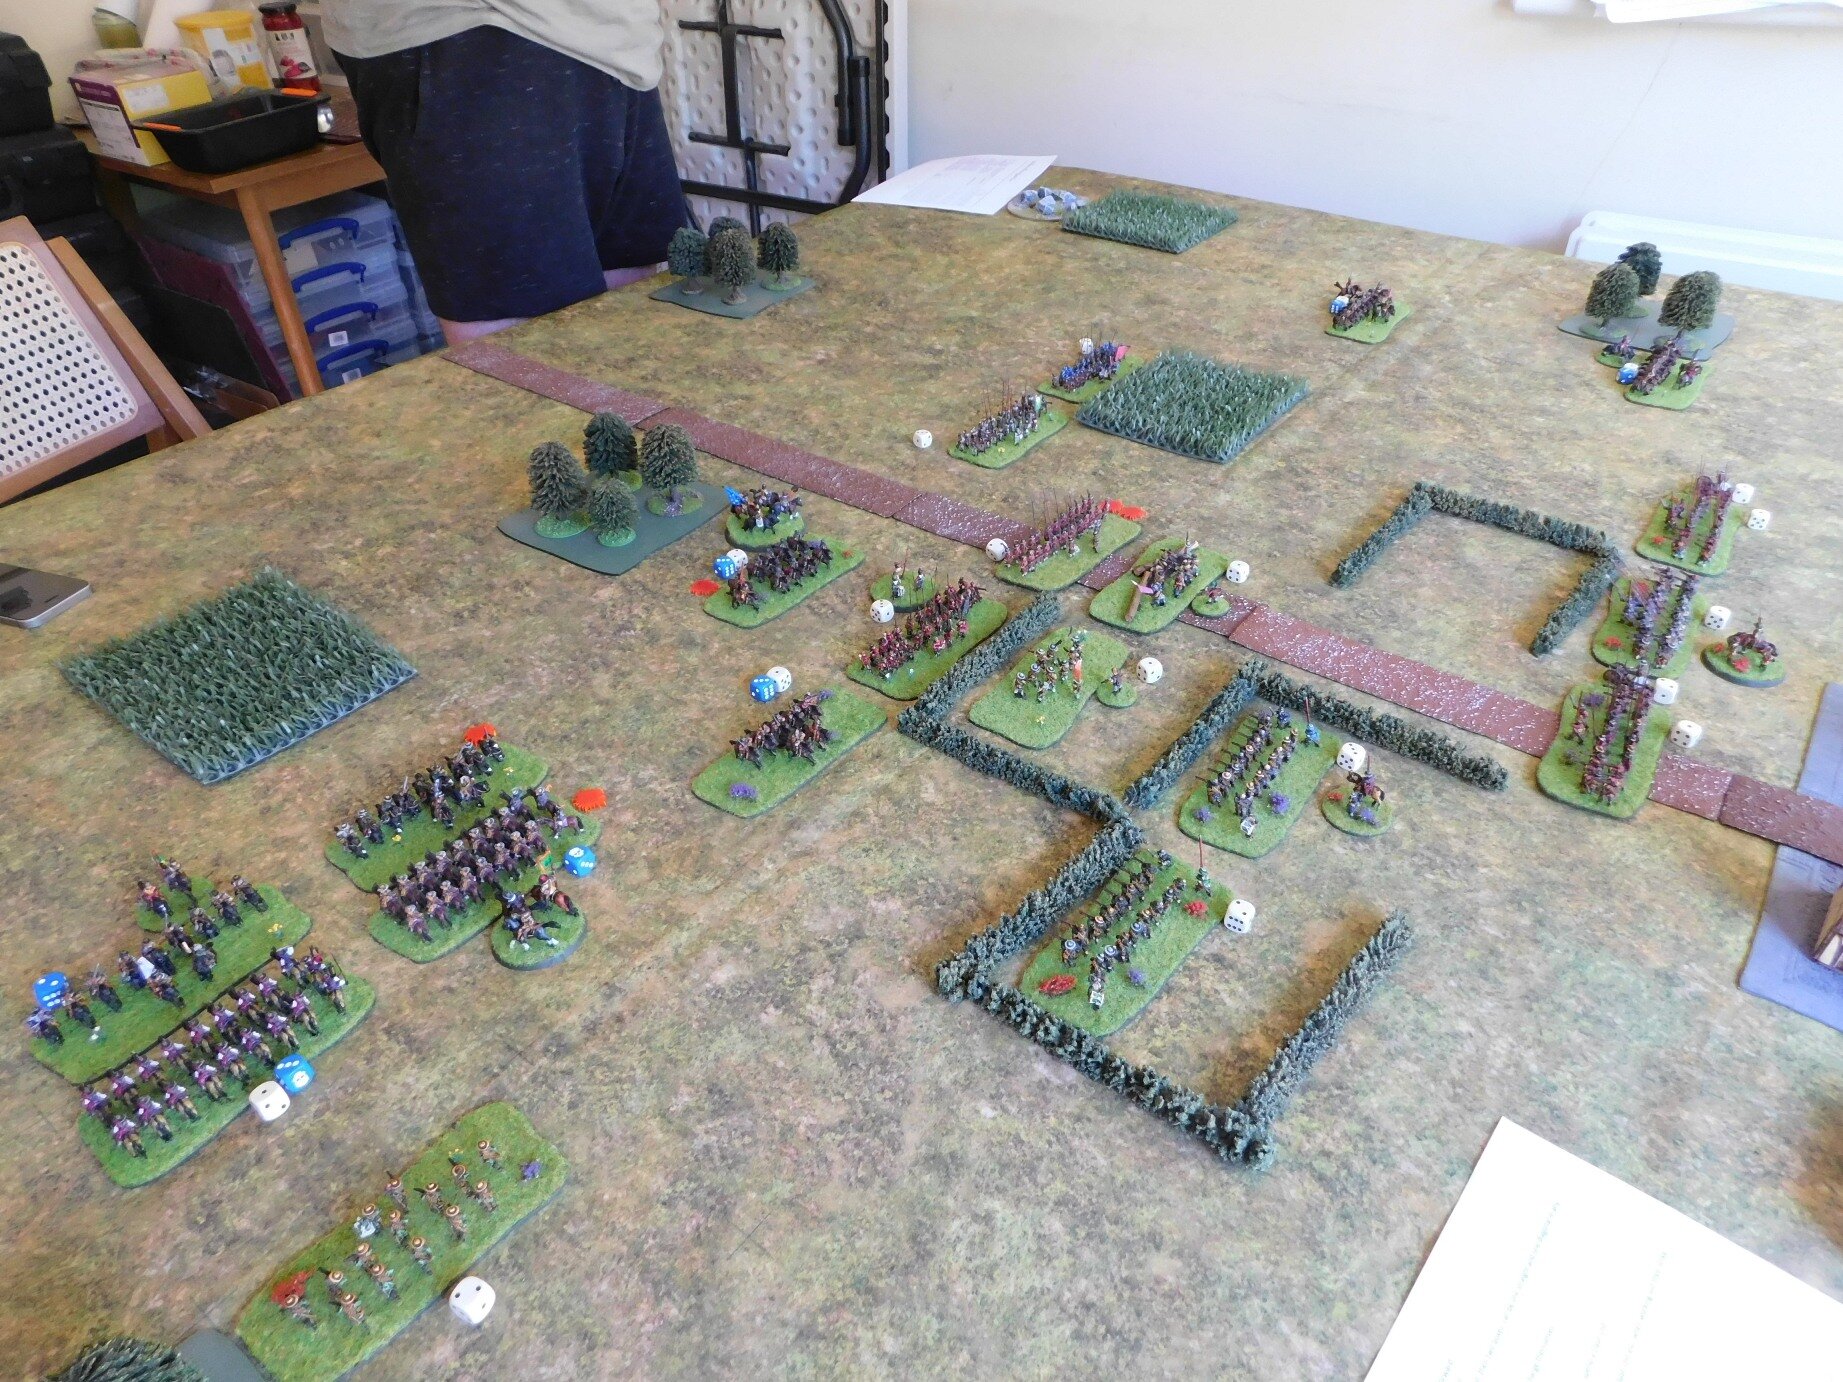
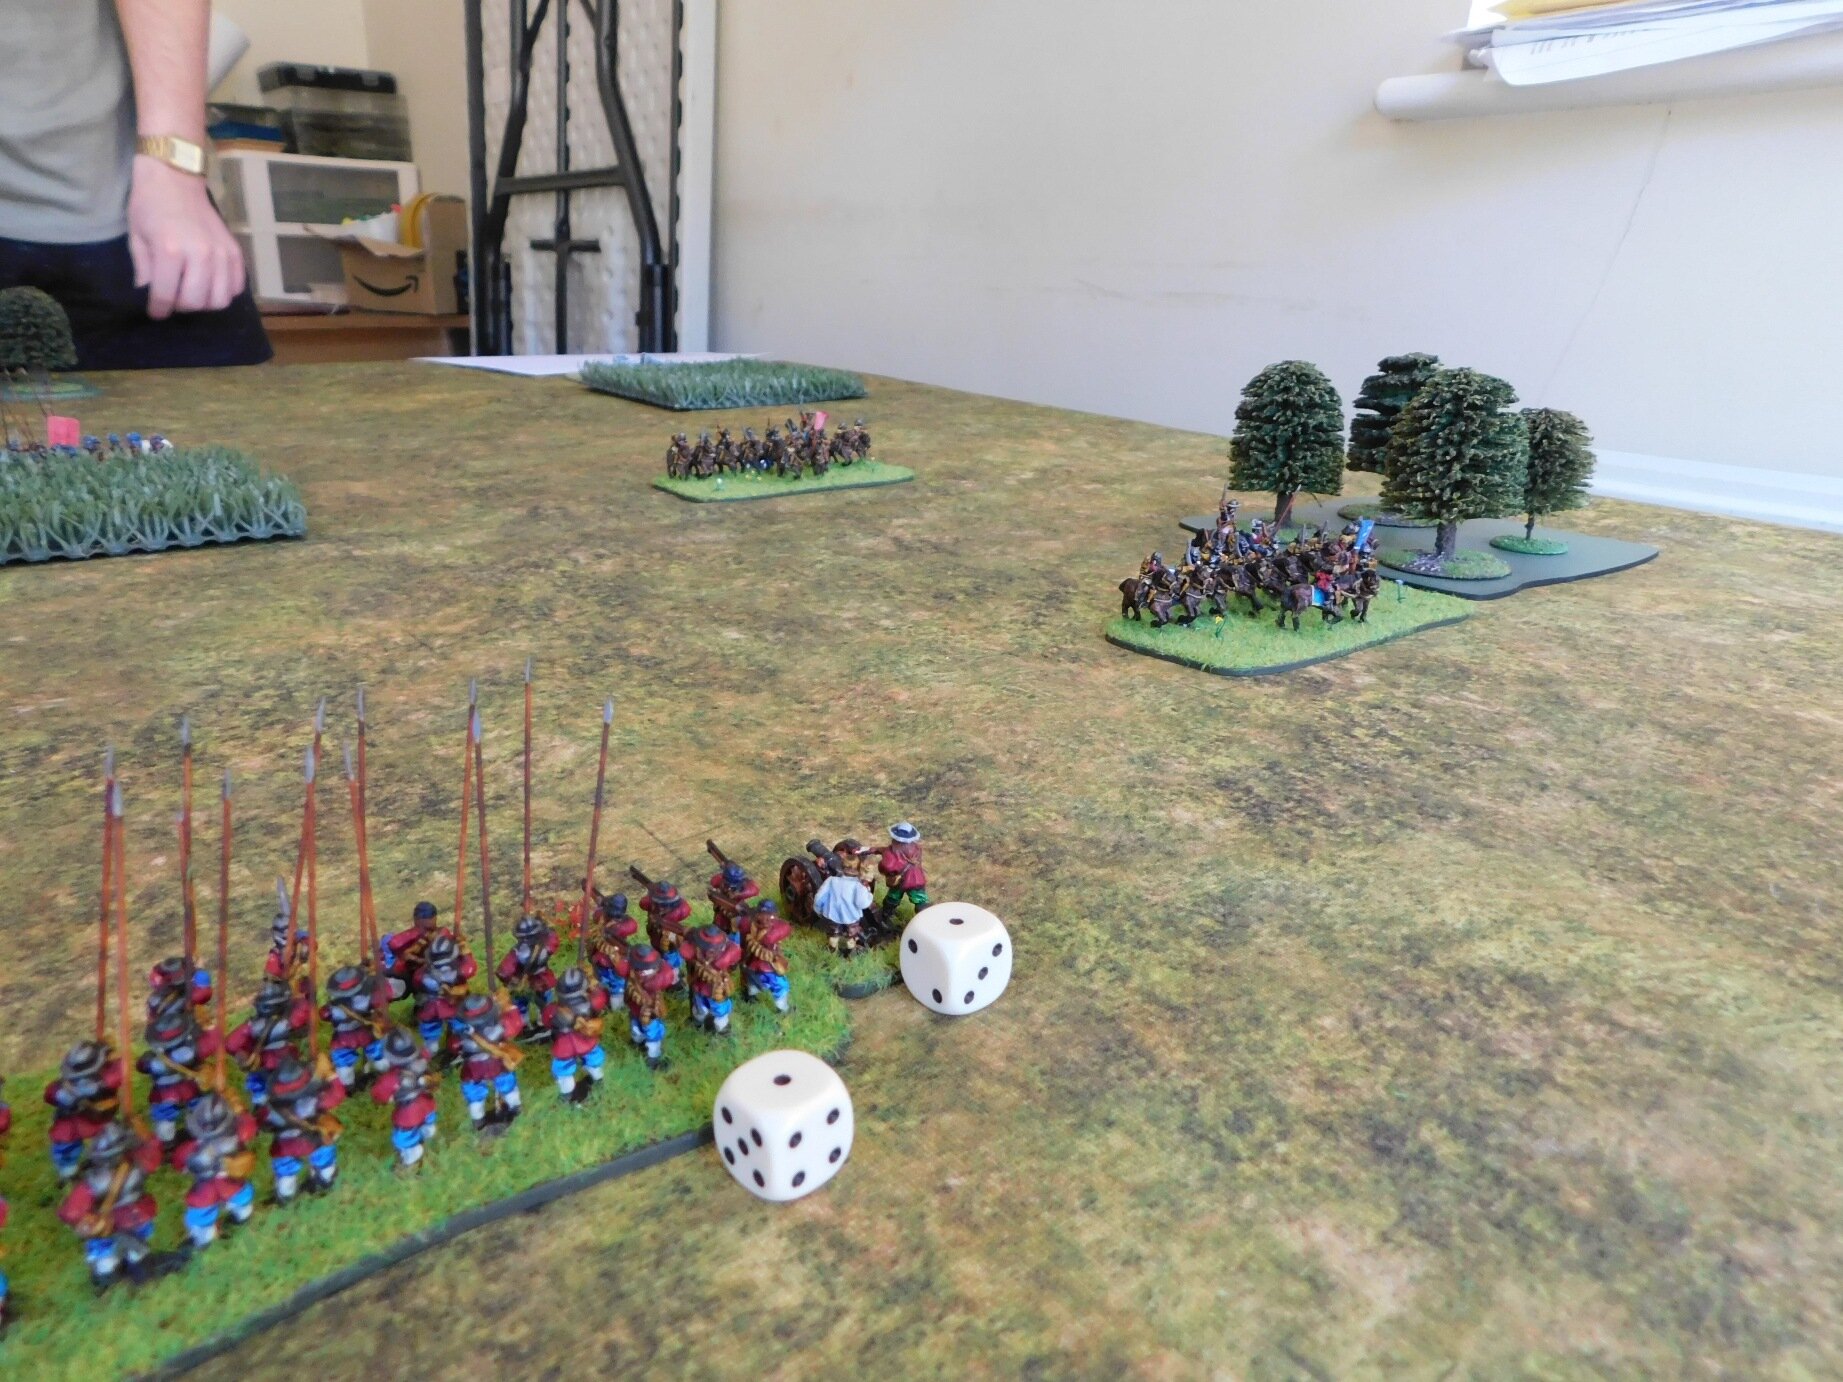
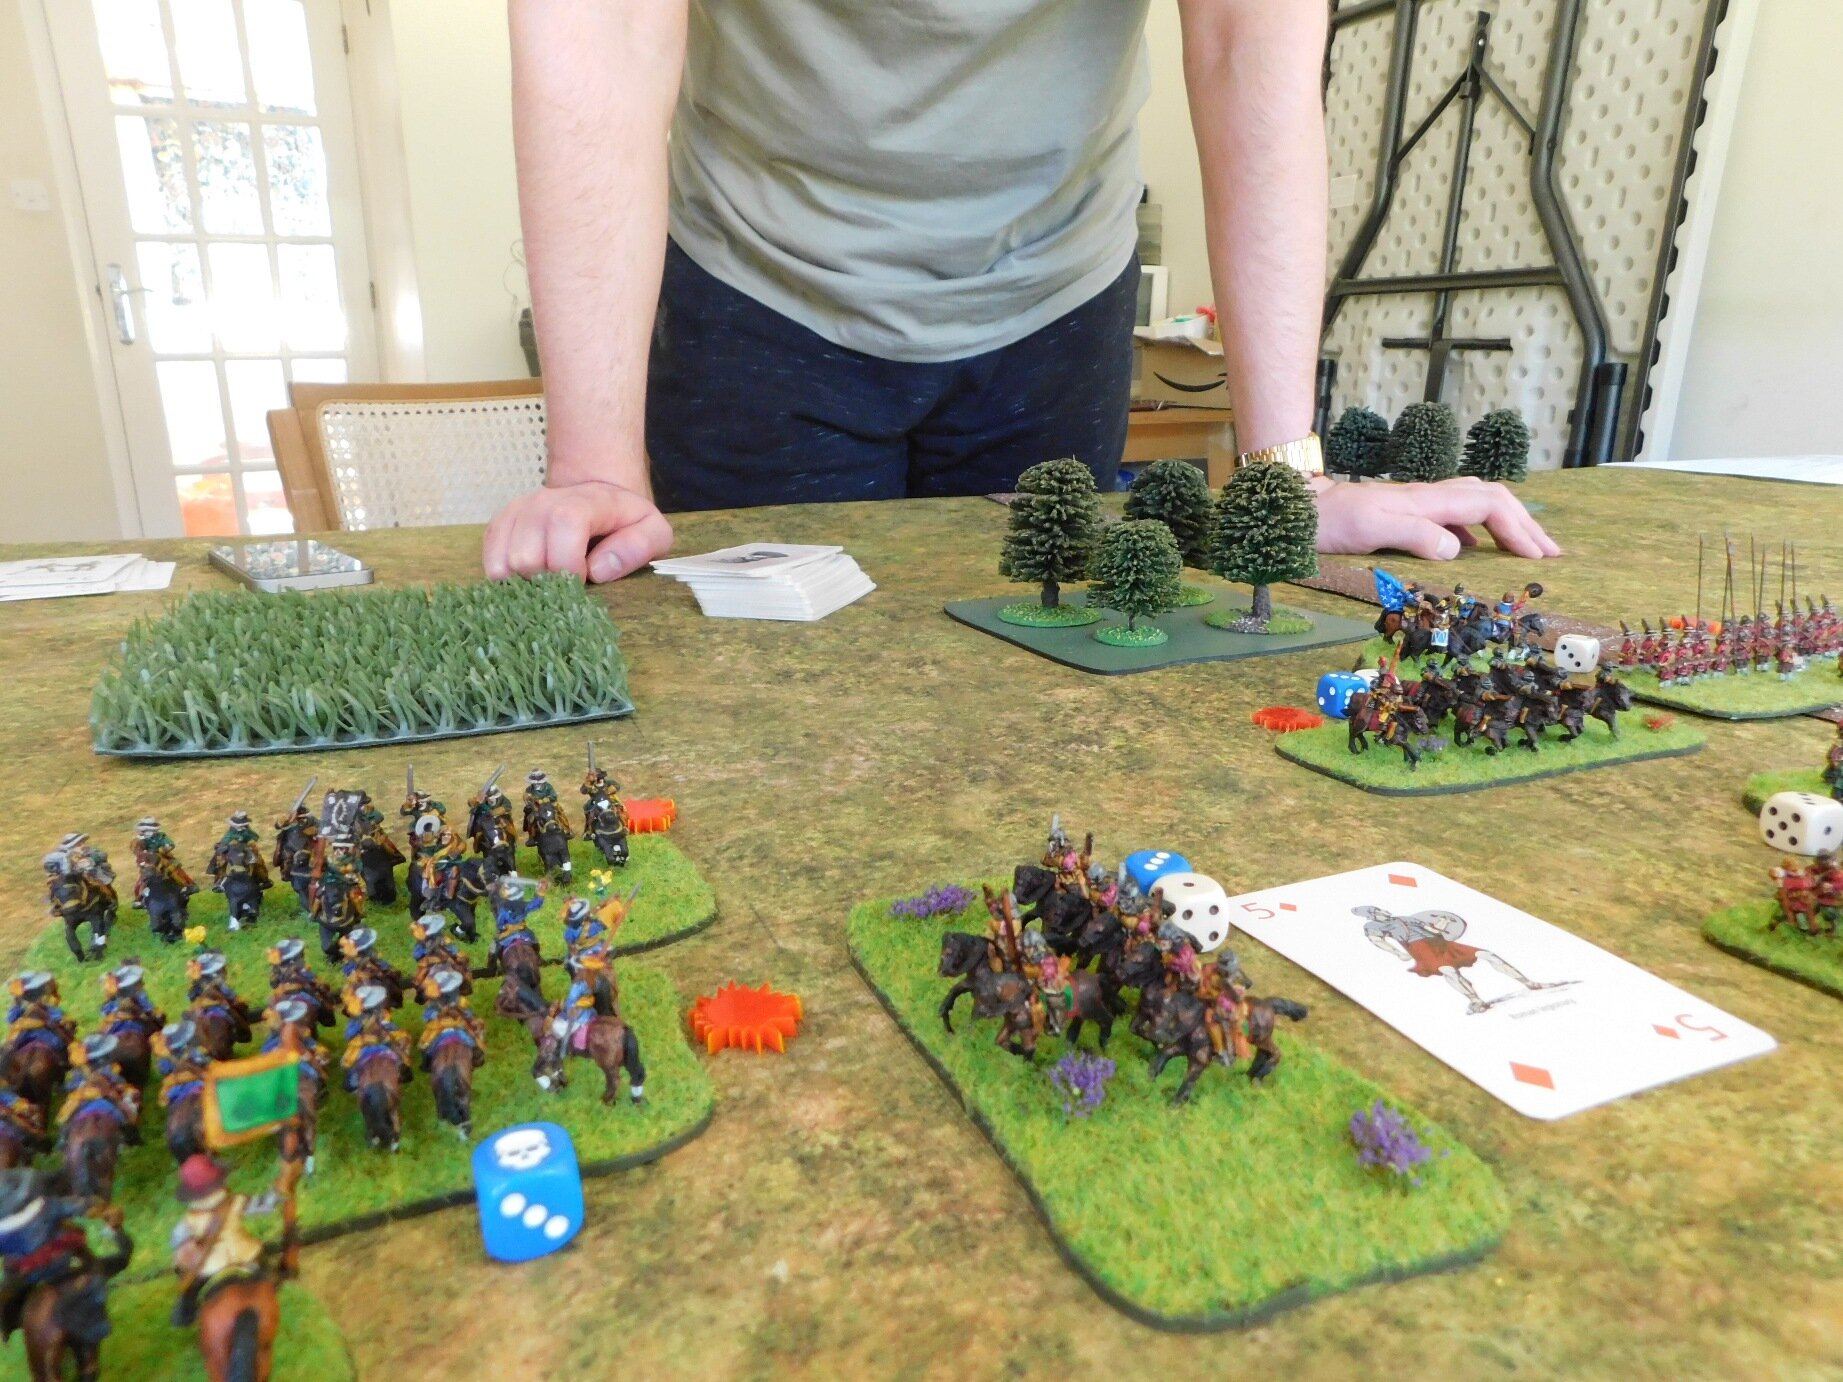
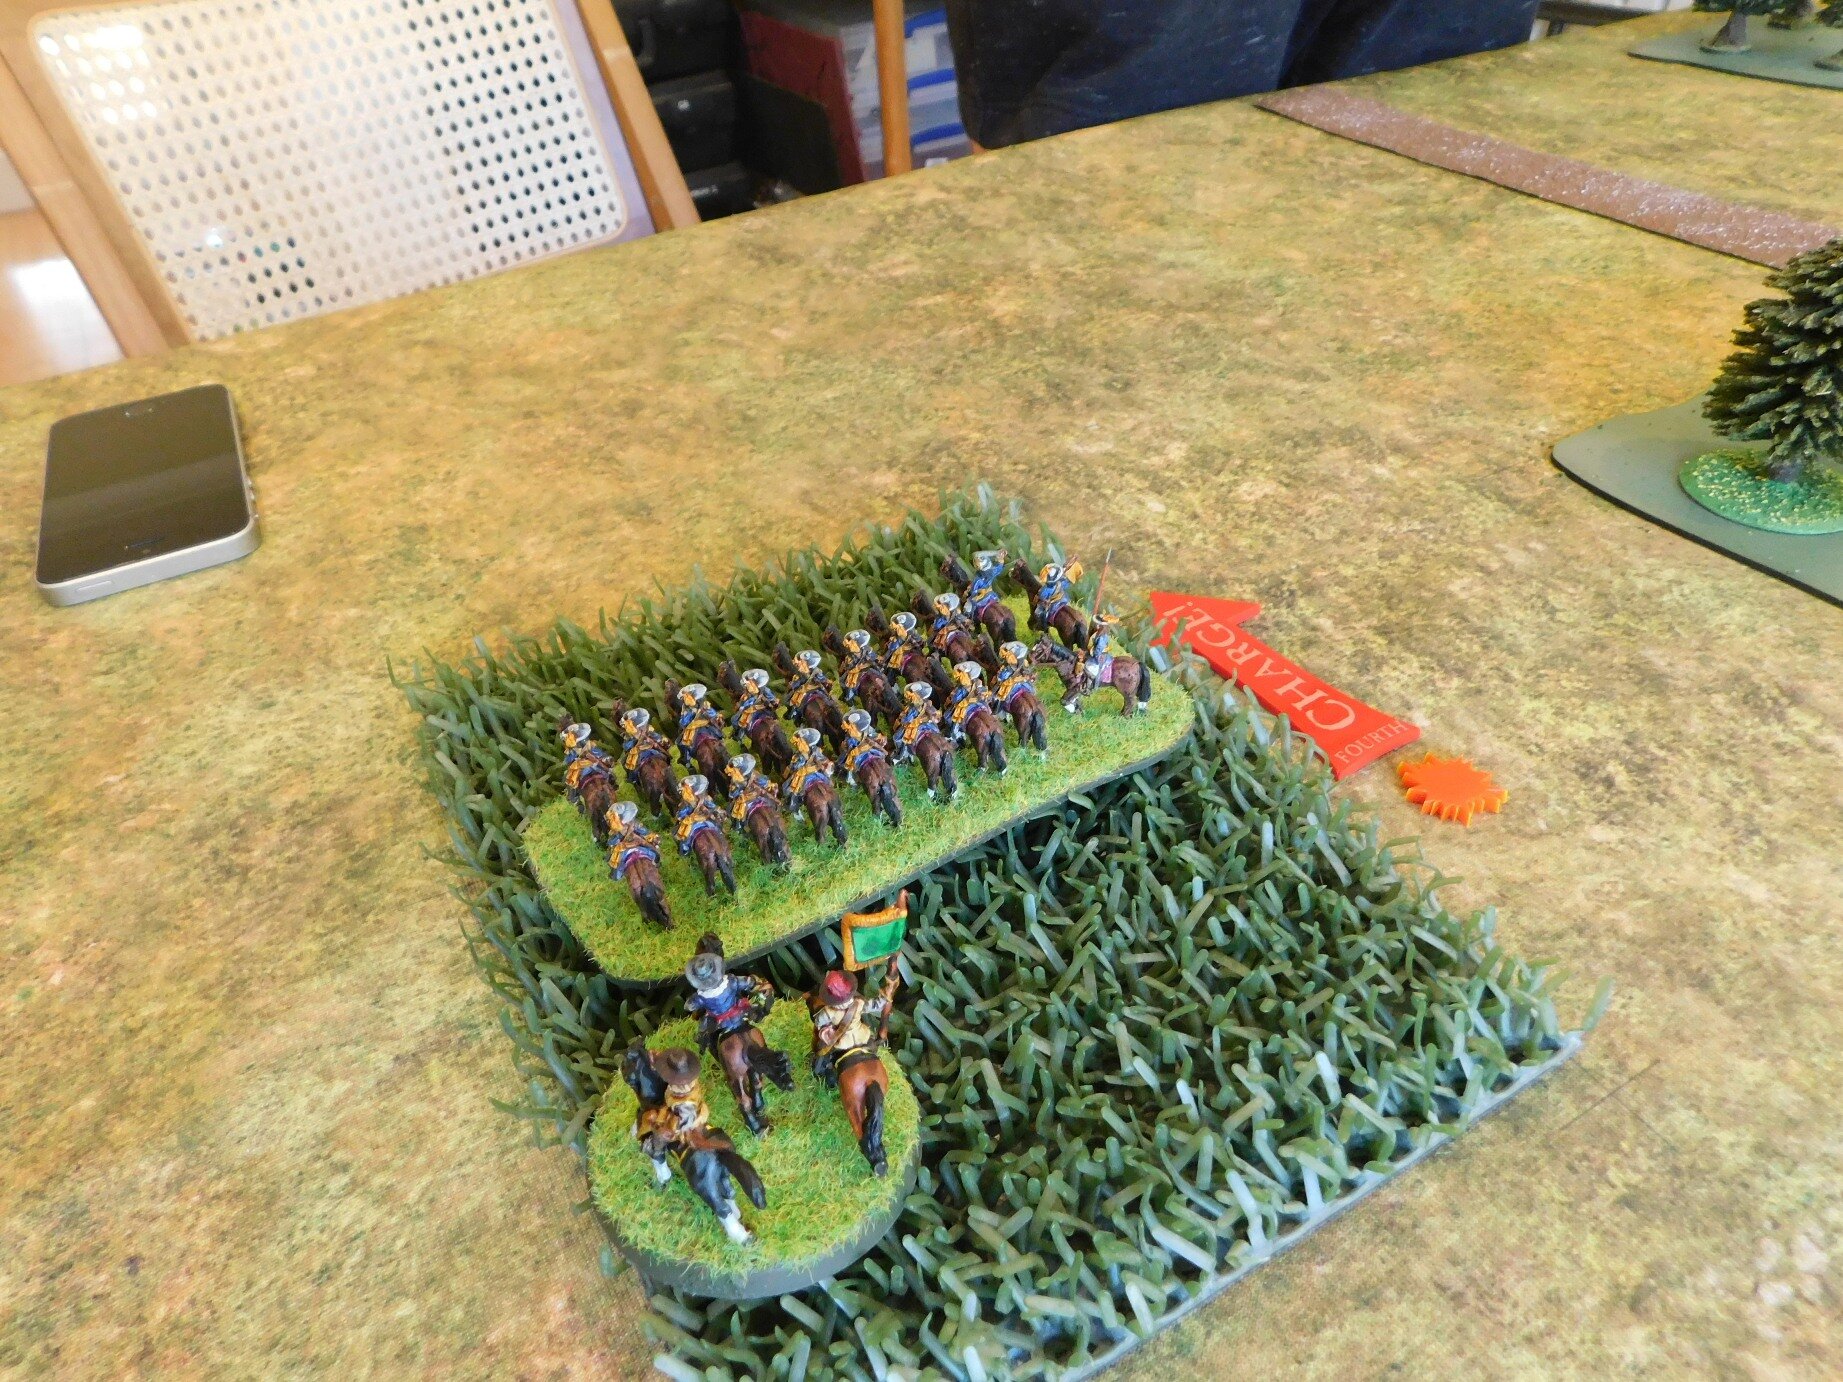
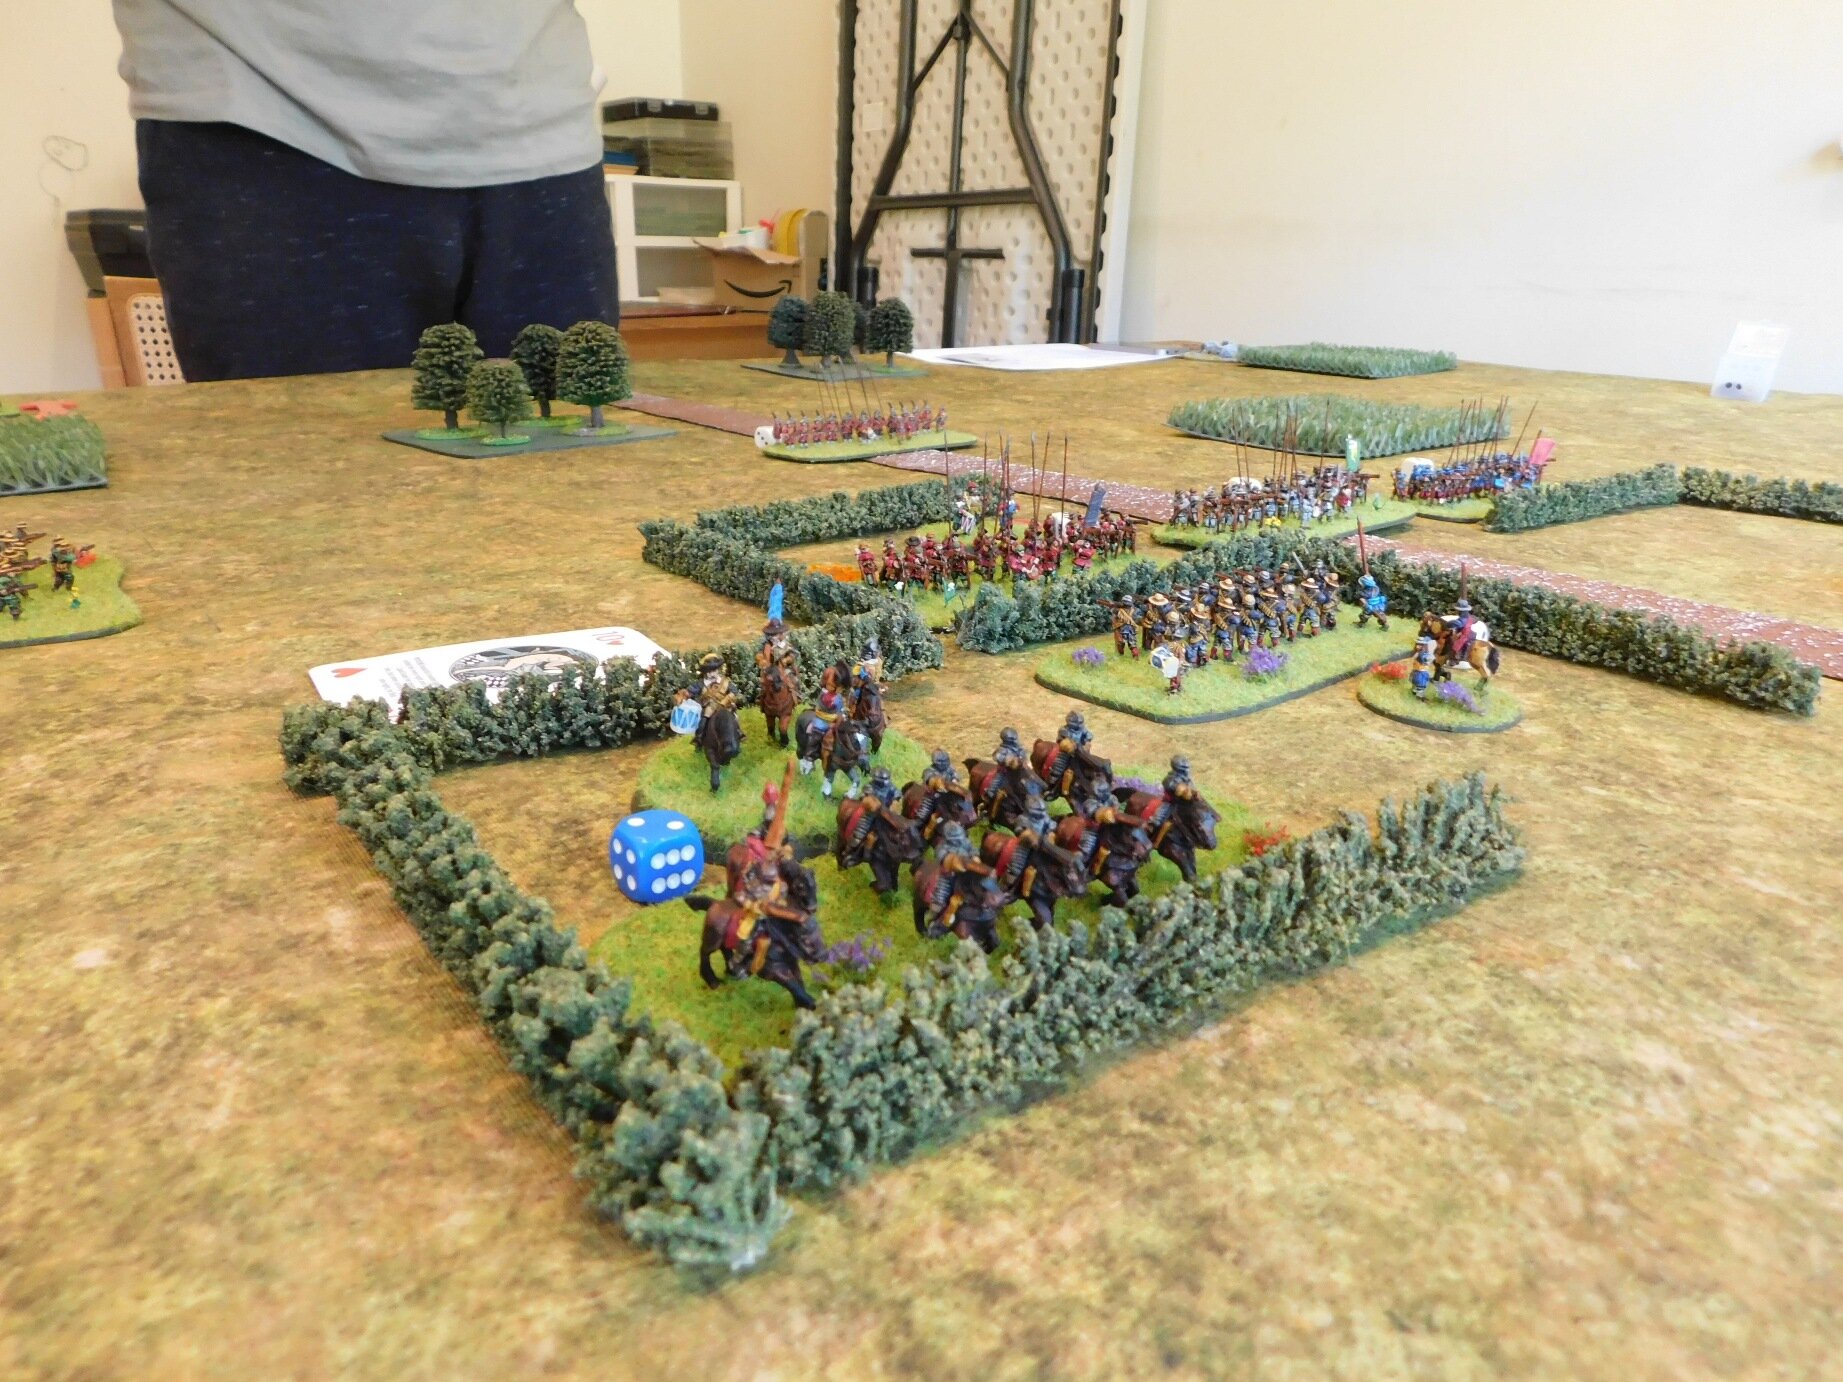
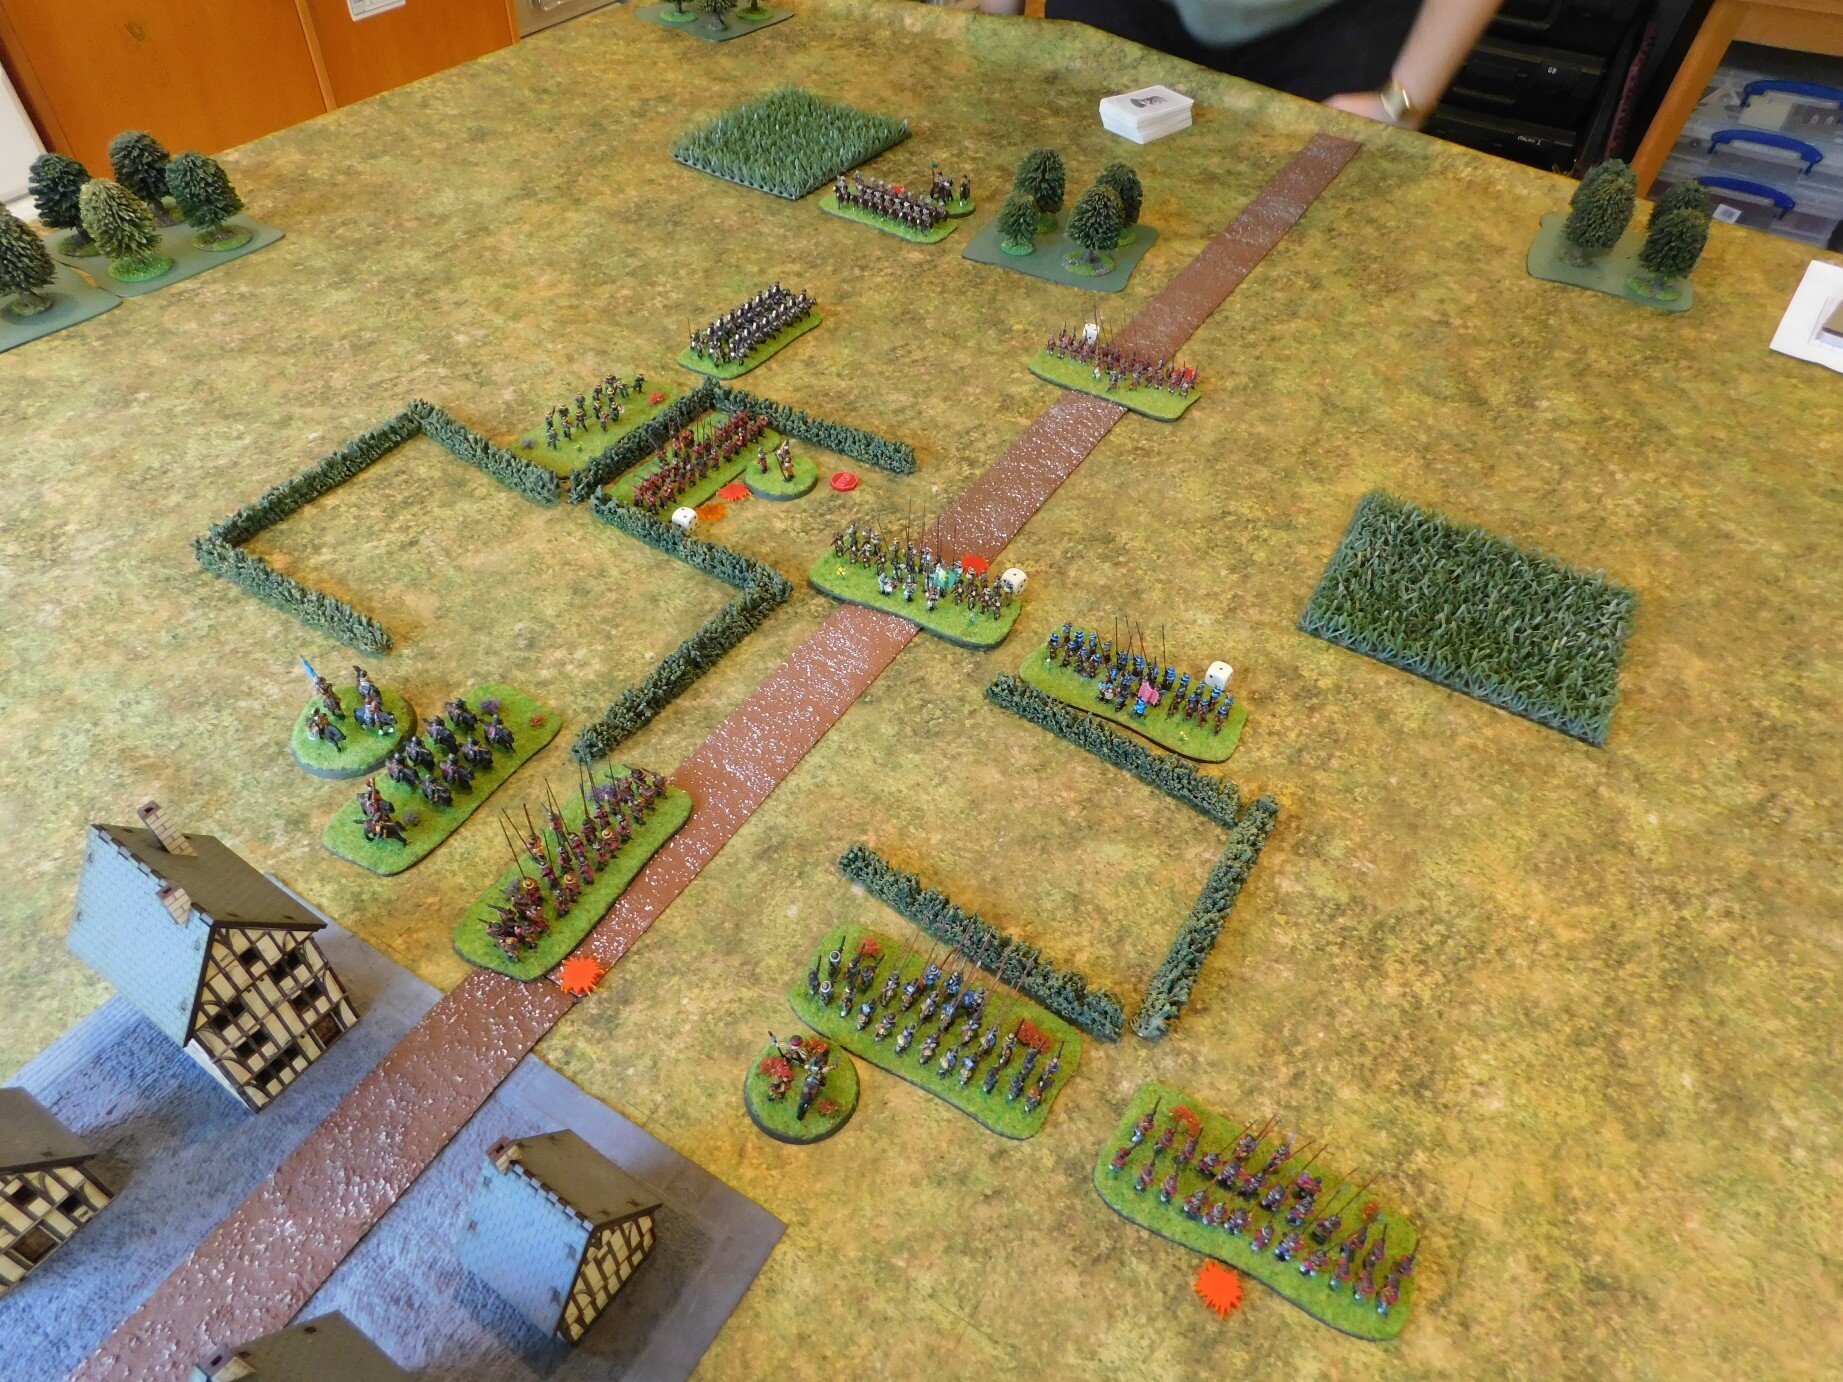
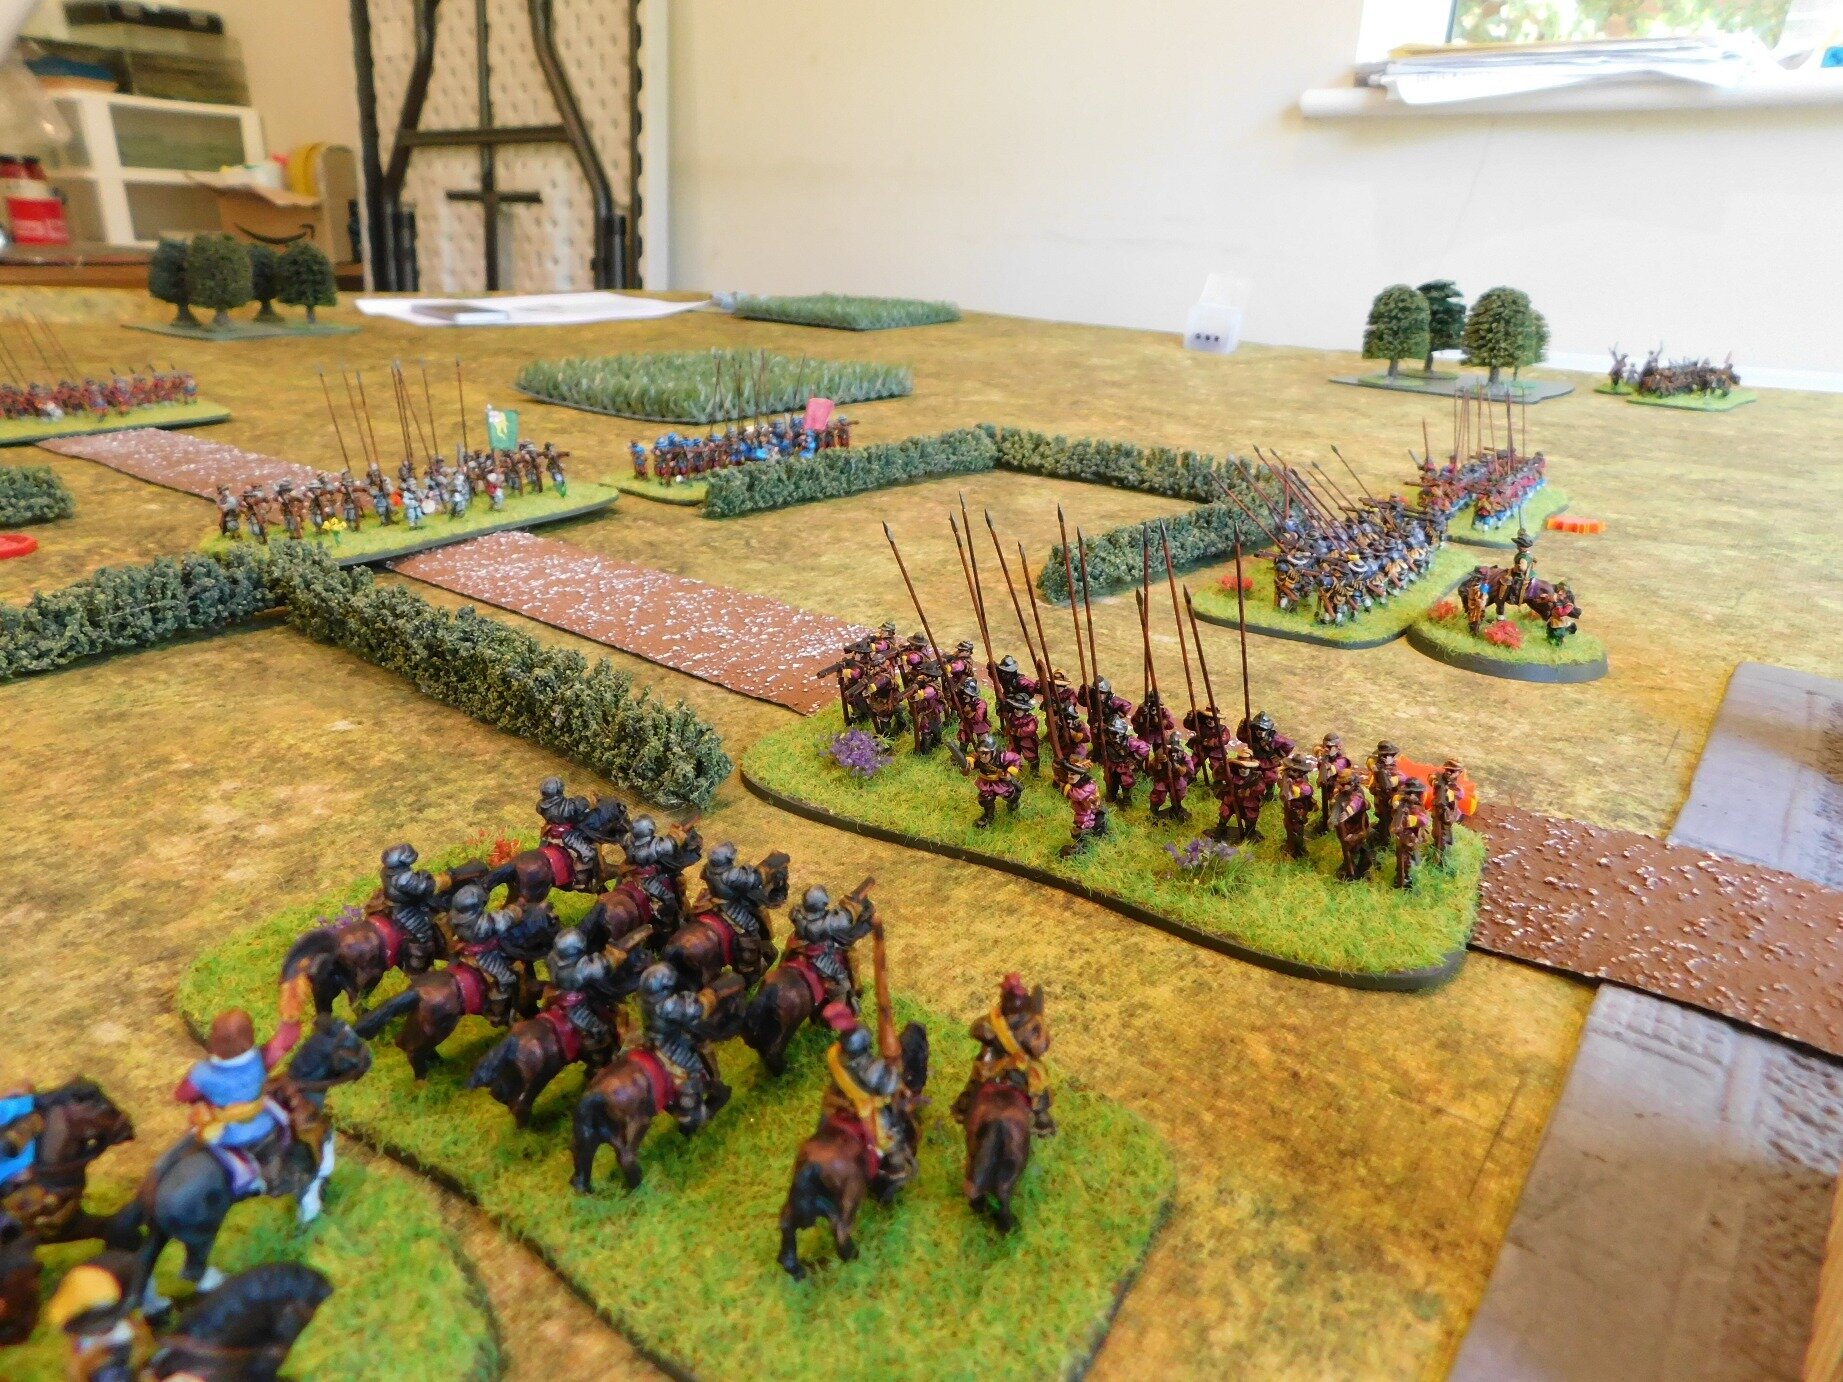
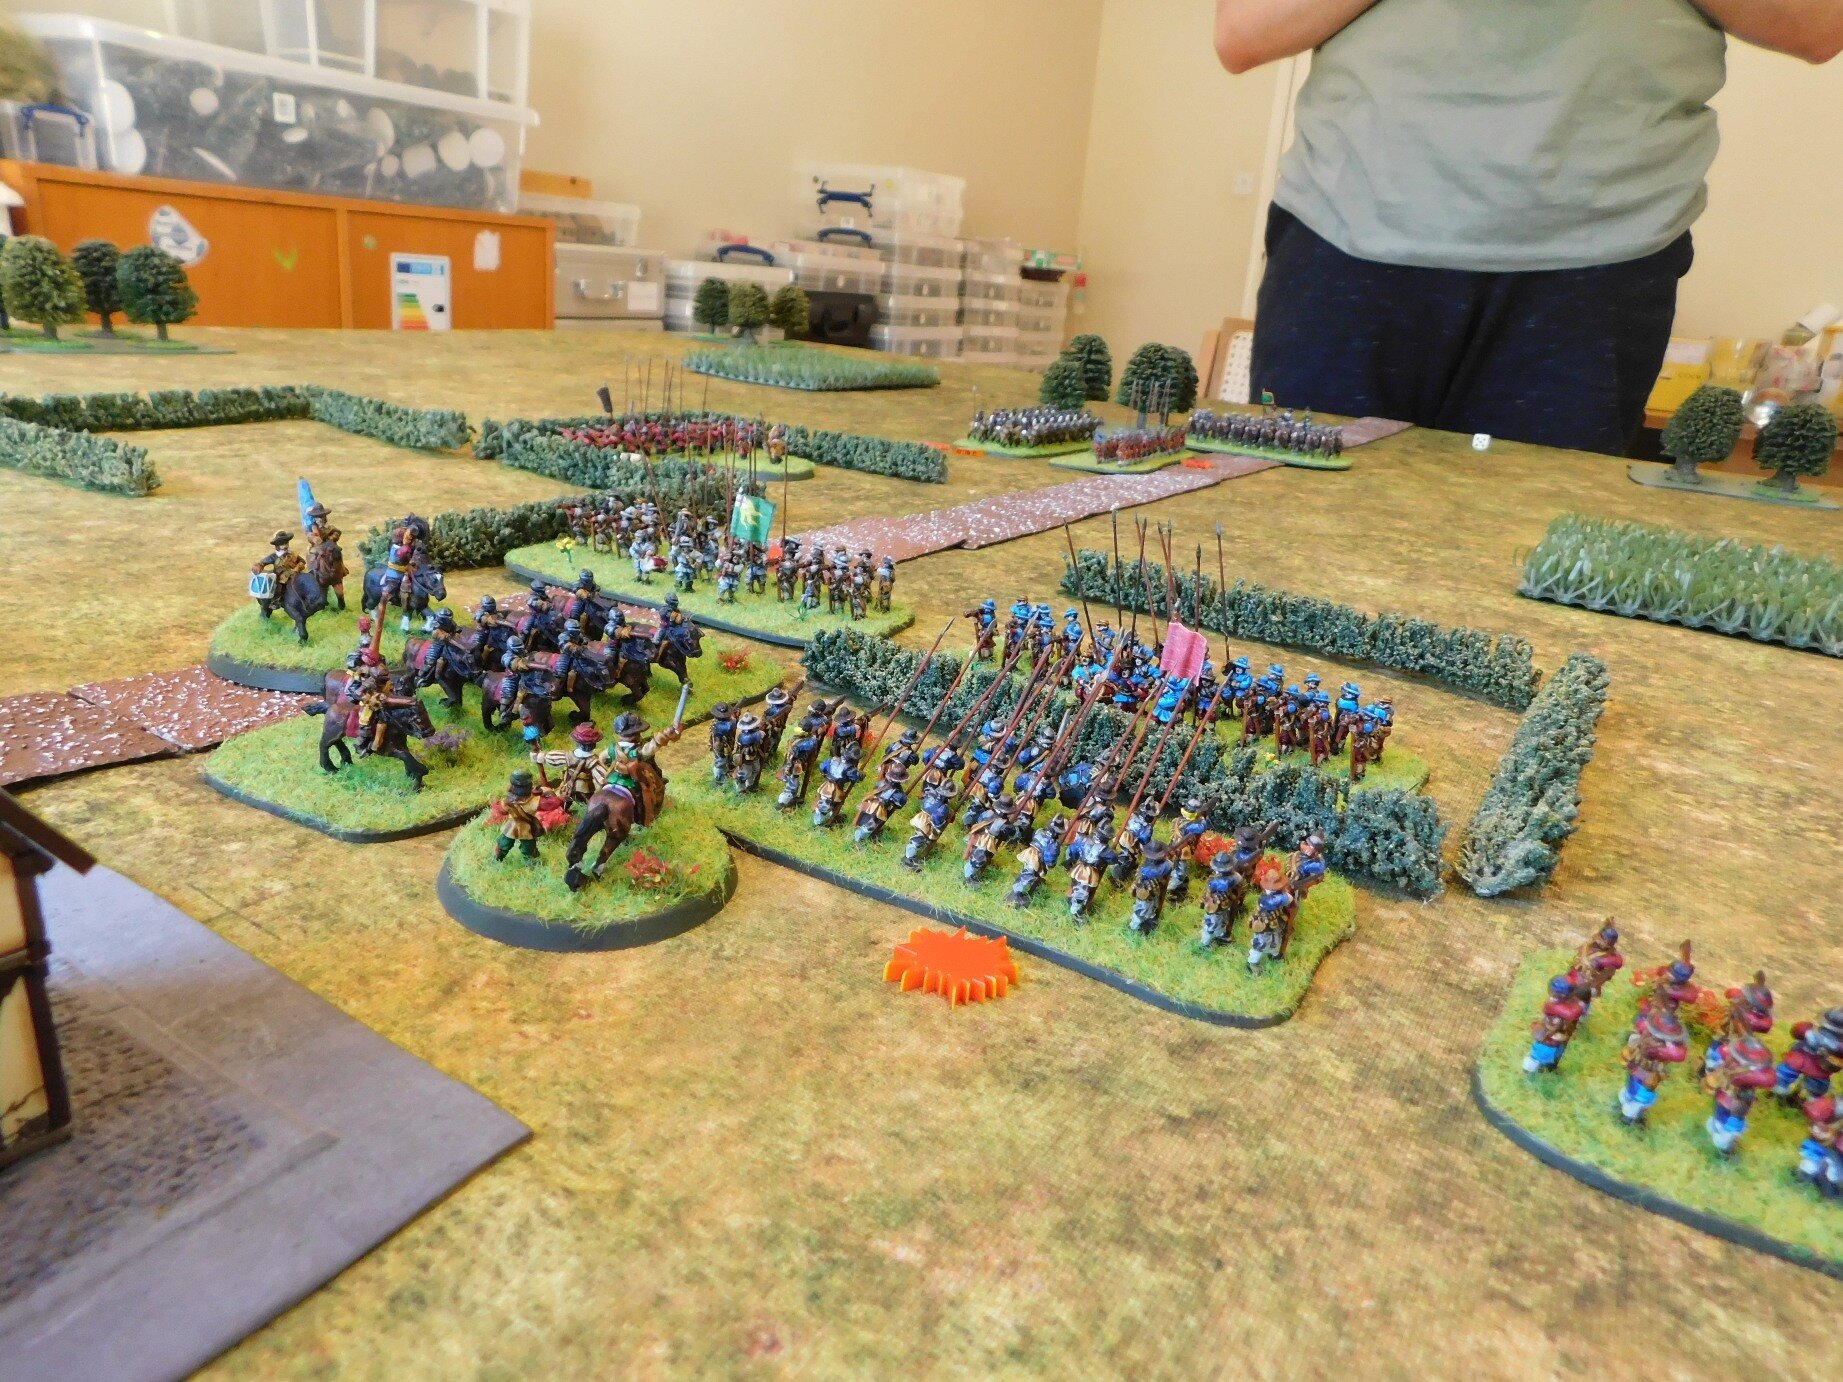
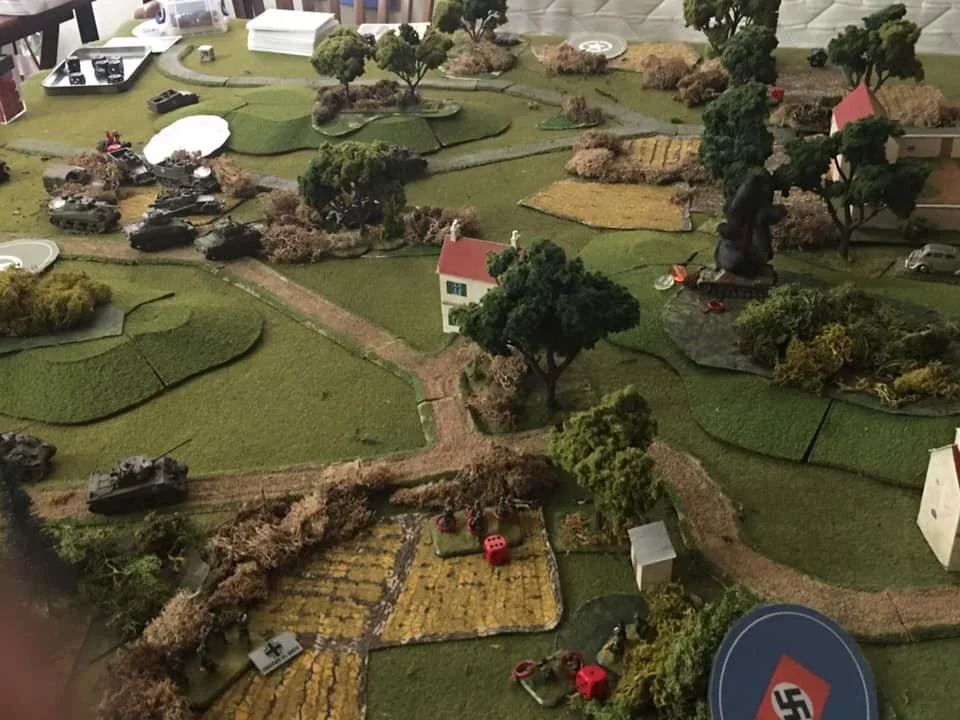
Here are some pictures of the game I lost:

IABSM AAR: Virtual Lard 2

One of the things that has been going on during lockdown is a series of virtual Lardy Days where people who are not lucky enough to be able to push lead with a member of their “bubble” can game remotely.

Mike Whitaker ran a game of I Ain’t Been Shot, Mum at the recent Virtual Lard 2. Here’s a quick AAR of the action taken from his excellent blog Trouble At T’Mill. Click on the picture below to see all:

FK&P AAR: The Battle for Pinkney's Court

With Sir John Boulters seriously wounded as he led his Cuirassier bodyguard in a desperate, but ultimately futile, attempt to shore up his left flank at the battle of Widbrooke Common, his son, “Little John” Boulters, has taken command of Royalist forces around Maidenhythe.

This is not a moment too soon, as the Parliamentarians seek to take advantage of Sir John’s injury by striking for Pinkney’s Court, the manor house that sits on the edge of Pinkney’s Green, north-east of the town itself. Taking the manor will give them a fitting place from which to plan and direct the rest of their campaign.

The two sides will therefore fight it out at the Battle for Pinkney’s Court.

The Royalists (on the far side of the field, above) have positioned themselves around the court: infantry and gun in the centre and on the left, and most of their cavalry on the right.

The Roundheads have placed their strong Dutch horse contingent on the left, aiming to sweep across the open ground of the Green. Their infantry are on the right, and will need to cross fields in order to get at the opposition.

Both sides must defend their building. The Royalists lose three victory coins if the Court falls; the Parliamentarians have their train in the yards of the Golden Ball tavern, so will also lose three victory coins if the building top right is taken by the enemy.

Opening Moves

The action began with the cavalry on the Parliamentarian left wing. As the Roundhead Horse swept forward, one Squadron of Royalist horse headed left thinking to move up the road and take the enemy guns.

The Royalist commander (me!) had, however, misjudged things, and the right-hand unit of enemy Horse managed to get forward and charge them in the rear, smashing the Cavaliers from the field.

This success drove the Roundhead cavalry into a frenzy and, without thinking, they charged after the retreating Royalists, heading straight for the hedge behind which one of the Cookham Militia battalia waited.

This proved a foolish thing to do, and they were sent crashing backwards, and would spend the rest of the game lurking in the woods trying desperately to rally.

In the meantime, the rest of the Royalist horse would take advantage of their superior number of units and defeat the rest of the Parliamentarian cavalry. This wasn’t enough to break the whole Roundhead army so, as the Royalist horse promptly disappeared off table in pursuit, the game would be decided by the infantry.

The Other Side of the Field

The Roundheads advanced smartly up the field, but let one of their battalia get too far forward and become an isolated target for what little Royalist cavalry had been put on this flank.

I was sure that my two units of horse could take the Parliamentarian battalia: one to pin from the front, the other to hit if from the side.

Unfortunately, the rebels were made of stronger stuff than I had expected, and I ended up losing both units of horse to fire and melee. In particular, the Roundhead Gallant Gentleman (in blue on the front of the pike unit’s base) intervened at a crucial moment: the extra hit being just enough to finish me off.

Not a good start!

The main lines then clashed, but it was going to take something fairly miraculous to save the day now: I was outnumbered five battalia to two!

Miracles were in short supply on the Royalist side, so although my lone pike block lasted far longer than anyone expected, the Oxfordshire commanded shot were soon sent flying backwards, which was enough to finish the game in the Roundhead’s favour.

Aftermath

This was the narrowest of defeats. For about two turns, whoever lost the next unit would lose the game: my outnumbered infantry balanced by the lost Roundhead cavalry.

Another great game of For King & Parliament

Robert Avery

TTS AAR: Assyrians and Egyptians Clash Twice

With lockdown restrictions easing, I was able to get in a couple of games of To The Strongest, with the width of the wargames table operating as an automatic social distancing device.

Friend Bevan and I decided to use the Egyptians and Assyrians: we’d have two games, keeping the terrain constant, swapping sides for the second game.

We opened with me commanding the Assyrians.

The Assyrian cavalry was massed on the right wing

I deployed in very much a traditional way: infantry in the centre, mounted troops on the wings. Wary of all the Egyptian light chariot units, my plan was to keep my line very much together and advance just into bowshot as one entity, aiming to concentrate fire from several units on any Egyptian lights that came into range and relying on the fact that one kill would knock one out.

The Egyptians massed all their chariots on their left wing, spreading their infantry across the battlefield from there. One thing I did immediately notice was that there were an awful lot of Egyptians on the table: a consequence of my smaller numbers of heavier, more veteran troops.

As the game began, the Egyptian chariots in front of my left wing faltered: apparently refusing to move until some bizarre religious rite had been fulfilled. This allowed me to advance forward so the flank of my line was protected by a piece of impassable ground.

The Egyptian chariots say “no”!

Eventually they did start to move forward. Well, some of them did. Bevan’s Guard Chariots turned smartly to their left and attempted the old switcheroo: heading for the other side of the battlefield. Although sometimes a successful ploy, this time it wasn’t. All that happened was that his elite troops spent the entire game shifting from right to left and never saw any action at all!

“Why not?” I hear you cry, “It can’t have taken that long to traverse the field!”. Correct, but in the meantime his other chariots had moved forward piecemeal and, as I had hoped, I was able to wipe them out with bowfire one by one. This left the Egyptian right wing hanging, with my veteran heavy chariots ready to pounce like the wolf upon the fold, to use an apt analogy. Bevan ordered a general retreat before this could happen!

The situation just before the end. Imagine the Egyptian chariots you can see at the top of the picture are no more, and my heavy chariots have swung round to flank the Egyptian line. The other Egyptian chariots are out of shot off to the right somewhere.

Game Two

For game two, I took the Egyptians. I deployed my chariots in a long line across the centre of the battlefield with my infantry in columns on either side. My plan was to advance together, shoot the enemy with my bows, and then have the infantry curl in from either side as he chased my evading light chariots.

Lure them into the centre, curl in from the sides.

What can I say except for the fact that it almost worked!

This was a terrific game that went on right to the point where both sides had only three victory coins left each. Both sides lost their camps, and both sides had many chances to finally polish the enemy off. In the end, Bevan gained the advantage, finishing me off by killing my last chariot unit with general attached.

My deployment was good, but I didn’t quite manage the infantry-curl-rounds correctly, being a little late on both sides i.e. I’d use this tactic again, but get the infantry into action a bit sooner.

Brilliant game, though!

Pharoah and the Shardana Royal Guard go into action

Robert Avery

FK&P AAR: Widbrooke Common Replayed

I had a chance to re-play the Widbrooke Common ECW scenario using For King & Parliament. I posted a long AAR from the first game so will limit myself to describing a couple of highlights this time.

wid1.JPG

For those who haven’t read the first report, the battle involves a Parliamentarian force emerging from a road through hedges to engage a Royalist force waiting for them on the other side of the eponymous common.

The game played in quite a similar way to last time, with both sides’ cavalry on the Parliamentarian right flank (i.e. right side in the picture above) coming together a few turns before the infantry met in the centre.

Once again, the Parliamentarian Dutch horse won the encounter overall, but lost a unit to pursuit. The other, however, crashed in to the left side of the Royalist infantry line in what turned out to be the coup de grace.

One unit of Royalist cavalry did break through, and went on to wipe out the Parliamentarian dragoons despite the fact that the latter were in cover behind a sizeable hedge. The Cavaliers then also disappeared off the battlefield: again showing how effective cavalry are in FK&P…but only once!

Another interesting incident was the way that the Royalist cavalry managed to bottle up the Parliamentarian reinforcements in a field. Ultimately, it didn’t have any effect on the result of the battle, but interesting anyway.

So another Parliamentarian victory, and it’s on to the battle for Pinkney’s Court next time.

IABSM AAR: Ost Front 1944

Another great little game from Julian Whippy and friends, taken from the IABSM Facebook Group.

Its the Eastern Front in 1944. The Bagramyans drive to the coast of Lithuania with 5th Guards Tank Army, colliding with Gross Deutschland and 551 Volksgrenadiers. The Russians had to clear the railway station and blow up the railway line with engineers before a train arrived in Turn 10.

Click on the pic below to see all.

FK&P AAR: Widbrooke Common

With lockdown easing, K. (daughter #1’s boyfriend, trapped with us for the duration, now a keen wargamer) was able to travel back to his native Ireland, so it was with a heavy heart that I took the news that he was going to visit his mother for three weeks. This was serious stuff: who was going to do the cooking and, obviously more importantly, who was I going to wargame with?

We decided to see him off with the next For King & Parliament English Civil War scenario in my North Wessex campaign.

For this encounter, the Parliamentarians under Sir Christopher Grey have discovered that the well-drilled and armed Royalist foot that did them so much damage last battle have been requisitioned by the King and sent to fight further west. This leaves Sir John Boulters, Royalist commander around Maidenhythe, very short of infantry: he must now rely on hastily recruited farmworkers from the Cookham area. Sir Christopher now leads his men towards Maidenhythe, seeking to take advantage of his erstwhile friend’s shortage of good quality foot. Grey’s men are strengthened both by reinforcements and a supply of arms and ammunition, including a couple of cannon. The two forces will meet half way between Cookham and Maidenhythe, at Widbrooke Common.

The set-up from the Parliamentarian side

And from the Royalist side

The Royalists have their back to a small splash-across stream. They have brigades of seasoned horse on either flank, and their untried, pike-heavv foot in the centre. Finally, they have a Forlorn Hope in the farmhouse on the right hand side of the field.

The Royalist infantry (the smoke markers represent an Untried unit yet to test for first-time nerves)

The Parliamentarians are just coming on to the common from the farmland immediately south of Cookham. Their Dutch horse has secured their right flank, half their foot is busy deploying in the centre, with the other half still in the process of arriving on the left flank. Their cannon have set up on or near the road: the common looks a bit soft for the guns!

The Parliamentarian Horse

The Parliamentarian Centre

The Battle Begins

One unit of Parliamentarian horse advanced forward quickly, the other two inexplicably lagging behind. This advanced unit was met by the three squadrons of Cavalier cavalry, also advancing strongly. In the resultant clash, the Parliamentarian horse was swept from the field, but one unit of Royalist horse had been lost, and another had set off in hot pursuit of their fleeing foe.

Note that the lost Parliamentarian cavalry squadron was my newly painted Dutch Horse unit, thus proving the adage that a unit never performs well on its first outing on the tabletop!

Meanwhile, the Royalist infantry advanced forward strongly, and the Parliamentarian foot on the left flank joined battle with the Royalist Forlorn Hope in the farmhouse.

Opening Stages

The main action continued with the cavalry. The pursuing Royalists ran over the Parliamentarian Dragoons, who had inexplicably pushed their way through the hedge in front of them rather than hiding behind it. This left the Royalists still in pursuit, jumping the hedge themselves as they headed off table to the Roundhead rear.

“That Be a big hedge, Jethro!”

Meanwhile, the other Parliamentarian horse had finally worked out how to get their steeds to go forward, and crashed in to the other remaining Royalist squadron. Honours were even in this fight, with each side losing a squadron, but that left one unit of Roundhead cavalry in a superb position behind the main Royalist infantry line.

Big problem for the Royalists!

Fortunately the Royalists had a reserve in the form of Sir John himself at the head of his Cuirassier Bodyguard. As the two infantry lines came together, Sir John led his loyal lobsters forward: outnumbered two-to-one.

This was actually an epic encounter, as Sir Christopher Grey was also at the head of his Cavalerie. The two commanders were therefore leading their horse directly against each other!

This proved a good move tactically, but a disaster for Sir John himself: seriously wounded in the clash that followed, he was carried from field, close to death, his Cuirassiers fleeing around him pursued by the Roundhead cavalry. History, unfortunately, does not record whether the two former friends actually met each other in the melee.

Worse was to follow. Although on the other side of the field the other Royalist horse had managed to flank charge a battalia of Untried Parliamentarian militia, the boys from Medmenham proved a tough nut to crack: quite frankly refusing to break no matter what the Royalists did.

The first flank charge goes in!

And worse! In the centre, the Untried Royalist foot wavered at the sight of the Roundhead foot in front of them, doubtless also unnerved by the fall of Sir John. Gradually the Royalist line began to bow backwards, and then suddenly broke: all victory coins gone. The Roundheads had won the day!

Just before the Royalist line broke

Aftermath

A great battle, and a suitable victory for K. as he heads off home.

The Untried Royalist foot proved no match for the seasoned Parliamentarian battalia, but it was really the two cavalry actions that decided the day. On the Royalist left, honours proved even with both sides losing the same number of units, but the Royalist horse left the field in pursuit whereas the Roundheads managed to rally and found themselves nicely behind the Cavalier line. On the Royalist right, the cavalry should have KO’d at least one of the infantry battalia they hit in the flank, but just couldn’t quite break them: they breed them tough in Medmenham.

But it was the wounding of Sir John and the dispatch of his Bodyguard that really did for the Royalists. It was an encounter that could have gone either way - a small but veteran Cuirassier unit versus a much larger but less protected Dutch horse squadron - but, as it was, the clash, and therefore the battle as a whole, went to Parliament.

Robert Avery

Two More Games of TTS

It’s back to the living room for another couple of games of To The Strongest against K.: daughter #1’s boyfriend, trapped with us for the duration of lockdown. K. is becoming a seasoned wargamer now: into double figures with battles over the lockdown period and, as we began our games, victor in three out of our last four encounters.

“How is your Sarmatian coming along?”

In fact, so veteran is he that for this game, rather than just saying that he didn’t mind which army he played, K. very emphatically said that he’s like to play the Sarmatians again: the army he’d had so much success with last time. That was fine by me: I proxie my Sassanid Persians as Sarmatians, with the cataphracts representing veteran Sarmations and the Clibinarii standing in for the regular chaps.

A solid wall of lancers!

I, on the other hand, would take my beloved Ancient Britons, now quite a different army since the list changed the chariot force from being lights to being normal troops…it was time for the Ancient British Panzer Division to take to the field once more!

Four of my six warbands

I did still have some lights, javelin-armed horsemen and slingers, and was determined to try and use them as well as some of my other opponents i.e. manoeuvring around the battlefield like Billy Whiz, constantly nipping at flanks and rear.

“Come and have a go if you think you’re hard enough!”

Our first game was the sort of grinding encounter that typicalises battles where one or both sides are full of deep units. I couldn’t kill his veteran lancers, he was having difficulty breaking my deep warbands. I did manage to get my light horse attacking the flanks and rear of various Sarmatian units, but to no effect whatsoever!

The Ancient Britons head for the rough ground

Chariots kept back as a mobile reserve/exploitation force

In the end, however, it was lights that won the day for me. A unit of light infantry slingers found themselves out of ammunition and in the middle of the battlefield. They spent a bit of time desperately trying not to be noticed by the Sarmatians, a tactic that succeeded to the extent that one lancer unit, already disordered, strayed within flank charge range. In went the slingers and KO’d the Sarmatian cavalry. This left them a few squares from the rear of another Sarmatian cavalry unit. Their blood was obviously up, as a couple of high activation cards allowed me to charge them as well…and then take them out, relieving K. of the last of his victory coins. The slingers had won the day!

Game 2

As the distaff side of things had taken the evil pooch (squatter in my wargames room!) out for a walk, we swapped sides for a second battle.

One thing I noticed immediately was what a lot of Ancient Britons there were: ‘fousands of them to be inexact!

From the other side: there are an awful lot of hairy-arsed barbarians to kill!

This turned out, however, not to matter at all, as the game ended up being very much a walkover in my favour. The Ancient Brits came on in a slightly crooked line, which allowed me to target individual units with my bow fire. This was, as usual, quite ineffectual, but the odd Disorders I did achieve gave me an extra advantage in the melees that followed.

I did have a scare early on when one of my non-Veteran brigade generals was killed by a slingshot, but, once battle was joined in the centre, my veteran units killed the warbands in front of them, punching a huge hole in the British line.

The British line begins to crumble

Not only did this cost K. a lot of victory coins, but it also left the way open to his camp: worth another three coins. In the end, however, I didn’t even need that: I had kept my left and right flanks back whilst my centre went in, now I sent them forward as well, aiming all the time at his weaker units. This tactic proved successful, and suddenly K. had no coins left. Looking at the tabletop, we both realised that I hadn’t actually lost a unit: just one very unfortunate general. Total victory was mine.

Big Hole in the middle of the Ancient British line

Aftermath

A great afternoon’s gaming, and a chance for me to pull two games back against K. Tomorrow is Father’s Day, so I’ve booked another couple of games for then, but more on that in a future post…

Robert Avery

Two Games of TTS...

…which almost never happened?

Why? I hear you ask. What could keep the man from his beloved wargaming?

An intruder, that’s what: an alien beast that has taken up residence in my wargaming room.

When I agreed that the family could get a dog, I made it clear that I wanted a good-sized, rough ‘n’ ready working dog. As you can see, I got exactly what I wanted. She’s a pedigree too, and one who delights in the name Irma Daydream Belle-ever, or Bella for short.

But back to wargaming…and with the space where my tables go filled with all sorts of doggy paraphernalia, I had to de-camp to the sitting room and go To The Strongest rather than my intended I Ain’t Been Shot, Mum.

With everything having to be shipped into the room as opposed to being immediately available , I decided to try my reconstructed 100YW English army: mounted knights, dismounted knights, longbows and billmen. K. would take the Sarmatians: neatly proxied by the Sassanid Persians.

For the first game, I made the classic “new army” mistake and forgot to consider how the army acted historically. As I’d rather foolishly put my cannon into the same brigade as the mounted knights, I placed them in the centre of the table, with battles consisting of a mix of dismounted knights, longbows and billmen on the flanks.

The Sarmatians took the initiative, swept forward, and basically defeated each battle as three separate encounters. Yes, I had plenty of missile-armed troops, but I just couldn’t get the concentration of fire I needed to halt the enemy heavy cavalry, who then swept in and lance-d my troops to death.

A foolish deployment!

I had learnt my lesson for game two, and set up in the traditional “Agincourt” fashion: archers in the middle, with the two battles next to each other for mutual support, with the melee troops on the flanks, and my mounted knights grouped on one side for a decisive flank attack.

This worked much better. As the Sarmatians advanced somewhat unevenly, I was able to target each unit in turn, hammering them with bow and cannon fire. By the time they had reached my line, they were already down three units, and natural attrition in melee, even on a one-for-one basis, gave me the victory, especially as the cannon had neatly taken the head off one of his generals!

A couple of good games (despite the change of location!) and a valuable lesson re-learnt: go historical with your tactics!

IABSM AAR: The Defence of Wulkow

Another brilliant 6mm I Ain’t Been Shot, Mum battle report from Mark Luther, this time featuring action in 1945.

On the 16th of April 1945 the Soviet army unleashed its last offensive against the German Reich. The bridgeheads over the Oder River split asunder and spewed forth red infantry and armor which forged forward to take Berlin. Although by this late stage in the war the German army was on its knees, it had a strong defensive position on the Seelow heights and gave a good account of itself, selling each meter of the Reich dearly.

Click on the picture below to see all:

IABSM AAR: Slaughter at Izdeshkovo!

Back to sanity after all this pike and shot malarkey with a quick game of I Ain’t Been Shot, Mum.

I’d decided to play through the Vyazma or Bust! early war eastern front campaign with K., Daughter #1’s boyfriend: trapped with us for the duration, but now an avid wargamer. I was looking forward to this game, especially as K. had been happy to let me have the Soviets.

Unfortunately, it was to be one of those games where the dice gods had utterly deserted me: even K., nascent gamer that he is, commented on the fact that I couldn’t roll a five or six to save my life: he even mentioned it later when I rolled double six whilst playing Monopoly (I won that one at least, bankrupting K. in the process!).

Click on the picture below to see my humiliation!

FK&P AAR: The Attack on Marlowe Again

Having written the scenario and got the table all set up, it seemed a shame not to play the Attack on Marlowe battle again, but this time swapping sides.

A full background to the game can be found in my original battle report (where I played the attacking Royalists), so here’s a summary and photographic report of the second run through (where I played the defending Parliamentarians).

This was a very different affair to our last game, as we both had a better idea of how things worked.

It was a grinding clash which, once my horse had returned from their pursuit off table, really came down to a whoever loses the next unit loses the game situation.

As it happened, that was me!

A great game, and I’m really looking forward to writing and playing the next scenario in the series.

FK&P AAR: The Attack on Marlowe

Now that I had enough figures to field two decent sized English Civil War armies, it was time to get them onto the tabletop.

As I didn’t have enough of the right sort of figures for any of the published scenarios, I settled down to write my own and, just in case long-term inspiration struck, came up with the background for a potential campaign.

The Background

It’s the fictional county of North Wessex sometime in the middle of 1644. Two landowners, previously great friends, have found themselves on opposite sides in the war. Passionate discussions over dinners have turned into bitter arguments have turned into armed dispute!

On the Royalist side is Sir John Boulters, whose series of mills around the town of Maidenhythe provide a ready source of troops. With a commission from the King to restore order in the area, Boulters’ force is balanced and well-equipped.

kavan’s foot

On the Parliamentarian side, Sir Christopher Grey has a less balanced force more suited to defence than attack: he is short on horse, but does have plenty of foot . Sir Christopher’s troops are…well, old-fashioned is a phrase that suits: what horse he has fights in the Dutch style rather than the more progressive Swedish formations, and his infantry are pike-heavy. He has, however, received reinforcements from London: a brigade of commanded shot.

The Battlefield

Key to control over North Wessex is control of the bridges over the Thames: one at Maidenhythe, and one at Marlowe. Boulters already holds Maidenhythe, and has determined to force his former friend to operate north of the river only by taking Marlowe as well.

Approaching from the east, his scouts report that the Parliamentarians are drawn up just in front of the outskirts of Marlowe, obviously determined to do battle.

The battlefield from the Parliamentarian side

The Royalists

As has already been mentioned, Boulters’ Royalists are a balanced force drawn up in three brigades.

the royalists

Stafferton’s Right wing Horse Brigade (Boulters and his lifeguard in the background)

Sir William Ray’s central foot brigade

Colonel Derek Derrick’s left wing horse brigade

The Parliamentarians

Drawn up with defence initially in mind, the Parliamentarian forces under Sir Christopher Grey await them.

dutch horse and dismounted dragoons on the left wing

the foreigners from london in the centre

pike heavy battalia on the right wing

More Shots of the Troops, Now With Markers Down

The Battle Begins

As the sun rose over Marlowe, the two sides prepared to do battle:

view from the right flank

The Royalists opened proceedings by advancing all three of their brigades. Assuming that the Parliamentarians would stay fairly static in their defence, their plan was to control the centre as each wing swept around the enemy flank.

They were therefore somewhat surprised when a Parliamentarian Forlorn Hope left its blocking position on the road and charged towards where Sir Boulters sat surveying the field behind his cuirassier lifeguard. Boulters had obviously forgotten Nicholas Seymour’s daughter, but it seems that Nicholas Seymour had not!

Faced with such paltry opposition, Sir John ordered his lifeguard to charge. Well, it was either that or face an ignominious withdrawal before the action had even begun!

It was no contest: the cuirassiers literally rode over the Parliamentarian Forlorn Hope, leaving Seymour coughing his lifeblood into the muddy ground.

seymour’s demise

Unfortunately, a charge like that cannot easily be stopped, and Boulters and his cuirassiers completely lost control: charging forward right up to the battalia of enemy commanded shot sheltering behind a hedgerow.

this looks like a good way to lose your commanding general!

Meanwhile, the Parliamentarian Dutch horse and Dragoons moved forward and a general melee broke out. Much to my surprise, the Dragoons initially repulsed the untried Nicholson’s Horse attack, sending their charge back disordered.

Nicholson’s Horse were, however, made of stern stuff, and with their commander shouting what can only be described as vile imprecations they closed with the Dragoons again, this time sending them flying from the field.

General Melee

General Melee

In the other part of the melee, however, the 1st Grey’s Cavalerie swept Stafferton’s horse from the field, then set off in pursuit of the broken survivors.

This, however, led them vulnerable to a flank charge from the Royalist Braywicke horse, a small Swedish-style unit raised and led by Simon Braywicke, a landowner on the western edge of Maidenhythe.

our flank charge must surely win the day!

Unfortunately, the charge had no effect on the Parliamentarian horse: they ignored Braywicke and his men and disappeared off east after the remains of Stafferton’s men.

Ed.’s Note: I think we did that bit wrong. The Cavalerie should have stopped their pursuit and turned to fight the Royalists.

This reverse left Braywicke a bit surprised, but his surprise only lasted long enough for his men to be hit by the 2nd Grey’s Cavalerie squadron: hit and smashed from the field!

perhaps not!

Meanwhile…

Meanwhile, on the other side of the field, the Parliamentarian foot had formed a line, and were nervously watching Royalist cavalry start to threaten their flank.

This they countered by sending one of the Kavan’s foot battalia forward to meet the nearest enemy cavalry squadron, and turning another to face the threat on their flank.

At the same time, the Londoner commanded shot units in a surprising display of martial fervor, left the shelter of their hedgerows and moved forward to bring the enemy under fire.

martial fervor from the londoners!

Although the Royalist cuirassiers chose to fall back, the 1st Maidenhythe Foot Battalia lowered their pikes and sent the foreigners scurrying back to (presumably) the slums that they had come from.

This coincided with the two last remaining horse units on that flank - Nicholson’s Horse for the Royalists and 2nd Grey’s Cavalerie for the Parliamentarians - coming together with a mighty smash: both squadrons becoming disordered. They clashed again, and although Colonel Stafferton was lightly wounded, the Royalists eventually won the encounter.

Perhaps due to the impetuosity of the Londoners, this flank had been decided firmly in favour of the Royalists. They had lost only two squadrons of cavalry, but had done for five enemy units: two Forlorn Hope, one Dutch Horse and one Commanded Shot.

Back to the Other Flank

Back on the other side of the field, the 1st Battalia of Kavan’s Foot were still holding off the Derrick’s Horse, and had managed to inflict a light wound on Colonel Derrick himself.

Pike Heavy Foot versus Swedish Horse

In the centre, however, the Royalist foot was pushing forward, and had made the start of the enclosures in front of the town.

The way into marlowe is now clear!

This enabled one Battalia to bring the Parliamentarian foot under fire, meaning that the Roundhead’s days were probably numbered.

the Mill Workers Coming to Colonel Derrick’s assistance

Meanwhile, the 3rd Battalia of Kavan’s Foot had been solidly repulsing charge after charge from the Woodhurst Horse. Although at one stage they were double-disordered, they actually managed to rally back to good order, and were obviously going to be very hard to shift.

Endgame

Looking at the battlefield, however, it was obvious that the Royalists had won the day. All that remained of the Parliamentarians were two battalia of Kavan’s foot on the right flank, and one of the Londoner commanded shot units in the centre. There was a squadron of Dutch horse floating somewhere off-table, but there was no sign of it returning just yet.

the situation at the end of the battle

The game had probably been decided by the impetuosity of the Parliamentarians. Time and time again their troops left the comparative safety of the hedgerows and charged into close range or contact with the Royalists.

As this was only the second time I’d played the rules, I’m not sure I got everything right, but it seemed to give a very good game anyway.

Next we shall swap sides and play this game the other way around, and after that I shall be designing an encounter where both sides get a consignment of artillery.

Excellent fun, and another good lockdown battle!

Robert Avery

IABSM AAR: Lille Revisited

Still on lockdown, but it’s bank holiday Monday so it must be time for another game of I Ain’t Been Shot Mum against K, Daughter #1’s boyfriend, trapped with us for the duration, but rapidly becoming a regular wargamer with, now, eight games under his belt.

The premise for today’s game is simple: it’s France 1940, and Rommel’s Germans are advancing rapidly on Lille, aiming for the village of Lomme, whose capture will seal off the escape route of all English and French forces in the area. The Allies have realised what the Germans are up to, and have dispatched a small force to hold Lomme for as long as possible. The scene is set for an epic clash!

Click on the picture below to see what happened:

IABNM AAR: OML3 Afternoon Game

I’ve finished another unit of Marian Romans (pictures after they are varnished) so am just wondering what to paint next.

Choices are to do another unit of Dutch horse for my ECW collection, start on the third unit of Marian Romans, search the lead mountain for inspiration, or start something new.

I know I have to resist starting something new (!) so opened the cupboard where I put everything that I want to paint but not just now…and there, at the front, was the new kit just bought from Battlefront during their lockdown sales from their Team Yankee range.

Tempting, but I really shouldn’t, so in the meantime I thought I’d give us all a bit of inspiration by resurrecting another battle report from Nick’s Maxim to Milan website charting the now moribund development of I Ain’t Been Nuked Mum: a version of IABSM for cold war Europe.

This was the afternoon game from the third Operation Market Larden Lardy Day in Evesham. Click on the pic below to see all:

Meanwhile I’m back doing what I should be doing: more Marian Romans!

IABSM AAR: Minsk-Mazowiecki

Another lockdown game of I Ain’t Been Shot, Mum against Daughter #1’s boyfriend, K, trapped with us for the duration.

This time we would be returning to Poland in 1939, using scenario #37 from the second September War scenario pack: Minsk-Mazowiecki. The action takes place on 13th September as Polish cavalry under General Wladyslaw Anders attempt to break through elements of the German 3rd Army as they march on Modlin.

Click on the picture below to see all:

IABSM AAR: Lockdown Game

Here’s a quick series of pictures from Rick Staple taken from the IABSM Facebook page.

It’s lockdown: so a quick joint/solo game of IABSM:

IABSM AAR: Border Clash with Borduria

Here’s another battle report from James Manto’s excellent blog Rabbits in my Basement.

For this game, James has expanded his Medieval and 18th Century Imaginations concept to the post-WW2 period, with an epic clash across the fictional border between Mantovia (huzzah!) and Borduria (boo, hiss!) set in 1949.

Click on the link above or the image below to see James’ picture-heavy write-up: