TTS AAR: Classical Indians versus Akkadians

Having played Kavan using the Akkadians versus his Classical Indians, we decided to swap sides and play the game the other way round.

The Akkadians were outscouted, and set up in a long line of men holding sharp pointy sticks, placing their veteran battle carts on their left/my right. I matched their infantry with my own, but put all my chariots and cavalry on my left. My plan was to hold my infantry back, giving them as long as possible to shoot their longbows, whilst I outflanked and won the battle with my mounted troops on the left.

Initially, this actually worked very well indeed. On the left, my chariots and horse neatly swung out a bit and headed past the end of his line at a rapid rate of knots.

This allowed me to send one unit of chariots towards his camp, and the other into the flank of his right-hand infantry.

Surely this was the game sown up…but, no, the Gods laughed and shuffled the deck, and the lone Akkadian spear unit at the end of his line snapped round neatly and disposed of my (previously outflanking) chariots without much difficulty!

This was disappointing, but his camp was still about to fall:

Meanwhile, on my right, his battle carts and infantry had finally reached my line and were dashing themselves against it.

This was actually quite worrying as although my javelinmen can hold their own in hand to hand combat, my longbowmen have a tendency to crumble really quickly.

Fortunately, the Akkadians assaulted the longbowmen piecemeal, so my three units of archers could concentrate their fire and pincushion the most forward enemy unit each turn. This meant that they tended to hit my line disordered, which really evened things up.

Moreover, my javelinmen were up on a hill, and resolutely refused to give way no matter what. Here’s a pictorial account of events on that wing:

So the left wing was doing well, but hadn’t won the game for me; and my right wing was holding, but under pressure. I would now have to win the game in the centre, and that was where I had my elephants and the elite Maiden Guard.

In they went as fast as a charging pachyderm, and nothing could stand before them!

Well, that’s a slight exaggeration, but with the cavalry on the left now free to assist, and the right wing just about won, the elephants did provide the coup de grace needed to take the last of Kavan’s victory medals.

A glorious victory for the Classical Indians!

TTS AAR: Akkadians versus Classical Indians

Time for a game of To The Strongest: I would take the Akkadians (the new, ‘slim-line’ version from the latest army lists) and Kavan would use a Classical Indian army of the Republican variety.

My plan was to act almost purely defensively: luring the Indians forward onto the tips of my spears. My only offensive move would be to send my heavy chariots forward on the left to try and get around the Indian right flank.

Everything went almost to plan, as the Indian javelinmen, chariots, elephants and cavalry hurled themselves forward without the first on the list even bothering with their extra longbows. To cut a long story short, they impaled themselves on the Akkadian line, and the game was won pretty easily.

Chronological pictures of the game appear below, but it’s worth mentioning why I said “almost” above. My heavy chariots did indeed thunder forward on the left most impressively, but then ran into bother facing a couple of raw units of Indian javelinmen. I sent some Household Infantry to help, and they got into trouble as well!

Unbelievably, the only thing that saved the day was the unit of Nim skirmishers in the rough ground (the unit with the die with ‘1’ on it in the picture above) who not only resisted every attempt of the Indian javelinmen to evict them from said rough ground, but went on to use their javelins to wipe them out as well!

Their success held my left flank together and allowed me to win the battle in the centre and on the right.

So a relatively workmanlike victory for the Akkadians. Here are the pics:

One thing to note: figures for both sides come from the Museum Miniatures CAD-designed Z ranges: highly recommended.

FK&P AAR: Cossacks & Transylvanians versus Muscovites

After the Cossacks got so badly hammered last time out against a Muscovite army, it was time to reinforce them with some Transylvanians: the Cossacks would provide the war wagons and foot, the Transylvanians some fairly decent cavalry.

The Muscovites were, again, mostly Sons of Boyars or Reiter cavalry supported by two small brigades of infantry.

View from behind the Muscovite line

Muscovites

Transylvanians & Cossacks

Muscovite Reiters

Elite Transylvanian Cavalry

As the battle began, both sides advanced forward smartly, with the terrain meaning that the game divided into three sectors: my left flank, the centre and my right flank.

On My Left

On my left, some scummy looking Border Guards had appeared in front of me: the perfect target for the Transylvanians!

Apparently not, as rather than running over them like a badly dressed speedbump, my horsemen got impaled on their pikes. This flank then turned into an uneasy stalemate as horse and foot units milled around charging each other with little effect. The battle would be decided elsewhere!

On the Right Flank

On my right flank, I had some Transylvanian Enlisted Light Cavalry supported by two Haiduk units sheltering in the woods.

The plan was to send the light cavalry forward to soften up the three units of Reiters coming towards me so that the Haiduks could wipe them out from safe amongst the trees.

This did not work: the light horse were swept away almost immediately, and then the Haiduks were charged from the flanks and front and, despite the bonuses for being in cover, were swept away as well. The final unit of Haiduks did hold out for some turns, but eventually succumbed, leaving my centre now vulnerable to flank attacks.

Meanwhile in the Centre…

Meanwhile in the centre, the main body of Muscovite Reiters steamed towards my line: a mixed line of raw Moloitsy short-pike-and-shot and tabor war wagons.

My tabor fired valiantly away with both their light guns and musketry, but because I only had two of them rather than my usual four, I couldn’t get the concentrated fire I needed to halt the enemy Reiters heading towards me.

The Moloitsy were charged and gave way, leaving the tabor as islands of resistance amongst a swirling sea of Muscovite horsemen.

By this stage, I was also getting very short of victory medals…

The End

As my right wing collapsed, the loss of one unit too many caused my army as a whole to collapse: the Muscovites had won the day!

This wasn’t a hammering, I hasten to add: the Muscovites had been losing units as well, but it the Cossacks and Transylvanians who crumbled first!

Another great game, through, even if the Muscovites are currently proving unstoppable!

FK&P AAR: Cossacks vs Muscovites

Time to get my new Muscovites onto the tabletop and into action, with their opponents being the Zaphorogian Cossacks. Russians verses Ukrainians: who would have thought!

I played the Cossacks, daughter #1’s boyfriend, Kavan, played the Muscovites. The rules used were For King & Parliament with the Eastern Front adaptations taken from the Tales from a Wargaming Shed website.

This turned out to be a fast and furious battle with what seemed like an endless wave of Muscovite horse crashing onto the Cossack tabor and infantry.

Here a gallery of the set up so that you can see the two sides:

The battle opened with a brigade of Muscovite Reiters thundering forward on the Cossack right flank, held by a brigade of Moloitsy and Registered Cossacks. The cards were with Kavan, with a couple of consecutive “10’s” ensuring that he actually charged home on his first turn!

The rapid charge had, however, obviously exhausted his cavalrymen, as they bounced backwards from the Cossack infantry, losing one squadron in the process.

The Muscovites also advanced another brigade of Reiters on my left flank, but not as fast, so I sent my Tartar allies out to deal with them whilst I advanced the tabor forward and prepared to deploy.

I almost came a cropper at this point, as his Reiters were once again quick off the mark, and hit one of my tabor wagons before it had a chance to deploy. Fortunately, I managed to survive the charge, but there was definitely now a weak point in my line!

Even worse, my Tatar Nobles (the best troops I had) had obviously been bribed by the Muscovites, as they left the table, along with some of their horse archers, without achieving anything!

I was now in quite serious danger of being outflanked on the left!

Fortunately I had a reserve brigade of infantry that I could deploy to face this threat, and the battle became a series of Muscovite assault on a fortress of Cossack tabor. Again and again, the Reiters and elite National Cavalry charged home, and again and again the Cossack line held.

My artillery was overrun, two of the tabor wagons were overrun, my Registered Cossacks on the right were wavering, but still we held, and the relentless assaults were costing the Muscovites dearly.

Kavan also wasn’t helped by a run of bad cards, including what you can see in the last picture, above: an absolute dead-cert winning flank charge on the reserve unit holding my left flank foiled by a couple of Aces drawn in a row.

This gave me the chance to get the last remaining unit of Tatars in on his flank and, finally, the Muscovites had had enough and retreated. A very narrow escape for the Cossacks!

It had been a terrific game, with everything coming right down to the wire. I had lost half my army, but had just managed to hold on long enough to get the win. Roll on the next game!

IABSM AAR: All American #03: La Fiere II

Great write up of a game of I Ain’t Been Shot, Mum from the keyboards of Dan Albrecht and Shane Waley.

Dan used a modified version of the third scenario from the All American scenario pack, along with a modified version of IABSM using Derek Hodge’s command card activation system.

Click on the pic below to see all:

IABSM AAR: Capturing Rauray

Earlier this year, at the Lardy Games Day Operation Market Lardon, I played in a very enjoyable game of I Ain’t Been Shot Mum run by Phil and Jenny.

The game involved elements of 2. SS Panzer-Division Das Reich and 9. SS Panzer-Division Hohenstaufen attempting to recapture the town of Rauray in Normandy from the 1st Battalion Tyneside Scottish. Noddy and I played the British against some very skilful German opposition.

The game had actually been playtested several times, and here’s an AAR from one of those playtests from the excellent Bleaseworld blog.

Click on the picture, below, to see all:

AoE AAR: Heilsberg

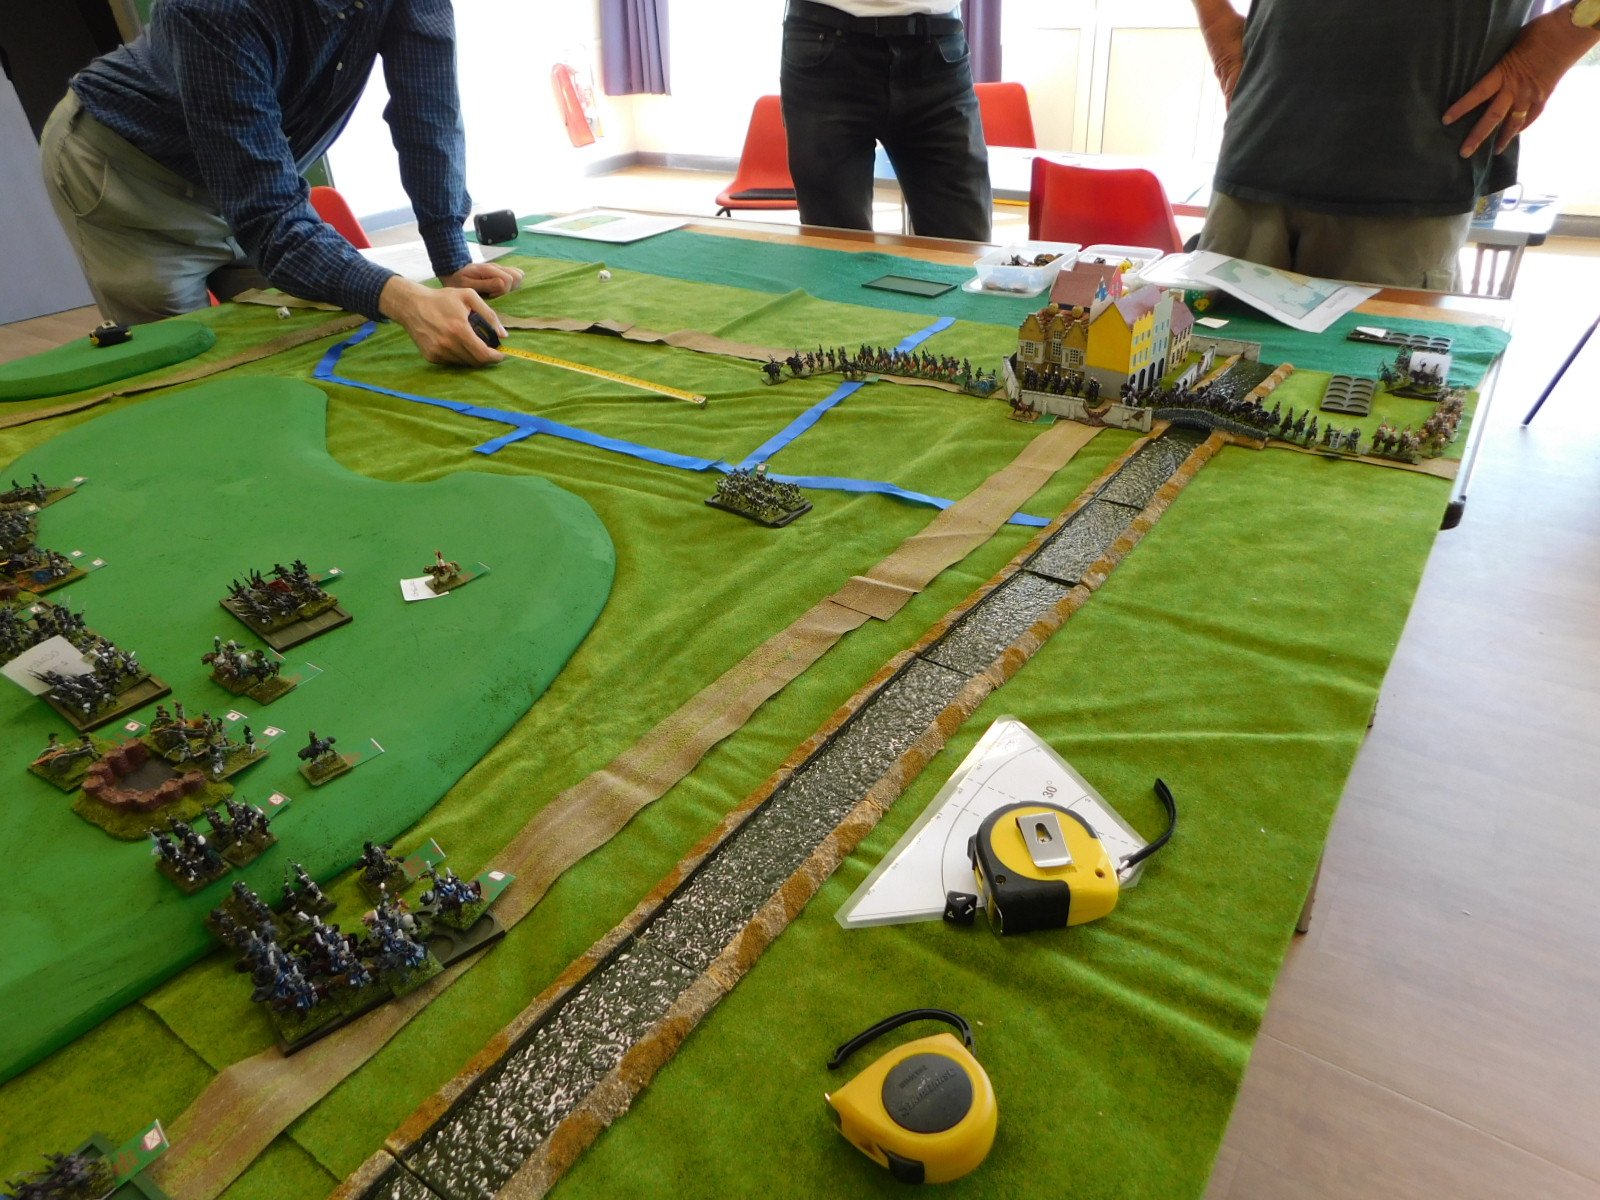
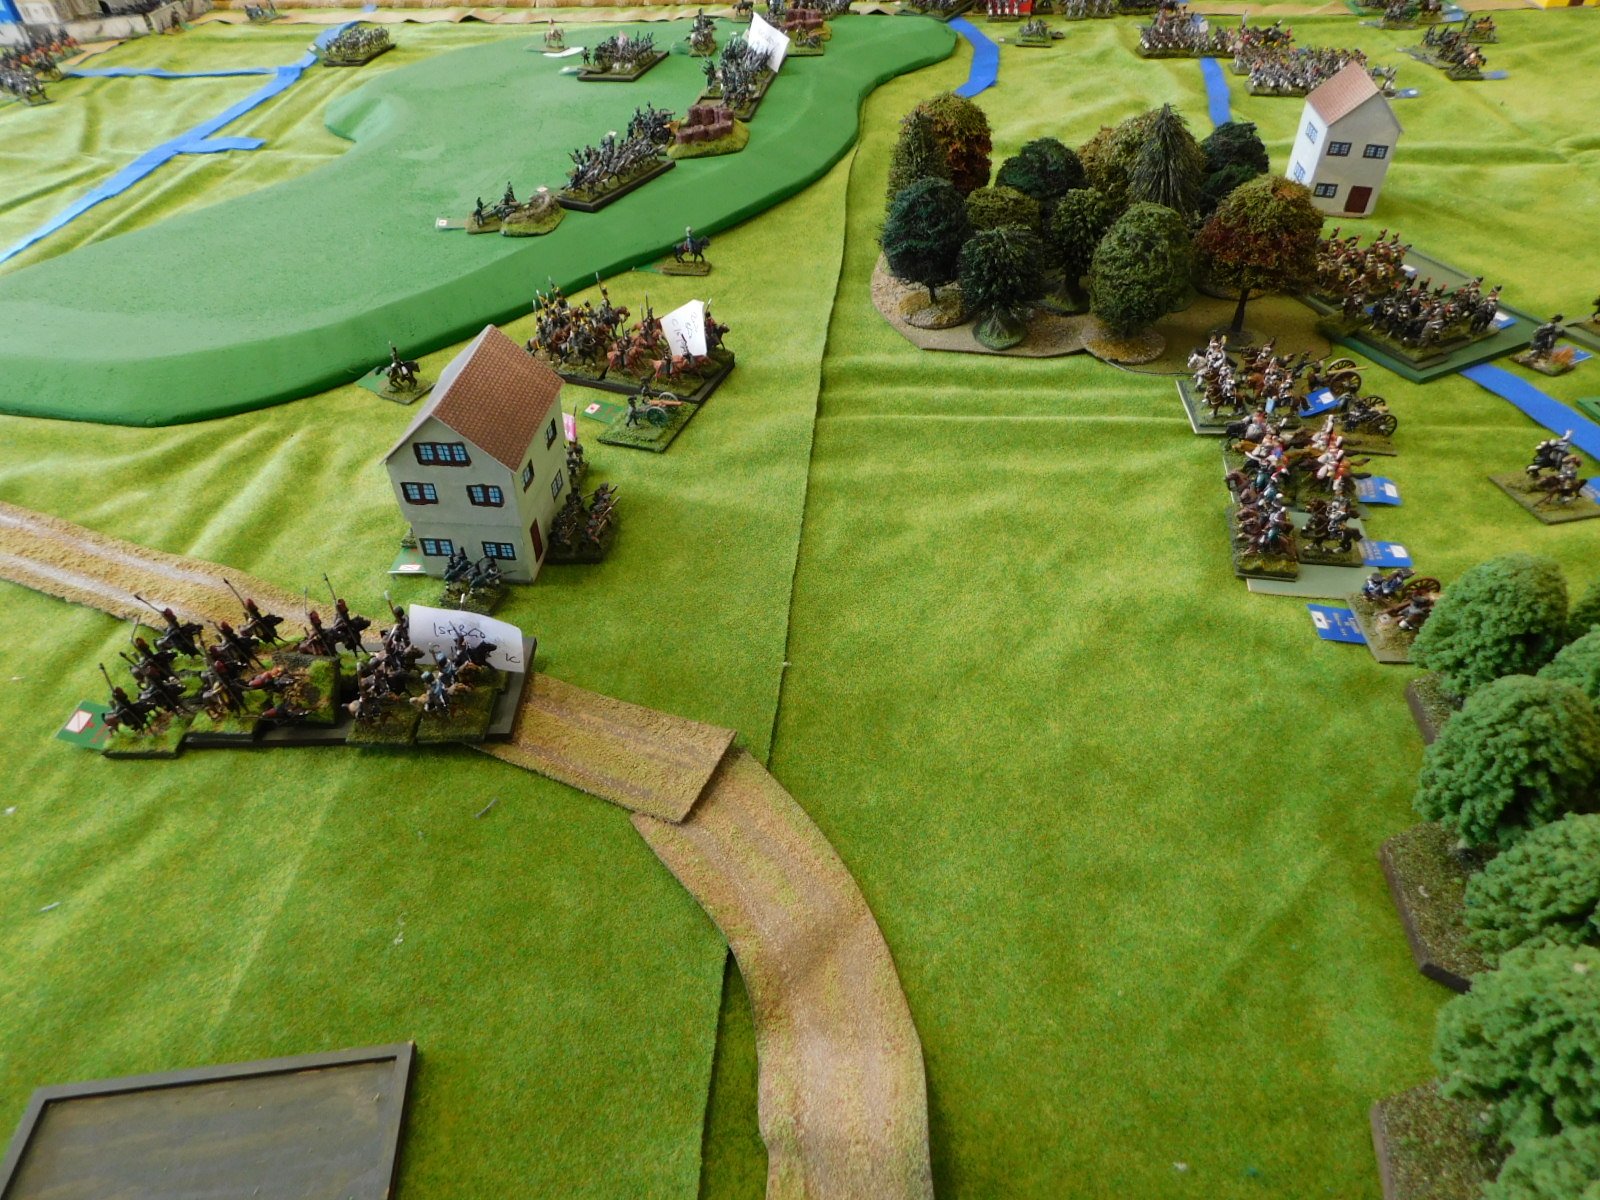
A couple of weeks ago it was over to Benson to play in a huge re-fight of the Napoleonic battle of Heilsberg.

From Wikipedia:

On 24 May 1807, the Siege of Danzig ended when Prussian General Friedrich Adolf, Count von Kalckreuth capitulated to French Marshal François Joseph Lefebvre. This gave Napoleon the opportunity to engage the Russian forces led by Levin August von Bennigsen. On 2 June, before Napoleon could act, Bennigsen ordered his columns to converge on Marshal Michel Ney's exposed VI Corps. Outnumbered by 63,000 to 17,000, Ney fought a rear guard action at the Battle of Guttstadt-Deppen on 5 and 6 June. Though he lost his baggage train, two guns, and 2,042 men, Ney managed to escape to the southwest over the Pasłęka (Passarge) River with the bulk of his soldiers.

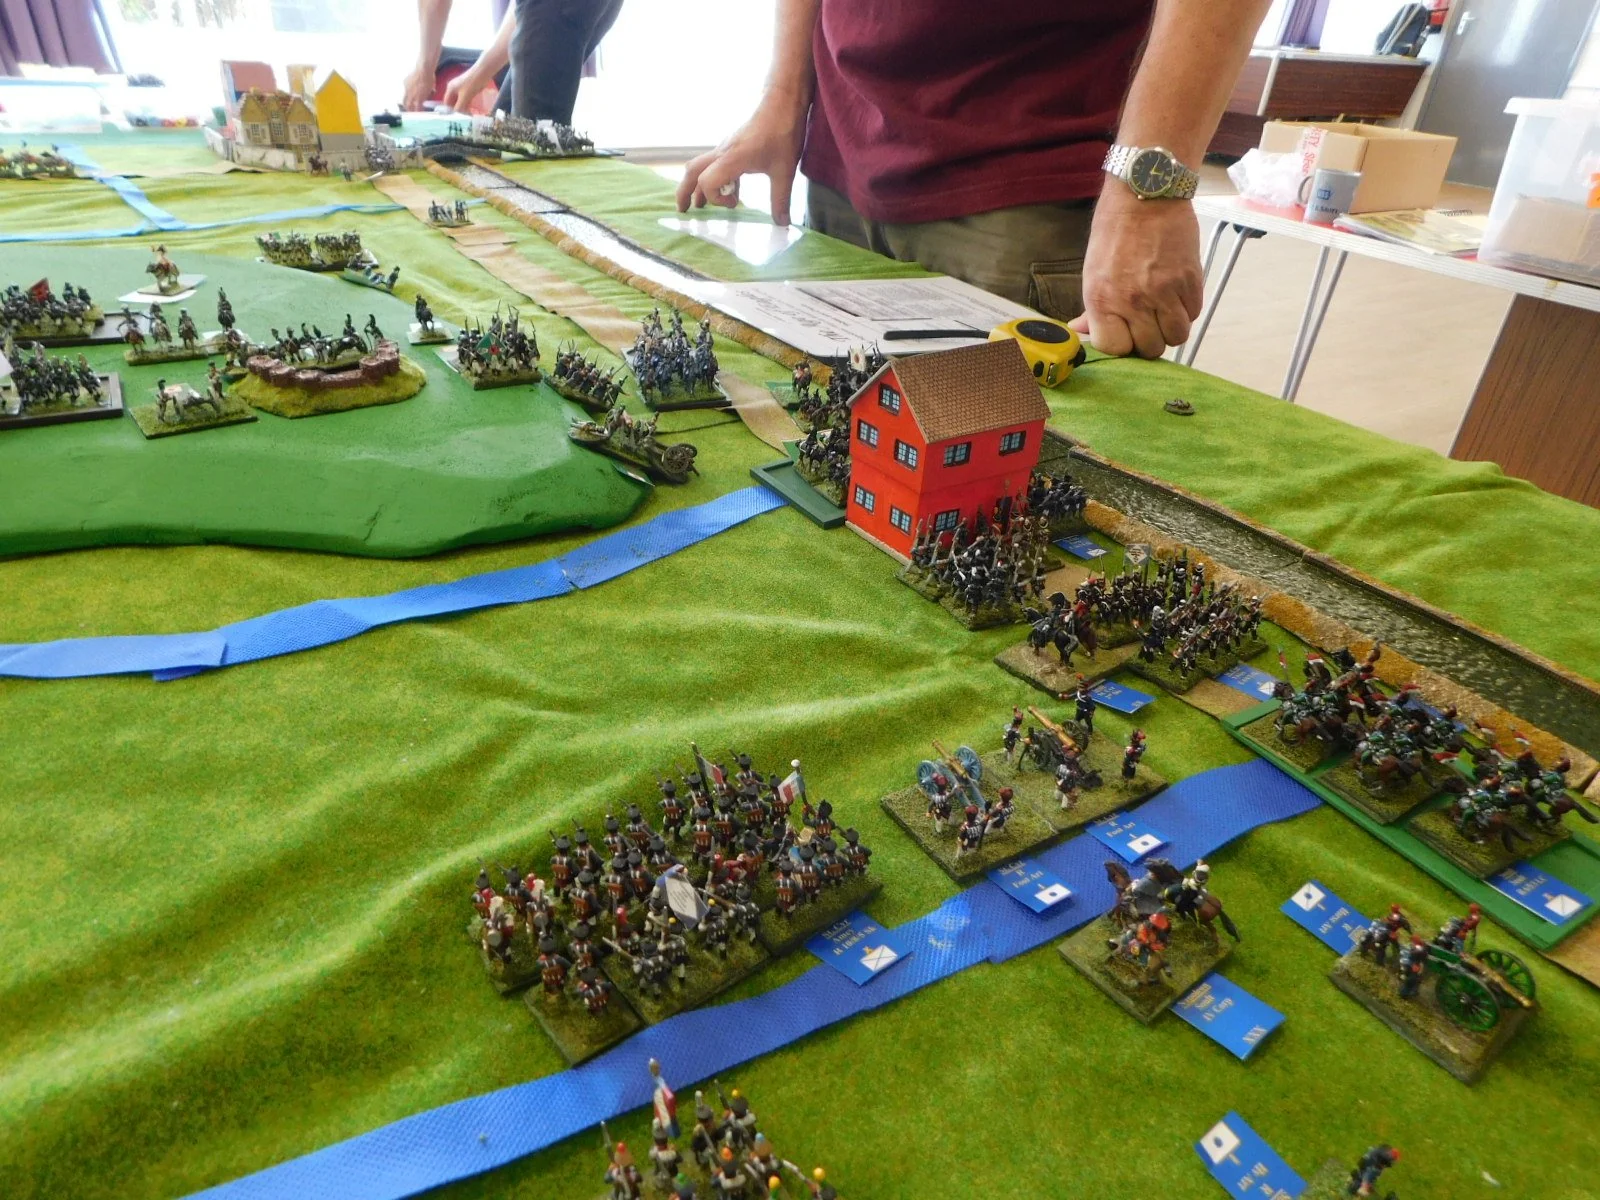
Within two days, Napoleon had ordered his 190,000-man army to close in on the 100,000 Russians and 15,000 Prussians. Aware of their approach, Bennigsen ordered his troops to fall back on Lidzbark Warmiński ("Heilsberg" in German). The Russian army took up strong defensive positions around the town, which stood on the Łyna (Alle) River. The French army, under Marshals Murat and Lannes, attacked on 10 June. Bennigsen repelled several attacks, resulting in huge French casualties, but had to withdraw towards Friedland the following day. Four days later, the decisive Battle of Friedland occurred, ending the War of the Fourth Coalition with the passing of the Treaty of Tilsit.

And about the battle itself:

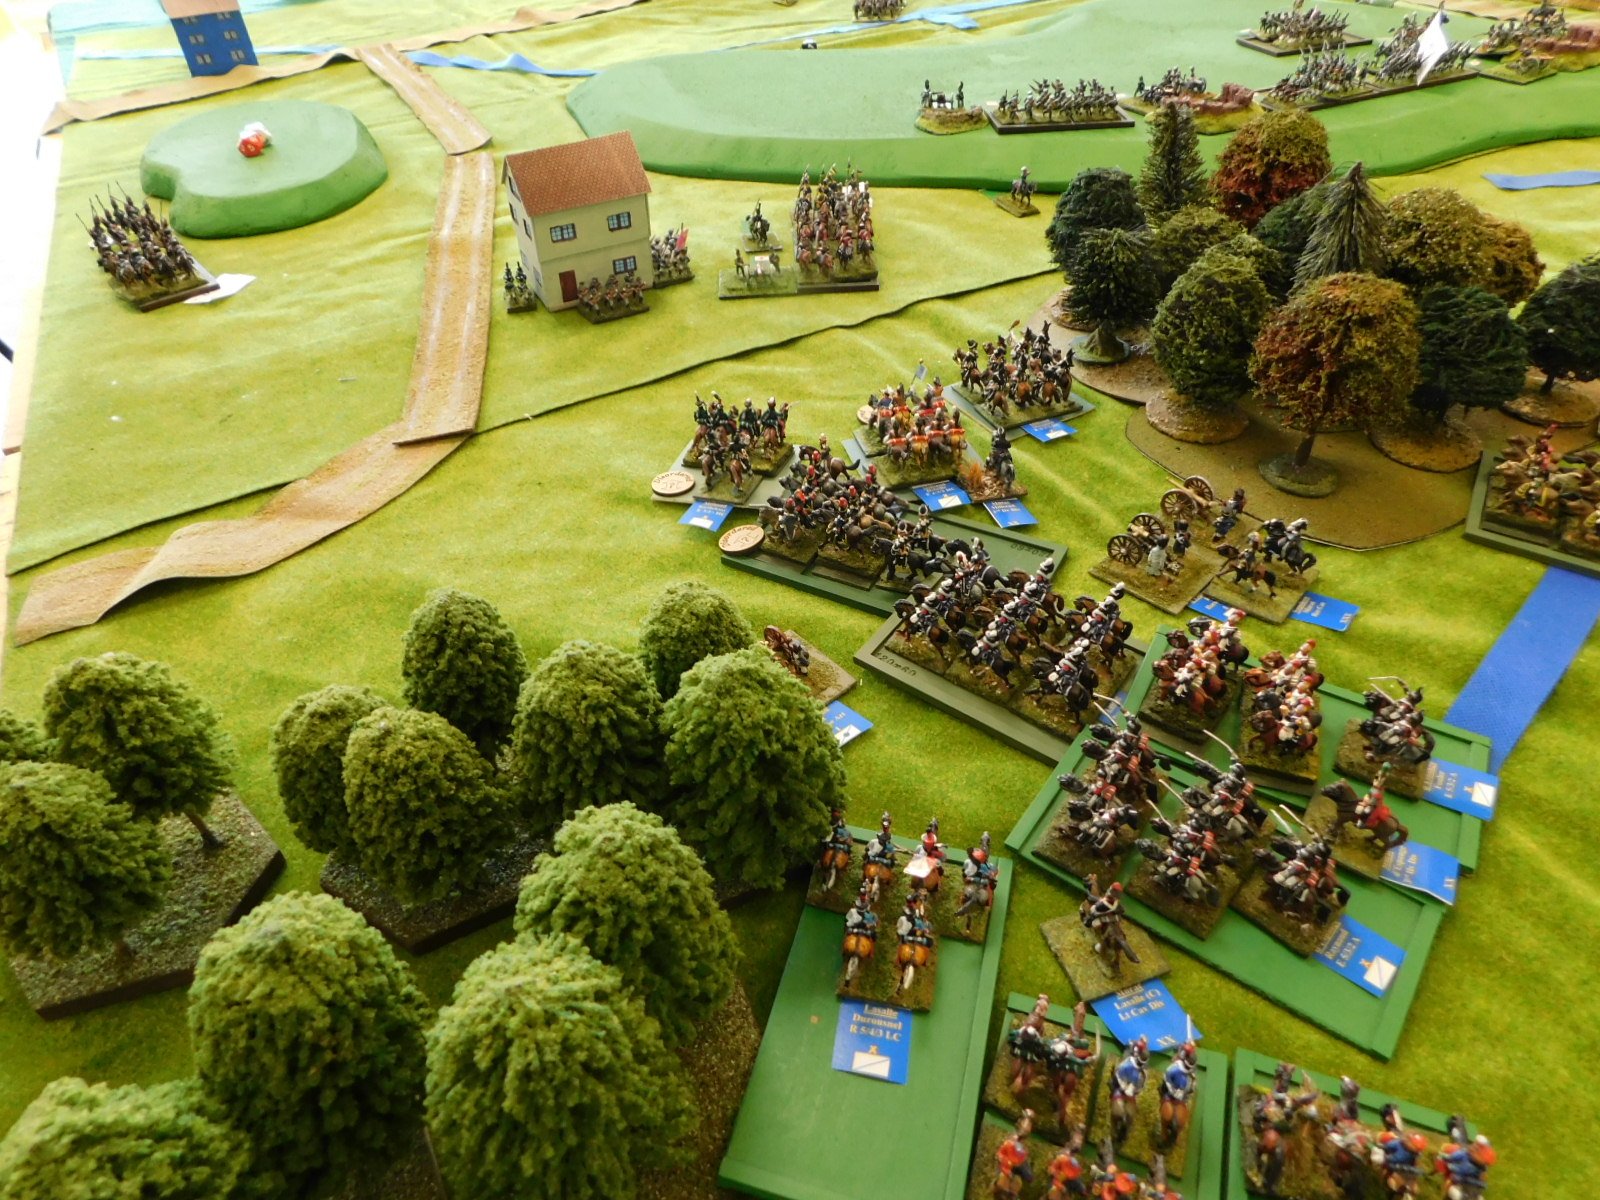
The French cavalry under Joachim Murat was selected to lead the frontal attack, but Napoleon did not arrive on the field in person until Murat had already led a disastrous charge. Marshal Mortier and Marshal Davout advanced on the Königsberg side. Soult and Lannes, leading separate cavalry units, and Ney, with the infantry, moved forwards on both sides of the River Łyna. These smaller units proved ineffective, especially when Prussian reinforcements arrived, sent by Anton Wilhelm von L'Estocq at Bennigsen's request. Lannes made an unsuccessful attack which cost the French 3,000 casualties. On the Russian side, Bennigsen was suffering from fever and had difficulty remaining in command.

On 11 June, the substantial casualties on both sides and the success of the Russian defence gave Bennigsen and Napoleon little choice but to call an undocumented truce to end hostilities. The French had lost an estimated 12,000 men. The truce was focused primarily on the recovery of wounded soldiers. The battle ended with medics and soldiers from both sides helping the wounded and retrieving the dead. When Napoleon entered the deserted Russian positions the following day, he found that all except the wounded had been evacuated overnight.

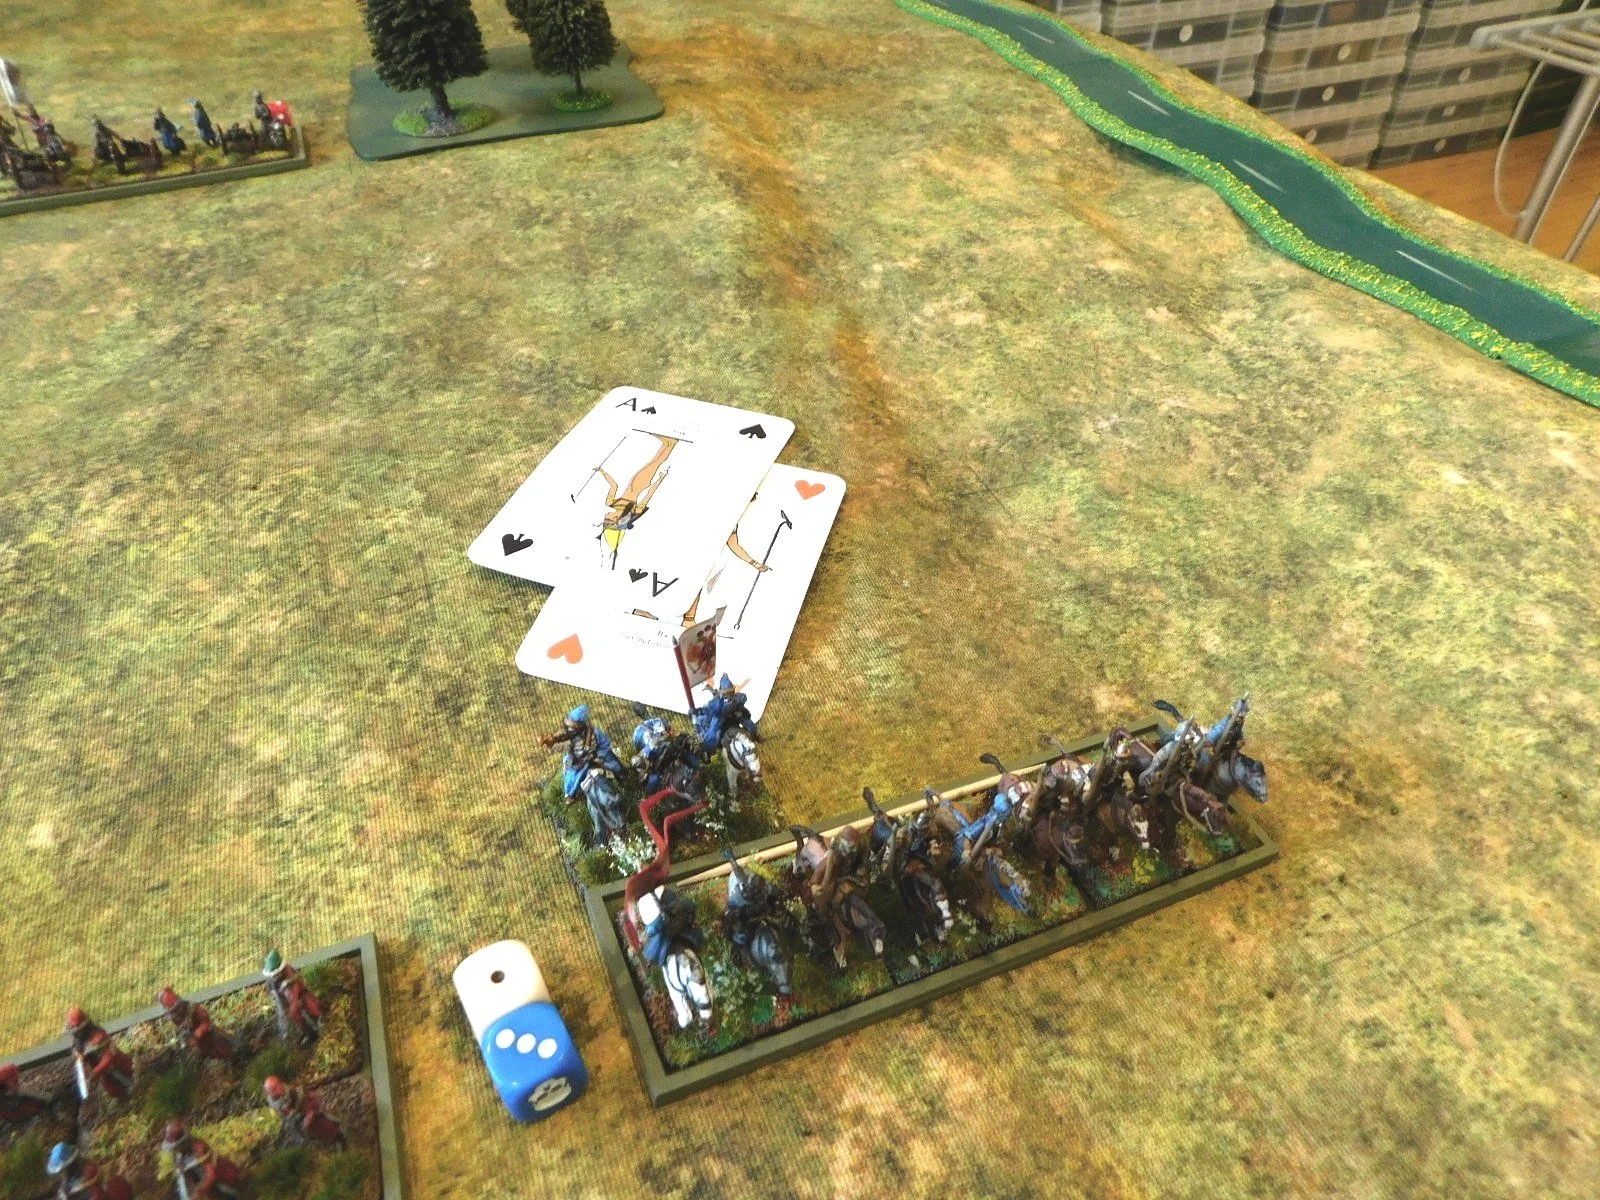
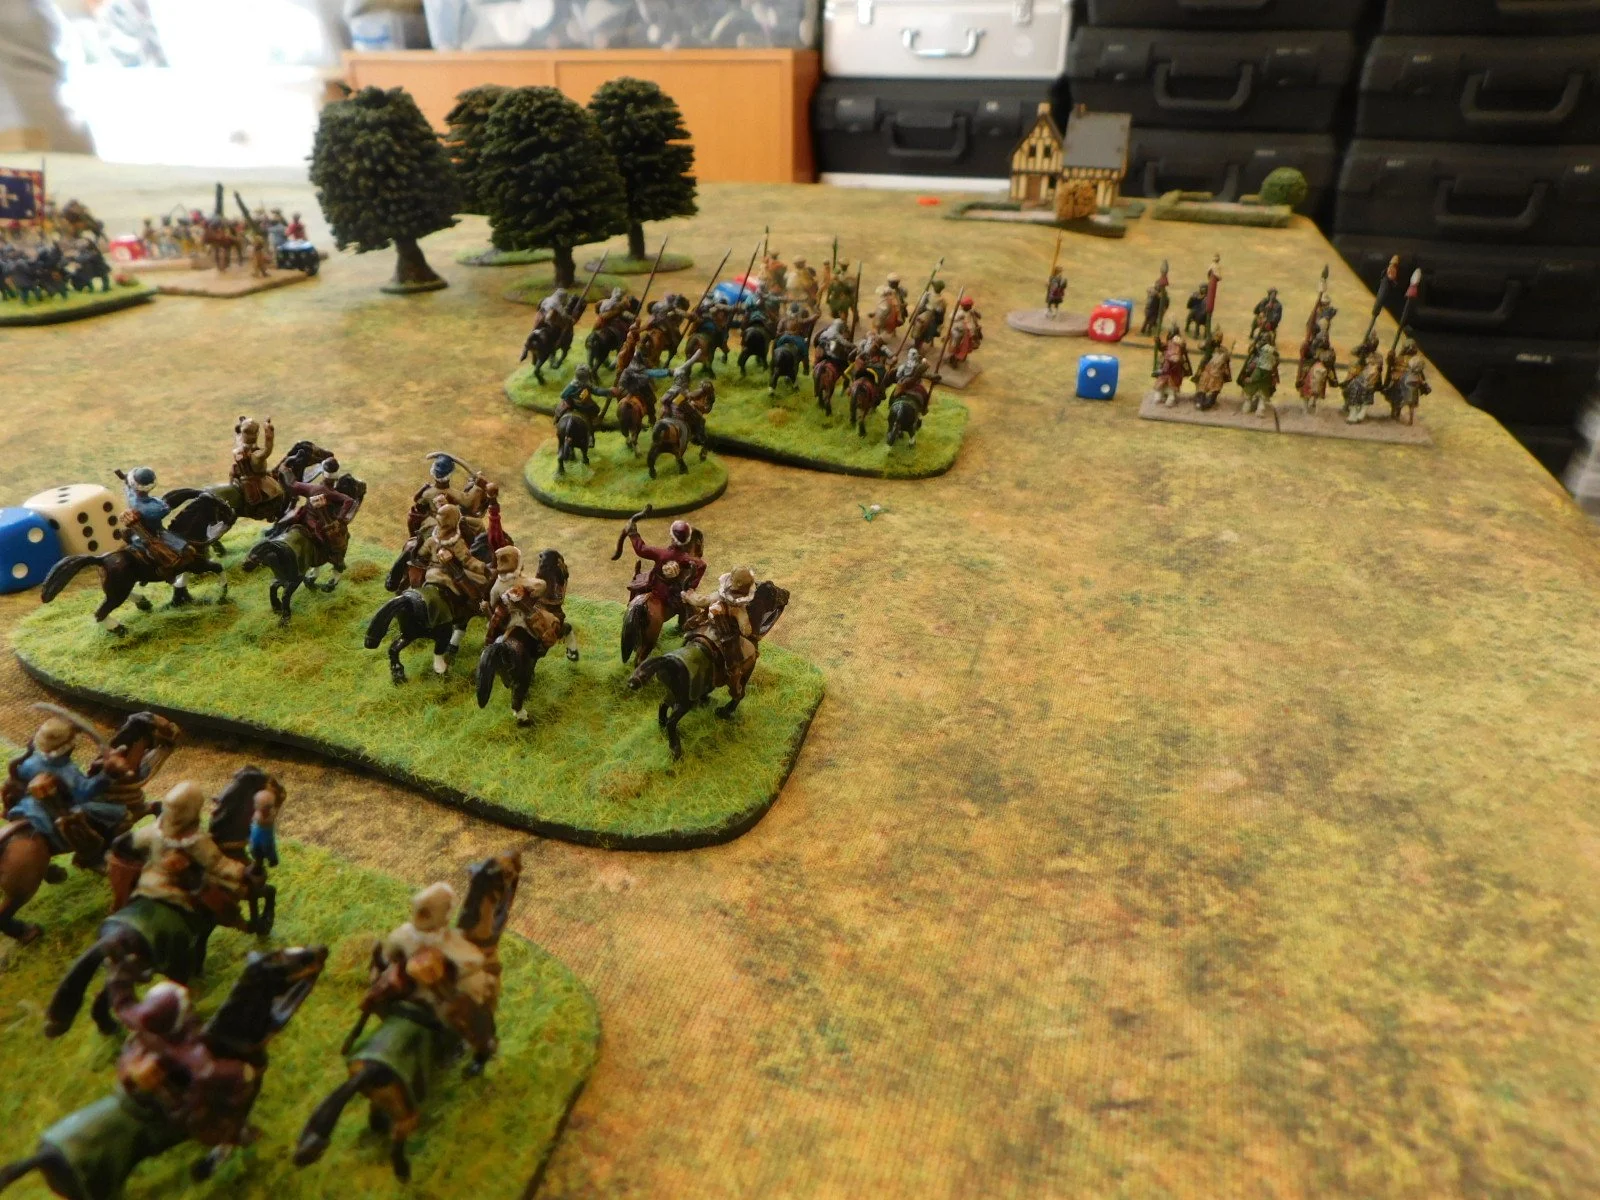
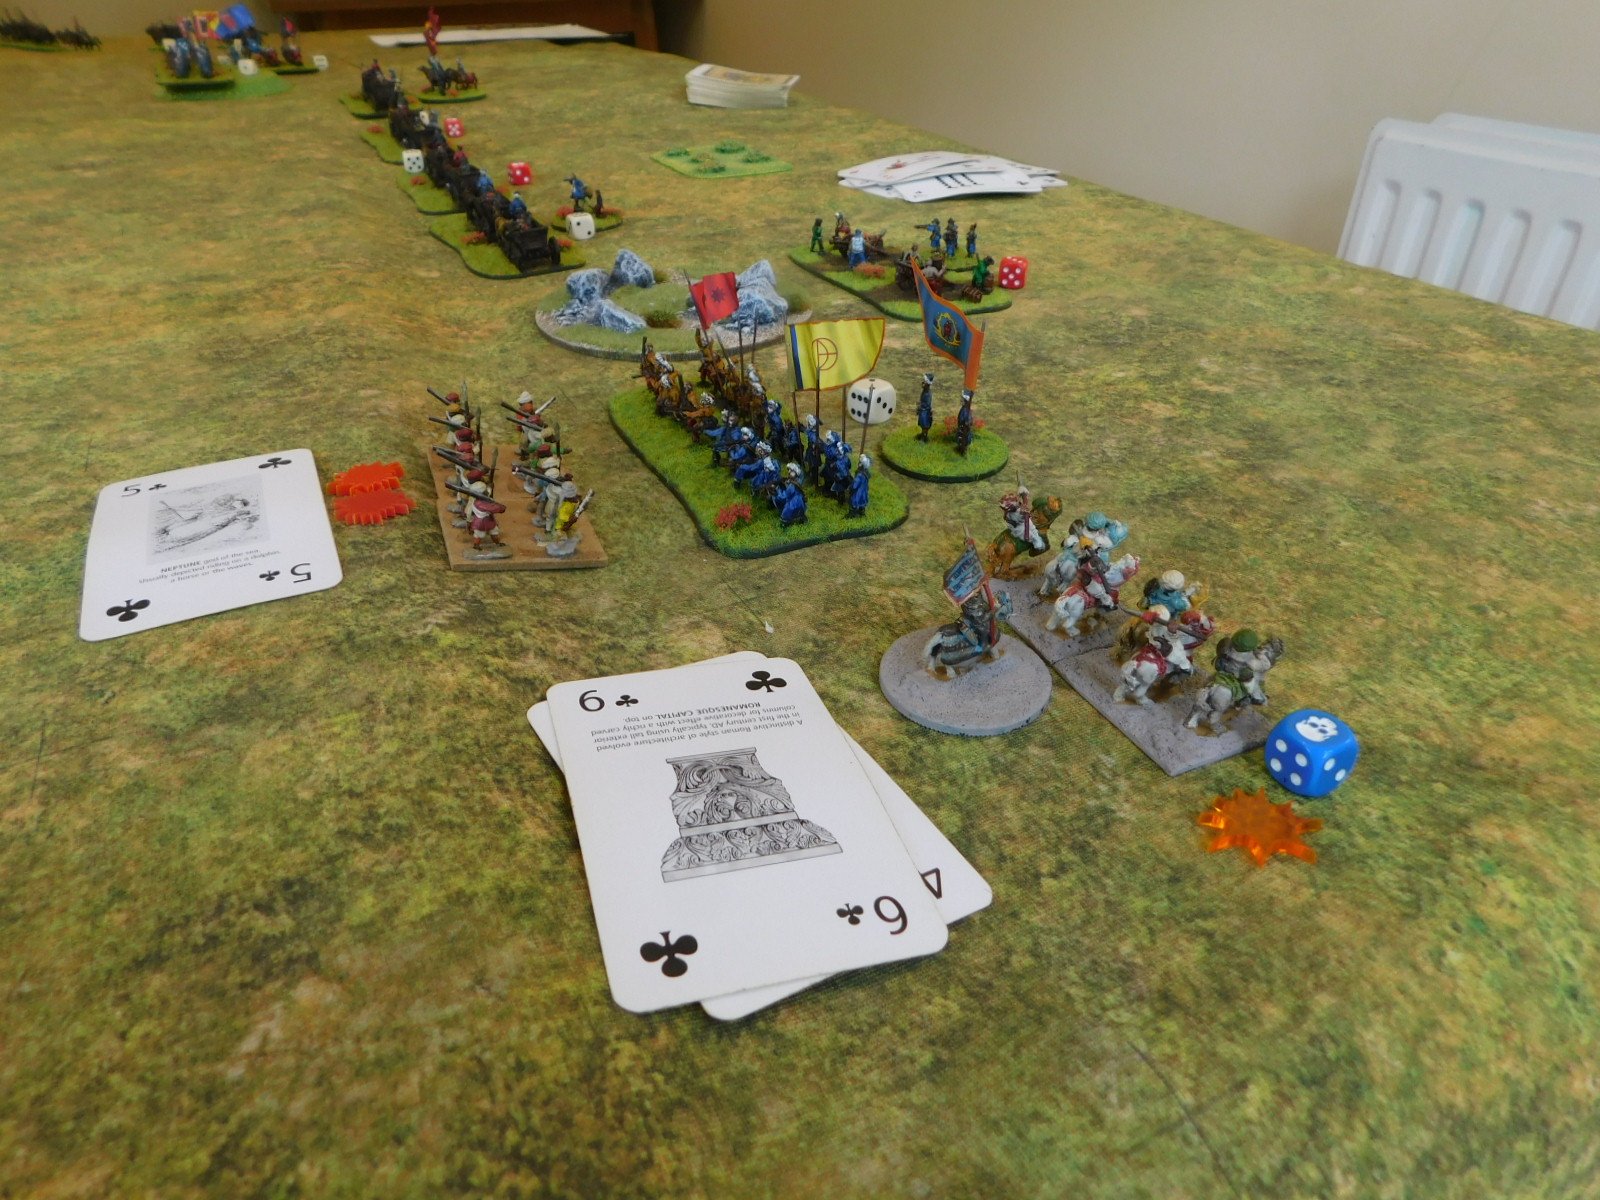
I would play Murat, commander of the French cavalry, with Anon and Mark leading the French infantry. The Russians would be played by Edward and John. We also had two referees (and the architects behind the game): Bevan on the French side and Dave on the Russian side. The rules used were Age of Eagles.

The French cavalry corps, with me as Murat commanding, arrive on the edge of the table. Our objective is the town that you can just see top right.

I knew that historically Murat had just thundered forward and charged up the slope at the waiting Russians. I also knew that that hadn’t worked, so my aim (and orders from our Napoleon) was to head to the left and try and get through the gap in the ridge past the trees with the house in front of them.

I duly headed off in that direction as fast as I could, but my troops quickly got a bit strung out. The Lights were okay, but the Heavies were having none of this fast-moving malarky!

Meanwhile, the Russians pulled back so all their troops were on the ridge and our infantry started to arrive on table.

The Russians were waiting for me with two strong (well, large) units of Cossacks and a battery of guns, so rather than recklessly trying to force the gap with the Lights, I waited until my Heavies actually deigned to arrive.

Meanwhile, the Russians were receiving reinforcements.

Time to earn my spurs! I brought the Heavies up along with my Horse Artillery and thundered through the gap, with the enemy Cossacks counter-charging my advancing cavalry.

I didn’t smash the Cossacks from the table - their large sotnias absorbing a lot of the impetus from my smaller but much better quality units - but definitely pushed them back, allowing me to start to pour through the gap.

Meanwhile, the French infantry was advancing forwards as fast as possible, and fighting had broken out around the village on the Russian left. This benighted place would change hands several times before finally falling to the French.

The Russian reinforcements were still streaming towards the fighting!

As the French infantry continued to pour forward, I kept the pressure up on the Cossacks and the regular cavalry that had begun to arrive to reinforce them.

By now, battle was becoming general across the whole of the front of the ridge.

On my side of the table, my cavalry were now definitely starting to push the Russian horse backwards, even with their reinforcements, and were starting to push forward onto the ridge itself: the flank of the Russian infantry beckoned, and I even managed to overrun a Russian artillery piece in its redoubt.

The French infantry were also getting well stuck in, and the Russians were gradually being pushed back all along their line.

This was not an easy fight, I hasten to add. French casualties were mounting up, and the action was a see-saw backwards and forwards rather than a steady advance from the French. My cavalry were facing a lot of fresh Russian regular horse and I was having to attack in surges: charge and get disordered, hopefully survive enemy actions, re-order and charge in again…but the enemy were definitely starting to crumble under our relentless assault!

What finally broke the Russian horse were a series of flank charges: my smaller units being much more manoeuvrable than his massive columns.

With my cavalry now dominant on the left side of the ridge, and my horse artillery on the way, and the Russian infantry in the centre starting to crumble, it was looking deadly serious for the Russians.

The clock was ticking, however, and we had to end the game there having fought 16 of the 23 turns that the scenario allowed.

So, who had won?

Well the French were definitely winning, and had secured two of their four objectives: the river line in front of the ridge and the ridge itself. They had also inflicted 41% casualties on the Russians whilst taking approximately half that themselves. Admittedly they technically only had seven turns to secure the riverline behind the ridge (that would have been very, very do-able) but taking the town, with its infantry defenders would have been very tough to do indeed within that time limit.

In the end, the referees ruled that extreme Russian casualties would have meant that their army abandoned both the field and the town, giving victory to the French. Huzzah!

It is, however, only fair to mention that the Russians disagreed vehemently with this interpretation of the result: claiming that they would have quite happily holed up in the town and waited for nightfall and the technical end of the action, giving them the victory despite their enormous casualties and loss of 75% of their objectives. I leave it up to you, dear reader, to decide who was right!

I was quite relieved to have done better than my historical counterpart, and was pleased with the way I had forced the Russian right flank.

The Age of Eagles rules give a good, fast-moving game, although I find the fact that you’re always rolling one die for a test or combat rather than two makes things uncomfortably random: there’s no normal distribution with just one die, and the fact that it’s a D10 gives you a nine point variance in result…it’s just that bit too random for me.

My thanks to all involved, but especially to Dave and Bevan who organised and ran the game. Perhaps a last word from one of the Russian commanders…

Really good to see some of you on Saturday, and big thanks for such a fun day and battle. The Russian right flank (which was weakly defended) took a pounding from some very skillfully handled French cavalry…but I think if we'd strengthened the flank from the start, the French infantry would have cleared the central high ground even quicker than they did. Even though we lost, I really enjoyed playing the Russians…an excellent defence over such a long period.


If you enjoyed reading this post, please add Vis Lardica to your list of favourites or, even better, to the list of favourite blogs on your own site.

www.vislardica.com

IABSM AAR: Calais at Britcon 2022

Michael Curtis ran two games of I Ain’t Been Shot, Mum at Britcon this year, ably helped by Phil and Jenny Turner.

This was a truly superb looking game: click on the picture below to see lots of photographs…and to be inspired!


If you enjoyed reading this post, please add Vis Lardica to your list of favourites or, even better, to the list of favourite blogs on your own site.

www.vislardica.com

IABSM AAR: Hungary 1945

It’s heatwave after heatwave at the moment, so Mark Luther attempts to cool us all down with a great game of I Ain’t Been Shot, Mum set in Hungary, 1945.

This was just a quickie scenario setup that wasn't based on a specific historical battle, but was inspired by the German actions to relieve Budapest in early 1945. Mark also wanted to get his Tiger IIs on the board.

Click on the picture below to see all:


If you enjoyed reading this post, please add Vis Lardica to your list of favourites or, even better, to the list of favourite blogs on your own site.

www.vislardica.com

FK&P AAR: Widbrooke Common Again

As Rob had not only come a long way but also beaten me fairly quickly playing The Attack on Marlowe scenario, it seemed only meet and right to have another game…and being logical chaps, we set up the table for the second scenario from Marlowe the Maidenhythe scenario pack: Widbrooke Common.

Scene from behind the Parliamentarian lines

It’s the Royalists on the attack: advancing against the Parliamentarians across the eponymous common. Although Rob had played the Cavaliers in the first game, we got switched around somehow, and now I would take the loyalists into battle against the Roundheads.

The Royalists wasted no time, and marched forward smartly towards the traitors opposite them. One slight worry was that a lot of my infantry were Untried (the yellow markers in the picture below) meaning that the first time they encountered anything battle-ly (were shot at, wanted to shoot, were charged etc) they would have to check their morale

Slightly to the left of centre, the two cavalry lines clashed, with honours really falling to the Roundheads: their bigger ‘Dutch’ units surviving the initial charges of my smaller ‘Swedish’ squadrons and then bashing me up in the melee that followed.

In the event, both sides cavalry effectively cancelled each other out, especially as one of my infantry units was able to turn and blast a Roundhead horse unit in the flank. The battle would end with each sides’ surviving cavalry manoeuvering for advantage in the open ground on my left wing.

Which meant that the battle would be decided in the centre and on my right.

As you can just about see in the picture above, the first thing that I did was to dispose of the Roundhead artillery with my small unit of Cuirassiers. A bit risky, but the cards were with me and the guns were silenced for no loss.

The Cuirassiers then went on to threaten the Roundhead rear, eventually destroying the unit of commanded shot that formed the Parliamentarian reserve.

You can also see, in the picture on the right, that my infantry have moved forward and begun to push back his main line. Here’s a couple of great shots of them going into action:

What isn’t shown in the pictures above, and the reason that victory was eventually mine, is that on the right flank my horse had moved forward and outflanked two Parliamentarian infantry units that were trying to evict a Royalist Forlorn Hope from a small farm building.

Here’s a shot from earlier in the game: the Forlorn Hope would keep the Roundhead infantry distracted for long enough for my horse to turn left and hit them in the flank…which meant that when I broke the infantry in the centre, Rob ran out of Victory Medals and I had won!

It had been a great game, fairly tight right until the end. The initial Roundhead success with the cavalry hadn’t turned into more mainly because his horse pursued my retreating horse for too long, which gave me a chance to re-group what I had left and at least keep him occupied while my infantry moved forward.

The Cuirassiers were, despite their small size, the stars of the game: punching a hole in the enemy line and then disordering the main Roundhead line by violently removing their reserves behind them.

Another great game of FK&P!


If you enjoyed reading this post, please add Vis Lardica to your list of favourites or, even better, to the list of favourite blogs on your own site.

www.vislardica.com

FK&P AAR: The Attack on Marlowe Again

New friend Rob came up for a couple of games of For King & Parliament, a system he was considering but hadn’t played before, so where better to start than the first game from my Marlowe to Maidenhythe scenario pack.

Without going into the detail of why and what for, the Royalists are attacking a Parliamentarian force “dug in” on the approaches to Marlowe. Rob would play the Royalist, I took the Parliamentarians.

Royalists on the left, Roundheads on the right

Here’s a pictorial account of the game:

So a win for the Royalists, and for Rob in his first game.

TTS AAR: Sassanids Win Three Out Of Three

So with Bevan having defeated me twice in quick succession, it was my turn to take the Persians and his to take the Gauls.

Having watched the master at work, I knew that the best tactics were just to get forward as fast as possible, get my horse archers shooting quickety-quick, and charge home with the heavies as soon as I got the opportunity!

The terrain forced the action into three separate channels: the left past the woods, the centre, and the right past the woods.

On the left, two of my heavy units backed up by the elephants faced the Gauls’ three main cavalry units. The heavies quickly chewed through the more likely armed Celts, but the elephants had to divert to protect the rear from a marauding Gallic warband. These Gauls weren’t up to much snuff, however, and the elephants quick sent them packing.

On the other flank, I used another unit of heavies and some horse archers to quickly dispatch his final unit of horse: things weren’t going too badly at all!

Regular readers will know that usually when I say that, it presages an immediate reversal of fortunes and a catastrophic defeat…but not this time.

The two centres clashed, and I scored an immediate success as a unit of veteran clibanarii smashed an enemy warband off the table!

My line wasn’t (unfortunately!) a solid wall of heavy cavalry, so Bevan pushed forward hard at the sections held only by horse archers. These naturally danced backwards, which was fine except for the fact that it meant that the Gallic warbands concerned now had a chance of taking my camps.

One of the good things about having a cavalry army, however, is its ability to move rapidly around the table, including to head backwards to head off travel.

As one of my heavy units headed for the Gallic camp, another headed straight into the rear of one of the warbands threatening my camps. The hit was, as you might imagine, devastating: the warband shattered and I had won the game!

So one game back for me, making the day two for Bevan and one for me…but three-to-nothing for the Sassanids.

This must make them one of the best armies under the To The Strongest system, at least where the battlefield is fairly open. Must be time to re-base the Sassanid infantry as well then!

TTS AAR: Gauls vs Sassanids - the Re-Match

Having been sliced and diced in under and hour in our first game, the Gauls had plenty of time for a re-match against the Sassanids. Bevan and I played the same sides again: me taking the brave and heroic Celtic underdogs again, him taking the Persians.

Both sides set up in a fairly similar fashion as last time, although the Gauls did split their cavalry between the two wings rather than concentrating on just the one.

As the game opened, once again the Sassanids shot forward rapidly, effectively clearing half the battlefield before the poor Celts had even had time to finish their croissants.

Out in front were the two wings of each army, and the first action was therefore clashes on the left and right.

On the left, two units of Celtic horse (the third had hung back for some reason) faced a unit of Sassanid Clibanarii and, led by a Boudicca type in her chariot, smashed the first unit from the field. They then went on to engage a second unit behind and quickly disordered them too. Yes they disordered themselves in the process, but things were certainly looking promising on the left!

On the right, I also achieved what I saw as an advantage: another cavalry unit and some Gaeseti fanatics effectively got the drop on another lot of clibanarii, getting a two-on-one advantage, and although some horse archers had slipped through my line, things looked promising here too.

Meanwhile, in the centre, my main group of warbands had hit the enemy line (a combination of horse archers and heavies) and pushed it back. Okay, the horse archers were evading away rather than being broken, but his camps were soon in sight, and they were worth a lot of victory medals!

Although I had taken some casualties, I was on the cusp of victory: all I had to do was survive the next, Sassanid, turn, and I would presumably finish off one or two enemy units, take his camps, and therefore win the game.

As you may already have been guessing, the salient part of that last paragraph was “all I had to do”!

Although Boudicca survived another round of combat, my infantry units heading for the Sassanid flanks were now hit in the flanks by those horse archers that had danced away from their advance. I wasn’t too bothered: deep warbands can soak up a lot of damage…but not, unfortunately, enough!

One was dashed from the field, the other disordered, effectively curtailing its advance next turn.

On the right, where my horse supported by infantry had been mullering his clibanarii, the fortunes of war suddenly turned against me. I went from two undamaged units facing a disordered enemy heavy cavalry unit to a lone, disordered warband facing two enemy units!

Finally, and to add insult to injury, that lone unit of horse archers that had slipped through my lines managed to get into my camp and ravage my Gallic baggage. That cost me three victory coins and the game!

I had, however, actually come quite close to winning the game, and had certainly lasted longer than last time!

Even better, next game it was my turn to run the Sassanids!

TTS AAR: Gauls versus Sassanids

Having re-based all my Sassanids, I couldn’t wait to get them onto the tabletop…and fortunately friend Bevan was available to help me do so.

The real question was who to pitch them against: the Sassanids are one of the most successful armies under the To The Strongest system: the combination of horse archers and chunky lancers giving everyone except a similar army real problems. I eventually decided upon the Gauls as suitable opponents: lots of big warbands that could soak up damage, not as fragile as the Ancient Brits, and with some decent cavalry of their own. Chuck in some Gaeseti fanatics, and on paper it looked like it might be a good match.

On paper.

Despite the fact that I had re-based the Sassanids, I elected to take the Gauls first time round. Outscouted, I decided to put all my cavalry on one wing: probably a mistake as that allowed Bevan to get his elephants opposite my horse…and if there’s one thing Gallic horse don’t like, it’s the look and smell of nellies!

The Sassanids opened proceedings by sprinting up the battlefield towards my line. Most unusually, the elephants shot out in front of the already fast-moving Sassanid line and stomped into the forest that I had thought I might use to protect my flank.

This looked like a good opportunity to me, so I sent a unit of Gaeseti fanatics into the woods to root the pachyderms out. Surely this was a couple of points I could secure before the rest of his line arrived.

Apparently not.

The elephants proved their worth and soon my fanatics were reeling backwards, with my CinC falling heroically in the melee!

Also on the left flank, the first charge of the Gallic cavalry versus the Sassanid cataphracts had taken place. Despite having the initiative, my horse had failed to dent the armoured horsemen at all, and another of my generals died!

Worse, some enemy Clibanarii were working their way down the flank and needed to be dealt with before they got into my rear!

Meanwhile, on the right flank, I had taken possession of the hill in front of my line. My thinking was that I could soak up a bit of horse archer fire, rallying if necessary, and then be uphill when the enemy lancers went in.

This didn’t really work either, as the Sassanid horse archers were having a very good day, and soon my two warbands looked like pincushions…and, you guessed it, I lost a third general!

So thirty minutes into the game, the situation looked like this:

The Gauls look pretty solid, but that’s an illusion. Next turn, the Gaeseti got mullered by the elephants, the lead cavalry unit got smashed off the table by the cataphracts (foreground action in the pic above), and I also lost the unit of cavalry next to the fanatics and one of the warbands on the hill. That, plus the three officers, was it: I was out of victory medals and out of the game!

Horrendous: Bevan had expertly sliced and diced the Gauls and served them for Sassanid tea!

FK&P AAR: Swedish vs Moghuls

With the Moghuls having defeated the Cossacks in short order (see previous post) there was time to have another game. This time I thought that I would wheel out the Swedes: not sure quite how the contemporary but not contemporaneous Swedes and Moghuls would ever encounter each other…but then that’s the great joy of wargaming!

I was a bit more confident of victory this time: the Swedish army has a good mix of pike-armed infantry and decent Reiter horse: surely this would be enough to put the upstart easterners in their place!

The Swedes

The Moghuls

I drew up my Swedes in entirely the traditional manner: two brigades of infantry in the centre, a brigade of cavalry on each wing. My plan was to advance in a line and just get stuck in as soon as possible: my pike should be able to defeat his largely musket- or sword-armed infantry through reach alone!

The Moghul plan was to sweep his wings forward using weight of numbers to win the cavalry battle there, then curl in to take my main line in the flanks just as his main line hit them from the front.

His cavalry duly swept forward, with my cavalry advancing to meet them.

Left flank

Right flank

As the cavalry on both sides began their fight for dominance on the wings, the Swedes marched their infantry forward in the centre.

On the left wing, my cavalry were initially successful, and had a great opportunity to charge his main horse units in the rear by swinging around the small wood top left in the left hand picture above. Unfortunately, I drew a “10” for my first movement card, so got into the perfect position to launch the charge but just couldn’t actually charge before the way into the enemy cavalry’s rear was blocked by Moghul elephants.

Meanwhile, on my right wing, the cavalry clash had proved inconclusive. Both sides had lost multiple units, and things ended up with his cavalry technically ready to do more, but positionally unable to do so before the main battle lines clashed.

With the cavalry actions on the wings proving inconclusive, it was obvious that the battle would be decided in the centre. The two lines moved into contact and a grinding melee began.

As with most grinding melees, it was 50/50 who would win: the advantage I had from my pikes countered by the Moghuls slightly outnumbering me.

To cut a long story short, after a long series of to-and-fro clashes, I lost. At the end of the battle, the Moghuls had only three victory medals left, so if I’d broken one of his foot units before he broke one of mine, then I would have won.

All that was left in the centre of battlefield!

A great game, with the Swedes proving decidedly harder for the Moghuls to beat than the Cossacks!

Here’s a chronological, pictorial history of the battle:

FK&P AAR: Cossacks versus Moghuls

Friend Bevan has recently acquired a 17th Century Moghul army, so naturally we had to get it onto the tabletop as quickly as possible.

The Moghuls’ first opponents would be my Zaphorogian Cossacks, and we’d use the “eastern front” version of For King & Parliament (in turn the ECW version of To The Strongest) that we have built up based on some core rule variants that you can find on the Tales from a Wargaming Shed blog.

The Moghuls

The Cossacks

My plan was to anchor my left flank on a patch of impassable ground, placing my artillery behind it so that they couldn’t be charged from the front (you can see this in the picture, above right). The left flank would be held by one foot brigade consisting of a sotnia of Registered Cossacks and two sotnias of Moloitsy.

Stretching out to the right from this point were the tabor war wagons, able to hold the centre of the field with sheer weight of fire. To their right were a second infantry brigade (same as the first one) and then, on the far right wing, the stars of the last battle, a brigade of Tatars: one squadron of noble lancer types, two clumps of horse archers.

The plan was, as I said, to anchor my left and centre, win on the right, and then sweep in and take his centre, battered from the fire of the tabor, from the flank.

Bevan’s plan, on the other hand, was to stay well clear of the killing field in the centre in front of my tabor, and advance strongly on the flanks. Hopefully his men there would win, and he’d decide what to do after that. Seems like quite a good plan to me!

The battle opened with the Cossacks being extremely reluctant to move forward at all. I managed to get the left wing into place, but only one tabor war wagon did what it was supposed to do. On my right wing, although the Cossack infantry were well up for a fight, the Tatars were not interested at all. This was slightly worrying: were my allies not quite so allied as I had thought? Had the Moghuls paid them off with more coin than I could afford?

The Moghuls trundled forward towards me.

Rather than spell out each phase of the battle in turn, let me give you an overview of what happened. In essence, Bevan’s plan worked perfectly.

On my left flank, my infantry, who should have been able to give a good account of themselves, especially as they were supported by the artillery and one end of the tabor line, crumbled under the weight of the Moghul attacks. One moment i had a left wing, the next I didn’t.

It was even worse of the right wing. The Tatars, the battle winners of my last two games, just refused to engage at all, and when they were attacked, just melted away. Definitely some dodgy politicking or bribery going on in the background!

Once my flanks were broken and driven it, Bevan’s Moghuls curled in on my flanks and the last of my victory medals soon disappeared. My tabor had hardly got to fight at all.

A nicely executed plan by the Moghuls and a well deserved victory. Here’s a chronological pictorial account of the game: