IABSM North of the Border

A quick trip to Edinburgh to visit daughter #1 at university gave me the chance to catch up with old friend Mr Hodge down at the South East Scotland Wargames Club.

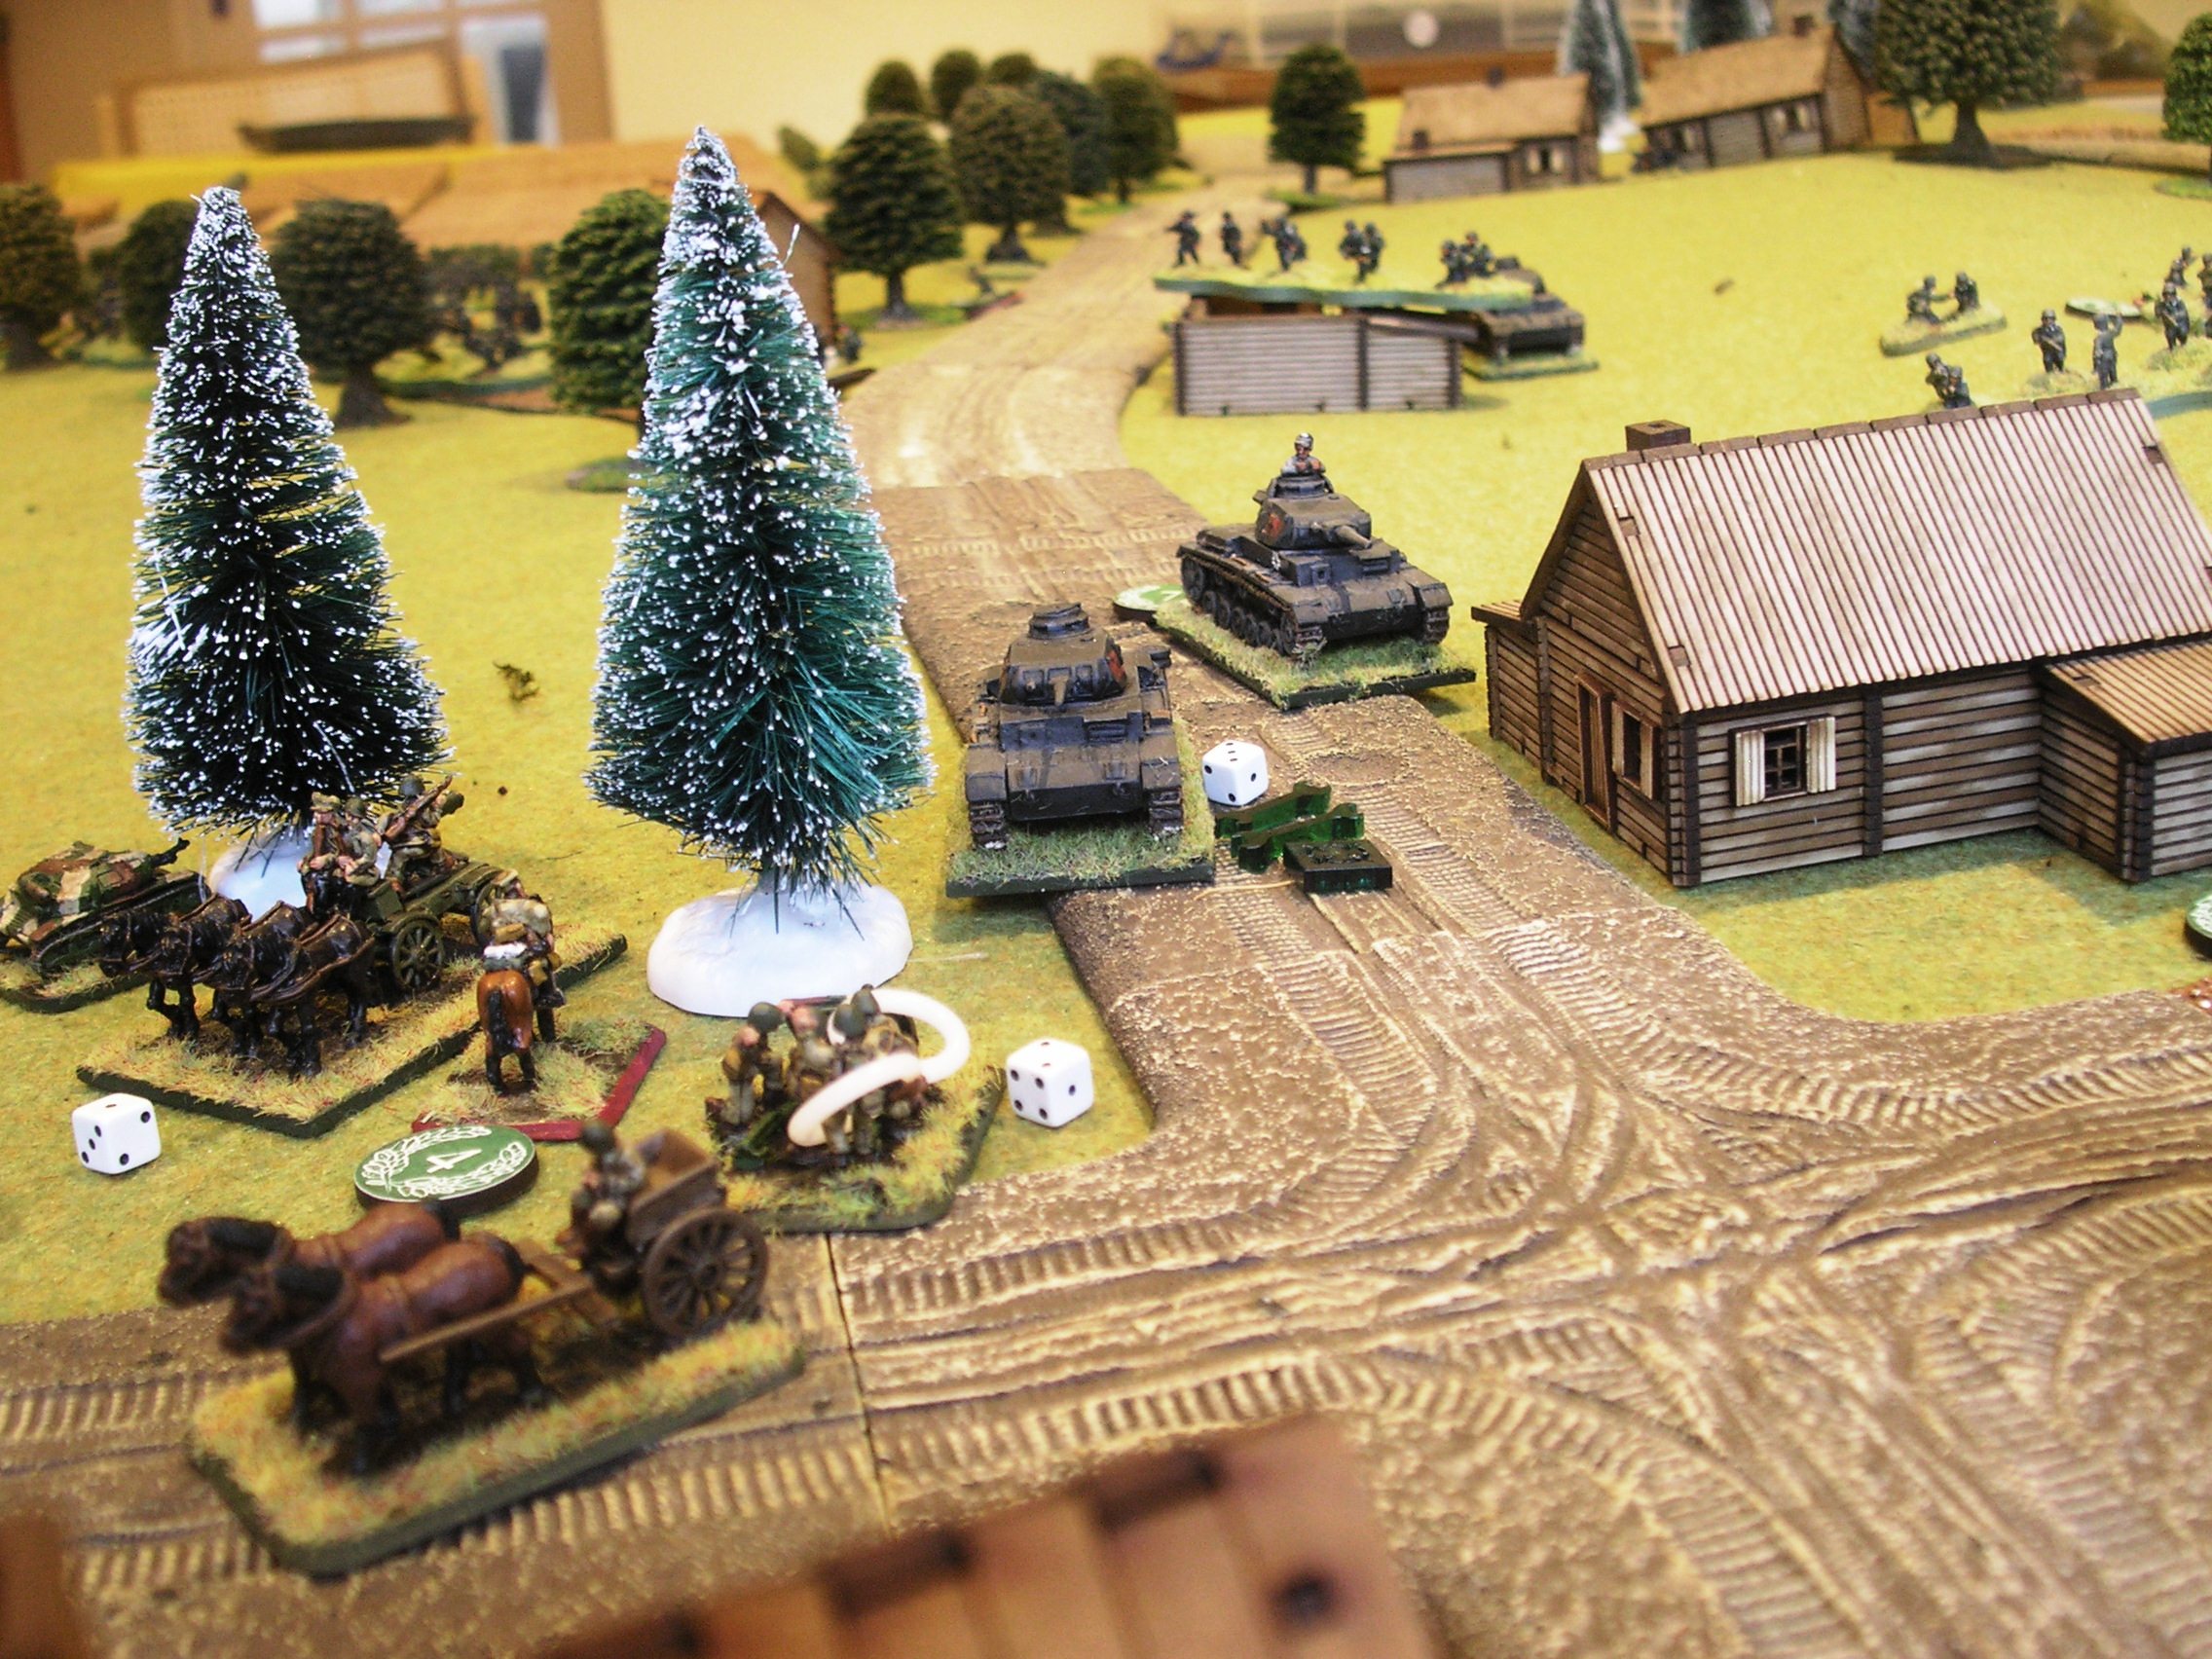
Derek put on a game if IABSM set in France in May 1940, using his excellent 10mm figures.

That's not me with Derek btw but my opponent!

I played the French: commanding seven H-39 tanks (good armour, but armed with a pop gun), two 25mm anti tank guns (good panzer killers!) and a platoon of infantry.

Facing me were five Panzer 38(t) tanks (excellent at this time of the war), two Panzer IVs, a platoon of motorcyclists, and some other infantry that never arrived or got off their Blinds.

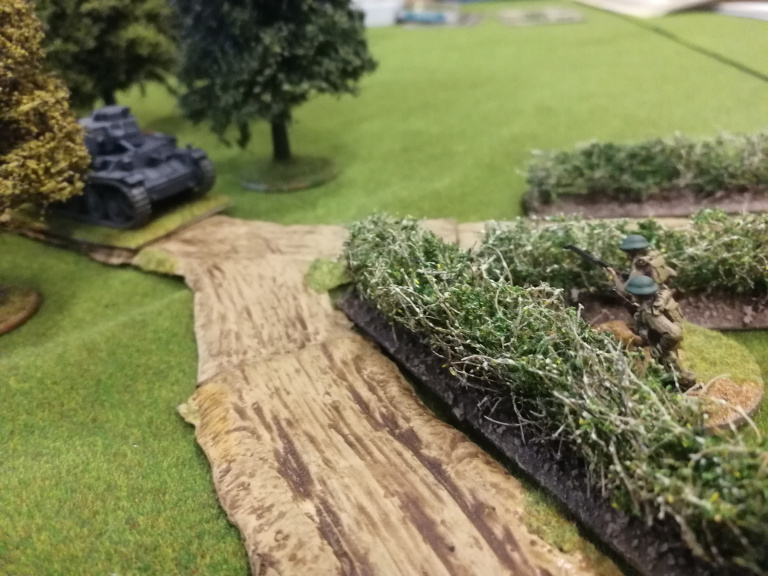
I deployed my tanks along the treeline and waited for Rommel's boys to attack. This they did, their motorcyclists appearing first: dumping their metal steeds as soon as I hit them with some HE, and then rushing forward towards a nearby field.

Meanwhile his P-38(t) tanks had appeared and advanced towards my line over open ground. My tanks engaged, and a firefight broke out: his five Panzers versus five of my tanks and, soon, my two anti tank guns.

His tanks were considerably better than mine, but stationary and out in the open. Mine were carefully concealed in the edge of the wood, and some lucky dice rolling meant that soon three of his were abandoned for the loss of two of mine.

When one of his Panzer IVs also succumbed to anti tank gun fire, the Germans decided that they'd had enough and retreated. Victory to the French!

All in all it was a good, if quick, game. My tanks performed much better than I was expecting (one of them proved almost indestructible despite being hit many times) and the tactics chosen by the Germans suited my deployment perfectly.

My thanks to Derek and the rest of SESWC for their hospitality, and I'm already looking forward to the next time I'm up.

IABSM AAR: Push Towards Lowicz

As part of a counter-attack that had already thrown the Germans back some twenty kilometres, the Polish 16th and 26th Infantry Divisions crossed the Bzura river near Lowicz on the morning of 14th September 1939, and the Polish 4th Infantry Division reached the road linking Lowicz and Glowno.

At this point, however, the retreating Germans were reinforced by the 4th Panzer Division, which had been withdrawn from the fighting in the outskirts of Warsaw, and launched a counter-attack of their own against the advancing Poles. This battle would recreate the encounter battle that followed.

A cracking game of IABSM in which a bold coup de main won the day. Click on the pic below to see all:

IABSM AAR: The Narew Crossing

It was back to Poland for our latest game of I Ain’t Been Shot, Mum and an extraordinarily exciting encounter that went right down to the wire.

On September 7th 1939, reconnaissance units from one of the Panzer Divisions of General Nikolaus von Falkenhorst’s XXI Army Corps captured Wizna after Polish mounted reconnaissance squads abandoned the village after a short fight and retreated to the southern bank of the Narew. When German tanks tried to cross the bridge, it was blown up by Polish engineers. This game would recreate the German attempt to force the Narew Crossing.

Click on the pic below to see all:

IABSM AAR: Grudziadz

Our last game of IABSM was set in the Tuchole Forest in Poland, right at the beginning of the war. Today’s battle would directly follow on from that encounter, and represent the stalwart Polish defense of Grudziadz. Both scenarios were taken from The September War, Part One, one of the TooFatLardies scenario packs that I have written for I Ain’t Been Shot, Mum!

Grudziadz was a strategically important town as it housed an officer academy, a cavalry school and the several army staffs directing Polish forces in the Polish Corridor region. It was, however, only lightly defended, with its garrison made up of infantry and border protection corps (KOP) along with supporting artillery. The German attack was launched from East Prussia by 21st Corps, mainly infantry and the reserve 10th Panzer regiment (mainly Panzer I and II).

Click on the pic below to see what happened.

IABSM AAR: The Tuchole Forest

Played a great game of I Ain't Been Shot, Mum! at the weekend: scenario #08 from the first September War scenario pack covering the invasion of Poland in 1939, The Tuchole Forest.

The battle, set in the Polish Corridor, was all about territory and objectives, and proved a very different kettle of fish from the usual head-on clash.

Click on the picture below to see who held onto what to win the game:

IABSM AAR: Anzio #13: Aprilia

Cracking game of I Ain't Been Shot, Mum fought this weekend just gone.

We used scenario #13 from the Anzio: Wildcat to Whale scenario pack featuring the action on 8th/9th February 1944 as the Germans advanced on Aprilia (the Factory).

Click on the picture below to see all:

IABSM AAR: One Of Our Planes Is Missing

Fellow Lardy Tony Cane has sent me another IABSM AAR, but this time with a bit of a difference: the game is set on the North West Frontier in the early 1920's.

According to Tony, the mission creep away from pure WW2 is all down to the purchase of Lardie specials. The scenario itself is from the Summer 07 edition, the piece on Mussolini's Baubles is in the Summer 06 edition, and those two combined with his collection of WWI German East Africa war figures and the fact he happened to have Pathans in the lead pile...

One of our Planes is Missing

The scenario, with minor changes to the orbat, follows that printed in the Summer 07 issue of the Lardie special, and uses the Mussolini’s Baubles adaption of IABSM in the Summer 06 edition.

"It's India's North West Frontier, the early 1920’s, and the CO has just asked me to lead a small force for a rush job requested by the RAF. They want a downed plane in the tribal area destroyed, hopefully before it is stripped of useful gear by the locals. This is a bit of a blow as I was looking forward to playing polo tomorrow afternoon!  

"A team of engineer types has been provided for the demolition, along with motor transport for the whole force, and even an armoured car has been rustled up. So perhaps if we start early it should be just a case of motoring in, destroying the plane and then back out again. With a bit of luck I may still make the polo match, and then on to the RAF club for free drinks perhaps."

Events were to prove that Lieutenant Harrowell-Clarke was a bit optimistic about how easy things would be.

The local tribe were clearly fired up by the chance to get to grips with the forces that had bombed their village. They basically opted to prevent the enemy from even getting through the pass. First into the breach was a suicidal attempt by a small team to blow up the road as it exited the pass.  The fates (cards) were not kind and two volleys from the section advancing on the road block wiped them out before the charges could be set. Still their sacrifice had caused a useful delay.

The Pathan snipers were however proving to be more effective. Repeatedly stalling attempts to remove the road block and actually causing a casualty on the MG team, and forcing it to retire. They were only overcome when chased off by the eventual advance of the Imperial forces.

Pinned down by sniper fire the lead section were not going to clear the road block any time soon.

The remainder of the force was now ordered to outflank the Pathans and, debussing from the transport, started toiling up the steep slopes.

Having organised the HQ section into firing positions on the right flank the commander returned to the troops stalled in the pass and finally got the attack moving and the road block removed.

A second Pathan band had joined those blocking the exit of the pass but caught in the open, the withering fire, of the now effectively deployed Imperial forces soon disposed of them as a fighting force.

With return fire slackening and time running out for the Imperial forces a hasty advance seemed worth the risk. First with the armoured car, then with the troops and transport of the HQ section. With this rapid progress the plane was reached in time (9 out of 12 turns allowed) and destroyed without any further interference from the Pathans.  The first platoon moved up the road to cover the village but were not needed.

In the end a glowing report on a mission accomplished could be written by Lieutenant Harrowell-Clarke  on the lines of, despite initial difficulties the aircraft was destroyed at the cost of only four casualties to the entire force. Though he probably did not get back in time for the polo match!

Tony Cane

IABSM AAR: Operation Compass #11: Bardia/One

Some great desert action from Tony Cane, as he and friends play the eleventh scenario from the Operation Compass scenario pack: Bardia/One.

The scenario covers one of the Australian assaults on the Italian-held town of Bardia as Compass turns from raid to army-beating campaign.

Click on the picture below to see what happens when you underestimate the opposition...

IABSM AAR: Blenneville or Bust! #5M: Chemont

Another great battle report from the excellent blog of Sergeant Steiner. 

Here, he and his friends play scenario #5M: Chemont from the Blenneville or Bust! scenario pack: involving a clash between Fallschirmjaeger and US armour.

My enjoyment comes as much from working out which BoB scenario the game is taken from as reading the report itself! Blenneville or Bust!  is a pyramid campaign involving five levels, so there are thirty-one possibilities in all. There's no mention of the name of the village in the report, but only the village of Chemont has a layout like that shown in the picture below. That means it's one of #5B, #5F or #5M. Only #5M involves German Fallschirmjaegers, so scenario #5M it is!

Click on the pic below to see all:

IABSM AAR: Bashnya or Bust! #4A: Holm

Another great I Ain't Been Shot, Mum! AAR from Sergeant Steiner's marvellous blog, this time also supported by the comments of the Duc de Gobin, author of the epic Warfare in the Age of Cynics blog.

This time, The Sergeant and the Dice Demon, Steve, are playing one of the scenarios from the Bashnya or Bust! scenario pack for IABSM: scenario #4A Holm.

What's quite fun for me, as the author of Bashnya or Bust!, is working out which exact scenario they're playing from the photos. On this occasion, I knew it was Holm immediately (distinctive terrain!), but which one. Well the only one with that exact number of T-34/85s and that exact number of Panthers is 4A...so hopefully that's it!

Anyhow, click on the pic below to see all. Recommended...along with a quick visit to the two blogs this comes from as well. Excellent stuff.


As usual, I hope that neither of the gentleman mentioned above objects to me re-posting their text and pictures. It is genuinely intended as a way to spread awareness of both IABSM and their excellent blogs rather than anything else.

IABSM AAR: Piotrkow Trybunalski

Just written up an AAR from the game we played yesterday using scenario #45 from the second September War scenario pack: the battle of Piotrkow Trybunalski.

A big game covering the actions of 5th September 1939 as the Germans drive down from the Borowska Heights.

Each side fielded a company of infantry and tanks, with the game taking about 3½ hours.

Click on the pic below for more:

IABSM AAR: Eastern Front

Another great battle report from Burt Minorrot's excellent Spanish-language blog Las Partidas de Burt. As I have said before, I hope he doesn't mind me reproducing it here.

Here, in a game dating back to 2014, Burt and friends fight a battle on the eastern front: a Soviet column advances against hidden German opposition.

Click on the pic for more:

Blitzkrieg in the West: The Germans: comments so far...

A bit of a shameless plug, but here are some of the comments made around the web about my latest work: the Blitzkrieg in the West: Germany handbook for IABSM, published Thursday 10th May:

John Ewing:

"An awesome piece of work. The level of detail is incredible."

Charles Eckart:

"Turned on computer a couple of hours ago. Went to TFL website immediately looking for Blitz-Germany. Only time for a quick scan through: outstanding!

"IABSM was my first Lard rules (still a favorite) and all four Blitz books provide the best single sources of information for 1940 I know of. Useful in many ways, thanks for your work."

Benito Marisa:

"I have bought the four books and they [are] the best thing since sliced bread. Not a player of IABSM myself but the detail and depth of the information is so good that can be used for any other set of rules or just for reference. Excellent job, congratulations."

Desmondo Darkin:

"Looks superb"

Derek Hodge (chief proof-reader of the handbook):

"I've had a head start on the reading this as I helped Robert with the proofreading and I can say that he's put a huge amount of work into it. I had no idea that German OOBs in 1940 were so varied. 

"The whole Blitzkreig in the West series is an absolutely fantastic resource for any wargamer interested in the 1940 campaign. You can use the lists in the pdfs to build OOBs at any level from company to division. 

"And the lists are also useful if you're playing a platoon level game such as Chain of Command as they enable you to see exactly where all the various support options come from. This is invaluable if you're trying to build support lists limited to what was historically available to any specific infantry platoon."

Nick Skinner (co-author of IABSM):

"More superb work from Mr Avery. Can't recommend it highly enough. Even if you do not game IABSM the unit information is astounding."