TFL Painting Challenge: Second March Update
/Two week’s worth of entries today: and some very nice work indeed.
As always, please do visit the individual galleries (see the Nav Bar, above) but here’s a selection of what was submitted:

Two week’s worth of entries today: and some very nice work indeed.
As always, please do visit the individual galleries (see the Nav Bar, above) but here’s a selection of what was submitted:


Regular visitors will know that my last two games of To The Strongest each involved my Classical Indians getting severely hammered by the Marian Romans. My opponent generously suggested that some of the reasons for my twin defeats were down to the relative strengths of the armies: the Marian Romans were made to kill an army like the Indians.
What might work against them, I asked, to be told that armies consisting of lance-armed cavalry supported by horse archers were very popular on the tournament circuit. Something like the Sasanids, I asked. Exactly, I was told…so this week’s game was to be my Sasanid Persians versus his Marian Romans. Revenge was to be mine!
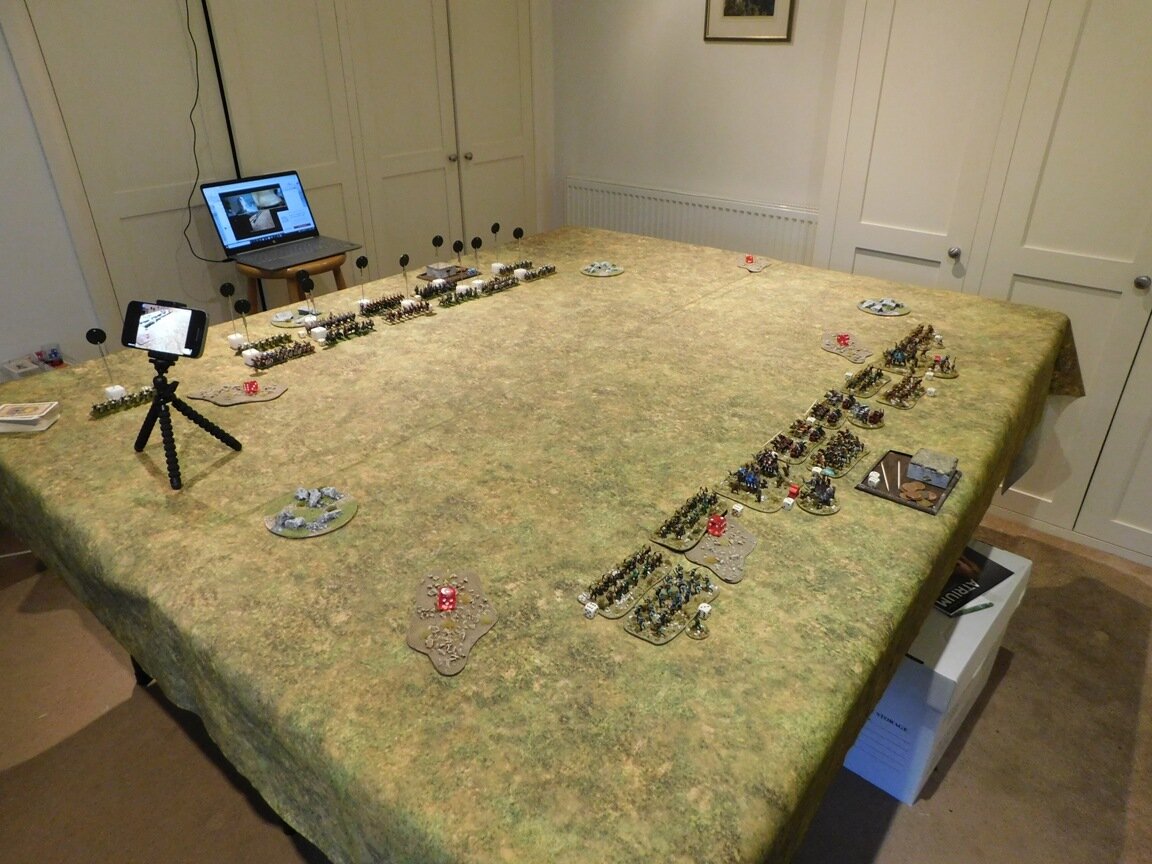
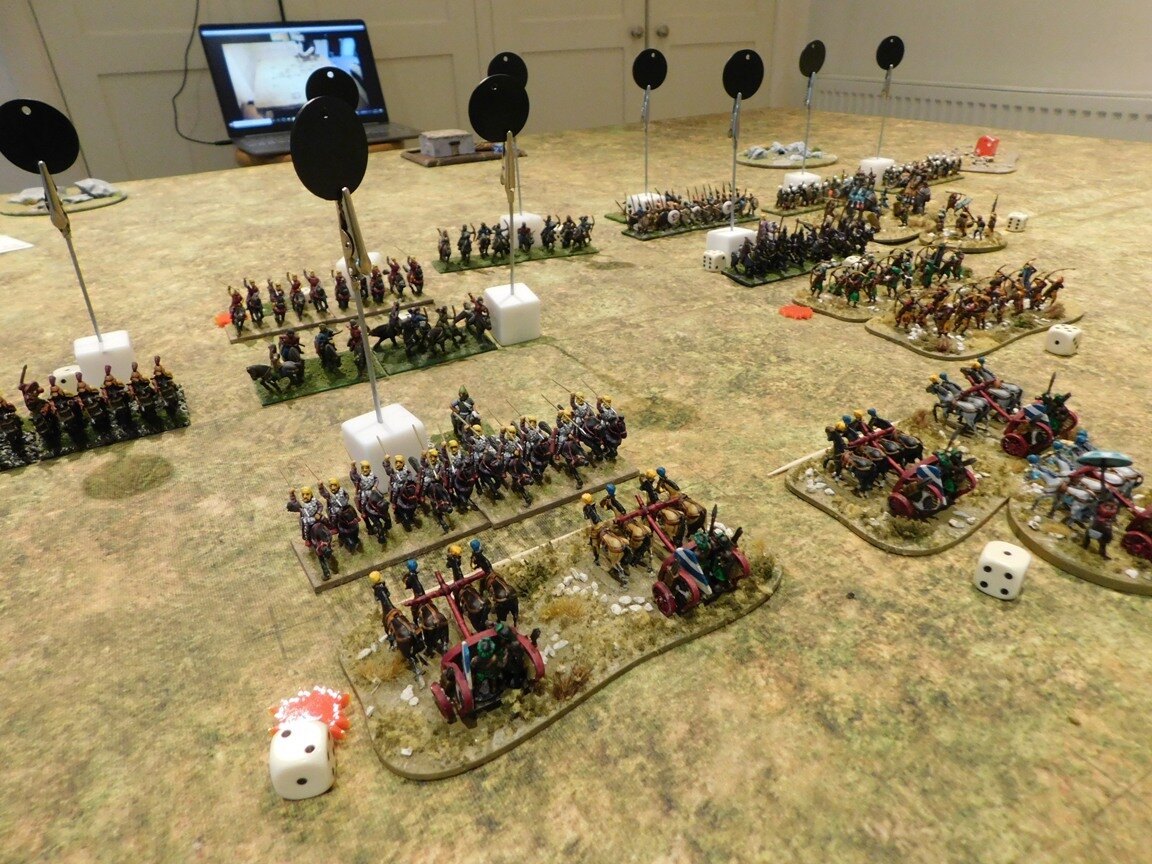
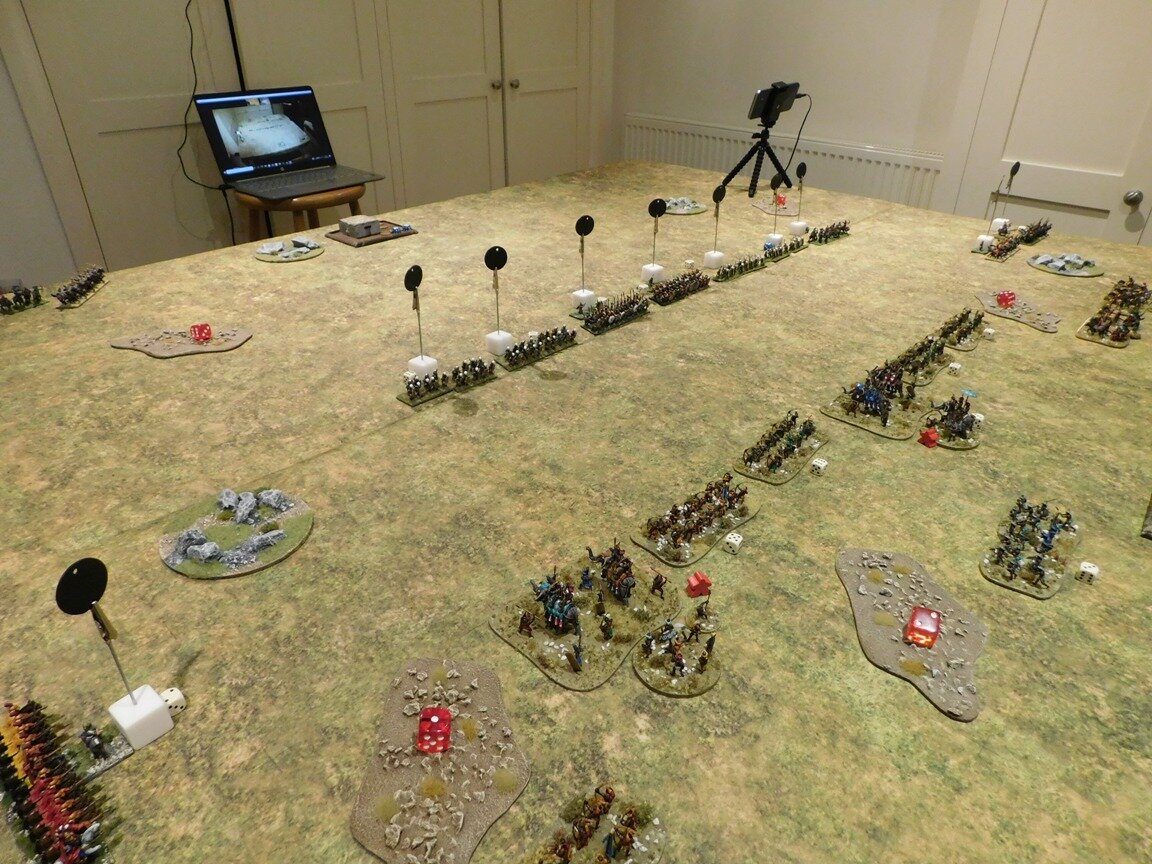
As is now usual, for the moment, the battle would be played over Zoom, with my remote opponent able to see the table through a combination of helicopter-view webcam and on-table-on-tripod ‘phone camera. Each of his units was also marked with a number, helping with the transmission of orders: “unit 4 will move forward a square” etc
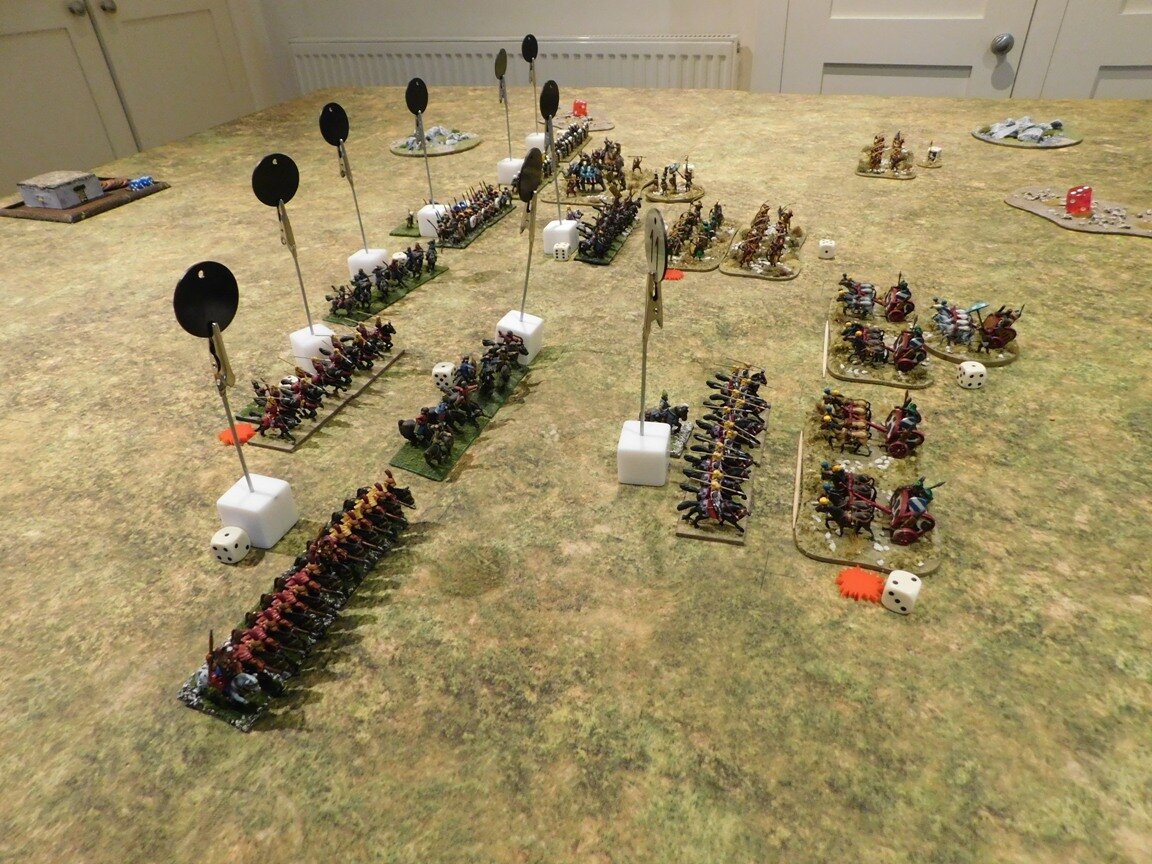
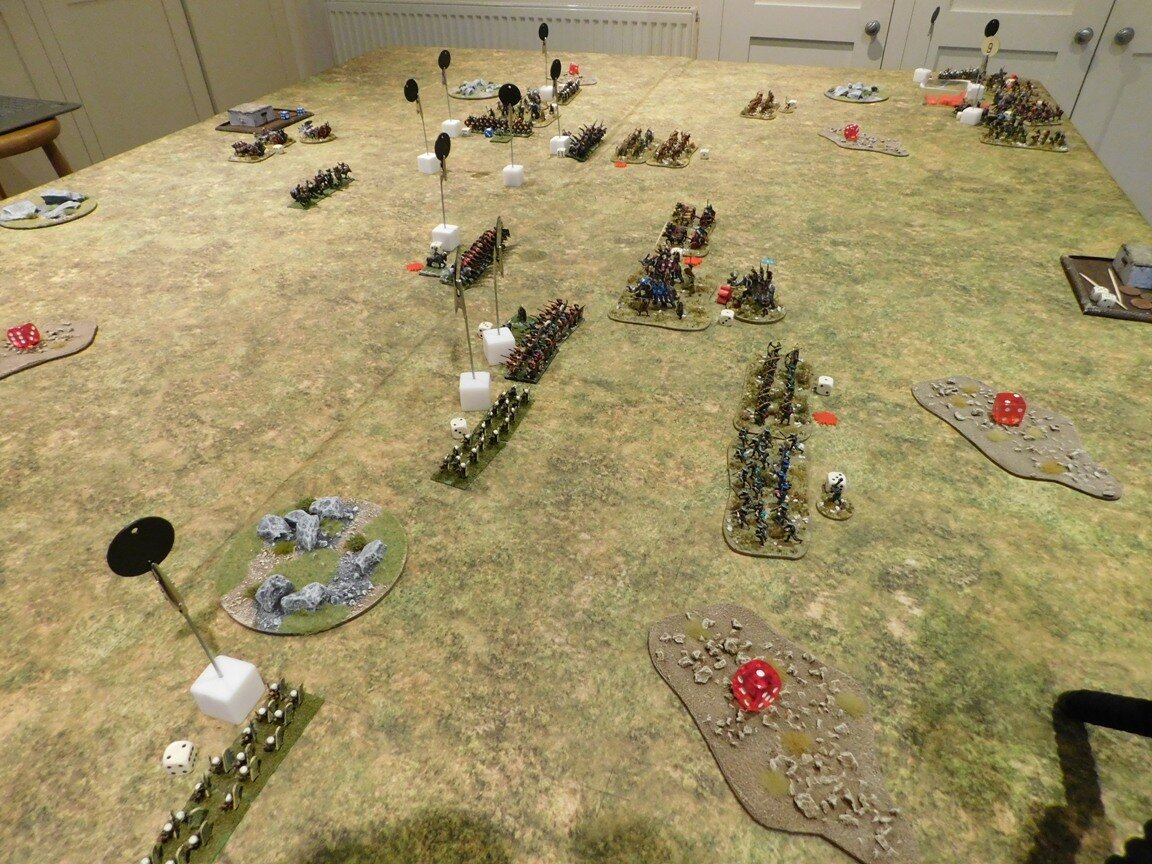
the set up
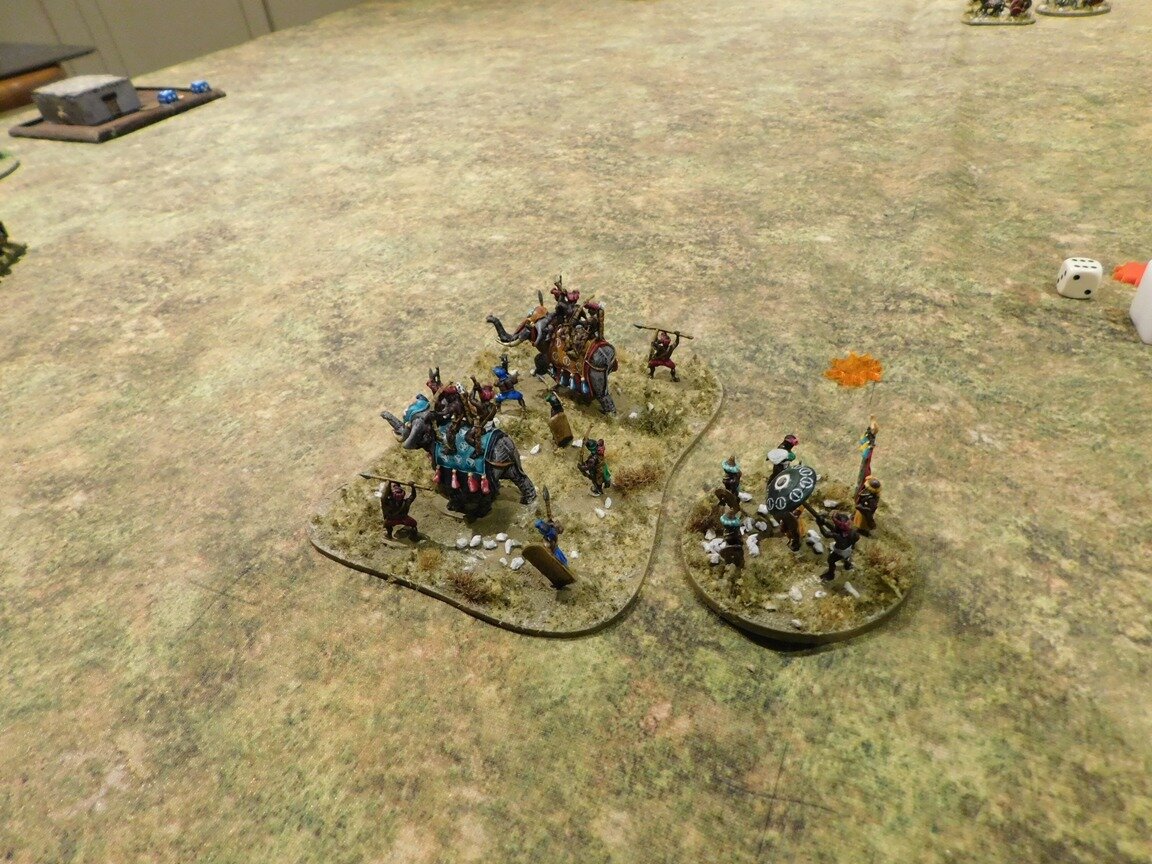
The Romans were unchanged from last week’s appearance: six units of veteran legionaries supported by some light and medium Gallic cavalry. The Sasanids sported six units of horse archers backing the hard punch of escorted elephants, cataphracts and four units of savaran lancers.
romans. Boo, hiss!
noble sasanids
My plan was simple: pin the Romans frontally whilst hooking around their left wing. Horse archers to weaken and exploit flanks and rears; elephants, cataphracts and lancers to hammer into weakened legionary units.
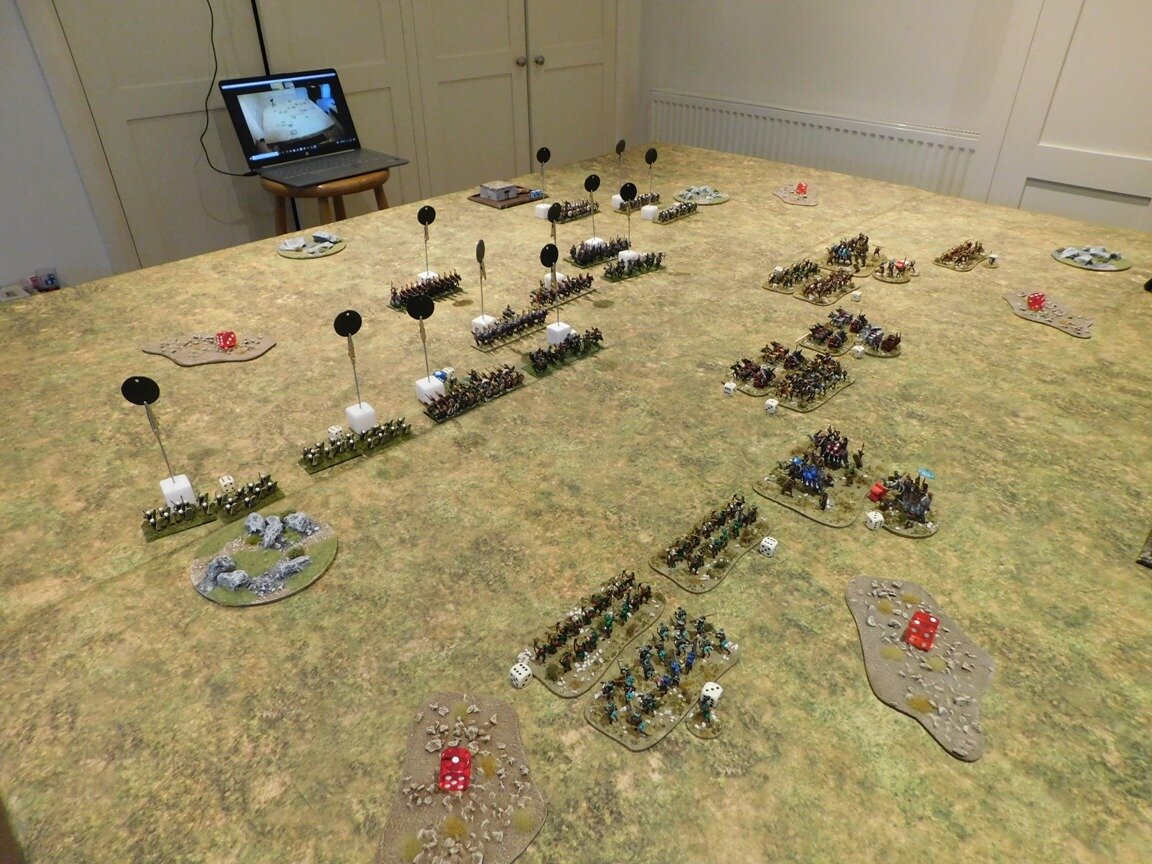
I had the initiative, so as the game began my right wing shot forward into the start position for their curl around the enemy left flank. Likewise, my left wing moved up to keep his left wing occupied.
the battle begins
You may have noticed that no mention has been made of my centre. This is because my central, most powerful brigade had decided that they hadn’t quite finished their breakfasts yet, and weren’t moving until all porridge (or whatever Sasanids have for breakfast) had been consumed!
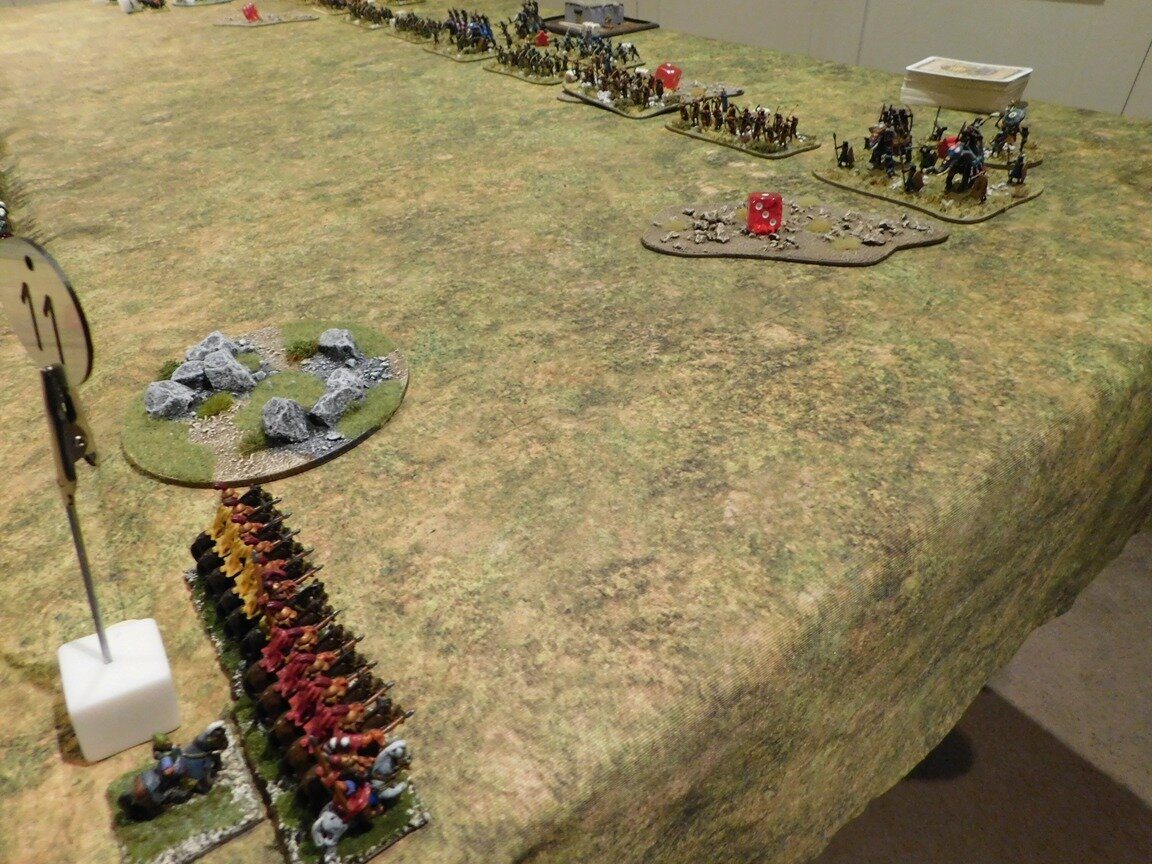
The elephants and veteran savaran look on as the wings engage
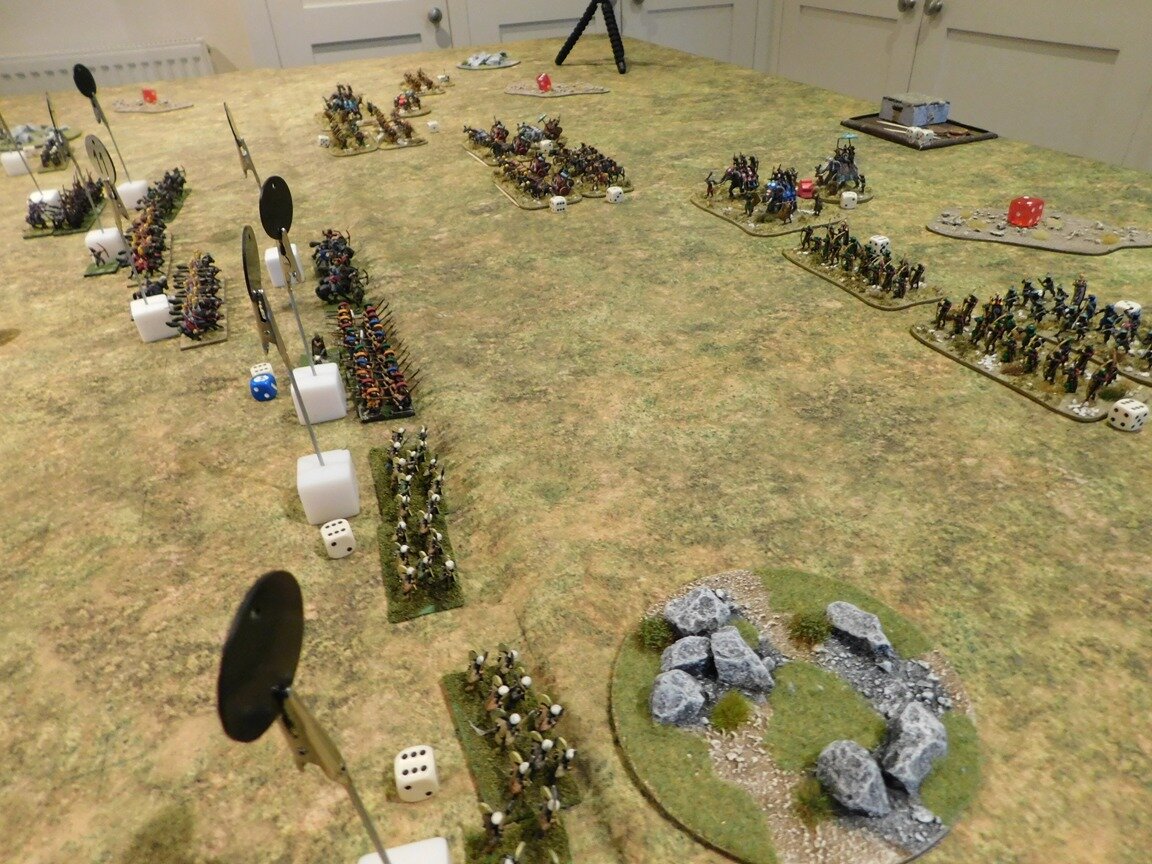
Now what I should have done at this point was to wait for my centre to get moving before sending in my flanking forces…but I didn’t, and fully paid the price!
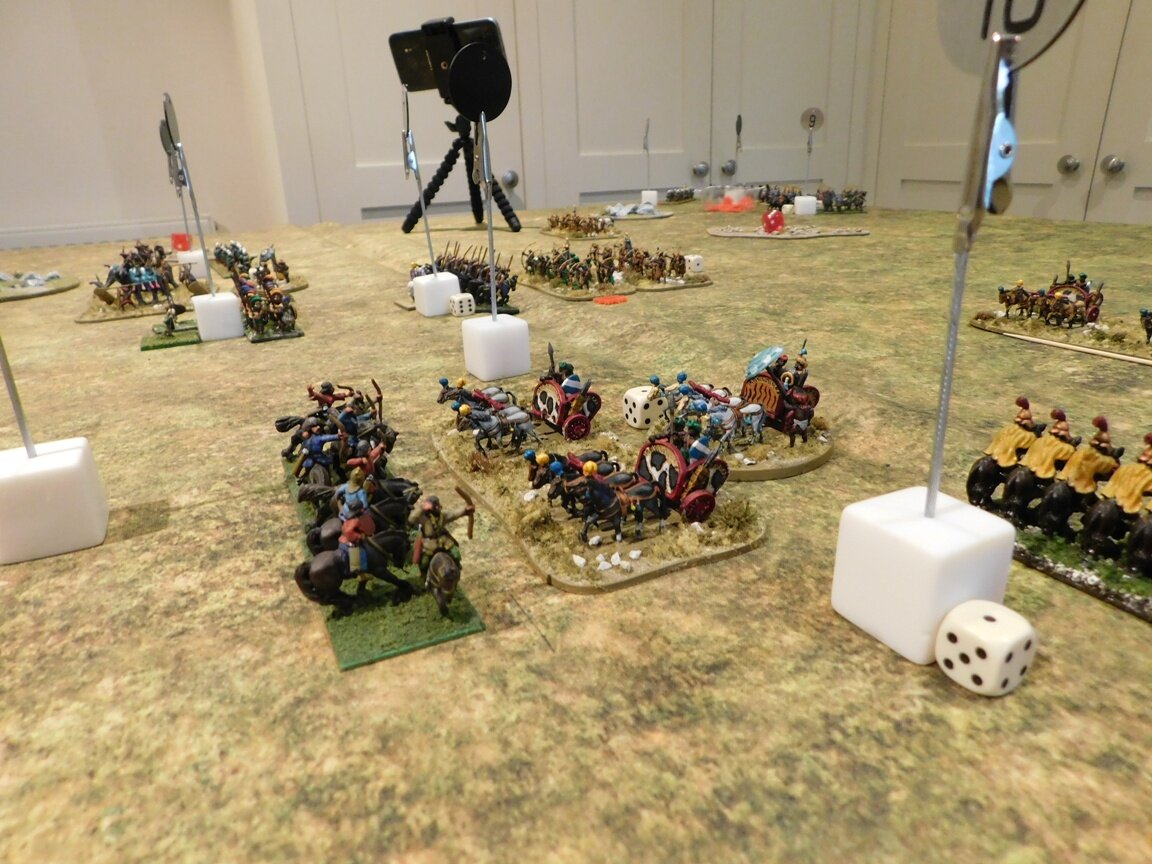
On my left flank, somewhat surprisingly and extremely annoyingly, my horse archers and lancers were seen off by the enemy cavalry backed up by legionaries. They moved forward very quickly, got their attacks in first, and soon I was left with cavalry around my left flank and nothing much to oppose them except what I could afford to commit from my centre. Hmmm…I’m sure that this was supposed to be the other way round!
One unit of horse archers lost to javelin-fire already; my savaran about to be defeated in combat with the gauls. my left flank is about to disintegrate.
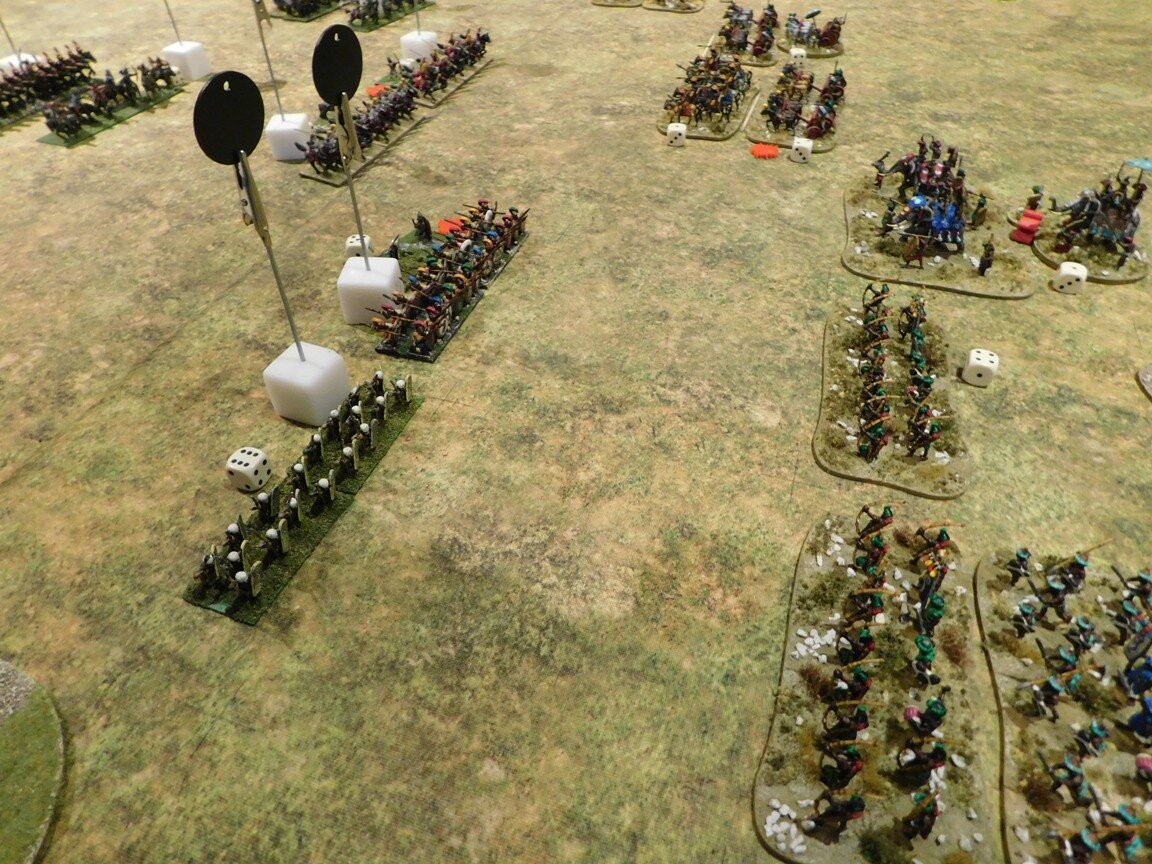
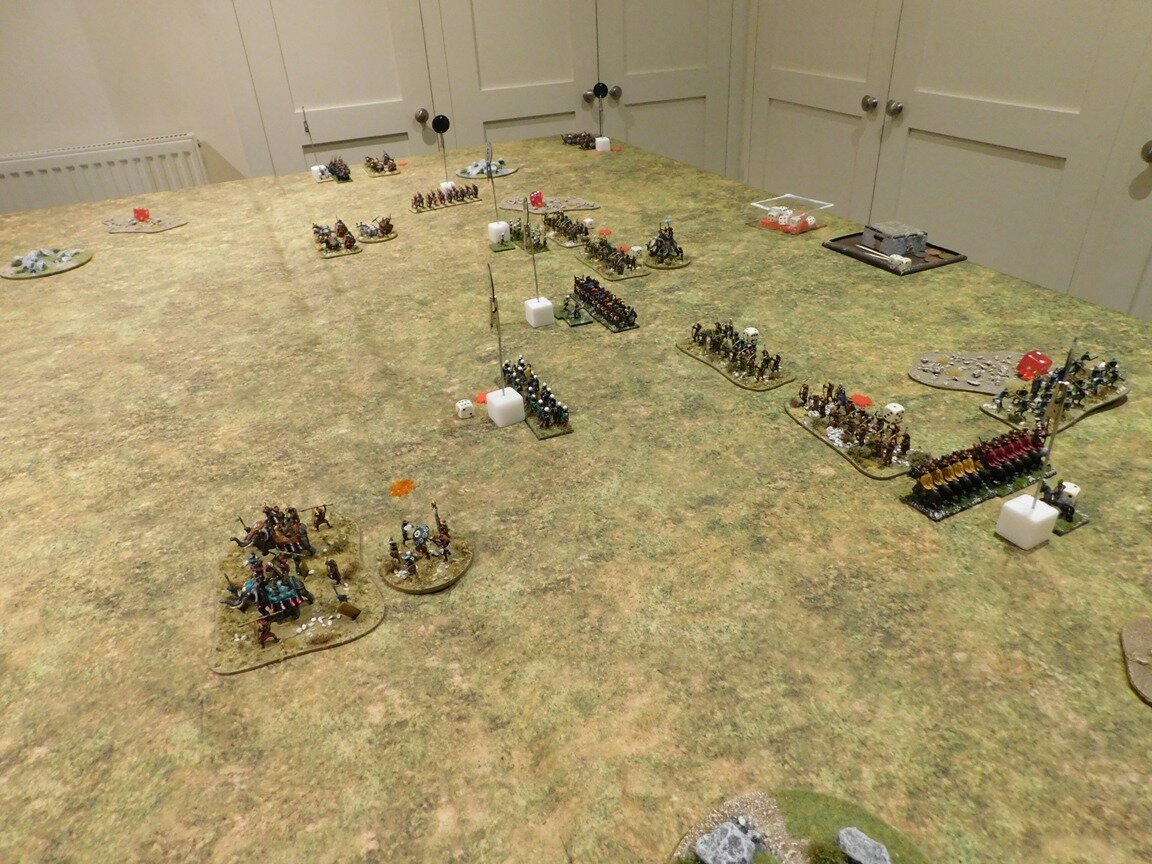
On my right, I was perfectly positioned to curl in and hit the Romans in the flank. Unfortunately, they used their extreme manoeuvrability (well drilled, these Italians!) to not only turn to face me, but also to form an oblique line that effectively protected them from harrying flank attacks.
unit 4, in orbis (all round defence), protects the new roman right flank from my central command…not that that was doing anything even vaguely threatening anyway!
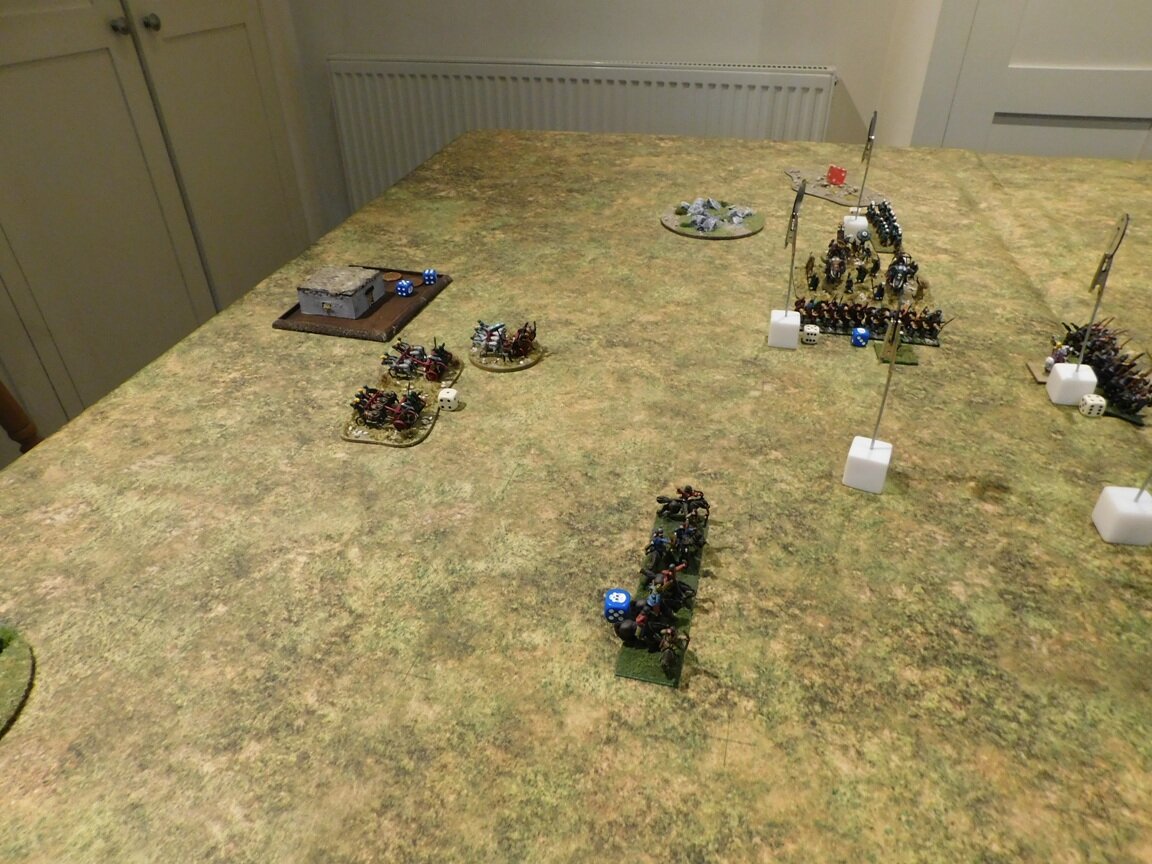
With my right flank attack effectively neutralised, the enemy right flank was now in the perfect position to curl around my left flank. I had to commit my centre to holding them off, who then got attacked by his centre: effectively he had done to me what I wanted to do to him!
romans outmanoeuvre me on the right
My right flank bravely tried to crack a few legionary skulls before disaster struck, but the truth of the matter was that I had been comprehensively outmanoeuvred. Game one went to the Romans!
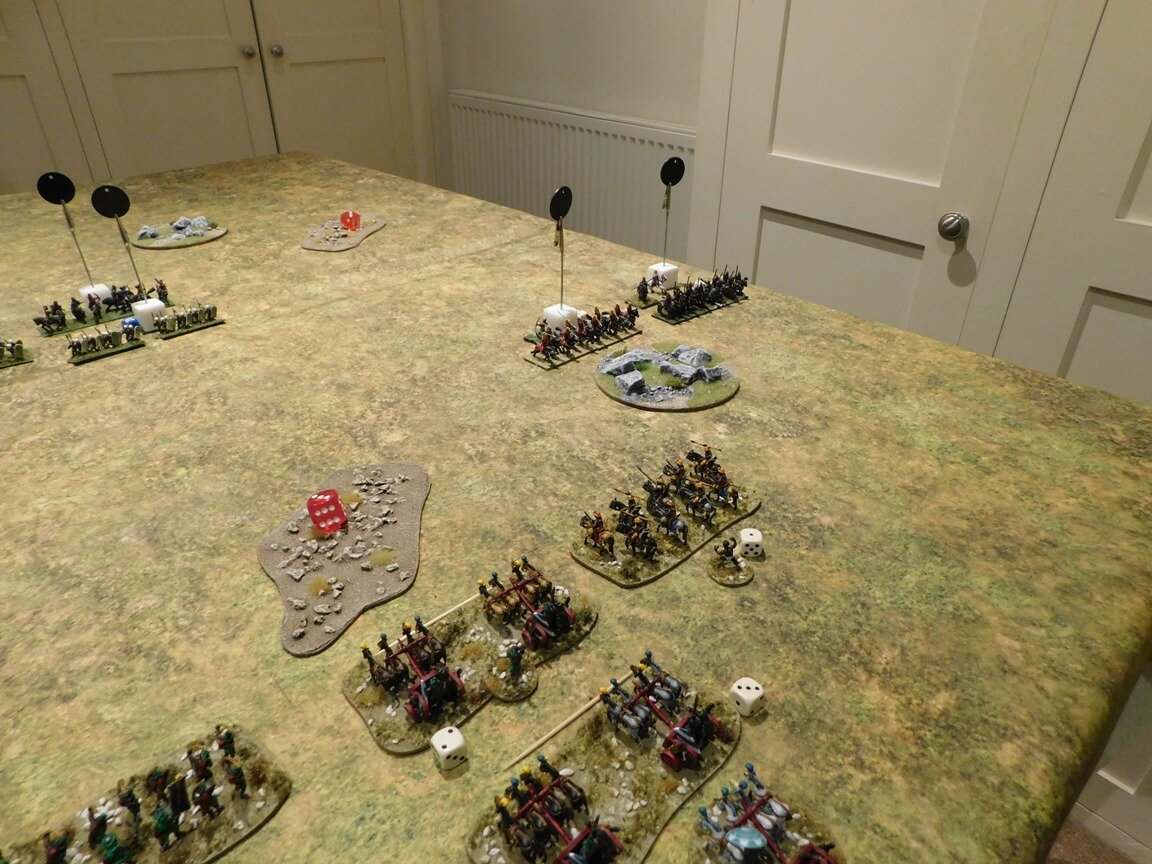
romans to the front, romans to the left!
As the above really hadn’t taken very long at all, there was time for a second game.
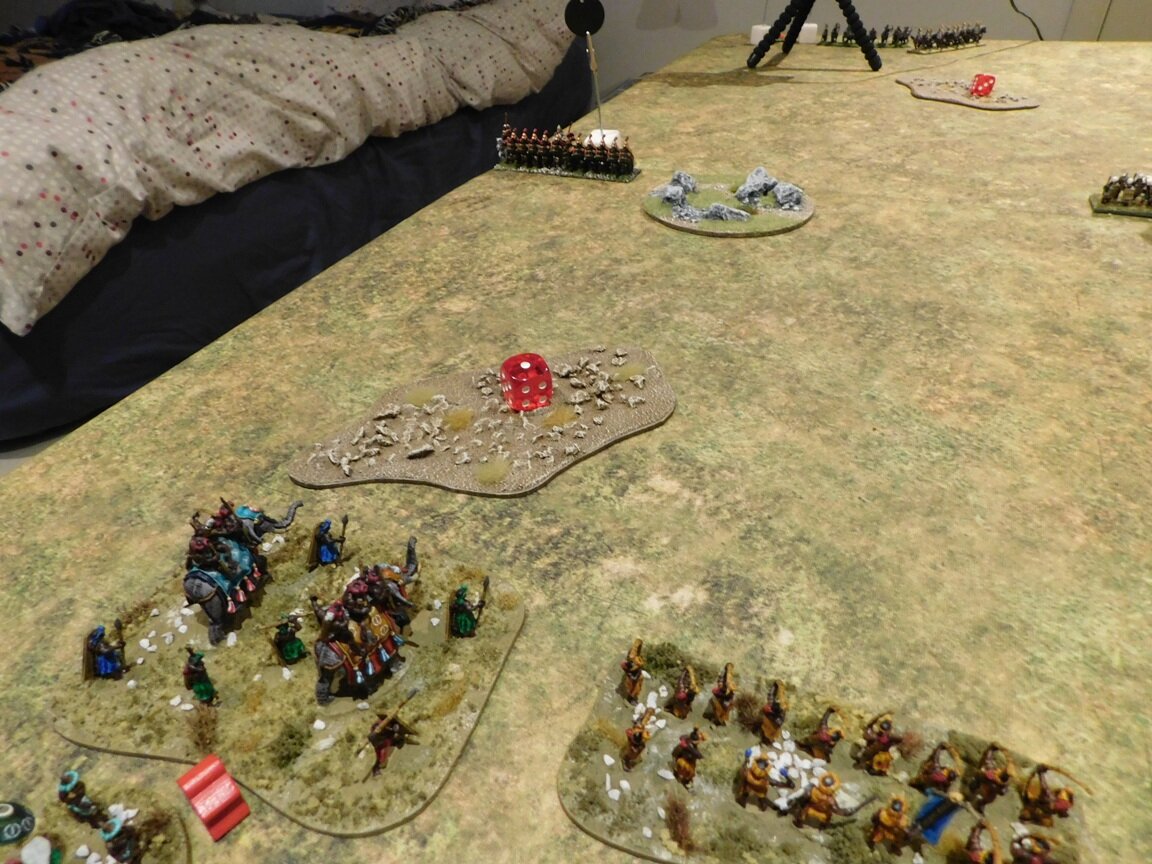
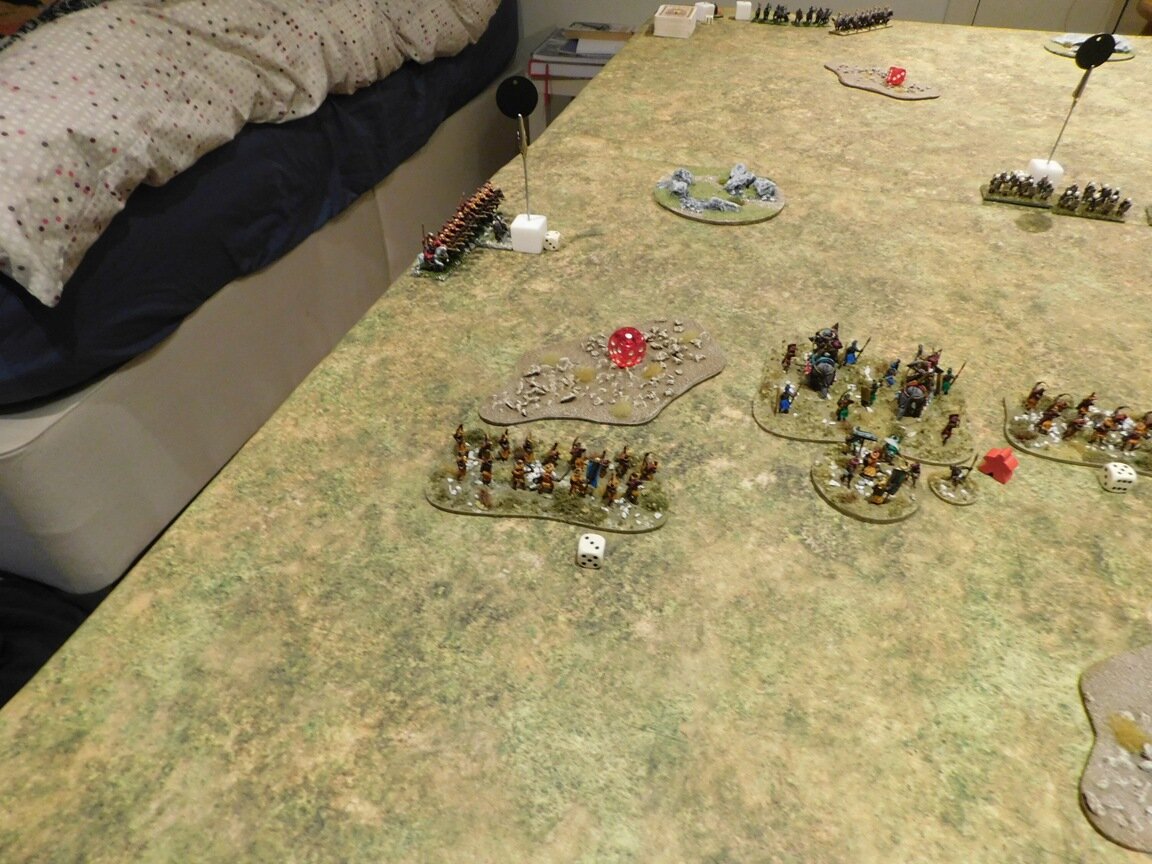
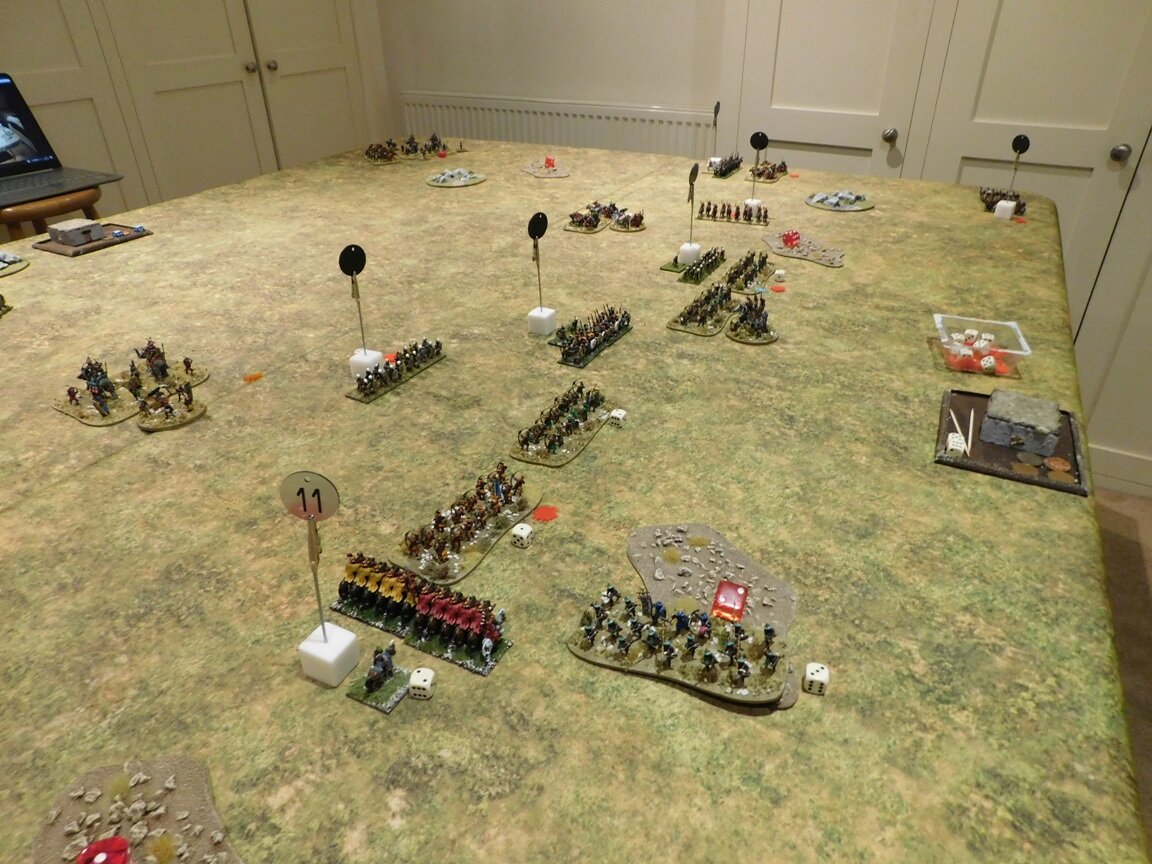
I was keen to have another go using the same tactics, and this time things seemed to be working much better for me: although the Romans had once again adopted their oblique line, this time my left flank was secure and my centre had kept up…so after the opening moves, the battlefield looked like this:
sasanids poised for victory!
Now, however, Lady Luck decided to intervene.
Really? I hear you cry: you were defeated by bad luck, were you? Not the enemy’s tactics and your own incompetence? Like in the last game?
No, really: it was bad luck.
For those of you who haven’t played To The Strongest, the mechanics work by the use of playing cards (or you can use D10 or chips) with higher cards being better than lower cards. Aces are low so, needless to say, drawing an Ace is generally a very bad thing.
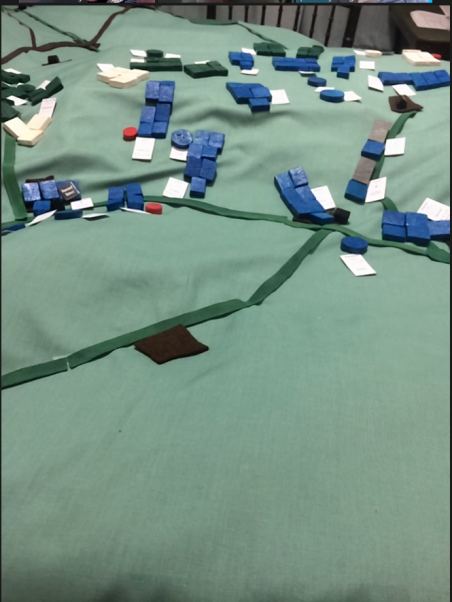
We kept a pictorial record of the cards that I drew as the clash that would decide the game took place:
It was so ridiculous that even my opponent was suggesting that the only solution was a box of matches and some lighter fluid!
Anyway, I lost that game too, but still had a great morning’s gaming
To finish, here are a few more pictures of the game. You look at them whilst I go and get a good fire going…!

Added to the collection today!
This is a reprise or updated version of a post from January 2019, in celebration of the latest additions to my collection of eastern European churches…
It’s one thing to collect figures - you need all sorts of different sorts to represent different armies, units etc - but to collect models of eastern European churches as well?
That’s what I seem to gave done over the last few years, in that I seem incapable of not buying any model that could vaguely be described as a “religious building, eastern”!
I once joked that I would like to have enough churches to have a different one for each of the maps in my Bashnya of Bust! scenario pack for I Ain’t Been Shot, Mum! That would take seven, eight or nine, dependent on whether you assumed one of the buildings in some of the smaller villages were houses of worship or not. Whichever it is, I seem to have achieved if not exceeded my target. Below is a gallery (in ascending order of size) of my church collection so far:


I’m pretty sure I don’t actually need any more eastern churches now, but if anyone should know of any others that are available…just add their details as a Comment and you can bet your bottom dollar that I’ll be spending my bottom dollar on another house of God!
Another absolutely beautiful battle report, this time featuring a game of I Ain’t Been Shot Mum played using the first scenario from the Defence of Calais scenario pack.
The report was originally posted on the IABSM FB group, which you can access by clicking here.
It’s May 1940, and with British troops being evacuated from the beaches at Dunkirk, the ancient port of Calais stood on the critical western flank of the Anglo-French lines.
In a desperate bid to shore up the flank Churchill committed the British 30th Infantry Brigade to defend Calais to the last. What ensued was an heroic struggle that is writ large in the annals of British military history.
This first scenario features men from the Searchlight Battalion, supported by anti-tank guns, trying to hold off the leading elements of the German advance. Click on the picture below to see all:

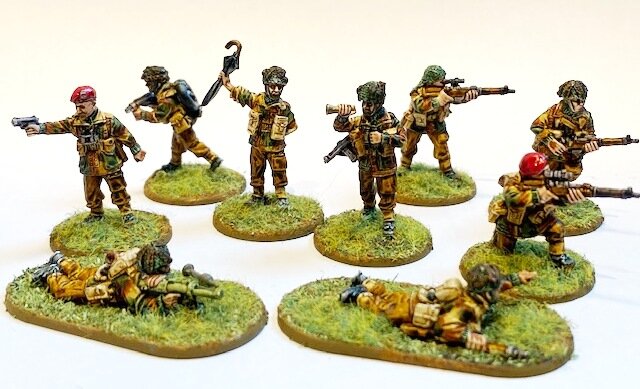
Absolutely brilliant After Action Report from Des Darkin, taken from the IABSM Facebook Group, featuring action in France in June 1944 as a British attack tries to push some Germans back. The game was played using the IABCYM dice-driven variant of I Ain’t Been Shot, Mum.
Played and reported in four sessions, this AAR combines Des’ various FB posts into one document with loads of great pictures: recommended reading.
Click on the picture below to see all:

This would have been the last February update, but Feb is a day-challenged month so today’s update falls into March!
Whatever the date, some lovely work being submitted today. As always, I recommend that you visit the individual galleries (access via the Nav bar, above) but, to whet your collective whistles, here’s a taster:


Another couple of games of To The Strongest, again on Zoom. This time it was to be my Classical Indians against the Marian Romans: a bit more of a challenge than the Achaemenid Persians!
As before, the set up was for my opponent to have a combination of a stationary overhead camera surveying the whole battlefield and a roving on-table ‘detail’ camera which could be moved to where the action was taking place.
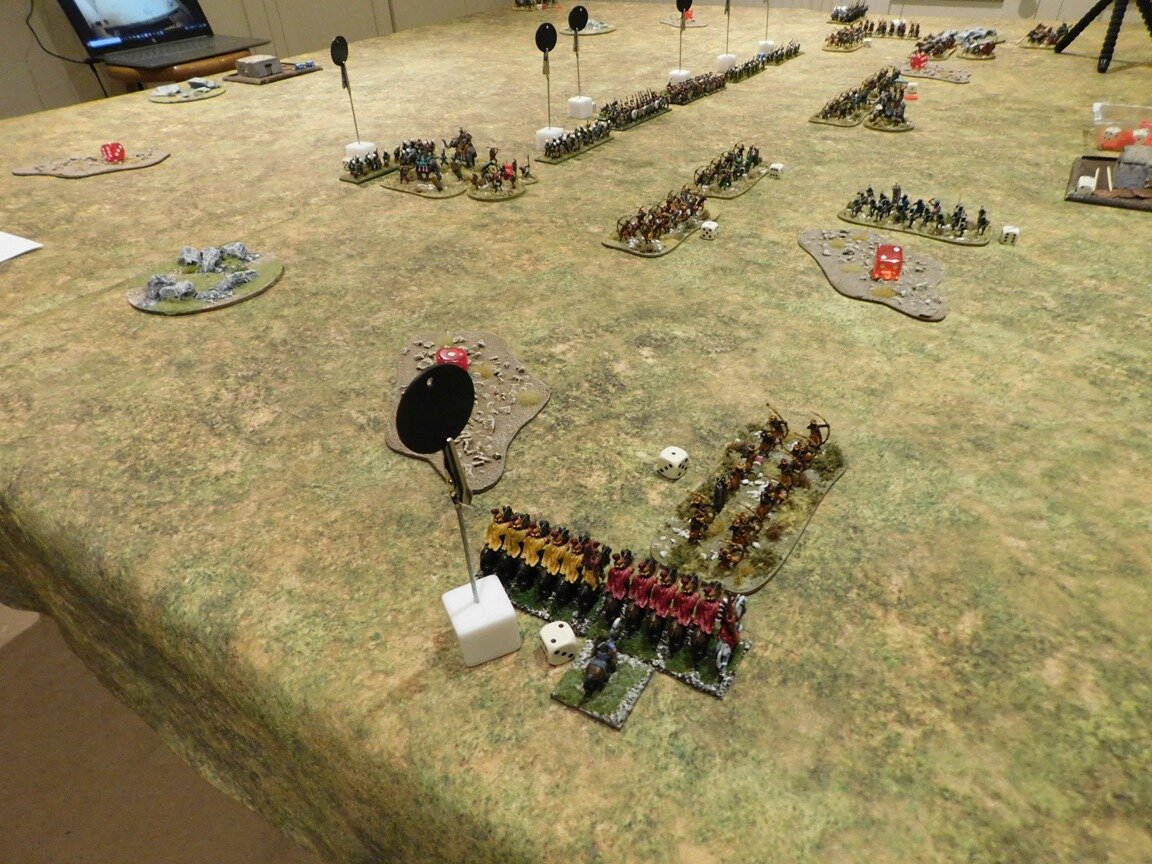
I lost the scouting phase and, as can be seen in the picture above, ended up in a long line across the battlefield facing a Roman force who’s main contingent seemed to be skulking in one corner.
My plan was therefore to hold back my left wing and send forward my centre and right wings to destroy his two separated commands one by one, and then combine my forces again to attack his rather impressive looking camps. Hopefully my superior numbers and mass longbow fire would negate his heavily armoured veteran legionaries (gulp!).
Skulking, I tell you, skulking!
Brave, noble, well-painted!
As already mentioned, I had lost the scouting phase, so my opponent had the initiative and would move first. That should have got him a couple of squares forward, just out of longbow range, but perfectly in keeping with my plan.
Unfortunately not.
A combination of group moves, marches, good cards and, presumably, sheer Roman determination led to a line of annoyed looking Italians appearing right in front of me before my men had had a chance to even finish their breakfasts!
Two thirds of his legionaries are now in my face!
Worse, some of his hairy cavalry had got off the table to the left of my line and were threatening to re-appear and roll me up like a yoga mat!
Well, that was my plan out the window: time for a desperate scramble to retrieve the situation.
A desperate scramble
Most of my men are uninvolved!
The cards were not with me either: although my four-horse chariots managed to manoeuvre themselves into the right position for a flank charge (above left), there they halted to admire the scenery rather than getting stuck in; and my longbows seemed to be firing the wrong sort of arrows today: nerf guns would have been more effective!
Then it was the Romans to go again, and my left hand command just evaporated!
I’m sure I had a left flank around here somewhere!
The Romans were then able to “left turn” with their usual alacrity and, although I did manage to kill one unit of light cavalry, that was really that.
Well that was as comprehensive a mullering as I have ever had!
The good news was, of course, that that left us time for a second game: every cloud, silver lining etc!
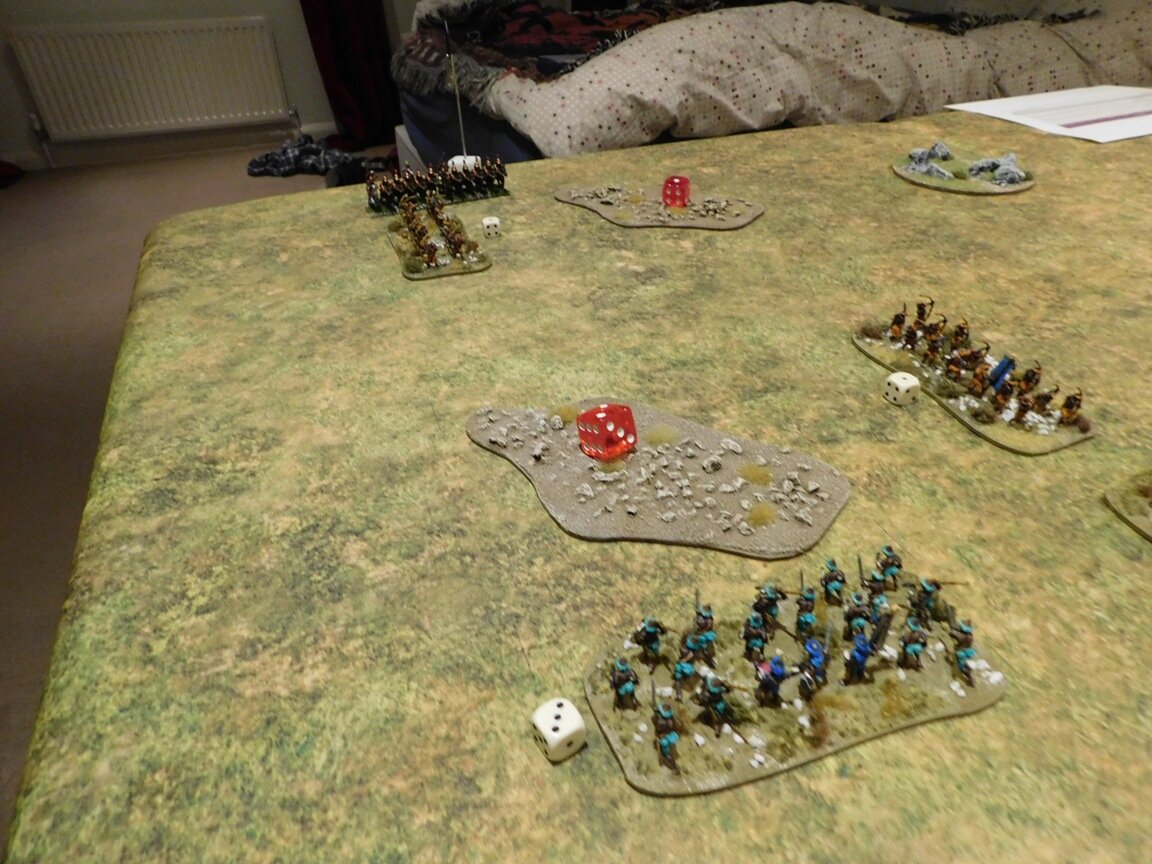
Things started well: I won the scouting phase this time and ended up in a much better position as the first card was about to be drawn.
Good, tight formation from the Indians this time!

A tough nut to crack!
The Roman commander looks down on my troops with disdain!
My plan was to quickly kill the cavalry in front of my right wing, then bring the chariots back into the centre for some flank attacks. Meanwhile, my other two commands would advance en masse and pepper his men with their longbows, weakening them in time for the elephants to go in from the front just as my heavy chariots hit them from the side.
Unfortunately, the Gods were against me again (despite me changing the pack of cards I was using in a desperate attempt to change my luck!) and my first turn ended with my men arrayed as shown in the picture above. Chariots: yes, good. Division One: yes, good. Division two…where on earth is Division Two!
If there was anything I’d learnt today about the Romans it’s that they can react really quickly to anything that happens and, sure enough, forward and sideways they came as they attempted to retrieve the situiation.
There was, however, an opportunity here. If I could get my chariots across the field and into the flank of the two legionary units in the centre of the table, then I reckon that I could hit one and then the other and roll them both up. After all, I’d have three attack cards on the first unit with a Hero and a General to get replays. That would put him a third of his main force down with no casualties to me:
I had, of course, neglected to factor in the fact that it was not my day!
Although my chariots flew across the field and got into a perfect charge position, they then stopped! I had had two chances to draw a seven or more (i.e. a 64% chance of success) and failed both times.
The Roman cavalry were thus able to come forward and hit my chariots in the flank (bye bye one unit of chariots and a general), then move the rest of their troops to begin rolling up my line.
Not as bad a mullering as last time, but definitely another hammering!
A couple of great games of TTS despite my ill-fortune. Some of you might be muttering that a good workman doesn’t blame his tools, but even my opponent agreed that it seemed as if every second card I drew was an Ace. For the final chariot combat, needing two 6’s for saves, I drew two Aces: a fitting end to the day!
Still, onwards and upwards, as they say: I’d like to fight the Marian Romans again, but might try one of the other Indian-style armies next time!
Regular visitors will know that one of my current projects is to build a Classical Indian army using the excellent 15mm CAD designed “Z” range from Museum Miniatures.
I already had enough figures to field a standard 130 point army for To The Strongest, which has already and quite successfully hit the tabletop a couple of time, but I wanted to add some units to increase it’s flexibility.
I say ‘increase its flexibility’ to mean two different things.
Firstly, I wanted to extend the figures’ use into other TTS armies, looking at the Vedic Indians as a starting point. This is an earlier army mainly consisting of chariots and javelinmen.
Secondly, I wanted to increase the tactical flexibility of the Classicial Indians. At the moment, I only have three commands, with my impact units being Elephants and Heavy 4-Horse Chariots. These are great, but risk being outflanked by armies with loads of lights. I therefore need more, slightly less powerful units as potential substitutes for the usual mighty, but inflexible, fist.
The lists all mention two-horse chariots as a slightly less powerful version of the heavy four-horse variety: less powerful so you get more of them. These would be ideal, except for the fact that Museum didn’t do them in their Z range.
Or at least they didn’t!
A quick e-mail to Dave, proprietor, with the request and justification, and within a couple of days (yes, days!) a two-horse chariot option hit the shop.
I bought nine!
These are, like the other figures in the range, lovely models and highly recommended. Great service from Museum as well. I feel ready for Alexander now!
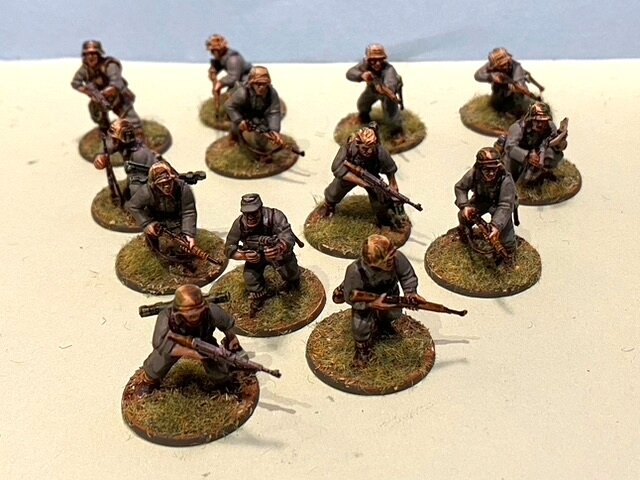
Finally managed to get some units off the painting table and into the finished pile!
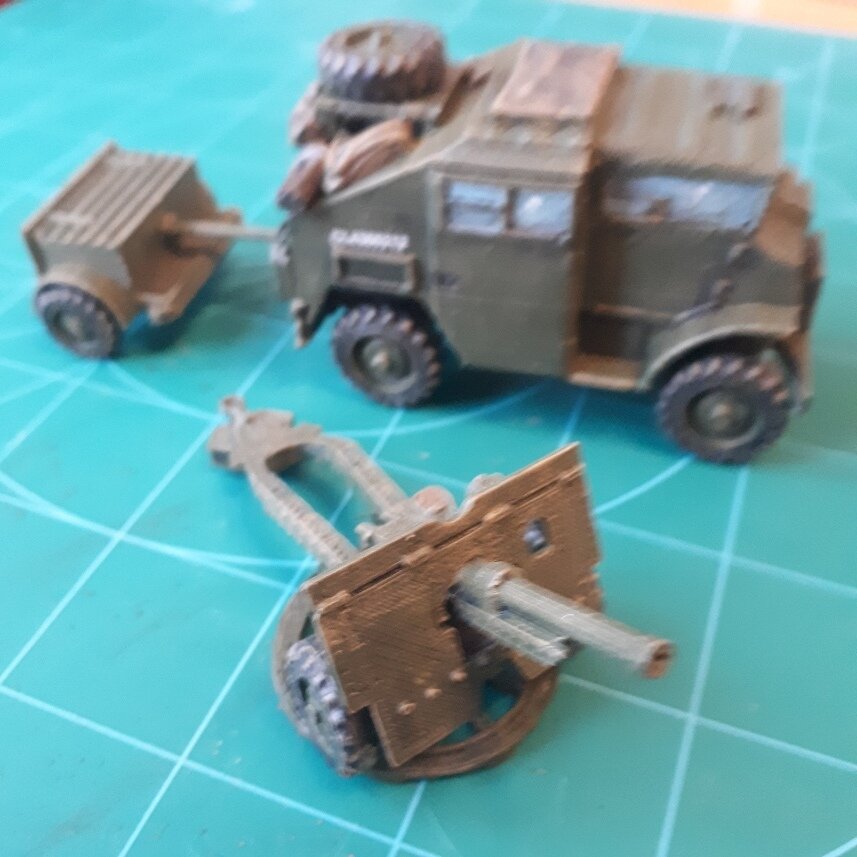
Here are four SdKfz 7 half-tracks from Battlefront:
These are intended as tows for my early war German artillery: I painted up four 10.5cm le FH18 howitzers last year that are in need of transport.
Those of you who know these sorts of things will know that that sort of howitzer was actually pulled by the smaller SdKfz 6 half-track but, as far as I know, Battlefront don’t do those, and I got these in one of their 40% off sales…which shows how long they’ve been waiting for a coat of paint!
What’s the difference between the two, you ask?
Well, the SdKfz 7 is bigger: 50cms longer, 15cms wider and 14cms taller, and weighs a third more. There were also a lot more of them: about 12,000 built versus about 3,500.
Hopefully no-one will notice when they’re on the tabletop!
It’s raining outside, and the first coat on the bases of the artillery tows I’m painting are drying, so the perfect time to do a quick Painting Challenge update.
Plenty of entries despite the fact that only a week has gone by since the last update: lockdown is proving productive for many of you!
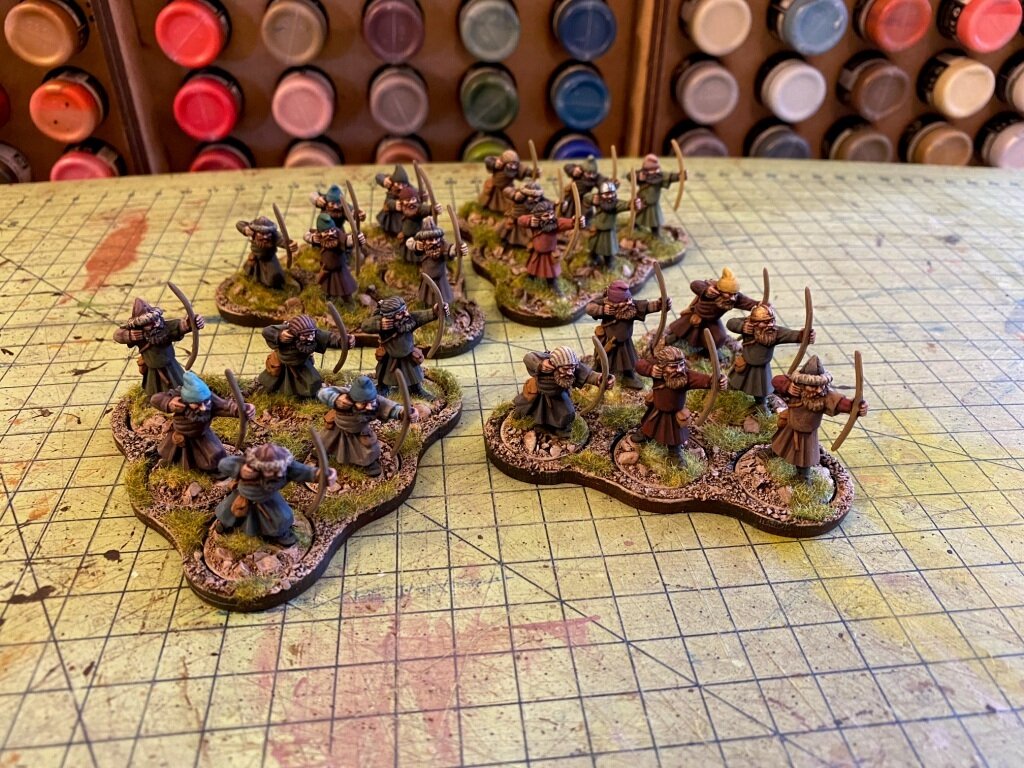
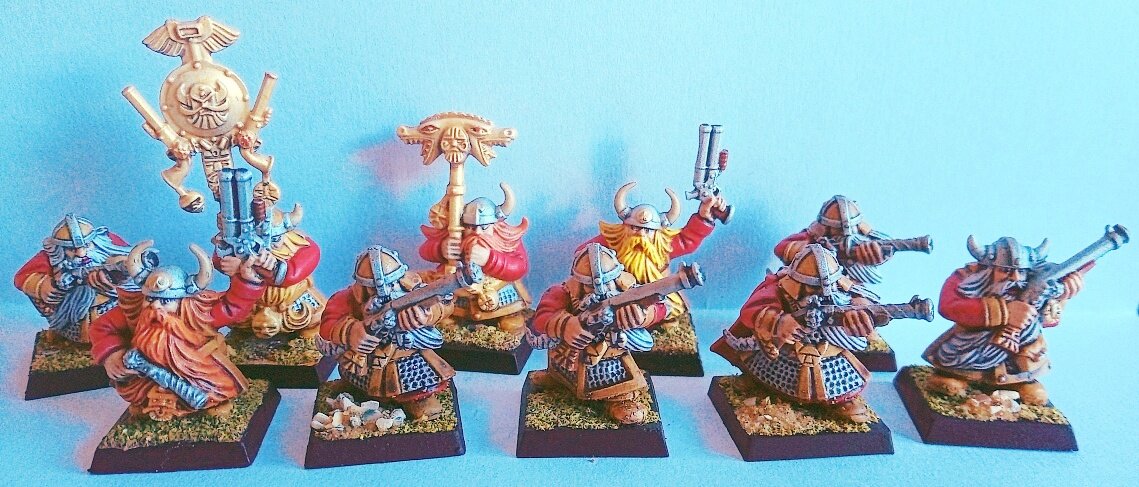
A special mention to Mr Plowman who, after a somewhat disappointing 16 points last year, bounces back with a 101 figure Dwarf army. Lovely work.
Visit the individual galleries, but here’s a taster of this week’s entries:


Great little pictorial battle report lifted from the I Ain’t Been Shot Mum Facebook Group.
Phil Turner’s game featured the British trying to hold off the Germans somewhere near Dunkirk. Click on the image below to see all.

Two remote games of To The Strongest played at the weekend: both featuring my newly painted Classical Indians against a cobbled together army of Achaemenid Persians.
I say cobbled together because I don’t have an Achaemenid Persian army, so what ended up on the tabletop were Assyrians as Persian cavalry, some Medes from an Alexandrian army, some Greek types as Ionians, some Scythian types as horse archers, then Sassanid Persian infantry as Sparabara and, embarrassingly and perhaps the most heinous crime, Greek Hoplites as the Immortals!
Due to lockdown, the game was played remotely i.e. the table and figures were set up at my house, with my opponent being able to see what was going on over Zoom from his house. After last week’s first attempt, I’d invested in a new webcam, so the picture was much improved:
I also bought a little tripod for my mobile ‘phone (you can see it in position, above) so it was also a lot easier to move the “battlefield reporter” camera around as well.
I placed my CinC and his two Heavy Chariot units in the centre, with the elephants and longbowmen on the wings.

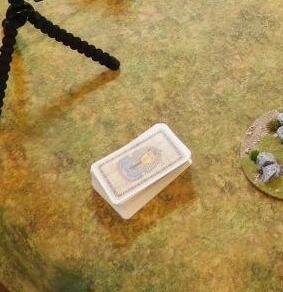
Unusual activation cards leaves two Persian and one Indian brigades stationary. It was the start of many poor cards for the Achaemenids.
I let the Achaemenids get too close, giving up the longbow’s greater range advantage.

The Maiden Guard in a fetching turquoise. Lovely figures: actually look like maidens!

…my elephants smash into one unit of Sparabara.
Against my chariots in the centre.
…and the Chariots charge forward into the enemy horse archers.
Leaving the Chariots free to sack the Achaemenid camp.
So a victory for the Indians: a couple of enemy units killed by missile fire, but the main damage was from the heavy chariots punching their way through the centre. After the game, Bevan mentioned that he wasn’t expecting to find “cavalry” in the centre of my line, and this discombobulated his battle plan!
I also feel honour bound to mention that the cards were most certainly not falling for the Achaemenids!

Note the sneaky Persian horse on my left!
Remember I mentioned how badly the cards were falling for the Achaemenids? Same thing this game: opening volley of longbows killed two of the three Persian cavalry units facing my left flank.
…mean nothing. They are to help Bevan see the rough ground over the webcam.
But I send the elephants forward relying on the longbowmen to deal with (or rather slow down!) the enemy horse when it reappears.
The Achaemenids have haemoraged Victory Coins!
What with my early missile-fire successes, the elephants punching through on the left, and the chariots/cavalry dealing with the right, the Achaemenids ran out of coins.
Note the chariots have also punched through on the far side.
So a second victory for the Persians, although things were a lot closer this time.
Massed longbow fire, and the elephants/heavy chariots at the schwerepunkt, proved a winning combination. Both sides had infantry with strong missile fire but weak melee skills supported by decent melee troops (his cavalry, my elephants and chariots) but I had the advantage in both areas: my longbows outranged his bows, and my elephants/chariots were a bit better than his cavalry. These two advantages gave me the win despite having less units (by one!) and less flexibility (three commands to his four).
Still, I suspect Bevan will have his revenge. Next encounter will see me fielding the Indians again, but against an Alexandrian army…gulp!
I knew there was a reason I spend so much time on keeping this site going!

One of Tim’s collection, taken from the IABNM Facebook Group
Fellow Lardy Tim Whitworth was browsing the other day, and came across the battle reports that I have taken from Nick Overland’s currently hibernating Maxim to Milan blog.
Nick wrote a variation of IABSM called I Ain’t Been Nuked Mum or IABNM for short which made some brief but very successful appearances at various Lardy days.
Inspired by what he read, Tim has set up a Facebook Group for IABNM, which you can get to by clicking here. It’s got the latest draft of the rules on there, and some lists, so hopefully we’ll see a few games taking place shortly.
It’s certainly inspired me to get all those boxes of Soviet armour out of the cupboard, the ones I bought in the last Battlefront sale…!
As so many people are sending in entries at the moment, I thought I’d keep on top of things with a quick Painting Challenge update after only a week rather than the usual two.
As usual, some lovely figures submitted, so I do recommend that you visit the individual galleries, but here’s a taster to keep you inspired:


Lloyd also gives us the story behind the ships he’s submitted: a tale that shows that although wargamers may pass on to the great table in the sky, their collections continue…and that there’s a value in cleaning out the cupboards!
Thought I might send in some pictures of my latest project. The first picture is of merchant ships and some escorts, 42 total. These are all 1/2400 scale and the merchant ship models have an interesting history. My first gaming group in the north coast broke up about 25 years ago due to people moving out of the area and one very unexpected death. I inherited some the deceased’s collection .
I gleaned all the merchants from the old collection and bought a few more to make up a decent sized convoy. Only one of these ships had been painted in in something other than basic battleship grey, a very boring sight! Most of the models are Panzerschiffe models, very basic resin cast models, some of which went directly into the bin since they were so poorly cast! All were repainted in differing schemes which I hope are close to what might have been seen at the time. The Hunt and Flower escorts are recent purchases from GHQ since there were none of these ships in the old collection.
The second photo shows a further 11 escorts, all DDs from the old collections and all repainted. Most are Panzershiffe, thought there are a few metal models mixed in.
The third photo is my homage to our cousins to the north. At the end of the war the RCN was the third largest navy in the world and they had fought everyday in the Battle of the Atlantic. Again most of these are Panzerschiffe and I’ve snuck the GHQ Flowers into this photo since they are Canadian ships.
This project was another “clean out the cupboard” projects. I feel pretty good about it!

Another remote game: this time a re-fight of Austerlitz.
The set up was similar to that for Ostrolenka (see earlier this year) but with a few improvements. Two teams of three players each: the French (Mark, Peter and I) and the Austro-Russians (Dave, Steve and Trevor) each in their own Zoom breakout room.
Each team could see each other and a limited view of the battlefield, and each was periodically visited by an Aide de Camp (Bevan) who took our orders and passed them on to the Umpire (Edward) who ran the table.
Eight participants, eight different locations: the wonders of modern communication!
The game would be played with the Age of Eagles ruleset but scaled at divisional level i.e. the smallest units were divisions grouped into corps.
Each turn would be one hour of battle time, and the battlefield was about 8 by 9 miles in size. Each side would decide their deployment and send in orders for their first (7.00am battle time) turn before the day of the game itself, with the aim being that each turn would take 20 minutes to play, meaning that playing nine turns would give us all a game lasting from 7pm to about 10pm.
Each turn, each team would be able to move their Army Command location and issue orders to each of their Corps. Or the team could decide to “ride about a mile and a half round your army to inspect things for yourself” instead of issuing orders.
As a guideline, we could issue a one sentence order with a one sentence advisory to each corps:
"V Corps to deploy between villages A and B. Artillery well to the front"
"II Corps to attack enemy to front. Cavalry in reserve prepared to take opportunities"
"IX Corps to assault village C. Watch out for enemy Corps behind hill to your left"
"III Corps to advance and pin enemy to front. Attack only if enemy corps disordered"
"VII Corps to withdraw behind XX stream line. Conscripts to form rearguard"
Corps would continue to follow their previous order until changed. We were further warned that:
If you issue an order to each Division you will run out of competent Aides de Camp to take orders before you get very far.
If you issue long and complicated orders with multiple conditions and sub clauses the Aide de camp will pass on a random selection that he remembers to the Corps commander.
For those of you unfamiliar with Austerlitz, our briefing was as follows:
Napoleon’s successes against the Austrians during the second half of 1805 have been extraordinary, with Vienna taken and many prisoners seized. However, Czar Alexander of the Russian Empire has now come west to help his ally Emperor Francis. Despite the French triumphs, Paris is swirling with rumours about Napoleon’s imminent defeat and fall from power, especially after Nelson’s victory at Trafalgar. The French Emperor needs one final triumph on the battlefield, and the hilly ground near Austerlitz makes a perfect setting.

Our army could deploy anywhere in the western third of the map (roughly bordered by the line of the stream running between Kritschen and Tellnitz). The Emperor Napoleon could place his HQ wherever he likes within that area, but the battle is lost instantly if he is captured or killed.
Streams were all easy to cross with only a modest loss of pace. Ponds and marshes were frozen, but would hinder movement somewhat. The battlefield was very hilly, with various plateaus. Santon Hill and the Goldbach Heights tower above all the other ground.
Our victory conditions were simple: victory would be achieved if significantly more casualties were inflicted on the enemy than were suffered by the French army, or if Czar Alexander was captured or killed. In either case, Austria would sue for peace and the Confederation of the Rhine could be established.
Our army consisted of six corps:
Bernadotte
Rivaux’s Infantry Division (some 5,500 men)
Drouet’s Infantry Division (some 6,500 men)
1 Foot Artillery Detachment
Davout
Friant’s Infantry Division (some 7,700 men)
Bourcier’s Heavy Cavalry Division (2,700 Dragoons)
Soult
Vandamme’s Infantry Division (some 8,700 men)
St Hilaire’s Infantry Division (some 9,000 men)
Legrand’s Infantry Division (some 8,600 men)
Beaumont’s Heavy Cavalry Division (2,700 Dragoons)
2 Foot Artillery Detachments (1 with heavy guns)
Lannes
Suchet’s Infantry Division (some 8,600 men)
Cafarelli’s Infantry Division (some 7,600 men)
Oudinot’s Infantry Division (some 5,400 Grenadiers)
2 Foot Artillery Detachments
Murat
Kellerman’s Light Cavalry Division (about 2,100 Chasseurs and Hussars)
Wathier’s Heavy Cavalry Division (1,700 Dragoons)
Nansouty’s Armoured Heavy Cavalry Division (1,700 Cuirassiers)
d’Hautpol’s Armoured Heavy Cavalry Division (1,600 Cuirassiers)
1 Horse Artillery Detachment
Bessieres (Imperial Guard)
Hulin’s Old Guard Foot Division (some 4,500 of the finest veterans)
Savary’s Old Guard Heavy Cavalry Division (1,600 elite horsemen)
1 Foot Artillery Detachment
As we didn’t expect the enemy to follow history and conveniently deploy in two easily-beatable chunks, we decided that we would go for the Pratzen Heights and then hold against all comers, waiting for the opportunity to exploit an opportunity.
We therefore issued the following orders to our corps commanders:
SOULT:
Deploys on Schlappanitz.
Turn 1 Orders:
Orders: Move as fast as possible east, keeping south of Girschkowitz and Blasowitz and up onto the northern end of the Heights.
Commentary: You must get up onto the Heights before the enemy.
Anticipation: Deploy along the edge of the Heights facing N-NE, with left flank covering Krug.
LANNES:
Deploys on Puntowitz.
Turn 1 Orders:
Orders: Move as fast as possible east keeping north of Pratzen and up onto the central mass of the Heights.
Commentary: You must get up onto the Heights before the enemy.
Anticipation: Form on Soult's right flank.
BERNADOTTE:
Deploys on Kobelnitz (or as close as our deployment limit allows)
Turn 1 Orders:
Orders: Move as fast as possible east via Pratzen and up onto the southern part of the northern end of the Heights.
Commentary: You must get up onto the Heights before the enemy.
Anticipation: Form on Lannes' right flank.
DAVOUT:
Deploys on Marxdorf
Turn 1 Orders:
Orders: Move to Puntowitz.
Commentary: Keep a sharp eye for Allied troops approaching from the south.
Anticipation: Guard against an Allied approach from the South
MURAT:
Deploys on Kritschen
Turn 1 Orders:
Orders: Move east to where the road crosses the Bosenitz Brook.
Commentary: Send scouts up onto the Santon Hill
Anticipation: Be ready to head either east or south dependent on what the enemy does.
BESSIERES:
Deploys on the Zurian Heights.
Turn 1 Orders:
Orders: Move to Girschkowitz.
FRENCH HQ & NAPOLEON:
Deploys with Lannes.
Turn 1 Orders:
Orders: Establish yourselves at the juncture between Soult and Lannes.

The idea was that once our strong centre had encountered the enemy, we would either crush them straight on (if they had come straight at us) or pin them so that a flank could roll them up (if they had weighted their opposite flank).
We actually predicted to ourselves that they would go strong up north, so we were anticipating Soult and Lannes being engaged, Murat pinning, and Bernadotte swinging north and rolling the enemy up from the south.
In the event, I think it fair to say that things went sort, but not entirely to plan!
Here’s a series of snapshots from the game, with commentary where appropriate:
From left to right:
Bessieres takes the Guard forward to Girschkowitz to protect the left flank.
Soult (the three central columns) heads up the hill and encounters Russians
Lannes (top centre right) is already engaged!
Bernadotte is moving forward slowly, Davoult is in reserve. Why is all our artillery (the grey blocks) in a stream bed?

The Guard have been hit by three divisions of Austrian Cuirassiers. Better send Murat to help.
Soult has a 3:2 advantage: should be okay.
Lannes still going strong.
Come on Bernadotte: get moving!
And will someone please get our artillery out of the stream!

The Guard have been smashed backwards! How can this be? Bessieres is sacked!
Murat (off screen to the left) is engaged and reports that he’s doing well.
Soult has been pushed back? Does not compute: we had a massive advantage! Get back up the hill immediately!
Lannes is still going strong.
Urgent messages going to Bernadotte, and don’t even talk to me about our artillery!

Murat still doing well to the left, but there seem to be lots of Russians coming towards him. No probs, we’ll break their centre and turn their right flank soon!
The Guard have retreated to a village and are sorting themselves out.
Soult goes back up the hill…but why has one division stayed behind?
Bernadotte is finally moving forward on the right. We bring Davoult forward to breakthrough the centre.

Murat is starting to feel the pressure…but he needs to keep fighting to hold our left.
Soult is knocked back again! What is wrong with you, man, you are French and outnumber the enemy! Get up that hill now!
Lannes (lovely boy, lovely boy) is back moving forwards again.
Bernadotte est un escargot (snail) reborn as a French marshal. Will you please hurry up and hit them hard on the right so you can swing round and roll them up!
The guns! The guns!
Murat has been dispersed, with only one division left, holding the Santon Hill. This is not good, but his sacrifice should have bought us time to win the centre and right and, as he said himself, any Hussar who is still alive at 30 is a blaggard and a coward!
The Guard have been pushed back (again!) but have determined to re-take the village. They’d better, Bessieres, as your future prospects are right in the middle of it!
Soult, Lannes and Bernadotte are pushing forward hard. Looking good: lots of blue, not so much green and white!
The guns are finally moving as well!
Hmmm…there are some Russian coming from the left now but (Gallic shrug) the battle seems to be won in the centre and on the right.
We just need Bernadotte to push forward, but he’s whining about Austrian cavalry holding him up!
A pity the battle didn’t end last picture: the enemy is resurgent!
This is where the battle ended.
Soult is barely holding, Davolut is under pressure, but Lannes and Bernadotte seem to be doing okay.

And that is, indeed where the battle ended.
Up to that last picture, we thought we’d been doing pretty well, but we were starting to come under lots of pressure.
Remembering the victory conditions, casualties were counted. We had taken 50% more than the opposition! Oops! Throwing Murat away like that had not been very helpful, and it was hard fighting all the way.
The Austro-Russians were claiming a glorious victory, but we thought that, situationally, we were on the cusp of a massive roll up, and we had taken the Heights and pushed the enemy back. That said, the victory claims from the French camp were much more muted: we knew that, whatever the situation, we had been quite badly roughed up.
What did we do wrong?
Well, we deployed to perfection, but underestimated how long it would take to get our guns into play.
We were also a bit passive in issuing orders sometimes. I think we could have pushed some divisional orders onto our marshals to improve the tactical situation (although there wasn’t that much room for tactics given our charge forward!) and definitely used ADCs to get the guns and Bernadotte moving forwards more quickly.
Using Capitaine ‘Indsight again, Soult initial set back was a real surprise and really turned the tide against us really early on. The unit that turned him back was the Russian Guard, who were, to coin a phrase “immense” and held us up far too long. Without their resistance, we’d have been over the hill and into Austerlitz by lunchtime!
Our huge mistake, however, was not going to see what was going on with Murat. We left him to get on with it, even when things turned against him. we then threw him away…in that he should have disengaged and pinned the Russian right flank advance. That’s how cavalry do things, after all, but we just ordered him to keep fighting. Funnily enough, it’s what the Austrian cavalry did to Bernadotte on our right.
So, in summary, a good plan, that could have worked, but we should have been more active. I blame the hours I’d already spent on Zoom working that day: my equivalent of Napoleon’s Waterloo malaise!
Good play from the enemy too. We might have had a good plan, but I think it fair to say that they made no serious mistakes once battle was joined. Well done Dave, Trevor and Steve!
Anyway, onto…
For a final decision, let’s hear from the Umpire:
To be honest, as one of the French players, I think we were relieved to be awarded a draw, but a draw had been declared and all that now remained was for Napoleon’s excellent propaganda machine to spin it into glorious victory!
To finish, my thanks to Edward and Bevan for running the game so smoothly, and to all the players for participating. It was a brilliant experience, and one I look forward to repeating soon.
A very enjoyable account, much like the reports I think Le Moniteur printed from time to time!
Very roughly, the Allies anticipated where your main attack would come from and placed our strongest Corps to block it. Sadly, Buxhowden was apparently a little hungover and they moved very slowly at the start. Our main plan was to hold the French on the Heights, with as compact a line as possible, whilst Bagration’s huge cavalry Corps savaged whatever you had on your left and then swung down the valley to smash into your advancing infantry on their flank. The Russian Imperial Guard were nicely positioned to help stop and then drive back the initial French attack.
Like a lot of things on the battlefield it don’t quite work out that way! Still Kutusov fought like a lion whilst always being outnumbered, Constantine’s Guards were magnificent, Bagration’s Cavalry did the business (Murat was always all trousers and whiskers) and once Buxhowden sobered up he know what to do. Oh and I suspect we got a few very timely dice rolls…
However our troops were all ordered to cut out the glorious but fatal charges on the French and to cause maximum casualties in defence. This seemed to work and according to our victory conditions it looked like an Allied victory – but half way through we would have settled on the draw, so no complaints about the decision.
Yes, a really good idea which produced a great game. Well done Edward & Bevan.
Here are some final, Umpire’s, shots of the game:
A huge update this time round: lockdown is obviously proving a fruitful time for painting!


Some very fine work here: don’t forget to visit the individual galleries to see more…
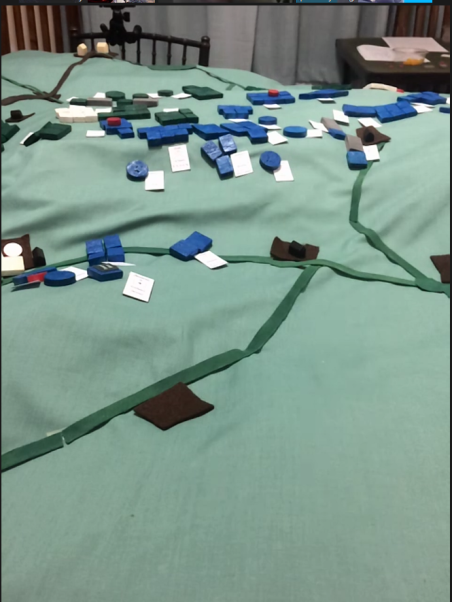
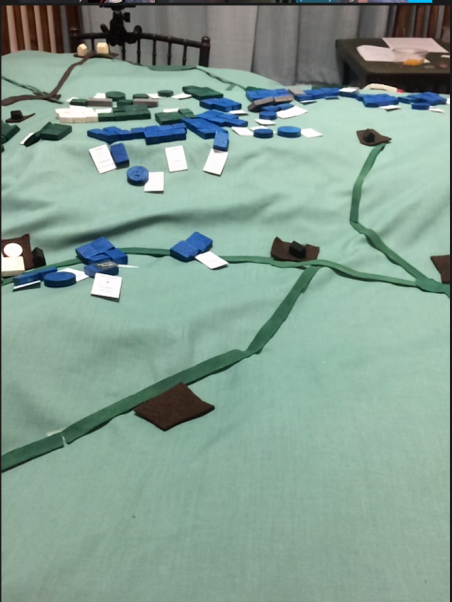
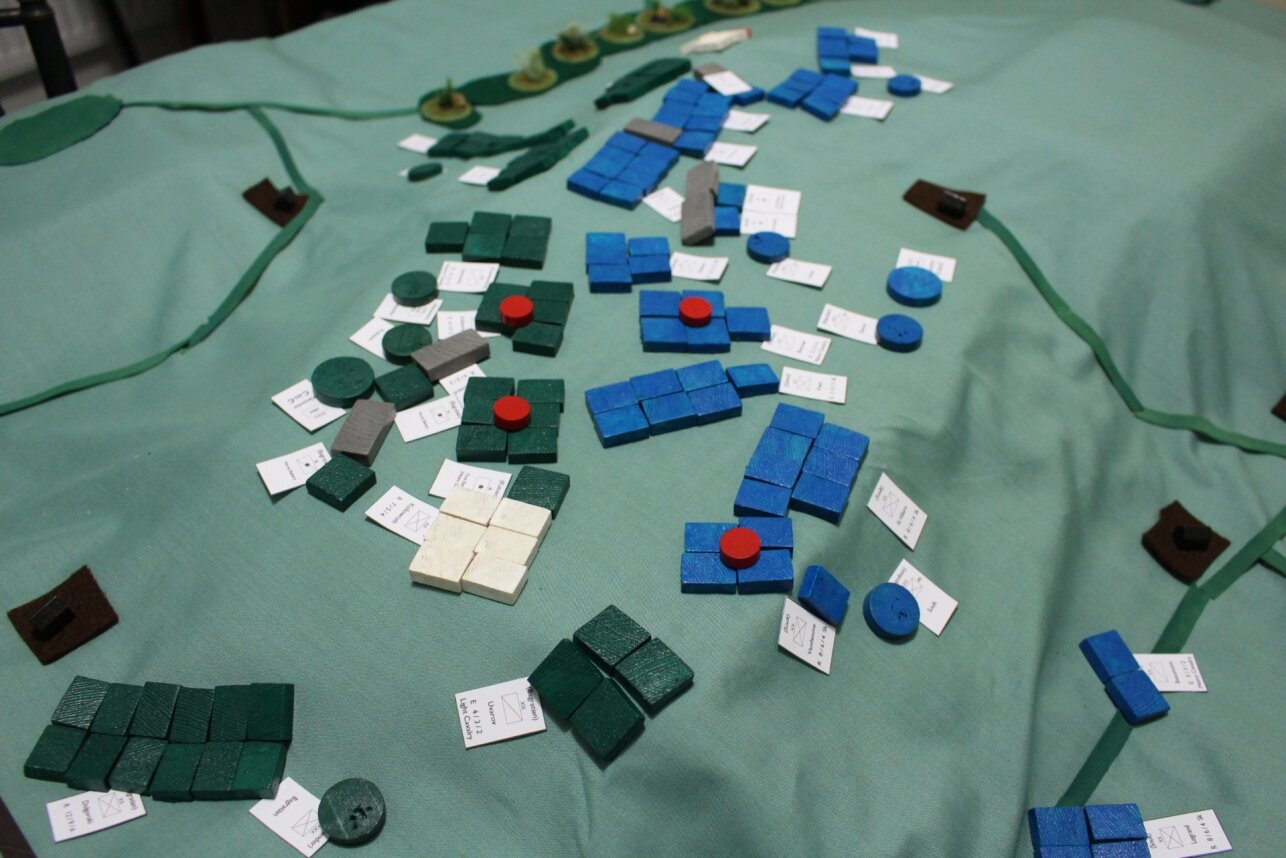
Having now played in three remote games, I decided that I should try and run my own: seems only fair that I should host once in a while! I recruited a willing volunteer (thank you Bevan!) and set about, er, setting up.

With the wargames room turned into a yoga studio until fitness clubs are open again, I had to set my tables up upstairs: plenty of room, but not as much light as usual. On the plus side, however, the wardrobe-like cupboard doors provided a useful place for the overall table camera to sit. This would give a bird’s-eye view of the battlefield whilst close up images were provided via a mobile ‘phone.
Connectivity was via Zoom. The laptop that you can see in the picture hosted the meeting, with the mobile ‘phone calling in as another participant. The overall camera gave a pretty rubbish picture, but it did at least allow Bevan to see everything that was happening, but his moves were mainly made based on the mobile ‘phone “roving camera” which I hovered over the table wherever the action was.

Testing the Set Up: this is what the remote player would see
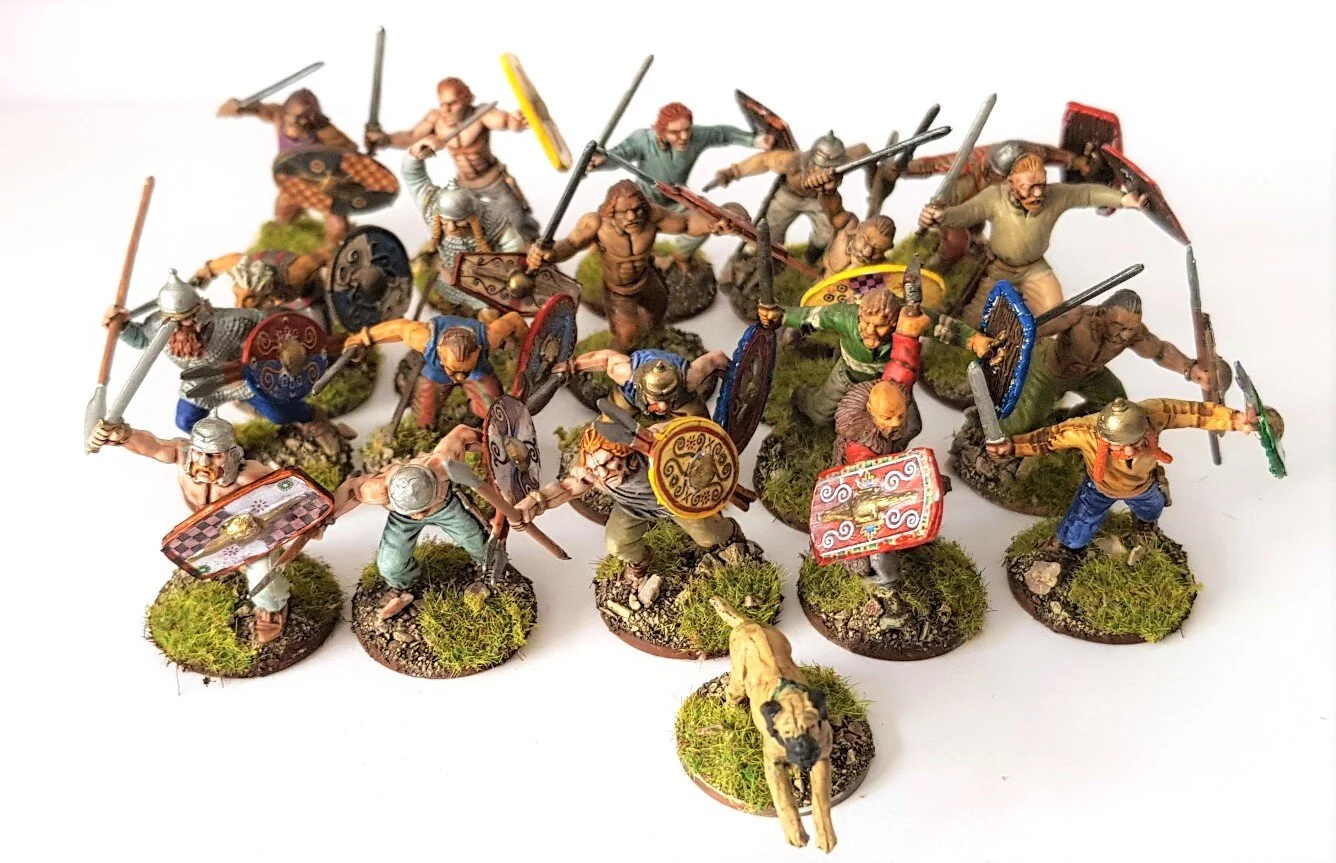
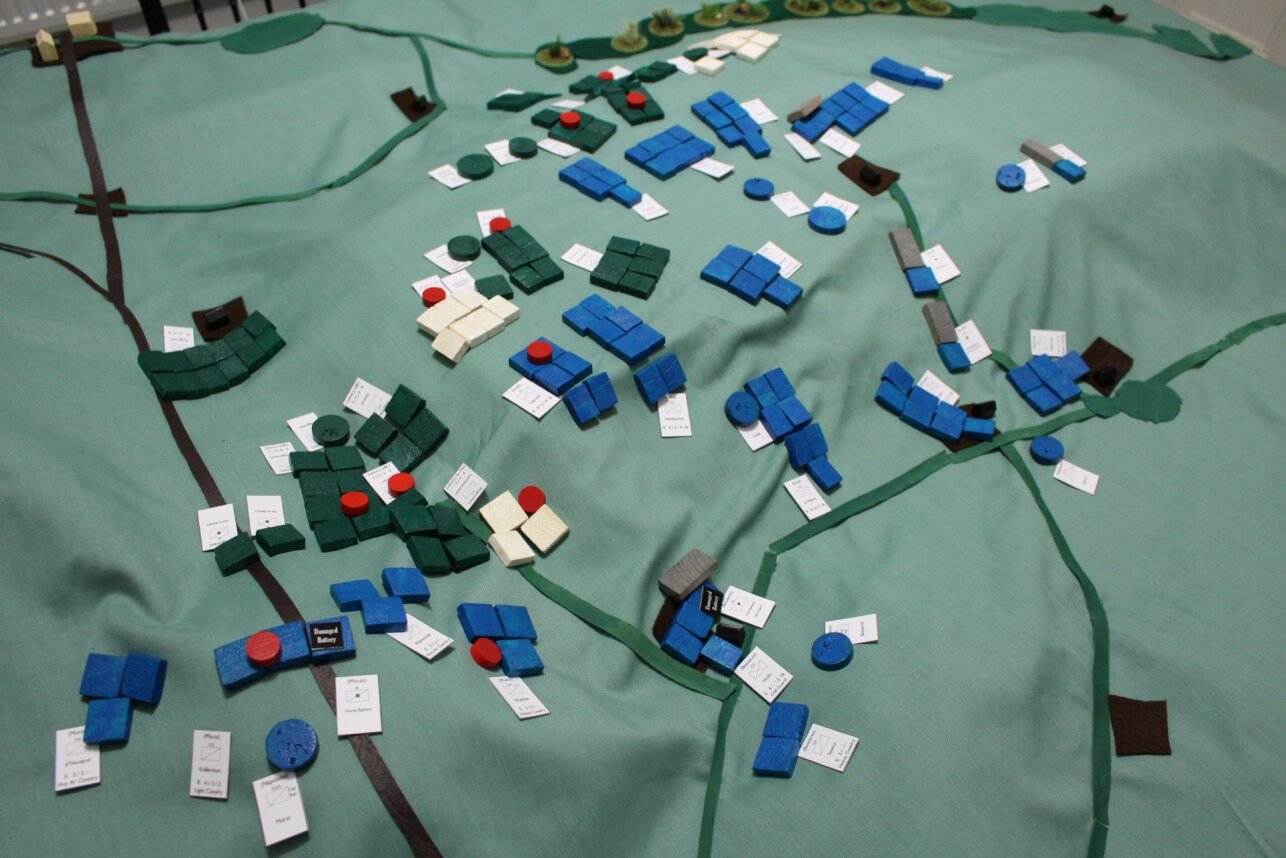
I had decided on To The Strongest as the grid-based system would mean no measuring and would be easier for Bevan to judge what to do. It would be a suitably un-anachronistic clash between my Marian Romans and Bevan’s Gauls.
In order to help Bevan keep track of his troops, I had bought a whole load of little stands to carry numbered tags. Although not really visible on the overall camera, they worked very well in close up, and allowed me to call out unit numbers rather than long explanations involving “this unit that’s near this thing” etc.

The Marian Romans consisted of four commands. The Proconsul commanded two legionary units (one veteran) and a unit of light archers. His first Legate also commanded two legionary units (one veteran) but with a unit of ballistae artillery. His second Legate once again commanded two legionary units (one veteran) but with a unit of eastern horse archers. Finally, he had an alae of two units of veteran auxiliary cavalry allegedly from Macedonia. I usually use Gauls as the auxiliary cavalry, but they were on the other side of the table so that I had to use some Persian-looking types instead.

Note the markers allowing Bevan to see which units were which
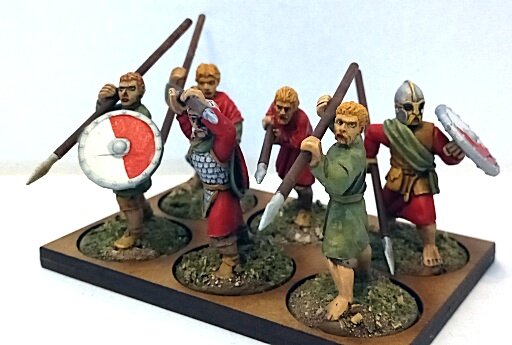
Bevan’s Galling Gauls also had four commands. Two commands consisted of three deep warrior-warbands bristling with heroes; one command consisted of three cavalry units; and the final command was two units of iouantoues (youths) light infantry with javelins and another unit of cavalry.
There did seem to be an awful lot of Gauls!
The battle opened with the entire Gallic line thundering forward, with the Romans advancing more cautiously towards them.

The Gauls had their warbands on the left and centre, their light unit just to the left of the trees in the middle of the battlefield, and their cavalry on the far right.
The Romans had their Macedonian cavalry on the left, then a long line of legionary units with their associated light troops in front of them, except for the ballistae that were opposite the camp.

The Gauls come thundering forward
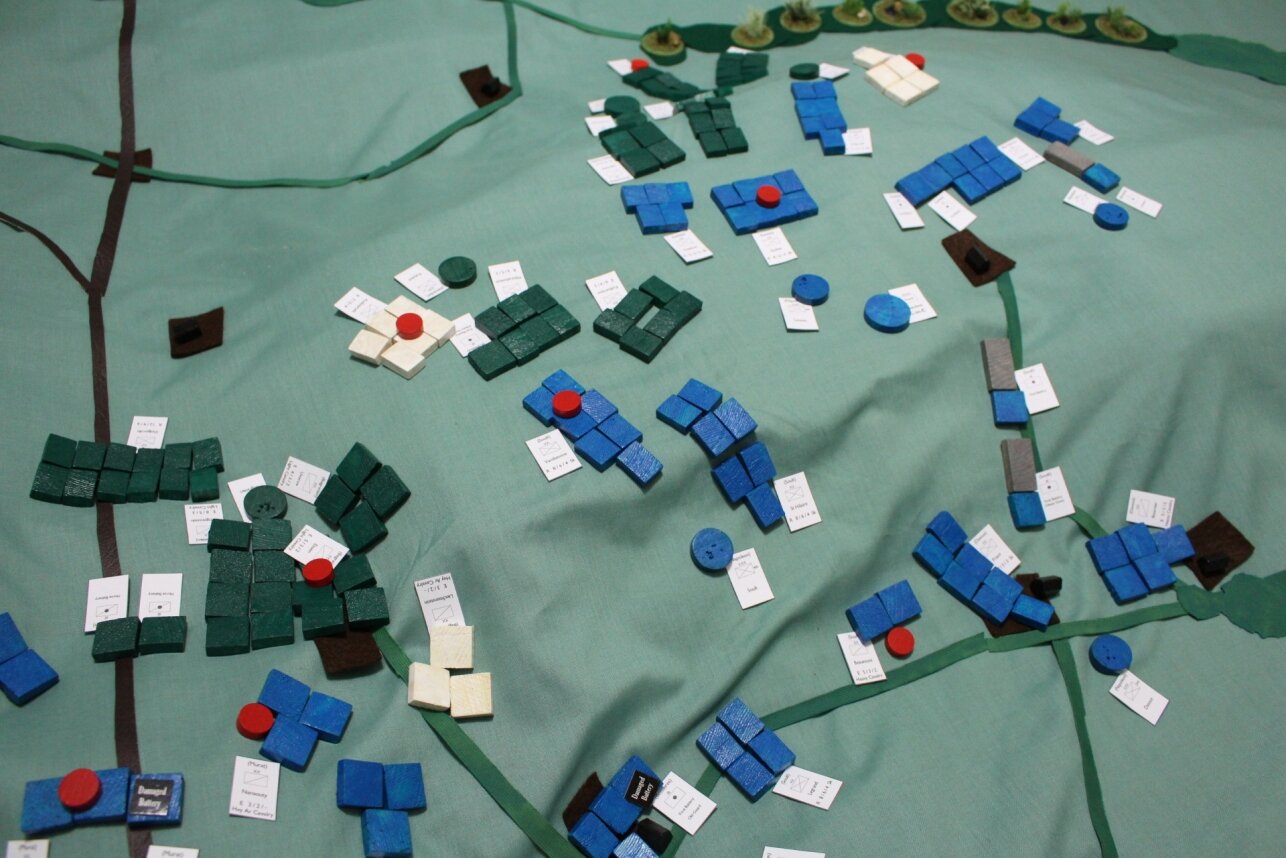
First action was on the Roman left, where the two cavalry forces clashed. The trees meant that the Gauls couldn’t use their superior numbers, and my horse was veteran, so I was hoping for some success here.
Regrettably, the Macedonians were obviously not enjoying the rather damper climes of Gaul, and were either pushed back in disorder or just disordered. Not a very good start!
Meanwhile, the two battle line drew together.
I quickly lost my light bowmen and horse archers to rampaging hairies, which meant that I would be one unit down in the main clash. On reflection, I should have sent my light bowmen into the trees on the right to threaten the left flank of the Gallic line, but unfortunately I didn’t think of that at the time!
Once the two lines clashed, it was actually all over pretty fast!
Although I held my own on either of the side combats you can see above, the warband in the centre moved forward towards the artillerymen (who were having a very bad day). I snapped one unit of legionaries backwards and left to plug the gap, which was quite impressive and shows the Romans’ manouevrability, but poor cards lost me a Legate and the nearest legionary unit.
Meanwhile, my left flank was crumbling. My usually impressive veteran horse were being very unimpressive, and the legionaries were getting surrounded. A foolish decision to help the cavalry didn’t help, and I lost the last of my coins to a charge from the rear!
Below is the position at the end of the battle. My left flank is just about gone: the legionaries having tried to help the cavalry out with, er, fatal results. My centre is holding, but Gauls have punched through and are about to engage the artillery hand-to-hand and then take my camp. My right could go either way.
All in all, a fairly conclusive drubbing for the Romans, but lessons learnt and I’m sure they will do better next time!
On the plus side, however, the “remote gaming” side of things worked nicely, and it is something I will run again…and I got to push some lead around a table for a change!
Robert Avery
I’ve finally got around to finishing another unit of javelinmen for my 15mm Classical Indian army: seems to have taken me ages!
I’m not sure why things have slowed down so much, but I suspect it’s something to do with playing three remote games over the last couple of weeks. I don’t know if this is something that happens to you, but I find that I am either painting or playing, but not both in the same phase, as it were. Weird, as you would have thought that playing would encourage you to paint.
I think what I really need is a new project.
I have got projects to finish - another legion of Romans, more Classical Indians, more ECW, more Hoplites, more Alexandrian pikemen - but am not enthusiastic about any of them at the moment…and there’s nothing worse that trying to paint a unit when you’re not enthused. I shall have to have a hunt around for something new to start…so feel free to make some suggestions. Must be 15mm though, as I only game in that scale (and to mix scales is, I feel, the road to madness and bankruptcy).
That said, I am going to try and run my first remote game on Sunday, so am busy working out how to get the best position for the camera, laptop etc. A report will follow the game, so watch this space!
Yesterday I took part in my third virtual game in ten days, this time as part of Virtual Lard IV: the equivalent of a regular Lardy Day, but with all the games being played remotely.
Today’s game was a re-fight of Ball’s Bluff. It’s the beginning of the war and a super-keen Union artilleryman has advanced his guns forward over the James river into Reb territory. The Rebs have cottoned on to the fact that the gunners are out on their own and have sent a force to capture the guns; Union high command have seen this coming and dispatched troops to bring the guns safely home. The stage is set for an epic clash!
Click on the picture below to see what happened:

Just a quick update today as I’m playing in Virtual Lard 4 this morning.
A last set of entries from some of our most prolific painters: Carole, Travis, Chris and Sapper. Check out their galleries, but here’s a selection of what’s new:


Vis Lardica is a website devoted to wargaming and military history, with a special emphasis on the company-sized rulesets produced by the TooFatLardies: I Ain't Been Shot Mum (WW2); Charlie Don't Surf (Vietnam); and Quadrant 13 (science fiction)

Welcome to Vis Lardica, a not-for-profit website mostly dedicated to the company-sized wargaming rules produced by the TooFatLardies, but encompassing my other gaming interests as well.


If you need to contact me, you can do so at:
vislardica@gmail.com
If you have enjoyed visiting this site, please add a link to it on your own wargaming blog: www.vislardica.com.