Cossack Moloitsy

Regular visitors will know that I am building a Zaporozhian Cossack army for use with the eastern theatre version of For King & Parliament.

I’ve painted up the ‘regular’ Registered Cossack element of the army, and the tabor wagon armed wagon train, so now it was time to start on the Moloitsy: the mass of pretty rubbish musket and spear armed infantry that made up the majority of any Cossack force.

As the figures I’m using (from the Wargames Company’s By Fire & Sword range) come in sotnias of twelve men, and I’m using bib bases of twenty-four men, I’ve decided to paint the troops in twelves: effectively two sotnias per base.

This does, of course, mean that I’m going to have to come up with ten colour schemes for my five units rather than just five, so it’s lucky the GW Contrast Paint range is quite large!

I’m loving the banners that come with these figures: there do seem to be loads of different designs. Again, not sure if I’ll be able to do all ten sotnias with a different banner, but there won’t be much duplication.

So that’s two down and three to go!

IABSM AAR: 83rd Naval Brigade in the Caucasus 1942

Another superb 6mm I Ain’t Been Shot, Mum! after action report from Mark Luther.

This time Soviet Naval Infantry take on a German recce force in the north Caucasus in August 1942. The Germans were closing in on the port of Novorossiysk from the north and the Soviets had set up blocking positions before Verkhnebakanskiy. This represents the 83rd Naval Infantry Brigade's fallback spot. They were facing the 125th Infantry Division with some StuGs and armored cars.

Click on the picture below to see all…

FK&P AAR: Laundry Day

Another day, another Norchester playtest!

The Royalist raiders, headed by Sir Arthur d’Artois area heading for the rear of the Parliamentarian lines, determined to take some of the pressure of their colleagues under siege in Norchester.

The Roundheads, however, have been tipped off and are expecting them: they have a force drawn up in front of the rear of their camp and are prepared to do battle!

Another cracking game, with the scenario passed as playtested.

The battle swung this way and that, but always with me having the edge, right up to the last moment. To indicate how close it was, my opponent had only one Victory Medal left himself i.e. if I’d broken one more unit or taken that camp, then victory would have been mine.

The final turn began with me on four Victory Medals: all of which I lost on the right as my troops finally gave way: about as close to victory as you can get without actually winning!

On to the next scenario now: Ramshackle Road…

Action from Marlowe to Maidenhythe

Most of you should know that Norchester will be my second scenario pack for For King & Parliament, with the first being Marlowe to Maidenhythe.

Always great to see my scenarios being used: here’s a link to the Blunders on the Danube blog where there’s a great report of the first scenario from M2M: the Attack on Marlowe

Blunders on the Danube/M2M AAR

TFL Painting Challenge: Another October Update

Morning all, and here’s another Painting Challenge update.

Lots of entries, but all from the usual suspects. Quite a few of you must be sitting on piles of painted figures to be photographed and sent in!

Do visit the individual galleries, but here’s a selection to whet your whistles!

I’ll update the Scorecard at the weekend.

Registered Cossacks

Regular visitors will know that I am currently building a 17th Century Zaporozhian Cossack army using By Fire & Sword miniatures.

I’ve already built the Tabor (war wagons) so next task was to paint up the Registered Cossack element: the nearest Cossack equivalent to regular soldiers. The Registered Cossacks began life in 1572 and served as a significant element of the Polish Lithuanian Commonwealth’s army until the 18th Century.

I’ve only painted two bases of Registered Cossacks, as most of a Cossack force should be lesser quality Moloitsy. Here they are:

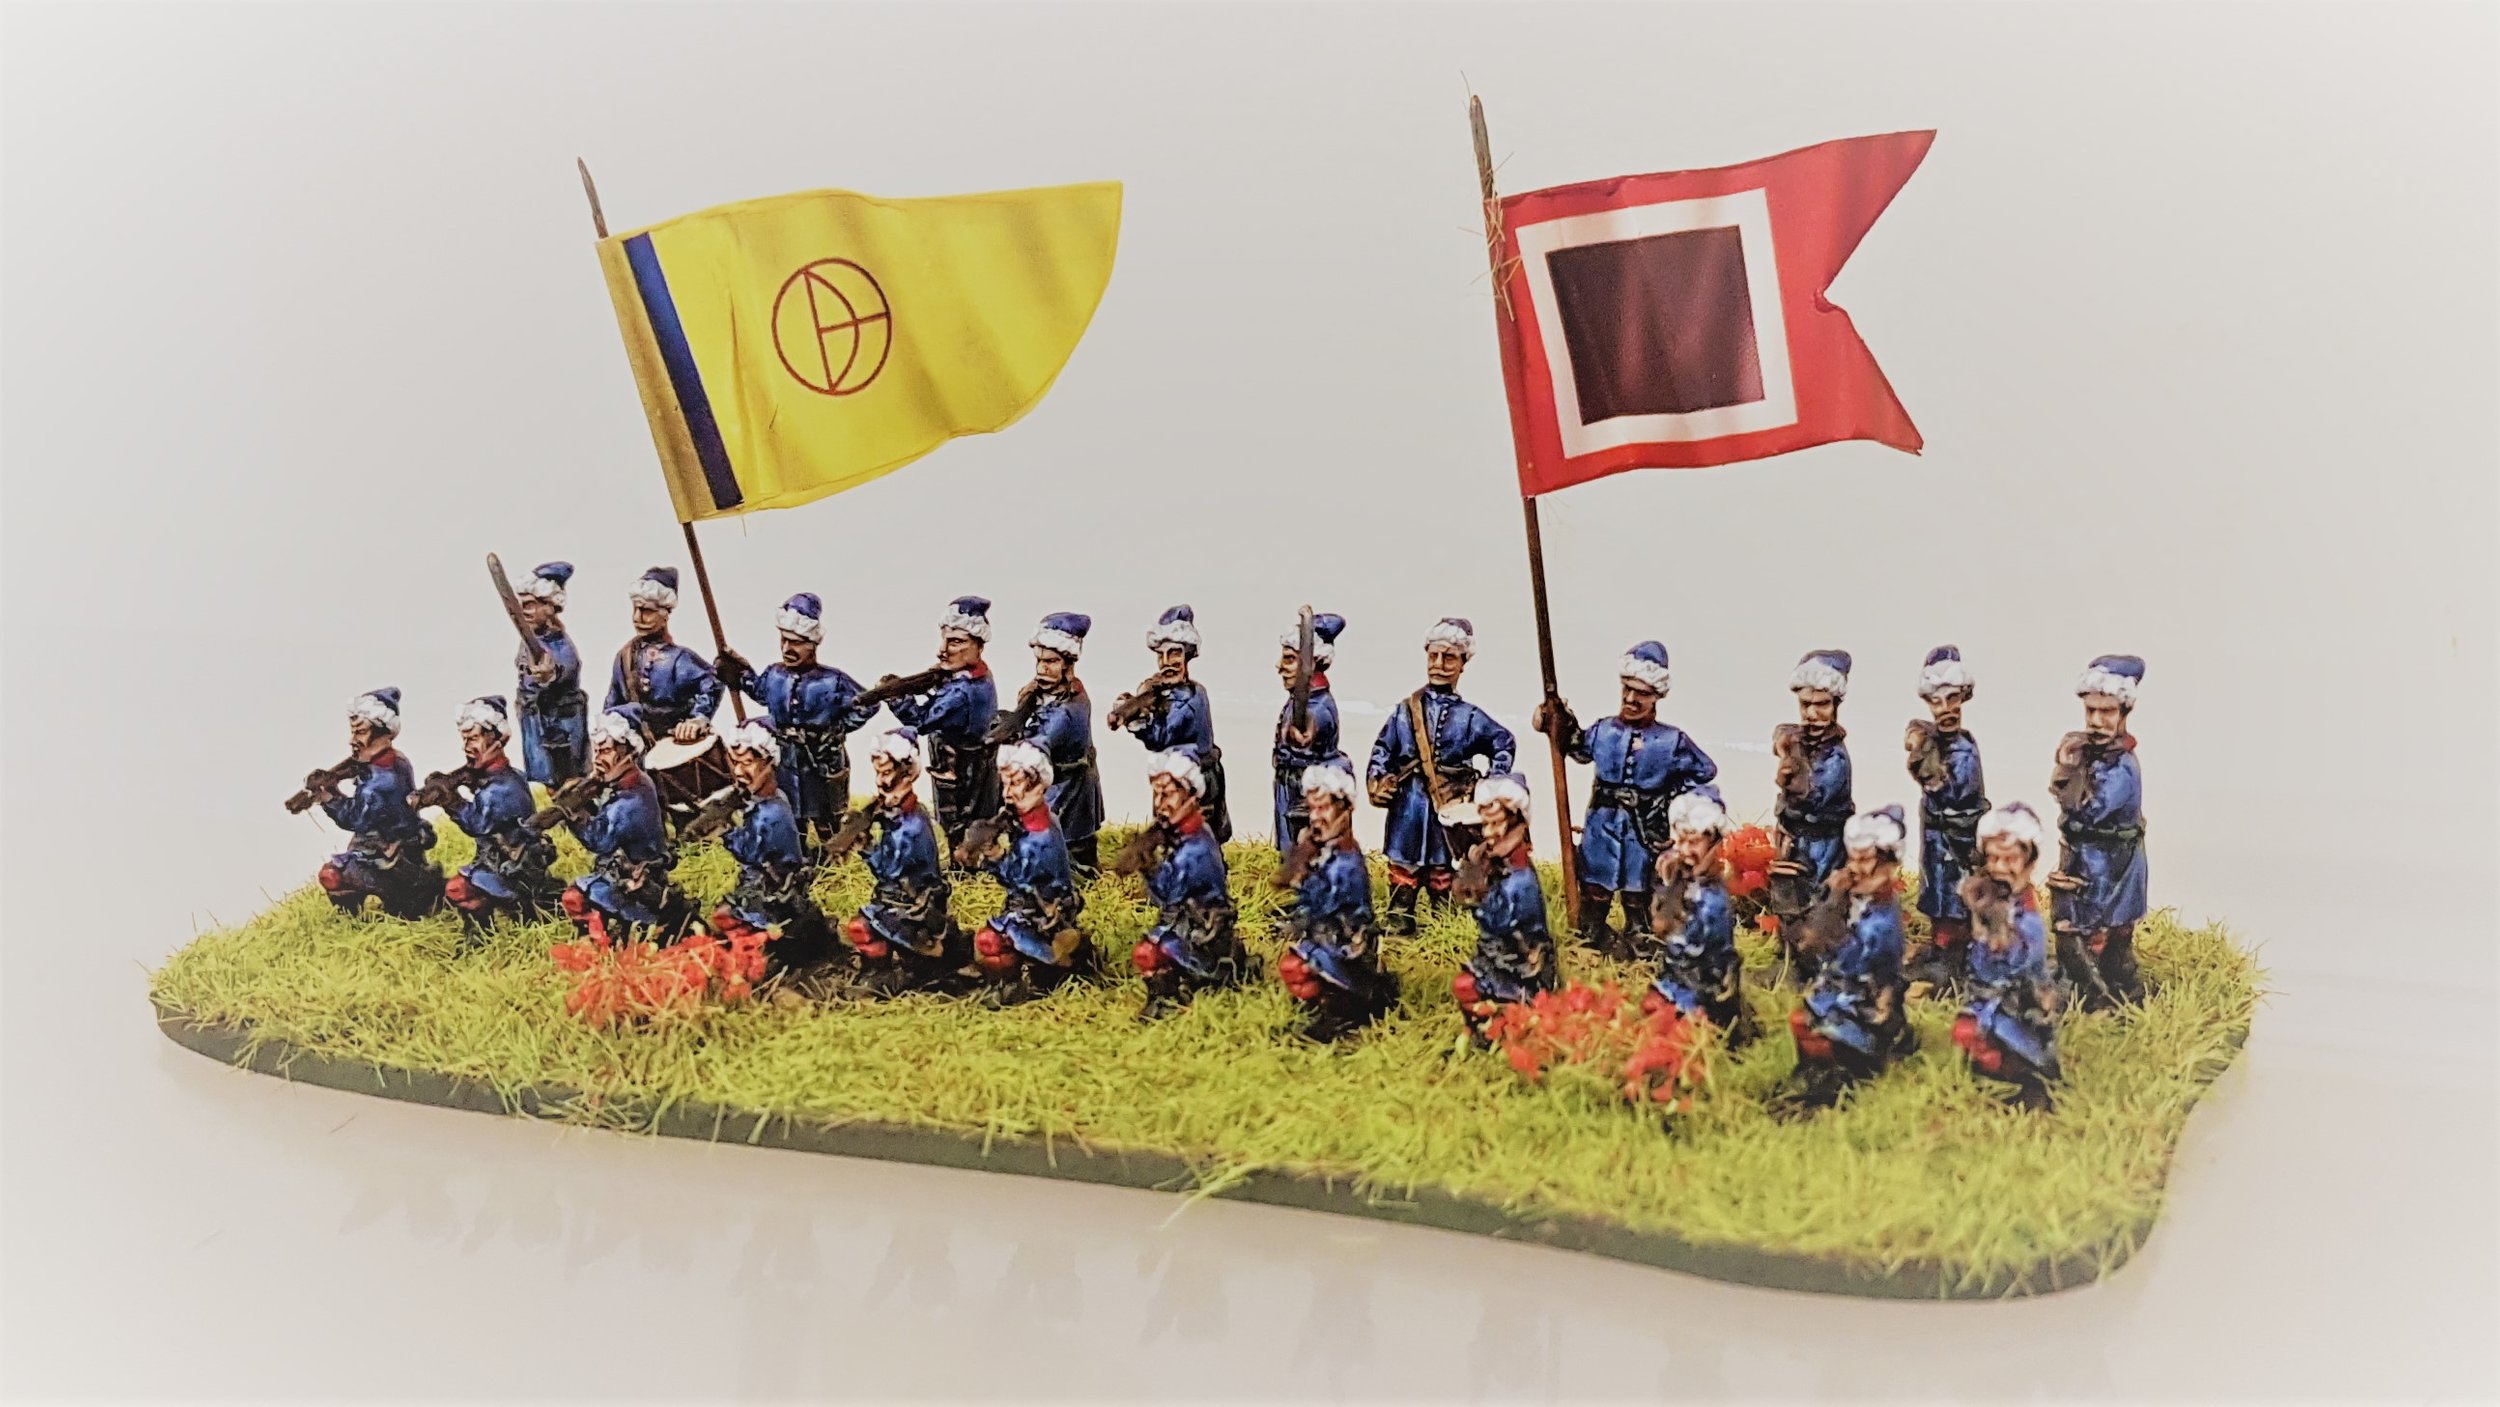
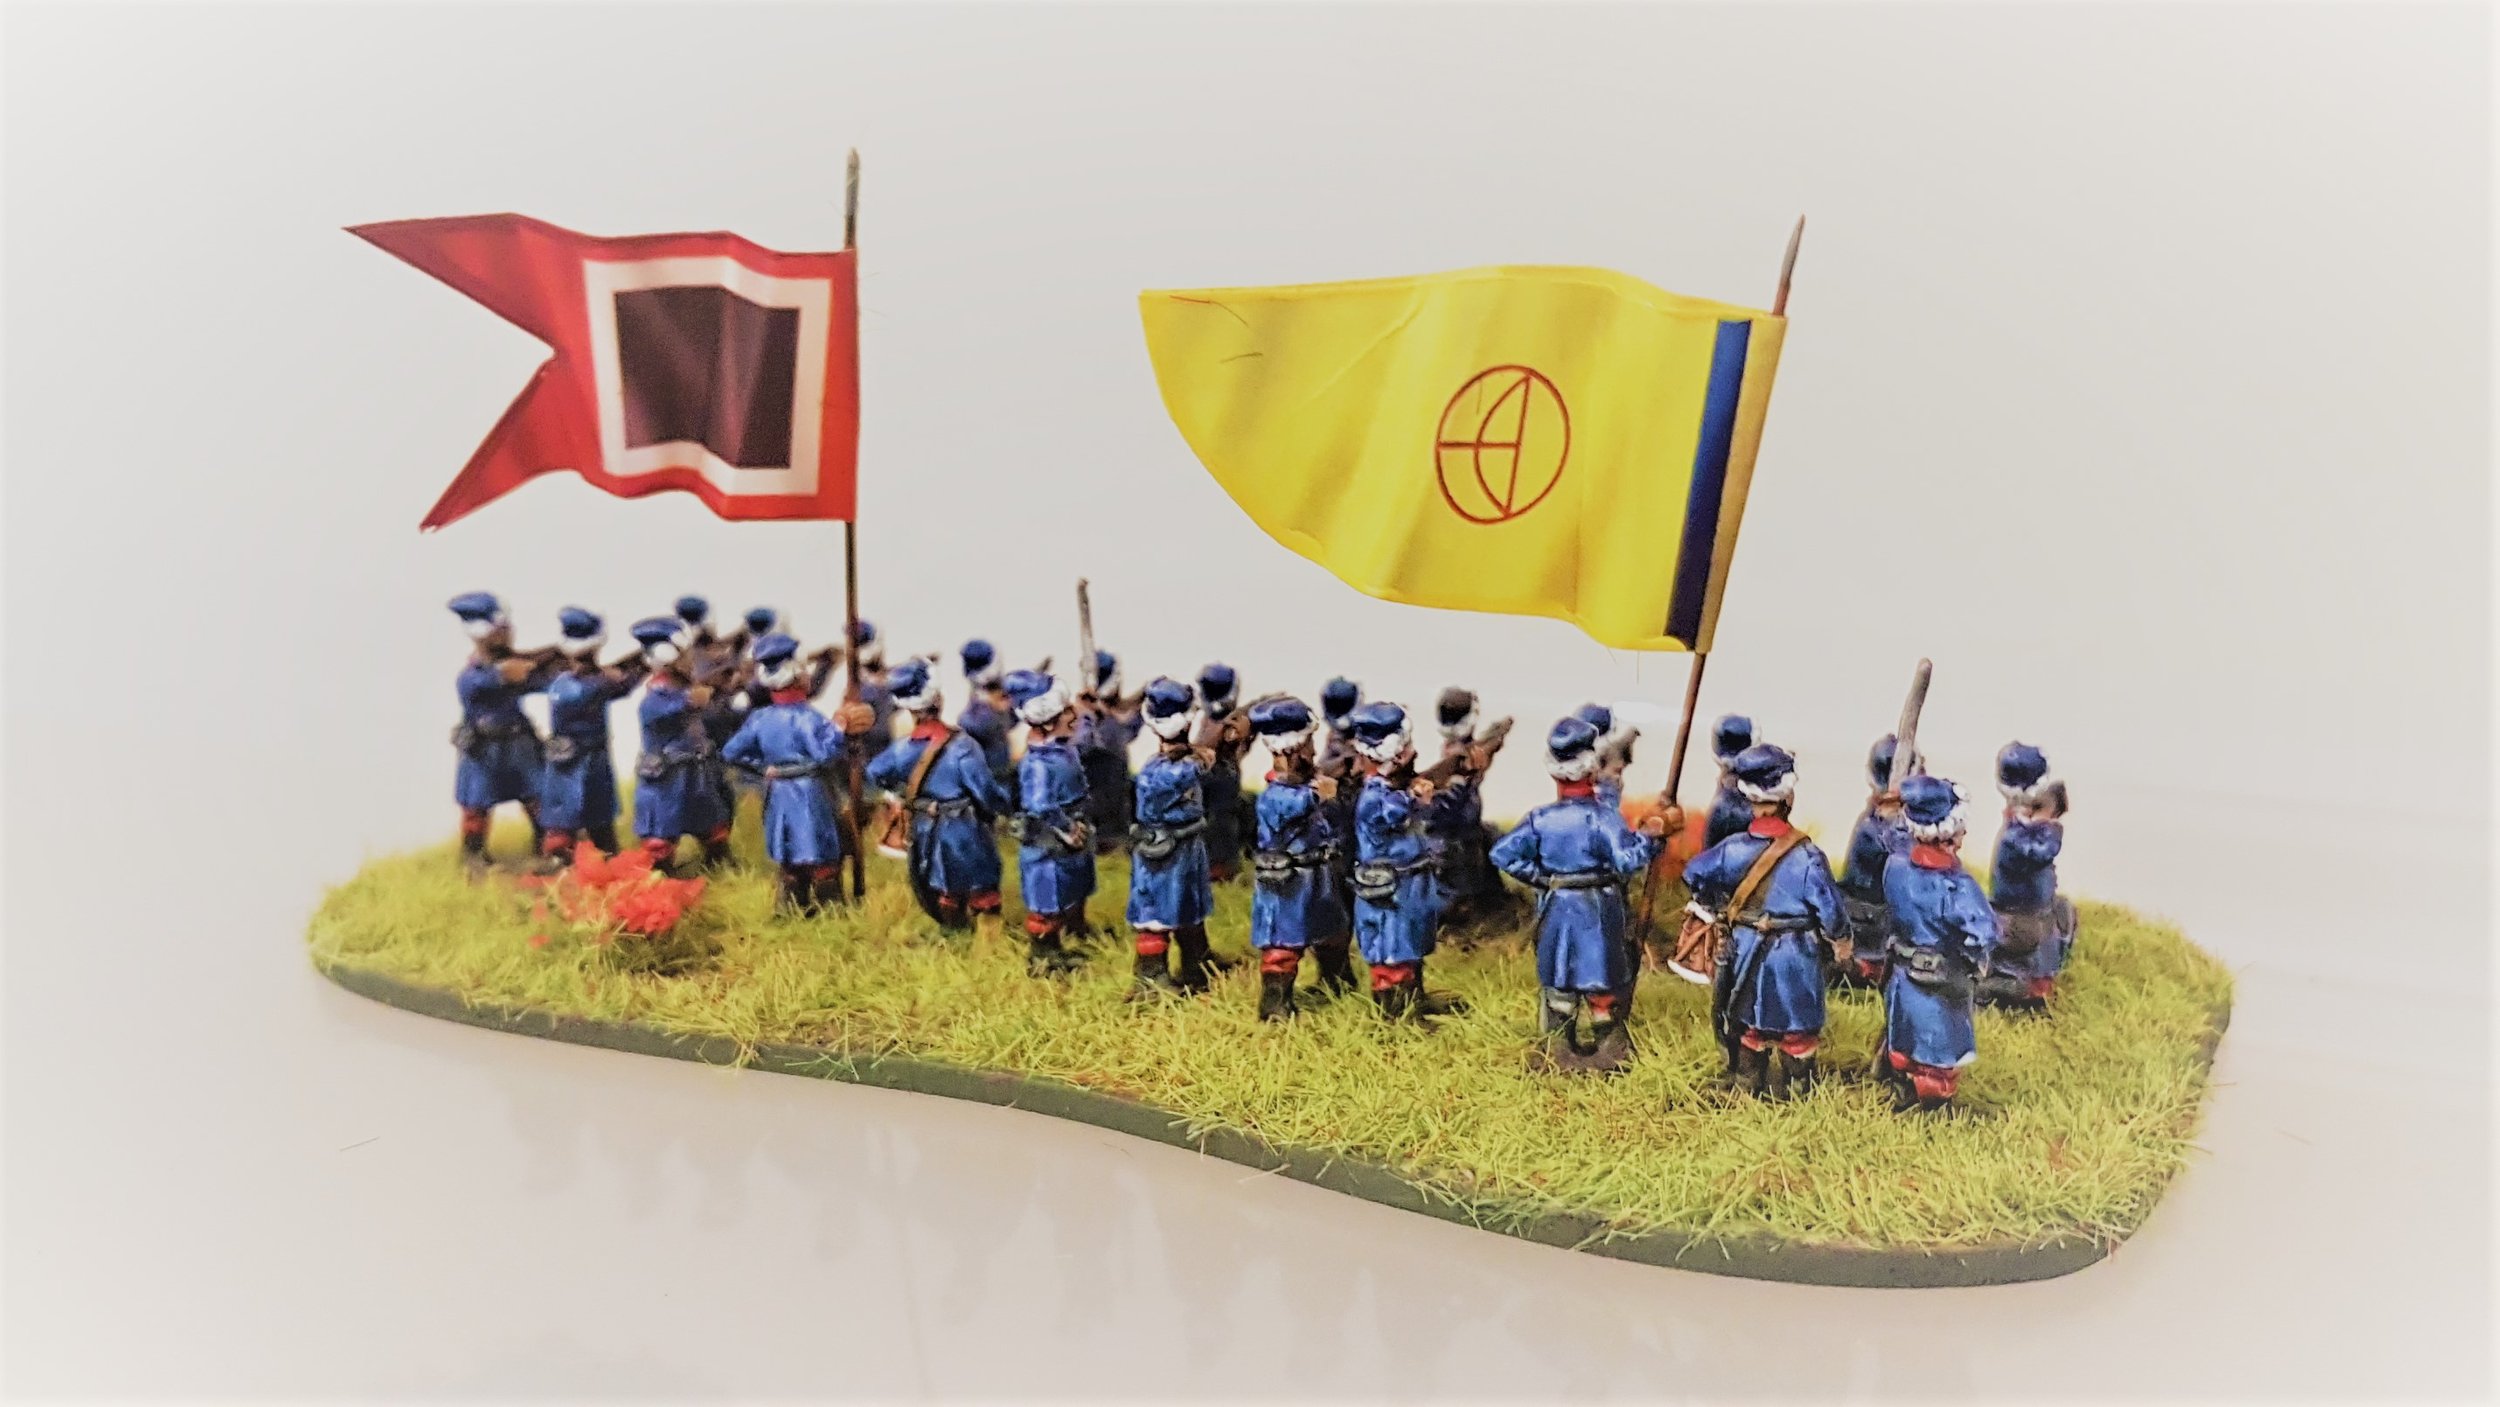
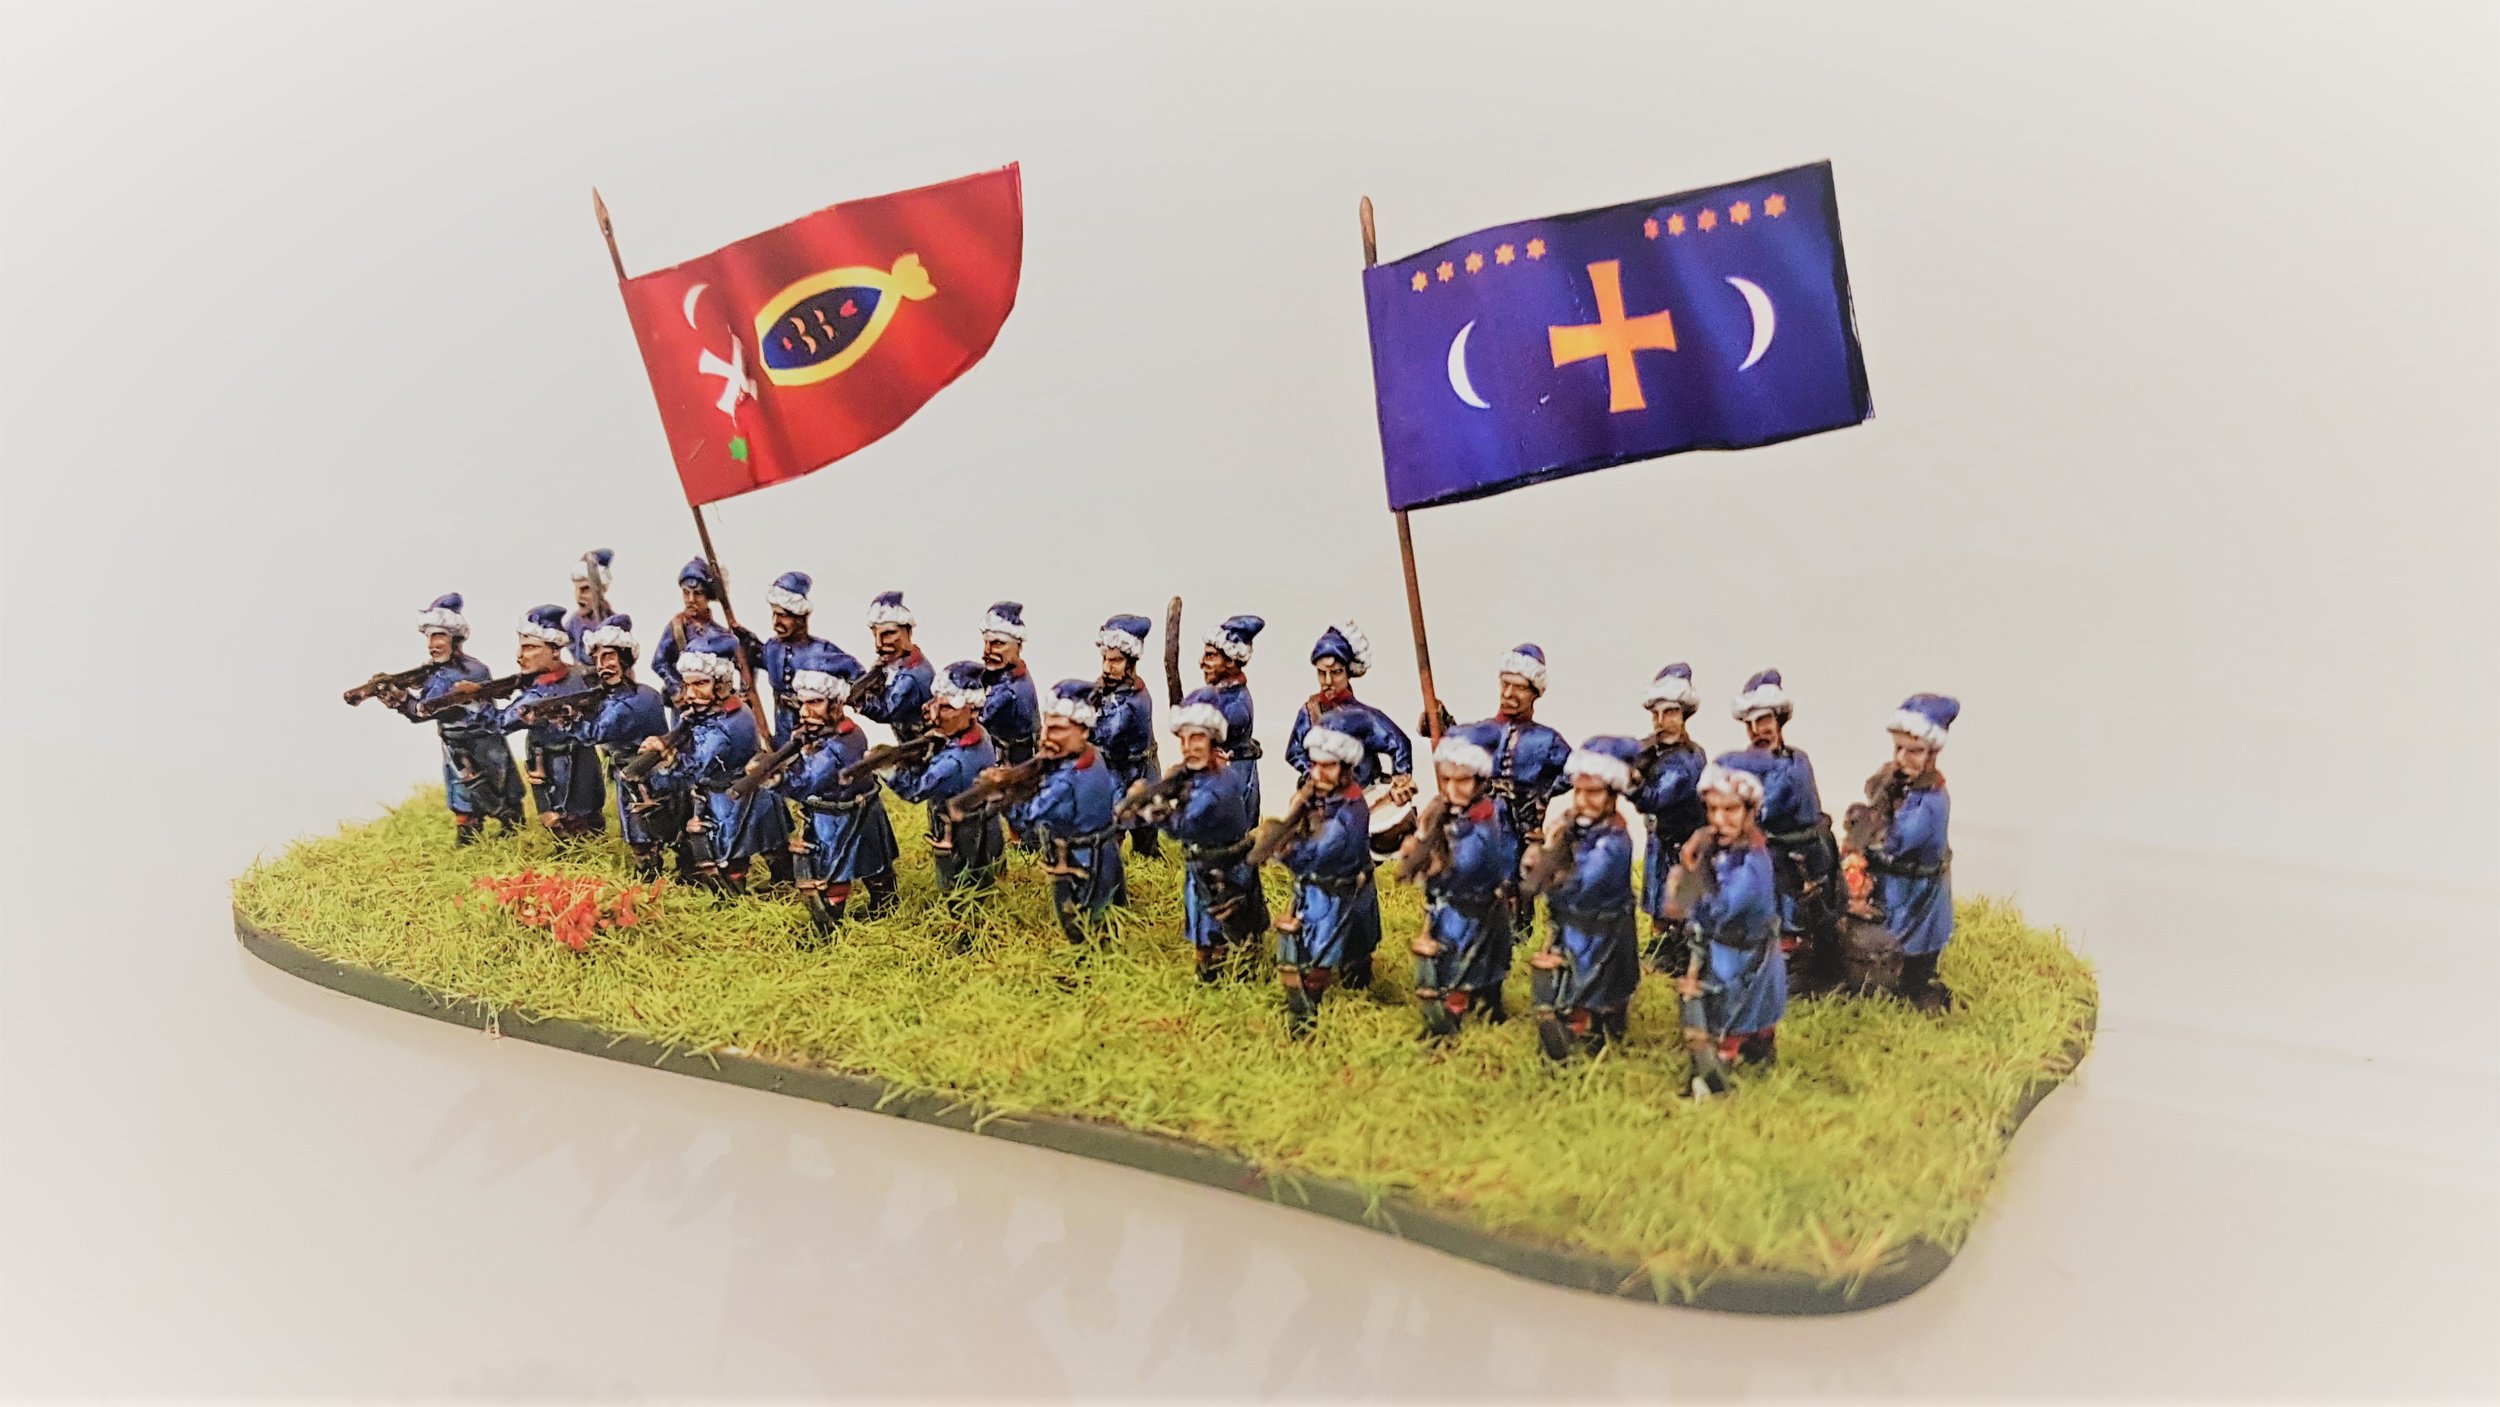
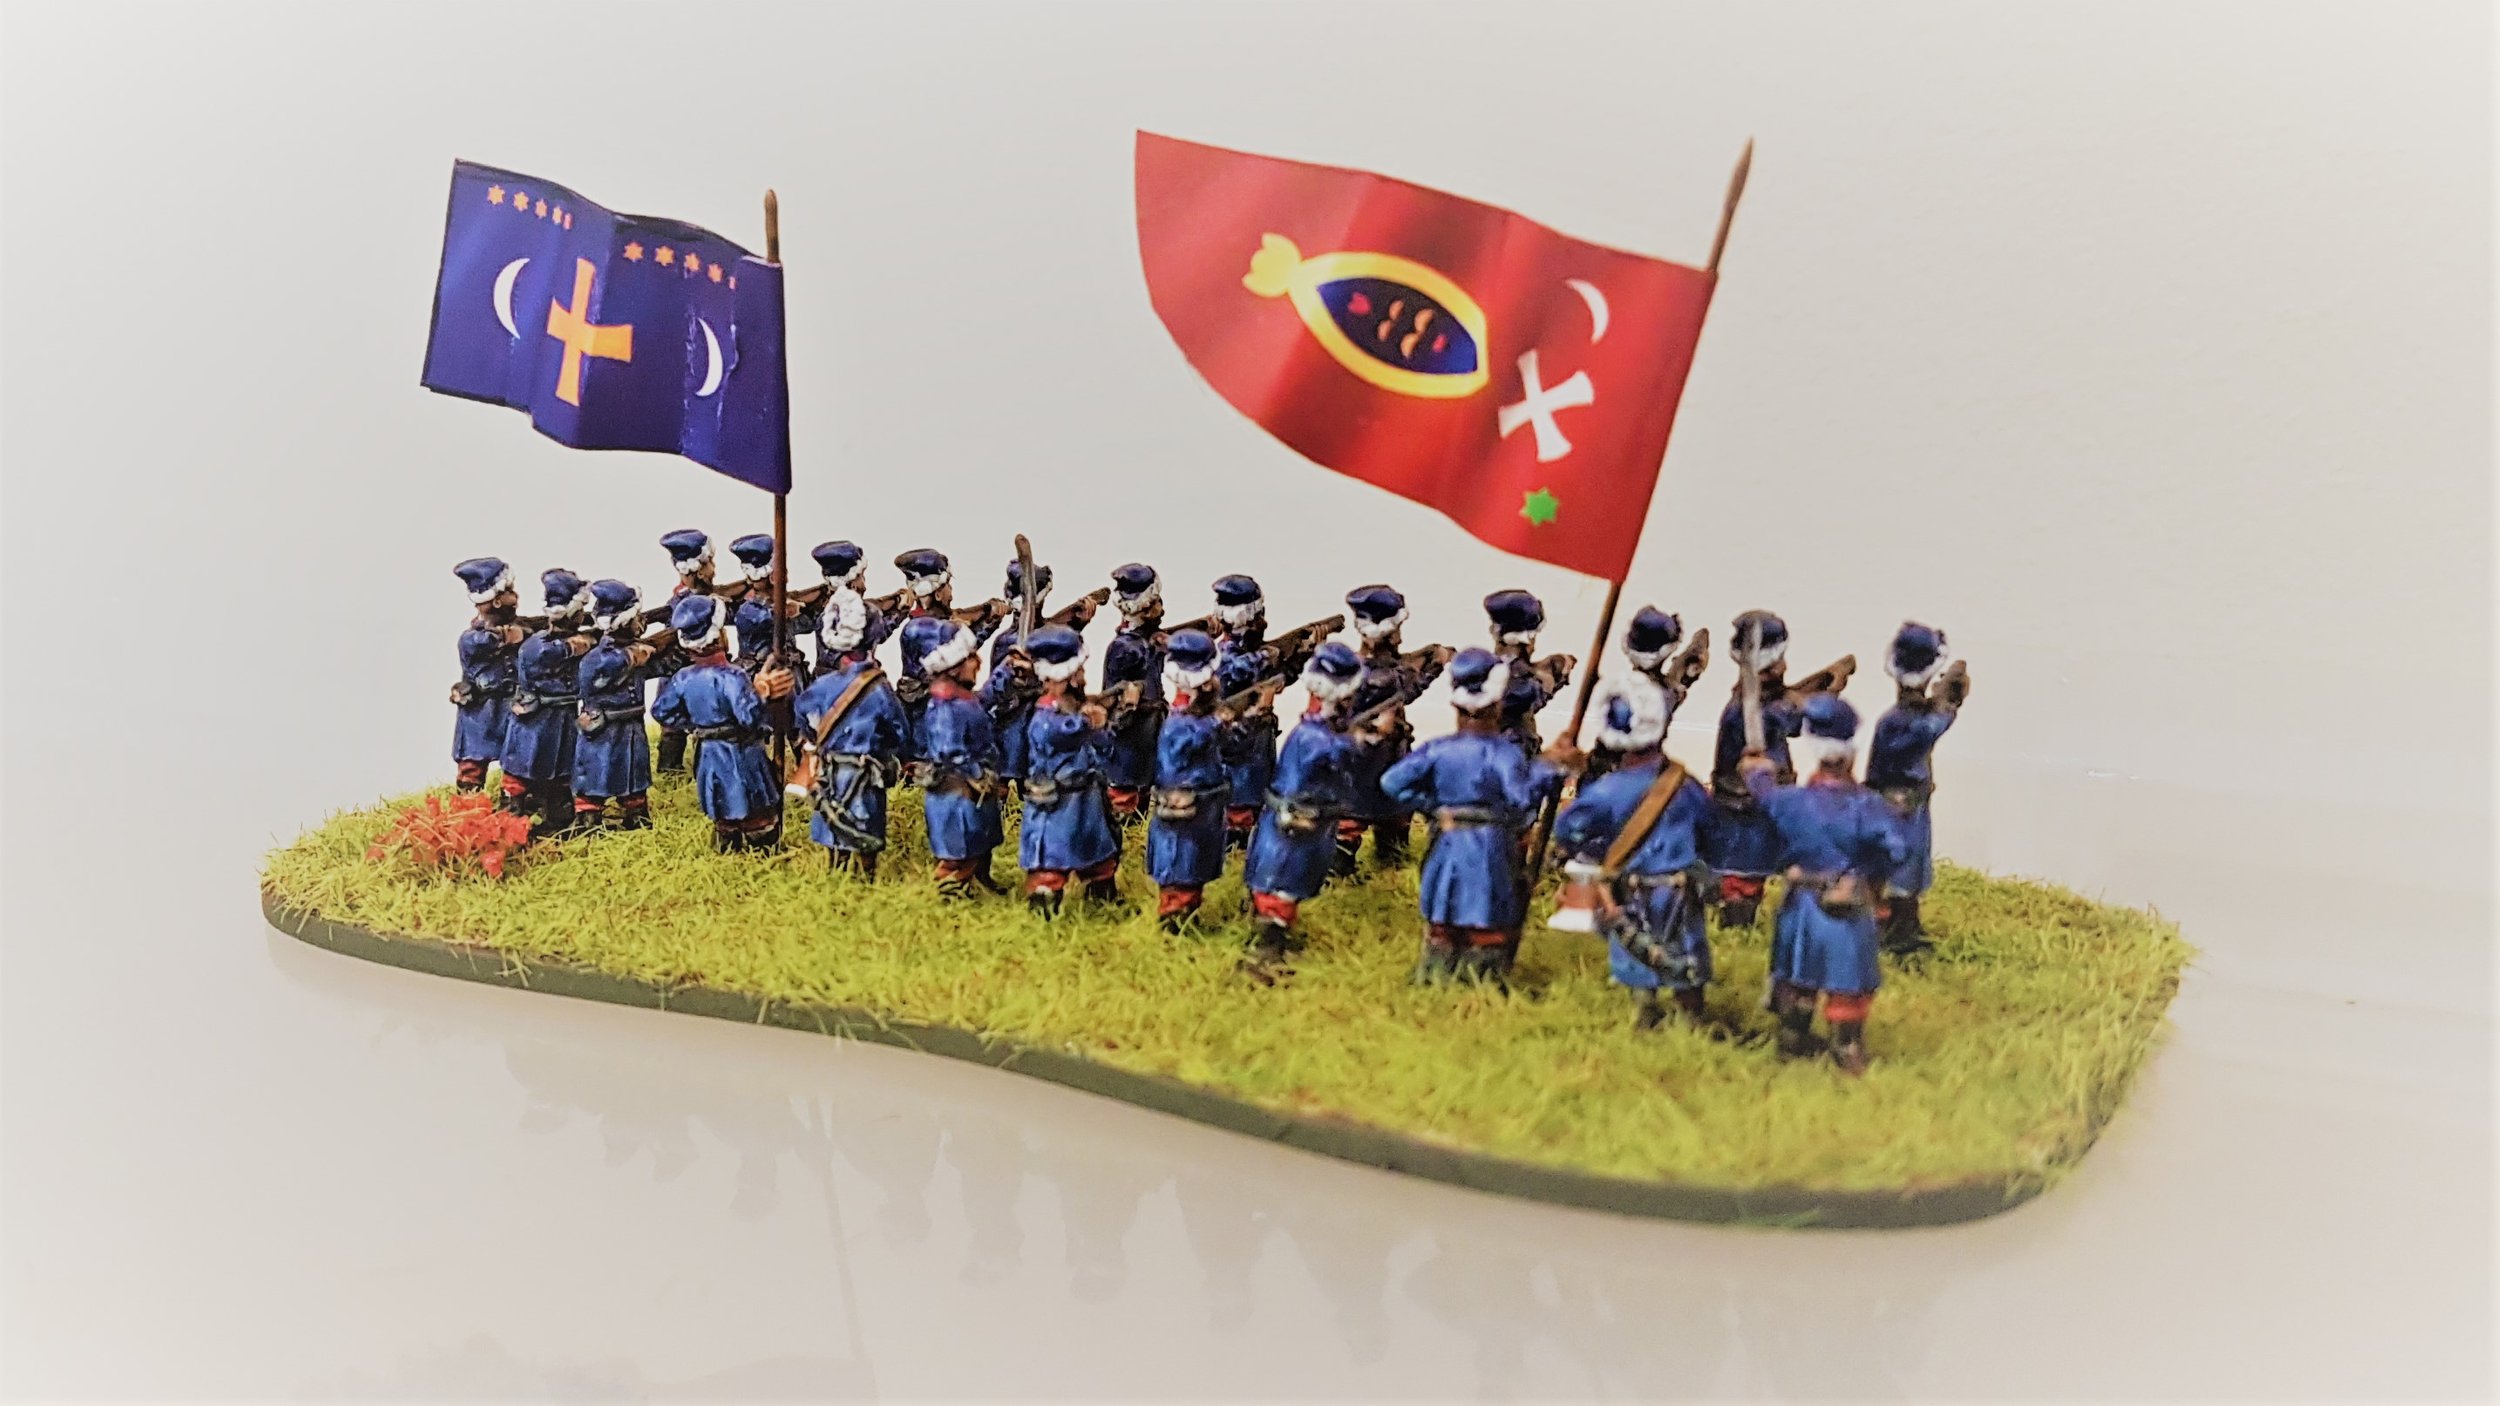
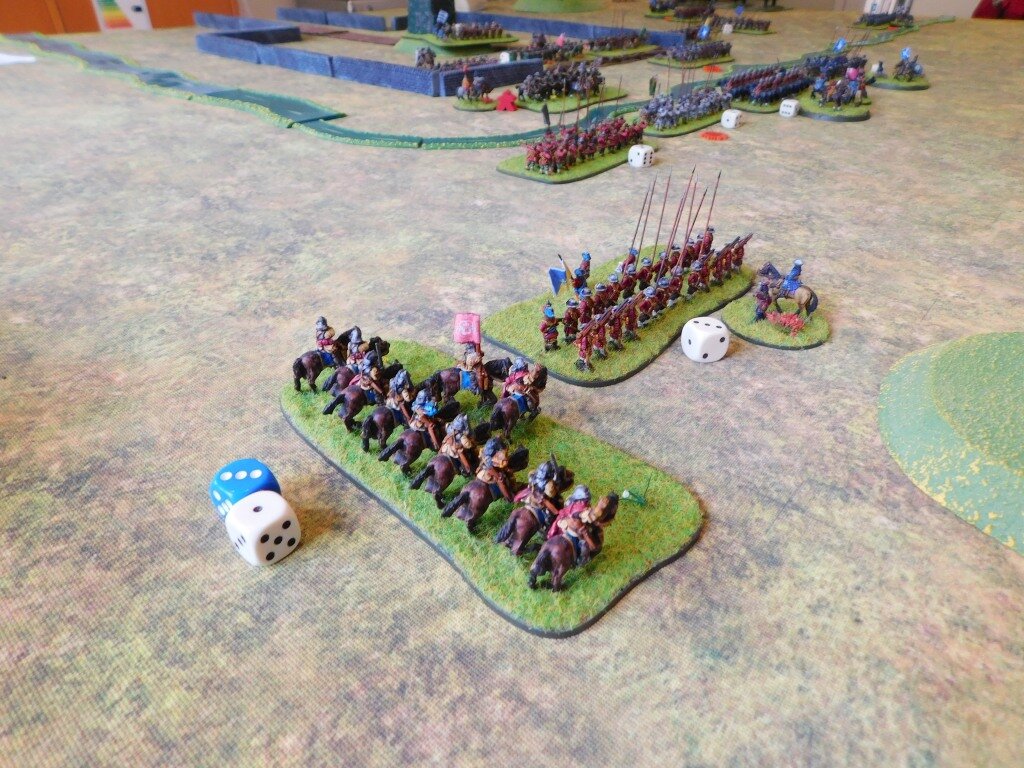
I’m learning more about the Zaporozhian Cossacks as I go along. These weren’t the “born in the saddle” elite light cavalry of the Don Cossack type, but infantry based chaps from the Dneiper River area of the Ukraine. First recorded in the early 1500s, they seem to have fought just about everyone in the area: either separately or as part of a Polish army.

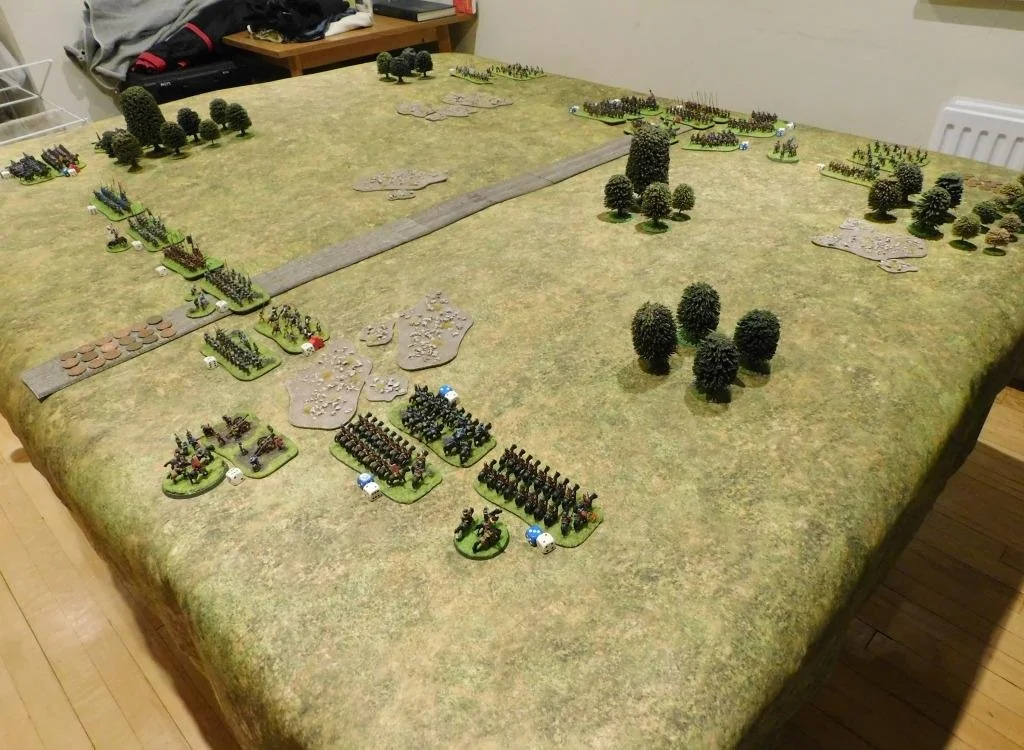
They specialised in raiding into other people’s territory, especially that of the Ottoman empire. One legend has it that the Sultan Mehmed IV asked them to stop their raids by sending the following letter:

As the Sultan; son of Muhammad; brother of the sun and moon; grandson and viceroy of God; ruler of the kingdoms of Macedonia, Babylon, Jerusalem, Upper and Lower Egypt; emperor of emperors; sovereign of sovereigns; extraordinary knight, never defeated; steadfast guardian of the tomb of Jesus Christ; trustee chosen by God Himself; the hope and comfort of Muslims; confounder and great defender of Christians – I command you, the Zaporogian Cossacks, to submit to me voluntarily and without any resistance, and to desist from troubling me with your attacks.

Needless to say, this didn’t go down too well with our Cossack friends, who replied with a letter so rude that I have been forecd to use asterisks for some of it!

Zaporozhian Cossacks to the Turkish Sultan!

O sultan, Turkish devil and damned devil's kith and kin, secretary to Lucifer himself. What the devil kind of knight are thou, that canst not slay a hedgehog with your naked arse? The devil shits, and your army eats. Thou shalt not, thou son of a whore, make subjects of Christian sons. We have no fear of your army; by land and by sea we will battle with thee. F*ck thy mother.

Thou Babylonian scullion, Macedonian wheelwright, brewer of Jerusalem, goat-f*cker of Alexandria, swineherd of Greater and Lesser Egypt, pig of Armenia, Podolian thief, catamite of Tartary, hangman of Kamyanets, and fool of all the world and underworld, an idiot before God, grandson of the Serpent, and the crick in our dick. Pig's snout, mare's arse, slaughterhouse cur, unchristened brow. Screw thine own mother!

So the Zaporozhians declare, you lowlife. You won't even be herding pigs for the Christians. Now we'll conclude, for we don't know the date and don't own a calendar; the moon's in the sky, the year with the Lord. The day's the same over here as it is over there; for this kiss our arse!

This momentous event was commemorated in a huge painting by Russian artist Ilya Repin:

Some excellent ideas there for invective to throw at my opponents once the army takes to the tabletop!

FK&P AAR: Happy Valley

Another playtest of a scenario for my next scenario pack: Happy Valley.

Quick summary of the situation: Royalists are besieged in Norchester and have called for aid; the vanguard of a relief force is intercepted in the aforementioned Happy Valley; a battle ensues.

Do click on the images in the gallery below: there’s more description of what’s happening on most of them.

Although it might not seem so from the descriptions above, this was a very close game: I was down to three Victory Medals by the end, so one more unit lost for me would have lost me the battle.

Another great game of For King & Parliament!

IABSM AAR: Grudziadz

Another great 6mm IABSM after action report from Mark Luther, this time featuring scenario eight from the September War Part One scenario pack (available from this website).

Played at Gigabites Cafe, Marietta, September 2021, the game involves the Germans attacking Grudziadz, a town in the Polish corridor in September 1939. The Germans thrust was from East Prussia i.e. they were actually attacking from the east.

Click on the picture below to see all:

SELWG 2021

IMG-20211017-WA0000.jpeg

On Your Marks…

The new venue for SELWG

I had a rare Sunday free, so thought I’d pop along to the first post-lockdown SELWG show.

The last time I’d been to SELWG, it had been at Crystal Palace and, to be honest, all I remember is the smell of chlorine from the pool and a nightmare journey there and back.

The refreshed show is actually in north London (presumably there are plans to re-name it NELWG) at the Lee Valley Track & Field stadium. The show was set up literally in the middle of the running track: somewhat ironic considering the inverse relationship between enjoying wargames and taking part in athletics!

The place is easy to find and, for me, now easy to get to. The site has a large, free car park right outside: such a refreshing change from the huge fees at Excel (Salute) or the nightmare that is Rivermead (Warfare). The only negative is that it didn’t have any charging points: very annoying in this modern age.

The show itself was very good, although it did feel a bit small: but this may be down to the fact that I’m used to the very big shows. That said, there were plenty of demo games (including a good 50 yards of Lard!) and a fair selection of traders. Interestingly, although there were plenty of 28mm figure manufacturers there, I couldn’t see any 15mm manufacturers, so ended up only buying some brushes and some basing materials. A cheap day!

It would have been a more expensive day as, unusually for me, I found something on the Bring & Buy that I wanted to, er, buy…but it was £100 and I never carry cash any more (I had a single £10 note on me!) and there was no cash point on site, the nearest being a 500 yard trip in either direction. Note to organisers: equip the B&B with a credit card machine or make sure there’s a cashpoint. So no nicely-painted 15mm WW1 German army for me :(

On the plus side, however, I did play in an excellent game of Infamy! in the morning. I played the Carthaginians up against some Republican Romans. It was a cracking game. The Roman skirmishers causing me all sorts of problems whilst I manoeuvred into a position from which my elephant could go in backed by my Libyan spearmen as my Spanish types hit the enemy from the flank. In the end, the sheer flexibility and staying power of the Romans meant that they could recover from the nellie’s charge quickly enough to ride the assault of my spearmen, and the Spanish just didn’t quite have the combat power to save the day. A cracking game, though, and thanks to Big Rich and my opponent, Chris, for making it so good.

So, all in all, a good day. Charging points and a cash machine for next time please, and get the food truck on site earlier than 1 o’clock: I like to have elevenses!

Here’s a final pic of a rather nice Mexican Revolution game:

TFL Painting Challenge: 1st October Update

Quite a slow month so far, but still plenty of entries flooding in.

As always, please do check out the individual galleries, accessible from the NavBar, above, but here’s a taster to keep you going:

The Cossack Tabor Rolls Up

Tabor Commander

Finally finished the first four bases of Cossack Tabor: the war wagons that can serve either as fortifications or as a moving fort.

These figures are the first of the By Fire & Sword miniatures: a Polish figure manufacturer specialising in 17th Century eastern European wars. Friend Bevan is collecting Poles, so I went for the Zaporozhian Cossacks.

I thought these were going to be a bit like the Cossacks you see in Taras Bulba (i.e. masses of light cavalry) but actually these particular Cossacks had rubbish cavalry (substituting Tartars when they needed horse) and were specialists in infantry fighting from behind lines of war wagons. Ah well, you live and learn!

What with lockdown, lorry drivers, Brexit and an imminent second edition, By Fire & Sword miniatures are quite hard to get hold of in the UK. I started my collection by cleaning out the Entoyment Hobby & Wargames Centre online store. Entoyment are an excellent supplier who not only offered a slight discount but also posted my figures to me the very next day after I’d ordered them. Highly, highly recommended.

I don’t usually bother with an unboxing photo, but the By Fire & Sword packaging for their Cossack Tabor box set is absolutely lovely. Here’s a little gallery of the original outside packaging, the inside box, and what the box looks like when you open it. Lovely: really got me enthused to get painting.

The Build

The wagons come in several bits: the wagon body, an under-wagon frame that holds the wheels and provides the tongue/shaft, the horses (about half with saddle and rider, half with just a yoke), a few small cannon to mount at the corner of a wagon, and the wagon crew.

Putting the wagons together is fairly easy, although I did find that I had to drill out every wheel’s socket with a pin drill before being able to fix them. A pain, and certainly much more difficult than most wagon wheel attaching.

I chose not to attach the crews onto the wagons before painting, although I did attach all the riders to their mounts.

The Paint

Painting was fairly easy: I used GW Contrast Paints as usual but restricted myself to dark reds, dark greens and two 0r three blues for the Cossack crews.

This is how they turned out:

Overall I’m very happy with these, and looking forward to getting them onto the tabletop. I’ll be using them with an adaption of For King & Parliament, using a single base as the Tabor as a Fortification, and double bases as the Tabor as moving, deep war-wagons

Next up are the Registered Cossack infantry…

IABSM AAR: Alt Langsow

Here’s another great battle report from Mark Luther. The game was I Ain’t Been Shot Mum in 6mm played at the Gigabyte Cafe in September.

This was a pretty basic Soviet attack on the defensive line NE of Seelow , 16 April, 1945. Elements of the 26th Fallschirmjaeger Regiment were dug in forward/east of Alt Langsow and the 301st Rifle Division and 220th Tank Brigade were ordered to overrun them and head to Neu Langsow.

Click on the picture below to see all:

TFL Painting Challenge: Last September Update

Lots of entries this post as people rush to get in before the end of the month.

Please do make sure that you visit the individual galleries (navigate there in the bar, above), but here’s a taster:

FK&P AAR: Mundaydean Lane

The next scenario in the The Siege of Norchester campaign involves the besieged Royalists trying to get a message through to summon help. Looking at the picture below, the Royalists are on the left, with the Roundheads on the right.

Just behind the Royalist line is a coach containing the messenger (see left hand picture, below) so this is a “Catch the Pigeon” scenario wherein the Royalists have to exit the coach off the other side of the table (or defeat the Parliamentarians so the road becomes clear) and the Roundheads have to make contact with the coach and achieve a single hit to stop it and capture their prey.

The battle began with an advance from both sides. I had a bit of luck here and managed to get my right flank cavalry force and a brigade of infantry nicely forward to the half way point (see picture, below, far left) whilst the Roundheads hung back a bit.

My second infantry brigade, however, seemed very reluctant to advance, leaving a bit of a hole in my centre: perhaps they were cautious about outstripping the coach by too far! See picture, below, centre.

On my left flank, the Parliamentarian horse facing me remained passive. I was quite happy with this, so did the same: my plan was to smash his horse from the field on the right then curl around the enemy left flank with what remained of my cavalry whilst my infantry advanced to contact. The Parliamentarians would be hit on two sides and I could then roll up their line like a piece of used carpet!

My left flank cavalry thus charged the Borders Horse in front of them as soon as possible (see picture, below, left) whilst my infantry moved forward. I kept my commanded shot back, intending to shoot from behind the hedge rather than face a charge by men with long pointy sticks (see picture, below, centre). Finally my other infantry brigade got the message and moved forward as well (see picture, below, right).

For some reason, the enemy horse on my left were still stationary. That suited me fine, as there were a lot of them and although the fact that my horse fought in the more modern Swedish style, I couldn’t risk one of his squadrons breaking through and going after the coach carrying the “pigeon”.

On the right, the two infantry lines were now fully engaged (below, left and right pictures) and I was gaining an advantage. On the right, a volley into the Highlanders in the wood was enough to drive them backwards, and a two-on-one situation near the hedge was enough to destroy one of his battalia. I had also achieved a two-on-one situation in the centre, and was just waiting for the opportunity to drive the enemy back there as well.

Meanwhile my horse had indeed destroyed or driven back their opposition and, despite both full-size squadrons threatening to leave the field in pursuit, one had been stopped by a wood for long enough to regain their senses, and had rallied and returned to hit a unit of Borders pistoliers in the flank. The small squadron that had been my reserve charged over the hedge into the flank of an enemy battalia and it looked as if I had decisively won that flank and could start the roll up process.

Meanwhile on the left, sensing that something needed to be done urgently if the battle was not to be lost, the enemy horse had finally begun to move forward.

I covered the advance of the squadron on the far left and, in an extraordinarily successful charge, another squadron of my cavalry had smashed the Dutch horse in front of them from the field. I was being very lucky with my cards!

With his right flank largely destroyed, his centre beginning to bow under the pressure, and his left flank reserve surprisingly now at a disadvantage, it was only a matter of time before the Roundheads retreated. The pictures below show the end stages of the battle:

My plan, for a change and helped by some lucky cards, had worked perfectly: the Roundheads collapsed and the coach and its passenger were able to sedately trot down the road and exit the table unmolested by any Parliamentarians!

FK&P AAR: Dick's Tower

Back to For King & Parliament and the playtest of the next scenario in my forthcoming pack: Dick’s Tower.

Quick precis of the story so far: Royalists holed up in the city of Norchester besieged by the Roundheads. Parliamentarian guns have been pounding away at the city walls, focusing their efforts on a section of wall by the ruined building known locally as Dick’s Tower. A breach has been made, time for the attack to go in.

Dick’s Tower

The Royalists start the game in and around the tower: see pictures, below.

Defending the breach are two battalia of shot-heavy infantry, with a couple of commanded shot battalia coming up to reinforce them. On their left, outside the walls, is a brigade of infantry supported by some guns. The CinC’s bodyguard cuirassiers, the Norchester Disenfranchised, along with General Sir Edmund Dexter are there too. Lurking on the right are a couple of squadrons of horse, just waiting for the opportunity to sneak-attack the Roundhead attackers.

The Parliamentarian attackers (see picture, above) consisted of ten battalia of infantry supported by a large squadron of Dutch-style horse, the Perform-Thy-Vows Puritan horse.

Opening Moves

As the sun rose, the Parliamentarian line moved smartly towards the small stream surrounding the tower. The Royalist supporting force moved up parallel to the walls, whilst the Staplehurst Horse on the right trotted forward looking for the Roundhead flank.

The Parliamentarians crossed the stream without pausing and threw themselves at the breach. Their troops on their right hung back slightly, looking to fight one battle at a time.

Staplehurst was still leading his horse forward and, as one Roundhead battalion (Manning’s Foot, in blue) was smashed from the field by fire from the shot-heavies, charged the far left of the Roundhead line.

Engaged from the front and flank, the Parliamentarian battalia there (Kelsey’s Foot, in grey) crumbled and fled. It would have been great if the Royalist horse had charged on to hit the next enemy battalia in the flank as well, but the Cavaliers were carried away by their success and turned to pursue their fleeing foes!

The Climax

Meanwhile the Royalist left were beating the Roundheads in front of them: the timely intervention of the cuirassiers breaking what had looked like being deadlock.

The Roundheads were now in some trouble: their line had recoiled from the walls surrounding the tower, and although they had reformed and were preparing to go back in, both flanks were crumbling.

Indeed, before anything else happened, the second unit of lurking Royalist horse also managed to turn an enemy infantry battalia’s flank.

And that was really it: the Parliamentarians had started the battle with ten infantry battalions but were now reduced to four, who promptly voted to leave the field as fast as possible!

Aftermath

An interesting game. I’d played the Royalists and was now dying to have a go as the Parliamentarians!

John and I agreed that he had come forward without much tactical manoeuvre: although he had been unlucky with his cards on his left…my horse should never have been able to get around the side like that.

What would I have done differently? When I do play this as the Roundheads, I think I’ll initially ignore the Tower and its defenders and concentrate on wiping out all the Royalists out in the open. I’ll then be able to concentrate my strength on the units behind the fortifications, hopefully using my (then) overwhelming numbers to win victory. Can’t wait to try this, but if you have any better ideas, please do comment to let me know!

TTS AAR: Akkad versus India

Time for another game of To The Strongest: I would play the Akkadians, friend John would play the Classical Indians.

The Classical Indians were of the Republican variety: normal rather than heavy chariots (two units); loads of longbows (five units); a unit of Maiden Guard javelinwomen (questionable historically, but lovely figures, pun intended); two units of elephants escorted by light infantry (hard to kill); and two units of not very good cavalry.

My brave Akkadians consisted of a couple of units of battlecarts (four-wheeled proto-chariots drawn by equids: as manoeuvrable as that sounds); lots of citizen spearmen (five deep units); three units of regular soldiers (two carrying axes and one armed with bows); and four units of fairly scummy light infantry (two units of slingers, two units of archers).

My plan was simple. Battlecarts on the left would smash through the enemy cavalry then wheel round into the rear of the rest of the Indian army. The rest of my troops would advance steadily forward, spears to the front, weathering a storm of longbow fire but pinning his troops in place until the battlecarts arrived. What could possibly go wrong?

Opening Moves

Accidental advance in echelon

To answer the previous question: quite a lot actually. Firstly, my various brigades refused to advance together and I ended up moving forward in echelon.

Secondly, the enemy cavalry, which should have folded before the might of my battlecarts, proved stubbornly difficult to break: in fact, at one stage it looked as if it would be my battlecarts that were smashed from the field!

On my right, enemy chariots smashed into one of my spear units and drove it and its accompanying light infantry from the field. I should have been able to support the spear unit that broke with another brigade of troops, but they were at the back of the field stubbornly refusing to move forward.

Two against one: my “BLUE” spearmen are about to leave the field

That meant that John could advance his elephants in the middle of the field, attempting to defeat each of my brigades in turn.

two against one again: elephants and longbowmen combine against my “turquoise” spearmen

The game was definitely starting to look in the balance. Although I managed to hold the centre, with both sides taking a lot of casualties, my left wing battlecarts were bogged down in melee and on my right wing the Indian chariots threatened to run riot into the flanks of what remained of my centre.

All was not lost, however, as an extraordinary passage of play was about to occur in which the Akkadian Royal Household Axemen, previously stuck miles from the action as part of the brigade that had stubbornly refused to advance, finally got forward and set to work.

Facing two Indian chariots units, they destroyed both and killed the Indian general commanding them. They then resisted attack after attack from the elite Maiden Guard despite already being Disordered.

The Royal Household axemen: heroes of Akkad!

This success gave me time to reorganise my centre and to get things sorted on my left wing. The battlecarts were reinforced with some infantry and finally broke through the enemy cavalry and swung round, as planned, into the enemy rear.

With their centre hit from the rear and under pressure from a reinvigorated Akkadian army, along with the Royal Household Axemen who were still clamouring for more, the Indian army collapsed and fled the field. Victory was mine.

Aftermath

Well that had been a close run thing! At the moment when the battle was truly in the balance, a rather convenient run of luck with the cards on my part swung the day in my favour, and all centred around one unit.

the situation at the end of the battle

A great game!

More Napoleonic French

I went straight from painting my second battalion of early period French Napoleonic infantry to painting the third battalion and, on the way, proved an old wargaming trope that the third unit is always the best painted!

As before, these are the excellent AB Figures 18mm range painted with GW Contrast Paints. The bases and movement tray are custom ordered from Warbases; and the flag is from the equally excellent Maverick Models (go for the “Effect on Material” ones).

Only another nine battalions still to go!

FK&P AAR: Plumleigh Common Again

After a drought of about a month, I managed to play four wargames yesterday (huzzah!) and, incredibly, managed to win them all (huzzah again!).

That was a game of To The Strongest; two games of For King & Parliament; and a game of Art de la Guerre, which I hadn’t actually played before.

There will be After Action Reports for all of them in due course but, for the moment, here’s a catch up report featuring FK&P and another run through of the Plumleigh Common scenario from my forthcoming scenario book.