FK&P AAR: Cossacks March Out Again

Time for the Zaphorogian Cossacks to ride out again, this time with an away fixture at friend Bevan’s house.

It was an unusually shaped battlefield, and one criss-crossed by small streams and (impassable) lakes. There was also a chunk taken out of one corner, meaning any units deployed there ran the very real risk of falling off the end of the world!

After their first encounter ended in ignominious defeat, the Cossacks had re-organised their army: equipping their tabor wagons with light artillery and dropping the brigade of raw Cossack horse.

On this battlefield, therefore, I placed my up-armed tabor in the centre, infantry to the left and right of them, and a brigade of Tatars on the far right just in front of the edge of the world. That left me a brigade of horse in reserve just behind my tabor’s right flank.

As before, our opponents were the Lithuanian Polish, hereafter known as the Poles or the Polish. They had their infantry and artillery in the centre, with loads of really quite good horse on either wing.

The battle opened with the Poles advancing rapidly on either wing, and the game split into two halves.

On my right flank, my Tatars (one unit of veteran nobles and two units of light bowmen) took on four units of decent Polish cavalry. My lights were quickly sent fleeing from the field, but their veteran comrades managed to destroy two of the Polish horse units despite, at one stage, being hit in the flank.

Half the Poles who had been chasing my lights from the field then returned and, eventually routed my tired nobles, but I’d still effectively won that flank, certainly in terms of victory medals lost.

Meanwhile, on the other flank, waves of Polish horse, most of it rather decent, some of it the dread Winged Hussars, came forward and crashed onto the three Cossack foot units right at the end of my line.

[The Winged Hussars were being represented by only their bases as painting their leopard skins had caused a delay in production. This was quite unnerving…as the temptation was to visually dismiss the units that were actually the most deadly on the table!]

Time and time again the Polish cavalry crashed into one unit of Cossack Moloitsy militia: a unit that just refused to break. Two light units and two medium units of Polish cavalry were sent packing before, finally, the Moloitsy gave way, leading to a general crumbling of that flank.

So exciting was this passage of play that I don’t actually have many photos of it. Below, left is the first wave of Polish cavalry moving forward. Below, centre is the situation after the first wave of Polish cavalry has been repelled, with the black-base-Hussars moving forward in the background. Below, right is after the Hussars have finally shattered the Moloitsy infantry.

Meanwhile, the Polish infantry had also split into two halves. On my right centre, they advanced towards the Cossack foot brigade amongst the trees and rough ground in the bend of the river. A firefight broke out between the two infantry forces, with each of us eventually losing a unit.

On my left centre, after hanging back for some time, the other Polish infantry brigade came forward. They advanced towards the left hand tabor unit but so keen was Bevan to get them into action at the same time as his Hussars were wiping out my Moloitsy that he left their flank exposed.

No sooner seen then acted upon: one of my reserve cavalry units, Tatar lights, smashed into their flank and smashed them from the field. The Tatars went on to knock off a unit of enemy Tatar light horse (Taras Bulba anyone?) before retreating back to safety.

The climax of the battle was now upon us. Before my Cossack Moloitsy on the left broke and ran I had been comfortably ahead: nine victory medals verses the three that Bevan had left. Once my left flank had broken, I was down to three victory medals. Could Bevan now snatch victory from the jaws of defeat?

As his troops massed for further charges into my left flank, the battle was actually decided back on the right centre, where Bevan’s remaining infantry unit had retreated back from its firefight with some of my Registered Cossacks in order to re-group.

I followed up, also deploying my final reserve: a unit of poor quality mounted Cossacks. These managed to pin the retreating Polish Haiduks in place, giving my Registered Cossacks time to follow up and hit them in the flank. They crumbled, their victory coins were lost, and the battle was mine!

The gallery below shows the initial clash between infantry lines on the right center. The position after this initial clash, and then the climactic moment mounted and Registered Cossacks dashed the enemy Haiduks from the field:

So a first victory for my Cossacks, but a very hard fought contest won only by the narrowest of margins.

Again the Poles avoided frontally assaulting my tabor wagons, concentrating on trying to win the battle by killing all my other troops. In this game that actually worked in my favour a bit: my tabor were free to deploy their new light guns with significant effect and the terrain was such that my infantry could hold on for long enough before fleeing the field.

For me, I tried to avoid throwing my cavalry away. Admittedly the veteran Tatar noblemen played a blinder and did much better than they should have, but keeping the other cavalry brigade in reserve worked really well: I would only have lost them to the mass of enemy cavalry as it advanced forward, and this way I was able to shore up my line and then exploit the retreat of the enemy infantry when the time was right. For my next outing, I think I’ll add a unit of artillery to the roster, sacrificing some infantry Gallant Gentlemen to do so. After all, I can only use them if I’m attacking, and my infantry won’t charge enemy horse!

Here’s a pic of the table at the end of the game.

Polish Artillery Tractors Ready To Rock!

Regular visitors will know that I am building a force of 1939 Polish motorised infantry, and that one of my wants was an accurate C4P artillery tractor. You can read the post about it here.

I’ve now had a chance to paint the models up, and am very happy with the result:

To re-iterate, these are custom designed 3D prints in 15mm from Syborg 3D Printing and, to me at any rate, represent what a C4P should look like.

All I need now is for Battlefront to get around to sending me the guns. How spoiled we all are now: it’s only been four weeks and I’m thinking how overdue they are!

At the same time as painting up the C4P tractors, I also completed the larger C7P tractors. These were not normally used for towing guns (they occasionally towed the really heavy stuff) and were used more as tank recovery vehicles by the armoured troops or as general mules for the engineers.

God only knows why I ordered four of them, but I’ll attach two to my tankers (double what’s needed!) and keep two to attach to my engineers…when I get round to painting the engineers that is.

Lovely models again, and I can’t emphasise enough what a pleasure it was to deal with Simon at Syborg: almost instant responses to my queries and a great deal of patience as I wanted the design for the C4P model tweaked again and again.

Oddball and Bowser!

Not the worst named estate agents in the world, but a quick bit of painting to fill in the gaps between Six Nations matches!

First up are two 3D printed Shermans from Syborg.

When I was looking at re-photographing my US troops, I noticed that I was short the tank company HQ. At the same time, whilst browsing the Syborg website I noticed that they do an “oddball” version of a Sherman i.e. a Sherman tank with a loudspeaker mounted on the side in the same way as the one commanded by Donald Sutherland’s spaced out Oddball character in the film Kelly’s Heroes. This was too much of a happy coincidence to resist, so I bought two and clipped the speaker off one of them. I now have both my tank company HQ and a one-off model that could be used as an objective or for a specific scenario.

My only word of caution with these models is that they are a little bit bigger than a PSC plastic Sherman. It doesn’t really make that much of difference once gaming, but it is noticeable.

Second up is one of those delightful bits of tail that make the tabletop really come alive: a water bowser i.e. a truck that carries a tank full of, er, water or, as someone suggested for the Brits today, tea or gin & tonic!

This is also from Syborg, and I would emphasise that “in the flesh” you can’t see the layers built from the printing process as much as you can in the photo. In fact it’s a cracking little model that will go really well with my NAAFI truck and the fuel tanker that I already have.

So two “highly recommended” models from Syborg.

IABSM at Winter Wonder Lard

Last weekend saw another excellent Winter Wonder Lard at Bristol Independent Gamers. On show were games of Chain of Command, Sharp Practice, Strength & Honour, What a Cowboy and, of course, I Ain’t Been Shot Mum.

The IABSM game was based on the tank battle on the Calais - Dunkirk Road, near St.Omer on 22nd May 1940.

On That day a patrol sent out from the Calais defences reported German tanks on the road between Calais and Dunkirk and fighting towards St.Omer. Staff Officers at Calais disputed this, stating that there were no substantial German forces within 30 miles of St. Omer and this could only be a stray reconnaissance patrol.

A British Force was ordered towards St.Omer to drive off these random German troops, but came into contact with lead elements of 1st Panzer Division, who were attacking French troops on the edge of the town.

Click on the picture below to see all:

TFL Painting Challenge Update

Time for an update to this year’s TooFatLardies Painting Challenge.

Lots of entries but still from quite a small pool of people. Where are you, regulars? Time to get back in the swing of things after lockdown and COVID!

Anyhow, please do go to the various galleries to see the full cornucopia of entries that have been sent in, but here’s a selection to whet the whistle:

More from Sumer!

One of my new year’s resolutions was to mix painting newly-bought figures with those forming the considerable lead mountain that haunts my dreams.

One significant component of the lead mountain is made up of the final units needed to complete a particular army, and one example of that has been, for quite a long time, the final unit of spearmen for my Sumerians.

Playing To The Strongest at 130 points, the Sumerians (or Akkadians or any other city state from around that time) definitely need four deep units of spearmen, and could really do with five, and maybe sometimes need six. I had five, and at 48 figures per unit, that meant I’d already painted 240 of the little devils. Hardly surprising that at that point I ran out of steam and couldn’t finish the sixth.

Those poor spearmen from the sixth battalion had been sat on my painting table, in a tray, trying to guilt me into painting them for over two years so, as I waited for the next batch of vehicles to finally finish motorising my WW2 Poles to arrive, I thought that they would be the next chunk dug out of the lead mountain.

And what a pleasure it turned out to be. I had forgotten how much fun it was to paint these chaps: all from Museum Miniatures’ excellent CAD designed Z Range. Basing them was still the same old pain (all those spears need to interlock), and I couldn’t remember how I painted the equids pulling the war wagon, but it was still a refreshing change from Poles, Cossacks or even Polish Cossacks!

And I cleared a space on the painting table too!

Cossacks Take To The Field (Briefly!)

My first game of the year, so it was only right that the Cossacks finally take to the field with their opponents, the Polish/Lithuanians (hereafter known as the Poles/the Polish), provided by friend Bevan. So new to the table were both armies that the Poles hadn’t even been properly based yet.

The table was set up quite differently to our usual ECW terrain: no hedges and loads of irritating patches of rough or impassable ground.

We used the excellent eastern front modifications to For King & Parliament available on the Tales From A Wargames Shed blog.

View from the Polish side

The Poles arrived with a fearsome army: two units of Winged Hussars; four units of Pancerni horse; three units of Petyhorsy horse; three units of Tatar mounted bowmen; and four infantry Haiduk units.

Not properly based! Are the shades of the wargaming room to be thus polluted?

To oppose them, my brave Zaporogian Cossacks fielded four tabor war wagons; two brigades each of one unit of Registered Cossacks and two units of Moloitsy; and two Tatar warbands, one of two units of mounted bowmen, the other the same but with a unit of Tatar noble lancers as well.

Tabor in the centre, then the infantry, then the cavalry on the wings.

Here’s how the game went:

In summary, the Poles sent their cavalry forward on each wing. This proved too strong for my horse, who were mostly Tatar bowmen and reluctant Cossacks, leaving the end of my infantry/tabor line exposed.

My musket fire proved ineffective (I think it must have been raining) and although they did cause the Poles some damage, the Moloitsy infantry then began to crumble.

As the battle ended, the Poles were about to fall upon the Registered Cossacks whilst my tabor still sat in the centre watching what was going on!

Aftermath

An excellent game (despite the result!) and it was good to get back to gaming and give my latest army a baptism (of fire!).

Painting Challenge Update

A quick update today to bring January to a close. A fine start from some people!

First up, we have Sapper’s first entries for the year. Sapper has taken part in all but the first year’s Challenge, so start’s his eighth year of participation. With an average score of 2,186 and a personal best of 2,591 (achieved last year), he is a prolific painter.

Otherwise, today we have more entries from Lloyd, Andrew, Mervyn, Carole and John. Do visit the individual galleries, but here’s a taster:

Sourcing a C4P Artillery Tractor

The next part of motorising my 1939 Polish collection was to add some artillery tractors.

Most artillery used horse-drawn limbers, but those attached to the two motorised units used the C4P artillery tractor: a half-tracked lorry. There were two versions of this vehicle: an early model with an open cab that was almost certainly obsolete by September 1939, and a later, closed cab version:

Being Polish and being early war, none of the main-stream manufacturers do a 15mm version of the C4P, so it was back to Syborg 3D Printing to see what Simon could sort for me (see previous post Motorising a Polish Infantry Company.

Simon quickly sent through the designs that he had been able to find: the standard, accepted versions of the C4P, which split into two versions: one with benches, one with benches and boxes.

Neither looked right to me, so I consulted the “bible” for Polish military vehicles: the PIBWL military site. That site (an invaluable tool for the September War wargamer) has a whole section on the C4P, including some more pictures, one of which clearly shows the vehicle from the rear:

A few things to note here:

I also read through the (excellent) Brushes & Bayonets post about actually making your own C4P by converting other models, with the author eventually going for something like this:

Whilst I am deeply impressed by someone being able to convert like that, I’m not sure it’s quite right. As I pointed out to Simon: “I'm pretty sure that everyone who has produced a model with lower benches and/or the boxes on the back is wrong. There's deffo no pictorial evidence for your rear end on the right, just a load of pictures of models that people have made over the years. On top of that, the description from that Polish website I sent you (the WW2 Polish vehicle bible for most people) does say Underneath high benches, especially in the rear, there were some stowage boxes of unexplained purpose the key word being ‘underneath’.

“I can see why people think what they do: it looks very precarious for the crewmen my way, but it's what's in the photos: the crewmen sit, effectively, on top of storage boxes, with not very much holding them in place!!!”

I then attempted a little design work of my own, using Powerpoint to mock up what I meant:

As I’ve said before, it all looks very precarious for the crews, but then for someone who’s previously sat on a seat behind a horse-drawn limber (which looks terrifying when at the gallop) this is probably the height of safety and security!

Simon’s next attempt was almost there:

But still not quite right. This time I sketched what I wanted: emphasising the height of the box-benches and the fact they run right the way to the back of the chassis (see image, right).

A Leonardo-like work worthy of inclusion in the Louvre, I’m sure you will all agree!

Within an hour or so I had the next iteration of Simon’s designs which, I am sure this time that you will all agree, look about as right as you are going to get considering the limitations of the medium:

Although not shown, there’s a spare wheel to be stuck on, and I think the addition of some seated crew will finish it off nicely.

If anyone has any comments or further info on the subject, please don’t hold back: I can’t find a clearer photo of the actual vehicle (a photo: not a model that someone had made or a picture that someone has drawn) showing the rear bed, but I can see that my crew will sit at the right height i.e. shoulders just above the top of the cab, backsides at the same height as the truck sides.

Now I know I should end this post with a “reveal” of the completed model painted up, based and ready to rock…but they haven’t arrived yet. Give the poor man a chance to print and post them to me as we only agreed the final design yesterday!

Rest assured that when they do arrive, they go straight to the front of the painting queue, so stay tuned for more!

IABSM AAR: Home Run at Osmanville

An excellent I Ain’t Been Shot Mum battle report for you to look at today, from Scott Miquelon’s equally excellent Little Soldier Painting Studio blog.

Scott has created a comic-book style AAR showcasing his solo game using the Home Run at Osmanville scenario from the 29 Let’s Go Large article in the TFL 2014 Christmas Special.

Click on the picture below to see all:

Motorising a Polish Infantry Company

Quite a few of the games in the two September War scenario packs involve motorised Polish infantry, and although I had the basic troops, I didn’t have any of the vehicles necessary to represent either the 10th Motorised Cavalry Brigade or the Warsaw Armoured Motorised Brigade.

I’d thought about motorising my basic troops before, but couldn’t find anyone who did any of the FIAT 508 and FIAT 508/518 cars/jeeps/pick ups that they used, or produced an affordable FIAT 621 truck of the right type. If there’s one thing to remember when starting to collect a motorised formation, it’s the fact that they have a lot of trucks on their roster!

Then I was at Warfare 2021 at Ascot Racecourse, and got talking to Simon Ryan, who runs Syborg 3D Printing. As I was buying some tankers and bowsers (I love the wide range of “tail” vehicles that he does), I mentioned that no-one, not even him, did any of the Polish transport vehicles mentioned above. We swapped e-mail addresses, and a few days later I got a message to say that he could now print me as many of the various different Polish transport vehicles as I wanted, and sent me pictures of the CAD versions so that I could see what I would be getting.

This was too good an opportunity to miss, especially as the 508s and 508/518s were only £2 each, and the 621s only £4 each.

The Motorised Infantry Company

First up were the vehicles to carry the main infantry company (IABSM being a company-sized game). I needed one FIAT 508 staff car for the boss, and then a 508/518 jeep and two FIAT 621 trucks for each platoon.

The original designs for the 621s had open flat beds, but the pictures I had found online showed them with benches for the troops to sit on. A couple of e-mails to Simon and I had trucks with benches.

The jeeps came without drivers, but a rummage in the bits box provided them.

The Machine Gun Platoons

A motorised company has three types of MG platoon. First up are a couple of MG teams in two FIAT 508/518 jeeps; then there are four MG teams in two FIAT 621 trucks; and finally, my favourite, four MG teams each mounted taczanka-style on the back of a 508/518 pick up:

As you can see, although I just had the transport element for the integral two-gun platoon, I put seven crew members in each of the trucks: seven in the back, three in the cabin, for two five-crew teams in each truck.

Again, the passengers came from the bits box, which is why, if you look carefully, you’ll see a wide variety of helmets…although they all look just about the same in 15mm. The Uzis and Kalashnikovs that some of them are carrying are a different matter, but I’ve tried to paint them out.

The taczankas come with the stand and the gun. The standing crew member is a left-over American, the chap standing offering more ammo is a Peter Pig Soviet.

Anti-Tank Guns, Mortars and an Ambulance

Four more FIAT 508/518s were needed for the regiment-level anti-tank platoon; two more 621s provided transport for the regiment-level mortar teams; and Simon produced a rather nice hard-body version that can be used as a workshop, command vehicle or, as I have it here, an ambulance.

I used a slightly different version of the 508/518 pick ups for the AT tows: I thought they’d want to be able to jump out easily to deploy the guns quickly!

Again the crews for the mortars come from the bits box and are as cosmopolitan as before!

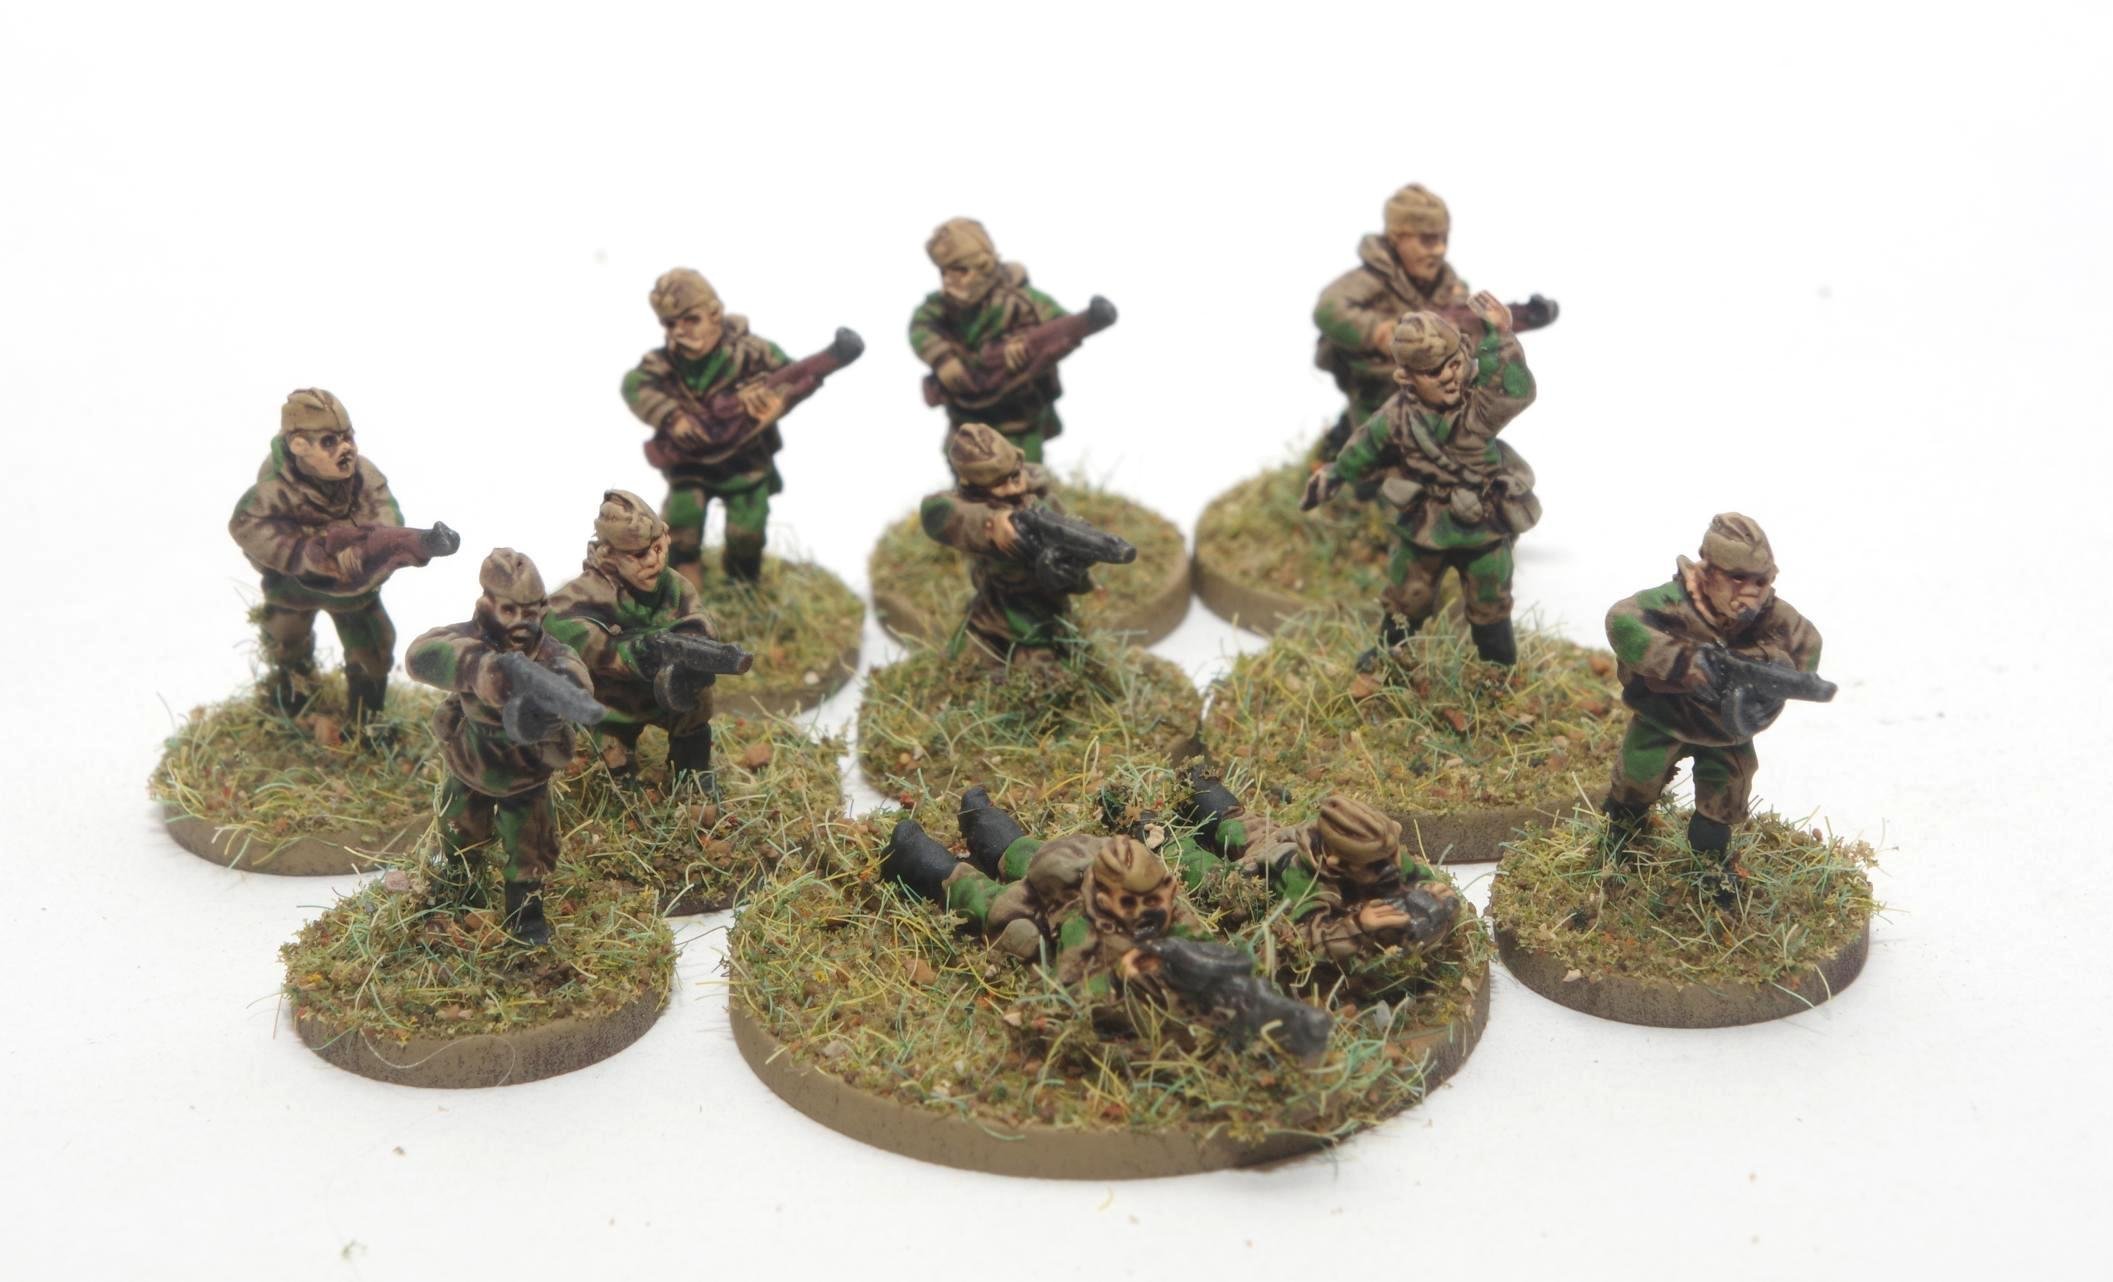
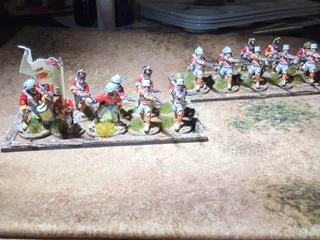
Motorcycle Reconnaissance Platoon

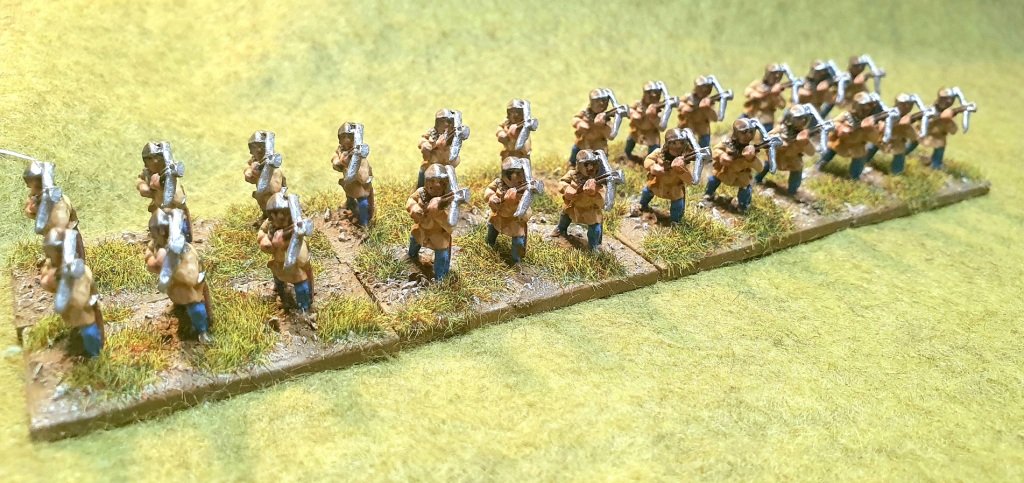
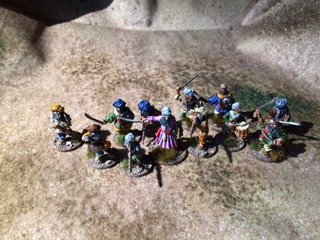
All those soft-skins can’t just motor forward willy-nilly, so I dug a pack of Battlefront Polish motorcyclists out from the depths of the lead mountain, and knocked them out to lead the way.

I only have one squad and the platoon commander, but will add a second and third squad with motorcycle combos as soon as Battlefront start producing them again.

Building and Painting

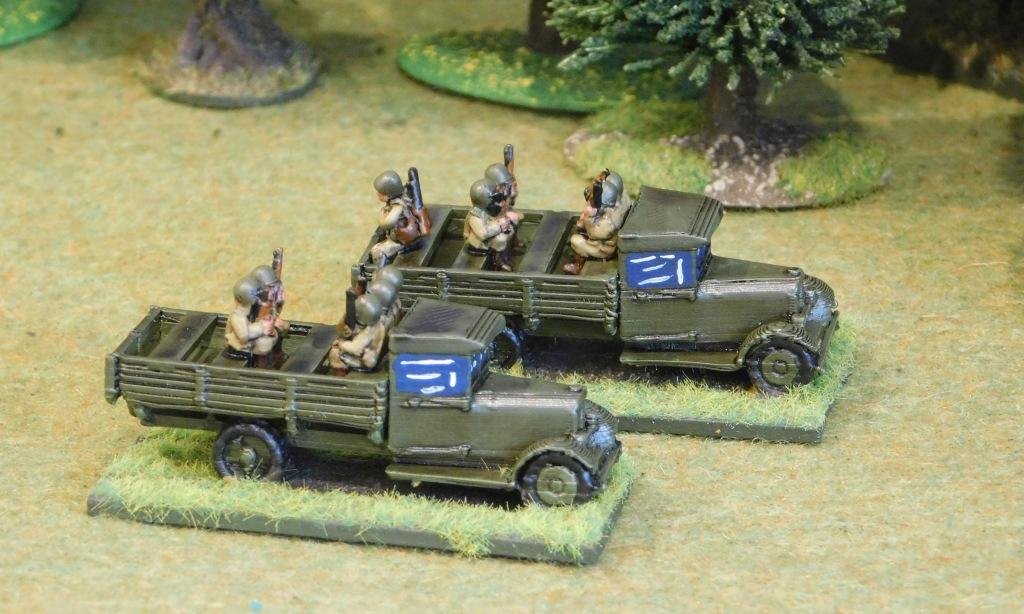
Building the models was easy: some of them needed the wheels putting on, but most came complete. The trucks needed the benched flat-beds stuck onto the frame, but that wasn’t too difficult. Getting the arms on the Battlefront motorcyclists to sit right (the drivers arms and the bike’s handlebars come as one piece so that you have to glue the rider in place then seat the arms and handlebars just so) was more difficult than assembling all of the 3D printed models combined.

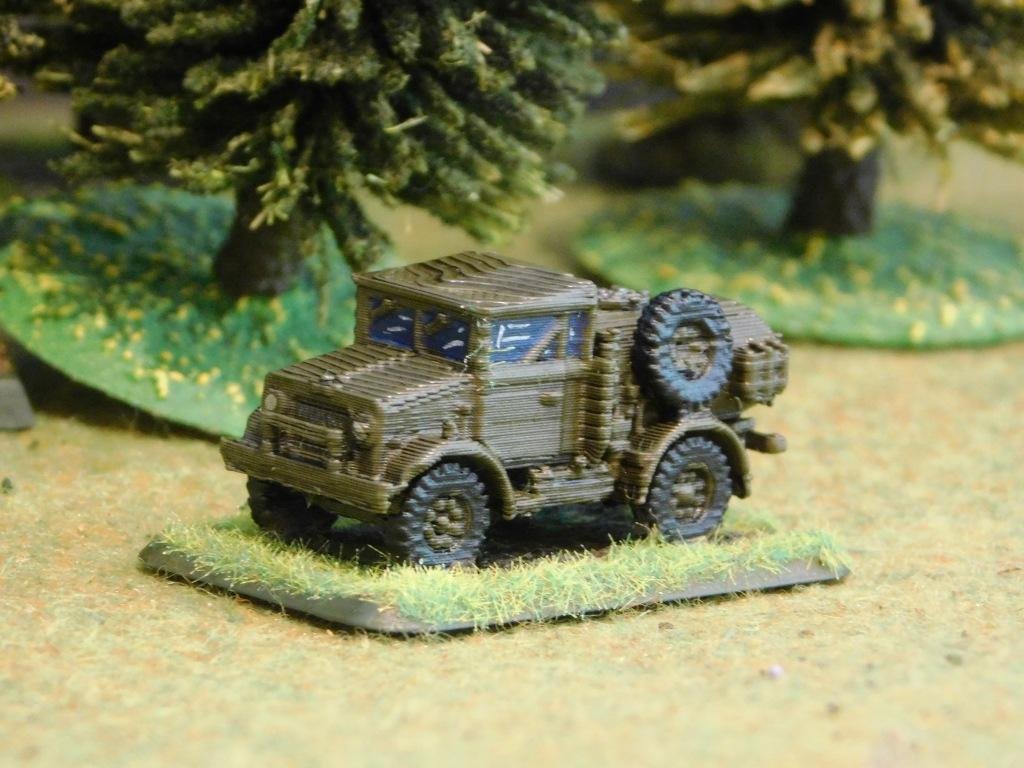
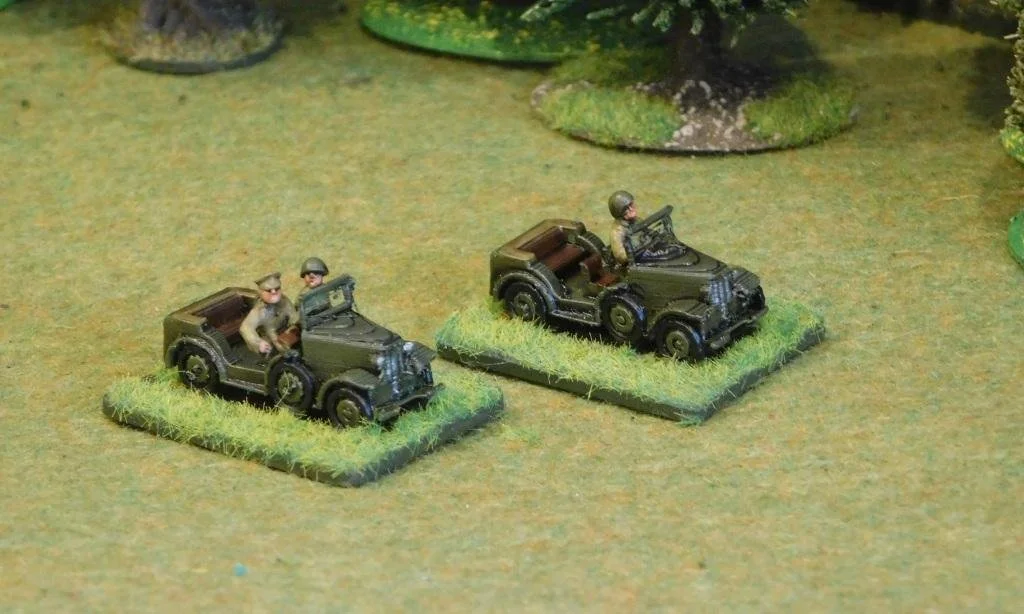
To paint the models, I undercoated in Army Painter Army Green. I then block painted all the crew figures, canvas and equipment before covering everything with a GW Agrax Earthshade wash. I then washed the vehicles again to get a darker green (just the vehicles) and highlighted the crew figures. Didn’t take that long at all.

I did think at one stage that I should have painted every vehicle in the Polish three-colour camouflage, and there are artworks and pictures of models produced like that. I couldn’t, however, find any photographs showing either motorised brigade with camouflaged vehicles: most look to be the standard Polish brownish-green. My rationale was also that maintaining a fleet of vehicles in their camouflage would have been a nightmare for the workshops involved: far easier to realise that these are transport not fighting vehicles and stick to an easily-painted standard greenish-brown!

Quality

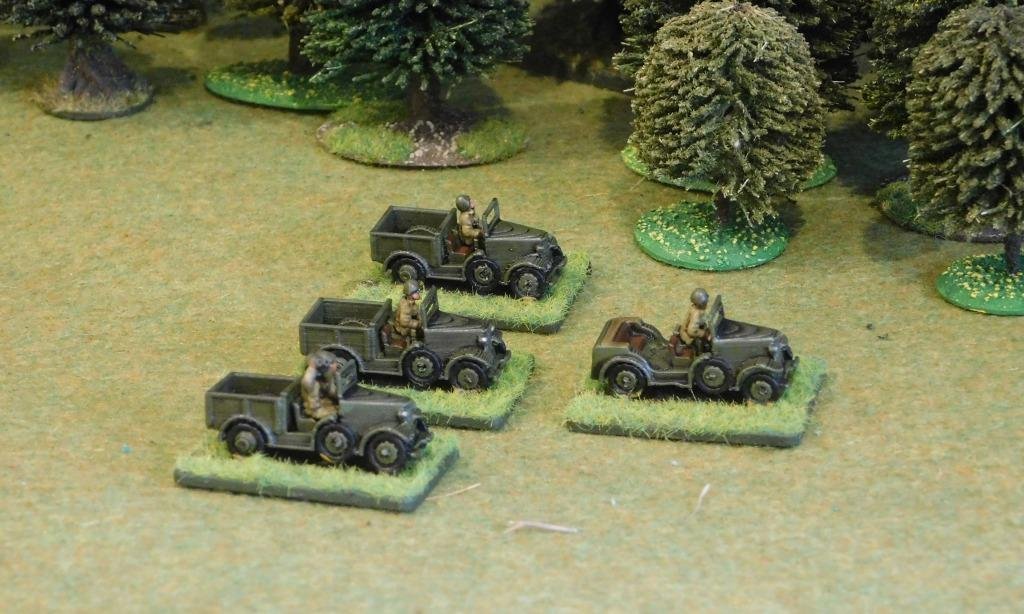
Some of the models show the graduated layers used in the printing process, but they just add a bit of depth to the look. Some of the wheels are a bit manky, and some of the edges a little “hairy” with loose strands, but nothing that doesn’t clean up quickly and easily.

Quality-wise, I would put these on a par with standard resin or metal vehicles and behind plastic vehicles…but I didn’t have to clip a whole load of parts out from a plastic frame and then glue or fit them all together. They’re also slightly cheaper (PSC £4.59 a truck, Zvezda £4.24 a truck), especially the cars/jeeps/pick ups.

Overall I’m very happy with my new transports for a Polish Motorised Infantry Company and supports. I got great service from Syborg and would highly recommend them as a supplier. I don’t know whether Simon will add these Polish models to his general listing, but I’m sure an e-mail would get you similar if you want them or, indeed, any other obscure vehicles. Highly recommended.

Painting Challenge Update

We have some more galleries opened this week, and the second or even third submissions from some of the early birds.

Opening her score for this year, Ashley submitted some sci-fi infantry. Ashley has entered six of the last eight year’s of Challenge, with a very genteel average of 171 points per year.

Also new into bat this year is Carole, who began this year’s Challenge campaign with some WW2 Soviets…a whole platoon of them in fact. Carole has been present in each of the eight year’s that the Challenge has run, with a very strong average score of 1,553 per year.

Our third re-starter is Stumpy: a prolific re-baser of already-painted figures (an achievement in itself given how much most people detest basing). Stumpy is also an eight year veteran of the Challenge, with an average score of 2,106.

Finally we have John Emmett, who has been with the Challenge for the last three years. His first entry includes, but is not limited to, an entry from last year that I missed. Over the last three year’s John has amassed an average score of 893 points, and I recommend a visit to his galleries to see his work.

On top of the above, we have another entry from Lloyd this week (some weird looking aliens from Khurasan).

As always, do visit the individual galleries on show: plenty of inspiration to be had.

Egyptian Officer from Stumpy

Artillery for the Gebirgsjaeger

With the 17th Century Cossacks now done, I needed something to paint whilst I decide what’s next.

Regular visitors will know that I re-photographed a lot of my collection of 15mm WW2 figures over Christmas, and re-building their galleries inspired me to fill in some of the gaps.

One such hole was some heavier artillery for my German Gebirgsjaeger mountain troops, and I remembered that somewhere in the lead mountain lurked the figures I needed. Much banging and crashing and sorting through boxes and cupboards later, I found the packet I was after: a Battlefront special order of two 105mm GebH 40 mountain howitzers (the GebH is short for Gebirgshaubitze).

The GebH 40 was the heaviest mountain howitzer ever made, but still broke down into four loads on single-axle trailers towed by kettenkrads or five pack loads carried by mules. Some 420 were made between 1942 and 1945, firing HE, AP, smoke and illumination shells.

Manpower Shortage

So I had the guns but no crews…and with Battlefront working on a reduced inventory (COVID etc) I needed to delve a bit deeper into the Lead Mountain to see what I could find to use.

First off were a few Gebirgsjaeger infantry, including two officers who would now command the gun teams: two down, eight to go.

Next I found some spare crew for the heavy mortars already in the Gebirgsjaeger collection, and although they are obviously toting mortar bombs rather than artillery shells or charges, they would do: six down, four to go. That’s where I hit the wall: no spare German artillerymen anywhere!

I did, however, find some Battlefront British artillerymen in shirt sleeves and some spare Gebirgsjaeger heads from Peter Pig’s head swap portfolio. A snip, a drill and a pin later, and I had my ten crew.

Making a Match

The next problem, of course, was how to paint them to match my existing Gebirgsjaeger: something made more difficult by the fact that I’ve been using Contrast paints almost exclusively for the last few years and the Gebs pre-date that change.

Fortunately I keep a rough record of what colours I paint things: nothing fancy, just a spreadsheet with rows labelled things like “Headgear”, “Coat”, “Trousers”, “Boots” etc. To give you an idea, the list for the Gebs was so old that it pre-dated the new GW acrylic range, so I also had to look up, for example, the fact that GW Graveyard Earth was now called GW Steel Legion Drab and, as you will see, I still didn’t get it all correct.

Some advice to all you painters out there:

  1. Never throw any spare figures away

  2. Always have a supply of spare heads (Peter Pig recommended)

  3. Always write down what colours you use for your figures

The Finished Product

So here they are: two 105mm GebH 40 mountain howiters:

These look great…but I am going to have to repaint the greys because I now realise that the grey doesn’t match the Shadow Grey highlight that I used on my originals. Apparently I should have used a colour called The Fang but didn’t: I looked in the pot and thought it looked a bit blue.

So it’s back to the painting table for these guys when I get a moment: the colour will have to go on over the varnish but it’s only for a touch-up highlight so should be okay.

Here’s the infantry guns picture so you can see what I mean:

Next up: a massive bit of hole-filling for the WW2 Poles!

More 2022 Painting Challenge Galleries Opened

Three more “regulars” back for the Painting Challenge.

First up is Steve Burt, who has participated in every year of the Challenge since we began, making this his ninth consecutive year. Steve has averaged 1,238 points per year, with a personal best of 1,716 in 2016.

Next is Andrew Helliwell, a prolific painter, who missed the first year of the Challenge but has been a steady participant ever since. Andy’s average is 2,329 per year, with his last two years both being over 3,000 points.

Finally in this set, we have Nick Cooper, who starts his second year of the Challenge. last year Nick managed 1,536 points: a very respectable first outing!

Already registered Mervyn and Lloyd also sent through a second set of entries this week. Do check out the individual galleries, but here’s a taster: