Q13 AAR: Marauders Squashed!

My first game of the year was an epic 15mm sci-fi clash between my newly painted Gitungi army, using figures mostly from Micropanzer’s Gitungi range, and an ‘evil vegetable’ army comprising figures from a number of different manufacturers but principally Khurasan’s Vornid plant-men and Ravenstar’s Horrids.

Click here or on the picture to see how the action unfolded...

IABSM AAR: Arnhem Game

Not really a full battle report, but more displaying the pictures of a recent IABSM game that tiger1arnhem posted in the Photos section of the TFL Yahoo Group.

Apparently he had written a full AAR, but lost it all due to technology issues. I feel his pain, and can only repeat the mantra "CTRL+S, CTRL+S"!

Click on the picture to see more:

Those of you who do wish to submit full AARs, whatever size or quality, for IABSM, CDS or Q13, can do so by e-mailing me at the same address as for the painting challenge: adminATvislardicaDOTcom.

IABSM AAR: Pasting The Padre

Exciting news! I have taken advantage of the Christmas break to catch up on the re-loading of content onto the new website, and am pleased to say that all the previous IABSM after action reports are now done. That's a huge library of battle reports to browse at your leisure, many with complete scenario information allowing you to re-play the action for yourself.

To celebrate, here's a new AAR, Pasting the Padre, which gathers together the reports written by James Mantos and the Mad Padre about the same game of IABSM played in November this year.

Click here or the picture to read the report; or use the top navigation bar to go to the IABSM After Action Reports section of the website to see literally hundreds more! 

Website Update: Malaya Day Nostalgia

The Christmas holidays mean I have more time to finish re-loading all the content onto the new VL website. 

I'm still working my way through the IABSM AARs, and great fun it is too. I have done all the scenario pack AARs, and the one-off game AARs, and am now working my way through the TFL Games Day AARs.

I have just finished uploading all the reports from the 2006 Malaya Games Day: a colossal battle involving over a battalion of infantry on either side at 1:1 scale, with the Japanese trying to force their way through the Lardak position, held by British Indian troops.

Click here to go to the IABSM AAR page. The Malaya Games Day reports are in the right hand column, down near the bottom.

Here are a few photos to whet your whistles...

Table2.025.jpg


The Eagle Has Landed...I Think!

I went over to Lard HQ last night for the final game of the year, billed as a Chain of Command re-fight of the climactic battle from the film The Eagle Has Landed.

For those of you who have missed out on this cinematic masterpiece, Michael Caine leads a bunch of Fallschirmjaegers on a mission to assassinate Winston Churchill as he visits a small village in rural England. All is going well for the Fall-ies, who are disguised  as Polish Paratroopers, until one of their number saves a local girl from going under the wheel of a water mill but is killed in the process, with his paratrooper uniform being ripped to reveal his German uniform underneath. Now discovered, Caine's men fight a battle to hold the village against an assault by nearby-based American troops whilst Caine himself (Steiner IIRC) goes off to kill Churchill.

The game, therefore, featured me leading three squads of US infantry supported by a Staghound armoured car into the village to firstly find out what was going on; secondly to identify any disguised Germans; and, thirdly, if any were found, to kill them!

The Germans, meanwhile, who were already occupying the village, had some convoluted mission requirements that seemed to involve tracking down a local woman who was actually one of their spies in order to be told where the secret tunnel was that led to the mansion house where Winnie was staying. I say convoluted because everything for the Germans seemed to get more and more confusing as the game went on: surely nothing to do with the immense amount of champagne that Mr Clarke, who was allegedly running the game, consumed as the evening went on.

After my last Lard HQ Chain of Command debacle (which no-one seemed to have forgotten unfortunately) I was determined to redeem myself. Rather than following the course of action from the film (where the Yanks charge into the village and get shot to bits before retreating for a more cautious second approach), we arrived at the edge of the village and cautiously moved forward towards the first house in order to try and find out what was going on.

There (well in the outside privy to be exact) we met a section of British infantry who confirmed that the Germans did indeed have men in the village, disguised as Polish paratroopers. That was all they could tell us...hardly surprising as they turned out to be more Germans on a mission to stop the main German mission for political infighting reasons.

Confused? Not as much as we were when Rich revealed that he'd brought the wrong box of figures with him so we would have to be portrayed using German figures. So we have Germans using British Paratrooper figures pretending to be Polish; more Germans using British infantry figures pretending to be British, and being played by a Scotsman; and Americans using German figures pretending to be...oh, no, sorry: actually being Americans!

Anyway, having sussed out what was going on, the Americans went forward cautiously: one squad hanging back as a base of support, one moving towards the church, and one moving up to the Whippet Inn (also somewhat confusingly portrayed by a German beer hall).

The squad advancing towards the church took fire from the steeple and lost a man, but our return fire was incredibly accurate and wiped out the German Bren team that were doing the shooting. The squad then started cautiously moving into the church itself. Meanwhile the Staghound moved into a position near the first house from where it could cover the village main street with its .50 cal.

The other two squads then leapfrogged forward until one was in the inn providing a base of support whilst the other was pressed against the back wall of the first house in the village, covering both the main street and the gardens to the rear.

Stalemate then ensued until the Germans realised that firstly all we had to do was keep them occupied until the end of the game and secondly that they needed to get back into the church to find the woman to find the secret passage to find the Churchill...you get the picture.

As false-Polish paras hit the high street, heading for the church, we opened up with everything we had: the Staghound's .50 cal, chewing up scenery as the two squads covering the high street actually did the damage. The first German squad was effectively rendered hors d combat (no, no French on the table...at least I don't think so...but at this stage, a bottle and half in, who knew) but another moved up and threw grenades into the church in an attempt to clear it.

This was not as effective as it should have been (one dead American), and the Germans soon suffered as a hail of grenades and small arms fire came right back at them. That squad was soon pinned and then wiped out as well.

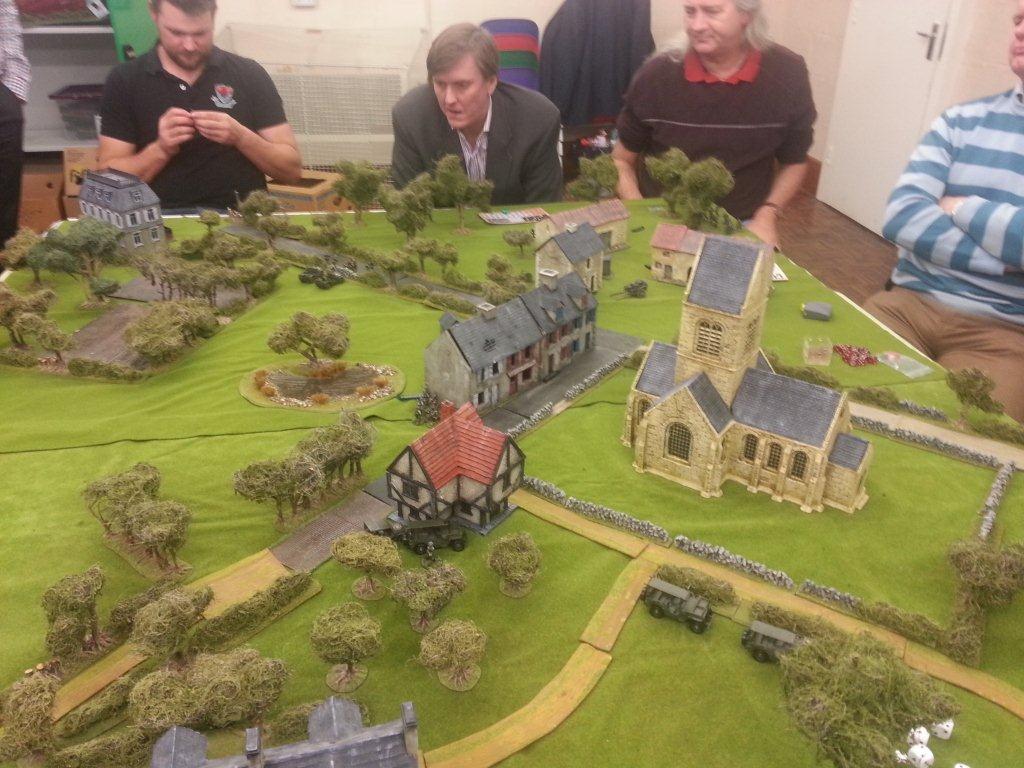
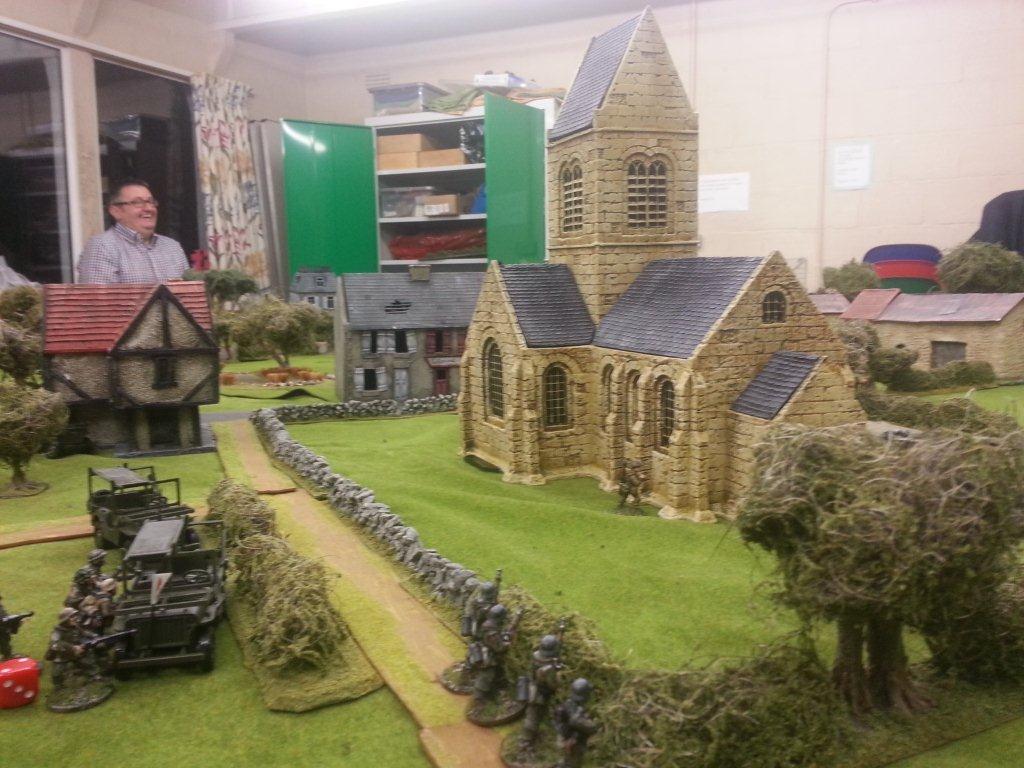
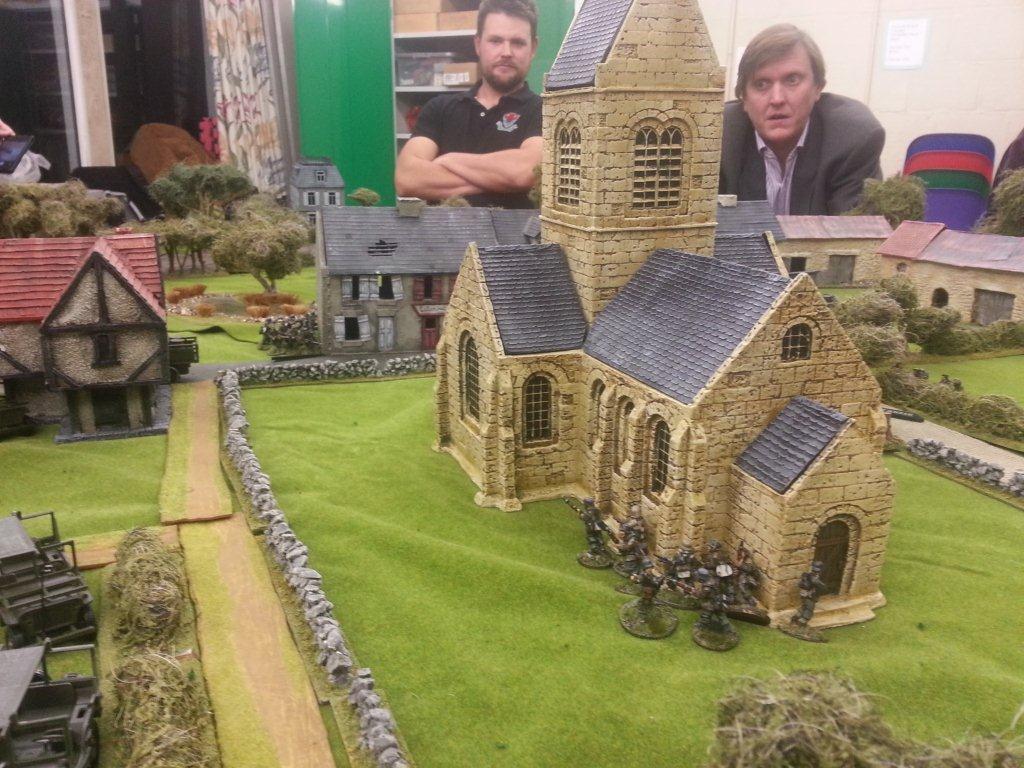
The game then drew to a close. We occupied the church and commanded the main route through the town; the Germans needed to control both in order to fulfil their mission, but were now down two full squads against our losses of four men (three killed by a demented local high on home brew).

All in all, a great game of Chain of Command, if somewhat chaotic. I was quite rightly accused of taking the game far too seriously (it was the Lardy Christmas game, after all) and have no excuse except to say that after last time I had no choice lest my reputation be damaged beyond repair!

My thanks to Rich, Nick, Panda, Trevor, Dougray McScot, Al, Noddy, Mark, Harpers, Panda, Elton etc for a most entertaining evening, with mince pies and booze thrown in for good measure. Just make sure you save me an After Eight when the packet is eventually opened!

Site Update

The reloading of the site's contents continues apace!

I have now finished re-loading all the IABSM After Action Reports as far as the one-off battle reports up to the end of 1942. That's all the scenario booklet AARs done, and about a third of the one-off games done.

Some people ask me why I bother to try and record every game of AAR about which a battle report has been written.

Well, there are a number of different reasons. Obviously the reports can be source of inspiration: encouraging you when the 'can't be bothered to game or paint' blues have got to you.

On top of that many of the reports are just such good reads: being so well written that they deserve to be published to a wider audience - and here I commend you to Mr Clarke's body of work.

Many reports also have vast numbers of really good photos attached to them: certainly enough to get your hands itching for a paintbrush again...and I know from personal experience that my terrain collection has grown in sophistication just so that my photos look more like those of the masters.

On top of a bit of inspiration, quite a few of the one-off game reports (especially Kev's) give complete game briefings: enabling you to play the scenario out yourself. Ideal if you're stuck for a game to play and (obviously) have played every scenario in my many scenario booklets!

Note also that some of these reports are now only available here on the Vis Lardica site. There are those that have been written specifically for the site, but there are quite a few others that have been lifted (usually with permission!) from sites or blogs that, for any number of reasons, no longer exist. Vis Lardica has become the IABSM archive, and I would like to see that archive as complete as possible.

So, in summary, read and enjoy the huge body of IABSM (and CDs and Q13) AARs that appear here. Even better: submit your own for inclusion. E-mail me at admin@vislardica.com. I'll do all the work: all I need to know is how I get hold of the text and any photos. All standards of work are included!

R

Playtesting the new Napoleonic Rules at Lard HQ

I went over to Lard HQ last night to try out the new TFL divisional level Napoleonic rules that are currently in playtesting.

Although the game shares the same activation dice system as Chain of Command, everything else is new. The basic infantry unit is the battalion: three to seven bases of four figures each, with each figure representing about 120 men. Horse are organised in a similar fashion, with guns being either grouped into batteries or, a nice touch this, integral to the battalion they support.

As you would expect from any new Lardy product, although it has a familiar feel to it, it is a genuinely different game, not just a re-hash of one system to another period or scale.

In last night's game, Mr Clarke and myself played the early French (I forget the exact date), versus Alan playing the dastardly Austrians, no doubt seeking to strangle our infant republic before we had a chance to assume our rightful position as masters of all Europe. Our task was to wrest control of a ford and a bridge held by a smaller but still substantial enemy force. Here is the set up:

The French are to the left, the Austrians to the right. Mr Clarke's big battalions will cross the bridge and hit the Austrians in the built up area (the big house with four windows). I would hold the left flank in case the Austrians counter-crossed the ford. There were a lot of Austrians in front of me:

As the game started, Rich duly advanced his men over the bridge and headed for the built-up area.

His plan was to line up his multiple battalions and hit the town all at once, but unfortunately one of his units took an excess of heavy artillery fire on the flank, and then routed back across the bridge. This caused a massive traffic jam on the bridge and severely unnerved the rest of his troops, meaning that rather than hitting the town all at once, his battalions were fed in piecemeal.

An initial assault was repulsed, then he fought off an enemy cavalry charge as the enemy sought to take advantage of the resultant confusion, then his next assault was successful...but the time taken for all this had given the Austrians time to reinforce the town and slowly Rich's men started to be pushed back out again.

Meanwhile, on the left flank, the Austrians had decided to counter attack:

I had turned to meet them, and then let a couple of battalions cross the ford before marching forward to take it myself: neatly splitting his force in two.

At that point, unfortunately, the game had to end as we were out of time. The Austrians were declared the winners, as Rich's attack was about to fail utterly and things had not yet got properly started on my flank. All agreed that it was a close run thing: with Rich being literally at match point a couple of times before Alan's Austrians, holding on doggedly, managed to turn things around.

It was a great game and a really positive try-out for the rules. Everything seemed to work just fine, and I found that I could quickly pick up the basic mechanics without difficulty. I would love to try this out using 15s rather than 28s and, perhaps more importantly, I think the game would work brilliantly for the whole of the 19th century...well, through to the end of the Franco-Prussian War at any rate.

My thanks to the Lardies for their hospitality. I'm off to look at Napoleonic figures in 15mm now!

AAR: Diot

Played a great game of I Ain't Been Shot, Mum! today using scenario #4H from the Blenneville or Bust! scenario pack. 

Exciting action as the Germans attempt to outflank the Allied advance via the strategically vital town of Diot, only to run into a company of Scottish infantry determined not to let them past!

Click on the picture to read the whole AAR:

And for those whose appetites are whetted by the above, I've reloaded the IABSM AARs down to the last one from the Fall of the Lion Gate Malaya and Singapore scenario pack - I'm doing all the scenario pack AARs first before moving on to individual games and the Games Day reports. Check them out!

AAR: Ploschad

Last week Neil and I played the climatic battle in our Bashnya or Bust! campaign: with the Soviets trying to get past the German defenders of Ploschad.

A cracking game, even if my camera was playing up a bit.

Click on the picture below to read the whole AAR...

I've also found the time to re-load the first eight or so IABSM AARs from the Blenneville or Bust! scenario pack too, so check them out!

AAR: Near Devyat

Craig Ambler gives us the next installment in his solo-play Bashnya or Bust! campaign. This time it's action near Devyat, featuring a German raid to spike some Soviet guns.

Click on the picture to read more...

And for those who like a bit of Vietnam action, I've finished loading all the Charlie Don't Surf! After Action Reports. Use the navbar in the header to go there now (well, after you've read Craig's AAR, of course).