TTS AAR: No Revenge for the Indians

Regular visitors will know that a couple of week’s ago, my Classical Indians were defeated by an 11-phalanx strong Hoplite Greek army played by friend Bevan. Now it was time to get my revenge with a re-fight of the same battle.

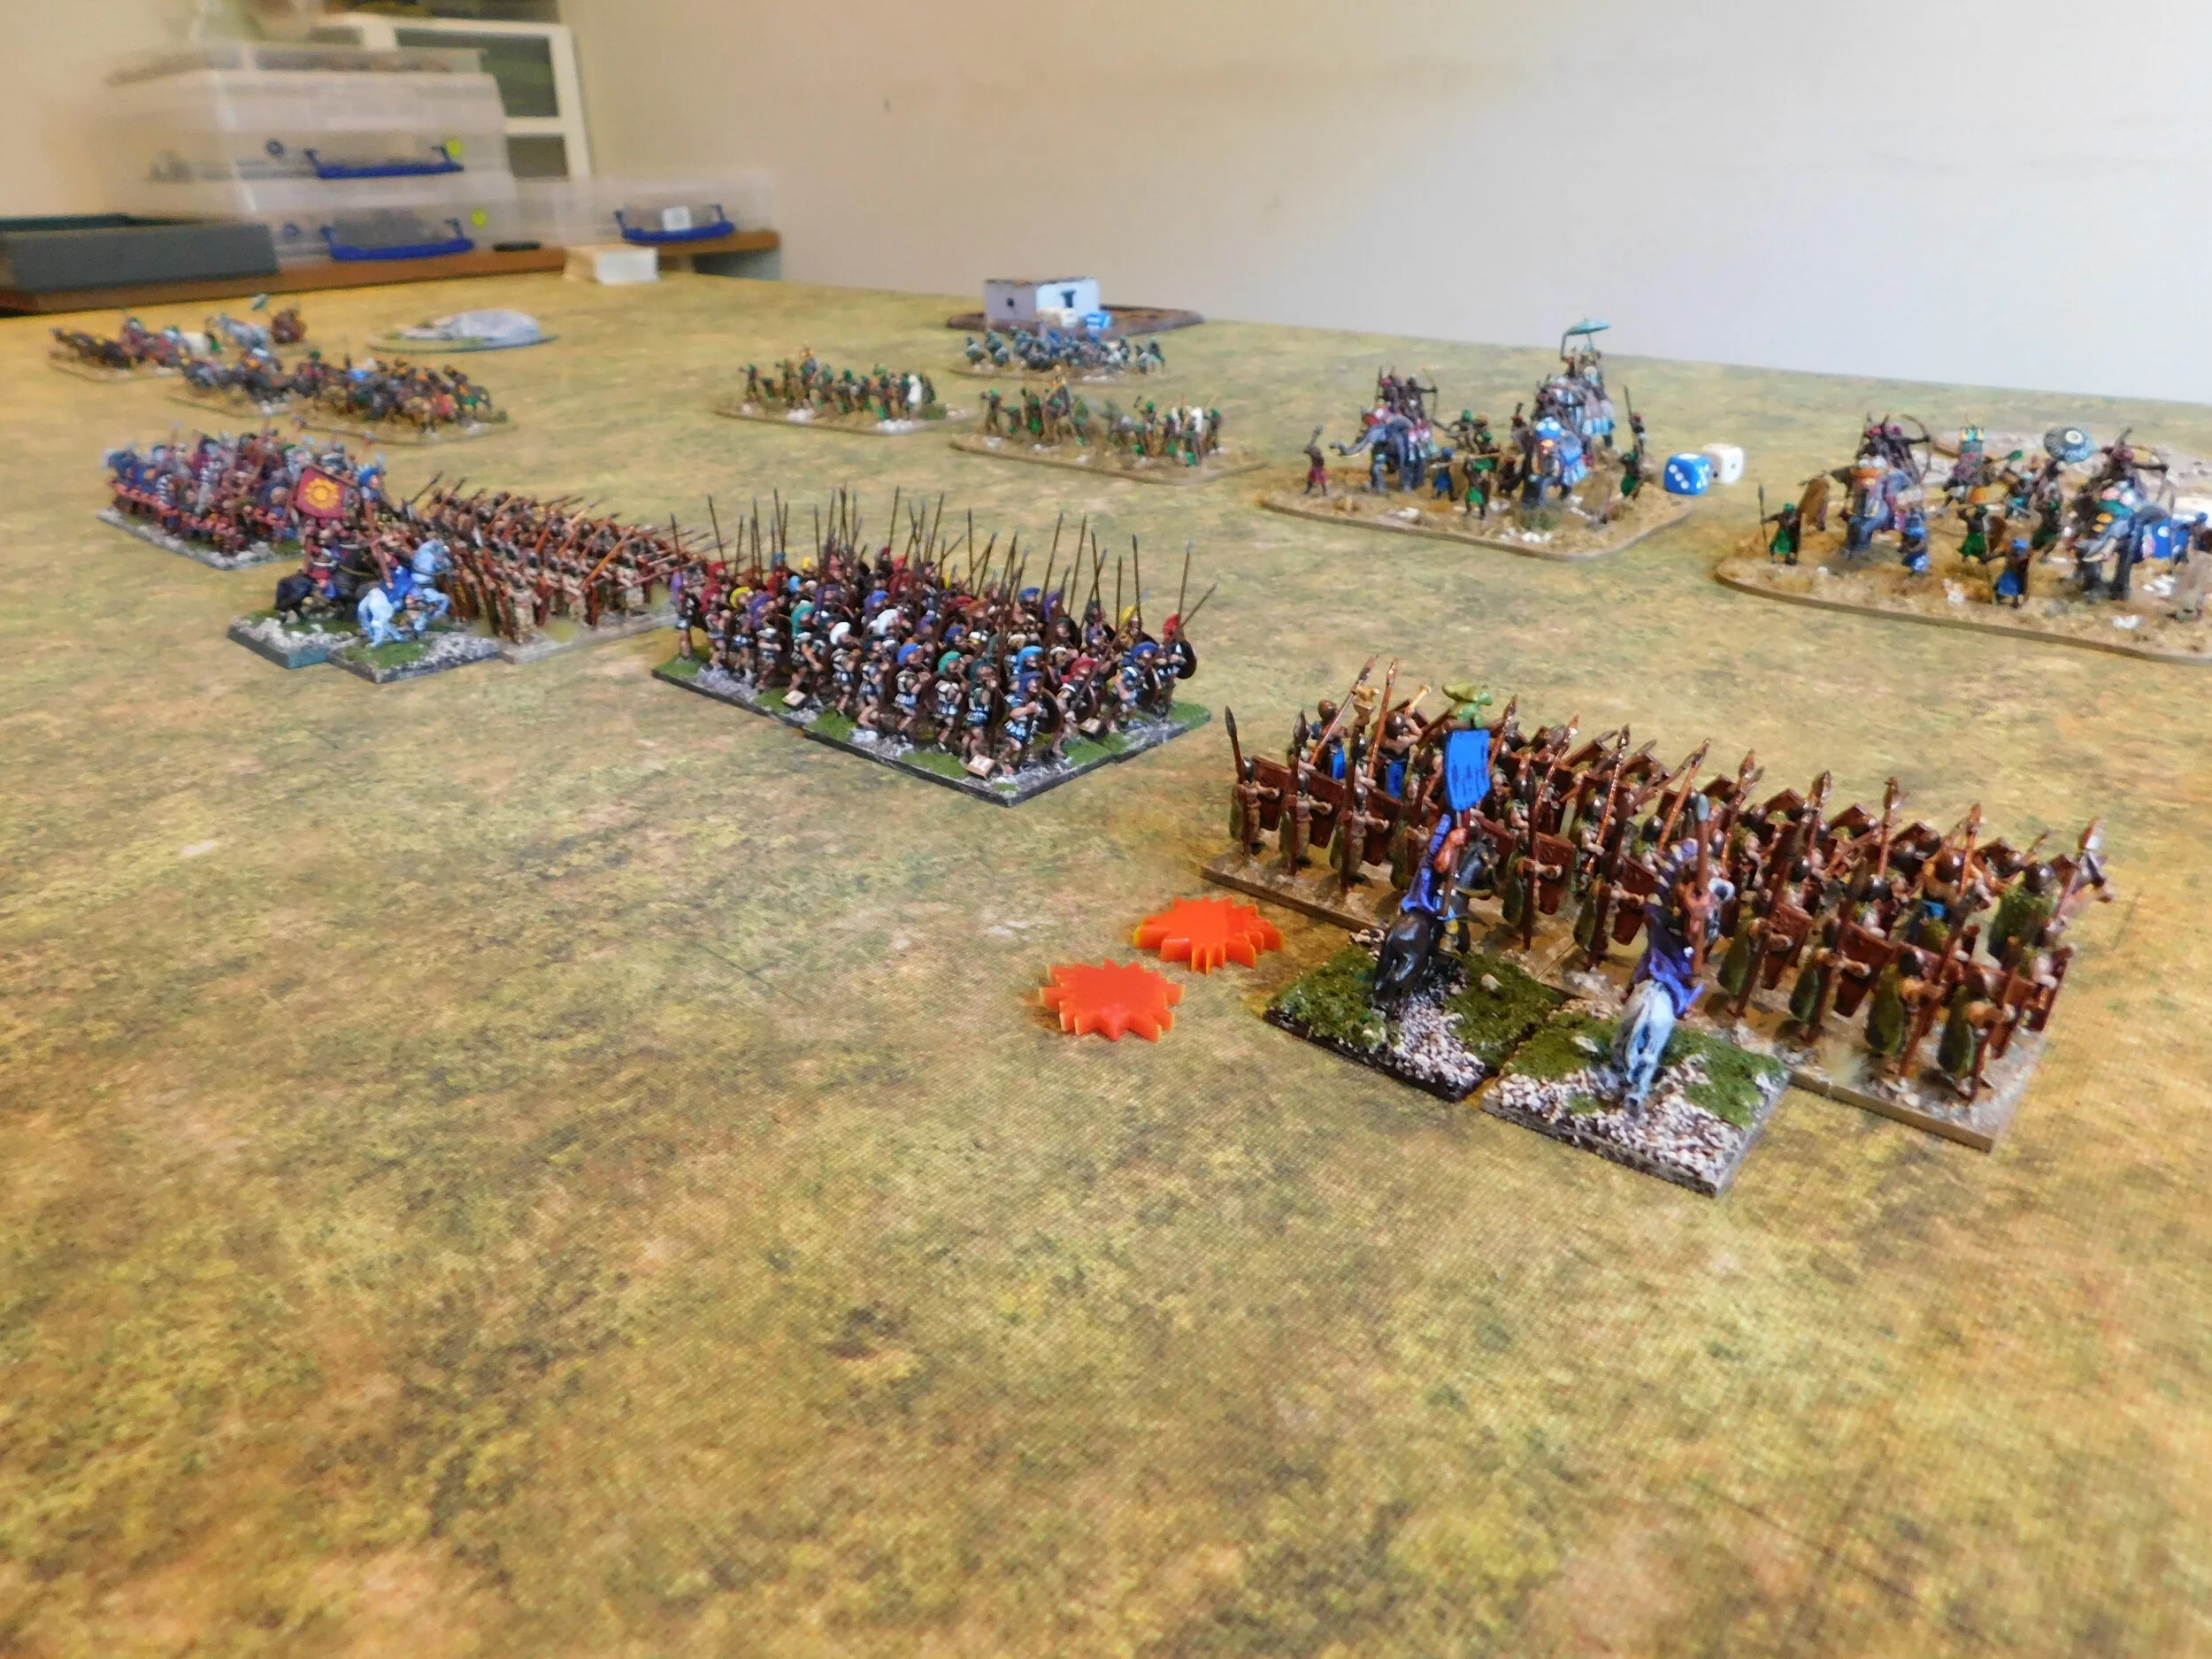
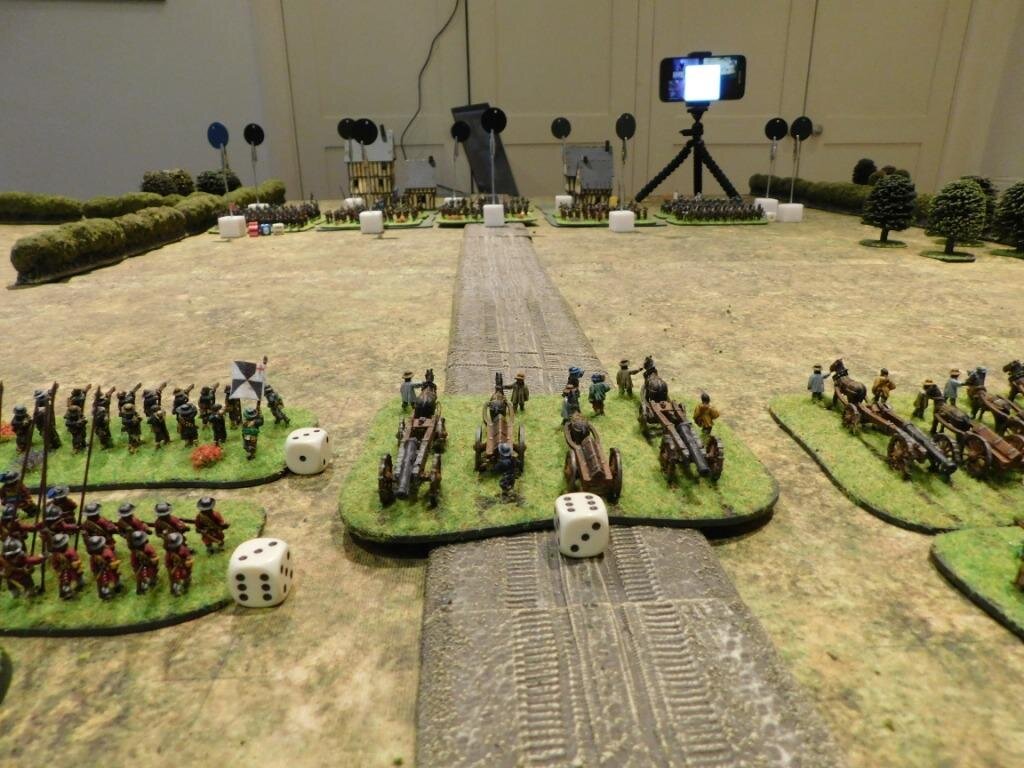
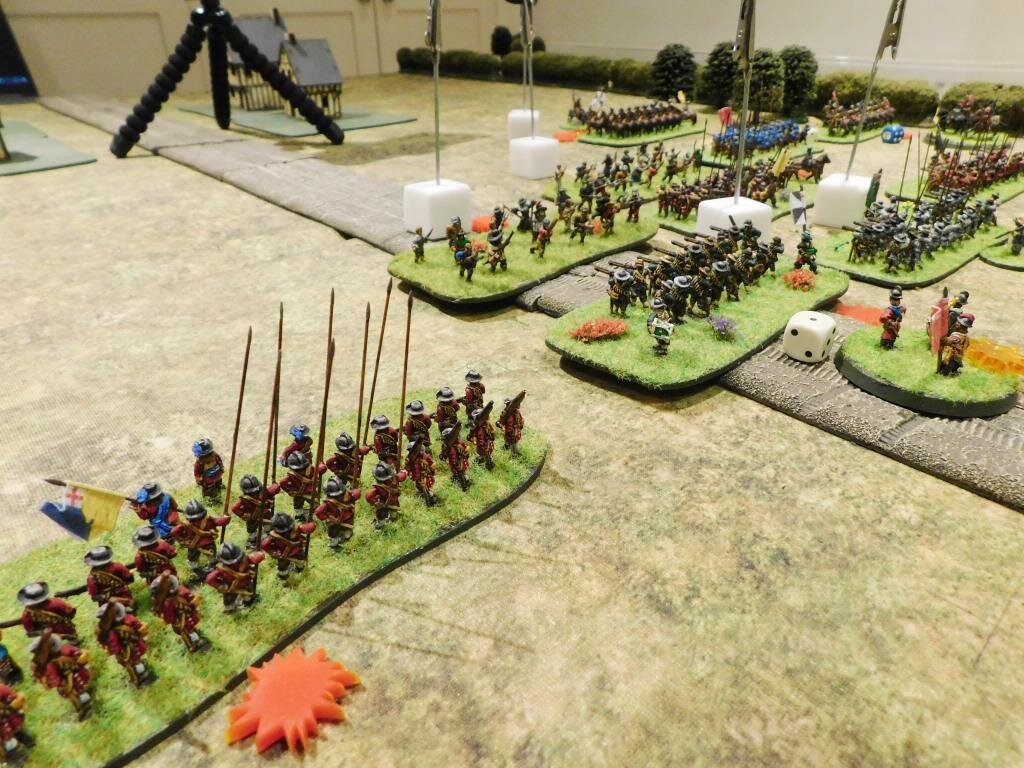
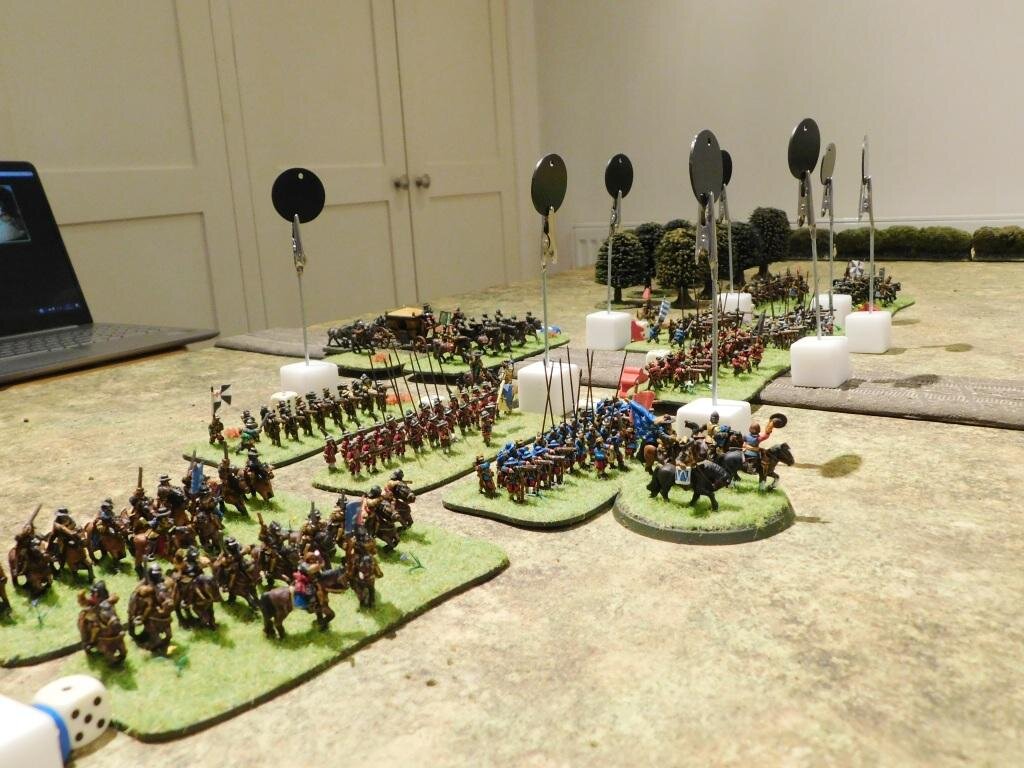
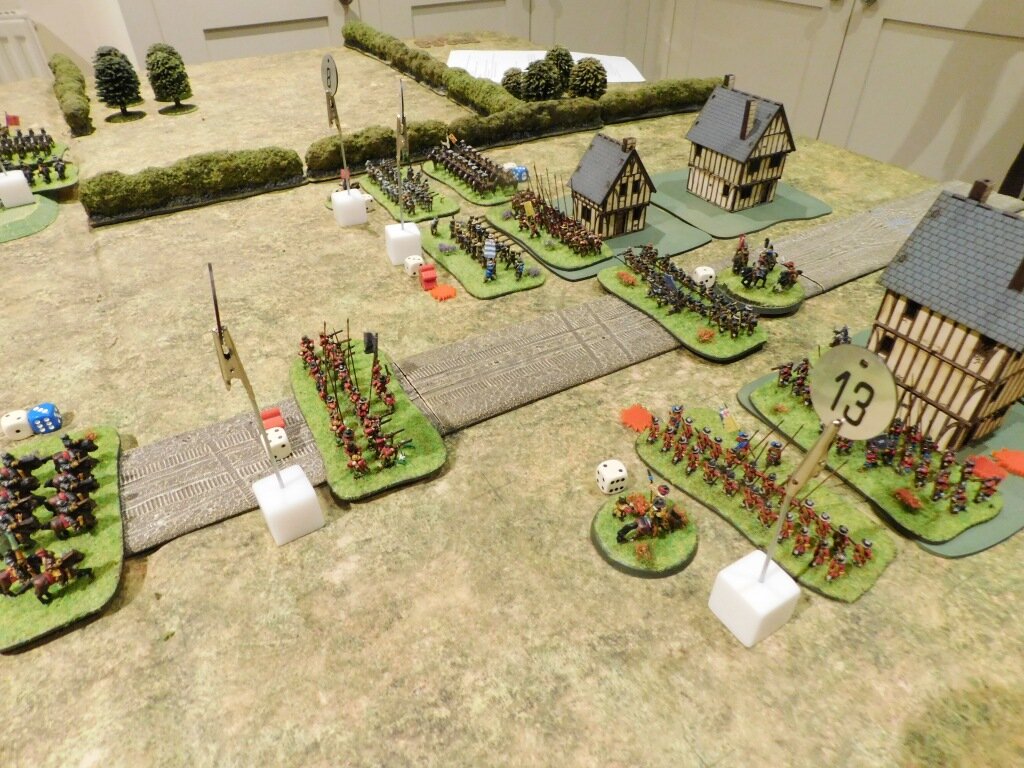
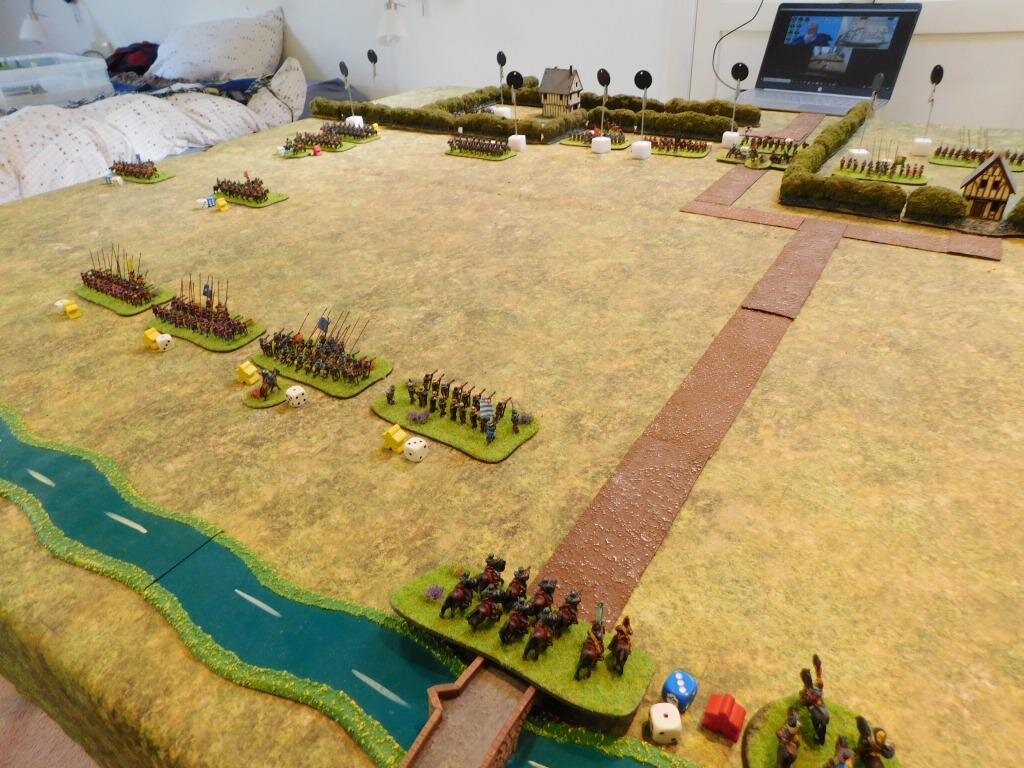
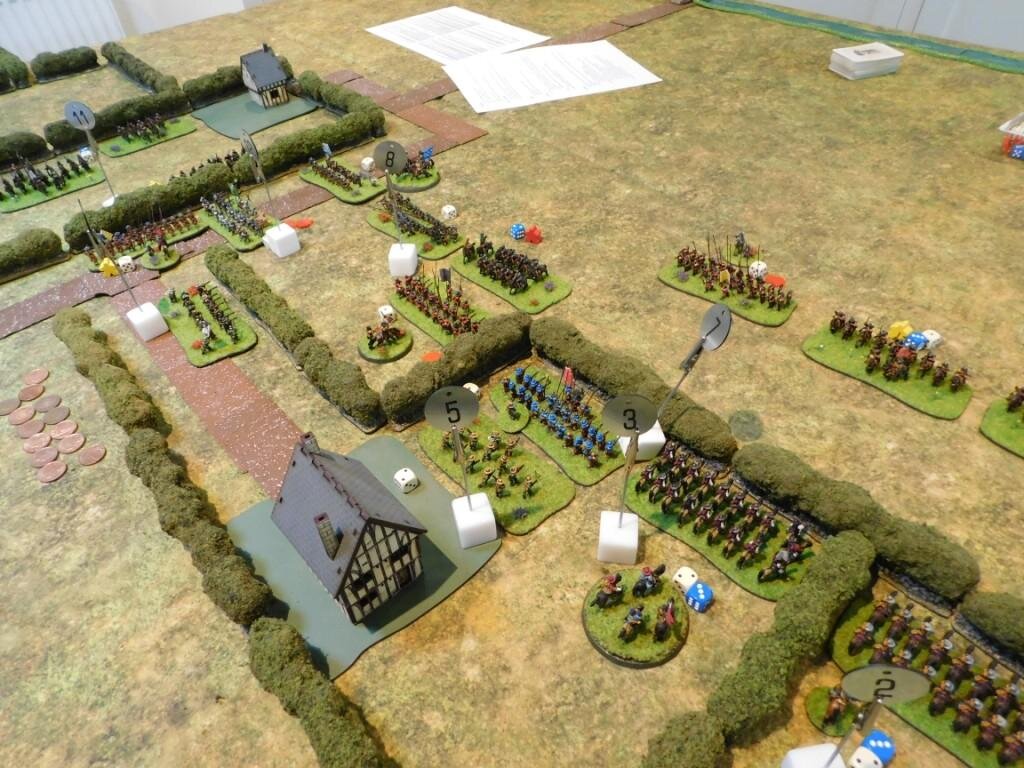
Opening stages: so far everything is going to plan!

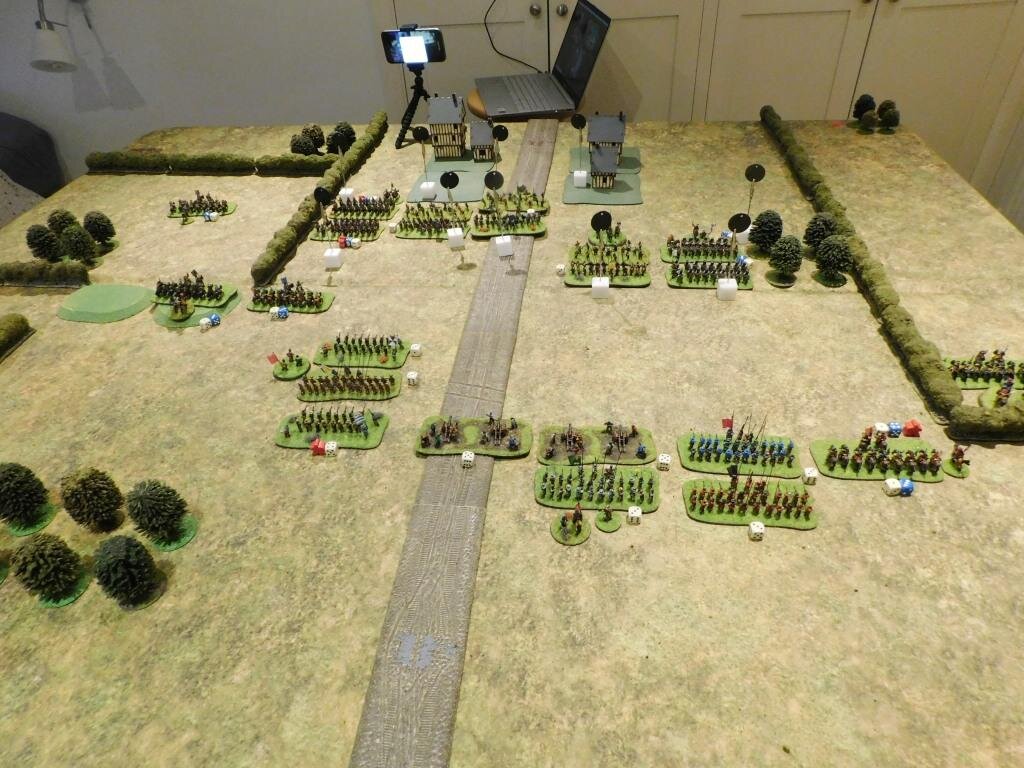
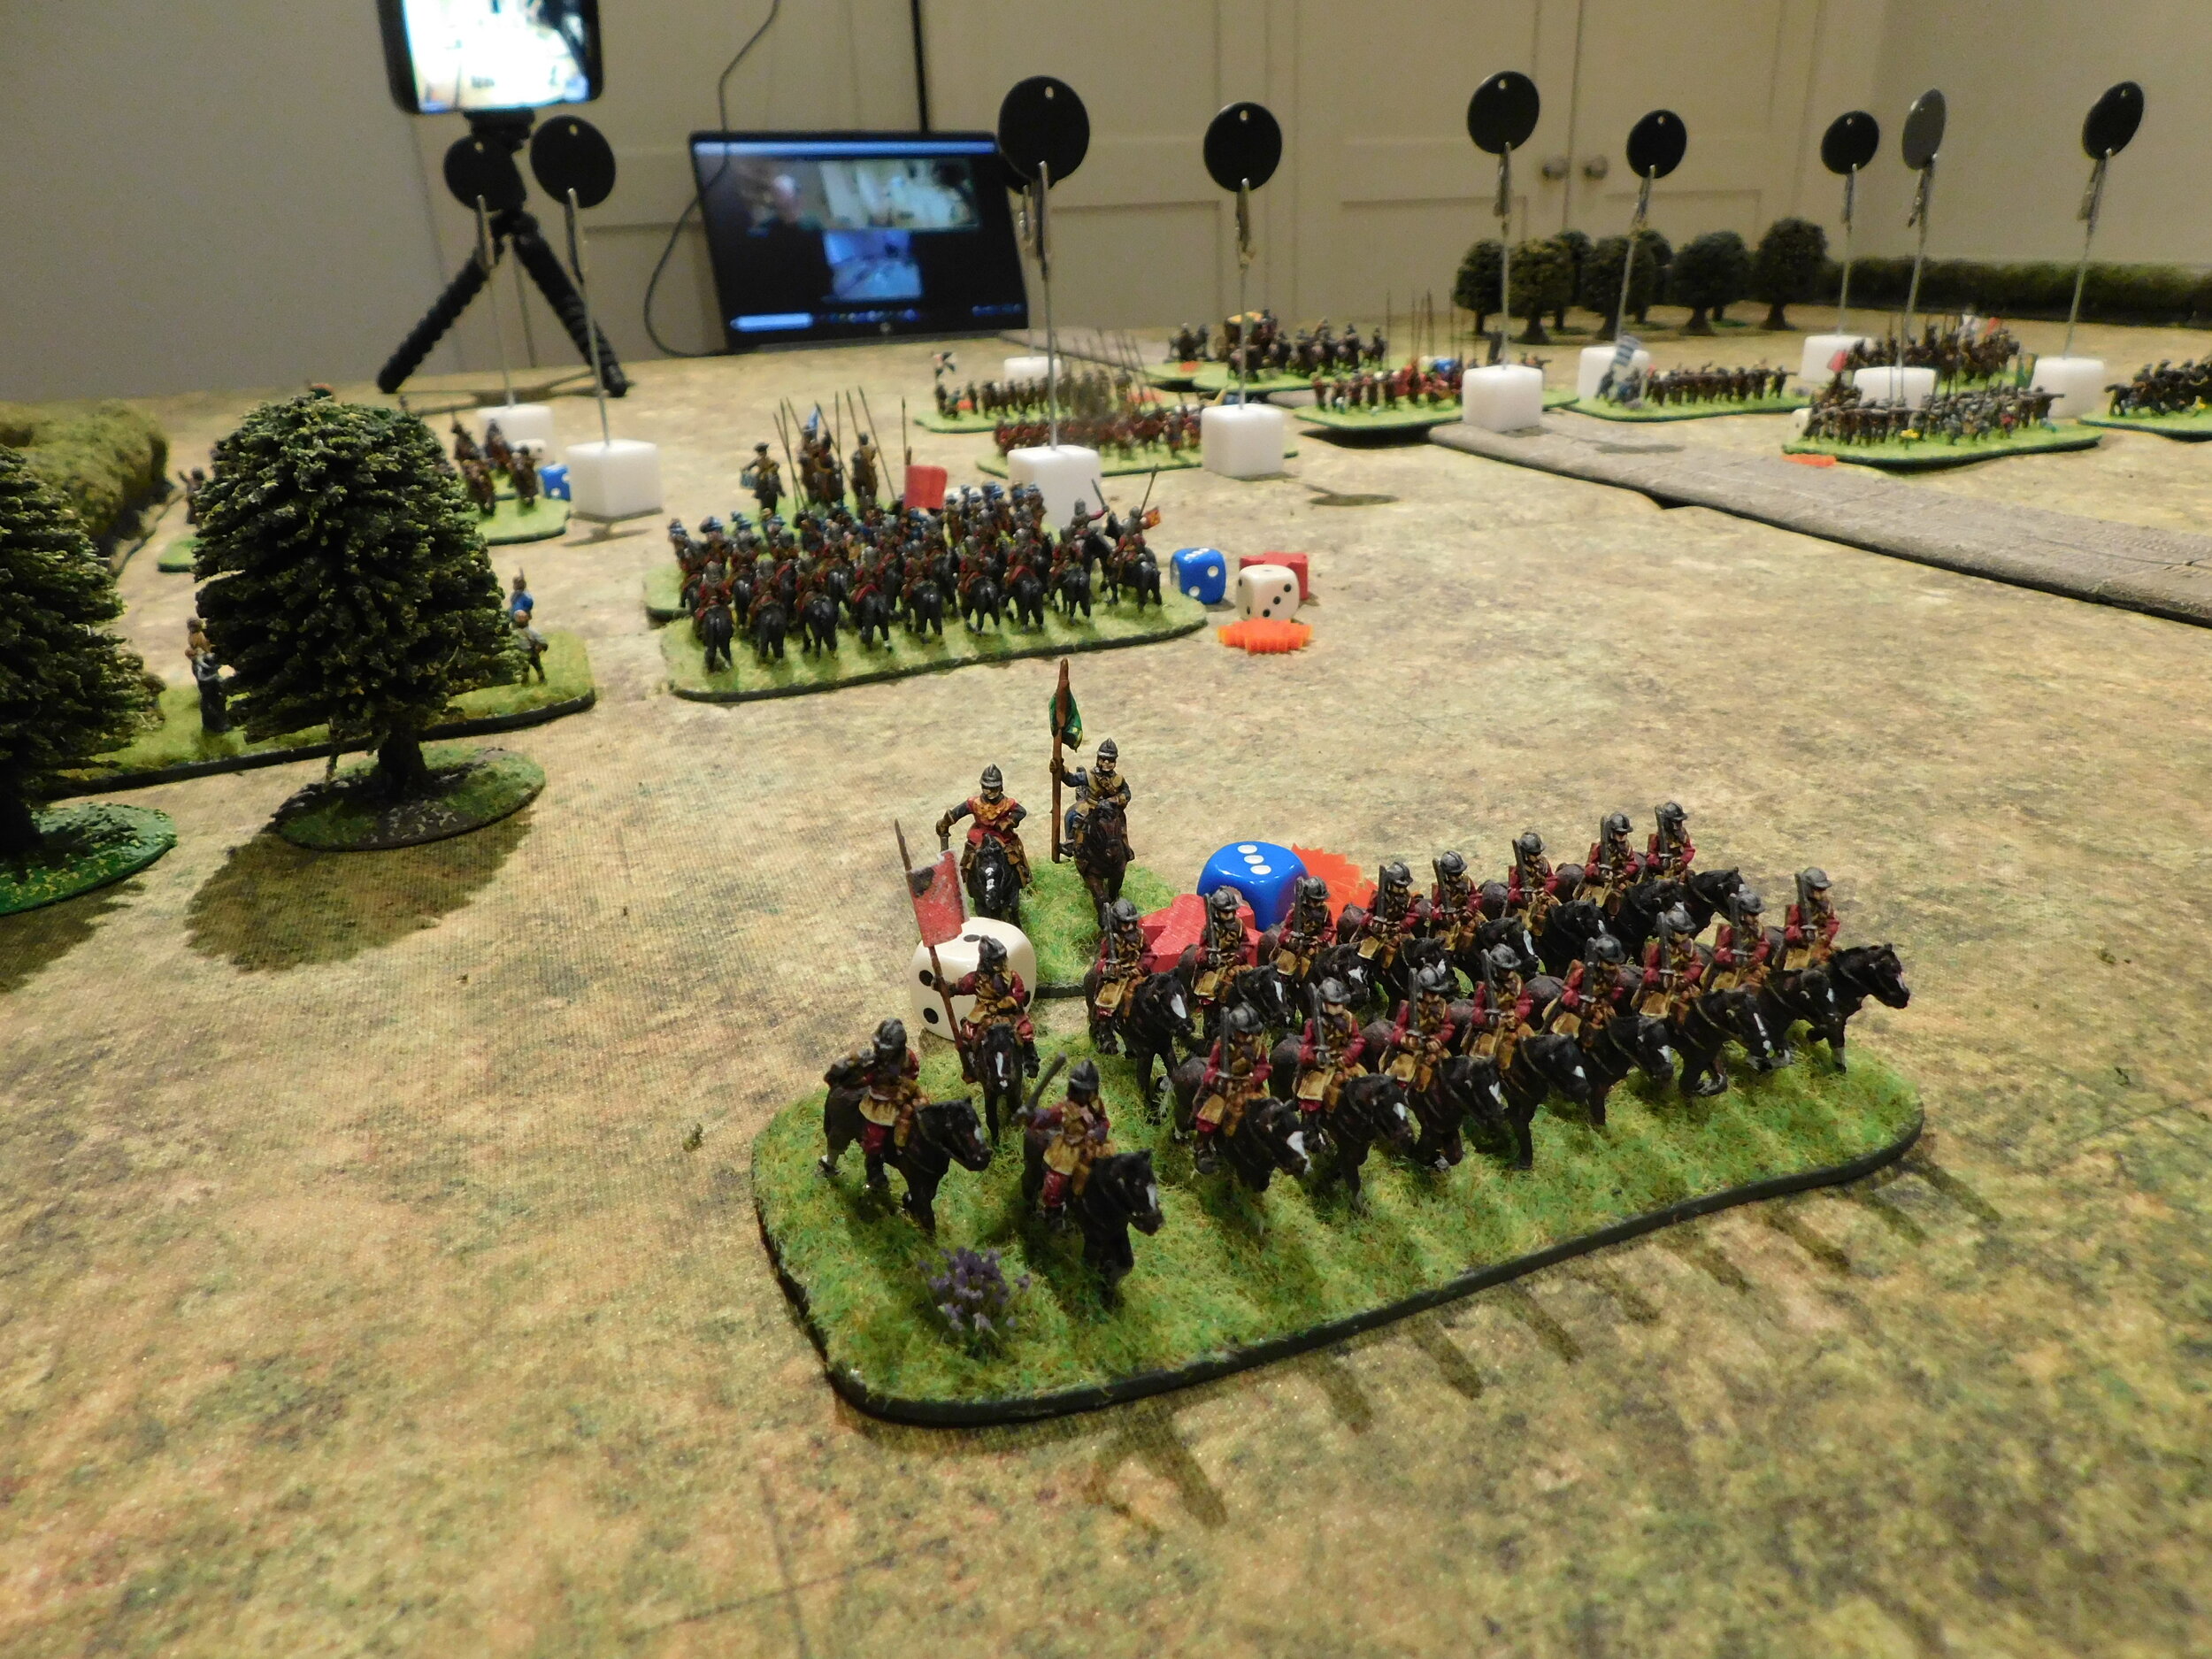
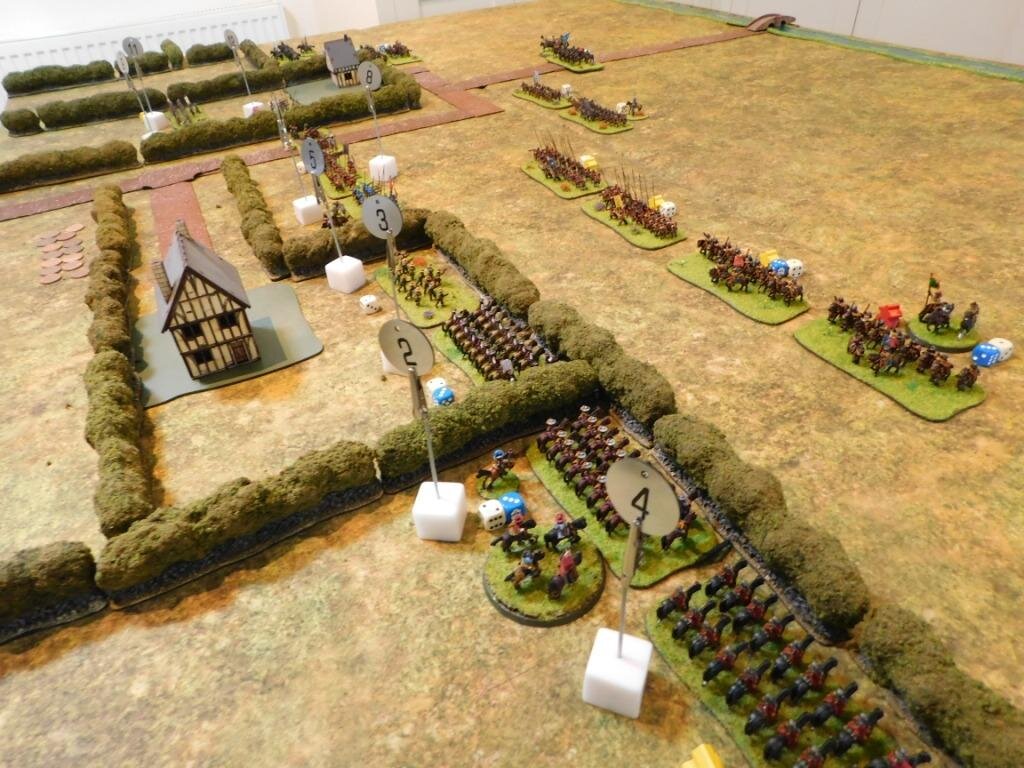
Well that was the plan!

Unfortunately things didn’t go at all to plan, and I ended up getting beaten more comprehensively than at our last encounter. Once again my massed longbow fire just failed to break his deep units, often getting to the stage of double-disordering but then not managing the extra hit needed to break them, but this time my impact troops suffered from terrible cards just at the point of impact, when it mattered most.

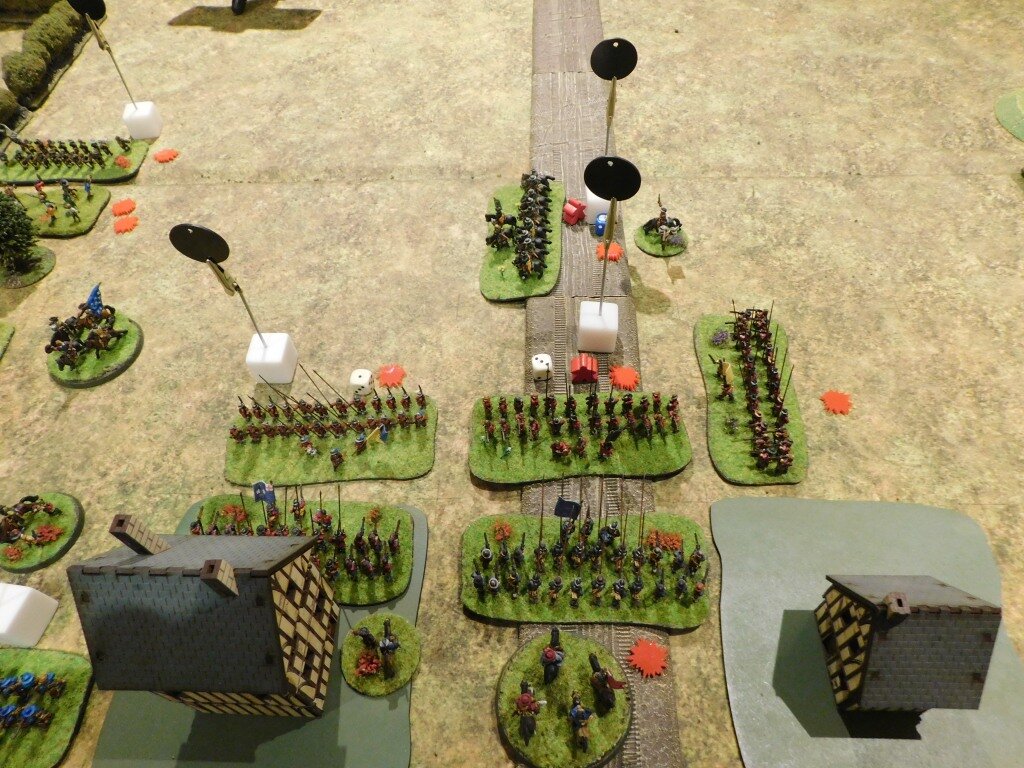
Just before the two battle lines came together

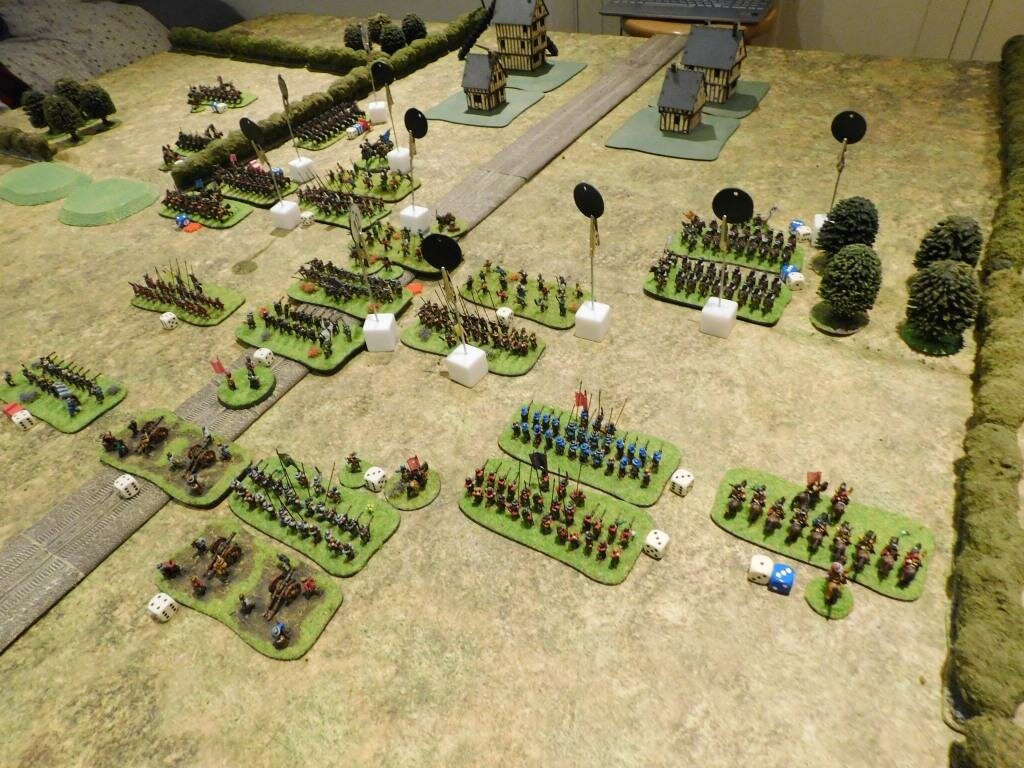
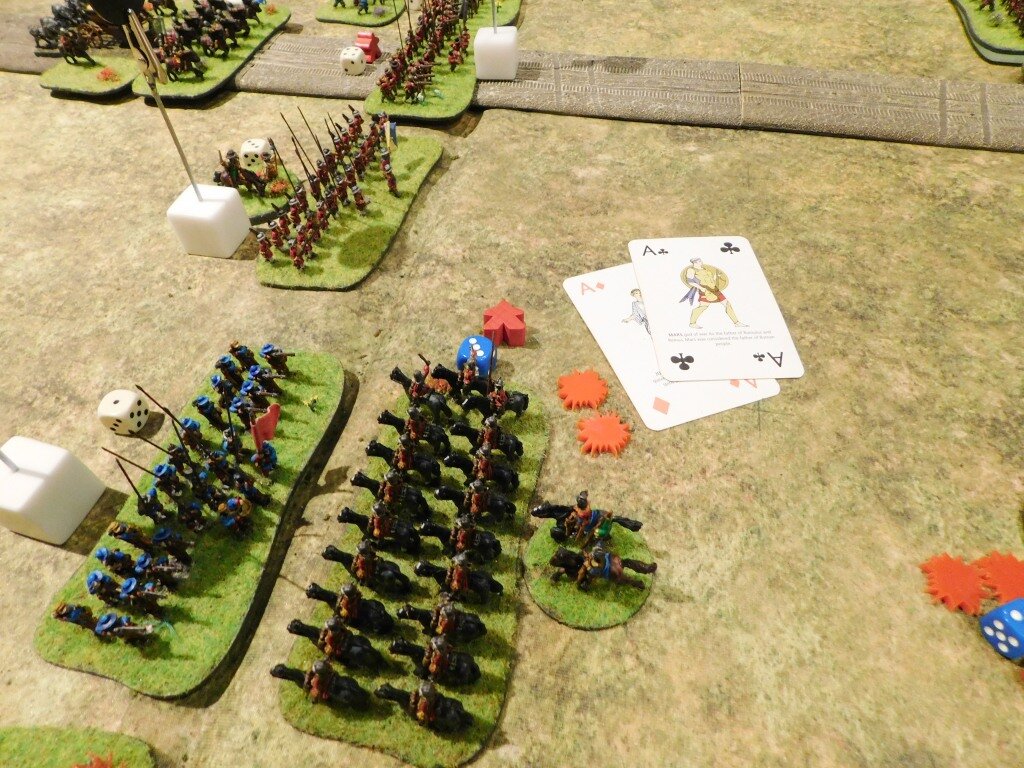
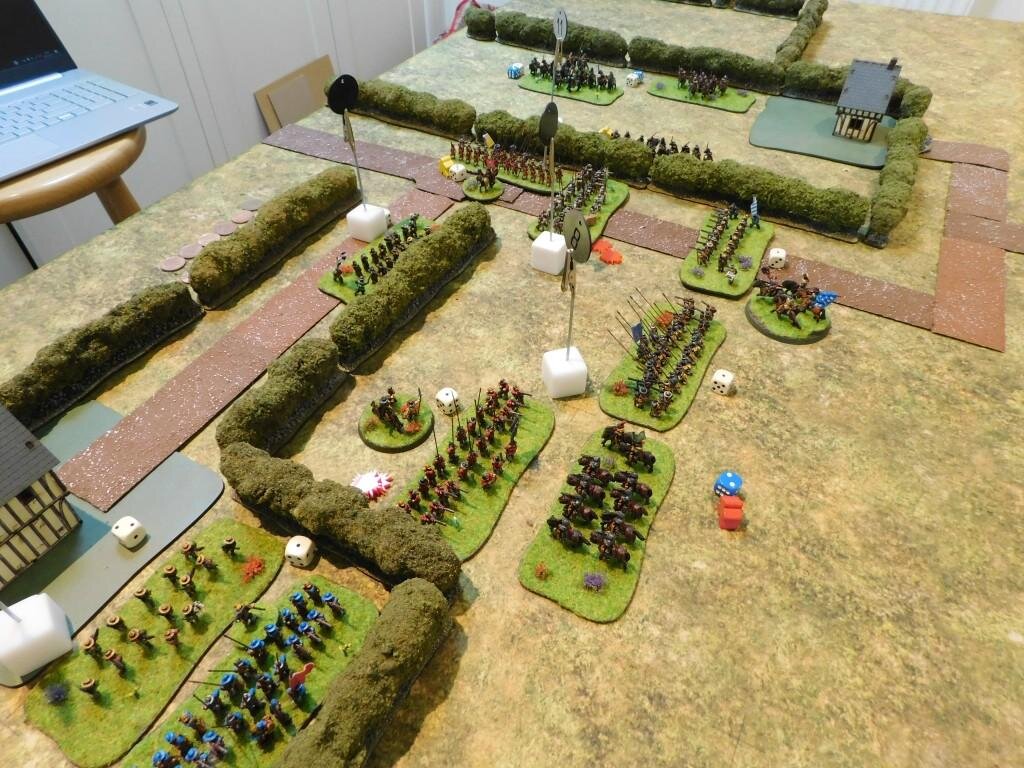
Although the game, as always with To The Strongest, was great fun, my troops were then gradually ground down by the remorseless space invaders from Greece!

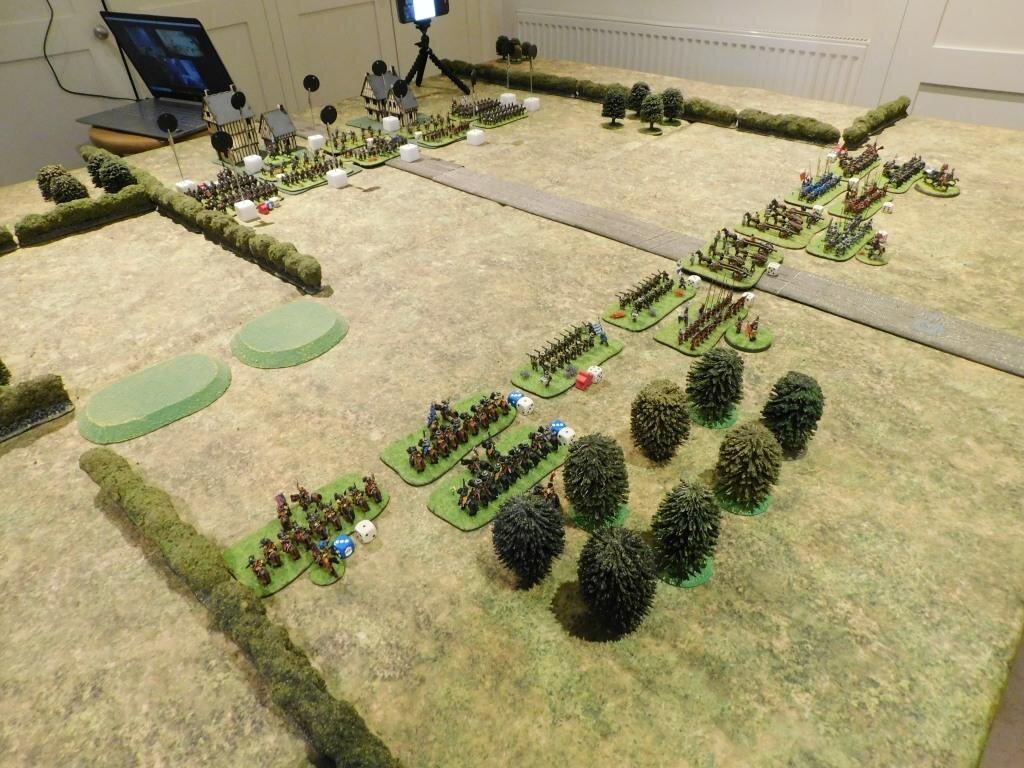
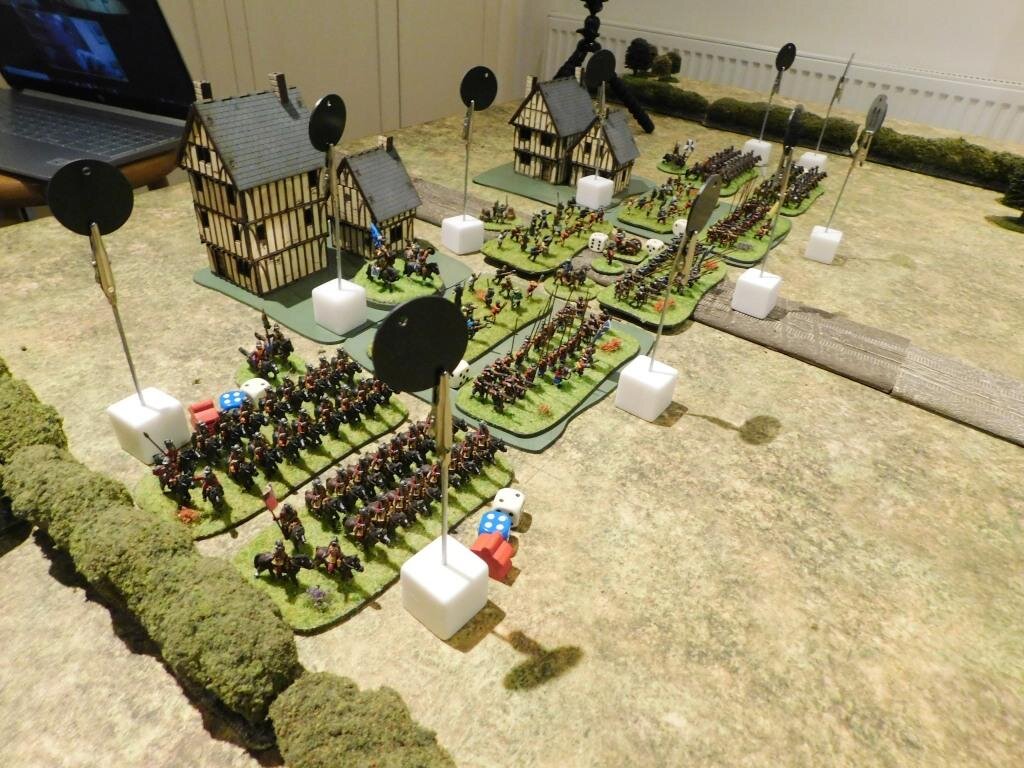
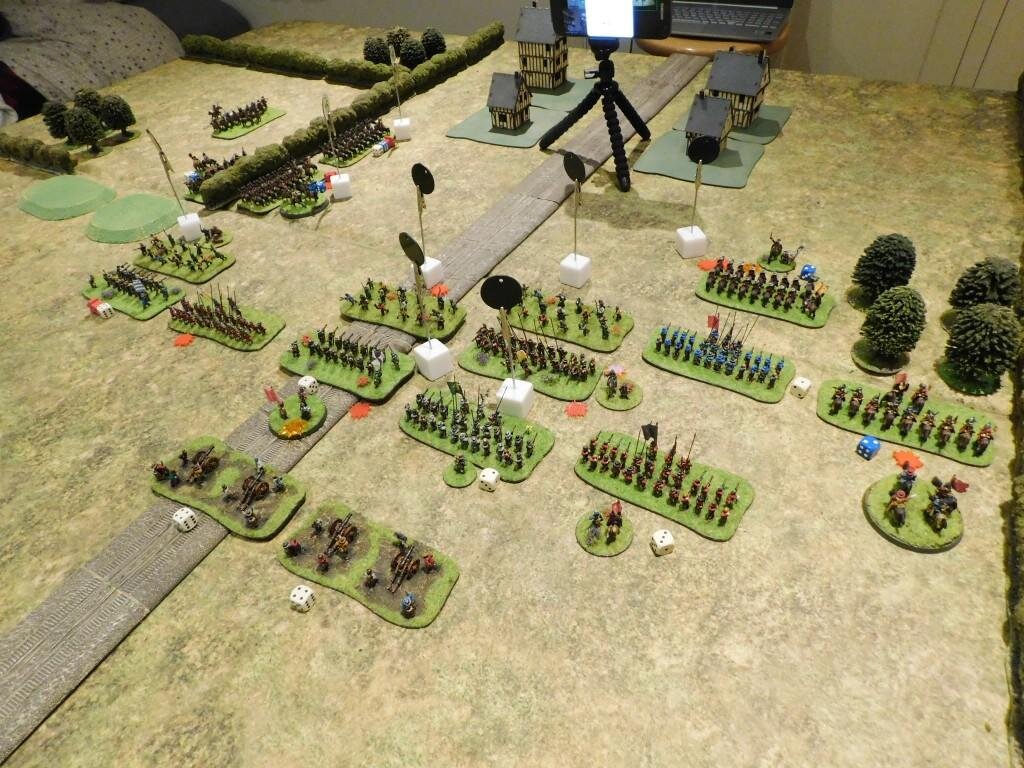
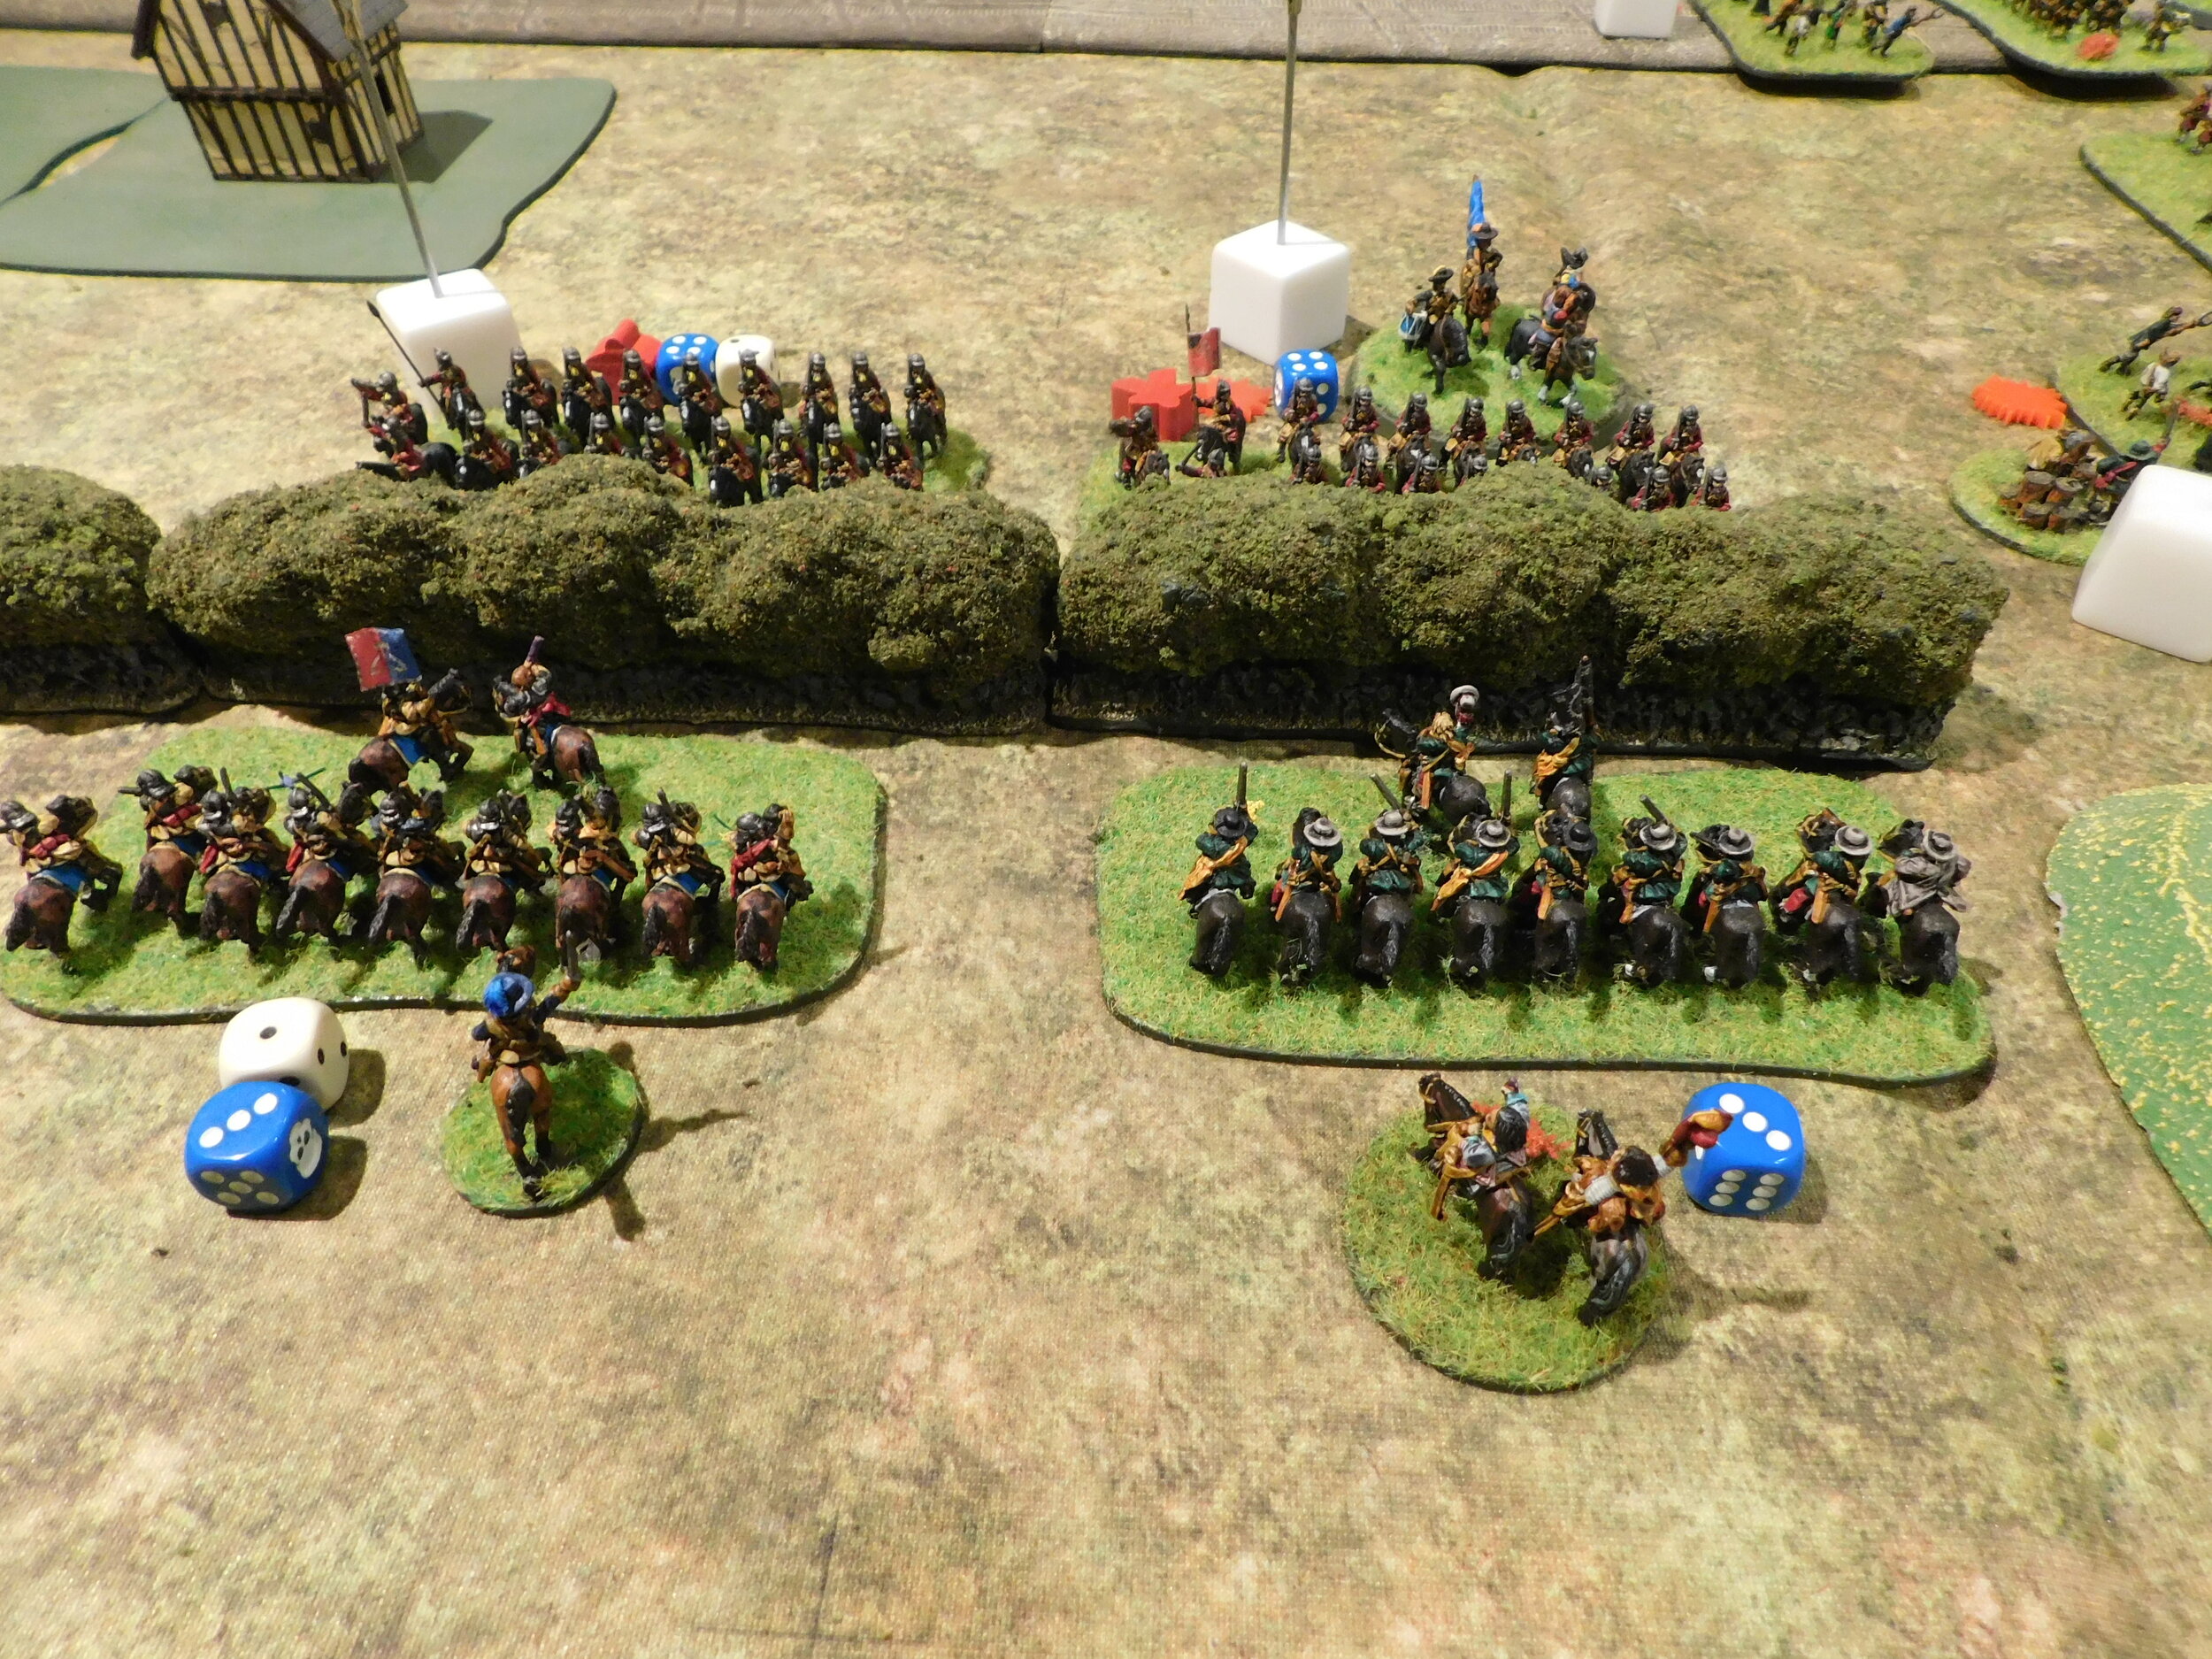
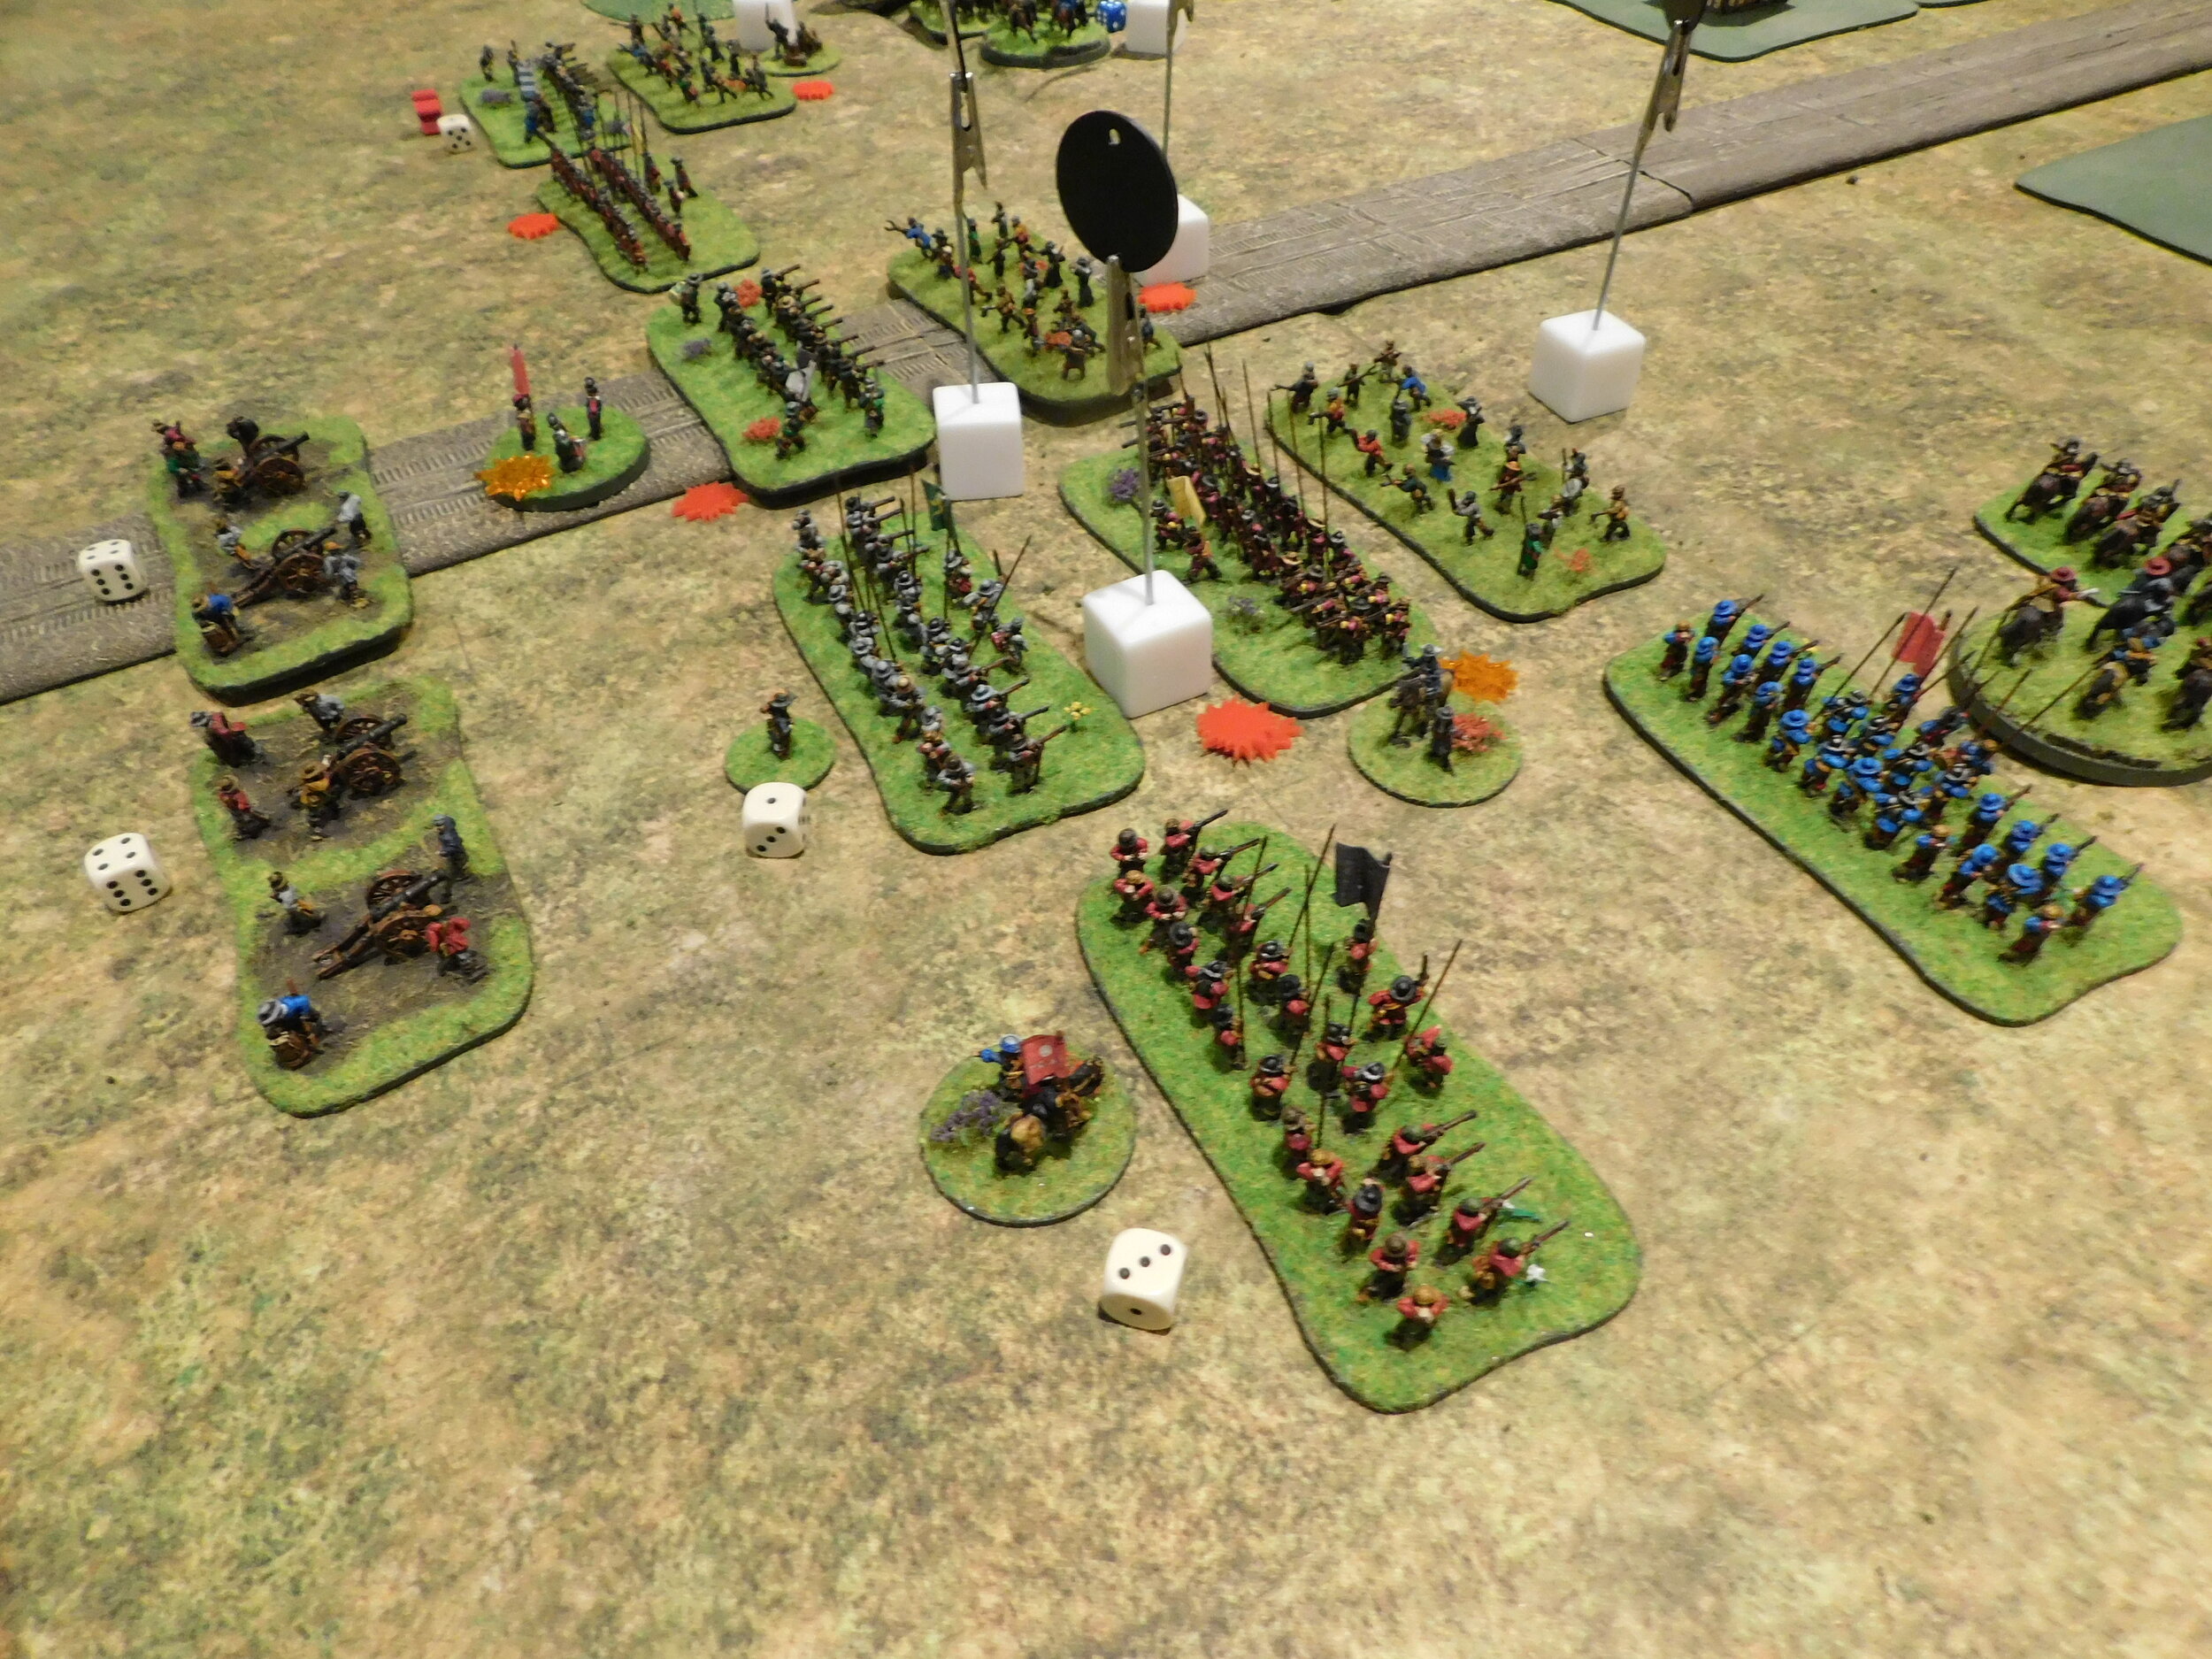
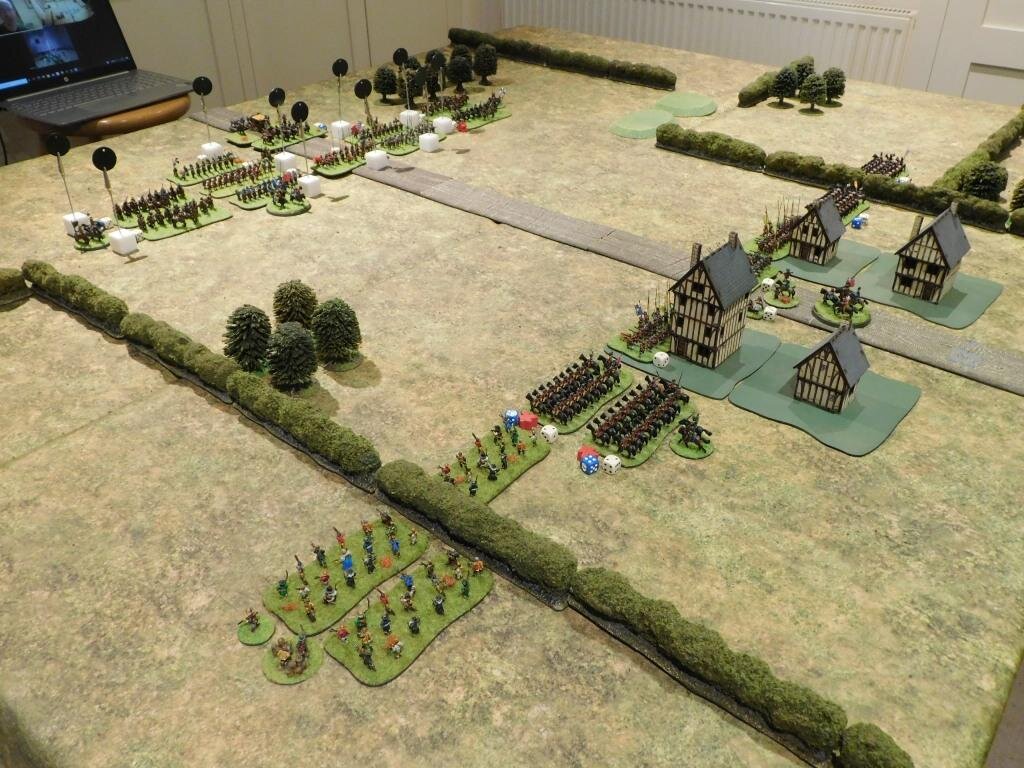
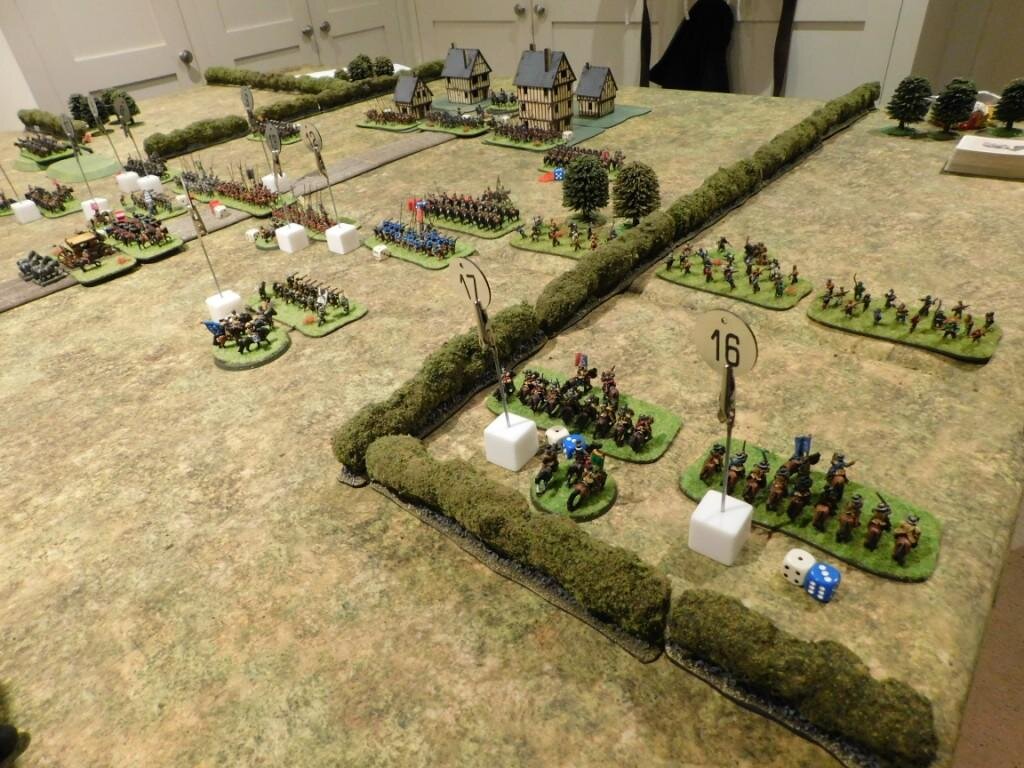
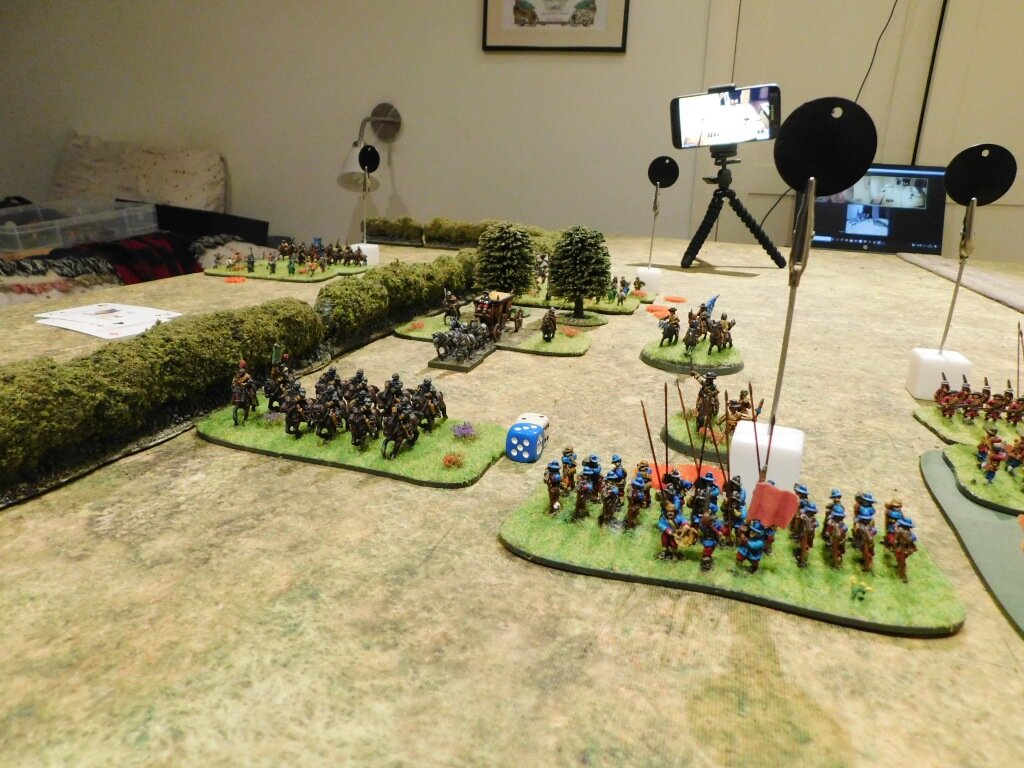
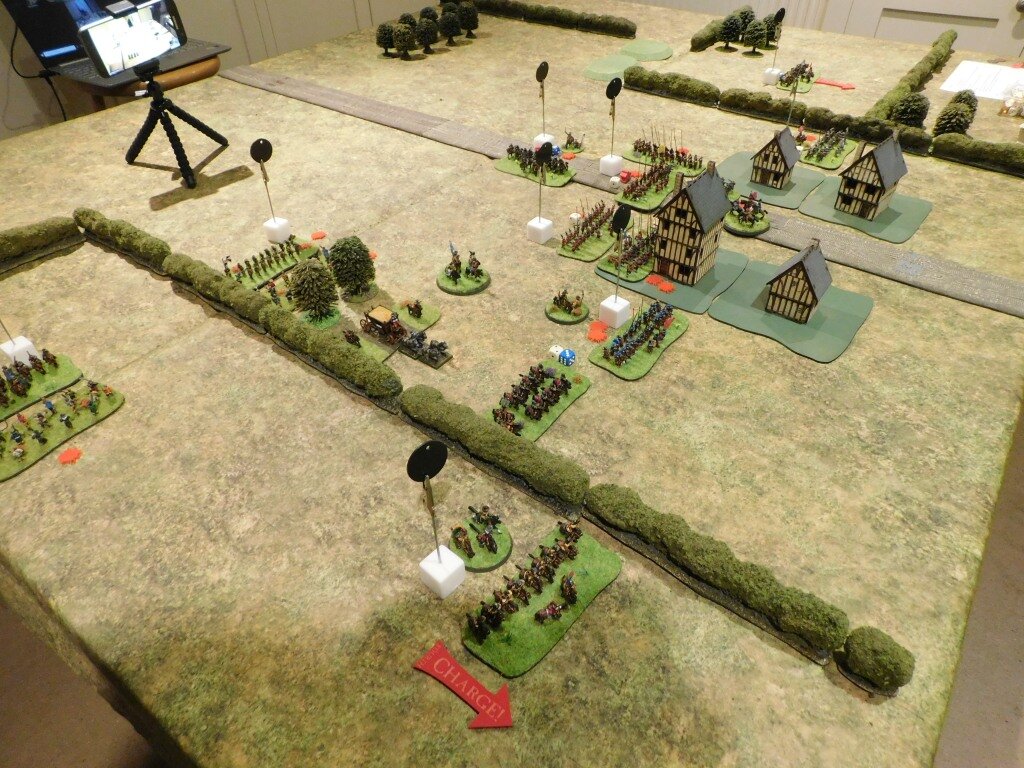
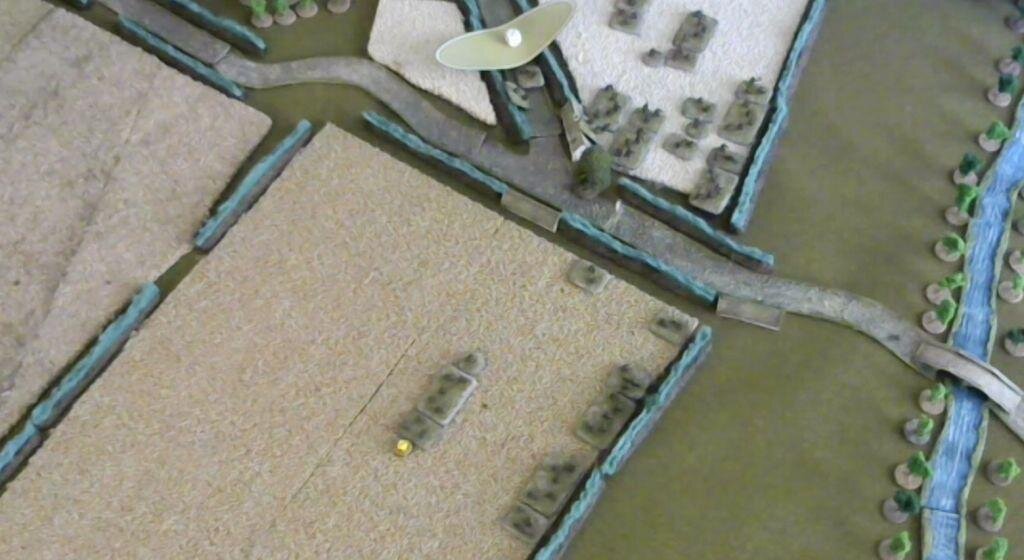
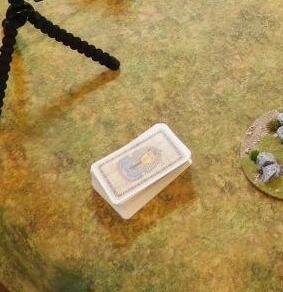
Here’s a few more pictures of the game:

Classical Indians vs the Greeks

Restrictions lifted on Sunday, first face-to-face game on Tuesday!

My Classical Indians would face off against a Hoplite Greek army fielded by Bevan…and what a Hoplite Greek army it was: ten units of Hoplites and one of light infantry. The rules used were To The Strongest, a grid-based game, so with my table being twelve squares wide, Bevan could form a space-invader like line of hoplite units and just advance forward, spearpoints out!

So many hoplites that I had to draft in some Summerians as proxies!

On the other side of the battlefield, my Classical Indians consisted of five units of longbowmen as the softening-up element, with a hard core of two escorted elephant units and two heavy chariot units as the “finishers”. Reserves were provided by the Maiden Guard.

Maiden Guards, Elephants, Longbowmen

The Game

As predicted, the Greeks deployed in a largely straight line and spent the early stages of the battle manoeuvring around the patches of scrub and palm trees in order to keep their frontage solid as they came into longbow range.

opening stages

At one stage it did look as if the cards had opened up a couple of holes in the hoplite line and, given a little more lateral space and luck, I could perhaps have got one of my heavy chariot units through a gap and into his rear, but Bevan just managed to block my path on both occasions.

I really wanted to get through that gap!

Finally the Greeks (and pseudo-Greeks!) arrived into longbow range, and my men opened fire. I was determined not to end the game with a camp-full of spare ammunition, so shot for all I was worth.

The Greeks staggered slightly, but came on. There were so many enemy units in an unbroken line that I couldn’t concentrate my fire, so although I could disorder or even double-disorder half his unit, I couldn’t quite break any.

The View from the Other Side

It was time to commit my melee troops, so forward trundled the elephants and chariots, wherever possible aiming at already-disordered enemy units.

Helicopter Viewpoint

Unfortunately, things followed the same pattern again: I disordered or double-disordered the four units I hit, but couldn’t quite manage the break, apart from one raw hoplite unit that did flee the field…but this was soon, space-invader like, replaced by another.

Damage, of course, was being done to both sides, but my troops only had two hits each as opposed to his three. I lost a unit of elephants (to what looked like the Spartans, no less), evening things up again, and the battle became one enormous melee.

Bye bye Nellies!

My men (and maidens) resisted bravely for a couple of rounds, another unit of hoplites was destroyed by one of my chariot units, but the writing was on the wall: I hadn’t done enough damage in the missile-fire stages of the game to win the grinding melee that followed.

I started steadily losing units, victory coins and eventually, the battle itself.

Aftermath

The game was actually a lot closer than the above implies. At one stage, I did actually manage to break his line with some chariots and had two more of his hoplite units on double-disorder. Unfortunately, the chariots couldn’t turn and get into the enemy rear in time, and I just couldn’t get the extra hit I needed to break the spearmen. I did use up all my spare ammunition though!

So a close run thing despite the apparent disparity in sides. My Classical Indians will lick their wounds and have another go in a few week’s time!

The far chariot unit has broken through, but too late to alter the outcome of the battle

TTS AAR: The Last Zoom Battle

Regular visitors will know that last time I faced Bevan’s Galatians with my Marian Romans, things started well but finished very badly: one devastatingly bad turn (I blame the cards, my figures blame me) led to an absolute thumping for Caesar and his men. It was now time for the re-match in what, I hope, will be my last game over Zoom as we all return to face-to-face gaming.

The Galatians: eight warbands of deep, fanatical infantry and a couple of tasty cavalry units. More heroes than The Expendables.

The Marian Romans: six units of veteran legionaries, a unit of legionary cavalry, three units of lights.

Learnings

I had learnt three things from my last encounter.

Firstly, don’t fight right in front of your camps: you might need a bit of room to pull back and rally and the Galatians are bound to punch at least one hole in your line so you need to make sure that any (unwieldy) warbands that have got through the gap take a lot of time to take your victory-points-rich camps.

Secondly, don’t face your light cavalry off against their cavalry: use their comparative manoeuvrability to keep some of their warbands occupied.

Finally, use the comparative manoeuvrability of your legionary units to get a temporary two-to-one advantage wherever possible. You need to do three hits to break a warband, so to break a warband in one turn will need the attacks of at least two units.

Armed with these nuggets of undoubtedly game-winning information, I logged on to Zoom and prepared for battle.

The Game

I had the initiative so advanced my line forward as fast as possible. The Galatians did the same, but in a somewhat more raggedy manner: no nice, straight, Roman lines for these barbarians.

I protected my left flank against a cheeky cavalry lap around by keeping one of my legionary units back from the main line. This made it difficult for the extra cavalry unit (bottom, left in the left-hand picture above) to either get past the unit and into my rear or to threaten the flank of the main line.

On the other flank, my two light cavalry units (the Persian types with the sandy bases) faced off against the warbands positioned far out on the Galatian left, with my legionary cavalry bolstering the line of legionaries. I’ve no idea why one of my legionary units has hung back: perhaps I thought this might temp a charge from one of his and allow me a to-the-rescue flank attack!

The Two Lines Clash!

The two lines began to come together with a mighty clash!

Last game I had pussy-footed around with my legionaries and allowed the Galatians to recover from their advance and hit me in a nice straight line. This time, as you can see from the pictures above, I had advanced forward smartly myself and was in a situation where my main line could get an overlap on the (my) right hand side of the four warbands that had advanced slightly in front of the others i.e. I could get the 2:1 advantage I needed on one of his warbands.

This duly happened, and even better than I expected. My lagging legionary unit came forward and conformed with the main line, giving me six units: L/L/L/L/L/C. One of his central warbands came forward giving him a line of five units: C/W/W/W/W. I was, I admit, a bit lucky in that his other central warband hung back!

The five legionary units that matched up with a warband performed as expected, disordering but not breaking the Galatians in front of them, two being coming disordered in return, but the overlapping legionary cavalry then smashed the warband they overlapped from the field!

This punched a hole in the Galatian line which my cavalry then charged in to. Pausing only to eliminate a unit of light infantry with their javelins, they then charged forward and took the enemy camp. One turn and half the victory points I needed had been gained!

However, things weren’t going all my own way.

One of my legionary units was then broken by the Galatian warband in front of them; and another, as my cavalry couldn’t be in two places at once, had moved forward into open space. Now it was my three camps (a lot of VPs to lose) that was threatened. Fortunately, my light cavalry out on the right flank were keeping three warbands occupied, otherwise I was in danger of being swamped by numbers despite the fact that I had just broken another warband on the left.

Never fear: the legionary cavalry hadn’t finished their work yet!

Neatly reversing out of the Galatian camp, they headed back onto the battlefield and smashed into the back of another enemy warband. That shook the Galatian warriors badly enough so that a fast-manoeuvring legionary unit could also about face, hit them in the rear and send them fleeing from the field. Victory was mine!

It Worked!

Amazingly, my battle plan had worked!

I had managed to fight away from my camps, keep three of his warbands occupied with my light cavalry, and get a vital overlap at the initial point of impact. I had been lucky in that the Galatian advance had been a bit raggedy, but if I had hung back, as last time, then they would have had a chance to correct and hit me as one line.

Stars of the show were, undoubtedly, the Legionary Horse. Only the second time on the battlefield and a Companion-like performance. One warband destroyed, one light unit destroyed, the enemy camp taken, and then a rear charge to set up another warband for its almost immediate destruction. Laurel wreaths aplenty!

A great way to, hopefully, end my period of wargaming over Zoom. Not that it’s a bad way to game, but pushing lead face to face is always better!

TTS AAR: Marian Romans versus Galatians

Time for another game of To The Strongest over Zoom with regular opponent, Bevan.

Those of you who follow the site will know that our last game ended in a large victory for my Marian Romans over Bevan’s Gauls. This was obviously pretty galling to Mr B (did you see what I did there?) so in search of revenge he suggested that I might like to try the Romans against a Galatian army, and sent me his list.

There were so many galatian warbands that I had to draft in some ZULUS to proxy for two of them!

My immediate reaction was a comic-book double-take. Eight warbands of deep, fanatical, hero-accompanied warrior units plus two good cavalry units, one of which was veteran!

The tale of the tape says it all. Let’s look at the infantry first. My Romans have six veteran legionary units. They save on a 5+ (which is very good) and have two hits each; they hit on 6+ until they take one hit, whence they hit on 8+. The Galatians have eight units. They are fanatics, so save on only an 8+ (bad) but have three hits each and, more importantly, keep fighting at 6+ to hit until destroyed.

The Romans then have three units of cavalry, two light, versus two units of Galatian cavalry, neither light and one veteran.

On top of all the above, and probably the final nail in my coffin, I was using my newly painted legionary cavalry unit and my newly painted Roman army standard. This had the potential to be nasty, brutal and fast!

The Game

The sides lined up facing each other. My plan was to hold back my infantry and try and get some sort of advantage from my extra cavalry unit. I was hoping they could slip past his line and go for their camp, or at least get onto somebody’s flank. With that advantage in place, I could close to infantry combat hopefully surviving long enough to avoid a lap around from his extra foot units: my hyper-manoeuvrable legionaries being very good at rapid changes of direction.

The Galatians advanced as fast as they could whilst still maintaining a relatively unbroken line. I advanced my infantry a little bit forward, but concentrated on what I was doing with the cavalry. Try as I might, however, I couldn’t temp Bevan’s cavalry forward enough to give me the advantage I was after.

The calm before the storm

I refused my left flank slightly

The two infantry lines came together with an almighty crash!

Unusually, my pila were effective, and at the end of the first round of fighting two of his eight warbands were double disordered, with another four disordered, and no casualties taken on my side at all. I’d also wounded one of his commanders.

Meanwhile, just before the main action, my legionary cavalry, which had been charged by his veteran horse, were also doing well: disordering the opposition and allowing a unit of my light horse to get into a decent position for a flank charge.

This was great: another round like that and I’d have broken enough of his warbands (and perhaps his cavalry too) to win the game!

The Inevitable Reverse!

And then it all changed.

The next turn I had one of those passages of play that defy belief.

In the melee that followed the above, I didn’t score a single hit on any of his troops (not even those teetering on the edge of obliteration) but lost two generals including the CinC, one legionary unit and had another two disordered! So much for a 60% chance of saving a hit! Oh, and his cavalry retreated and re-ordered themselves.

Worse, I’d managed to get a unit of light cavalry onto the flank of one of his warbands that was already shaken to the point of being about to flee. If I could destroy them, and just one more hit would do it, then a rolling up could occur. The activation cards were kind: I had three chances to kill the unit, two attack cards per chance, 30% chance to hit with him having only a 30% chance to save if I did so.

Nothing. Just…nothing!

Now against some armies it would still be possible to make a comeback from the situation described above, but against a Galatian army with two warbands as yet uncommitted: not a chance. Bevan just steamrollered forward and that was that!

Here’s a shot of the end of the game. Just count the Galatian disorder markers! Nine of them…but eight of them had been inflicted in round one, and no warbands had been broken.

Aftermath

Well it had been a fun game, and revenge will doubtless be mine when the two sides meet again next week.

Here’s another few shots of the game:

FK&P AAR: Rogue Nation

Last weekend I had the chance to re-play the final scenario in my Marlowe to Maidenhythe scenario pack for FK&P: Rogue Nation.

It’s a stand-up fight between a late ECW period Parliamentarian army and a combination of militia and clubmen set, once again, around the village of Gappe.

As is customary these days (but not for much longer!) we played via Zoom: with my opponent being able to see the whole table via an overhead webcam, and more specific areas of the battlefield via an on-table mobile phone.

Here’s the report:

So a glorious victory for my Parliamentarians for a change. My opponent’s post-game e-mail began “what was I thinking?” as I think he realised that coming forward as his men did had been a mistake.

What was also pleasing was that my run of extremely (really extremely) bad cards seemed to have come to an end. In fact, another reason that my opponent gave for his defeat was that he was careless of his tactics as he was expecting my cards to be as bad as usual! Well, this game I actually had some quite good luck for a change, especially in the opening stages of the main infantry clash.

My victory was, however, not enough to reverse the course of the campaign in general. The M2M pack gives you a totaliser to keep track of how you do in each battle…and I think it fair to say that after twelve games played I was firmly on the losing side.

Great fun, and I must start writing the new pack soon!

Postscript

As I was playing the Rogue Nations scenario, the chap of FB who’s playing through the campaign was playing the Pinkney’s Court game:

Nice to see that someone else also has problems with the Royalist horse at this stage of the war!

FK&P AAR: The King's Secrets

Lots of pike-and-shot content on here at the moment. No apologies for that: I’m playing all my games via Zoom at the moment, and grid based games are a lot easier to manage than freeform games such as IABSM or Q13. Normal service will be resumed as soon as possible!

Anyhoo, on to today’s post: an after action report from my latest game of For King & Parliament : another scenario from the Marlowe to Maidenhythe pack, this time scenario 11: The King’s Secrets.

The basic premise is that the Royalists (played remotely by my opponent) have to get a stagecoach carrying secret documents off the opposite end of the table. Blocking their way are a Parliamentarian militia supported by local villagers…

Even after the disastrous cards on my left, I came close to winning the game in the centre: but the Parliamentarians remained resolute and I couldn’t get the disorder I needed.

Although at the end of the game I had curled around his main line and was about to roll it up, other Royalist units had punched a hole for the stagecoach and bodyguard Cuirassiers to get through.

Another great game, despite the result!

Another M2M Report

A couple of days ago I mentioned that I’d seen the Marlowe to Maidenhythe campaign from my new scenario pack for For King & Parliament being played out by someone on the Facebook 6mm Miniatures & Wargaming group. They’d just played the first scenario in the campaign: the Attack on Marlowe.

Fortunately they seem to have enjoyed that game (!) as they’ve now posted game two: Widbrooke Common.

You have to be a member to see posts on the group, but here’s a link for those of you who are, or who would like to be: link.

In the meantime, for those of you who either belong to far too many FB groups already (guilty as charged, your honour) or who don’t like FB at all, here’s a pic from the start of the game.

And now for the plug!

You can buy the scenario pack from the BigRedBat shop by clicking here or on the pic below.


First Marlowe to Maidenhythe AAR!

One of the nice things about writing scenario packs (in addition to having a little bit of extra cash to buy more figures) is seeing that people are actually playing games based on your work.

Marlowe to Maidenhythe, my English Civil War scenario pack for For King & Parliament was only published about two weeks ago, so it’s really pleasing to be able to report that I’ve seen the first AAR based on the first encounter of the campaign.

It’s posted on FB, in the 6mm Miniatures & Wargames Group which, as it is Private, you might not be able to immediately see from this link…but it is there, let me assure you!

I hope the author doesn’t mind, but here’s a quick pic of the initial stage of the battle:

If anyone’s interested, you can buy your own copy of Marlowe to Maidenhythe by clicking here or on the picture below.


FK&P AAR: McCleod's Odyssey

With my Rabble bases now painted, it was time to have go at scenario #10 from the Marlowe to Maidenhythe scenario pack: McCleod’s Odyssey.

In summary, the Scots who have featured as mercenaries in previous scenarios in the campaign are making their way home, but run into a force of Militia backed up by locals who want a word, shall we say, about the Scots’ behaviour as they went south.

It’s a standard encounter battle, with both sides directed to get stuck in as soon as possible.

The Scots, to the right, approach the village of the Gappe, held by the Militia and local folk

Deployment

The Scots placed their Highlanders on the left, opposite the rough and more enclosed terrain, their artillery and pike only units in the centre, and their standard battalia on the right. In reserve were their horse: a unit of poorly mounted pistoliers and a unit of poorly mounted lancers.

The Militia occupied the Gappe: infantry battalia in the centre, Swedish horse on the left and Dutch horse on the right. The three units of Rabble were on the far right, facing the Highlanders.

The Battle Begins

My plan was for my Highlanders to deal with the Rabble then sweep in to the Gappe from the flank. Bevan, my opponent, however, was up to all my tricks, and moved his Dutch horse to the right of the village, threatening the Highlanders’ flanks.

At the same time, the enemy Swedish horse moved out to their left. Not wanting my day ruined by the sudden arrival of cavalry on my right flank, I moved the Scots horse to counter: you can see them top left in the picture below.

Finally, my main infantry units moved forward…but my pike-armed battalia decided that they had walked far enough and just about refused to move.

Everything then seemed to happen at once.

On the left, two of my Highlander units were charged, as predicted, by the enemy Dutch horse, with both surviving the charge but becoming disordered in the process. I struck back and, incredibly, one unit of Dutch horse was double-disordered and had their Colonel wounded.


This was a great opportunity for a game-winning opening clash but, try as I might, I just couldn’t find a way to break the enemy horse and would now have to suffer the fate of all loose infantry attacked by large numbers of close formation horse!

Meanwhile, on the other flank, my horse and the enemy Swedish horse now faced each across one of the fields outside the village.

A victory for the Scottish horse, despite their manky mounts, but now they would Pursue their fleeing enemies from the field unless they stopped and rallied.

As these actions were happening on the flanks, my centre moved forward, me seeking an advantage by overlapping his left wing.

Mid Game

After the initial clash, I had won the right flank but was about to lose my left flank: the Highlanders were outnumbered 5:3 and could do nothing except take the charges from the Dutch horse.

One unit of Highlanders crumbled and fled, leaving a gap through which one unit of Dutch horse could pour. The enemy horse pursued for a bit, then rallied and headed into the big open space behind my centre. All that was in front of them was my guns, and although I managed to disorder the horse and wound the General with them with some startlingly accurate artillery fire, I was soon overrun.

Meanwhile, another of my Highlander units had gone, leaving the third in a dire situation.

Meanwhile, the two centres were fighting it out but, despite having superior numbers, a bit of bad luck meant I was losing.

If my cavalry didn’t return soon, I was going to be out of victory medals!

End Game

The left side of my centre was now beginning to crumble as well as his successful right wing started to curl in on me.

We were both down to a handful of victory medals, with enough units at double-disorder to settle the matter one way or the other if they broke.

My pistolier horse quite their pursuit and crashed into the left side of the enemy battalia in the right hand building. That pike unit broke, and the advantage was momentarily mine, but then my pike-only unit in the centre of the field (bottom left in the pic above) went, and we were evens again.

It was down to whoever lost the next unit and, finally, my last unit of Highlanders could take no more: they had been fighting front and flank for three turns now, somehow hanging on…and that was the last of my coins gone!

The day was lost: but it had been an epic battle that, once again, had come down to a could-go-either-way climax.

Afterword

My big mistake was to let my Highlanders get into combat with Dutch horse: I should have retreated to cover if I could. That would have meant I went into the more successful clashes on the right and centre without having haemorrhaged victory coins on the left.

A great game, however, whatever the result.

FK&P AAR: Return to Widbrooke Common

This being the second game in my latest run-through of Marlowe to Maidenhythe, my just-published scenario pack for For King & Parliament.

I had lost the first game quite badly (down ten victory medals) so was keen that this one went my way. The scenario is an encounter battle, with the Parliamentarians (played by Peter, boo, hiss!) facing the Royalists (played by me, huzzah!) across Widbrooke and Battlemead Commons: the open land between Cookham and Maidenhythe down near the river.

Roundheads to the left, skulking in the hedgerows!

The Royalists face a couple of problems. Number one, the enemy has hedges to hide behind meaning that if they didn’t attack I would have to assault troops in cover with an even number of points; and number two, my main infantry brigade is all untried, meaning the danger of disorder in any first clash is high.

On the other hand, my opponent, Peter, was absolutely paranoid about the large numbers of “Swedish” horse that I was fielding. He was convinced that they would make mincemeat of his “Dutch” horse (a fair assumption, but one that had been firmly shown not to be a surety in our first game last week*) to the point that I am fairly certain that he had lain awake at night moaning “the Swedes, the Swedes: what do I do about the Swedes”!

This worry would actually be the major factor that decided the outcome of the game.

*Dutch horse fight deep and slow, Swedish horse fight fast and thin. They tend to lap around the flanks of Dutch horse and thus get a substantial advantage in an initial melee.

The Battle Begins

I opened the proceedings by sweeping forward on either wing with, you guessed it, my Swedish horse. My infantry I advanced cautiously in the centre.

Peter replied by opening fire with his artillery, which actually did me a favour, as the units targeted had to check for disorder due to their untried status: which both failed, but so early on in the game that I had the chance to re-order them before any enemy was encountered. My men had now had their first taste of battle and survived unscathed: they would act normally from now on.

As my Swedish horse on my left approached his Dutch horse, they retreated behind the hedgerows to their rear. This suited me just fine as Dutch horse, despite their deficiencies, are worth more points that Swedish horse (they are strong against almost everything else) so I was happy to have his cavalry bottled up in a corner ‘guarded’ by units worth half the cost.

The Roundhead Dutch horse bottled up in one corner by their own fear of my Swedish horse

Meanwhile on my Right

Meanwhile on my right, my other brigade of Swedish horse was attempting to turn the Parliamentarian flank.

This looked difficult to do at first, as there were a couple of infantry battalia there who turned to face me, but my infantry were coming forward as well, meaning that the Roundhead foot would potentially have to fight in two directions at once.

Scene from behind the Parliamentarian lines. Units 9, 11 and 12 are about to retreat to their right, leaving my horse free to curl in from the flank

The Roundheads attempted to consolidate their position by pulling back and to the right as much as possible, but this manoeuvre, whilst sensible in some ways, let me bring my cavalry around in a proper outflanking movement.

Once my cavalry were around his flank, with my infantry coming forward, the Parliamentarians were in some difficulties. I used a battalia of infantry to clear his guns (by this time out of ammunition) and then sent them in through the gap opened up to attack the right hand side (from my point of view) of his line.

A bit of bad luck saw me lose the battalia, so I was forced to commit my reserve (my commanding general’s Cuirassier bodyguard) into the attack, but by this time my cavalry were in position for their flank attack.

The Royalist cavalry are round the flank!

With commanded shot to their front and Swedish horse to their flank, the grey-suited Roundhead battalia quickly crumbled, exposing the flank of the untried infantry battalia next to them.

This followed suit, and the rest of his line quickly followed them off the table: pinned from the front and rolled up from the right.

The Roundhead cavalry were, eventually, thrown forward but, by this time, it was too late to have any real effect: the day was mine.

Aftermath

A solid victory that netted me 10 victory medals (I had lost a couple of units early on) and evened up the campaign to date.

Next we will fight for Pinkneys Court, but here are some more pictures of today’s encounter:

TTS AAR: Roman Revenge!

Regular readers will know that I’ve recently suffered a series of defeats at the hands of the Marian Romans. One of my regular opponents, Peter, has crushed my Classical Indians twice and then the Sasanid Persians twice; my other regular opponent, Bevan, had beaten the Summerians twice. This despite the fact that I’m regularly told that the Marian Romans aren’t that good (too much heavy infantry, not enough cavalry) and certainly not a tournament army.

Well you could have fooled me!

It was obviously time for me to have a go with Caesar’s boys and see whether I had managed to learn anything from the somewhat painful lessons described above: for our next encounter, I would use the Marian Romans and Bevan would play the Gauls.

This was the second clash between the two, with Bevan winning the last game (I have been going through a bad patch lately!) fairly decisively.

At this point I must confess that rather than put together a list myself I used Peter’s Marian Roman army list: 130 points of veteran infantry with three camps, a standard, and three units of cavalry.

I set up as you can see, above, with my camps in one corner and my Roman infantry in a fairly tight block. That was lesson one: keep your legionaries where they can mutually support each other.

There did seem to be an awful lot of Gauls facing me: six warbands liberally sprinkled with heroes, and four good cavalry units.

As I suspected, the Gauls attempted to lap their cavalry around my main battle line. My cavalry were tasked with holding the right flank, with a unit of legionaries turned that way as a back up, whilst the rest of the army beat the Gauls in the centre. The Gallic cavalry on my left flank would have to be dealt with by the infantry.

The two sides advanced towards each other fairly smartly, with Bevan suffering some unlucky cards with his left flank cavalry meaning that they were delayed getting into the fight. This was excellent news, as I didn’t think my outnumbered and outclassed cavalry would be able to hold the opposition for long once battle was actually joined.

the legionaries form square!

My Shaky Right Flank

On my left flank, two units of Gauls had started lapping round, but my infantry snapped to face them and dealt with the flanking units fairly easily. His cavalry was still late to the party on my right, giving me the chance to disorder one of his warbands without breaking formation.

The Gallic cavalry and warband at the front of the picture are about to be mullered by my legionaries

The main battle lines were now joined, but the superior quality of my troops meant that in the centre I had now killed one warband, and disordered two more. One legionary unit had, however, been lost and, over on the right, another was being hit front and rear at the same time. I desperately needed to get my successful units on the left over into the centre.

rushing back to the centre! thank jupiter the romans manoeuvre well. note the legionary unit fighting front and back top right!

If there’s one thing the Romans do very well, it’s march: and before anything had had a chance to happen on my right flank, I had four legionary units pushing back warbands on the left and centre.

the left and centre legionary units are grinding down the opposition

Meanwhile the legionary unit on the right wing that had been attacked front and back had actually managed to repel both units: driving the warband back and destroying the cavalry: these Romans can fight as well as march!

Unbelievably, my cavalry were still holding their own: the lights kept evading and returning, and my one decent unit was still around despite being attacked in the front and flank at the same time.

the roman mincing machine in action

With the four main Gallic warbands now disordered and my legionaries almost unscathed, it was now just a matter of time. The cards fell evenly, but with me hitting on a 6+ and saving on a 5+, and the disordered Gauls hitting on an 8+ and saving on a 7+, the advantage was all mine. One warband after another broke and fled the table until all the Gallic victory coins were gone.

Aftermath

My losses amounted to one legionary unit and one light cavalry unit so a pretty colossal victory for the Romans

The tactics I’d employed, learnt the hard way, had worked, and Peter’s army list with it’s six veteran legionary units had proved its worth.

Now I need to prove that this wasn’t a fluke!

FK&P AAR: Attack on Marlowe Again

One of my regular To The Strongest Ancients opponents wanted a go at For King & Parliament, so I suggested we play through the new Marlowe to Maidenhythe campaign.

I have recently been playing the Parliamentarians a lot, so we agreed that I would play the Royalists, and he would play the Roundheads. With that decided, it was on to scenario #01: The Attack on Marlowe.

The battlefield from the Royalist side. We were playing by Zoom.

This first, introductory, scenario is quite small (only 90 points per side) and features a Royalist attack on Parliamentarian forces drawn up waiting for them.

My plan was simple: use my superior horse to dispose of his cavalry, and then harry his flanks as my infantry took the centre.

Well, that was the plan…but it didn’t work. Despite the fact that my horse were fighting in the superior “Swedish” style and his were fighting in the old-fashioned “Dutch” style, my cavalry on my right flank were swept from the field!

The battle has begun: the field from the Parliamentarian side. Note the unit markers used to help my opponent keep track of his troops over Zoom.

Worse than that, on my left I manoeuvred my two units of cavalry to face and flank one of his pike units only to fall victim to some amazing shooting from both the unit and its accompanying light gun.

The opening stages of the game therefore left me down five units!

Although the outcome was now something of a foregone conclusion, I had no choice but to battle on: each game in the campaign is scored on how many victory medals the winner had left at the end of the game, so although I was fairly sure I was now going to lose, I needed to make it as painful as possible for my opponent to finish me off!

“‘Ware Horse to our right!”

Unfortunately this proved no very painful at all!

As my line moved forward, the Roundhead Dutch horse returned from having disposed of my cavalry and lined up to roll up my main battle line (as shown in the pic above).

I committed my reserve battalia to stopping them, but they were soon overwhelmed by a combination of infantry and cavalry attacks. I managed to blow away a couple of enemy Forlorn Hope units away, but soon my last victory medal was gone and I had suffered a pretty devastating defeat: down 10 victory medals after only the first game!

Revenge had better be mine in Game 2!

AAR: Virtual Lard V

One of the few good things to come out of lockdown has been how people have found ways of gaming remotely.

The Virtual Lard Games Days are an excellent example of this. Using the Lardy Discord server to co-ordinate, vast numbers of games run simultaneously all around the world, with a virtual pub also available for those all-important post-game discussions. The Virtual Lards are, in effect, online conventions.

Virtual Lard V took place last weekend, and I was lucky enough to get a place on two games: one in the morning and one in the afternoon (this isn’t guaranteed: the sessions are often over-subscribed).

Sharpe Practice in the AM

The morning’s session was a terrific game of Sharp Practice Napoleonics with Col Murray running a session that involved the French (commanded by the two Bobs: Lucky Bob C and myself) attempting to stop some Austrians (commanded by Andrew and Grizzlymc) making away with some items that had best remain nameless.

I won’t detail the step-by-step action, but suffice to say that my masterful mismanagement of the French Grenadiers kept a large proportion of the Austrians so busy shooting them to bits that the rest of our force (Bob’s Line and my Skirmishers) were able to drive the rest of the enemy off the table, so reducing their Force Morale to zero and giving us the game.

It was very exciting. At one stage it looked like being a certain Austrian victory as their Dragoons headed off-table with “the items”…but their movement rolls were poor, giving Bob and I (well, mainly Bob) time to hammer the Hungarians with musket fire again and again until they broke and fled. The last turn could have gone either way, but the draw of the cards, for once, favoured the French, and victory was ours.

Here are some pictures:

As an afterthought, one of the amusing things about Virtual Lard is the way that it brings people from different time zones together. Grizzlymc was actually in Sydney, Australia, and sipping whisky at what, for us, was early morning!

IABSM in PM

My afternoon game was I Ain’t Been Shot, Mum!, with Jim Catchpole running a scenario set in France in 1944. Dan Albrecht and I were commanding a company of British infantry moving forward to clear a village that may or may not have been in German hands. A pleasant chap called Michael was playing the Germans: he hadn’t played IABSM before.

All went well for the British until we hit a major chokepoint: a bridge that proved to be the single crossing point over a fast-flowing river right outside the village in question.

We began by doing everything right: probing over the bridge with out recon carriers, laying down smoke to cover a German MMG, but then the cards turned against us and the German artillery came hammering down.

An abortive attempt to break out of our “beachhead” by the carriers failed dismally (my fault entirely, Dan!) and then we just couldn’t get out of the artillery kill zone. If we moved forward, the waiting Germans shot us; if we stayed where we were we got hit by shells from above.

We lasted a couple of turns then ordered a retreat!

It was a difficult scenario, but we could have done a whole lot better. Which was a pity, as our leapfrogging advance to the bridge was a speedy thing of beauty! What we should then have done was to take the time to spot properly, lay down smoke properly etc but the arrival of the German artillery mucked up our plans.

Well played Michael, well umpired Jim, and I think Dan and I both agreed that our solution was to pull back and call in the artillery. Or, to put it another way: I say we take off and nuke the entire site from orbit...it's the only way to be sure!

Here a few shots of the game right up to the point where the German artillery arrived:

Afterword

All in all, another great Virtual Lard. My thanks to the organisers and game-runners, and can’t wait until the next one.

FK&P AAR: Return to Cookham Moor

After last week’s defeat, there was nothing for it but to play the next game in the campaign: Cookham Moor.

The Moor is a fun battle where both sides start the game facing each other across a stretch of open land:

My right flank consisted of a brigade of Dutch horse. They are good, solid troops, but the Royalists in front of them were in Swedish formation: more agile and, most importantly, able to counter-charge. That has led to defeat in previous battles, so I decided to try something new: I would advance up to the hedgerow and wait for them to come to me. The Commanded Shot from the nearest infantry brigade would move slightly forward into the woods, threatening the flank of any Royalist advance. At the same time, the guns would deploy and the Scots on my left flank would move up to the hedgerow in front of them. For once, the cards fell my way:

The Royalists advanced forward across their line, and soon the battlefield looked like this:

DSCN2349.JPG

The Royalists then moved their central infantry to their right to face up against the Scots, uncovering the cavalry that had moved over from the right. This cavalry then charged straight forward: right at the Parliamentarian guns just over the bridge!

This was a disaster, as the Royalist cavalry swept the guns from the field, then heading off table in pursuit. There was now a massive hole in my line.

A general melee then broke out across the entire line. My Scottish pikemen did well, forcing the Royalist Commanded Shot to intervene; but my Highlanders, as usual, proved ineffectually weak.

With the infantry locked into combat, the focus changed to the cavalry clash on the right.

Here, my decision to hold the hedgerow proved a very good one, as after a couple of turns all his cavalry was dispersed.

This made up for the disaster in my centre, but both sides were now looking very battered indeed: so battered, in fact, that whichever side next lost a unit would lose the game.

If that was not exciting enough, on my far right the Royalist CinC at the head of his small-unit bodyguard cuirassiers was faced off against my CinC at the head of some Dutch horse!

It all came down to this combat. Could I do the single hit I needed to break the bodyguard and win the game?

Well, you can see from the picture above that I didn’t manage to hit the enemy in my turn. No matter, I thought, he needs two hits on me to break me.

Unbelievably, however, the two hits were done, my cavalry broke, leaving Sir Christopher all on his tod! I had lost the combat and lost the battle!

Aftermath

Phew! What a game!

I had managed to retrieve the situation in the centre and everything had all come down to one final combat that I had really lost on the luck of the cards…but at least I had played the Dutch horse well!

FK&P AAR: Return to Whyteladyes Lane

I had another play through of the Whyteladyes Lane scenario last weekend, hoping to put my previous defeat (to John) behind me as I sent Bevan’s Royalists running from the field. As is now usual, the game was played over Zoom, with markers showing the number of each unit so that Bevan could more easily work out which of his troops were where.

The game is a tough one for the Roundheads, as they begin the game in an extended column against ready-for-them Cavaliers in a more sensible formation.

Last time, I had pushed forward right from the start, and been chewed up piecemeal. This time I decided that I would form approximately on the head of my column and work from there.

This definitely seemed to work much better, and although I still had one unit (the one at the head of the column) isolated, I now had a bit of a battle line formed to hold the front whilst the rest of my troops deployed. As you can see in the photo below, the Royalists spotted my isolated Highlanders and charged them with a small unit of “bodyguard” Cuirassiers.

All my cavalry were on my right flank, so I advanced them forward to block his cavalry moving down behind a hedge and into my rear.

Usually I charge my Dutch-style horse in as soon as possible but, this time, knowing that the enemy Swedish-style horse would then take the initiative through a counter-charge (something my more ponderous units cannot do) I decided to employ more historical tactics and halt just beyond charge range and discharge my pistols into the advancing enemy.

This worked a treat, as you’ll see in the picture below. All three units to the right are disordered, but it will only take one more hit to break either of the enemy horse units, whereas my greater numbers mean that I can survive another two hits.

All now seemed to be going well, and even Bevan confessed later that he felt that, at this stage, I had the advantage. That was, unfortunately, about to change!

If you look at the picture, below, you’ll see that out at the top of the screen two Royalist units are overlapping my line. I should have taken steps to deal with these immediately, probably by withdrawing back over the hedge or by moving sideways…but I didn’t, not seeing how much of a threat these would turn out to be.

This was a bad mistake, compounded by my response: I thought I move forwards out of danger by breaking through the enemy line.

This is the situation (below) a few minutes later: the enemy unit of pikemen dressed in red in the centre of the photo have swept in from the left and destroyed two of my pike units.

My unit dressed in blue managed to get onto their flank, but the cards didn’t fall for me, and the Royalists would go on to destroy the Highlanders as well. That was nine Victory Medals gone in one fell swoop!

To add insult to injury, on the other side of the field my Dutch horse had now been forced into engaging two battalia of enemy pike: not something that horse enjoy doing! The game continued for another couple of turns, but the writing was on the wall. I eventually had no choice except to order a retreat.

Afterword

I came close this time, so I think when I replay this scenario again I will try pulling back my column and forming on the hedge line behind the first couple of battalia.

Whatever the result, another great game of FK&P: I shall just have to get my revenge at Cookham Moor this afternoon!

TTS AAR: The Sasanids Seek Revenge!

Regular visitors will know that my last two games of To The Strongest each involved my Classical Indians getting severely hammered by the Marian Romans. My opponent generously suggested that some of the reasons for my twin defeats were down to the relative strengths of the armies: the Marian Romans were made to kill an army like the Indians.

What might work against them, I asked, to be told that armies consisting of lance-armed cavalry supported by horse archers were very popular on the tournament circuit. Something like the Sasanids, I asked. Exactly, I was told…so this week’s game was to be my Sasanid Persians versus his Marian Romans. Revenge was to be mine!

As is now usual, for the moment, the battle would be played over Zoom, with my remote opponent able to see the table through a combination of helicopter-view webcam and on-table-on-tripod ‘phone camera. Each of his units was also marked with a number, helping with the transmission of orders: “unit 4 will move forward a square” etc

the set up

The Romans were unchanged from last week’s appearance: six units of veteran legionaries supported by some light and medium Gallic cavalry. The Sasanids sported six units of horse archers backing the hard punch of escorted elephants, cataphracts and four units of savaran lancers.

romans. Boo, hiss!

noble sasanids

The Plan

My plan was simple: pin the Romans frontally whilst hooking around their left wing. Horse archers to weaken and exploit flanks and rears; elephants, cataphracts and lancers to hammer into weakened legionary units.

Opening Moves

I had the initiative, so as the game began my right wing shot forward into the start position for their curl around the enemy left flank. Likewise, my left wing moved up to keep his left wing occupied.

the battle begins

You may have noticed that no mention has been made of my centre. This is because my central, most powerful brigade had decided that they hadn’t quite finished their breakfasts yet, and weren’t moving until all porridge (or whatever Sasanids have for breakfast) had been consumed!

The elephants and veteran savaran look on as the wings engage

Now what I should have done at this point was to wait for my centre to get moving before sending in my flanking forces…but I didn’t, and fully paid the price!

On my left flank, somewhat surprisingly and extremely annoyingly, my horse archers and lancers were seen off by the enemy cavalry backed up by legionaries. They moved forward very quickly, got their attacks in first, and soon I was left with cavalry around my left flank and nothing much to oppose them except what I could afford to commit from my centre. Hmmm…I’m sure that this was supposed to be the other way round!

One unit of horse archers lost to javelin-fire already; my savaran about to be defeated in combat with the gauls. my left flank is about to disintegrate.

On my right, I was perfectly positioned to curl in and hit the Romans in the flank. Unfortunately, they used their extreme manoeuvrability (well drilled, these Italians!) to not only turn to face me, but also to form an oblique line that effectively protected them from harrying flank attacks.

unit 4, in orbis (all round defence), protects the new roman right flank from my central command…not that that was doing anything even vaguely threatening anyway!

End Game

With my right flank attack effectively neutralised, the enemy right flank was now in the perfect position to curl around my left flank. I had to commit my centre to holding them off, who then got attacked by his centre: effectively he had done to me what I wanted to do to him!

romans outmanoeuvre me on the right

My right flank bravely tried to crack a few legionary skulls before disaster struck, but the truth of the matter was that I had been comprehensively outmanoeuvred. Game one went to the Romans!

romans to the front, romans to the left!

Game 2

As the above really hadn’t taken very long at all, there was time for a second game.

I was keen to have another go using the same tactics, and this time things seemed to be working much better for me: although the Romans had once again adopted their oblique line, this time my left flank was secure and my centre had kept up…so after the opening moves, the battlefield looked like this:

sasanids poised for victory!

Now, however, Lady Luck decided to intervene.

Really? I hear you cry: you were defeated by bad luck, were you? Not the enemy’s tactics and your own incompetence? Like in the last game?

No, really: it was bad luck.

For those of you who haven’t played To The Strongest, the mechanics work by the use of playing cards (or you can use D10 or chips) with higher cards being better than lower cards. Aces are low so, needless to say, drawing an Ace is generally a very bad thing.

We kept a pictorial record of the cards that I drew as the clash that would decide the game took place:

It was so ridiculous that even my opponent was suggesting that the only solution was a box of matches and some lighter fluid!

Anyway, I lost that game too, but still had a great morning’s gaming

To finish, here are a few more pictures of the game. You look at them whilst I go and get a good fire going…!

IABSM AAR: Les Attaques

Another absolutely beautiful battle report, this time featuring a game of I Ain’t Been Shot Mum played using the first scenario from the Defence of Calais scenario pack.

The report was originally posted on the IABSM FB group, which you can access by clicking here.

It’s May 1940, and with British troops being evacuated from the beaches at Dunkirk, the ancient port of Calais stood on the critical western flank of the Anglo-French lines.

In a desperate bid to shore up the flank Churchill committed the British 30th Infantry Brigade to defend Calais to the last. What ensued was an heroic struggle that is writ large in the annals of British military history.

This first scenario features men from the Searchlight Battalion, supported by anti-tank guns, trying to hold off the leading elements of the German advance. Click on the picture below to see all: