IABSM AAR: Pacific Island Invasion

A nice little after action report from Desmondo Darkin, orginally posted on the I Ain’t Been Shot, Mum Facebook page.

Not only do we get the first part of an AAR (the rest being lost in the mists of time!) but also some hints and tips on how to run an island invasion of your own.

Click on the picture below to read more…

IABSM AAR: Walking in a Winter Wonderland

Quite appropriately for whether we have been having recently, Tim Whitworth and the Like A Stone Wall wargames group raided the 2005 Summer Special for a scenario with which to play their latest game of I Ain’t Been Shot, Mum!

Not much commentary, but some lovely pictures of their terrain and models. Click on the pic below to see all:

IABSM AAR: The Pimple

Here’s a few pictures from a recent game of I Ain’t Been Shot, Mum played by Dan Albrecht and his chums at the Vermont Gamers Group.

The scenario was #21: The Pimple from the Operation Compass scenario book (written by Yours Truly). Dan says:

“True to form the Italians took it on the chin. With Brits in hull-down position and Italians with only two Actions, no Big Men to remove Shock, after 10 turns most all M13/40s were knocked out or their main gun was damaged or immobilized. Still, good way to learn the rules, practice shifting artillery fire with FOs and besides…no American football on the TV this past Sunday!”

IABSM AAR: "The Luckiest Panzerjaeger"

A few pictures from a James Manto solo game which he posted on the IABSM Facebook Group recently.

As James says:

Some pics from my solo game last weekend including a close up of what I'm calling "the world's luckiest PanzerJaeger I " which survived a duel with the KV-2.

Personally, I’m also loving the aircraft.

IABSM AAR: South of Cherbourg

Here’s a quick AAR taken from the I Ain’t Been Shot, Mum Facebook group, posted by the Chevalier de la Terre. The scenario used is the South of Cherbourg scenario from IABSM v3 rulebook; and has resulted in a beautiful looking game.

Click on the picture below to see all:

I’ve also added an even quicker AAR from fellow Lardy Julian Whippy, also from the I Ain’t Been Shot, Mum Facebook group. You can see the rest of Mr Whippy’s pics by clicking on the picture below.

IABSM AAR: Sint Jooth, Day 2

Another great battle report from Tim Whitworth and the ‘Like a Stone Wall ‘ Wargames Group, this time put together from several Facebook posts mostly from the I Ain’t Been Shot, Mum! FB group.

This game is a continuation of their fight for the village of Sint Jooth in Holland in 1945. The British pulled out their war weary infantry on the night of 20th of January and re-grouped for an attack the next day (you can read the AAR covering the previous day’s action here).

Click on the picture below to see if the British had more luck on Day 2:

A Few IABSM AARs

The I Ain’t Been Shot, Mum! Facebook Group is a great source of information and inspiration. It’s also a place where people post a lot of short and snappy After Action Reports slightly different from the larger write-ups you find on people’s blogs.

Now not everyone wants to be a member of Facebook, which I can perfectly well understand, so below you’ll find links to a few recently-FB-posted AARs that I’ve copied across to Vis Lardica.

I’ve got specific permission to do so from most of the authors, but for those few that I haven’t, I hope that they don’t mind: VL is a not-for-profit website (it’s the old joke: “How do you make a £1 million from wargaming? Start with £3 million!”) designed only to spread the Lard.

Belle Maison

Action in Tunisia

AAR: First Game of the Year

And so to the first battle of 2019: a game of I Ain’t Been Shot, Mum! against Dave using one of the scenarios from the TooFatLardies Summer Special 2016. For those unaware of the Specials, and now the Lard Magazine, these are a wonderful source of scenarios, information and inspiration for all Lard games.

The scenario, by Richard Morrill, was called George of the Jungle, and was set in Burma, 1945. A Company, 9th Borders, part of 63 Brigade of 17th Indian Division, was tasked with clearing a small village near Meiktila of Japanese. The reason for the scenario’s title is that this action includes the participation of George McDonald Fraser, author of the Flashman novels, and is mentioned in his autobiography Quartered Safe Out Here. I would play the Japanese, and Dave would play the British.

Click on the picture below to see what happened:

IABSM B.E.F. Photographed

Continuing my re-photographing of my collections, next up is the BEF: the British Expeditionary Force of 1940.

The album portrays a Regular Infantry Company plus its battalion, brigade and divisional support; plus the various options available for supporting armour.

This was actually the very first WW2 army that I painted up, and although the infantry have withstood the test of time (and many appearances on the battlefield), the armour could do with a complete refresh. In my defence, however, when I started this collection many years ago, there weren’t the range of cheap, plastic tanks available that there are now. Were I starting again, I’d be going for a complete company of each type of tank available from Zvezda!

Click on the pic below to see all:

The OB for the collection is taken from the second of my Blitzkrieg in the West theatre books for I Ain’t been Shot, Mum!


IABSM French Photographed

One of the ‘toys’ I got for Christmas was a new digital camera. I’d had the old one for some seventeen years, and it had really started to give up the ghost. Batteries were drained with one shot, it hated anything but the brightest of sunlight, and the cover to the compartment for the batteries had developed the annoying habit of popping open at the slightest touch.

The new one came from the post-Christmas sale from John Lewis. This was another first from me, as I actually stood and queued outside for half an hour, and then rushed in with the tsunami of other shoppers to try and get a bargain: not something I have done before, as I usually avoid the whole “Sales” madness. It seems to have been worth it, however, as once I had actually worked out where the sale items were (in their own special area) I picked up the camera I wanted for £30 less than the sale price on Amazon.

New camera means an excuse to photograph some figures, so I re-shot all my 1940’s French. Still haven’t got exactly the results I was looking for, but they look a lot better than my previous gallery.

Some rather colourful R-35’s from a supporting GBC (Groupe de Bataillons de Chars)

I’ve got a lot more figures, especially Somua and Char B1 tanks, and some of the more esoteric portee vehicles that Battlefront was pushing during their Blitzkrieg phase, but I’ve tried to avoid cheese and stick to the official OB’s from the TFL Blitzkrieg in the West: the French handbook.

Reading the lists and building the gallery is a great way of seeing where the gaps are in my collection.

Must be time to get some more French: I wonder if I can find any of them on sale anywhere…


IABSM AAR: Blenneville or Bust #4G: Belle Maison

Bruce Romanick posted another IABSM AAR on the IABSM Facebook page.

Following on from their last game using the Blenneville or Bust! scenario pack (scenario #3D: Saint Melotte) this time the SAGE group played scenario #4G: Belle Maison, where both the Germans and the Americans are aiming to the occupy the same village in the valley.

According to Bruce’s post, which I hope he doesn’t mind that I reproduce here, the Yanks managed to push the German out of the village, with an opportune air strike taking out a Panther. A minor US win after 3+ hours.

IABSM AAR: Cymru Am Byth #13: Swanning Up To Brussels

Tim Whitworth and the lads from the Like A Stone Wall wargames group played another game of I Ain’t Been Shot, Mum the other day, this time using the Cymru Am Byth scenario pack.

The scenario pack covers the operations of the Welsh Guards during WW2, and includes sixteen unique scenarios and a mini-campaign.

The LASW chaps played scenario #13: Swanning Up To Brussels: a German heroic rearguard action versus 1st and 2nd Battalion elements of the Welsh Guards Group that took place on 2nd September 1944.

Tim’s general comment was: “I'll just say the British found it hard going. In these rules the tactics that you employ certainly matter!”

IABSM AAR: Normandy Breakout

A few pictures from the Like a Stone Wall wargaming group playing a Normandy 1944 break out game. The British are defending against a German counter attack. 

Note the use of the Lardage measurement sticks. The LASW chaps have swapped from using inches to Lards, with one Lard being equivalent to 1½ inches.  This allows them to play on their rather swanky 12 foot long table!

IABSM AAR: Blenneville or Bust! #3D: Saint Melotte

Bruce Romanick has been learning the IABSM ropes whilst playing some of the scenarios from the Blenneville or Bust! scenario pack.

He’s posted a few photos of his latest game, scenario #3D Saint Melotte (where the British are defending a small French village against German armoured attack) on the IABSM Facebook page, which (and I hope he doesn’t mind) I reproduce here.

Apparently the plucky Brits managed to hold off the Germans…

IABSM AAR: Lille

Time for another game of I Ain’t Been Shot, Mum! with John and Dave…but what to play? Dave has requested an early war encounter, so a quick look back through my library of scenarios and I settle on one of Richard Clarke’s games: Lille.

The premise is simple: Rommel’s Germans are advancing rapidly on Lille, aiming for the village of Lomme, whose capture will seal off the escape route of all English and French forces in the area. The Allies have realised what the Germans are up to, and have dispatched a small force to hold Lomme for as long as possible. The scene is set for an epic clash!

Click on the picture below to see all:

IABSM AAR: An Affair at Gazala

The regular TooFatLardies specials are a fantastic source of scenarios for all the TFL products, including that hardy perennial, I Ain’t Been Shot, Mum!

With John coming round for a game, I needed a quick bit of inspiration (sometimes you need a change from playing your own scenarios all the time) so quickly flicked through Derek’s excellent index to the Specials’ content, available for free in the files section of the TFL Yahoo Group. It had been a long time since the Italians had graced the tabletop, so I decided to play the An Affair at Gazala scenario written by fellow Lardy Klaus-Dieter Fritsch from the Christmas 2017 special.

The scenario takes place in June 1942 during the Gazala battles, but is entirely fictitious apart from the general setting.

The British are occupying a position atop a ridge. On the ridge are three hills and a few ruined buildings. Each hill represents an Italian objective: their aim being to either take at least two of the objectives or force the Brits to retreat through breaking their Force Morale (a rule “borrowed” from Chain of Command).

The situation is complicated by the conditions. The whole table is considered rough terrain, with wheeled vehicles limited to the track running up the centre. Even tracked vehicles have a chance of bogging down if traversing the rough ground, and both sides had a Vehicle Breakdown card in their deck. On top of that, the remains of a khamsin sandstorm were still around: visibility was limited to 36”, all fire at Effective and Long range was reduced, and the dust kicked up by moving vehicles a factor as well. In other words, just another day up in the Blue!

A lot of Italians!

The Italians

John would play the Italians. His choice, I hasten to add!

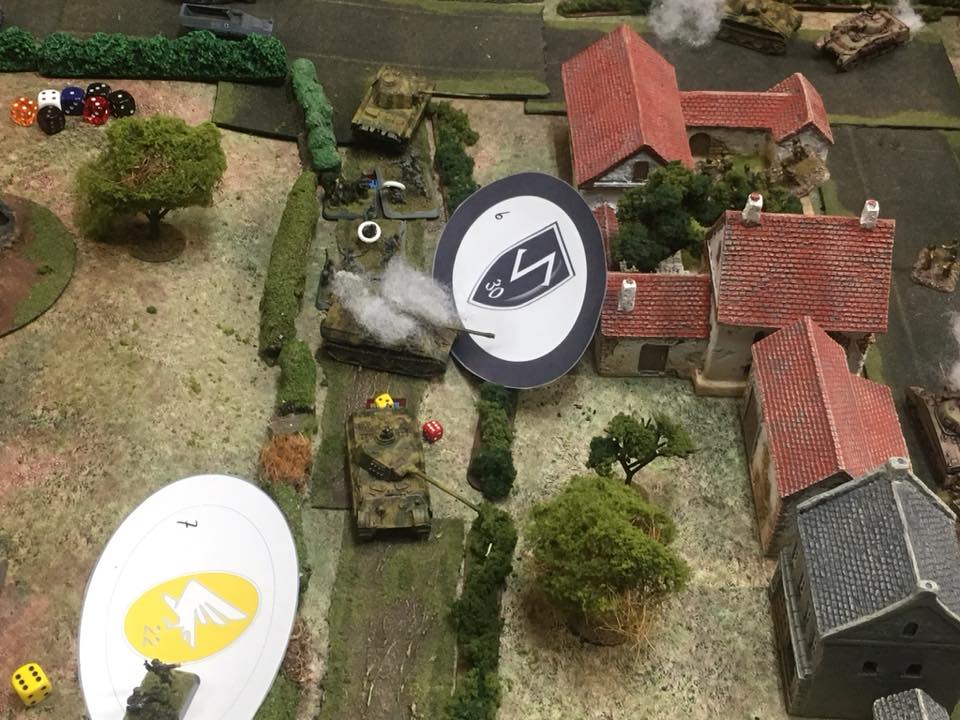
At his disposal, he had a three-platoon company of infantry consisting of a total of fourteen truck-mounted infantry squads and three AT rifle teams. These were supported by two platoons of tanks, with each platoon consisting of three M14/41 tanks, one Semovente 75/18 assault gun, and one L6/40 light tank. The Italians also had no particular shortage of Big Men or radios.

The British (or rather Scots!)

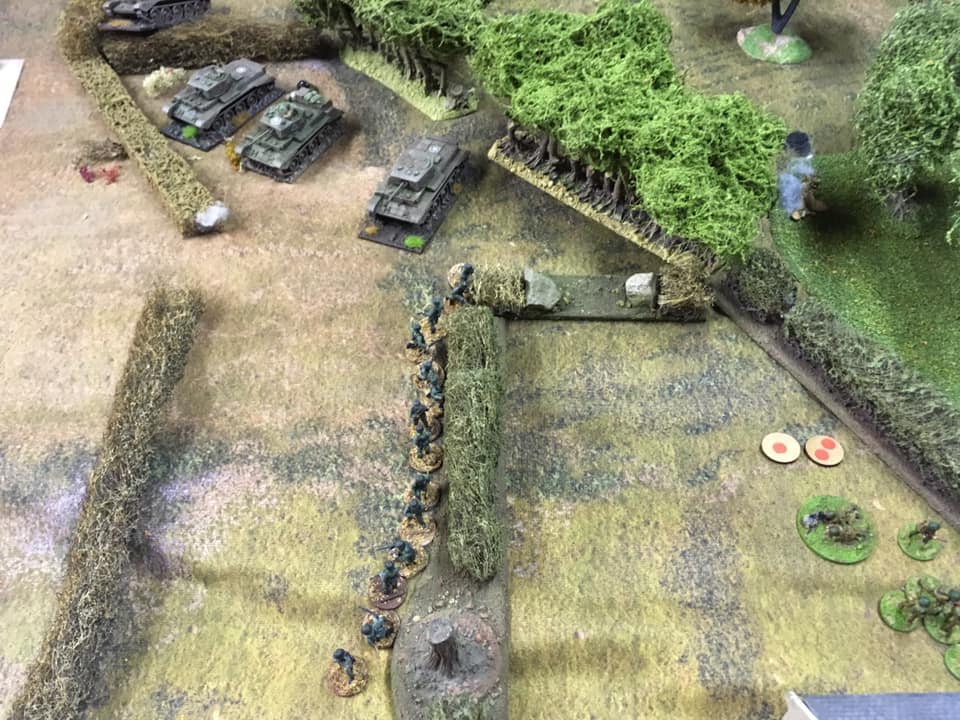
The Scots Guards holding the hills consisted of a three-platoon company of top class, stubborn, aggressive infantry (I shall refrain from commenting any further - the mother-in-law is from the Granite City - but there was no way the Italians were having our hills!) with plenty of Big Men, light mortars and anti-tank rifles.

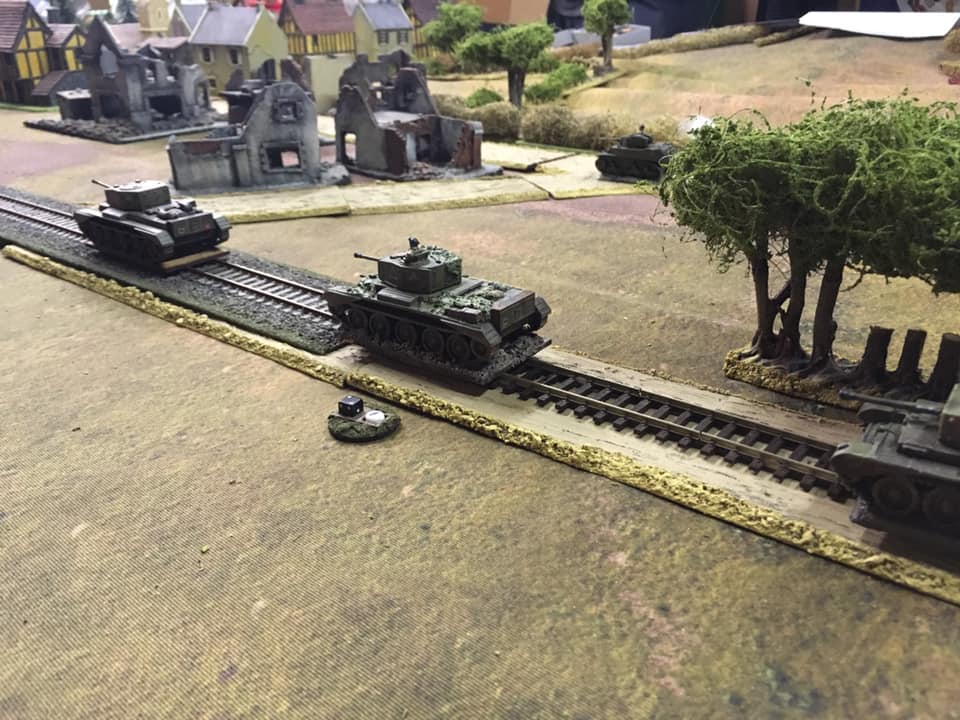
Supporting them was a single Vickers MMG and a single 2pdr anti-tank gun (I think I was supposed to have two of these, but settled for one gun with a Bonus Fire card) plus an attached tank platoon of two M3 Grants, two A15 Crusaders and an M3 Stuart “Honey”. We’ll dispense with this last: the Honey spent just about the entire game Bogged Down, never getting to fire a shot and barely even catching sight of the enemy!

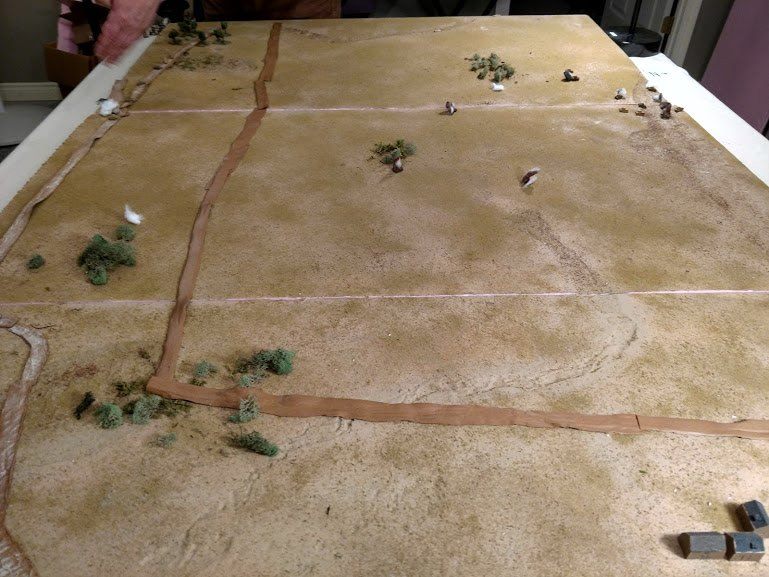
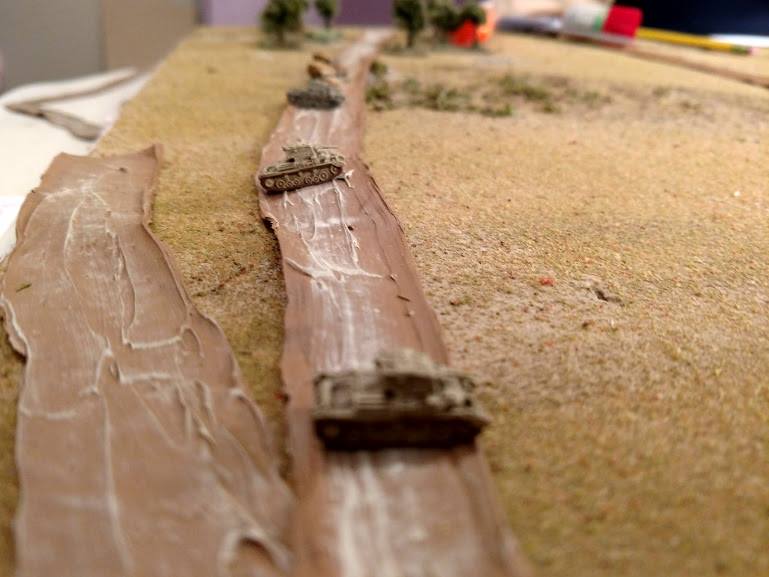
I decided to keep my armour in reserve, positioning them on the track, out of sight just behind the ridge.

It’s quiet…too quiet!

The Game Begins

As the sun rose over the British position, Italian Blinds began snaking their way onto the battlefield along the narrow track. Despite their elevated position, the khamsin prevented the Scots from spotting anything until the Italian column had passed a rocky outcrop near the track.

The Italian Armour Leads the Way

The lead Blind proved to be a platoon of tanks, so I deployed my single anti-tank gun (in a sangar) and opened fire. I also summoned my armour up onto the ridge: if the Italian tanks headed for the infantry platoon holding the hill on the right of my line, I wanted to have more than one 2lb and a Boys AT Rifle to face them!

Preparing for the Advance of the Italian Armour

The combined fire of the Grants, Crusaders and anti-tank gun proved effective: with the crews of the two lead Italian M14/41 tanks quickly bailing out as a fusillade of shells knocked holes in their vehicles.

Unfortunately, the abandoned vehicles then provided a neat shield for the other three Italian tanks, who would spend the next portion of the game shelling the Scots infantry in front of them with, fortunately, little effect.

The two tanks at the back are bailed!

“Keep your heids down, lads!”

Stymied on that axis of attack, the Italians now switched their entire effort to their right flank, advancing two platoons of infantry, their HQ platoon, and their other platoon of armour towards the left of the Scottish position as fast as they could go.

With so many units going forward together, there was a bit of confusion as the advance began, but the Italians soon sorted themselves out and began to threaten the Scottish line.

The Italian infantry advance by rushes, protected by a screen of tanks and the Khamsin

Although fire from the Scottish infantry proved ineffective due to the effects of the khamsin, the British tanks again enjoyed an initial success: knocking out the three Italian AT Rifle teams and taking a few chunks out of the advancing infantry.

All was looking good: with the Italian Force Morale reduced down to [4] in exchange for only a few casualties. Then, suddenly, the British tanks lost their mojo. All their shots at the advancing Italian tanks missed or bounced off armour, and return fire caused the crews of both Grants to bail: running for home chased by the jeers of their Scottish comrades!

I looked at my Force Morale: the loss of the tanks and a Big Man had dropped me down to [5], enough that if the Italians, despite their precarious hold on their own morale, managed to knock out a couple more tanks or infantry squads, then I was Gone (with a capital G), the Scots being ordered to retreat.

Correction: it was a Grant and a Crusader that bailed, not the two Grants

All now depended on who managed to land the first decent blow. Incredibly (in my opinion) it was the Italians who took the initiative: their tanks storming forward to burst through the British line and threaten to shoot everything up from behind!

Two Italian tanks burst through the line. Note the Bogged Down Honey!

A close up of the same situation

Both of the Italian tanks now turned their fire onto the Crusader: one shooting it from the flank, one from behind.

Not good!

Much to my surprise, the Crusader survived this onslaught, its gunner returning fire, but with no effect, and the first of the Italian infantry was now getting ominously close to the Scottish sangars.

Things were desperate, but the crew of the Crusader kept their nerve, reversing up onto the hill to keep their front armour towards the Italian tanks. The gunner calmly targeted one of the Italian tanks…BOOM!

At this point, the Italian Force Morale hit [0] and I had won!

Aftermath

Well that was a bit close!

If the Italian tanks had managed to dispatch the Crusader that they had got the drop on (more than possible given the situation) they would have been in the perfect position to start taking out my infantry from behind, with their own infantry poised to attack simultaneously from the front. A narrow escape for the Scots: who had just not been able to do enough damage to the khamsin-covered Italian advance.

An amazing game that all came down to the last few minutes of the action. Thanks, Klaus-Dieter, for a great scenario.

Robert Avery

IABSM AAR: Stopping the Gap

Another excellent battle report from Carojon of the Devon Wargames Group.

This game was a small fictitious battle from a free scenario designed by Richard Clarke using IABSM. The scenario recreates what must have been one of many similar struggles going on in the closing days of the Normandy campaign in late summer of 1944 as the allies fought hard to close what became known to history as the 'Falaise Pocket'.

Click on the picture below to see all:

IABSM AAR: The Second Battle of Tomaszow Lubelski

The last week of September 1939 saw a combined “Northern Front” Polish army join the attack towards Tomaszow Lubelski. Due to bad communications between the different Polish divisions, the result was a series of largely uncoordinated attacks by Polish unis arriving from the north-east, launched in the direction of the city only to be shattered wave-by-wave by the German defenders.

This scenario would represent one such attack: with Polish and German forces brawling for control of the centre of the table. Four objectives would be placed there, with each side entering the table and attempting to take and hold them. The game would end after ten appearances of the Turn Card, at which point victory would go to the side that held the most objectives. If, however, one side managed to hold at any point three of the four objectives, then the game would end immediately, with that side wining the battle.

Click on the picture below to see the extraordinary events that followed…