TTS AAR: The Last Zoom Battle

Regular visitors will know that last time I faced Bevan’s Galatians with my Marian Romans, things started well but finished very badly: one devastatingly bad turn (I blame the cards, my figures blame me) led to an absolute thumping for Caesar and his men. It was now time for the re-match in what, I hope, will be my last game over Zoom as we all return to face-to-face gaming.

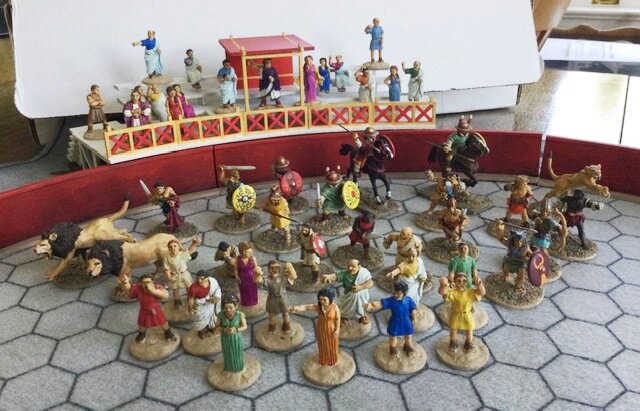
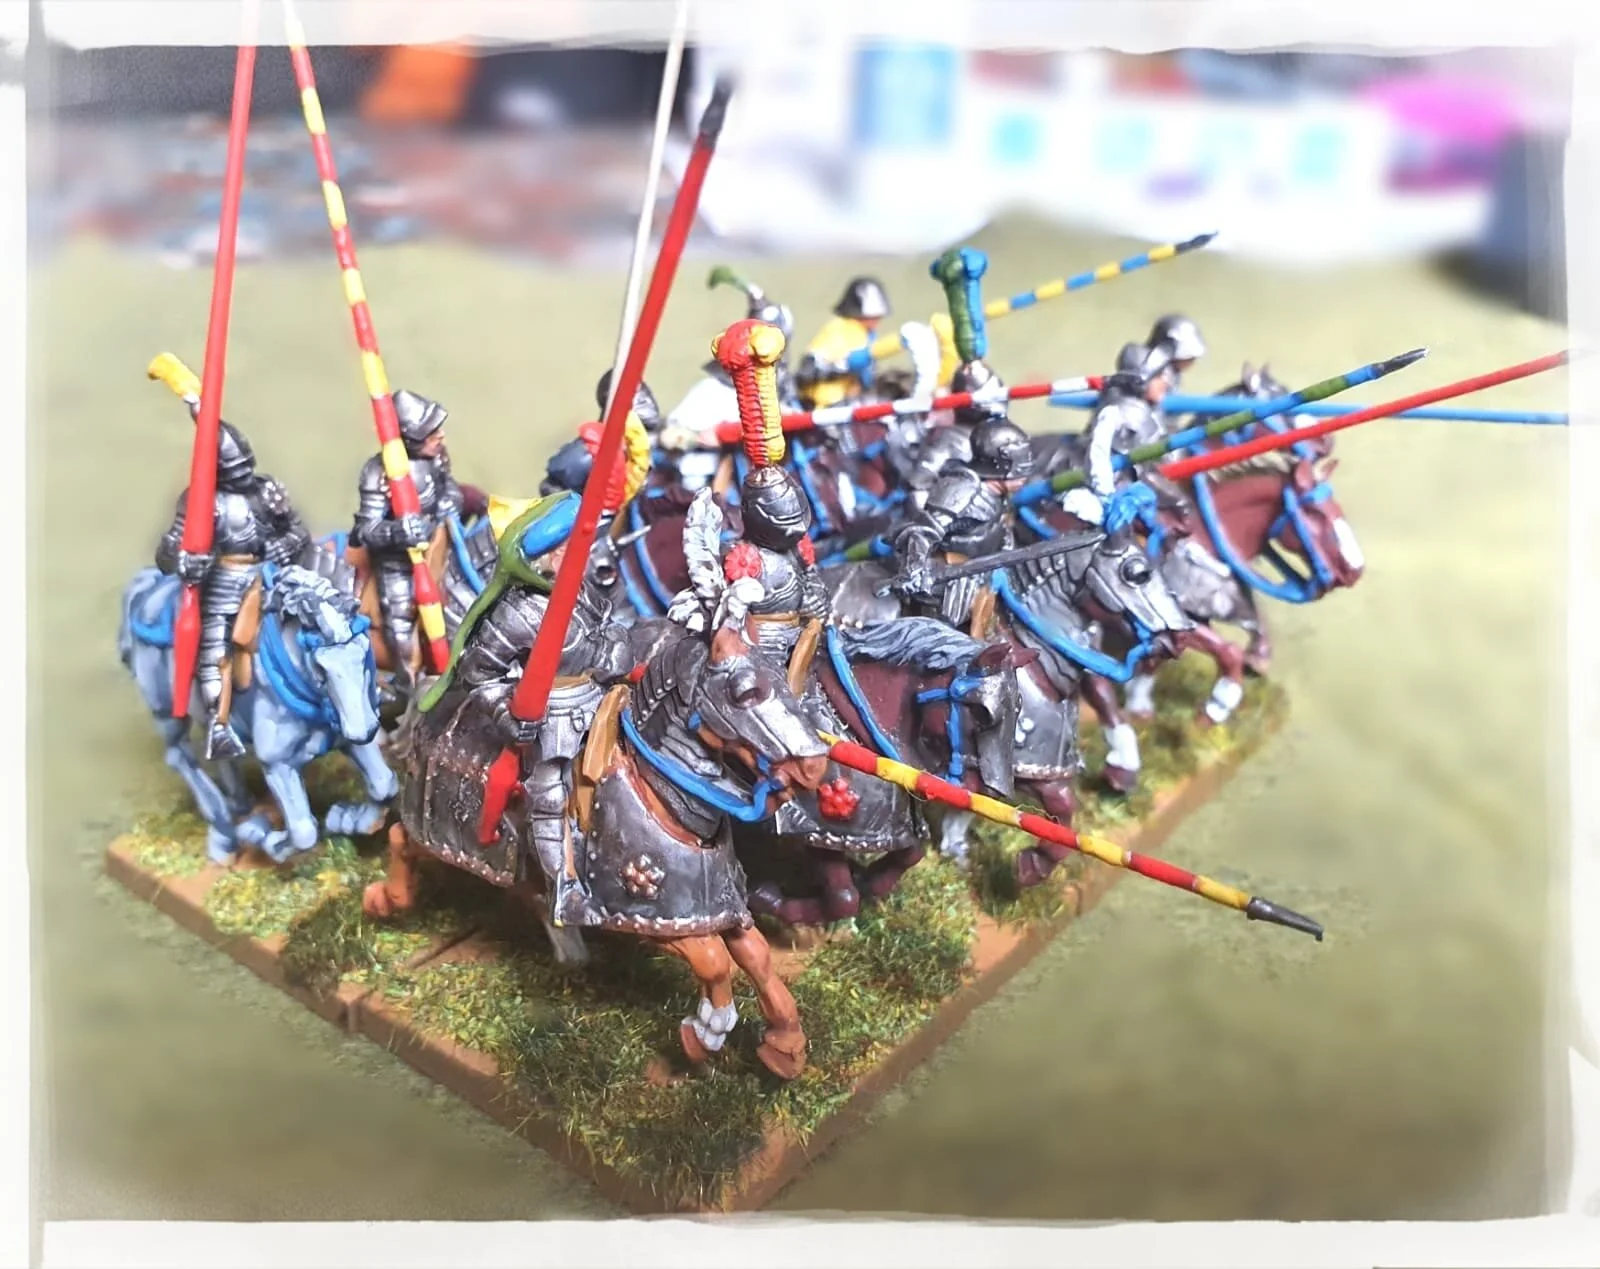
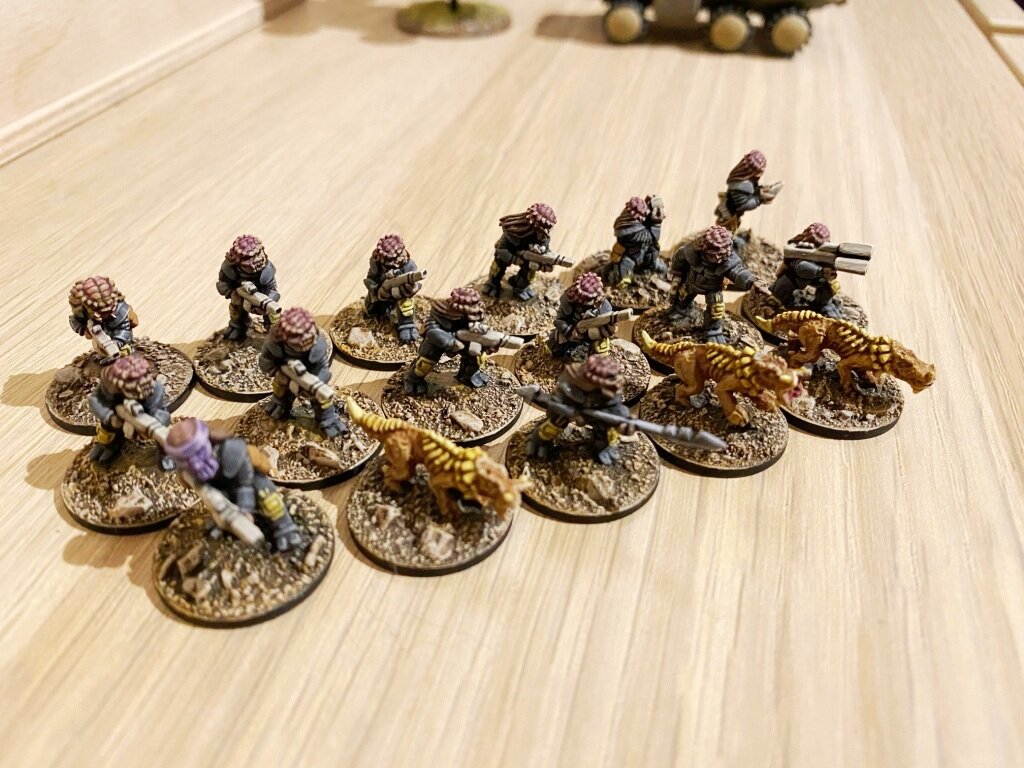
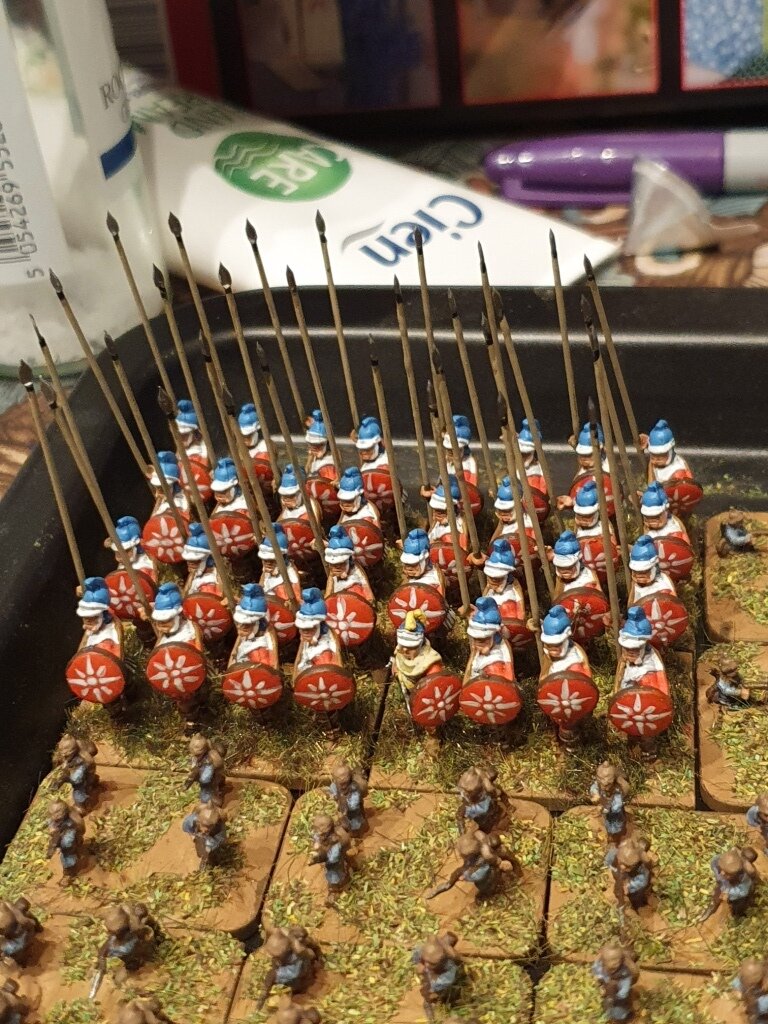
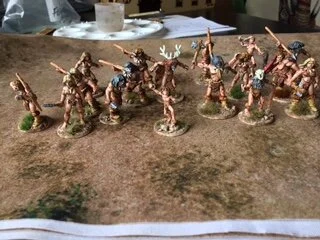
The Galatians: eight warbands of deep, fanatical infantry and a couple of tasty cavalry units. More heroes than The Expendables.

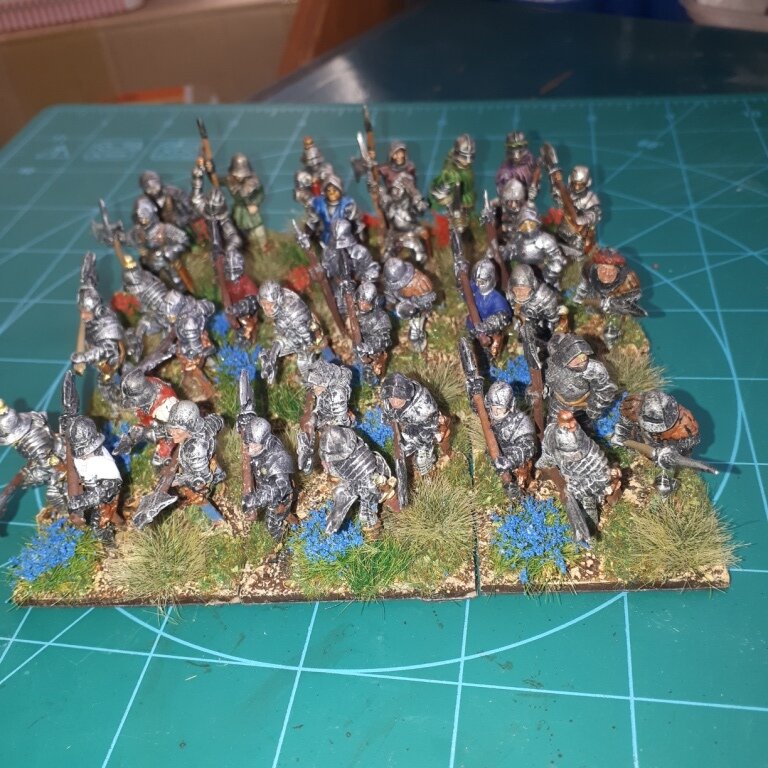
The Marian Romans: six units of veteran legionaries, a unit of legionary cavalry, three units of lights.

Learnings

I had learnt three things from my last encounter.

Firstly, don’t fight right in front of your camps: you might need a bit of room to pull back and rally and the Galatians are bound to punch at least one hole in your line so you need to make sure that any (unwieldy) warbands that have got through the gap take a lot of time to take your victory-points-rich camps.

Secondly, don’t face your light cavalry off against their cavalry: use their comparative manoeuvrability to keep some of their warbands occupied.

Finally, use the comparative manoeuvrability of your legionary units to get a temporary two-to-one advantage wherever possible. You need to do three hits to break a warband, so to break a warband in one turn will need the attacks of at least two units.

Armed with these nuggets of undoubtedly game-winning information, I logged on to Zoom and prepared for battle.
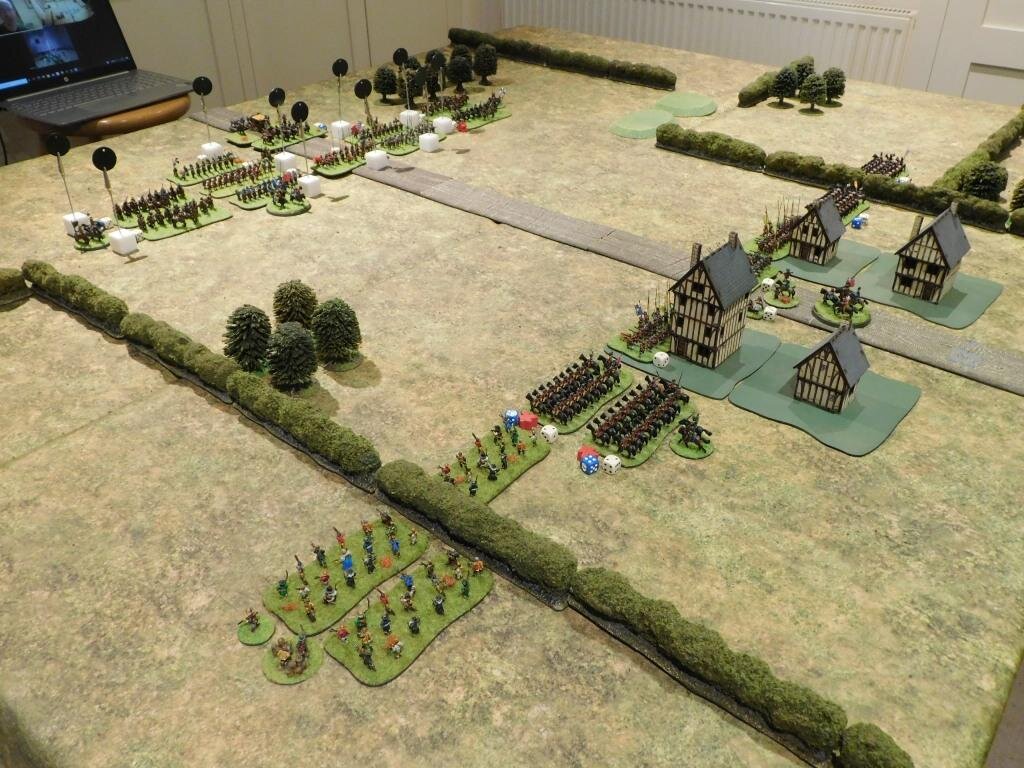
The Game

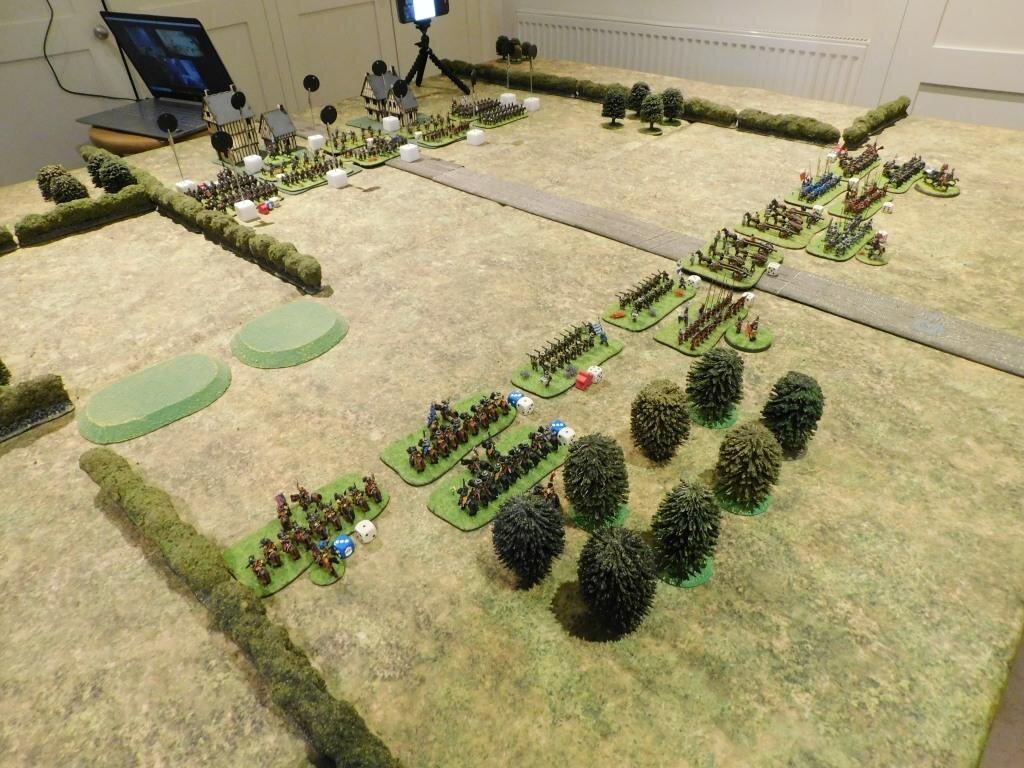
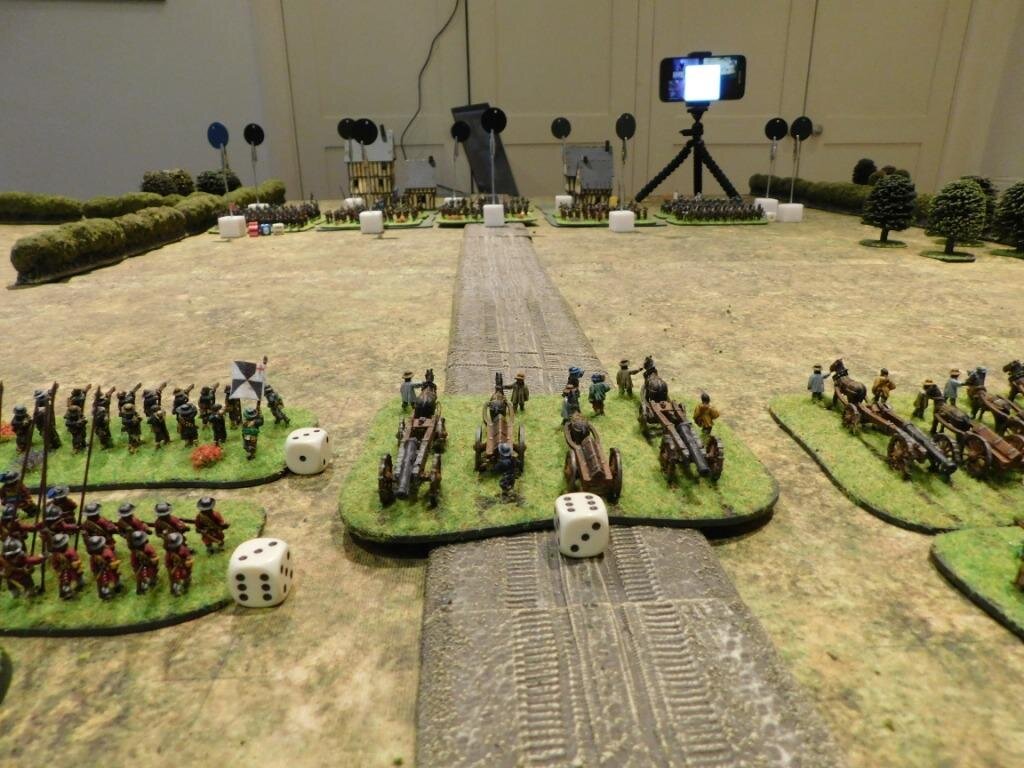
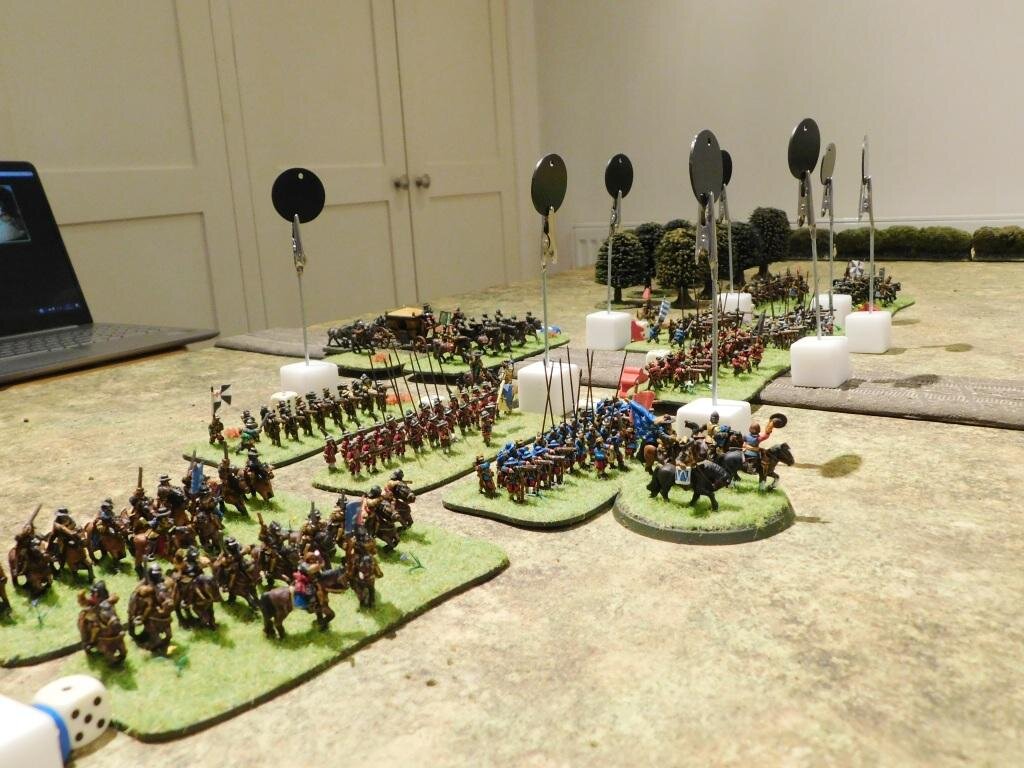
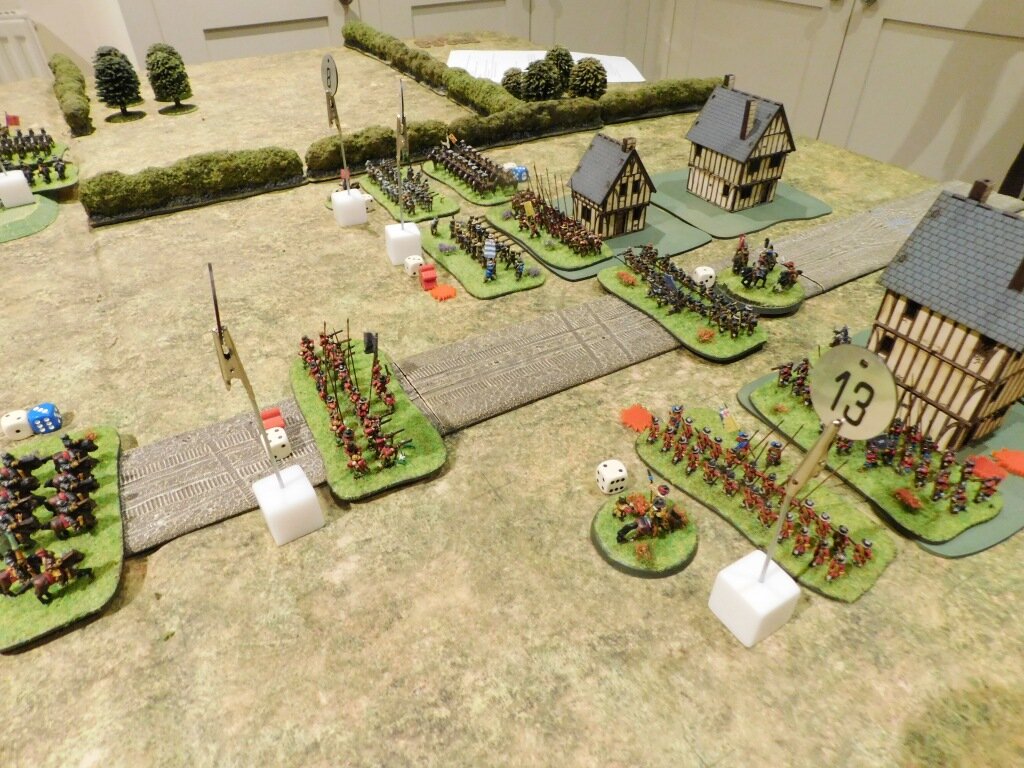
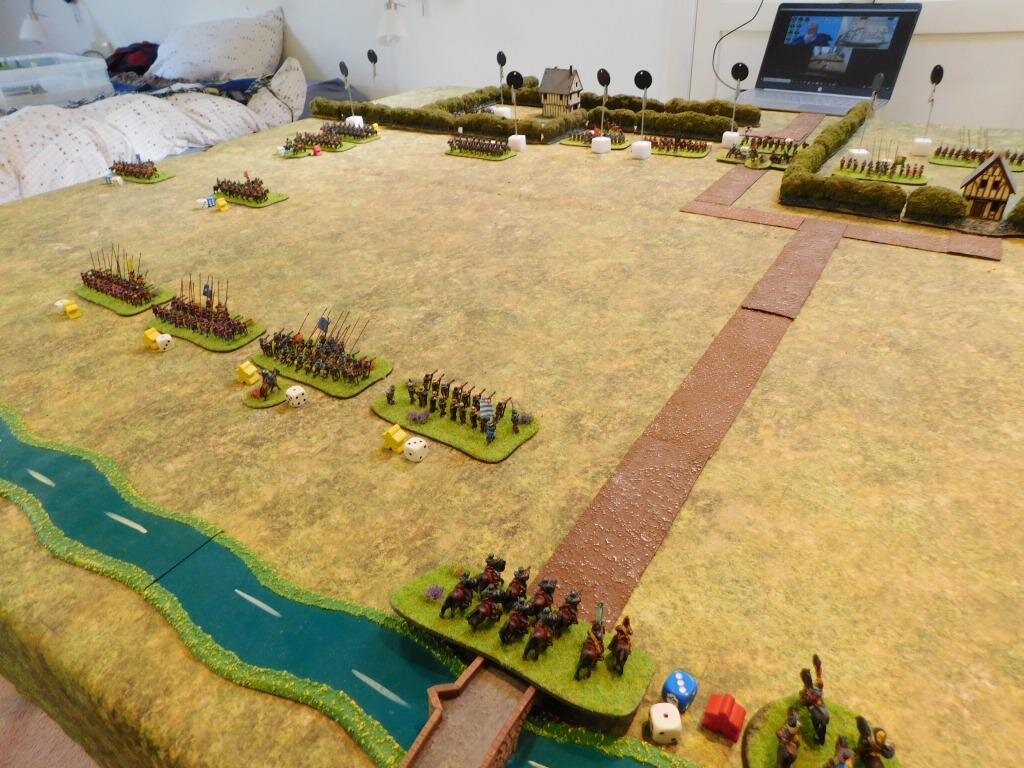
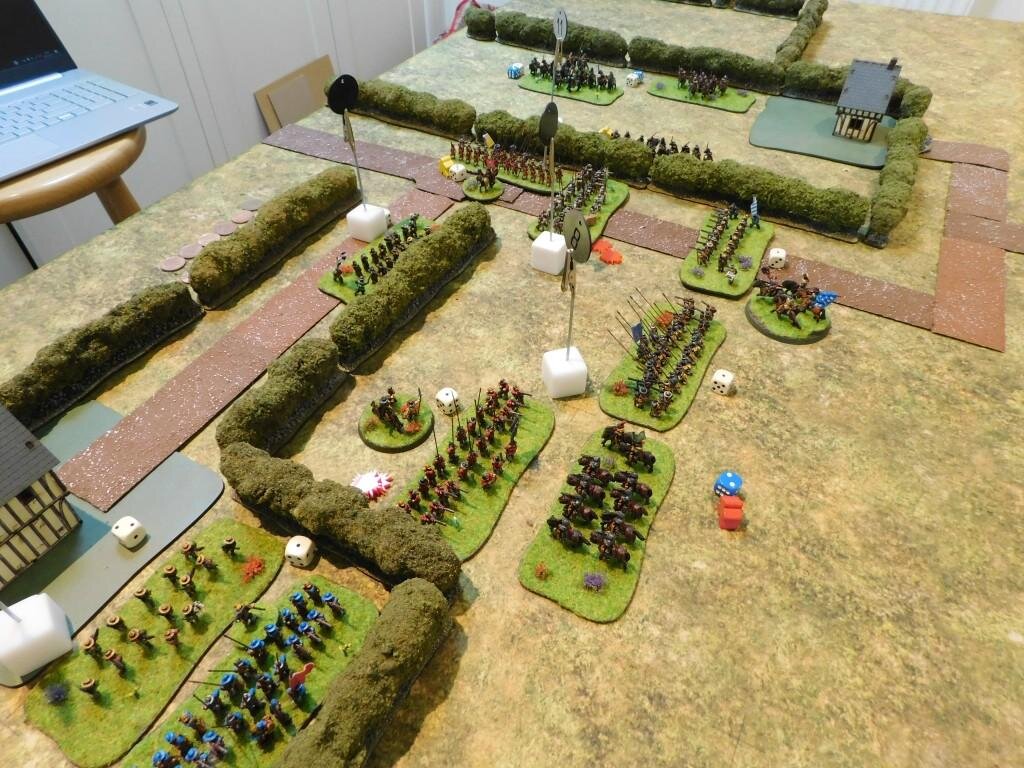
I had the initiative so advanced my line forward as fast as possible. The Galatians did the same, but in a somewhat more raggedy manner: no nice, straight, Roman lines for these barbarians.

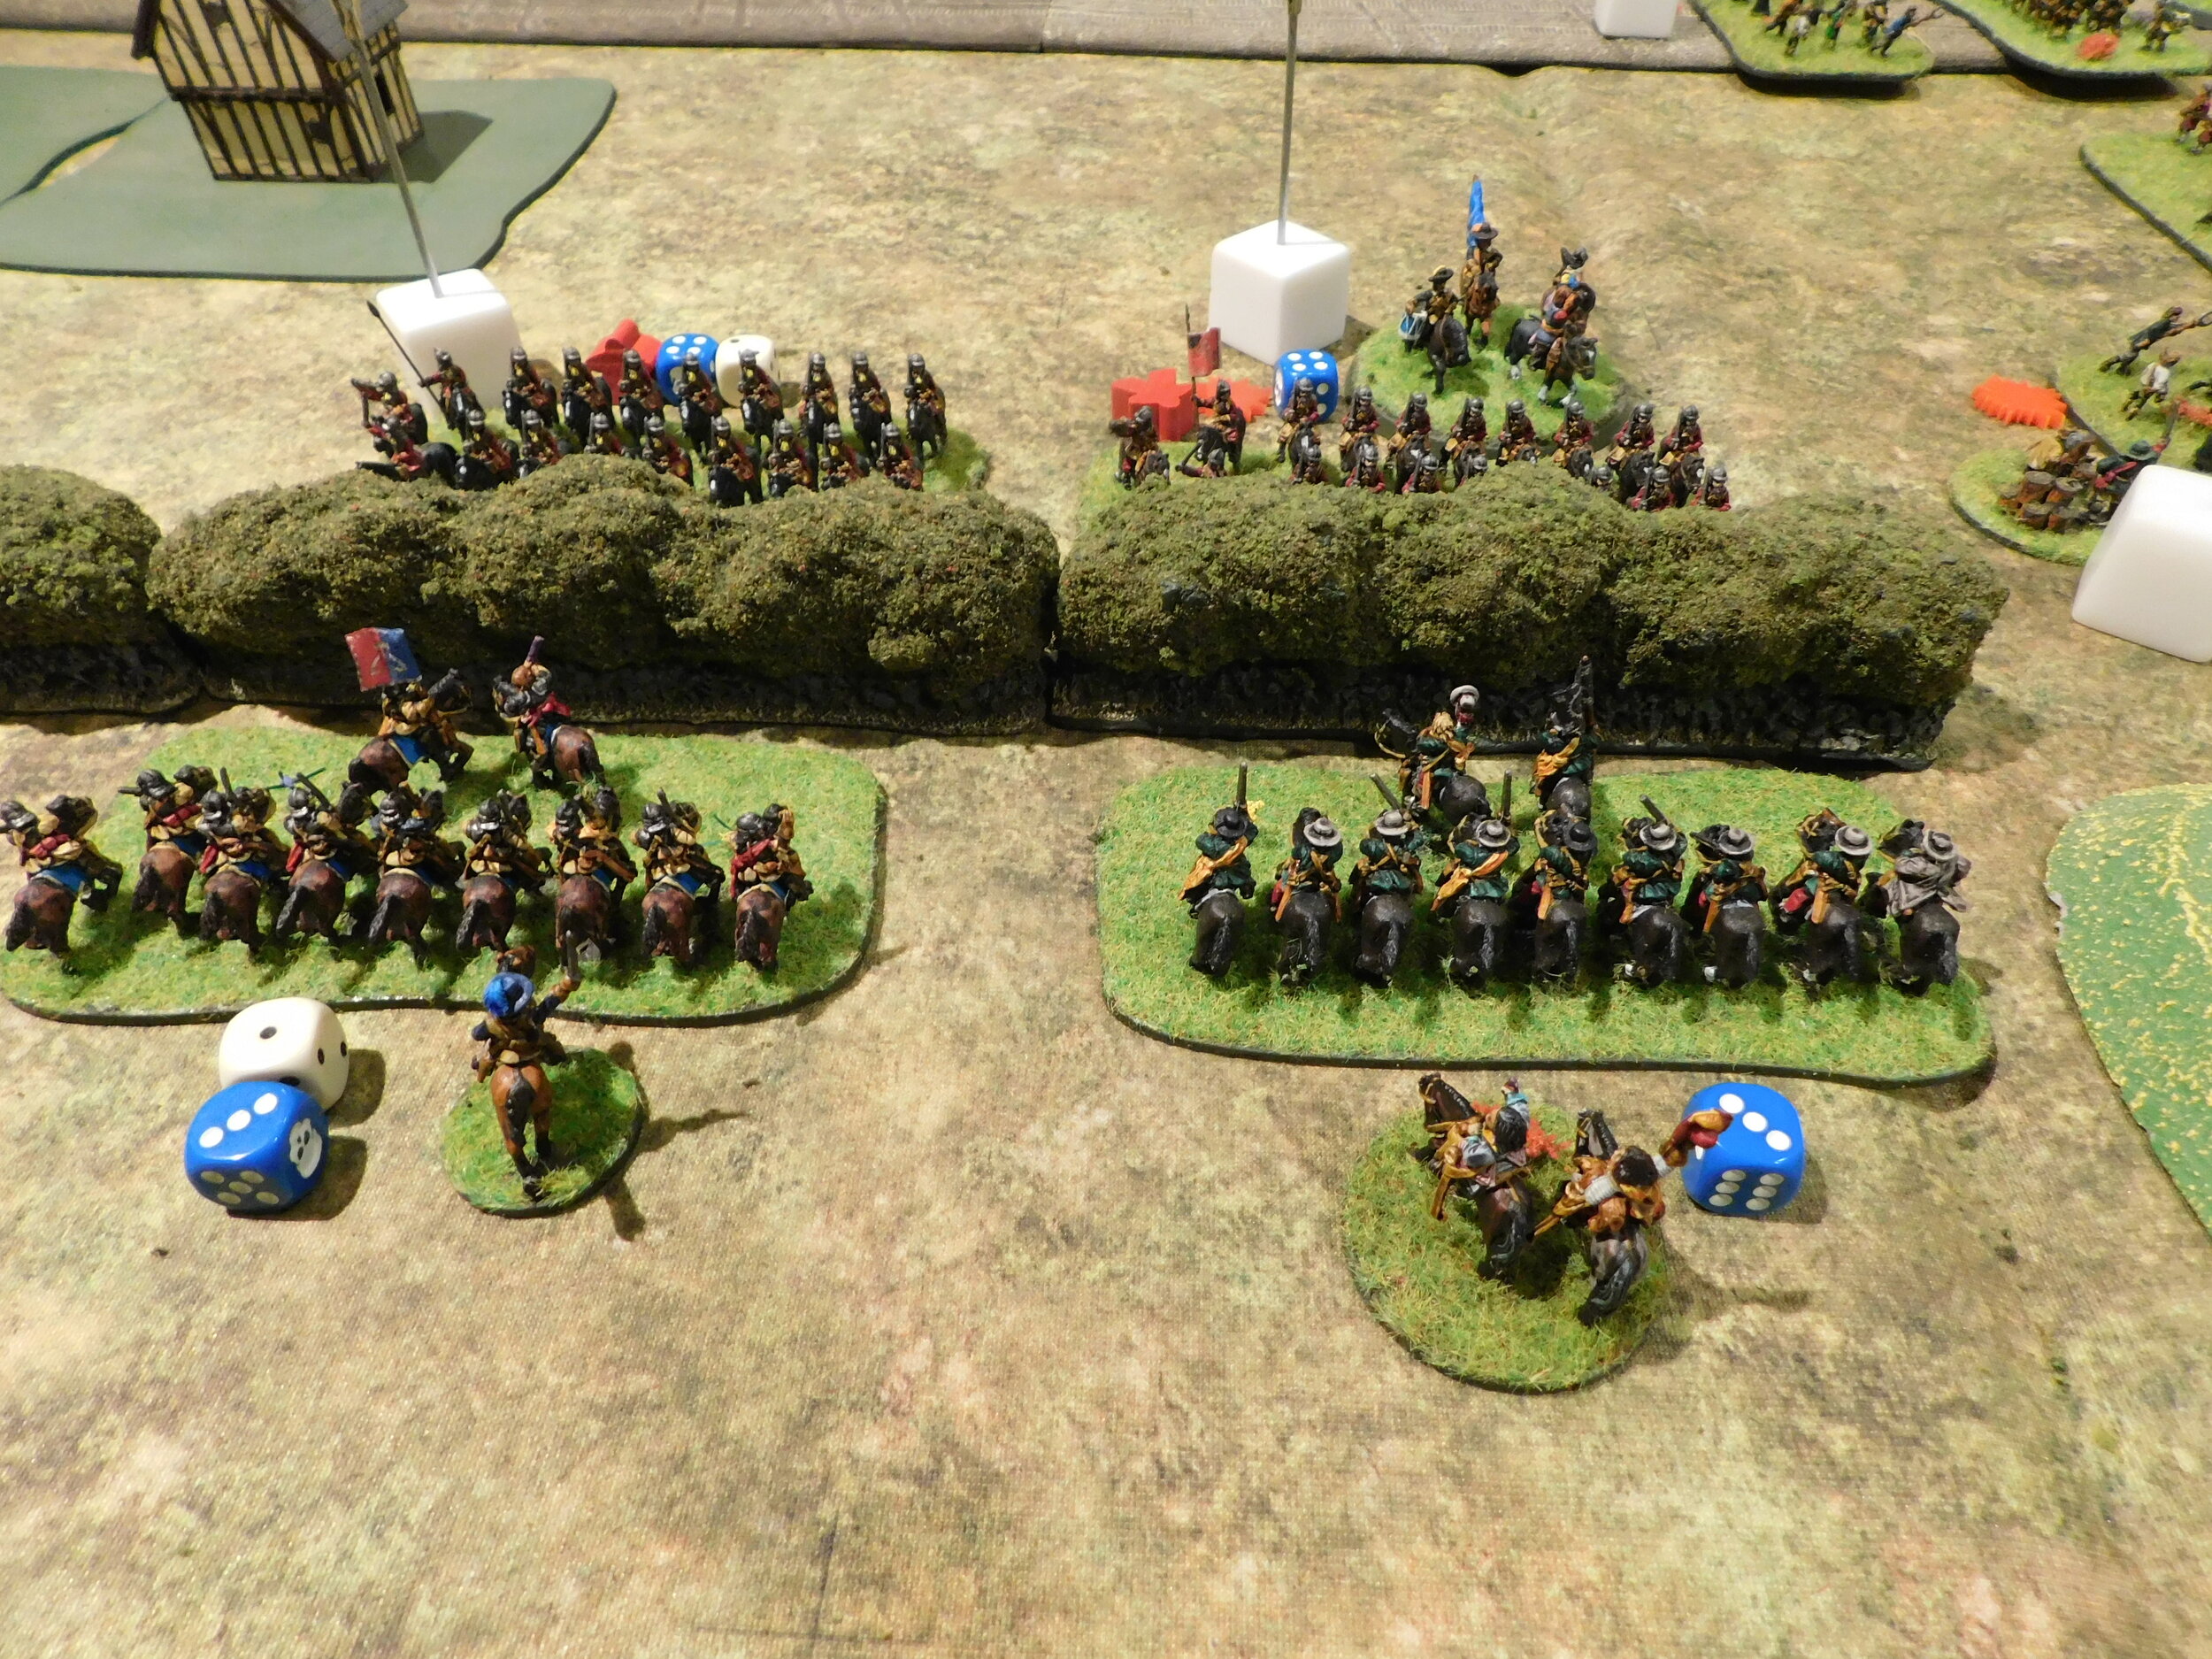
I protected my left flank against a cheeky cavalry lap around by keeping one of my legionary units back from the main line. This made it difficult for the extra cavalry unit (bottom, left in the left-hand picture above) to either get past the unit and into my rear or to threaten the flank of the main line.

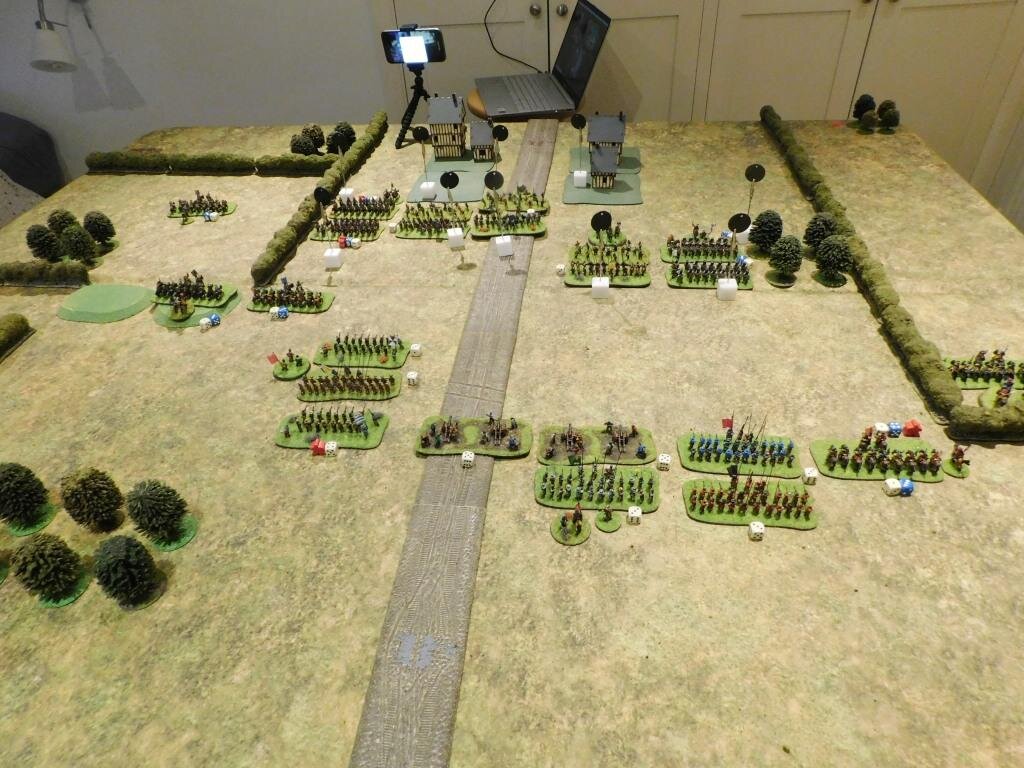
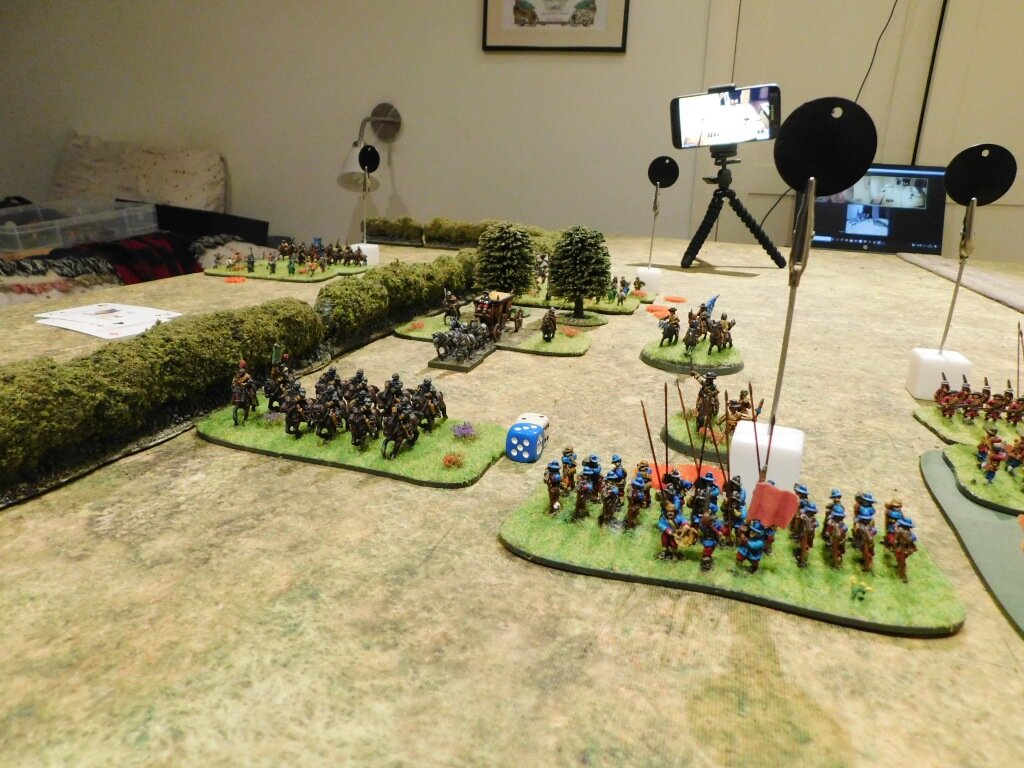
On the other flank, my two light cavalry units (the Persian types with the sandy bases) faced off against the warbands positioned far out on the Galatian left, with my legionary cavalry bolstering the line of legionaries. I’ve no idea why one of my legionary units has hung back: perhaps I thought this might temp a charge from one of his and allow me a to-the-rescue flank attack!

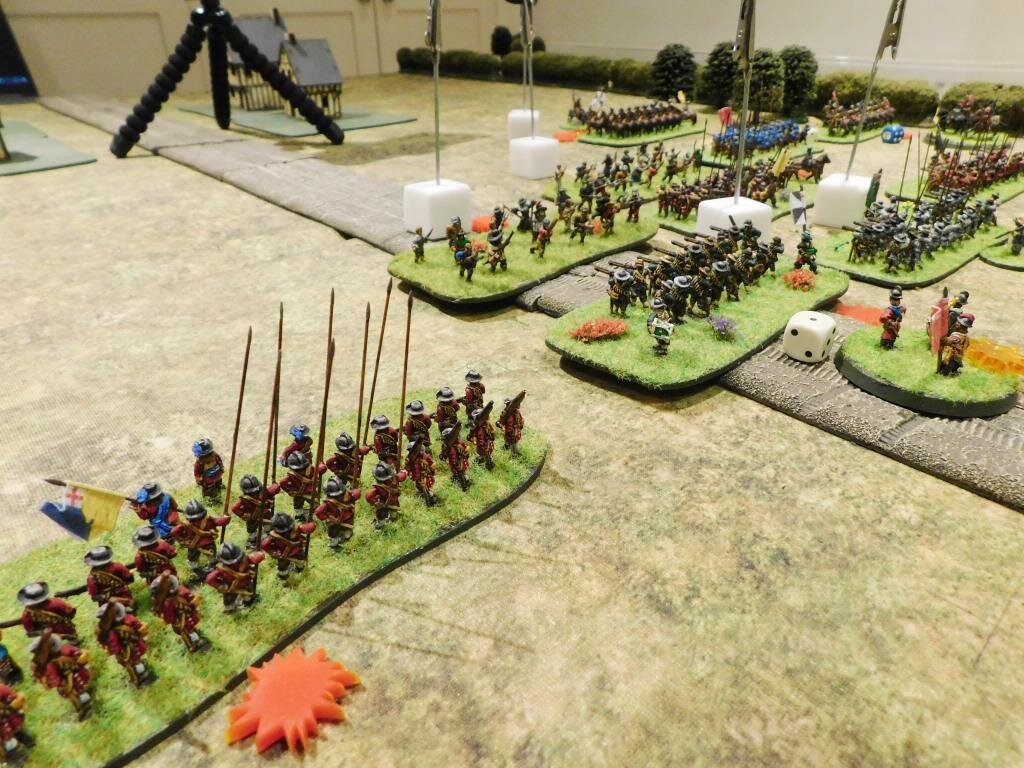
The Two Lines Clash!

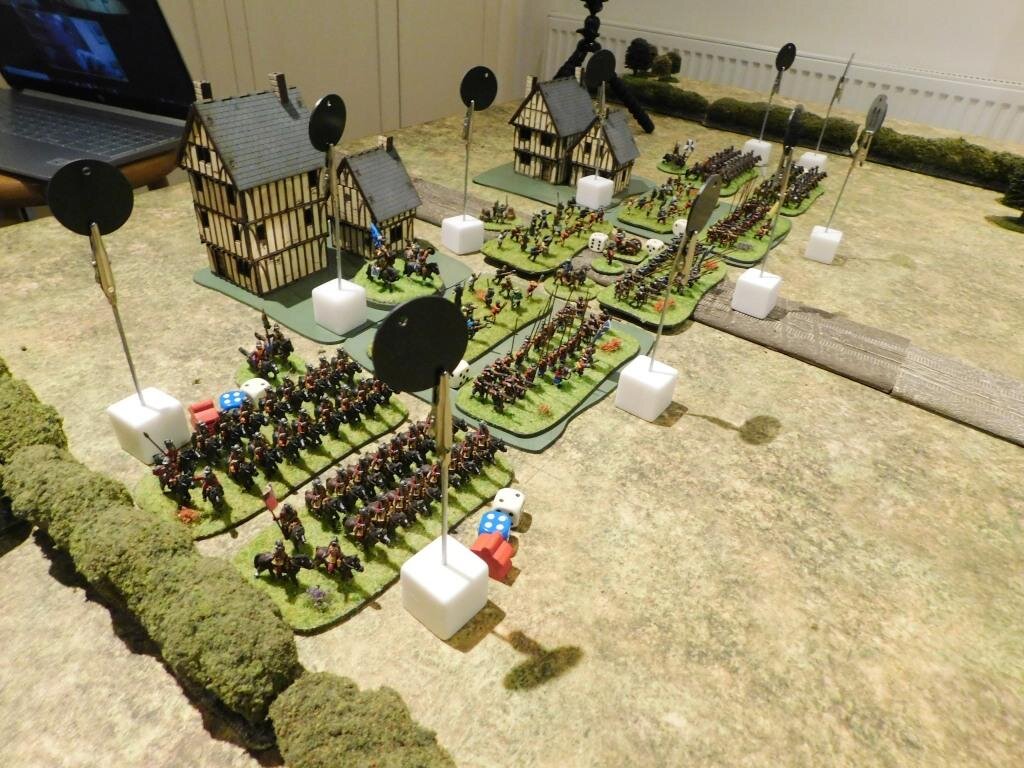
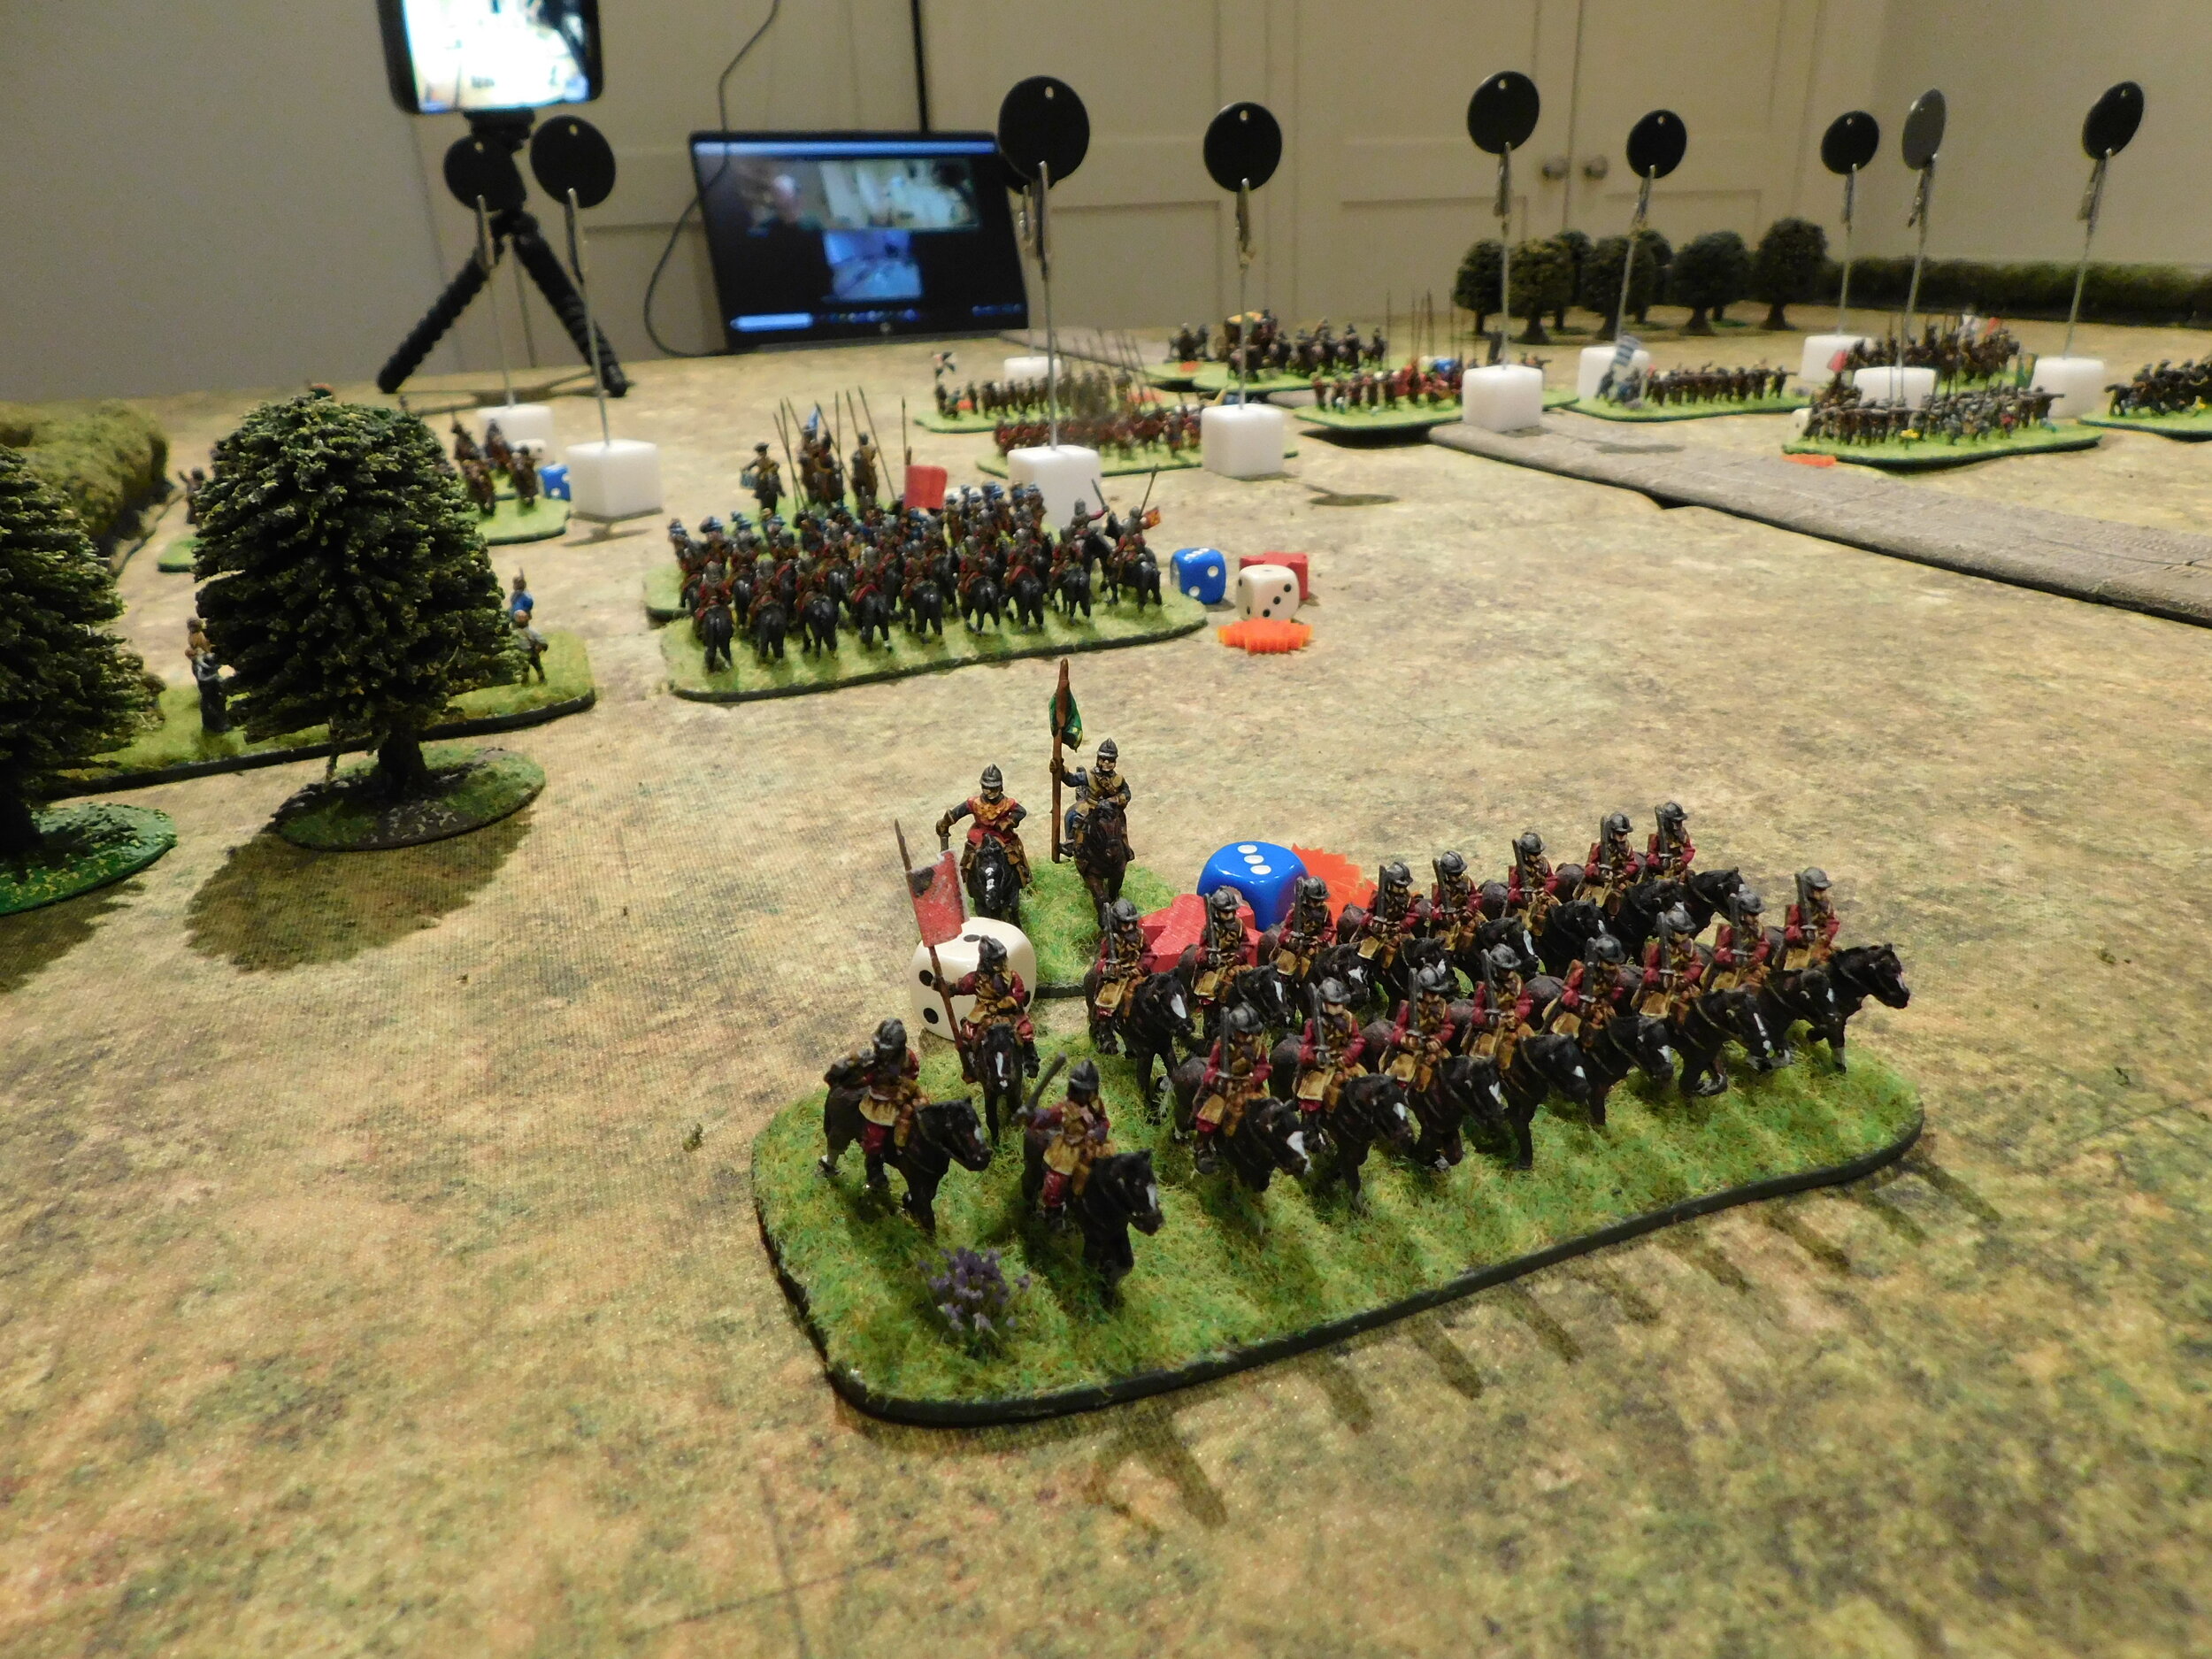
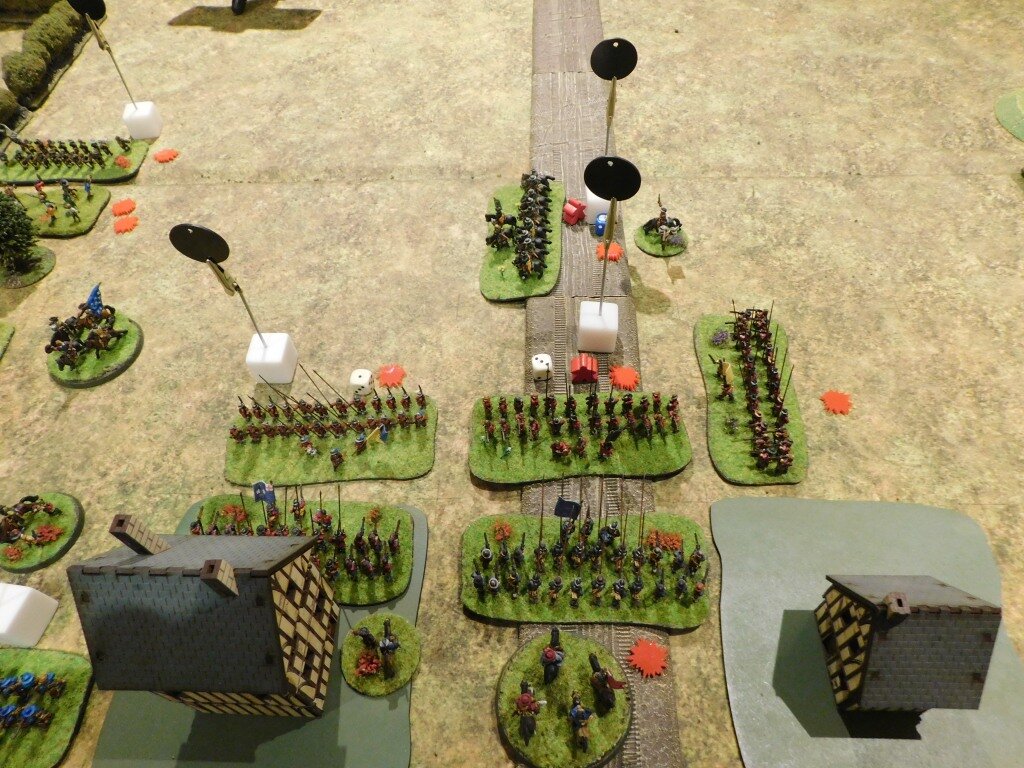
The two lines began to come together with a mighty clash!

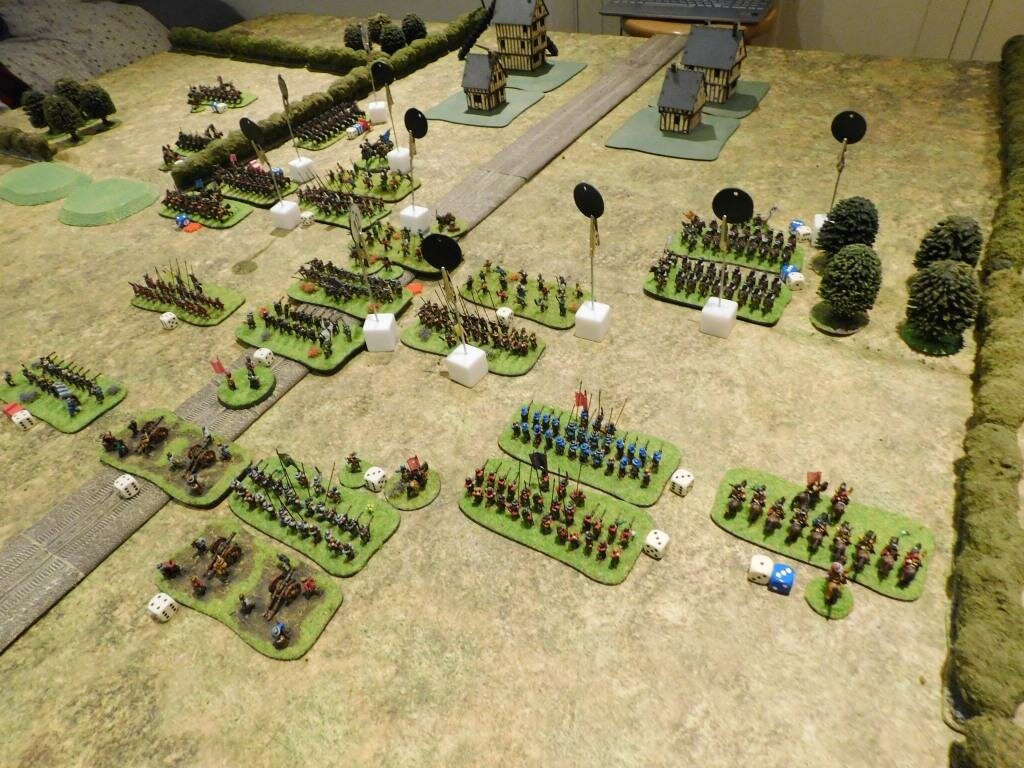
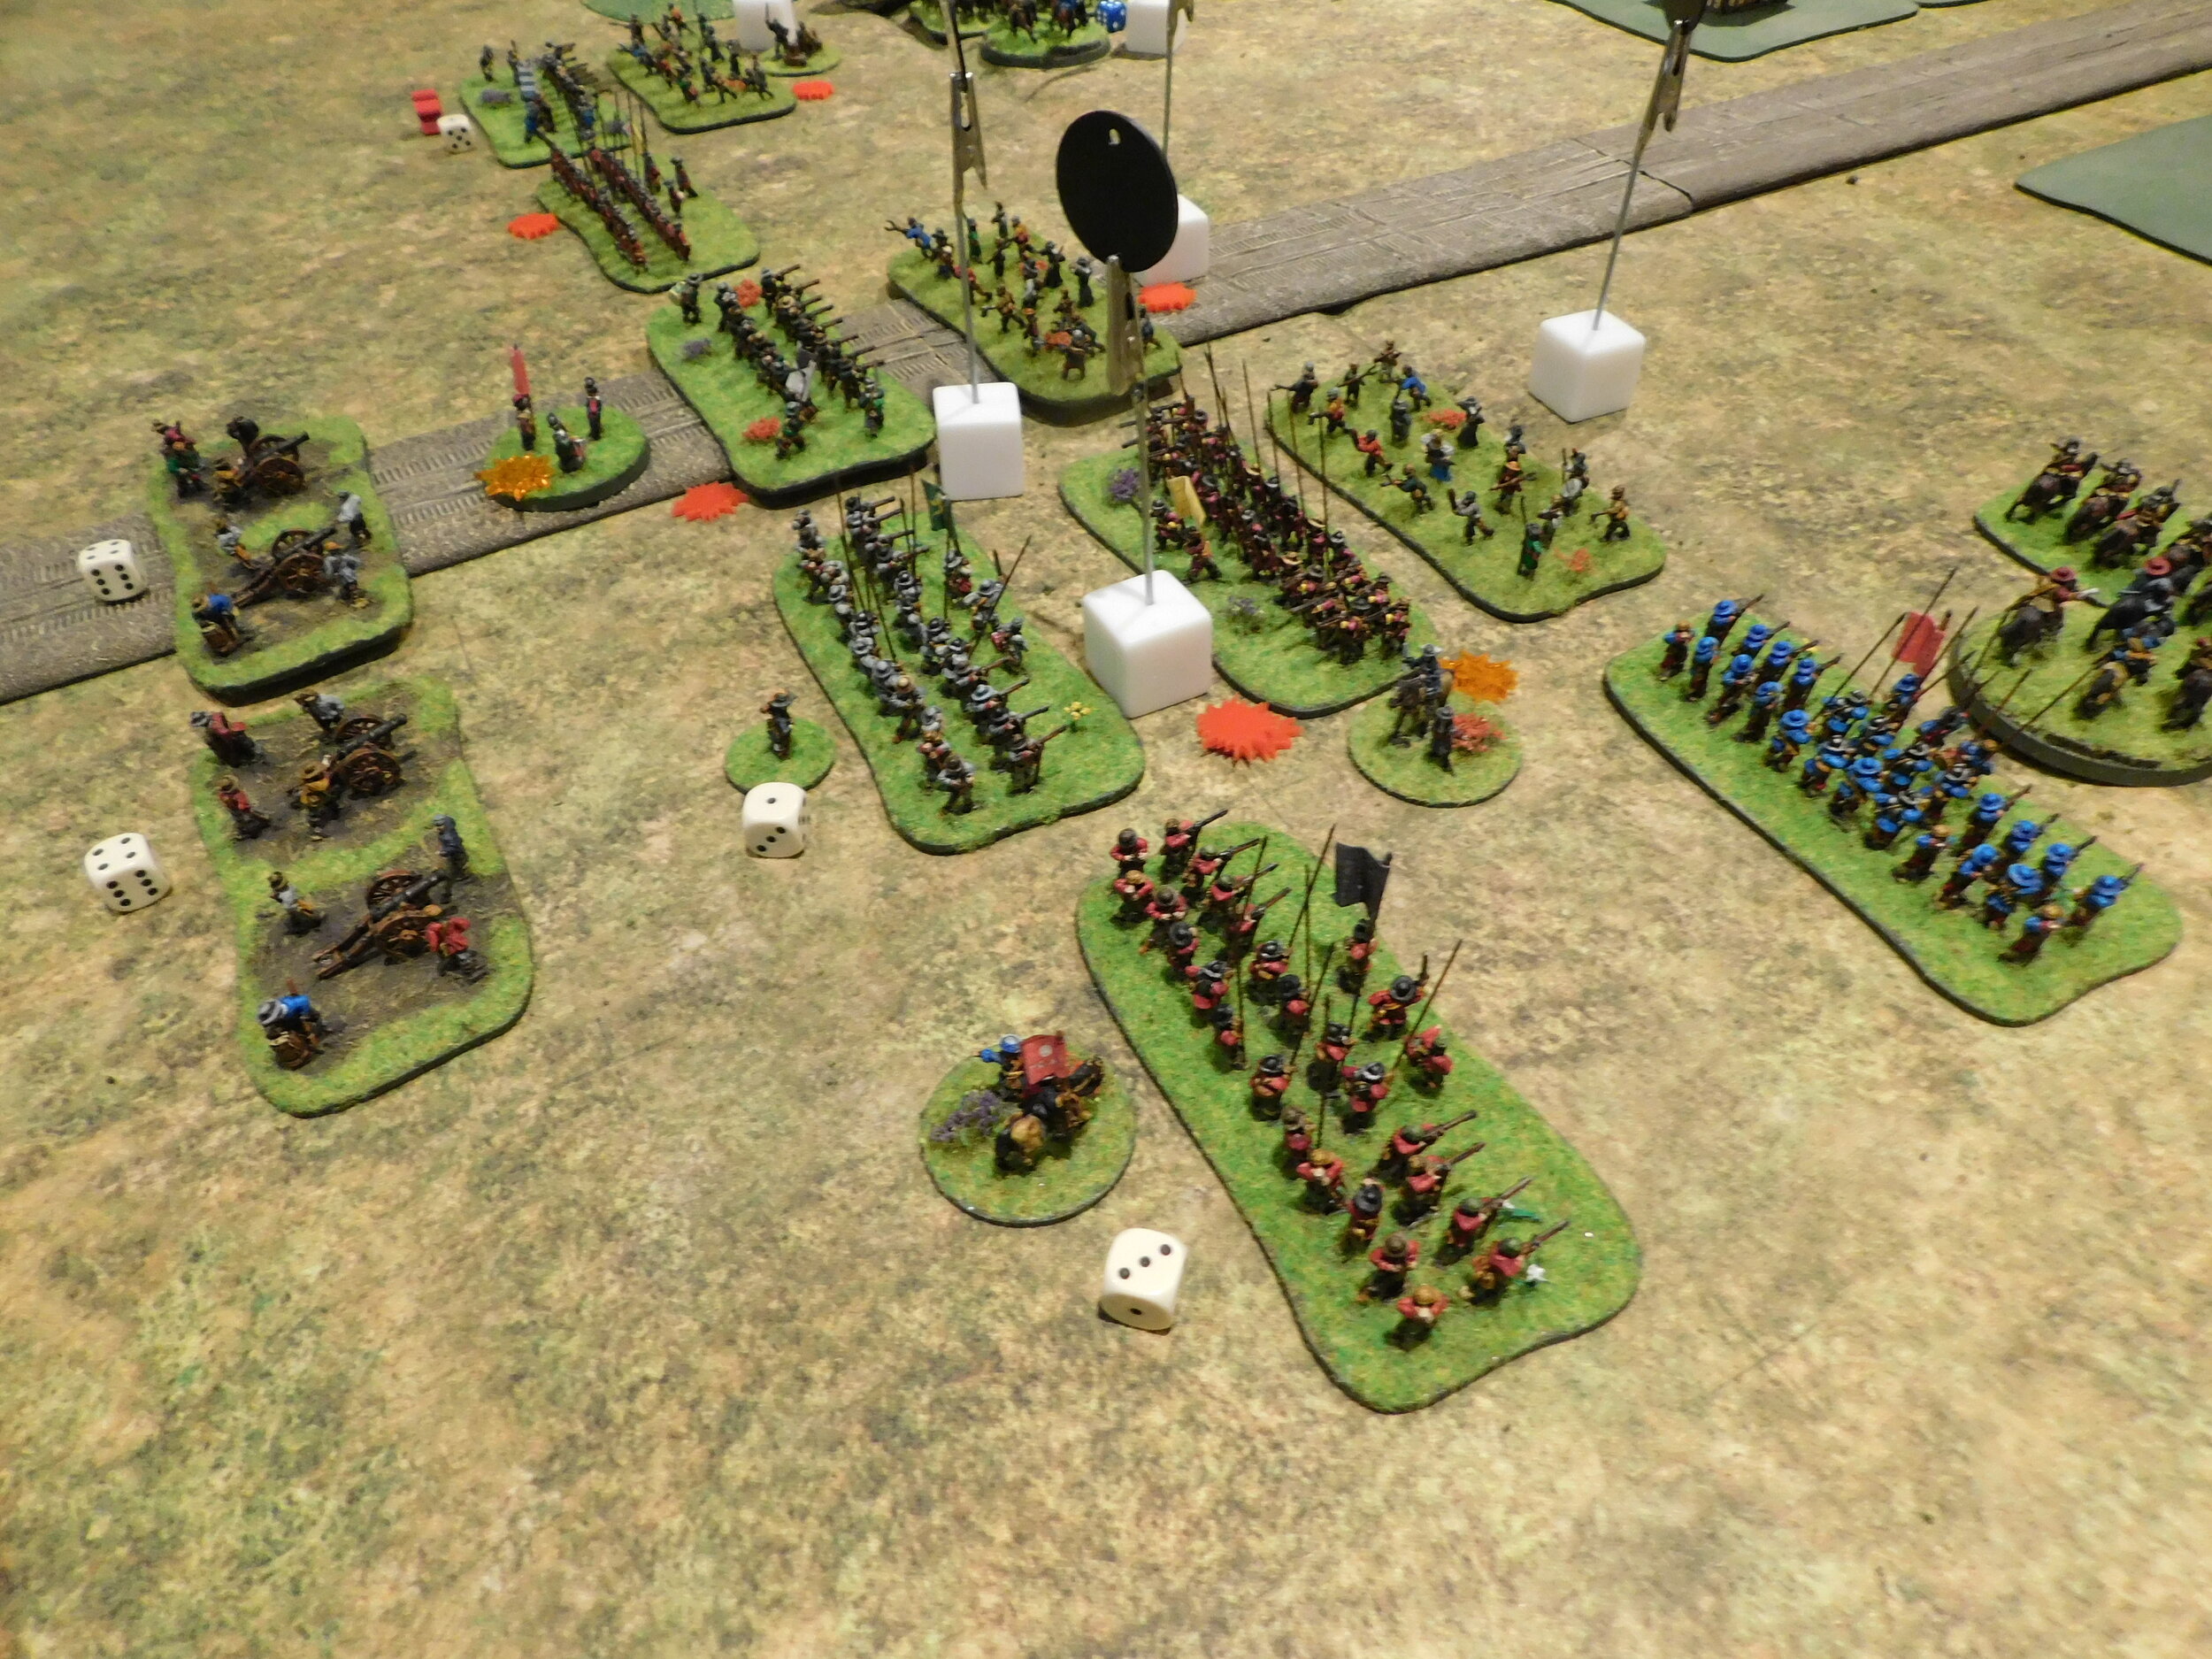
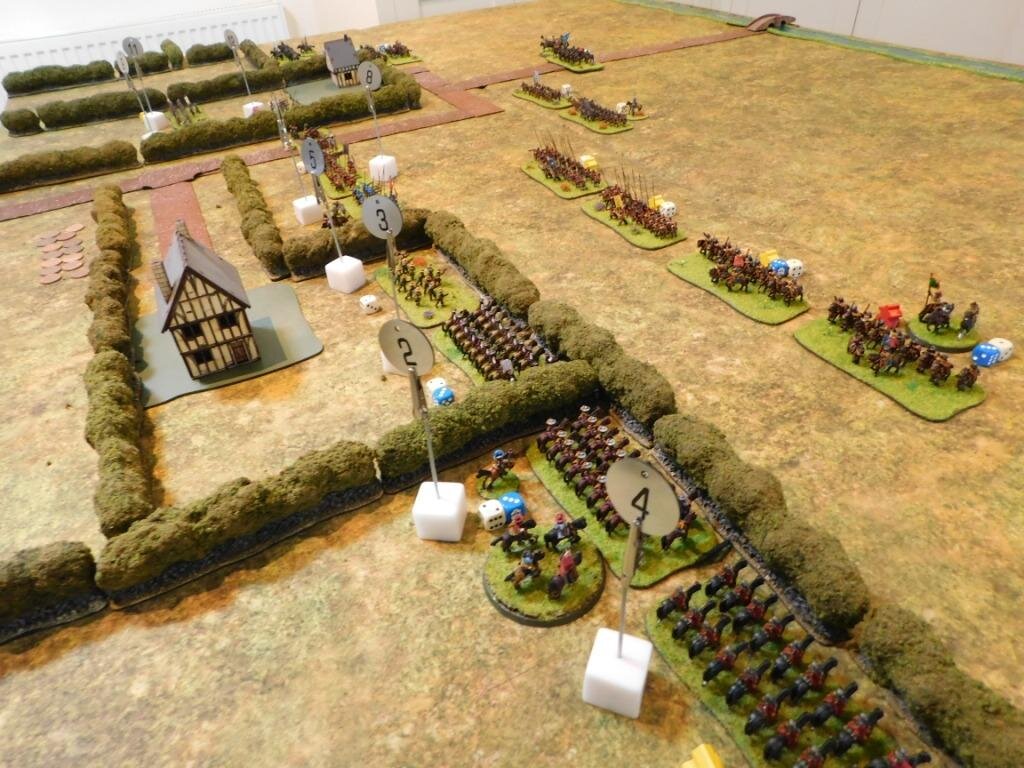
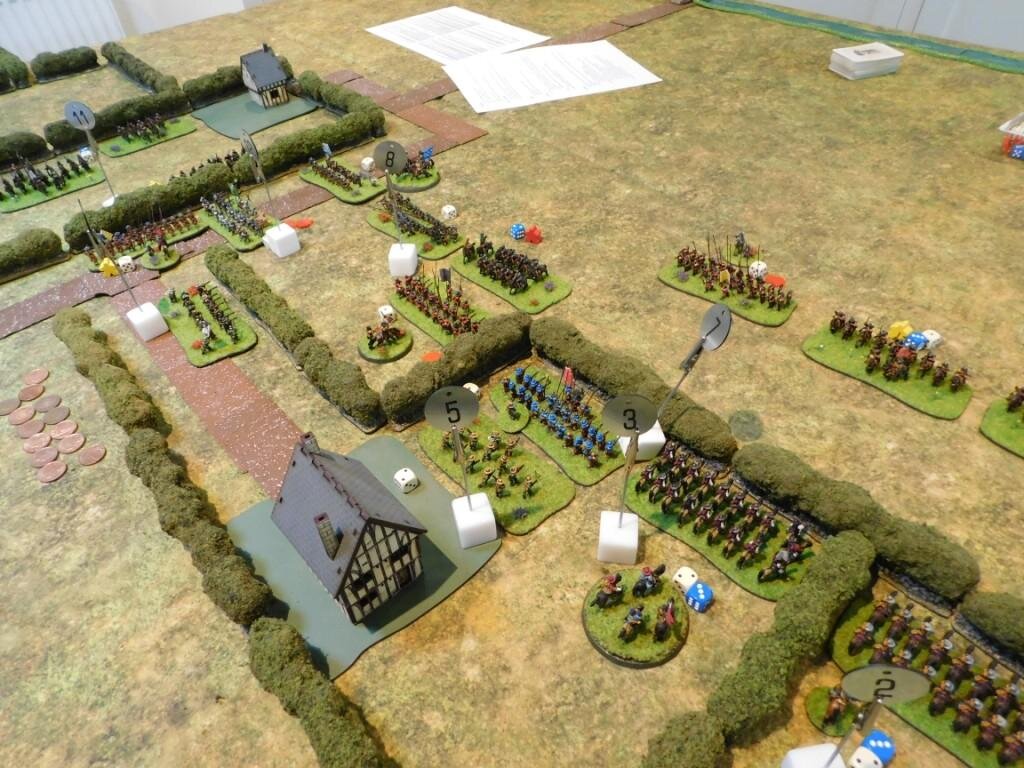
Last game I had pussy-footed around with my legionaries and allowed the Galatians to recover from their advance and hit me in a nice straight line. This time, as you can see from the pictures above, I had advanced forward smartly myself and was in a situation where my main line could get an overlap on the (my) right hand side of the four warbands that had advanced slightly in front of the others i.e. I could get the 2:1 advantage I needed on one of his warbands.

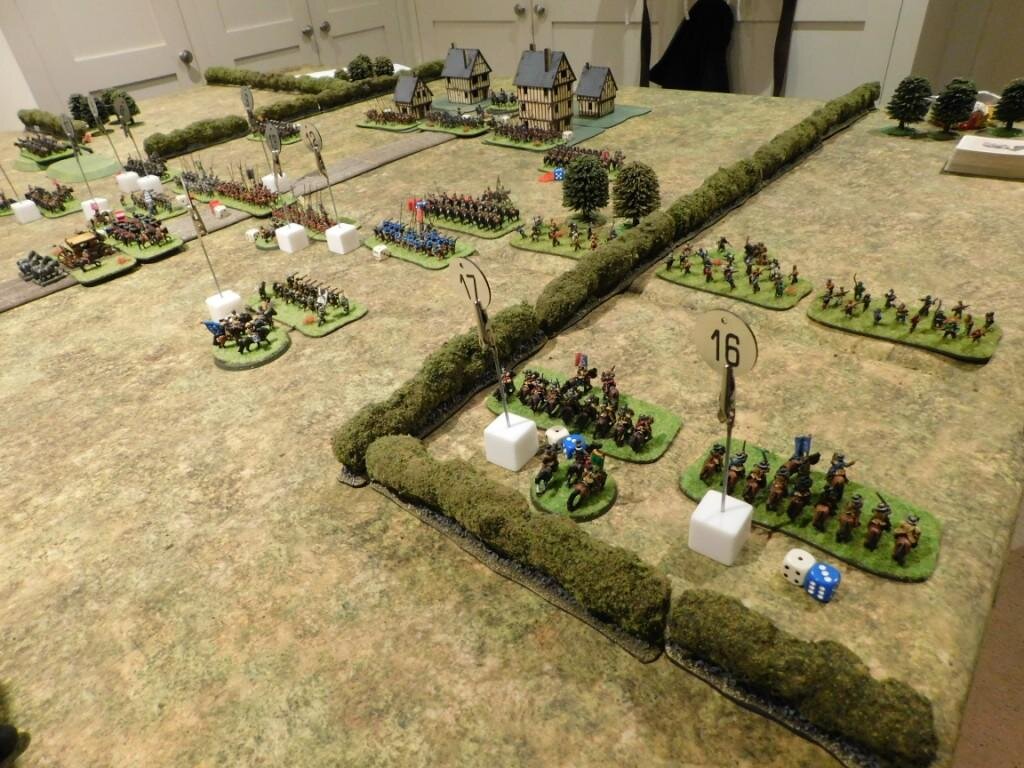
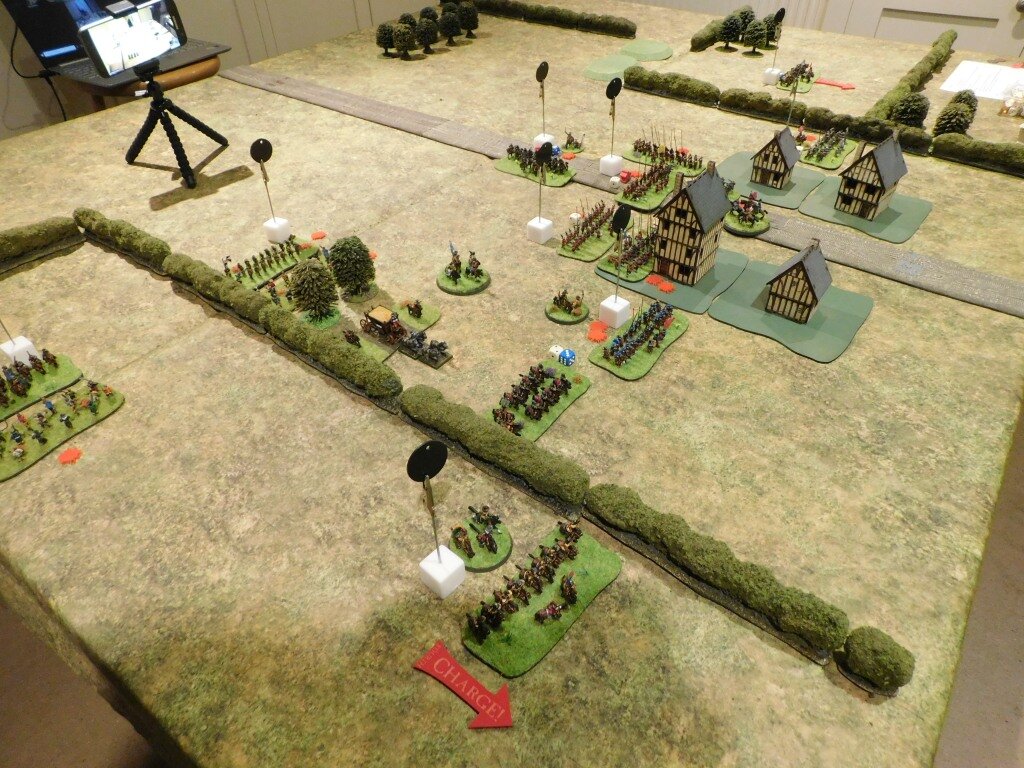
This duly happened, and even better than I expected. My lagging legionary unit came forward and conformed with the main line, giving me six units: L/L/L/L/L/C. One of his central warbands came forward giving him a line of five units: C/W/W/W/W. I was, I admit, a bit lucky in that his other central warband hung back!

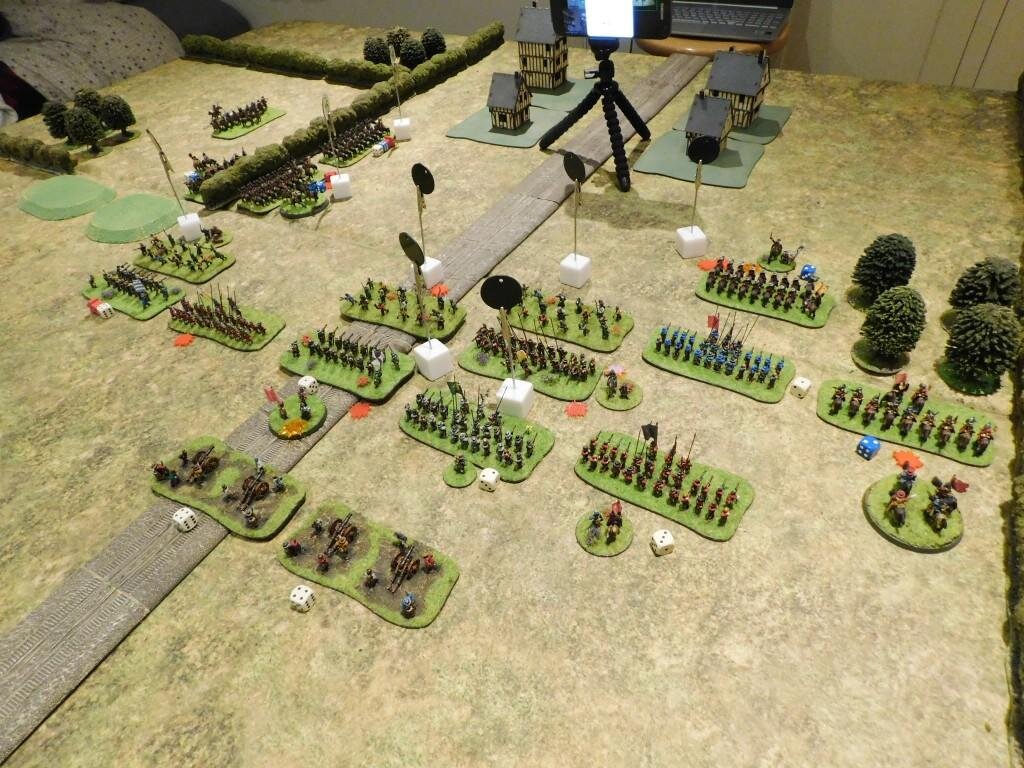
The five legionary units that matched up with a warband performed as expected, disordering but not breaking the Galatians in front of them, two being coming disordered in return, but the overlapping legionary cavalry then smashed the warband they overlapped from the field!

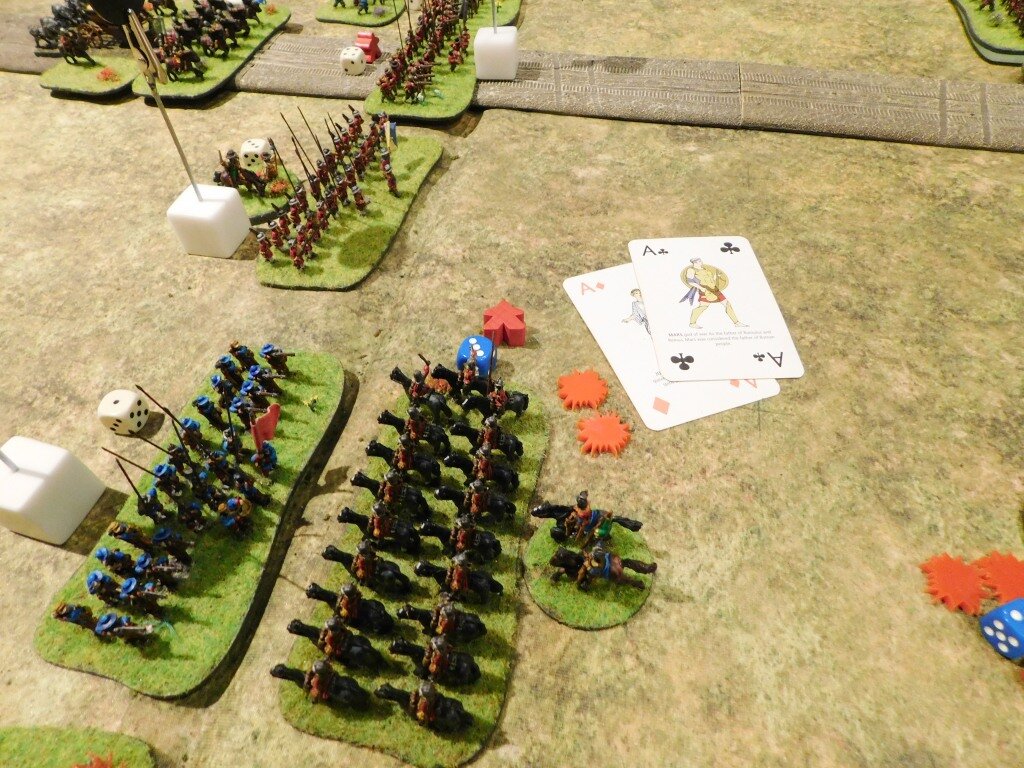
This punched a hole in the Galatian line which my cavalry then charged in to. Pausing only to eliminate a unit of light infantry with their javelins, they then charged forward and took the enemy camp. One turn and half the victory points I needed had been gained!

However, things weren’t going all my own way.

One of my legionary units was then broken by the Galatian warband in front of them; and another, as my cavalry couldn’t be in two places at once, had moved forward into open space. Now it was my three camps (a lot of VPs to lose) that was threatened. Fortunately, my light cavalry out on the right flank were keeping three warbands occupied, otherwise I was in danger of being swamped by numbers despite the fact that I had just broken another warband on the left.

Never fear: the legionary cavalry hadn’t finished their work yet!

Neatly reversing out of the Galatian camp, they headed back onto the battlefield and smashed into the back of another enemy warband. That shook the Galatian warriors badly enough so that a fast-manoeuvring legionary unit could also about face, hit them in the rear and send them fleeing from the field. Victory was mine!

It Worked!

Amazingly, my battle plan had worked!

I had managed to fight away from my camps, keep three of his warbands occupied with my light cavalry, and get a vital overlap at the initial point of impact. I had been lucky in that the Galatian advance had been a bit raggedy, but if I had hung back, as last time, then they would have had a chance to correct and hit me as one line.

Stars of the show were, undoubtedly, the Legionary Horse. Only the second time on the battlefield and a Companion-like performance. One warband destroyed, one light unit destroyed, the enemy camp taken, and then a rear charge to set up another warband for its almost immediate destruction. Laurel wreaths aplenty!

A great way to, hopefully, end my period of wargaming over Zoom. Not that it’s a bad way to game, but pushing lead face to face is always better!

Film: Podolskiye Kursanty

I was browsing Amazon last night, looking for something to watch, and came across the Russian film The Last Stand aka The Last Frontier aka Podolskiye Kursanty.

To quote the summary on IMDB, the film tells the story of the Podolsk cadets' heroic stand outside Moscow in October 1941. Cadets from the Podolsk infantry and artillery schools were sent to the Ilyinsky line of defense, fighting alongside units from the Soviet 43rd Army to hold back the German advance until reinforcements arrived. Hopelessly outnumbered, young men in their teens laid down their lives in a battle lasting almost two weeks to obstruct the far superior German forces advancing towards Moscow.

The film itself is a fairly standard WW2 fact-ion piece on a particular battle (the fiction part of the faction being a love triangle involving a rather attractive nurse - incredible eyes!) but what caught my eye, and the reason why I am recommending it here, was the look and feel of things.

First up, the kit is spectacular. When they first showed a German tank I thought “here we go, another faked up panzer something” but then I realised I was looking at a Panzer 35(t) i.e. not a German tank so much as a Czech tank in German service. There were a few of them, then some Panzer IIs, some SdKfz 251s (well, they might have been 250s) and, finally, some Panzer IVs and a cracking StuG.

Most of the heroes of the film man Soviet L-46 45mm anti-tank guns, towed by trucks and also equipped with anti-personnel rounds, and watching how they use them is fascinating. Add in the T-34s and, I think, T-60s, all the support vehicles (including some katyushas), the uniforms, small arms and the like and you have a feast of good-looking kit to look at.

God knows where they got it all from. Perhaps they just decided to re-manufacture it all. I mean, if you can make 1,800 hobbit feet for the LOTR, knocking up a few tanks and a company’s worth of uniforms shouldn’t take you long.

Watching the film (which cost me 99p to rent btw) was well worth it just for all that, but the sets are outstanding as well. The main set-piece is the defensive works on the ‘frontier’. This comprises a Soviet village split by a river…and looks just like it does on the tabletop!

I know that’s the wrong way round, but you spend a bit of time setting up for a game without really knowing how much your table actually looks like the terrain in question, so it’s nice to see that the tabletop isn’t too far from what a village might actually look like…although I do think that the set looked a bit clean and tidy.

Anyway, well worth a look, and I recommend watching it in VO with subtitles.

More Romans

As I haven’t got an all-consuming painting project on the go at the moment, I’m trying to knock off all those odd units that I bought but don’t actually need to field an army.

You know the one’s I mean: when you buy the raw lead for a new army, you go for completeness and get everything…EVERYTHING.

The first few units fly off the painting table on the wings of your enthusiasm, but you haven’t yet got enough figures painted to field the army.

The next, largest chunk of units appear on a regular basis but at a slower rate: you’re almost there. The last few units are a real struggle: you’ve had enough of painting (insert new army) and want to move on to something else, but you persevere and, finally, the new army is ready for action.

At the side of the painting table, however, are all those extra units you bought, for completeness if nothing else. The trouble is, you are now sick of the (insert new army), are more interested in playing with the newly painted contingent and, anyway, you don’t really need that extra unit of horse, those extra infantry, do you?

So these units languish in the lead mountain until, one day, bereft of something better to do, but in the mood to paint, you bite the bullet and try and remember how you painted the last lot…so that everything matches!

So it was with these Roman cavalry.

I field Caesarian Marian Romans. They have the option of a unit of Legionary Cavalry, but anyone worth their salt knows that the real work was done by the Gallic or ‘German’ horse. I already have a large Celtic army, so could always use some of them for Julius’ horse, even when they were fighting other Celts (you can never have too many Celtic types!).

At the time, as I’d just painted 144 Roman Legionaries, the thought of painting twelve more legionaries-on-horseback was beyond the pale, so these have sat patiently waiting for a coat of paint.

Nice figures from Baueda via Magister Militum. Easy to paint. Still didn’t enjoy it much though!

The Army Standard at the front is actually something I needed. They are figures from Capitan Games via the Stonewall Miniatures site. They are a bit big for 15mm, more like 18mm, but thus very suitable for an Army Standard.

TTS AAR: Marian Romans versus Galatians

Time for another game of To The Strongest over Zoom with regular opponent, Bevan.

Those of you who follow the site will know that our last game ended in a large victory for my Marian Romans over Bevan’s Gauls. This was obviously pretty galling to Mr B (did you see what I did there?) so in search of revenge he suggested that I might like to try the Romans against a Galatian army, and sent me his list.

There were so many galatian warbands that I had to draft in some ZULUS to proxy for two of them!

My immediate reaction was a comic-book double-take. Eight warbands of deep, fanatical, hero-accompanied warrior units plus two good cavalry units, one of which was veteran!

The tale of the tape says it all. Let’s look at the infantry first. My Romans have six veteran legionary units. They save on a 5+ (which is very good) and have two hits each; they hit on 6+ until they take one hit, whence they hit on 8+. The Galatians have eight units. They are fanatics, so save on only an 8+ (bad) but have three hits each and, more importantly, keep fighting at 6+ to hit until destroyed.

The Romans then have three units of cavalry, two light, versus two units of Galatian cavalry, neither light and one veteran.

On top of all the above, and probably the final nail in my coffin, I was using my newly painted legionary cavalry unit and my newly painted Roman army standard. This had the potential to be nasty, brutal and fast!

The Game

The sides lined up facing each other. My plan was to hold back my infantry and try and get some sort of advantage from my extra cavalry unit. I was hoping they could slip past his line and go for their camp, or at least get onto somebody’s flank. With that advantage in place, I could close to infantry combat hopefully surviving long enough to avoid a lap around from his extra foot units: my hyper-manoeuvrable legionaries being very good at rapid changes of direction.

The Galatians advanced as fast as they could whilst still maintaining a relatively unbroken line. I advanced my infantry a little bit forward, but concentrated on what I was doing with the cavalry. Try as I might, however, I couldn’t temp Bevan’s cavalry forward enough to give me the advantage I was after.

The calm before the storm

I refused my left flank slightly

The two infantry lines came together with an almighty crash!

Unusually, my pila were effective, and at the end of the first round of fighting two of his eight warbands were double disordered, with another four disordered, and no casualties taken on my side at all. I’d also wounded one of his commanders.

Meanwhile, just before the main action, my legionary cavalry, which had been charged by his veteran horse, were also doing well: disordering the opposition and allowing a unit of my light horse to get into a decent position for a flank charge.

This was great: another round like that and I’d have broken enough of his warbands (and perhaps his cavalry too) to win the game!

The Inevitable Reverse!

And then it all changed.

The next turn I had one of those passages of play that defy belief.

In the melee that followed the above, I didn’t score a single hit on any of his troops (not even those teetering on the edge of obliteration) but lost two generals including the CinC, one legionary unit and had another two disordered! So much for a 60% chance of saving a hit! Oh, and his cavalry retreated and re-ordered themselves.

Worse, I’d managed to get a unit of light cavalry onto the flank of one of his warbands that was already shaken to the point of being about to flee. If I could destroy them, and just one more hit would do it, then a rolling up could occur. The activation cards were kind: I had three chances to kill the unit, two attack cards per chance, 30% chance to hit with him having only a 30% chance to save if I did so.

Nothing. Just…nothing!

Now against some armies it would still be possible to make a comeback from the situation described above, but against a Galatian army with two warbands as yet uncommitted: not a chance. Bevan just steamrollered forward and that was that!

Here’s a shot of the end of the game. Just count the Galatian disorder markers! Nine of them…but eight of them had been inflicted in round one, and no warbands had been broken.

Aftermath

Well it had been a fun game, and revenge will doubtless be mine when the two sides meet again next week.

Here’s another few shots of the game:

Epic First Painting Challenge Update for May

An absolutely colossal update today, with several big catch-up entries from several of the Challenge’s Big Guns: Matt, Lloyd, Andy and John.

Absolutely worth spending a bit of time in the individual galleries, but here’s a taster to be going on with:

To Hell With Tanks!

4477894._UX3264_SS3264_.jpg

Last weekend I picked up one of Ken Tout’s books from a charity shop: only a couple of quid for what proved to be an excellent read.

To Hell with Tanks is the third in the series of Ken Tout’s memoirs, and covers the Northants Yeomanry as they take their Shermans and, later, Buffaloes then Shermans again, through Holland and into Germany in 1944-5.

Tout was a gunner, so the story is told from an OR point of view: there’s little about strategy and operations and lots about the harsh reality of serving in tanks in WW2.

There are really two books in one here. The first is the biography of the regiment as it makes its way though the war, and this part is written as if it were being read to a room full of people. It gallops along at a pace that renders it almost impossible to put down until the end of the chapter. It’s often almost stream of consciousness stuff: James Joyce eat your heart out! Take this passage describing one tank’s attempts to manoeuvre through a village under fire:

Bobby McColl switched to intercom. ‘Steady forward, driver. See if you can get through. Everybody, eyes peeled. Bloody smoke!’

Don Foxley muttered another prayer. Automatically. All mind, eyes, hands, feet concentrated on the road, the ruins, the burning tanks, the Sherman upset in the ditch, the lowering smoke clouds. Carefully he controlled sticks and pedals. Sherman steady on the road. Heavy on the road. Tracks reacting to brakes. Drive wheels responding to pedals. Until a sensation of crumbling, and slipping, and falling, neutralised the brakes, rendered pedals impotent. And Don clung to the brake handles for balance as that tank, too, toppled into the vast ditch.

It can be pretty grim too. The descriptions of death are a strange combination: visceral imagery combined with a matter-of-fact style delivered at the pace described above. Here’s a mild example: a tank commander is caught by mortar fire when outside his tank trying to fix a tow rope. He’s about to signal his driver by waving his arm:

His arm still raised Sergeant Huitson performed a classic gymnastic backward roll.

He did not get up. The pure snow around his body was spattered with even purer red blood and then sullied by the fall of smoking splinters, carbonized shards, and charred rags of clothing.

No-one reading these passages can be in any doubt that war is a terrible thing.

The second part of the book takes the form of a separate but substantial piece at the end of each chapter written in the first person. Each one takes the role of a different member of a tank crew, or ARV man, or accompanying PBI. It describes their “job” in a diary-like form and gives real insight into the role and what it entails. There are real nuggets of information here that make the rest of the text come, if possible, even more alive. Take this excerpt from the wireless operator:

But they didn’t tell you what it would be like in action, in a Sherman turret. There is only one escape hatch, where the commander perches behind the gunner’s seat. Between them and me…more importantly between the hatch and me is this almighty gun, blocking the way out. Even in normal times it takes a deal of squeezing and squirming to get under the gun and into my seat - a fairly roomy seat once you get here.

That’s in normal times. In the instant of time, the flash of reality, when a tank blazes into multiple explosions - engine, petrol tank, donkey engine, ammunition all going off like ten volcanoes and a thousand firework displays - there are obstructions beyond the normal. Under the gun hangs a huge bag which catches the empty cases as the big gun fires. There is a heap of battle rubbish and thrown-off personal clothes or boots. Any maybe a fourteen stone corpse mixed up among it. And I will have to crawl and tunnel through that lot - while the tank goes BIG BANG and bang again, BEFORE I can even begin to leap towards the light.

Just reading it again makes me feel claustrophobic !

Re-reading all the above, don’t let me give you the impression that the book is all about the action. In both parts of the book, there’s also plenty of descriptions of non-battle activity, mostly to do with being either on the move or in laager. This is equally descriptive. Take this passage about the daily task of “netting”:

‘Come on, you lazy scamps. You dozy operators. Netting in ten minutes. Open netting today on my call sign. Rouse ye! Rouse ye!’

The inevitable chorus of ‘Ferk off! Up yours!’ was an idle protest. Operators rolled out of their blankets and climbed into turrets. At the appointed time Ken Squires would send out a signal on the appropriate frequencies, and operators would tune in precisely to the two frequencies which their set enabled them to lock on to. In battle it was theoretically possible to switch from one frequency to the other on the pronouncement of a codeword. This was in case Jerry was listening. In fact this danger was so disregarded that the squadron had never used the switching drill in actual battle, just as they had never used the Morse so assiduously practised at training regiments.

In all the book is an invaluable guide to what being a Sherman tanker was really like. It keeps mentioning, for example, the high profile of the Sherman; the fear of the dreaded ‘88’; the danger of being in the recon Stuart or Dingo; the stifling heat and choking stench within a closed up tank; the constant knocks and bruises from being rattled around inside a big metal box with sharp bits everywhere; the risk a commander took if he went into action with his head sticking out of the turret; the lack of visibility of the road, the enemy, of anything except a small patch of light through the periscope and much, much more.

Interestingly, it does deal with the “Ronsen” effect, although in the context of the Germans describing the Shermans as “Tommy-cookers”. That doesn’t seem to be Tout’s opinion: his view seems to be that in any tank sometimes a hit does result in an immediate column of fire out of the turret, and sometimes it doesn’t.

Highly recommended, and I will be keeping my eyes out for the other two in the series.

Druids...and did anyone order a Chinese?

I’ve been playing quite a lot of To The Strongest over Zoom lately, using my new-ish Marian Romans against the Celts. One thing my opponent likes fielding that I had never done are the Druids available as an army standard equivalent.

We’ve been using memory or a marker of some kind to represent said religious types, but I think it’s always better to get the proper figures onto the table so have been looking out from some suitable minis.

Something else led me to the Stonewall Figures website and their range of Ancients figures by Capitan. These include Gauls, and a quick browse revealed some rather nice Druids which I purchased immediately. Only a couple of days later these popped through the letterbox and were immediately accelerated to the front of the painting queue:

The rather fanciful obelisk is home made: some modelling clay stolen from Daughter #2 and roughly shaped into a monolithic shape. I then added some very rough horizontal-type ogham-style writing with a sharp edge. The obelisk was painted in GW Contrast Basilicum Grey with some green mossy details added. It still didn’t look quite right, so I very crudely filled the ogham writing with some acrylic dark gold paint, wiping off any excess.

I quite like the result, although it is a very large obelisk…which means that at least I shouldn’t forget to apply the re-play attack card bonus on the tabletop!

Anyway, the figures are lovely and highly recommended. The whole Capitan range is worth a look: they are quite large 15mm figures, but very nicely sculpted.

A Chinese Anyone?

Whilst waiting for the clay to set, my eye happened to fall onto a pack of MDF buildings sent to me as samples by Frank, the chap who runs MiniWarfare out of China. These were forming a small hillock on the edge of the lead mountain, so I thought I’d excavate and build them.

Regular readers will know that MiniWarfare produce some spectacularly good far eastern buildings for Burma/Malaya/Vietnam etc:

The burlap in the windows and door is mine.

The samples that Frank sent me were of Chinese buildings: two identical houses and a restaurant.

It’s the photography that’s crooked, not the models!

As with the Vietnamese huts, these kits are hyper-easy to build - much easier than 4Ground or Sarissa - and are therefore highly recommended for that reason alone.

Unlike normal, I decided to paint them using GW Contrast paints. The roofs on the houses are actually much darker than they appear in the pic above (obelisk coloured to be exact!) and please forgive the slightly brash colouring on the restaurant!

And now for the bad news: the MiniWar website is currently under construction, so you can’t buy anything at the moment. I do hope Frank hasn’t gone out of business due to COVID, so please join me in checking back every now and then.

I really must get my far eastern huts back on the tabletop soon: time for some Liongate or Bloody Burma!

Final Painting Challenge Update for April

Yes, I know it’s a day late! Blame IT issues: sometimes my PC gets so clogged up using the office’s 365 that it forgets the more important things in life such as how to do the Painting Challenge!

A huge amount of entries this week, including some very fine work indeed. Do please visit the individual galleries, but here’s a selection to whet your whistle!

Some inspirational work there, and a special welcome to new entrant John: 196 points on the board already.

FK&P AAR: Rogue Nation

Last weekend I had the chance to re-play the final scenario in my Marlowe to Maidenhythe scenario pack for FK&P: Rogue Nation.

It’s a stand-up fight between a late ECW period Parliamentarian army and a combination of militia and clubmen set, once again, around the village of Gappe.

As is customary these days (but not for much longer!) we played via Zoom: with my opponent being able to see the whole table via an overhead webcam, and more specific areas of the battlefield via an on-table mobile phone.

Here’s the report:

So a glorious victory for my Parliamentarians for a change. My opponent’s post-game e-mail began “what was I thinking?” as I think he realised that coming forward as his men did had been a mistake.

What was also pleasing was that my run of extremely (really extremely) bad cards seemed to have come to an end. In fact, another reason that my opponent gave for his defeat was that he was careless of his tactics as he was expecting my cards to be as bad as usual! Well, this game I actually had some quite good luck for a change, especially in the opening stages of the main infantry clash.

My victory was, however, not enough to reverse the course of the campaign in general. The M2M pack gives you a totaliser to keep track of how you do in each battle…and I think it fair to say that after twelve games played I was firmly on the losing side.

Great fun, and I must start writing the new pack soon!

Postscript

As I was playing the Rogue Nations scenario, the chap of FB who’s playing through the campaign was playing the Pinkney’s Court game:

Nice to see that someone else also has problems with the Royalist horse at this stage of the war!

Filling the Gaps

Whilst it’s nice to have a project to work on, it’s also nice to paint a whole load of itty-bitty things just to fill the gaps in a collection, or to take advantage of a new release…and that’s what this post covers.

First up, we have yet another Russian Orthodox church. Yes, after my last post, someone (kindly!) pointed out that I didn’t have the Hovels version in my collection. One quick order later, a couple of weeks wait and, low and behold, here’s my tenth Russian Orthodox church, and very nice it is too.

So now I’m fairly confidently stating that I have every single 15mm Russian Orthodox church available but, on the off-chance you know of any others, do feel free to let me know.

Oh, the others I have can be found here.

Next up is another command stand for my ECW armies. These chaps are from Matchlock Miniatures, available via the Caliver Books-run Minifigs website. I was ordering some of their 15mm ECW personalities for my Rabble bases (preaching puritan, ratcatcher, lady with long gun etc) when I suddenly remembered that I was short a Colonel command stand. These are two of their Generals, and very nice figures they are too, and perfectly compatible with my existing Peter Pig, Hallmark and Khurasan troops.

Although it’s quite hard to see in the picture, the chap behind (with the hat) is actually holding a dog! Anyway, highly recommended as a source of character figures if nothing else.

Finally in today’s random selection of bits and bobs from the painting table are more Ursids from Khurasan. For those of you unfamiliar with the range, these are giant 15mm sci-fi bears, seven feet tall, wearing sunglasses, smoking cigars and armed with bear-portable fusion guns or BPFGs!

The original release was four different infantry types, but now Jon has added a Big Man equivalent and an “Ur-Cannon” weapons team to the range. Loving these bears, and added to Stan Johansen’s Blareds (smaller bears) they make a great fun sci-fi force. My painting doesn’t really do these justice!

So all in all a bit of fun from the painting table. Next up are some more Romans and some Druid types to work their opponents up into a frenzy!

FK&P AAR: The King's Secrets

Lots of pike-and-shot content on here at the moment. No apologies for that: I’m playing all my games via Zoom at the moment, and grid based games are a lot easier to manage than freeform games such as IABSM or Q13. Normal service will be resumed as soon as possible!

Anyhoo, on to today’s post: an after action report from my latest game of For King & Parliament : another scenario from the Marlowe to Maidenhythe pack, this time scenario 11: The King’s Secrets.

The basic premise is that the Royalists (played remotely by my opponent) have to get a stagecoach carrying secret documents off the opposite end of the table. Blocking their way are a Parliamentarian militia supported by local villagers…

Even after the disastrous cards on my left, I came close to winning the game in the centre: but the Parliamentarians remained resolute and I couldn’t get the disorder I needed.

Although at the end of the game I had curled around his main line and was about to roll it up, other Royalist units had punched a hole for the stagecoach and bodyguard Cuirassiers to get through.

Another great game, despite the result!

Another M2M Report

A couple of days ago I mentioned that I’d seen the Marlowe to Maidenhythe campaign from my new scenario pack for For King & Parliament being played out by someone on the Facebook 6mm Miniatures & Wargaming group. They’d just played the first scenario in the campaign: the Attack on Marlowe.

Fortunately they seem to have enjoyed that game (!) as they’ve now posted game two: Widbrooke Common.

You have to be a member to see posts on the group, but here’s a link for those of you who are, or who would like to be: link.

In the meantime, for those of you who either belong to far too many FB groups already (guilty as charged, your honour) or who don’t like FB at all, here’s a pic from the start of the game.

And now for the plug!

You can buy the scenario pack from the BigRedBat shop by clicking here or on the pic below.


More Classical Indians

Having painted enough Classical Indians to field a 130 point Monarchist army, it was time to start looking at what figures I needed to add in order to be able to field other armies from the Indian sub-continent.

First up was obviously to check that I could field the Republican variant of the classic Classical Indians. Hmmm…in order to do that, I needed to paint up another unit of horse.

These have sat, undercoated only, on my painting table for some time but, once I’d actually picked up a brush and got started, were actually quite fun to paint. It’s always that first brushstroke that’s the hardest!

These are more of the Museum Miniatures CAD-designed “Z Range”, and very lovely they are too. I particularly like the cataphract command figure in the middle: full of life and animation. Okay, so the guys with the swords don’t look too comfortable, but this is a Raw unit after all, and the spear-holding figures are nice.

Now on to see what I need to make my Classical Indians into Vedic or Tamil Indians, and then onto the Graeco-Indians after that!

TFL Painting Challenge: Huge April Update

It’s been a couple of weeks since the last Painting Challenge update, so loads of entries to add to the galleries.

There’s loads of lovely work on show, so do make sure you visit each person’s individual showcase, but here’s a selection for you to enjoy:

First Marlowe to Maidenhythe AAR!

One of the nice things about writing scenario packs (in addition to having a little bit of extra cash to buy more figures) is seeing that people are actually playing games based on your work.

Marlowe to Maidenhythe, my English Civil War scenario pack for For King & Parliament was only published about two weeks ago, so it’s really pleasing to be able to report that I’ve seen the first AAR based on the first encounter of the campaign.

It’s posted on FB, in the 6mm Miniatures & Wargames Group which, as it is Private, you might not be able to immediately see from this link…but it is there, let me assure you!

I hope the author doesn’t mind, but here’s a quick pic of the initial stage of the battle:

If anyone’s interested, you can buy your own copy of Marlowe to Maidenhythe by clicking here or on the picture below.


FK&P AAR: McCleod's Odyssey

With my Rabble bases now painted, it was time to have go at scenario #10 from the Marlowe to Maidenhythe scenario pack: McCleod’s Odyssey.

In summary, the Scots who have featured as mercenaries in previous scenarios in the campaign are making their way home, but run into a force of Militia backed up by locals who want a word, shall we say, about the Scots’ behaviour as they went south.

It’s a standard encounter battle, with both sides directed to get stuck in as soon as possible.

The Scots, to the right, approach the village of the Gappe, held by the Militia and local folk

Deployment

The Scots placed their Highlanders on the left, opposite the rough and more enclosed terrain, their artillery and pike only units in the centre, and their standard battalia on the right. In reserve were their horse: a unit of poorly mounted pistoliers and a unit of poorly mounted lancers.

The Militia occupied the Gappe: infantry battalia in the centre, Swedish horse on the left and Dutch horse on the right. The three units of Rabble were on the far right, facing the Highlanders.

The Battle Begins

My plan was for my Highlanders to deal with the Rabble then sweep in to the Gappe from the flank. Bevan, my opponent, however, was up to all my tricks, and moved his Dutch horse to the right of the village, threatening the Highlanders’ flanks.

At the same time, the enemy Swedish horse moved out to their left. Not wanting my day ruined by the sudden arrival of cavalry on my right flank, I moved the Scots horse to counter: you can see them top left in the picture below.

Finally, my main infantry units moved forward…but my pike-armed battalia decided that they had walked far enough and just about refused to move.

Everything then seemed to happen at once.

On the left, two of my Highlander units were charged, as predicted, by the enemy Dutch horse, with both surviving the charge but becoming disordered in the process. I struck back and, incredibly, one unit of Dutch horse was double-disordered and had their Colonel wounded.


This was a great opportunity for a game-winning opening clash but, try as I might, I just couldn’t find a way to break the enemy horse and would now have to suffer the fate of all loose infantry attacked by large numbers of close formation horse!

Meanwhile, on the other flank, my horse and the enemy Swedish horse now faced each across one of the fields outside the village.

A victory for the Scottish horse, despite their manky mounts, but now they would Pursue their fleeing enemies from the field unless they stopped and rallied.

As these actions were happening on the flanks, my centre moved forward, me seeking an advantage by overlapping his left wing.

Mid Game

After the initial clash, I had won the right flank but was about to lose my left flank: the Highlanders were outnumbered 5:3 and could do nothing except take the charges from the Dutch horse.

One unit of Highlanders crumbled and fled, leaving a gap through which one unit of Dutch horse could pour. The enemy horse pursued for a bit, then rallied and headed into the big open space behind my centre. All that was in front of them was my guns, and although I managed to disorder the horse and wound the General with them with some startlingly accurate artillery fire, I was soon overrun.

Meanwhile, another of my Highlander units had gone, leaving the third in a dire situation.

Meanwhile, the two centres were fighting it out but, despite having superior numbers, a bit of bad luck meant I was losing.

If my cavalry didn’t return soon, I was going to be out of victory medals!

End Game

The left side of my centre was now beginning to crumble as well as his successful right wing started to curl in on me.

We were both down to a handful of victory medals, with enough units at double-disorder to settle the matter one way or the other if they broke.

My pistolier horse quite their pursuit and crashed into the left side of the enemy battalia in the right hand building. That pike unit broke, and the advantage was momentarily mine, but then my pike-only unit in the centre of the field (bottom left in the pic above) went, and we were evens again.

It was down to whoever lost the next unit and, finally, my last unit of Highlanders could take no more: they had been fighting front and flank for three turns now, somehow hanging on…and that was the last of my coins gone!

The day was lost: but it had been an epic battle that, once again, had come down to a could-go-either-way climax.

Afterword

My big mistake was to let my Highlanders get into combat with Dutch horse: I should have retreated to cover if I could. That would have meant I went into the more successful clashes on the right and centre without having haemorrhaged victory coins on the left.

A great game, however, whatever the result.

First of the Napoleonics

it’s all your faulT, mate!

it’s all your faulT, mate!

Regular visitors will know that I’ve been looking for a new project to work on. My choice was the bottomless pit of Napoleonics: not a period I’ve ever collected figures for before.

After a bit of research, I decided to get some early-period French: the uniforms are less ornate than later on and one might as well start at the beginning! The next choice was what figures to use. The rest of my collection is all 15mm, so it had to be 15mm, but I had heard good things about AB’s range of 18mm models: 18mm/15mm: surely not that much difference, so I decided on them!

Next choice was size of units and basing.

I found the rather excellent Napoleonistyka website which gave me the sizes of the various units, so I decided to start by building a battalion of early war French infantry i.e. nine companies: one grenadier company of 80-90 men, seven fusilier companies of 120 men, and one company that was either another fusilier company (pre-1805) or a voltigeur/light company. About 1,000 men in all.

I then looked at basing. This was an absolute ‘mare, as I didn’t have a particular set of rules in mind. I investigated as much as I was able, and eventually settled on a 32-man battalion of 1 x grenadier base (4 figs), 1 x voltigeur base (4 figs), then two double company fusilier bases (each 8 figs, one with the 4 command figures in it) and two single company fusilier bases (each 4 figs).

That gave me a nice approximately square unit eight figures wide and four figures deep which seemed to be able to be used for most major rules systems. It could form an attack column eight wide, four deep; a march column four wide, eight deep; a square with each side being four figures facing, two figures turned away; or a line sixteen men wide and 2 deep.

That made each figure equal 30 men, and the only annoying thing was that the battalion was therefore technically eight companies strong, not nine…but my solution if the rules demand nine 4-figure companies is to have enough battalions to always be able to split one into spare companies if necessary!

I could have gone with six 6-figure bases, but couldn’t see how that would improve things in terms of portraying the companies correctly: logic would say that if you wanted to use 6-figure bases, you should drop the figure ratio to 20 men per figure and have nine 6-figure bases per battalion, which seems like an awful lot of figures!

The figures for my battalion arrived from Eureka UK quite quickly. Interestingly, you choose and buy the figures individually: time consuming but quite fun. They did look a bit big, but I decided to crack on and paint them anyway. GW Contrast paints for the most part, with colour choices via research into what other people had used.

So how did they turn out?

Well they are very nice figures and have painted up well despite my rudimentary skills. The faces, in particular, look good, and the Contrast white is ideal for their main uniforms. The blue is stronger than it looks in the picture, and the only weak point is perhaps the black for the hats…but re-watching Sharpe last night most of the hats were faded anyway.

One thing: I’m not very good at painting the rosettes on their hats!

DSCN2522.jpg

There is only one teensy-tiny problem.

Their size.

It seems that 18mm is very different to 15mm! Which I should have known!

Here’s a comparison with my ECW figures from Hallmark/Peter Pig:

I’m now trying to work out if this is a problem for me. As I mentioned above, all the rest of my collection is 15mm…so can I count these as big 15’s, or have I started a new scale?

I just can’t decide. I haven’t really got any 18th/19th Century European terrain, but most of my trees and other 15mm buildings are big enough to work…

I need to decide quickly, however, as I have another two battalions on order. What do you think? Let me know via the comments, below.

FK&P AAR: Return to Widbrooke Common

This being the second game in my latest run-through of Marlowe to Maidenhythe, my just-published scenario pack for For King & Parliament.

I had lost the first game quite badly (down ten victory medals) so was keen that this one went my way. The scenario is an encounter battle, with the Parliamentarians (played by Peter, boo, hiss!) facing the Royalists (played by me, huzzah!) across Widbrooke and Battlemead Commons: the open land between Cookham and Maidenhythe down near the river.

Roundheads to the left, skulking in the hedgerows!

The Royalists face a couple of problems. Number one, the enemy has hedges to hide behind meaning that if they didn’t attack I would have to assault troops in cover with an even number of points; and number two, my main infantry brigade is all untried, meaning the danger of disorder in any first clash is high.

On the other hand, my opponent, Peter, was absolutely paranoid about the large numbers of “Swedish” horse that I was fielding. He was convinced that they would make mincemeat of his “Dutch” horse (a fair assumption, but one that had been firmly shown not to be a surety in our first game last week*) to the point that I am fairly certain that he had lain awake at night moaning “the Swedes, the Swedes: what do I do about the Swedes”!

This worry would actually be the major factor that decided the outcome of the game.

*Dutch horse fight deep and slow, Swedish horse fight fast and thin. They tend to lap around the flanks of Dutch horse and thus get a substantial advantage in an initial melee.

The Battle Begins

I opened the proceedings by sweeping forward on either wing with, you guessed it, my Swedish horse. My infantry I advanced cautiously in the centre.

Peter replied by opening fire with his artillery, which actually did me a favour, as the units targeted had to check for disorder due to their untried status: which both failed, but so early on in the game that I had the chance to re-order them before any enemy was encountered. My men had now had their first taste of battle and survived unscathed: they would act normally from now on.

As my Swedish horse on my left approached his Dutch horse, they retreated behind the hedgerows to their rear. This suited me just fine as Dutch horse, despite their deficiencies, are worth more points that Swedish horse (they are strong against almost everything else) so I was happy to have his cavalry bottled up in a corner ‘guarded’ by units worth half the cost.

The Roundhead Dutch horse bottled up in one corner by their own fear of my Swedish horse

Meanwhile on my Right

Meanwhile on my right, my other brigade of Swedish horse was attempting to turn the Parliamentarian flank.

This looked difficult to do at first, as there were a couple of infantry battalia there who turned to face me, but my infantry were coming forward as well, meaning that the Roundhead foot would potentially have to fight in two directions at once.

Scene from behind the Parliamentarian lines. Units 9, 11 and 12 are about to retreat to their right, leaving my horse free to curl in from the flank

The Roundheads attempted to consolidate their position by pulling back and to the right as much as possible, but this manoeuvre, whilst sensible in some ways, let me bring my cavalry around in a proper outflanking movement.

Once my cavalry were around his flank, with my infantry coming forward, the Parliamentarians were in some difficulties. I used a battalia of infantry to clear his guns (by this time out of ammunition) and then sent them in through the gap opened up to attack the right hand side (from my point of view) of his line.

A bit of bad luck saw me lose the battalia, so I was forced to commit my reserve (my commanding general’s Cuirassier bodyguard) into the attack, but by this time my cavalry were in position for their flank attack.

The Royalist cavalry are round the flank!

With commanded shot to their front and Swedish horse to their flank, the grey-suited Roundhead battalia quickly crumbled, exposing the flank of the untried infantry battalia next to them.

This followed suit, and the rest of his line quickly followed them off the table: pinned from the front and rolled up from the right.

The Roundhead cavalry were, eventually, thrown forward but, by this time, it was too late to have any real effect: the day was mine.

Aftermath

A solid victory that netted me 10 victory medals (I had lost a couple of units early on) and evened up the campaign to date.

Next we will fight for Pinkneys Court, but here are some more pictures of today’s encounter:

TTS AAR: Roman Revenge!

Regular readers will know that I’ve recently suffered a series of defeats at the hands of the Marian Romans. One of my regular opponents, Peter, has crushed my Classical Indians twice and then the Sasanid Persians twice; my other regular opponent, Bevan, had beaten the Summerians twice. This despite the fact that I’m regularly told that the Marian Romans aren’t that good (too much heavy infantry, not enough cavalry) and certainly not a tournament army.

Well you could have fooled me!

It was obviously time for me to have a go with Caesar’s boys and see whether I had managed to learn anything from the somewhat painful lessons described above: for our next encounter, I would use the Marian Romans and Bevan would play the Gauls.

This was the second clash between the two, with Bevan winning the last game (I have been going through a bad patch lately!) fairly decisively.

At this point I must confess that rather than put together a list myself I used Peter’s Marian Roman army list: 130 points of veteran infantry with three camps, a standard, and three units of cavalry.

I set up as you can see, above, with my camps in one corner and my Roman infantry in a fairly tight block. That was lesson one: keep your legionaries where they can mutually support each other.

There did seem to be an awful lot of Gauls facing me: six warbands liberally sprinkled with heroes, and four good cavalry units.

As I suspected, the Gauls attempted to lap their cavalry around my main battle line. My cavalry were tasked with holding the right flank, with a unit of legionaries turned that way as a back up, whilst the rest of the army beat the Gauls in the centre. The Gallic cavalry on my left flank would have to be dealt with by the infantry.

The two sides advanced towards each other fairly smartly, with Bevan suffering some unlucky cards with his left flank cavalry meaning that they were delayed getting into the fight. This was excellent news, as I didn’t think my outnumbered and outclassed cavalry would be able to hold the opposition for long once battle was actually joined.

the legionaries form square!

My Shaky Right Flank

On my left flank, two units of Gauls had started lapping round, but my infantry snapped to face them and dealt with the flanking units fairly easily. His cavalry was still late to the party on my right, giving me the chance to disorder one of his warbands without breaking formation.

The Gallic cavalry and warband at the front of the picture are about to be mullered by my legionaries

The main battle lines were now joined, but the superior quality of my troops meant that in the centre I had now killed one warband, and disordered two more. One legionary unit had, however, been lost and, over on the right, another was being hit front and rear at the same time. I desperately needed to get my successful units on the left over into the centre.

rushing back to the centre! thank jupiter the romans manoeuvre well. note the legionary unit fighting front and back top right!

If there’s one thing the Romans do very well, it’s march: and before anything had had a chance to happen on my right flank, I had four legionary units pushing back warbands on the left and centre.

the left and centre legionary units are grinding down the opposition

Meanwhile the legionary unit on the right wing that had been attacked front and back had actually managed to repel both units: driving the warband back and destroying the cavalry: these Romans can fight as well as march!

Unbelievably, my cavalry were still holding their own: the lights kept evading and returning, and my one decent unit was still around despite being attacked in the front and flank at the same time.

the roman mincing machine in action

With the four main Gallic warbands now disordered and my legionaries almost unscathed, it was now just a matter of time. The cards fell evenly, but with me hitting on a 6+ and saving on a 5+, and the disordered Gauls hitting on an 8+ and saving on a 7+, the advantage was all mine. One warband after another broke and fled the table until all the Gallic victory coins were gone.

Aftermath

My losses amounted to one legionary unit and one light cavalry unit so a pretty colossal victory for the Romans

The tactics I’d employed, learnt the hard way, had worked, and Peter’s army list with it’s six veteran legionary units had proved its worth.

Now I need to prove that this wasn’t a fluke!

TFL Painting Challenge: First April Update

A large numbers of entries from a small number of people today: definitely a monthly catch-up for some people.

Do go to the individual galleries, but here’s a selection of today’s submissions: