More Marlowe to Maidenhythe AARs

As mentioned in previous posts, one of the things I like about publishing scenario packs (in addition to the extra money to buy more figures) is reading people’s AAR of the games therein.

I’ve featured a round of reports from the first scenario of the Marlowe to Maidenhythe pack, The Attack of Marlowe, and am pleased to say that the people playing through the campaign seemed to have enjoyed the first game well enough to play through the second: Widbrooke Common.

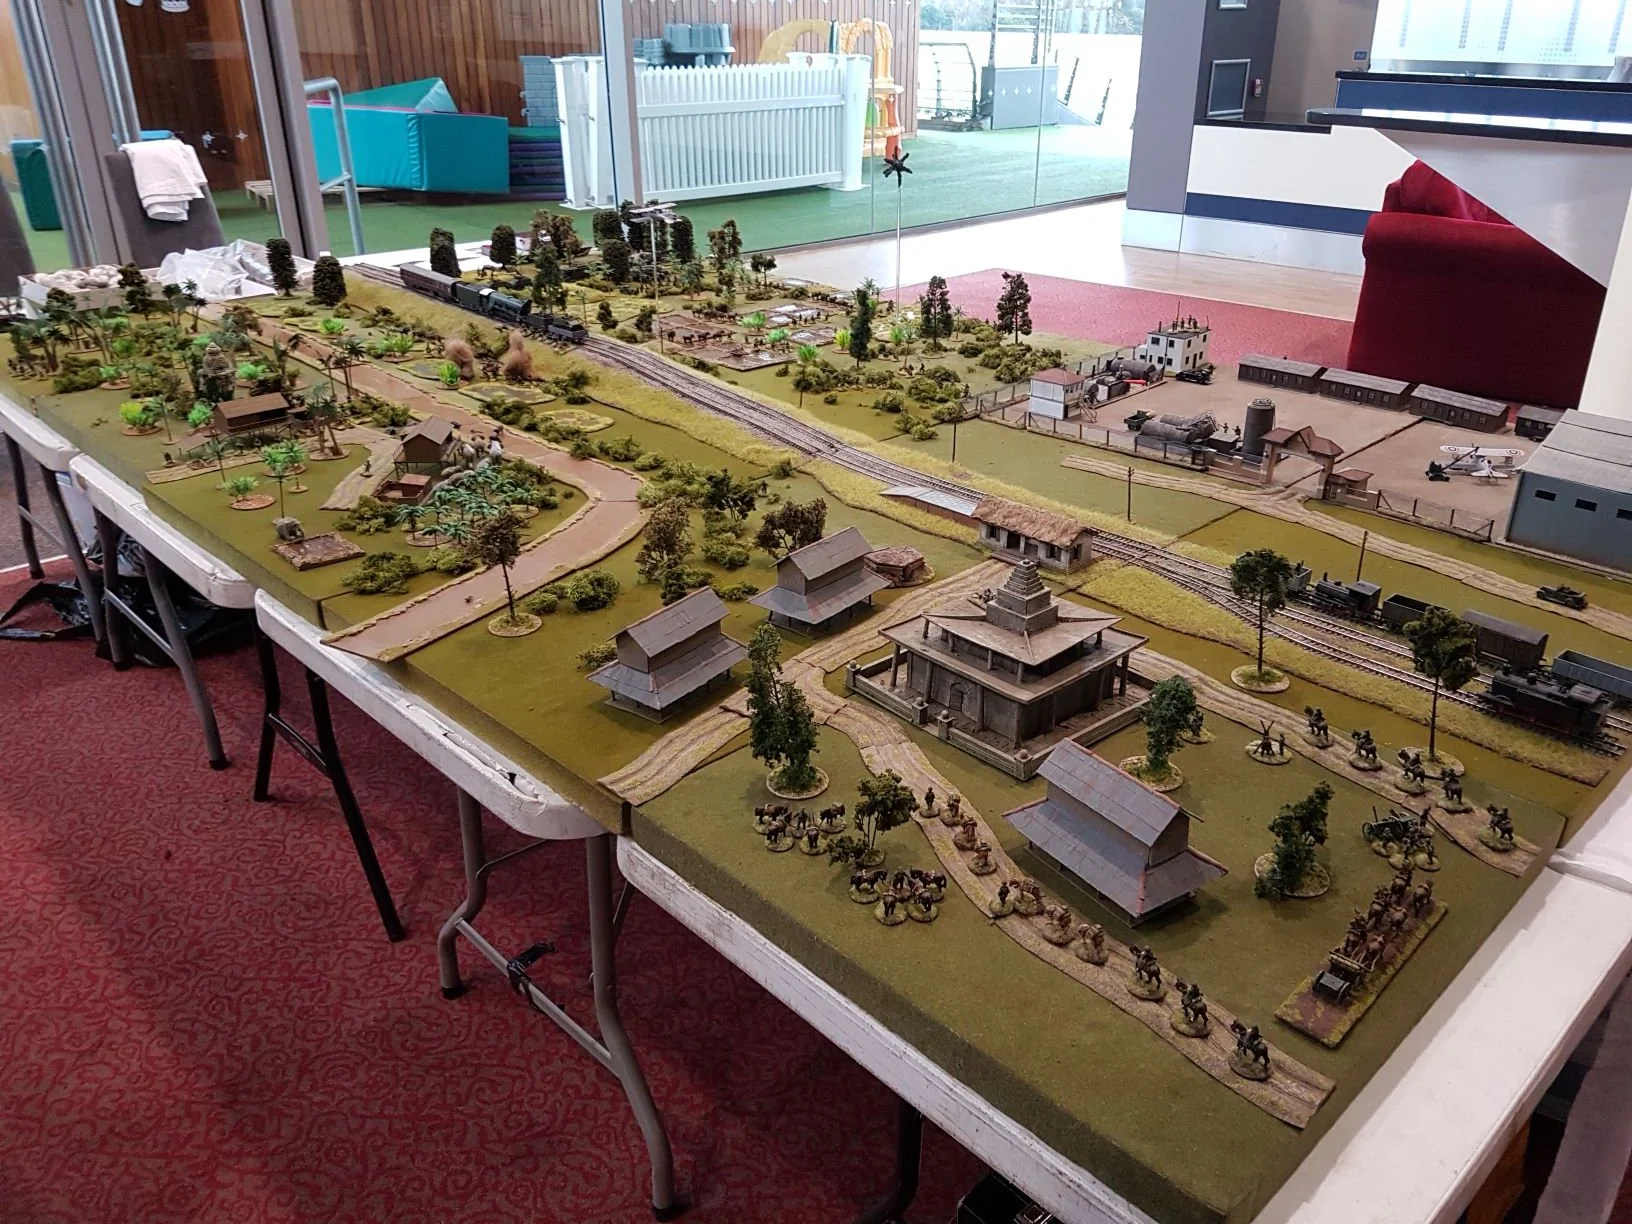
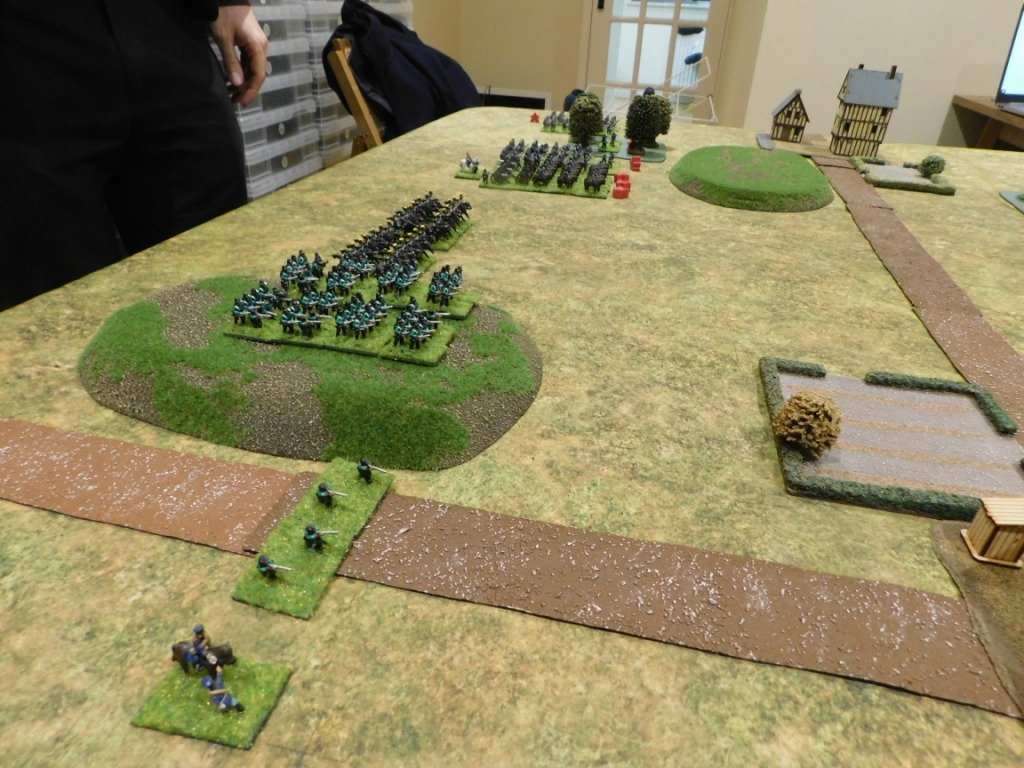
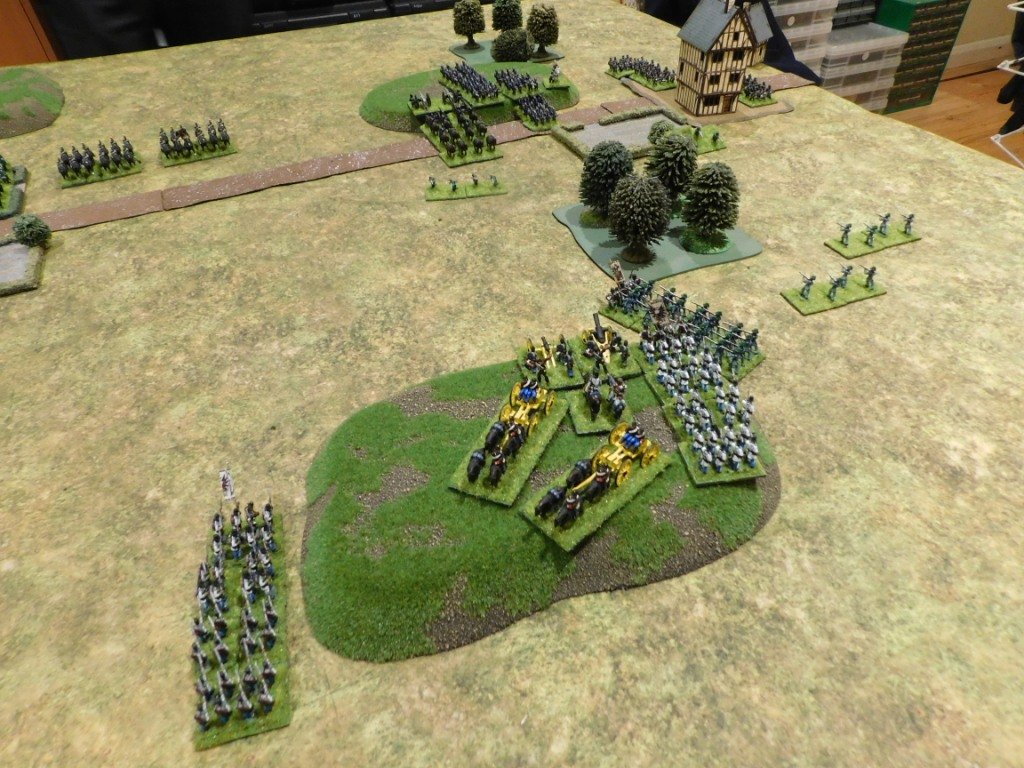
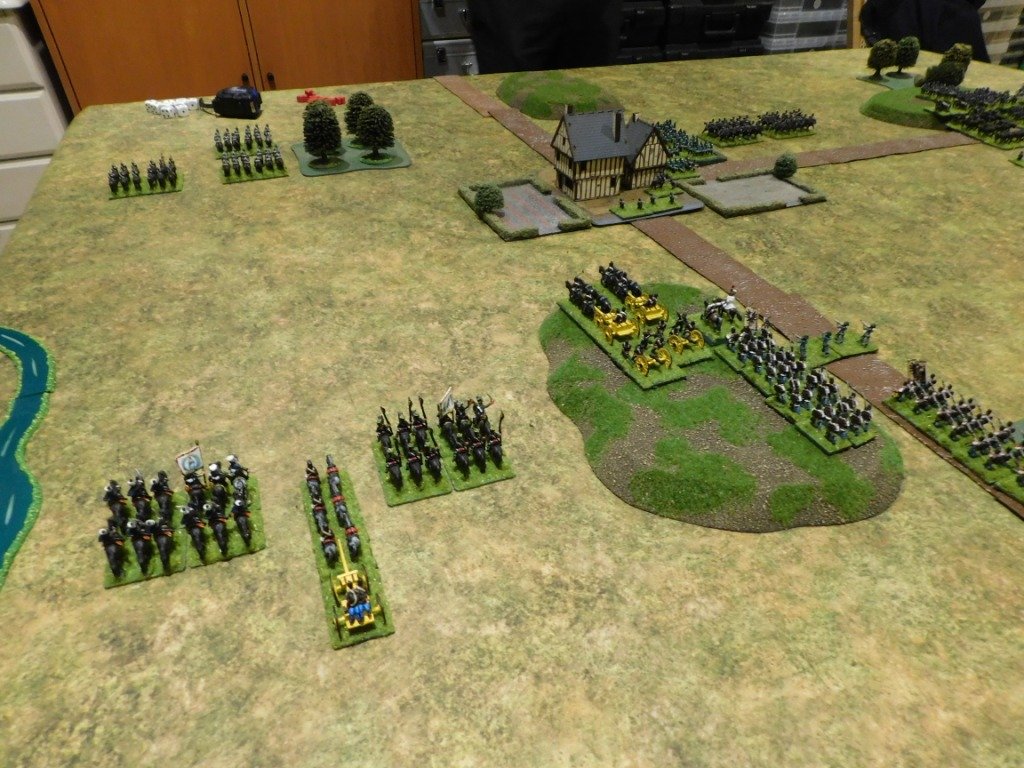
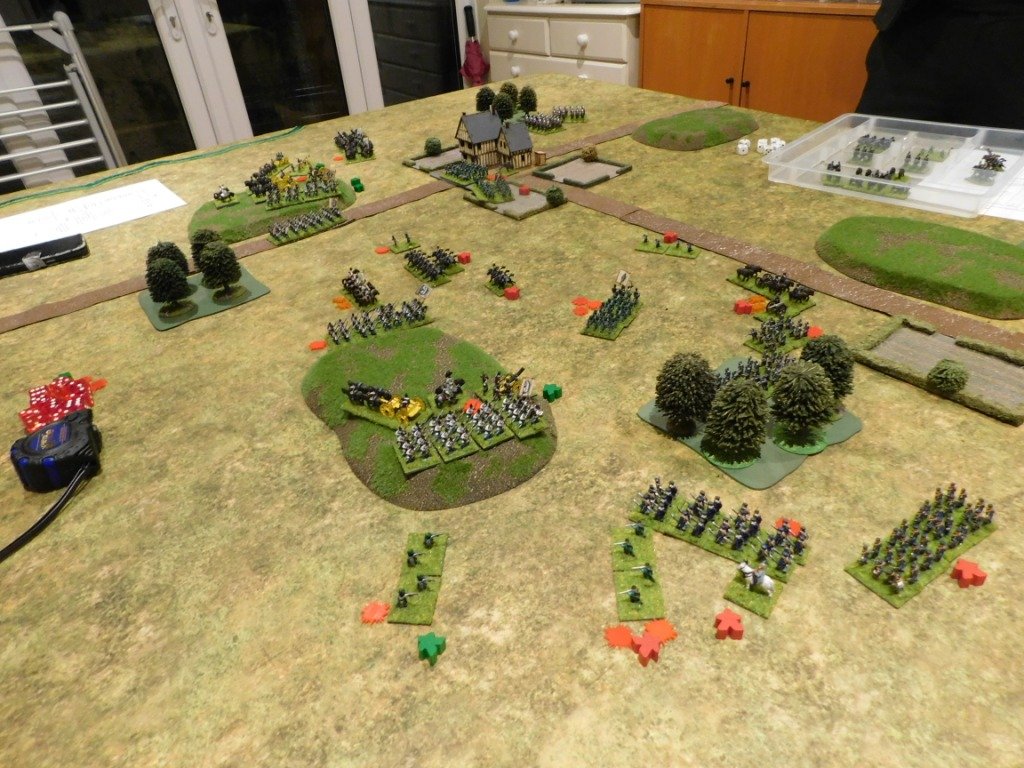
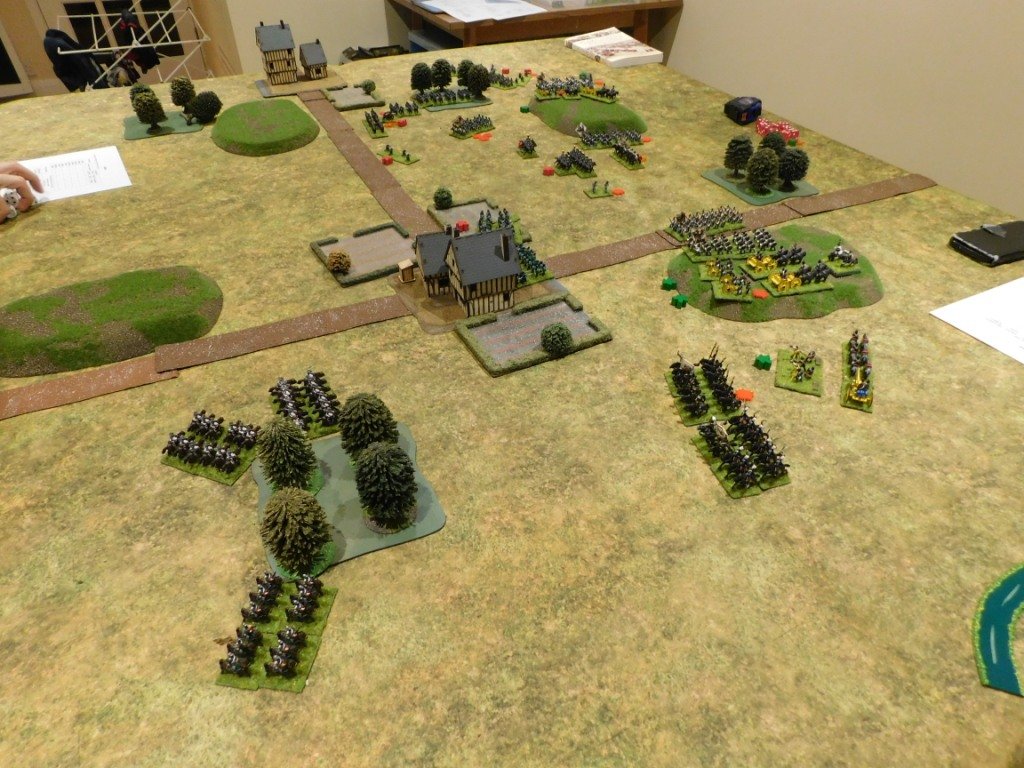
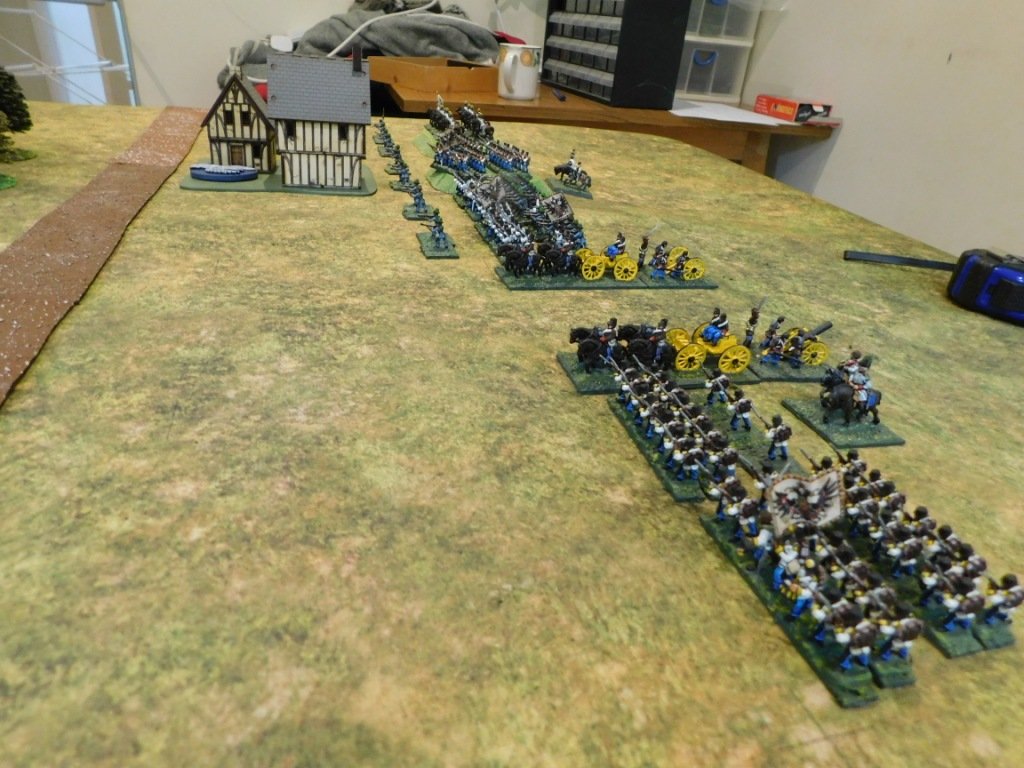
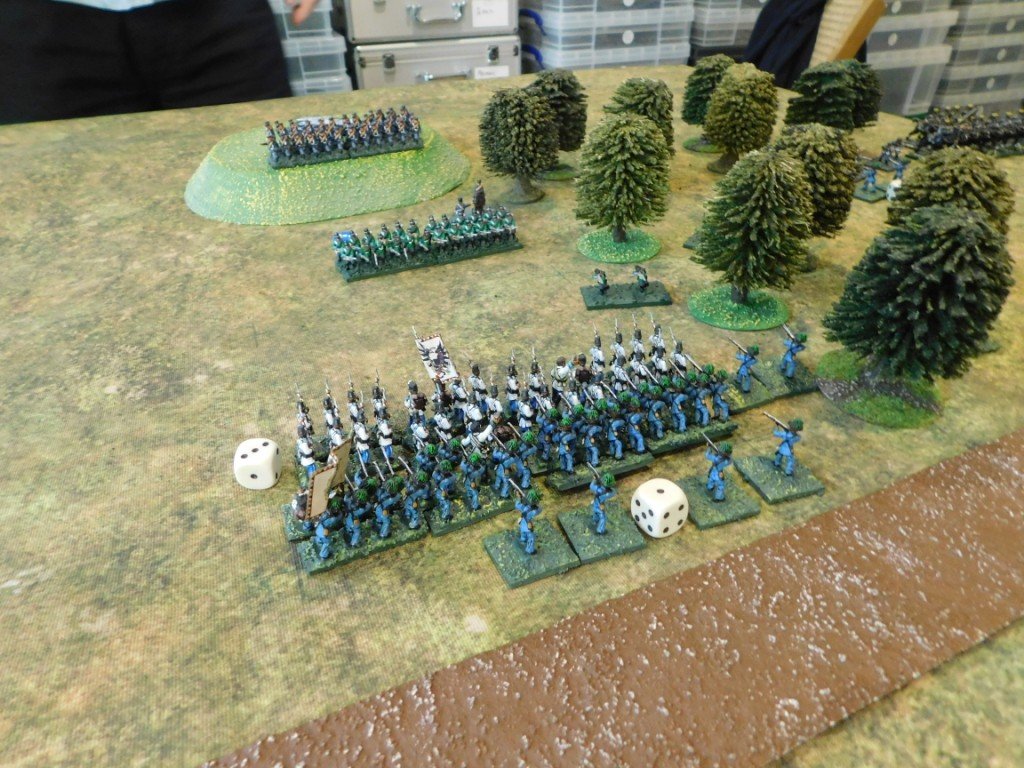
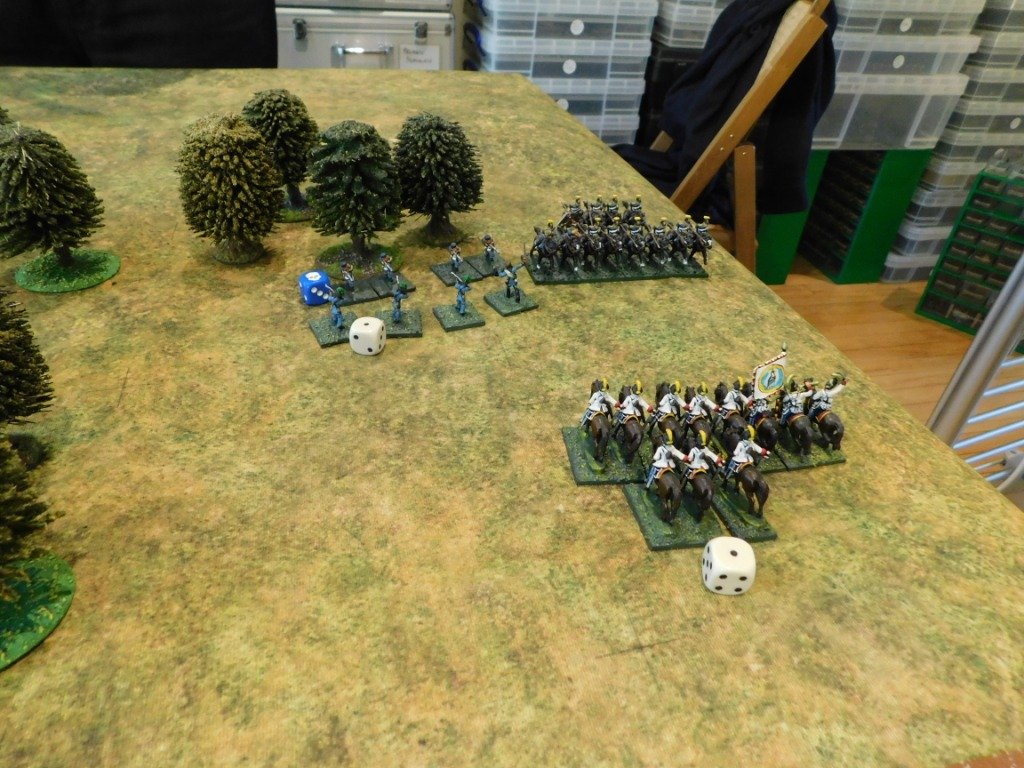
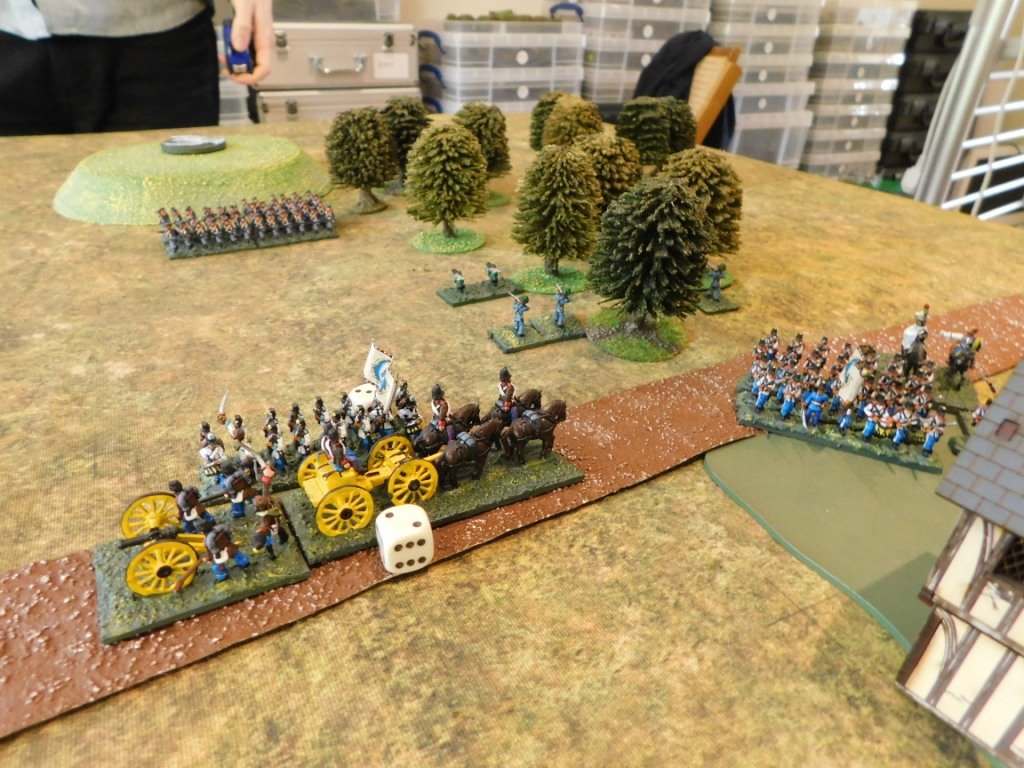
Here a link to the Blunders on the Danube blog where disaster is narrowly avoided during the game when one of the tables used collapses! Despite the unexpected earthquake (this is Berkshire after all!) this is a great looking game with some lovely figures deployed. Here a pic:

The Start of the Game

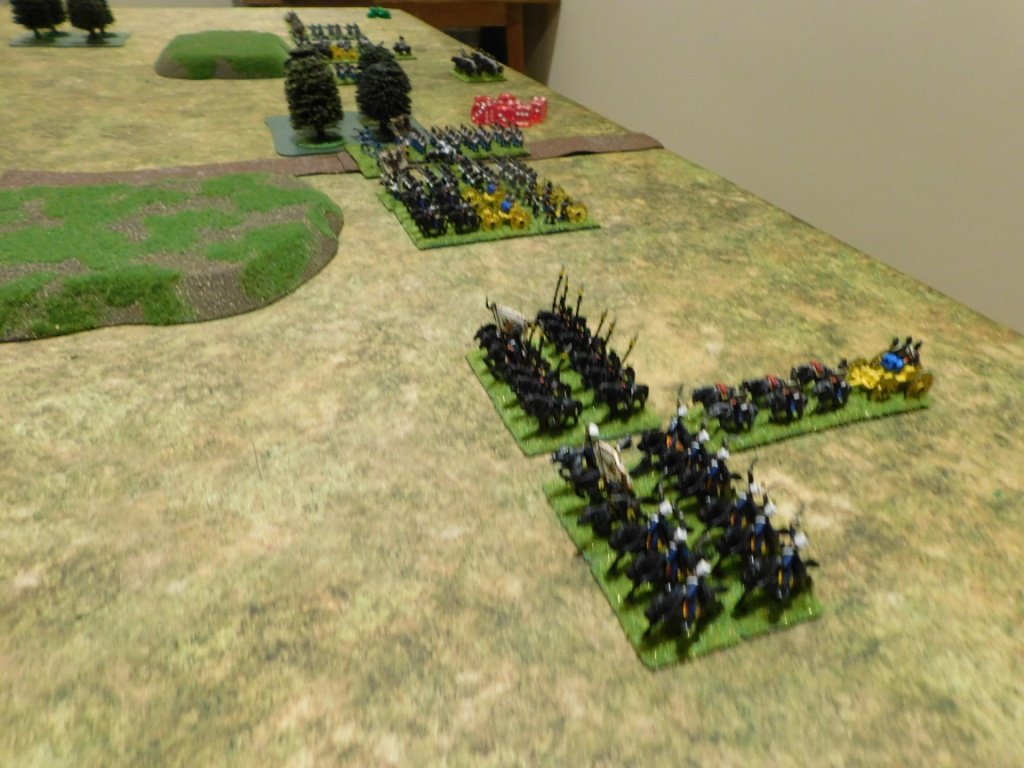
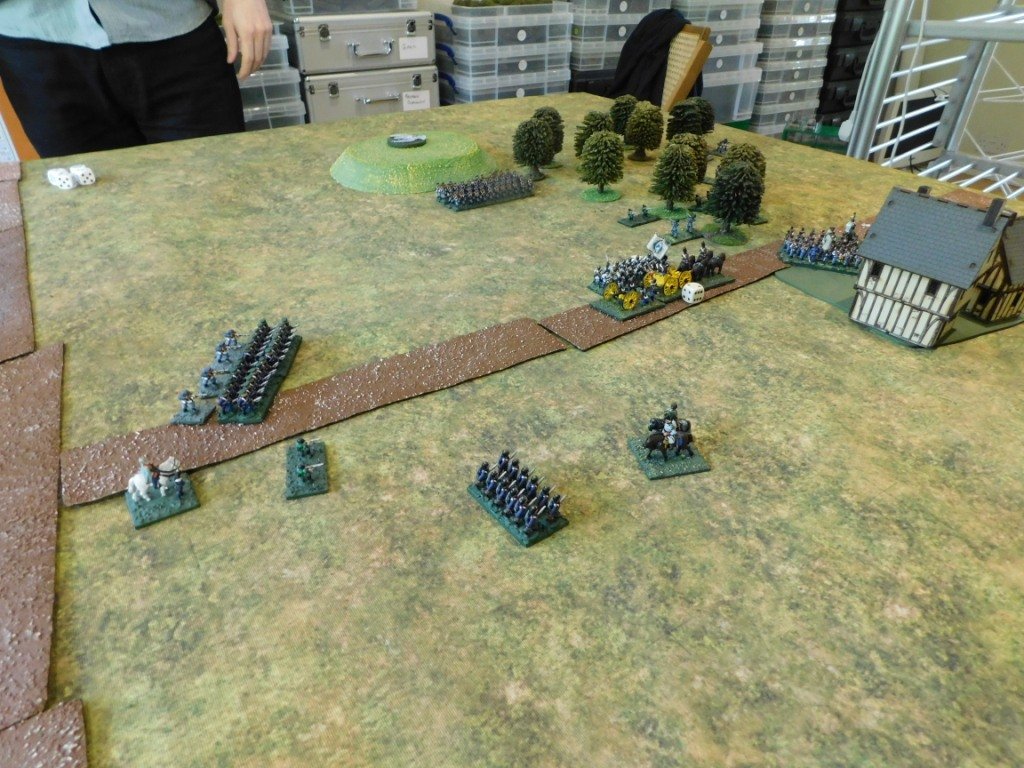
Then it’s on to the Troop Time! blog, where Widbrooke Common has also been played out, thankfully without any near-catastrophes.

The author of the blog, Zanoni, does mention that he’s disappointed that the M2M scenarios aren’t linked more closely, but as I’ve explained before, that’s the way they are designed.

As the first multi-game supplements for FK&P, I wanted M2M and SoN to be scenario books that primarily provided people with lots of easily run games i.e. without any barriers to playing any of the 24 scenarios provided in any order.

I did think about going the whole hog and writing a campaign based on a dependency tree and with characters/units who can progress or expire (much like I do for my IABSM scenario packs) but felt that, at this stage, what FK&P needed was just lots of individual games that people can play

That said, I also wanted to link them together in some way, so there's a strong campaign thread running through each pack, the games feature the same people and units throughout, and there a neat tracker provided so that players can keep a running score of how they are doing: hopefully a good compromise, "best of both worlds" product.

So hopefully Zanoni will keep playing through the pack: he certainly seems to be enjoying himself so far.

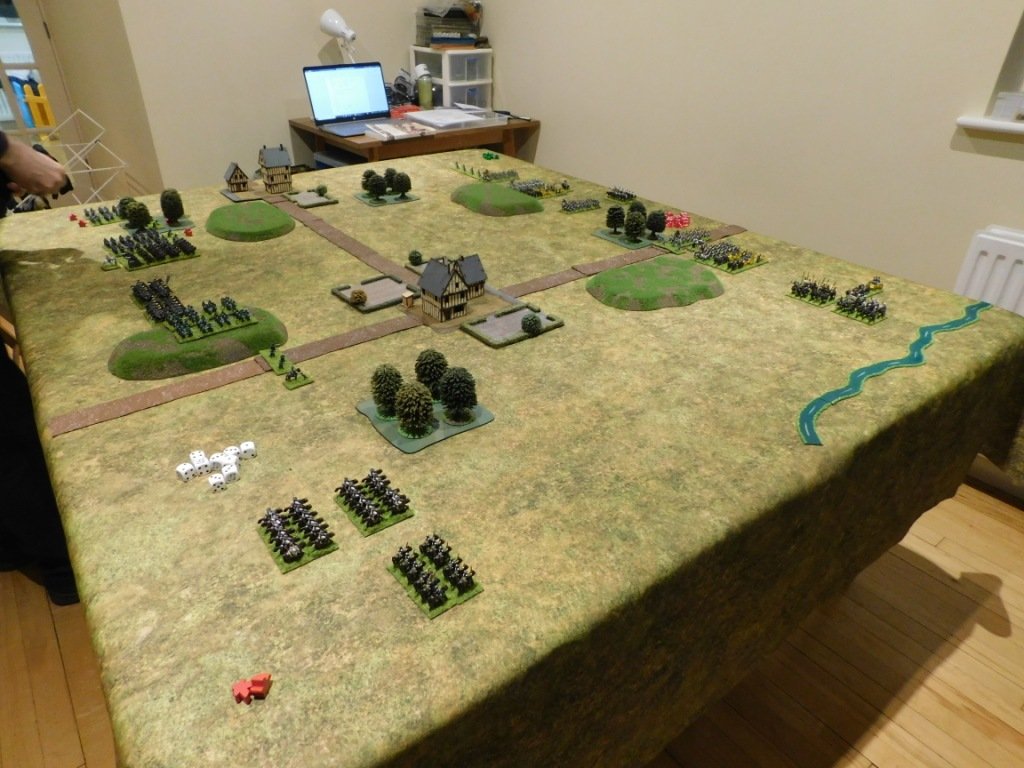
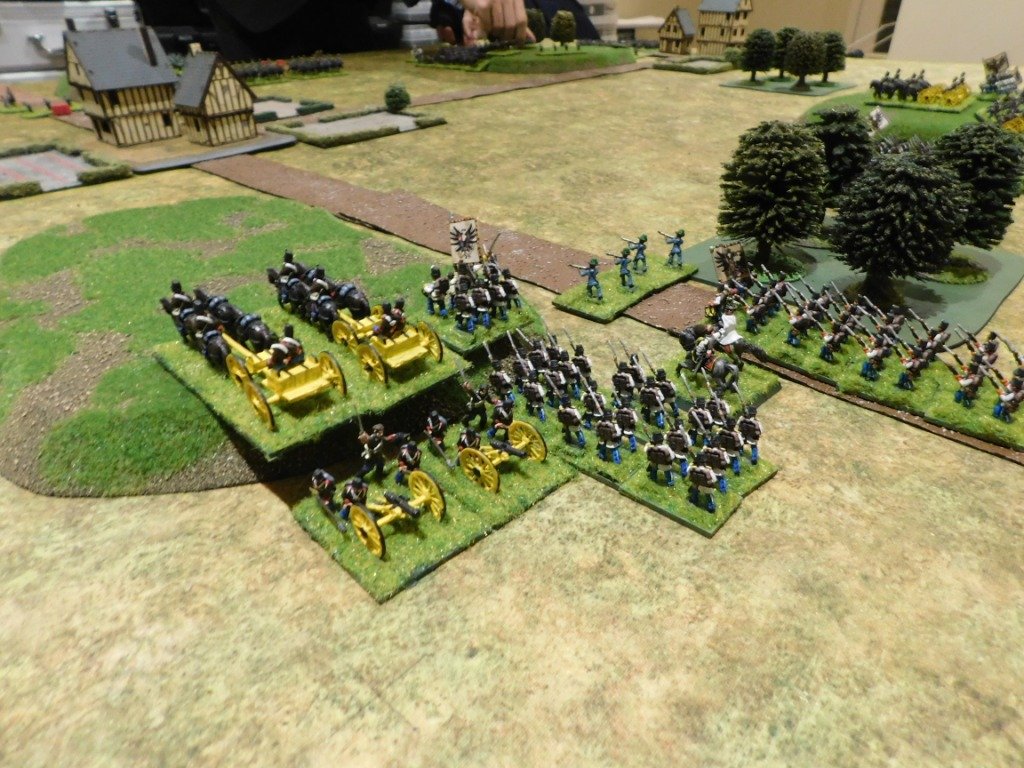
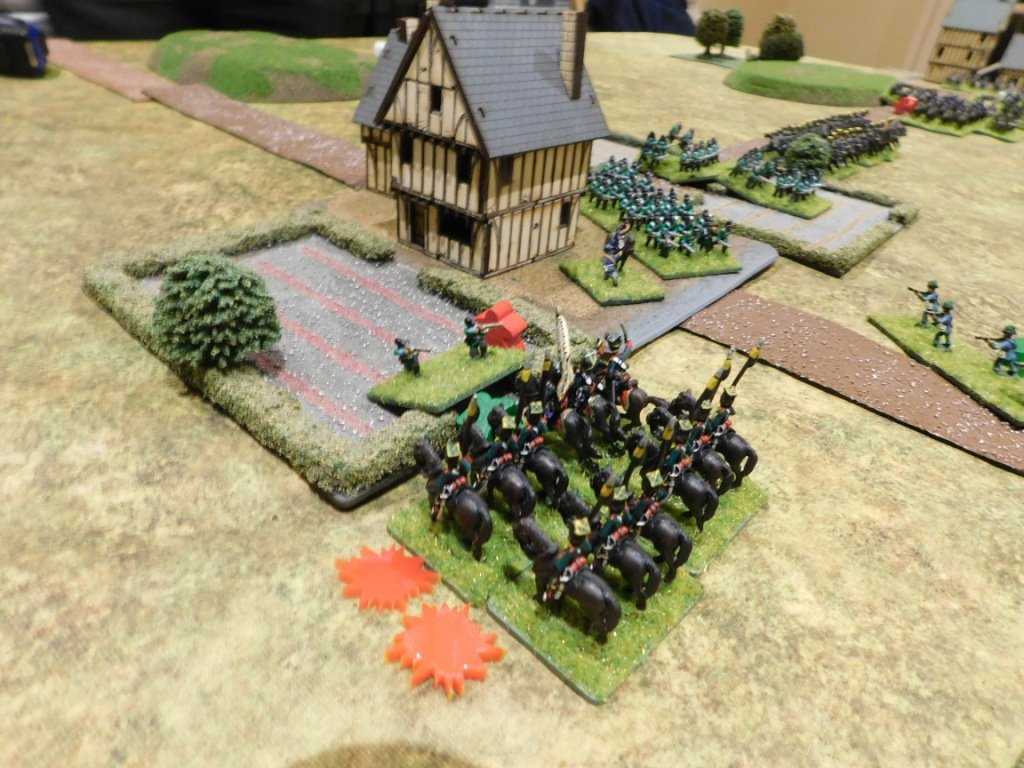
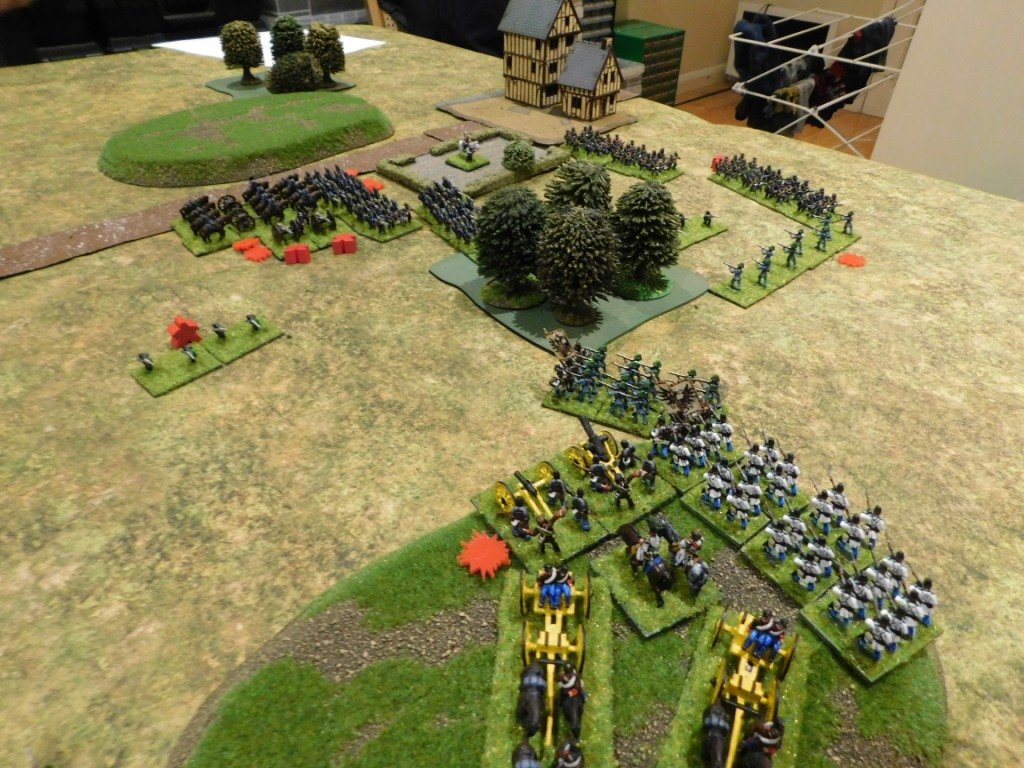
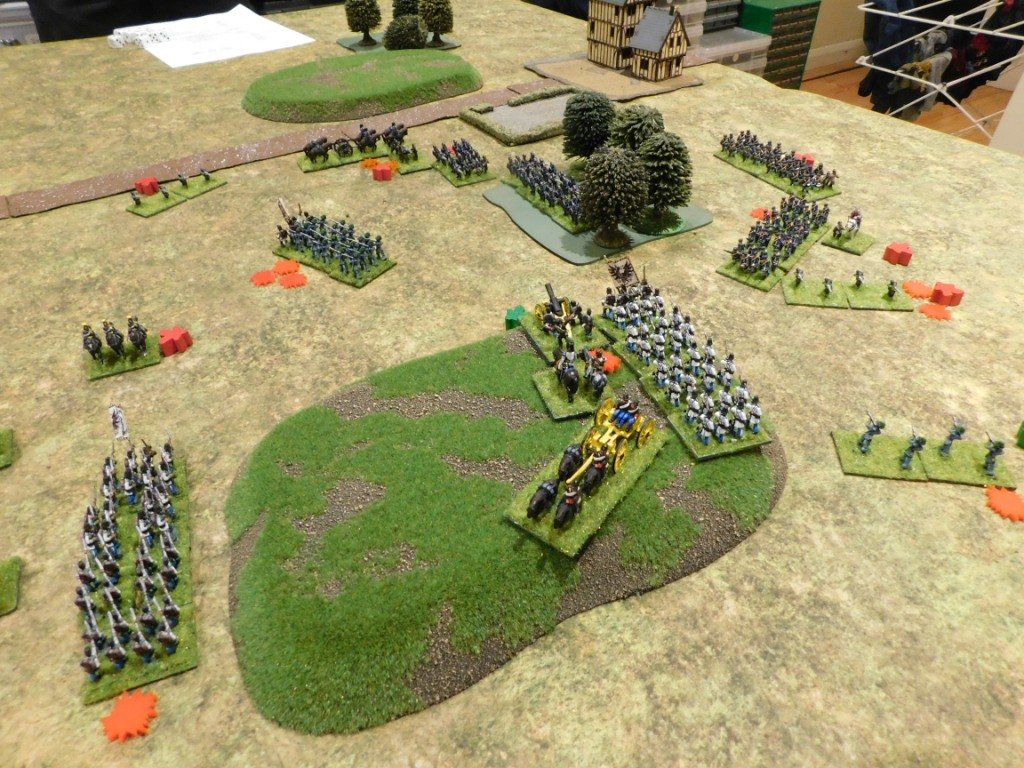
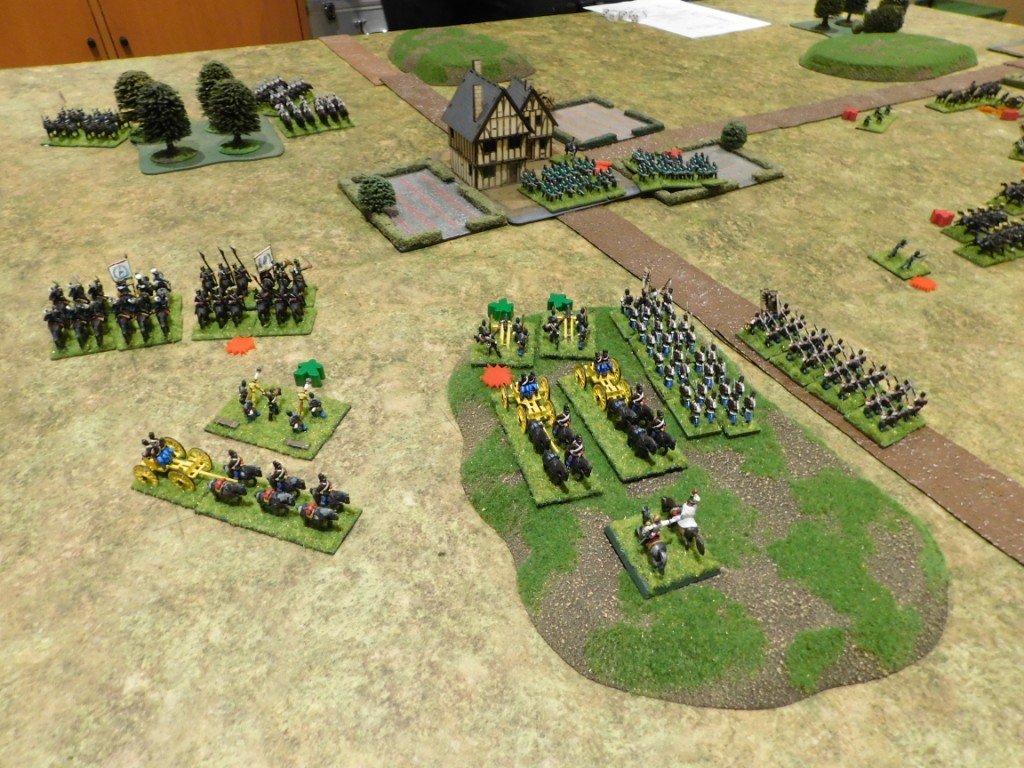
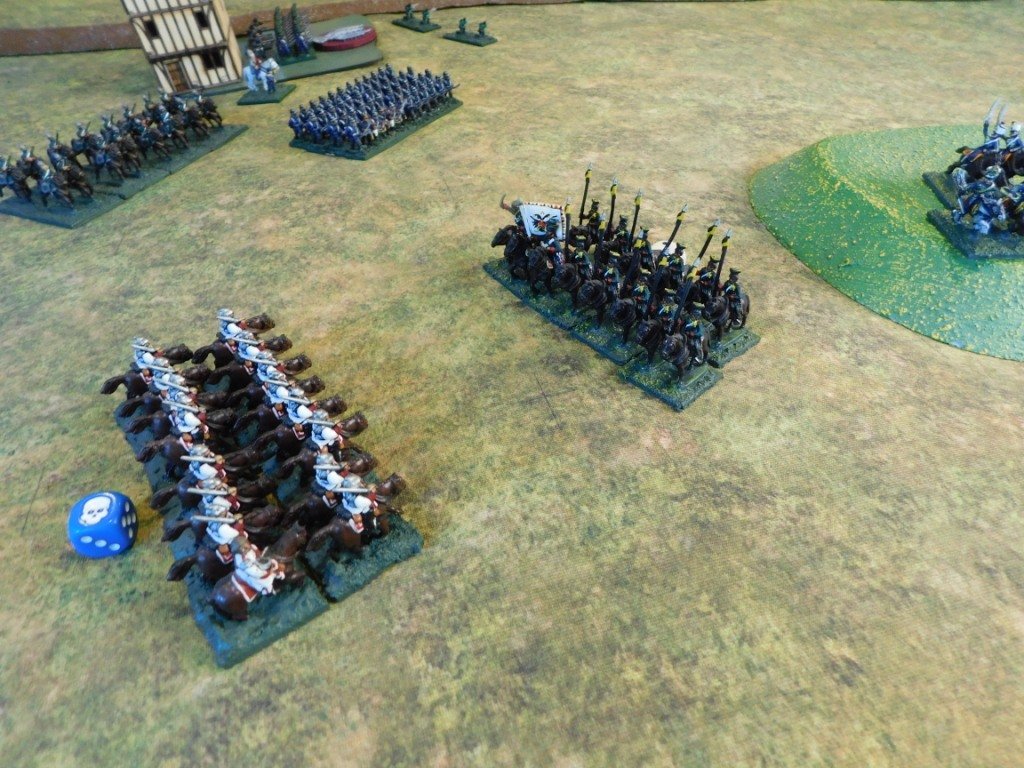
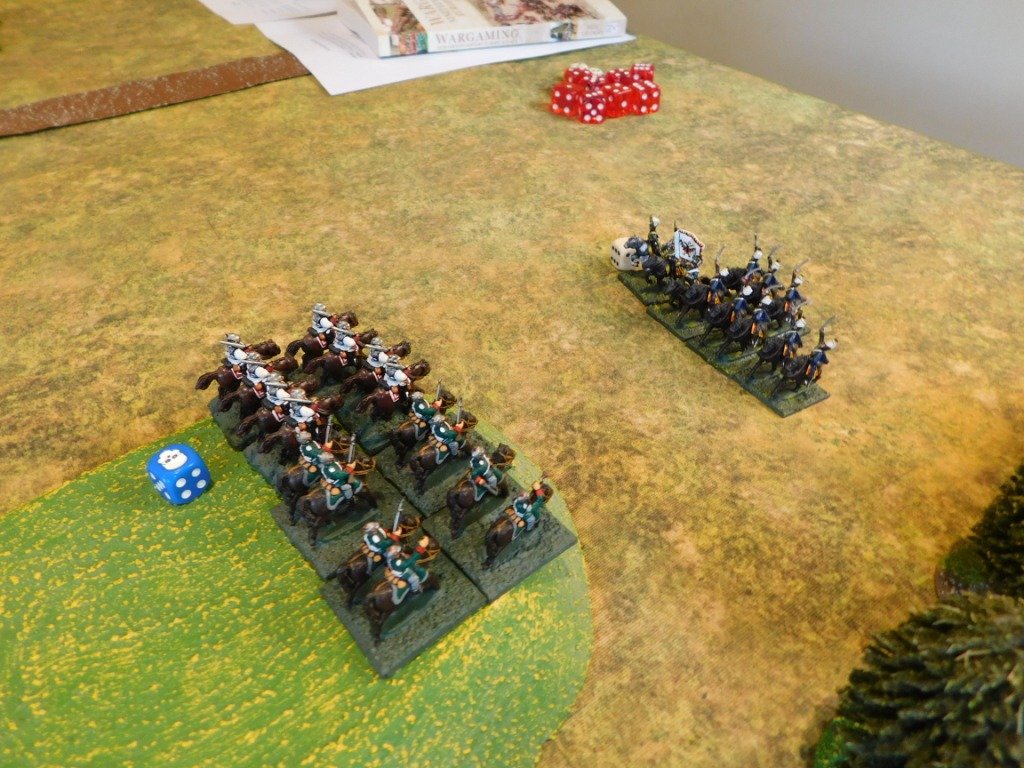
The two lines clash! Picture from the Troop Time! blog.

Now all we need is the Iron Mitten to catch up with his Widbrooke Common game!

Lard Magazine 2021 Now Available

Click on the Pic to Buy!

It’s Christmas, so it must be time for the annual Lard annual, the Lard Magazine 2021.

A mere six of your finest English pounds buys you a cornucopia of all things Lard. Highly recommended.

In this year’s bumper magazine we have:

Welcome and Introduction

Big Rich reflects on the last year and his hopes for the future

Bazooka Town. Joe Bilton

Won’t you take me to… A complete Late War Pint Sized Campaign set in the Ruhr Pocket for Chain of Command

Let’s Get This Project Started. Colin Murray

I’m coming up, so Colin had better get this project started. The boy from Buckfast offers some great advice for getting a new project off to a flying start

Hell Hath No Fury Like a Woman Scorned. John Savage

Especially when she’s in a chariot! Get your wheelbarrow ready for this multi part campaign for Infamy, Infamy! set in rebellious Britain in AD60

We’re on a Highway to Hell. David C.R. Brown

Rocking his way to the Eastern Front for some ‘O’ Group action, it’s the Housewife’s Favourite himself. Nice!

Great War What a Tanker. Keith Jordan

A look at adapting What a Tanker for the very first tank on tank action, Keith Head to Villers Brettonneux. I hope he’s packed his wellies!

City & People. Sidney Roundwood

“Hullo clouds. Hullo Sky”. With the shackles of sanity abandoned, Sidney muses on creating terrain for the urban environment of 17th Century Paris. As you do

Red Star Rampant. Jim Jackaman

The 1939 Khalkin Incident see the Soviets Take on the Japanese in Bag the Hun. A full guide with seven spiffing scenarios to get you scrambling for your Yak

Desperate Measures in the Mediterranean. Charley Walker & Co.

The inseparable duo of Charley and Fred Worthingham present a Kiss Me Hardy scenario set in the Mediterranean of 1794

War Among the Ferns. Simon Walker

Simon presents a complete guide to the New Zealand Wars with Sharp Practice. A full breakdown or British, Colonial and Maori forces from 1843 to 1872. That’ll get tongues wagging!

An Incident at the Bay of Islands. Simon Walker

A scenario from the New Zealand Wars for use with War Among the Ferns

Building a German Church. Joe Bilton

With his architectural hat on and full health and safety clearance, Joe looks at building a German church suitable for his Bazooka Town campaign

Vox Normannorum. Olve Kroknes

A complete saga experience from the Viking era for Dux Britanniarum from the Pen of Norway’s Lardy Viking himself

Assault on Esperia. Tim Whitworth

An IABSM scenario from the soft underbelly of Italy in 1944 see the French confront German forces near the Liri River

Return to the Raevsky Redoubt. David C.R. Brown

Borodino, the epic clash between two Empires in 1812. Here, Godfather of Wargaming, Dave Brown, returns to the Grand Redoubt with General d’Armee

Rückzug. David Hiscocks

A Pint-Sized-Campaign set in France and Belgium in August 1944. Can the Germans stop the breakout from Normandy and the great swan? Call the RSPB!

Haitian Revolutionary Armies. Peter Davies

Sharp Practice Army lists for an unusual Napoleonic period confrontation in the Caribbean. Go on. You know you want to. Trent Miniatures. It’s calling…

Sour Grapes. Joe McGrath

Strewth! The Fallschirmjäger take on the Australians in the scenario for Chain of Command on Crete from Joe across the pond in the US with a scenario he ran at Historicon

The Roundwood Report Revisited. Sidney Roundwood

They said it would never happen, but Sidney is back and talking to Mark Backhouse about the forthcoming Strength & Honour rules from Reisswitz Press

Go Sharp Into the Desert. John Savage Pasha

John provides a full supplement for using Sharp Practice for actions in the Sudan between British, Egyptian and Mahdist forces. Break out the Factor 50 Quartermaster!

The Sands of Shah Wadi Wadi. Pasha John Savage

A short campaign of linked games for the Sudan. Can the Reverend and his daughter escape the evil Osman Dinna Munni? I suspect some girls will, some girls won’t. Which is a very old musical joke

Micro-CoC. Kev Pierce

An informative guide to playing Chain of Command with 6mm forces. I am honestly refraining from making a smutty comment. But you knew that.

The Australians at Pozieres. By Alex Sotheran

Rochdale’s finest son, aka Storm of Steel, leaves behind the glamour of the studio for the mud of the Western Front with this scenario for Mud & Blood

La Haye Sainte. By Joe McGinn

Joe Looks at gaming the assault on the world’s most famous farmhouse. Not the one in Bethlehem. The other one.

IABSM Figure Galleries

No gaming face-to-face for a bit as everyone’s nervous about catching COVID just before Xmas.

I don’t blame them actually: having had it in early December, I can recommend avoiding it if possible: four days of the worst head cold you could possibly imagine followed by a couple of weeks of an annoyingly constant cough. I’m still largely deaf in one ear (problems with the eustachian tube!) and have no puff at all.

But enough of the complaining…

IABSM Figure Galleries

I’ve been schroffing up some of the galleries of my collection of WW2 figures: filling in the gaps that I’ve, er, filled since I first created them; making sure the links work; and adding in a couple of Japanese companies from the relatively new Blitzkrieg theatre pack.

You can visit the index page, here, where you can find links to the various galleriers.

A Gap Filled: German motorised light artillery battery

My next task is to re-photograph all the units that are currently shot against a white background, or just photographed anyhow for the painting challenge, against a more set up background like the German guns, above.

That’s a hellishly long task, though: find the figures, lay out each unit, photograph each unit, load the photographs onto the PC, edit each image, go back and re-take the photos where the original shot didn’t work, build the web page, load the images, caption the images, link the page and, finally, check it all through for errors.

I reckon each gallery takes 4-6 hours to complete, so don’t be surprised if I prioritise other things! The results are very satisfying, though, so well worth it I suppose.

It also gives me a chance to make sure all the figures are stored in the right place: there’s nothing more annoying than being unable to find a unit of tanks that you know you have but that aren’t where they should be!

They’re here somewhere!

TFL Painting Challenge: Another December Update

I’ll be doing at least weekly updates for the Painting Challenge in December: means I can keep on top of the entries that always flood in at this time of year!

As always, I recommend you look at the individual galleries but, just before we get to the usual whistle-whetters, here’s a couple of pieces sent in by John Emmett: absolutely lovely. I don’t usually pick out individual pieces, but these two were just too good not to highlight.

And here’s a selection of the other entries received this last week:

IABSM AAR: South of Cherbourg

Here’s a quick IABSM battle report from Sergeant Steiner’s excellent blog.

The Sergeant played through one of the free scenarios in the main rulebook: the South of Cherbourg game. This is an all infantry scenario with regular Wehrmacht defending against advancing US troops in Normandy in 1944.

Click on the picture below to see all:

More Cossacks/Tatars

I’m still plugging away at my 15mm Cossacks-with-Tatar-allies: only two more units and then I have my 130 point army for FK&P, with another six or so units then clearing all the figures on my painting table.

After all, you’ve got to have enough figures to allow for a few changes and/or bigger battles!

First up today is my overall Cossack commander-in-chief. There’s the Hetman himself, his standard bearer with the usual very impressive flag, a mounted drummer and, finally, a little help from above in the shape of a dour looking orthodox priest.

Figures are, as usual, from the By Fire & Sword range, which I cannot recommend enough. Okay, so I still find the plastic horses a little fragile for my liking, but just the flags they provide with every unit make them a must-have. These are painted with GW Contrast paints.

Second up is another base of Tatar bowmen. I also like these a lot: the detail is very crisp and takes the Contrast paint very well. I’m trying to make them look different from the Cossacks by having most wearing light tan clothing - the Cossacks in general being more colourful - with the odd figure in Cossack blue (traded clothing presumably) or a reddy-brown, mixed-on-the-palette shade.

I should be able to finish the army off over Christmas (well, as much as any army is ever finished!) and then it’s on to their opponents: probably the Poles.

IABSM AAR: Blenneville or Bust! #4B Reversed

Here’s an after action report that shows how flexible the IABSM scenario books are.

James Moulding and friends played scenario #4B from the Blenneville or Bust! scenario pack, but with the roles reversed i.e. in the original game, the British are attacking defending Germans but in this game it’s the British defending with the Germans attacking.

Click on the picture, below, to see all:

Note that this report is taken from the IABSM Facebook page. I hope James doesn’t mind me reproducing it here.

TFL Painting Challenge: Christmas is Coming!

The first batch for December as people start that final push for points before the end of the month and the end of this year’s Challenge.

Plenty of time to get you last entries in: so get painting and photographing!

Please do visit the individual galleries, but here’s a taster to whet the whistle:

Cossack Command & Tatars

Sorry for the lack of posts this week: been very busy in the real world!

Expect a flood of interesting content over the next couple of days but, to start, here’s a catch-up of some painting I’ve been doing.

First up are a couple of command bases for my 15mm Zaporogian Cossacks. Lovely figures from the By Fire & Sword range painted mostly with Contrast paints. I especially like the chap on the right with the pipe.

Alongside the two Colonels, I also painted a base’s worth of Tatar light horsemen. These are also from the By Fire & Sword range, and are also nice figures.

One thing: the riders are metal and the horses are plastic. There must be a good reason for this, and I didn’t notice that the figures felt top heavy, but the plastic is of the soft, bendy variety, so sometimes the horses are “set” at a funny angle and, unlike metal figures, can’t be straightened out. You have to slope the base when you mount it to get the horse as a whole to sit straight.

It also means that I am less confident of picking up the base by the two outside figures: I’m worried that the plastic won’t take the weight. I know I shouldn’t be picking up the base by the figures anyway, but sometimes in the heat of battle etc. I shall have to see how they manage on the tabletop.

IABSM AAR: Viking Panzers in Central Poland

Another cracking I Ain’t Been Shot, Mum battle report from the pen and camera of Mark Luther.

It’s another 6mm battle fought at the Gigabyte’s cafe, and this time features a somewhat generic game based on actions to the east of Warsaw in August 1944 where the Soviets had sent masses of tanks through thin lines of the German defenders. The panzer units were then forced to scramble to cut those units off before they totally disrupted the front.

Click on the picture, below, to see all…

More Moloitsy and some Tatars

Another base of Cossack Moloitsy rolls off the production line. That makes four I have now, which is enough for the 150 point army I have planned. I do have one more base’s worth of figures to paint, however, so will probably end up with five in all.

As before, these are By Fire & Sword miniatures painted up using mostly GW Contrast paints, and mounted on a Warbases large vehicle base.

My Cossacks, not being of the Ukrainian sort, don’t have very good cavalry, so I’m going to add some Tatar allies to the army. I have bought enough to field what I need but, whilst wandering around Warfare this weekend just gone, I saw these chaps on sale for quite a reasonable price i.e. painted well enough for me to like them, priced at under double the raw lead.

Whilst I’m not sure that they are actually Tatars, they will do as Tatar bowmen…and I shall probably use them to indicate veteran bowmen as their distinctive headgear makes them look like they are more of a chosen unit than a random collection of warriors.

IABSM AAR: Anzio #10: Highway 7

Another great 6mm I Ain't Been Shot Mum game from Mark Luther played at Gigabites Cafe in November 2021.

The scenario is taken from the Anzio: Wildcat to Whale scenario pack and features US infantry and armour assaulting a collection of four farmhouses held by men from the Herman Goering Panzer Division.

Click on the picture below to see all:

A Day at the Races: Warfare 2021

This weekend just gone, I visited the Warfare show at its new if exceedingly temporary home at Ascot Racecourse (next year it will be somewhere in Farnborough - Ascot proving too expensive for a repeat).

Those of you who have been to Warfare in previous years will know of its historical presence at the Rivermead Leisure Centre in Reading: a place often characterised by terrible parking, worse catering, but two large halls (and a few smaller rooms) packed full of gaming goodness that made it an unmissable event.

So how was the Racecourse.

Pretty good actually, if you ask me.

There were a few problems: the parking, although free, was very badly signposted when I arrived around midday. Apparently the original car park had filled up more quickly than anticipated, and there wasn’t any decent signage for the overflow. But it was, when I eventually found it, plentiful and free, which is good.

As for the atmosphere, I thought it was excellent. The main body of the show was on the ground floor of the main grandstand: a space that seemed to stretch for miles and miles. Imagine Salute squeezed into a 10m wide corridor and you have an idea of what I mean. This gave the show an intimate, labyrinth like quality, where display games and trade stands seemingly appeared out of nowhere in a way that I can only describe as being akin to the back of Mr Ben’s favourite tailors! In a similar vein, and for our younger viewers, I half expected to step into Narnia at any moment!

It reminded me a bit of the town hall in Kensington that used to be the venue for Salute, but schroffed up and brand new. I liked it.

Amazing 54mm battle between the Romans and Carthaginians

The ancillary elements, the Bring & Buy, the competition games, were on the second and fourth floors: again, plenty of room and very pleasant surroundings. I don’t competition game any more (brings out the worst in me!) but I enjoy wandering around looking at all the armies on show, admiring the look and feel of the rule sets I like, scoffing at the ones I don’t! The venue made this easy to do and a most enjoyable trek.

So, all in all, an excellent show in an excellent venue. Even better, the catering was up to the standards you would expect from Ascot Racecourse, and not too pricey either. Three excellent coffees and a cake cost me only £11.50 (and the cake was delicious: fresh etc); my lunch was a burger that actually tasted of cow and not of a poor unfortunate who broke a leg at the last!

Well done to the Wargames Association of Reading, and I’m already looking forward to next year’s show.

19C AAR: The Battle of Lederhosen

With both the Austrians and the Prussians now rebased (see previous posts) it was time to get the armies back onto the tabletop. This would be their second outing after over twenty years in storage!

The Austrians

  • 1st Division

    • 1st Line Battalion

    • 2nd Line Battalion

    • One Jaeger Company

    • Two artillery batteries

  • 2nd Division

    • 1st Jaeger Battalion

    • 3rd Line Battalion

    • Two Jaeger Companies

    • Two artillery batteries

  • Cavalry Division

    • 1st Uhlan Regiment

    • 1st Hussar Regiment

  • Army Reserve

    • 1st Dragoon Regiment

The Prussians

  • 1st (Jaeger) Division

    • 1st Jaeger Battalion

    • 2nd Jaeger Battalion

    • One Jaeger Company

  • 1st (Line ) Division

    • 1st Guards Battalion

    • 2nd Guards Battalion

    • 1st Landwehr Battalion

    • 2nd Landwehr Battalion

    • One Jaeger Company

    • Three artillery batteries

  • Heavy Cavalry Division

    • 1st Cuirassier Regiment

    • 2nd Cuirassier Regiment

    • 1st Dragoon Regiment

  • Light Cavalry Division

    • 1st Uhlan Regiment

    • 2nd Uhlan Regiment

And that was where we had to end the game unfortunately.

I was certainly in a very good position on my left, honours were even in the centre, but I was definitely losing the right,. So we called it a draw, with a slight strategic advantage to the Prussians balanced by the extra casualties they had taken.

A great game, and I’m now rebasing the French so that they can join in the fun!

TFL Painting Challenge: Last November Update

Activity levels are rising as people try and get their final entries in for the year!

Make sure you visit the individual galleries to see all the goodness, but here’s a selection to whet the whistle:

Allan Mallinson's "The Shape of Battle"

I’m reading a rather good book at the moment: Allan Mallinson’s The Shape of Battle: Hastings to Helmand.

Mallinson was a British army officer for many years, and is also the author of the popular Matthew Hervey series of books about a British Napoleonic/early 19thC cavalry officer. In addition, he’s written several books of military history, of which this is one.

The book looks at six campaigns, each culminating in a decisive battle: Hastings, Towton, Waterloo, Sword Beach, Imjin River and Helmand. Each of the six sections describes the background events that led to the campaign, the broad-brushstrokes events of the campaign itself, and then what happened at the battle. There are some nicely designed maps to make everything clear: very useful when dealing with, for example, Towton, when keeping track of who is for York and who is for Lancaster is difficult enough at the best of times.

Mallinson’s writing style makes this a very easy book to read, and the chapters are liberally peppered with quotes from either historical or historical fiction sources. To look at the chapter on Towton again, I loved the quotes from Shakespeare’s plays that accompany the text: makes the facts spring off the page with colourful delight!

This is an excellent book for the wargamer who knows a bit, or who used to know a lot, about the different campaigns covered. I know, for example, quite a bit about Hastings and the way that the Anglo-Saxons and Normans made war, but I last looked at it in any detail several years ago, so it was a really nice, and inspiring, way of refreshing both my knowledge and interest in the action.

Recommended as an Christmas present to yourself!

More Cossacks

In between all the re-basing that I’ve been doing, I finally got around to picking up my brushes and finishing off another base of Cossack Moloitsy.

These are more of the excellent By Fire & Sword miniatures. I like the ones in blue, but am not so keen on their purple-clad neighbours, even if it does match their banner!

Talking of which, the chaps in blue gave me all sorts of problems with their banner. Not the one shown: that is attempt three, with the previous two ending up in the bin. Unusual, as I’ve found the provided banners really easy to deal with in the past. Must be clumsy hands from too much re-basing!

Anyway, one more base of Moloitsy to go, and then the officers and artillery…and the Tartar allies are already on order!

19th Century Prussians Re-Based

Having re-based the Austrians, and liking the results, it was time to have a go at the Prussians.

I had forgotten how brittle the old Freikorps 15 figures are, so I’m afraid we had a few casualties along the way. I lost a handful of infantry and, for some reason, the Lancers just kept snapping off their bases. The infantry I could spare (loads of singly-based skirmishers to plug the gaps!) but it took me quite a bit of effort to re-build the lost Lancers, and even then I’ve made sure the broken figures are the middle of three.

As per yesterday’s post, these figures haven’t seen the light of day for over twenty years, so it’s really nice to see them schroffed up and ready for action again.

That’s 204 foot, 62 mounted and seven guns/limbers/teams done…and a right pain it is too!

19thC AAR: Austrians vs Prussians

As we’d been playing For King and Parliament almost exclusively for the past few months, my regular wargaming opponent and I fancied a change. He’d spotted my fairly extensive collection of 19th Century figures, so suggested we dust them off and have a game.

Good idea, says I, so the next question became a discussion about what rules to use. I wanted something simple, with no need for protractors and laser pointers and the like, so we thought we’d give Neil Thomas’ Wargaming 19th Century Europe 1815-1878 a try.

This compact little booklet contains a wealth of information. There’s a large background section followed by six pages of rules and then large numbers of army lists, battle scenarios and historical information.

Six pages of rules sounded good to me, especially as I knew that I would need to re-base my collection to play any commercially available rules, so would only need to expend a little brain power to work out how to use my existing figures and play-test the system before making any sort of re-basing decision.

We set up a quick encounter game using as many of my Austrian and Prussian figures as possible, and set to…

The Battle

As I said, above, we used my existing figures based as is, and made loads of mistakes with the rules - despite their simplicity!

I won’t therefore do a full AAR, just a gallery of the action. Suffice to say that my brave but outnumbered Austrians were soundly beaten: the breachloaders used by the dastardly Prussians proving highly superior to my Lorenz rifles!

It was a most enjoyable game, however, with the rules proving simple yet infinitely subtle. It certainly had the feel of a 19th Century battle: very pleasing as many rulesets for the period, in my experience, are a Napoleonic battle with a bit of advanced weaponry tacked on!

I’ve now started re-basing my troops to suit the system (and many other sets as there’s nothing too outre about what’s needed) and we’ll have more of a proper game next time.

Oh, and it’s worth mentioning that none of the figures featured had been on the tabletop for over 20 years!