TFL Painting Challenge: First March Update

Apologies for the lack of recent posts: real world work has been incredibly busy!

Here’s an update with entries stretching back just over three weeks…and there are some huge entries as well.

This week we have Andrew with his medievals, Chris with a howitzer, Lloyd with a truly awesome number of little ‘planes, Matt with a legion of Star Wars Legion figures and a few other bits and bobs, Mervyn with some Strength & Honour bases, Asley with some cracking sci-fi figures, and Stumpy with some Napoleonic command stands

Do please visit the individual galleries, but here’s a taster:

TTS AAR: Vikings Resurgent!

Time for a quick game of To The Strongest. Today’s game would feature the Vikings, commanded by Yours Truly, versus the Burgundian Ordnance, commanded by John.

The yellow caps are lance markers, the red meeples indicate veteran Huscarl units.

Two very different armies: my Vikings are a foot-only army comprised mostly of big shieldwall units (I’ll call them warbands) with a few lights thrown in; the Burgundians are a combination of lethal and indestructible Knights with some useful missile-armed spearmen in support.

I knew I would lose if I let the Burgundians pick me off one unit at a time: the only way to win was to move forward and attack en masse so that my battle line could absorb the initial charge of his Knights then swamp them with numbers.

I also knew that my light bowmen were useless against the Knights (the arrows would just plink off!) so determined to send both light units up the far left flank and try and get behind his battle line and into his camps, knowing that he didn’t have enough units to face my warbands and defend his rear.

I therefore moved my warbands forward in a long line, being careful not to let the more impetuous Vikings surge forward in an uncontrolled manner.

This meant that when the main lines did clash the outcome was exactly as I had predicted: the warbands hit by the Knights were badly disordered at first contact but not destroyed, and then other warbands piled in to help.

Keep your eyes on the light units to the far left as well: they are doing what they were supposed to do!

By now I was whittling down his army, especially on my right flank. With so few Burgundian units on the table, he just couldn’t afford to lose many and, as we reached the climax of the battle, I had wiped the four units on his left and left-centre for the loss of only one of my warbands.

That meant that I only really needed one big push to win the day and, rather pleasingly, that came from (yes, you guessed it) one of my light units finally taking the first Burgundian camp.

With half their army destroyed and their baggage taken, that was enough to send the neo-Frenchmen packing: the Vikings had won the day!

Norman Crossbowmen

I needed a rest from doing kite shields, so decided to paint up some crossbowmen bases. These would have started to appear from about 1000CE onwards.

Again, these are very nice figures from Museum Miniatures. I have painted them up as relatively ‘official’ units, all wearing padded armour a bit like a fabric version of a hauberk.

I like the poses on these figures, particularly the ones I have used at the back who are using the stirrup to pull the string back.

I’m also going to do a couple of bases of light crossbowmen, but these two bases are the backbone of the missile defence of the army.

As you can doubtless see, I had problems with the shields of the command group, so I wasn’t completely free of the shield-curse yet!

More Normans

The Normans, excellent 15mm figures from Museum Miniatures, are continuing to roll off the production line.

Following from the armoured milites, we have the first of their foot equivalents: either Spearmen or Shieldwall dependent on which list you use.

As most of each figure involved chainmail or helmet, I changed from my usual Contrast Paints method to the method I used to use back in the day: black undercoat then paint up in layers from there. Not too shabby a result, I hope you will agree!

Once again, it was the shields that caused me the biggest bother, as it’s quite a large area to paint free hand. Again, I used the “decals that are a bit small then paint up” method: using the decals almost as a guide to what to paint where. Note that they don’t show as quite so rough on the figures actually on the tabletop: one of the downsides of having a good camera is that they take a real picture!

CDS AAR: Valley of Tears at Winter Wonderlard 2023

Yesterday saw the annual Winter Wonderlard Lardie Day in Bristol.

I couldn’t be there myself (real world interfering with gaming again!) but here’s the first of the AAR using TFL company-sized rules from the day, with Steve Blease and his “Valley of Tears” Golan Heights scenario using Charlie Don’t Surf .

There were two sessions: see pictures from both, and others taken on the day, by clicking on the picture, below:

TFL Painting Challenge: First Feb Update

Everyone has been very busy over the last couple of weeks, so lots of huge entries to log.

This update we have first entries from Mr Hodge and Mr Kay, plus more entries from Matt, Carole, John, Stump, Andrew, Lloyd, Mervyn and Nick.

Do visit the individual galleries, but here’s a taster:

TTS AAR: A Defeat for the Legions!

Time for another game of To The Strongest with John.

Rather than play a standard pick-up game where each side lines up on opposite sides of the table, we went for a more scenario based encounter, with the Romans starting the game in three columns: their main legionary force in the centre, their horse to the right and their lights to the left. The Celtic types facing them were largely deployed as one might start a standard game, but with enough exceptions to make things interesting.

To have any chance of victory, the Romans needed to deploy for battle as soon as possible: a task completed fairly easily as the superb drill of the legionaries kicked into play. There was a gap in the line on the road itself: the Cohorts VIII and IX not performing as expected!

Note that the yellow markers indicate that the Romans have pila ready to use.

The Celts announced their intention to move forward en masse. Their wings duly did so, but for some reason (the vagaries of the cards) their centre units hung back. This gave me a real opportunity to defeat them in detail on either flank before turning to crush their centre.

On the right, my single unit of legionary cavalry, supported by some auxiliary horse archers, duly moved forward to engage the enemy horse and chariots rapidly trying to curl around my flank. I also brought four cohorts of infantry (two units in TTS terms) across in support.

This really was a good opportunity to win on this flank, but the Gods decided otherwise: consecutive 2’s drawn from the pack meant that my legionary horse sat stationary rather than charging home.

My supporting legionaries were, however, able to charge home, dispersing the Celtic cavalry in front of them (kudos to the single Cohort X base for its contribution to the fight) but this wing was still very much in dispute rather than going my way.

Things weren’t going my way on the other wing either. For some reason, my main legionary force, including the double-size Cohort I with the aquila or Eagle Standard, also hung back, meaning that rather than fighting two enemy warbands with two Roman units, I now risked a delayed fight tying up my units until they were overwhelmed by more Celts coming into the fray!

And so it came to pass: the Celtic warbands in the centre ‘woke up’, and headed forward…

It would now be much more of a traditional stand up fight, and all would be well if I could get the Roman ‘mincing machine’ into action: I needed to bring my men together, make full use of my remaining pila, and rotate units in and out of the front line as required.

Unfortunately none of that happened!

Having split my line to deal with each wing of the initial enemy attack, I couldn’t get free enough of the rampaging Celts to get it back together again. So rather than fighting as one command, my Romans had to fight as three isolated commands on the left, in the centre, and on the right.

Secondly, my legionaries had obviously packed their pila away for the march, as not a single volley had any effect on the opposition. I also suffered a wave of officer casualties including the two tribunes commanding the main body of the legion. On top of that, even John remarked that the cards had turned against me: I was missing hits that should have gone in and failing saves that should have been easy. It was just not the Romans’ day!

My cohorts were gradually disordered and then wiped by the Celts using their superior numbers, and I just didn’t have the coins to withstand those losses for long.

So a defeat for the Romans probably stemming from my failure to wipe the enemy wings at the beginning of the battle. I’d made a bold tactical decision that had a good chance of success, particularly on the right, but it hadn’t worked and I’d suffered the consequences against the remorseless Celtic hordes commanded by John!

First of the Normans

My big project for the first part of 2023 is a 15mm Norman army using the excellent CAD designed figures from Museum Miniatures.

First up are a brigade of veteran milites or knights: cavalry in mail with their big kite shields and carrying lance.

These are painted mostly with GW Contrast paints, which I find give the right balance between how the finished models look and the speed at which I can turn them out.

I wasn’t looking forward to doing the shields, and they were indeed the toughest part of the process.

I wanted to use decals, but Museum has no arrangements with anyone for that, so I looked through what Little Big Man Studios has in their catalogue for other ranges and ordered anything that looked a bit Norman.

In the end,the decals meant for Khurasan’s range of Normans was the closest fit, although even their decals were a bit small: I had to use the decal more as a starting point than as the finished product, something you can see if you look closely at the red and yellow striped shield in the image above: you’ll see the decal in the middle with my painting around the outside. Time consuming and annoying!

The flags came from Wargames Designs: very easy to use provided you’re not completely cack-handed with a pair of scissors!

Although I hemmed and hawed for some time, I eventually decided to go with my original plan and mount the figures on the big bases I like to use for To The Strongest and For King & Parliament. Yes, it reduces the flexibility of what I can do, but the ease of use and look are good enough compensations. The big bases are Warbases vehicle bases and nicely fit my TTS grid.

CDS AAR: Valley of Tears

We're not in Vietnam anymore...

Steve Blease ran through his 6mm Yom Kippur 'Valley of Tears' CDS variant game which he'll be running at the Winter Wonder Lard III Lardy Day in Bristol later this month. Here are a few shots of the action:

TFL Painting Challenge: end of January update

A thousand apologies for the lack of posts recently: real world work has been crazy and I’ve been busier than a squirrel in a barrel of nuts…and so have the entrants to this year’s TFL Painting Challenge.

Five first entries for the year and even some people on their second, third and even fourth entry.

Do visit the individual galleries (accessible via the NavBar, above) but here’s a taster to wet your whistle.

19thC AAR: Battle in the Crimea

Having recently re-based all my British Crimean figures, it was time to get them onto the tabletop. Like some of my other 19thC figures, these troops hadn’t seen the light of day for almost twenty years: a testament to my inability to sell or give away any of my collection!

As I had done all the work, I would take the British, with friend John taking the Russians. Set up was a simple one: both sides were after possession of a strategically important village in about the centre of the table. We would use the Neil Thomas Rules for Wargaming the 19th Century.

As the game begun, both sides hotfooted it towards the village.

As you can see, the Brits were a bit faster (and maybe closer, but we rolled for sides!) so managed to get into the village before the Russians. Also note the opposing sides’ cavalry moving towards each other slowly on the near flank.

Before we move on with the narrative, here’s a great shot of the British during their approach:

The Fight for the Village

The British reached the village first and barely had time to form line before the Russian columns started to charge home.

On The Right

On the right hand side of the field, a British battalion supported by skirmishers faced off against two large masses of Cossack horse supported by heavy artillery and a battalion of Cossack foot.

Throughout the rest of the game, this battalion would hold this flank, sending the three Cossack units flying back to their steppes. The price was high: only half the British infantry were still on their feet at the end of the battle.

On The Left

On the left hand side of the field, the British cavalry slowly advanced towards their opponents: the plan was to protect the left flank then, once the Russian infantry were fully committed to the village, to smash the enemy horse from the field before looping around the Russian rear.

Unfortunately, although the flank was indeed protected throughout the game, when the British cavalry did eventually commit to combat, the result were…mixed! There was certainly no rapid smashing from the field going on and the situation developed into a grinding melee that lasted until the end of the battle.

The British eventually probably had the best of the encounter, but their cavalry had done all they were going to do for the day: no looping around the rear was going to occur.

This was very disappointing, as I was expecting the cavalry to quickly carve through their opponents and then go on to wreak havoc in the Russian rear.

With the two flanks fought to a standstill, resolution was going to occur in the centre.

Extreme Action In The Centre

As previously mentioned, the Russian columns charged into the village, focussing their efforts on the lone battalion of Highland infantry occupying the buildings on the left hand side of the road.

Time and time again, fresh columns of brown clad infantry advanced into the fight until the area was strewn with their corpses, but sheer volume of numbers was beginning to tell and soon there were only a handful of brave Scots left. These resisted for another turn or two, then were finally sent flying, leaving the left hand side of the village in Russian hands,

At the same time as the above, more Russian columns attacked the British battalion holding the right hand side of the village. These crumbled somewhat faster than the Scots, and soon the entire village was in Russian hands! Things looked a bit grim for the Brits!

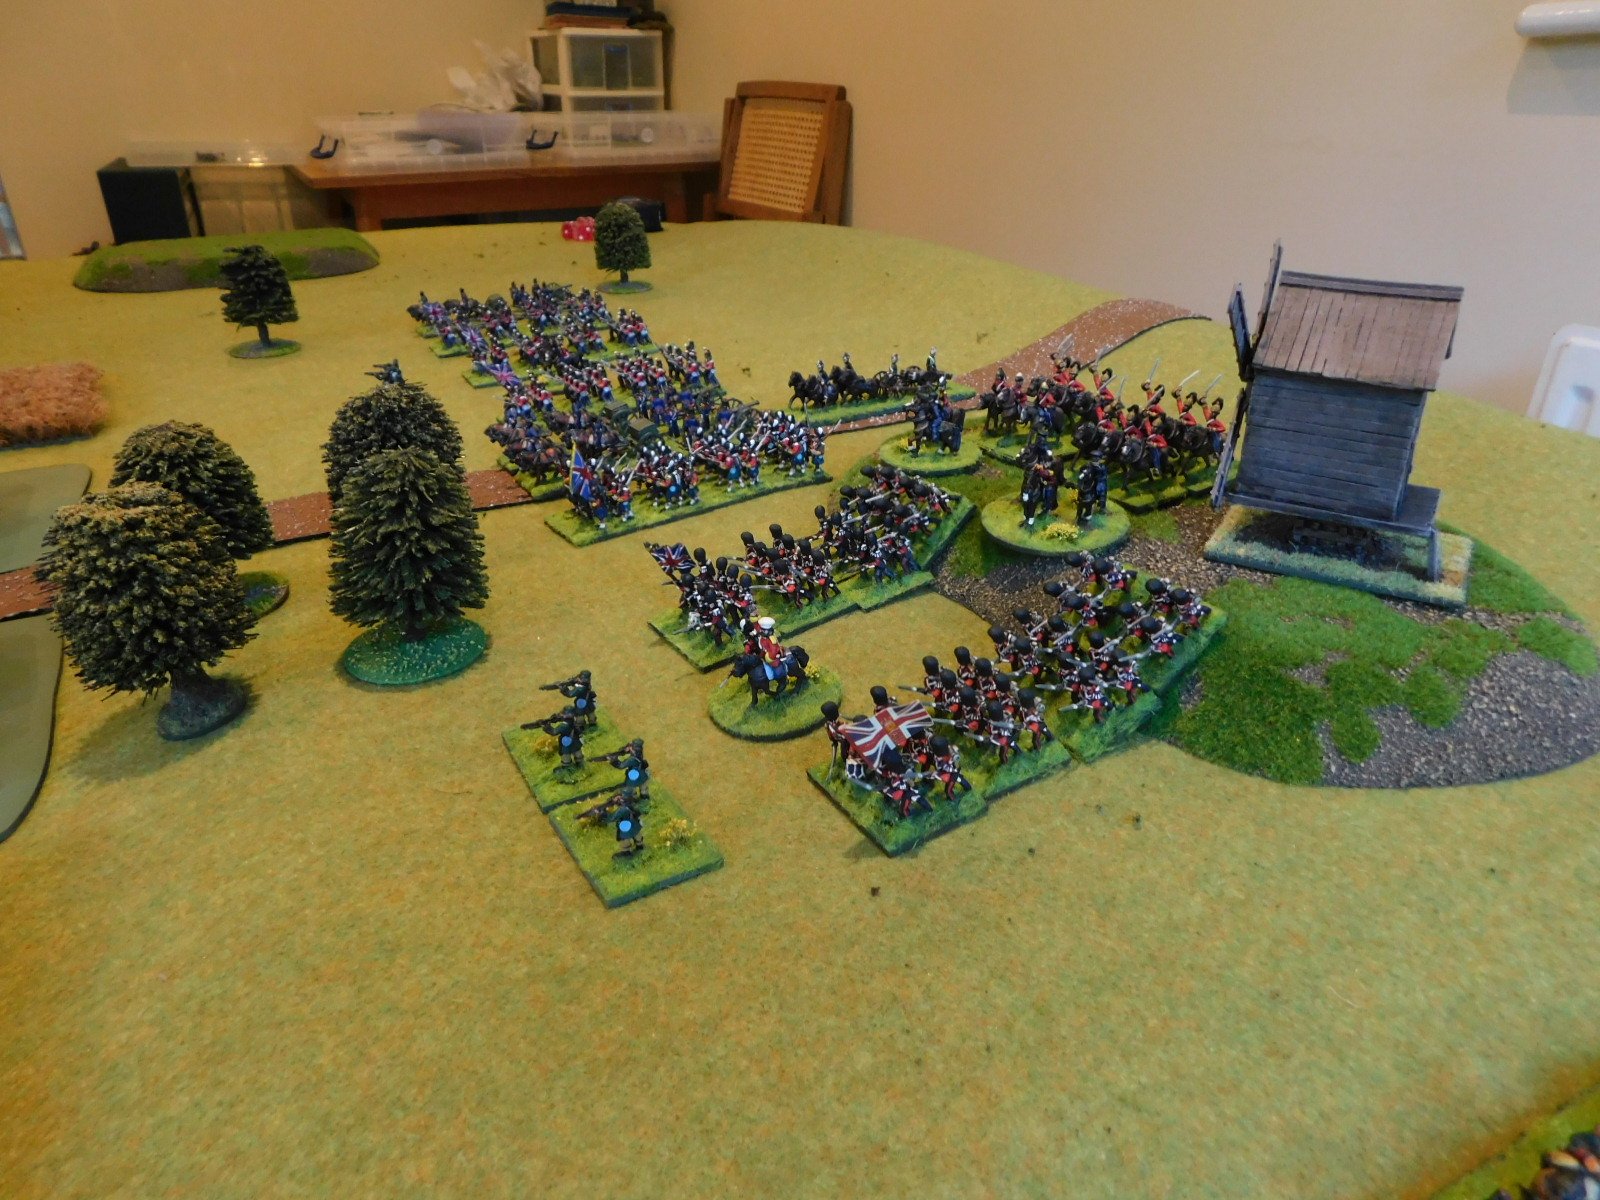
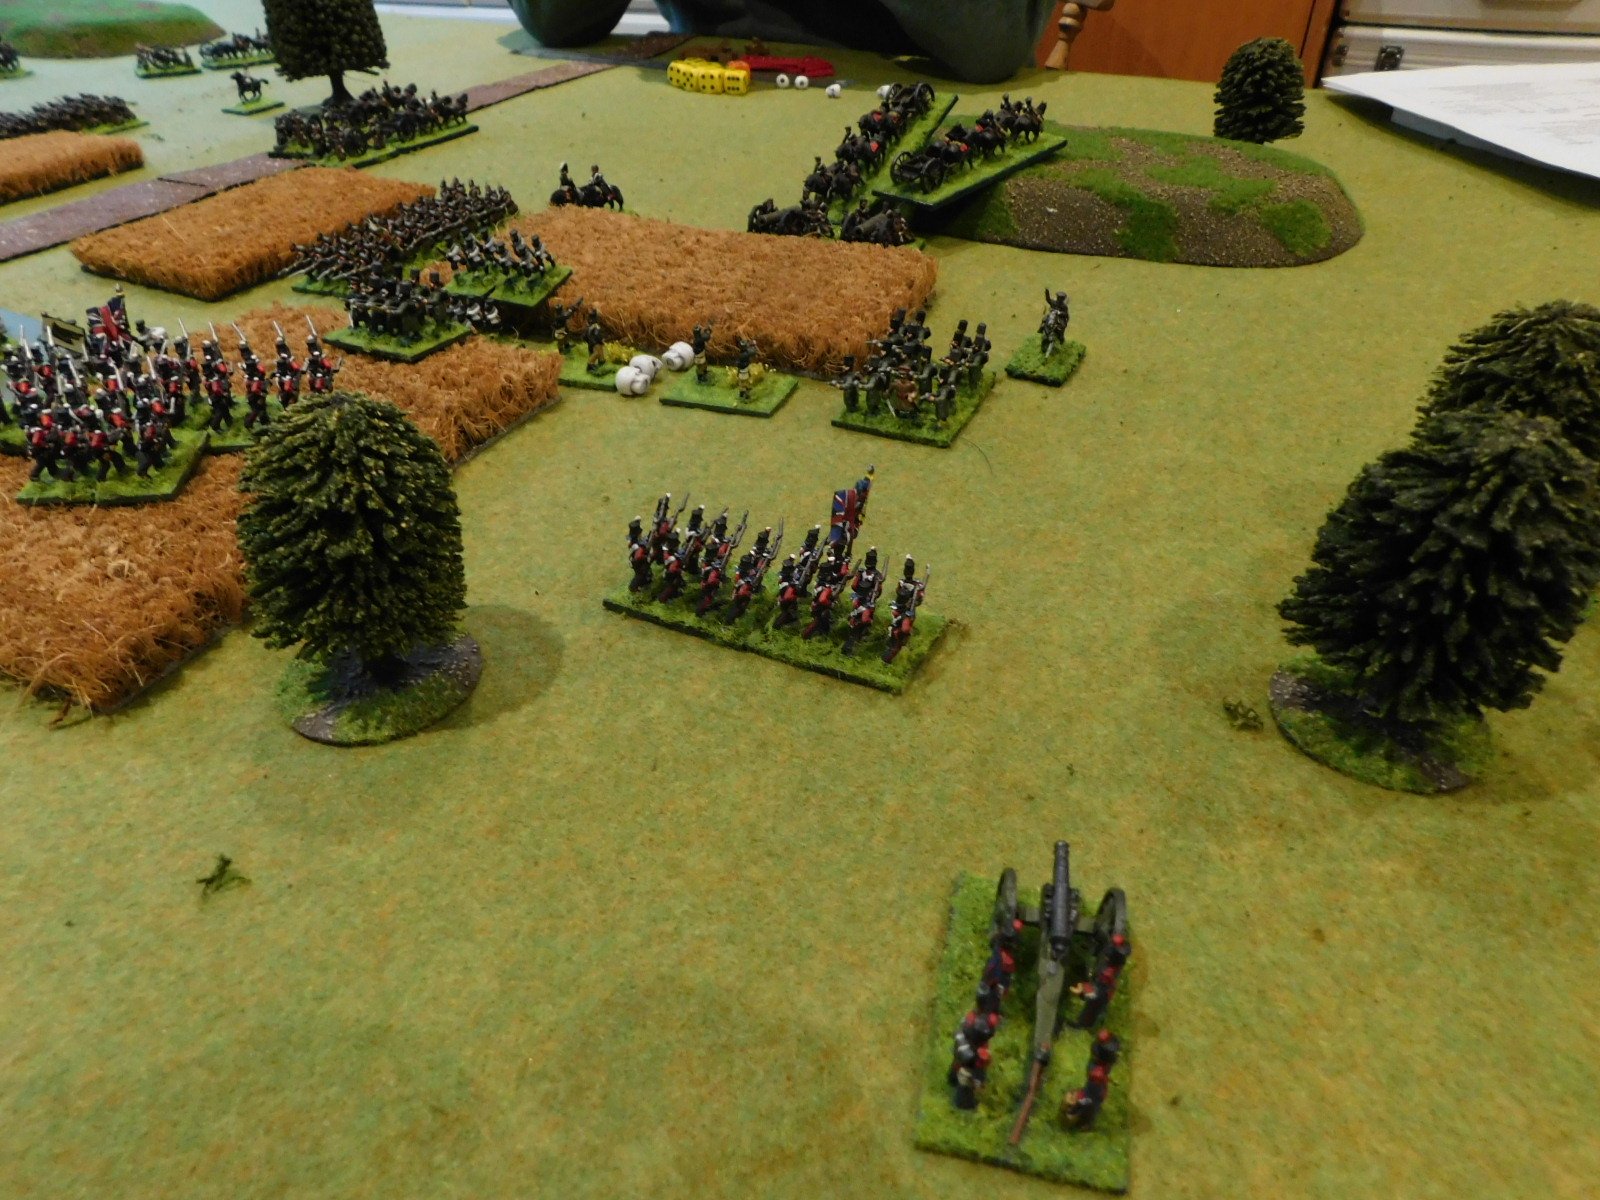
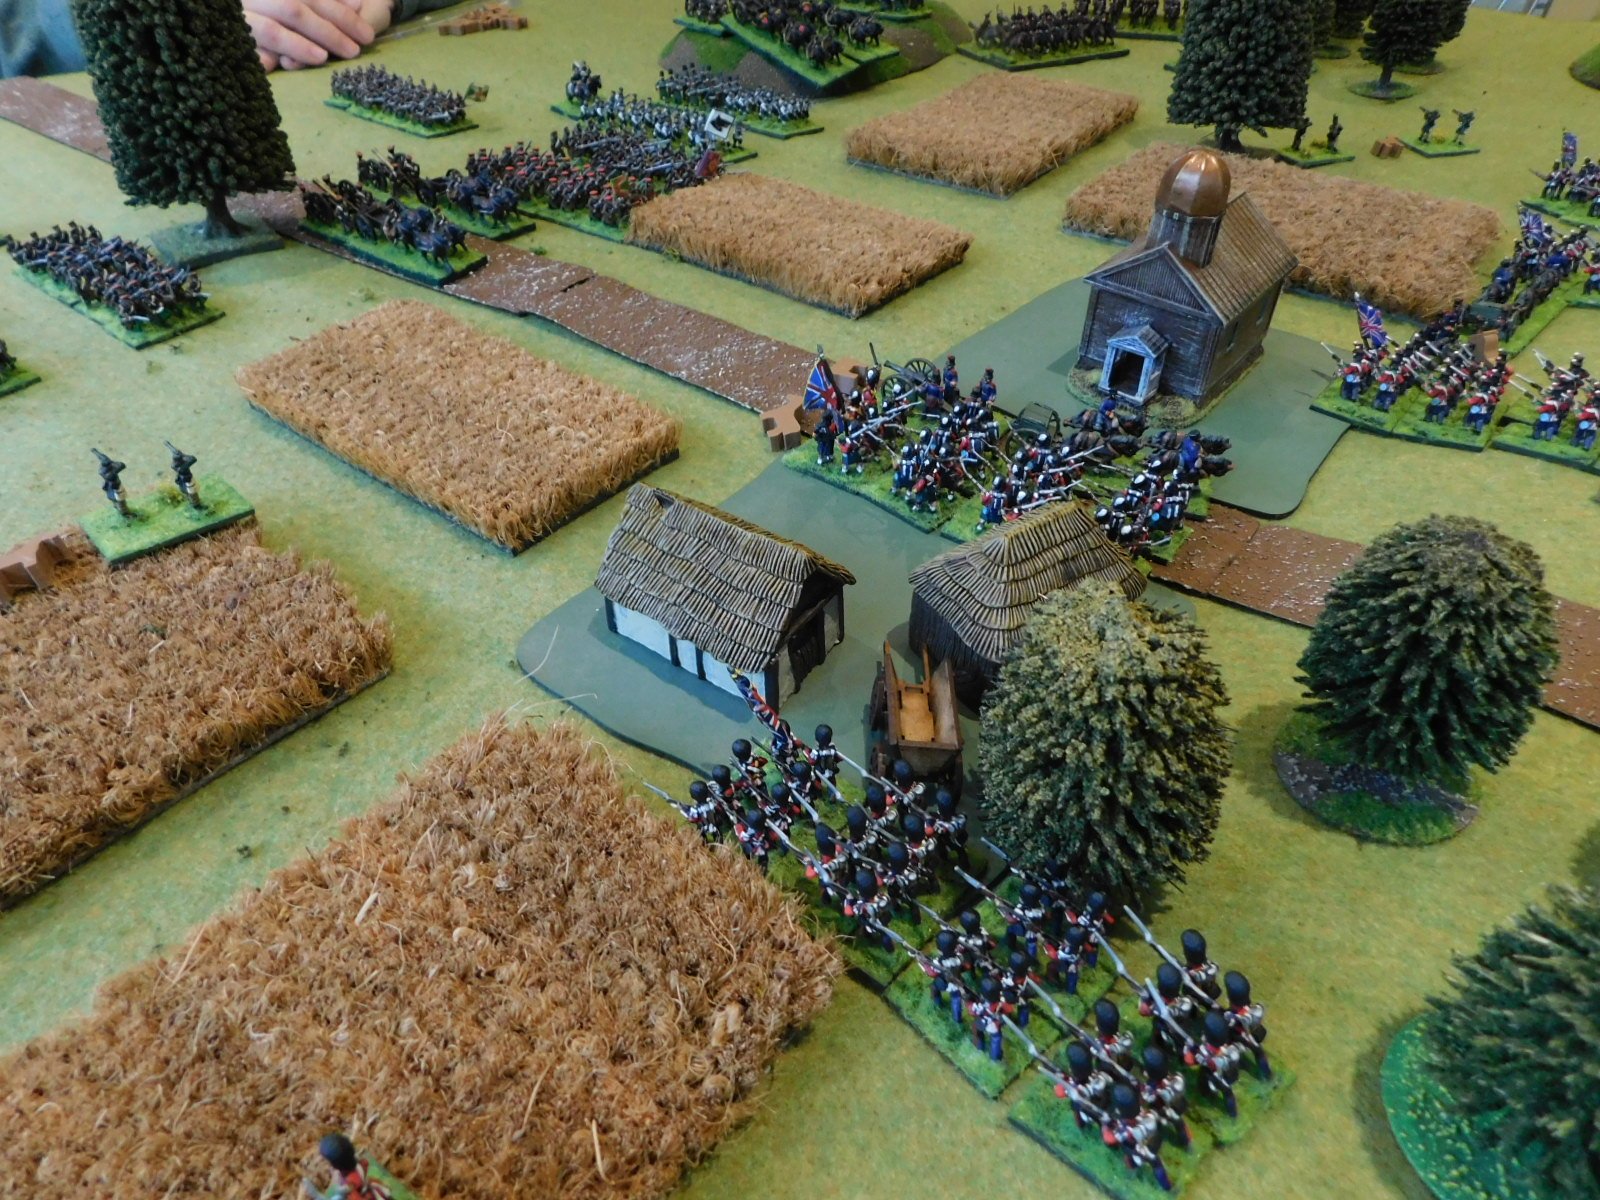
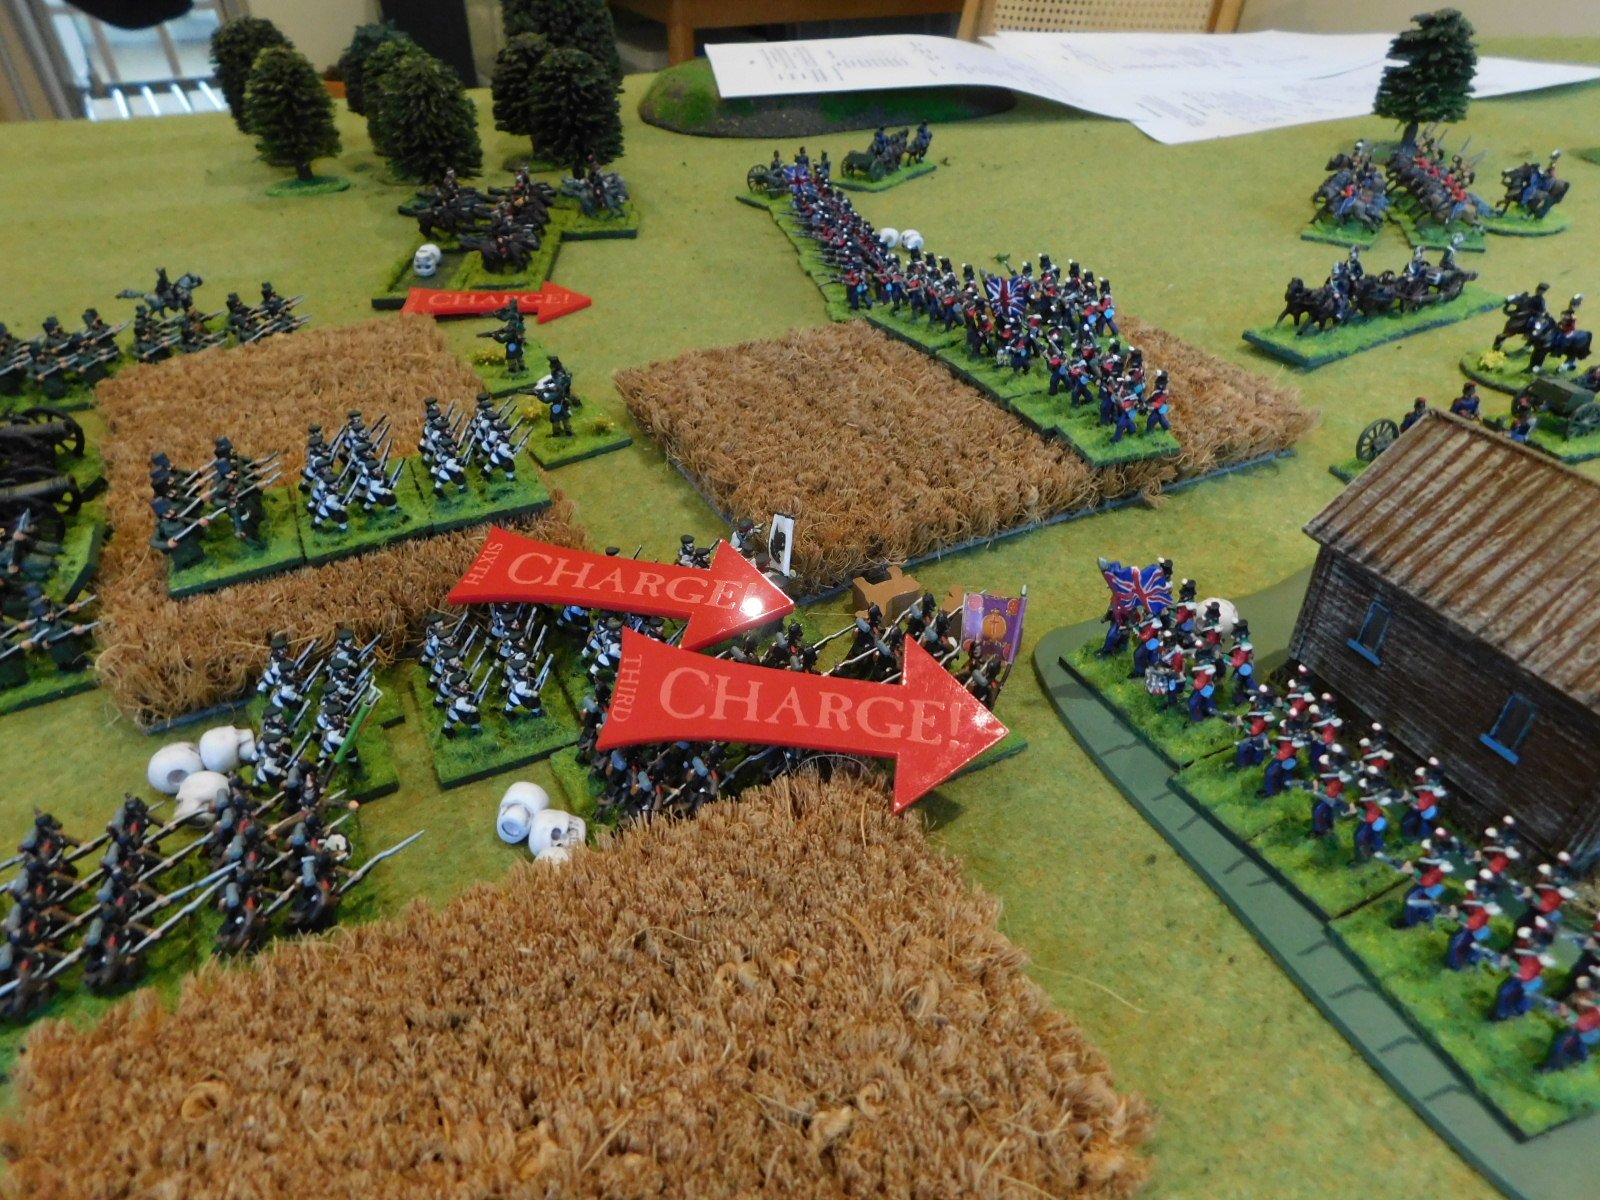
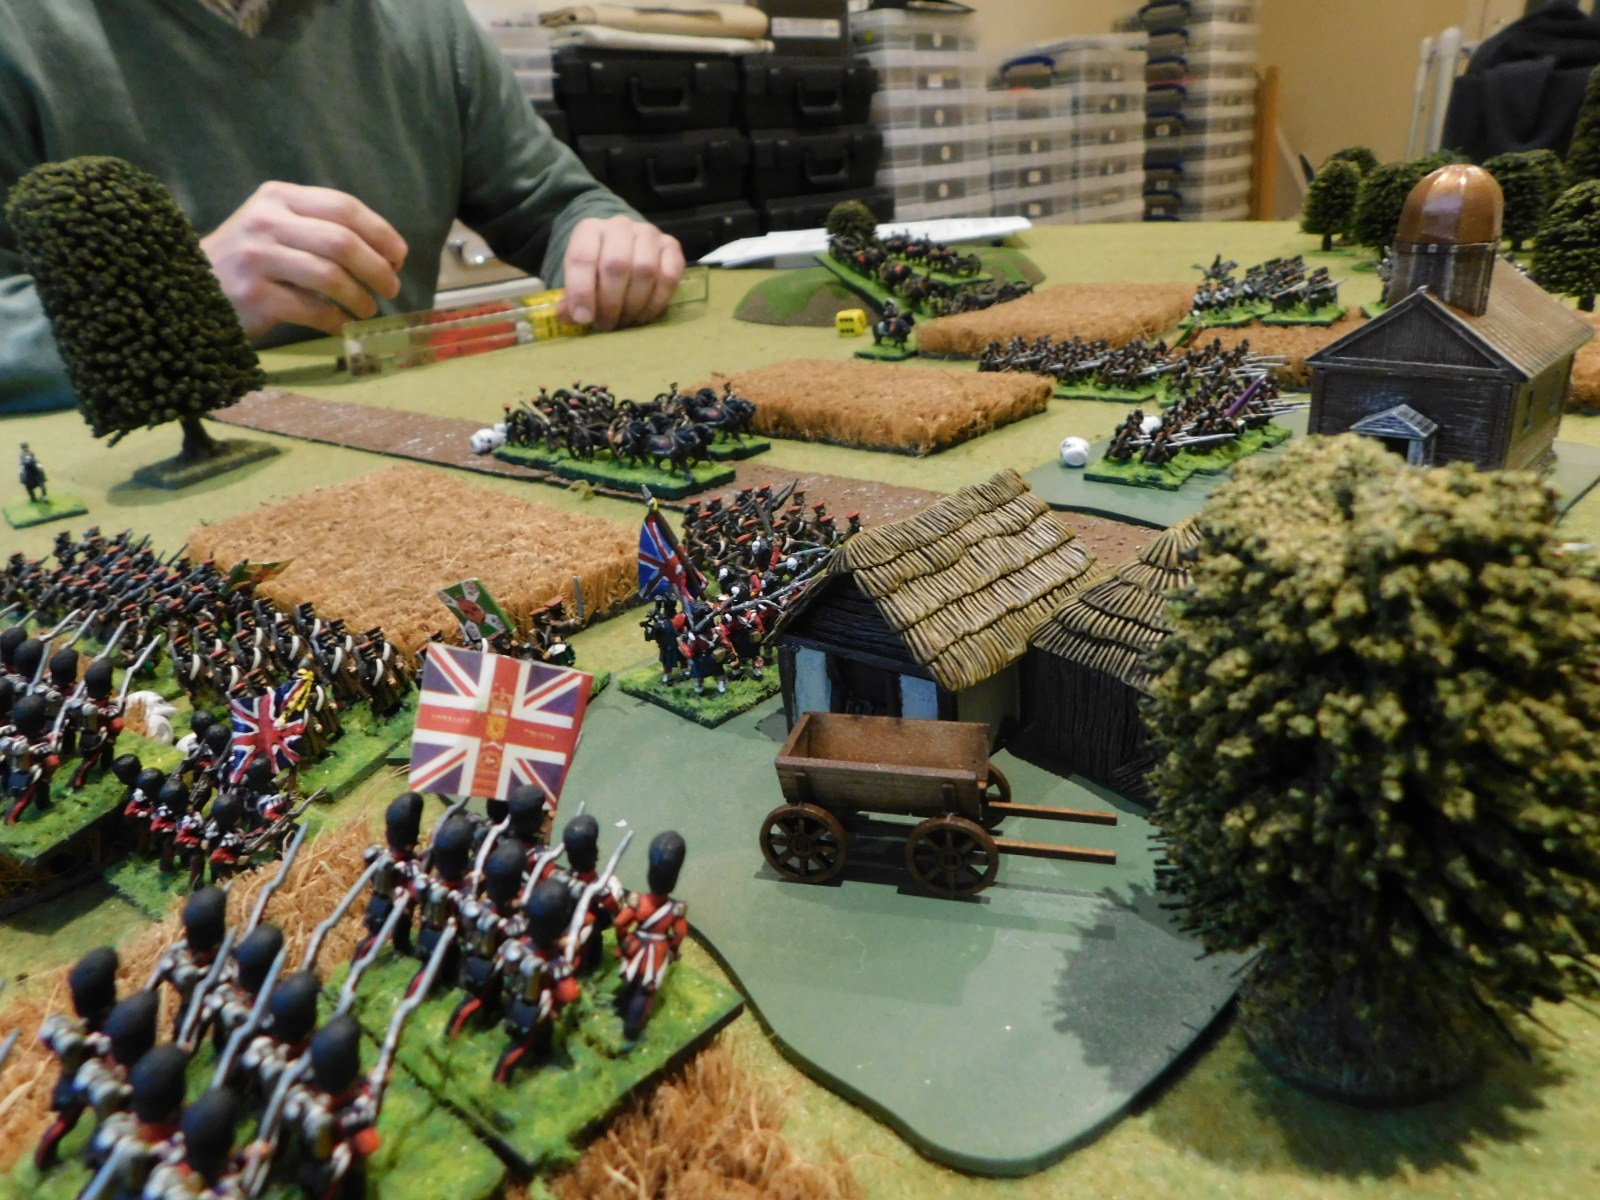
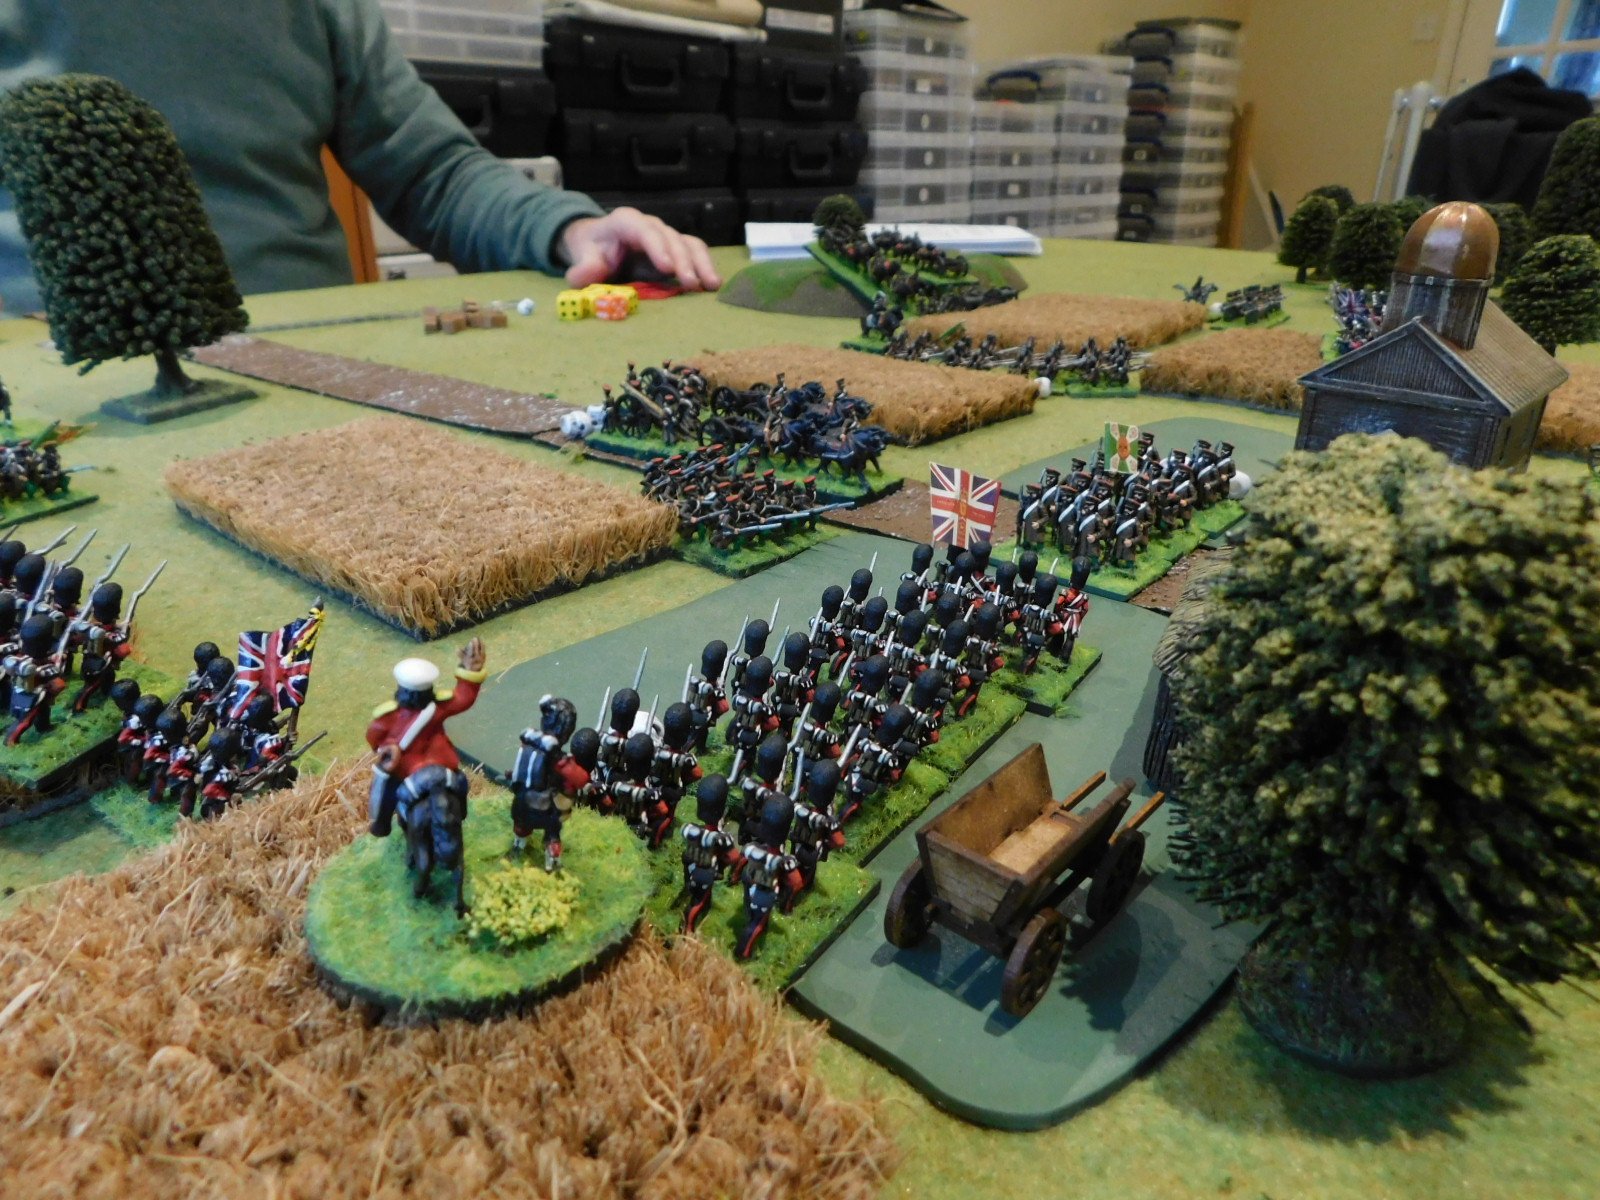
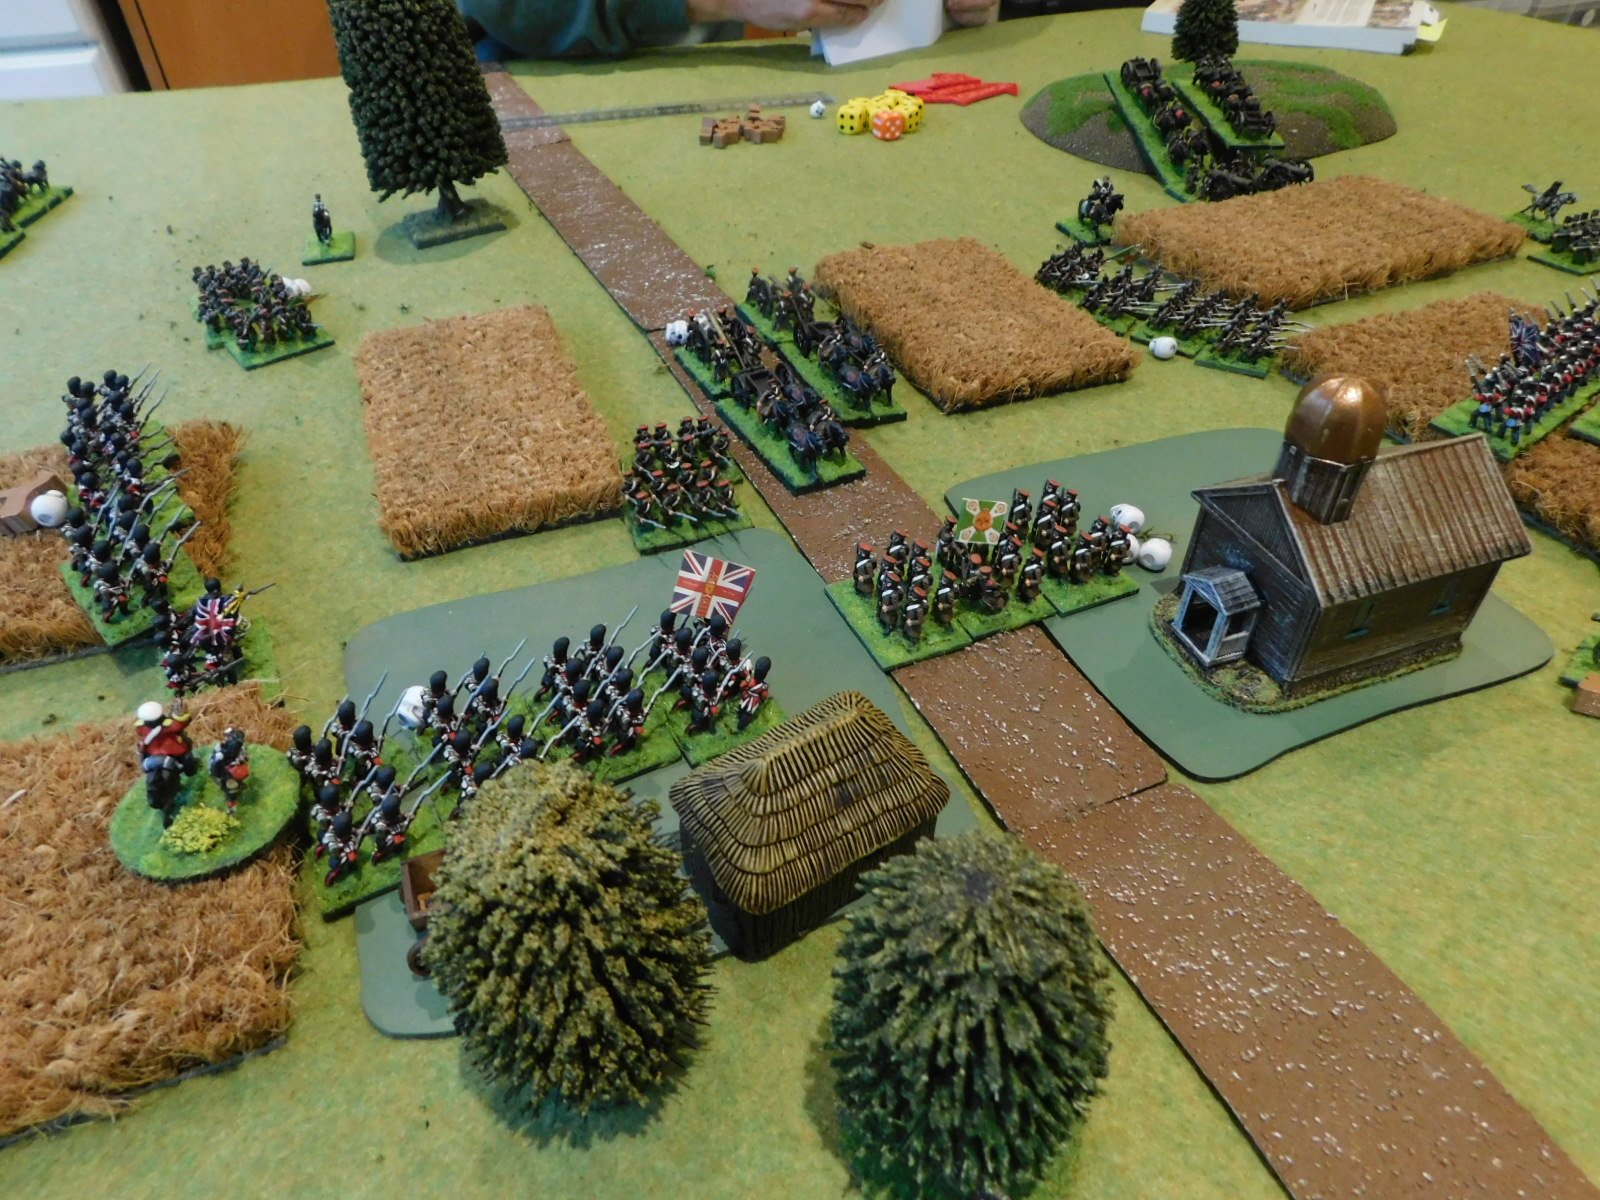
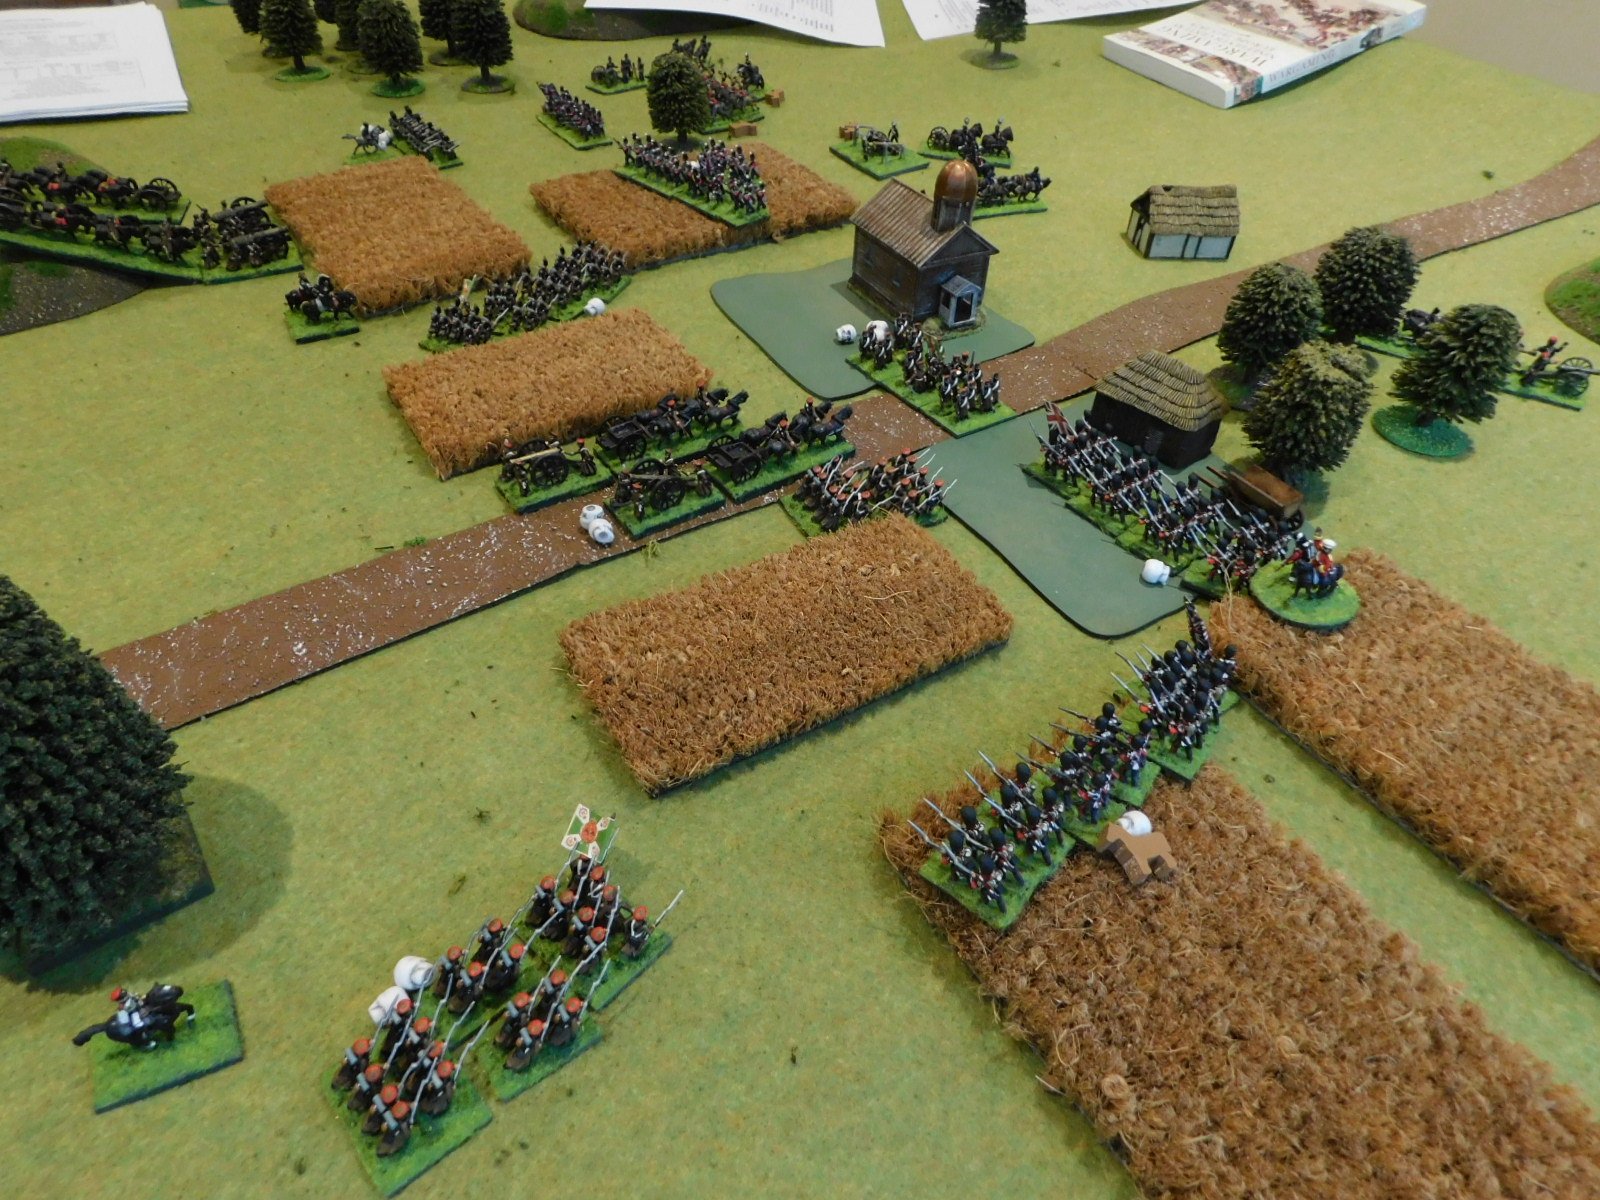
This was, however, only a temporary setback. The two battalions of Guardsmen on the left of the British line had repelled the Russians in front of them and now took the offensive. One formed columns and moved towards the left hand side of the village whilst the other pivoted around its right hand man to flank more Russian columns as they advanced forward.

This proved too much for the Russians, and soon the left hand side of the village was back in British hands, with no more Russian reinforcements on the way.

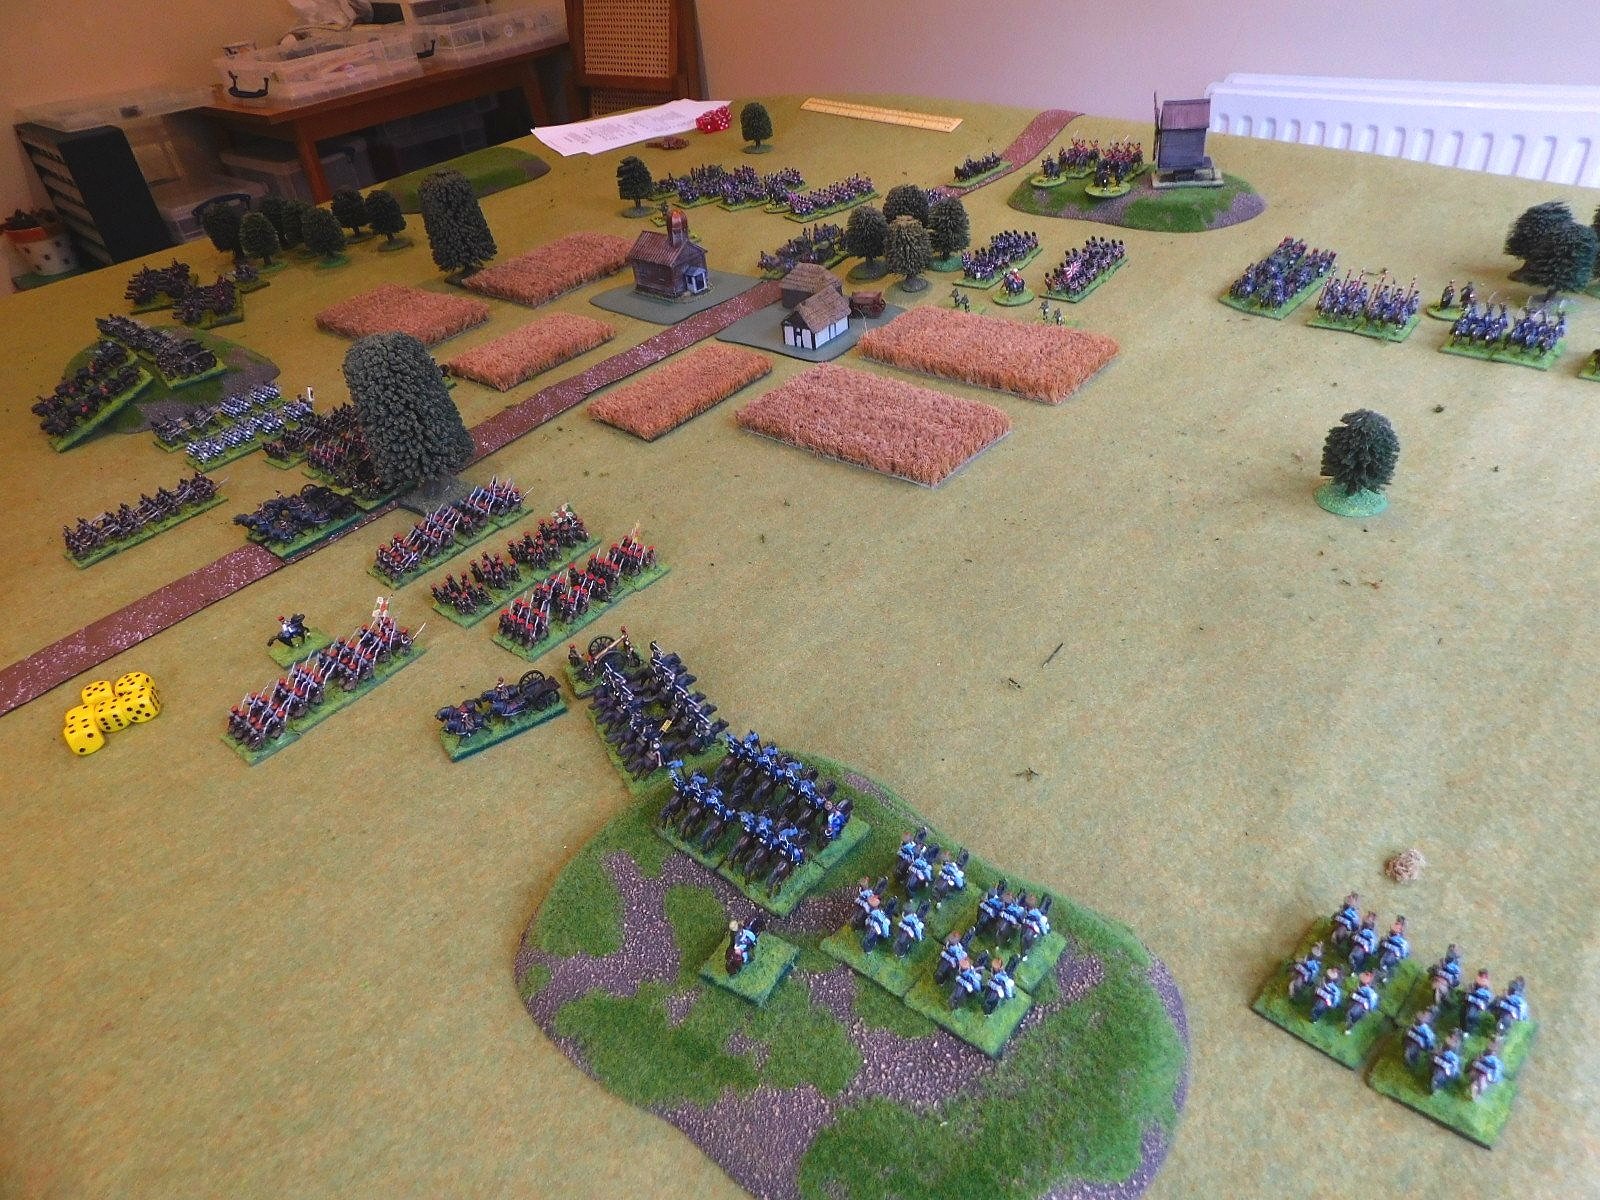
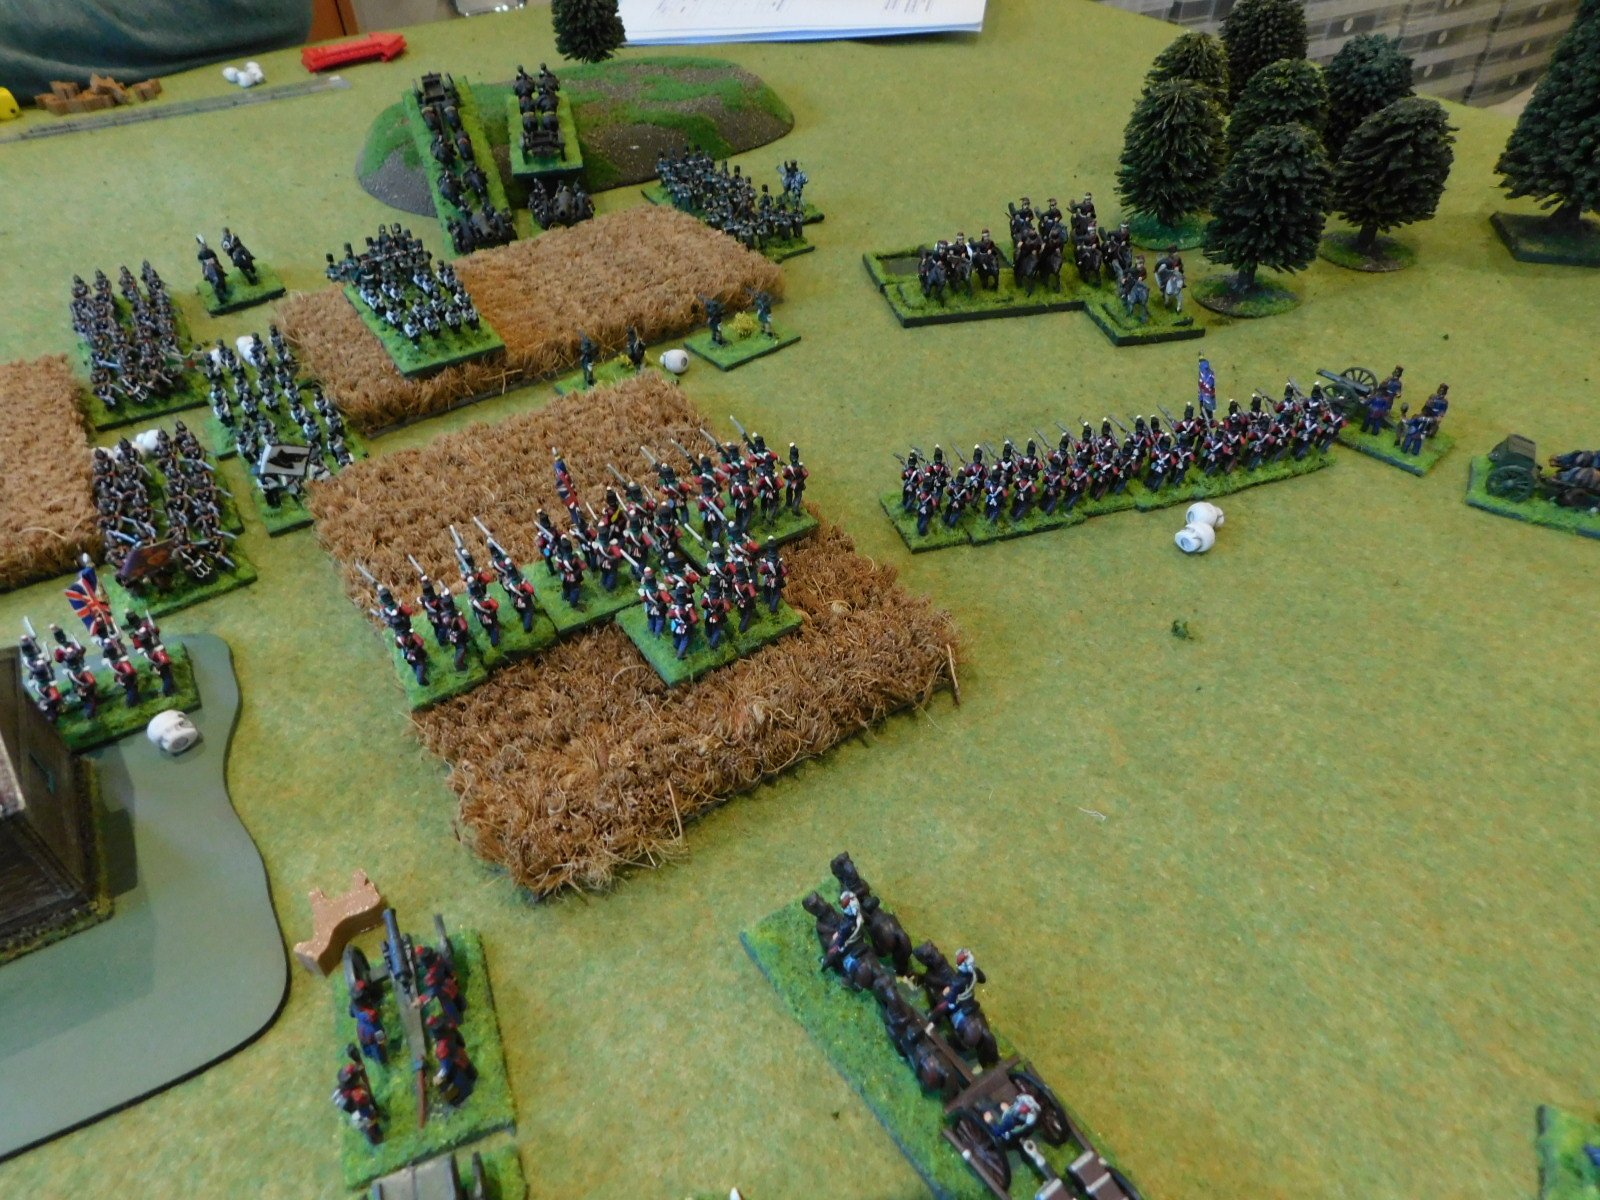
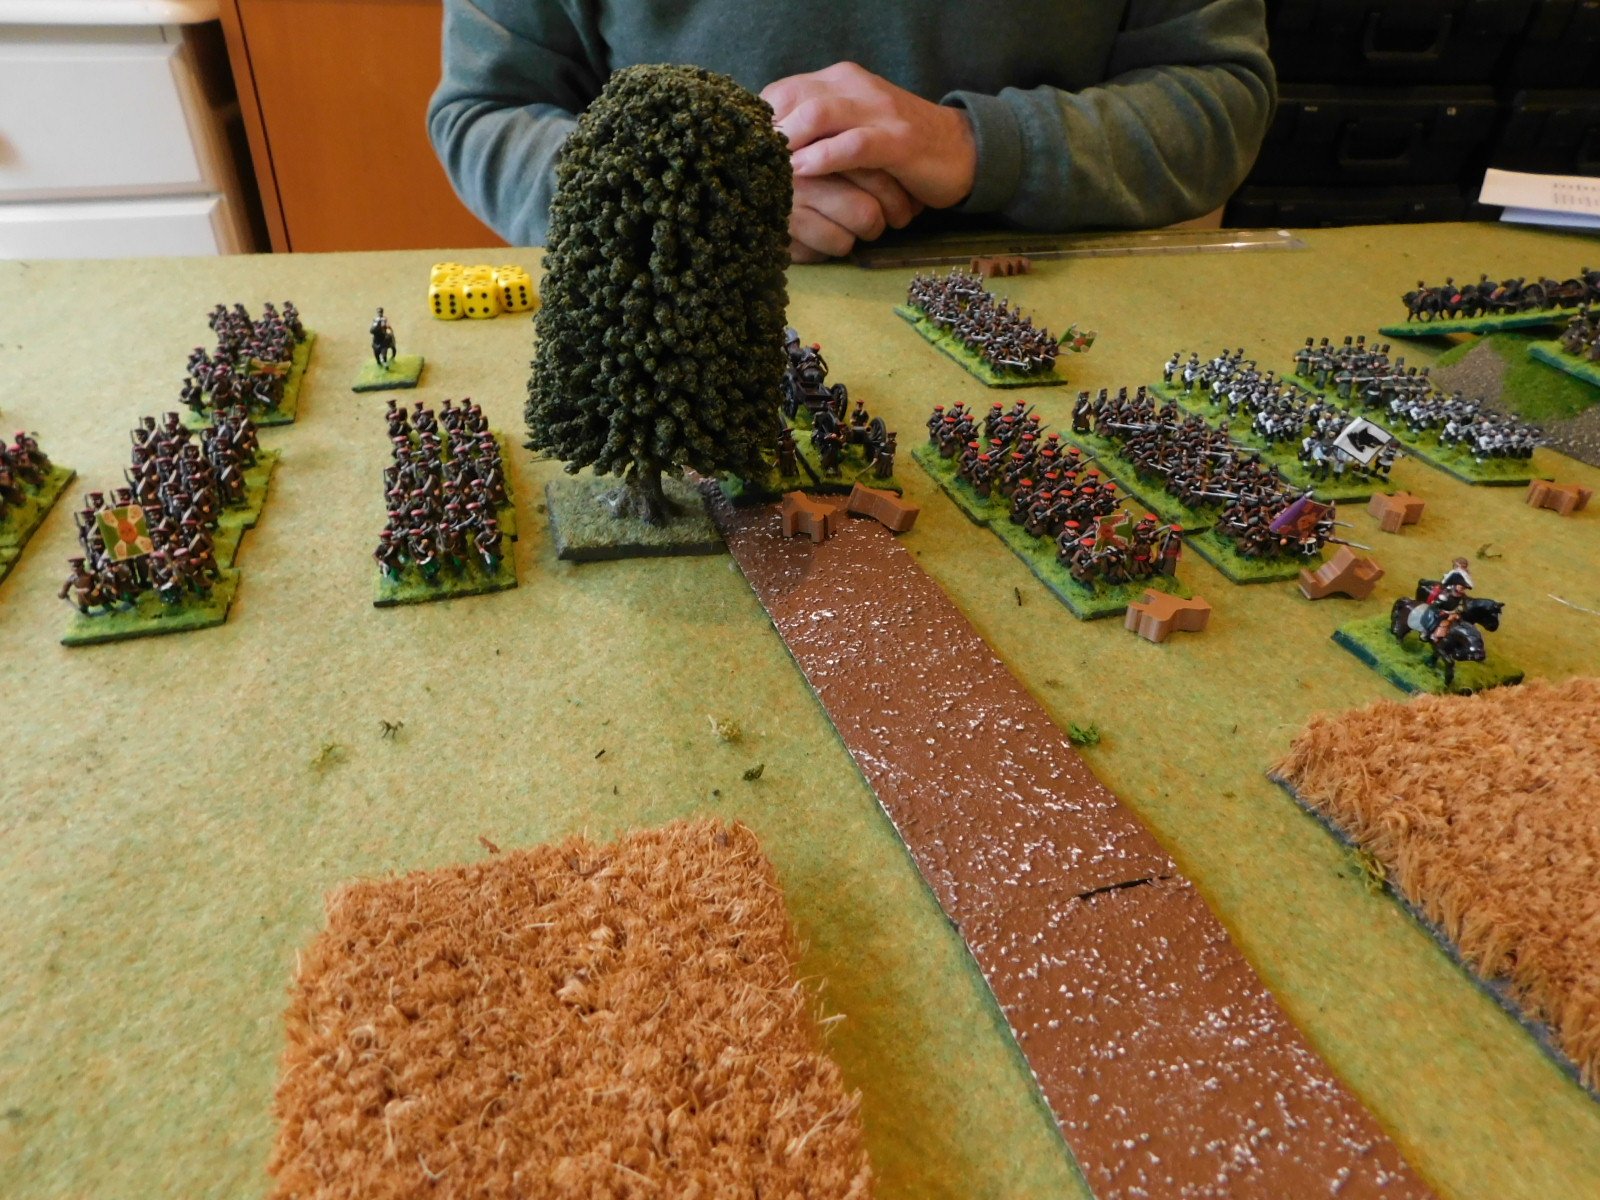
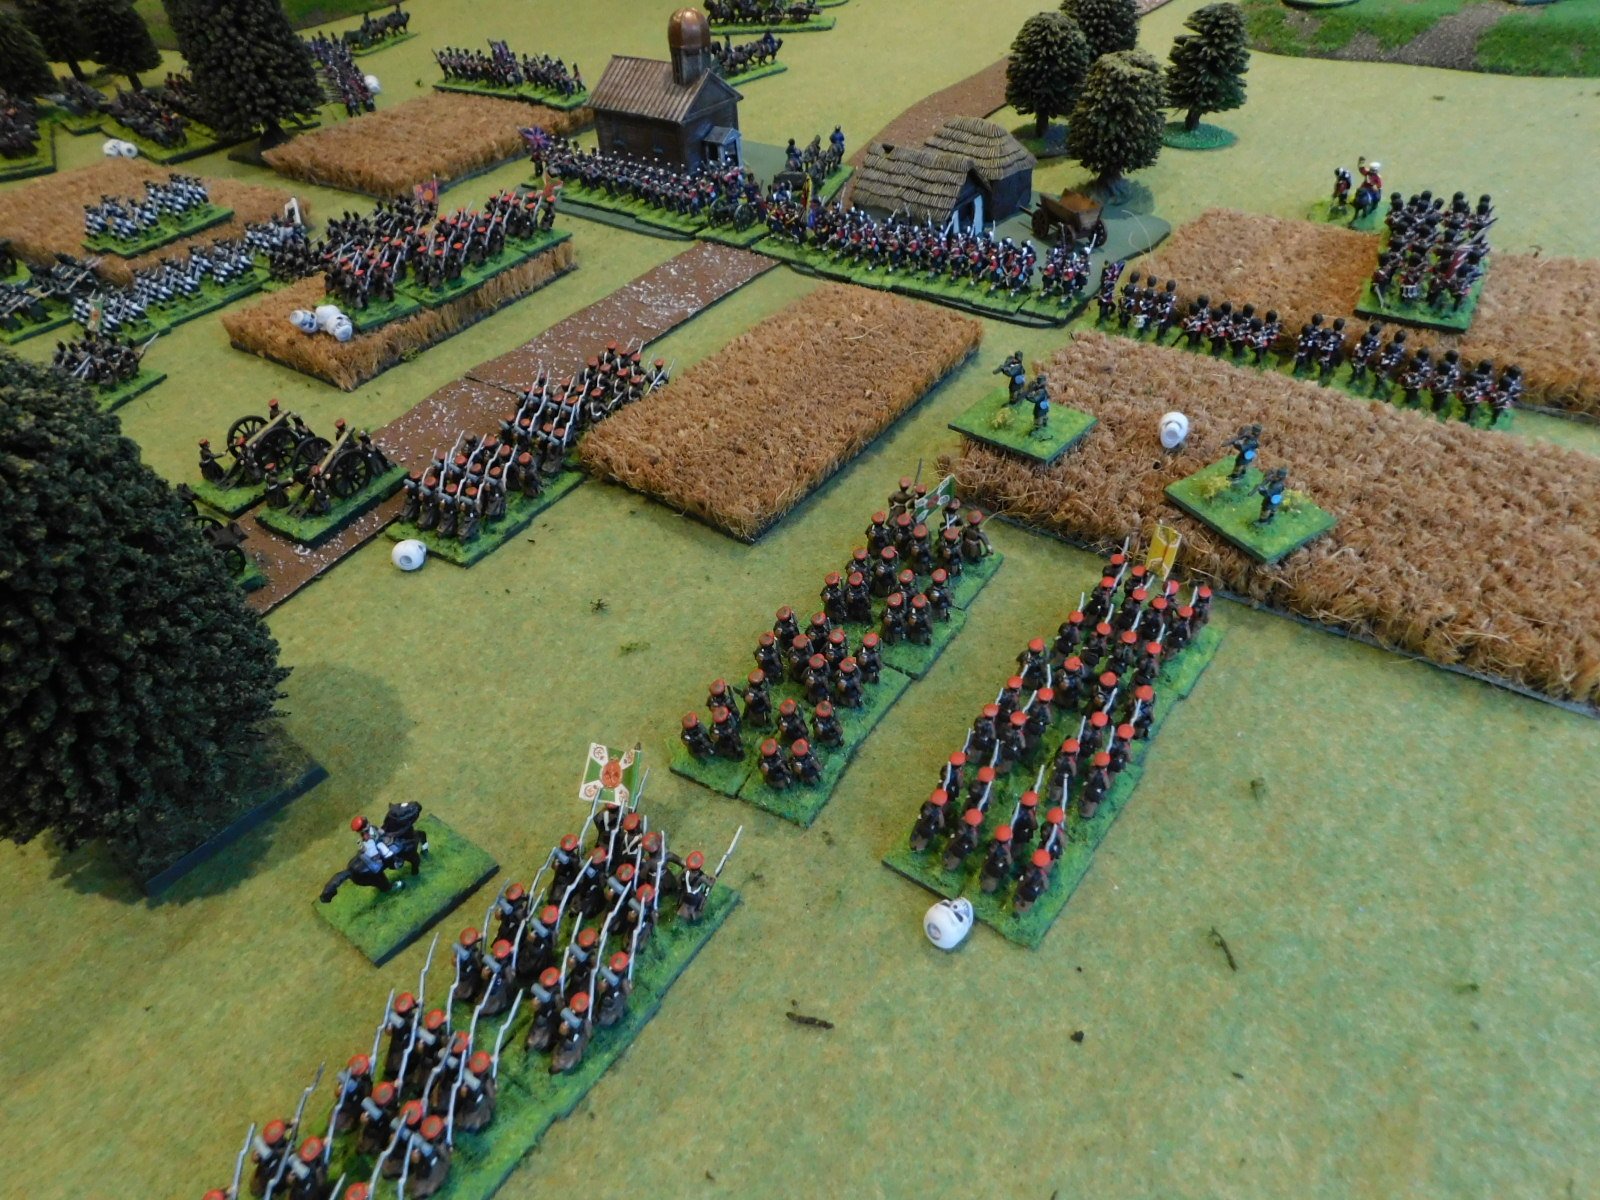
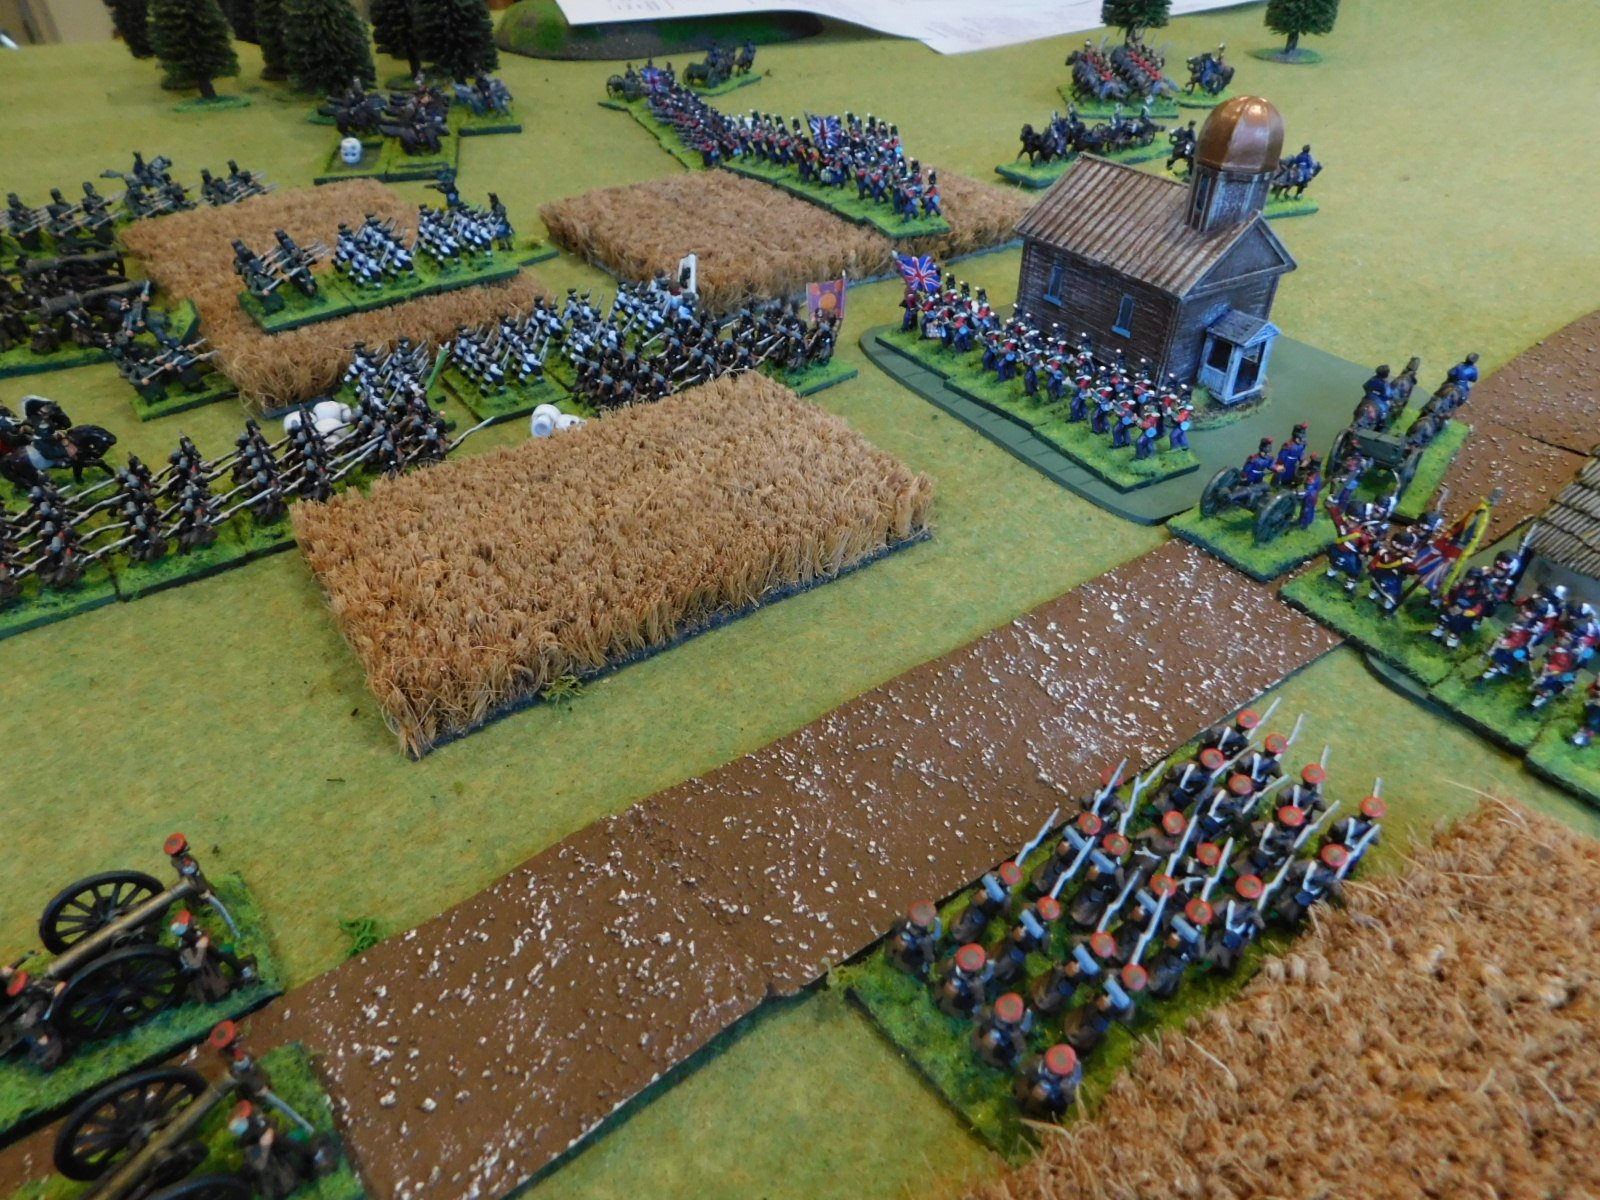
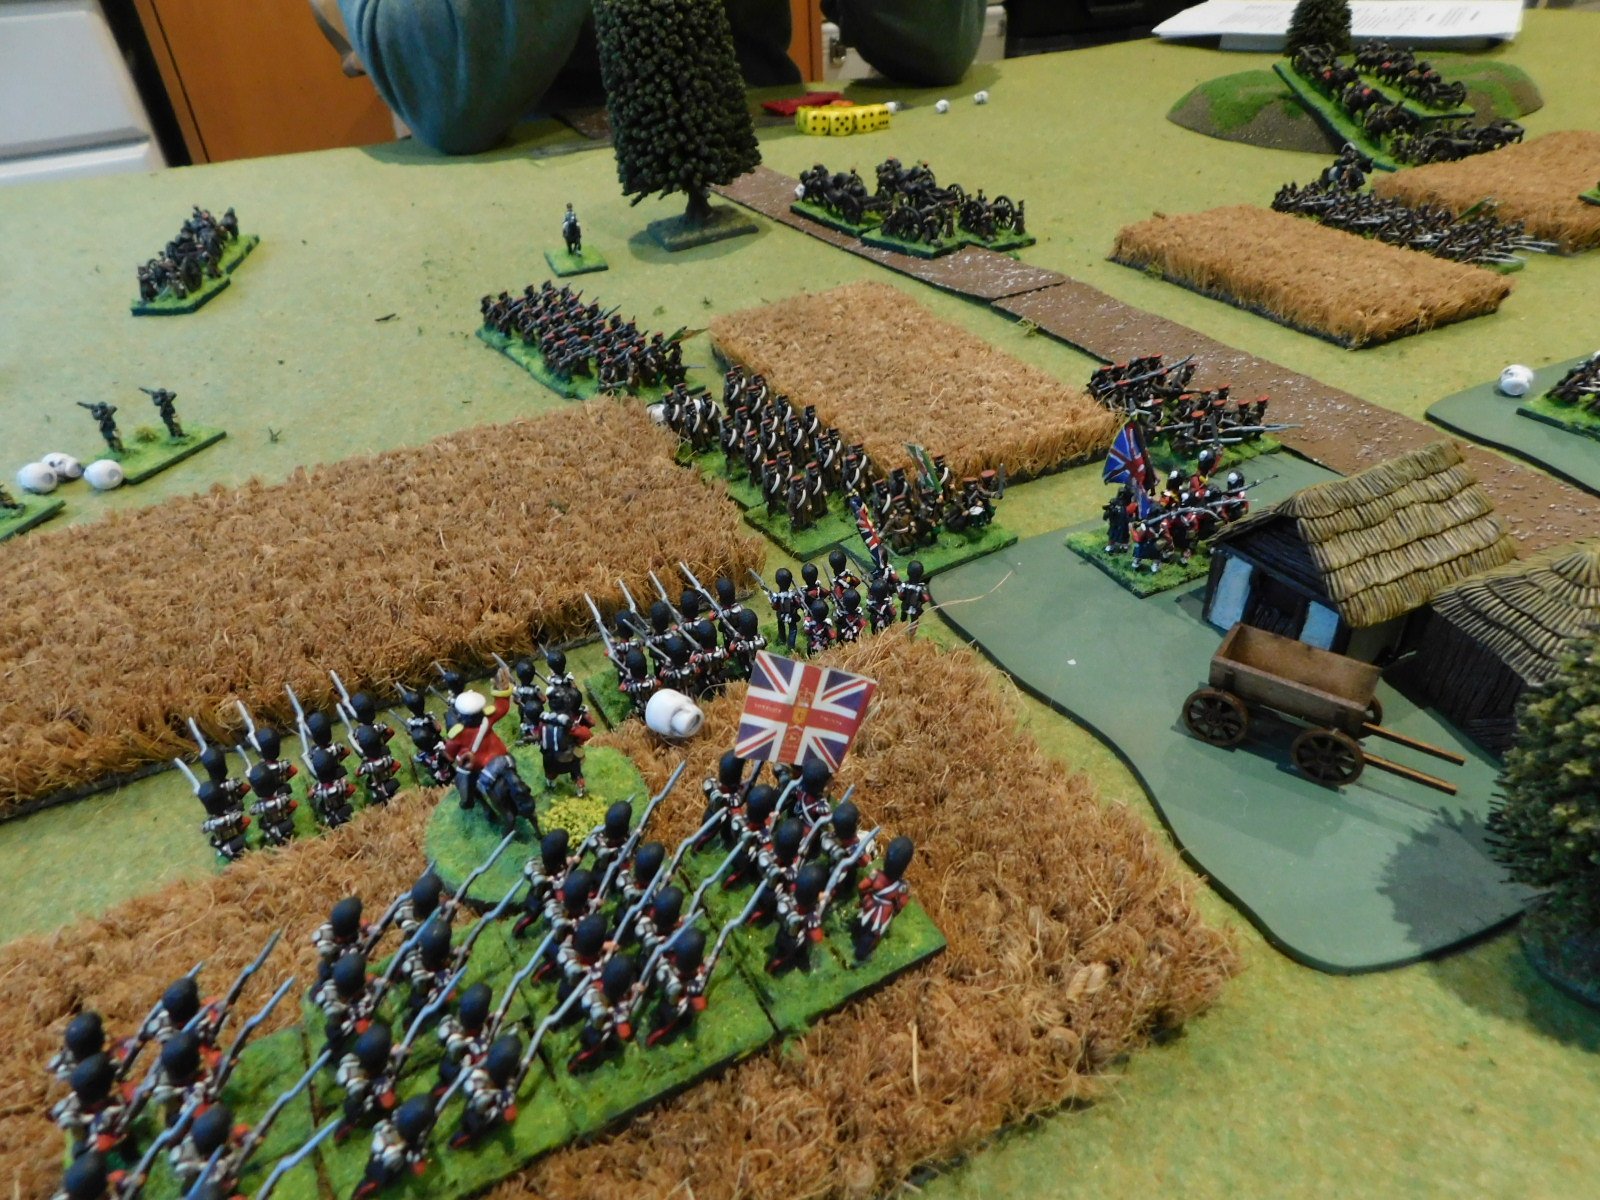
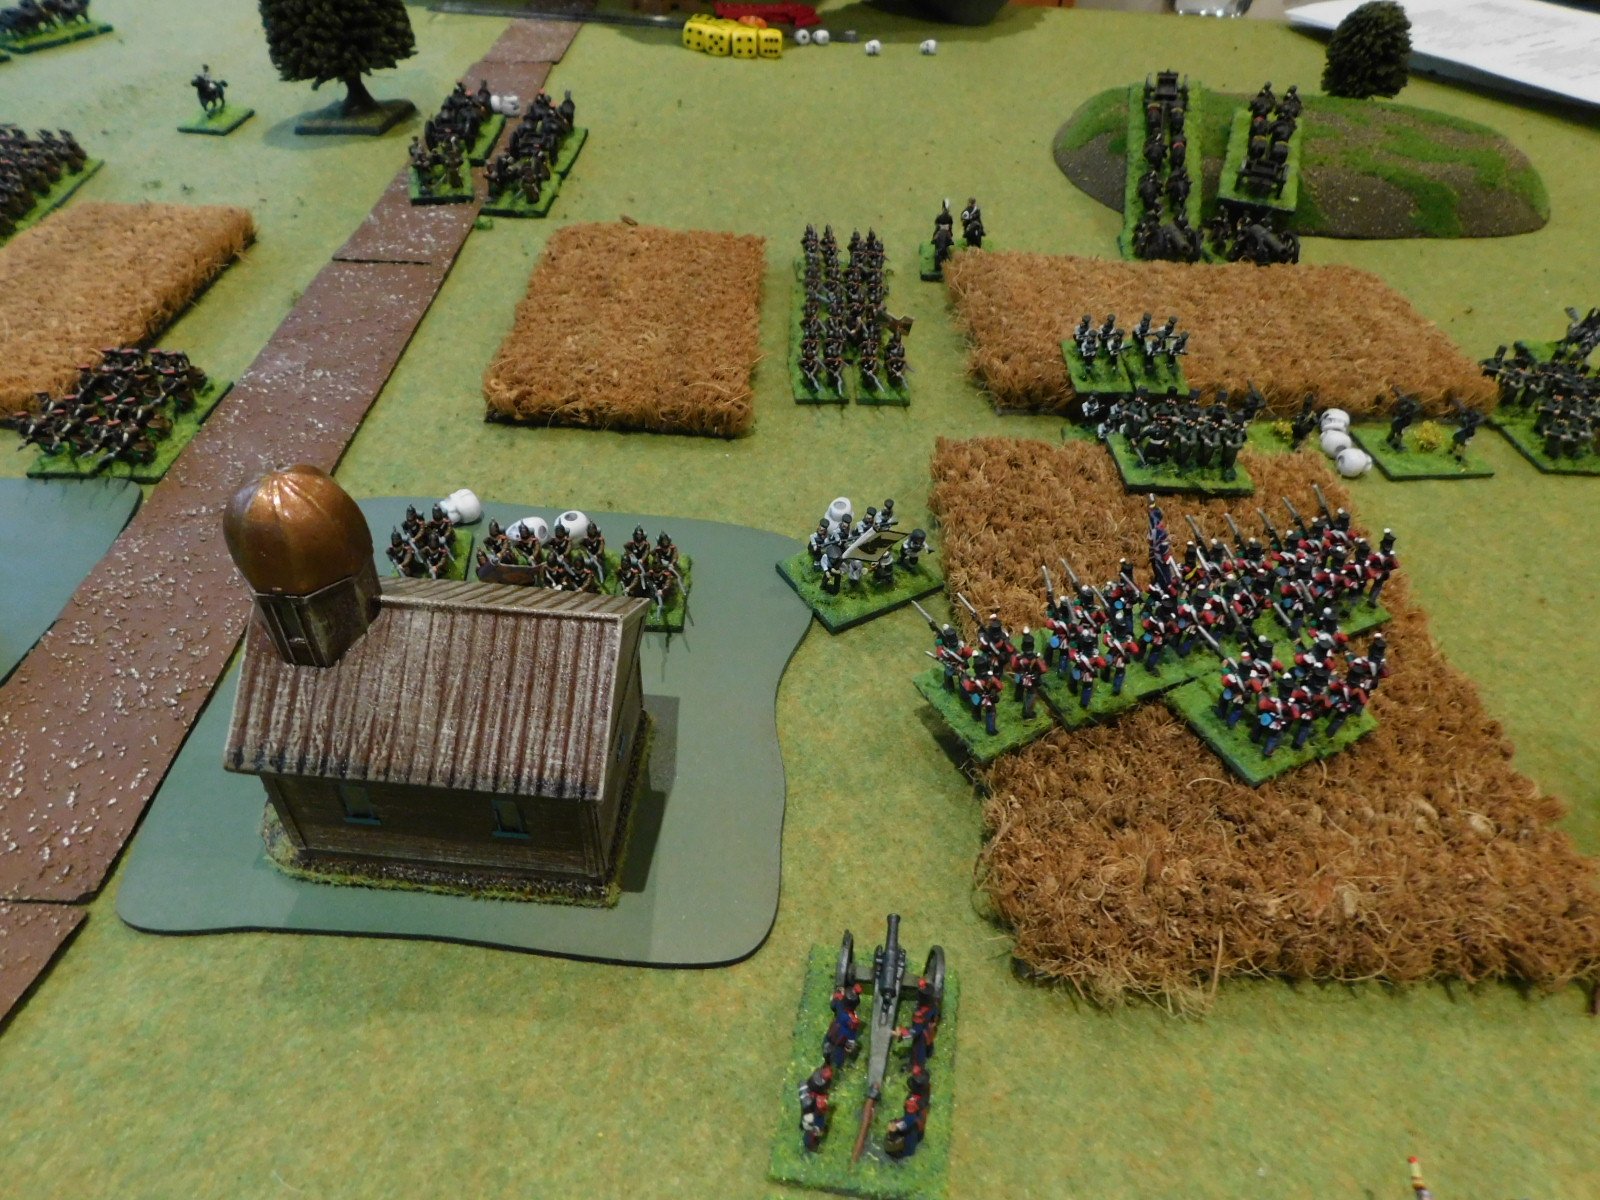
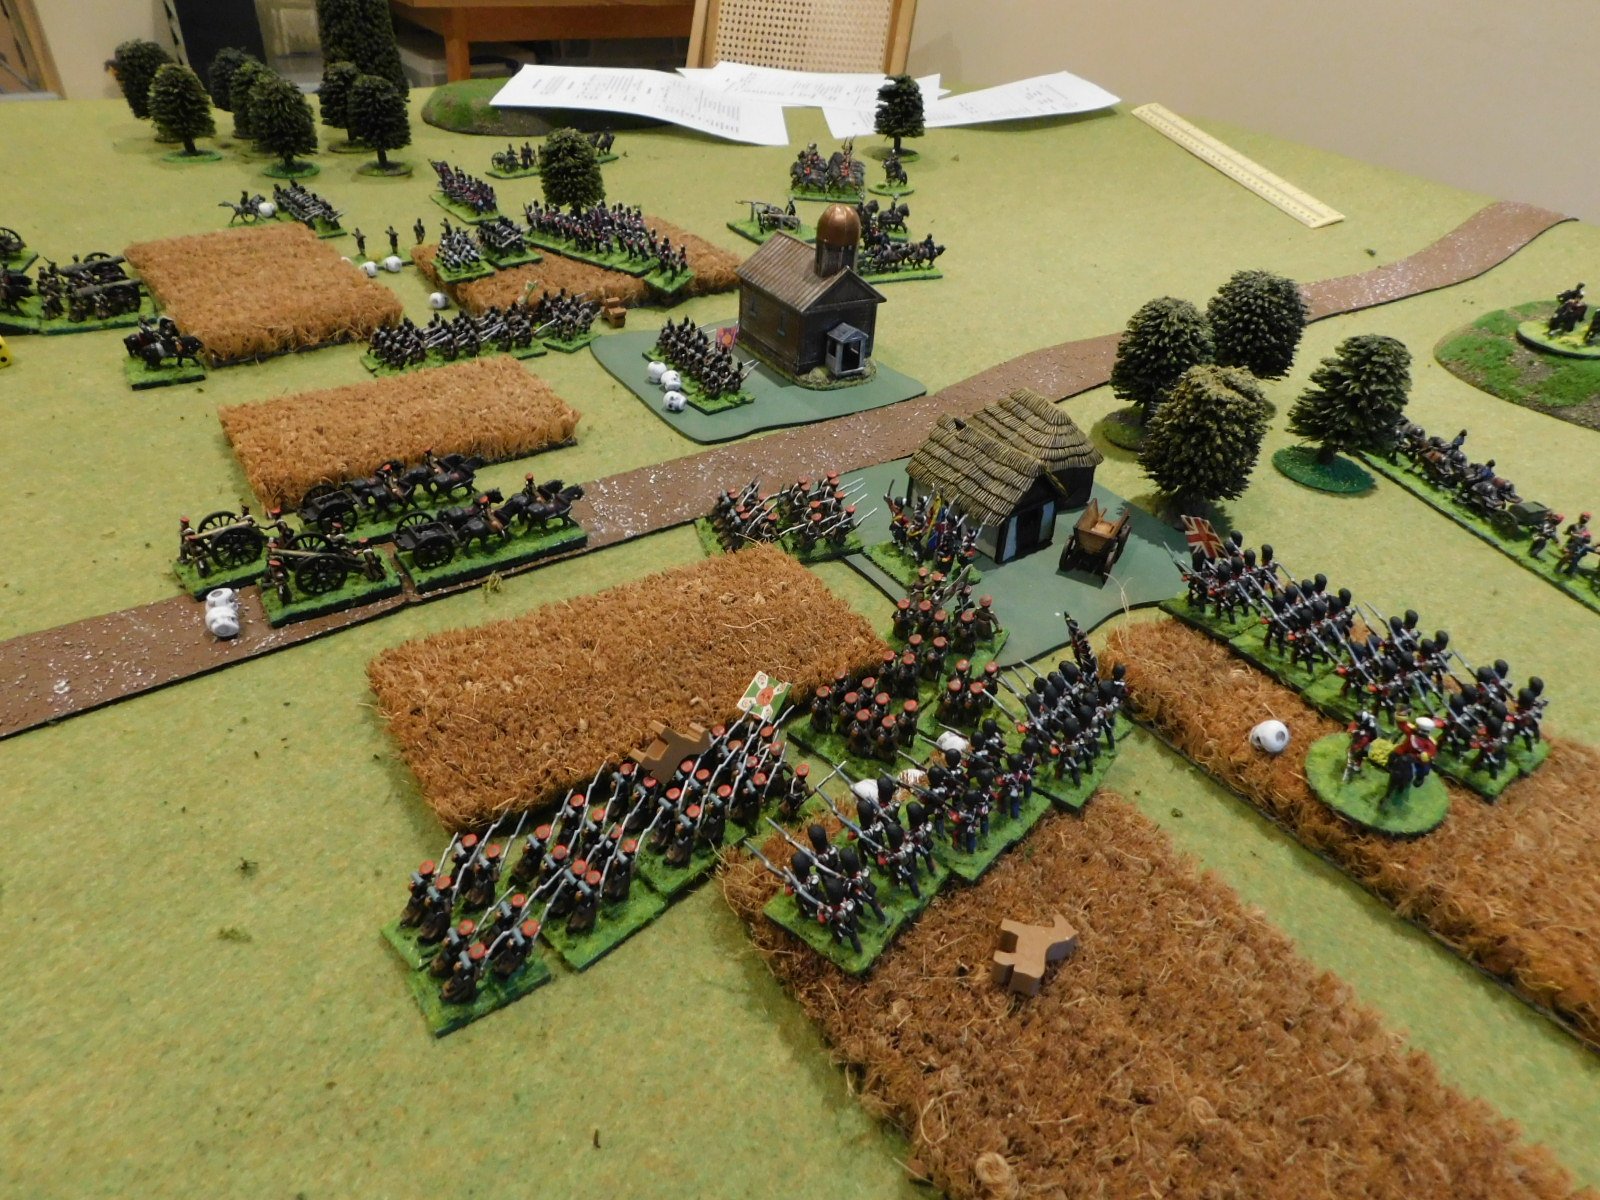
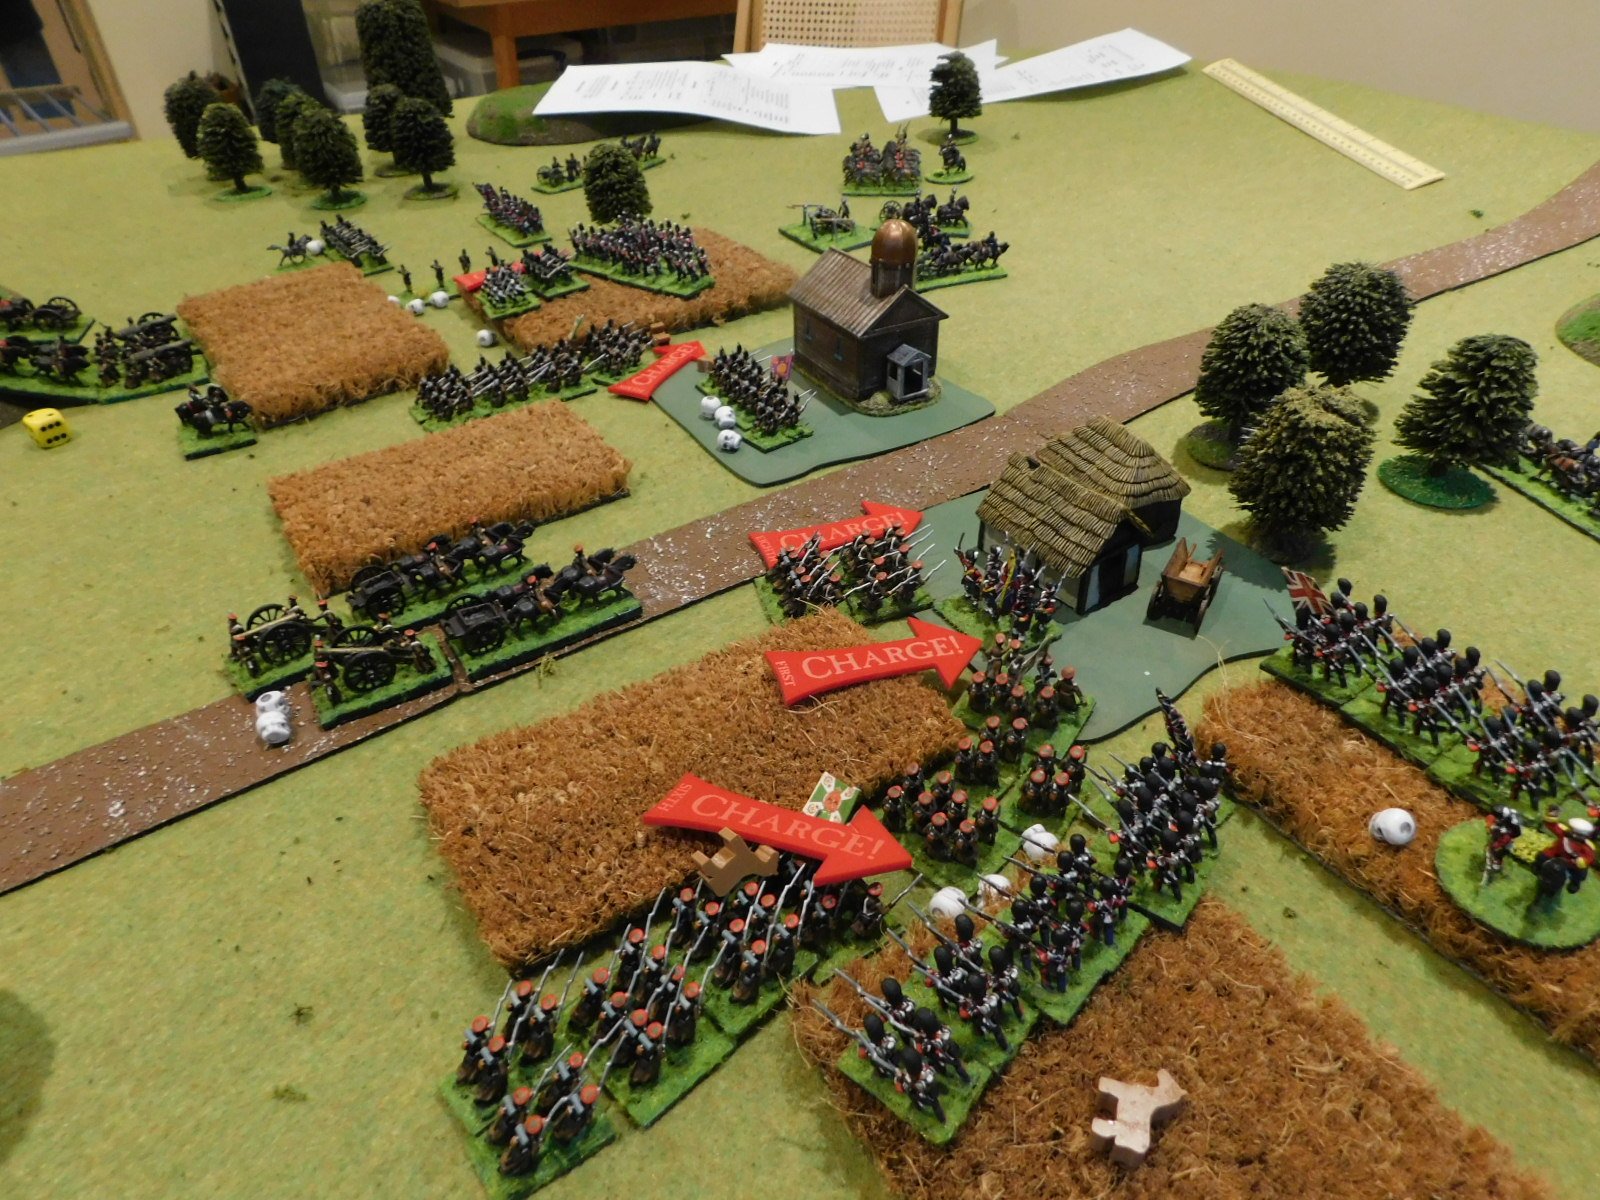
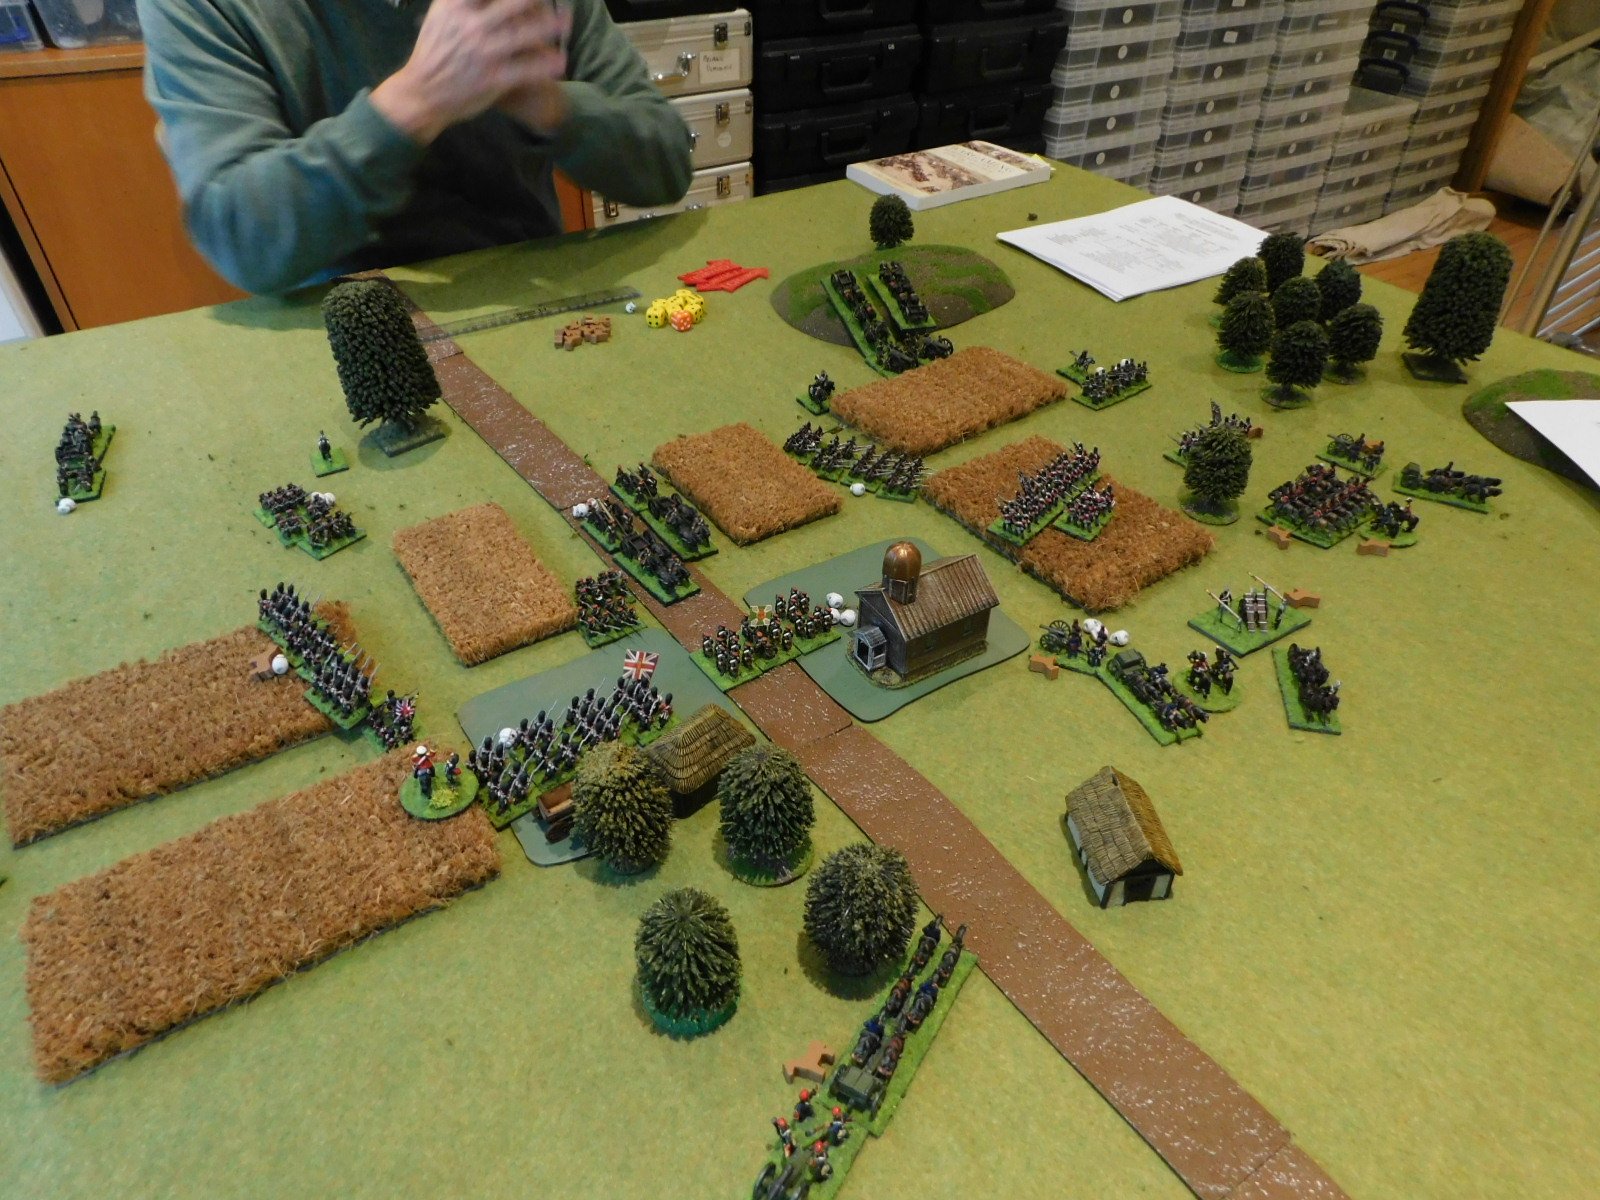
Meanwhile, on the right of the central British line, a battalion of line infantry had been holding its position in the centre of a cornfield, repelling any Russian columns who came towards them. Fortunately for the Brits, the terrain meant that the Russian attacks had come in piecemeal as opposed to a co-ordinated push.

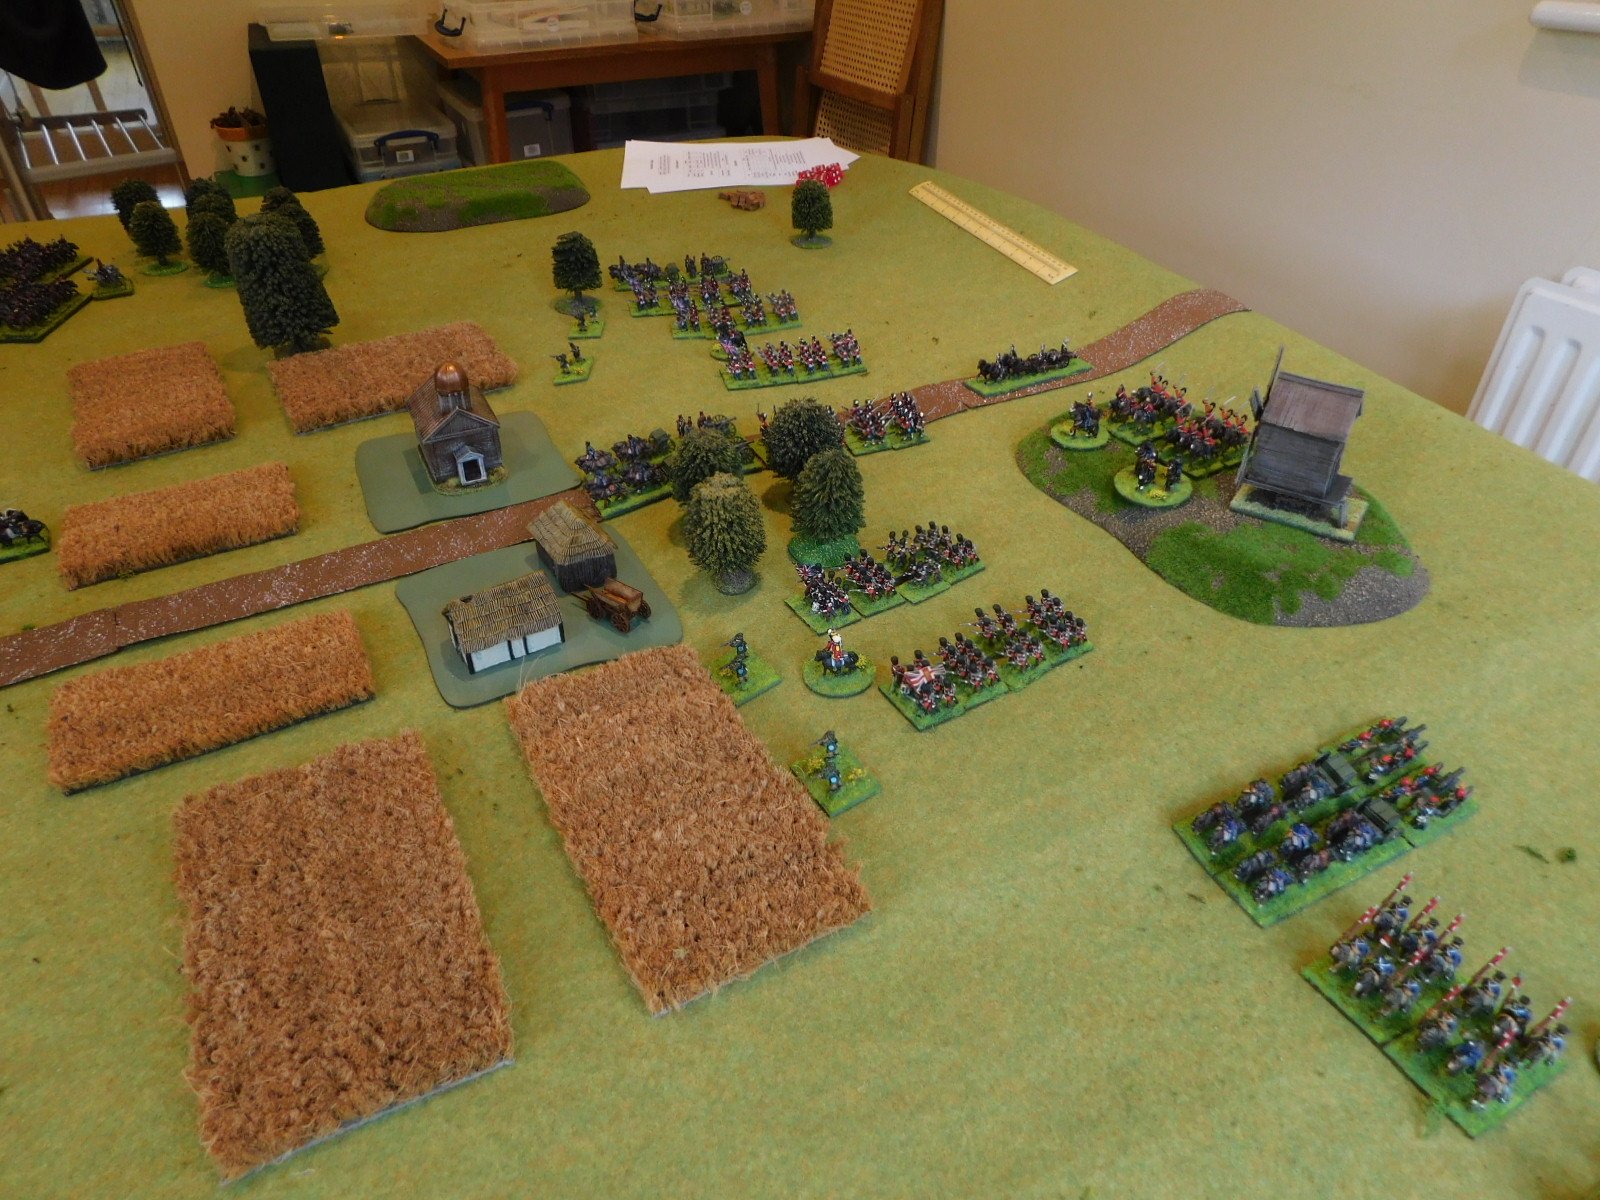
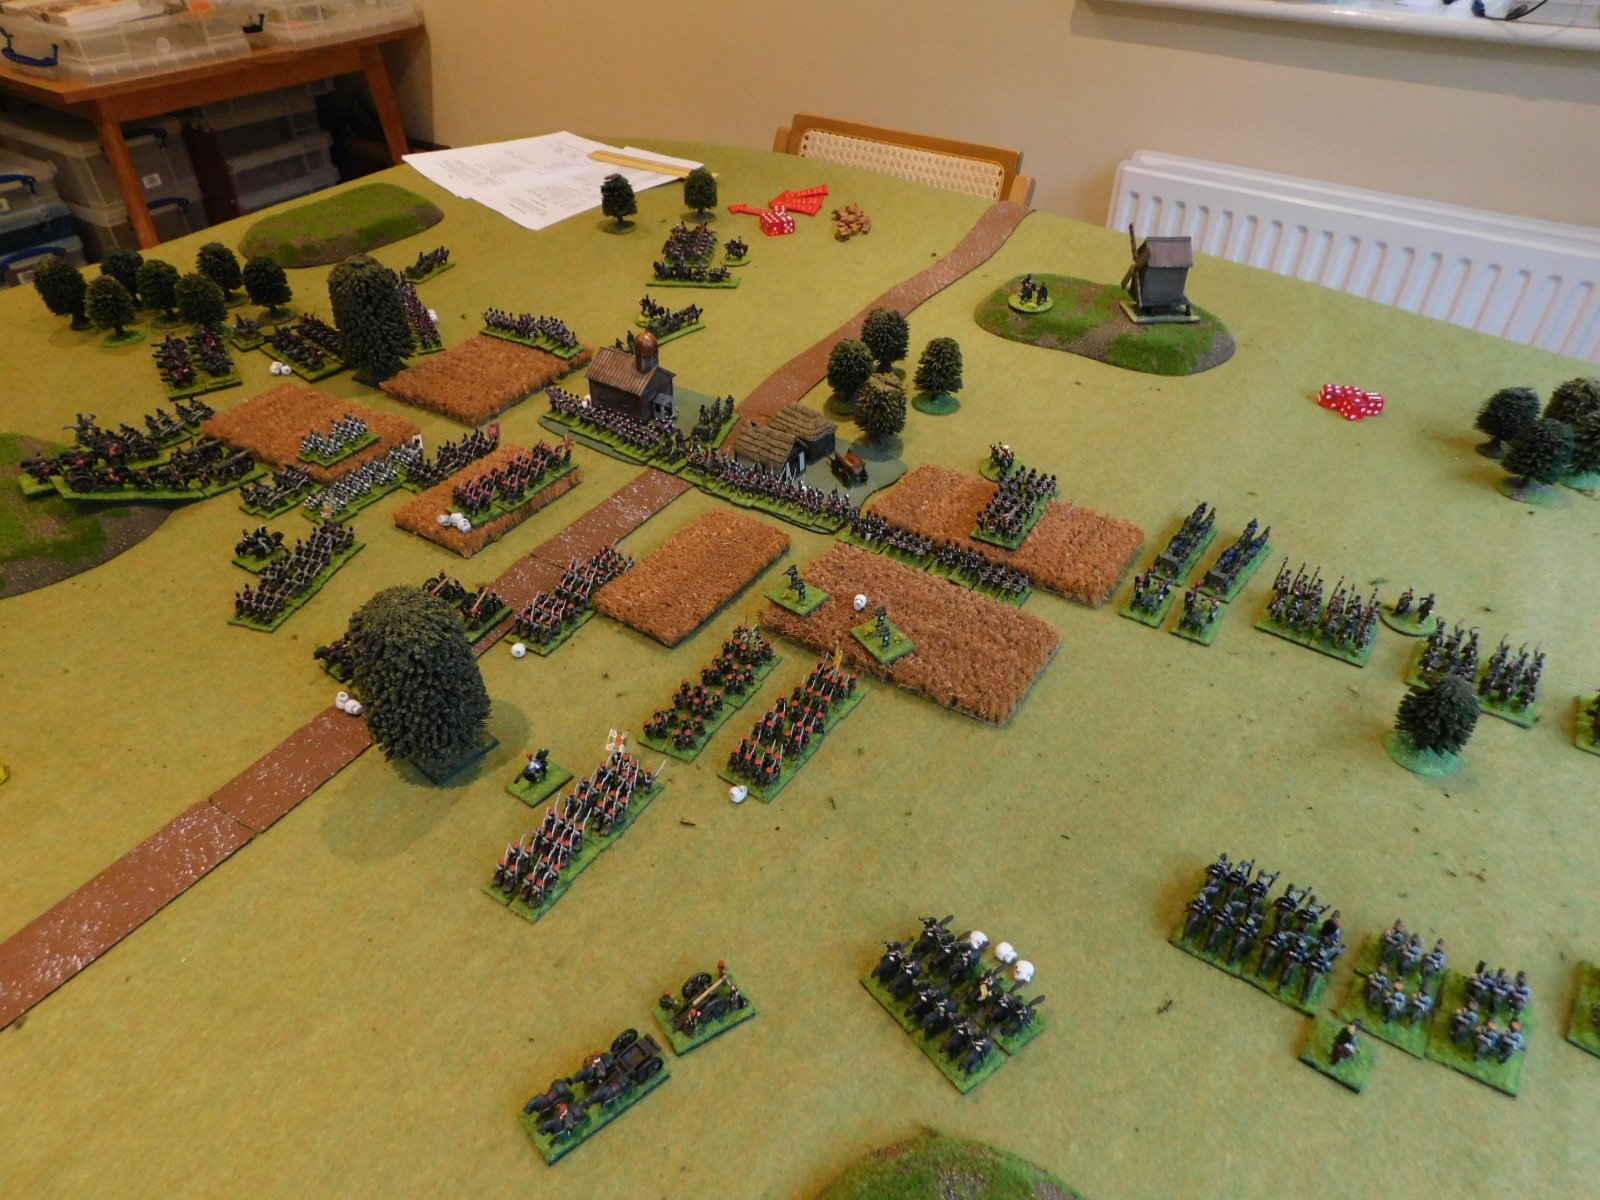
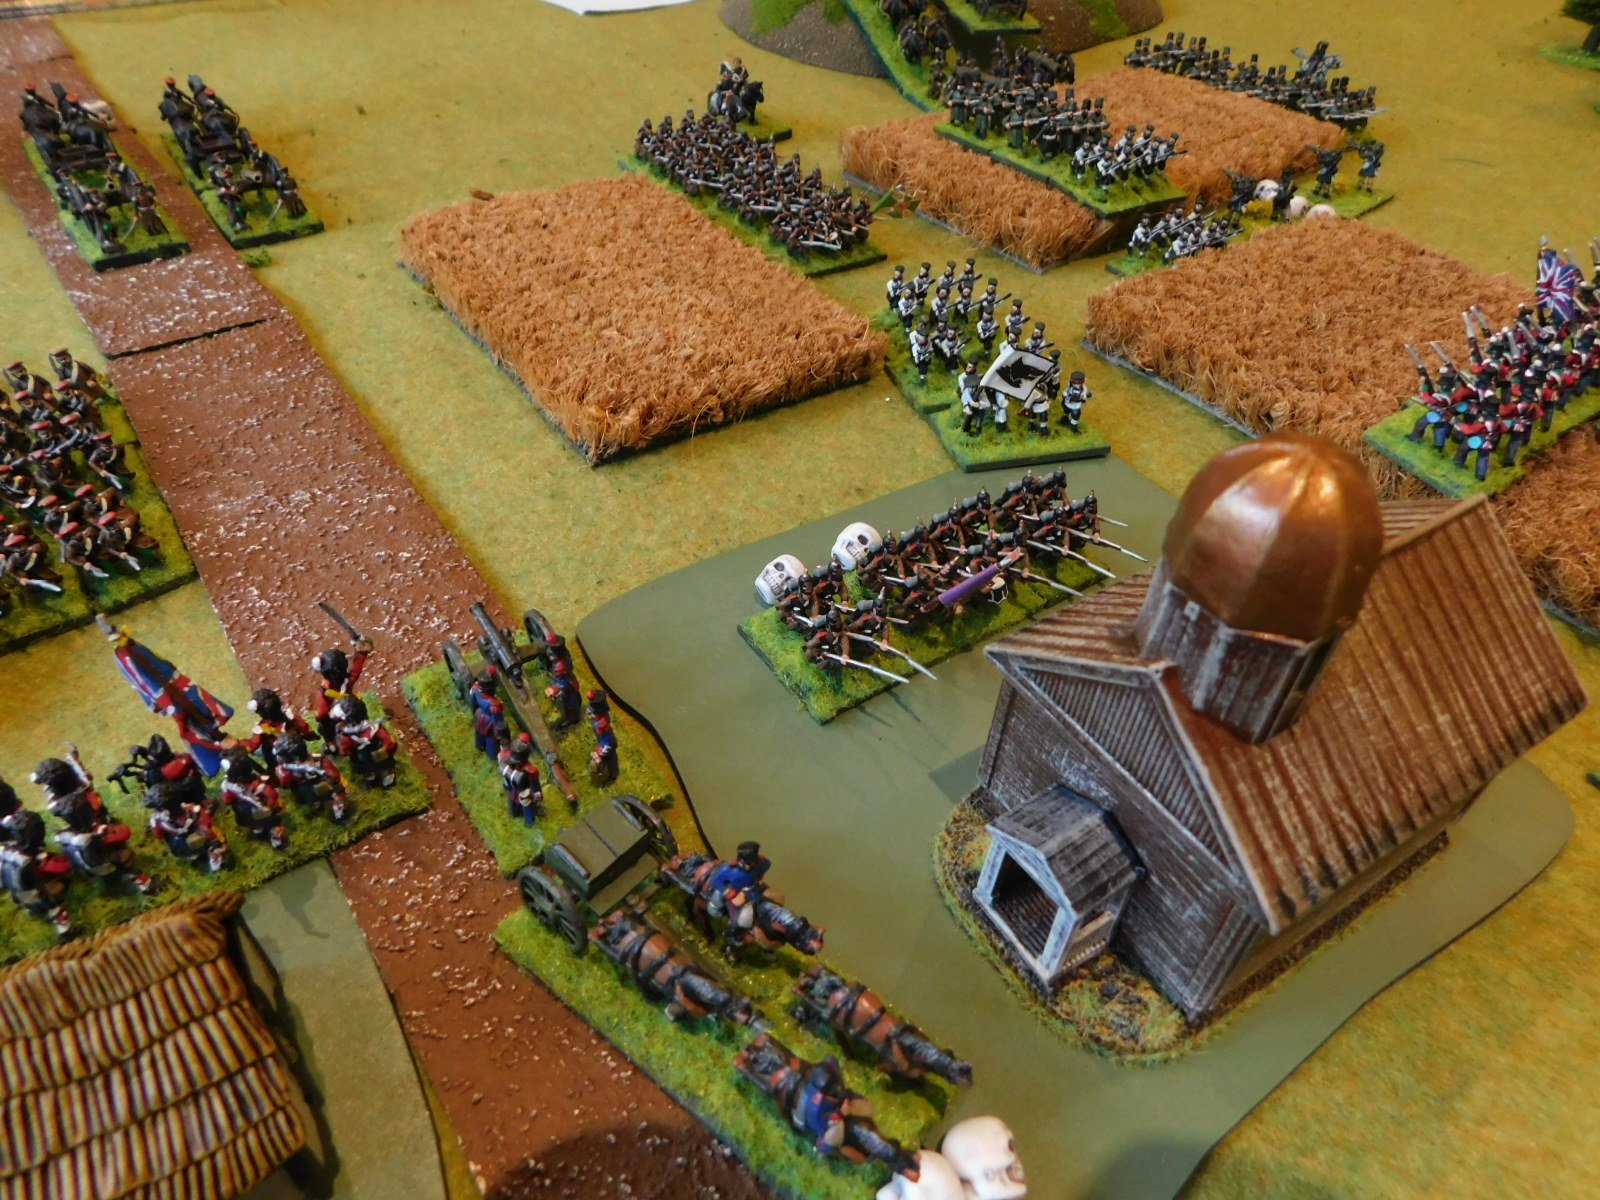
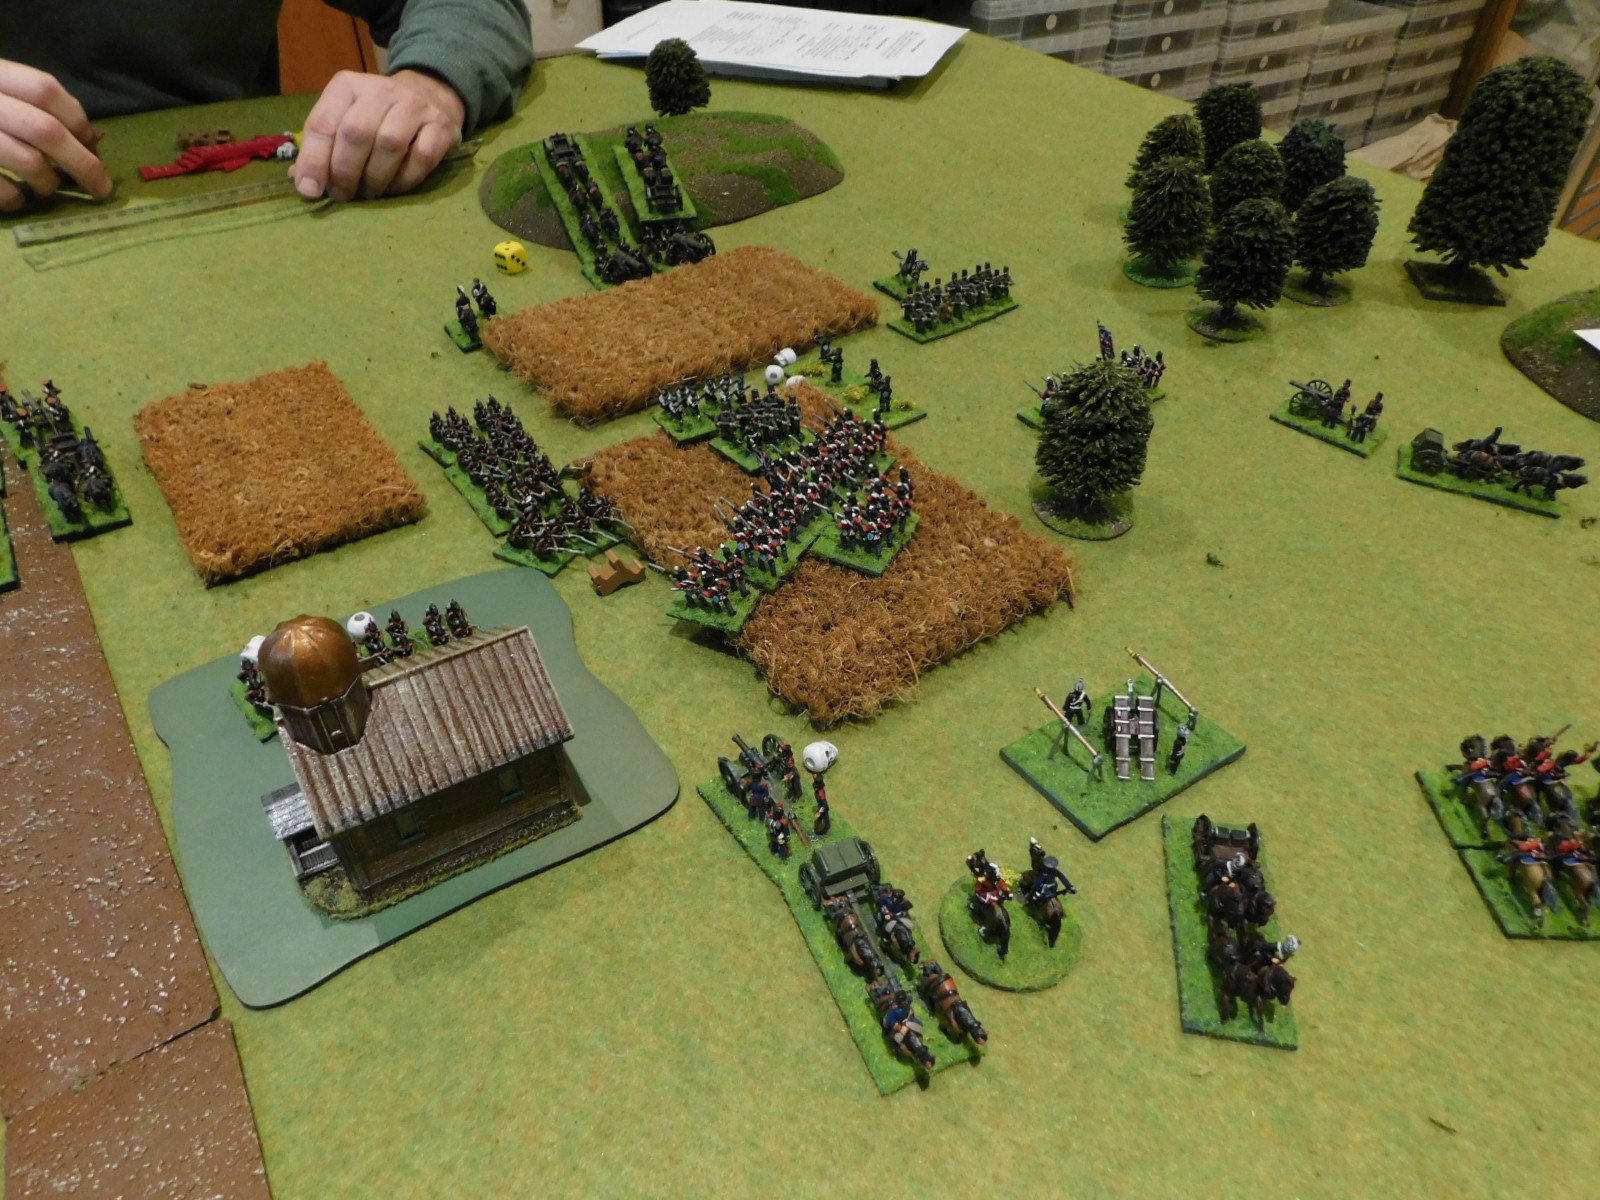
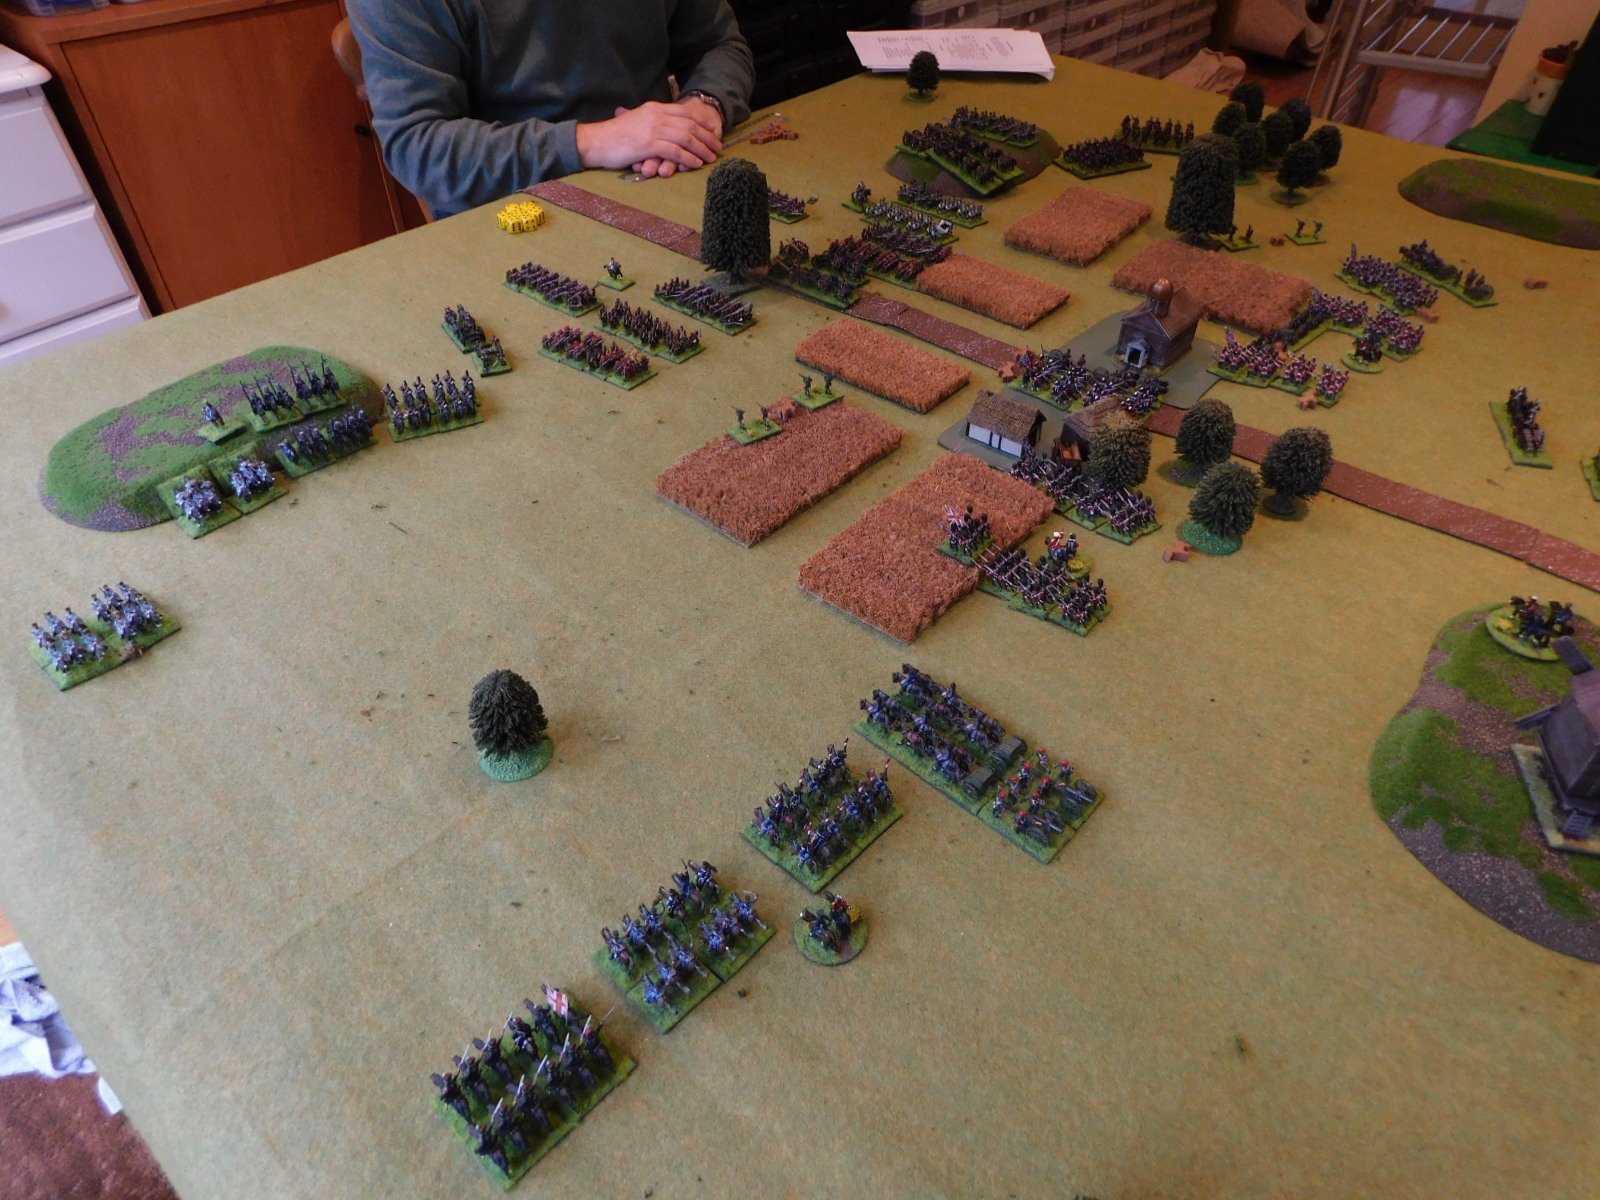
Although honours were now technically even, with each side holding one half of the village, the Russians were down to only three effective infantry units (from eleven!) whereas the British had only lost two of their six infantry battalions. With the wings stalemated, the Russian commander declined to waste his troops on further assaults, or even to try and hold the gains that they had made, and ordered a general retreat.

Aftermath

Another great game and one that was actually very close indeed.

When the Russian columns pushed two British battalions out of the village, I was seriously concerned that I wasn’t going to get back into them, especially as my “elite” cavalry were busy getting nowhere.

To finish, here are a couple of shots not included above of the battle in progress:

First Painting of the Year

Not the start of a new project (they are still in their box!) but a few bits and pieces for existing armies.

First up we have some organ guns for my Burgundian Ordnance army. I had some rockets already, but organ guns are more correct and having the actual models will hopefully remind me that there are special rules that apply to this type of artillery in To The Strongest. I’ve also painted up a couple of pavilions to add a bit of flavour to the Burgundians’ camp bases.

These are from Alternative Armies: very nice sculpts and they arrived very quickly as well.

Next up are a few command figures for my British army for the Crimean War (1854-6). I don’t actually need command figures for the rules I’m playing at the moment (Neil Thomas’ Rules for 19th Century Wargaming) but I find the army looks a bit odd without them. It also helps remind me of which units are in which division.

These are Rank & File figures from Timecast: very nice figures that my somewhat messy painting doesn’t really do justice to.

My next painting will be the start of the first big project for 2023: a 15mm Norman army using the excellent Museum Miniatures CAD range. Can’t wait to get started on them!

IABSM AAR: Blenneville or Bust! #01: West of Pierrecourt

Just before Christmas I had a chance to play a great game of I Ain’t Been Shot Mum using the first scenario from the Blenneville or Bust! scenario pack: West of Pierrecourt.

The Allies are moving up the valley hoping to hook round Pierrecourt to the west. In order to do this, they need to be able to cross the Moire River. There’s a major bridge at Belle Maison, but Belle Maison is apparently full of Germans, so it would be good to find somewhere else to cross. Aerial assets have spotted a small bridge west of Pierrecourt, and the reconnaissance elements of the US 107th Infantry Division (nicknamed the Coyotes) have been sent forward to check it out.

The Germans, meanwhile, are keenly aware that the troops in Pierrecourt are relying on the Moire to protect their wider left flank. As the Allied advance begins, their commanders send out 30th Panzer Division’s reconnaissance units to cover as many river crossings as they can. This scenario covers the first clash between the opposing scouts.

Click on the picture below to see what happened:

First Painting Challenge Update of 2023

I’m pleased to report that you lot didn’t rest your brushes for very long: six entries already for the 2023 Painting Challenge.

In no particular order, we have submissions from Ashley, Matt, Nick, Mervyn, Stumpy and Ralph. You can see all their work in their individual galleries, but here’s a taster:

Some beautiful work there, and plenty more to come!

TTS AAR: Burgundian Ordnance vs Vikings

As Bevan had his Vikings out and I wanted to get my still-relatively-new Burgundians onto the table, we decided to have a game that would set the two against each other.

The Viking army was the same that had beaten my Vikings: maxed out on Bondi with a few lights in support. My Burgundians fielded four units of Later Knights supported by four units of sound infantry: three mixed spear or bill and bow units and a unit of crossbowmen. I also had an organ gun present.

View from behind the Burgubdian line: there’s an awful lot of Vikings over there!

The Vikings rushed forward, but were unprepared for the sheer weight of the Burgundian Knights that charged them. Two of my armoured units, shot in by archers to disorder the shieldwalls just before impact, smashed straight through the Vikings in front of them, sending them fleeing for their longships.

One of victorious Knights units then took the enemy camp whilst the other roamed around the centre of the field looking for more Vikings to charge.

Just after the first of the viking shieldwall units disappears from the field

taking the enemy camp (top leftish); rolling them up (centre right)

Meanwhile, on the right, one unit of Burgundian infantry used their horses (i.e. the Mounted Infantry bonus) to advance forward fast enough to split the advancing Viking line. This enabled another unit of Knights to turn right and hit the right flank of the Viking left-flank force that was currently engaged in a massive shoving match with some more Burgundian infantry.

With three Bondi units and their camp now destroyed, this proved too much for the Vikings to bear and, as another Bondi unit fled the field, the rest of the enemy army crumbled and followed. A glorious victory to the Burgundians!

Actually I was a bit lucky on my left, where a huge Viking outflanking force effectively took no part in the game because (a) having the initiative meant I could stay well away from them at set up and (b) Bevan’s attempts to move them into an outflanking position were stymied by the cards, who had obviously decided they didn’t like Vikings any more!

The whole game took only about an hour and further proved the power of the Burgundian charge!

IABSM AAR: Happy Christmas!

Over the Christmas period, I got a chance to play in a Christmas-themed game of I Ain’t Been Shot Mum set in late December 1944.

It was a Battle of the Bulge scenario, with me playing a US force defending a major supply dump against an attack from a German armoured column. I could expect some support from nearby Brits, but couldn’t be sure when they would arrive.

Click on the picture below to see what happened…

TTS AAR: Vikings vs Vikings: the Decider

Having fought the Vikings versus Vikings battle twice over with one victory apiece, it was time to play the decider. Forces were unchanged from the last game.

Bevan’s Vikings had the initiative, and soon the two battle lines were thundering towards each other.

Looking at the picture above you’ll see that Bevan overlaps my main line with one unit of Bondi and a unit of lights, facing only a unit of light archers. Knowing I was going to be outnumbered, I had deliberately put my Huscarls (veteran troops indicated by the red Meeple) to protect my flank.

The lines came together with a mighty smash. What you can’t see is that out of frame to the left, his extra unit of Bondi and their accompanying lights are driving my lights backwards and will eventually send them off the table.

Much disorder on both sides after the first clash, with no-one really getting an advantage…which is not what I wanted as I needed to win quickly if I was not to be overwhelmed by superior numbers. Still out of frame to the left are his extra Bondi!

A couple of my units break through the centre, introducing the possibility of an assault on the enemy camp, but there’s now a mass of enemy units on the right flank…

…and worse, as you can see in the picture above, his Bondi on the left have finished dealing with my lights and have manoeuvred themselves into a position from which they can assault my main battle line from the rear!

Those Bondi do indeed charge me from behind and the resultant loss of my end Huscarl unit leads to a general disintegration of my line.

A resounding defeat results!

Aftermath

A great series of Viking vs Viking clashes. You can see from the picture to the right that the two enemy units in front of my Huscarls are about to give way, so if I had just been able to kill them one turn earlier, then my veterans could have turned to face the flanking unit that did so much damage.

The sagas will now record that my Vikings slunk away, defeated. Doubtless they will re-group and be back into action soon!

Last Painting Challenge Update of 2022

I’ve now uploaded the final entries into the 2o22 Painting Challenge: any entries received from now will go into the 2023 Painting Challenge.

Today’s batch includes entries from Sapper, Mr Plowman, Andrew Helliwell, Mervyn, Chris Kay and Stumpy; along with an enormous first-and-last catch-up entry from Mr Hodge.

Do visit the individual galleries, especially Derek’s as it’s got some great stuff in there that you won’t have seen before today, but here’s a taster:

And finally, I declare that the TFL 2023 Panting Challenge is now open: let the painting begin!