Epic Scots Painted Up

I stopped buying Wargames Illustrated shortly after it turned into the Battlefront catalogue (a pity, as I have every issue of the old style magazine and still dip in and dip out of them on a regular basis) but, when I saw they had a free Warlord Epic ECW Scots sprue as part of the package, thought I’d take the opportunity to (a) give the new-look WI another chance and (b) try out the Warlord Epic Scots.

I hadn’t really interacted with any Warlord Epic figures up to this point: my collection is nearly all 15mm and thought of buying Napoleonics that were slightly but significantly smaller that what I have (the admittedly larger, more like 18mm AB range) didn’t appeal.

In fact, I’d always wondered what on earth Warlord were thinking when they introduced another unique scale into the wargaming world. Why not go 10mm or 15mm rather than something in between? Or were they trying to create a Hobby like GW?

Anyway, reading around, the Epic ECW ranges were supposed to be larger than the Epic Napoleonics, more like 13.5mm, so I was happy to give them a go. I duly bought my copy of WI and settled down to have a read and a look at the free sprue.

First impressions were good. A nice lot of detail on the figures and they certainly seemed a good size. They also looked like they would be quick to paint: no picking up lolly sticks with 3-4 figures on them, just bases of 10 figures a time…plus the fact that a percentage of each figure wouldn’t need to be painted as it was hidden by their neighbour next door.

The 10-figure blocks were a pain in one way, in that they don’t fit with my existing basing system, but I don’t have any Commanded Shot bases for my Scots yet (in fact, the army is positively short of muskets having several Pike Only battalia) so I thought I’d give four “shooter” blocks a go as an oversize Commanded Shot unit.

So, what do I think?

Yes, very nice really.

They were easy to paint: really detailed relief takes Contrast Paint beautifully, and they were as quick to paint as I thought they would be.

I added a command figure from Blue Moon’s 18mm range that towers over them a bit, and a standard bearer from Alternative’s Furiosa range who fits nicely. And a dog just for laughs.

The $64m question, of course, is how they would fit in with my other figures: mostly Peter Pig and Hallmark 15’s.

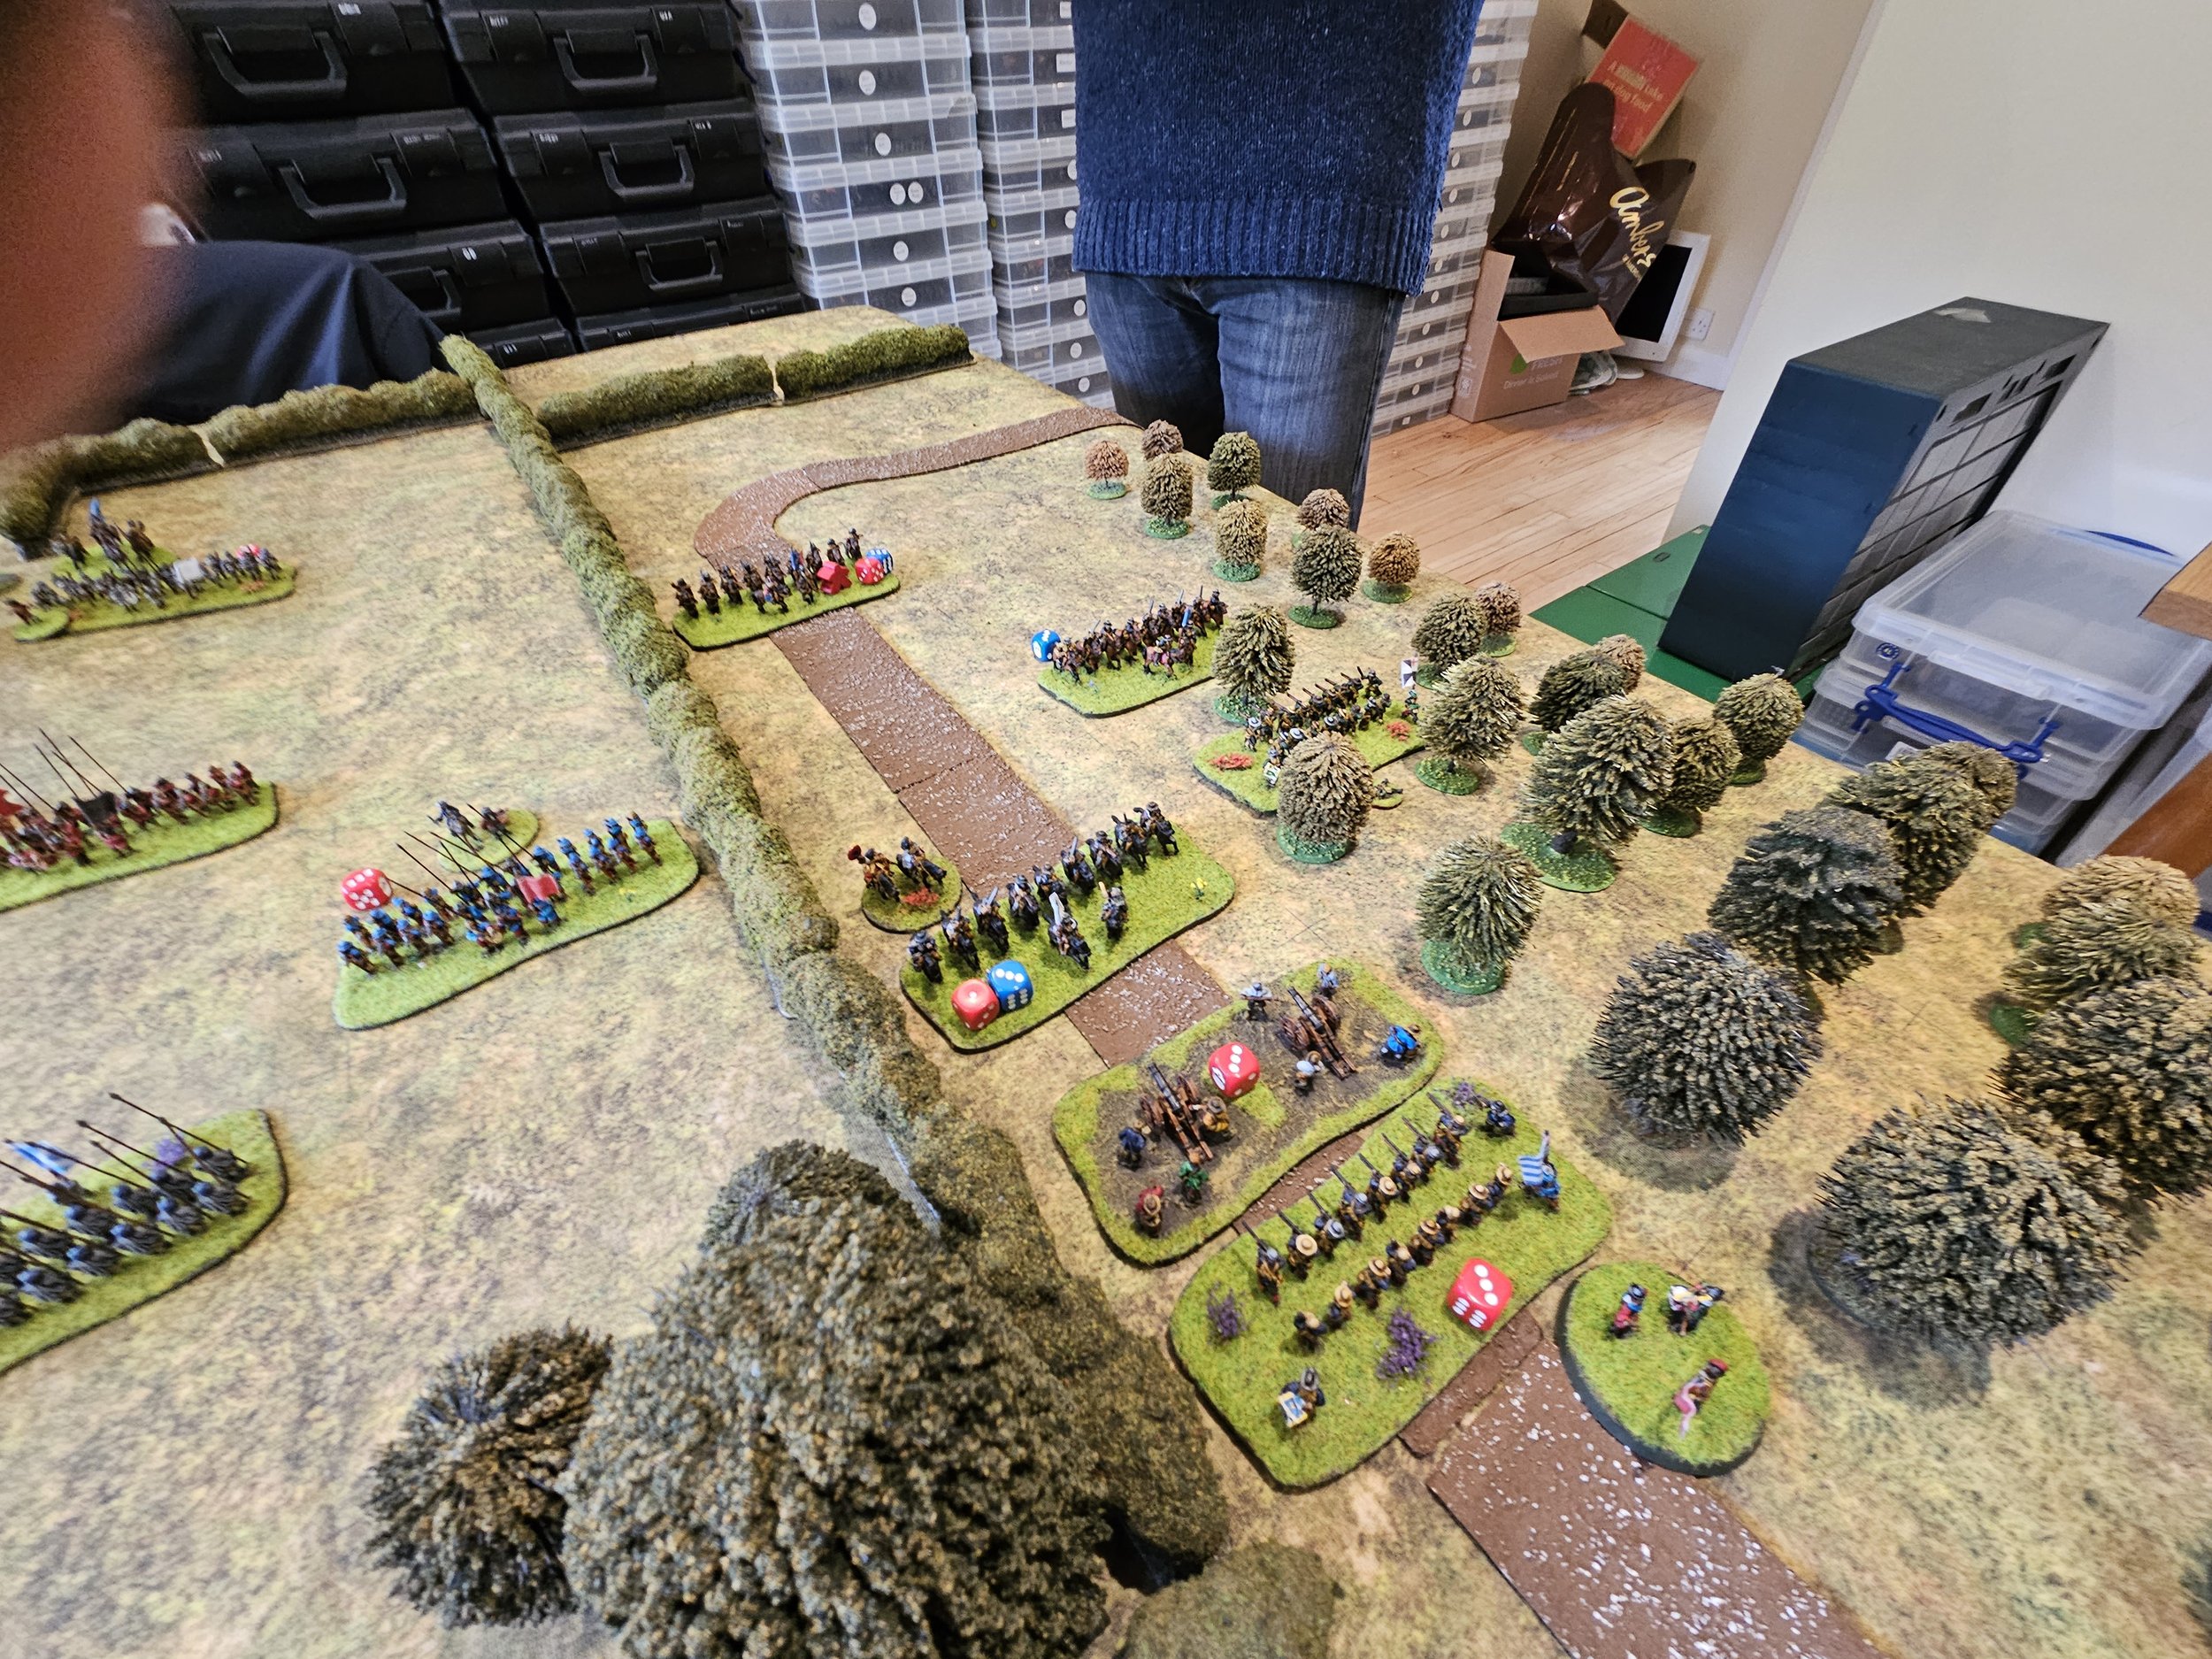
Well, the photo below shows the Scots and a battalia of English pike and shot side by side for comparison:

The height difference isn’t noticeable at all. In fact I think the Epic figures are 15mm from top of bonnet to foot and that the 13.5mm measurement is to their eyes.

They are obviously a little more densely packed than my usual basing system, but that won’t be a problem providing I’m consistent with deploying any Scottish Commanded Shot like this.

One thing: they are a bit slimmer front-to-back then their metal equivalents, almost on their way to being flats, but I’m going to put this down to a diet of good Scots’ porridge rather than anything else!

The price is also good. The sprue also contains four pike 10-man blocks and a smattering of singles, horsemen, artillerymen etc. Would certainly work out much cheaper than buying everything in metal.

Will I buy more?

Probably not…but only because I have loads of Scots already.

I do need some more Commanded Shot, however, so if anyone would like to donate a sprue they received with WI but don’t want, Comment or PM me at the usual address and I’ll quite happily take it off your hands!

Would I buy Epic if I didn’t have any ECW figures and wanted to get into the period?

Yes, I would.

I’d have a basing system that suited the 10-man blocks (FK&P is a very forgiving rule system basing-wise) and would quite happily have built a large collection of Royalist, Parliamentarian and Scots figures up.

So a big recommended from me, and I will certainly look at the other Epic ranges provided they are also 15mm equivalents.

They look even better from behind: the only direction I will ever see them from of course!

TTS @ Warfare: Game Four: EIR versus Tang Chinese

My fourth and final game at this year’s To The Strongest competition at Warfare was my Early Imperial Romans against Peter Ryding’s Tang Chinese.

Peter is a wily opponent and an expert of using a force that is a mixture of light cavalry, heavy cavalry and solid infantry…and the one thing I didn’t want to happen was him to get his Chinese around the end of my line and outflank my Romans.

As the battle began, Peter immediately went for my flanks with his light cavalry. I didn’t think I’d have a problem on the right: I’d kept that flank strong, intending to deal with the lights then use my superior drilled mobility to curl in and attack his infantry in the centre.

Likewise, on the left, all I would have to do is to move the rear left hand unit of cavalry (with the red cloaks) out to the side and I was sorted.

Unfortunately the poor cards that had been dogging me all day reared their ugly head again, and things did not go according to plan.

On the right, I shot down one of his light horse units almost immediately, and closed with the other to drive it back.

All well and good…but then my central infantry, which I had been intending to get back to the left to engage his main force, just refused to move. Where was my superior drilled mobility? It was buried in Aces!

Oh, and if you look, Peter is making it even more difficult to close with his troops by refusing that flank and presenting me with an oblique line to attack…meaning my men would have even further to go before being able to get stuck in. Clever, very clever!

Worse, the aforementioned red cloaked cavalry on my left had also refused to move as planned, leaving that flank horribly exposed. Peter, never one to miss an opportunity, took full advantage, and soon that flank was completely buggered!

I mean, look at them just sitting there! They obviously haven’t moved since their original deployment when only the smallest movement of one square would have stopped the Tang lights in their tracks.

Now there are those of you who are reading this who are saying “oh look, there’s Rob again complaining about his luck as opposed to admitting he’s playing badly”.

Yes, point taken: you play the cards you’re dealt and all that, and Peter has made no mistakes in executing a very cunning plan…but take a look at the photo below to show what happened as I moved in on his camp: something that could potentially have gained me enough coins to turn the battle my way.

Three Aces are showing…and what’s even more amusing is that for this game that wasn’t even the worst cards that I drew!

Anyway, suffice to say that I didn’t get into the enemy camp or in amongst his infantry before the flank attacks on my left took their toll and the Romans gave way and fled the field, giving Peter a colossal and well-deserved victory.

Results

One colossal loss, one massive victory, and two losing draws gave me a seventh place in the overall competition: a bit of a disappointment to say the least!

But no matter: there was still the Doubles competition at the Seven Dials Club in Covent Garden to come.

My partner?

Peter, of course!

The reports on that tournament will follow in due course…

TTS @ Warfare: Game Three: EIR versus New Kingdom Egyptian

My third game at this year’s To The Strongest tournament at Warfare was my Early Imperial Romans against Nathaniel’s New Kingdom Egyptians.

Don’t be fooled by the compact look of Nat’s army: there were a lot of light chariot units clumped together, all with bows, so I could expect a hail of bowfire as I closed with the enemy.

I have an NKE army myself (in 15mm) and so was also expecting the Egyptians to rapidly expand their position and attempt to lap around my flanks, always a danger for an infantry army like the Romans. This didn’t happen, however, and Nat kept his troops closed together as he advanced towards me, doubtless determined to just shoot me down head on.

Unfortunately for Nat, this played directly into my strengths.

My Romans can usually soak up arrows or rally off any disorders that they do take on the way in, and love to melee with lesser quality infantry or, even better, light troops. Likewise, my cavalry would be happy to just keep charging his light chariots until they evaded off the table.

And that’s what happened for the rest of the game, as you’ll see from the photos below:

As you can see, enough of my infantry units won their initial clash quickly enough to help out those who hadn’t (the superior manouevrability of the Romans really helping those flank charges go in) and my cavalry did indeed chase his light chariots off the table.

So a workmanlike 13-2 victory for the Romans, with my only loss coming from a General who got in the way of one arrow too many!

TTS @ Warfare: Game Two: EIR versus Polybian Romans

Game two of the To The Strongest tournament at Warfare, using my Early Imperial Romans, was an interesting match against the Polybian Romans: an earlier-period Roman army that presented in a quincunx formation i.e. deployed in three lines in a chequerboard formation, with the younger hastati in front, followed by the more seasoned principes and the veteran triarii behind. This would allow Nigel’s units to rotate his lines on the spot: meaning that he could rally and bring more pila into action even when in a “zone of control”.

Romans in Quincunx

My plan was not a subtle one: it was to get stuck in with my legionaries whilst trying to lap my cavalry round his flanks. Accordingly, as the game began, I marched my troops forward smartly.

Things started well, with me managing to get a two-on-one advantage on two of his quincunx, one of which I managed to destroy. The picture below shows two legionary units perpendicular to each other as one has just moved into the square where the quincunx was:

Unfortunately this turned out to be the high point of the game for my Romans!

The two battle lines came together and a grinding melee developed with fortunes swaying backwards and forwards between the two sides. Here’s a pic taken just before the lines clashed:

At tbis point my flank forces should have finished with his and come back in to hit the sides of the enemy line, giving me victory.

What actually happened was that my flank forces got bogged down and couldn’t get the local victories I needed to break themselves free to intervene elsewhere. As an example, here’s a unit of enemy horse sandwiched between two of my units: it should have died very quickly, but just kept surviving everything I could throw at it!

All this grinding melee was using up the clock and, before I knew it, time was called.

We totted up the points and I had lost the game by the narrowest of margins: 6 points to 7!

Really interesting to face the Polybian Roman quincunx, well played by my opponent, but a frustrating result.

Two games in to the tournament and two losing draws racked up: not good!

TFL Painting Challenge: First December Update

As we enter the final month of this year’s Challenge, a whole host of entries sent in during the last two weeks of November.

Do visit the individual galleries, available via the NavBar above, and here’s a taster:

There’s still plenty of time to get your entries in for this year, so don’t put those brushes aside yet!

TTS @ Warfare: Game One: EIR versus Eastern Franks

One of the main reasons for me going to the Warfare show this year was that I was competing in the To The Strongest tournament there. Four games in one day, 135 points, my Early Imperial Romans ready for action.

I was expecting my first game to be against Andy’s Dacians-with-Sarmatian-allies, as I nearly always face Andy’s Dacians in round one of a tournament as they and the Romans are usually the closest together historically, but Andy wasn’t there so I would instead face Tim’s Eastern Franks. Talk about out of the frying pan and into the fire…just what my Romans hate: an all cavalry army.

The photo above shows the position just after the start of the battle: you can see Tim is looking to sneak around my flanks. I’m not too worried, at this stage, about my right flank (my legionaries can oblique right) but I do need to pull my cavalry back on the left to protect against the enemy horse on the other side of the wood advancing forward and getting behind my line.

This should have been a fairly easy move to make, but unfortunately Fortuna obviously had it in for me that day and both my cavalry brigade and the left hand legionary brigade froze in place, presumably bamboozled by the fact that there were no Dacians to be seen!

Although not a good situation, all was not lost: all I needed to do was to turn my cavalry to face the outflankers and get the legionaries into action.

Aaargh!

Another turn where my troops would do nothing…unlike Tim’s Franks!

I was now down a cavalry unit, but managed to stabilise the far left by sheer good luck as my other unit of Equites Cohortales survived being hit in the flank, turned, and drove off their attackers. They then advanced forward themselves to threaten Tim’s camp.

The left-centre, however, was a mess. Tim had brilliantly taken advantage of my stagnation by concentrating his heavy horse: knocking out two of my legionary units there and effectively bursting through my line.

With me threatening his camp, and him threatening to surround and wipe out the rest of my cavalry, it looked as if we’d end up about honours even overall, so the game would be decided on the right.

Here things had not gone badly, just not well. I’d lost the Auxilia to another nicely executed outflanking manoeuvre, but killed one of Tim’s generals in return.

All this to-ing and fro-ing had, however, drained the clock and we were now out of time. Totting up the points, a winning draw to Tim 8-5.

Here’s the position at the end of the battle:

So a tight first game with a disappointing result. Excellent play from Tim: using his superior mobility on the flanks and then taking full advantage of the opportunity in the left centre.

Three games still to go: so plenty of time to rescue the situation!

FK&P AAR: Munce's Wood

Friend Rob and I are playing through the Siege of Norchester scenario pack. After narrowly losing the first game, Tounton Bridge, my Parliamentarians would face the Royalists at Munce’s Wood.

A pack of Royalist-sympathising Clubmen have been caught by a much larger Roundhead force. Fortunately for the Clubmen, there’s also a Cavalier army in the vicinity. The scene is set for a clash at Munce’s Wood.

Royalists on the left, Parliamentarians on the right (Clubmen in the middle!)

With the opposition a bit fragmented, and with superior quality cavalry on my left, my plan was to advance strongly on my left and centre, holding back my weaker right flank. Hopefully the Roundhead cavalry would quickly beat the fewer Cavaliers in front of them and then be able to surl around to take the enemy centre, by then presumably locked in place by my central advance, in the flank.

That was the plan, but unfortunately my cavalry just couldn’t beat their Royalist foes back. The enemy was defending a hedge line, and a particularly sticky unit of Swedish horse just plain refused to give way despite overwhelming pressure from my Dutch troopers.

Not only that, but my troops in the centre fought so badly that I was forced to pull some cavalry from the left to reinforce my centre. Things were not going well!

Meanwhile, much to my surprise, my commanded shot and artillery on the right flank were holding their own against the Royalist horse.

My three weak units held up Rob’s stronger three units for the whole of the battle and, although I would eventually lose all three, that sacrifice was worth it to keep his horse off my right flank.

On the left, my Dutch horse were still trying to get over the hedge, but just couldn’t do so in the face of continued opposition from the Royalists.

With that flank stalled as well, the game would be decided in the centre.

Things were beginning to thin out now as various units on both sides had broken and fled the field. In the end it came down to who could keep fighting for longer, and unfortunately it wasn’t my troops!

The final act was for one of my few surviving battalia of Border Foot to smash through the enmy opposite them, but then be hit from all sides by other Parliamentarians. As a final act of humiliation, it was actually a unit of Clubemn - the very people we were trying to surpress - that dealt the coup de grace, and my command generally collapsed and routed.

So a second defeat for the Parliamentarians in the campaign to take Norchester. Let’s hope I have more success at Cadmore Hill, the site of the third clash!

15mm "Heroic Scale" Pilgrims from Khurasan

As I’d also like to be able to field my Normans as Early Crusaders, I decided to add a couple of units of pilgrims to the mix.

The best I could see on offer were those from Khurasan. They do a pack of ten ‘standard’ pilgrims along with another pack of three unique extras: a monk with crucifix held high, a woman brandishing a frying pan, and an urchin throwing a rock.

I needed sixteen figures for each “mobs” base, so a pack of each plus half a pack of unarmoured Norman infantry nicely fitted the bill.

Plus points first: great figures with loads of character that paint up easily.

The only negative is that they are heroic scale i.e. a little larger than even a large 15mm figure.

So how noticeable is the difference?

Well, it’s a little noticeable: in that if you are looking for it, it’s obviously there, but under game conditions I don’t think it will be noticeable at all. Here’s a couple of comparison phots with some Museum Miniatures’ Norman foot infantry from their CAD-designed Z range of Normans:

You’ll have to make your own minds up, but I’m not sure the difference is significant enough to matter.

It would matter less, of course, if your whole Norman army was taken from Khuarsan’s Heroic 15mm MILLENNIUM -- 1000AD to 1150AD range…something I might have done if I hadn’t already got Museum’s Normans: they are both lovely ranges of figures.

FK&P AAR: Transylvanians vs Swedes - The Re-Match

As we still had plenty of time left after our last game (Transylvanians vs Swedish, a narrow victory for me) Si and I decided to play again.

I offered a change of sides, but Si said that now that he’d taken the Swedes for a test run, he’d like to use them again “for real” this time. That was fine by me, so we re-set the table and both re-deployed.

Both sides placed their infantry facing the small village on the far side of the picture, above. I faced my Elite National Cavalry off against the Swedish Cuirassiers and cavalry in the centre, with my light horse on the left wing hopefully enough to slow down or stop more Swedish cavalry facing them.

An advance by both sides rapidly saw the two battle lines come together in the centre and on my left in a series of cavalry melees that swung backwards and forwards in terms of advantage for both sides.

Although I managed to hold the left flank, my center had to give ground and soon all I could see was my own horse thundering back towards me!

Fortunately I had troops available on my left to bring into the centre as reinforcements, and the battle broke up into a series of individual melees as units that had disposed of one enemy looked for another opponent to engage. In the confusion, one of my light horse units also managed to sneak through and take the Swedish camp, a much needed boost to my fortunes at that point!

Meanwhile the two infantry lines had slowly advanced towards each other and begun exchanging long range fire, with the Transylvanian militia troops getting the worst of the deal.

At this point I stopped taking photographs as it was neck and neck as to who would run out of victory medals first. In the event, it was me: giving Si and the Swedish a narrow victory.

A cracking couple of games decided by very narrow margins.

FK&P AAR: Transylvanians vs Swedes

Friend Si coming round for a gaming session provided the perfect excuse to get my new 17th century Cuirassiers onto the table.

Si would field the Swedes (with said Cuirassiers) and I would play the Transylvanians:

The Swedes

The Transylvanians

My plan was to hold his superior infantry on my right whilst my better cavalry rolled over his centre and his right.

Originally I had planned to sweep my light cavalry around the left, but realising that he could block that move with his horse, my first action was to try and reposition my lights so that I could use them either as general reinforcements or to bolster up my right. You can see them moving across the rear of the battlefield in the pictures above, and here’s an even better shot:

Grand tactics!

The two main battle lines then came together with a crash, with the Transylvanians definitely getting the advantage as their elite cavalry went in. The Swedes reeled backwards, apart from one unit of Cuirassiers that stubbornly refused to give way, and a period of jostling backwards and forwards ensued.

This continued until the relentless pressure from the Transylvanian horse finally proved too much for the Swedes to bear, and their centre began to crumple (their right had given way much earlier).

Meanwhile, there had not been a lot of activity on my right flank: my infantry had indeed advanced forward and then stopped to hold the ground, but the Swedes had been too busy elsewhere to worry about them.

Just as the Swedes thought they might have to do something on their left, their centre finally gave way and the game was mine.

My New Secret Weapon for Competitions

Those of you who were in the To The Strongest competition at Warfare this year will have heard me loudly decrying the number of Aces I was pulling: not for melee or shooting but for activation.

Time and time again my master strategies were defeated as my troops just refused to move at all as a result of an Ace (or usually Aces!) appearing as the first card drawn in a command’s turn.

I thought about changing my packs of cards (especially the red pack: you b*st*rds are due on the bonfire soon, I tell you!) but have realised that such a petty attempt to change my luck probably won’t work: I mean, probability is probability and play a lot of games and the monkey’s typing up Shakespeare are bound to appear sooner or later. I needed a more radical approach…

Yes, I have joined the shuffling machine club!

First encountered at the World Championships earlier this year, I have been enviously observing my fellow players who own them effortlessly producing perfectly shuffled decks without the need to do more than load up the wings and press the button. Now I, too, can avoid any of the bad luck that characterised my Warfare performance…and all for only about £10. Bargain!

This will also neatly prevent a certain friend of mine from banana-ring my decks of cards with his (admittedly nicely executed) riffle shuffles. He will doubtless be interested to hear that, according to Wikipedia: The Gilbert–Shannon–Reeds model provides a mathematical model of the random outcomes of riffling that has been shown experimentally to be a good fit to human shuffling and that forms the basis for a recommendation that card decks be riffled seven times in order to randomize them thoroughly. Later, mathematicians Lloyd M. Trefethen and Lloyd N. Trefethen authored a paper using a tweaked version of the Gilbert–Shannon–Reeds model showing that the minimum number of riffles for total randomization could also be six, if the method of defining randomness is changed.

I’m not sure when my new shuffling machine will have it’s debut, but be warned that I am already clearing shelf space for all the trophies that I an now going to win as, according to me at any rate, all that has been holding me back is my appalling luck and nothing to do with the fact that I am facing very skilled opponents who have actually taken the trouble to learn the rules!

For those interested:

ZONJIE Automatic Card Shuffler Machine 2 Deck, Electronic Casino Poker Card Shuffling, Battery Operated -One/Two Deck Card Shuffle Sorter, Cards Playing Tool Accessories


FK&P AAR: Muscovites vs Transylvanians

With my Transylvanians having lost the first game by only one Victory Medal, it was time to swap sides for a re-match: this time I would take the Muscovites, with Bevan playing the Transylvanians.

As you can see in the picture, above, both sides have deployed very traditionally: infantry in the centre, cavalry on each wing. You’ll also see that my horse on my left flank considerably outnumber their mounted opponents, so my plan was very much to punch through there and then roll the Transylvanian line up.

With that in mind, I opened the game by advancing forward on the left as hard and fast as I could.

As you can see in the bottom two pictures above, on the far left, left of the woods, I didn’t manage to punch through the enemy lights quite how I had hoped, but did manage to open up a bit of space just to the right of the woods. The question now became whether I could exploit this advantage!

Meanwhile, elsewhere on the field, the two battle lines had generally come together, with a series of fierce melees taking place:

Now was the time for my troops on the left to curl inwards and roll up the Transylvanian line: something I really needed them to do as they represented a good proportion of my fighting strength, and my lesser-quality centre wouldn’t hold for ever!

Above you can see a couple of pictures showing how I was trying to get my horse back into the action: but they do seem to have an awful lot of ground to cover!

And all that ground proved my downfall, with my centre and right flank giving way before I could get the cavalry back into the game.

Regular readers will know that I lost the first game in this two-battle series by one Victory Medal…and so it was again in this game! If I had survived one more turn in the centre/on the right then my cavalry would have made it back into the action in time to win the game for me, but victory evaded me by the smallest of margins as one unit too many fled the field.

So that was four games with Bevan in two days…and four defeats. Ouch! But, as Michael Jordan once said:

“I’ve failed over and over and over again in my life and that is why I succeed.”

Good to know that I’m secretly a success at this wargaming thing!

Very secretly!


If you've enjoyed this post, please do consider "buying me a coffee" : you can be sure that all proceeds will be channelled back into wargaming, leading to even more content for you to enjoy!

TFL Painting Challenge: Mid-November Update

Only a smidge over six weeks to go in this year’s Challenge, and the entries are coming in fast.

Do please visit the individual galleries, accessible via the black navbar above, but here’s a taster of the entries so far this month:

Congratulations to Matt who has surpassed his previous record score of 5,522 (set in 2015) to now be on 5,591. Surely the magic 6,000 beckons…and painting loads of Ottoman cavalry really well would really help hit that target!

Andrew is also on a new record score of 4,636, beating his previous high of 3,908 set last year. I think we need 5,000 out of you this year please.

Finally Sapper is also on a new high: 3,030 versus the 2,638 set last year: perhaps 3,250 or even 3,500 to come?

There’s still plenty of time to get your entries in - I’m often adding the last few early on New Year’s Day - so let’s make a final push to get those scores up.

I’ll also take mass submissions of work completed over the last 11 months or so, so don’t worry about not having submitted something so far. If I could just ask that everything is clearly labelled, as although I can usually tell a Jaeger from a Janissary, counting the number of 6mm figures you’ve submitted in a mass-army photo is not much fun!

My New "Real Life" Roman Baggage Train!

I’m doing a lot of To The Strongest competitions at the moment, using an almost wholly metal 28mm Early Imperial Roman army that weighs a ton! Carrying it from the student digs at Britcon to the venue practically killed me, and the SELWG ramp wasn’t much fun either!

Now, however, I have the solution: a rather nifty folding camping trolley from Finnhomy bought from Amazon:

This neatly fits the entire army plus a box of terrain, lunchbox, waterbottle etc (in fact we had two armies plus paraphernalia in it on the journey out of the venue) making it super easy to transport from car to table, and then acting as a side table as well. I wish I’d bought it sooner!

As the description suggests, it also neatly folds up into the boot of the car and is honestly the best thing since sliced bread!

Details are here:

Finnhomy Folding Trolley on Wheels with Brake, Festival Trolley, Collapsible Beach Trolley with Removable Wheels, Camping Trolley 100KGs Capacity, Garden Trolley Wagon with Drink Holders

Warfare 2023

I had a mixed day at Warfare last Saturday: the show was great, but I didn’t do very well in the To The Strongest competition I had entered and, as icing on the cherry on my cake, I got home to find that I had left my jacket on the back of the chair I’d been using for my last game!

But this post isn’t about that, nor about the competition games: they will follow individually in due course, once the Vis Lardica Ministry of Truth has had time to put a positive spin on an execrable performance! No, this post is about Warfare, the show.

And what a good show it is!

Now at the Farnborough International Exhibition & Conference Centre, Warfare is only about an hour for me, and is a trip well worth making.

I got there nice and early! This is the competition area: it was big!

The venue has grown on me since my first visit last year. Free parking right next to the hall helps, and it didn’t seem as dark and gloomy as before.

I, as I said, was there for a competition, along with 420 other people, which immediately gave the show an extremely busy and bustling feel. It was also great to walk about amongst the other games’ tables and see what was what. Some impressive armies and terrain on show, and there was plenty of room as well: some other competitions I have been to are too cramped to make spectating even possible let alone enjoyable.

There were also plenty of traders and a significant Bring & Buy. I didn’t actually purchase anything, having spent all my money on a new “real life” Roman baggage train (see post later in the week) but could have done so had an imminent tax bill from last year not been weighing on my mind, but there were plenty of products to put on the list for the future.

I won’t be buying either of these (well, not soon!) but thought they were rather fun:

Finally, there were a large number of excellent demonstration games that I made sure to find time to look at during the competition lunch break. I didn’t really have time to note down who had done what, but here’s a quick gallery of some of the one’s that I saw:

So Warfare is recommended for a visit next year, even if you aren’t competing.

Oh, and if you do go, and you see my jacket, pick it up for me will you…

FK&P AAR: Transylvanians vs Muscovites

Time for another game of the eastern Europe variant of For King & Parliament: my Transylvanians would take on Bevan’s Muscovites.

Transylvanians

Muscovites

This was a cracking game where the action swayed backwards and forwards across the field.

In summary, the Transylvanian elite National Cavalry (the chaps with the yellow and red lance pennants) charged forwards right of centre of the field and swept all before them: smashing enemy units from the field with ease!

On my left flank, however, the mass of Transylvanian light horse were comprehensively butchered by Muscovite heavy cavalry, who steam-roller-ed over them with barely any effort at all.

In the centre, the two sides came together as the actions above were taking place and, unfortunately, my troops got the worst of it and slowly began to give ground.

Honours were even, with both sides hemorrhaging victory medals, until the very last moments of the game, with the Muscovites just taking the win 16:15!

As I said above: a cracking game…with the charge of the Transylvanian elite National Horse being one of those moments that will go down in gaming history!

Here the battle in pictures:


If you've enjoyed this post, please do consider "buying me a coffee" : you can be sure that all proceeds will be channelled back into wargaming, leading to even more content for you to enjoy!

ECW Infantry Battalia

Regular visitors will know that I recently bought the new ECW casualty figures from Alternative Army’s Furioso range (and very nice they were too).

Never one to miss an opportunity to buy stuff, at the same time I also ordered enough figures to make up a standard ECW infantry battalia in the way that I configure them for For King & Parliament. Seemed rude not to really!

I hadn’t bought any of the Furioso range before (mainly using Peter Pig and Hallmark via Magister Militum for my ECW collection) so was curious to see how these would fit in.

The first thing to mention is the excellent way in which they were delivered, especially the pikemen. I don’t usually like figures with integral pikes - the pikes always seem to get bent out of shape in transit and then never go back to how they should be - preferring to add my own using rigid wire spears, but these arrived absolutely and beautifully straight, taped to a piece of cardboard to make sure they remained so. Well done to AA!

Secondly, the figures paint up very well indeed. The detail is crisp, and takes Contrast paints very nicely indeed. The pikemen come in breastplate and helm, and it’s nicely sized breastplate that is easy to (after the undercoat) re-paint in black and then highlight with a dull steel colour. Likewise the musketeers: the detail (the apostles, the feathers on some of their hats) highlight clearly and easily. Great stuff.

Finally, their sizing is comparable to the rest of my collection. Yes, the pikes are considerably more solid than the wire spears I’ve used elsewhere, but this is a minor gripe: height-wise they work very well.

So, all in all, I am very impressed with the Furioso pike and shot from Alternative and will doubtless find myself browsing the rest of the range in the very near future! Highly recommended.


If you've enjoyed this post, please do consider "buying me a coffee" : you can be sure that all proceeds will be channelled back into wargaming, leading to even more content for you to enjoy!

TTS AAR: Sicilio- Normans: The Return Match

With plenty of time remaining and the table and figures all set up, Bevan and I decided to swap sides and play again: I would take the Papal Italians (proxied by a Burgundian Ordnance army) and Bevan would play the Sicilio-Normans.

Now if I thought my luck was bad in the last game, in this game it really fell off a cliff!

On the right flank I lost a unit of Knights to some scummy Sicilian light cavalry, leaving a huge hole in my line that enemy Knights immediately exploited. I did manage to get a breakthrough of my own going, but it took longer than it should and the battle ended elsewhere before I could take full advantage.

On the left, I got into the perfect position to do some damage, but the cards weren’t with me, and my glorious flank charges fizzled out unsuccessful!

Meanwhile, the Sicilio-Norman infantry ground forward in the centre and, with what I had lost already and the fall of my camp to the enemy Knights that had broken through, I was soon out of victory medals.

A frustrating game: as Bevan said afterwards, I didn’t do anything tactically wrong…it’s just the cards didn’t fall my way. To misquote the great Les Dawson: I had all the cards I needed, just in the wrong order!

No matter, these things happen. At least I could get my revenge in quickly, as we were due a couple of games of For King & Parliament, Eastern Front Variant in 24 hours time, with my Transylvanians facing the Muscovites. But more on that later…

ECW Casualties

Those who have gamed with me know that I do love a good marker: be it an ammo marker, a pin, shock, wounds…whatever system, I love a good marker!

They’re dead, Jim: you can tell by the SBOBCP’s

Up to recently, however, I’ve shied away from using “dead” or “wounded” casualty figures to mark things such as disorder, believing that it was far better to concentrate my figure production on actual units rather than waste time and money on something that can easily be replaced by a small bit of brightly coloured plastic.

My recent foray into competition gaming has, however, made me think the opposite. I originally went into competitions using my small bits of brightly coloured plastic, but soon realised that these looked out of place opposite the more subtle casualty markers used by my opponents. I looked like a newbie, for God’s sake!

The situation was remedied for my 28mm Romans in my games of To The Strongest, when friend Peter gave me a set of Roman shields mounted on flocked 2p pieces, but my 15mm English Civil War figures for For King & Parliament still suffered from the SBOBCP syndrome.

The Romans are more subtly dead now, jim!

Until now!

I haven’t really used Alternative Armies’ Furioso range for any of my 17th Century collection, preferring to stick to the usual suspects of Peter Pig, Hallmark via Magister Militum, By Fire & Sword (for Eastern Front) and the occasional Essex. No particular reason for this (I buy sci-fi figures from Loud Ninja via their site) just generally not being familiar with the range and choosing to stick with what I know.

I did, however, see an advertisement for some new casualty markers from Alternative, so thought this might be a good time to dip my toe in the Furioso waters. I duly ordered (taking advantage of a 20% off sale and the situation to buy another battalia of ECW infantry as well…but more on them another day) and received a smart little package in return.

Apologies for the quality of the picture (the setting sun on a Grey Seer’d painting tray) but these are rather nice. They come small enough to mount on a 1p piece, as I have done above, and are very easy to paint up: just the right amount of detail to make them pop. There are six different types (three face up and three face down) but, as you can see, you can easily make a variety pack through different painting schemes.

They also do some standing up wounded if that’s your preference.

These get a highly recommended from me, and I can’t wait to get them onto the table.

TTS AAR: Sicilio-Normans take to the field

Now that I had painted up the Italo-Norman militia, it was time to get them into action. I wanted them to face a contemporaneous army, so friend Bevan would field my Burgundian Ordnance collection masquerading as Papal Italians!

Okay, so things weren’t entirely apt, as I was actually fielding Sicilio-Normans instead of pure Italo-Normans, but as the country of Italy wasn’t actually formed until 1870, I decided that stretching things slightly too far south wouldn’t matter too much.

As you can sort of see in the picture, above, both sides had concentrated their cavalry on one flank (my right, Bevan’s left) so the stage was set for a fairly mighty clash early on in the game…and that’s exactly what happened.

Meanwhile, the each side’s infantry contingent slogged forward towards the enemy, with an unusual run of cards meaning that my troops advanced forward in echelon.

Unfortunately for me, the Pope had obviously secured some divine intervention to support his forces, as my unusual run of cards continued with me drawing appalling cards for the cavalry combat, with what should have been a fight in my favour (four heavy units vs three heavy units, two light units vs one light unit) ending up with my cavalry just about wiped out (one light unit remaining) whilst leaving two of his heavy cavalry units still very much in action.

Meanwhile, the infantry lines had, in a ragged way, closed and gone to melee. Things looked a bit better for me here, and I had started to get back into the game a bit.

Even better, going completely against convention, my newly-painted unit of Italo-Norman militia had burst through the enemy line and had got to within striking distance of the enemy camp…and as Bevan only had four Victory Medals left at this stage, if I could just hold on for another turn, there was a fair chance I could nab the camp, pick up another Medal from somewhere else on the field, and win the game.

Unfortunately, the consequences of losing the cavalry battle on my right wing then came back to haunt me with a vengeance, as the two enemy units of Knights arrived back into the action: flank charging some poor Sicilio-Norman spearmen with devastating effect.

Already Disordered, the Sicilians crumbled and fled, and the game was Bevan’s!

A cracking encounter that, despite my earlier bad luck, got down to the wire, with both sides being in a position where the next casualty would have lost them the game. Sportingly, Bevan did agree that I had had universally bad luck throughout the game, but you have to play the cards you’re dealt so no complaints!