FK&P AAR: Plumleigh Common

Those of you who have been following Rob and I’s play through of the Siege of Norchester campaign will know that so far my Parliamentarian have not been doing very well: I’m currently ten victory medals behind overall, so really needed a decent win at Plumleigh Common to put me back on track.

In this scenario, the Cavaliers are trying another assault on the Roundhead siege lines, but this time the Parliamentarians are ready for them, resulting in an all out battle.

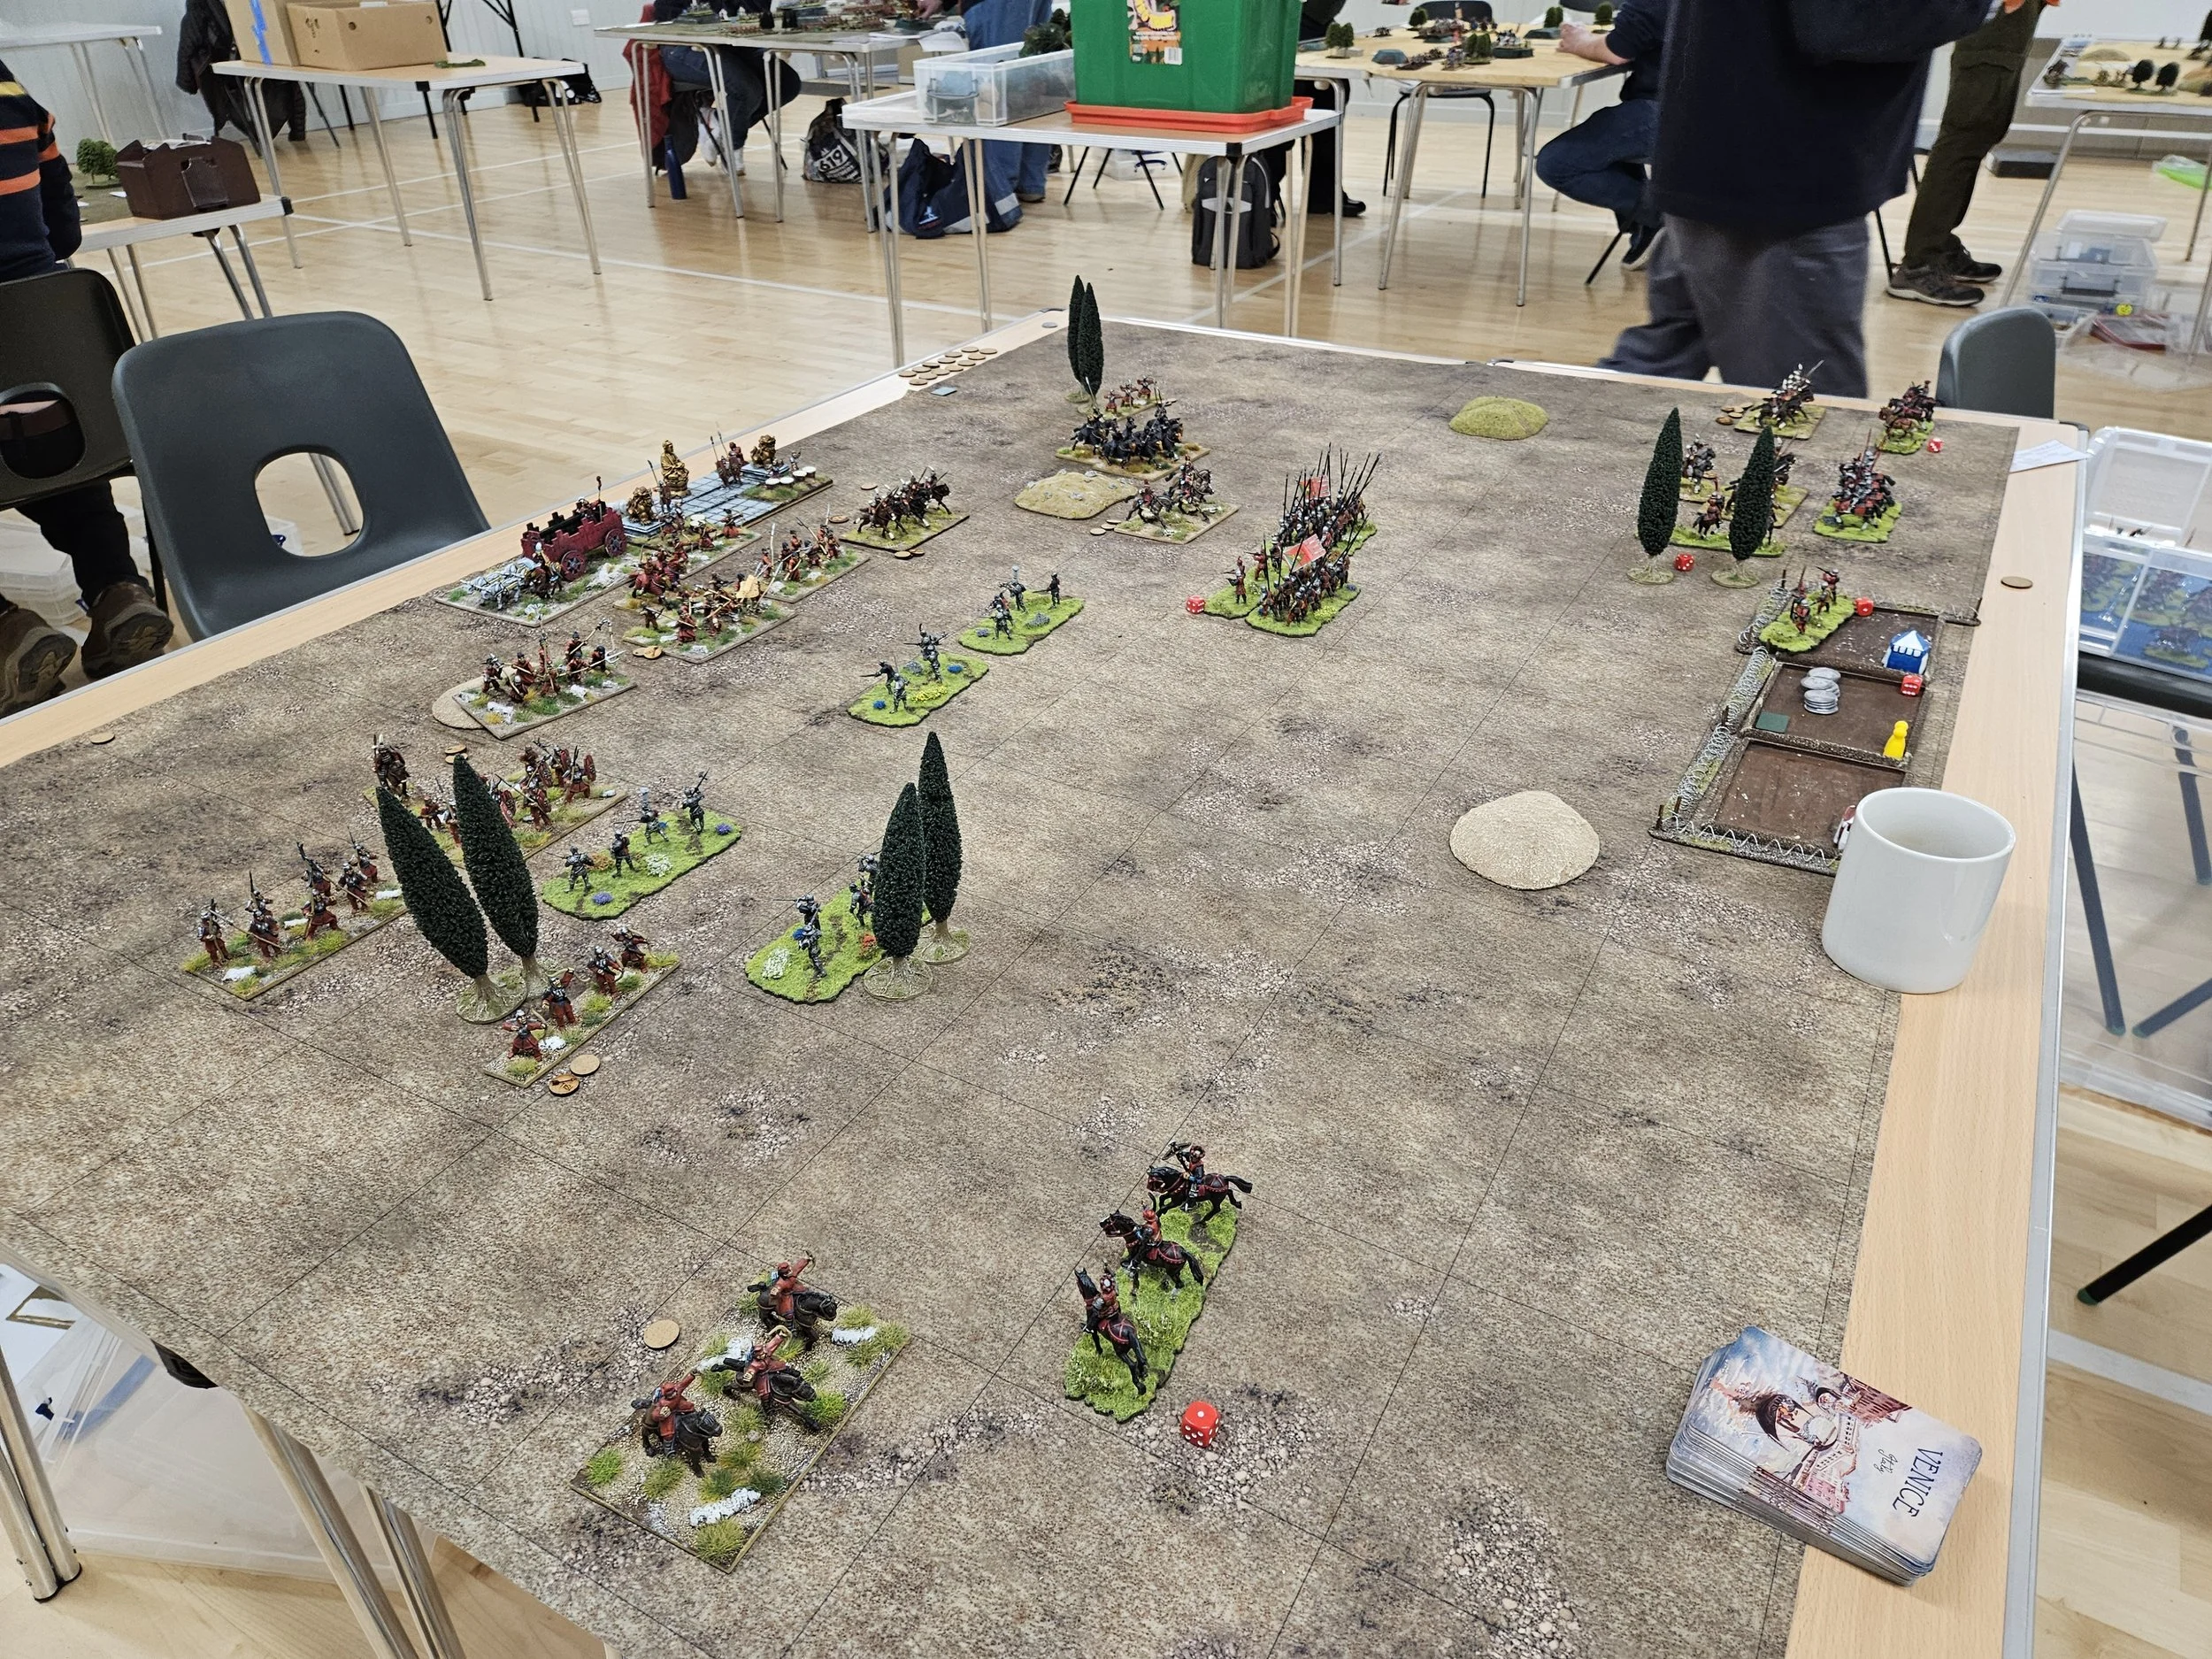
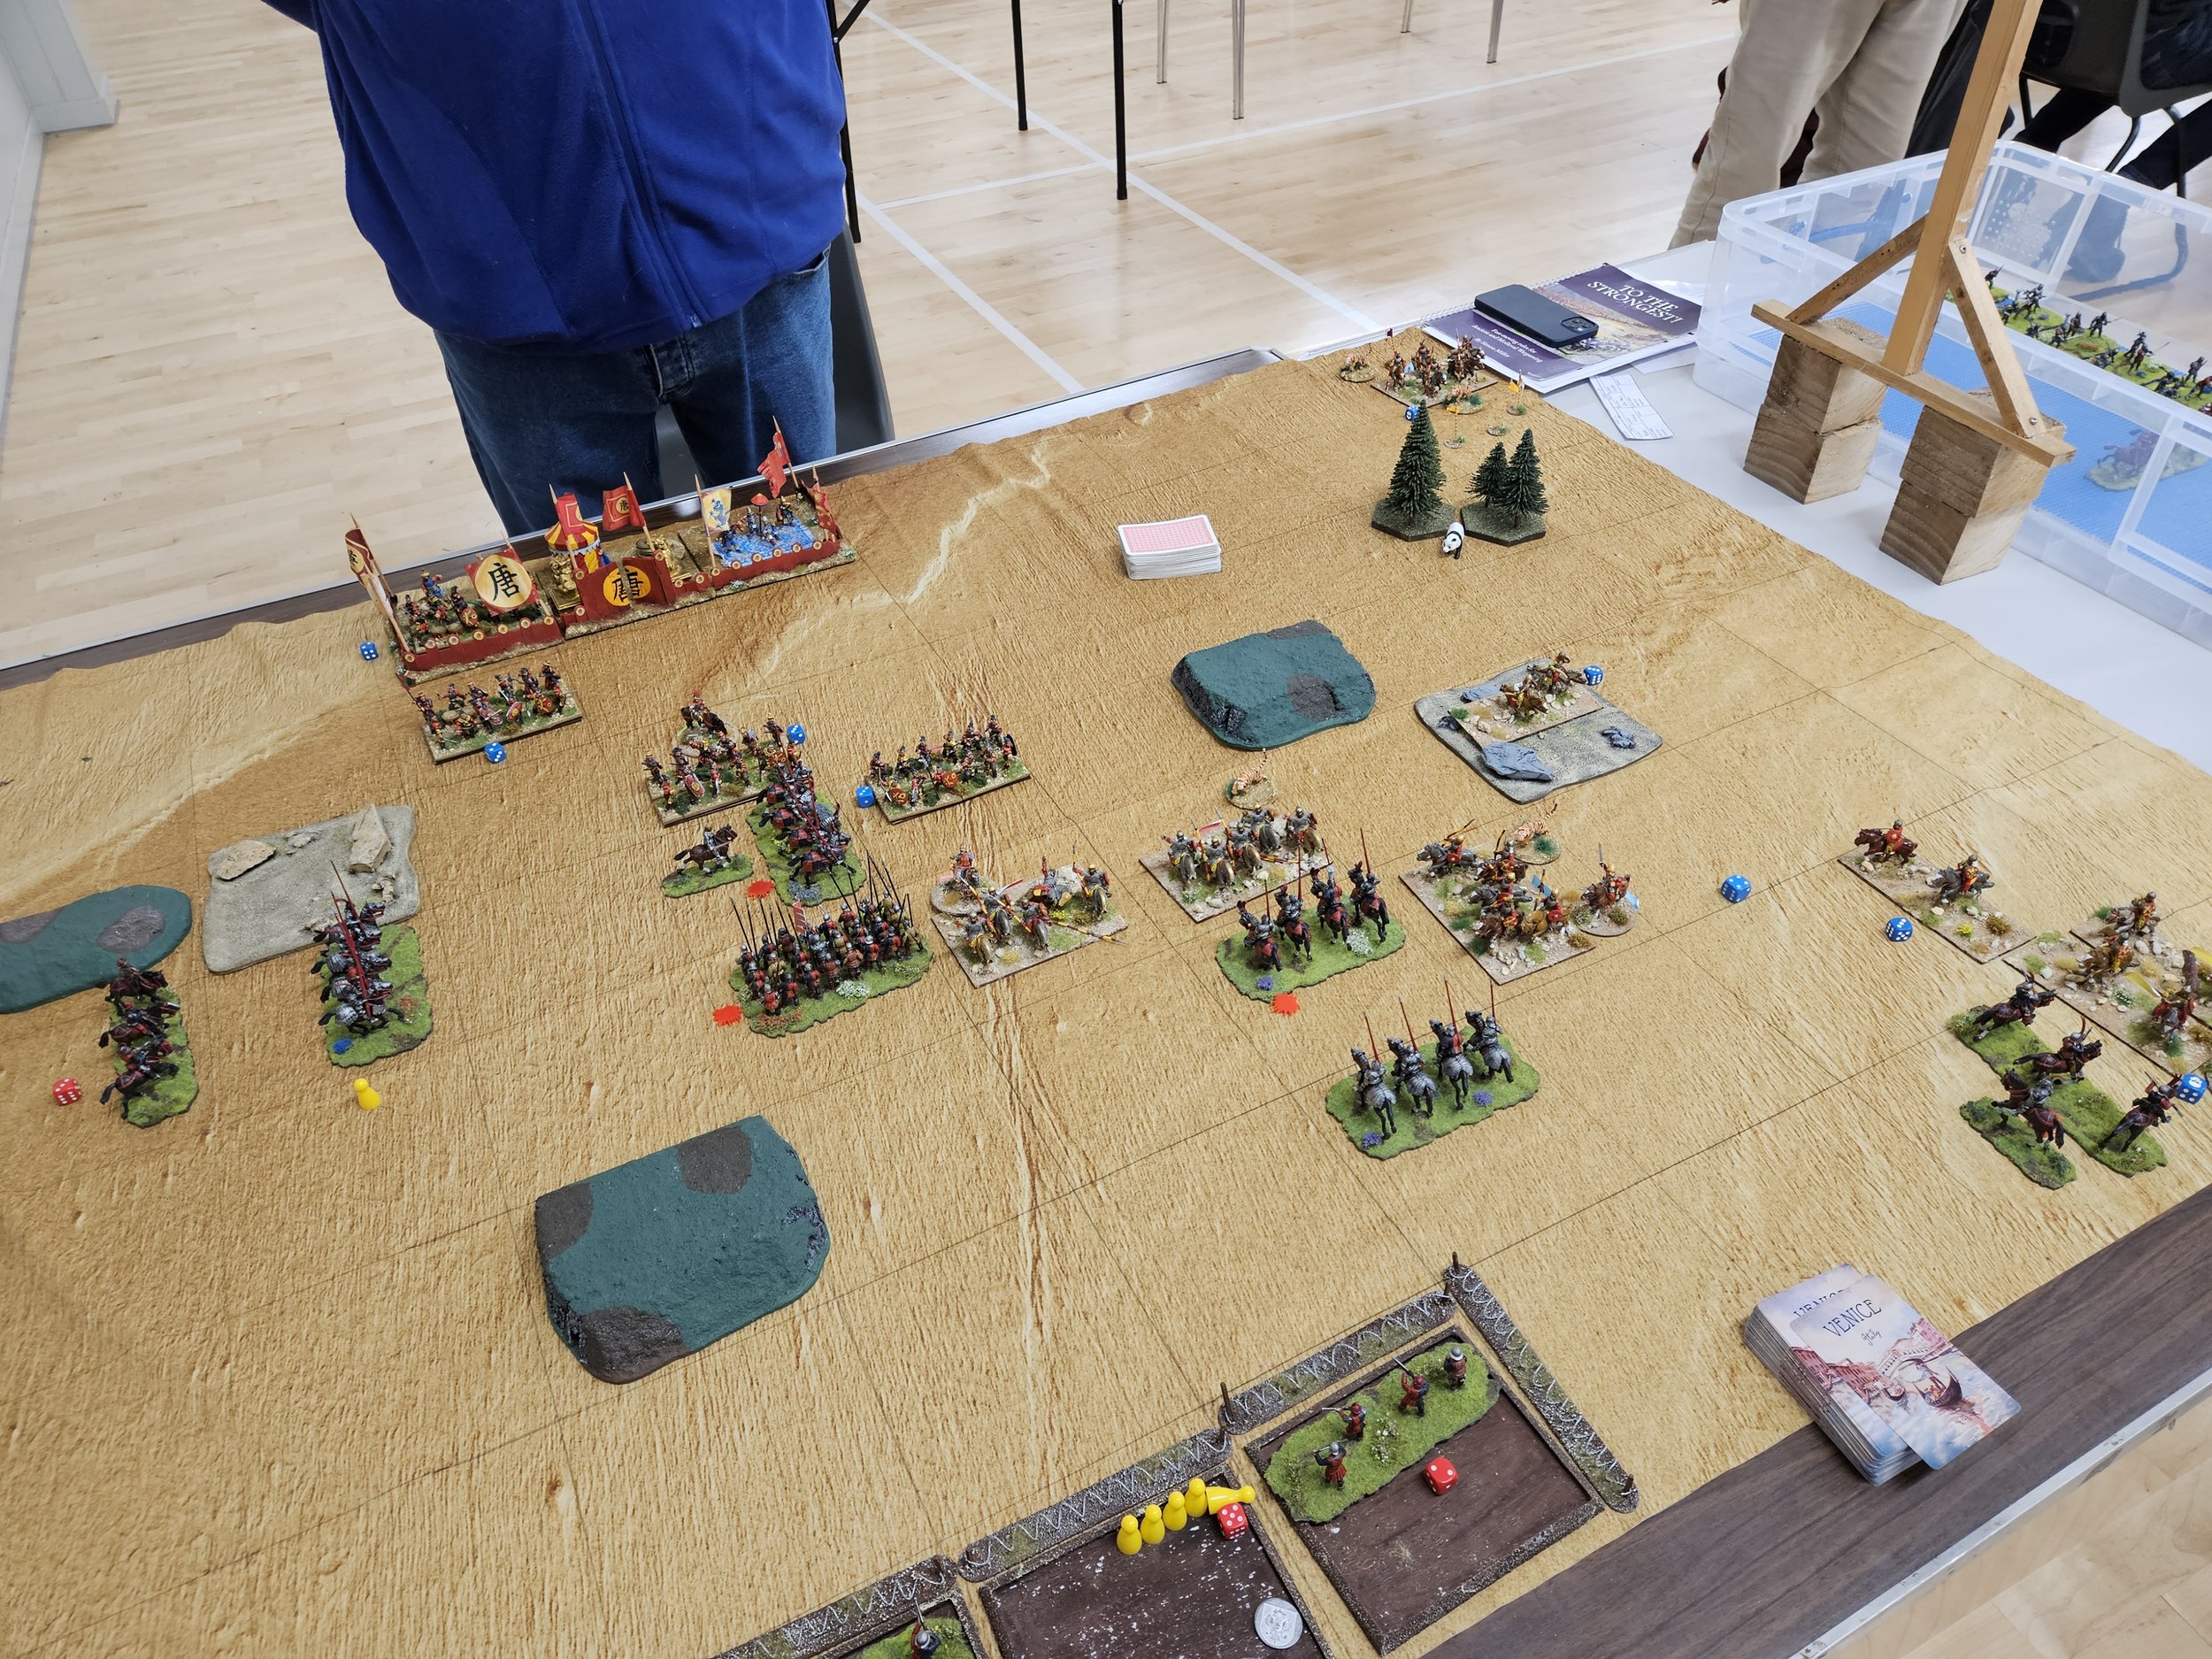
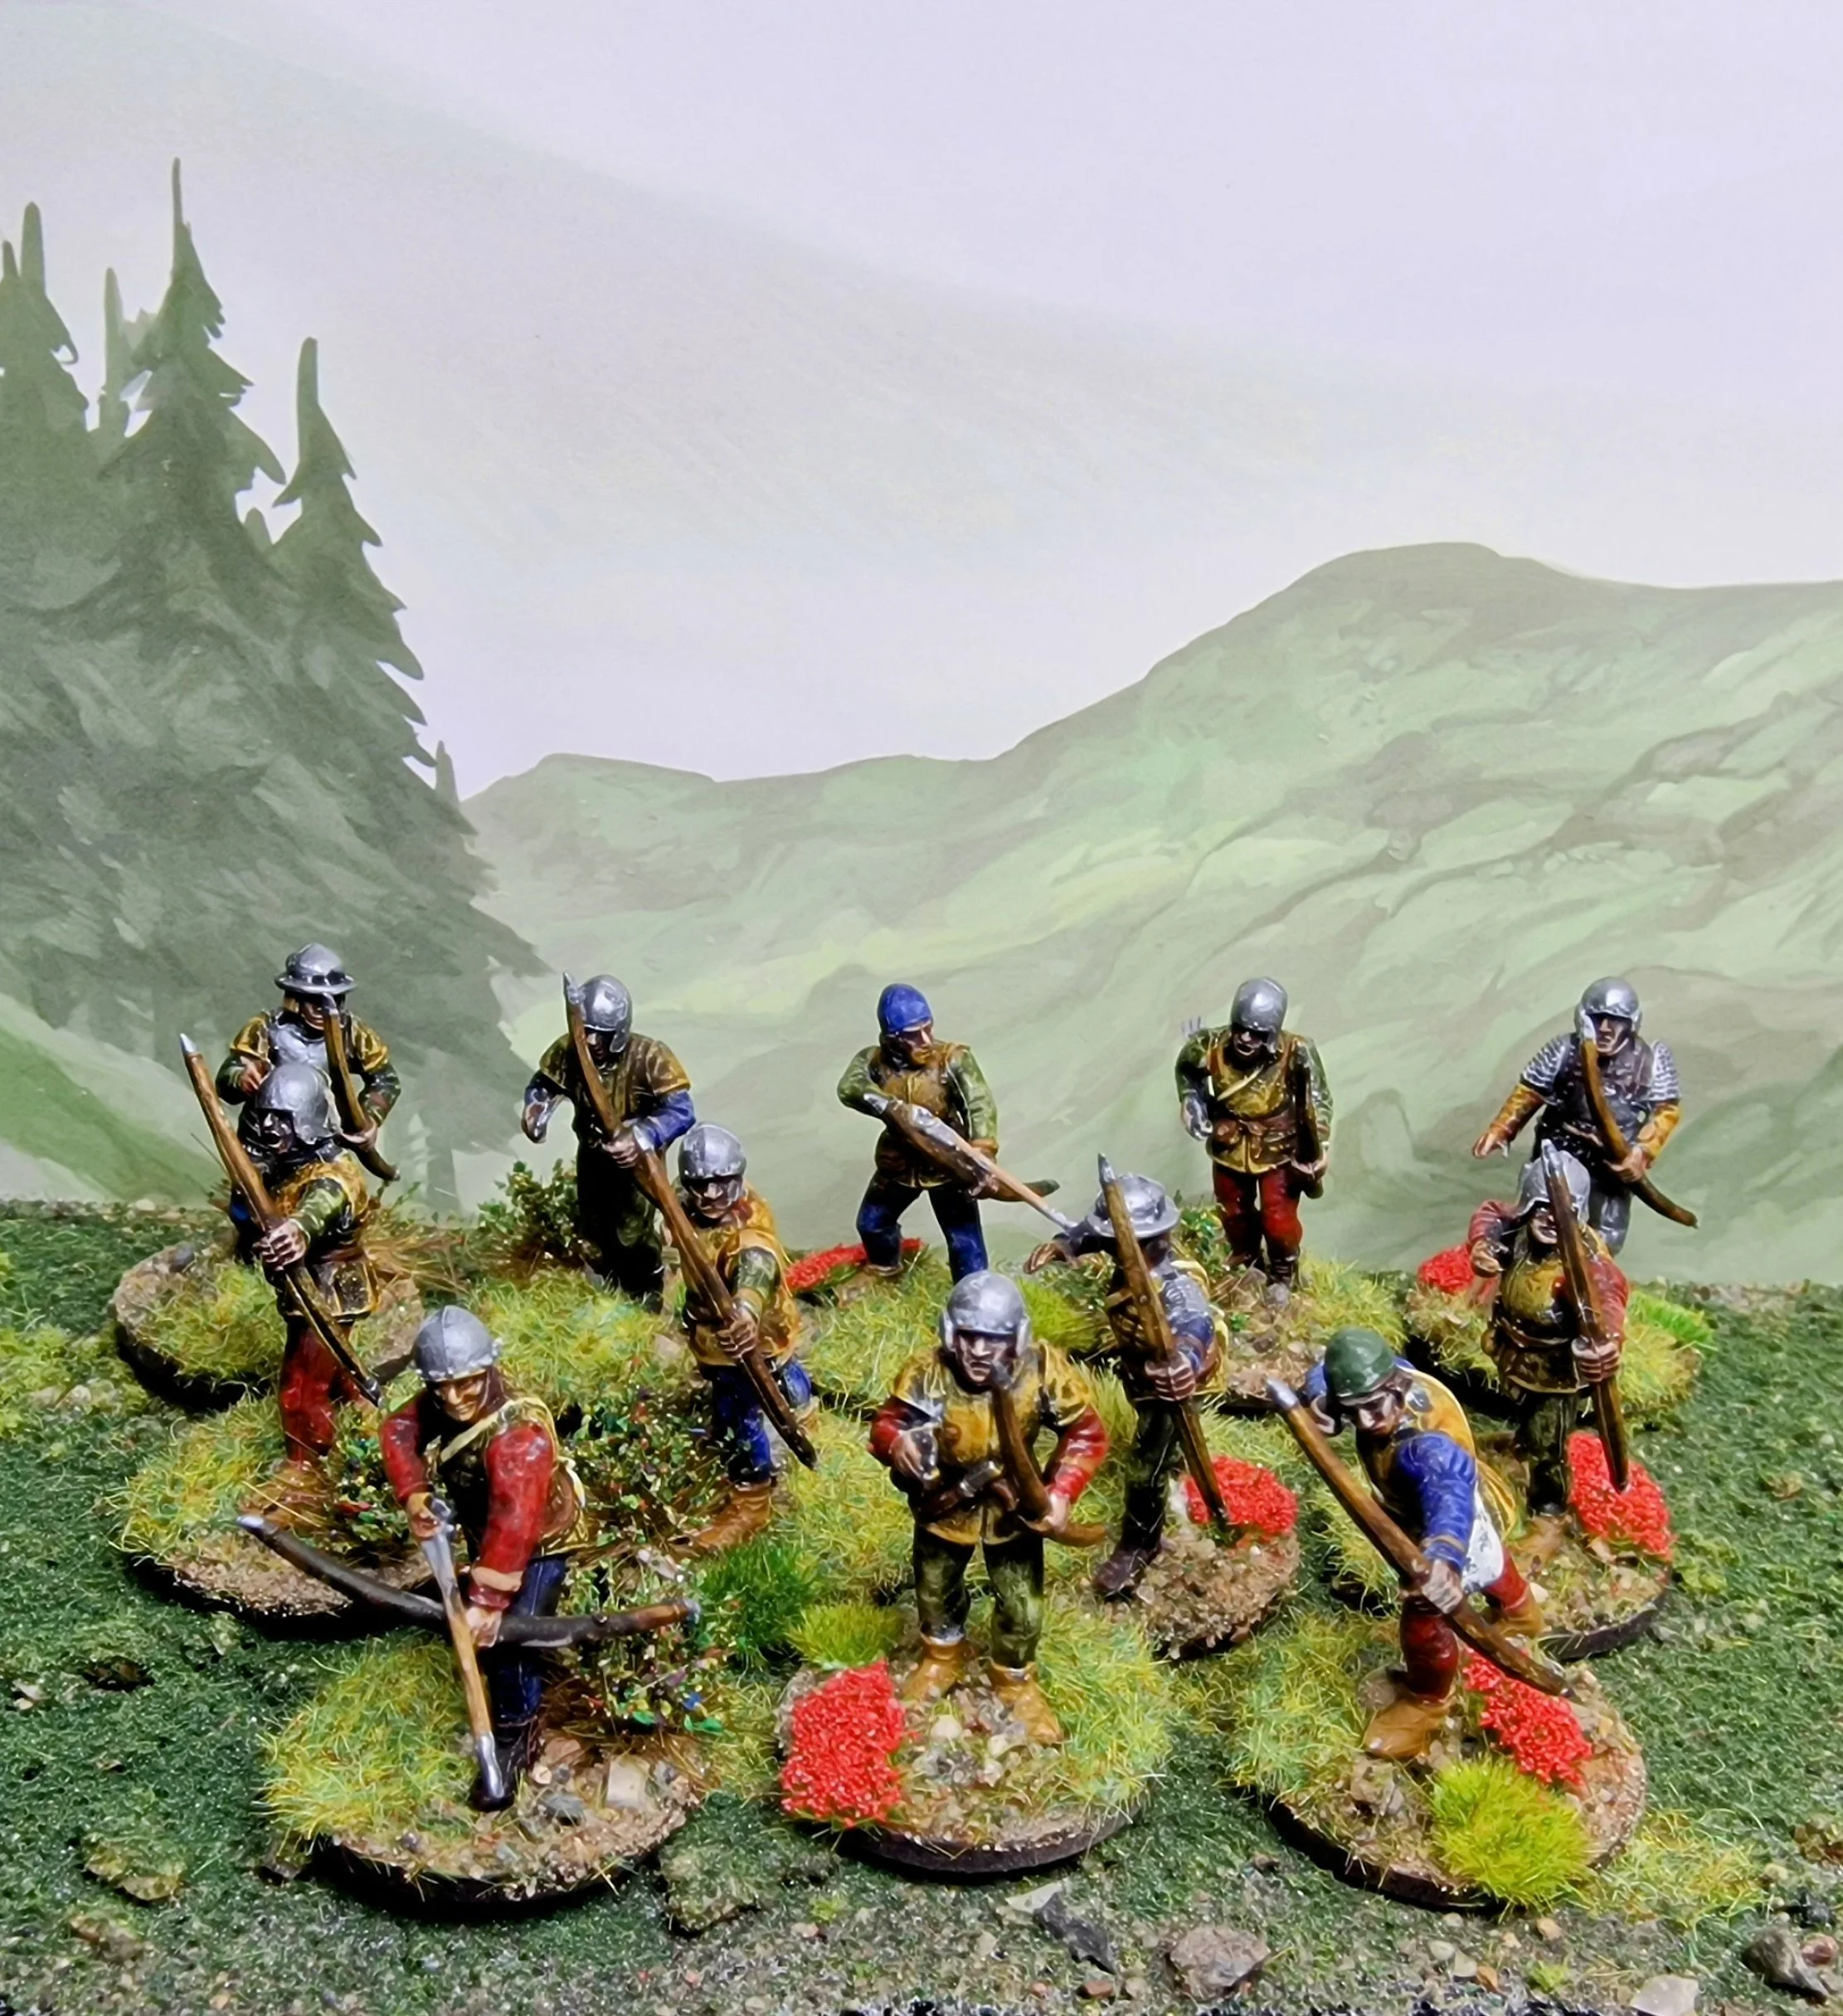
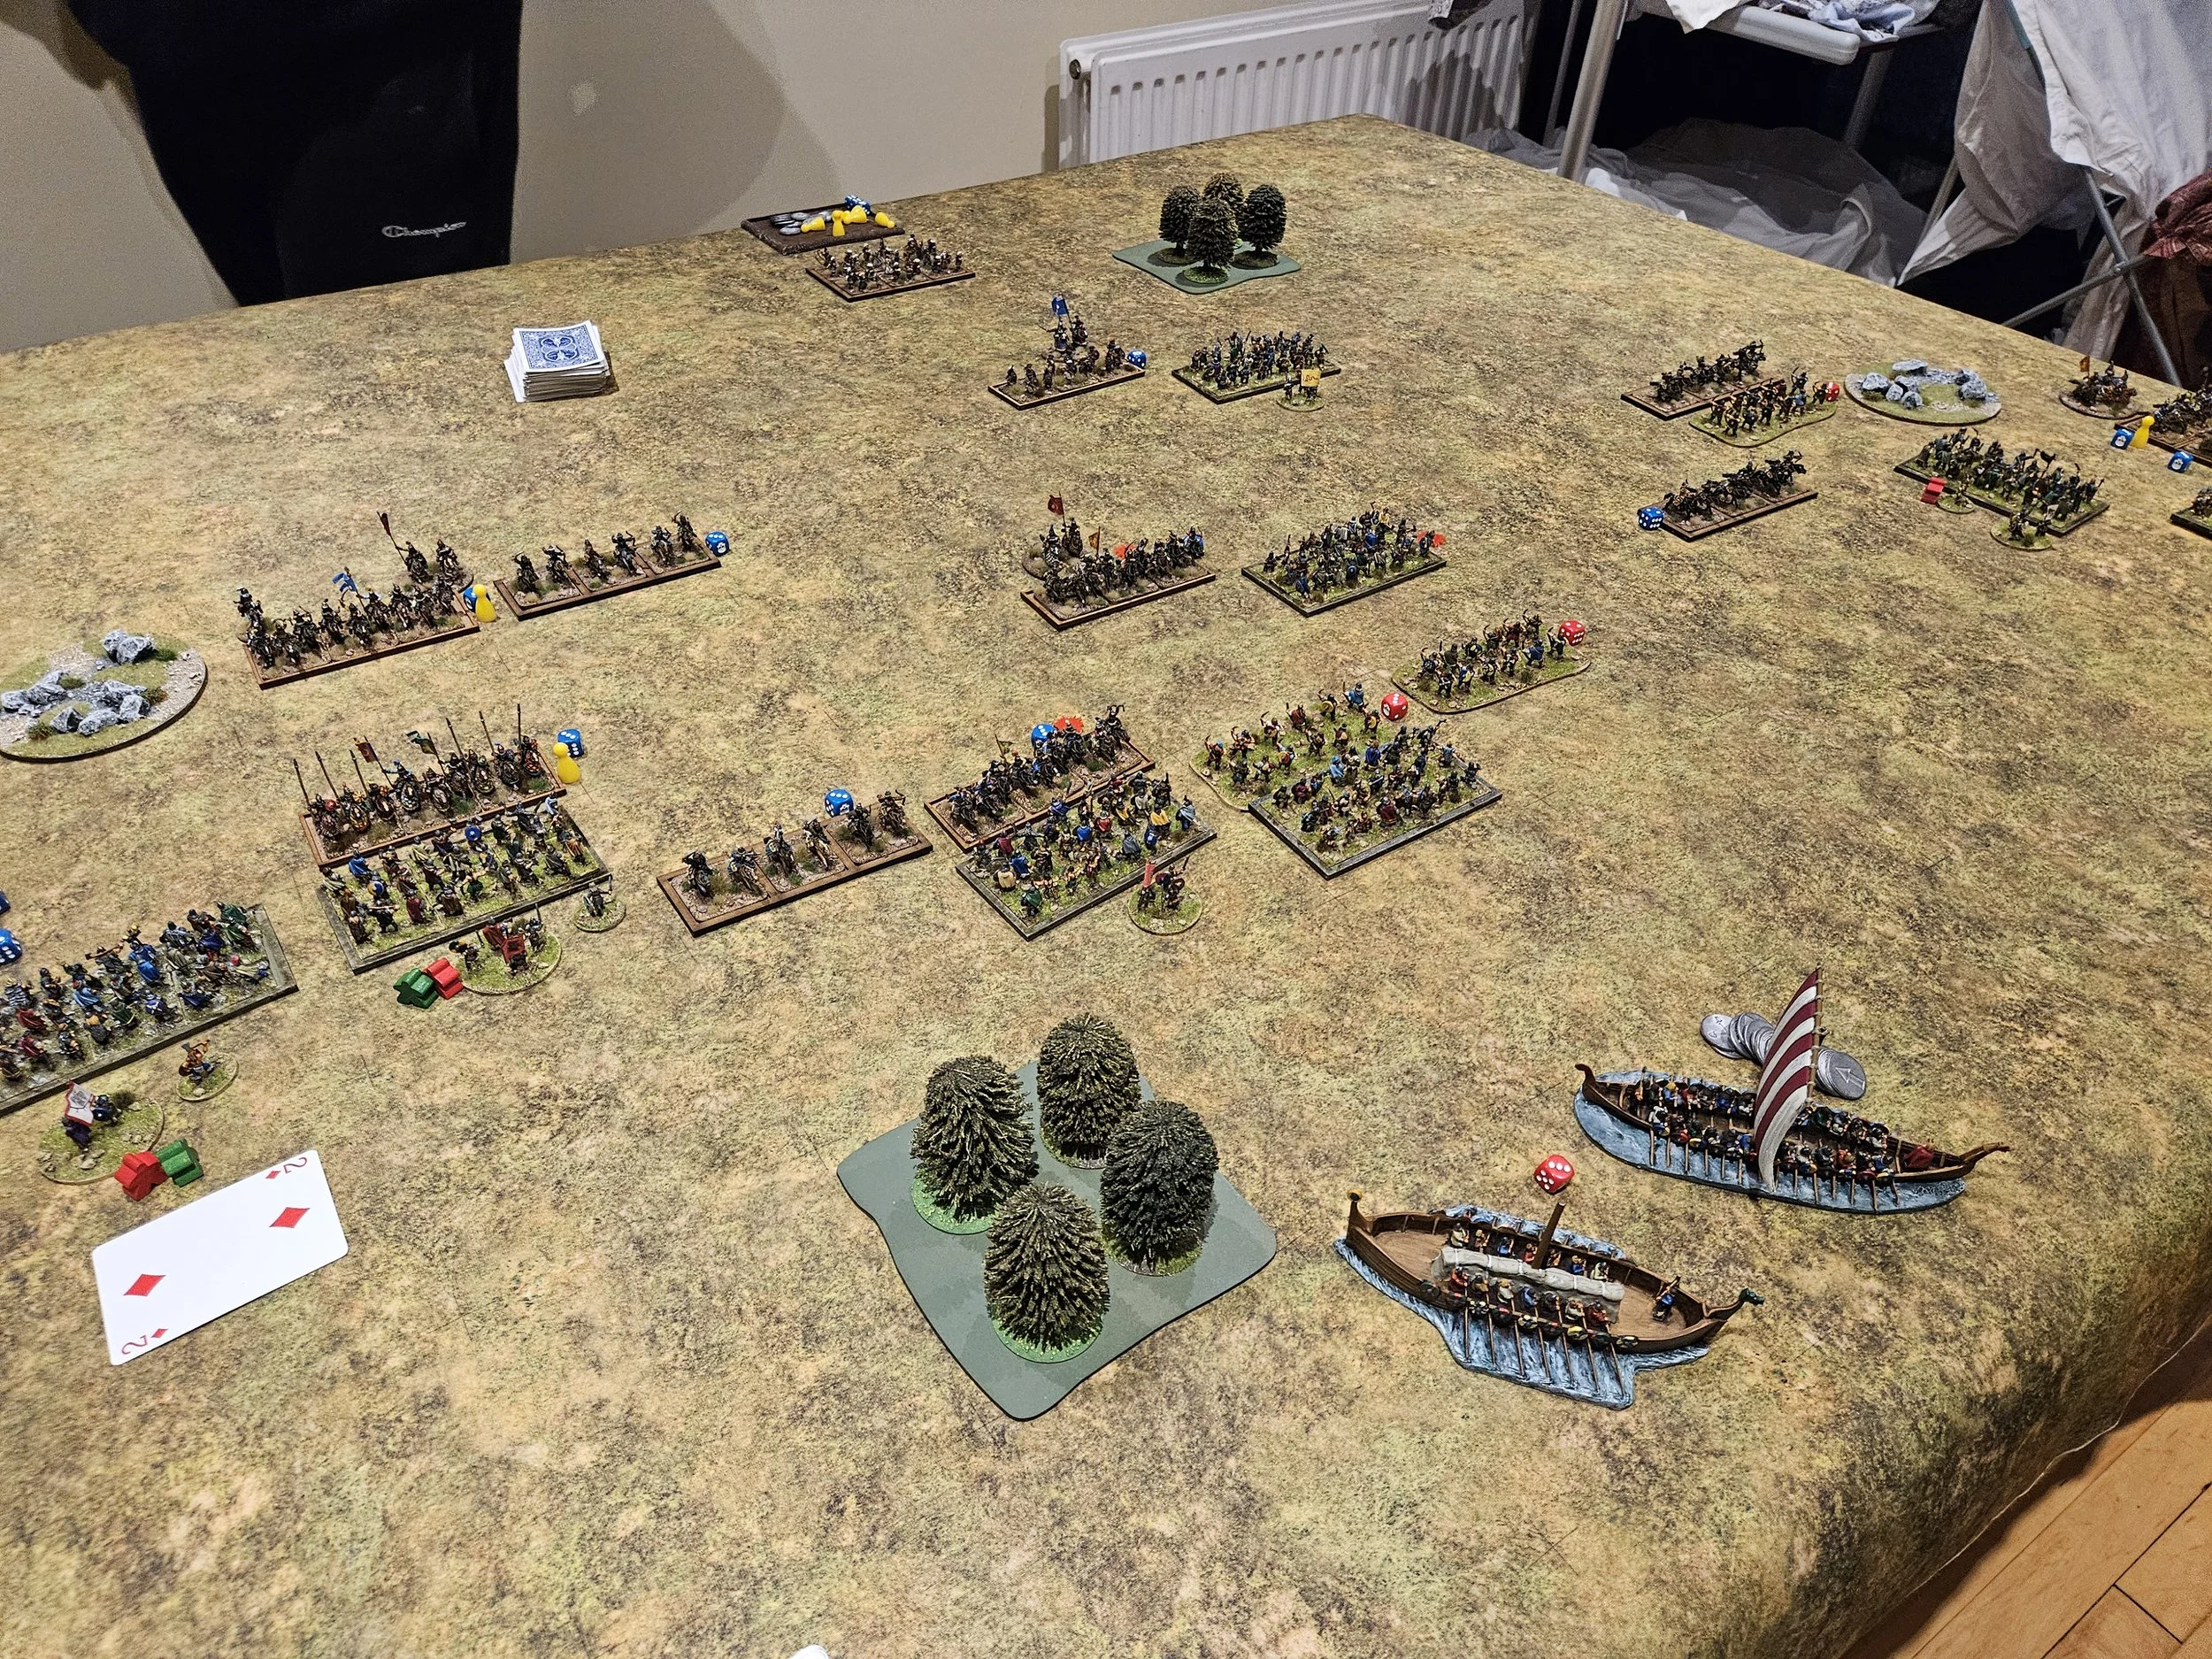
The picture above shows the view from behind the Parliamentarian lines, with Norchester itself being top left. My plan was to advance my Borders Horse on the far right around the flank of the enclosed fields, block any advance of enemy infantry out of the enclosures, and strongly advance in the centre and win the battle there.

The Battle of the Enclosures

The first part of my plan was to drive the enemy horse back on the far right flank. Although our forces numbered the same, my troops were mounted on nags rather than the sleek chargers of the oppositiom, so I knew I needed to win quickly or have my cavalry blown for the rest of the game.

The Royalists helped my cause by attacking piecemeal, and soon I had the advantage:

Unfortunately that didn’t last, and the situation devolved into a back and forwards encounter that neither side seemed likely to win until Rob sent some infantry in to reinforce his cavalry.

This gave him a temporary advantage and, for the moment it looked as if that flank would be lost to me.

Back in the Centre

Meanwhile, back in the centre, I had advanced quickly forward. On the right side, I had no wish to advance against the Royalist infantry safe behind the hedges of the enclosure, so was happy just to block their exit. In the centre centre, I advanced forward quickly in order to gain the initiative. Both sides avoided moving troops into the ground between Norchester and my works: too swept by artillery to be safe!

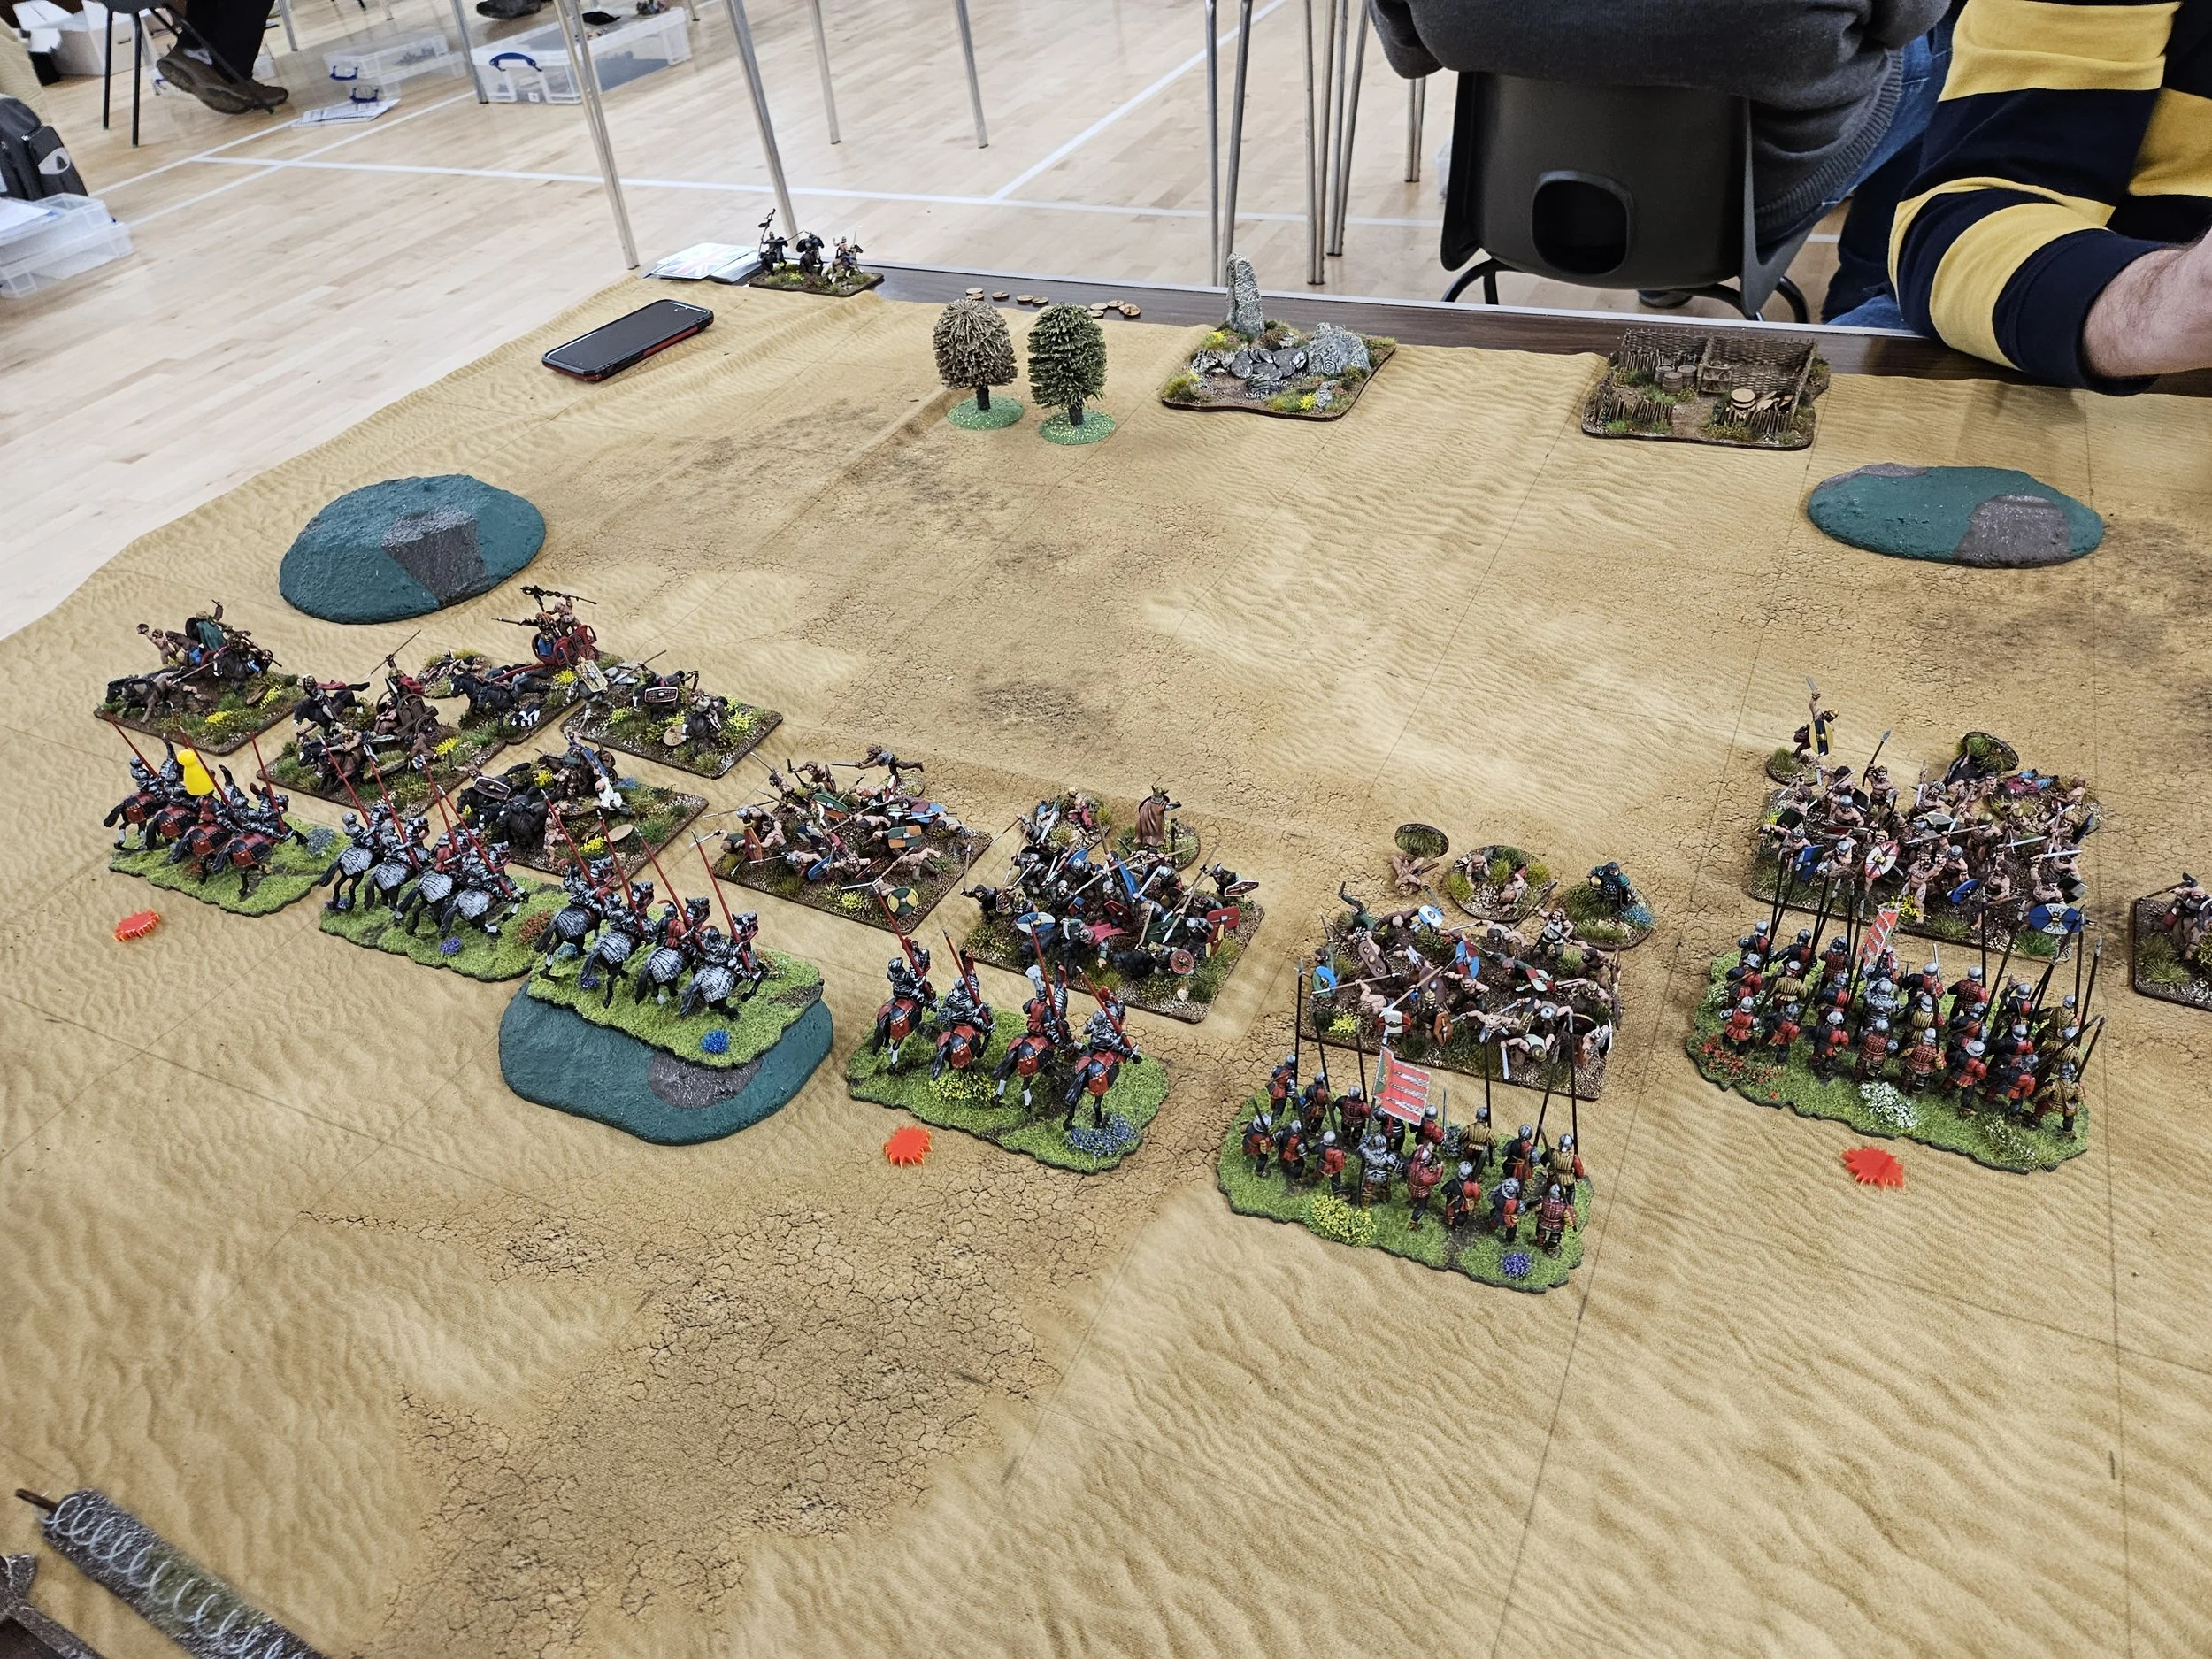
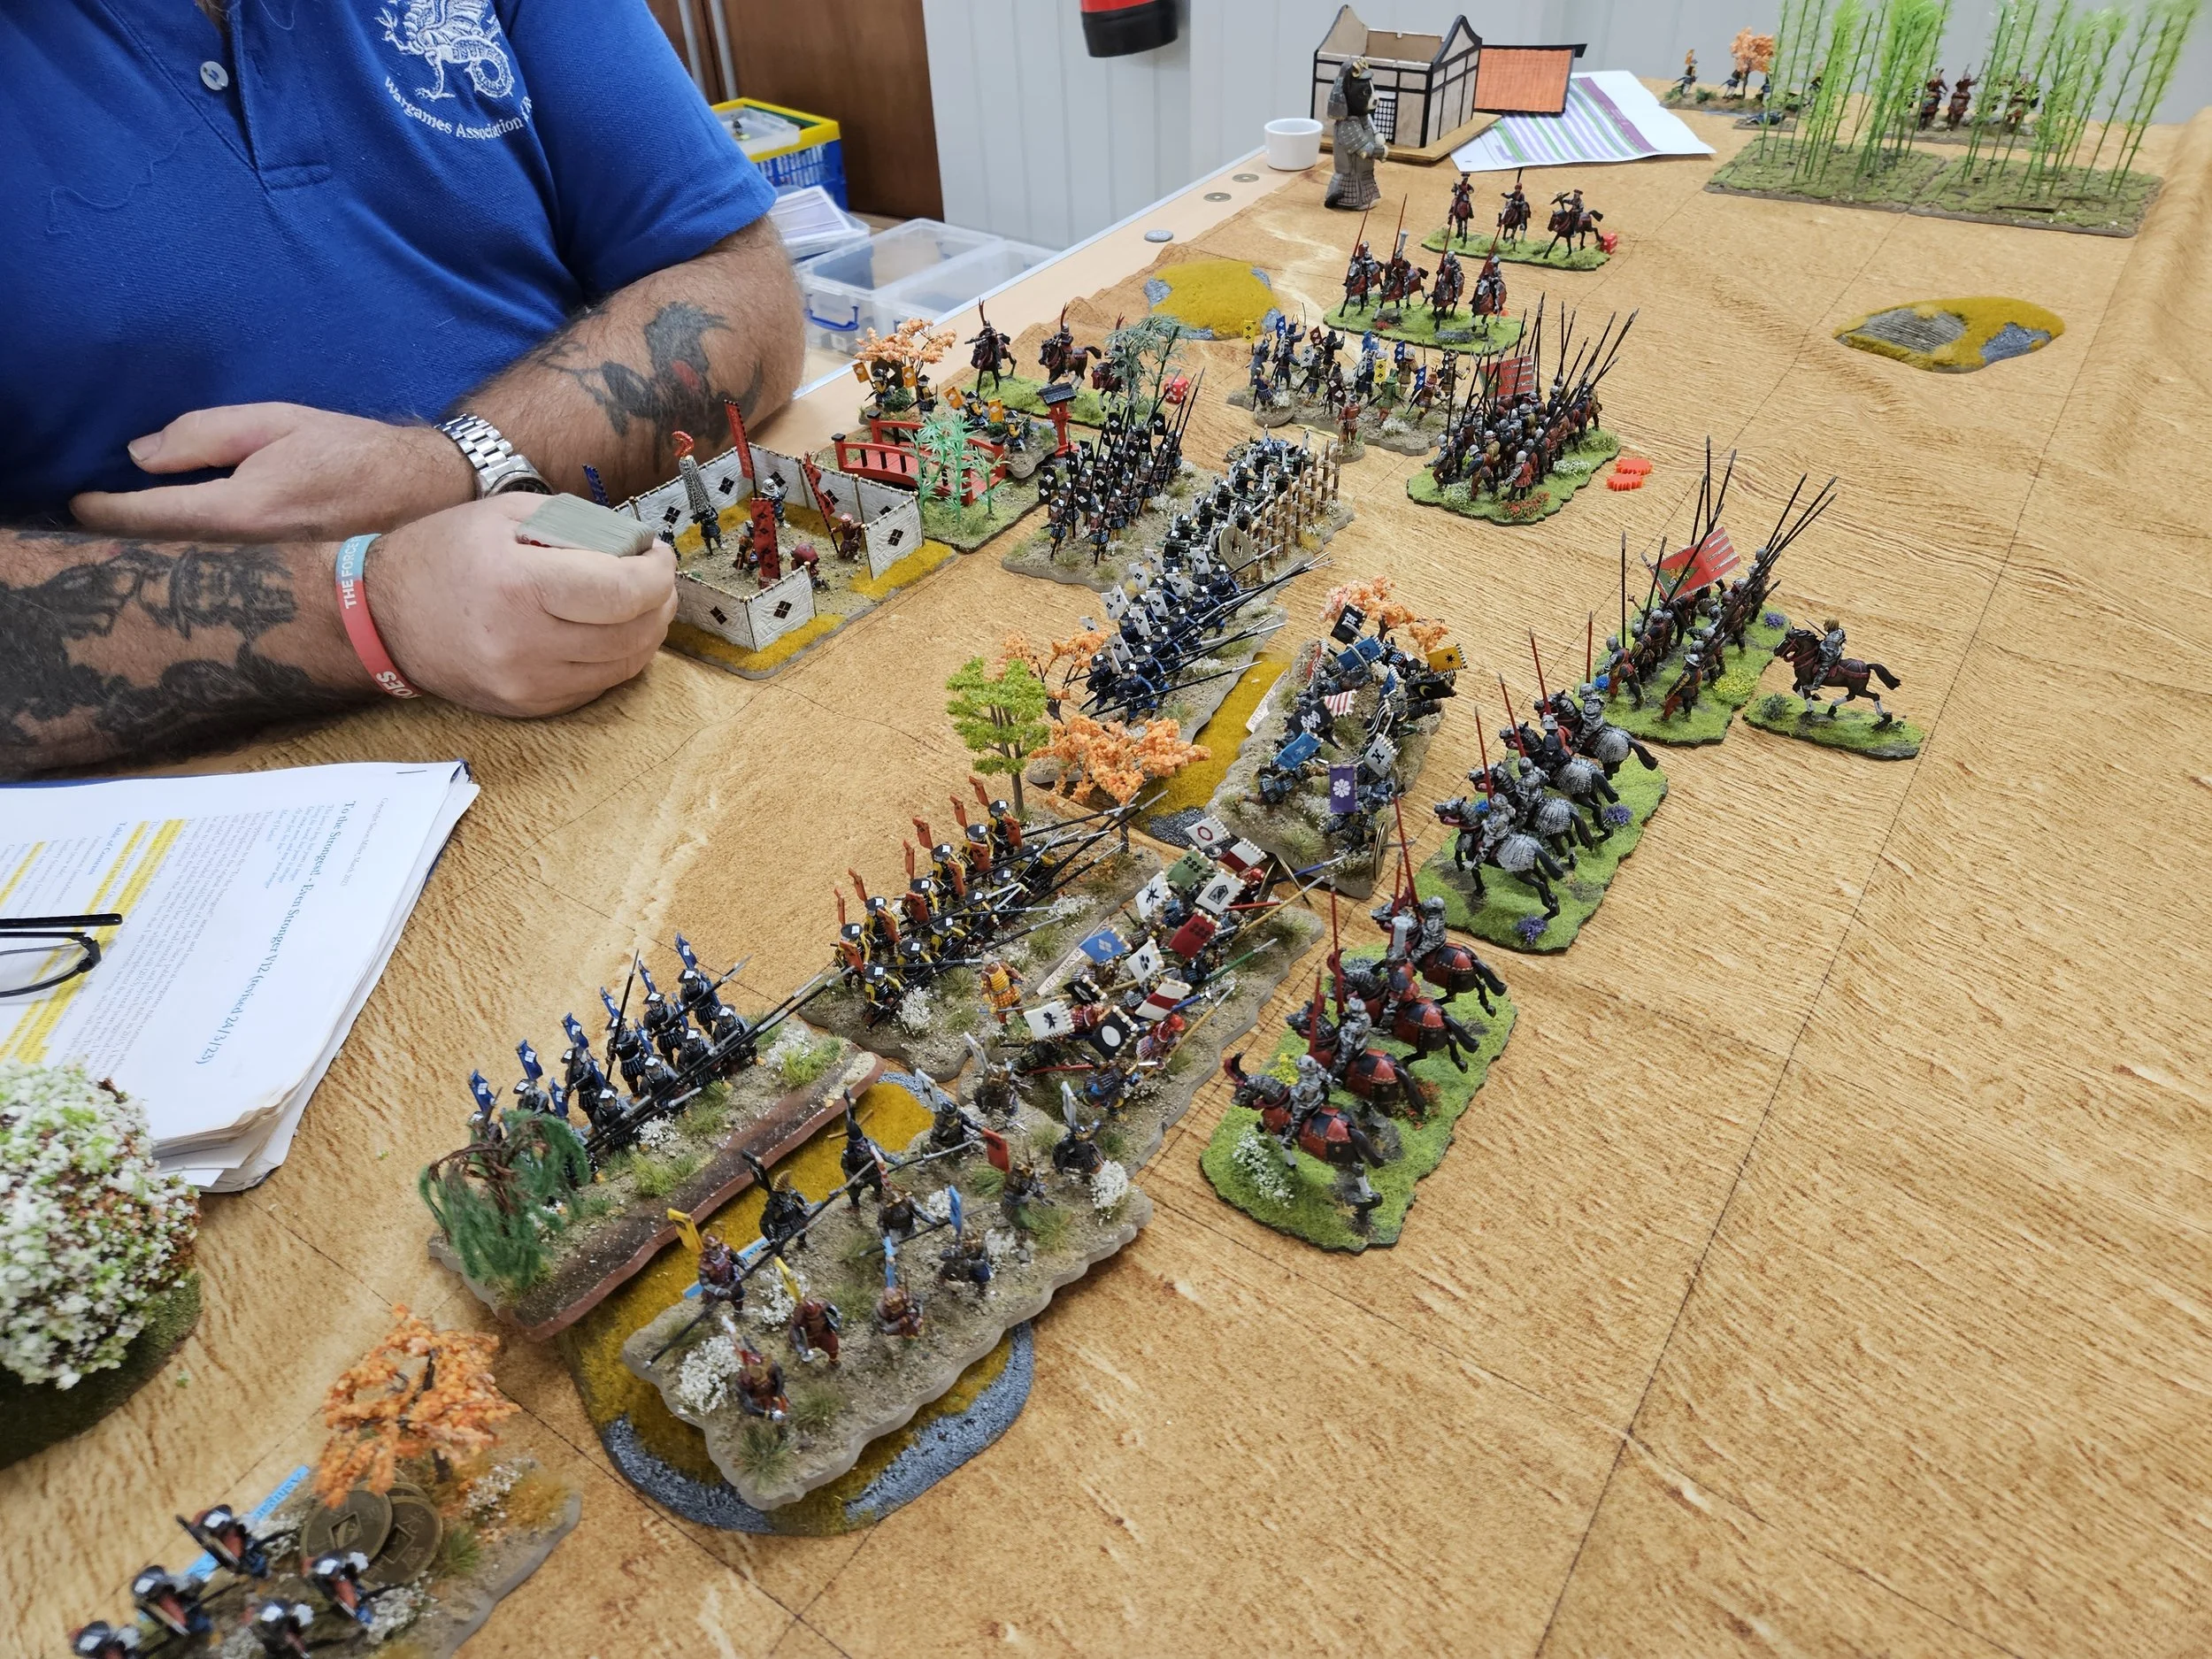
Battle was soon joined, and a general melee broke out:

All was going well until a squadron of Royalist cavalry threatened the left flank of my line. Fortunately I had a unit of the Puritan Horse there against just such a move, so charged the enemy horse downhill, confident of victory.

Unbelievably, Rob’s cavalry made four saves against the attacks on them, meaning my men swept downhill and literally bounced off the enemy. To add insult to injury, the Royalist cavalry then counter-charged and sent my men fleeing from the field!

Luckily I had reinforcements I could move to protect the flank…well, to be honest, it was a battalia of infantry that had got stuck, unused, behind the main battleline, so it was good to actually have something useful for them to do!

The fighting in the centre was now intense, and I had already had to recyle one of my Scots Battalia: it was all going to be down to whose troops could last the longest.

My left flank was also looking problematic, and even moving some of the pioneers out of the siege works to help didn’t make a huge difference. In the scenario, pioneers are represented by Highlanders: very much a one-shot weapon and useless against the cavalry they were facing!

Endgame

The main line finally shattered in both directions at once: with one of my Puritan Horse units fleeing the field whilst another broke through. At the same time, the Pioneers distracted a squadron of enemy cavalry so much that they were pinned in place, unable to take advantage of their position.

It was still neck and neck but, suddenly, gloriously, my cavalry on the right wing, long forgotten about, decided to intervene and win the day.

Freed from the cavalry melee by the intervention of one of my Borders infantry battalia, who head soundly beaten the enemy infantry that had kept my horse pinned in place, the Scottish lancers crashed into the flank of an already disordered enemy infantry battlaia and smashed them from the field.

This, combined with all the losses taken by each side so far, and the fact that two of the Royalist cavalry squadrons left the field in pursuit, reduced Rob’s pile of victory medals to zero, giving me the victory.

It had been carnage on both sides: checking my pile of coins I saw that I had gained a four-medal victory, so combined we had lost 28 victory medals between us: the equivalent of around nine units or a third of the units depoloyed at the start of the game.

So, after five games, the Parliamentarians now trail by only six victory medals overall, and it’s on to Dick’s Tower for the next encounter!

TFL Painting Challenge: End of March Update

Morning all. Just about time to sneak in another update to the 2024 TFL Painting Challenge before the end of the month…and quite a bumper update it is too.

Starting us off today is the stakhanovite Mr Slade, who has sent in not only a legion (pun intended) of 28mm Romans but just about a whole 15mm Ancient Indian army as well:

Not far behind in terms of sheer volume is Stumpy, with a large amount of figures based up and ready for the table. Here we have 28mm Napoleonics and the start of a 28mm Dacian army:

Carole has also been busy: painting up a large amount of 28mm sci-fi scenery items from Mantic. Carole also sent in some giant spiders, but they are far too creepy to post!

The Wars of the Roses is always a popular period for wargamers, and Mr Helliwell has been amassing a collection and a half of suitable figures. Here’s his latest offering:

Sapper has been putting the finishing touches to his Viking and his Arab armies, all in 15mm:

And, finally, Mervyn sends in some 15mm American Civil War cavalrymen:

Don’t forget you can see more of everyone’s work in their individual galleries (accessesed via the NavBar, above) and, for those who want to see even more, there are the galleries from previous years’ entries available as well.

It’s the long weekend coming up tomorrow, so enjoy the four days off work and use them wisely i.e. paint more figures!

A bit of Miscellaneous Painting

Always good to add some character units to your rank and file, so when I saw that the 3D printed March to Hell range of Celts included war dogs and a handler, I knew I had to get one to act as one of the many "Heros” accompanying my Ancient Brits.

A nice little piece that paints up very easily indeed. The hounds were a single coat of Contrast Basilicum Grey over undercoat; the handler was painted as a normal Celt: dark blue tunic with light blue stripes.

Next are a couple of extras for my Venetians.

My Spearmen don’t seem to be achieving much, so here’s a unit of Alabadiers or Billmen who, hopefully, will fare a bit better.

The Alabardiers are made from the heads and bodies of spare normal infantry combined with the arms and weapons of spare knights, which is why they all look a bit top heavy!

It also got a bit crowded on the base…which is why, in the back rank, one of them is smashing the back end of his axe into the face of another! I should perhaps have dropped a figure from each line or at least spaced them out properly.

Finally, a unit of light crossbowmen and an infantryman carrying a flag that I can use either as an army standard or to mark where a dismounted general is or the like.

TTS World Champioships 2024: Game 4: Venetians vs Tang Chinese

My fourth and last game at World’s pitted my Venetians against another Tang Chinese army…and having lost rather badly against Peter’s Tang in Round 2, I was rather hoping to do a bit better against Roger’s Tang in Round 4!

As things hadn’t been going very well so far, I decided to throw caution to the wind and (a) field most of my Later Knights as dismounted and (b) just get stuck in as soon as possible. Tactics, schmactics and all that!

Accordingly, as soon as the whistle went, I sped forward: my foot Knights sprinting up the field towards the opposition:

The sharp-eyed amngst you will have noticed that Roger had sent some horsemen rushing forward towards my right flank, seeking to get behind my advancing Knights or to sack my camps.

Fortunately I had antipated such a move and left a small force to deal with these intruders and, with a little help from the cards, the two enemy horse units were soon destroyed and my flank secured.

Meanwhile, on the left, I had sent some Knights forward to see if they could work their way around Roger’s flank.

Unfortunately, although I did manage to kill a couple of enemy units, it took me some time to do so - winkling lights out of a wood proved more time-consuming than I had anticipated - and, at the end of the game, my troops here were only just starting to break through.

All of which meant that it was centre that would decide things.

My dismounted knights, spear and pike units stormed forward, intent on causing mayhem, but their earlier sprint up the field had obviously exhausted my knights who proved unable to break the enemy in front of them.

My pikemen, however, did much better: driving forward clearing all before them before turning in to threaten the enemy flank.

By this time, however, Time’s winged chariot had hurried near, and the clock had somewhat un-Marvellously run out, the last game of the day being a either a really long one with no time limit or, in this case, a somewhat truncated affair due to needing to end the day on time.

The result? A winning draw 7-3 for my Venetians: not the score I needed to resurrect my fortunes. This meant that, once the scores had been totted up, that I came 14th overall: very disappointing.

Still, it’s all about the playing, not the winning (he said through gritted teeth with his nose visibly lengthening as he did so) and they had been four great games against four worthy and sporting opponents. The day was also superbly organised, so thanks to all involved: Si, Mark, Bevan, Steve, John et al. I really would recommend this event to any TTS player.

Meanwhile, my troops slunk back to their canals for more training: duri ai banchi as we Venetians like to say!

TTS World Championships 2024: Game 3: Venetians vs Ancient British

The story so far: one big win, one big defeat…so it was all to play for in game three of the 2024 To The Strongest World Championships.

This time, my Ventians would face Matt’s Ancient British, and lot’s of them there were too!

The Ancient British outcouted, and before I knew it, I had shed loads of barbarians coming right at me: chariots and cavalry on the wings, infantry in the centre.

There was nothing for it but to get straight back at them and see what happened!

The two lines came together with a mighty crash…

…but honours were fairly even. The Brit infantry were in deep units, but my Knights had better saves, so things pretty much cancelled themselves out.

Cue a grinding melee that swung backwards and forwards between us: before too long, most of Matt’s units were on two disorders and most of mine were on one, but my pikemen and spearmen were having a good day and were pushing forwards towards the British camps: it was all going to be down to who gave way first.

Then disaster struck: one of Matt’s warbands broke through my line and charged towards my camp.

No matter, I thought, I have light infantry handgunners behind fortifications, and whenever I have tried taking a fortified camp packed full of light infantry, I have failed again and again and again.

Not today, however.

With barely a pause to draw breath, the British warband smashed straight through the fortifications into the camp, killing my lights as they did so. Four coins down!

Next thing, the game ended due to time considerations, with the Venetians recording a 4-9 losing draw: actually the first time I have not had a clear “win/lose” result in a competition game.

It had been a great encounter with a tough opponent. Had we continued, I think Matt would have quickly taken the rest of my camp and therefore the game but, on the other hand, there was also a fair possibility that I could have caused a general collapse in his line first, which could just about have given me the win…but I guess we will never know.

Must be an excuse for a return match some time in the future!

TFL Painting Challenge: Another Update

Apologies for the lack of posts this week: very busy at work…buit now that it’s the weekend, I have time to do a very necessary update to this year’s TFL Painting Challenge.

A good week this week, including the return of Mr Davenport after a four-year absence. He has sent in some very nice 28mm American War of Independence figures, all Perry 28mm with GMB standards:

Next up is Sapper, who has let the painting pile up and submits a vast cornucopia of 15mm figures: Polish Winged Hussars, Arabs and a few Vikings thrown in:

Another large entrant this week (in terms of number of figures not necessarily girth!) is Mr Helliwell, with another Wars of the Roses, late Medieval collection.

This is only a part of what Andrew has submitted, so do visit his gallery for more. I’ve also included one of his self-made ponds/march terrain pieces as well:

I love Mr Emmett’s work as well. Here he sends in some WW2 Poles and, featured below, a lighthouse, shed and dock:

Finally for this update, we have some Egyptian columns from Carole, some Dwarf command stands from Ralph, and some bases for Strength & Honour from Mervyn:

So a very good haul indeed this update, including Andrew Helliwelll being the first person to break the 1,000 point marker this year…but I’m sure there will be many more following hereafter!

TTS World Championships 2024: Game 2: Venetians vs Tang Chinese

The consequence, or course, of having had such a good first game meant that in round two I was once again up against Peter - winner of many, many tournaments and a regular opponent - and his Tang Chinese.

To my shame, I must admit that I did have a minor temper tantrum at the news: but, in my defence, I was very tired after a very long week’s work, and who would want to face Peter in a tournament…charming chap that he is, he does have a tendancy to win!

Anyhoo, tantrum over, it was time to settle down to the game:

As you can see from the picture, above, things did not start off very well for me!

Peter’s Tang outscouted my Venetians, and a superb deployment on his part and some good cards to begin saw his light cavalry, soon to be followed by heavier cavalry, all over my right flank.

This move to the (his) left, also meant that a third of my army was effectively facing thin air: not a good situation.

Some good manouevring on my part, however, brought the left hand contingent of my heavy knights back into the action and, in fact, got them into a great position to flank charge some of his central units.

Unfortunately, my new specially-bought,Venice-backed playing cards chose that moment to wobble, and my flank charges and moves across the field failed to happen as I had planned: disaster!

This meant that rather than putting the battle on a more even footing with some locally good superior numbers and flank attack possibilities, Peter had the time to turn to face my troops coming at him from his right flank to block my advance there. He was effectively where I had been at the start of the battle on my right, but also in an echelon formation that further prevented me using my superior numbers to advantage.

Meanwhile, of course, he had already achieved superiority of numbers on my right flank, and was able to use them to bash me up there before I had the chance to do the same to him on his right. He was (as ever, some would say) one step ahead of me.

Now it was just a matter of time, and Peter was soon able to start to sending my troops fleeing from the field, meaning that I suffered a very bad 2-12 loss!

A superb example of how to wrong-foot your opponent from deployment, and although I was a trifle unlucky not to be able to at least partly rescue the situation in the middle part of the game, as we all know, a plan that depends on luck is not a plan at all!

TTS World Championships 2024: Game 1: Venetians vs Sengoku Samurai

This year’s To The Strongest World Championships was held at Blewberry in Oxfordshire. It was a superbly organised event that all who took part agreed was good fun.

My first opponent was Colin and his Sengoku Samurai: a nasty combination of Samurai types,both mounted and dismounted, with their longbows and naginata two-handed cutting weapons, and Ashigaru Teppo mixture of spearmen, bowmen and musketeers. This was not going to be easy!

Fortunately I won the deployment, and watched as Colin set up his troops crowded on to the left hand side of the battlefield.

This gave me an excellent opportunity (helped by a suitable stratagem card) to get on to his left flank, and that’s exactly what I did:

Unfortunately, however, his corner unit of veteran Samurai proved tough as old boots (or whatever the Japanese equivalent is) and, to make matters worse, my pike block took not one but two surprising hits from missile fire.

Meanwhile, the rest of my troops had got stuck in to the Japanese main line, with my left hand unit of Knights also managing to see off one unit of Samurai horse and threaten the flank of another.

With my troops now fully committed, it was time to turn from Athena to Mars and hope that my troops were up to the task:

As you can see, although the Samurai centra began to give way, the remaining Samurai horse on the left wing proved very resilient despite the cards giving me every opportunity to best them!

Fortunately most of my frontline troops were Later Knights, and quality began to tell. More and more of Colin’s units were either sent fleeing the field or forced to retreat into his camp, and eventually victory was mine.

A good start to the competition with a 13-1 victory.

Venetian Casualty Markers

Next stage for the Venetians was to fill in all the peripheral bits and pieces needed to actually play the game, including casualty markers and heroes.

I wanted some nice casualty markers, but didn’t want to go to all the trouble of building and painting actual figures. My Romans have a set of markers, kindly donated by friend Peter, which consist of a Roman shield mounted on a single-figure base, so I decided to mimic that for the Venetians.

Regular visitors will know that I am ujsing Perry plastics, whose various sprues include pavises: the stand-alone shields used by crossbowmen for shelter whilst they reload. These looked ideal, so I cut enough off the sprues and sprayed them with a white undercoat.

Next I bought some pavise-shaped transfers specifically designed for the Perry pavises from Little Big Man Studios (an excellent company, by the way: highly recommended) which were really, really easy to mount. Finally, a quick scoot round the edges with some brown Contrast paint and each pavise-marker was now ready.

The bases are 2p coins with a light coating of basing material and then flock and the finished pavises glued on top.

Experts amongst you will have spotted that the pavise transfers are actually in Burgundian colours (all that was available) but actually the red and yellow works very well with the colour scheme I’ve adopted for the Venetians, so I’m very happy with these: I just hope I don’t have to use them very much!

The heroes are just standard cavalrymen but using some of the fancy heads that the Perry’s kindly provide. These really are lovely figures and, again, highly recommended for those seeking to build some kind of late medieval army.

TFL Painting Challenge: First March Update

Let’s have a look what people have been sending in this time…

First up is Mr Helliwell, with more medievals. These are all billmen or longbowmen and are based on Perry Miniatures in 28mm:

Next we have Nick, who has sent in his usually cornucopia of fantasy figures in 28mm. I particularly like the Vendel Goblins and the zombie/ghouls, and there are plenty more of both in his gallery, accessed through the NavBar, above:

Lots of small scale aircraft sent in this time. Unusually not from Mr Luther or the Hat, but this time from Mervyn and Mr Burt. Mervyn’s are the aircraft for North Korea, Mr Burt’s are from the PSC Battle of Britain game:

Matt Slade, commission painter extraordinaire, has been finishing his Normans…but we know that’s not true: no army is ever truly finished. Loving the camp!

Finally, here’s Chris Kay’s cowboys and Romans, and Carole’s sci-fi scenery. Check out Chris’ new photography skills!

That’s two months of the year gone, and there are already some impressive totals being racked up. Check out the individual galleries (accessible via the NavBar, above) and remember: if you can’t beat ‘em, join ‘em…plenty of room for more entrants.

FK&P AAR: The Battle of Stour Road

Friend Rob came up from Andover-area for the fourth game in our play-through of the Siege of Norchester scenario book for For King and Parliament. So far, my Parliamentarians have won one game and lost two, so I’m a few medals behind overall.

Today’s game features a Royalist attack on nascent Parliamentarian siege lines. The Royalists have got around the flank of the Roundheads with their cavalry and now prepare to sweep all before them…

The outskirts of Norchester can just be seen top left, parliamentarian siegeworks are top right

Royalist outflanking force

Parliamentarian mobs work the siege lines

As the Royalist infantry and cavalry moved in, the Roundhead Mobs moved into the siegeworks, and the ‘corner’ battalia of Border foot went into hedgehog:

moving in for the kill

moving in for the safety!

The first action involved two of the Royalist cavalry units combining to drive a Parliamentarian battalia from the field.

Unfortunately for the Royalists, as one of their cavalry units followed the fleeing infantry in pursuit, the event triggered the arrival of the Roundhead’s cavalry reserves, who promptly charged them in return, driving them from the table as welll.

roundhead reinforcements arrive: it’s the puritan cavalry brigade

The action then switched to the ‘corner’of the Parliamentarian line, where the battalia of foot were holding their own, unlike the pike-only battalia behind them, who were crumbling fast:

the corner of the parliamentarian line

in hedgehog

The Puritan cavalry had effectivly dealt with one Royalist regiment of Swedish-style horse, but didn’t seem to be able to polish off the other.

Meanehile, the action was hotting up at the ‘corner’ and, in the distance, you can see that Royalist infantry have now engaged and are beating up the Roundhead mobs (armed only with picks and shovels).

Puritan cavalry engaged…

…and in pursuit

The action at the ‘corner’ hots up

As my infantry was now under so much pressure, I really needed the cavalry to intervene.

Unfortunately, although one unit of Puritan horse continued their pursuit and swept the Royalist commander’s small unit of cuirassiers bodyguard from the field, it then disappeared off into the distance, never to be seen again.

Almost worse than that, my other unit of Dutch horse was still trying to deal with almost the last remaining Cavalier Swedish horse regiment: no matter what I did, the enemy horse just woudn’t break, leaving my men pinned in place!

With my cavalry thus neutralised, finally the pressure on my infantry became too much and they began to break.

A last ditch attempt by the chaps who had been digging the siege works failed to achieve anything either - their shovels and picks being no match for pike and musket - and the Parliamentarians were forced to retreat, leaving the Royalists in possession of the field.

A great game but another defeat for Parliament. Rob is now ten coins ahead overall: just about a whole battle in hand!

Onto to Plumleigh common: where we’ll see if these Royalists can stand up to the might of siege gun Titan!

TTS AAR: Timurids vs Vikings

This was the return match from the game reported on Feb 15th: last time my Vikings beat Kavan’s Timurids, now we would swap sides and play again.

As you can see from the pictures above, I won the scouting phase and set off towards my opponent at a rapid rate of knots.

When Kavan moved his Vikings forward to meet me, he accidentally created a gap between his two wings where his longboats were beached…and I thought “ah ha! I can defeat the two halves of his army one at a time and hit him from his inner flank”.

The Left Flank

This was the side where I needed to hold his troops up for long enough for me to defeat the Viking right flank.

I assigned three Turkoman horse archer and three Timurid lancer bases for this task. Facing them were four Viking warbands supported by two light archer units.

As you will see from the pictures, below, things initially went quite well for me: flank charging and destroying a Viking warband and disordering two more.

Unfortunately, that was the high point of my success here: the Vikings recovered well and, with the help of one of their reserve warbands from their camp, managed to finish this phase of the game ahead: two warbands destroyed, three warbands and two light units remaining versus my Timurid force reduced down to two horse archer bases!

So the Vikings slightly ahead, but that was okay, as the idea was just to hold them whilst my right wing went to work.

The Right Wing

Although I initially only assigned one Timurid lancer unit here, they were supported by three bases of Turkoman horse archers, and the Vikings had got themselves pinned up against some impassable ground, meaning I could just focus on one of their bases at a time. I also quickly sent one reserve lancer unit to help finish them off.

This was potentially rich pickings for me, as the not-pinned base had an army standard (so was worth four coins) and the pinned base had King Cnut himself in charge, making the base worth six, or maybe even seven coins. Take out these two, and that was two thirds of the Viking hoard (not horde!) taken care of.

Again things started very well, with the standard-bearing warband destroyed and King Cnut lightly wounded. Go the Timruids!

Unfortunately, rather than debilitating Cnut, his wound seemed to inspire him, and the beggar just wound’t die no matter what I threw at him and his men:

In fact, the game ended with Cnut and his men retreating back towards their longships presumably in need of some refreshing beverages, with far too much of my army in hot pursuit!

The Final Phase

By now we were almost out of time. The Vikings still had just over half their warbands intact, whereas my Timurids were down to only three medals. The result was therefore only slightly in doubt and I was happy to resign the game rather than to flog the proverbial dead horse.

So that was two games of Vikings versus Timurids and two victories for the Vikings: slightly surprising considering how underrated they usually are.

Okay, so their victory in the last game was slightly lucky - King Cnut holding out against extraordinary odds despite being wounded and all that - but that’s presumably why he’s counted as a Brilliant General!

I still haven’t properly got the hang of using Timurids - that combination of missile fire to soften the enemy up then a charge home with lances to finish them off - but that just means more practice needed…

Venetians Almost Up To Strength

Regular visitors will know that I am currently building a 28mm Later Italian Condotteri (Venetian) army to use of this year’s To The Strongest competition circuit.

An incomplete army, with borrowed figures to fill the gaps, took to the battlefield at the Welsh Open last month, but with the World Championships fast approaching, it was time to get cracking on the rest.

First up were the Lanzieri provisionati or spearmen. I decided to use the same figures as for the pikemen, but just use less of them. Not sure if that is correct, but the alternative was to perform reductive surgery on the pikes to make them shorter. which seemed like an awful lot of hard work and fragile joints!

Then I needed to paint up the final unit of Later Knights. Again I went for the un-surcoated look as this unit wouldn’t have an officer attached to it and could be used to represent lanza spezzate “broken lance” mercenaries.

This also made the knights very easy to paint: reins, horse, paint everything armoured in black then dry-brush with silvery-steel to get the armour effect. Lances in bright red and you’re done!

I’d already painted two units of foot knights (to use in case I need to dismount my cavalry in the face of, for example, elephants, camels, bad terrain, mucho missile fire etc) but needed three more to complete the set:

I loved painting these. Using Perry plastics enables you to build figures in some really unique, characterful poses, and they are even easier to paint than the mounted knights (no horse!). I also like the idea that such a puny looking unit (only four figures) can carve their way through a deep warband like the proverbial knife through barbarian butter!

So that is most of the army now done. Just need to do a few heroes, a spare unit of light crossbowmen in case I want to go earlier than handguns, and then an army standard and some Alabardieri (halberdiers) to bulk things out for bigger points totals.

All I have to do now is hope that the curse of the “first time on the tabletop” doesn’t apply at the World’s!

TFL Painting Challenge: February Update

We’re over half way through February, and more entries are coming in all the time. Let’s have a look at what we have this update.

First up is Carole, with figures for a Darkest Africa campaign and some lovely scenery. You can see more of the scenery in Carole’s gallery, accessed through the NavBar, above.

Next up is Matt Slade’s first entry of the year. Last year Matt achieved the fairly incredible score of 6,033 points, a personal best and an excample for us all. Matt starts this year with over 500 points of painting, some of which are shown below:

Last year’s second highest entrant, Andrew Helliwell, has also been painting hard already in 2024. Andrew has already amassed almost 800 points, here’s some of this update’s entries:

Finally for this update we have entries from Stumpy and Ralph Plowman. Stumpy’s ar the Napoleonic French infantry (with adorable poodle at the front!) and the tank; Ralph’s are the Greeks: some of his oldest wargames figures repainted and rebased alongside some new light troops.

Plenty of time to get your entries in, so pick up your brushes and paint away!

TTS AAR: Vikings vs Timurids

Another game of To The Strongest, this time featuring my Vikings against a Timurid army played by Daughter #1’s boyfriend, Kavan - who hopefully realises that the key to his continued relationship with my offspring is to lose heavily whilst loudly congratulating me on my brilliant play!

A rather empty battlefield: more tundra than fjord!

Beached longships form the Viking camp

The Timurid right wing

As the Vikings are an infantry-only army (no room for horses on those cross-North Sea longship ferries) my big fear was being outflanked and suddenly finding Timurid cavalry in my camp and up my backside!

I therefore put a couple of strong shieldwall units on either flank, rather than concentrating them in the centre and leaving the flanks to the lights as I usually would.

As with many of my more brilliant ideas, this worked well in theory but not in practice, as the cards conspired to prevent my deep shieldwall unit on the left making a very simple diagonal charge to drive two units of horse archers off the table.

This allowed those two units to neatly bypass the shieldwallers, leaving them nicely in a position to turn and either hit me in the rear or to ride for my camps:

“Four or more needed…”

not an ideal outcome

I was also in a bit of trouble on the right, as although I did manage to dispose of his lights there, Kavan had followed up his horsearchers with a couple of meaty heavy cavalry units, who also managed to get around onto my flank and were quickly set to drive at least one shieldwall unit from the field.

Fortunately the top unit in the picture above (the one with the Raven banner) was on fire, and although the bottom unit did indeed get driven from the field, the top unit managed to take out both of the Timurid cavalry units shown, although they did need a bit of luck to do so:

All this action on the flanks did mean that the Timurid centre was a bit weaker than it might have been, and soon another Viking shieldwall unit had broken through towards the Timurid camp, defended only by kharash (driven slaves).

The Timurid camp wasn’t the only one under attack.

Although I had managed to hold off some horse archers, Timurid heavy cavalry charged into one part of my camp, and threatened to take the other, even with two bases of Viking light archers present.

I had started with fifteen victory coins, but was now down to nine, which was about to become six.

Kavan had started with eleven victory coins, but was now down to three. This was unlucky for him, because the Viking unit that threatened his camp had now cleared the kharash off the field, and was able to crash, unopposed, into the Timurid camp.

This was enough, just, to give me the win: a surprise victory for the Norsemen over the more manoeuvrable Timurids.

Here’s the game in longshot…

First of the Venetian Foot Knights

As regualr visitors will know, I have been building a 28mm Later Italian Condotteri Venetian army to use on the To The Strongest competition circuit this year.

It’s a nice little army: five units of mounted Later Knights with Lances provide the punch, with light cavalry and foot units in support.

One problem I might encounter, however, is facing elephants. I know it isn’t exactly historically accurate for Venetians to expect to face elephants in combat (although I understand it’s hellish difficult to get them out of the canals once they’re in!) but this is competition gaming so a certain flexibility of approach is required.

Anyway, back to the problems facing of facing elephants. In TTS, cavalry of all types do very badly against elephants as the horses, unless they are familiar with pachyderms, won’t close with the beasts, giving an elephant base a huge advantage in any combat with them.

The solution is to dismount some or all of the Knights, who are somewhat slower but equally formidable on foot: their Lances change to 2-handed cutting weapons, giving a bonus in combat, and they gain extra bonuses when saving against missile fire.

Elephants? We poop on elephants!

As I like to be able to field the right figures rather than proxies or mark a mounted unit as dismounted, and its a good excuse to buy more figures, I decided I needed a foot equivalent for each of my five Later Knights bases. Here are the first two.

These are Perry Foot Knights: easy to build and even easier to paint: black with a silvery steel drybrush then add a bit of detail as required.

Three more bases to go!