Timurid's at Vanquish...Part One

I had another opportunity to practice for To The Smallest at this year’s Vanquish show in Bourne End, as friends of mine from SOGS were putting on a TTS demo game.

I only arrived at lunchtime, but we still managed to find time for two games: both would involve my Timurids fighting a force of Early Byzantines.

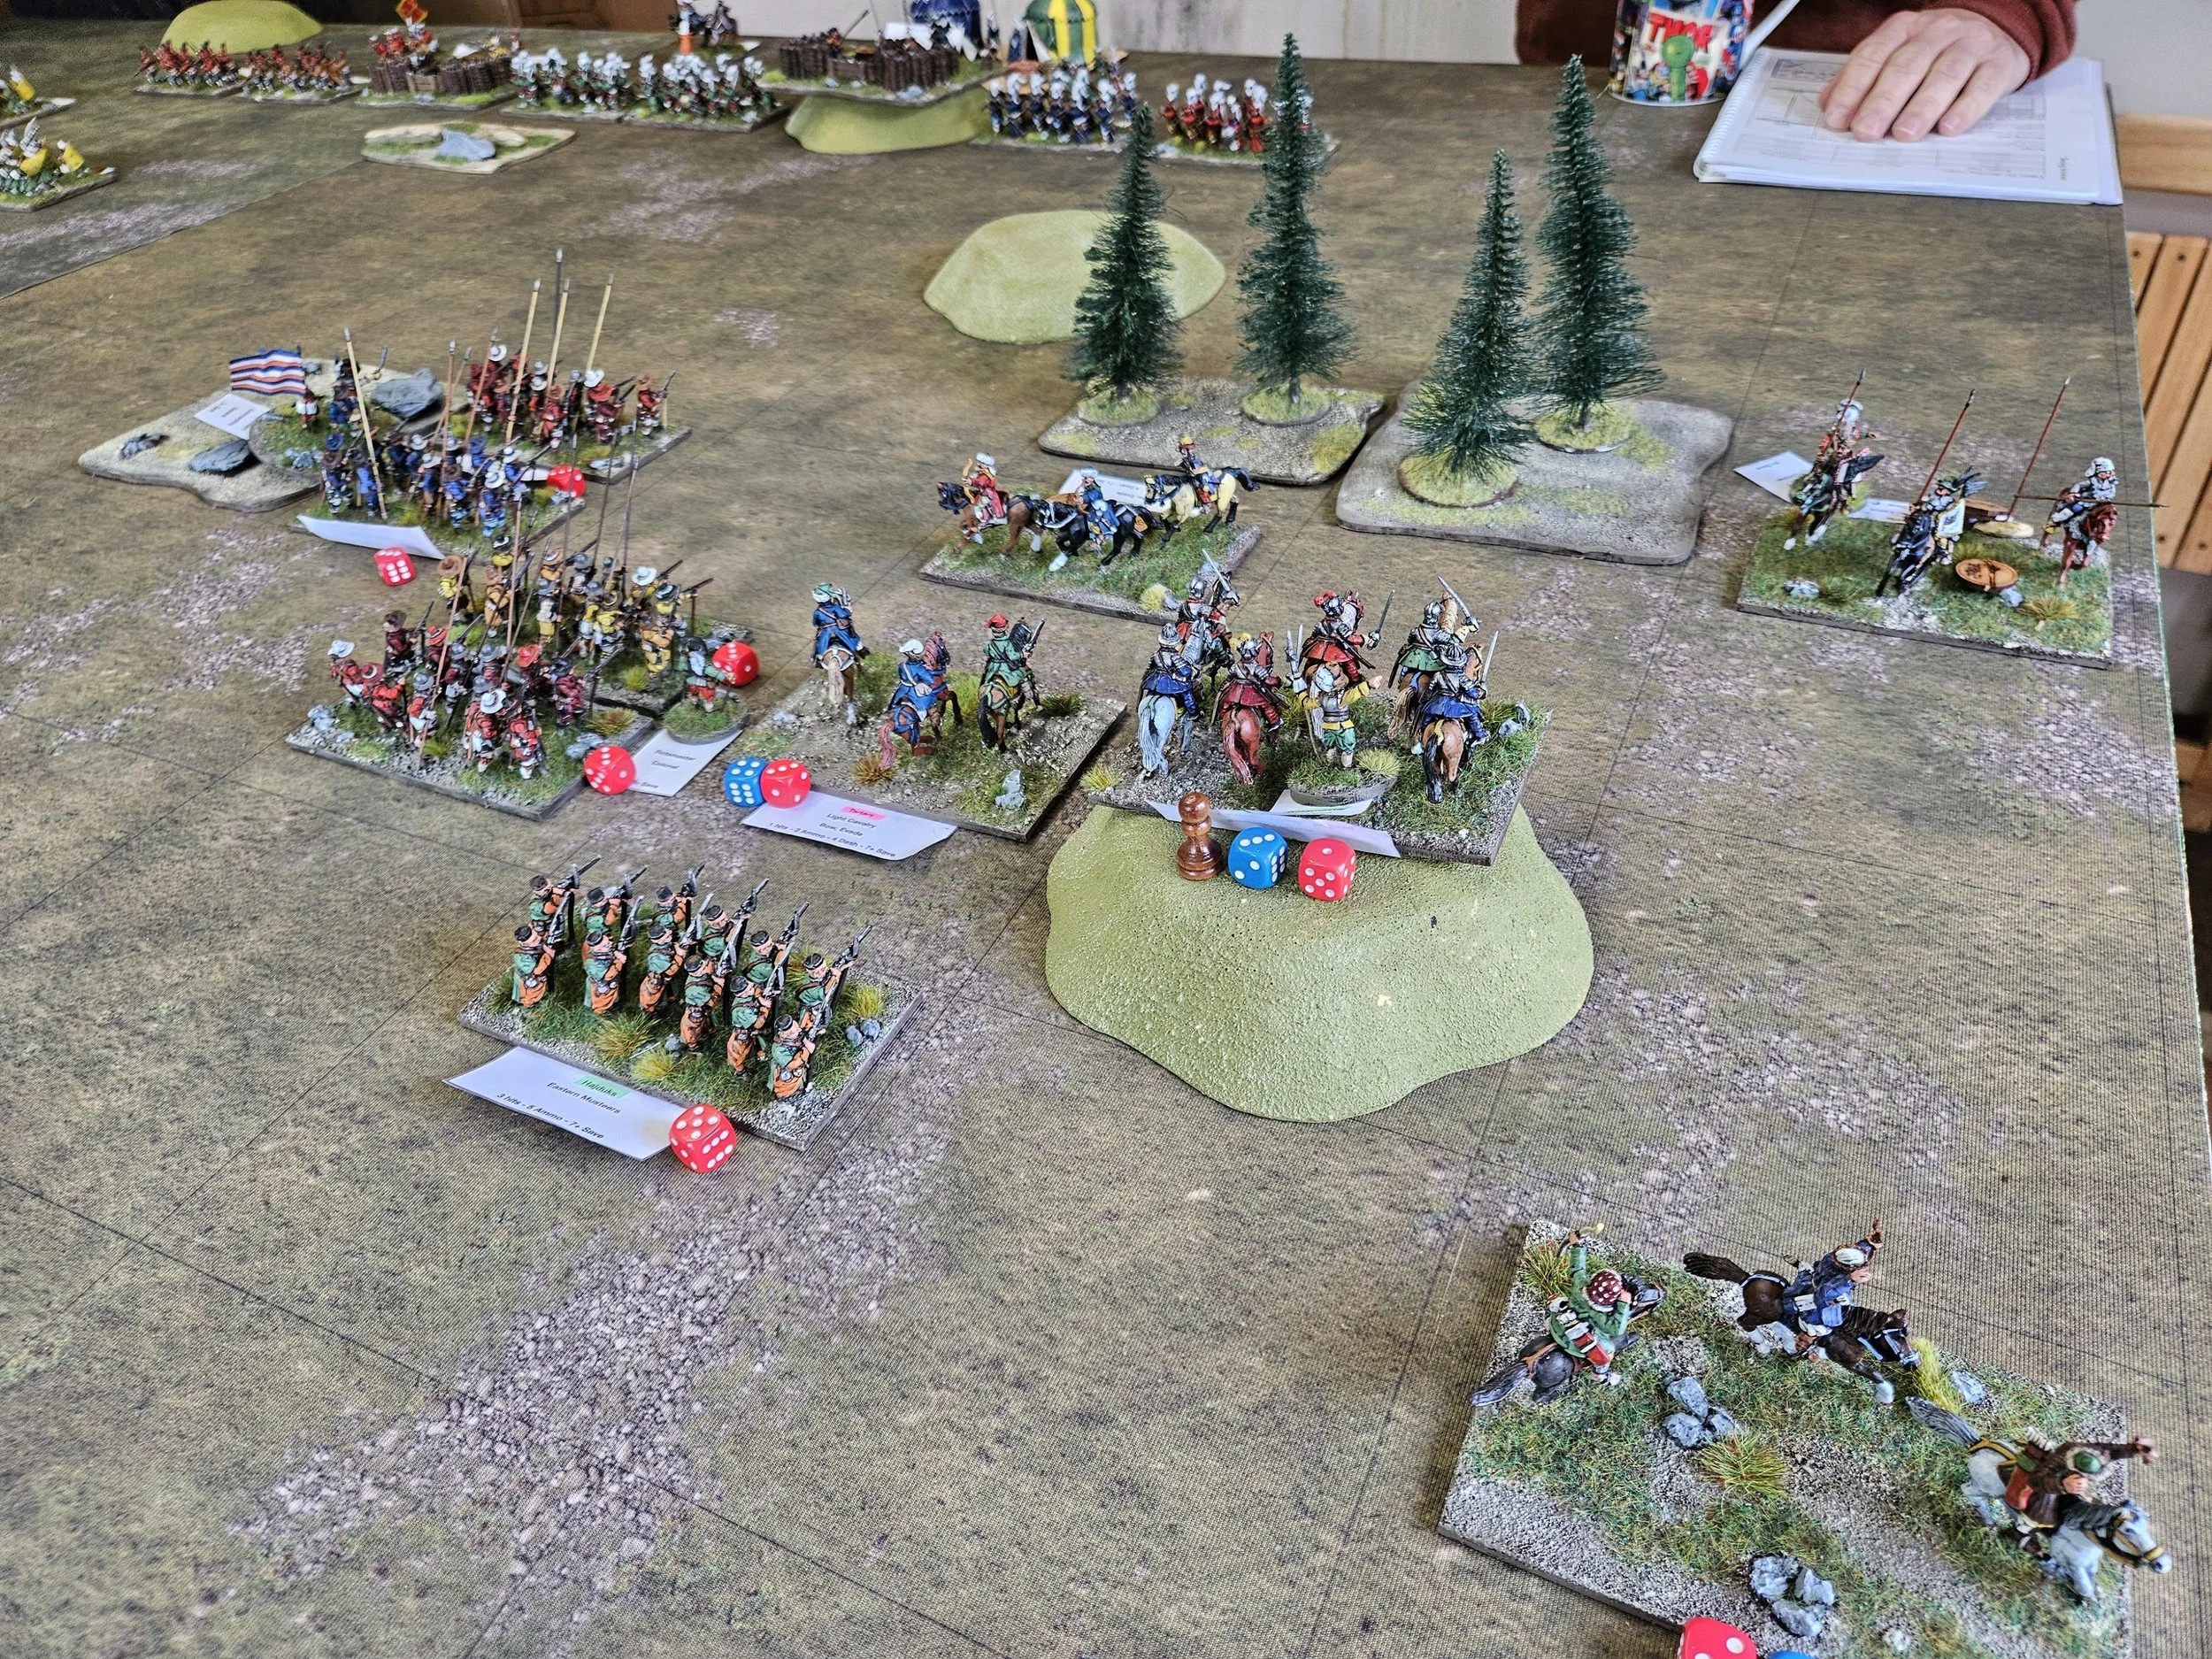
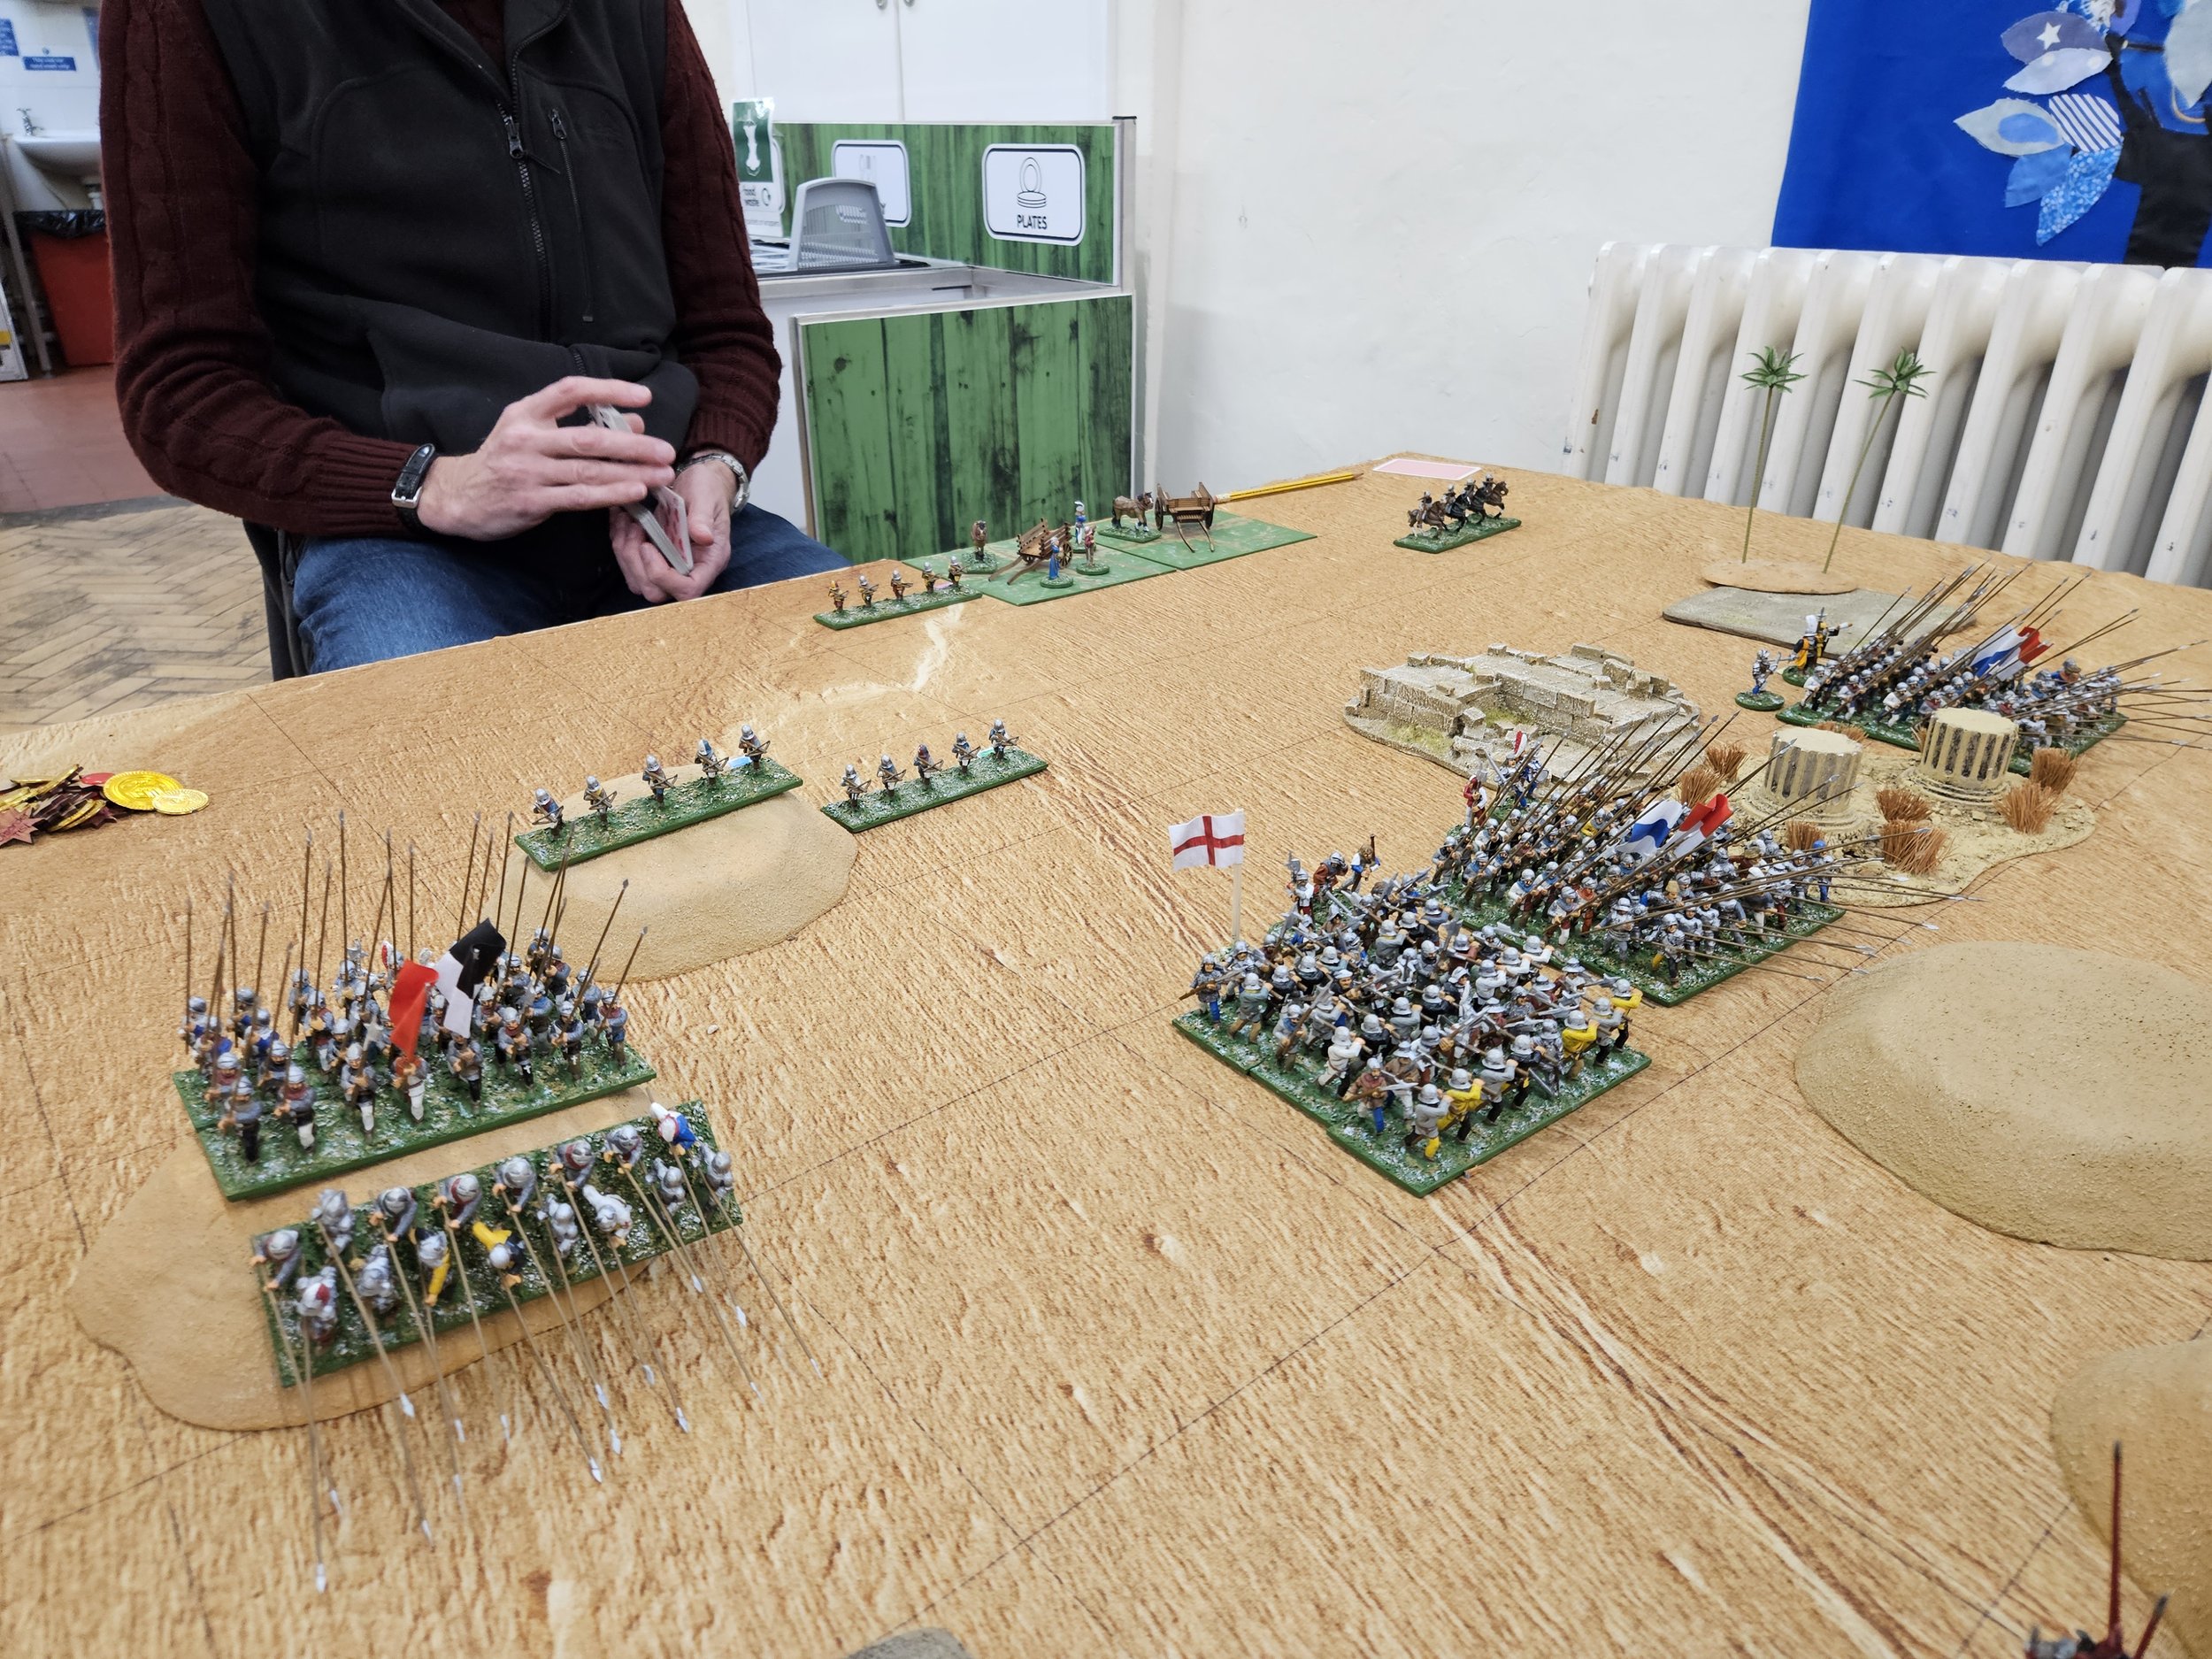
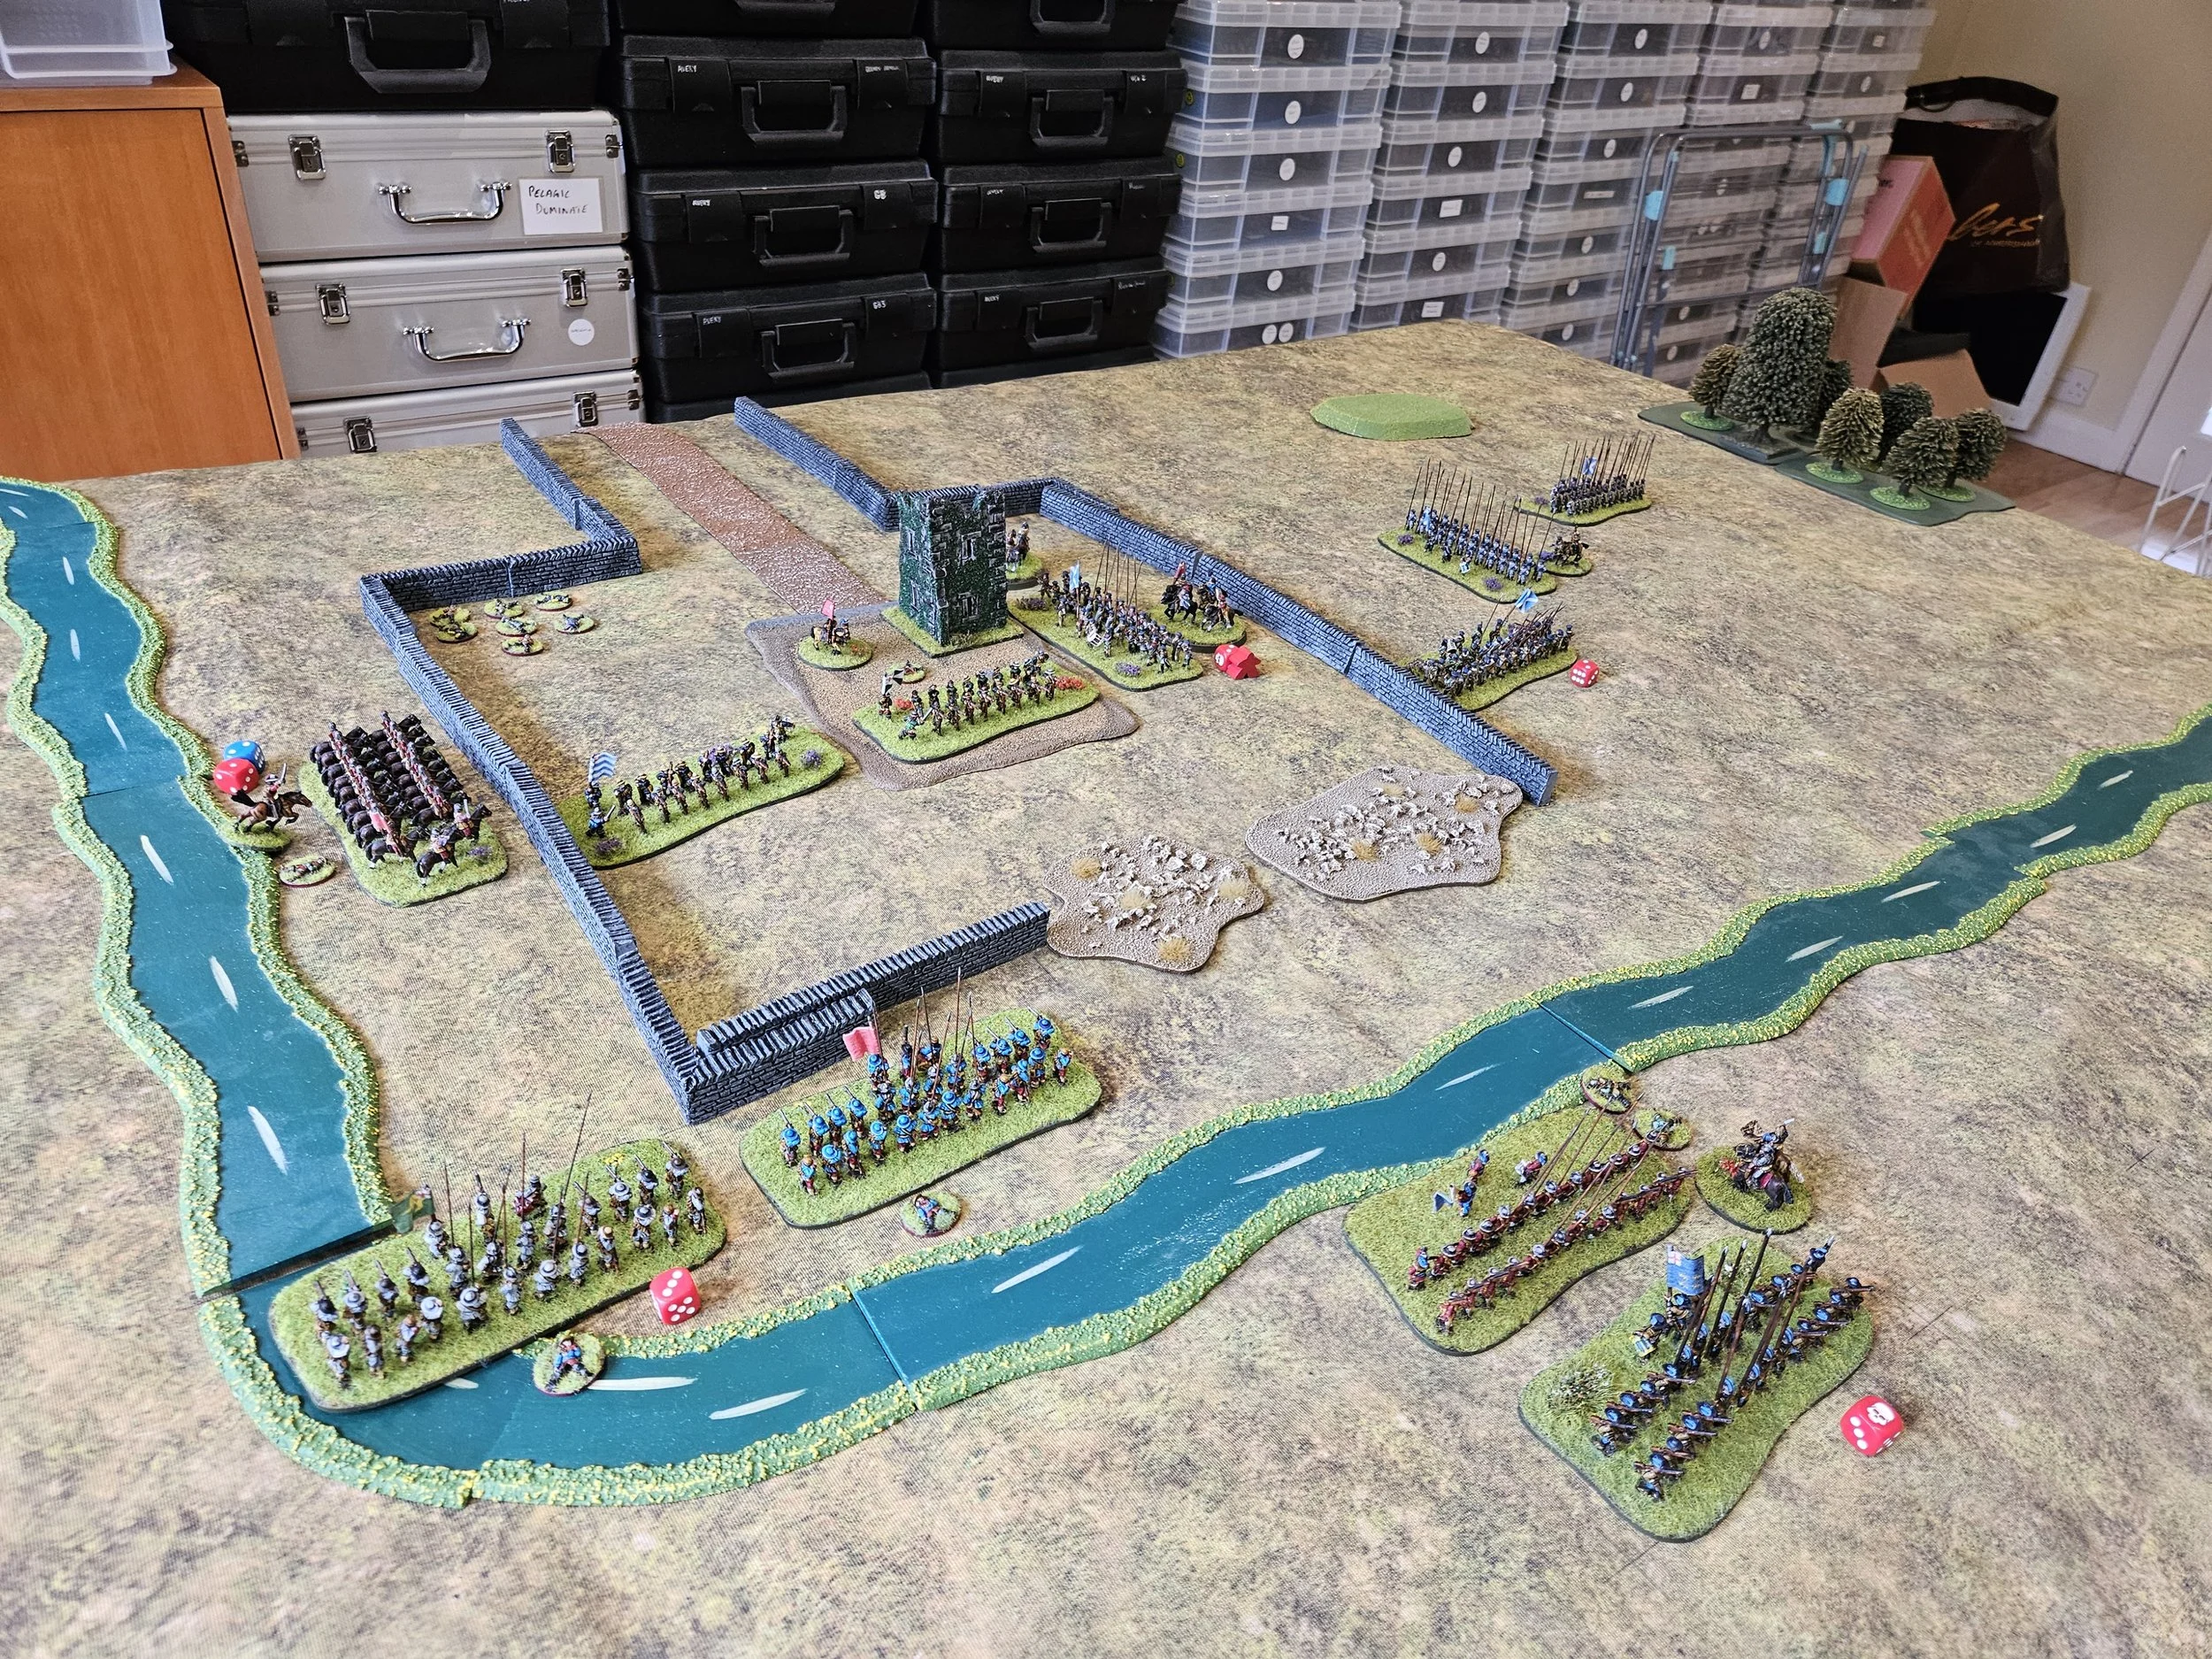
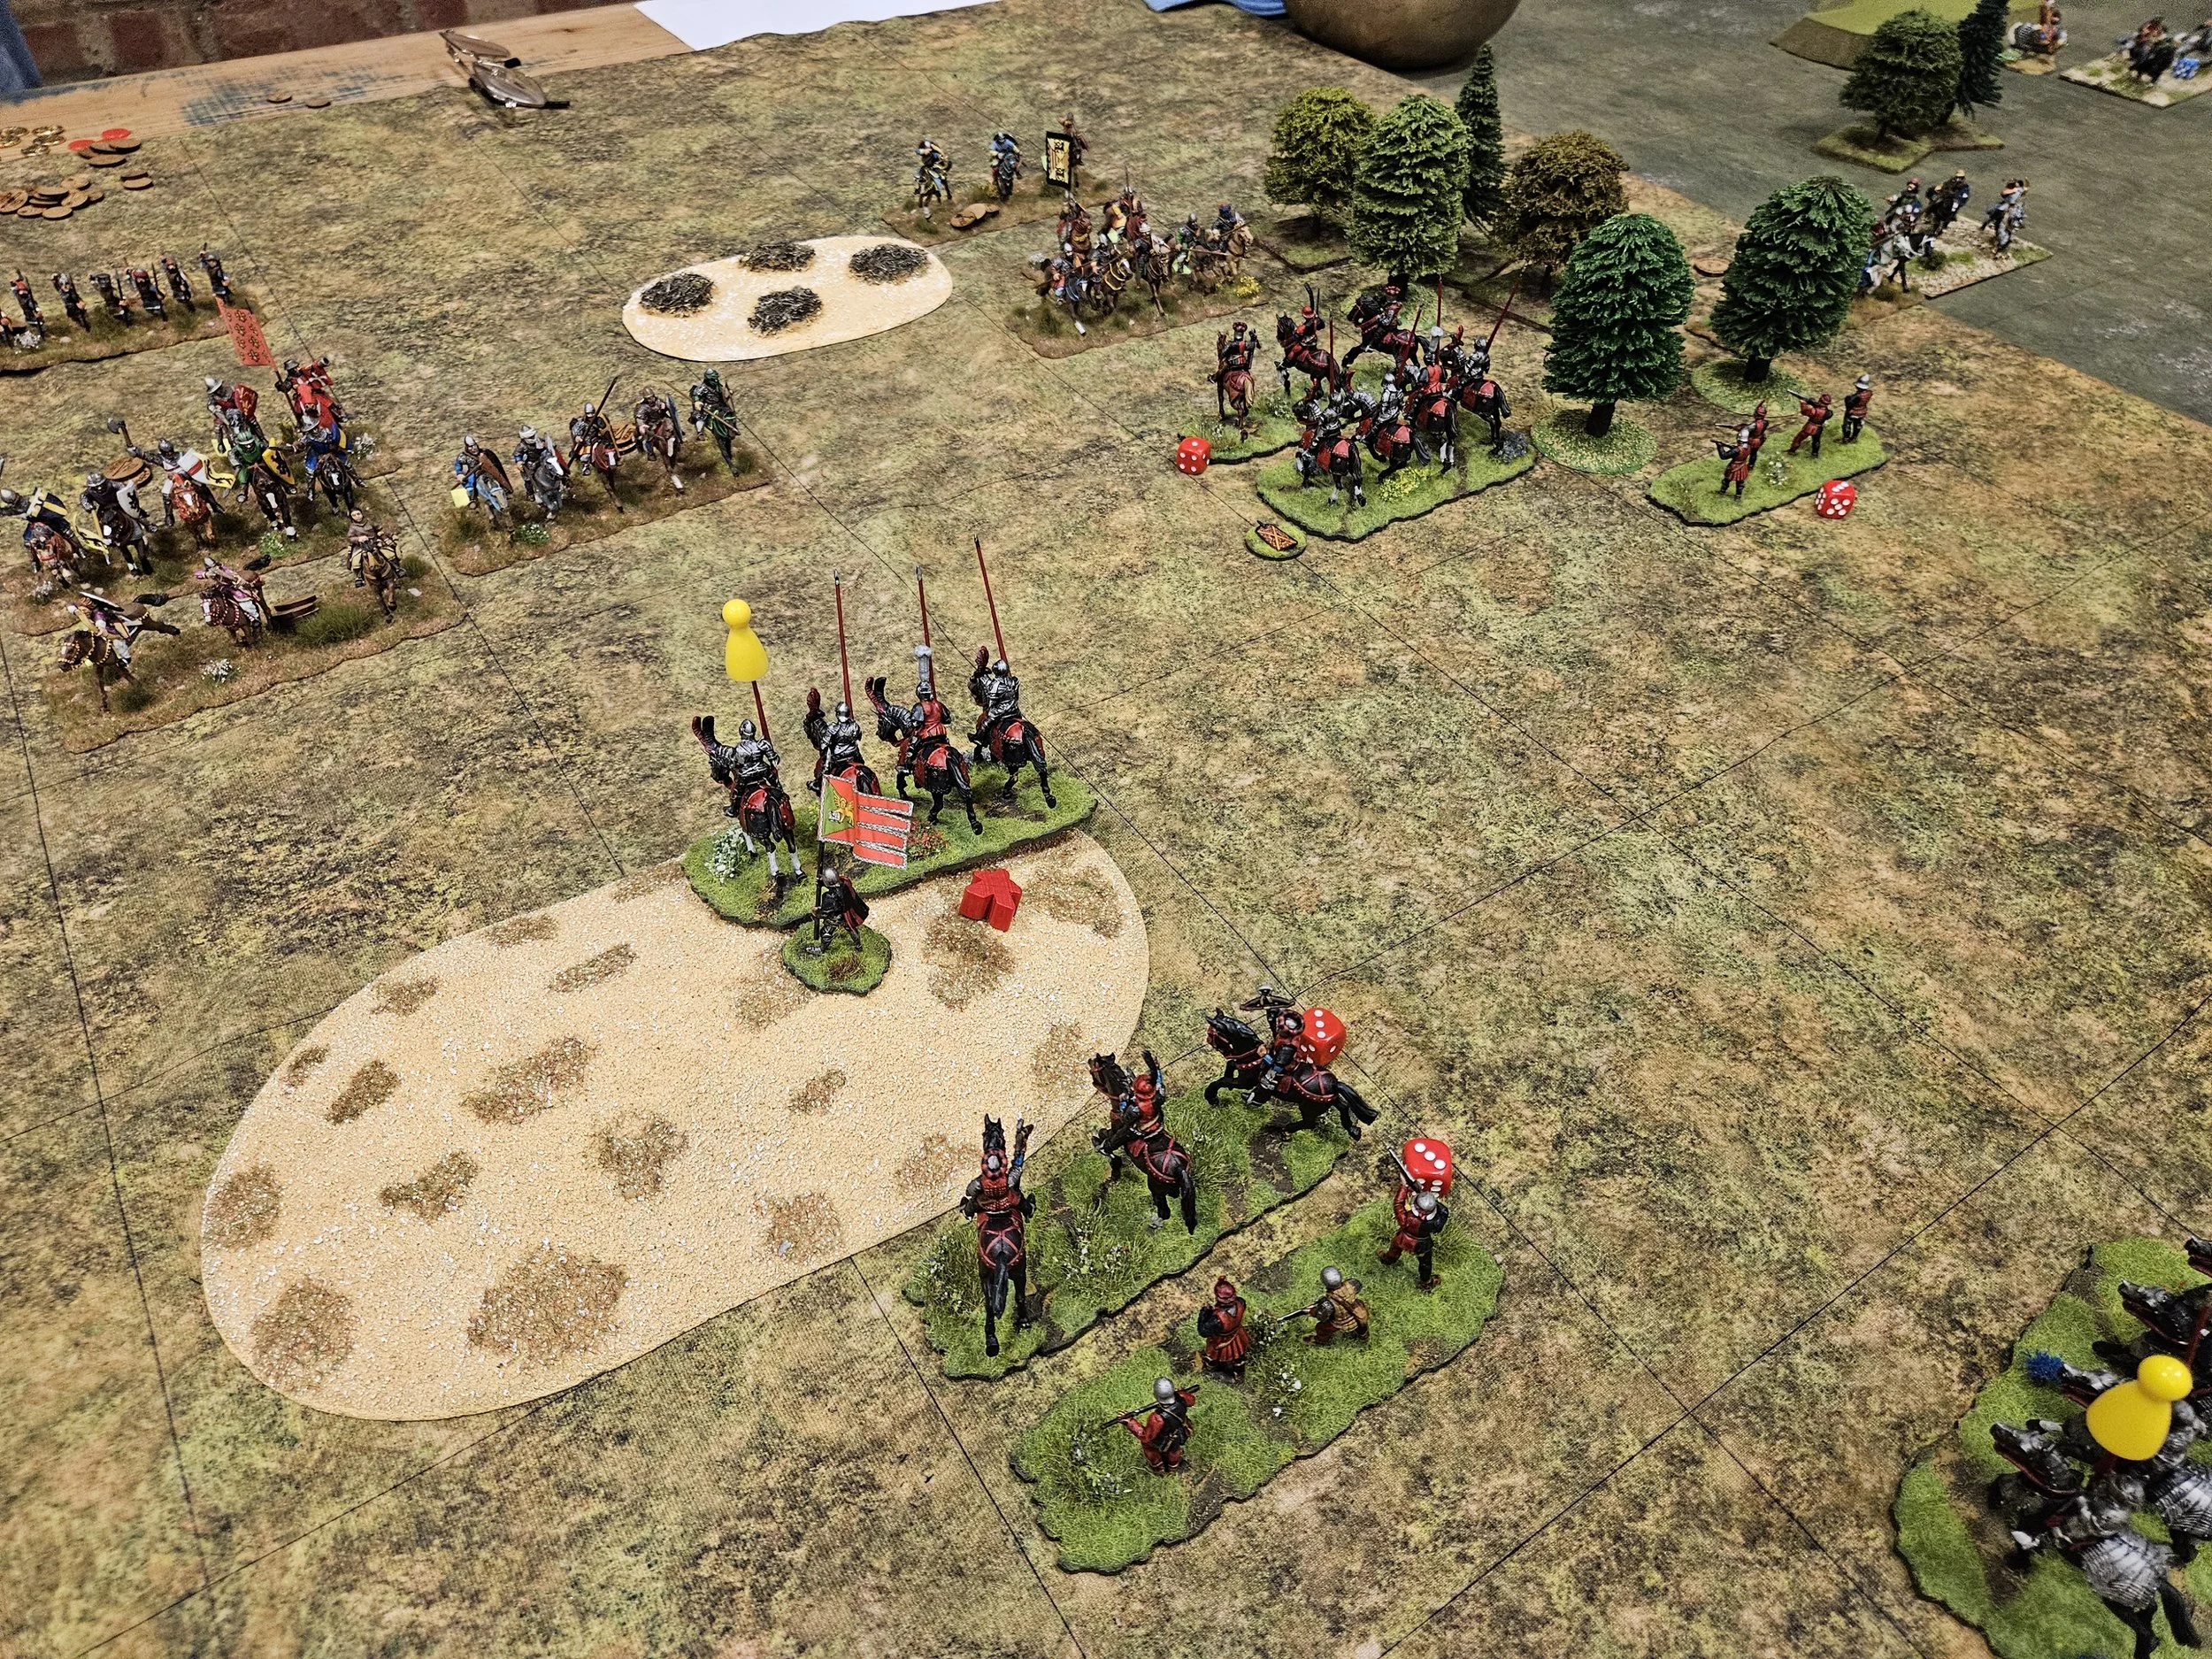
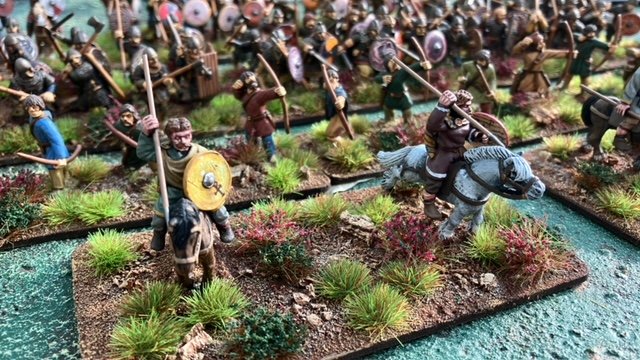
In the first game, my plan was to stack my infantry on the right, then head forward with them as fast as possible before turning to roll the Bysantines up from the flank. You can see the first moves in the picture above.

This worked really well, and had the added advantage of keeping my troops away from his rather nasty extra-bow-armed auxiliary-types in the centre.

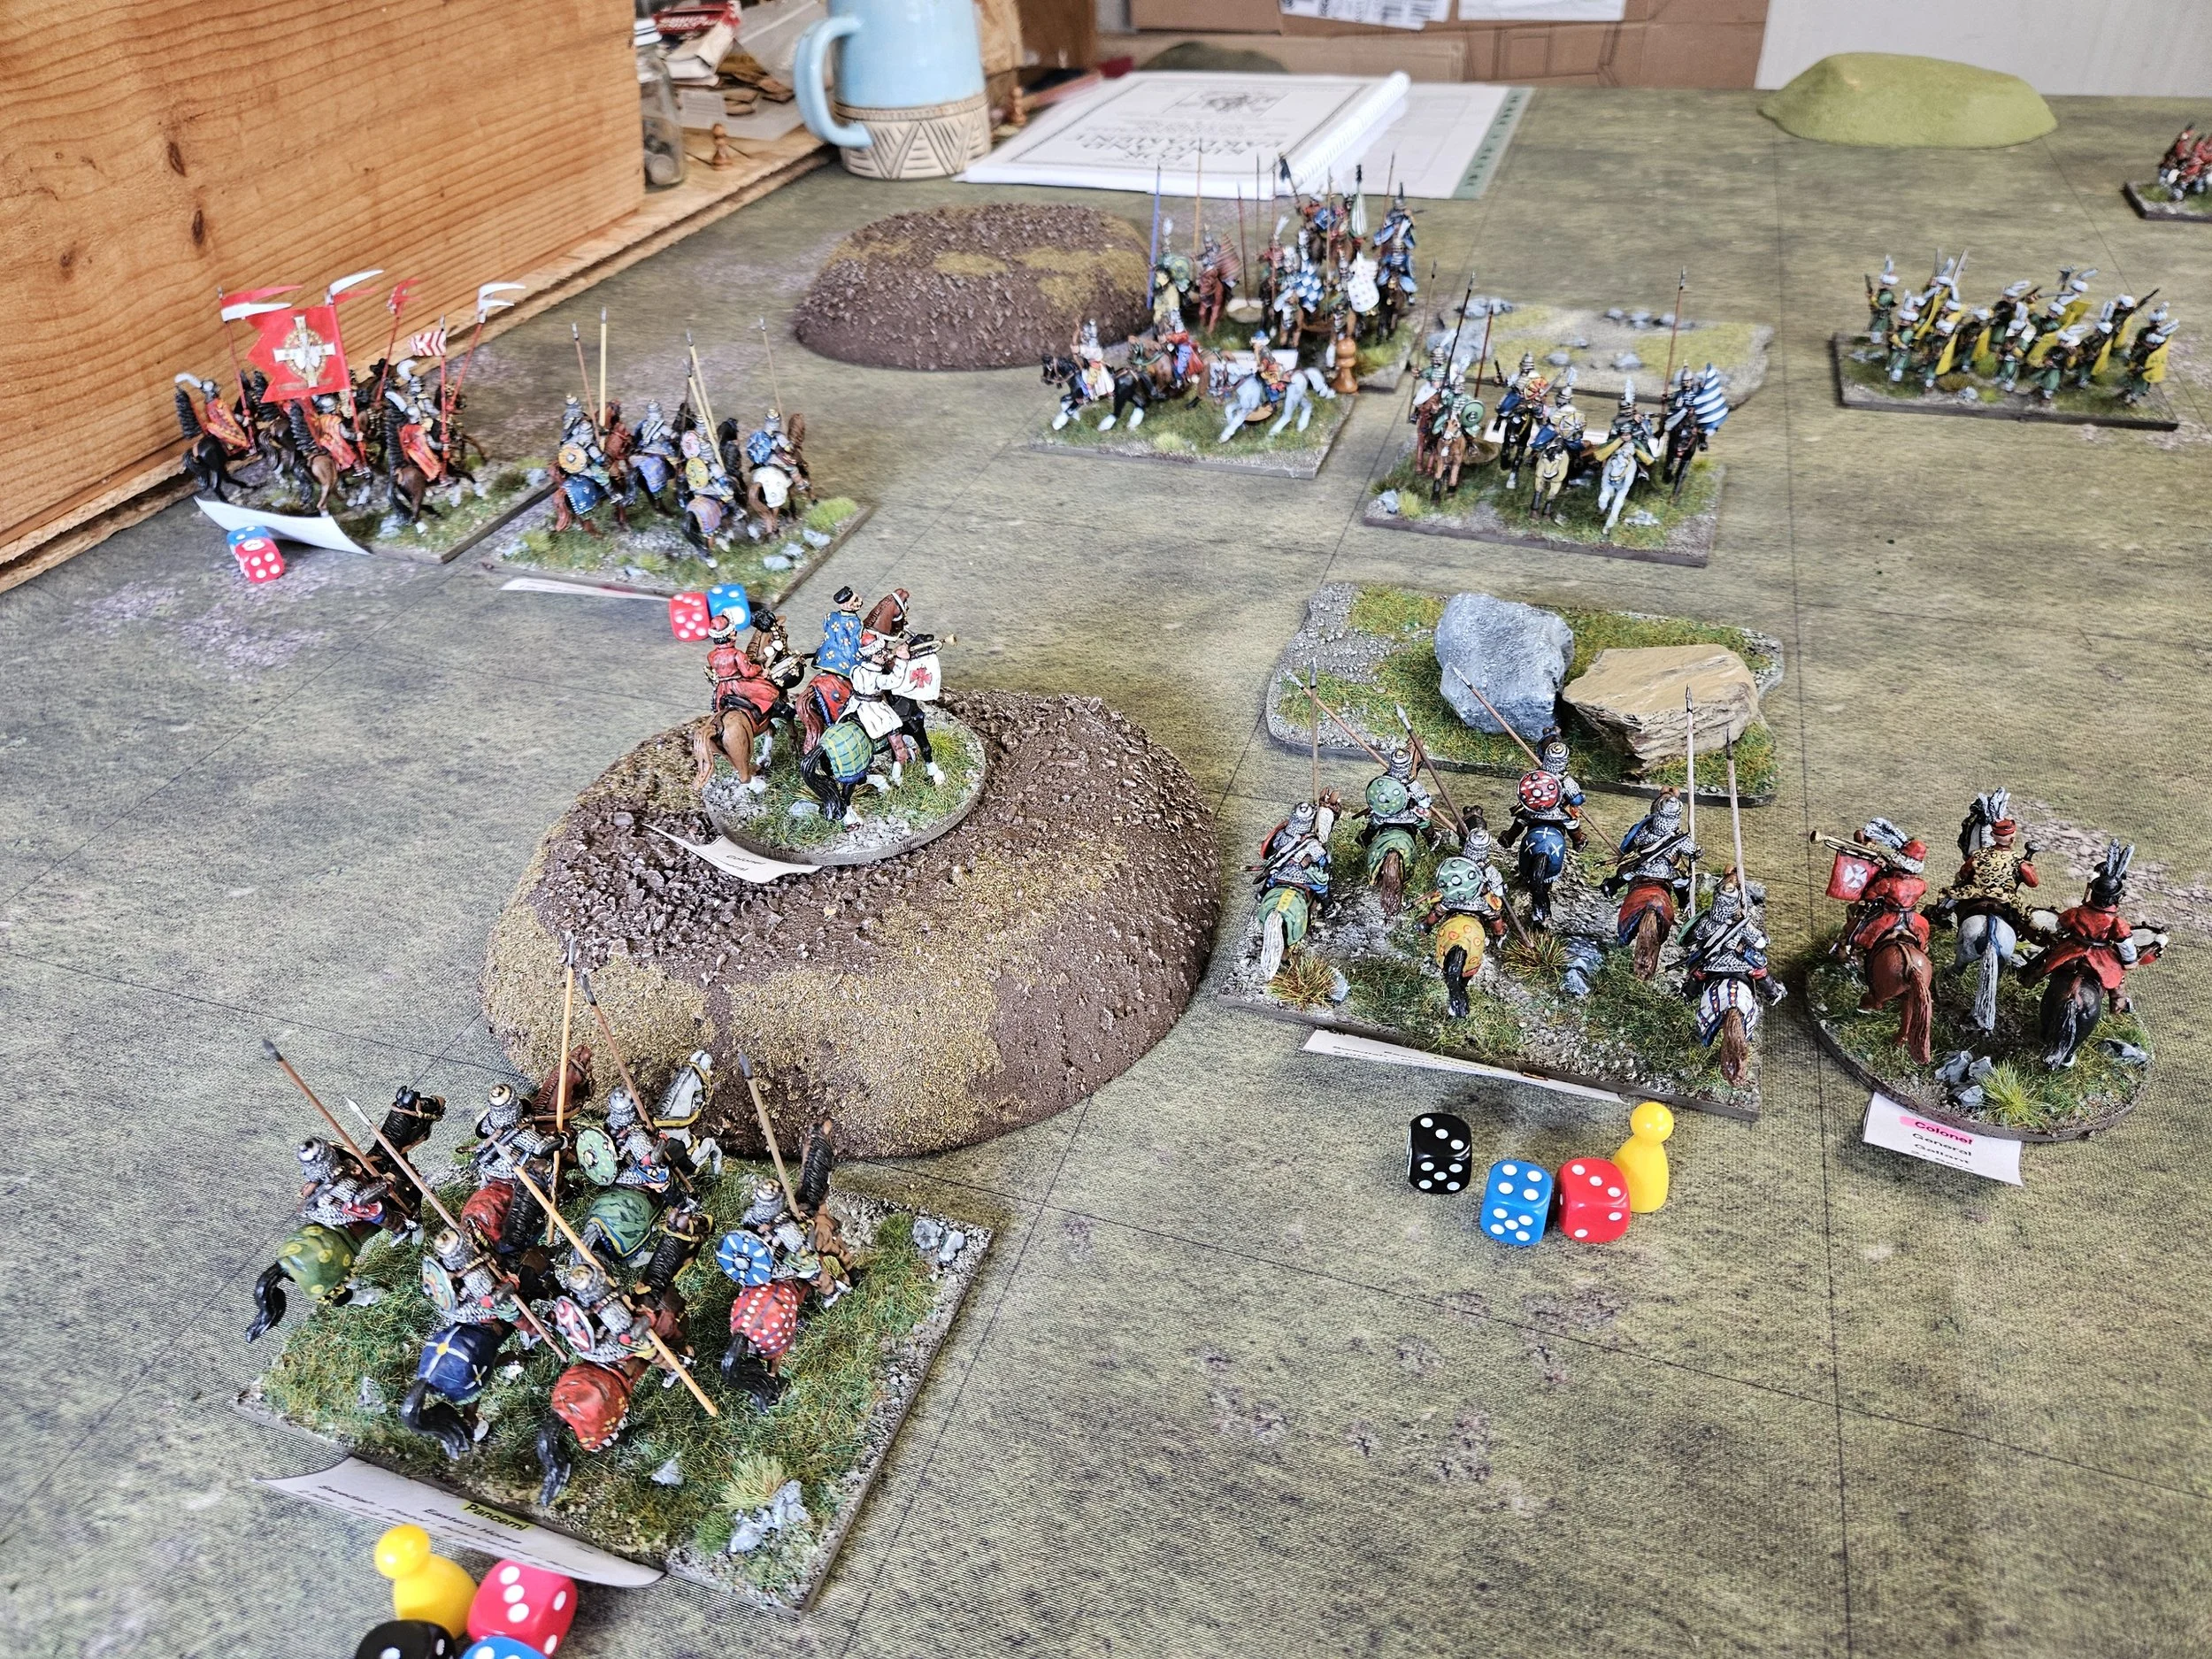
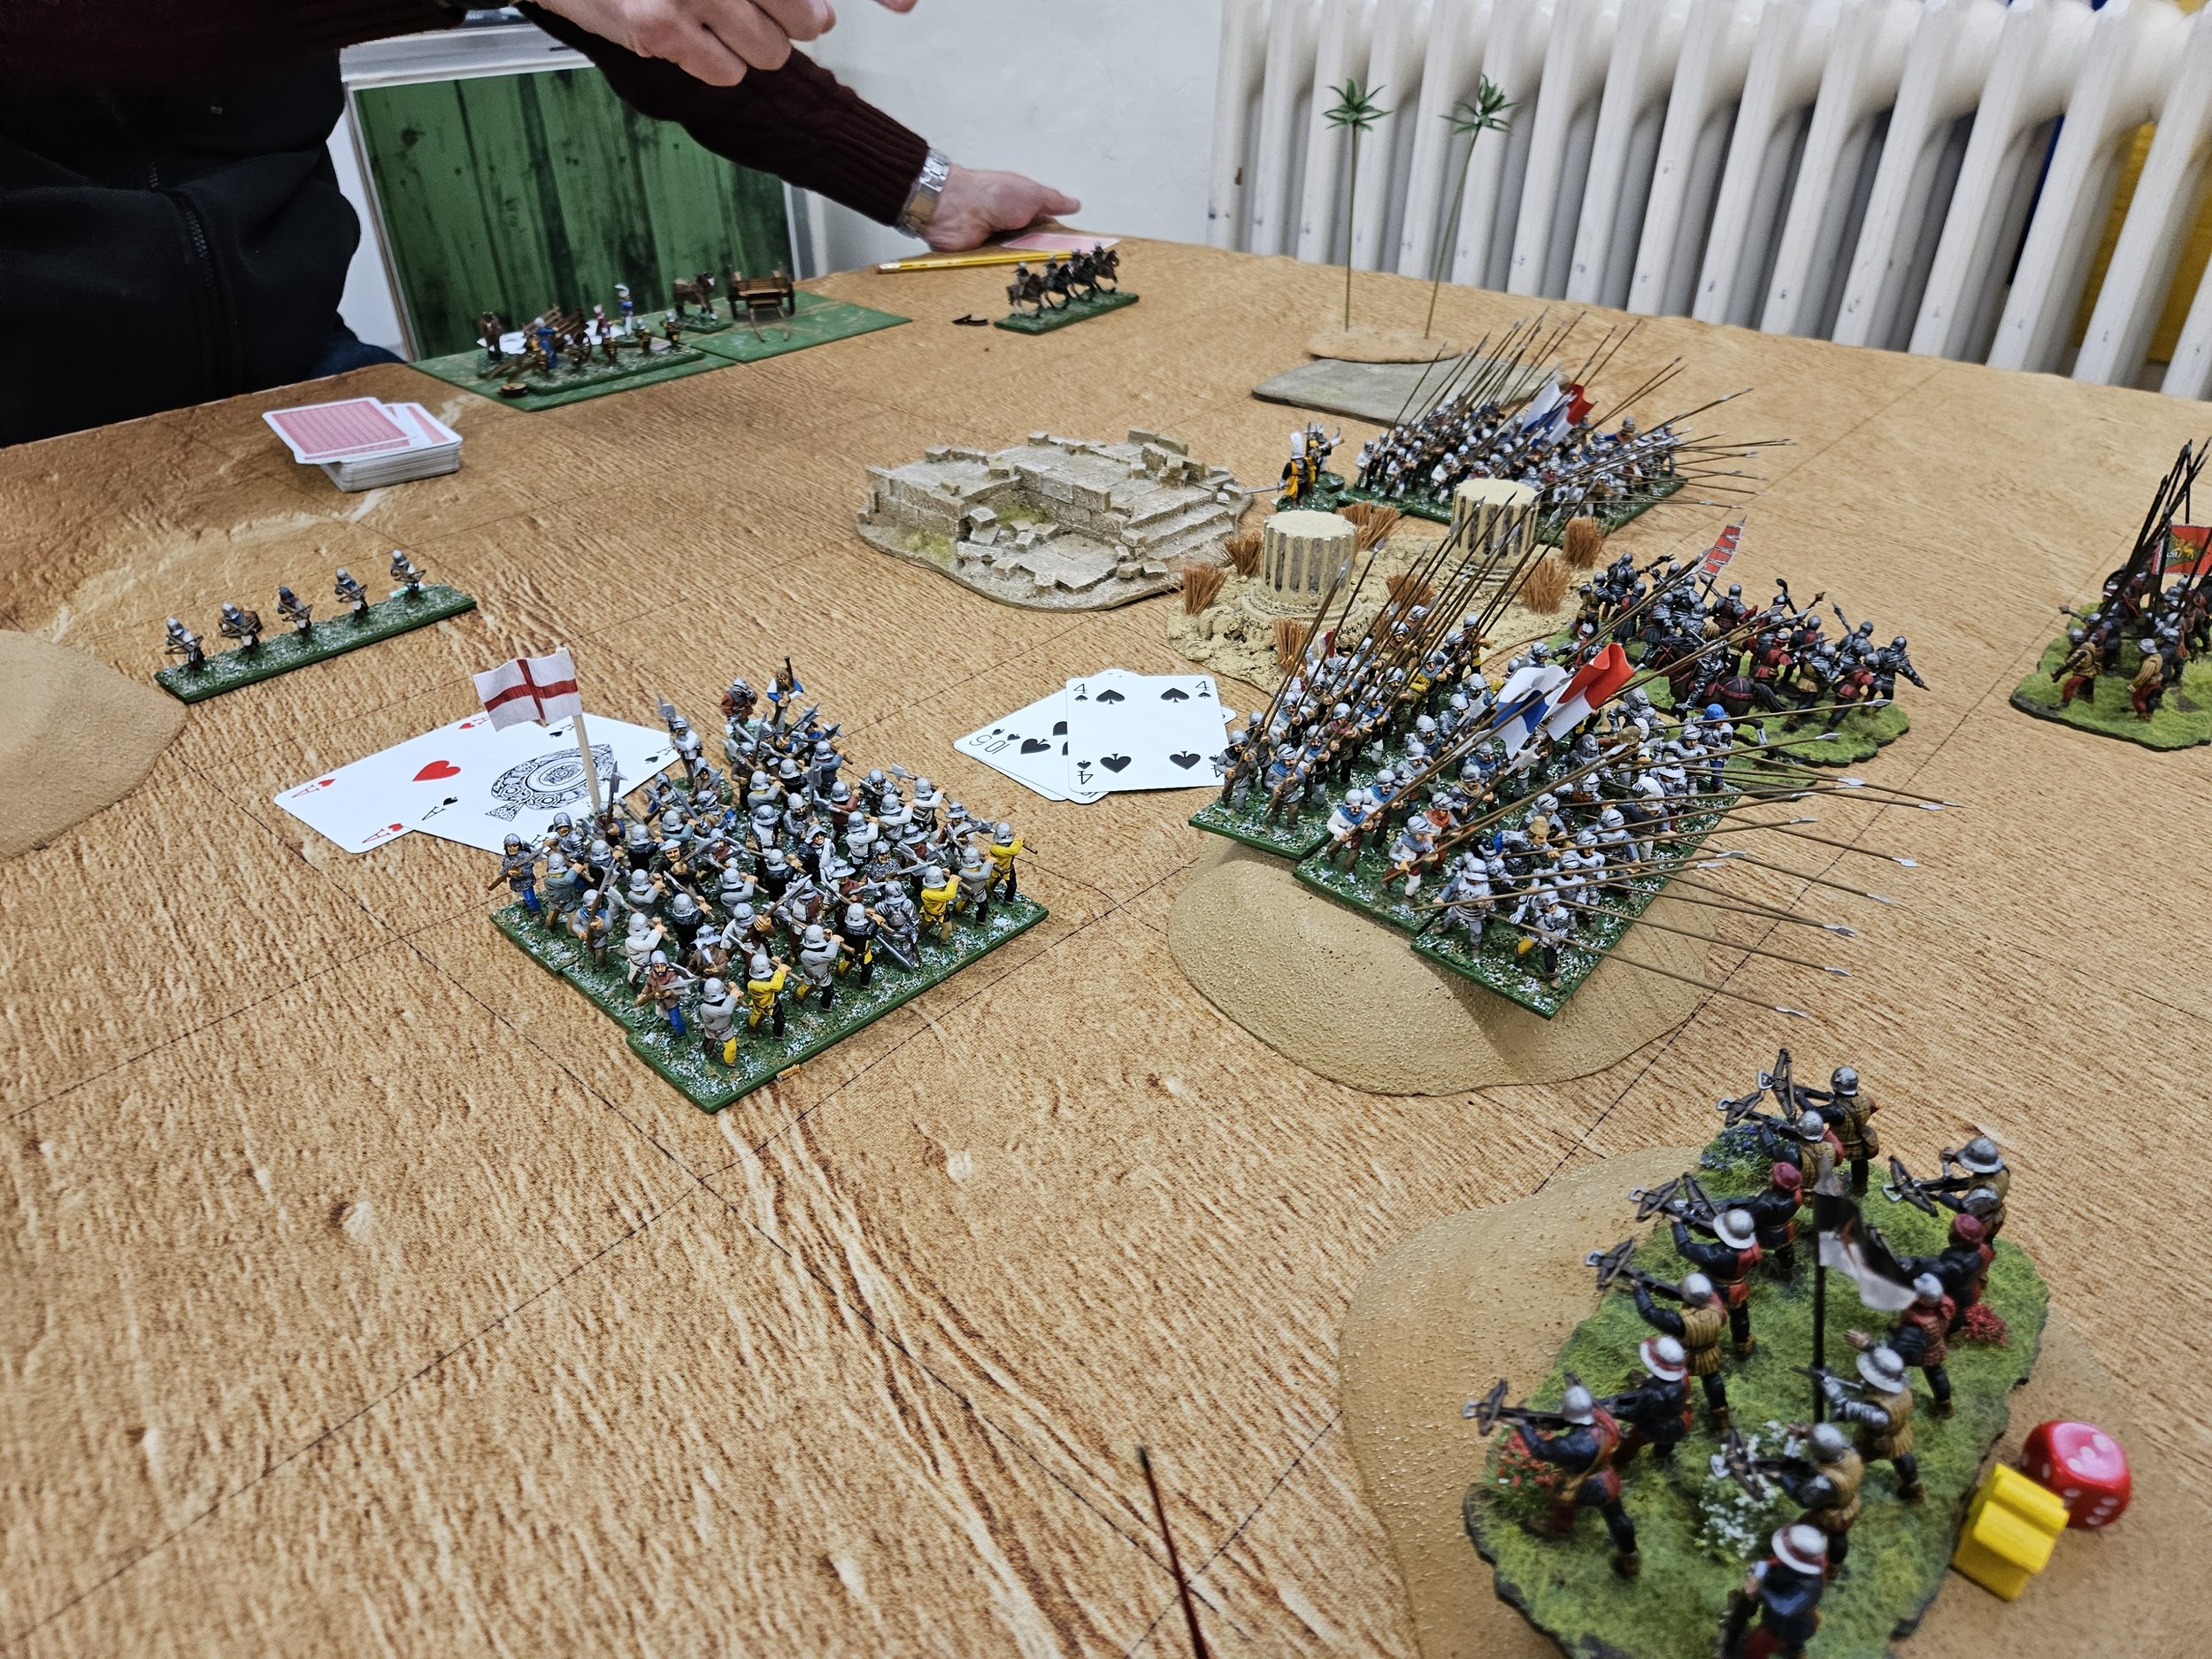
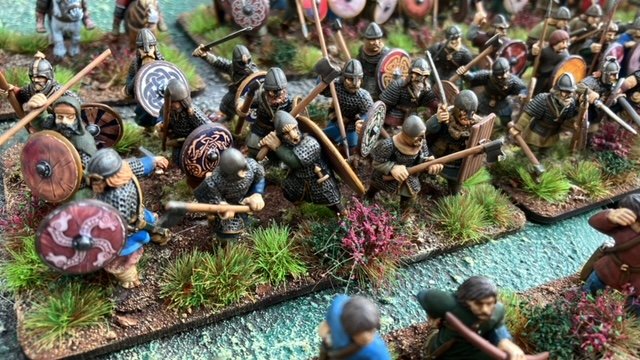
My flanking force got into the perfect position, and turned to begin the rollup. Surely nothing could stop me now!

Well you’d think that, wouldn’t you!

Unfortunately the cards deserted me in a big way, and my perfectly positioned flanking force just wouldn’t get moving or, when they did, achieved almost nothing.

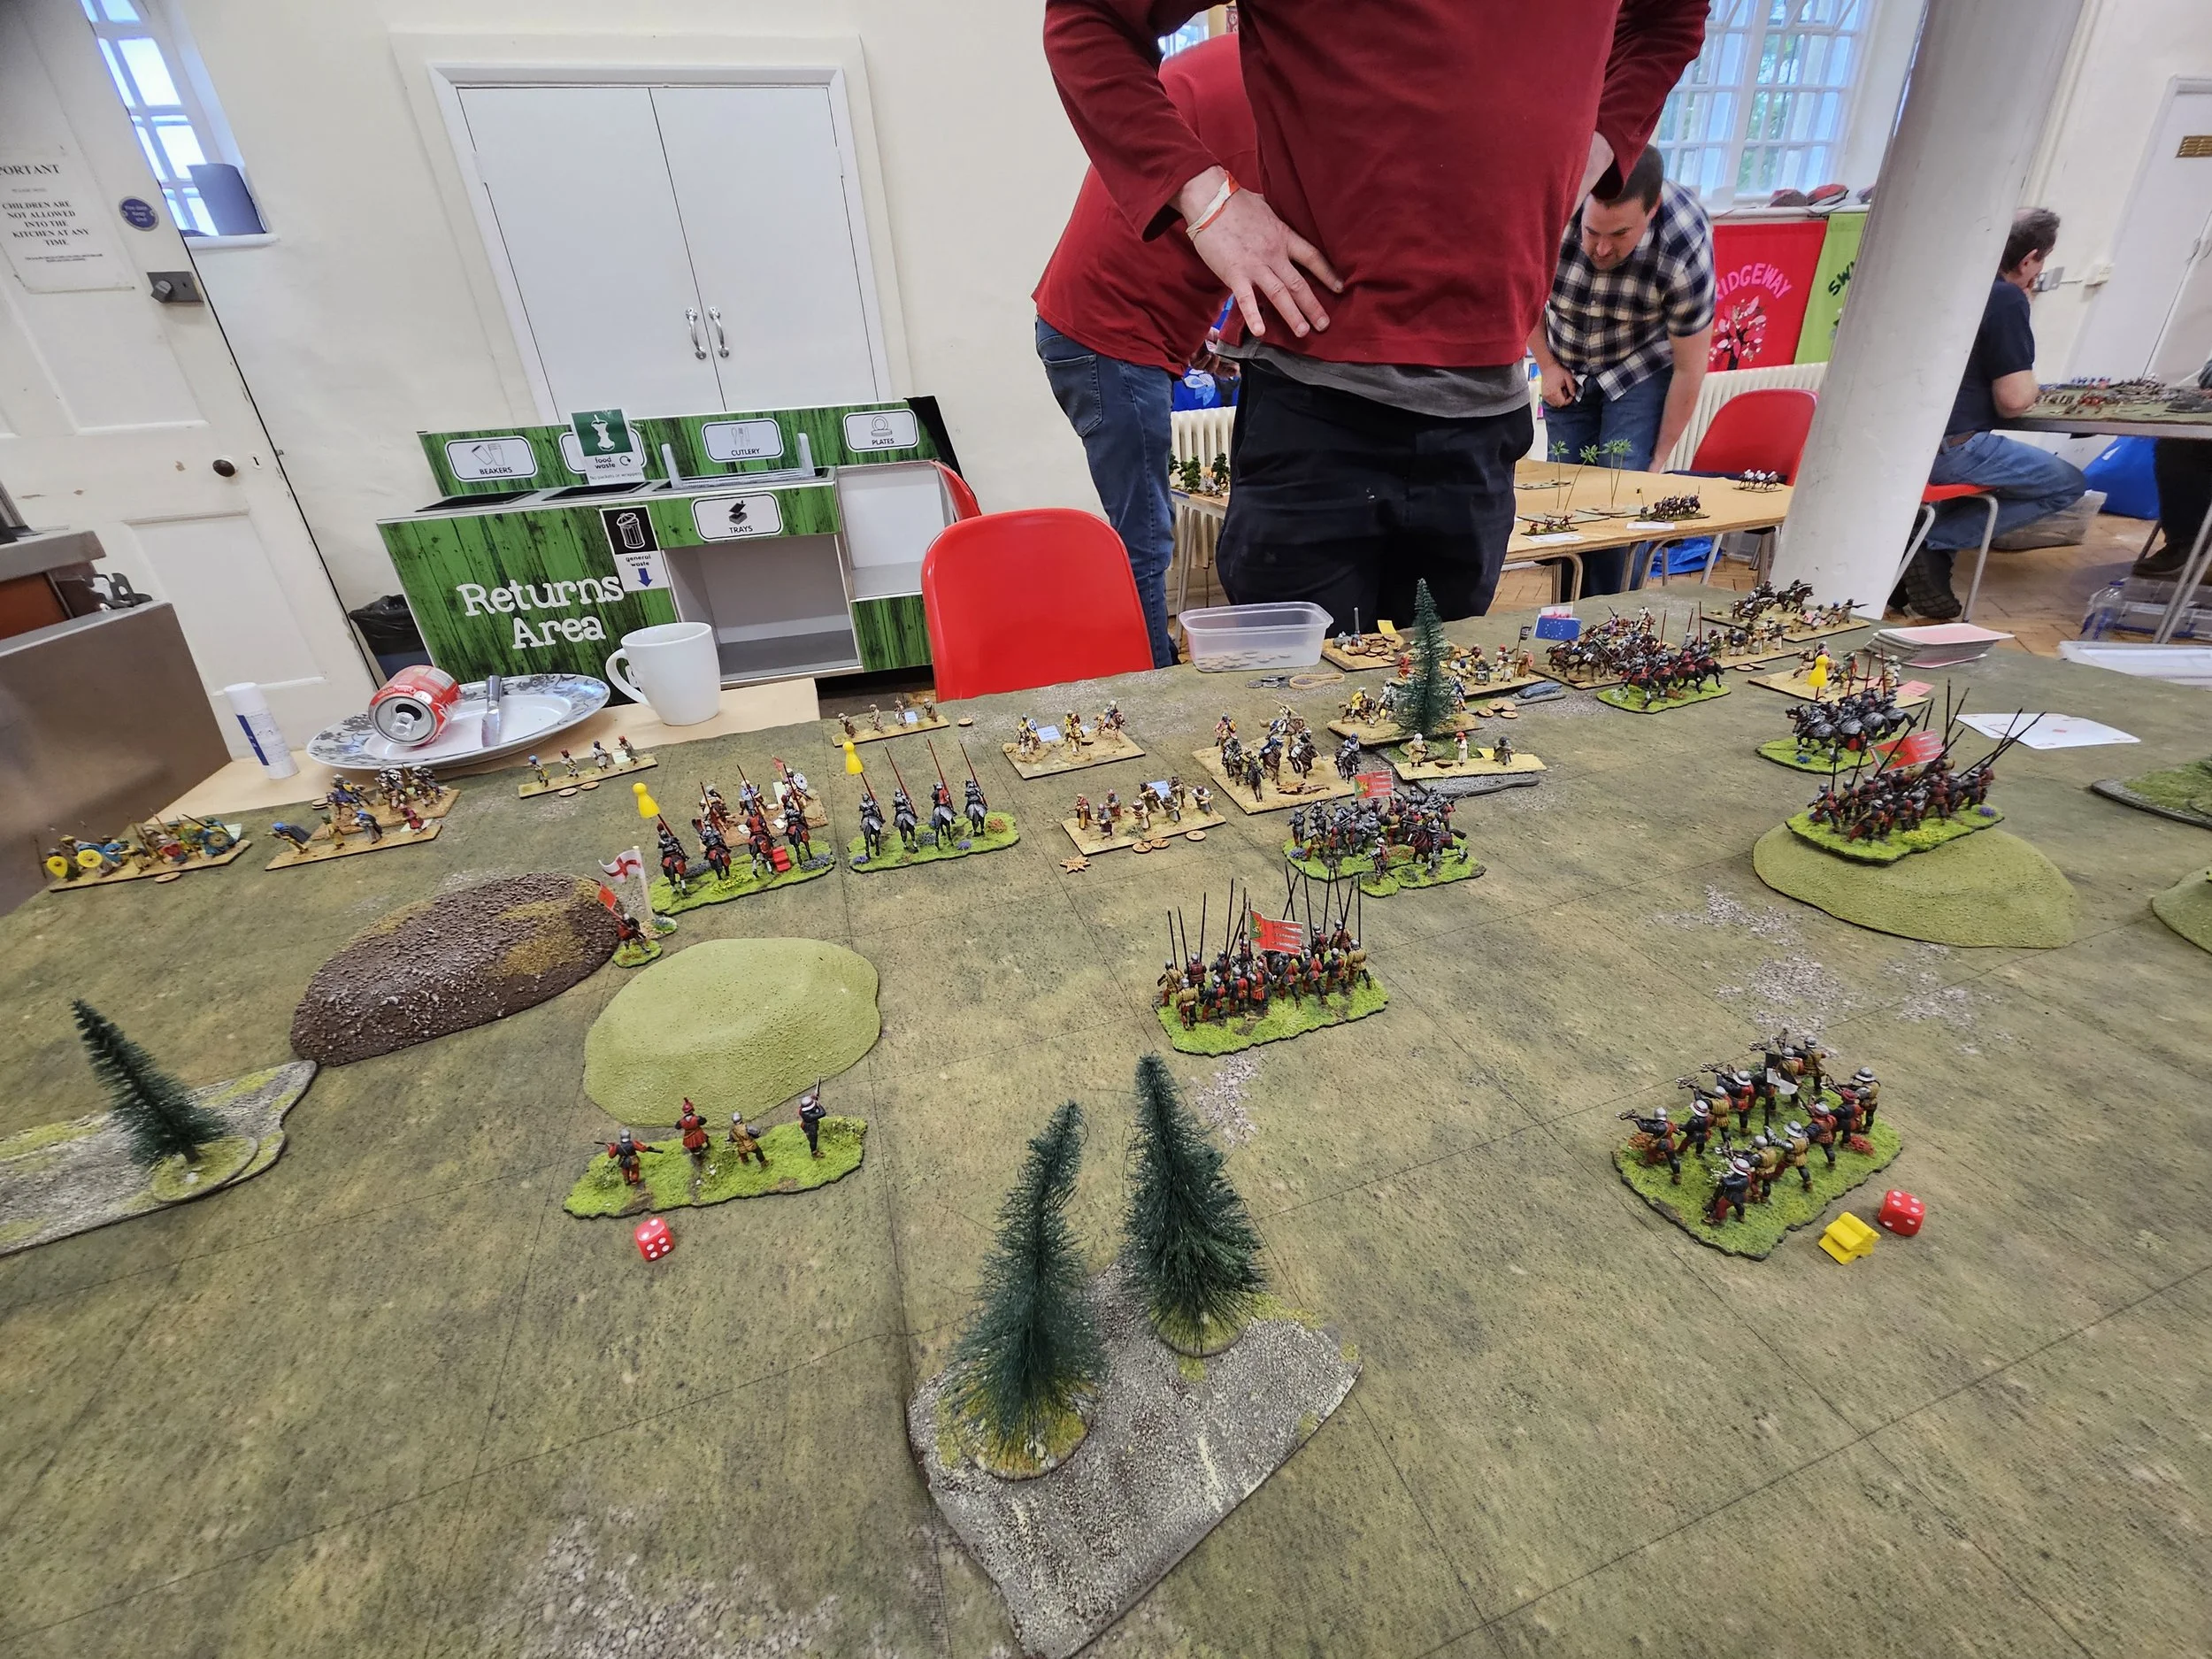
Meanwhile, in the centre, his largely-raw auxiliaries suddenly developed backbones and just wouldn’t break despite the attentions of my heavy, half-veteran cavalry. In fact, rather than fleeing from the field as they should, it was my horse that ran away!

Nothing was going right for me, and with the last of my victory medals handed over to my opponent, the game was lost!

A 2-14 defeat that boded ill for my chances in Wales!

TFL Painting Challenge: First June Update

It’s been a bit quiet recently on the Painting Challenge front: several of our regulars have commented that real life and/or wargaming events have got in the way of their painting. That said, still a good number of entries for our first June update

First up we have Mr Emmett with some lovely kit for an Arnhem game he’s running. I particularly like the Daimler Armoured Car.

Andrew Helliwell delivers next. He claims to have painted less than usual for this entry, but that still seems like quite a lot to me! Highlight is the medieval Italian carroccio with sacred banner…

Next up is Mr Burt, with the rest of his Java Seas ships and some late WW2 infantry:

Sapper sends in some rather nice 15mm Arabs with some 28mm WOTR in support!

And then to finish we have Matt Slade with some more 15mm Classicial Indians and Mervyn with huge numbers of 15mm ACW infantry:

So, as I said, a fairly quiet entry for the Challenge so far in June.

Do make sure you visit the individual galleries, accessed through the NavBar, above: some terrific work on display…and those of you who have entered this year: pick up those brushes and get moving!

19thC AAR: A Maximilian Adventure

Friend Bevan and I finally got a chance to get a game in last week. As I was hosting, I gave Bevan the choice of what to play, and he suggested we break out Neil Thomas’ Rules for 19th Century Wargaming again.

That was good with me, so I put together a quick Maximillian Adventure battle: French versus Mexican Juarista, a theatre not specifically covered in the rules, but easy to create based on the stats for French armies from 1859 and 1870 and a bit of research to fill in the gaps and stat the Mexicans. For those interested:

The French

  • French Elite Troops (Foreign Legion, Zouaves): Elite, Later Breechloading Rifle, Loose Order

  • French Cosmopolitan Troops: Average, Rifled Musket, Loose Order

  • Most Cavalry: Average, except for the Chasseurs D’Afrique: Elite

  • Artillery: Bronze, Rifled

Infantry have Elan and Broken Terrain.

Average command levels.

Mexican Juarista

  • Mexican Elite Troops (Los Supremos Podres): Average, Rifled Muskets, Close Order

  • Mexican Regular Infantry: Levy, Rifled Muskets, Close Order

  • Guardia Nationale: Levy, Smoothbore Musket, Close Order

  • Cavalry: Average

  • Artillery: Smoothbore

Poor command levels

As you will see below, although I had the stats about right, I’m not sure I got the forces involved sufficiently balanced.

The Game

The scenario involved a French column moving along a road, with a Juarista force coming at them from one flank.

Seeing the hordes of Mexicans descending upon them, the French quickly snapped round and began moving towards them, with skirmishers from the FFL and the Zouaves rushing forward to bring the lead Juarista units under fire.

Seeing all these French columns heading up the hill towards them, the Juaristas changed formation into line: their plan being to weaken the columns with fire and then charge them with the regiment still in column.

Meanwhile the Mexican regular cavalry moved up on the left of their line, also ready to exploit any opportunities caused by the devastating fire that was doubtless soon to fall on the French line!

Unfortunately for the Juaristas, the French commander knew what he was doing and, knowing that his breechloaders gave his troops a considerable advantage in terms of both range, cover and firepower, decided to forego the usual tactics of elan and charge and challenged the Mexicans to a shooting match.

Talk about unfair tactics!

Faced with inevitable defeat in the firefight, the Mexicans attempted to switch back into column and take the fight to the French, but this just made the matter worse, as the French were now in a good position to do to the Mexicans what the Mexicans had intended to do to the French: blow the Juarista close order columns away before they even got into contact.

Someone in the French camp had obviously fought at Waterloo - just about possible!

The Mexican’s situation was not helped by some rather impressive French dice-rolling: nothing like walking through devastating fire to put a real dent in your dia!

The end of the battle was now fast approaching: we had been using a modified victory medals system for checking overall morale (i.e. each side had a certain number of victory medals representing about 30% of the bases under their command, with a victory medal surrendered for each base lost) and the Mexicans were down to their last few medals.

As a final throw of the dice (pun intended!) the Mexican cavalry charged their French counterparts and, much to everyone’s surprise, actually managed to beat them back.

But unfortunately it was too little too late, and another round of French fire saw the last of the Juarista medals evaporating away. With their tails firmly between their legs, the Mexicans withdrew, only the efforts of their cavalry preventing them being ridden down by the victorious French.

FK&P-E AAR: Polish Lithuanians vs Ottomans

Friends Mark and Si have been collecting Polish-Lithuanian and Ottoman armies in 28mm to use with my “eastern front” variant of For King & Parliament.

As I currently have neither army in my collection finished, and play in 15mm, I was keen to have go. I would play the Polish-Lithuanians (hereafter known as ‘the Poles’) and John and Si would play the Ottomans (hereafter known as the Ottomans or the Turks!).

The Poles won the scouting, so I deployed my Winged Hussars and veteran Pancerni cavalry on the left, my guns in the centre, and some German foot supported by Reiters and Turkoman light cavalry on the right.

The Ottomans had their Janissery infantry and artillery on my right, their Azab levy foot in the middle, and their Sipahi cavalry (including some guard) on my left.

The game opened with each side moving their cavalry forward as rapidly as possible, and soon a collosal melee broke out, horse swirling back and forth amongst the confusion of the battle.

Meanwhile, my plan on the right had been to use my ‘German’ horse and accompanying lights to disperse the enemy horse in front of me, then advance to threaten the flank of the enemy infantry and guns as my ‘German’ foot advanced to contact from the front. Unfortunately the cards had other ideas, and my men refused to move more than a token distance towards the enemy.

The Ottoman cavalry command opposite my ‘Germans’ had exactly the same plan, and did manage to advance forward into bow range.

Fortunately their attempts to do unto me what I had intended to do unto them failed miserably and, with a new turn beginning, I was able to clear the enemt horse away and start my ‘Germans’ forward.

This left the game progressing nicely: I reckoned my four units of foot with cavalry support hitting the enemy flank could take care of the Janiserries, and my cavalry on the left were all veteran versus merely a mixed bag of Turks, so provided Si couldn’t get the Azabs in on my guns and more ‘German’ foot in the centre, I should be okay.

And so it came to pass: my cavalry on the right proved unstoppable, and soon Ottoman horse were fleeing the table in great numbers.

In fact, the battle was won on the left by the cavalry before my poor infantry and flanking cavalry had time to get stuck in at all:

So a solid win for the Poles…doubtless helped by my secret weapon lurking in her crate under the table: a fierce Pomeranian* mascot to inspire my troops to the heights they achieved!

*Pomerania being part of Polish Lithuania at the time!

Location of the Pomeranian Voivodeship within the Polish–Lithuanian Commonwealth

Painting Ottomans

I have about half a 17th Century Ottoman army ready for the tabletop: the infantry bought from a friend, the cavalry painted by Glenbrook Painting Services (recommended).

Half an army is no good to man nor beast, so Time to get started on the other half. First up were some more European Sipahi and, as I had the figures handy, another infantry command base.

As the rest of the cavalry is painted acrylics-on-a-black-undercoat, I followed suit with the two horse units shown above rather than using my beloved Contrast Paints.

This was a bit of a shock to the system, especially with the horses, but they didn’t seem to turn out too badly. The By Fire & Sword figures are above-average castings but one unusual trait is that, with cavalry, the horse provided is plastic versus a metal figure.

This has two effects: firstly a base is a bit top heavy, and secondly the horses are sometimes bent out of shape and can’t easily be straightened. Fortunately not a problem with this batch, although I did have to remeber to be careful when taking them off their painting-bases.

The Janissary command base, on the other hand, uses Essex figures and is done using Contrast Paints. Comparing the two (i.e. command base versus the two cavalry units) shows the difference between the two painting styles. In this case, for this colour scheme, I prefer the Contrast look, although I accept that for some colour schemes nothing beats the layered (base coat, top coat, highlight) acrylic treatment.

TTS AAR: Timurids vs Sassanid Persian - The Re-Match

As we still had plenty of time after the last battle, we decided to have a straight re-match.

This time our Timurids decided on a more sensible deployment: infantry in the middle, cavalry on the wings.

Neither side had any interest in shilly-shallying around, so headed for the opposition as fast their feet/hooves could carry them.

The first clash was on the left wing, where a brigade of Timurid cavalry crashed into a brigade of Sassanid cataphract horse.

Things did not go well for the Timurids: losing the whole brigade apart from the veteran heavy cavalry…and even they were forced to retreat back to the Timurid camp, horse-tails between their legs!

With the left flank thoroughly lost, it was time to look to the centre and right for success.

As the two battle lines came together, fierce melees broke out on the left-centre (kharash driven slaves versus Persian Savaran) and right-centre (a Timurid cavalry brigade commanded by Steve against some more Savaran supported by lights) but, in the centre-centre, Timur-the-Lame himself, at the head of some veteran cavalry, punched through the enemy troops in front of him.

Never one to miss an opportunity for death and destruction, Timur then executed a smart left turn and headed into the flanks of the Persian horse who had begun to beat back the kharash.

This was initially very successful, knocking a couple of light units from the field, but the Persian Savaran hit in the flank survived the impact and then, using one of theose rules that make you go “are you George Bernard?”, fell back two squares and then moved forward again to threaten Timur’s flank and the seven victory medals he represents!

Meanwhile, on the right, the Timurid cavalry had been doing stirling work removing Persian cavalry from the field:

By this time, the Persians were down to one victory medal, but the Timurids were damaged as well (all those units lots on the left flank) and, if the Persians got another turn and took out Timur, we were in danger of losing the game despite the fact that everything seemed to be going our way.

Worse, the Persian force that had defeated me on the left had swung round and were now heading rapidly back towards the centre. We really had to win now…but where to get that elusive last victory medal from?

Perhaps you remember the Timurid veteran cavalry that had fled to their camp?

Well they were still lurking in the camp…and some Sassanid light horse had strayed within range of their bows. I drew my first activation card and: Ace!

Okay, no matter, there’s a general present, so I can re-draw: this time a “2”.

A hail of arrows headed towards the enemy light and, unbelievably, scored a hit which the lights failed to save. Victory was ours again, but it had been a much closer game, finishing 13-7.

TTS AAR: Timurids vs Sassanid Persians

This June sees the inaugral 15mm To The Strongest competition, “To The Smallest” at Firestorm Games in Cardiff. The competition will be played on a large 10mm grid: the idea being to give it a significantly different feel to a standard 28mm game played on a 12x8 grid.

Always best to have a practice at a new format, so Si, Steve, John, Bevan and I gathered together to give it a go. Our first game was to be Steve and I playing the Timurids versus the others playing the Sassanid Persians.

The Timurids ahd four commands, three cavalry and one infantry, which, for some reason, ended up on the far right of our line. I’m not sure why: any cunning plan that we had for what to do with them has since escaped me!

The centre of the Sassanid line comprised multiple units of cataphracts, so as the game began I sent the Timurid lance-armed heavy cavalry right at them: the idea being to fire our bows on the approach to disorder and then charge in to polish them off.

Unbelievably, this worked really well, and one unit of lancers punched straight through the Sassnanid line, cataphracts flying everywhere, and ended up in a great position to threaten the enemy camps.

Meanwhile on the left, two units of Timurid heavies and two units of Timurid lights faced off against an almost identical configuration of Sassanid horse, the only (but key) difference being that my units were in a single, tightly-bunched command rather than slightly spread out.

This meant that when things went wrong - my veteran heavies going unexpectedly disordered - I had the troops available to protect them as they withdrew to rally, with the protectors, another heavy cavalry unit, actually smashing the enemy cavalry from the field. With my veterans rallied and on their was back into the fight, the left wing was now looking good.

The key unit in the pictures above is the Timurid cavalry with the blue flag bottom left in the image on the left and almost exactly in the centre of the image on the right: they smashed the Sassanid Savaran cavalry off the table before they could charge the rear of my veterans, reversing what looked like it was going to be a reverse!

On the right, the infantry there had yet to achieve much of anything, although they were keeping a couple of enemy cavalry units occupied and therefore away from the action in the centre.

Meanwhile, the Timurids were pouring through the Sassanid centre.

And had totally polished off the Sassanids on the left:

Back to the centre, and my veteran heavies moved into the enemy camp, reducing the Sassanids to just one medal remaining. They weren’t totally beaten, however, and a nasty moment ensured when my CinC’s unit (i.e. veteran heavies with Brilliant General and Army Standard - worth seven coins) was almost smashed from the table, fortunately making a vital save just at the right time.

A moment later, a Sassanid light unit was either KO’d or forced to evade off the table and the game was ours for a 13-3 victory.

So a decent victory for the Timurids…although it has to be said that the cards were running for us throughout the game.

As for the 15mm/10cm squares experience: not much change for me, as I usually play on a 15cm grid on a much bigger area than a standard competition table, but the others found it a significant change to what they are used to. Roll on the To The Smallest competition!

Rainy Day Painting

It’s raining again, and no-one is around, so a trip to the painting table to see what we can find to work on.

First up are a couple of large artillery bases for my 17th Century Ottomans:

I wanted some big guns for the Ottomans and, as you can see, I found them!

The guns themselves are from the English Heritage: a recent trip around Framlington Castle (recommended, even in the rain) gave me access to the gift shop and to said guns. They’re great for a huge artillery pieces and it’s only the wheels that need painting. Add on some Ottoman crewmen from Essex and away you go.

The Ottoman artillery didn’t take very long, so it was what else I could find in the lead mountain to fill the time. With all the news being about the situation in Palestine, it seemed grimly inevitable that my eye eventually fell on a small bag of figures that turned out to be Khurasan’s Egyptian crewed weapons for the Yom Kippur War 1973.

In the packet you get one HMG team, one 81mm PM-41 medium mortar team, and two Malyutka or “Sagger” anti-tank guided missile teams. All nice figures that paint up nicely: the only problem was remembering what combination of paints I’d used for the crews’ uniforms…but fortunately I keep a record of that sort of thing so was able to quickly find the info I needed.

TTS AAR: Venetians Abroad vs Later Crusader (Ewelme 24: Game Four)

My final game at the 2024 Ewelme tournament was against Rob’s Later Crusader army. This was an army reasonably similar to mine: strong cavalry backed up by bog standard infantry, although my Knights were slightly better than his horse, and his infantry all had crossbows.

My plan was not especially subtle: use my superior cavalry to win the wings whilst my infantry held the centre, then curl in and roll the Crusaders up from both flanks. Accordingly, I advanced my two brigades of Knights and Lights rapidly towards the enemy.

On the left flank, it proved quite hard to get through his Crusader Knights. I lost a unit of “Broken Lances” shortly after the first clash and had to send some spearmen in for support.

Although things eventually began turning my way, it took all five of my units (two Knights, two Lights and the Spearmen) to get the advantage on his two units of Crusader Knights and some infantry. The battle was not going to be won on the left!

On the right, however, things went much better for the Venetians.

A rapid advance with some Knights and light horse actually worked brilliantly with, for once in the whole tournament, my ‘veteran Knights’ and ‘veteran Later Knights with Army Standard’ actually doing what they were supposed to do: smashing enemy units from the field with abandon whilst proving impervious to attacks from the flanks and rear.

In fact, it’s so unusual for my Later Knights and Knights to actually survive a combat despite their 4+ and 5+ saves respectively, that it’s worth another picture:

By now the Crusaders were beginning to fold, with both flanks under extreme pressure from my surviving Knights.

A final couple of Crusader units gave way, and the game was mine: a hard-fought win 183 points to 67 points (12-8 in terms of victory medals).

So that was the last game, and I had amassed one huge loss, one losing draw, one big win, and the win against the Crusaders, above.

The points were totted up and I had managed 5th place: a lot better than I had expected given my first two games.

It had been an excellent day’s play against three great opponents, and I cannot but recommend the To The Strongest competition circuit to all. Although there are competitions before then, the biggie this year is the two-day Britcon event (well, it’s three days if you count the Friday evening as well) with five games (six if you count Friday’s warm-up) over two days.

Entries are open now.

TTS AAR: Venetians Abroad vs Granadine (Ewelme 24: Game Three)

My third game at this year’s Ewelme competition was against Steve’s Granadines: one of the Moorish dynasties established in Spain 1200-1500.

The great thing about fighting the Granadines was that Steve’s army was almost wholly comprised of shieldwall infantry, lights and missile troops: with only up to two units of Knights that might give my men pause for thought before getting stuck in i.e. provided I protected my flanks, I should be able to beat him on a pure unit-by-unit match up.

My tactics, therefore, would be simple: advance swiftly towards the enemy and engage his troops as soon as possible, just going for a quick win by bashing his lesser units off the table as fast as I could! I therefore determined to use my first turn to group move forward each of my three commands with no shilly-shallying around.

Naturally, however, the cards had different plans:

This was, however, only a temporary setback, and soon my men were right on top of the Moors, with Steve’s cards preventing him from countering my advance by also getting in on the ‘double Aces’ act:

After that, however, things went very much to plan: my Knights proved just about unstoppable, and my Alabadiers also showed how good they could be against standard infantry.

In the end my predictions about how the battle would go came true: wherever I could get my men stuck in, the enemy crumbled, so as long as I kept the initiative and forced Steve to respond to my attacks as opposed to being able to manoeuvre and launch any of his own, the game was mine.

The eventual result was a 192:17 victory (13 coins to 2 coins), with my only casualties being a couple of units of Lights.

So three games out of four done: one big loss countered by one big win, and a losing draw on the scoreboard: I needed a good result in game four to save the day!

More Epic Scots - the Cavalry and Small Guns

Having used all the musket-bearing men from the handful of ECW Warlord Epic Scots Covenanter sprues that I had acquired, it was time to see what I could do with the rest of them.

I didn’t want any more pike-only units, so that left some Scots cavalry, Scots lancers, and a few pieces of what I’d call small artillery: frame guns and falconets.

As there weren’t enough cavalry to make up a single decent sized unit of either pistoliers or lancers, I decided to build a small unit of each: the new For King & Parliament Celtic Fringe books have plenty of small cavalry units in them, so these would be ideal.

Now I like the Warlord Epic Scots infantry: the right size (or near as damn it!) to match my 15mm collection, nicely sculpted with plenty of detail, and I found the “strips” approach ideal for massed ranks of musketeers.

The Scots cavalry however are unfortunately another matter: the cavalry on these sprues are badly sculpted to the point where I almost just discarded them and bought replacements from another manufacturer.

Or let me be more specific: the horses are fine, in fact are nicely done, but their riders are terrible.

Both lancers and pistoliers have very poor detail to the body and faces (much less detail than on the infantry) and, worse, each has this blob area of plastic with no detail at all where the front of the figure meets the horse…a poorly detailed coat can be compensated for with a cunning paint job, a blob area of plastic has either to be carved into shape or just ignored.

On top of the above, the lancers carry not lances but (presumably in keeping with the Scottish theme) cabers: enormous logs that have to be painted to show a useable lance or risk being seen as objects of derision.

I forgot to take any pictures of the figures before painting them (well, I didn’t think I would need to) but my fellow blogger from the Keep Your Powder Dry website (excellent site, highly recommended) has posted this one, above, that shows what I mean.

He does, however, go on to say that the figures look good from the side (which I agree with) and that these are an improvement on other Warlord Epic cavalry…which makes me glad I haven’t got any!

Being tight as the proverbial badger’s backside, however, and not wanting to spend any money on alternatives, I persevered, and produced one small unit each of lancers and pistoliers. They’ll “do” at the three foot range, but won’t be featuring in any close-ups!

To end on a positive note, the artillerymen, on the other hand, are great.

They have all the detail of the pike or musketeers strips, but as individuals. They were very easy to paint up, and their falconets (the one on the left in the picture above) and frame guns (the other two) are great.

So a mixed bag from the Warlord Epic Scots Covenanter range. Loving the infantry and artillery, not loving the cavalry.

TTS AAR: Venetians Abroad vs Later Swiss (Ewelme 24: Game Two)

After losing so badly to Peter’s Later Tibetans in Game One, it was inevitable that my second game would also be a tough one…facing Dillon’s Later Swiss, to whom I’d lost my first game at the Roll Call competition.

At least I knew what to expect and, sure enough, the Swiss shot forward, determined to get their massive four-hit pike blocks into action as soon as possible.

My only chance was to somehow stem the tide of the Swiss advance and then manouevre around their flanks and rear: something I had failed to do last battle.

The opening moves were therefore very much me trying to get behind what terrain their was, block the Swiss advance as best I could, and get my Knights and Lights into the lanes between the advancing pike blocks.

Although stopping the pike blocks proved problematic, I was helped by Dillon’s cards and, as the game unfolded, looked to try and roll him up left to right.

I also managed to get my best unit (veteran Later Knights, Lance, Hero, General, Army Standard) through his lines, all ready to turn and crash into his men from behind when…

Well that was somewhat frustrating…especially as that proved to be the highpoint of the Venetian game!

The battle settled down into a series of grinding melees with neither side getting an advantage, except for the fact that the Swiss were gradually getting closer and closer to my camp.

At this point we unfortunately ran out of time, with my troops suffering a 42-105 losing draw (three medals vs eight medals) which, to look on the bright side, was better than they did against the Swiss last time!

Two games in and a big loss and a losing draw to my name: things were not looking good!

TFL Painting Challenge: Early May Update

The Challenge continues, and a vertiable cornucopia of entries in this time around…so let’s waste no more time and jump right in.

First up is the usual huge entry from Nick Cooper: all fantasy 28mm figures apart from three 54mm plastic Saracens that he claims to have painted “for a friend”…

Continuing the fantasy theme here we have a couple of large dragons from Ralph Plowman. These I have classified as 28mm aircraft: they have wings, don’t they!

Next up is the prolific Mr Helliwell, with a combination of 15mm Napoleonics and 28mm medievals:

After a long period of producing terrain, Carole has switched back to painting figures. Here we see some Back of Beyond infantry and archeologists, with a few Mexican Intervention types thrown in:

Stumpy has been painting and re-basing at speed this month. Here are some lovely Sarmation cataphracts along with some spear- and bow-armed infantry and a few Egyptian policemen to boot!

Finally here are entries from Mr Uther and Mervyn. Mark’s are the seaplanes, whilst Mervyn has been building Koreans houses and laying tracks:

Keep those entries coming in!

TTS AAR: Venetians Abroad vs Later Tibetans (Ewelme 24, Game One)

This year’s Ewelme tournament was themed For England and St George: later armies from the Medieval lists and one of your generals had an extra hero who could be activated by crying that phrase or one more suited to your army.

My first game was against Peter’s Later Tibetans.

This was extremely amusing as in the run up to the draw for the first round games (televised by Peter and the team from SOGS) I had answered the question “what sort of army would you least like to face” with the slightly facetious “anything commanded by Peter”. Naturally Lady Luck was listening in and, sure enough, out came Peter’s chit swiftly followed by mine! It was going to be a long day!

The Tibetans, being nearly all on horseback, outscouted my holidaying Venetians, with the result that once again I found myself facing an army that was heavily weighted to one flank.

The Tibetan “Peace Mountain” can be seen top left!

I was absolutely determined not to be outflanked, so hung back my right whilst strongly advancing my left.

Unfortunately this made very little difference, and soon I was facing light horse and cataphracts threatening my right flank.

I pondered what to do for some time, then attempted to consolidate my position.

Unfortunately I left the smallest of chinks in my armour and, before I knew it, I had cataphracts pouring in from the right, smashing my units from the table faster than you can say nam myoho renge kyo!

Note that this meant that the yellow cataphracts had to successfully turn and move one forward (difficult move) then move diagonally and charge (another difficult move).

My centre then collapsed under the wright of more flank charges as the Tibetans poured in from the right, and nothing I tried to do seemed to work.

A rather ignominius defeat 17:192 points!

Superb play from Peter, poor play from me. I should have compressed my troops into one corner, formed a wall of spearmen, some in orbis, and used my Knights effectively rather than seeing them smashed from the table without even getting to use their lances.

Not a good start to the day!

FK&P AAR: Dick's Tower

Regular visitors will know that friend Rob and I are working our way through my The Siege of Norchester campaign book for For King & Parliament. We have completed five of the twelve scenarios so far, with a run of poor results leaving my Parliamentarians six victory medals behind overall.

Game six involves a Roundhead assualt on a section of the walls of Norchester that have been breached by Titan and the other siege guns: a section of the walls incorporating the so-called Dick’s Tower, a ruined tower where one of the King Richard’s was once supposed to have stayed.

As you’ll see in the picture, below, the Royalists are both defending the breach and have troops outside the walls…

View from behind the Parliamentarian lines after their initial move

My cunning plan was to use a couple of units to bottle up the enemy behind the walls whilst using the majority of my force to overwhelm, if only by sheer weight of numbers, his men outside, then turn back to the walls and use my again presumably superior numbers to defeat his troops there too. Think Napoleon at Austerlitz!

To his credit, however, Rob told me what he thought my plan was almost as soon as I started moving, so perhaps I should have said “obvious” instead of “cunning” when describing my plan!

Here’s a shot from behind the Royalist lines:

The Graveyard bottom left is just where we stored the casualty markers!

First action was on my left, where Rob rapidly advanced his cavalry in an attempt to keep my troops there from heading right to execute the first phase of my plan.

Two squadrons of Royalist Swedish horse hit the standard pike block on my far left, and although one squadron was destroyed, the other still threatened and my pikemen were on their last legs, meaning that my commander in chief had to move my reserve Dutch horse into a position where they could intervene if necessary.

My damaged battalia fell back and began to rally as the two cavalry squadrons met. Although Rob’s Swedish horse had the advantage of the counter-charge, the sheer weight of my Dutch horse coming down off the hill was eneough to eventually break them, and that side of the field was mine…but it had delayed the execution of my plan even if doing so cost Rob two squadrons of horse.

Roundhead commander staying out of the action: you can’t afford to lose your Commanding General in FK&P!

Meanwhile Rob had also moved his troops out from behind the breeched section of the walls surrounding the tower and started a rolling firefight with my three battalia of infantry there.

This firefight would continue for a couple of turns with neither side getting an advantage, although as Rob’s shot-heavy battalia would in due course be able to “double-shot” my men for longer than my standard battalia, I knew I needed to get stuck in on the right as soon as possible.

And so on to the right hand side of the field, where both sides advanced towards the muddy stream bed as quickly as they could: Rob’s men to block me from getting across, my men to get over the stream bed in order to deploy my superior numbers.

Although I did get over the stream bed first, a quick march from Rob’s infantry left two of my battalia isolated on the wrong side of the obstacle, but that situation was soon remedied, somewhat helped by the fall of the cards (FK&P has a playing card-based activation system).

Then it was just a matter of using my greater numbers to chew through the enemy facing me on the right flank. This I eventually achieved, then curling round to head back into the centre towards the rest of the Royalist foot.

By now I had won enough victory medals off the Royalists to win a standard game, but for this encounter there were actually three more victory medals in Dick’s Tower itself, so whilst the Royalists held the tower, they could keep on fighting…and did!

Things had been fairly even in the centre so far, with each side losing a battalia. A foolish charge by the blue-coated battalia against troops behind un-breached walls cost me the Colonel of the unit, but things were about to change dramatically as my infantry poured in from the right flank. My Dutch horse were also now threatening from the left.

Assailed from three sides at once the last remaining Royalists eventually gave way, leaving the tower and the last three victory medals in my hands.

A victory for the Parliamentarians which, once we’d totted up the points, brought me to within two victory medals of the Royalist running total. It’s now on to Mundaydean Lane to see if I can narrow the gap even further!

Q13: Mozzian Jezsnailis!

Like many wargamers, I am a sucker for anything shiny…which is why it is always a bad idea for me to have anything to do with Khurasan Miniatures, surely the very embodiment of shine!

In addition to a very large and varied collection of historical ranges, Khurasan also have a substantial catalogue of 15mm sci-fi figures. One such is a range of “black powder sci-fi” figures based on the history of the planet that eventually spawned the Garn (think T-Rex with guns).

Latest addition to that range are the Mozzians: snail-men, complete with shells, with muskets. Here’s some of the historical blurb taken from the Khurasan website:

The oldest race on Torosus were the Mozzians, living in the rainforests, jungles, and, in other regions, in great cave cities, typically not venturing out because they required a damp environment to thrive. The Mozzians were slow but physically large and immensely strong, and were well protected by their vestigial shells, into which they were able to contract their entire body, as long as they stripped off all of their gear (much to the surprise of their vertebrate foes, who couldn't conceive how they were able to disappear into a shell so relatively small).

I can’t paint quite as well as the chap who did the above, so my Mozzians are a bit more basic, but I’m very happy with the result I achieved:

I thnik that I will add these to the roster of the Pelagic Dominate (another Khurasan range) where they will nicely complement the Kharkarines, Myzontids and Orcas.

TTS AAR: Venetians Abroad versus Catalan Company (Roll Call Game Four)

My final game at Roll Call this year was against Dene’s Catalan Company: an army consisting of Almughavar javelinmen supported by cavalry, allied light horse and Greek archers.

The Catalans had outscouted my Venetians and came forward rapidly in a ragged line.

As both sides had their horse on the same side of the field, the first clash came on my right, where my Knights clashed with Dene’s. Both sides lost a unit but the advantage in positioning was slightly in my favour.

In the centre, more of my Knights punched through the horse in front of them, with the decision now being how to take on the enemy’s central command of formed infantry happily ensconced on a couple of hills.

Back on the right hand side of the field, my Knights finished clearing the enemy cavalry away, leaving them clear to advance but a long way from the rest of the action.

Unfortunately, however, things weren’t going so well on the other side of the table. My infantry had definitely come off worse in the initial clash, not helped by the fact that my Halbardiers just couldn’t get the cards they needed to activate let alone fight…although they did stand heroically solid when attacked on the flank (top middle in the second picture, below).

My camp was now exposed, however, with Dene quite happy to take one half whilst threatening the other: things were critical as that represented an awful lot of Victory Medals.

We were just about to start another turn - a turn in which Dene had a good chance of taking the game, despite the success of my Knights on the right - when time was called: all the manouevring early in the game had used up the clock!

A very narrow escape for the Venetians: a losing draw 7:9.

What was worse (for Dene) was that not finishing off my Venetians meant that I pipped him at the post for the third place position, with him finishing fourth only a few points behind me!

All in all, a great day’s gaming: well done to Tim for organising, and to all the other players in competing in the usual TTS good humour and sportsmanship.

As for my Venetians, they will now continue their journey Abroad with a trip to historic Ewelme and the “England and St George” competition there.

TFL Painting Challenge: Second April Update

A second April update to keep on top of all the entries coming in.

First up, Mr Helliwell, who switches his attention back to 15mm Napoelonics with a large multi-unit entry of which the following are just some examples:

Carole is still producing vast amounts of terrain: a combination of ruins, buildings, fencings and plantings!

In amongst some more elephants, Mr Slade has re-based a significant dark age force. For those who don’t knwo, you can claim re-basing in the Challenge: you just score half points.

Excitingly this week, we have a new entrant to the Challenge: Des Darkin starts his quest for points with some 20mm WW2 troops. welcome Des: I’m sure that many more will follow.

Finally, a quick round up of the other entries received this week. Here we have John Emmett’s V1 rocket launcher; Mervyn’s Romans and the start of a massive fleet from Mr Burt.

Keep them coming!

REMINDER

Due to the fact that I have changed my domain hosting away from Yahoo to Squarespace, I have lost the admin@vislardica.com e-mail address. Silly me for not anticipating this and letting you all know! From now on, can we use vislardica@gmail.com please.

TTA AAR: Venetians Abroad versus Ayyubid Egyptian (Roll Call Game Three)

My third game at Roll Call 2024 was against Andy’s Ayyubid Egyptians: another beautifully painted army.

Neither side was particularly interested in doing anything excapt having straight at the enemy, although I did make a point of maintaining my line as much as possible.

The game quickly split into two sectors: the centre/right and left.

On the centre/right, my Knights and Lights worked together to drive back his quality cavalry and infantry. As usual, half my Knights rode straight over their opposition without difficulty and half failed to achieve anything at all…but, generally, the action in this sector went in my favour.

On the left, however, my infantry didn’t do as well as I had hoped, and soon the Ayyubid’s were threatening my camp.

The game looked in the balance at this point but, fortunately, my troops on the right were now in a position to hammer their wavering opponents. They duly did so, and the collapse of the Ayyubid left gave me a 12-6 victory before Andy did to me on my left what I had just done to him on his left.

So a loss, two wins, and one more game to go!