Classical Indians: The Elephants

An important part of any Classical Indian army are the elephants. They can form the spearhead of your attack: stomping any enemy units into submission. They are particularly useful against cavalry-based armies who haven’t encountered pachyderms before.

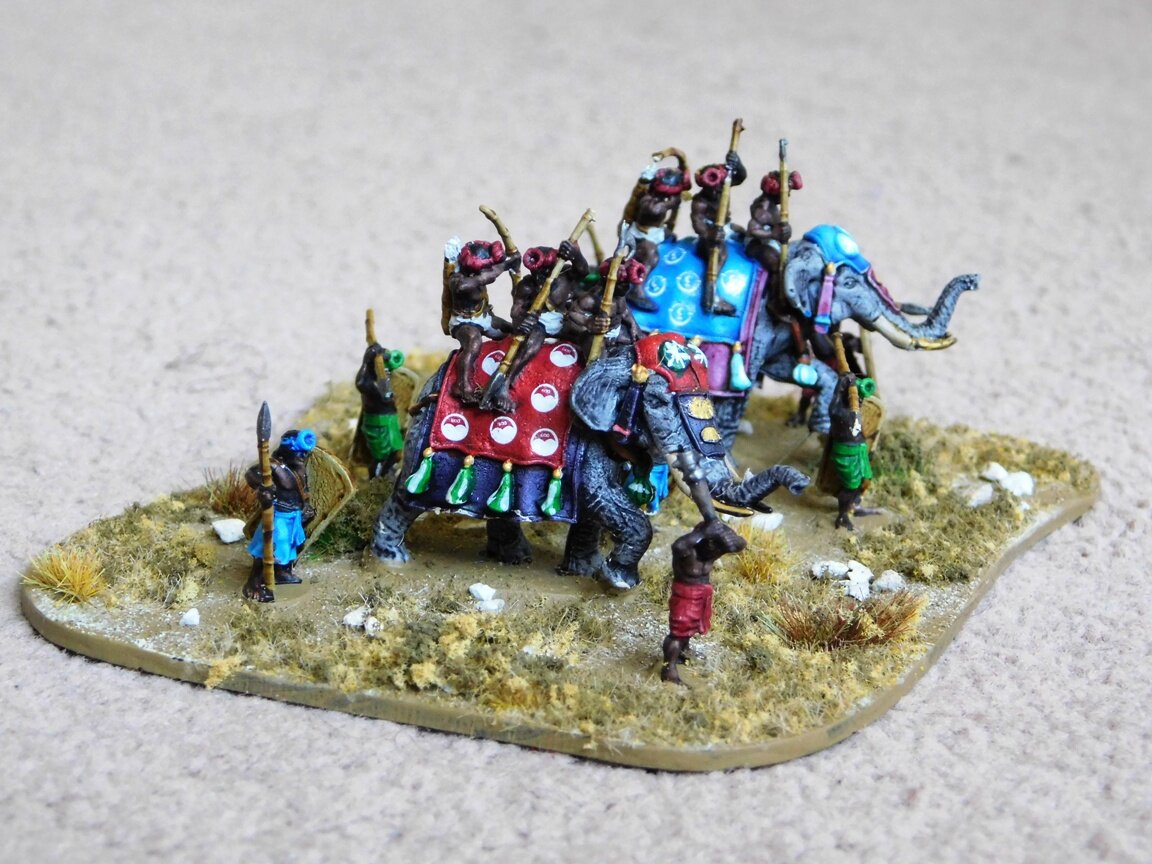
As with the rest of my Classical Indians , my elephants are from Museum Miniatures’ 15mm CAD-designed “Z” range, and very pretty they are too:

They were also very easy to paint: time-consuming, in that there’s a lot of elephant and crew to produce, but much easier to turn out than I had anticipated.

The elephants themselves are painted with a single coat of GW Contrast Basilicum Grey. Then each under-blanket is painted a dark colour, with the over-blanket a contrasting lighter colour. The rather natty designs on the over-blanket are actually WW2 tank decals (Soviet IIRC), and have turned out even better than I expected.

I painted the crew in situ but, if I have to paint any more, may consider painting them separately then mounting them. It’s 50/50: it’s fiddly to paint them in place, but quite difficult to get them mounted well, so you could ruin a paint job messing around trying to get completed crew figures in place.

Classical Indian Heroes

Regular visitors will know that I am currently painting up a 15mm Classical Indian army using Museum Miniatures excellent “Z” range of CAD designed figures.

I had said that the next element to be worked on were the elephants: a massive task involving a mix of the elephants themselves (six of them) and their escorts (a load of light infantry types). I mounted the crew figures on their steeds, fixed them all to painting bases (a mixture of lolly sticks for the foot and bits of card for the nellies), sprayed them, and then wondered what I would do whilst I waited for them to dry. Gone are the days of sitting there with a hair dryer: with Tier 4 in full swing, I didn’t have any opponents anyway! I needed a quick painting fix, so decided to paint up the five “Heroes” that had sitting on the sidelines awaiting some attention.

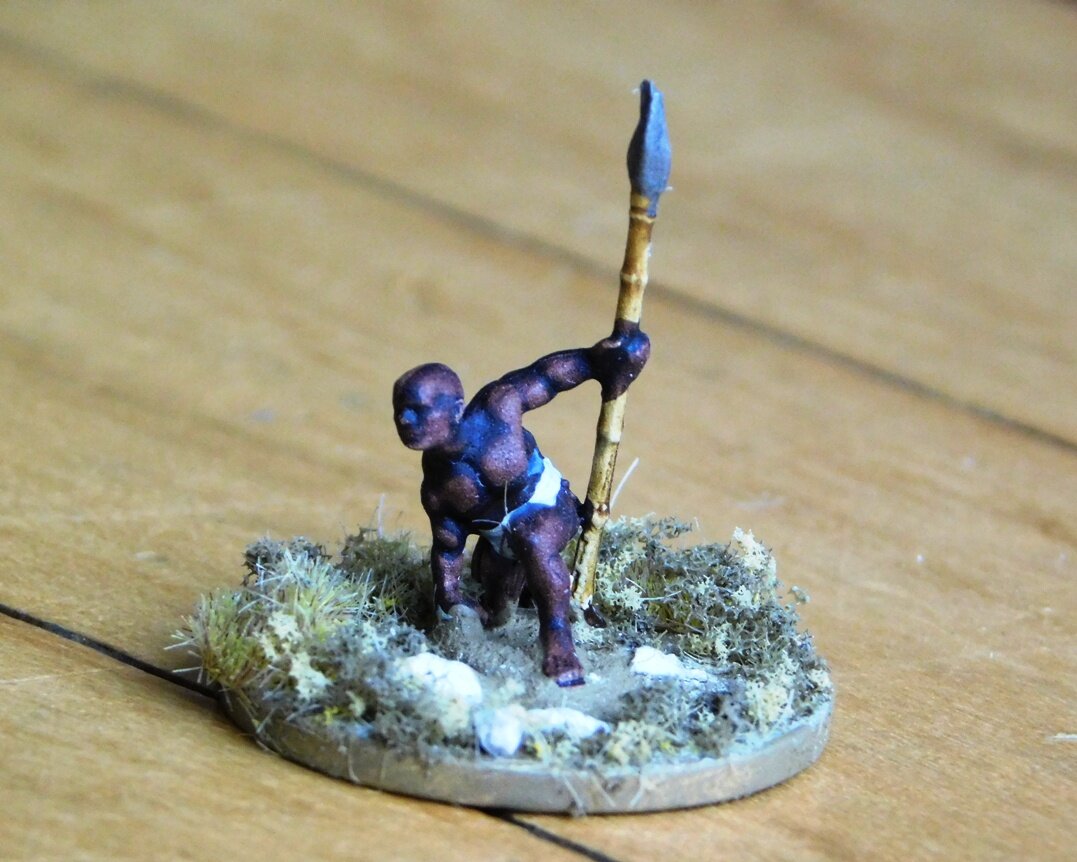
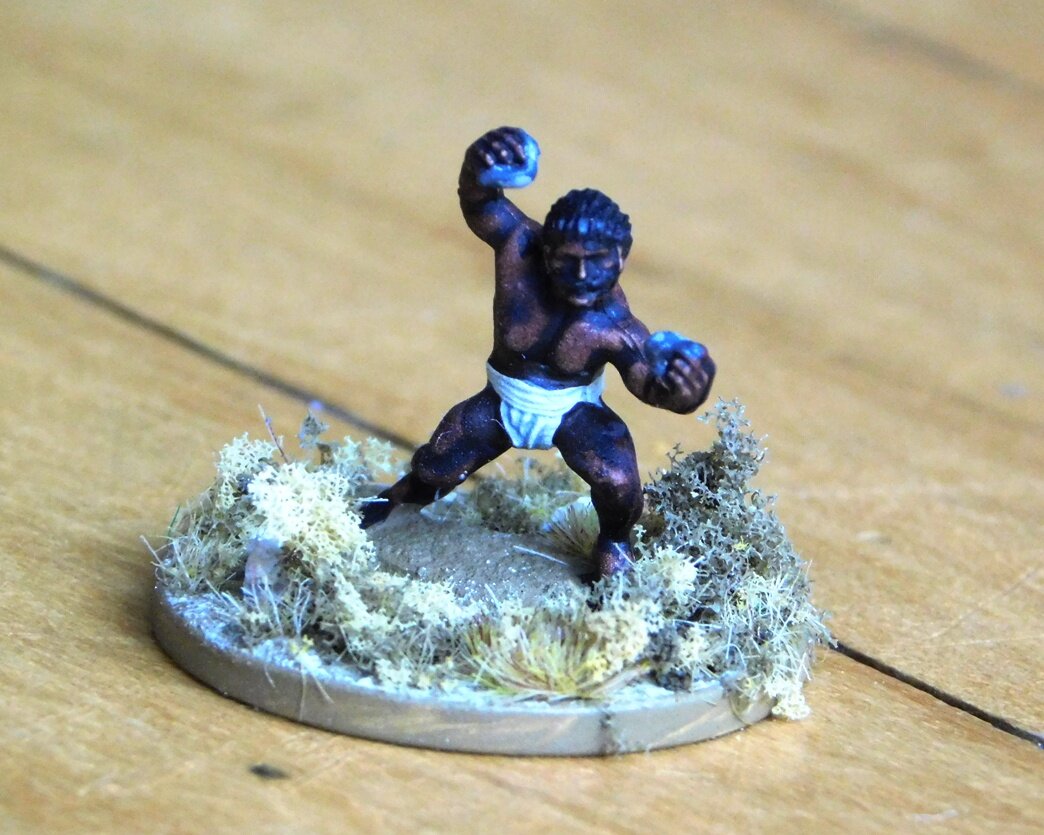
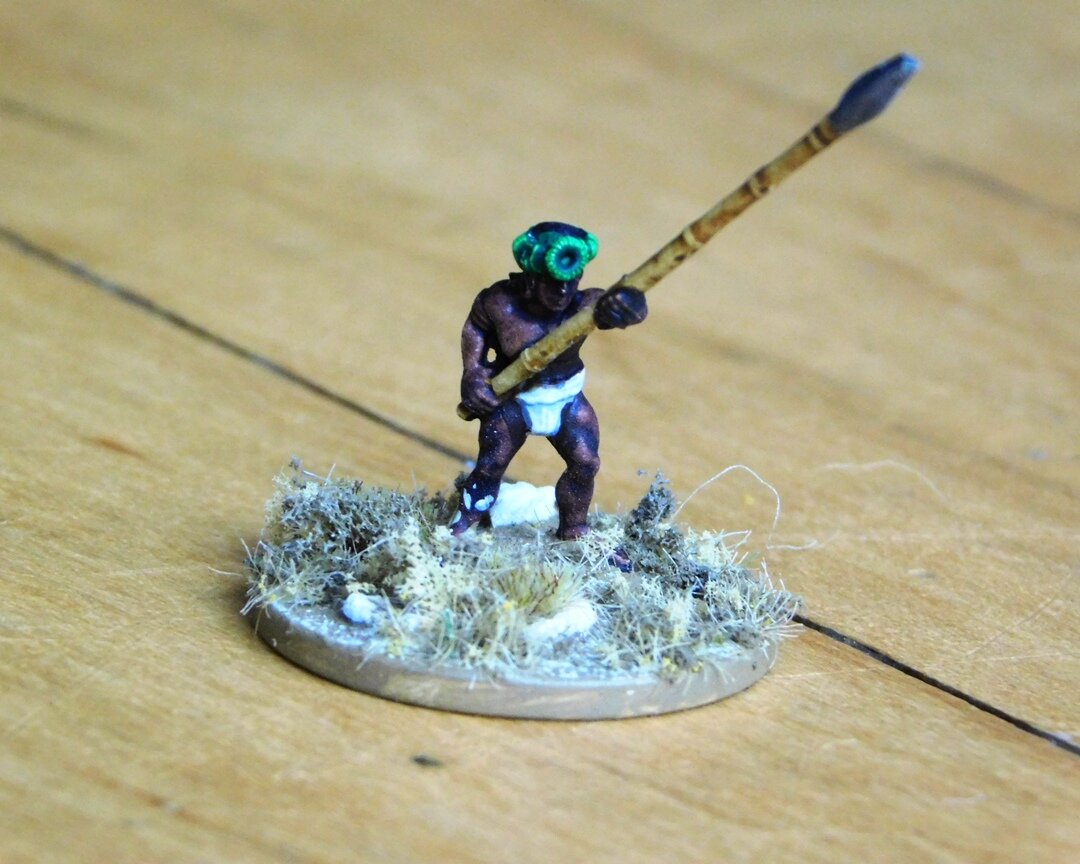
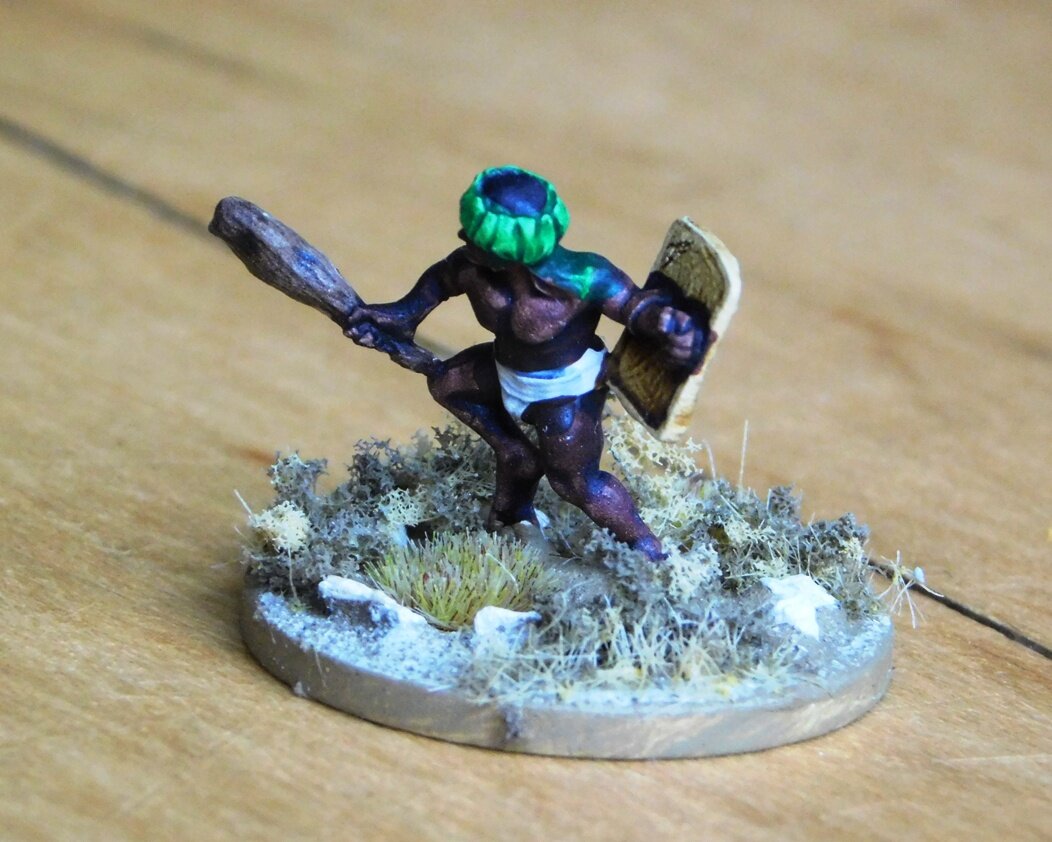
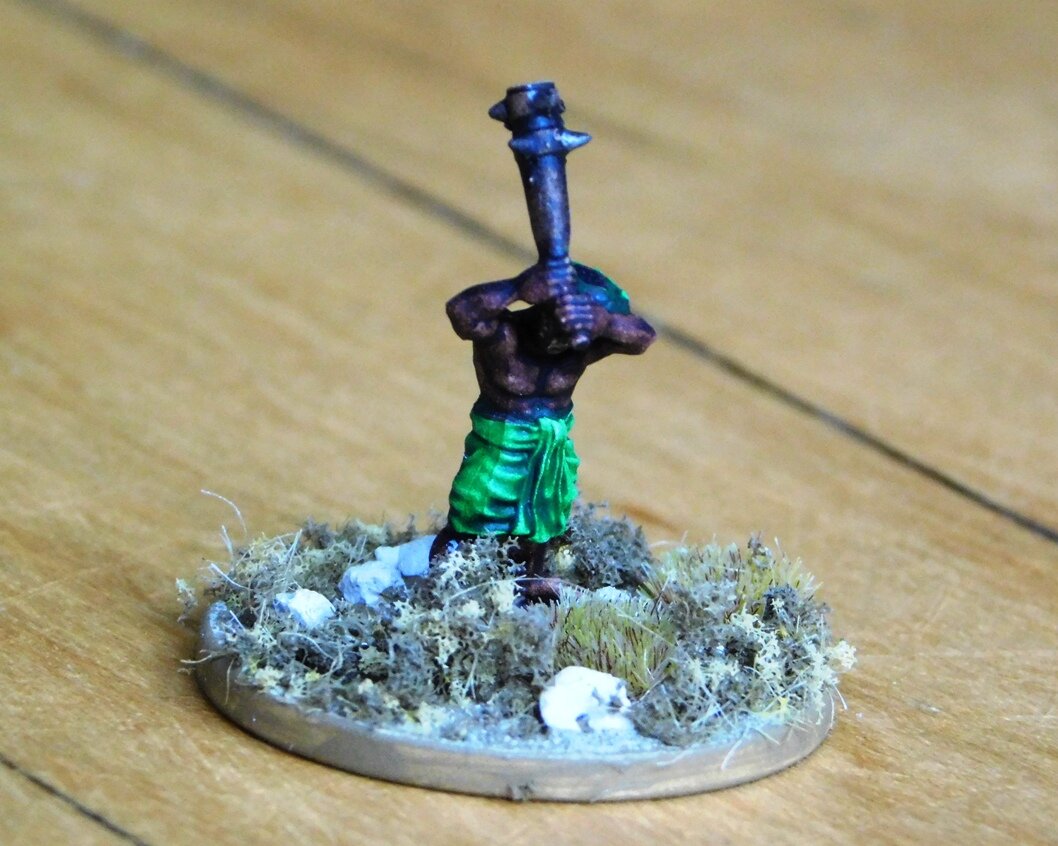
Heroes need, in my opinion, to stand out from the crowd a bit, so what better figures to use than a selection from the “Indian or Arab Hordes” pack that Museum do. These are both striking and unusual, and suited what I wanted down to the ground:

I am loving these poses, and the way the figures are sculpted really allows the Contrast paint to do its work as well. The first two heroics - the chap kneeling down with a spear and the chap holding the two rocks - are some of my favourite casts ever. The close up shots reveal the sloppiness in my painting style, but they look really, really good when viewed at wargaming distance.

Highly recommended.

Enter the Heavy Chariots!

No gaming at the moment as COVID restrictions are still in force, so it’s on with the painting: specifically adding units to my 15mm Classical Indian army.

The last week or so has been spent putting together and painting a couple of heavy chariot units:

These are figures from Museum Miniatures’ CAD designed “Z” range painted using mostly GW Contrast paints.

Just in case you’re after a bit of inspiration, here are a couple of notes:

  • The dark brown horses are painted using Cygor Brown diluted 50/50 with the Contrast thinner, then black manes, tails and lower legs.

  • The dun horses use Agresso Dunes as the skin colour, with black manes, tails and lower legs.

  • The grey coloured horses (a shade probably unknown to nature but looks good on a model!) are Space Marines grey with Basilicum grey manes, tails and lower legs.

  • The black horses are Templar Black Contrast for the skin, then a standard acrylic black for the mane and tail.

  • The crew skintone comes from a 50/50 mix of Cygor Brown and Fyreslayer Flesh

  • The chariot sides were painted Skeleton Horde, the black blobs in an approximate cow hide pattern, dark grey infill on the blobs, then stippled white in between.

  • The bases are Warbases large vehicle bases with GW basing material on top with a sprinkling of talus before it dried. That was then drybrushed in a bone colour and the edge painted as well. Then three types of shrubbery brush in clumps placed randomly. Then a sprinkle of mixed dark green and dark yellow basing fluff.

  • The whole lot then varnished in a matt anti-shine finish.

DSCN2099.JPG
  • The bright coloured shields are a bit fantastic (simple alternating stripes) but provide a nice contrast to the other colours

  • I decided to paint the chariot wheels and structure in the darker Contrast red for the same reason.

  • Finally, I didn’t touch up the figures after basing, especially the horses and lower parts of the chariots, as I felt that the models looked better with a bit of dirt and dust on the undercarriage!

Next up are the escorted elephants. That’s quite a big project, with each (deep) base containing two elephants-and-crew and eight escorts on foot. Three bases worth to do, so might take me a bit of time! Wish me luck…

Classical Indians: Some Cavalry

Here’s the latest Classical Indian unit to roll (or rather gallop) off the production line: a base’s worth of cavalry.

As with the rest of my Classical Indians, these are 15mm Museum Miniatures figures from their CAD designed ”Z” range. They are painted with GW Contrast paints and mounted on a large vehicle base from Warbases.

The chaps chucking a javelin and the cataphract commander are lovely figures. I’m less sure about the swordsmen: they look like uncomfortably poor riders to me…but then, on the To The Strongest army list, the Classical Indian cavalry are all very poor quality, so maybe they suit!

Classical Indians: The Maiden Guard

More Classical Indians rolling off the production line!

This time it’s the Maiden Guard:

As usual, these are from Museum Miniatures’ 15mm “Z” range of CAD designed figures painted mainly with GW Contrast Paints.

I know that the idea of the Maiden Guard in terms of being a battlefield fighting unit is somewhat, er, fictional, but the way I have constructed my TTS Classical Indian 130 point army list means that I only need one unit of Javelinmen, who can be Veteran, so I thought I’d just go for it and paint a unit of figures different from anything else I’m going to need. After five longbowmen units in a row, a change is as good as a rest!

And these figures are lovely. Rather than being your typical 15mm female warrior figures (basically men with two lumps of green stuff on the chest) these really are significantly different from the male figures in the range. They are slighter overall, with slightly emphasized hips, and breasts that actually look like the sort of breasts you might get on an athletic young lady rather than a couple of stray footballs!

As I hope you can see, they paint up very well too, and I would highly recommend them for anyone who needs Amazons or the like.

I’m moving on to the Classical Indian cavalry now, but here’s a couple of pics of the last on the longbowmen.

More Classical Indians

I’ve had a chance to paint up another couple of longbow bases for the Classical Indians.

These are 15mm figures from Museum Miniatures “Z” range, and very nice they are too. I’ve painted them with GW Contrast Paints, and mounted them as elements of vehicle bases from Warbases. Most of the basing materials come from Boontown.

The fleshtone comes from a 50:50 mix of Cygor Brown and Fyreslayer Flesh. I’m getting more confident with mixing the Contrast paints now.

One more base of longbowmen to go, and then on to the Maiden Guard.

First of the Classical Indians

Regular visitors will know that I consoled myself for the pain of the new lockdown (no training, no wargaming) with the purchase of new 15mm Ancients army to be used with To The Strongest.

The army I chose was Museum Miniatures relatively new “Z” range of Classical Indians: the “Z” means that they were CAD designed rather than being sculpted. I’ve been really happy with my “Z” Sumerians, really happy with the “Z” Greeks, so after painting a Baueda Marian Roman army, I was very much looking forward to the “Z” Indians.

And I was right to do so.

They are a dream to paint. The detail is excellent, and they take the paint really easily. These first two units, both of longbowmen, were each completed in a day (one Saturday, one Sunday) and I could have fitted a third in if I’d really tried.

I decided to break away from the way all my other Ancients armies are based (to the old Vis Bellica basing) and go with what had worked really well for my English Civil War armies: one element per unit on a nice big base.

I also decided to go a bit mad with the basing. I usually shove a layer of GW basing material on then dry brush a light shade on top, with flock or a tuft or two for decoration. Here, however, I went for it in a big way: same basing material and dry brush, but with patches of little stones pushed into the basing material before its dry (with watered down PVC on top to hold the stones in place). Then I added three different types of tuft, and two different type of flock roughly mixed together. I think it looks quite good.

To give you everything, these are 15mm Museum Miniatures Classical Indian longbowmen with infantry command. They are painted with GW Contrast Paints, with the excellent fleshtone achieved by with a 50/50 mix of Fyreslayer Flesh and Cygor Brown. The base is from Warbases (a vehicle base) with the flock etc from a variety of suppliers.

I’m quite happy with these, and looking forward to doing the rest.

Marian Romans are Go!

It’s taken me about three months, but I now finally have enough Marian Roman figures painted to get the army onto the tabletop.

My target was achieved with the painting of a second Legatus (commander of a legion) and the first two Cohorts of my second legion.

DSCN1861.jpg

Those of you who visit this site regularly will see that I have differentiated between the legions by giving this second set blue-painted shields instead of the red ones used for the first legion. I was tempted to use black helmet crests as well but, in the end, decided that different shields were enough.

The figures are 15mm Baueda Marian Romans painted mainly with GW Contrast Paints. Shield transfers are from Little Big Man Studios, bases from Warbases.

This now means that I have 130 points of Romans to field using the To The Strongest rules: four commanders, six units of legionaries (three veteran), two units of veteran Gallic cavalry, and then a unit each of horse archers, Cretan archers and legionary artillery.

The Marian Romans laid out and ready to go!

Also good news is that daughter #1’s boyfriend is back staying with us for another week…which means the chance to take the Romans for a spin. Obviously I’m a little concerned with fielding a brand new army, as wargaming tradition has it that newly painted figures always perform really, really badly (especially if they are the best painted figures that you have ever done!), but I think I shall just have to bite the pila as it were and get on with it!

Roman Artillery

I’m just finishing off a few more bits and pieces for my 15mm Marian Roman army before starting on the second legion (another 120 legionaries!). One of the units I need is the legionary ballistae or bolt-throwers.

Those of you who have been following this site will know that I am using Baueda figures for my Marian Romans, but Baueda don’t do any artillery yet, so it was back to the ever-reliable Peter Pig to pick up a couple of packets. That’s one of the things I like about the Pig: you can buy a big army, or you can buy a small packet or two to fill a gap.

The Pig don’t do Marian Romans, but they do have a very nice range of Early Imperial types. Yes these chaps would therefore be in lorica segmentia rather than mail, but maybe they were testing the prototypes of the new armour being introduced. As I understand it, the ballistae were manned by odds and sods from the 10th Cohort, so why shouldn’t they be dressed slightly differently!

The packs duly arrived and, on first glance, looked a bit small compared to the Baueda figures. This was, however, an illusion caused by pose and lack of helmet crest. They go together pretty well: certainly not badly enough to make a difference on the tabletop. I’ve just double checked the case I store them in, where they are next to Baueda figures: no real difference except, as mentioned, the helmet crest effect.

The figures are very nice: well up to Peter Pig’s usual high standards. I liked the ballistae themselves as well: simple, but with enough detail to make them look like what they are.

In fact, the only problem is that they now make me wish I’d gone a different route and gone for an Early Imperial army instead of the Marians, but then there’s always time to rectify that in the future…!


A Few Odds & Ends from the Painting Table

Very busy at work this last week, so only time to complete a few odds and ends for the two projects I’m currently working on: English Civil War and Marian Romans.

I always find that having two projects on the go at any one time is better than having just one. If, like I do, you only collect in one scale (15mm for me) I also find that it’s best to use different manufacturers as well: alleviates the boredom factor.

First up, a couple of command stands for my English Civil War armies. Here I’ve used a couple of gentleman officers from Hallmark (via Magister Militum) as a random Colonel-type, and then a couple of spare figures from Peter Pig - one command, one artilleryman - as a Colonel of artillery. The mini-gabions are Hama beads filled with basing material!

The Hallmark figures are really exquisite and, if you use Contrast Paints like I do, really easy to paint.

On top of the above, I’ve now painted up the five Hero figures I need for my Marian Roman army. Representing Heroes is always difficult, as you need a figure that stands out a bit and yet is not being used for the rest of the army.

What I chose to do was to add a set of Peter Pig Centurion figures to my Baueda Marian Roman army.

One of the great things about Peter Pig (in addition to the huge range and lovely, very paintable sculpts that they do) is that you can ask them to give you a custom built pack of just one sculpt. So here I looked at one of their mixed command packs, chose one figure, and had a pack of eight of just that figure sent to me. Very handy indeed.

More Romans

Just a couple of pieces today. First up is the Legatus Legionis or commander of the Legion: just a simple command base for my TTS Marian Romans. Figures are Baueda 15mm sourced from Magister Militum.

What is slightly odd is that with the Baueda Marian Roman cohort command, the chap holding the standard (the Aquilifer) is dressed in a lion skin and the signaller (the cornicen) is wearing a wolf skin, whereas here, for the legion command, it’s the other way around.

Next up is a Baueda Semi-Permanent Legionary Marching Fort that I will use as a TTS camp. Now this model was quite complicated to put together well, and I have a horrible feeling that the Primus Pilus would take one look and order the thing taken down and put up again.

The gates are particularly wonky, mainly because after I’d built it I realised that I had stuck the gates on upside down! This gave me a huge gap at the bottom of the gates (plenty of room for a barbarian to crawl through) which I then had to fill with Hama Beads!

But it is a lovely model, and I’m going to get the somewhat smaller Marching Camp as well.

Final Two Cohorts Now Done

The 15mm Marian Romans for To The Strongest are coming along nicely: about two thirds of what I need to field the army are now done.

I’m representing a legion with five TTS units, with each unit therefore representing two cohorts (these are the days before the Augustan super-strength first cohort). As I like to minimise the number of markers on the table, each unit is two bases (neatly making one base represent one cohort) with a formed unit being the two bases neatly in line with each other and a disordered unit represented by the two bases being separated and at an angle to each other. Latest off the production line are the final two cohorts (or one TTS unit) for the first legion I’m going to field.

In keeping with how the legions operated in Gaul under Caesar, I’m intending the core of the army to be six or seven legionary units: four or five from one legion, two or three from another. Naturally I’ll therefore be painting up two full legions (240 legionaries in all!) which will also allow me to play out the civil war battles that followed the Gallic wars.

The figures are from Baueda, bought in the UK via Magister Militum, painted using GW Contrast paints. The shield transfers are the Baueda-specific designs from Little Big Man Studios. Bases are from Warbases.

Next up will be the Legate Legionis in charge as a command stand, and a semi-permanent camp for the chaps to rest in after each battle!

TTS AAR: Three Games One Sunday

Three great games of To The Strongest this Sunday, all Sassanid Persians versus 100YW English. I took the Sassanids for Game One, Kavan for Game Two, and then it was back to me playing the Sassanids in Game Three.

Henry V versus the Persians!

Henry V versus the Persians!

The results? I think it fair to say that the Sassanids did very well indeed, winning all three games! Those of you who are paying attention will have worked out that that meant that the day was two-one to me.

The first game was a glorious victory for both me and the Sassanids, but one largely caused by Kavan’s terrible cards! I used standard tactics: horse archers on the wings keeping his men there occupied whilst the heavy horse and elephants punched their way through the middle.

The escorted elephants punch a hole

The second game was a similar affair, but this time it was me on the receiving end. I knew what was coming, so managed to deal with the initial horse archer advance on my right wing with mass longbow fire. In the centre, I had massed my heavies opposite his, but lost two of my three generals in the first round of combat. This effectively stuffed me command-wise, and I got overlapped on the left by those gosh-darned light horsemen as I just couldn’t get the units I needed to activate into action regularly enough. As my left began to crumble, Kavan punched a hole in my centre which he then flooded with the rest of his heavies: the coup de grace coming as he took my camp.

The English camp falls…again!

With both of us now very familiar with the strengths and weaknesses of both friendly and enemy troops, the third game was a neck-and-neck affair which either of us could have won. Each side had one camp each, and both fell: mine to mounted men-at-arms that three units of horse archers just couldn’t stop in time; his to another heavy cavalry punch through the middle. I won in the end, but it was a very close run thing.

All in all, an excellent afternoon’s gaming.

The Sassanid Heavies roll forward


More Marian Romans

After leaving the painting table alone for a week, it was back to work on my 15mm Marian Romans. This army needs seven units each comprising 24 legionaries i.e. 168 legionaries in all. That’s a lot of quite repetitious painting!

Four of seven now done

I’m using Baueda figures, sourced through Magister Militum in the UK. They each come as one piece, so no hassle attaching shields or spears and, as you can hopefully see, have plenty of character and some variety.

These are painted using GW Contrast Paints. I began by undercoating in the Grey Seer undercoat rather than the Wraithbone White that I usually use. Running out of Wraithbone on another project made me try the single can of Grey Seer that I’d bought intending to experiment, and I was glad it did: I find the grey undercoat very much more forgiving than Wraithbone, and I don’t feel there’s really any difference in the colour you end up with. I will go grey (oh, in so many ways!) from now on, I think.

The shield transfers are from Little Big Man Studios: excellent but a session or two on its own to do them. As the shield has a heavy metal boss down its middle, the transfers come in two halves, each of which have to be carefully cut out. That’s 44 transfer halves to cut out (two figures don’t carry a scutum) and mount.

As usual, I need to remember to clean the excess flock off the figures before I photograph them. Just a question of brushing them down with a soft brush, but somehow I never remember. It all comes off anyway when you start using them!

So four down, three to go…and only one more unit with red shields and plumes. Onwards!

Last of the 100YW Figures (for the moment)

One unit of billmen and a couple of command figures.

That’s all I’ve been needing to bring my English 100YW army for To The Strongest up to 130 points without having to use any proxies for a couple of months now…and I’ve finally got round to painting them.

The figures come from Gladiator Games, and were delivered promptly with their usual excellent service.

I must confess that I don’t much like these particular figures from the range (the bills are all bendy, and all held in the same slightly weird way) but they are done! The longbowmen and knights are much better.

The command figures came out a bit better:

So that army is now temporarily “done”.

On to finishing the Romans and more ECW.

Two More Games of TTS

It’s back to the living room for another couple of games of To The Strongest against K.: daughter #1’s boyfriend, trapped with us for the duration of lockdown. K. is becoming a seasoned wargamer now: into double figures with battles over the lockdown period and, as we began our games, victor in three out of our last four encounters.

“How is your Sarmatian coming along?”

In fact, so veteran is he that for this game, rather than just saying that he didn’t mind which army he played, K. very emphatically said that he’s like to play the Sarmatians again: the army he’d had so much success with last time. That was fine by me: I proxie my Sassanid Persians as Sarmatians, with the cataphracts representing veteran Sarmations and the Clibinarii standing in for the regular chaps.

A solid wall of lancers!

I, on the other hand, would take my beloved Ancient Britons, now quite a different army since the list changed the chariot force from being lights to being normal troops…it was time for the Ancient British Panzer Division to take to the field once more!

Four of my six warbands

I did still have some lights, javelin-armed horsemen and slingers, and was determined to try and use them as well as some of my other opponents i.e. manoeuvring around the battlefield like Billy Whiz, constantly nipping at flanks and rear.

“Come and have a go if you think you’re hard enough!”

Our first game was the sort of grinding encounter that typicalises battles where one or both sides are full of deep units. I couldn’t kill his veteran lancers, he was having difficulty breaking my deep warbands. I did manage to get my light horse attacking the flanks and rear of various Sarmatian units, but to no effect whatsoever!

The Ancient Britons head for the rough ground

Chariots kept back as a mobile reserve/exploitation force

In the end, however, it was lights that won the day for me. A unit of light infantry slingers found themselves out of ammunition and in the middle of the battlefield. They spent a bit of time desperately trying not to be noticed by the Sarmatians, a tactic that succeeded to the extent that one lancer unit, already disordered, strayed within flank charge range. In went the slingers and KO’d the Sarmatian cavalry. This left them a few squares from the rear of another Sarmatian cavalry unit. Their blood was obviously up, as a couple of high activation cards allowed me to charge them as well…and then take them out, relieving K. of the last of his victory coins. The slingers had won the day!

Game 2

As the distaff side of things had taken the evil pooch (squatter in my wargames room!) out for a walk, we swapped sides for a second battle.

One thing I noticed immediately was what a lot of Ancient Britons there were: ‘fousands of them to be inexact!

From the other side: there are an awful lot of hairy-arsed barbarians to kill!

This turned out, however, not to matter at all, as the game ended up being very much a walkover in my favour. The Ancient Brits came on in a slightly crooked line, which allowed me to target individual units with my bow fire. This was, as usual, quite ineffectual, but the odd Disorders I did achieve gave me an extra advantage in the melees that followed.

I did have a scare early on when one of my non-Veteran brigade generals was killed by a slingshot, but, once battle was joined in the centre, my veteran units killed the warbands in front of them, punching a huge hole in the British line.

The British line begins to crumble

Not only did this cost K. a lot of victory coins, but it also left the way open to his camp: worth another three coins. In the end, however, I didn’t even need that: I had kept my left and right flanks back whilst my centre went in, now I sent them forward as well, aiming all the time at his weaker units. This tactic proved successful, and suddenly K. had no coins left. Looking at the tabletop, we both realised that I hadn’t actually lost a unit: just one very unfortunate general. Total victory was mine.

Big Hole in the middle of the Ancient British line

Aftermath

A great afternoon’s gaming, and a chance for me to pull two games back against K. Tomorrow is Father’s Day, so I’ve booked another couple of games for then, but more on that in a future post…

Robert Avery

Third Batch of Marian Romans

Taking Mr Bloggs’ advice, I decided to crack on and paint the third of the minimum five legionary units I need for my Marian Roman army.

As he said, that way when I come back to them I will have already painted over half the legion, so the task won’t seem too great.

A bit of excess flock to remove, but these are effectively cohorts five and six, or should I say V and VI. For the record, these are Baueda figures ordered in the UK through Magister Militum, and painted mainly with GW Contrast paints.

I’m now going to give myself a break and paint some ECW artillery!

Matching Figures

As previously mentioned, I’m bringing my Vis Bellica 100YW English army up to To The Strongest strength: which means doubling the size of some of the units.

The big problem, of course, is how do you match the new elements to the old: especially when you painted the old elements at least a decade or so ago?

The first problem is sourcing the right figures. I’d used Museum Miniatures first time around and, doubtless because of their continuing quality of product and excellent service, they are still around and actually going from strength to strength with their Z Ranges. Their 100YW range was still available, so I was easily able to match up my existing unit of Household Archers in terms of the raw lead.

The second problem is the colour scheme to use. Yes, I can see what colours the existing figures are, but I haven’t always kept a record of exactly which paints I used. I do for many of my armies, especially for WW2 and later periods, but not for the 100YW one.

The new element is on the left, furthest from the camera

Fortunately I had painted the existing archers very simply: red and blue and metal, so I wasn’t too worried that the old and the new would differ too much.

Far more important was the development of my painting style. As you can sort of see in the picture above, my old way of painting was a simple two-shade approach over a black undercoat. So undercoat in black, paint a dark version of the colour you want, highlight with a light version. This was very effective, and looks good, but quite time consuming: you are actually painting each figure twice. These days, however, I tend to use GW Contrast Paints over their Wraithbone undercoat: an entirely different method.

And from behind (the new element is now on the right)

Here is where the pleasure of using Contrast Paints comes in to play: the results are almost identical to the shading, and half the effort. You can also get some very nice depth on things like the axeman’s hauberk and the belt around it.

Okay, so I’m only painting to good wargames standard, but you can achieve some incredible things with Contrast Paints. I was, for example, very pleased with my ECW command figures (Essex 15mm).

So you now have the right figures painted to a good approximation of the existing element: all you have to do next is base them.

This is where I came more of a cropper. Firstly, for my existing army I had used thin metal bases, but had now run out. I could have sourced some, I suppose, but in the end decided to take the easy option and use my now-standard Warbases premium mdf versions.

I also had no paint that matched the existing bases (a very oddly light green) and had no note of where I had got in from. Worse, I had totally run out of the flock that I had used previously and, again, had no idea of where I had got it from. In the end, I bit the bullet and just went for the closest thing I could find in my flock collection: it doesn’t match, but it’s not too bad.

So there’s what you have to do to match old and new units:

  • the figures

  • the colours

  • the painting style

  • the bases

  • finishing the bases

I’m pretty happy with the match, and I’m sure that under “battle conditions” I’ll stop noticing any differences within minutes.

Post Script

I also painted up a unit of what Museum call Brigandines and I’m using as Billmen:

More Painting

Not commuting every day has certainly increased my painting output, so it was time to start a project that’s been on my mind since before Christmas.

Regular visitors will know that I play the Ancients game To The Strongest using 15mm figures on a 15cm grid. This way, I can use the armies that I originally put together for Vis Bellica on 6cm frontages by using two VB units for one TTS unit. This has meant a lot of investment in my old VB armies: effectively doubling the size of each or, where “deep” units such as Hoplites and Warbands are concerned, quadrupling the number of bases needed.

One of the last armies to need the TTS expansion treatment is my 100YW English army: knights, longbows and billmen. The trick here was going to be matching the figures and paint schemes that I had used before.

Figures weren’t so much of a problem…once, that is, I’d remembered (i.e. searched the Internet until I got a match) that I’d used Museum Miniatures for the core of the VB army. Paints would have to be as close as I could get with the originals using Contrast Paints.

Here’s the first two contributions: a command stand and an element of longbows:

I also managed to find time to complete a second unit of Commanded Shot for my ECW armies. As with the other, these were Peter Pig figures in 15mm.

I’ve also just had another delivery of Hallmark figures so (once the wife has wiped the package down with Dettol!) it’ll be on to more Dutch Horse.

A Bit of Bank Holiday Painting

I managed to get a bit more painting done over the bank holiday weekend: just a few bits and pieces rather than anything major.

First up, a unit of Cretan Archers for my Greek and Macedonian armies:

These are from Museum Miniatures’ excellent Z Range of CAD figures. Really nice and highly recommended.

Then there are a couple of officer stands for For King & Parliament: a General and a Colonel.

These are the always-dependable Essex figures in 15mm. I think I went bit over the top with the costume on the Colonel’s flag-bearer, but have compensated by making the General’s costume quite muted.