TTS AAR: The One With The Mid-Game Earthquake!

As our first Normans versus Vikings game hadn’t taken that long, Kavan and I decided to swap sides and play again. This was to be a very exciting game, but for all the wrong reasons!

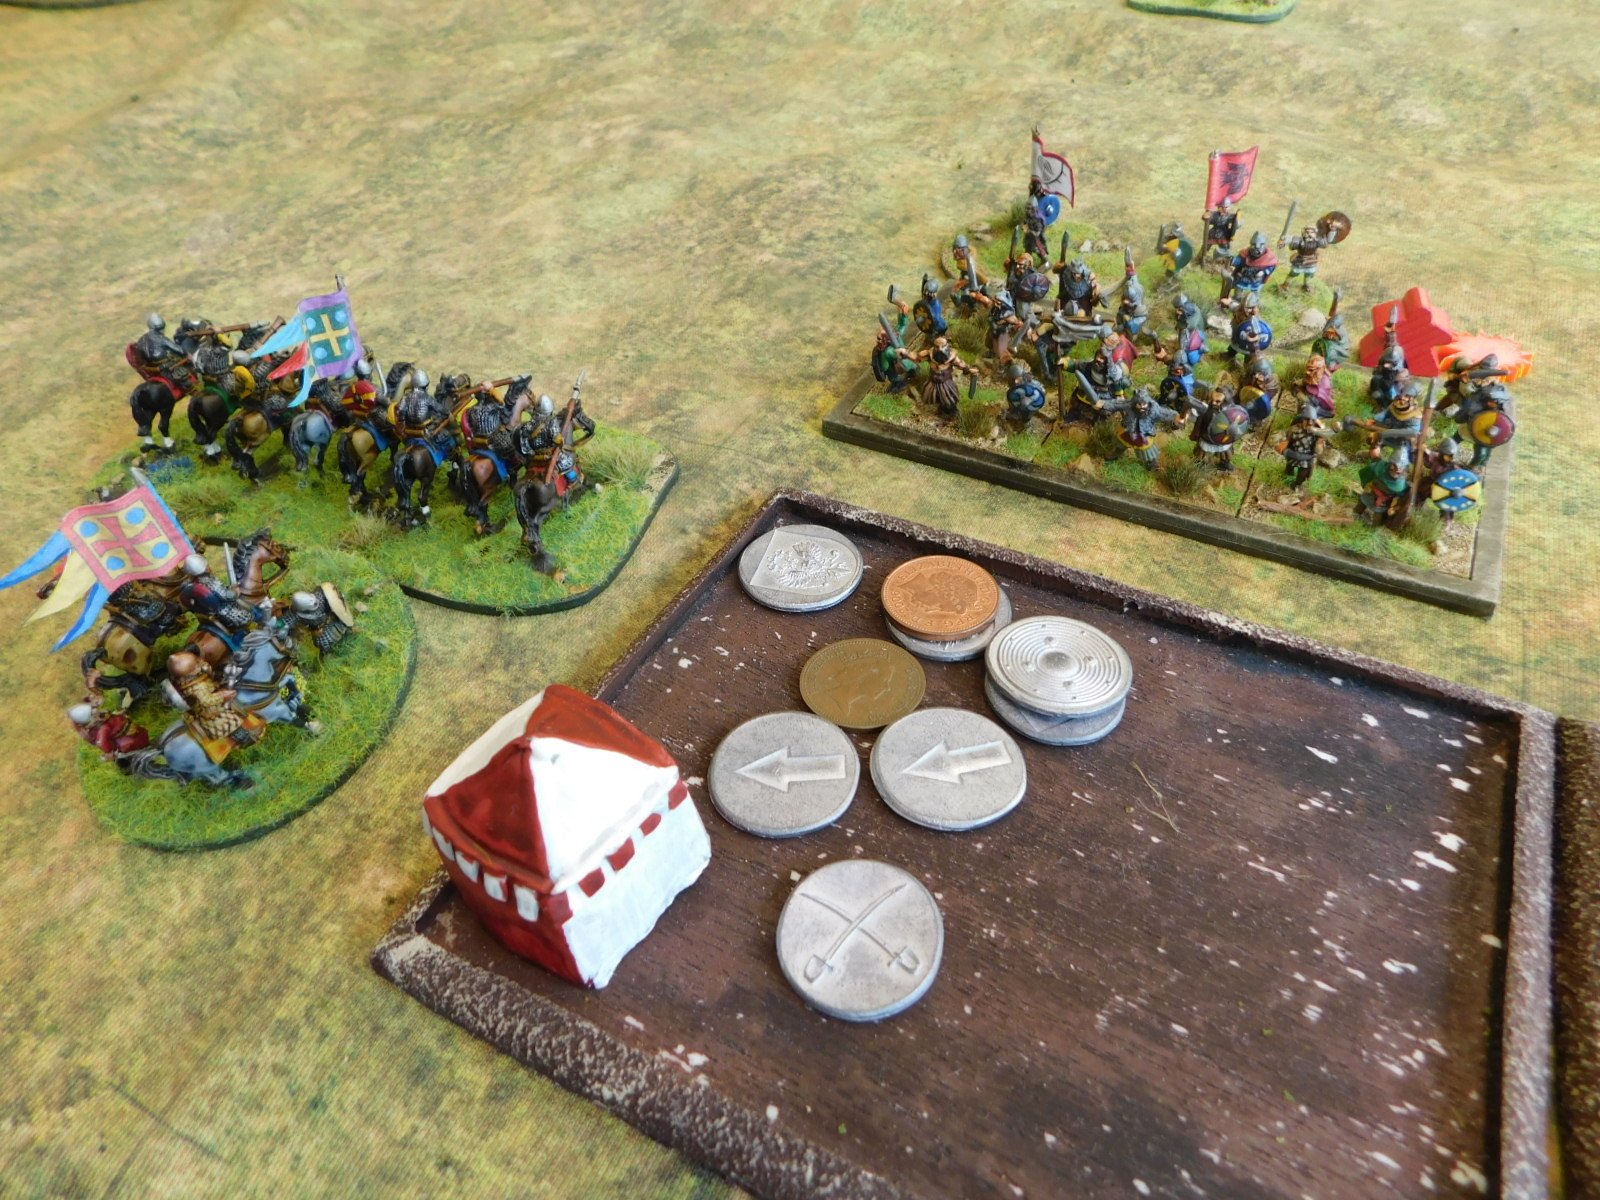
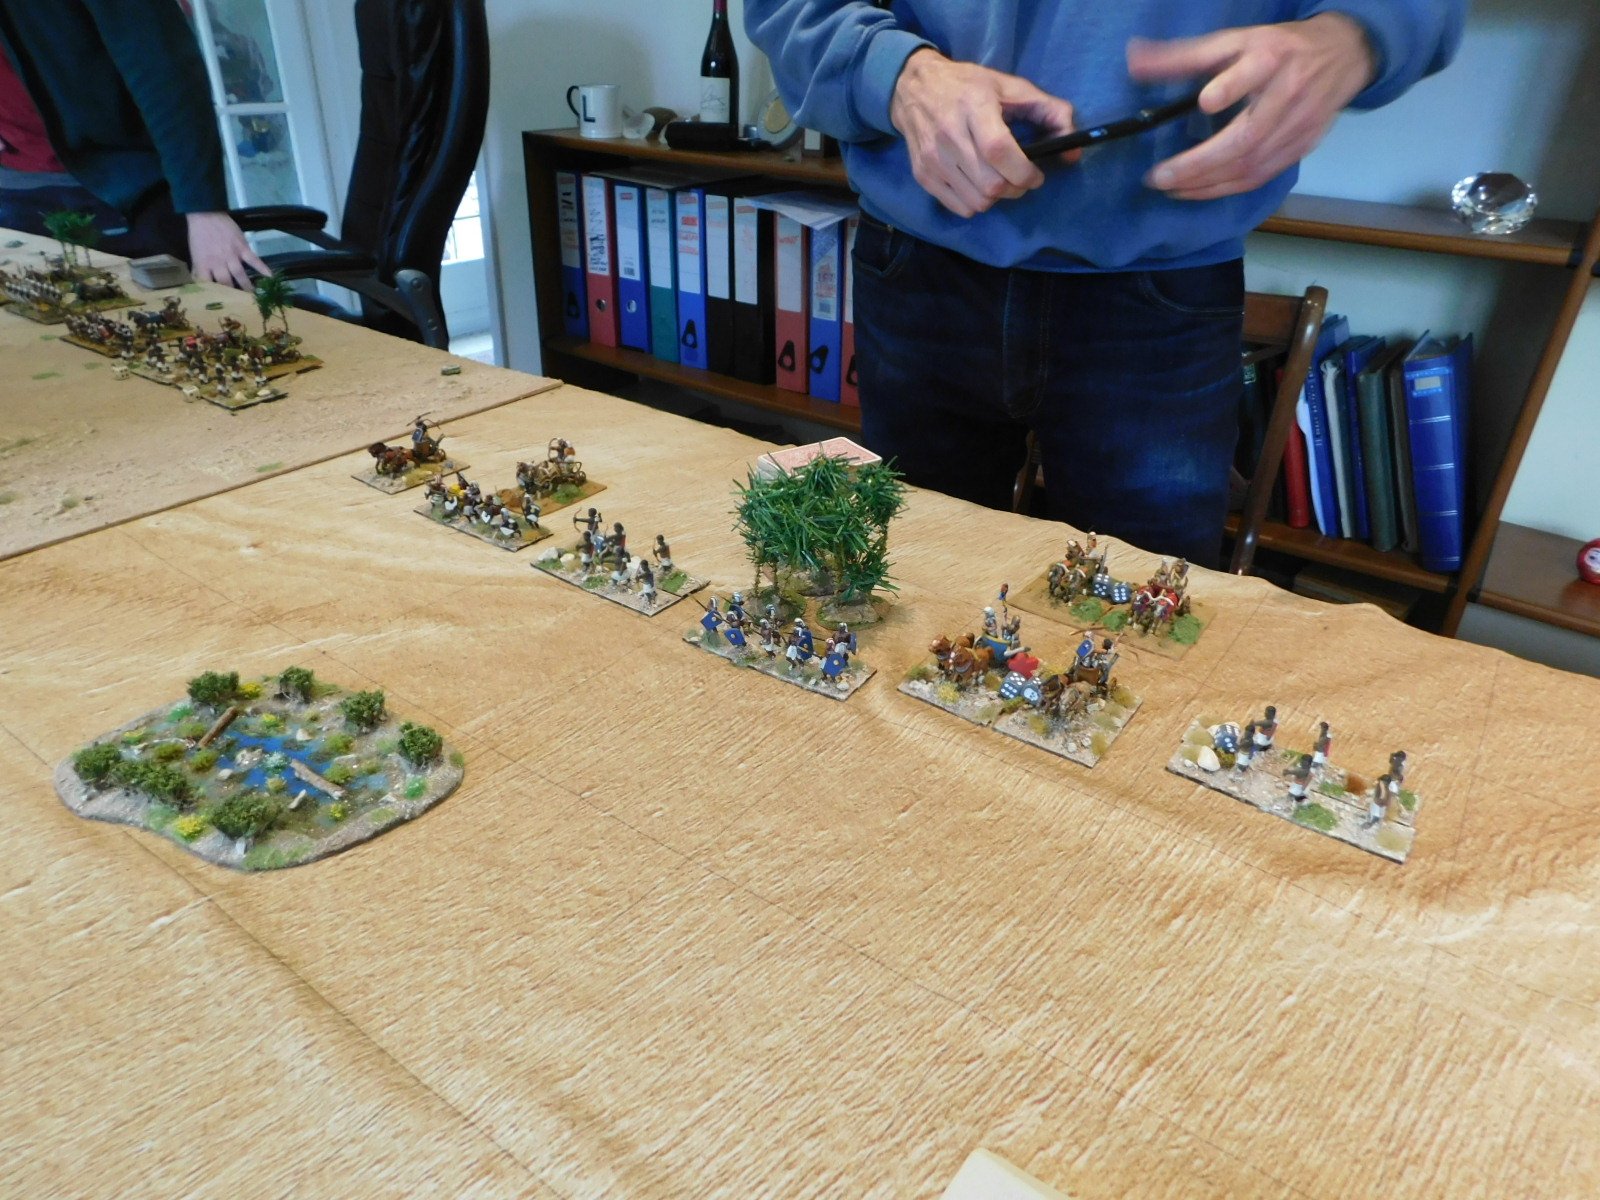
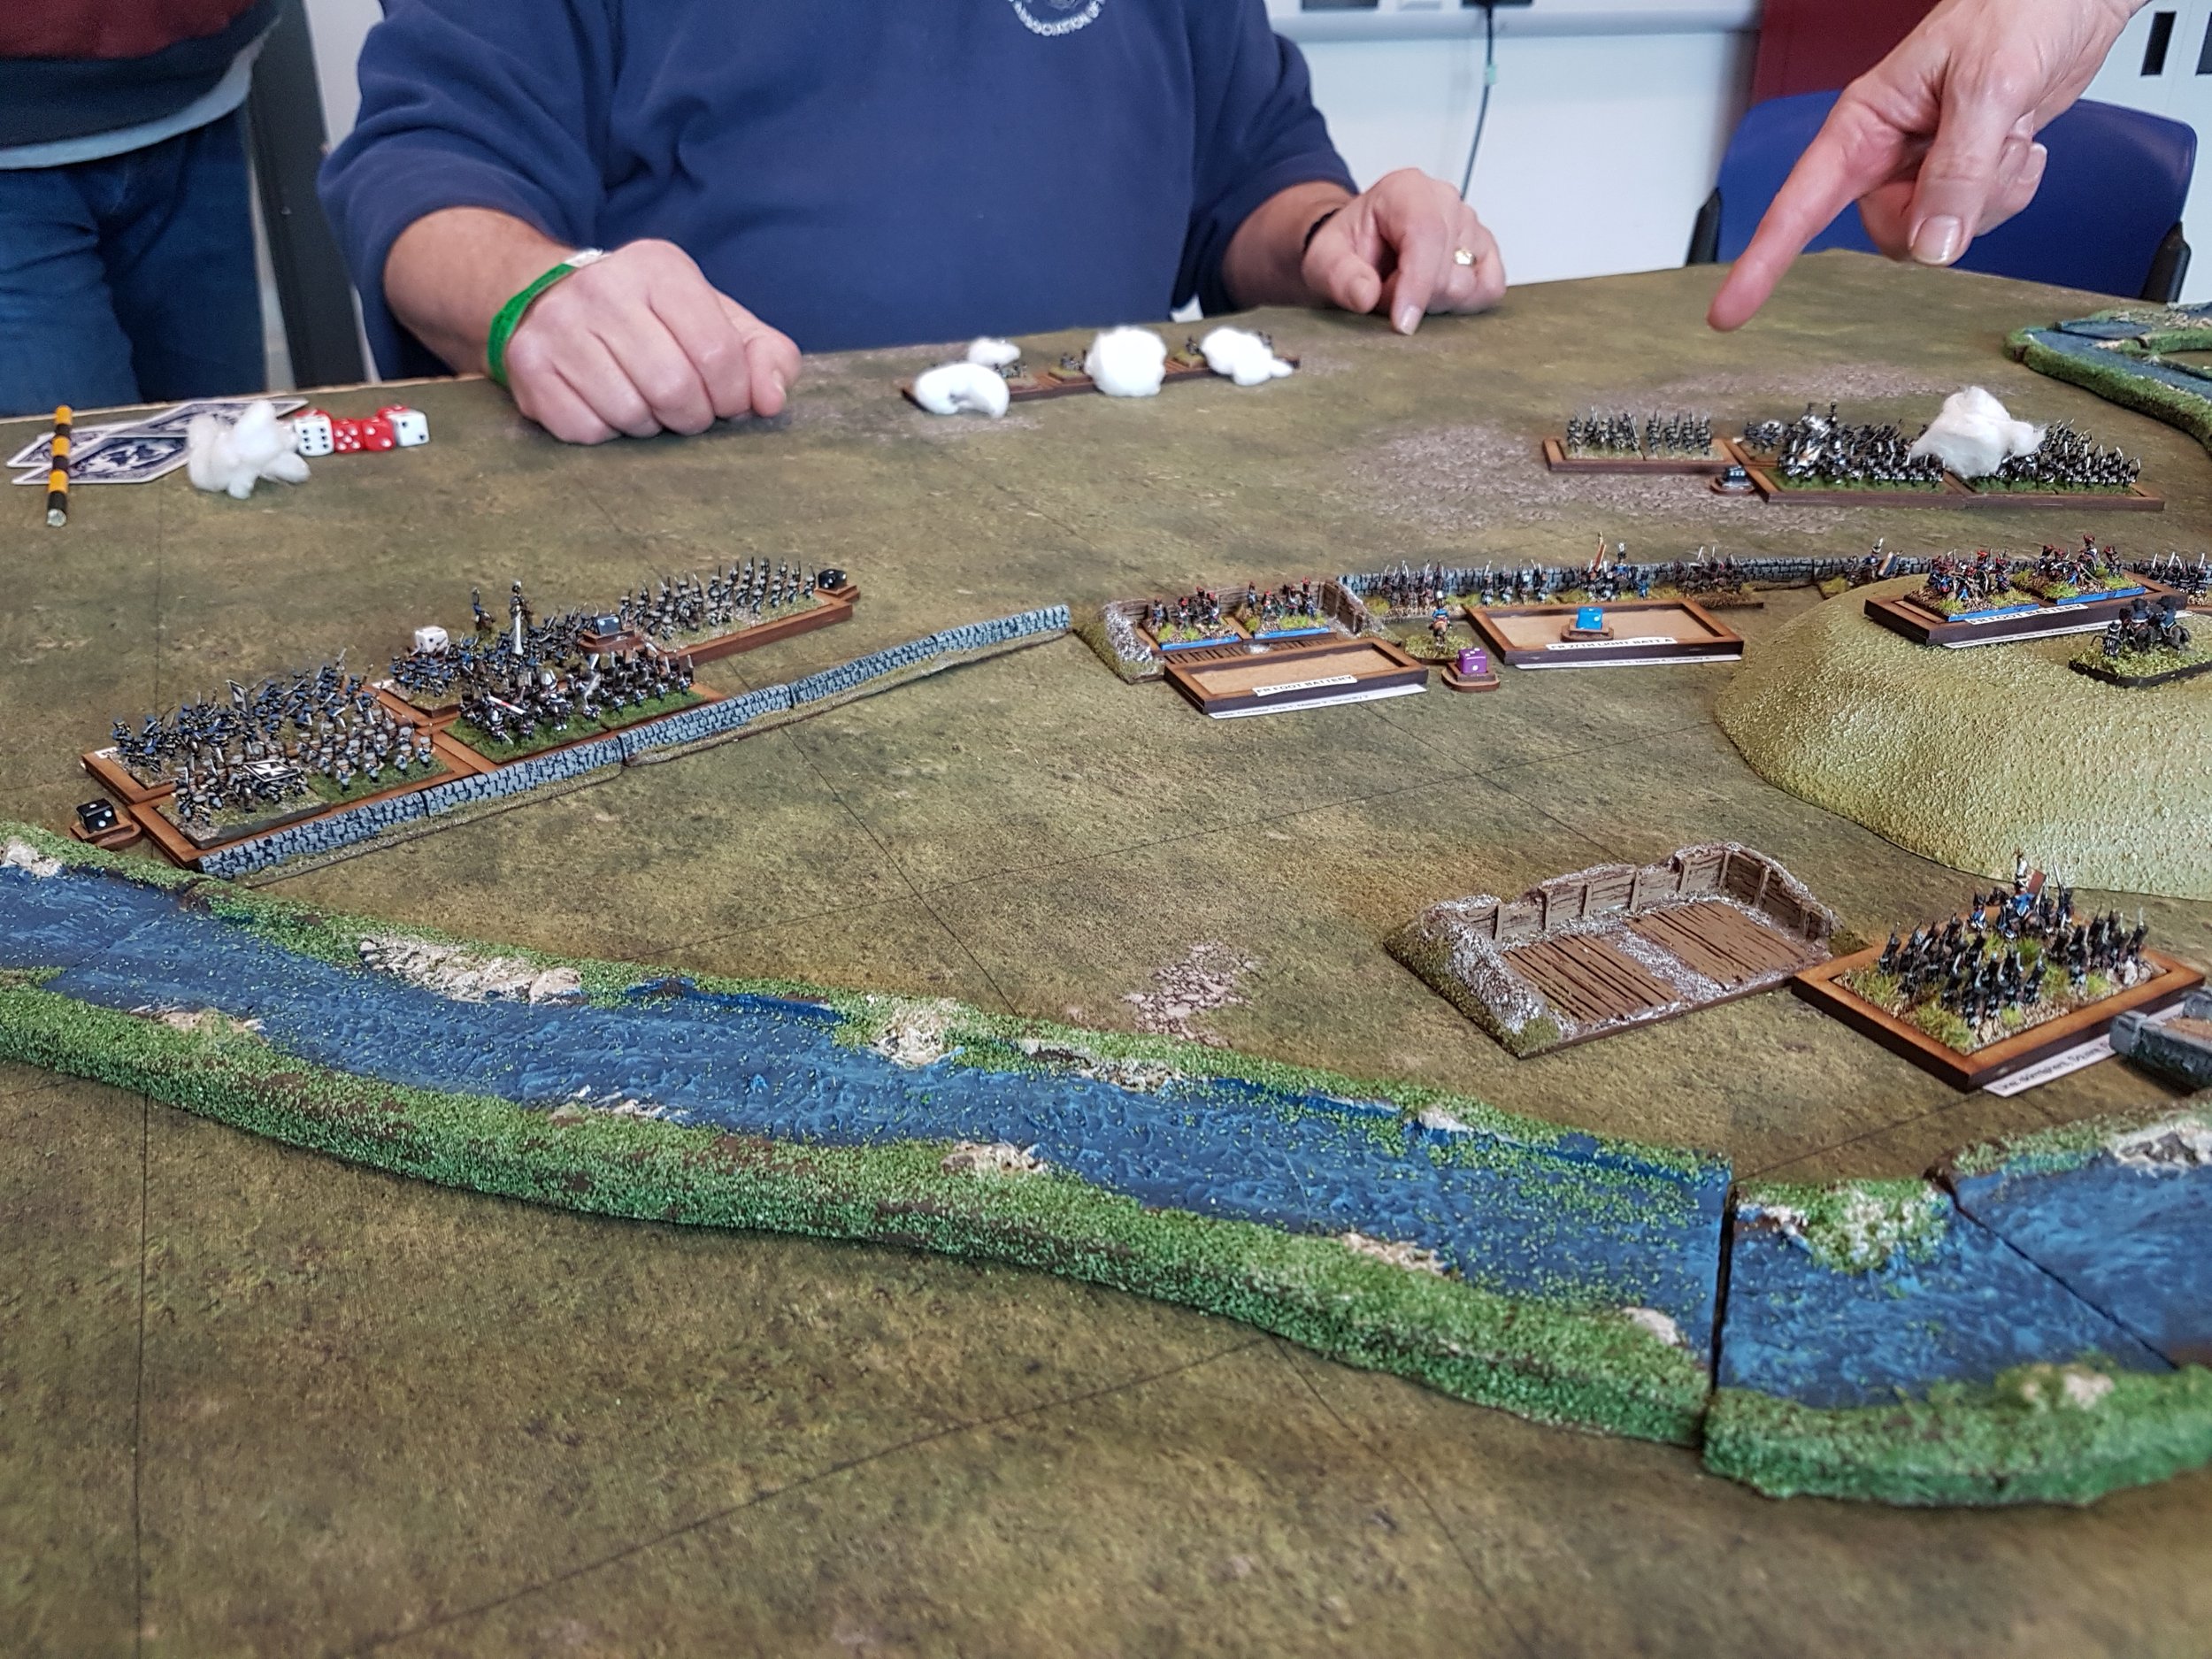
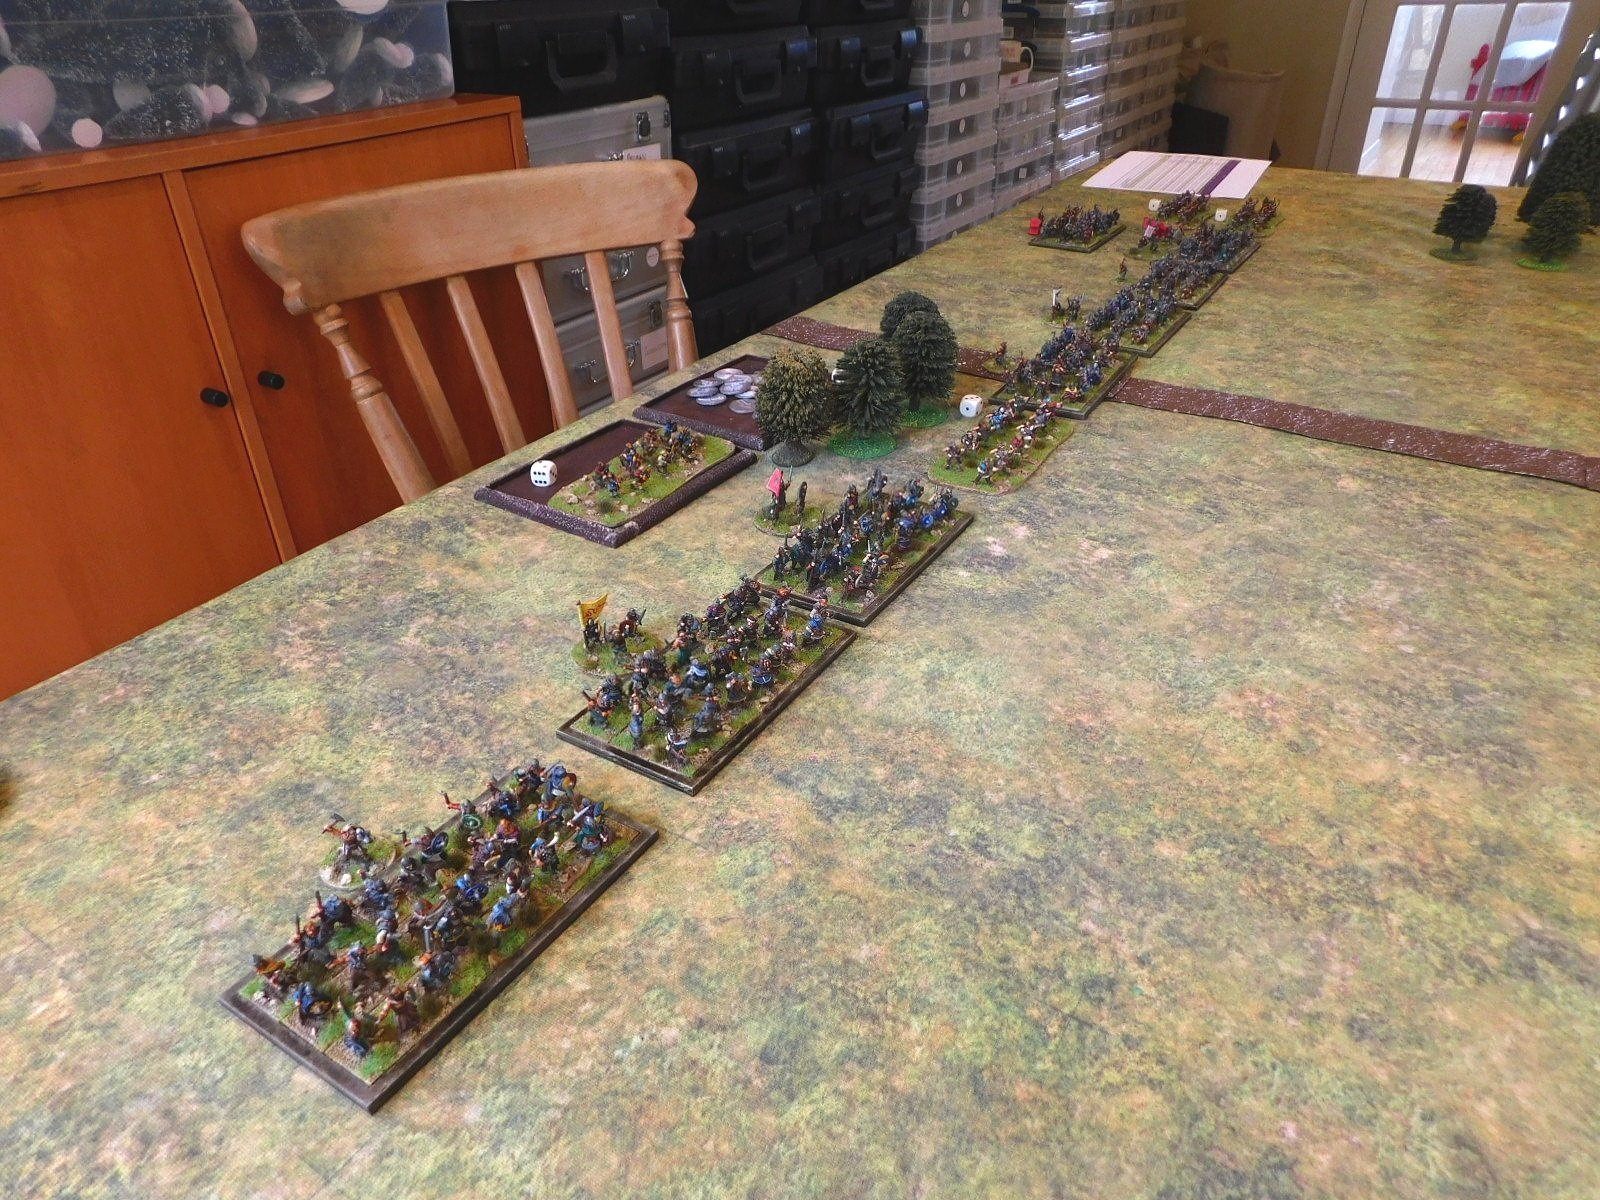
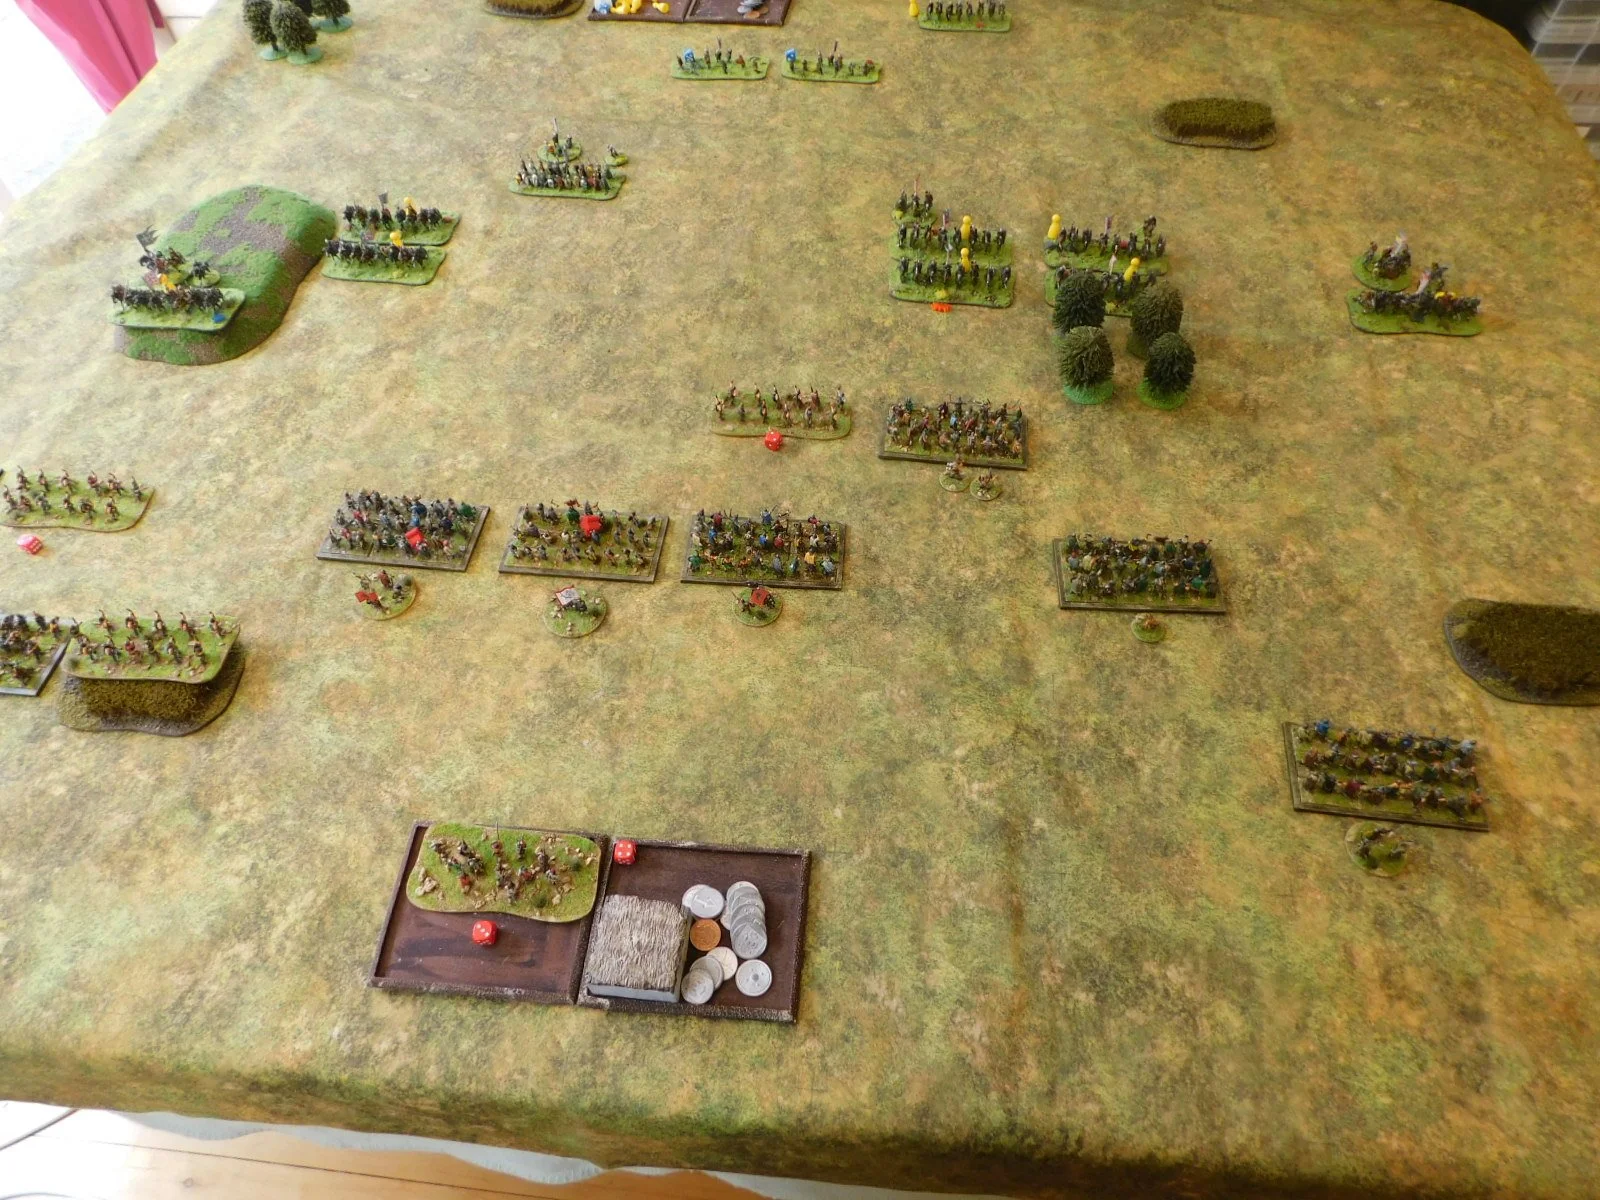
Deployment was pretty quick. Having seen how the Normans were able to harry the somewhat dispersed Vikings in the last game, I was determined to keep my troops together to protect the flanks of each unit whilst giving maximum opportunities for mutual support. I put the huscarls, my best troops, in the centre hoping to punch through to his camps…and made sure I left my light javelinmen to protect my camps: no repeat of the last game here!

The Normans advanced towards me really quickly so, not wanting to have no room for tactical retreats and the like, I pushed forward as well. I also moved my light archers to the front determined to use every advantage I had despite the fact that missile fire had had almost no effect in the last game.

The initial clashes produced mixed results, and it looked as if we were in for a grinding clash determined not by subtle tactics but by blunt force!

Then disaster struck!

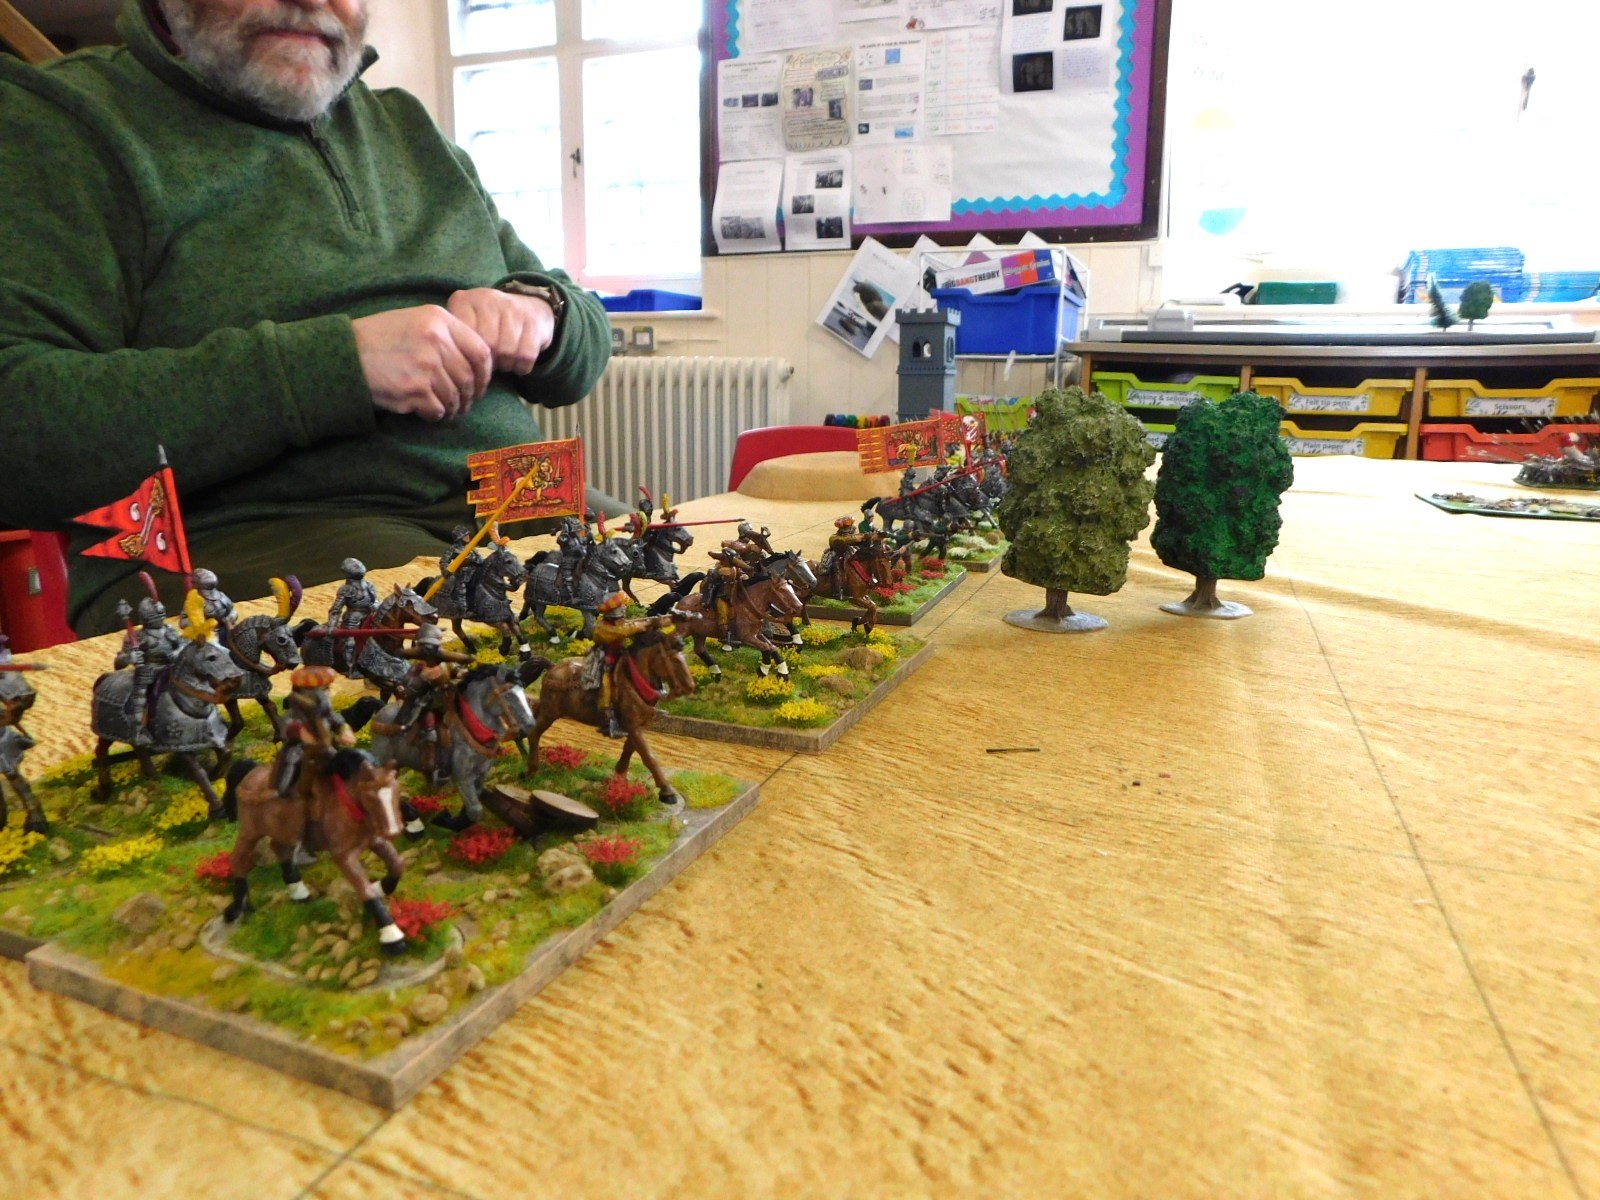
I have used the same fold-up tables for many years, and have never had a problem with them. This time, however, I must have neglected to lock the legs on one table properly, and as Kavan leant forward to position one of his units for the attack, the table underneath him collapsed!

Fortunately the rapid advance of the Normans means that almost all the figures were on my side of the battlefield i.e. on the other table, and it was only one set of legs that collapsed not both, so only a few units were affected and even those mostly by jostling rather than a long drop to the floor!

We were therefore able to put the battlefield back together fairly easily, and re-order all the jostled units with no damage done. Phew!

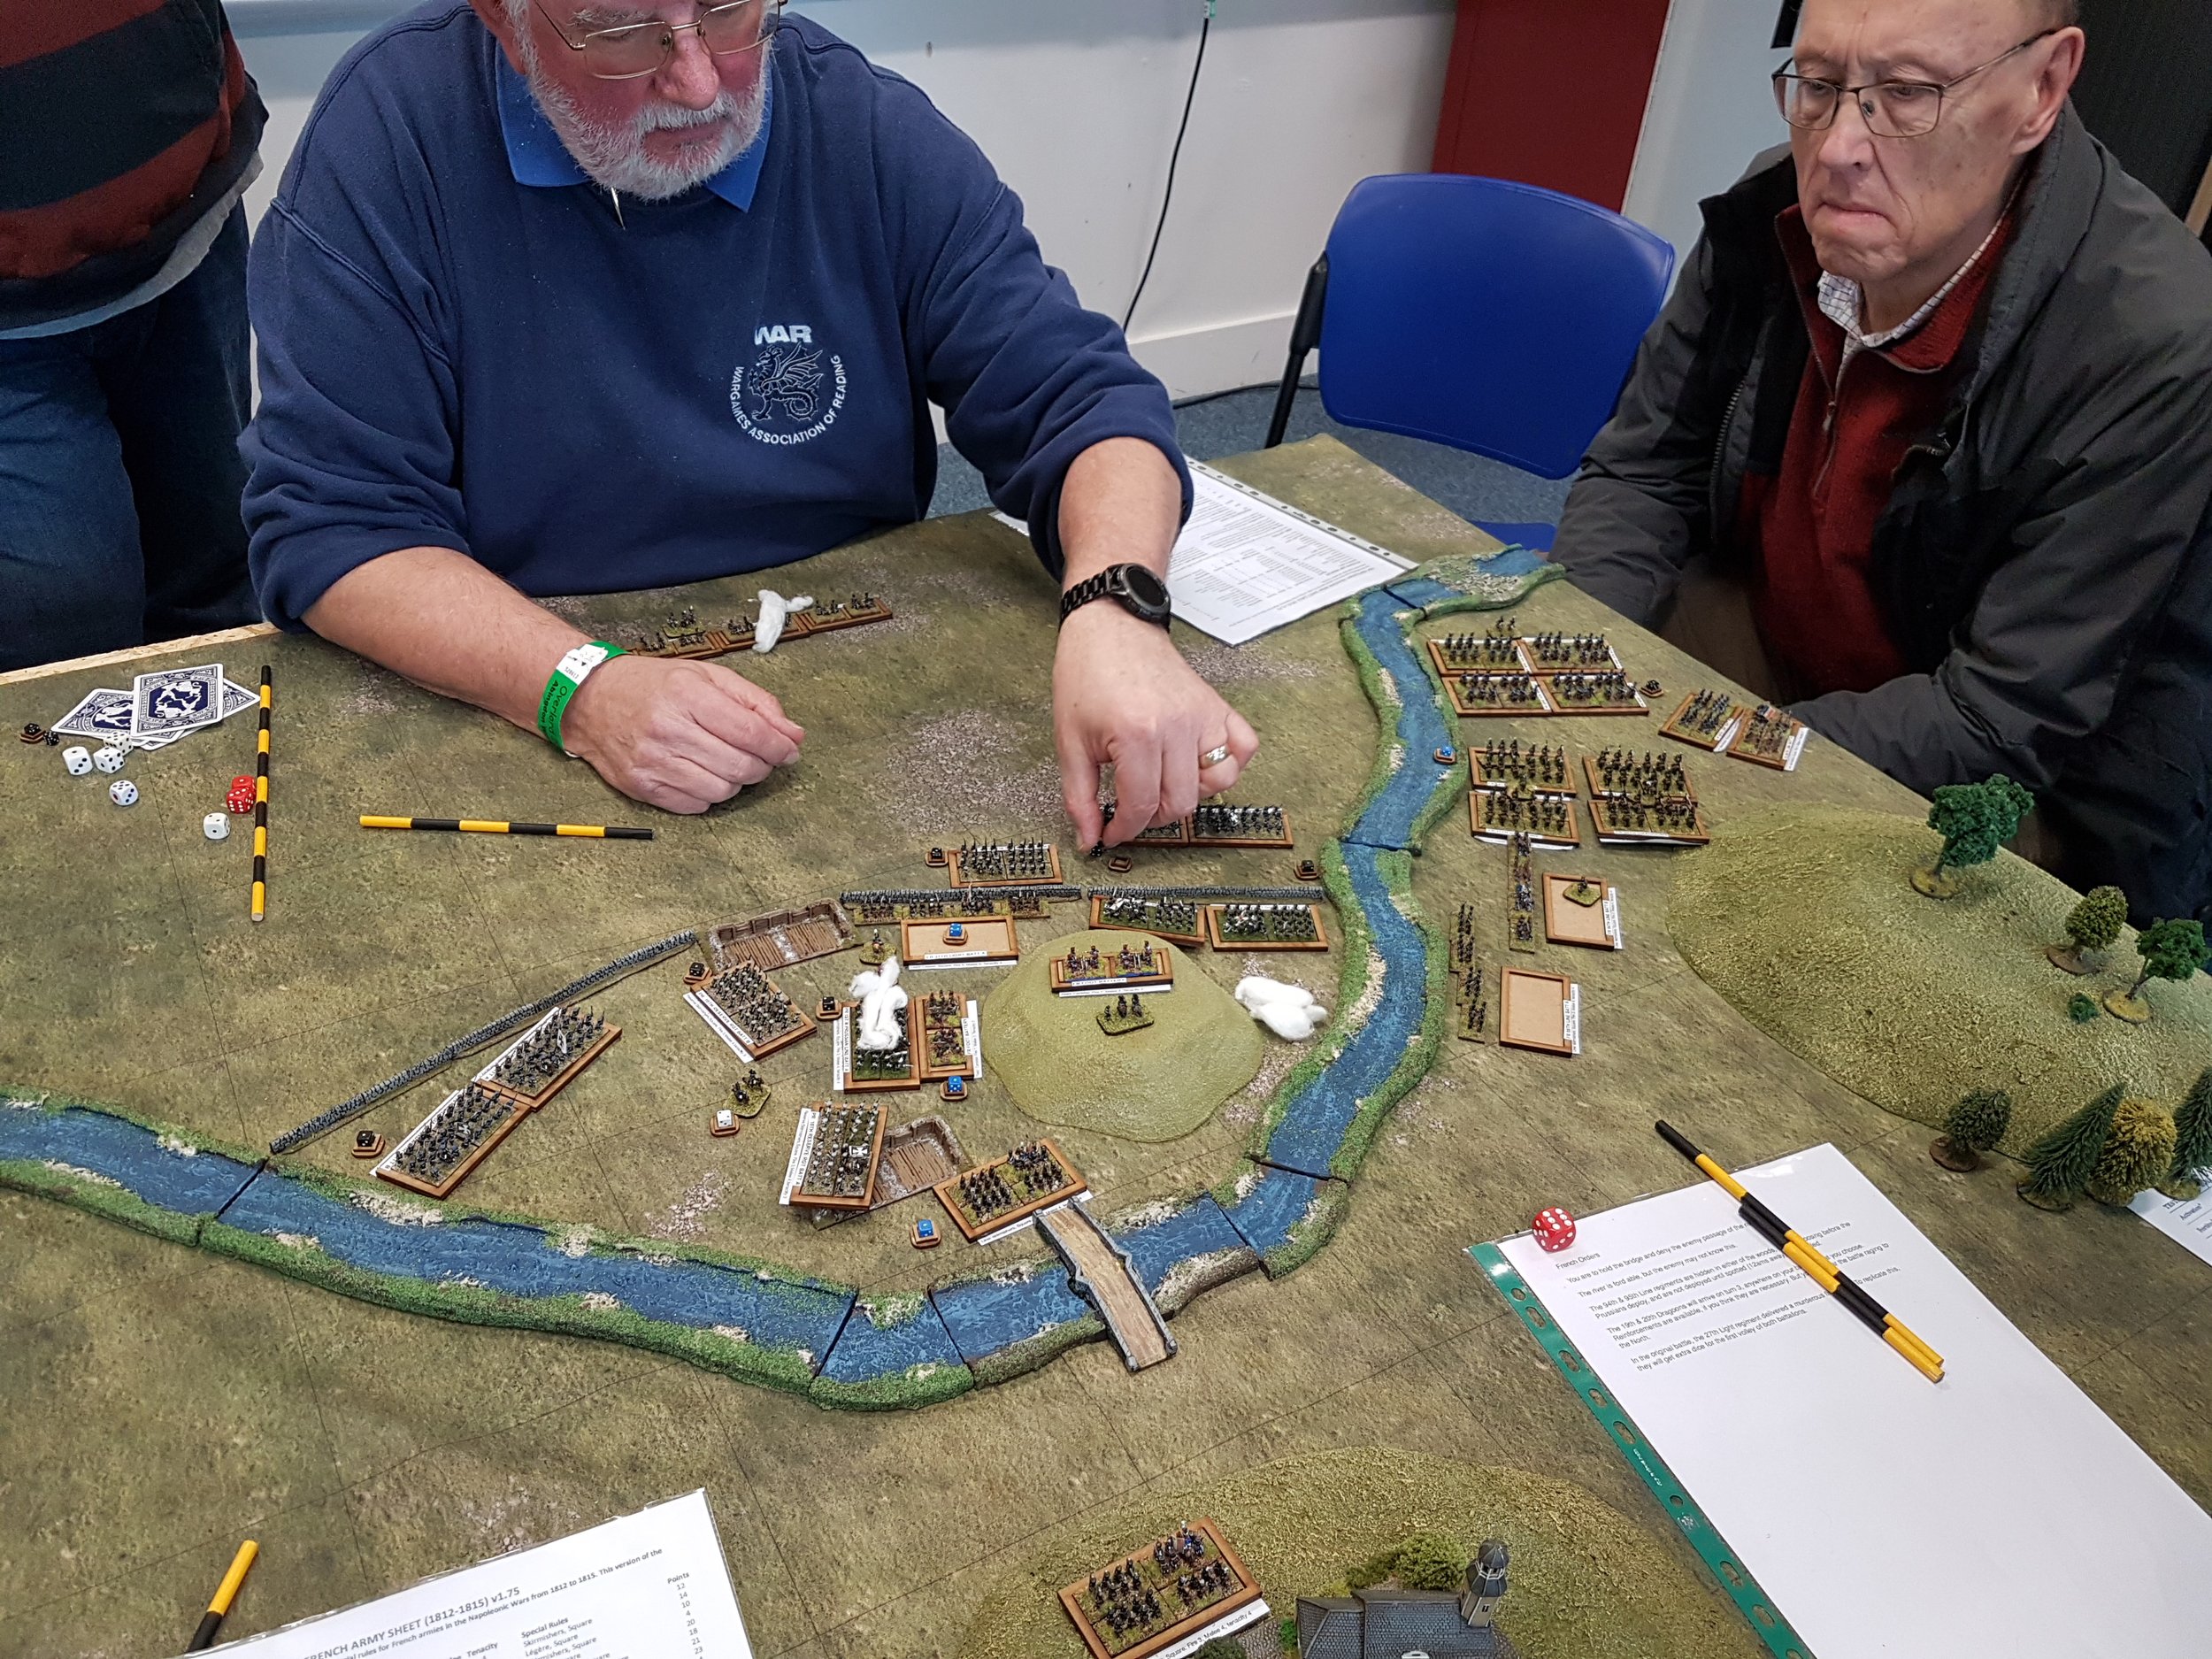
At this point in the game, the Normans were doing pretty well: pushing the Viking units back with a series of hard charges from their lance-armed heavy cavalry.

Now, however, the tide turned: the “earthquake” had obviously been the Allfather, or perhaps the Odinson, intervening!

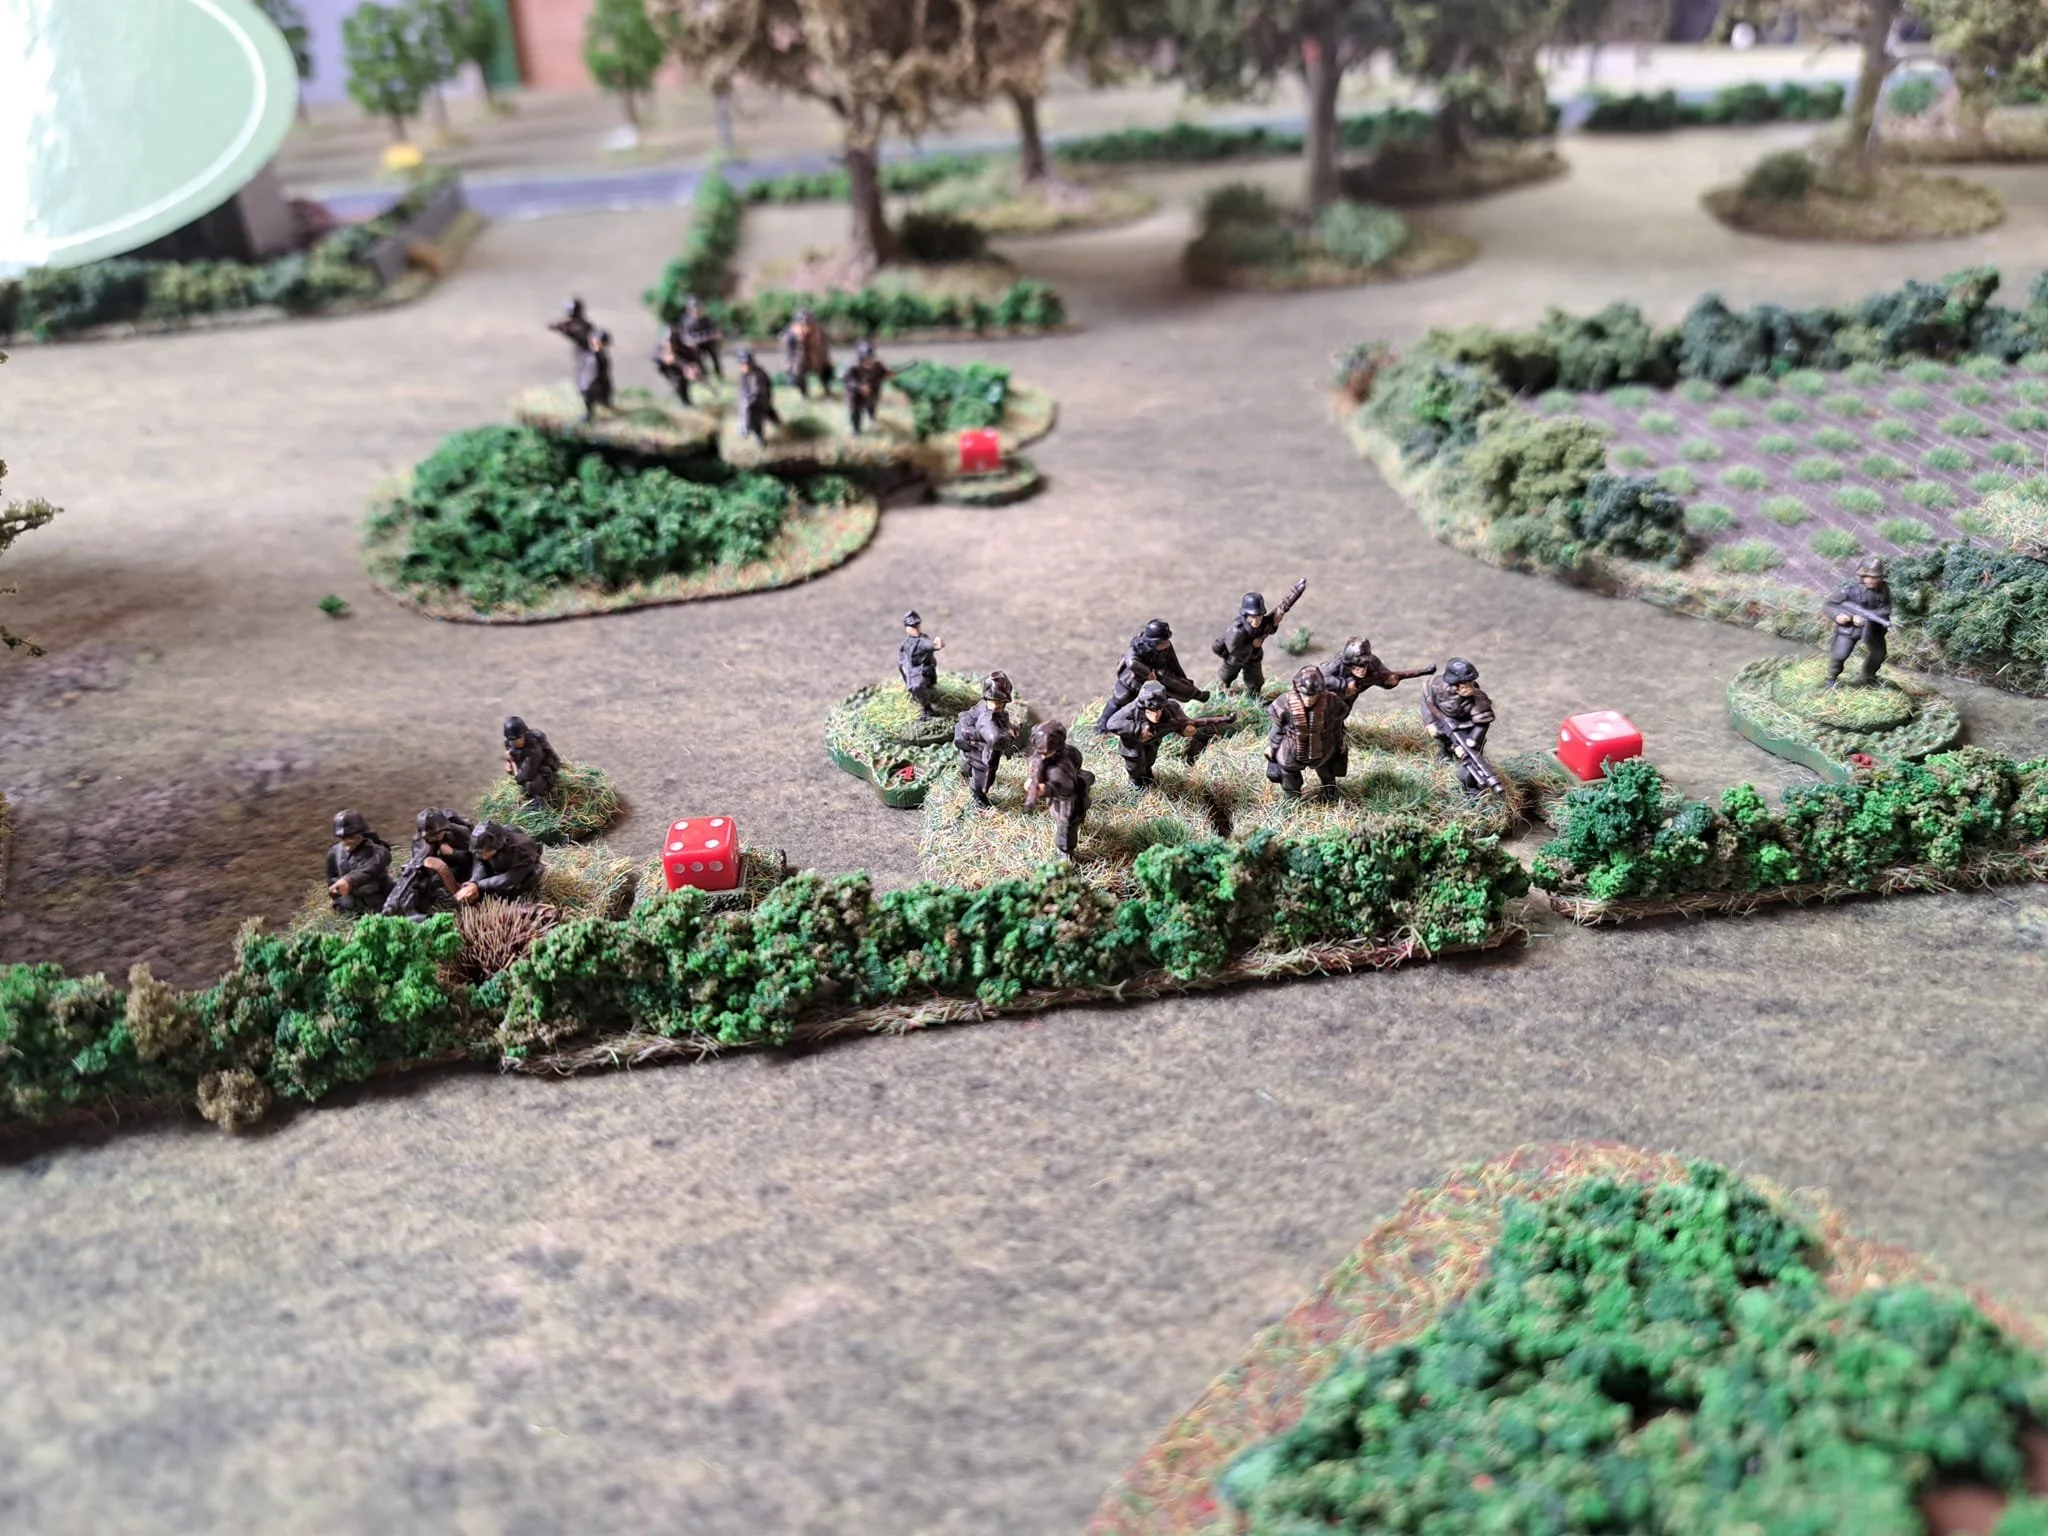
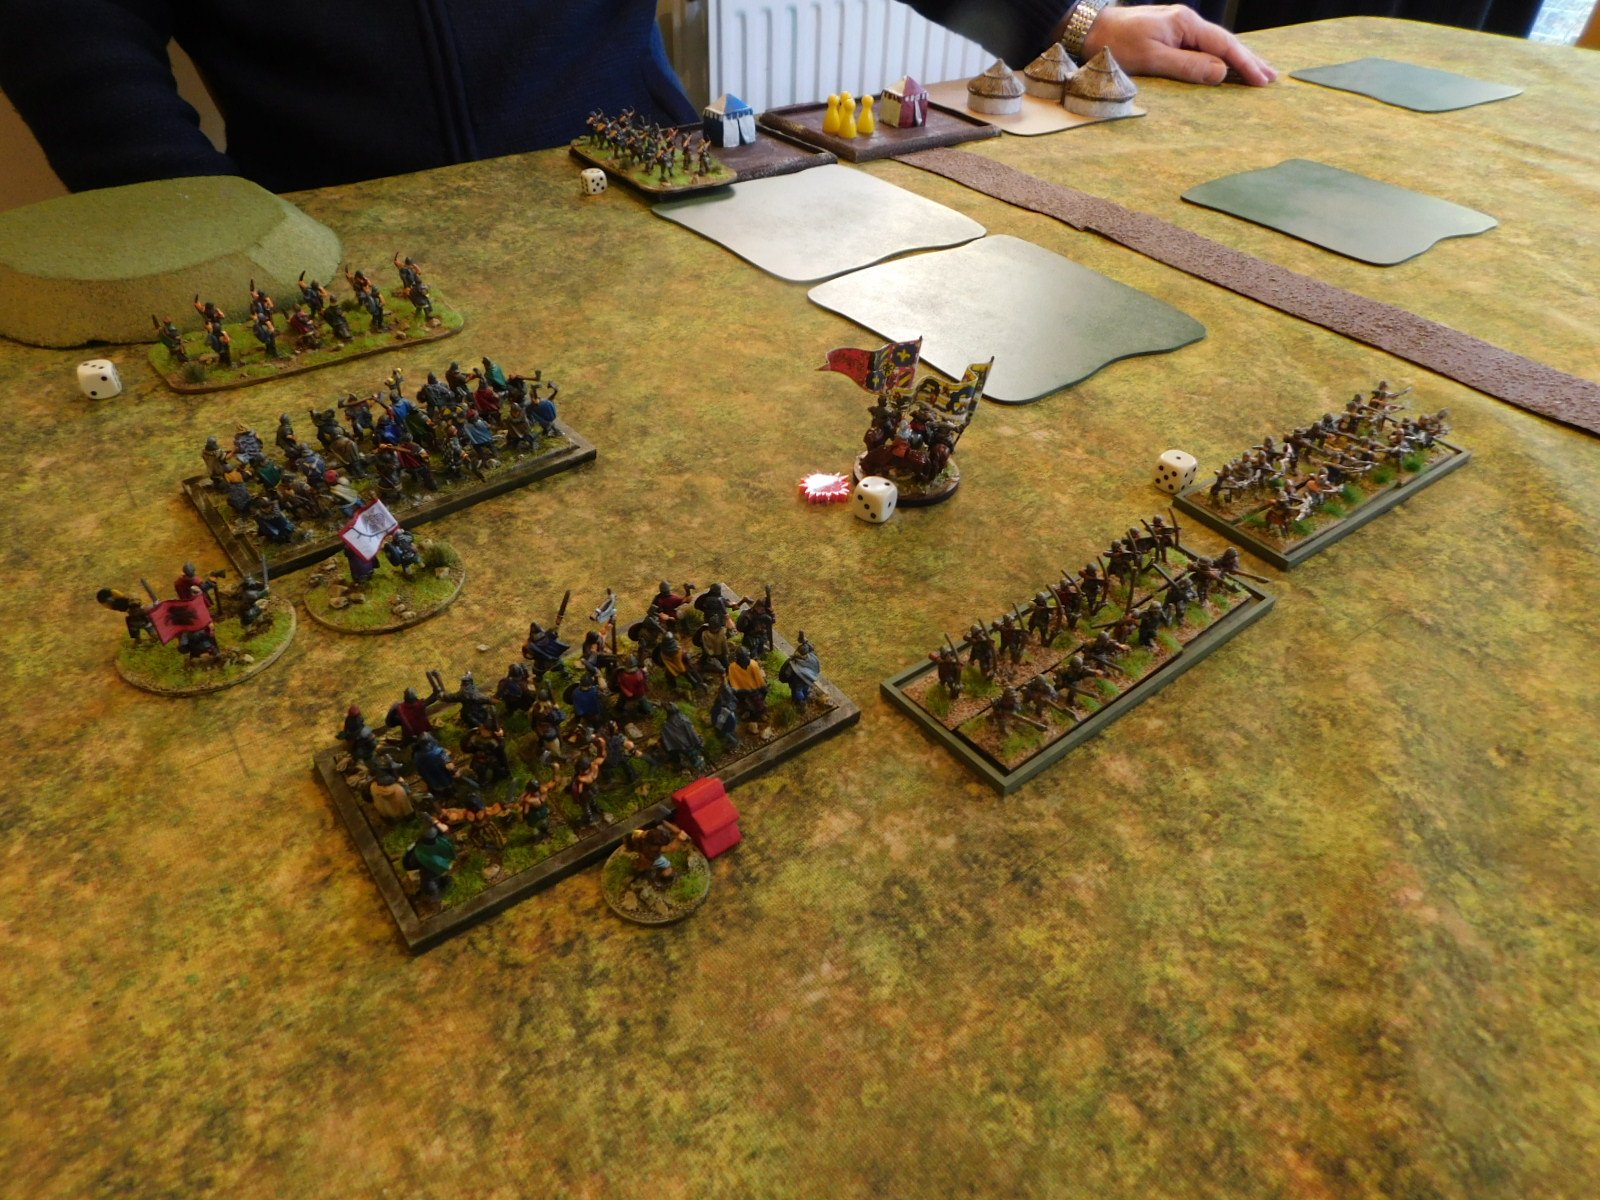
My men rallied, and began knocking Norman units off the table one by one. Even my lights contributed: with an initial clash between the big boys often resulting in one disorder a side even a single, successful hit from Viking light archers meant an enemy unit cleared from the table (my “deep” units could take two disorders before breaking, the Normans only one).

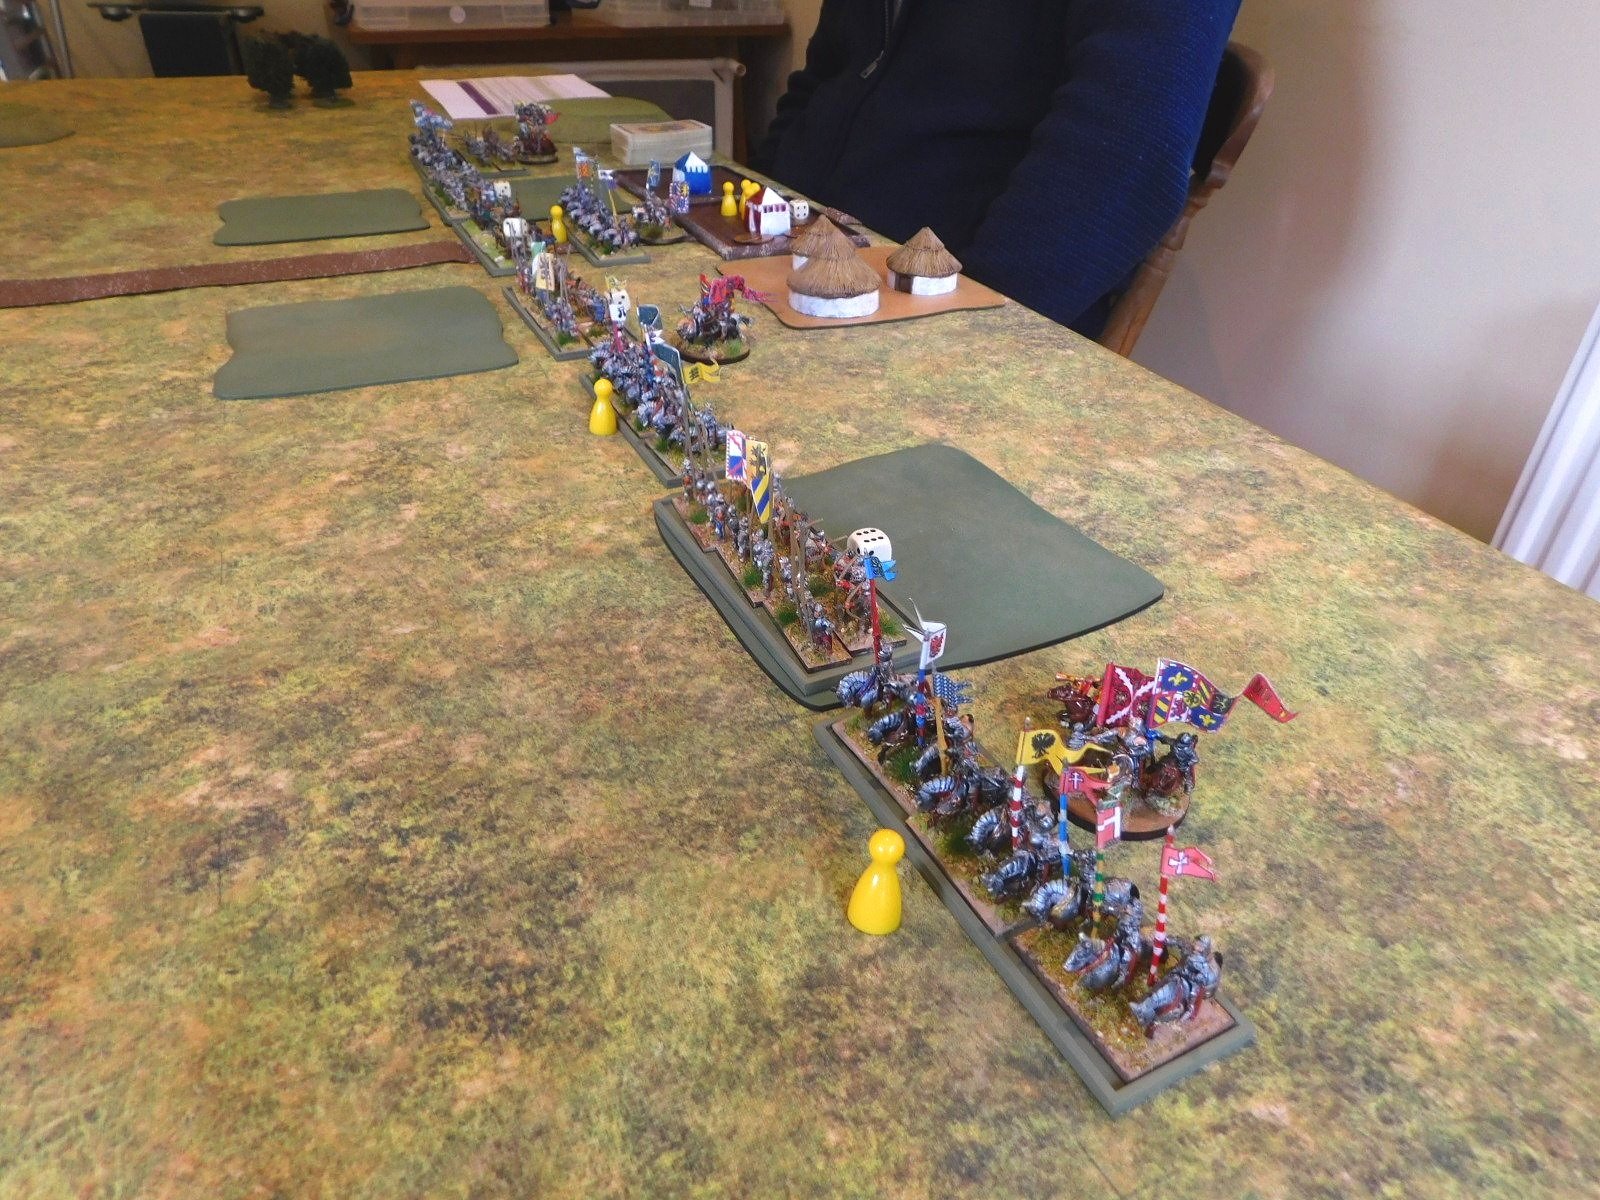
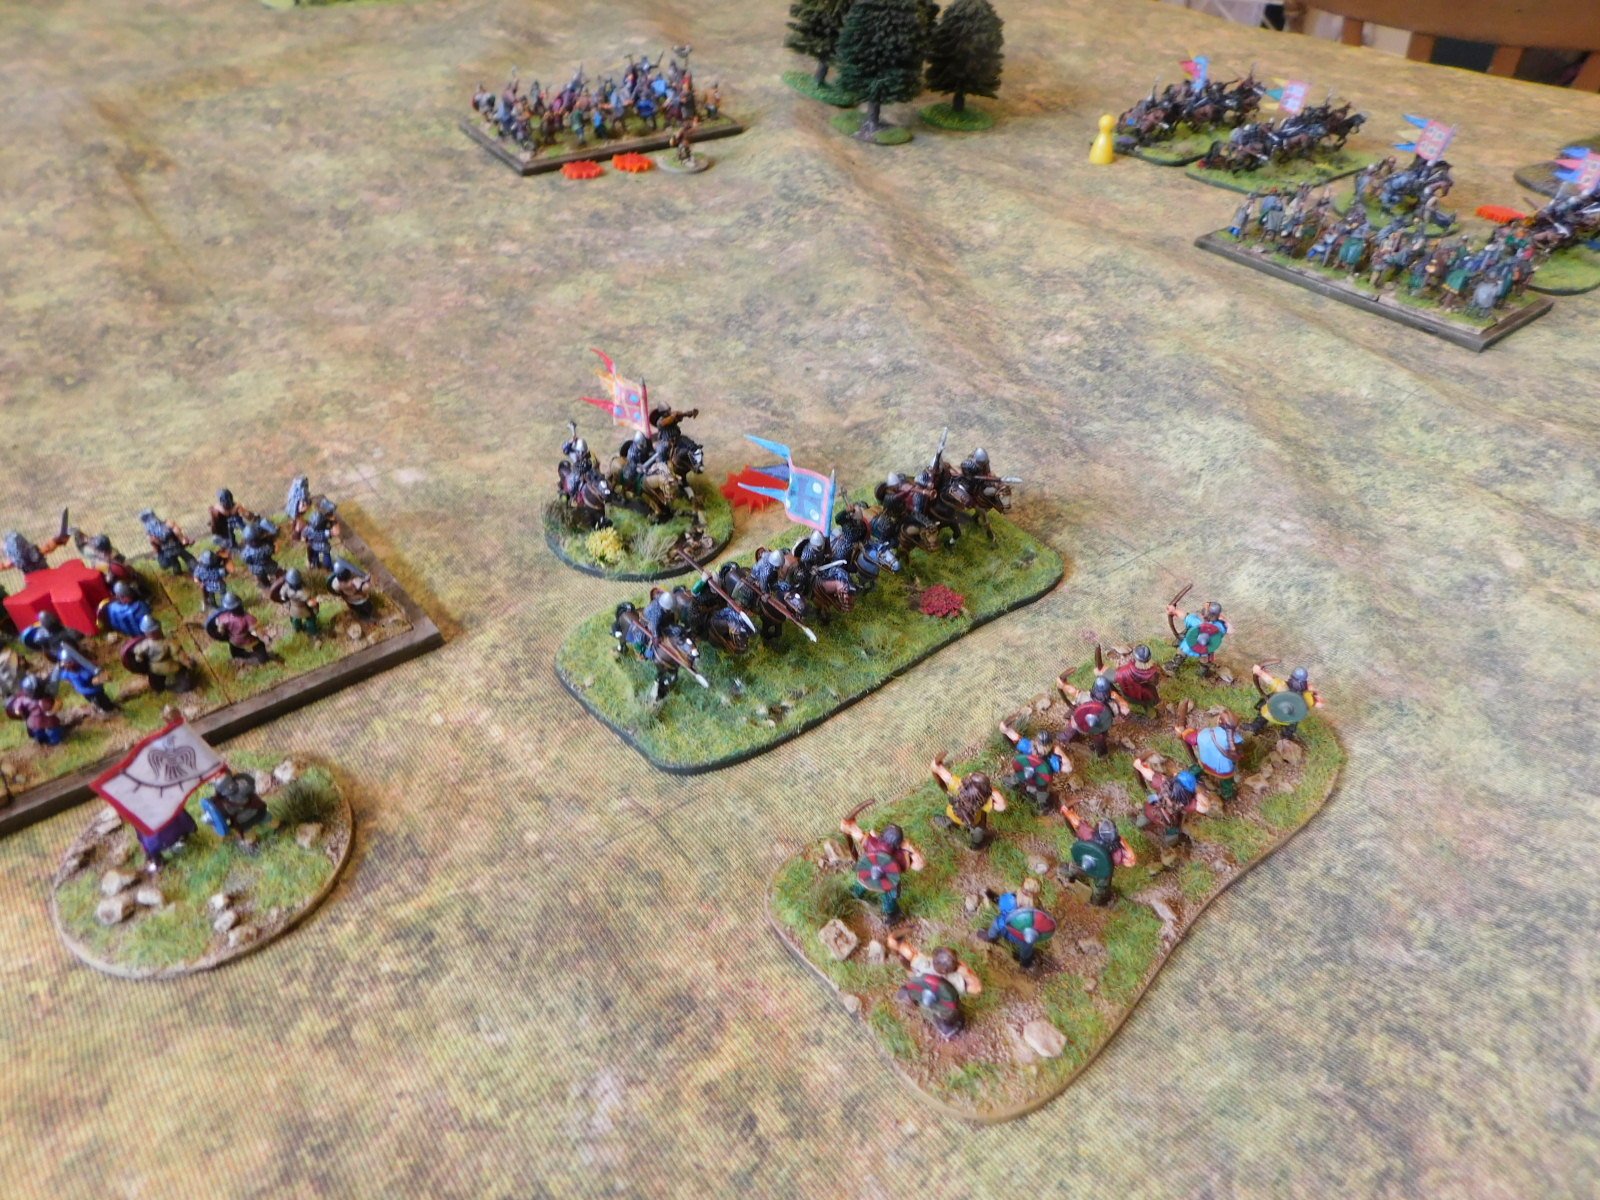
My idea about mutual support proved useful, as several times warbands that had already dealt with the enemy horse in front of them were able to turn and intervene in another clash, as below:

Here, the intervening Vikings smashed the enemy they flank charged from the table, giving the unit under pressure time to rally off a disorder. Yes, they were then in a terrible position being flank charged in turn, but the Vikings are tough and can usually take one flank charge without breaking.

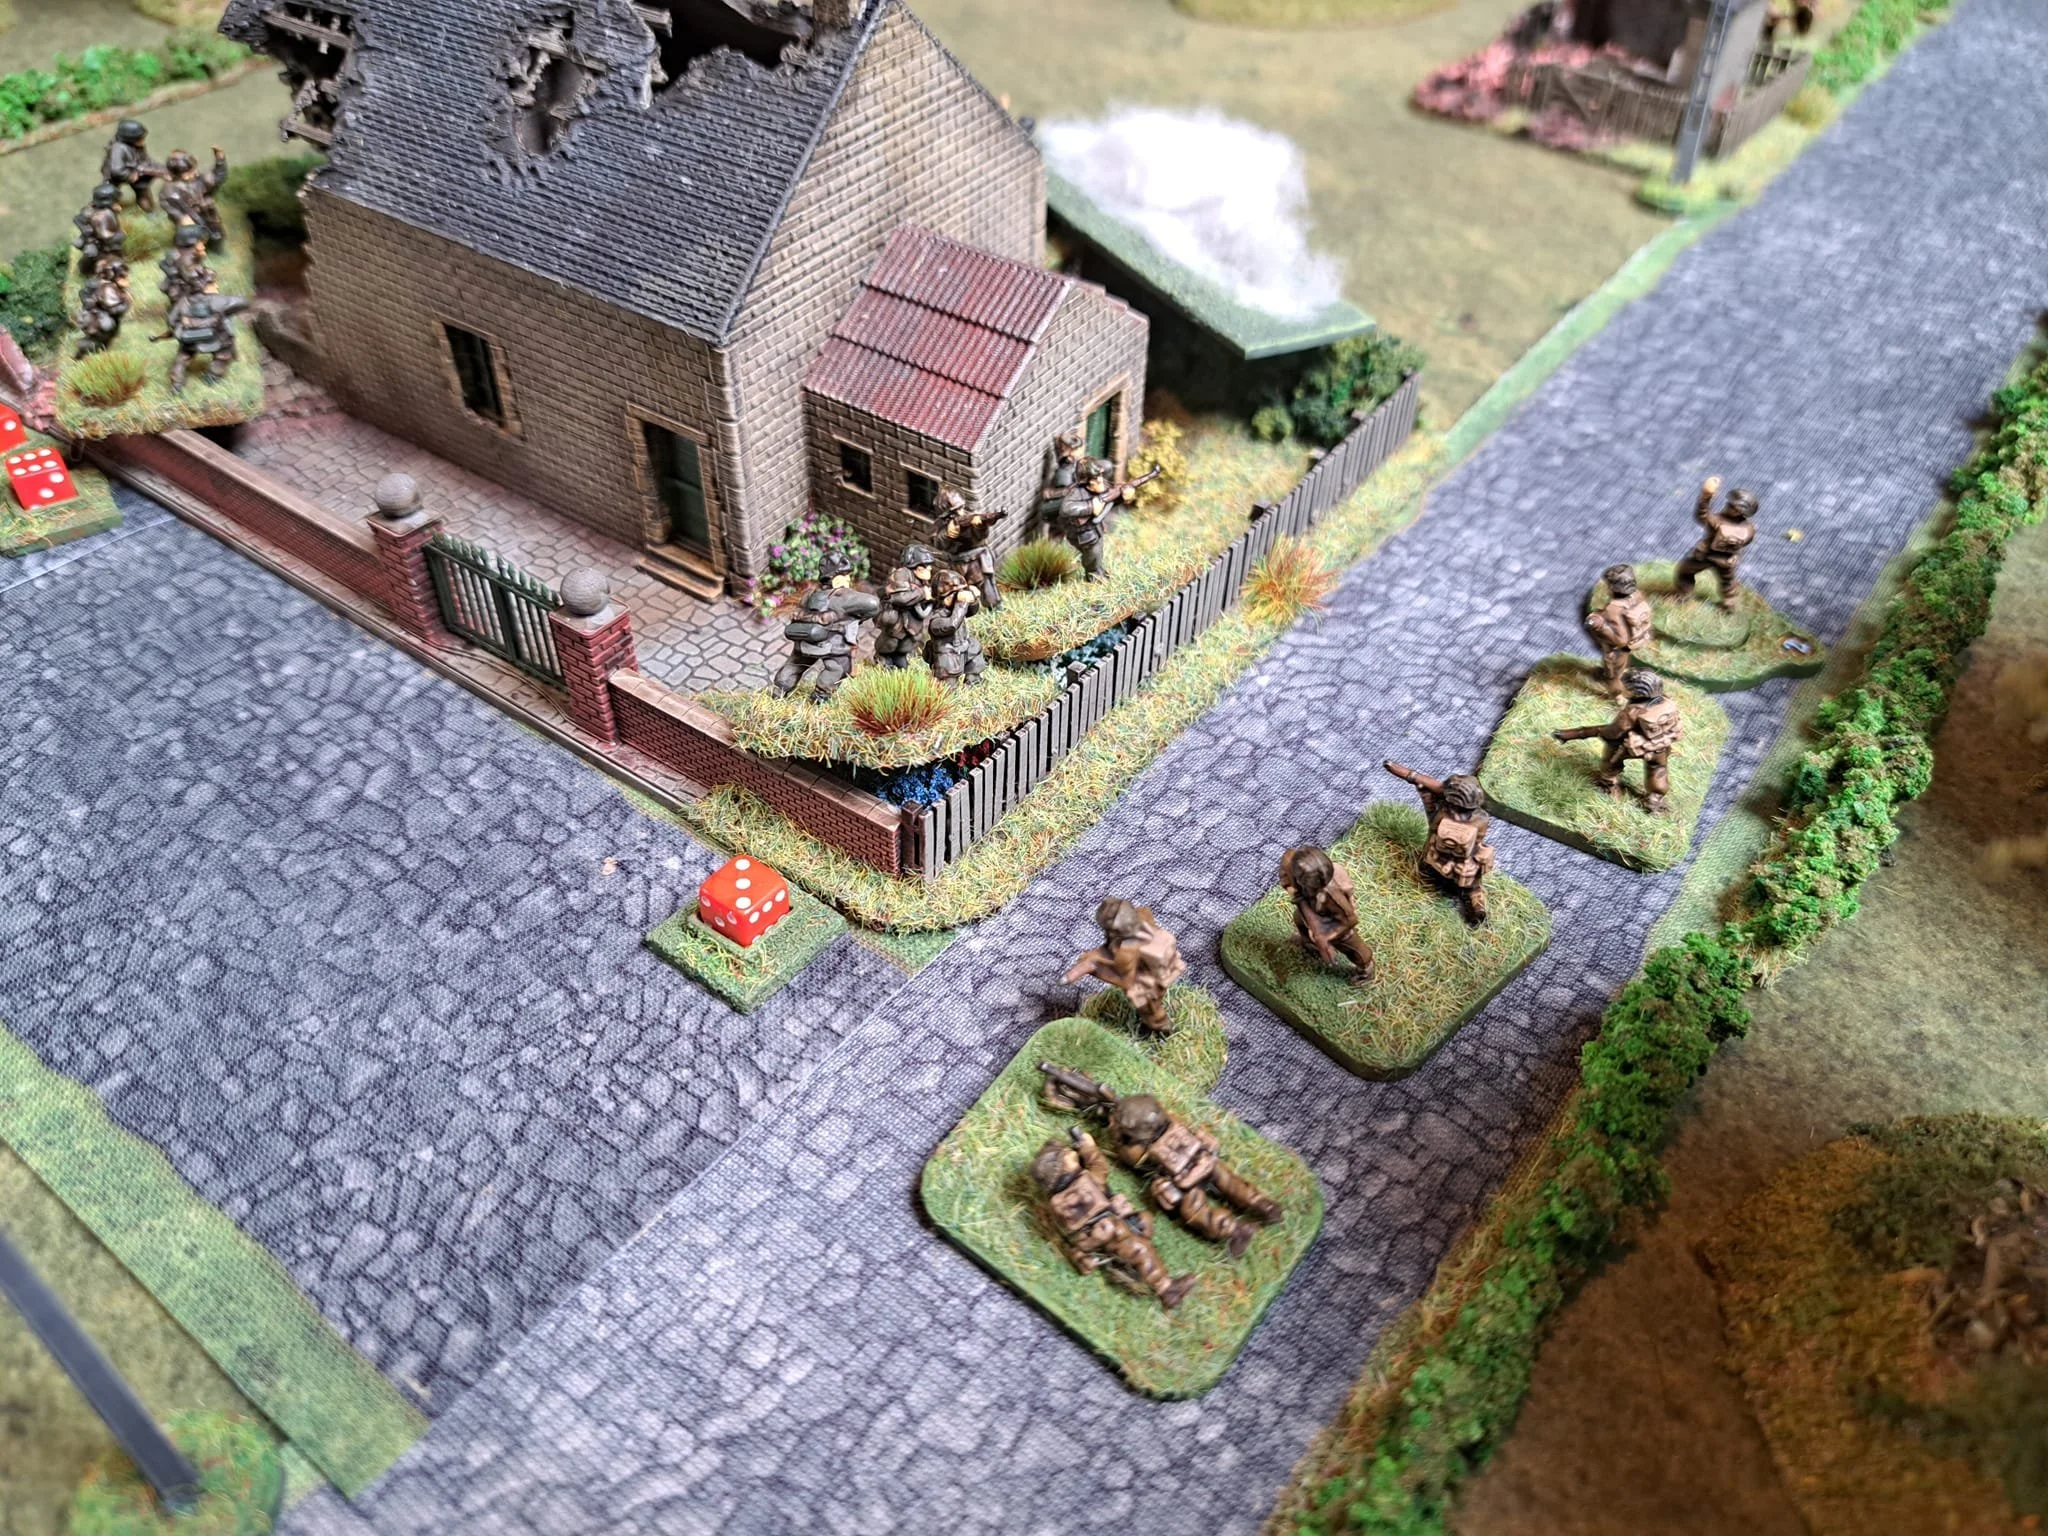
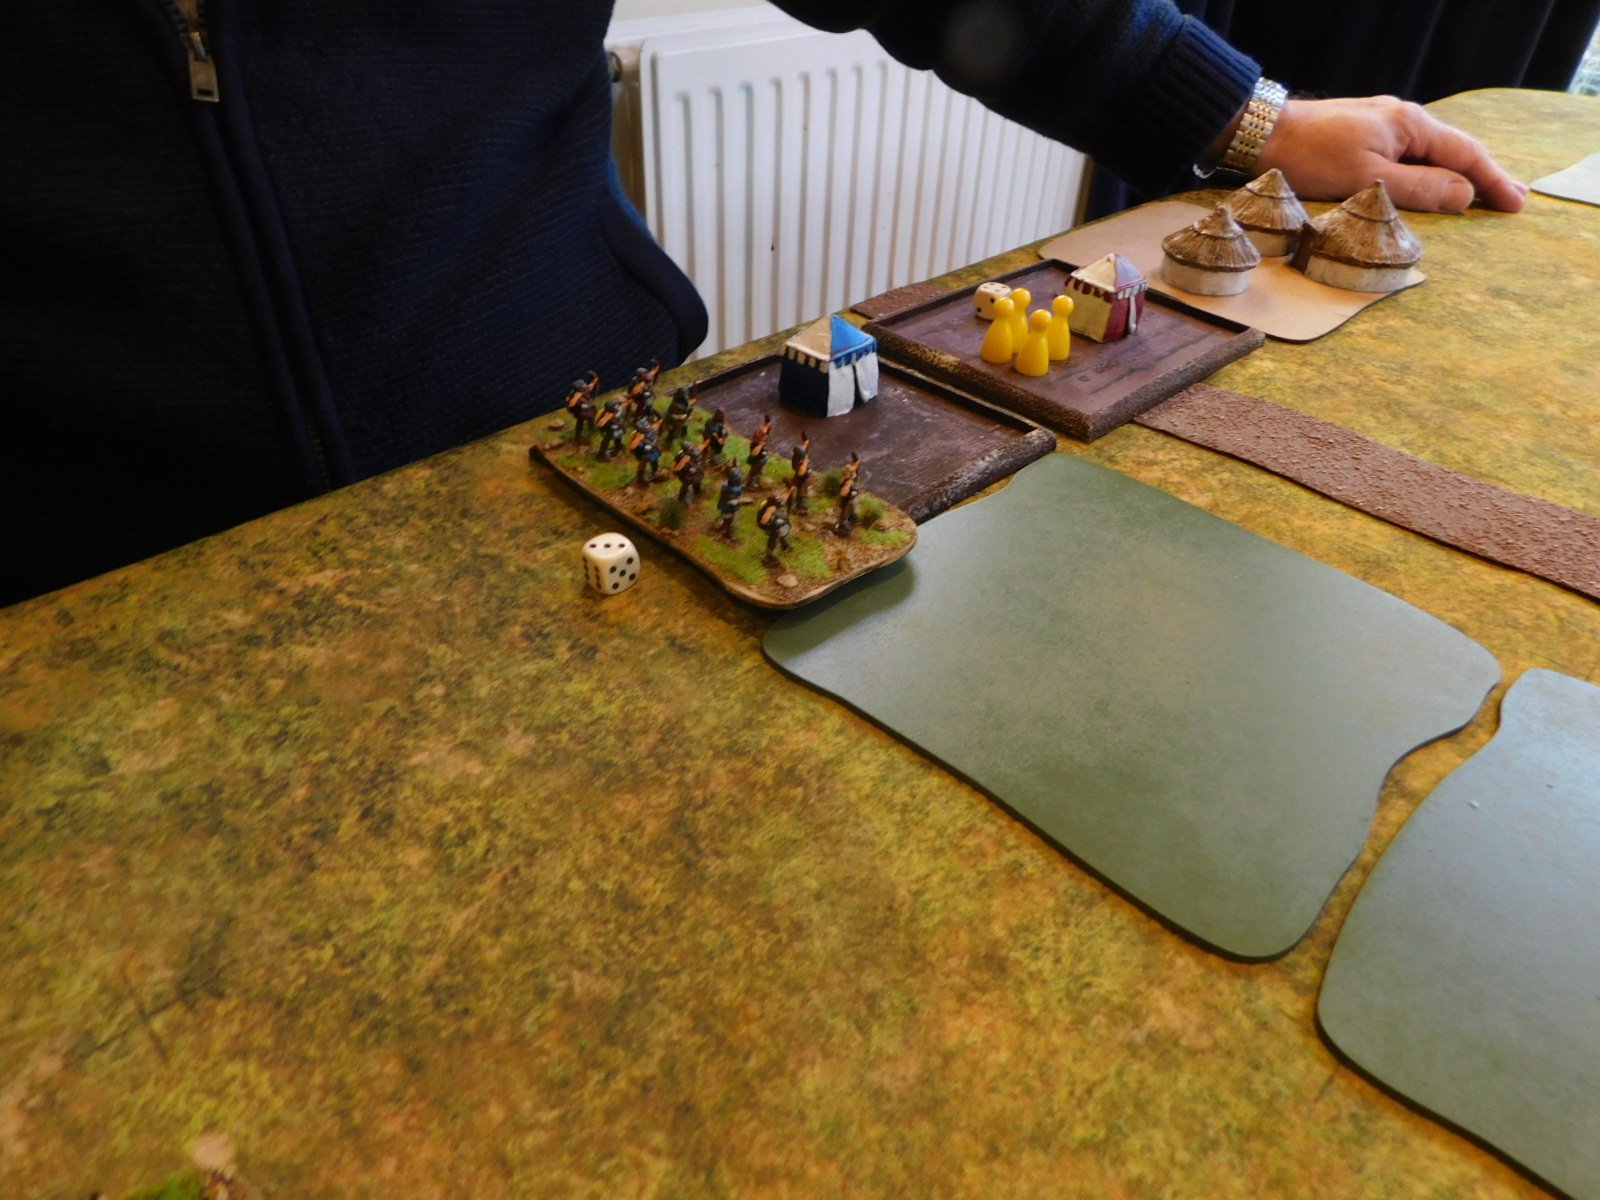
Fittingly, it was a light archer unit that polished off the last of the Norman victory medals:

A great game with a very narrow escape. I will make jolly sure the table legs are locked next time!

TTS AAR: Normans Take The Field!

As mentioned in my last post, with the last of the Milites finished it was time for the Normans to finally take the field with a game of To The Strongest versus Kavan playing the Vikings.

This would be quite an interesting battle as the Normans were mostly heavy cavalry and the Vikings were all infantry. My plan was to take advantage of my extra mobility and get around his flanks, as charging formed infantry with cavalry is rarely a good idea!

As the game began, both sides advanced forward strongly, with the battle rapidly dividing into three sectors: the left, the centre and the right.

In the centre, Viking huscarls (the units with the red Meeple) had sped forward and hit a line of Norman cavalry in the Norman half of the table. With three Norman units in play against just one Viking, I was fairly confident that I could win the first clash, but I had underestimated just how ‘hard’ the huscarls were: being a deep, veteran, shieldwall unit with extra two handed cutting weapons!

My first Norman cavalry unit just evaporated and, worse, the follow up huscarls, led by their overall commander and waving their ‘land-waster’ standard, hit my own overall commander’s unit and forced him to make the decision to run away as fast as possible! Oh, the shame!

A quick overview pic, with the Viking huscarls bursting through my centre!

Meanwhile, on the left flank, my plan had actually worked out rather well.

Three units of milites had faced up to a couple of the lesser-quality Viking bondi units supported by some lights, and used their superior mobility to get around the hairy infantry and into the Viking camp. Six glorious victory medals headed my way as my horsemen remembered their heritage and sacked and plundered the enemy camp for all its worth!

My Viking Longships haven’t arrived yet, so the Viking camp has a weird looking hut in it…and lots of Norman cavalry!

In the centre, however, the Vikings were about to do to me what I had done to them, with their commander’s huscarl unit crashing after my fleeing horse and then into the Norman camp and refusing to be shifted even by William himself!

Fortunately only one half of my camp was taken, but that still meant three victory coins to Kavan!

Casualties were now mounting on both sides, so it was obvious that the battle would be decided on the right where, up to now both sides had cautiously crept towards each other.

Somehow I had managed to get into a decent tactical position where I could get two of my cavalry units onto one of the bondi units but, as I have said before, these deep units are tough and the bondi survived long enough to pull back and get some support.

Not even the toughest Viking, however, can keep taking charges from the front and flank, and so it was here as well. The bondi unit broke and with that Kavan’s final victory medals were spent and the Vikings decided to retreat.

A great game and a very narrow victory for the Normans as I only had five coins left myself.

It was an interesting battle and one where I learnt that Norman cavalry definitely do not want to take on Viking huscarls or bondi units head on, even with lances: the only way is to get around their flanks or hit them two-on-one.

TTS AAR: A Day in the Desert

Another series of mega-games of To The Strongest yesterday!

The premise is as follows:

  • two teams: one of three players, one of two players

  • New Kingdom Egyptians vs Neo-Assyrians

  • Four armies, two identical armies of each, each army is 300 points

  • In the morning, one team takes the Egyptians and the other the Assyrians for two simultaneous 300 point battles

  • In the afternoon, the teams swap armies for two more simultaneous battles

  • Finally one massive 1,200 point battle with each side bidding to play their preferred army by sacrificing victory medals

  • Add up all the points over the five battles and see which team wins

The big pyramid marks the centre of the 18 foot table. The temple at the far end is the end of the battlefield, but there’s a mirror behind it making things look even bigger!

Game One

My morning game involved me using a New Kingdom Egyptian army against Steve and Dillon playing the Neo-Assyrians.

I decided to mass my light chariots to give them a bit more staying power and at first this seemed to be working nicely. My charioteers charged forward and were soon loosing a hail of arrows on the Assyrians.

Unfortunately, there seemed to be something wrong with my bows that day, and I just couldn’t score a hit to save my life. The Assyrians then came forward in return and hammered me in melee. We didn’t finish the game (phew!) but at the final whistle I had lost 7:13 points.

Game Two

For the first afternoon game, I swapped sides and played the Assyrians versus Si taking the Egyptians.

This battle started really well for the Assyrians, going 5-0 up within the first few turns. Unfortunately my luck turned and the cards (it was a new deck as well) decided that they hated me!

It was a hard fought game that we did manage to fight to a conclusion: with me going down 15:21 points.

The Mega-Game

Fortunately my team partner, Peter, had done somewhat better than I had, and we went into the final mega-game only two points behind. We then sacrificed two more victory coins to make sure that we took the Assyrians: so four down in all.

We played this enormous battle as one game in two halves, meaning that there were a couple of times that the two halves got out of sync and one side or the other had to pause and wait for the other to catch up. Dillon, playing in the centre on the enemy side, had to fight Peter with some of his commands and me with what was left. Despite these small speedbumps, the game rattled on at a cracking pace, showing what a robust system To The Strongest is.

Not only was the game cracking, but also very close. We started off with me doing rather well, and Peter doing less well. Then I had a catastrophic turn when I shed victory coins like last year’s fashion (not sure where that metaphor came from!) but recovered to deal out the same treatment to my main opponent, Si, immediately afterwards.

Both Peter and I then continued to alternate good patches with bad patches, calling out our successes (and failures) to the other as they happened. Finally the last Egyptian victory medal was won, and it all came down to how many we had left.

We’d been keeping them in a little pot, and, at first, it looked as if we had hardly any left at all. This was, however, an illusion, as we’d been taking out the big medals as we went along leaving only the little ones behind. The final score was 42:31 to Peter and I, meaning that we had won the day overall.

All in all a great day’s gaming. My thanks to Peter for organising and hosting.

IABSM AAR: Spanish Civil War Action!

Lee Young and friends recently played out a game of I Ain’t Been Shot Mum set in the Spanish Civil War. I missed this on the IABSM Facebook Group, so it’s a pleasure to feature it now. Lee says:

Another great game of IABSM, this time our Wednesday night game takes us back to the Spanish Civil War.

The Nationalist had to break through the Communist line and reach the top of the road to Madrid. Had to do some tweaks to the FT-17s and placed some extra cards in for ammo shortages. Played better than I expected.

FK&P AAR: Widbrooke Common

Played a second game of For King & Parliament with friend Fred, this time using scenario #02 from the Marlowe to Maidenhythe scenario pack: Widbrooke Common.

I didn’t have my camera with me, so not many photos, and those that there are are from my mobile, but one thing that did stand out about the game was the power of a well placed unit of Forlorn Hope.

For those of you who know the game, Forlorn Hope are the weakest possible units: usually acting as no more than speed bump as they get overrun by better quality battalia. Not in this game however!

Placed occupying a farm house in the centre of the table, Fred’s Forlorn Hope held up two of my full strength standard battalia for the whole game, constantly rendering them Disordered when I got too close, meaning I never really got a chance to properly assault them.

I still won the game, I hasten to add, but would have won it a lot more quickly and effectively if it hadn’t been for the Forlorn Hope.

Here are the other shots of the game that I took:

FK&P AAR: The Attack on Marlowe

A long, long time ago in a galaxy far, far away, I was at school with a chap that everyone called Fred. Not sure quite why, as that wasn’t his name, but I’m thinking it might have been because he just looked like a “Fred” in that he was very large and very strong and had a difficult to spell surname. Or it might have been because he bore more than a slight resemblance to the Scooby Doo character, assuming that Fred Jones lifts, that is!

Fred and I used to wargame at school - mostly Ancients using WRG 6th - but lost touch after he swapped to doing the real thing and joined the army. Flash forward many years and he was now out, had seen me on Linked In, and made contact again. We met up shortly afterwards for a drink or three, and from there it was a very easy transition to arranging a game.

Gaming is very different now to what it was then. In those days, the early to mid-eighties, nothing was quick and nothing was small: a battle was a whole day or weekend affair, minimum, with thousands of 25mm figures on the tabletop and an allowance built into the session’s timetable for colossal, life-threatening rules disputes involving such matters of importance as fractions of inches or degrees; the definition of charging in a straight line; or line of sight arguments that could only be settled by the hiring of a theodolite! Fred used to paint 25mm Minifigs’ Napoleonics with a syringe needle, for God’s Sake, in order to make sure the regimental numbers on the cuffs were legible!

I had no wish to return to those days, especially the “life-threatening rules disputes” as he was still a very large person and now presumably trained to kill, so decided upon a game of For King and Parliament, the English Civil War version of To The Strongest. FK&P is a cracking game that, to my mind, really captures the look and feel of the period to give reasonably realistic results with fast-play mechanics. It’s grid based, obviating a lot of the disputes about measuring, and driven by drawing playing cards.

We used the first scenario from my Marlowe to Maidenhythe scenario pack, with both sides acknowledging that this first game would be a training session more than anything else. Fred took the Royalists, on the attack versus my Parliamentarians.

Fred’s first question: where was the grid? It is there, but indicated in a way that doesn’t interfere with the look of the game.

I won’t describe the battle in detail, but suffice to say that it was a grinding win for the Royalists.

What was interesting, however, was seeing Fred reacting to the different challenges he faced, drawing on military rather than wargaming experience. My battalia were to be “located and fixed in place” before being destroyed by an attack from the flank, so Fred immediately understood the concept of a Zone of Control or ZoC, and proved very good at the fixing and destroying bit.

An advantage was to be “immediately followed up” with the emphasis being on a series of consecutive hammer blows rather than necessarily conserving damaged units. It was all very interesting, and we both enjoyed the game immensely.

Here are some more shots of the battle:

IABSM AAR: Action at Galmanche

I hope that everyone can be lucky enough to play in one of Phil Turner’s excellently presented and run games of I Ain’t Been Shot Mum. I did so at one of the Operation Market Larden events, and enjoyed myself immensely.

Here’s another game from Phil that uses one of the scenarios from the rulebook. Click on the picture below to see all…

TTS AAR: Sicilians versus the Tang!

Yes, I know it’s not any sort of historical or even geographical match up, but this is Ancients/Medieval gaming so that’s convenionally allowed!

Nice

Anyhow, it was off to friend Peter’s house for a quick game of To The Strongest using his big figures. I would play the Italo-Normans as a try out for expanding the 15mm ‘pure’ Normans that I’m currently painting up into a Sicilian army; and Peter would play a nicely painted, bring-and-buy Tang Chinese army he’d had hidden away for years.

The armies were actually quite evenly matched. The Sicilians consisted of a core of Knights, some veteran, supported by spearmen, some with bows, and some lights. The Tang had a core of cavalry and cataphracts supported by, you guessed it, some spearmen and some lights, with his troops having extra crossbows rather than bows.

The Sicilians were outscouted and, I must confess, out deployed. On my left flank, all my cavalry faced all the Tang cavalry. In the centre, three quarters of my infantry faced his. But on the right flank, a good 25% of my infantry were facing empty space. Doh!

Time to make the Tang an offer they couldn’t refuse!

Comparing notes after the game, both Peter and I were convinced that we would win the cavalry clash that was almost certainly coming on my left wing: Peter because he had more lights supporting his heavies than I had, me because my cavalry were a bit better quality than his. We both duly advanced our horse forward as fast as possible.

It was in this first cavalry clash that it rapidly became apparent what sort of day I was going to have: I lost both my cavalry generals in rapid succession, drawing so many Aces that Peter actually asked me whether I wanted to check I had the right number in the deck!

I had disordered two of his units in the first clash, so was posed to sweep all before me, but have just lost both my cavalry generals: they should be behind the knights on the hill and those toi their left!

The writing was fairly much on the wall from that point onwards. My cavalry, all now out of command, were gradually beaten backwards, and although a bit of good luck could have given me an advantage, those Aces kept on coming.

The photo below shows one of the moments that could have turned the game: I have lights on the flank of some disordered cataphracts, they’ve drawn a ‘2’ to get into charge position (meaning that they have an 80% chance of going in) and what do I draw? Yes, you guessed it, another Ace!

Meanwhile, in the centre, my infantry weren’t doing much better. Although both my generals were currently still breathing (that would change: I lost one of them later on in the game), I hadn’t had any success in either getting my right wing into play or even getting my centre into any sort of effective action.

With my victory medal count rapidly diminishing as my cavalry gradually gave way, the only way for me to win was to defeat his infantry quickly, but Peter cannily kept pulling back so that I just couldn’t get to grips with them. Add in losing another general to the mix to effect my ability to spur my men forwards, and you can see that it just wasn’t going to happen.

Seeing I had only a couple of victory medals left, Peter now changed tactics: coming forward and targeting my light units with everything he had. Their departure proved the final straw for the Sicilians, and they fled the field!

A most enjoyable game despite my defeat and frustrating habit of drawing Aces, and I could console myself with the fact that this must mean that next game I won’t be drawing any Aces at all…as the laws of probability work like that, don’t they?

Don’t they?

Well, they will in my decks!

IABSM AAR: North of Caen

Here are some pictures of game Alex Sotheran has been playing using the first scenario from the I Ain’t Been Shot Mum rulebook: North of Caen. These were posted in the IABSM Facebook group.

AAR: TTS European Championships

Friend Peter had organised a new competition for To The Strongest - the European Championships - and wanted to know if I was interested in taking part. Now I don’t really do competition battles any more: ghastly memories of arguing over minutiae in WRG 6th or similar and ultra-competitive behaviour (usually from me!) souring the experience…and the TTS tournaments are all played in 28mm and my collection, as you all probably know, is exclusively 15mm.

I checked the diary, however, and it turned out that, unusually, I had a completely free day that Saturday, so I said to Peter that I would come along and help and, if needed, make up the numbers as a super-sub should an odd number of players turn up (assume the joke about expecting an even number of odd players to turn up!).

I duly arrived at Ewelme (you-elm apparently) Primary School early yesterday morning and enjoyed half an hour of peaceful reflection eating my breakfast sandwich in an idyllic rural setting until everyone else arrived. To be honest, it was worth the half hour travel time for that alone!

Peter was lending me a Burgundian Ordnance army, so handed me a box full of troops and then it was fingers crossed to see if I would get any games…but as it happened, even numbers were present. No matter: I was happy to time keep and generally help out, and there were some spectacular looking armies to admire, even if they all looked very big to me!

About 15 minutes in, however, one of the players was forced to up-sticks and head home to sort a family matter, so I quickly grabbed the Burg’s and settled down to fulfil my super-substitute role.

My opponent, Andy, was using Almoravids: a very nice looking set of Spanish Berber types, all of whom were already deployed and ready to rock. We agreed that keeping to the tournament schedule meant we couldn’t go through the usual scouting, terrain and deployment process, so I just slammed the Burgs onto the table in a long line and off we went.

I am about to sub in for John, on the right

It was a great battle. The very first javelin thrown by the Almoravids went straight through my CinC, Charles the Bold’s, visor and killed him instantly! I followed that up by managing to draw five Aces in seven cards and it looked as if a hideous defeat was about to follow…but the Burg’s are a resilient lot, and somehow managed to fight their way back to a 100:73 point victory. I do remember one set of Knights smashing the Black Guard from the table in one charge, and killing a couple of enemy generals, but not much more than that!

Then it was onto game two: fighting Michael and his Later Italian Condotta with Swiss Allies, or Venetians for short. This was another cracking game, involving my Knights coming up against some very menacing looking pike blocks. Star of the show was my little Organ Gun artillery unit, which held up the Swiss pike block for two or perhaps three turns as it marched relentlessly towards my camp. The crew of said gun even managed to do the Swiss some damage in the melee! This stout and quite frankly incredible defence allowed me to get some Knights onto the Swiss flank and, much to the shock of all concerned, send them fleeing for the rear. Much to my surprise, another win at 108:58 points.

At this point we broke for lunch and a tour of the school-church-alms house complex, all built by Alice Chaucer, thrice-married grand-daughter of Geoffrey, and the first female Knight of the Garter. Fascinating stuff that included a secret stair and the minstrels’ gallery where Henry VIII allegedly first, er, succeeded, shall we say, with Anne Boleyn.

Onto the afternoon session, and bad news for the super-sub. Another player had withdrawn from the tournament meaning that numbers were uneven again. I was all prepared to return to the bench when someone else, Mark to be exact, said that they would be happy to sit this game out to give me another go. This was gentlemanly behaviour in the extreme, so it was time to face Chris and his Later Swiss. More pikes!

This, third game was also excellent. The Burg’s were caught napping, out-scouted and then pinned back against the edge of the table by some extraordinarily fast marching from the Swiss (I still don’t know what they do with their pikes when acting as mounted infantry LOL). I was sure I was doomed, and told Chris the same, but he assured me that all was not lost…a bad mistake on his part as his prophesy began to come true. Still pinned against the edge of the table, a camp lost to the enemy, the Burg’s stuck their heels in and began to push back. A couple of enemy generals were dispatched (it was a bit of a theme for the day) and some non-pike units broken, but it was a combination of missile-fire to disorder then send in the Knights to punish, which finally broke a Swiss pike block sending loads of victory medals my way. If we’d played on, the game could still have gone either way, but I ended the winner with a score of 102:79 points.

At that point I returned to the substitutes’ bench and spent a very enjoyable couple of hours wandering around the games, admiring both the action and all the very lovely figures on display.

Time for the results and I was amazed to find that I had come fourth. This was obviously partly due to the bye I had received in the fourth round, but was very welcome news indeed. Even more surprising (doubtless particularly so to those who have gamed against me!) was that I was also voted Most Chivalrous Player of the day. Even my family were gob-smacked by that one!

So many thanks to Peter for organising a great day, and for everyone else there, particularly my three opponents Andy, Michael and Chris. I had a whale of a time and am now wondering from whom I can borrow an army for the next one!

IABSM AAR: Russian Civil War Action

The core I Ain’t Been Shot Mum system is really very flexible indeed, and here’s an example to prove my point.

Taken from the IABSM Facebook Group, here are some pictures of a Russian Civil War game played by Lee and friends. Technically 20-odd years prior to the period, and ran very smoothly:

I love the sabot bases: they work really well.

Overlord 2023/Valour & Fortitude

I went to Abingdon Wargames Club’s Overlord 2023 show at the weekend. This was the first one back after lockdown and COVID, and a very pleasant little show it is too.

Whilst it’s not the biggest show in the world, it had all the important elements needed: demo games, trade stands, car-parking, reasonable food and drink, and only a £4 entrance fee.

I didn’t buy anything, for a change, I’m still painting Normans and working on the lead mountain, but I did get to play in a very nice 6mm game of Valour & Fortitude: the fast-play, skeleton Napoleonic/19th Century rules from the Perry twins.

It’s quite a brutal game, in the same style as the Neil Thomas rules I have been using for the post-Napoleonic 19th Century period, in that battalia take a few hits then go shaken then are removed from the table, all of which can happen in one round of melee…but it was a fun encounter where myself and a chap who’s name I didn’t catch, as the French, successfully defended a river/bridge against large numbers of Prussians.

My thanks to Si, Mark and John for running the scenario, and to my opponent and fellow player for making it an enjoyable game. As I said, above, the French hung on, just, for long enough to win…but it was the very narrowest of narrow victories!

If you can get to Abingdon without too much trouble, put Overlord into your diaries for next year: definitely worth going to.

TTS AAR: Vikings Resurgent!

Time for a quick game of To The Strongest. Today’s game would feature the Vikings, commanded by Yours Truly, versus the Burgundian Ordnance, commanded by John.

The yellow caps are lance markers, the red meeples indicate veteran Huscarl units.

Two very different armies: my Vikings are a foot-only army comprised mostly of big shieldwall units (I’ll call them warbands) with a few lights thrown in; the Burgundians are a combination of lethal and indestructible Knights with some useful missile-armed spearmen in support.

I knew I would lose if I let the Burgundians pick me off one unit at a time: the only way to win was to move forward and attack en masse so that my battle line could absorb the initial charge of his Knights then swamp them with numbers.

I also knew that my light bowmen were useless against the Knights (the arrows would just plink off!) so determined to send both light units up the far left flank and try and get behind his battle line and into his camps, knowing that he didn’t have enough units to face my warbands and defend his rear.

I therefore moved my warbands forward in a long line, being careful not to let the more impetuous Vikings surge forward in an uncontrolled manner.

This meant that when the main lines did clash the outcome was exactly as I had predicted: the warbands hit by the Knights were badly disordered at first contact but not destroyed, and then other warbands piled in to help.

Keep your eyes on the light units to the far left as well: they are doing what they were supposed to do!

By now I was whittling down his army, especially on my right flank. With so few Burgundian units on the table, he just couldn’t afford to lose many and, as we reached the climax of the battle, I had wiped the four units on his left and left-centre for the loss of only one of my warbands.

That meant that I only really needed one big push to win the day and, rather pleasingly, that came from (yes, you guessed it) one of my light units finally taking the first Burgundian camp.

With half their army destroyed and their baggage taken, that was enough to send the neo-Frenchmen packing: the Vikings had won the day!

CDS AAR: Valley of Tears at Winter Wonderlard 2023

Yesterday saw the annual Winter Wonderlard Lardie Day in Bristol.

I couldn’t be there myself (real world interfering with gaming again!) but here’s the first of the AAR using TFL company-sized rules from the day, with Steve Blease and his “Valley of Tears” Golan Heights scenario using Charlie Don’t Surf .

There were two sessions: see pictures from both, and others taken on the day, by clicking on the picture, below: