TFL Painting Challenge: Tlaxcallan Update!

Today’s Painting Challenge update is named in honour of Lloyd’s Tlaxcallan entries: some amazing painting there which I will further honour with a little gallery of their own:

These are in 28mm and mostly from Outpost. They are not the only Meso-American figures Lloyd has to show us: visit his gallery for more.

Otherwise, we have entries from Matt, Carole, Mervyn and Chris. Check out their galleries for their work, but here’s a taster:

Keep them coming!

A Few Burgundians

Regular visitors will know that I bought a 15mm Burgundian Ordonnance army at the Warfare show last year. I’d already added some organ guns to its roster, but now needed to properly finish it off.

First up were some mounted crossbowmen, the only light cavalry in the army and thus the source of all of my scouting points.

These are Essex 15mm figures, painted with Contract Paints. Painting these after the Khurasan Normans was a real pleasure, and I am quite in love with the Essex style again. Their chunky, broad surfaces really take Contrast Paint well and I’d say that if you didn’t know they were 15’s, the photo above could show 25’s.

Next up were some light infantry handgunners, also Essex.

The photo above doesn’t really do them justice, but the Contrast white really works when placed next to the blue and the red: look at the chap second from the left in the back row (the one with the red hat). He’s the one that the photo has actually captured well.

SP AAR: OML9: Xhosa Raid!

My second game at Operation Market Larden 9 was a game of Sharp Practice set in South Africa in 1846.

To quote the briefing, “Xhosa raiding parties have brough terror to European settlers along the border with Cape Colony, destroying farmsteads, murdering their inhabitants and driving off livestock. The Governor has ordered both Regular and locally-raised auxiliary units up into the Waterkloof mountains to escort the civilians back to safety”.

I would play the commander of the auxiliary units tasked with rescuing the civilians.

The column I was helping to protect. My auxiliaries will enter the table from far to the right of what you can see here. The xhosa will come from where the camera is and off to the right as well.

This turned out to be a Ripping Yarn of a game, with waves of Xhosa initially trying to overwhelm the column and my troops with fire then, realising that we were winning the firefight, attempting to charge in and fight us at close quarters.

Most of the work, I admit, was done by my colleague controlling the Regulars, who established a firing line towards the rear of the column and a group of Riflemen in a ruined farmhouse and, quite frankly, shot the Xhosa to death.

For my part, apart from an initial hiccup with Corporal Nutter’s section of militia, who used my first move to retreat behind cover and then did not activate for the whole of the rest of the game, I managed to get some very useful Frontier Light Horse types into a position where they were protecting the road and could use their double-barrelled carbines to good effect, and then started rolling up the Xhosa’s left flank with the rest of my troops.

A charge from the Xhosa just about wiped out another of my units (horsemen who were, at that point, fighting dismounted) but that left the charging Xhosa vulnerable to a couple of volleys and a counter-charge that sent them scurrying from the table.

In the end, we defeated the Xhosa without taking too many casualties ourselves. Here’s a gallery of the action:

My thanks to everyone who was running/playing the game (it was great to use such beautifully painted figures on a cracking layout) and, of course, to Ade Deacon for organising the event as a whole. Can’t wait for OML10!

IABSM AAR: OML9: The Race to Brussels

One of the games I played in at this year’s Operation Market Larden was a superbly presented I Ain’t Been Shot Mum scenario put on by Phil and Jenny.

Iaon and I would lead tanks from the Welsh Guards supported by motorised infantry from the Grenadier Guards in a race across Belgium to be the first units into Brussels. Historically, the only opposition encountered was in the town of Halle, and that’s what the day’s affairs would recreate. Our mission was to get a “significant force” off either of the bridges at the other end of the table.

Unfortunately, things did not go entirely to plan mainly, I hasten to add, due to a spectacular cock-up in tactics on my part!

Click on the picture below to see how easy it is to snatch defeat from the jaws of victory!

Operation Market Larden #9

A couple of weekends ago, I made my annual pilgrimage to Evesham to take part in the Operation Market Larden (or as I sometimes write, “Lardon”!) Lardy Day

This proved to be a fantastic day’s gaming, with about a dozen tables on display, all of which could easily have taken a “Best of” award at any major wargames show.

Here’s a quick gallery, mostly taken from just before the day began: after that, I was too busy playing to take more and, without everyone standing around playing, you can actually see the tables!

My thanks to Ade Deacon for organising again: I was only sorry I couldn’t stay for drinks and curry but family matters called me away.

I’ll write up the two games I played in as separate posts, so keep your eyes peeled for them. I know Mike can’t wait for the IABSM one!

TFL Painting Challenge: First June Update

Are we almost half way through the year already? How time flies when you’re having fun!

Here’s the first Painting Challenge update for June: some lovely painting being submitted. Do visit the individual galleries (look in the black navbar, above, for how to clickthrough to them) but here’s a taster:

IABSM AAR: Race to Brussels

At Operation Market Larden 9 last Saturday, my morning game was a superb Race for Brussels game put on by Phil and Jenny.

The Dynamic Duo had playtested the game a few days before, and Steve Blease has written a lovely After Action Report that you can read by clicking on the picture below:

But how did you do at the game, I hear you ask?

Rest assured, I’ll be writing a full report concerning my execrable performance when I have time to do so but, put it this way, it was definitely an “interview without coffee” for my company commander when he limped back to base!

Siculo-Normans

Or troops from the Norman Kingdom of Sicily.

As the look and fighting style of the Siculo-Normans was heavily influenced by nearby Arabic territories, I wanted to used different manufacturers to the rest of my Normans (all from Museum Miniatures’ excellent CAD-designed range). Looking around the Internet, Khurasan and Baueda (available in the UK via Magister Militum) seemed the best best, so off my orders went.

First up, some of the Khurasan figures and, of them, first finished were the light cavalry.

I must confess that I am not quite sure what to say about these. I generally love Khurasan’s figures, and must have well over a thousand of them from various ranges. These come from their Norman range and whilst they look great, with very animate and all-action sculpts, the actual execution of the figures was less than what I expected.

The horses are beautifully animated, but arrived all crushed down on their bases. Straightening them took an age, and they are very fragile as well. I came very close to snapping them right off the base several times.

Same with the Siculo-Norman infantry. Every spear was not just bent but positively twisted, taking a lot of time to sort. Worse, the bases had either been sculpted badly or been carelessly clipped from the sprue: one corner was turned up slightly and thus every figure (all thirty!) needed the bases flattened and filed much more than I’ve ever encountered previously before they would stand up. A right pain!

So good and bad things to say. It won’t stop me buying Khurasan’s stuff in the future, but I will be cautious about this range.

FK&P AAR: Transylvanian Double Act

I recently spent a bit of time properly marking up my 17th Century “eastern front” Transylvanian and Muscovite armies: by “marking up” I mean putting identifiers on each unit that allows me to remember which are which! That done, it was time to get them onto the tabletop.

The Transylvanians were a bit of a mish-mash. Their core Household troops (heavies and lights) were supported some more light cavalry and two brigades of infantry, one of foreign Commanded Shot and one of Szekley Pike & Shot (represented by Scots!).

The Muscovites were similar: a core National Cavalry and foreign Reiters supported by a brigade of Tartar horse-archer allies, with two brigades of foot, one Cossack, one Soldat (foreign-trained foot).

Game One

Our first game was very short. My opponent, Kavan, had forgotten how important it is in For King & Parliament not to lose your commanding general (as valuable as a couple of camps in To The Strongest) and blithely sent his CinC forward with the first wave of attackers.

The Transylvanian Household Cavalry were, however, having an exceptional day: their first charge smashed the squadron of enemy cavalry led by the Muscovite CinC from the field (meaning that Kavan lost about half his Victory Coins in one go) and then charging again to KO a second unit as well.

Combined with losses elsewhere on the field, this was enough to break the Muscovite morale and send them fleeing back to “the first throne” in some disarray!

Game Two

As the first game had been so quick, we decided to re-set the sides and play again, but this time with the Muscovite CinC safely at the back of his troops rather than leading from the front!

Two key differences in this game. Firstly, the Transylvanian infantry had to fight for possession of the small town on their right flank; and secondly the Transylvanian Household Cavalry didn’t achieve the same success on their initial charges as last time.

This meant that the heavier Muscovite cavalry had time to drive back the Transylvanian light horse, particularly on the Transylvanian left wing, and then curl around to threaten that entire flank.

A combination of steady foot and charging horse put the town into Muscovite hands and that, plus the combination of lost light units and the usual battlefield attrition in the centre, meant that the Transylvanians were gradually ground down and, after a series of reverses in the centre, were forced to retreat.

Aftermath

Two great games of For King & Parliament/Eastern Front Edition and honours even with one win for each side.

Success for the Transylvanians has to come from understanding how to make the significant numbers of light horse work. I didn’t manage it in either game really (the first game was the Household cavalry’s show!) so something to work on for next time!

TTS AAR: Anglo-Normans Hammered!

With Viking and Norman armies now complete, I thought I’d have a look at what else this meant I could field. The most obvious mash-up was an Anglo-Norman army i.e. an English army from after William the B’s victory at Hastings.

This seemed to me to be quite a good combination: you have the the mobile power of Norman knights, the endurance and ferocity of the Viking foot (well, Anglo-Saxons…but the fyrd is a fyrd as they say!), and some lights in support.

With that decided, it was time to pick an opponent. Looking at the list of units that have been painted but haven’t been on the tabletop yet, it was obvious that the Assyrians were up. Not an historical match up by any stretch of the imagination (well, perhaps a pre-emptive strike on what would be the site of the British museum?) but this is Ancients so we won’t worry about that too much! I would play the Anglo-Normans, Kavan would play the Assyrians.

I deployed in a conventional manner - infantry in the middle, cavalry on the wings, lights with missile weapons in front - but Kavan made the unusual choice to put all his heavy infantry on his left wing, with the heavy cavalry and heavier chariots in the centre and his lighter infantry on the left. He then proceeded to march his heavy infantry forward at a rapid pace, hanging back most of his other troops.

I must confess that this completely banjaxed me, and I spent the next phase of the battle trying to re-arrange my troops to match. Talk about surrendering the initiative to your enemy!

Kavan’s troops, of course, were not waiting for me to sort myself out: they were up and at me, taking full advantage of the confusion to sneak a unit of cavalry through the middle as I tried to face the twin threats approaching my flanks.

And this was just the start!

With cavalry now driving through the middle of my line, I couldn’t advance the infantry I’d moved to the right flank to counter his infantry, meaning that I tried to stop them with my knights. Kavan had anticipated this, however, and had hung a unit back to protect his flanks. So this effectively stalemated that side of the field, taking my best troops out of the battle.

Things were going no better on my left and in the centre, with Kavan cross-ruffing his heavy chariots between the two to both prevent me getting any sort of advantage on either and then, with a superb run of cards, even managing to rear charge a unit of heavy Norman spear that I was pulling back to try and defend my camps!

Even if my heavies did survive that initial impact, I was definitely now on the back foot, and it wasn’t long before they did give way, leaving the way clear for the Assyrian chariots to break through and finish the capture of my camps that the cavalry had begun.

That took care of the last of my victory medals, meaning that the Assyrians had won a glorious victory over my utterly-defeated Anglo-Normans.

A great game of To The Strongest, fought superbly by Kavan, who knocked me off balance with his initial deployment and never let me recover. A master class!

Digging into the Lead Mountain

I was waiting for some new figures to arrive and had a bit of painting time to spare, so I thought I’d bite the bullet and clear some of my lead mountain.

Chosen were some 15mm American Civil War (ACW) infantry to add to an incomplete Confederate army. I’d last worked on the army well before the arrival of Contrast Paints, and hadn’t painted the figures very well, so this was very much a case of smashing out as many “wargames standard” figures as possible as quickly as possible.

The figures are from Essex Miniatures and, as with all Essex ranges, take the paint well even if they are a bit manikin-like sometimes. I painted 88 of the little blighters, in batches of ten, with each batch taking about two hours to do once all the prep work had been done. This is what Contrast Paint is made for!

Here’s a closer look:

TTS AAR: The One With The Mid-Game Earthquake!

As our first Normans versus Vikings game hadn’t taken that long, Kavan and I decided to swap sides and play again. This was to be a very exciting game, but for all the wrong reasons!

Deployment was pretty quick. Having seen how the Normans were able to harry the somewhat dispersed Vikings in the last game, I was determined to keep my troops together to protect the flanks of each unit whilst giving maximum opportunities for mutual support. I put the huscarls, my best troops, in the centre hoping to punch through to his camps…and made sure I left my light javelinmen to protect my camps: no repeat of the last game here!

The Normans advanced towards me really quickly so, not wanting to have no room for tactical retreats and the like, I pushed forward as well. I also moved my light archers to the front determined to use every advantage I had despite the fact that missile fire had had almost no effect in the last game.

The initial clashes produced mixed results, and it looked as if we were in for a grinding clash determined not by subtle tactics but by blunt force!

Then disaster struck!

I have used the same fold-up tables for many years, and have never had a problem with them. This time, however, I must have neglected to lock the legs on one table properly, and as Kavan leant forward to position one of his units for the attack, the table underneath him collapsed!

Fortunately the rapid advance of the Normans means that almost all the figures were on my side of the battlefield i.e. on the other table, and it was only one set of legs that collapsed not both, so only a few units were affected and even those mostly by jostling rather than a long drop to the floor!

We were therefore able to put the battlefield back together fairly easily, and re-order all the jostled units with no damage done. Phew!

At this point in the game, the Normans were doing pretty well: pushing the Viking units back with a series of hard charges from their lance-armed heavy cavalry.

Now, however, the tide turned: the “earthquake” had obviously been the Allfather, or perhaps the Odinson, intervening!

My men rallied, and began knocking Norman units off the table one by one. Even my lights contributed: with an initial clash between the big boys often resulting in one disorder a side even a single, successful hit from Viking light archers meant an enemy unit cleared from the table (my “deep” units could take two disorders before breaking, the Normans only one).

My idea about mutual support proved useful, as several times warbands that had already dealt with the enemy horse in front of them were able to turn and intervene in another clash, as below:

Here, the intervening Vikings smashed the enemy they flank charged from the table, giving the unit under pressure time to rally off a disorder. Yes, they were then in a terrible position being flank charged in turn, but the Vikings are tough and can usually take one flank charge without breaking.

Fittingly, it was a light archer unit that polished off the last of the Norman victory medals:

A great game with a very narrow escape. I will make jolly sure the table legs are locked next time!

Mammoth Painting Challenge Update

May has proved a very productive month for many of you, with a veritable cornucopia of entries into the 2023 TFL Painting Challenge.

This week we have entries from Mervyn, Sapper, Matt Slade, Carole, John, Mr Luther, Stumpy, Lloyd, Andrew and myself. Top scorer, as ever, is Mr Slade, who has already passed his last year’s total and is determined to break his previous record of 5,522 points, set in 2015.

It’s not a competition, however, but a personal challenge, so let’s all pick up those brushes and see whether we can equal Matt’s aim. I scored a personal best last year with 2,077 points, beating my previous best of 2,005 points, set in 2019, so am keen to make it two in a row.

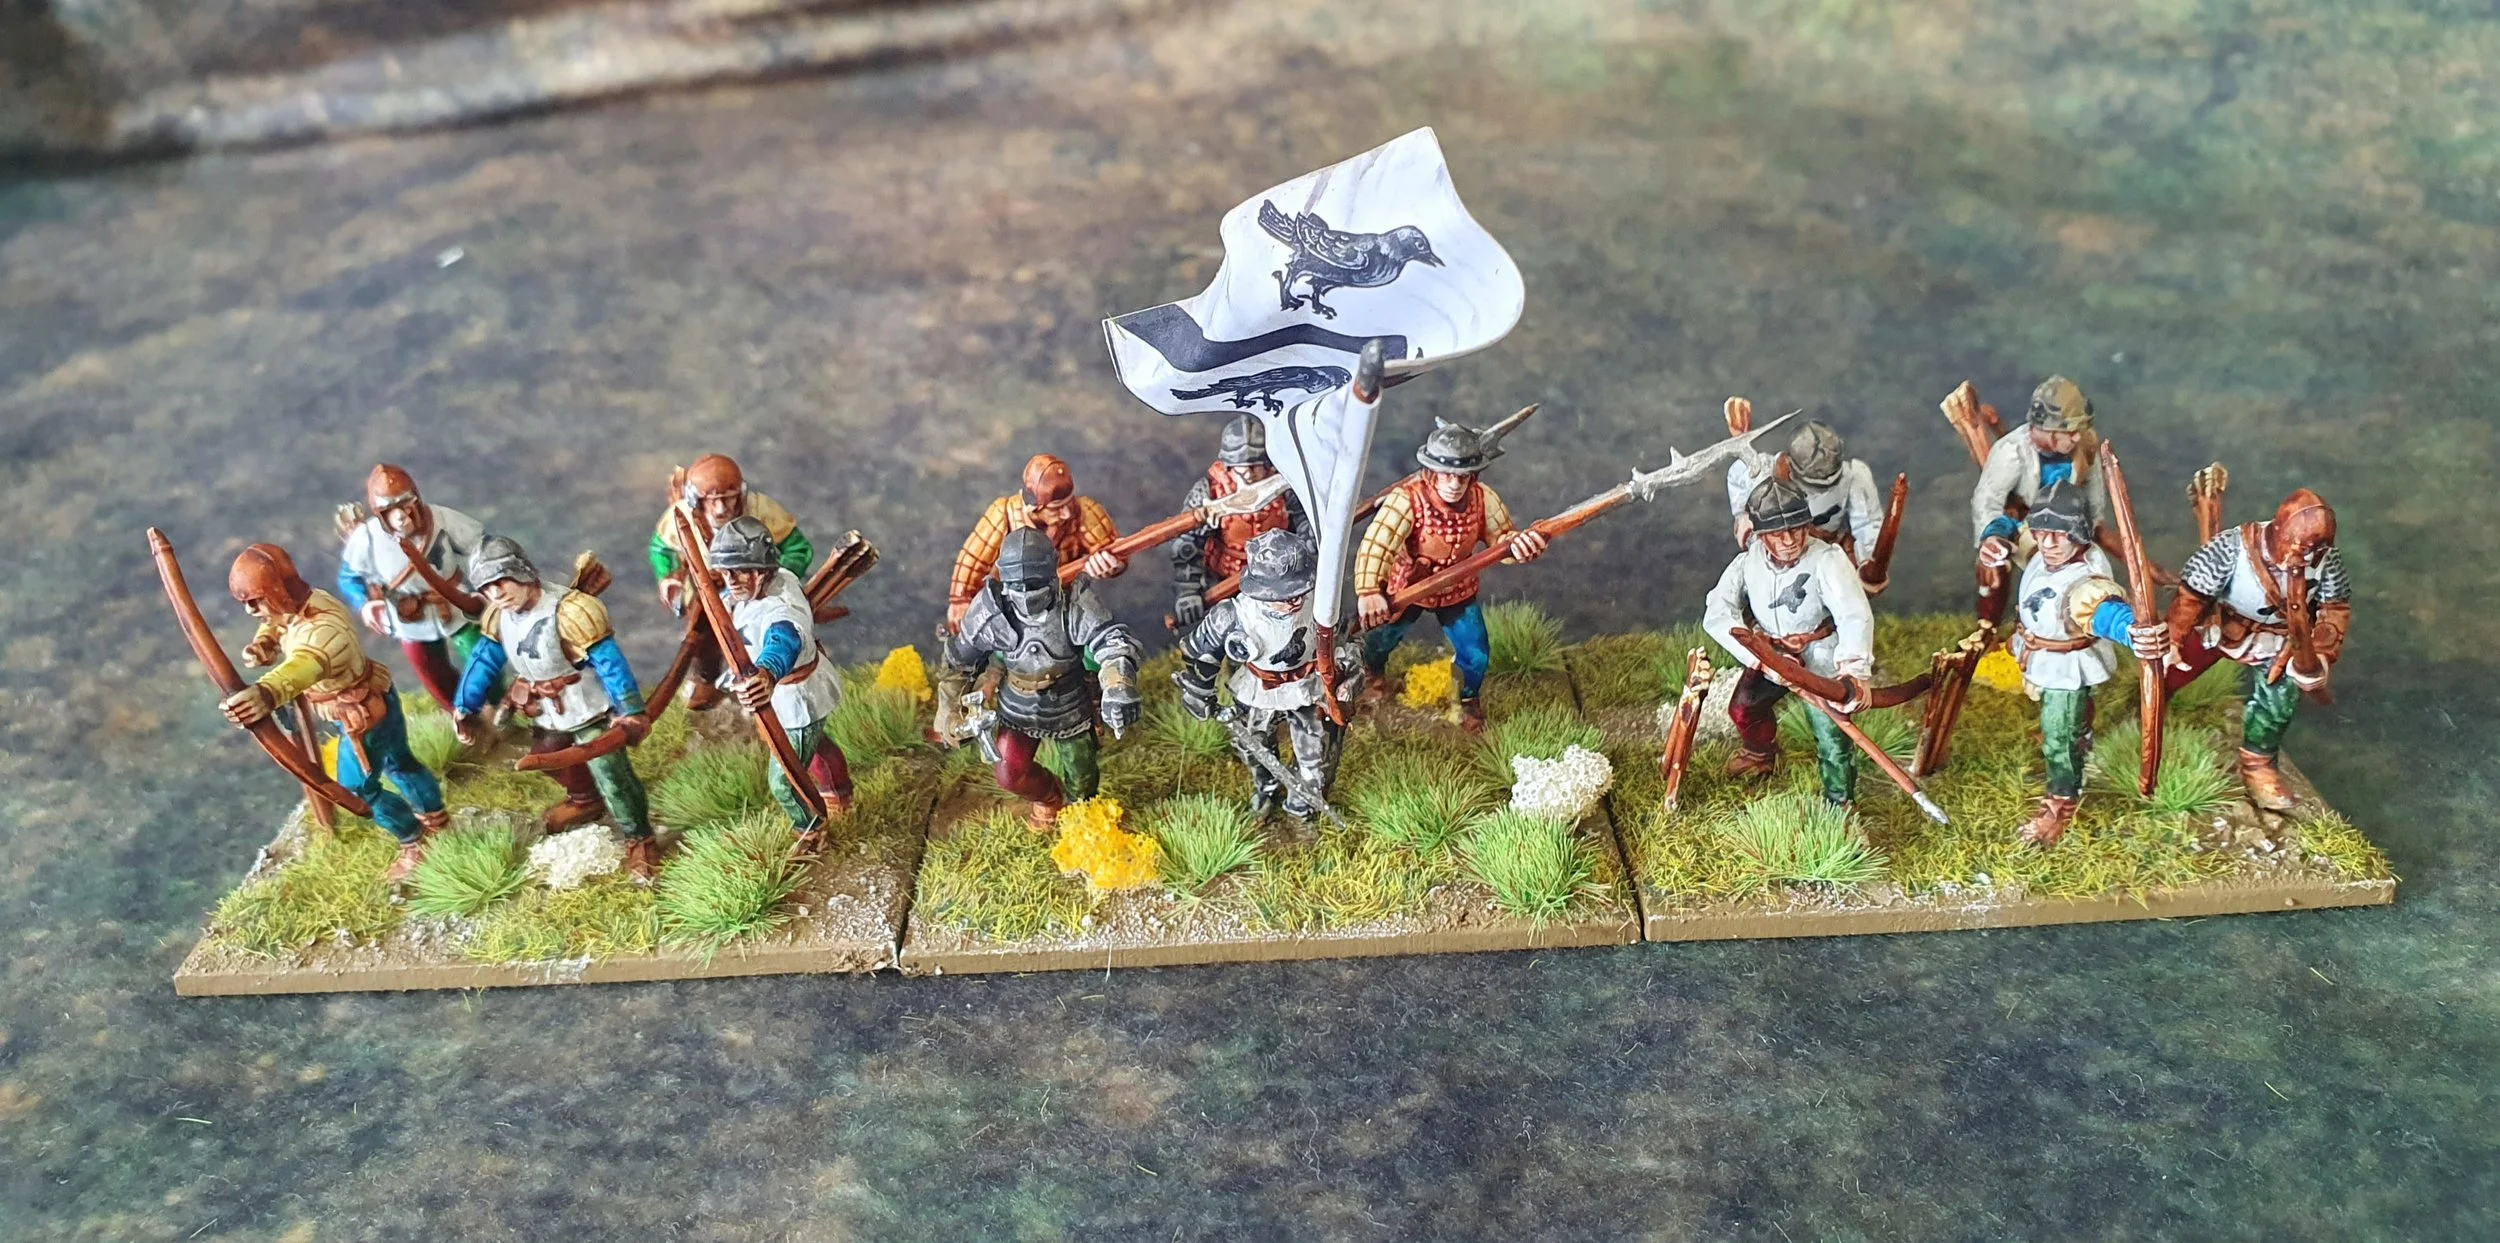
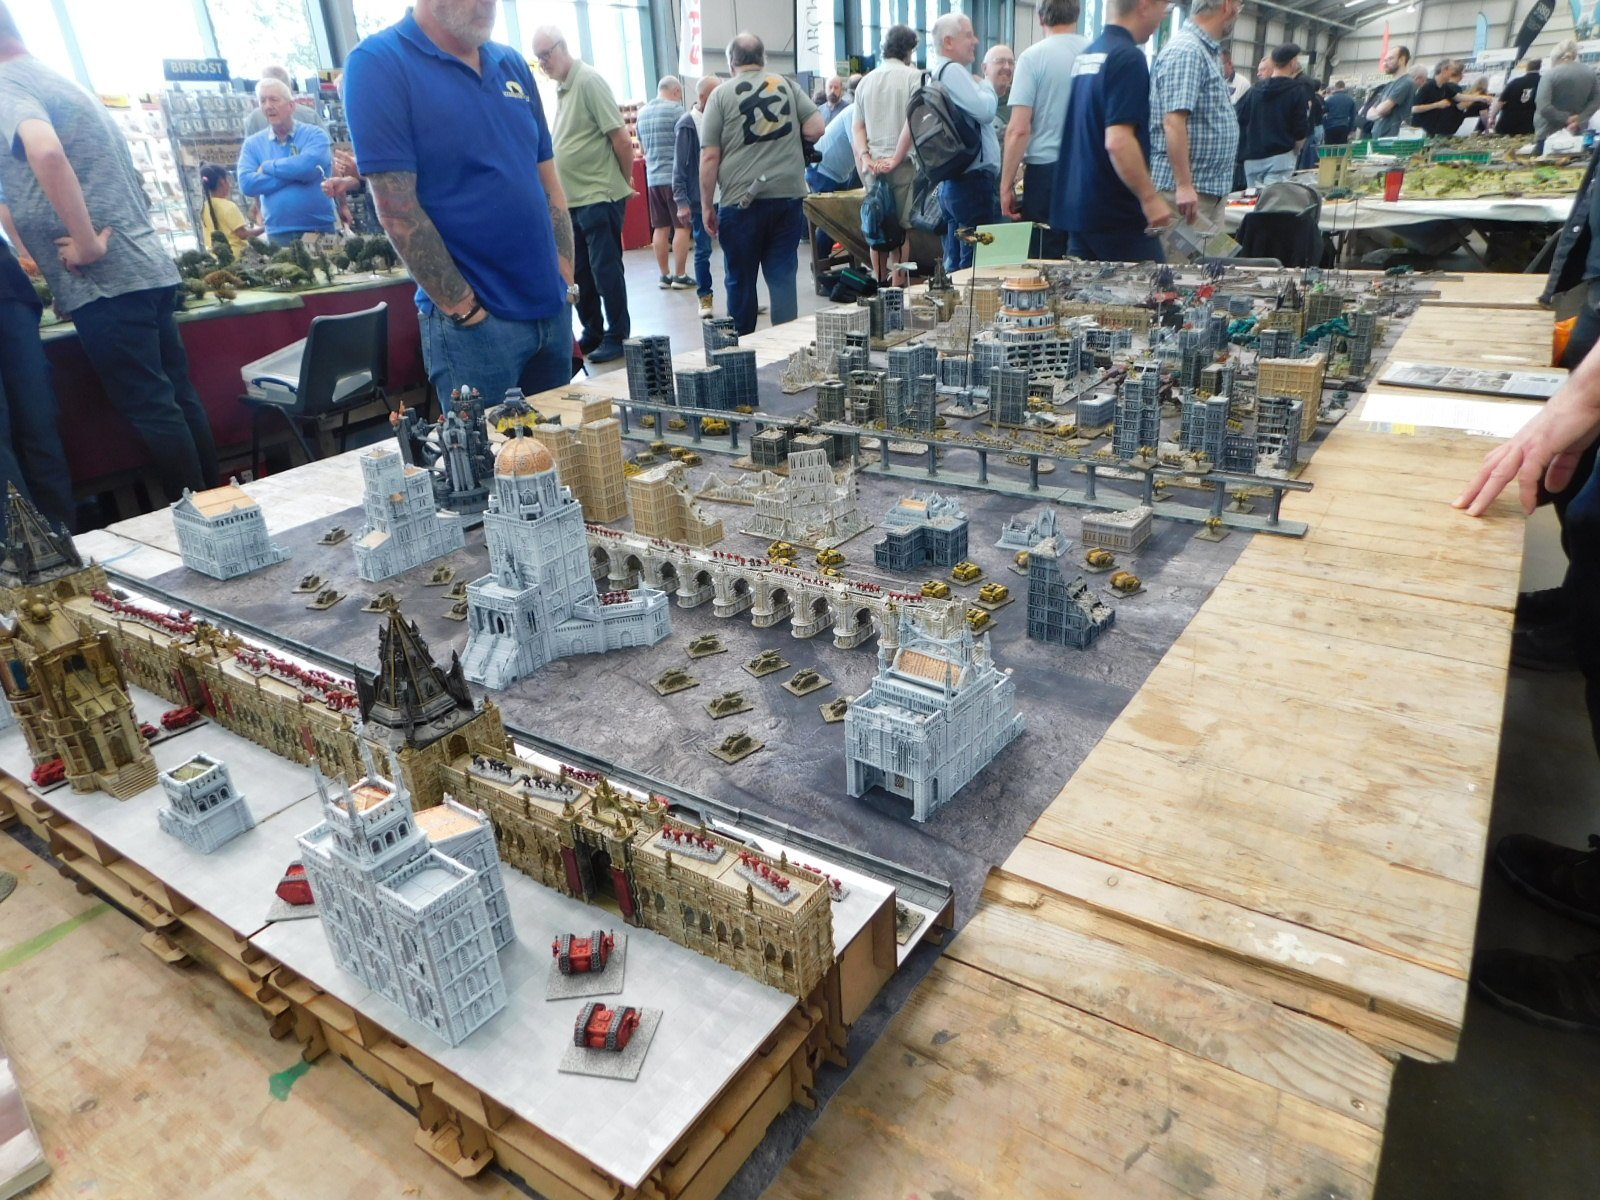
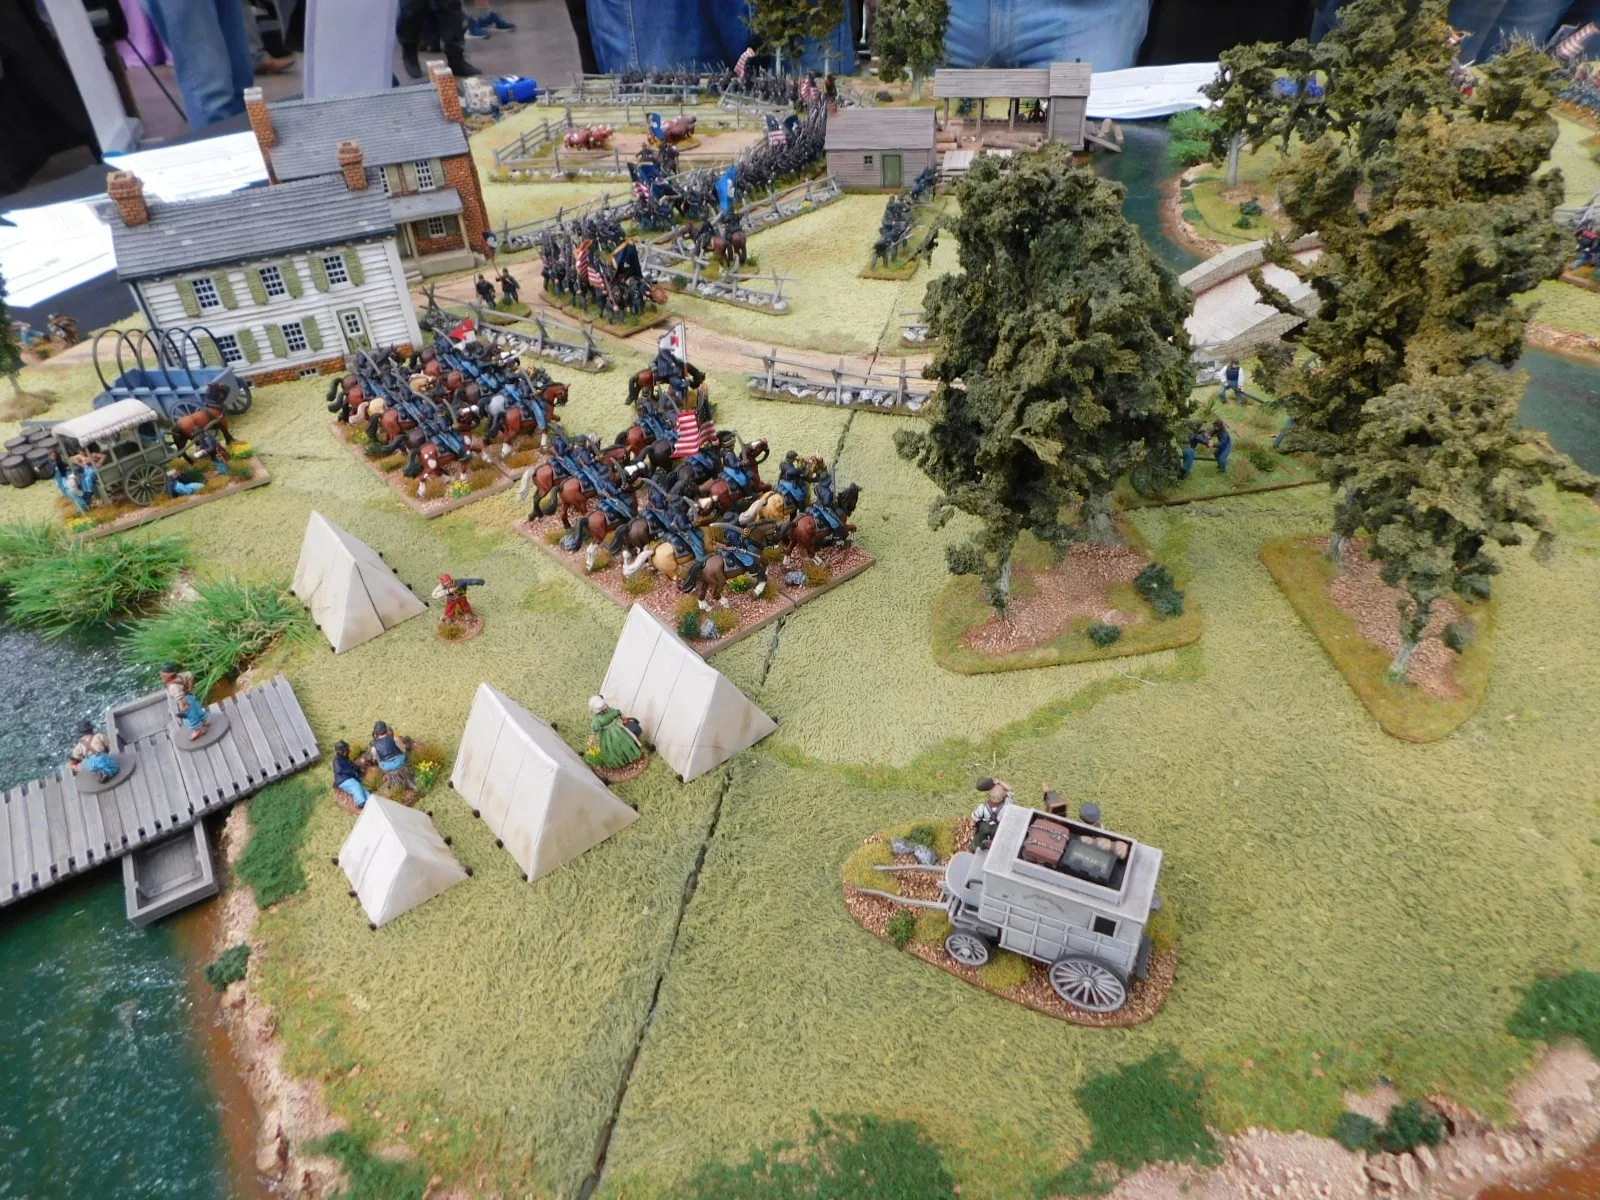
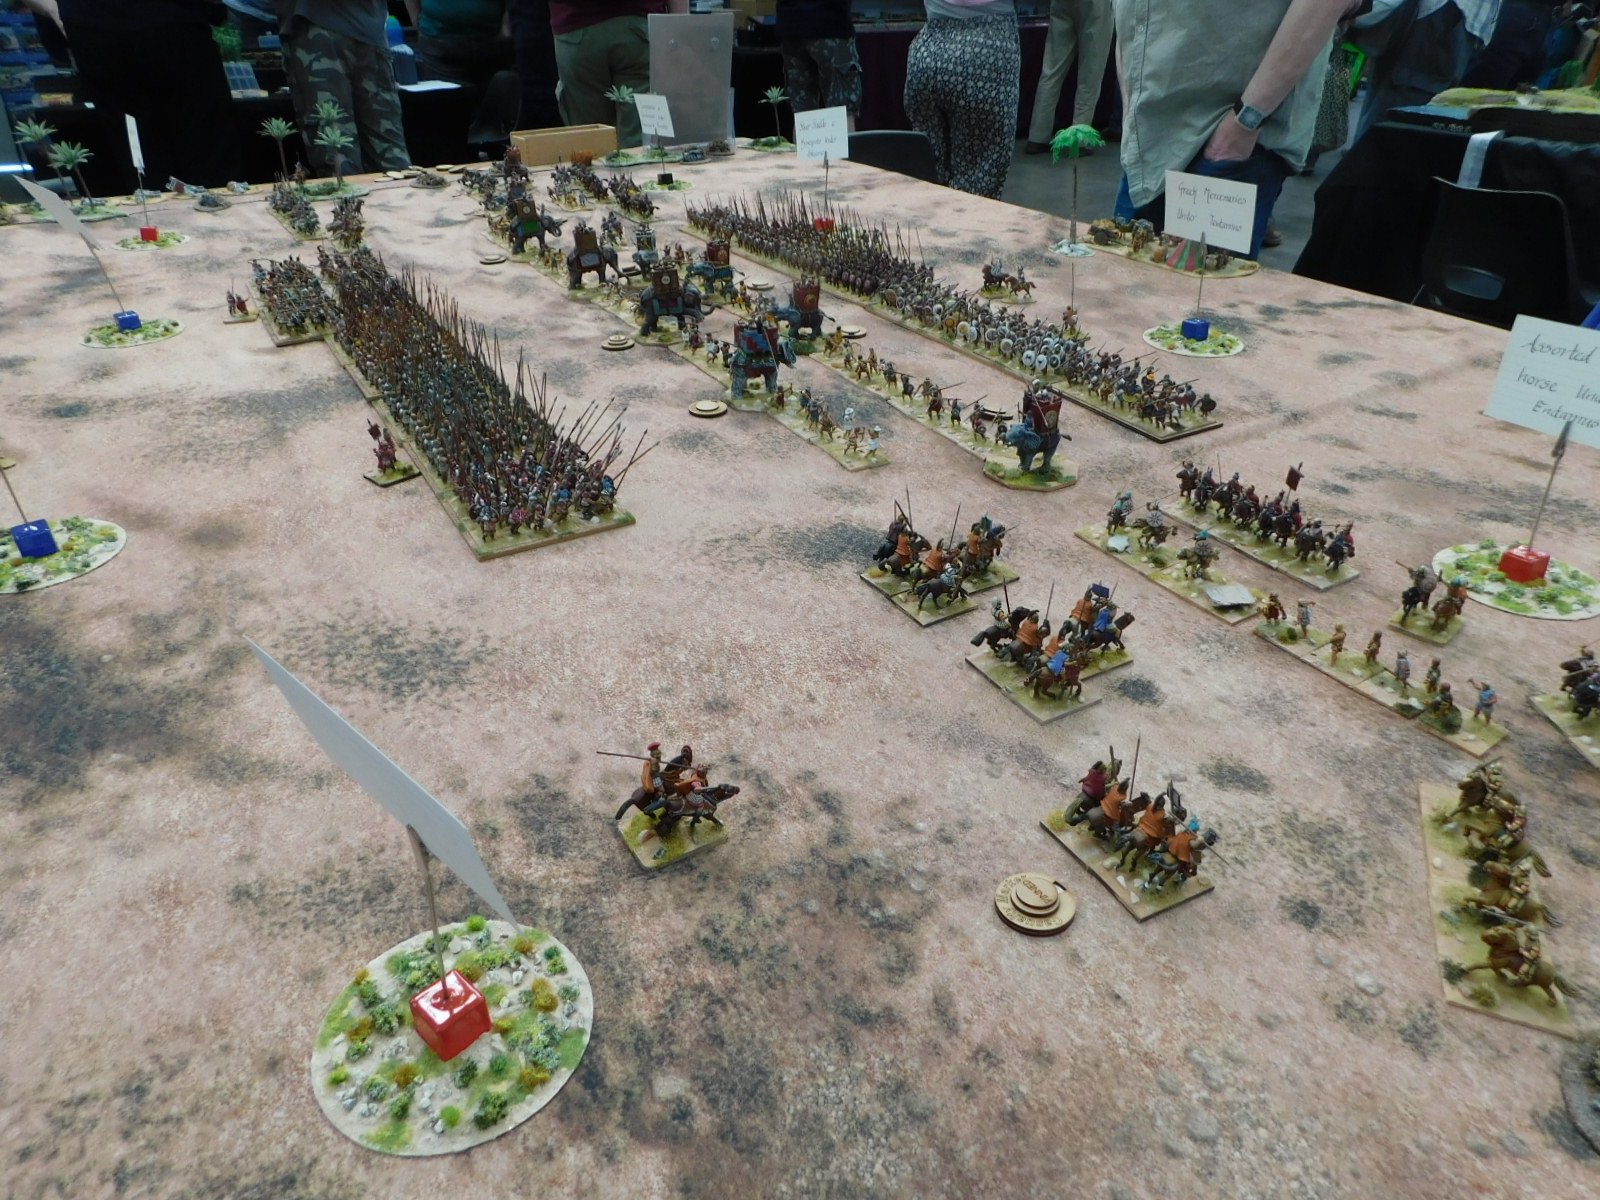
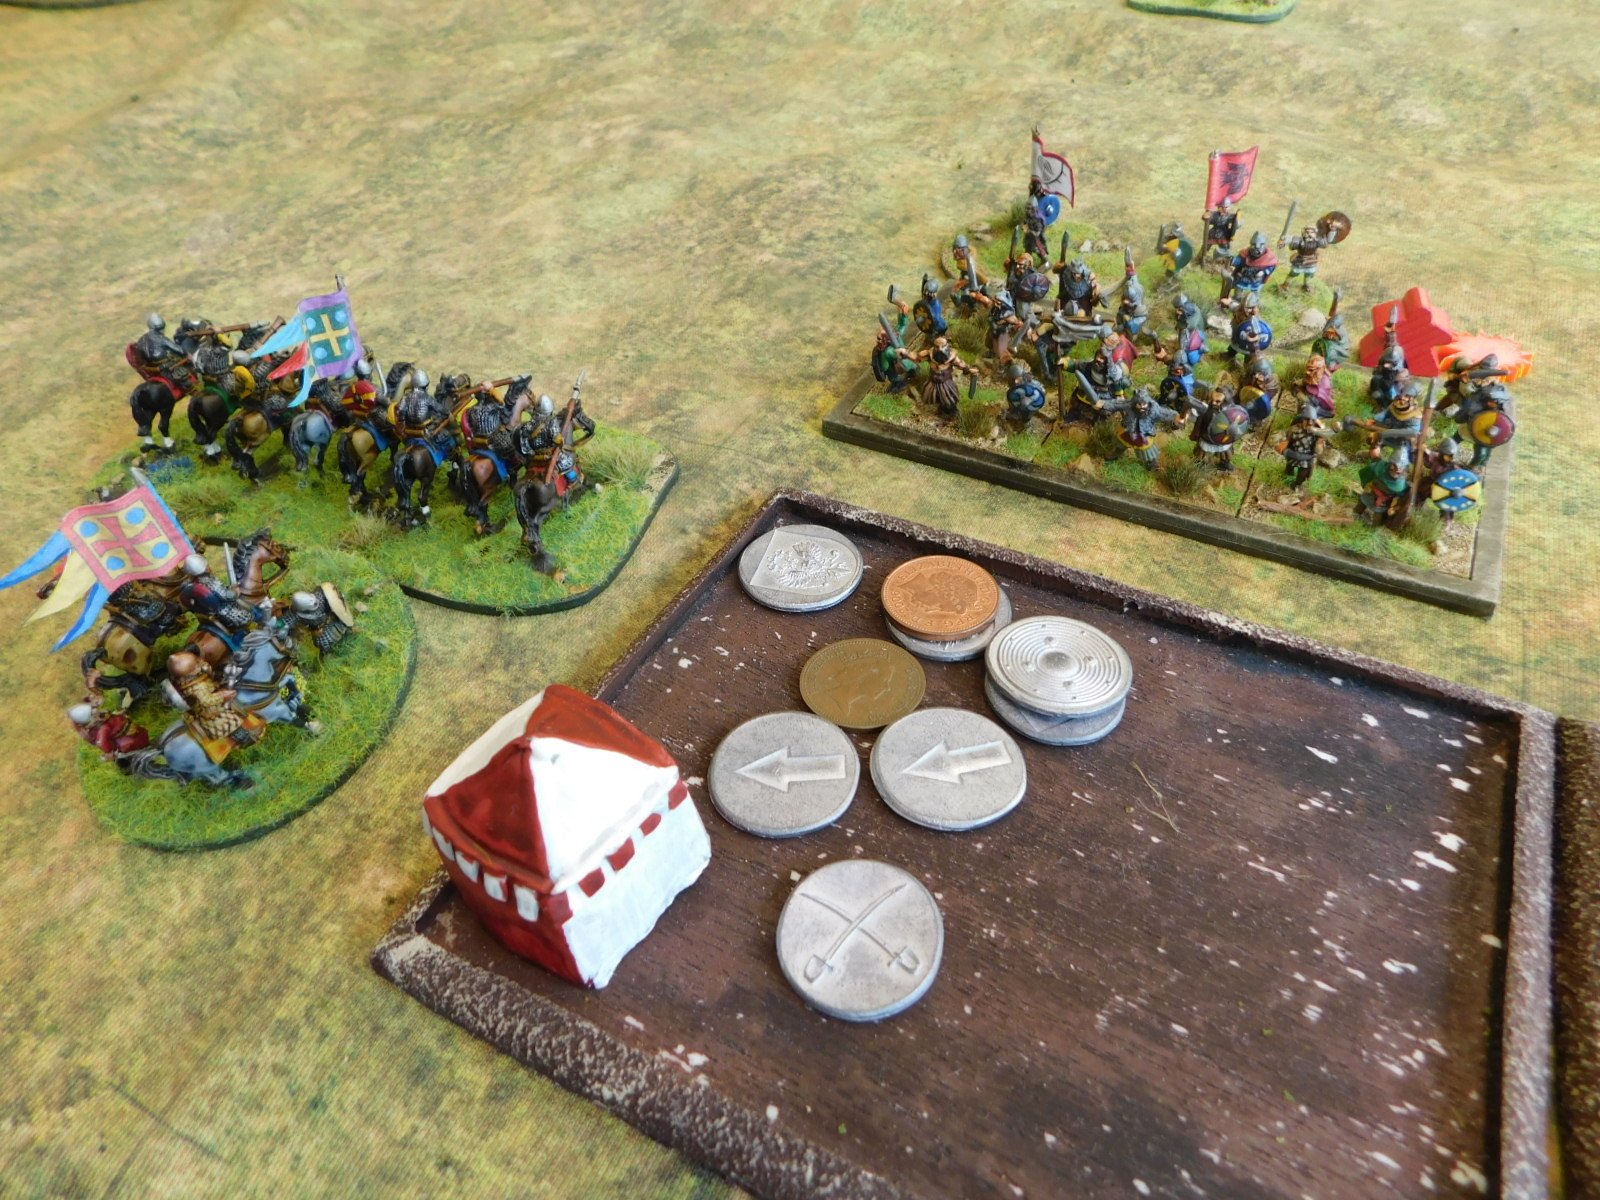
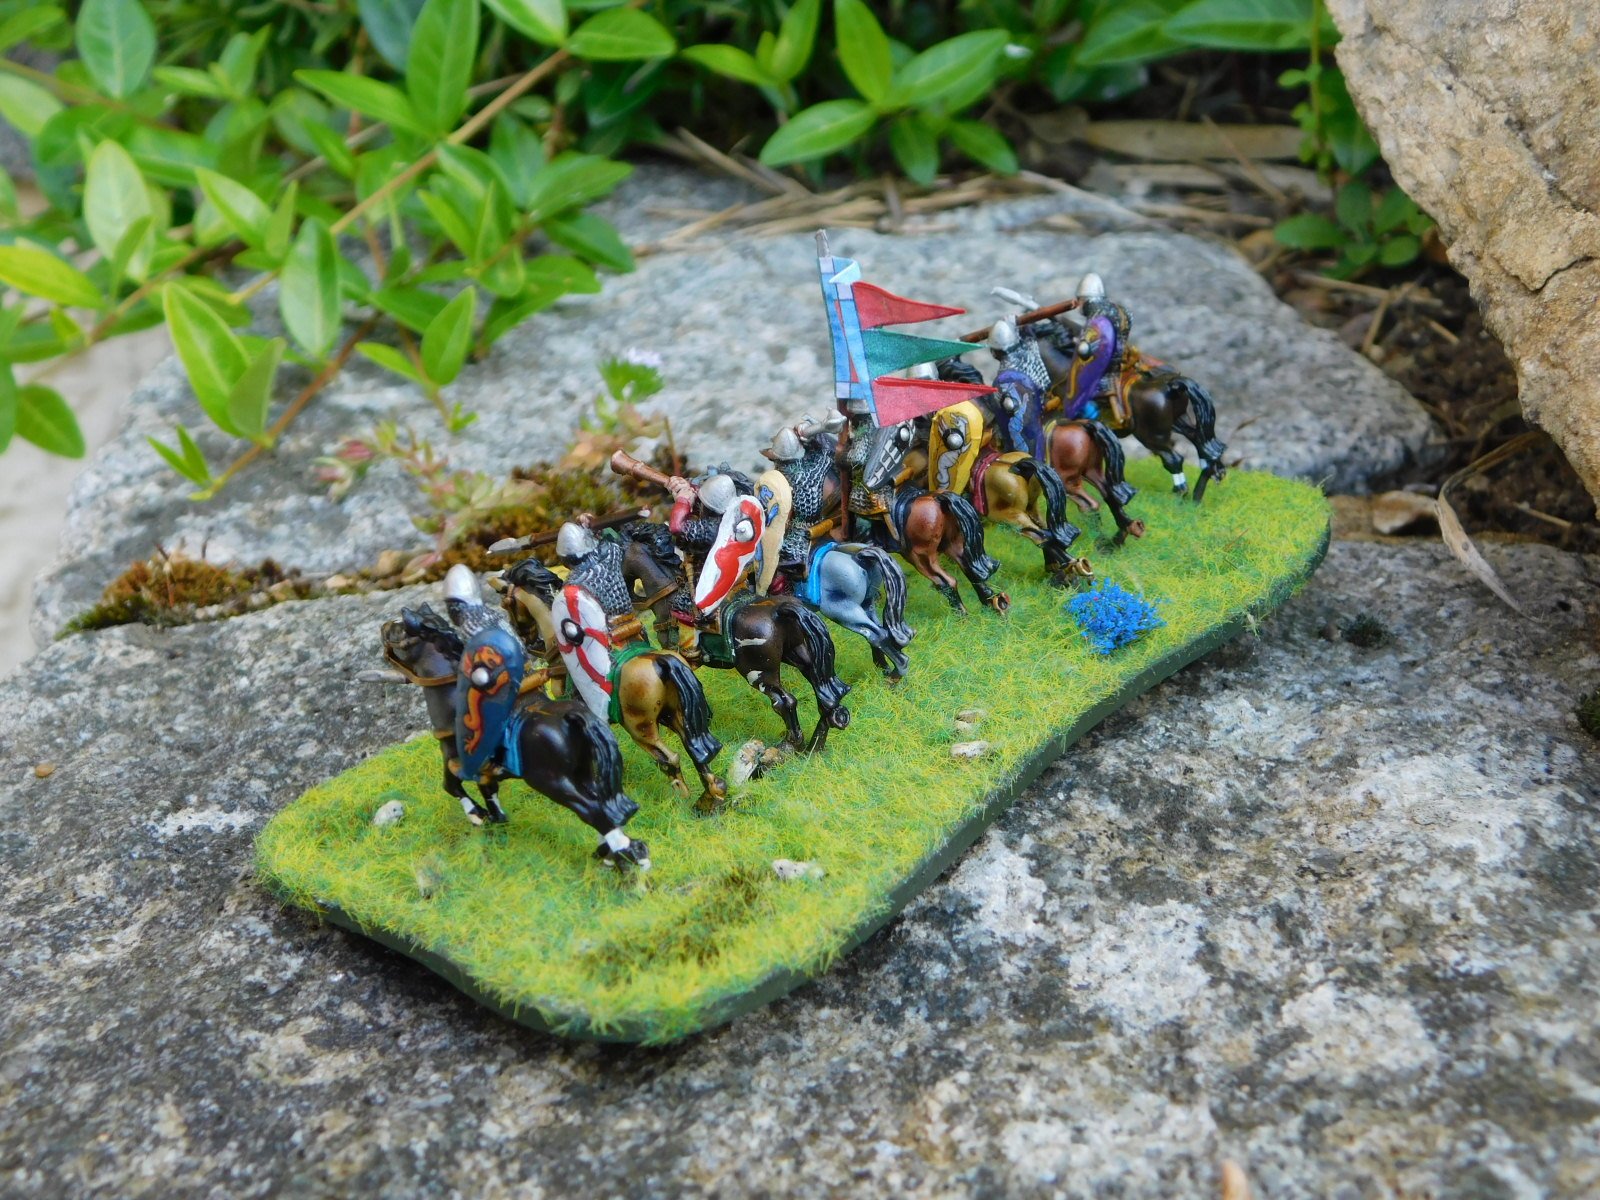
Please do visit everyone’s individual galleries: there’s some great work there. You can access them through the NavBar, above. Meanwhile, here’s a taster from this round of entries:

Partisan Show

I hadn’t been to the Partisan show in Newark in years, mainly because at about two and a half hours away it’s really just on the outside of how far I want to drive for a single day’s show. Indeed, the last time I went I was actually breaking a journey to Scotland, staying over in Newark in one of those happy coincidences that happen occasionally.

Anyhoo, to Partisan and Newark I went this year, and jolly pleased I was to have gone. The show was excellent: much better, even, then poor, tired, gloomy, old Salute. Firstly, the hall was light: you could actually see the demo games without the need for extra lighting. Secondly, there was a real buzz about the show, a certain je ne sais quoi that has been missing from the other shows I’ve been to this year. Finally the demo games were amazingly good, as you’ll see from the pictures below.

I could quibble about the catering or the slightly limited number of trade stands…but they would only be quibbles. Highly recommended, and I shall be diarising another visit next year.

TTS AAR: Normans Take The Field!

As mentioned in my last post, with the last of the Milites finished it was time for the Normans to finally take the field with a game of To The Strongest versus Kavan playing the Vikings.

This would be quite an interesting battle as the Normans were mostly heavy cavalry and the Vikings were all infantry. My plan was to take advantage of my extra mobility and get around his flanks, as charging formed infantry with cavalry is rarely a good idea!

As the game began, both sides advanced forward strongly, with the battle rapidly dividing into three sectors: the left, the centre and the right.

In the centre, Viking huscarls (the units with the red Meeple) had sped forward and hit a line of Norman cavalry in the Norman half of the table. With three Norman units in play against just one Viking, I was fairly confident that I could win the first clash, but I had underestimated just how ‘hard’ the huscarls were: being a deep, veteran, shieldwall unit with extra two handed cutting weapons!

My first Norman cavalry unit just evaporated and, worse, the follow up huscarls, led by their overall commander and waving their ‘land-waster’ standard, hit my own overall commander’s unit and forced him to make the decision to run away as fast as possible! Oh, the shame!

A quick overview pic, with the Viking huscarls bursting through my centre!

Meanwhile, on the left flank, my plan had actually worked out rather well.

Three units of milites had faced up to a couple of the lesser-quality Viking bondi units supported by some lights, and used their superior mobility to get around the hairy infantry and into the Viking camp. Six glorious victory medals headed my way as my horsemen remembered their heritage and sacked and plundered the enemy camp for all its worth!

My Viking Longships haven’t arrived yet, so the Viking camp has a weird looking hut in it…and lots of Norman cavalry!

In the centre, however, the Vikings were about to do to me what I had done to them, with their commander’s huscarl unit crashing after my fleeing horse and then into the Norman camp and refusing to be shifted even by William himself!

Fortunately only one half of my camp was taken, but that still meant three victory coins to Kavan!

Casualties were now mounting on both sides, so it was obvious that the battle would be decided on the right where, up to now both sides had cautiously crept towards each other.

Somehow I had managed to get into a decent tactical position where I could get two of my cavalry units onto one of the bondi units but, as I have said before, these deep units are tough and the bondi survived long enough to pull back and get some support.

Not even the toughest Viking, however, can keep taking charges from the front and flank, and so it was here as well. The bondi unit broke and with that Kavan’s final victory medals were spent and the Vikings decided to retreat.

A great game and a very narrow victory for the Normans as I only had five coins left myself.

It was an interesting battle and one where I learnt that Norman cavalry definitely do not want to take on Viking huscarls or bondi units head on, even with lances: the only way is to get around their flanks or hit them two-on-one.

Last of the Norman Milites

Here are the last of the Norman Milites figures: 15mm miniatures from Museum Miniatures’ CAD designed Z Range.

That’s eleven units of Norman cavalry (88 figures) I’ve painted since the first ones rolled off the production line in February, all of which were painted in ‘eights’ so with each horse and rider painted in a unique colour scheme.

These are lovely figures. I read a review somewhere else on the ‘net criticising them for not having enough depth of detail to take Contrast paints well, but that hasn’t been my experience. I highly recommend the Museum Z Range and now have Sumerians, Classical Indians, some Greeks, and now the Normans.

Must be time to get them onto the tabletop…