Campaign in Milton Keynes

No, not my attempt to invade the most famous new town of them all but a visit to the annual Campaign wargames show held, would you believe it, in Milton Keynes.

Milton Keynes is only about an hour from me. I’ve actually been there before: once on a geography field trip when I was at school, and once for business about eight years ago.

Campaign is an unusual show in that it takes place in the middle of the MK Central shopping centre. Yes, right in the middle of a mall. As such, besides the usual wargaming folk, you have large numbers of members of the public exposed to our hobby…which is a good thing.

MK Central is the mall to end all malls: it is truly enormous with every chain you can think of in there. The show itself is small: it’s a handful of trade stands, a double fistful of demonstration games and, mostly, a venue for a variety of Ancients competitions.

I think the idea of the show is terrific: our hobby needs a constant supply of new blood to keep it fresh, so exposure from Campaign has got to be a good thing and I applaud the organisers for their efforts.

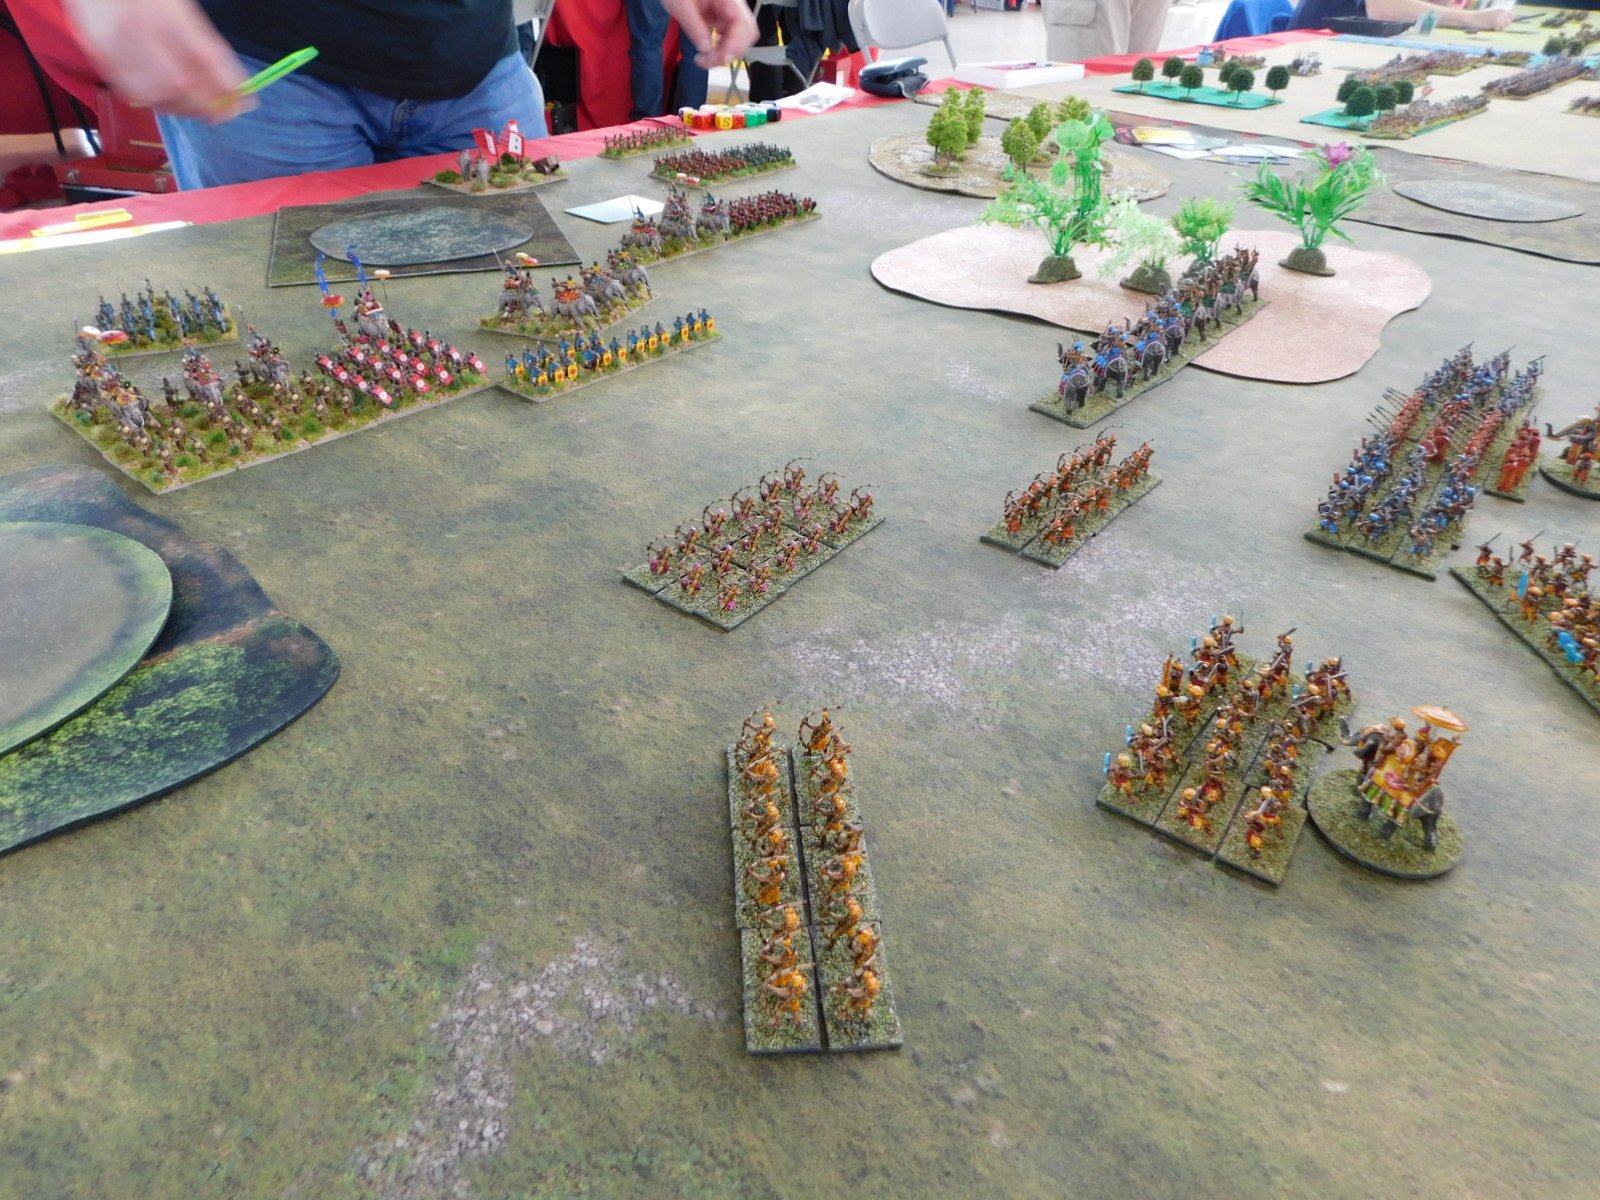
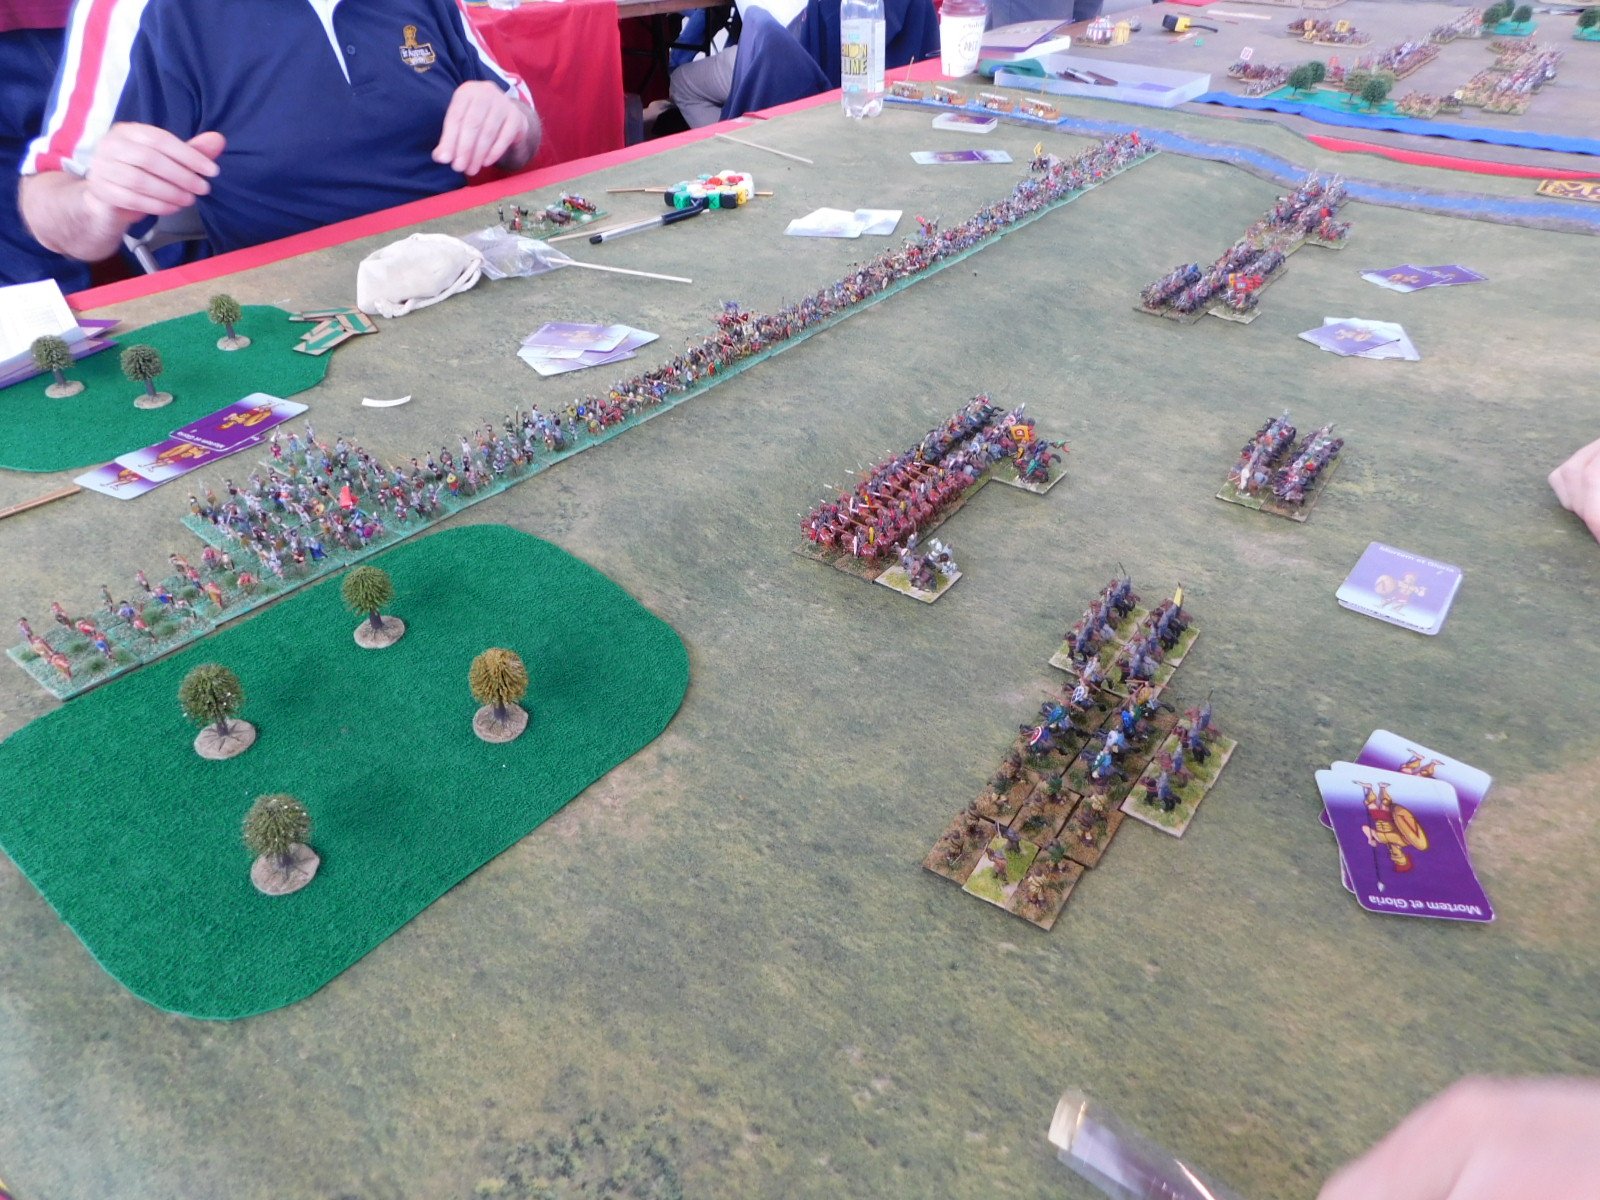
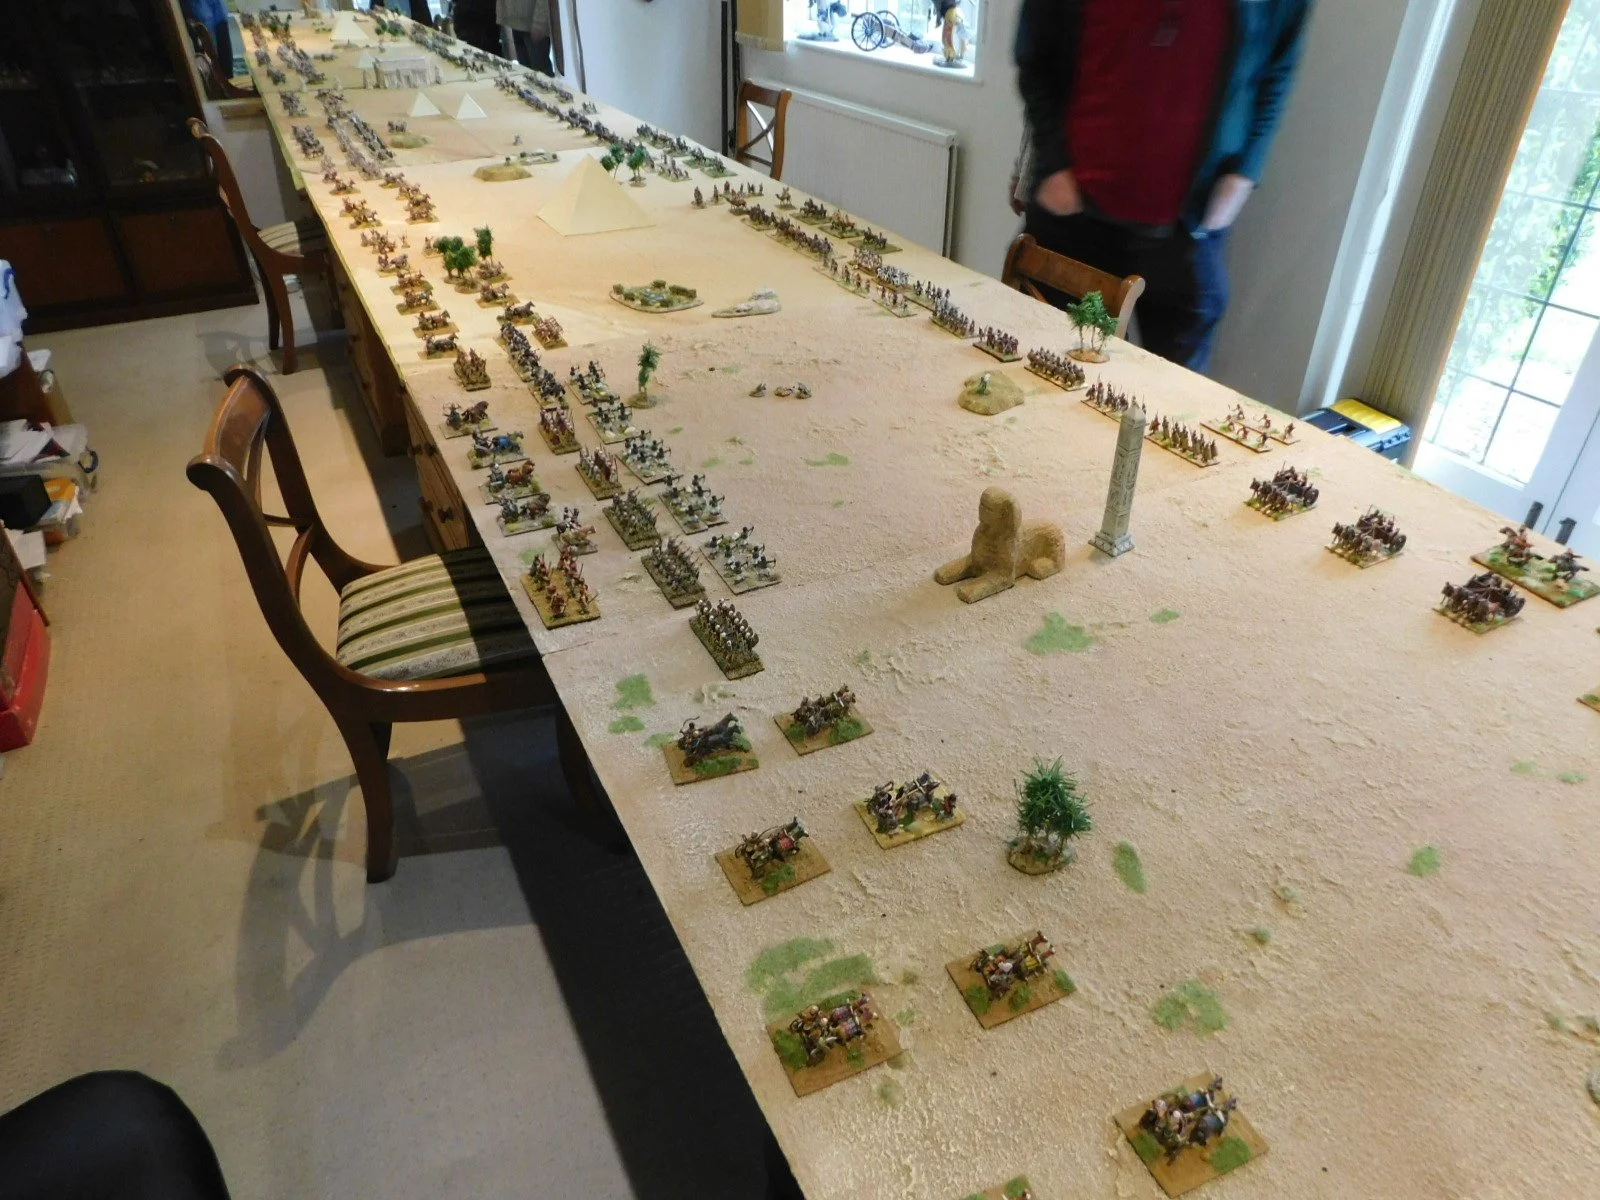
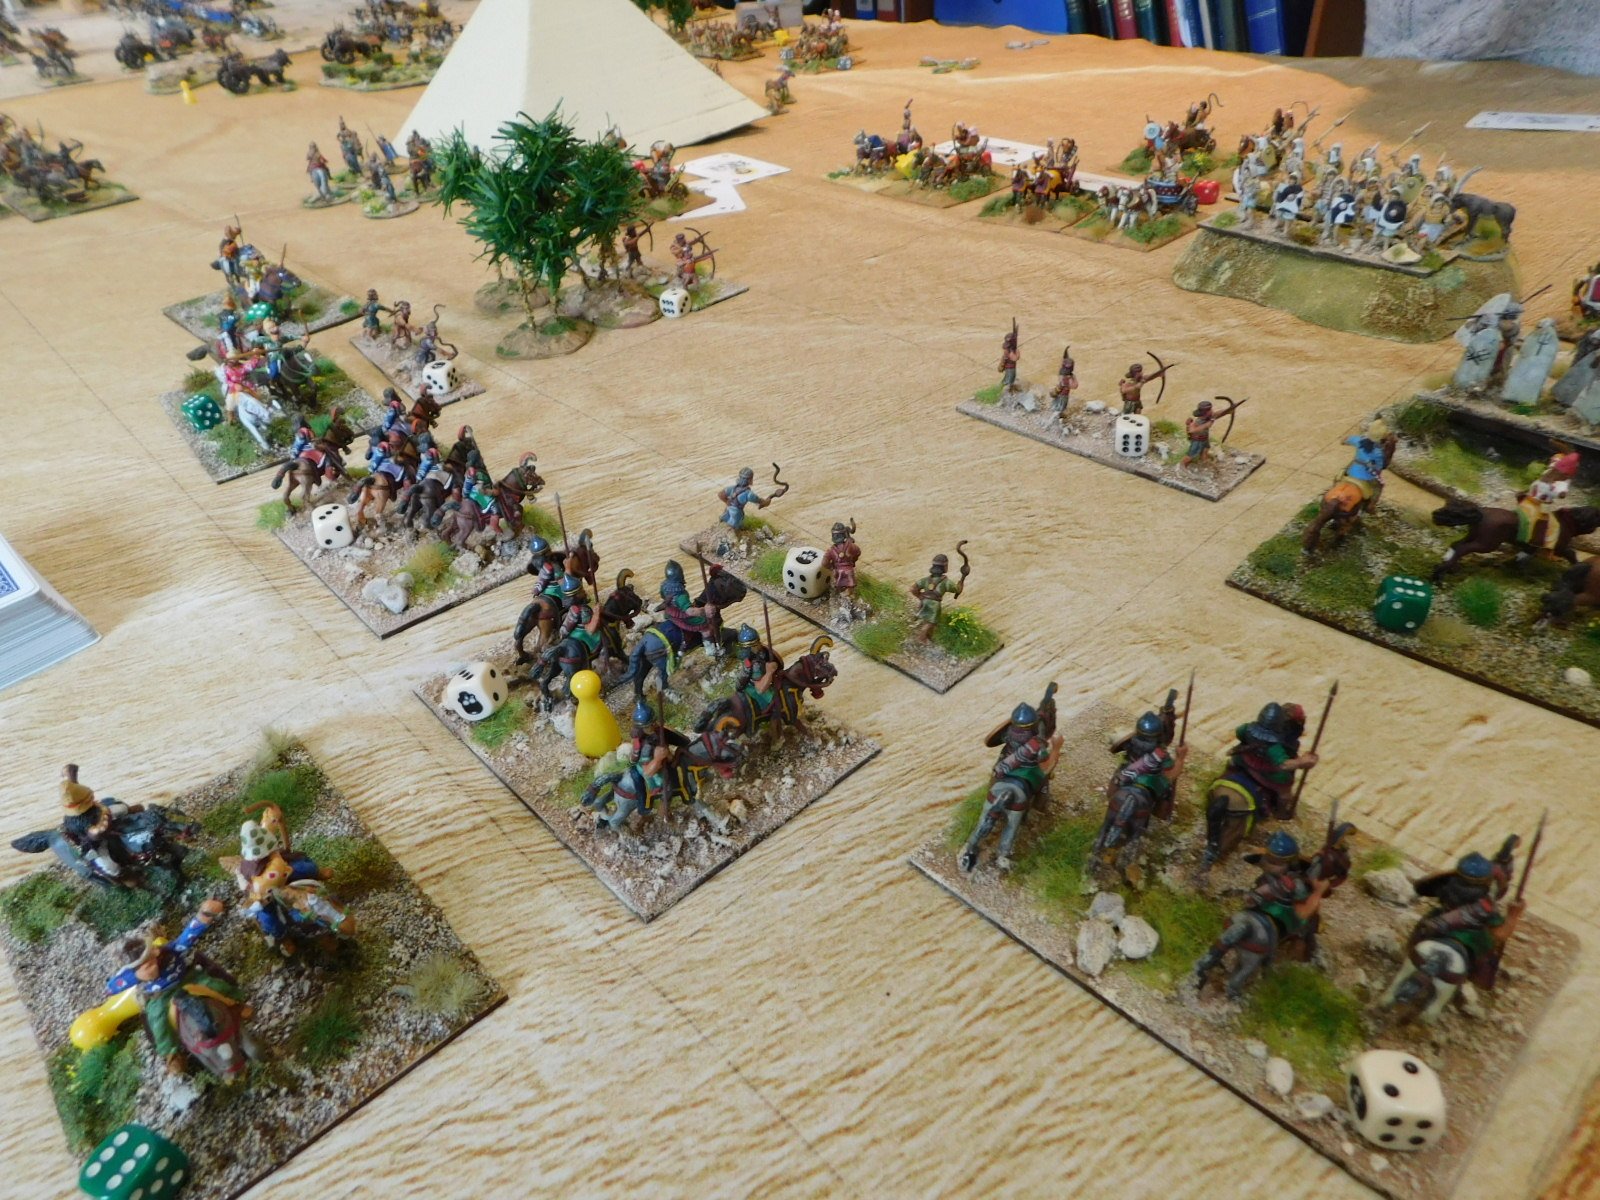
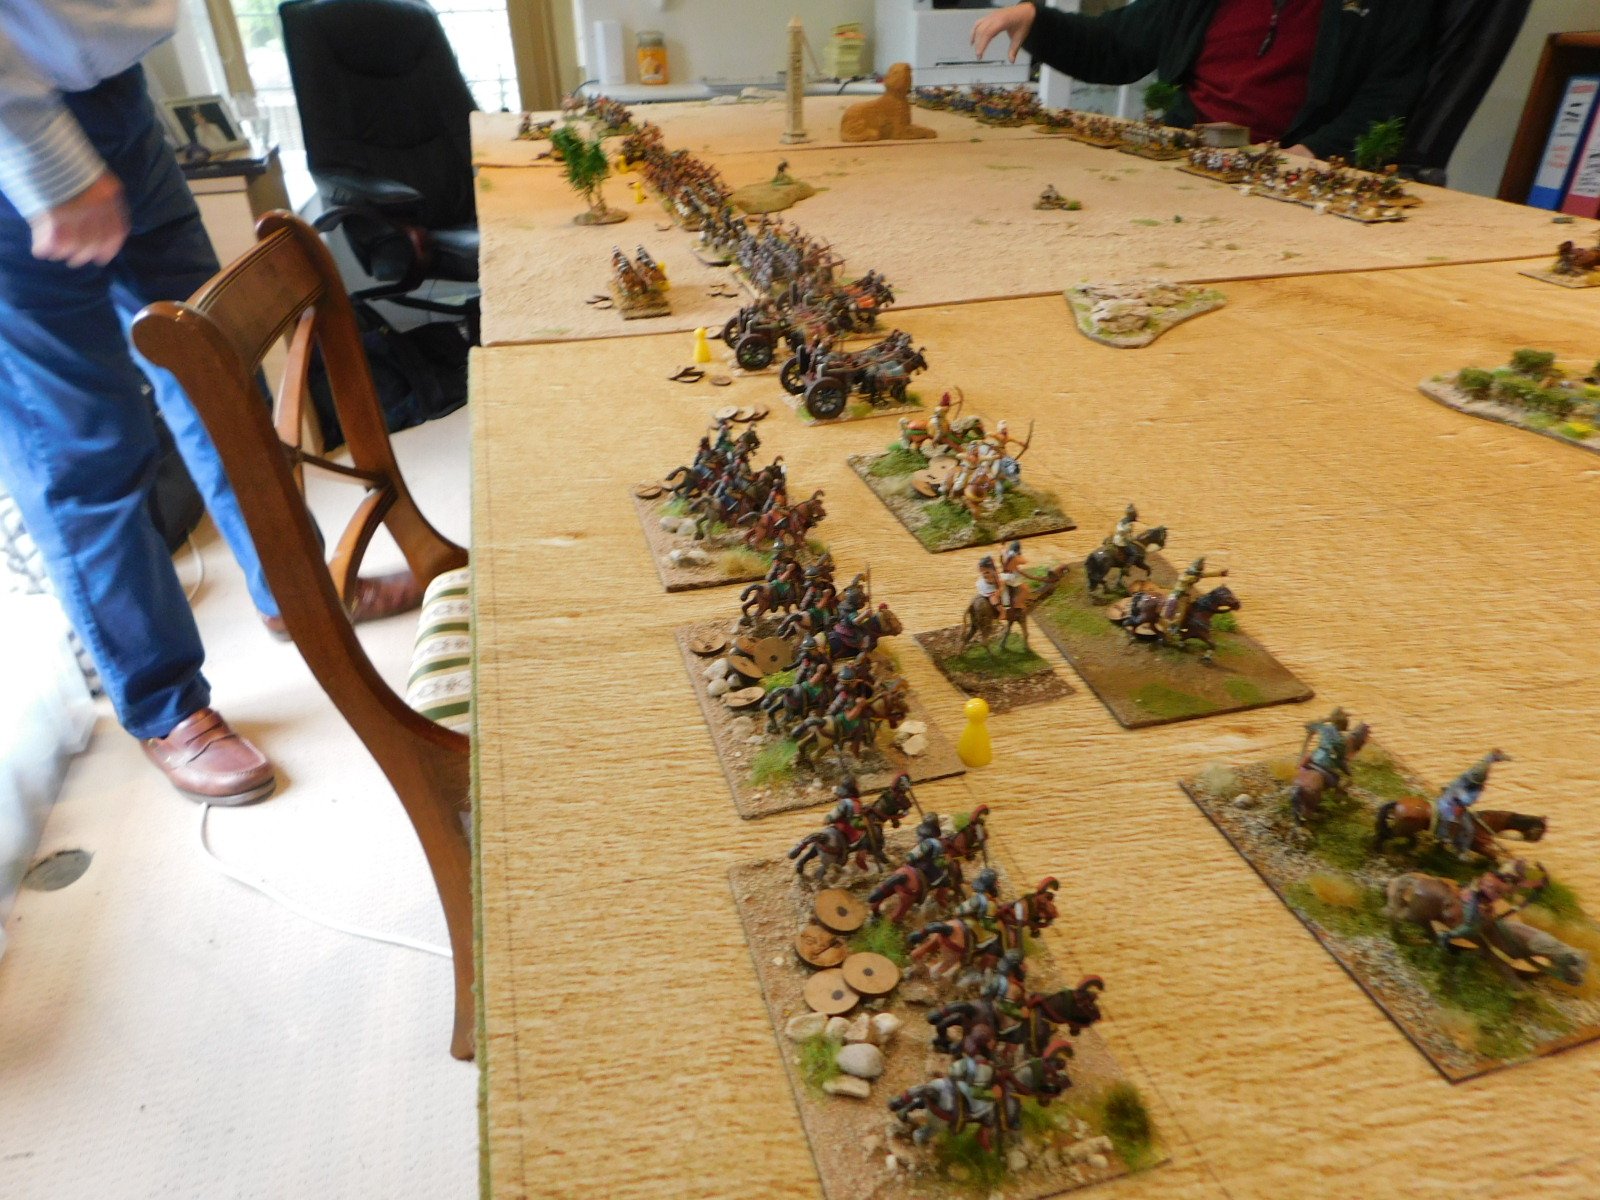
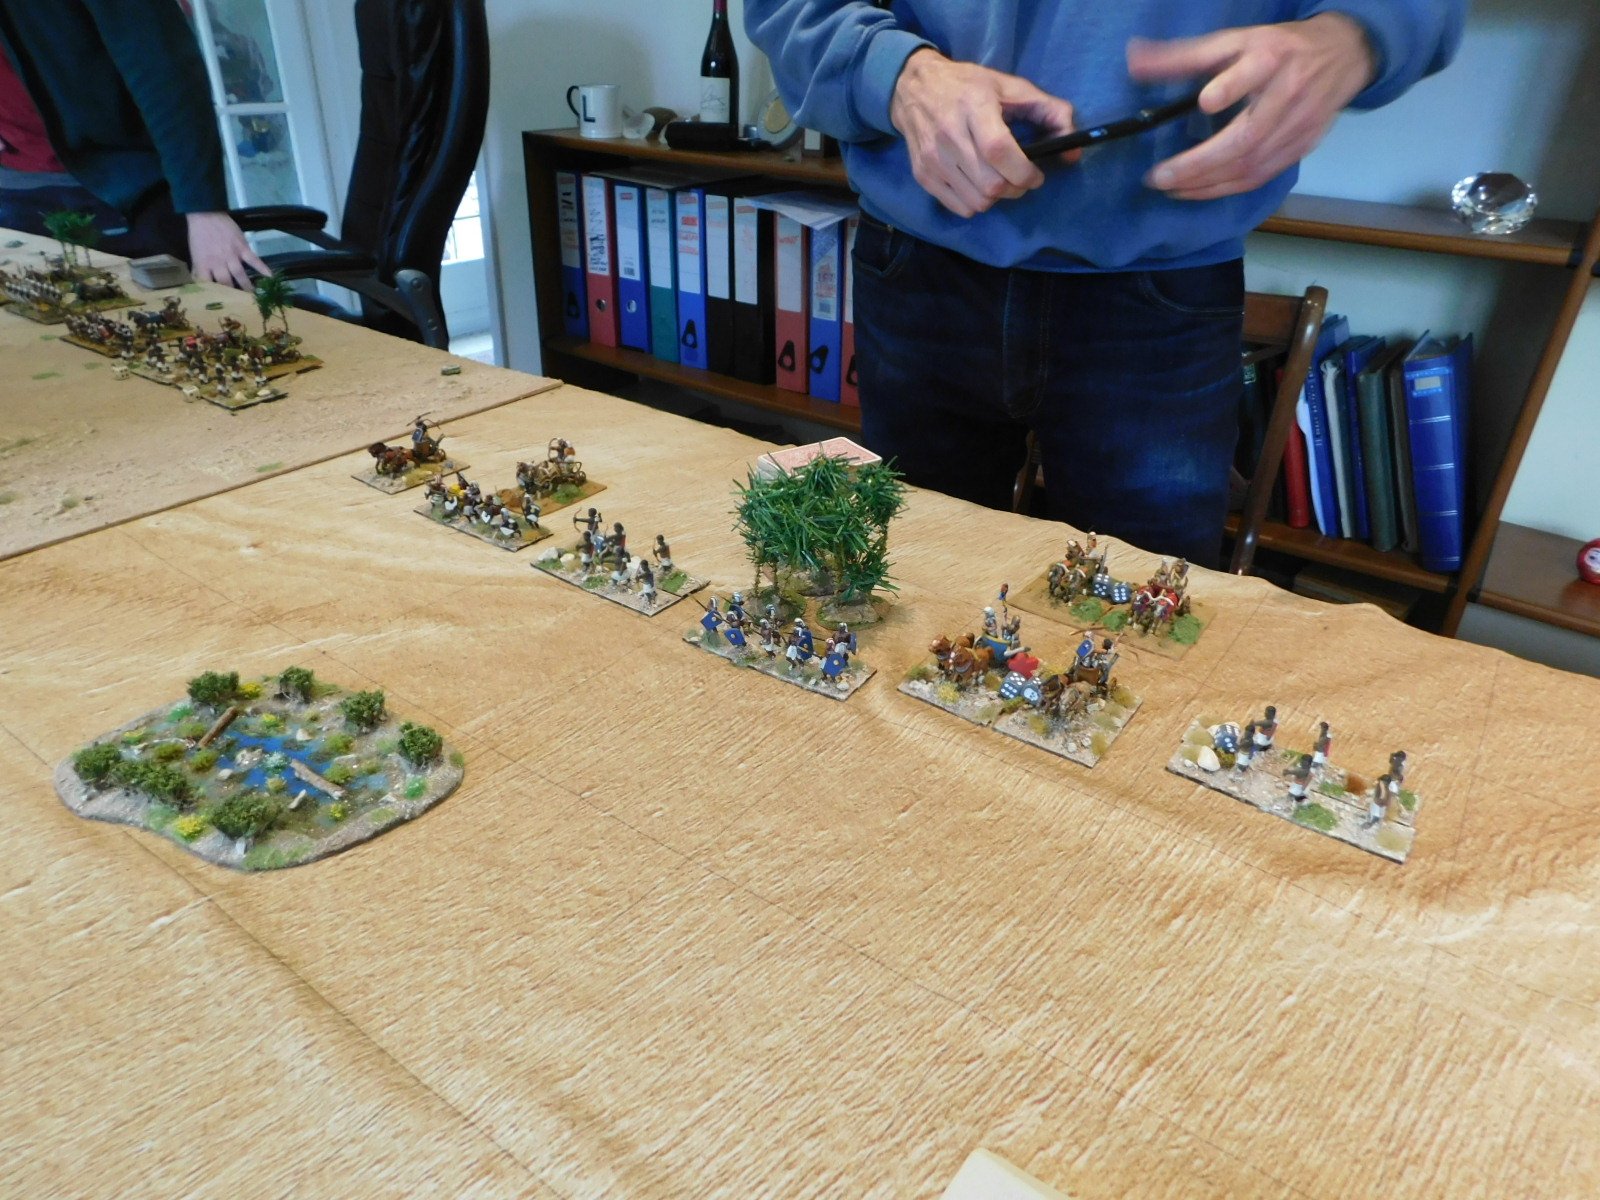
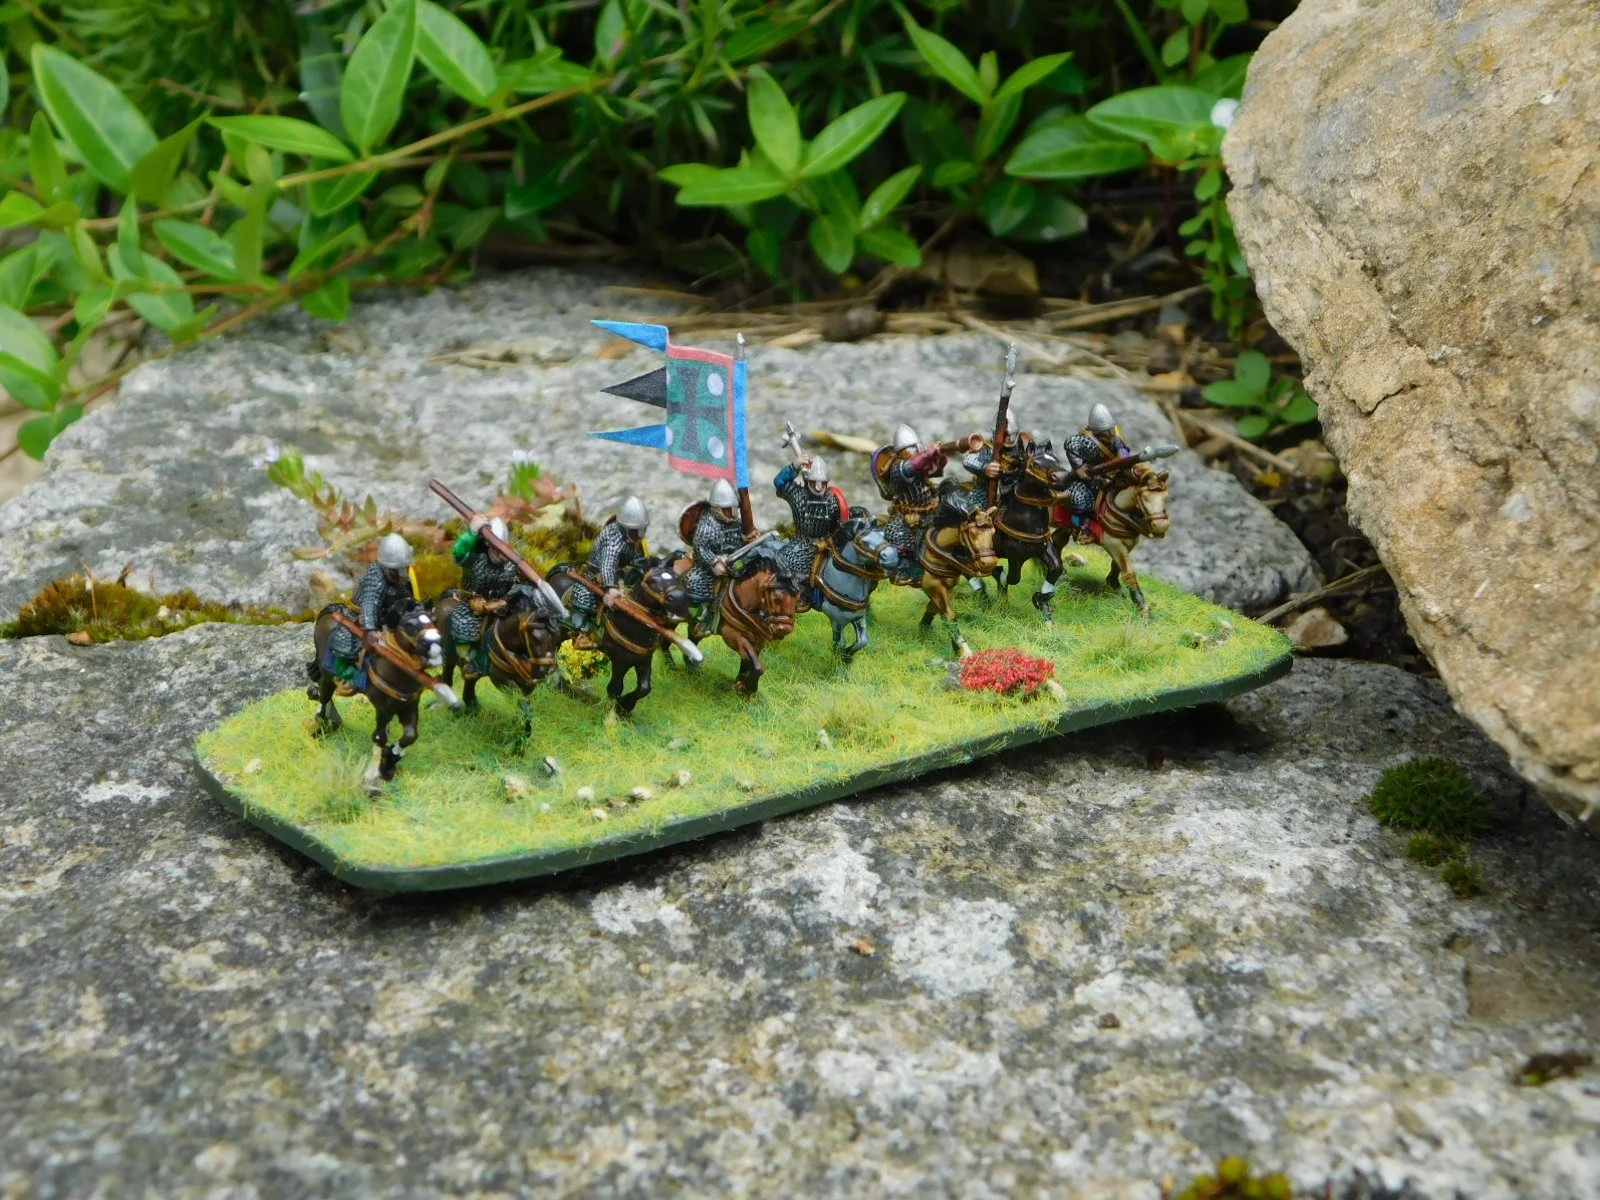
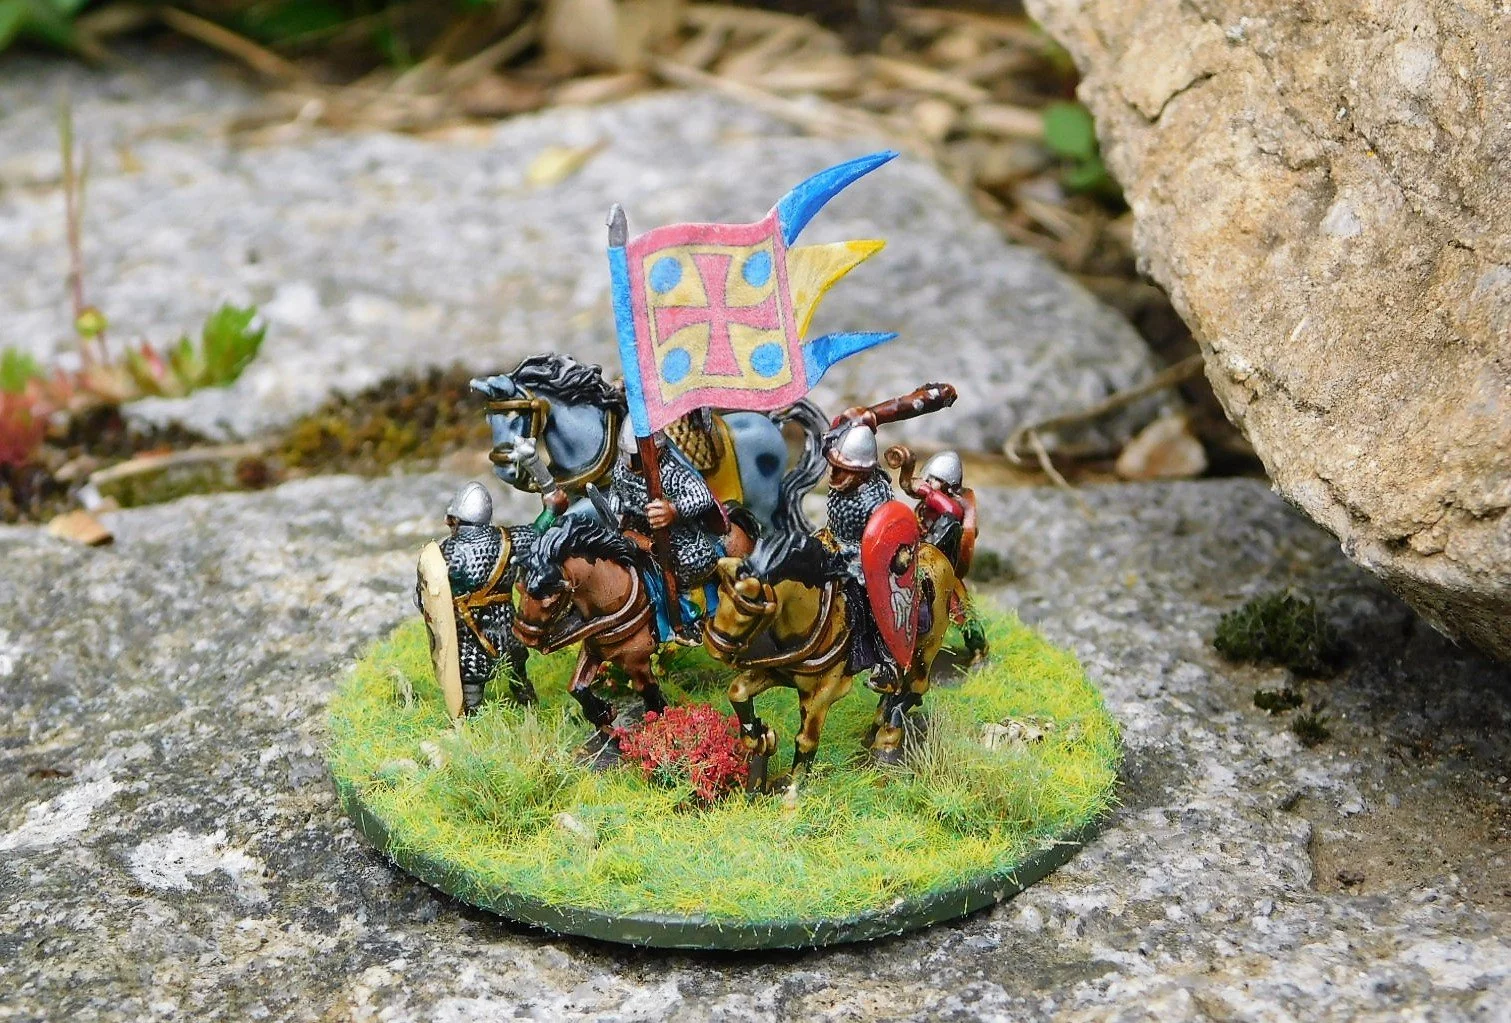
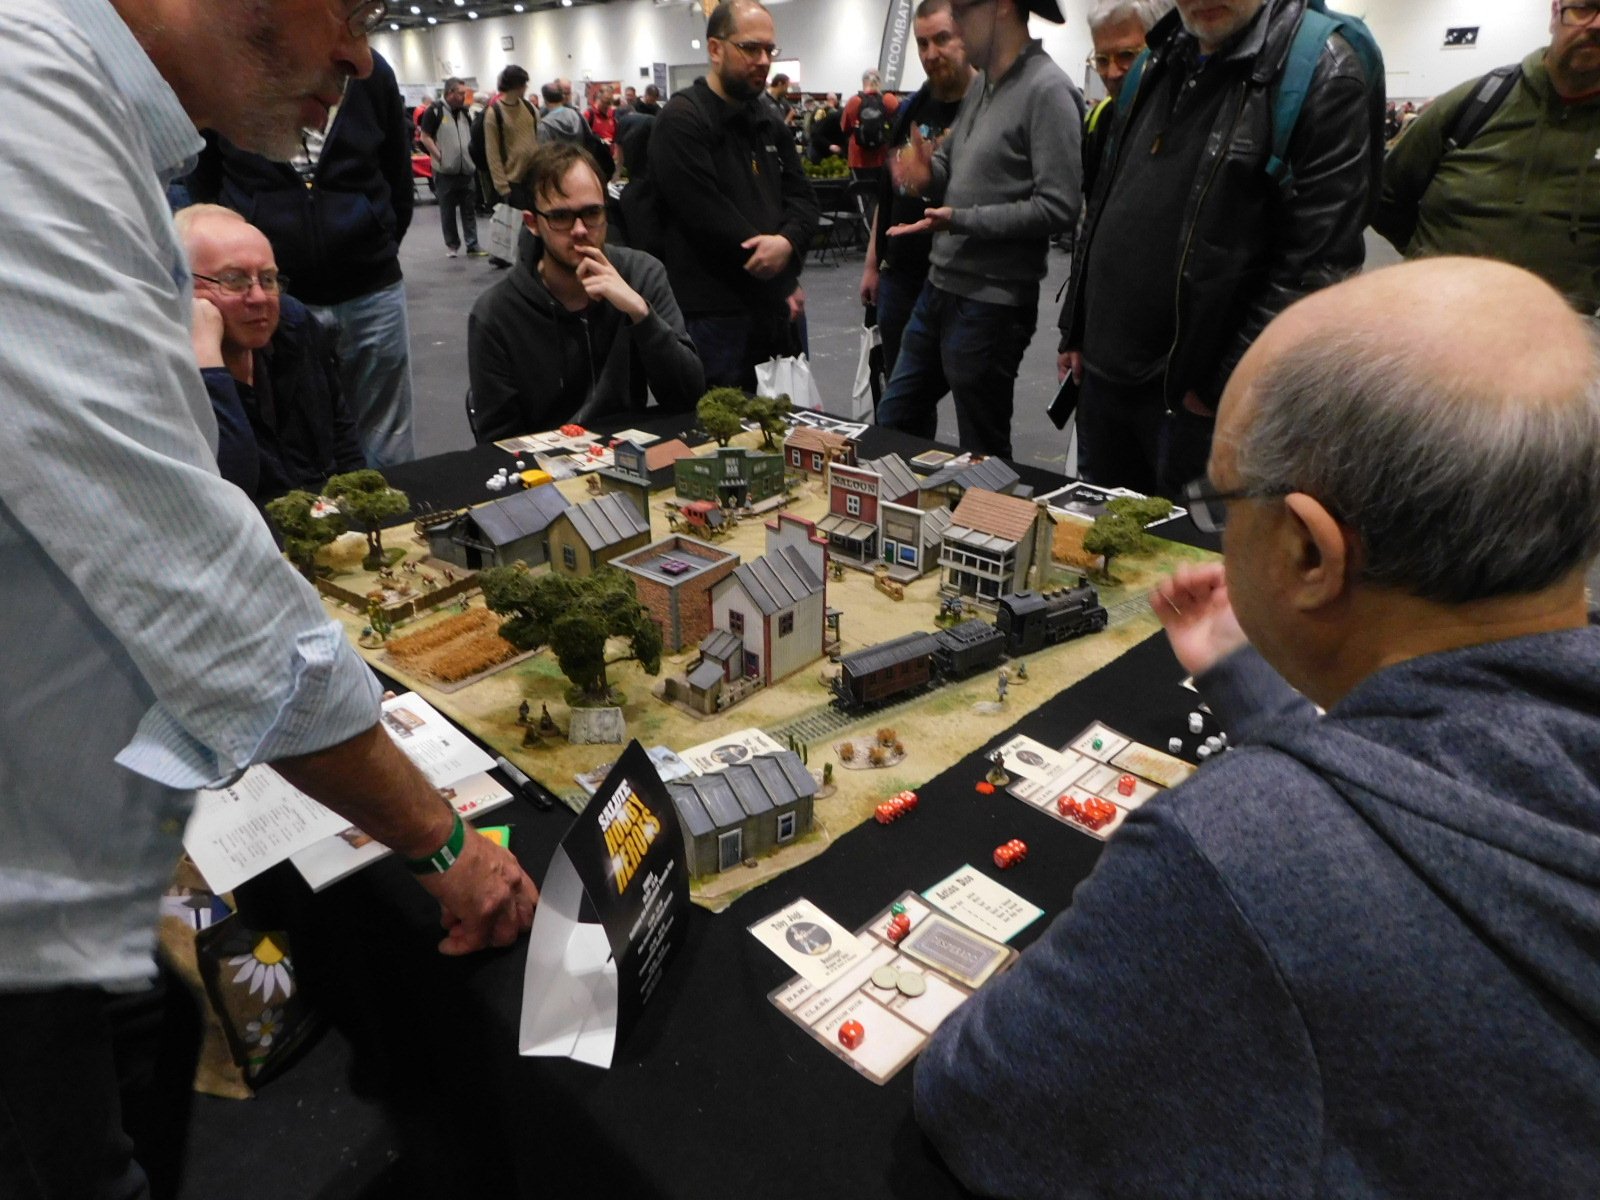
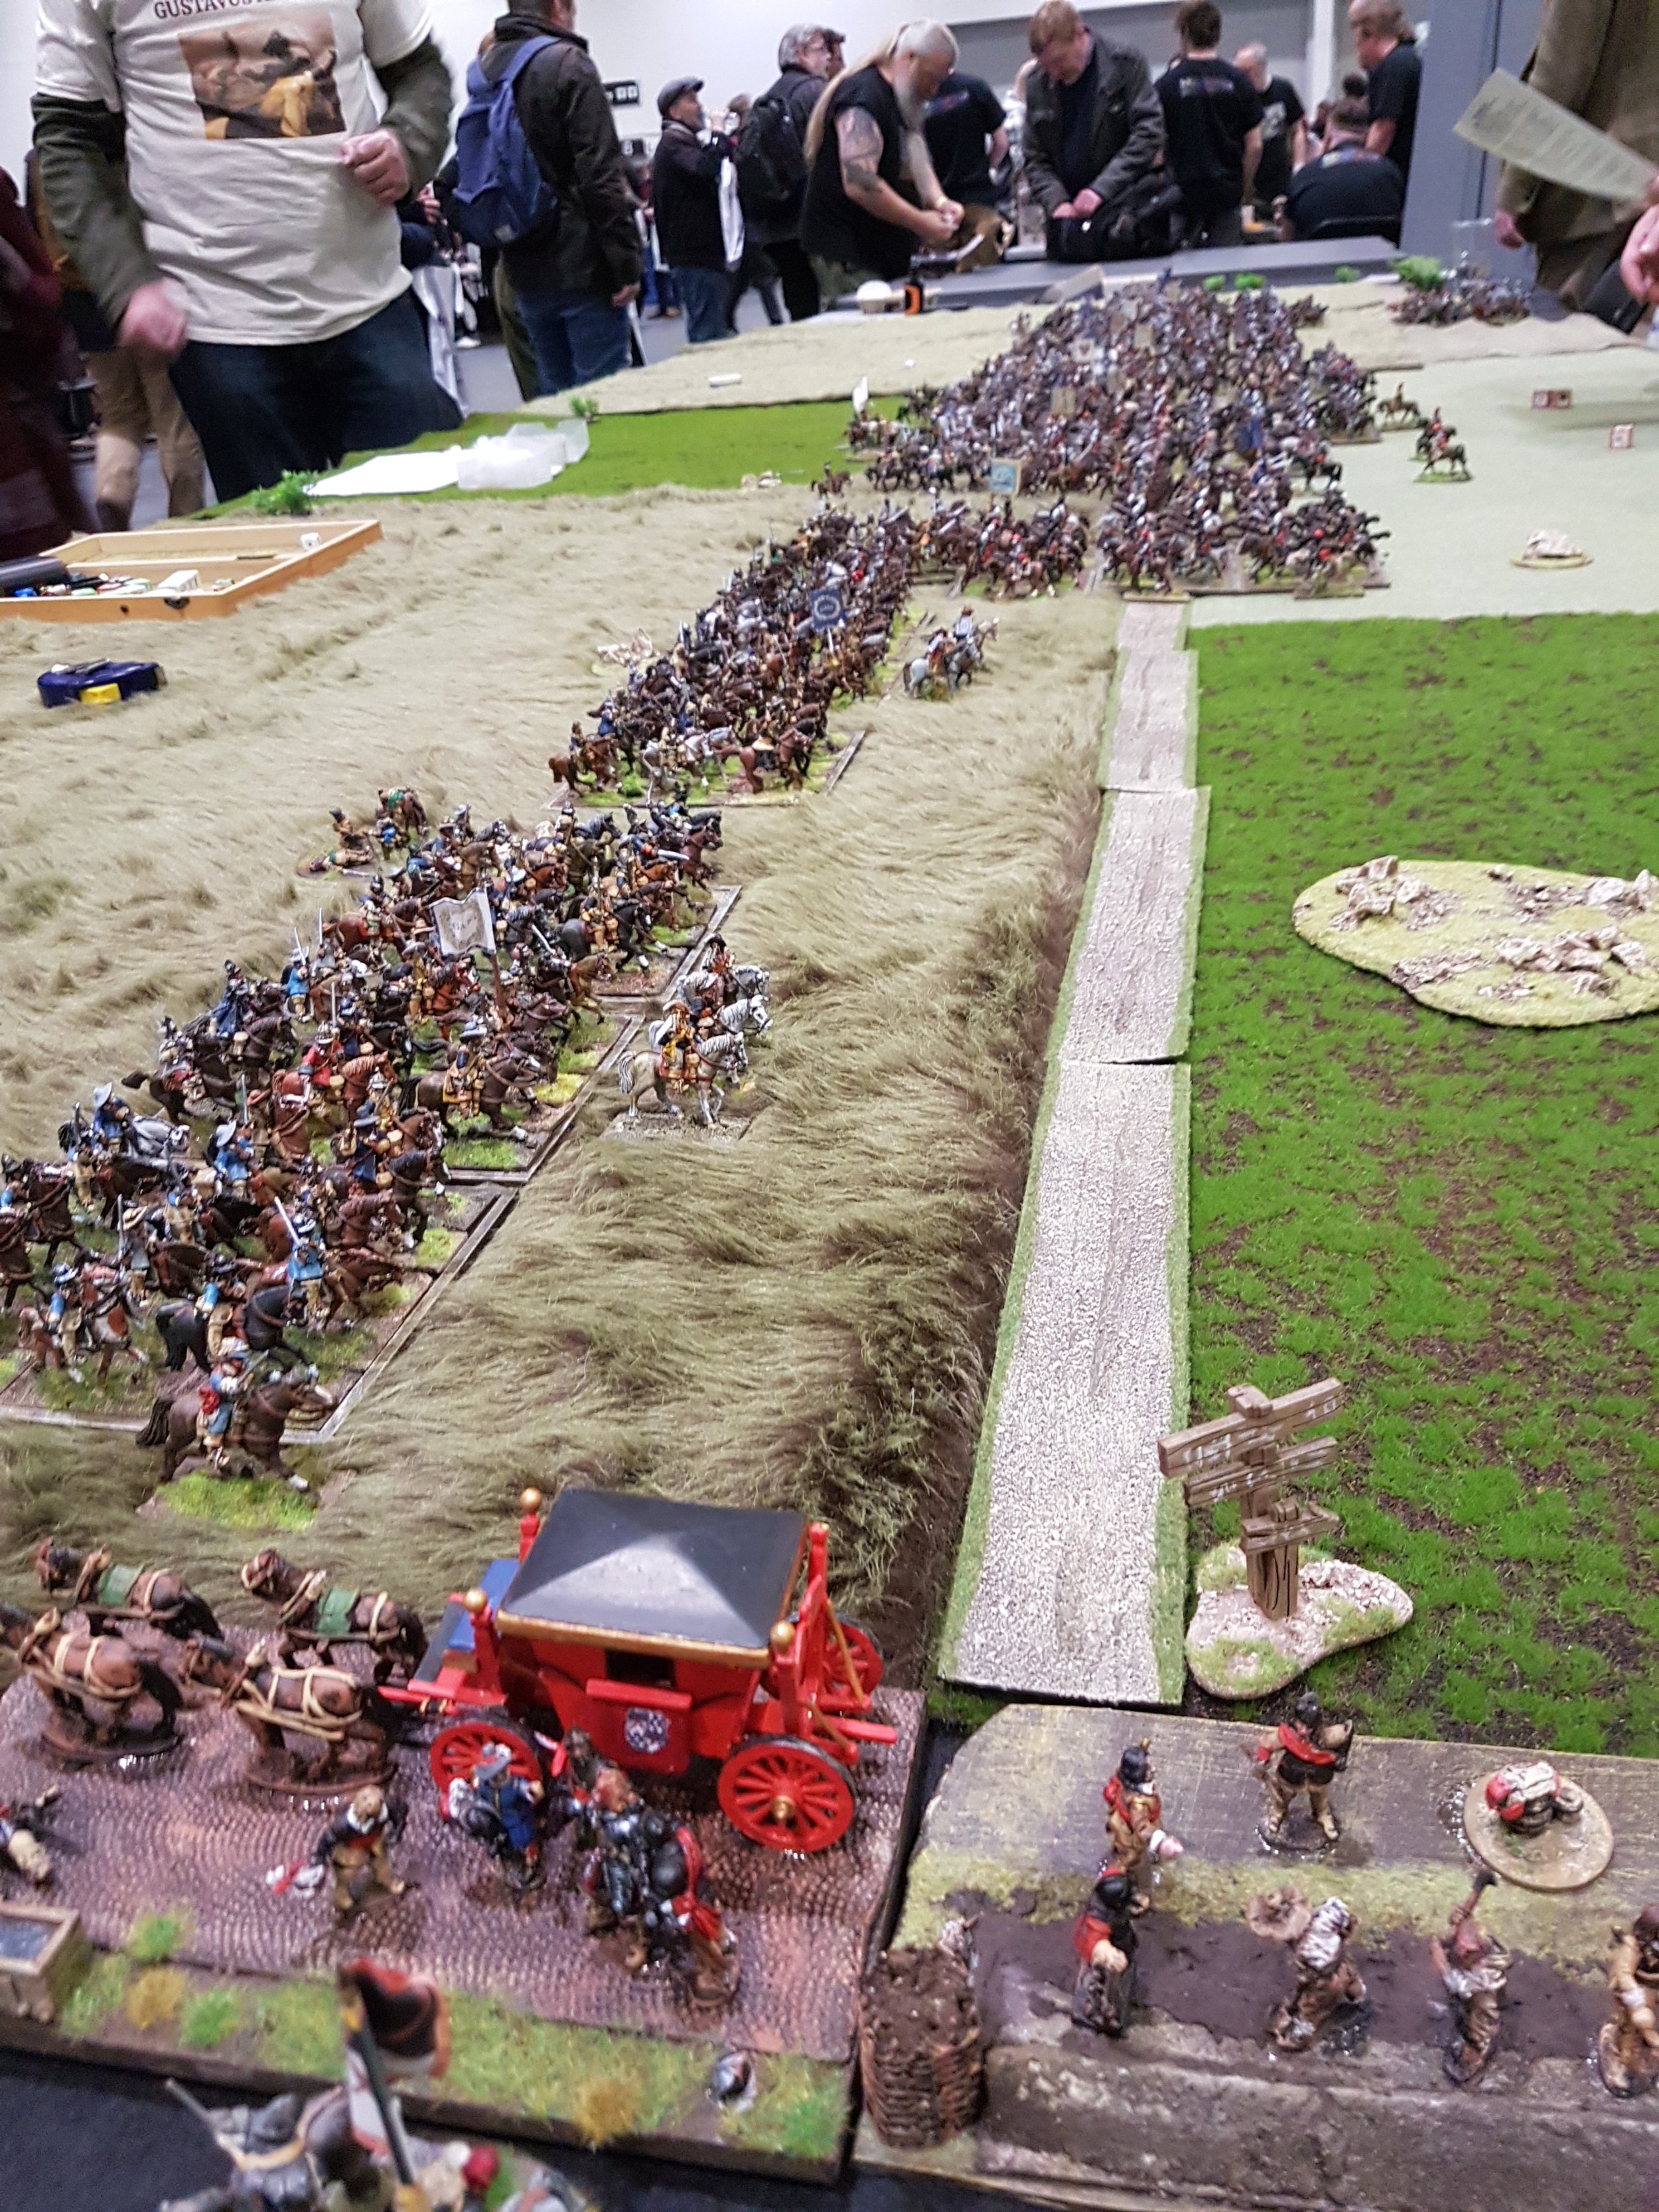
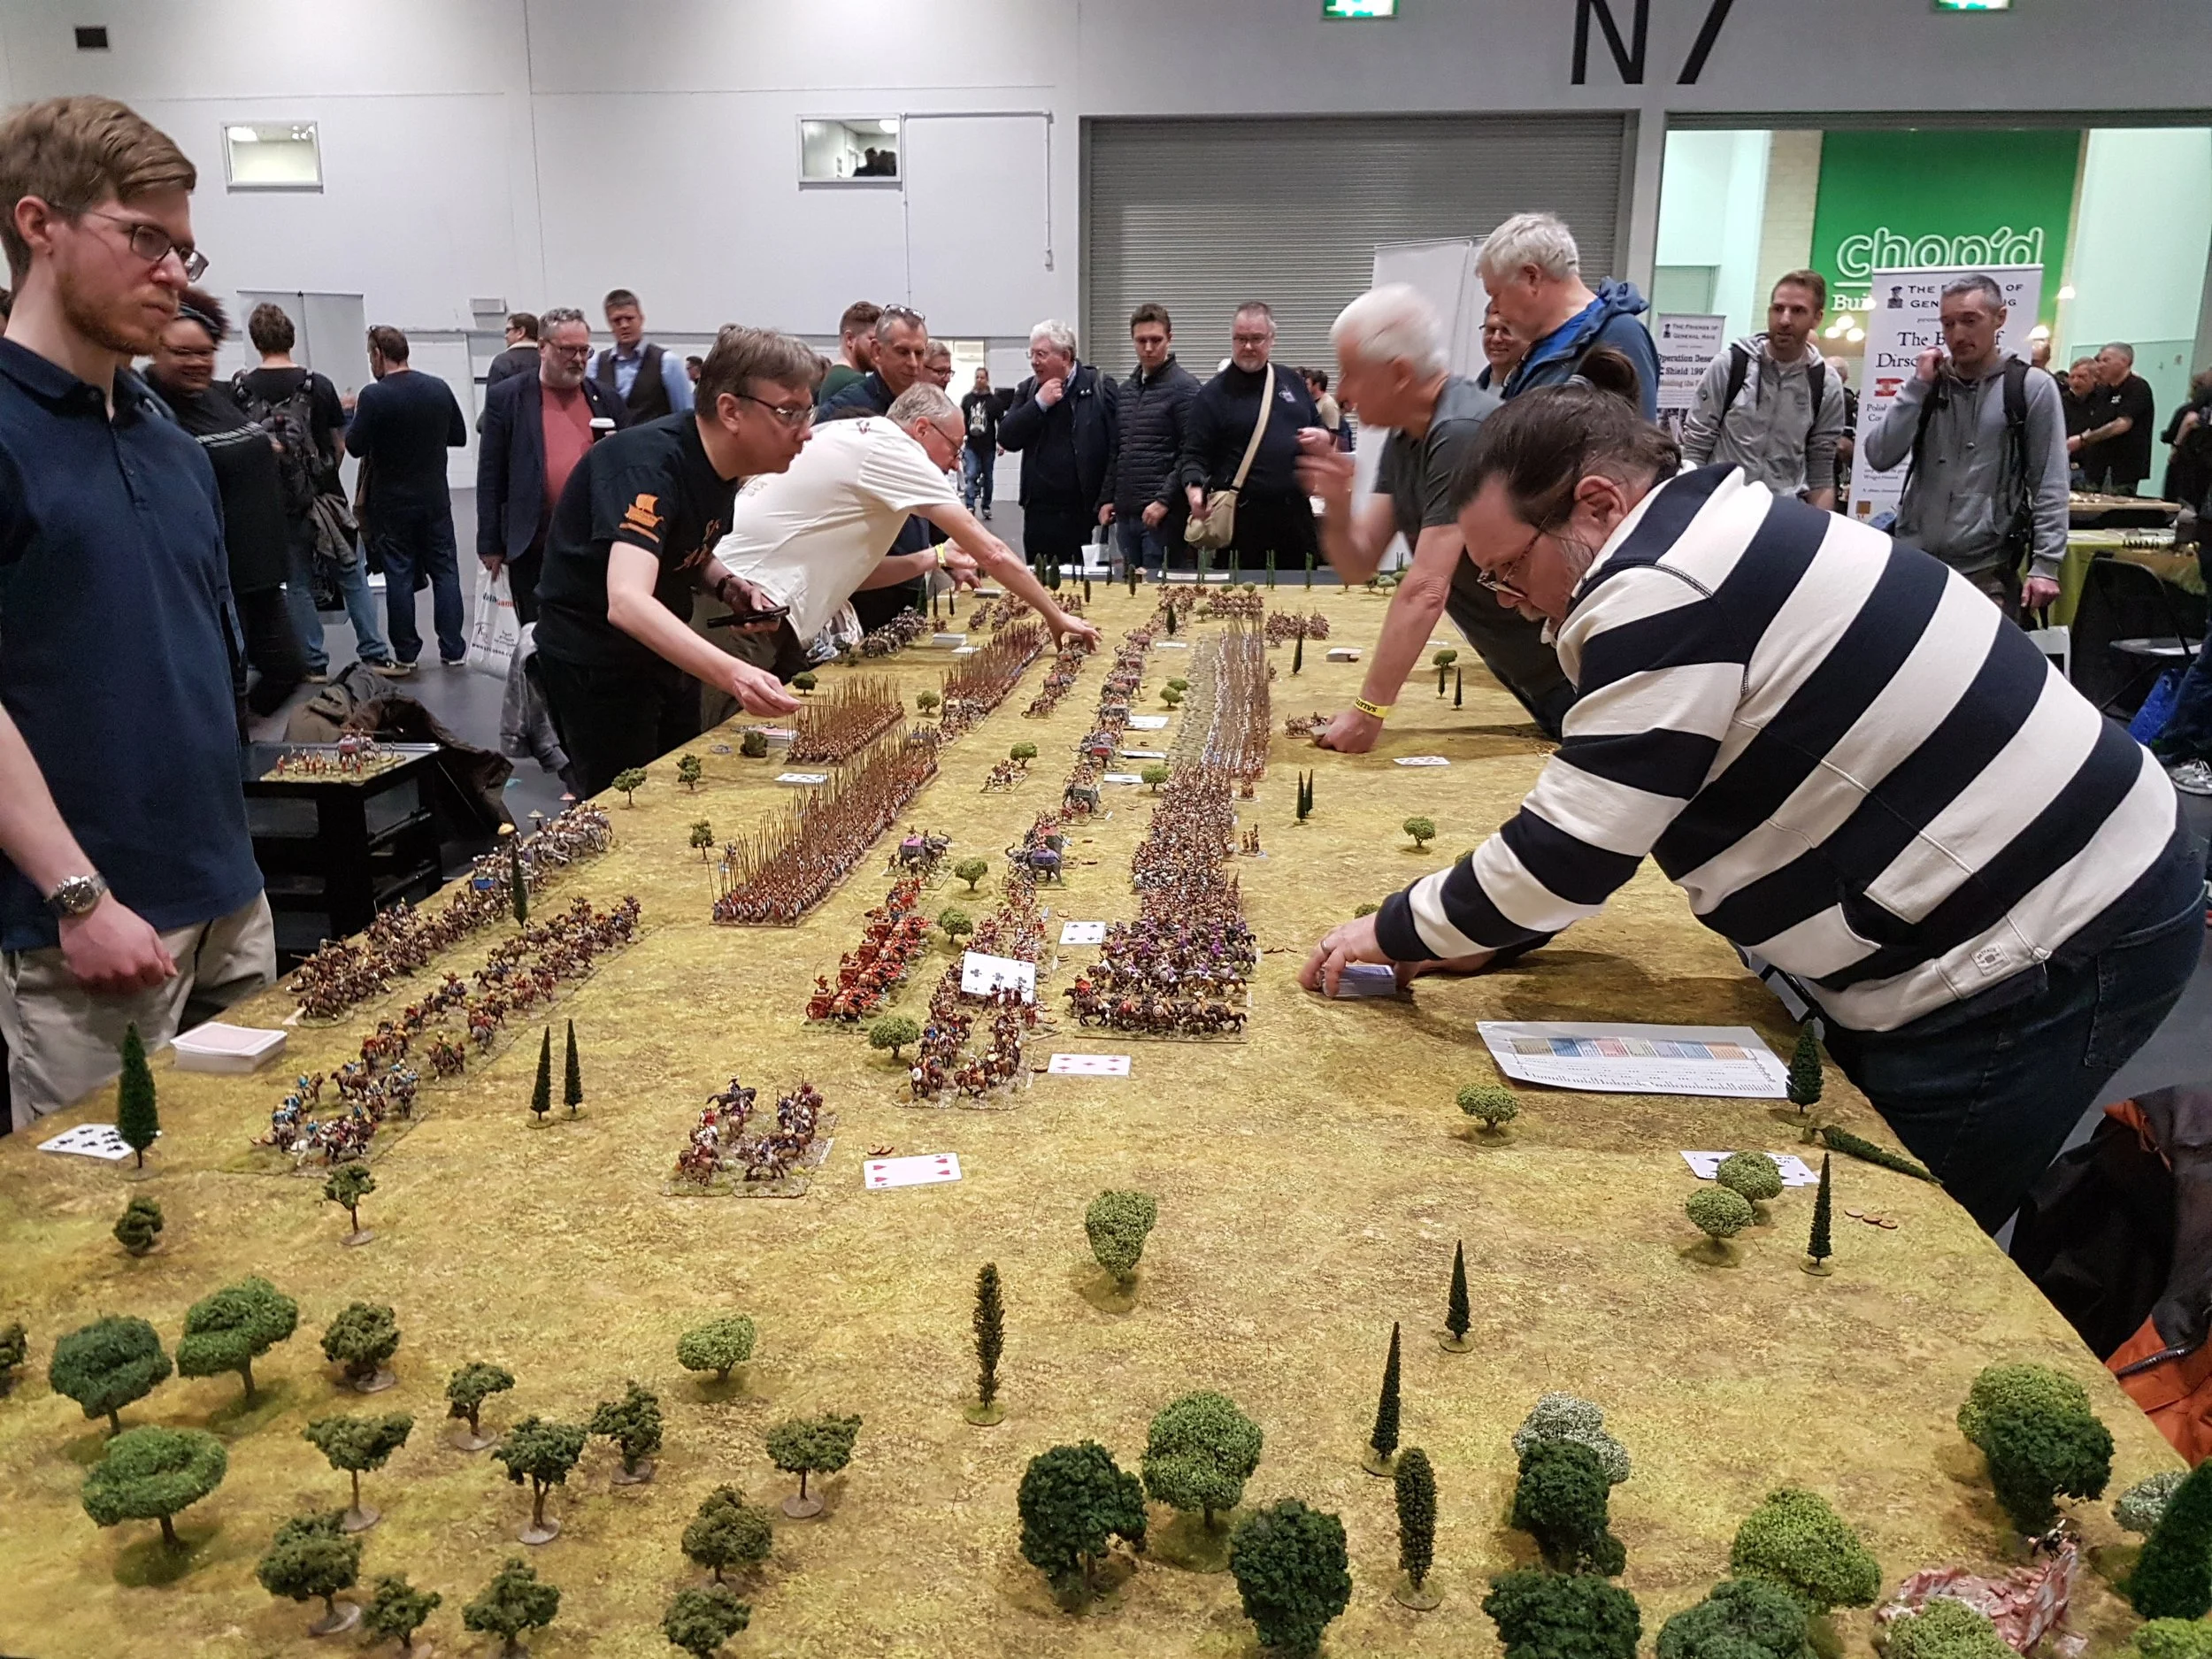
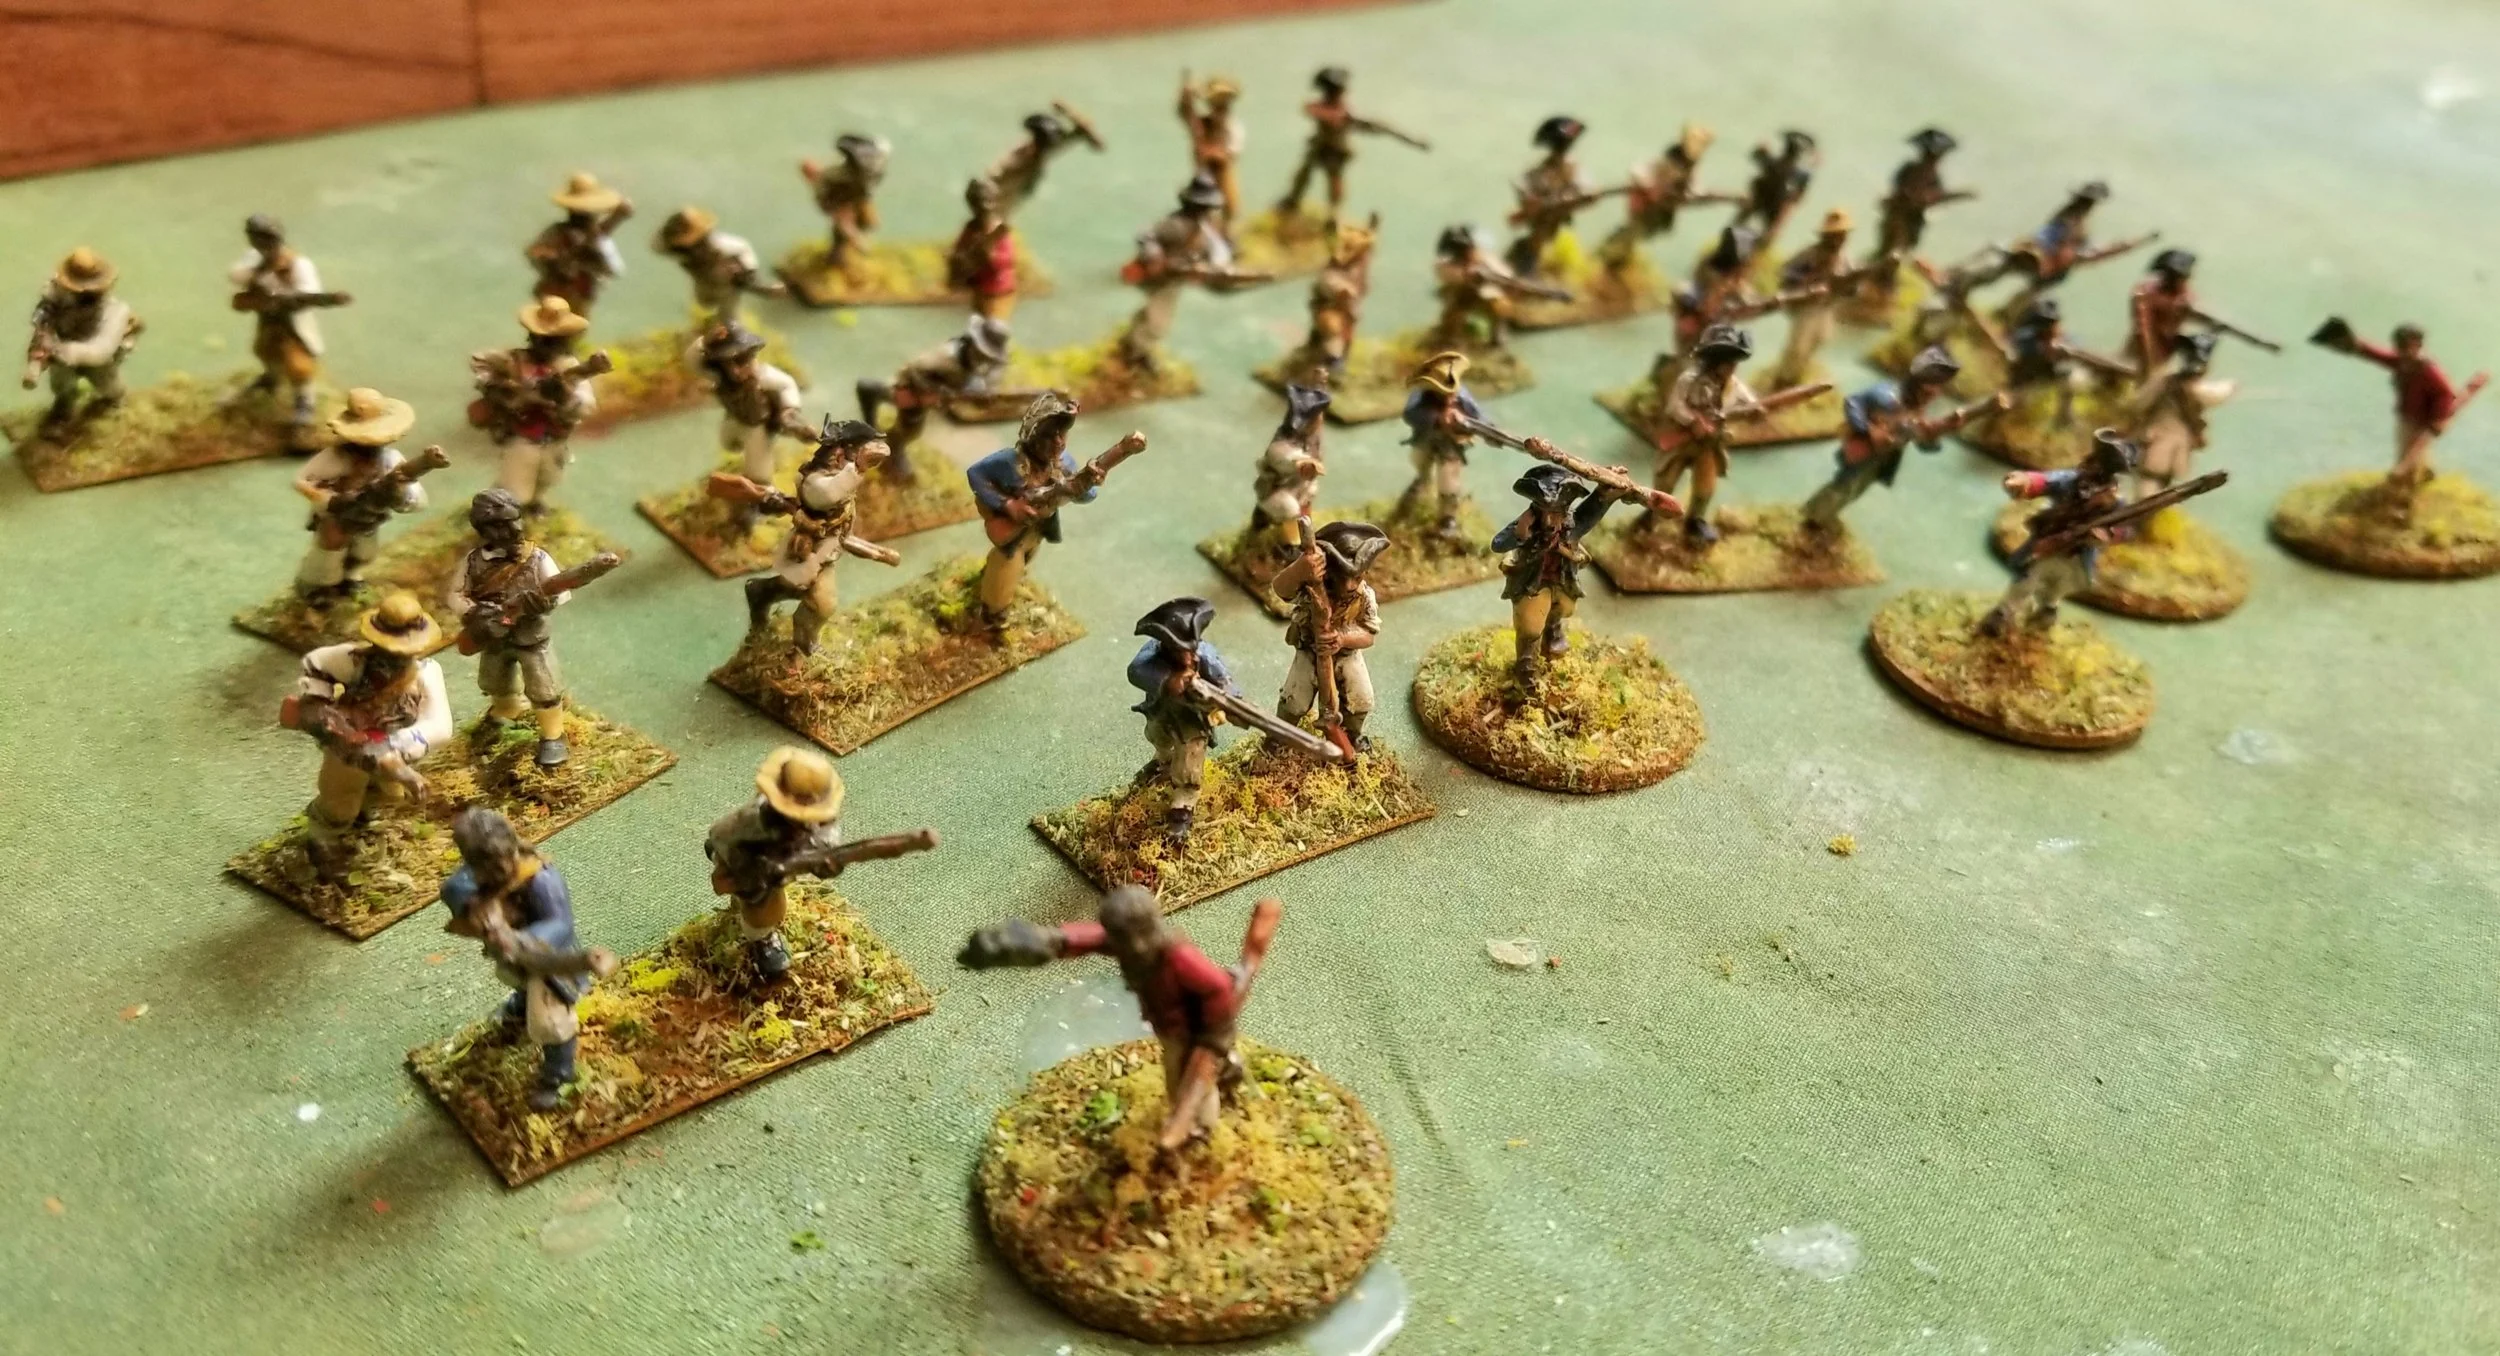
Here are some pictures from some of the competition games:

TTS AAR: A Day in the Desert

Another series of mega-games of To The Strongest yesterday!

The premise is as follows:

  • two teams: one of three players, one of two players

  • New Kingdom Egyptians vs Neo-Assyrians

  • Four armies, two identical armies of each, each army is 300 points

  • In the morning, one team takes the Egyptians and the other the Assyrians for two simultaneous 300 point battles

  • In the afternoon, the teams swap armies for two more simultaneous battles

  • Finally one massive 1,200 point battle with each side bidding to play their preferred army by sacrificing victory medals

  • Add up all the points over the five battles and see which team wins

The big pyramid marks the centre of the 18 foot table. The temple at the far end is the end of the battlefield, but there’s a mirror behind it making things look even bigger!

Game One

My morning game involved me using a New Kingdom Egyptian army against Steve and Dillon playing the Neo-Assyrians.

I decided to mass my light chariots to give them a bit more staying power and at first this seemed to be working nicely. My charioteers charged forward and were soon loosing a hail of arrows on the Assyrians.

Unfortunately, there seemed to be something wrong with my bows that day, and I just couldn’t score a hit to save my life. The Assyrians then came forward in return and hammered me in melee. We didn’t finish the game (phew!) but at the final whistle I had lost 7:13 points.

Game Two

For the first afternoon game, I swapped sides and played the Assyrians versus Si taking the Egyptians.

This battle started really well for the Assyrians, going 5-0 up within the first few turns. Unfortunately my luck turned and the cards (it was a new deck as well) decided that they hated me!

It was a hard fought game that we did manage to fight to a conclusion: with me going down 15:21 points.

The Mega-Game

Fortunately my team partner, Peter, had done somewhat better than I had, and we went into the final mega-game only two points behind. We then sacrificed two more victory coins to make sure that we took the Assyrians: so four down in all.

We played this enormous battle as one game in two halves, meaning that there were a couple of times that the two halves got out of sync and one side or the other had to pause and wait for the other to catch up. Dillon, playing in the centre on the enemy side, had to fight Peter with some of his commands and me with what was left. Despite these small speedbumps, the game rattled on at a cracking pace, showing what a robust system To The Strongest is.

Not only was the game cracking, but also very close. We started off with me doing rather well, and Peter doing less well. Then I had a catastrophic turn when I shed victory coins like last year’s fashion (not sure where that metaphor came from!) but recovered to deal out the same treatment to my main opponent, Si, immediately afterwards.

Both Peter and I then continued to alternate good patches with bad patches, calling out our successes (and failures) to the other as they happened. Finally the last Egyptian victory medal was won, and it all came down to how many we had left.

We’d been keeping them in a little pot, and, at first, it looked as if we had hardly any left at all. This was, however, an illusion, as we’d been taking out the big medals as we went along leaving only the little ones behind. The final score was 42:31 to Peter and I, meaning that we had won the day overall.

All in all a great day’s gaming. My thanks to Peter for organising and hosting.

Siculo Norman Cavalry

As previously mentioned, I’m building my 15mm Norman army out to include Anglo-Normans and Italo-Normans.

One key difference between Norman-Normans and Italo-Normans is the influence that the existing mix of Greeks, Arabs and Lombards had, and I wanted to reflect that in the different troop types/figures that I would field.

The To The Strongest list allows for up to four bases of Norman knights, two bases of Mercenary Knights and two bases of Communal Knights. I could field the Norman knights via my Norman-Norman milites, so just needed a couple of bases of different-looking figures for either the Mercs or the Communal types.

Step forward Baueda (available in the UK via Magister Militum) who actually do figures specifically for the Siculo-Normans…so here they are:

Nice looking figures, although they are distinctly smaller than the Museum Miniatures Z range that I am using for the Norman-Normans. They also all have upright lances in soft metal which, to my mind, just means lots of bent spears that continually need to be straightened.

I decided to hand paint the shields myself rather than use a decal as a base. Not a process I enjoyed, but I did get better at it as I went on. I should really have added Baueda Norman command figures as well, but I wasn’t thinking when I ordered the figures so have no command types and have had to hang the banners on standard lances rather than the extended version that banner-carriers have.

So that you have a direct comparison, here’s another base of standard Norman-Norman milites that I have finished. Only two more of them to do now!

Matching Assyrians

As mentioned before on this blog, moving from one set of rules to another often involves certain tasks: the dread re-basing being the most common. Close on re-basing’s heels, however, is the need to add more troops to the army, either different troop types or just more figures.

My Assyrians for To The Strongest are a case in point. The collection I had needed a few extra figures for use with TTS, but that was with some single element bases combined into pairs of double element bases. That was fine, and I added a first wave of new figures that you’ll have seen showcased on this blog previously, but did mean that some of the double element pairs didn’t match. The second heavy infantry unit, for example, comprised one element of mixed Spears/Bowmen with one element of either Slingers or Archers. Not a problem on the tabletop, but it just didn’t quite sit right.

So I bit the bullet and ordered enough figures to match the mixed Spears/Bowmen base and set about attempting to paint the new figures to match.

The figures are Chariot Miniatures via Magister Militum - I seem to remember that I wanted a change from the Essex Miniatures that make up most of the army. Here’s the new element, painted and based, front and back:

But does it match the old element, I hear you cry? Not as easy as you might think, as I first painted the Assyrians in 2021, some twenty-two years ago and way before the introduction of the Contrast Paints I use these days.

Here are the two elements together:

The new base is on the right as you look at the picture above. It’s the one without the command figure with the different shield.

Not a bad match.

Obviously I can see every tiny difference, but to the average eye, particularly at the magic 3ft distance, they might as well be identical. Job done!

TFL Painting Challenge: Coronation Bank Holiday Special!

Well not so much this bank holiday but the last one: as many of you seem to have spent an awful lot of time painting figures!

So, today, we have entries from:

  • Matt Slade with the usual vast numbers of Star Wars figures plus some Italian Wars infantry plus some What A Cowboy gunmen

  • Nick Cooper with a miscellanea of fantasy figures

  • Andrew Helliwell has more late medievals…and whose terrain storage cupboard must be overflowing by now

  • Stumpy with more Napoleonics and some Beau Geste types

  • A superb Bad Squiddo Squid from Ralph

  • Chris Kay also goes all What A Cowboy

  • Sapper does 15mm Goths in a big way

  • Mervyn has some 15mm Greeks and 28mm US Marines

Make sure you visit the individual galleries, but here’s a selection for you to feast your eyes on:

With another bank holiday this weekend, I’ll expect to see a similar amount of entries for next time!

Even More Normans!

Not much gaming going on at the moment, so I had a chance to finish off some more Normans.

Off the painting table today are two units of light archers, the heroes, and the senior command stand consisting of William the B himself plus Bishop Odo (who you can’t see as he’s behind the flag).

These are more of the 15mm Museum Miniatures CAD designed Z Range, except for five of the Heroes who are from the Splintered Light Norman specials pack. I particularly like the chap at the back charging forward whilst swinging his sword.

I’ve also now ordered a ton of Sicilian and Italian style Norman spearmen from Baueda (via Magister Militum) and Khurasan, plus a few extra cavalry types to represent light cavalry and Sicilian style milites. Looks like I’m going to be painting Normans for some time!

Norman Archers

Had a real push on finishing the Normans last weekend:

There are two units of Archers and two units of Light Crossbowmen. These are 15mm figures from Museum Miniatures lovely “Z” range of CAD designed minis. Highly recommended for anyone looking for Normans in that scale.

With these figures finished, I can now field Anglo-Normans if I add my Vikings to the roster as quasi-Anglo-Saxon types. I could also field a Norman-Norman army, but it would be a very infantry-heavy one: I’m going to need to paint up some more milites before I can field mostly-mounted Normans.

Salute 2023

It’s April, so it must be time for the annual pilgrimage to Excel and Salute.

This year, rather than drive, I thought I’d try taking the new Elizabeth line. Going by train would previously have involved a change at Paddington onto the tube, another change at Aldgate onto the DLR and, all in all, be a right pain…but now I got on a train at Maidenhead and got off at Custom House only about an hour later. Extraordinary! And the return trip cost me less than it does to park at Excel all day, so money saved too.

Anyhow, on to the show: the hall in Excel was its usual gloomy self; no real queue to get in; pretty packed in the morning but emptied out after lunch. The best bit of the show, obviously was the Lard Zone, with some spectacular-looking demo games of What A Cowboy; IABSM; Chain of Command; Strength & Honour; and General d’Armee.

There were some great looking non-Lard demo games elsewhere as well, some of which I’ve photographed below. Forgive the variable quality: I was having camera troubles, so some are from my camera and some are from my mobile phone.

I wasn’t shopping for very much, so only bought a few odds and ends, but one thing that did strike me was how little there was on offer for a 15mm gamer such as myself. Essex were there, Forged in Battle were there, Battlefront/FoW “we now only do late war” kit was everywhere, but apart from those three, I don’t think there were any other 15mm manufacturers present. Certainly nothing spectacular and new to spend my money on, and I was ready, willing and able!

So a bit disappointing really, especially as this was supposed to be the 50th Anniversary Salute. Worth going, but very run of the mill :(

TFL Painting Challenge: St George's Day Update

Or Shakespeare’s birthday update: take your pic!

Lots of entries added this time round, including the return of Steve Burt with some nice Napoleonic British Dragoons and a cornucopia of entries from Matt Slade that are either 10mm or 32mm: switching between the two must be fun for the eyes!

Anyway, please do check out the individual galleries, reachable through the NavBar at the top, but here’s a taster to wet the whistle!

IABSM AAR: Spanish Civil War Action!

Lee Young and friends recently played out a game of I Ain’t Been Shot Mum set in the Spanish Civil War. I missed this on the IABSM Facebook Group, so it’s a pleasure to feature it now. Lee says:

Another great game of IABSM, this time our Wednesday night game takes us back to the Spanish Civil War.

The Nationalist had to break through the Communist line and reach the top of the road to Madrid. Had to do some tweaks to the FT-17s and placed some extra cards in for ammo shortages. Played better than I expected.

FK&P AAR: Widbrooke Common

Played a second game of For King & Parliament with friend Fred, this time using scenario #02 from the Marlowe to Maidenhythe scenario pack: Widbrooke Common.

I didn’t have my camera with me, so not many photos, and those that there are are from my mobile, but one thing that did stand out about the game was the power of a well placed unit of Forlorn Hope.

For those of you who know the game, Forlorn Hope are the weakest possible units: usually acting as no more than speed bump as they get overrun by better quality battalia. Not in this game however!

Placed occupying a farm house in the centre of the table, Fred’s Forlorn Hope held up two of my full strength standard battalia for the whole game, constantly rendering them Disordered when I got too close, meaning I never really got a chance to properly assault them.

I still won the game, I hasten to add, but would have won it a lot more quickly and effectively if it hadn’t been for the Forlorn Hope.

Here are the other shots of the game that I took:

FK&P AAR: The Attack on Marlowe

A long, long time ago in a galaxy far, far away, I was at school with a chap that everyone called Fred. Not sure quite why, as that wasn’t his name, but I’m thinking it might have been because he just looked like a “Fred” in that he was very large and very strong and had a difficult to spell surname. Or it might have been because he bore more than a slight resemblance to the Scooby Doo character, assuming that Fred Jones lifts, that is!

Fred and I used to wargame at school - mostly Ancients using WRG 6th - but lost touch after he swapped to doing the real thing and joined the army. Flash forward many years and he was now out, had seen me on Linked In, and made contact again. We met up shortly afterwards for a drink or three, and from there it was a very easy transition to arranging a game.

Gaming is very different now to what it was then. In those days, the early to mid-eighties, nothing was quick and nothing was small: a battle was a whole day or weekend affair, minimum, with thousands of 25mm figures on the tabletop and an allowance built into the session’s timetable for colossal, life-threatening rules disputes involving such matters of importance as fractions of inches or degrees; the definition of charging in a straight line; or line of sight arguments that could only be settled by the hiring of a theodolite! Fred used to paint 25mm Minifigs’ Napoleonics with a syringe needle, for God’s Sake, in order to make sure the regimental numbers on the cuffs were legible!

I had no wish to return to those days, especially the “life-threatening rules disputes” as he was still a very large person and now presumably trained to kill, so decided upon a game of For King and Parliament, the English Civil War version of To The Strongest. FK&P is a cracking game that, to my mind, really captures the look and feel of the period to give reasonably realistic results with fast-play mechanics. It’s grid based, obviating a lot of the disputes about measuring, and driven by drawing playing cards.

We used the first scenario from my Marlowe to Maidenhythe scenario pack, with both sides acknowledging that this first game would be a training session more than anything else. Fred took the Royalists, on the attack versus my Parliamentarians.

Fred’s first question: where was the grid? It is there, but indicated in a way that doesn’t interfere with the look of the game.

I won’t describe the battle in detail, but suffice to say that it was a grinding win for the Royalists.

What was interesting, however, was seeing Fred reacting to the different challenges he faced, drawing on military rather than wargaming experience. My battalia were to be “located and fixed in place” before being destroyed by an attack from the flank, so Fred immediately understood the concept of a Zone of Control or ZoC, and proved very good at the fixing and destroying bit.

An advantage was to be “immediately followed up” with the emphasis being on a series of consecutive hammer blows rather than necessarily conserving damaged units. It was all very interesting, and we both enjoyed the game immensely.

Here are some more shots of the battle:

TFL Painting Challenge: First April Update

A large number of entries from a small number of people this week.

We have Matt Slade with more Star Wars figures; Sapper and Mr Helliwell with their WOTR collections; the usual assortment from Nick Cooper; and some Cuban militia from Mark Luther.

Do visit the individual galleries, accessible via the Nav bar above, but here’s a taster for you in the meantime:

IABSM AAR: Action at Galmanche

I hope that everyone can be lucky enough to play in one of Phil Turner’s excellently presented and run games of I Ain’t Been Shot Mum. I did so at one of the Operation Market Larden events, and enjoyed myself immensely.

Here’s another game from Phil that uses one of the scenarios from the rulebook. Click on the picture below to see all…

Romans and Normans

Here’s a couple of bits of painting I’ve managed to complete.

First up, a unit of unarmoured milites for the Normans. Very much a question of one down and two to go on these: I’m writing this post instead of working on the next unit!

These are more from the Museum Miniatures CAD designed 15mm ‘Z’ Range, and very nice they are too. I went for the bright colours because these are wealthy individuals looking to look their best on the battlefield.

Next up was unit of Roman legionary engineers, which I will use as the Camp Servants that appear in the Marian Roman army list for To The Strongest that I work from.

These are 15mm Baueda figures ordered from Magister Militum. What I particularly like is that no two figures in a pack of eight are the same: that’s a decent variety for such a niche sculpt. I think I could have done a better job on the faces, though, and, for some reason, the Army Painter matt varnish has come up a bit glossy…but that will fade with time.

Right, better get back to those Normans…

TTS AAR: Sicilians versus the Tang!

Yes, I know it’s not any sort of historical or even geographical match up, but this is Ancients/Medieval gaming so that’s convenionally allowed!

Nice

Anyhow, it was off to friend Peter’s house for a quick game of To The Strongest using his big figures. I would play the Italo-Normans as a try out for expanding the 15mm ‘pure’ Normans that I’m currently painting up into a Sicilian army; and Peter would play a nicely painted, bring-and-buy Tang Chinese army he’d had hidden away for years.

The armies were actually quite evenly matched. The Sicilians consisted of a core of Knights, some veteran, supported by spearmen, some with bows, and some lights. The Tang had a core of cavalry and cataphracts supported by, you guessed it, some spearmen and some lights, with his troops having extra crossbows rather than bows.

The Sicilians were outscouted and, I must confess, out deployed. On my left flank, all my cavalry faced all the Tang cavalry. In the centre, three quarters of my infantry faced his. But on the right flank, a good 25% of my infantry were facing empty space. Doh!

Time to make the Tang an offer they couldn’t refuse!

Comparing notes after the game, both Peter and I were convinced that we would win the cavalry clash that was almost certainly coming on my left wing: Peter because he had more lights supporting his heavies than I had, me because my cavalry were a bit better quality than his. We both duly advanced our horse forward as fast as possible.

It was in this first cavalry clash that it rapidly became apparent what sort of day I was going to have: I lost both my cavalry generals in rapid succession, drawing so many Aces that Peter actually asked me whether I wanted to check I had the right number in the deck!

I had disordered two of his units in the first clash, so was posed to sweep all before me, but have just lost both my cavalry generals: they should be behind the knights on the hill and those toi their left!

The writing was fairly much on the wall from that point onwards. My cavalry, all now out of command, were gradually beaten backwards, and although a bit of good luck could have given me an advantage, those Aces kept on coming.

The photo below shows one of the moments that could have turned the game: I have lights on the flank of some disordered cataphracts, they’ve drawn a ‘2’ to get into charge position (meaning that they have an 80% chance of going in) and what do I draw? Yes, you guessed it, another Ace!

Meanwhile, in the centre, my infantry weren’t doing much better. Although both my generals were currently still breathing (that would change: I lost one of them later on in the game), I hadn’t had any success in either getting my right wing into play or even getting my centre into any sort of effective action.

With my victory medal count rapidly diminishing as my cavalry gradually gave way, the only way for me to win was to defeat his infantry quickly, but Peter cannily kept pulling back so that I just couldn’t get to grips with them. Add in losing another general to the mix to effect my ability to spur my men forwards, and you can see that it just wasn’t going to happen.

Seeing I had only a couple of victory medals left, Peter now changed tactics: coming forward and targeting my light units with everything he had. Their departure proved the final straw for the Sicilians, and they fled the field!

A most enjoyable game despite my defeat and frustrating habit of drawing Aces, and I could console myself with the fact that this must mean that next game I won’t be drawing any Aces at all…as the laws of probability work like that, don’t they?

Don’t they?

Well, they will in my decks!

A Few More Assyrians

I needed a rest from painting Normans, so I thought I’d fill out my Assyrian army a little bit more.

When I started playing To The Strongest, I resurrected all the Ancients armies that I used to use for Vis Bellica, the only problem being that a VB element was approximately half the size of the elements I use for TTS. Not a problem for most of my armies, as I always over-collected on what I’d actually need to play a game, but it was for the Assyrians: the trouble being that as it was a small, expensive (in points terms) army, I didn’t have multiple identical VB elements that I could combine into a smaller number of TTS elements.

So here’s one TTS element (or, I suppose, two VB elements) of Assyrian heavy infantry, spearmen with big shields in front, archers behind. The figures are from Essex: always dependable figures that do exactly what it says on the tin!

The other issue with matching older figures is, of course, that one’s painting style changes over the years. These days I almost exclusively use Contrast paints, my Assyrians are painted using a black undercoat with acrylics on top , so I had to effectively re-learn how to paint that way. Annoyingly, I couldn’t get the cuirass to look as good as the figures I painted some fifteen years ago. I suppose I’ll just have to buy some more to get more practice in!