
IABSM AAR: Closing the Gap
/Quick post taken from the IABSM Facebook Group: Michael Curtis played a 1944 Falaise Gap scenario on one of Phil and Jenny Turner’s amazing tables.
Click on the picture below to see all:

Quick post taken from the IABSM Facebook Group: Michael Curtis played a 1944 Falaise Gap scenario on one of Phil and Jenny Turner’s amazing tables.
Click on the picture below to see all:

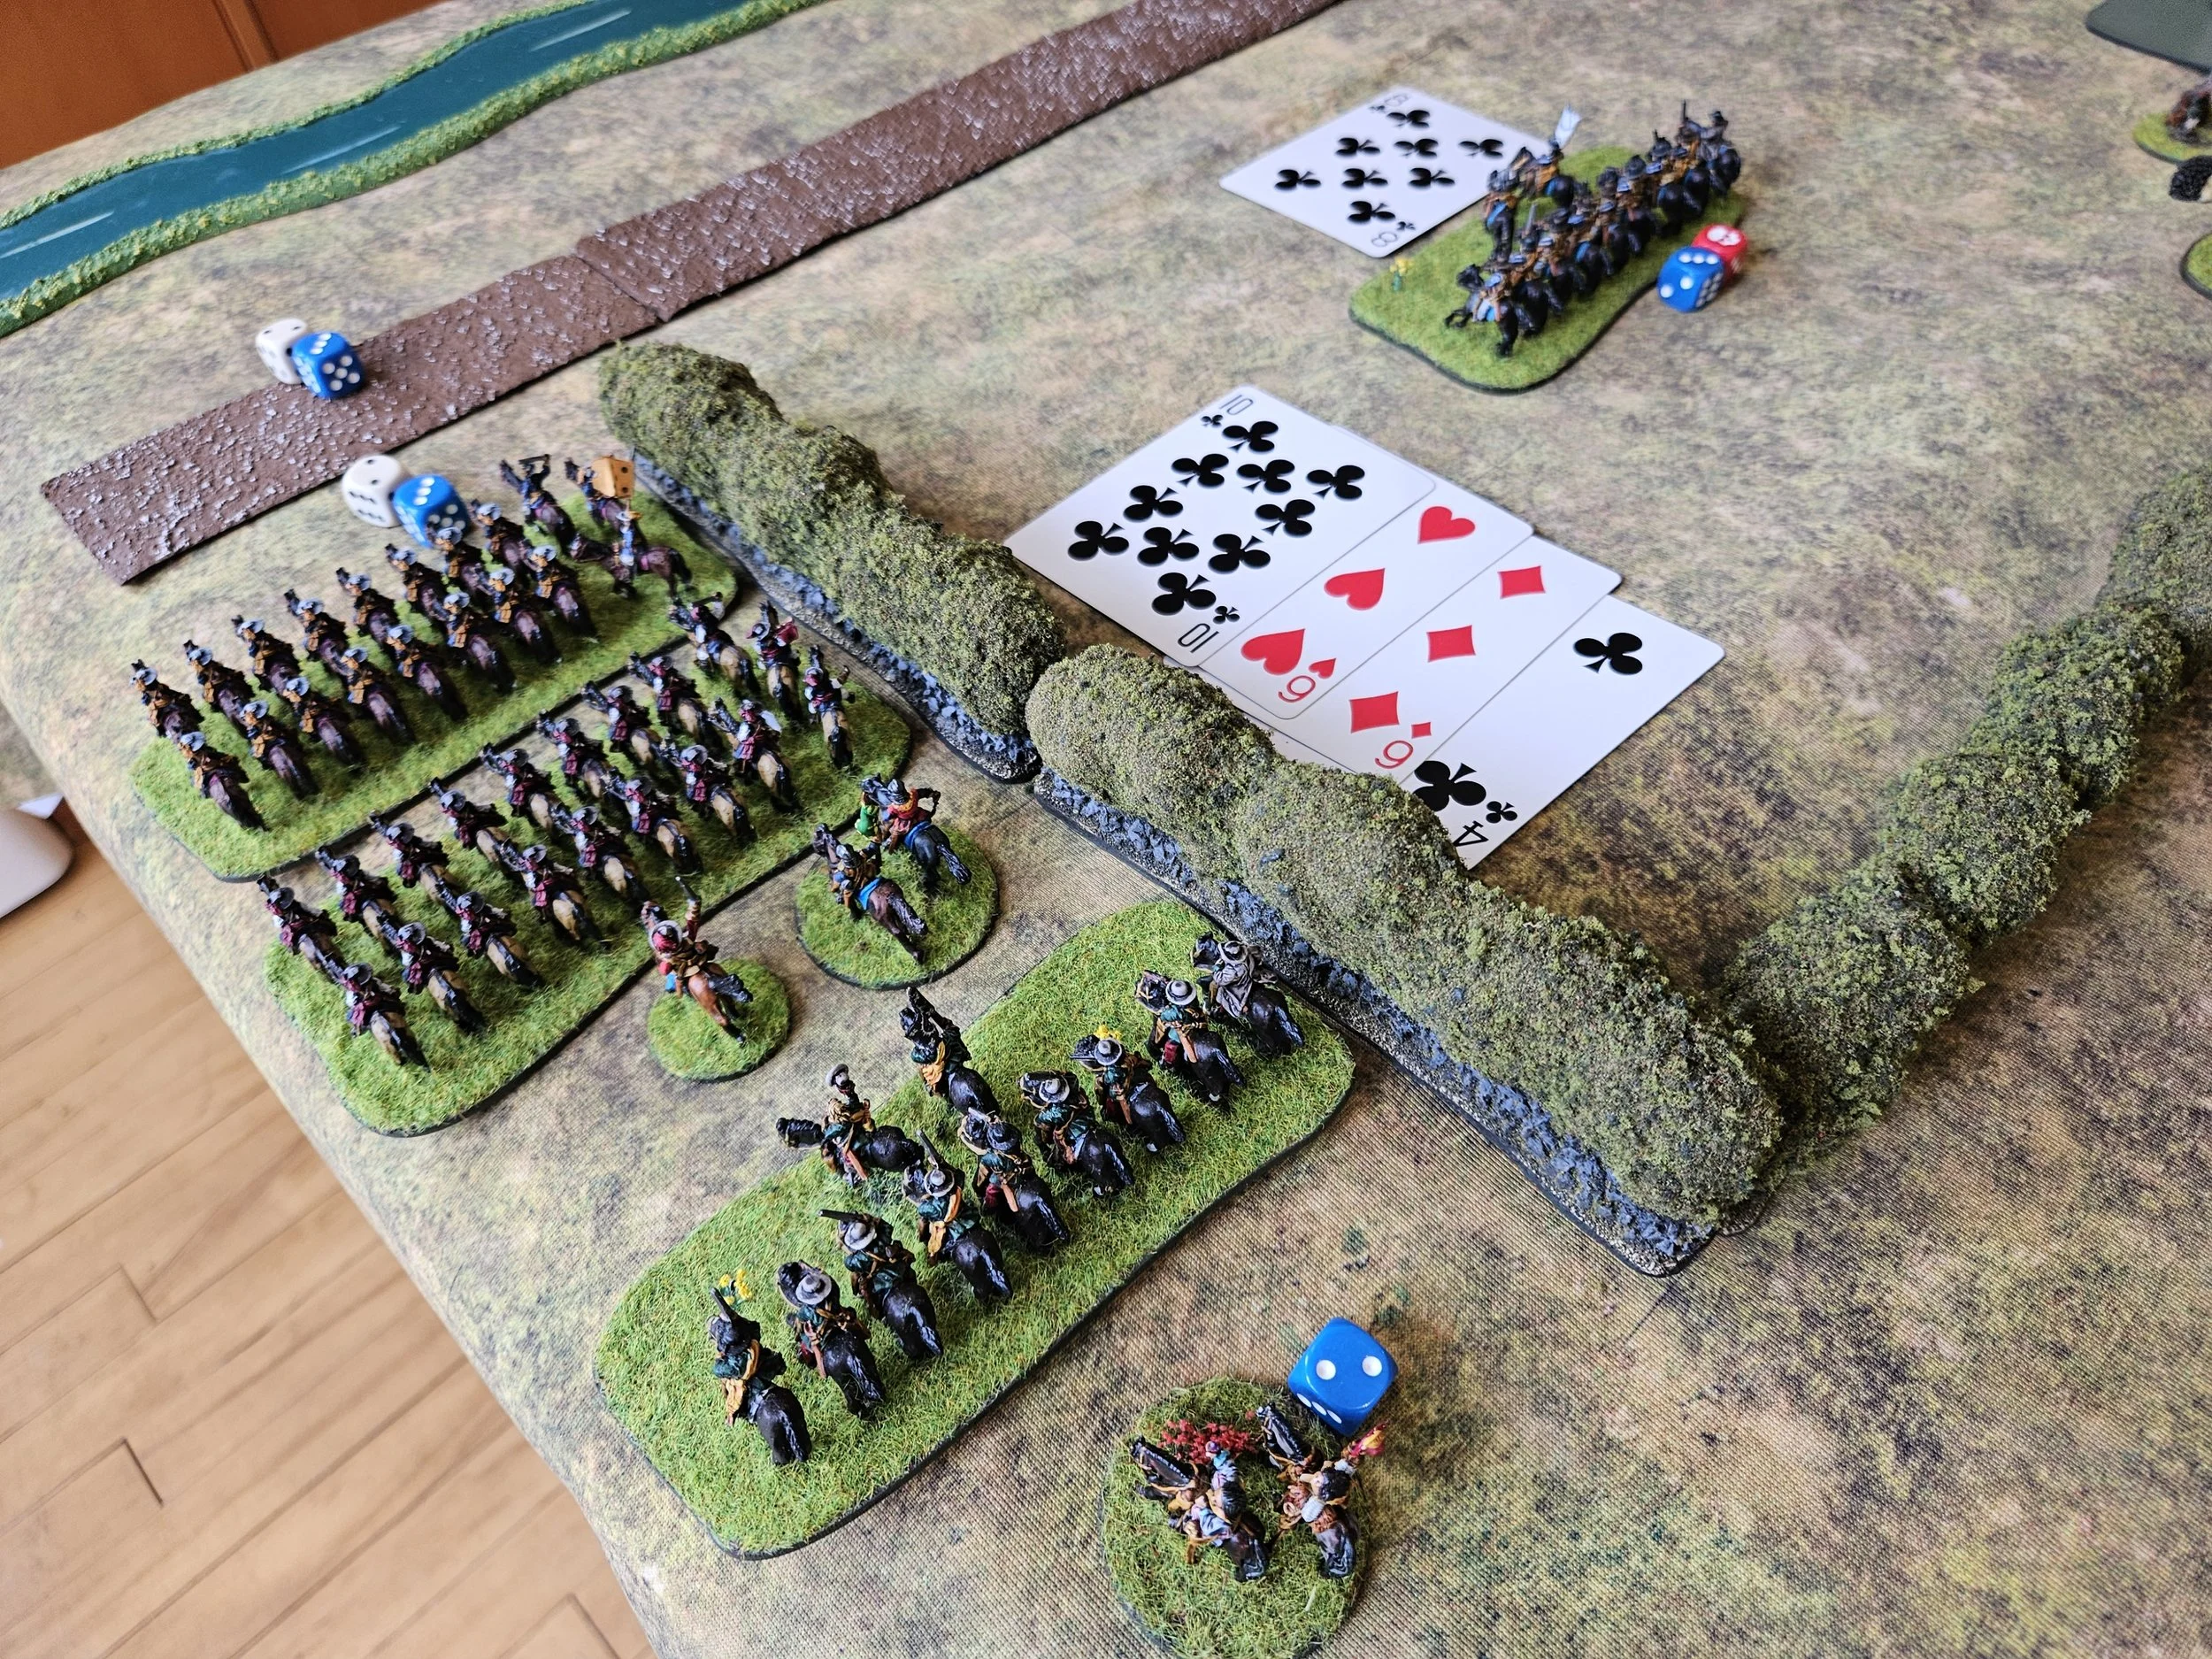
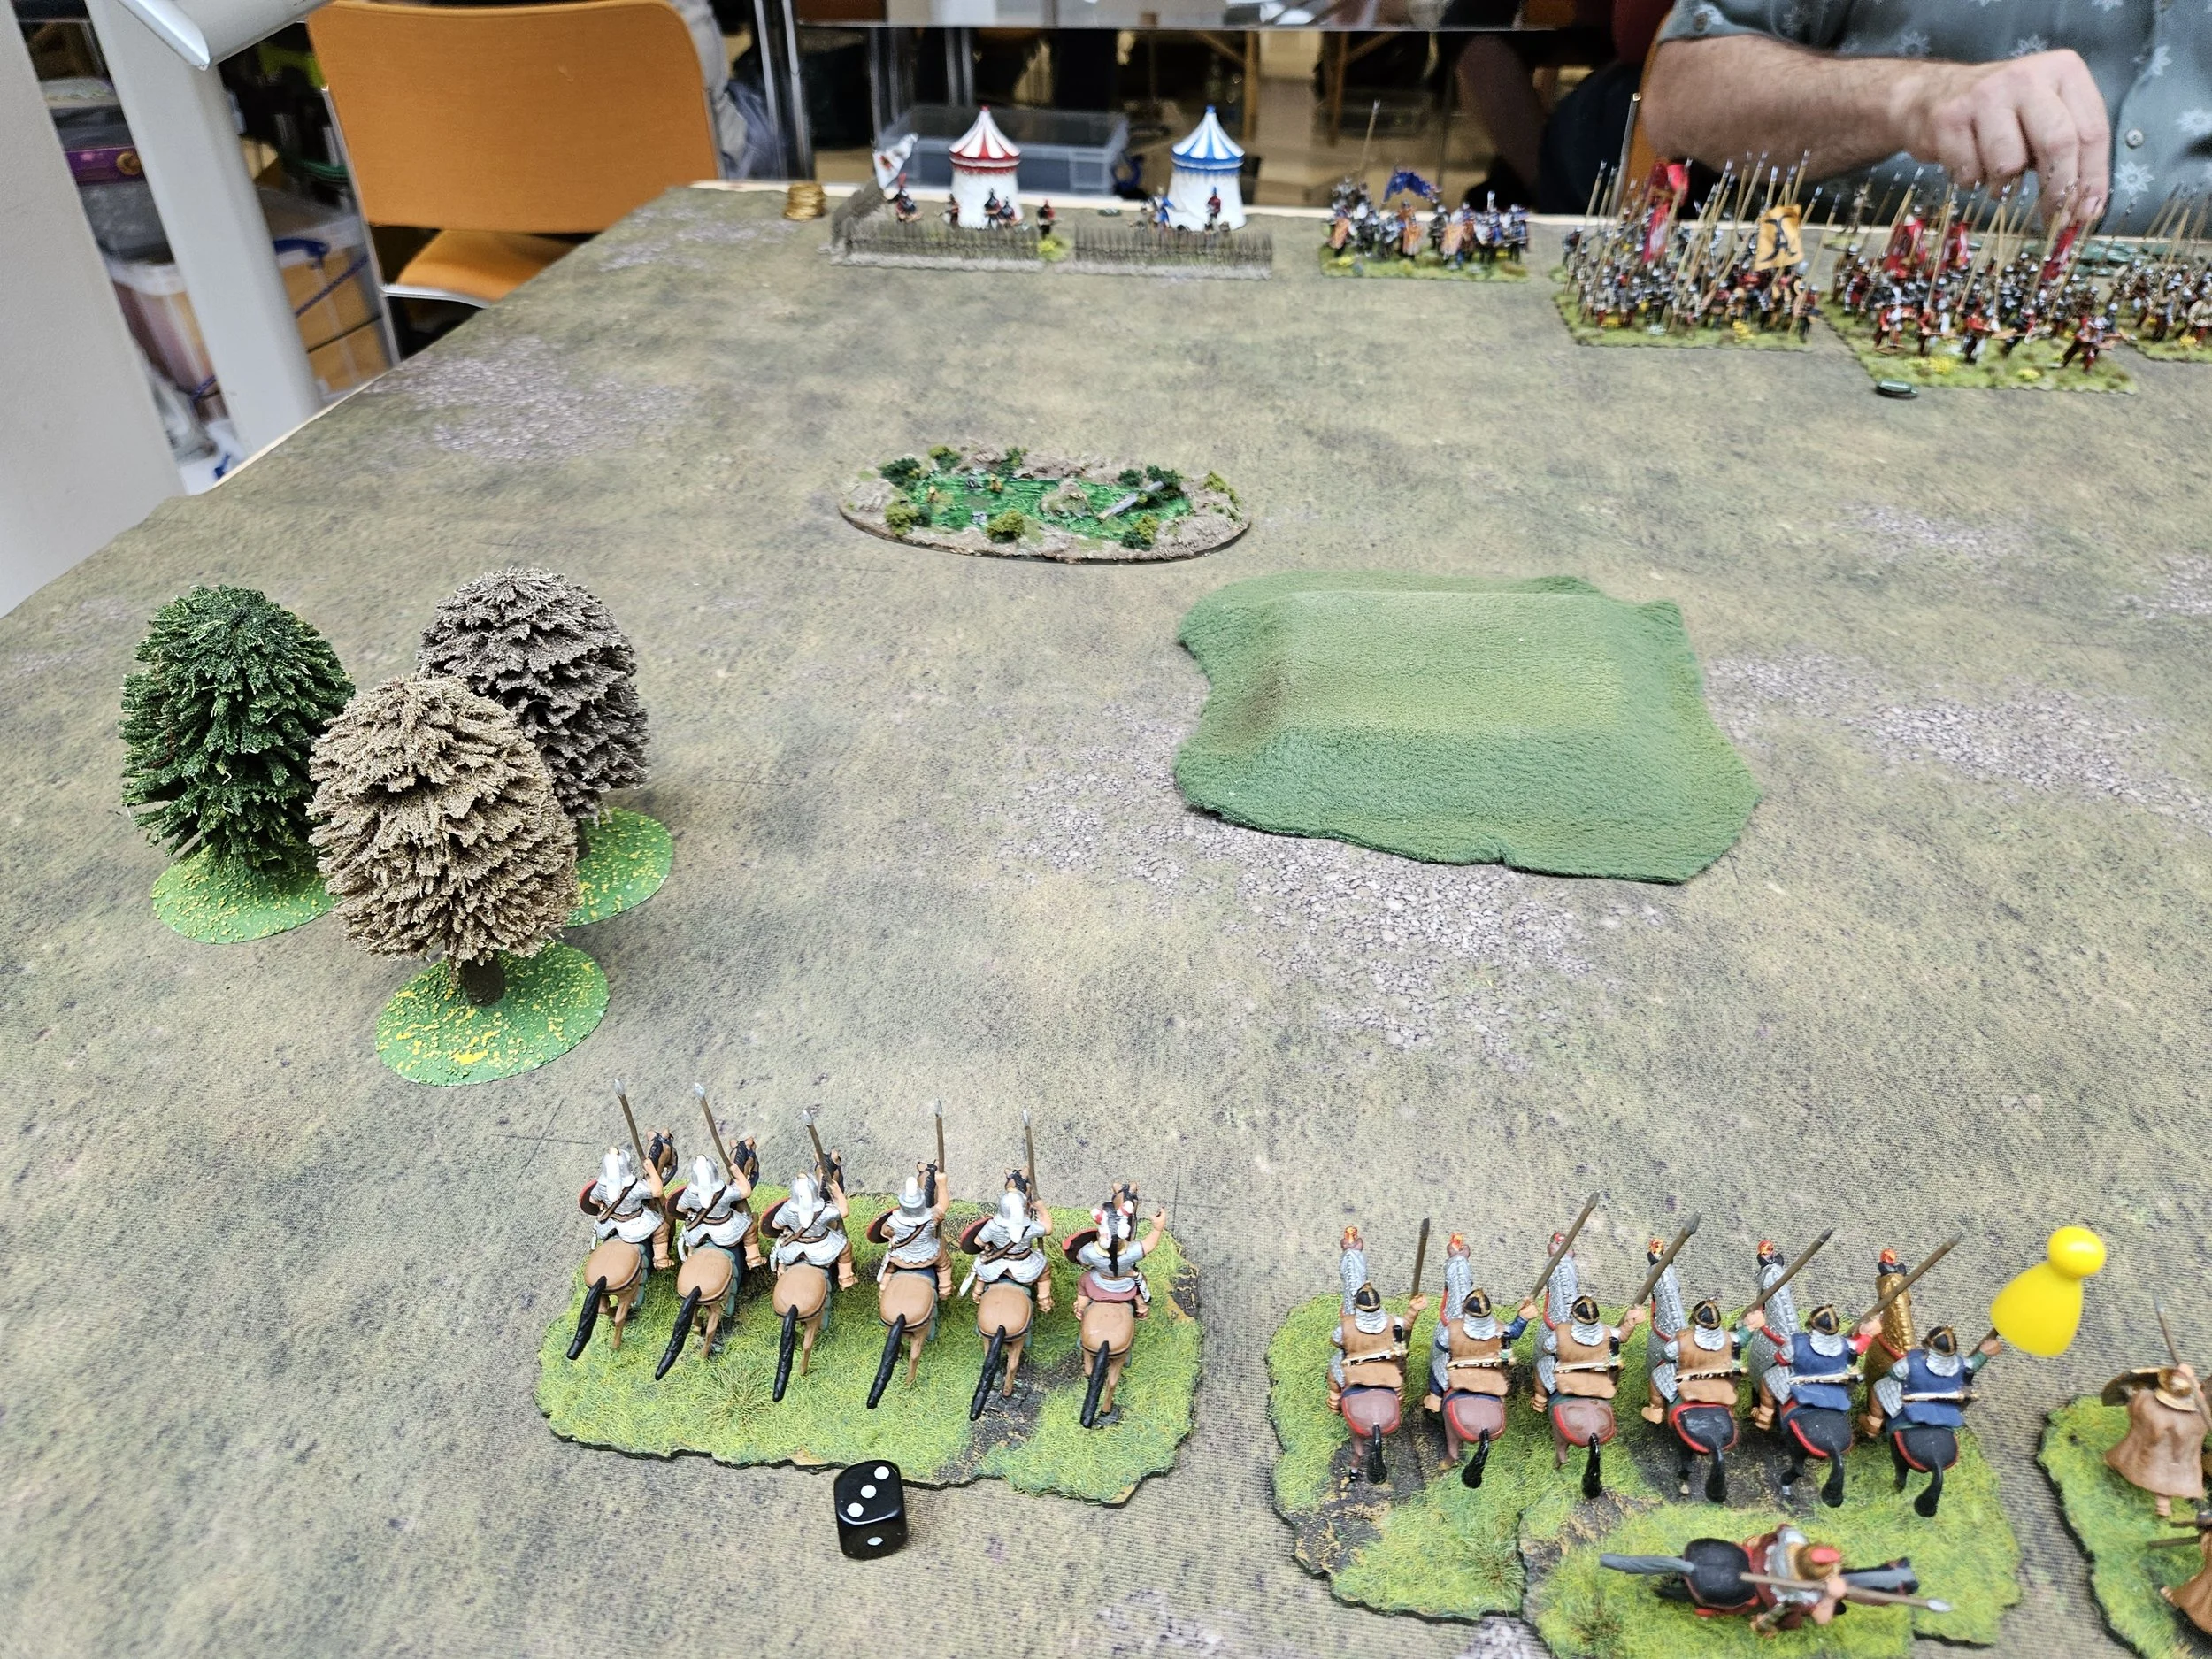
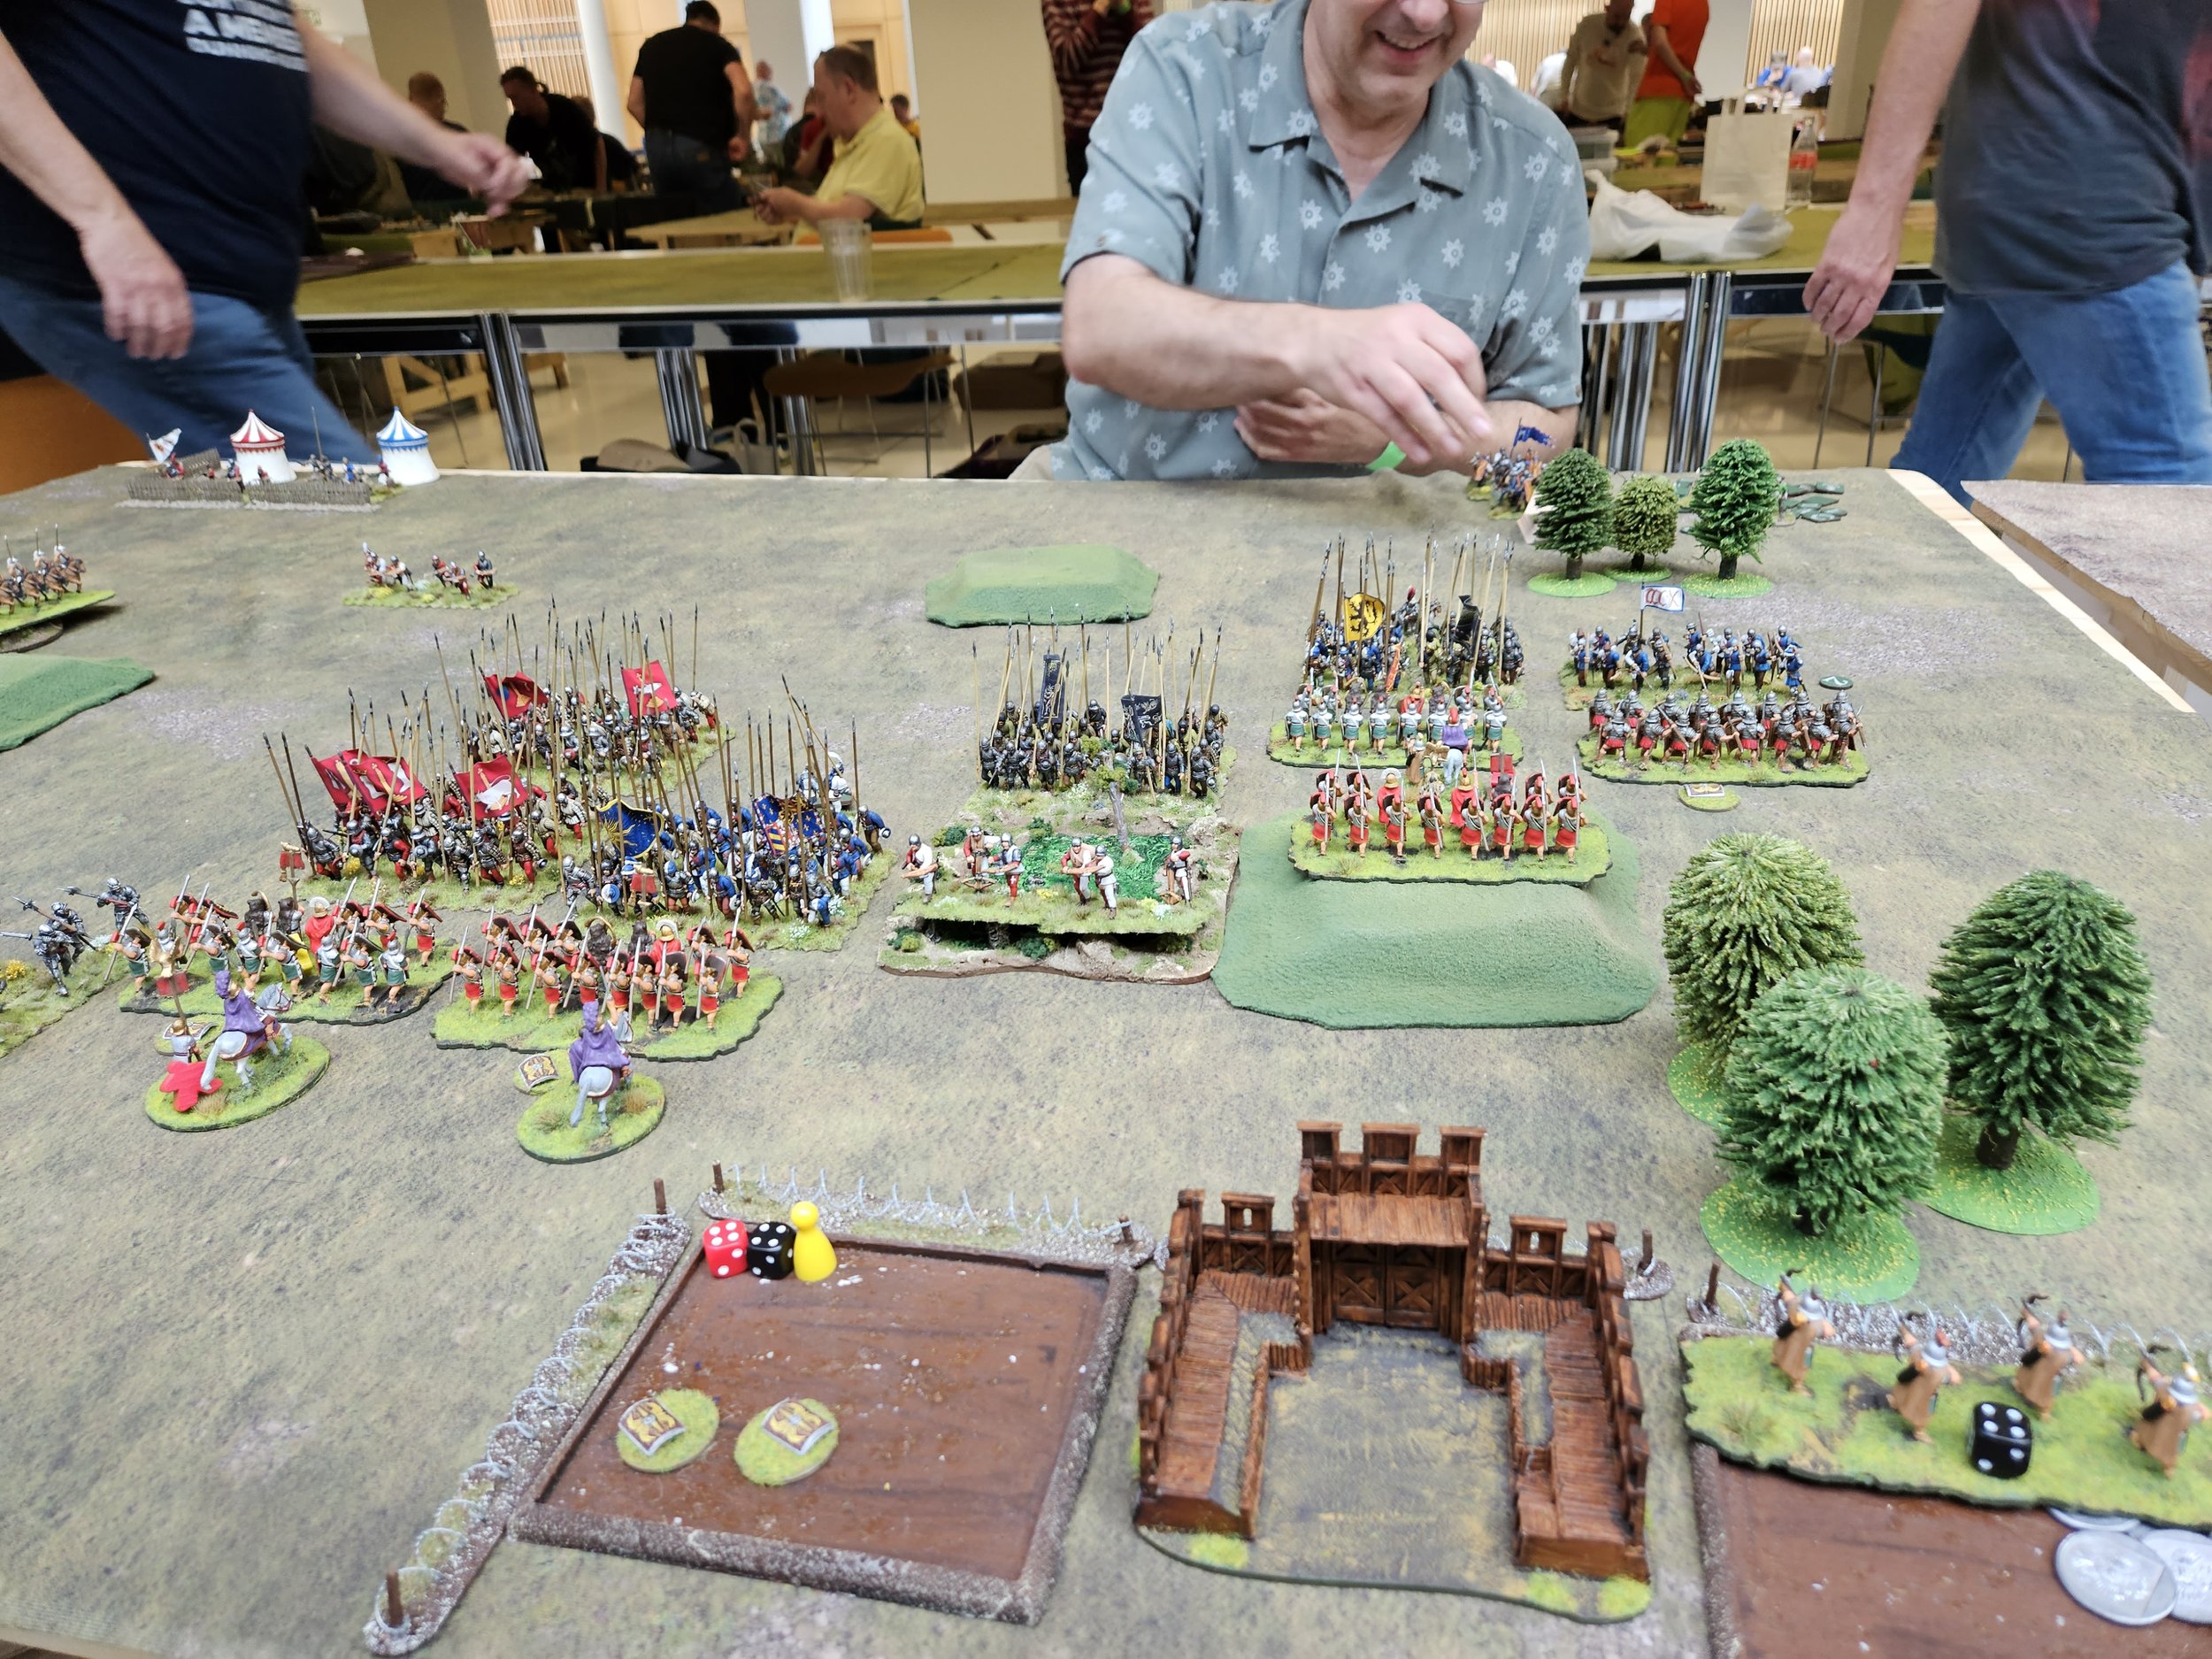
Friend Rob came over for a game of For King & Parliament yesterday and we ended up playing through the first scenario from the Siege of Norchester campaign pack.
For this battle, the Royalists need to keep possession of a bridge near the hamlet of Tounton, with the Parliamentarians obviously needing to wrest it from them.
Tounton Bridge is to the left
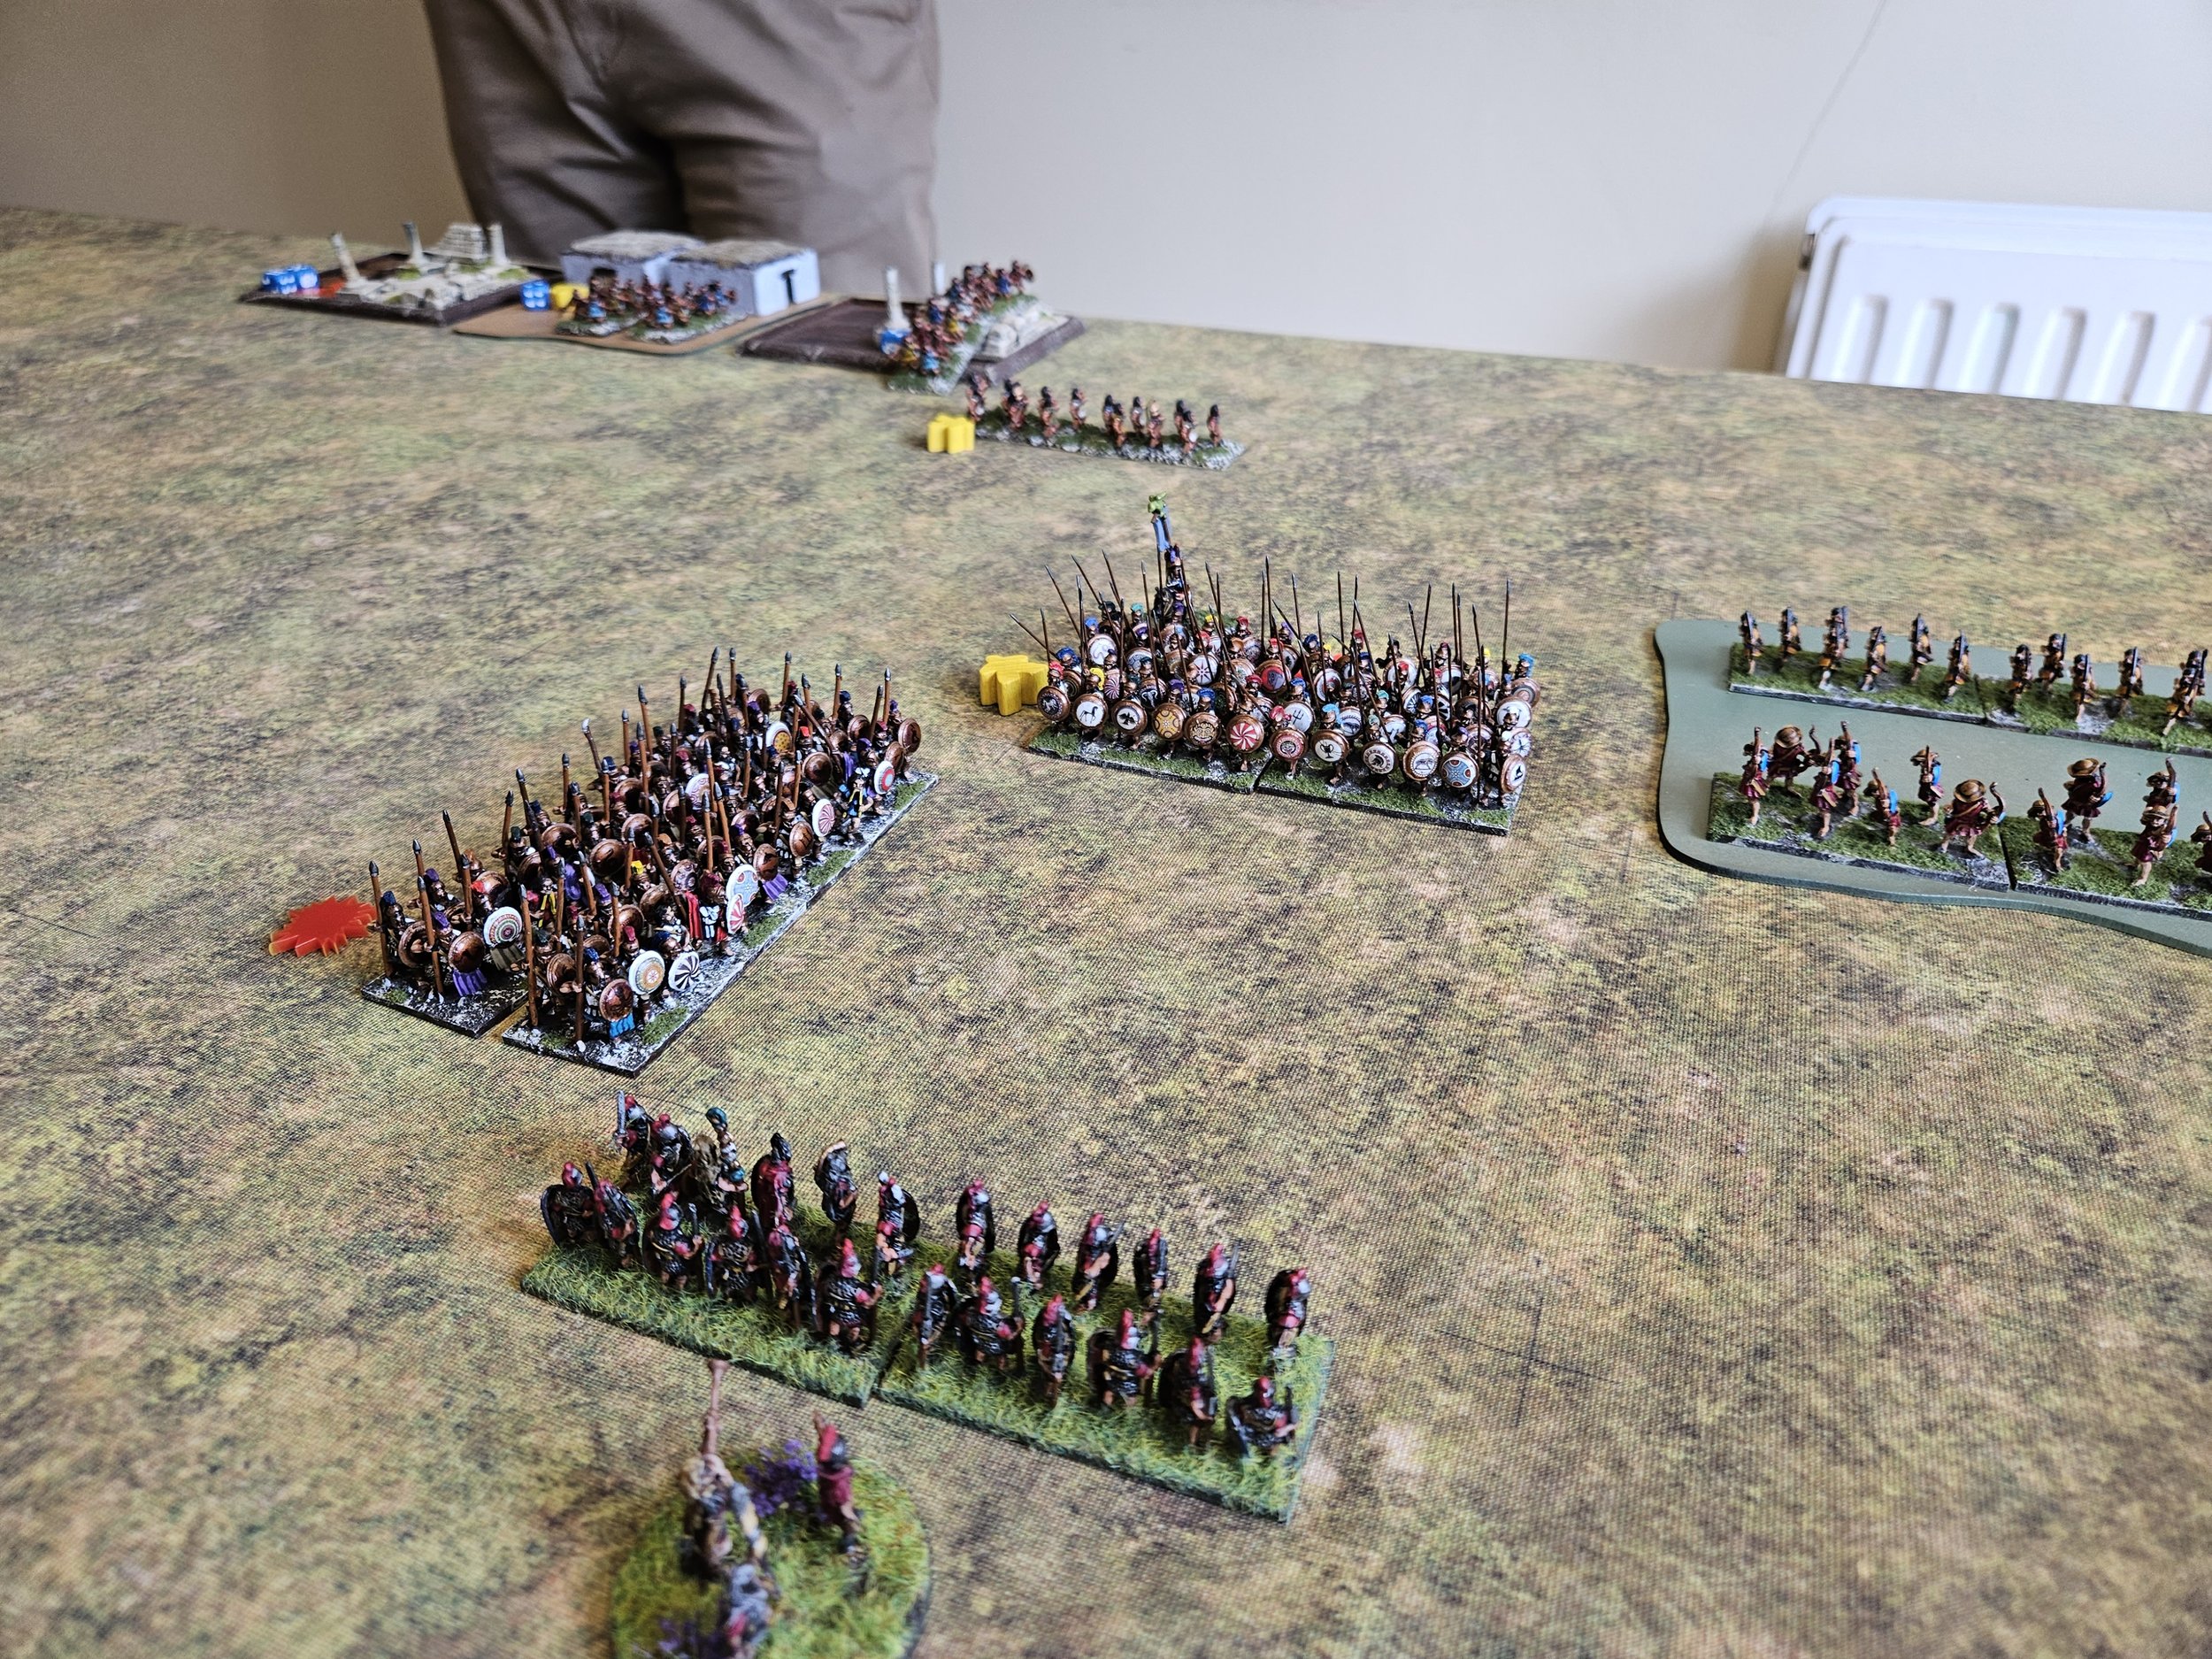
The Royalists, under Sir Edmund Dexter, were in four brigades. There was a small brigade of Swedish Horse on each wing; and two brigades of foot in the centre, one of which had not seen battle before. Out front was Rankin’s Forlorn Hope, at back were Miller’s Guns.
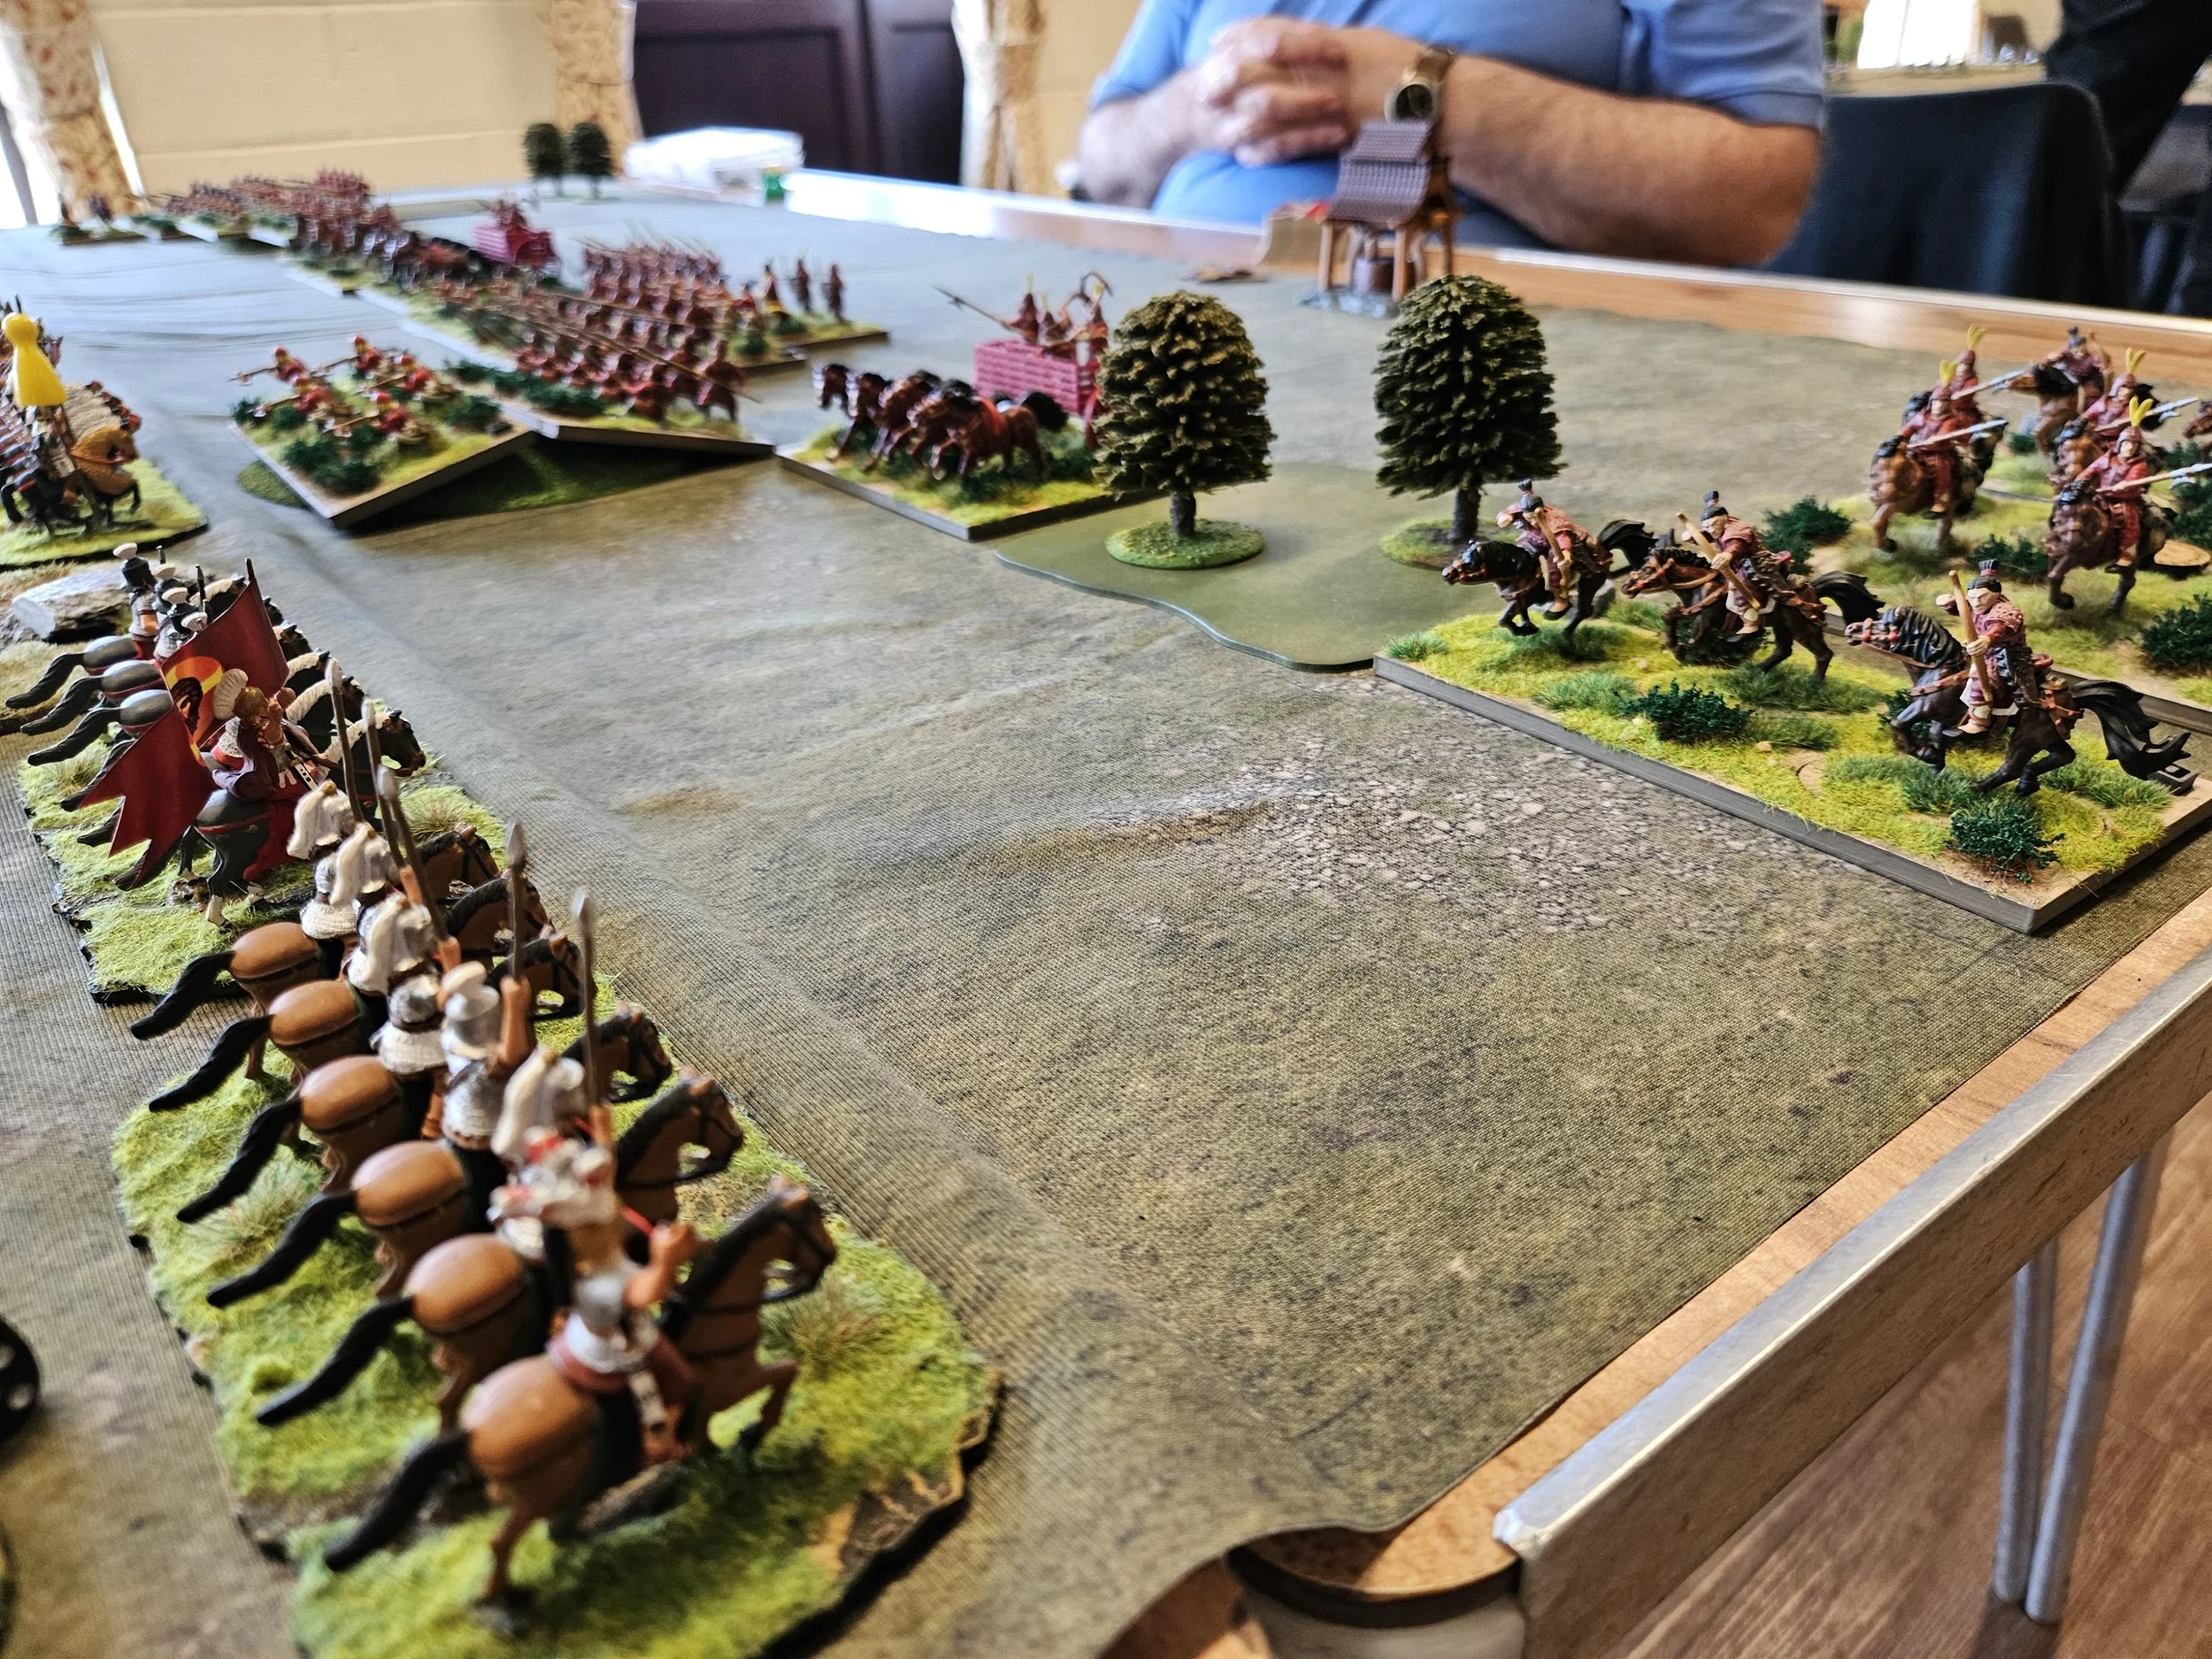
Facing them were the Roundheads under General Thomas Dread-Naught. Core to his force was a large brigade of Puritan Horse under Colonel Kill-Sin Rhapsody: you can see God’s light shining on them as they enter the field in the picture above! The rest of his men were trawled from the border regions: a brigade of foot, one of horse mounted on steeds really only fit for the knacker’s yard, and a small brigade of tartan-clad men from further north. A rag-tag force maybe, but plenty powerful too.
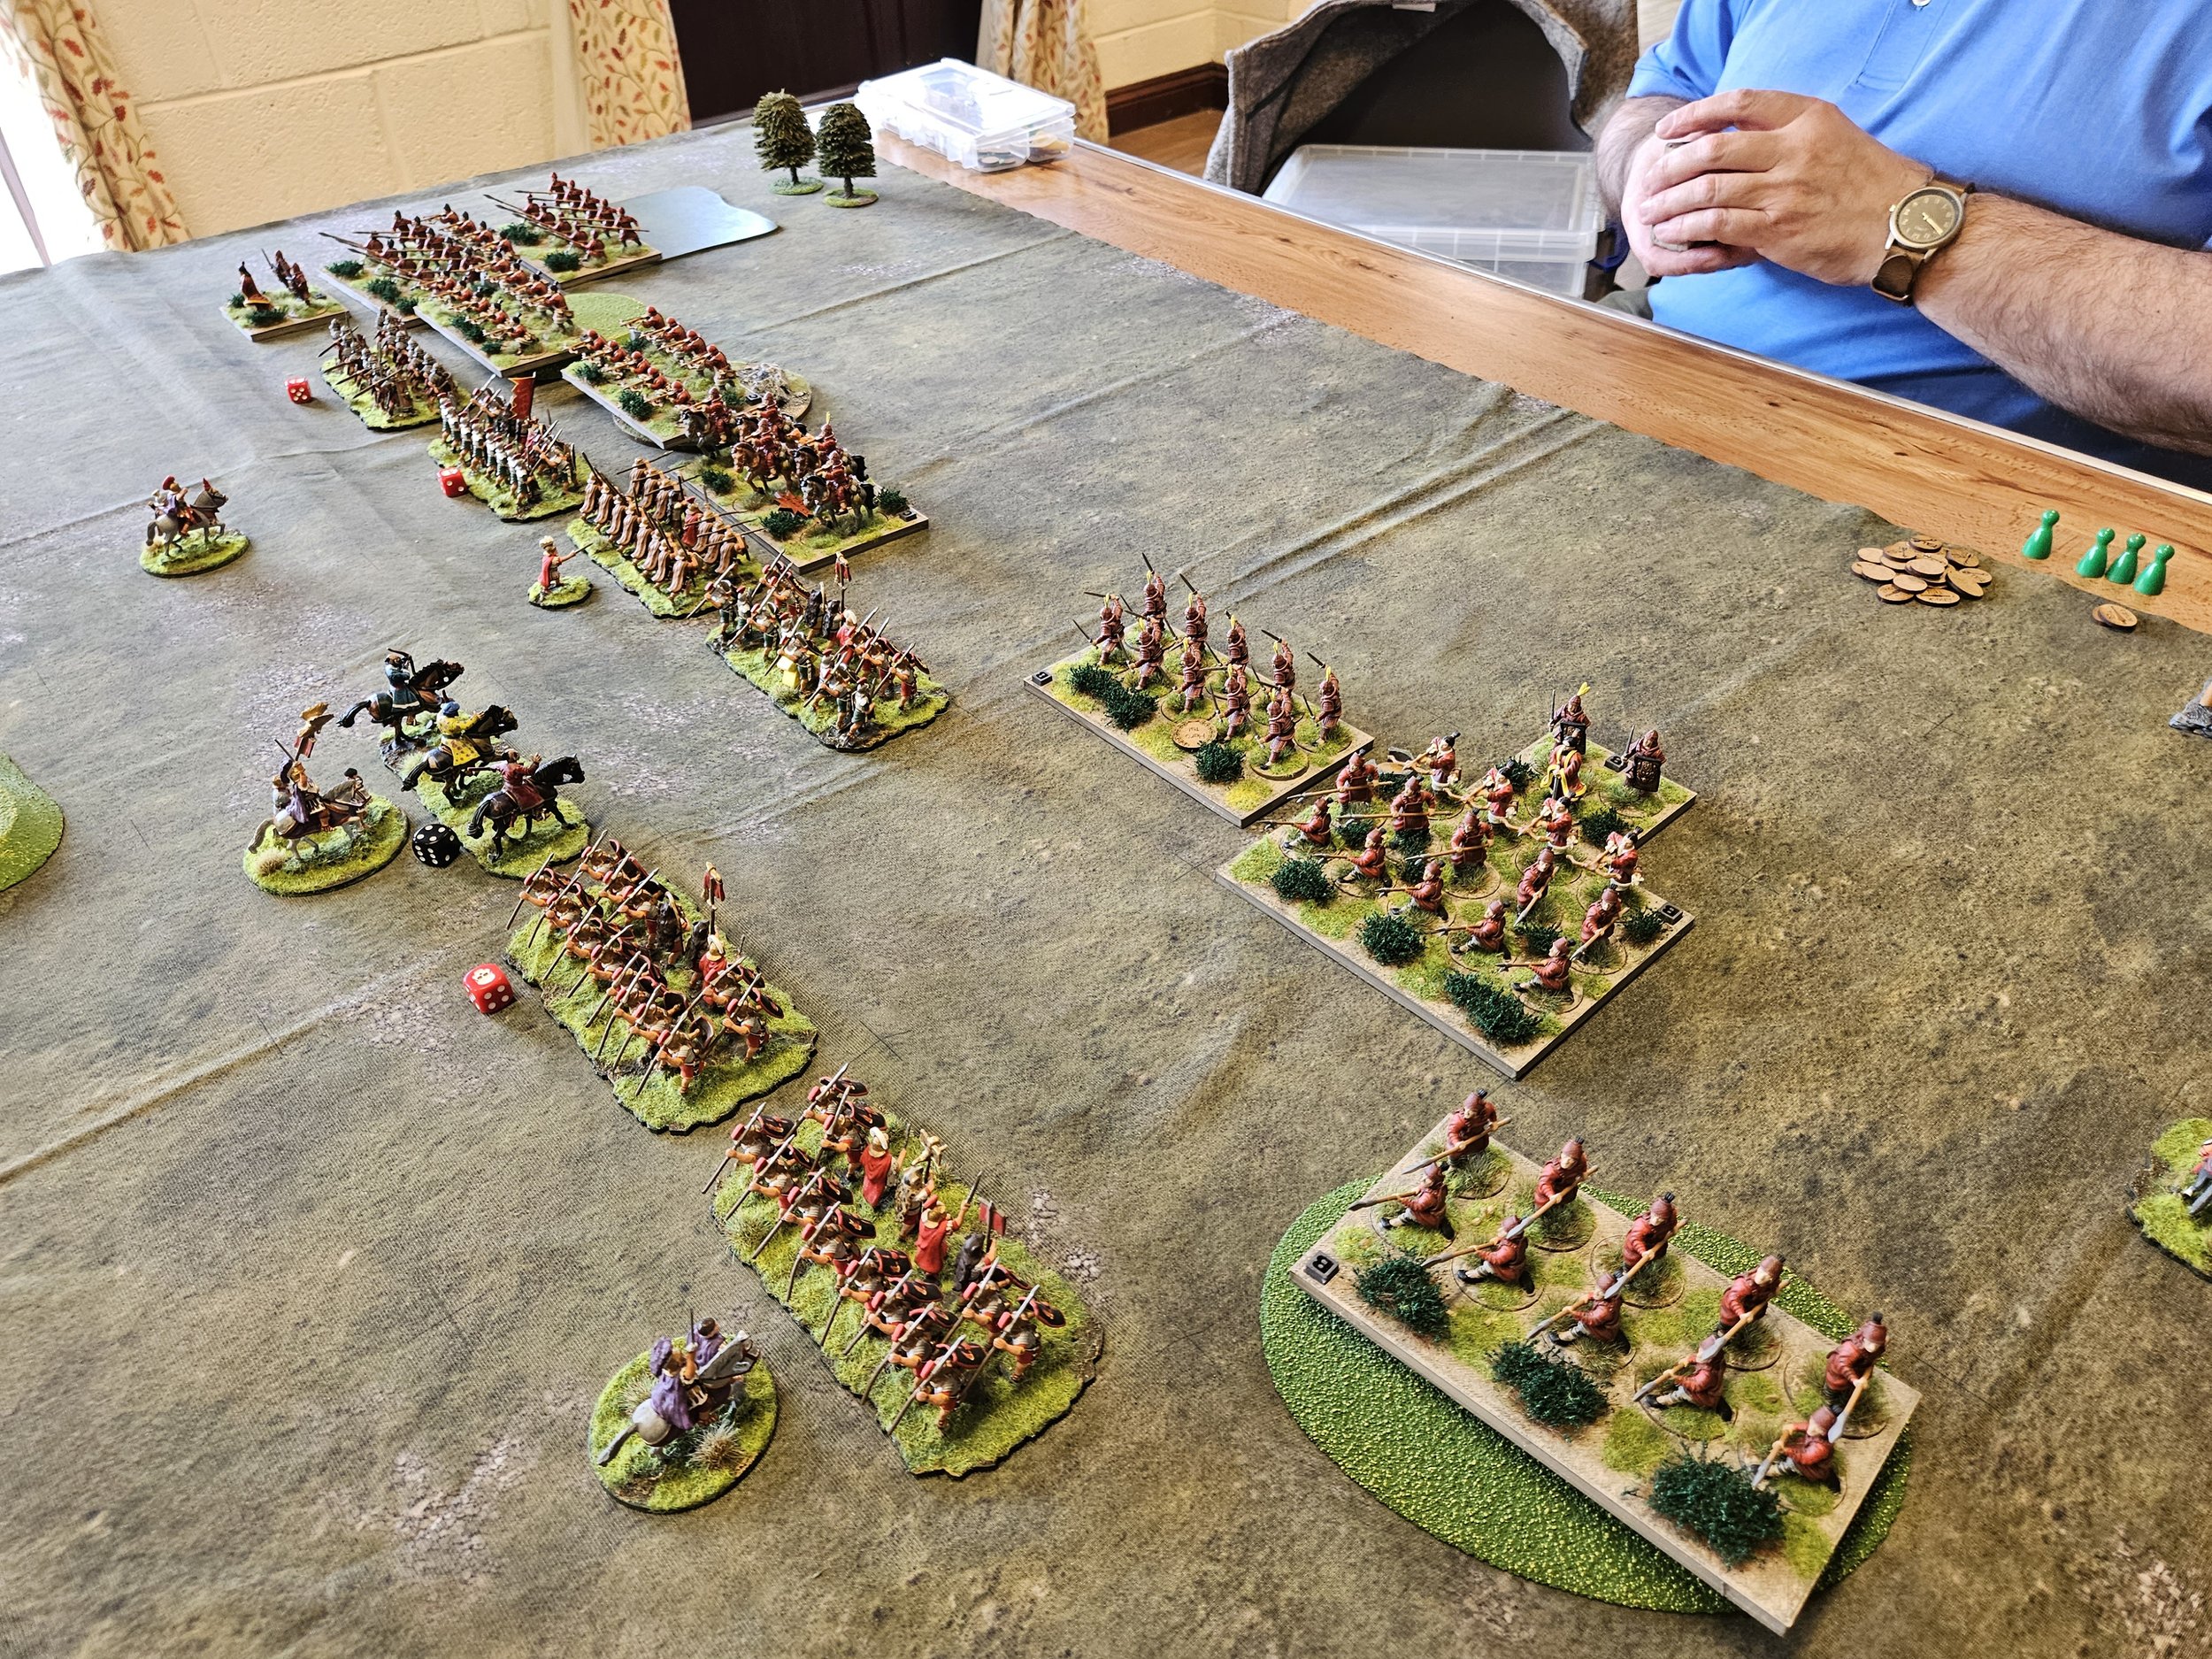
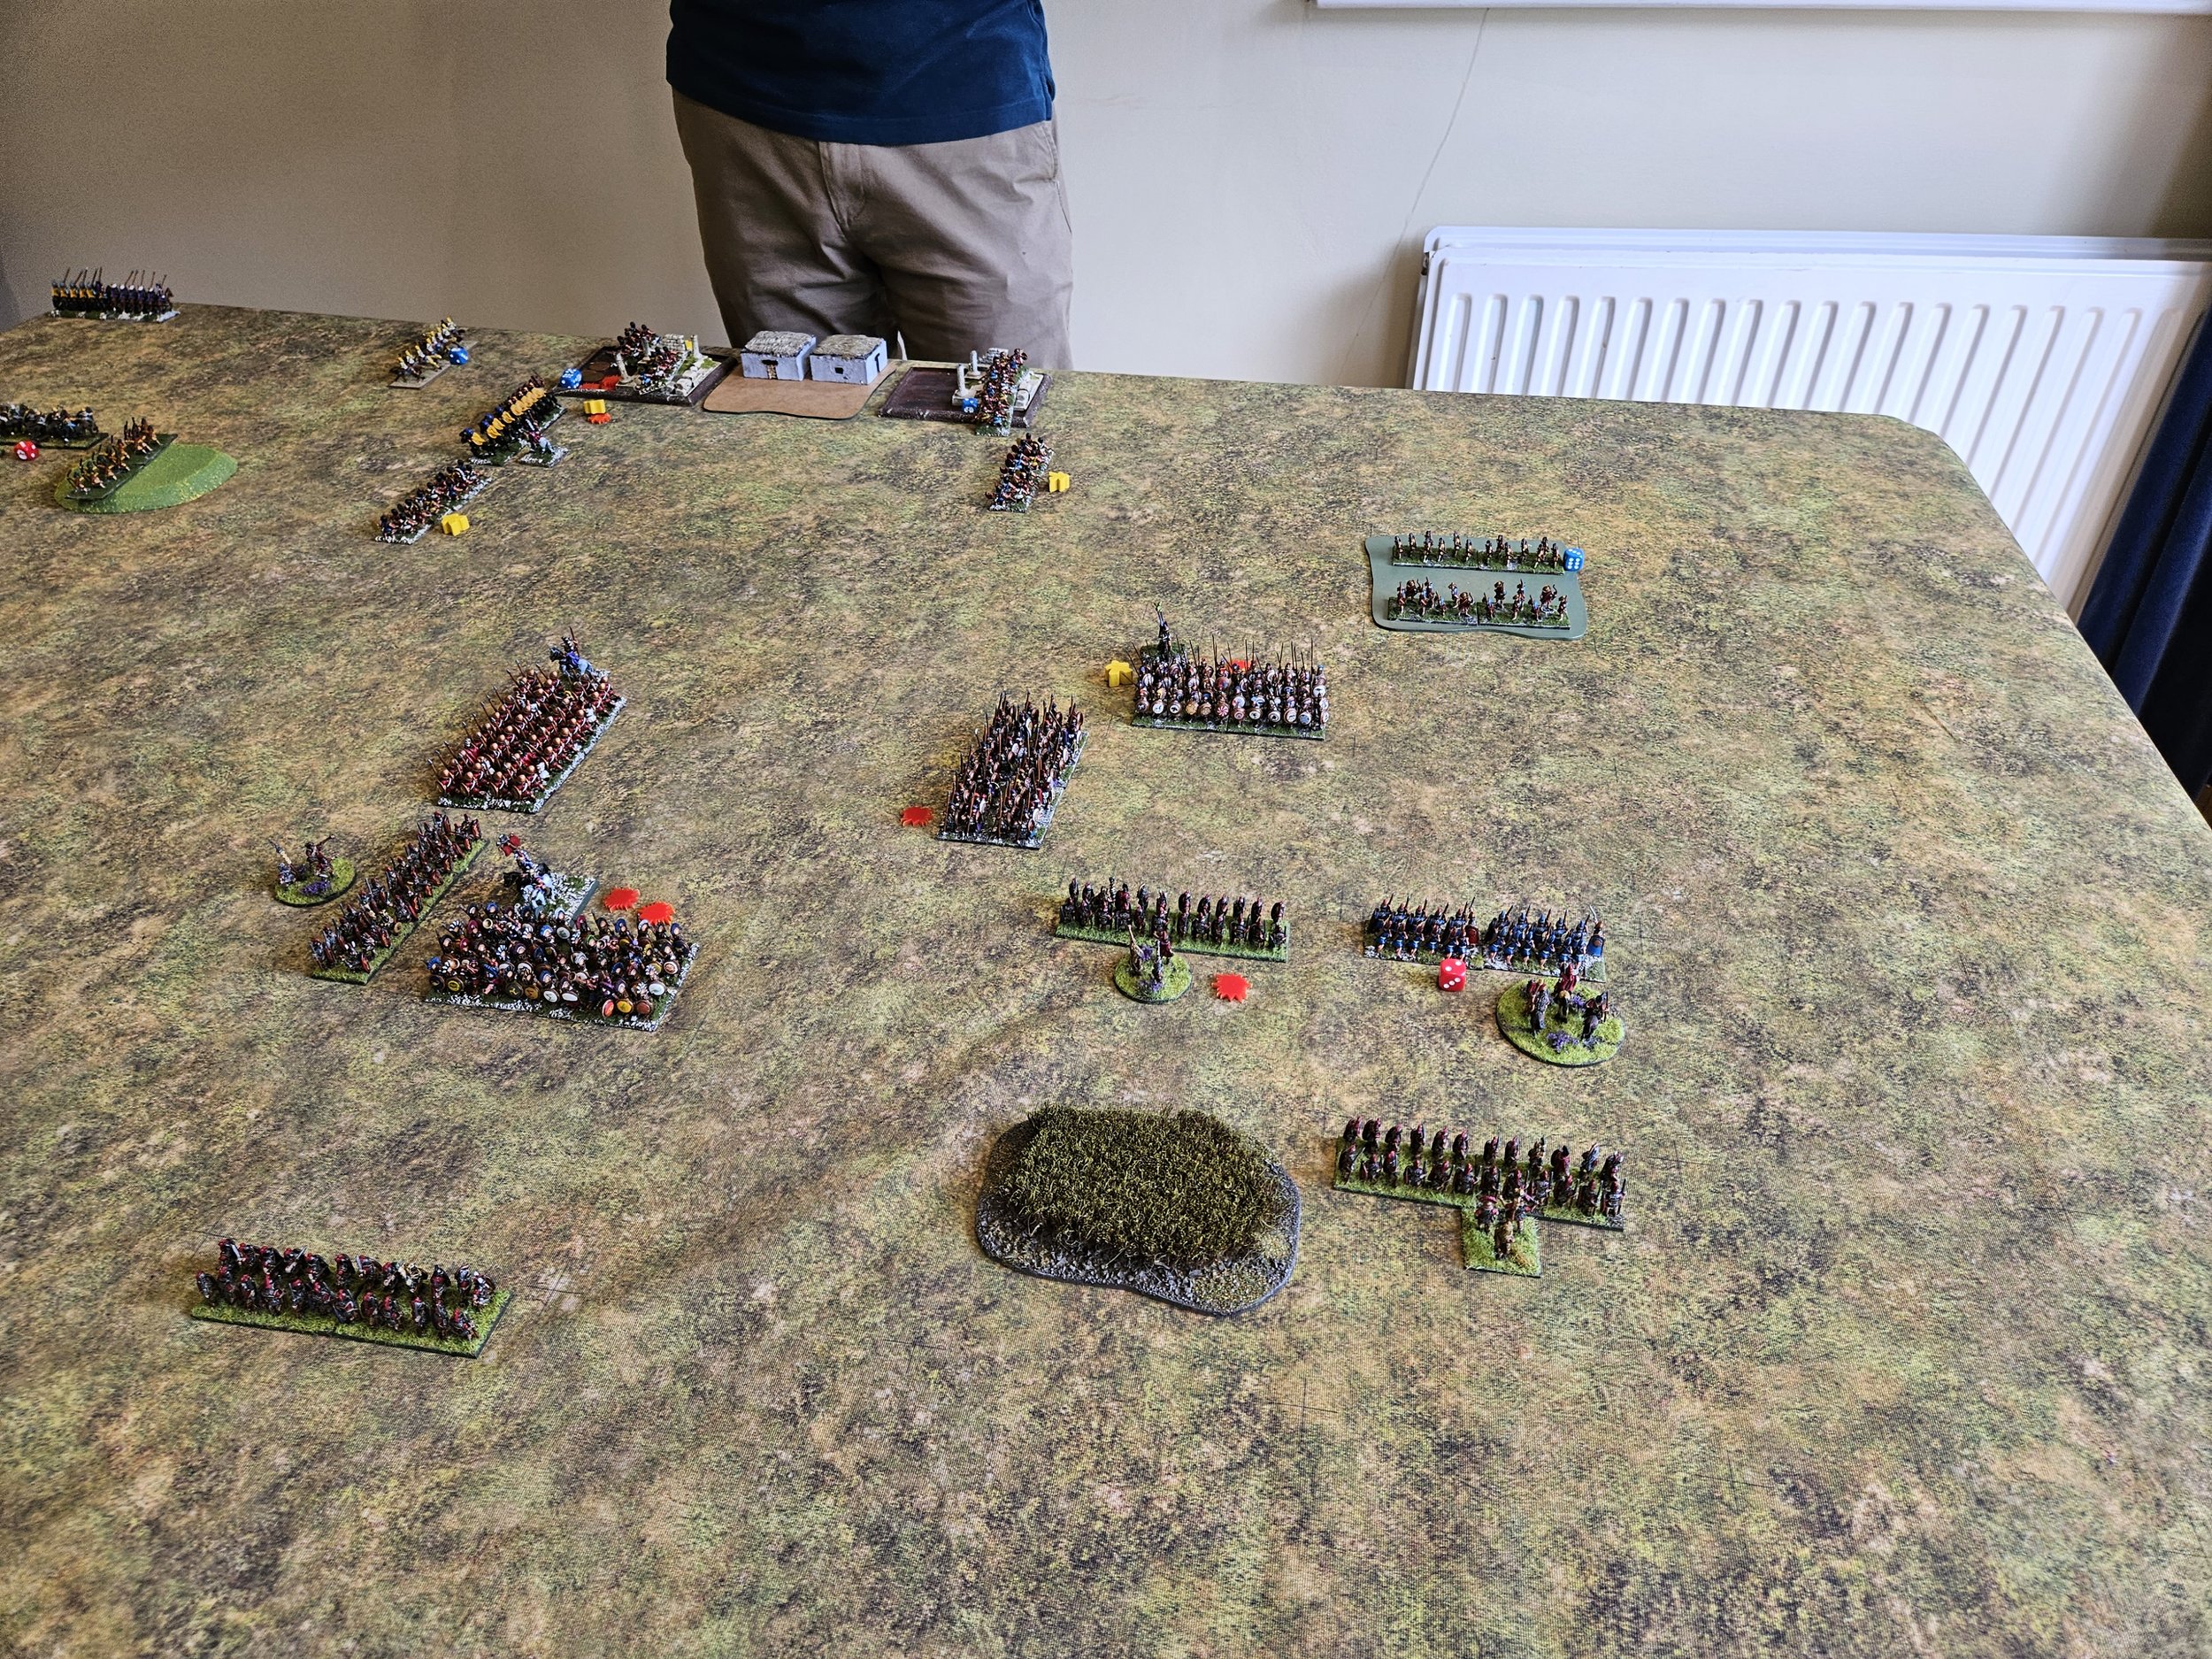
The action opened with a general Parliamentarian advance against the largely static Royalists.
In the centre, the Royalist Forlorn Hope was dealt with fairly easily, but on the Roundhead right wing, one squadron of Royalist horse dispersed the Border Lancers without difficulty. This left them facing a wood full of Highlanders, but their blood was up and they charged in regardless of the terrain. The Highlanders, supported by some Mounted Pistoliers resisted the charge and that left a stalemate around the wood that lasted for the rest of the game!
Behind this action, however, another unit of Pistoliers had flank charged and dealt with the other squadron of Royalist horse, leaving the Scots to head north towards the rear of the rest of the Cavalier lines and the bridge, albeit on blown horses.


Meanwhile, on the other side of the field. Colonel Rhapsody was leading his Puritan Horse to disaster. Two of his squadrons tried an outflanking manoeuvre on the far left wing, but the Cavalier horse near them proved too fleet of foot: one unit neatly hopping the hedge, turning to face, and then charging furiously into the Puritan’s rear. Two squadrons of God-fearing cavalry got to meet their Lord sooner than they expected!

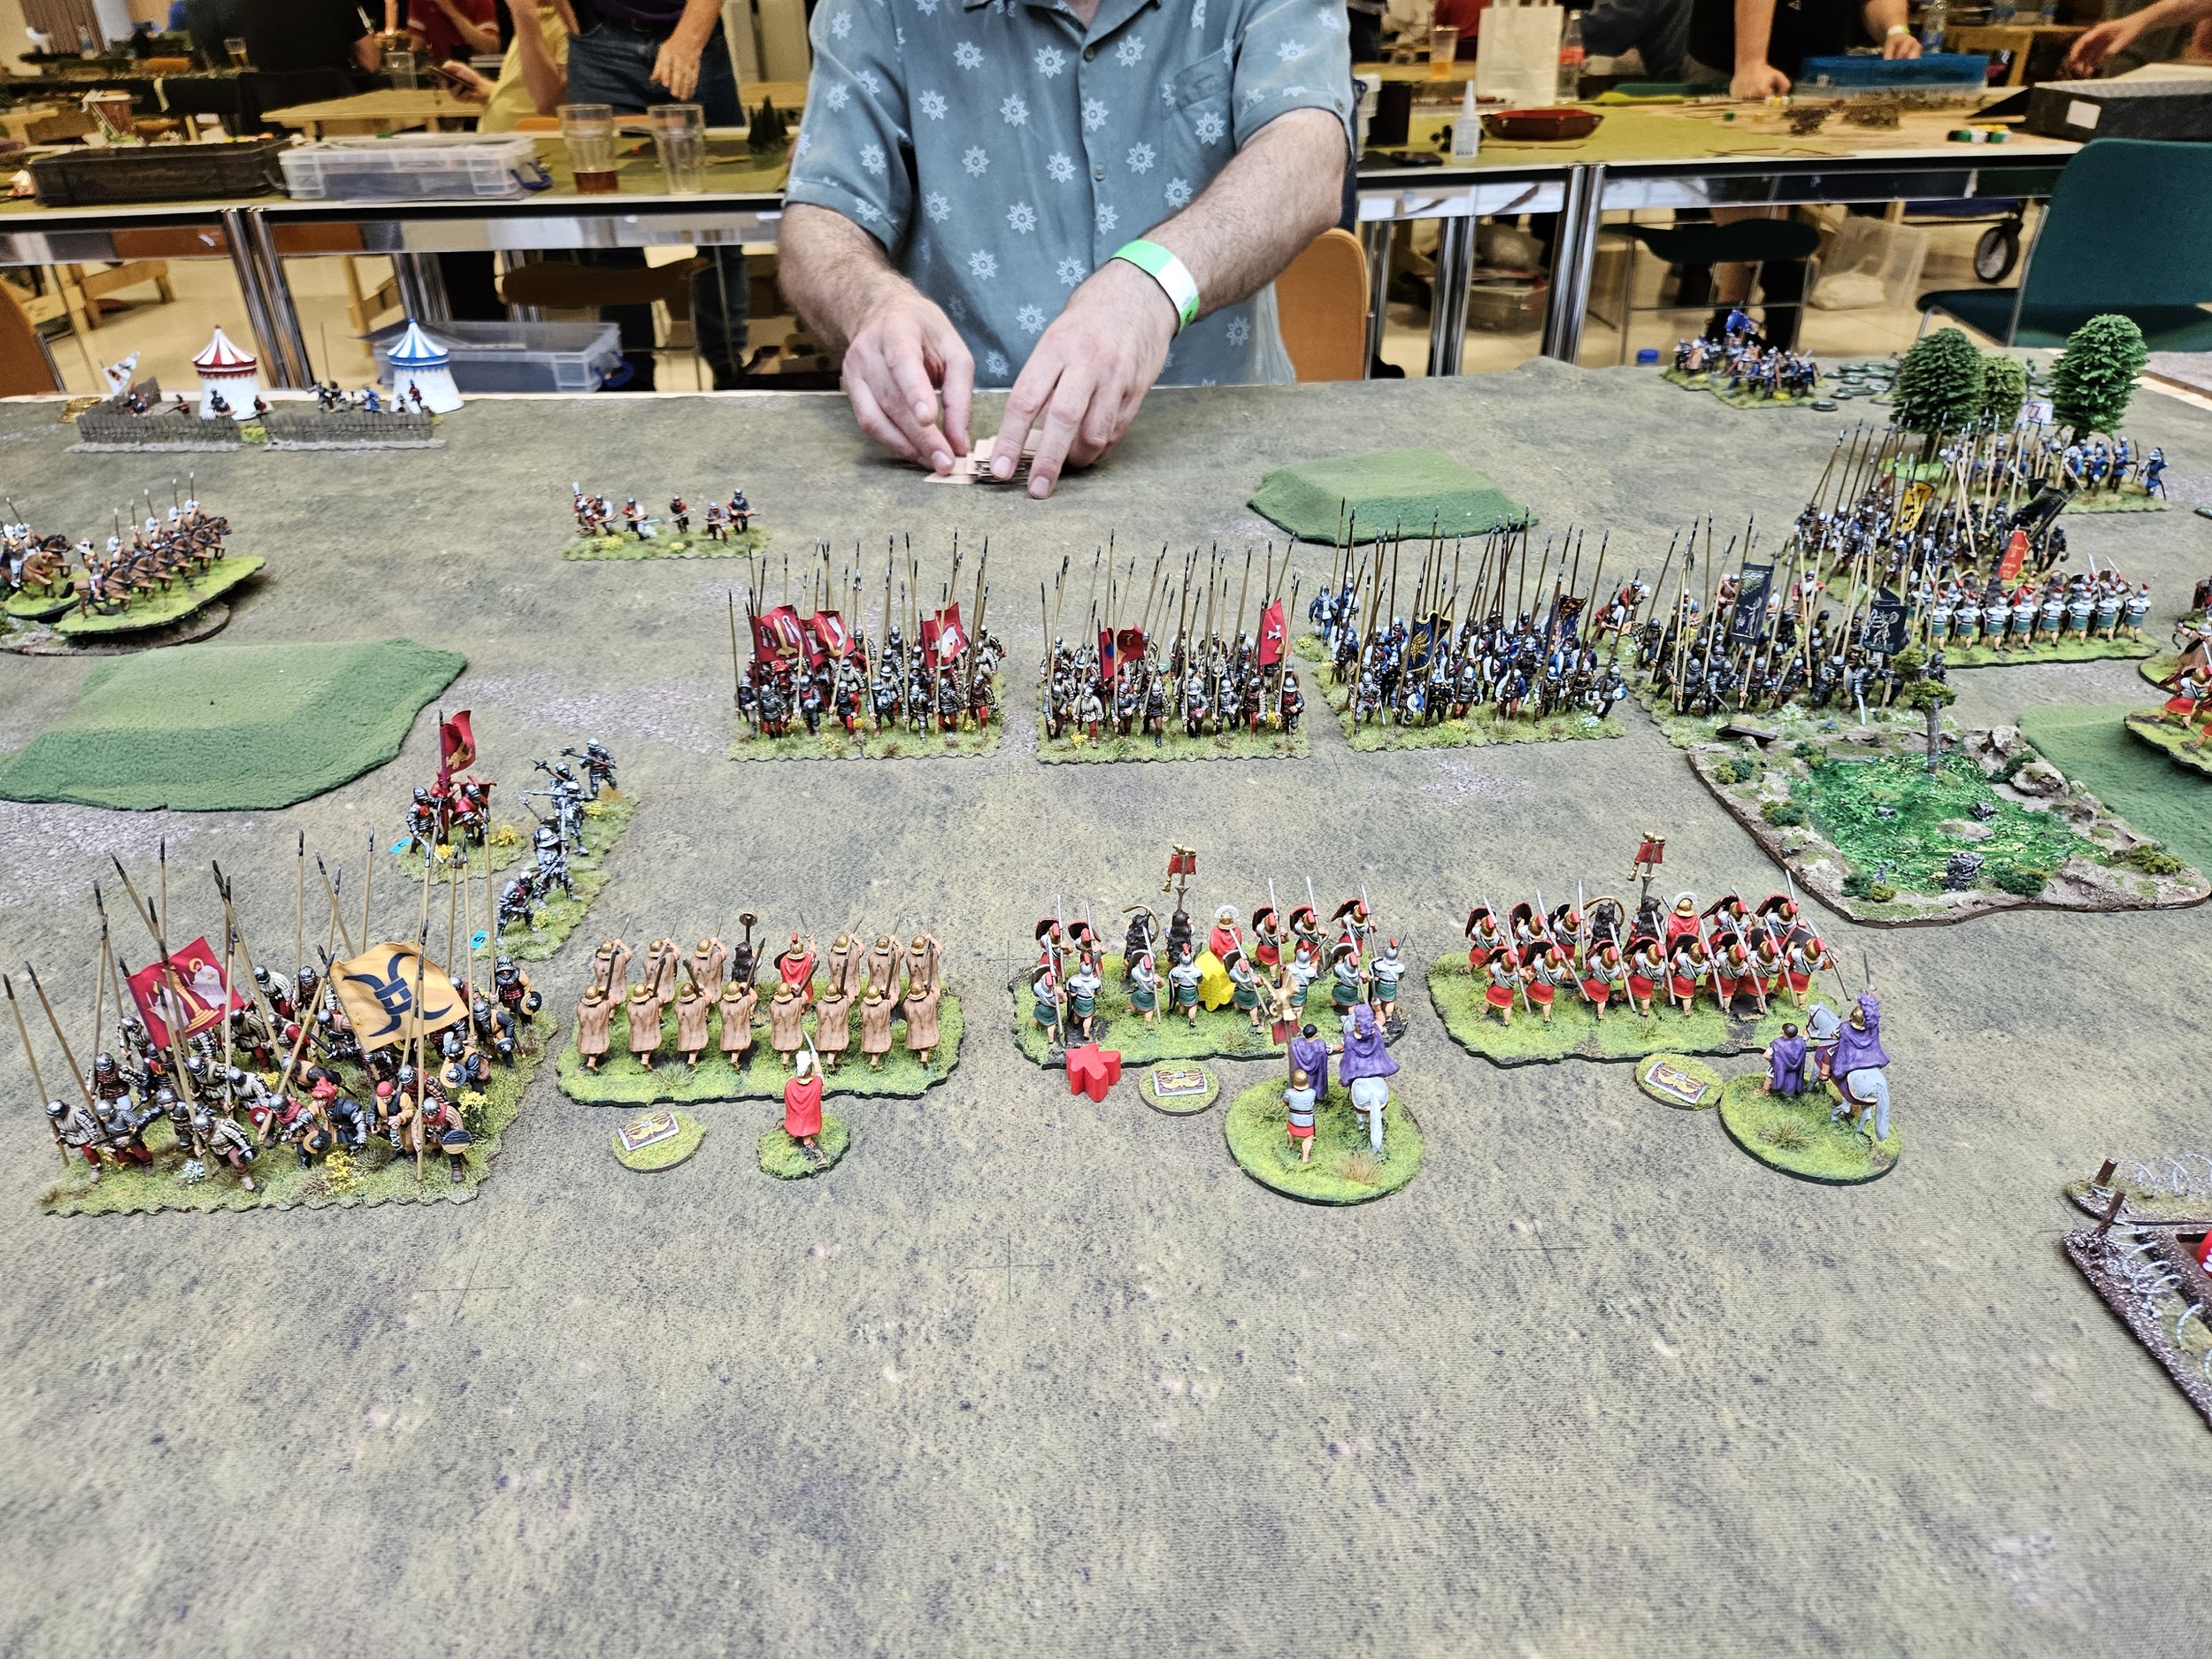
Onto the centre, where the Parliamentarians had moved forward and thrown their line into a general engagement. The Royalists moved to meet them, then retreated, then moved forward again, musket fire and the shouts of charging pikemen drowning out the cries of the wounded, and this indecision allowed the Roundheads to open a gap in the Cavalier line.
Ideally they would have had cavalry ready to exploit the hole, but the rest of the Puritan Horse was stuck on the left so it was up to some commanded shot to move forward and begin to outflank the Royalist line.
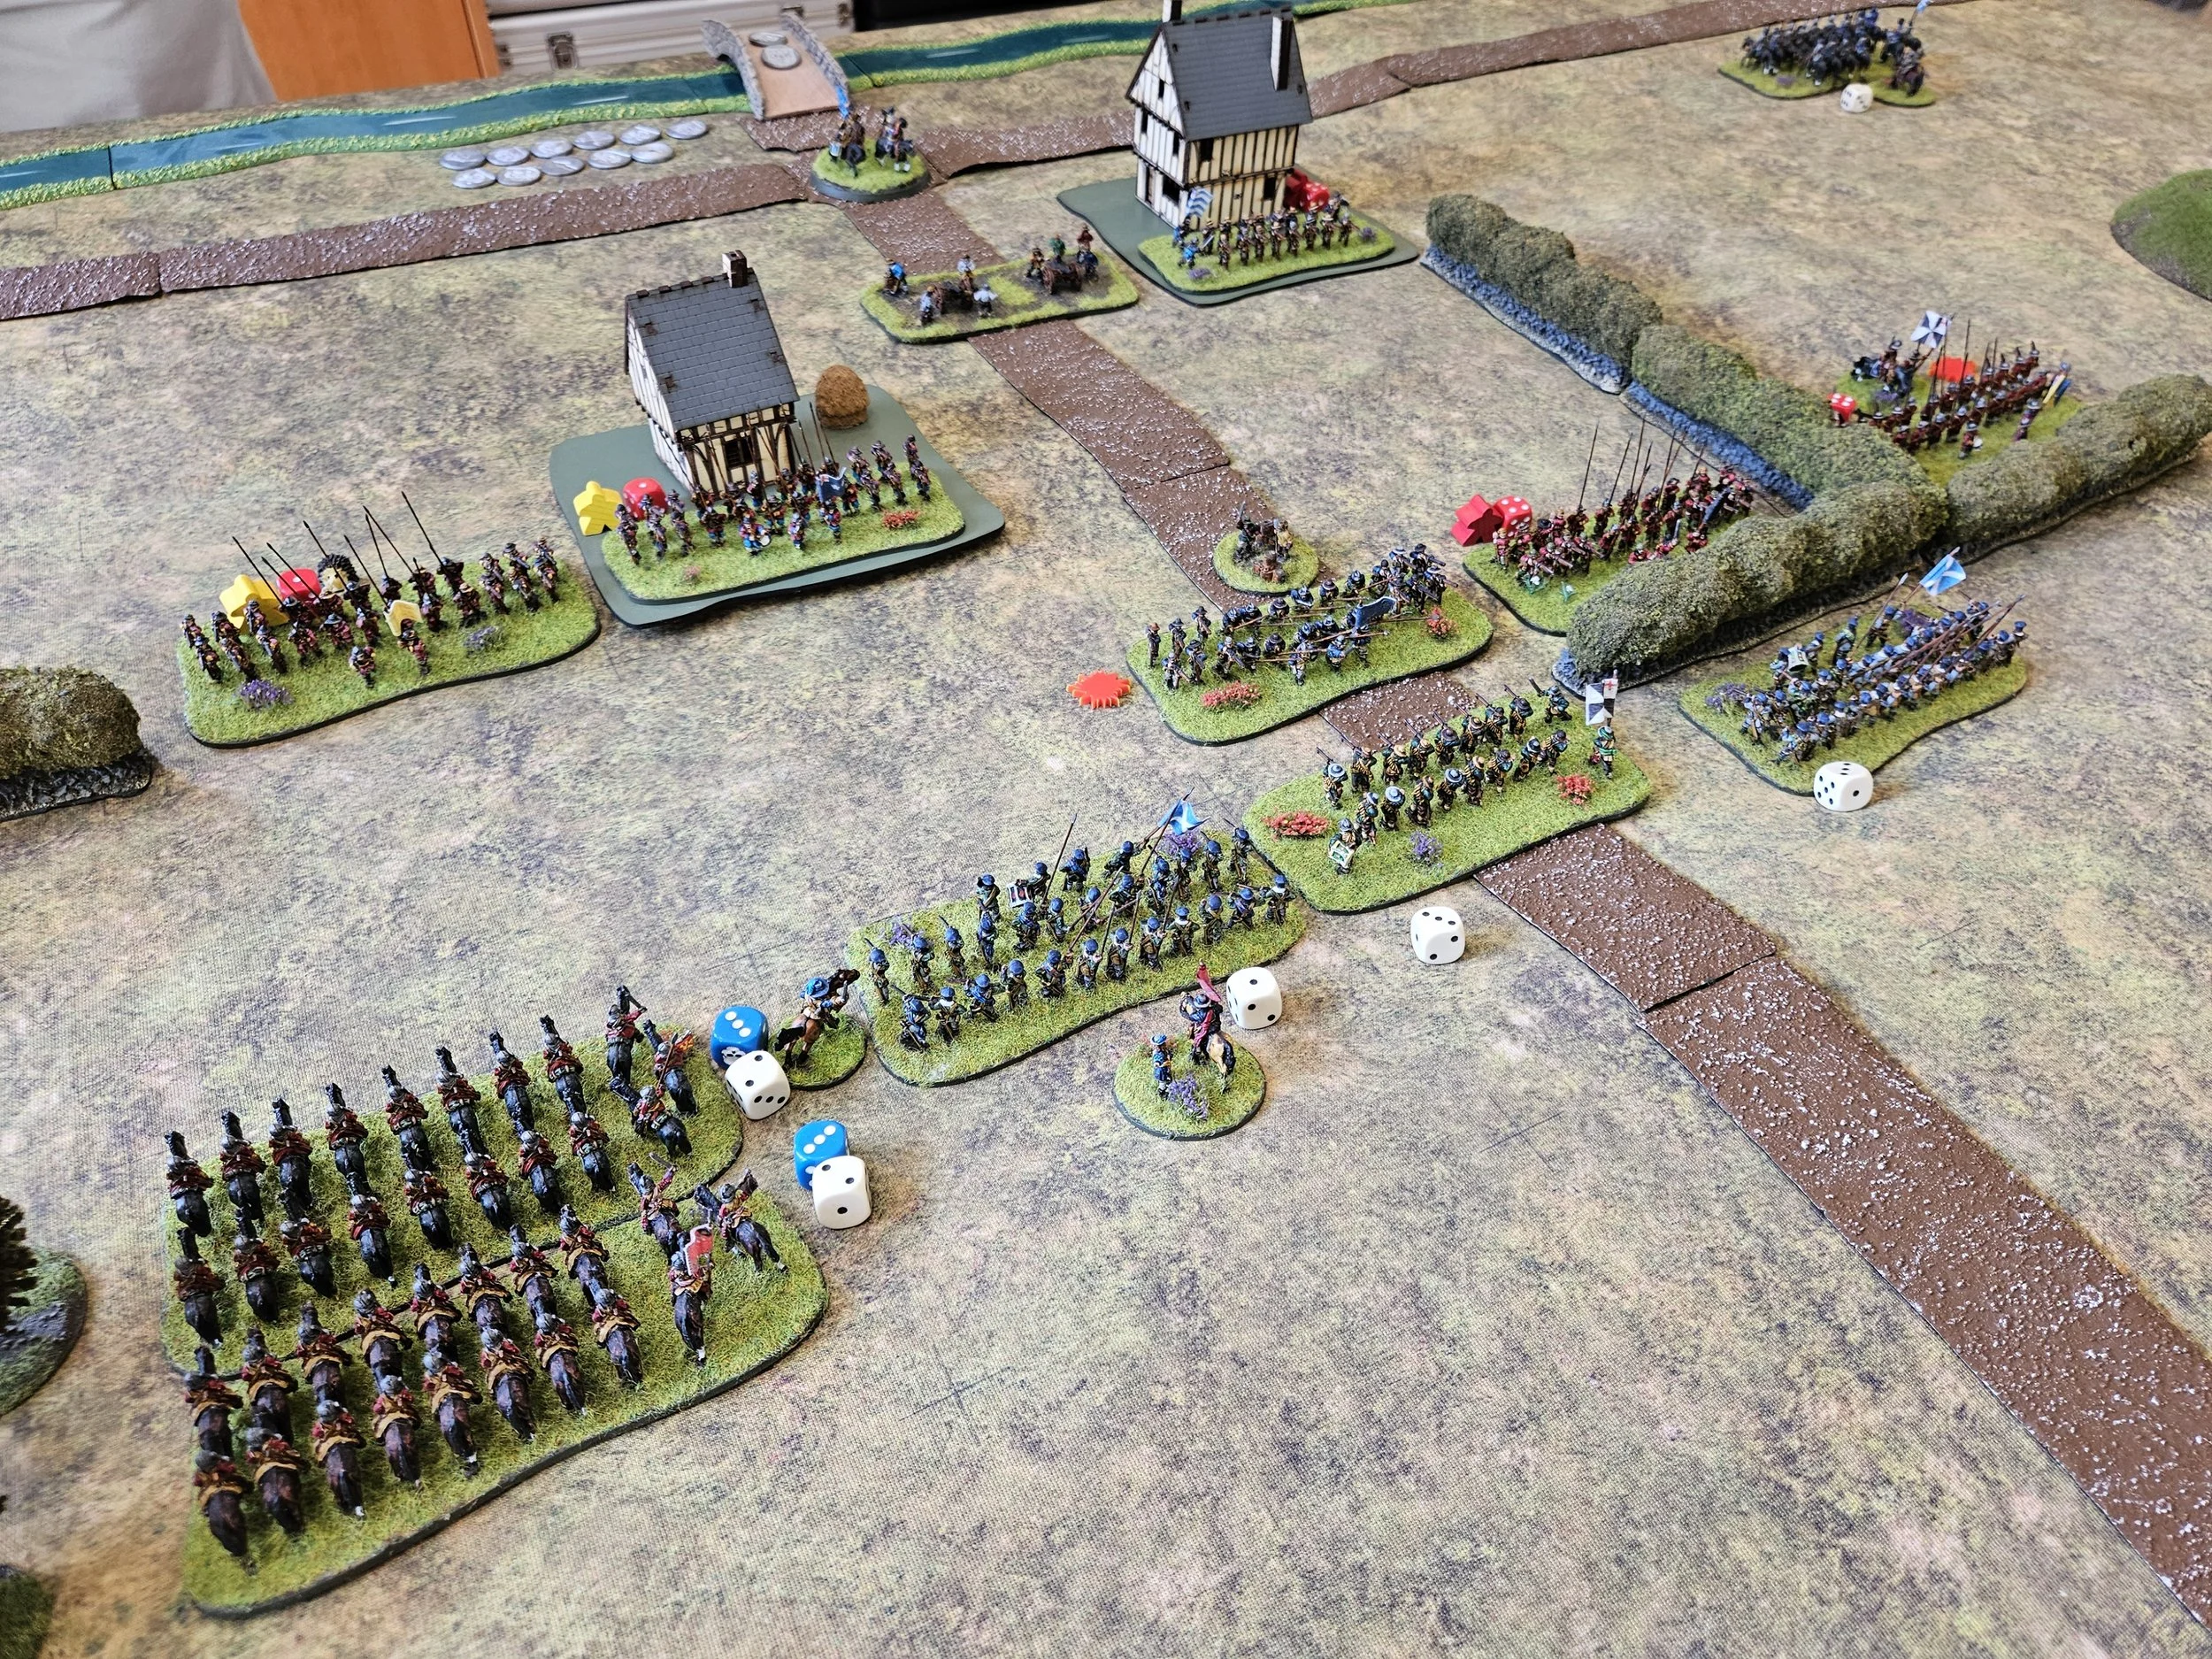


Meanwhile the Roundhead Borders/Scots horse that had broken through on their right had slowly (blown horses puffing and panting their way forward) managed to get around the rear of the Royalist position. Trotting past some enemy Commanded Shot who were happy to keep hiding in Tounton (the unit just wouldn’t activate despite the fact that the Roundheads were a sitting duck!) the Scots, much to their surprise found that they had taken the bridge. Surely the battle was now decided?
It was not, however, as simple as that. Yes, the Royalists were reduced to one coin, and the Parliamentarians technically had the bridge, but the Roundheads had lost an awful lot of cavalry and were also down to one coin. It was sudden death time!
Earlier in the game: the roundheads advance to contact
The Roundheads were pretty convinced that they could destroy the Royalist unit on the right - it was already disordered and surrounded on three sides - they just had to survive the next turn in order to do so. This was when the Royalist Commanded Shot that had been skulking in Tounton finally got their act together, moved out of the houses they had been sheltering in to a position from which they could fire onto the flank of the Scots horse, who had moved off the bridge to cut down the Royalist gunners from behind.
The double-shotted volley rang out and the Scots horse disintegrated! This was too much for the rest of the Roundheads, and rather than push forward to victory, they began to retreat. Moving back onto the bridge, the Royalists had won the day!
Enemy horse? What enemy horse?
The bridge taken.
Enemy horse? What enemy horse? All we can see is two lone scotsmen officer-types!
Totting up the points, the Royalists had won a narrow victory 16:14: snatching victory from the jaws of defeat! It had been a cracking game, with the advantage swinging backwards and forwards throughout. On to Munce’s Wood for the second game in the campaign!
Untried Royalists (the yellow meeple) await the Parliamentarian onslaught!
Just time to get another TFL Painting Challenge update in before the end of September.
This time we have entries from Andrew, Sapper, Stumpy, Matt, Carole, Mervyn and Yours Truly.
Do visit the individual galleries, accessed from the NavBar above, but in the meantime here’s a selection to wet the whistle:


We’re almost into the last quarter of the year, so keep them coming. There’s last year’s totals to beat!
My final battle was a “civil war” clash against another Early Imperial Roman army commanded by Sid B.
Our armies were, however, subtly different. Mine, mainly due to a shortage of figures, was relatively small and elite whereas Sid’s was larger and had more Auxilia versus Legionaries. As it happened, four of the sixteen armies on the day were Roman (three Early Imperials and one Middle Imperials) which was apparently quite unusual as the recent trend has been for lance-armed cavalry armies to dominate the lists.
Unfortunately I don’t have a very detailed account of the game as such was the tension in this climactic game that I forgot to take any pictures, or at least forgot to take any pictures until what the end result was going to be had become clear.
I do remember that our two lines advanced towards each other, with Sid’s men slightly ahead of mine as a poor run of cards for movement had meant my left wing had hung behind.
The lines then clashed, with disastrous results for my troops. As Sid said at the time: Rob’s Romans had all the right cards, just not in the right order! Worse, my lights had again failed to hold the camps properly (that’s twice in a row after a long run of success) and I was soon down to my last few coins. To be fair to Sid, however, he played a superb game: not making any mistakes and taking full advantage of every situation.
Fortunately the Praetorians saved me from a complete whitewash: charging up a hill in the final turn of the game to wipe out the enemy I Cohort and capturing their eagle…but this was too little, too late and I lost 7-13.
As the World’s is run on a Swiss Chess style system (the players with the highest cumulative scores fight each other each round, albeit with adjustments to avoid playing the same person twice) this unfortunately bounced me down to 4th place in the tournament overall.
A good result with two outright wins, one winning draw and one outright loss, but slightly frustrating as the ultimate prize had seemed to be within my grasp. As it was, Sid won the tournament, so really well done to him: couldn’t have happened to a nicer chap!
So in all a great day’s play. I would highly recommend entering all the To The Strongest tournaments that you can: all my four games were very convivial affairs with not an argument to be seen. Next year, 2024, the World’s are moving back to their original February date: that now being set for 24th February 2024, with a venue around the Chalgrove area (near Oxford). So put it in your calendar now and start getting your army ready: my Romans await you!
Those following recent posts will know that I went into game three with two outright victories under my cingulum militare.
That was great, but what was not so great is that the World Championships work on a modified Swiss Chess system, which means that after each round the two people with the top two scores fight each other, the people in third and fourth place fight each other etc. There are tweaks such as the fact that you don’t fight anyone who you’ve fought before, but the salient point here is that the better you do, the stronger opposition you face.
My third opponent was therefore one of the big beasts of the tournament scene: Peter R, fielding his Timurids. Peter has won many, many tournaments and would, in anyone’s books, be considered as the first seed if we were playing at Wimbledon. Gulp! My only consolation was the fact that I had actually beaten his Timurids before, in one of our semi-regular friendly games, although not with the Romans.
As mentioned in my previous post, this battle had an even more extraordinary start than the last one, where I went 8-0 up after only pulling about five cards…
I had set up my three camps in the bottom left hand corner of the field, guarded by the usual unit of light infantry. I had a couple of legionary units nearby for added security, but they are obviously usually needed elsewhere on the field. The lights (veteran auxilia sagittarrii) are, however, usually sufficient.
Not today.
In his first action of the game, Peter swept two units of light cavalry towards my camps, and with an extraordinary run of cards, killed the auxilia sagittarrii and took all three of my camps, meaning I was 0-10 down (losing 13 loses me the game) without having drawn more than one card - an Ace!
Disaster after one card!
Things were looking so appalling for me that Peter, with extraordinary generosity, even offered (twice) to re-start the game, but I turned down the offers: rules are rules and, if I was going to go down, I was going to go down fighting!
First things first: take back the camps…and take back the camps before losing another three coins (the equivalent of 1.5 units/generals).
As the Timurids only had two units of light cavalry there, it was actually fairly easy to do. One legionary unit marched backwards into one camp, one withdrew from the centre of the field and marched into another. That left one unit of enemy lights sandwiched between the two, and then destroyed next turn. Meanwhile, another unit of legionaries had chased the other enemy light cavalry unit off the table, and then halted to guard it’s probable re-entry point. You don’t want an enemy light cavalry unit unattended in your rear!
This was better, but had tied up three legionary units meaning that I only had two and the cavalry left to beat the vast majority of the Timurids in front of me.
Now those of you who watched England’s first match in this year’s Rugby World Cup, against Argentina, will have seen how losing a man to a red card early on it the game inspired the English team to play better than they have done for eighteen months and pull the game out of the bag, and so it was here with the Romans.
The cavalry finally proved their worth, killing an enemy general and some of the enemy horse, and the two remaining infantry cohorts proved positively unstoppable, also disposing of a couple of enemy units despite being heavily outnumbered. Suddenly the score was back to 10-3 in my favour, with several Timurid units disordered as well.
Now Peter proved what a canny player he is: with one eye on the clock, he retreated away from me as fast as he could meaning that as time was called, I had achieved what the system would call a winning draw at the aforementioned 10-3 rather than the 12-3 outright victory that should and would have followed had we continued.
An extraordinary game pulled back from the brink!
Yes, it was a pity I couldn’t get the decisive victory I wanted, but a winning draw after the start I’d had was nothing to complain about…and I would have had the victory had we continued.


On reflection (and we all know that Captain Hindsight has 20:20 vision) the Timurid success in my camps happened too soon for Peter to exploit. A turn later and the legionaries who rescued the camp would have been further from it and less able to do so, and the rest of his army would have been close enough to mine to expect to be able to kill the single unit needed to polish me off even if it cost him multiple units to do so.
Losing a general, a unit of veteran horse, and some more light horse to my first cavalry charge didn’t help either, and from then on I had his main force on the back foot on the right wing.
In the centre, he didn’t get the cards he needed to close with my infantry quickly enough to hit me when it counted and, anyway, when he did, it was veteran legionaries (presumably somewhat annoyed about having their personal possessions trampled by enemy lights!) waiting to cut them down.
A great game that neither Peter nor I will forget!
My second game of To The Strongest at the 2023 World Championship promised to be a lot more testing than the first. I was up against John L’s Medieval Russians: an all cavalry army.
There’s nothing the legions hate more than fighting an all cavalry army. The enemy lights stay out of range and harass you with missile fire or nip at your flanks and rear. The enemy heavies, who often have bows of their own, wait out of gladius-reach until you’re tired or overextended and then slam into you with lances. Not nice at all!
The game began with the Russians advancing rapidly towards my line. This put their cavalry on the right just within charge range of my cavalry. I duly sent in the Equites Alares and, somewhat luckily, immediately knocked one of his heavy cavalry units off the table. The subsequent morale checks led to two of his light units also fleeing the field, and opened up a huge hole in his line.
The Equites Contarium thundered through this hole and, led by the Roman cavalry commander, sacked the Russian camp. I had played about five cards and was immediately eight coins up!
The game then became a desperate attempt on my part to secure the other three coins I needed to finish him off whilst John tried everything he could to rescue the situation.
In the end I ended up losing three units and a general (I told you these cavalry armies are hard for the Romans to beat) before I could finally squish a deep unit of German Knights between advancing legionaries and the Equites Contarium coming back from the camp for an 11-8 victory.
As you can see, John’s army is beautifully painted, and it was a real pleasure to face off against it.
And if you think that five cards for eight coins was an extraordinary start to a game, wait until you read what happened in game three…!
Yesterday it was off to Chalgrove for the 2023 To The Strongest World Championships. As always, I had my trusty Early Imperial Romans with me, and was fully ready to put the Latin mincing machine to work!
My first game was against Michael G’s Western Han Chinese. A beautiful 3D printed army with a couple of nasty looking heavy chariots, a load of crossbow-armed units and some vicious dagger-axemen as well.
As it happens, everything went my way. Michael’s heavy chariots were having an off day and left the field almost on first combat, and from then it was just a matter of my legionaries wading their way forward against a positive storm of crossbow bolts to get in amongst it with the Chinese infantry.
Here I did have a little luck: Michael and I reckoned that he had fired at least twenty crossbow volleys at my advancing men and scored only two disorders which I quickly rallied. As the Roman mincing machine swung into action, my cavalry punched through the gap where his heavy chariots had been and, after that, it was just a matter of time before the game was mine. A 12-0 victory to give me a good start to the day’s proceedings.
Although the Romans did win outright victory, it would only have taken a little more luck with the crossbows for Michael to put me into serious trouble. I’ve always wanted a Chinese army for my collection and, looking at Michael’s, even more so now!
Here’s a quick AAR from Alex Sotheran featuring one of the v3 rulebook scenarios: click on the picture to see all:

Alex ran another game recently: introducing four new players to I Ain’t Been Shot Mum. In this game, the British were held up on the left flank, but smashed through on the right to cut off the Germans retreat and capture the crossroads:
Yesterday was the annual trip to Newbury Racecourse for the Colours wargames show.
I must confess that I almost didn’t go: my memories of previous Colours were of a very packed, very hot, and very sweaty show…and the weather forecast was for the day to be the hottest day of the year so far.
Well, it did prove to be the hottest day of the year so far, but when I arrived at about 10.30am, the venue was actually pleasantly cool: all the doors on all the floors were open and there was actually a breeze blowing through the stand. It did get a bit more crowded and a bit hotter during the day, but well done to the organisers for making sure that despite the blazing sunshine, I shall remember this year’s show as one of the coolest on record.
That and the free parking and low entrance fee (£5), and the fact that one of the catering points was actually a Costa (or at least had Costa coffee), made me very glad that I had made the effort to attend, and I shall certainly diarise next year’s show as soon as I can.

I wasn’t shopping for anything in particular this year, but there were the usual plethora of tempting trade stands, and I did actually end up buying some very nice “clumps” to use on my big element bases.
Magister Militum were conspicuous by their absence (being in the process of being sold) and as I wandered past where they usually were, I remembered that I bought something from them at their first show ever. Can’t remember what it was, but I’ve been a regular customer since, and they have always given excellent service. Let’s hope the enterprise goes to an equally good new home.
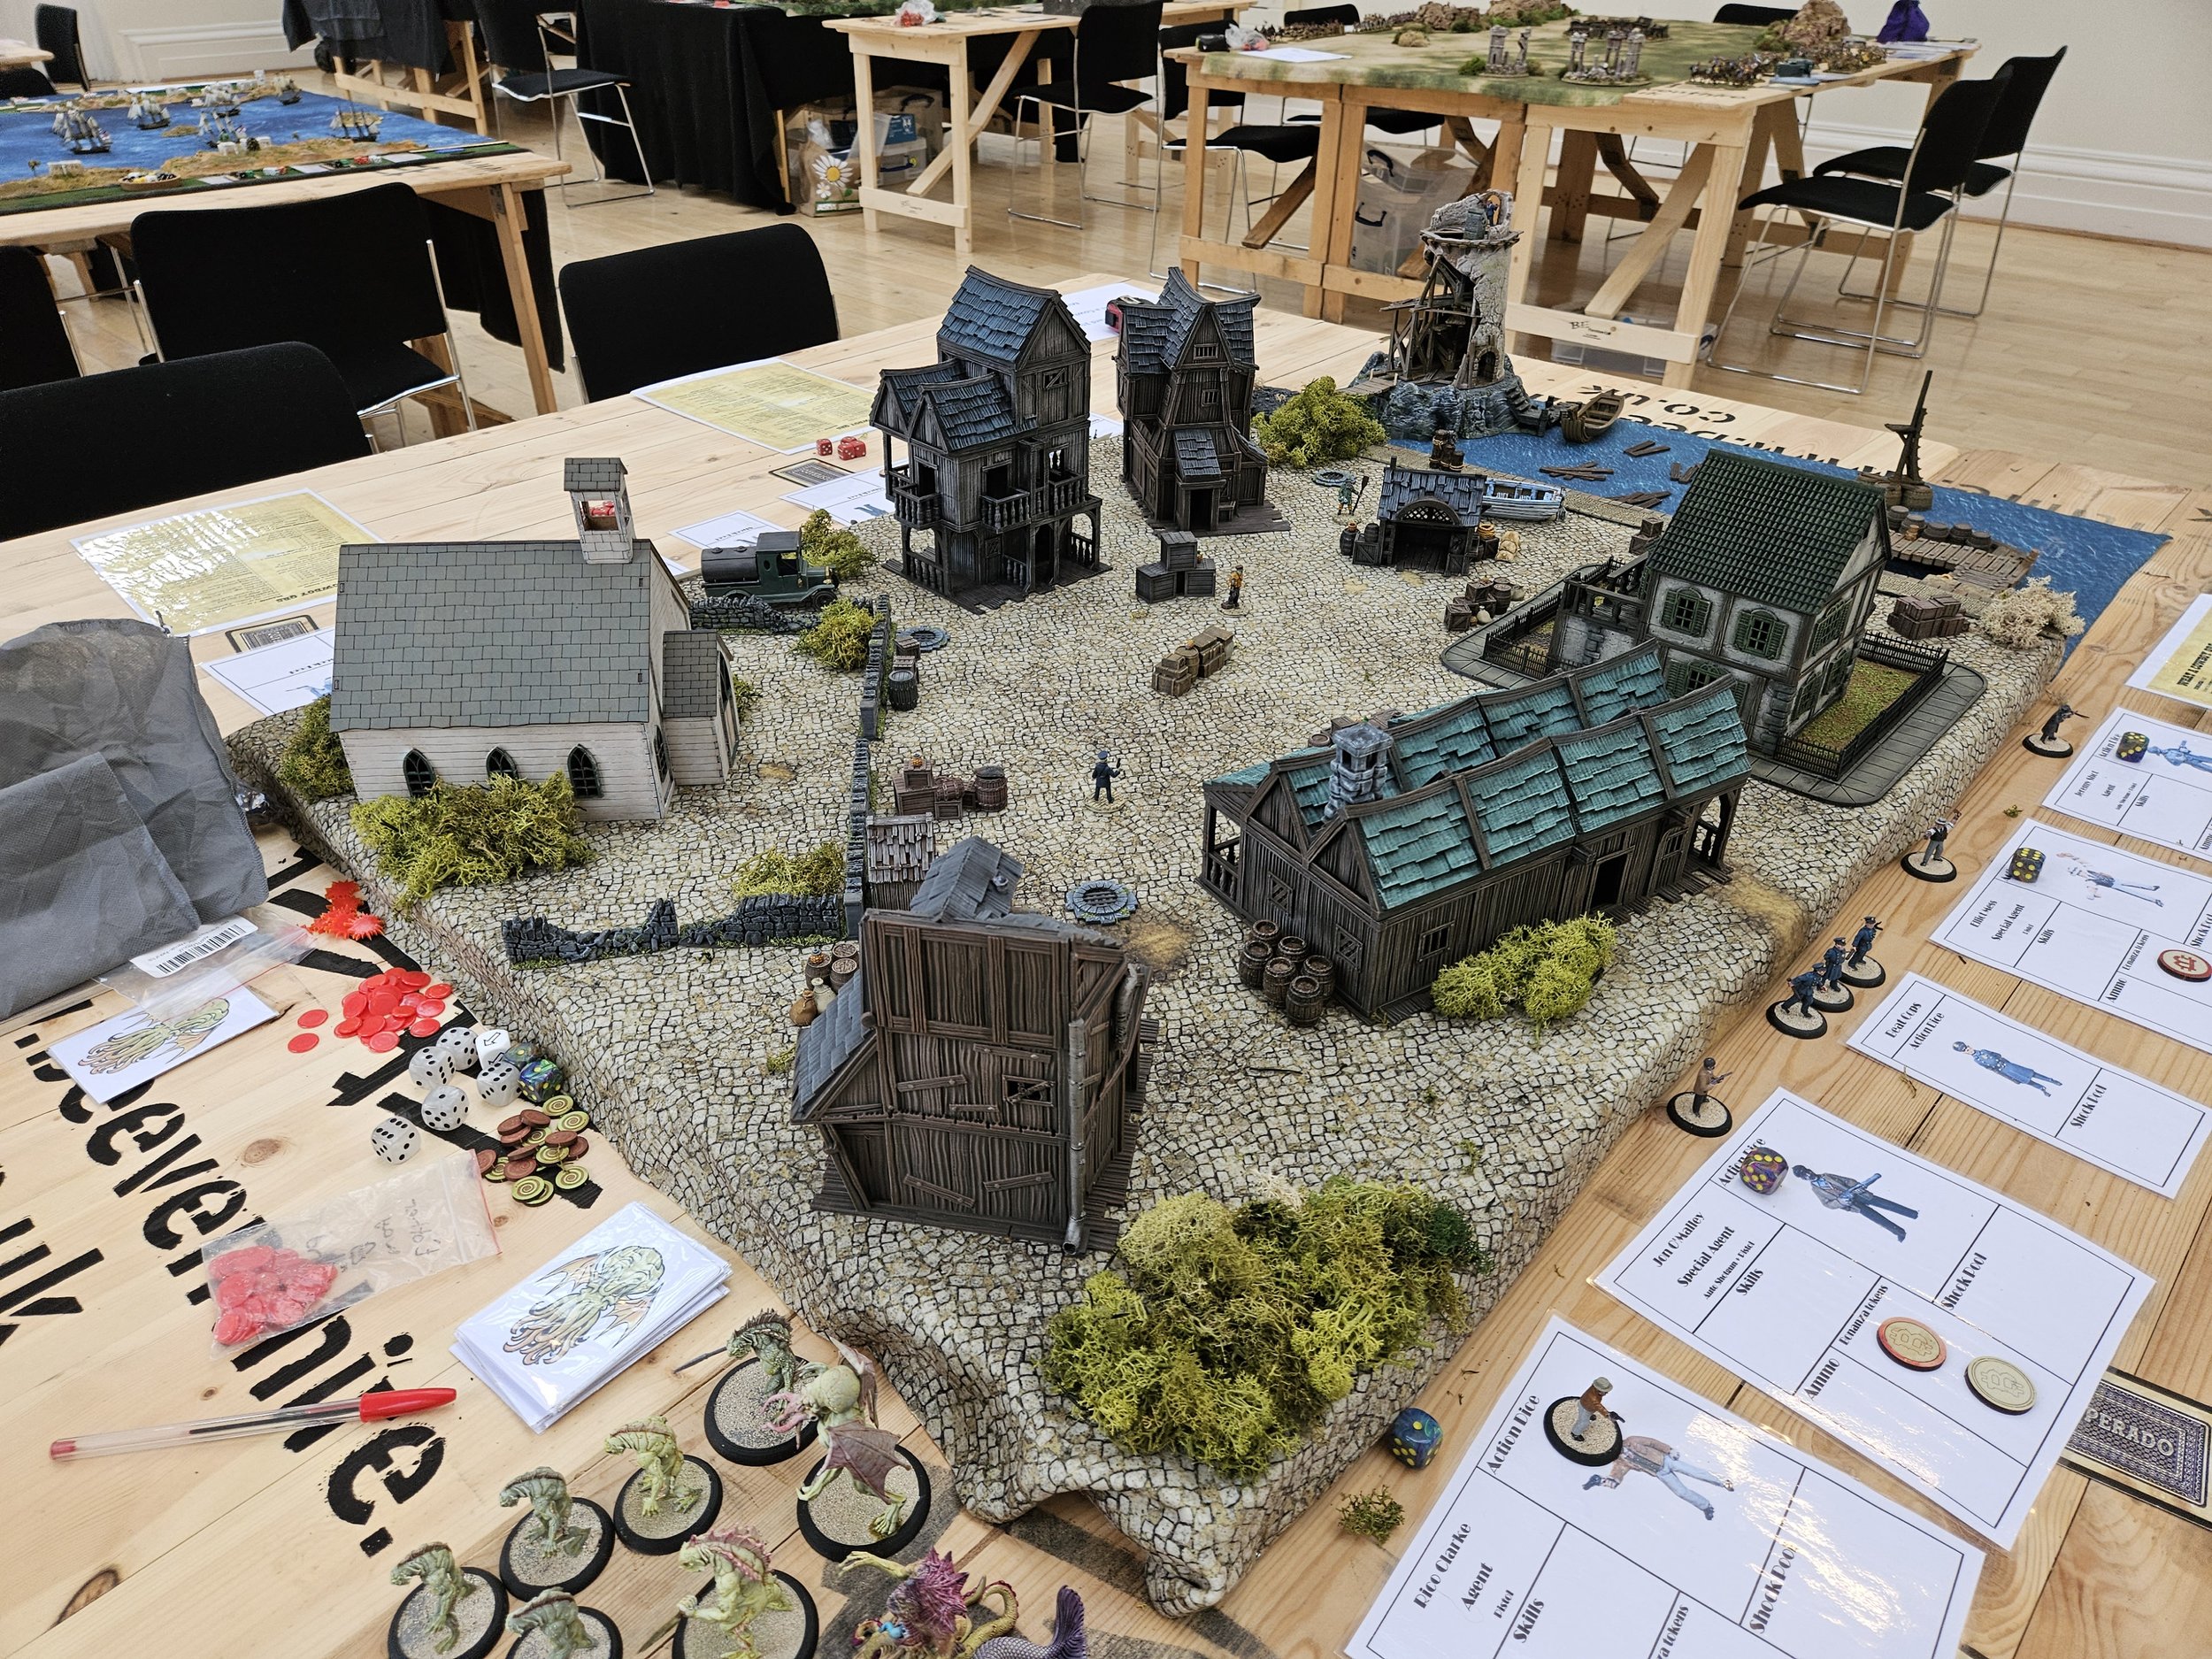
I thought that the display games were better than usual this year (there’s a gallery of some of them below) and I even played in one of them: the soon-to-be-published mini-skirmish game set in the Edo period of Japan currently known as Bonzai Bonkers or, perhaps more properly, To The Last Sword or similar. Incidentally, Sid, if you’re reading this, my 16-year old thinks the latter is too generic and that Bonzai Bonkers is the way to go! Kids, eh?
The game is excellent fun whilst, as with all Lardy games, really engendering the feel of the period/theme it’s designed to replicate: here, all the jidaigeki/chambara films that I love. The rules are very easy to pick up (my opponent, Gary, and I were working out our own combats etc within ten minutes) but involve a suitably fiendish amount of decision-making.
In this scenario, my band of four ronin and two retainers (I’m sure that means we were missing one!) were out to reclaim a legendary blade from the evil wrongdoers who had killed our daimyo and stolen the sword in the first place.
As with all good films games, it all came down to one last fight, where the hero Juko, supported by his retainer Mushin, was up against the Boss of the opposition: a far better fighter and dressed in armour. Juko fought bravely but was cut down and all looked lost, but Mushin hurled himself forward and, throwing caution to the wind (no parrying dice for Mushin!), finished the Boss off with a lunging thrust: my clan had avenged the insult, reclaimed the sword, won the battle and won more honour as well. My thanks to Sid and Gary for an excellent game.
So a very good Colours indeed, and my commiserations to anyone who decided not to go because of the heat: it was, as they say, a good’un.
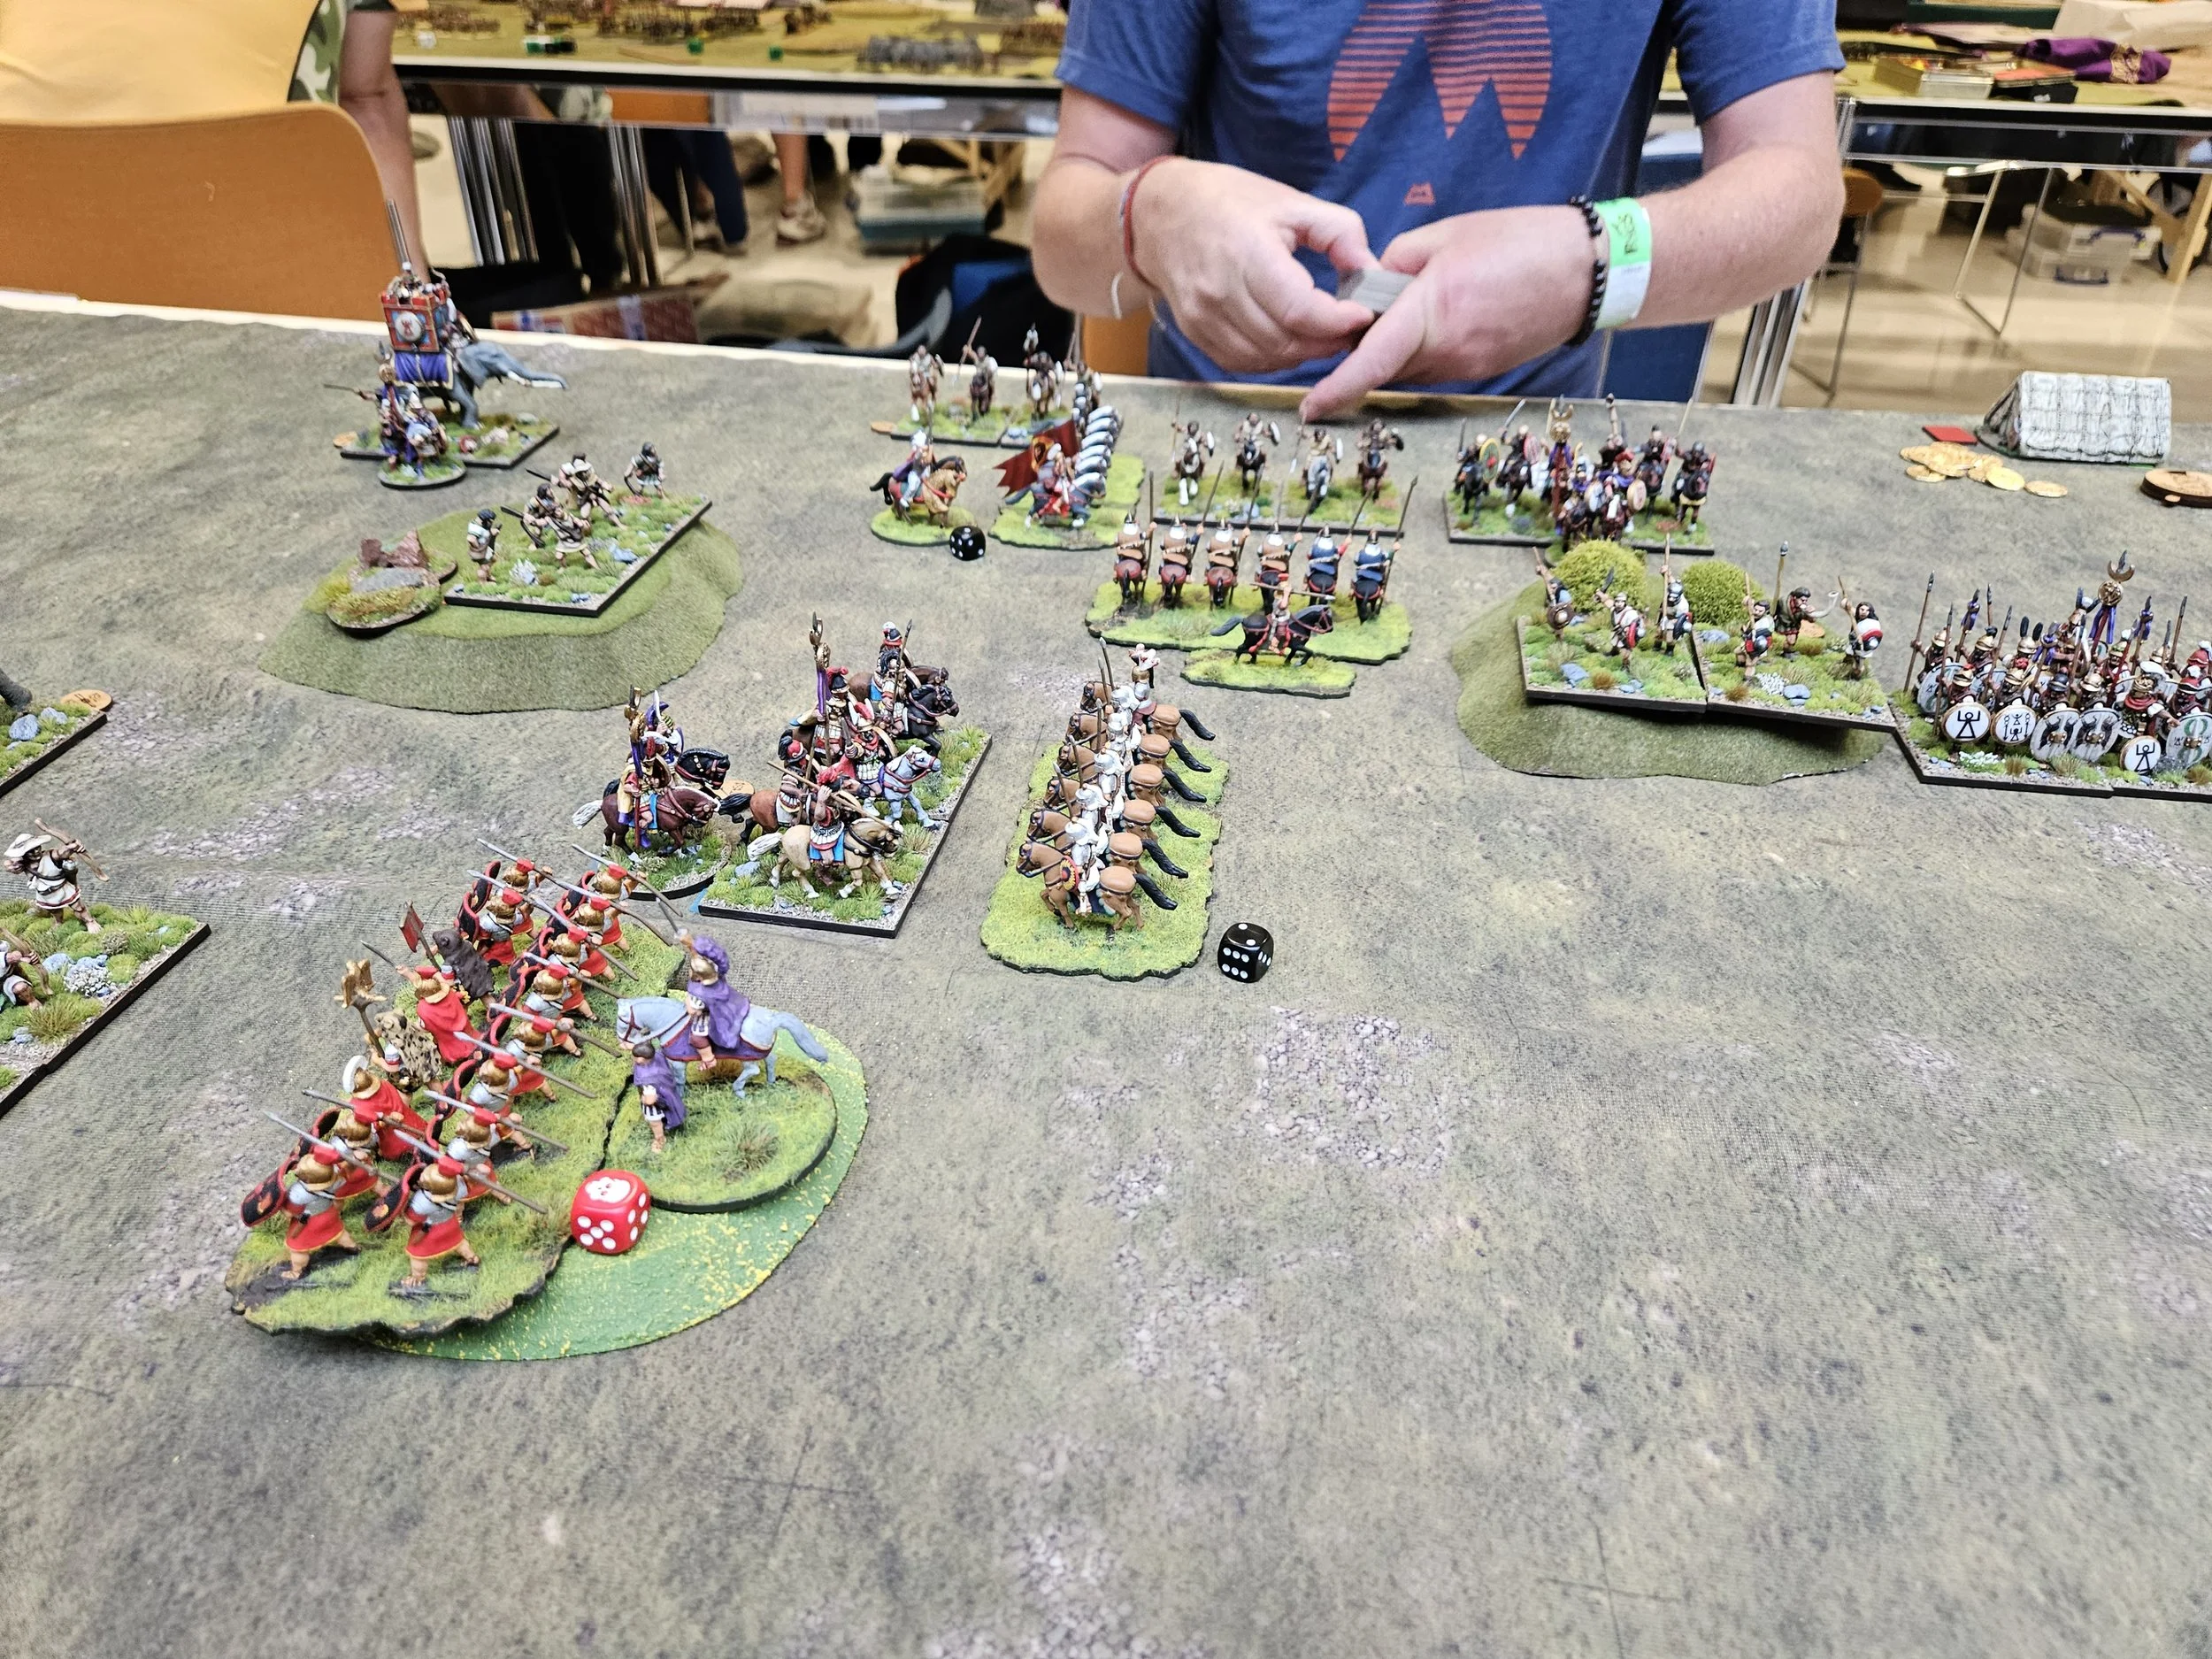
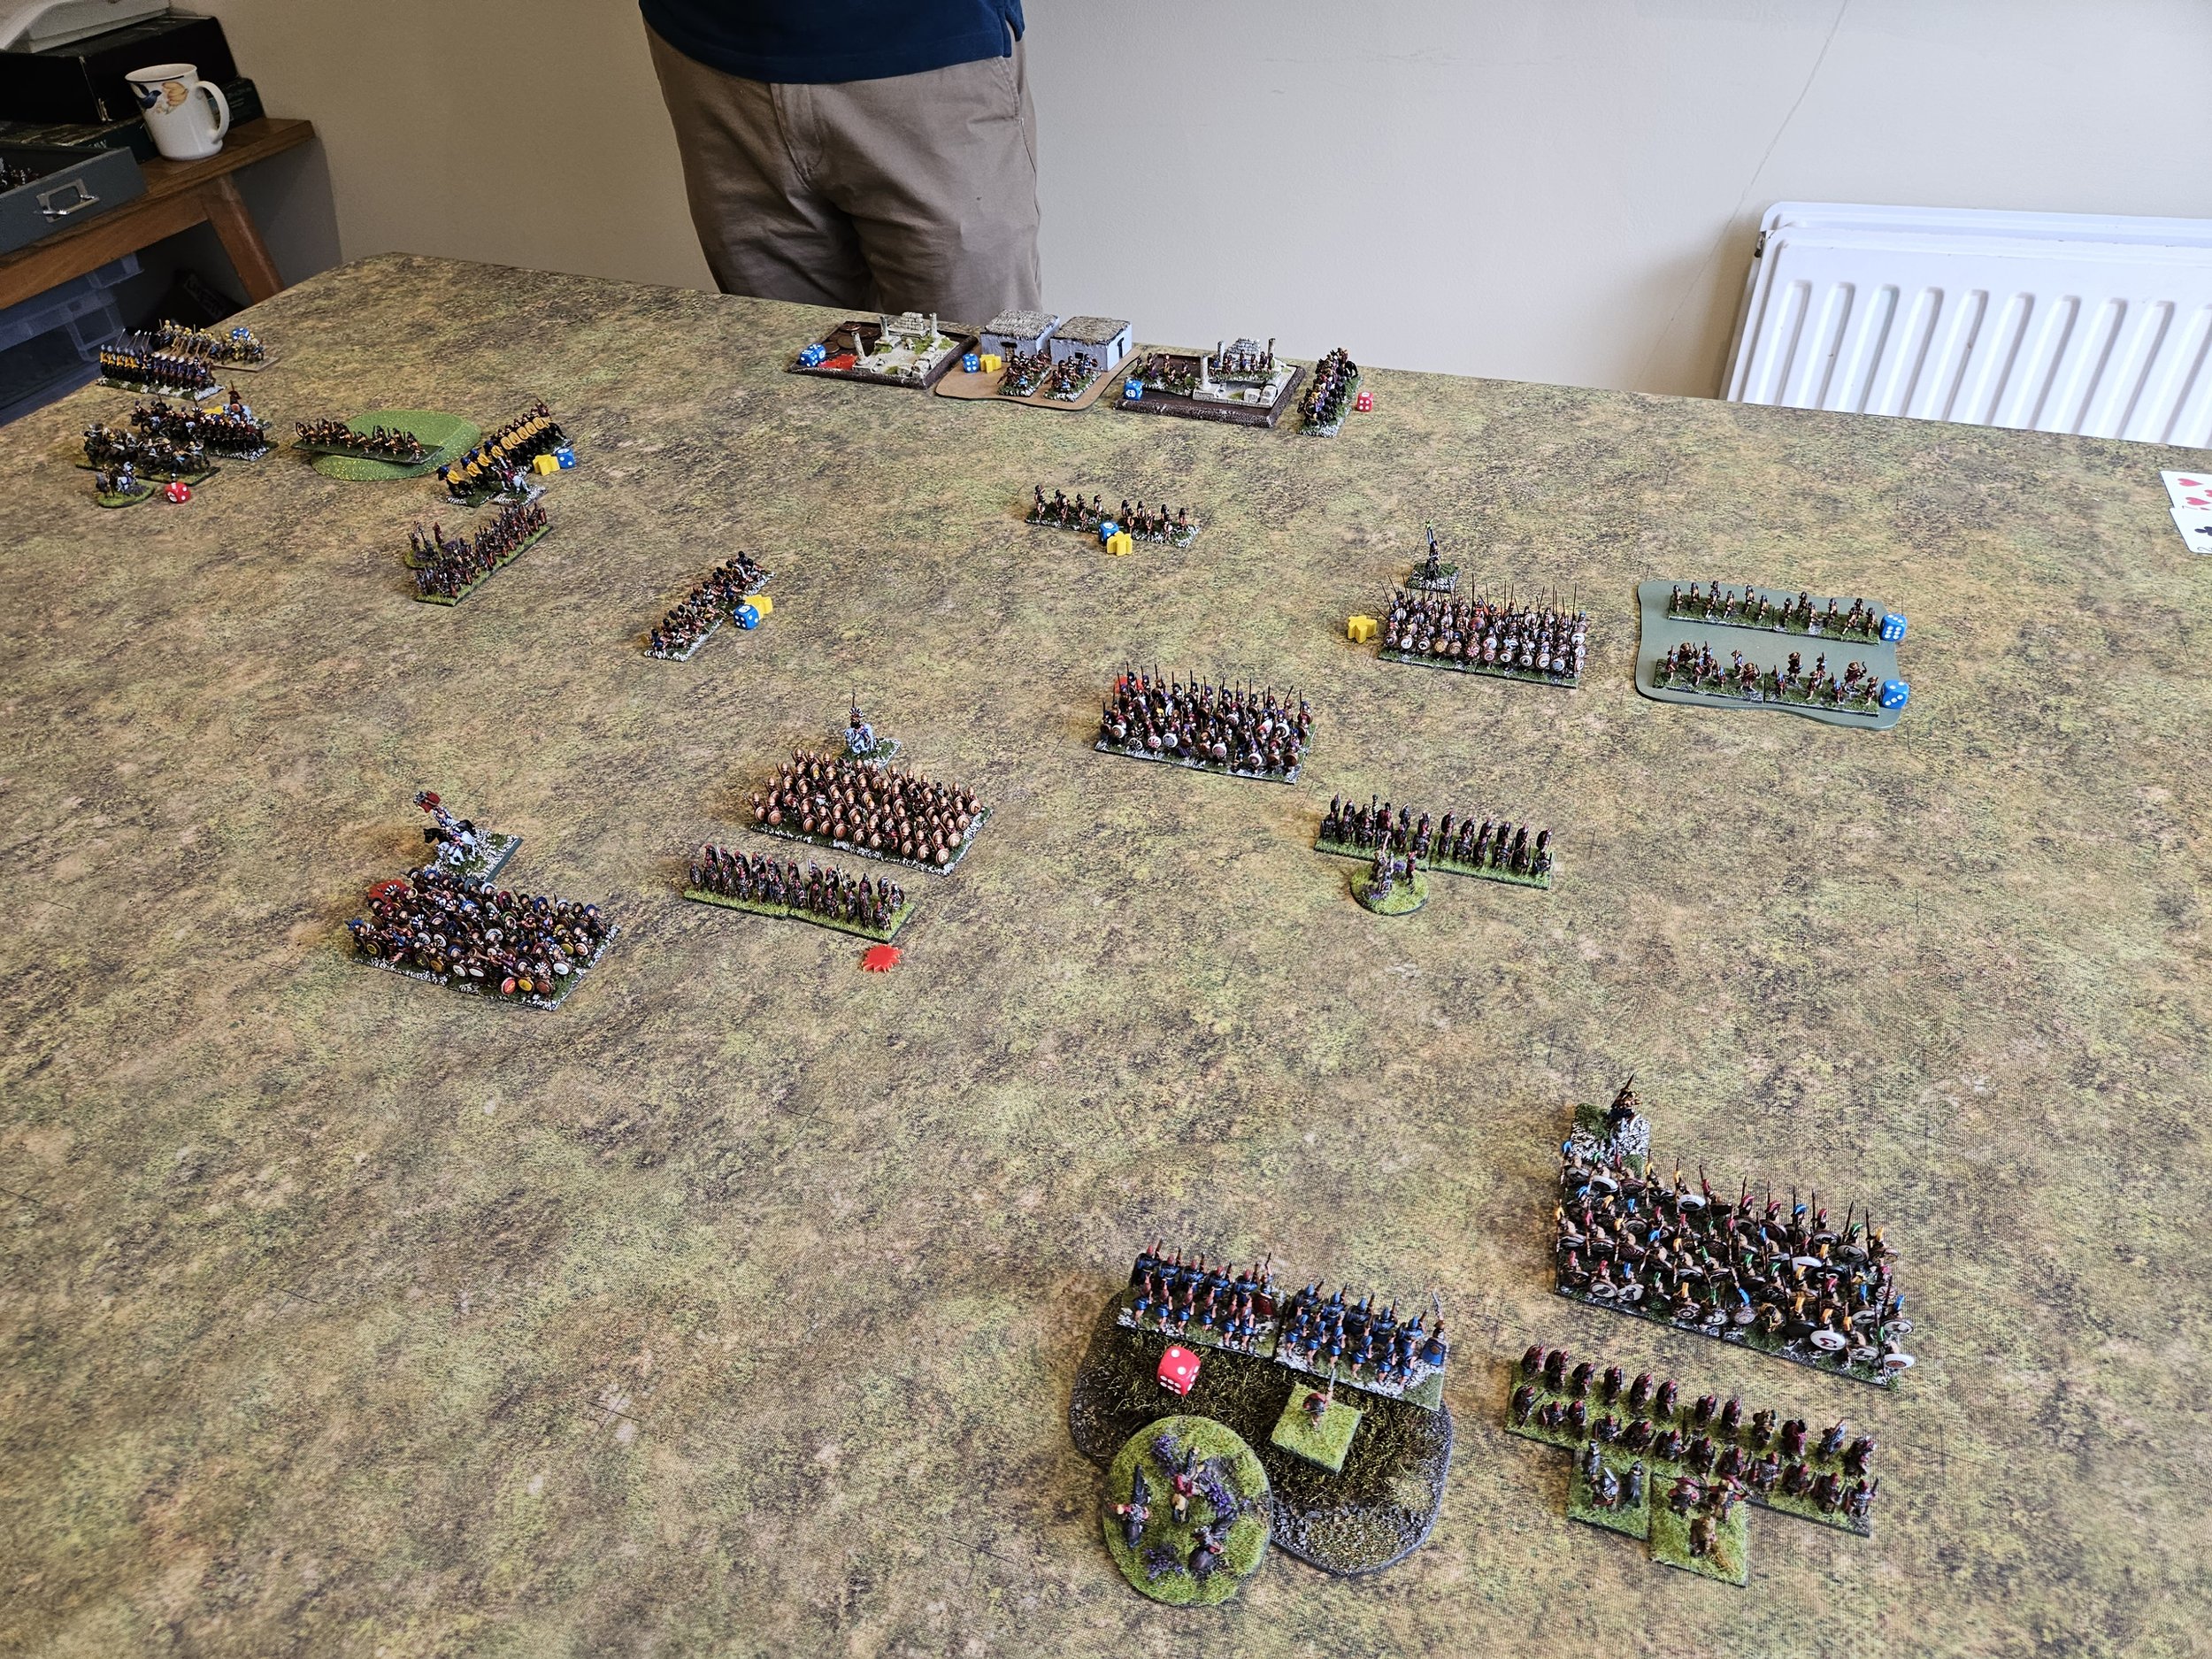
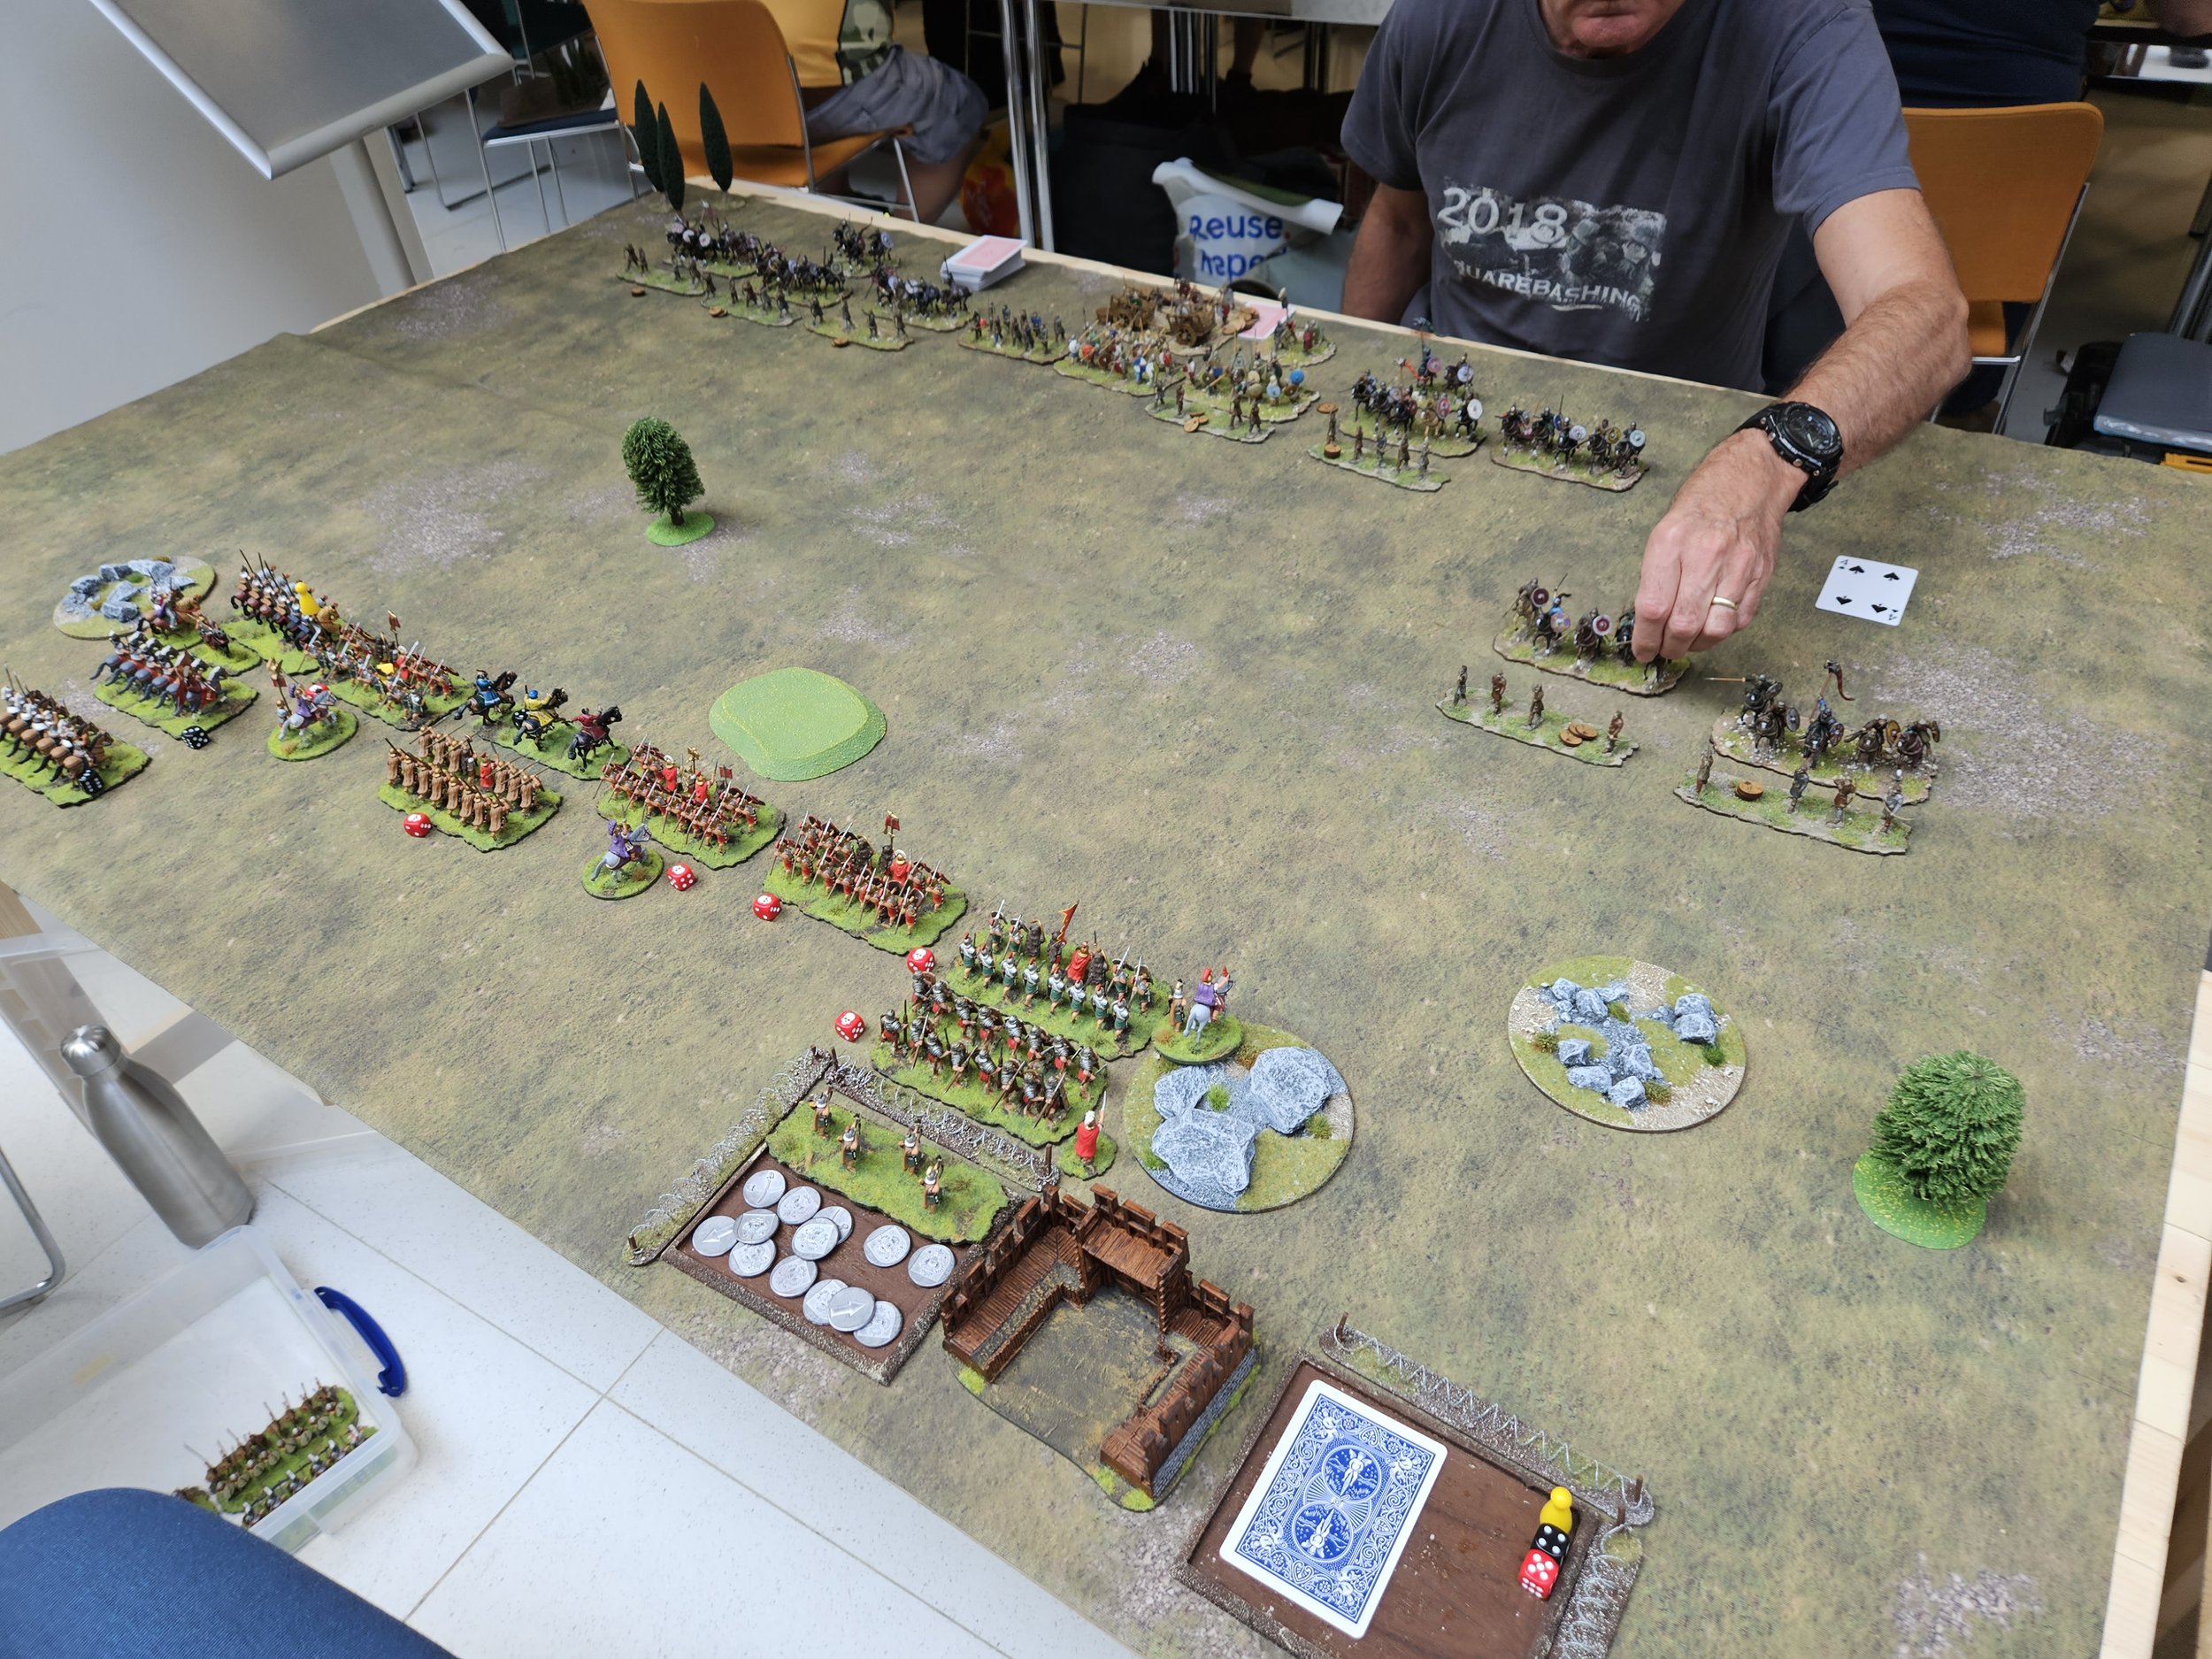
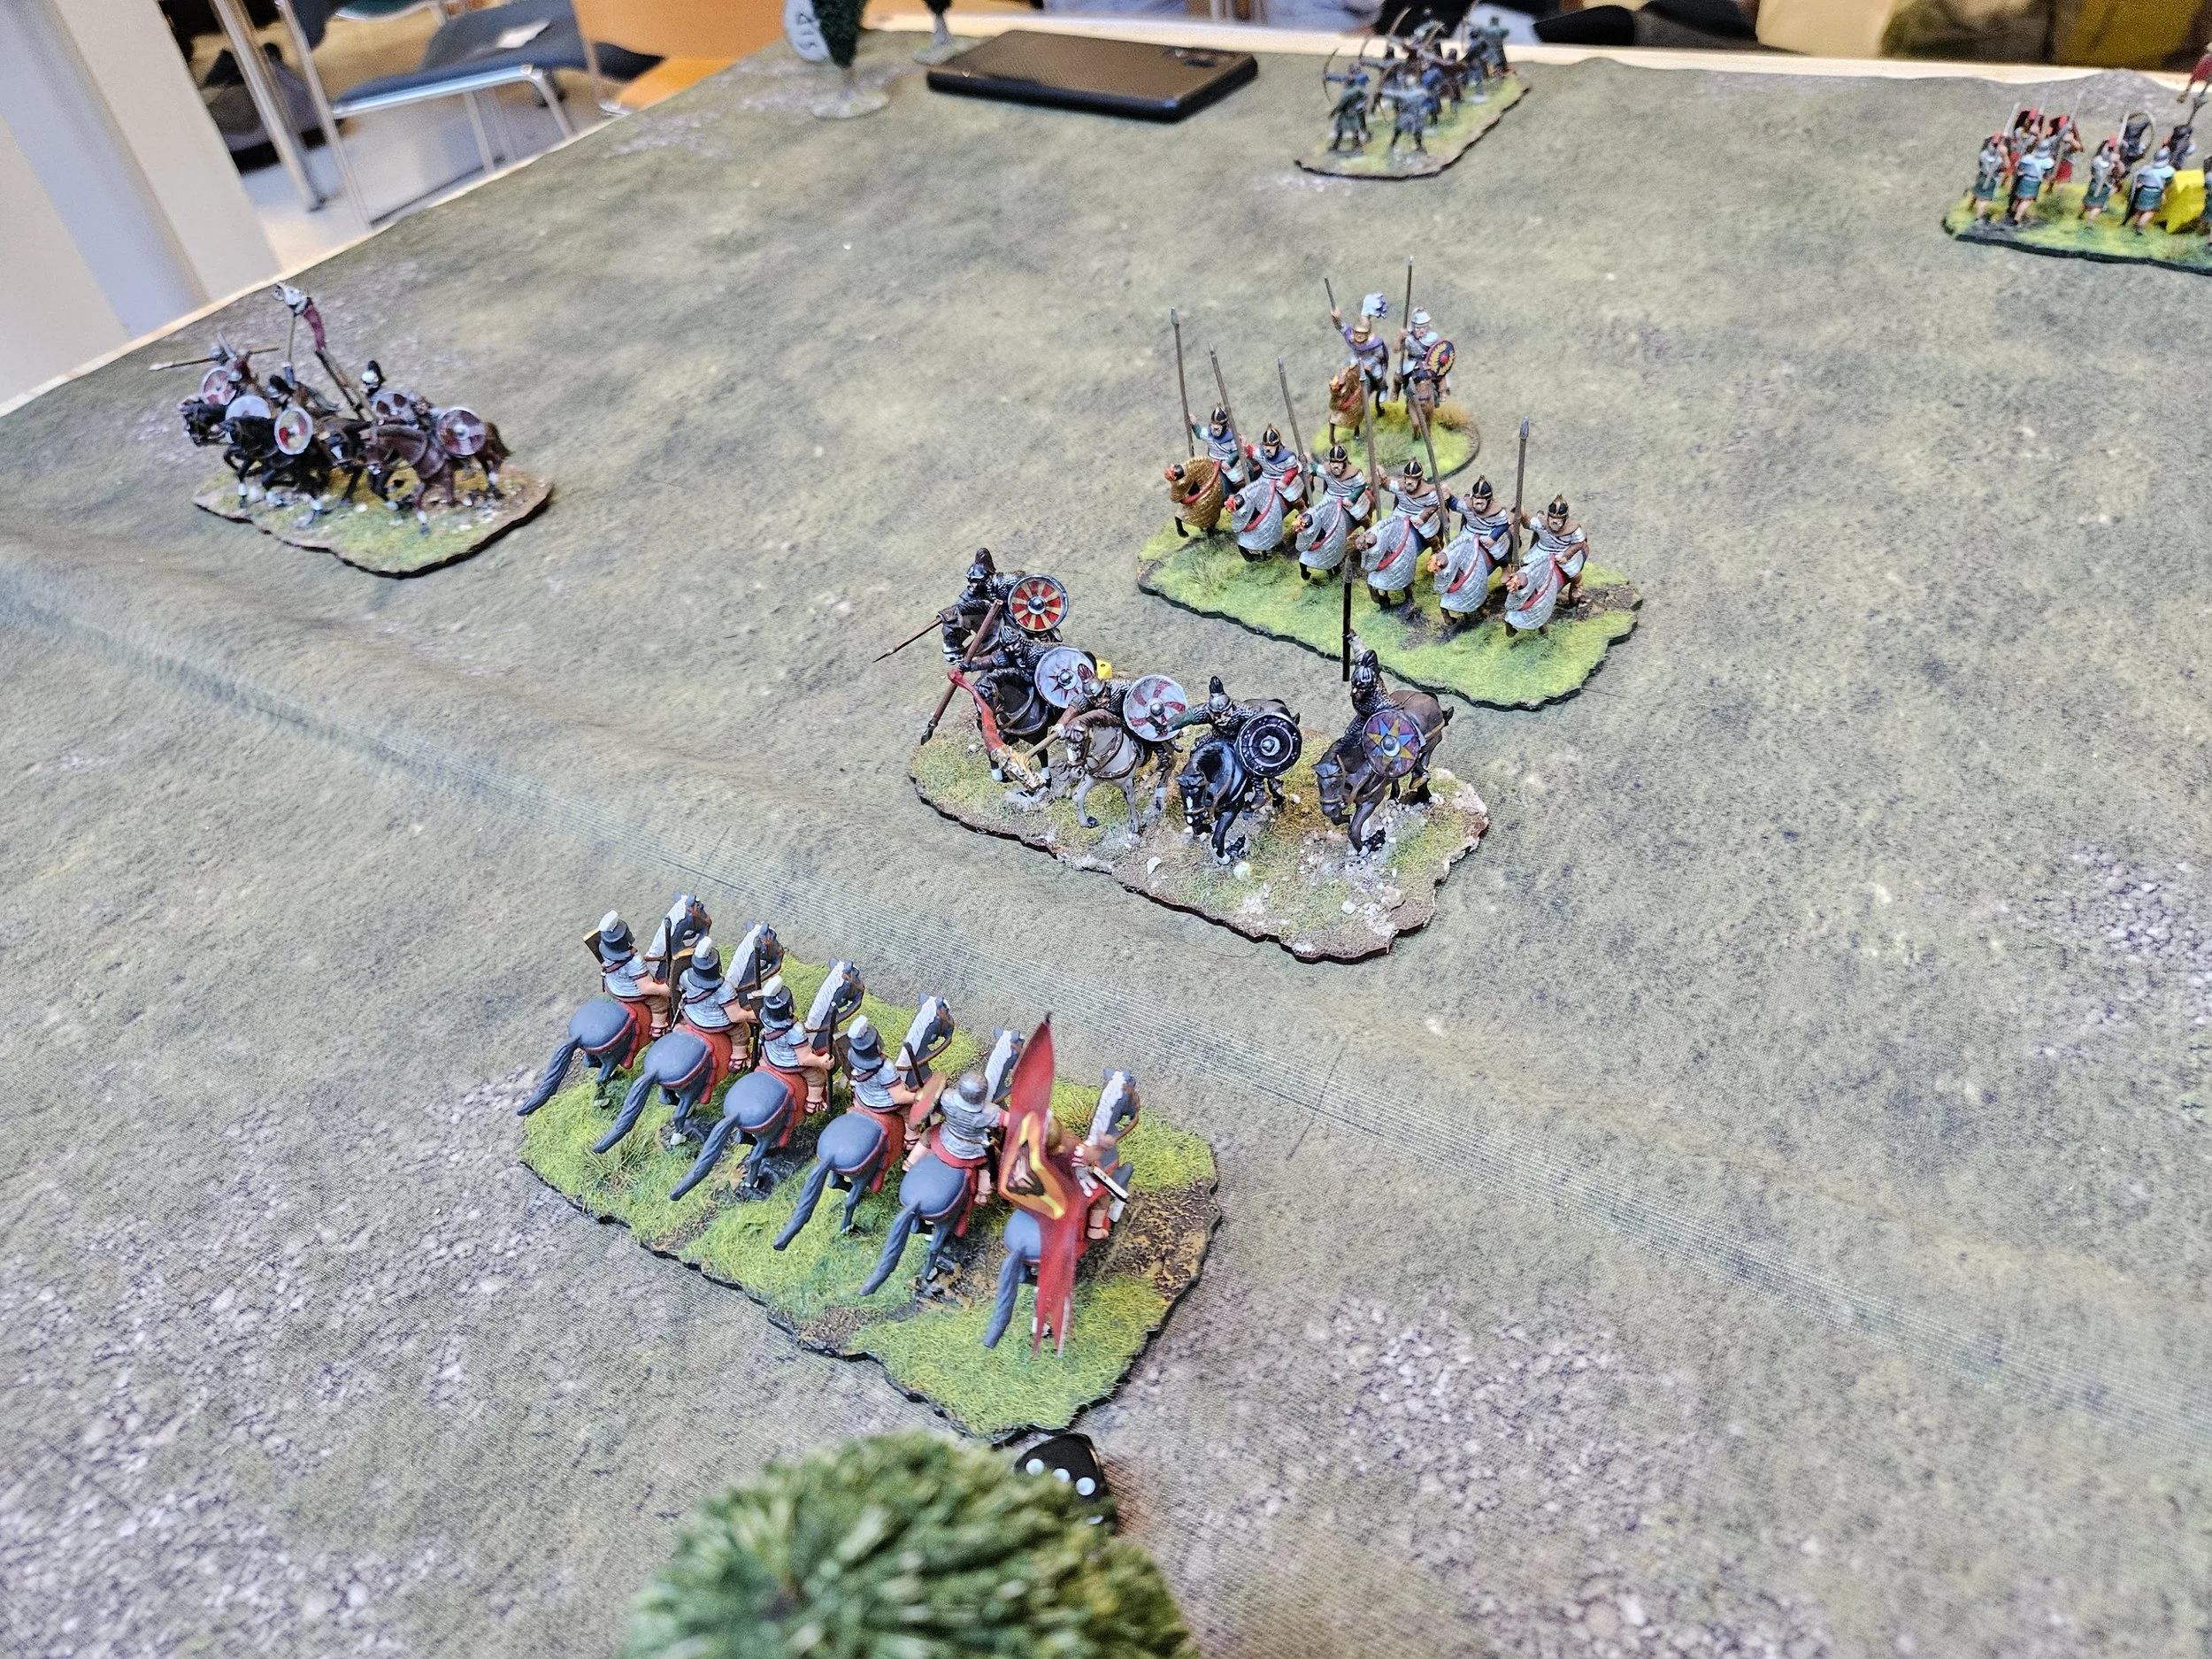
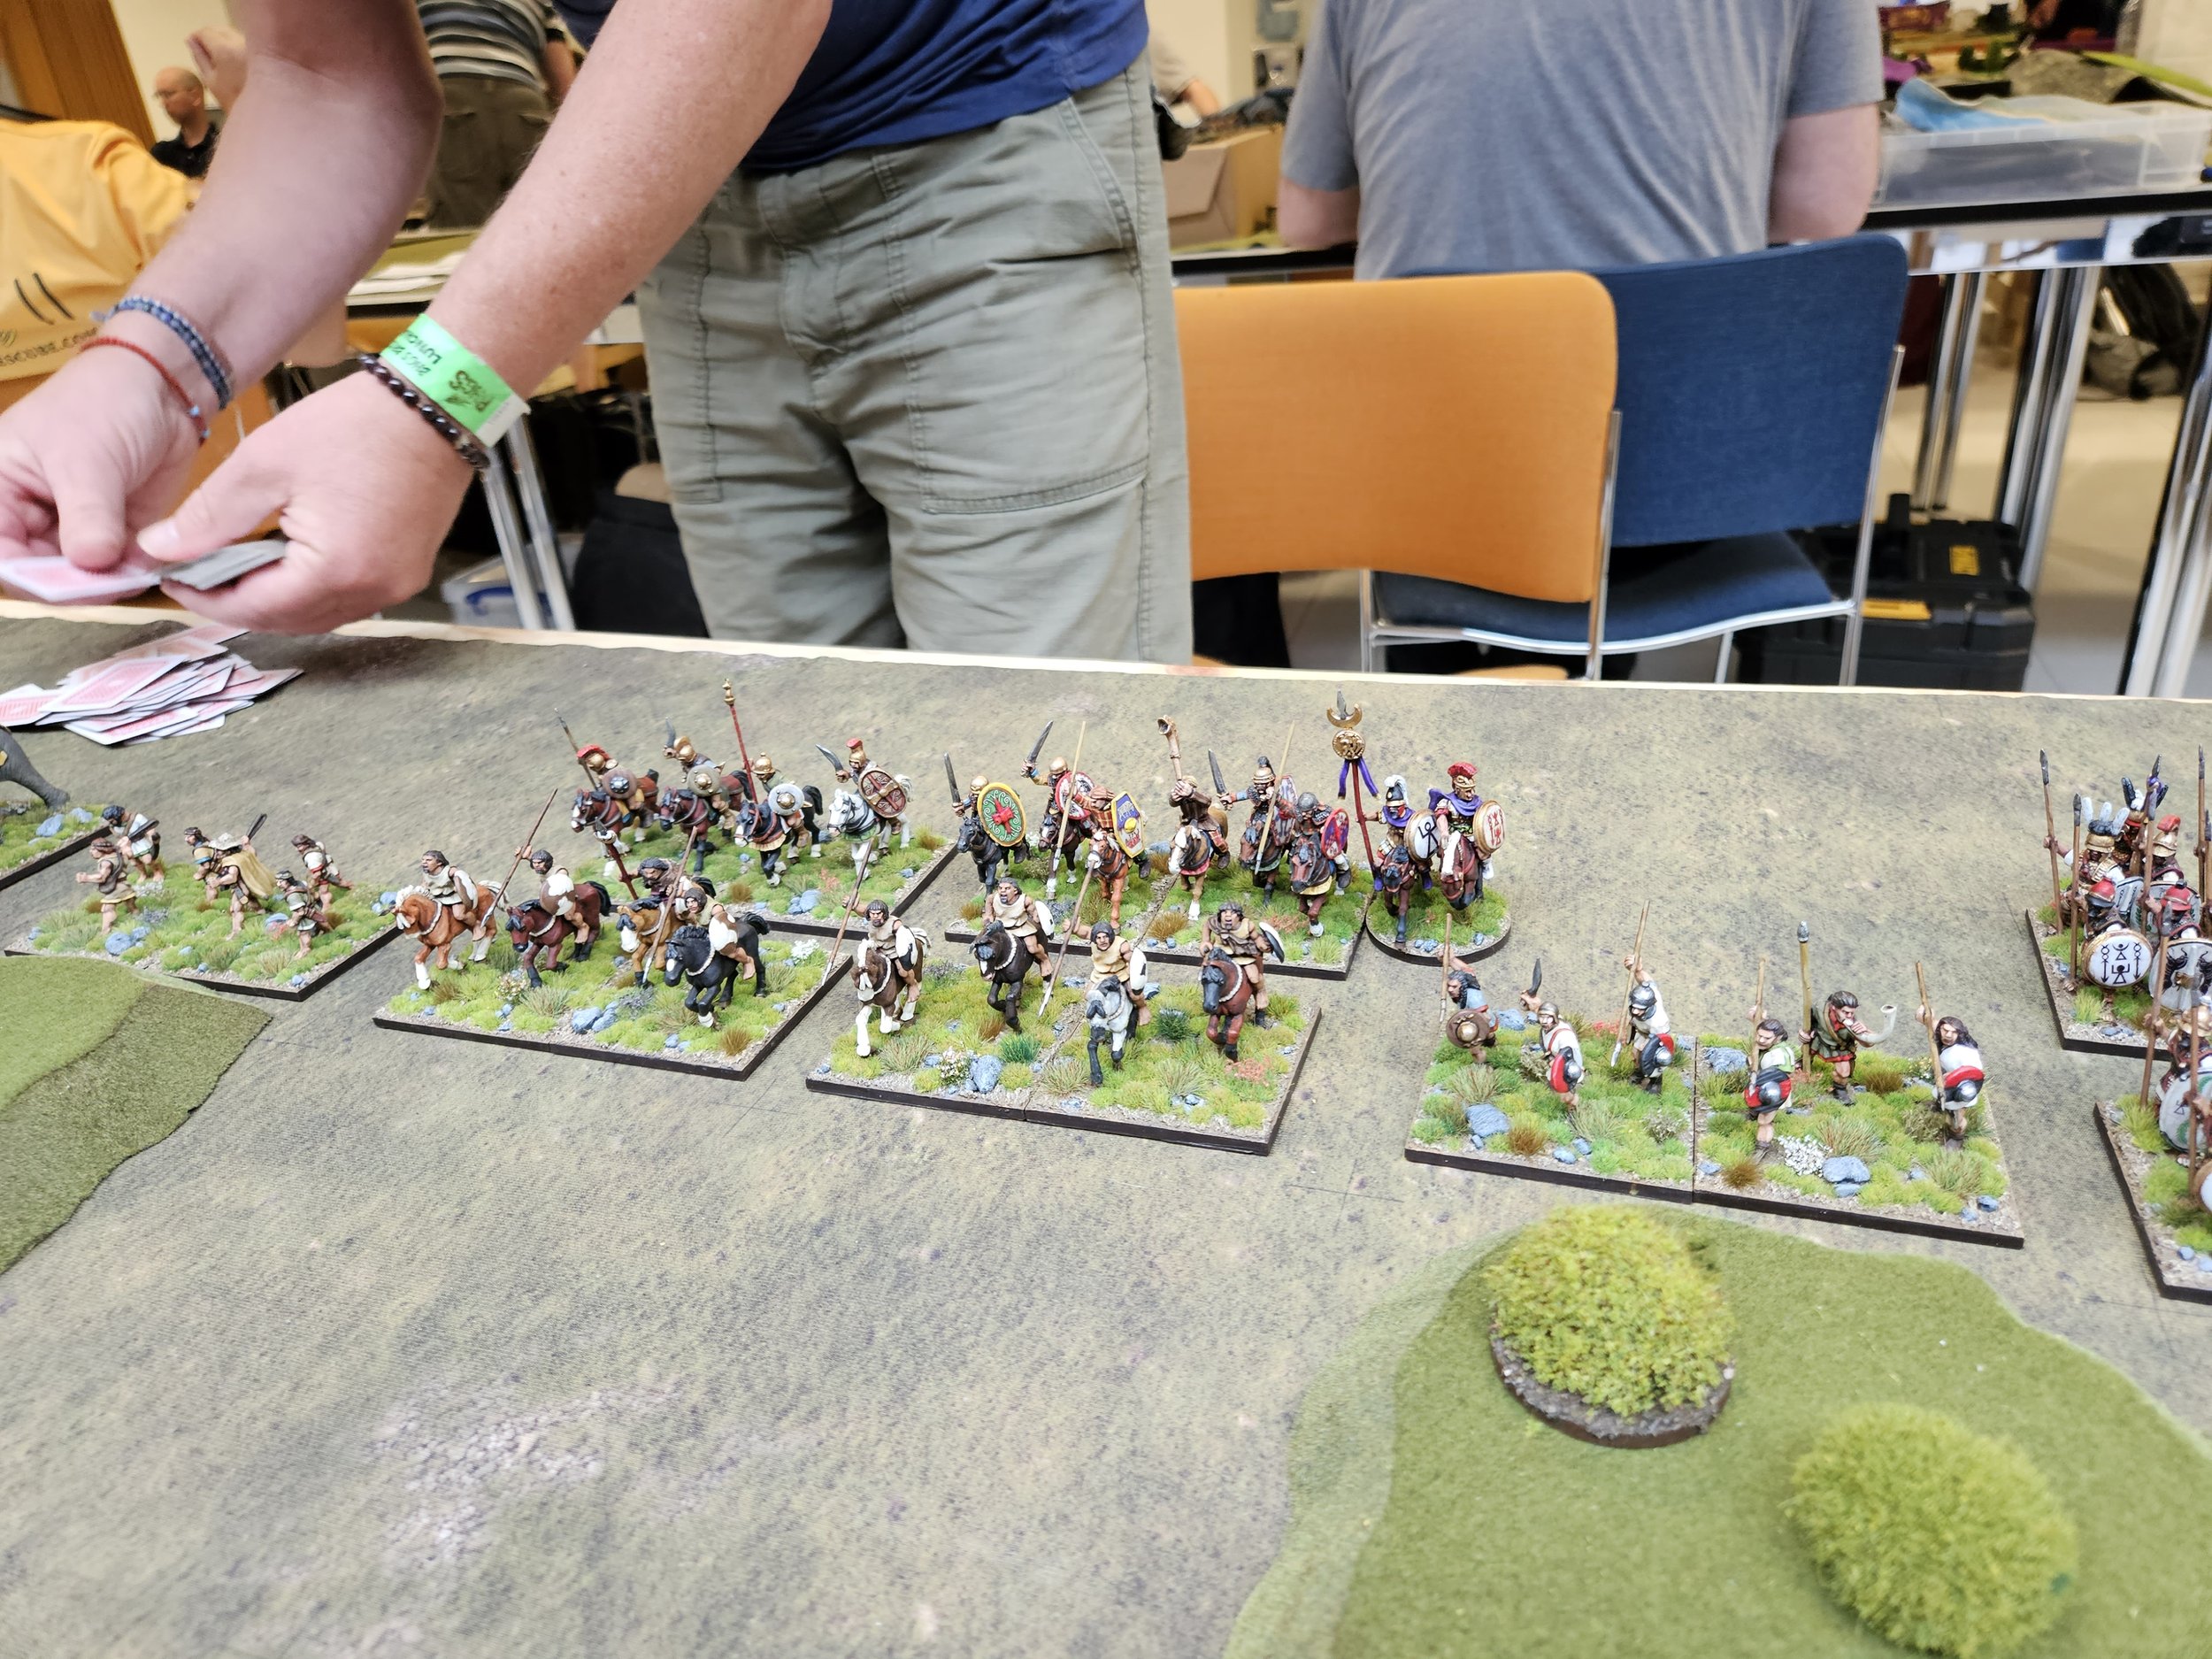
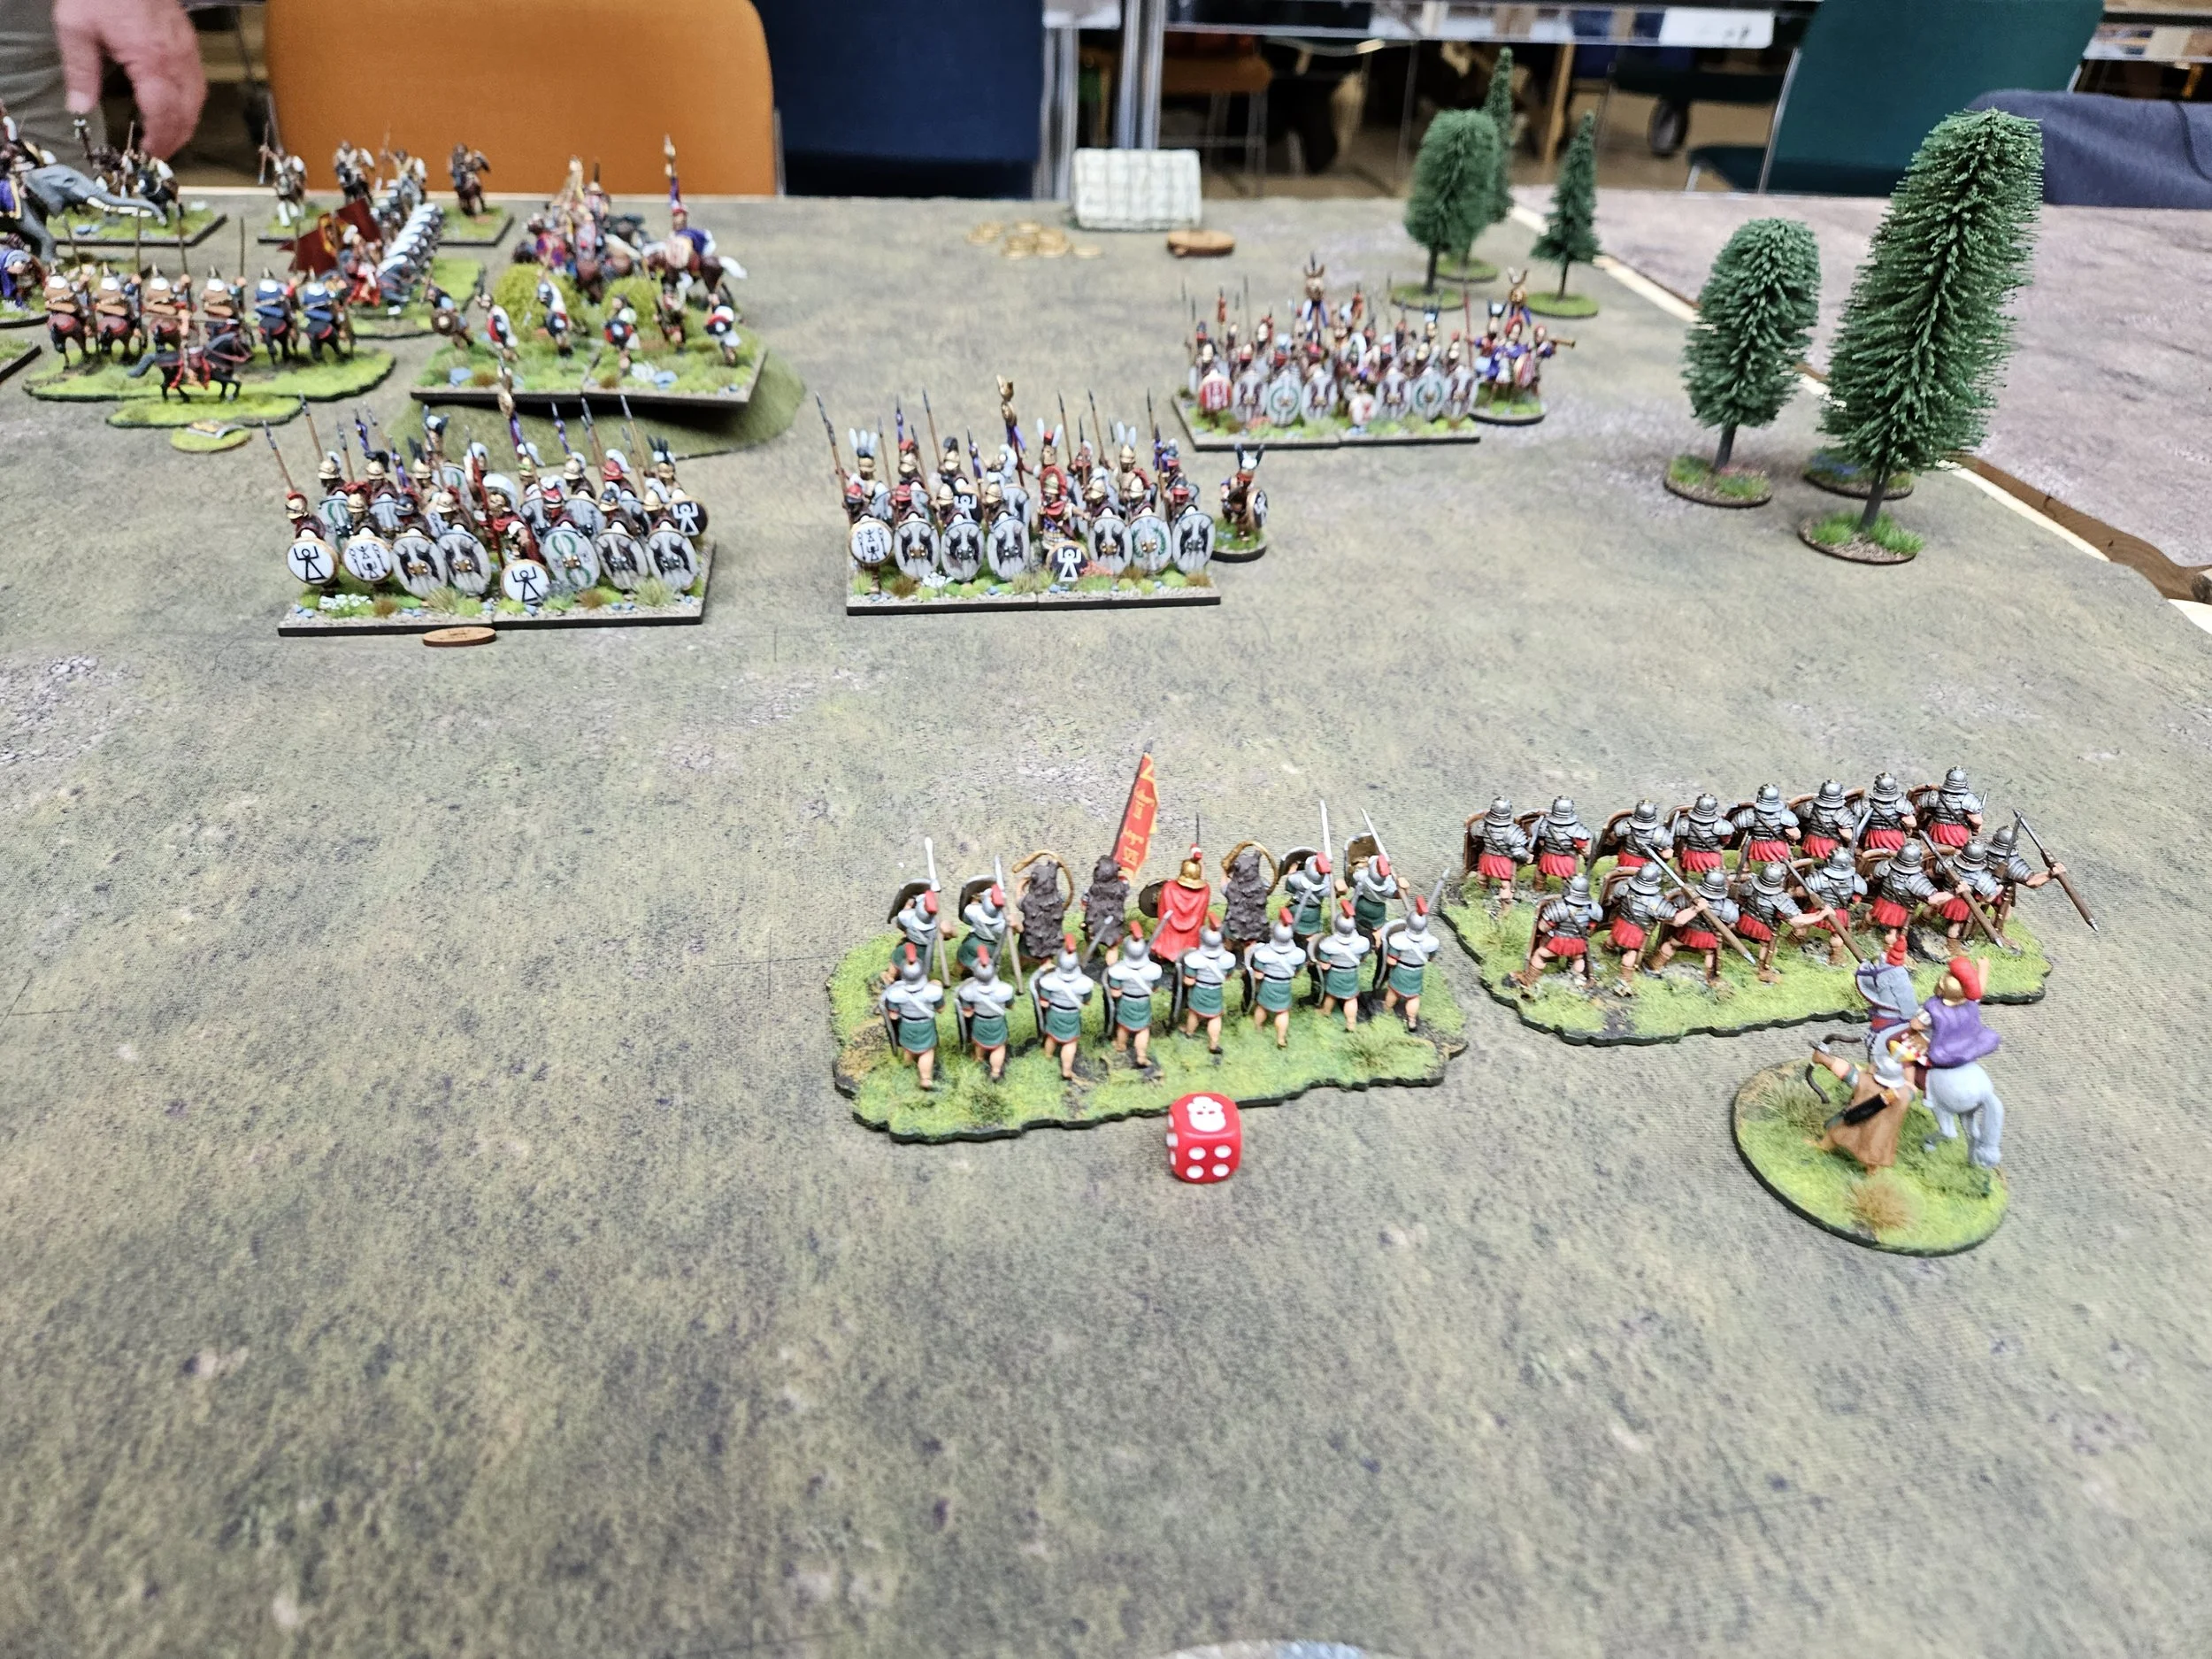
Clearing out my computer’s memory, I came across these pictures from a game played earlier this year: a practice session for the autumn tournament season that pitched my Early Imperial Roman’s against friend Other Rob’s Hoplite Greeks.
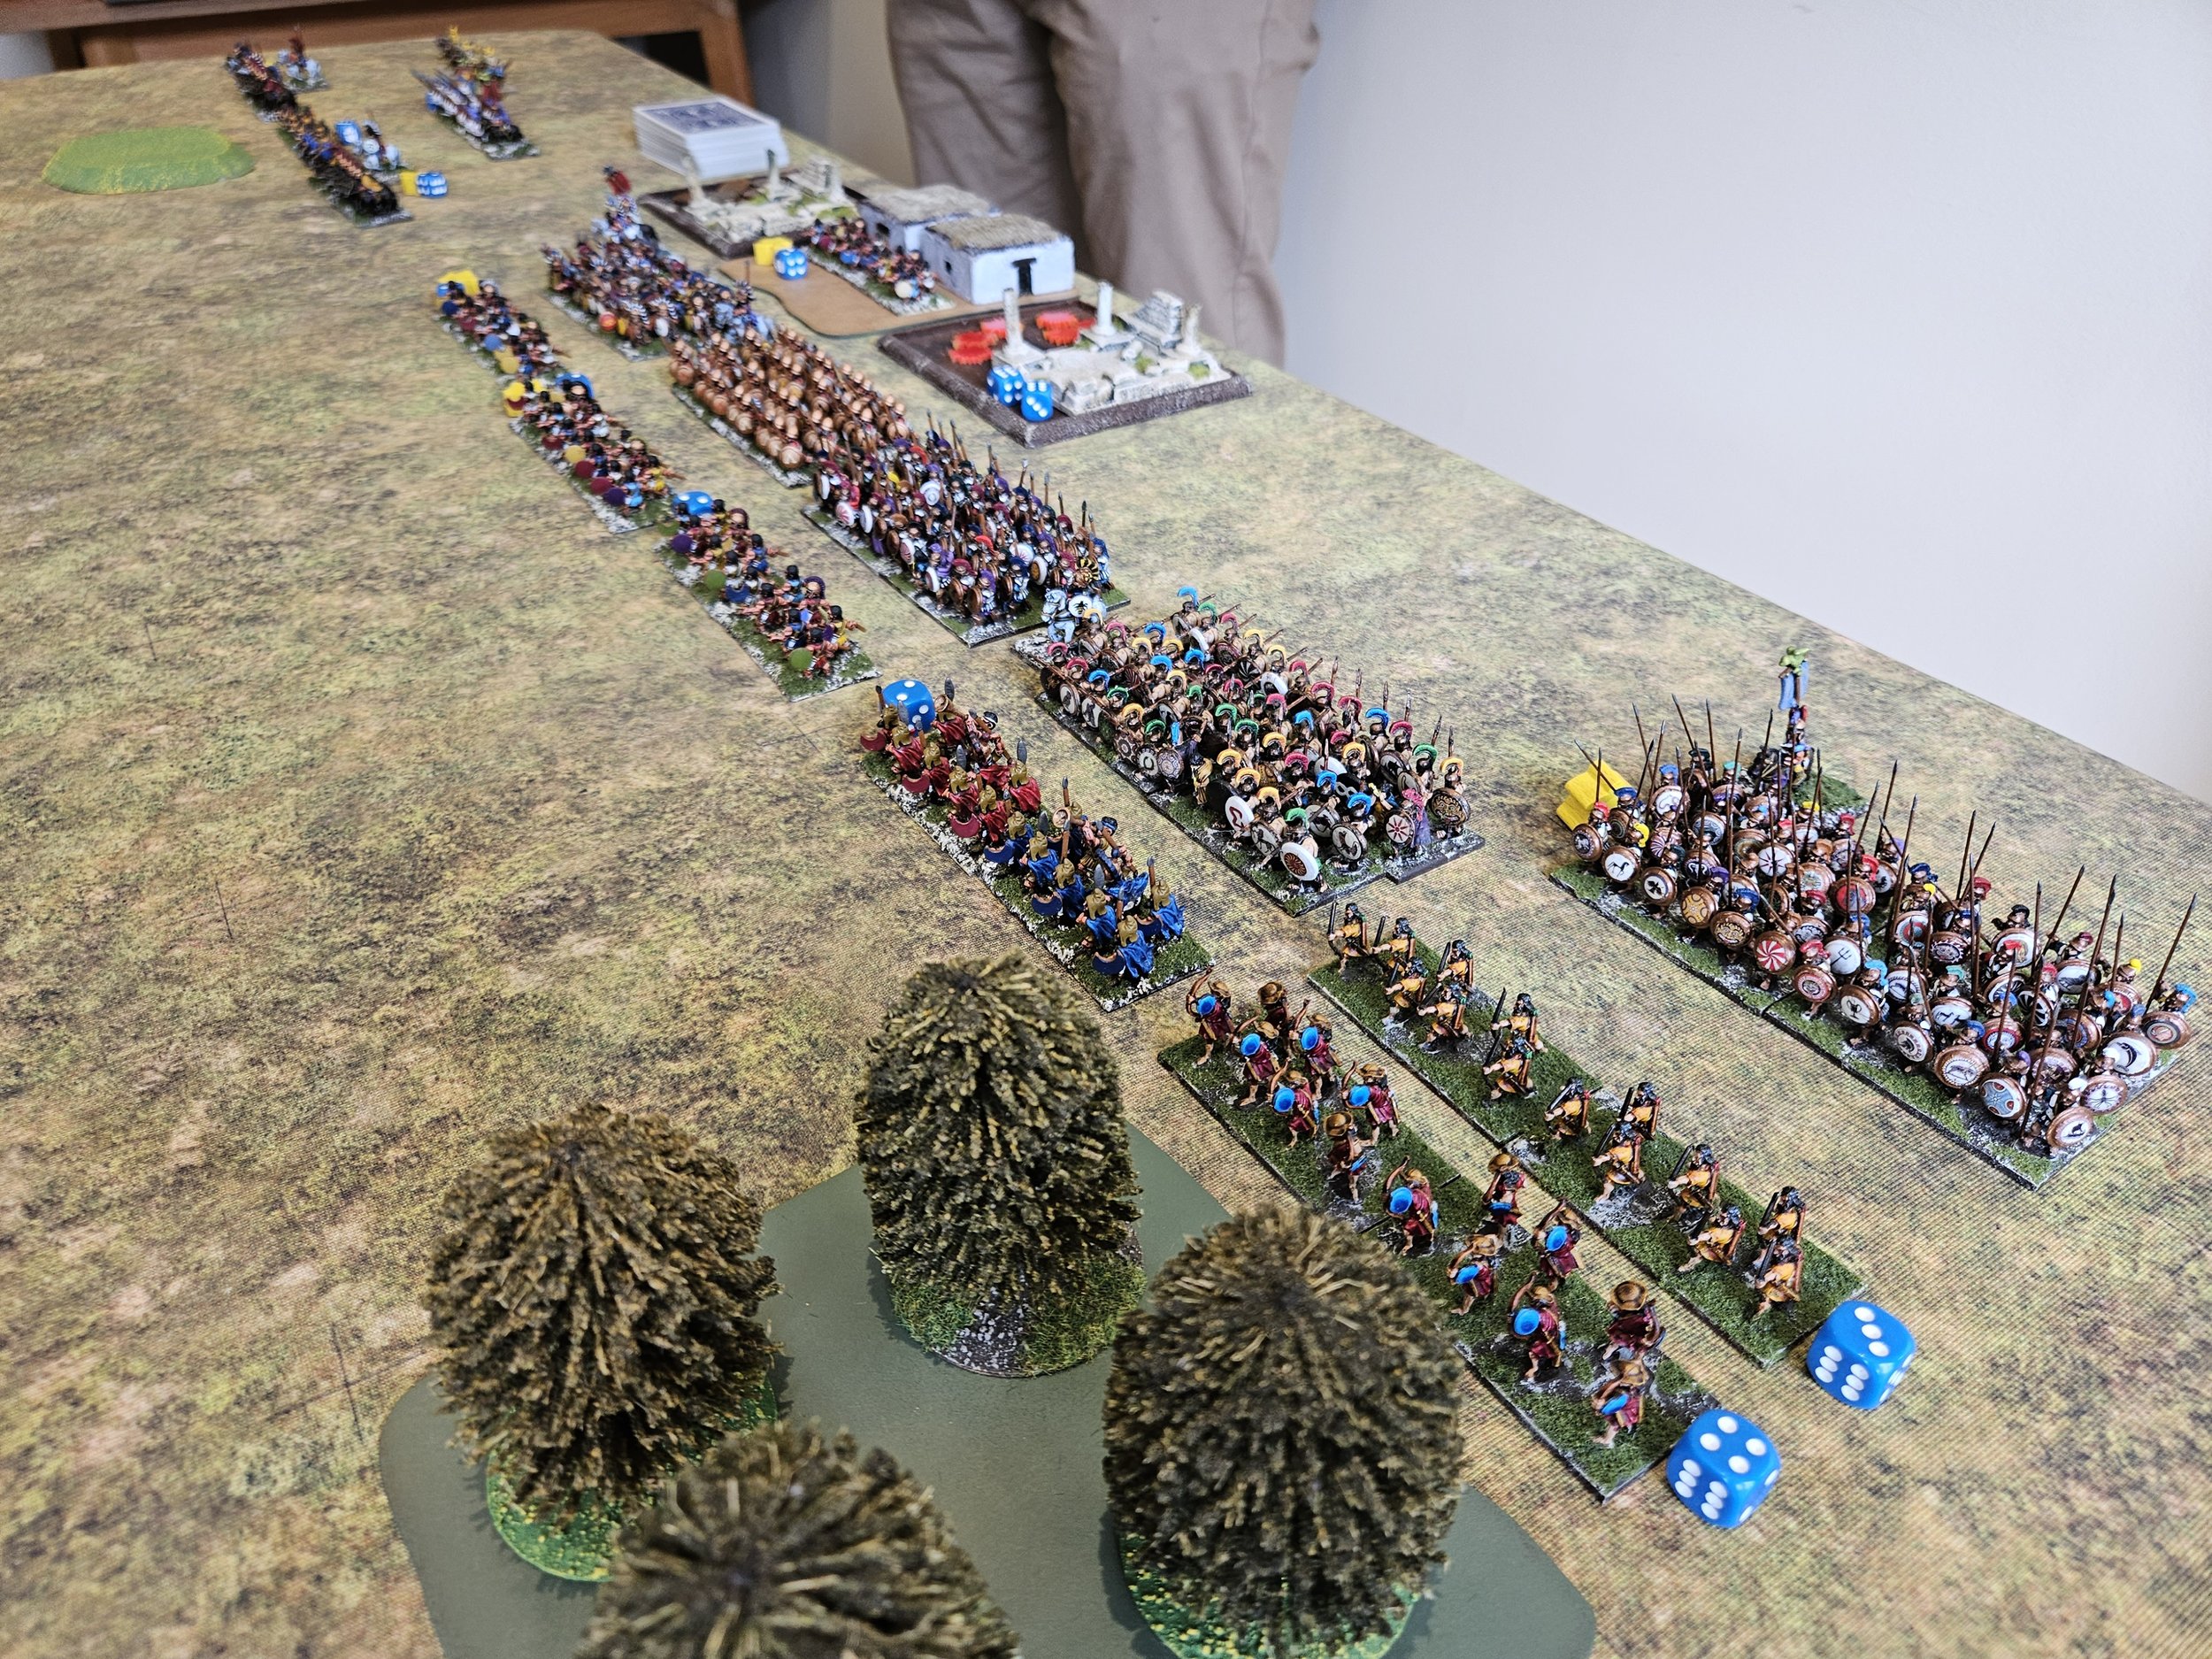
As it was a few weeks ago, I don’t have a blow-by-blow account of the game for you, but I do remember that the large Greek phalanxes caused a few problems for the Romans, and it was only their ability to manoeuvre and to rally that got them the win.
Here’s a gallery of the action: hopefully the pictures will tell the story!
It’s all coming back to me now!
My plan was to have the Roman cavalry overwhelm the lesser quality Greek horse on my left then curl back into the centre to take the Greeks in the flank.
That didn’t happen: as per usual the Roman horse proved incapable of beating the moth-eaten rabble in front of them, so that flank remained effectively neutralised throughout the battle.
That meant that the Legions had to do the work and won the day by ganging up on the individual phalanxes and taking them from two sides at once. Oh, and the Equites Sagittarrii light horse took the enemy camp as well, which helped!

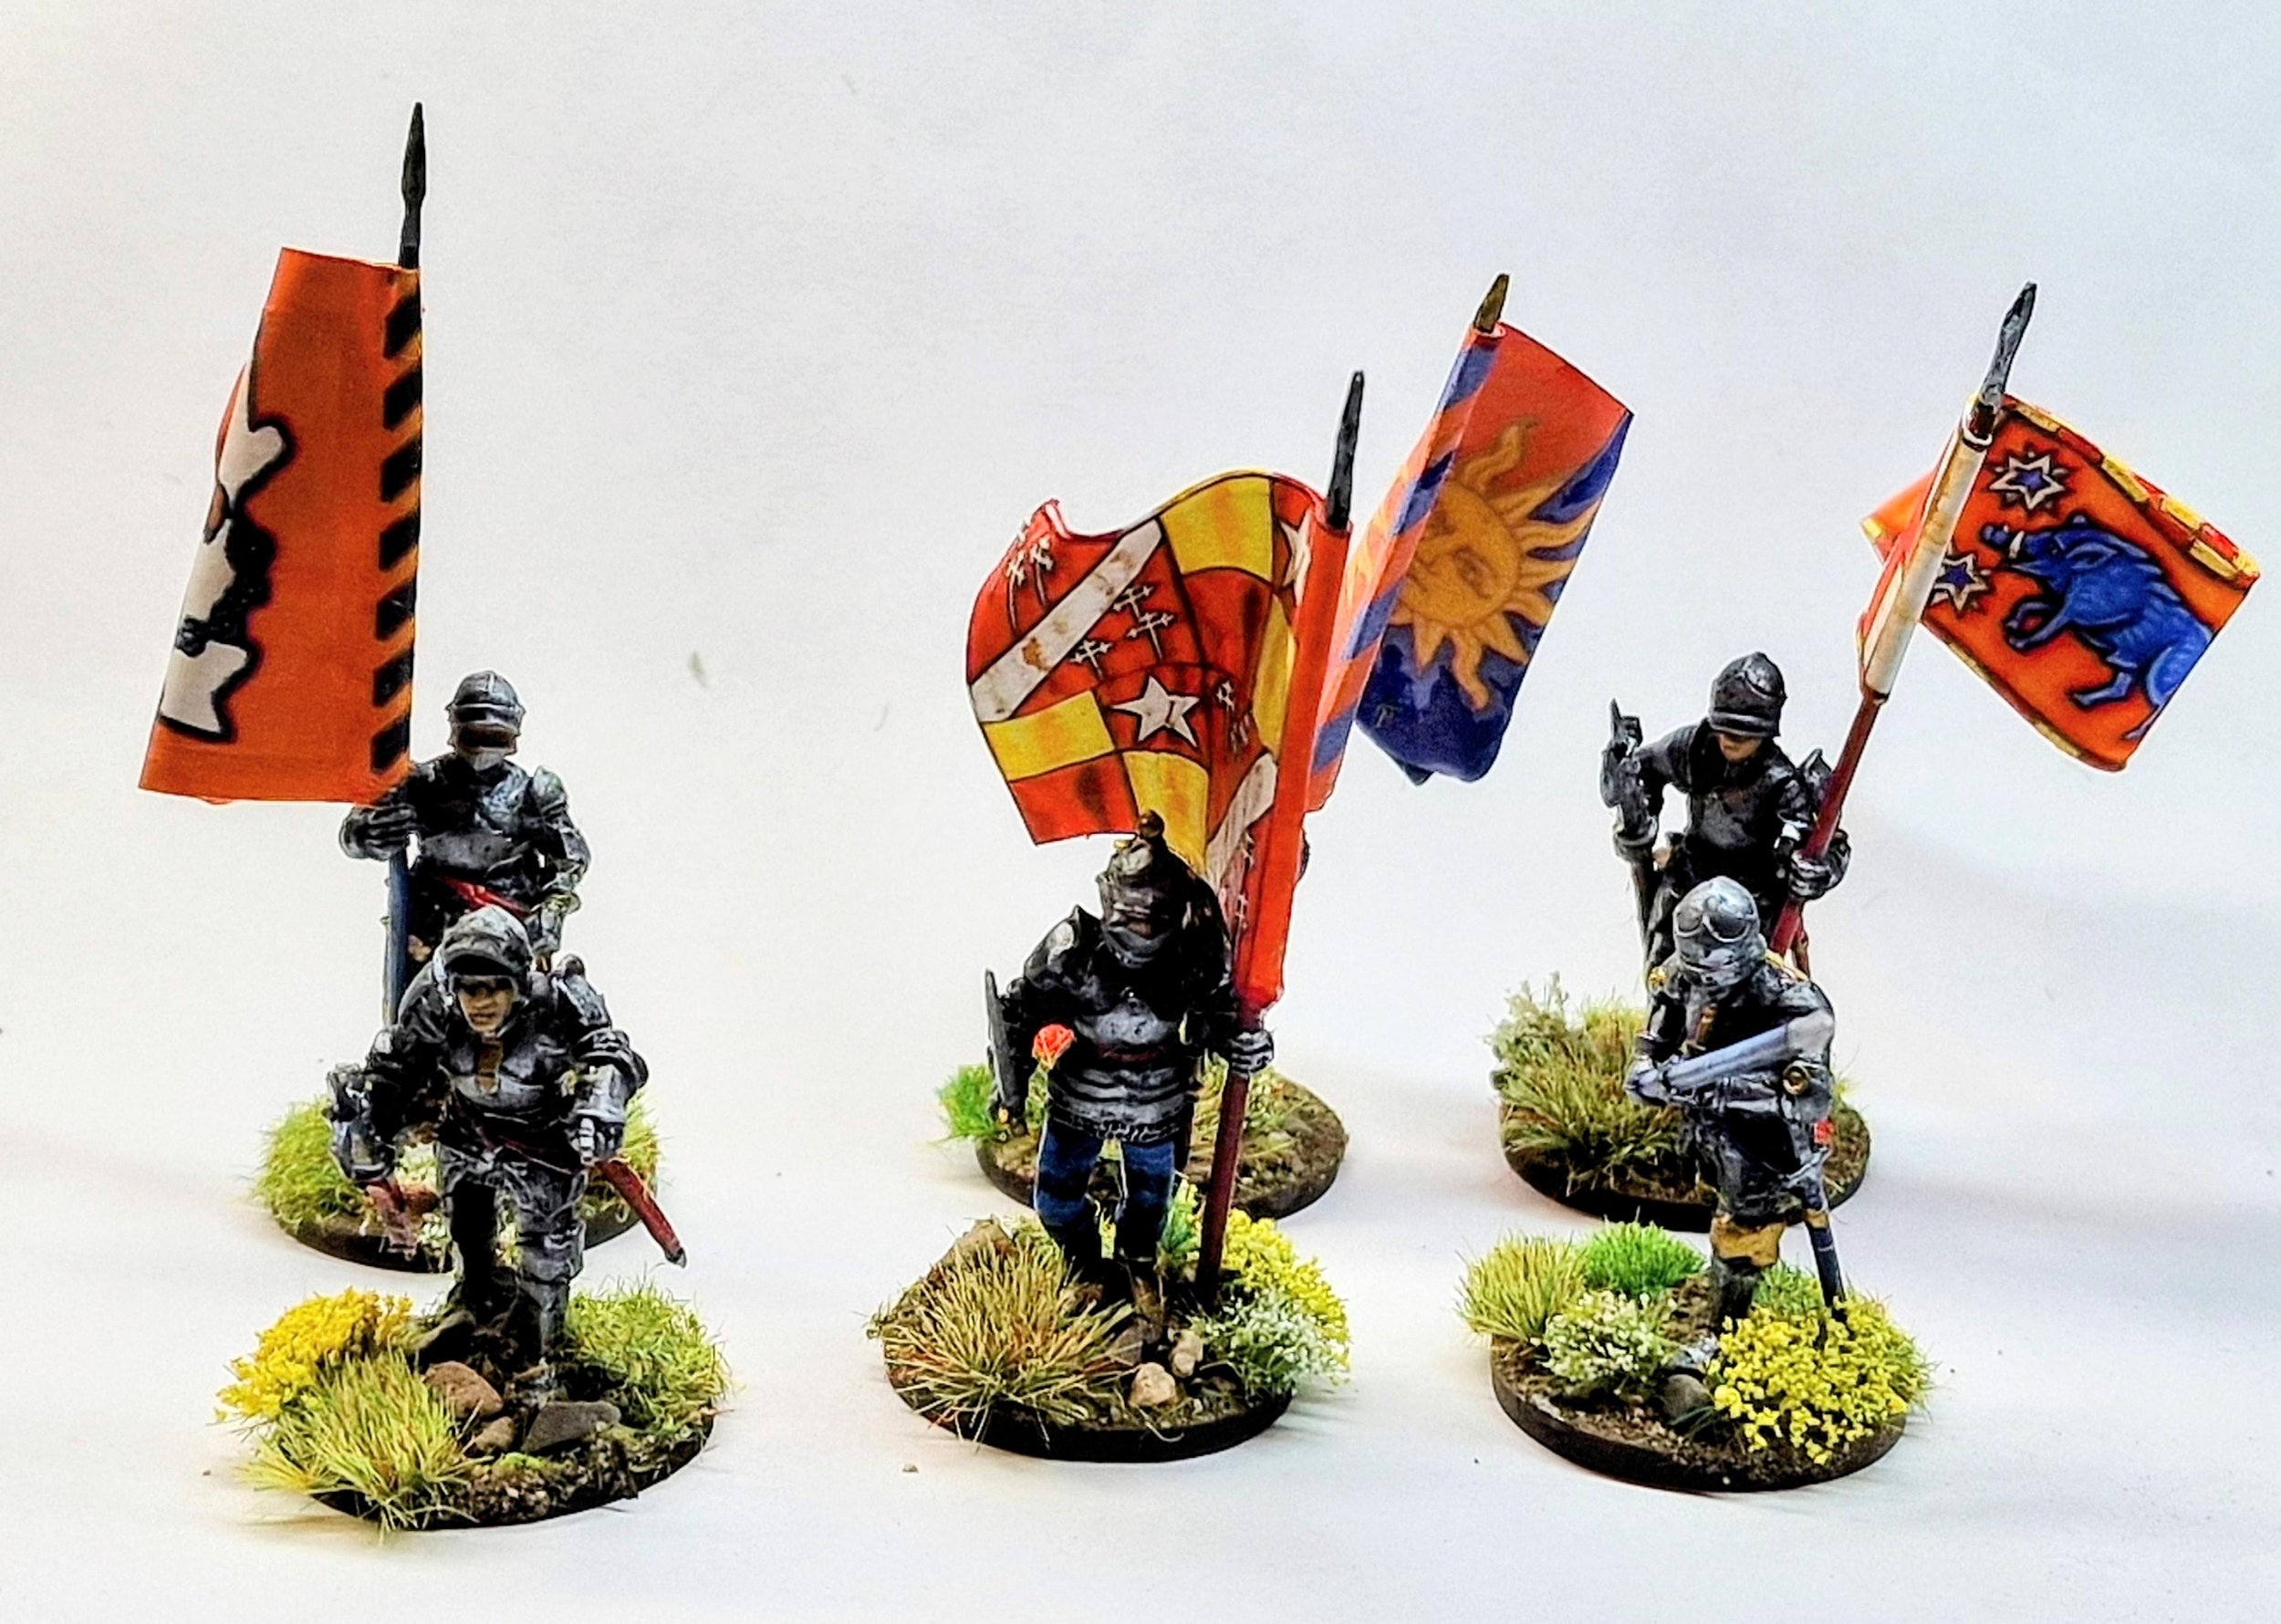
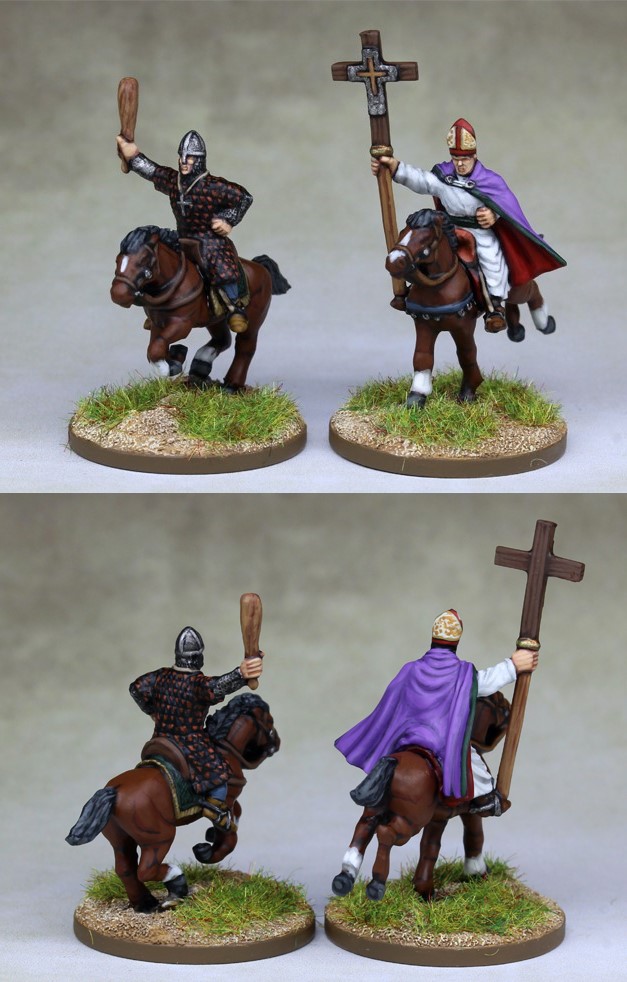
Regular visitors will know that one of this year’s projects has been a 15mm Norman army using the excellent Museum Miniatures CAD designed Z range of figures.
The Normans, under the To The Strongest rules that I use have access to a Papal banner: the banner awarded to William the Conqueror (or First or Bastard, dependent on which camp you’re in) which looked a little like the image to the right.
I’m going to source one of those but, meanwhile, I also want to use the Normans as Early Crusaders, so needed a standard for them too. The choices, according to the lists are the Holy Lance of Antioch and The True Cross, so when Khurasan released the pack, below, I was straight onto the ‘net to order:
I’m not quite as good at painting as Khurasan’s house painter, but here’s my attempt:

I’ll leave aside the question of historical accuracy, but these are really nice figures that paint up very easily indeed. As they are part of Khurasan’s “heroic” range of Millennium figures (first millennium, that is) they are quite chunky and size very well with Museum’s Normans. Highly recommended.
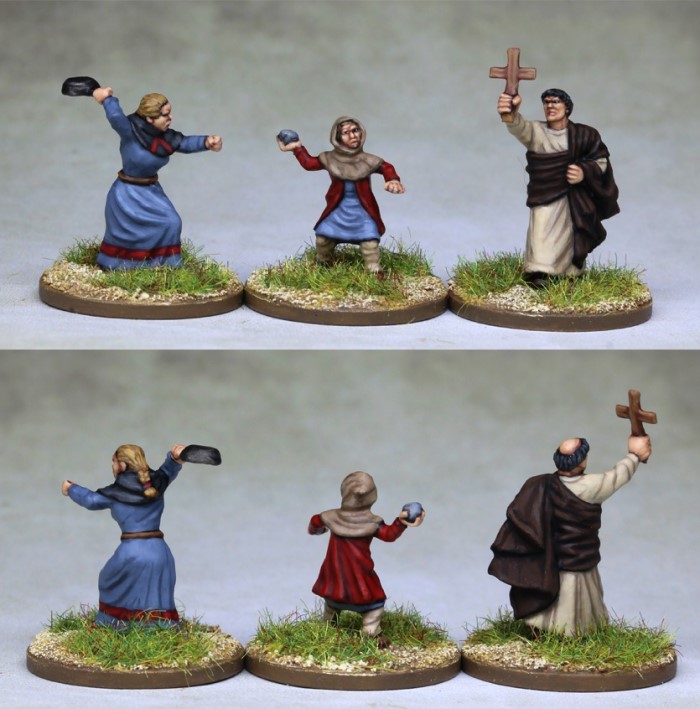
Next up has got to be the Pilgrims set and, even better, the pack below:
A substantial update this time round: good to see that have all been using your summer’s for something constructive!
Some of you have commented that some of your entries aren’t getting through first time, so you have to re-send when you notice I’ve missed them. Can’t explain this, I’m afraid, something odd with Yahoo mail I think. Keep an eye out for this, though, and I will add missing submissions back in asap.
Check out the individual galleries, accessed through the NavBar, above, but here’s a selection to wet the whistle:


Will Depusoy and friends are continuing their Kursk campaign with the second battle in the series: this time with Das Reich jumping off their panzerkiel past the village of Berezov into the first Soviet defensive belt.
Click on the picture below to see all:


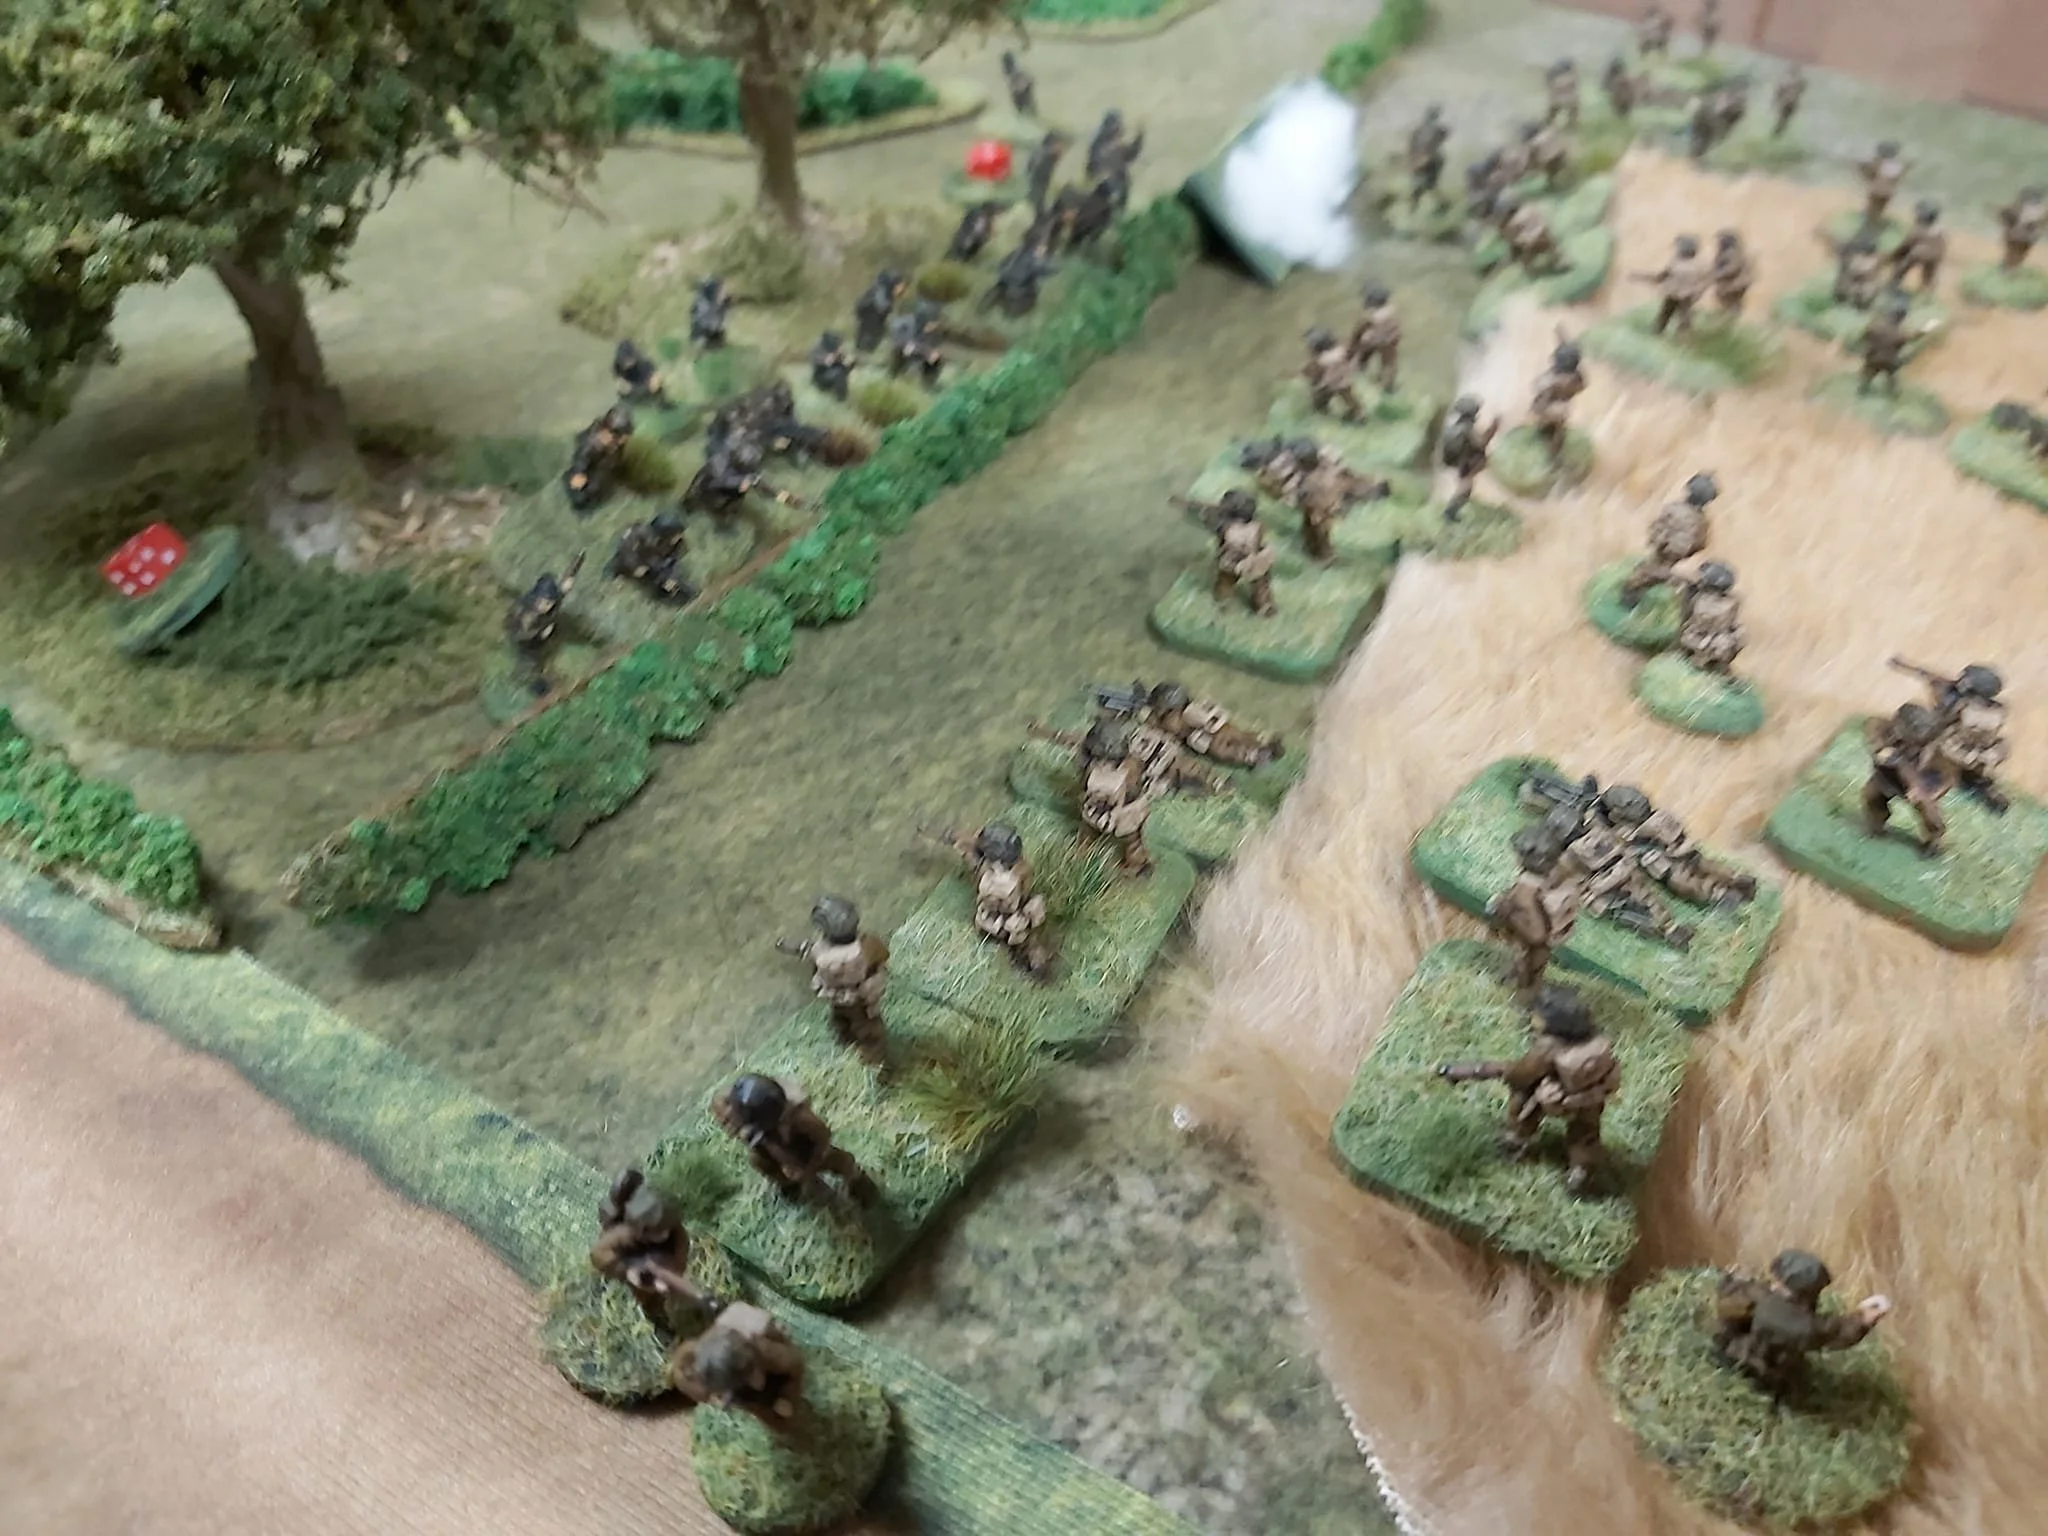
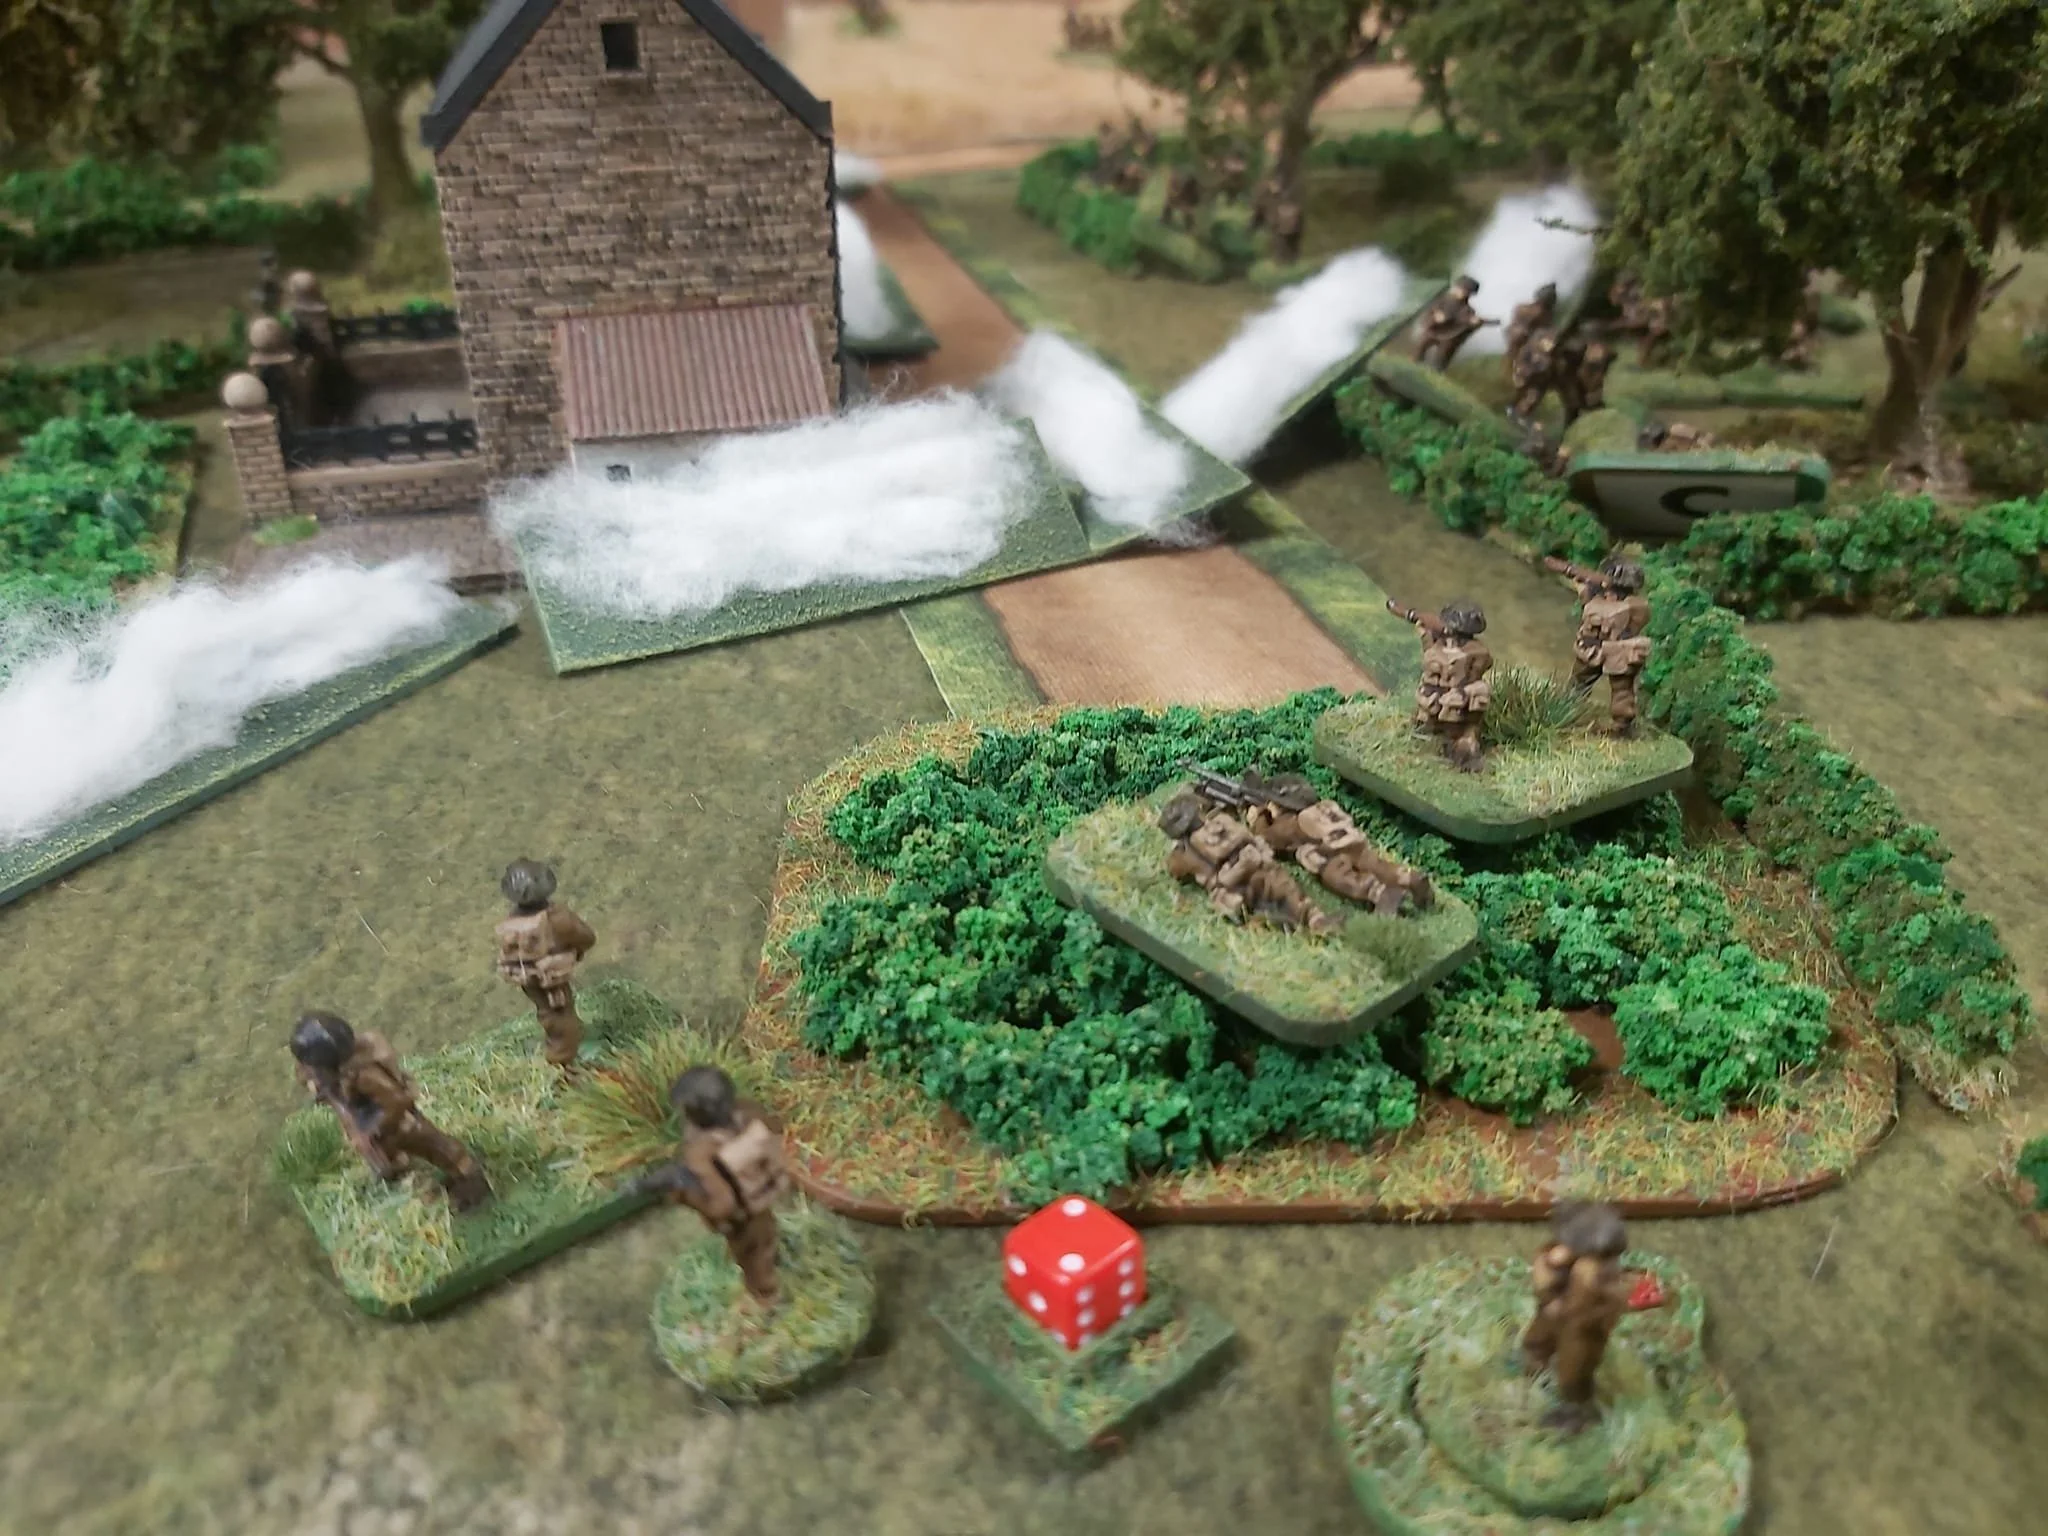
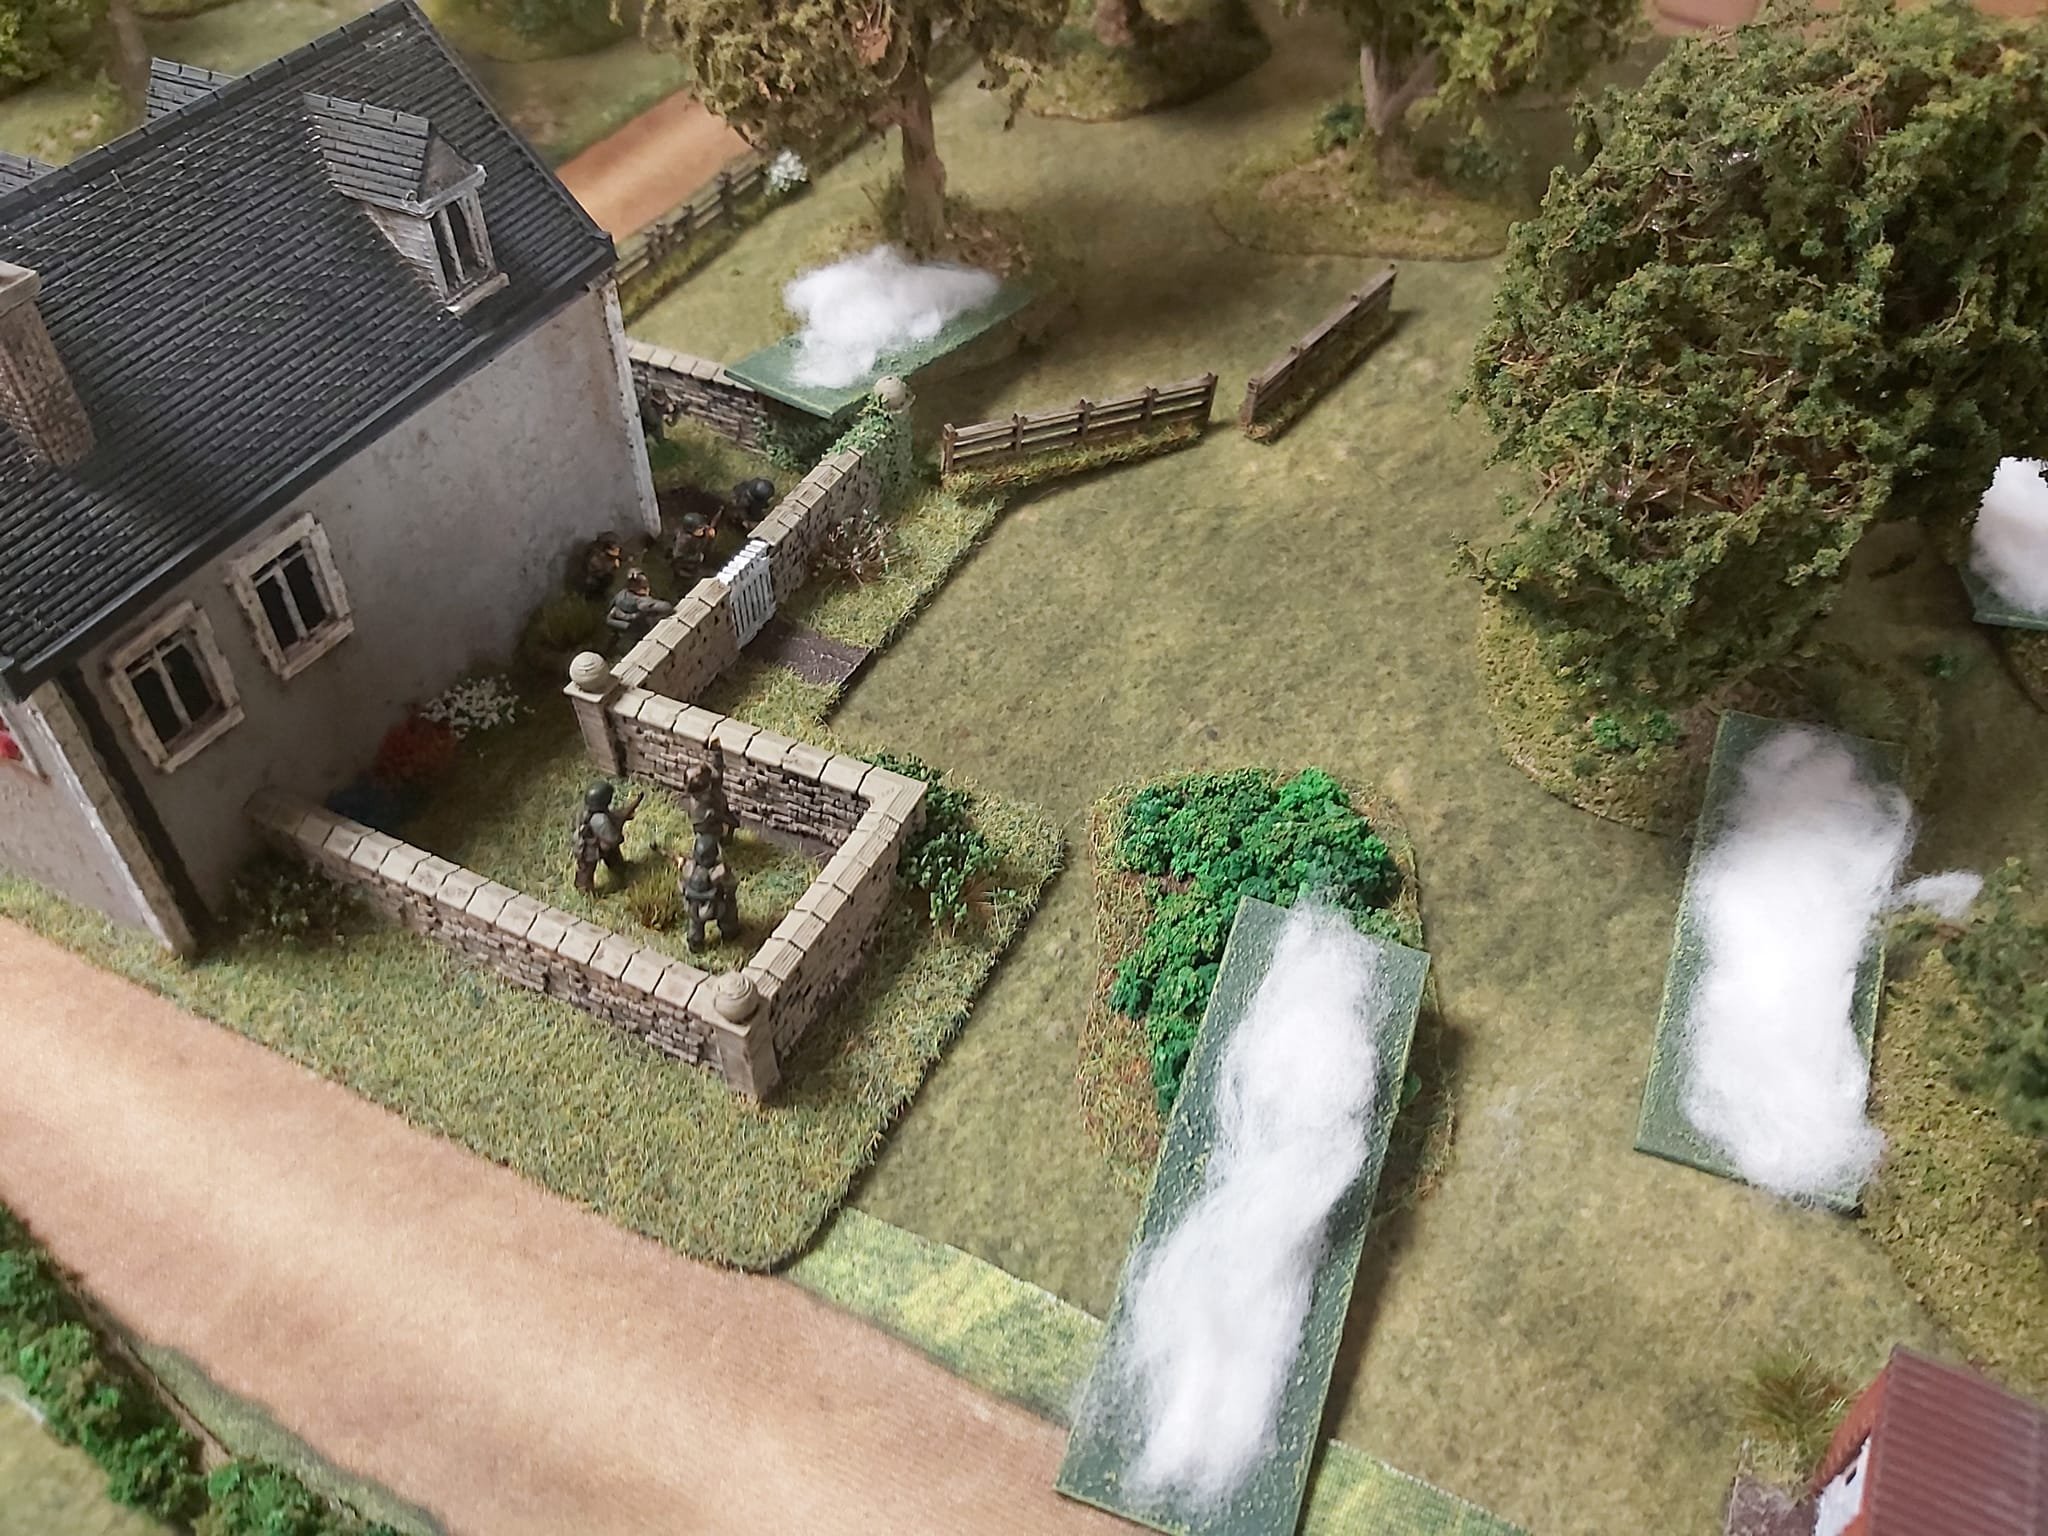
Here’s a quick AAR from Alex Sotheran taken from the IABSM Facebook Group.
As Alex says: “IABSM at the club tonight. Despite one British platoon commander not attending the 'O' Group they managed to push on to the German held crossroads and using a combination of smoke and manoeuvre threw them out at the point of a bayonet!”
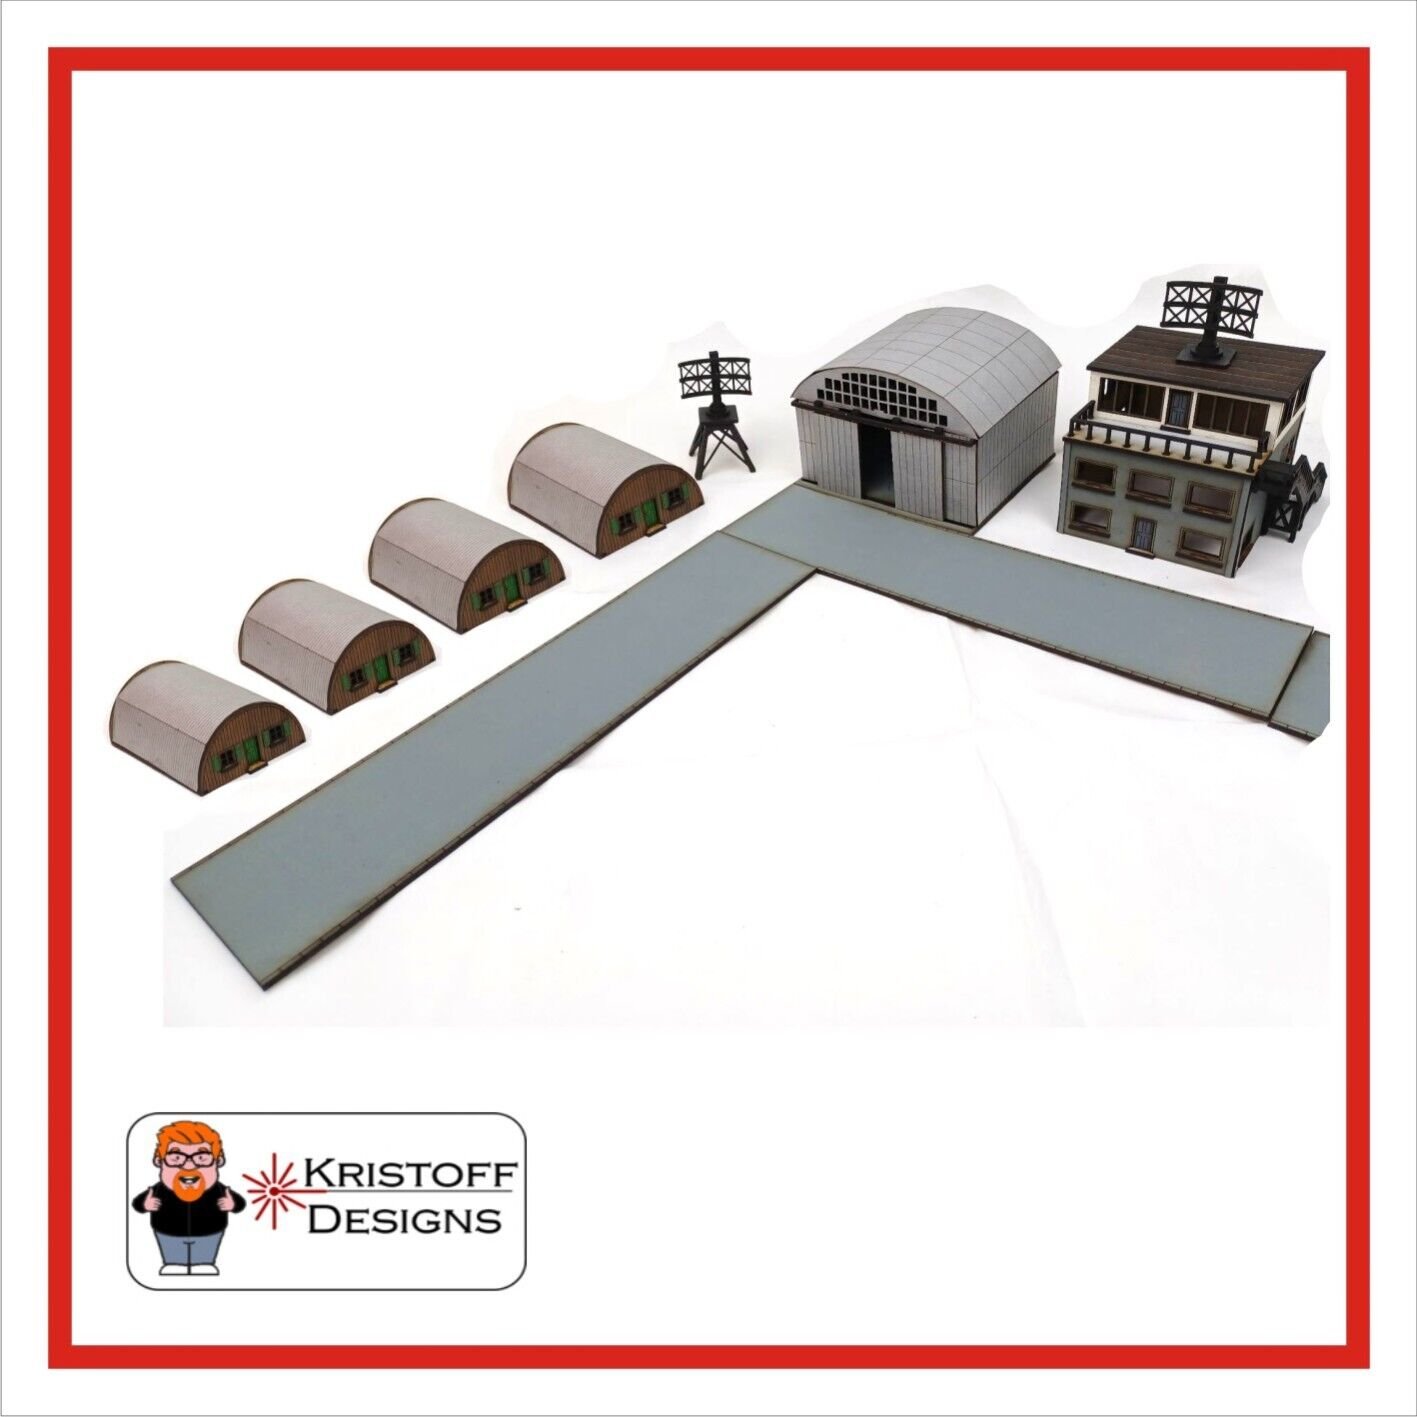
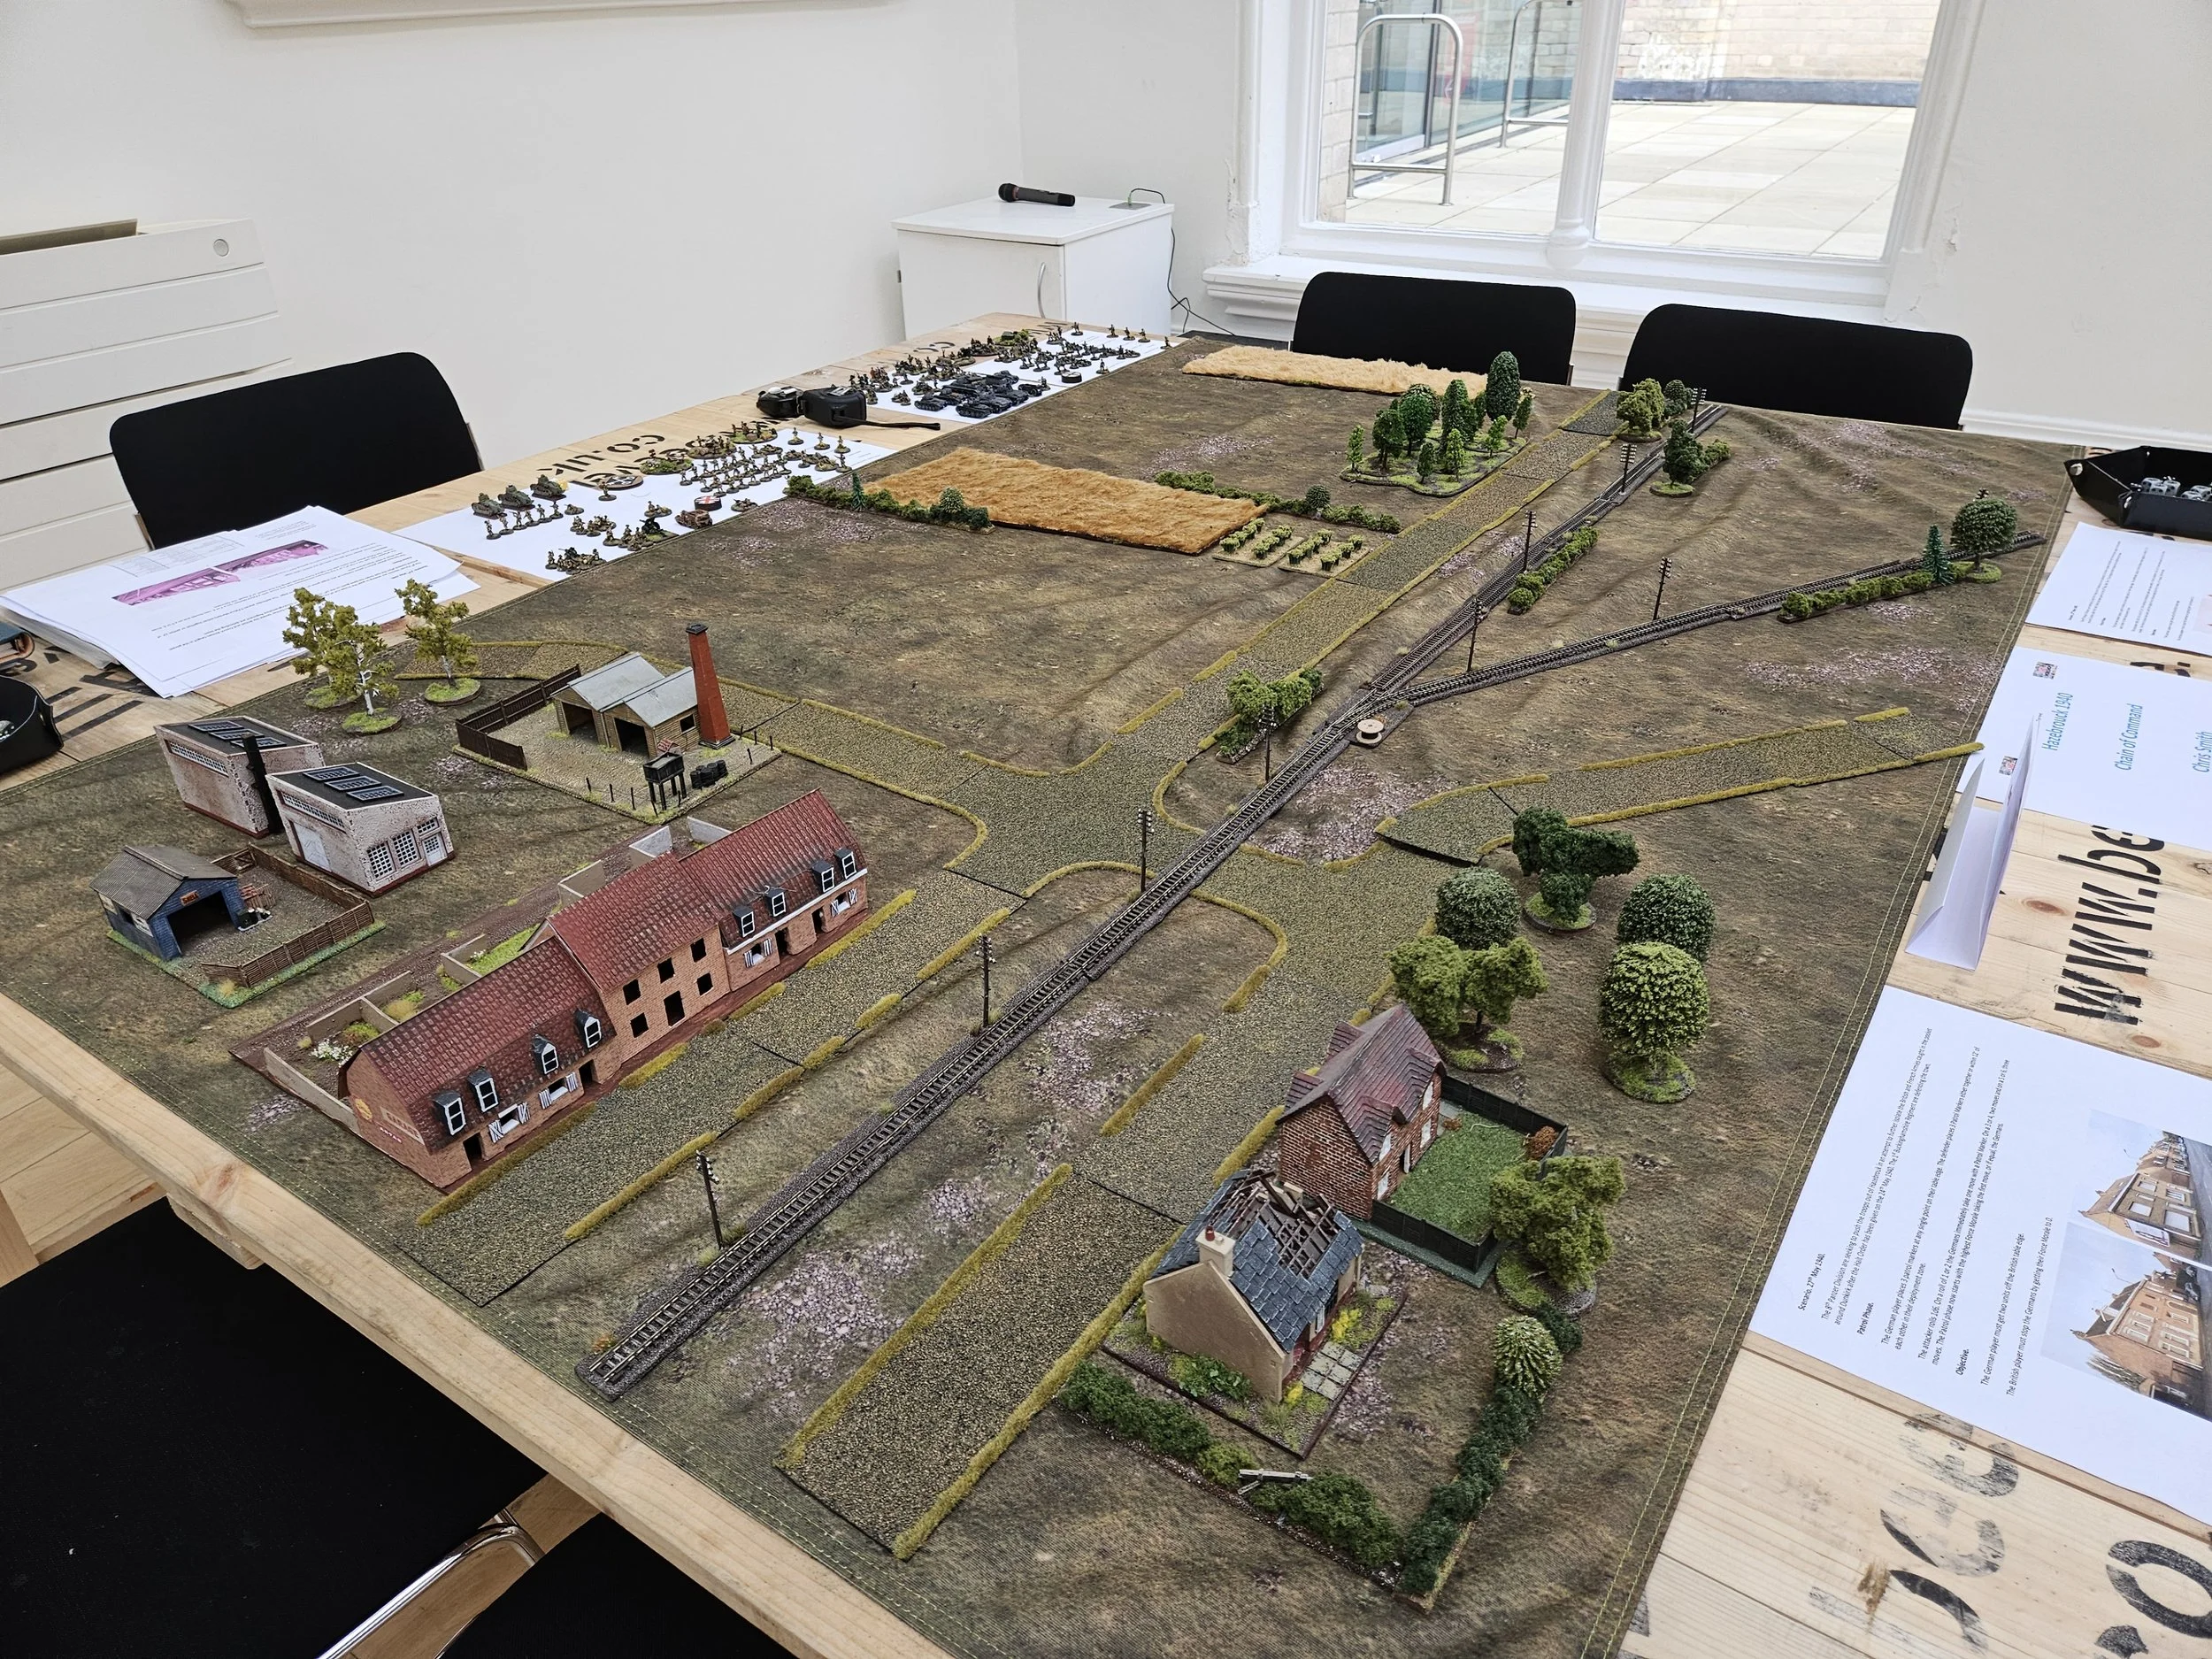
I was pootering about on EBay the other day when I came across a WW2 pre-painted Wargame Airfield Scenery terrain set from Kristoff Designs.
I have several scenarios involving airfields that I play, and this looked like a good opportunity to get some specific terrain to use for them…and at only £20 for the lot seemed like a good bargain as well.
The pack arrived quickly, so I set to work and began the build, starting with the hanger building with the big sliding doors.
There are instructions for this build, and the hanger went together easily once I’d worked out that the black side of the internal struts faces into the hanger rather than outwards (it would have been useful to have that fact noted on the instructions). Even the roof went on well: the curve is fairly slight, so it’s easy to get the heavy paper/light card provided to sit on the joists, if that’s the right term to use. The sliding doors do indeed slide: well, one of mine does. The other lurches about a bit but can be positioned so it looks okay once the model is on the tabletop.
Actually, my only criticism of this building is its size. It’s supposed to be a hanger of some kind, but the only thing that would fit into it is a very small plane indeed. I’m actually wondering whether the set is designed for the mini-FOW planes (an abomination in my opinion: 15mm planes should be 15mm not 1/144 or whatever) but, as you can see from the photo below, not even my humble i-16 can get through the doors and there’s no chance for the Stuka!
The four Nissan huts were next. I love the front and the backs of these: the little green shutters and doors and plank effects work really well. My only problem was the fact that I couldn’t get the roofs to fit properly. Now I’m sure this is down to my lack of modelling skill, but I’m not really happy with the job I did on any of the four: the RSM would have the lot torn down and start again! Note also that these Nissan huts come without any instructions, which I am sure is fine for the intuitive modeller, but wasn’t for me!
Even worse, the Control Tower also comes with no instructions, or at least the set I had didn’t have any. This is actually a great little model, but it was quite challenging to put together without a step-by-step guide.
The outside staircase is a particular case in point: I wouldn’t risk climbing up the one I built! If you are building one of these, then the stairs themselves are pretty tough to do: I did mine by gluing the frame together then poking the steps through the bannisters and twisting them into position: very fiddly and not much fun! The illustration also shows doors: I think I’m supposed to build some out of the bits that punch out of the door spaces, but that seems very hard to do!
The two radar towers also require intuition to put together but, fortunately, aren’t very difficult to do. The runways are useful as well, but are very narrow: see my comments above about the hanger building.
Overall, I am pleased that I have these kits, but proper instructions would have made building them easier, and although they are very good value at only £20, I would have preferred to have paid a bit more and got a proper sized hanger. As it is, it is more of a tall storage shed!
All the kit together does, however, look suitably like some run down airfield in the desert or Malaya or the like, so will suit what I want it for. Not “recommended” but more of a “not bad for what you pay for it” rating.
My final battle at Britcon was against Peter’s Ostrogoth army: another almost-all cavalry force that was bound to lap around my flanks!
Outscouted, my set up was defensive, but I managed to place enough terrain to protect the flanks of my camp, then put the cavalry on the left hoping to hold up his elite nobles for long enough for the Legions to quash any other resistance with a Space Invaders like march forward in a straight line.
The game really turned my way very early on when a couple of extremely unlucky cards meant that Peter and the Ostrogoths lost an elite unit and their senior general in the first proper cavalry clash on the left.
After that, it was a matter of pining his troops back against things they couldn’t evade through and heading for his camp with everything I had: a workmanlike victory 17:4,
So, on to the results. I had four victories and one defeat under my belt, but one of the victories was the 7:5 Carthaginian affair so in reality three victories, one draw and one defeat.
In the end, when everything was totted up, I came third, an improvement of one place on Ewelme. The full scores were:

Congratulations to Adrian on a well deserved victory, and huge thanks to Sid for organising it all.
I would recommend giving the Britcon tournament a go at least once: it’s great fun even if it is quite a test of endurance: it certainly knocked me out for the next few days!
I’d also recommend a trip to 4550 Miles to Delhi the Indian restaurant we (and, coincidentally the Lardies) all ended up in on the Saturday night: great food and atmosphere.
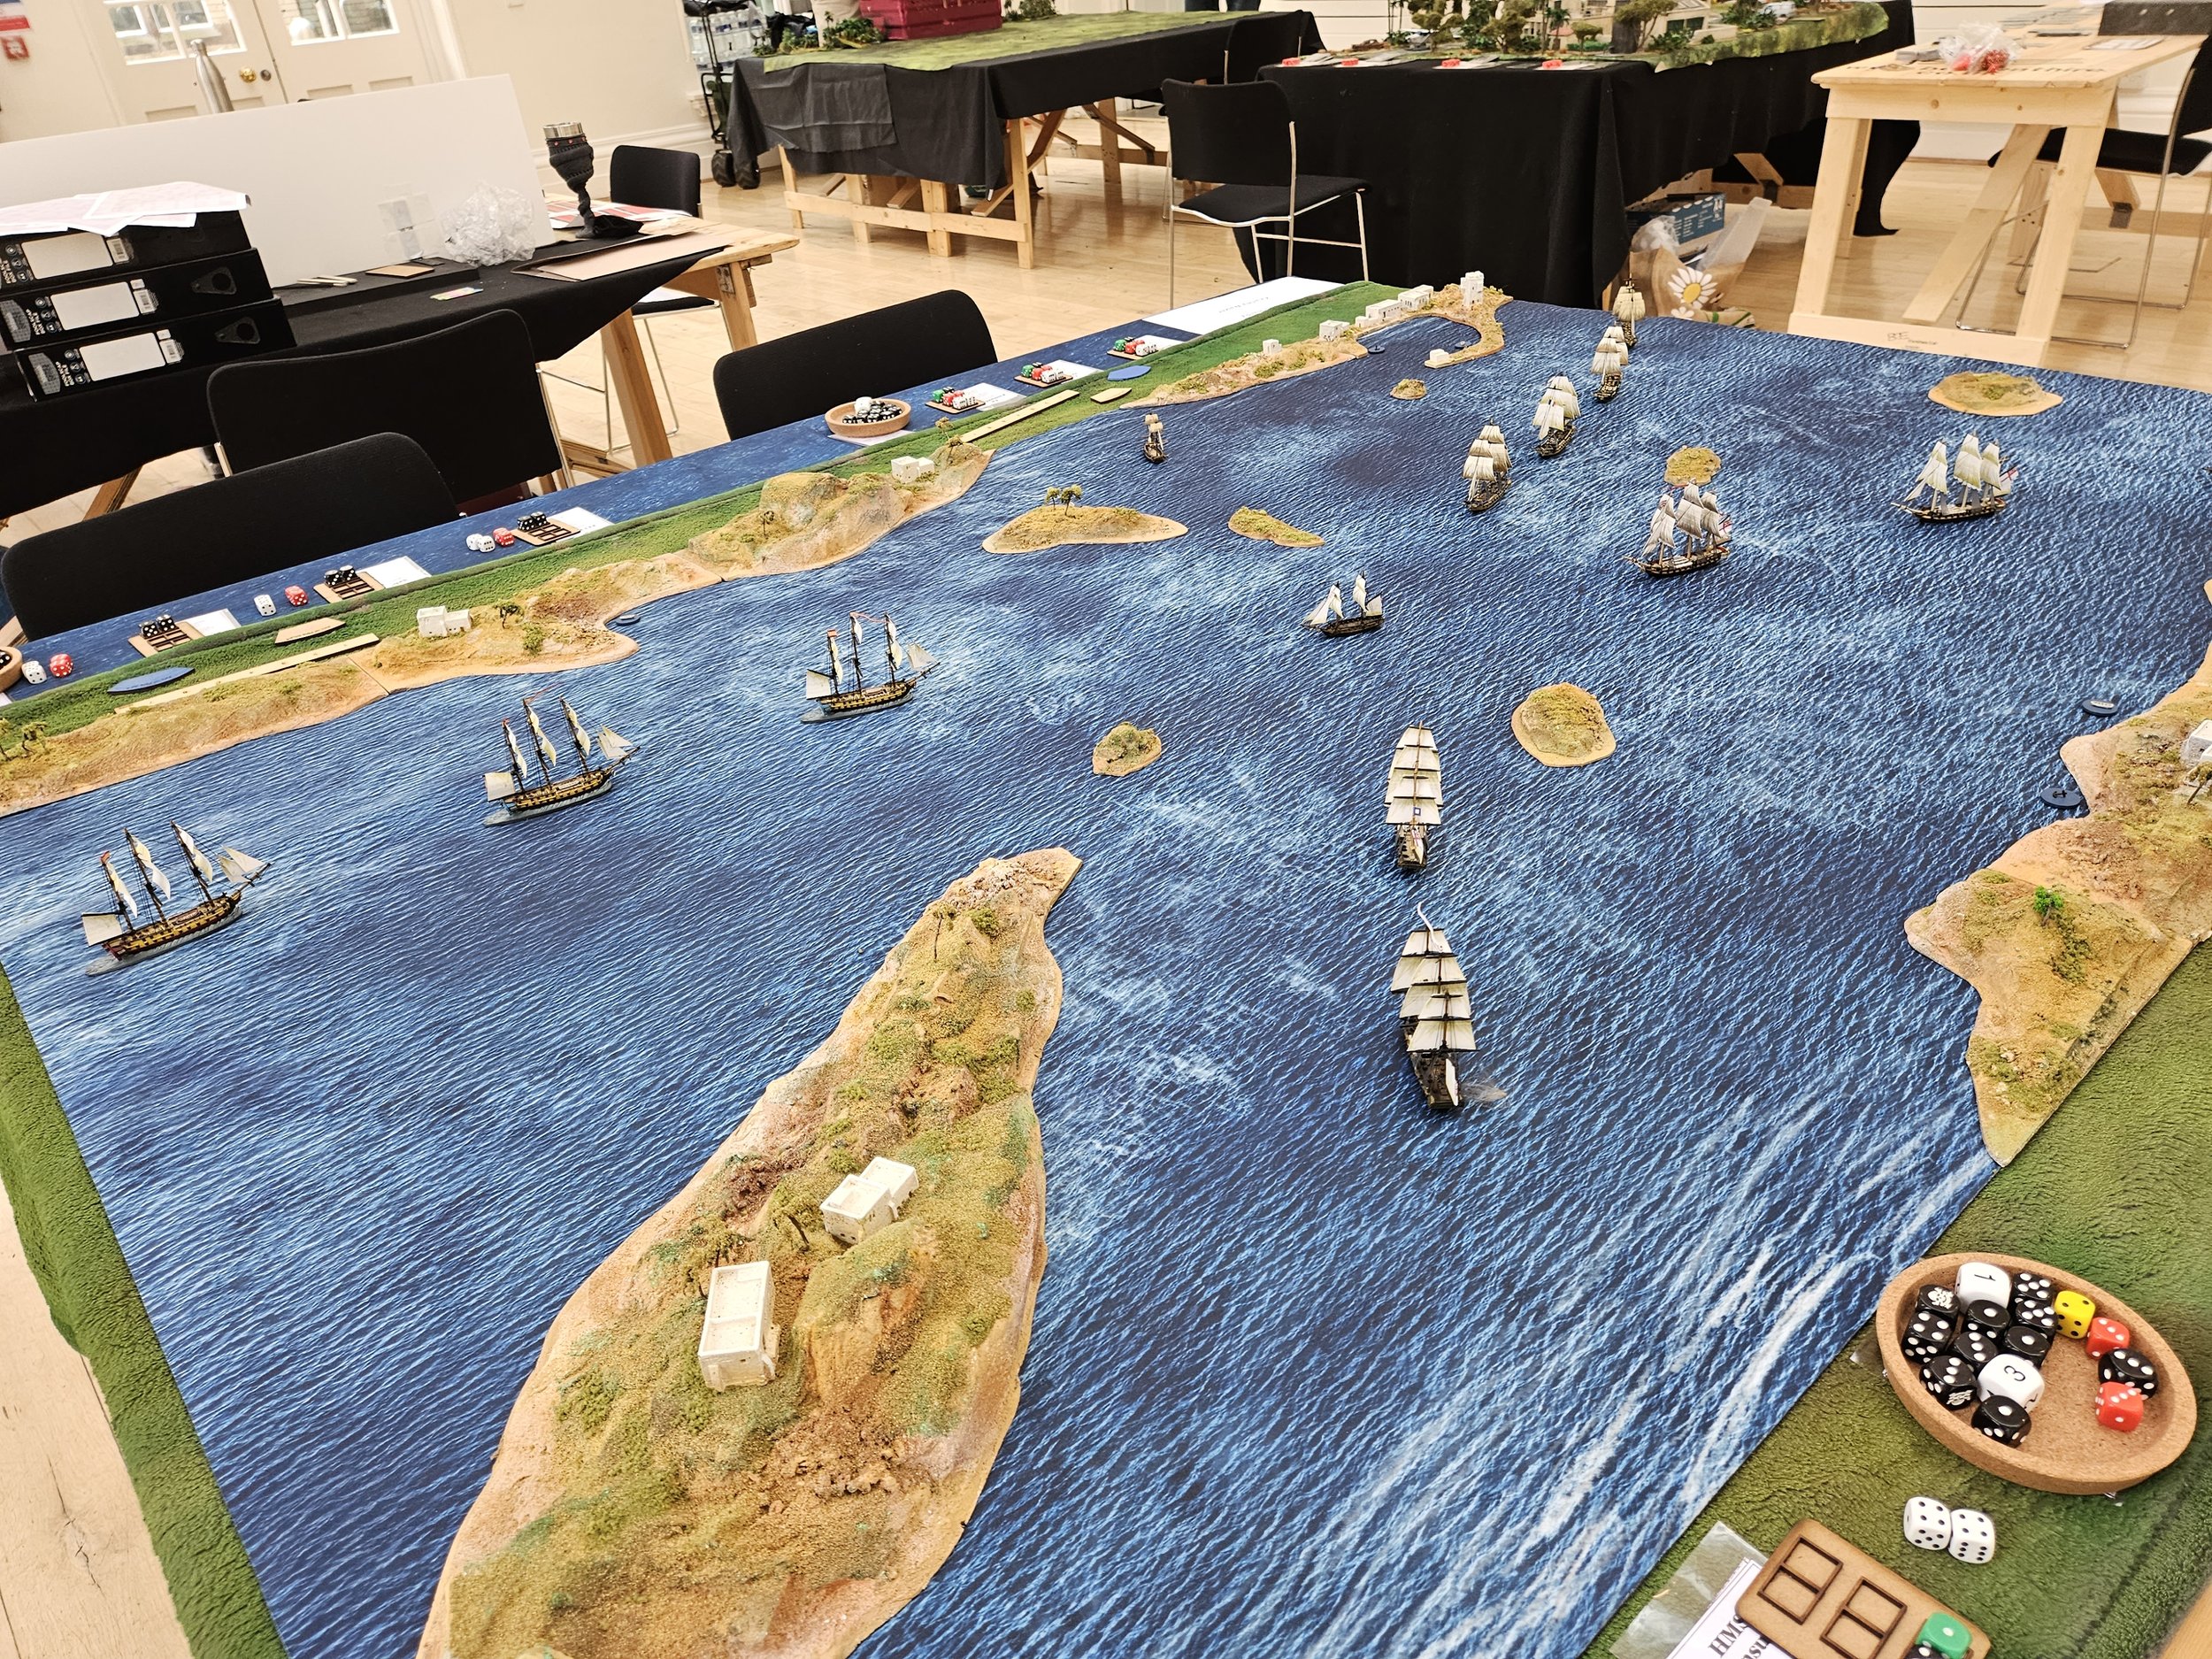
Steve Blease and fellow Lardy Phil got together to push some 6mm tanks around the table using the Arab-Israeli 6DW variation of Charlie Don't Surf.
Steve devised a basic scenario loosely based around the Battle of Dothan Valley on the West Bank at the start of the June/Six Day War of 1967. Click on the picture below to see all..

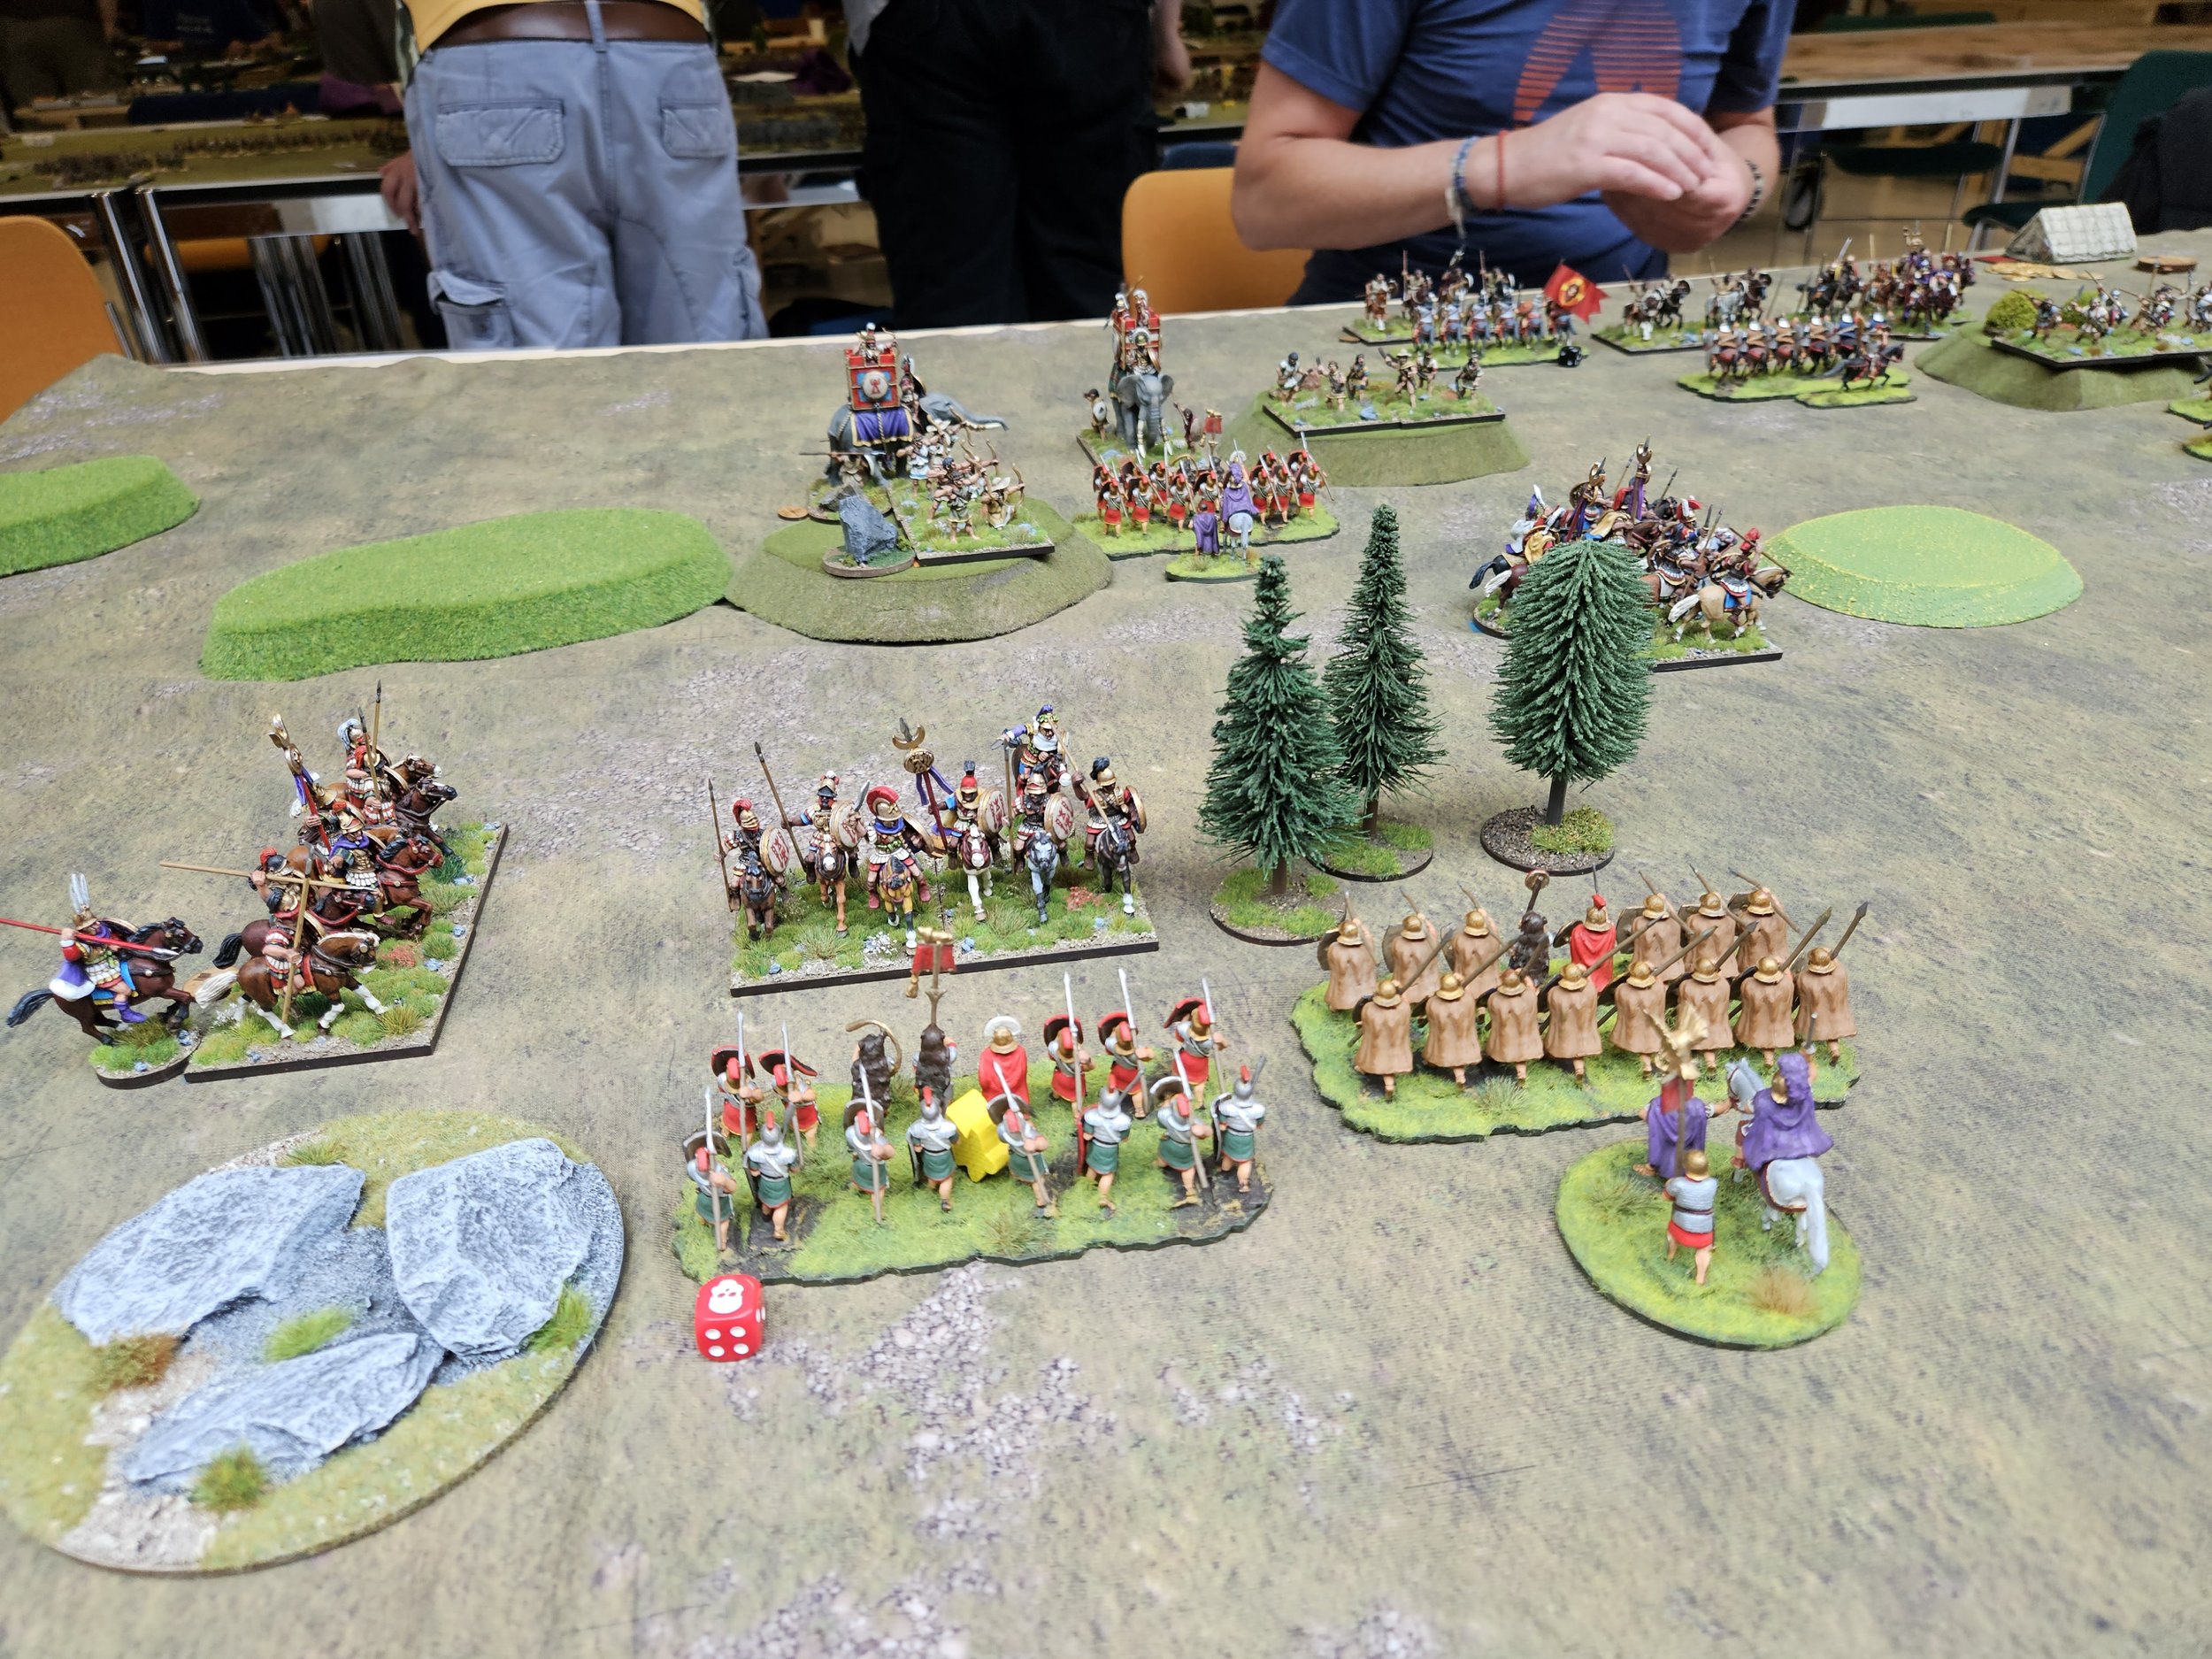
This was probably my hardest game of the tournament: matched up against Howard’s beautifully painted Later Carthaginians.
This was an epic clash that lasted some 3½ hours and was the only game of mine that was stopped by the umpire rather than coming to its natural conclusion.
Rather than use the set terrain, we had used the rules in the book, allowing me to protect my wings with a couple of pieces of impassable rocks. That meant that I could tie up his three units of heavy cavalry with the Praetorians and Auxilia whilst the rest of my army went for the rest of his.
My plan was for one unit of Legionaries to take out his elephants centre-left, whilst my cavalry took out the rest of his cavalry centre-right and then got round behind and into his camp. Meanwhile, I would hold back his elite pseudo-Legionaries with the rest of my true Legionaries on the right.
As always, no plan survived first contact with the enemy: my Legionaries refused point blank to go after his elephants and my cavalry got blocked in the middle…Howard had some annoying light infantry positioned on steep hills that caused me a lot of grief.
One of the key moments of the game: the equites alares get back to block the carthaginian heavy cavalry
The battle started to sway Howard’s way but, for once, the Roman cavalry were superb. The Equites Alares effectively held the centre on their own, rushing backwards and forwards to force his advancing units to protect their flanks.
At the end of the game it was tied 5:5, but my cavalry, on their last turn, managed to flank charge one of Howard’s units knocking it from the board and thus giving me a 7:5 victory.
Another good reason for going to Britcon was to see the Lardzone in action: a whole hall devoted to games from the TwoFatLardies.
It was no disappointment. Below you will find a gallery of the tables set up for the day, demonstrating the incredible displays on show.


In fact, the only table I didn’t get a picture of was the late war Burma game of Chain of Command run by Rich himself: it was still being set up when I had the chance to visit. So I have borrowed one from the Battle Bunker HQ’s post about Britcon, along with the shot of the enormous Chain of Command table, also a Pacific game, and the Sharp Practice ACW clash.
My third game at the Britcon 2023 To The Strongest tournament was against Simon and his Hapsburg Burgundians again. Regular readers will know that I fought a warm-up battle against Simon on the Friday night, losing badly!
This was a grinding game that could have gone either way. The enemy pike pressed forward relentlessly with the Legions conducting an epic fighting withdrawal as the Roman cavalry worked their way onto the HB’s flanks.
Unfortunately, my “roll up” mounted flank attack went in with only enough time for me to break one of Simon’s pike blocks before the legionaries finally gave way: a 5:17 loss.
What was frustrating was that my plan was sound and I came so close to rolling him up entirely…it just didn’t quite happen. If one more pilum had gone in, if my cavalry had got one more hit…if, if, if!
Still, at least I did better than in the first battle!
Vis Lardica is a website devoted to wargaming and military history, with a special emphasis on the company-sized rulesets produced by the TooFatLardies: I Ain't Been Shot Mum (WW2); Charlie Don't Surf (Vietnam); and Quadrant 13 (science fiction)

Welcome to Vis Lardica, a not-for-profit website mostly dedicated to the company-sized wargaming rules produced by the TooFatLardies, but encompassing my other gaming interests as well.


If you need to contact me, you can do so at:
vislardica@gmail.com
If you have enjoyed visiting this site, please add a link to it on your own wargaming blog: www.vislardica.com.


![20230909_121731[1].jpg](https://images.squarespace-cdn.com/content/v1/5406c773e4b087d8052ef58b/1694331130860-C6QW63CTAKOERVY8E2GH/20230909_121731%5B1%5D.jpg)
![20230909_134519[1].jpg](https://images.squarespace-cdn.com/content/v1/5406c773e4b087d8052ef58b/1694331158186-TBSQUOAZIV3ZGBWNM3R3/20230909_134519%5B1%5D.jpg)


